Mother’s Day is the perfect excuse to let little fingers do the talking. These finger paint ideas turn sweet smudges and tiny prints into keepsakes Mom will want to hang up year after year.
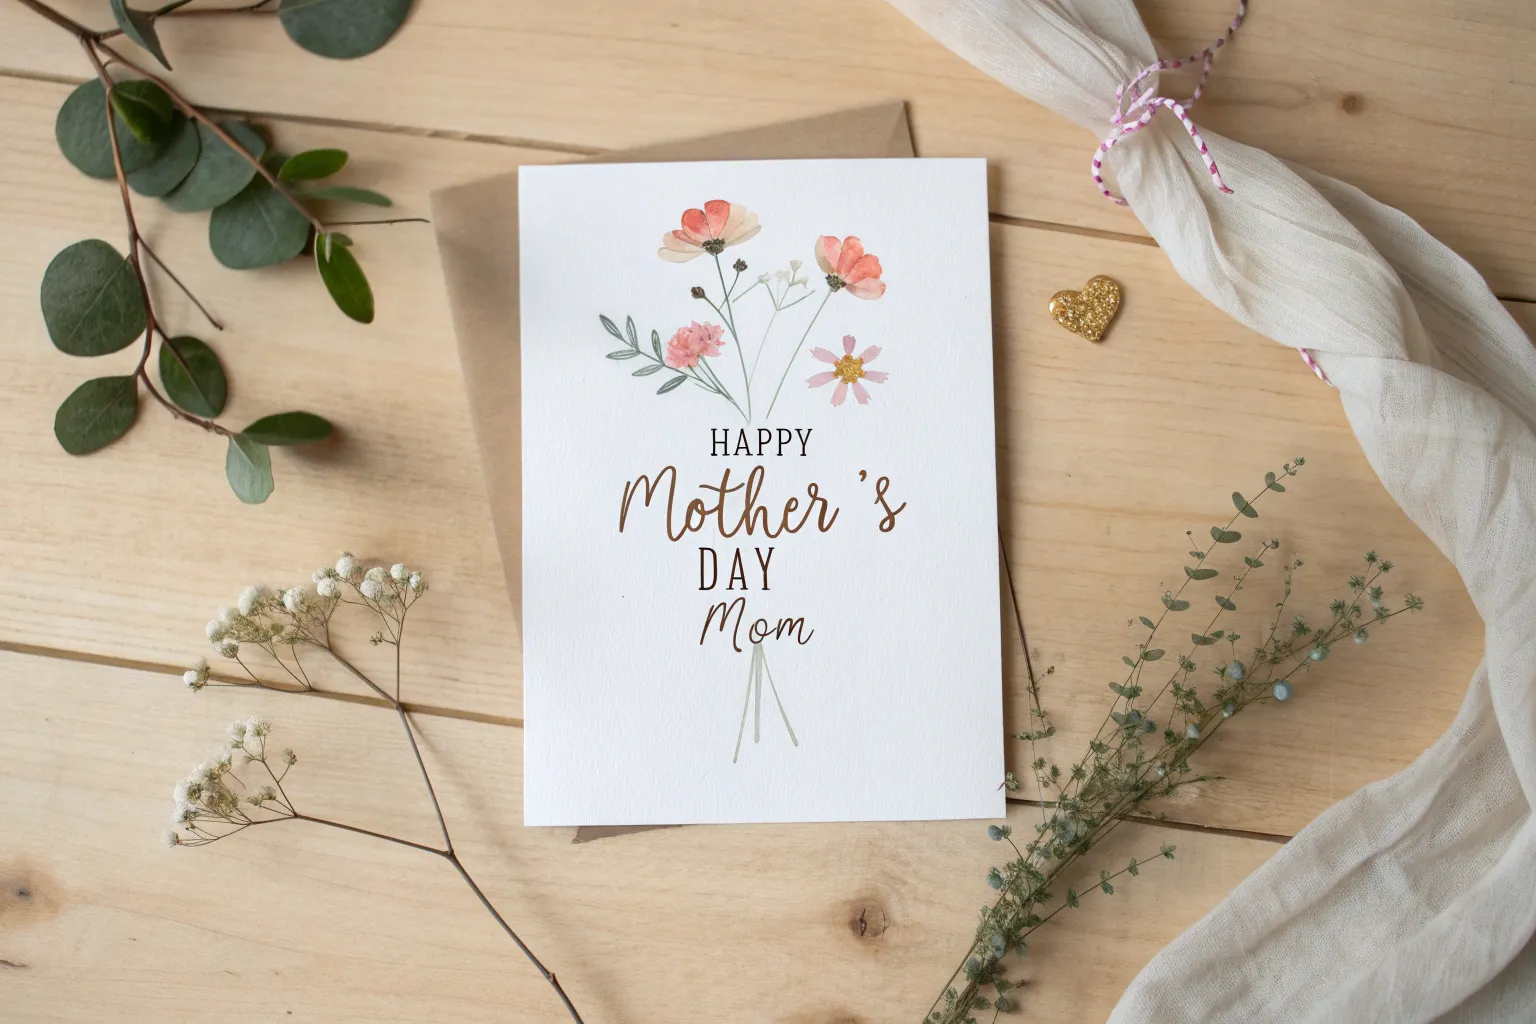
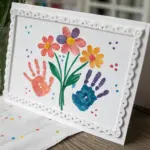
Handprint Flower Bouquet Card
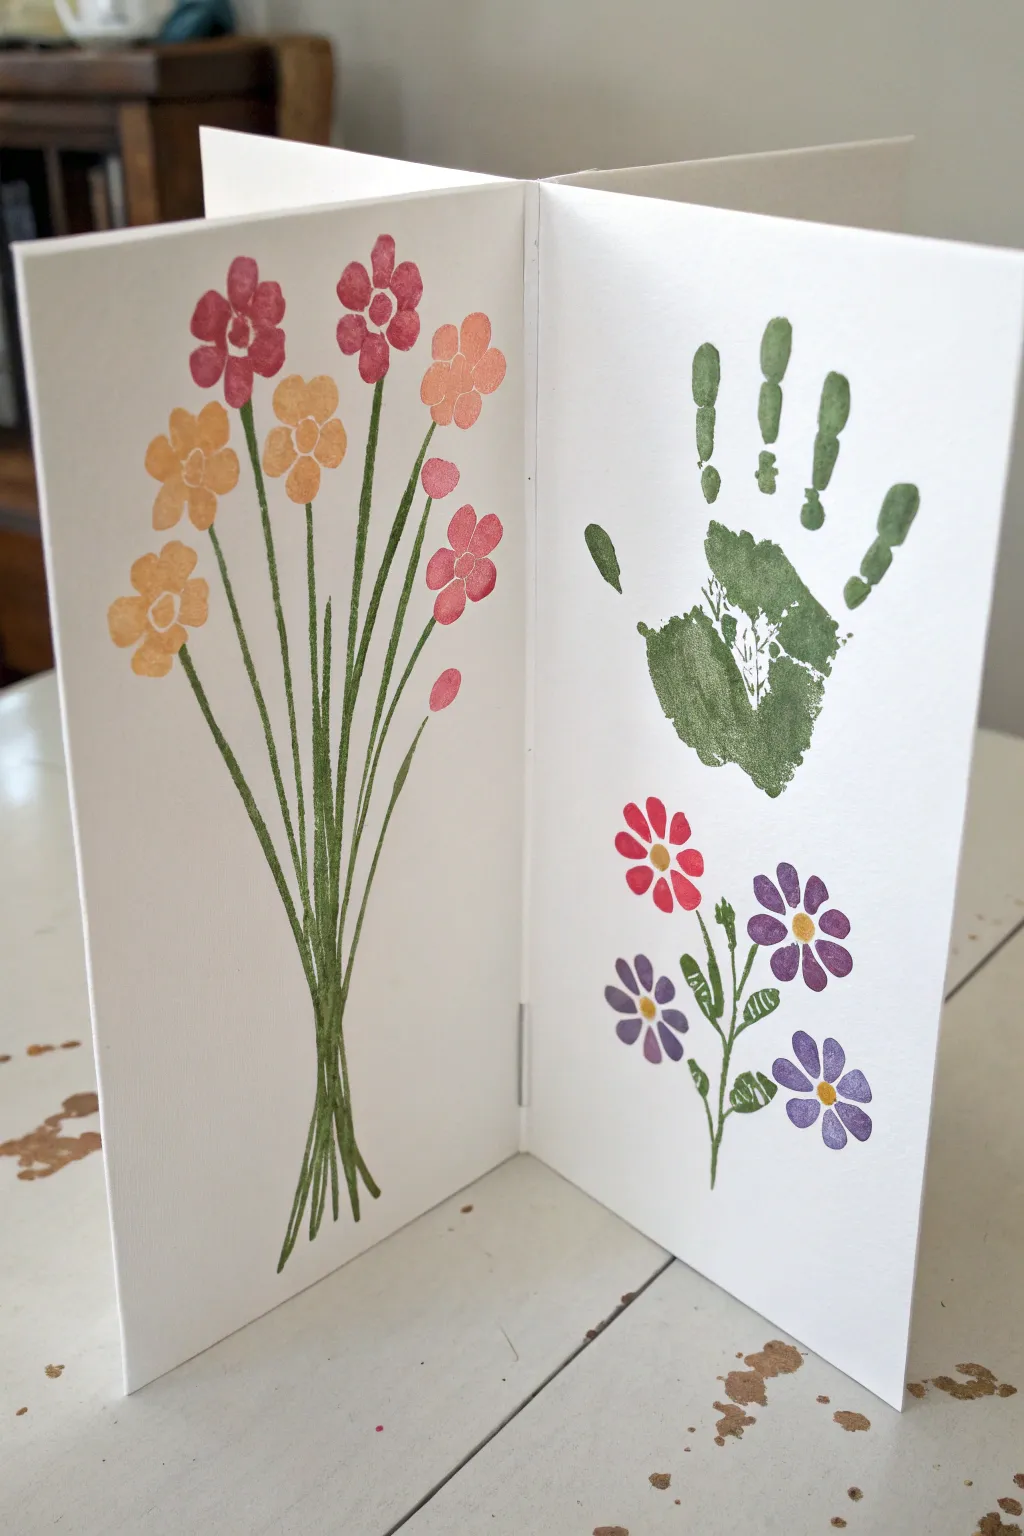
Create a cherished keepsake with this clever folding Mother’s Day card that features two distinct floral designs. One panel blooms with delicate fingerprint petals on tall stems, while the other showcases a playful green handprint transformed into a garden scene.
Step-by-Step
Materials
- Heavyweight white cardstock (12×12 inch or A3 size)
- Green acrylic or tempera paint (for stems and handprint)
- Assorted flower colors (pink, orange, red, purple, yellow)
- Fine liner paintbrush or green felt-tip marker
- Sponge dabbers or just your fingers
- Paper towels and water for cleanup
- Bone folder or ruler (for crisp folds)
- Palette or paper plate
Step 1: Preparing the Card Base
-
Cut and fold the cardstock:
Start with a large rectangular piece of white cardstock. Fold the paper in half widthwise to create a standard book fold, then open it back up. -
Create the accordion structure:
Take the left edge of the paper and fold it inward to meet the center crease you just made. Repeat this with the right edge, folding it inward to the center line. -
Sharpen the creases:
Use a bone folder or the edge of a ruler to press down firmly on all folds. This structure allows the card to stand upright and displays multiple panels at once.
Step 2: Designing the Fingerprint Bouquet (Left Panel)
-
Paint the stems:
On the left inner panel, use a fine liner brush tailored to a point with green paint to draw a cluster of long, thin stems. -
Angle the stems:
Start all stems from a central point at the bottom center of the panel, fanning them out slightly as they reach the top so they look like a gathered bouquet. -
Prepare flower colors:
Squeeze small amounts of pink, orange, and red paint onto your palette. I find it helpful to keep the blobs separated to avoid muddying the colors. -
Add fingerprint petals:
Dip a fingertip (index or pinky works best) into a color and press it gently around the top of a stem to form petals. Usually, five prints in a circle create a perfect flower shape. -
Create center details:
Once the petal paint is tacky or dry, dab a contrasting color (like yellow or white) in the very center of each flower using a smaller fingertip or the end of a paintbrush handle. -
Fill in gaps:
Add a few single fingerprint buds near the ends of some stems or floating slightly detached to add movement to the bouquet.
Clean Prints
Keep baby wipes nearby for quick cleanups between colors. This prevents unintentional color mixing and keeps your card stock smudge-free.
Step 3: Creating the Handprint Garden (Right Panel)
-
Coat the hand in green:
Generously paint the palm and fingers of your child’s hand with green paint. Ensure the coverage is even but not so thick that it drips. -
Stamp the handprint:
Press the painted hand firmly onto the upper half of the right inner panel. This green handprint can represent a unique plant or abstract foliage. -
Creating the lower garden:
Below the handprint, use your fine brush to paint three smaller stems blooming upwards from the bottom edge. -
Adding different flower types:
For variety, paint these lower flowers with a different technique. Use a brush to create more defined petals in red and purple, giving them a daisy-like appearance. -
Detailing the lower flowers:
Add yellow centers to these new red and purple flowers. You can also paint small green leaves attached to their short stems. -
Let it dry completely:
Allow the entire card to sit flat and undisturbed until the thickest parts of the paint are fully dry to the touch.
Personalize It
After the paint dries, use a black fine-tip pen to write ‘Mom’ or ‘Grandma’ on the green handprint palm, turning the foliage into a hidden message.
Once dry, stand your beautiful accordion card up for a colorful display that captures a moment in time.


Fingerprint Heart Cluster Card
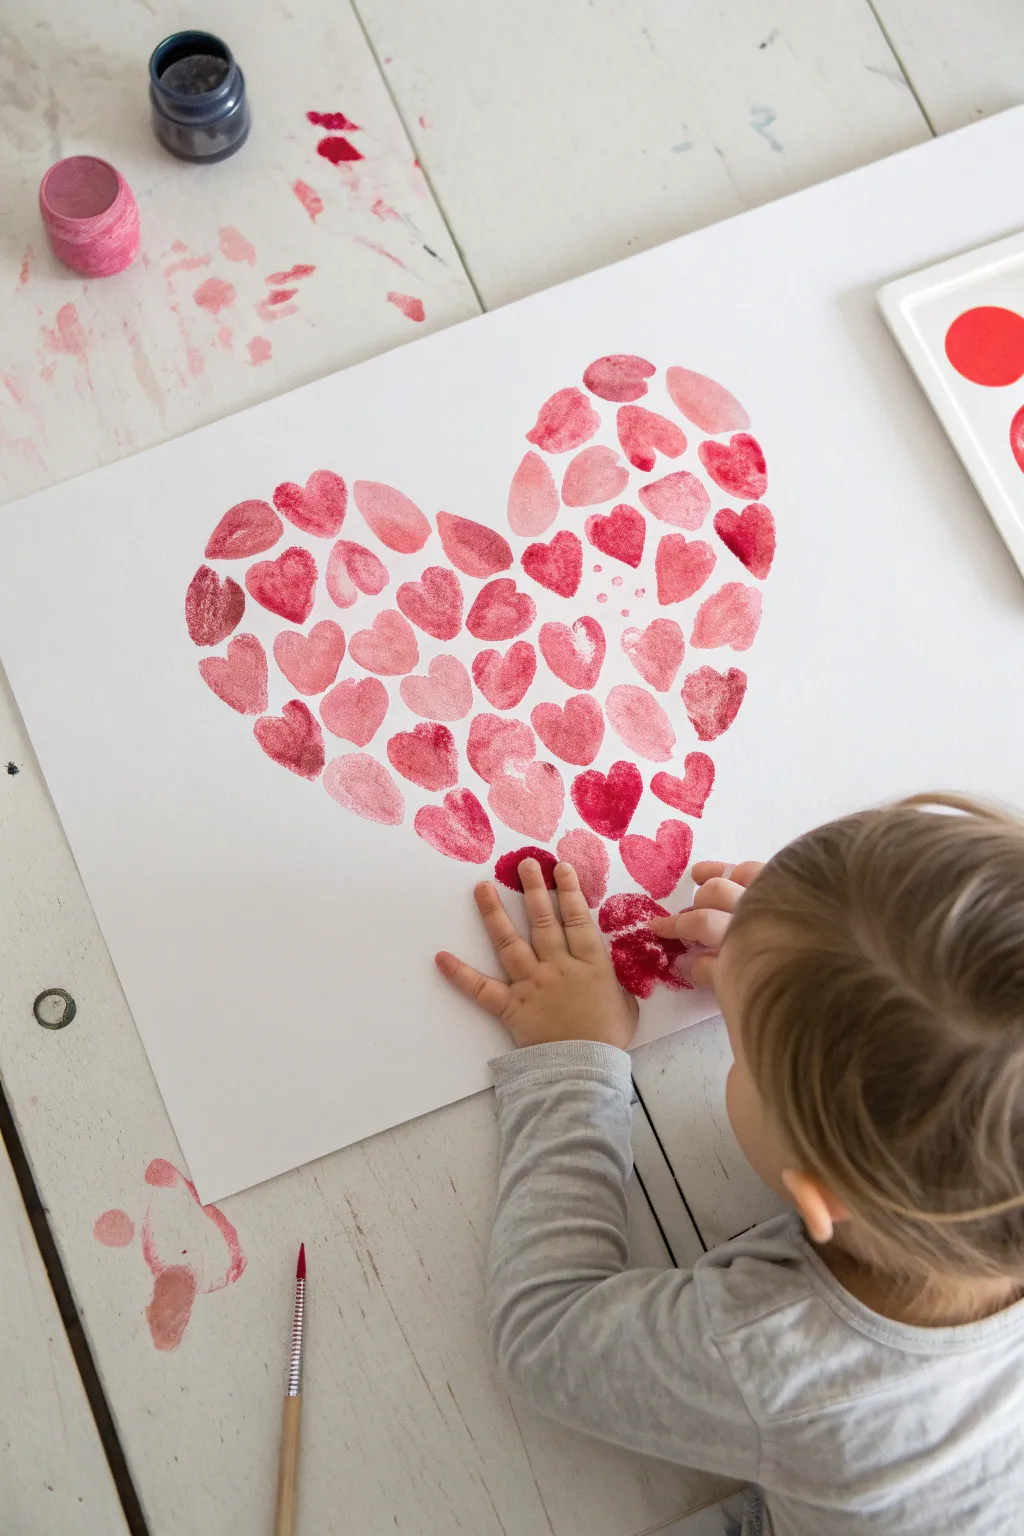
This adorable project transforms simple thumbprints into a blooming heart shape, perfect for a heartfelt Mother’s Day card or keepsake. The varying shades of pink and red create a beautiful, textured mosaic effect that looks far more sophisticated than standard finger painting.
Detailed Instructions
Materials
- Heavyweight white cardstock or watercolor paper (A3 or A4 size)
- Non-toxic washable tempera or acrylic paints (red, pink, wine/burgundy)
- Palette or small white trays for paint
- Paper towels or baby wipes (for messy fingers)
- Pencil (optional, for tracing)
- Small paintbrush (for touch-ups or mixing)
Step 1: Preparation
-
Prepare the workspace:
Lay down a protective covering on your table, like newspaper or a craft mat. Place your white cardstock in the center. -
Set up your palette:
Squeeze out coin-sized amounts of your red, pink, and burgundy paints onto the palette or tray. Keep them slightly separate to allow for distinct color choices later. -
Create a guide (optional):
If you are worried about maintaining the shape, lightly sketch a large heart outline on the paper with a pencil. Make the line very faint so it won’t show through the paint.
Clean Edges Trick
Cut a heart shape out of a separate piece of paper and use the negative space (the hole) as a stencil. Stamp inside it for a perfectly sharp edge.
Step 2: Creating the Prints
-
Start with the outline:
Dip a thumb or index finger into a medium pink shade. Instead of smearing, press the finger firmly onto the paper to create a clear oval print. -
Define the shape:
Begin placing prints along the outer edge of your heart shape first. This establishes the boundaries and ensures the heart looks symmetrical. -
Vary the pressure:
Encourage varying pressure with each press; lighter pressure makes smaller petal-like shapes, while firm pressure makes bold, round prints. -
Switch colors:
Wipe the finger clean with a paper towel and switch to a darker red or burgundy. Add these darker prints sporadically along the outline for contrast. -
Filling the interior:
Now, move to the inside of the heart. Dip into the lightest pink and start filling the empty white space. -
Cluster the prints:
Place the prints close together, almost touching but not completely overlapping. This creates that clustered, mosaic look seen in the photo. -
Mixing on the finger:
I like to occasionally dip a finger into pink and then slightly into red before pressing. This creates a beautiful marbled or two-tone effect on a single print. -
Double-tap technique:
For heart-shaped individual prints, press the thumb once, tilt it slightly left, and press again slightly overlapping the bottom to create a mini heart shape within the big heart. -
Fill the gaps:
Look for any large white gaps within the heart. Use a pinky finger for smaller dots to fill these tight spaces without overcrowding the design.
Step 3: Finishing Touches
-
Check density:
Step back and look at the heart. It should look full and abundant. Add a few more dark red prints near the bottom point of the heart to add visual weight. -
Clean edges:
If any prints went too far outside the heart shape, you can gently wipe them immediately if the paint is wet, or just add more prints to adjust the overall curve. -
Let it dry completely:
Allow the artwork to sit undisturbed for at least 30 minutes. If the paint is thick in areas, give it up to an hour. -
Erase guidelines:
Once the paint is 100% dry, gently erase any visible pencil marks from your initial sketch.
Smudgy Prints?
If prints look like blobs, you’re using too much paint. Dab the painted finger on a scrap piece of paper once before stamping the final artwork.
Once dry, this lovely textured heart is ready to be framed or folded into a card for Mom


Handprint Flower Pot Keepsake
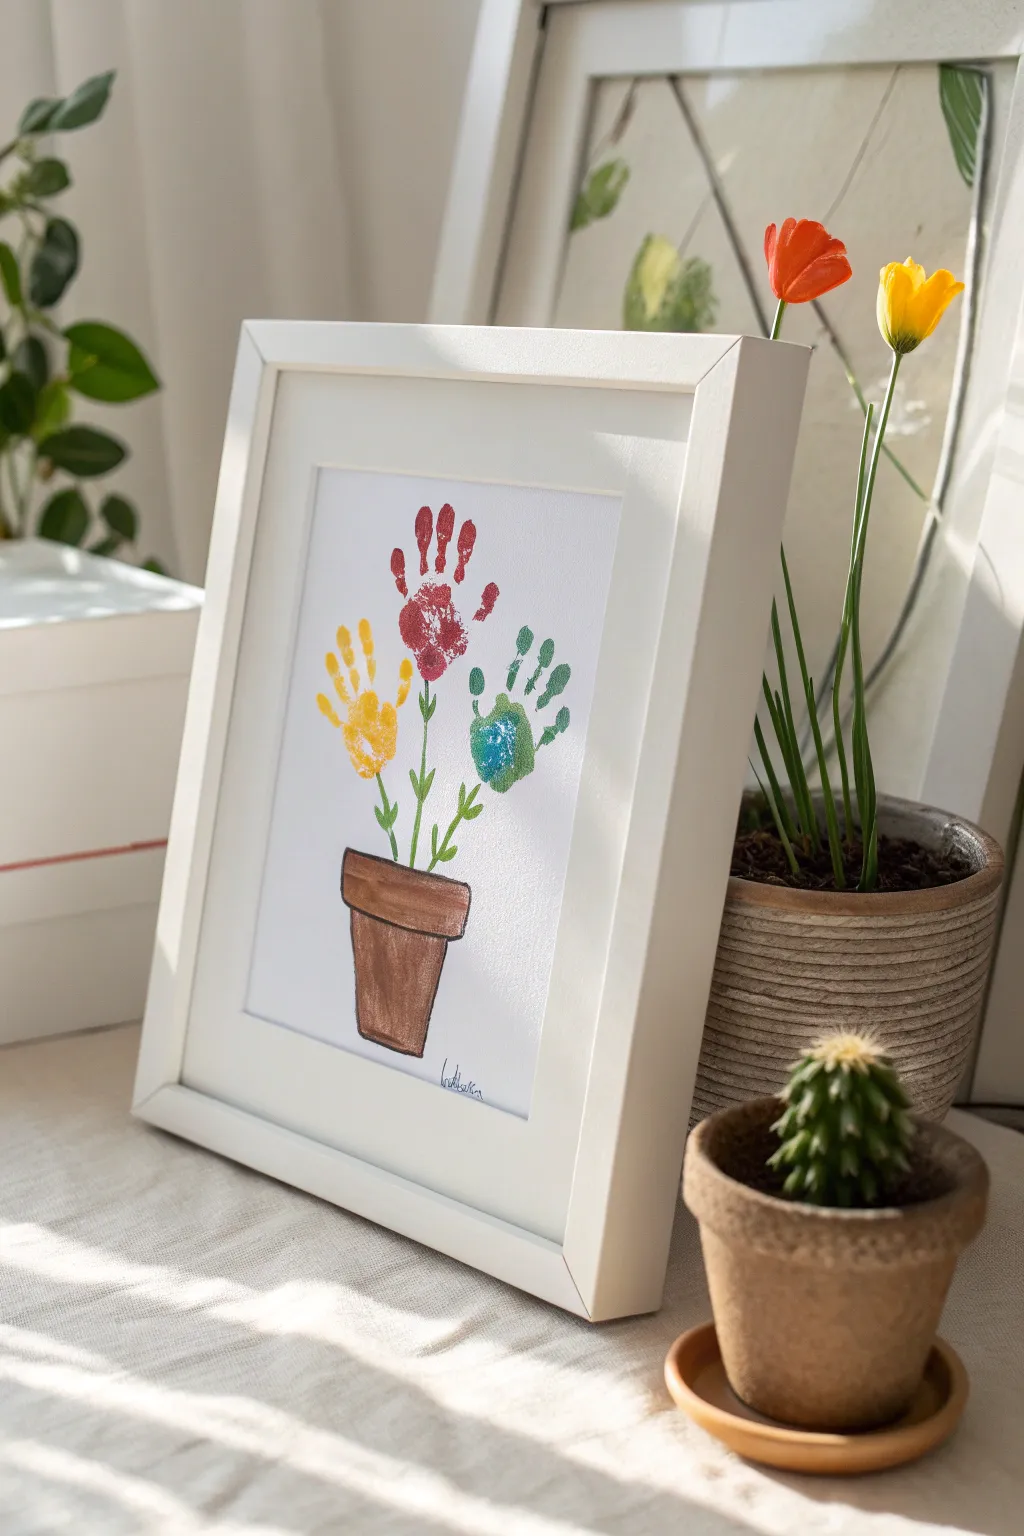
This heartwarming keepsake transforms little hands into a vibrant bouquet that blooms forever. Featuring three cheerful handprint flowers growing from a rustic pot, it’s a beautifully simple way to capture a moment in time for Mom.
Detailed Instructions
Materials
- Heavyweight white cardstock or watercolor paper
- Washable tempera or acrylic craft paint (red, yellow, green, blue)
- Brown marker or paint pen
- Green marker or paint pen
- Paintbrushes (foam brush for hands, fine tip for details)
- Paper plate or palette
- Baby wipes or paper towels
- White picture frame (8×10 or similar)
Step 1: Planning and The Pot
-
Prepare your surface:
Lay down your cardstock on a flat, protected surface. It helps to lightly tape the corners down with painter’s tape so the paper doesn’t shift while wiggling hands are involved. -
Sketch the pot outline:
Using a brown marker or a thin brush with brown paint, draw a simple flower pot shape near the bottom center of the paper. A trapezoid shape works best—wider at the top rim and slightly narrower at the base. -
Fill in the pot:
Color in your flower pot completely. If using paint, aim for a slightly textured look to mimic terracotta; if using markers, vertical strokes can add a nice dimension. -
Add rim detail:
Draw a thick horizontal rectangle across the top of your pot to create the rim. This gives the vessel some weight and makes it look more realistic.
Smudged edges?
If a finger wiggles and smudges, don’t scrap it! Turn the smudge into a falling petal or a buzzing bumblebee with a black marker.
Step 2: Creating the Handprint Blooms
-
Preparing the yellow:
Squeeze a dollop of yellow washable paint onto your palette. Using a foam brush, coat the child’s hand thoroughly but not so thickly that it drips. -
The first flower:
Guide the yellow hand to the left side of the paper, hovering above the pot. Press the hand down firmly, ensuring the palm and all five fingers make contact. -
Lift and clean:
Gently lift the hand straight up to avoid smearing the print. Clean the hand immediately with baby wipes before moving to the next color. -
Preparing the red:
Apply red paint to the hand for the center flower. I prefer to position this one slightly higher than the side flowers to create a pleasing, balanced arrangement. -
The center flower:
Press the red hand down in the center, above the pot. Make sure the fingers are spread open comfortably to look like radiating petals. -
Clean again:
Wipe the red paint off thoroughly. This step is crucial to keep the final color bright and muddy-free. -
Mixing the third color:
For the final flower on the right, create a unique variation. Coat the palm with green and the fingers with blue, or mix them slightly on the hand for a marbled effect. -
The final flower:
Press this dual-tone hand onto the right side of the paper. Ensure it mirrors the height of the yellow flower to keep the composition symmetrical. -
Dry time:
Set the artwork aside for about 10-15 minutes. The handprints must be dry to the touch before you draw the stems, or you risk smudging the paint.
Step 3: Stem and Finish
-
Connect the stems:
Using a green marker or fine paintbrush, draw a line from the base of the middle finger on the red handprint straight down into the pot. -
Side stems:
Draw angled lines connecting the yellow and green/blue handprints to the pot. These lines should converge towards the center stem as they enter the pot’s soil. -
Adding foliage:
Sketch small, teardrop-shaped leaves along the green stems. Stagger them for a natural look, placing some higher and some lower. -
Signature touch:
Have the child sign their name or add the date in small print near the bottom of the pot. A fine-tip black pen works perfectly for this subtle detail. -
Framing:
Once the artwork is completely dry, place it inside a clean white frame to elevate the simple craft into a gallery-worthy display.
Add some sparkle
Before the paint dries completely, sprinkle a tiny pinch of biodegradable glitter onto the wet paint for flowers that shimmer in the light.
Hang this sweet masterpiece where Mom can see it every day and smile at those tiny blooming prints


Fingerprint Tulip Garden
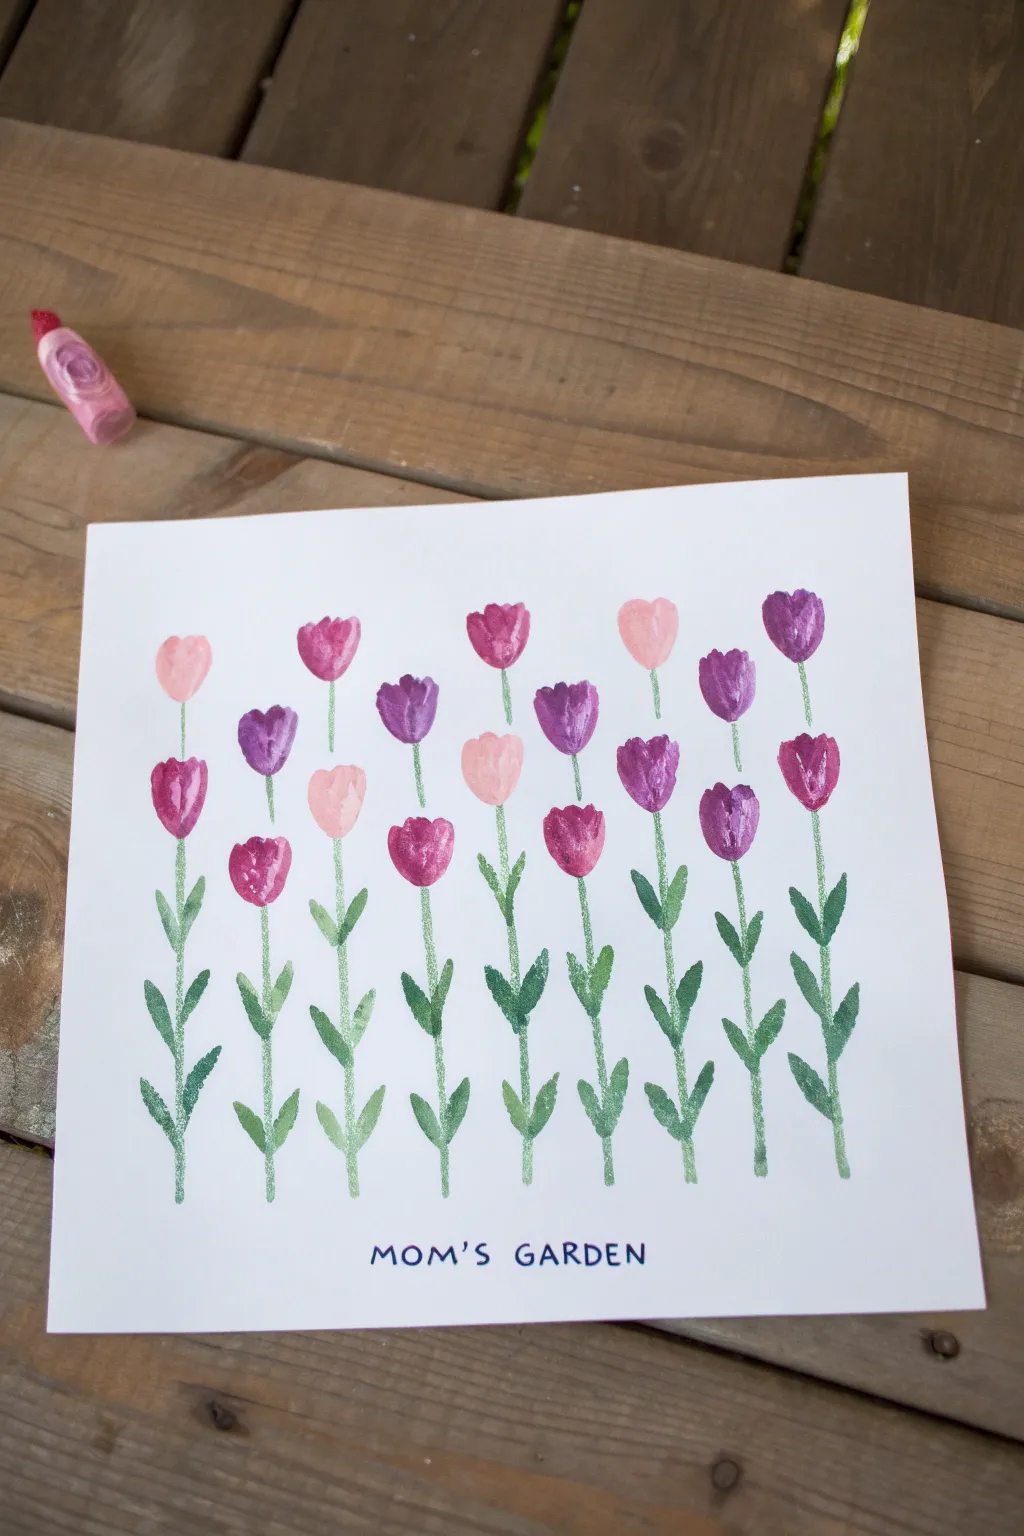
This charming art project transforms simple fingerprints into a vibrant field of tulips, perfect for a handmade Mother’s Day gift. The result is a clean, modern floral print that captures the sweet imperfections of hand-painted art.
Step-by-Step Tutorial
Materials
- Heavyweight white paper or cardstock (8×8 inch square works well)
- Acrylic paints (shades of pink, magenta, purple, and green)
- Small flat tip paintbrush
- Small round tip paintbrush
- Paper plate or palette
- Fine-point blue or black marker
- Paper towels
- Water cup
Step 1: Preparation & Practice
-
Set up your palette:
Squeeze small dollops of your flower colors onto a paper plate. You’ll want a light pink, a deep magenta, and a rich purple. For more variety, mix a little white into the purple to make a lavender shade. -
Test your prints:
Before committing to the final paper, practice on a scrap sheet. Dip your thumb or index finger into the paint. You want a thin, even coat—too much paint will create globs rather than a nice texture. -
Find the right pressure:
Press your painted finger onto the scrap paper. Experiment with rocking your finger slightly to get a fuller oval shape if desired, or just a straight press for a uniform look.
Step 2: Creating the Blooms
-
Start the bottom row:
Begin with your darkest purple or magenta paint. Press your finger onto the paper about three inches from the bottom edge to create the first flower head. -
Create a pattern:
Continue adding fingerprints in a horizontal row across the paper, spacing them about an inch apart. Alternate your colors between purple, magenta, pink, and lavender to create a varied garden effect. -
Add the second tier:
Once the first row is done, move up about an inch and a half. Place these fingerprints in the spaces between the flowers below, creating a staggered brick-pattern arrangement. -
Finish the top row:
Add a third row of fingerprints near the top, continuing the staggered spacing. Varying the height slightly makes the garden look more natural and organic. -
Let the blooms dry:
Allow the paint to dry completely. This is crucial because you don’t want to smudge the flower heads when you go back in to paint the stems.
Smudge Control
If you accidentally smudge a print, turn it into a ‘fallen petal’ design or wait for it to dry and paint over it with an opaque acrylic color to hide the mistake.
Step 3: Adding Greenery
-
Mix your garden green:
Prepare your green acrylic paint. I like to mix a tiny bit of white or yellow into a standard forest green to give it a softer, leafy look. -
Paint the main stems:
Using the small round tip brush, paint a straight vertical line from the bottom center of each flower head down to the bottom of the page. -
Handle the back rows:
For the flowers in the second and third rows, paint their stems straight down until they ‘disappear’ behind a flower in the foreground. Don’t paint over the blooms below. -
Start the leaves:
Switch to a slightly wider brush if available, or press harder with your round brush. Paint two leaves at the base of the stems in the front row. -
Shape the leaves:
Use a simple stroke that starts at the stem and flicks outward and upward. This tapered shape mimics real tulip leaves perfectly. -
Fill in the gaps:
Add smaller leaves to the stems of the upper rows where space allows, ensuring the bottom of the garden looks lush and full without being overcrowded.
Make it Shine
Once the paint is fully dry, add tiny dots of gold glitter glue to the center of a few flowers for a sparkle that catches the light.
Step 4: Finishing Touches
-
Detail the blooms:
Once the stems are dry, you can add subtle definition to the flower heads. Mix a slightly darker shade of each flower color and paint a tiny ‘V’ shape at the top center of each fingerprint to resemble petals opening. -
Dry completely:
Let the entire painting sit until the green paint is fully dry to the touch. -
Add text:
Using a fine-point blue or black marker, carefully print ‘MOM’S GARDEN’ or a similar message centered at the very bottom of the page. -
Erase guidelines:
If you used any pencil marks to help with spacing the text or flowers, gently erase them now, being careful not to rub the paint.
Frame this lovely garden print to create a keepsake that preserves those precious fingerprints forever
BRUSH GUIDE
The Right Brush for Every Stroke
From clean lines to bold texture — master brush choice, stroke control, and essential techniques.
Explore the Full Guide
Negative Space Heart Fingerprint Frame
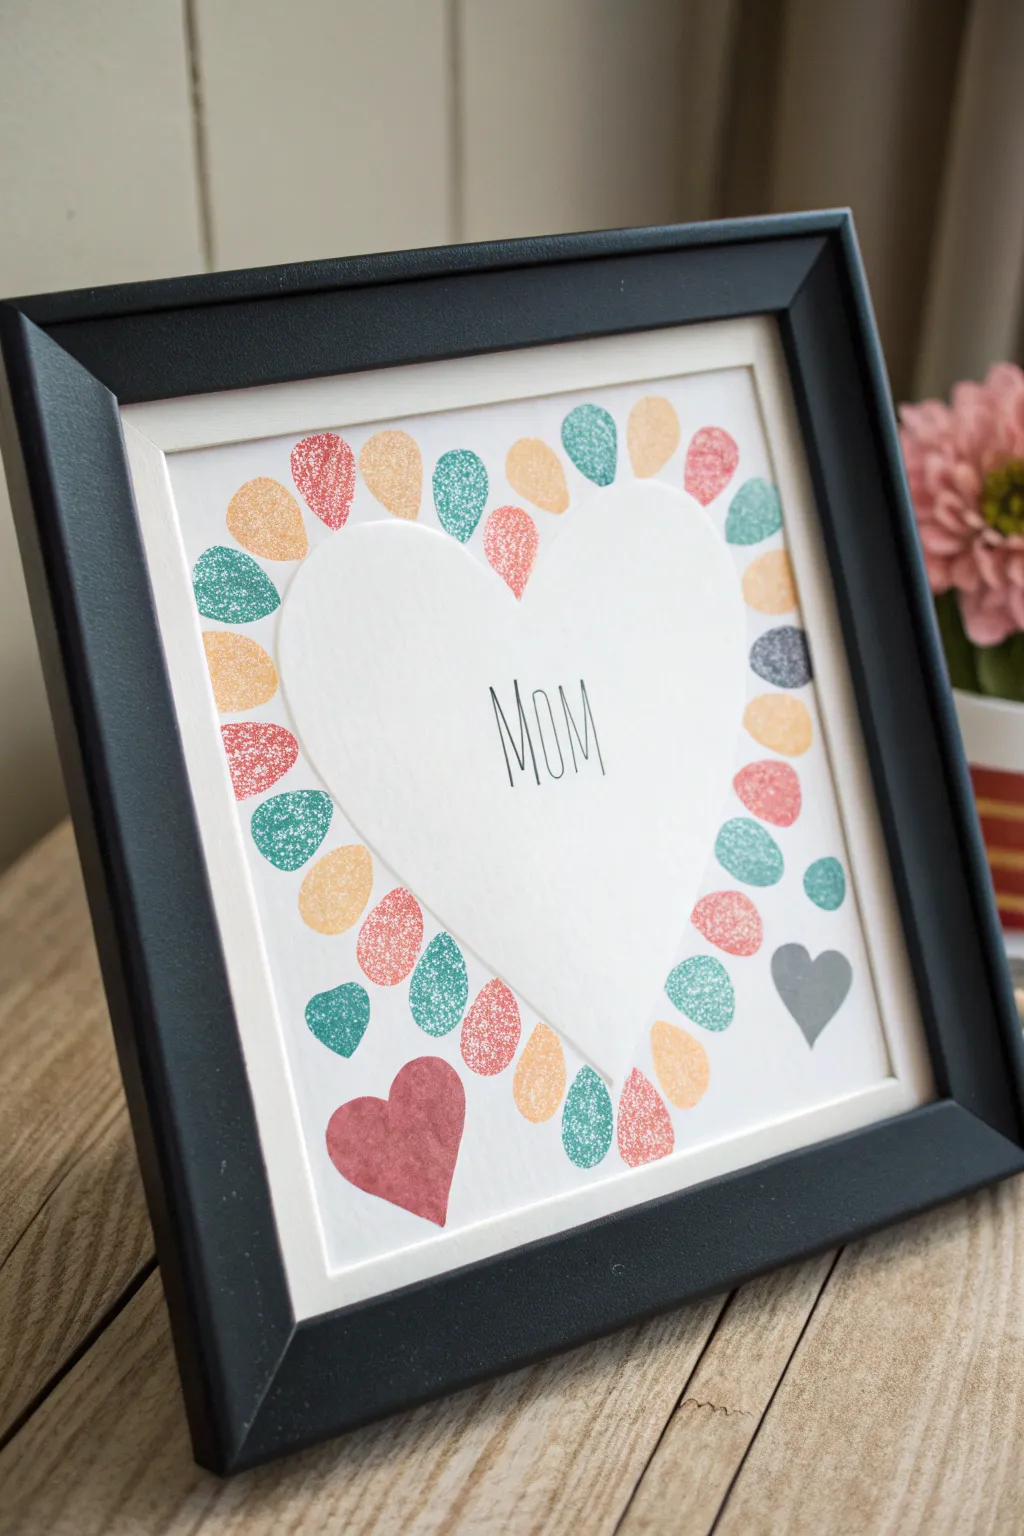
Create a heartfelt keepsake for Mom using simple fingerprints to define a beautiful negative space heart shape. This framed artwork combines a modern, minimalist look with the personal touch of your child’s own prints.
Detailed Instructions
Materials
- White cardstock paper (8×10 size recommended)
- Scrap paper or light cardboard (for heart stencil)
- Removable adhesive dots or painter’s tape
- Pencil
- Scissors
- Washable ink pads or acrylic craft paint (coral, teal, and mustard yellow)
- Black fine-tip marker or pen
- Black picture frame (8×10 with mat)
Step 1: Preparing the Canvas
-
Cut the paper:
Trim your main sheet of white cardstock to fit the picture frame you have chosen. If your frame has a mat, ensure the paper is cut slightly larger than the mat opening so you can tape it in place later. -
Create the heart template:
Take a piece of scrap paper or thin cardboard and fold it in half. Draw half a heart shape along the fold and cut it out. Unfold it to reveal a symmetrical heart. -
Position the template:
Place the cut-out heart template in the exact center of your white cardstock. You can use a ruler to measure from the edges to ensure it is perfectly centered. -
Secure the heart:
Using a small amount of removable adhesive or a rolled piece of painter’s tape on the back, stick the heart template onto the cardstock. Press it down just enough so it won’t shift while you work, but not so hard that it tears the paper later.
Smudged Edges?
If paint bleeds under the template, wait for it to dry, then use a white gel pen or a tiny dab of white acrylic paint to touch up the edge and restore the crisp line.
Step 2: Creating the Fingerprint Border
-
Prepare the colors:
Set out your ink pads or squeeze small amounts of acrylic paint onto a palette. Aim for a palette of muted coral, teal, and mustard yellow to match the example. -
Get the fingers ready:
Make sure the child’s finger is clean and dry before starting. If using paint, apply a thin, even layer to their finger with a sponge brush to avoid globs. -
Start stamping at the top:
Begin stamping fingerprints right along the edge of the heart template. Position the finger so about half of the print lands on the template and half lands on the white cardstock. -
Create a pattern:
Continue stamping around the perimeter of the heart, alternating between your chosen colors (e.g., yellow, red, teal). Keep the prints close together but not necessarily overlapping. -
Vary the angles:
As you move around the curves of the heart, rotate the paper or the finger angle slightly so the prints radiate outward like flower petals. -
Fill the gaps:
Go all the way around the template until the entire outline is covered in colorful prints. Ensure there are no large white gaps between the prints right at the template edge. -
Add floating hearts (optional):
To mimic the example, you can add a larger construction paper heart or stamp a few extra heart shapes in the bottom corners unrelated to the main outline for extra decoration. -
Let it dry:
Allow the ink or paint to dry completely. This usually takes about 10-15 minutes for thin acrylics or ink pads.
Make It 3D
Instead of just fingerprints, punch small heart shapes out of colored cardstock and glue a few around the perimeter for a mix of texture and print.
Step 3: Finishing Touches
-
Remove the template:
Carefully peel up the heart template from the center. Do this slowly to ensure clean edges where the paint met the paper. -
Reveal the negative space:
You should now see a crisp white heart shape defined by the colorful ring of fingerprints. -
Add the lettering:
In the center of the white heart, use a pencil to lightly sketch the word ‘MOM’. Aim for a tall, thin, modern font style. -
Ink the text:
Trace over your pencil lines with a fine-tip black marker or pen. Use steady strokes to keep the lines clean and minimalist. -
Erase pencil marks:
Once the marker ink is fully dry, gently erase any visible pencil sketch lines. -
Frame the artwork:
Place the finished artwork into your black frame. If using a mat, center the heart within the mat opening and secure the paper from the back with tape.
Now you have a modern, custom piece of art ready to hang on the wall or wrap up for a special gift
Fingerprint Bee Garden for Mother’s Day
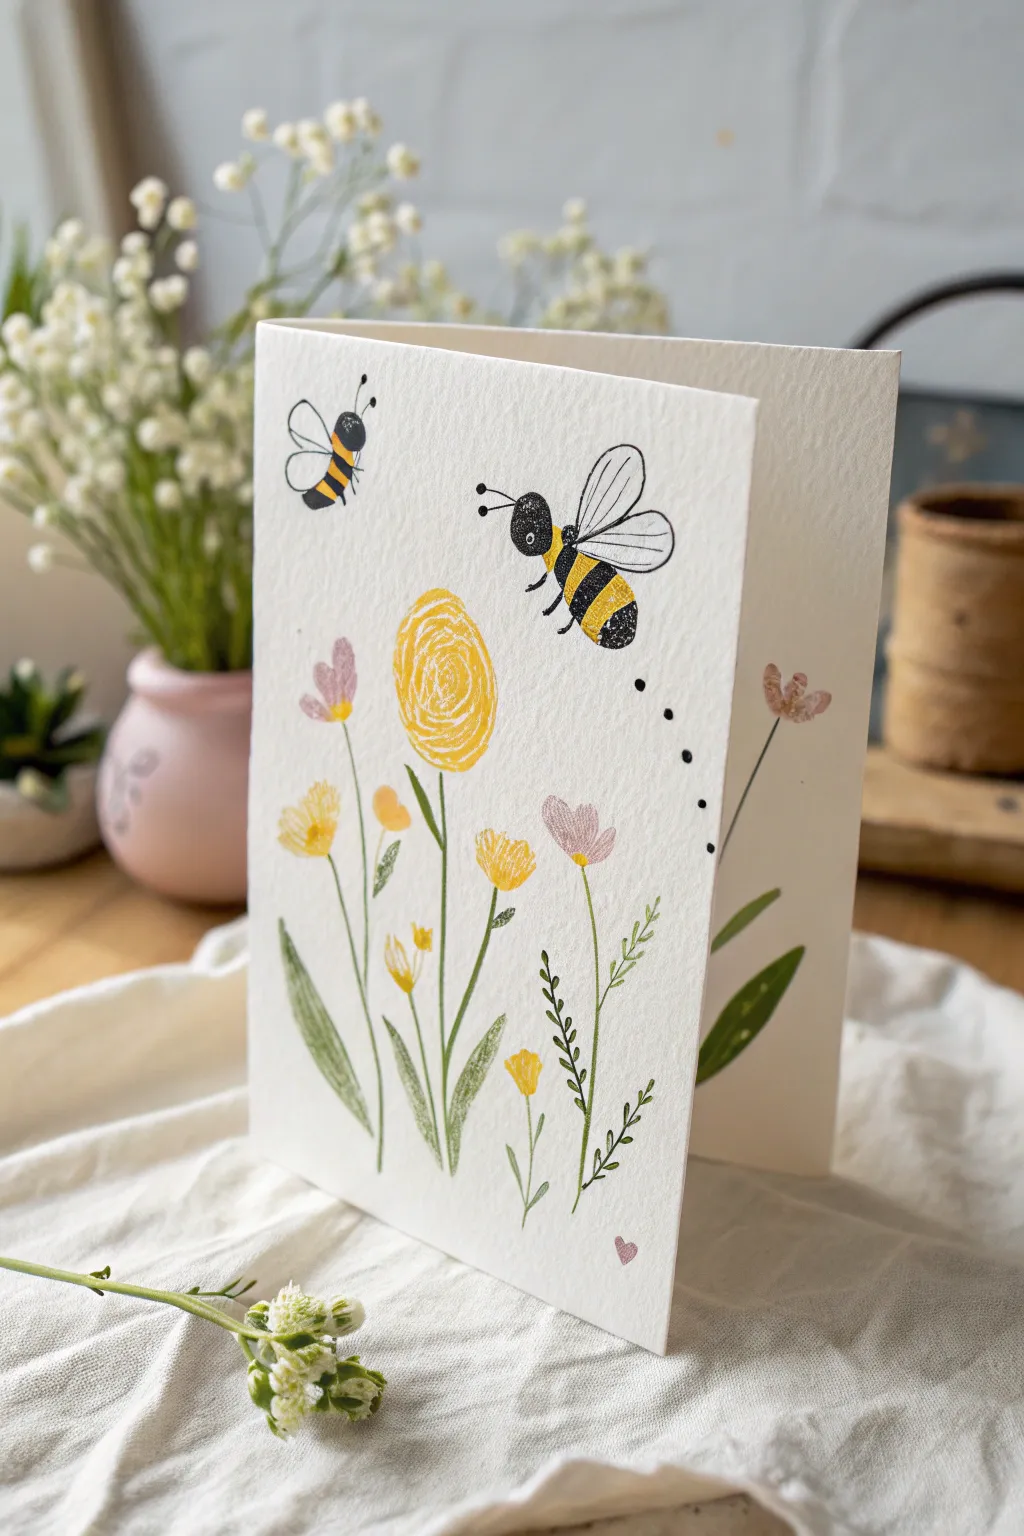
Transform simple fingerprints into a buzzing garden scene perfect for Mother’s Day. This charming card combines playful finger painting with delicate pen work to create a keepsake that feels both handmade and polished.
Detailed Instructions
Materials
- High-quality white cardstock or watercolor paper (folded to card size)
- Yellow, black, and pink washable craft paints or ink pads
- Fine-tip black drawing pen (archival ink is best)
- Small round paintbrush
- Green watercolor paint or markers
- Paper towel or baby wipes
- Scrap paper for testing
Step 1: Creating the Bees
-
Stamp the large bee body:
Start with the main bee. Dip your thumb into yellow paint (or use an ink pad) and stamp it firmly onto the upper right section of the card. Aim for an oval shape. -
Add the smaller bee:
Using your pinky finger or a smaller child’s thumb, create a second, smaller yellow oval on the upper left side of the card. -
Create the bee heads:
Once the yellow paint is dry to the touch, dip your index finger into black paint. Carefully stamp a black fingerprint overlapping the front end of each yellow oval to create the bees’ heads. -
Draw the stripes:
With your fine-tip black pen, draw curved lines across the yellow bodies to create the classic bumblebee stripes. Fill in the stripes with the pen or use a tiny bit of black paint if you prefer a bolder look. -
Add wings and antennae:
Sketch two teardrop-shaped wings on the back of each bee using the black pen. Add two tiny lines with dots on the end for antennae coming off the black heads. -
Create the flight path:
Using the very tip of your pen, tap a series of small dots trailing behind the large bee to show its buzzing flight path.
Stamp Smart
Test your finger stamps on scrap paper first. If the print is too blobby, blot your finger on a paper towel to remove excess paint before stamping the final card.
Step 2: Planting the Garden
-
Stamp the main flower:
For the large central flower, use your thumb or a larger round stamp with yellow paint. Press it into the center of the card, slightly below the bees. -
Detail the center flower:
Once the yellow circle is dry, use a white gel pen or a scratch tool to draw a spiral or concentric circles inside the paint to mimic petals. -
Add side blossoms:
Dip a pinky finger into pink paint and stamp small flowers on either side of the yellow center. You can do single dots or clusters of three for variety. -
Stamp filler flowers:
Add a few more small yellow fingerprints near the bottom to represent smaller wildflowers or buds. -
Draw the stems:
Using a green marker or a paintbrush with green watercolor, draw long, slender lines extending from the bottom of the card up to each flower head. -
Paint the leaves:
Add leaves to the stems. I like to vary the shapes—long and thin for the tall flowers, and small, fern-like dashes for the filler greenery. -
Add texture to leaves:
To give the leaves a textured look similar to the image, lightly dab them with a darker green shade or scratch faint lines into the wet paint.
Step 3: Finishing Touches
-
Add a tiny heart:
In the bottom right corner, stamp or draw a tiny pink heart as a sweet signature. -
Review and refine:
Check your ink lines. If any bee legs or antennae look too faint, re-trace them gently to make them pop against the white paper. -
Let it cure:
Allow the card to sit flat for at least 30 minutes to ensure all thick paint layers are completely dry before folding or writing inside.
Smudge Control
If you smudge black ink into the yellow paint, wait for it to dry, then use a white gel pen to cover the mistake, or turn the smudge into a tiny flying gnat.
Now you have a bouquet that will last forever and a sweet message ready for Mom

PENCIL GUIDE
Understanding Pencil Grades from H to B
From first sketch to finished drawing — learn pencil grades, line control, and shading techniques.
Explore the Full Guide
Fingerprint Cupcake Sprinkles for Mom
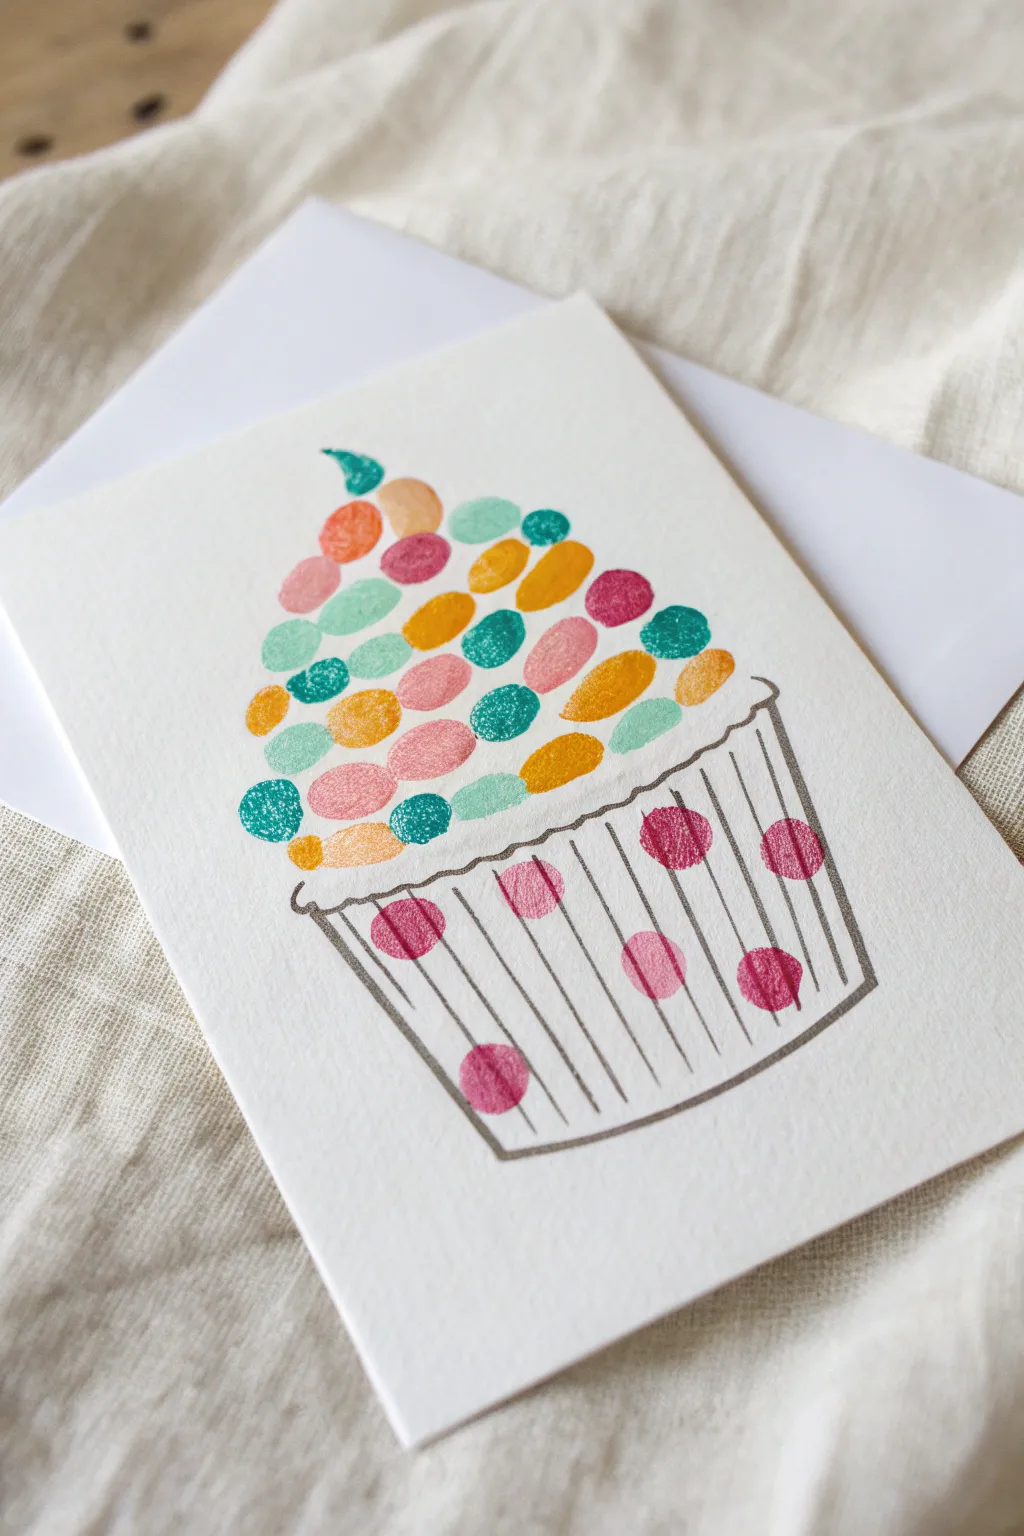
Show Mom just how sweet she is with this charming handmade card featuring a colorful cupcake made entirely from tiny fingerprints. The textured dots create fluffy frosting and decorative sprinkles, while simple pen lines add a whimsical sketched look.
Step-by-Step
Materials
- Heavyweight white cardstock or watercolor paper
- Washable ink pads (pink, teal, orange, yellow, light blue)
- Fine-tip black drawing pen (0.5mm or 0.8mm)
- Pencil for light sketching
- Eraser
- Wet wipes or damp paper towel
Step 1: Planning the Layout
-
Fold the Card:
Begin by folding your sheet of heavyweight cardstock in half to create a standard greeting card size. Run your fingernail along the crease for a sharp, professional edge. -
Sketch the Base:
Using a pencil, very lightly draw the outline of a cupcake wrapper on the bottom half of the card front. Aim for a trapezoid shape that is wider at the top and narrower at the bottom. -
Add Vertical Lines:
Lightly sketch vertical lines inside the wrapper shape to mimic pleats. Don’t worry about them being perfectly straight; a slight curve adds character. -
Outline the Frosting:
Sketch a very faint triangle or mound shape above the wrapper to guide where your fingerprints will go. This ensures your cupcake frosting doesn’t lean too far to one side.
Smudge Alert
If a fingerprint looks too faint, wait for it to dry completely before re-stamping over it. Stamping wet-on-wet usually results in a blurry blob rather than a crisp print.
Step 2: Creating the Fingerprint Art
-
Prepare Your Fingers:
Select your ink pad colors. Ensure your hands are clean and dry before starting so oils don’t repel the ink. -
Start the Base Layer:
Press your index finger onto a light pink or peach ink pad. Stamp a row of fingerprints directly along the top edge of your penciled wrapper line. -
Build the Frosting:
Switch to a new color, like teal or yellow. Press firmly to get a solid oval shape. Remember to wipe your finger on a wet wipe between color changes to keep the hues bright. -
Working Upwards:
Continue adding rows of fingerprints, gradually using fewer prints as you move upward to form a pyramid shape. Alternate colors randomly to create a confetti-sprinkle effect. -
Filling the Gaps:
Overlap the prints slightly so there isn’t too much whitespace between the ‘sprinkles.’ The unpredictability of the placement makes the frosting look fluffy. -
Top It Off:
Finish the mound with a single fingerprint at the very peak. I like using a darker teal or pink here to act as a cherry or distinct topper. -
Wrapper Polka Dots:
Dip your pinky finger into deep pink ink. Randomly stamp small dots inside the wrapper area, placing them between your sketched vertical lines.
Make It Sparkle
Once the ink is fully dry, add tiny dots of clear glitter glue or metallic gel pen on top of the colorful fingerprints to make the ‘sprinkles’ shimmer in the light.
Step 3: Inking and Finishing Details
-
Let it Dry:
Allow the ink to dry completely for about 5 to 10 minutes. If the ink is wet, the pen lines in the next step might bleed. -
Outline the Wrapper:
Trace over your pencil lines for the cupcake wrapper using the fine-tip black pen. Use a loose, sketchy hand rather than using a ruler for rigid lines. -
Draw the Pleats:
Draw the vertical lines inside the wrapper. Start from the top edge and pull the pen quickly downward for a tapered look. -
Add the Scalloped Edge:
Draw a wavy, scalloped line across the top of the wrapper, framing the bottom row of fingerprints to make it look like the cake is peeking out. -
Erase Pencil Marks:
Once you are certain the black ink is 100% dry, gently erase any visible pencil guidelines from the first phase.
Now you have a sweet, personalized keepsake that captures a moment in time perfectly
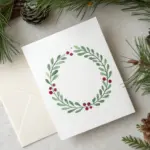
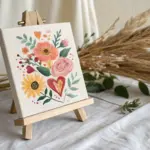
Fingerprint Heart Wreath Keepsake
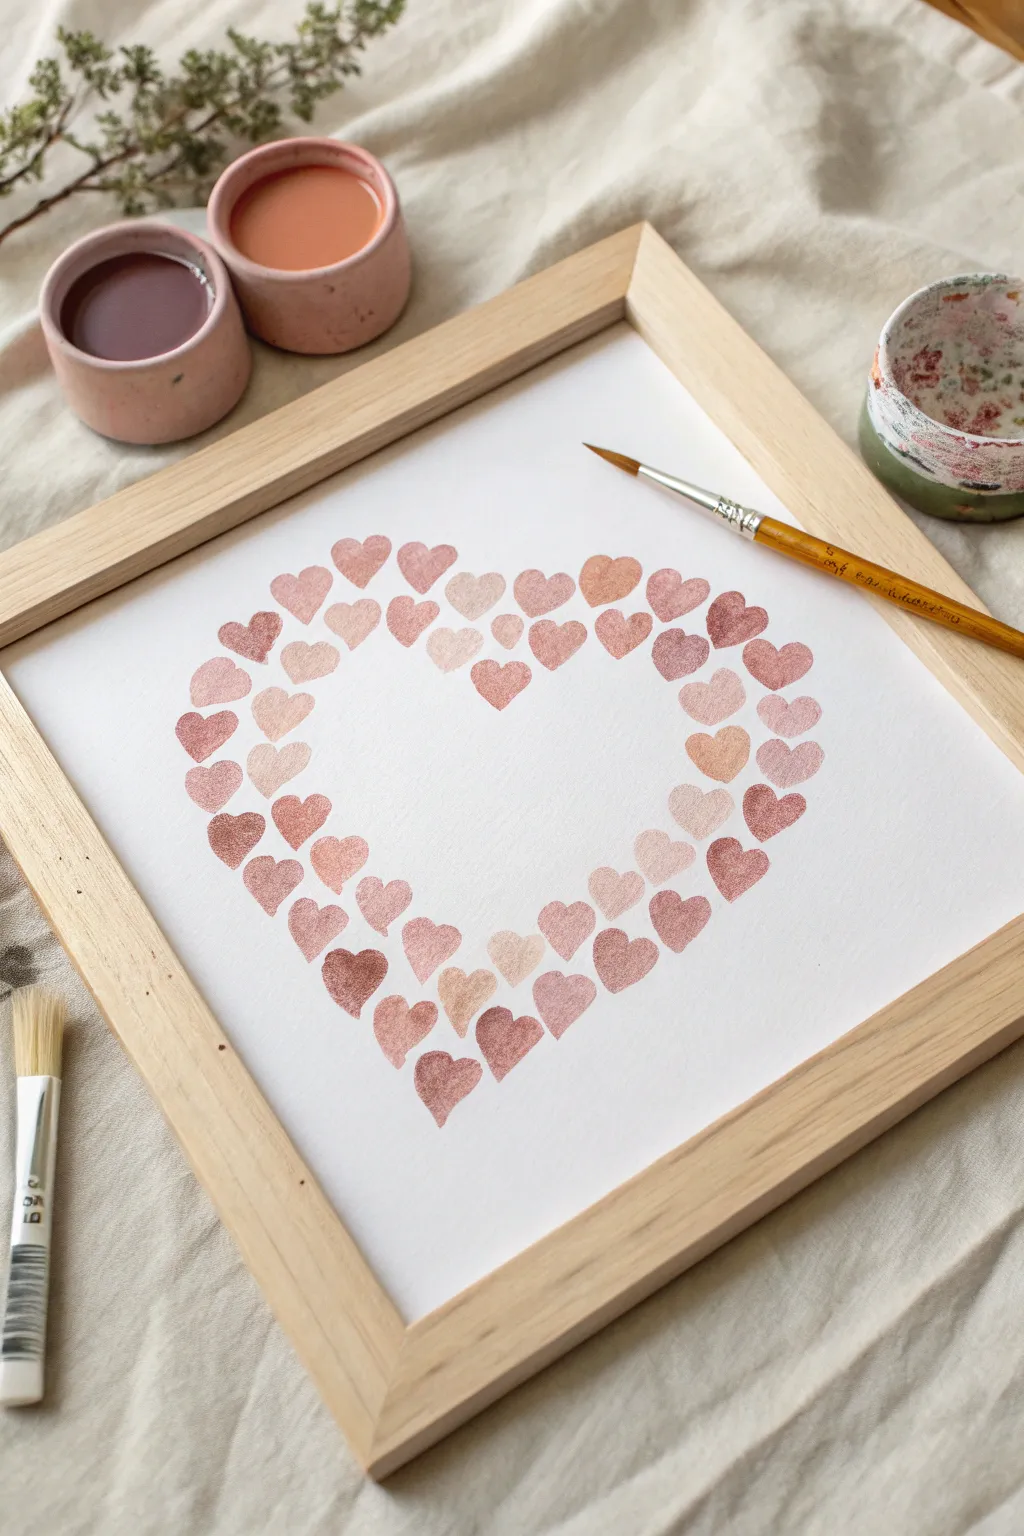
Create a delicate and heartwarming piece of art by arranging small, hand-painted hearts into a larger wreath shape. The soft, earthy palette of blush and terracotta tones gives this keepsake a sophisticated and modern feel perfect for a gallery wall.
Step-by-Step Tutorial
Materials
- High-quality watercolor paper (cold press, heavy weight)
- Square light wood frame (approx. 10×10 or 12×12 inches)
- Watercolor or gouache paints (shades of terracotta, dusty rose, mauve, and beige)
- Small round paintbrush (size 4 or 6)
- Pencil
- Eraser
- Paper plate or palette
- Small mixing cups (optional)
Step 1: Planning the Layout
-
Prepare the canvas:
Cut your watercolor paper to fit the dimensions of your square frame precisely. -
Sketch the guide:
Using a pencil, very lightly draw a large heart shape in the center of the paper. This line will serve as the spine for your arrangement. -
Refine the shape:
Keep your pencil line faint; you want it just visible enough to guide you but easy to erase later if any parts peek through.
Uneven Heart Shapes?
Don’t stress about perfect symmetry. The charm of this piece relies on the organic variation. Use the ‘press and lift’ brush method for easy shapes.
Step 2: Mixing the Palette
-
Create a base color:
Start with a burnt sienna or terra cotta color on your palette to act as your darkest anchoring shade. -
Mix lighter variations:
Create 3-4 distinct variations of your base color by mixing in varying amounts of white gouache or simply diluting with more water for transparency. -
Test the shades:
Swatch your mixed colors on a scrap piece of paper to ensure you have a nice gradient from dark mauve to pale blush.
Color Harmony Tip
Stick to a monochrome palette (variations of one hue) rather than a rainbow. Adding a tiny dot of brown to all colors unifies them instantly.
Step 3: Painting the Hearts
-
Start at the top:
Begin painting your first small heart at the very top ‘dip’ of your pencil guideline. -
Paint technique:
To make a simple heart using a round brush, press the brush down to varying pressures to create two cohesive teardrop shapes that meet at the bottom. -
Vary the sizes:
As you work your way down the curve, paint hearts of slightly different sizes to create an organic, non-uniform look. -
Alternate colors:
Switch between your mixed shades frequently. Place a dark terracotta heart next to a pale peach one to create visual interest and depth. -
Follow the curve:
Continue painting hearts along the pencil line, angling each individual heart slightly so it flows with the direction of the large heart’s curve. -
Manage the spacing:
Leave a tiny bit of white space between each heart—they can touch slightly, but shouldn’t overlap heavily. -
Create the point:
When you reach the bottom point of the large heart, place a medium-sized heart exactly at the tip to anchor the shape. -
Fill the interior:
Once the outline is established, add a second, inner layer of smaller hearts just inside the first row to thicken the wreath. -
Add a loner:
Paint a single, floating heart in the center of the negative space at the top, just below the dip, as seen in the inspiration image.
Step 4: Finishing Touches
-
Let it dry completely:
Allow the paint to dry fully. Watercolor dries lighter, so wait to see the final effect. -
Erase guides:
Gently erase any visible pencil marks from your initial sketch, being careful not to smudge the paint. -
Frame the artwork:
Place your finished piece into the light wood frame behind glass to protect the pigment.
Hang your beautiful heart mosaic in a sunny spot to enjoy the warmth of the colors every day


Resist Message With Finger-Paint Wash
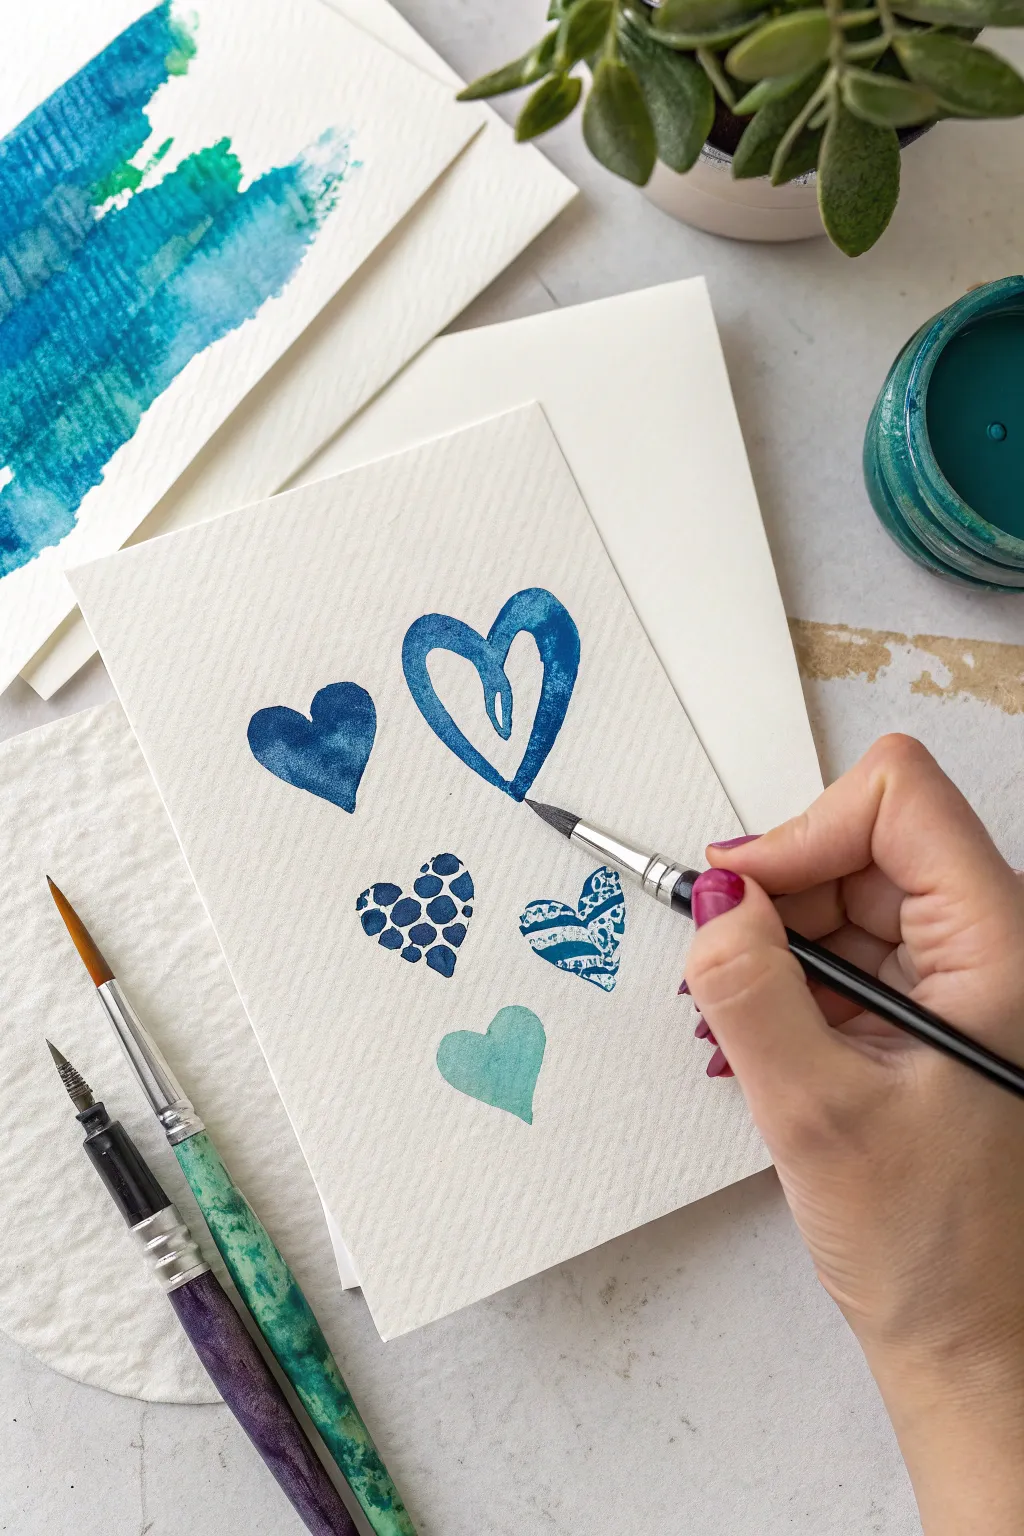
Create a charming collection of hand-painted hearts using a mix of resist techniques and simple brushstrokes. The result is a clean, modern card design with beautiful teal and deep blue hues.
Step-by-Step Tutorial
Materials
- Cold press watercolor paper (cut to card size)
- Watercolor paints (phthalo blue, turquoise, indigo)
- Round watercolor brush (size 4 or 6)
- Masking fluid or white crayon (optional for resist effects)
- Clean water jar
- Paper towel
- Painter’s tape or wash tape
Step 1: Preparation
-
Prepare your workspace:
Clear a flat surface and lay down your watercolor paper. If you want a clean border or need to hold the paper steady, tape the edges down with painter’s tape. -
Mix your palette:
Prepare three shades of blue: a deep indigo for bold hearts, a mid-tone cerulean, and a watery turquoise for lighter washes.
Fixing paint blooms
If you get a ‘bloom’ or cauliflower edge where paint dries unevenly, don’t panic. Quickly dab it with a clean, damp brush to soften the hard edge into the surrounding color.
Step 2: Painting the Hearts
-
Start with the solid heart:
Load your brush with the deep indigo paint. In the upper-left quadrant, paint a classic heart shape, filling it in completely for a bold, saturated look. -
Paint the open heart:
Reload your brush with cerulean blue. To the right of the first heart, paint a heart outline using loose, fluid strokes. Add a second, smaller loop inside the center for a gestural feels as shown in the photo. -
Create the polka dot resist:
Below the solid heart, draw a heart shape and fill it with small circles using clear masking fluid or a white crayon. Let this resist layer dry completely before proceeding. -
Wash over the dots:
Once the resist is dry, apply a wash of deep blue paint over the entire polka-dot heart shape. The unpainted circles will pop out as the white of the paper shines through. -
Create the striped resist:
Next to the polka dot heart, repeat the resist process. Draw zebra-like stripes or jagged lines within a heart outline using your masking fluid or crayon. -
Paint the striped heart:
Cover the striped heart area with a mid-tone blue wash. Watch as the pattern emerges instantly against the colorful background. -
Paint the soft turquoise heart:
For the bottom-most heart, switch to a very watered-down turquoise. Paint a simple, filled-in heart shape at the bottom center to anchor the design. -
Refine edges:
While the paint is still slightly damp, you can gently touch up any jagged edges with the tip of your brush, but keeping it loose adds to the charm.
Step 3: Finishing Touches
-
Let it dry:
Allow the entire card to dry completely. This is crucial if you used masking fluid to prevent tearing the paper. -
Remove masking fluid:
If you used liquid masking fluid, gently rub it away with a focused finger or a rubber cement pickup tool to reveal the crisp white paper underneath. -
Flatten the card:
If the watercolor paper has buckled slightly from the water, place the dry card under a heavy book overnight to flatten it out seamlessly.
Add metallic flair
Once the blue paint is totally dry, trace over one or two of the hearts with a gold gel pen or metallic watercolor for a sophisticated shimmer.
Once dry, this lovely card is ready to be gifted or framed as a piece of mini art
Mother’s Day Handprint Family Tree
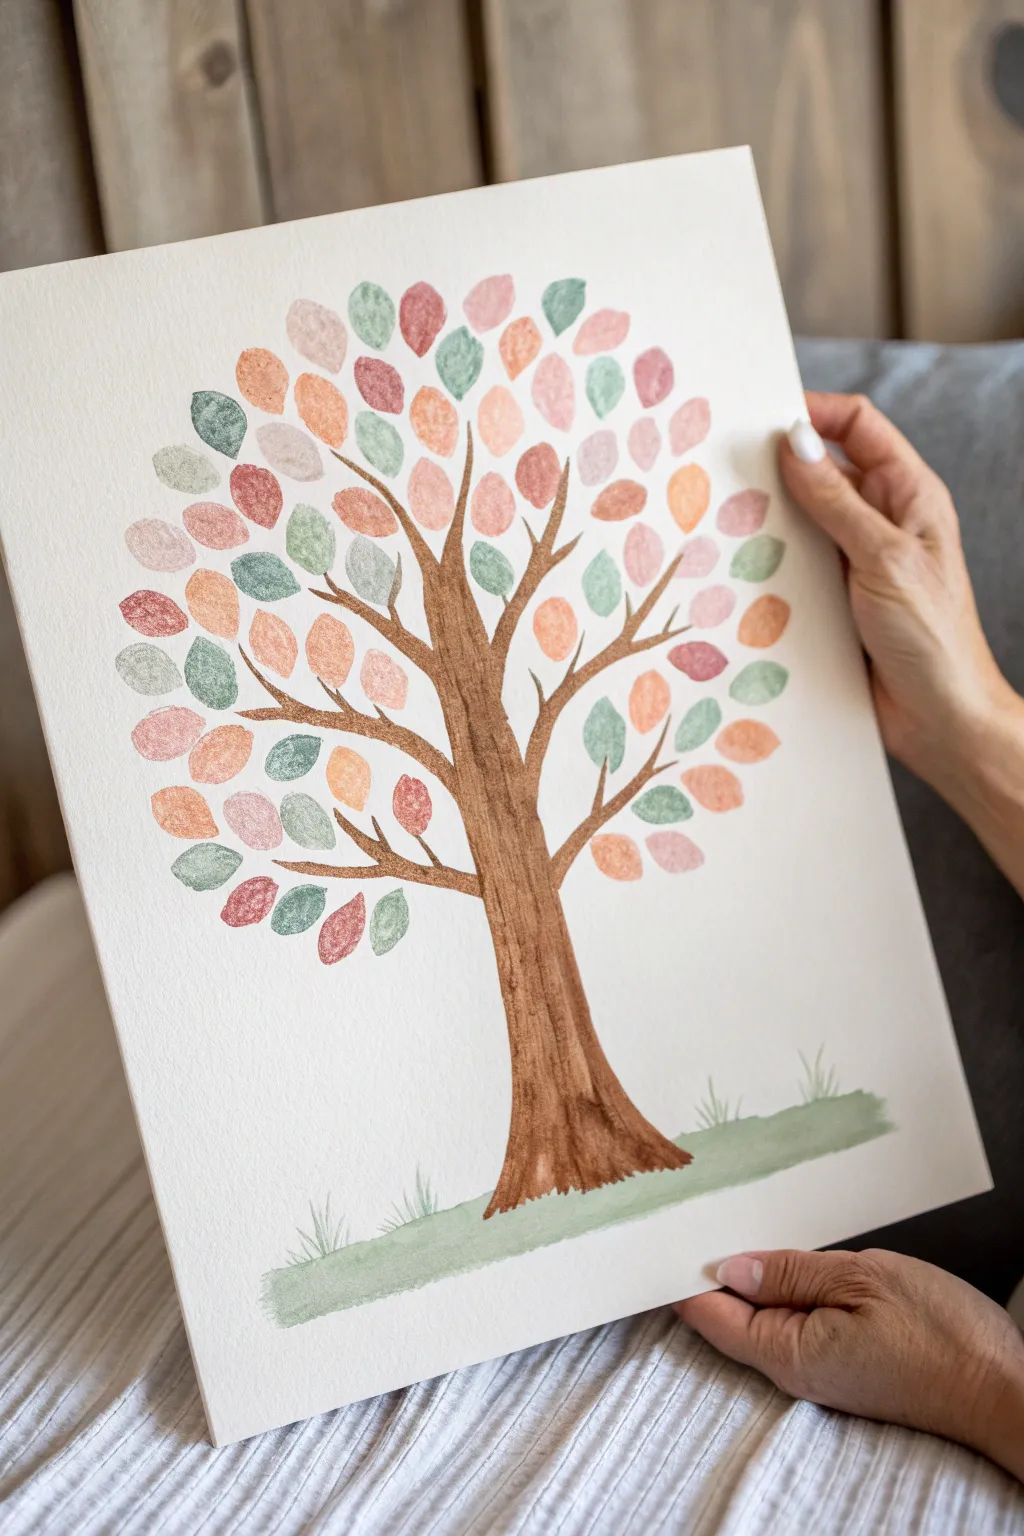
Create a cherished keepsake with this elegant twist on the classic family tree. Using soft watercolor hues and the unique touch of actual fingerprints, this artwork transforms simple marks into a blooming canopy of love.
How-To Guide
Materials
- Heavyweight cold-press watercolor paper (at least 140lb/300gsm)
- Watercolor paints (pan or tube)
- Small round paintbrush (size 4 or 6)
- Fine liner brush (size 0 or 1)
- Cup of water
- Paper towels
- Pencil (HB or H)
- Kneaded eraser
Step 1: Sketching the Skeleton
-
Lightly pencil the trunk:
Start by lightly sketching the outline of the tree trunk in the center of your paper. Make the base wider, tapering gently as it goes up. -
Add main branches:
Draw three to four main branches extending from the top of the trunk. Keep the lines fluid and organic rather than perfectly straight. -
Branch out further:
From each main branch, sketch smaller, thinner twigs extending outward. Think of a ‘Y’ shape pattern, ensuring there’s plenty of empty space for the leaves later. -
Refine the sketch:
Look over your tree structure. If any branches look too stiff, soften the curves. Use a kneaded eraser to lighten the graphite lines until they are barely visible guides.
Paint Consistency Pro-Tip
For the best fingerprint texture, use paint the consistency of heavy cream. If it’s too watery, the print will just look like a blob without defined edges.
Step 2: Painting the Tree Structure
-
Mix your brown hue:
Create a warm brown shade by mixing burnt umber with a tiny touch of water. You want the paint to be fluid but pigmented enough to show texture. -
Fill the trunk base:
Using your size 4 or 6 round brush, paint the trunk. Use long, vertical strokes to mimic the texture of bark. I like to leave tiny slivers of white paper showing through for a natural look. -
Extend to branches:
Continue painting up into the main branches. As you move away from the trunk, switch to the tip of your brush to make the lines narrower. -
Detail the twigs:
Switch to your fine liner brush for the smallest twigs. These lines should be delicate and tapering at the ends. -
Add depth to the bark:
While the brown is still slightly damp, drop a slightly darker brown mix along the left side of the trunk and under the main branches to create shadow. -
Paint the grass base:
Mix a watery sap green or olive tone. Paint a loose, horizontal wash at the very bottom of the trunk to ground the tree. Add a few quick, upward flicks of the brush to suggest grass blades. -
Let it dry completely:
Pause here. The brown and green paint must be bone dry before you start adding fingerprints to avoid smudging mud.
Oops, Smudged It?
Did a fingerprint smudge? Don’t panic. Once dry, use a white gel pen to draw a small heart or vein pattern over the mistake to turn it into a unique leaf.
Step 3: Blooming the Canopy
-
Prepare your palette:
Mix three or four distinct pastel colors on your palette: a sage green, a dusty rose, a soft peach, and a light coral. The paint should be creamy—not too watery, or it won’t hold the fingerprint shape. -
Technique test:
Test the consistency on a scrap piece of paper. Dip your index finger into the paint, dab off excess on a paper towel, and press firmly. You want a clear oval shape with visible ridges. -
Start with green leaves:
Dip your finger into the sage green mix. Press fingerprints onto the ends of various twigs, spacing them out randomly across the canopy area. Clean your finger thoroughly between colors. -
add the pink tones:
Move to the dusty rose color. Place these prints in the empty spaces, sometimes angling them slightly differently to create movement. -
Fill in with peach:
Use the peach and coral tones to fill the remaining gaps. It helps to envision a large circle shape for the overall canopy and fill within that boundary. -
Overlap for density:
It’s okay if a few fingerprints slightly overlap the brown branches or other leaves once the first layer is dry; this creates a lush, full effect. -
Connect floating leaves:
Once the fingerprints are dry, take your fine liner brush with the brown paint again. Draw tiny stems connecting any ‘floating’ fingerprints back to the nearest branch.
Frame this personalized masterpiece to preserve a moment in time when their hands were still this small


Have a question or want to share your own experience? I'd love to hear from you in the comments below!