If you’ve ever painted a mushroom and thought, “Okay, that was fun… now what?” you’re in the right place. These mushroom painting ideas are the kinds of studio prompts I use when I want something cute, magical, and totally doable in one sitting.
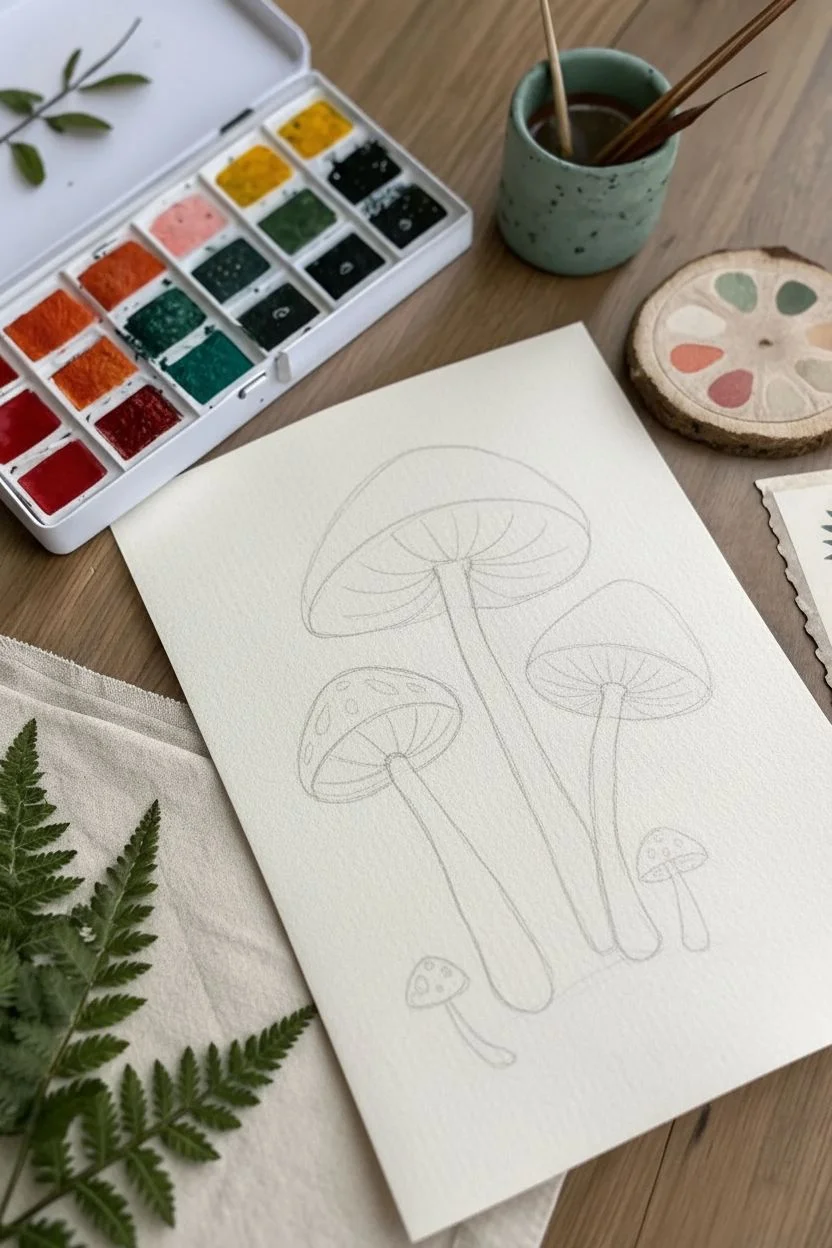
Easy Mushroom Trio Using Simple Shapes
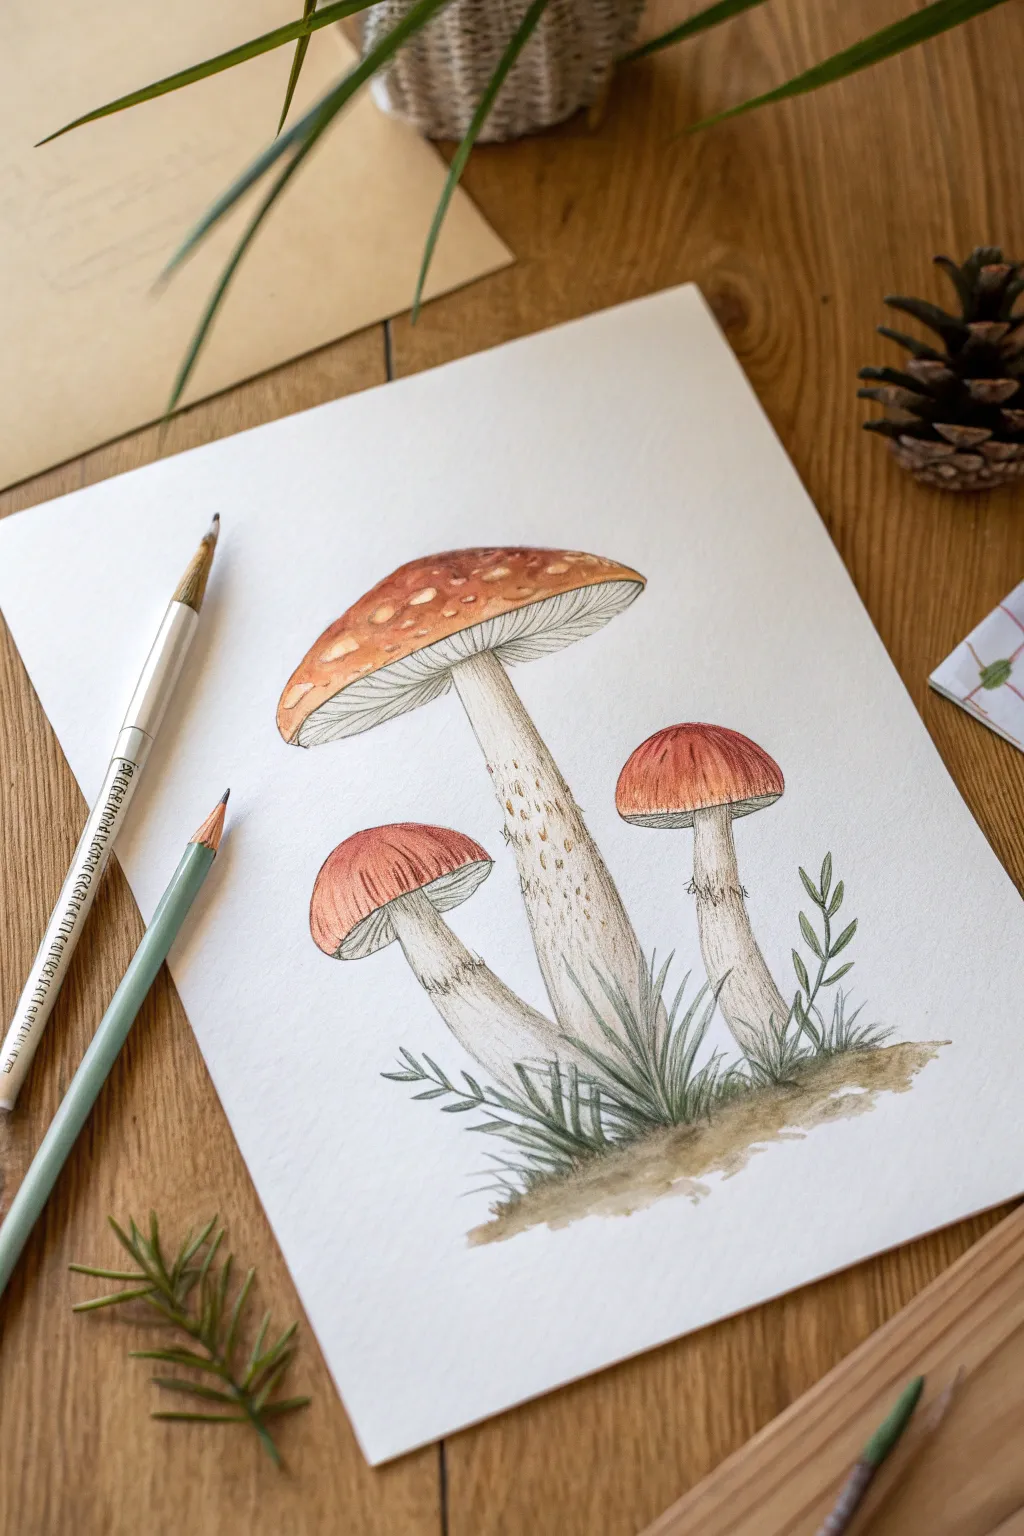
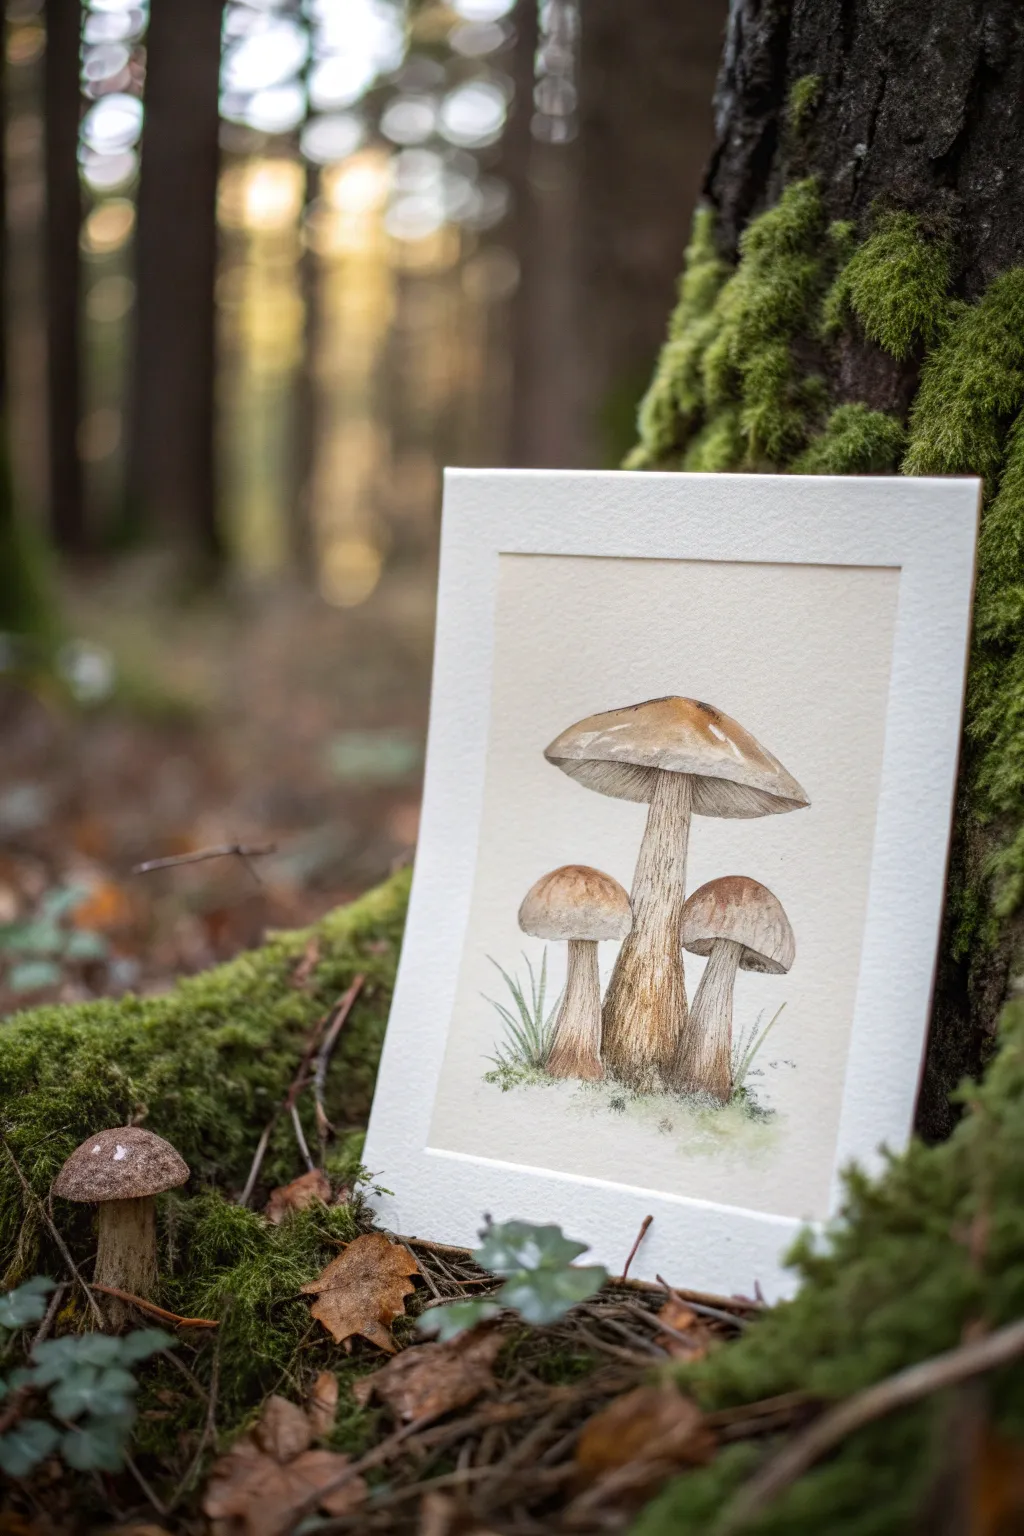
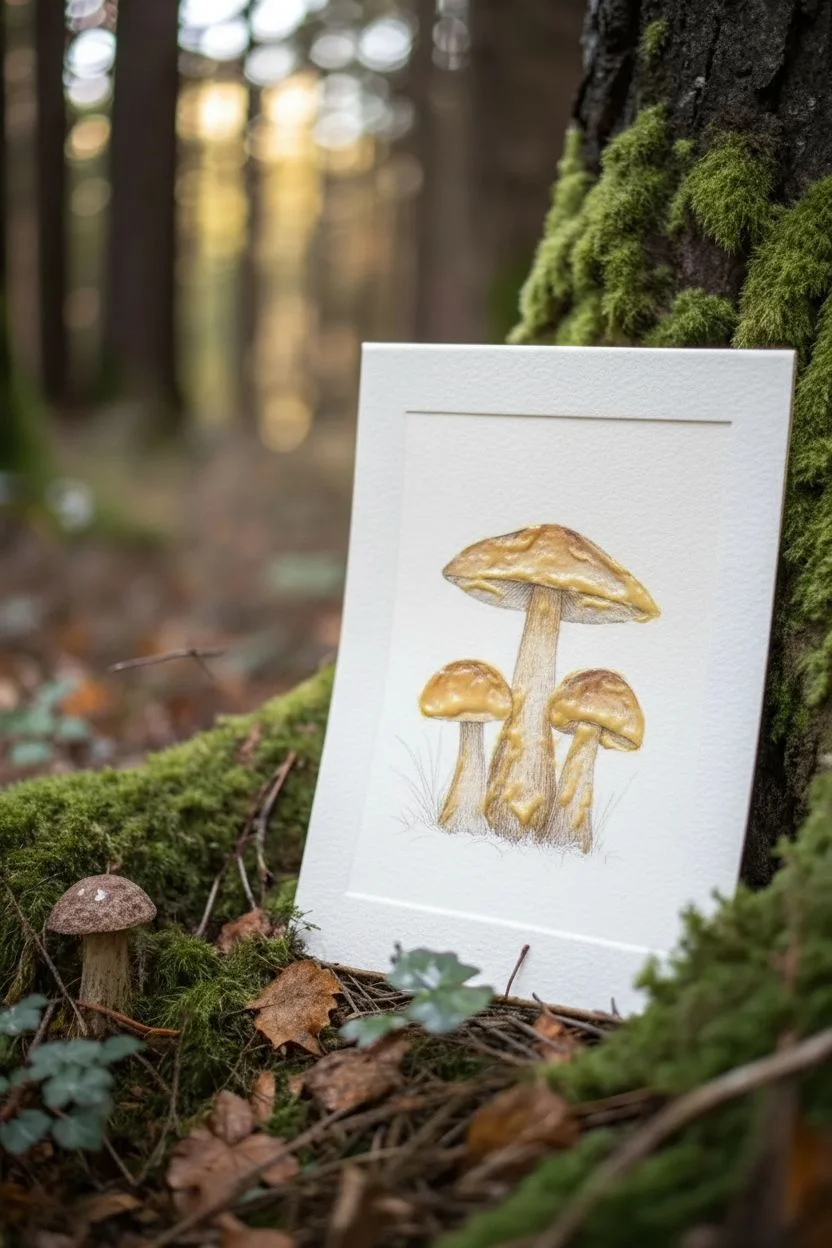
Capture the charm of the forest floor with this mixed-media mushroom study, combining the soft wash of watercolors with the precise detail of colored pencils. The result is a beautifully textured, botanical-style illustration of a large toadstool flanked by two smaller companions.
Step-by-Step Guide
Materials
- Hot press watercolor paper (smooth texture)
- Watercolor paints (Rust/Terracotta, Yellow Ochre, Burnt Umber, Sap Green)
- Colored pencils (White, Dark Brown, Olive Green, Rust Red)
- Round watercolor brush (size 4 or 6)
- HB or 2B graphite pencil
- Kneaded eraser
- Jar of water
- Paper towels
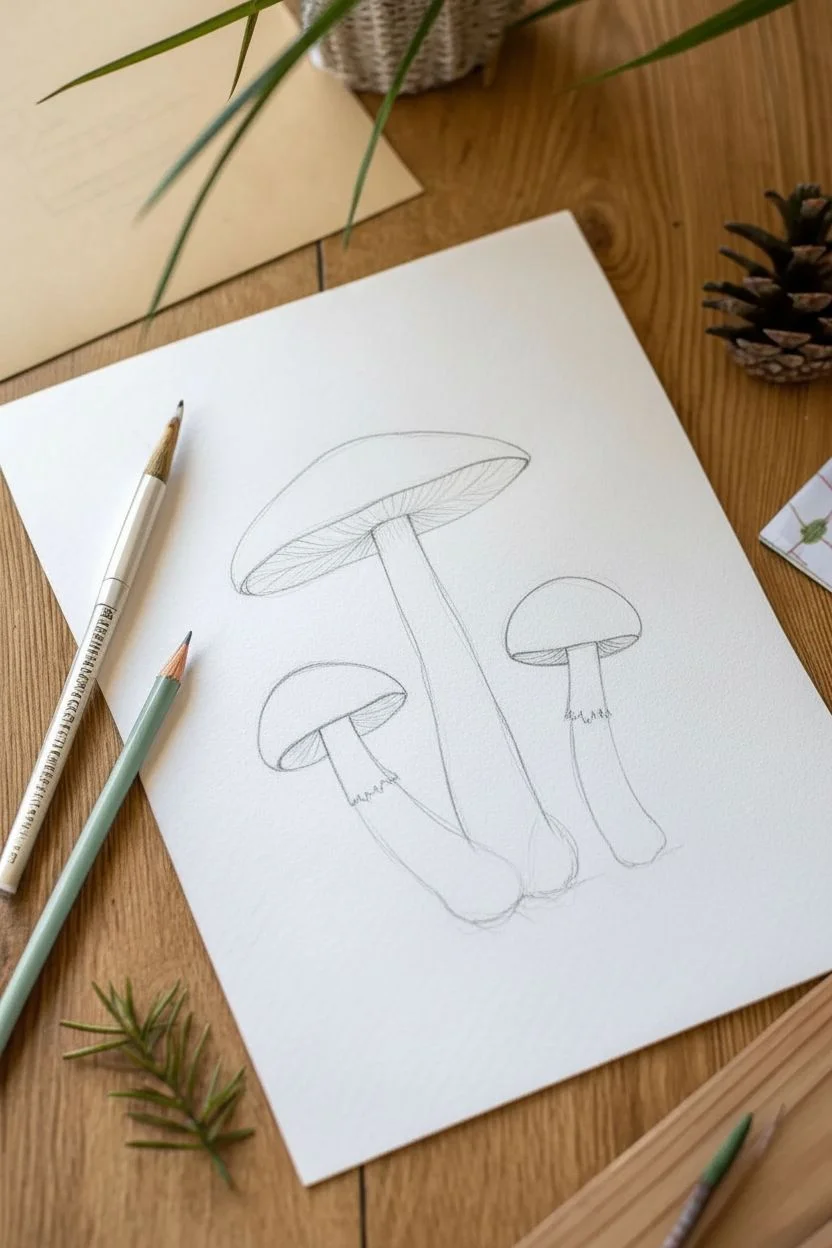
Step 1: Sketching the Framework
-
Establish the Stems:
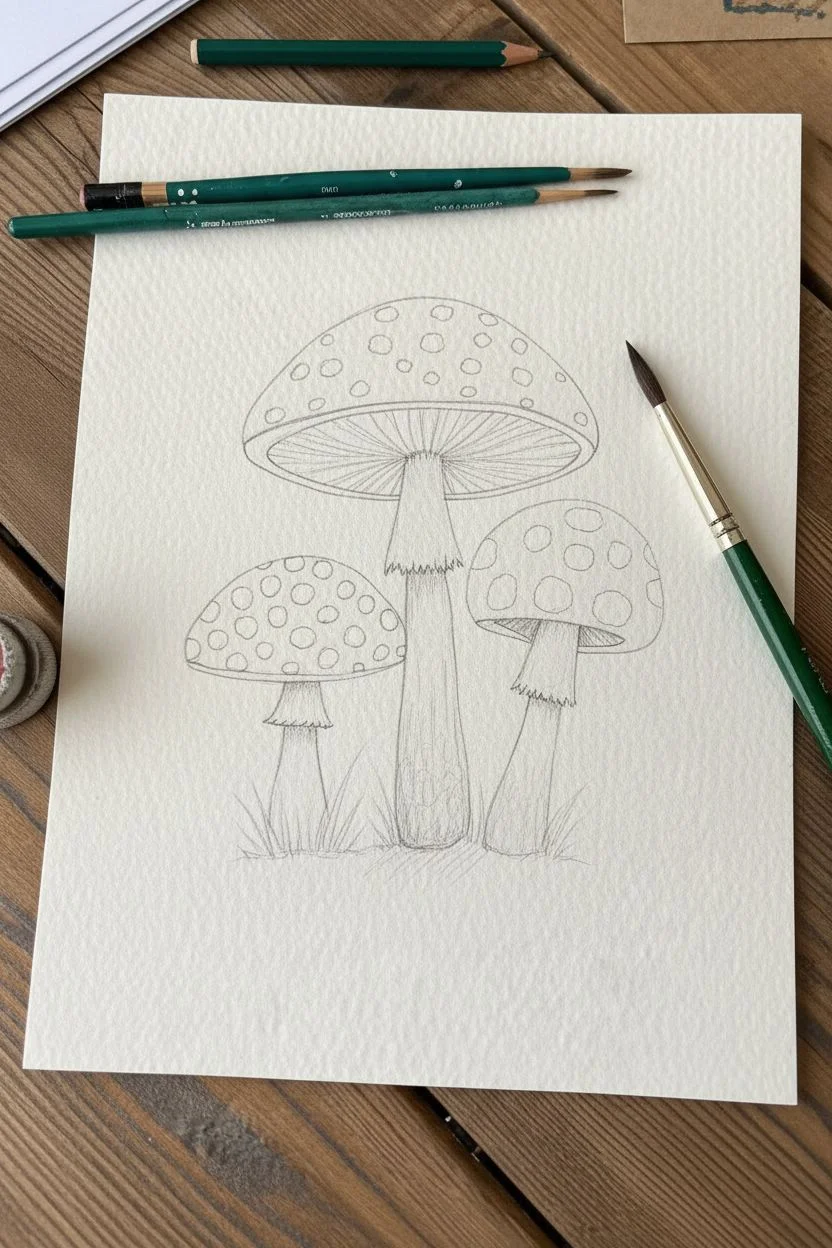
Begin by lightly sketching three vertical, slightly curved lines to act as the central axis for your mushroom stems. Place the tallest one in the center and two shorter ones flanking it on either side. -
Draft the Caps:
For the center mushroom, draw a wide, flattened oval shape at the top of your stem line. For the two smaller mushrooms, draw rounder, dome-like semi-circles. -
Refine the Shapes:
Thicken the stems, making them slightly bulbous at the base and tapering gently as they move up. Connect the caps to the stems with curved lines underneath to represent the gills area. -
Clean Up Lines:
Use your kneaded eraser to gently lift the graphite until the sketch is barely visible. This ensures the pencil lines won’t show through the transparent watercolor layers later.
Preserve the Whites
Don’t worry if you accidentally paint over a spot meant to be white. You can lift wet paint with a clean paper towel or use white gouache at the very end to bring the brightness back.
Step 2: Applying Watercolor Washes
-
Base Color for Caps:
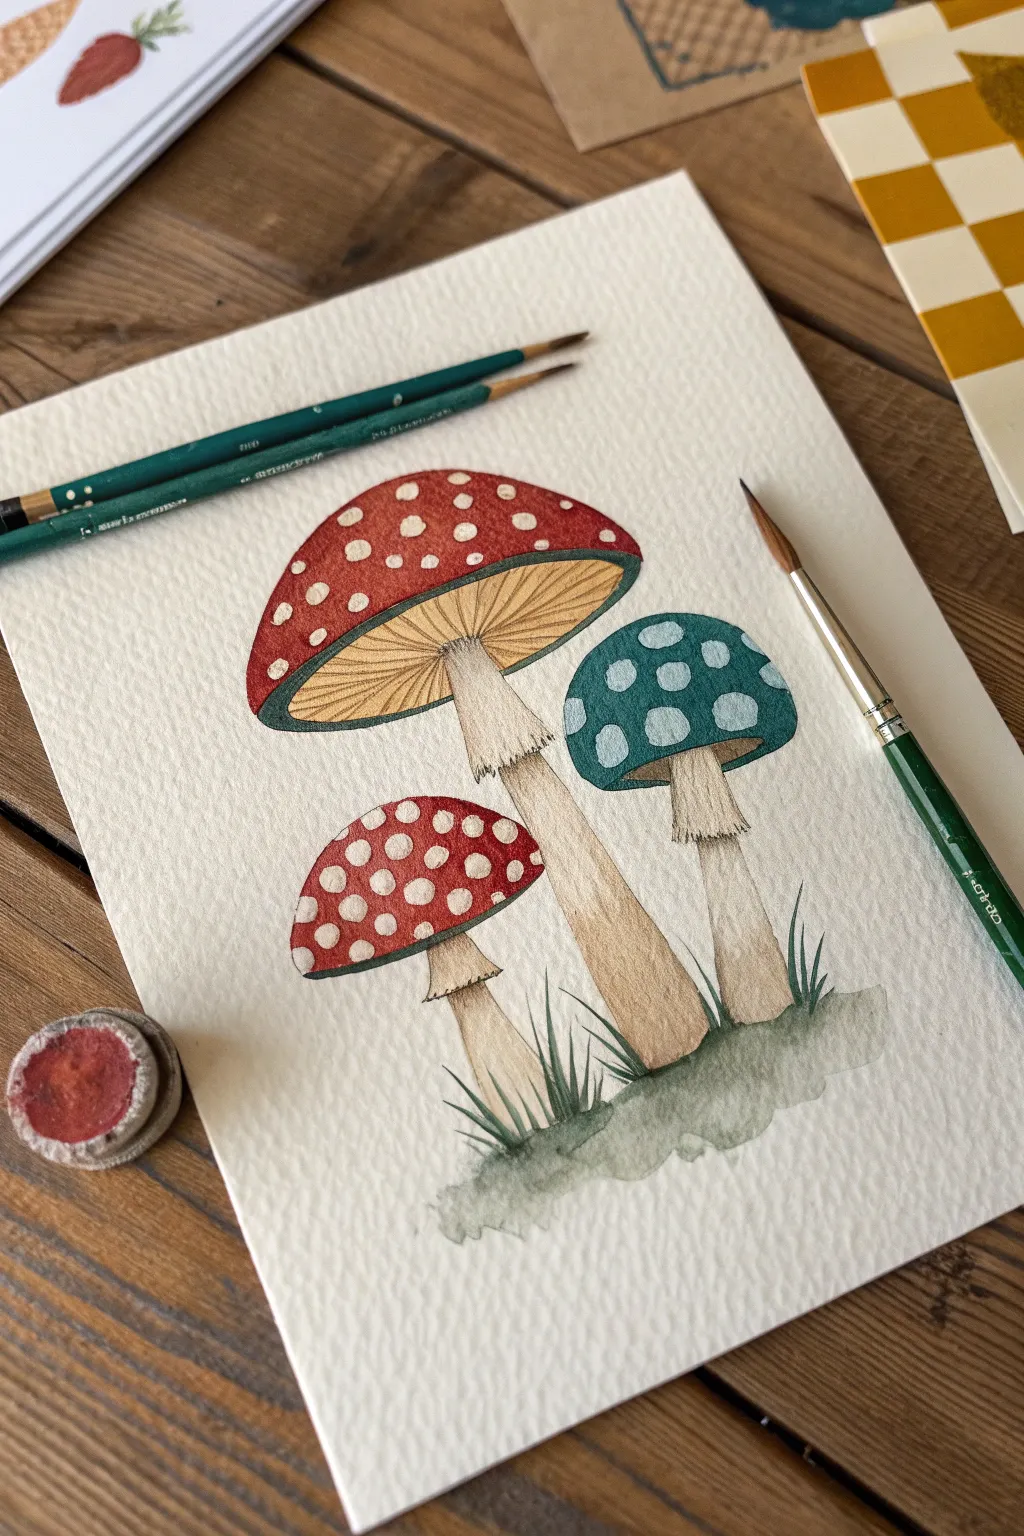
Mix a watery wash of Rust or Terracotta paint. Apply this to the top of the caps, leaving small, irregular white spaces on the large central cap to represent the characteristic spots. -
First Stem Layer:
Using a very dilute Yellow Ochre mixed with a touch of Burnt Umber, paint the stems. Keep this layer pale to establish a base tone without making it too dark too soon. -
Adding Shadows:
While the paint is still slightly damp, drop a tiny bit of darker brown pigment at the very top of the stems (under the caps) and at the base where they meet the ground to create volume. -
Grounding the Trio:
Paint a loose, organic patch of earth at the base using a mix of Green and Brown. Keep the edges soft and feathered to suggest moss or soil. -
Let it Dry Thoroughly:
Allow the paper to dry completely. If the paper feels cool to the touch, it is still damp; wait until it is room temperature before moving to pencils.
Make It Glossy
Once the artwork is totally dry, add tiny dots of white gouache or a white gel pen to the tops of the caps to simulate a dewy, wet texture.
Step 3: Details with Colored Pencil
-
Gills and Cap Texture:
Using a sharpened Rust Red or Dark Brown pencil, draw fine lines radiating from the stem to the edge of the cap on the undersides. Keep your pressure light for a delicate look. -
Defining the Spots:
I like to take a white colored pencil or a white gel pen here and refine the spots on the main cap, making them pop against the dried watercolor wash. -
Stem Texturing:
With a Dark Brown pencil, add small stippled dots and tiny vertical dashes along the stems, concentrating them near the base and the skirt of the mushroom for texture. -
Deepening Shadows:
Use the brown pencil to gently shade the side of the stems away from the light source, reinforcing the 3D cylindrical shape. -
Drawing the Grass:
Using an Olive Green pencil, draw sharp, upward strokes at the base of the mushrooms to create blades of grass. Vary the length and direction of the strokes for a natural appearance. -
Adding Leafy Elements:
Sketch a few small sprigs of leaves or fern-like shapes emerging from the grass clumps using the same green pencil, adding variety to the foliage. -
Final Contrast Check:
Step back and assess your drawing. Use the darkest brown pencil to sharpen the very bottom edges where the stems meet the ground to anchor the composition firmly.
Now you have a charming botanical illustration perfect for framing or gifting to a nature lover
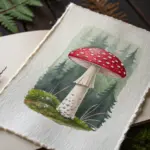


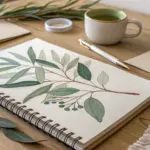
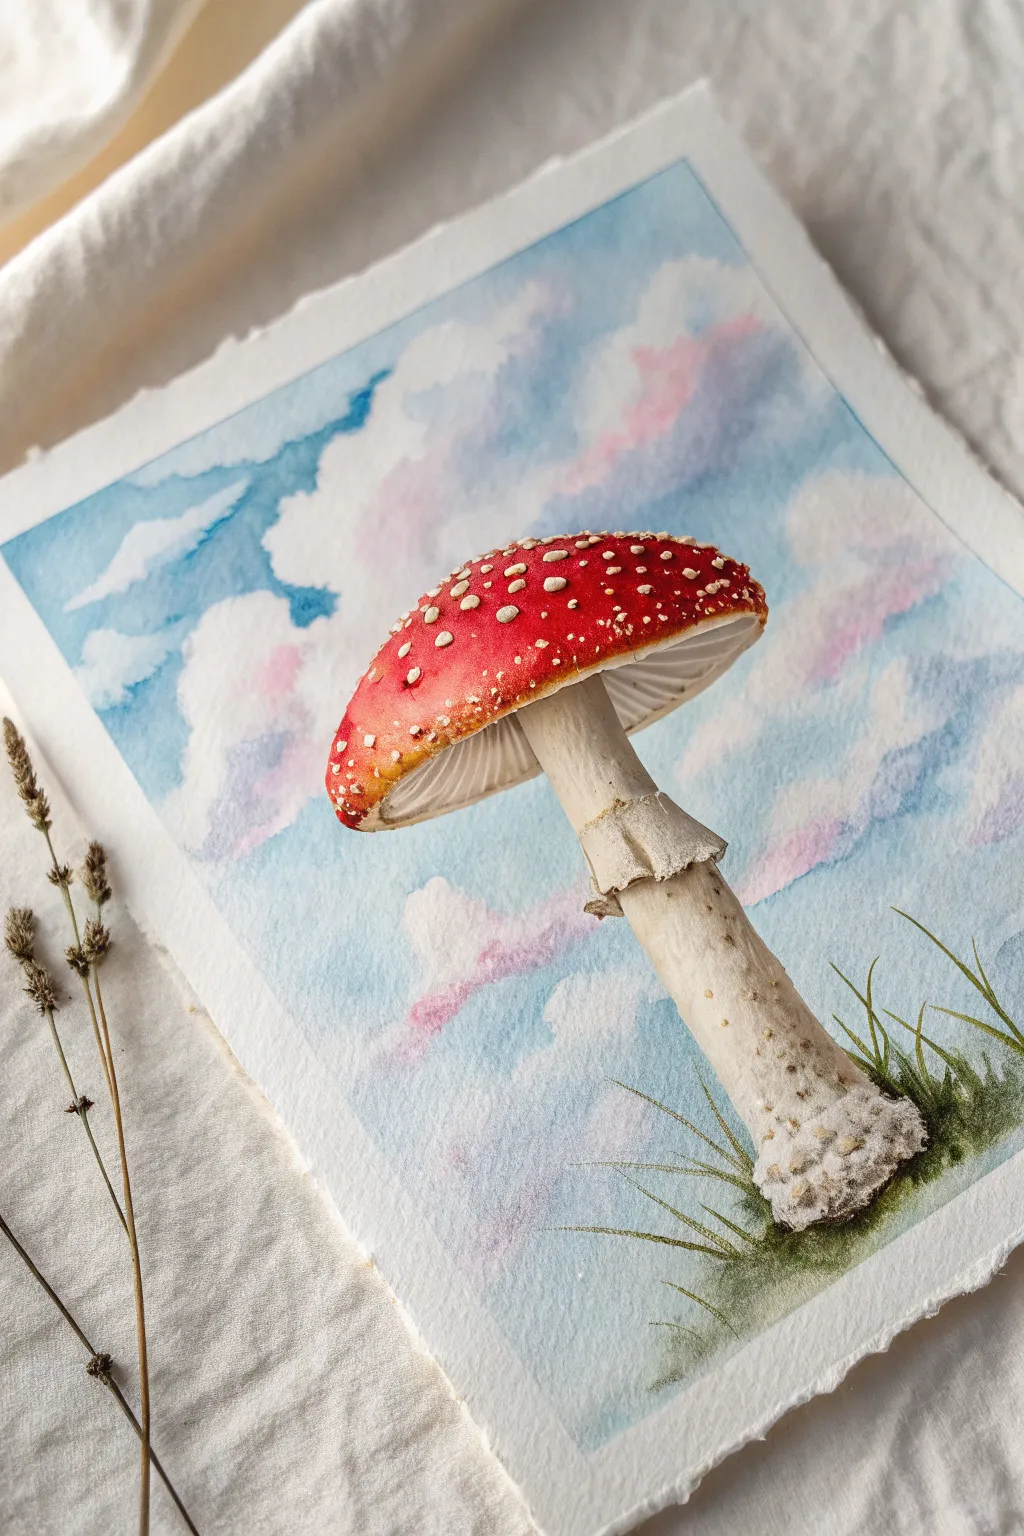
Loose Watercolor Mushrooms With Soft Washes
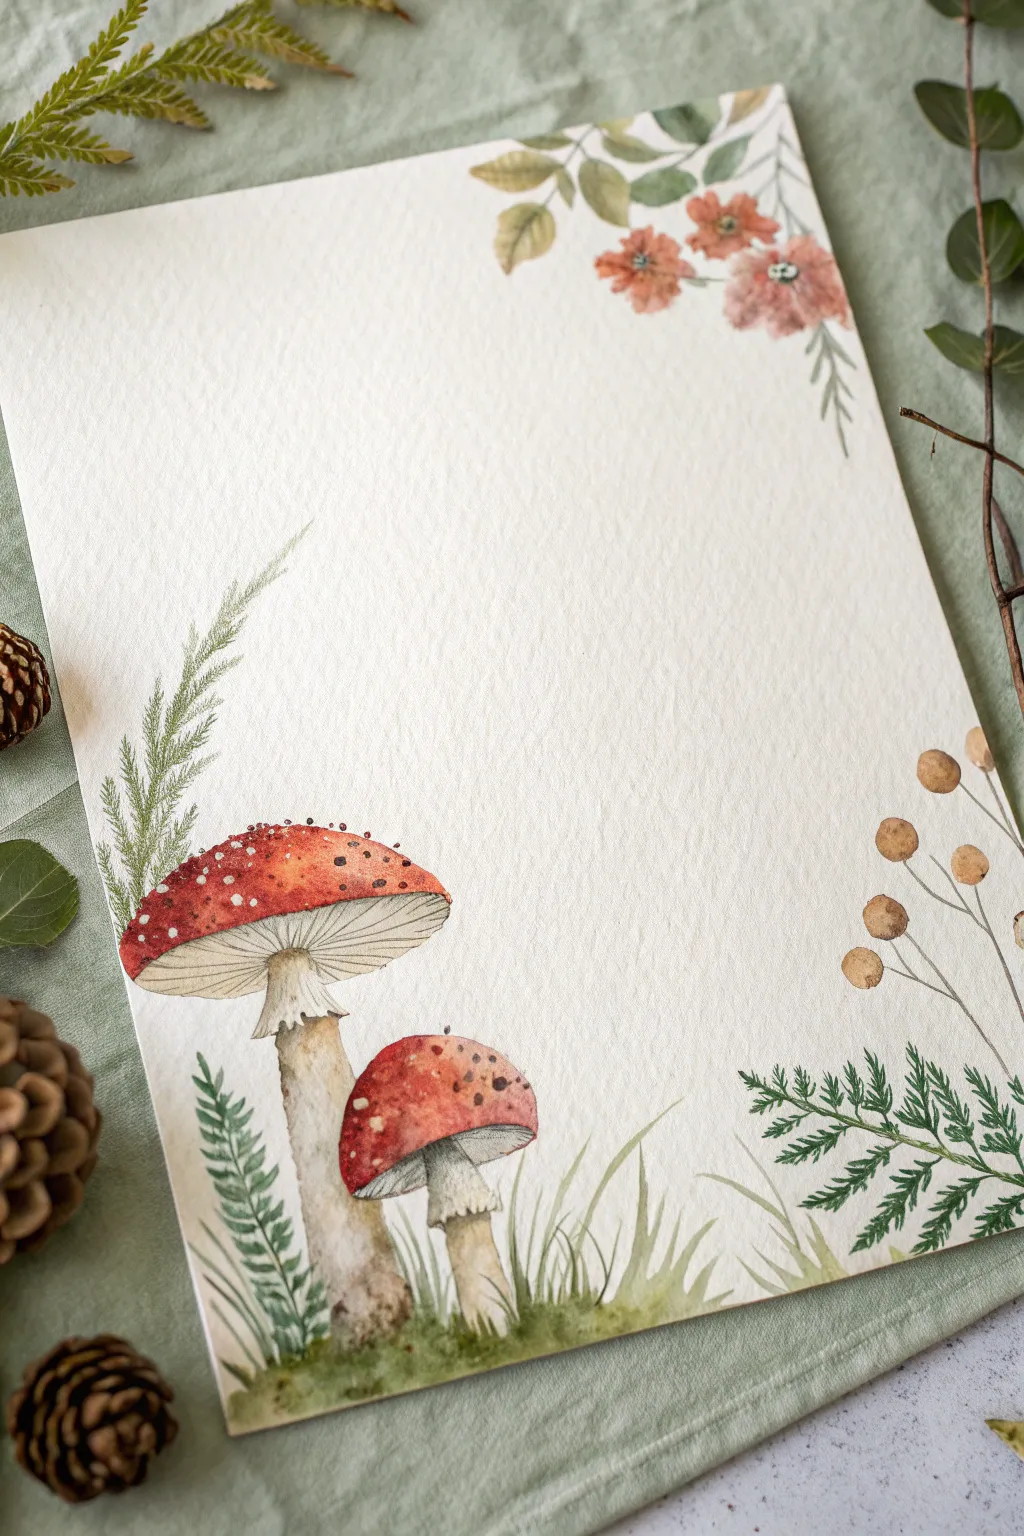
Capture the magic of the forest floor with this delicate stationery design, featuring classic Amanita mushrooms and feathery ferns. The composition frames the paper’s negative space perfectly, leaving plenty of room for your handwritten notes or calligraphy.
How-To Guide
Materials
- Cold press watercolor paper (A4 or letter size)
- Watercolor paints (Alizarin Crimson, Burnt Sienna, Yellow Ochre, Sap Green, Payne’s Grey)
- Round watercolor brushes (size 2 for details, size 6 for washes)
- White gel pen or gouache (for mushroom spots)
- Pencil (HB) and kneadable eraser
- painter’s tape or masking tape
- Paper towels and water cup
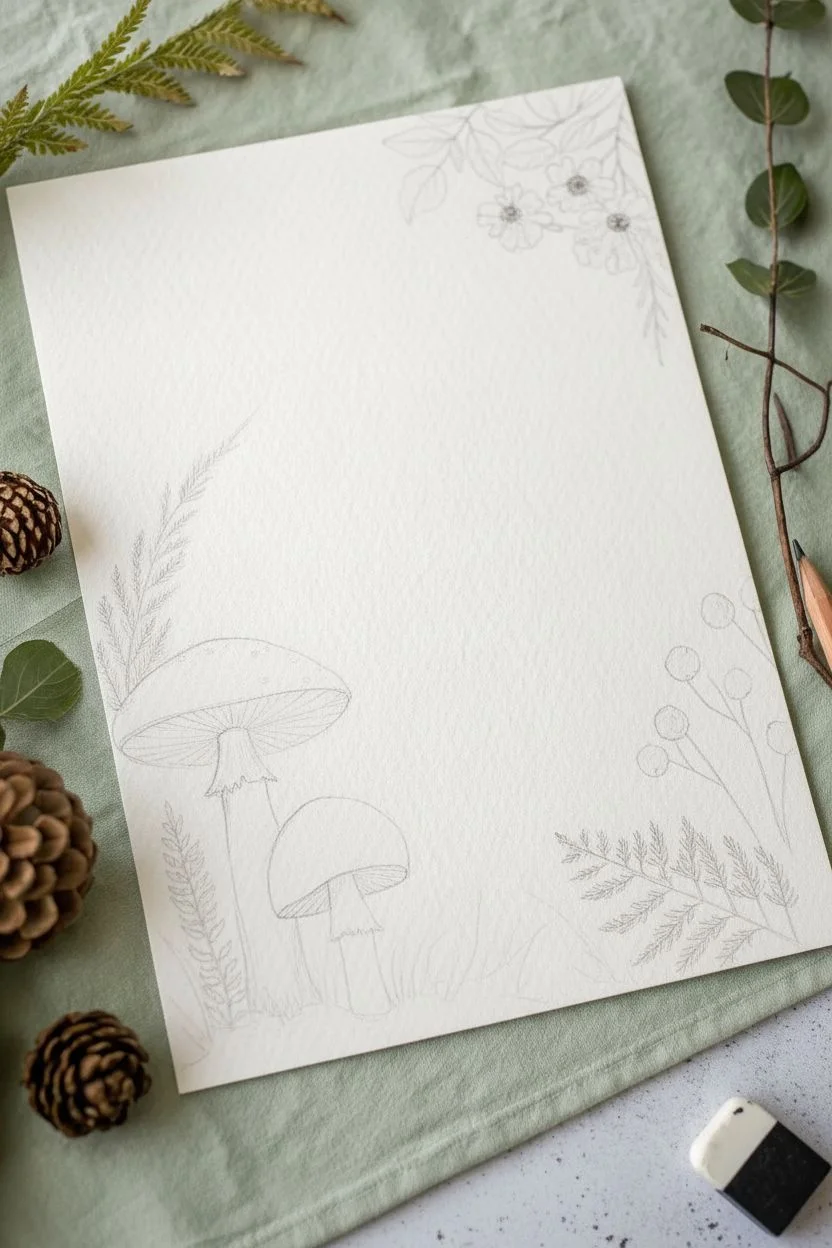
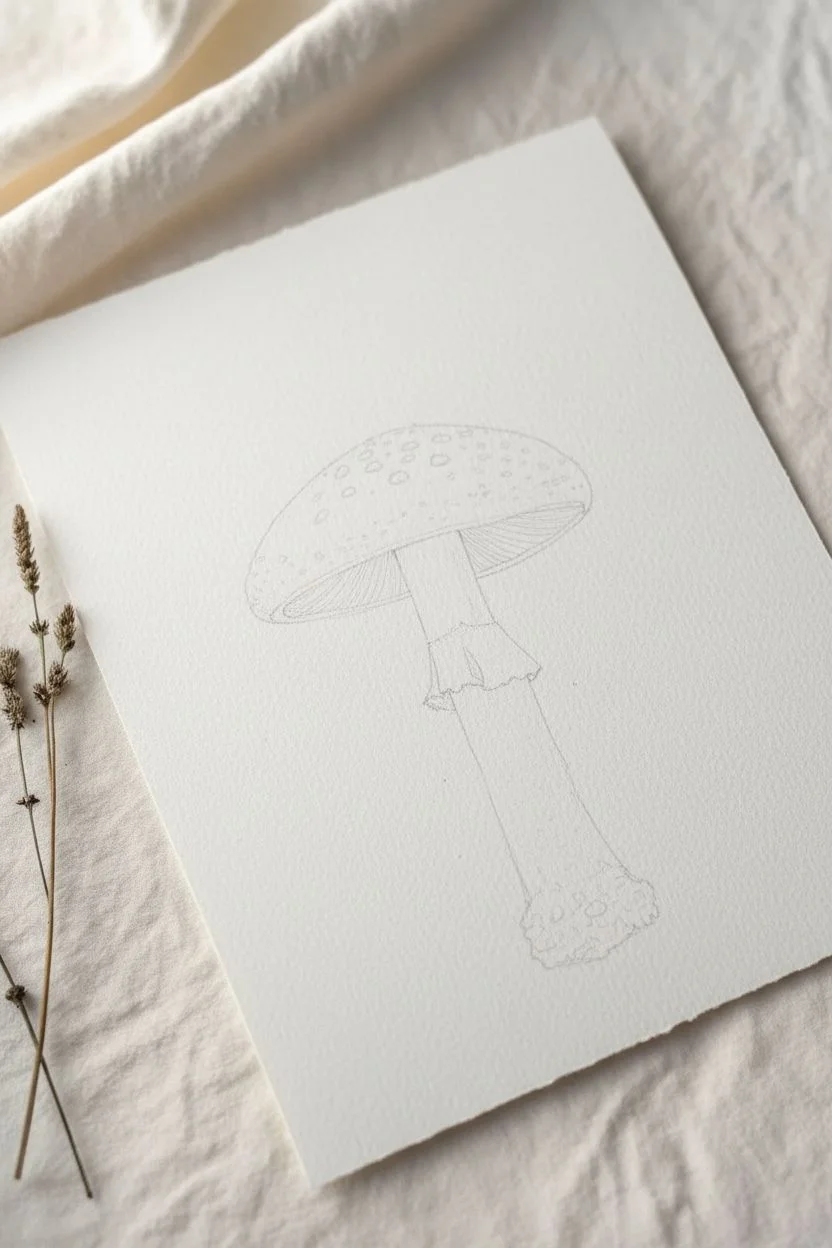
Step 1: Sketching the Layout
-
Plan the composition:
Lightly visualize an ‘L’ shape for your composition. The main weight will be in the bottom left corner with the mushrooms, tapering off into delicate ferns along the bottom edge, mirrored by a smaller cluster of flowers in the top right corner. -
Draft the mushrooms:
In the bottom left, sketch two mushroom caps: a large, flattened oval cap tilting slightly left, and a smaller, distinctively round cap below it to the right. Add thick, sturdy stems for both, ensuring the smaller mushroom seems to tuck slightly behind. -
Add floral elements:
Draw faint lines for the surrounding foliage. Sketch a tall, feathery fern rising behind the large mushroom. Along the bottom edge, outline smaller fern fronds. In the top right corner, sketch three small, simple five-petal flowers and descending leaves.
Muddy Colors?
If your mushroom red is bleeding into the stem, the paint was too wet. Let the red cap dry completely before painting adjacent areas. A hair dryer on low heat speeds this up.
Step 2: Painting the Mushrooms
-
Base wash for caps:
Mix a watery red using Alizarin Crimson and a touch of Burnt Sienna. Paint the entire cap shape of both mushrooms, leaving the paint slightly translucent so it doesn’t look heavy. -
Deepen the color:
While the base is still slightly damp, drop concentrated red pigment onto the left side and top of the caps to create a shadow gradient. This gives them roundness and volume. -
Paint the stems:
For the stems, mix a very pale wash of Yellow Ochre and Payne’s Grey. Paint the stems vertically, adding a slightly darker shadow just under the cap where the skirt (annulus) connects. -
Detail the gills:
Once the red caps are dry, use your size 2 brush with a diluted grey-brown mix. Paint very fine lines radiating from the stem to the edge of the cap to represent the gills. Keep these lines delicate. -
Add the white spots:
Wait for the red paint to dry completely. Im using a white gel pen here for precision, but opaque white gouache works too. Dot tiny, irregular white speckles across the red caps, clustering them slightly more toward the top.
Add Vintage Texture
Make the paper look aged by lightly splattering diluted brown paint or coffee across the empty white space using a stiff brush or old toothbrush.
Step 3: Adding Foliage & Flora
-
Paint the tall fern:
Mix Sap Green with a tiny bit of red to desaturate it. With the tip of your brush, paint the central stem of the tall fern behind the large mushroom, then flick short, quick strokes outward for the pine-like needles. -
Bottom ferns:
Using a slightly darker green mix, paint the fern leaves at the bottom right. Press the belly of the brush down and lift it as you pull away to create the tapered leaf shapes. -
Top corner flowers:
Paint the small flowers in the top right using a diluted terracotta or soft red wash. Keep them loose and impressionistic rather than overly detailed. Add olive green leaves trailing downward. -
Grass blades:
With your smallest brush and pale green paint, flick upward strokes from the bottom edge of the paper to ground the mushrooms, making it look like they are growing from a mossy floor. -
Brown seed pods:
On the right side, about halfway up, paint thin brown stems with small, round ochre circles attached to mimic dried seed pods or berries.
Step 4: Final Touches
-
Ground the scene:
Add a very faint wash of mossy green and brown directly underneath the mushroom stems and bottom foliage so they aren’t floating in white space. -
Erase pencil lines:
Check that the entire painting is bone dry. Gently run your kneadable eraser over the scene to pick up any visible graphite lines, leaving just the watercolor.
Your charming forest floor stationery is now ready to receive a heartfelt letter or poem


High-Contrast Mushrooms on a Dark Background
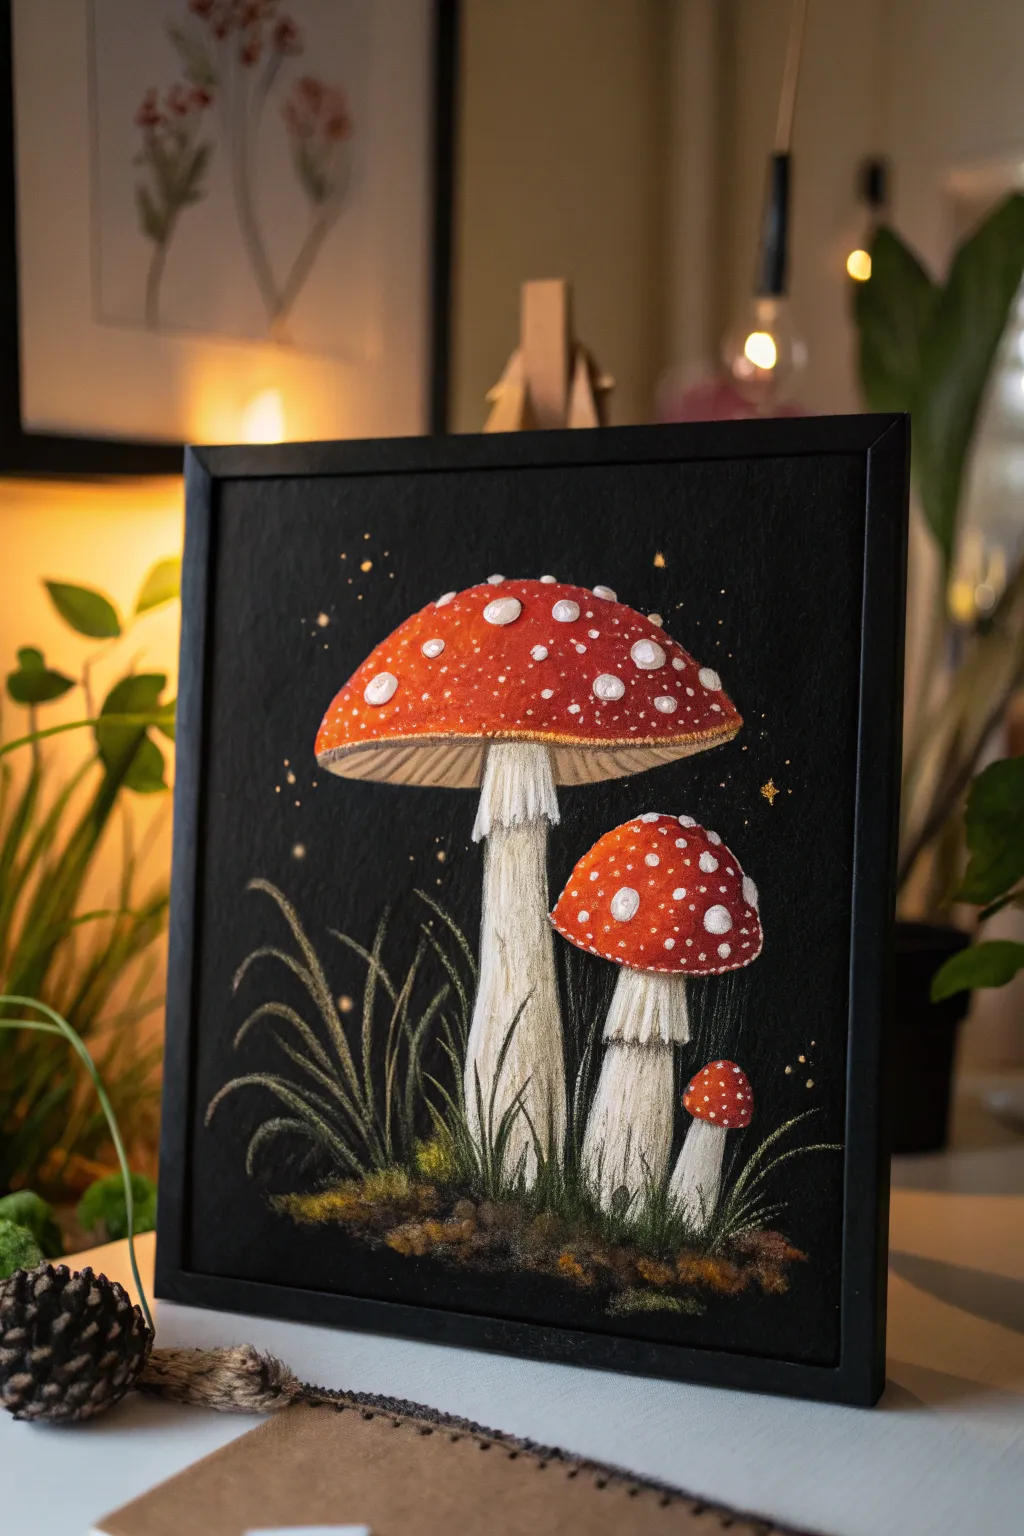
Capture the enchanting glow of the forest floor with this striking high-contrast pastel drawing. Using black paper as your base instantly creates drama, allowing the vibrant reds and whites of the fly agaric mushrooms to pop with almost luminescent quality.
Detailed Instructions
Materials
- Black textured pastel paper or cardstock (A4 size)
- Soft pastels (red, vermilion, white, cream, dark green, olive green, yellow ochre, brown)
- Pastel pencils or charcoal pencils (white, black, dark brown)
- Blending stumps or tortillons
- Workable fixative spray
- Artist tape
- Black frame (optional, for finishing)
Step 1: Preparation & Sketching
-
Secure the surface:
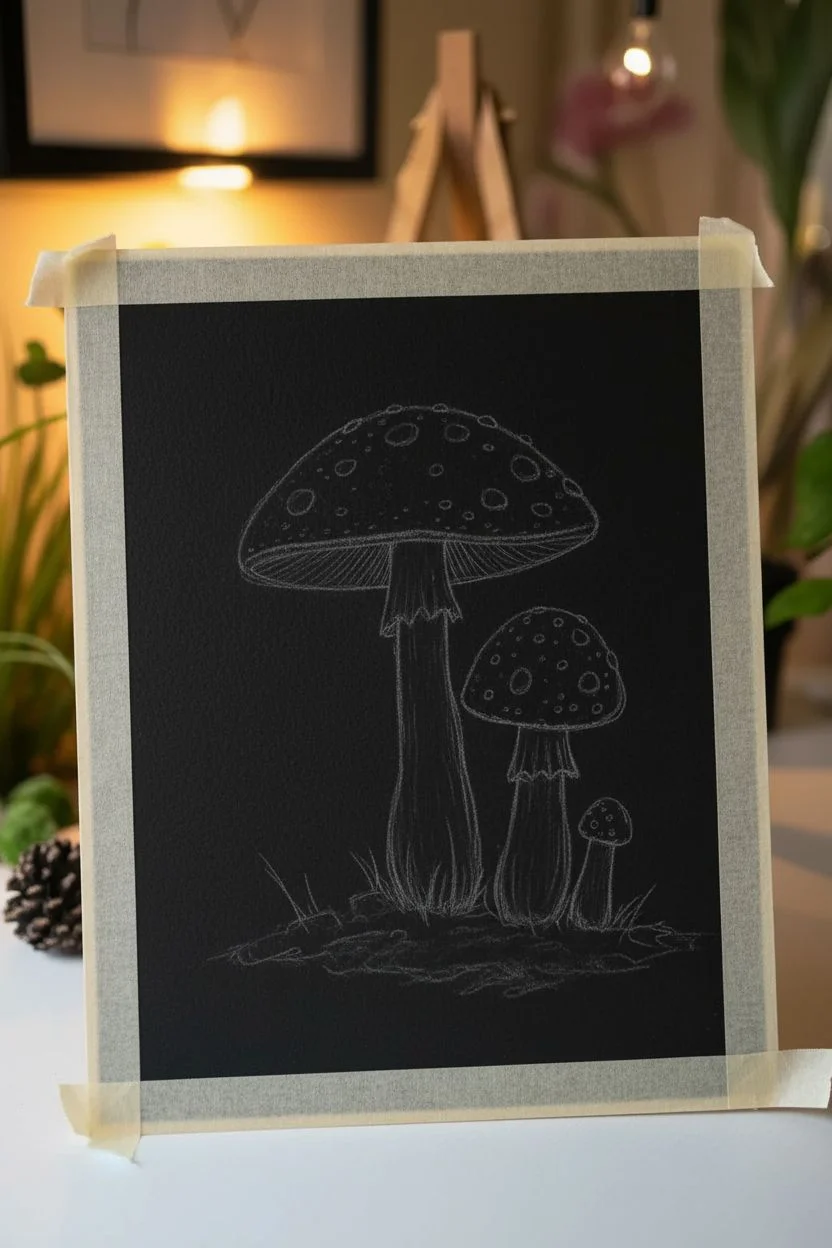
Tape your black paper down to a drawing board or table using artist tape. This prevents the paper from shifting and creates a clean border if you decide to frame it later. -
Outline the composition:
Using a white pastel pencil with a very light touch, sketch the basic shapes of your three mushrooms. Draw a large central mushroom, a medium one to its right, and a tiny sprout near the bottom right. Keep these lines faint so they don’t show through later. -
Map the stems and ground:
Sketch the thick, slightly curved stems for the mushrooms. Add a rough, mound-like shape at the base to represent the earthy ground where moss and grass will grow.
Clean Edges Tip
Keep a kneadable eraser handy. If your white pastel dust migrates onto the black background, dab it gently—don’t rub—to lift the dust without smearing it into the paper grain.
Step 2: Creating the Caps
-
Base layer of red:
Take a deep red soft pastel and fill in the majority of the mushroom caps. Avoid the very edges for now. This dark base will give the mushrooms weight. -
Adding highlights:
Layer a brighter vermilion or orange-red on the top and left sides of the caps to indicate a light source. Blend this gently into the darker red using your finger or a blending stump to create a smooth gradient. -
Defining the rim:
Use a white pastel pencil to carefully draw the gills peeking out from under the large mushroom cap. These should look like fine, radiating lines. Add a thin, light rim to the edge of the cap to separate it from the gills. -
The iconic spots:
With a soft white pastel or a heavy application of white pastel pencil, place irregular dots on the red caps. Vary the sizes—some large and chunky, some tiny specks. Press firmly so the white is opaque against the red.
Make It Glossy
For a ‘wet’ look on the mushroom caps, use a white gel pen to add tiny, sharp highlights on top of the largest white spots. This mimics moisture catching the light.
Step 3: Stems & Gills
-
Blocking in the stems:
Color the stems using a cream or off-white pastel. Do not make them solid white; the creaminess adds a natural, aged look. Leave some black paper showing through for texture. -
Adding shadow and texture:
Use a light brown or grey pastel pencil to draw vertical striations on the stems. This mimics the fibrous texture of mushroom stalks. Darken the area right under the cap for shadow. -
The skirt:
Draw the ‘skirt’ (annulus) on the large mushroom stem. It should look ragged and delicate, hanging down slightly. Use pure white here to make it stand out against the creamier stem.
Step 4: Ground & Atmosphere
-
Earthy base:
Apply dark brown and olive green pastels roughly at the base of the stems. Smudge them together to create a mossy, soil-like texture. I find tapping the pastel creates a better moss effect than rubbing. -
Grassy blades:
Using a sharpened olive green or pale green pastel pencil, flick quick, upward strokes to create grass. Let the lines taper off into the black background. Vary the length and direction for a natural look. -
Adding depth to the grass:
Intersperse a few strokes of yellow ochre or cream among the green grass blades to suggest dried grass catching the light. -
Magical sparkles:
Take a yellow or gold pastel pencil and dot tiny specs of light in the air around the mushrooms. Draw tiny four-pointed star shapes for a few of them to look like twinkling fireflies or fairy dust.
Step 5: Finishing Touches
-
Refining contrast:
Step back and look at your drawing. If the red caps need more punch, add another layer of vermilion. If the black background has smudge marks, carefully clean them up with a black pastel pencil. -
Final spray:
In a well-ventilated area, lightly mist the drawing with a workable fixative. This prevents the pastel dust from falling off or smudging when you frame it. -
Framing:
Once dry, carefully peel off the tape. Place the artwork in a simple black frame to enhance the moody, high-contrast aesthetic.
Now you have a whimsical piece of forest art that glows beautifully in low light


Mushrooms Framed by Ferns and Curly Vines
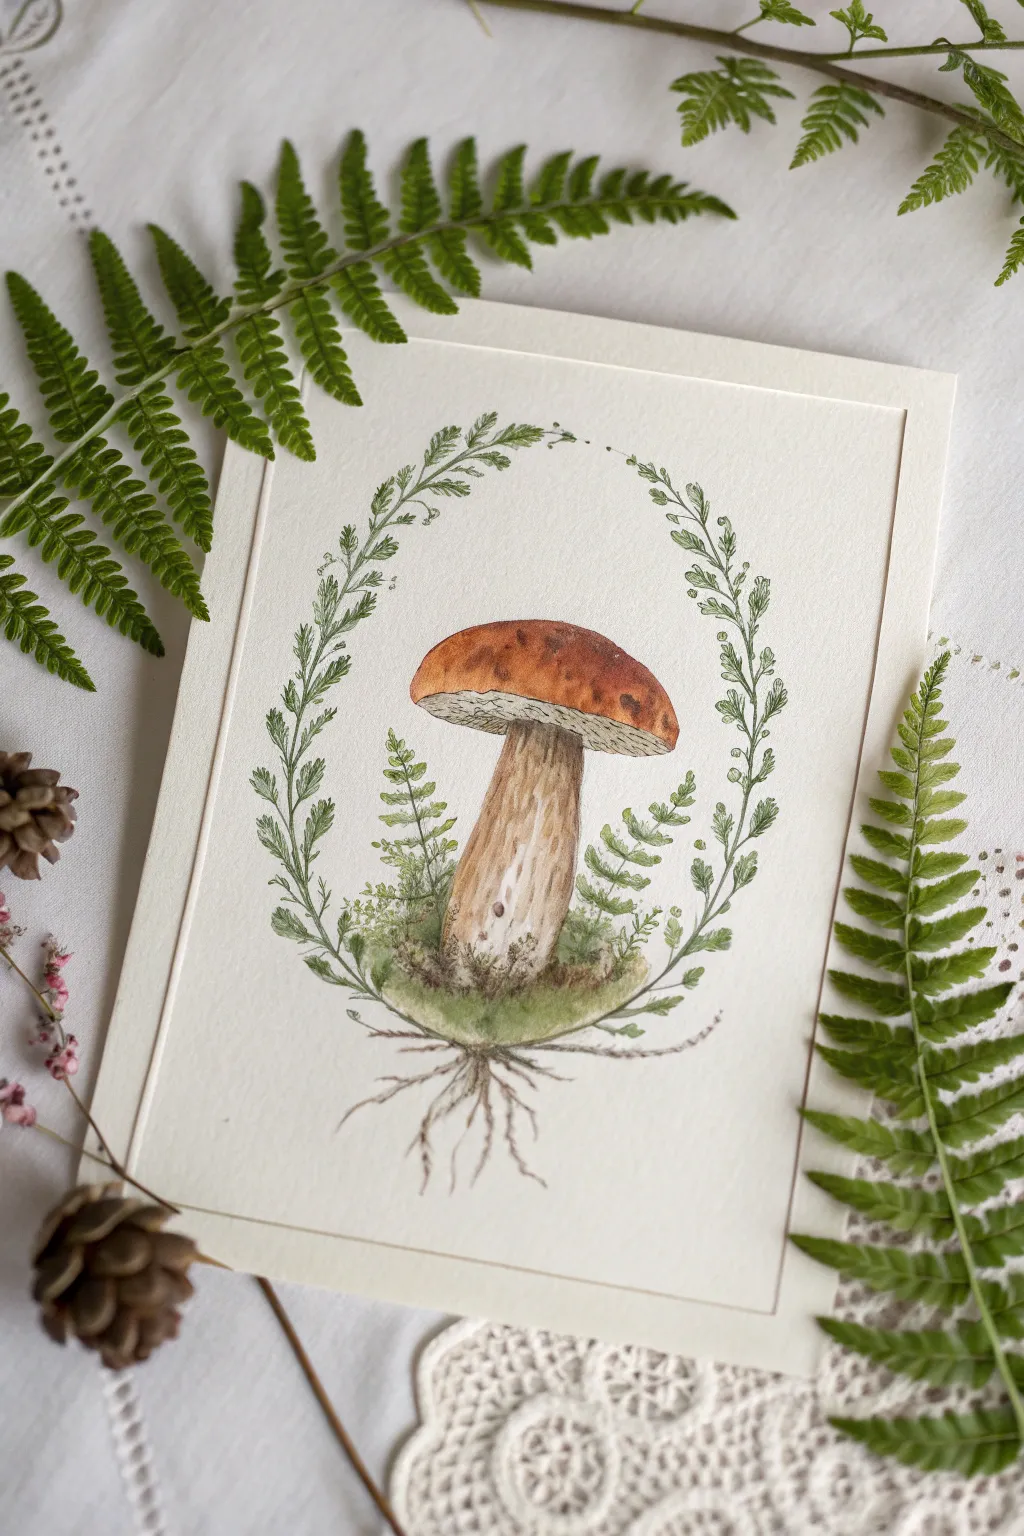
Capture the quiet magic of the forest floor with this delicate watercolor study. This project frames a stately Bolete mushroom within an elegant oval of trailing ferns, combining botanical precision with whimsical charm.
How-To Guide
Materials
- Hot press watercolor paper (smooth texture)
- Watercolor paints (burnt sienna, yellow ochre, sap green, burnt umber, raw umber)
- Pencil (HB or H for light lines)
- Kneadable eraser
- Round watercolor brushes (sizes 2, 4, and 00 for details)
- Fine-liner pen (optional, sepia or brown)
- Masking tape
- Water jars and paper towels
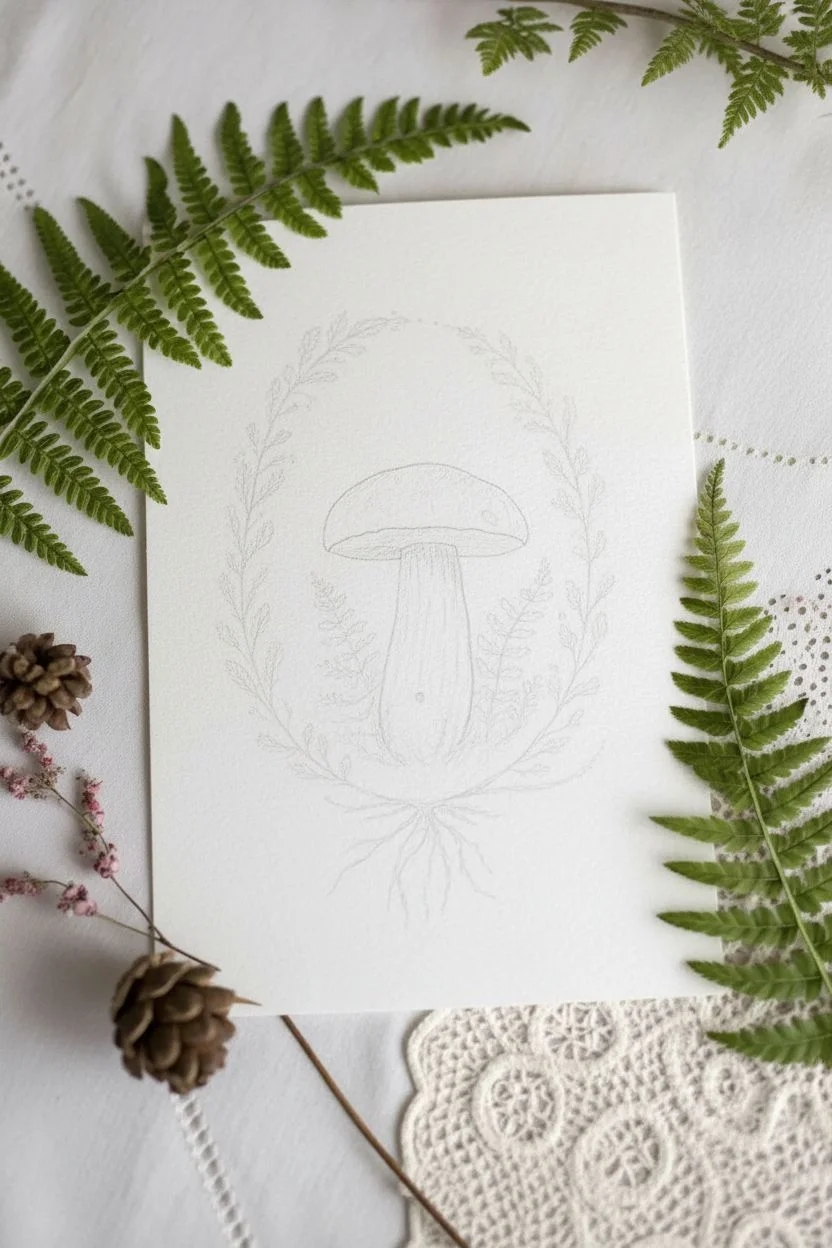
Step 1: Sketching the Composition
-
Establish the frame:
Begin by lightly sketching an oval shape in the center of your paper. This will serve as the guide for your fern wreath. It doesn’t need to be mathematically perfect; a slightly organic shape feels more natural. -
Draft the mushroom shape:
In the center of the oval, sketch the mushroom. Start with a wide, bun-shaped cap. Below that, draw a thick, sturdy stalk that widens slightly at the base. Add a curved line under the cap to indicate the spongy pores. -
Add nature’s details:
Lightly sketch the fern fronds following the curve of your oval guide. Draw small, individual leaf shapes stemming from the main vine. Add a few small fern sprigs at the base of the mushroom and sketch squiggly root lines extending downward from the soil line. -
Clean up the drawing:
Use your kneadable eraser to lift up the graphite until only a faint ghost image remains. This prevents heavy pencil lines from showing through your transparent watercolors later.
Step 2: Painting the Mushroom
-
Base wash for the cap:
Mix a watery burnt sienna. Apply this color to the top of the mushroom cap. While it’s still wet, drop in a slightly more concentrated burnt sienna or burnt umber near the edges and the top right to create volume and roundness. -
Painting the stalk:
For the stalk, mix a very pale wash of yellow ochre with a touch of raw umber. Paint the entire stalk, leaving a few tiny slivers of white paper for highlights if you can. Keep the wash uneven to suggest texture. -
Texture the under-cap:
Underneath the cap, use a mix of diluted raw umber and a tiny bit of yellow. Paint this area carefully. Once dry, use your smallest brush to stipple tiny dots or cross-hatching to mimic the spongy texture of a Bolete mushroom. -
Deepening shadows:
Once the cap is dry, paint the rim where the cap meets the sponge with a dark brown line. Soften this line with a damp brush so it blends slightly upward into the red cap. -
Stalk striations:
Using a size 0 or 00 brush and a thicker mix of raw umber, paint fine, vertical lines down the stalk. These should be broken and irregular, not straight ruler lines, to mimic the fibrous nature of the stem.
Muddy colors?
If your greens and reds look muddy where they touch, wait for each section to dry completely before painting adjacent areas. Patience prevents unwanted blending.
Step 3: The Greenery
-
Painting the Fern Wreath:
Mix a fresh sap green. Starting at the bottom of your oval, paint the central stem of the vine using the tip of your brush. Then, paint small, paired leaves working your way up the sides. Vary the pressure to make the leaves taper. -
Varying the greens:
To make the wreath look alive, dip your brush into a slightly darker green (mix sap green with a little brown) randomly for some leaves, and a lighter watery green for others. -
Grounding the mushroom:
Paint the small ferns and mossy patches around the base of the stalk. I like to let the greens bleed slightly into the bottom of the mushroom stalk to show it’s nestled in vegetation. -
Adding the roots:
Using a very fine brush and a watery mix of burnt umber and sepia, trace over your root sketches. Make these lines shaky and organic, tapering them off into nothingness as they go deeper.
Pro Tip: Paper Tone
For an antique botanical look, lightly wash your entire paper with very diluted tea or coffee and let it dry before you start sketching. It adds instant vintage warmth.
Step 4: Final Details
-
Refining the oval:
Step back and assess your fern wreath. If it looks too sparse, add tiny little buds or tendrils curling off the main stem to fill in gaps without making it heavy. -
Adding texture to the ground:
Splatter incredibly tiny dots of brown or dark green near the base of the mushroom to represent soil and grit. You can do this by tapping a loaded brush against your finger. -
Final defined lines:
If you want a sharper illustrative look, use a very fine brush (or a sepia fine-liner pen) to selectively outline the bottom of the cap and the edges of the ferns. Keep the lines broken and light.
Frame your mushroom study with a wide mat to give the delicate details plenty of room to breathe
BRUSH GUIDE
The Right Brush for Every Stroke
From clean lines to bold texture — master brush choice, stroke control, and essential techniques.
Explore the Full Guide
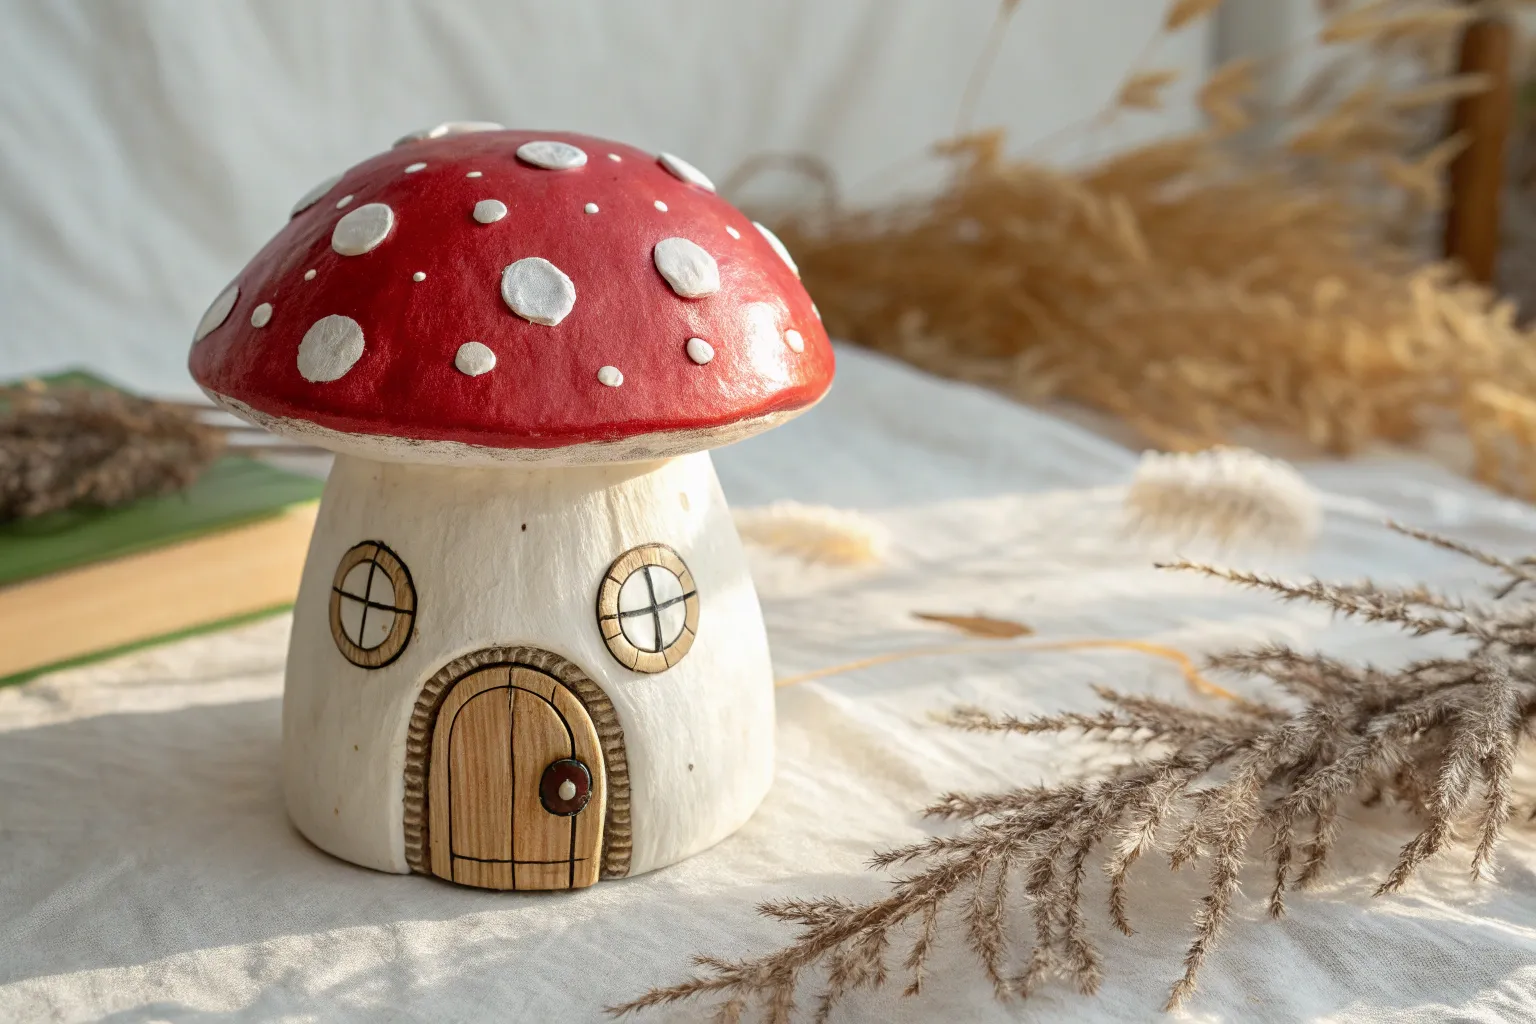
Whimsical Mushroom House With a Tiny Door
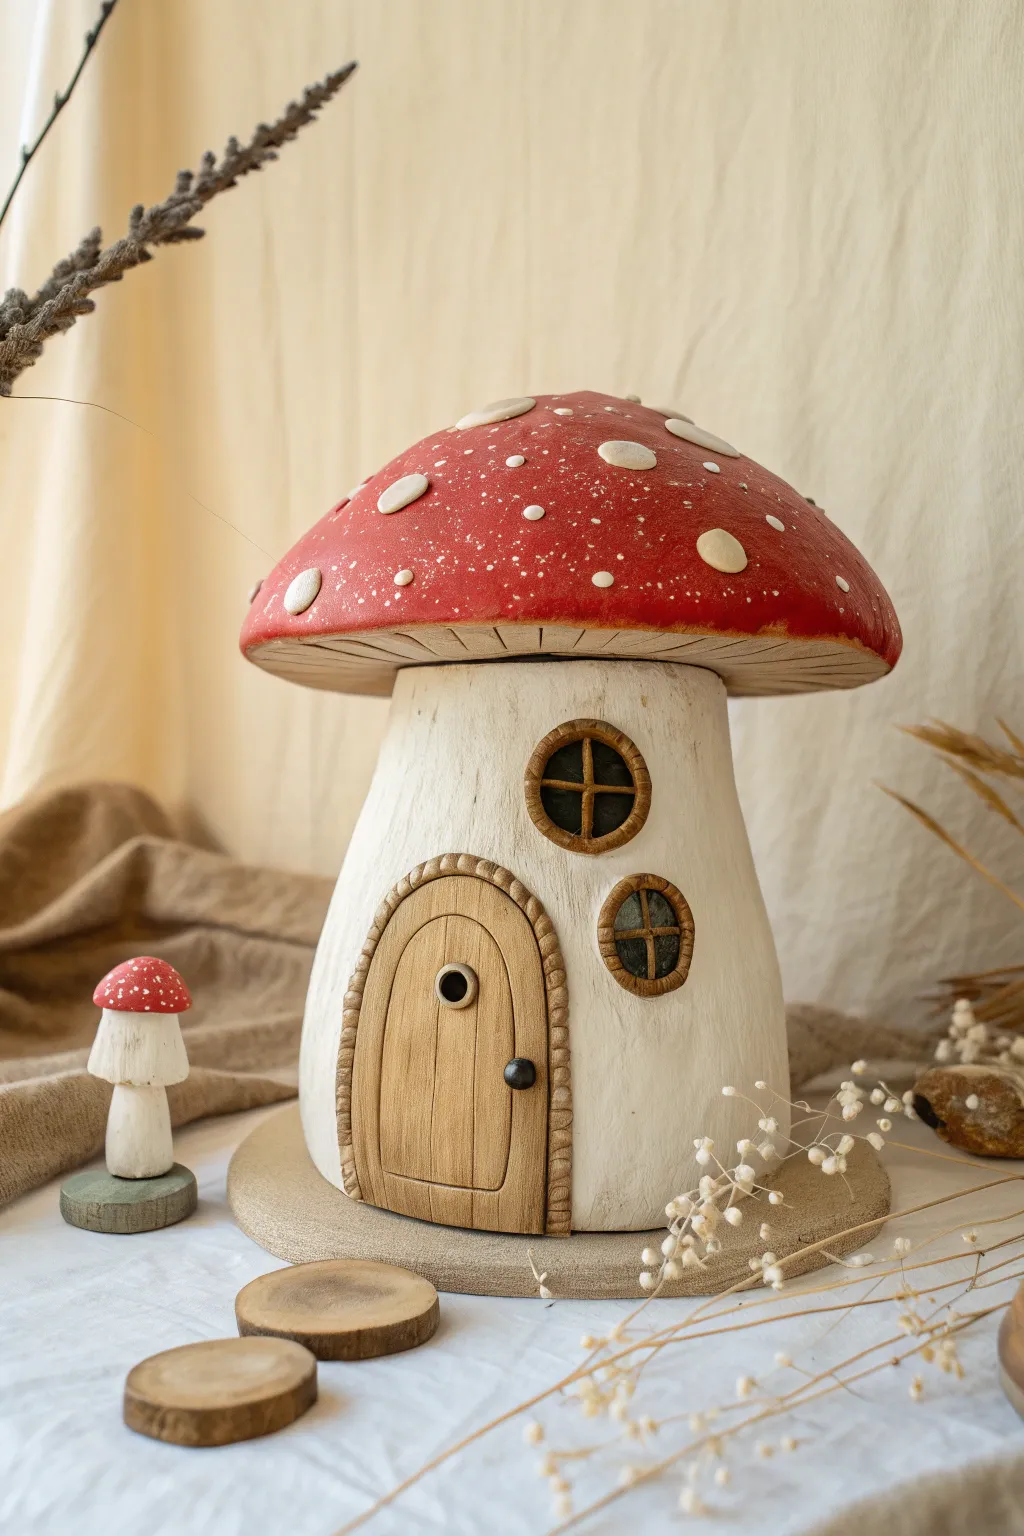
Transform simple materials into a fairytale dwelling with this charming mushroom house sculpture. Featuring a textured stem, a vibrant spotted cap, and intricate wooden details, this piece brings a touch of woodland magic to any shelf.
Step-by-Step
Materials
- Large wooden mushroom blank (or air-dry clay to sculpt your own)
- Acrylic paints: Titanium White, Barn Red, Burnt Umber, Raw Sienna, Black
- Fine-grit sandpaper
- Carving tools or a linoleum cutter (if adding texture manually)
- Round synthetic brushes (sizes 2, 4, and 8)
- Detail brush (size 0)
- Matte varnish or sealant
- Wood glue
- Small wooden rounds or balsa wood for the door/windows (optional, if building 3D elements)
- Pencil
Step 1: Preparation and Base Sculpting
-
Prepare the surface:
Start by lightly sanding your wooden mushroom blank to ensure a smooth painting surface. If you are sculpting from clay, shape a thick, sturdy stem and a broad, domed cap, then let it dry completely according to package instructions. -
Texture the stem:
To achieve the rustic, bark-like texture seen in the photo, use a carving tool or linoleum cutter to gouge shallow, vertical lines up and down the white stem. If using a pre-made smooth wooden blank, you can simulate this with paint later, but actual texture adds depth. -
Sketch the features:
With a pencil, lightly outline where the arched door and the two circular windows will go. Place the door centrally at the bottom and stagger the windows slightly for a playful look. -
Create the 3D elements:
If your base is plain, fashion a small door frame and window frames from thin balsa wood or additional clay. Glue these onto your sketched areas to create actual relief.
Texture Trick
Don’t have carving tools? Use the side of a stiff bristled brush and thick gesso to drag vertical lines up the stem before painting.
Step 2: Painting the Stem and Features
-
Base coat the stem:
Mix a tiny drop of Raw Sienna into Titanium White to create a warm, creamy off-white. Apply this all over the stem, working the paint into the carved grooves. -
Add aging effects:
Once the white base is dry, create a wash using water and a small amount of Burnt Umber. Brush this lightly over the stem and immediately wipe the surface with a paper towel. The dark paint will stay in the vertical grooves, highlighting the texture. -
Paint the door:
Use a mix of Raw Sienna and a touch of white for the door itself. Paint vertical lines with Burnt Umber to simulate wooden planks. -
Define the stonework:
Paint the arched frame around the door to look like stone or brick. Use a light beige or grey, and outline individual stones with a fine liner brush and thinned brown paint. -
Paint the windows:
Fill the inside of the circular windows with Black to create depth. Paint the frames and cross-braces in a medium brown to match the door trim. -
Add the doorknob:
Dip the end of a paintbrush handle or a dotting tool into black paint and place a small dot on the right side of the door for a knob.
Mossy Details
Glue dried moss or small model-train foliage around the base of the stem to make the cottage look like it’s growing in a real forest.
Step 3: The Red Cap and Finishing Touches
-
Base coat the cap:
Paint the entire top surface of the mushroom cap with Barn Red. You may need two coats to get a rich, opaque finish. -
Add the gills:
Underneath the cap overhang, paint the underside a creamy beige. Use a small brush to paint thin, radiating lines from the stem to the edge to mimic mushroom gills. -
Create the white spots:
Once the red paint is fully dry, paint raised white spots. If you have modeling paste, mix it with white paint for texture; otherwise, just layer thick dots of Titanium White in various sizes. -
Speckle the cap:
For a magical, organic feel, dilute some white paint on an old toothbrush and flick it lightly over the red cap to create tiny, starry speckles between the large spots. -
Paint the base:
If your mushroom stands on a platform, paint it a neutral beige or soft grey to ground the piece. -
Seal the work:
Finish by applying a coat of matte varnish over the entire piece. This protects the paint and unifies the sheen, giving it that finished, professional look.
Now you have a cozy little retreat ready to welcome any passing garden fairies
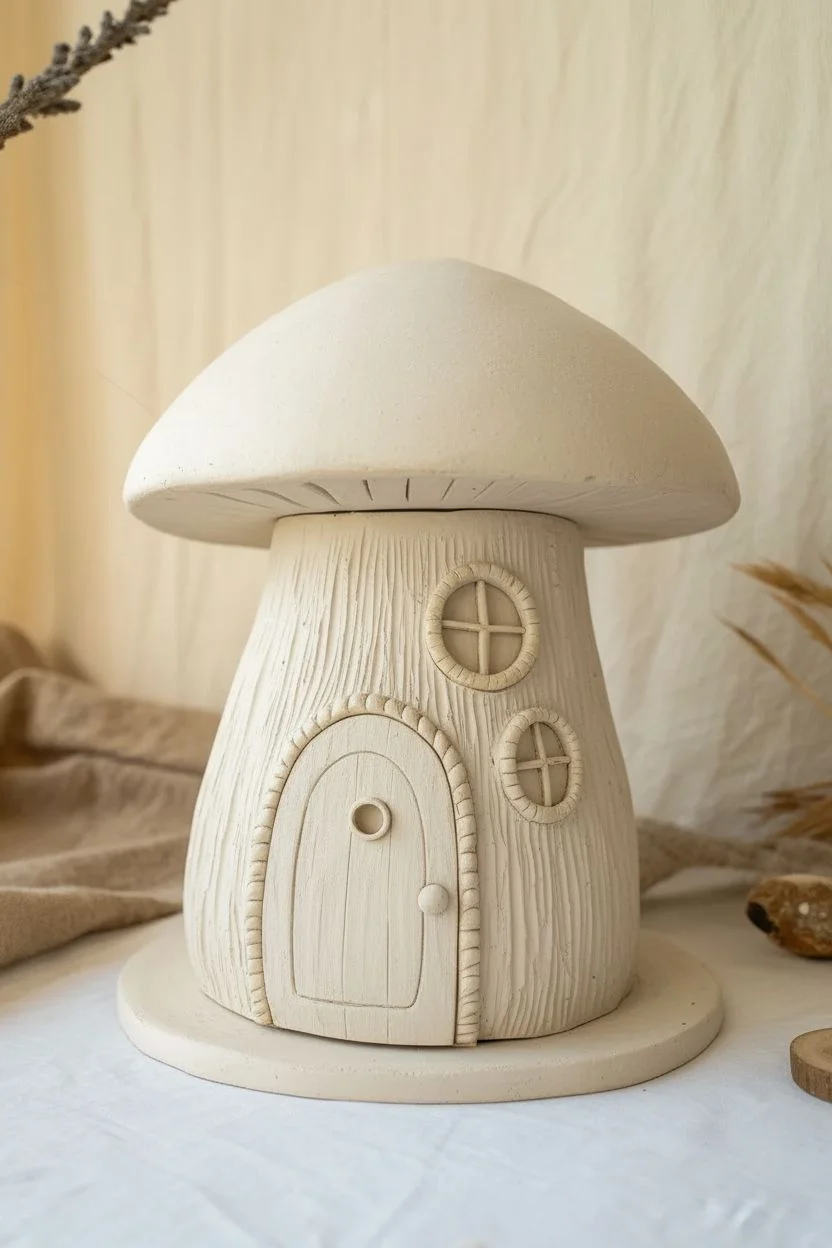
Glowing Windows and Warm Lantern Light on a Mushroom
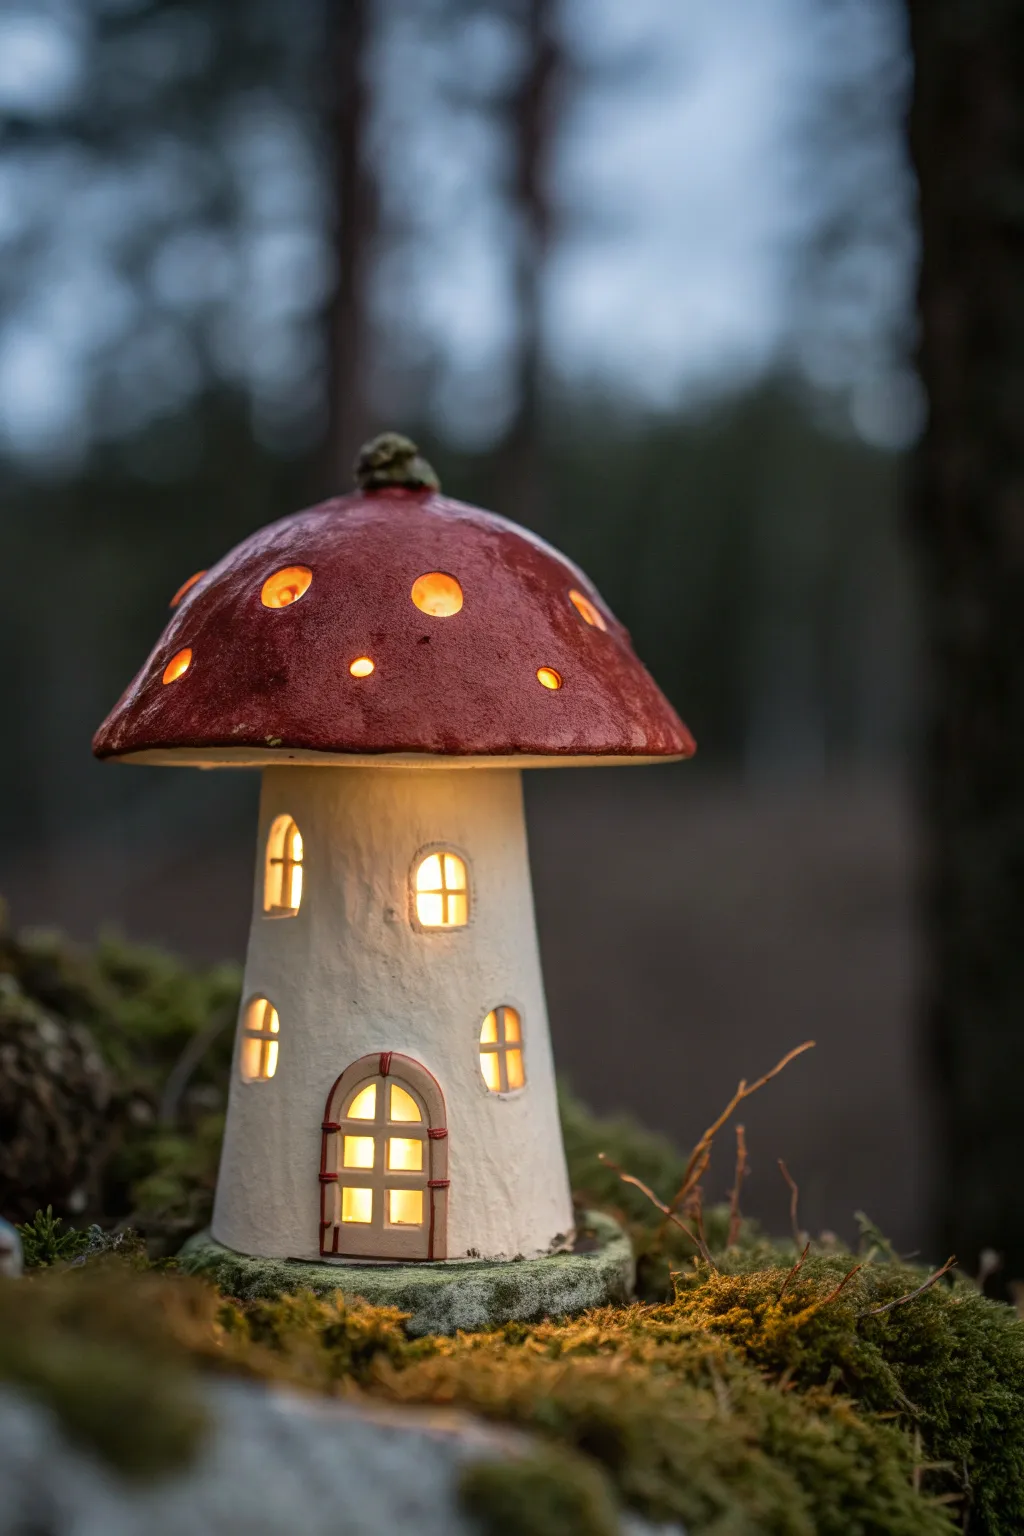
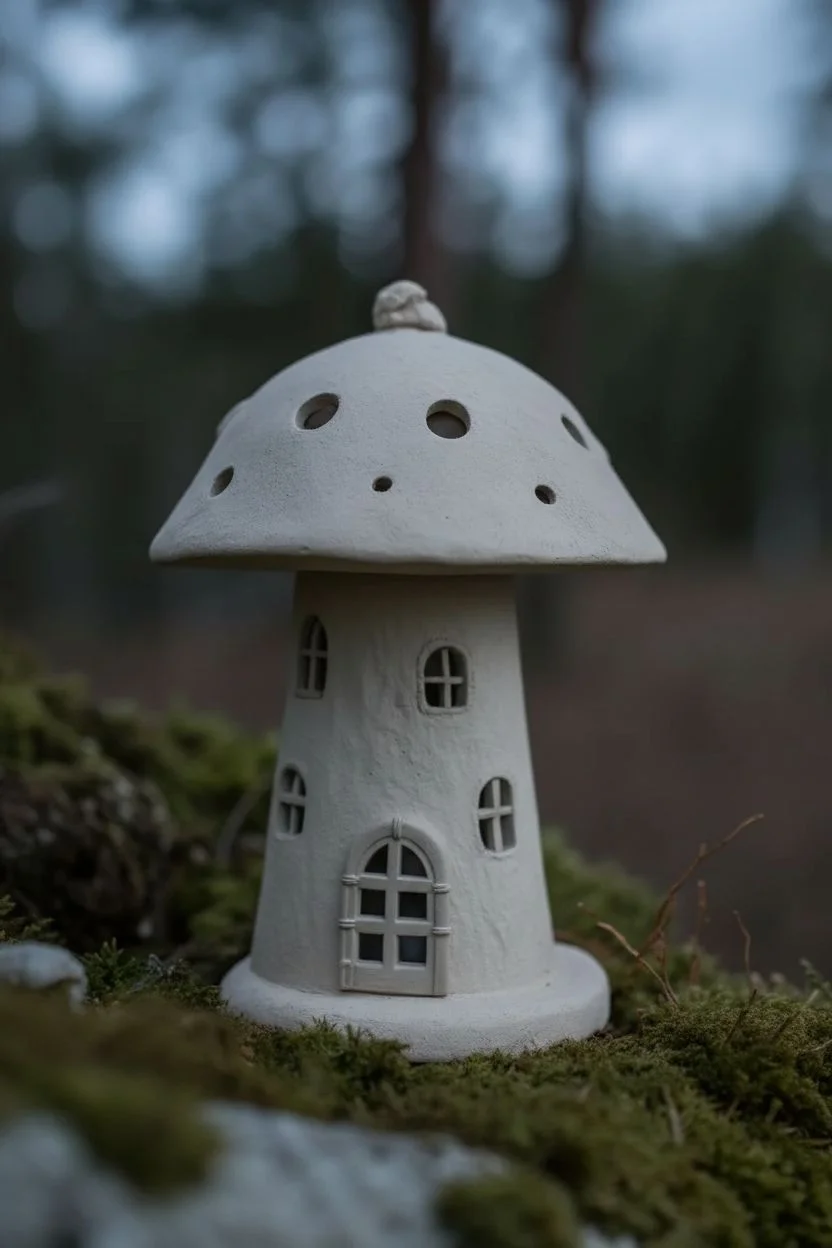
Transform a simple clay structure into a magical forest dwelling that radiates warmth from within. This project combines sculpting and painting techniques to create a charming lantern perfect for adding a fairytale touch to any nook.
How-To Guide
Materials
- Air-dry clay or polymer clay
- Rolling pin
- Sculpting tools (needle tool, small knife)
- Ball of foil or styrofoam (for armature)
- Small LED tea light or fairy lights
- Acrylic paints (Barn Red, Cream/Off-White, Burnt Umber)
- Small detail brushes
- Gloss varnish
- Sandpaper (fine grit)
- Water and sponge
Step 1: Sculpting the Base and Stem
-
Prepare the workspace:
Lay down a non-stick mat or parchment paper. Condition your clay by kneading it until it is soft and pliable, ensuring there are no cracks. -
Create the stem form:
Roll out a thick slab of clay and wrap it around a cylindrical object (like a cardboard tube) to form the hollow stem, or manually coil and smooth the clay upwards to create a tapered cylinder. Ensure it is wide enough to house your LED light. -
Cut the openings:
While the clay is still damp but firm, use a sharp craft knife to carefully cut out the arched door shape at the bottom. -
Carve the windows:
Cut out small arched windows scattered around the upper part of the stem. I like to vary the heights slightly to give it a whimsical, organic feel. -
Add window panes:
Roll very thin snakes of clay. Cut small pieces to create the cross-bars (muntins) for each window and the door, gently pressing them into the openings from the inside so they stick. -
Sculpt the door frame:
Add a thin strip of clay around the door opening to create a frame, and smooth the edges into the main stem with a little water.
Step 2: Crafting the Cap
-
Shape the mushroom cap:
Form a large dome of clay. You can drape a slab over a ball of foil or a small bowl to get the rounded shape. Make sure the diameter is wider than your stem. -
Create light holes:
Using a straw or a small circular cutter, punch various holes through the cap. These will act as the glowing spots on the mushroom’s roof. -
Refine the edges:
Smooth the bottom rim of the cap so it looks slightly uneven and natural, rather than perfectly sharp. -
Construct the mount:
Score and slip the top of the stem and the underside of the cap to join them securely, or design the cap to be removable so you can easily access the light inside. -
Dry the structure:
Allow the entire piece to dry completely according to your clay’s instructions. Air-dry clay may take 24-48 hours.
Natural Texture Tip
Before the clay dries, gently press a clean piece of sandpaper or a stiff brush against the stem’s surface to give it a realistic, stucco-like texture.
Step 3: Painting and Finishing
-
Sand imperfections:
Once fully dry (and hard), gently sand any rough edges, particularly around the window cutouts and the rim of the cap. -
Base coat the stem:
Paint the entire stem and the window frames with a creamy off-white acrylic paint. You may need two coats for opaque coverage. -
Paint the cap:
Apply a rich Barn Red to the top of the mushroom cap. Use a stippling motion with a sponge or brush to give it a slightly textured, organic look. -
Detail the door:
Paint the door frame in a contrasting color, perhaps a reddish-brown to match the cap details. -
Weather the piece:
Mix a very watery wash of Burnt Umber. Lightly brush it over the textured white stem and immediately wipe it back with a paper towel to highlight the nooks and crannies. -
Add the base moss:
Paint the very bottom rim of the stem with dark greens or glue on actual dried craft moss for realism. -
Final glow:
Place your LED tea light or string lights inside the hollow stem and place the cap on top to see your house come to life.
Fixing Clay Cracks
If small cracks appear as the clay dries, mix a tiny bit of fresh clay with water to make a paste (slip) and fill in the gaps, then sand smooth.
Now you can enjoy the cozy ambience of your handmade fairy dwelling

PENCIL GUIDE
Understanding Pencil Grades from H to B
From first sketch to finished drawing — learn pencil grades, line control, and shading techniques.
Explore the Full Guide
Mushrooms Under a Starry Sky With Fireflies
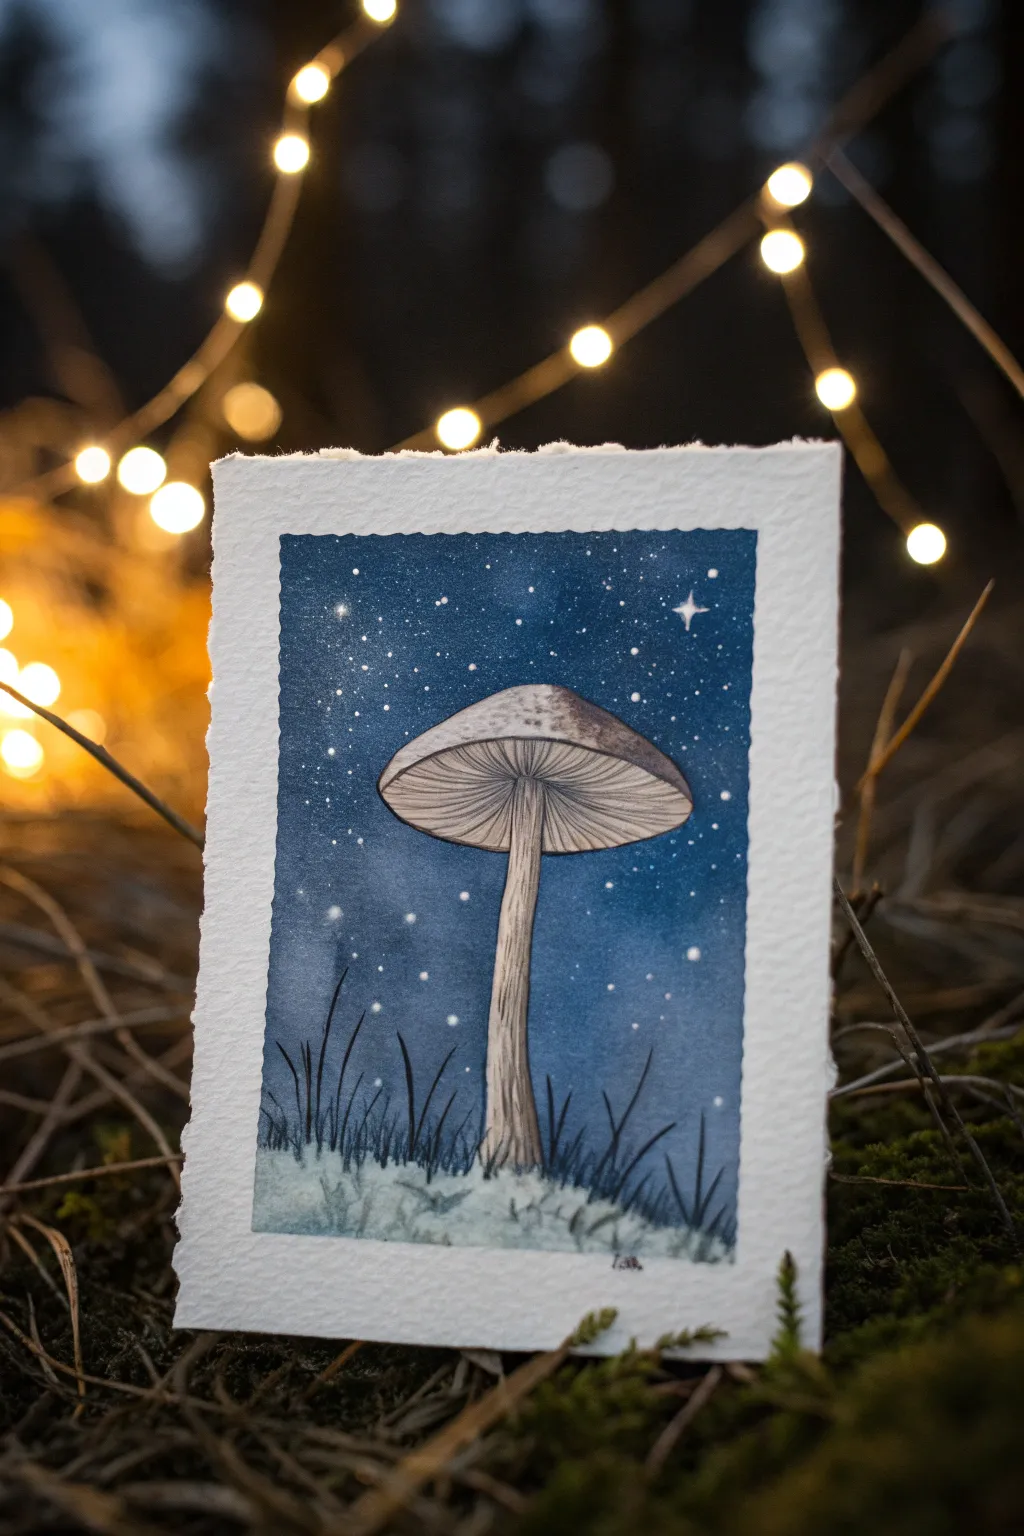
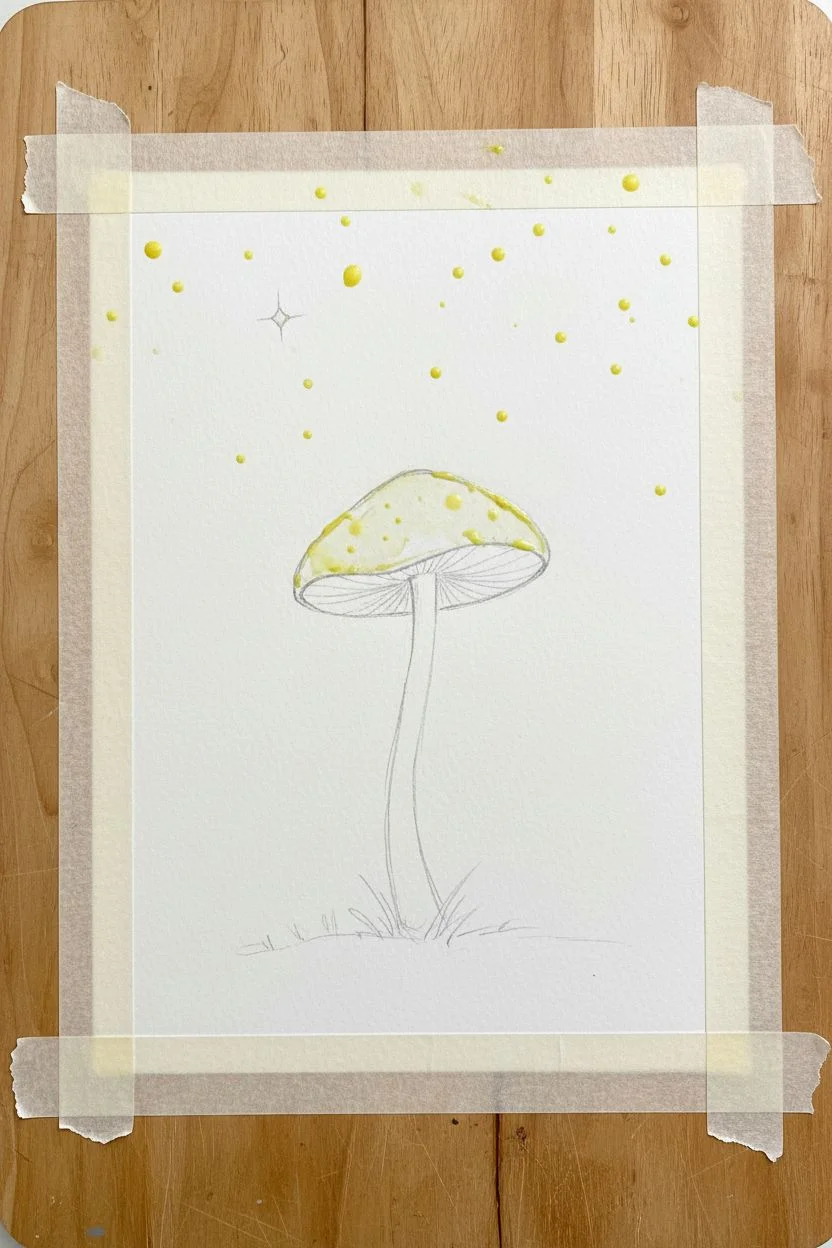
Capture the quiet magic of the forest floor with this enchanting watercolor painting of a solitary mushroom beneath a starlit canopy. The deep indigo sky contrasts beautifully with the delicate beige tones of the fungi, creating a peaceful, dreamlike composition perfect for beginner artists.
Step-by-Step Tutorial
Materials
- Cold press watercolor paper (deckle edge optional)
- Watercolor paints (Indigo, Payne’s Gray, Burnt Umber, Yellow Ochre, White Gouache)
- Masking fluid
- Pencil (HB or 2H)
- Round brushes (size 4 and size 0/detail)
- Clean water cups
- Paper towels
- Low-tack masking tape
Step 1: Preparation and Sketching
-
Prepare the borders:
Begin by taping down your watercolor paper to a board. If you want the clean, crisp internal border shown in the reference, place your tape about 1/2 inch inside the edges of the paper to create a rectangular frame for your painting. -
Lightly sketch the subject:
Using an HB pencil, draw a very faint outline of the mushroom in the center. Start with a gentle curve for the cap and a long, slender stem. Add a few small lines at the bottom to indicate grassy ground. -
Mask the stars:
Dip an old brush or a dedicated masking tool into masking fluid. Dot small points across the sky area to represent stars. Vary the sizes slightly, and add a small four-point cross shape for a twinkling ‘North Star’ effect. -
Mask the mushroom:
In this piece, the mushroom stays light against a dark background. Carefully apply masking fluid over the entire mushroom shape so you can paint the sky freely without worrying about the edges.
Starry Splatter Tip
For a more natural starry sky, flick white gouache off a toothbrush onto the dry blue background instead of masking every single dot manually.
Step 2: Painting the Night Sky
-
Mix your sky wash:
Create a deep, saturated night sky color. I like to mix Indigo with a touch of Payne’s Gray to get that really rich, dark blue. Ensure you have enough mixed to cover the whole background. -
Apply the first layer:
Starting at the top of the sky area, lay down a wash of your dark blue. As you move closer to the ground, dilute the paint slightly with water to create a soft gradient, making the horizon just a shade lighter. -
Deepen the cosmos:
While the paper is still slightly damp (but not swimming), drop more saturated Indigo into the upper corners and top edge to create a vignette effect, drawing the eye toward the center. -
Let it dry completely:
Allow the background to dry thoroughly. This is crucial; if you move to the next step while it’s wet, your crisp lines will blur.
Step 3: Painting the Mushroom
-
Remove masking fluid:
Once the paper is bone dry, gently rub away the masking fluid from the mushroom and stars using your finger or a rubber cement pickup tool. -
Paint the cap base:
Mix a very watery wash of Burnt Umber and Yellow Ochre. Paint a pale, translucent layer over the mushroom cap and stem to kill the bright white of the paper. -
Detail the gills:
Switch to your size 0 detail brush. Using a slightly darker mix of Burnt Umber, paint fine lines radiating from the top of the stem to the edge of the cap to create the gill texture. -
Add shadows to the stem:
Paint vertical, streaky lines down the length of the stem using the brown mix. Keep the center of the stem lighter to show its cylindrical volume. -
Define the cap:
Add a darker brown shadow under the rim of the cap where the gills meet the skin, giving the mushroom a 3D umbrella shape.
Uneven Gradients?
If your sky wash looks streaky, re-wet the entire sky area gently with clear water and drop in pigment again while it’s all uniformly wet.
Step 4: Final Details
-
Paint the foreground:
For the snowy or mossy ground, use a very pale blue-grey wash. Dab the paint loosely at the base of the stem, darker near the bottom edge. -
Add silhouetted grass:
Using your darkest Indigo or straight black, paint thin, wispy blades of grass overlapping the bottom of the sky and the glowing ground. Let some blades cross in front of the mushroom stem. -
Enhance the stars:
If your masked stars aren’t bright enough, dot a tiny bit of white gouache over them. Add a few extra tiny specks for distant galaxies. -
Reveal the border:
Carefully peel away the masking tape at a 45-degree angle to reveal your crisp edges.
Frame your tiny masterpiece or gift it as a handmade card to a nature lover.
A Snail Climbing a Mushroom for Instant Story
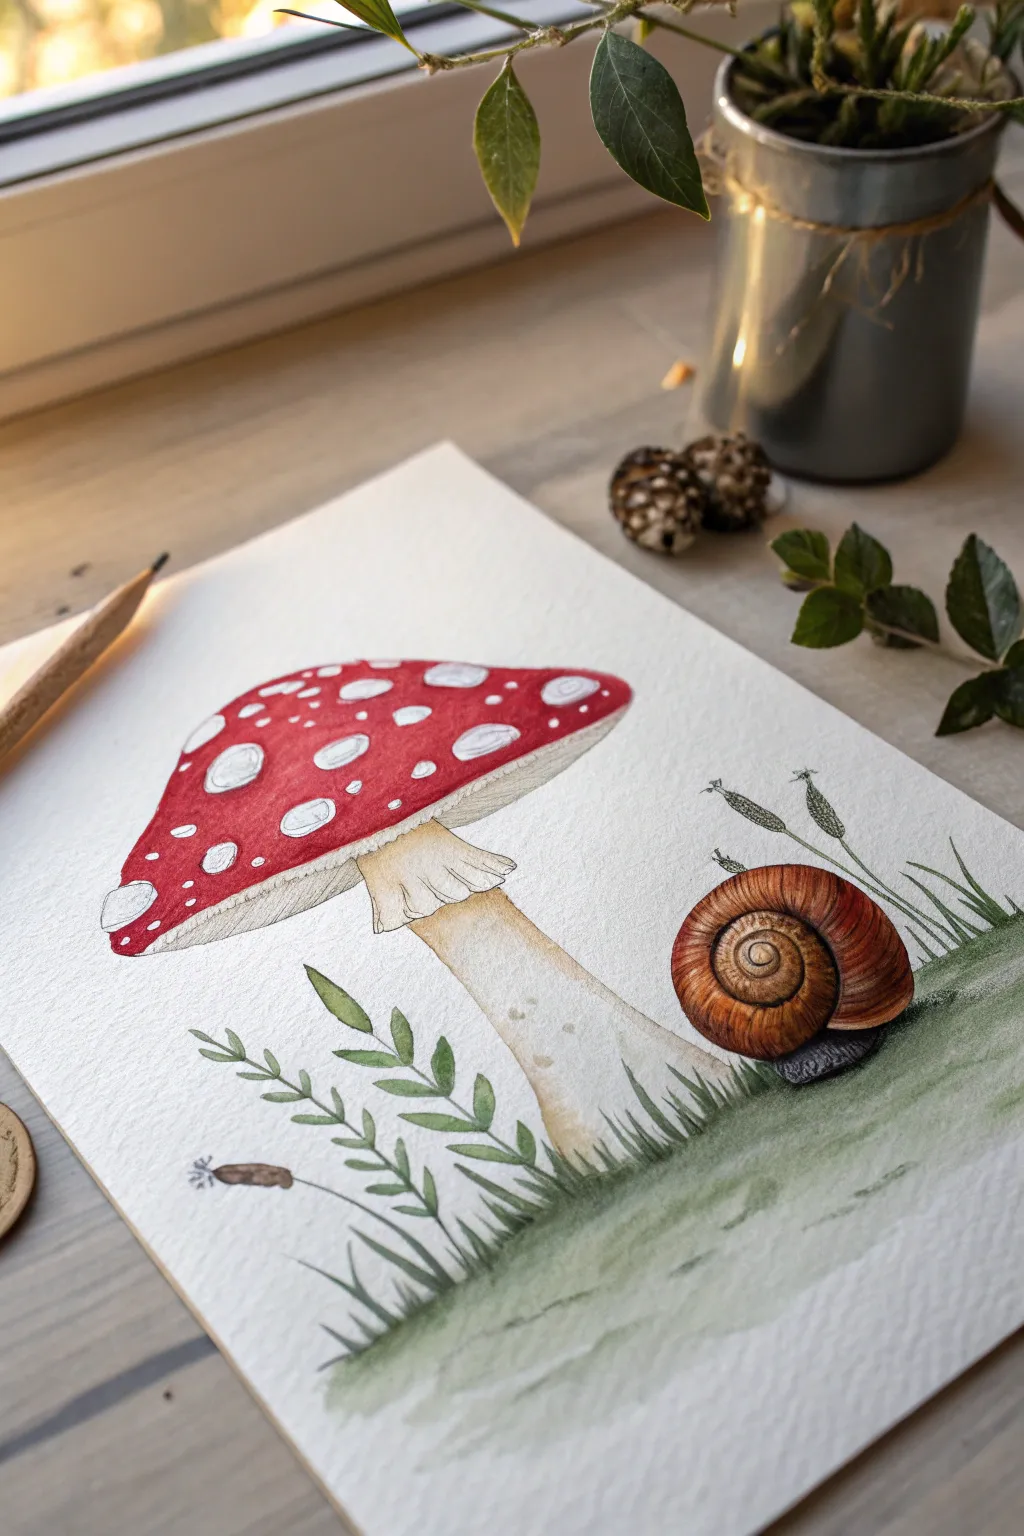
This charming project captures the serene moment of a detailed snail encountering a classic red fly agaric mushroom. The soft watercolor washes combined with fine ink details create a lovely balance between realism and storybook illustration.
Detailed Instructions
Materials
- Cold press watercolor paper (300 gsm)
- HB graphite pencil
- Kneaded eraser
- Watercolor paints (Alizarin Crimson, Burnt Sienna, Yellow Ochre, Sap Green, Payne’s Grey)
- Small round brushes (size 2 and 4)
- Fine liner pen (0.1mm or 0.3mm, waterproof, brown or black)
- White gel pen or gouache (optional)
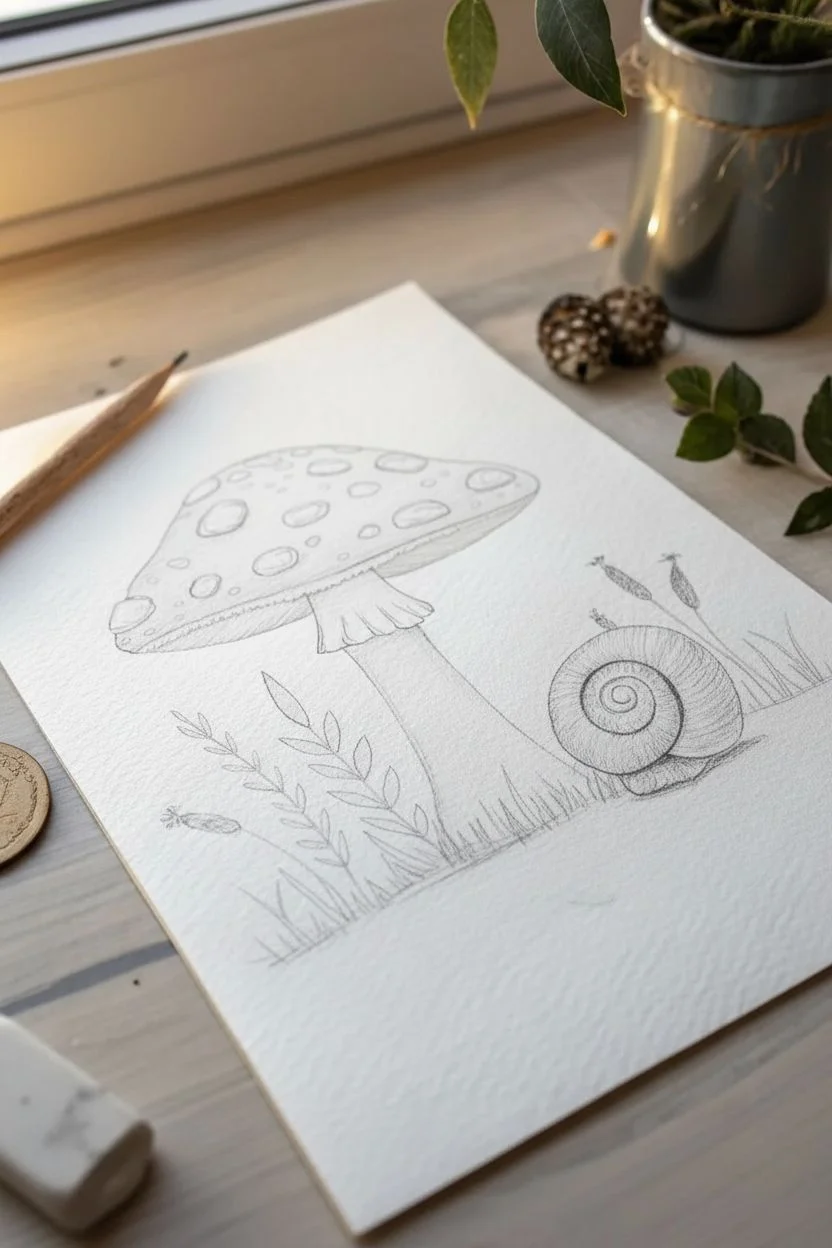
Step 1: Sketching the Composition
-
Base shapes:
Begin by lightly sketching the large mushroom cap slightly off-center to the left. Draw a wide, flattened dome shape for the cap and a gentle curve for the stem. -
Adding texture details:
Refine the mushroom shape by adding the skirt (annulus) halfway down the stem with jagged edges. Sketch irregular circles on the cap to mark where the white spots will go—make them different sizes for a natural look. -
The snail companion:
To the right of the mushroom stem, sketch a spiral shape for the snail’s shell. It should look like a cinnamon roll resting on its side, with a small, darker body tucking underneath. -
Grounding elements:
Add a few vertical strokes for grass blades around the base of the mushroom and the snail to ground your subjects. Sketch tiny leaves or sprouts rising on the left side.
Uneven Watercolors?
If your red paint dries with hard edges inside the cap (blooms), soften them with a damp, clean brush while the paint is still slightly tacky to smooth the blend.
Step 2: Watercolor Washes
-
Painting the spots:
Carefully paint around the circular spots on the mushroom cap using clean water, or use masking fluid if you have it. Alternatively, just leave the white paper bare as you paint. -
The crimson cap:
While avoiding the spots, fill the mushroom cap with a vibrant Alizarin Crimson. Vary the intensity, dropping in a bit of darker red near the bottom edge for shadow and keeping the top lighter. -
Stem and gills:
Mix a very dilute wash of Yellow Ochre and Burnt Sienna. Paint the stem and the underside of the cap (the gills area) with this pale cream color, keeping the center of the stem almost white for a highlight. -
Snail shell base:
Paint the snail shell with a warm Burnt Sienna. I like to let this dry briefly before adding a second layer of darker brown in the spiral crevices to create volume. -
Grass and ground:
Use a watery mix of Sap Green and a touch of Payne’s Grey for the ground. Apply loose, horizontal strokes underneath the mushroom and snail, letting the paint fade out at the edges for a vignetted look.
Add a Dew Drop
Paint a tiny oval on a leaf. Darken the top inside edge and add a pure white dot to the bottom inside edge to create a hyper-realistic dew drop effect
Step 3: Adding Definition
-
Shell details:
Once the initial shell layer is dry, use a smaller brush with concentrated brown to paint the distinct spiral lines. Follow the curve of the shell to emphasize its roundness. -
Leafy greens:
Paint the specific leaves and grass blades using a more saturated green mixture. Use the tip of your brush to get crisp points on the grass blades. -
Stem shadows:
Add faint shadows under the extensive mushroom skirt and along the right side of the stem using a watery greyish-brown to give it cylindrical form.
Step 4: Ink and Fine Details
-
Refining the gills:
Using your fine liner pen or a very fine brush, draw delicate lines radiating from the stem to the edge of the cap on the underside to represent the mushroom gills. -
Separation lines:
Lightly outline the bottom edge of the red cap and the spots with broken, delicate ink lines. This separates the red cap from the white spots cleanly. -
Snail texture:
Add fine hatching lines to the snail shell to enhance the swirl texture. Use stippling (tiny dots) on the snail’s body to give it that bumpy, organic skin texture. -
Grassy accents:
Ink a few of the foreground grass blades and the small leafy plant on the left. Don’t outline everything perfectly; broken lines look more natural. -
Final highlights:
If painting around the white spots resulted in messy edges, use a white gel pen or a dab of opaque white gouache to tidy them up and make them pop.
Step back and enjoy the peaceful woodland narrative you have created on paper


Mini Mushroom Studies in a Sketchbook Grid
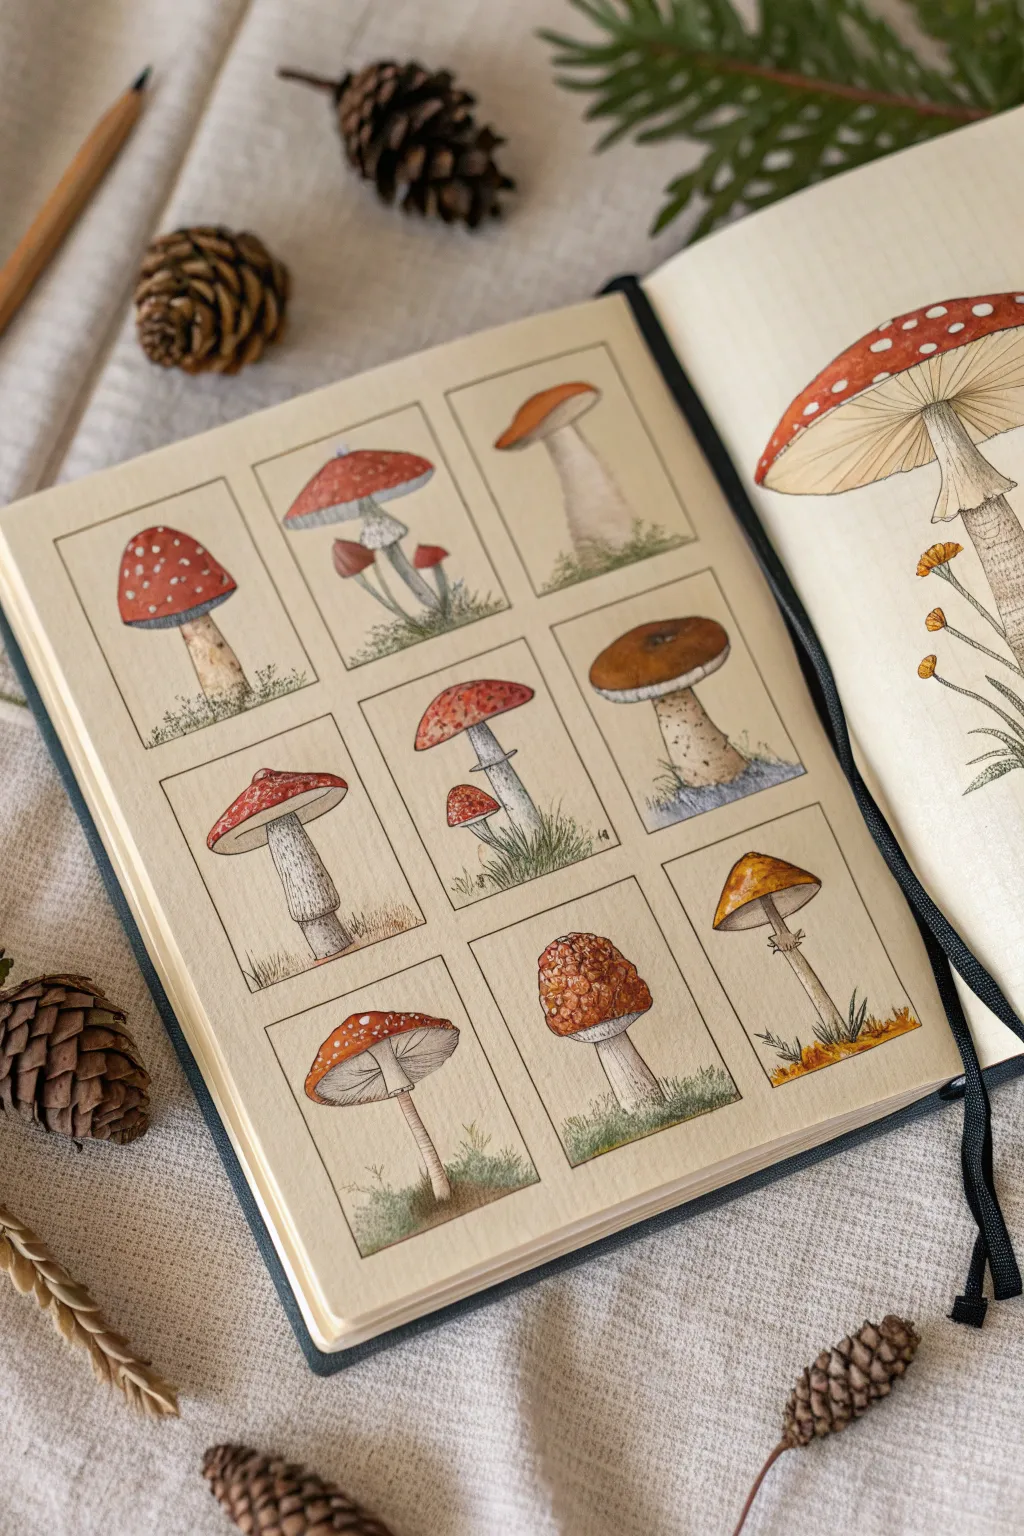

Capture the diversity of the forest floor by creating a sketchbook spread dedicated to nine distinct mushroom varieties. This project uses a neat grid layout to turn small, individual botanical studies into a cohesive and visually satisfying collection.
Step-by-Step Guide
Materials
- Sketchbook with heavy paper (smooth or cold press texture)
- HB pencil and eraser
- Ruler
- Fine liner pens (sepia or dark brown, 0.1mm and 0.3mm)
- Watercolor paints (warm earth tones, reds, oranges, yellows)
- Small round brushes (sizes 0, 2, and 4)
- White gel pen or gouache (optional)
Step 1: Setting the Structure
-
Measure the page:
Start by measuring the usable area of your sketchbook page. You need to fit a 3×3 grid, so divide the width and height availability by three to determine your ideal box size. -
Draft the grid:
Using your ruler and HB pencil, lightly draw the nine rectangular frames. Leave a consistent, small margin between each box to let the individual illustrations breathe. -
Sketch basic cap shapes:
Inside each box, lightly sketch the primary shapes of the mushroom caps. Vary them intentionally—some domed, some flat, some bell-shaped, and others upturned like funnels. -
Add stems and details:
Draw the stems connecting to the caps. Pay attention to thickness; some should be stout (like a porcini) while others are slender. Sketch in rough placement for gills, skirts (the ring around the stem), and ground foliage.
Uneven Watercolors?
If your paint creates ‘blooms’ or watermarks, your brush might be too wet. Blot it on a paper towel before touching the paper to control the flow better.
Step 2: Inking and Outline
-
Outline the frames:
Go over your pencil grid lines with a ruler and a fine liner pen. A sepia or dark brown ink looks more organic than harsh black for botanical studies. -
Ink the mushrooms:
Carefully trace your mushroom sketches. Use broken or lighter lines for the delicate gills and stippling (dots) for textured areas on the stems. -
Add texture marks:
Before painting, add small ink details like the spots on a fly agaric or the rough texture on a boletus stem. Ink some grass blades at the base of each stem to ground them. -
Erase guidelines:
Wait until the ink is completely dry to prevent smudging, then gently erase all visible pencil marks.
Step 3: Watercolor Washes
-
Base wash for caps:
Start painting the caps. For the classic red mushrooms, use a diluted scarlet or vermilion. For the brown ones, mix burnt sienna with a touch of ochre. Apply a light, even wash first. -
Shadowing the stems:
While the caps dry, use a very watery gray or beige to add dimension to the white stems. Paint usually on one side (left or right) to indicate a light source. -
Layering cap colors:
Once the first layer is dry, come back to the caps with more saturated paint. Deepen the red in the center or on the shadowed side to create a 3D effect. -
Painting the gills:
For mushrooms showing their undersides, use a very fine brush to add faint washes of tan or pale pink between your ink lines. -
Grounding the subjects:
Dab a little sap green or mossy olive color at the base of the stems where you drew the grass. Keep this loose so it doesn’t distract from the mushroom itself.
Level Up: Scientific Labels
Write the Latin name of each mushroom species (e.g., *Amanita muscaria*) in tiny cursive script at the bottom of each grid box for a true botanical field guide look.
Step 4: Final Details
-
Deepen the contrast:
I find adding a tiny amount of burnt umber to the darkest crevices—like right under the cap where it meets the stem—really makes the image pop. -
Add texture to the brown caps:
For the textured brown mushrooms (like the one in the center right), dab slightly thicker, uneven paint to mimic a bumpy surface. -
Highlighting:
If you accidentally painted over the white spots on the red mushrooms, use a white gel pen or a dot of white gouache to bring them back. -
Final assessment:
Check the grid for balance. If one square looks too pale, add another light glaze of color to unify the collection.
Now you have a charming collection of fungi that serves as a great reference for future, larger paintings
Flat-Color Folk Art Mushrooms With Bold Outlines

Capture the charm of the forest floor with this stylized watercolor illustration featuring bold shapes and warm, earthy tones. This project combines flat color blocking with crisp ink-like details for a distinct folk art aesthetic that pops off the page.
Step-by-Step
Materials
- Cold press watercolor paper (A5 size or similar)
- Watercolor paints (Vermilion/Rust Red, Yellow Ochre, Lamp Black, Burnt Sienna, Payne’s Grey, Moss Green)
- Round watercolor brushes (Size 4 and Size 0 or 2 for details)
- Pencil (HB or H)
- Kneaded eraser
- Clean water and paper towels
- Small mixing palette
Step 1: Sketching the Layout
-
Outline the mushroom caps:
Start by lightly sketching three main mushroom cap shapes. Place the largest, wide cap near the top center, a medium triangular cap to its right, and a smaller bell-shaped cap on the left. -
Add the stems and small details:
Draw long, slightly curved stems descending from each cap. Notice how the large one’s stem curves slightly right, while the left one tilts left. Sketch two tiny button mushrooms near the bottom right and bottom center. -
Suggest the foliage:
Lightly indicate where the ground line will be and sketch simple fern-like fronds and rounded leaves growing upward between the stems to balance the composition. -
Clean up the sketch:
Use your kneaded eraser to lift the graphite until the lines are barely visible. This ensures the pencil marks won’t dirty your watercolor washes later.
Uneven Wash Fix
If your large red cap dries with splotches or ‘cauliflowers,’ wait for it to dry 100%, then apply a second thin, even layer of the same red mix to smooth out the color.
Step 2: Painting the Caps and Undersides
-
Paint the large cap red:
Mix a warm, rusty red (Vermilion mixed with a touch of Burnt Sienna) and fill in the top half of the largest mushroom cap. Carefully leave small white ovals unpainted to serve as the spots. -
Fill the right cap:
Using a slightly lighter version of that red or a terracotta shade, paint the triangular cap on the right side. Instead of dots, painting thin vertical stripes of negative space (leaving the paper white) creates a nice textural variety. -
Paint the black cap:
For the left mushroom, use a dark charcoal or diluted Lamp Black. Fill the cap shape, again leaving small circular areas of white paper for the spots. -
Add the gill base color:
Mix a creamy beige using Yellow Ochre and plenty of water. Paint the underside sections of all three main mushrooms with this flat wash. Let this dry completely before moving on. -
Paint the tiny accents:
Color the two tiny button mushrooms near the ground. Give the right one a red cap and the left one a red cap with white dots to tie the color palette together.
Vintage Varnish
For an aged, scientific chart look, lightly wash the entire background (avoiding the mushrooms) with extremely diluted tea or coffee after the painting is fully dry and set.
Step 3: Adding Stems and Surroundings
-
Paint the dark stems:
Mix a very dark, grey-black wash (Lamp Black with a touch of Payne’s Grey or Green). Carefully paint the long stems of the three main mushrooms. Keep the edges crisp and smooth. -
Connect the stems to the caps:
Extend that dark color up into the very center of the beige undersides, creating a small dark triangle where the stem meets the gills. -
Paint a mustard ground:
Mix a loose, watery wash of Yellow Ochre or Raw Sienna. Paint an organic, uneven patch at the bottom of the page to anchor the mushrooms, letting the paint fade out naturally at the edges. -
Add decorative foliage:
Using a golden-orange mix (Ochre + Vermilion), paint the simple leafy sprigs rising from the ground. Use a single stroke for each small leaf.
Step 4: Fine Details and Linework
-
Outline the gills:
Switch to your smallest brush (size 0) with a dark grey or black mix. Paint thin, delicate lines radiating from the stem center to the edge of the beige gill area on the main mushrooms. -
Define the cap segments:
On the red and black caps, you can add very faint, thin outlines if your paint edges aren’t crisp enough, but the folk art style works best if the blocks of color define the shape themselves. -
Detail the golden foliage:
Add thin stems to your orange leaves using a fine liner brush and a brownish-orange hue to give them a little more definition against the paper. -
Final assessment:
Check for any gaps or uneven edges. If the white spots on the caps were accidentally painted over, you can reclaim them with a dot of opaque white gouache or a white gel pen.
Enjoy displaying your finished piece, which brings a cozy woodland feel to any corner of your home
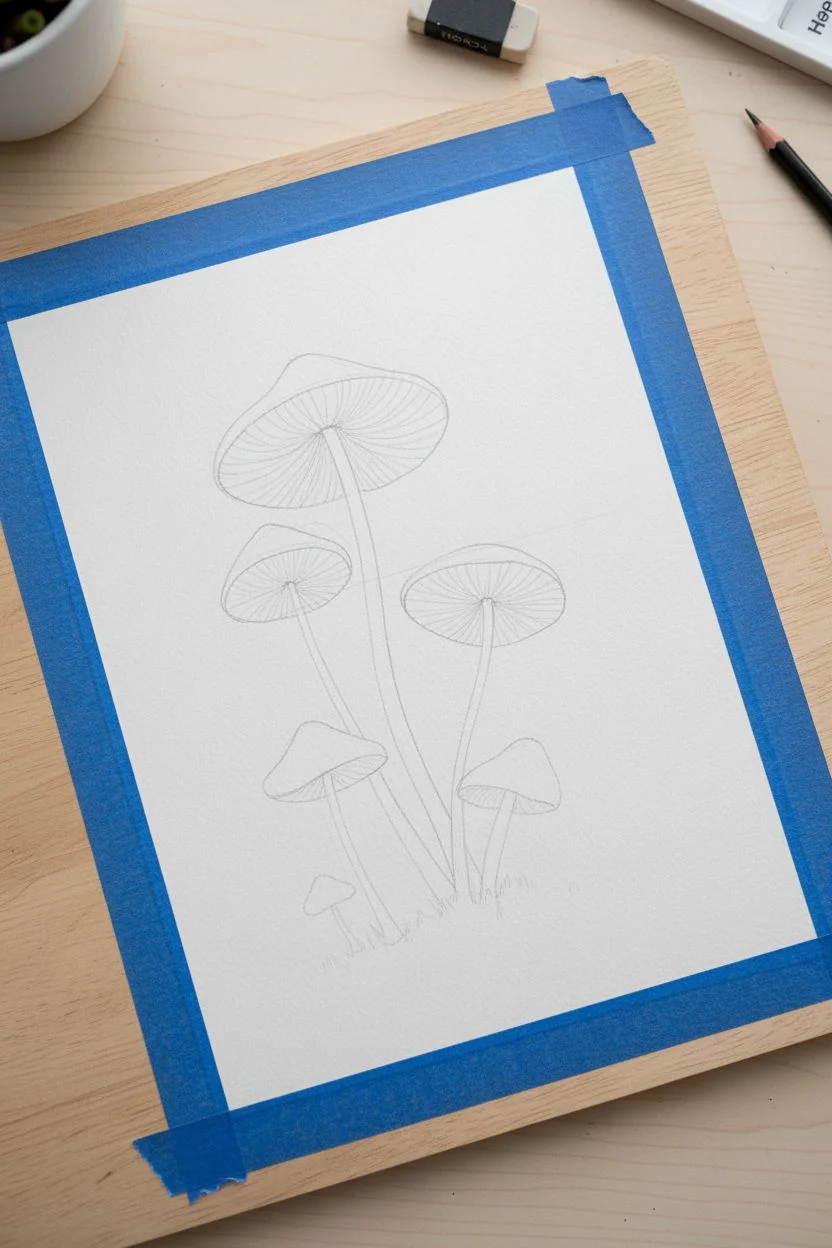
Ink Linework Mushrooms With a Soft Wash Background
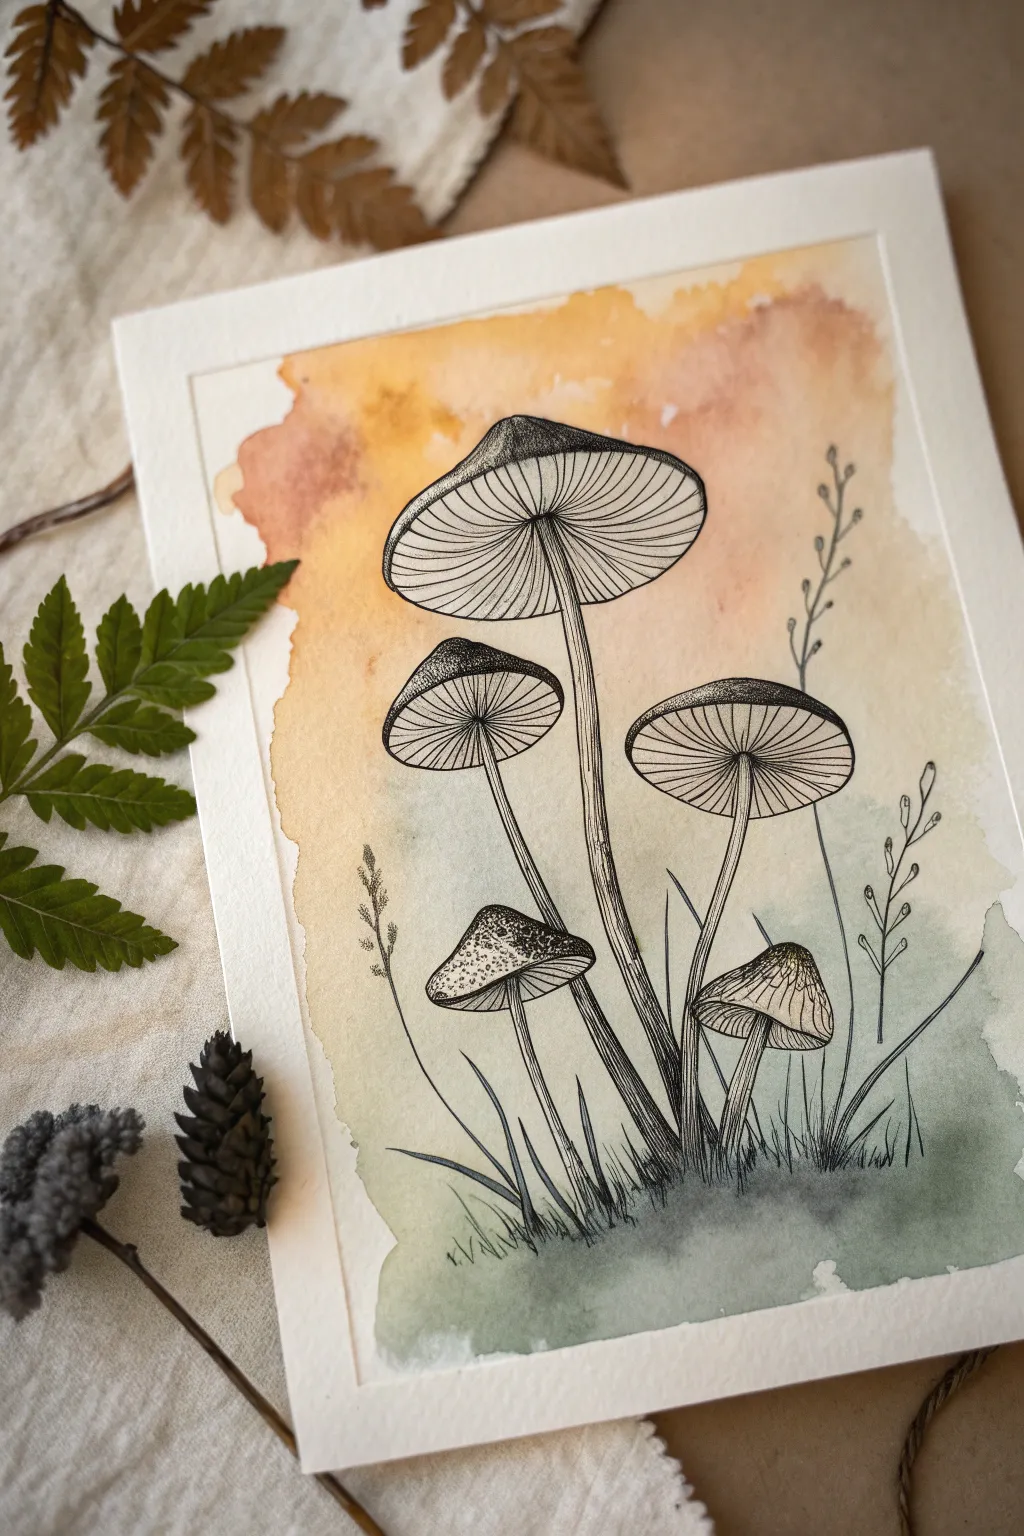
This project combines the precision of fine ink drawing with the ethereal beauty of a loose watercolor wash. The result is a striking botanical illustration where detailed stippled mushrooms stand out against a dreamy sunset gradient.
Step-by-Step Tutorial
Materials
- Cold press watercolor paper (300 gsm)
- Watercolor paints (Yellow Ochre, Burnt Sienna, Payne’s Grey, Sap Green)
- Round watercolor brushes (size 6 and 10)
- Waterproof fine liner pens (sizes 0.1, 0.3, and 0.5)
- HB pencil
- Kneaded eraser
- Water cups and paper towels
- Painter’s tape or masking tape
Step 1: Preparation & Sketching
-
Tape the Edges:
Begin by taping down all four edges of your watercolor paper to a board. This creates the clean white border seen in the reference and prevents the paper from buckling when wet. -
Light Pencil Outline:
Using your HB pencil, lightly sketch the placement of five mushrooms. Start with the largest, tallest one in the center, then stagger two medium ones on the left and right, and finish with two small ones near the base. Keep the shapes simple—skinny stems and broad, umbrella-like caps. -
Sketch the Mechanics:
Refine the shapes by drawing the underside of the caps (the gills) as ovals. Ensure the stems connect to the center of these ovals to give a sense of perspective.
Bleeding Lines?
If your ink spiders, the paper was too damp. Always touch the back of your hand to the paper; if it feels cool, it’s still wet. Wait longer or use a hairdryer.
Step 2: The Watercolor Wash
-
Wet on Dry Technique:
Mix a watery puddle of Yellow Ochre. Using your size 10 brush, paint a loose, jagged shape that covers the area where your mushrooms sit. Don’t paint right to the tape; leave a raw, organic edge like in the photo. -
Adding Warmth:
While the yellow is still wet, drop in Burnt Sienna or a soft orange near the top right and left corners of your wash. Let the colors bleed naturally into the yellow. -
Cooling the Base:
Clean your brush and pick up a mix of Sap Green and a touch of Payne’s Grey. Touch this into the bottom third of the wash to suggest grass and earth. Allow the green to blend upward slightly into the yellow. -
Lifting Color:
If the background gets too dark where the mushroom caps are, use a clean, thirsty brush to lift a little pigment away. This doesn’t need to be perfect since the ink will cover much of it. -
Total Drying Time:
Let this layer dry completely. The paper must be bone dry before you start inking, or your pens will bleed and ruin the crisp lines.
Step 3: Inking the Mushrooms
-
Outline the Caps:
Switch to your 0.5 fine liner. Trace the main outlines of the mushroom caps and stems. Keep your hand relaxed; a slightly wobbly line adds organic character. -
Drawing the Gills:
Using a thinner 0.1 pen, draw lines radiating from the stem connection point to the outer rim of the cap. These lines should curve slightly to follow the umbrella shape. -
Stippling Texture:
On the top surfaces of the caps, use the 0.3 pen to add texture. I like to concentrate tiny dots (stippling) on one side of the cap to suggest shadow and volume, leaving the other side mostly white. -
Defining the Stems:
Add vertical contour lines running up the stems with the 0.1 pen to make them look fibrous. Add darker shading at the very bottom where they meet the ground and just under the caps.
Metallic Magic
Once the ink is dry, add subtle gold watercolor or gold ink accents to the gills or edges of the mushroom caps for a magical, shimmering forest effect.
Step 4: Final Details
-
Adding Vegetation:
Draw simple, wispy grasses and a few thin, leafy sprigs around the base using the 0.3 pen. Let some stems cross in front of the mushrooms and others behind to create depth. -
Grounding Shadows:
Add denser hatching or stippling at the very base of the stems where they enter the ‘ground’ to plant them firmly in the scene. -
Erase Sketches:
Once the ink is fully dry, gently erase any visible pencil marks with the kneaded eraser. -
The Reveal:
Slowly peel off the painter’s tape at a 45-degree angle to reveal your crisp white border.
This beautiful study balances control and chaos, resulting in a piece perfect for framing on a gallery wall
Negative Space Mushrooms Using Masked Silhouettes
Capture the earthy elegance of the forest floor with this delicate watercolor study featuring three bolete-style mushrooms. By masking the main subjects first, you can easily create a pristine, crisp boundary against a softly washed background.
Step-by-Step Guide
Materials
- Cold press watercolor paper (300 gsm)
- Masking fluid (drawing gum) and old brush/applicator
- Watercolor paints (Burnt Umber, Yellow Ochre, Sepia, Sap Green, Payne’s Grey)
- Round brushes (sizes 2, 6, and 8)
- Fine liner pen (brown or sepia)
- Pencil (HB) and kneadable eraser
- Paper towels and two jars of water
Step 1: Preparation & Masking
-
Sketch the Composition:
Begin by lightly sketching the outline of three mushrooms in the center of your paper. Draw one large, tall mushroom in the middle and flank it with two smaller, younger mushrooms on either side. -
Refine the Shapes:
Add detail to your sketch, defining the convex caps and thick, cylindrical stems. Sketch a few blades of grass at the base to ground the composition. -
Apply Masking Fluid:
Shake your masking fluid bottle gently. Using an old brush or a silicone applicator tool, carefully fill in the entire shape of the three mushrooms. Extend the fluid slightly down into the grass area. -
Let it Cure:
Allow the masking fluid to dry completely. It should feel transparent or slightly yellowed and rubbery to the touch; if it’s tacky, wait a bit longer.
Protect Your Brushes
Never use your good watercolor brushes for masking fluid! The latex dries quickly and will ruin the bristles. Use a cheap craft brush or coat the bristles in bar soap first.
Step 2: Background Wash
-
Mix a Neutral Tone:
On your palette, mix a very dilute wash of Yellow Ochre with a tiny touch of Burnt Umber to create a warm, creamy beige tone for the background. -
Wash the Background:
Using your size 8 brush, apply this wash over the entire paper, painting right over the masked mushrooms. The masking fluid will protect the white paper underneath. -
Dry Completely:
Let this background wash dry fully. Using a hairdryer on a low, cool setting can speed this up, but be careful not to melt the masking fluid. -
Remove the Mask:
Once the paper is bone dry, gently rub off the masking fluid with your finger or a rubber cement pickup tool to reveal the pristine white mushroom silhouettes.
Natural Speckling
For realistic texture, try lightly splattering clean water or dark brown paint onto the damp mushroom caps using a toothbrush for a mottled, organic look.
Step 3: Painting the Caps
-
Base Color for Caps:
Load your size 6 brush with Yellow Ochre and a hint of Burnt Sienna. Paint a light wash over the mushroom caps, leaving a few small slivers of white paper for highlights on the very top. -
Add Depth:
While the base layer is still damp, drop in a richer mix of Burnt Umber and Sepia along the edges and shadows of the caps to create volume. -
Texture the Caps:
After the caps dry, take a size 2 brush with semi-dry Sepia paint. Add subtle texture marks or irregularities to make the caps look organic and weathered.
Step 4: Stems & Details
-
Paint the Stems:
Mix a pale wash of Burnt Umber and Yellow Ochre. Paint the stems vertically, keeping the center of the stalks lighter to suggest their cylindrical roundness. -
Add Stem Texture:
Using a very fine brush or your liner pen, add delicate vertical striations (lines) down the stems using Sepia or a dark brown mix. Focus these lines on the shaded sides of the stems. -
Define the Gills:
Underneath the caps, use a darker Sepia mix to paint the shadow area where the gills would be. This separates the cap from the stem. -
Paint the Grass:
Mix Sap Green with a touch of Burnt Umber for an earthy green. Paint short, flicking strokes at the base of the stems to create grass blades and moss. -
Grounding Shadows:
Add a little Payne’s Grey to your green mix and paint directly under the base of the mushrooms to ‘plant’ them firmly on the ground. -
Inking the Outlines:
Finally, use a brown fine liner pen to loosely outline the major shapes. Keep the line work broken and jittery rather than solid to maintain a natural, sketched aesthetic.
Once framed, this nature study brings a quiet, woodland charm to any corner of your home
Patterned Mushroom Caps: Dots, Stripes, and Checkerboards
Capture the charm of the forest floor with this watercolor study of fly agaric-inspired mushrooms. You will learn to layer translucent washes to create depth and contrast between the earthy stems and vibrant, spotted caps.
Detailed Instructions
Materials
- Cold press watercolor paper (300 gsm)
- Watercolor paints (Alizarin Crimson, Burnt Sienna, Teal/Viridian, Yellow Ochre, Paynes Grey)
- Round watercolor brushes (size 2 and size 6)
- Pencil (HB or H)
- Kneaded eraser
- Jar of clean water
- Paper towel
Step 1: Sketching the Composition
-
Map out the shapes:
Begin by lightly sketching the largest mushroom in the center. Draw a wide, domed cap and a tall, slightly curved stem that thickens at the base. Add a smaller mushroom to the lower left and a medium-sized one to the right, slightly overlapping them to create depth. -
Add cap details:
Underneath the large red cap, sketch the gill lines radiating from the stem to the rim. For all three caps, lightly draw small circles of various sizes to mark where the white spots will be. This acts as a ‘resist’ map for your painting later. -
Refine the stems:
Sketch the ‘skirt’ (annulus) on the stems just below the caps. It should look jagged and textured. Add a few vertical lines on the stems to suggest fibrous texture and draw tufts of grass at the very base.
Uneven Watermarks?
If you get ‘blooms’ or cauliflower edges in your red paint, try to work faster so the edge creates a consistent bead of water, and avoid adding water back into semi-dry paint.
Step 2: Painting the Caps
-
The large red cap:
Mix a vibrant red using Alizarin Crimson with a touch of Burnt Sienna. Using your size 6 brush, carefully paint around the pencil circles you drew, leaving the white paper exposed for the dots. Paint the rest of the cap solid red. -
Darkening the rim:
While the red paint is still slightly damp, drop a tiny bit of darker red or mixed purple along the bottom edge of the cap to create a shadow where it curves inward. -
The teal cap:
For the rightmost mushroom, mix a Teal or Viridian Green with a hint of blue. Similar to the red cap, paint around your circular spots carefully. I find using the tip of the smaller brush helps navigate the tight spaces between dots. -
The small red cap:
Repeat the process for the small bottom-left mushroom using the same red mixture. Since this one is lower down, you can make the red slightly darker to suggest it’s in the shadow of the larger one.
Use Masking Fluid
Painting around tiny dots can be tedious! Apply masking fluid to the dots before painting the red/teal caps. Rub it off when dry for perfect white circles.
Step 3: Stems and Gills
-
Underside color:
Mix a diluted Yellow Ochre. Paint the underside of the large red mushroom cap. Once dry, use a very fine brush (size 2) and a mix of Ochre and Burnt Sienna to paint thin, radiating lines for the gills. -
First stem wash:
Paint the stems with a very watery wash of Burnt Sienna or raw umber. Keep this layer pale to represent the mushroom’s fleshy color. -
Adding stem texture:
Once the initial wash is dry, use a slightly darker brown mixture to paint vertical striations up the stem. Concentrate the color under the skirt and at the base of the stems for volume. -
The skirts:
Paint the skirts with a very pale grey-brown wash, adding small vertical tick marks at the bottom edge to make them look tattered and soft.
Step 4: Grounding and Details
-
Painting the grass:
Mix a muted dark green using Paynes Grey and your Green/Teal. Using quick, upward flicking motions with the tip of your brush, paint the grass blades at the base of the stems. -
Ground shadow:
Dilute your green-grey mix significantly with water. Brush a soft, irregular wash under the mushrooms to create the earthy ground, letting it bleed slightly into the grass roots. -
Refining the spots:
If your pencil lines are still visible inside the white spots, gently erase them with a kneaded eraser. If you want the spots to look aged, you can glaze them with an extremely watered-down yellow ochre, but leaving them bright white is also lovely. -
Final outlines:
Depending on your style, you can leave the edges soft or use a very fine brush with dark brown paint to add subtle definition to the edges of the caps and stems for a clearer illustrative look.
Now step back and admire your little woodland trio, perfect for framing or a greeting card
Surreal Floating Mushrooms in a Dreamy Sky
Transport yourself to a dreamscape with this ethereal painting of a vibrant Amanita muscaria floating against a cotton-candy sky. This project combines soft wet-in-wet watercolor techniques for the background with detailed, opaque layering to make the mushroom pop right off the page.
Step-by-Step
Materials
- Cold press watercolor paper (300 gsm)
- Watercolor paints (Cerulean Blue, Rose Madder, Sap Green)
- Gouache paints (Opaque White, bright Red, Yellow Ochre, Burnt Umber)
- Round brushes (sizes 2, 6, and 10)
- Masking fluid (optional)
- Pencil (HB)
- Kneaded eraser
- Paper towels
- Two jars of water
Step 1: Planning and Sketching
-
Light Sketching:
Begin by lightly sketching the outline of the mushroom in the center of your page. Draw the dome-shaped cap, the gills underneath, and a thick, sturdy stem with a flared base. -
Refining Details:
Add the skirt (annulus) around the stem and rough in the texture of the volva (the bulbous base). Keep your lines faint so they don’t show through the sky later. -
Protecting the Subject:
If you are worried about painting over the mushroom, carefully apply masking fluid to the entire sketch. Allow it to dry completely before touching the paper again.
Pro Tip: Spot Dimensions
Don’t make your white spots perfect circles. Making them slightly irregular and ‘warty’ looks much freer and more organic to the species.
Step 2: Painting the Dreamy Sky
-
Wetting the Paper:
Using your largest clean brush, apply a glaze of clean water to the entire background area around the mushroom. The paper should be glisten, but not hold puddles. -
Blue Patches:
Load your brush with dilute Cerulean Blue. Drop color onto the wet paper, leaving random, organic white spaces to represent fluffy clouds. Let the water move the pigment for soft edges. -
Adding Pink Accents:
While the paper is still damp (but not soaking), introduce touches of Rose Madder near the edges of the clouds. Let it bleed slightly into the blue to create lavender transitions. -
Softening Edges:
If any cloud edges look too harsh, use a clean, slightly damp brush to soften them while the paint is still workable. -
Drying Time:
Allow the background to bone dry. If you used masking fluid, gently rub it off with your finger or a rubber cement pickup once the paper is dry.
Level Up: Mixed Media Pop
Once the painting is dry, use a white gel pen to add tiny highlights to the grass blades or to sharpen the edges of the finest mushroom gills.
Step 3: The Mushroom Cap
-
Base Color:
Mix a vibrant Red gouache with a tiny touch of Yellow Ochre. Paint the entire cap shape, ensuring a smooth, opaque application. -
Adding Shadow:
While the red is wet, mix a little Burnt Umber into your red. Paint this darker shade along the very bottom rim of the cap and slightly up the sides to create a rounded 3D form. -
The Gills:
Use a mix of White and a tiny dot of Burnt Umber to create a creamy off-white. Using your smallest brush, paint fine lines radiating from the stem to the cap’s edge to imply gills. -
Painting the Spots:
Once the red cap is fully dry, load a size 2 brush with thick White gouache. Dot the surface with irregular shapes, making the spots near the edges smaller and flatter to enhance perspective.
Step 4: Stem and Details
-
Stem Base Layer:
Paint the stem with the same creamy off-white mix used for the gills foundations. Keep the application solid. -
Adding Texture:
I like to use a ‘dry brush’ technique here. Remove most paint from a brush dipped in diluted brown, then lightly drag it over the stem to create a rough, textured look. -
The Skirt:
Define the skirt with a darker beige mix, painting the underside in shadow to make it look like it’s hanging over the stem. -
Grounding the Base:
Stipple a mix of thick white and brown gouache at the very bottom of the stem to create the bumpy volva texture. -
Grass Blades:
With your smallest brush and Sap Green, flick quick, upward strokes at the base of the mushroom to create wispy grass blades.
Step back and admire your dreamy, floating fungi creation
Two-Panel Story: Mushrooms on One Side, Moon on the Other
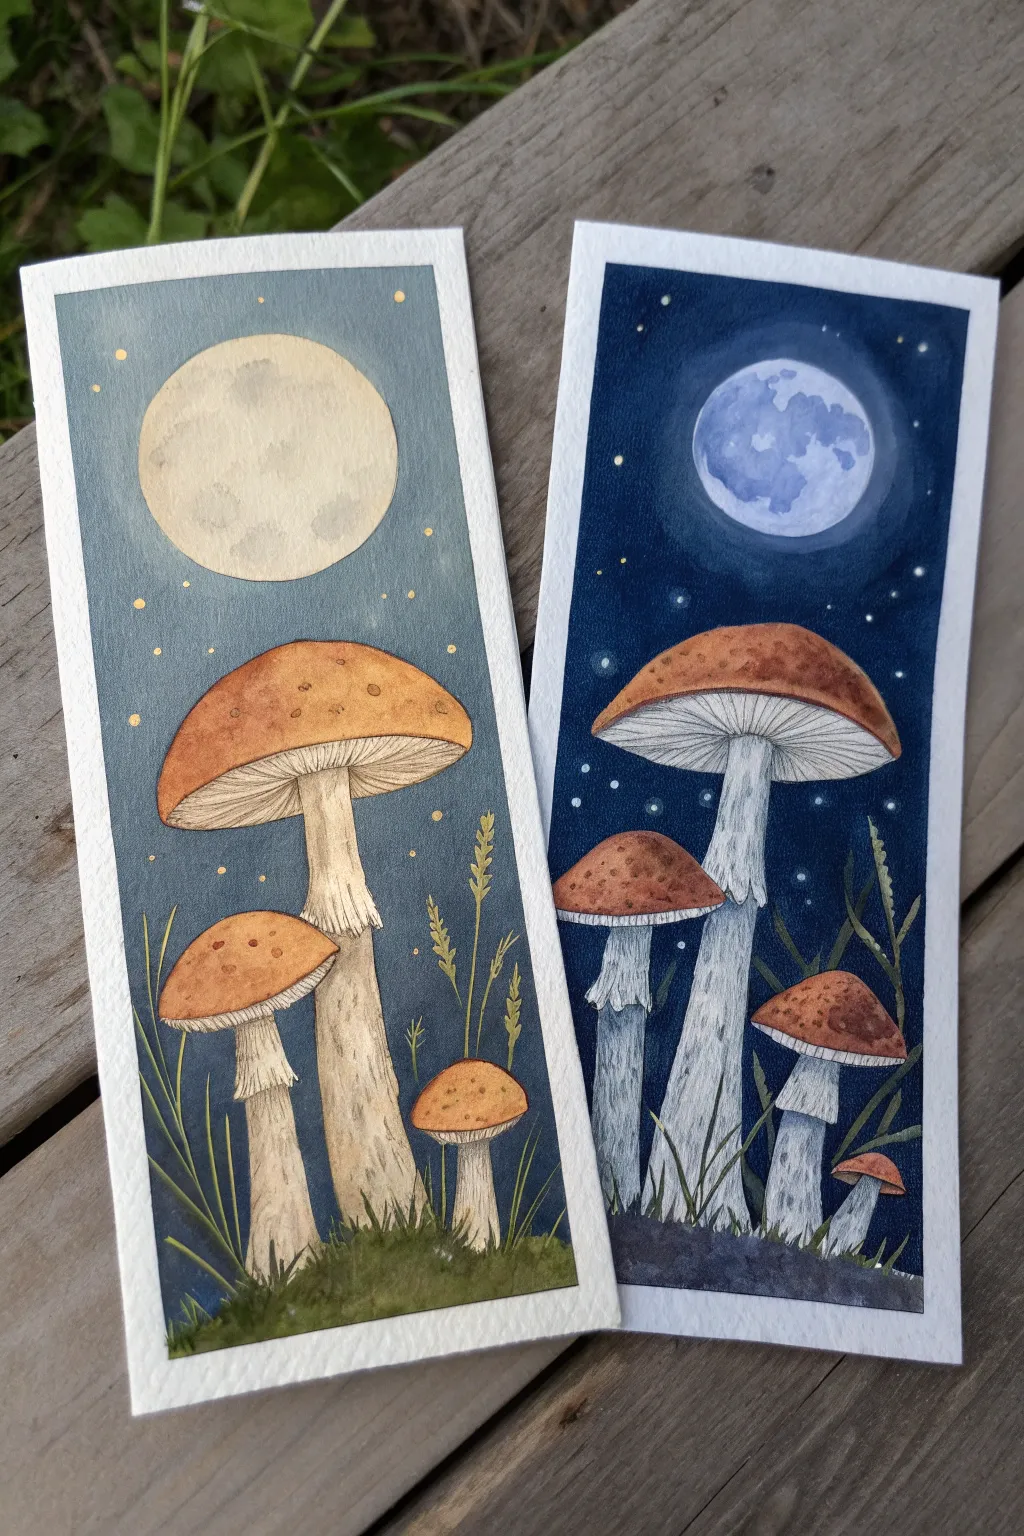
Capture the magic of a forest floor under different phases of the moon with these enchanting watercolor bookmarks. This project creates a stunning diptych featuring warm mushroom caps set against contrasting twilight and midnight skyscapes.
Detailed Instructions
Materials
- Cold press watercolor paper (cut into two 2.5″ x 7″ strips)
- Painter’s tape or masking tape
- Watercolor paints (Indigo, Prussian Blue, Burnt Sienna, Yellow Ochre, Sap Green, Payne’s Grey)
- White gouache or white gel pen
- Gold metallic watercolor or pen
- Round brushes (sizes 2, 4, and 6)
- Pencil and kneaded eraser
- Two jars of water
- Paper towels
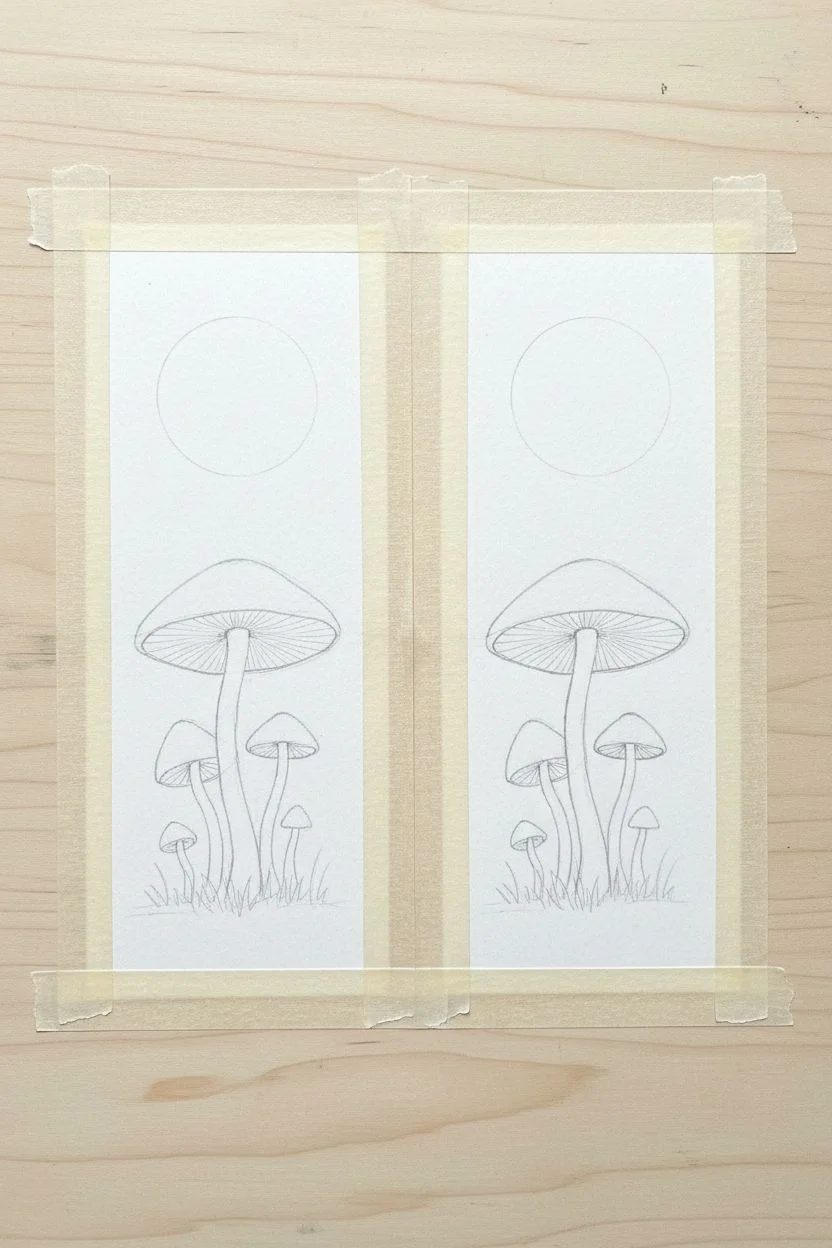
Step 1: Preparation & Sketching
-
Tape down your paper:
Secure your two watercolor paper strips side-by-side on a hard board using painter’s tape. Taping all four edges creates a crisp, professional white border once the tape is peeled away. -
Lightly sketch the composition:
Using a faint pencil touch, outline a large circle for the moon near the top of each bookmark. Below, sketch the mushroom shapes—one large central mushroom dominating the space, flanked by smaller ones. Vary the heights slightly between the two bookmarks to create interest. -
Refine the details:
Add the delicate details of the mushroom gills under the caps and the rough texture of the stems. Sketch in a few blades of grass at the bottom to ground your scene.
Moon Glow Tip
To make the blue moon truly glow, lift a little paint around the edges with a clean, damp brush before the sky wash dries completely. This creates a soft halo effect.
Step 2: Daytime Twilight (Left Bookmark)
-
Paint the twilight moon:
Mix a very watery wash of Yellow Ochre with a tiny touch of grey. Fill in the moon circle. While still damp, drop in slightly darker grey blotches to create craters and texture. -
Wash the sky:
Prepare a mix of Payne’s Grey and a little Prussian Blue, diluted to a medium transparency. Carefully paint around the moon and the mushrooms to fill the sky. The color should be flat and smooth, representing a hazy evening. -
Color the mushroom caps:
Mix Burnt Sienna with Yellow Ochre for a warm, earthy orange. Paint the caps, keeping the tops slightly lighter to suggest moonlight reflection. -
Define the stems and gills:
Use a pale wash of Burnt Umber or a creamy beige for the stems. For the gills, use a fine liner brush and a darker brown mix to draw thin, radiating lines from the stem to the cap edge. -
Add grassy details:
Using Sap Green mixed with a little brown, paint the ground and flick upward strokes to create grass blades around the base of the stems.
Sky Streaks?
If your large sky wash looks streaky, mix more paint than you think you need initially and work quickly while the edge is still wet to avoid hard drying lines.
Step 3: Midnight Blues (Right Bookmark)
-
create the glowing moon:
For the right bookmark, paint the moon with a pale blue wash. While wet, drop in concentrated blue or purple spots for a cratered, cool look. Once dry, outline it with a faint halo of lighter blue to make it glow. -
Paint the night sky:
Mix a saturated, deep Indigo or Navy Blue. Carefully paint the sky around your pencil sketches. You want this to be much darker than the first bookmark to represent deep night. -
Paint deeper mushroom tones:
Use Burnt Sienna with a touch of red or brown for these caps. Since it’s ‘night’ in this scene, you can make shadows on the stems cooler by adding a tiny touch of blue to your beige mix. -
Shadow and texture:
Once the base layers are dry, darken the overlapping areas. Add cool grey shadows to the stems (especially under the skirt) to make them look three-dimensional. -
Ground the scene:
Paint the ground area with a very dark mix of green and Indigo, blending it seamlessly into the night sky background at the bottom edges.
Step 4: Magical Final Touches
-
Add the stars:
For the twilight (left) bookmark, use metallic gold paint or a pen to dot small stars around the moon. For the midnight (right) bookmark, use white gouache or a gel pen to create crisp white stars. -
Highlight the mushrooms:
I find that adding tiny white or light beige dots to the top of the mushroom caps adds a lovely fairytale texture. Use gouache specifically for this so it stands out against the orange. -
Peel the tape:
Ensure the paper is bone dry. Slowly peel the tape away at a 45-degree angle to reveal your clean, crisp borders.
Now you have a pair of celestial markers ready to save your place in your next fantasy read
Mushroom Painting on a Smooth Stone Surface
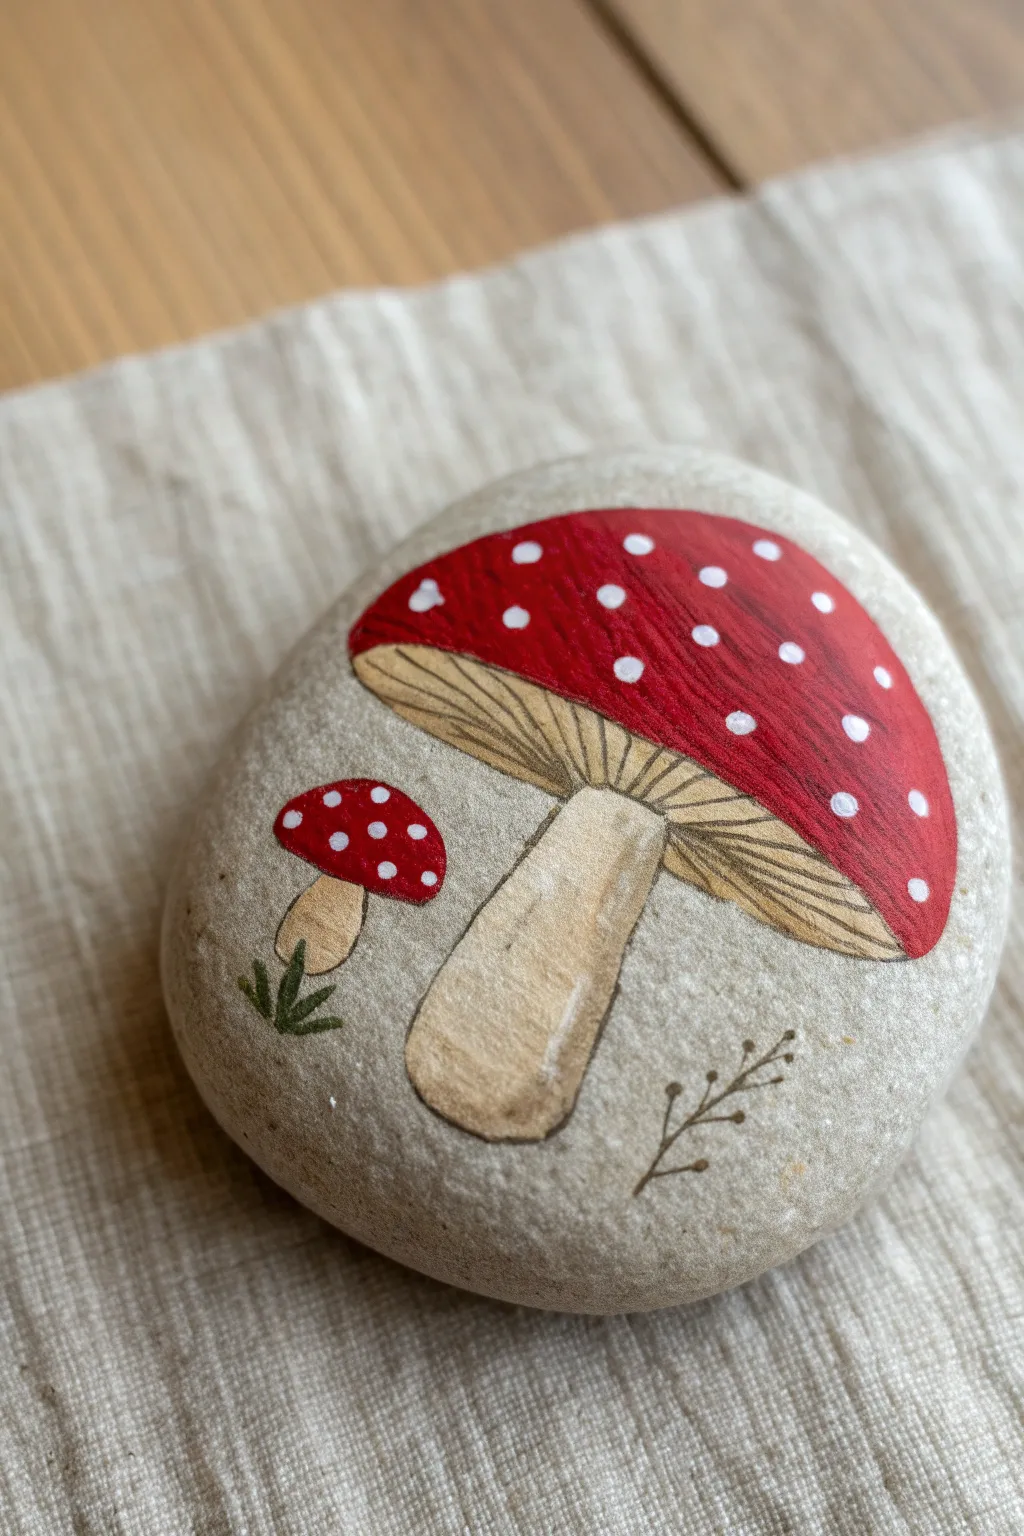
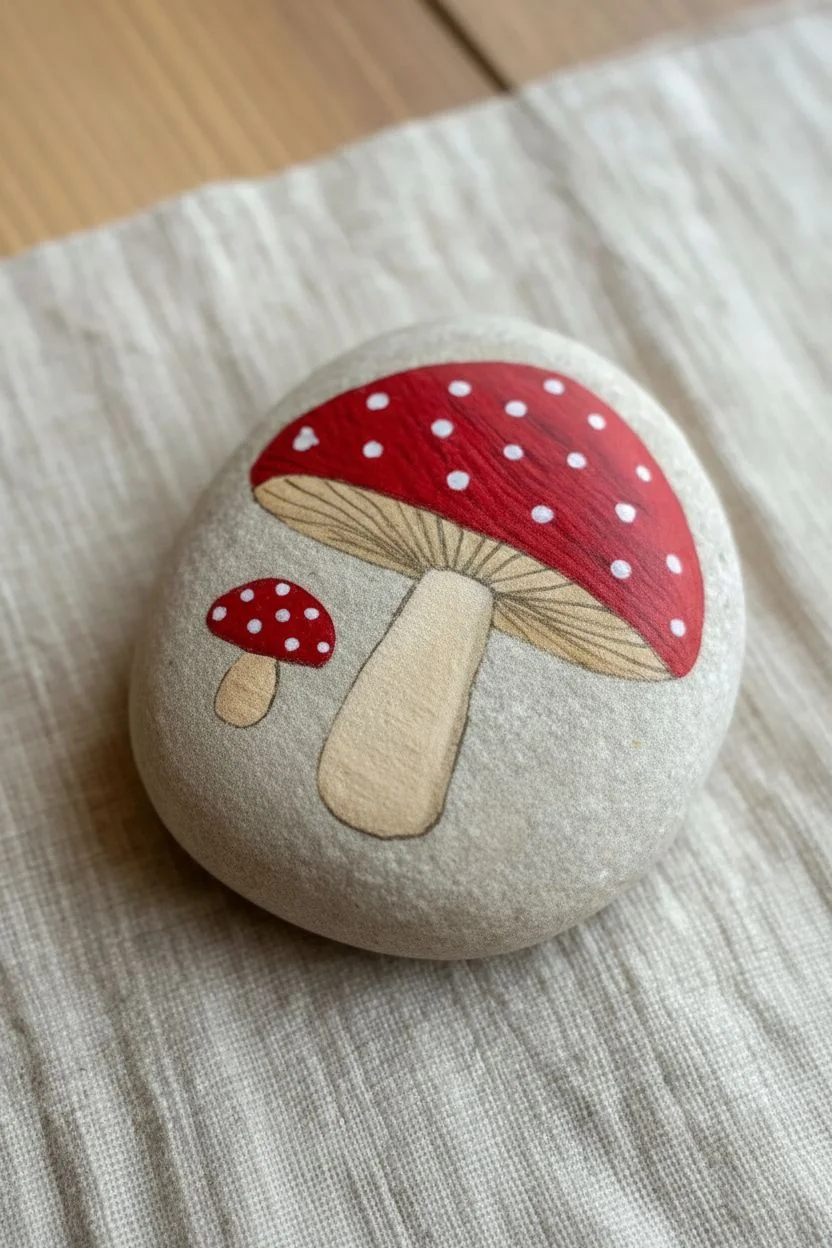
Transform an ordinary smooth river rock into a piece of charming woodland decor featuring a detailed fly agaric duo. The finished piece combines bold acrylic reds with delicate ink linework for an illustrative, storybook quality.
Step-by-Step Tutorial
Materials
- Smooth river stone (light grey base)
- Pencil (HB or similar)
- Eraser
- Acrylic paints (bright red, creamy beige/off-white, white, light brown)
- Fine liner pens (black and dark brown, waterproof)
- Small flat paint brush
- Fine detail paint brush (size 0 or 00)
- Matte varnish/sealer
Step 1: Sketching and Base Colors
-
Stone selection:
Choose a smooth, oval-shaped river rock with a clean, light surface. Wash it with soapy water and let it dry completely to ensure the paint adheres properly. -
Initial sketch:
Lightly sketch the outline of the large mushroom first, placing its cap towards the upper right. Add the stem curving slightly down. -
Add the companion:
Draw the smaller mushroom to the left of the large stem. Position it lower down to create a sense of depth and scale. -
Painting the caps:
Using a small flat brush, fill in both mushroom caps with bright red acrylic paint. You may need two coats for opaque coverage; let the first coat dry before adding the second. -
Stem base layer:
Mix a creamy beige color using white and a tiny dot of brown. specialized paint isn’t needed here, just mix until you get a warm off-white. -
Filling the stems:
Fill in the stems and the underside area of the large mushroom cap with this creamy beige mixture. Don’t worry about shading yet.
Ink Advice
Make absolutely sure your acrylic paint is 100% dry before using micron pens or liners. Wet acrylic ruins felt tips instantly.
Step 2: Details and Linework
-
Stem shading:
While the beige paint is dry, take a very watered-down light brown paint. Glaze the bottom and right side of the large stem to give it a cylindrical form. -
Underside texture:
Use the same watered-down brown to paint darker bands under the large cap, suggesting where the gills will be. -
Outline work:
Once all paint is perfectly dry, use a fine black waterproof pen to outline the entire large mushroom. Keep the line thin and delicate. -
Drawing the gills:
With the pen, draw fine lines radiating from the stem to the edge of the cap on the underside. I find drawing these quickly keeps the lines looking natural. -
Detailing the small mushroom:
Outline the small mushroom with the black pen. Add a few tiny vertical lines on its stem for texture. -
Adding vegetation:
At the base of the small mushroom, use a dark green paint or a green marker to draw three simple, pointed grass blades. -
Decorative twig:
To the right of the large stem, use a brown fine liner to draw a simple twig with small budding branches for visual balance. -
The white spots:
Using your smallest detail brush or a dotting tool, dab pure white paint onto the red caps. Vary the sizes slightly, but keep them generally small and scattered. -
Final highlights:
Add a thin white highlight line along the left side of the large stem to enhance the 3D effect. -
Sealing:
Once the ink and paint are fully cured, apply a coat of matte varnish to protect your work without making the rock unnaturally shiny.
Make It a Set
Paint different mushroom species on rocks of varying sizes to create a full ‘forest floor’ collection for your garden or shelf.
Now you have a durable piece of nature art that captures the magic of the deep woods


Have a question or want to share your own experience? I'd love to hear from you in the comments below!