Nature has a way of handing you the most gorgeous colors, textures, and shapes without you having to overthink a thing. Here are some of my favorite nature art ideas you can try with simple finds like leaves, rocks, flowers, and sticks—the kind of projects that feel playful and surprisingly satisfying.
Leaf Printing With Paint or Ink

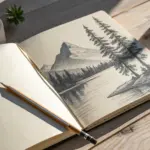
Capture the intricate veins and delicate textures of nature with this refined leaf printing technique. The resulting artwork balances organic detail with a crisp, minimal aesthetic that looks beautiful when framed.
Step-by-Step Tutorial
Materials
- Fresh, large leaf with prominent veins (like a Bodhi or similar broad leaf)
- High-quality watercolor paper or heavy printmaking paper (smooth surface)
- Green block printing ink or heavy-body acrylic paint
- Brayer (rubber roller) or flat foam brush
- Pencil for light notations (optional)
- Small detail brush (size 2 or 4)
- Sheet of scrap paper or newsprint
- Palette or glass slab for ink rolling
- Clean cloth or paper towels
- Tweezers (optional, for lifting)
Step 1: Preparation
-
Select your botanical subject:
Choose a fresh leaf that isn’t too dry or brittle. Leaves with raised, prominent vein structures on the underside yield the best prints. -
Clean and dry the leaf:
Gently wipe the leaf surface to remove any dust or debris. Ensure it is completely dry, as moisture will repel the ink or paint. -
Prepare your ink or paint:
Squeeze a small amount of green block printing ink onto your palette. I find that block printing ink works best because it has the perfect tacky consistency, but heavy acrylics can work in a pinch. -
Charge the brayer:
Roll your brayer back and forth through the ink until it’s evenly coated with a thin, velvety layer. You want a ‘hissing’ sound, not a squelchy one. -
Ink the leaf:
Place your leaf vein-side up on a piece of scrap paper. Roll the inked brayer over the leaf, ensuring full coverage. Apply ink primarily to the raised veins, being careful not to flood the recessed areas.
Smudged edges?
If ink bleeds beyond the vein lines, your ink application was too heavy. Try blotting the leaf on a paper towel once before printing to remove excess pigment.
Step 2: Printing Process
-
Position the leaf:
Carefully pick up the inked leaf by the stem. Hover over your final paper to check placement, then commit by laying it down ink-side down. -
Apply gentle pressure:
Place a clean sheet of scrap paper over the leaf to protect your hands and the artwork background. Use the flat of your hand to press down firmly. -
Secure the print:
While keeping one hand firmly on the center to prevent shifting, gently rub firmly over the entire leaf area to transfer the ink from the veins to the porous paper. -
The reveal:
Lift the scrap paper. Then, carefully grab the leaf stem and peel the leaf off the paper in one smooth, slow motion. Let the initial print dry for about 10-15 minutes.
Sharper Tip
For the crispest details, use water-soluble block printing ink instead of acrylics. It stays ‘open’ longer, allowing you more time to position the leaf perfectly.
Step 3: Refinement and Detailing
-
Inspect the transfer:
Look closely at your dried print. You might notice areas where the vein connection is faint or where the ink didn’t quite catch. -
Load a detail brush:
Mix a small amount of watercolor or thinned acrylic that matches your print color. Load a fine-point detail brush (size 2 works well). -
Enhance the veins:
Very lightly trace over any broken vein lines to reconnect them. Use a light touch to mimic the organic, broken texture of the print rather than drawing a solid, heavy line. -
Add texture marks:
If parts of the leaf texture look too sparse, stipple tiny dots or short dashes of paint to simulate the cellular structure seen in the original print. -
Define the stem:
The stem often prints faintly. Use your brush to carefully extend and define the stem line, grounding the leaf on the page. -
Clean up edges:
If there are any accidental ink smudges outside the leaf shape, try to lift them gently with a damp clean brush if using watercolor, or cover with opaque white gouache if necessary. -
Optional: Add secondary elements:
I sometimes like to sketch or paint very faint ‘ghost’ leaves in the background using a lighter wash of color to create depth. -
Final drying:
Allow the entire piece to dry completely flat. If the paper has buckled slightly from the moisture, place it under a heavy book overnight once dry.
Frame your botanical print simply to bring a touch of the outdoors into your living space

Nature Collage Using Leaves, Petals, and Seed Pods
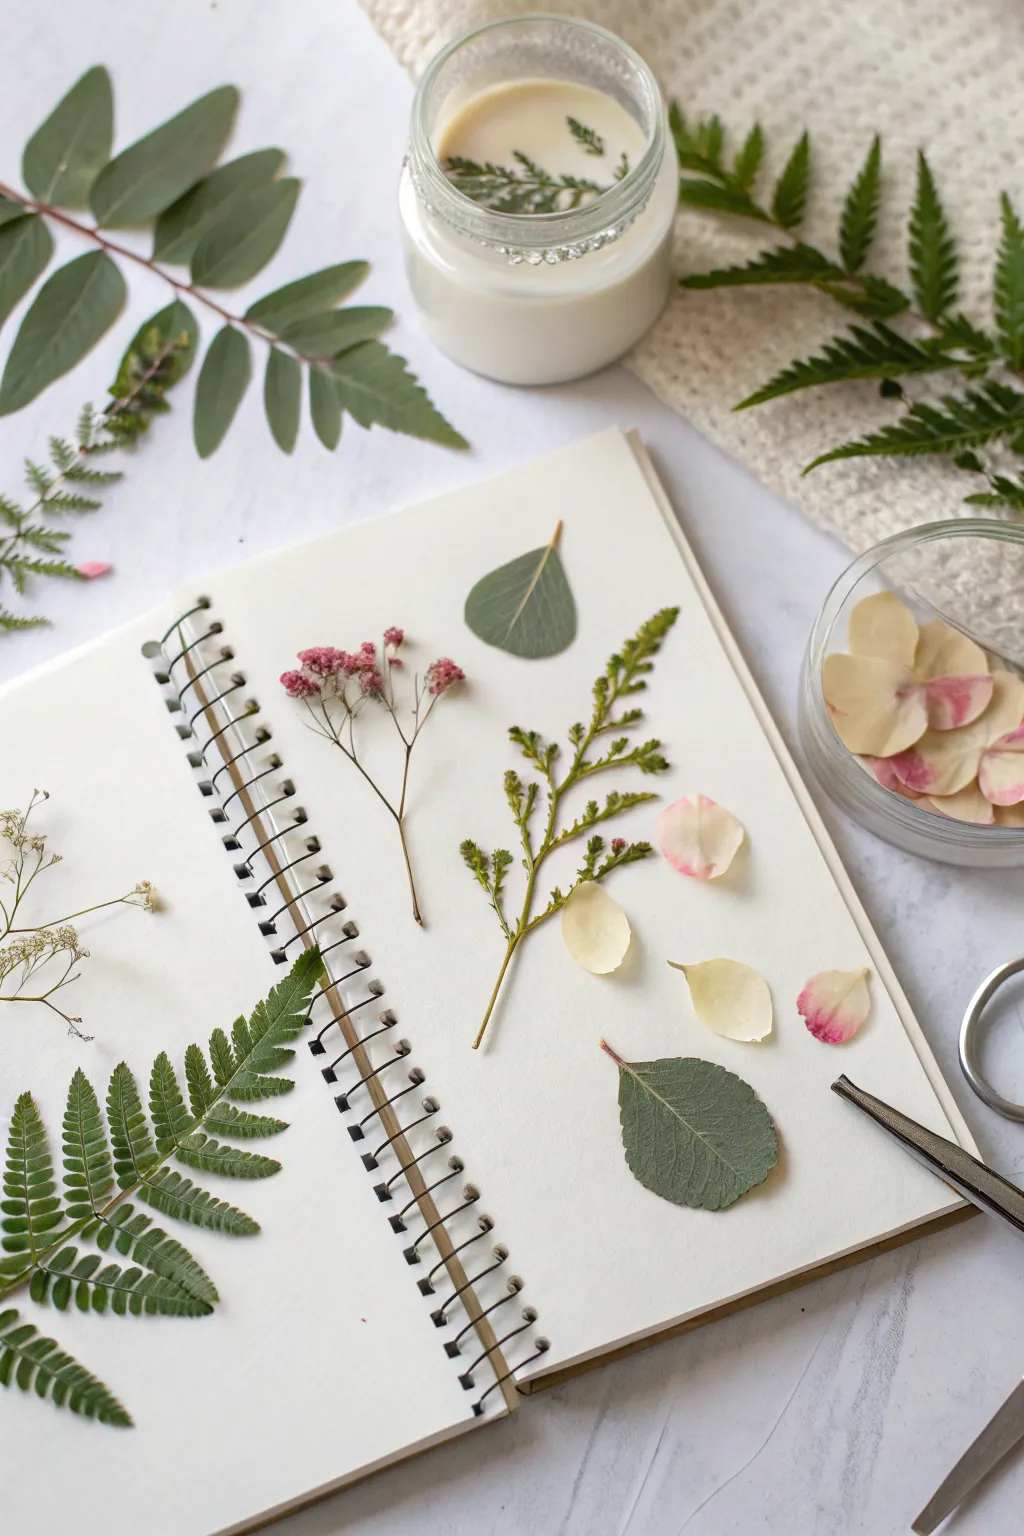

Transform a simple spiral-bound notebook into a stunning botanical study by arranging pressed fern fronds, delicate sprigs, and soft petals. The result is a clean, minimalist display that celebrates the intricate details of nature against a stark white background.
How-To Guide
Materials
- Spiral-bound sketchbook (heavyweight paper)
- Pressed fern fronds
- Pressed eucalyptus leaves
- Pressed baby’s breath (gypsophila) or similar tiny flowers
- Pressed flower petals (rose or hydrangea)
- Small conifer sprig
- Tweezers
- Matte craft glue or Mod Podge
- Small paintbrush for glue
- Scissors
Step 1: Preparation & Layout
-
Prepare your specimens:
Before you begin, ensure all your plant materials are thoroughly pressed and dried flat. If they still hold moisture, they may curl or mold later. -
Open the canvas:
Lay your spiral-bound sketchbook open to a clean, double-page spread. Smooth down the pages so they lie as flat as possible. -
Plan the left page:
On the left-hand page, place a large fern frond diagonally near the bottom corner, angling the tip towards the spine. Add a very delicate, wispy sprig near the outer edge for balance. -
Plan the right page:
Arrange the main composition on the right page. Start by visualizing a central vertical axis, but aim for an imperfect, organic spacing rather than rigid symmetry.
Fragile Leaves?
If dried leaves are too brittle to handle, use clear craft tweezers. Mist them very lightly (just once!) with water 5 minutes before gluing to make them slightly pliable.
Step 2: Arranging the Main Composition
-
Position the conifer sprig:
Place the central coniferous branch first. Position it slightly right of center, creating a strong vertical line that anchors the other elements. -
Add floral delicacy:
To the left of the conifer, place the sprig of dried baby’s breath. Angle the stem slightly inward so the flowers fan out near the top. -
Place foliage accents:
Select two rounded green leaves (like silver dollar eucalyptus). Place one near the top center and one near the bottom right to create visual weight at opposite corners. -
Scatter the petals:
Take a few loose, translucent flower petals. Scatter them gently around the conifer sprig—one near the middle right, one lower down, and perhaps a tiny bud near the bottom. -
Refine the spacing:
Step back and look at the spread. Use your tweezers to nudge pieces slightly until the ‘white space’ between them feels breathable and balanced.
Step 3: Adhering the Elements
-
Prepare the adhesive:
Pour a small amount of matte craft glue into a dish. You want a thin, spreadable consistency that won’t soak through the paper. -
Glue the fern:
Starting with the left page, lift the large fern. Lightly brush glue onto the spine and thicker veins on the back, then press it firmly back into place. -
Secure the stems:
Move to the right page. Carefully lift the dried flower and conifer stems. Apply tiny dots of glue along the main stalks and press down for ten seconds. -
Attach the leaves:
Apply a thin layer of glue to the back of the eucalyptus leaves. Smooth them down from the center outward to prevent air bubbles. -
Fix the petals:
I usually use the tiniest dab of glue for the petals, just at the base or center, leaving the edges free to curl slightly for a natural, 3D effect. -
Final press:
Once everything is glued, place a piece of wax paper over the open spread and gently rub with your hand to ensure good contact without damaging the fragile plants.
Label It
Use a fine-tip archival ink pen to write the scientific or common name of each plant next to its stem, turning your art into a botanical reference guide.
Allow the glue to dry completely before closing the book to preserve your botanical arrangement


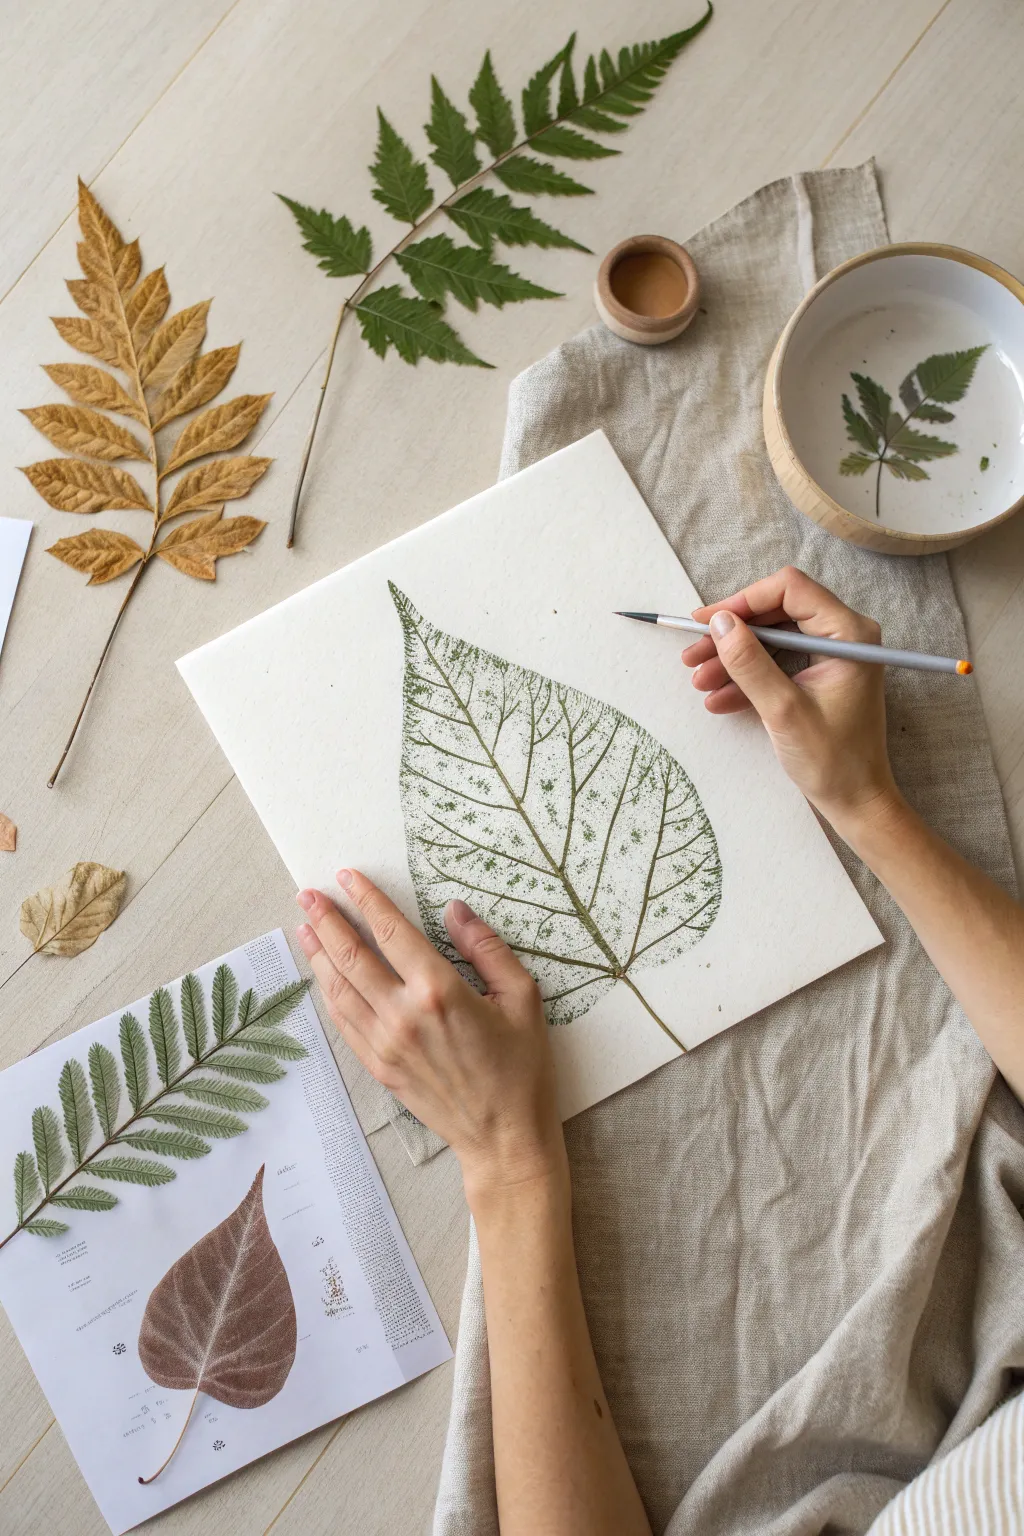
Leaf Rubbings for Instant Texture Studies
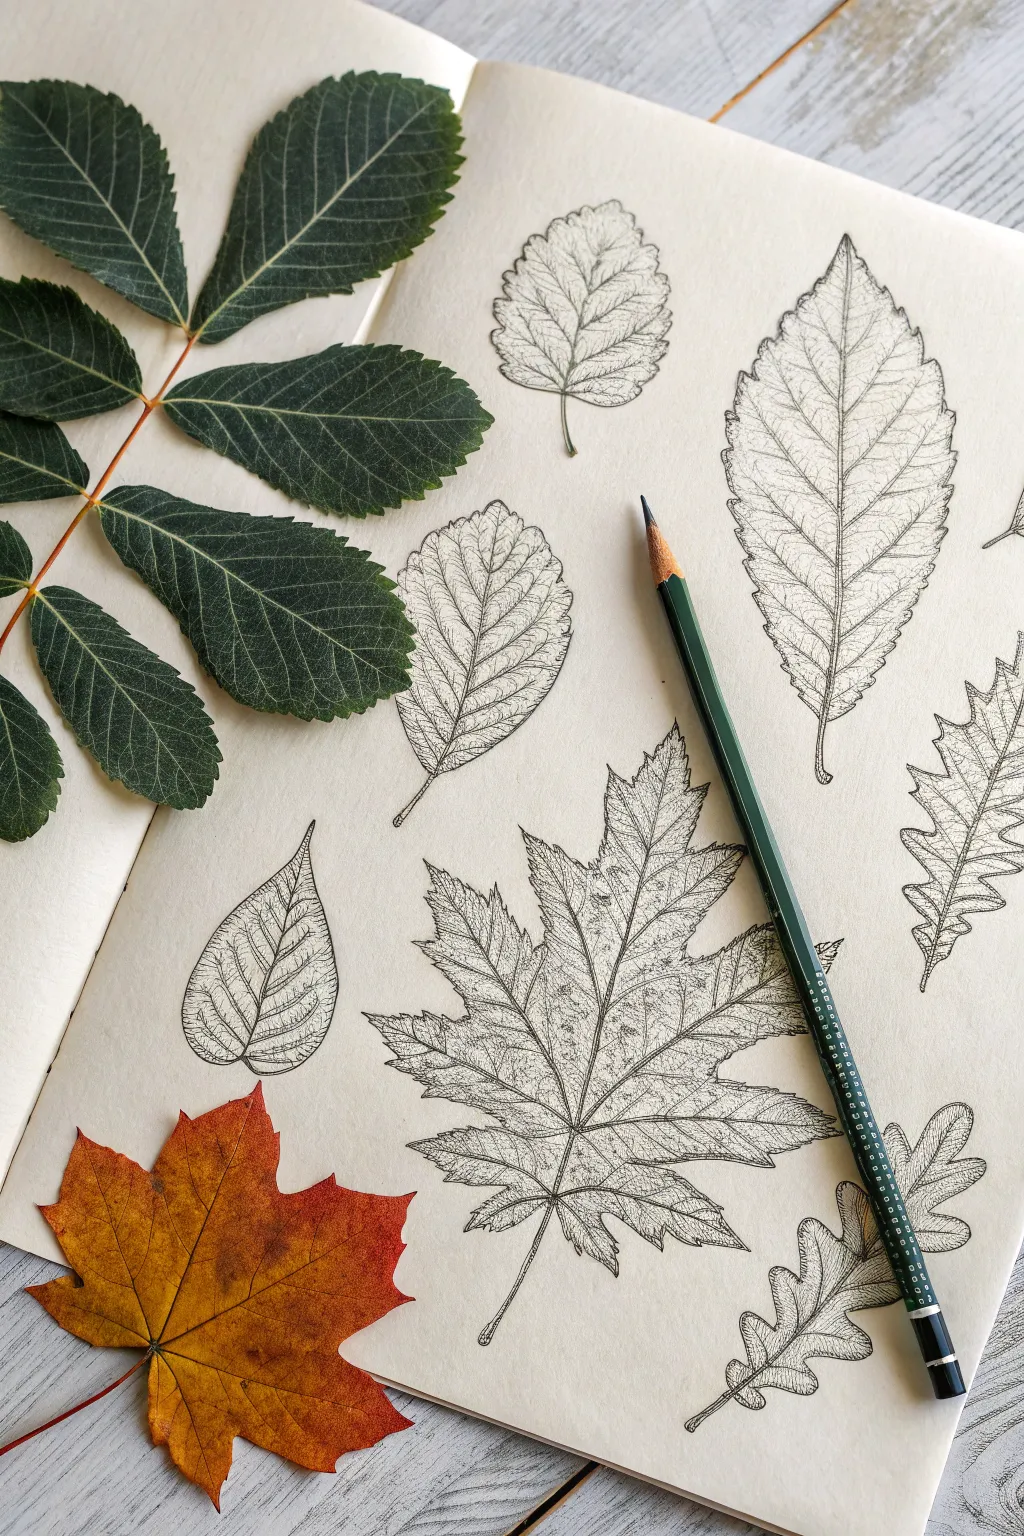
Capture the intricate vein structures of nature with these strikingly realistic pencil rubbings. This project transforms a simple sketchbook page into a botanical study by revealing the hidden textures of fresh foliage.
Step-by-Step
Materials
- Sketchbook with smooth, off-white paper (approx. 80-100 gsm)
- Soft graphite pencil (HB or B)
- Sharpening tool
- Fresh, flat leaves (various shapes like Maple, Elm, or Ash)
- Masking tape (optional)
Step 1: Preparation and Selection
-
Collect specimen:
Gather a variety of leaves from your garden or a local park. Look for leaves with prominent, raised veins on the underside, as these will create the crispest images. -
Flatten the leaves:
If your leaves are slightly curled, press them under a heavy book for an hour. For the best rubbing results, the leaf needs to sit perfectly flat against the paper. -
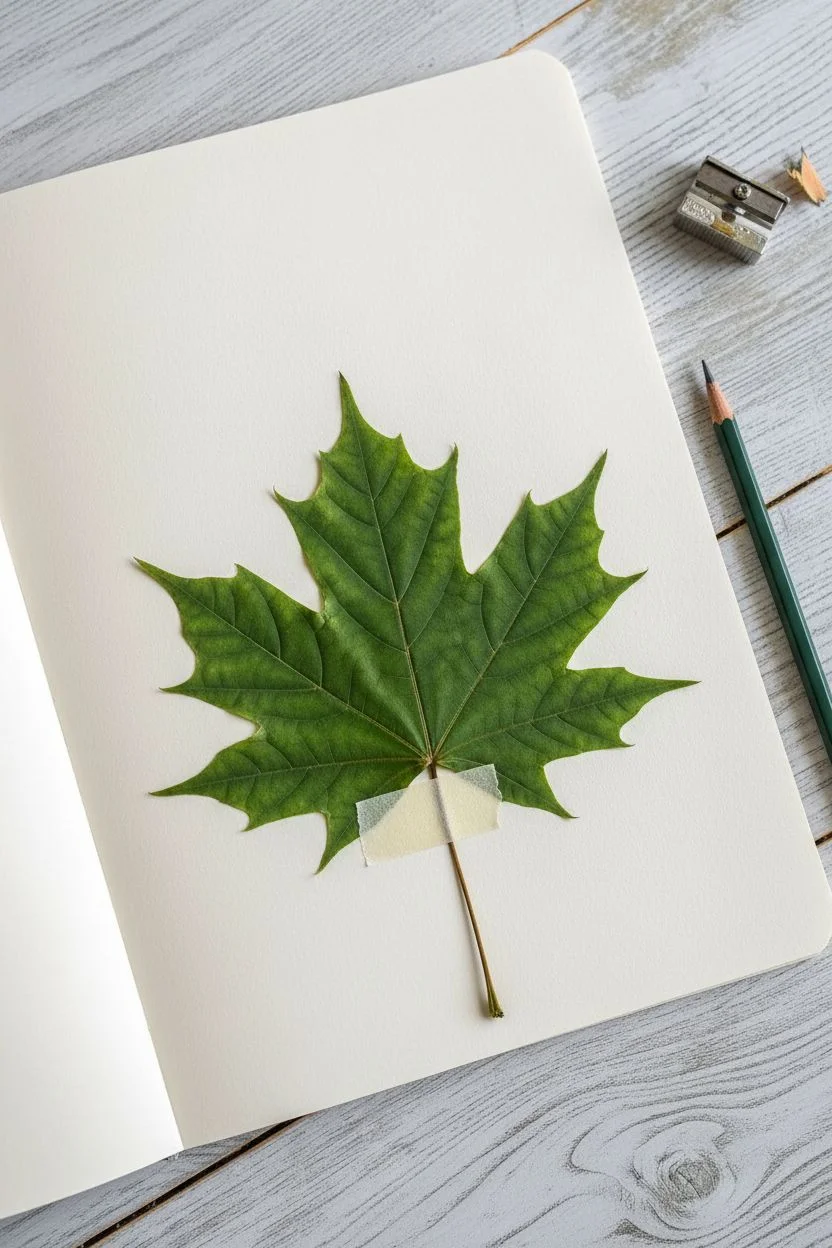
Position the first leaf:
Open your sketchbook to a clean page. Place your first leaf on the table or a hard surface, with the vein side facing up. This is crucial—you want the bumpy texture facing the paper. -
Secure the paper:
Lay your sketchbook page directly over the leaf. You can feel the leaf’s shape through the paper to ensure it is positioned where you want it. -
Tape for stability:
If I’m worried about the leaf shifting, I sometimes use a tiny piece of masking tape on the stem to stick it to the underside of the paper or the table.
Blurry lines?
If the image is fuzzy, your paper might be too thick or the leaf moved. Switch to lighter paper or tape the leaf stem down securely.
Step 2: Creating the Rubbing
-
Prepare your pencil:
Sharpen your pencil, but don’t make it needle-sharp. A slightly duller point or holding the pencil at a low angle works best to catch the texture without piercing the paper. -
Start the outline:
Hold the pencil almost flat against the paper. Gently rub over the central stem of the leaf first to anchor the image visually. -
Rub outwards:
Work your way from the center vein outward toward the edges of the leaf. Use light, even pressure initially to locate the margins. -
Darken the details:
Once the full shape is visible, go back over the veins with slightly firmer pressure. This builds contrast and highlights the intricate network of lines. -
Refine the edges:
Pay distinct attention to the serrated edges or unique lobes of the leaf. Ensure the outline is crisp, distinct from the background paper. -
Lift and check:
Carefully lift the paper to remove the leaf. Inspect your rubbing; if there are smudges, you can gently erase around the outside, but leave the texture inside untouched.
Step 3: Composition and Layering
-
Plan the layout:
Select a second leaf of a different shape or size. Visually plan where it will fit best on the page to create a pleasing composition, leaving some negative space. -
Repeat the process:
Place the new leaf under the page, vein-side up, and repeat the rubbing technique. Try rotating the leaf to add movement to the layout. -
Vary the pressure:
For some leaves, try a lighter touch to make them look more delicate, or press harder for sturdy leaves like oak to create visual depth. -
Fill the gaps:
Continue adding smaller leaves to fill larger empty spaces. Don’t be afraid to let stems point in different directions for a natural, scattered look. -
Add finishing details:
Once your page is full, you can lightly sketch in extra stem length with your pencil if the rubbing cut off abruptly, grounding the floating leaves.
Go chromatic
Swap the graphite for colored pencils or watercolor crayons. Layer different greens, browns, and oranges to mimic autumn foliage.
Enjoy the relaxing rhythm of revealing nature’s hidden patterns on your page


Stick and Twig Frames for Tiny Nature Art
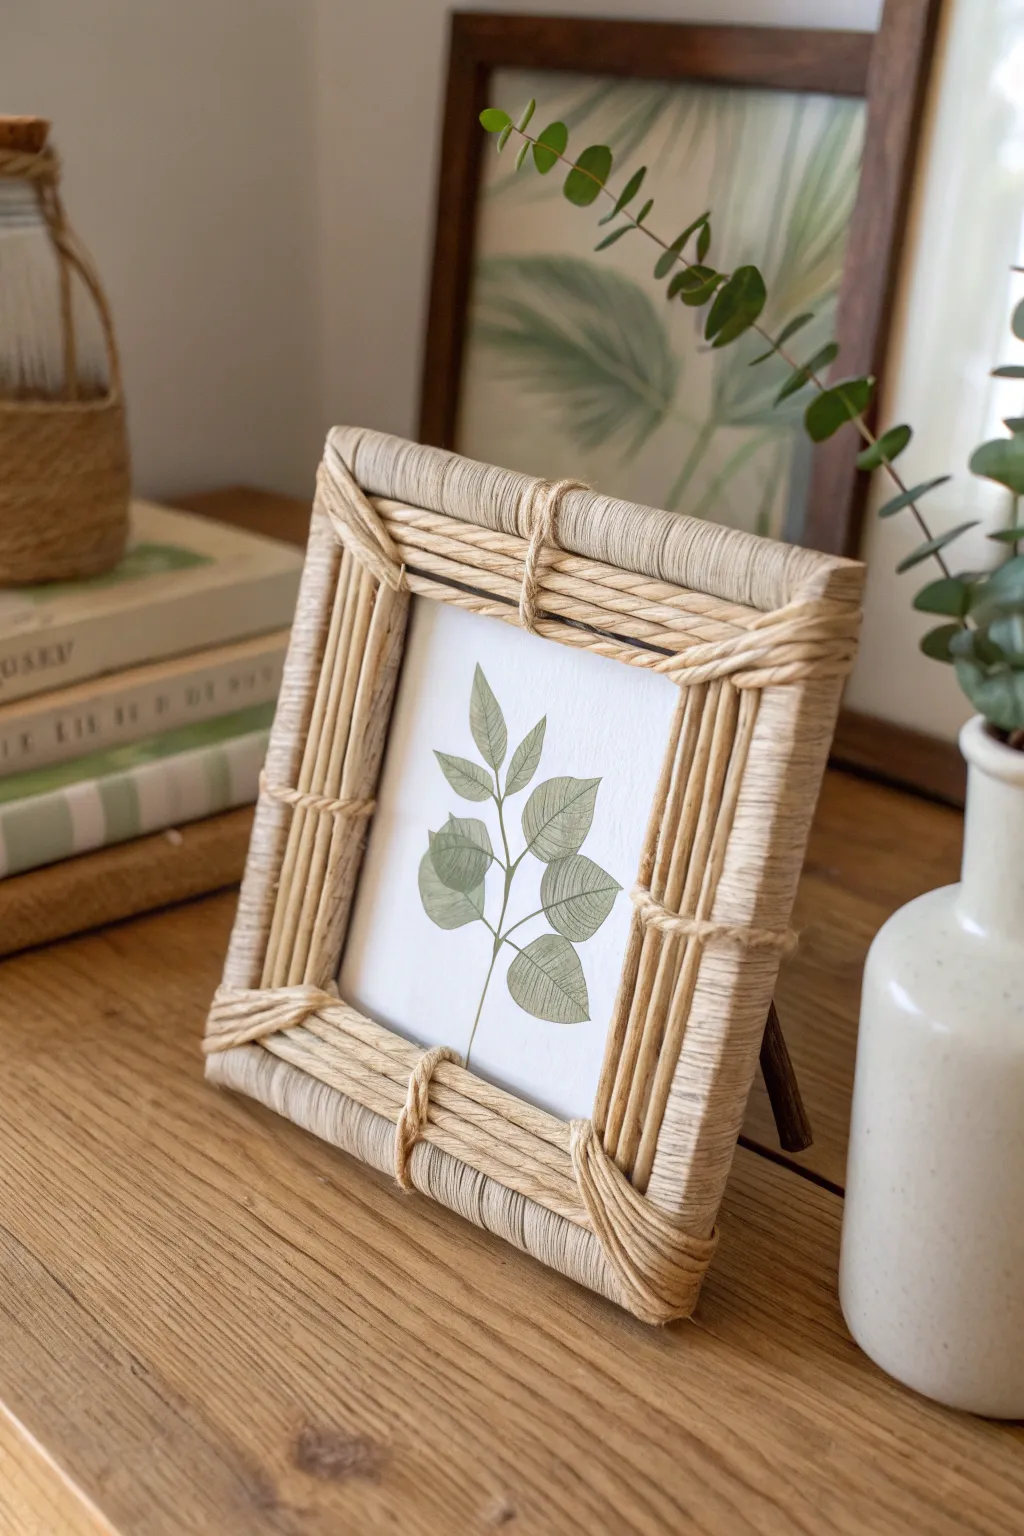
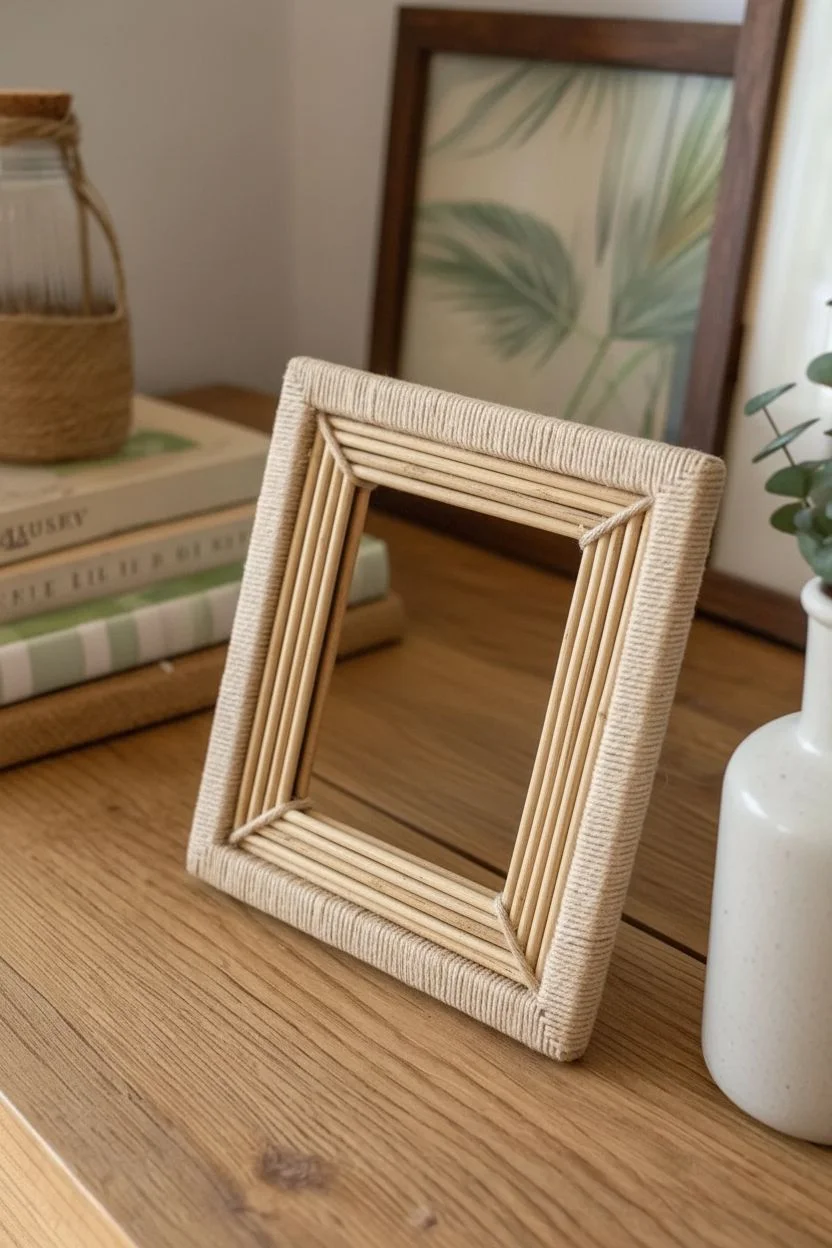
Bring the outdoors in with this charming, rustic frame made from natural jute and bamboo-style twigs. This project transforms a simple cardboard or wood base into a textured display piece perfect for showcasing small botanical prints.
Step-by-Step Tutorial
Materials
- Thick cardboard or a flat, unfinished wooden frame (approx. 5×5 inches)
- Natural jute twine (medium thickness)
- Thick cotton cord or macramé cord (natural beige)
- Small bamboo sticks, dowels, or straight twigs (approx. 3-4mm diameter)
- Hot glue gun and clear glue sticks
- Scissors
- Pencil
- Ruler
- Botanical art print or pressed leaf (sized to fit window)
- Craft knife (if cutting your own cardboard base)
- Cardstock for backing
Step 1: Preparing the Base
-
Create the frame form:
If you aren’t using a pre-made flat wooden frame, cut a square from thick cardboard. Measure a 5-inch square, then cut out a smaller 3-inch square from the center to create a window. -
Wrap the top and bottom:
Take your cotton or macramé cord. Apply a line of hot glue along the back of the top horizontal edge of the frame. -
Secure the cord:
Press the end of the cord into the glue, then begin wrapping tightly around the frame bar until the entire top side is covered. Repeat for the bottom horizontal side. -
Cut the twigs:
Measure the vertical sides of your frame window. Cut your bamboo sticks or dowels to match this length exactly. You will need about 6-8 sticks per side depending on their thickness.
Sticky Situation?
If hot glue oozes out between the bamboo sticks, let it cool completely, then gently scrape it away with a craft knife or toothpick.
Step 2: Assembling the Sides
-
Attach the side twigs:
Apply a generous amount of hot glue to the exposed cardboard on the left vertical side. Place your sticks side-by-side vertically, pressing them firmly into the glue so they sit flush against the wrapped top and bottom sections. -
Repeat for the right side:
Do the same for the right vertical side, ensuring the sticks are straight and tightly packed with no gaps showing the base underneath. -
Create horizontal accents:
Cut four bundles of bamboo sticks (about 3 sticks per bundle) to fit the width of the top and bottom sections. This adds that layered dimension you see in the photo. -
Glue the accents:
Glue these horizontal stick bundles directly on top of the cotton-wrapped sections—one bundle at the top edge and one near the window edge on both the top and bottom bars.
Level Up Your Frame
Brush a diluted layer of antique wax or brown shoe polish over the bamboo sticks before assembling to giving them an aged, vintage look.
Step 3: Adding the Jute Details
-
Start the corner lashing:
Cut a long length of the thinner jute twine. Start at the top-left corner. Anchor one end with a dot of glue on the back. -
Wrap the corners:
Wrap the jute diagonally over the corner intersection where the vertical sticks meet the horizontal bundles. Wrap 4-5 times to create a decorative ‘X’ or diagonal lash. -
Secure the horizontal bars:
Move to the center of the top bar. Wrap the jute vertically around the horizontal stick bundles and the frame itself to cinch everything tight. I find wrapping it 3 times looks best. -
Repeat wrapping pattern:
Continue this lashing process on all four corners and the centers of each side. This mimics traditional lashings used in furniture construction. -
Hide the ends:
For every wrapped section, endure the loose end is glued securely to the back of the frame for a clean finish.
Step 4: Final Assembly
-
Prepare the artwork:
Trim your botanical print or mount your pressed leaf onto clean white paper. Ensure it is slightly larger than the window opening. -
Attach the backing:
Center the artwork behind the window opening. Use tape to secure it in place temporarily. -
Seal the back:
Cut a piece of cardstock slightly smaller than the outer frame dimensions. Glue this over the back of the artwork and frame edges to seal everything in and hide your glue points. -
Add a stand:
Glue a small twig or piece of stiff cardboard to the lower back of the frame as a kickstand so it can recline slightly on a shelf.
Now you have a beautifully textured frame ready to display your favorite tiny nature finds
BRUSH GUIDE
The Right Brush for Every Stroke
From clean lines to bold texture — master brush choice, stroke control, and essential techniques.
Explore the Full Guide
Pressed Flower Bookmarks and Mini Compositions
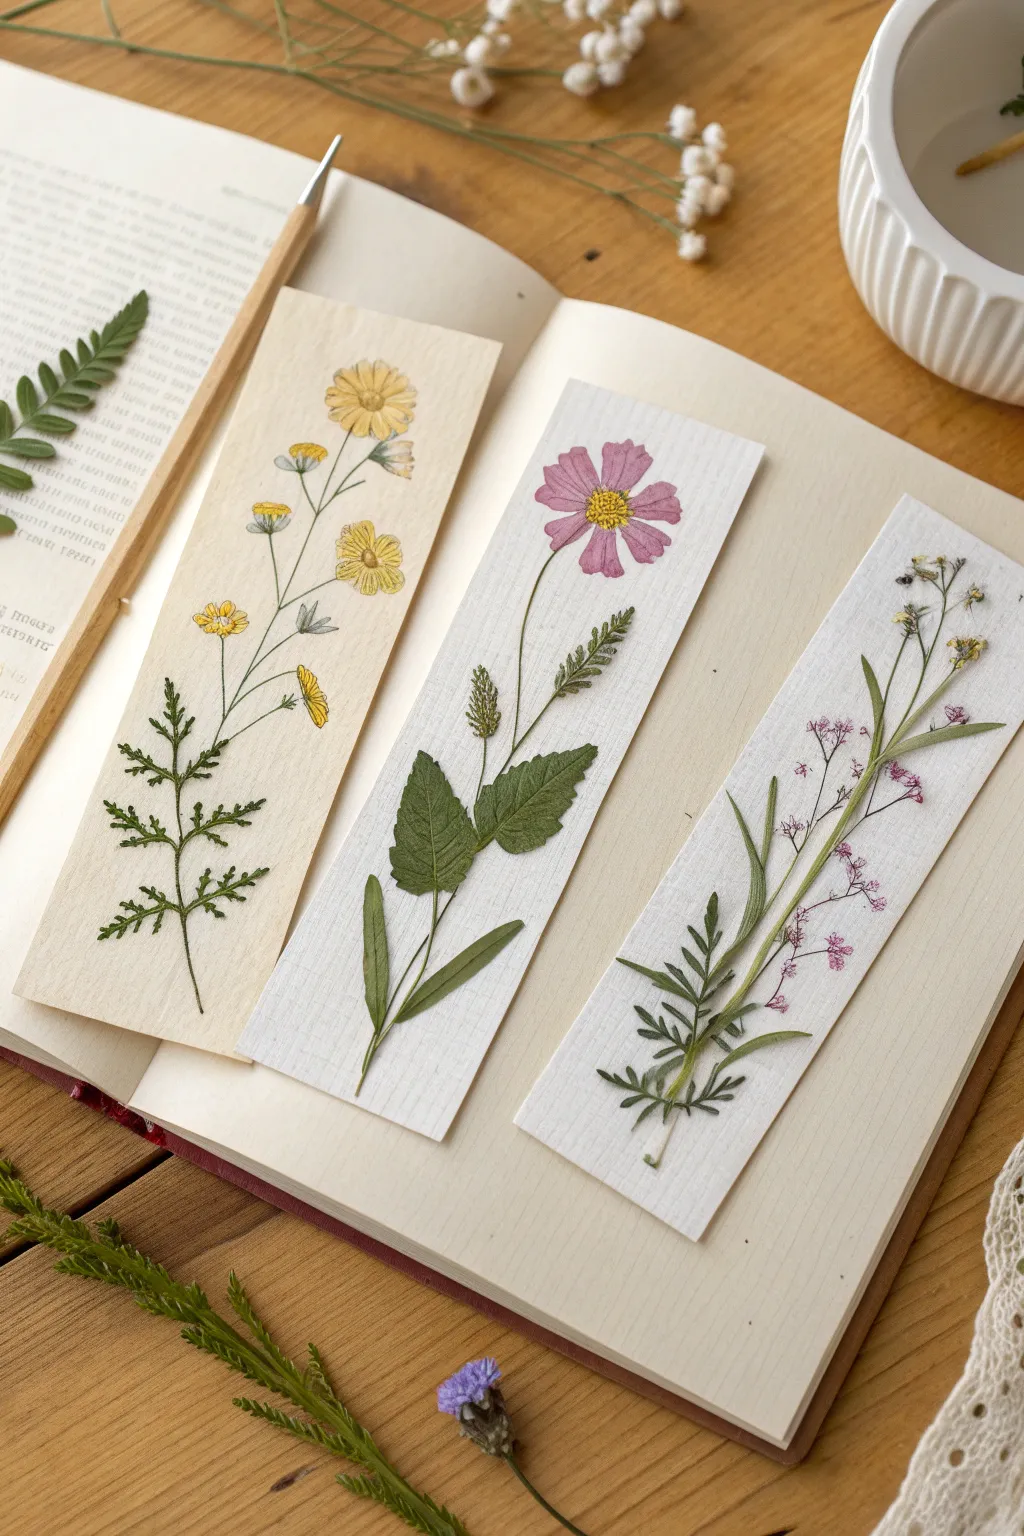
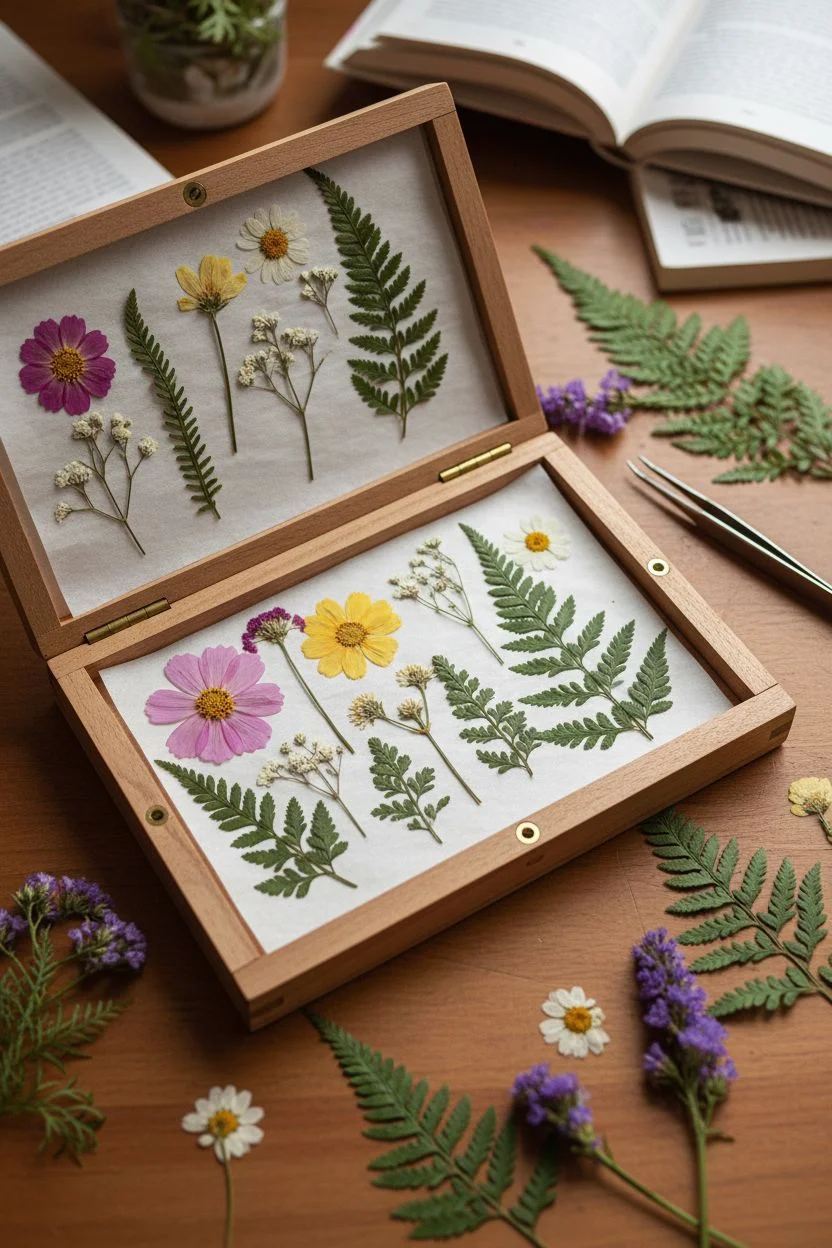
Capture the fleeting beauty of a garden with these elegant pressed flower bookmarks, perfect for preserving your favorite blooms. These slender compositions combine real pressed botanical elements with high-quality textured paper to create functional art pieces that bring a touch of nature to your reading nook.
Step-by-Step Guide
Materials
- Fresh flowers and leaves (cosmos, daisies, ferns, herbs)
- Heavyweight textured cardstock or watercolor paper (cream and white)
- Flower press or heavy books
- Blotting paper or parchment paper
- Craft glue or botanical adhesive (clear-drying)
- Fine-point tweezers
- Scissors or a craft knife
- Clear matte varnish or self-adhesive laminating sheets (optional)
- Small paintbrush (for glue application)
Step 1: Preparation & Pressing
-
Gather your specimens:
Collect a variety of small wildflowers, garden blooms like cosmos or daisies, and interesting greenery. Look for flowers that are naturally relatively flat, as bulky centers can be difficult to press neatly. -
Trim stems and foliage:
Before pressing, remove excess bulk. If a flower has a thick calyx (the green part at the base), carefully trim it down with small scissors so the petals can lay flat. -
Begin the pressing process:
Sandwich your fresh botanicals between sheets of blotting paper or parchment paper. Place this sandwich inside a heavy book or a designated flower press. -
Wait for thorough drying:
Leave the flowers undisturbed for 2-3 weeks. Patience is key here; checking too early can introduce moisture or tear delicate petals. -
Check for crispness:
The botanicals are ready when they feel papery and devoid of moisture. Carefully remove them using tweezers to avoid crumbling.
Step 2: Designing the Bookmarks
-
Cut the base paper:
Cut your textured cardstock into rectangular strips. A standard size is about 2 inches wide by 6-7 inches long, but you can adjust this to fit your favorite books. -
Select your centerpiece:
Choose a main flower for each bookmark. For the middle design, a vibrant pink cosmos works beautifully as a focal point. -
Dry arrange the layout:
Without using glue yet, lay your pressed pieces onto the cardstock strips. Experiment with layering stems, adding fern leaves for height, or creating a bouquet effect. -
Refine the composition:
Try to mimic natural growth habits. For example, place larger leaves near the ‘bottom’ of the stem and smaller buds or delicate tendrils near the top.
Pick thin blooms
Choose flowers with single layers of petals (like pansies or cosmos) rather than dense roses. They press flatter and dry faster, reducing mold risk.
Step 3: Assembly
-
Apply adhesive carefully:
Dip a fine brush or toothpick into clear-drying craft glue. Apply tiny dots of glue to the back of the sturdiest parts of the plant, such as the main stem and the center of the flower. -
Secure the base layer:
Starting with the background greenery, place the glued element onto the cardstock. Use tweezers for precise placement to avoid getting oils from your fingers on the paper. -
Add the focal blooms:
Layer your main flowers over the greenery. I like to gently press down on the center of the flower with the back of the tweezers for a few seconds to ensure a good bond. -
Insert filler details:
Tuck tiny sprigs of baby’s breath, loose petals, or small buds into any gaps to balance the design and add texture. -
Trim overhanging edges:
If any stems or leaves extend beyond the edge of the cardstock, flip the bookmark over and carefully trim the excess with scissors for a clean line.
Add watercolor wash
Before gluing flowers, paint a very subtle watercolor wash on the cardstock background to add depth or a vintage, aged paper look.
Step 4: Finishing Touches
-
Let the adhesive cure:
Allow the glue to dry completely. This usually takes about an hour, depending on the humidity and amount of glue used. -
Optional protection layer:
To make the bookmarks durable for daily use, you can apply a self-adhesive laminating sheet or brush on a very thin layer of matte varnish. -
Flatten one last time:
Place the finished bookmarks under a heavy book overnight. This ensures everything sets perfectly flat and the cardstock doesn’t curl from the glue moisture.
Enjoy using these delicate slices of nature to mark your place in your next reading adventure
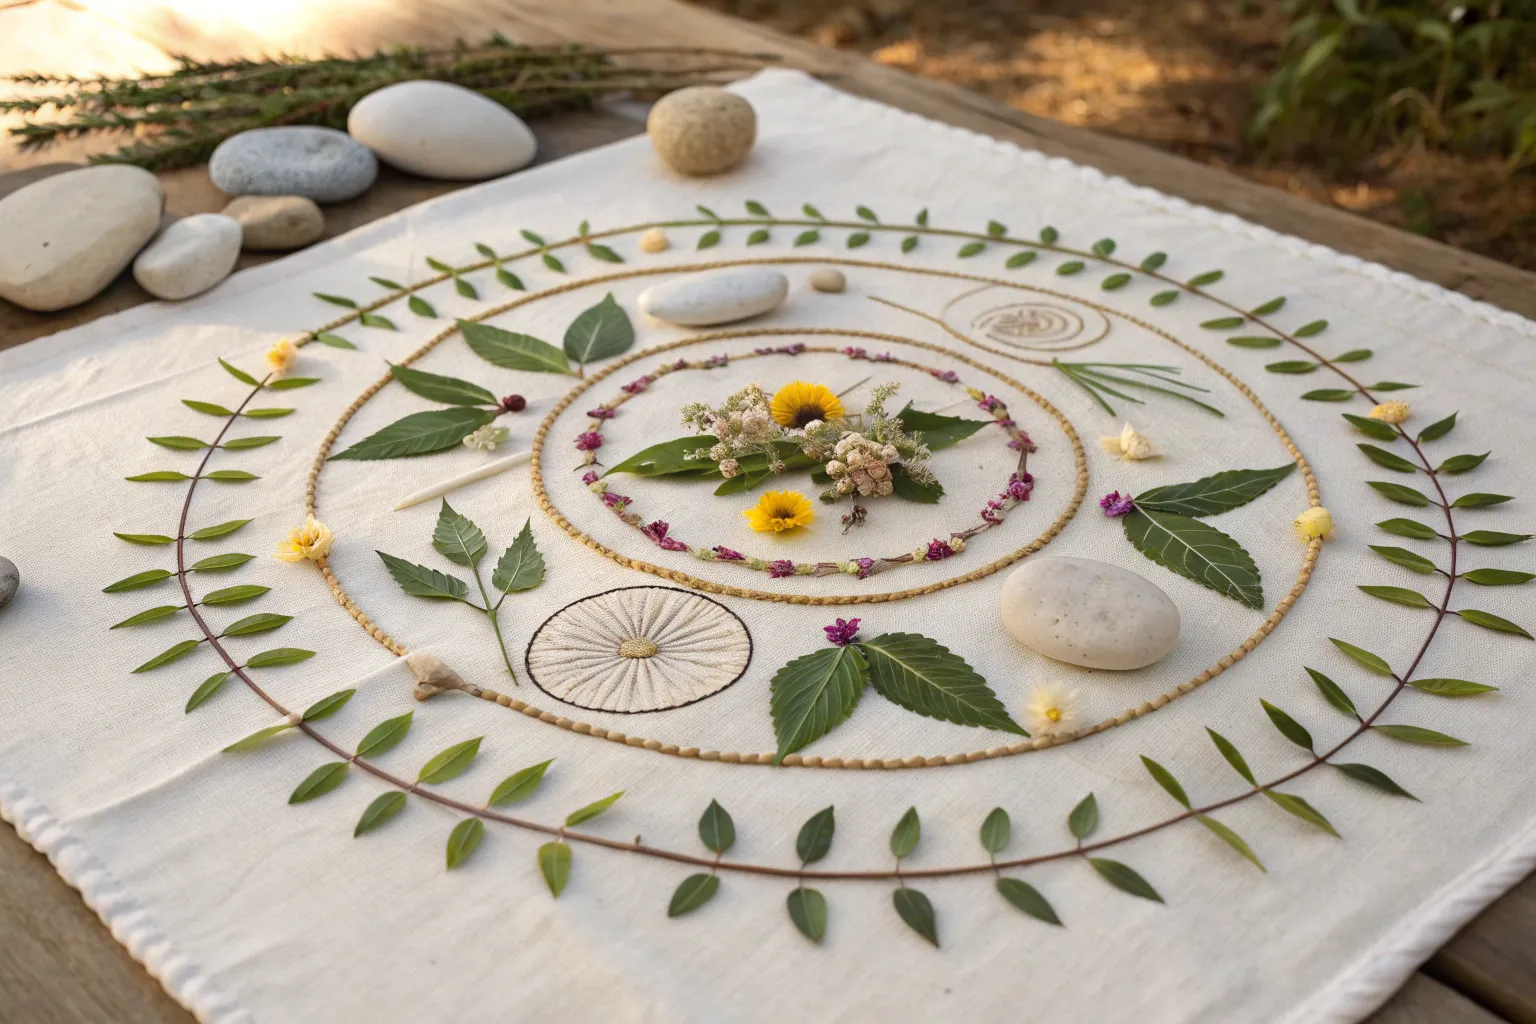
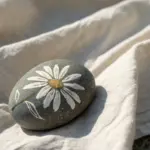
Nature Mandalas With Leaves, Pebbles, and Petals
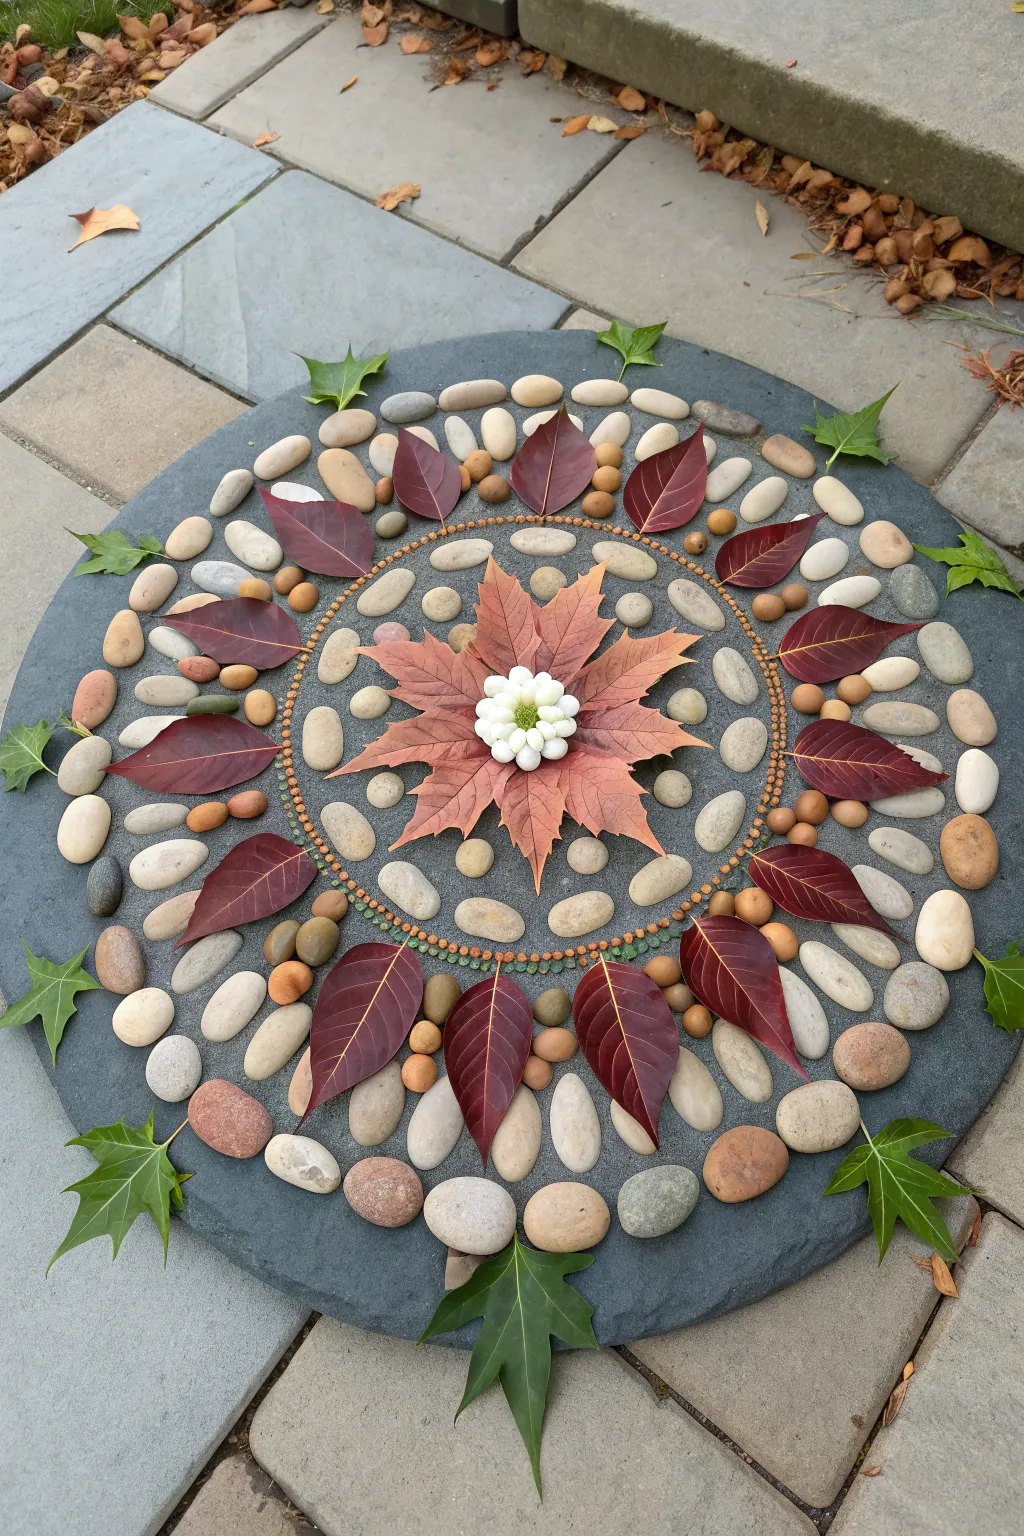
Celebrate the changing seasons by arranging a symmetrical masterpiece using nature’s own palette. This mandala combines the smooth textures of river stones with the vibrant hues of autumn leaves to create a grounding, meditative focal point for your garden or patio.
Step-by-Step Tutorial
Materials
- Large circular slate or flagstone base (approx. 24-30 inches)
- Large vibrant Maple leaf
- Small white flowers or petals (e.g., mums or clover)
- Small round white pebbles or berries (for the center)
- 12 medium-sized dark reddish-brown leaves (pointed oval shape)
- 8-10 bright green Ivy leaves
- Collection of smooth light grey river stones (various sizes)
- Small acorn tops or brown seeds
- Tiny pebbles or seeds for the thin ring details
- Broom for sweeping the base clean
Step 1: Preparation & Centerpiece
-
Prepare the canvas:
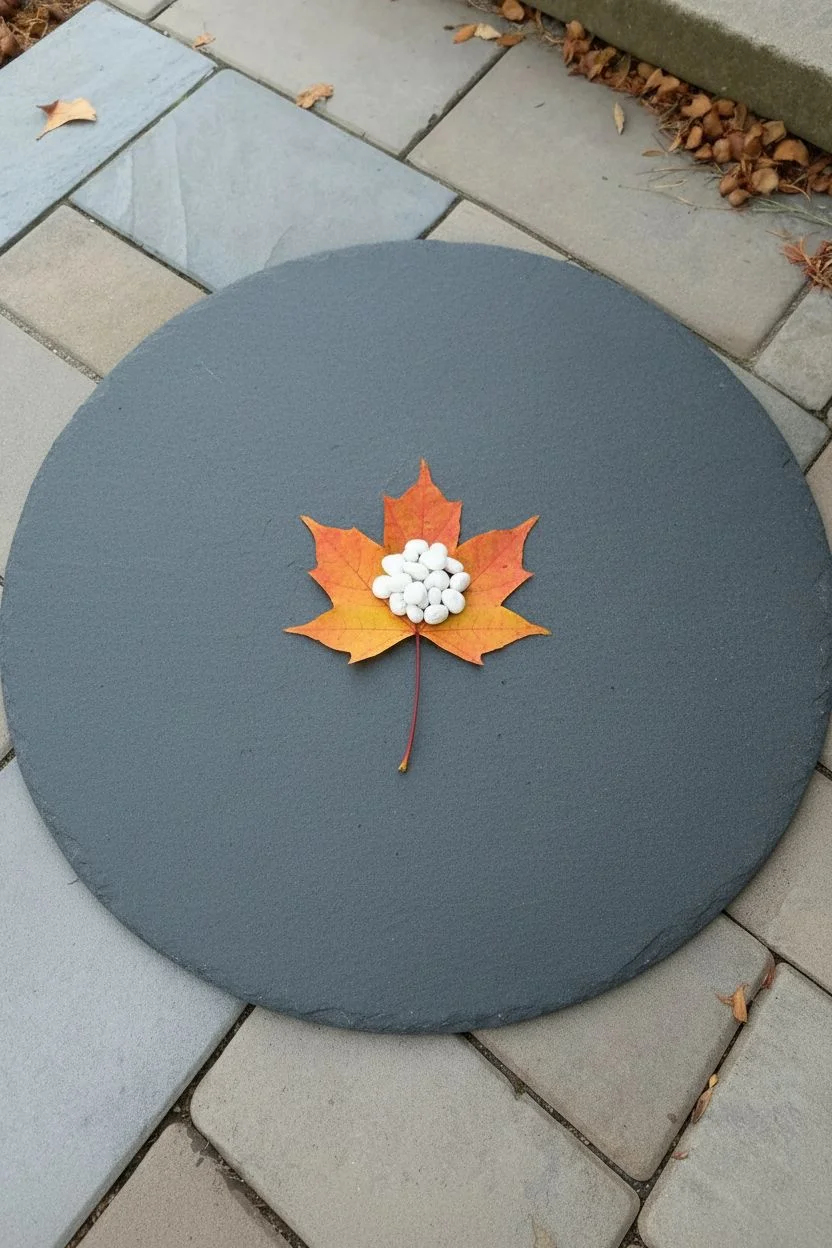
Begin by finding a flat surface for your mandala. If you are using a slate stepping stone like the one shown, sweep it clean of any dust or debris so your materials sit flat and the colors pop against the dark background. -
Place the anchor:
Select a large, perfectly shaped Maple leaf with warm autumnal tones. Place this directly in the absolute center of your stone circle. -
Create the heart:
In the very center of the Maple leaf, arrange a tight cluster of small white elements. You can use small white flower heads or even tiny smooth white pebbles to form a little mound that acts as the mandala’s eye.
Wind-Proofing Tip
Work on a calm day. If it’s slightly breezy, use a tiny dab of biodegradable glue or honey to tack lightweight leaves to heavier stones underneath.
Step 2: Inner Rings
-
First pebble definition:
Surround the central Maple leaf with a ring of medium-sized, smooth grey stones. Place them just inside the valleys between the leaf’s points to define the shape. -
The seed circle:
Create a delicate, thin ring using tiny seeds, lentils, or very small pebbles. Carefully place these in a perfect circle immediately surrounding the tips of the central Maple leaf. -
Establish the radius:
Just outside your seed ring, arrange a circle of medium grey river stones. Try to choose stones that are vaguely oval or rectangular and point them inward toward the center.
Night Mode
Replace the central white flower mound with a battery-operated tea light candle. It will illuminate the leaf veins and stones beautifully at dusk.
Step 3: The Leaf Starburst
-
Layout the red leaves:
Take your dark reddish-brown pointed leaves. Arrange roughly 12 of them in a circle, with their tips pointing outward. The bases of these leaves should nestle between the grey stones you just placed. -
Anchor the leaves:
To keep these light leaves from blowing away and to add texture, place a small acorn top or brown seed at the base of each red leaf. -
Fill the gaps:
In the wedge-shaped spaces between the tips of the red leaves, place a medium-sized grey river stone. This helps define the starburst pattern.
Step 4: Outer Borders
-
Second decorative ring:
Create another thin, delicate ring using your tiny seeds or small pebbles. This ring should connect the tips of the red leaves, encompassing the entire inner design. -
Large stone border:
Select your largest smooth grey stones. Place these in a wide ring outside the seed border, aligning them with the gaps between the red leaves. -
Add warmth:
In the gaps of this outer stone ring, tuck in slightly smaller, rounder reddish or brown stones to carry the color palette to the edge. -
Final green accents:
Finish the design by placing bright green Ivy leaves around the very outer edge of the slate. Evenly space them so they point outward like a compass, grounding the design with fresh color.
Step back and enjoy the calming symmetry of your artwork before the wind eventually scatters it back to nature

PENCIL GUIDE
Understanding Pencil Grades from H to B
From first sketch to finished drawing — learn pencil grades, line control, and shading techniques.
Explore the Full Guide
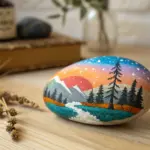
Land Art Spirals and Paths Made From Found Materials
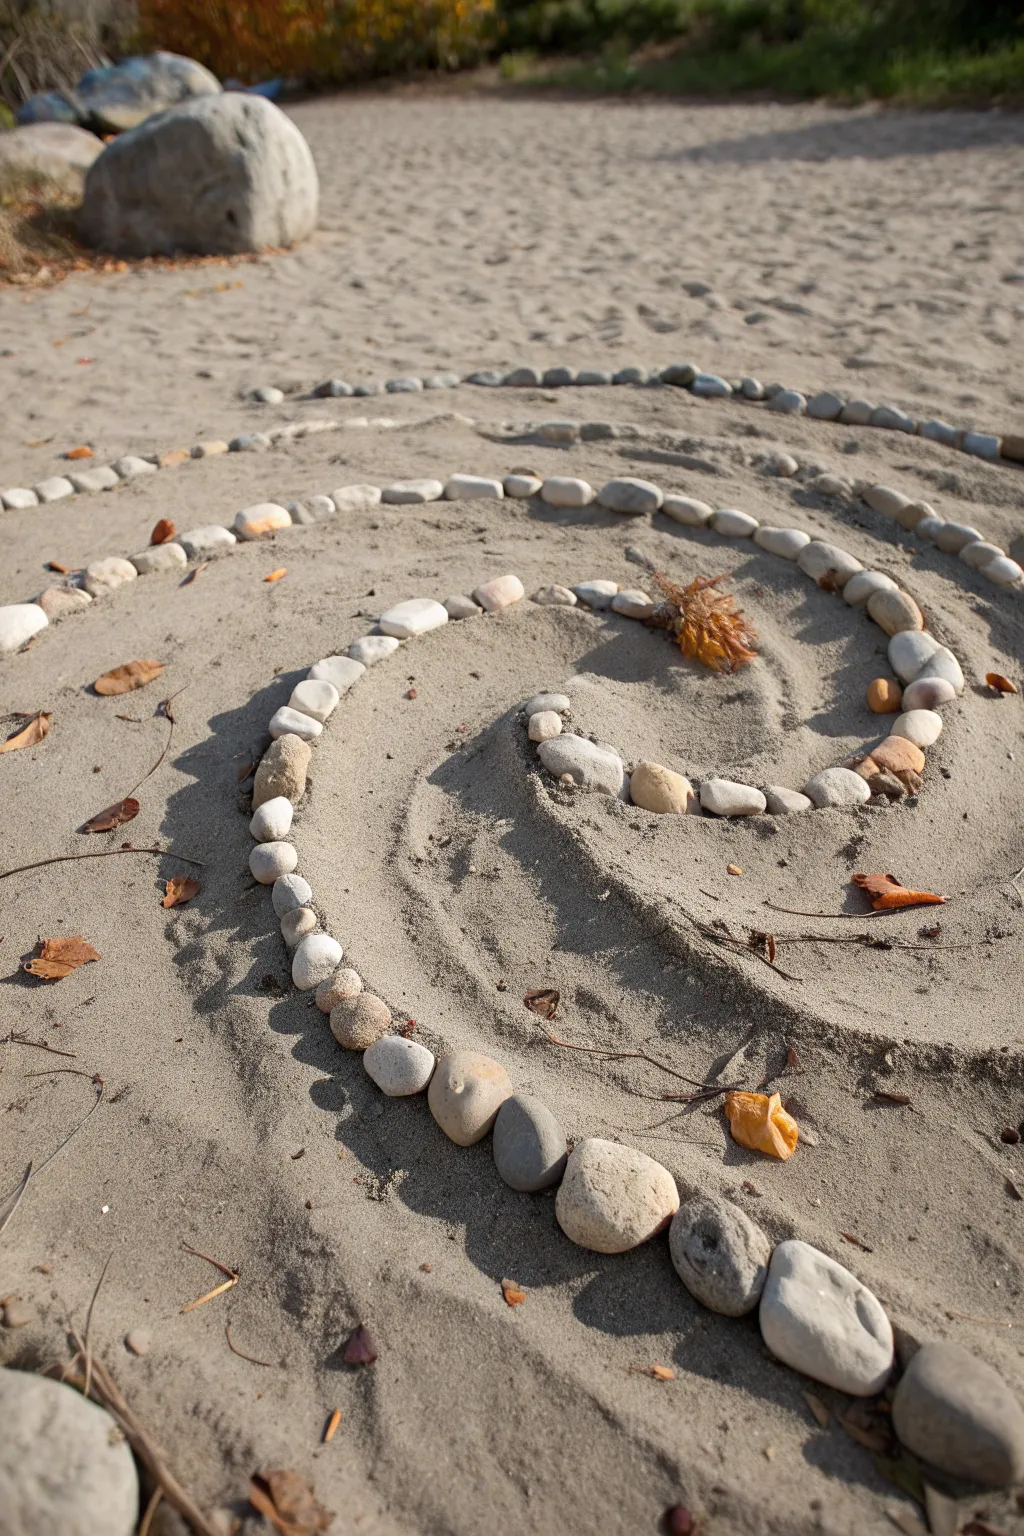
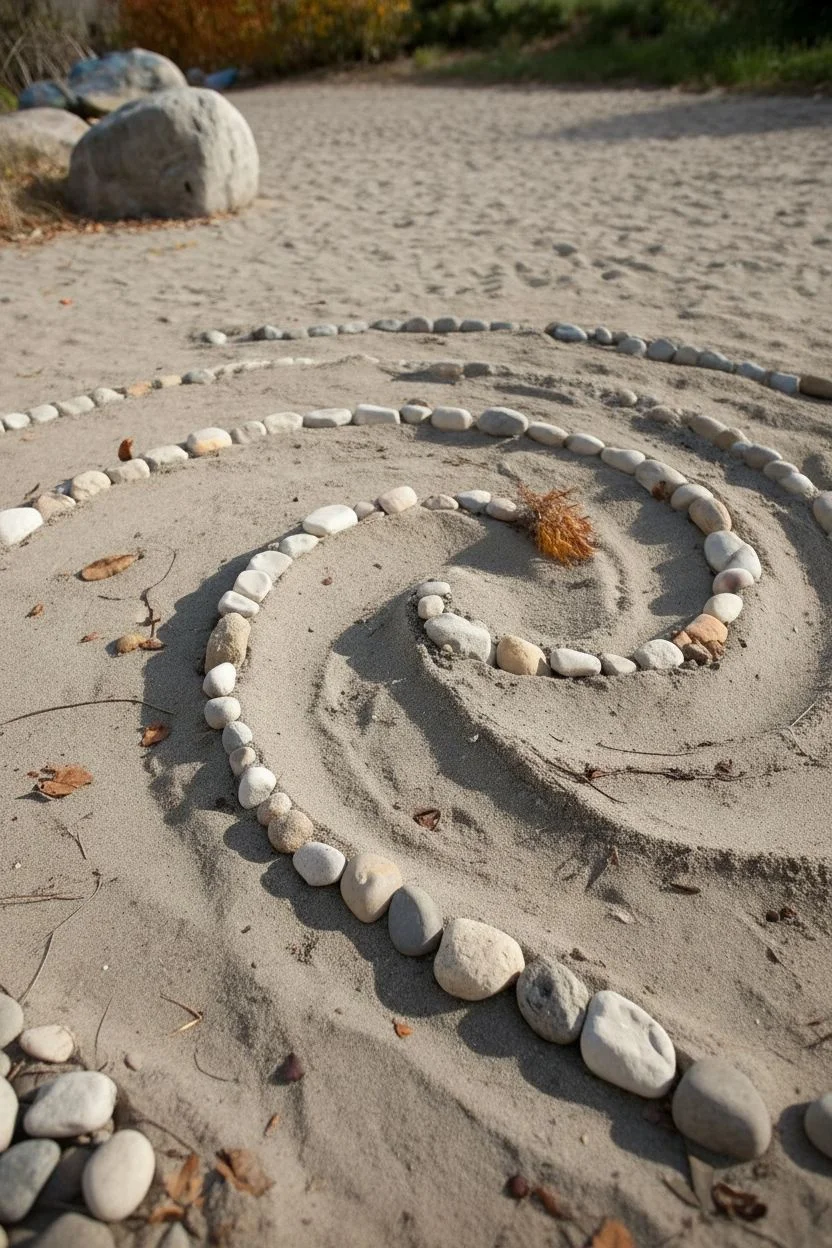
Transform a simple patch of sand into a meditative piece of impermanent art with this classic spiral design. Using smooth stones and the natural canvas of the beach or a sandbox, you’ll create a winding path that invites the eye to travel inward.
Detailed Instructions
Materials
- A large, flat area of sand (beach or sandbox)
- Collection of 50-70 smooth stones (palm-sized or smaller)
- A sturdy stick or driftwood piece (for drawing lines)
- Small rake (optional, for smoothing sand)
- Dried leaves or twigs (optional decoration)
Step 1: Preparation & Center
-
Prepare the canvas:
Find a relatively flat and clear area of sand. If there are footprints or debris, use your foot, a hand rake, or a piece of driftwood to smooth the surface level. -
Sort your stones:
Gather a good collection of stones. Look for variety in size but consistency in color—light gray or white stones pop beautifully against tan sand. I prefer to sort them into piles of ‘small,’ ‘medium,’ and ‘large’. -
Mark the center point:
Decide exactly where the center of your spiral will be. Place a single distinct stone or a small cluster of tiny pebbles there to act as your anchor. -
Begin the groove:
Using a finger or a sturdy stick, draw a tight, curved line starting near your center anchor. This groove will guide where you place your stones.
Step 2: Laying the Inner Coils
-
Start placing stones:
Begin placing stones along the inner side of your drawn line. For the tight inner coils, use smaller, flatter stones so the curve doesn’t look blocky. -
Create the first loop:
Continue placing stones until you have completed the first full rotation around the center. Keep them touching or very close together to create a solid line. -
Deepen the path:
As your stone line grows, use your hand or a stick to deepen the groove in the sand right next to the stones. This negative space creates shadows that make the rocks stand out more. -
Add texture:
If you have some dried leaves or interesting twigs, tuck a small piece near the center or in the early curves for a touch of organic color.
Natural gradients
Try arranging your stones by color gradient as you spiral out—starting with darker wet stones in the center and transitioning to dry, lighter stones on the outer rings.
Step 3: Expanding the Spiral
-
Graduate to larger stones:
As the spiral winds outward and the curve becomes gentler, start using your medium-sized stones. This graduation in size adds a nice visual weight to the outer rings. -
Maintain spacing:
Ensure the distance between the coils remains relatively consistent. You want the ‘path’ of sand between the stone lines to be wide enough to look intentional. -
Adjust bedding:
For rounder stones that might roll, twist them back and forth into the sand slightly to nestle them securely so they don’t shift. -
Refine the sand path:
Go back over the sand path between the coils with your fingers or a flat tool to smooth it out, removing any accidental footprints or displaced sand.
Add dimension
Instead of a single line of stones, try stacking smaller flat stones on top of the larger base stones to create a 3D wall effect for your spiral.
Step 4: Finishing Touches
-
Complete the tail:
Allow the spiral to end naturally. You can trail off with smaller stones or have the line simply stop at an open point. -
Scatter elements:
Take a few dried autumn leaves or small twigs and scatter them sparingly around the edges or within the grooves to blend the structured art with the natural environment. -
Check perspective:
Stand back and look at your spiral from a low angle. Fix any stones that look out of alignment or disrupt the smooth flow of the curve. -
Clean the perimeter:
Smooth out the sand immediately surrounding the artwork to erase your own footprints, giving the piece a pristine, untouched appearance.
Step back and enjoy the calming simplicity of your new sandy creation before the tide or wind eventually reclaims it


Have a question or want to share your own experience? I'd love to hear from you in the comments below!