
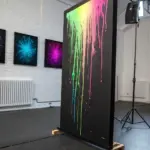
Neon drawings are basically my favorite kind of “instant wow” because you can get that electric glow with a few smart layers and a super dark background. Here are some neon drawing ideas I lean on all the time—starting with the classic sign-style looks and moving into weirder, more playful glow experiments.
Neon Lightning Bolt Doodle Set
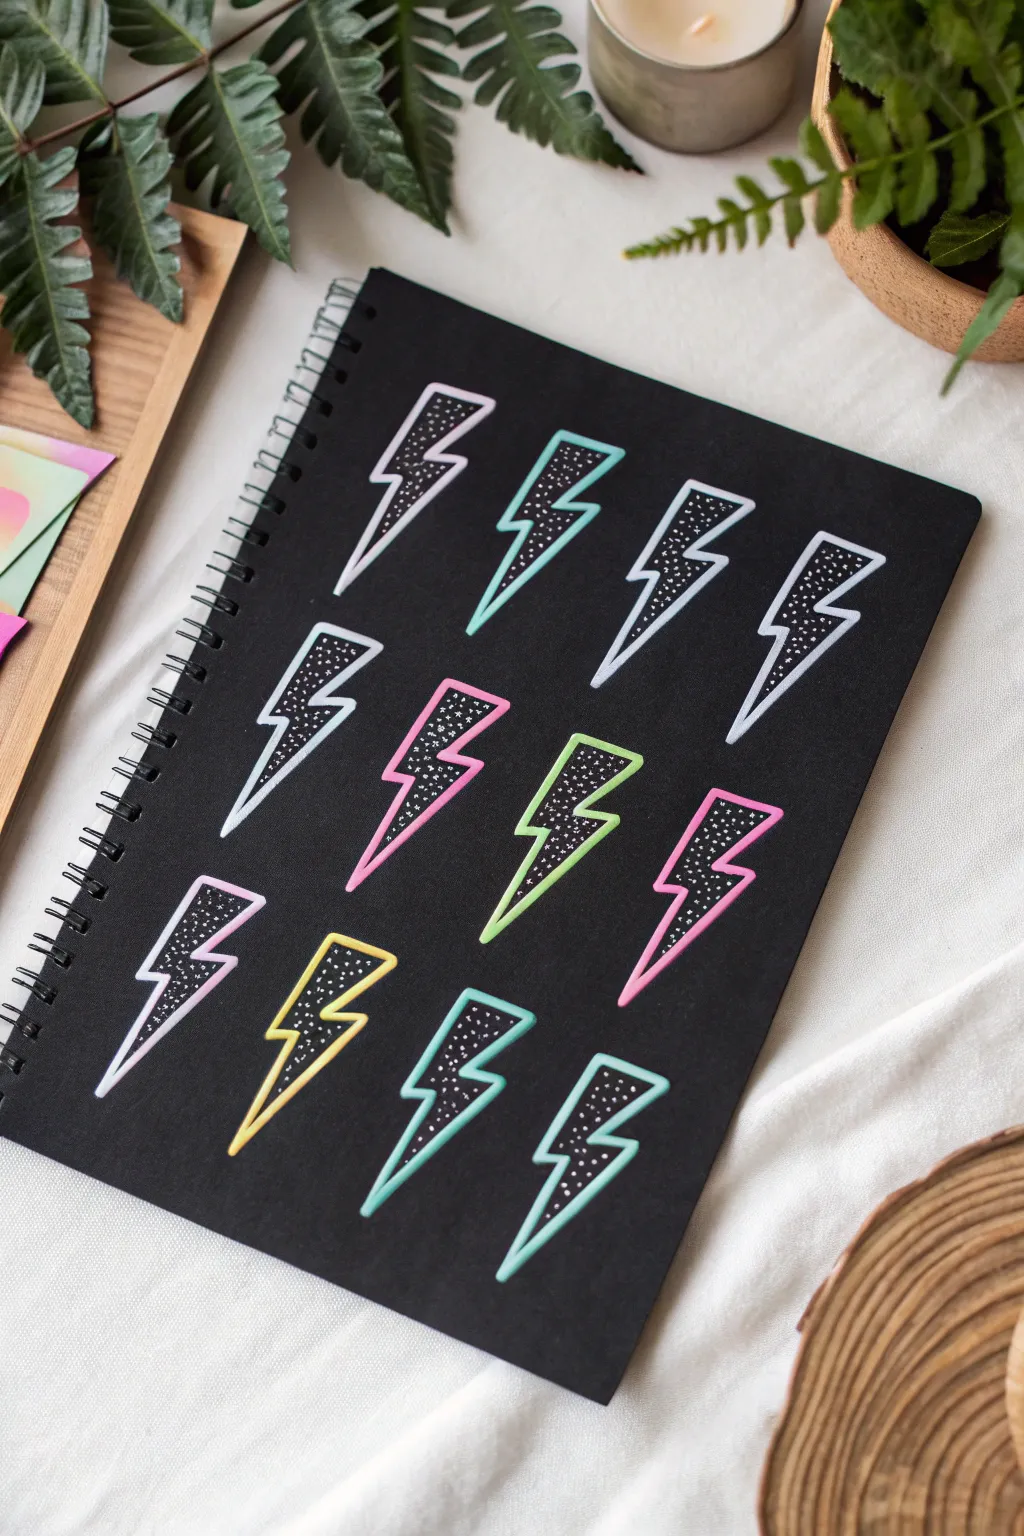
Transform a plain black notebook into an electric statement piece with these simple yet striking lightning bolt doodles. By combining bright pastel outlines with a starry stippled interior, you achieve a glowing neon sign effect that really pops against the dark background.
Detailed Instructions
Materials
- Black spiral-bound sketchbook or notebook (uncoated cover works best)
- White gel pen (size 08 or 10)
- Posca paint markers or opaque gel pens (pastel pink, teal, white, lime green, yellow)
- Pencil (optional for sketching)
- Eraser (optional)
Step 1: Planning the Layout
-
Visualizing the grid:
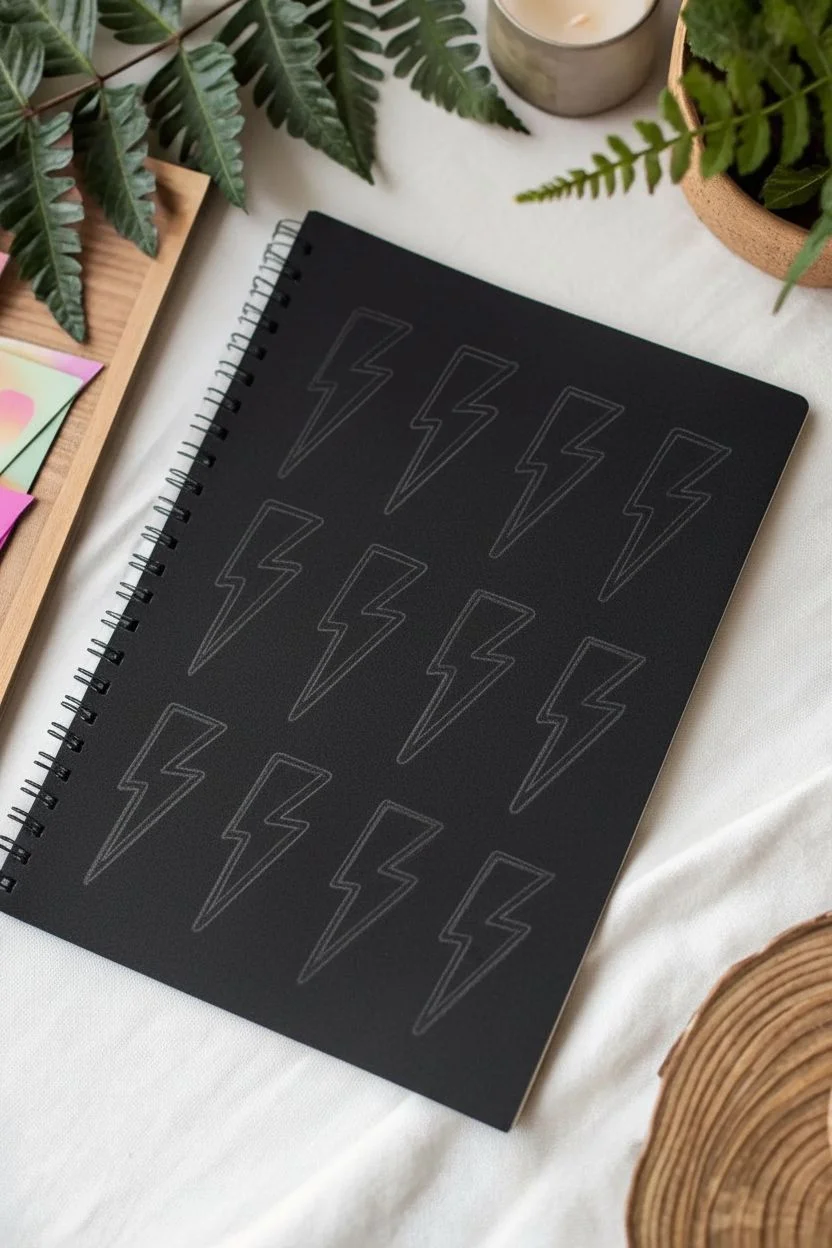
Start by looking at your notebook cover and imagining a grid. For this design, we want three rows of four bolts each. You can lightly mark the center points of where each bolt will go with a pencil if you need guidance. -
Sketching the shape:
Practice drawing the lightning bolt shape on a scrap piece of paper first. It’s essentially a zig-zag line that doubles back on itself, thick at the top and pointed at the bottom. -
Pencil draft:
Lightly sketch the lightning bolt outlines onto the black cover using a regular pencil. Keep the lines very faint so they are easy to cover later.
Step 2: Drawing the Outlines
-
Starting with white:
Select a few bolts to be pure white. Using your white gel pen or paint marker, trace the pencil sketch for these specific bolts. Go slowly to ensure clean, sharp corners. -
Adding pastel pink:
Switch to your pastel pink marker. Trace the outlines of a few other bolts, distributing them randomly across the grid so the colors are balanced. -
Teal accents:
Use the teal marker to outline the next set of bolts. In the reference, teal is used three times, creating a nice cool-toned repetition. -
Lime green pop:
Take your lime green marker and outline one or two bolts. This bright citrus color adds that true ‘neon’ vibe to the collection. -
Yellow finish:
Complete the outlining phase with a yellow marker for the final bolts. Allow all the colored outlines to dry completely for about 5 minutes to prevent smudging.
Ink Skipping?
If your white gel pen skips on the texture of the cover, try warming the tip against your thumb or wiping it on a damp cloth to clear dried ink blockage.
Step 3: Creating the Stardust Effect
-
Preparing the white pen:
For the interior details, you need a fine-point white gel pen. Scribble on scrap paper first to get the ink flowing smoothly. -
Doting the interior:
Inside the first lightning bolt, start adding tiny white dots. Vary the spacing slightly but keep them relatively dense to create texture. -
Adding tiny stars:
Interspersed among the dots, draw very small four-point stars or ‘plus’ signs. I like to do about one star for every ten dots to keep it subtle. -
Filling the remaining shapes:
Repeat the stippling process for every single lightning bolt. This white filling against the black background is what makes the colored outline appear to glow. -
Cleaning up:
Once the white ink is fully dry, gently erase any visible pencil sketch lines that might be peeking out from under the marker. -
Second coat (optional):
If your colored outlines seem a bit translucent against the dark paper, carefully re-trace them giving them a second coat for maximum opacity.
Glow Up
Use a white colored pencil to lightly shade around the outside of the colored lines. This creates a soft ‘halo’ effect, making the neon look even more realistic.
Now you have a custom sketchbook cover that looks energetic and ready for your brightest ideas


Neon Stars and Sparkles With Hot Spots

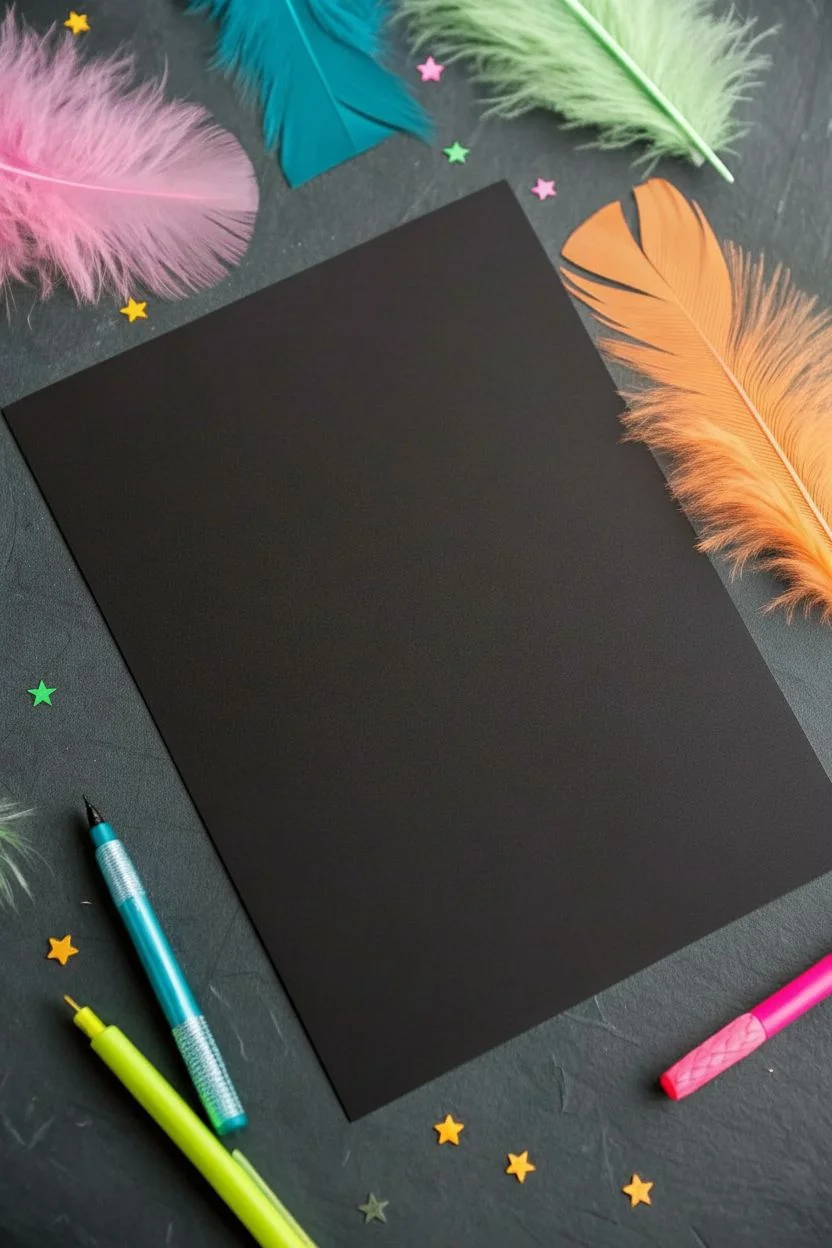
Transform a simple sheet of black paper into a vibrant galaxy using nothing but neon gel pens and a little creativity. This project creates a striking glowing effect as bright stars seemingly pop off the dark background, perfect for a card or framed art.
How-To Guide
Materials
- Black cardstock or heavy construction paper
- Neon gel pens (pink, yellow, blue, orange, green)
- Metallic silver or gold gel pen
- Pencil (optional)
- Ruler (optional)
- Star-shaped sequins or confetti (optional for extra texture)
Step 1: Setting the Stage
-
Prepare your canvas:
Lay out a piece of clean black cardstock on a flat surface. Smooth out any bends, as you want a perfectly flat surface for crisp lines. -
Plan the layout:
Decide on your composition. The example uses a border-style arrangement where the stars frame the center, leaving negative space in the middle for text or photos later. You can lightly mark the corners of your invisible ‘frame’ with a pencil if you need a guide.
Ink Not Flowing?
Neon gel pens can clog. Scribble circles on a scrap of paper or warm the tip by holding it between your palms for a minute to get the ink moving smoothly again.
Step 2: Drawing the Stars
-
Start with the big stars:
Using your brightest neon pink pen, draw a few five-pointed stars scattered around the perimeter. Keep them roughly the same size but vary their rotation so they don’t look stamped. -
Fill in stars immediately:
Don’t just outline them; color the inside of your star shapes fully to get that solid, sticker-like appearance. -
Switch to blue:
Pick up your neon blue pen. Draw several more five-pointed stars in the spaces between the pink ones, maintaining that scattered look. -
Add warmth with orange:
Incorporate neon orange stars now. Place them near the corners to anchor the design visually. -
Brighten with yellow and green:
Use your yellow and green pens to fill in larger gaps. These colors tend to pop the most against black, so distribute them evenly to balance the brightness. -
Create distinct star shapes:
While most should be classic five-pointed stars, try drawing a few four-pointed ‘diamond’ stars for variety.
Step 3: Building the Galaxy
-
Layer in smaller stars:
Go back through your color rotation, but this time draw much smaller stars. These should look like distant celestial bodies compared to your first layer. -
Add metallic accents:
Take your metallic silver or gold pen. Draw a sparse number of stars among the neon ones to add a different kind of shimmer. -
Create tiny dot clusters:
Using different neon colors, gently tap the tip of the pen to create tiny dots or ‘stardust’ clusters around the bigger stars. This fills the empty black space without cluttering it. -
Review the density:
Step back and look at the overall balance. If one side looks too empty, add a medium-sized star there.
Level Up: Glowing Halo
Use a white colored pencil to lightly shade a soft halo around your biggest neon stars. This enhances the glowing effect and makes them look truly luminous.
Step 4: Finishing Touches
-
Create ‘hot spots’:
Select a few of your largest, brightest stars. Carefully draw a second layer of ink over them once the first is dry to make them extra opaque and vibrant. -
Add mixed media (optional):
If you have star-shaped sequins or confetti that match your ink colors, you can glue 3-5 of them onto the paper now for a 3D effect. -
Let it dry completely:
Gel ink sits on top of the paper fibers and can smear easily. Give your artwork at least 15 minutes to fully set before touching it. -
Clean up stray marks:
If you see any tiny smudges, you can sometimes gently scratch them off black cardstock with a craft knife or cover them with a tiny dot of black marker.
Your dazzling neon starscape is now ready to shine brightly on your wall or desk


Neon Skull Outline With Electric Highlights
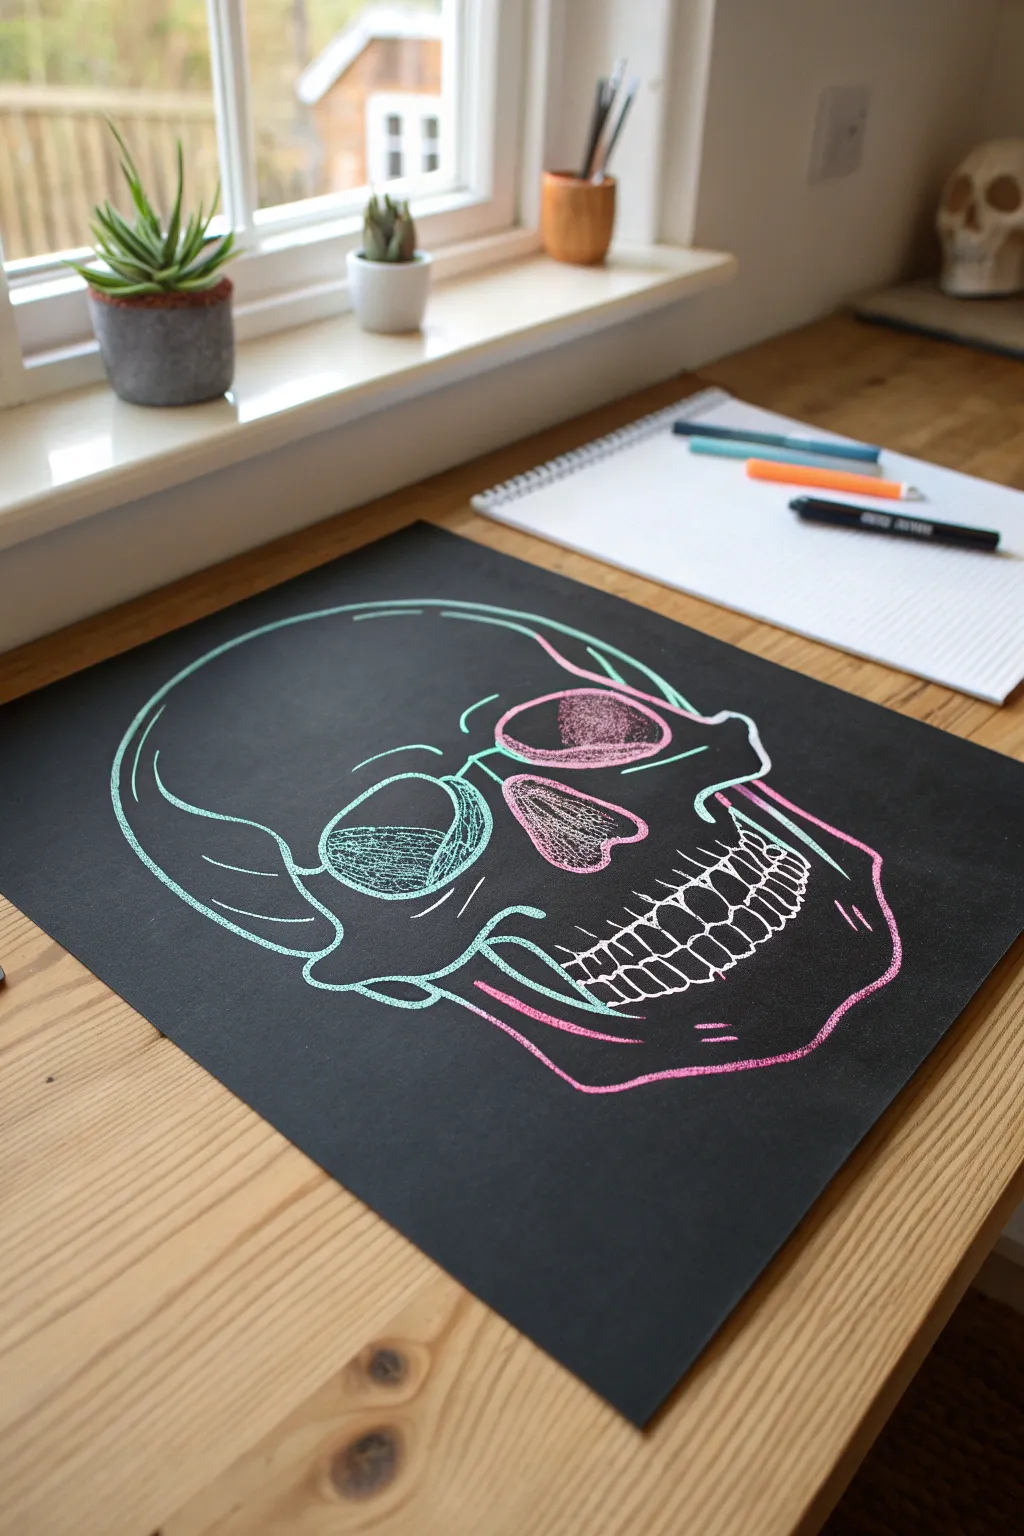
This striking project captures the edgy aesthetic of neon signage using just a few bold gel pens on black paper. By combining crisp cyan outlines with vibrant pink shadows and highlights, you’ll create a drawing that virtually pops off the page.
How-To Guide
Materials
- Black cardstock or heavyweight black sketch paper (A4 or 9×12 inch)
- Neon turquoise or cyan gel pen (e.g., Gelly Roll Moonlight)
- Neon pink gel pen
- White gel pen (fine tip)
- Graphite pencil (HB or 2B) for sketching
- Eraser (kneaded eraser works best on black paper)
- Scrap paper for testing ink flow
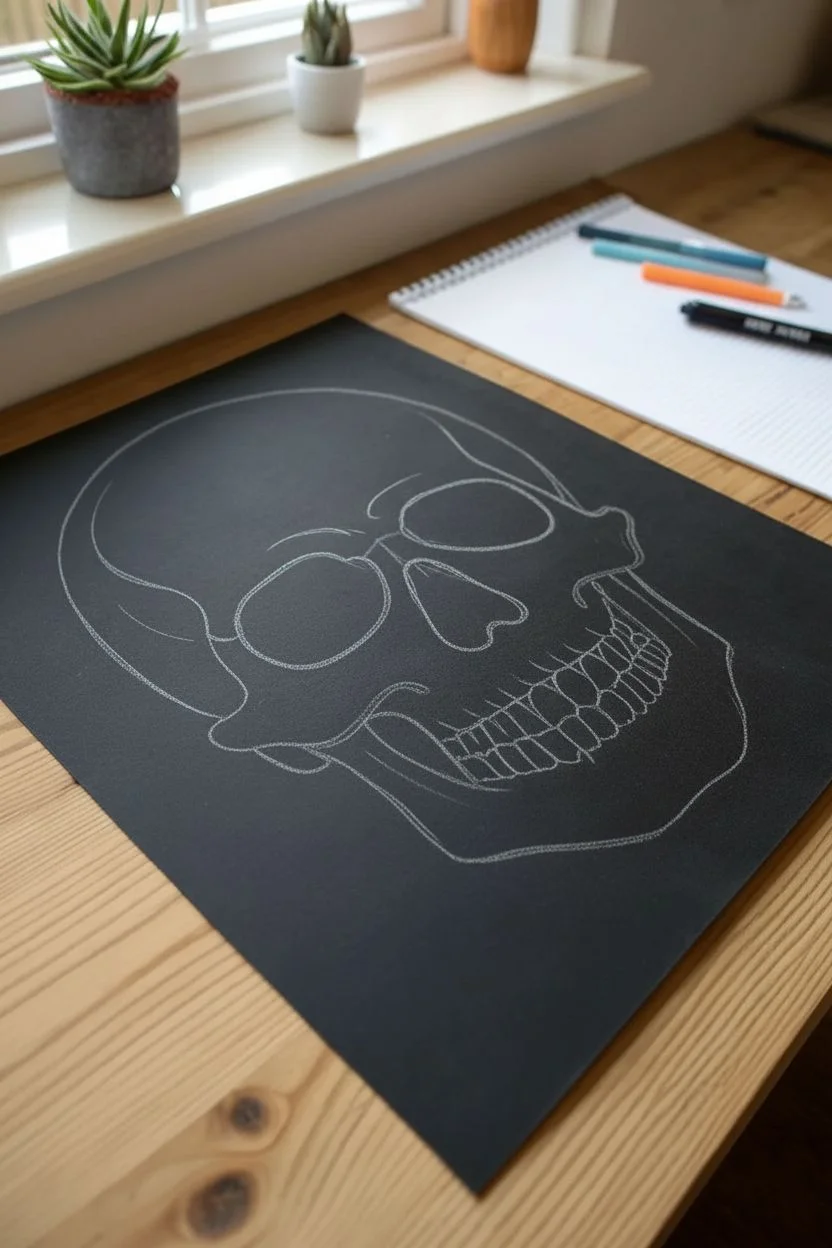
Step 1: Sketching the Framework
-
Map the cranium:
Start by drawing a faint pencil circle in the upper center of your black paper to represent the main part of the skull. -
Outline the jaw:
Extend a squared-off U-shape from the bottom of your circle to form the mandible and jawline. -
Place the features:
Lightly sketch two large, slightly irregular oval shapes for the eye sockets, ensuring they are symmetrical. -
Add the nose cavity:
Draw an upside-down heart shape or triangle between the eyes for the nasal cavity. -
Refine the structural lines:
Connect your basic shapes, adding the cheekbones (zygomatic arches) that flare out below the eye sockets. -
Sketch the teeth:
Draw a horizontal curve for the mouth line, then lightly mark vertical dividers for the upper and lower teeth rows.
Step 2: Inking the Cyan contours
-
Start the left outline:
Using the neon turquoise gel pen, trace the far left outer edge of the skull cranium. -
Define the left eye:
Outline the left eye socket with the turquoise pen. Instead of a perfect circle, give it a slightly angular, organic shape. -
Highlight the cheekbone:
Draw the swooping line of the left cheekbone and the upper ridge of the jawline. -
Detail the left socket:
Inside the left eye socket, gently scribble horizontal hatched lines to create a ghostly fill texture. -
Outline the nasal cavity:
Trace the outer edge of the nose cavity with the turquoise pen, keeping the line weight consistent. -
Trace the jaw bottom:
Outline the bottom edge of the mandible with a confident, continuous turquoise stroke.
Ink Flow Tip
Gel pens can clog on textured paper. Keep a sticky note nearby to scribble on periodically to keep the ink flowing smoothly.
Step 3: Adding Electric Pink & White
-
Outline the right side:
Switch to your neon pink gel pen. Trace the right side of the cranium and cheekbone, slightly overlapping the cyan lines at the top. -
Define the right eye:
Outline the right eye socket in pink. Notice how using a different color for this side creates a chromatic aberration effect. -
Texture the right socket and nose:
Use the pink pen to scribble density into the right eye socket and the nasal cavity, similar to what you did on the left. -
Create the pink drop shadow:
Re-trace the bottom jawline just below your turquoise line using the pink pen to simulate a vibrant glow or shadow. -
Draw the teeth:
Switch to a white gel pen. Carefully outline each tooth, keeping the shapes slightly rounded and spaced for a stylized look. -
Add white highlights:
Use the white pen to add small, sharp accents on the brow ridge and cheekbones where the ‘light’ would hit hardest. -
Erase pencil marks:
Wait at least 15 minutes for the gel ink to fully cure, then very gently dab—don’t rub—with a kneaded eraser to lift visible graphite.
Glow Effect
Use a white colored pencil to lightly shade around the colored lines. This soft halo mimics the diffusion of real neon light.
Now you have a vividly modern skull illustration ready to frame or display


Neon Cat Eyes in the Dark
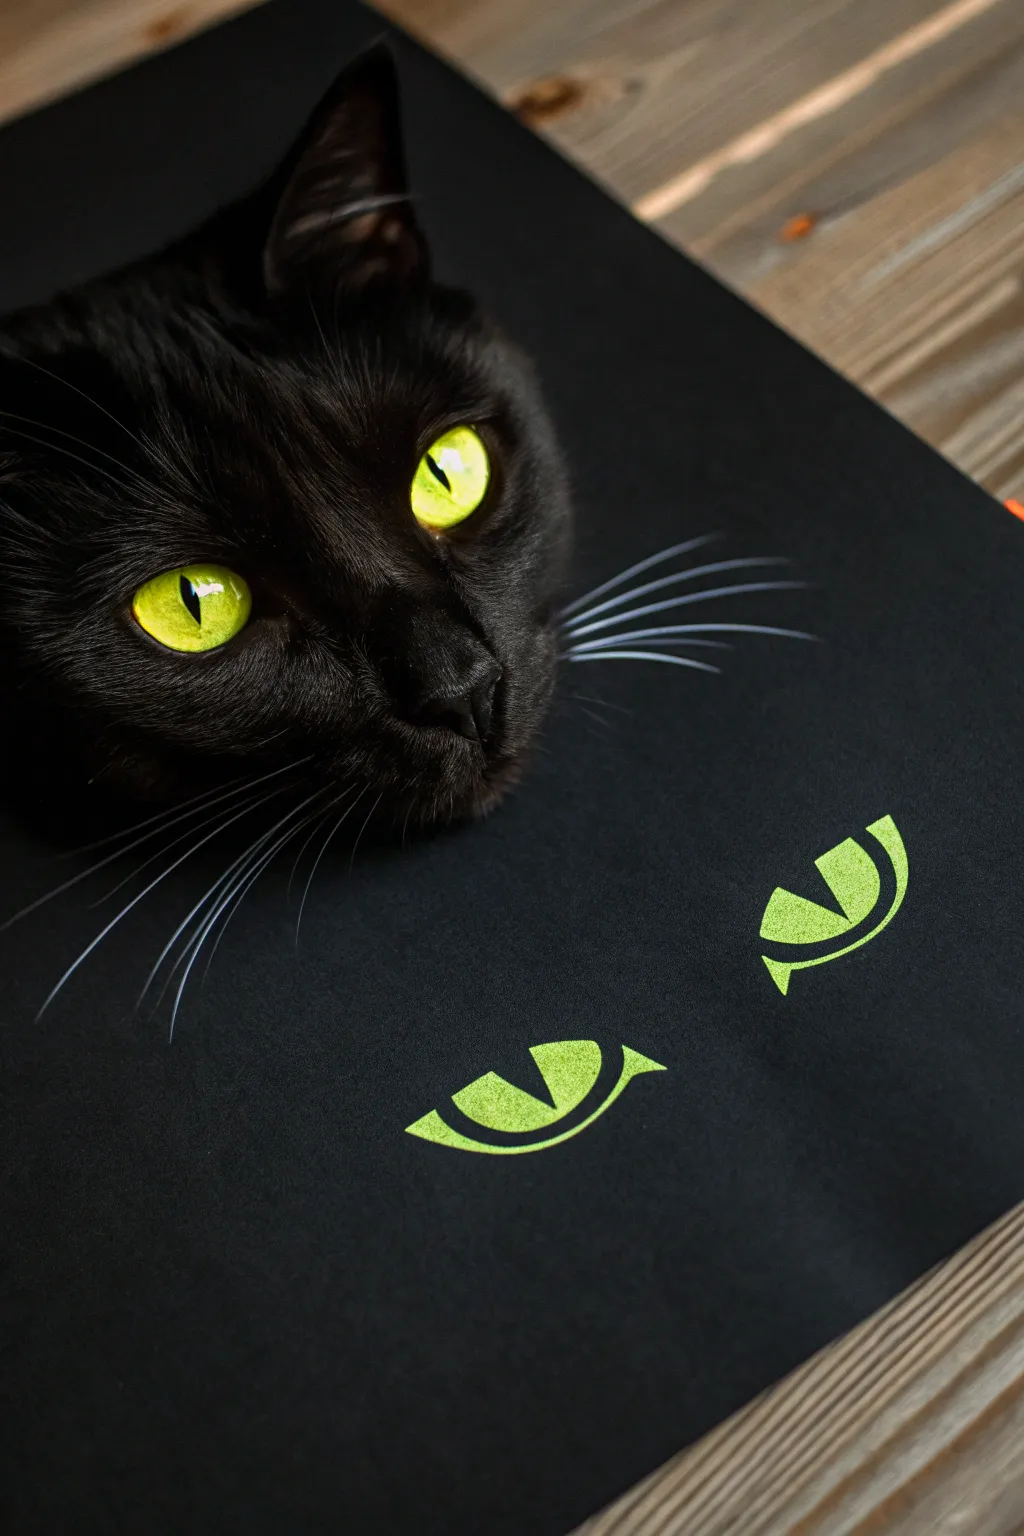
Capture the hypnotic stare of a nocturnal feline with this striking high-contrast project. By using neon ink on jet-black paper, you create a luminous effect that mimics glowing eyes in the dark without needing any actual lights.
Step-by-Step Guide
Materials
- Heavyweight black paper or cardstock (smooth finish preferred)
- Neon green paint marker (Posca or similar acrylic base)
- Pencil (white or regular graphite)
- Eraser
- Ruler
- Reference photo of stylized cat eyes
Step 1: Planning and Sketching
-
Prepare the Surface:
Lay your black paper on a flat, clean surface. Ensure it is free of dust or oils from your hands, as these can resist certain markers. -
Determine Placement:
Decide where the eyes will sit on the page. Since the top half is negative space (or room for a real cat to pose!), focus your composition on the lower third of the paper. -
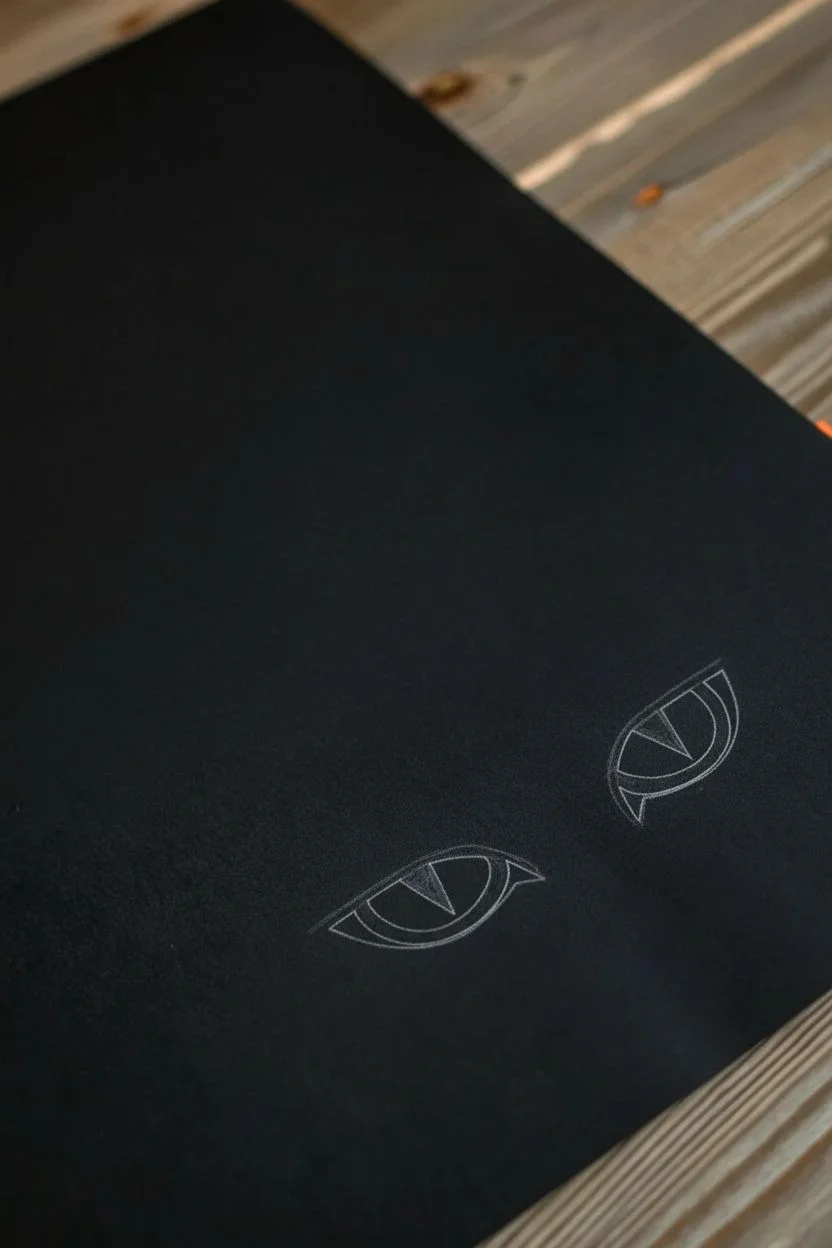
Sketch the Eye Shape:
Using a pencil very lightly, draw two almond shapes. If you use regular graphite, you’ll need good lighting to see the sheen on the black paper; a white charcoal pencil is much easier to see. -
Refine the Angles:
Give the eyes a stylistic, geometric look by sharpening the inner corners to point downwards and angling the outer corners upwards. -
Mark the Pupils:
Draw the slit pupils. Instead of a simple line, specificy a triangular wedge shape for the pupil to create that intense feline focus. -
Add Highlights:
Sketch a small shape within the iris area where the shine will be. This negative space is crucial for making the eyes look wet and alive.
Ink absorbing too much?
If the black paper sucks up the ink and it looks dull, apply a base layer of white gel pen or paint first. Let it dry, then layer the neon green on top for maximum brightness.
Step 2: Applying Neon Color
-
Prime the Marker:
Shake your neon green paint marker well to mix the pigment. Press the tip down on a scrap piece of paper until the ink flows smoothly and fully saturates the tip. -
Outline the Iris:
Carefully trace the outer edge of your sketched iris shape. Keep your hand steady to create a crisp, clean line against the black background. -
Define the Pupil:
Outline the pupil shape you drew earlier. Remember, you want to leave the pupil area completely black, so don’t color inside this shape. -
Fill the Left Eye:
Start filling in the iris area of the left eye. Use smooth, parallel strokes to ensure even coverage. If the black paper absorbs the first layer, don’t worry—we will layer it. -
Preserve the Highlight:
As you color, carefully go around the highlight shape you sketched. Leaving the pure black paper visible here creates the reflection effect. -
Fill the Right Eye:
Repeat the filling process for the right eye. I find that turning the paper slightly can help maintain a comfortable hand angle for coloring. -
Dry the First Layer:
Let the ink dry completely for about 5-10 minutes. Acrylic markers dry fast, but you don’t want to drag semi-wet ink and create streaks.
Step 3: Refining and Finishing
-
Apply a Second Layer:
Go over the green areas a second time. This second coat is vital for achieving that ‘electric’ neon pop that looks like it’s glowing. -
Clean Up Edges:
Use the marker tip to sharpen any fuzzy edges on the corners of the eyes. The sharper the points, the more striking the design will appear. -
Erase Guidelines:
Once the artwork is 100% dry to the touch, gently erase any visible pencil marks. Be very gentle near the paint to avoid scratching it. -
Final Inspection:
Check for any pinholes where the black paper shows through the green. Dab a tiny bit of ink into these spots to solidify the color.
Make it 3D
Add a tiny dot of white gel pen inside the black pupil area or on the edge of the neon iris to create an extra glossy, wet look that adds depth.
Now you have a piercing pair of eyes ready to watch over your room from the shadows

PENCIL GUIDE
Understanding Pencil Grades from H to B
From first sketch to finished drawing — learn pencil grades, line control, and shading techniques.
Explore the Full Guide
Neon Planet and Rings With Starfield Glow
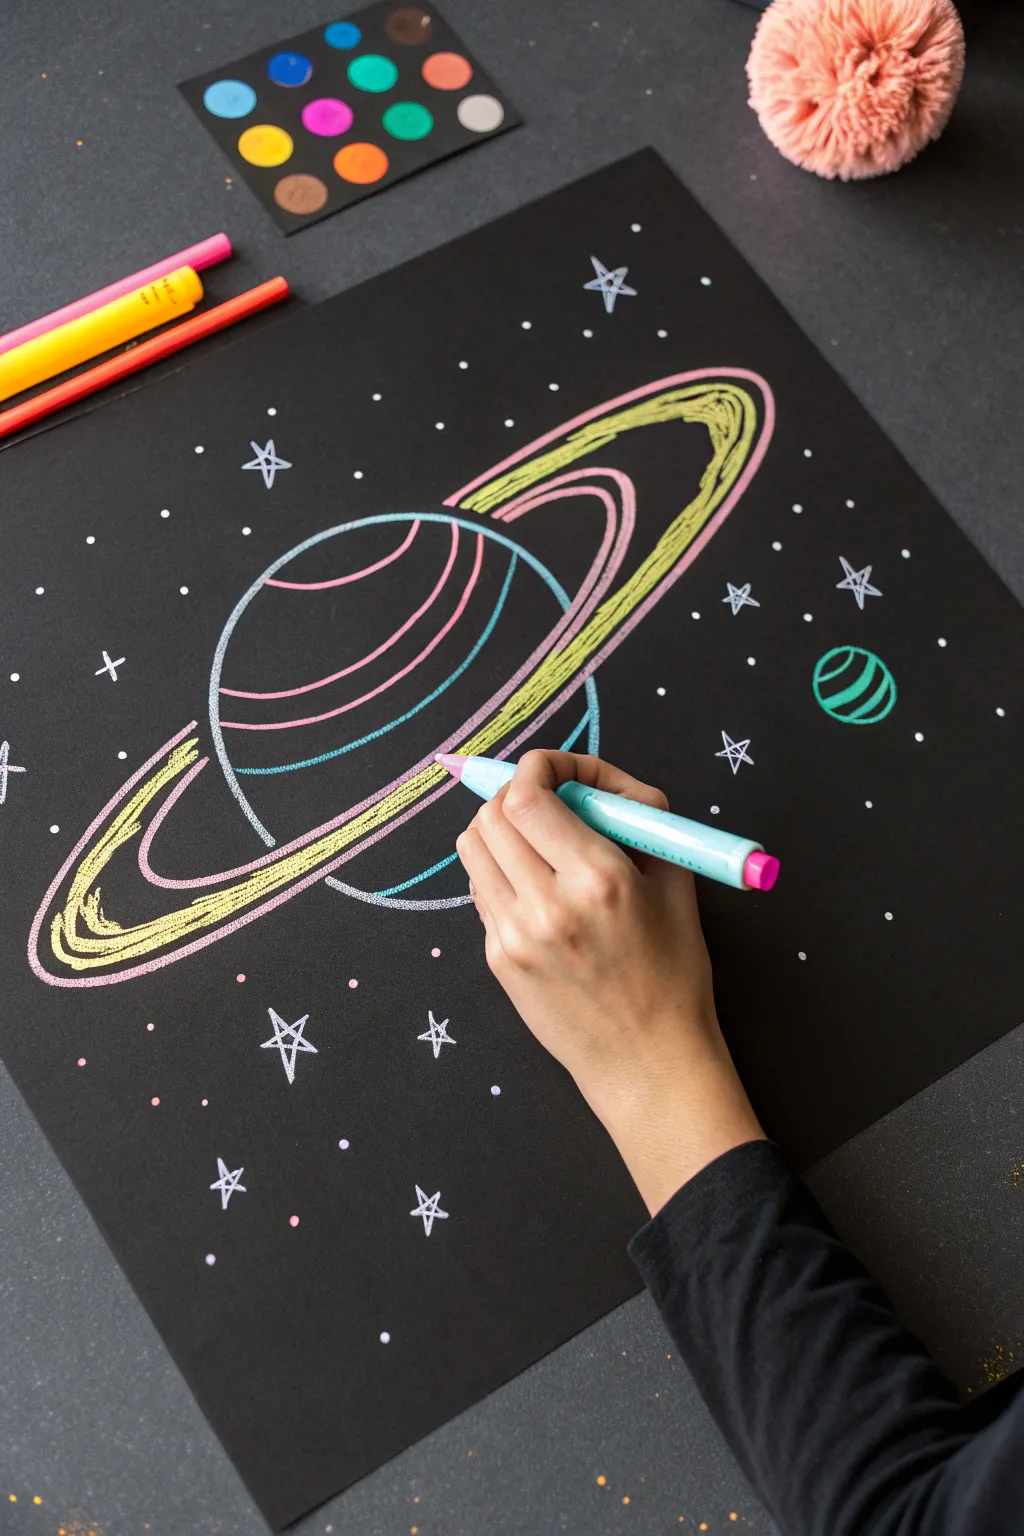
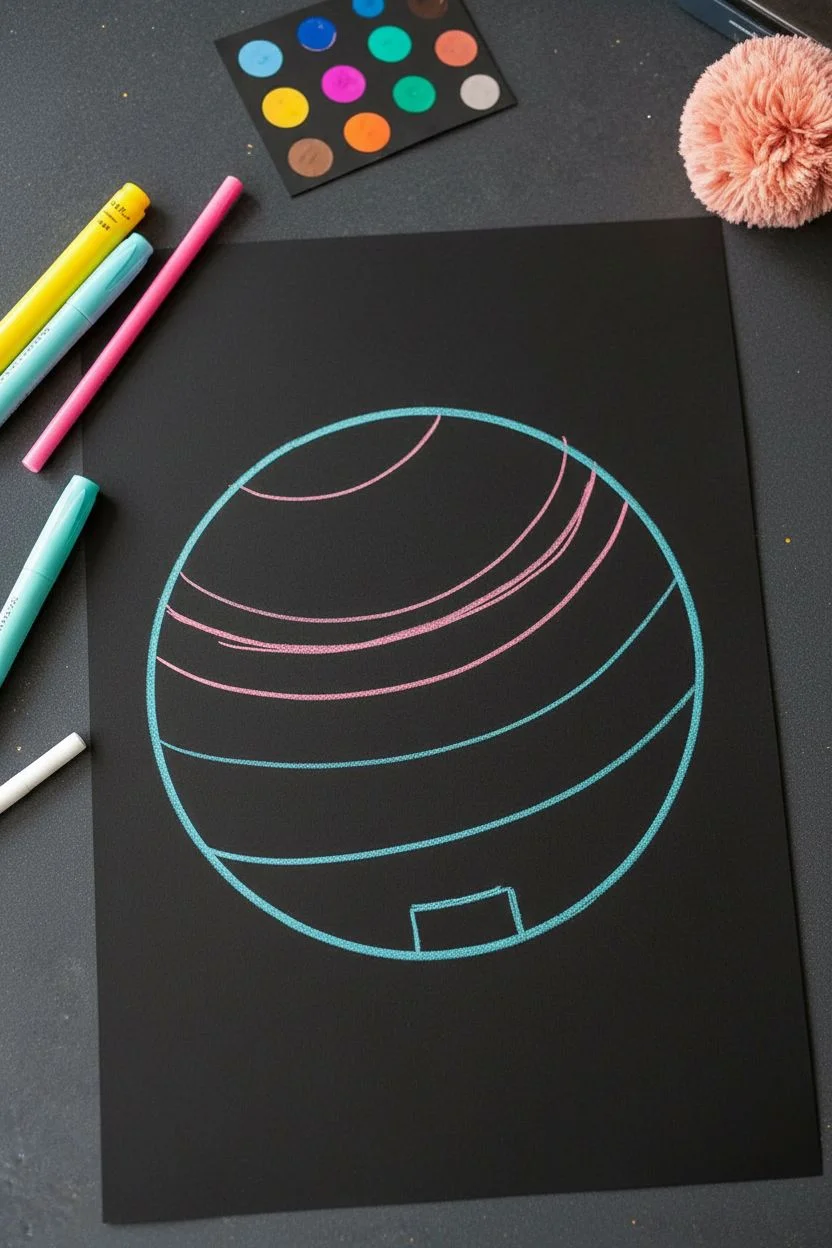
Bring the galaxy to life with this vibrant black-paper drawing featuring a stylized ringed planet floating among the stars. The contrast between the matte black background and the bright neon ink creates a stunning, glowing effect perfect for sci-fi lovers.
Step-by-Step Tutorial
Materials
- Black cardstock or poster board (smooth finish)
- Neon chalk markers or metallic gel pens (Light Blue, Pink, Yellow, Green)
- White gel pen or fine-tip chalk marker
- Pencil (optional, for sketching)
- Soft cloth or tissue (for smudging/correcting)
Step 1: Setting the Sphere
-
Sketch the Planet Outline:
Start by drawing a large circle in the center of your black paper using the light blue marker. Don’t worry if it’s not a perfect circle; a slightly flattened sphere looks more planetary. -
Create the First Stripe:
Using the pink marker, draw a curved line across the upper third of the planet. Follow the curve of the planet’s top edge to give it a 3D spherical look. -
Add Parallel Bands:
Draw two more curved pink lines below the first one, keeping them parallel. Leave a gap between the bottom-most pink line and the bottom of the blue circle. -
Close the Planet Shape:
If your initial blue circle was sketchy, go over the bottom curve again with the light blue marker to solidify the planet’s base.
Smudged Ink?
Wait for chalk markers to fully dry before resting your hand on the paper. Use a slightly damp Q-tip to erase mistakes.
Step 2: Constructing the Rings
-
Draft the Inner Ring:
With your pink marker, draw a long, flattened oval shape that wraps around the planet. Imagine the line going behind the planet—stop the line where it hits the planet’s body and restart it on the other side. -
Thicken the Ring Structure:
Switch to the yellow marker. Draw a larger oval outside the pink one you just created. This outlines the outer edge of the planetary ring system. -
Fill the Gap:
Inside that space between the pink and yellow ring outlines, use the yellow marker to scribble back and forth. I find a loose, zig-zag texture looks better than solid coloring here because it mimics dust and ice particles. -
Define the Back Ring:
Ensure the yellow ring continues ‘behind’ the planet. Draw the upper arc of the yellow ring passing behind the top of your blue sphere.
Level Up
Use a dry paintbrush to gently drag wet ink inward from the planet’s edge, creating a soft, glowing atmospheric gradient.
Step 3: Stellar Details
-
Add distant moons:
To the right of the main planet, draw a small circle using green. Add two curved stripes inside it to mimic the texture of the larger planet. -
Scatter the Major Stars:
Using a fine-tip white marker or pen, draw several five-pointed stars around the open space. Keep them open (don’t color them in) for a doodle-style aesthetic. -
Create Distant Starlight:
Dot the background with tiny specks of white and pink ink to represent distant stars. Vary the pressure to make some stars appear brighter than others. -
Draw Star Bursts:
Add a few ‘cross’ shaped stars (+) and four-pointed sparkles to create variety in your starfield. -
Highlight the Planet:
Take your white pen and add a small, curved reflection line on the top left of the blue planet outline to suggest a light source. -
Final Cleanup:
Let the ink dry completely for a few minutes. If any chalk marker lines look patchy, go over them a second time for maximum neon vibrancy.
Hang your cosmic creation on a wall or use it as a striking cover for a bullet journal
Bioluminescent Jellyfish in Neon Lines
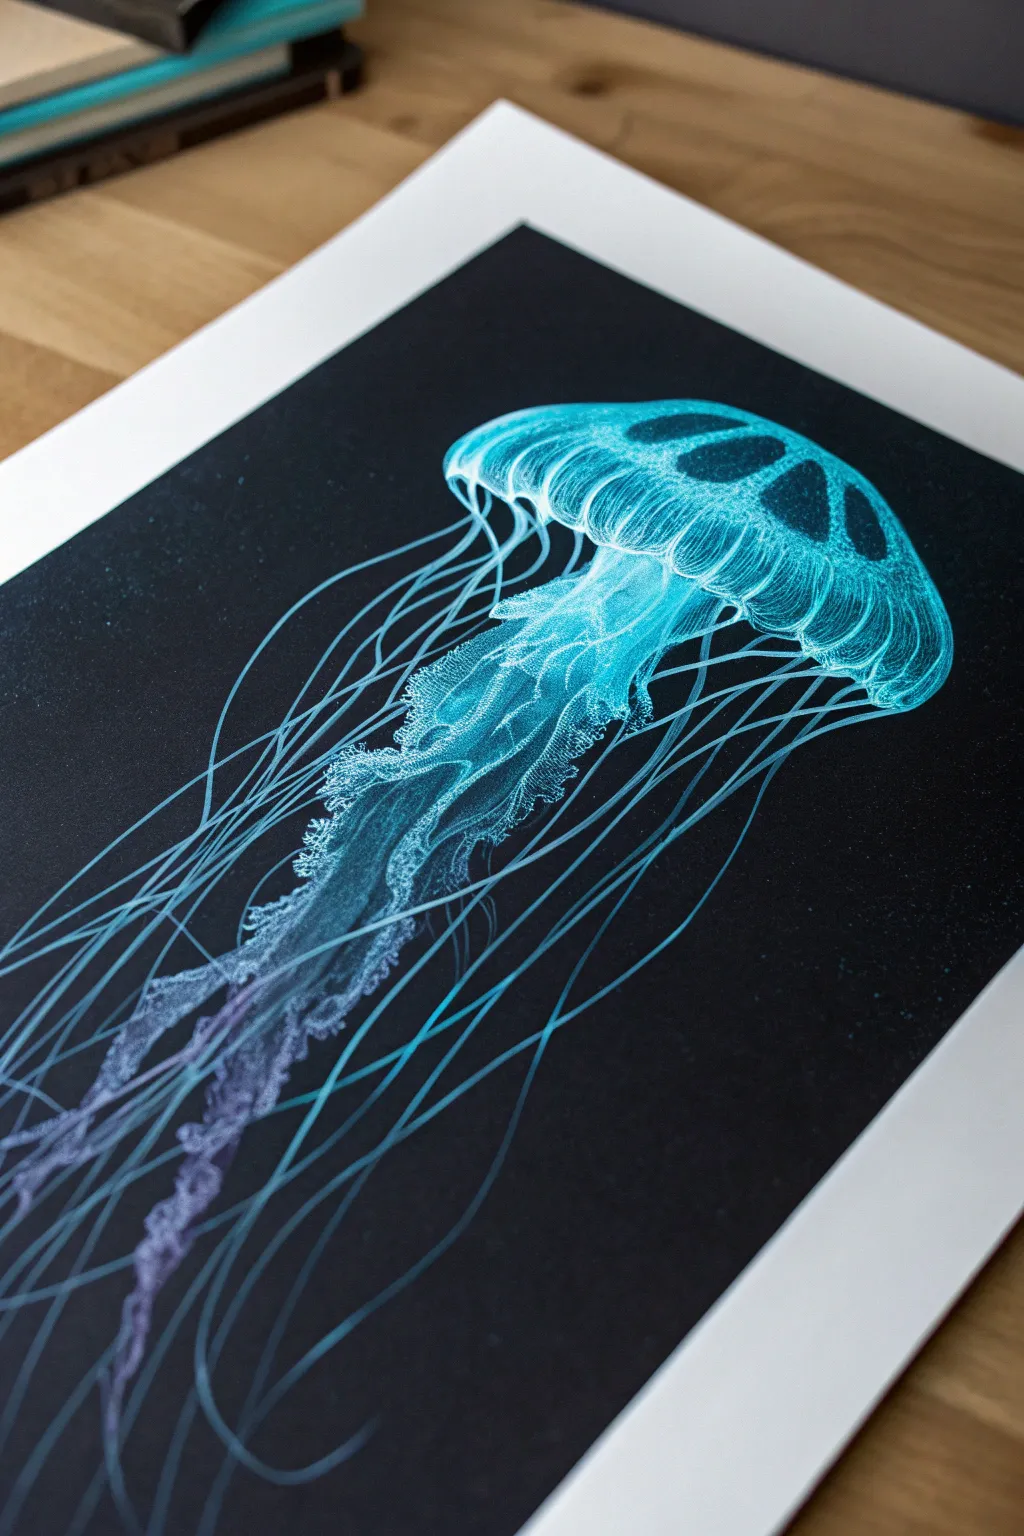
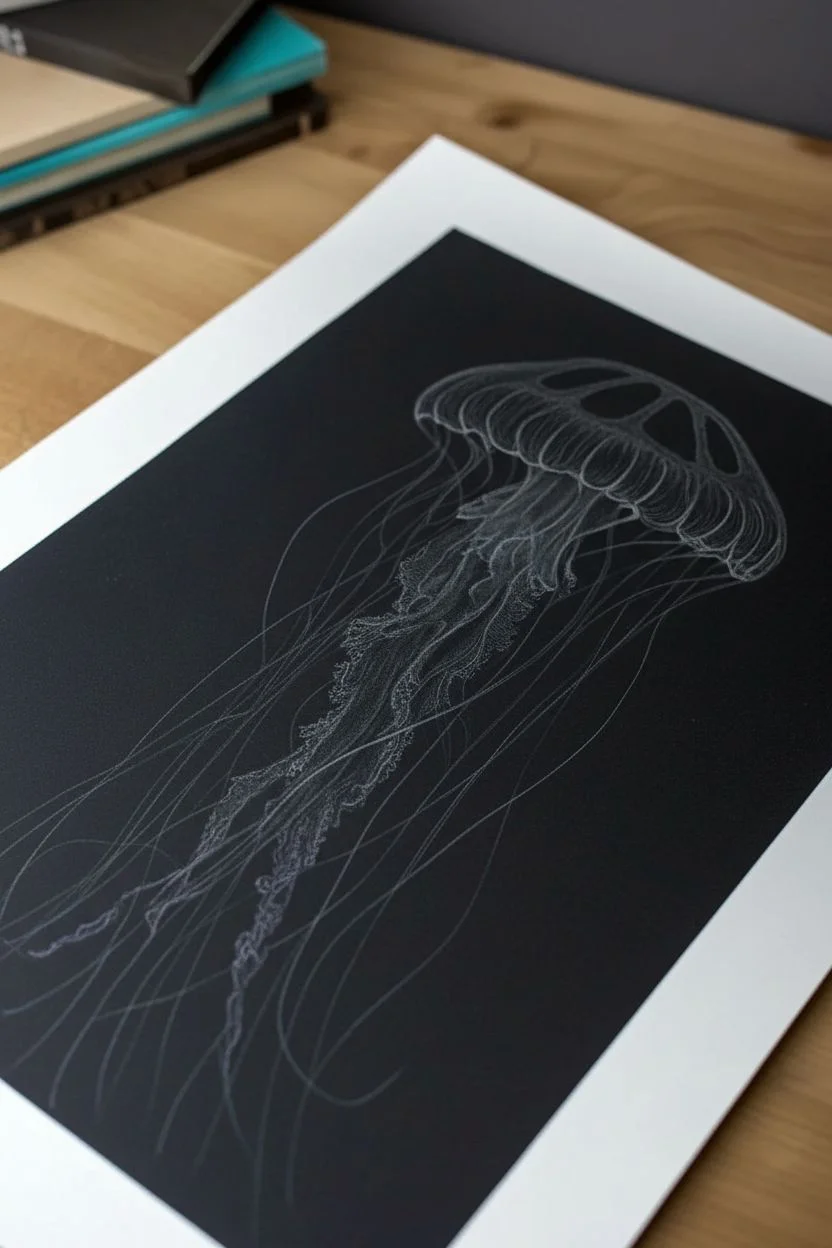
Capture the ethereal beauty of bioluminescence with this striking jellyfish study. Using bright cyan and white pencils on deep black paper creates a stunning illusion of inner light that seems to float off the page.
How-To Guide
Materials
- Black drawing paper or cardstock (smooth texture is best)
- White colored pencil (wax or oil-based)
- Cyan or light blue colored pencil
- Electric blue colored pencil
- Lavender or pale purple colored pencil
- Detail eraser or eraser pencil
- Sharpener
Step 1: Basic Structure
-
Outline the bell:
Begin by lightly sketching a mushroom-cap shape near the top third of your black paper using a white pencil. Keep your pressure extremely light so you can erase mistakes easily. -
Define the rim:
Draw a scalloped or wavy line along the bottom edge of the mushroom cap to create the jellyfish’s bell skirt. Add a second, slightly smaller curve inside the top of the bell to give it transparency and volume. -
Sketch the oral arms:
From the center of the bell, lightly sketch a flowing, ruffled central mass dropping downwards. This doesn’t need to be precise yet; just capture the general direction and wavy motion. -
Map the tentacles:
Draw long, sweeping guide lines extending from the rim of the bell all the way to the bottom of the page. Vary the curvature so they don’t look stiff.
Clean Lines
Smudging white pencil on black paper is a disaster. Keep a spare sheet of paper under your drawing hand at all times to protect your work.
Step 2: Creating the Glow
-
Base layer of blue:
Take your cyan pencil and gently shade the entire bell shape. Don’t press hard; you just want a faint blue haze on the black paper. -
Highlighting the anatomy:
Switch to white. Firmly draw the internal structures of the bell, creating three or four petal-like shapes radiating from the center summit. These should be the brightest part of the dome. -
Detailing the bell texture:
Use fine white strokes to draw vertical lines curving down the sides of the bell. These striated lines mimic the muscle fibers of the jellyfish. -
Glow gradient:
Blend the electric blue pencil over the white lines you just drew, fading out toward the edges. This layering technique is key to the neon effect.
Starry Depth
Use a white gel pen to tap tiny dots into the background around the jellyfish. Vary the sizes to create the look of plankton or distant stars.
Step 3: The Central Tentacles
-
Ruffling:
Use a scribbling motion with the cyan pencil to create the frilly texture of the central oral arms. Think of it like drawing bunched-up lace. -
Adding depth:
Define the edges of these ruffles with sharp white lines. Leave the recessed areas darker (just the black paper showing through) to create volume. -
Color transition:
As you move lower down the central tentacles, introduce the lavender pencil. Blend it slightly with the cyan to create a subtle color shift. -
Fading away:
Let the bottom of the central mass fade out into a dotted or stippled texture rather than a solid line, suggesting movement and transparency.
Step 4: Long Tentacles & Final Touches
-
Tracing the long lines:
Go back to your long guide lines. Trace over them with a steady hand using the cyan pencil. -
Varying line weight:
Thicken the lines where they attach to the bell, and let them taper to a whisper-thin point at the ends. -
Highlighting curves:
Take the white pencil and trace only the upper curves of the tentacles. I find this creates a ‘highlight’ that makes them look cylindrical rather than flat. -
Adding stray light:
Draw very faint, thin ghost lines parallel to the main tentacles using the electric blue pencil to suggest motion blur. -
Final punch:
Review your drawing and look for the absolute brightest spots—usually the top of the bell and edges of the ruffles. Press hard with white to make them pop against the black darkness.
Now you have a luminous deep-sea creature that truly glows on the page
BRUSH GUIDE
The Right Brush for Every Stroke
From clean lines to bold texture — master brush choice, stroke control, and essential techniques.
Explore the Full Guide
Neon Feather With Gradient Glow Layers
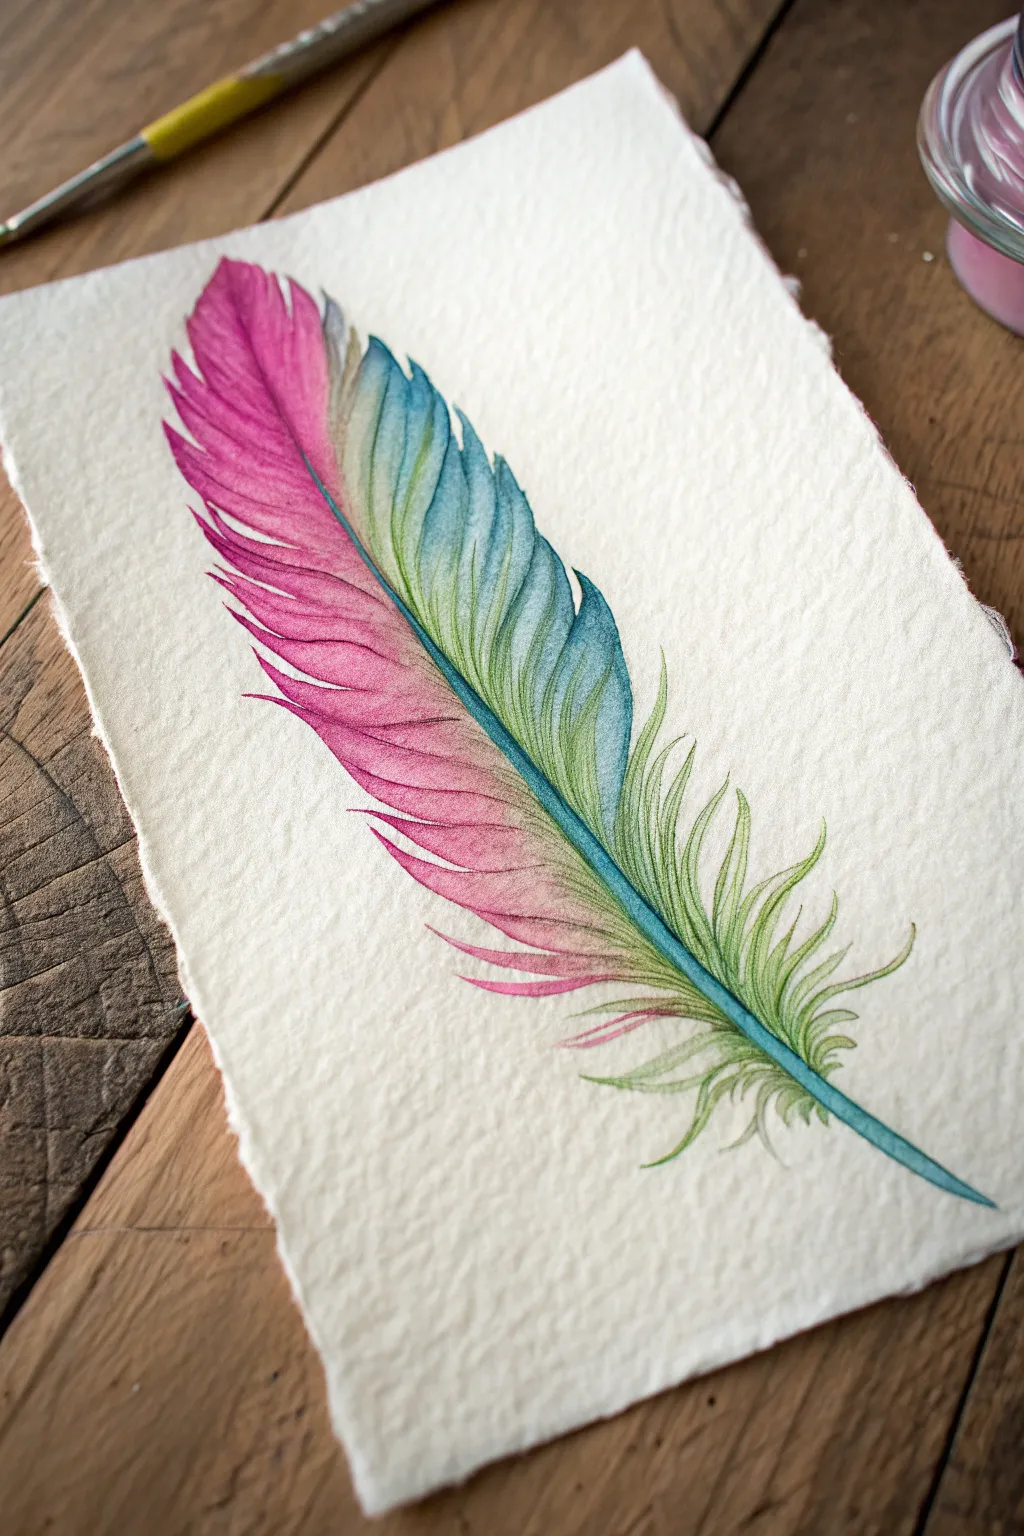
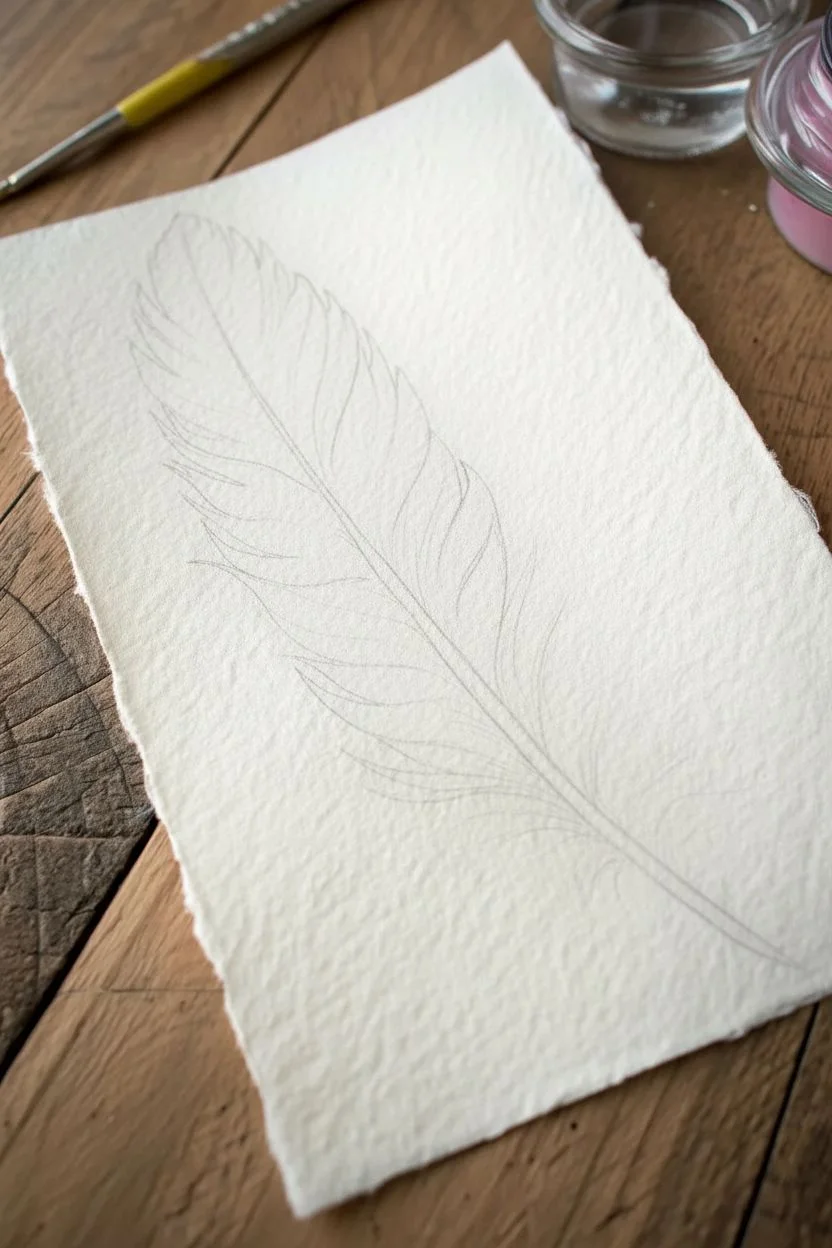
Capture the delicate structure of a feather with this vibrant watercolor project, transitioning seamlessly from electric magenta to cool teal. The high-contrast edges and wet-on-wet blending create a stunning, almost glowing effect on textured paper.
Detailed Instructions
Materials
- Cold-press watercolor paper (300 gsm or heavier, textured)
- Watercolor paints: Magenta/Quinacridone Rose, Phthalo Blue (Green Shade), Sap Green
- Round watercolor brushes (Size 2 and Size 6)
- Pencil (HB) for light sketching
- Kneaded eraser
- Jar of clean water
- Paper towel or cloth
- Mixing palette
Step 1: Sketching the Structure
-
Define the rachis:
Start by drawing a gently curved line for the central quill (rachis). Make it slightly thicker at the base and taper it to a fine point at the top. -
Outline the vane:
Lightly sketch the general shape of the feather’s vane. Don’t worry about individual barbs yet; just focus on the overall elongated oval silhouette. -
Add character:
Refine the outline by adding a few breaks or splits in the feather’s edge to make it look natural and organic. Keep your pencil pressure very light so the graphite won’t show through the paint.
Step 2: The First Wash – Establishing the Gradient
-
Prepare your colors:
Mix a vibrant puddle of Magenta and a separate puddle of Phthalo Blue with a touch of Sap Green to create a teal hue. Ensure they are juicy and saturated. -
Paint the quill:
Using your smaller brush (Size 2), carefully paint the central quill. Start with the teal mix at the bottom and blend it into the magenta near the top of the spine. -
Start the left side:
Switch to the Size 6 brush. Wet the left side of the feather shape with clean water, staying just inside your pencil lines. -
Drop in pink:
While the paper is wet, touch your magenta-loaded brush to the top left area. Let the pigment flow and bloom downwards. -
Introduce the blue:
Clean your brush and pick up the teal mix. Apply this to the bottom left area, allowing it to meet the pink in the middle. Watch as they blend to create a soft violet transition. -
Repeat on the right:
Repeat this wet-on-wet process for the right side of the feather. I like to keep the teal section slightly larger on this side for visual balance.
Pro Tip: Hard Edges
To get those crisp, razor-sharp edges on the barbs, ensure your paper is completely dry before adding detail layers. If it’s damp, lines will fuzz out.
Step 3: Refining Details and Texture
-
Dry completely:
Allow the first wash to dry entirely. The paper should feel cool to the touch, not damp. -
Define the barbs:
Using the tip of your Size 2 brush and a more concentrated (less water) paint mix, start painting fine lines that curve outward from the central quill. -
Follow the form:
Ensure these lines follow the curve of the feather. Use magenta for the pink sections and teal for the green/blue sections. -
Create separation:
Leave tiny slivers of the lighter first wash visible between your new brushstrokes. This creates the individual ‘hairs’ of the feather. -
Darken the edges:
Add extra pigment to the very outer edges of the feather to create crisp contrast against the white paper. -
Enhance the splits:
Where you sketched breaks in the feather earlier, emphasize them by painting distinct, separated barbs that curl away slightly. -
Add the downy bottom:
At the very base of the feather, use very loose, wispy strokes with a pale green mix to create the soft, fluffy down feathers. -
Final quill details:
Run a thin line of concentrated teal along the shadow side of the central quill to give it dimension and make it pop.
Level Up: Metallic Pop
Once fully dry, trace the central quill or feather tips with a fine metallic gold pen or pearlescent watercolor for a magical shimmer.
Step back and admire how the colors blend seamlessly while the fine details bring the feather to life
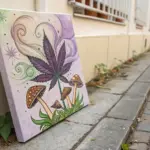
Neon Mushroom Cluster With Magical Spores
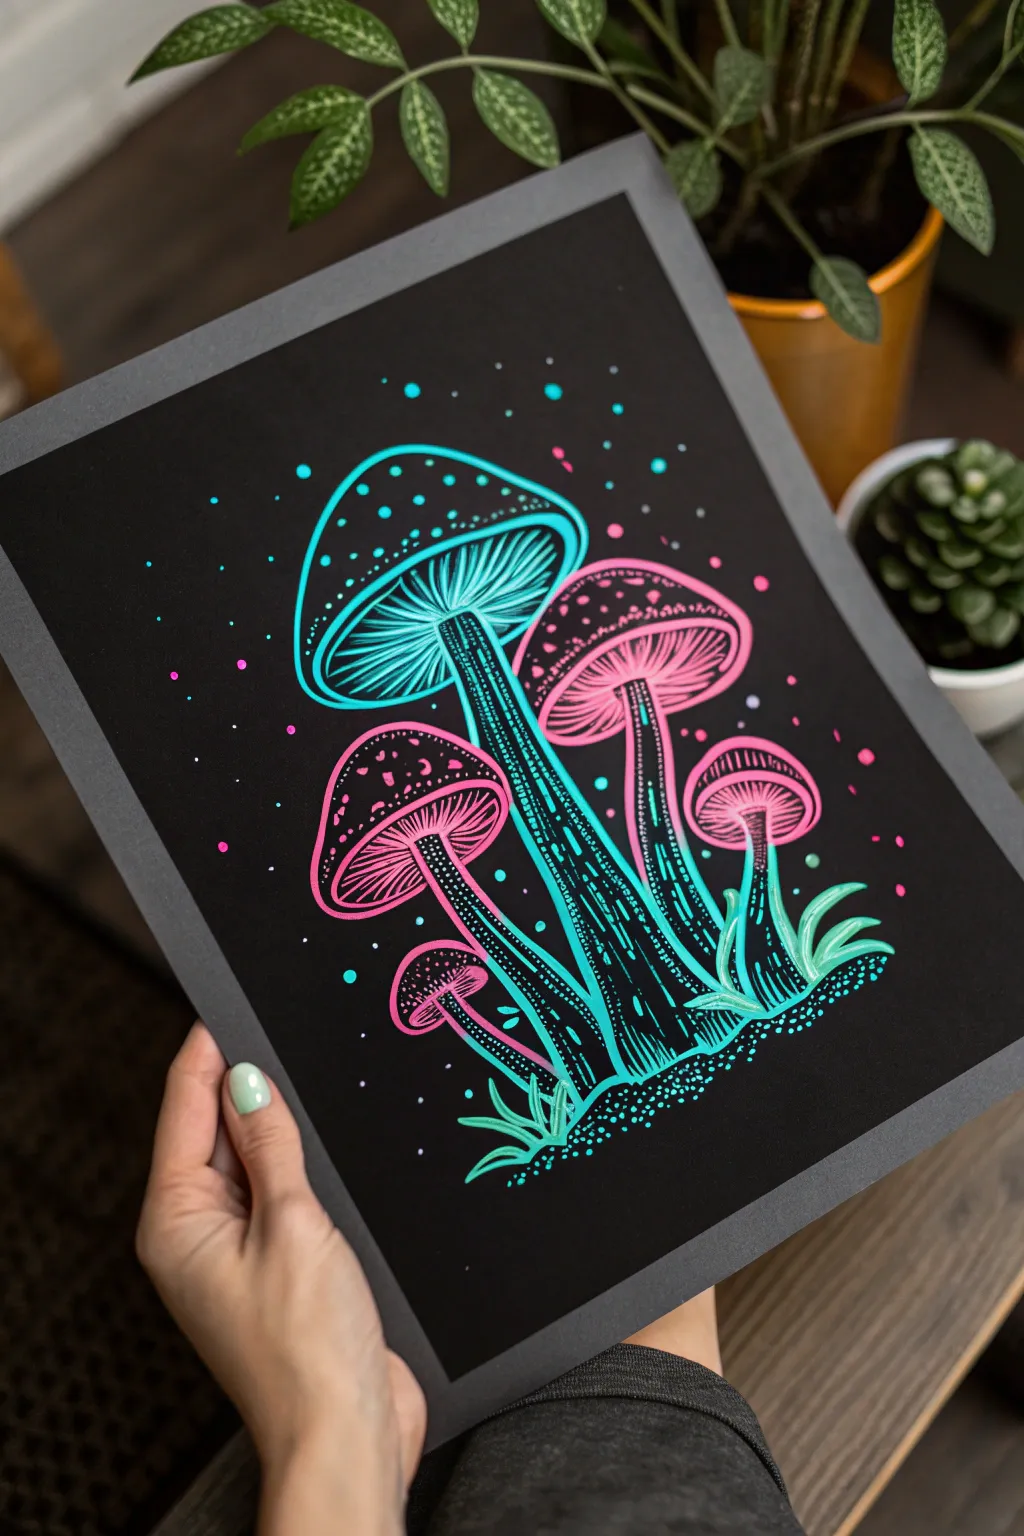
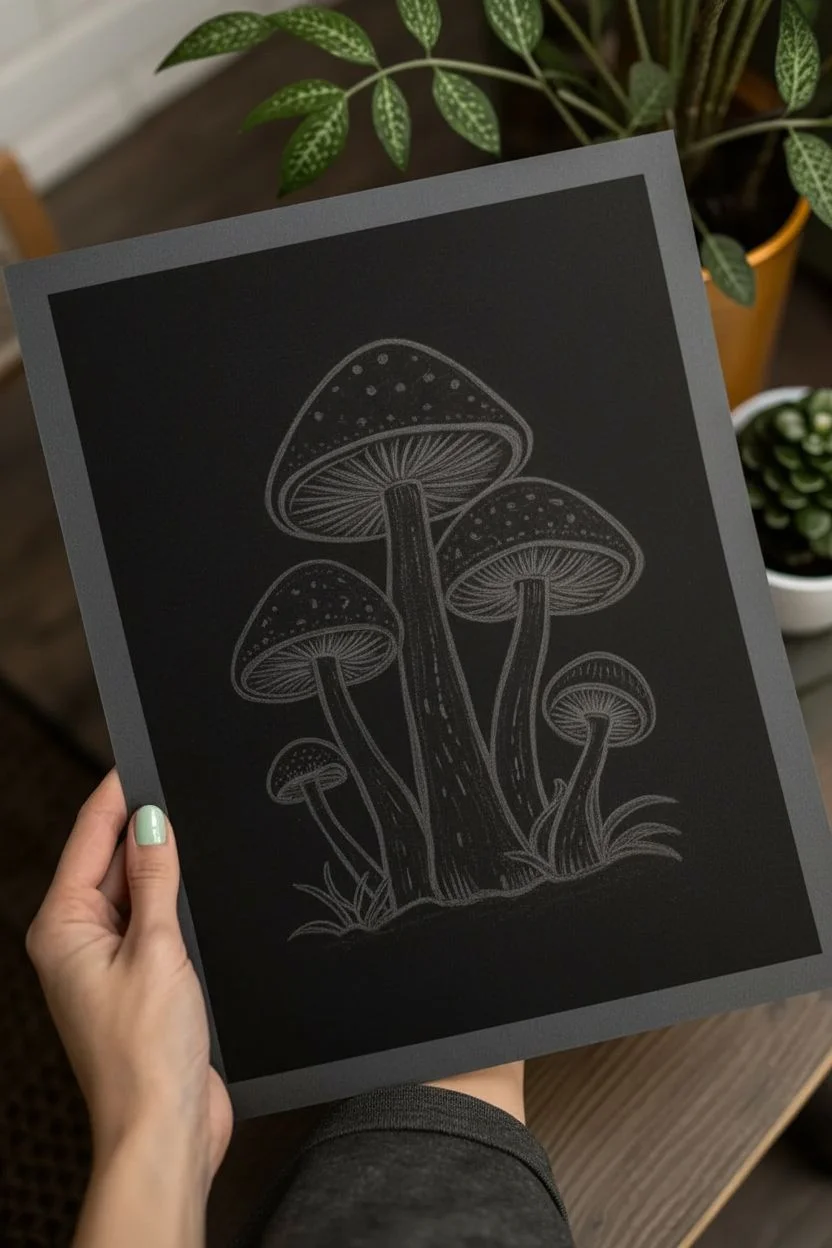
Capture the bioluminescent magic of the forest floor with this striking high-contrast mushroom study. Using vibrant neon gel pens or paint markers on black paper makes the colors pop with an almost electric intensity.
Step-by-Step Tutorial
Materials
- Heavyweight black cardstock or mixed media art paper
- Neon cyan gel pen or fine-tip paint marker (0.7mm)
- Neon pink gel pen or fine-tip paint marker (0.7mm)
- Graphite pencil (HB or H)
- White eraser
- Ruler
Step 1: Drafting the Composition
-
Sketch the primary mushroom:
Begin by lightly sketching the largest, central mushroom with your graphite pencil. Place the cap near the top center, drawing a rounded triangle shape, and extend a long, slightly curved stem downward. -
Add secondary mushrooms:
Sketch a medium-sized mushroom to the right of the main one, slightly lower. Then, add a smaller one to the left, and a tiny ‘baby’ mushroom tucked near the bottom left base. -
Refine the shapes:
Go back over your ghost lines to define the caps. Give them a classic toadstool look with rounded tops and visible gills underneath. Ensure the stems widen slightly at the base. -
Initial ground details:
Lightly pencil in some jagged grass blades at the base of the stems to ground the composition.
Smudge Alert
Gel pens on glossy black cardstock sit on the surface longer than regular paper. Place a clean scrap of paper under your drawing hand to prevent smearing your work.
Step 2: Inking the Outlines
-
Outline the main mushroom:
Switch to your neon cyan pen. Carefully trace the outer contour of the largest central cap and its stem. Keep your hand steady for a clean, continuous line. -
Ink the gills:
Using the same cyan pen, draw fine lines radiating from the top of the stem to the edge of the cap to create the gill texture. These should be delicate and closely spaced. -
Outline the pink mushrooms:
Pick up your neon pink marker. Outline the remaining three mushrooms (right, left, and tiny bottom one). Using the pink, draw the radiating gill lines for these caps as well. -
Detail the stems:
Return to the cyan pen for the central stem. Draw vertical lines varying in length to simulate texture. For the pink mushroom stems, use the pink pen to add similar vertical grain lines.
UV Upgrade
If you really want to make this drawing pop, use specialized UV-reactive fluorescent markers. Under a blacklight, your mushroom cluster will actually glow in the dark.
Step 3: Adding Texture and Glow
-
Stipple the caps:
This is where the magic happens. On the large cyan cap, add small dots and slightly larger uneven spots. This mimics the warts found on toadstools and adds visual interest. -
Pattern the pink caps:
Repeat the stippling process on the pink mushroom caps. Vary the density of the dots; placing more dots near the edges can help simulate roundness. -
Develop stem shading:
Add cross-hatching or deeper vertical lines on the shadowed sides of the stems (I usually pick the right side) to create volume. Use cyan on the blue stem and pink on the others. -
Draw the grass:
Using the cyan pen, draw sharp, spiked leaves of grass growing up around the base of the stems. Add a few small pink accents to the grass for color continuity. -
Create the spore cloud:
Dot the background with tiny specks of both cyan and pink ink. Allow them to become less dense as they move further away from the mushrooms, creating a magical floating spore effect. -
Add ground details:
Stipple a dense collection of dots right at the very bottom of the stems to suggest dirt or moss. Alternate colors here to blend the base into the background.
Step 4: Final Touches
-
Enhance contrast:
Look for areas that feel flat. Add a second layer of ink to the darkest shadow areas on the stems to increase the neon intensity against the black paper. -
Erase guidelines:
Wait at least 15 minutes to realistic ensure the gel ink is completely dry. Gently erase any visible pencil sketch lines so only the neon remains.
Now step back and admire how the neon ink vibrates against the dark background to create a truly luminous effect


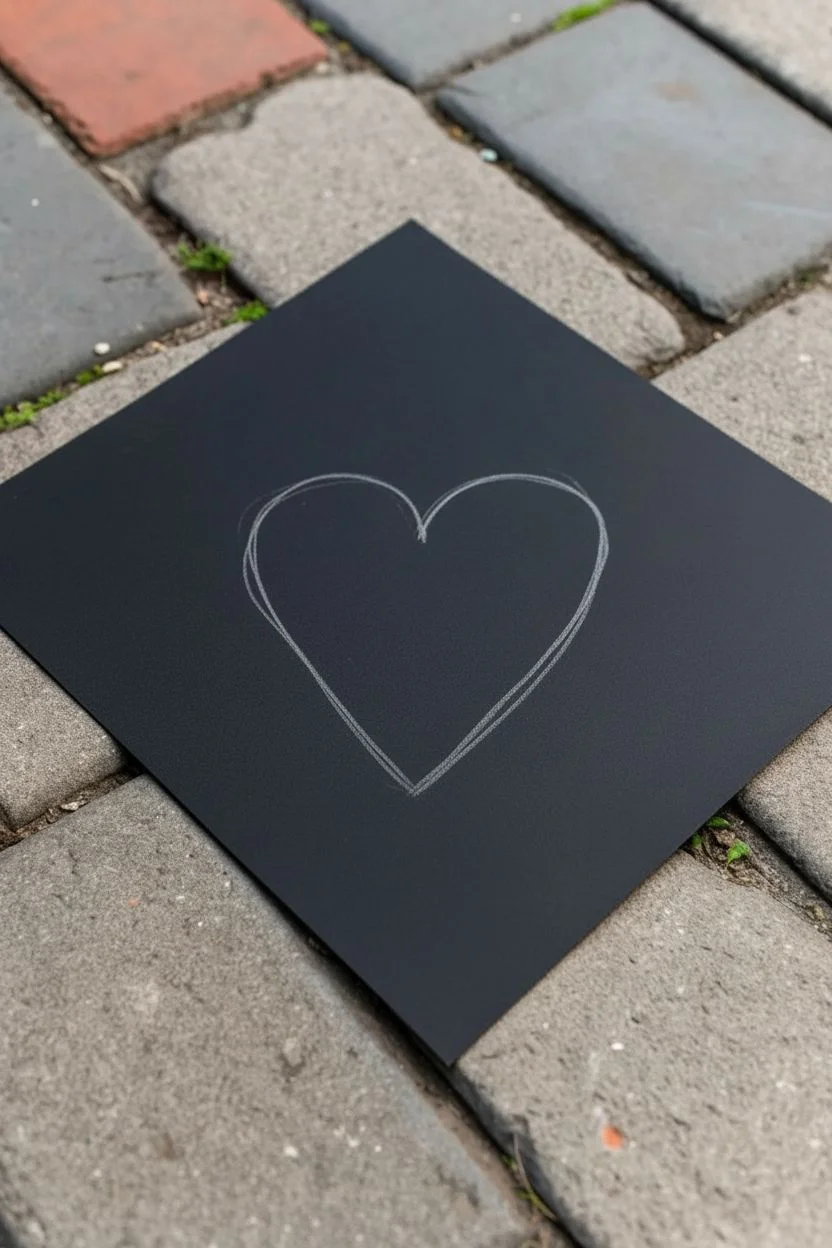
Neon Geometric Frame Around a Simple Icon
This minimalist project creates a striking neon effect by combining geometric precision with a sweet, hand-drawn motif. The contrast of bright gel pens against black paper makes the simple lines pop as if they were glowing lights.
Step-by-Step Guide
Materials
- Black paper sketchbook or cardstock
- Light blue neon gel pen (e.g., Gelly Roll Moonlight or similar)
- Pink neon gel pen
- Ruler or straight edge
- Pencil (optional for sketching)
- Eraser (optional)
Step 1: Setting the Frame
-
Find the center:
Start by eyeing the center of your black page. -
Drafting lightly:
If you are nervous about committing to ink immediately, lightly sketch a triangle with a pencil first to ensure it is centered. -
Drawing the first side:
Take your light blue neon gel pen and your ruler. Place the ruler at an angle for the left side of the triangle. -
Inking the line:
Draw a smooth, straight line downwards. Keep your pressure consistent so the ink flows thickly. -
Completing the shape:
Connect the remaining two sides of the triangle using the ruler, ensuring the corners meet sharply. -
Checking the flow:
If the blue ink looks a bit transparent, let it dry for a minute and then retrace the lines a second time for maximum opacity.
Step 2: Adding the Icon
-
Positioning the heart:
Visualize the center point inside your blue triangle. This is where the heart motif will sit. -
Drawing the inner heart:
Switch to your pink neon gel pen. Draw a small, simple heart shape in the very center. -
Starting the outline:
To create the double-heart look, place your pen tip slightly above the cleft of the first heart. -
Tracing the curves:
Slowly draw a second heart around the first one, maintaining an even distance or ‘gap’ between the two lines. -
Managing the point:
When you reach the bottom point of the heart, make sure the outer line mimics the sharpness of the inner heart. -
Closing the shape:
Finish the curve back up to the top center. I find it easier to draw one half of the outline and then the other to keep it symmetrical. -
Refining lines:
Look closely at your pink lines. If there are any shaky spots, carefully go over them once more to smooth out the thickness. -
Adding white highlights (optional):
For an extra ‘glass tube’ look, you can add tiny white dots or dashes at the curves of the heart and triangle corners.
Ink Skipping?
If your gel pen skips on black paper, try scribbling on your thumb or a scrap piece of paper first to get the ball rolling freely before touching the artwork.
Step 3: Finishing Touches
-
Drying time:
Let the ink sit undisturbed for at least 5-10 minutes. Neon gel ink sits on top of the paper fiber and smears easily when wet. -
Erase guidelines:
Once fully dry, gently erase any visible pencil marks from your initial sketch.
Glow Up
Use a white colored pencil to lightly shade around the lines on the black paper. This creates a soft ‘halo’ effect that makes the neon look like it’s actually illuminating the page.
Enjoy the satisfying contrast of your finished neon design against the dark background
Neon Glitch Art With RGB Split Lines
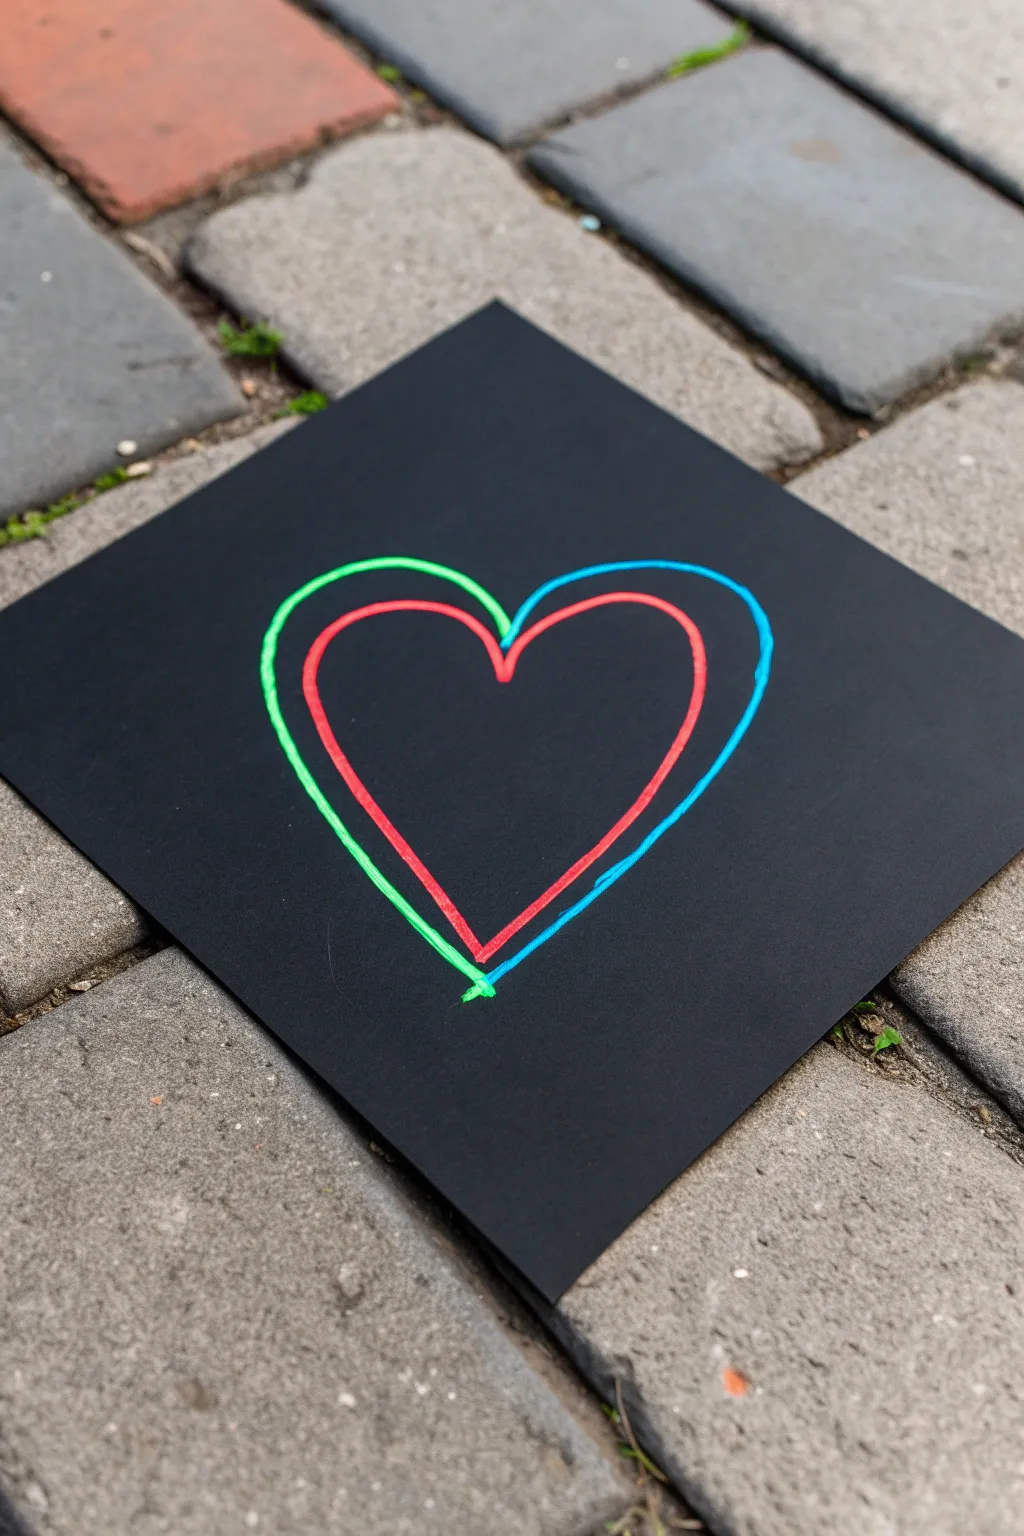
Capture the digital aesthetic of a screen glitch with this simple yet striking drawing technique. By offsetting red, green, and blue lines on black paper, you’ll create a vibrating 3D effect that pops right off the page.
Step-by-Step Tutorial
Materials
- Black cardstock or heavy black paper (square cut)
- Neon green gel pen or paint marker
- Neon red (or bright pink) gel pen or paint marker
- Neon blue gel pen or paint marker
- Pencil (HB or lighter)
- Eraser
- Ruler (optional)
Step 1: Preparation and Base Sketch
-
Prepare the canvas:
Cut your black cardstock into a square. A 6×6 inch or 8×8 inch square works well for this design, giving you enough space to draw comfortably without being overwhelmed. -
Find the center:
Lightly mark the center of your paper with a pencil. This doesn’t need to be geometrically perfect, but it helps ensure your heart lands in the middle. -
Sketch the central heart:
Using very light pressure with your pencil, sketch the outline of a simple, symmetrical heart in the center of the paper. This will serve as your guide for the red layer later. -
Refine the shape:
Clean up your sketch lines. You want a distinct single line to follow, not a hairy sketch, because the ink application needs to be precise.
Step 2: Drawing the RGB Layers
-
Start with Red:
Take your red or bright pink neon marker. Trace directly over your pencil sketch. -
Focus on line weight:
Keep your hand steady to maintain a consistent line thickness. If the ink looks thin, let it dry for a few seconds and go over it once more to make it opaque. -
Dry the center layer:
Allow the red ink to dry completely. Smudging the center line now would ruin the crisp glitch effect we are aiming for. -
Position the Green layer:
Pick up the neon green marker. You are going to draw a second heart that is shifted slightly to the left and upwards from the red one. -
Draw the left arch:
Start at the top cleft of the heart. Draw the green line about 2-3mm to the left of the red line, following the curve perfectly. -
Complete the Green outline:
Continue the green line down to the point. Notice how in the reference, the green and red lines touch or cross slightly at the bottom point. This intersection heightens the glitch illusion. -
Position the Blue layer:
Now switch to your neon blue marker. This layer will be shifted to the right and slightly downwards compared to the red center. -
Draw the right arch:
Start the blue line at the top cleft, positioning it about 2-3mm to the right of the red line. -
Follow the curve:
Trace the shape of the heart, maintaining that gap. I find it helpful to focus on the space between the lines rather than the line itself to keep the gap consistent. -
Connect the point:
Bring the blue line down to the bottom tip. It should cross over or meet the red and green tips, creating a messy, vibrant intersection at the very bottom.
Ink Brightness Trick
If your neon markers look dull on the black paper, draw the lines with a white gel pen first. Let it dry, then layer the neon colors on top for maximum pop.
Step 3: Finishing Touches
-
Check for gaps:
Look closely at your lines. If the black paper is showing through the ink too much, carefully touch up those areas to maximize the neon brightness. -
Clean up:
Once you are 100% certain all ink is dry, gently erase any visible graphite pencil marks from your initial sketch. -
Enhance the glitch (optional):
If you want a more chaotic look, you can add tiny horizontal dashes of color sticking out from the main lines, but the clean version shown here often looks best.
Digital Distortion
Try this effect with other shapes like stars or lightning bolts. You can also vary the offset: shift green left and blue right for a classic chromatic aberration look.
Now you have a piece of analog art that looks perfectly digital
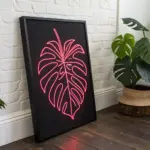
Neon Portrait Lighting With Color Blocking
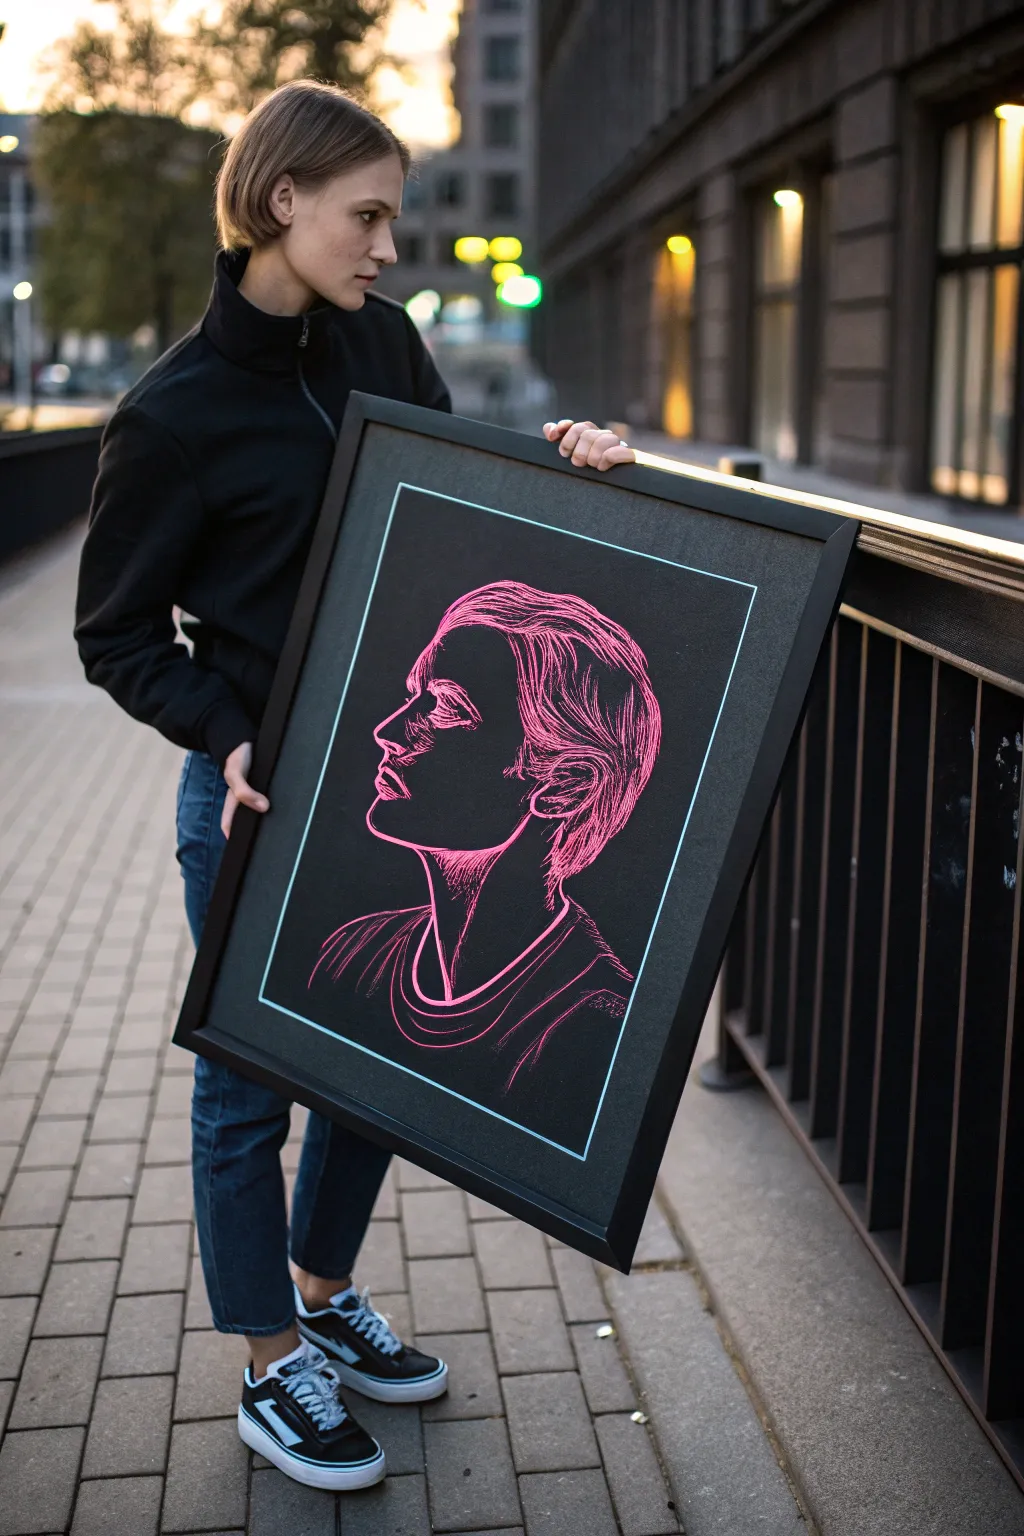
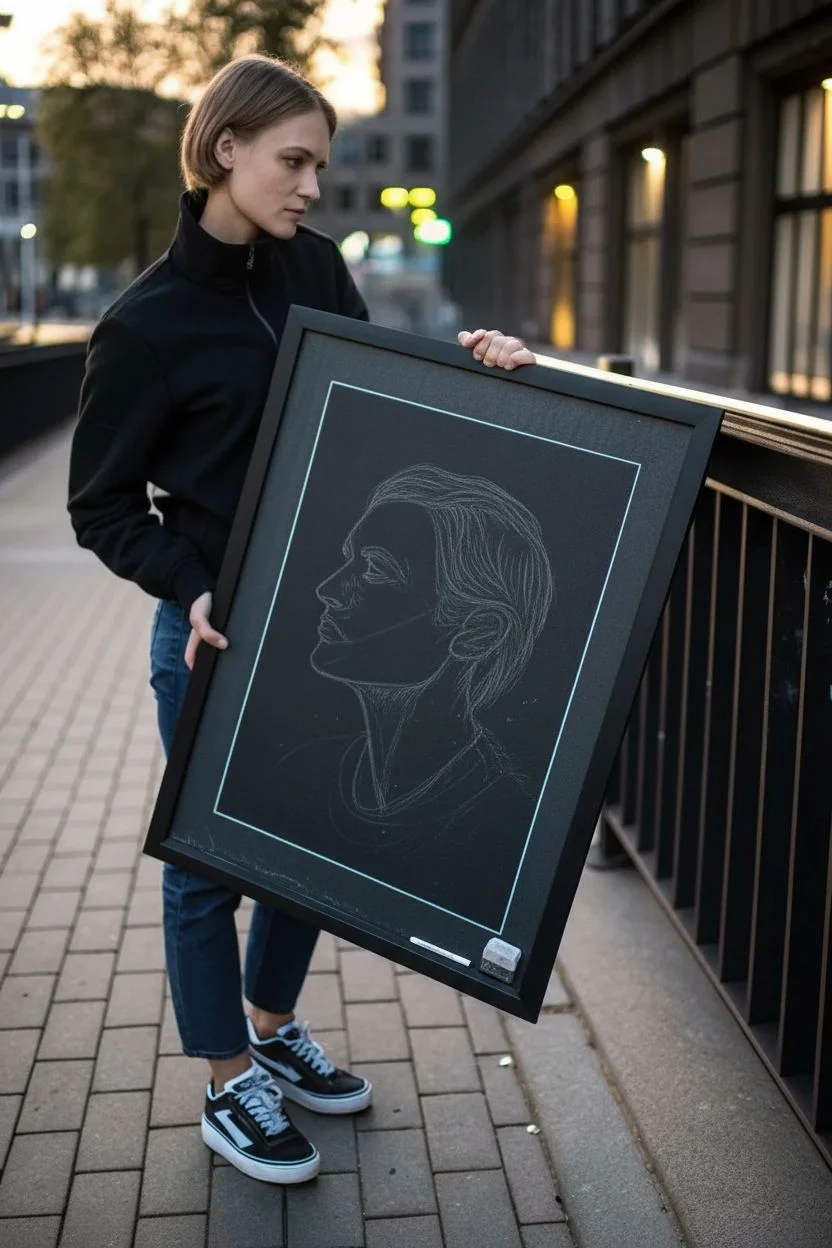
Capture the electrifying glow of a neon sign without the expensive glass tubing using high-contrast illustration techniques. This project combines stark black backgrounds with vibrant pink linework and cyan borders to create a striking, modern portrait that looks as if it’s humming with energy.
Step-by-Step
Materials
- Large sheet of heavyweight black paper or black illustration board (approx. A2 size)
- Neon pink gel pen, paint marker, or high-pigment colored pencil
- Neon cyan/light blue gel pen or paint marker
- White charcoal pencil or graphite pencil (for sketching)
- Kneaded eraser
- Ruler
- Reference photo of a side profile
- Black wooden frame (to fit paper size)
- Matte spray fixative (optional)
Step 1: Preparation and Sketching
-
Prepare your surface:
Begin by cleaning off a large, flat workspace. Lay down your black paper or illustration board, ensuring it is free of dust or oils from your hands, as these can resist the ink later. -
Define the borders:
Using your ruler and the white charcoal pencil, lightly measure and mark a border about 2-3 inches from the edge of the paper. This will serve as the inner frame line for the final piece. -
Analyze your reference:
Take a moment to study your side-profile reference photo. Look specifically for the shadow shapes and where the ‘light’ would hit the edge of the face, hair, and neck. -
Draft the outline:
With the white charcoal pencil, very faintly sketch the profile in the center of the paper. Keep your pressure extremely light so the white lines don’t show through the final neon ink. -
Refine the anatomy:
Tighten up the sketch, focusing on key features like the brow bone, nose bridge, lips, and jawline. Mapping out the flow of the hair strands is crucial for that stylized look. -
Clean up the draft:
Use your kneaded eraser to gently dab away excess white charcoal dust. You want only a ghost image of the sketch remaining to guide your permanent markers.
Step 2: Applying the Neon
-
Test your medium:
Before touching the final artwork, test your neon pink pen or marker on a scrap piece of black paper to ensure the opacity is high and the ink is flowing smoothly. -
Start with the face profile:
Begin inking the main profile line of the face—forehead, nose, lips, and chin—using confident, continuous strokes. Avoiding shaky lines helps mimic the smooth appearance of bent glass tubing. -
Detail the features:
Add the internal details like the eye, nostril, and ear. Use slightly thinner or broken lines for wrinkles or softer areas to imply depth without over-complicating the ‘neon’ look. -
Render the hair:
Switch to longer, sweeping strokes for the hair. Group the strands together rather than drawing every single hair; think of them as blocks of light hitting the waves of the hair. -
Add cross-hatching shadows:
To create the stylized shadowing on the neck and cheek seen in the example, use loose, directional hatching lines. I find it helpful to keep these lines fairly spaced out to maintain the high contrast. -
Draw the clothing:
Outline the collar and shoulders with simple curved strokes. Add just enough detail to suggest fabric folds, keeping the bottom edge purposefully faded or scratchy where the light would naturally fall off.
Use White Base
Make colors pop by drawing a thin white line first, then layering the neon color on top. This simulates the bright white core of real neon tubing.
Step 3: Final Touches and Framing
-
Draw the inner border:
Switch to your neon cyan or light blue marker. Carefully trace over the border lines you measured earlier, using the ruler to ensure a razor-sharp, glowing frame around the portrait. -
Double-layering for brightness:
Once the first layer of ink is completely dry, carefully go over the brightest parts of the pink portrait (like the nose tip and hair highlights) a second time to boost opacity. -
Erase guidelines:
Check thoroughly that all ink is dry, then gently erase any remaining visible white charcoal sketch marks with the kneaded eraser. -
Seal the artwork:
If using a medium that might smudge, take the drawing outside and apply a very light coat of matte spray fixative. -
Mount and frame:
Place the artwork into your black wooden frame. Secure the back, wipe down the front (if there is glass), and your neon-style masterpiece is ready to display.
Glow Effect
Use dry pastel or colored pencil lightly around your main pen lines to create a soft, hazy ‘glow’ that radiates onto the black paper.
Hang this striking piece in a dimly lit area to fully appreciate the optical illusion of the neon effect
Neon “Light Painting” Scribbles With Motion Trails

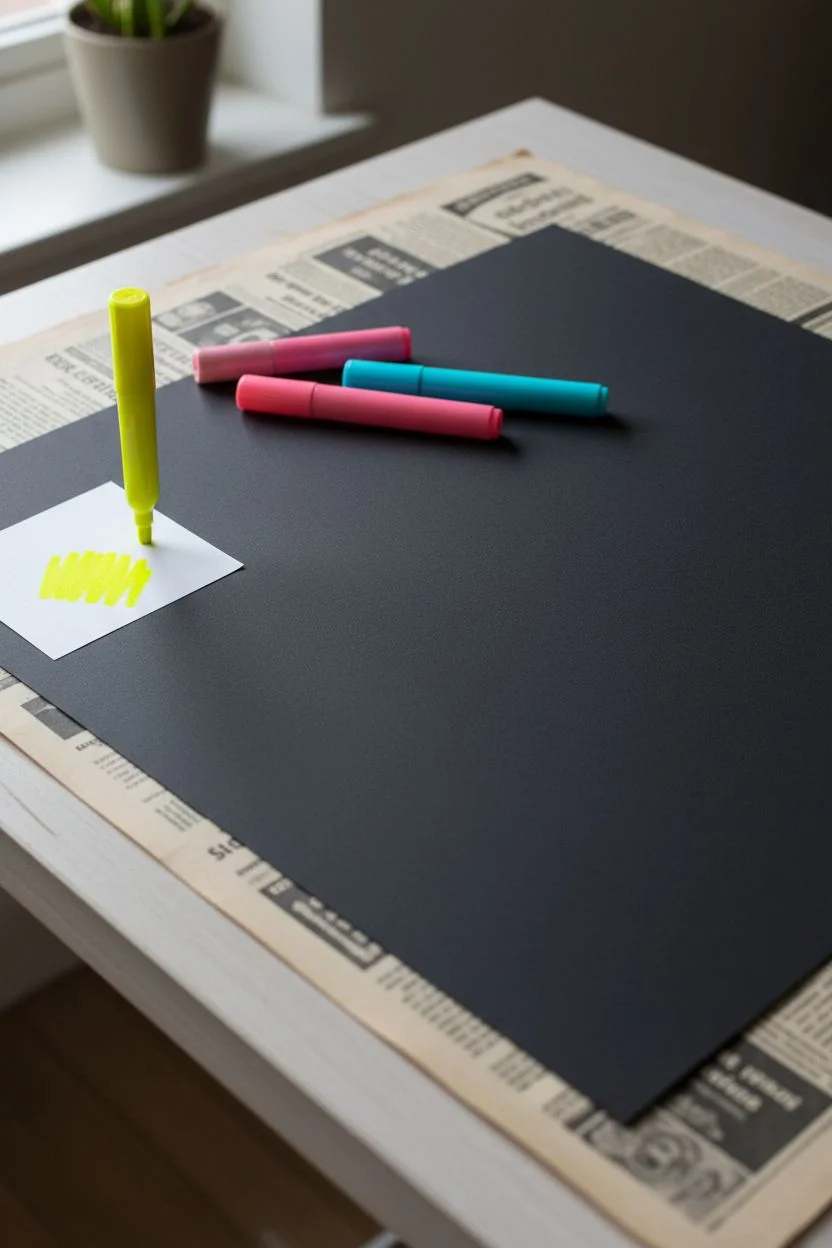
Capture the vibrant energy of long-exposure photography with this simple yet striking drawing project. Using bright, opaque markers on stark black paper creates a glowing effect that mimics light trails dancing in the dark.
Detailed Instructions
Materials
- High-quality black cardstock or mixed media paper
- Neon chalk markers or opaque paint pens (specifically yellow, pink, and cyan)
- Scrap paper for testing ink flow
- Table surface protected with newspaper (optional)
Step 1: Preparation and Planning
-
Select your paper:
Choose a black paper that has a smooth finish but enough weight to handle paint markers without buckling. A heavy cardstock works beautifully for this. -
Prime your markers:
If you are using new paint pens or chalk markers, shake them vigorously to mix the pigment. Press the nibs down on a piece of scrap paper until the ink flows smoothly and fully saturates the tip. -
Plan the composition:
Visualize the central area of your paper. This design relies on overlapping spirals that stretch horizontally across the page, so imagine three main overlapping zones where your colors will interact.
Step 2: Drawing the Base Loops
-
Start with the first color:
Take your neon yellow marker. Begin on the left side of the paper, slightly below the vertical center. -
Create the initial spiral:
Draw a large, loose circular motion. Don’t lift your pen; instead, keep the movement fluid and continuous, spiraling outward slightly to create multiple rings. -
Expand the gesture:
Allow your yellow loops to travel toward the center of the page. Vary the size of the circles slightly to make the movement look organic and energetic. -
Finish the first layer:
Once you have a cluster of yellow loops on the left and center, lift your pen. I like to let this dry for just a few seconds to avoid immediate smearing when the next color is applied.
Ink Not Showing Up?
If colors look dull, your black paper might be too absorbent. Try standard cardstock or poster board, which keeps the ink on the surface for a brighter pop.
Step 3: Layering Colors
-
Introduce the second color:
Switch to your neon pink marker. Position your hand near the bottom center of the page, overlapping with the edge of your yellow design. -
Draw the lower loops:
Create a new series of continuous loops. Focus this color on the lower-middle section, letting the pink lines cross over and under the yellow lines you just drew. -
Vary the pressure:
Keep your hand relaxed. A consistent, medium speed helps create smooth curves rather than jagged or shaky lines. -
Extend to the right:
Pull the pink spiral motion toward the right side of the paper, creating a balanced cluster on that side. Lift your pen when the shape feels substantial.
Loose Wrist Technique
Don’t draw from your fingers. Move your entire arm from the shoulder. This creates much smoother, perfectly rounded loops compared to planting your wrist.
Step 4: Completing the Composition
-
Add the final hue:
Pick up the cyan or light blue marker. This color will serve as the bridge between the yellow and pink, filling in the upper area. -
Target the gaps:
Look for the negative space in the upper-center and top-right of your composition. Begin your continuous looping motion there. -
Intertwine the colors:
Draw large, sweeping loops that intersect heavily with both the yellow and pink sections. The blue overlapping the other colors creates that dense ‘light painting’ aesthetic. -
Review the density:
Step back and look at the whole piece. If the center looks too empty, go back in with any of the three colors and add one or two more focused loops to tighten the knot of lines. -
Final drying:
Paint markers can stay wet longer than standard pens. Allow the artwork to sit undisturbed for at least 15 minutes to ensure the thickest intersections are completely dry. -
Flattening (optional):
If your paper curled slightly from the ink moisture, place the dry artwork under a heavy book overnight to flatten it perfectly before displaying.
Now you have a dynamic piece of abstract neon art that glows right off the page


Have a question or want to share your own experience? I'd love to hear from you in the comments below!