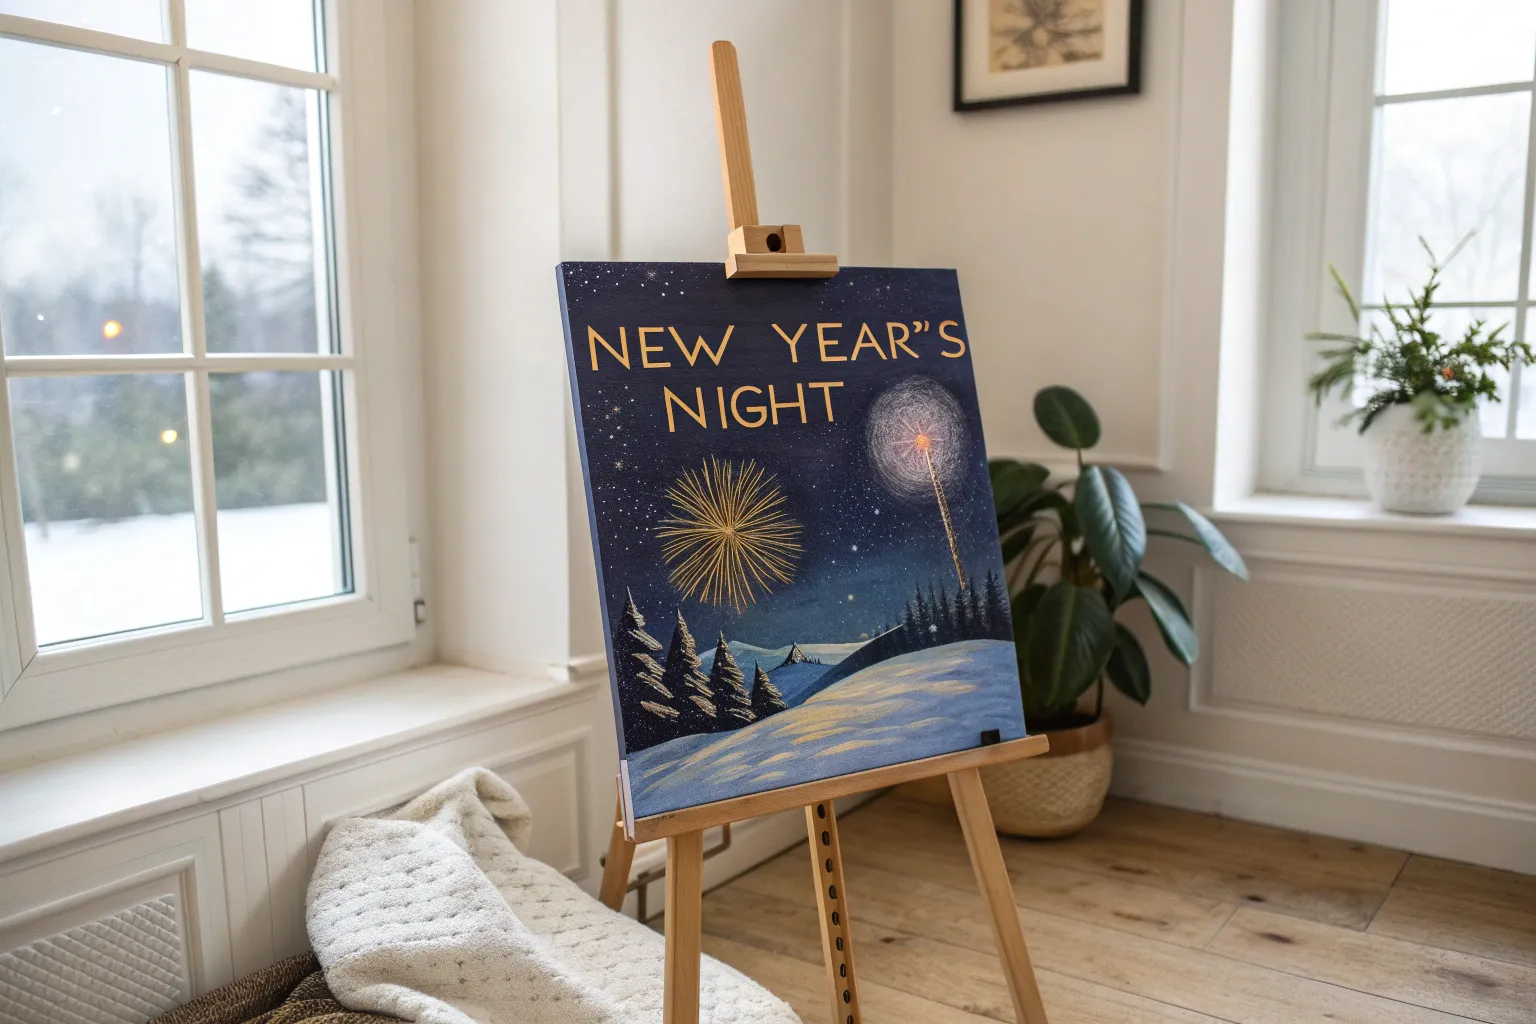
Nothing says New Year like bold lights, midnight skies, and a few celebratory details you can paint without overthinking it. I pulled together my favorite easy painting ideas that look festive fast, even if you’re working with simple shapes and a limited color palette.
Fireworks on a Simple Night Sky
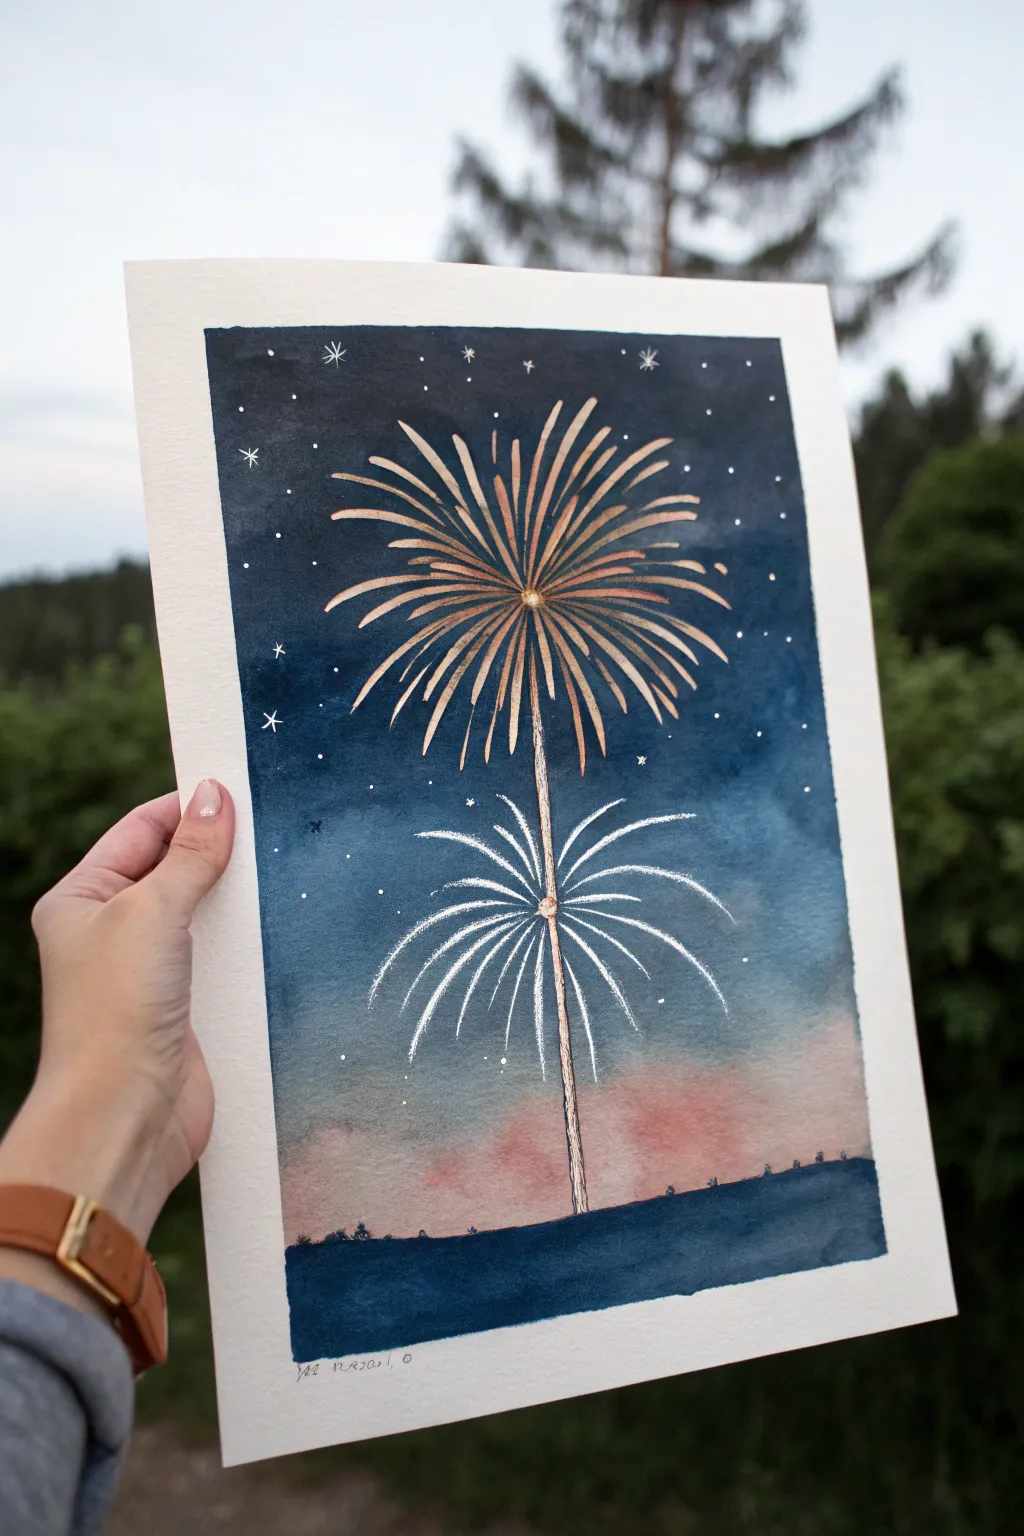
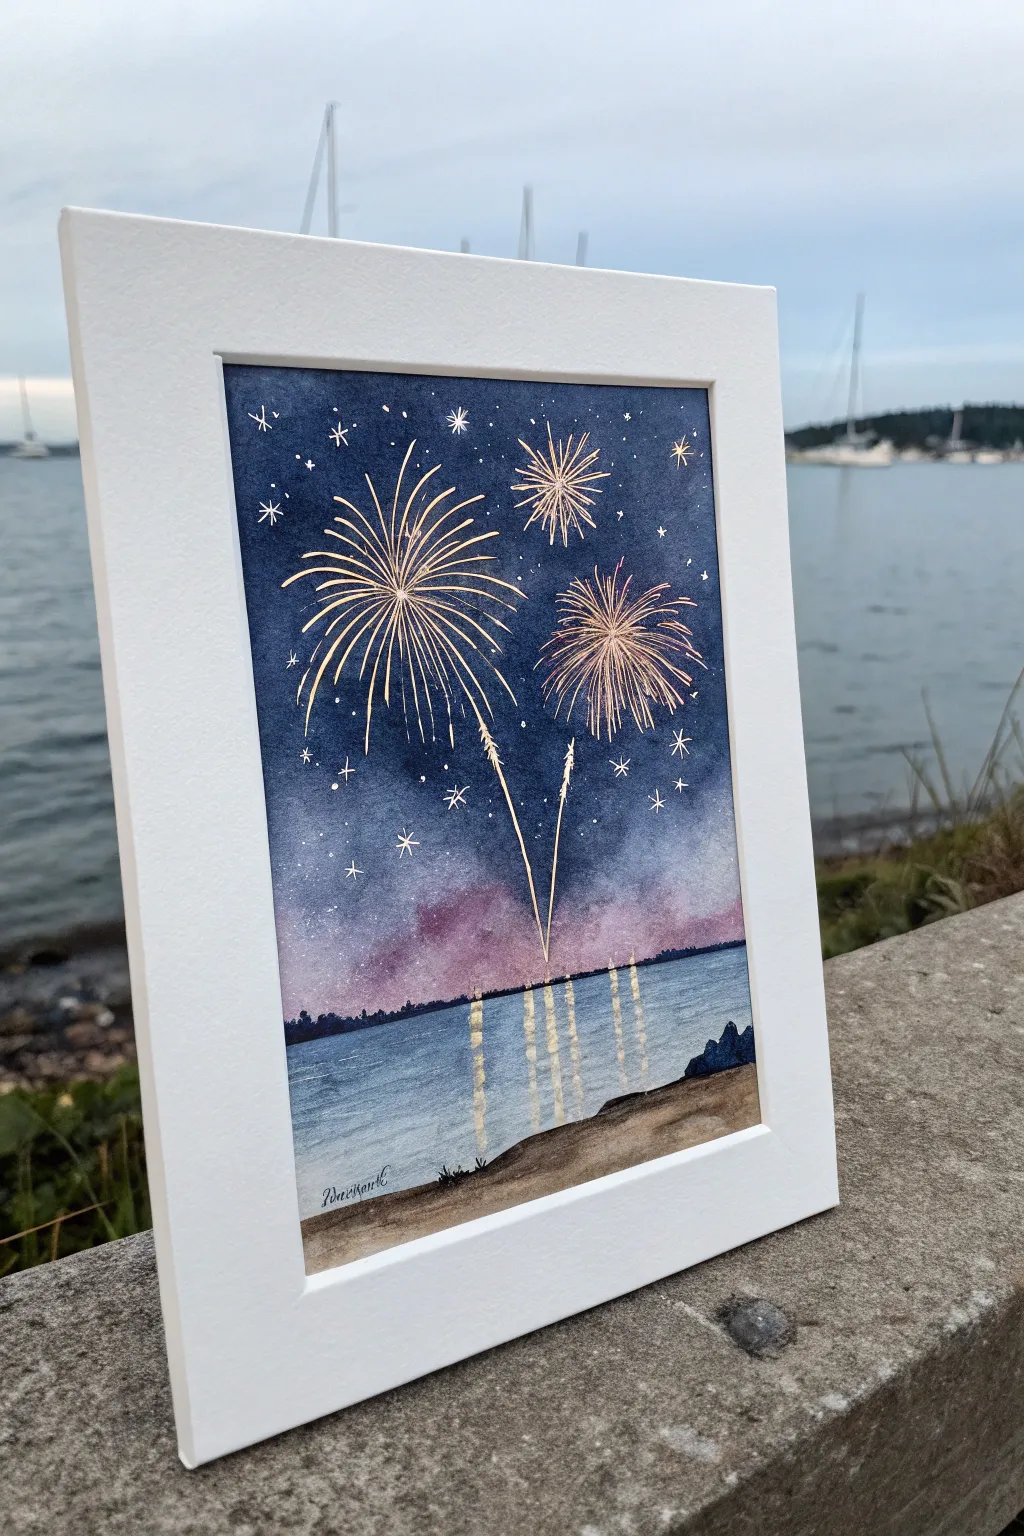
Capture the magic of a New Year’s celebration with this elegant watercolor painting featuring two distinct bursts of light against a moody gradient sky. The contrast between the deep indigo heavens and the metallic shimmer makes for a sophisticated yet approachable project.
Detailed Instructions
Materials
- Cold press watercolor paper (A4 or similar size)
- Painter’s tape or masking tape
- Watercolor paints (Indigo, Payne’s Gray, Prussian Blue, Black, Burnt Sienna/Alizarin Crimson for the glow)
- Flat wash brush (large)
- Round brushes (size 4 and 8)
- Fine liner brush or rigger brush
- Gold metallic paint or Posca pen
- White gouache or white gel pen
- Clean water and blending palette
- Paper towels
Step 1: Setting the Stage
-
Secure the paper:
Begin by taping down all four edges of your watercolor paper to a board or table. This creates a crisp white border and prevents the paper from buckling under heavy washes. -
Lightly sketch spacing:
Use a pencil to make two very faint dots where the centers of your fireworks will be—one higher up in the center, and one slightly lower down. -
Prepare the gradients:
On your palette, mix a generous puddle of deep indigo blue mixed with a touch of black for the top of the sky. In a separate well, mix a watery, soft reddish-pink wash using Alizarin Crimson or Burnt Sienna.
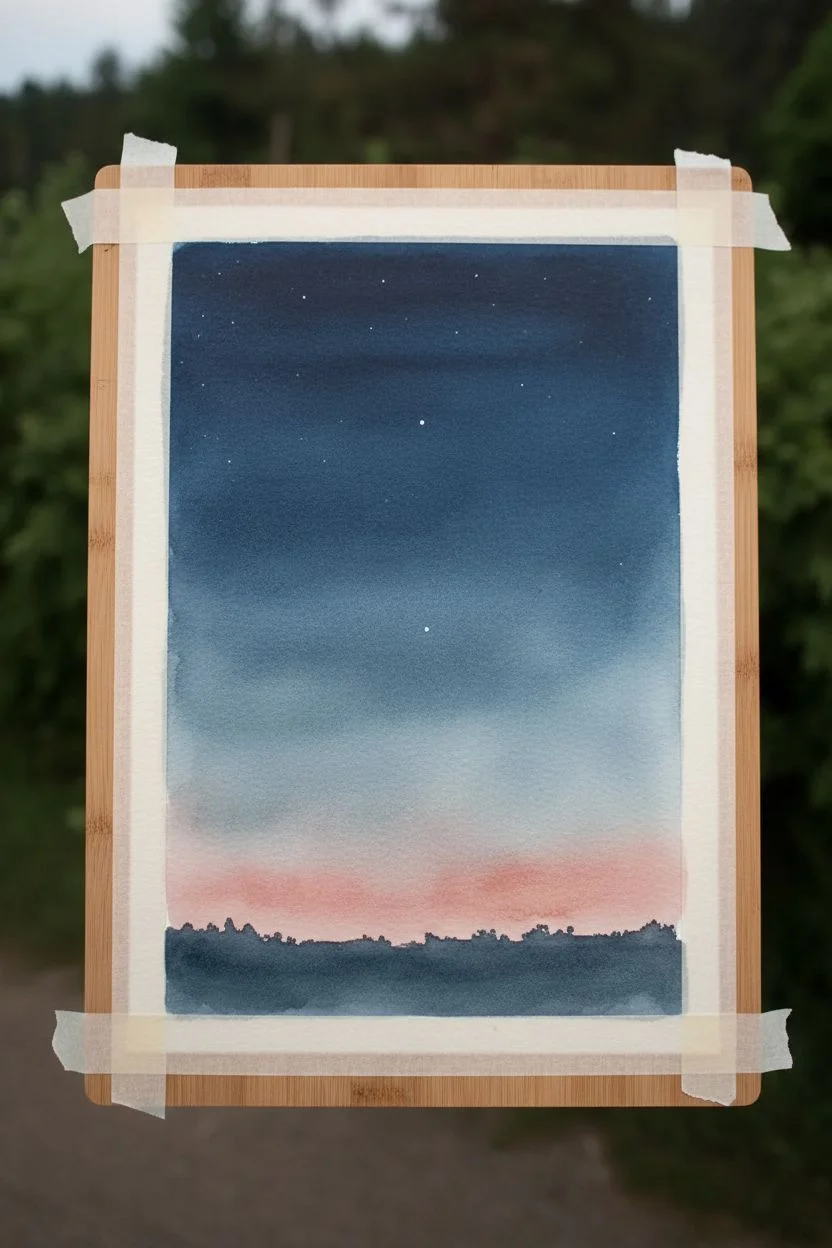
Step 2: Painting the Sky
-
Start the wash:
Using your large flat brush, apply clean water to the entire sky area, stopping about an inch above the bottom edge. While wet, load up the dark indigo mix. -
Create depth:
Apply the dark blue heavily at the very top, brushing horizontally. As you work your way down the page, dip your brush in water to dilute the paint, creating a transition from deep night to twilight. -
Add the horizon glow:
When you reach the lower third of the paper, switch to your reddish-pink wash. Gently blend this into the fading blue to create a misty, sunset-like glow near the horizon. Let the colors bleed naturally. -
Paint the ground:
While the sky is still slightly damp but not soaking, mix a thick, dark blue-black. Paint a loose, uneven strip across the very bottom to represent the distant ground or horizon line. -
Initial starry details:
Before the sky is completely bone-dry, load a brush with clean water and tap the handle to splatter tiny droplets onto the dark blue section. This lifts the pigment to create subtle ‘distant stars’. -
Wait for drying:
This is crucial: allow the background to dry completely. If you paint the fireworks now, they will fuzzy and bleed. I usually verify dryness by touching the paper gently with the back of my hand.
Clean Lines Trick
To get perfectly sharp firework trails, practice the ‘flicking’ motion on a scrap piece of paper first. Quick, confident strokes are smoother than slow ones.
Step 3: The Main Attraction
-
The central stem:
Using gold paint or a metallic pen, draw a thin, slightly wavering vertical line starting from behind the ground layer up to your top pencil dot. -
Start the gold burst:
For the top firework, use your gold paint. Start from the center dot and flick your brush outward. Press down at the start and lift at the end to create tapered strokes. -
Layering the sparks:
Add a second interior layer of shorter gold strokes in between the longer ones to make the explosion look dense and full. -
The silver companion:
Switch to white gouache (consistency of heavy cream) or a white gel pen. Using the lower dot as a center, paint the second, smaller firework. -
Curved trajectories:
For this lower white firework, give the strokes a significant downward curve, like a weeping willow or a falling fountain shape. -
Connect the trail:
Draw the vertical smoke trail for the white firework, connecting it to the main stem.
Add Some Sparkle
While the gold paint is still wet, sprinkle a tiny pinch of ultra-fine gold glitter onto the center of the main firework for actual texture and shine.
Step 4: Final Embellishments
-
Bright stars:
Using opaque white gouache or a gel pen, dot distinct stars in the dark blue upper sky. Create variation by making some dots larger than others. -
Twinkling accents:
Choose 3 or 4 of your brightest stars and add cross-hatches to turn them into twinkling four-point stars. -
Highlighting the center:
Place a tiny, concentrated dot of metallic gold or bright white right at the center hub of each firework to show the point of ignition. -
Tape removal:
Once you are certain every drop of paint is dry, slowly peel away the masking tape at a 45-degree angle away from the painting.
Frame this piece behind glass to protect the metallic pigments and enjoy your personal celebration on paper


Big Year Numbers With Sparkler Strokes
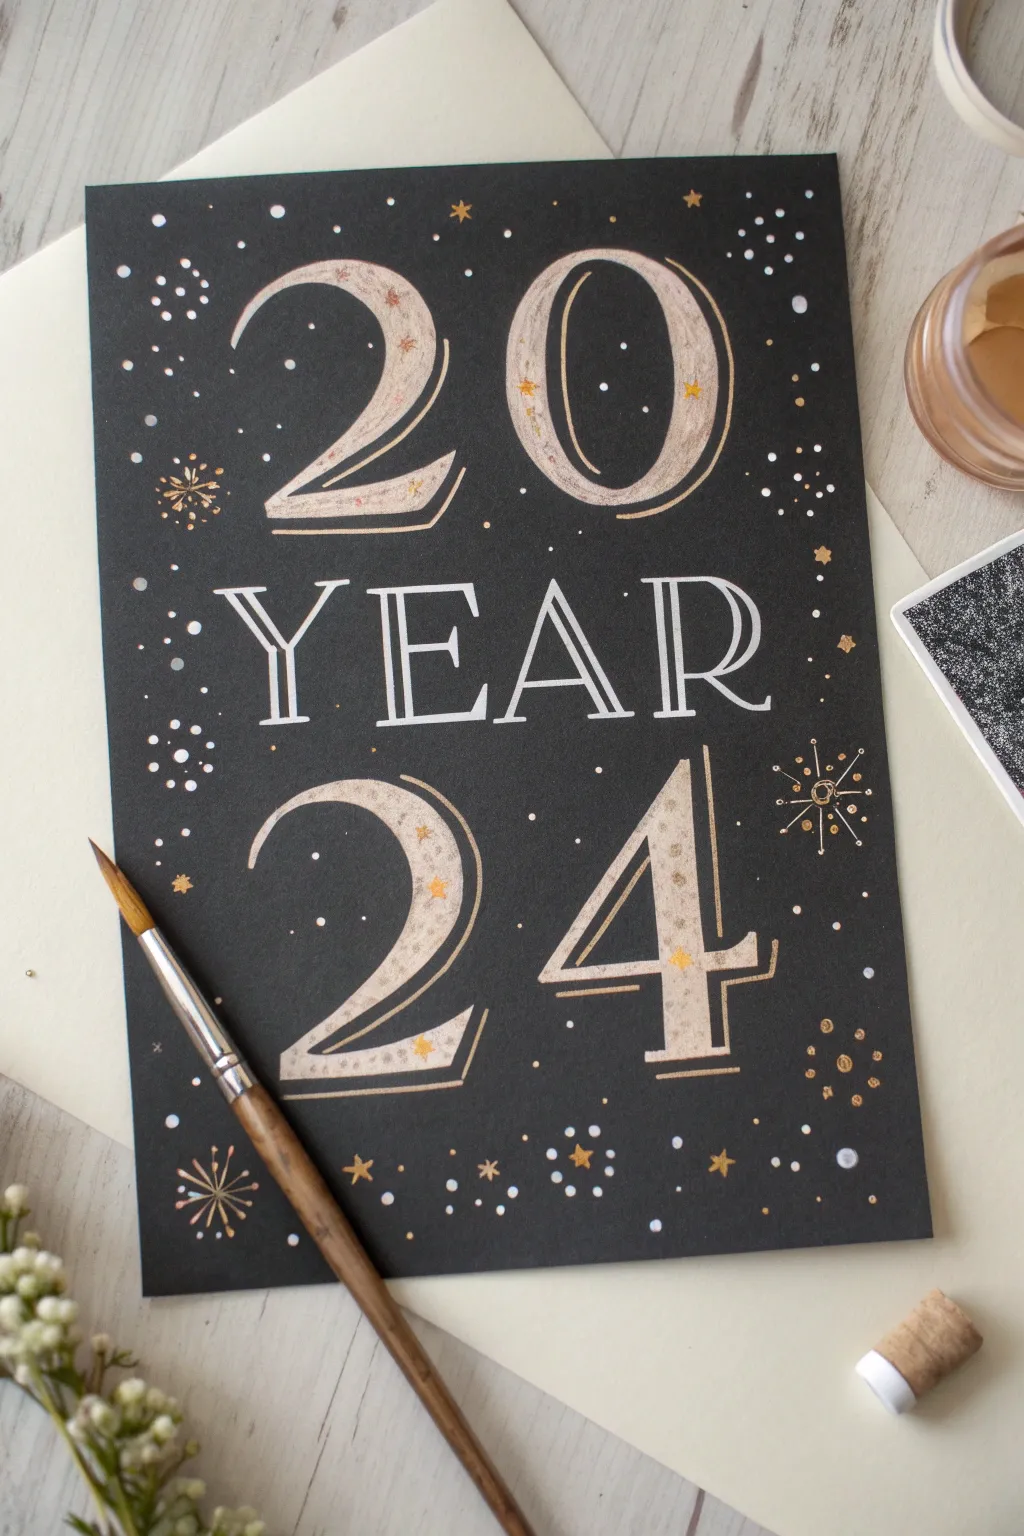
Celebrate the new year with a celestial-themed card that pops against a midnight background. This project combines bold lettering with delicate metallic details for a sophisticated, hand-crafted look.
Step-by-Step Guide
Materials
- Black cardstock or heavy mixed media paper (A5 or A4 size)
- White gel pen (medium or broad tip)
- Gold metallic watercolor paint or gold ink
- Fine detail paintbrush (size 0 or 1)
- Pencil and eraser
- Ruler
- Gold gel pen or fine tip marker (optional)
Step 1: Layout & Lettering
-
Prep the layout:
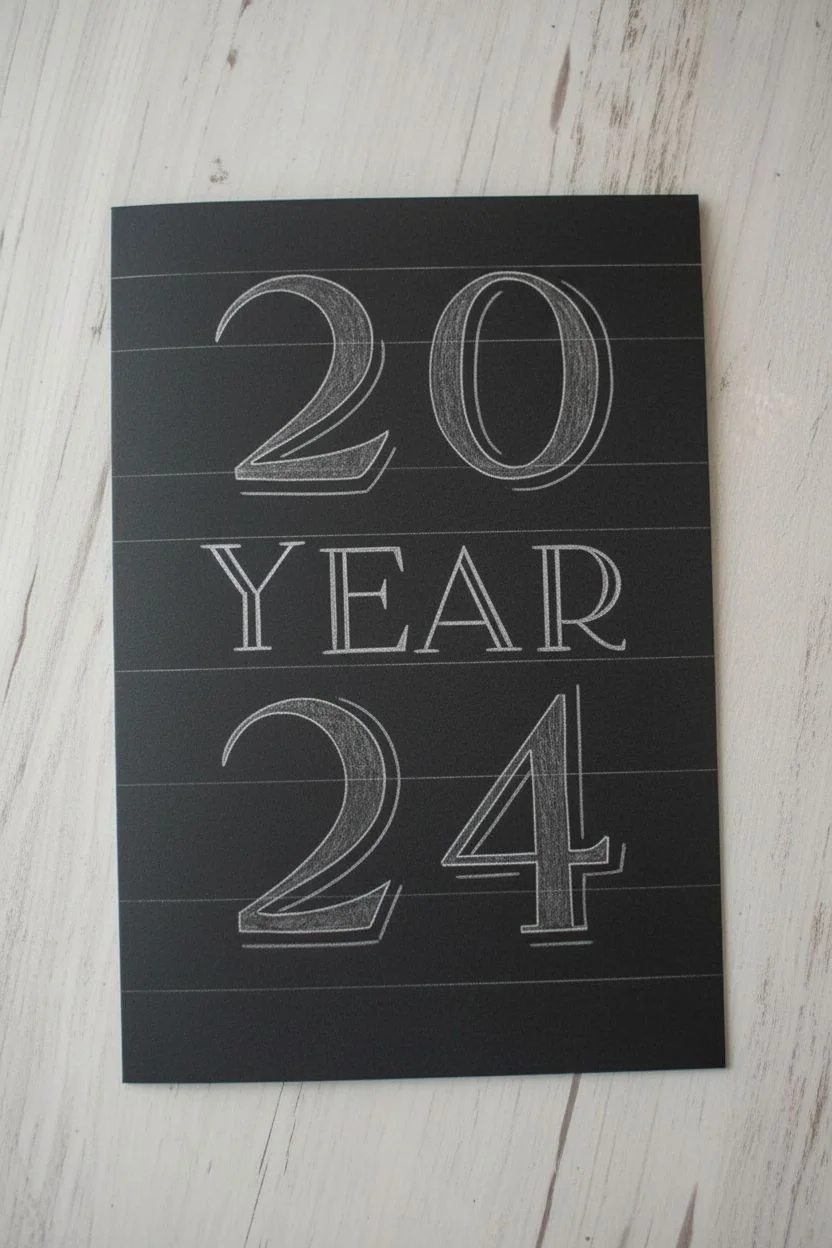
Begin by finding the vertical center of your black cardstock. Use a ruler and a light pencil touch to draw three horizontal guidelines. You’ll need a large section at the top for the ’20’, a narrower middle strip for the word ‘YEAR’, and a large bottom section for the ’24’. -
Sketch the numbers:
Lightly sketch the large numbers ’20’ and ’24’ in the top and bottom sections. Aim for a classic serif style with varying stroke widths—thick downstrokes and thin upstrokes give it elegance. -
Add the middle text:
In the central band, sketch the word ‘YEAR’ in all caps. Use a simple, clean serif font. Space the letters widely so they span the width of the larger numbers above and below. -
Refine the outlines:
Go back over your number sketches and turn the single pencil lines into double lines to create ‘hollow’ block letters. Do the same for ‘YEAR’ but keep these lines thinner and closer together.
Step 2: Inking & Paint
-
Outline in white:
Using your white gel pen, carefully trace over your final pencil lines. Start from the top left and work your way down to avoid smudging the fresh ink with your hand. Keep a scrap piece of paper nearby to get the ink flowing if the pen skips. -
Add drop shadows:
To make the numbers pop, add a drop shadow to the ’20’ and ’24’. Draw a thin gold line along the bottom and right edge of every curve and stroke using your fine brush and metallic paint. This simple step adds instant dimension. -
Fill with texture:
Inside the large hollow numbers, lightly dry-brush some watered-down white or very pale gold paint. You don’t want a solid fill; just a scumbled, textured wash that looks a bit like chalk dust or clouds. -
Internal details:
Once the wash is dry, use your gold paint to add tiny stars inside the numbers. I like to scatter small 5-point stars and simple dots randomly within the number boundaries. -
Inline the middle text:
For the word ‘YEAR’, draw a very thin white line inside each letter’s thickest part. This ‘inline’ effect gives it a vintage typography feel without being overpowering.
Fixing Smudges
If you smudge white gel ink on black paper, wait for it to dry completely. Then, use a black marker or a tiny dab of black acrylic paint to carefully cover the mistake.
Step 3: Celestial Embellishments
-
Create starbursts:
Identify empty spaces around the numbers. Using Gold paint or a gold pen, draw starburst designs—start with a simple cross, then an ‘X’ over it, and add dots at the tips of the lines. -
Add surrounding dots:
Load your brush with white paint (or use the gel pen) to create a field of stars. Vary the pressure to make dots of different sizes. Cluster them slightly denser near the corners of the paper. -
Mix in gold speckles:
Repeat the previous step with gold paint, placing metallic dots in between the white ones. This creates depth and makes the background shimmer. -
Erase guidelines:
Wait until everything is completely dry—gel ink can take longer than you expect. Gently erase any visible pencil marks from your initial sketch. -
Final highlights:
Check the large numbers again. If the outlines look a bit dull against the fill, re-trace the outer white edges one last time to ensure they are crisp and bright.
Add Real Sparkle
For extra dimension, apply tiny dabs of glue to the center of your largest starbursts and press on small rhinestones or real gold leaf flakes.
Now you have a stunning piece of typographic art to start the year off right


Champagne Glasses Clinking at Midnight
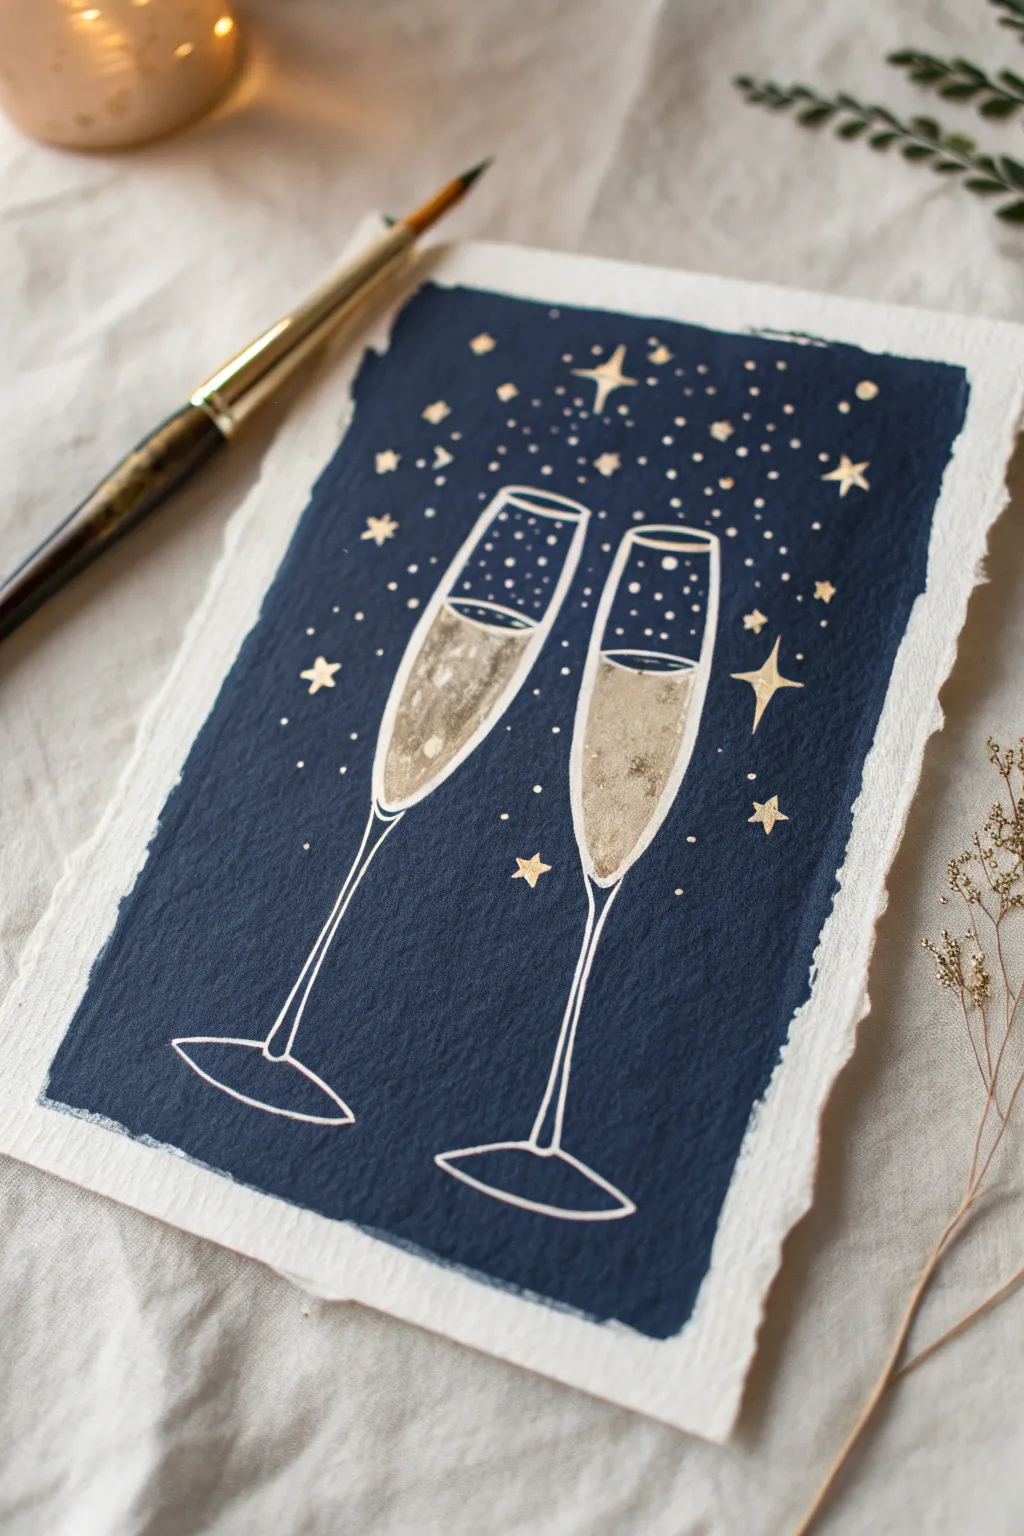
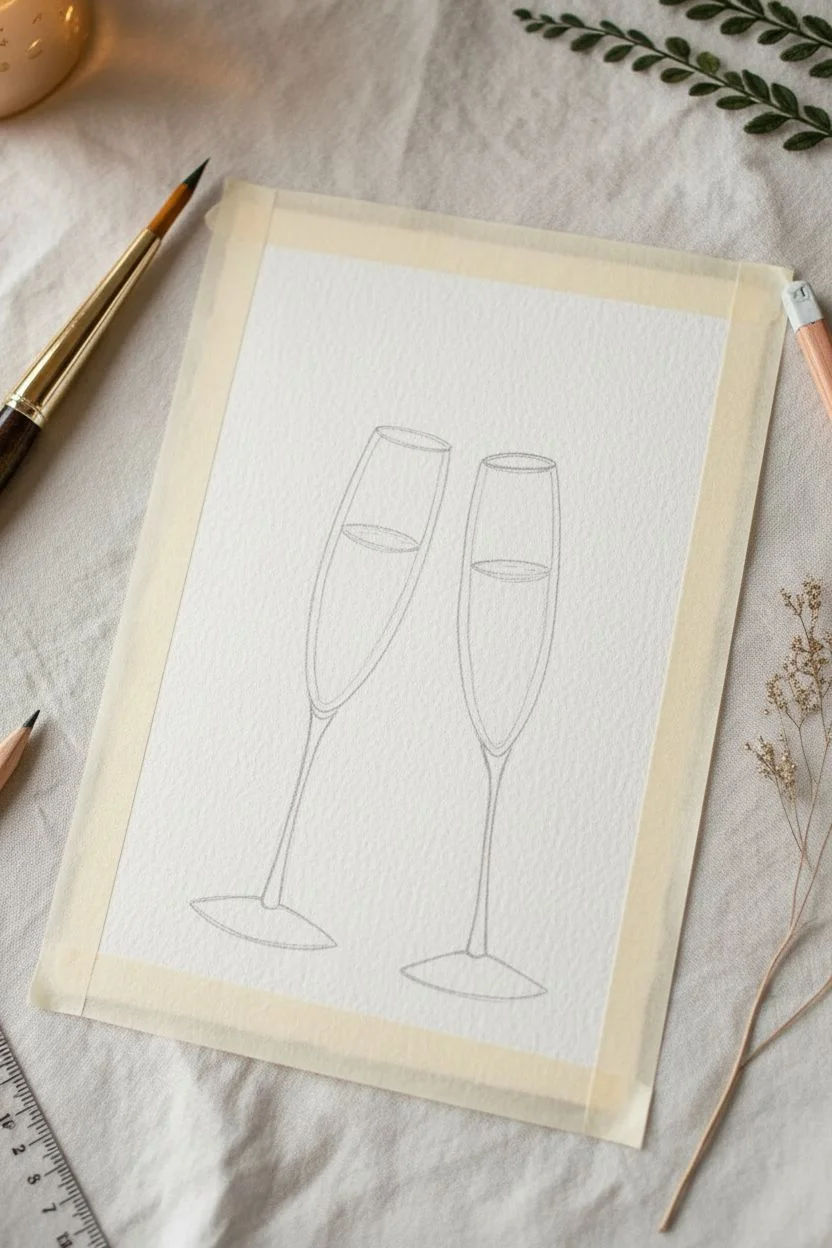
Capture the effervescence of a New Year’s celebration with this elegant gouache and watercolor illustration. By combining deep navy blue with shimmering metallic gold, you create a striking contrast that feels both festive and sophisticated.
Step-by-Step Tutorial
Materials
- Cold press watercolor paper (deckle edge preferred)
- Masking tape
- Indigo or Prussian Blue gouache paint
- Metallic gold watercolor pan or ink
- White gel pen (0.8mm or 1.0mm)
- Flat shader brush (size 10 or 12)
- Round detail brush (size 0 or 1)
- Pencil and eraser
- Ruler (optional)
Step 1: Preparation and Sketching
-
Paper Selection:
Begin with a piece of high-quality watercolor paper. The example uses paper with a deckled (torn) edge for a rustic, handmade feel. If your paper is standard, you can carefully tear the edges against a ruler to mimic this look. -
Taping the Border:
Unlike standard taping where you tape the paper down flat, for this floating background look, apply masking tape directly onto the paper itself. Create a rectangular border about 1 inch inward from the deckled edges, framing the area where you will paint the dark background. -
Sketching the Glasses:
Lightly sketch two tall champagne flute shapes in the center of your taped frame. Start with the elongated U-shape for the bowls, add long thin stems, and finish with triangular bases. -
Refining the Details:
Draw the liquid line inside each glass, keeping it slightly below the rim. Make sure the glasses are tilted slightly toward each other as if they are about to clink.
Step 2: Painting the Background
-
Mixing the Navy:
Mix a rich, opaque Indigo or Prussian Blue gouache. Gouache is preferred here over watercolor because it provides that solid, matte finish that covers the paper evenly without showing too much texture. -
Blocking in the Blue:
Using your flat shader brush, carefully paint around your pencil sketches of the champagne glasses. Fill in the entire rectangular area up to the masking tape border. -
Edging Work:
Switch to a smaller round brush to get close to the stems and rims of the glasses without accidentally painting inside them. The outline of the glasses needs to remain the stark white of the paper. -
Drying Time:
Let this background layer dry completely. Gouache can reactivate if touched while damp, so be patient before moving to the next steps.
Clean Lines Pro Tip
If you struggle to paint around the glasses perfectly, use masking fluid on the glass shapes before painting the blue. Peel it off later for pristine white paper.
Step 3: Adding the Sparkle
-
Painting the Champagne:
Load your round brush with metallic gold watercolor. Paint the liquid inside the glasses, but don’t fill it solid; use a somewhat watery wash so it looks translucent, perhaps leaving a few tiny spots unpainted for highlights. -
Defining the Glass:
Once the blue background is totally dry, trace the pencil outlines of the glasses with a white gel pen. Go over the lines firmly to ensure they pop against the dark blue. -
Adding Bubbles:
With the white gel pen, dot small circles rising from the bottom of the glass bowls up toward the rim. Vary the sizes slightly to make the carbonation look natural. -
Creating the Starry Sky:
Using the metallic gold paint, add different star shapes to the blue background. Mix four-pointed stars with simple dots and tiny diamonds to create a celestial confetti effect. -
Gold Bubbles:
Intersperse a few gold dots among the white bubbles inside the glasses and floating above the rims for extra magic. -
Final Touches:
Peel away the masking tape slowly at a 45-degree angle to reveal a crisp, clean edge around your blue night sky.
Level Up: 3D Sparkle
Add tiny dabs of clear glitter glue or iridescent medium over the largest gold stars and bubbles once dry to make the artwork actually shimmer in the light.
This sophisticated little painting makes a perfect New Year’s card or a festive decoration for your holiday mantle
City Skyline Silhouette and Fireworks
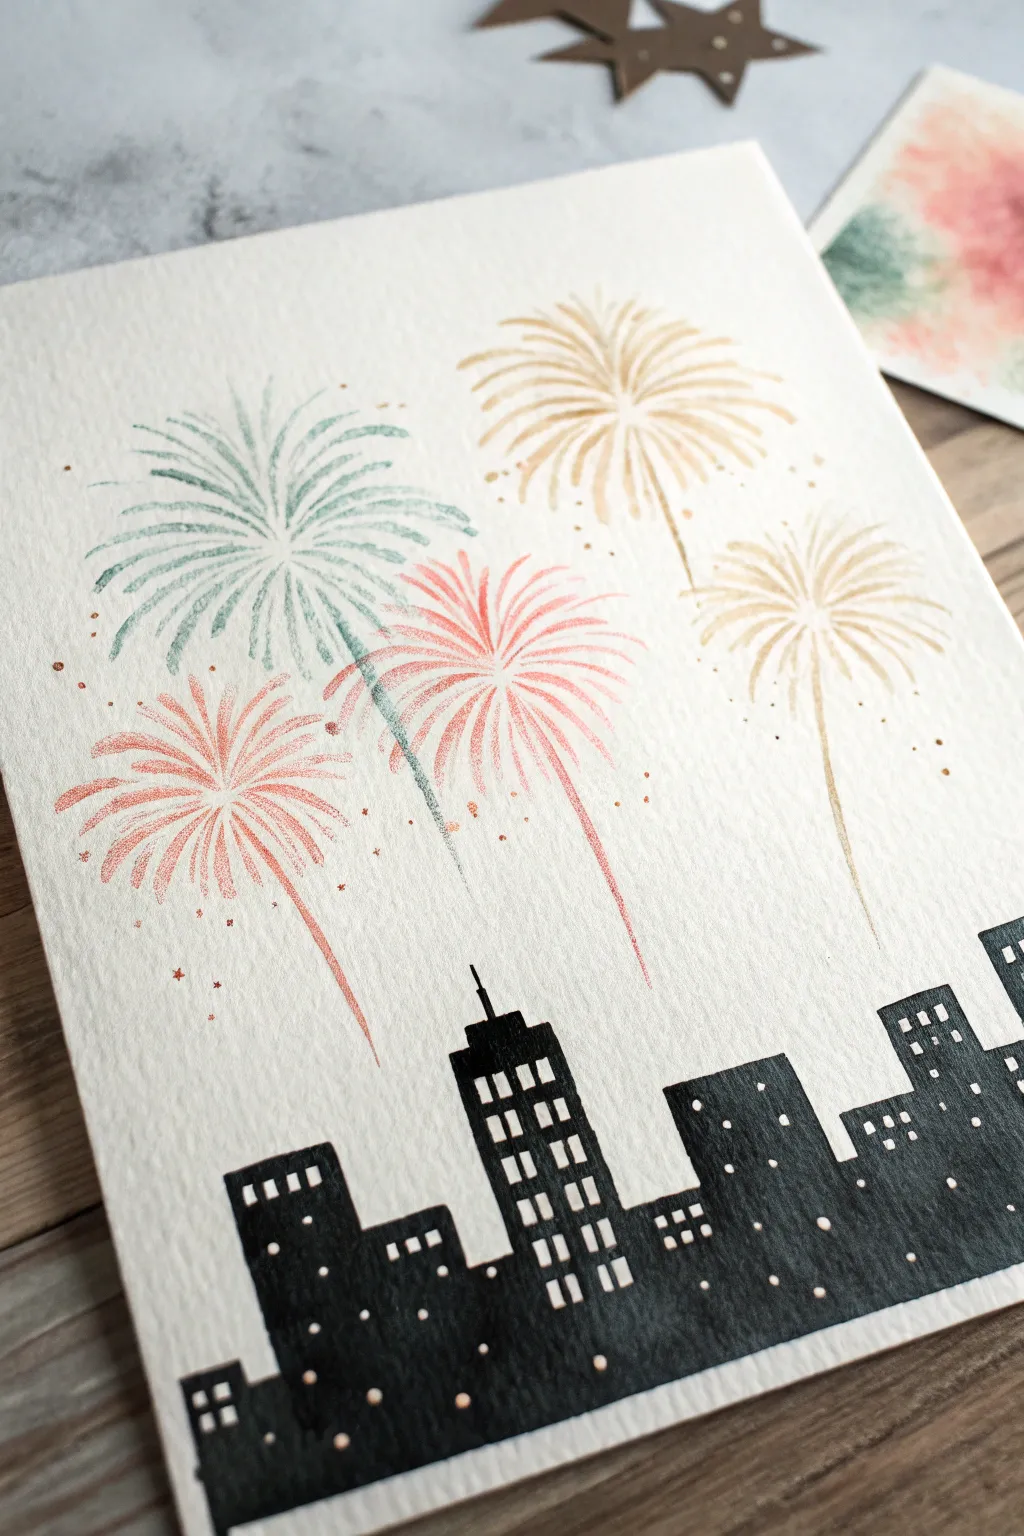
Capture the excitement of New Year’s Eve with this elegant yet simple card design featuring a bold city skyline against a sky full of bursting fireworks. The contrast between the matte black buildings and the shimmering metallic fireworks creates a festive, modern look.
Step-by-Step
Materials
- Cold press watercolor paper (A5 or 5×7 inches)
- Black ink pad (archival or pigment ink)
- Acrylic block for stamps
- City skyline stamp set (or black liner pen)
- Fireworks stamp set
- Metallic ink pads (Gold, Copper)
- Colored ink pads (Teal/Sage, Coral/Pink)
- White gel pen (optional, for windows)
- Scrap paper for masking
Step 1: Setting the Scene
-
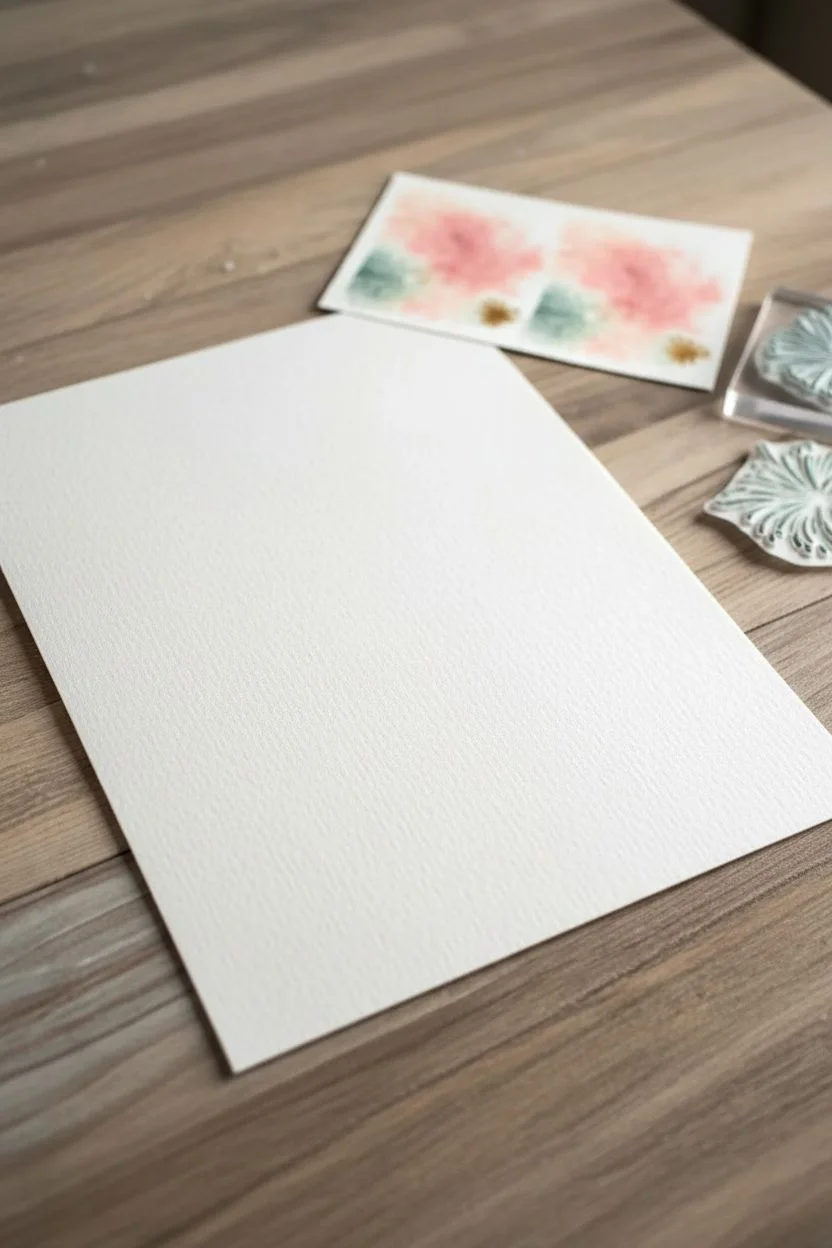
Prepare the paper:
Start with a clean sheet of cold press watercolor paper. The textured surface adds a lovely dimension to the stamped images that smooth cardstock can’t quite match. -
Plan the composition:
Visualize where your skyline will sit. You want the buildings to occupy roughly the bottom quarter or third of the page to leave ample room for the fireworks display above. -
Test your colors:
On a scrap piece of the same paper, test your chosen ink colors. Make sure the metallic gold pairs well with the teal and coral shades you’ve selected.
Uneven Stamping?
If the textured paper causes patchy stamped images, place a foam mat underneath your paper while stamping. This cushion helps the stamp push into the paper’s texture for a crisp impression.
Step 2: Stamping the Fireworks
-
First firework placement:
Select a large starburst or firework stamp. Mount it on an acrylic block and ink it up with a soft teal or sage green color. -
Stamp the main burst:
Press the stamp firmly onto the upper left quadrant of the paper. Rock it slightly to ensure the textured paper catches all the ink details. -
Add metallic elegance:
Clean your stamp or switch to a slightly different firework shape. Use metallic gold ink to stamp two bursts on the right side of the paper—one higher up and one slightly lower. -
Layer in color:
Using a coral or soft pink ink, stamp two more fireworks. Place one largely overlapping the bottom of the teal burst, and another slightly lower, creating a cascading effect. -
Create depth:
Notice how the taller, thinner lines of the firework stamps create ‘tails’ falling toward the ground. Ensure these tails are visible but don’t extend all the way to where the buildings will be. -
Add sparkle details:
If your stamp set has tiny dot or star clusters, use the metallic and coral inks to stamp random confetti dots around the main bursts to simulate falling sparkles.
Level Up: Embossing
Swap the metallic ink for Versamark ink and gold embossing powder. Heat set it with a heat tool to create raised, shiny 3D fireworks that truly pop off the page.
Step 3: Building the City
-
Ink the skyline:
Take your city skyline stamp and ink it thoroughly with a rich, matte black ink. If you don’t have a long enough stamp, you will need to stamp in sections. -
Stamp the foundation:
Align the bottom of the stamp with the bottom edge of your paper. Press down very firmly, holding the stamp in place for a few seconds to let the ink soak into the paper fibers. -
Extend the city:
If your paper is wider than the stamp, re-ink and carefully align the next section next to the first, overlapping slightly to avoid gaps. -
Fill in the gaps:
Sometimes textured paper leaves tiny white flecks in large solid areas. I like to use a black fineliner pen to color in any missed spots for a solid silhouette look.
Step 4: Illuminating the Windows
-
Create light:
The charm of this piece is the lit windows. Using the negative space of the stamp is easiest, but if your stamp is solid black, wait for it to dry completely. -
Draw windows (optional):
If you used a solid block stamp or drew the silhouette by hand, use a white gel pen to dot in rows of windows on the taller skyscrapers and smaller houses. -
Final touches:
Check the balance of the image. If the sky looks too empty in spots, add a few tiny hand-drawn dots with a gold gel pen to tie everything together.
Allow the ink to dry completely before writing your New Year’s greeting on the back or inside
BRUSH GUIDE
The Right Brush for Every Stroke
From clean lines to bold texture — master brush choice, stroke control, and essential techniques.
Explore the Full Guide
Confetti Shower Over Bold New Year Lettering

Celebrate the turning of the page with this cheerful, minimalist artwork featuring bold, hand-drawn typography and a playful shower of painted confetti. It’s a forgiving project perfect for beginners that brings a pop of festive color to any New Year’s display.
Step-by-Step
Materials
- High-quality watercolor paper or heavy mixed media paper (A4 or similar size)
- Pencil and eraser
- Ruler
- Black brush pen, thick marker, or black acrylic paint with a flat brush
- Watercolor paints or acrylic paints (various colors)
- Small round paintbrush (size 2 or 4)
- Paper plate or palette
- Water cup and paper towels
Step 1: Planning the Layout
-
Measure and mask:
Start by finding the center of your paper. If you want crisp edges later, you can tape the paper down to your work surface, but this piece looks great with natural edges too. -
Draft guidelines:
Using a ruler and a pencil with very light pressure, draw three horizontal baselines across the paper where your three words will sit. Space them evenly, leaving plenty of room at the top and bottom. -
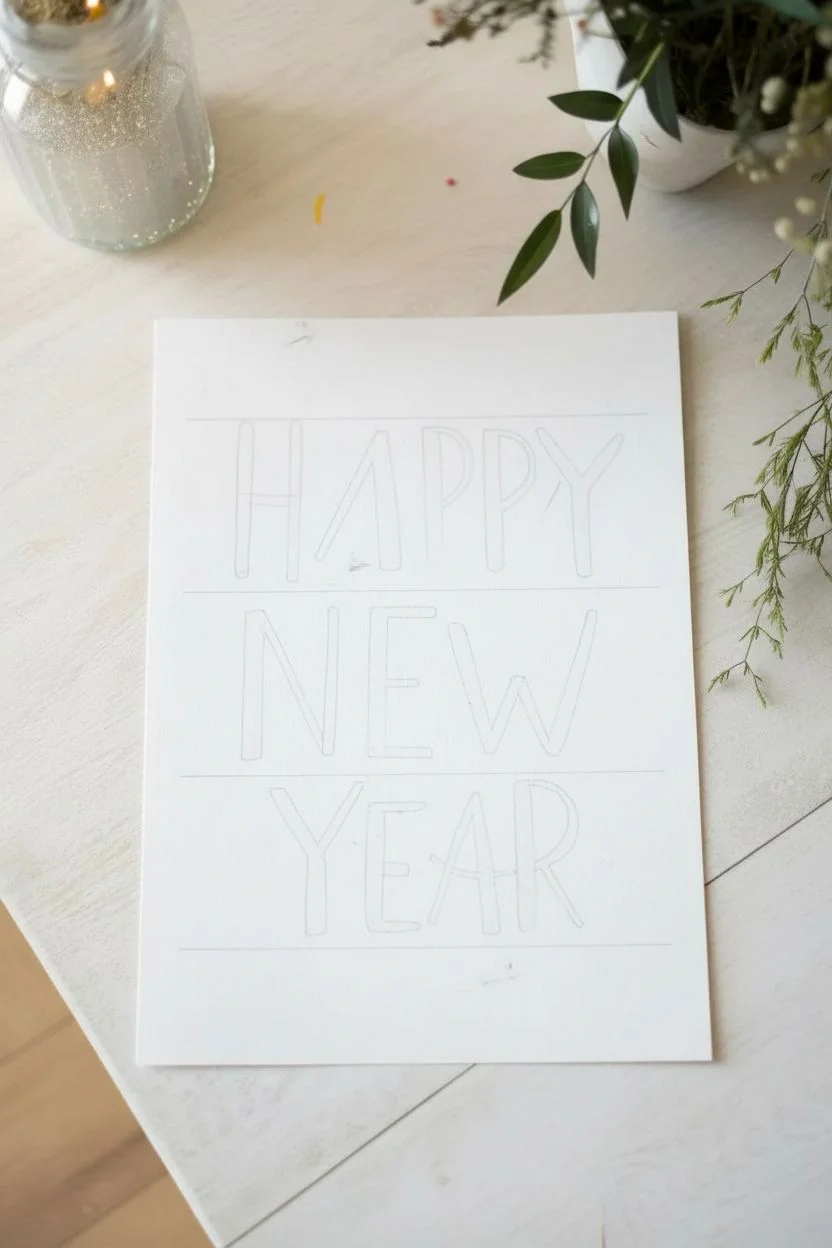
Lightly sketch the words:
Sketch out ‘HAPPY’, ‘NEW’, and ‘YEAR’ in block capital letters. Focus on making the letters tall and narrow to mimic the style in the photo. Don’t worry about perfection; the hand-drawn look adds character. -
Center the design:
I usually step back at this point to check alignment. Ensure the middle word ‘NEW’ acts as the anchor, with ‘HAPPY’ and ‘YEAR’ balanced above and below it.
Uneven Circles?
Don’t stress over perfect circles. If freehand dots feel too messy, dip the circular end of a pencil or a Q-tip into the paint and stamp it onto the page for uniformity.
Step 2: Inking the Lettering
-
Outline the letters:
Using your black brush pen or a small flat brush loaded with black acrylic paint, carefully trace over your pencil outlines. Keep your hand steady and pull the brush towards you for smoother lines. -
Thicken the strokes:
Go back over your lines to create a uniform thickness. The style here isn’t calligraphy with thin and thick variations; it’s a bold, mono-weight style. Aim for lines about 3-4mm wide. -
Refine the edges:
Check the tops and bottoms of your letters. Square off any rounded edges to give the font a crisp, modern sans-serif appearance. -
Erase pencil marks:
Wait until the black ink or paint is completely bone dry. Then, gently erase the visible pencil guidelines to leave a clean, stark contrast.
Step 3: Adding the Confetti
-
Prepare your palette:
Squeeze out small amounts of confetti-colored paints. The example uses muted mustard yellow, soft teal, salmon pink, terracotta, and a few bright blue accents. -
Paint large dots:
Start with your largest confetti pieces. Dip your round brush and press it flat onto the paper to create imperfect circles. Scatter these randomly around the text, keeping them sparse. -
Add medium circles:
Clean your brush and switch colors. Add slightly smaller dots in a second color, filling in some of the larger gaps without overcrowding the letters. -
Create tiny specks:
Using the very tip of your brush or a smaller detail brush, dot tiny specks of color in the empty spaces. This size variation is key to making the confetti look realistic. -
Layering illusion:
For a sense of depth, let some of the dots overlap slightly, or place a lighter dot over a dry darker one. Use a variety of warm and cool tones to keep the eye moving. -
The drop test:
Imagine dropping a handful of confetti from above. Add a few extra dots near the bottom of the page to simulate them settling on the ground. -
Final drying:
Allow the colored dots to dry completely before framing or displaying your festive creation.
Add Some Sparkle
For a glamorous New Year’s Eve twist, replace the yellow paint dots with actual gold leaf adhesive and gold foil, or use a metallic gold paint pen for shine.
Now you have a bold and joyful piece of art ready to ring in the new year with style
Fireworks Reflections on Water
Capture the magic of a festive night with this dazzling mixed-media painting featuring golden fireworks exploding over a tranquil waterfront. The combination of deep indigo watercolor washes and metallic ink creates a striking contrast that mimics the real glow of pyrotechnics.
How-To Guide
Materials
- Cold press watercolor paper (approx. 5×7 inches)
- Watercolor paints (Indigo, Payne’s Gray, Purple/Magenta, Black)
- Gold metallic paint pen or fine brush with gold gouache
- Silver or white gel pen
- Masking tape
- Flat wash brush (3/4 inch)
- Round brushes (size 4 and 8)
- Jar of clean water
- Paper towels
- White mat frame (for display)
Step 1: Setting the Scene
-
Secure the paper:
Tape down all four edges of your watercolor paper to a board or table to create a clean white border and prevent buckling when the paper gets wet. -
Establish the horizon:
Lightly sketch a straight horizon line about one-third of the way up from the bottom of the paper using a hard pencil so the lines remain faint. -
Wet the sky:
Use your flat wash brush to apply clean water to the entire sky area above your horizon line. You want the paper to be glistening but not forming puddles.
Ink Bleeding?
If your gold lines are feathering or looking fuzzy, your watercolor base layer hasn’t fully dried. Wait another 10 minutes or use a hair dryer on low heat.
Step 2: Painting the Night Sky
-
Add the first wash:
Load your large round brush with a deep indigo blue. Start at the very top of the paper and work your way down, allowing the color to fade slightly as you approach the horizon. -
Deepen the darkness:
While the paper is still damp, drop in concentrated Payne’s Gray or a touch of black into the top corners to create a vignette effect that makes the night feel deeper. -
Create the glow:
Rinse your brush and pick up a soft purple or magenta shade. Gently blend this into the wet lower sky area, right above the horizon line, so it bleeds softly upward into the blue. -
Paint the water base:
Once you are happy with the sky, paint the water section below the horizon using a diluted wash of the same indigo color, keeping it lighter than the sky to suggest reflection. -
Add the foreground shore:
Paint a small, uneven strip along the bottom edge using a mix of brown and black to represent the sandy or rocky shoreline. I like to let this shoreline dip slightly to look natural. -
Dry completely:
This is crucial: allow the entire painting to dry completely before moving to the next phase. If the paper is cool to the touch, it’s still wet.
Step 3: Adding Details & Fireworks
-
Define the horizon:
Using a small round brush and dark black or Payne’s Gray, paint a thin, jagged silhouette of distant trees or land along the horizon line. -
Start the main firework:
With your gold pen or a fine liner brush dipped in gold gouache, draw a central point in the upper left quadrant. Pull curved lines outward from this center like flower petals. -
Layer the sparks:
Add a second, smaller set of lines in between the longer stalks of the main firework to make the explosion look dense and full. -
Create secondary bursts:
Draw two smaller fireworks nearby—one perhaps slightly higher and smaller, and another to the right. Vary their sizes to create depth. -
Draw the tails:
From the center of the main fireworks, drag two long, thin, trailing lines downward toward the horizon, simulating the rocket’s path. -
Paint the reflections:
Using the gold paint, create vertical, wiggly lines in the water directly below where the fireworks are. These should be broken lines to look like ripples on the water’s surface. -
Add stars:
Use a white gel pen or silver ink to dot tiny stars throughout the dark blue sky. Draw a few larger four-point stars for extra sparkle. -
Final touches:
Sign your work in the bottom corner with a fine pen, then carefully peel away the masking tape at a 45-degree angle to reveal your crisp borders.
Make it Shine
For a truly magical effect, sprinkle a tiny pinch of super-fine gold glitter onto the wet gold paint of the fireworks before it dries.
Place your finished piece in a white mat to instantly elevate it into a professional-looking display

PENCIL GUIDE
Understanding Pencil Grades from H to B
From first sketch to finished drawing — learn pencil grades, line control, and shading techniques.
Explore the Full Guide
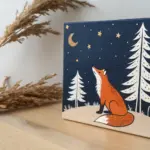
Winter Pines With Distant New Year Fireworks
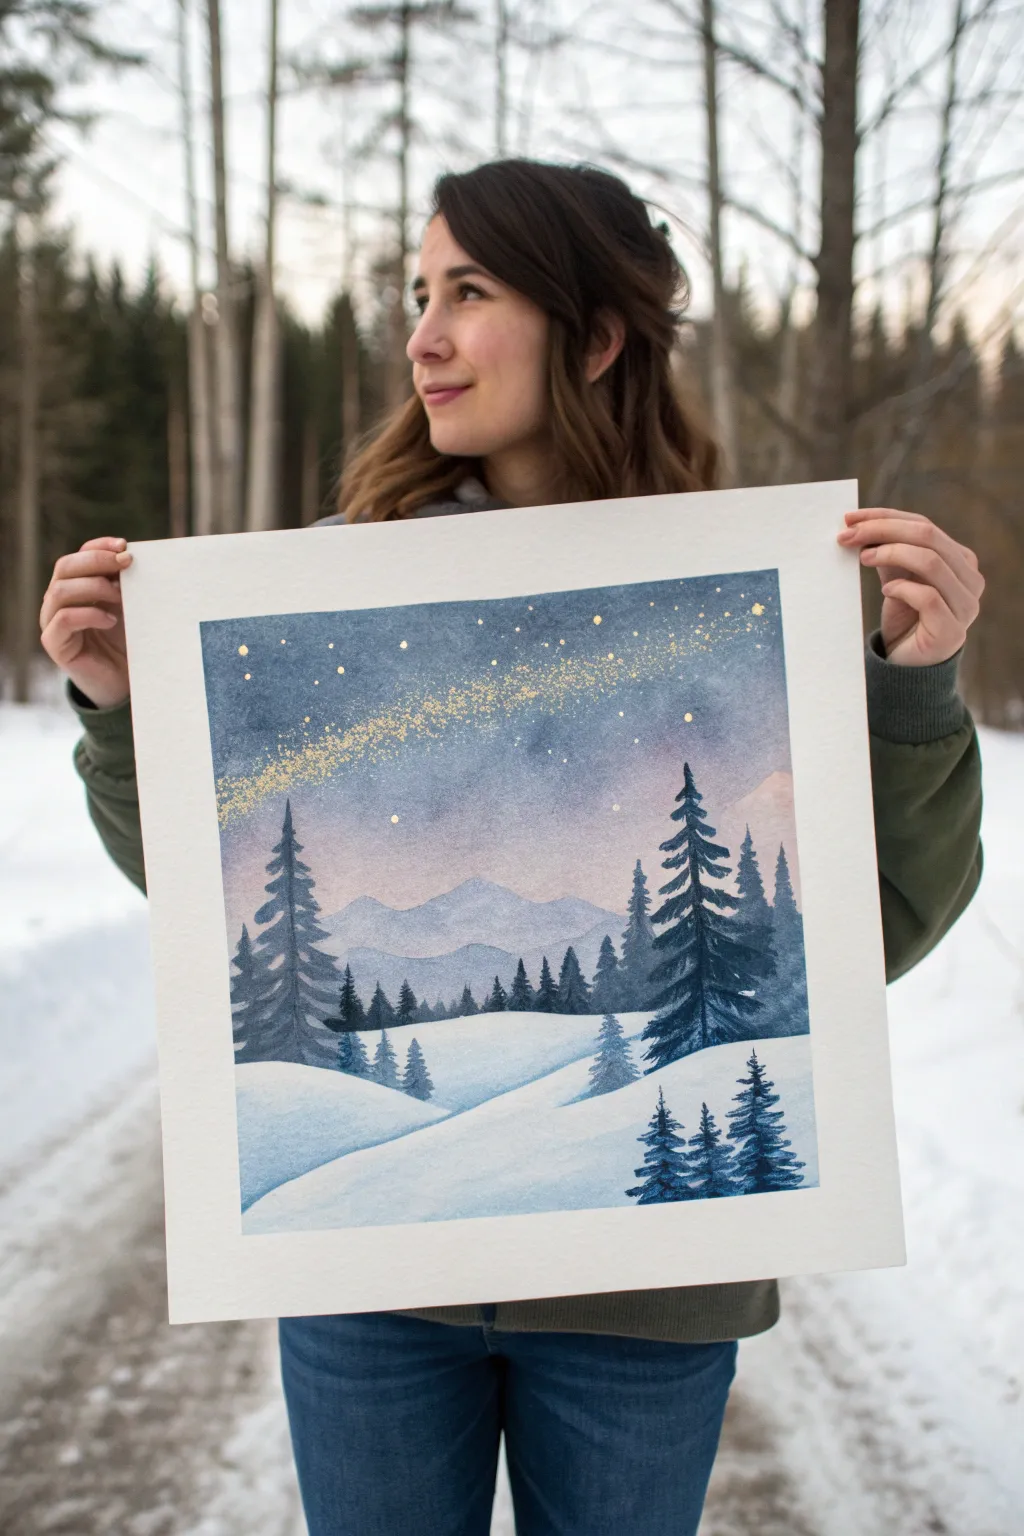
Capture the serene magic of a silent winter night with this watercolor landscape featuring snowy drifts and a glittering golden sky. This project combines soft, blended washes for the background with crisp, layered details for the pine trees, creating striking depth.
Step-by-Step
Materials
- Cold press watercolor paper (square format, approx. 10×10 or 12×12 inches)
- Watercolor paints (Indigo, Payne’s Gray, Ultramarine Blue, Alizarin Crimson, Burnt Umber)
- Gold metallic watercolor paint or gold ink
- Gold glitter paint (optional for texture)
- Round watercolor brushes (sizes 2, 6, and 10)
- Masking tape (for clean edges)
- Two jars of water
- Paper towels
- Pencil and eraser
Step 1: Setting the Scene
-
Prepare the paper:
Tape down all four edges of your watercolor paper to a board or table. This creates that crisp white border seen in the final piece and prevents the paper from buckling when wet. -
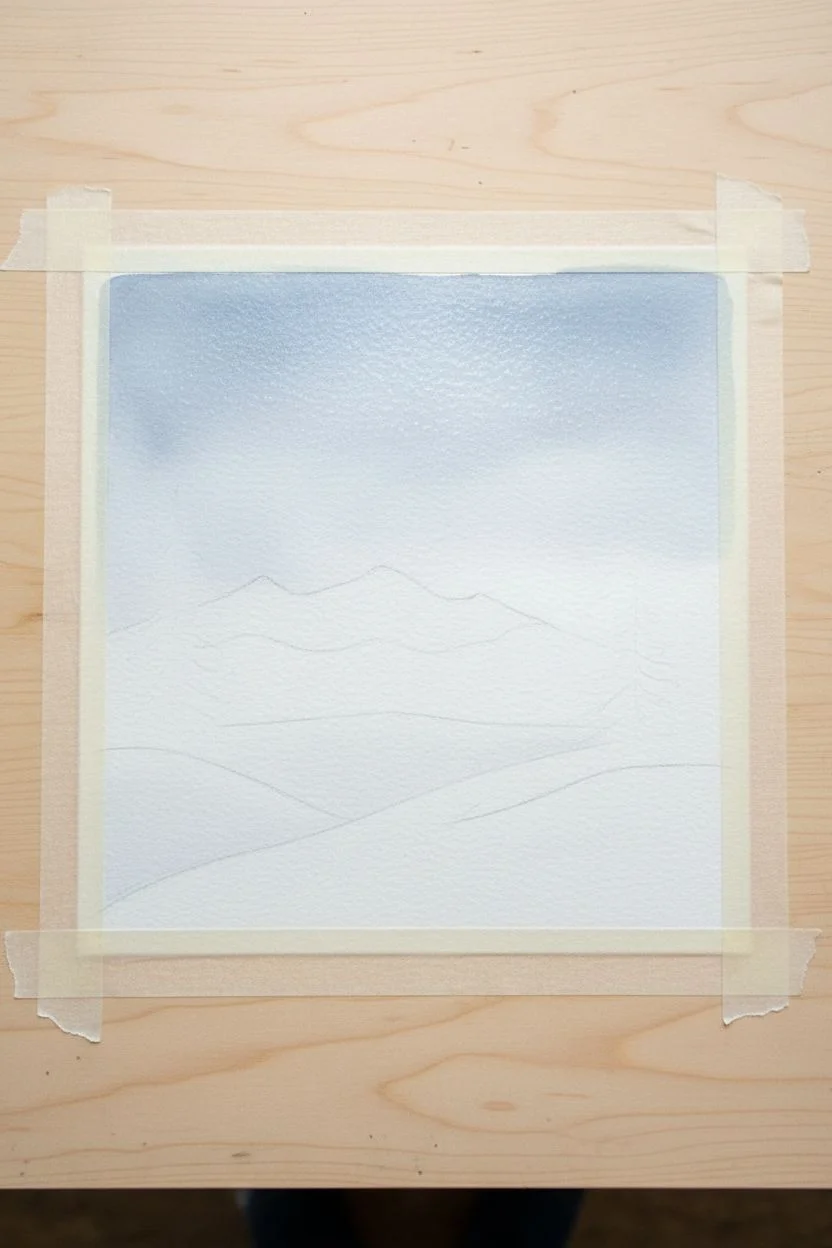
Sketch the composition:
Lightly sketch the horizon line for the snowy foreground hills. Add faint mountain shapes in the distance, but keep lines very subtle so they don’t show through the paint later. -
Wet the sky area:
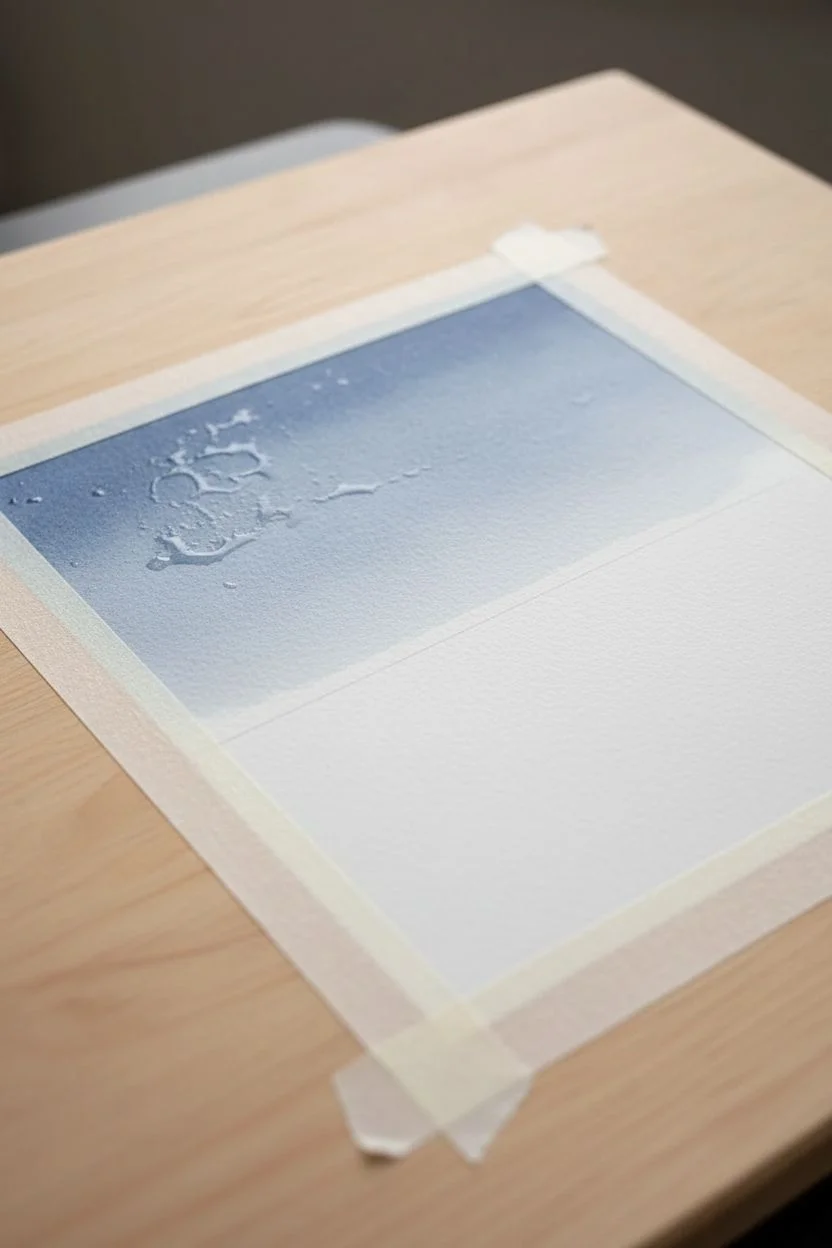
Using your largest brush and clean water, thoroughly wet the paper from the top edge down to the mountain line. The paper should glisten but not have puddles.
Step 2: Painting the Sky & Mountains
-
Apply the first sky wash:
Load your brush with a mix of Indigo and a touch of Alizarin Crimson for a purplish-blue. Drop this colot into the wet paper at the top, letting it flow downwards. -
Create the fade:
As you move down the sky, rinse your brush slightly to dilute the color, creating a gradient that fades into a very pale lavender-pink near the horizon line. -
Paint the distant mountains:
While the sky is damp but not soaking, mix a watery pale blue-purple. Paint the distant mountain range shapes, allowing the bottom edges to bleed slightly into the snow area for a misty effect. -
Let it dry completely:
This is crucial. The paper must be bone dry before moving on, or your sharp tree lines will blur into the background washes.
Muddy Sky Fix
If your sky colors turn muddy, stop immediately. Let the paper dry completely, then add a fresh glaze of pure color on top. Don’t overwork wet paint.
Step 3: Creating the Snowy Foreground
-
Define the snow drifts:
Mix a very diluted wash of Ultramarine Blue and a tiny dot of Payne’s Gray. Paint the shadows of the snow hills, leaving the tops of the drifts pure white paper to represent highlights. -
Soften edges:
Clean your brush and run damp bristles along the edge of your blue shadow lines to soften them, making the snow look rolling and gentle rather than rigid.
Make It Sparkle
For extra dimension, try using a gold glitter glue or a metallic gel pen for the largest stars in the center of the ‘galaxy’ band after the paint dries.
Step 4: Adding the Forest
-
Mix the tree color:
Create a dark, saturated mix using Indigo and Payne’s Gray. I like to add a tiny bit of Burnt Umber to green it up slightly without losing the cold, wintry feel. -
Paint the background tree line:
Using a size 6 brush, paint a jagged line of small trees along the base of the mountains. Keep these less detailed and slightly lighter in value to push them into the distance. -
Paint the mid-ground trees:
Switch to a smaller brush to paint the distinct pine trees on the left side. Use a stamping motion, starting at the top point and widening as you go down, leaving gaps for snow. -
Paint the foreground trees:
Paint the largest, most detailed trees on the right side and bottom corner. Use the tip of your brush for the top branches and press down harder for the wider, heavy bottom branches. -
Add shadows:
Once the trees are dry, take your diluted blue snow-shadow mix and add slight cast shadows on the snow beneath the trees to ground them.
Step 5: The Golden Finale
-
Prepare the gold:
Activate your gold watercolor pan with a few drops of water, or shake your gold ink bottle well. You want a creamy consistency that is opaque. -
Splatter the stars:
Load a brush with gold, hold it over the sky area, and tap the handle against another brush to splatter creates a random field of stars. -
Create the galaxy band:
Concentrate your splattering across the middle of the sky in a diagonal band to mimic the Milky Way. You can also manually dot in larger stars with the brush tip. -
Remove the tape:
Once everything is completely dry, slowly peel the masking tape away at a 45-degree angle to reveal your crisp white border.
Now frame your sparkling winter night to bring a touch of seasonal calm to your space
Heart-Shaped Fireworks for New Year Wishes
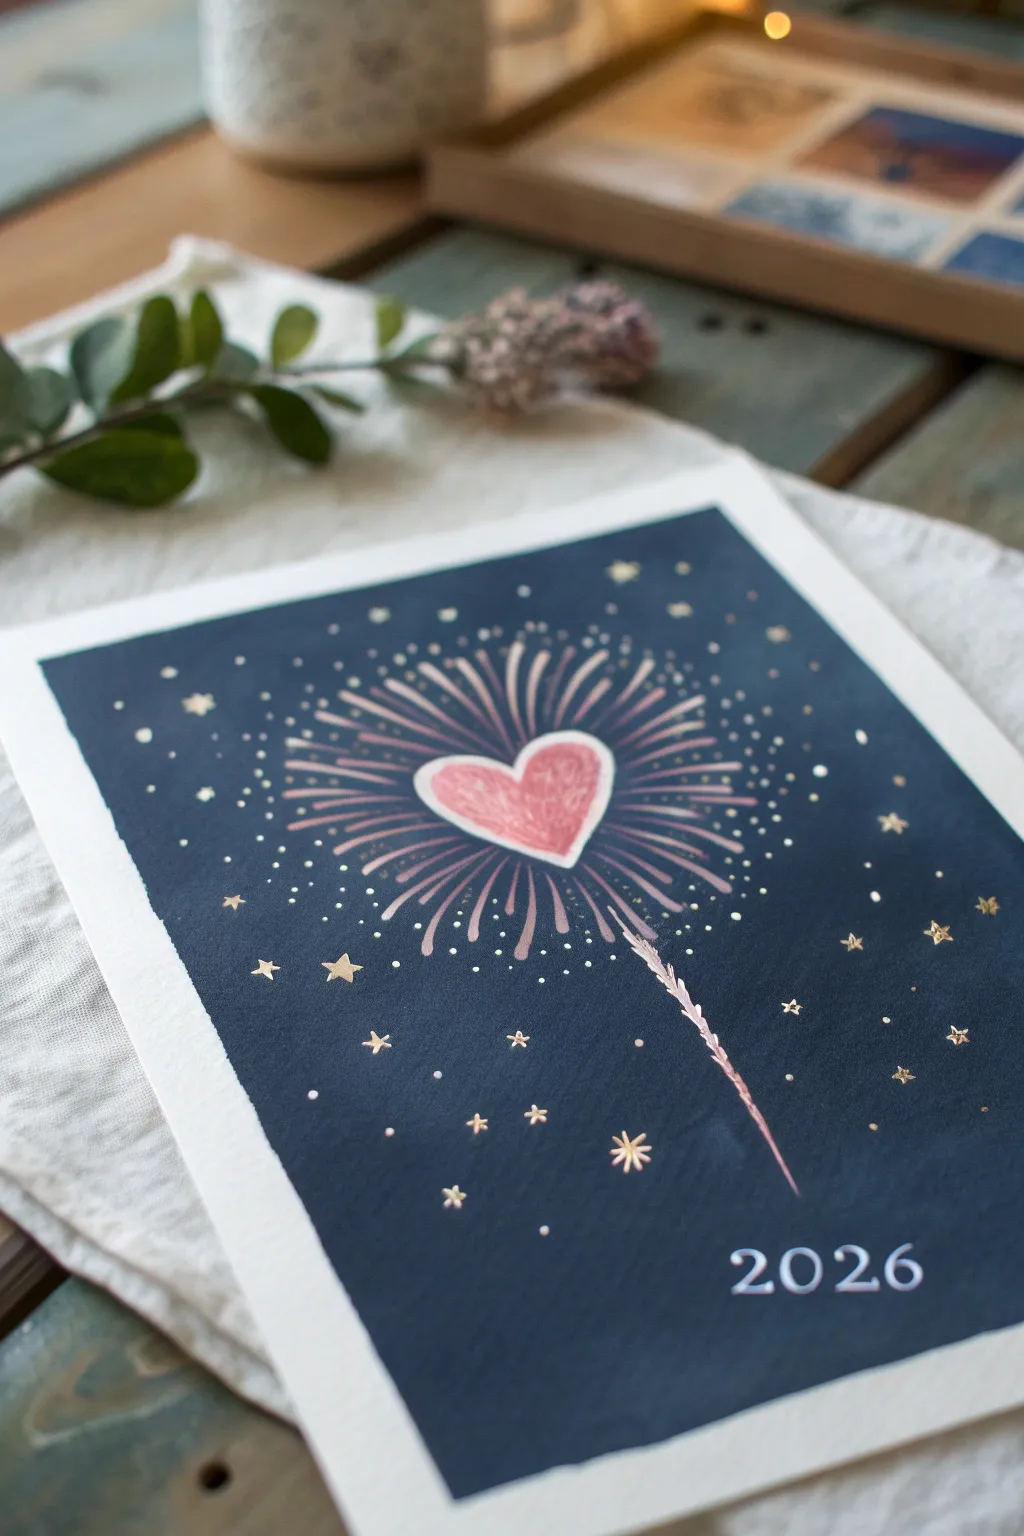
Ring in 2026 with a touch of warmth and whimsey using this simple yet striking watercolor and gouache painting. The deep indigo background makes the pink heart-shaped firework and golden stars pop, creating a magical glow perfect for New Year wishes.
How-To Guide
Materials
- Thick watercolor paper (cold press, 300gsm is ideal)
- Masking tape
- Gouache paints (indigo or dark navy blue, white, rose pink)
- Metallic watercolor or acrylic paint (gold)
- Flat wash brush (large)
- Round detail brushes (sizes 0 and 2)
- Pencil and eraser
- Ruler
- Palette for mixing
- Jar of water and paper towels
Step 1: Setting the Stage
-
Prep your paper:
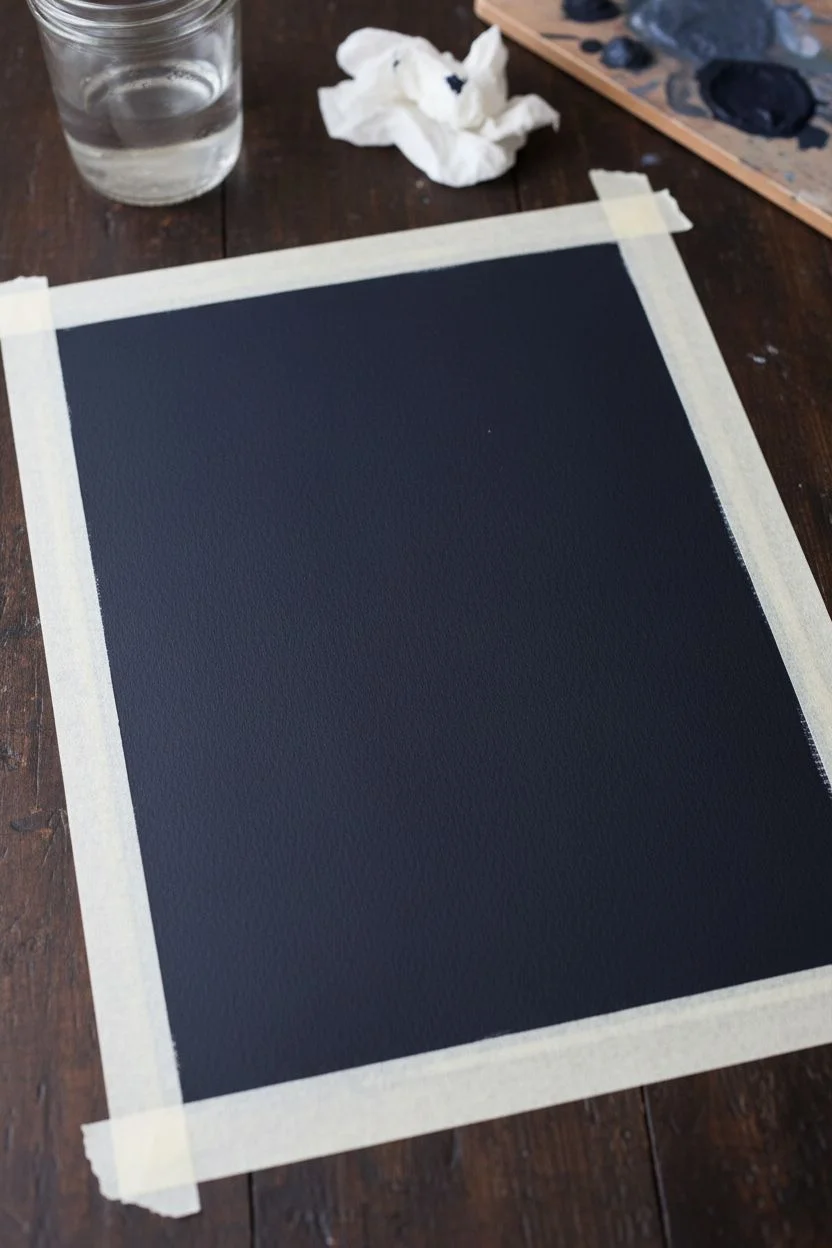
Cut your watercolor paper to your desired size, perhaps roughly A5 for a greeting card look. Tape down all four edges to your work surface using masking tape; this creates that crisp, clean white border you see in the final piece. -
Mix the background color:
On your palette, mix a rich, deep indigo gouache. You want it dark enough to simulate a night sky, so don’t be shy with the pigment. If you only have blue, mix in a tiny touch of black or burnt umber to deepen it. -
Paint the night sky:
Using your large flat wash brush, apply the dark indigo paint evenly across the entire taped area. Gouache dries fast and matte, which is perfect for this illustration. -
Allow to dry completely:
Let the background layer dry fully. It must be bone dry before we add the lighter details on top, or the colors will muddy. You can use a hairdryer on a low setting to speed this up.
Clean Lines Pro-Tip
If your white outline overlaps the dark background too much, mix a tiny bit of the background indigo into the white. It softens the harsh contrast.
Step 2: Creating the Firework Center
-
Lightly sketch the heart:
Once dry, use a pencil to very faintly sketch a small heart shape in the upper center of the page. Keep the lines incredibly light so they don’t show through the pink paint later. -
Mix the heart color:
Mix a soft, rosy pink using white and red gouache. You want a creamy consistency that will stand out opacity-wise against the dark background. -
Fill the heart:
Using a size 2 round brush, paint the interior of your heart sketch. I find that doing two thin coats often looks smoother than one thick, gloopy coat. -
Outline the heart:
After the pink center is dry, take a very fine detail brush (size 0) and your white gouache. Paint a delicate white outline around the pink heart to define its shape clearly.
Step 3: Adding the Sparkle
-
Paint the inner burst:
Using the same rose pink mix, paint short, thin lines radiating outward from the heart. These represent the initial explosion trails. -
Add the outer burst:
Switch to a lighter shade of pink (add more white to your mix) or pure white gouache. Paint longer, fine lines extending further out between the pink ones, creating a starburst effect. -
Add the stem:
With the rose pink mix, paint a thin, slightly wavy line extending downwards from the bottom of the firework burst. Add tiny, feathery strokes along the line to make it look like a sizzling sparkler stick. -
Dot the details:
Dip a fine brush or even a toothpick into white gouache. Add tiny dots around the tips of the firework burst lines to simulate glowing embers fading out.
Level Up: 3D Sparkle
Once the paint is dry, add dots of clear glitter glue or 3D fabric paint over the firework’s center embers for real texture and shimmer.
Step 4: Golden Touches & Lettering
-
Prime the gold:
Activate your metallic gold watercolor or shake your acrylic gold well. You want it fluid enough to flow off a small brush but pigmented enough to shine. -
Scatter the stars:
Paint small five-pointed stars randomly around the sky using your smallest brush. Vary their sizes slightly for a natural look. -
Add distant starlight:
Fill in the empty negative spaces with tiny gold dots. This creates depth and makes the night sky look heavily populated with stars. -
Pencil the date:
Use a ruler to lightly mark a baseline near the bottom right. Sketch the year ‘2026’ faintly to ensure your spacing is correct before painting. -
Paint the numbers:
Carefully trace over your pencil lines with white gouache. A size 0 or 00 brush is best here for getting crisp serif edges on the numbers. -
The reveal:
Wait until every drop of paint is completely dry. Slowly and carefully peel away the masking tape at a 45-degree angle to reveal your clean white border.
Display your shimmering artwork on a mantelpiece or scan it to print cards for friends and family


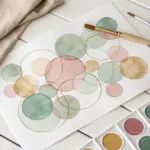
Painted New Year Collage With Confetti Texture

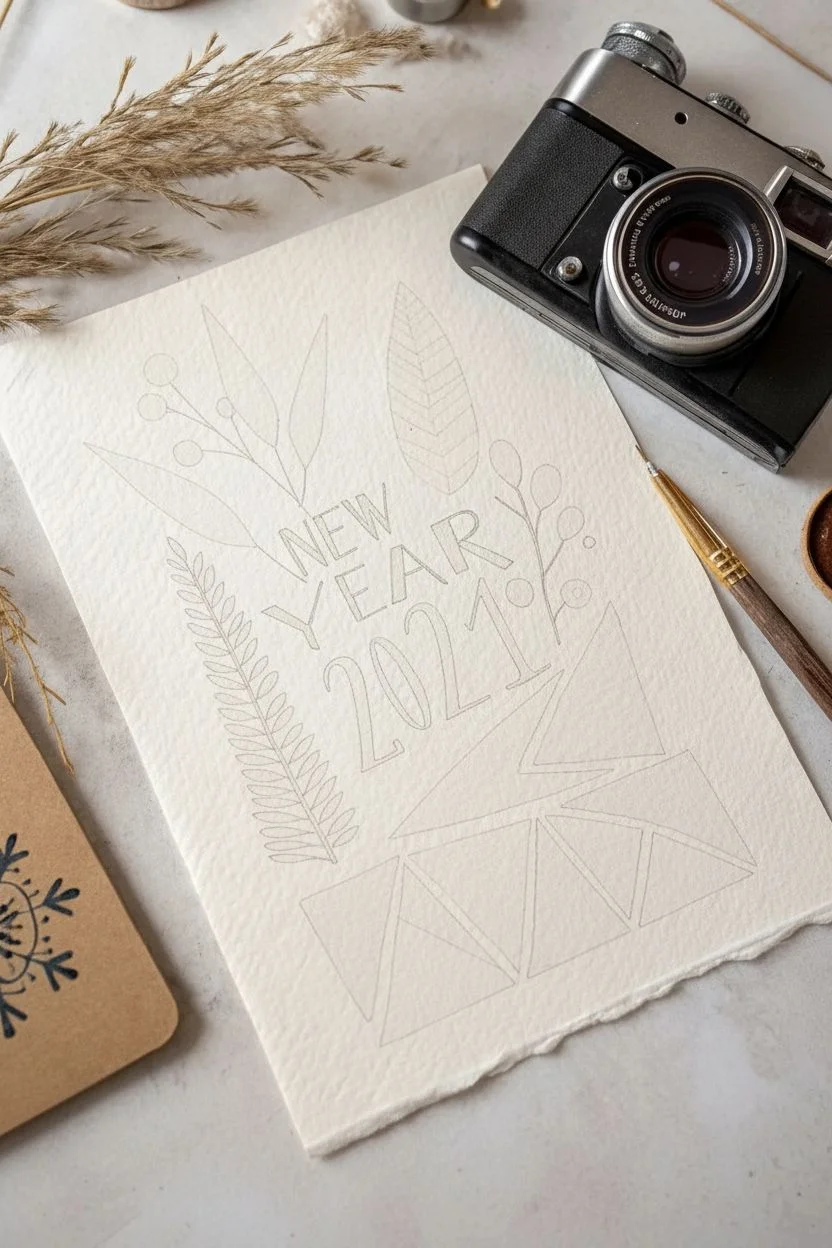
Celebrate the fresh start of a new year with this beautiful mixed-media piece that combines crisp geometric shapes with delicate botanical line work. The earthy palette and subtle confetti textures give it a warm, organic feel perfect for gifting or framing.
Step-by-Step
Materials
- Cold press watercolor paper (A5 or 5×7 inches)
- Watercolor paints (Rust red, ochre/gold, sage green, slate blue)
- Small round brush (size 2 or 4)
- Fine liner brush or size 0 round brush
- Gold metallic watercolor or gouache
- Pencil and eraser
- Ruler
- Salt (optional for texture)
Step 1: Planning and Layout
-
Prepare the paper:
Start with a high-quality sheet of cold press watercolor paper. The texture of cold press paper adds lovely character to the finished piece. If you want deckled edges like the photo, carefully tear your paper size using a ruler as a guide instead of cutting it with scissors. -
Pencil in the text:
Using a light pencil hand, sketch out ‘NEW YEAR’ and the year numbers in the center of the page. The lettering style is somewhat casual; notice how the words ‘NEW YEAR’ follow a gentle upward curve, while the year is large and prominent below it. -
Sketch placement guides:
Lightly sketch triangles at the bottom of the page to create the geometric mountain-like border. Also, create a rough placement guide for the leaves: one branch extending up from the left, a large leaf at the top center, and a sprig on the right.
Uneven Watercolors?
If your large flat shapes look streaky, try mixing a larger puddle of paint first. Apply it quickly with a juicy (wet) brush so the edges don’t dry before you fill the shape.
Step 2: Painting the Elements
-
Paint the bottom triangles:
Mix your earthy tones—rust red, slate blue, ochre, and pale blush. Paint the triangles along the bottom edge, alternating colors so no two adjacent shapes are the same shade. Leave tiny slivers of white space between them for a crisp, collage-like look. -
Add texture to shapes:
While the triangle paint is still very wet on the ochre and rust shapes, you can sprinkle a tiny pinch of salt or drop in clean water to create that speckled, confetti-like blooming effect visible in the reference. -
Paint the text:
Once you are happy with the layout, paint the ‘NEW YEAR’ text using a dark slate blue or charcoal watercolor. Use the tip of your round brush for sharp serifs. For the year numbers, switch to a gold or ochre tone to make them stand out. -
Create the large left leaf:
Paint the large fern-like leaf on the left side using a muted sage green. Start from the bottom stem and paint small, rhythmic strokes outward to form the individual leaflets. Let the color vary slightly in transparency for depth. -
Paint the top botanical elements:
For the upper stylized branch, paint the leaves in solid block colors—rust and ochre. I find it easiest to paint the leaf shape first, then connect them with a very thin line for the stem afterwards. -
Detail the striped leaf:
For the large center-top leaf, shape it with a very pale wash of blush or peach first. Let it dry completely. Then, using a rust-colored mix, paint the chevron stripes carefully over the dried base layer.
Go Mixed Media
For sharper text, swap the paint for a metallic gold gel pen or a fine-tip waterproof marker. This gives ultra-crisp lettering against the softer watercolor background.
Step 3: Finishing Touches
-
Add the right-side sprig:
Paint the delicate sprig on the right side using a soft grey-green. Keep the leaves rounder and more spaced out compared to the fern on the left to maintain visual balance. -
Incorporate berries:
Dot small circles of rust red near the stems of your botanical elements to represent berries. These add a nice pop of color that ties in with the geometric shapes at the bottom. -
Add ‘confetti’ speckles:
Load a small brush with gold or ochre paint and tap it gently over the paper to create random splatters. You can also manually paint tiny dots around the text and leaves for a more controlled confetti look. -
Final triangle details:
Return to your bottom geometric section. If desired, add a larger floating triangle or two above the main border to break up the space, using a contrasting texture or color like the speckled ochre. -
Erase guide lines:
Wait until the painting is 100% dry—watercolor can be tricky and smear if damp. Gently erase any visible pencil marks from your initial sketch to leave the artwork looking clean and professional.
Display your finished artwork on a mini easel or frame it to ring in the new year with meaningful creativity


Have a question or want to share your own experience? I'd love to hear from you in the comments below!