November is my favorite month to paint because it’s all about that sweet in-between—late autumn warmth slipping into early winter quiet. These November painting ideas are meant to feel doable and cozy, like we’re chatting while paint dries in my studio.
Rustic Barn in a November Harvest Field
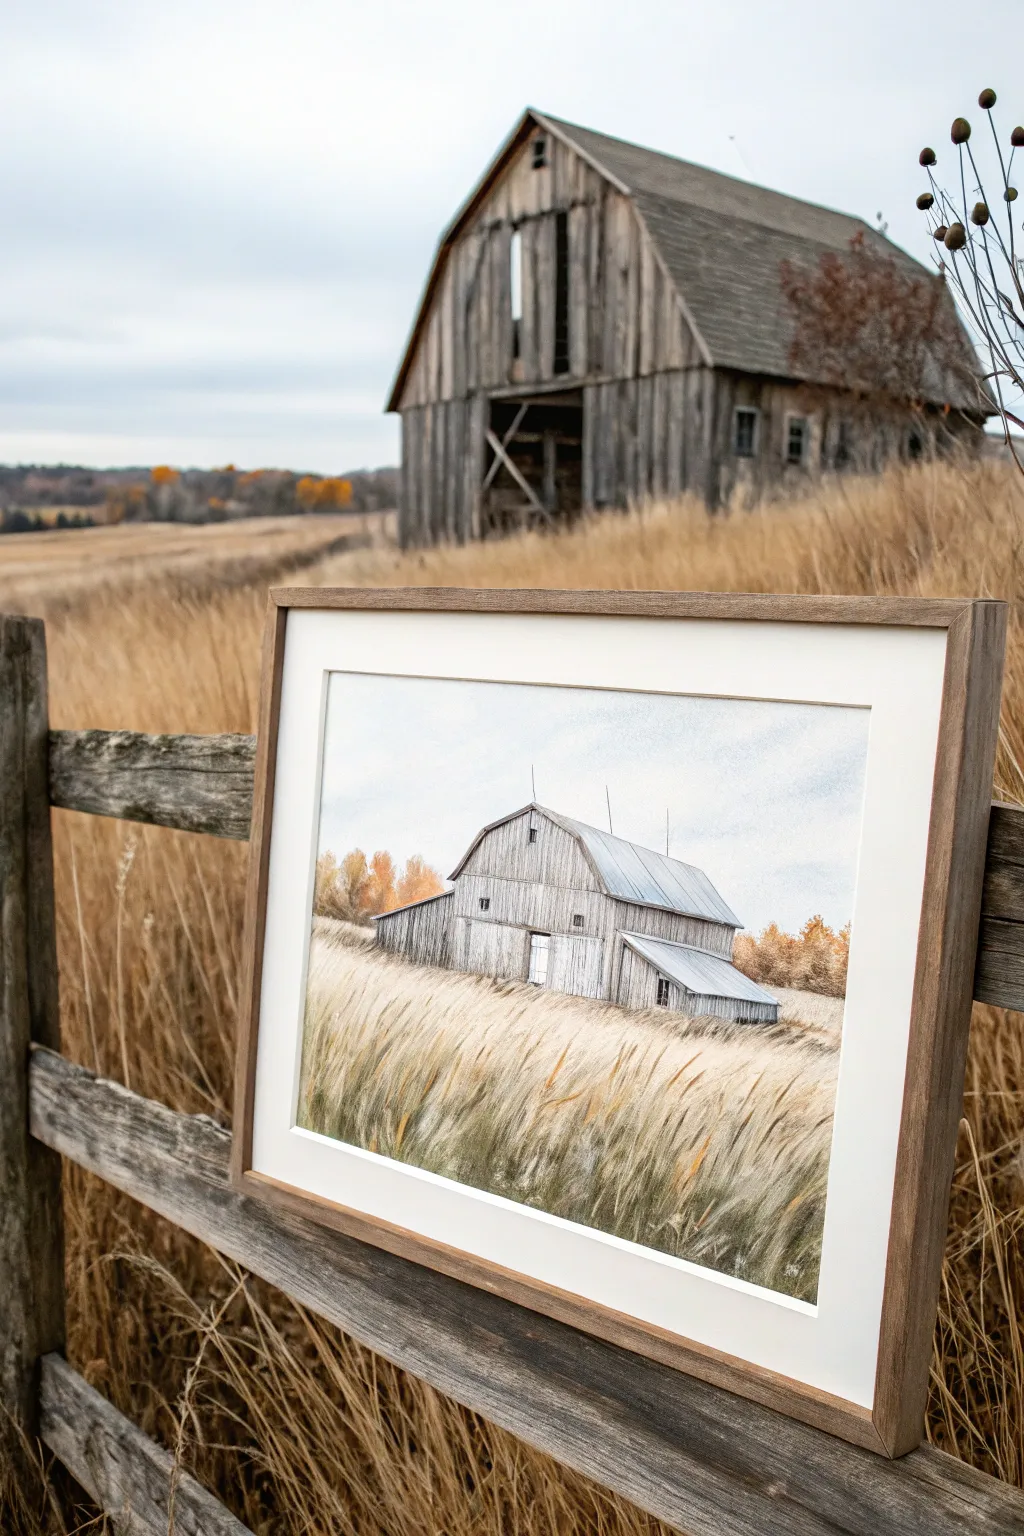
Capture the quiet beauty of late autumn with this detailed watercolor painting of a weathered barn nestled in tall grasses. This project focuses on building texture through layers, from the soft wash of the sky to the crisp details of the wooden siding.
Step-by-Step
Materials
- Cold press watercolor paper (140lb/300gsm)
- Watercolor paints (Payne’s Grey, Burnt Sienna, Yellow Ochre, Ultramarine Blue, Burnt Umber)
- White Gouache (for highlights)
- Round brushes (sizes 2, 6, and 10)
- Rigger or liner brush for fine grass
- Pencil (HB) and kneaded eraser
- Masking tape
- Painting board
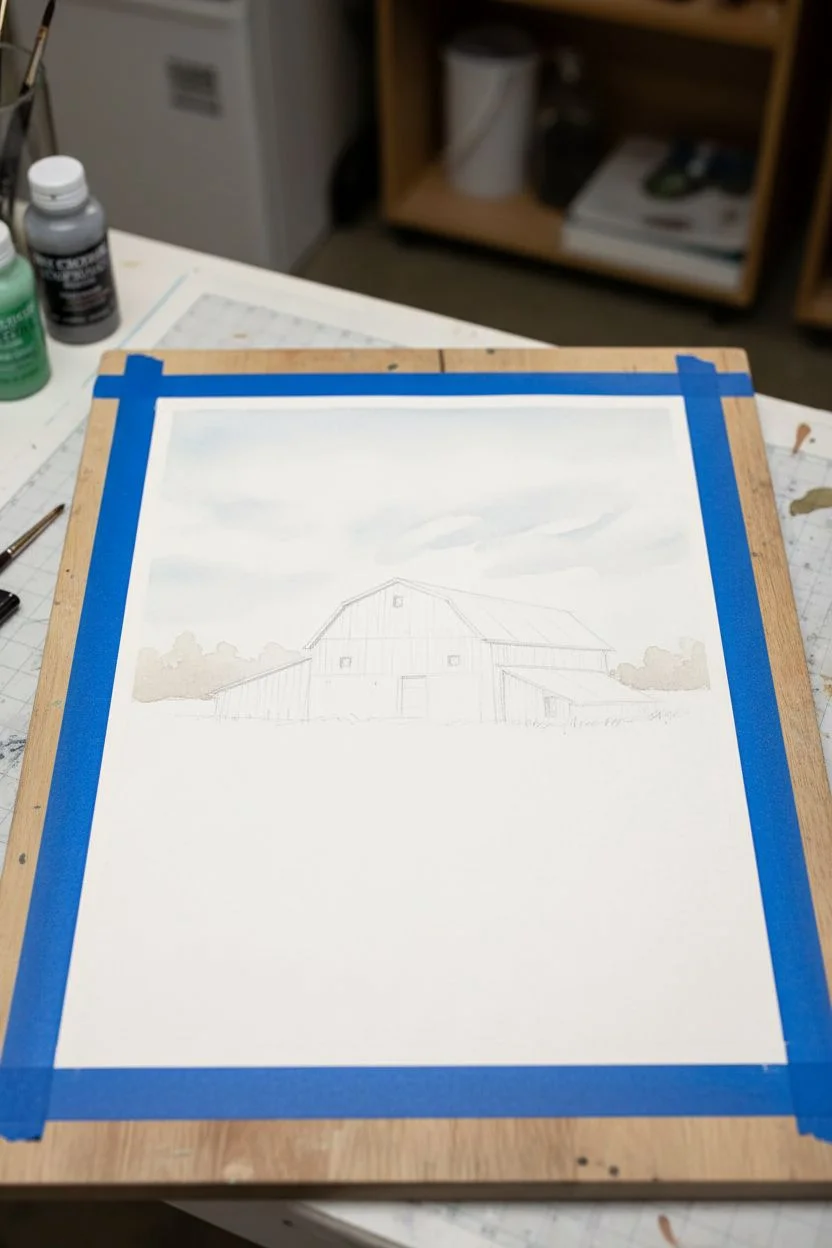
Step 1: Sketch and Sky
-
Tape and Trace:
Secure your watercolor paper to your board using masking tape to create a clean border. Lightly sketch the outline of the barn, paying attention to the angles of the roof, shed additions, and the horizon line for the grass. Keep pencil lines faint so they don’t show through later. -
Wet-on-Wet Sky:
Wet the entire sky area with clean water using your largest round brush. While the paper is glistening but not puddling, drop in a very pale wash of Ultramarine Blue mixed with a tiny touch of Payne’s Grey. -
Creates Clouds:
While the sky wash is still wet, lift out soft cloud shapes using a clean, thirsty brush or a crumpled paper towel. Keep the sky pale and simple to ensure the barn remains the focal point. -
Distant Trees:
Once the sky is damp but no longer shiny, mix Burnt Sienna with a little Yellow Ochre. Dab in the distant tree line behind the barn using a size 6 brush. Keep the edges soft to push them into the background.
Fixing Muddy Colors
If your grey barn color looks muddy, let it dry completely. Glaze a transparent blue or violet over it to cool it down, or a thin orange wash to warm it up without lifting the paint.
Step 2: The Weathered Barn
-
Barn Base Layer:
Mix a watery grey using Payne’s Grey and a touch of Burnt Umber. Apply this wash over the entire barn structure, leaving small slivers of white paper for the brightest highlights on the roof. -
Roof Texture:
Once the base layer is dry, mix a slightly darker, cooler grey. Using the size 2 brush, paint thin vertical lines on the roof to mimic the seams of the metal or shingles. -
Wood Siding:
Switch to a warmer grey mix for the wooden walls. Paint vertical strokes, varying the pressure to create a weathered wood texture. Leave gaps between some strokes to show the lighter underpainting. -
Deep Shadows:
Mix a dark, concentrated value of Payne’s Grey and Burnt Umber. Paint the dark windows, the door outline, and the deep shadow under the eaves. This high contrast makes the structure pop. -
Adding Rust:
Glaze a very watered-down Burnt Sienna over parts of the roof and the barn walls to suggest rust and aged wood. I like to do this while the previous layer is bone dry to keep the colors gentle.
Step 3: Field of Gold
-
Field Underpainting:
For the foreground, wet the paper below the barn. Drop in varied washes of Yellow Ochre, Burnt Sienna, and a touch of Olive Green. Let the colors bleed together naturally. -
Building Density:
Once the first wash is dry, use a size 6 brush to add localized shadows in the grass using a mix of Burnt Umber and Green. Paint upward, flickering strokes to establish the direction of growth. -
Fine Grass Details:
Switch to your rigger or liner brush. Mix a creamy consistency of Yellow Ochre and White Gouache. Paint individual stalks of dry grass in the foreground, curving them slightly as if blowing in the wind. -
Foreground Depth:
Add darker individual stalks near the bottom edge of the paper using Burnt Umber. This helps create atmospheric perspective, making the foreground verify close. -
Final Highlights:
Use pure White Gouache with the liner brush to add the very brightest tips to the grass and fine details on the barn roof. -
Frame It:
Allow the painting to dry completely before carefully peeling off the masking tape. Place your artwork in a rustic wood frame to complement the subject matter.
Level Up: Texture
Before painting the grass, lightly drag fine sandpaper over the dry paper in the field area. The pigment will settle into the roughed-up texture, creating a natural, organic look.
Hang this piece in a cozy corner to bring the peaceful feeling of the harvest season indoors.


Bare Tree Silhouette Against a November Sunset

Capture the stark beauty of late autumn with this atmospheric watercolor piece featuring a delicate black tree silhouette against a glowing pink and orange gradient sky. This project explores wet-on-wet blending techniques to create a soft, luminous background before adding crisp, high-contrast details.
How-To Guide
Materials
- Cold press watercolor paper (300gsm)
- Watercolor paints (Alizarin Crimson, Cadmium Yellow, Burnt Sienna, Payne’s Grey or Black)
- Wide flat wash brush (1 inch)
- Small round detail brush (size 0 or 1)
- Medium round brush (size 6)
- Masking tape
- Pencil and eraser
- Paper towels
- Fine liner pen (optional, waterproof)
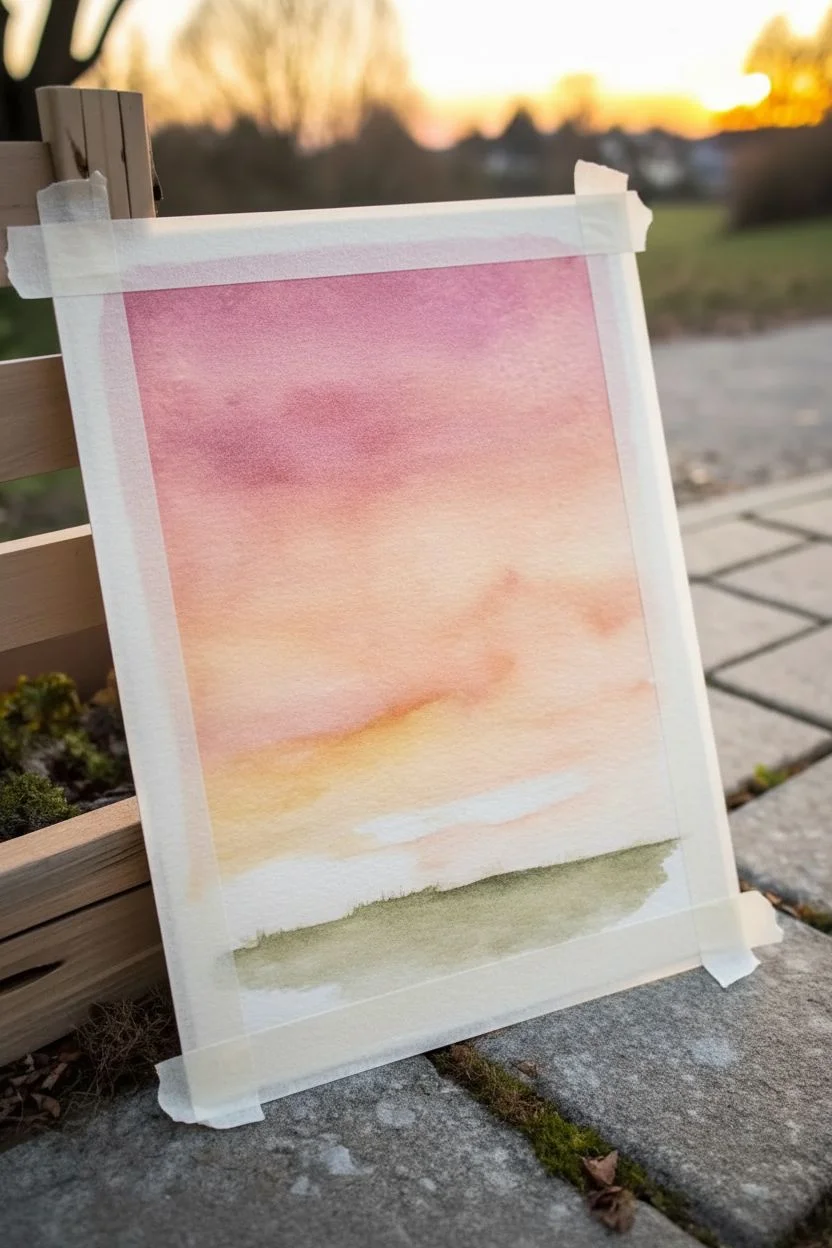
Step 1: Painting the Sunset Sky
-
Prepare your workspace:
Begin by taping down all four edges of your watercolor paper to a board. This prevents the paper from buckling when wet and creates a clean white border for framing later. -
Wet the paper:
Using your large flat brush and clean water, apply an even coat of water across the entire upper two-thirds of the paper where the sky will be. The paper should be glisten but not have standing puddles. -
Apply the pink tones:
Load your brush with a diluted Alizarin Crimson or similar cool pink. Start at the very top of the paper and sweep horizontally, letting the color naturally diffuse downwards into the wet paper. -
Transition to orange:
Clean your brush slightly and pick up a warm Cadmium Yellow mixed with a touch of the pink. Apply this below the pink section, blending the edges gently where they meet to create a soft, peach-colored transition. -
Add the horizon glow:
Near the bottom of the sky area, switch to a pure, pale yellow. Apply this loosely, leaving some areas very light to mimic the brightness of the setting sun. -
Create soft clouds:
While the paint is still damp, lift out a few horizontal streaks of color using a clean, thirsty brush or the corner of a paper towel. This creates the illusion of soft, low-hanging clouds near the horizon. -
Paint the ground base:
Mix a light wash of muted green or Burnt Sienna for the ground. Apply this to the bottom third of the paper, overlapping slightly with the bottom of the sky wash. Let the entire background dry completely before proceeding.
Step 2: Creating the Silhouette
-
Sketch fine lines:
Using a pencil very lightly, map out the main trunk placement and 2-3 major branches. Keep the sketch minimal so it doesn’t show through the paint later. -
Mix the silhouette color:
Create a dense, dark mixture using Payne’s Grey and a touch of Burnt Umber, or straight black watercolor. It should be the consistency of heavy cream for maximum opacity. -
Paint the trunk:
Using the medium round brush, start at the base of the tree. Paint the trunk, shaping it so it is wider at the bottom and tapers gradually as you move up. -
Anchor the roots:
Extend the base of the trunk into gnarled roots that grip the ground. Use dry brush strokes here—dragging the brush so it skips over the paper texture—to simulate grass and uneven terrain. -
Add main branches:
Switch to your small detail brush. Extend the main branches outward from the trunk, ensuring they twist and turn slightly for a natural, organic look rather than straight lines. -
Paint secondary branches:
From each main branch, split off into smaller V-shapes. I find it helpful to roll the brush slightly between my fingers to keep the lines fluid and erratic. -
Add fine twigs:
Fill in the canopy with very fine, hair-thin twigs using just the tip of your smallest brush or a waterproof fineliner pen. These should be delicate and dense, reaching toward the top edge of the paper. -
Create foreground texture:
With the detail brush and your dark mixture, flick upward quickly along the ground line to paint uneven blades of grass and small weeds around the tree roots. -
Add depth to the ground:
Dilute your dark paint significantly to a watery grey. Add a few subtle shadows extending from the tree roots across the grass to ground the object.
Bleeding Edges?
If your tree branches start ‘bleeding’ into the sky, your background wasn’t fully dry. Stop immediately, let it dry completely (use a hairdryer to speed it up), and then resume painting.
Add Some Birds
To make the scene feel more alive, paint tiny V-shapes in the distance using your smallest brush to represent a flock of birds flying home against the sunset.
Once the black paint is fully dry, carefully peel away the tape to reveal your crisp borders and frame your autumnal masterpiece


Misty November Morning Landscape
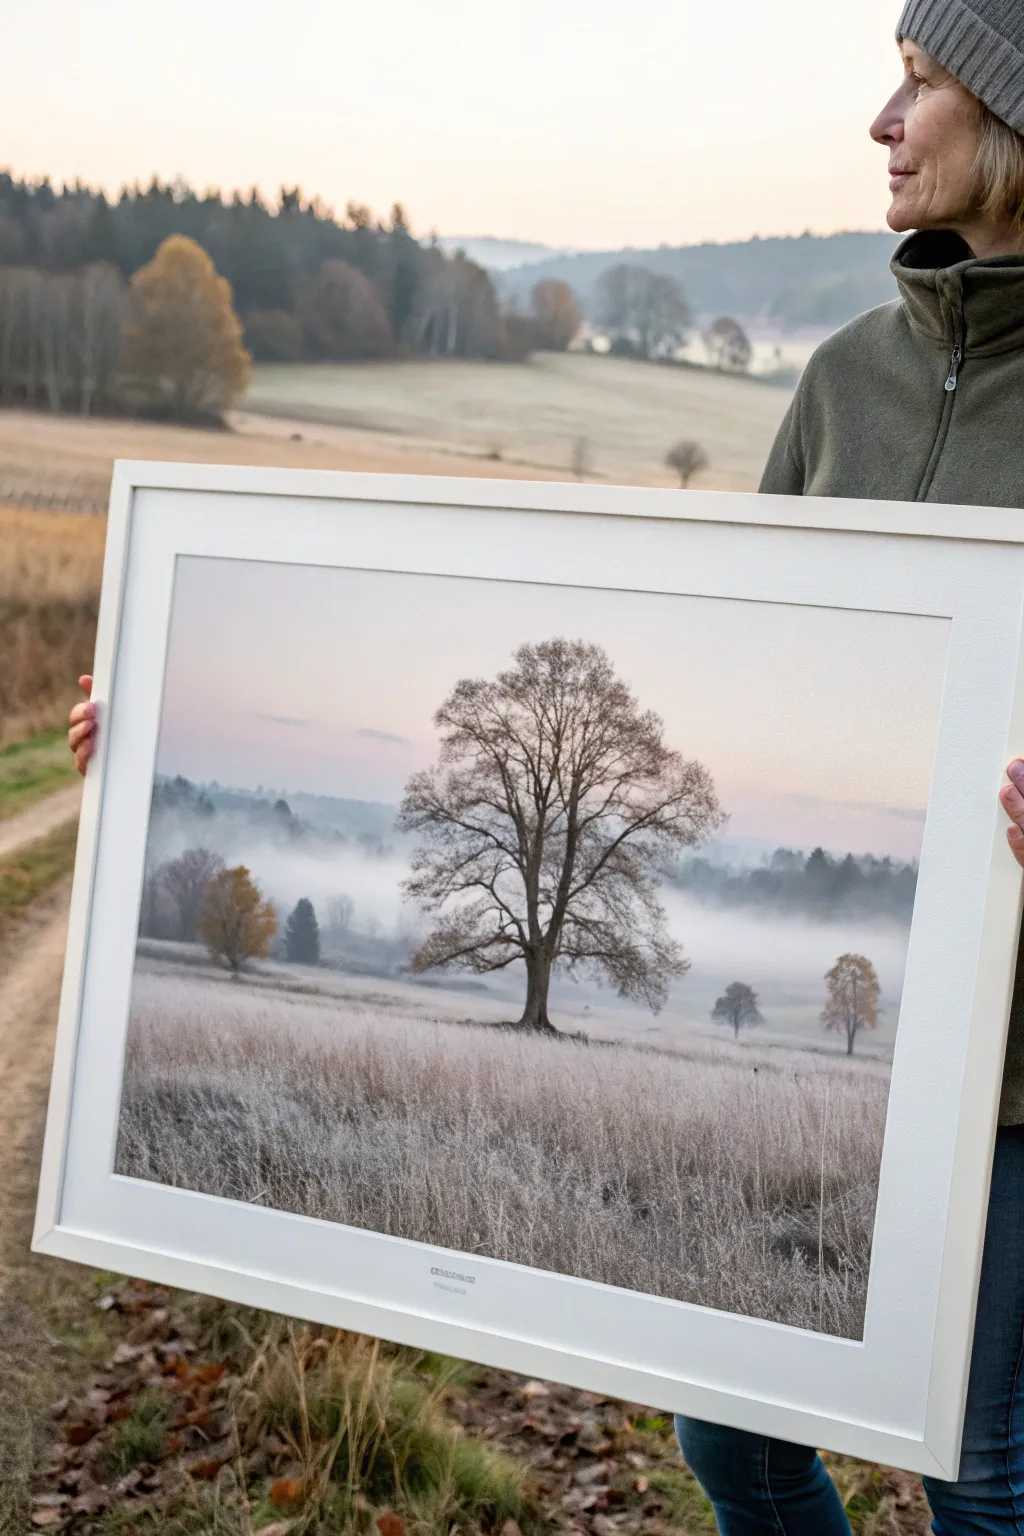
Capture the serene chill of late autumn with this atmospheric landscape painting, featuring a majestic bare tree standing guard over a frosted meadow. The soft interplay of pink morning light and cool misty blues creates a quiet, contemplative mood perfect for the season.
Step-by-Step Guide
Materials
- Large watercolor paper (cold press, at least 140lb)
- Watercolor paints: Indigo, Payne’s Grey, Burnt Sienna, Yellow Ochre, Alizarin Crimson, Sap Green
- Large flat wash brush (1-inch)
- Round brushes (sizes 4, 8, and 12)
- Rigger or liner brush for fine branches
- Masking fluid applied with an old brush
- White gouache or white ink for frost details
- Two jars of water
- Paper towels
- Painting tape
- Board for mounting paper
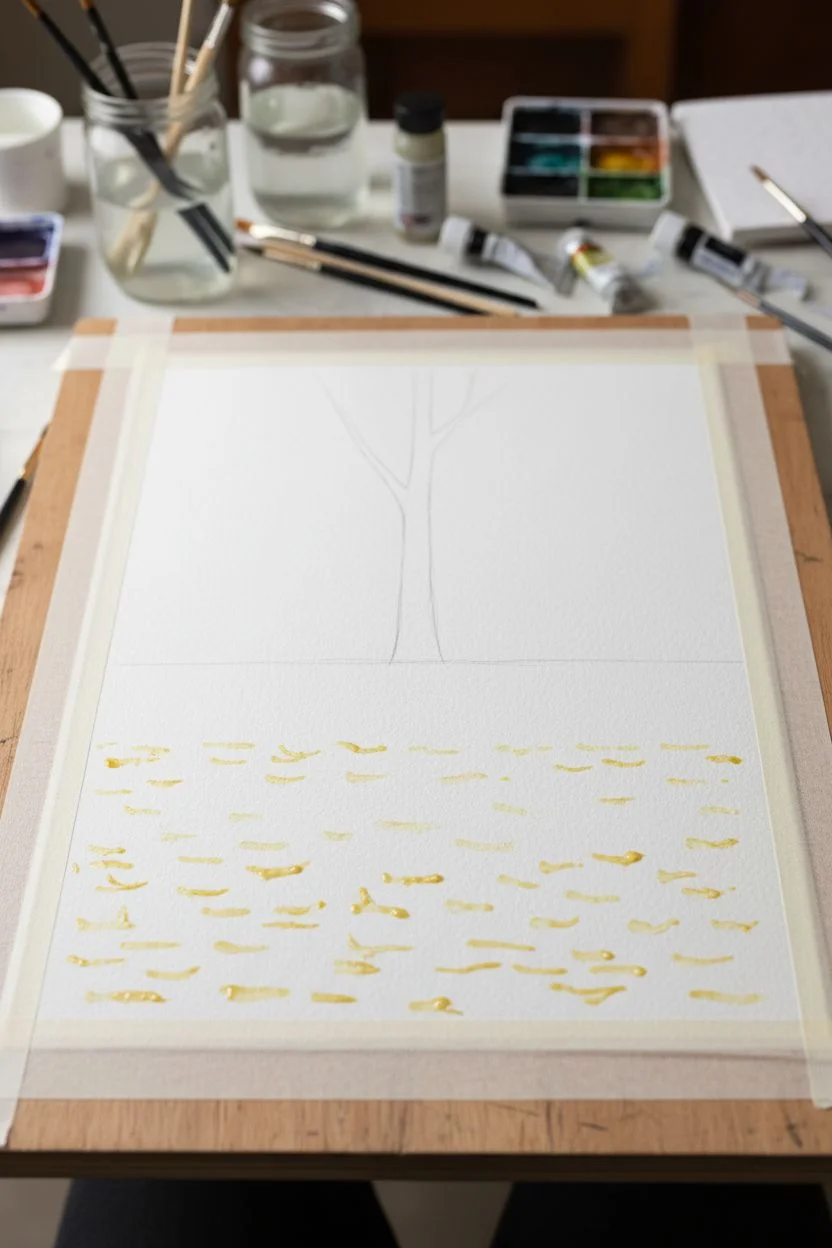
Step 1: Setting the Scene
-
Prepare the surface:
Begin by taping your watercolor paper securely to a board on all four sides. This prevents buckling when we apply heavy washes later. -
Initial sketch:
Use a hard pencil (H or 2H) to very lightly sketch the horizon line about one-third of the way up the paper. Briefly mark the position of the main central tree trunk, but don’t draw individual branches yet. -
Masking highlights:
If you want preserve pure white highlights on the foreground grass tips, apply thin flicks of masking fluid now. Let this dry completely before touching it with paint.
Step 2: The Atmospheric Sky
-
Wet-on-wet sky:
Thoroughly wet the entire sky area spanning from the top edge down to the horizon line with clean water using your large flat brush. -
Applying the glow:
While the paper is glistening, drop in a very watery mix of Alizarin Crimson and a tiny touch of Yellow Ochre near the horizon to create that soft morning pink glow. -
Cooling the upper sky:
As you move upward, blend in a cool grey-blue mix (Indigo diluted significantly). Ensure the transition from the pink horizon to the blue upper sky is seamless and soft. -
Adding the misty tree line:
While the sky is still damp (but not soaking), paint the distant tree line using a varied mix of Payne’s Grey and Sap Green. Let the edges blur slightly into the wet sky to create the effect of fog. -
Deepening the fog:
For the characteristic white mist band, lift out some pigment just above the horizon using a clean, damp brush, or leave the paper white in a horizontal strip behind where the main tree will stand.
Pro Tip: Misty Edges
To keep the background trees looking truly foggy, soften their bottom edges with a clean, damp brush immediately after painting them. Hard edges kill the illusion of mist.
Step 3: The Frozen Foreground
-
Base ground wash:
Once the sky involves is dry, wet the bottom third of the paper. Apply a wash of muted earth tones using Burnt Sienna and Payne’s Grey, keeping it very pale to represent frost-covered ground. -
Texturing the grass:
While the foreground is damp, use a specialized fan brush or an old, splayed round brush to flick upward strokes of darker grey-brown. This suggests the vertical growth of tall, dead winter grass. -
Adding frost details:
Mix a little white gouache with pale blue watercolor. Using a dry-brush technique, drag this over the dried foreground texture to simulate frost clinging to the grass tips.
Level Up: Limited Palette
Try painting this entire scene using only three colours: Indigo, Burnt Sienna, and White. It creates incredible color harmony and forces you to focus on tonal values.
Step 4: The Centrepiece Tree
-
Painting the main trunk:
Mix a strong, dark colour using Burnt Sienna and Indigo. With a size 8 round brush, paint the trunk of the central tree, making it wider at the base and tapering upward. -
Structure and branches:
Switch to a smaller round brush to pull main branches outward. Remember that oak-like trees often have somewhat jagged, angular branch structures rather than perfect curves. -
Fine twig details:
For the delicate outer canopy, I find a rigger brush works best here. Use a thinned mixture of your dark tree colour to paint the fine, lace-like network of twigs at the very ends of the branches. -
Secondary trees:
Add the smaller, distant trees on the left and right using softer, more muted colours to push them into the background. A touch of Yellow Ochre on the left tree suggests lingering autumn foliage.
Step 5: Final Atmosphere
-
Grounding shadows:
Add horizontal cast shadows at the base of the trees using a cool purple-grey mix. Keep these soft, as light in mist doesn’t create harsh shadows. -
Removing masking:
If you used masking fluid, gently rub it away now to reveal the bright white paper underneath. -
Final frost highlights:
Use pure white gouache to add final sharp highlights to the tallest stalks of grass in the immediate foreground to enhance the depth.
Frame your finished piece with a clean white mount to emphasize the delicate, frosty atmosphere you’ve created


Falling Leaves in a Windy November Street Scene
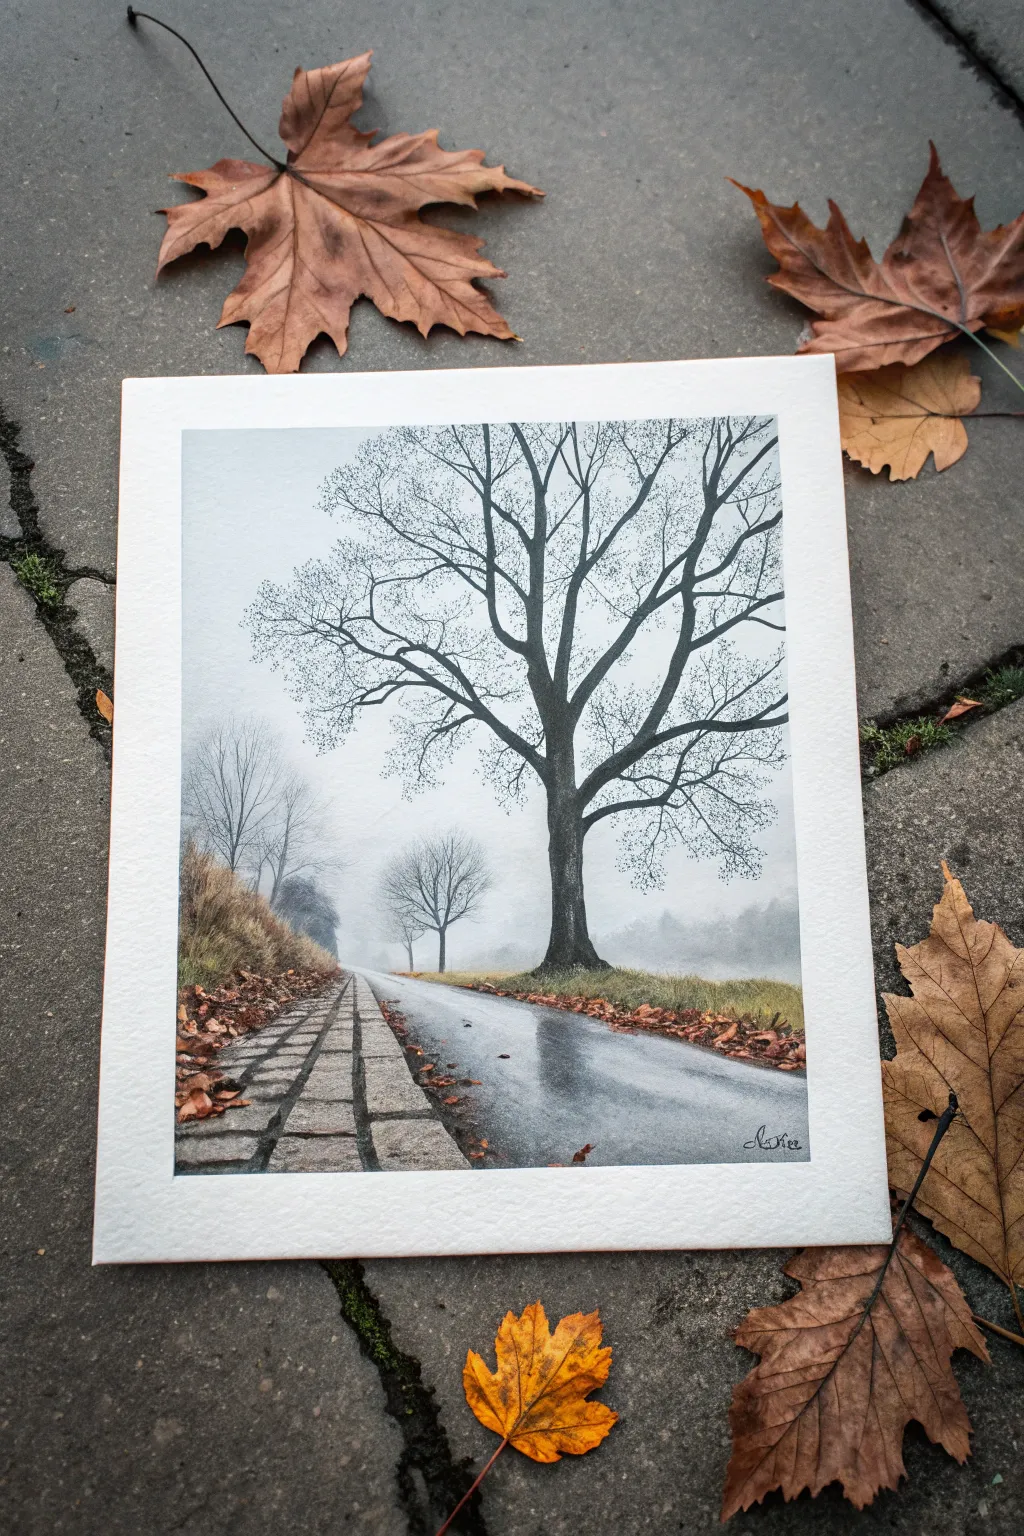
Capture the serene melancholy of November with this atmospheric watercolor landscape. This project focuses on mastering soft gradients for fog effects and contrasting sharp, barren tree silhouettes against a misty background.
Step-by-Step
Materials
- Cold Press Watercolor Paper (140lb/300gsm), taped down
- Watercolor Paints (Payne’s Grey, Burnt Umber, Burnt Sienna, Yellow Ochre, Ultramarine Blue, Alizarin Crimson)
- White Gouache (for highlights/opaques)
- Round Brushes (Sizes 2, 6, and 10)
- Rigger or Liner Brush (Size 0 or 1)
- Masking fluid (optional)
- Pencil (HB or 2B) and kneaded eraser
- Two jars of water
- Paper towels
- Mixing palette
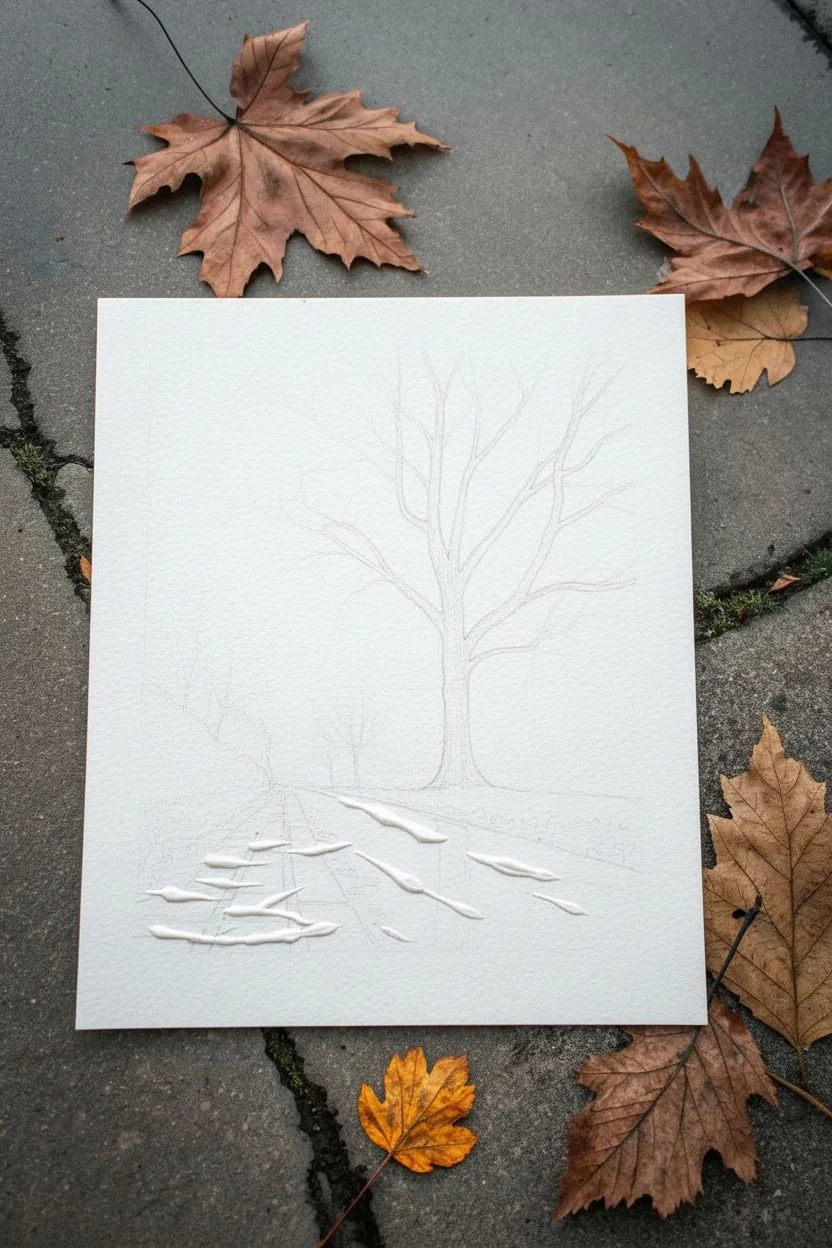
Step 1: Sketching and Preparation
-
Light Outline:
Begin with a very faint pencil sketch. Draw the horizon line low on the paper, about one-third from the bottom. Mark the curve of the road receding into the distance and lightly sketch the main trunk of the large foreground tree. Indicate the cobblestone border on the left. -
Masking (Optional):
If you want to preserve pristine whites for the brightest reflections on the wet road, apply a tiny amount of masking fluid in thin horizontal streaks where the light hits the asphalt. Let it dry completely.
Bleams & Blooms
If your tree branches look too thick or ‘spaghetti-like,’ water down your paint slightly and switch to a rigger brush. Paint from the trunk outward, flicking the brush at the end.
Step 2: The Foggy Background
-
Wet-on-Wet Sky:
Pre-wet the entire sky area ending at the horizon line with clean water. The paper should be glisten, but not hold puddles. -
Setting the Atmosphere:
Mix a very dilute wash of Ultramarine Blue and a touch of Payne’s Grey. Drop this color into the top corners, letting it fade almost to white as it reaches the horizon. This creates the heavy mist effect. -
Distant Trees:
While the paper is still damp (but losing its shine), paint the distant tree forms using a watery grey mix. Tap the brush gently to create soft, diffused shapes that look like they are receding into the fog. Keep these shapes pale and undefined. -
Middle Ground Trees:
As the paper dries further, mix a slightly darker, cooler grey. Paint the slightly nearer tree on the left. The reduced moisture in the paper will give this tree slightly harder edges than the ghost trees in the back, adding depth.
Step 3: Foreground and Road
-
Road Base Layer:
For the asphalt, mix Payne’s Grey with a hint of Alizarin Crimson for a cool, purplish grey. Wet the road area and apply the paint, darkening the color near the bottom foreground and lightening it as it curves toward the fog. -
Cobblestones:
Paint the cobblestone strip on the left with a mix of Burnt Umber and Grey. Don’t paint individual stones yet; just lay down a varied wash of earthy tones. -
Reflections:
While the road wash is still damp, lift out horizontal highlights using a thirsty brush or a paper towel to simulate wet pavement reflections. I find lifting paint creates a softer, more realistic wet look than adding white later. -
Grassy Edges:
Mix Yellow Ochre and Burnt Sienna to create the color of dead autumn grass. Use upward, flicking strokes along the left bank and the right side of the road to suggest tall, dried vegetation.
Pro Tip: Atmospheric Depth
Test your background trees on scrap paper first. If the paint is too dark, they will jump forward and ruin the foggy illusion. They should be barely visible against the white paper.
Step 4: The Hero Tree
-
Trunk Structure:
Once the background is completely dry, mix a strong, dark color using Payne’s Grey and Burnt Umber. It should be the consistency of milk. Paint the main trunk, ensuring it gets wider at the base. -
Major Branches:
Switch to a size 6 round brush. Extend the main branches upward and outward. Remember that tree branches taper as they grow outward; lift pressure on your brush as you reach the ends of the strokes. -
Fine Twigs:
Use your rigger or liner brush for the delicate outer twigs. The paint creates a beautiful contrast against the misty sky. Keep your hand loose and let the lines tremble slightly for a natural look. -
Adding Texture:
For the tiny, leftover leaves or buds on the smaller branches, spatter tiny droplets of dark grey paint or stipple gently with the tip of a dry brush.
Step 5: Final Details
-
Cobblestone Definition:
Return to the cobblestone path. Use a dark grey mix to paint the shadows between the stones, defining their shapes without outlining them completely. Vary the pressure to keep it looking organic. -
Fallen Leaves:
Mix a vibrant Burnt Sienna and dab small irregular spots along the sides of the road and in the grass to represent fallen leaves. Add a few on the road surface itself. -
crisp Shadows:
Add the deepest shadows under the grass clumps and at the base of the tree to anchor it to the ground. -
Gouache Highlights:
Finally, if you didn’t use masking fluid, use a tiny amount of white gouache to add the sharpest glints of light on the wet road or the edges of the cobblestones.
Sign your name in the corner and enjoy the moody atmosphere of your finished piece
BRUSH GUIDE
The Right Brush for Every Stroke
From clean lines to bold texture — master brush choice, stroke control, and essential techniques.
Explore the Full Guide
Whimsical Thanksgiving Turkey With Patterned Feathers
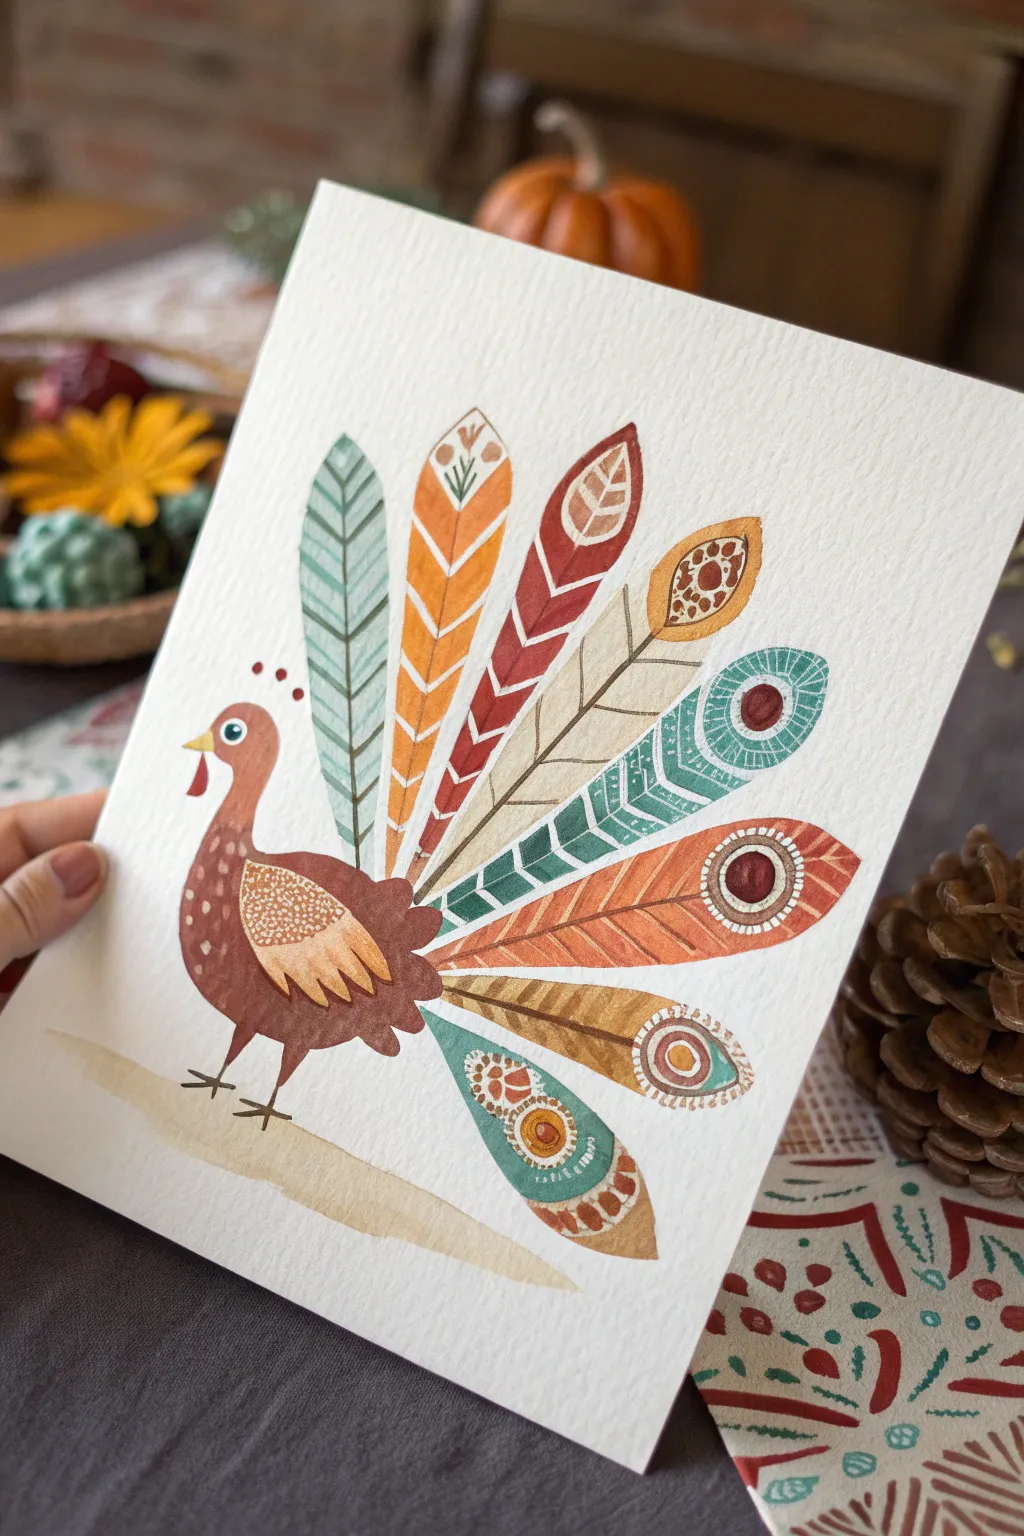
Celebrate the season with this charming folk-art inspired turkey, featuring a fan of uniquely patterned feathers in a warm harvest palette. The textured watercolor paper adds a lovely rustic feel to the whimsical line work and colorful details.
Step-by-Step Guide
Materials
- Cold press watercolor paper (140 lb/300 gsm)
- Watercolor paints (burnt sienna, yellow ochre, terracotta, teal/sage green, deep red)
- Round watercolor brushes (size 4 and size 0/1 for details)
- White gouache or white gel pen
- Pencil and eraser
- Palette for mixing
- Cup of water and paper towels
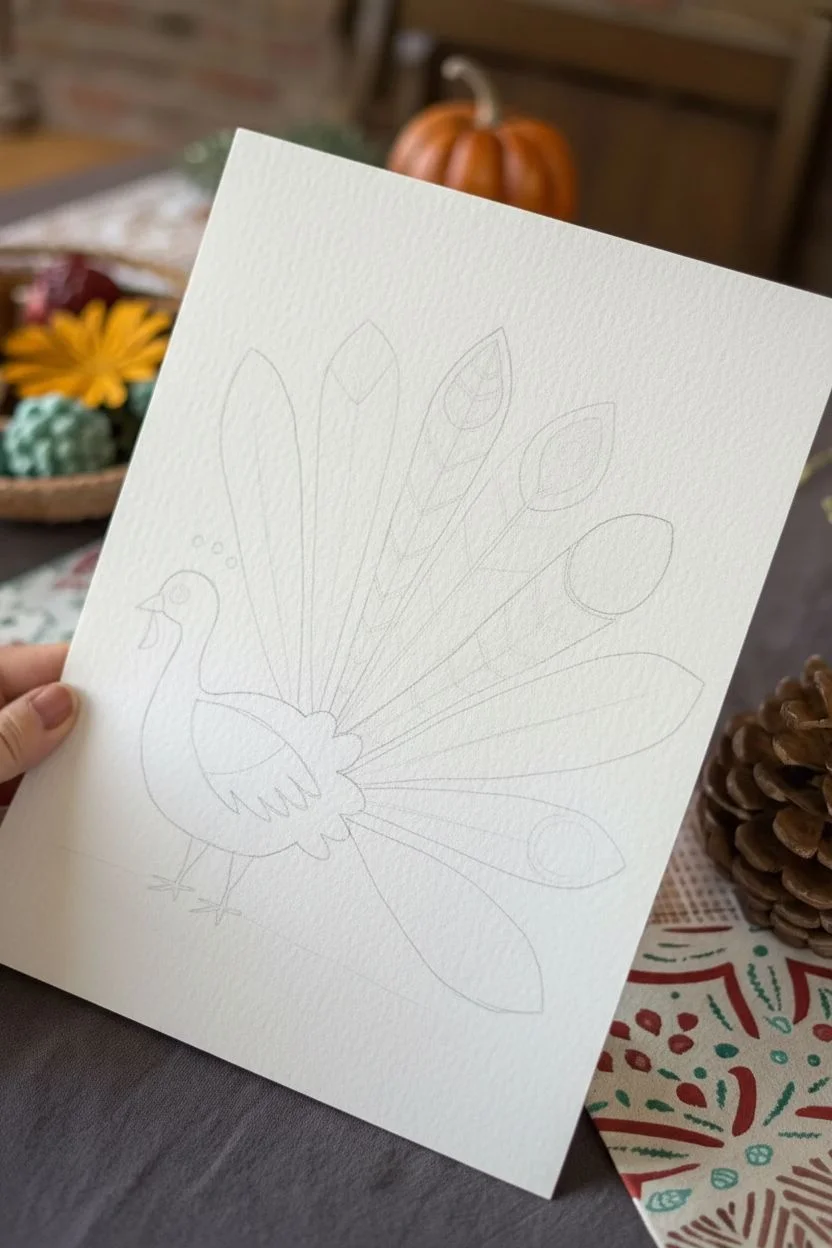
Step 1: Determining the Composition
-
Sketch the body shape:
Begin lightly with your pencil. Near the bottom left third of your paper, draw a simple, rounded teardrop shape for the turkey’s body. The chest should be full and curved, tapering up into a slender neck and round head. -
Add the wing and feet:
Sketch a smaller, angled teardrop shape on the side of the body for the wing. At the base, draw two simple stick legs ending in three-pronged feet. -
Position the feather fan:
Lightly draw seven long, oval feather shapes fanning out behind the turkey. Start with the vertical one in the center, then space three on the left and three on the right, ensuring they radiate outward evenly.
Unsteady Hand?
If painting fine details feels shaky, switch to colored pencils or fine-tip markers for the feather patterns once the watercolor base is completely dry.
Step 2: Painting the Base Layers
-
Base coat the body:
Load your size 4 brush with a warm reddish-brown mix (burnt sienna). Paint the entire body and head, excluding the beak and wattle. Keep the edges crisp. -
Paint the wing:
Mix a golden yellow ochre. Fill in the wing shape while the body is still damp if you want a slight bleed, or wait for it to dry for a cleaner separation. I prefer waiting just a moment so the colors don’t muddy. -
Color the feathers:
Now, paint the base color for each feather, alternating your palette. Use sage green for the outer left and a middle right feather. Use deep red/terracotta for the center-left and far-right feathers. -
Continue the feather sequence:
Use yellow ochre for the second feather from the left and beige/light tan for the center-right feather. Finally, paint the bottom-most right feather with a teal or dark turquoise. -
Add facial features:
While the feathers dry, use a tiny amount of yellow for the beak and bright red for the wattle hanging from the neck. Paint a small white circle for the eye with a black dot pupil. -
Ground the turkey:
Mix a very watery wash of tan or light brown. Paint a swooping strip of ground beneath the turkey’s feet to anchor the composition.
Paper Matters
Use cold-press paper with a distinct tooth. The texture catches the pigment and gives that lovely ‘vintage’ speckled look seen in the wing and body.
Step 3: Adding the Details
-
Detail the wing:
Once the wing is fully dry, painting scallops along the bottom edge using a slightly darker brown. Add small white dots using gouache or a gel pen to the upper part of the wing for texture. -
Pattern the green feathers:
On the sage green feathers, use a darker green or grey to paint a central vein line. Add chevron stripes (V-shapes) pointing upwards along the length of the feather. -
Design the orange feather:
For the orange feather, use white gouache to paint a central line. Add inverted V-stripes pointing downwards. At the rounded tip, paint a small botanical sprig or flower shape. -
Decorate the red feathers:
On the red feathers, paint bold white leaf-vein patterns. For the tip of the feather, draw a large teardrop shape in white, and fill the inside with smaller geometric lines like a leaf skeleton. -
Style the beige feather:
Outline the beige feather with a thin brown line. Draw a central vein. At the tip, paint an oval filled with tiny brown dots to mimic seeds or pollen. -
Embellish the teal feathers:
These feathers get the ‘peacock’ treatment. Paint a large circle at the tip in a contrasting color like rust or dark red. Surround it with concentric circles of white dots and lines. -
Add final body textures:
Using white gouache, add three small dots above the turkey’s head. Paint small white dots on the turkey’s chest to suggest feathers. -
Define the legs:
Use a dark brown or black fine liner (or very fine brush) to go over the legs and feet, ensuring they look sturdy.
Now step back and enjoy this festive, colorful addition to your holiday decor
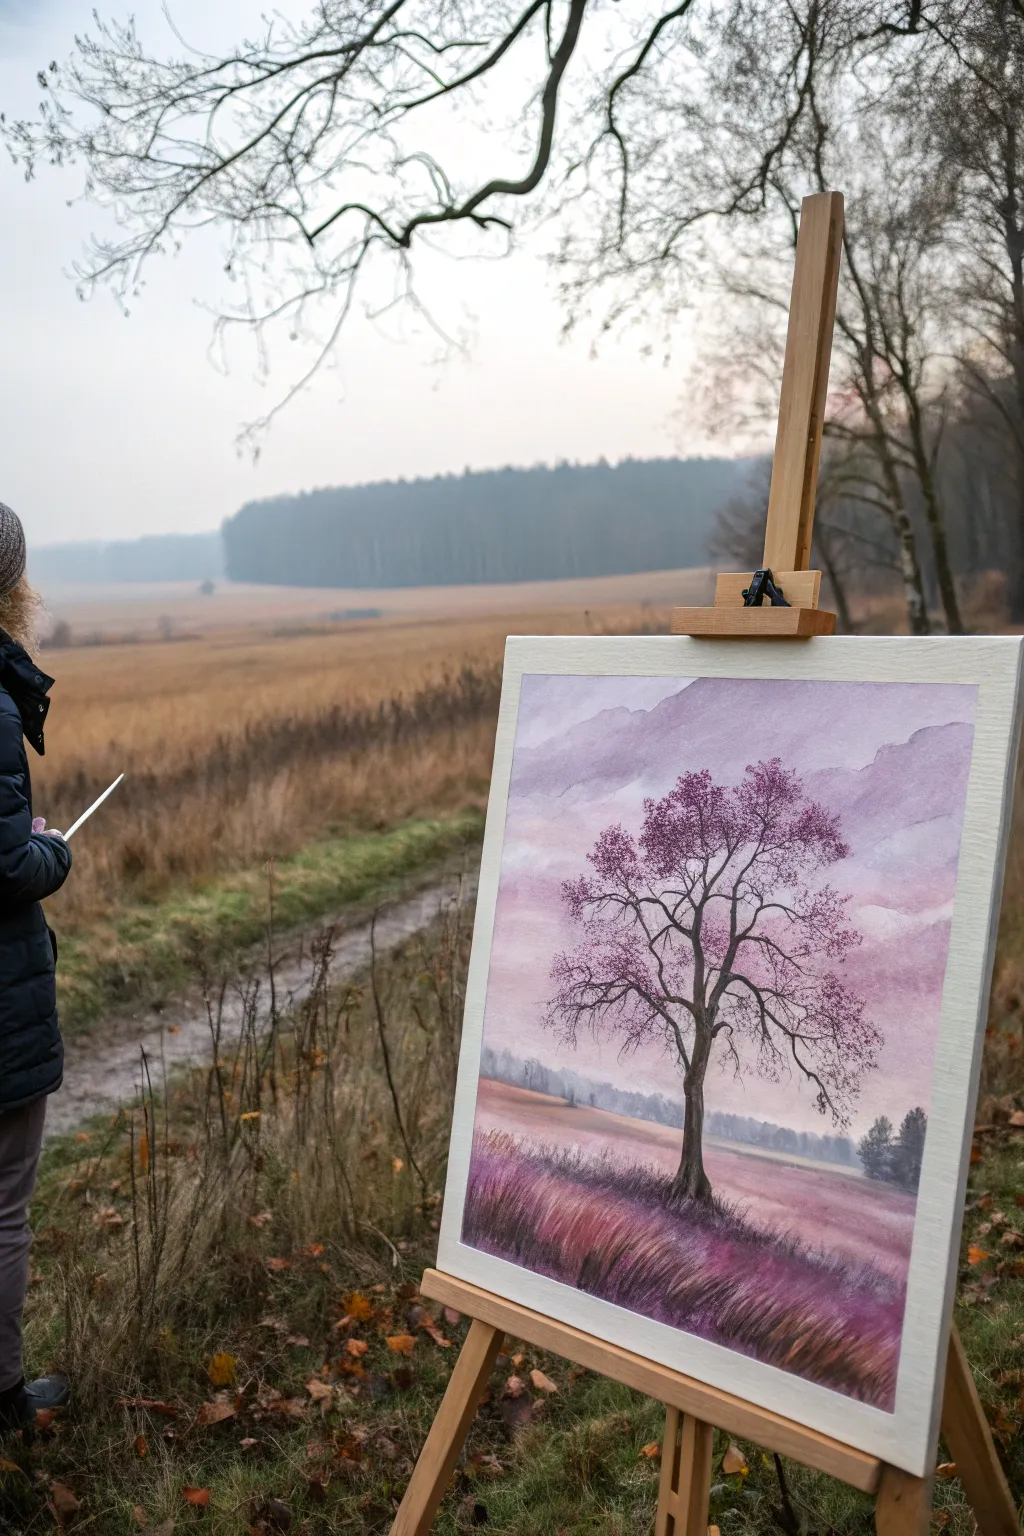
Monochrome November Landscape in Plum and Umber

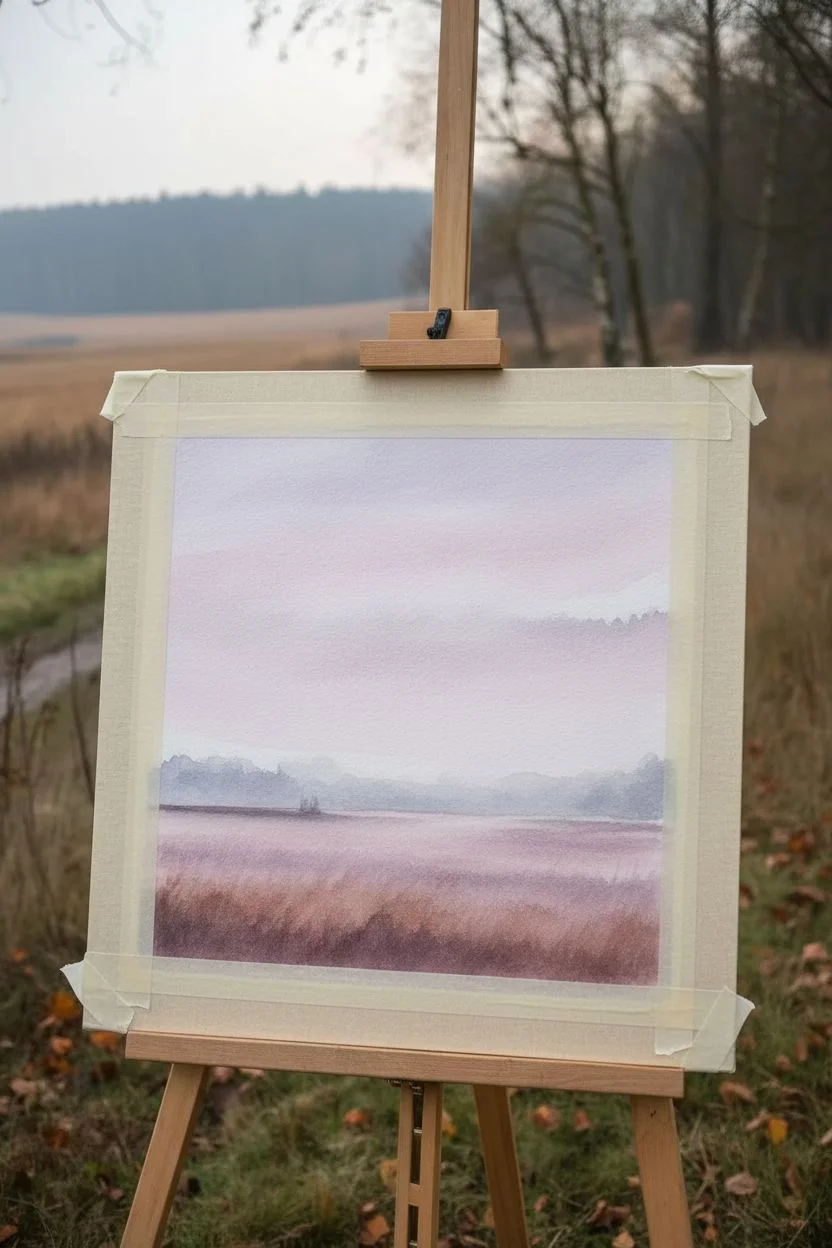
Capture the quiet, chilly atmosphere of a late autumn day with this moody landscape study. Using a limited palette of plums, violets, and earthy umbers, you’ll create a misty scene centered on a detailed, dormant tree silhouette.
Detailed Instructions
Materials
- Watercolor paper (cold press, 140lb/300gsm)
- Watercolor paints (Payne’s Grey, Burnt Umber, Alizarin Crimson, Ultramarine Blue, Dioxazine Purple)
- Masking fluid (optional)
- Large flat wash brush (1-inch)
- Round brushes (sizes 4, 8, and a rigger/liner brush)
- Board and masking tape
- Paper towels
- Two jars of water
Step 1: Setting the Atmosphere
-
Prepare the workspace:
Begin by taping your watercolor paper securely to a board on all four sides. This ensures the paper stays flat during the heavy washes we will apply for the sky. -
Mix the sky colors:
Create a large puddle of pale lavender wash. I like to mix Alizarin Crimson with a touch of Ultramarine Blue and plenty of water. Keep a separate, slightly darker grey-purple mix ready for the clouds. -
Wet-on-wet sky base:
Using your large flat brush, wet the entire upper two-thirds of the paper with clean water until it glistens but doesn’t pool. -
Apply the first wash:
Drop the pale lavender wash across the wet paper, allowing it to flow naturally. While still wet, streak in horizontal suggestions of clouds using the darker grey-purple mix to create depth without hard edges. -
Ground layer:
While the sky is drying slightly (but still damp near the horizon), mix a diluted wash of Burnt Umber and Dioxazine Purple. Paint the bottom third of the paper for the field, allowing the horizon line to blur slightly into the sky for a misty effect. -
Drying time:
Let this entire background layer dry completely. The paper must be bone dry before you start the detailed tree to prevent bleeding.
Muddy colors?
If your purples and browns are turning grey, dry your brush more between colors. Clean your water promptly; dirty water dulls violet tones faster than any other color.
Step 2: The Distant treeline
-
Mix a hazy grey:
Combine Payne’s Grey with a lot of water to create a very faint, ghostly grey tone. -
Paint the background trees:
Using a size 8 round brush, dab in a low, uneven treeline right along the horizon. Focus on soft, irregular shapes rather than individual details to push them into the distance. -
Add right-side clumps:
Before the horizon line dries, add slightly darker, denser clumps of trees on the far right side to create asymmetry and balance the composition.
Step 3: The Main Subject
-
Sketch the trunk:
Mix a strong, saturated dark brown using Burnt Umber and a touch of Payne’s Grey. With a size 4 brush, paint the main trunk of the tree slightly off-center, making the base wider and tapering as you go up. -
Major branches:
Extend the main thick branches outward. Remember that trees are organic; avoid perfect symmetry and let the branches twist and turn slightly. -
Fine twig details:
Switch to a rigger or liner brush. With a very inky consistency of paint, pull out fine, delicate twigs from the larger branches. Use a shaky hand intentionally here to make the twigs look natural and rugged. -
Adding texture to the bark:
Once the trunk is semi-dry, use a mostly dry brush with dark pigment to drag vertical texture lines up the trunk, suggesting rough bark.
Add Winter Frost
For a frostier November look, sprinkle a pinch of table salt onto the wet foreground wash. Brush it off when dry for a crystalline ice texture.
Step 4: Foreground and Finishing Touches
-
Foreground grasses:
Load a round brush with a mix of Dioxazine Purple and Burnt Umber. Using quick, upward flicking motions, paint clumps of tall grass in the immediate foreground at the bottom of the paper. -
Deepening the shadows:
Add a second layer of darker purple-brown flicks over the grass to create density and shadow variation in the field. -
Rooting the tree:
Darken the area immediately around the base of the tree trunk with grassy strokes to make it look firmly planted in the earth rather than floating. -
Optional foliage splatter:
Load a brush with reddish-purple paint and tap it against your finger to splatter tiny dots around the upper branches. This suggests remaining dried berries or dead leaves clinging to the tree. -
Final assessment:
Step back and look at the contrast. If the tree trunk looks too pale against the sky, glaze over it carefully with another layer of dark umber to strengthen the silhouette. -
Remove tape:
Ensure the painting is perfectly dry, then slowly peel away the masking tape at a 45-degree angle to reveal crisp, clean edges.
Now you have a serene, atmospheric landscape ready to frame or gift


Have a question or want to share your own experience? I'd love to hear from you in the comments below!