
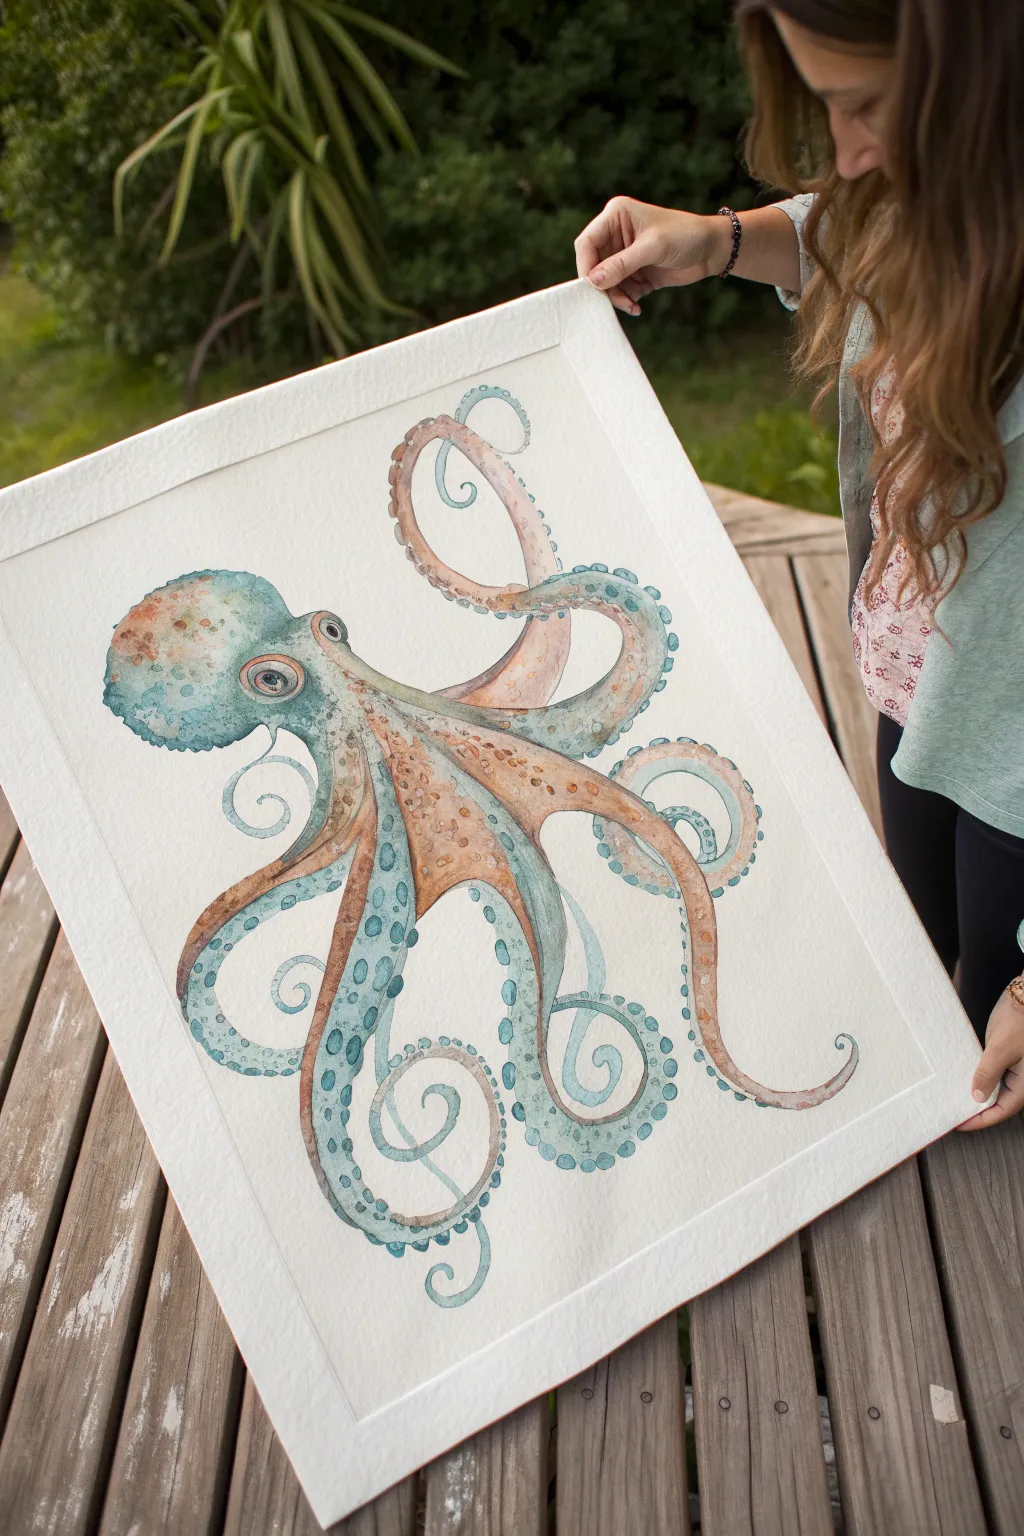
If you’re in the mood to paint something that feels fluid, mysterious, and totally mesmerizing, an octopus is basically the perfect muse. I love how you can go realistic or wildly fantastical, and those twisting tentacles always make the whole composition feel alive.
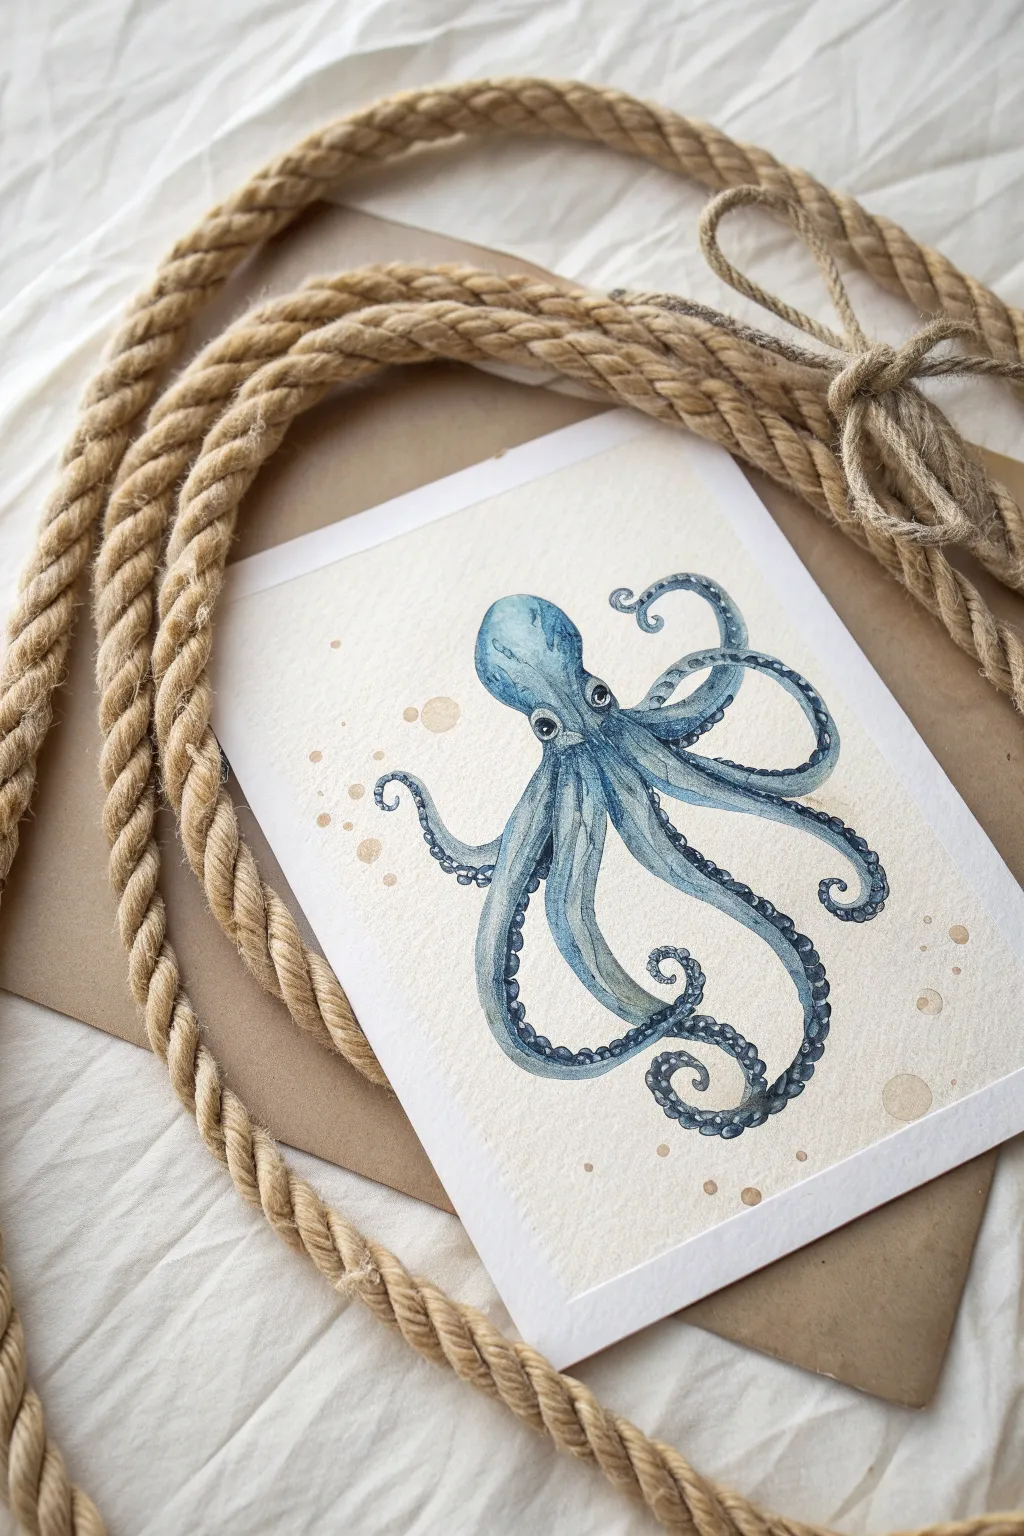
Underwater Octopus With Soft Bubbles
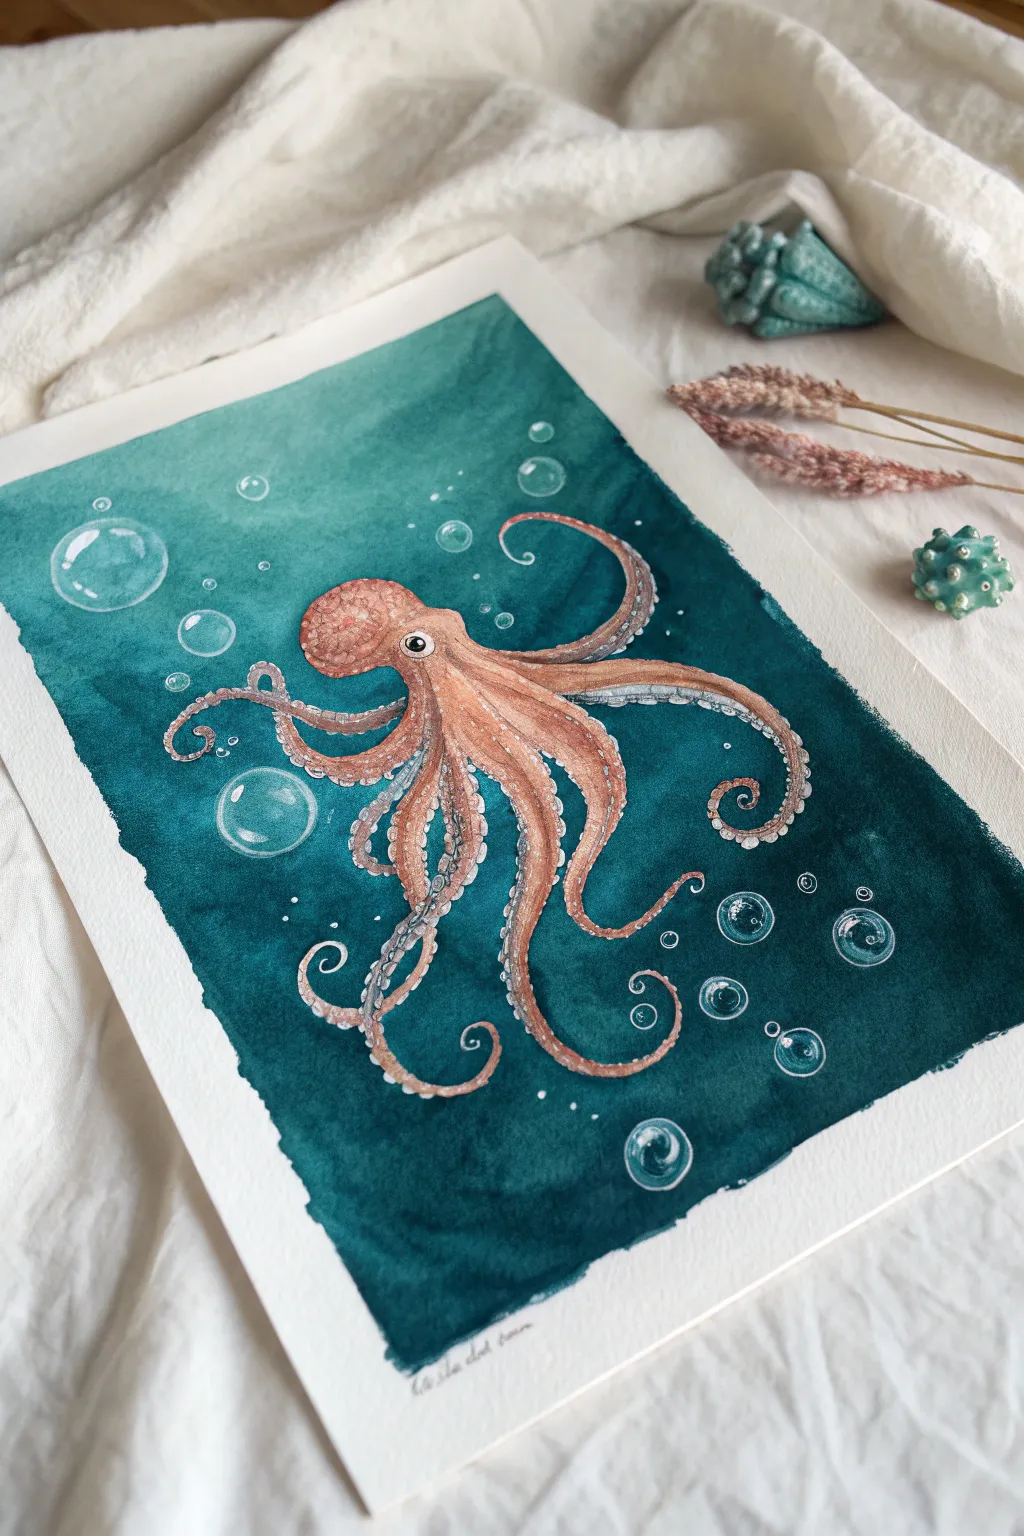
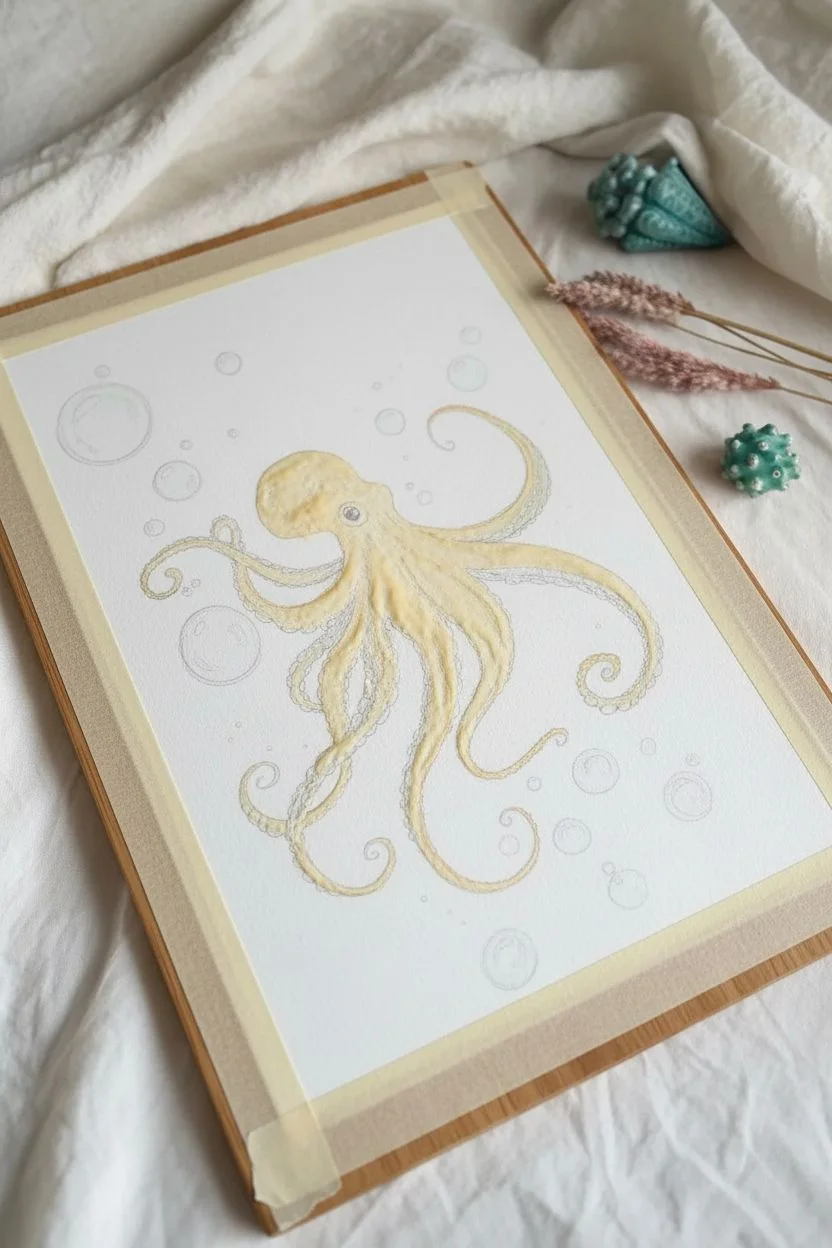
This project captures the graceful movement of an octopus suspended in a deep, teal ocean. You’ll master wet-on-wet background washes and detailed layering to bring the glowing creature and its bubbles to life.
Step-by-Step Tutorial
Materials
- Cold press watercolor paper (300 gsm)
- Masking fluid
- Watercolor paints: Indigo, Phthalo Green or Viridian, Burnt Sienna, Burnt Umber, White Gouache
- Brushes: Large round wash brush (size 10-12), medium round brush (size 6), fine detail brush (size 0-2)
- Pencil (HB) and kneaded eraser
- Painter’s tape or masking tape
- Paper towels
- Two jars of water
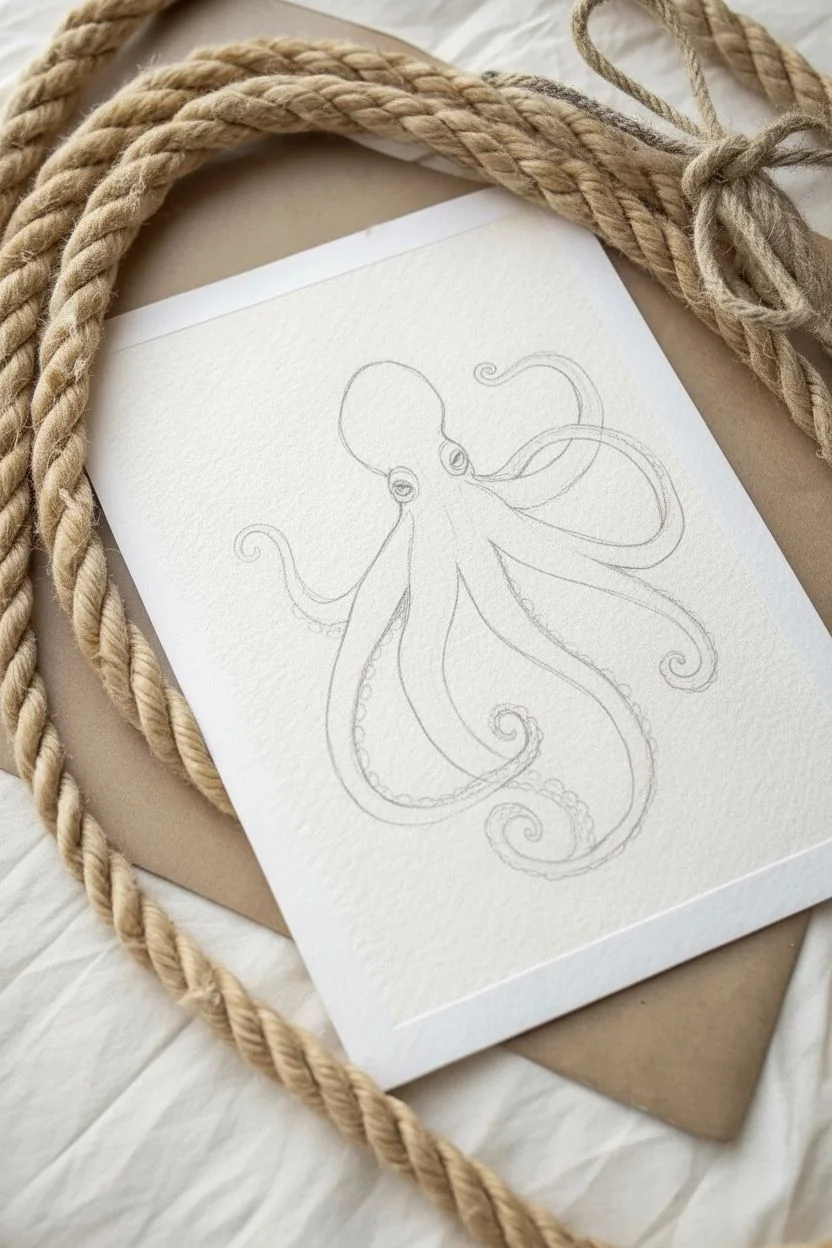
Step 1: Preparation & Drawing
-
Secure the paper:
Begin by taping down your watercolor paper to a board on all four sides. This prevents buckling when we apply the heavy background wash later. Ensure the tape is pressed down firmly to keep clean edges. -
Sketch the octopus:
Lightly sketch the octopus outline in the center. Focus on the bulbous head (mantle) and the flowing, S-curved tentacles. Don’t worry about perfect suction cups yet; just get the main flow and shape. -
Plot the bubbles:
Draw circles of various sizes floating around the octopus, primarily towards the top left and bottom right corners, to create a sense of movement. -
Apply masking fluid:
Using an old brush or a masking fluid applicator, carefully fill in the entire octopus shape and the interior of every bubble. This reserves the white paper so you can paint the dark background freely. -
Allow to dry:
Wait until the masking fluid is completely dry and rubbery to the touch. It will likely turn a yellowish or gray color when ready.
Uneven background?
If your background has ‘cauliflower’ blooms, don’t panic. These watermarks actually look like moving water currents. Embrace the texture rather than overworking it.
Step 2: The Ocean Background
-
Mix your ocean color:
Create a deep turquoise mix using Phthalo Green (or Viridian) and Indigo. You want a substantial amount of paint for the large wash. -
Wet the background:
With your large wash brush, apply clean water to the paper area surrounding the masked octopus. Do not wet the masked areas themselves. -
Apply the gradient:
While the paper is glistening, drop in your teal mix. Make the color darkest at the bottom and corners, diluting it slightly with water as you move toward the top left to suggest filtered sunlight. -
Refine the edges:
Let the paint pool naturally around the masked shape. I prefer to leave the outer edges of the painting somewhat rough and uneven for an artistic, hand-painted look rather than painting edge-to-edge. -
Dry and remove mask:
Let the background bone dry completely. Once dry, gently rub off the masking fluid with your finger or a rubber cement pickup tool to reveal the pristine white shape beneath.
Step 3: Painting the Octopus
-
Base layer:
Mix a watery wash of Burnt Sienna. Paint the entire body of the octopus with this light, warm tan color. While wet, drop in tiny touches of slightly darker brown on the shadow side of the head. -
Shadows and form:
Once the base is dry, use a medium brush with a Burnt Sienna and Burnt Umber mix. Paint along the bottom edges of the tentacles to create cylindrical volume. -
Defining the eye:
Paint the eye using a dark brown or black mix, leaving a tiny pinprick of white paper for the highlight. This immediately brings personality to the creature. -
Adding texture:
Using a dry brush technique or stippling with the fine brush, add tiny dots and speckles of reddish-brown on the head and upper tentacles to mimic skin texture. -
Painting suction cups:
With your finest brush and a diluted grey-blue or shadow color, verify the underside of the tentacles. Paint small, open circles for the suction cups, shading just one side of each ring to make them look uniform.
Adding Shimmer
Mix a tiny pinch of pearlized watercolor or iridescent medium into your white gouache for the final highlights. The octopus will shimmer when the light hits the paper.
Step 4: Bubbles & Highlights
-
Bubble base:
For the bubbles you unmasked earlier, wet them slightly and drop in a very faint wash of the background teal color on just one side to give them dimension. -
White gouache details:
Switch to white gouache and your smallest brush. Add sharp, curved reflection lines on the bubbles to make them look glassy. -
Octopus highlights:
Add tiny dots of white gouache to the tops of the suction cups and the textured bumps on the head to make them look wet and shiny. -
Connecting debris:
Splatter tiny dots of white gouache around the tentacles to simulate disturbed sand or micro-bubbles in the water.
Remove the tape slowly at an angle to reveal your crisp, finished underwater scene


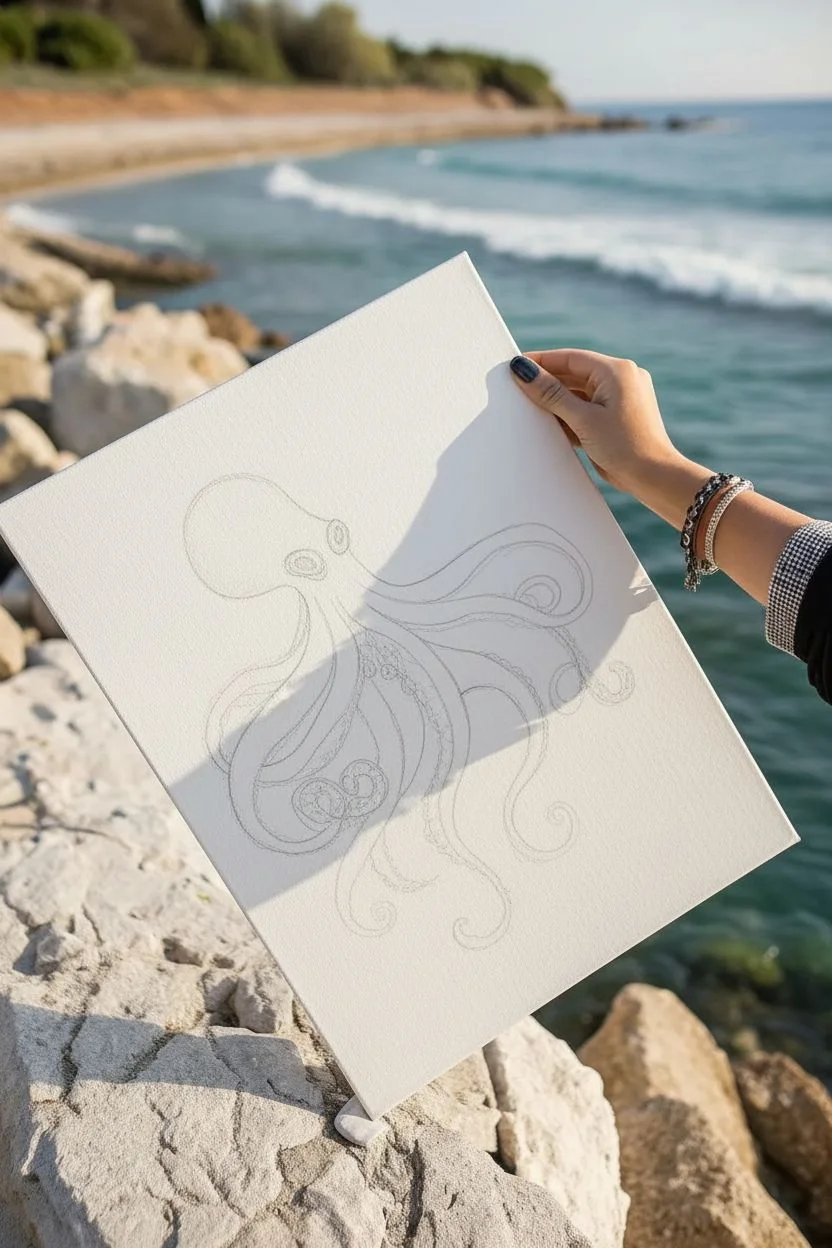
Classic Blue-Green Ocean Palette Octopus
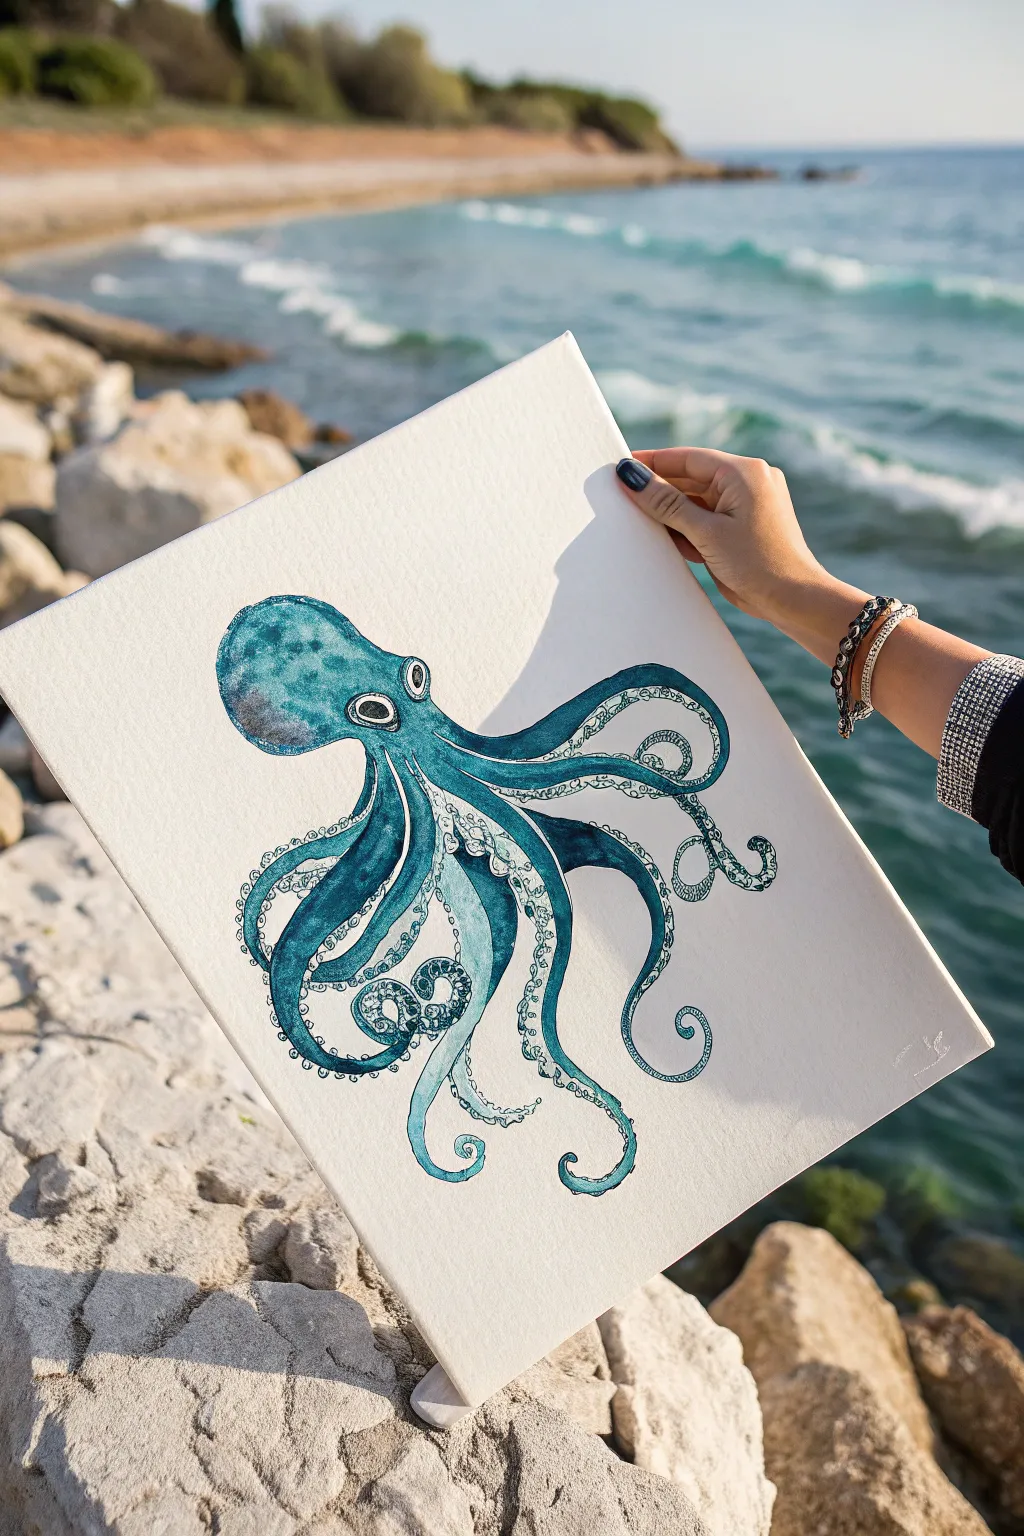
Capture the fluid elegance of marine life with this striking octopus illustration, featuring cool teal tones and intricate ink details. The blend of watercolor-style washes with crisp outlining creates a modern, graphic look perfect for beach house decor.
Step-by-Step Guide
Materials
- Square stretched canvas (approx. 12×12 inches)
- Acrylic paints (Phthalo Blue, Teal, White, Paynes Grey)
- Acrylic glazing medium or flow improver
- Round synthetic brushes (sizes 2, 4, and 6)
- Waterproof fine-liner pen (black, 0.5mm) or black acrylic fineliner
- HB pencil
- Eraser
- Palette
- Water cup
- Paper towels
Step 1: Planning and Sketching
-
Prepare the canvas:
Ensure your canvas is clean and taut. While you can prime it with gesso for a smoother surface, the slight texture of raw canvas adds character to the washes. Place the canvas on a flat surface. -
Outline the head:
Lightly sketch a bulbous, rounded shape for the octopus’s mantle (head) on the left side of the canvas. Keep the lines faint so they don’t show through later. -
Position the eyes:
Draw two prominent circles near the base of the head, slightly protruding. Add smaller circles inside for the pupils, giving the creature a curious expression. -
Map the tentacles:
Sketch eight flowing arms extending from beneath the head. Let them curl and twist naturally, filling the empty space on the right and bottom of the canvas. Vary the curves to create a sense of movement in the water.
Ink Bleeding?
If your pen creates fuzzy lines, the paint isn’t dry enough. Wait 20 more minutes or use a hair dryer. Ensure you use waterproof archive ink.
Step 2: Applying the Base Colors
-
Mix your teal wash:
On your palette, mix Teal with a touch of Phthalo Blue. Add a generous amount of glazing medium or water to create a semi-transparent, watercolor-like consistency. -
Paint the mantle:
Using a size 6 brush, fill in the head shape with your teal wash. While wet, dab a slightly darker concentration of blue on the left edge to create a shadow and define the volume. -
Fill the main tentacles:
Follow the curves of the arms with the same teal mix. Leave the undersides of the tentacles (where the suckers will go) unpainted or extremely pale for now. -
Create depth:
While the paint is still damp, I like to drop small amounts of watered-down Paynes Grey into the crevices where the tentacles overlap. This wet-on-wet technique adds instant dimension without harsh lines.
Step 3: Detailing and Texture
-
Define the undersides:
Mix a very pale blue-white shade. Using a size 4 brush, paint the strip along the underside of each tentacle where the suckers are located. -
Paint the suckers:
Switch to your size 2 brush. Dip it into a darker teal-grey mix and paint small ring shapes along the pale undersides of the arms. Make them larger near the head and tiny near the tips. -
Enhance the skin texture:
Once the base layer is fully dry, dry-brush a little pure white paint lightly over the top of the head and the highest points of the tentacles to simulate light hitting wet skin. -
Paint the eyes:
Fill the pupils with solid black or dark grey, leaving a tiny white dot in each for a reflection highlight. Paint the iris a pale, watery grey.
Add Sparkle
Mix a tiny amount of iridescent medium or pearl white paint into your final highlights to make the octopus look wet and glistening in the light.
Step 4: Inking and Final Touches
-
Outline the silhouette:
Wait until the painting is completely bone-dry. Take your waterproof fine-liner and carefully trace the outer edge of the entire octopus. A slightly jittery or organic line looks better here than a perfect vector line. -
Define the details:
Use the pen to outline the eyes and the individual suckers. Add small hatched lines or dots near the shadowed areas of the tentacles to suggest rough skin texture. -
Add localized texture:
Draw tiny circles and irregular spots on the mantle (head) using the pen to mimic the octopus’s color-changing cells. -
Clean up:
Once you are certain the ink is dry, gently erase any remaining pencil sketch lines that might be visible. -
Protect the work:
If desired, apply a clear matte spray varnish to protect the artwork from dust and UV light, ensuring your sea creature stays vibrant.
Hang your finished canvas in a well-lit spot to bring a splash of the ocean into your home


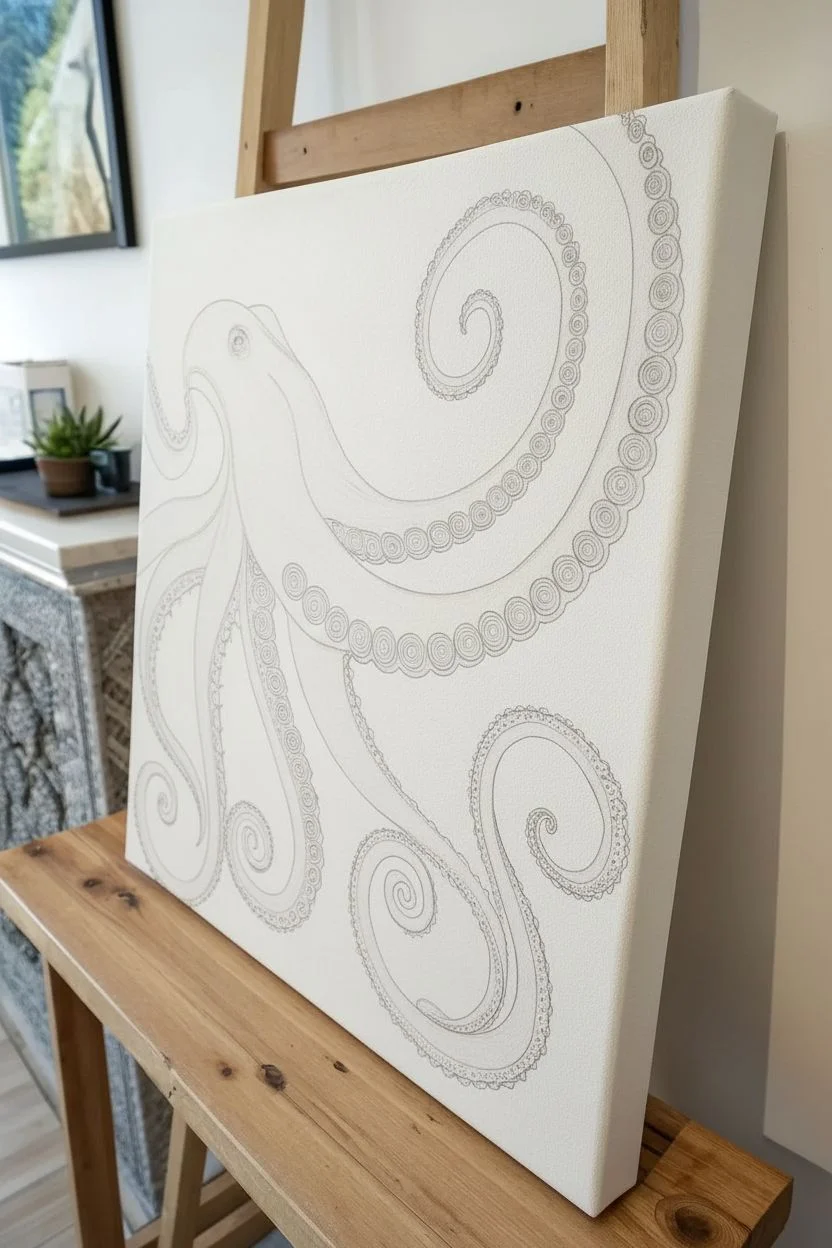
Curled Tentacles Spiral Composition
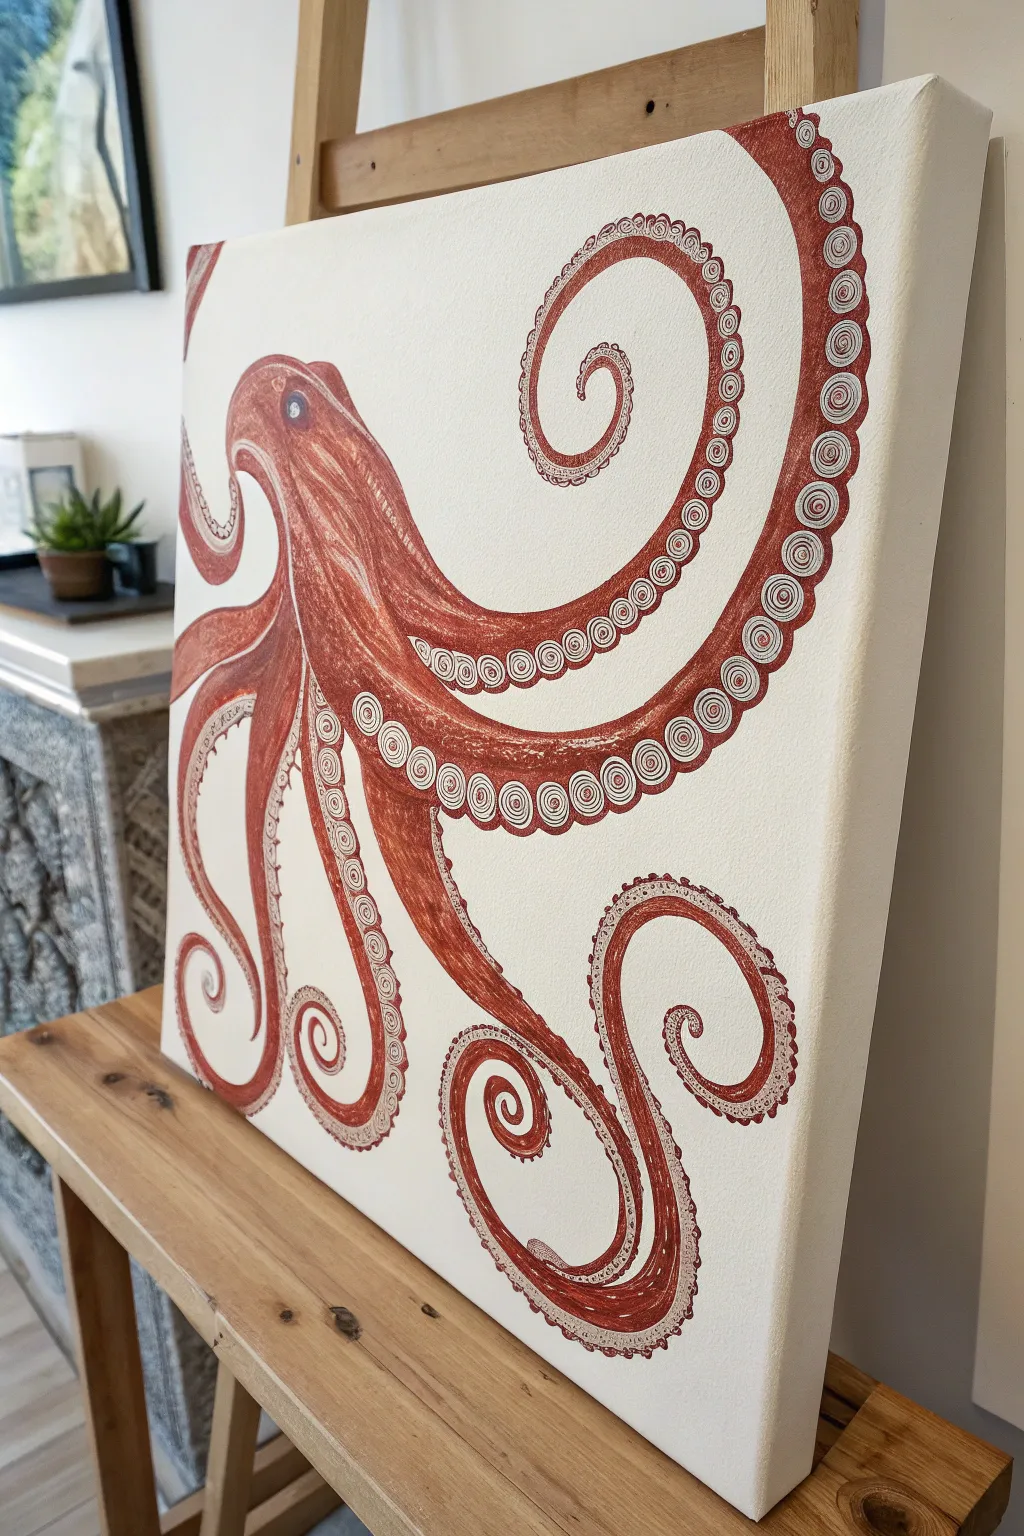
This striking canvas painting features a reddish-brown octopus with beautifully curled tentacles that create a dynamic spiral composition. The focus is on the repetitive patterns of the suckers and the flowing motion of the arms, creating an elegant and decorative piece of marine art.
Detailed Instructions
Materials
- Stretched canvas (rectangular, portrait orientation)
- Acrylic paints: Burnt Sienna, Red Oxide, Titanium White, and a touch of Black or Dark Umber
- Pencil (HB or H) for sketching
- Eraser
- Paintbrushes: Flat (medium), Round (small), and a fine Liner brush
- Palette for mixing
- Water cup and paper towels
Step 1: Sketching the Composition
-
Placement of the Head:
Begin by lightly sketching the mantle (head) of the octopus in the upper-left quadrant of the canvas. It should be an oval shape that tilts slightly downwards to the right. -
Drafting the Main Spiral:
Draw the largest, most prominent tentacle sweeping upwards from the body, arching high across the top right, and curling into a tight spiral. This is the anchor of your composition. -
Adding Lower Tentacles:
Sketch the lower tentacles extending downwards. Let two or three of them hang relatively straight before curling up at the very ends, similar to the loops of a script letter. -
Filling the Space:
Draw the remaining arms to fill the negative space on the left and bottom right. Ensure each arm flows organically from the central body mass without looking tangled. -
Defining the Sucker Track:
Lightly draw a parallel line along the underside of every tentacle. This strip will define where the suckers will eventually be painted.
Brush Control Secret
For those tiny spiral tips, thin your acrylic paint with a drop of water until it has an ink-like consistency. This helps the paint flow smoothly off a liner brush without breaking
Step 2: Applying the Base Colors
-
Mixing the Main Hue:
On your palette, mix a generous amount of Burnt Sienna with a little Red Oxide. You want a warm, earthy reddish-brown tone. -
Painting the Mantle:
Using a medium flat brush, fill in the head area. Apply the paint somewhat thinly so the canvas texture still shows through slightly, giving it an organic feel. -
Filling the Tentacle Bodies:
Paint the upper side of each tentacle with your reddish-brown mix. Be careful to leave the ‘sucker track’ you sketched earlier unpainted for now. -
Adding Subtle Variation:
While the paint is still wet, mix a tiny bit of darker brown or black into your base color. Add shadows to the underside of the head and where tentacles overlap to create volume. -
Painting the Eye:
Paint a small, dark circle for the eye. Add a tiny white highlight dot near the top to bring it to life instantly.
Step 3: Detailing the Suckers
-
Base for Suckers:
The unpainted strip on the tentacles will serve as the base for the suckers. You can leave it raw canvas white or paint it a very pale cream (White mixed with a speck of Burnt Sienna). -
Outlining the Discs:
Switch to your small round brush. Using the main reddish-brown color, carefully paint rings along the sucker track. Start large near the body and make them progressively smaller as the tentacle tapers. -
Creating the Centers:
Inside each ring, paint a concentric circle pattern. It often helps to do a smaller ring inside the first, then a dot in the very center. -
Connecting the Suckers:
Use the liner brush to paint small connecting lines or ‘webbing’ between the base of the suckers and the main tentacle body, ensuring they look attached rather than floating.
Add Metallic Flair
Once the painting is dry, trace the outer edge of the suckers with a metallic copper or gold paint pen. This adds a subtle shimmer that catches the light beautifully
Step 4: Refining and Texturing
-
Adding Skin Texture:
Mix a lighter version of your base color (add more White). Using a dry-brush technique, lightly scumble over the top of the head and the thickest parts of the arms to suggest rough skin texture. -
Highlighting Edges:
With a thin liner brush and a pale tint, add very thin highlight lines along the upper ridges of the tentacles to emphasize their cylindrical shape. -
Sharpening the Spirals:
Go back into the tight curls of the tentacles. If the paint blobs together, use your liner brush and the background white color to cut back in and separate the spirals visually. -
Final Contrast Check:
Look at the painting from a distance. If the reddish-brown looks too flat, glaze a thin layer of transparent red oxide over the darkest areas to deepen the richness. -
Clean Up:
Erase any visible pencil lines that weren’t covered by paint, and touch up the white background if any smudges occurred during the painting process.
Hang your canvas proudly and enjoy the fluid motion of your new octopus friend


Close-Up Tentacles and Suckers Study
Capture the graceful movement of the deep sea with this delicate watercolor study. This project focuses on the beautiful interplay between soft, watery blues and warm, detailed copper tones on the tentacles.
Step-by-Step Tutorial
Materials
- Cold press watercolor paper (A3 or similar sketchbook size)
- Watercolor paints: Indigo, Prussian Blue, Burnt Sienna, and a touch of Red Oxide
- Round brushes: sizes 6 for washes and 0 or 1 for fine details
- Pencil (HB) for sketching
- Kneaded eraser
- Two jars of water
- Paper towels
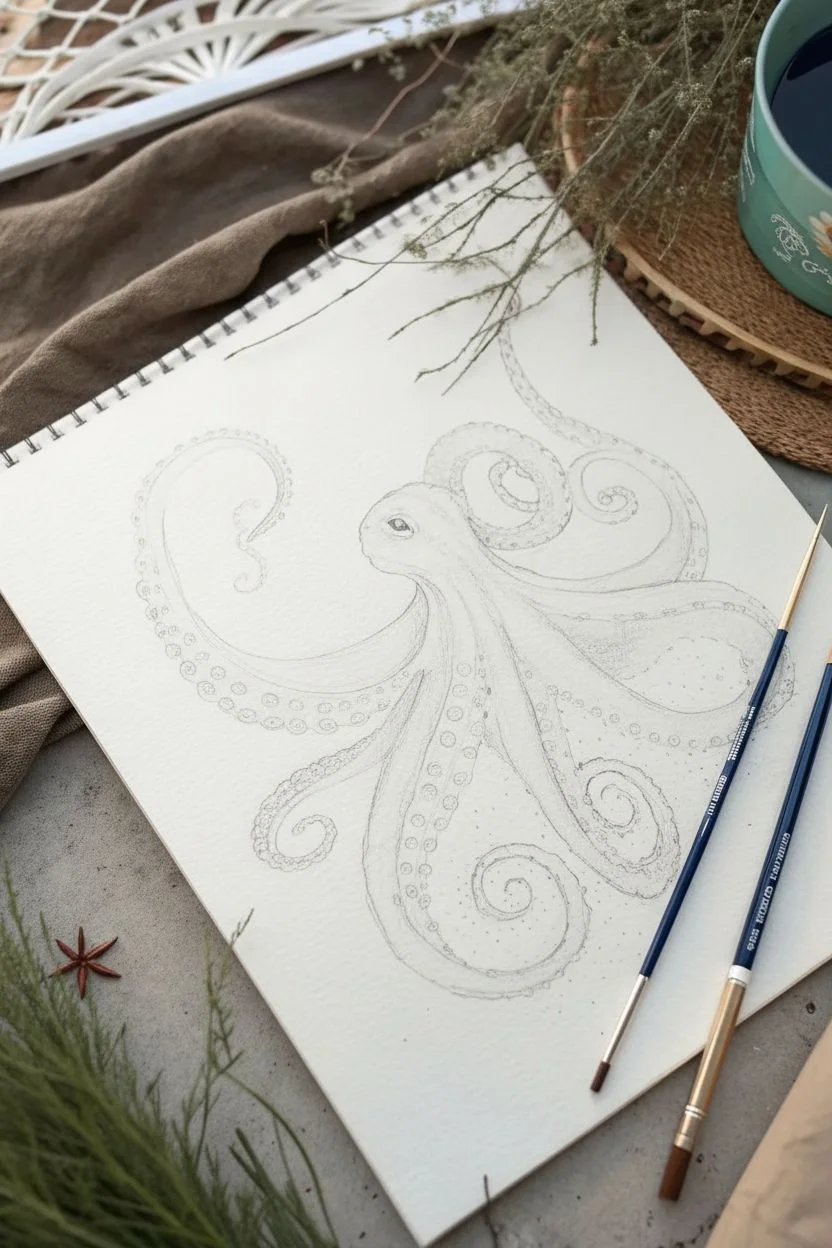
Step 1: Sketching the Form
-
Basic Shape:
Start by lightly sketching the mantle (the head) as a rounded oval shape near the center-top of your page. Keep your pencil pressure very light so the graphite doesn’t show through the transparent paint later. -
Flowing Tentacles:
Draw the eight arms radiating outward. Instead of making them stiff, give each one a unique curve or spiral. Notice how the arms on the left sweep expansively, while the bottom ones curl tightly inward. -
Refining the Anatomy:
Thicken the lines of the arms, tapering them to fine points at the ends. Sketch the eye on the side of the head, giving it a slightly sleepy, lidded appearance. -
Sucker Placement:
Lightly indicate where the rows of suckers will go on the underside of each tentacle. You don’t need to draw every single circle yet, just map out the path of the ‘underbelly’ ribbon.
Step 2: The First Wash
-
Wet-on-Wet Base:
Mix a watery wash of Prussian Blue with a tiny hint of gray or Indigo to desaturate it. Apply clear water to the head area first, then drop in your blue mix, letting it bloom softly creating natural texture. -
Body Gradient:
Continue this blue wash down the top side of the main tentacles. As you move away from the head, dilute the paint more to let the paper white show through, creating highlights on the curves. -
Warm Undersides:
While the blue is drying (or careful not to touch it if wet), mix Burnt Sienna with a lot of water. Paint a pale, warm wash along the underside strip of the tentacles where the suckers will eventually be. -
Drying Time:
Let this initial layer dry completely. The paper should feel cool to the touch but not damp before you proceed to detailing.
Muddy colors?
Wait for the blue layer to be absolutely bone-dry before painting the copper suckers. If the blue is damp, the orange-brown will bleed into it, turning a dull gray.
Step 3: Building Depth and Detail
-
Defining the Head:
Using a size 6 brush and a slightly stronger mix of Indigo and Blue, paint the shadowed areas of the head, specifically around the eye and under the mantle lip, to give it volume. -
Shadowing the Arms:
Paint a darker stripe of blue along the ‘spine’ or outer edge of the tentacles. Soften the inner edge of this line with a damp clean brush so it blends into the lighter wash. -
Painting Suckers:
Switch to your fine detail brush (size 0 or 1). Mix a concentrated Red Oxide or Burnt Sienna. Paint small rings for the suckers. Vary their shapes—some are perfect circles, while others are viewed from the side as ovals. -
Adding Contrast:
Inside some of the larger suckers, dab a tiny dot of darker brown to create depth. Leave the center of the ring the pale wash color from the first step.
Try salt for texture
Sprinkle a pinch of table salt onto the wet blue wash of the head. When it dries and you brush the salt away, it leaves a beautiful, organic mottled texture perfect for sea creatures.
Step 4: Final Touches
-
The Eye:
Paint the pupil of the eye dark Indigo or black, leaving a tiny speck of white paper for the highlight. This brings the creature to life instantly. -
Texture Spots:
I like to add a little texture here. Flick your brush or gently dot diluted blue paint onto the head and upper arms to mimic skin texture. -
Atmospheric Speckles:
Load a brush with watery paint and tap it against another brush handle over the paper to create the fine splatter effect seen around the tentacles. Use both blue and brown colors for this. -
Optional embellishments:
If you wish, loosely paint simple star shapes nearby in reddish-brown to echo the star anise shown in the reference, adding to the composition’s balance.
Step back and admire the fluidity of your underwater creation as it dries
BRUSH GUIDE
The Right Brush for Every Stroke
From clean lines to bold texture — master brush choice, stroke control, and essential techniques.
Explore the Full Guide
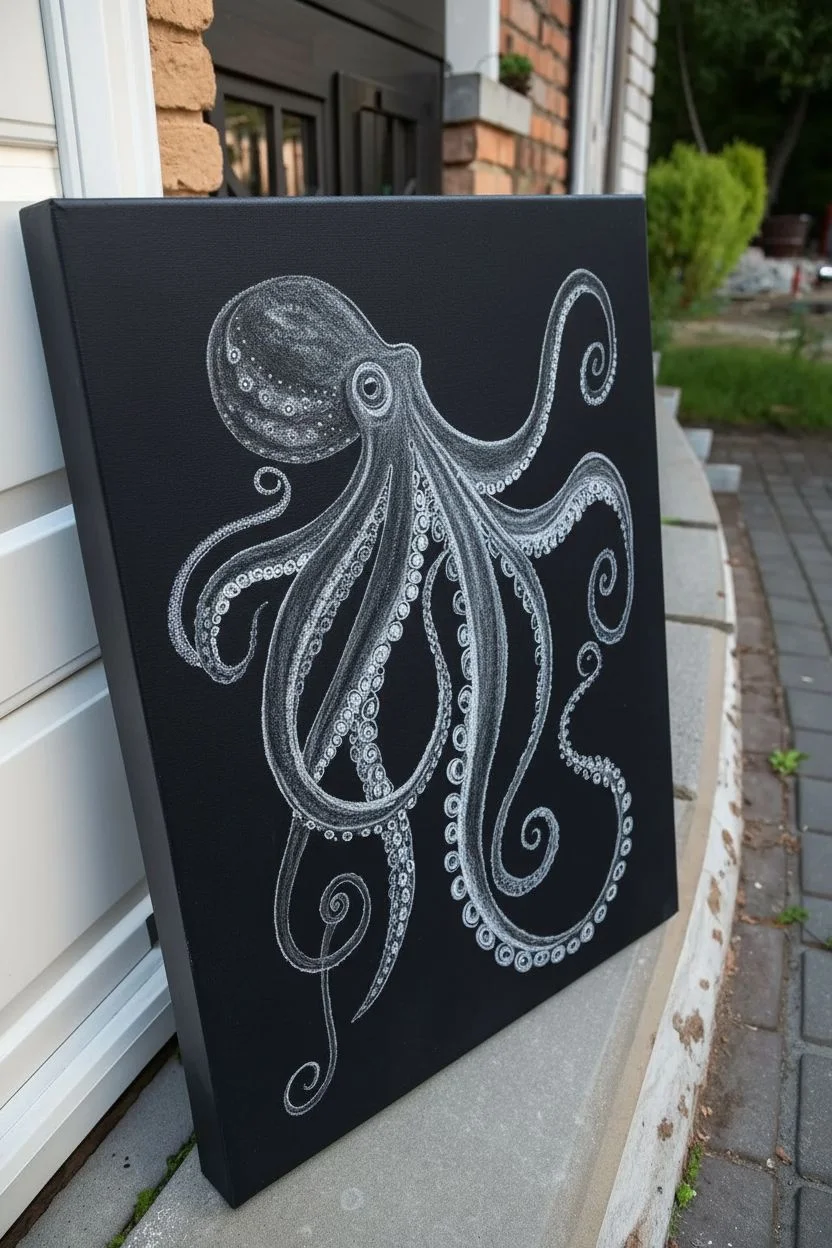
Monochrome Octopus in Black and White
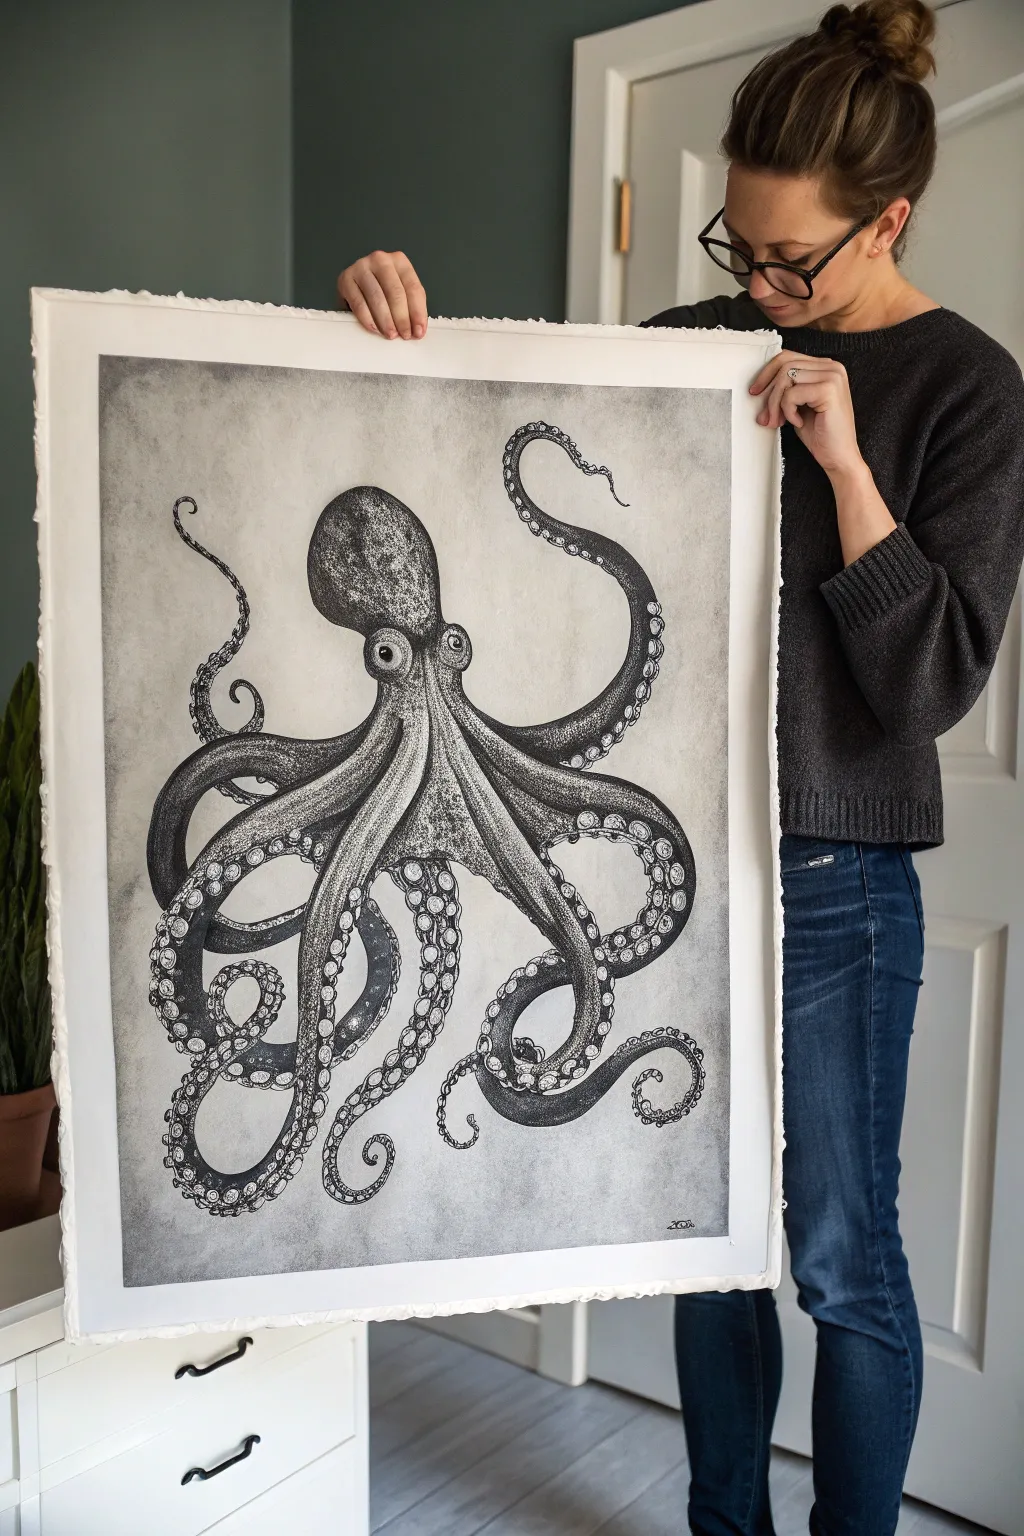
Capture the graceful complexity of an octopus with this monochrome artwork that relies on texture and contrast for its impact. By using fineliner pens and stippling techniques, you’ll build up rich depth and realistic form without needing a single drop of color.
Detailed Instructions
Materials
- Large sheet of high-quality watercolor paper or heavy drawing paper (at least 18×24 inches, hot press for smoother lines)
- Graphite pencil (HB or 2H)
- Kneaded eraser
- Set of waterproof archival ink fineliner pens (sizes 005, 01, 03, 05, and 08)
- Reference photo of an octopus
- Ruler (optional for centering)
- Masking tape
Step 1: Planning and Sketching
-
Prepare your surface:
Since this is a large piece, tape your paper down to your work surface or drawing board using masking tape. This prevents the paper from shifting or warping while you work on delicate details. -
Block in the main shapes:
Using your HB or 2H pencil, lightly sketch a large oval for the mantle (head) near the upper middle section. This will be the anchor for the rest of the body. -
Add the eyes:
Draw two prominent circles protruding from the base of the mantle. Octopuses have very distinct, slightly bulging eyes, so make sure they are positioned symmetrically but naturally. -
Map out the tentacles:
Lightly draw eight flowing lines radiating from beneath the eyes. Create dynamic movement by curling some tips upward and twisting others. Think of them like ribbons floating in water—avoid stiff, straight lines. -
Thicken the limbs:
Flesh out the tentacles by drawing lines on either side of your initial guides. Pay attention to how the arms taper from a thick base near the beak to delicate, pointed tips. -
Sketch the suckers:
Along the underside of the curled arms, sketch rows of circles for the suction cups. These should be larger near the base of the arm and get progressively tiny towards the tip. Don’t press too hard; these are just guides.
Uneven Ink Flow?
If your pens start skipping during stippling, hold them more vertically. Angled pressure can damage the delicate nibs. Rotate between two identical pens to let the ink refill in the tip.
Step 2: Inking and Outline
-
Define the silhouette:
Using an 05 pen, trace the main outline of the octopus’s body. Use a steady hand, but don’t worry about microscopic perfection—organic lines look more natural. -
Outline the suckers:
Switch to an 03 pen to outline the individual suction cups. Give them a slight double rim to suggest their cup-like shape and depth. -
Erase pencil marks:
Once the ink is completely dry (give it at least 15-20 minutes to be safe), gently use a kneaded eraser to lift away all your graphite guidelines. This leaves you with a clean, crisp line drawing ready for shading.
Pro Tip: Hand Rest
Place a scrap piece of paper under your drawing hand. This prevents hand oils from smearing the ink or transferring graphite, keeping that crisp white background pristine.
Step 3: Shading and Texture
-
Start the stippling process:
This is the most time-consuming but rewarding part. Using your finest pen (005 or 01), begin adding tiny dots to the darkest shaded areas first—typically under the arms and on the shadowed side of the head. -
Build the gradient:
To create a rounded 3D effect on the tentacles, cluster your dots densely at the edges and space them out as you move toward the center highlight. This transition from dark to light creates volume. -
Texture the skin:
Octopus skin isn’t perfectly smooth. I like to add occasional patches of denser stippling or tiny ‘c’ shaped marks on the mantle to suggest bumpiness and rough texture. -
Detail the eyes:
The eyes are the focal point. Use dense stippling or solid black (with an 08 pen) for the pupil, leaving a small white speck for a reflection. Shade the iris heavily with dots to make it look deep and glassy. -
Shade the suckers:
Use your 005 pen to add just a few dots inside the rim of each suction cup. This tiny shadow gives them a concave, hollow appearance. -
Balance the contrast:
Step back from your illustration. Look for areas that seem too flat. Use your larger 05 or 08 pen to deepen the shadows in the crevices where the arms overlap, ensuring there is a strong distinction between the limbs. -
Final background touches:
Create a subtle vignette effect by lightly shading the background around the octopus with graphite powder or very light pencil shading, smudging it outward to fade into the white paper. Keep the area immediately around the octopus light to make it pop.
Frame your intricate cephalopod in a simple black frame to emphasize the striking monochrome details.
Watercolor Octopus With Blooming Washes
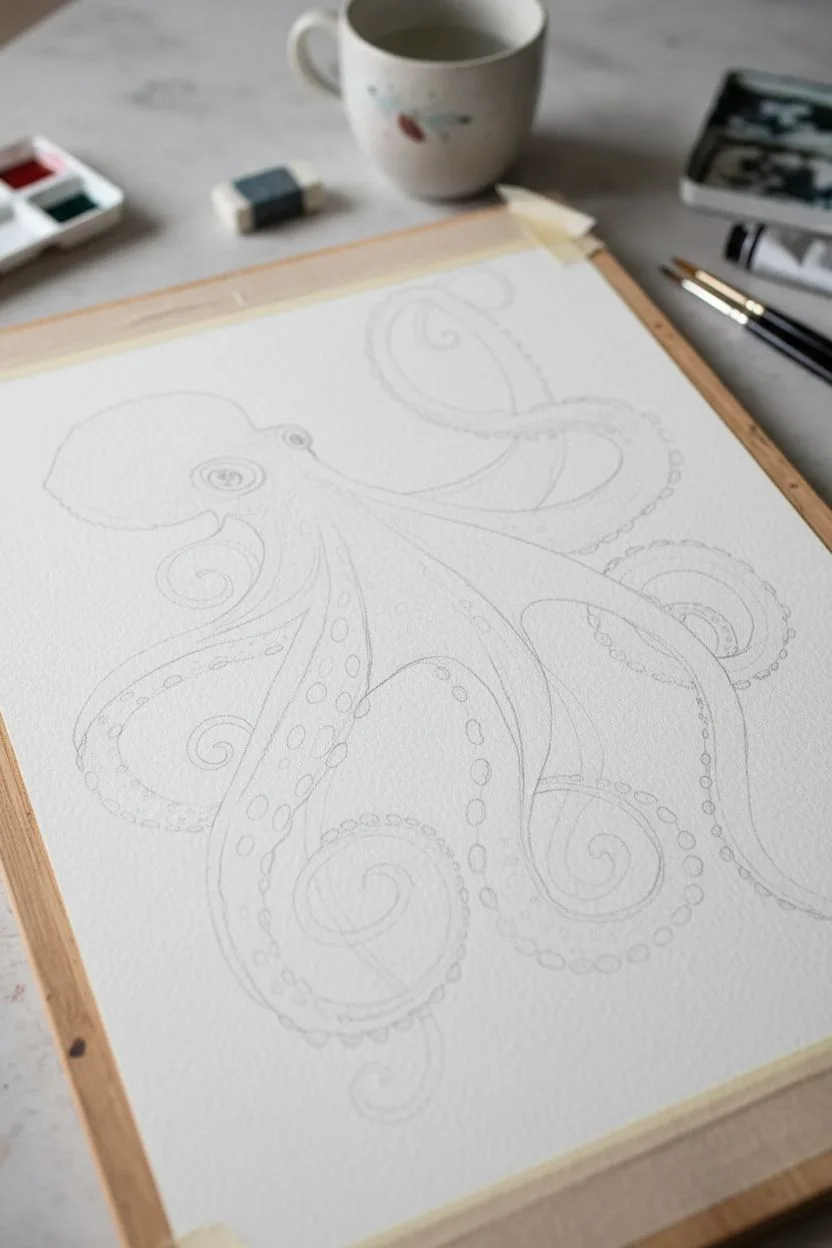
Capture the fluid grace of an octopus using a wet-on-wet technique that creates natural blooms and soft transitions. This piece balances structured details like suction cups with loose, organic washes in shades of sea-foam teal and earthy peach.
Step-by-Step Guide
Materials
- Cold press watercolor paper (heavier weight like 300gsm recommended)
- Watercolor paints (Cerulean or Turquoise Blue, Burnt Sienna or Light Rust, Sepia)
- Round brushes (sizes 2, 6, and 10)
- Pencil (HB or 2H)
- Kneaded eraser
- Clean water jars
- Paper towels
- Masking tape or board for stretching paper
Step 1: Planning the Flow
-
Initial Sketch:
Start with a light pencil sketch. Draw the large, bulbous mantle (head) near the upper left. From underneath, extend eight flowing arms that swirl and twist. Avoid making them symmetrical; let them curl naturally like ribbons in water. -
Refine the Anatomy:
Add the eye structure just below the mantle—it should look slightly hooded. Outline the rows of suction cups along the underside of the tentacles. Keep your lines faint so they won’t show through the transparent watercolor later. -
Clean Up:
Use a kneaded eraser to lift any heavy graphite. The sketch should be barely visible, just enough to guide your brush.
Step 2: Painting the Mantle and Body
-
Wet-on-Wet Base:
Using a size 10 brush, wet the mantle area with clean water until it glistens but isn’t pooling. Drop in a dilute wash of turquoise mixed with a hint of grey. -
Creating Blooms:
While the paper is still wet, drop concentrated touches of burnt sienna (rust) and deeper teal into the wash. Let the pigments mingle on the paper naturally to create the mottled skin texture typical of octopuses. I like to tilt the paper slightly to encourage organic movement. -
The Eye Detail:
Once the surrounding skin is slightly drier but damp, paint the eye. Use a darker mix of deep teal and sepia for the pupil and iris, leaving a tiny spot of white paper for the highlight to bring it to life. -
Connecting the Arms:
Continue the wet wash down into the upper sections of the arms, transitioning from the cool blue head to a warmer, peachier tone for the body center using watered-down light rust.
Salt Texture Trick
While the head wash is still wet, sprinkle a few grains of table salt into the paint. When it dries and you brush it off, it creates a unique, starry texture perfect for aquatic skin.
Step 3: Tentacles and Details
-
Painting the Arms – Top Side:
Work on one tentacle at a time. Paint the top skin surface with your mix of burnt sienna and light rust. While wet, touch the edges with teal to create a shadow effect where the arm curves. -
The Underside Wash:
For the underside where the suction cups live, switch to a pale, cool teal wash. Ensure this stays distinct from the warmer top side to show dimension. -
Adding Suction Cups:
Wait for the base washes on the arms to dry completely. Using a size 2 brush and a darker teal mix, carefully paint small rings for the suction cups. Vary their size—larger near the body, tiny at the tips. -
Defining the Rings:
Inside each suction cup ring, add a faint crescent of darker blue on one side to simulate depth. -
Layering Textures:
Return to the main body and add small dots of concentrated pigment (both rust and teal) onto the dry paper. This stippling effect adds rough texture to the skin. -
Deepening Shadows:
Mix a small amount of sepia into your teal. glaze this transparently under overlapping tentacles to separate them visually and push the background arms further back. -
Final Highlights:
If you lost any crisp highlights in the suction cups or eye, you can use a tiny touch of white gouache or a white gel pen to reclaim them.
Color Harmony
Instead of pure orange, mix a little of your teal into the orange paint. This ‘muddying’ creates a harmonious, muted tone that links the two colors beautifully.
Step back and admire how the interplay of warm and cool tones brings your underwater creature to life

PENCIL GUIDE
Understanding Pencil Grades from H to B
From first sketch to finished drawing — learn pencil grades, line control, and shading techniques.
Explore the Full Guide
Rainbow Octopus With Bold Tentacles
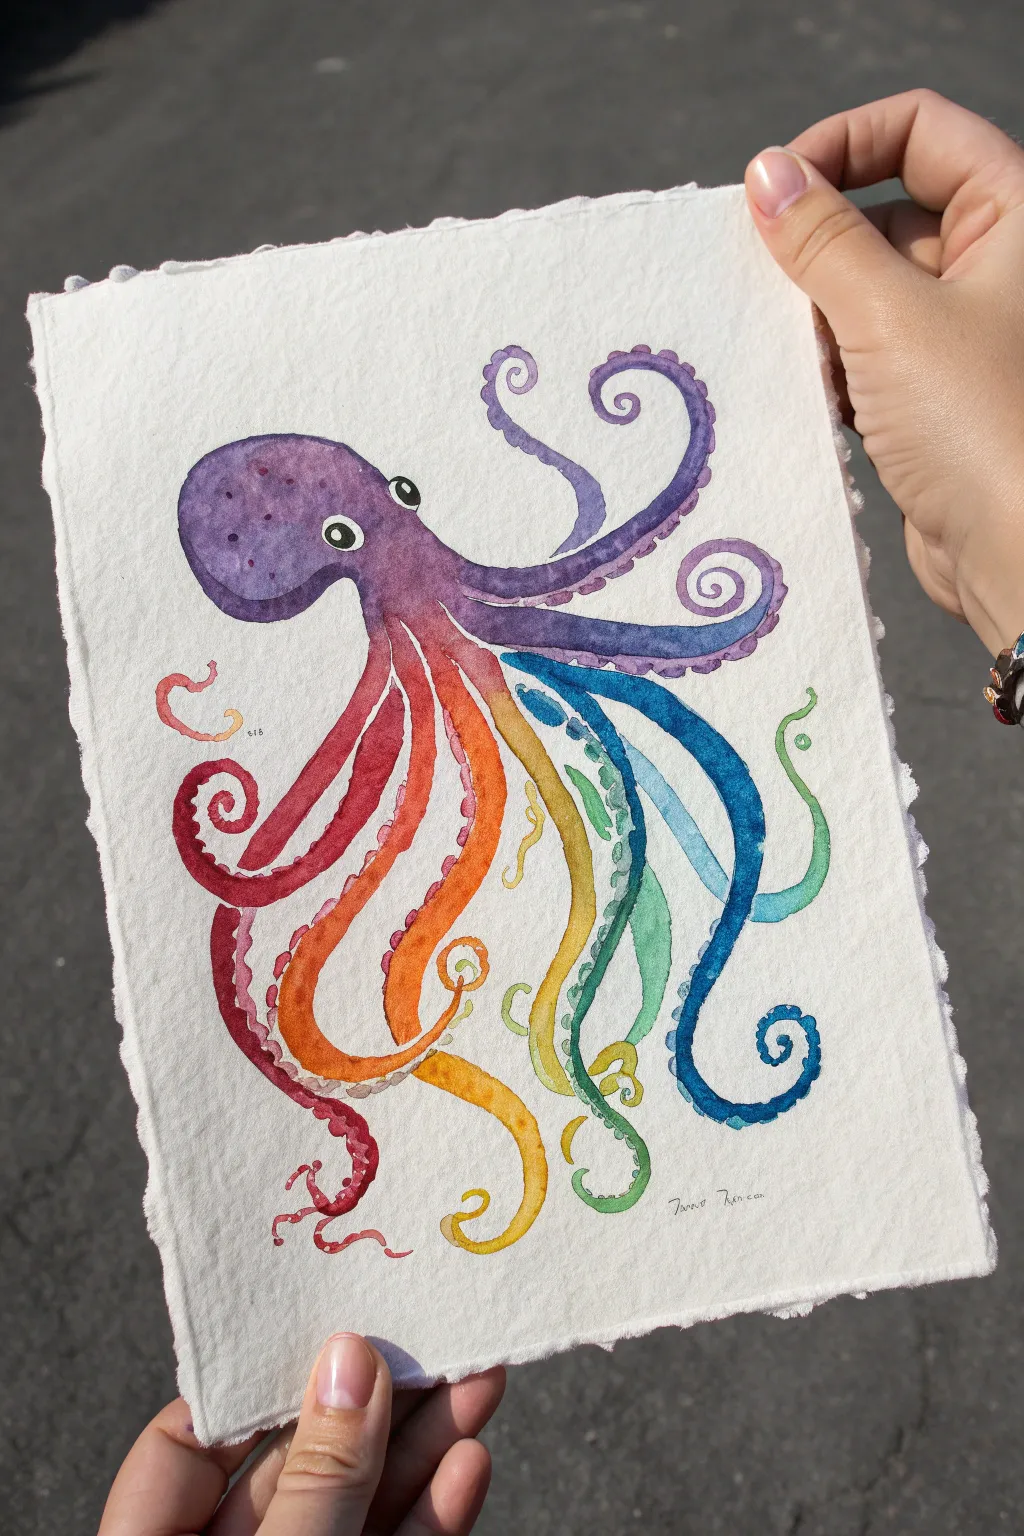
Capture the magic of the deep sea with this whimsical watercolor octopus that features a stunning full-spectrum gradient across its flowing tentacles. The textured paper and bright, saturated pigments give this piece a playful yet polished illustrative quality.
How-To Guide
Materials
- Cold press watercolor paper (deckled edge optional)
- Watercolor paints (rainbow palette: purple, red, orange, yellow, green, teal, blue)
- Round watercolor brushes (sizes 4 and 8)
- Detail brush (size 0 or 00)
- Pencil and eraser
- Jar of clean water
- Paper towel
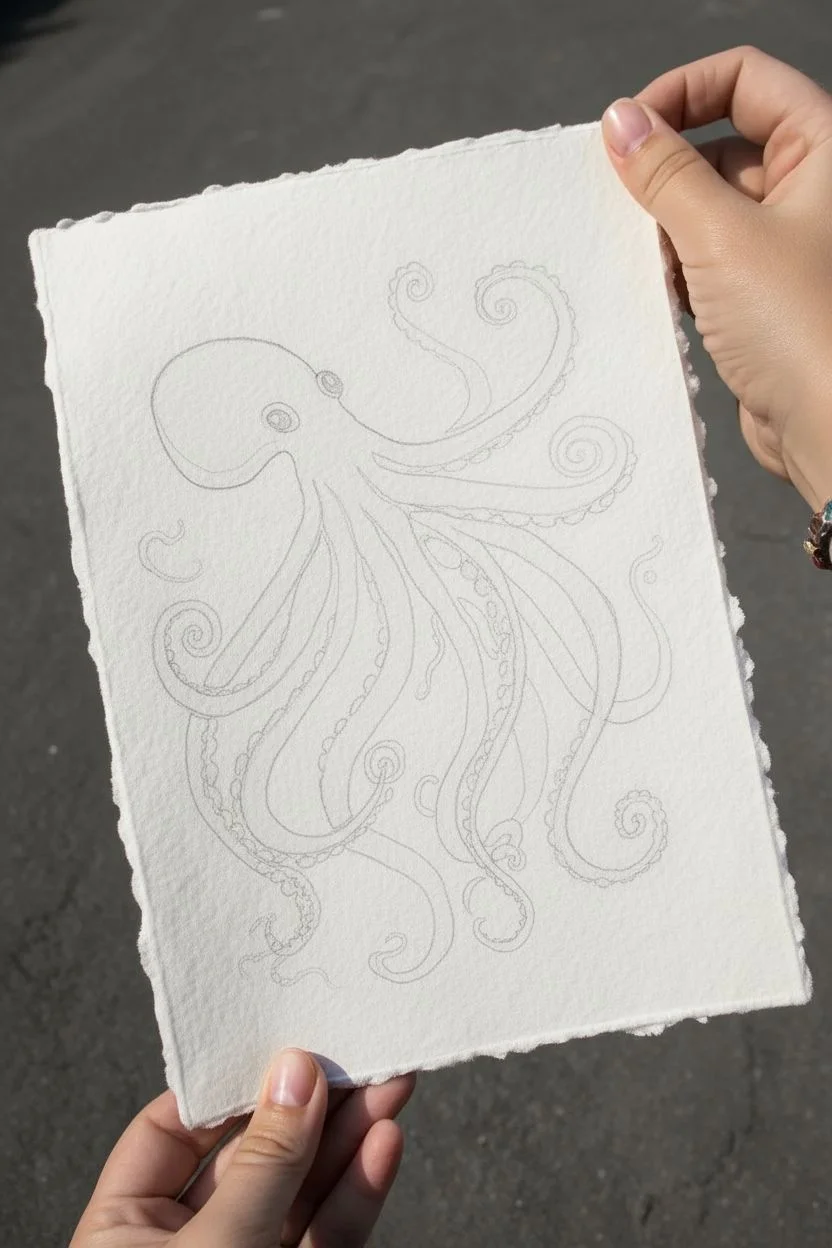
Step 1: Sketching the Form
-
Outline the head:
Start by lightly sketching a rounded, bulbous shape for the octopus’s mantle (head) on the upper left side of your paper. Keep the lines faint so they won’t show through the transparency of the watercolor later. -
Map the eyes:
Draw two large, oval eyes near the bottom of the head shape. Place them slightly apart to give the octopus a friendly, curious expression, leaving small circles inside for the highlights. -
Draft the tentacles:
Lightly sketch the eight tentacles flowing outward. Aim for dynamic, curling curves rather than straight lines, arranging them so they fan out to create space for your rainbow gradient.
Bleeding Colors?
If your tentacle colors are bleeding into each other unpleasantly, wait for each arm to dry completely before painting the one immediately next to it.
Step 2: Painting the Gradient
-
Start with purple:
Load your size 8 brush with a rich violet or purple watercolor. Paint the entire head area, carefully working around the whites of the eyes to keep them crisp. -
Begin the upper tentacles:
While the head is still damp, pull that purple color down into the top two tentacles, allowing them to curl upward. -
Transition to red:
Moving clockwise, switch your paint color to a deep red or magenta. Paint the next tentacle down, blending the top connection point slightly with the purple body if it’s still damp for a soft join. -
Blend into orange:
Clean your brush and pick up a bright orange. Paint the next tentacle, creating a long, flowing S-curve. Paint freely into the curled tips. -
Yellow tentacles:
Select a warm golden yellow for the central tentacles. Because yellow is lighter, you may need a second layer to make it vibrant enough against the white paper. -
Cool down with green:
Mix a fresh lime or sap green. Paint the next tentacle in the sequence, letting it twist and intertwine slightly with its neighbors. -
Add the blues:
Using a teal or cerulean blue, paint the lower-right tentacles. Focus on getting smooth, tapered ends where the tentacle narrows. -
Finish with indigo:
Complete the circle by painting the final tentacle in a deep indigo or dark blue, which transitions nicely back toward the purple head.
Color Intensity
Watercolors dry lighter than they look when wet. Do a second pass over the tentacles once the first layer is dry to get that bold, saturated look.
Step 3: Adding texture and Details
-
Paint the suction cups:
Once the main tentacle washes are completely dry, use your smaller size 4 brush to paint rows of small C-shapes or circles along the underside of each arm. Use a slightly darker shade of the base color (e.g., dark red on the red arm) to make them pop. -
Texturize the head:
Create texture on the purple head by dropping in small dots of concentrated purple paint while the area is slightly re-wetted, or wait until dry and stipple them on for sharp speckles. -
Define the eyes:
Using your smallest detail brush and black paint (or a very concentrated dark purple), carefully fill in the pupils, preserving the tiny white highlight circles you sketched earlier. -
Enhance the shadows:
Mix a diluted purple or neutral grey wash. I like to glaze this lightly under the point where the tentacles meet the body to create depth and dimension. -
Optional flourishes:
If you have empty space, add tiny, loose swirls of color around the tentacles to mimic water movement or floating seaweed.
Sign your name near a curling tentacle tip and display your colorful sea creature proudly
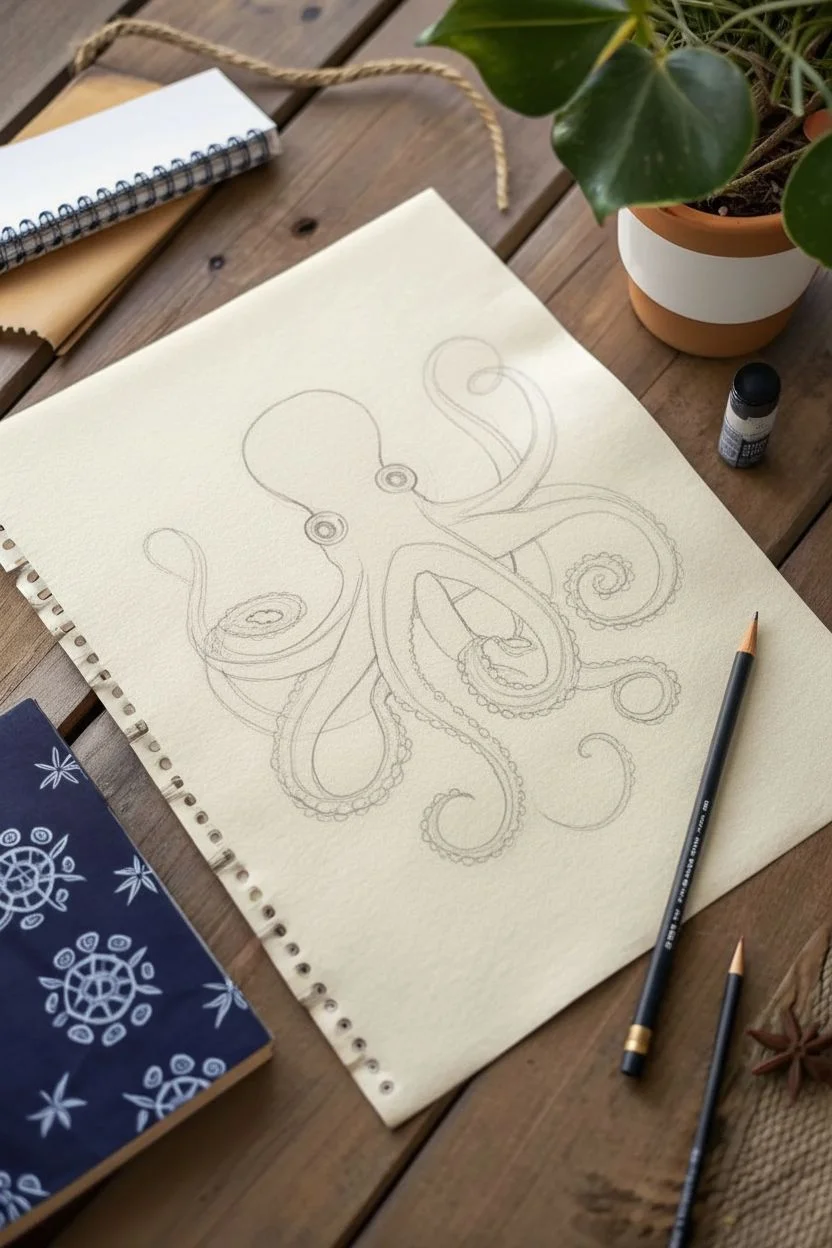
Textured Dotwork Octopus Skin
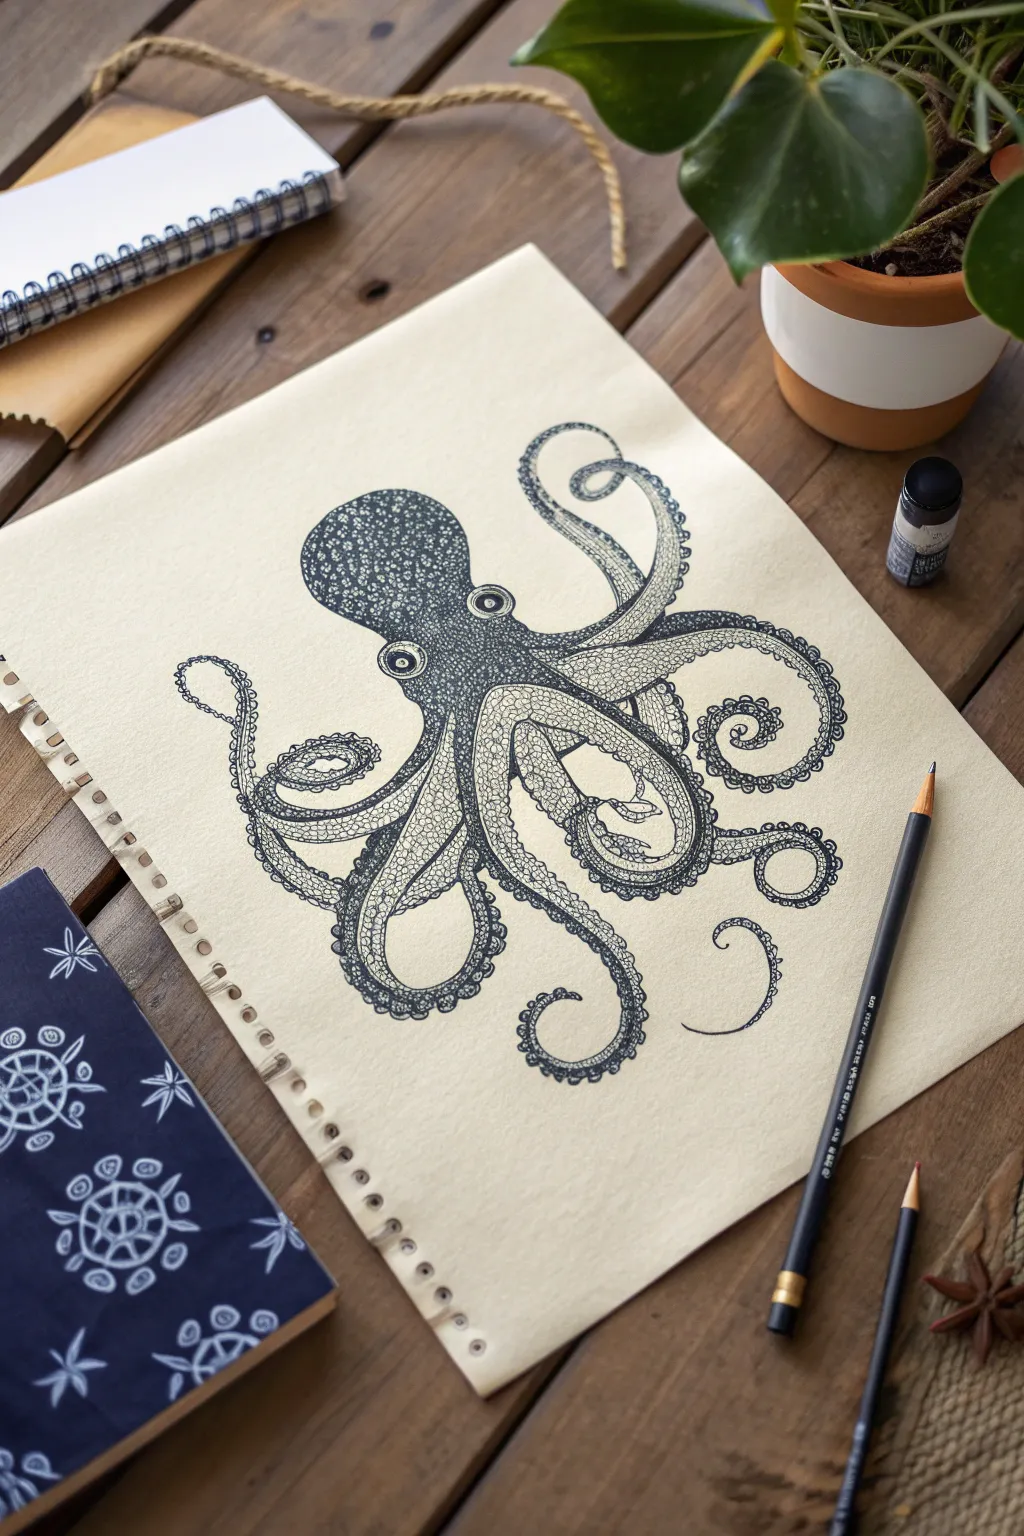
Capture the intricate beauty of marine life with this detailed ink drawing of an octopus, featuring a mesmerizing textured skin effect. Using fine liners and patience, you’ll build up layers of tiny circles and dots to create depth and dimension on cream-colored paper.
Detailed Instructions
Materials
- Sheet of cream or off-white drawing paper (medium tooth)
- Black fine liner pens (sizes 005, 01, 03, and 05)
- Graphite pencil (HB or 2H)
- Soft kneaded eraser
- Reference photo of an octopus
Step 1: Sketching the Form
-
Draft the head:
Begin with a light pencil sketch. Draw a bulbous, slightly elongated oval shape for the mantle (head) of the octopus, positioning it centrally but slightly towards the top of your page. -
Map the eyes:
Add two protruding oval bumps on the sides of the head where the mantle meets the arms. Draw circular irises within these bumps, making one slightly larger to suggest perspective. -
Flow the arms:
Sketch eight long, tapering arms extending from the base of the head. Curve them fluidly, letting some overlap and others curl outwards. Aim for a mix of S-curves and spirals at the very tips to create a dynamic, fluid look. -
Refine the outline:
Go over your pencil lines to define the final shape. Ensure the connections between the arms and body feel muscular and organic, not stick-like. Lightly erase any messy sketch lines until you have a faint, clean guide.
Step 2: Inking the Outlines
-
Main contour:
Switch to an 03 or 05 fine liner. Carefully trace the outer perimeter of the octopus. Use a confident, steady hand, varying the line weight slightly—thicker on the undersides of the arms for shadow, thinner on top. -
Define the sucker details:
Along the underside of the curling arms, draw small, flattened ovals to represent the suction cups. Start large near the body and make them tiny as they reach the arm tips. -
Eye details:
ink the eyes with an 01 pen. Draw a small pupil in the center and leave a tiny white highlight to bring the creature to life. Outline the eye socket with a slightly heavier line.
Ink Flow Tip
Keep a scrap piece of paper nearby to test your pens periodically. Fine liners can clog if used over heavy graphite sketches.
Step 3: Texturing the Skin
-
Base layer of circles:
This is the core of the style. Using an 01 pen, begin filling the mantle (head) with small, tightly packed circles. They don’t need to be perfect; irregular shapes look more like natural skin texture. I find it helpful to vary the sizes slightly here. -
Applying the gradient:
To create roundness, pack the circles rarely and smaller in the center of the head (the highlight area). As you move toward the edges of the form, draw the circles larger and closer together. -
Filling the gaps:
Switch to an 005 pen. In the darker, shadowed areas (like the sides of the head and between arms), fill the tiny triangular gaps between your circles with solid black ink. This ‘negative space’ shading makes the texture pop. -
Arm texture:
Extend this pebbled texture down the top side of the arms. Use larger, more elongated oval shapes for the skin pattern on the arms to suggest the stretching of the skin. -
Stippling shadows:
Where one arm crosses under another, use stippling (tiny dots) instead of circles to create a dense shadow. This differentiates the texture and adds immediate depth.
Wobbly Lines?
If your circles get messy or lines overlap, don’t panic. Increase the density of the texture in that area to turn the mistake into a shadow.
Step 4: Refining and Shading
-
Deepen the contrast:
Go back with your 03 pen and darken the areas where the limbs meet the body. Add stippled shading inside the larger suction cups to make them look concave. -
Connect the patterns:
Ensure the texture flows seamlessly from the head into the arms. Add transition dots—medium-sized specks—so the pattern doesn’t abruptly change from circles to smooth skin. -
Final clean up:
Once the ink is completely dry (give it at least 15 minutes to be safe), use your kneaded eraser to gently lift away all remaining graphite guidelines. -
Accentuate drawing:
Take a step back. If the octopus looks flat, add a slightly thicker outline to the entire outer silhouette with an 05 pen to make it stand out boldly from the paper.
Now you have a stunning, intricate piece of marine art that showcases both patience and precision


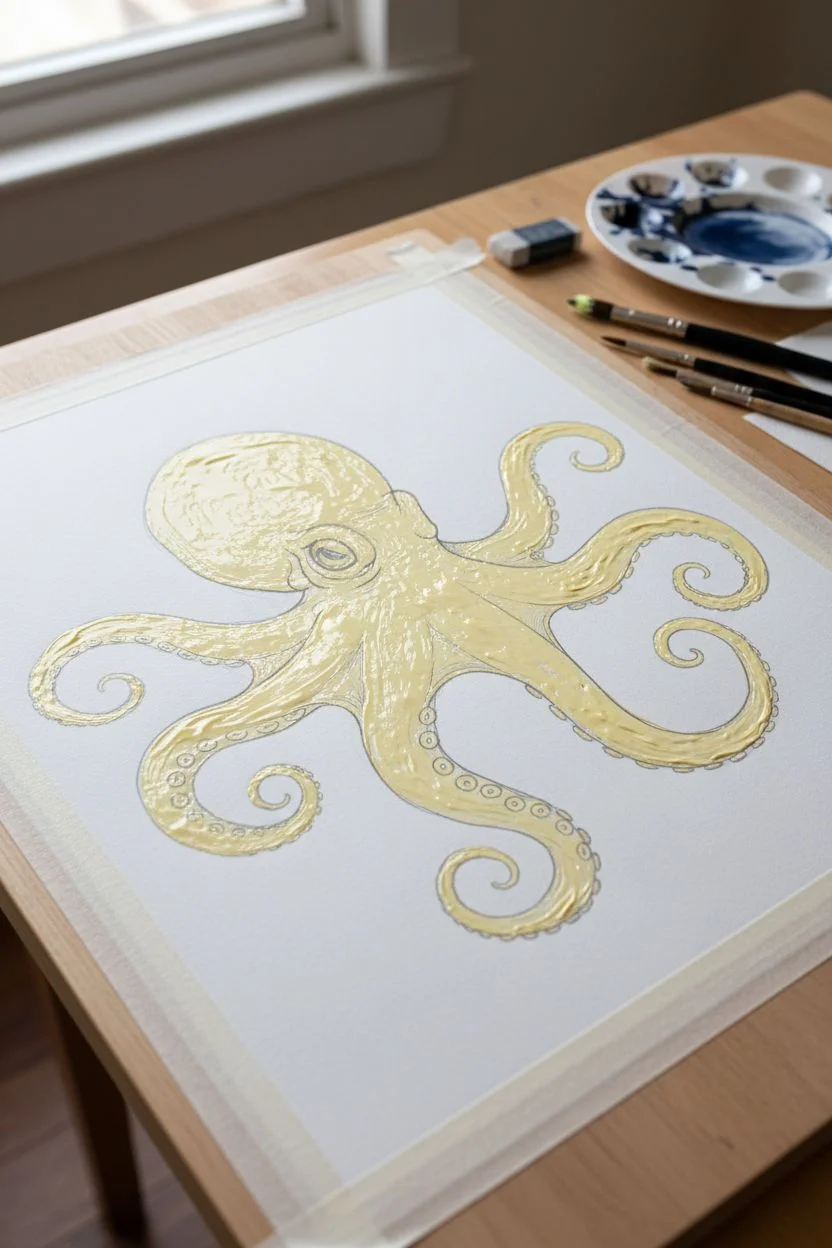
Metallic-Style Octopus Highlights
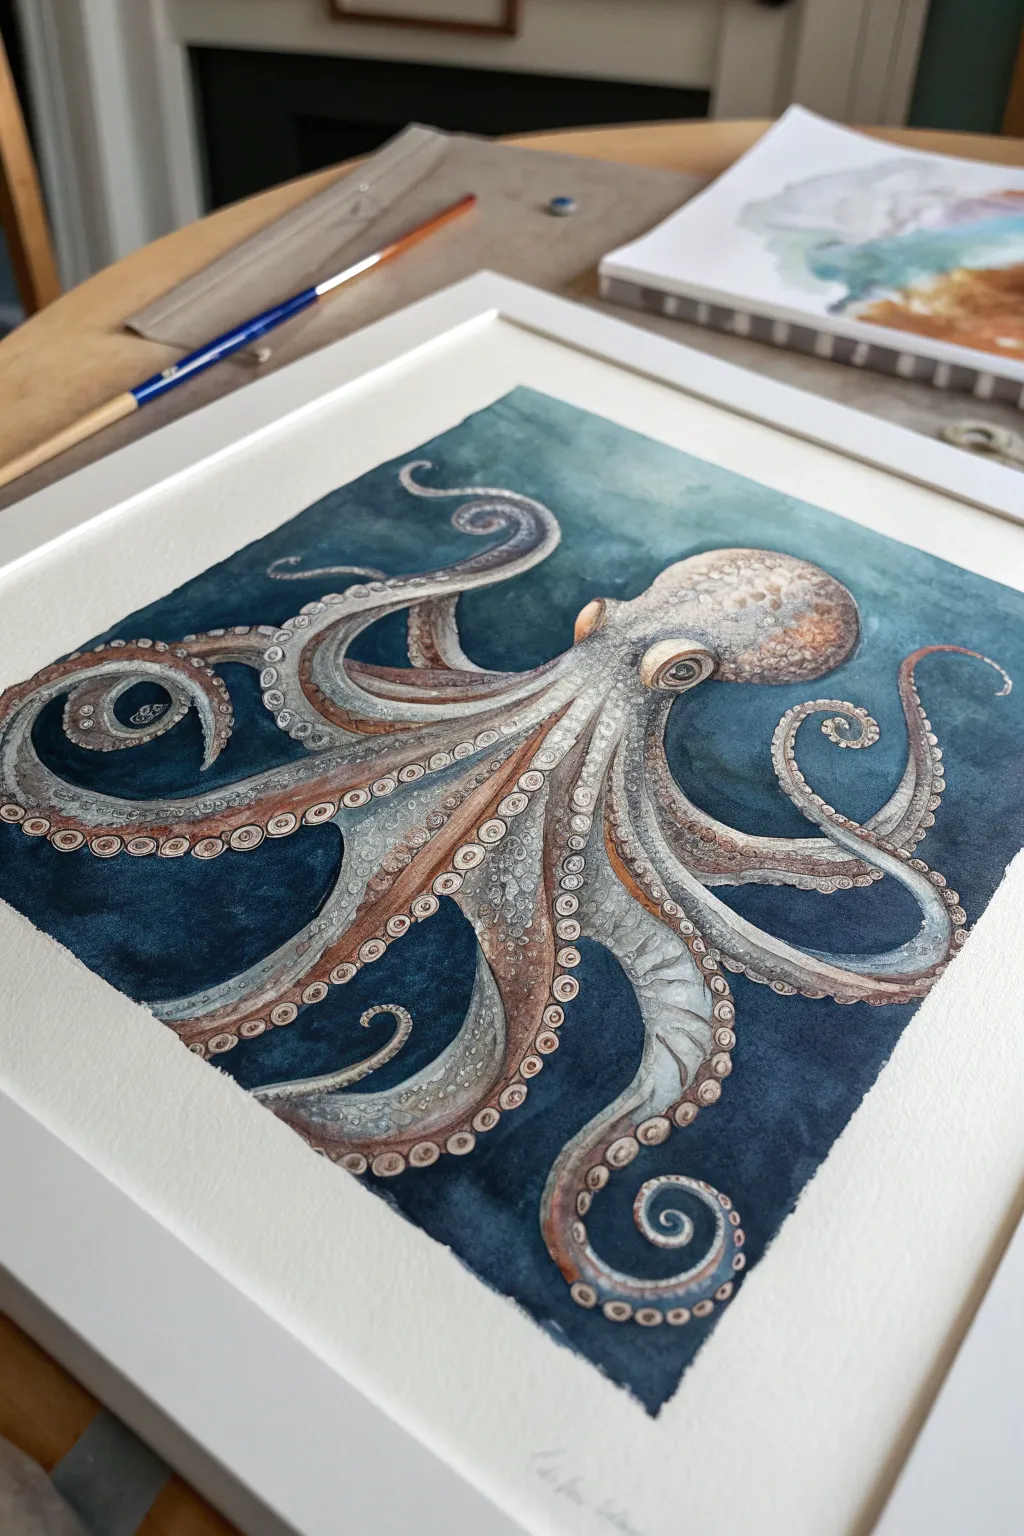
Capture the ethereal beauty of marine life with this sophisticated watercolor tutorial that balances deep, oceanic blues with warm, metallic highlights. You’ll layer rich washes to create a dramatic background while carefully detailing the octopus’s intricate textures using metallic accents.
Step-by-Step Tutorial
Materials
- High-quality watercolor paper (cold press, heavy weight)
- Watercolor paints: Indigo, Payne’s Gray, Burnt Sienna, Sepia
- Metallic watercolor or gouache (copper and pearlescent white)
- Masking fluid (drawing gum)
- Round brushes (sizes 2, 4, and 8)
- Fine detail brush (size 00 or 0)
- Paper towels
- Pencil and kneaded eraser
- Masking tape
Step 1: Sketching and Preparation
-
Tape down your paper:
Begin by securing your watercolor paper to a board using masking tape. This creates a clean white border and prevents buckling when we apply heavy washes later. -
Draft the outline:
Lightly sketch the octopus form. Start with the bulbous mantle (the head) and then plot the general curves of the eight arms. Don’t worry about suckers yet; just focus on the flowing movement of the tentacles. -
Define the details:
Refine your sketch, adding the large eye with a distinct pupil. Draw the rows of suckers along the underside of the visible tentacles, varying their sizes to show perspective. -
Protect the subject:
Apply masking fluid carefully over the entire octopus sketch using an old brush or a dedicated applicator. This is crucial for keeping our subject pristine while we paint the dark background.
Uneven Background?
If your blue background dries with ‘cauliflower’ blooms, don’t panic. These watermarks actually look like authentic underwater currents. Embrace them as organic texture.
Step 2: The Deep Ocean Background
-
Prepare the wash:
Mix a large puddle of deep blue. I recommend combining Indigo with a touch of Payne’s Gray to get that abyssal, near-black blue color. -
Apply the first layer:
Using your largest brush, wash the background area around the masked octopus. Work quickly to keep a wet edge, but allow some natural variation in the pigment density to mimic water depth. -
Deepen the shadows:
While the paper is still slightly damp, drop more concentrated Indigo into the corners and directly around the octopus silhouette to create high contrast. -
Let it dry completely:
Allow the background to bone dry. Once dry, gently rub off the masking fluid with your finger or a rubber cement pickup to reveal the innovative white paper shape.
Level Up: Salt Texture
While your dark blue background wash is still wet, sprinkle a pinch of coarse sea salt onto the paint. When dry, brush it off to create star-like speckles in the water.
Step 3: Painting the Octopus
-
Base layer for the body:
Mix a very watery, pale wash of Sepia and Burnt Sienna. Apply this loosely over the octopus body, leaving some areas white for highlights on the head and tentacle curves. -
Establishing form:
Switch to a size 4 brush. With a slightly darker mix of Sepia, paint the shadows on the underside of the tentacles and the creases around the eye. -
Painting the suckers:
For each sucker, paint a small ring of Burnt Sienna. Leave the center of the ring pale or white to make them look concave. -
Adding skin texture:
Use a stippling technique (dabbing small dots) on the head and upper arms with your brown mix to create that bumpy, mottled octopus skin texture. -
Define the eye:
Paint the pupil black or dark grey, leaving a tiny pure white spot for the reflection. Paint the iris with a golden-brown hue to make the eye pop.
Step 4: Metallic Highlights and Final Touches
-
Mix your metallics:
Prepare your metallic copper and pearlescent white paints. The consistency should be creamy, not too watery. -
Apply copper accents:
Using a fine detail brush, glaze the copper paint over the darker brown areas of the tentacles and the mottled texture on the head. This gives that essential shimmering effect. -
Highlight the suckers:
Add tiny touches of pearlescent white or very pale copper to the rims of the suckers to make them look three-dimensional and wet. -
Enhance the shadows:
Go back in with your darkest blue mix and crisp up the edges where the octopus meets the background. This sharpens the silhouette significantly. -
Final check:
Step back and look for balance. If the metallic shine feels too subtle, add a second layer of sheen to the highest points of the tentacles. -
Remove tape:
Once everything is completely dry, slowly peel off the masking tape at a 45-degree angle to reveal your crisp white border.
Frame your piece under glass to really let those metallic pigments catch the light and shine
Minimal Line Art Octopus Silhouette
Transform a plain kitchen basic into a piece of nautical art with this crisp, linear octopus design. Using fabric markers allows for intricate detailing while maintaining a clean, minimalist silhouette that looks professionally printed.
Detailed Instructions
Materials
- White or cream cotton tea towel (washed and dried)
- Black fabric marker (fine tip)
- Black fabric marker (medium/brush tip)
- Pencil (HB or lighter)
- Eraser
- Iron and ironing board
- Piece of cardboard (to place under fabric)
- Masking tape
Step 1: Preparation and Sketching
-
Surface Prep:
Begin by washing and thoroughly drying your tea towel to remove any sizing chemicals. Iron it completely flat so you have a smooth canvas to work on. -
Secure the Fabric:
Place a piece of cardboard underneath the layer of the towel where you plan to draw. This prevents ink from bleeding through to the back. Tape the corners of the towel down to your work surface to keep it taut. -
Outline the Head:
Using a light pencil grip, sketch the bulbous head (mantle) of the octopus in the center-upper portion of your workspace. Keep the shape organic and slightly oval. -
Draft the Tentacles:
Sketch eight wavy tentacles extending outwards. Create a sense of movement by curling the ends; some should curl inward like spirals, while others can wave loosely outward. Don’t worry about perfect symmetry—flow is more important here. -
Refine the Sketch:
Go back over your pencil lines to define the width of the tentacles. They should be thicker near the body and taper to fine points at the tips. Add a large, simple eye shape on the side of the head.
Bleeding Lines?
If ink spreads into the fibers excessively (feathering), your fabric might still have sizing or is too damp. Ensure it’s bone dry, and try dabbing the marker rather than dragging it slowly.
Step 2: Inking the Outlines
-
Trace Main Lines:
Take your medium/brush tip fabric marker and carefully trace over the main outline of the octopus body and tentacles. Maintain a steady hand for smooth, continuous curves. -
Define the Eye:
Color in the pupil of the eye with the medium marker, leaving a small white highlight if desired, or keep it as a simple dark oval like the reference. -
Erase Pencil Guidelines:
Wait about 10-15 minutes to ensure the main ink lines are completely dry. Gently erase visible pencil marks, being careful not to snag the fabric weave.
Pro Tip: Line Stability
Pull the fabric taut with your non-drawing hand as you ink. Drawing on loose fabric can cause the marker tip to snag or skip, resulting in shaky lines.
Step 3: Adding Texture and Detail
-
Texture the Head:
Switch to your fine tip marker. Inside the head shape, draw small, tight clusters of tiny flowers or circles to create a dense, textured pattern. This ‘stippling’ effect adds visual weight to the head. -
Draw Suction Cups:
Along one edge of each tentacle, draw a series of small semi-circles or ovals. These represent the suction cups. Start larger near the body and make them tinier as you reach the tentacle tips. -
Connect the Cups:
Use a thin line to connect the suction cups to the main tentacle body, giving them a slightly raised appearance. -
Internal Lines:
Draw a secondary line running down the center of each tentacle to separate the suction cup side from the smooth skin side. This adds dimension to the limbs. -
Add Flow Lines:
Draw very thin, sparse lines parallel to the tentacles’ curves to suggest movement and skin folds. -
Decorative Elements:
If you want to fill negative space, add a few loose, detached squiggle lines or ‘s’ shapes near the tentacle tips to suggest water currents.
Step 4: Finishing Touches
-
Inspect and Darken:
Look over the entire piece. If any black areas look faded or uneven due to the fabric texture, go over them a second time to ensure a deep, rich black. -
Heat Setting:
Allow the ink to dry for at least 24 hours. I prefer to leave it overnight just to be safe. -
Iron to Seal:
Once fully dry, place a thin cotton cloth over the drawing and iron on a high heat setting (no steam) for 3-5 minutes. This locks the ink into the fiber so it becomes washable.
Hang your new octopus towel in the kitchen for an instant touch of seaside charm
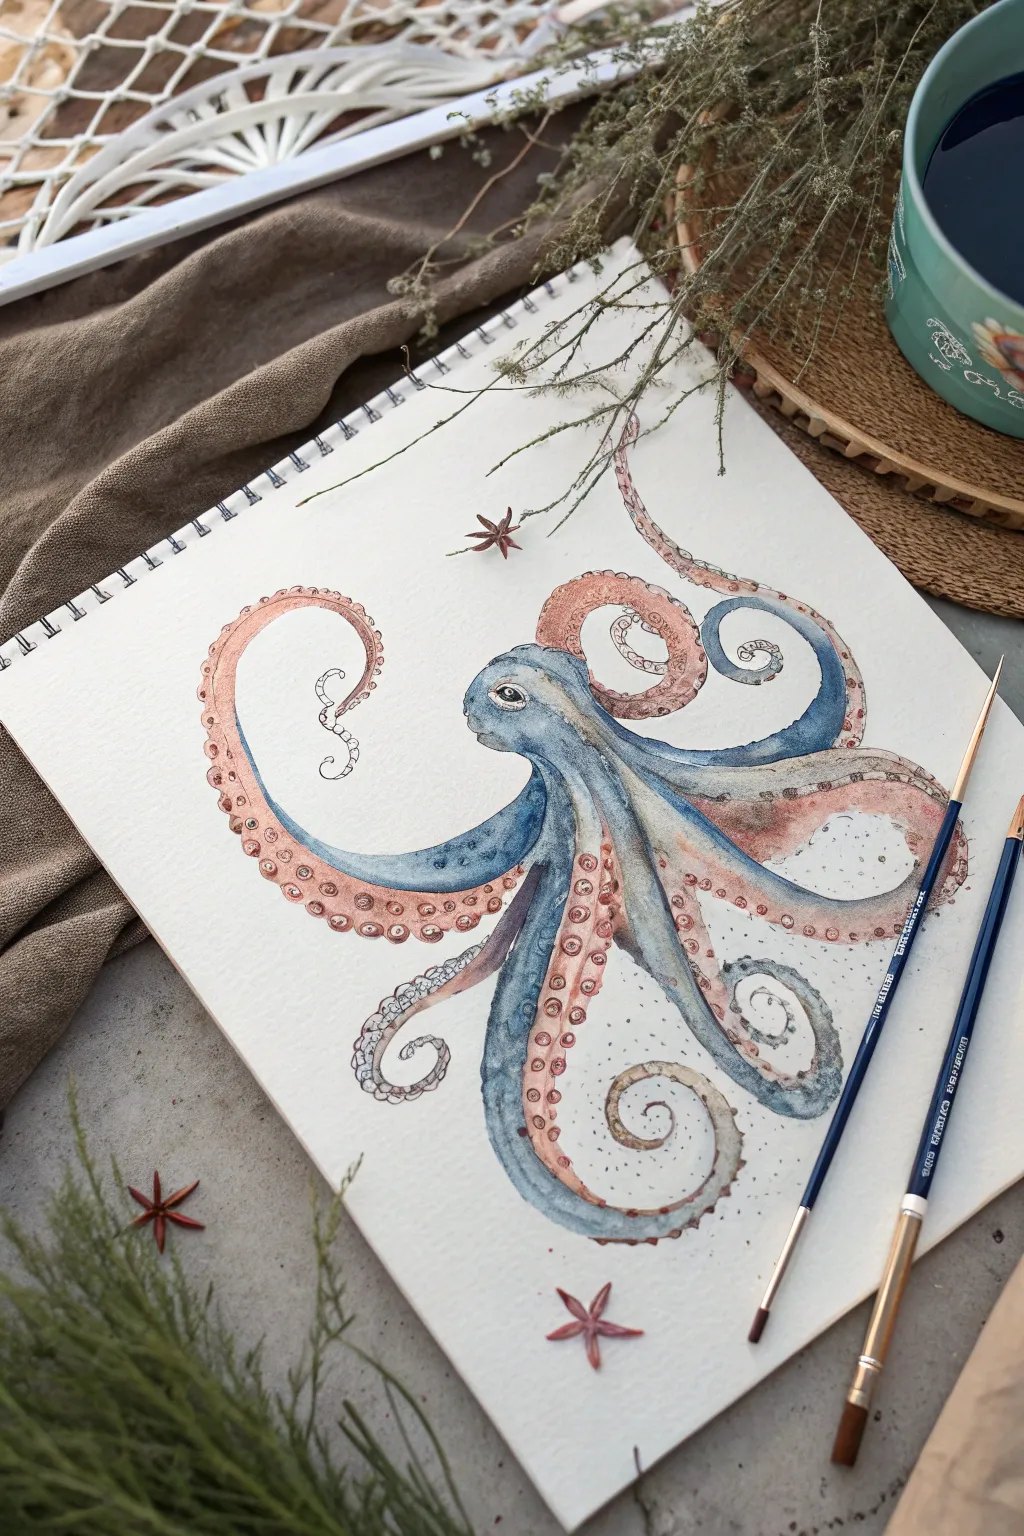
Cute Cartoon Octopus for Beginners
This adorable watercolor project features a wide-eyed, blushing octopus floating in a bubbly teal sea. With its soft dusty-pink hues and crisp ink outlines, it’s the perfect beginner-friendly piece that balances cartoon charm with watercolor technique.
Step-by-Step Tutorial
Materials
- Cold press watercolor paper (approx. 5×7 inches)
- Watercolor paints (Dusty Rose, Salmon/Peach, Titanium White, Teal/Turquoise, Paynes Grey)
- Round watercolor brushes (Size 4 and Size 0 or 1 for details)
- Fine liner pen (black, waterproof, 0.3mm or 0.5mm)
- Masking tape
- Pencil (HB) and eraser
- Jar of clean water
- Palette or mixing plate
- Paper towels
Step 1: Sketching the Outline
-
Create the Head:
Start by lightly sketching a large, rounded inverted balloon shape for the octopus’s head. Keep the top slightly flatter and widen the curves as you go down towards the ‘neck’ area. -
Draft the Tentacles:
Draw eight curving tentacles radiating from the base of the head. Make them wavy and playful—curl a few tips upward and let others dangle down. Vary their thickness, keeping them wider at the base and tapering to a point. -
Add Facial Features:
In the lower third of the head, draw two large, oval eyes spaced slightly apart. Between them and slightly lower, add a tiny, curved smile. Don’t forget the circular spots on the forehead and the suckers on the underside of the tentacles. -
Ink the drawing:
Once you are happy with the sketch, trace over your pencil lines with a waterproof black fine liner. Be sure to ink the individual suckers carefully. Wait for the ink to dry completely before erasing the pencil marks.
Bleeding Lines?
If your black ink smudges when painting, your pen isn’t waterproof or you didn’t wait long enough. Ensure the ink is 100% dry before touching it with a wet brush.
Step 2: Painting the Octopus
-
Mix the Body Color:
On your palette, mix a dusty rose color. You can achieve this by mixing a small amount of brown or burnt sienna into a standard pink or red to desaturate it slightly. -
Apply the Base Wash:
Using your size 4 brush, paint the entire body of the octopus with a light wash of your mixed color. Work quickly to avoid hard edges, but be careful to paint around the whites of the eyes to keep them bright. -
Deepen the Shadows:
While the base layer is still slightly damp, drop a slightly more concentrated version of the rose paint into the shadowed areas—specifically under the head where the tentacles start and along the bottom edges of the arms. -
Paint the Spots and Suckers:
Switch to your smaller brush. Use a slightly darker salmon or reddish-pink mix to fill in the spots on the forehead and the insides of the suckers. This contrast makes the details pop. -
Add Eye Details:
Paint the pupils of the eyes using a dark grey or black paint. Leave a small white circle unpainted in each pupil for the highlight, or add it back later with opaque white paint. -
Creating the Blush:
Dilute a tiny bit of red paint with water. Gently tap this onto the cheeks just below the eyes to give the octopus a sweet, blushing expression.
Step 3: Background and Finishing Touches
-
Prepare the Background Area:
Using clean water, wet the background area around the octopus. Be very careful not to let the water touch the painted octopus, as the colors might bleed. -
Paint the Ocean Wash:
Load your larger brush with a watery teal or turquoise mix. Touch the loaded brush to the wet paper and let the color bloom outward. I like to keep the paint lighter near the top and saturated near the bottom. -
Add Seaweed Accents:
Once the blue background is dry, mix a deeper turquoise or green-blue. Paint simple, leafy seaweed shapes emerging from the bottom corners of the paper. -
Create Bubbles:
Using the same dusty rose color from the octopus, paint a few floating circles of varying sizes in the water to represent bubbles. Keep these light and transparent. -
Highlight the Seaweed:
If you want extra depth, trace the outline of your dried seaweed shapes with your fine liner pen to match the style of the octopus. -
Final White Highlights:
Using Titanium White paint or a white gel pen, add tiny reflection dots to the tops of the bubbles and perhaps a second smaller highlight in the eyes to make them look extra glossy.
Add Some Sparkle
Mix a tiny pinch of iridescent medium or shimmer powder into the ocean water wash. This gives the background a magical, underwater glimmer when the light hits it.
Now you have a charming underwater friend ready to brighten up your sketchbook or gift to a friend
Octopus Gripping a Nautical Object
Capture the fluid elegance of marine life with this striking watercolor octopus painting. Using layers of indigo and delicate speckling, you’ll create a piece that feels both vintage and refreshingly modern.
Step-by-Step Tutorial
Materials
- Cold press watercolor paper (300 gsm)
- Watercolor paints (Indigo, Prussian Blue, Burnt Sienna, Payne’s Gray)
- Round brushes (size 2, 4, and 8)
- Pencil (HB or H)
- Kneaded eraser
- Two jars of water
- Paper towels
- Masking tape (optional)
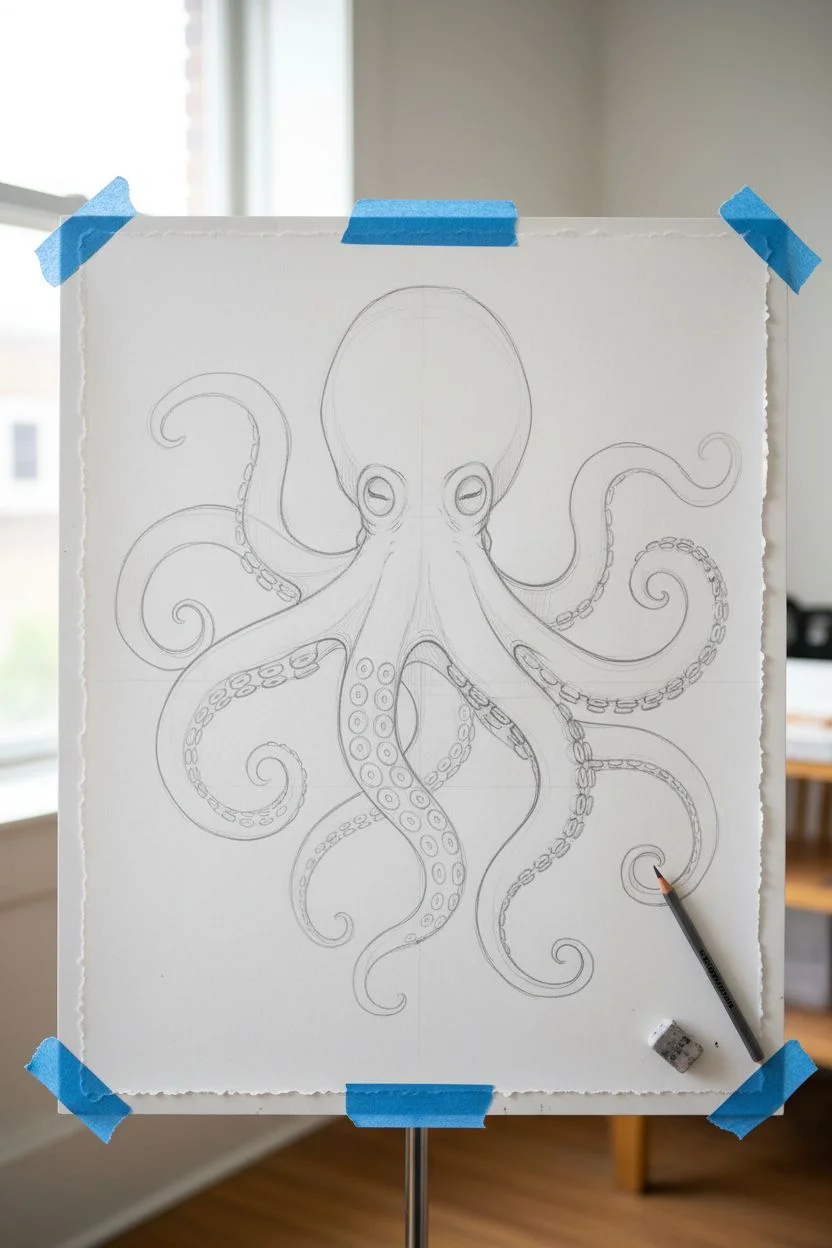
Step 1: Sketching the Form
-
Outline the head:
Begin by lightly sketching an elongated oval shape for the octopus’s head (mantle) near the upper center of your paper. Keep your pencil strokes very faint so they don’t show through the transparent watercolor later. -
Map the eyes:
Draw two small circles just below the head mantle for the eyes. Position them slightly apart to give the octopus characteristic depth. -
Draft the tentacles:
Sketch eight flowing lines radiating from below the eyes. Curve them whimsically—some curling inward, others extending outward—to create movement. Remember that octopus arms are flexible, so avoid stiff, straight lines. -
Refine the shapes:
Flesh out the tentacles by drawing lines on either side of your initial guides. Tapering them to a point at the ends is crucial for a realistic look. Erase your initial guide lines gently with a kneaded eraser.
Water Control Tip
Keep two water jars: one for rinsing dirty brushes and one for clean water. This ensures your blue mixes stay vibrant and your yellow/brown speckles don’t turn muddy green.
Step 2: First Wash & Base Layers
-
Mix your base blue:
Create a watery mix of Indigo and a touch of Prussian Blue. You want a medium transparency for this first layer. -
Paint the mantle:
Using a size 8 brush, apply a clean water glaze to the head area first (wet-on-wet technique). Drop in your blue mix, letting the pigment bloom naturally. Leave a small patch of white paper near the top left for a highlight. -
Start the tentacles:
Switch to a size 4 brush. Paint the main body of the tentacles with your base blue. Work on one tentacle at a time to control the drying. -
Add dimension early:
While the tentacle paint is still damp, drop slightly more concentrated Indigo into the shadowed areas (usually the underside of the curve). I find this creates a natural volume without harsh lines. -
Initial drying:
Let this entire base layer dry completely. The paper should be cool to the touch but not damp before proceeding.
Level Up: Salt Texture
While the head (mantle) wash is still wet, sprinkle a few grains of table salt on it. Brush it off when dry for a mesmerizing, organic starburst texture.
Step 3: Detailing & Texture
-
Define the eyes:
Paint the eyes carefully with a dark mix of Payne’s Gray and Indigo. Leave a tiny speck of white paper in each eye to serve as a ‘catchlight,’ bringing the creature to life. -
Enhance the shadows:
Mix a darker, less watery version of your Indigo. Glaze this over the areas where tentacles overlap or twist away from the light. This separation is key to avoiding a flat look. -
Paint the suckers:
Using your smallest size 2 brush, paint small ring shapes along the underside of the tentacles. Use a concentrated blue mix for high contrast. Vary the size of the circles—larger near the base, tiny at the tips. -
Add skin texture:
With a damp brush that isn’t too wet (dry brush technique), lightly drag some pigment over the mantle head to suggest rough skin texture. -
Deepen the crevices:
Go back in with your darkest blue mix and outline the very deepest crevices between the arms and under the head to make the form pop.
Step 4: Atmosphere & Finishing Touches
-
Mix a sandy tone:
Dilute a small amount of Burnt Sienna with plenty of water to create a pale, sandy beige color. -
Create background speckles:
Load a brush with the watery beige mix. Tap the handle against another brush over the paper to splatter small droplets around the octopus. This mimics sand or floating particles in the sea. -
Add blue droplets:
Repeat the splatter technique with a very dilute blue mix, focusing near the tentacles to suggest water movement and bubbles. -
Soften edges:
If any splatter spots look too harsh, quickly dab them with a clean paper towel to soften them into the background. -
Final assessment:
Step back and check your contrast values. If the painting looks too pale, add one final glaze of dark blue to the deepest shadows once everything is bone dry.
Allow your painting to dry flat overnight to ensure the paper settles perfectly before framing.
Shipwreck Kraken Octopus Scene
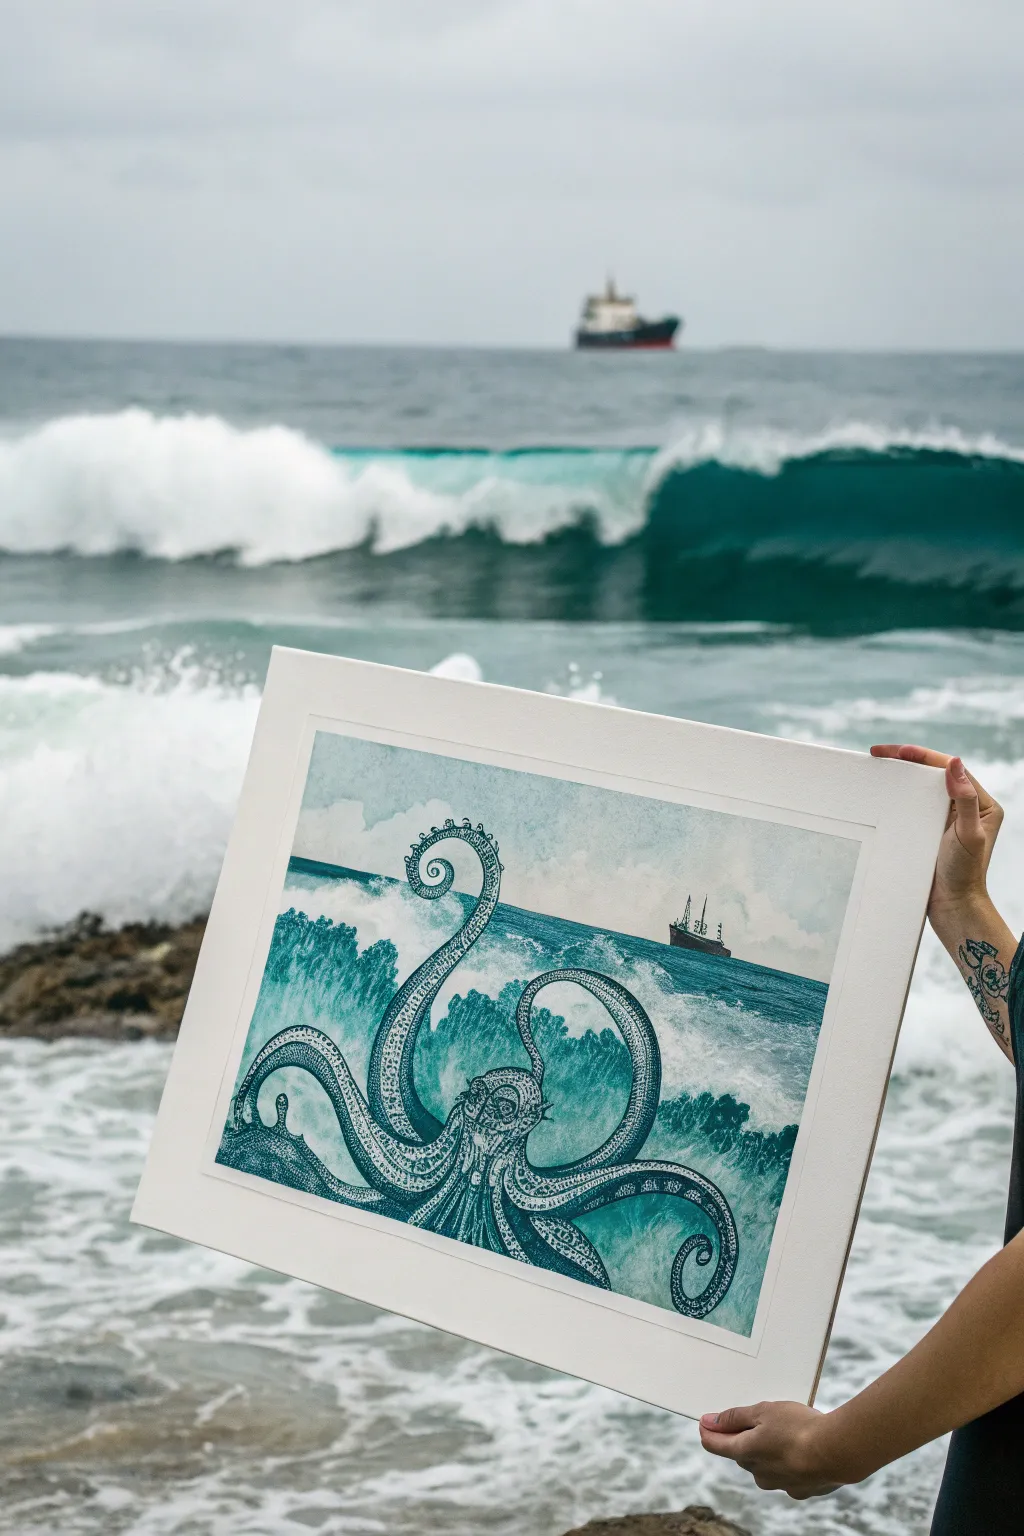

Capture the moody power of the ocean with this striking nautical print, blending illustrative detail with the raw energy of crashing waves. This project mimics the look of a classic etching or linocut, using a limited teal palette to create a cohesive and dramatic scene involving a legendary sea monster.
Detailed Instructions
Materials
- High-quality printmaking paper (white or off-white)
- Block printing ink (Teal, Prussian Blue, and Black)
- Linoleum block or Soft-Cut carving block (approx 11×14 inches)
- Lino cutters (various sizes: V-gouge and U-gouge)
- Brayer (rubber roller)
- Glass palette or acrylic sheet for rolling ink
- Baren or wooden spoon for burnishing
- Pencil and tracing paper
- Fine liner pens (optional for touch-ups)
- Mat board and frame (white)
Step 1: Design & Transfer
-
Draft your composition:
Sketch your scene on paper first. Place the large octopus in the foreground, using swirling tentacles to create movement. Draw a horizon line near the top third, with a small silhouette of a cargo ship in the distance. -
Focus on the tentacles:
Design the tentacles with distinct suction cups and curved forms. They should appear to be rising out of foaming, choppy waves rather than sitting flatly on top. -
Reverse the image:
Since printing reverses the image, flip your drawing or trace it onto the back of your paper before transferring it to the linoleum block. -
Transfer to block:
Use carbon paper or a soft graphite pencil rubbing to transfer your finalized, reversed sketch onto the carving block.
Clean Carving
Warm your lino block slightly with a hair dryer before carving. It softens the material, making it easier to cut smooth curves for the tentacles without slipping.
Step 2: Carving the Block
-
Outline the main shapes:
Use a fine V-gouge tool to carve along the outlines of the octopus, the ship, and the major wave crests. This defines your boundaries. -
Create texture in the octopus:
Switch to a smaller cutter to detail the suction cups. Leave the raised areas for the ink, carving away the centers of the cups or the spaces between them to create that speckled, illustrative look. -
Carve the ocean waves:
This is crucial for the energy of the piece. Use long, flowing cuts to mimic water movement. Vary your stroke direction—curved for the crashing foam and horizontal for the distant calm water. -
Detail the ship:
Keep the ship silhouette simple. It needs to be recognizable but distant. Carve away the sky around it carefully to leave the ship standing tall. -
Clear large negative spaces:
Use a wide U-gouge to clear away the large sections of the sky. You don’t need it perfectly smooth; some chatter marks often add character to the sky area.
Step 3: Inking & Printing
-
Mix your custom color:
On your glass palette, mix Teal ink with a small touch of Prussian Blue and a tiny dot of Black. Using a palette knife, blend until you achieve a deep, churning ocean blue-green. -
Charge the brayer:
Roll your brayer into the ink supply, lifting and rolling until the roller has a velvety texture, often described as an ‘orange peel’ look. -
Apply ink to the block:
Roll the ink onto your carved block in smooth, consistent passes. Roll horizontally and then vertically to ensure even coverage on all raised surfaces. -
Position the paper:
Carefully align your printmaking paper over the inked block. Once it touches the ink, do not shift it or the image will smear. -
Burnish the print:
Using a barren or the back of a wooden spoon, apply firm, circular pressure all over the back of the paper. Pay special attention to the detailed octopus areas to ensure the ink transfers fully. -
The reveal:
I always hold my breath a little here—slowly peel one corner of the paper back to check coverage. If it looks patchy, lay it back down and burnish more. Then, peel the paper entirely off the block.
Level Up: Gradient Roll
Try a ‘rainbow roll’ by putting teal ink on one side of your palette and dark blue on the other. Roll them together to overlap, creating a gradient from deep sea to lighter surface waves.
Step 4: Finishing Touches
-
Dry the print:
Hang your print or lay it flat on a drying rack. Oil-based inks can take days to dry, while water-soluble inks dry much faster. -
Optional hand-coloring:
If you want more depth, you can use a very transparent watercolor wash over the dried ink to darken the deep sea or add faint clouds to the sky, though the monochromatic look is striking on its own. -
Sign and number:
Pencil your signature and the edition number (e.g., 1/10) in the bottom margin. -
Mat and frame:
Cut a white mat with a generous border to give the artwork space to breathe, then mount it in a simple frame to finish the piece.
Hang your finished masterpiece where it can remind you of the wild beauty of the deep sea
Neon Glow Octopus on Dark Background
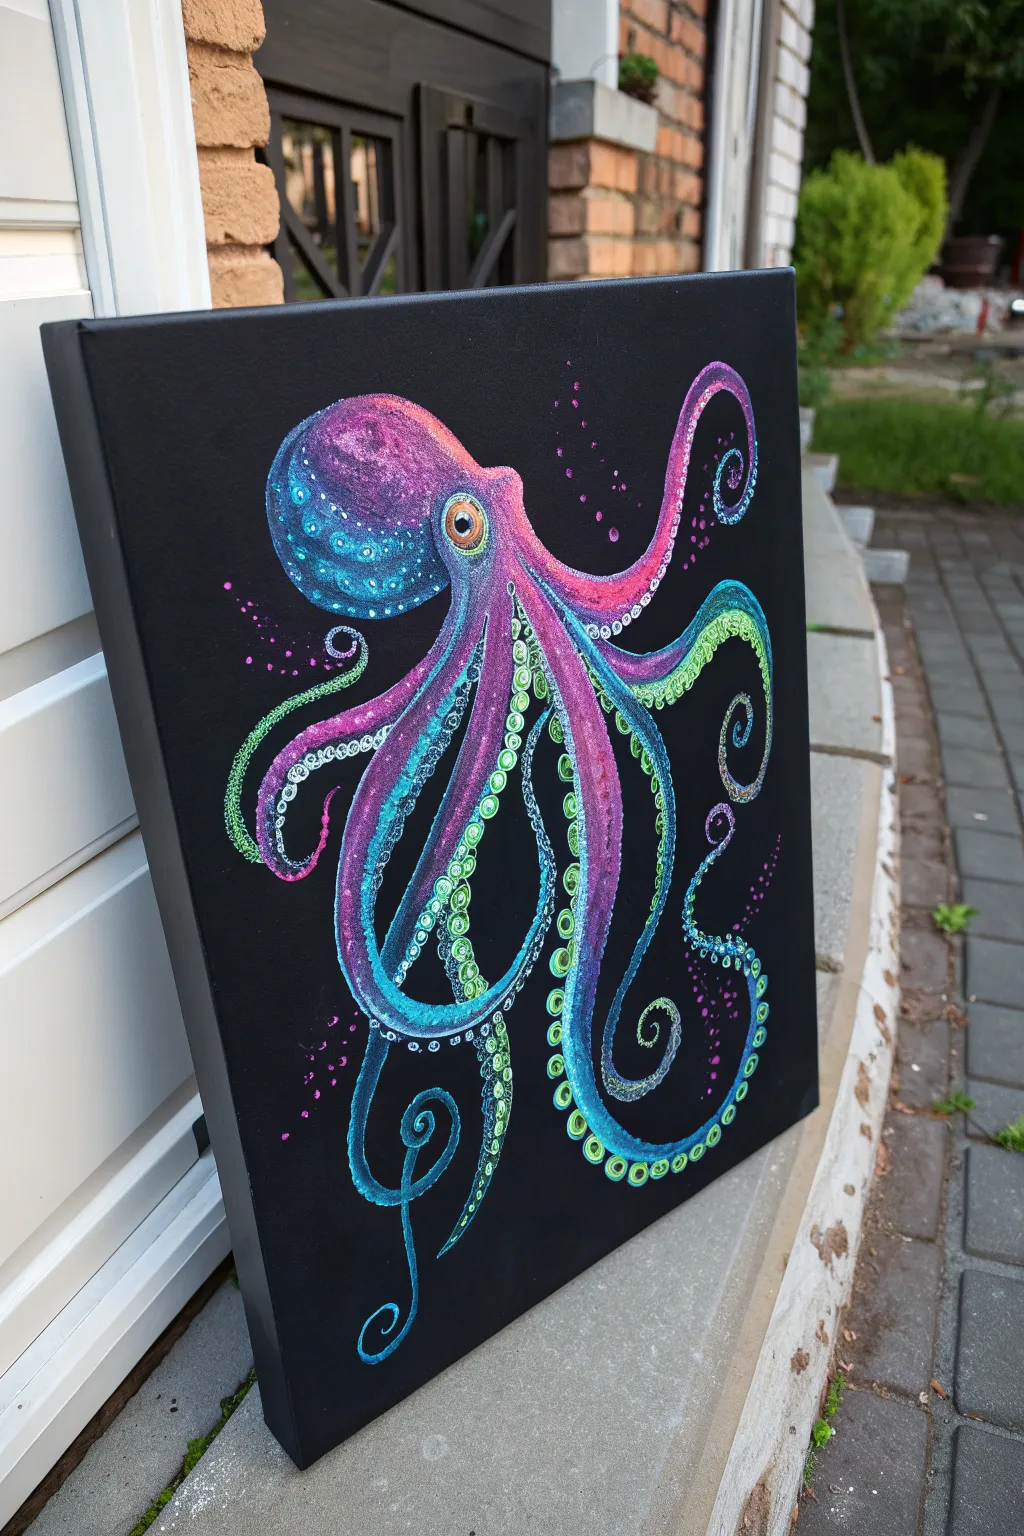
Bring the deep sea to life with electrifying neon hues against a stark black background. This project uses dazzling pinks, teals, and purples to create a luminescent creature that seems to float right off the canvas.
How-To Guide
Materials
- Stretched black canvas (rectangular, approx. 16×20 inches)
- Acrylic paints: Neon Pink, Neon Blue (Cyan), Neon Purple, Lime Green, Titanium White, Black
- Pencil (white charcoal or chalk pencil preferred)
- Round synthetic brushes: sizes 2, 4, and 8
- Fine liner brush (size 0 or 00)
- Mixing palette
- Cup of water and paper towels
Step 1: Sketching the Shape
-
Establish the head:
Begin with a white charcoal or chalk pencil on your black canvas. Draw a large, bulbous shape for the octopus’s mantle (head) in the upper left quadrant. It should look somewhat like a rounded balloon tilted slightly to the right. -
Map the eye:
Just below the mantle where the tentacles will start, sketch a prominent circle for the eye. Add a smaller circle inside for the pupil to gaze outward. -
Flow the tentacles:
Sketch eight long, winding lines extending from the base of the head. Let them flow organically—some curling upward, some spiraling down, and others stretching wide. Don’t worry about perfect anatomy; focus on creating graceful, swirling curves. -
Thicken the limbs:
Go back over your single lines and add thickness to each tentacle. Taper them so they are thicker near the head and gradually become pointy at the tips. I like to twist a few of them so the underside is visible.
Color Vibrancy fix
Is the black canvas eating your colors? Troubleshooting: Paint a layer of white underneath the neon areas first. Let it dry completely, then apply the neon paint on top for maximum brightness.
Step 2: Laying the Neon Base
-
Base coat the head:
Using your size 8 round brush, mix a deep purple with a touch of neon blue. Paint the entire head area. This first layer might look a bit transparent on the black, which is fine; it adds depth. -
Block in color zones:
Assign colors to the tentacles. Paint the upper tentacles in a gradient of pink to purple, and the lower tentacles in teal to green. Apply the paint somewhat thinly so the black canvas texture shows through slightly. -
Strengthen the hues:
Once the first layer is dry to the touch, go back in with pure neon pink and neon blue. Apply these brighter colors to the center of the head and the sun-facing sides of the tentacles to establish a light source. -
Paint the eye:
Fill the outer ring of the eye with a mix of orange and gold (or mix yellow with a dot of pink). Paint the pupil jet black, leaving a tiny spot of white unpainted for a reflection, or add it later.
Go UV Crazy
Use actual fluorescent or UV-reactive acrylic paints instead of standard brights. Display the piece under a blacklight for a true bioluminescent deep-sea glow effect.
Step 3: Adding Texture and Detail
-
Stipple the skin:
Using a size 4 brush, tap small dots of light blue and white over the purple head. Concentrate them near the top to create a bumpy, textured appearance typical of aquatic skin. -
Highlight the ridges:
Mix white with a tiny amount of neon pink. Using a smaller brush, trace thin lines along the upper edges of the pink tentacles to make them look wet and shiny. -
Create the suckers:
On the twisted undersides of the tentacles, paint rows of small circles. Use a vibrant lime green mixed with white for the tentacles that are predominantly blue or teal. -
Define the sucker rings:
Switch to your fine liner brush. Inside each lime green circle, paint a smaller, darker ring (dark green or teal), and then a tiny dot of white in the very center to make them look cupped. -
Add pink suckers:
Repeat the previous step for the pink/purple tentacles, but use white and light pink for the suckers to maintain the color scheme. -
Enhance the swirls:
Where the tentacles curl into tight spirals, use your liner brush with almost pure white paint to outline the very edge of the curve. This high contrast makes the neon pop against the black.
Step 4: Final Glow Effects
-
Add background bubbles:
Dip the wrong end (the handle) of a brush into pink or purple paint. Dot scattered groups of bubbles rising from the tentacles into the black background. -
Create the spatter effect:
Load an old toothbrush or stiff brush with watered-down white or neon blue paint. Run your thumb over the bristles to flick tiny specks across the canvas, simulating suspended sea particles. -
Sharpen the outlines:
Inspect the edges of your tentacles. If any black background got messy, touch it up with black paint. Conversely, crisp up the neon edges with a final pass of your brightest tint. -
Final eye highlight:
Place one absolute crisp dot of pure Titanium White in the eye (swirling over the black pupil and colored iris) to give the octopus a wet, glassy look.
Hang your luminous creation in a dimly lit corner to let those neon pigments truly shine


Have a question or want to share your own experience? I'd love to hear from you in the comments below!