Ornament painting is my favorite kind of tiny-canvas magic: quick, festive, and ridiculously satisfying. Whether you’re painting classic round baubles or rustic wood slices, these ideas will help you make ornaments that feel personal and totally display-worthy.
Classic Snowflake Ornaments in Crisp White
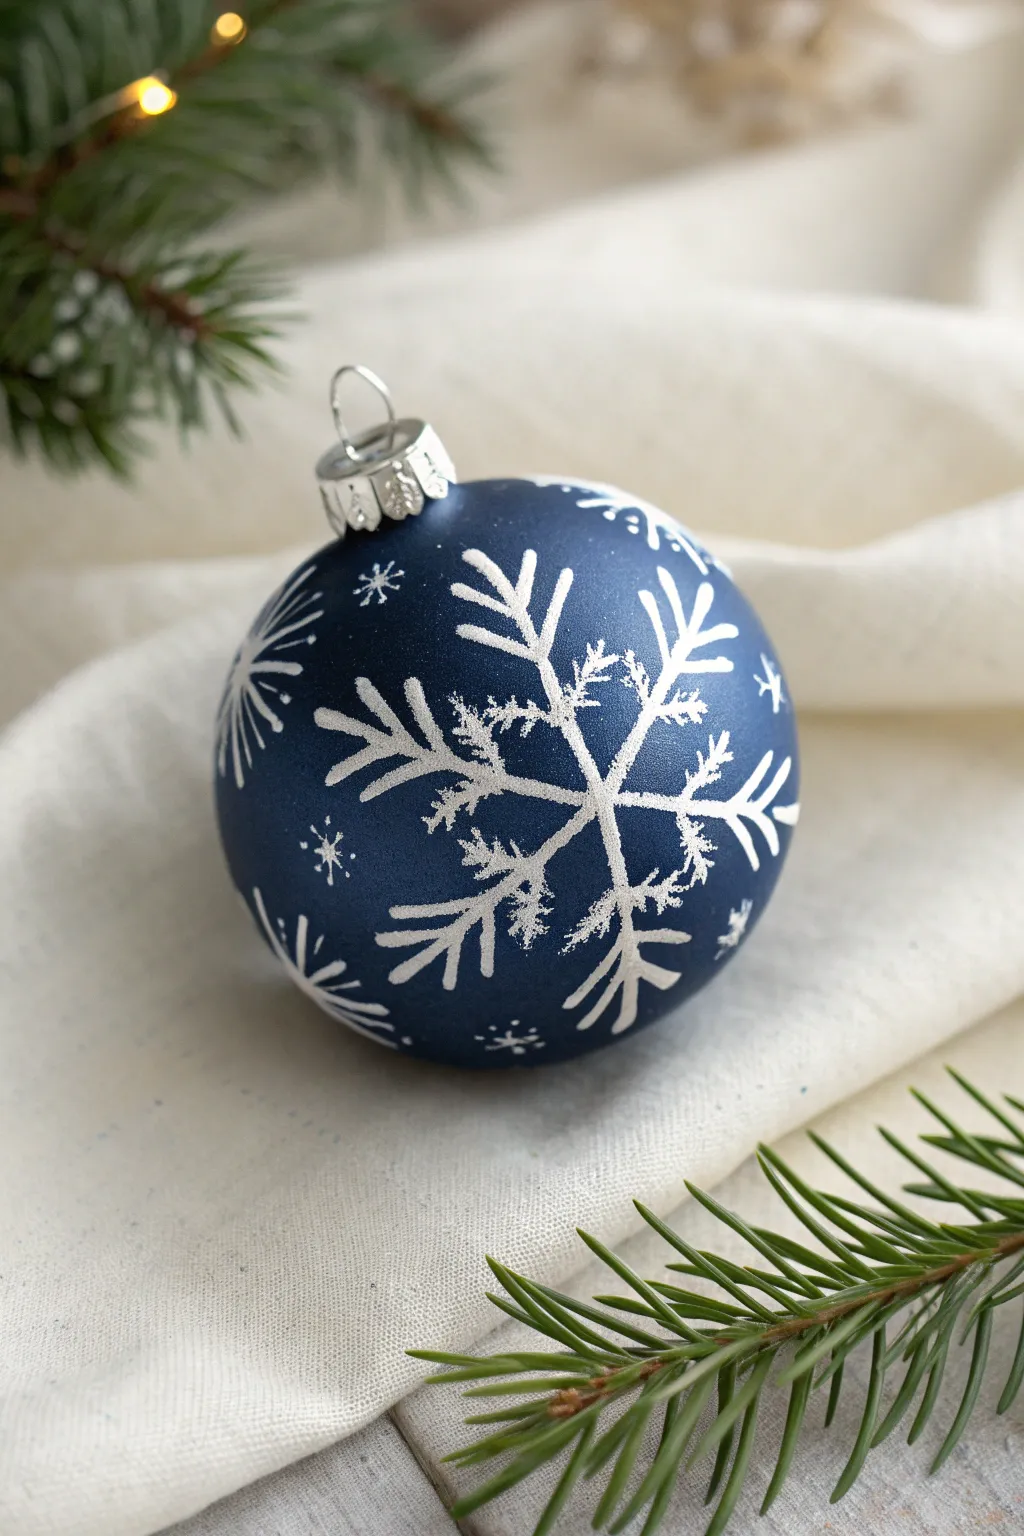
Capture the stillness of a snowy evening with this elegant ornament design featuring a striking white snowflake against a deep, matte blue background. The contrast between the velvety finish and the crisp white lines creates a sophisticated, classic look perfect for any tree.
Step-by-Step Tutorial
Materials
- Round ceramic or glass ornament (matte navy blue finish)
- White acrylic paint (high opacity) or white paint pen (fine tip)
- Round brush (size 0 or 00) or liner brush
- Pencil (white charcoal or chalk pencil recommended)
- Paper plate or palette
- Jar of water
- Paper towels
- Spray sealant (matte finish, optional)
Step 1: Preparation and Planning
-
Clean the surface:
Before you begin, wipe down your matte blue ornament with a slightly damp cloth to remove any dust or oils. Let it dry completely to ensure your paint adheres properly to the textured finish. -
Mark the center:
Using a white charcoal or chalk pencil, gently place a tiny dot in the center of the side you wish to paint. This will serve as the anchor point for your main snowflake. -
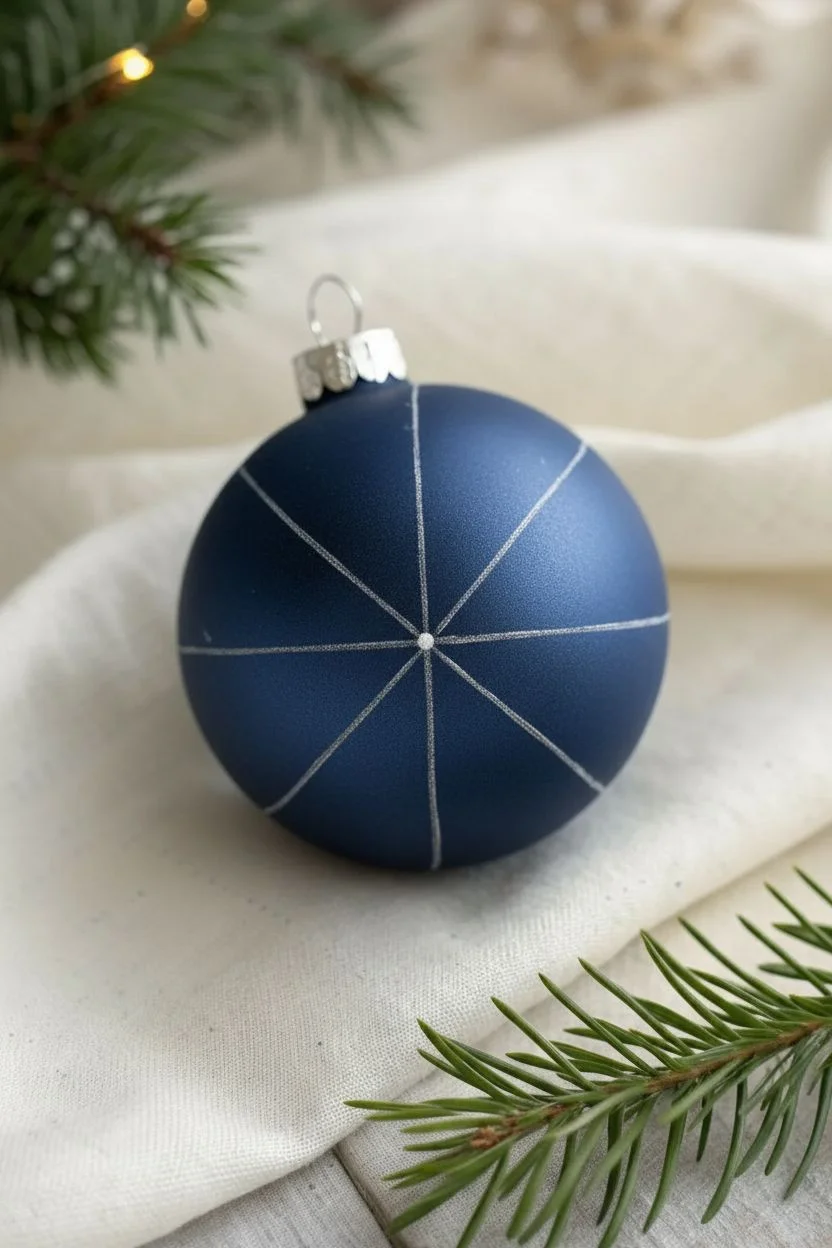
Draw guide lines:
Lightly sketch a simple cross (+) through your center dot. Try to keep the lines equal in length to establish the main vertical and horizontal axis. -
Add diagonal guides:
Draw an ‘X’ through the center point, cutting through the spaces of your first cross. You should now have an asterisk shape with eight evenly spaced arms.
Pro Tip: Steady Hands
Rest your painting hand’s pinky finger gently on a dry part of the ornament to stabilize your brush strokes. If the surface is slippery, hold a piece of tissue under your finger.
Step 2: Painting the Main Snowflake Structure
-
Prepare your paint:
Squeeze a small amount of white acrylic paint onto your palette. If the paint feels too thick, dip your brush in water and mix a tiny drop in—you want an ink-like consistency that flows smoothly but remains opaque. -
Paint the axis lines:
Using your fine liner brush or size 0 round brush, carefully trace over your chalk guidelines. Start from the center and pull the brush outward for the sharpest lines. -
Thicken the center:
Go back over the lines near the center intersection, making them slightly thicker than the tips. This adds visual weight to the core of the snowflake. -
Create the inner star:
About a third of the way up each arm, paint small ‘V’ shapes connecting the arms together. This creates a starburst or web effect near the center of the flake.
Troubleshooting: Blobs
If you accidentally drop a blob of paint, don’t wipe it while wet! It will smear into the matte finish. Let it dry completely, then gently scrape it off with a fingernail or craft knife.
Step 3: Adding Delicate Details
-
Paint the outer V’s:
Move to the outer third of the vertical and horizontal arms. Paint two sets of ‘V’ shapes pointing outward (like an arrowhead) on each of these main four lines. -
Detail the diagonal arms:
For the diagonal arms, paint feathery, smaller strokes coming off the sides. Instead of clean ‘V’ shapes, make these look more like crystallized ice or fern leaves for texture variation. -
Add icy texture:
I like to take a predominantly dry brush with just a little paint and dab tiny texture spots along the inner star section. This mimics the look of frosted ice accumulation. -
Refine the tips:
Check the very ends of each arm. If they look blunt, use the very tip of your brush to drag the paint out into a sharp, fine point.
Step 4: Finishing Touches
-
Add surrounding flakes:
In the negative space around the main snowflake, paint partial flakes wrapping around the curve of the ornament. These can be simpler—just three or four lines meeting at a point. -
Paint tiny stars:
Scatter small six-pointed stars or simple dots in the remaining open blue areas to create the feeling of a falling snow sky. -
Clean up guidelines:
Once the white paint is completely dry to the touch, use a heavily dampened Q-tip or a soft eraser to gently remove any visible chalk guidelines. -
Seal the work:
To protect your handiwork without losing that lovely velvet look, spray the ornament lightly with a matte clear coat sealant in a well-ventilated area.
Hang this frozen masterpiece on the tree to reflect the calm beauty of the season

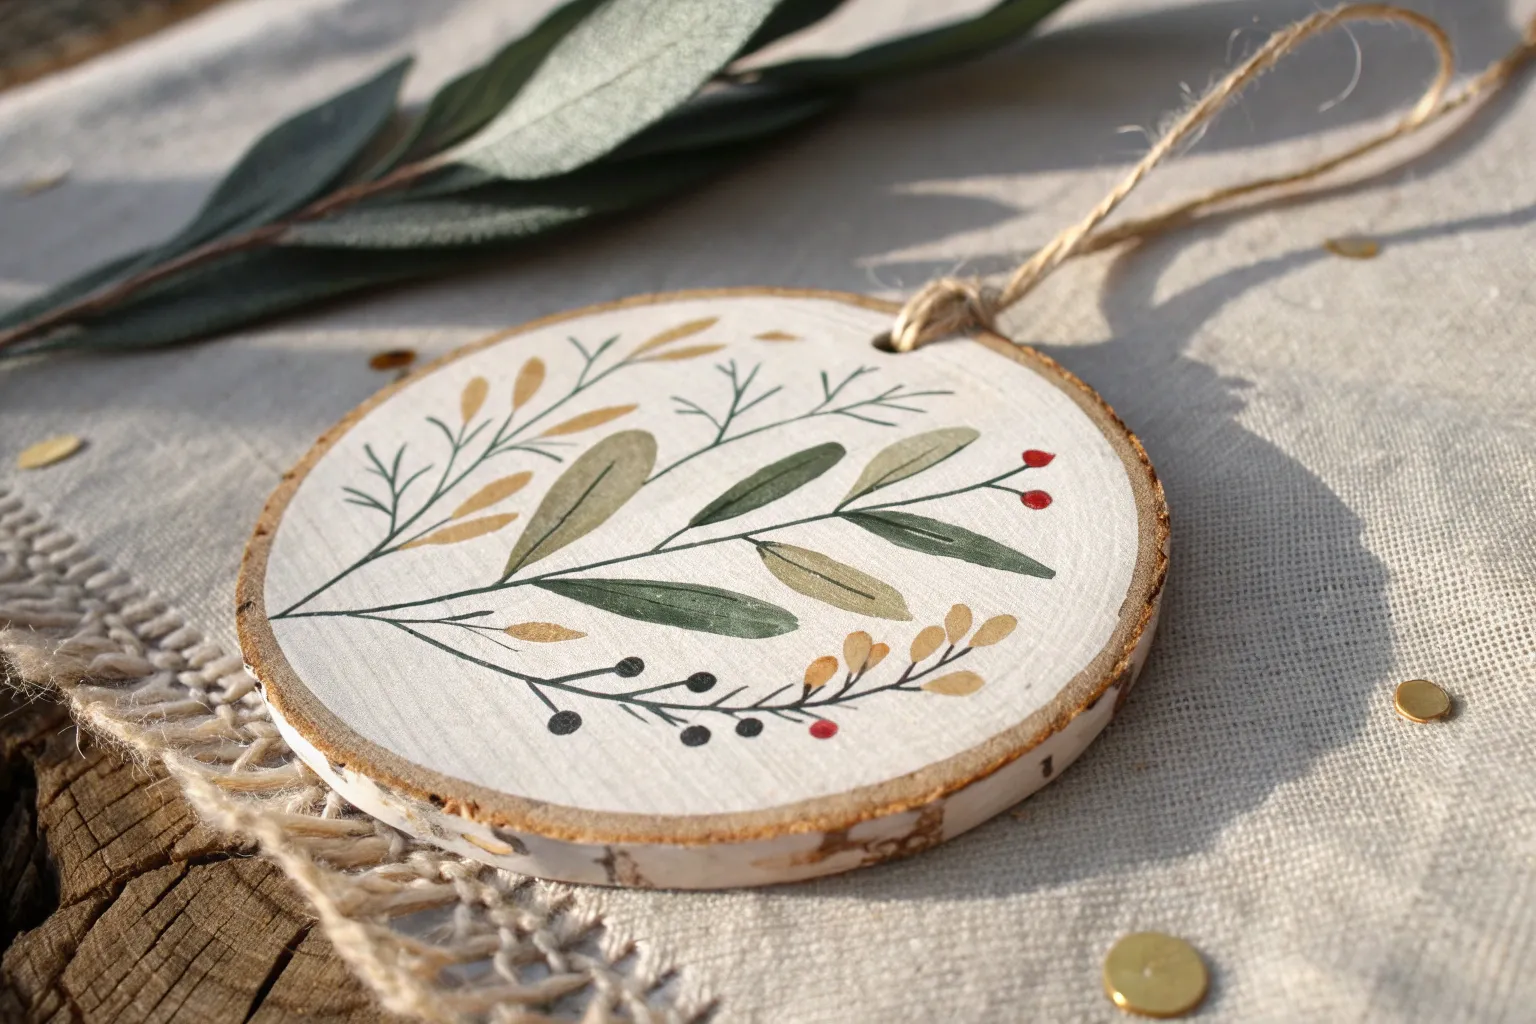
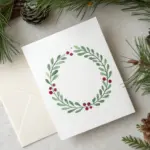
Hand-Lettered Names and Dates for Keepsakes
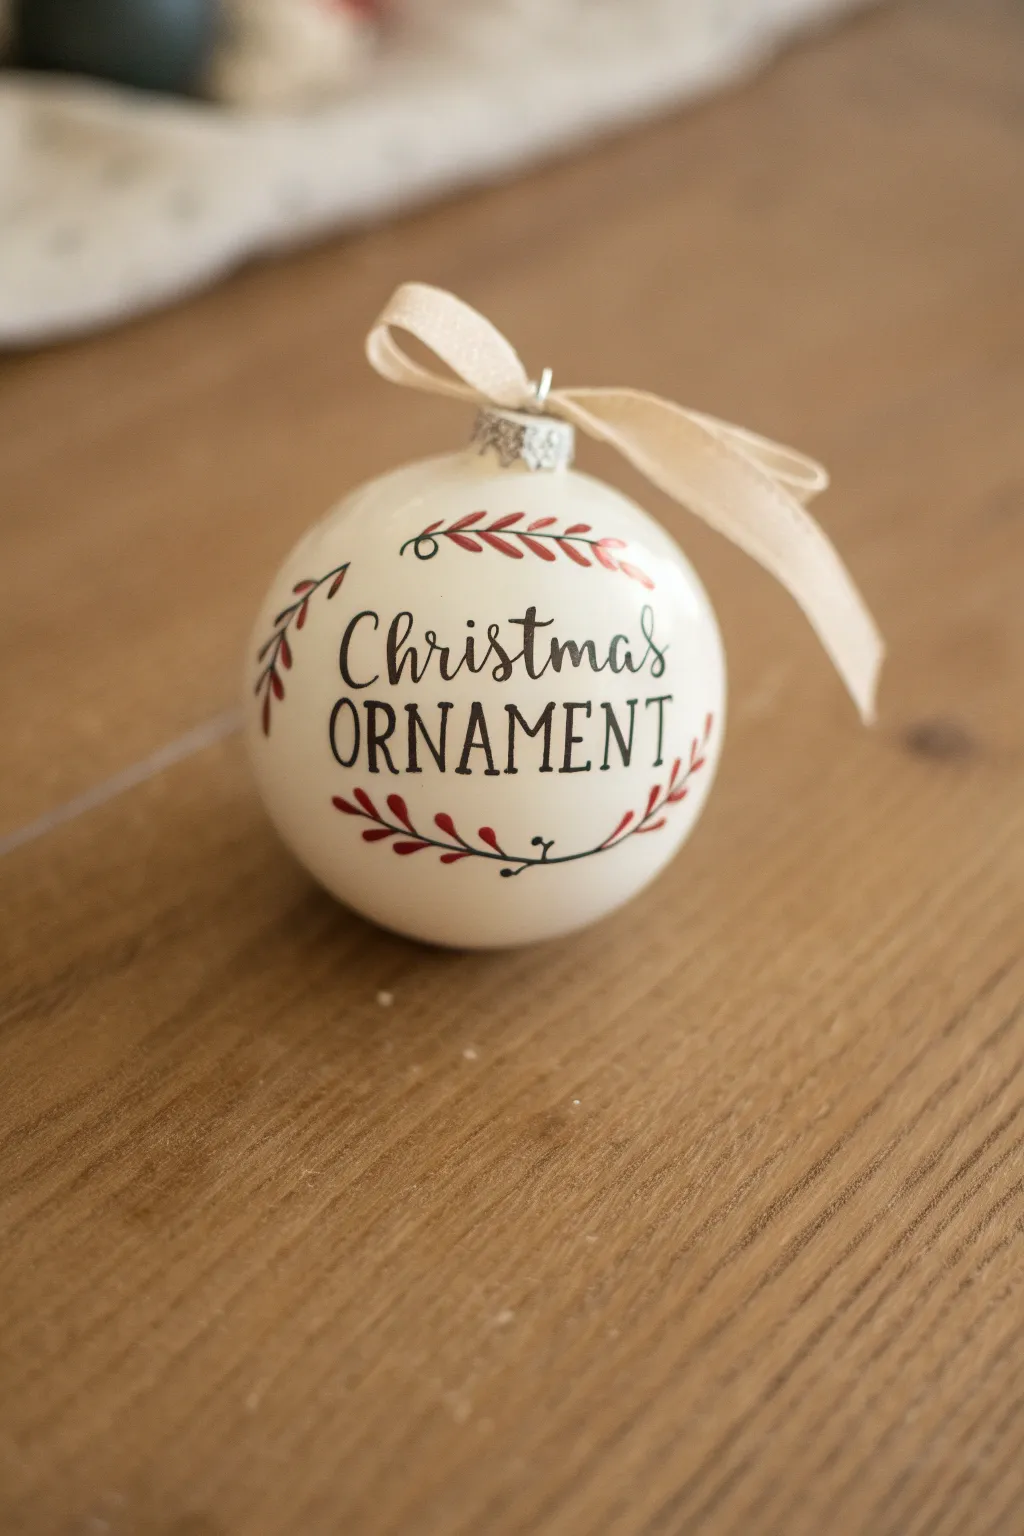
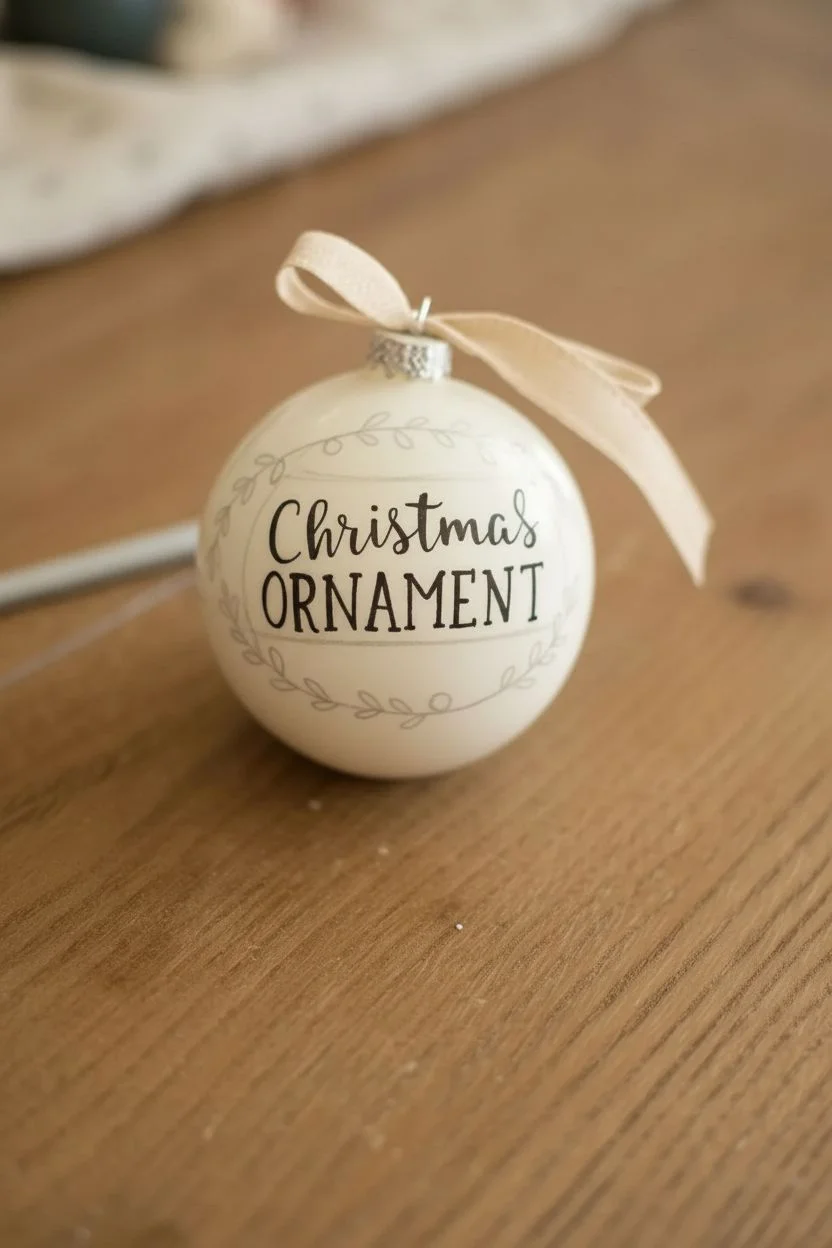
Create a timeless keepsake with this elegant hand-lettered ornament design that pairs charming typography with a delicate botanical wreath. The creamy white finish and traditional red and green palette give it a warm, nostalgic feel perfect for any tree.
How-To Guide
Materials
- smooth white ceramic or glass ball ornament
- Extra-fine point permanent marker (black)
- Fine tip paint pens (red and deep green)
- Pencil and eraser
- Soft beige ribbon (approx. 1/2 inch wide)
- Paper towel or rag
- Small cup or roll of tape (to hold ornament steady)
Step 1: Preparation & Lettering
-
Secure the workspace:
Place your round ornament on a roll of tape or a small cup to keep it from rolling away while you work. -
Clean the surface:
Wipe the ornament down with a little rubbing alcohol or a clean cloth to remove any fingerprints or oils that might prevent the ink from sticking. -
Draft the text placement:
Using a pencil very lightly, sketch two horizontal guide lines near the center of the ball where your text will sit. -
Pencil in the script:
Lightly write the word ‘Christmas’ on the top line in a loose, flowing cursive style. -
Pencil the block letters:
Directly below, draft the second word (e.g., ‘ORNAMENT’ or a family name) in tall, narrow sans-serif capital letters. -
Structure the wreath:
Sketch a simple curved line above ‘Christmas’ and a matching mirrored curve below the bottom word to form the spine of your wreath. -
Committing to ink:
Once happy with the layout, trace over your pencil text with the extra-fine black permanent marker. -
Refining the script:
Go back over the downstrokes of the cursive word ‘Christmas’ to thicken them slightly, creating a faux-calligraphy look. -
Inking the vines:
Trace the upper and lower curved lines with the black marker to define the main vine stems, adding small curly-cues at the ends for whimsy.
Ink Smearing?
Work from top to bottom if you’re right-handed (or vice versa) to avoid dragging your hand through wet ink. A hairdryer on cool can speed up drying.
Step 2: Painting the Details
-
Adding leaves:
Switch to your red paint pen. Along the upper black vine line, draw small, simple tear-drop shapes angling outward to create leaves. -
Completing the top wreath:
Continue the red leaves across the entire top vine, keeping them relatively evenly spaced. -
Bottom wreath variation:
For the bottom vine, alternate between red leaves on the outer edges and just a few clustered near the center. -
Introducing green:
I like to add small green accents now; simply trace over a few sections of the black vine stem with the green paint pen, or add tiny green dashes between the red leaves for contrast. -
Side accents:
Draw two small, independent sprigs of leaves on the left and right sides of the ornament, framing the text, using the same red and black color scheme. -
Drying time:
Let the paint and ink sit for at least 30 minutes to ensure everything is completely dry to the touch. -
Erase guidelines:
Gently erase any visible pencil marks, being careful not to scratch off your fresh paint work. -
Finishing touch:
Thread a length of beige ribbon through the ornament cap and tie it into a soft, floppy bow to complete the rustic look.
Pro Tip: Faux Calligraphy
Don’t stress about fancy pens. Just write normally, then draw a second line next to every downward stroke and fill in the gap to create specific weight.
Hang your custom creation on the tree and enjoy the handmade charm it adds to your holiday decor


Buffalo Plaid Ornament Painting for Cozy Vibes
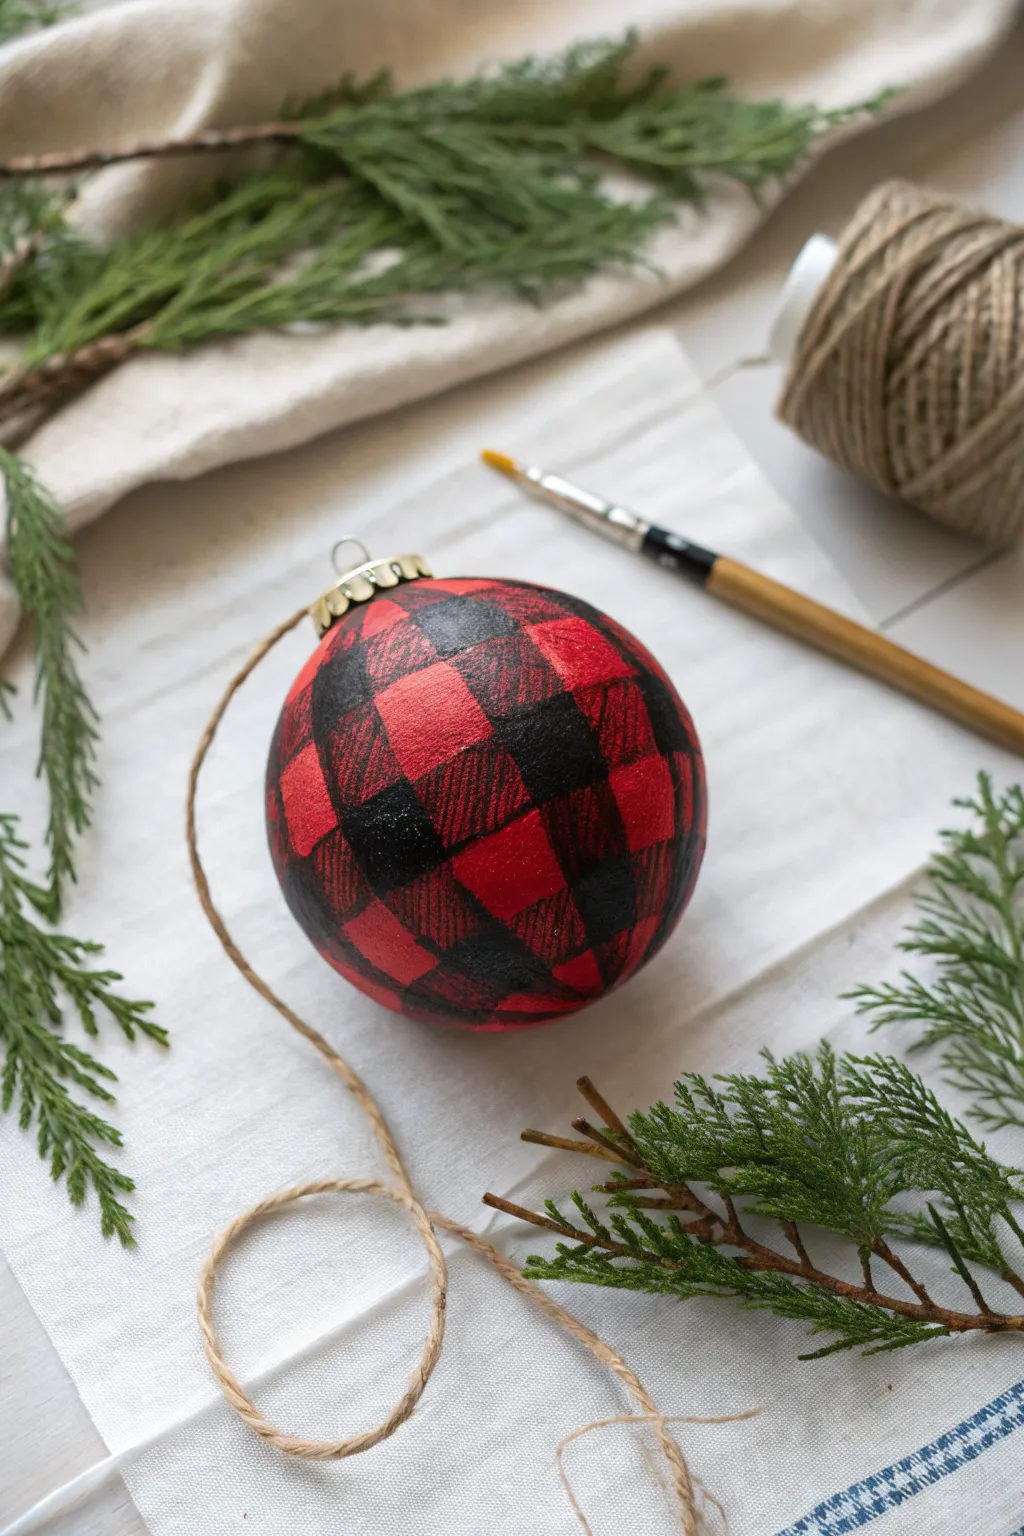

Transform a plain bauble into a rustic masterpiece with this hand-painted buffalo plaid design. The rich red and overlapping black tones capture the warmth of a favorite flannel shirt, making it a perfect addition to any farmhouse-style tree.
Step-by-Step
Materials
- Round ornament (ceramic, wood, or matte plastic)
- Red acrylic paint (bright festive red)
- Black acrylic paint
- Dark red or burgundy acrylic paint (optional, or mix red + black)
- Flat shader brush (small to medium size)
- Fine liner brush
- Palette or paper plate
- Water cup and paper towels
- Jute twine for hanging
Step 1: Base Coat Application
-
Prepare the surface:
Ensure your ornament is clean and dry. If using a shiny plastic ornament, you might want to lightly sand it or use a primer so the paint adheres better. -
Paint the red base:
Cover the entire ornament with a coat of bright red acrylic paint. Use smooth, even strokes to minimize brush marks. -
Check for coverage:
Let the first coat dry completely. If you can still see the original surface through the red, apply a second coat for a solid, vibrant background.
Tape for Straight Lines
Struggling with straight lines on a round surface? Use thin washi tape or painter’s tape to mask off your grid before painting the dark red stripes.
Step 2: Creating the Grid
-
Mix a dark red shade:
On your palette, mix a small amount of black into your red paint to create a deep burgundy or dark red. This will serve as the transitional color where the plaid stripes appear to overlap. -
Paint vertical stripes:
Using your flat shader brush, paint thick vertical stripes with the dark red mixture. Try to keep the spacing between stripes roughly equal to the width of the brush strokes. -
Wait for drying:
Allow these vertical stripes to dry to the touch so you don’t smudge them in the next step. -
Paint horizontal stripes:
Paint horizontal stripes around the ornament using the same dark red mixture. This creates a basic grid pattern over your bright red base. -
Observe the intersections:
Notice where the vertical and horizontal stripes cross each other. These intersection squares are where we will add the darkest color to create the plaid illusion.
Add a Snowy Touch
After the plaid is dry, stipple a little white texture paste or white paint on the top of the ornament to make it look like it’s dusted with fresh snow.
Step 3: Adding Depth and Detail
-
Fill the intersections:
Switch to pure black paint. Carefully paint in the square intersections where the dark red stripes cross. -
Use the right brush:
I prefer using the same flat brush for this to keep square edges, but switch to a liner brush if you need more control at the corners. -
Texture the stripes:
To give it that woven fabric look, use a very dry brush with a tiny bit of black paint. Lightly drag it through the dark red stripes to simulate thread texture. -
Add vertical hatching:
Using a fine liner brush and black paint, add very thin, scratchy vertical lines within the dark red horizontal bands. -
Add horizontal hatching:
Do the same with horizontal scratchy lines inside the dark red vertical bands. This subtle detail essentially mimics the weave of flannel cloth.
Step 4: Finishing Touches
-
Let it cure:
Allow the paint to try thoroughly. Acrylics dry fast, but thick layers might need an hour or so. -
Seal the work (optional):
If you want extra durability or a specific finish, apply a coat of clear matte or satin varnish over the entire ornament. -
Attach the hanger:
Cut a length of jute twine. Thread it through the ornament cap and tie a knot to create a rustic loop for hanging. -
Reattach the cap:
If you removed the metal cap for painting, carefully snap it back onto the neck of the ornament.
Hang your new plaid creation on the tree and enjoy the warm, rustic charm it brings to your holiday decor


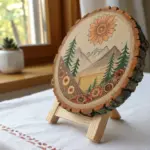
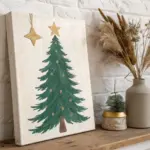
Simple Evergreen Trees on Wood Slice Ornaments
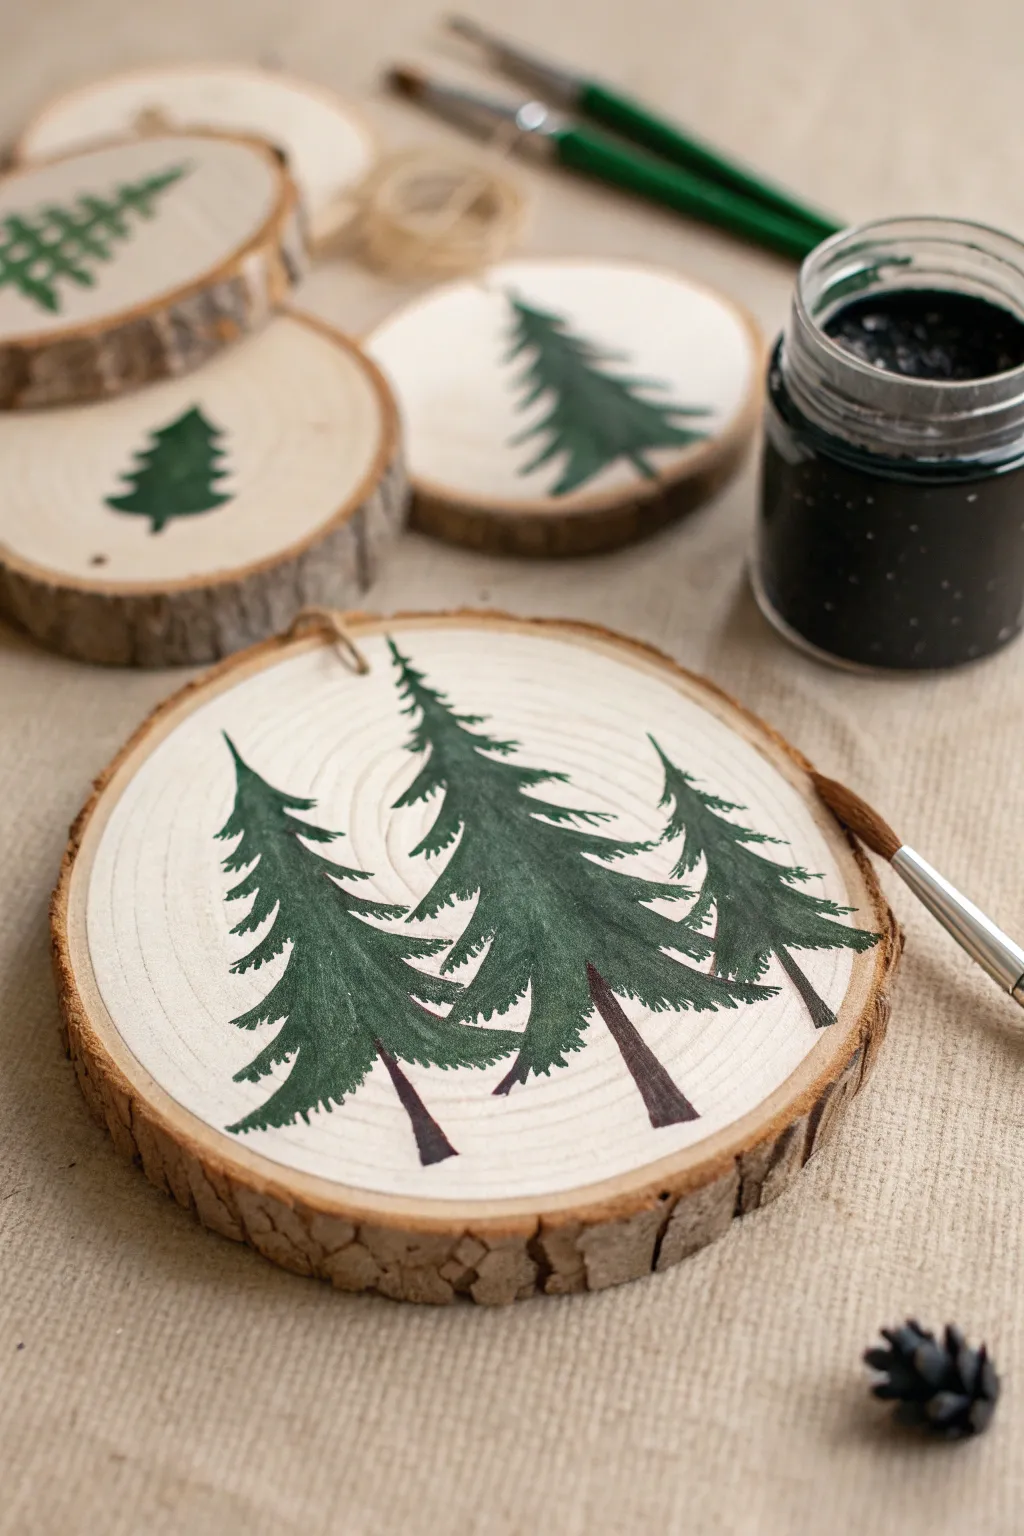
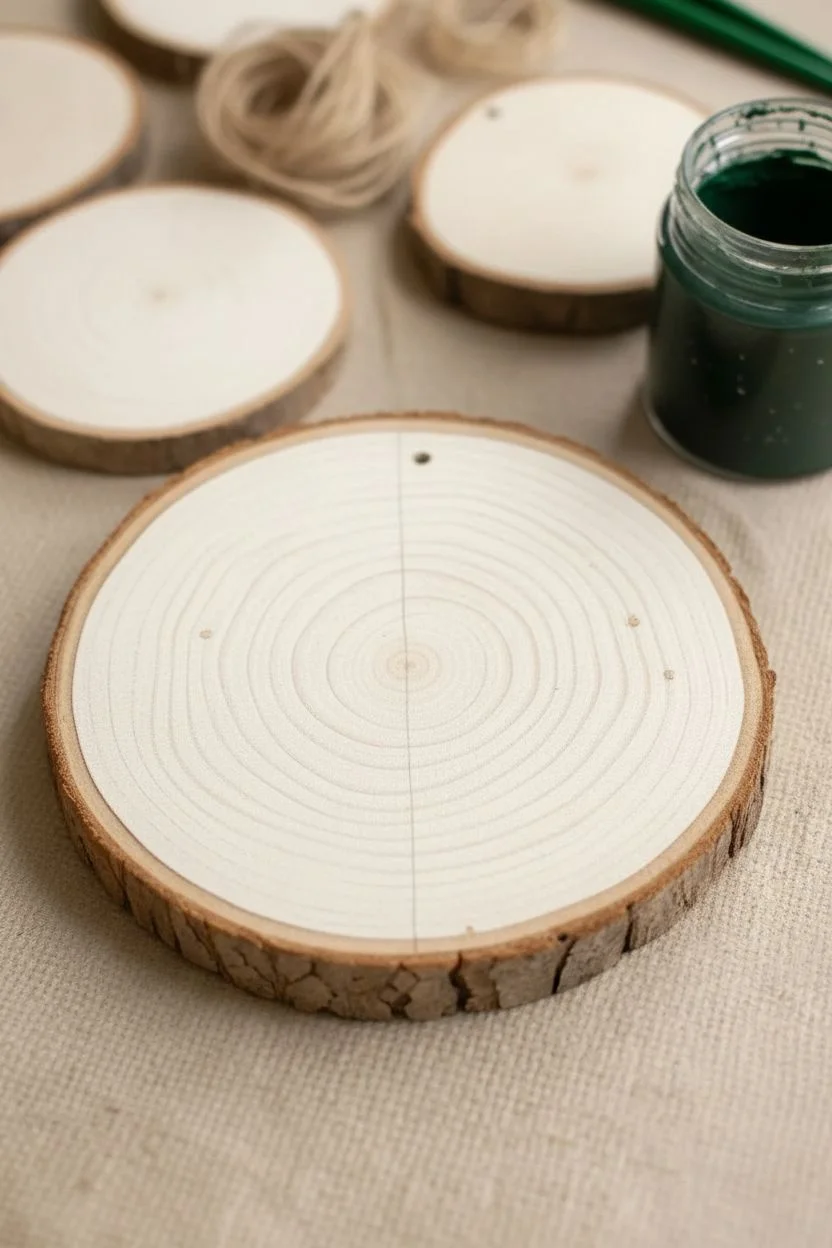
Embrace the tranquility of the forest with these hand-painted wood slice ornaments featuring lush evergreen trees. The natural grain of the wood provides a perfect rustic canvas for simplistic yet charming pine silhouettes.
How-To Guide
Materials
- Unfinished round wood slices with bark edge (various sizes)
- Dark forest green acrylic paint
- Dark brown acrylic paint
- Fine liner detail brush (size 0 or 00)
- Small round brush (size 2 or 4)
- Small cup of water
- Palette or paper plate
- Jute twine for hanging
- Paper towels
Step 1: Preparing the Canvas
-
Clean surface:
Before painting, ensure your wood slice is clean and free of loose sawdust. A quick wipe with a dry cloth or stiff brush works wonders to prevent paint clumping. -
Plan composition:
Decide on your layout. For the featured project, visualize a central cluster of three trees: a tall one in the middle, flanked by two slightly shorter ones on either side. -
Mix greens:
Squeeze out your dark forest green paint. If it feels too transparent, mix in the tiniest drop of black or brown to deepen the shade, creating that classic pine needle hue.
Bleeding Paint?
If paint bleeds into the wood grain, use less water on your brush. A drier brush application keeps lines crisp on porous surfaces like raw wood.
Step 2: Painting the Trees
-
Center tree line:
Using your fine liner brush and the green paint, draw a very faint vertical line right in the center of the wood slice to mark the trunk of the main tree. -
Top branches:
Starting at the very top of your center line, create the tip of the tree with tiny, short strokes pointing upward and outward. -
Build downward:
Work your way down the trunk. Use short, sweeping strokes that flick outward and slightly downward to mimic drooping pine boughs. Keep the top narrow. -
Widen the base:
As you move lower, make your strokes gradually wider horizontally. Allow some gaps between the layers of branches so the natural wood grain shows through. -
Side trees placement:
Locate the starting points for the two flanking trees. Their tops should sit lower than the central tree to create a balanced triangular composition. -
Left tree texture:
Repeat the painting process for the left tree. I find it helpful to vary the pressure here—press harder at the branch base and lift off quickly at the tip for a tapered point. -
Right tree strokes:
Paint the right-hand tree. Try to make this one slightly different in fullness or irregular shape; nature isn’t perfectly symmetrical, and your painting shouldn’t be either. -
Layering depth:
Once the first layer is touch-dry, go back over the thickest parts of the trees with a second coat of green to make them opaque and bold. -
Adding texture details:
Use the very tip of your smallest brush to add tiny ‘flyaway’ needles or branches sticking out from the main shape to give it a realistic, feathery look.
Step 3: Finishing Touches
-
Painting trunks:
Switch to the dark brown paint. Carefully paint a thin, straight trunk extending from the bottom foliage of each tree down toward the edge of the wood slice. -
Root flair:
Slightly widen the trunks right at the very bottom where they ‘meet the ground’ to verify the perspective. -
Drying time:
Let the paint dry completely. Wood absorbs moisture, so this might happen faster than on canvas. -
Drill hole (optional):
If your wood slice isn’t pre-drilled, carefully drill a small hole near the top edge, avoiding your painted artwork. -
Threading twine:
Cut a length of jute twine, thread it through the hole, and knot it securely to create a loop for hanging.
Snowy Effect
For a winter vibe, tap a dry toothbrush into white paint and flick fine mist over the dried trees to create a gentle snowfall effect.
Hang your new woodland creation on the tree or use it as a custom gift tag for a nature lover
BRUSH GUIDE
The Right Brush for Every Stroke
From clean lines to bold texture — master brush choice, stroke control, and essential techniques.
Explore the Full Guide
Snowman Faces With Easy Shading

Transform a plain white bauble into a cheerful winter friend with this charming snowman face design. The textured ‘snow’ top and simple painted features make this a delightful project that brings personality to your Christmas tree.
Detailed Instructions
Materials
- White matte glass or plastic ball ornament
- Acrylic paints: Orange, black, light pink, white
- Fine detail paintbrushes (liner or size 0 round)
- Small round paintbrush
- Snow-Tex or texture paste
- Clear glitter (iridescent or white)
- Small palette or plate
- Cup of water for rinsing
- Paper towels
- Pencil (optional)
Step 1: Preparation & Base
-
Clean surface:
Begin by wiping down your white ornament with a soft cloth or a little rubbing alcohol to remove any oils or dust. -
Remove cap:
Carefully pull off the metal ornament cap and hanger so you can work freely around the top opening. Set it aside safely. -
Sketch lightly:
If you’re nervous about freehand painting, use a pencil to very lightly sketch the placement of the eyes and nose.
Oops, Smudged Paint?
If you smudge a black line, dampen a Q-tip with water immediately and gently lift the mistake off before it sets on the white background.
Step 2: Painting the Features
-
Paint the nose:
Using a small round brush and bright orange acrylic, paint a horizontal carrot shape in the center. Make the left side rounded and taper it off to a point on the right. -
Add dimension to the nose:
While the orange is wet, you can touch a tiny bit of white to the top edge for a highlight, or just let it dry flat for a graphic look. -
Paint the eyes:
Dip a detail brush into black paint. Create two oval shapes above the nose. Make them slightly irregular to mimic lumps of coal. -
Add eye highlights:
Once the black is tacky but almost dry, add a tiny white reflection dot to the upper right area of the right eye for life. -
Create the mouth:
With the detail brush and black paint, draw a thin, curved smile line under the nose. Add small vertical tick marks at the ends for a classic snowman grin. -
Add the eyebrows:
Paint two tiny, floating curved lines high above the eyes to give him an expressive, happy look.
Step 3: Adding Details & Texture
-
Buttons:
Moving down the sphere, paint two small black dots vertically aligned below the mouth to represent his coat buttons. -
Twig arms:
On the lower sides of the ornament, paint thin black lines that branch out like twigs. These should look like they are hugging the bottom curve of the ball. -
Rosy cheeks:
Mix a very watery wash of pale pink paint or use a dry-brush technique. Gently dab a circle on each cheek area. Keep it sheer so it looks like a soft blush. -
Apply texture paste:
Around the top opening where the cap goes, spread a layer of white texture paste (like Snow-Tex). Dab it downwards slightly onto the ‘forehead’ to look like accumulating snow. -
Add sparkle:
While the texture paste is still wet, sprinkle clear or iridescent glitter generously over the paste so it sticks. -
Dry completely:
I prefer to let this sit for several hours to ensure the texture paste hardens fully. -
Reassemble:
Once everything is dry to the touch, gently place the metal cap back onto the ornament neck.
Make It Frosty
For an all-over frosty look, sponge a very thin layer of white glue over the empty white spaces and dust with superfine glitter before painting features.
Hang your new frozen friend near a light string to catch the sparkle on his snowy cap
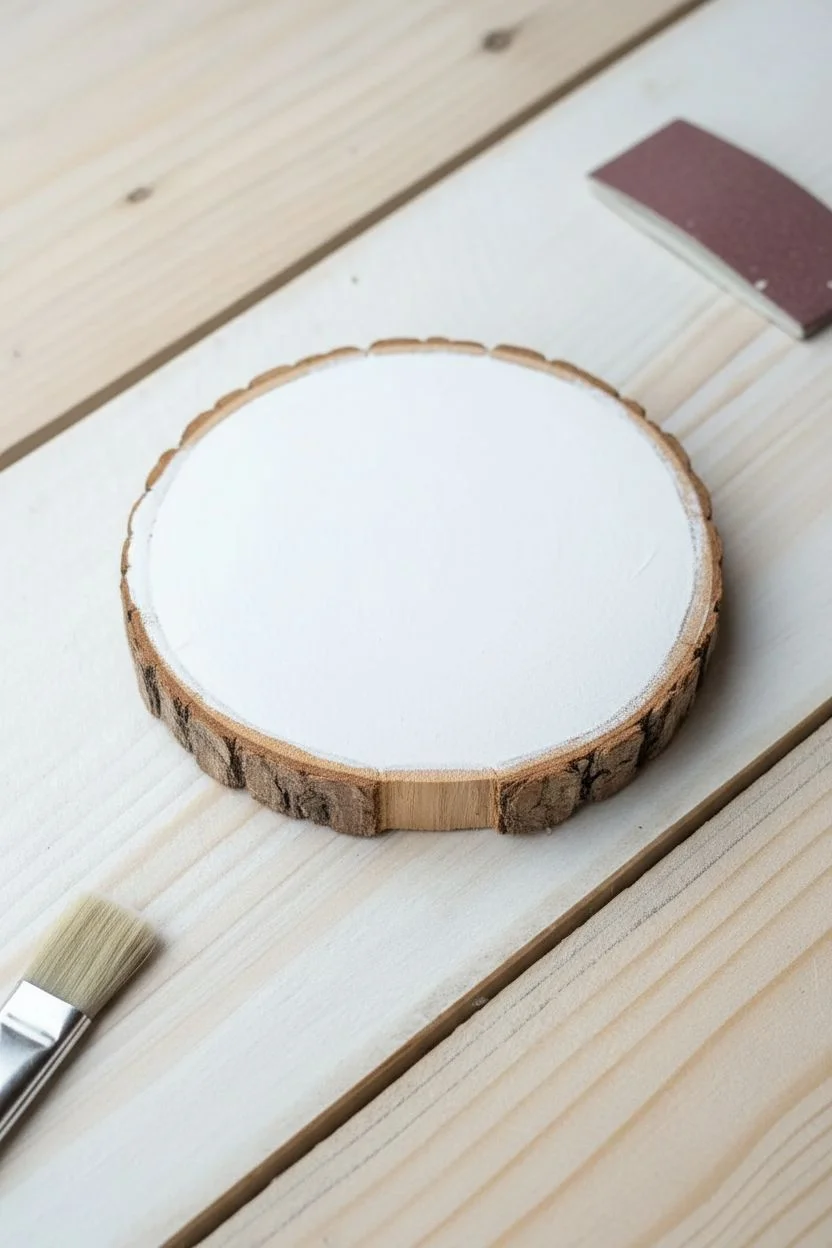
Red Cardinal on a Winter Branch Ornament
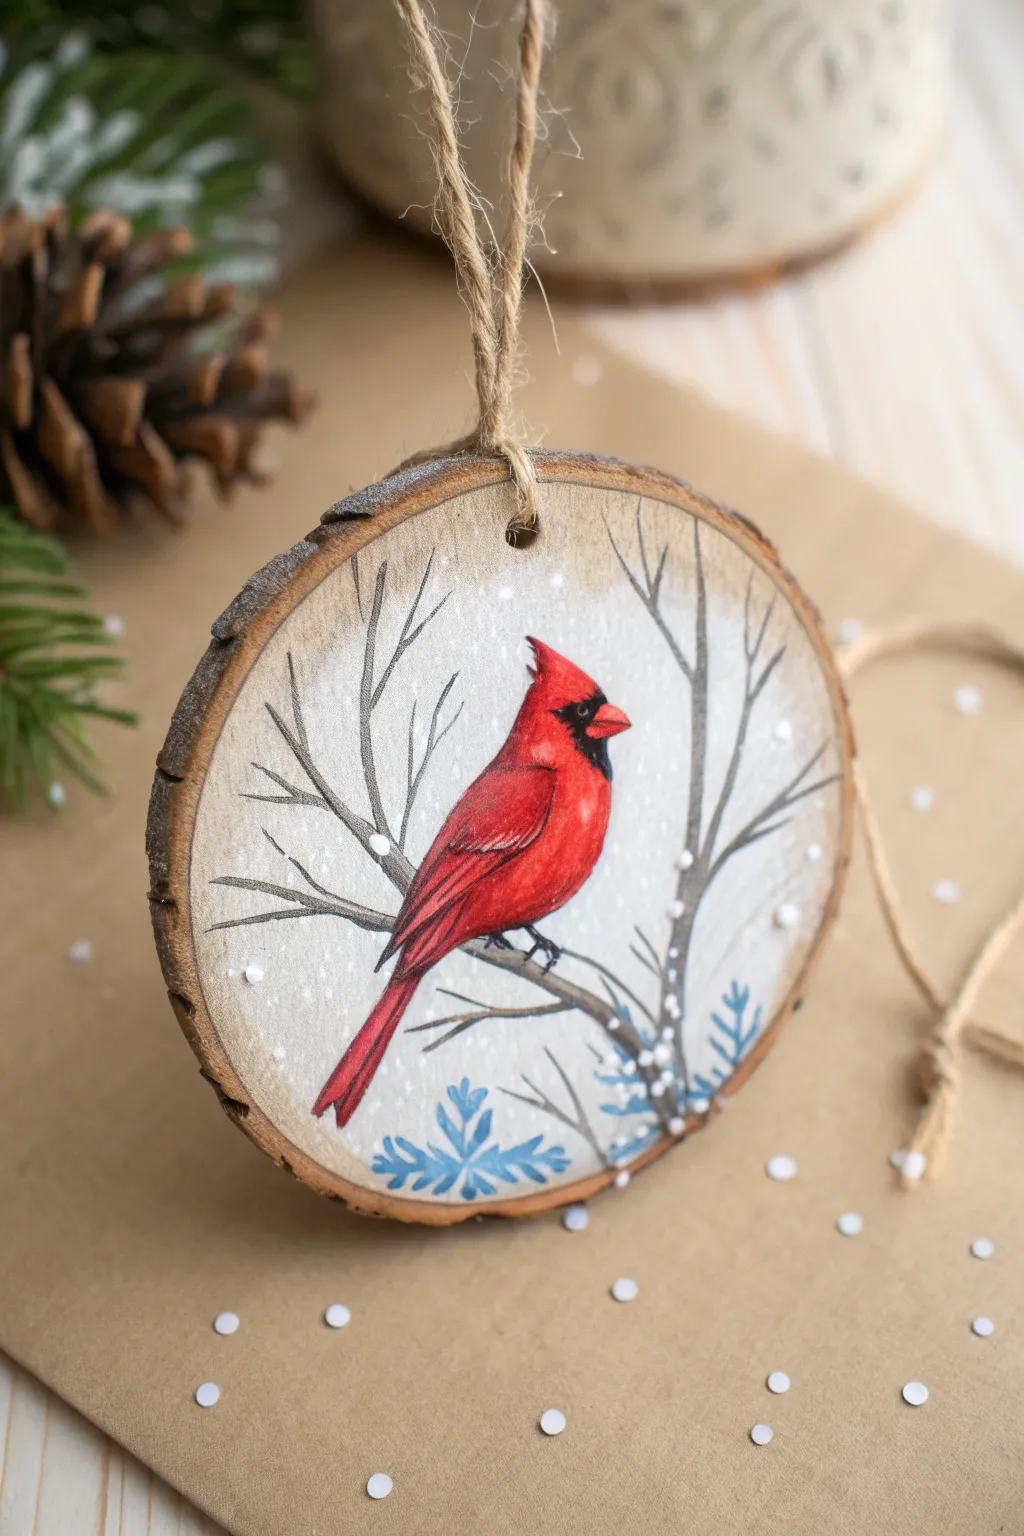

Capture the stillness of winter with this striking wood slice ornament featuring a vibrant red cardinal perched on bare branches. The contrast of the bright red bird against the snowy white background makes a classic, eye-catching decoration for any Christmas tree.
How-To Guide
Materials
- Wood slice ornament (approx. 3-4 inches) with pre-drilled hole
- Acrylic paints: Titanium White, Mars Black, Cadmium Red, Alizarin Crimson, Burnt Umber, Burnt Sienna, Sky Blue
- Gesso or white primer (optional, but recommended)
- Round brushes: sizes 0, 2, and 4
- Liner brush: size 00 for fine details
- Pencil and eraser
- Jute twine for hanging
- Matte finish sealer spray or varnish
- Palette or small plate
- Water cup and paper towels
Step 1: Preparing the Canvas
-
Prime the Surface:
Begin by applying a thin layer of white acrylic paint or gesso to the center of the wood slice. Don’t cover the entire surface; leave a rustic border of natural wood visible around the edge to frame your painting. -
Feather the Edges:
While the white paint is still wet, gently dry-brush the edges outward so the white fades softly into the natural wood tone rather than having a hard stop line. -
Add Subtle Sky Tints:
Mix a tiny amount of Burnt Umber into your white to create a warm, creamy off-white. Lightly wash this over the white base. I like to add the faintest touch of grey or blue near the bottom for atmospheric depth. -
Dry Completely:
Let the background layer dry fully before sketching. If the wood grain is still too visible, add a second thin coat of your creamy white mixture.
Pro Tip: Perspective
Make the branches behind the bird a lighter, greyer brown than the main branch the bird is sitting on. This atmospheric perspective pushes them into the distance.
Step 2: Sketching and Underpainting
-
Outline the Subject:
Lightly sketch the cardinal’s shape with a pencil. Start with an oval for the body and a smaller circle for the head, connecting them with the signature crest. Draw the main branch beneath the bird. -
Sketch the Background Branches:
Draw faint lines for the bare winter trees in the background. Keep these lines vertically oriented and branching upward to frame the bird. -
Base Coat the Bird:
Fill in the entire cardinal shape with a bright Cadmium Red using your size 2 or 4 round brush. Don’t worry about shading yet; just get a solid, opaque red base down. -
Branch Foundation:
Using a mixture of Burnt Umber and a touch of Black, paint the main branch under the bird’s feet. Use a steady hand to vary the thickness, making it look natural and gnarled.
Step 3: Adding Details and Contrast
-
Deepen the Reds:
Mix Alizarin Crimson with the Cadmium Red to create a darker red shadow tone. Apply this to the underside of the belly, under the wing, and the lower tail feathers to give the bird volume. -
Feather Texture:
Using the size 0 brush, paint short, thin strokes of the lighter red on the wing and breast area to simulate the texture of feathers. Follow the curve of the bird’s body. -
The Face Mask:
Carefully paint the distinct black mask around the beak and eyes using Mars Black and a fine liner brush. This is the cardinal’s most defining feature, so take your time here. -
Beak and Eye:
Paint the triangular beak with a bright orange-red. Use a tiny dot of black for the eye, and once dry, add a microscopic white dot as a highlight to bring the bird to life. -
Background Trees:
Mix a diluted grey-brown using Burnt Umber and White. Use the liner brush to paint the thin, wispy branches in the background. Some should go behind the bird to create depth.
Level Up: 3D Snow
Mix a little baking soda into your white acrylic paint for the snow on the branches. It creates a fluffy, gritty texture that looks like real piled-up snow.
Step 4: Winter Atmosphere
-
Snow on Branches:
Using pure Titanium White, carefully dab paint along the top edges of the main branch and selected background twigs. Don’t make it a solid line; let it look like accumulated clumps of snow. -
Falling Snow:
Dip the handle end of a small paintbrush into white paint and dot it onto the background to create falling snowflakes. Vary the size of the dots for a realistic effect. -
Frosty Blue Accents:
Mix a pale Sky Blue and paint stylized snowflake shapes or frosty fern patterns at the very bottom of the wood slice to suggest ground vegetation covered in frost. -
Sealing the Artwork:
Once the paint is completely dry (wait at least an hour), spray or brush on a clear matte sealer to protect the artwork from fading and moisture. -
Final Assembly:
Thread a length of jute twine through the pre-drilled hole at the top. Tie a secure knot, creating a rustic loop for hanging.
Now your beautiful winter cardinal is ready to add a splash of color to your holiday decor

PENCIL GUIDE
Understanding Pencil Grades from H to B
From first sketch to finished drawing — learn pencil grades, line control, and shading techniques.
Explore the Full Guide
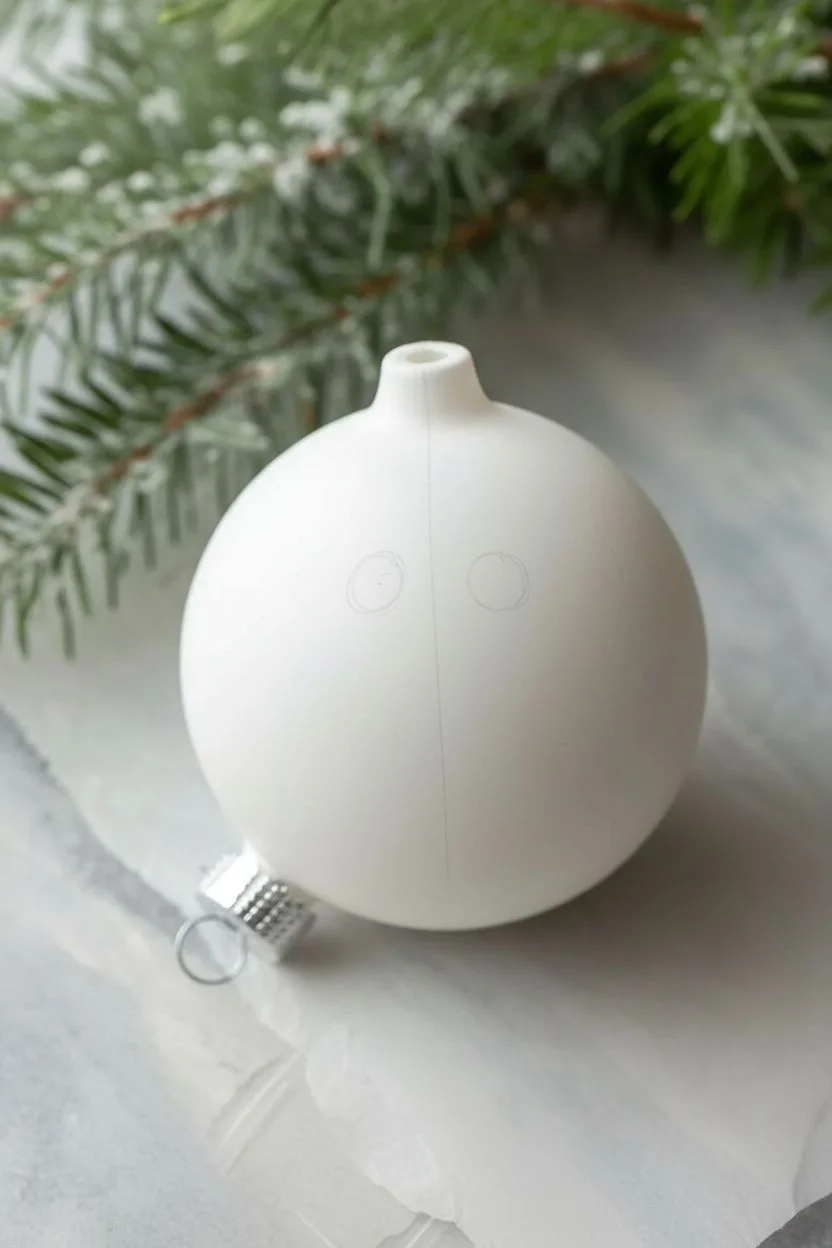
Penguins in Sweaters With Pattern Details
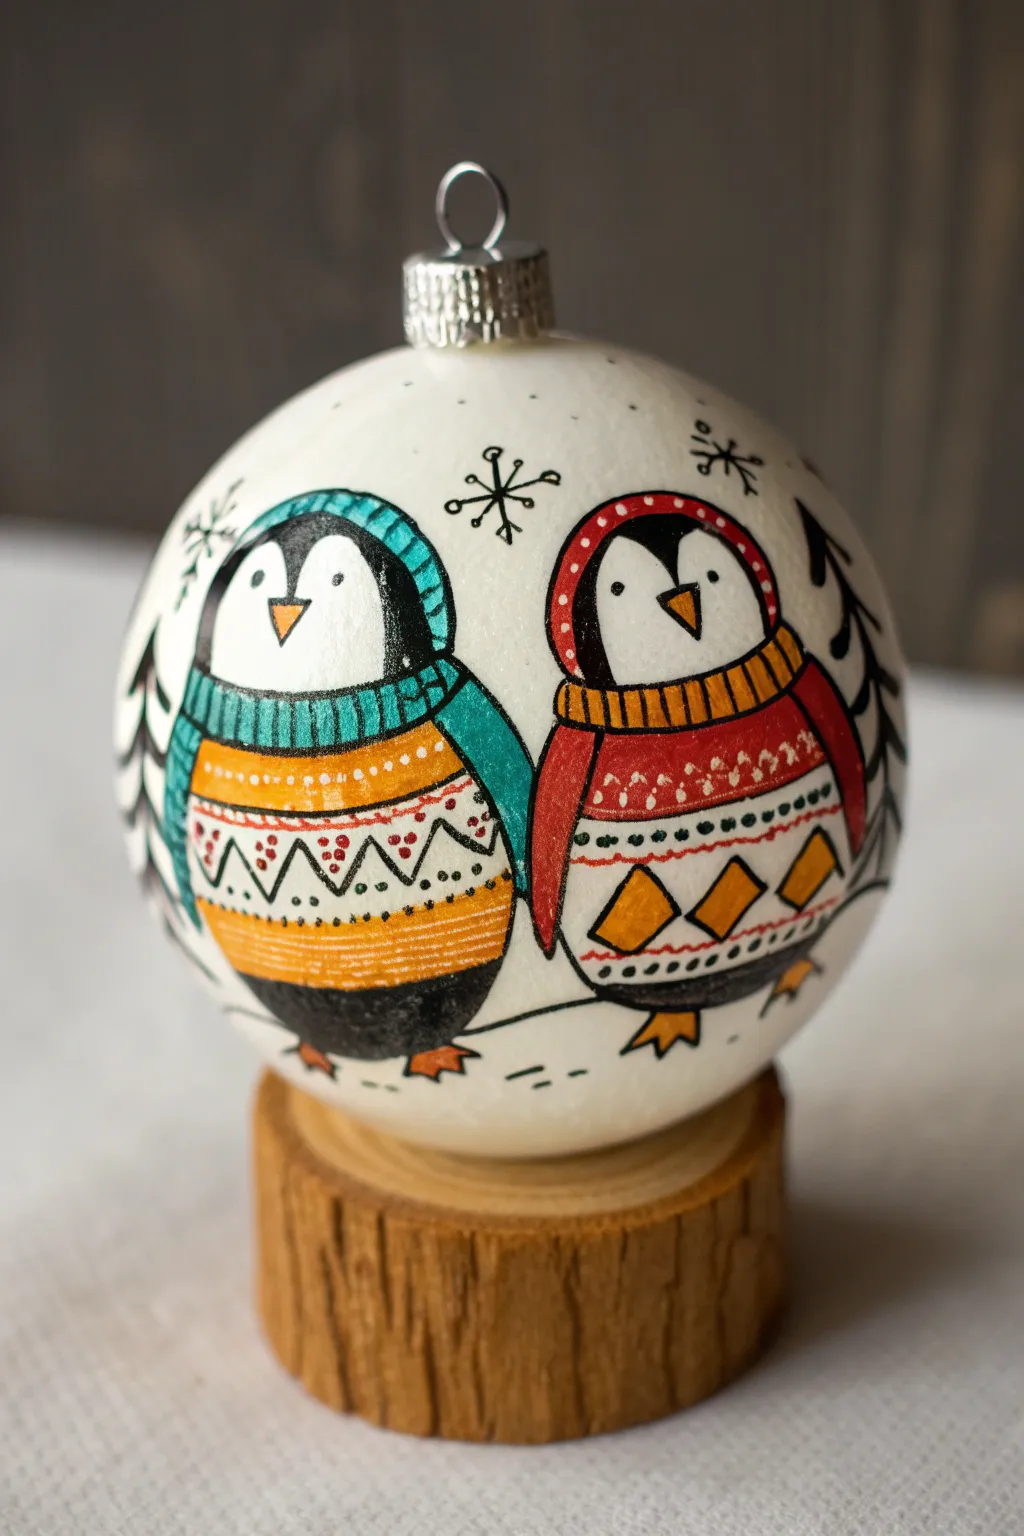
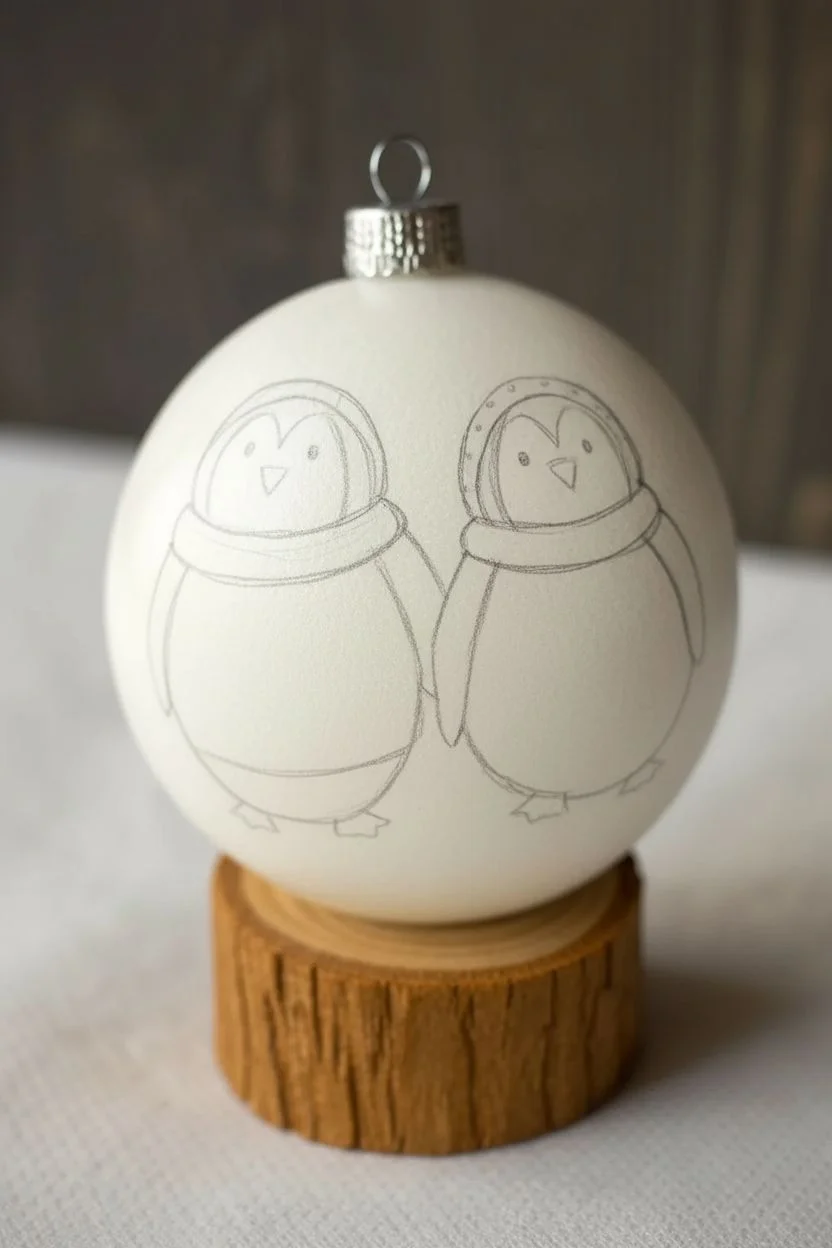
These charming, illustratively styled penguins bring a cozy winter vibe to any Christmas tree. Using fine-point pens over a matte white base creates a clean, detailed look that mimics a storybook illustration.
How-To Guide
Materials
- Matte white glass or ceramic ball ornament
- Gesso or matte white acrylic paint (if ornament isn’t already matte)
- Pencil (HB or lighter)
- Black fine-point permanent marker or acrylic paint pen (0.5mm or 0.7mm)
- Acrylograph pens or paint markers (Teal/Turquoise, Orange-Yellow, Red, Grey)
- White gel pen or extra fine white paint pen
- Clear matte spray varnish
Step 1: Base Preparation & Sketching
-
Prep the Surface:
Ensure your ornament is clean and dry. If using a shiny glass ball, I recommend applying a coat of clear gesso or matte medium to give the surface some ‘tooth’, which stops markers from slipping. -
Map Out the Penguins:
Lightly sketch two large oval shapes side-by-side using a pencil. These will be the bodies. Make sure they are touching slightly to show they are friends. -
Define the Heads:
Within the top third of each oval, draw the curved lines for the penguin faces. The one on the left should look straight ahead, while the right one can tilt slightly inward. -
Sketch Accessories:
Draw the outline of the beanie hats on their heads and the thick cowls or scarves around their necks. Add simple flipper shapes sticking out from the sides of their sweaters.
Smudge Alert
Curved surfaces are tricky for resting your hand. Hold the ornament by the metal cap or wear a cotton glove on your holding hand to avoid smudging wet ink.
Step 2: Outlining & Color Blocking
-
Initial Inking:
Using your black fine-point marker, carefully trace over your pencil lines. Don’t worry about shaky lines; a slightly organic line adds to the hand-drawn charm. -
Penguin One: The Teal Look:
For the left penguin, use a turquoise or teal paint marker to fill in the hat and the top part of the scarf. Let this dry completely before moving on. -
Penguin One: The Sweater:
Color the main body of the sweater with a warm yellow-orange marker. Leave the belly area white if you want a layered look, or color the whole sweater section. -
Penguin Two: The Red Look:
On the right penguin, color the hat brim and the main body of the sweater with a bright holiday red marker. -
Contrasting Accents:
Use the orange-yellow marker to color the scarf of the right penguin and the diamond shapes on their sweater. Use the teal/grey for subtle stripe details. -
Black Fills:
Fill in the penguins’ bodies (heads and sides) with solid black paint or marker, being careful to leave the white face masks and beaks clear.
Add Some Sparkle
Before the clear coat dries, sprinkle a tiny pinch of extra-fine holographic glitter onto the white parts of the snow or the hats for a frosty shimmer.
Step 3: Detailing & Patterns
-
Sweater Patterns:
Once the base colors are dry, use your fine black pen to draw patterns. Add zig-zags, little dots, and horizontal stripes across the colored sweater sections. -
Knit Texture:
On the scarves and hat brims, draw close vertical lines to simulate the ribbing of a knit texture. -
Facial Features:
Draw two small black dots for eyes on each face. Add small triangular orange beaks using a marker, then outline them in black. -
White Highlights:
Use a white gel pen to add tiny dots or patterns over the red and teal sections—like little snowflakes or polka dots on the hats. -
Background Elements:
Sketch simple, stylized pine trees on the sides of the ornament using black ink. Keep them loose and sketchy. -
Floating Snowflakes:
Draw star-shaped snowflakes in the empty white space above the penguins to balance the composition. -
Grounding Shadows:
Add a few horizontal dashed lines under their feet to suggest they are standing on snow, rather than floating in space. -
Seal the Deal:
Let the ink dry for at least an hour to prevent smearing. Finish with a light coat of matte spray varnish to protect the artwork.
Hang your custom creation high on the tree and enjoy the winter whimsy it adds to your decor
Polar Bear Ornament Painting With Soft Highlights
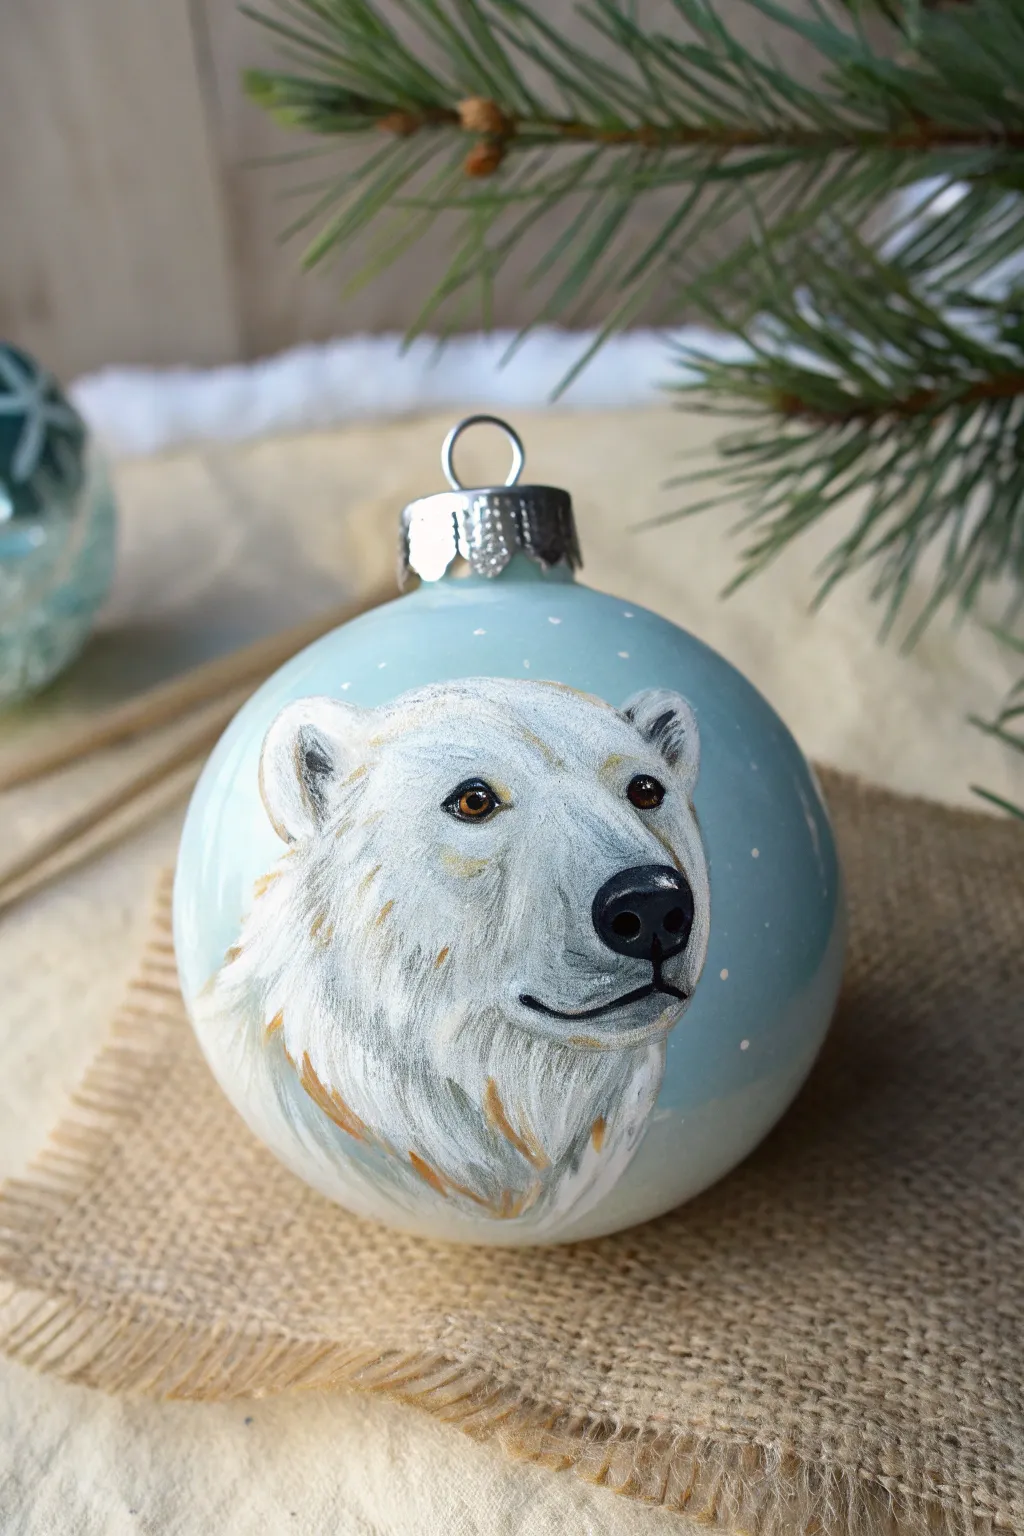
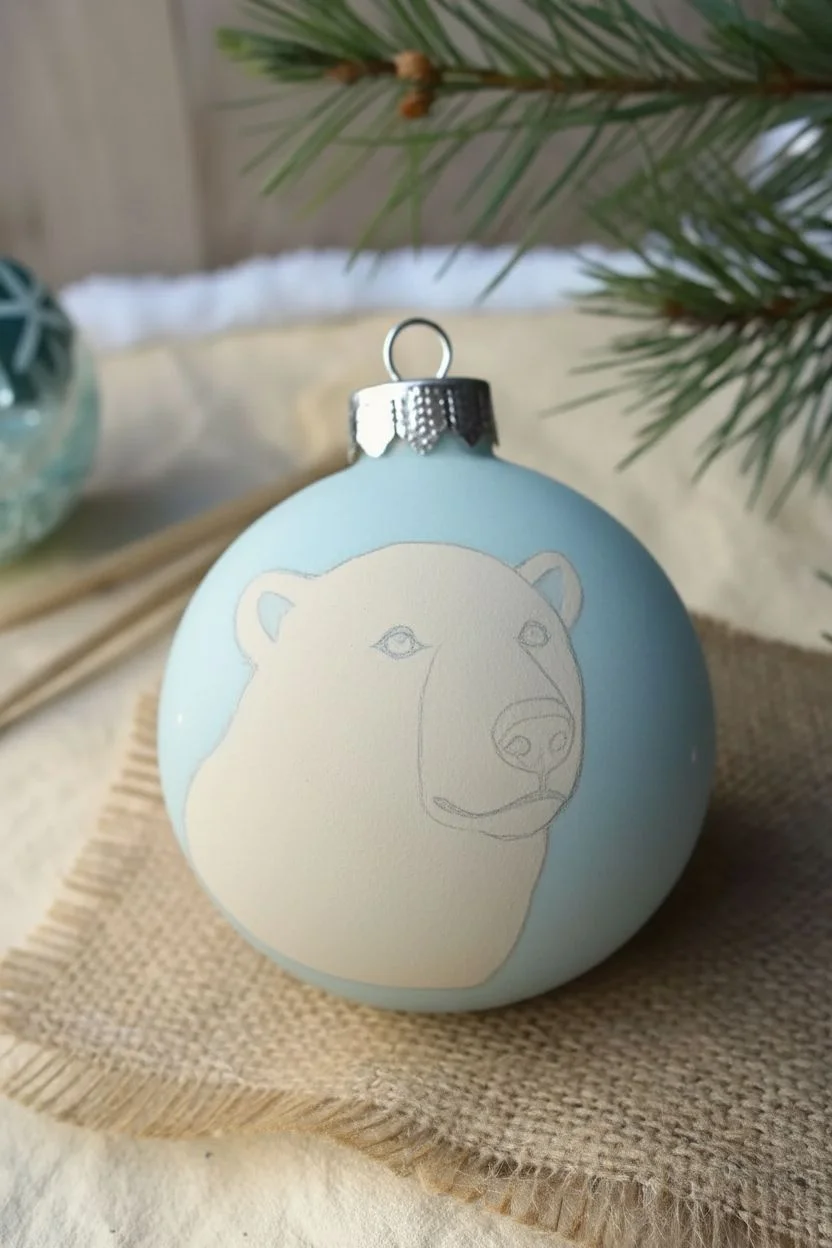
Transform a plain bauble into a winter masterpiece with this realistic polar bear portrait. Using layers of acrylic paint, you’ll build up soft, textured fur that pops beautifully against a calming icy blue background.
Step-by-Step Guide
Materials
- Light blue matte glass or ceramic ornament (or a clear one painted light blue)
- Acrylic paints (Titanium White, Mars Black, Burnt Umber, Yellow Ochre, Raw Sienna, Phthalo Blue)
- Small round brushes (sizes 0, 1, and 2)
- Fine liner brush (size 00 or 000)
- Palette for mixing
- Water cup and paper towels
- Pencil or chalk pencil for sketching
- Matte or satin varnish
Step 1: Preparation and Sketching
-
Base coat preparation:
If your ornament isn’t already the perfect icy blue, mix Titanium White with a tiny dot of Phthalo Blue and a touch of Burnt Umber to gray it down. Apply two even coats over the entire bauble, letting the first dry completely before adding the second. -
Establish the outline:
Using a very light touch with a pencil or white chalk pencil, sketch the basic contour of the polar bear’s head. Place it slightly off-center for a dynamic composition. Focus on the triangular shape of the nose area and the rounded ears. -
Block in the base shape:
Mix a light greyish-beige using White, a speck of Raw Sienna, and a tiny amount of Black. Fill in the entire silhouette of the bear with this base color. This underpainting ensures the white fur we add later will have depth and won’t look flat.
Fur Flow Pro Tip
Rotate the ornament constantly while painting fur strikes. Pulling the brush toward your body usually offers more control than pushing away, helping you create tapered, realistic hair tips.
Step 2: Painting the Features
-
Map the darks:
With a size 1 brush and Mars Black, carefully paint the nose shape, the mouth line, and the eye sockets. Don’t worry about perfect detail yet; just get the placement right. -
Refine the eyes:
Mix Burnt Umber with a little Yellow Ochre for the iris color. Paint a small circle within the black eye socket. Once dry, add a tiny black pupil in the center. -
Add life to the eyes:
Using your finest liner brush and pure Titanium White, place a tiny, crisp reflection dot in the upper right quadrant of the pupil. This ‘catchlight’ instantly brings the bear to life. -
Detail the nose:
Pure black can look like a hole, so mix a dark charcoal grey to highlight the top curve of the nose leather. Keep the nostrils pure black for depth.
Level Up: Icy Sparkle
While the snowy background dots are still wet, sprinkle a pinch of ultra-fine iridescent glitter over them. This adds a magical, frosty shimmer that catches the Christmas tree lights.
Step 3: Creating Fur Texture
-
Start the fur layering:
Load a size 1 brush with a mix of White and the tiniest bit of Raw Sienna. Using short, flicking strokes, start laying down fur direction from the nose outward. Keep these strokes somewhat sparse; we represent the shadowed undercoat here. -
Mid-tone fur:
Clean your brush and pick up Titanium White mixed with a very small touch of grey. Apply a second layer of fur strokes over the previous ones, focusing on the cheeks and forehead. Let the underlayer show through in gaps. -
Directional flow:
Pay close attention to how fur grows. Around the muzzle, the strokes are very short and radiate outward. On the neck and cheeks, the strokes should be longer and sweep downwards and back. -
Adding warmth:
Polar bear fur often has yellowish stains. Glaze a very watered-down Yellow Ochre or Raw Sienna in the shadow areas under the chin and behind the jawline. I find this subtle staining makes the animal look much more realistic than a pure white bear. -
Brightest highlights:
Using your smallest brush and pure, thick Titanium White, add the final confident strokes on the top of the nose bridge, the tops of the ears, and the forehead. These should be crisp lines that sit on top of everything else. -
Whiskers and fine hairs:
With the liner brush and watered-down dark grey paint, add tiny follicle dots on the muzzle. If you’re feeling steady, drag out a few very faint, long whiskers.
Step 4: Background and Finishing
-
Snowy atmosphere:
Return to the blue background. Dip the handle end of a small brush or a toothpick into white paint. Gently dot random ‘snowflakes’ around the bear’s head, varying the size slightly for a natural effect. -
Cleanup outlines:
If any fur strokes went too wild, use the background blue color to carefully trim them back, creating a neat silhouette. -
Varnish and protect:
Allow the painting to cure for at least 24 hours. Gently brush on a coat of matte or satin varnish to protect your artwork from scratches and dust during storage.
Hang your majestic polar bear on a high branch where the lights can catch those realistic eyes and enjoy the winter magic you’ve created


Mini Winter Cabin Scenes on Wood Slices
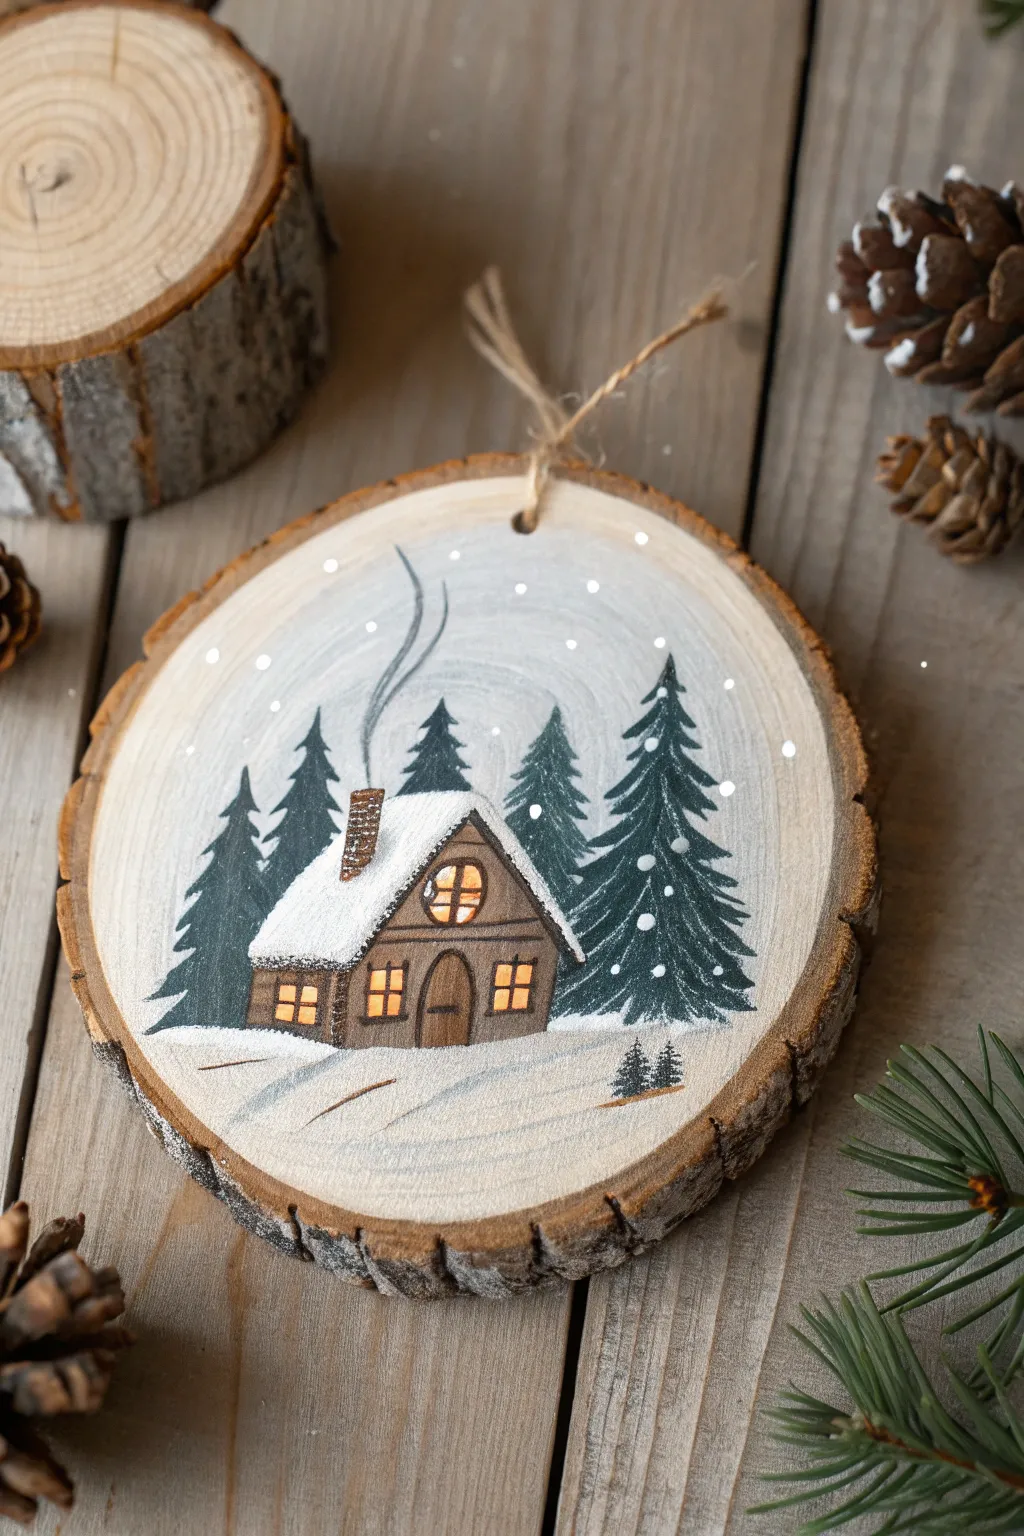
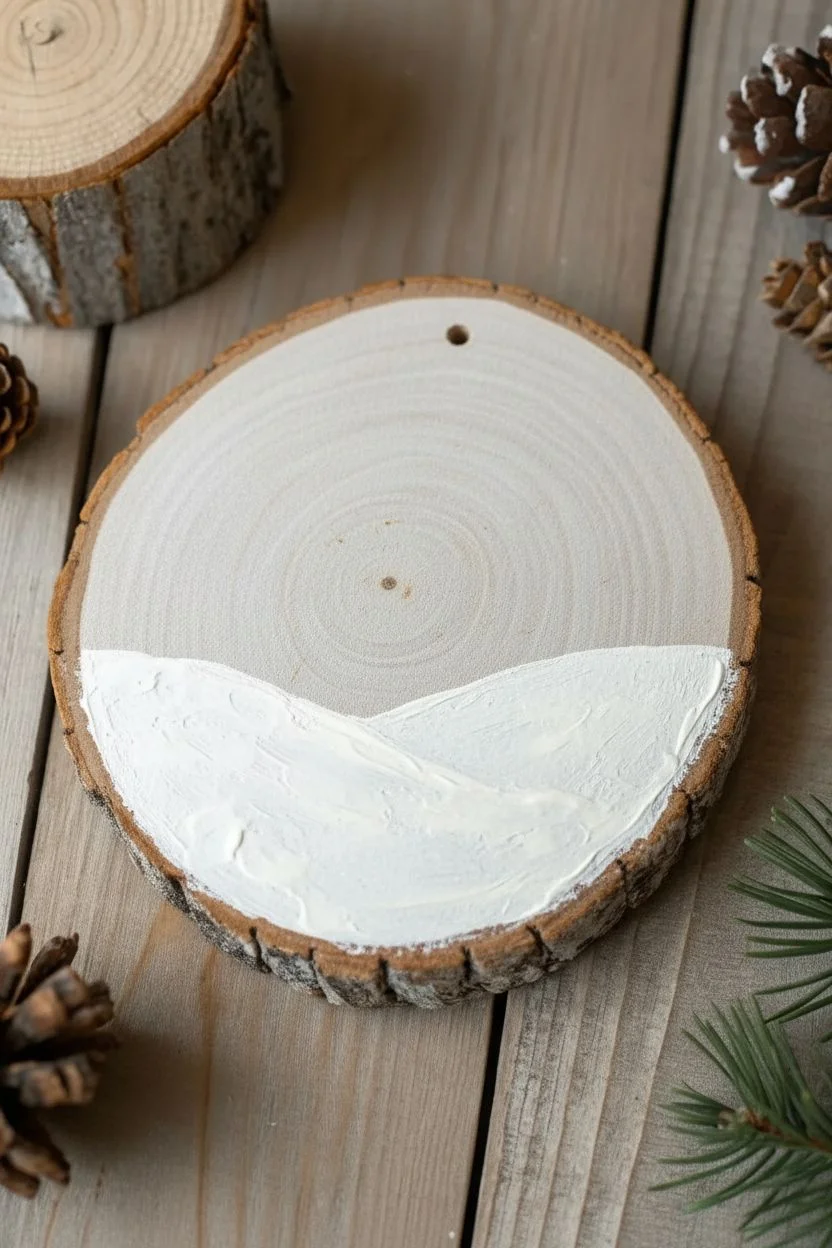
Capture the magic of a silent winter night with this charming wood slice ornament featuring a rustic cabin nestled among tall pines. The warm, inviting glow from the tiny windows contrasts beautifully against the cool gray and white snowy backdrop.
How-To Guide
Materials
- Wood slice with bark edge (approx. 3-4 inches diameter)
- Acrylic paints: White, Dark Green, Black, Burnt Umber (dark brown), Yellow Ochre, Burnt Sienna (reddish brown), Light Blue or Grey
- Flat shader brush (small)
- Round detail brushes (sizes 0 and 2/0)
- Jute twine for hanging
- Water cup and paper towels
- Drill with small bit (if wood slice is undrilled)
- Matte or satin varnish (optional)
Step 1: Preparation & Background
-
Prepare the surface:
Ensure your wood slice is clean and dry. If it’s rough, give the face a very light sanding with fine-grit sandpaper so your paintbrush glides smoothly. If your slice doesn’t have a hole yet, drill one near the top edge now. -
Paint the snowy base:
Using a flat shader brush, mix a generous amount of Titanium White with a tiny drop of Light Blue or Grey. Paint a sweeping hill across the bottom third of the wood slice. Don’t make the top edge perfectly straight; a slight curve adds dimension. -
Create the sky:
For the sky area above the snow, use a very watery wash of white paint mixed with a hint of grey. You want the wood grain to still show through slightly, creating a hazy, atmospheric winter sky effect. Let this base layer dry completely.
Step 2: Painting the Cabin
-
Outline the cabin shape:
Switch to your small round brush. Using Burnt Umber mixed with a little water, lightly sketch the basic house shape: a rectangle for the base and a steep triangle for the roof. -
Block in the walls:
Fill in the cabin walls with Burnt Umber. Paint vertical strokes to mimic wood planks. I find that leaving tiny gaps between strokes helps suggest texture. -
Add the snowy roof:
Load your brush with pure White. Paint a thick, fluffy layer of snow on top of the roof structure. Allow the white to overhang the edges slightly, creating eaves. -
Paint the chimney:
Add a small rectangular chimney on the left side of the roof using Burnt Sienna. Dab tiny dots of darker brown on it to suggest brick texture. -
Detail the door and trim:
Using a very fine liner brush and black or dark brown paint, outline the door in the center and add horizontal lines across the walls to define the logs further.
Fixing Wobbly Lines
If your window panes look messy, wait for them to dry fully. Then, use the yellow paint to tidy up the negative space around the lines rather than trying to repaint the thin lines again.
Step 3: Adding the Warm Glow
-
Create the windows:
Mix Yellow Ochre with a touch of White to create a warm ‘light’ color. paint small squares for the lower windows and a circle or arch pattern for the attic window. -
Add window panes:
Once the yellow is dry, use your finest brush (size 2/0 or smaller) with thinned brown paint to carefully draw the crossbars (muntins) inside the windows. -
Highlight the glow:
To make the light look real, glaze a tiny bit of thinned orange or Burnt Sienna around the edges of the yellow window squares.
Make It Sparkle
While the white snow paint on the roof and ground is still wet, sprinkle ultra-fine iridescent glitter over it. This mimics the glistening texture of fresh powder snow.
Step 4: The Pine Forest
-
Paint background trees:
Mix Dark Green with a little Grey for the trees further away. Paint simple triangular tree shapes behind the cabin. These should look a bit faded to create depth. -
Paint foreground pines:
Using pure Dark Green, paint two large, majestic pine trees on the right side and one on the left. Start at the top point and dab your brush downward and outward to create scruffy branches. -
Highlight the branches:
Mix a lighter green or add a touch of white to your green paint. Lightly dab the tops of a few distinct branches to show where the light hits them. -
Add snow to the trees:
Using a mostly dry brush with White paint, gently tap ‘snow’ onto the tips of the pine branches. Be sparing; you want the dark green to remain dominant for contrast.
Step 5: Final Details
-
Add the chimney smoke:
With a very watery grey mix, paint a delicate, wavy line swirling up from the chimney. It should be barely visible, like actual smoke dissipating. -
Paint falling snow:
Dip the handle end of a paintbrush into white paint. Dot the sky area to create heavy snowflakes. I like to vary the pressure to make some dots larger and some smaller. -
Ground the cabin:
Add a little bit of grey shading under the cabin and trees on the snowy ground to anchor them so they don’t look like they are floating. -
Attach the hanger:
Once everything is perfectly dry, thread a piece of jute twine through the drilled hole and knot it securely.
Hang this peaceful little scene on your tree to bring a touch of woodland serenity to your holiday decor
Northern Lights Gradients for Dramatic Ornaments
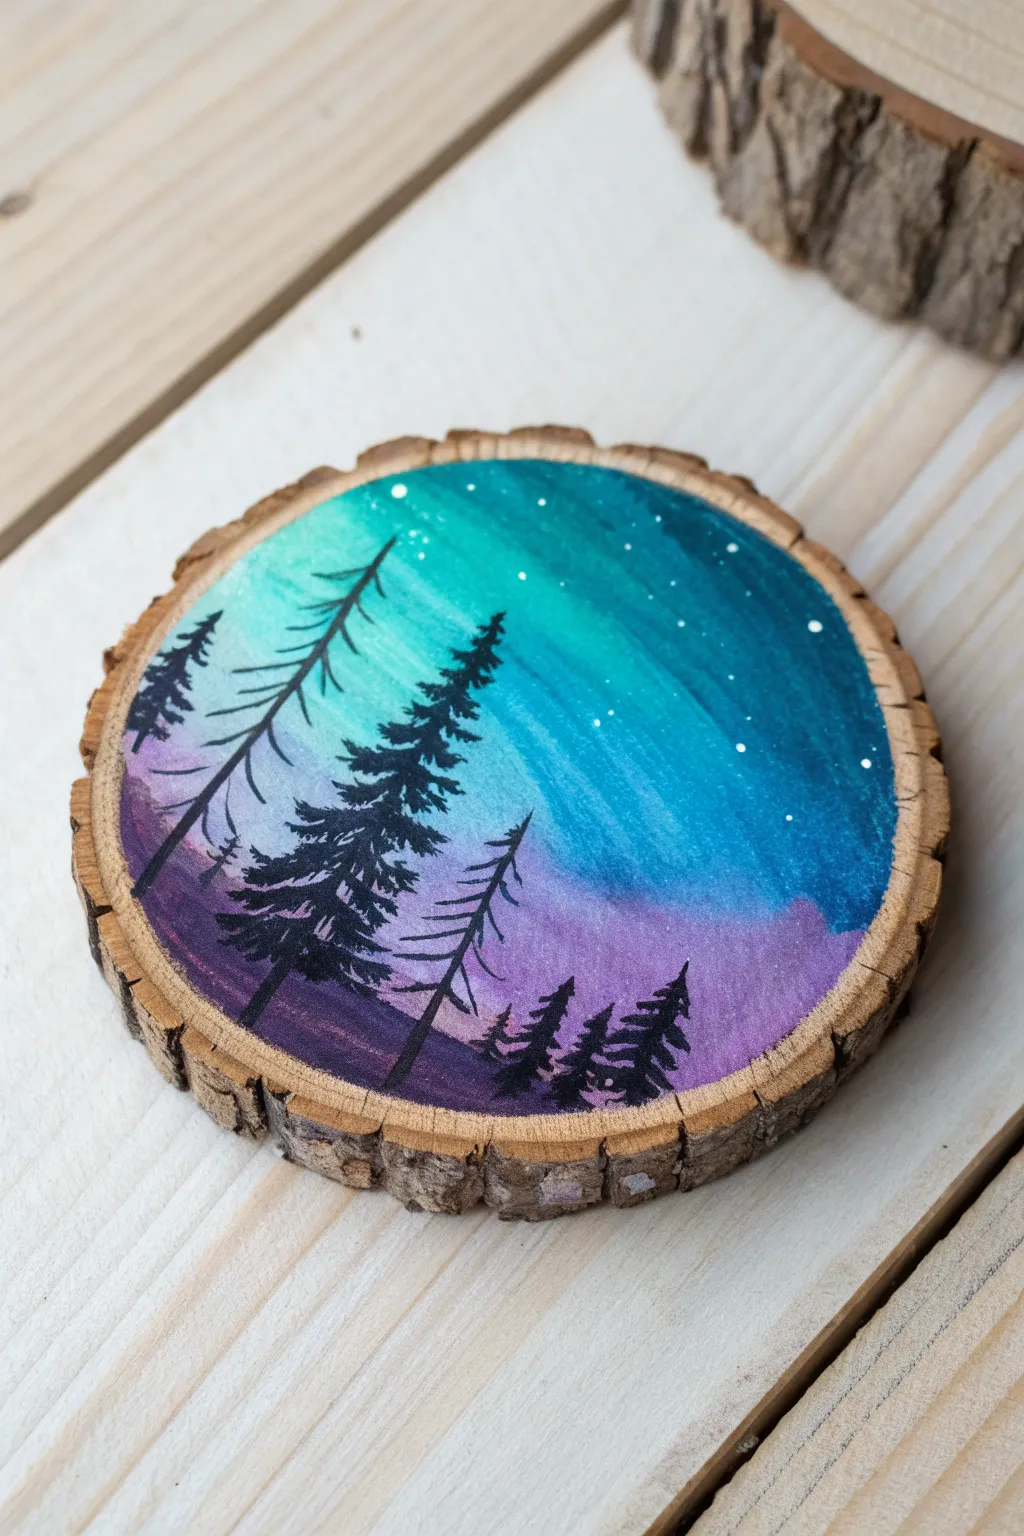
Capture the ethereal beauty of the Northern Lights on a rustic canvas with this stunning wood slice project. The natural bark edge perfectly frames the vibrant teal and purple gradient, creating a dramatic contrast against the silhouette of a silent forest.
Step-by-Step Tutorial
Materials
- Round wood slice (approx. 3-4 inches diameter) with bark edge
- Gesso or white acrylic paint (priming)
- Acrylic paints: Teal/Turquoise, Phthalo Blue, Dioxazine Purple, Black, Titanium White
- Flat shader brush (size 6 or 8)
- Small round detail brush (size 0 or 00)
- Fan brush (optional, for blending)
- Palette or paper plate
- Cup of water and paper towels
- Spray sealer or varnish (matte or satin)
Step 1: Preparing the Canvas
-
Prime the surface:
Begin by applying a thin layer of gesso or white acrylic paint to the face of the wood slice. Don’t paint right up to the bark; leave a tiny sliver of raw wood visible to maintain a clean edge. Let this dry completely to ensure your colors pop. -
Sand for smoothness:
If the primed surface feels rough, give it a very light scuff with fine-grit sandpaper. This helps the gradient blend more seamlessly later on.
Gradient Not Blending?
If paints aren’t blending smoothly, they are likely drying too fast. Mist the wood slightly with water or mix a slowing medium into your acrylics to keep them workable longer.
Step 2: Creating the Aurora Sky
-
Lay down the teal:
Squeeze out your teal and blue paints. Using a slightly damp flat brush, paint a wide, sweeping diagonal band of teal across the upper-left to middle section of the wood slice. -
Introduce the blue:
While the teal is still wet, add Phthalo Blue to the upper right edge. Blend it into the teal using horizontal sweeping motions to create a smooth transition from light to dark blue. -
Add the purple horizon:
On the bottom third of the slice, apply the purple paint. Work quickly so you can blend the upper edge of the purple into the bottom edge of the teal sky while the paints are wet. -
Refine the blend:
Clean your brush, dampen it slightly, and gently work the area where the teal and purple meet. You want a soft, hazy transition rather than a hard line. If the paint dries too fast, a tiny drop of water or glazing medium helps move it again. -
Strengthen the darks:
To add depth, mix a tiny bit of blue into your purple and apply this darker shade along the very bottom edge and the far right curve, simulating the night sky vignette. -
Let it cure:
Allow the gradient background to dry completely. It must be dry to the touch before you start the silhouette work to prevent muddying the black paint.
Step 3: painting the Silhouette Forest
-
Draft the forest floor:
Switch to black acrylic paint. Create slightly uneven, rolling hills at the very bottom of the purple section to serve as the ground for your trees. -
Paint the main trunks:
Using your smallest detail brush (size 0 or 00), paint a few thin vertical lines for the tree trunks. Vary their heights—some tall reaching into the teal, some short staying in the purple. -
Add the top branches:
Starting at the top tip of a trunk, use the very tip of your brush to tap small, downward-sloping dashes. Keep these very narrow at the peak. -
Widen the tree shape:
Work your way down the trunk, making your horizontal strokes slightly wider and more jagged as you descend. I find a slight zigzag motion helps mimic organic pine needles. -
Fill in the canopy:
Go back over the branches to fill in gaps, but keep the edges rough. The trees shouldn’t be perfect triangles; let them look a bit wild and sparse in places. -
Create clearings:
Ensure you leave some space between a few trees so the beautiful gradient background peeks through.
Pro Tip: Perspective
Make the trees in the foreground darker and more detailed, while making trees ‘further away’ slightly smaller and perhaps mixed with a tiny bit of purple to push them back visually.
Step 4: Stars and Finishing Touches
-
Prepare the stars:
Dilute a small drop of Titanium White paint with water until it reaches an ink-like consistency. -
Dot the constellations:
Dip the tip of your smallest brush (or a toothpick) into the thinned white paint. Gently touch the blue and teal areas of the sky to create stars. Group some together and leave other areas empty for realism. -
Add a shooting star:
If you like, pull your brush quickly to create a faint streak or cross shape for a larger twinkling star. -
Seal the artwork:
Once everything is bonedry (wait at least an hour), apply a spray varnish. This protects the wood and makes the colors vibrant and permanent.
Hang this miniature masterpiece on your tree or gift it to a nature lover to bring the magic of the polar sky indoors
Ornament Painting With Metallic Accents and Stars

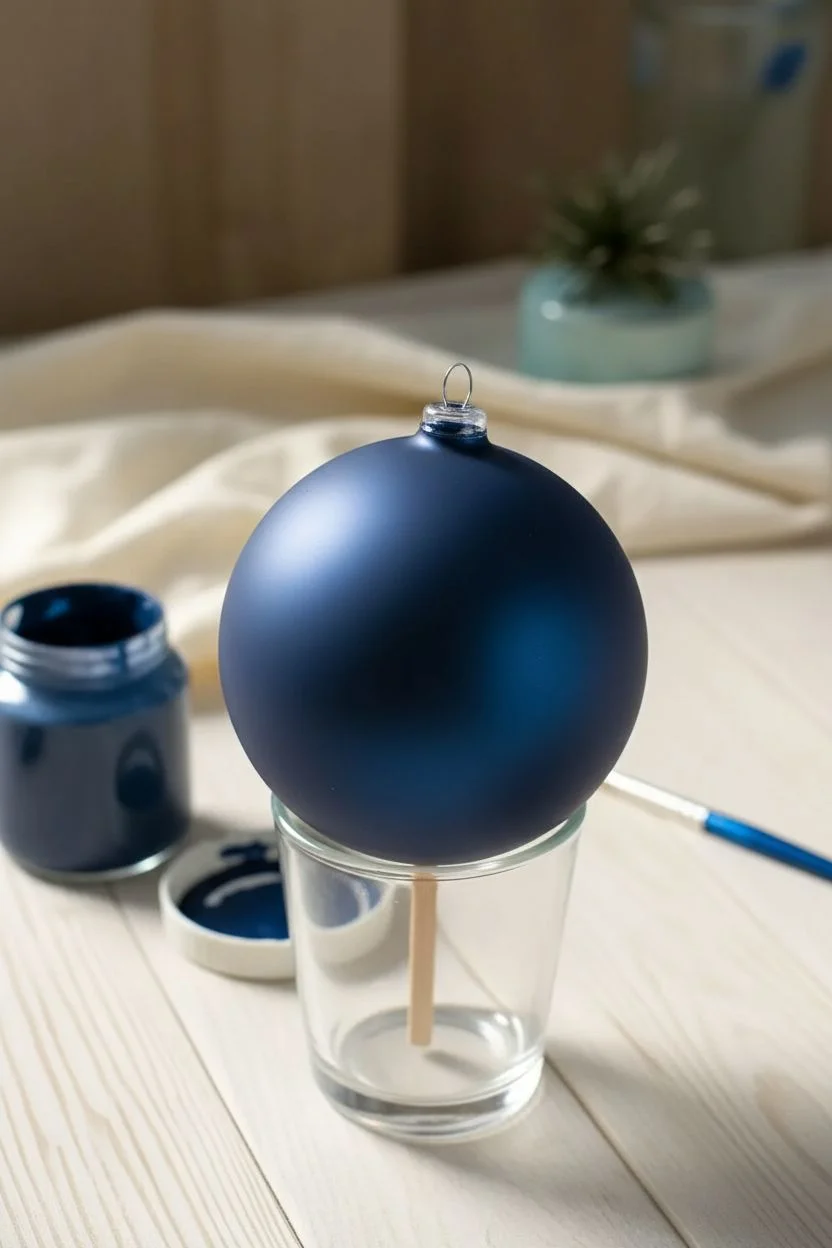
Bring the magic of a clear winter sky indoors with this sophisticated navy and gold ornament project. The deep matte blue finish provides a dramatic backdrop for constellations of hand-painted metallic stars and delicate falling snow.
How-To Guide
Materials
- Clear glass or plastic ball ornament (round)
- Deep navy blue acrylic paint (matte finish preferred)
- Metallic gold acrylic paint
- Gold glitter (fine grain)
- Small flat paintbrush (for base coat)
- Fine liner brush (size 00 or 000)
- Small round brush (size 1 or 2)
- Dotting tool or toothpick
- Paper plate or palette
- Cup or empty tape roll (to hold ornament)
Step 1: Base Coat Application
-
Prepare the Ornament:
Remove the metal cap and hanger from the top of your ornament and set them aside safely. Wipe the surface of the ball with a little rubbing alcohol to remove oils or fingerprints. -
Apply the Midnight Blue:
Using your flat brush, apply a smooth, even coat of deep navy blue acrylic paint to the entire exterior surface. -
Let it Dry:
Place the ornament opening-side down on a stick or pencil propped in a cup to dry completely without touching surfaces. -
Second Coat:
Once dry to the touch, apply a second coat of blue to ensure full opacity. A rich, dark background is crucial for making the gold pop. -
Matte Finish (Optional):
If your blue paint is glossy, I like to add a layer of matte varnish at this stage to achieve that velvety texture seen in the photo.
Paint Inside Technique
For a smoother finish, pour the blue paint INSIDE a clear ornament, swirl to coat, and drain. Then paint gold stars on the outside glass.
Step 2: Painting the Gold Accents
-
Practice Your Stars:
Before touching the ornament, practice painting five-pointed stars on a piece of scrap paper with your liner brush to get the motion down. -
Paint Large Stars:
Using the small round brush and metallic gold paint, create 3-4 distinct, larger five-pointed stars spaced unevenly around the center of the ball. -
Add Glitter While Wet:
Immediately after painting each large star, sprinkle a pinch of fine gold glitter onto the wet paint so it adheres, giving it that textured sparkle. -
Paint Medium Stars:
Switch to your fine liner brush. Paint slightly smaller, solid gold stars in the open spaces between the large glittered ones. -
Create Tiny Starbursts:
Use the very tip of the liner brush to paint tiny eight-point starbursts or snowflakes—just a simple cross with an ‘X’ over it. -
Vary the Sizes:
Keep the pattern organic by ensuring no two stars are exactly the same size or perfectly aligned.
Step 3: Detailing and Finishing
-
The Dotting Technique:
Key to this look is the ‘stardust.’ Dip a dotting tool or the cut end of a toothpick into the metallic gold paint. -
Fill the Gaps:
Gently dot the gold paint into the empty blue spaces. Press lightly for small dots and harder for slightly larger ones. -
Create Clusters:
Group a few dots closer to the large stars to simulate a constellation effect. -
Dry Completely:
Allow the painted details to dry fully. This usually takes at least an hour since the dots can be thick. -
Shake Off Excess:
Gently brush or blow away any loose glitter that didn’t stick to the large stars. -
Reassemble:
Once everything is cured, carefully place the metal cap and hanger back onto the ornament neck.
Uneven Star Points?
Don’t stress perfectly straight lines. If a star looks wonky, simply turn it into a larger starburst by adding thin radiating lines.
Now hang your celestial creation on the tree and enjoy its understated elegance
Half-Painted Ornaments With Clear Windows and Confetti

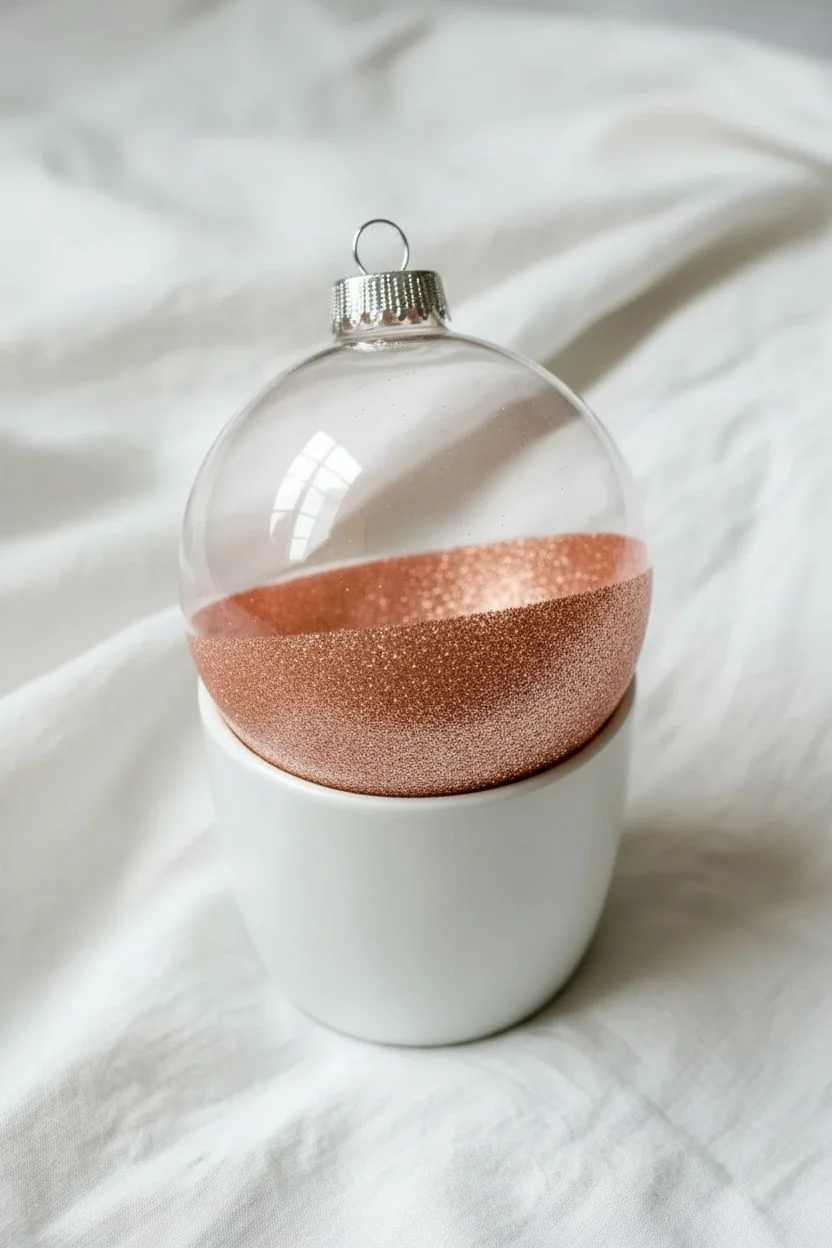
Create a magical snow-globe effect without the water by turning a plain clear ornament into a festive masterpiece. This design features a glittering copper-dipped bottom paired with hand-painted floating confetti and stars for a delicate, twinkling look.
Step-by-Step Guide
Materials
- Clear glass or plastic disc ornament (or classic round shape)
- Painter’s tape or masking tape
- Metallic copper or rose gold fine glitter
- Mod Podge or white craft glue
- Foam brush
- Small round detail brush (size 0 or 1)
- Acrylic paints: Bright Pink, Burnt Orange, Metallic Gold
- White or metallic silver acrylic paint (optional for extra dots)
- Paper plate or palette
- Cup for drying (or ornament hook)
Step 1: Creating the Glitter Dipped Base
-
Prep the surface:
Start by wiping down the exterior of your ornament with a little rubbing alcohol or glass cleaner to remove any fingerprints or oils. This ensures your tape and glue adhere perfectly. -
Tape the line:
Apply a strip of painter’s tape horizontally around the ornament. Place it slightly below the the halfway mark. Press the edge of the tape down firmly to create a crisp seal. -
Apply adhesive:
Using a foam brush, apply a smooth, even layer of Mod Podge or craft glue to the exposed bottom section of the ornament. -
Add the sparkle:
While the glue is still wet, generously pour the copper or rose gold glitter over the glued area. Catch the excess glitter on a paper plate beneath so you can reuse it. -
Tap off excess:
Gently tap the neck of the ornament to shake loose any unattached glitter particles. -
Remove tape:
Carefully peel away the painter’s tape while the glue is still slightly wet. I find this prevents the dried glue from peeling up with the tape and keeps that line sharp. -
Dry the base:
Set the ornament upright in a small cup or hang it to dry completely. Wait at least 30 minutes before moving to the painting phase.
Uneven Glitter Line?
If paint or glitter creeps under the tape, use a damp cotton swab or toothpick to gently scrape away the excess while it’s still damp for a clean edge.
Step 2: Painting the Floating Confetti
-
Prepare your palette:
Dispense small dots of the bright pink, burnt orange, and metallic gold acrylic paints onto your palette. -
Start with the stars:
Dip your fine detail brush into the metallic gold paint. Paint small five-point stars scattered randomly around the clear upper half of the ornament. -
Star technique tip:
Keep the stars simple by crossing three short lines—an ‘X’ with a vertical line through it work well for tiny stars. -
Add large colored dots:
Clean your brush, then pick up the burnt orange paint. Dot the tip of your brush gently onto the glass to create medium-sized circular confetti pieces. -
Add pink accents:
Switch to the bright pink paint. Add slightly smaller dots interspersed among the orange dots and gold stars. -
Create variation:
Vary the spacing. Cluster a few dots closer to the glitter line to make it look like the confetti is rising from the base, and keep them sparser near the top. -
Fill in tiny details:
Using the very tip of your brush or a toothpick, add the smallest micro-dots using silver or a lighter pink. These tiny specks add depth to the ‘floating’ effect. -
Review spacing:
Rotate the ornament to ensure the pattern flows naturally all the way around without any large awkward empty spaces. -
Final dry:
Allow the painted details to dry completely, preferably overnight, to ensure the acrylic paint hardens fully on the glass surface.
Paint Slipping?
Glass is slick! If paint slides, dab it on rather than brushing. If it’s too thin, let the first layer dry and dab a second coat right on top for opacity.
Hang your shimmering creation near a light source to watch the confetti sparkle and shine
Zentangle Patterns for Meditative Ornament Painting
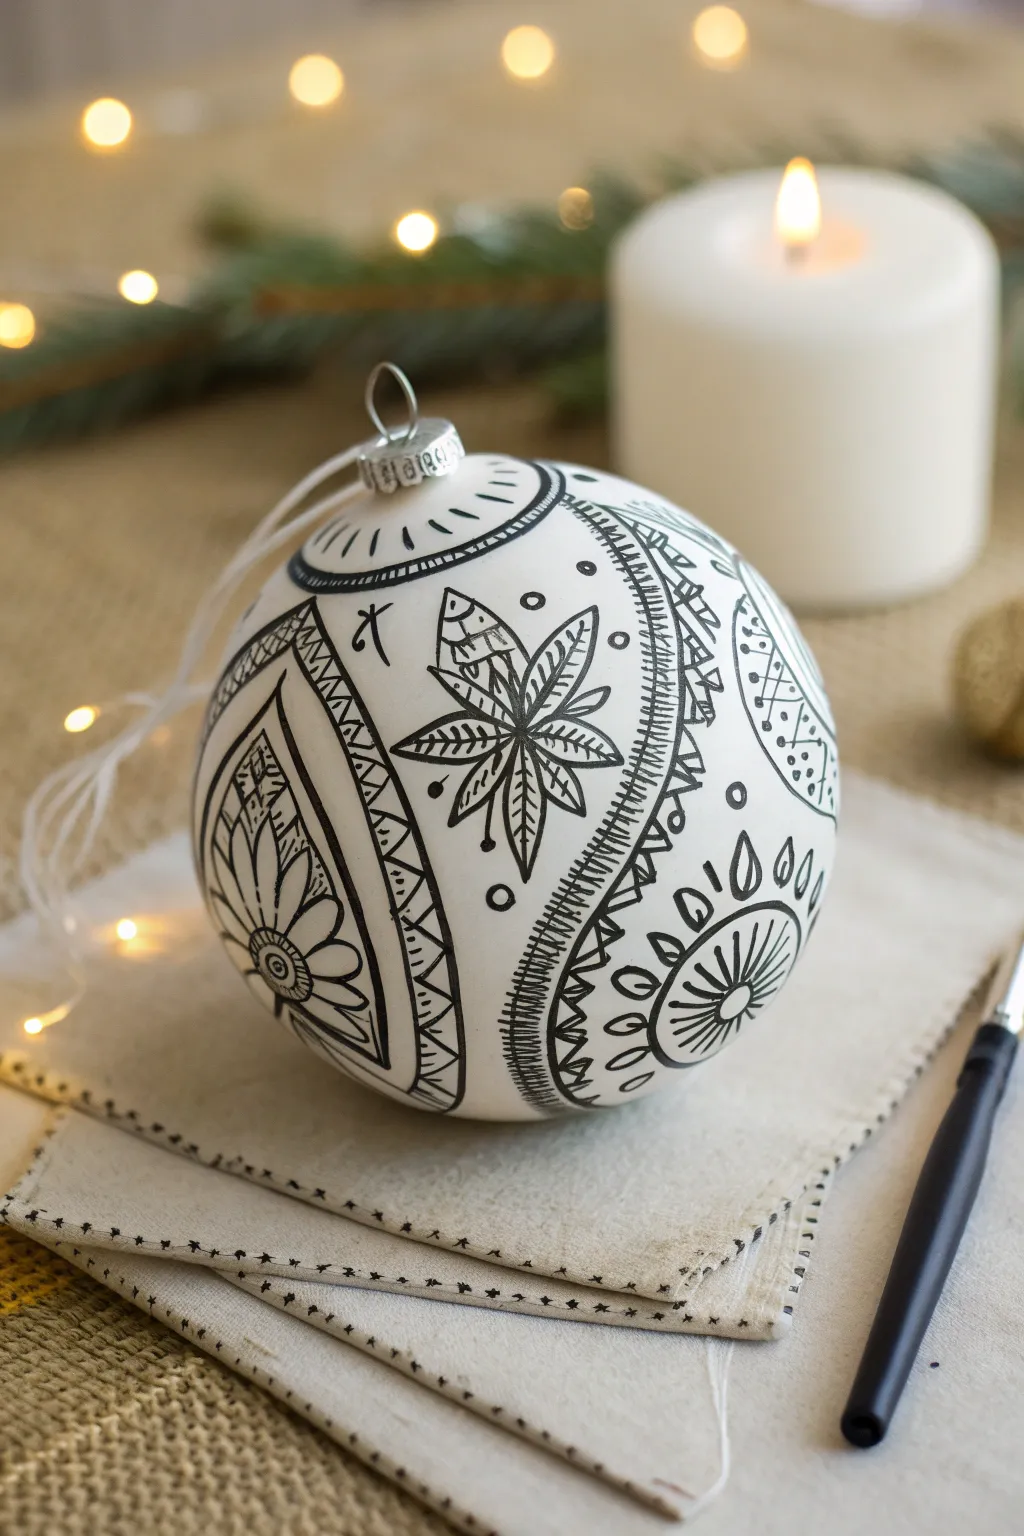
Transform a plain white bauble into a mesmerizing piece of art using relaxing, repetitive patterns reminiscent of Zentangle drawing. This high-contrast black and white design feels modern yet handcrafted, perfect for adding a touch of sophisticated detail to your holiday decor.
Step-by-Step Tutorial
Materials
- Matte white ceramic or glass ornament
- Black fine-point permanent marker or paint pen (0.5mm or 0.7mm tip)
- Pencil (HB or lighter)
- Soft eraser
- Paper towel or cotton craft gloves
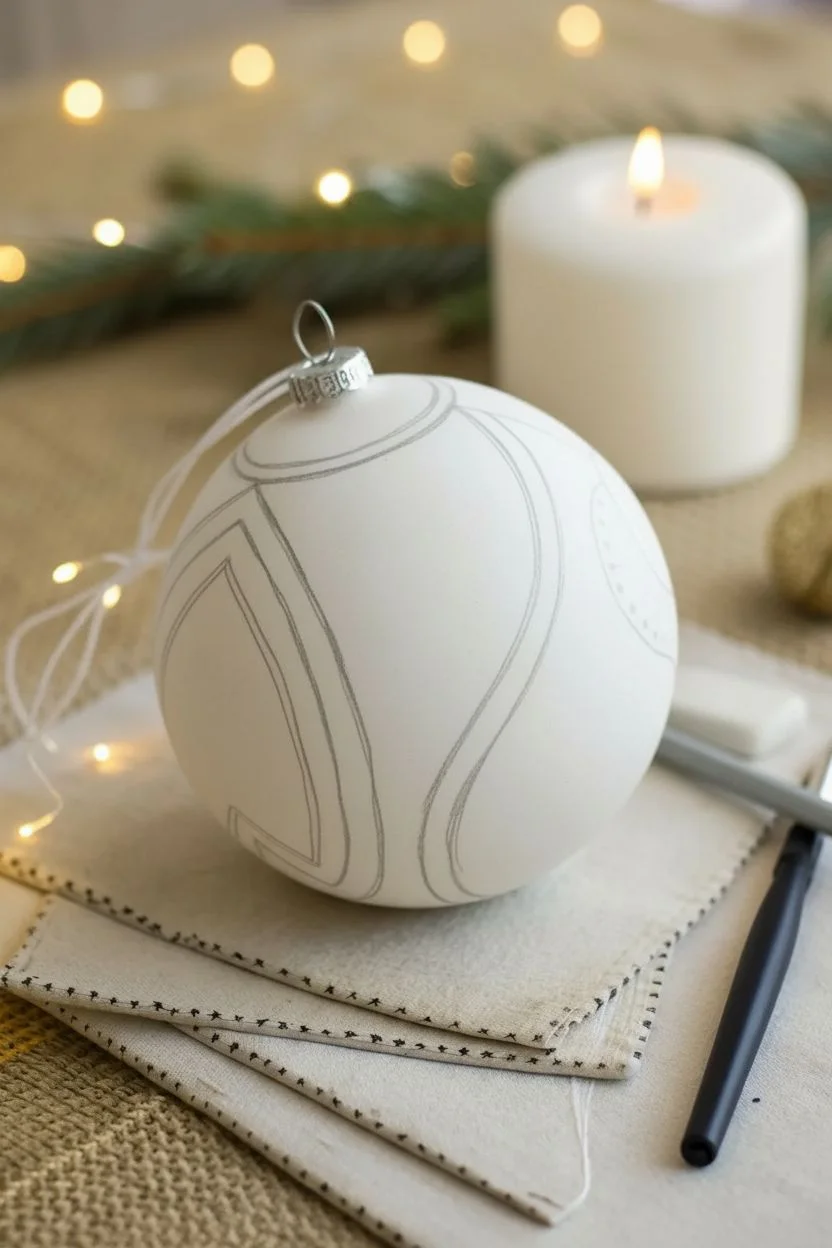
Step 1: Planning and Partitioning
-
Clean the surface:
Before starting, wipe down your white ornament with a soft cloth or a little rubbing alcohol to remove any oils or dust. This ensures your marker ink adheres smoothly and stays crisp. -
Sketch the primary curves:
Using a light pencil, draw two large, sweeping ‘S’ curves that flow from the top of the ornament down towards the bottom. Imagine dividing the sphere into three or four large, organic sections rather than perfect straight lines. -
Outline the top collar:
Draw a circle around the metal cap area at the top to create a defined ‘collar’ zone. This will serve as an anchor point for your first pattern band.
Step 2: Drawing the Linear Patterns
-
Ink the main dividers:
Trace over your sweeping pencil lines with the black marker. Make these lines bold and assured; if you wobble, simply thicken the line slightly to hide imperfections. -
Create the hashed border:
Choose one of your long defining curves and add a second parallel line about a quarter-inch away. Fill the space between these lines with short, horizontal hatch marks, creating a ladder-like texture. -
Add the triangular borders:
On another section divider, draw a ‘sawtooth’ or zigzag line running parallel to the main curve. Inside each small triangle formed by the zigzag, draw a smaller triangle to add depth. -
Decorate the collar:
Refine the circle around the top cap with a double line. Fill this band with simple vertical dashes or small ticks to frame the top of the ornament.
Smudge Prevention
Work from the top down or wear a cotton glove on your holding hand. Oils from your skin can repel the ink or cause fresh lines to smear while you rotate the bulb.
Step 3: Filling the Sections
-
Draw the teardrop motif:
In one of the larger open spaces, draw a large teardrop shape. Inside it, sketch a half-flower or sunrise pattern radiating from the bottom rounded edge. -
Detail the teardrop’s interior:
Fill the petals of your half-flower with lines or small dots. These tiny details are what give the Zentangle style its signature intricate look. -
Create the central leaf cluster:
In the central open area of the ornament, draw a five-pointed leaf or star shape. Use a split-leaf design where one half of each leaf is filled with striped lines and the other half is left white. -
Surround with organic shapes:
Around your central leaf, add small floating circles and dots. This helps break up the white space without overcrowding the design. -
Add the scalloped wheel:
In another section, draw a semi-circle or ‘wheel’ shape attached to one of your border lines. Fill the center with spokes radiating outward like a sun. -
Add teardrop petals:
Surround the outer edge of your wheel shape with small, floating teardrop shapes. Draw a small line inside each teardrop to mimic a vein or seed. -
Balance the negative space:
Step back and look at the whole sphere. If a spot looks too empty, add a small symbol like a cross, a tiny circle, or a few stray dots to balance the composition.
Add a Pop of Color
Once the black ink is dry, use a metallic gold or silver pen to fill in specific small shapes, like the centers of the flowers or every other stripe in the borders.
Step 4: Finishing Touches
-
Erase pencil guides:
Allow the ink to dry completely for at least 30 minutes to prevent smudging. I like to be extra patient here. Once dry, very gently erase any visible pencil marks. -
Seal the design (optional):
If you plan to handle the ornament frequently, you can apply a light mist of matte spray varnish to protect the ink from scratching off over time.
Hang your finished masterpiece on the tree and enjoy the calm satisfaction of your detailed handiwork
Floral Wreath Ornaments With Layered Petals
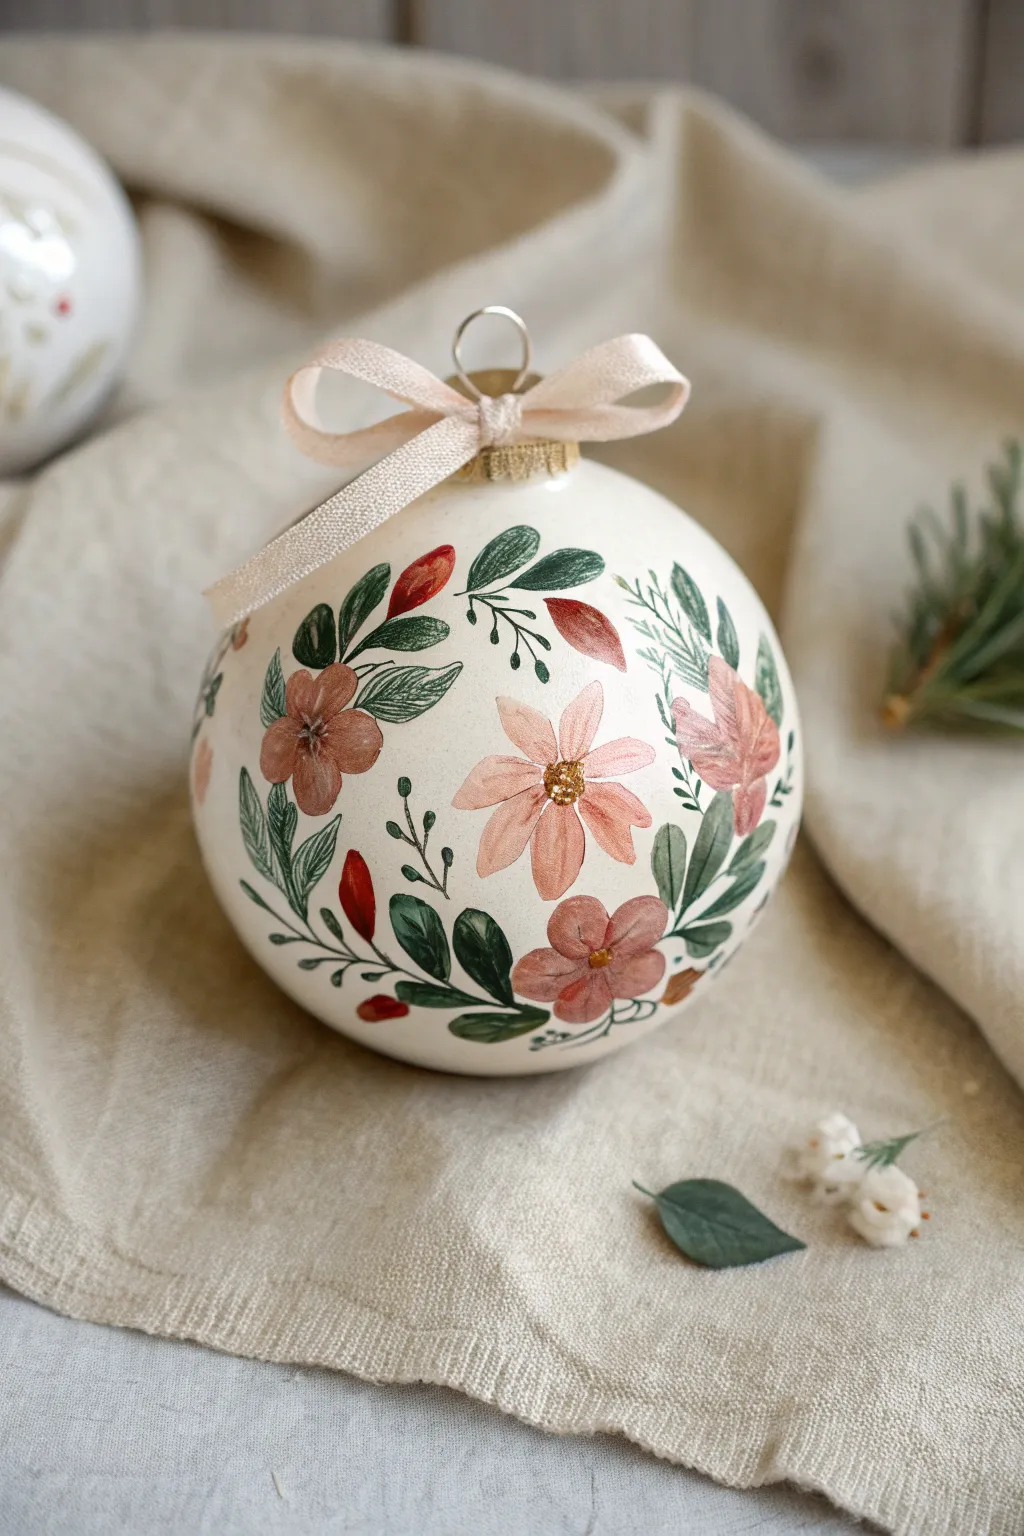

Transform a plain ceramic bauble into a delicate botanical masterpiece featuring soft pink blooms and deep verdant leaves. This tutorial guides you through layering acrylics to achieve a hand-painted, vintage-inspired look that feels both organic and elegant.
Detailed Instructions
Materials
- Ceramic or matte glass ball ornament (cream/off-white base)
- Acrylic paints: Dusty Rose, Terracotta, Deep Forest Green, Sage Green, Crimson Red, White, Gold Metallic
- Round paintbrushes: Sizes 0, 2, and 4
- Fine liner brush: Size 00 or 000
- Pencil (very light graphite)
- Palette for mixing
- Water cup and paper towels
- Pale pink velvet or satin ribbon (1/4 inch width)
- Clear matte sealant spray
Step 1: Planning and Base Layers
-
Prep the surface:
Ensure your ornament is clean and dry. If you are starting with a clear glass ornament, paint the entire surface with a matte cream or off-white acrylic base coat. Let it dry completely, perhaps applying a second coat for opacity if needed. -
Sketch the placement:
Using a very light touch with your pencil, mark the ‘equator’ of the ornament where your wreath will sit. Sketch rough circles for the three main flowers and curved lines to indicate the flow of the leafy vines connecting them. -
Block in the main flowers:
Mix a little White with Dusty Rose to create a soft base pink. Using the size 4 brush, paint the five petals of the central large flower. Start from the outside of the petal and pull your brush toward the center to create a natural taper. -
Paint secondary blooms:
For the smaller side flowers, switch to a mix of Terracotta and Dusty Rose for a slightly deeper, warmer hue. Paint these with simpler, rounder shapes, almost like small pansies or wild roses. -
Add red bud accents:
Identify spots for the smaller, unopened buds. Use pure Crimson Red mixed with a tiny dot of brown or green to desaturate it slightly. Paint small teardrop shapes floating near the main vines.
Step 2: Adding Foliage and Depth
-
Paint the primary leaves:
Load your size 2 brush with Deep Forest Green. Paint the larger leaves surrounding the main flowers. Press down at the base of the leaf and lift as you pull outward to create a sharp point. -
Layer lighter greenery:
Mix Sage Green with a touch of White. Intersperse smaller, softer leaves among the dark ones. This variety in green tones gives the wreath a realistic, lush appearance rather than looking flat. -
Connect with vines:
Using your size 0 brush and thinning the Deep Forest Green paint slightly with water, connect the flowers, buds, and leaves with thin, flowing stems. Keep your hand loose to avoid stiff lines. -
Add petal definition:
Once the pink base flowers are dry, mix a translucent glaze of Dusty Rose and a tiny bit of water. Paint a second layer on just the lower half of each petal to create shadow and depth where they meet the center. -
Detail the leaves:
With the 00 liner brush and a very dark green (or black-green mix), faint veins can be added to the larger leaves. Keep these lines incredibly thin and delicate.
Brush Control Pro-Tip
For the finest lines on stems and veins, add a drop of water to your acrylic paint until it has an ink-like consistency. This helps the paint flow smoothly off the liner brush without skipping.
Step 3: Fine Details and Finishing
-
create the gold center:
Dip the handle end of a small brush or a dotting tool into Metallic Gold paint. Dot the center of the main pink flower repeatedly to create a textured, pollen-like cluster. Add a few tiny dots to the centers of the smaller terracotta flowers as well. -
Add ink-style outlines:
I prefer to use a specialized liner brush for this step. Using thinned dark green or charcoal paint, carefully outline select parts of the petals and leaves. Don’t outline everything fully; broken, gestural lines look more artistic. -
Paint tiny sprigs:
Fill in any empty negative space with delicate, fern-like sprigs using the liner brush and the Sage Green mix. These act as fillers to balance the composition. -
Dry and seal:
Allow the ornament to dry for at least 24 hours to ensure all layers are set. Take it to a well-ventilated area and spray a light coat of clear matte sealant to protect your work from scratches. -
Attach the ribbon:
Cut a length of the pale pink ribbon. Thread it through the metal cap loop and tie a neat, small bow at the very top. Trim the ends of the ribbon at an angle for a polished finish.
Fixing Wobbly Lines
If a stem or outline goes astray, quickly use a clean, damp brush (slightly stiff bristles work best) to gently ‘erase’ the wet paint before it dries. It works like a magic eraser!
Hang this charming ornament on a prominent branch where the soft floral details can be admired up close
Mini Pet Portrait Ornaments for Personalized Gifts
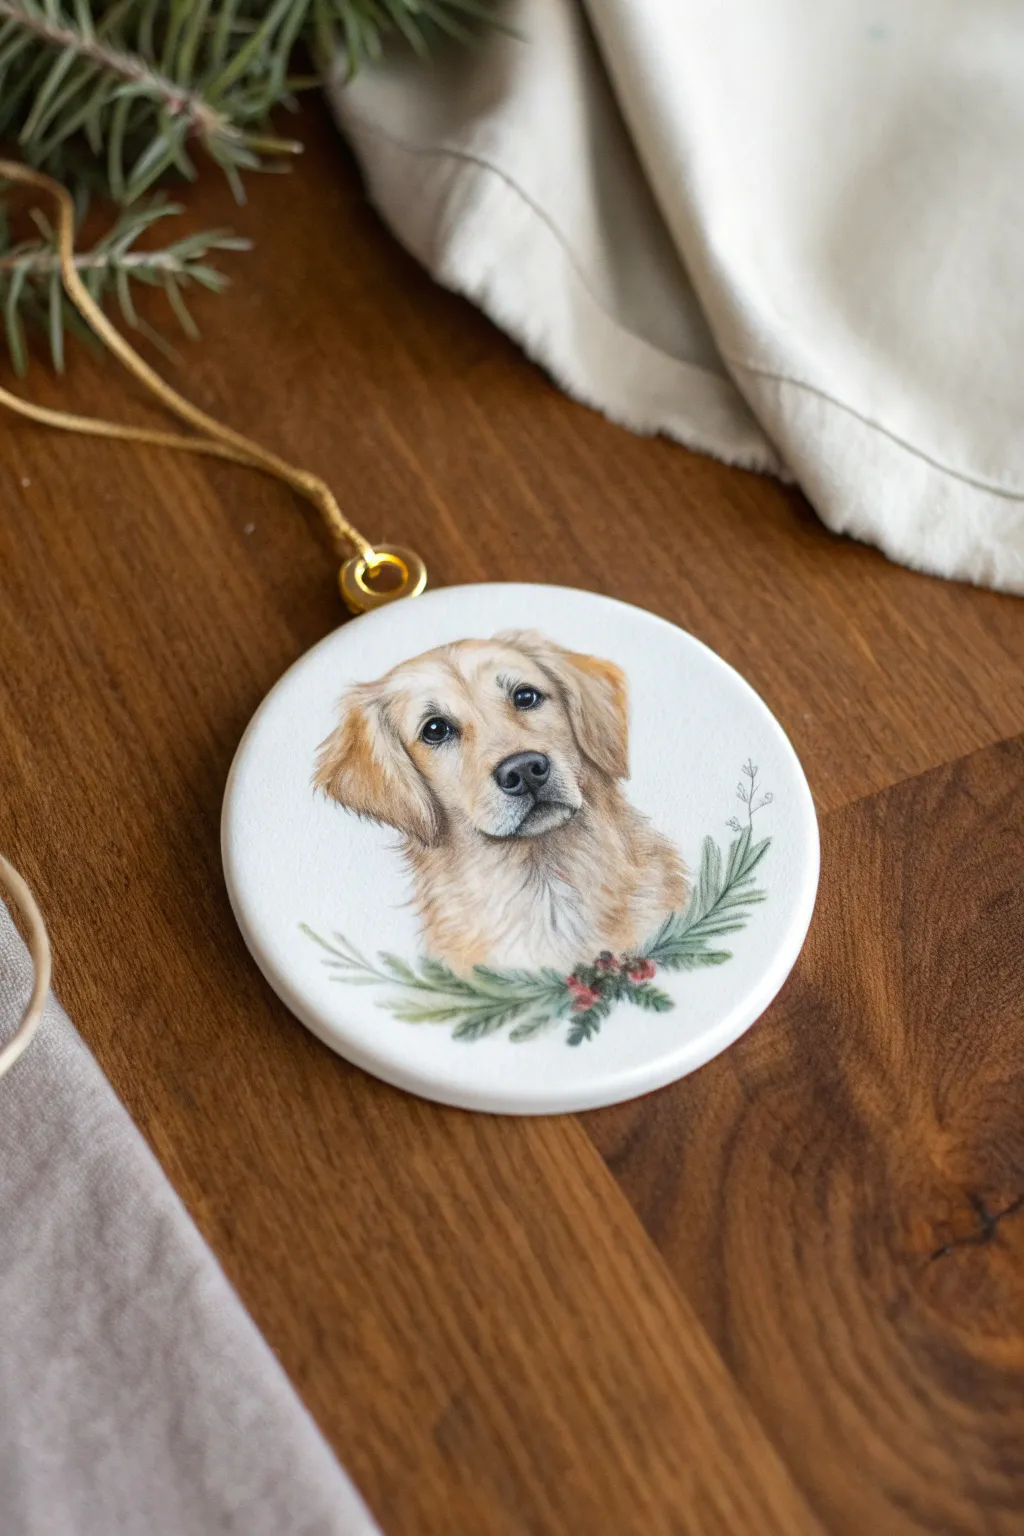
Capture the loyal gaze of a beloved pet with this delicate painted ornament, featuring a realistic Golden Retriever portrait surrounded by winter greenery. This personalized keepsake uses fine brushwork to build up lifelike fur textures on a smooth ceramic surface.
Step-by-Step Tutorial
Materials
- Round ceramic or wood ornament blank (approximately 3-4 inches)
- Fine grit sandpaper (if using wood)
- Acrylic paints (Titanium White, Burnt Umber, Yellow Ochre, Burnt Sienna, Mars Black, Sap Green, Alizarin Crimson)
- Small synthetic brushes (sizes 000 liner, 0 round, and 2 filbert)
- Pencil for sketching
- Spray varnish or sealant (matte or satin finish)
- Gold embroidery floss or ribbon
- Palette for mixing paint
- Paper towels and water cup
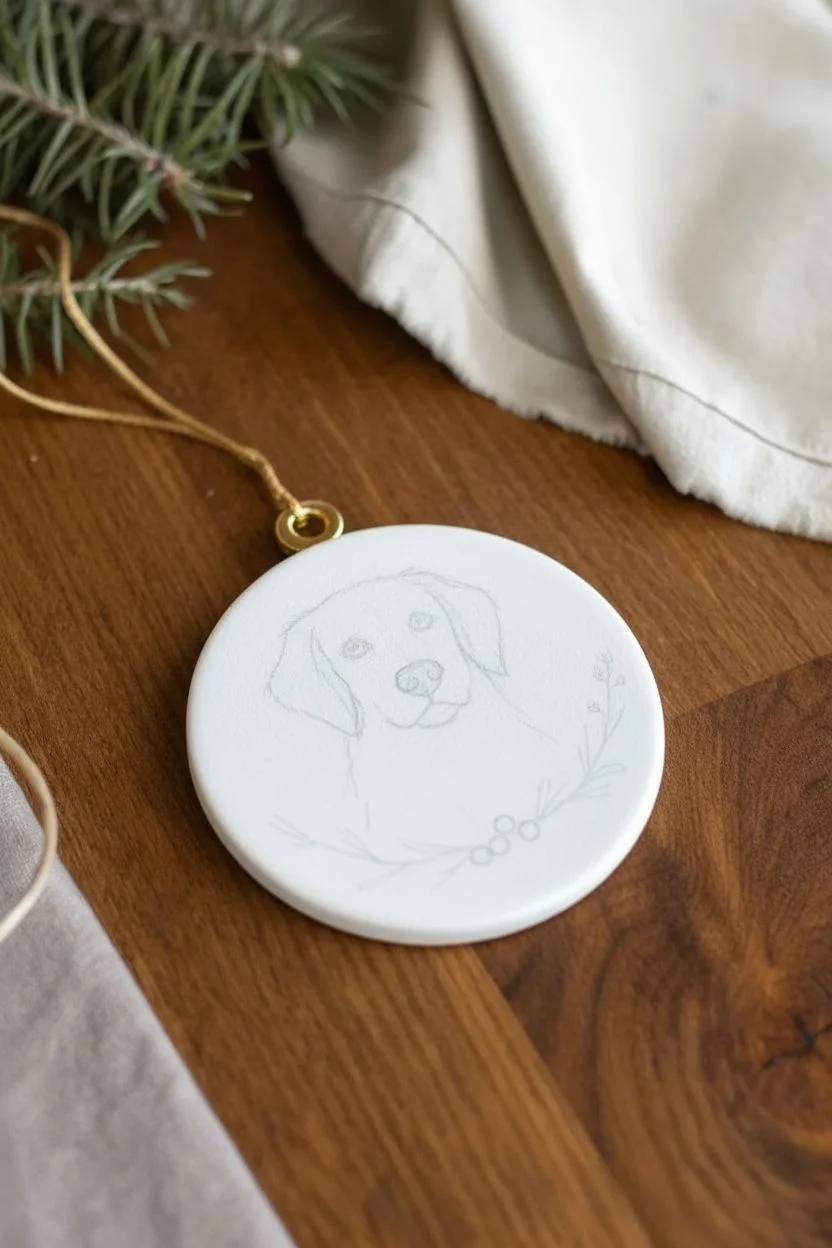
Step 1: Preparation and Sketching
-
Prepare the surface:
Ensure your ornament surface is clean and dry. If you are using a wooden blank, sand it lightly until smooth and apply two coats of white gesso or acrylic primer, sanding between coats for the smoothest possible finish. -
Outline the portrait:
Using a very hard pencil (like an H or 2H) so lines remain faint, lightly sketch the dog’s head in the center of the circle. Focus on the main shapes: the rounded skull, the snout muzzle, and the triangular drop ears. -
Mark facial features:
Carefully place the eyes, nose, and mouth line. Getting these proportions correct now is crucial, as paint is harder to correct later. The eyes should align horizontally, and the nose should sit centrally below them. -
Sketch the foliage:
Lightly draw a curved line beneath the dog’s neck for the wreath. Sketch in small, pine-needle branches sweeping upward on both sides and mark three small circles for berries in the center.
Eyes look lifeless?
Make sure you have a distinct highlight (catchlight). A tiny, crisp white dot in the 10 o’clock or 2 o’clock position on the pupil instantly adds focus and life.
Step 2: Painting the Portrait Base
-
Block in base colors:
Mix a light cream color using Titanium White and a tiny drop of Yellow Ochre. Apply this as a base coat over the lighten fur areas—the muzzle and cheeks. Use a watered-down Burnt Sienna for the darker ear areas. -
Establish the shadows:
Mix Burnt Umber with a touch of Burnt Sienna. With a size 2 brush, gently wash in the darker areas around the eyes, under the ears, and beneath the chin to create depth before adding texture. -
Paint the eyes:
Using your smallest brush, paint the iris with a dark brown mix. Once dry, add the pupil in pure Mars Black. Leave a tiny speck of white paper or add a dot of white paint later for the reflection—this brings the dog to life. -
Paint the nose:
Fill in the nose shape with a dark grey (mix Black and White). Darken the nostrils with pure Black, blending the edges slightly so they don’t look like stickers.
Step 3: Adding Detail and Texture
-
Create fur texture:
Switch to your 000 liner brush. Mix your mid-tone gold (Yellow Ochre + Burnt Sienna) and start flicking tiny strokes in the direction of hair growth. Start from the nose and work outward. -
Layering fur colors:
I like to work in layers here. Once the mid-tones dry, mix a lighter cream color and paint fine hairs over the top, especially on the snout, eyebrows, and edges of the ears. -
Deepen contrast:
Use a darker brown wash to glaze over shadow areas if they look too flat. Add very dark, fine hairs inside the ears and along the neck to suggest volume. -
Define the mouth:
Use a dark grey-brown to gently define the mouth line and the ‘lips’ or jowls, ensuring a soft transition into the surrounding fur. -
Final highlights:
Add pure white strokes for whiskers and the brightest highlights on the forehead and nose tip. These final touches make the texture pop.
Add a Name
Use a superfine gold paint pen to write the pet’s name in cursive along the bottom curve of the ornament, just underneath the greenery wreath.
Step 4: Decorative Elements and Finish
-
Paint greenery leaves:
Mix Sap Green with a touch of Burnt Umber for a natural pine color. Use the liner brush to paint individual pine needles radiating from your sketched stems. -
Add berries:
Paint the berry circles with Alizarin Crimson. Once dry, add a tiny dot of white on the top right of each berry for a shine, and a tiny dark crescent on the bottom left for shadow. -
Dry and seal:
Allow the paint to cure for at least 24 hours. In a well-ventilated area, spray the ornament with a clear matte or satin sealant to protect the portrait from scratching. -
Add hanging hardware:
Thread a gold jump ring through the ornament hole. Cut a length of gold thread or cord, loop it through the ring, and tie a secure knot.
Hang this painted tribute on your tree and enjoy the warmth of a handmade pet portrait every holiday season.
Glow-In-The-Dark Night Sky Ornaments With Silhouettes
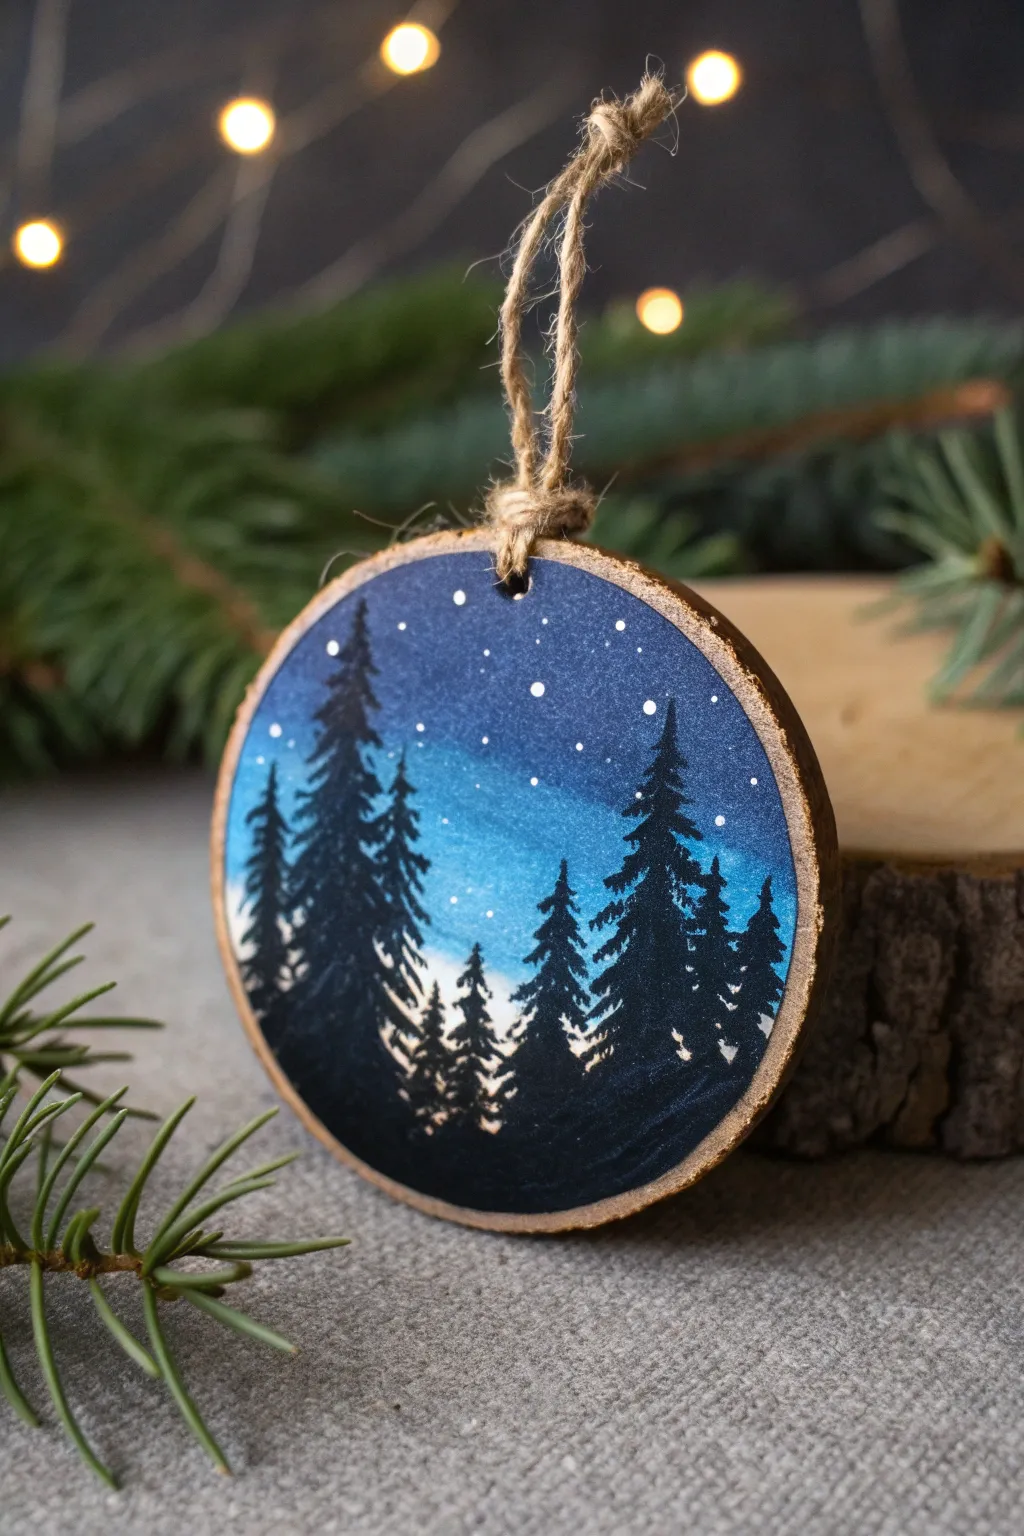
Capture the serene beauty of a winter evening with this hand-painted wood slice ornament using a simple silhouette technique. The moody gradient sky contrasts beautifully with the sharp black trees, creating a peaceful little window into nature for your tree.
Detailed Instructions
Materials
- Round wood slice ornament with pre-drilled hole
- Acrylic paints (Navy Blue, Royal Blue, Teal/Aqua, White, Black)
- Glow-in-the-dark acrylic medium or paint (optional)
- Flat shader brush (small to medium)
- Small round detail brush (size 0 or 1)
- Jute twine or ribbon for hanging
- Cup of water and paper towels
- Palette or paper plate
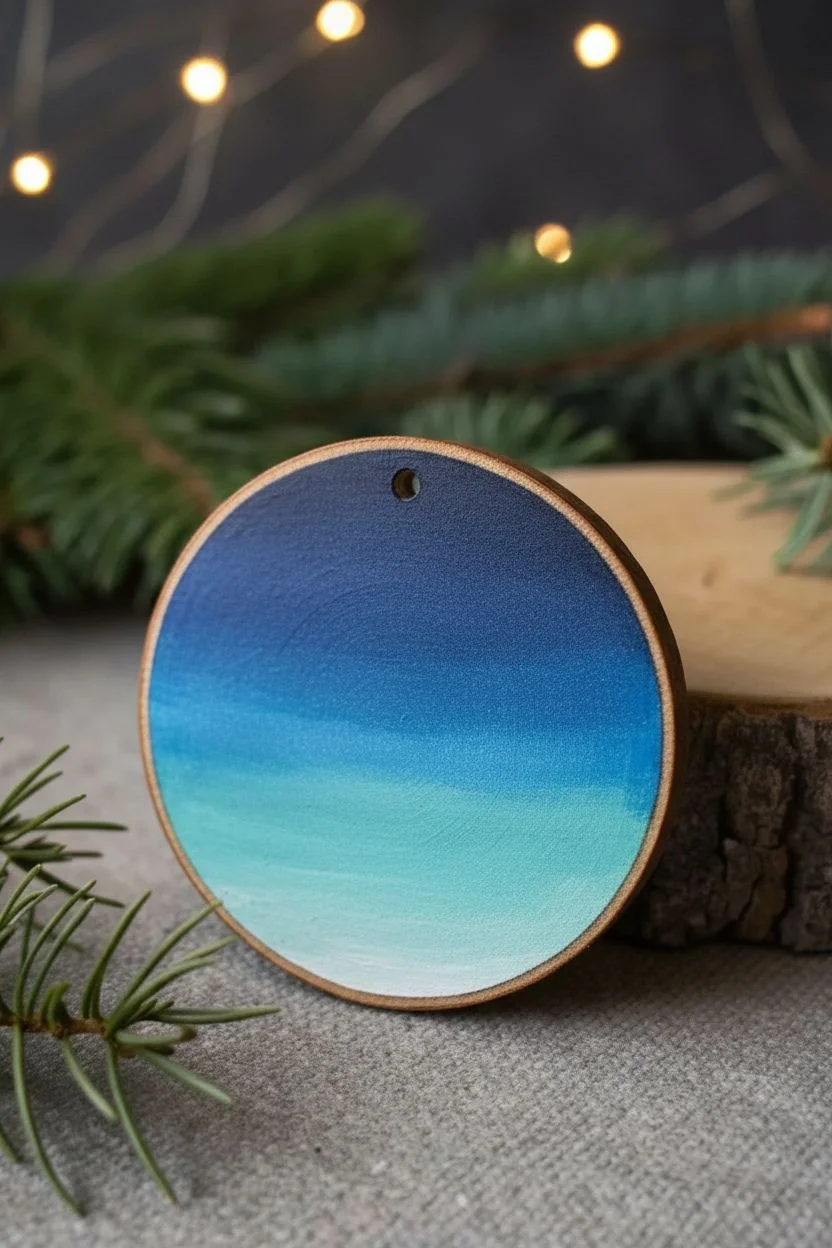
Step 1: Painting the Gradient Sky
-
Prepare the Surface:
Ensure your wood slice is clean and free of loose dust. If the surface is rough, give it a very light sanding with fine-grit sandpaper, but the rustic texture works well for this design. -
Base Color Application:
Start by mixing a deep Navy Blue. Apply this to the top third of the wood slice using your flat brush, curving slightly to follow the round shape. -
Mid-Tone Transition:
Mix a Royal Blue shade. While the navy paint is still slightly wet, paint the middle section, blending the upper edge into the navy to create a seamless transition. -
Adding the Horizon Light:
For the bottom third (just above where the ground will be), use a lighter Teal or Aqua color mixed with a touch of white. Paint this area, blending upward into the Royal Blue. -
Smoothing the Gradient:
Clean your brush, leave it slightly damp, and gently run it back and forth over the transition lines between colors to soften them. The goal is a smooth ombré effect from dark night to a glowing horizon. -
Let it Dry:
Allow the background layer to dry completely. This is crucial because painting sharp black silhouettes over wet blue paint will result in a muddy gray mess.
Step 2: Creating the Silhouettes
-
Establish the Ground:
Using black acrylic paint and a medium brush, paint a solid, undulating mound at the very bottom of the slice to represent the dark forest floor. -
Drafting the Tree Trunks:
Switch to your small detail brush. Paint thin, vertical lines extending upward from the black ground. Vary the heights—make some tall to reach the navy sky, and others shorter. -
Painting Tree Branches:
Starting from the top of a trunk line, use the very tip of your detail brush to dab small, horizontal strokes. Keep the strokes very narrow at the top to form a pointed crown. -
Filling Out the Trees:
Work your way down the trunk, making the horizontal dabs slightly wider as you go. Use a jagged, irregular motion to mimic pine needles rather than straight lines. -
Layering the Forest:
Paint the tallest, most prominent trees first. Then, add smaller, shorter tree tops in between them to create depth and the illusion of a dense forest. -
Ground Connection:
Ensure the bottom branches merge seamlessly into the black ground layer you painted earlier.
Wet-on-Wet Blending
Work quickly on the background! Acrylic dries fast, so keep your brush damp to smudge the horizon lines together for that dreamy, soft sky look.
Step 3: Finishing Touches
-
Adding Stars:
Dip the handle end of a small brush or a toothpick into white paint. Gently dot the upper dark blue section of the sky. -
Creating Distance:
Vary the size of your dots. Make tiny pinpricks for distant stars and slightly larger dots for brighter ones. Group a few together for a natural look. -
Optional Glow Effect:
If you want the glow-in-the-dark effect mentioned in the article title, re-dot your stars with a glow medium once the white paint is dry, or apply a thin wash of glow paint over the teal horizon area. -
Re-drill the Hole:
If paint has clogged the pre-drilled hole at the top, use a toothpick or large needle to clear it out while the paint is still slightly pliable. -
Attach the Hanger:
Cut a length of jute twine, thread it through the hole, and tie a secure knot at the top to finish your rustic ornament.
Starry Splatter
Instead of painting individual dots, dilute white paint with water and flick an old toothbrush over the wood for a galaxy of tiny, realistic stars.
Hang this peaceful scene on your tree and enjoy the quiet winter atmosphere it brings to your holiday decor


Have a question or want to share your own experience? I'd love to hear from you in the comments below!