
Outdoor painting can totally change the vibe of your home—sometimes with just one smart color choice in the right spot. Here are my favorite outdoor painting ideas for boosting curb appeal, defining architecture, and making your outdoor spaces feel more like you.
Classic White Exterior With Dark Trim
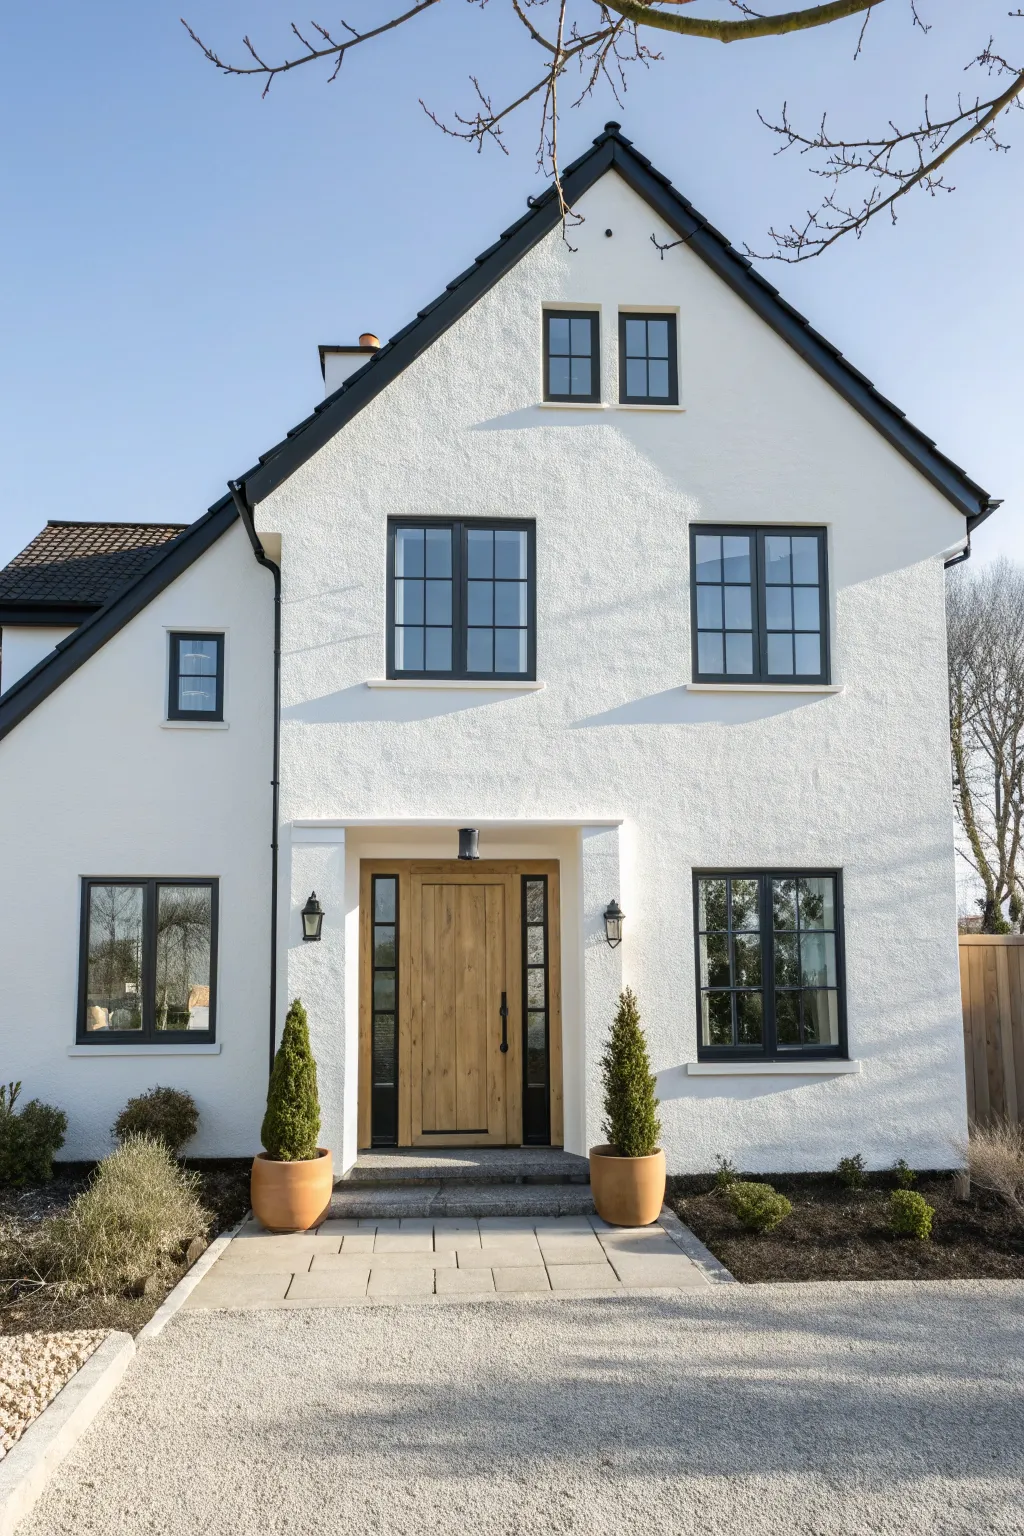
Transform a home’s exterior into a stunning example of modern farmhouse style with this crisp, high-contrast palette. By pairing bright white stucco with dramatic charcoal windows and natural wood accents, you’ll create a timeless look that feels fresh and inviting.
How-To Guide
Materials
- High-quality exterior masonry paint (Pure Brilliant White)
- Exterior satin or gloss trim paint (Charcoal or Black)
- Exterior wood stain (Natural Oak or Clear sealant)
- Pressure washer
- Stiff bristle brush and masonry cleaner
- Painter’s tape (exterior grade)
- Drop cloths and plastic sheeting
- Masonry roller (long nap) and extension pole
- Angled sash brush (2-inch)
- Small artist brush for touch-ups
- Ladder and stabilizer
- Caulk and exterior filler
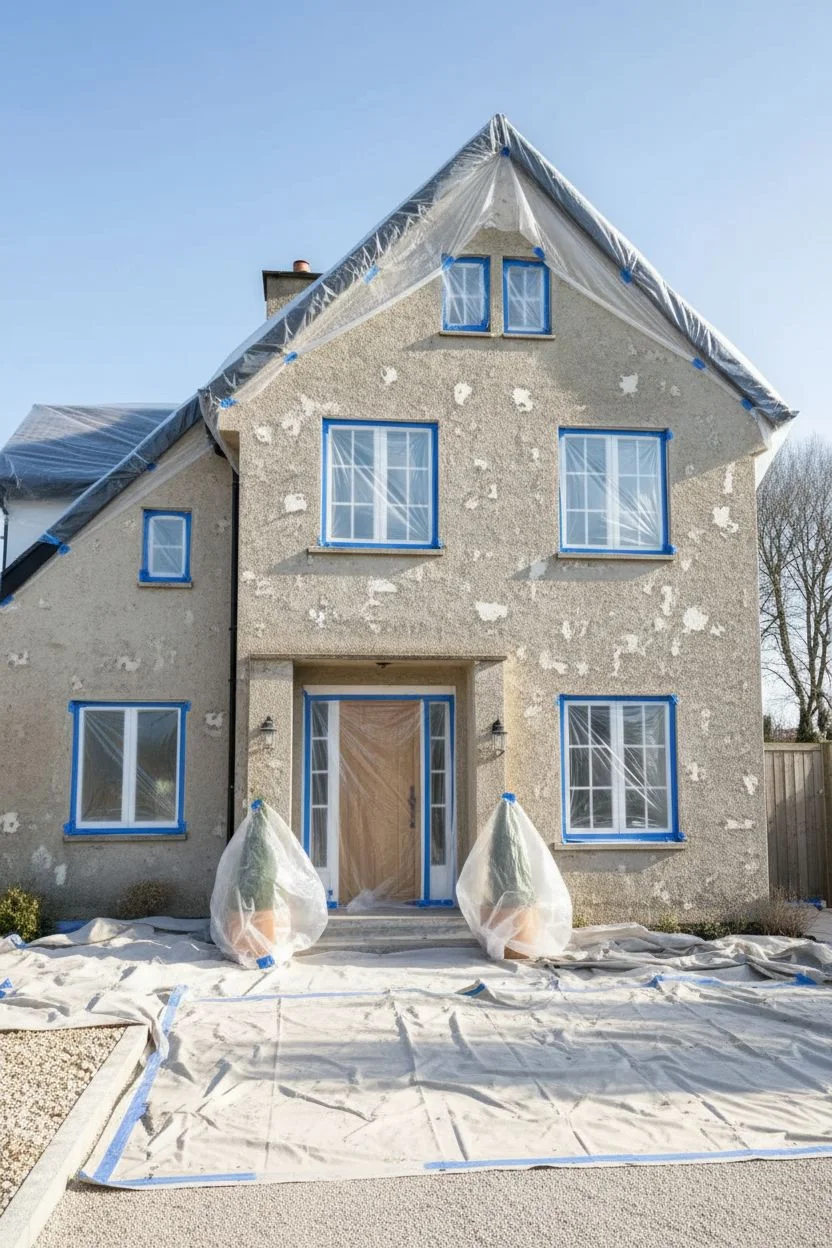
Step 1: Preparation
-
Clean the substrate:
Begin by thoroughly cleaning the exterior walls. Use a pressure washer on a low setting to remove dirt and grime without damaging the stucco texture. For stubborn moss or algae, scrub with a stiffness bristle brush and a specialized masonry cleaner. -
Repair imperfections:
Inspect the stucco for any cracks or chips. Fill these with a quality exterior filler suitable for textured surfaces. Allow the filler to cure completely according to the manufacturer’s instructions before sanding it flush. -
Protect surroundings:
Cover the ground, potted plants (like those flanking the door), and the gravel driveway with drop cloths. Use plastic sheeting to mask off the roofline, gutters, and downspouts to prevent accidental splatters.
Textured Wall Trouble
If the stucco texture is very deep and the roller misses spots, work the roller in a ‘W’ pattern and back-roll immediately. A thick nap roller (3/4 inch to 1 inch) is non-negotiable here.
Step 2: Painting the Masonry
-
Cut in edges:
Using a 2-inch brush, carefully cut in the white masonry paint around the window frames, door frame, and under the eaves. Wiggle the brush bristles into the textured surface to ensure full coverage in the crevices. -
Roll the walls:
Load a long-nap masonry roller with the Pure Brilliant White paint. Work in sections of about 3×3 feet, starting from the top and working your way down. The long nap is essential for getting paint into the deep texture of the stucco. -
Apply second coat:
Once the first coat is dry (usually 4-6 hours), inspect for any missed spots or thin areas. I always apply a full second coat to achieve that bright, opaque finish that really pops against the sky.
Pro Design Tip
Keep the fascia boards (the roof edge trim) black to frame the house like a picture. This outlines the architectural shape against the sky.
Step 3: Detailing the Trim
-
Mask the glass:
Apply exterior painter’s tape precisely to the glass panes of the windows. Press down the edges firmly with a putty knife to stop paint from bleeding under the tape. -
Paint window frames:
Using a smaller angled sash brush, paint the window frames and mullions with the Charcoal or Black exterior trim paint. Maintain a wet edge to avoid brush marks on the smooth surfaces. -
Refine the lines:
Carefully remove the tape while the paint is still slightly tacky to get a crisp edge. If any paint seeped onto the glass, gently scrape it away with a razor blade once fully dry. -
Paint gutters and downspouts:
To integrate the drainage system into the design, paint the downspouts black to match the trim or white to disappear against the wall. In this look, matching the black trim creates a cohesive, graphic outline.
Step 4: The Entrance Feature
-
Prepare the door:
Sand the wooden door lightly to remove old varnish or rough spots. Wipe away all dust with a tack cloth to ensure the stain adheres properly. -
Stain and seal:
Apply a clear or natural oak stain to the door to highlight the wood grain. This warm tone provides a critical visual break from the high-contrast black and white scheme. -
Install hardware:
Once the door is dry, install or re-install the black handles and letterbox. Finish the look by mounting black lantern-style sconces on either side of the entrance.
Step back and admire how the simple switch to stark contrast has completely revitalized the curb appeal of the property


Warm Cream With Soft White Details


Transform your front entrance into a welcoming beacon with this gentle, inviting palette. By pairing a buttery warm cream door with crisp white trim, you’ll create a classic Scandinavian-inspired look that feels both historic and fresh.
Step-by-Step Guide
Materials
- Exterior wood primer (oil-based recommended for durability)
- Exterior semi-gloss paint (Butter Cream or Pale Yellow)
- Exterior semi-gloss paint (Soft White)
- Sandpaper (80, 120, and 220 grit)
- Painter’s tape (exterior grade)
- Drop cloths
- Sanding block or orbital sander
- Stiff bristle brush for cleaning
- Mild detergent or TSP substitute
- Wood filler (exterior grade)
- Caulk and caulking gun
- 2-inch angled sash brush
- 4-inch foam roller or mini roller for doors
- Screwdriver (for hardware removal)
- Tack cloth
Step 1: Preparation & Cleaning
-
Clear the area:
Begin by removing any wreaths, mats, or decor from the porch area to give yourself plenty of working space. Lay down drop cloths to protect the stone steps and surrounding plants. -
Remove hardware:
Using a screwdriver, carefully take off the door handle, lock plates, and the peephole knocker. Store these screws in a labeled bag so they don’t get lost. -
Scrub the surface:
Mix a solution of mild detergent or TSP substitute with water. Scrub the door and the surrounding trim vigorously with a stiff bristle brush to remove dirt, mildew, and old spiderwebs. Rinse thoroughly and let dry completely. -
Scrape loose paint:
Inspect the door and frame for any peeling or flaking paint. Use a paint scraper to gently remove these loose sections until you have a solid edge.
Step 2: Repair & Sanding
-
Fill imperfections:
Look for deep scratches, dents, or holes in the wood. Apply exterior wood filler with a putty knife, smoothing it out slightly higher than the surface to allow for shrinkage. -
Initial sanding:
Once the filler is dry, sand the entire door and trim with 120-grit sandpaper. I find an orbital sander works best for the flat panels, but switch to a sanding block for the molded edges and corners. -
Smooth the finish:
Follow up with a pass of 220-grit sandpaper. This finer grit creates a silky smooth base that helps the new paint adhere properly without showing texture marks. -
Caulk the gaps:
Run a bead of exterior paintable caulk along the seams where the trim meets the siding to seal out moisture. Smooth the bead with a wet finger for a seamless look. -
Dust removal:
Wipe down every surface with a tack cloth to pick up the fine dust. Any leftover dust will create tiny bumps in your paint finish.
Pro Tip: Weather Watch
Check the forecast before starting. Ideal painting weather is overcast but dry, with temperatures between 50°F and 80°F. Direct sun makes paint dry too fast.
Step 3: Priming & Painting
-
Masking off:
Apply painter’s tape carefully around the glass panes in the transom window and along the edges where the trim meets the house siding to ensure crisp lines. -
Apply primer:
Brush a coat of high-quality exterior primer over the bare wood and filled areas. If you are making a drastic color change, prime the whole door. Let this dry according to the manufacturer’s instructions. -
Paint the trim first:
Stir your Soft White paint well. Using the 2-inch angled sash brush, paint the surrounding door frame and the decorative molding above the door. Work from the top down. -
Detail the door panels:
Switch to your Butter Cream paint. Start with the recessed areas and molding profiles of the door panels using a brush. Ensure you catch any drips in the corners immediately. -
Roll the flat surfaces:
For the flat vertical stiles and horizontal rails, use a small foam roller. This helps achieve a smooth, factory-like finish without brush strokes. -
Second coat:
Allow the first coat to dry fully (usually 4-6 hours). Lightly sand with very fine sandpaper if needed, wipe clean, and apply a second coat for full coverage and richness. -
Reinstall hardware:
Once the paint has cured for at least 24 hours (so it doesn’t stick), carefully screw your hardware back into place. -
Final touch-ups:
Remove the painter’s tape slowly at a 45-degree angle. Use a small artist’s brush to touch up any spots where paint might have bled under the tape.
Troubleshooting: Sticky Door
If the door sticks after painting, rub a plain white candle or paraffin wax along the edges that touch the frame. This lubricates the contact points.
Step back and admire how this soft, sunny hue instantly brightens your home’s exterior appeal


Greige Body With Bright White Trim
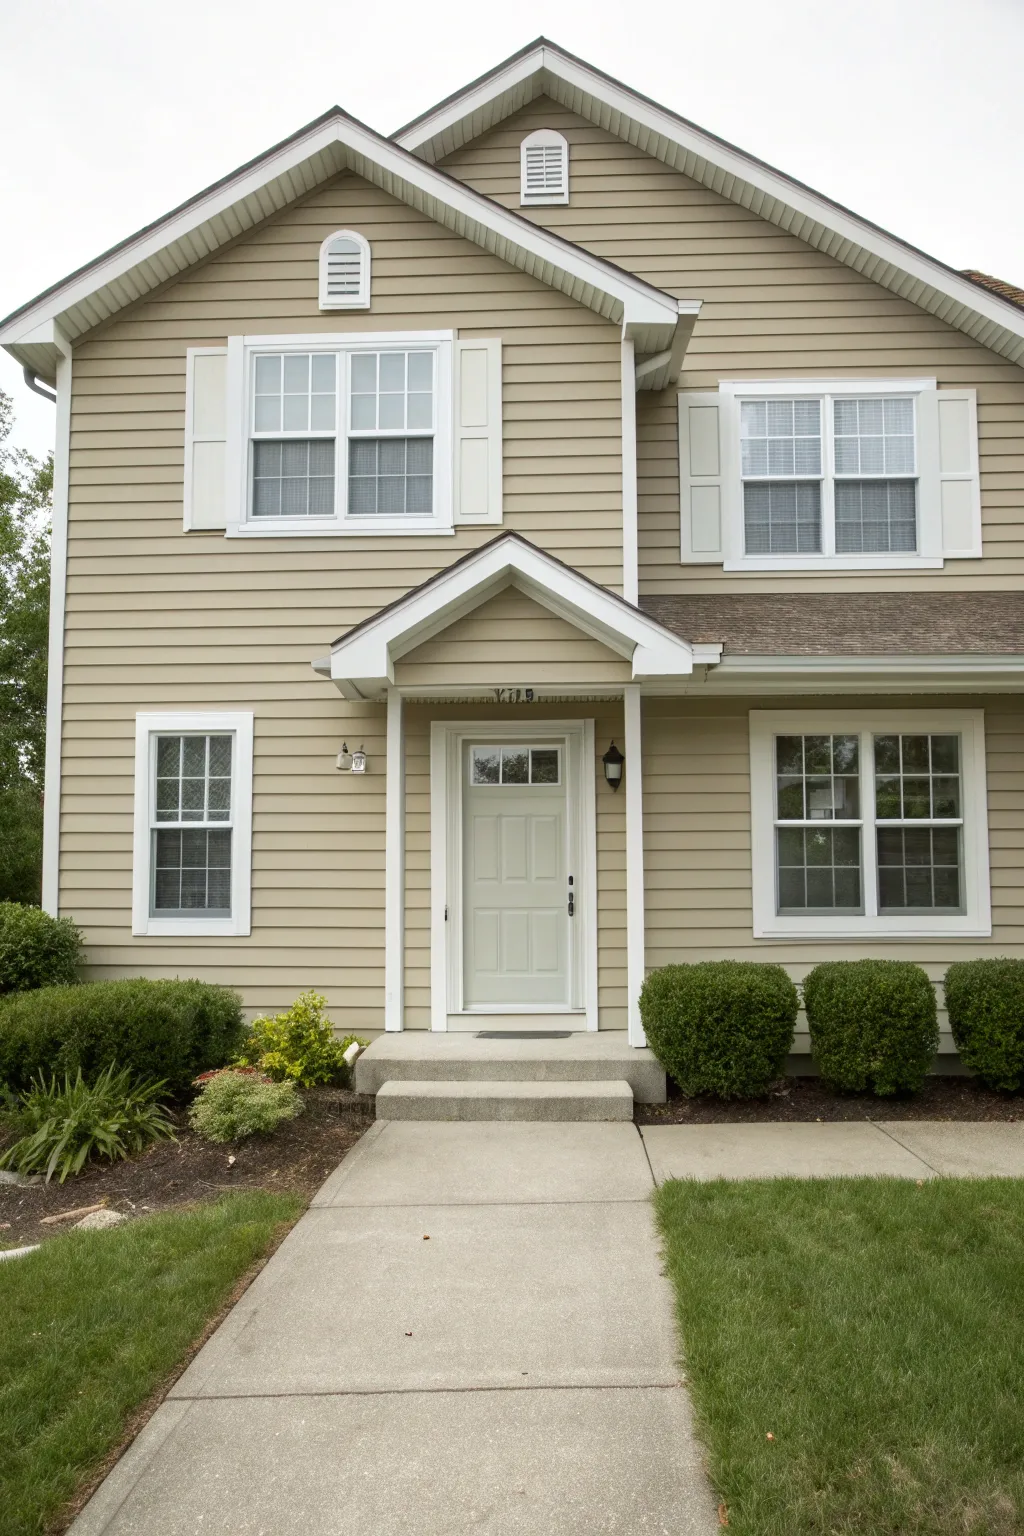
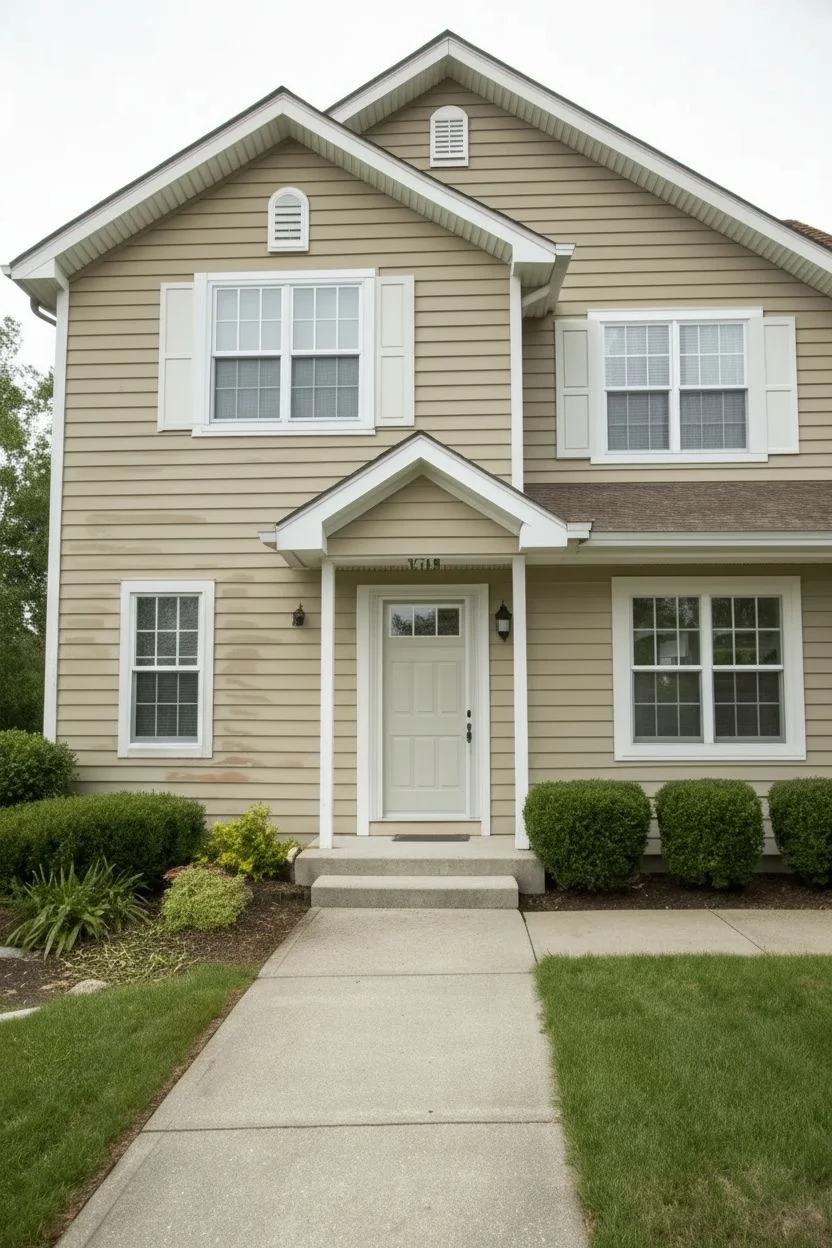
Transform your home’s curb appeal with a sophisticated “greige” (grey-beige) palette grounded by crisp white accents. This look balances warmth and modern neutrality for a welcoming, polished entry that feels classic yet current.
Step-by-Step
Materials
- Exterior acrylic latex paint (Greige/Tan color)
- Exterior semi-gloss trim paint (Bright White)
- Front door paint (Pale Sage or Soft Grey)
- Pressure washer
- Outdoor painter’s tape
- Drop cloths (heavy duty)
- Scraper tool and wire brush
- Exterior primer
- Caulk gun and exterior caulk
- Angled sash brush (2.5 inch)
- Roller frame and extension pole
- Medium nap roller covers (3/8″ to 1/2″)
- Ladder
Step 1: Preparation & Cleaning
-
Clear the perimeter:
Begin by moving any patio furniture, potted plants, or loose decor away from the house. Trim back the boxwood bushes and any landscaping touching the siding to ensure full access. -
Wash the siding:
Use a pressure washer to thoroughly clean the siding, fascia, and trim. Work from the top down to remove dirt, mold, and chalky residue. Allow the house to dry completely for at least 24 hours. -
Scrape and smooth:
Inspect the existing siding for loose or peeling paint. Use a scraper and wire brush to remove any flaking areas, then feather-sand the edges so the new paint lays flat. -
Caulk gaps:
Check around window frames, door trim, and siding joints. Apply fresh exterior caulk to any cracks or gaps to seal out moisture and create a seamless look.
Sticky Siding?
If paint peels when removing tape, the paint may have bridged the gap. Gently score the tape edge with a utility knife before pulling to break the seal.
Step 2: Priming & Protection
-
Mask key areas:
Protect light fixtures, the doorbell, and door hardware with painter’s tape. Lay drop cloths over the concrete porch steps and nearby shrubbery to catch inevitable drips. -
Spot prime:
Apply a high-quality exterior primer to any bare wood or areas where you scraped away old paint. If you are making a drastic color change, priming the entire surface is recommended.
Step 3: Painting the Trim
-
Start with the highest trim:
Using your ladder safely, begin painting the fascia boards and soffits under the roofline with bright white semi-gloss paint. It’s always easier to do the high detail work before the large siding areas. -
Detail the windows:
Paint the window frames and sills. Use an angled sash brush for precision corners. Don’t forget the decorative shutters—for this look, they match the body color or a slightly deeper beige, but often the white trim surrounds make them pop. -
Paint the porch columns:
Apply the white trim paint to the porch posts and the entryway overhang. I like to do two thin coats here rather than one thick one to avoid sagging drips on vertical surfaces.
Boost the Contrast
For a bolder modern farmhouse look, paint the window sashes (the moving parts) black instead of white, keeping the outer frame white for impact.
Step 4: Painting the Siding
-
Cut in edges:
Brush the greige paint along the edges where the siding meets the newly painted white trim, under the eaves, and around the foundation line. -
Roll the body:
Use a roller on an extension pole to paint the main siding boards. Work in small sections, roughly 4 feet wide, maintaining a wet edge to prevent lap marks. -
Address the texture:
Back-brush immediately after rolling if your siding has deep texture or grooves; this pushes paint into the crevices that the roller might miss. -
Apply second coat:
Once the first coat is dry (check your can for recoat times), apply a second coat for true color richness and weather durability.
Step 5: The Final Touches
-
Refresh the front door:
Paint the front door in a soft, welcoming hue like the pale sage shown. Open the door to paint the edges, leaving it ajar until fully dry to prevent sticking. -
Clean up details:
Remove painter’s tape slowly at a 45-degree angle while the paint is still slightly tacky to ensure crisp lines. -
Reinstall fixtures:
Once the door and trim are fully cured, reattach your house numbers, light fixtures, and mailbox.
Step back and admire how this fresh neutral palette completely revitalizes the character of your home


Light Gray With Charcoal Accents
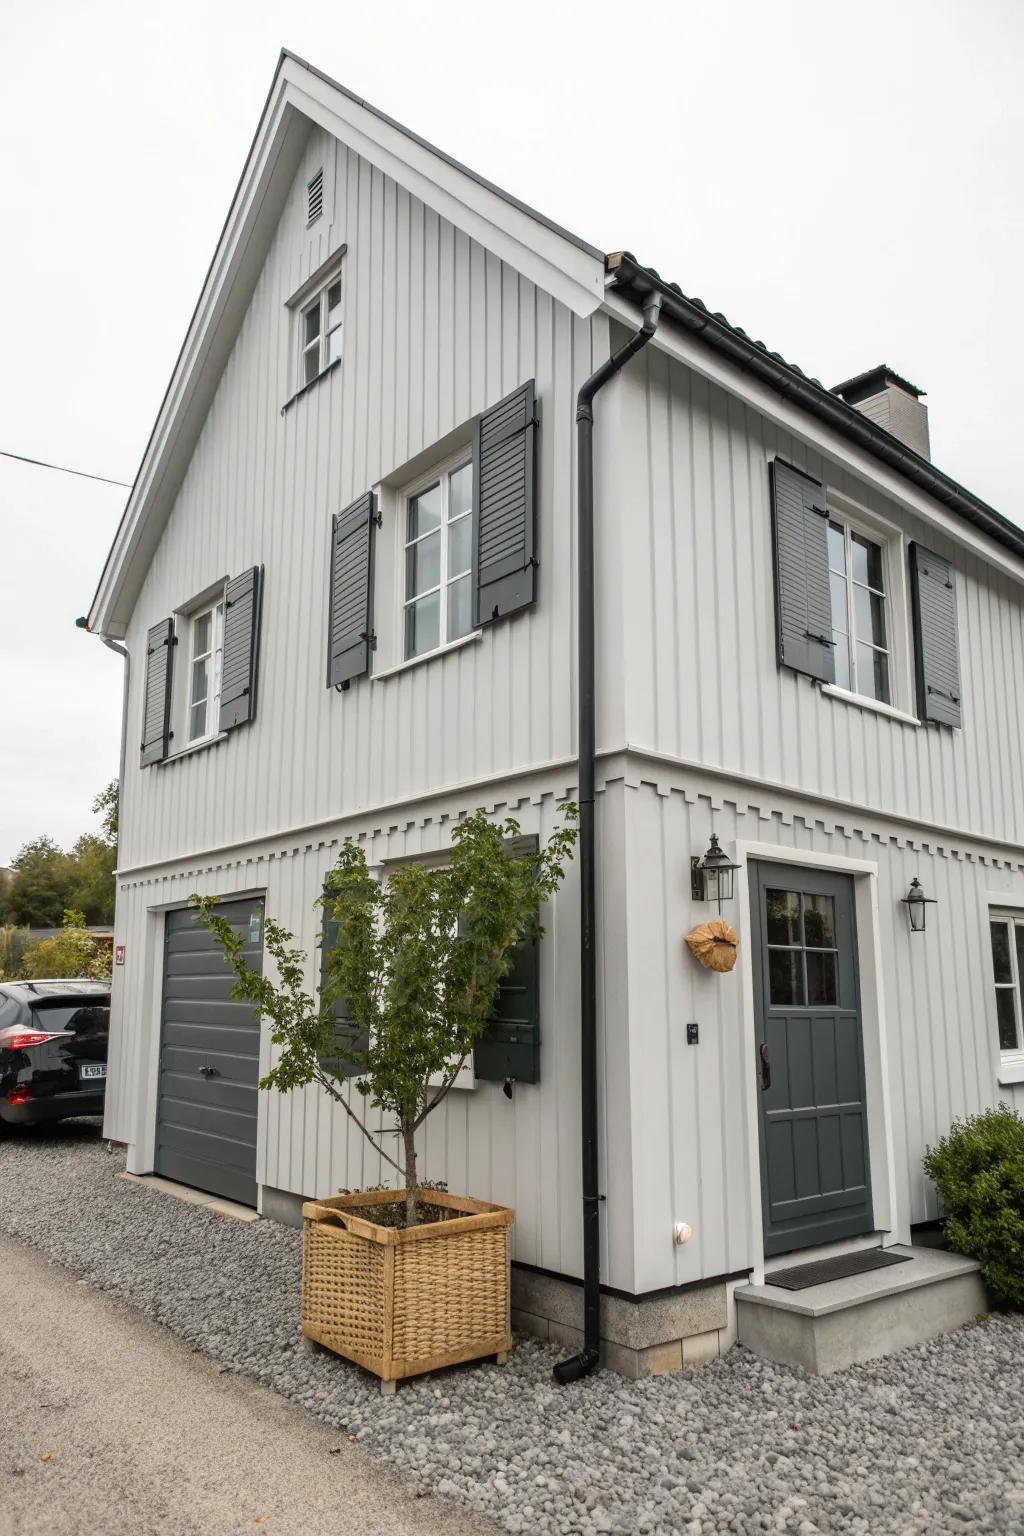
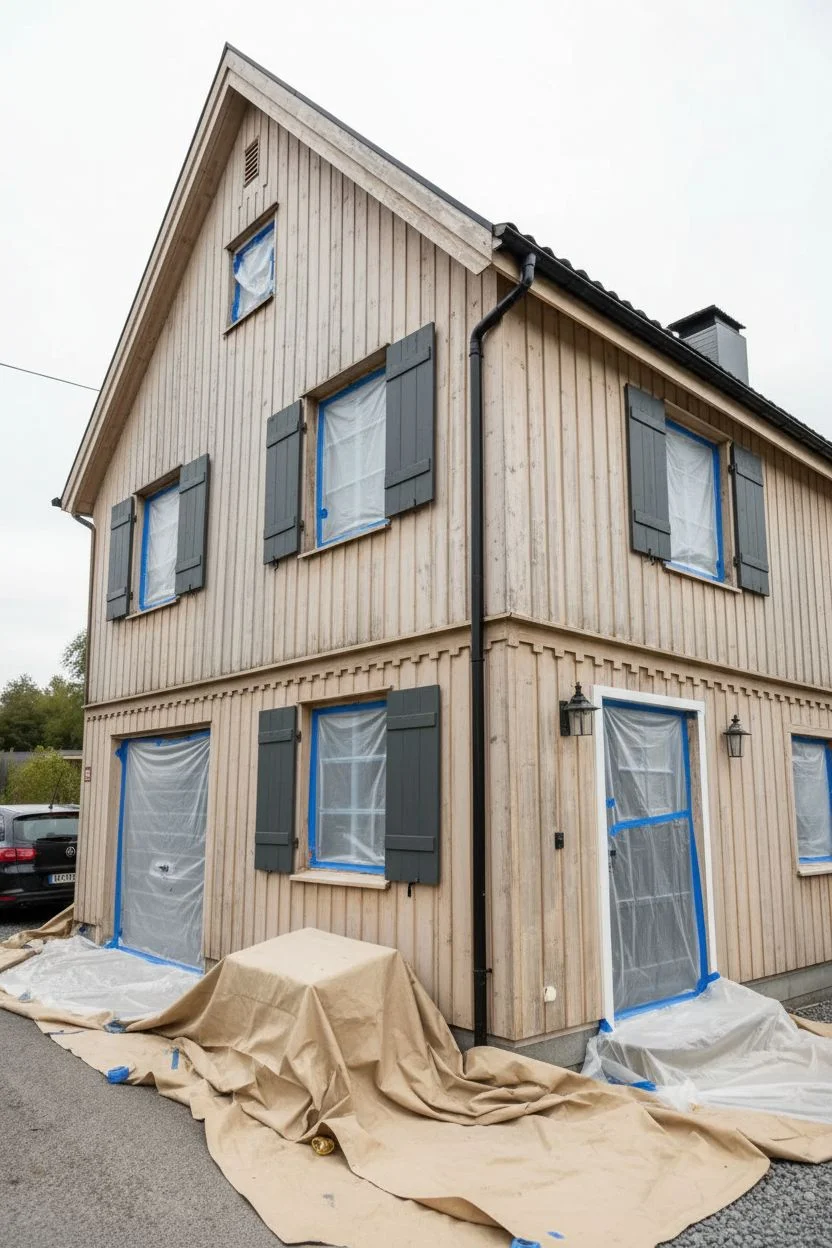
Transform your home’s exterior with this classic pairing of airy gray siding and sophisticated charcoal trim. This Scandinavian-inspired palette creates a clean, modern aesthetic that feels both inviting and stately, perfect for highlighting architectural details like board-and-batten siding.
Detailed Instructions
Materials
- High-quality exterior primer
- Light gray exterior latex paint (satin finish)
- Charcoal or dark slate gray exterior paint (semi-gloss)
- Pressure washer
- Exterior caulk and caulking gun
- Scrapers and sanding sponges
- Painter’s tape (exterior grade)
- Drop cloths and plastic sheeting
- Ladder and scaffolding (if needed)
- Angled sash brush (2.5 inch)
- Flat exterior brush (3-4 inch)
- Paint roller and extension pole
- Small artist brush for touch-ups
Step 1: Preparation & Cleaning
-
Assess and Clean:
Begin by thoroughly inspecting the existing siding and trim for any rot or damage. Once repairs are noted, use a pressure washer to remove dirt, mildew, and loose paint, working from the top down to prevent streaking. -
Scrape and Sand:
After the wood is completely dry, scrape away any peeling paint flakes. Follow up by sanding rough edges smooth to ensure a seamless bond for your new coats. -
Caulk and Seal:
Apply fresh exterior caulk to gaps around windows, doors, and corner boards. Sealing these joints now prevents moisture intrusion and creates that sharp, professional finish we’re aiming for. -
Masking Off:
Protect hardware, light fixtures, and windows with plastic sheeting and painter’s tape. Don’t forget to cover the foundation and ground landscaping with drop cloths.
Step 2: Priming the Canvas
-
Spot Priming:
If you have specific areas of bare wood exposed from scraping, hit those with a high-quality exterior primer first. This spot-priming technique prevents tannin bleed-through. -
General Priming:
For drastic color changes or older wood, apply a full coat of primer over the entire house. I find this extra step invaluable for uniform sheen and longevity. -
Inspection:
Once the primer is dry, do a quick walk-around. Look for any missed cracks or holes that became visible after the white primer was applied, and fill them as needed.
Pro Tip: Weather Watch
Avoid painting in direct, hot sunlight or if rain is expected within 24 hours. The best temp range is usually 50-85°F.
Step 3: Applying the Main Color
-
Cutting In:
Starting at the top of the house (like the gables), use an angled brush to cut in the light gray paint along edges, corners, and under the eaves. -
Rolling the Siding:
Use a roller or a paint sprayer for broad sections of siding. If spraying, be sure to back-roll immediately to push the paint into the wood grain. -
Batten Detail:
Since this house features vertical board-and-batten siding, pay special attention to the sides of the battens (the raised strips). Use a brush to ensure full coverage in those crevices. -
Second Coat:
Allow the first coat to dry according to the manufacturer’s instructions, then apply a second coat for full depth of color and weather protection.
Level Up: Potted Accents
Coordinate your entryway by staining wooden planters (like the woven one shown) or painting pots in the same charcoal shade.
Step 4: The Charcoal Details
-
Window Trim & Doors:
Switch to your charcoal gray paint. Carefully paint window casings and sashes with an angled sash brush, keeping a steady hand for crisp lines. -
Shutters:
If your shutters are removable, take them down to paint them on sawhorses. Apply two coats of the dark charcoal, ensuring you get into every louver or panel groove. -
Doors and Garage:
Paint the entry door and garage doors in the same charcoal shade. For the front door especially, use a high-quality brush to minimize stroke marks for a furniture-like finish. -
Gutters and Downspouts:
To integrate the drainage system into the design, paint the downspouts black or charcoal to match the trim, turning a functional element into a sleek accent.
Step 5: Finishing Touches
-
Clean Up Lines:
Remove the painter’s tape slowly before the trim paint has fully cured to avoid peeling. Use a small artist brush to fix any little wobbles where the gray meets the charcoal. -
Re-install Fixtures:
Once everything is touch-dry, reinstall your light fixtures, house numbers, and shutters. Consider updating hardware to matte black to complement the new color scheme. -
Final Cleanup:
Fold up drop cloths and dispose of masking materials. A final sweep of the walkways leaves your renewed home looking pristine.
Step back and admire how this crisp, dual-tone palette completely refreshes the entire character of your home
BRUSH GUIDE
The Right Brush for Every Stroke
From clean lines to bold texture — master brush choice, stroke control, and essential techniques.
Explore the Full Guide
Navy Siding With Crisp White Trim
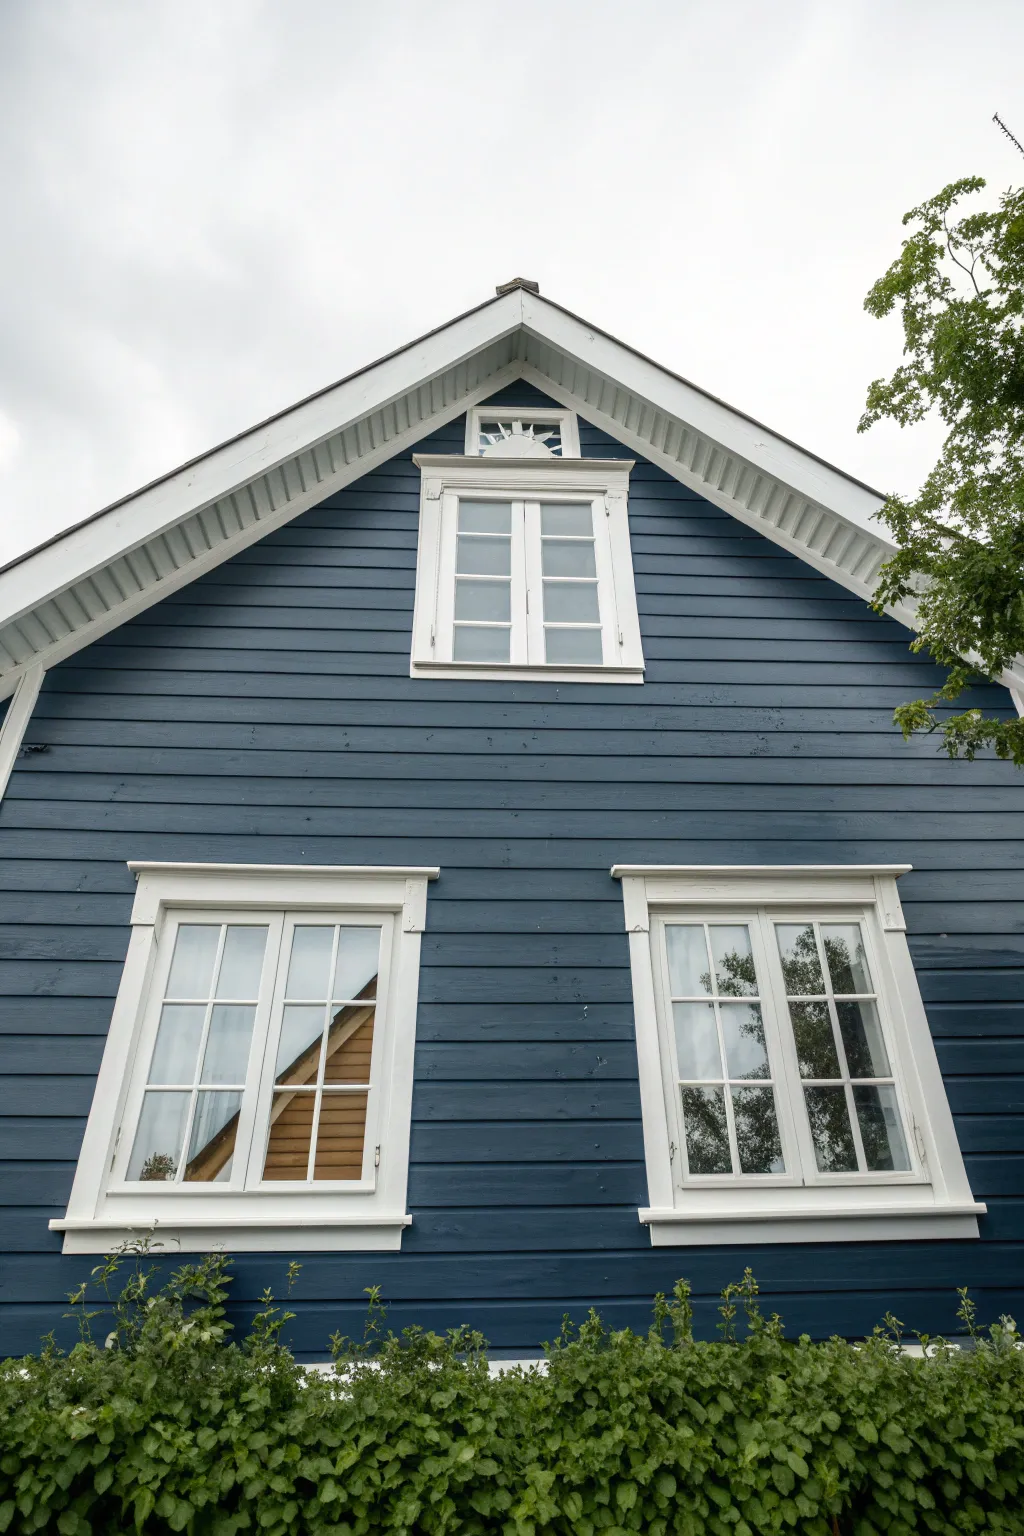
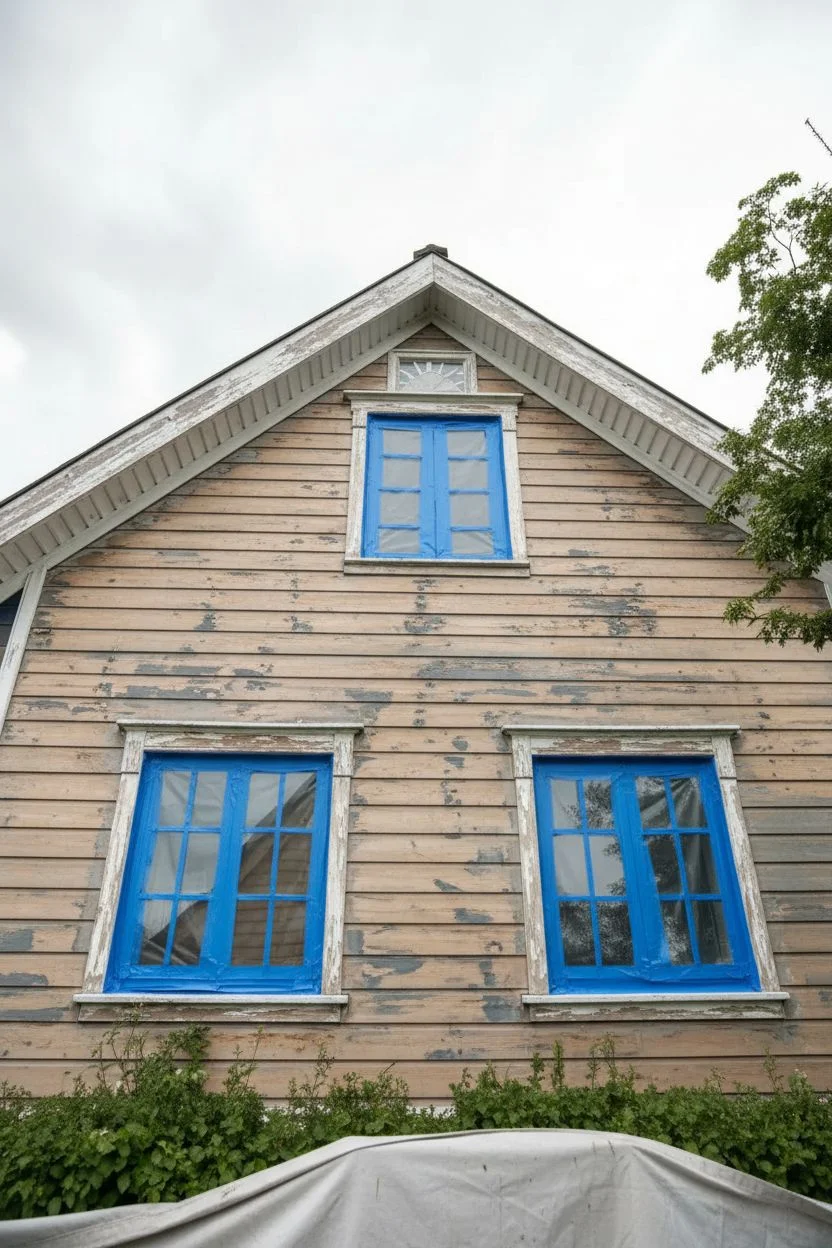
Transform your home’s exterior with a classic navy blue and white color scheme that feels both nautical and timeless. This project involves painting wood siding and trim for a deeply saturated, high-contrast finish that instantly boosts curb appeal.
Step-by-Step
Materials
- Exterior acrylic latex paint (Navy Blue, e.g., Hale Navy or similar)
- Exterior acrylic latex paint (Crisp White)
- Exterior primer
- Pressure washer (optional but recommended)
- Scraper and wire brush
- Exterior wood filler or caulk
- Sanding block (80-100 grit)
- Painter’s tape (exterior grade)
- Drop cloths
- Ladder
- Paint sprayer (optional for large areas)
- 4-inch exterior paintbrush
- 2-inch angled sash brush
- Paint roller and extension pole
Step 1: Preparation & Cleaning
-
Clean the surface:
Before any paint touches the wood, thoroughly wash the siding to remove dirt, mildew, and chalkiness. A pressure washer on a low setting works wonders, but scrubbing with a stiff brush and a TSP substitute is also effective. -
Allow to dry:
Let the wood dry completely for at least 24 to 48 hours. Painting over damp wood will trap moisture and cause blistering later. -
Scrape loose paint:
inspect the siding for any peeling or flaking paint. Use a paint scraper or wire brush to remove loose material until you have a solid edge. -
Sand rough areas:
Using an 80-100 grit sanding block, feather the edges of the scraped areas so there isn’t a harsh ridge between old paint and bare wood. -
Repair damage:
Fill any nail holes, cracks, or gaps in the siding with a high-quality exterior wood filler or paintable caulk. Smooth it out and let it cure according to the package instructions. -
Protect surroundings:
Lay down drop cloths over the bushes and ground near the foundation to catch drips. Mask off window glass carefully with exterior painter’s tape.
Step 2: Priming & Body Color
-
Prime bare spots:
Apply a coat of high-quality exterior primer to any bare wood exposed during scraping. If you are making a drastic color change, I find priming the entire surface helps ensure true color saturation for that deep navy. -
Cut in the edges:
Start applying the navy paint by ‘cutting in’ around the trim, windows, and under the eaves using a 4-inch brush. Work in manageable sections. -
Paint the siding:
Apply the navy blue paint to the main siding boards. Work horizontally, following the direction of the clapboards. If using a roller, back-brush immediately to work the paint into the wood grain and grooves. -
Maintain a wet edge:
To avoid lap marks (where wet paint overlaps dry paint), always keep a wet edge and work from top to bottom, finishing one full board length at a time if possible. -
Apply second coat:
Once the first coat is dry (usually 4 hours), apply a second coat of navy. Dark colors often require two or even three coats to achieve full opacity and depth without streakiness.
Pro Tip: Back-Brushing
Even if spraying, always follow with a brush (‘back-brushing’). This forces paint into the wood pores for better adhesion and longevity.
Step 3: Trim & Details
-
Prep the trim:
Ensure the window casings, fascia, and decorative attic vent are clean and taped off from the fresh navy siding if necessary (or simply use a steady hand). -
Paint window casings:
Using a 2-inch angled sash brush, apply the crisp white paint to the window frames. Paint the inner sashes first, then move to the outer frame and sill. -
Detail the attic vent:
For the decorative vent at the peak, use a smaller artist’s brush if needed to get into the crevices of the sunburst design without getting white on the navy siding. -
Paint the fascia:
Finish by painting the fascia boards under the roofline. Long, smooth strokes with a fully loaded brush will give the best coverage here. -
Clean up:
Remove the painter’s tape carefully while the final trim coat is still slightly tacky to prevent peeling. Clean up any drips immediately with a damp rag.
Level Up: Gloss Contrast
Use a satin finish for the navy siding but a semi-gloss or high-gloss for the white trim. The difference in sheen makes the details pop even more.
Step back and admire how the crisp white lines frame that deep blue for a stunning, modern look
Sage Green That Blends With Landscaping
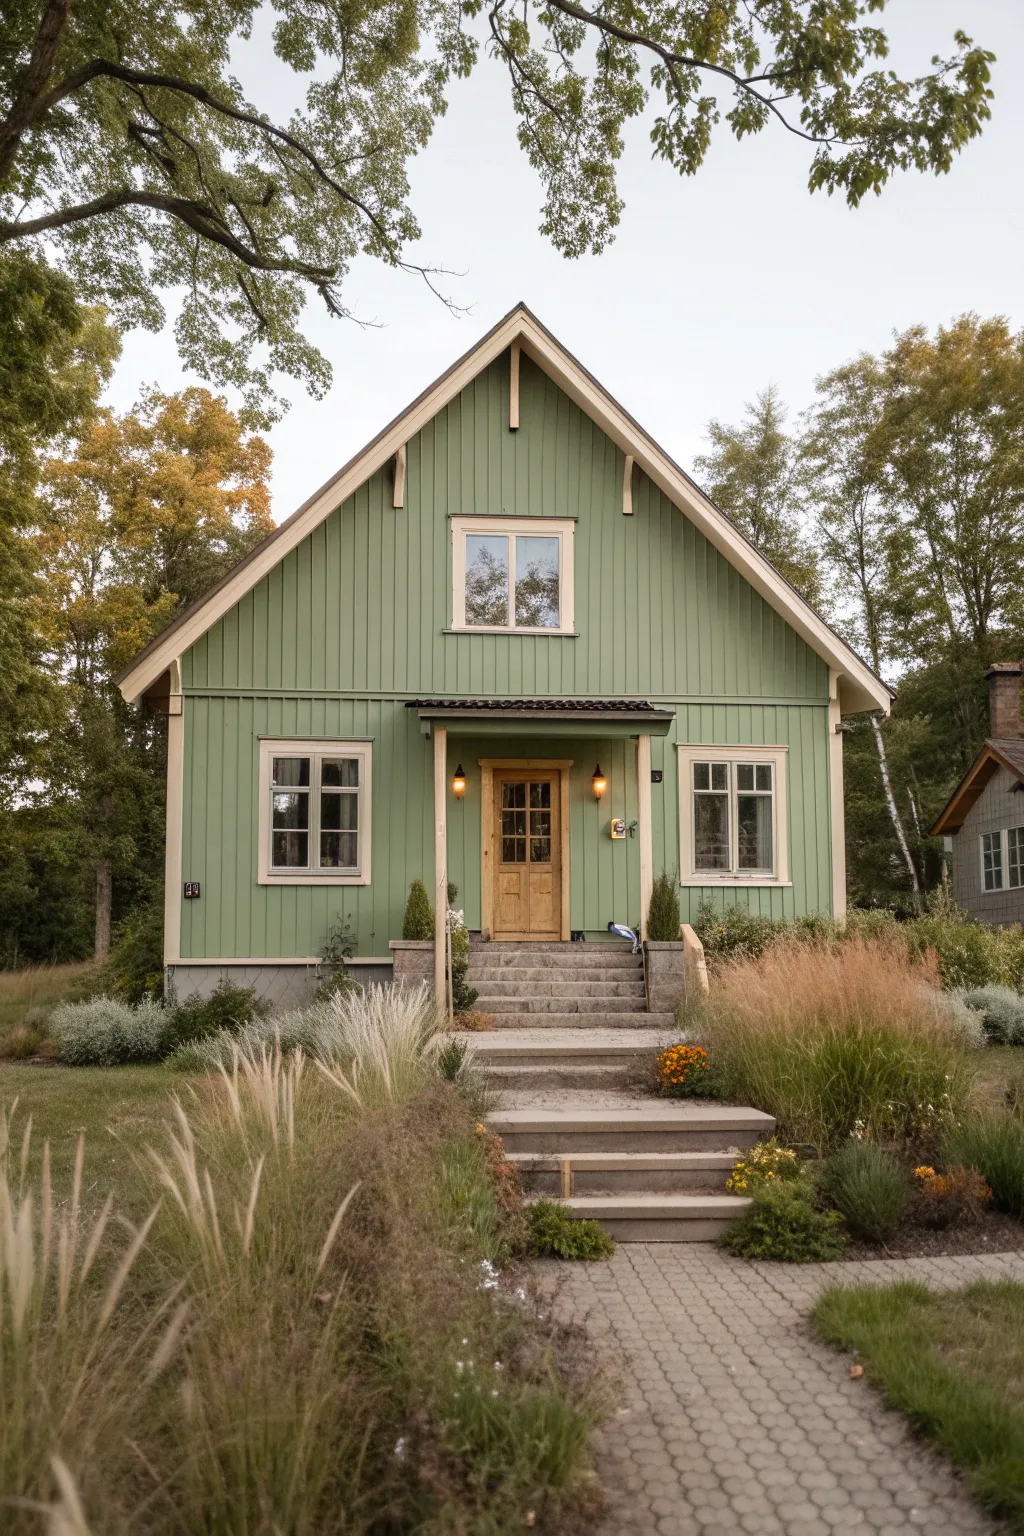
Transform your home’s exterior into a serene retreat that harmonizes perfectly with nature using a classic sage green palette. This project focuses on achieving a smooth, durable finish on vertical wood siding, accented by crisp cream trim and a warm natural wood door.
How-To Guide
Materials
- High-quality exterior latex paint (Sage Green)
- High-quality exterior trim paint (Cream/Off-White)
- Exterior wood stain/sealer (for front door)
- Pressure washer
- Exterior wood primer
- Caulk gun and exterior grade caulk
- Painter’s tape (exterior grade)
- Drop cloths
- Scrapers and sanding blocks (80-120 grit)
- Extension ladder
- Paint sprayer (optional but recommended for siding)
- Angled sash brushes (2.5 inch)
- Roller frame and 3/8 inch nap covers
- Stir sticks
Step 1: Preparation
-
Check the weather:
Before you even buy paint, check the forecast. You need a window of at least 2-3 dry days with temperatures between 50°F and 85°F to ensure proper curing. -
Clean the siding:
Use a pressure washer to thoroughly clean the entire exterior. Work from the top down to remove dirt, mildew, and chalky residue, but be careful not to gouge the wood. -
Scrape loose paint:
Once the house is dry, inspect the siding for peeling or flaking paint. Use a good carbide scraper to remove any loose material until you reach a solid edge. -
Sand rough edges:
Take a sanding block or orbital sander to the scraped areas. Feather the edges so they blend smoothly into the surrounding paint, preventing visible ridges later. -
Caulk gaps:
Walk around the house with a caulk gun. Fill any cracks around windows, door frames, or between siding boards to weather-proof the home and ensure a clean look. -
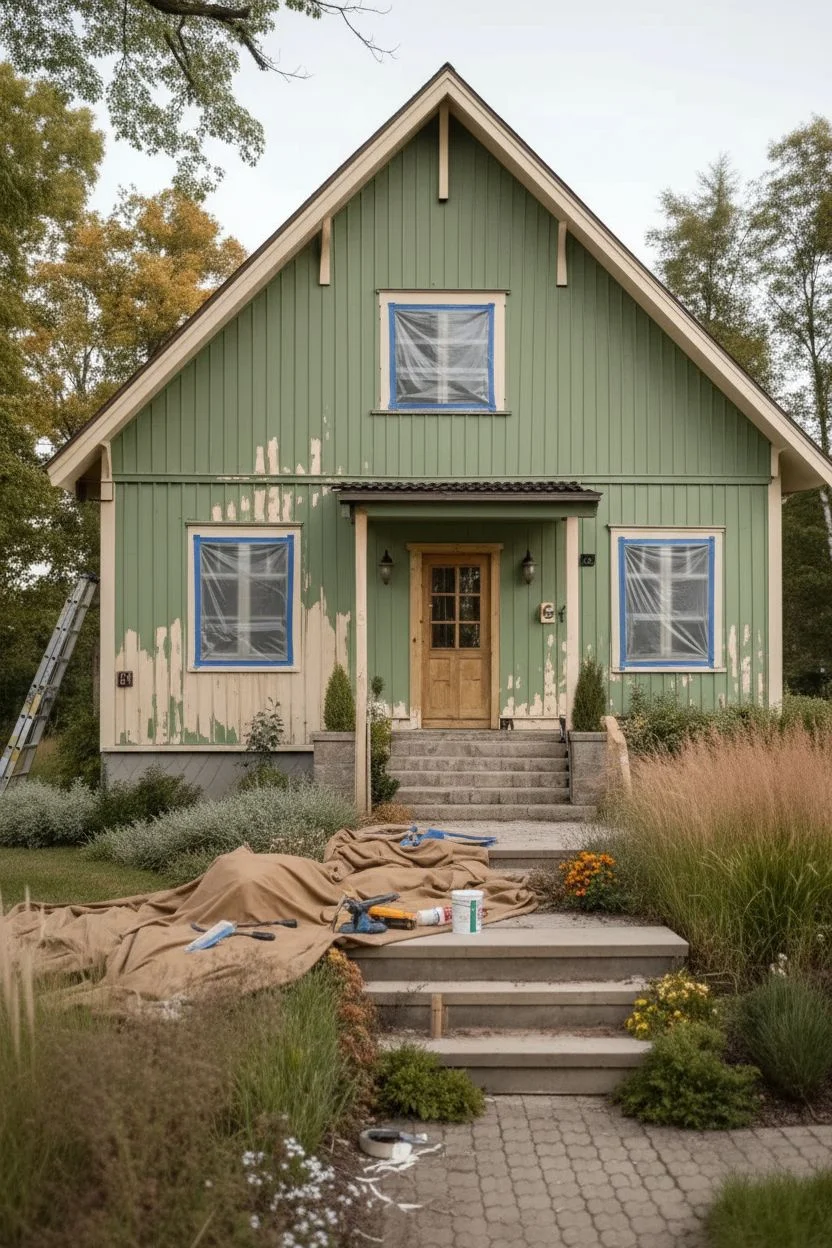
Protect the landscape:
Lay drop cloths over those beautiful ornamental grasses and shrubs near the foundation. I also tape plastic sheeting over windows and light fixtures. -
Prime bare wood:
Apply a high-quality exterior primer to any spots where you exposed raw wood. If you are making a drastic color change, prime the whole house.
Step 2: Painting the Siding
-
Cut in the edges:
Start by brushing the sage green paint along the roofline, corners, and around the trim where a roller or sprayer might not reach accurately. -
Apply the first coat:
Using a paint sprayer or a roller, apply the first coat of sage green to the vertical siding. Work in sections, maintaining a ‘wet edge’ to avoid lap marks. -
Back-brush the siding:
If you are spraying, have a helper follow immediately behind with a brush to work the paint into the wood grain and grooves for better adhesion. -
Let it dry completely:
Follow the manufacturer’s drying time instructions before considering a second coat. Rushing this step can cause tackiness or peeling. -
Apply the second coat:
Repeat the painting process for full coverage. Two coats are essential for that depth of color and to protect the wood from the elements.
Pro Tip: Sheen Choice
Use a satin or eggshell finish for the siding to hide imperfections, but switch to semi-gloss for the trim. It highlights the details and is easier to clean.
Step 3: Trim and Door Details
-
Tape off the siding:
Once the green siding is fully cure-dried (give it at least 24 hours), apply painter’s tape to the siding where it meets the window and door trim. -
Paint the window trim:
Use an angled sash brush to carefully paint the window frames and sills in your cream color. Two coats will give you that crisp, professional pop. -
Highlight the fascia:
Paint the roofline fascia boards and the decorative support brackets under the eaves in the same cream hue to define the home’s architecture. -
Refinish the door:
If your wooden door is looking tired, lightly sand it and apply a fresh coat of clear exterior sealer or stain to bring out the natural wood grain, contrasting beautifully with the green. -
Install fixtures:
Reattach your wall sconces, house numbers, and mailbox once all paint is dry. Removing the tape reveals your clean lines.
Troubleshooting: Lap Marks
Seeing uneven stripes? You likely let an edge dry mid-wall. Always paint full boards from top to bottom before moving horizontally to keep a wet edge.
Step back and admire how naturally your home now nestles into its surroundings with its fresh new coat

PENCIL GUIDE
Understanding Pencil Grades from H to B
From first sketch to finished drawing — learn pencil grades, line control, and shading techniques.
Explore the Full Guide
Taupe With Forest Green Shutters
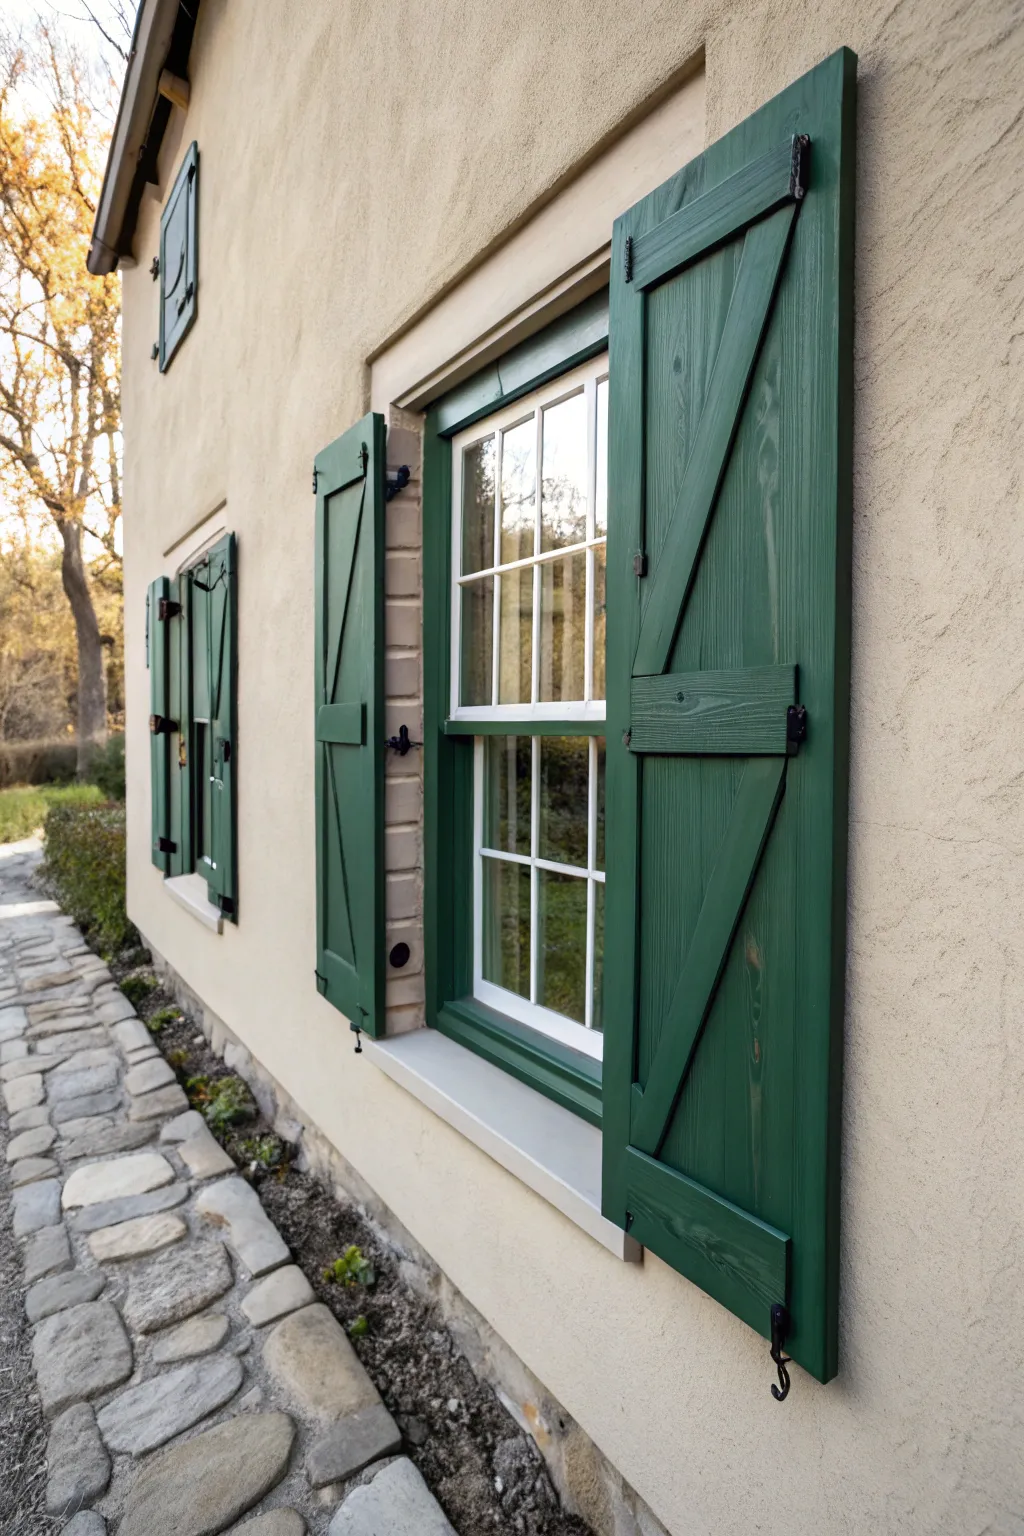
Transform your home’s exterior with a timeless color pairing that evokes classic countryside charm. This project involves painting wooden board-and-batten shutters in a deep forest green to contrast beautifully against warm, textured taupe walls.
Detailed Instructions
Materials
- Exterior acrylic latex paint (Forest Green, satin or semi-gloss finish)
- Exterior masonry paint (Taupe, flat finish)
- High-quality 2-inch angled sash brush
- 4-inch mini roller with 3/8-inch nap (for shutters)
- Larger roller with 3/4-inch nap (for stucco)
- Painter’s tape (exterior grade)
- Drop cloths
- Sandpaper (120 and 220 grit)
- Exterior primer
- Screwdriver or drill (for hardware removal)
- Stiff bristle brush (for cleaning stucco)
- Spackling or wood filler
Step 1: Preparation
-
Remove hardware:
Before dipping your brush, take the time to remove any existing shutter hardware, such as hinges and dogs. It’s tempting to paint around them, but removing them ensures a cleaner, professional finish and prevents paint buildup on the metal. -
Clean the surfaces:
Wash both the shutters and the stucco wall thoroughly. I find a pressure washer on a low setting works best for the stucco to get into the deep texture, while a simple scrub with soapy water and a sponge is safer for the wood shutters. -
Repair imperfections:
Inspect the wood for any rot or cracks and fill them with exterior wood filler. For the stucco, patch any hairline cracks with masonry caulk. Let all repairs dry completely before sanding smooth. -
Sand the wood:
Lightly sand the shutters with 120-grit paper to remove loose paint and create a ‘tooth’ for the new coat. Follow up with 220-grit for a smoother finish, then wipe away all dust with a tack cloth. -
Masking:
Apply exterior painter’s tape carefully around the window trim and dividing lines where the wood meets the stucco. Lay down heavy-duty drop cloths over the stone pathway to protect it from drips.
Stuck latches?
If paint buildup makes hardware stick, boil old metal hinges in water with a little baking soda. The old paint will peel right off, leaving clean metal ready for reinstallation.
Step 2: Painting the Stucco
-
Prime the wall:
If you are changing the color drastically or the stucco is bare, apply a coat of masonry primer. Use a thick-nap roller to ensure the primer gets into all the nooks and crannies of the texture. -
Cut in the edges:
Using your 2-inch brush, paint the taupe color along the edges where the roller can’t reach—under eaves, around the window frame, and near the ground. -
Roll the main surface:
Load your heavy-nap roller with the taupe masonry paint. Apply it in ‘W’ patterns, working in manageable sections to keep a wet edge. The texture of the stucco will require you to use a bit more pressure to fill the pores. -
Second coat:
Once the first coat is dry (usually 4-6 hours), apply a second coat for full, even coverage. This depth of color is crucial for achieving that warm, earthy look.
Step 3: Painting the Shutters
-
Prime the wood:
Apply a high-quality exterior wood primer to the shutters, sealing any bare wood spots. Pay special attention to the end grain at the top and bottom of the boards, as this is where moisture often intrudes. -
Paint the detailed areas:
Start with your angled brush to paint the recessed areas, the spaces between the boards, and the edges of the cross-battens. Getting these tricky spots done first prevents drips later. -
Roll the flat surfaces:
Use the 4-inch mini roller for the flat vertical boards and the horizontal battens. This helps achieve a smooth finish without heavy brush marks. Work with the grain of the wood. -
Tip off the paint:
Immediately after rolling, lightly drag your brush tip over the wet paint in long, continuous strokes (tipping off). This removes the roller texture and mimics a hand-painted look. -
Apply finish coat:
Allow the first coat of green to dry overnight. Lightly scuff sand with fine grit paper if needed, clean the dust, and apply a second coat for a rich, deep forest green that stands up to the elements. -
Reinstall hardware:
Once the paint has cured for at least 24 hours, carefully reattach your hinges and shutter dogs. This is the moment the look truly comes together.
Pro Tip: Weather Matters
Avoid painting in direct sunlight or if rain is forecasted within 24 hours. Direct sun dries latex paint too fast, causing lap marks, while rain can ruin the finish before it sets.
Step back and admire how the deep green breathes new life and elegance into your home’s façade
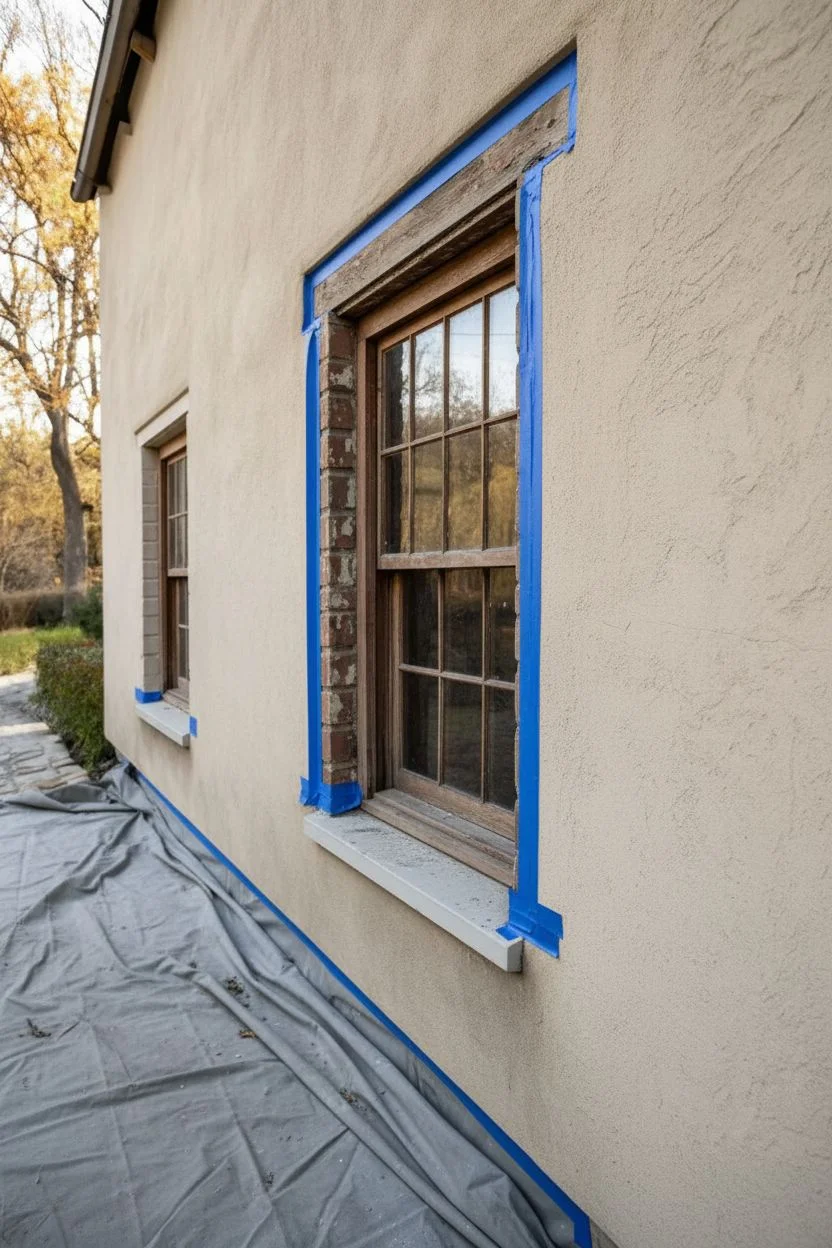
High-Contrast Window Frames for a Modern Look

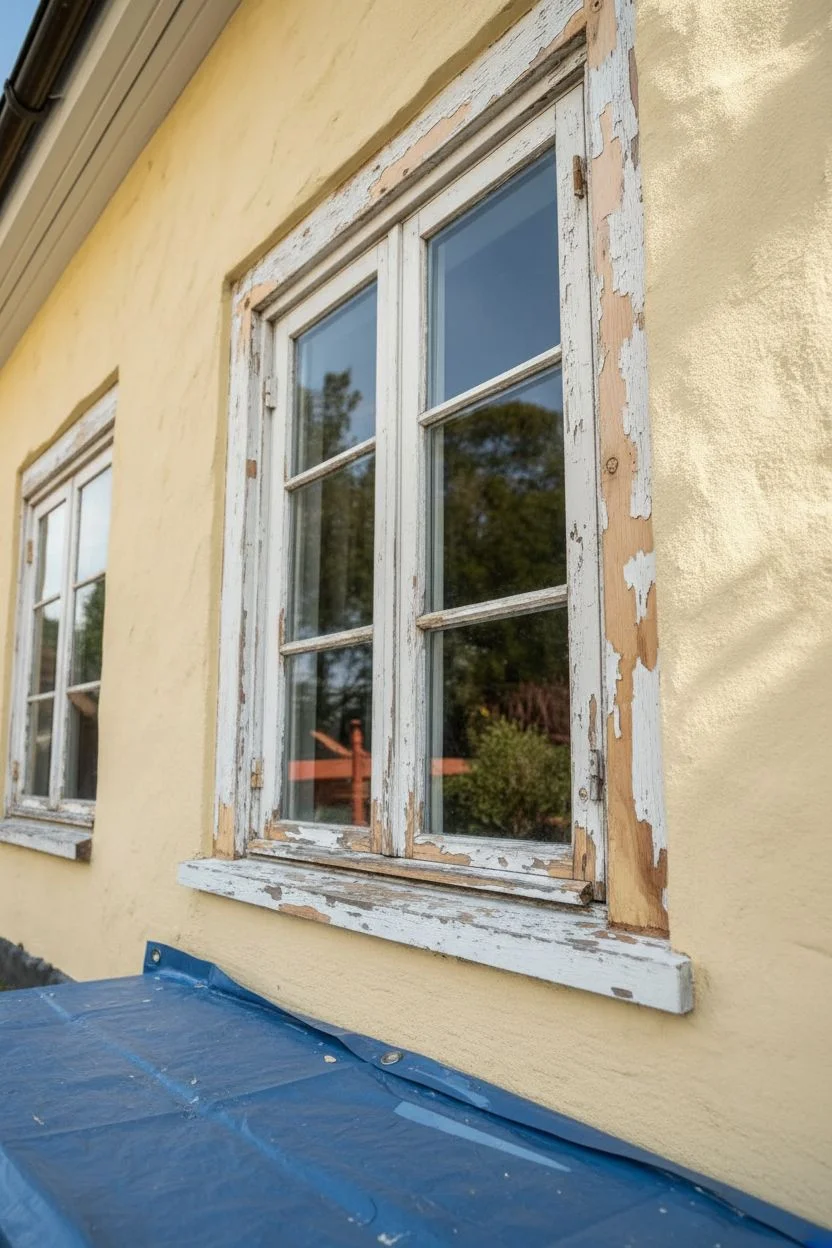
Transform your home’s exterior instantly by painting wooden window frames in a bold, dark charcoal or soft black. This project creates a striking contrast against lighter stucco or siding, giving traditional architecture a fresh and contemporary edge.
Step-by-Step
Materials
- Exterior wood primer
- High-quality exterior trim paint (satin or semi-gloss finish)
- Medium-grit sandpaper (120-150 grit)
- Fine-grit sandpaper (220 grit)
- Painters tape (exterior grade)
- Drop cloths or plastic sheeting
- Angled sash brush (1.5 to 2 inch)
- Scraper or putty knife
- Wood filler (exterior grade)
- Clean rags
- Mild detergent and water bucket
Step 1: Preparation & Cleaning
-
Check the weather:
Before you begin, ensure you have a stretch of clear weather with mild temperatures, ideally between 50°F and 85°F, so the paint cures properly without drying too fast or freezing. -
Protect the area:
Lay down drop cloths or plastic sheeting directly under the window to catch any paint drips or sanding dust, protecting your garden beds or walkways. -
Inspect the woodwork:
Examine the window frames closely for any rot or loose paint. Use a scraper to remove any flaking or peeling areas to ensure a solid base. -
Cleaning:
Wash the frames thoroughly with water and a mild detergent to remove dirt, mildew, and pollutants. Let the wood dry completely before moving on. -
Repair imperfections:
Fill any holes, cracks, or gouges with exterior wood filler. Smooth it over with a putty knife and allow it to dry according to the manufacturer’s instructions.
Clean Lines Hack
Score the edge of the painter’s tape with a razor blade before pulling it off. This breaks the seal between paint and tape, ensuring crisp lines on the glass.
Step 2: Sanding & taping
-
Initial abrasion:
Sand the entire frame with medium-grit sandpaper. The goal isn’t to remove all old paint, but to scuff the surface so the new primer adheres well. -
Smooth the filler:
Once the filler is dry, sand those specific spots flush with the rest of the wood using fine-grit sandpaper for a seamless finish. -
Dust off:
Wipe down the entire frame with a clean, damp rag to remove all sanding dust. -
Mask the glass:
Carefully apply painter’s tape to the glass panes, leaving a tiny gap (about 1/16th inch) between the tape and the wood. This allows the paint to seal the glazing to the glass preventing water intrusion. -
Protect the siding:
Apply tape to the exterior wall surrounding the frame if you are worried about brush slips on the stucco or siding.
Step 3: Priming & Painting
-
Apply primer:
Using your angled sash brush, apply a coat of high-quality exterior primer. This is crucial if you are making a drastic color change or painting over bare wood spots. -
Let it cure:
Allow the primer to dry fully. I usually like to wait a bit longer than the can suggests to ensure it’s rock hard before top-coating. -
First coat of paint:
Stir your dark exterior trim paint thoroughly. Dip your brush about an inch into the paint and apply the first coat, starting with the inner muntins (the grid bars) and working outward to the main frame. -
Watch for drips:
Inspect corners and crevices immediately after painting them to catch any runs or drips before they tack up. -
Dry time:
Let the first coat dry completely. Dark colors sometimes take a bit longer to set than lighter ones. -
Light sanding:
For an ultra-smooth professional finish, lightly sand the first coat with fine-grit sandpaper and wipe away the dust. -
Final coat:
Apply the second coat of paint, using long, smooth strokes to level the paint and hide brush marks. -
Remove tape:
Carefully peel away the painter’s tape while the paint is still slightly tacky to prevent peeling the new skin of paint off firmly.
Hardware Upgrade
For a true transformation, remove old hardware before painting. Once the fresh black paint cures, install new brass or matte black latches.
Step back and enjoy the dramatic facelift your home’s exterior has just received


Paint the Front Door as a Focal Point
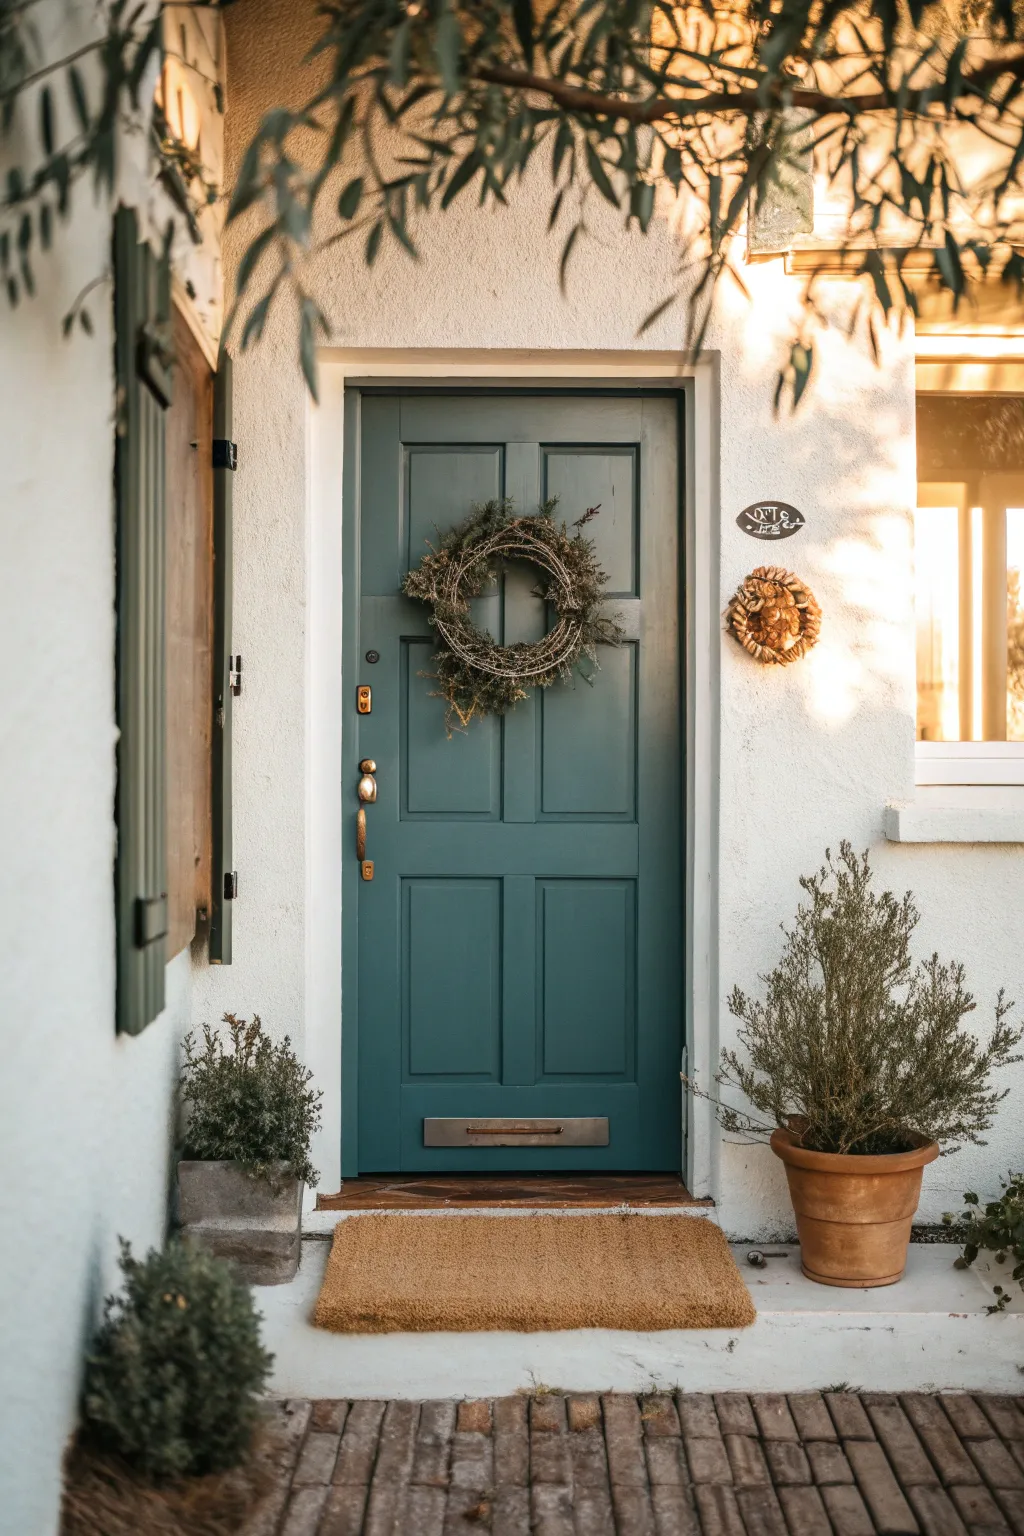
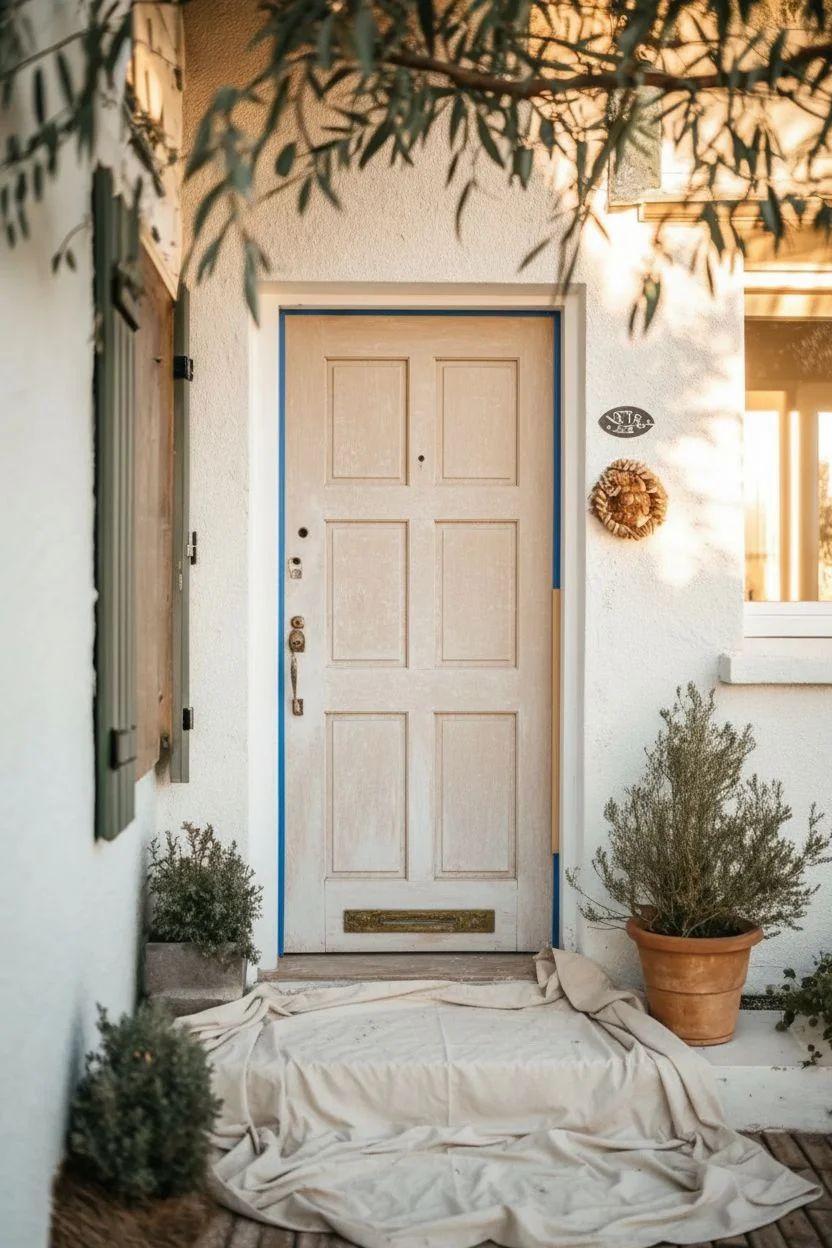
Transform your home’s curb appeal with a sophisticated teal door that acts as a welcoming focal point against white stucco. This project captures the essence of a sun-drenched cottage entry, complete with classic brass accents and a natural finish.
Step-by-Step Guide
Materials
- Exterior semi-gloss paint in deep teal (e.g., Farrow & Ball Inchyra Blue)
- Exterior primer (grey-tinted recommended)
- High-grit sandpaper (220-grit)
- Sanding sponge
- Painter’s tape (exterior grade)
- Drop cloths
- Screwdriver (for hardware removal)
- Mild detergent and sponge
- 2-inch angled sash brush
- 4-inch foam roller
- Small roller tray
Step 1: Preparation
-
Check the conditions:
Choose a day with mild weather, ideally between 50°F and 80°F, and avoid painting in direct, harsh sunlight to prevent the paint from drying too quickly. -
Remove hardware:
Use a screwdriver to carefully remove the knocker, mail slot, peephole, and kickplate. If the handle and deadbolt are complex, tape them off meticulously, but removal is best for a clean finish. -
Clean surface:
Wash the entire door with mild detergent and water to remove dirt, grease, and grime. Rinse thoroughly and let it dry completely. -
Protect surroundings:
Slide a drop cloth under the door to catch drips. Open the door slightly to ensure you can reach all edges without sticking. -
Sand for adhesion:
Lightly sand the existing finish with 220-grit sandpaper to create a ‘tooth’ for the new paint. Use a sanding sponge to get into the recessed corners of the panels. -
Dust off:
Wipe away all sanding dust with a damp rag or tack cloth. Any remaining dust will cause a gritty texture in your final coat.
Sticky Situation?
If the door sticks to the weatherstripping after closing, rub a little candle wax or clear bar soap along the edges of the door frame to reduce friction.
Step 2: Painting
-
Tape edges:
Apply painter’s tape to the weather stripping, glass (if any), and hinges. Press the edges down firmly to prevent bleed-through. -
Paint the panels:
Start with the recessed rectangular panels. Use the angled sash brush to paint inside the corners and edges first, then smooth out the flat center of the panel. -
Paint center stile:
Paint the vertical strip running down the middle of the door, between the panels, using your brush or a small roller depending on width. -
Paint rails:
Move on to the horizontal rails (the top, middle, and bottom strips). Feather the edges where they meet the vertical stiles to avoid hard lines. -
Paint outer stiles:
Finish by painting the two long vertical strips on the far left and right sides of the door. I like to use long, continuous strokes here for the smoothest look. -
Check edges:
Don’t forget to paint the edge of the door that is visible when it opens inward. If the door swings out, paint the hinge side edge. -
Dry and sand:
Allow the first coat to dry according to the manufacturer’s instructions. Once dry, lightly sand with very fine grit paper to smooth out any brush marks. -
Second coat:
Apply a second coat following the same order: panels, center stile, rails, then outer stiles. This deepens the teal color and ensures solid coverage.
Step 3: Finishing Touches
-
Remove tape:
Carefully peel off the painter’s tape while the paint is still slightly tacky to ensure a crisp, clean line. -
Polish hardware:
While the door dries, clean and polish your brass hardware so it shines against the new dark paint. -
Reinstall hardware:
Once the door is fully cured (usually 24 hours), screw the mail slot, knocker, and handle back into place. -
Style the entry:
Complete the look by adding a natural twig wreath and placing potted greenery, like rosemary, on either side of the step.
Make It Glossy
For a ultra-luxurious, European look shown in some high-end homes, use a high-gloss exterior enamel instead of semi-gloss to make the deep teal color pop.
Enjoy the fresh, inviting entrance that perfectly bridges the gap between classic charm and modern color
Match the Garage Door to Your Accent Color
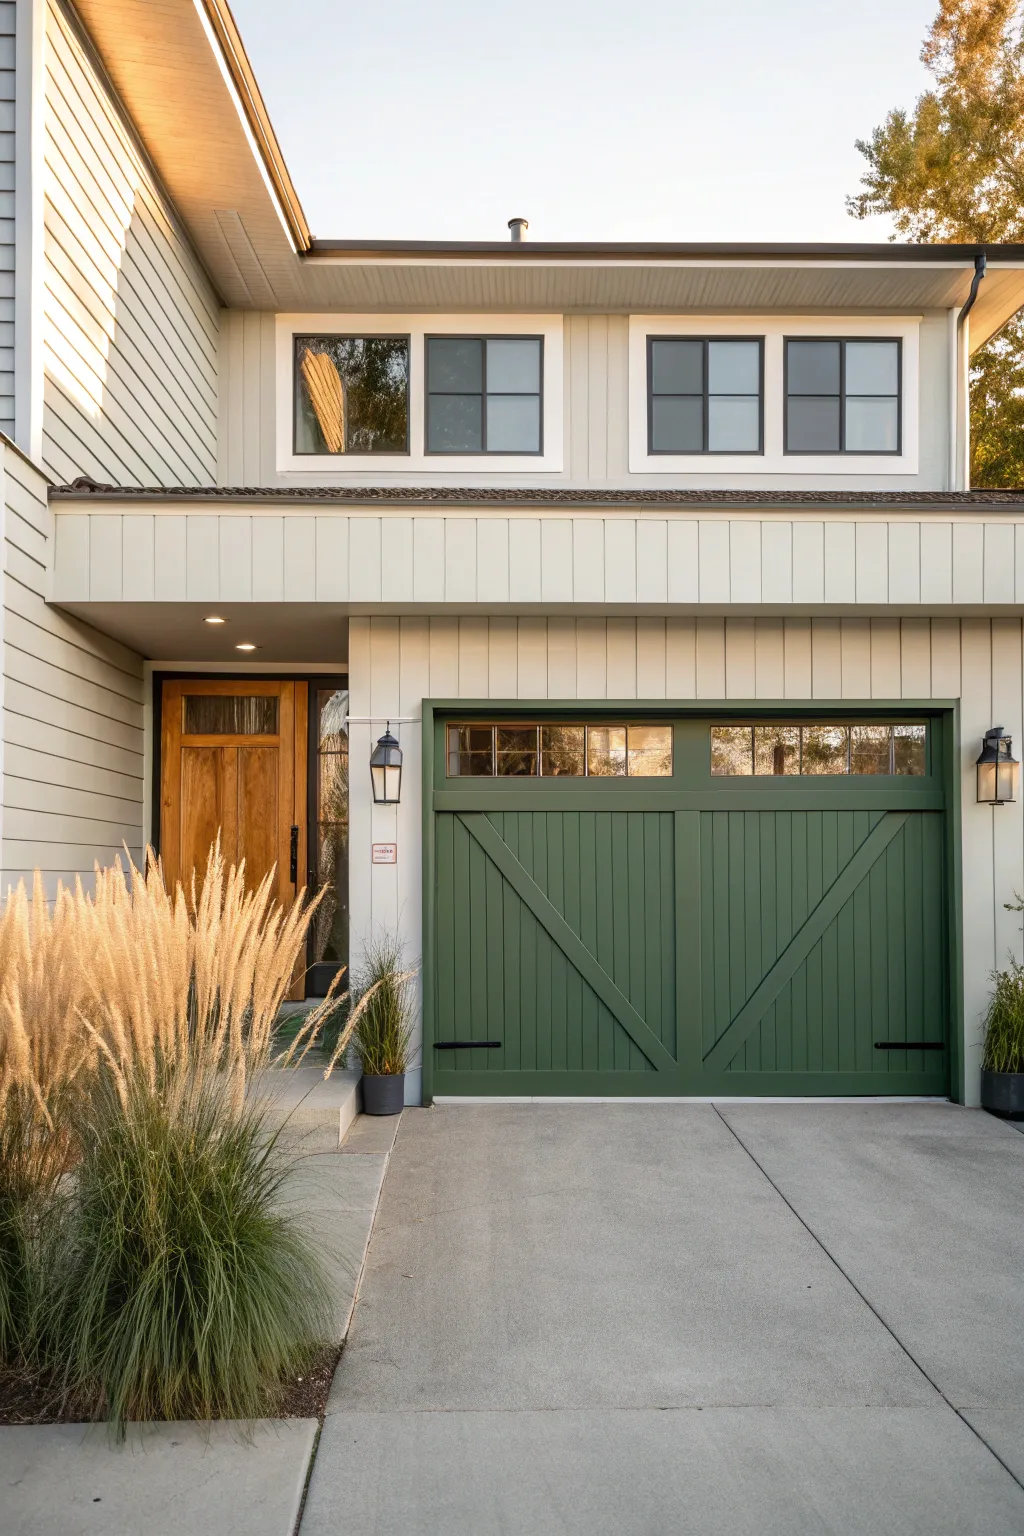
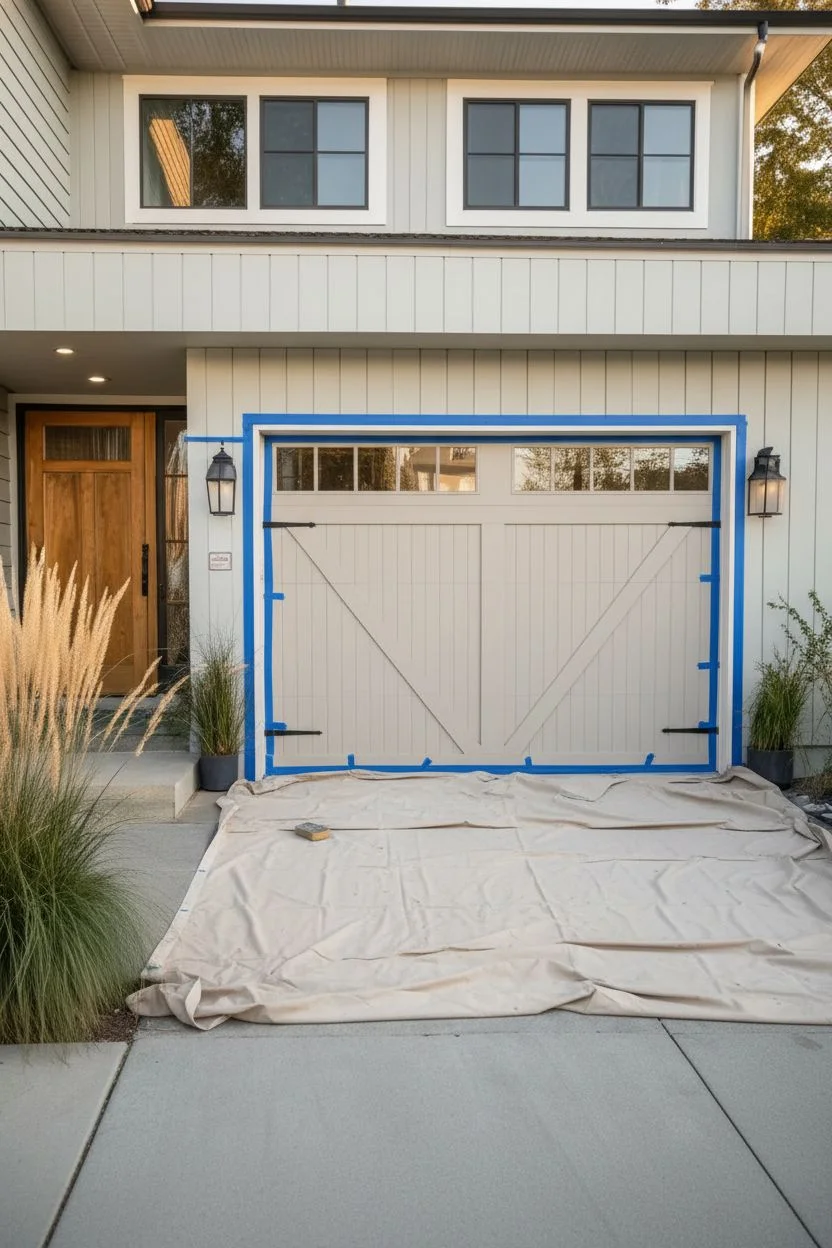
Tie your home’s exterior together by bringing a bold accent color to your largest canvas: the garage door. This project creates a cohesive, custom look by mirroring deep forest green tones on both the door and trim for instant curb appeal.
Step-by-Step Tutorial
Materials
- Exterior acrylic latex paint (Forest Green, semi-gloss)
- Exterior primer (tintable recommended)
- Trisodium Phosphate (TSP) cleaner
- Sanding sponge (medium grit)
- Painter’s tape (exterior grade)
- Drop cloths or plastic sheeting
- 4-inch roller with 3/8-inch nap
- 2-inch angled sash brush
- Stir sticks
- Paint tray and liners
- Step ladder
- Rags for cleanup
Step 1: Preparation and Cleaning
-
Check the weather:
Before starting, check your local forecast. You need at least 2-3 days of dry weather with temperatures between 50°F and 90°F for the paint to cure properly. -
Clean the surface:
Dissolve TSP cleaner in a bucket of warm water according to package directions. Scrub the entire garage door surface thoroughly to remove dirt, grime, and any oily residue from car exhaust. -
Rinse and dry:
Rinse the soap off completely with a hose and allow the door to dry fully. Any trapped moisture underneath the new paint can cause bubbling later. -
Scuff sand the finish:
Use a medium-grit sanding sponge to lightly sand the existing finish. You aren’t trying to strip the paint, just creating a rougher ‘tooth’ for the new primer to grip. -
Protect surrounding areas:
Lay down drop cloths on the driveway. Apply exterior painter’s tape carefully around the door frame, siding, and any hardware handles or hinges you can’t remove.
Don’t Paint Closed
To prevent the door from sticking shut, open the garage door slightly while paint dries on the edges. This keeps the fresh paint from bonding to the weatherstripping.
Step 2: Priming the Surface
-
Spot prime damage:
If there are any bare metal or wood spots exposed from sanding, hit those areas with a specific spot primer first to prevent rust or bleed-through. -
Apply full primer coat:
Roll a coat of quality exterior primer over the flat panels. Use your angled brush to work the primer into the recessed grooves and corners where the roller can’t reach. -
Let it cure:
Allow the primer to dry completely. This usually takes about 2-4 hours, but check your specific manufacturer’s instructions.
Sticky Situation
If the door feels tacky even after drying, lightly dust the weatherstripping with talcum powder. This prevents the paint from pulling off when the door opens.
Step 3: Painting the Details
-
Start with recessed areas:
Begin painting with your 2-inch angled brush. Focus on the inset panels, window frames (if applicable), and deep grooves first. I prefer doing this tedious part first so the roller can smooth out any brush marks later. -
Edging the perimeter:
Carefully cut in the paint around the very edges of the door where it meets the weatherstripping, being careful not to paint the rubber seal itself. -
Check for drips:
Monitor your brushwork closely. Gravity will pull excess paint down from corners, so smooth out any drips immediately before they tack up.
Step 4: Rolling the Main Panels
-
Load the roller:
Pour your Forest Green paint into a tray. Load the 4-inch roller evenly, ensuring it’s saturated but not dripping. -
Roll the stiles and rails:
Paint the vertical stiles (upright sections) and horizontal rails. Use long, smooth strokes to maintain a wet edge. -
Blend the sections:
As you move from section to section, lightly back-roll over the areas where brush work meets roller work to create a uniform texture. -
First coat drying:
Let the first coat dry for at least 4-6 hours. Don’t rush this; exterior paint needs time to set up or the second coat will drag and lift the first one. -
Apply second coat:
Repeat the process for a second coat. The deep green color will look much richer and more opaque after this layer. -
Remove tape:
While the final coat is still slightly tacky (not fully dry), carefully peel away the painter’s tape at a 45-degree angle to ensure a crisp clean line. -
Reattach hardware:
Once the door is fully cured (give it 24 hours if possible), reattach any handles or decorative hinges you removed earlier.
Step back and admire how a simple color change completely transforms the character of your home
Porch Columns in Clean, Bright White
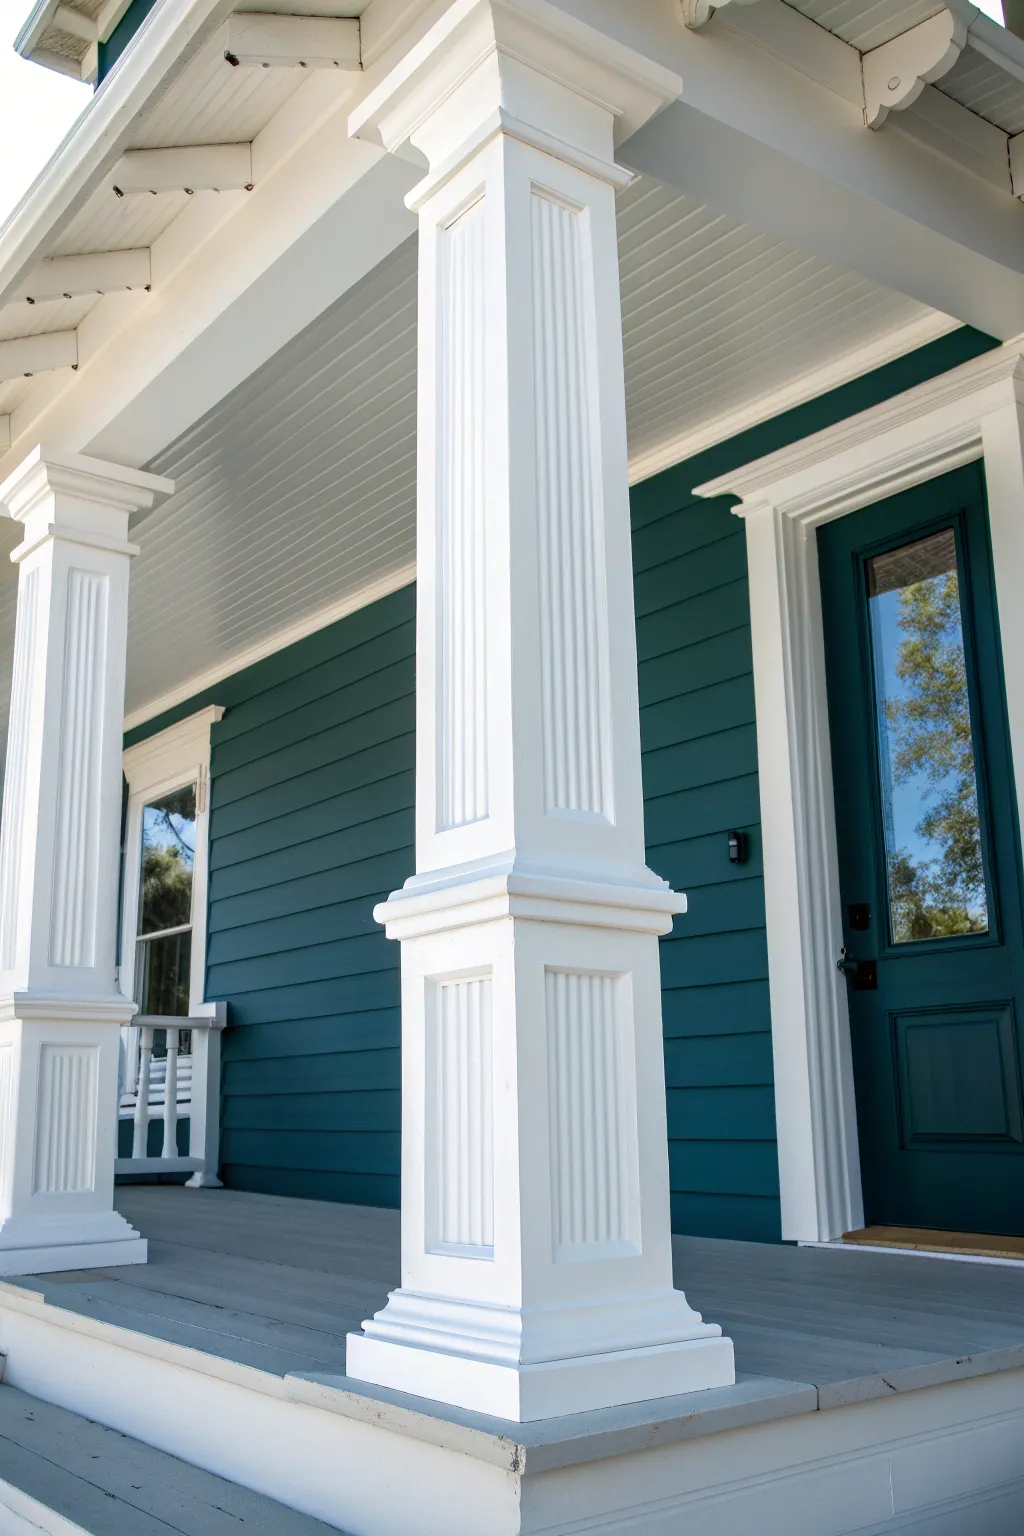
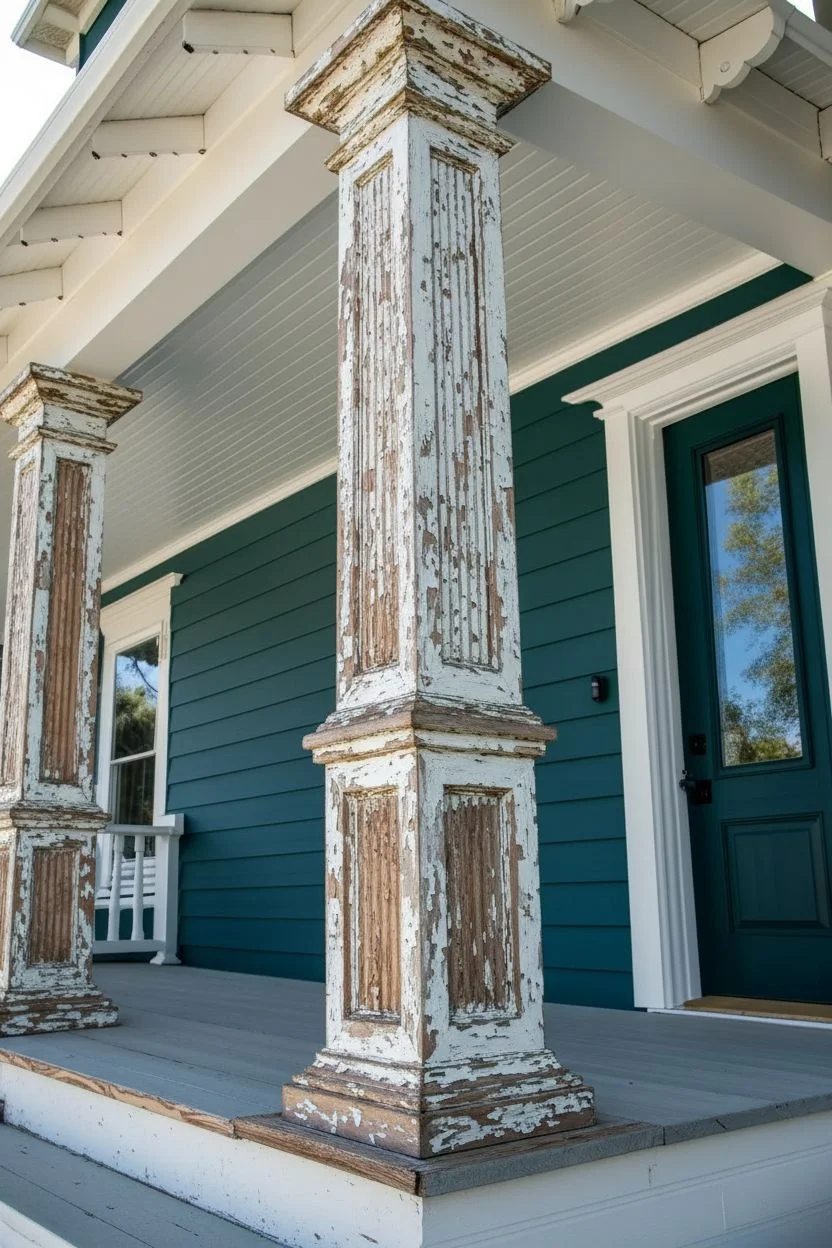
Give your home’s entrance a grand and polished look by refreshing worn porch columns with a coat of brilliant, clean white paint. This project highlights architectural details like fluting and molding, creating a stunning contrast against darker siding that instantly elevates curb appeal.
Step-by-Step Guide
Materials
- Exterior acrylic latex paint (Semi-gloss or Gloss White)
- Exterior primer (bonding)
- Pressure washer or bucket and scrub brush
- TSP (Trisodium Phosphate) substitute or exterior cleaner
- Wood filler or exterior caulk
- Caulk gun
- Sandpaper (80-grit and 120-grit)
- Sanding block or orbital sander
- Tack cloths
- Painter’s tape (multi-surface)
- Drop cloths
- 2-inch angled sash brush (synthetic bristles)
- 4-inch foam roller or mini roller (optional for flat faces)
- Putty knife
- Scraper
Step 1: Preparation & Cleaning
-
The initial assessment:
Start by inspecting every inch of your column for rot, loose paint, or existing damage. If the wood feels soft or spongy to the touch, you will need to repair or replace those sections before painting. -
Scraping away the old:
Using a sharp scraper and putty knife, remove any loose, peeling, or chipping paint. Be aggressive enough to remove the failing layers but gentle enough not to gouge the wood underneath. -
Cleaning the surface:
Mix your TSP substitute or exterior cleaner with water in a bucket. Scrub the columns thoroughly to remove dirt, mildew, and chalky residue, or use a pressure washer on a low setting if the wood is sturdy. -
Letting it dry completely:
Allow the wood to dry for at least 24 to 48 hours. Painting over damp wood is a surefire way to get bubbling and peeling later on, so patience here is mandatory.
Step 2: Repair & Protect
-
Filling imperfections:
Once dry, apply exterior wood filler to any gouges, nail holes, or deep scratches. For the joints between trim pieces, use a high-quality exterior caulk to ensure a seamless look and prevent water intrusion. -
Sanding for adhesion:
After the repairs have cured, sand the entire column. Start with 80-grit paper on rough spots and move to 120-grit for a smooth finish. This step scuffs the old glossy paint so the new coat sticks well. -
Removing the dust:
Wipe down the entire column with a tack cloth or a damp rag. I find that leaving even a little dust behind can create a gritty texture in the final finish. -
Masking off the area:
Lay down drop cloths to protect the porch floor. Apply painter’s tape carefully around the base of the column where it meets the floor and at the top where it meets the ceiling to ensure crisp lines.
Sticky Situation?
If paint bridges the gap between the tape and wood, score along the tape edge with a sharp utility knife before pulling. This prevents peeling your new paint off the column.
Step 3: Priming & Painting
-
Applying the primer:
Brush on a coat of high-quality bonding exterior primer. This is especially crucial if you have exposed raw wood or are covering a darker color. Use your brush to get into the deep grooves of the fluting. -
Drying and checking:
Let the primer dry according to the can’s instructions. Check for any bleed-through or rough spots; a quick light sanding might be needed one last time before the topcoat. -
Painting the details first:
Load your 2-inch angled sash brush with the bright white exterior paint. Start by painting the intricate areas first—the fluted grooves, the molding curves, and the corners. -
Smoothing the grooves:
As you paint the flutes, watch out for drips pooling at the bottom. Brush upwards and feather the paint out to keep the layers thin and even. -
Painting the flat faces:
Move on to the flat, square sections of the column. You can continue using your brush for a traditional, hand-painted texture, or switch to a small foam roller for a faster, smoother application on these broader surfaces. -
Applying the second coat:
Allow the first coat to dry completely. Apply a second coat using the same method—details first, then flat surfaces—to achieve that solid, brilliant white opacity. -
Removing the tape:
While the final coat is still slightly tacky (not wet, but not fully cured), carefully peel away the painter’s tape at a 45-degree angle to keep the paint from tearing. -
Final inspection:
Check your work for any missed spots or heavy brush marks. A tiny artist’s brush can be helpful here to touch up any minor imperfections near the floor or siding.
Brush Maintenance Tip
Wrap your brush tightly in plastic wrap or a plastic bag between coats. This keeps the paint wet and the bristles soft, saving you from washing it out multiple times a day.
Step back and enjoy the fresh, welcoming brightness your newly painted columns bring to your entryway
Paint the Foundation to Ground the House

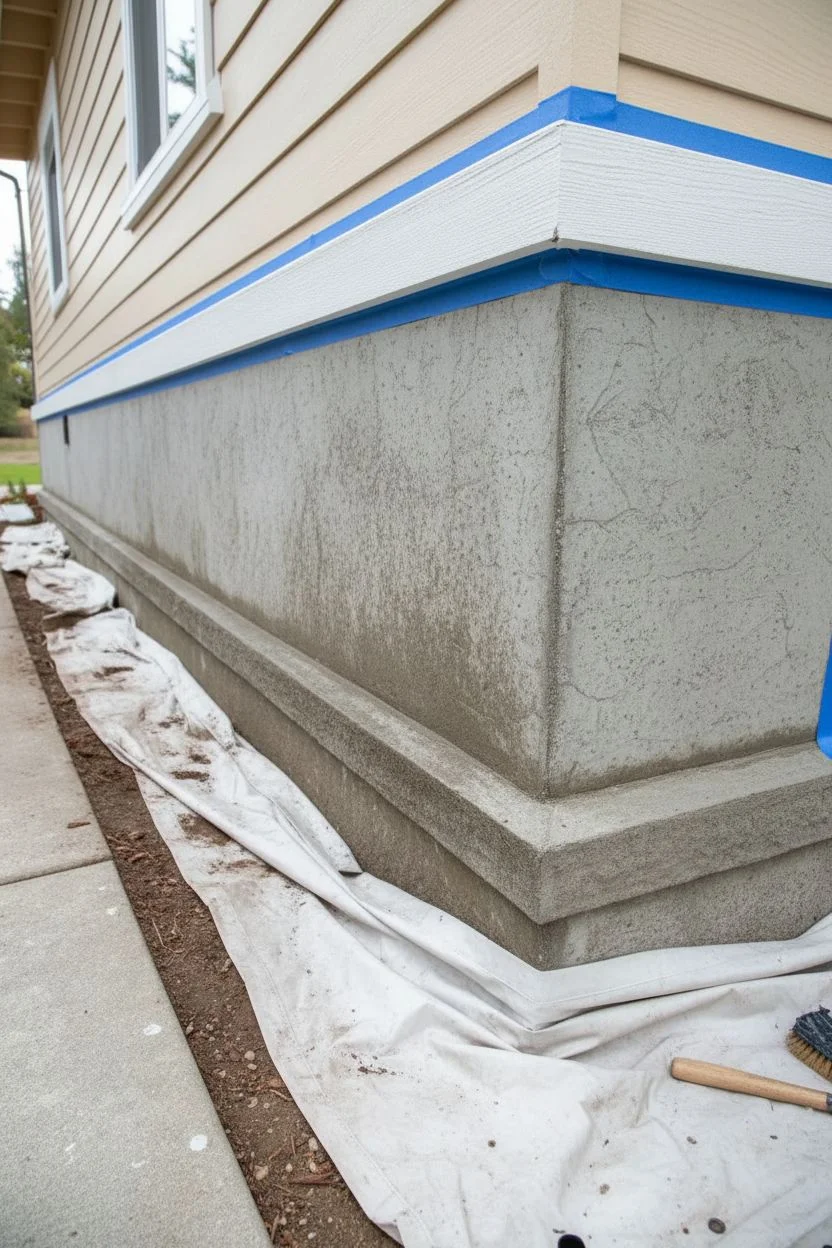
Transform the often-overlooked concrete base of your home into a sleek, modern architectural feature. This project uses high-contrast slate grey masonry paint to anchor light-colored siding, creating a sophisticated visual weight that makes the whole house feel polished.
Detailed Instructions
Materials
- Stiff-bristle scrubbing brush
- Pressure washer (optional)
- Masonry cleaner or TSP substitute
- Exterior masonry primer (bonding primer)
- High-quality elastomeric masonry paint (Dark Slate Grey)
- Painter’s tape (exterior grade)
- Drop cloths or plastic sheeting
- 4-inch paintbrush (for cutting in)
- High-nap roller cover (3/4 inch or 1 inch for rough surfaces)
- Roller frame and extension pole
- Wire brush (for loose concrete)
Step 1: Cleaning and Prep
-
Assess the Surface:
Begin by inspecting the concrete foundation for any large cracks or loose, flaking concrete. Use a wire brush to knock away any loose debris or old peeling paint. -
Clear vegetation:
Pull back any mulch, dirt, or plants at least 6-8 inches away from the wall. You need clear access to the very bottom edge where the concrete meets the earth. -
Scrub the concrete:
Mix a masonry cleaner or TSP substitute with water according to the package directions. Scrub the surface vigorously with a stiff-bristle brush to remove dirt, efflorescence (white salty deposits), and mildew. -
Rinse thoroughly:
Use a garden hose or a pressure washer on a low setting to rinse away all the cleaning solution. Let the concrete dry completely, which usually takes at least 24 hours of good weather. -
Mask the siding:
Apply exterior-grade painter’s tape along the bottom edge of the siding or trim where it meets the foundation. Press the tape edge down firmly to prevent bleed-through. -
Protect the ground:
Lay down drop cloths or plastic sheeting over your soil or trench to catch drips. It’s much easier to move a drop cloth than to scoop up paint-covered dirt later.
Step 2: Priming the Surface
-
Choose the right primer:
Select a high-quality masonry bonding primer. This is crucial because concrete is porous and alkaline, which can cause regular paint to fail prematurely. -
Cut in edges:
Use your 4-inch brush to apply primer along the top edge near the tape and down the corners. Jam the bristles into the pores of the concrete to ensure good adhesion. -
Roll the main area:
Dip your heavy-nap roller into the primer. A thicker nap (3/4 inch to 1 inch) is necessary to get the specialized primer into the deep texture and pockmarks of the concrete. -
Dry completely:
Allow the primer to dry according to the manufacturer’s instructions. It usually dries faster than the topcoat, but don’t rush it.
Uneven Coverage?
If the concrete texture is extremely rough and the roller misses spots, keep a cheap chip brush in your back pocket to manually dab paint into the deepest crevices as you go.
Step 3: Applying the Slate Finish
-
Select your paint:
For the topcoat, use an elastomeric masonry paint in a deep Slate Grey. Elastomeric paint is thicker than standard latex and stretches, helping to bridge small hairline cracks. -
Brush the perimeter:
Just like with the primer, start by brushing the grey paint along the top edge under the siding tape. Take your time here for a crisp line. -
Work the bottom edge:
Paint the very bottom edge that meets the dirt line carefully with the brush. I find it helpful to paint slightly below the final grade level so no bare concrete shows when you rake the mulch back. -
Roll the first coat:
Load the high-nap roller and apply the paint in a ‘W’ pattern, then fill it in. Don’t press too hard; let the thick nap deliver the paint into the texture. -
Watch for pinholes:
Inspect the surface wet. Concrete absorbs paint quickly. If you see tiny black pinholes, back-roll over the area immediately to push paint into those voids. -
Apply second coat:
Once the first coat is dry (usually 4-6 hours), apply a second coat. This ensures the deep grey color is solid and opaque, and provides the necessary mil thickness for weather protection. -
Remove tape:
Remove the painter’s tape slowly while the second coat is still slightly tacky to avoid peeling any dried paint film off with the tape. -
Replace landscaping:
Wait at least 24 hours for the paint to cure before pushing wet mulch or soil back against the new beautiful grey foundation.
Create a Trim Effect
For a more architectural look, paint the horizontal ledge at the top of the foundation in a lighter shade (like the house trim color) to separate the siding from the base.
Enjoy the instant curb appeal boost this sharp, grounded foundation brings to your home exterior


Have a question or want to share your own experience? I'd love to hear from you in the comments below!