
When I want studio vibes without leaving the house, I set up a paint and sip at home night that feels creative, cozy, and totally low-pressure. Here are my go-to ideas—classic first, then more playful—so you can pull off an easy, social at-home painting party with a drink you love.
Dining Table Studio Setup
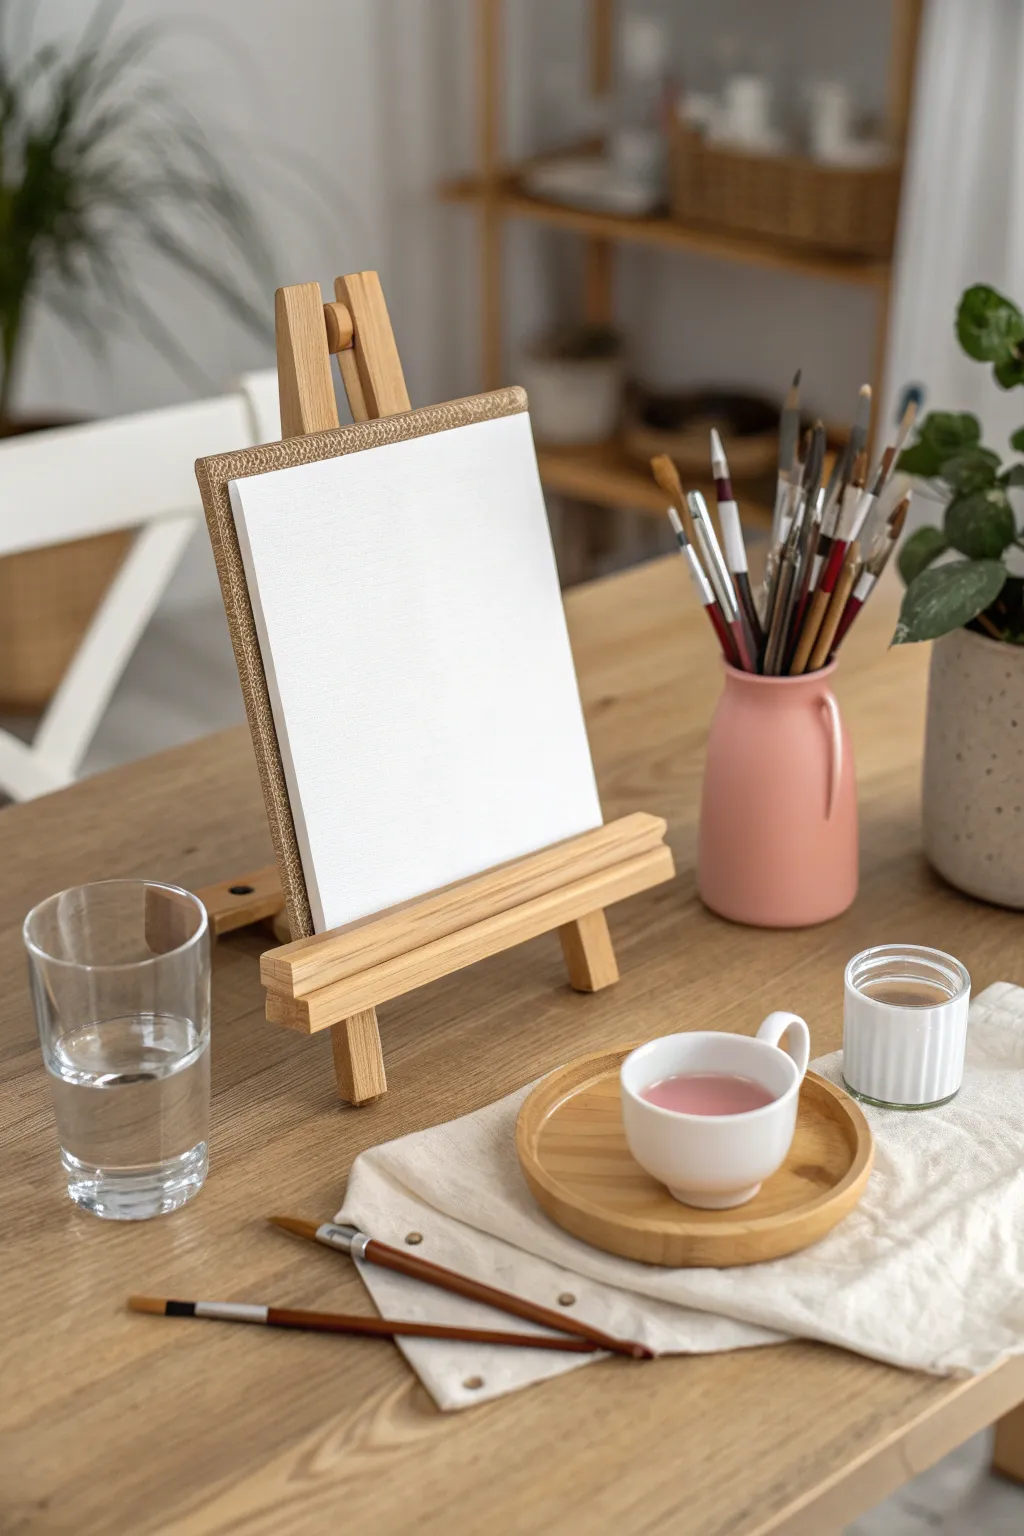
Before the first stroke of color hits the canvas, the setup itself is an art form that invites creativity and relaxation. This guide focuses on preparing the perfect “paint and sip” station at your dining table, ensuring you have an inviting, organized workspace ready for inspiration to strike.
Step-by-Step
Materials
- Small wooden table easel (A-frame or H-frame style)
- Blank canvas board or stretched canvas (approx. 8×10 or 9×12 inches)
- Clear glass tumbler for water
- Ceramic mug or teacup (for your beverage or paint water)
- Small wooden coaster or saucer
- Selection of paintbrushes (various sizes: rounds, flats, filberts)
- Pink ceramic vase or jar (for holding brushes)
- Neutral-colored cloth napkin or drop cloth
- Potted plant (optional, for ambiance)
Step 1: Clearing the Space
-
Choose your location:
Find a spot on your dining table with good natural light. If painting in the evening, ensure you have a bright, neutral lamp nearby. -
Wipe down the surface:
Clean the table thoroughly to remove any crumbs or dust. A clean surface not only protects your artwork but mentally prepares you for a fresh start.
Step 2: Easel Assembly
-
Position the easel:
Place your small wooden easel in the center of your designated workspace. Make sure the back leg is extended fully so it’s stable and won’t tip over. -
Check the angle:
Adjust the tilt of the easel if your model allows. A slight backward tilt is usually best to prevent glare and keep the canvas secure.
Wobbly Easel?
If the easel slides on the smooth table, place a small piece of non-slip shelf liner or a rubber mat underneath the legs to keep it rock steady.
Step 3: Canvas Preparation
-
Unwrap the canvas:
Remove any plastic packaging from your blank canvas board or stretched canvas. -
Mount the canvas:
Rest the canvas on the bottom ledge of the easel. Center it horizontally. If your easel has a top clamp, slide it down gently to hold the canvas in place without pinching it too hard.
Two-Cup Rule
Always keep your paint water and your drinking cup in very different looking mugs or on opposite sides to avoid accidentally drinking paint water.
Step 4: Organizing Tools
-
Arrange the brushes:
Take your selection of paintbrushes and place them handle-down into the pink ceramic vase. This keeps the bristles safe and makes them easy to grab. -
Set the brush holder:
Position the vase of brushes to the right (if you are right-handed) or left (if left-handed) of the easel, slightly towards the back so you don’t knock it over. -
Lay out active brushes:
Select one or two brushes you intend to start with and lay them horizontally on the cloth napkin in front of you.
Step 5: Hydration Station
-
Prepare rinse water:
Fill the clear glass tumbler about halfway with cool tap water. Place this near your dominant hand for easy brush rinsing. -
Set up the beverage:
Place the wooden saucer next to your workspace—but not too close to the rinse water to avoid accidental dipping! Set your teacup or mug on the saucer. -
Add a sipping beverage:
Fill the teacup with your favorite calming tea or drink. I always like to have something warm nearby to keep the mood cozy.
Step 6: Final Touches
-
Place the cloth:
Fold the cloth napkin or drop cloth neatly and place it under the teacup area or directly in front of the easel to catch any potential drips. -
Add greenery:
Move a small potted plant into the periphery of your setup. It shouldn’t block your movement but adds a nice touch of life to the studio vibe. -
Safety check:
Sit in your chair and mimic the painting motion. Ensure everything is within reach but not crowding your elbow room.
With your station perfectly arranged, you are now ready to begin your artistic journey


Coffee and Canvas Mug Painting
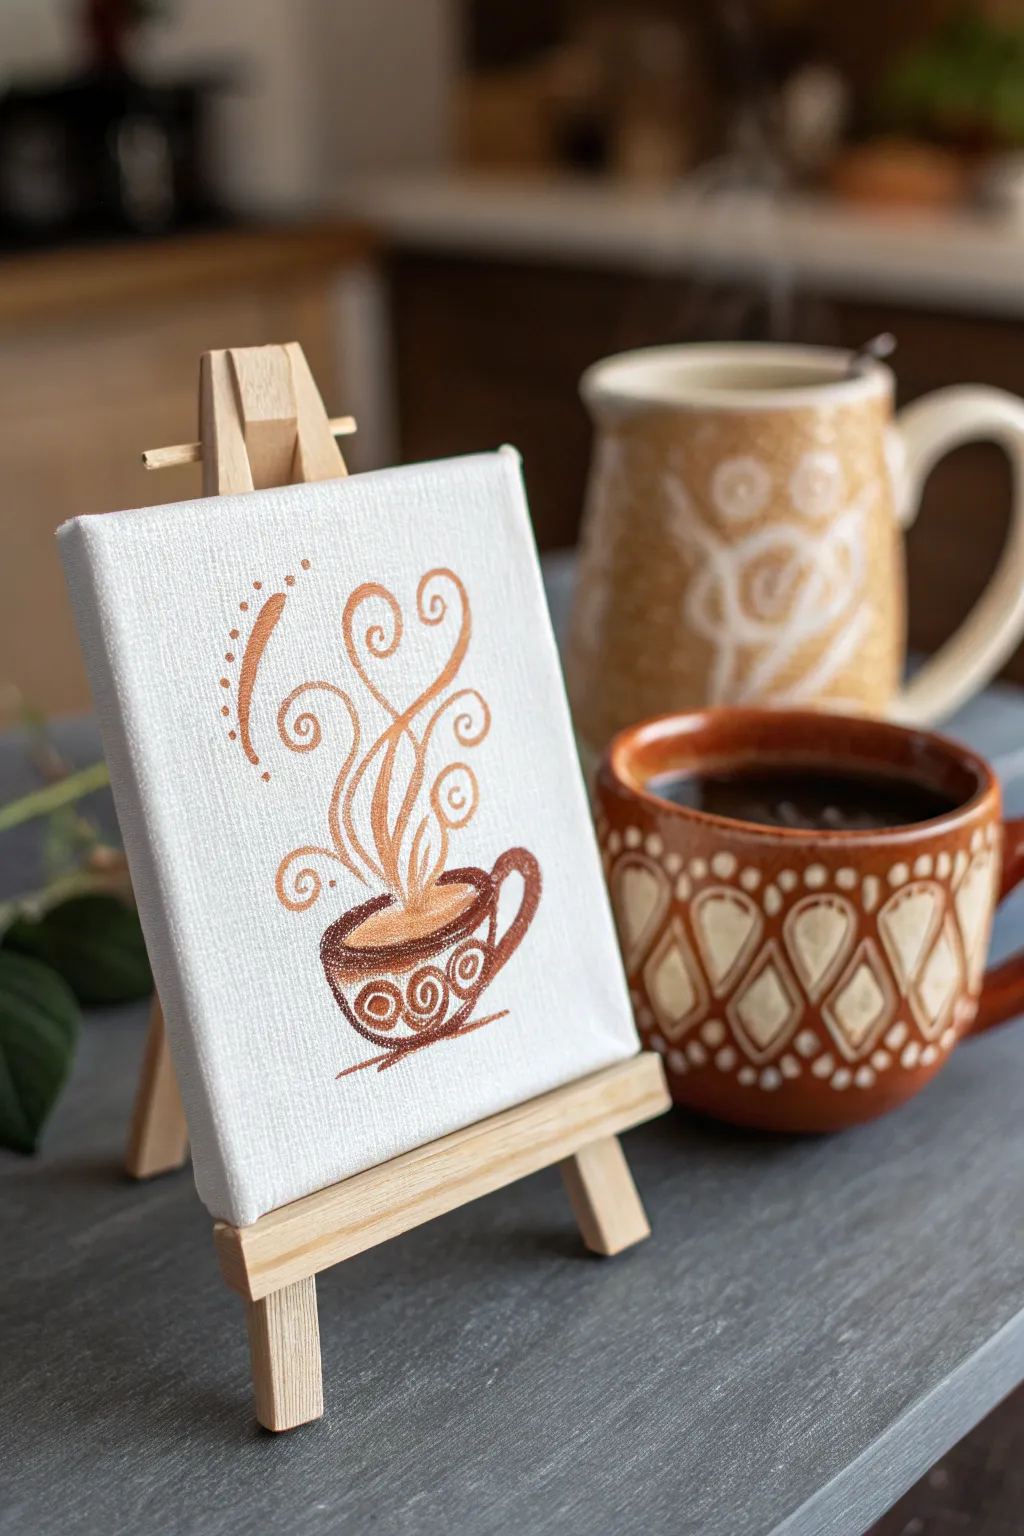
Bring the cozy warmth of your favorite cafe into your home with this charming miniature artwork. Featuring a stylized coffee cup with whimsical, swirling steam in rich monochromatic browns, this project is perfect for beginners looking to practice fluid line work.
Step-by-Step Tutorial
Materials
- Mini canvas (4×4 or 5×5 inch) on a mini easel
- Acrylic paints (Burnt Sienna, Raw Umber, Titanium White)
- Small round brush (size 1 or 2)
- Fine liner brush (size 00 or 0)
- Palette or small plate
- Cup of water
- Paper towels
- Pencil for sketching (optional)
Step 1: Drafting the Design
-
Preparation:
Set up your mini easel and place the canvas on it. Squeeze out small pea-sized amounts of Burnt Sienna, Raw Umber, and White onto your palette. -
Mixing the Base Tone:
Mix a small amount of Burnt Sienna with a tiny touch of Raw Umber to create a rich, medium-dark brown. This will be your primary outline color. -
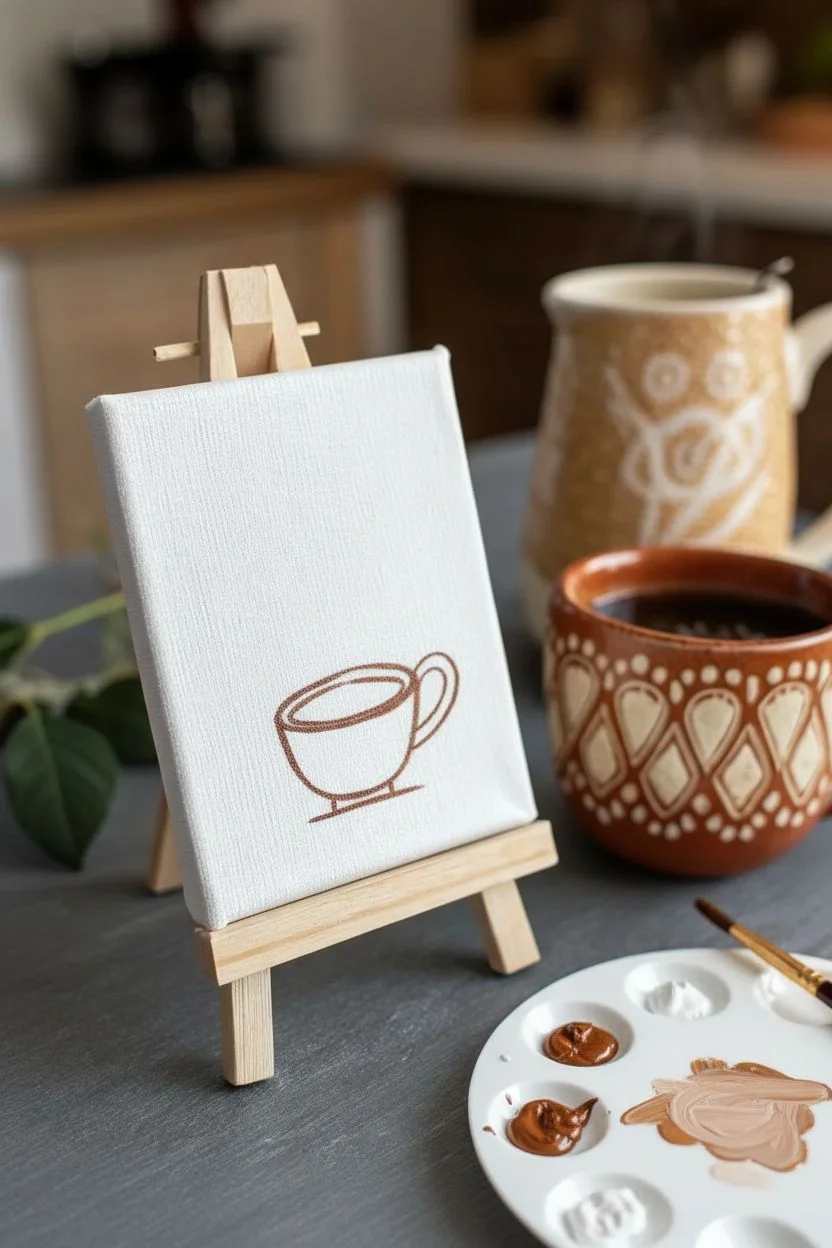
Outline the Cup Shape:
Using the small round brush and your mixed brown, paint a wide, flattened oval near the bottom third of the canvas. This forms the rim of the coffee cup. -
Form the Body:
Paint a curved ‘U’ shape extending downward from the oval rim to create the cup’s bowl. Add a small, flat line at the very bottom for stability. -
Add the Handle:
On the right side of the cup, paint a playful, looped handle. Keep the lines relatively thick to match the rustic style of the cup.
Steady Hands
For the delicate steam swirls, dilute your acrylic paint with a drop of water until it has an ink-like consistency. This helps the paint flow smoothly off tone liner brush without breaking.
Step 2: Filling and Decorating
-
Create the Coffee Liquid:
Mix a lighter shade by adding a little White to your original brown mixture. Paint the glowing oval inside the rim to look like the surface of the coffee. -
Darkening the Coffee:
While the previous step is still slightly wet, take a tiny bit of pure Burnt Sienna or darker brown and blend it into the left side of the coffee oval to add depth. -
Decorative Swirls:
Switch to your fine liner brush. Dip it into the White paint, then mix slightly with the brown to get a creamy beige. Paint small spiral patterns inside the dark body of the cup. -
Highlighting the Rim:
Using the same creamy beige color, add a distinct highlight line along the front upper edge of the cup’s rim to make it look three-dimensional. -
Adding the Saucer Line:
With the darker brown mix, paint a quick, gestural stroke underneath the cup to suggest a saucer or table surface.
Step 3: The Whimsical Steam
-
Planning the Flow:
Visualise three main lines of steam rising from the cup. They should curve outward like a fountain. -
First Steam Swirl:
Using your medium brown mix and the liner brush, paint a long line starting from the center of the coffee, curving upward and to the left, ending in a tight spiral. -
The Central Heart:
Paint two lines rising from the center that curve away from each other and curl inward at the top, almost forming a heart shape. -
Additional Curls:
Add smaller, shorter swirls branching off the main steam lines. Keep your wrist loose to ensure the lines feel airy and organic. -
Decorative Dots:
On the left side of the steam cloud, add a curved decorative accent line that hugs the steam. Decorate the outside of this curve with a series of small brown dots that decrease in size.
Metallic Magic
Swap the beige paint for a metallic copper or gold acrylic when painting the decorative swirls on the cup. This adds a beautiful shimmer that catches the light like real ceramic glaze.
Step 4: Final Touches
-
Checking Contrast:
Step back and look at your canvas. If the steam lines look too faint against the white canvas, go over them carefully with a slightly darker brown. -
Adding Highlights:
I like to take a tiny bit of almost pure white and add tiny dots to the center of the cup’s decorative swirls for extra sparkle. -
Signing Your Work:
Use your finest brush to add your initials in the corner, perhaps in the same brown tone used for the steam.
Now you have a perfect little coffee tribute to display near your brewing station or on your desk


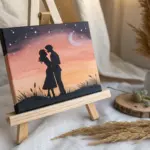
Paint Your Pet From a Printed Outline
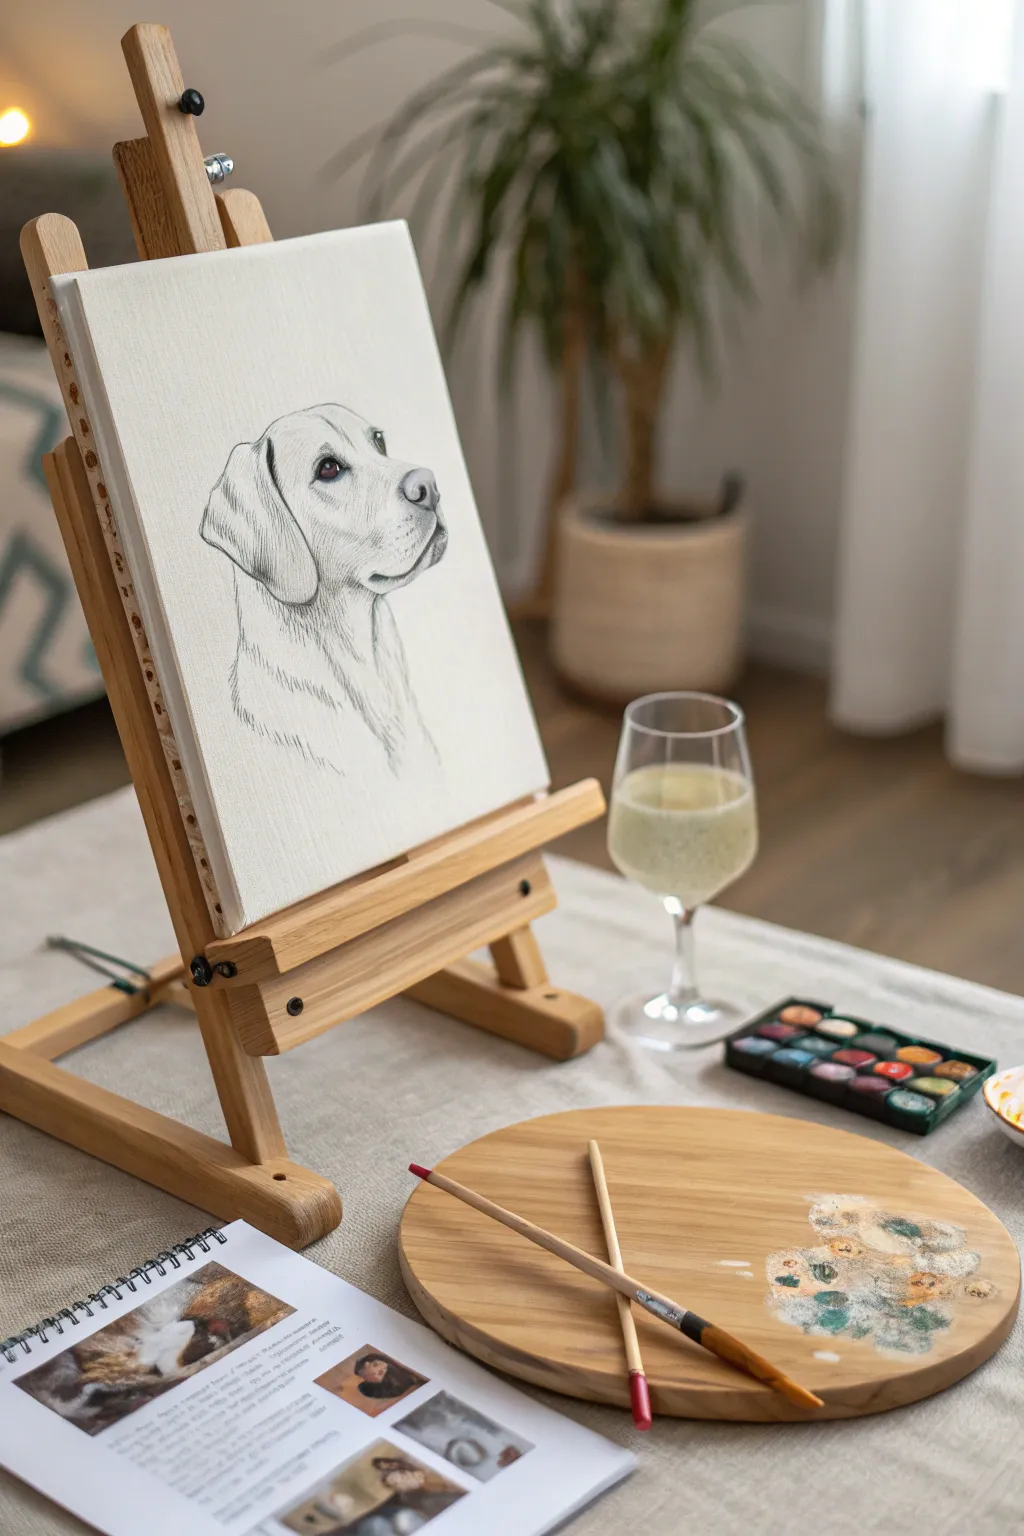

Capture the lovable expression of your pet with this guided sketching method that makes drawing accessible to everyone. The result is a clean, professional-looking pencil outline on canvas, ready for the first layers of paint or beautiful as a standalone minimalist piece.
How-To Guide
Materials
- Digital photo of your pet
- Computer and printer
- Standard printer paper
- Soft graphite pencil (6B or similar) or charcoal transfer paper
- Stretched canvas (rectangular, e.g., 9×12 or 11×14 inches)
- Masking tape or painter’s tape
- Mechanical pencil or hard pencil (HB)
- Kneaded eraser
- Wooden tabletop easel
- Reference photo (printed or on a tablet)
Step 1: Preparing Your Reference
-
Select the perfect photo:
Choose a clear, high-resolution photo of your pet at eye level. A three-quarter profile view, like the dog in the example, often creates a more dynamic portrait than a straight-on view. -
Edit for clarity:
Using simple photo editing software on your phone or computer, increase the contrast and turn the photo black and white. This helps you focus on the shapes and shadows rather than the colors. -
Print your template:
Print the edited photo on standard paper. Resize it before printing so the dog’s head fits well within the dimensions of your canvas size.
Use a Window Light Box
If you don’t have transfer paper, tape your print and canvas to a sunny window. The light shining through makes tracing the outline onto the canvas effortless.
Step 2: Creating the Transfer
-
Coat the reverse side:
Flip your printed photo over. Using a soft 6B graphite pencil, scribble densely over the entire back of the paper where the image is located. Ensure you cover every area where lines exist on the front. -
Position on canvas:
Place the paper, image side up, onto your canvas. Center the pet’s face, leaving some ‘breathing room’ around the edges for the background. -
Secure the template:
Use small strips of masking tape on the corners to hold the paper firmly in place. You don’t want it shifting while you trace. -
Trace the main outlines:
With a mechanical pencil or a sharp HB pencil, firmly trace over the major lines of your pet’s face: the eyes, nose, mouth line, and the outer shape of the ears and head. -
Check your progress:
Lift one corner of the paper carefully to ensure the graphite is transferring to the canvas. If the line is too faint, press harder or add more graphite to the back. -
Trace the fur direction:
Don’t just outline the head shape; trace groups of fur, especially around the neck and chest, to indicate the direction the hair grows. This texture is crucial for realism later. -
Remove the template:
Once you have traced all key features, remove the tape and paper. You should see a light, clean graphite outline on your canvas.
Lines Won’t Transfer?
Graphite not showing up? Your canvas texture might be too rough. Switch to rubbing a dedicated charcoal stick on the back of the paper for a darker, looser transfer.
Step 3: Refining the Sketch
-
Reinforce the eyes:
Go back over the eyes directly on the canvas with your pencil. Darken the pupil and outline the iris rim, but leave a small white circle for the ‘catchlight’ or reflection. -
Darken the nose and mouth:
Strengthen the lines around the nostrils and the lips. These areas are naturally darker and anchor the drawing. -
Add fur texture:
Using short, flicking pencil strokes, add more detail to the fur on the ears and neck. Mimic the flow of hair you see in your reference photo. -
Clean up stray marks:
Take a kneaded eraser and gently dab away any smudges or accidental fingerprints. This keeps the canvas pristine white around your subject. -
Soften the lines:
If any transferred lines look too mechanical or thick, dab them lightly with the eraser to lighten them until they look like a hand-drawn sketch. -
Final assessment:
Step back from your easel to view the proportions from a distance. I find this perspective shift often reveals small asymmetries you might miss up close. -
Prepare for painting:
If you plan to paint immediately, lightly spray the sketch with a workable fixative (optional) to prevent the graphite from smearing into your paint colors.
Your personalized pet portrait sketch is now complete and ready to be brought to life with color


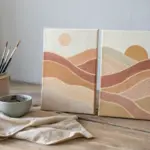
Texture Play With Cards and Sponges
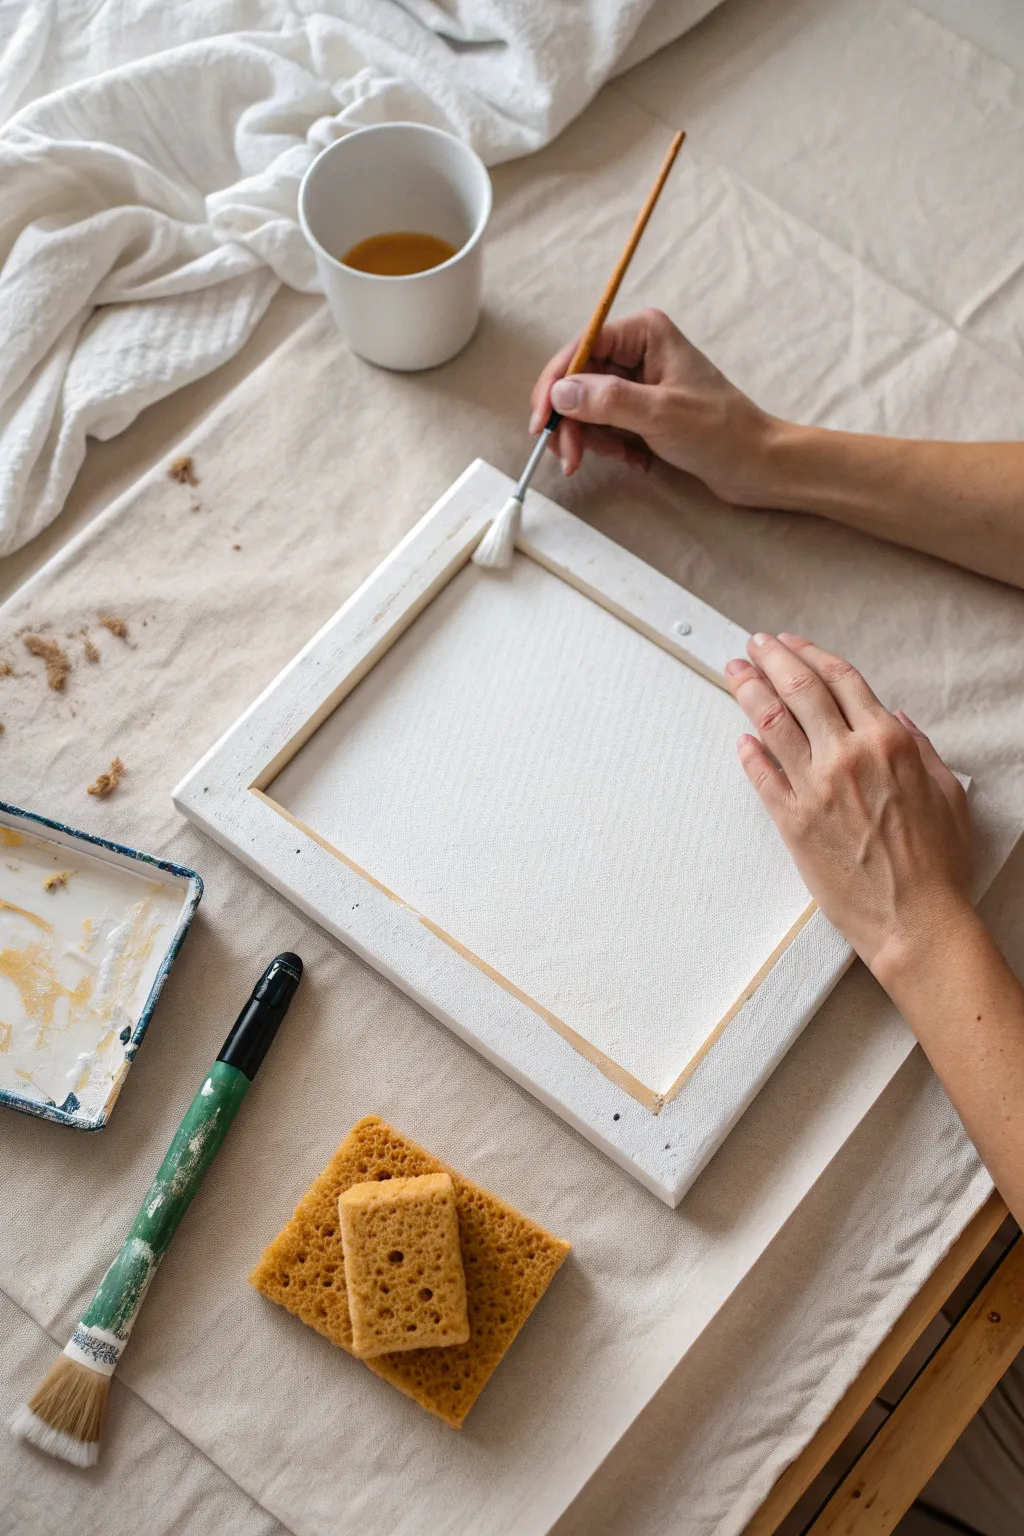

Transform a standard stretched canvas into a unique, textured surface by working from the back. This project focuses on priming and preparing the raw wooden frame and canvas backing to create a dimensional, farmhouse-style base for future artwork.
How-To Guide
Materials
- Stretched canvas (any size)
- White gesso or acrylic primer
- Small flat paintbrush
- Large flat paintbrush (for broad strokes)
- Natural sea sponge or synthetic texture sponge
- Cup of water (for diluting)
- Paper palette or plate
- Drop cloth or protective covering
Step 1: Preparation
-
Set the scene:
Begin by laying down a protective drop cloth on your work surface. This project involves working with raw materials that can get messy, so having a designated space helps keep things tidy. -
Flip the canvas:
Unlike traditional painting, turn your stretched canvas face down. You will be working on the reverse side where the wooden frame and staples are visible. -
Inspect the surface:
Check the raw canvas texture on the back. Brushing away any loose dust or lint now ensures a cleaner application of your primer later. -
Prepare your primer:
squeeze a generous amount of white gesso onto your palette. If the gesso is very thick, I like to mix in a tiny drop of water to improve flow without losing coverage.
Fixing Clumps
If your sponge texture looks too spiky or aggressive, wait about 5 minutes for it to set slightly, then gently pat it down with a dry, clean brush to soften the peaks.
Step 2: Priming the Frame
-
Load the brush:
Dip your small flat paintbrush into the white gesso. You want enough product to cover the wood but not so much that it drips. -
Apply the first coat:
Start painting the exposed wooden frame. Use long, smooth strokes to work the paint into the wood grain. -
Work the corners:
Pay special attention to the corners where the wood pieces join. Tap the brush gently into any crevices to ensure full coverage. -
Border control:
Carefully paint the edge where the canvas fabric meets the wood. You want a clean line, but don’t worry if a little paint gets on the canvas itself—it adds to the rustic look. -
Let it dry:
Allow the first coat on the wood to dry for about 15-20 minutes. It should feel dry to the touch before you proceed.
Step 3: Texturing the Canvas
-
Dilute the medium:
In your cup, mix a small amount of gesso with water to create a milky, wash-like consistency. This will soak into the raw canvas fabric better than thick paint. -
Initial wash:
Using the large flat brush, apply this wash over the entire back surface of the canvas fabric. This seals the fibers and prepares them for texture. -
Sponge prep:
Dampen your texture sponge slightly and squeeze out excess water. Dip it into the undiluted gesso on your palette. -
Dabbing technique:
Press the sponge gently onto the canvas backing. Lift it straight up to create peaks and organic textures. Avoid dragging the sponge, as that flattens the effect. -
Layering texture:
Continue dabbing across the surface. Vary the pressure to create areas of heavy texture and areas that are more subtle. -
Frame integration:
Lightly dab the sponge over the painted wooden frame as well. This unifies the look, making the frame and canvas feel like one cohesive piece. -
Final dry:
Let the entire project dry completely, preferably overnight. The thick textured areas will take longer to cure than the flat painted sections.
Add Some Age
Mix a tiny drop of burnt umber acrylic into your white gesso before sponge painting. This creates a warm, vintage parchment look instead of stark white.
Now you have a beautifully textured, custom-primed foundation ready for your next creative painting layer
BRUSH GUIDE
The Right Brush for Every Stroke
From clean lines to bold texture — master brush choice, stroke control, and essential techniques.
Explore the Full Guide
Candlelit High-Contrast Painting

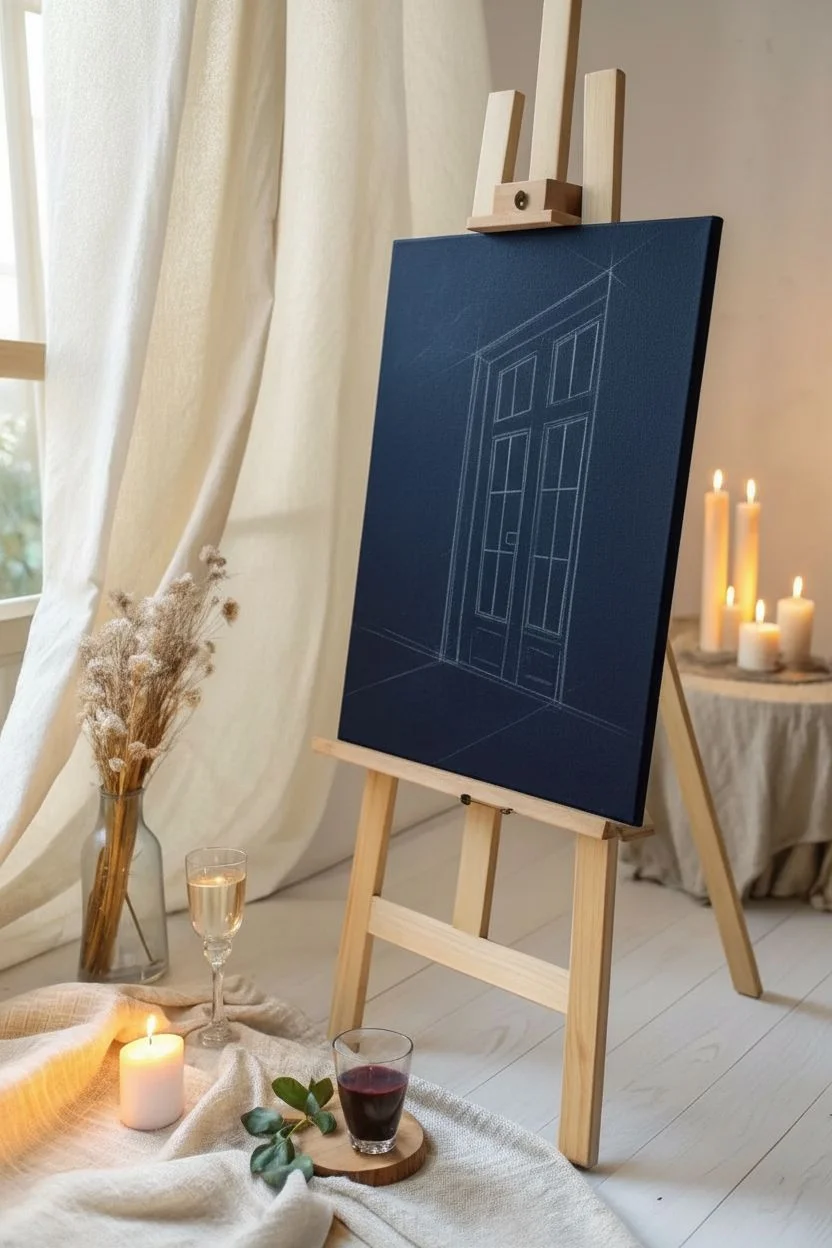
Capture the cozy allure of a warm home on a dark night with this striking high-contrast painting. You’ll work with deep, moody indigos and vibrant oranges to create a glowing window effect that pops right off the canvas.
Step-by-Step Guide
Materials
- Rectangular stretched canvas (16×20 or similar vertical format)
- Acrylic paints: Ultramarine Blue, Phthalo Blue, Black, Burnt Umber, Titanium White, Cadmium Yellow, Cadmium Orange, Venetian Red
- Flat shader brushes (large and medium)
- Small round detail brush
- Palette knife (optional for mixing)
- Water cup and paper towels
- Ruler or straight edge
- Chalk or pastel pencil for sketching
Step 1: Setting the Scene
-
Prime the background:
Start by mixing a very dark, midnight blue using Phthalo Blue and a touch of Black. Cover the entire canvas with this base coat to eliminate white space and establish the night atmosphere. -
Dry and sketch:
Let the base coat dry completely. Using a ruler and a piece of chalk or a light pastel pencil, lightly sketch a large, slightly angled rectangle for the window frame, following the rule of thirds to place it off-center. -
Add perspective:
Draw the inner lines for the window panes (muntins). To create a slight perspective, angle the top and bottom lines of the window frame downward just a hair toward the left, implying the viewer is looking slightly up or from the side.
Pro Tip: Edges Matter
Don’t make the window lines perfectly straight creating a ‘wobbly’ hand-painted look adds to the rustic, storybook charm of the piece.
Step 2: Creating the Glow
-
Base layer of light:
Mix Titanium White with a small amount of Cadmium Yellow. Paint the inside of the window panes with this pale mixture. This acts as an underpainting to make the subsequent colors vibrant. -
Applying warmth:
Once the pale yellow is tacky or dry, glaze over it with pure Cadmium Yellow. Concentrate the brightest, purest yellow in the center of the window panes. -
Deepening the interior:
Blend Cadmium Orange into the corners and edges of the glass panes while the paint is still wet. This creates a gradient that mimics light diffusing from a central source. -
Hint of shadow:
Mix a tiny bit of Venetian Red with your Orange. Dab this into the very corners of the glass panes and vaguely sketch interior shapes—perhaps curtains or furniture—just as abstract shadows behind the glass.
Step 3: Building the Frame
-
Block in the wood:
Mix Burnt Umber with a touch of Cadmium Orange to get a warm wood tone. Using a medium flat brush, paint the thick vertical frame and the thinner grid lines (muntins) over your chalk sketch. -
Highlighting the frame:
Imagine the light is coming from *inside* the house. Mix a lighter brown using your wood tone and some White. Paint thin highlights on the inside edges of the window frame where the interior light would hit the wood. -
Shadowing the frame:
Use a mix of Burnt Umber and Black to darken the outer edges of the window frame, helping it recede into the dark night background.
Troubleshooting: Muddy Colors?
If your bright orange window light turns green when touching the blue sky, let the blue layer dry completely before painting the window frame edges.
Step 4: Atmospheric Details
-
Deepening the night sky:
Return to your large flat brush. Mix Ultramarine Blue and Black. Add turbulent, sweeping strokes around the window to create a textured, cloudy night sky, leaving some of the original base coat visible. -
Adding the moon glow:
In the top left corner, blend a very small amount of White and Phthalo Blue to create a soft, hazy moonlight spot. Don’t paint a crisp moon; just a diffused glow behind the clouds. -
Grounding the scene:
Paint the ground area at the bottom using uneven strokes of dark blue and black. Blend a little of your Cadmium Orange mixture onto the ground directly beneath the window to show light spilling out onto the earth. -
Magical sparks:
Load a small round brush or even an old toothbrush with slightly watered-down bright orange paint. Flick or gently dot tiny specks of ‘fireflies’ or magical dust rising from the ground near the bottom left of the window. -
Final contrast check:
Step back and look at your work. If the window interior doesn’t feel bright enough, add one final touch of pure White mixed with Lemon Yellow to the absolute center of the brightest pane.
Enjoy the warmth and mystery your new painting brings to the room


Have a question or want to share your own experience? I'd love to hear from you in the comments below!