Some nights you just want easy painting that looks amazing without overthinking it—and that’s exactly what paint and sip is for. Here are my go-to paint and sip ideas that feel relaxing, social, and totally doable in one sitting.
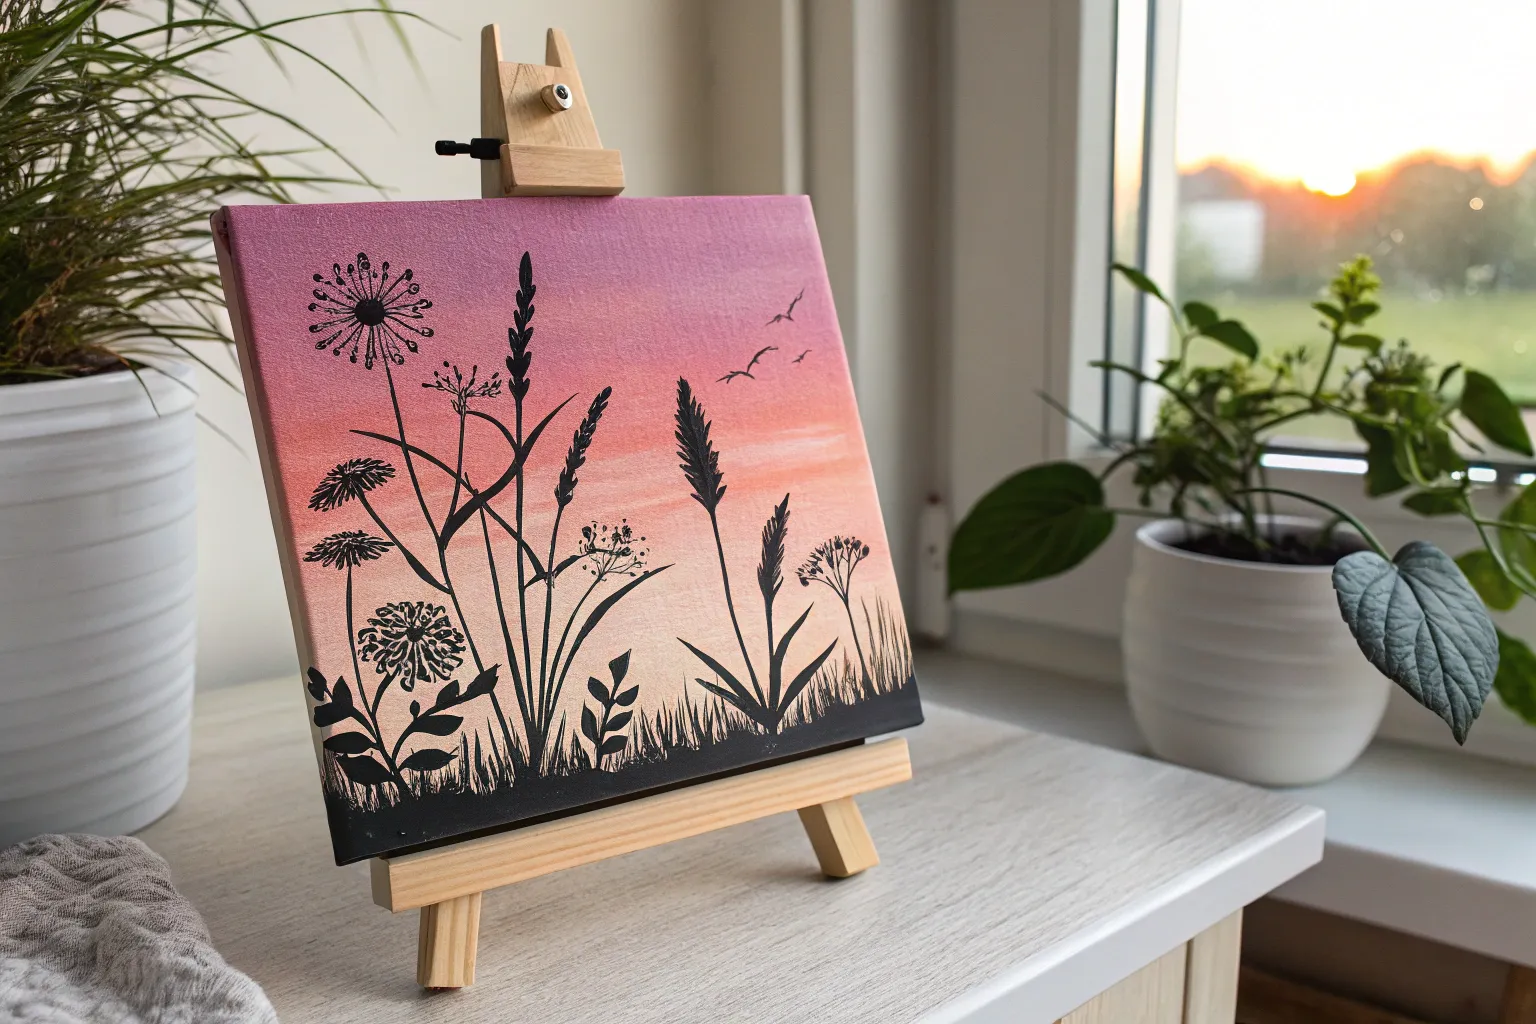
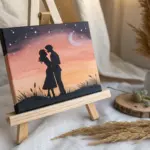
Sunset Gradient With Black Silhouettes
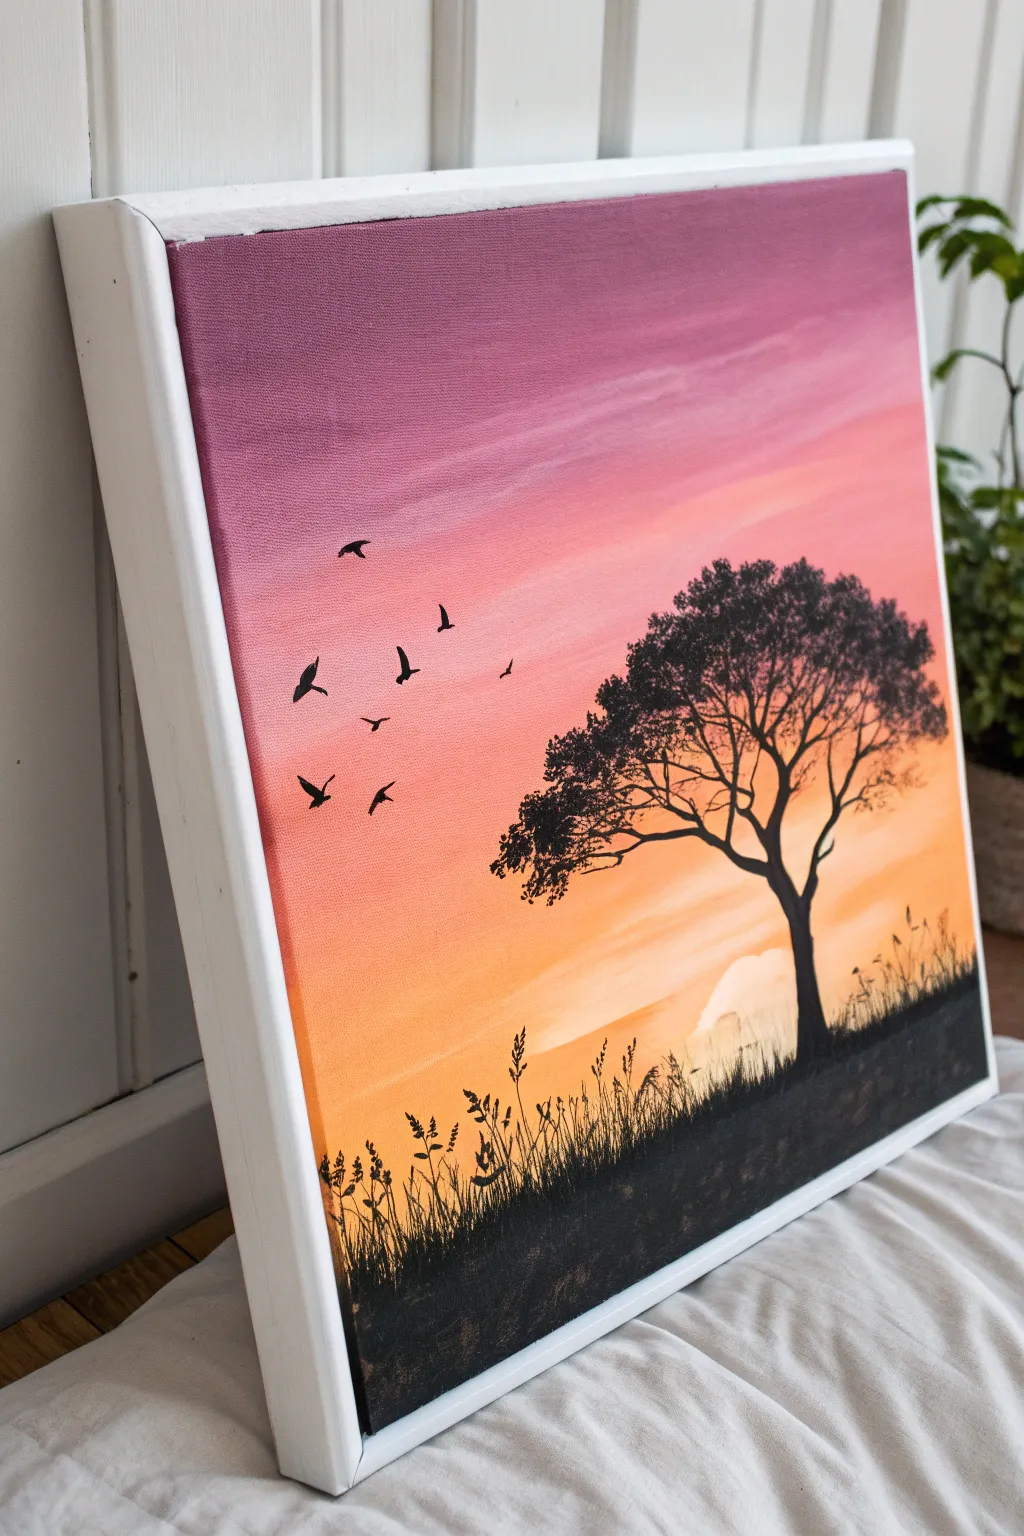
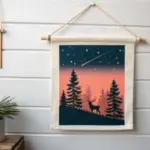
This project features a stunning, smooth gradient sky transitioning from deep violet to warm orange, serving as the perfect backdrop for sharp black silhouettes. This high-contrast style is incredibly forgiving for beginners while looking impressively professional when finished
How-To Guide
Materials
- Square stretched canvas (approx. 12×12 inches)
- White floating frame (optional)
- Acrylic paints: Titanium White, Lemon Yellow, Orange, Magenta, Deep Violet, Mars Black
- Large flat brush (1-2 inch) for blending
- Medium round brush
- Small liner or detail brush
- Jar of water
- Paper towels
- Palette or paper plate
Step 1: Creating the Gradient Sky
-
Prepare your colors:
Squeeze generous amounts of Violet, Magenta, Orange, Yellow, and White onto your palette. Do not put Black on the palette yet to avoid accidental mixing. -
Start at the top:
Using your large flat brush, apply a horizontal band of Deep Violet across the very top inch of the canvas. Keep the paint relatively wet to help with blending later. -
Transition to pink:
Without washing your brush (or just wiping it slightly), pick up some Magenta. Paint the next band below the violet, overlapping slightly to blend the two colors together right on the canvas. -
Add warmth:
Wipe your brush clean on a paper towel. Pick up the Orange paint and apply a band below the pink, again overlapping the wet edges to create a soft transition. -
Introduce the light:
Mix a little White into your Orange to lighten it, then apply this below the pure orange. Move downwards, gradually adding Yellow to your brush to create a glowing peach tone. -
Finish the horizon:
For the bottom section of the sky, use a mix of Yellow and plenty of White to create a very pale, bright horizon line. Ensure the entire canvas is covered. -
Smooth the blend:
With a clean, slightly damp flat brush, gently sweep back and forth horizontally across the transition lines from top to bottom to smooth out any harsh stripes. Let the background dry completely before proceeding.
Step 2: Painting the Silhouette Details
-
Plan the horizon line:
Once the sky fits your vision and is dry to the touch, switch to black paint. Paint a solid black undulating strip across the bottom 2 inches of the canvas to create the ground. -
Tree trunk structure:
Using a medium round brush, start the tree trunk on the right side. Paint a thick line rising from the ground, curving slightly inward and then branching out. -
Adding branches:
Switch to a smaller brush. Pull branches outward and upward from the main trunk, making them thinner as they move away from the center. Think of ‘Y’ shapes as you split the branches. -
Create the foliage:
Use an old, scruffy brush or sponge to dab black paint onto the ends of the branches. Use a stippling motion to create the texture of leaves, keeping the shape rounded but irregular. -
Refine the tree:
Ensure some sky pokes through the leaves so the tree doesn’t look like a solid blob. I like to keep the leaf clusters denser near the branches and lighter at the edges. -
Base grasses:
Using your smallest liner brush, flick quick, short strokes upward from the black ground line to look like short grass blades. -
Tall stalks and weeds:
Paint several long, thin stems reaching higher into the orange sky. Add tiny dots or small oval shapes at the tips to mimic seed heads or wildflowers. -
Add the birds:
With the liner brush, paint small ‘V’ or ‘M’ shapes in the upper left sky. Vary the size and angle wings to make the flock look natural and in motion.
Seamless Blending Tip
Work quickly while the sky paint is wet! If acrylics dry too fast, mist the canvas lightly with water to keep the colors workable for smooth gradients.
Step 3: Finishing Touches
-
Check for gaps:
Look closely at your black areas. If the background color shows through, apply a second coat of black to make the silhouette solid and opaque. -
Sign and frame:
Add your signature in the corner using a small brush (perhaps in white or light grey) and place the canvas into a floating frame if desired.
Shaky Hands?
If you struggle with painting thin lines for the grass or birds, try using a black permanent marker or paint pen over the dry acrylic background instead.
Enjoy the peaceful atmosphere your sunset silhouette brings to the room


Starry Night Sky With Easy Dot Stars
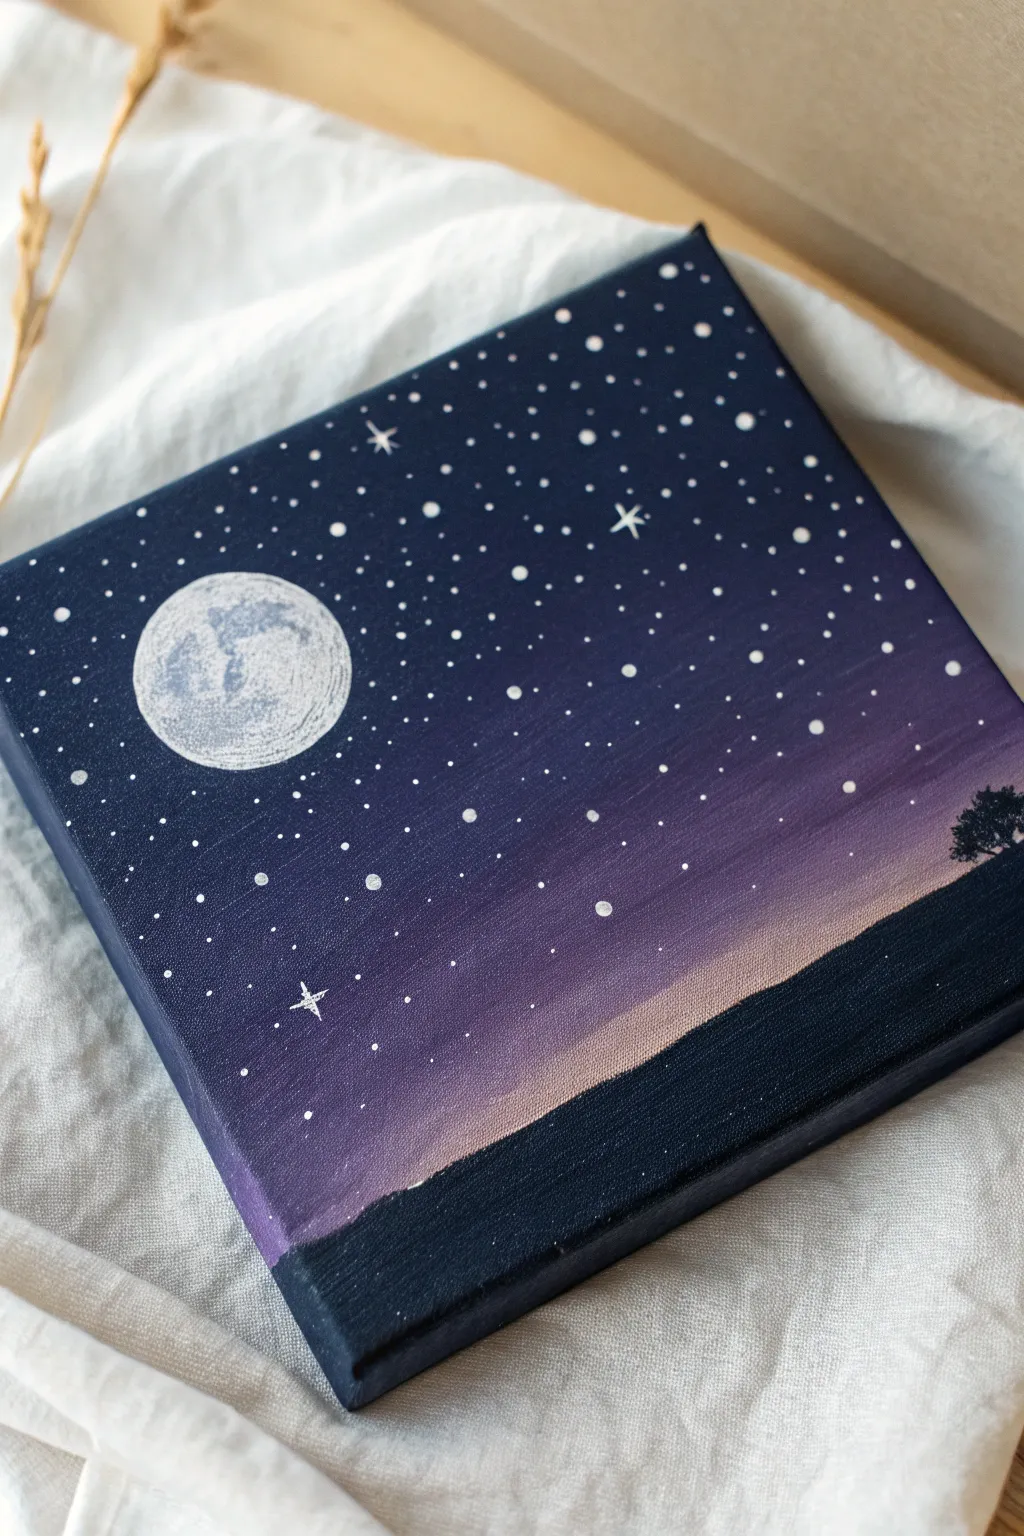
This serene painting captures the quiet magic of a starlit night with a simple yet striking gradient background and a glowing full moon. It’s a perfect beginner project that teaches essential blending techniques while delivering impressive, deep-space vibes.
Step-by-Step
Materials
- Small square canvas (e.g., 8×8 or 10×10 inches)
- Acrylic paints: Navy Blue, Deep Purple, Magenta/Pink, Black, Titanium White
- Flat shader brush (medium size)
- Small round detail brush
- Old toothbrush (optional for stars)
- Pencil
- Water cup and palette
- Paper towels
Step 1: Creating the Twilight Gradient
-
Map the horizon:
Start by drawing a faint horizontal line about one-quarter of the way up from the bottom of the canvas. This will separate your sky from the dark ground. -
Mix the darkest sky color:
On your palette, mix a small amount of black into your navy blue to create a deep, midnight blue. Apply this to the top third of the sky area using your flat shader brush, using long horizontal strokes. -
Introduce the purple mid-tone:
Clean your brush slightly, then load it with deep purple. Paint the middle section of the sky, overlapping slightly with the wet navy blue edge above it. -
Blend the transition:
While both paint strips are still wet, gently brush back and forth over the meeting line to create a seamless blur between the navy and purple. -
Add the horizon glow:
Mix a little white into your magenta or pink paint to create a soft twilight hue. Paint the bottom section of the sky right down to your pencil line. -
Final sky blend:
Blend the pinkish tone upward into the purple section. Aim for a smooth transition from the dark top to the light horizon. Let the canvas dry completely.
Oops, rough blend?
If your sky gradient looks stripey, wait for it to dry completely. Re-wet the area with a very thin glaze of water, then re-apply paint and blend again.
Step 2: Painting the Moon
-
Outline the shape:
Once the sky is dry, use a pencil or a small round object to trace a circle in the upper left quadrant of the sky. -
Base coat:
Fill the circle with plain titanium white paint. It doesn’t need to be perfectly opaque yet; a slightly uneven texture actually helps mimic the lunar surface. -
Add texture:
While the white is still tacky, mix a tiny dot of blue or grey into white. Dab this grayish mix gently onto the moon’s surface to create ‘craters’ and shadows. I find using a fairly dry brush works best here to keep the texture rough.
Step 3: Adding Stars and Foreground
-
Dotting the stars:
Load your smallest round brush with slightly watered-down white paint. Touch the tip gently to the canvas to create tiny dot stars. -
Vary the sizes:
Create variety by pressing harder for some stars and lighter for others. Concentrate a few more stars near the top darker section. -
Create the ‘twinklers’:
Choose about three spots for larger stars. Paint a small dot, then carefully pull four thin lines outward from the center (up, down, left, right) to make a four-pointed star shape. -
Paint the ground:
Mix black with a touch of navy blue. Use the flat brush to fill in the entire bottom section below the horizon line, covering your initial pencil mark. -
Shape the hill:
Ensure the top edge of the black ground is crisp against the pink sky. You can make it slightly uneven to look like natural terrain. -
Paint the tree silhouette:
Using your smallest detail brush and the black mixture, paint a tiny tree on the far right side of the horizon. -
Tree details:
Start with a thin vertical line for the trunk, then use a stippling (dotting) motion to create the leafy canopy. Keep it small to emphasize the vastness of the sky. -
Paint the edges:
Don’t forget to wrap your painting around the sides of the canvas! Extend the gradient sky and black ground onto the edges for a professional finish.
Make it Shine
Once fully dry, add a tiny dot of pure, thick white paint to the center of your three largest stars to make them look like they are glowing intensely.
Step back and admire your own slice of the infinite galaxy

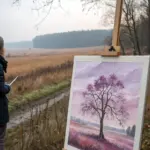


Simple Beach Scene With Palm Tree Silhouette

Capture the calm of a tropical evening with this gentle watercolor landscape. Featuring soft gradients, crashing foam, and a striking palm tree silhouette, this piece is perfect for beginners looking to practice wet-on-wet blending.
Detailed Instructions
Materials
- Cold press watercolor paper (approx. 5×7 inches)
- Watercolor paints (Turquoise, Peach/Coral, Light Blue, Burnt Sienna)
- Black ink pen or fine liner (0.3mm or 0.5mm)
- Black brush pen or small round brush with black gouache
- Masking tape or artist tape
- Flat wash brush (1/2 inch or 3/4 inch)
- Small round brush (size 2 or 4)
- White gel pen or white gouache
- Cup of water and paper towels
Step 1: Setting the Sky
-
Prepare the Paper:
Begin by taping down all four edges of your watercolor paper to a board or table. This creates that crisp white border seen in the final piece and prevents the paper from buckling when wet. -
Wet the Sky Area:
Load your flat wash brush with clean water. Apply a thin, even coat of water to the top two-thirds of the paper, stopping just above where you want the horizon line to be. -
Apply the Blue Gradient:
While the paper is still wet, pick up a light blue watercolor mix. Gently sweep it across the very top of the sky, letting it naturally diffuse downward. Keep this layer light and airy. -
Add Warmth with Peach:
Rinse your brush and pick up a soft peach or coral tone. Paint horizontal strokes starting at the horizon line and moving upward to meet the blue. Allow the peach and blue to touch slightly; the wet paper will help them blend into a soft transition. -
Define the Clouds:
While the peach layer is still damp, dab in slightly more concentrated coral pigment in horizontal streaks to suggest soft cloud formations drifting across the sunset.
Wave Technique
Don’t overwork the white caps! The most realistic foam comes from dry-brushing or leaving raw paper white. Imperfection makes the waves look like they are truly moving.
Step 2: ocean & Sand
-
Paint the Horizon Line:
Switch to a turquoise or teal color. Carefully paint a straight horizontal line for the ocean’s edge, right below your peach sky. If the sky is still very wet, wait a minute so the horizon doesn’t bleed upward. -
Create the Waves:
Continue painting the turquoise downward, but as you get closer to the shore, dilute the paint with more water to make it lighter. Leave a few jagged, unpainted slivers of white paper to represent the foamy crests of waves. -
Adding Sand:
Mix a warm, sandy color using Burnt Sienna and plenty of water. Paint the bottom section of the paper, gently pulling the color up towards the uneven ocean edge. -
Softening the Shores:
Where the sand meets the ocean, use a damp, clean brush to soften the edge slightly, making it look like water retreating over the beach. -
Allow to Dry Completely:
Before adding any crisp details, the entire background wash needs to be bone dry. I like to use a hairdryer on a low setting here to speed things up.
Make It Golden
For a magical ‘golden hour’ effect, swap the peach sky color for a vibrant gold or yellow ochre, and add tiny metallic gold accents to the water’s surface.
Step 3: Silhouettes & Details
-
Sketch the Palm Trunk:
Using your black ink pen or a very fine brush with black paint, draw a slightly curved vertical line starting from the bottom left corner, reaching up into the blue sky area. Thicken the base slightly. -
Add Palm Fronds:
Draw arching lines radiating from the top of the trunk. Make about 6-8 main branches, curving them downward as gravity would pull them. -
Detail the Leaves:
Along each arched branch, use quick, short flicking motions with your pen to create the jagged palm leaves. Ensure these strokes follow the direction of the branch growth. -
Texture the Trunk:
Add small, horizontal hash marks or scribbles up the length of the trunk to suggest the rough texture of palm bark. -
Background Island:
Using the same black pen, draw a tiny, low-lying island shape on the horizon line on the mid-left side. Add miniature stick-figure palm trees to give the scene a sense of vast scale. -
Foreground Foliage:
At the very bottom left corner, where the tree is rooted, draw some spiky grass or bush shapes using upward flicking strokes. This grounds the tree in the scene. -
Final Highlights:
If your ocean highlights disappeared, use a white gel pen or white gouache to add thin, jagged lines along the wave crests for extra sparkle. -
The Reveal:
Once all ink is dry, strictly and slowly peel away the masking tape at a 45-degree angle to reveal your clean, professional borders.
Frame your mini masterpiece in a simple mat to accentuate those clean edges you worked so hard on


Big Moon Over A Calm Lake

Capture the mystic beauty of a supermoon casting its glow over tranquil waters in this stunning acrylic painting project. The deep teal sky and shimmering reflection create a calming yet dramatic effect that looks incredibly professional on canvas.
Step-by-Step Guide
Materials
- Canvas (16×20 or square format)
- Acrylic paints: Phthalo Blue, Mars Black, Titanium White, Raw Umber, Yellow Ochre
- Large flat wash brush (2 inch)
- Medium flat brush
- Small round detail brush
- Sponge or paper towels
- Round object for tracing (plate or lid) or compass
- Pencil
- Palette and water cup
Step 1: Setting the Night Sky
-
Establish the horizon:
Measure about one-third of the way up from the bottom of your canvas and lightly draw a straight horizontal line with your pencil to separate the sky from the water. -
Trace the moon:
Place your round object (like a dinner plate or lid) slightly above the center of the canvas in the sky area. Trace a perfect circle. This large moon will be the focal point. -
Mix the sky base:
Prepare a dark teal mixture by combining Phthalo Blue with a touch of Mars Black and a tiny bit of Titanium White to create a deep, moody teal color. -
Paint the background sky:
Using your large wash brush, paint horizontal strokes across the sky area, carefully painting around your pencil-traced moon. Gradually add a tiny bit more black as you reach the top corners for a vignette effect. -
Add subtle clouds:
While the sky is still slightly wet, wipe your brush almost dry and pick up a tiny amount of a lighter teal-grey mix. Drag very faint, horizontal wisps across the sky to mimic high-altitude clouds or contrails.
Wobbly Moon Edge?
If your hand shakes while painting the sky around the moon, wait for the sky to dry completely. Then, repaint the edge of the moon with white to clean up the circle.
Step 2: Creating the Lunar Surface
-
Base coat the moon:
Mix Titanium White with a very small dot of Yellow Ochre to create a warm cream color. Fill in the entire moon circle with this base tone. -
Map the craters:
Create a ‘lunar grey’ by mixing Titanium White with a speck of Raw Umber and Black. Sponge or dab this color onto the moon in random patches, focusing on the left side and bottom for shadow. -
Add texture details:
Take a small round brush with a darker grey-brown mix. Stipple (tap repeatedly) small irregular shapes to form the ‘maria’ or dark plains of the moon, blending the edges softly into the cream base while the paint is wet. -
Highlight the rim:
Clean your brush and use pure Titanium White to paint a crisp edge along the top right curve of the moon, blending it slightly inward to make the sphere look three-dimensional.
Dry Brush Magic
For the faint clouds and water ripples, use a ‘dry brush’ technique. Wipe almost all paint off onto a paper towel before touching the canvas for a soft, smoky look.
Step 3: Painting the Water & Reflection
-
Block in the water:
For the lake, mix Phthalo Blue and Black to get a color slightly darker than your sky. Paint the entire water section below the horizon line with horizontal strokes. -
Create the distant shore:
Using pure Black on a medium flat brush, paint a jagged silhouette along the horizon line to represent distant hills or trees. Keep this line relatively thin. -
Start the reflection base:
Mix a light blue-grey color. Using the flat edge of your medium brush, paint horizontal dashes directly under the moon, starting narrow at the horizon and getting wider as you move down the canvas. -
Layer the shimmer:
Switch to a cream color (White + tiny bit of Yellow Ochre). Add shorter, choppier horizontal strokes over the blue-grey reflection area. I like to keep these strokes loose to mimic rippling water. -
Brightest highlights:
Load a small round brush with pure Titanium White. Add bright, concentrated dashes in the center of the reflection path, especially toward the bottom foreground, to show the intense moonlight. -
Add water texture:
Take your dark water base color again and cut back into the reflection edges with thin horizontal lines. This breaks up the light path and makes the waves look more realistic. -
Final ripples:
Add a few very faint highlight lines elsewhere in the dark water to suggest gentle movement, but keep the main focus on the central reflection.
Step back and admire how the light seems to glow from within your nighttime landscape
BRUSH GUIDE
The Right Brush for Every Stroke
From clean lines to bold texture — master brush choice, stroke control, and essential techniques.
Explore the Full Guide
Wine Glass Splash Silhouette Painting
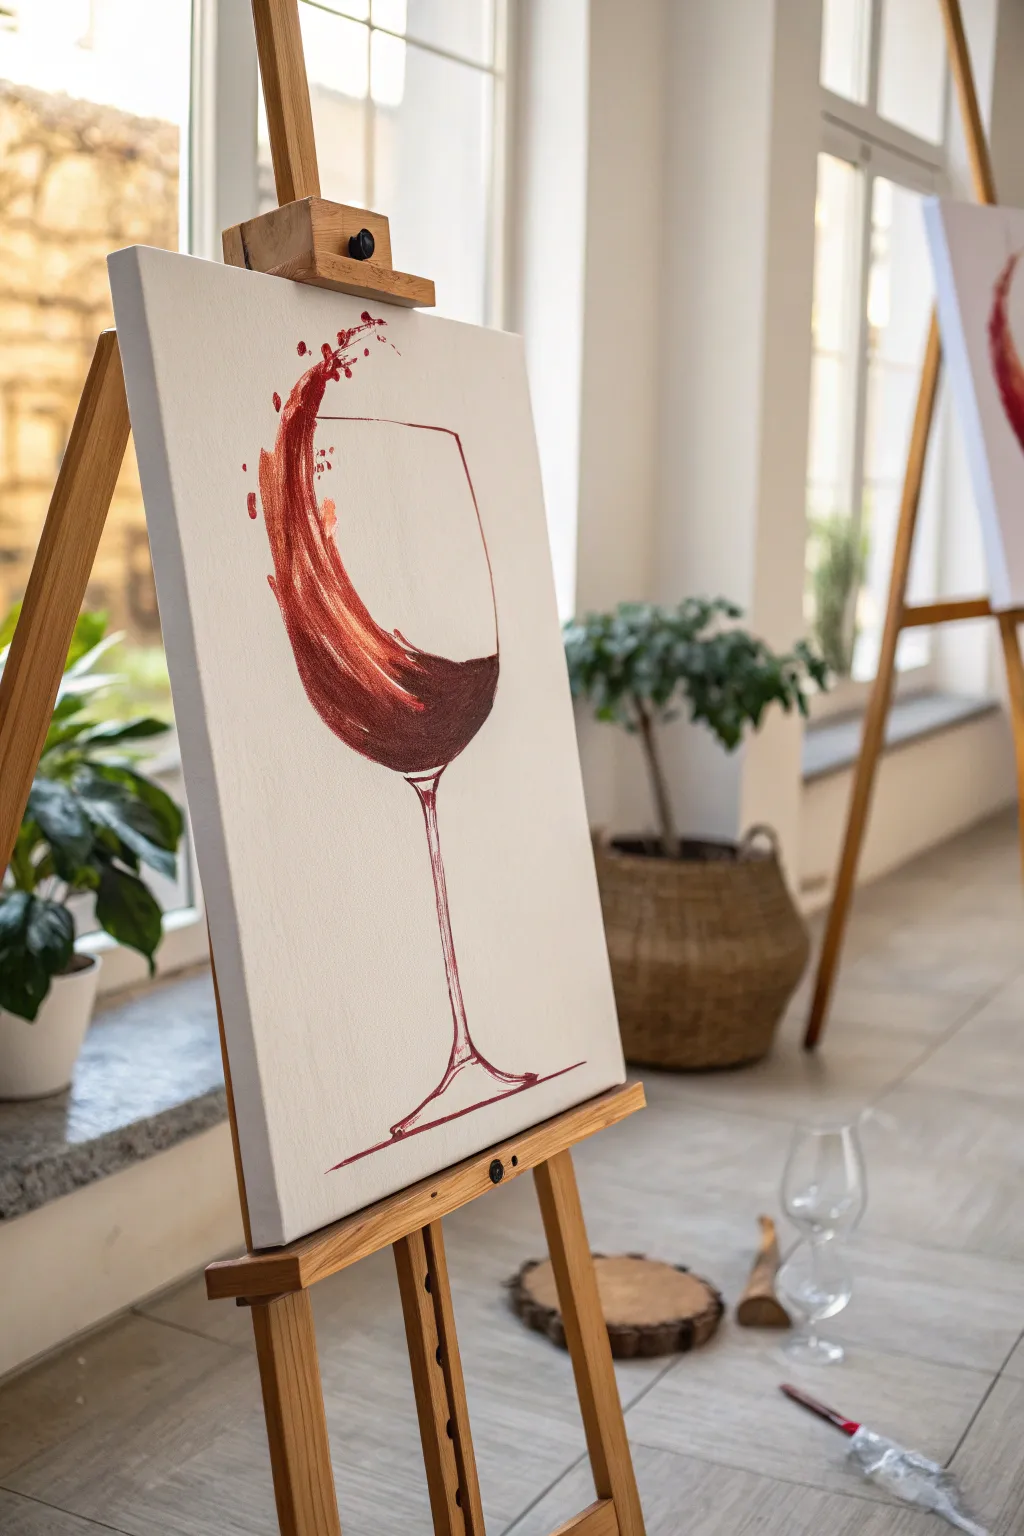
Capture the fluid elegance of a glass of red wine in motion with this striking silhouette-style painting. Using bold strokes and negative space, you will create a modern piece that looks sophisticated but is surprisingly beginner-friendly.
Detailed Instructions
Materials
- Rectangular stretched canvas (16×20 inches recommended)
- Acrylic paints: Deep Red (Alizarin Crimson), Bright Red (Cadmium Red), Black, and White
- Pencil for sketching
- Round synthetic brush (size 4 or 6)
- Small liner brush (size 0 or 1)
- Flat shader brush (size 8)
- Cup of water and paper towels
- Palette or paper plate
Step 1: Sketching the Structure
-
Find the center:
Begin by lightly marking the center of your canvas with your pencil to ensure your glass is positioned correctly. It helps to draw a very faint vertical line to guide the stem and bowl alignment. -
Outline the bowl:
Sketch a U-shape for the bottom of the wine glass bowl. Since this is an artistic interpretation, the top of the bowl doesn’t need to be a complete oval; leave the top left side open where the splash will eventually go. -
Draw the stem and base:
Draw a long, slender stem extending down from the center of the U-shape. At the bottom, sketch a wide, slightly curved triangle for the foot of the glass. -
Erase guidelines:
Once you are happy with the shape of your glass, gently erase that central vertical guideline, leaving only the outline of the glass itself.
Practice the Flick
Before painting the splash on canvas, practice the wrist flick motion on a paper plate. Quick, confident strokes look more liquid than slow ones.
Step 2: Painting the Glass Outline
-
Mix your outline color:
On your palette, mix a small amount of black into your deep red paint to create a rich, dark burgundy tone. This will act as the ‘ink’ for your structural lines. -
Trace the stem:
Using your liner brush and the dark burgundy mix, carefully trace the pencil lines of the stem. Keep the pressure light to maintain a thin, elegant line. -
Define the bowl:
Continue tracing the U-shape of the bowl. Note that the line can be slightly thicker at the bottom of the curve to suggest the weight of the glass. -
Add the base details:
Paint the foot of the glass. Instead of a solid line, try using broken, gestural strokes to make it feel more artistic and less rigid. -
Create reflections:
Using a tiny bit of watered-down red, add a faint, thin line on the right side of the bowl’s rim to suggest the glass continuing upward, but don’t close the shape entirely.
Splash Too Solid?
If your wine splash looks like a solid block, streak in some white or lighter red while wet. This breaks up the mass and looks like light hitting liquid.
Step 3: Creating the Wine Splash
-
Base layer of wine:
Switch to your round brush (size 4 or 6). Load it with the deep red paint and fill the bottom of the glass bowl. Use curved strokes following the shape of the glass. -
Start the swirl:
Extend a thick stroke of deep red paint up the left side of the glass, curving it inward and then flicking it outward towards the top left corner of the canvas. -
Add bright highlights:
While the deep red is still wet, pick up some bright red on the same brush. Blend this into the center of the swirl and the wine in the bowl to create dimension and light. -
Intensify the depth:
Add a touch of the dark burgundy mix to the very bottom of the bowl and the underside of the wave. This shadow adds volume to the liquid. -
Create movement lines:
Using the flat brush turned on its chiseled edge, drag streaks of bright red upward through the splash. This mimics the fast motion of the liquid rising. -
The splash droplets:
Dip your small liner brush into slightly watered-down bright red paint. Make small dots and teardrop shapes fleeing from the top of the main splash. -
Dynamic flicking:
For a spontaneous look, load the brush with watery red paint and gently tap the handle against your finger to splatter tiny droplets near the top left of the swirl. -
Final highlights:
Clean your liner brush thoroughly. Dip it into pure white paint and add very thin, crisp lines along the curve of the bowl and a few sparkles on the wettest part of the splash. -
Stem reflections:
Add a single, very thin white highlight along one side of the stem to make the glass look glossy and reflective.
Step back and admire the energetic movement you’ve captured in your vintage painting
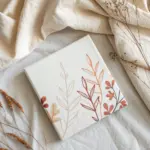
Easy Floral Bouquet With Loose Brush Dabs
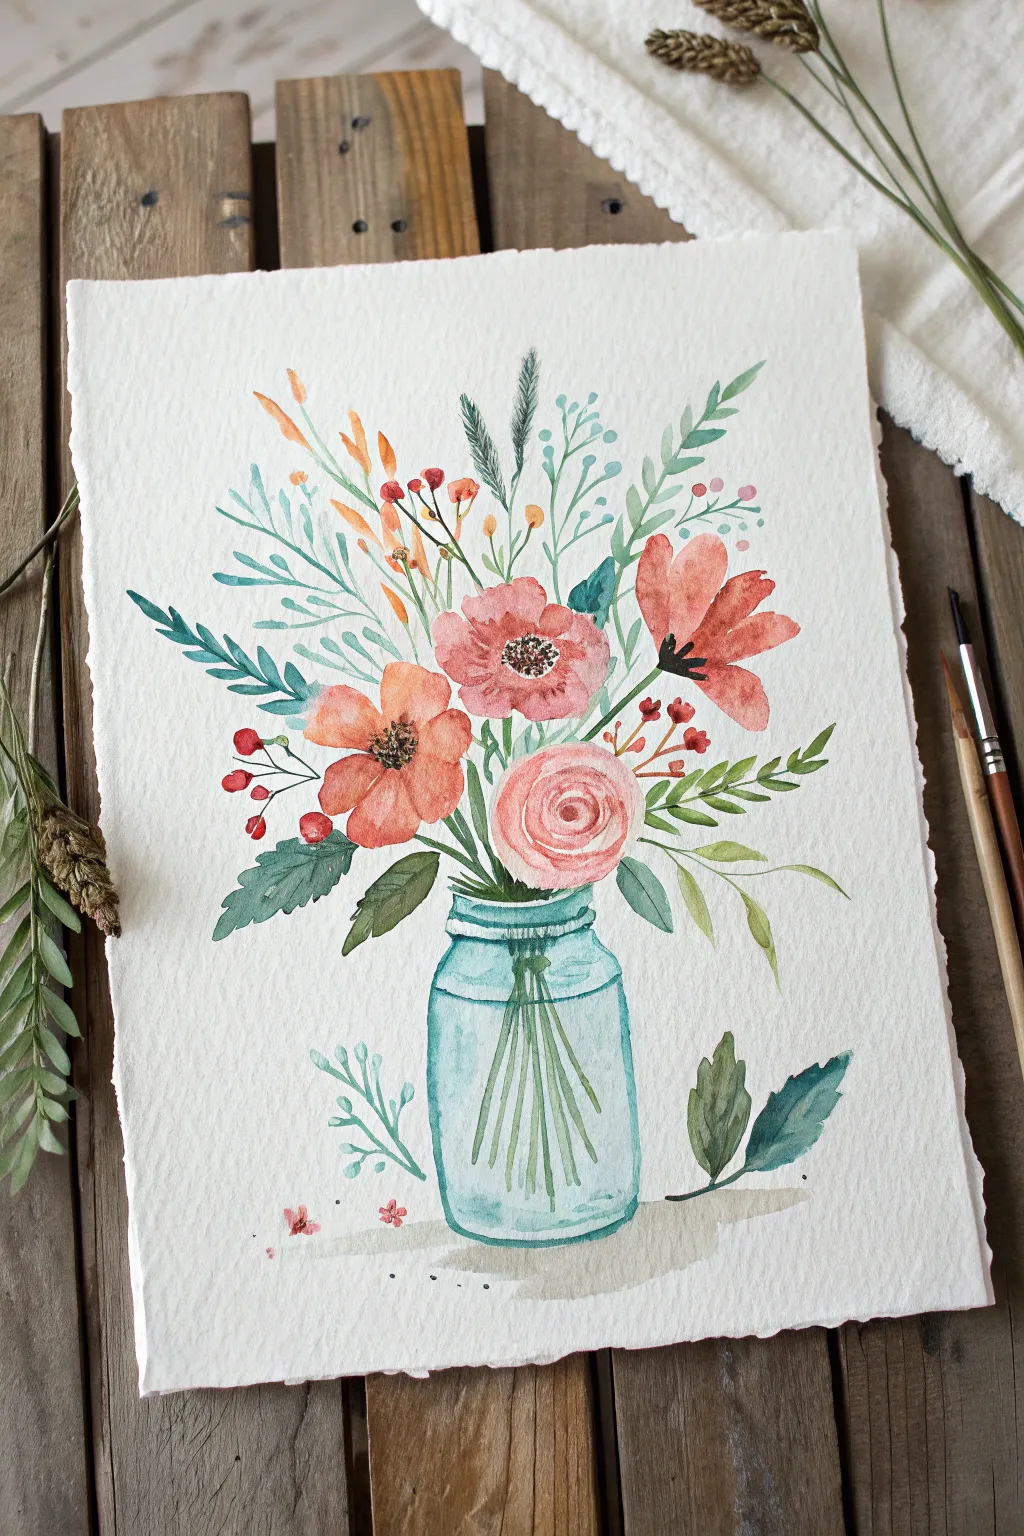
Capture the charm of a farmhouse garden with this lovely watercolor illustration, featuring coral blooms and wild greenery resting in a translucent blue jar. The loose, relaxed brushstrokes make this project perfect for beginners looking to practice floral composition without the pressure of realism.
How-To Guide
Materials
- Cold press watercolor paper (textured)
- Watercolor paints (Coral, Vermilion, Sap Green, Viridian, Cerulean Blue, Burnt Umber)
- Round brushes (sizes 2, 6, and 8)
- Pencil and eraser
- Jar of water
- Paper towels
- Palette for mixing
Step 1: Drafting the Jar
-
Sketch the outline:
Begin by lightly sketching the outline of a mason jar in the lower center of your paper. Draw an oval for the rim, a short neck, and a rectangular body with slightly rounded bottom corners. Keep your pencil pressure extremely light. -
Add jar details:
Sketch water lines inside the jar and vertical lines for stems. Don’t worry about drawing every single stem perfectly; just indicate their general direction. -
Wash the glass:
Mix a very watery wash of Cerulean Blue with a tiny touch of Viridian to get that vintage aqua glass look. Using your size 8 brush, fill in the jar shape. Keep it translucent—add more water to the center areas to suggest light passing through. -
Create dimension:
While the jar is still damp, drop slightly more concentrated blue pigment along the bottom curve and the side edges to create roundness. Let this layer dry completely. -
Paint the stems:
Once the blue jar wash is dry, use a size 2 brush and a mix of Sap Green and water to paint the stems inside the jar. The blue wash over them will naturally make them look submerged. -
Darken the rim:
Use a stronger mix of your blue hue to define the threads on the jar’s neck and the dark rim at the very top.
Step 2: Blooming Flowers
-
Paint the main rose:
Mix a soft pink using Coral and plenty of water. Start with a tight spiral in the center for the rose, then dab loose, C-shaped petals radiating outward. Leave small gaps of white paper between the strokes to keep it airy. -
Add the coral poppies:
Choose positions for the two large, open flowers. Use a mix of Coral and Vermilion. Paint these with broad, sweeping strokes of the size 6 brush, making them slightly flatter than the rose to show a different angle. -
Create the darker bloom:
For the flower on the right, use a deeper red-orange mix. Paint three or four distinct petals pointing generally upward, simulating a tulip or lily shape. -
Detail the centers:
Once the flower petals are dry, use a size 2 brush with Burnt Umber (dark brown) to clear stippling dots in the center of the poppies. Add tiny lines radiating from the center for the stamen.
Muddy Colors?
If your greens and reds are bleeding into brown, ensure the first flower layer is bone dry before painting adjacent green leaves. Patience prevents muddying.
Step 3: Foliage & Fillers
-
Paint base leaves:
Mix Sap Green with a touch of blue for a cool-toned green. Paint large, jagged leaves at the base of the bouquet, draping over the rim of the jar. -
Add tall grasses:
Using the tip of your size 6 brush, flick long, thin strokes upward using a lighter yellow-green mix. These simulate wild grasses and add height to the composition. -
Incorporate blue sprigs:
Mix a teal color (Viridian + Blue) and paint fern-like sprigs with small, rhythmic dashes along a central stem on the left side of the bouquet. -
Paint berry branches:
With a fine brush, draw thin brown branches sticking out. Add small red or coral dots to the ends to create winter berries or buds. -
Fill empty spaces:
Look for gaps in your bouquet. Fill them with light washes of green leaves or tiny blue dot clusters to balance the arrangement. -
Ground the object:
Mix a very watery grey or light brown. Paint a horizontal wash underneath the jar to create a shadow, grounding your artwork so it doesn’t look like it’s floating. -
Final touches:
Add a few fallen leaves or petals near the bottom of the jar for a casual, imperfect feel. Splatter a tiny bit of paint if you want a messier, artistic texture.
Add Sparkle
Once the jar is 100% dry, use a white gel pen to add sharp highlights on the glass curve and the flower petal edges for extra pop.
Let your beautiful botanical painting dry completely before framing it or gifting it to a friend

PENCIL GUIDE
Understanding Pencil Grades from H to B
From first sketch to finished drawing — learn pencil grades, line control, and shading techniques.
Explore the Full Guide
Dandelion Wishes With Floating Seeds
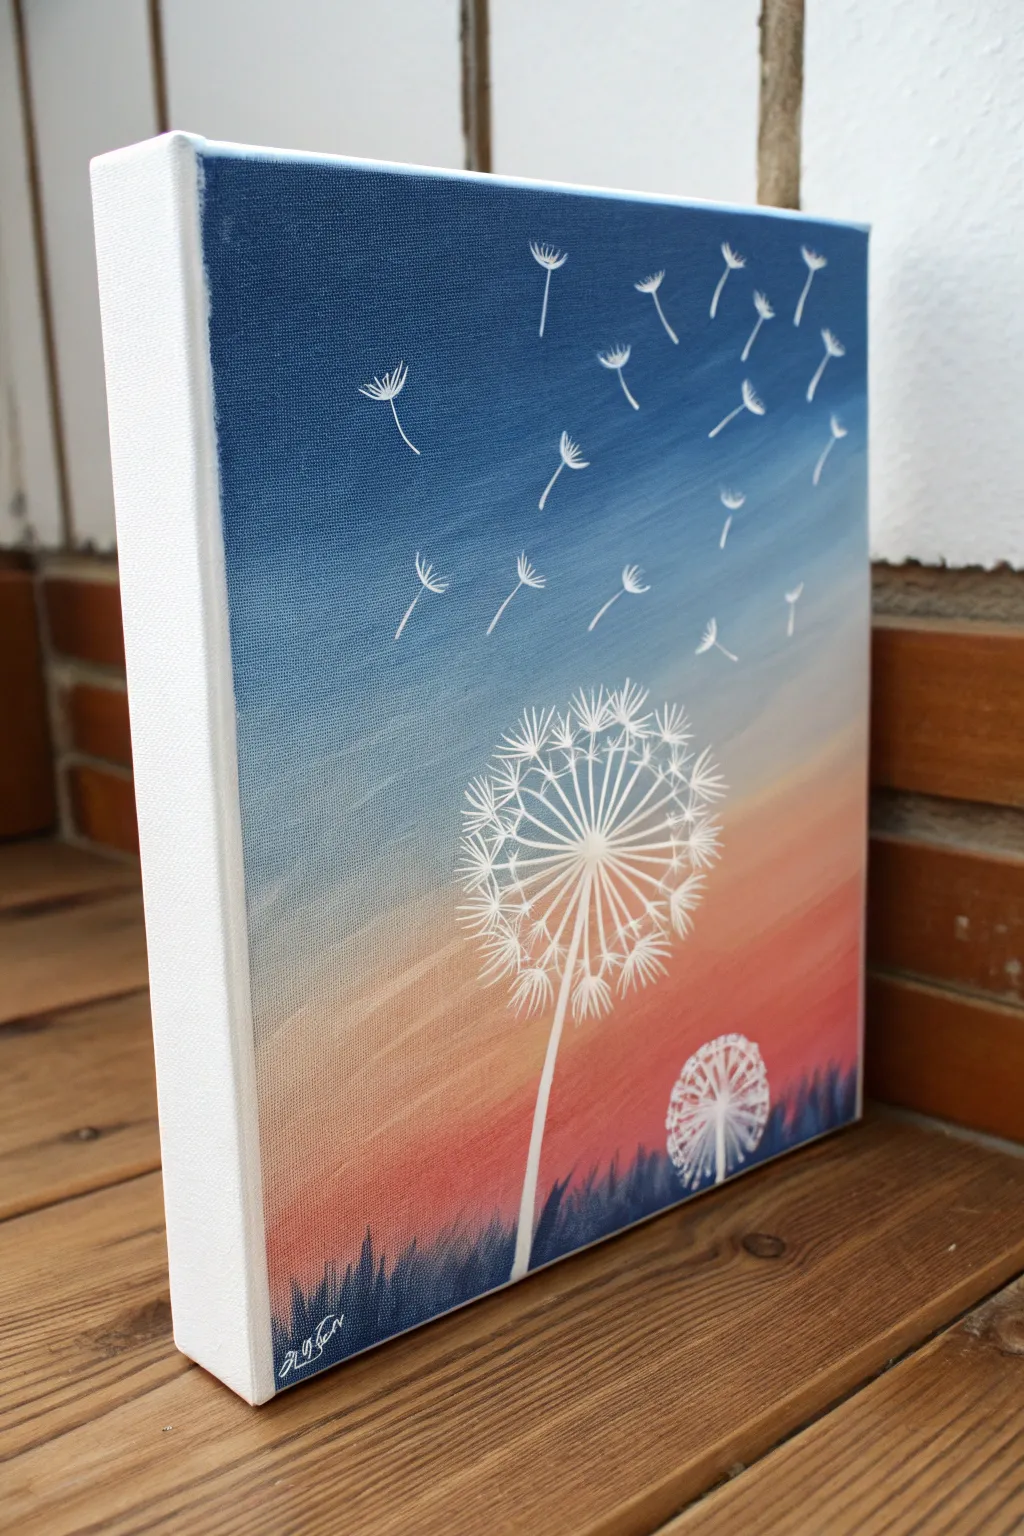
Capture the fleeting beauty of a sunset wish with this serene acrylic painting. Featuring a smooth gradient sky and delicate white seed silhouettes, this piece is perfect for beginners looking to practice blending and fine line work.
Detailed Instructions
Materials
- Square canvas (stretched or panel)
- Acrylic paints: Navy Blue, Hooker’s Green, Titanium White, Salmon Pink (or Light Orange), Magenta
- Flat shader brush (approx. 1 inch)
- Small round detail brush (size 0 or 00)
- Medium round brush
- Cup of water
- Palette or paper plate
- Paper towels
Step 1: Creating the Ombré Sky
-
Prime the top:
Load your large flat brush with Navy Blue paint. Start at the very top edge of the canvas and paint distinct horizontal strokes across the upper third, ensuring full coverage. -
Transition to light blue:
Without cleaning your brush fully, pick up a generous amount of Titanium White. Mix it directly on the canvas just below the navy section to create a lighter blue, blending the seam while the paint is still wet. -
Add warmth:
Rinse your brush thoroughly. Mix a bit of Salmon Pink with White. Apply this right below the light blue area, blending upward slightly to create a soft, hazy transition where the blue meets the peachy tone. -
Deepen the horizon:
Mix a small amount of Magenta into your Salmon Pink for a darker, rosier hue. Paint the bottom third of the canvas with this color, bringing it down almost to the bottom edge. -
Smooth the gradient:
With a clean, slightly damp brush, gently run horizontal strokes across the entire canvas from top to bottom to soften any harsh lines between your color zones.
Paint Dragging?
If your fine lines are breaking or looking scratchy, mix a single drop of water into your white paint. Ink-like consistency flows much better.
Step 2: Painting the Grass Silhouette
-
Mix the shadow color:
Create a dark, shadowy hue by mixing Navy Blue with a touch of Hooker’s Green and a tiny dot of Magenta. This creates a more interesting shadow color than plain black. -
Block in the grass:
Using a medium round brush, dab this dark mixture along the very bottom edge of the canvas to create an uneven, organic ground line. -
Add grass blades:
Switch to your smaller brush if needed. Use quick, upward flickering strokes to pull blades of grass up from the dark base. Vary heights and directions slightly for realism. -
Dry completely:
Let the background and grass layer dry completely before moving on to the white dandelions. This prevents the white paint from picking up background colors and turning muddy.
Step 3: The Dandelions & Seeds
-
Paint the main stem:
Using your smallest detail brush and pure Titanium White, paint a slightly curved line rising from the grass in the center-left, stopping about two-thirds up the canvas. -
Create the center point:
Visualize a center point at the top of your stem. Paint thin, radiating stick-straight lines outward from this center, like the spokes of a bicycle wheel, forming a large sphere shape. -
Add the fluff:
At the end of each radiating spoken line, paint a tiny ‘V’ shape or a small cluster of three short dashes. This mimics the seed parachutes. -
Layer the fluff:
Add a few shorter, fainter white lines between the main spokes to make the dandelion head look full and round. I find slightly watering down the white paint helps make these lines sharper. -
Paint the smaller dandelion:
Repeat this process for a smaller, lower dandelion on the bottom right side. Make the stem shorter and the head more compact. -
Add floating seeds:
Scatter individual seeds floating upward into the blue sky. Paint a tiny curved line for the seed bottom, a thin stem upward, and a small ‘V’ top. -
Direct the wind:
Ensure all the floating seeds are angled in roughly the same direction (up and to the right) to create a sense of wind movement. -
Final highlights:
Go back over the center of the main dandelion with a fresh coat of white to make the core appear brighter and denser where the seeds congregate. -
Sign your work:
Use your finest brush to add your signature in the bottom corner, perhaps in a contrasting white or light blue.
Make It Sparkle
Once the painting is fully dry, add tiny dots of silver glitter glue or metallic silver paint to the centers of the seed puffs for a magical effect.
Step back and admire the gentle movement in your peaceful sunset scene
Colorful Bird Stack On A Branch
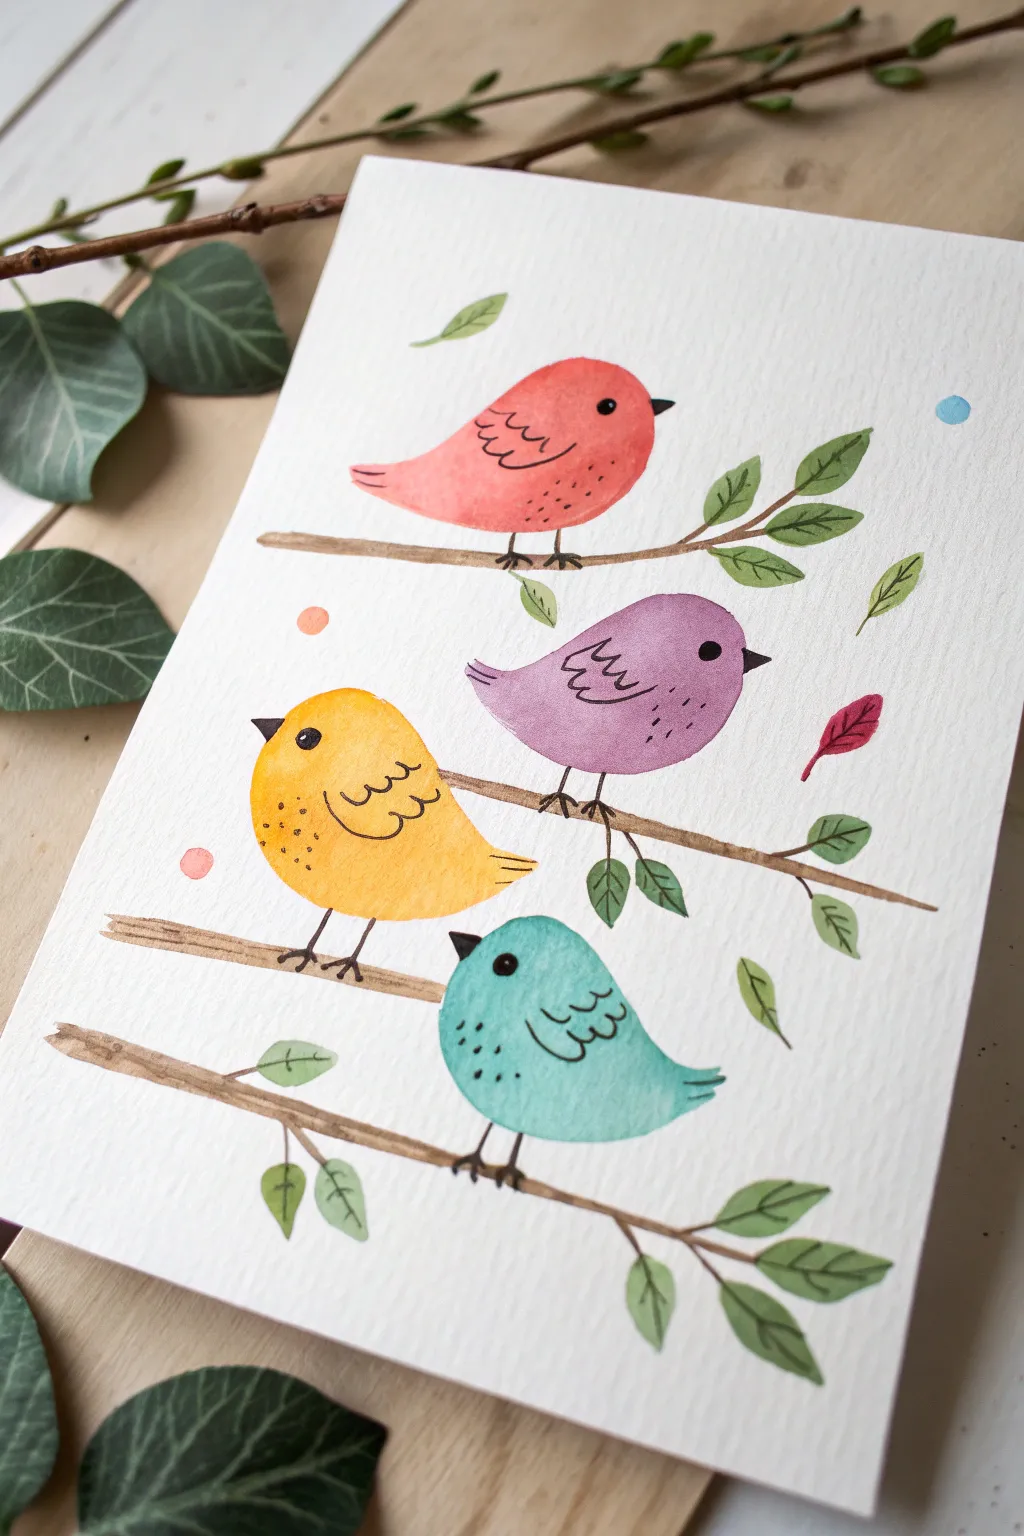
Capture the charm of four distinct, colorful birds perched on delicate branches in this cheerful watercolor project. The simple shapes and playful details make this perfect for beginners looking to practice wet-on-dry techniques and ink detailing.
Step-by-Step Guide
Materials
- Cold press watercolor paper (A5 or 5×7 inch)
- Watercolor paints (Red/Coral, Purple, Yellow, Teal/Turquoise, Brown/Sepia)
- Round brushes (Size 6 for bodies, Size 2 for details)
- Fine liner pen (Black, waterproof, 0.3mm or 0.5mm)
- Pencil and eraser
- Paper towels and water cup
Step 1: Sketching the Layout
-
Mark branch positions:
Start by lightly sketching three horizontal lines across your paper to represent the branches. Space them out vertically so the birds won’t feel cramped. The top bird will perch on the top branch, the purple bird on the middle one, and the yellow and teal birds will share the lower spaces. -
Outline the bird shapes:
Draw simple, rounded tear-drop shapes for the bird bodies. The top (coral) bird faces right; the purple bird below it faces right; the yellow bird faces left; and the bottom (teal) bird faces left. Keep your pencil lines very faint so they disappear under the paint.
Clean Lines
Wait for the paint to be 100% dry before using the pen. If the paper is cool to the touch, it’s still damp. Ink on damp paper will bleed and ruin the crisp lines.
Step 2: Painting the Base Layers
-
Paint the top coral bird:
Load your size 6 brush with a watered-down coral or reddish-orange mix. Fill in the top bird shape, keeping the edges smooth. Let the color be slightly uneven for a natural watercolor look. -
Paint the purple bird:
While the first bird dries, mix a soft violet or purple. Paint the second bird down, ensuring the tail feathers have a slight point sticking up. -
Paint the yellow bird:
Rinse your brush thoroughly and pick up a bright, warm yellow. Fill in the third bird’s body, which is facing left. I like to make this one slightly rounder and plump. -
Paint the teal bird:
For the bottom bird, mix a fresh turquoise or teal color. Paint the final body shape at the bottom, facing left. -
Let the bodies dry:
Wait until all four bird shapes are completely dry to the touch. If they are still damp, the subsequent ink and branch steps will bleed into the bodies.
Make It Yours
Change the season by altering the leaves! Use orange and brown leaves for autumn, or turn the floating dots into snowflakes for a winter scene.
Step 3: Adding Branches and Foliage
-
Paint the branches:
Using a size 2 brush and brown watercolor, paint thin, organic lines over your initial branch sketches. Allow the lines to be slightly wobbly for a natural wood texture. Make sure the branches go ‘under’ the birds’ feet areas. -
Add gentle green leaves:
Mix a muted olive green. Using the tip of your round brush, press and lift to create small leaf shapes attached to the branches. Add a few ‘floating’ leaves around the birds to fill empty white space. -
Include decorative dots:
Using leftover paint colors (like a soft pink or light blue), dab small circles in the background randomly to add a confetti-like effect.
Step 4: Inking the Details
-
Draw the beaks and eyes:
Once all paint is bone dry, take your black fine liner pen. Draw small triangles for beaks and solid black circles for eyes on each bird. Leave a tiny white dot in the eye for a highlight if you can. -
Outline the wings:
Draw a small ‘U’ or ‘W’ shape on the side of each bird’s body to suggest a wing. Add scallops or loops inside these shapes to mimic feathers. -
Add legs and feet:
Draw thin, stick-like legs extending from the bird bodies down to the branches. Add little claws gripping the wood. -
Detail the bellies:
Add texture to the chests by stippling small dots or drawing tiny dashes near the bottom of their bellies for shading. -
Final leaf details:
If desired, draw a simple central vein line through some of the painted green leaves for added definition.
Step back and admire your charming flock of colorful friends


Northern Lights With Swipe Blending
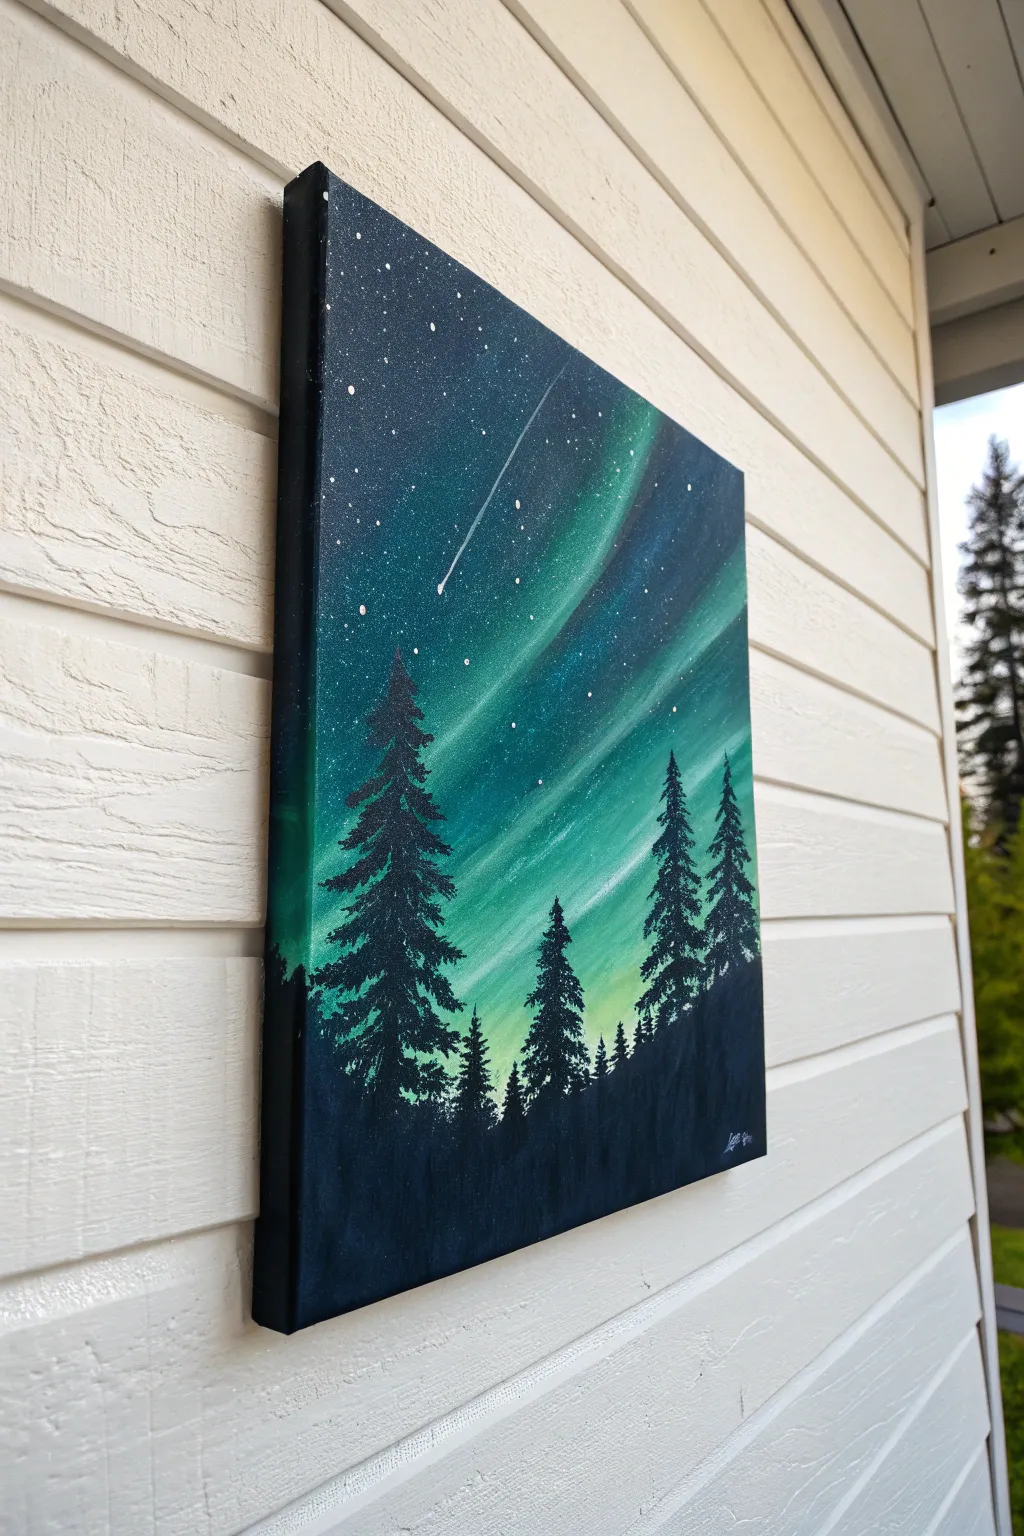
Capture the ethereal glow of the Northern Lights in this striking acrylic painting. Using simple swipe blending techniques, you will create dynamic ribbons of light that dance across a star-filled sky above a silent forest.
Detailed Instructions
Materials
- Square stretched canvas (e.g., 12×12 or similar)
- Acrylic paints: Carbon Black, Titanium White, Phthalo Green, Phthalo Blue, Dioxazine Purple, Lemon Yellow
- Large flat brush (1-inch or 2-inch)
- Medium flat brush
- Fan brush (for trees)
- Small round detail brush
- Water cup and paper towels
- Palette or paper plate
- An old toothbrush (optional, for stars)
Step 1: Setting the Background
-
Prepare the canvas:
Start by painting the entire canvas, including the sides, with a coat of Carbon Black. This provides a deep, dark base that will make your greens and blues pop. -
Establish the horizon:
While the black base is drying, mix a dark navy color using Phthalo Blue and a tiny touch of black. Paint the bottom third of the canvas with this dark tone to start suggesting the dense night atmosphere near the ground.
Muddy Sky?
If colors are getting muddy while blending the aurora, wipe your brush on a paper towel after every single swipe. Keeping the brush clean prevents over-mixing.
Step 2: Creating the Aurora
-
Mix your light source:
Create a mixture of Titanium White with a generous amount of Lemon Yellow and a touch of Phthalo Green. You want a very pale, almost neon lime green. -
Apply the light streaks:
Using your medium flat brush, apply diagonal streaks of this pale lime mixture across the canvas. Start from the bottom right area and sweep dramatically toward the top left. -
Add mid-tones:
Load your brush with pure Phthalo Green. Paint lines directly next to and slightly overlapping your lime streaks. Don’t worry about perfect blending yet; just get the color on the canvas. -
Introduce the deep sky:
In the upper left corner and the spaces between the green streaks, apply Phthalo Blue and Dioxazine Purple. This creates the deep space surrounding the lights. -
The swipe technique:
Wipe your large flat brush clean and dry it well. With a very gentle hand, swipe diagonally across the wet paint, following the direction of your streaks. This blends the colors into soft, airy ribbons. -
Refine the glow:
If you lost some brightness, add a little more white/yellow mix to the center of the aurora bands and blend gently again. I find this layering creates a more convincing luminescence. -
Let it dry:
Allow the background sky to dry completely before moving on to the stars. This prevents the white stars from turning green or muddy.
Step 3: Stars & Shooting Star
-
Create the stars:
Mix a watery Titanium White paint. Dip an old toothbrush or stiff brush into it, then run your thumb across the bristles to flick tiny speckles over the upper two-thirds of the canvas. -
Paint larger stars:
Use your smallest detail brush to dot in a few distinct, larger stars randomly among the spray. -
Add the shooting star:
Using the detail brush and pure white, paint a small dot for the head of the shooting star. Drag the brush quickly away from the dot to create a fading tail that cuts across the aurora lines.
Add Moonlight
For extra dimension, highlight the right side of the tree branches with a very faint, dry-brushed gray-blue to suggest moonlight hitting the forest.
Step 4: The Silhouette Forest
-
Paint the tree line foundation:
Reload your palette with pure Carbon Black. Paint an uneven, hilly shape across the bottom fourth of the canvas to serve as the ground. -
Establish tree trunks:
Using a small flat brush turned on its chiseled edge, paint vertical lines of varying heights rising from the black ground. These are the trunks for your pine trees. -
Form the treetops:
Switch to a fan brush or small round brush. Start at the very top of a trunk line and tap tiny amounts of black paint to create a pointed tip. -
Build the branches:
Work your way down the trunk, tapping the brush side-to-side. Make the branches wider as you go lower, creating a classic triangular pine shape. -
Create depth:
Paint a few very tall trees in the foreground, and then fill the gaps with smaller, shorter trees to make the forest look dense and distant. -
Add details:
Use the very tip of your detail brush to sharpen the tops of the trees or add wispy branches sticking out from the main silhouettes.
Sign your name in the corner with a contrasting color like white or light blue to finish your masterpiece
Neon Abstract With Two-Color Pour Look
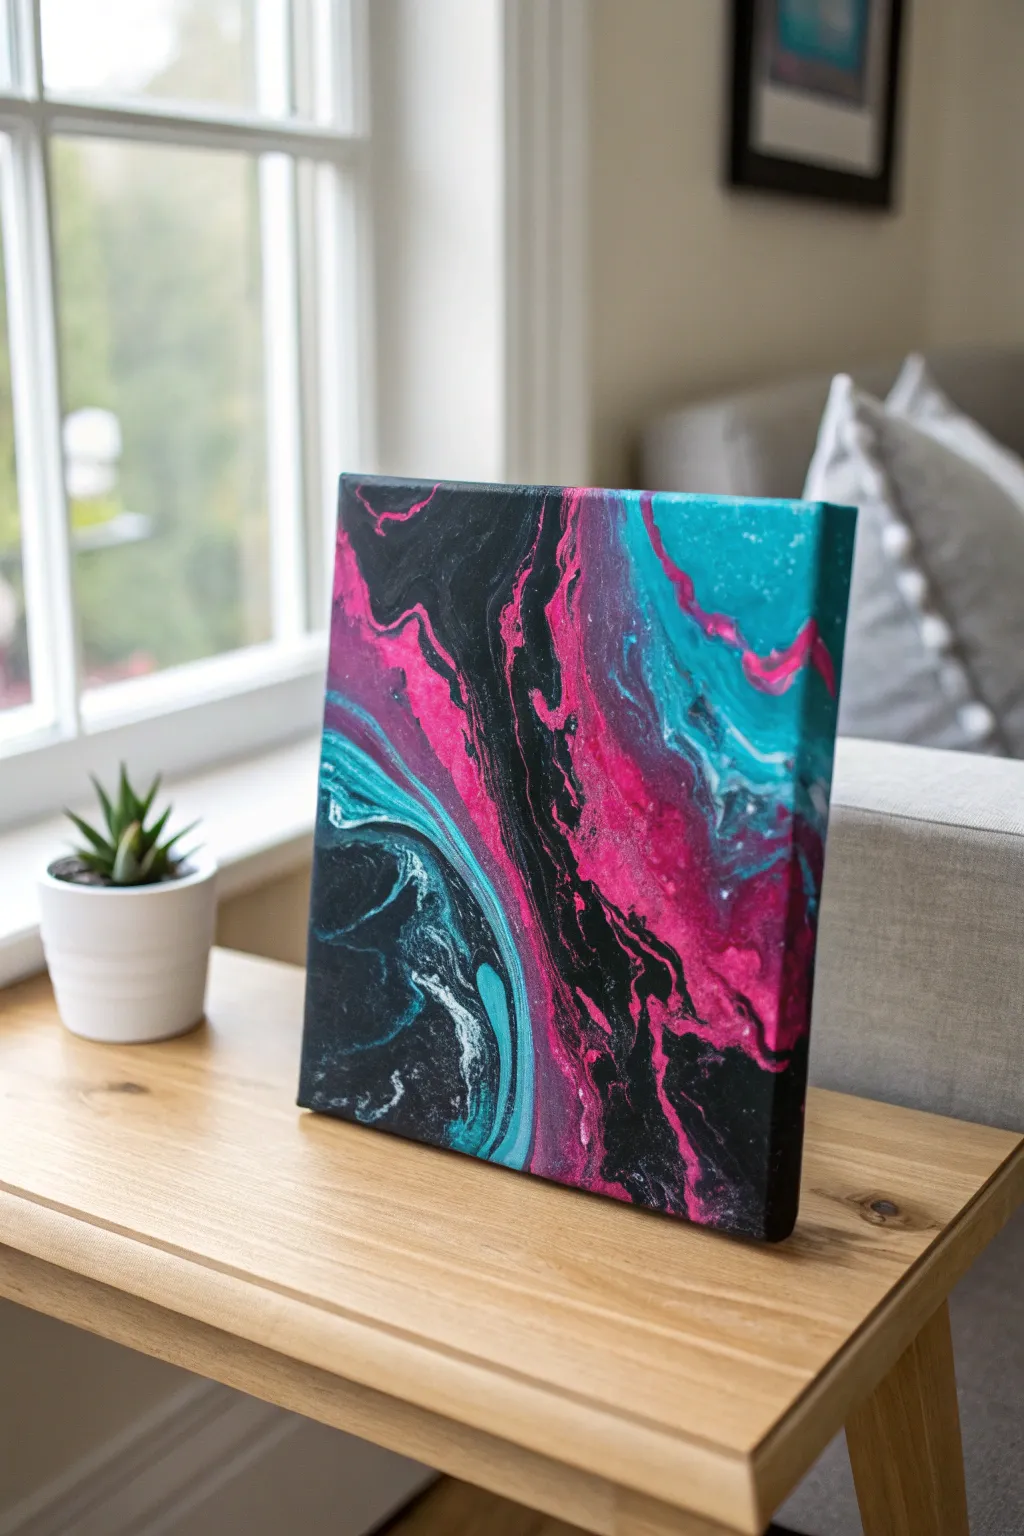
Create a mesmerizing, high-contrast abstract piece that mimics the effortless flow of liquid art without the mess of a full acrylic pour. This project combines deep blacks with striking neon pinks and teals for a modern, galaxy-inspired aesthetic.
How-To Guide
Materials
- Square stretched canvas (10×10 or 12×12 inch)
- Heavy body acrylic paint: Mars Black
- Fluid or soft body acrylic paint: Neon Pink/Magenta, Turquoise/Teal, Titanium White
- Pouring medium (or school glue mixed with water)
- Plastic cups for mixing
- Stir sticks
- Hairdryer or straw (optional)
- Small palette knife or plastic card
- Drop cloth or plastic sheet
Step 1: Preparation and Mixing
-
Set Up Your Stations:
Cover your workspace with a drop cloth or plastic sheet. Elevate your canvas slightly by placing four plastic cups underneath the corners, allowing excess paint to drip off freely. -
Mix the Pouring Medium:
In separate cups, mix your neon pink, turquoise, white, and a small amount of black with pouring medium. Aim for a consistency like warm honey—it should flow off the stick in a steady stream but settle into the cup without disappearing immediately. -
Layer the Dirty Cup:
Take a clean, empty cup. Pour a generous amount of black in first. Then, layer small amounts of pink, turquoise, and white on top. Do not stir. Repeat this layering process two or three times until the cup is about half full.
Muddy Colors?
If colors look brown or grey, you likely over-tilted or stirred the paint too much. Next time, move the canvas slower and stop tilting sooner.
Step 2: The Pour and Tilt
-
Flip Cup Technique:
Place the canvas upside down on top of your ‘dirty cup.’ Holding both firmly together, flip them over so the cup is now upside down on the canvas surface. -
Release the Paint:
Wait about thirty seconds for the paint to settle, then gently lift the cup straight up. The paint will spill out in a puddle. Don’t worry if it looks messy at first. -
Create Negative Space:
Before tilting, pour some straight black paint (mixed with medium) around the edges of the colorful puddle and fill the corners of the canvas. This helps the colorful puddle slide easier. -
Slow Tilting:
Gently tilt the canvas in a circular motion. Watch how the colors stretch and interact. Try to guide the colorful ‘ribbon’ diagonally across the canvas, leaving significant areas of black for contrast. -
Refine the Flow:
Tilt the canvas steeply to run excess paint off the corners. This stretches the cells and lines, making them look elegant rather than blobby.
Add Metallic Sparkle
Mix a metallic silver or iridescent medium into your white paint. It creates shimmering veins that catch the light beautifully against the matte black.
Step 3: Enhancing Details
-
Add Veins:
If you want more definition like the reference image, dip a palette knife into the white or teal paint and gently drag thin lines through the wet black areas. -
Blow for Effect:
Use a straw to gently blow on specific areas where colors meet the black. This creates feathery, smoke-like transitions. -
Define the Edges:
Run your finger along the underside of the canvas frame to catch drips. This ensures a clean edge when it dries. -
Create Cells (Optional):
If you want bubble-like cells, you can lightly torch the surface with a kitchen torch or heat gun, popping air bubbles and bringing underlying colors to the top.
Step 4: Finishing Up
-
Manual Corrections:
I prefer to use a toothpick to manually swirl any harsh lines while the paint is still wet, creating that natural marble effect. -
Drying Time:
Allow the painting to dry undisturbed on a level surface for at least 24 to 48 hours. Acrylic pours take much longer to dry than standard paintings. -
Varnish:
Once fully cured (after a few weeks), apply a high-gloss varnish to make the neon colors pop and protect the surface.
Enjoy the unpredictable beauty of fluid art as your unique galaxy takes shape
Stencil-Style City Skyline At Sunset
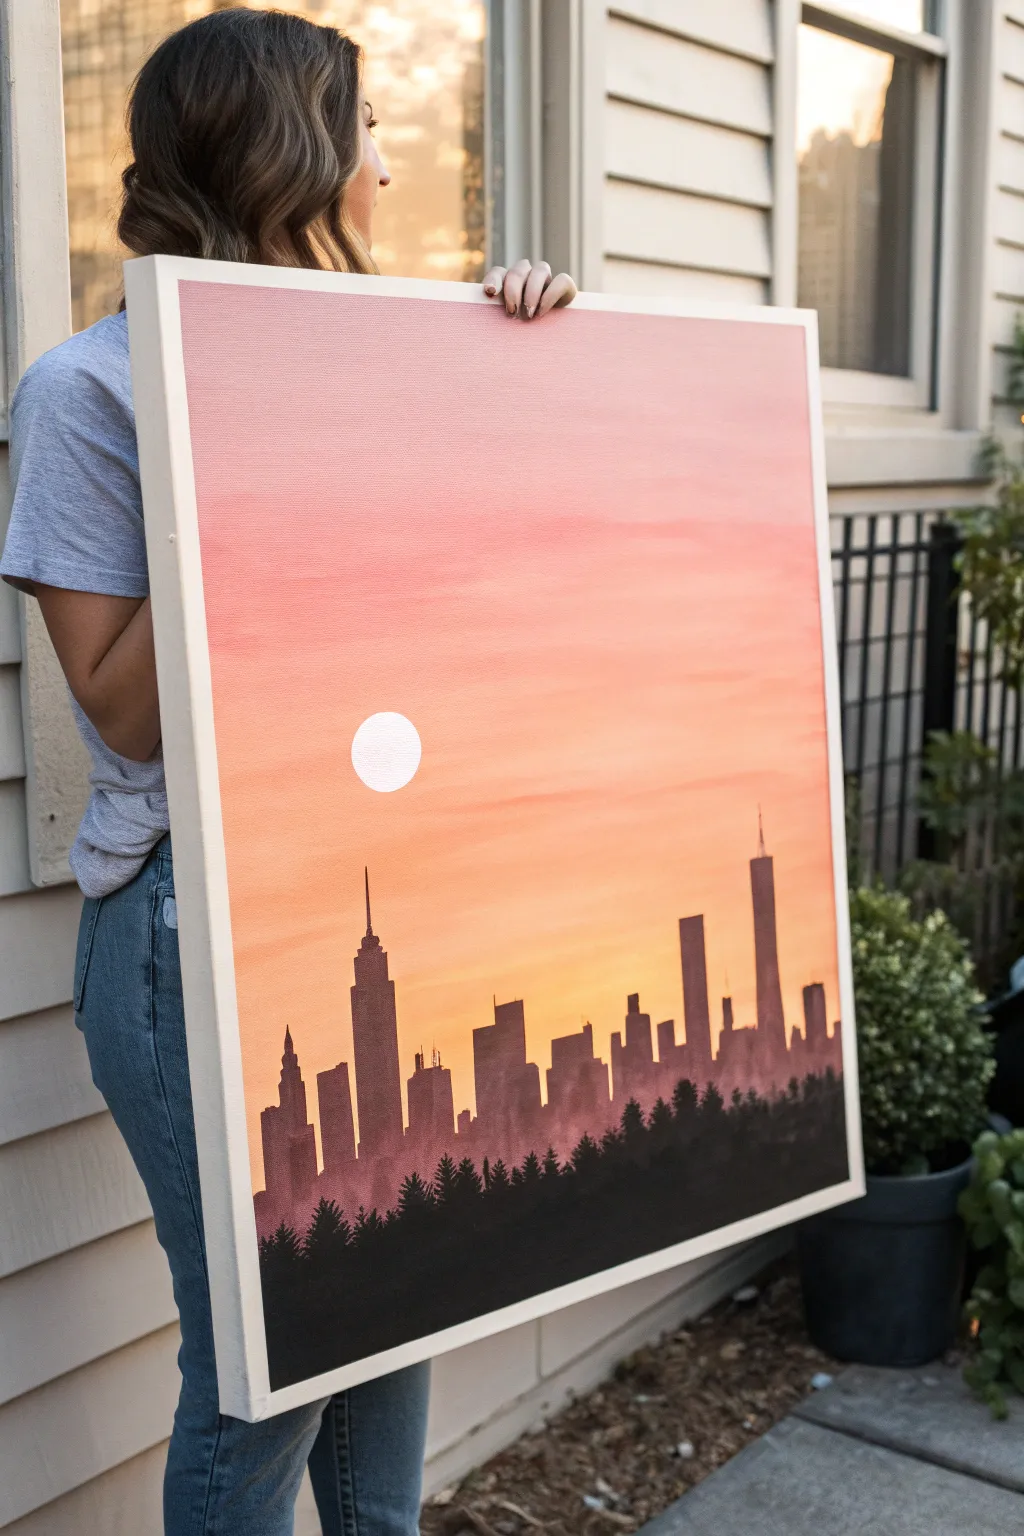
Capture the serene beauty of a metropolitan sunset with this striking silhouette painting. The smooth gradient sky transitions from soft pink to warm orange, creating a perfect backdrop for a crisp, cityscape profile.
Detailed Instructions
Materials
- Large square canvas (e.g., 24×24 or 30×30 inches)
- Acrylic paints: Titanium White, Light Pink, Peach/Coral, Orange, Dark Purple or Black
- Large flat brush (2-3 inch) for blending
- Medium flat brush
- Small round detail brush
- Painter’s tape or low-tack masking tape
- Pencil and eraser
- Ruler
- Palette or paper plate
- Cup of water and paper towels
Step 1: Creating the Gradient Sky
-
Prepare the canvas:
Start with a clean, dry canvas. If you want an ultra-smooth surface, you can apply a layer of gesso first and sand it lightly once dry, though standard store-bought canvases work perfectly fine. -
Mix your sky colors:
On your palette, prepare generous amounts of your sky colors. You’ll need a pale pink (white mixed with a touch of pink), a medium peach, and a vibrant orange. -
Paint the top band:
Using your large flat brush, apply the pale pink paint to the top third of the canvas. Use long, horizontal strokes that go all the way from the left edge to the right edge to minimize brush marks. -
Apply the middle band:
Without washing your brush completely (wipe off the excess), pick up the peach color. Paint the middle third of the canvas, overlapping slightly with the wet pink edge above. -
Add the horizon color:
Apply the vibrant orange paint to the bottom third of the canvas. Don’t worry about the very bottom edge being perfect, as it will be covered by the city silhouette later. -
Blend the transitions:
While the paint is still wet, use the large brush to blend the boundaries between the colors. Gently sweep back and forth horizontally where the pink meets the peach, and where the peach meets the orange, creating a seamless gradient. -
Add subtle clouds:
While the background is drying but slightly tacky, use a dry, clean brush with a tiny amount of slightly lighter paint (peach mixed with white) to streak in very faint horizontal cloud lines for texture. -
Let it dry completely:
This step is crucial. Allow the background to dry fully—usually about 20–30 minutes—before attempting to paint anything on top.
Seamless Blends
Keep a misting spray bottle handy while painting the sky. A gentle mist keeps acrylics wet longer, giving you more time to create that perfect, smooth gradient blend.
Step 2: The Sun and Skyline
-
Draft the sun:
Once dry, decide on the placement of your sun or moon. Use a small cup or a compass to lightly trace a circle in the upper-left quadrant of the sky. -
Paint the sun:
Using your medium flat brush and Titanium White paint, carefully fill in the circle. You may need two coats to ensure it is bright and opaque against the pink background. -
Sketch the skyline:
Lightly sketch the outline of your city buildings across the bottom third of the canvas with a pencil. Vary heights and shapes—include iconic pointed skyscrapers and flat-topped office buildings. -
Tape the edges (optional):
If you are nervous about painting straight lines for the buildings, apply strips of painter’s tape vertically to mask off the sides of your skyscrapers. This creates crisp, professional edges. -
Mix the silhouette color:
Create a dark, shadowy color. While pure black works, I find mixing dark purple with a little black creates a richer, more atmospheric shadow tone. -
Fill in the buildings:
Using the medium flat brush, paint inside your sketched building outlines. Ensure the paint is solid and opaque. If you used tape, peel it off while the paint is still slightly wet to avoid peeling. -
Add architectural details:
Switch to your small detail brush. Add thin antennas, spires, or water towers to the tops of a few buildings to give the silhouette realistic complexity.
Rough Edges?
If your building lines look shaky, use a ruler and a white gel pen or a very thin brush with sky color to ‘cut’ back into the building shape and straighten the edge.
Step 3: Foreground Trees
-
Start the treeline:
For the very bottom edge, mix a true black to differentiate the foreground trees from the slightly lighter buildings behind them. -
Stipple the foliage:
Use an old, frayed brush or dab a sponge to create the texture of tree tops along the bottom edge of the canvas, overlapping the base of the buildings. -
Shape the pine trees:
Using the small detail brush, pull upward strokes to create the tips of pine trees rising from the foliage mass, giving a jagged, natural look to the bottom horizon. -
Final touches:
Step back and check for any patchy areas in the black silhouette. Apply a second coat to the darkest areas if any canvas shows through.
Hang your masterpiece in a prominent spot to enjoy the permanent calm of a city evening


Have a question or want to share your own experience? I'd love to hear from you in the comments below!