Whenever I’m planning a paint night, I always reach for ideas that feel beginner-friendly but still look like something you’d proudly hang up afterward. The secret is choosing bold shapes, easy blends, and a little high-contrast magic so everyone leaves feeling like an artist.
Classic Sunset Silhouette Paint Night
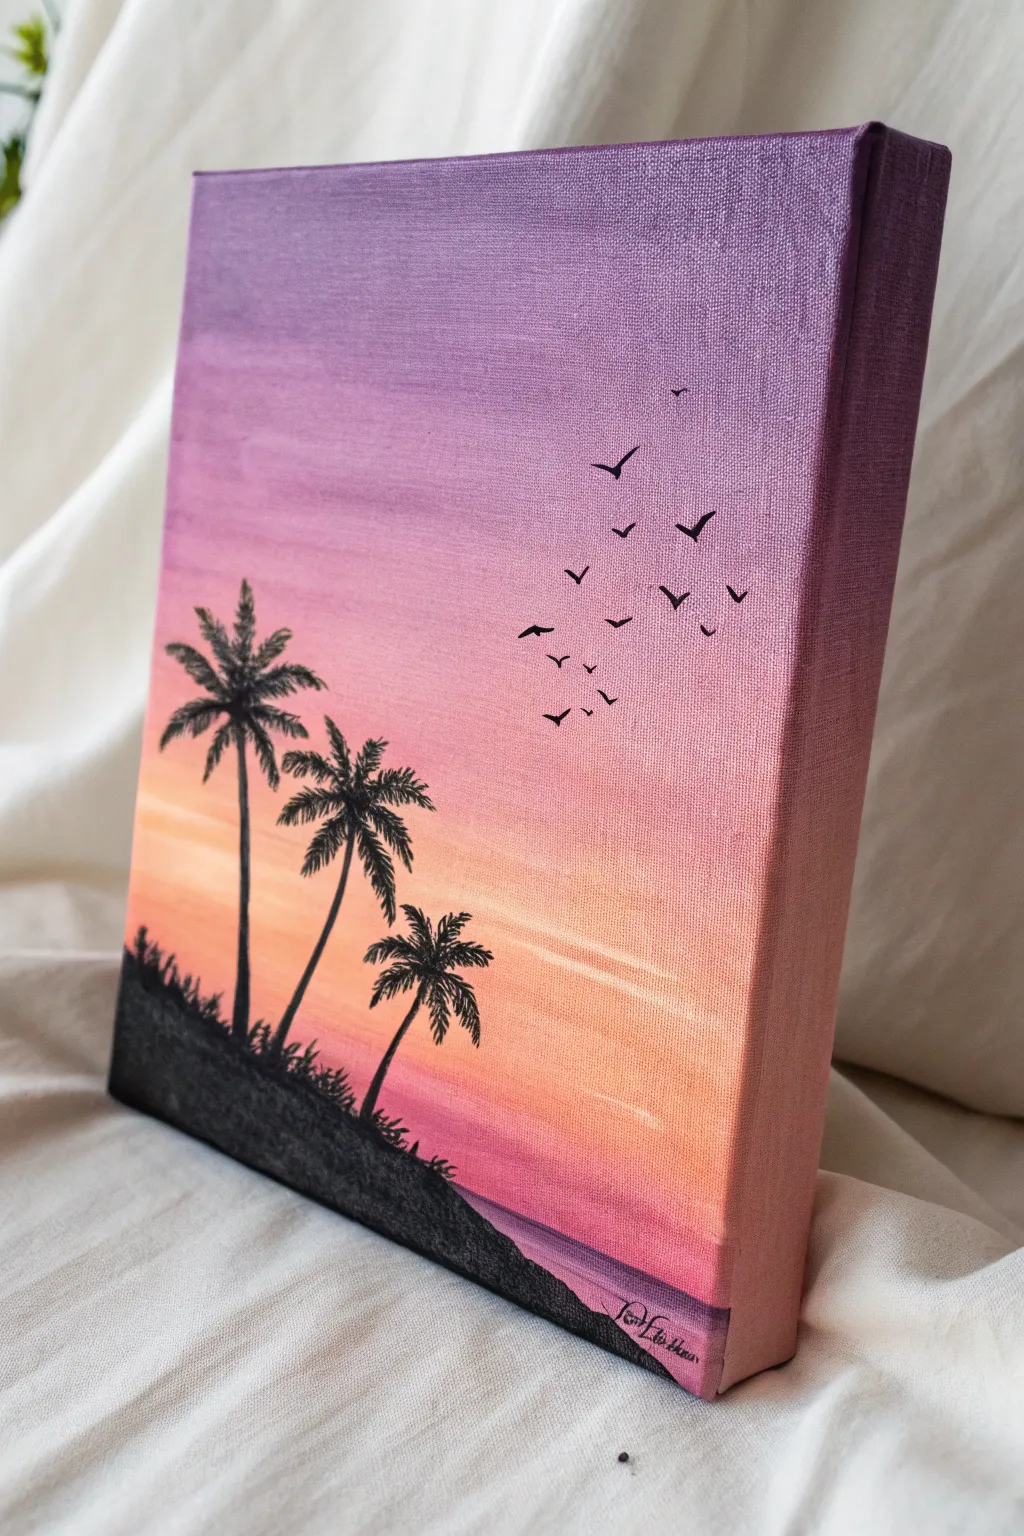
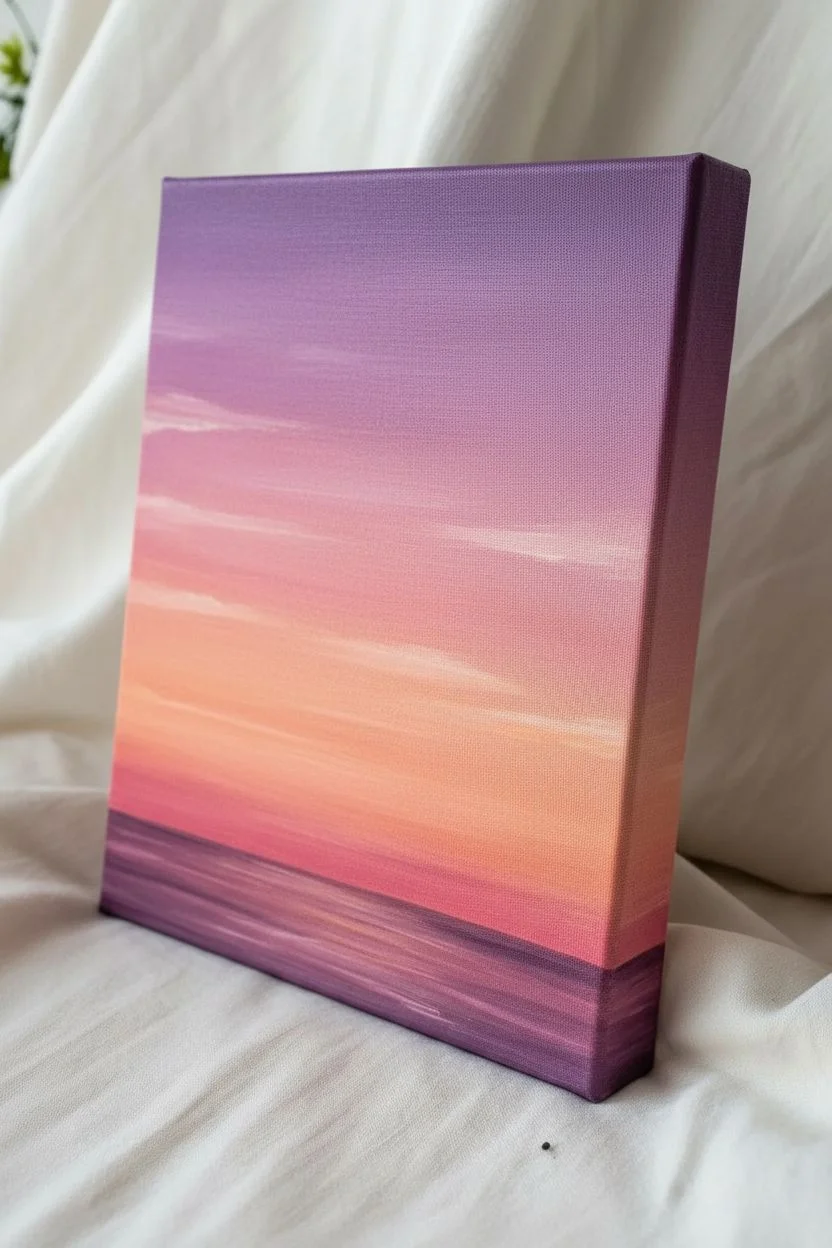
Capture the serene beauty of twilight with this stunning yet simple acrylic painting. Using a smooth gradient technique, you’ll blend rich purples into warm oranges to create a perfect backdrop for striking black silhouettes.
Step-by-Step
Materials
- Stretched canvas (e.g., 8×10 or 11×14 inches)
- Acrylic paints: Deep Violet, White, Magenta, Orange, Bright Yellow, Black
- Wide flat brush (for background)
- Medium round brush (for clouds/details)
- Fine detail brush (for birds and trees)
- Cup of water
- Paper towels
- Palette or paper plate
Step 1: Painting the Gradient Sky
-
Prepare the violet:
Start by squeezing a generous amount of Deep Violet onto your palette. Mix in just a touch of White to make it creamy and opaque. -
Apply the top layer:
Using your wide flat brush, paint the top third of the canvas with the violet mixture. Use long, horizontal strokes from edge to edge to ensure smooth coverage. -
Incorporate the edges:
Don’t forget to wrap the color around the sides of the canvas. This gives the finished piece a professional, gallery-ready look without needing a frame. -
Blend in lavender:
Without cleaning your brush, pick up a bit more White and a tiny dab of Magenta. Blend this lighter purple directly below the violet section on the canvas, working quickly while the paint is wet to create a soft transition. -
Shift to pinks:
Clean your brush thoroughly. Mix Magenta with a little White and start painting the middle section of the canvas. Gently brush upward into the lavender layer to blend the seam where the colors meet. -
Add the warm glow:
As you move toward the bottom third, introduce Orange and a small amount of Bright Yellow to your brush. Paint this warm peachy tone near the horizon line, blending it upwards into the pink. -
Finalize the horizon:
At the very bottom strip of the sky (before the water), use your palest yellow-orange mix. Rinse your brush and use very light, dry horizontal strokes to smooth out any harsh lines in your gradient. -
Paint the water reflection:
Below the horizon line, replicate the sky’s colors in reverse but much darker. Use horizontal strokes of pinks and violets. Painting the water slightly darker helps ground the image. -
Add subtle clouds:
While the sky is drying, use a barely damp medium round brush with a tiny amount of diluted white or light peach paint. Gently streak in a few thin, wispy clouds across the orange section.
Smooth Blends
Keep a misting spray bottle nearby. A light mist over the canvas keeps acrylics wet longer, making gradients buttery smooth.
Step 2: Creating the Silhouettes
-
Outline the land:
Ensure the background is completely dry to the touch. Load a medium brush with Black paint and outline a sloping hill starting from the bottom left corner, rising slightly towards the right. -
Fill the foreground:
Fill in the entire land area with solid black paint. I like to dab the top edge of the hill slightly with the brush tip to create the texture of grass or uneven terrain. -
Position the palm trees:
Switch to your fine detail brush. Paint three vertical lines for the palm tree trunks. Make them slightly curved and varied in height, with the bases thicker than the tops. -
Paint palm fronds:
From the top center of each trunk, paint 5-7 curved lines extending outward like a firework. These are the spines of your palm leaves. -
Detail the leaves:
Using the very tip of your detail brush, flick small, quick strokes hanging down from each palm spine. These should look feathery and jagged, simulating palm leaves. -
Add grassy texture:
Along the top silhouette of the hill, use the detail brush to flick tiny upward strokes. This creates the look of tall grass or bushes growing at the base of the trees. -
Create the flock:
Using the finest point of your brush and slightly watered-down black paint (ink consistency), paint small ‘V’ or ‘M’ shapes in the upper right quadrant for distant birds. -
Refine the flock:
Vary the size and angle of the birds to imply movement. Some should have wings fully extended, while others might look flatter. -
Sign your work:
Once everything is dry, add your signature in the bottom corner using a small brush or a paint pen.
Shaky Hands?
If painting tiny birds is intimidating with a brush, use a fine-tip black permanent marker or paint pen over the dry acrylic.
Step back and admire your personal tropical sunset escape


Starry Night Sky Dot Painting Paint Night
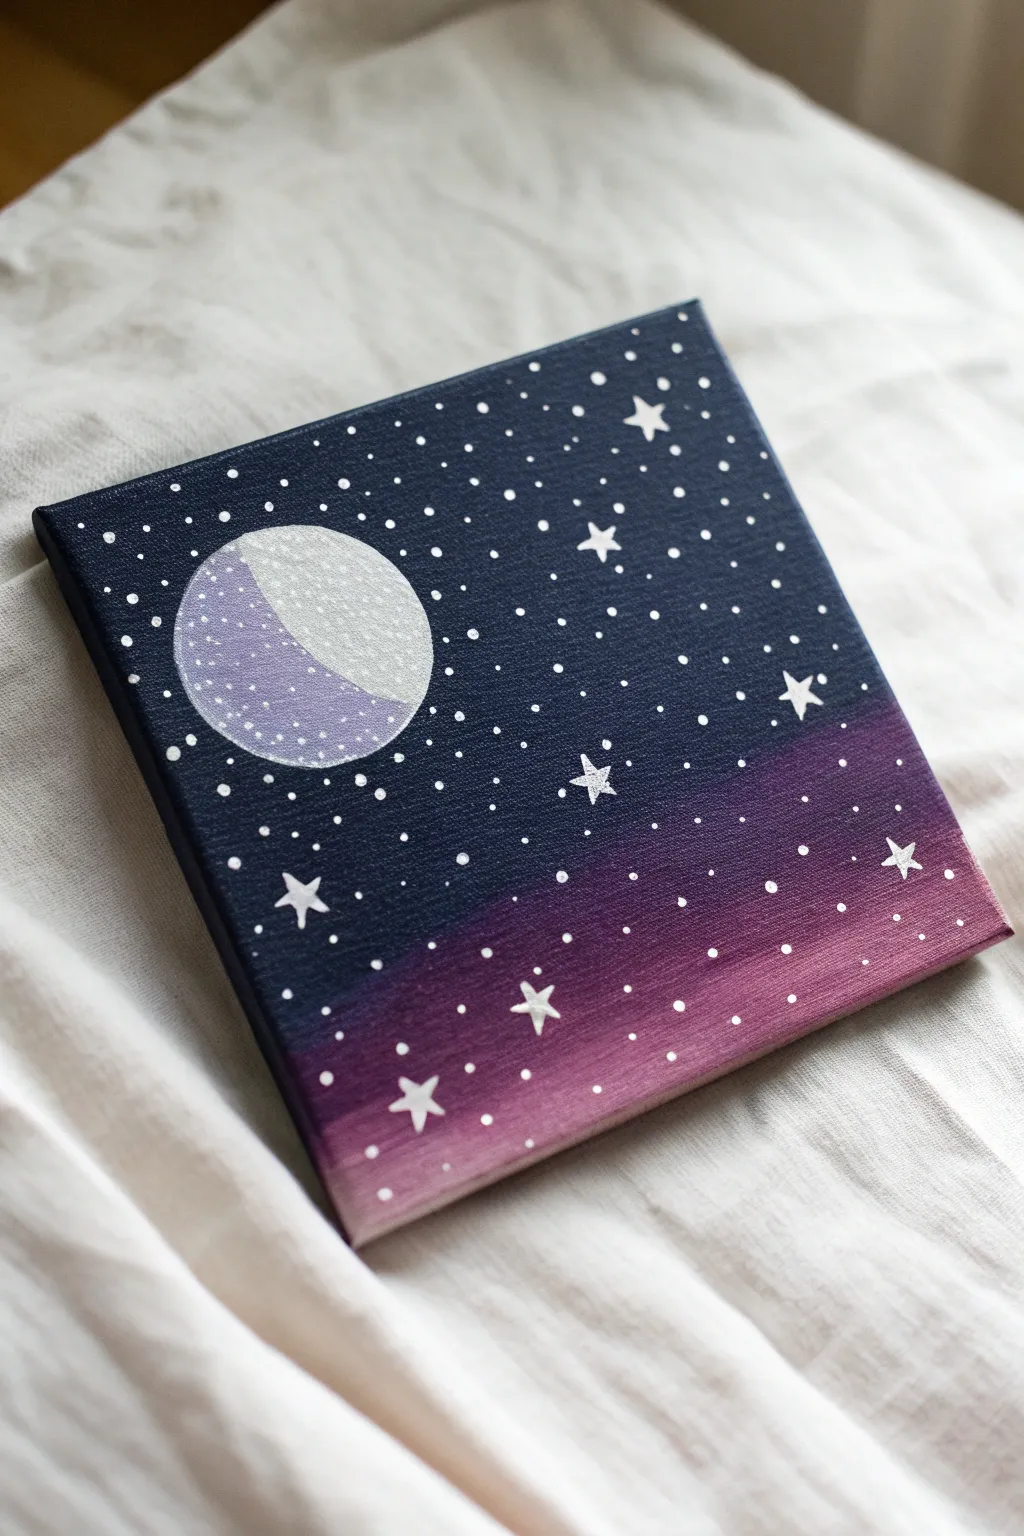
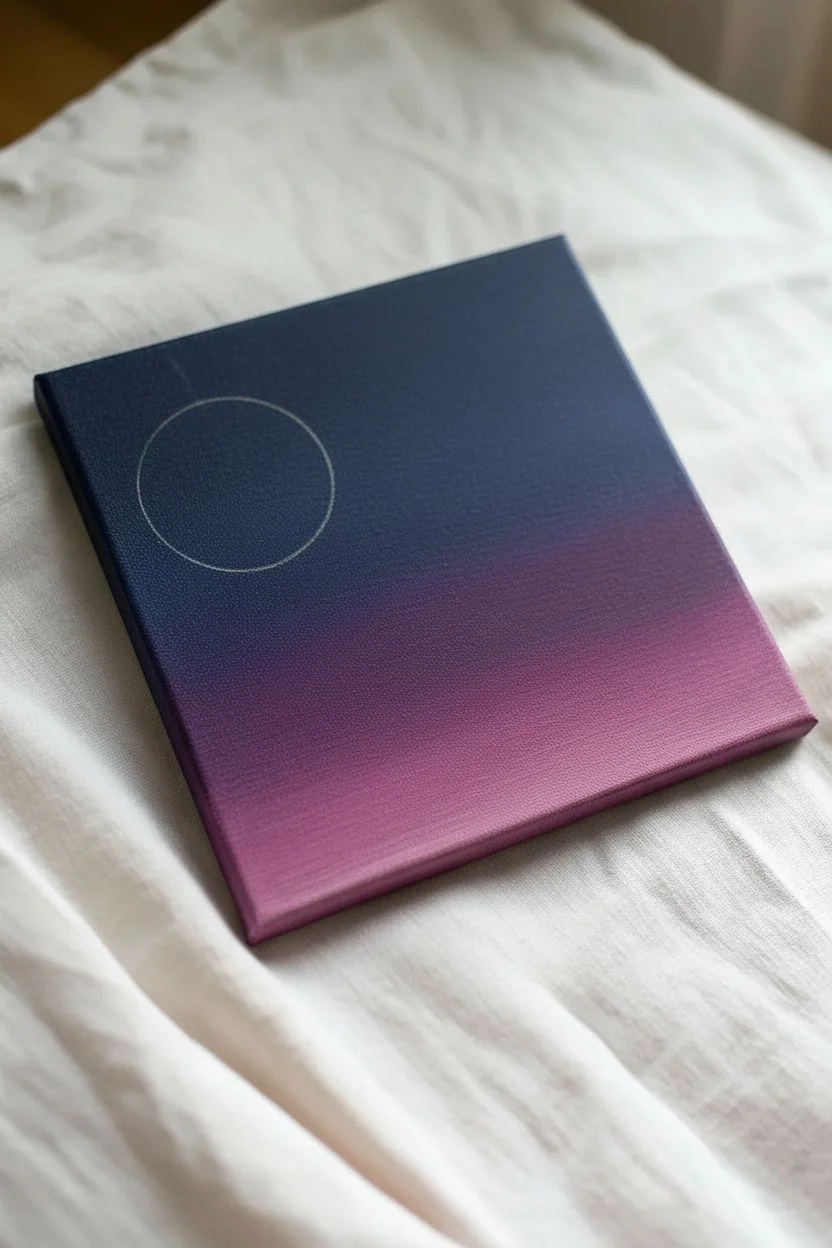
Create a serene glimpse of the cosmos with this beginner-friendly acrylic painting. By blending a deep blue into a magical purple and adding simple geometric details, you’ll capture a stylized moonlit sky that’s perfect for a relaxing paint night.
Step-by-Step Guide
Materials
- Small square canvas (e.g., 8×8 inch)
- Acrylic paints: Navy Blue (or Indigo), Deep Purple, White, Magenta
- Flat shader brush (medium size)
- Small round detail brush (size 0 or 1)
- Dotting tool or toothpick
- Pencil
- Round object for tracing (like a jar lid or roll of tape)
- Cup of water and paper towels
Step 1: Creating the Ombre Background
-
Prepare the canvas:
Start with a clean, dry canvas. It helps to have your paints squeezed out onto a palette beforehand so you can work quickly while the acrylics are wet. -
Apply the Midnight Blue:
Using your flat shader brush, load up a generous amount of Navy Blue or Indigo paint. Begin painting the top half of the canvas, using smooth horizontal strokes from left to right. -
Cover the sides:
Don’t forget to wrap the paint around the edges of the canvas for a polished, frameless look. Paint the top and upper side edges with the same dark blue. -
Start the gradient:
As you reach the middle of the canvas, start mixing a tiny bit of Deep Purple into your blue without washing the brush. Continue painting downwards, letting the color shift slightly. -
Blend in the Purple:
Clean your brush slightly, then load it with Deep Purple. Paint a horizontal band below the blue section, overlapping the wet edges so the colors merge seamlessly. -
Add the Magenta glow:
For the bottom third, mix Magenta with a touch of Purple. Paint this across the bottom, blending upwards into the purple section to create a soft, glowing horizon line. -
Finish the background:
Ensure the bottom edges of the canvas are painted with the lighter purple-magenta mix. Let the entire background dry completely before moving on to the next phase.
Step 2: Painting the Moon
-
Trace the moon shape:
Once the canvas is dry to the touch, place your round object (like a jar lid) in the upper-left quadrant. Lightly trace a circle with a pencil. -
Outline the crescent:
Inside the circle, draw a curved line to separate the bright crescent shape from the shadowed part of the moon. -
Paint the bright side:
Using a clean flat brush or a larger round brush, fill in the crescent shape with solid White paint. You may need two coats to get full opacity over the dark background. -
Paint the shadow side:
Mix a light lavender color using White and a tiny dot of Purple. Fill in the rest of the circle with this soft color so the moon looks whole but shadowed. -
Clean up the edges:
Use your small detail brush to refine the outer edge of the circle, ensuring it looks crisp against the dark sky.
Uneven Gradient?
If your blend looks choppy, wet your clean brush slightly (damp, not dripping) and run it horizontally over the transition line to smooth the paints together.
Step 3: Stars and Details
-
Paint large stars:
Switch to your smallest detail brush. Dip it in White paint and verify the tip is sharp. Paint a few 5-pointed stars scattered randomly across the sky, varying their sizes slightly. -
Create the starry field:
Using a dotting tool, the back of a paintbrush, or a toothpick, dip into White paint and gently press dots all over the blue and purple background. -
Vary dot sizes:
I find the sky looks more realistic if you vary the pressure. Press harder for larger ‘planets’ and lighter for distant stars. -
Detail the moon:
Add tiny white dots inside the lavender shadow of the moon to suggest craters and texture, keeping them subtle. -
Add final sparkle:
Review your composition. If a certain area looks too empty, add a tiny cluster of dots or a small star to balance the image.
Add a Silhouette
Once dry, paint a solid black silhouette of pine trees or distant mountains along the very bottom edge for extra depth and a landscape feel.
Now step back and admire your peaceful piece of the universe


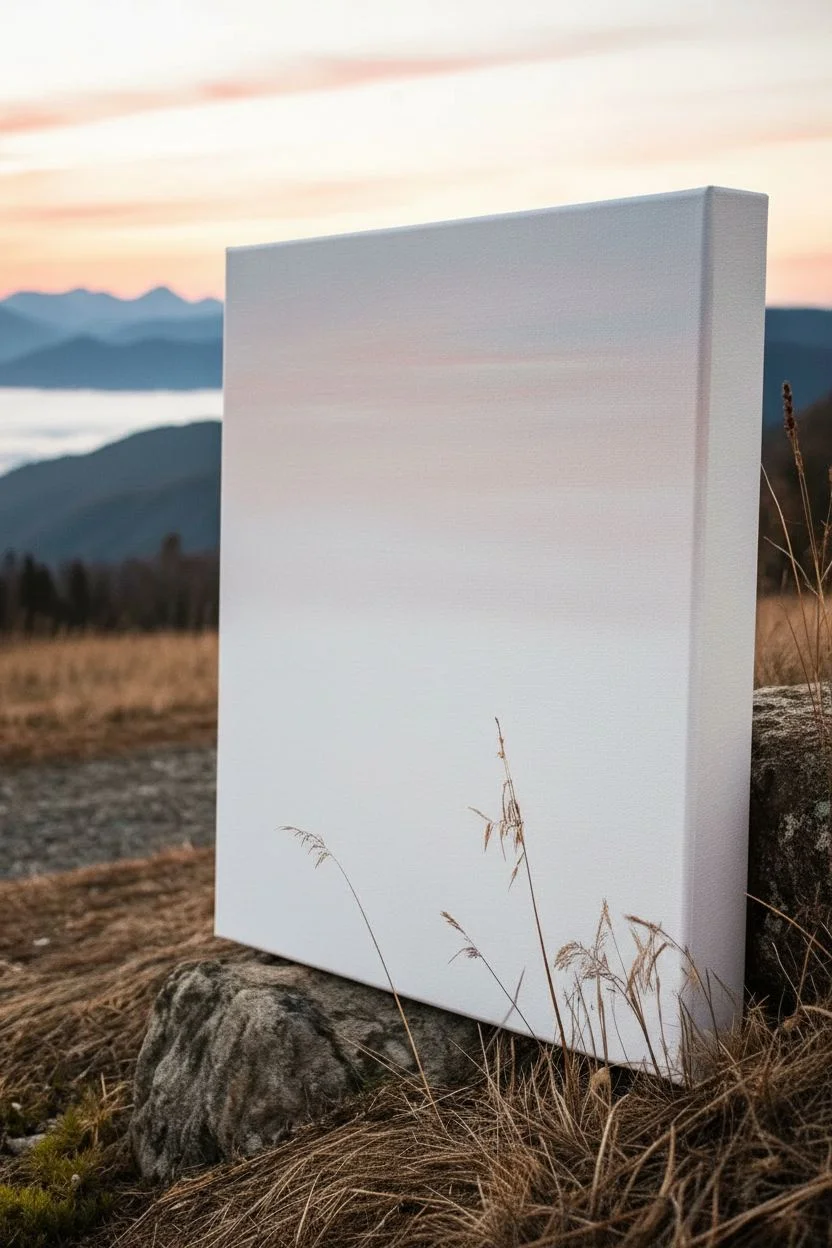
Easy Layered Mountains at Dusk Paint Night
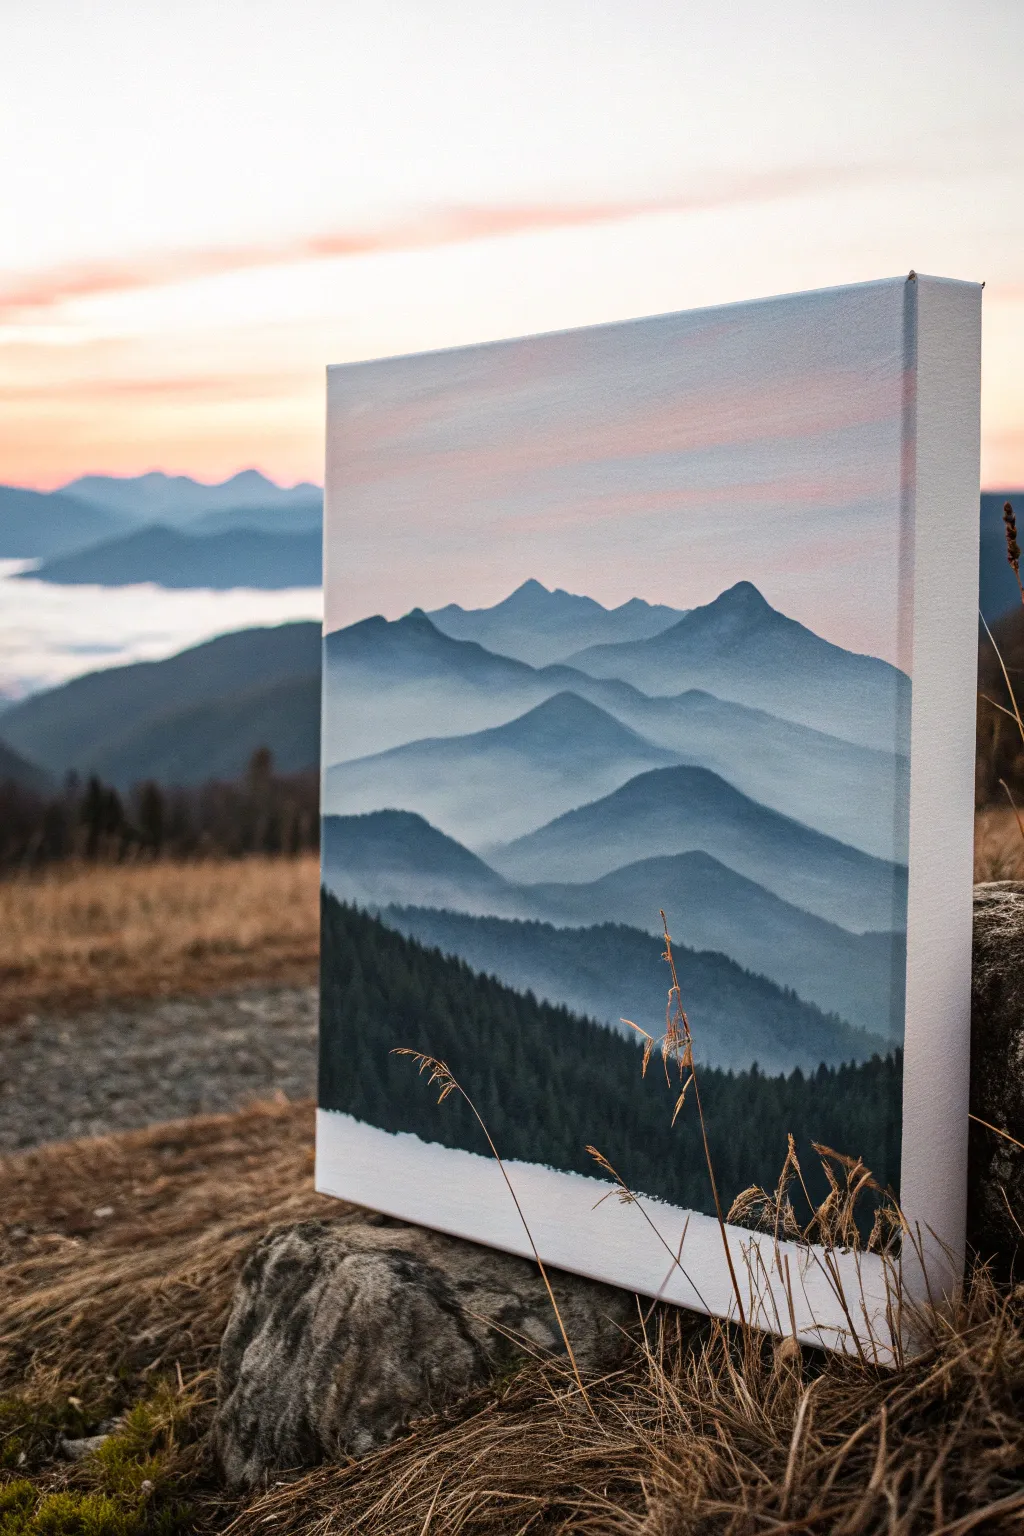
Capture the serene beauty of distant mountain ranges fading into the dusk with this layered painting project. By working from the furthest background to the nearest foreground, you’ll create a stunning sense of depth and atmospheric perspective.
Detailed Instructions
Materials
- Stretched canvas (e.g., 12×16 inches or square)
- Acrylic paints: Titanium White, Mars Black, Phthalo Blue (or similar deep blue), Alizarin Crimson (or a cool red)
- Flat paintbrushes (1-inch wash brush for the sky)
- Assorted round brushes (sizes 4 and 8)
- Small fine liner brush
- Palette or paper plate
- Cup of water and paper towels
Step 1: The Sky Gradient
-
Mix the sky base:
Start by mixing a very generous amount of Titanium White with the tiniest speck of Alizarin Crimson and a dot of blue. You want a barely-there, soft grayish-pink that mimics the early evening light. -
Paint the upper sky:
Using your large flat wash brush, paint horizontal strokes across the top third of the canvas. The color should be fairly solid but soft. -
Blend the horizon:
While the paint is still wet, mix a pure white into your pinkish blend to lighten it significantly. Paint this lighter shade just below the first band, blending softly upwards so there are no hard lines. -
Add subtle clouds:
With a mostly dry brush and a tiny bit of slightly darker pink-grey, swipe gentle, broken horizontal streaks across the upper sky to suggest thin, high-altitude clouds.
Mist Master
Keep a separate clean, damp brush ready while working. Use it immediately to feather out the bottom edge of each mountain layer before the acrylic dries.
Step 2: Creating Distance
-
Mix the furthest mountain color:
Create a very pale, milky blue. Mix plenty of White with a small touch of Phthalo Blue and the smallest hint of black to desaturate it. It should be only slightly darker than your sky. -
Paint the first ridge:
About one-third down from the top, use a round brush to paint a jagged, uneven mountain skyline. Fill in the area below this line with the same pale blue mixture. -
Create the mist effect:
While the bottom of this first mountain layer is wet, take a clean, slightly damp brush and blend the bottom edge downwards into nothingness. This ‘fading out’ technique is crucial for that foggy look. -
Second mountain layer:
Mix a slightly darker version of your blue-grey. Paint the next ridge line below the first one, ensuring the peaks don’t line up perfectly with the ones above. I find offsetting the peaks makes the range look more natural. -
Fade the second layer:
Just like before, add a little water or white paint to the bottom of this new layer and blend it downwards until it becomes transparent or very pale.
Step 3: Middle Ground Layers
-
Deepen the blue:
For the third layer of mountains, add more Phthalo Blue and a touch more black to your mix. This layer should be distinctly darker than the previous ones but still look hazy. -
Shape the prominent peaks:
Paint a larger, more defined mountain shape in the middle ground. Let the slopes be a bit steeper here, creating a valley effect in the center composition. -
Glazing for atmosphere:
If your layers overlap too harshly, mix a very watery thin glaze of white paint. Lightly brush this over the valley areas between mountains to simulate settling fog.
Level Up: Starry Night
Once the sky is fully dry, use an old toothbrush to flick tiny specks of watered-down white paint across the upper pink section for faint evening stars.
Step 4: Foreground Detail
-
Mix the darkest shade:
Create your foreground color using Phthalo Blue and Mars Black. You want a deep, rich midnight blue—almost black, but retaining a cool tint. -
Block in the foreground hill:
Paint a large, sweeping slope starting from the bottom corners and rising upwards. This will serve as the base for your detailed trees. -
Stipple the treeline:
Using a smaller round brush or a fan brush turned vertically, tap along the top edge of this dark slope. Create tiny vertical spikes to represent the tops of increasing pine trees. -
Fill the forest density:
Below the spiked treeline, fill in the rest of the shape with solid dark color. To add texture, don’t paint it perfectly flat; use vertical dabbing motions to suggest hundreds of trees packed together. -
Final highlights:
Take a fine liner brush with slightly lighter grey-blue paint. Add extremely subtle highlights to just the tips of a few foreground trees where the light might catch them. -
Paint edges:
Don’t forget to wrap your painting around the sides of the canvas! Extend your mountain lines and colors over the edges for a professional, frame-free finish.
Step back and admire how your simple layers have built a complex, deep landscape ready for display


Moon Over Lake Reflection Paint Night
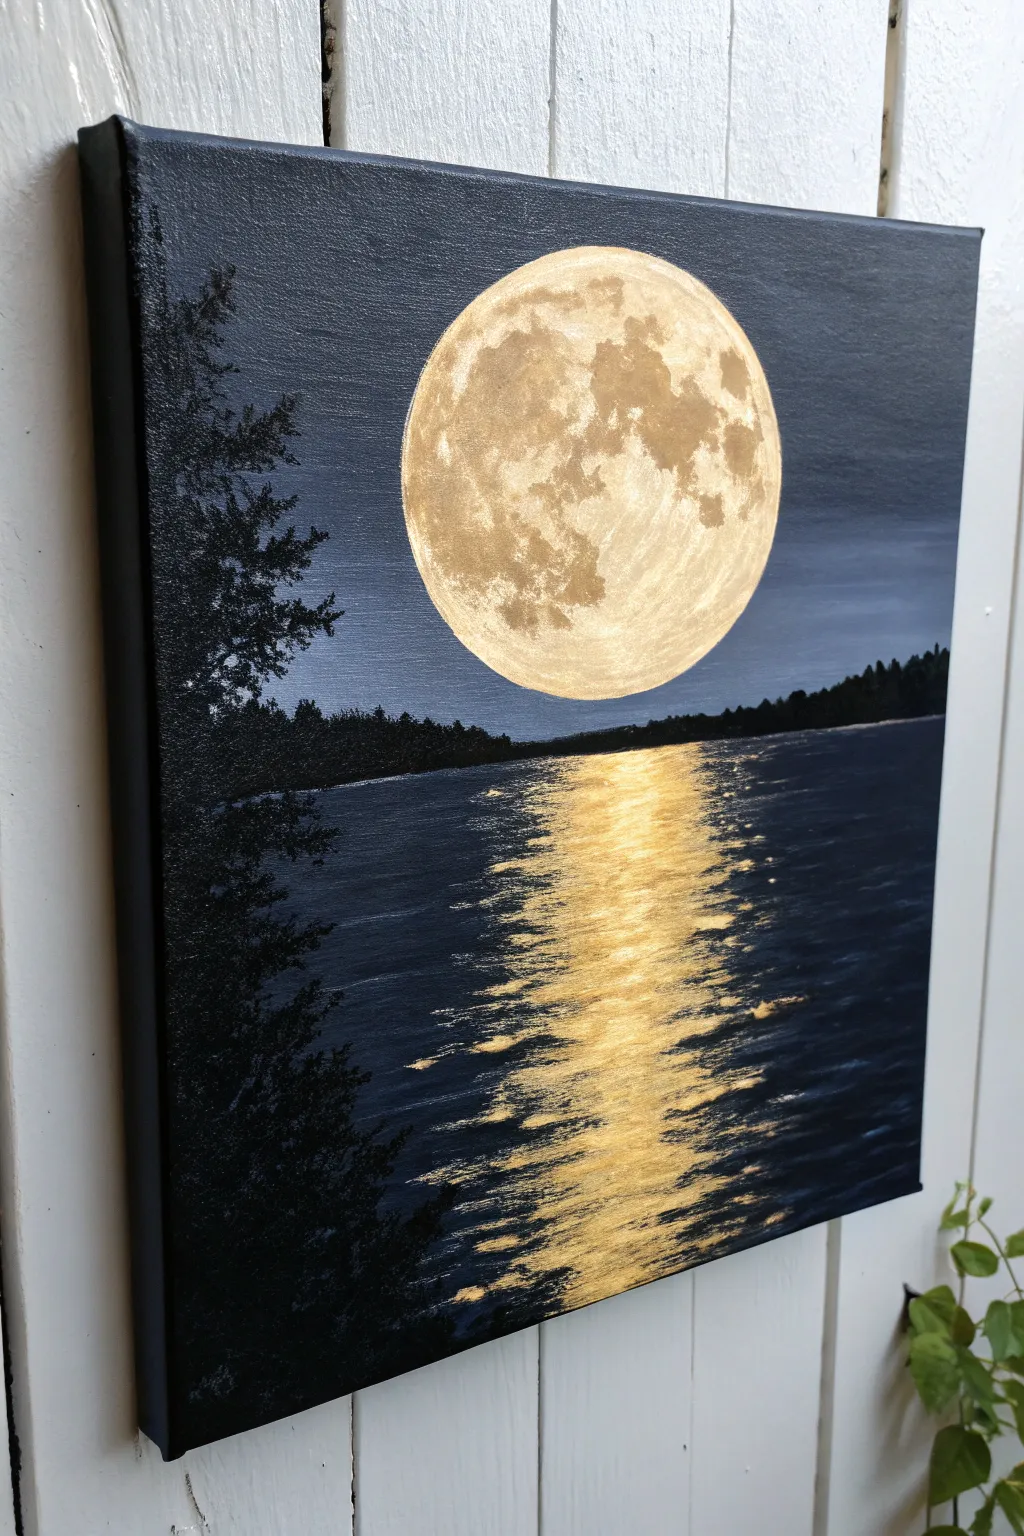
Capture the serene beauty of a full moon casting its golden glow over a dark lake with this striking acrylic painting project. The contrast between the matte dark blues and the shimmering gold metallic paint creates a simple yet sophisticated piece perfect for a relaxing paint night.
Step-by-Step Tutorial
Materials
- Stretched canvas (e.g., 12×12 or 16×20 inches)
- Acrylic paints: Black, Phthalo Blue (or Navy), White, Metallic Gold
- Large flat brush (1-inch width)
- Medium flat brush
- Small round detail brush
- Fan brush (optional, for trees)
- Old toothbrush (optional, for stars)
- Paper plate or round object for tracing
- Pencil
- Palette
- Water cup and paper towels
Step 1: Setting the Scene
-
Create the horizon:
Start by deciding where your horizon line will be. For this composition, place it just slightly below the center of the canvas. Use a ruler or a steady hand to draw a very light pencil line across the canvas. -
Trace the moon:
Position your round object (like a paper plate or a bowl) in the upper center of the sky area. Lightly trace a circle with your pencil. Make sure it’s centered nicely above the water. -
Mix the sky gradient:
On your palette, mix a dark midnight blue using black and your blue paint. You want a gradient that gets lighter near the horizon. Start painting the top corners of the sky with your darkest mix using the large flat brush. -
Blend the sky:
As you work your way down toward the horizon, gradually mix in tiny amounts of white to your blue. Keep your brush strokes horizontal and smooth to blend the colors seamlessly. -
Paint the water base:
For the water, use a slightly darker version of your blue-black mix than you used for the sky. Paint the entire bottom section below the horizon line with horizontal strokes, ensuring solid coverage. -
Paint the edges:
Since this is on a stretched canvas, don’t forget to paint the sides black or dark blue. This gives the artwork a professional, finished look without needing a frame.
Too much gold?
If your reflection gets too wide or messy, wait for the gold to dry. Then, take your dark water color (navy/black) and carefully paint horizontal lines from the outside in to narrow the path.
Step 2: The Golden Moon
-
Block in the moon base:
Once the sky helps define the shape, take your medium brush and fill in the moon circle with a solid coat of metallic gold paint. Let this base layer dry completely. -
Add moon texture:
Mix a tiny dot of white or a very light beige into your gold. Using a small round brush or even a scrunched-up piece of paper towel, sponge or dab texture onto the moon to mimic craters. -
Deepen the craters:
Mix a tiny bit of brown or grey into the gold. Dab this darker shade into the ‘seas’ or shadowed areas of the moon listed in the visual reference, creating depth and realism. -
Highlight the rim:
Use pure white or very pale gold on your smallest brush to outline the top right edge of the moon, suggesting where the light hits the strongest.
Make it Sparkle
Mix a tiny pinch of loose gold glitter into your final layer of the moon and the brightest part of the water reflection for a texture that physically shines in the light.
Step 3: Silhouette and Reflection
-
Paint the distant tree line:
Using pure black paint and a small brush, dab irregular shapes along the horizon line. Keep these trees small and somewhat indistinct to show they are far away. -
Refine the tree line:
Vary the heights of these distant trees slightly to make the forest look natural, ensuring the bottom of the tree line is perfectly flat against the water. -
Start the foreground trees:
On the left side of the canvas, paint a large, dark pine tree silhouette. Use the corner of a flat brush or a fan brush, tapping horizontally to create pine boughs that extend into the sky and over the water. -
Darken the shadows:
Ensure your left-side trees are pitch black. I find it helpful to do a second coat here so no background blue shows through, making the silhouette crisp. -
Begin the reflection:
Load a flat brush with metallic gold paint but wipe most of it off so the brush is fairly dry. Drag the brush horizontally back and forth directly under the moon in the water section. -
Widen the shimmer:
Start with narrow strokes just below the horizon, and gradually widen the reflection path as you move toward the bottom of the canvas. This creates perspective. -
Intensify the glow:
Reload your brush with more gold paint and go over the center of the reflection path again. The center should be the brightest and most opaque, fading out to the sides. -
Add water movement:
Use a small detail brush with pure gold to add a few thin, squiggly horizontal lines on top of the main reflection. This mimics ripples catching the intense moonlight. -
Final touches:
Step back and look at your painting. If the water looks too flat, add a few very faint horizontal streaks of black through the gold reflection to break it up and simulate waves.
Now you have a tranquil, glowing night scene to hang on your wall
BRUSH GUIDE
The Right Brush for Every Stroke
From clean lines to bold texture — master brush choice, stroke control, and essential techniques.
Explore the Full Guide
Pine Tree Line Silhouette Paint Night
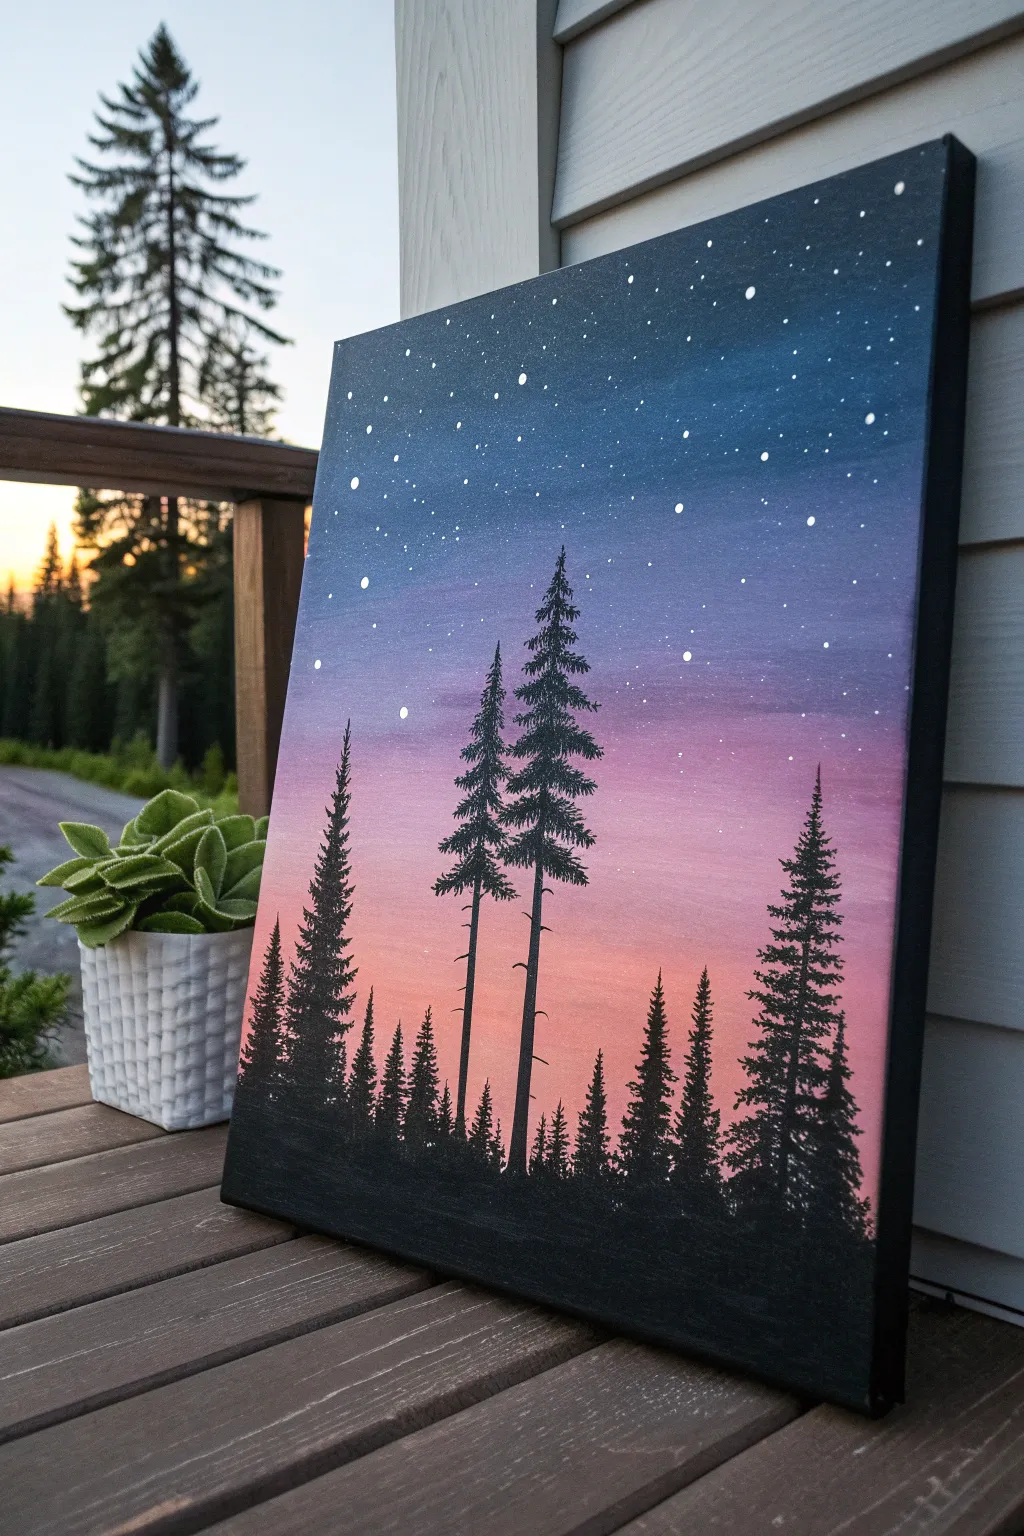
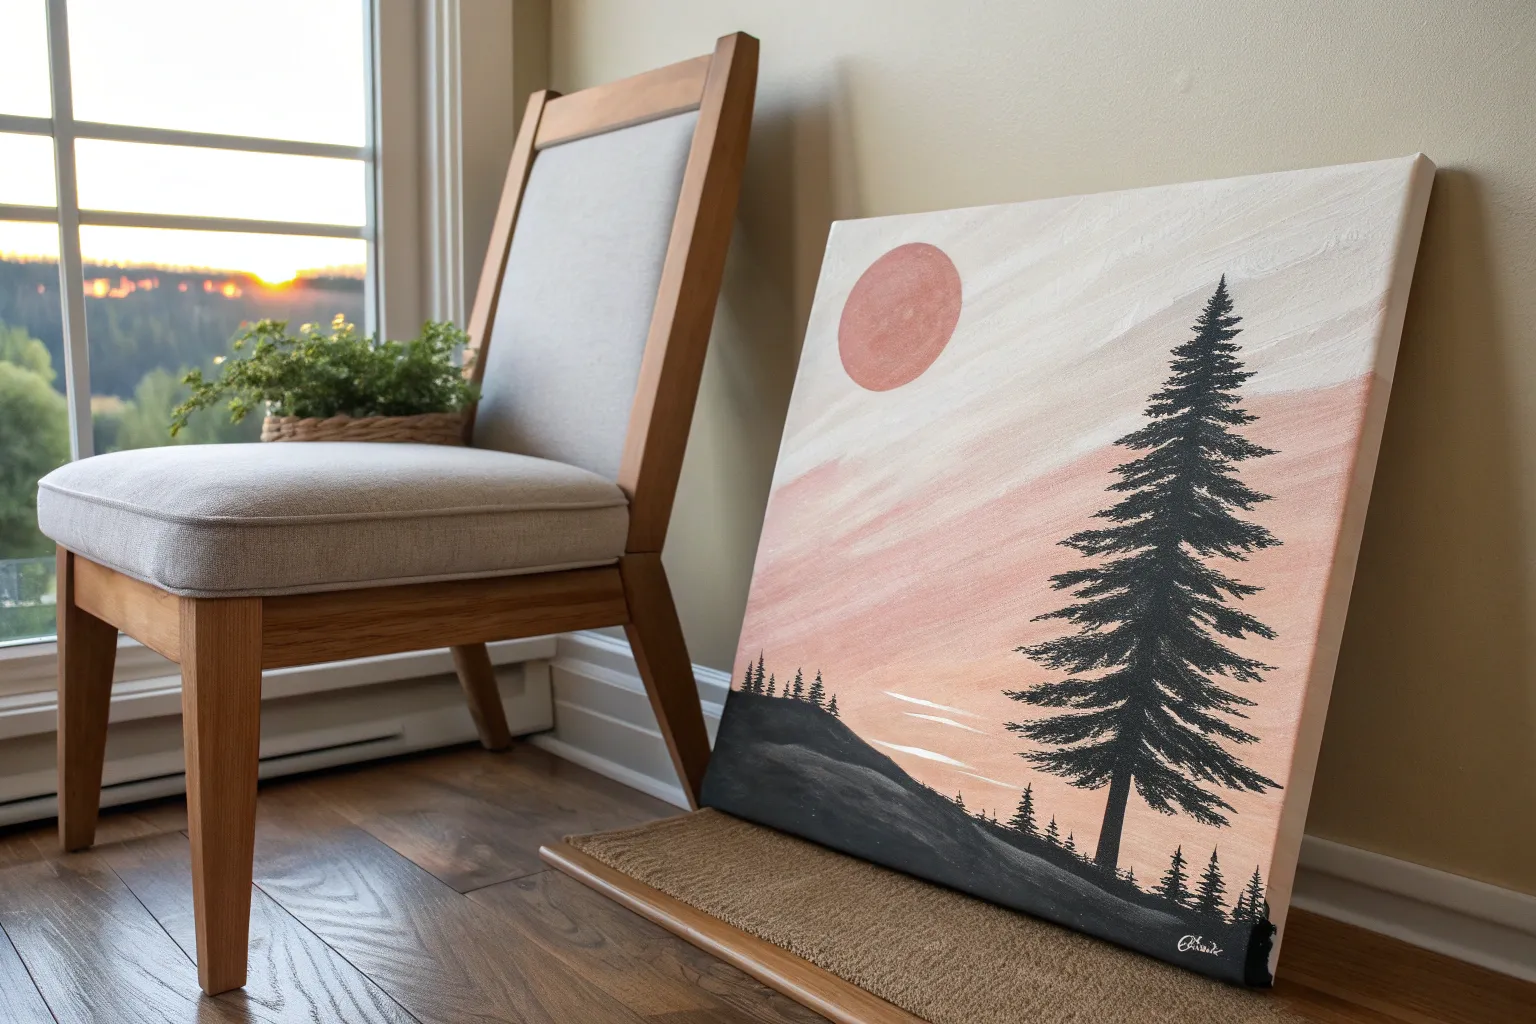
Capture the magic of a fading sunset with this striking gradient sky, transitioning from warm peach to deep midnight blue. The stark black silhouettes of towering pine trees create a beautiful contrast against the colorful backdrop, finished with a dusting of starry details.
Detailed Instructions
Materials
- Rectangular stretched canvas (e.g., 11×14 or 16×20 inches)
- Acrylic paints: Titanium White, Peach or Light Orange, Magenta or Deep Pink, Phthalo Blue or Ultramarine, and Mars Black
- Large flat brush (1-2 inch) for blending the background
- Medium round brush for tree trunks
- Small liner or detail brush for branches
- Old toothbrush or stiff fan brush for stars
- Cup of water
- Paper towels or rag
- Palette or paper plate
Step 1: Painting the Gradient Sky
-
Prepare your colors:
Squeeze out generous amounts of your sky colors onto the palette: Peach/Orange, Magenta, Phthalo Blue, and White. Keep Black separate for later. You want the colors ready to go so you can blend while the paint is still wet. -
Start with the horizon:
Using your large flat brush, mix a little White into your Peach color to make it creamy. Apply this horizontally across the bottom third of the canvas. Don’t worry about the very bottom edge too much, as it will be covered in black later. -
Add the middle section:
Without washing your brush completely (just wipe it off slightly), pick up the Magenta. Apply this directly above the peach section, brushing back and forth horizontally where the two colors meet to encourage them to blend into a soft coral transition. -
Introduce the blue:
Wipe your brush clean. Pick up the Phthalo Blue and apply it to the top third of the canvas. Paint firmly across the top edge and work your way down toward the pink. -
Blend the transition:
Where the blue meets the magenta, blend gently. The mixture will naturally create a deep purple hue. I find that moving the brush in long, smooth horizontal strokes helps eliminate streakiness here. -
Deepen the night sky:
For the very top corners and edge, mix a tiny dot of Black into your Blue to create a midnight navy shade. Apply this only at the very top to create a vignetted look that draws the eye downward. -
Let it dry completely:
This step is crucial. Allow the background to dry fully (about 15-20 minutes) before starting the trees. If the sky is wet, the black silhouette paint will turn muddy.
Muddy Sky Fix
If your pink and blue turn gray/brown where they meet, let the paint dry completely. Then, glaze over the muddy area with a thin layer of pure magenta to restore vibrancy.
Step 2: Creating the Stars
-
Mix watery white paint:
Take a small amount of Titanium White and mix it with water until it reaches the consistency of thin milk or ink. -
Splatter the stars:
Dip an old toothbrush or a stiff brush into the watery white mixture. Hold it over the blue section of the canvas and flick the bristles with your thumb to spray tiny droplets. Focus most stars at the top, fading them out as you reach the pink horizon. -
Add feature stars:
Use the tip of your smallest detail brush to manually place a few larger, brighter stars in the upper sky for variety.
Pro Tip: Sharp Tops
For needle-sharp tree tops, switch to a liner brush with slightly thinned black paint (add a drop of water). This helps the paint flow smoothly off the brush for crisp points.
Step 3: Painting the Silhouette Trees
-
Establish the ground:
Switch to Mars Black. Paint a solid, uneven strip along the bottom of the canvas to represent the forest floor. Make it slightly bumpy rather than a straight line to look natural. -
place the main trunks:
Using a medium round brush, paint vertical lines for your tree trunks. In this composition, paint two tall, prominent trunks slightly off-center, and fill the sides with shorter trunks. -
Start the pine branches:
Switch to your smallest brush or a fan brush turned vertically. Start at the top of a tree, tapping small horizontal dashes that get wider as you move down the trunk. -
Build the texture:
For the iconic pine tree look, use a zig-zag motion. Keep the branches close together near the trunk and let them get sparse and ragged at the tips. Ensure you leave gaps so the sunset color peeks through the foliage. -
Vary the heights:
Paint the foliage for the smaller background trees on the left and right sides. Make these denser and less detailed than the two hero trees in the middle to create depth. -
Refine the details:
Go back to your two tall center trees. Add distinct, broken branches poking out near the top where the foliage is thinner. This unevenness makes them look realistic and weathered. -
Connect to the ground:
Blend the bottom of the trees into the black ground strip, maybe adding a few tiny upward brush flicks to suggest long grass or small shrubs at the base. -
Final touches:
Check for any light spots in your black silhouettes and fill them in solid. Once the black paint is fully dry, your masterpiece is ready to hang.
Step back and admire how the dark trees make those sunset touches pop
Beach Horizon and Waves Paint Night
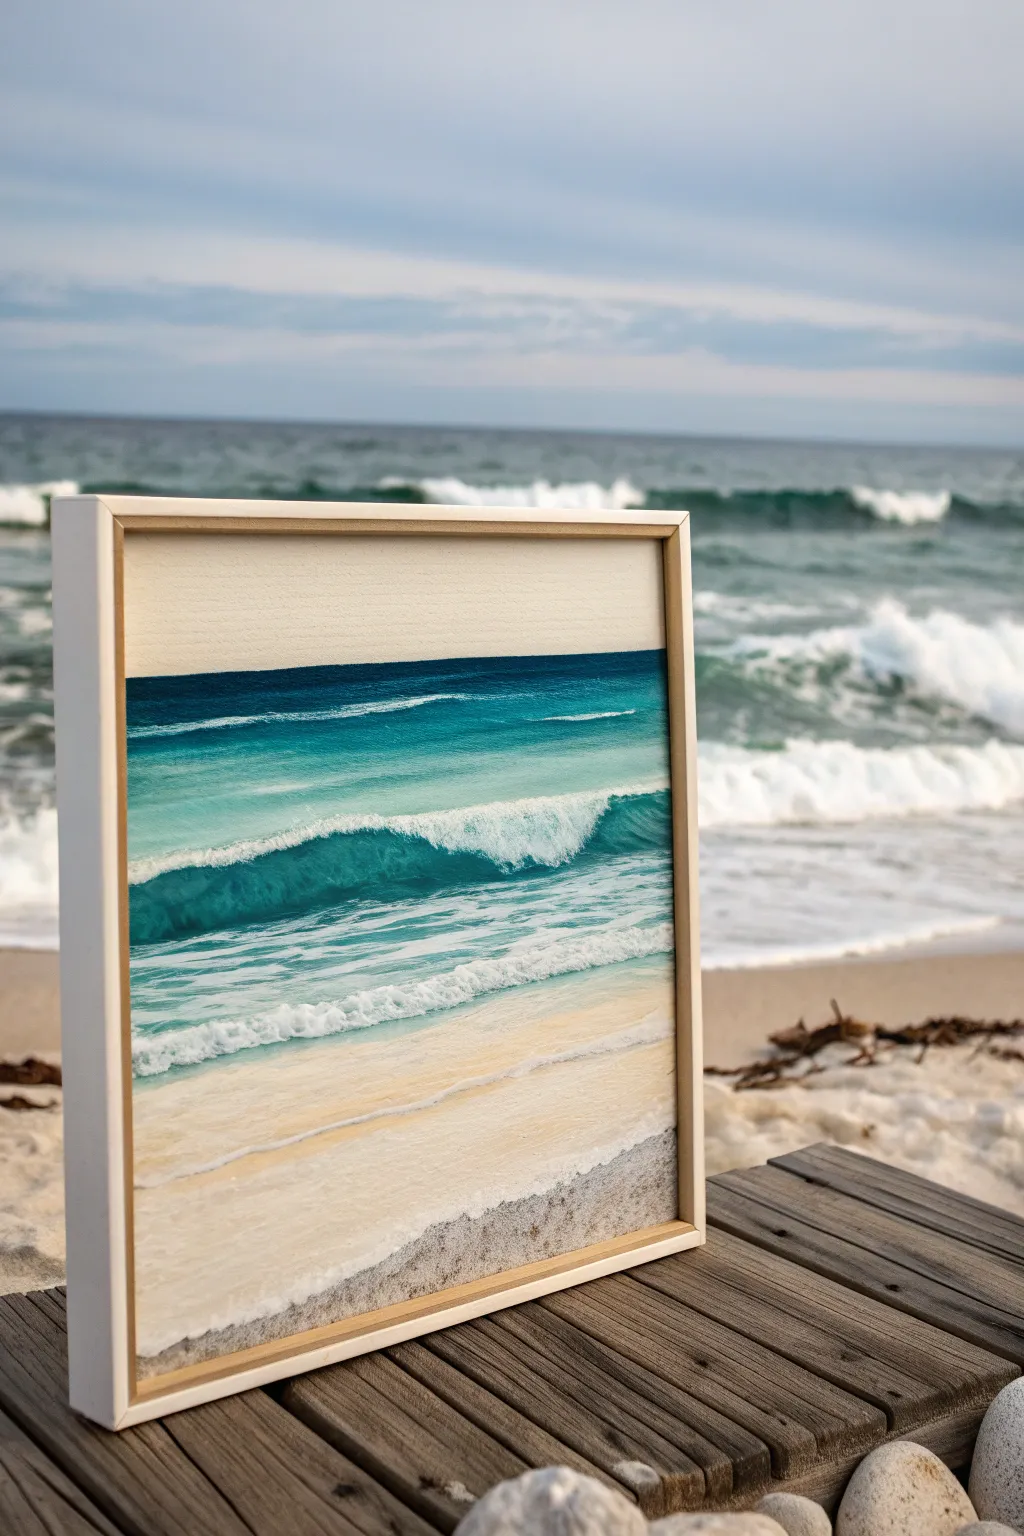
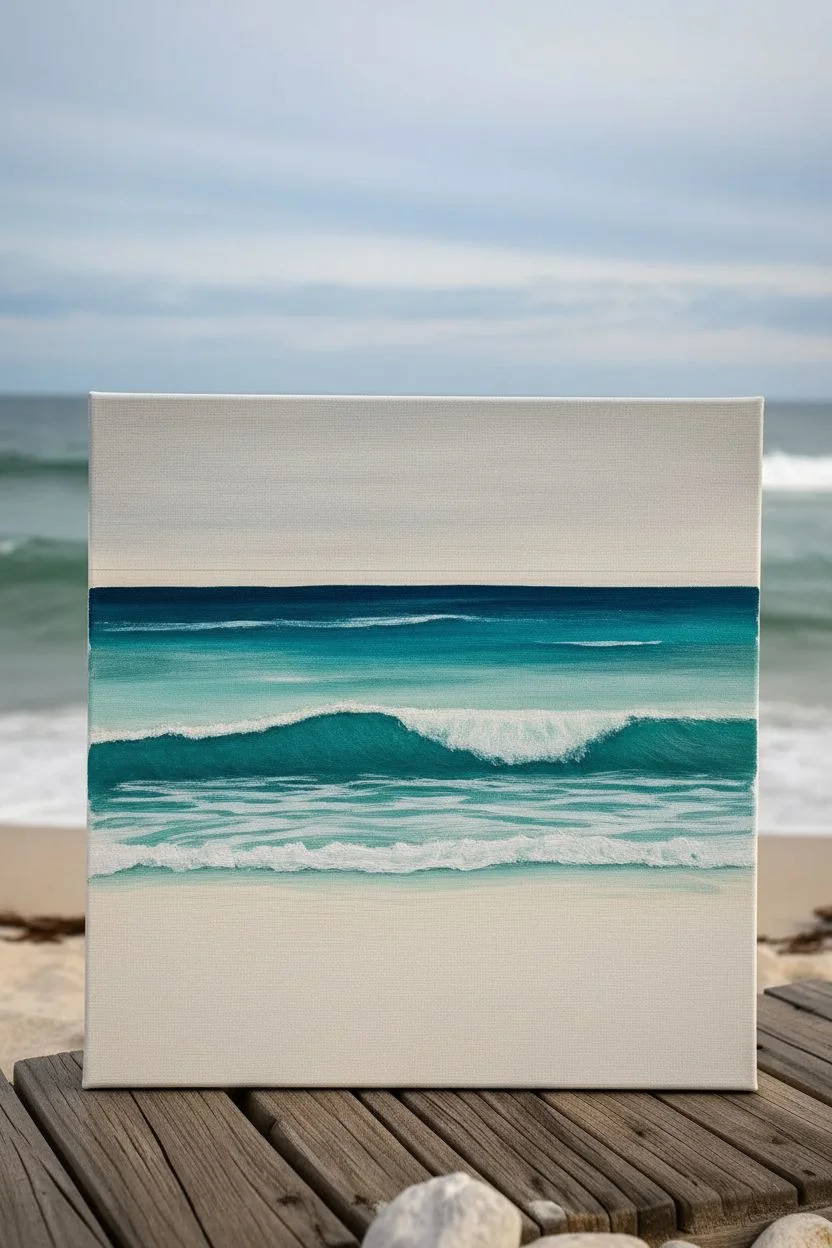
Capture the rhythm of the ocean with this calming landscape, focusing on translucent turquoise waves and a soft, sandy shoreline. This project uses strategic layering to create depth in the water and a realistic sense of movement in the foam.
How-To Guide
Materials
- Canvas panel or stretched canvas (12×12 or similar square)
- Acrylic paints: Phthalo Blue, Turquoise Green, Titanium White, Burnt Umber, Yellow Ochre, Ultramarine Blue
- Flat shader brushes (large and medium)
- Small round detail brush
- Fan brush (optional)
- Palette knife
- Cup of water and paper towels
- Floating frame (optional for finishing)
Step 1: Setting the Scene
-
Establish the Horizon:
Use a pencil or ruler to lightly mark your horizon line about one-third of the way down from the top of the canvas. This doesn’t need to be perfect, but keeping it relatively straight is key for a calm ocean scene. -
Paint the Sky:
Mix a large amount of Titanium White with a tiny dot of Ultramarine Blue and a hint of Burnt Umber to create a soft, muted grey-white. Fill the sky area entirely, keeping your brushstrokes horizontal to suggest distant atmosphere. -
Create the Deep Water:
For the area just below the horizon line, mix Phthalo Blue with a touch of Ultramarine. Paint a distinct, dark strip right against the horizon line to represent the deepest part of the ocean. -
Transition to Teal:
Without cleaning your brush fully, pick up some Turquoise Green and Titanium White. Blend this into the dark blue strip, working downwards. The color should become a vibrant, lighter teal as you move toward the middle of the canvas.
Wave looks flat?
Deepen the shadow directly under the white foam crest. High contrast between the dark trough and the white foam is the secret to 3D volume.
Step 2: Building the Wave
-
Sketch the Wave Shape:
Using a medium flat brush and a mix of Turquoise Green and Phthalo Blue, paint the curve of the main crashing wave. It should arch slightly in the center-left and taper off to the right. -
Deepen the Trough:
Underneath the crest of your wave, use a darker mix of Phthalo Blue and a tiny bit of Burnt Umber to create the shadow inside the wave barrel. This contrast is what makes the water look translucent later. -
Add Highlighted Water:
Mix Turquoise Green with more White. Paint the top part of the wave face (above the shadow you just painted), blending it softly downwards. The goal is to make the water look like light is shining through it. -
Paint the Foreground Water:
Below the main wave, fill the remaining sea area with a pale aqua color (White + Turquoise). Use horizontal strokes, leaving the bottom quarter of the canvas empty for the sand.
Master the gradient
Use a damp (not dripping) brush to blend the horizon colors while the paint is still wet on the canvas for a seamless transition.
Step 3: Sand and Shoreline
-
Base Sand Color:
Mix Titanium White, Yellow Ochre, and the tiniest speck of Burnt Umber. Fill the bottom section of the canvas. I find it helpful to brush these strokes slightly diagonally to mimic the slope of a beach. -
Wet Sand Effect:
Where the water meets the sand, mix a little of your sky grey color into the sand mixture. Paint this strip right at the water’s edge to show wet, reflective sand. -
Texture the Beach:
Take a fairly dry brush with a mix of Burnt Umber and White. Dab or stipple this lightly at the very bottom edge of the canvas to create the look of coarser sand or pebbles.
Step 4: Seafoam and Details
-
Crashing Foam Base:
Load a clean brush (or palette knife) with pure Titanium White. Apply it thickly along the top edge of your wave shape where it breaks. Don’t smooth it out; texture is good here. -
Rolling Foam:
With a dry brush and a small amount of white paint, drag the crashing foam downwards slightly over the face of the wave to show gravity pulling the water down. -
Foreground Ripples:
Using your small round brush and watery white paint, create thin, wiggly horizontal lines in the aquamarine foreground area. These represent small ripples rushing toward the shore. -
Shoreline Wash:
Paint a jagged, irregular white line where the water meets the sand. Dry brush the white paint back into the water area to create that misty, receding foam look. -
Ocean Spray:
If you have a fan brush or an old toothbrush, lightly flick a tiny spray of white paint near the crashing part of the wave for extra realism. Be sparing with this effect. -
Final Highlights:
Add pure white highlights on the very crest of the wave and a few sparkles on the water surface where the sun would hit.
Let your painting dry completely before placing it in a floating frame to match the airy feel of the coast

PENCIL GUIDE
Understanding Pencil Grades from H to B
From first sketch to finished drawing — learn pencil grades, line control, and shading techniques.
Explore the Full Guide
Northern Lights Reflection Paint Night
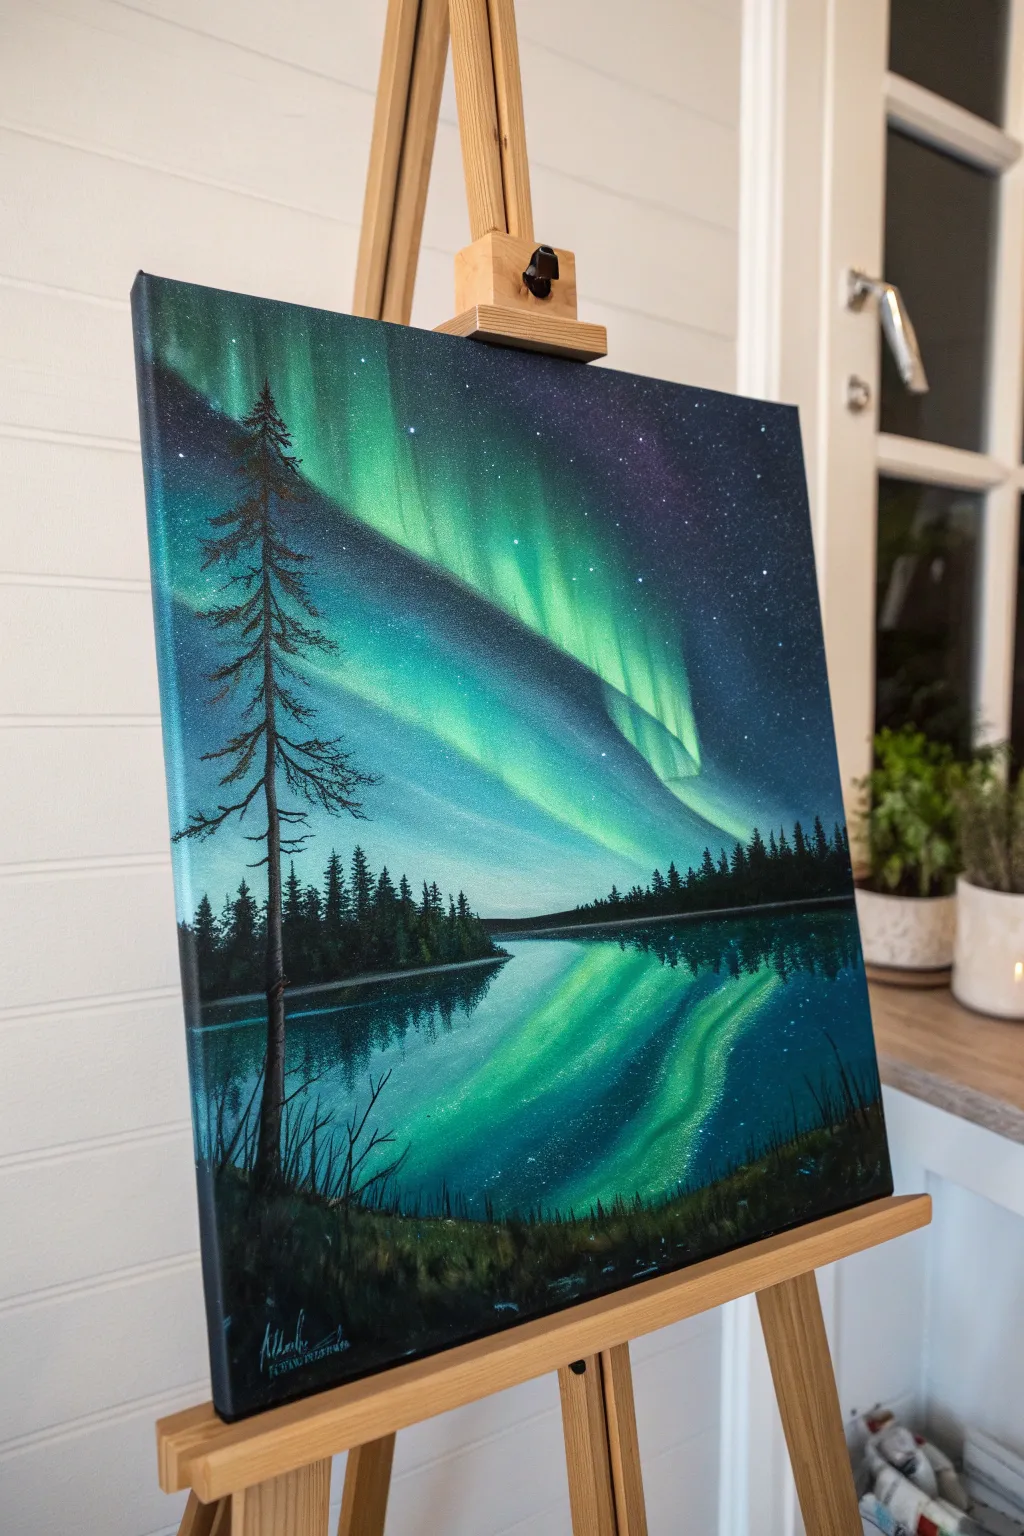
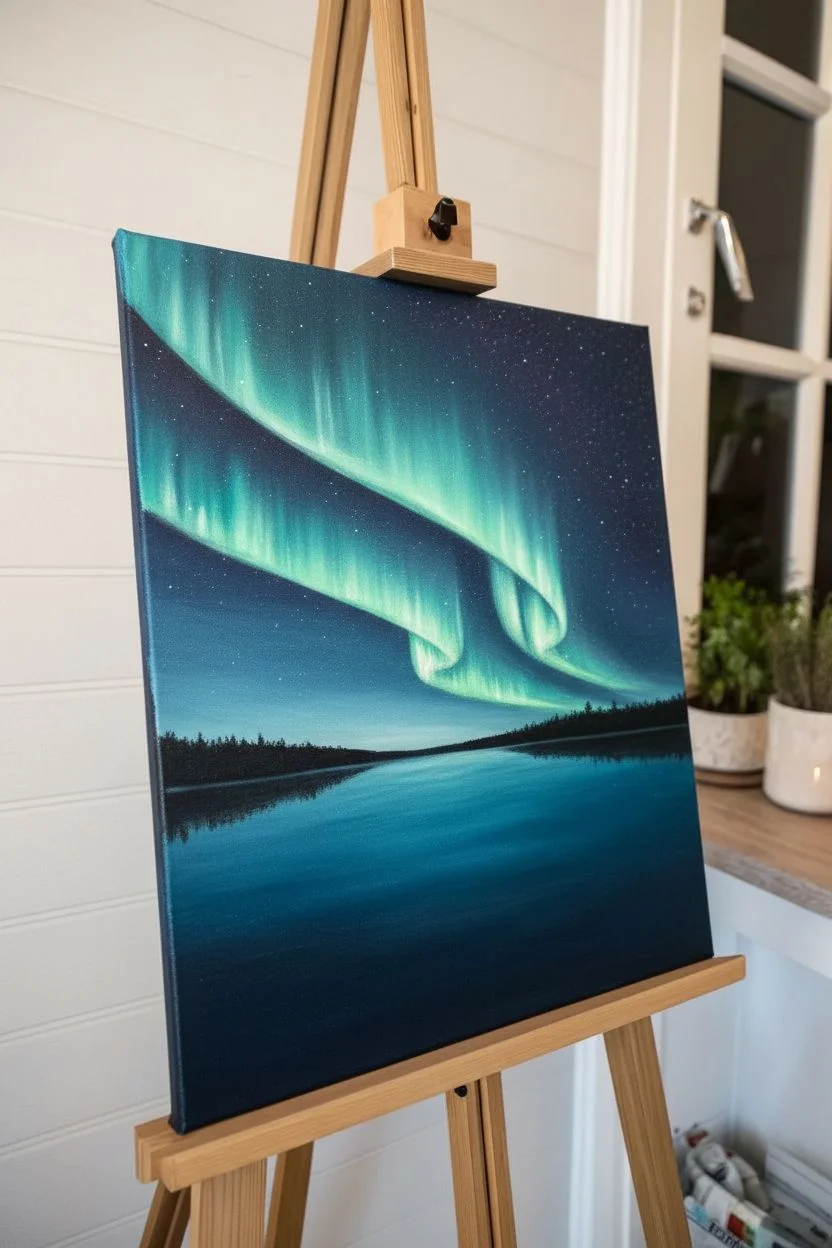
Capture the magic of the polar skies with this tranquil painting of the Northern Lights reflecting over a still lake. Using blending techniques and silhouette contrasts, you’ll create a glowing, ethereal landscape that looks professional yet is surprisingly beginner-friendly.
How-To Guide
Materials
- Canvas (16×20 inch recommended)
- Acrylic paints: Phthalo Blue, Prussian Blue, Turquoise, Emerald Green, Titanium White, Carbon Black, Dioxazine Purple
- Large flat wash brush (2 inch)
- Medium angle brush
- Small flat shader brush
- Fine liner brush
- Cup of water and paper towels
- Palette or paper plate
- Old toothbrush (optional for stars)
Step 1: Painting the Sky and Aurora
-
Prime the sky:
Start by mixing a dark midnight blue using Prussian Blue with a touch of Black. Apply this generously to the top two-thirds of your canvas, fading it slightly as you reach the middle horizon line. -
Establish the horizon:
Blend a lighter blue-grey tone near the center of the canvas where the horizon will be. This transition helps create depth and atmospheric perspective before you add the glowing lights. -
Base the Aurora shape:
While the background is still slightly tacky but mostly dry, use Titanium White on a medium brush to paint the sweeping, curved shape of the aurora. Start from the top left and arc down towards the right horizon. -
Add the green glow:
Mix Turquoise and Emerald Green with a little White. Glaze this over your white swoosh. I like to use vertical brush strokes here to mimic the dancing curtains of light consistent with real auroras. -
Intensify the brightness:
Take nearly pure White with just a hint of yellow or light green and highlight the bottom edge of your aurora band where the light would be strongest. Blend upward gently into the darker green. -
Deepen the sky:
Around the edges of your glowing lights, feather in some Dioxazine Purple and Phthalo Blue. This high contrast makes the green pop intensely against the night sky. -
Create the starry field:
To make stars, thin down some Titanium White with water until it’s ink-like. Load an old toothbrush or a stiff brush and flick the bristles to splatter tiny dots across the dark upper corners.
Muddy colors?
If your greens are turning muddy against the dark sky, let the dark background layer dry completely first. Apply a layer of white where the lights go, dry that, then glaze the green on top.
Step 2: Creating the Lake Reflection
-
Mirror the sky:
For the water, you essentially want to mirror what you did above. Start by painting the bottom third of the canvas with the same dark blue-black mix used for the upper sky. -
Reflect the Aurora:
Using your green and turquoise mix, paint the reflection of the light band in the water. Use horizontal, side-to-side strokes this time to create the look of a rippled water surface. -
Add water movement:
While the paint is wet, streak in thin lines of White and very pale blue horizontally through the green reflection. This breaks up the image and gives the illusion of a glimmering lake surface. -
Darken the water edges:
Ensure the bottom corners and the very bottom edge of the canvas are extremely dark, almost pure black, to ground the painting and frame the glowing water.
Step 3: Silhouettes and Details
-
Paint the distant tree line:
Mix a solid Black. Using a small flat shader brush or angle brush, tap in a jagged line of trees right across the horizon where the sky meets the water. -
Reflect the distant trees:
Immediately beneath the tree line, pull a little bit of that wet black paint straight down into the water area to create a soft, shadowy reflection of the forest. -
Draft the main tree:
On the left side, paint a thin vertical line for the trunk of the large foreground pine tree. It should span nearly the entire height of the canvas. -
Add pine branches:
Using a fan brush or a small angle brush, tap in the branches of the pine. Start narrow at the top and get wider as you move down, leaving distinct gaps so the sky shows through. -
Create the foreground bank:
Paint a curved black shape at the bottom grassy bank. Use upward flicking motions with a small brush to create the texture of tall grasses and reeds along the water’s edge. -
Final highlights:
Add a few tiny touches of light grey on the left side of the tree trunk to suggest moonlight hitting the bark, and clean up any significant stars that got covered by the trees.
Add some magic
For extra sparkle, mix a tiny pinch of iridescent glitter or shimmer medium into your white paint before doing the final highlights on the water ripples and the aurora’s brightest edge.
Step back and admire your peaceful winter night scene
Cat on a Branch Under the Moon Paint Night
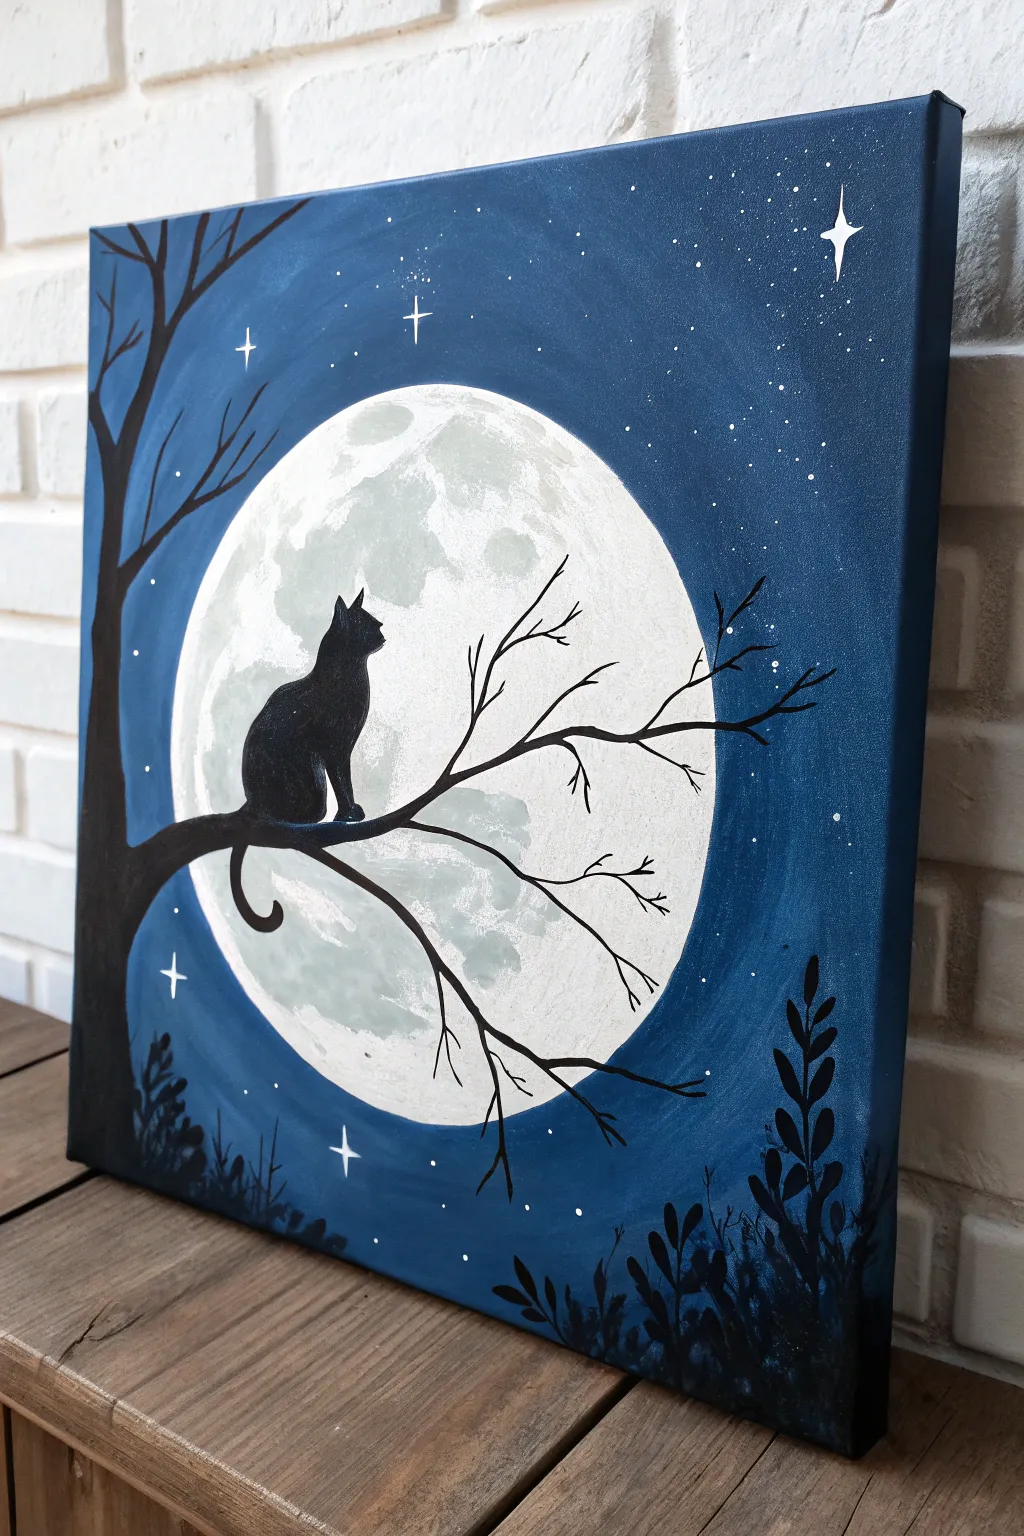
Capture the mystic beauty of a midnight watch with this striking acrylic painting featuring a poised cat silhouette against a glowing, textured moon. The deep blue gradient sky and crisp black details create a high-contrast piece that looks impressive but is beginner-friendly.
Detailed Instructions
Materials
- Canvas (16×20 inch recommended)
- Acrylic paints: Titanium White, Mars Black, Phthalo Blue (or Navy Blue), Ultramarine Blue
- Large flat brush (1 inch)
- Medium round brush
- Small fine liner brush
- Circle template (plate, bowl, or compass)
- Chalk or pastel pencil
- Palette
- Cup of water and paper towels
- Sponge (optional for moon texture)
Step 1: Setting the Night Sky
-
Trace the moon:
Before painting, place your circular object (like a dinner plate) slightly off-center on the canvas. Lightly trace around it with a pencil or chalk. We won’t paint inside this circle yet. -
Mix your blues:
Prepare two shades of blue on your palette: a deep Phthalo or Navy Blue for the outer edges, and a lighter Ultramarine mix (add a touch of white) for closer to the moon. -
Paint the outer vignette:
Using your large flat brush, paint the corners and edges of the canvas with the darkest blue. Don’t forget to paint the sides of the canvas for a finished look. -
Create the gradient:
While the dark paint is still wet, switch to your lighter blue mix. Blend it from the dark edges towards the moon circle. Use crisscross strokes to smooth out the transition between the two blues. -
Refine the edge:
Carefully paint up to the chalk line of your moon with the lightest blue tone, ensuring a clean, sharp edge. Make sure the sky is solid and opaque.
Step 2: Texturing the Moon
-
Base coat the moon:
Once the sky is dry enough that you won’t smudge blue into it, paint the entire circle with Titanium White. It doesn’t need to be perfectly smooth; texture is good here. -
Mix grey tones:
Mix a very light grey using plenty of white and a tiny dot of black. You can also mix a second, slightly darker grey for variety. -
Sponge on craters:
Dip a small piece of sponge or a crumpled paper towel into your light grey. Dab off most of the paint, then gently blot it onto the moon to create shadowy craters. -
Add highlights:
Go back over some grey areas with pure white to add depth and brightness. I like to keep the center slightly brighter to make it glow.
Moon Glow Trick
Before painting the black tree, dry-brush a tiny amount of white paint just outside the moon’s edge into the blue sky. This creates a hazy, glowing atmospheric effect.
Step 3: The Silhouettes
-
Draft the tree:
Once the sky and moon are completely dry, use your chalk to sketch the main trunk on the left side and a large branch reaching across the moon. -
Paint the trunk:
Using Mars Black and the medium round brush, fill in the tree trunk. Make the base wider and irregular to suggest bark texture. -
Branch out:
Extend the main branch across the moon. Ensure it is thick enough to support the cat but tapers as it reaches the right side. -
Sketch the cat:
Lightly outline the cat shape sitting on the branch. Focus on the curve of the back, the pointed ears, and the tail hanging down. -
Fill the silhouette:
Carefully fill in the cat with Mars Black using a smaller brush for precision around the ears and nose. Make sure the black is solid against the bright moon. -
Add fine twigs:
Switch to your fine liner brush. Paint delicate, thin twigs branching off the main limb. Let them overlap the moon and the sky for a realistic depth. -
Ground the scene:
At the very bottom of the canvas, paint simple plant shapes and grasses using quick upward strokes with black paint to frame the bottom edge.
Personalize It
Change the silhouette to match your own pet! You can paint two cats sitting together, add a bird on a distant branch, or swap the cat for an owl.
Step 4: Final Details
-
Flick the stars:
Dilute a little white paint with water until it’s inky. Dip a stiff brush (or toothbrush) into it and flick the bristles to spray tiny stars across the blue sky areas. -
Paint the hero stars:
Using your fine liner and pure white paint, add a few larger, four-pointed ‘twinkle’ stars. Place one or two near the top corners for balance.
Step back and admire your serene nocturnal masterpiece


Split-Canvas Matching Landscape Paint Night
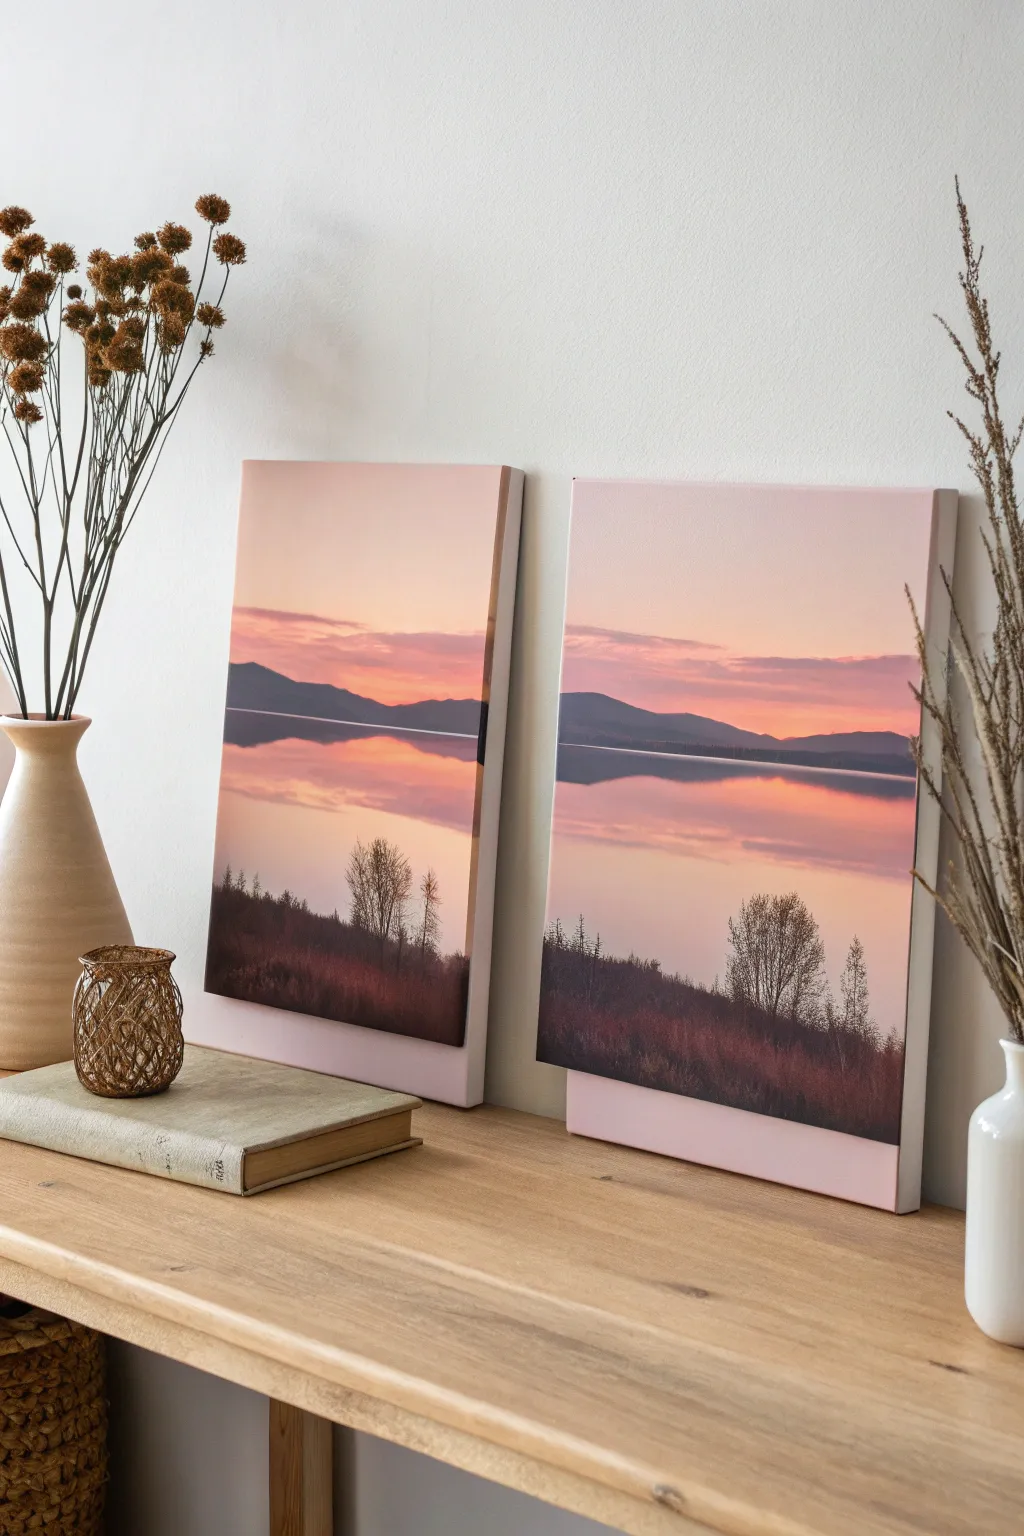
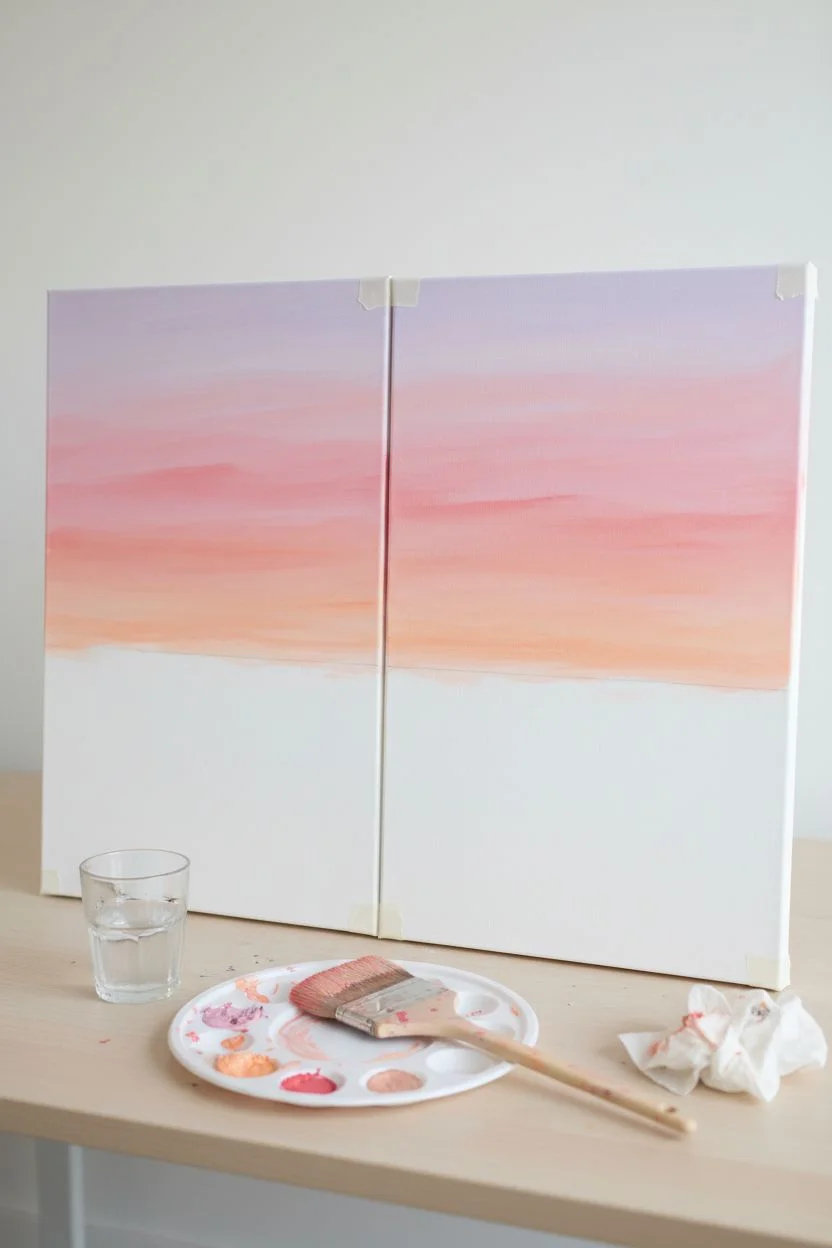
Transform a single serene landscape into a stunning diptych that spans across two canvases, creating a modern window-like effect. This project uses soft blending techniques to capture the tranquil glow of a pink and orange sunset reflecting over still water.
Step-by-Step Guide
Materials
- Two matching stretched canvases (e.g., 12×16 or 16×20 inches)
- Acrylic paints: Titanium White, Cadmium Yellow, Alizarin Crimson (or a deep pink), Ultramarine Blue, Burnt Umber, Mars Black
- Large flat brush or wash brush (2-inch)
- Medium flat brush
- Small round brush for details
- Fan brush (optional, for trees)
- Painter’s tape or masking tape
- Palette and water cup
- Paper towels
Step 1: Preparation and Sky Gradient
-
Join the Canvases:
Place your two canvases side-by-side on your work surface. To ensure the horizon line matches perfectly, I like to temporarily tape them together from the back. This makes them act as one large surface while you block in the main shapes. -
Establish the Horizon:
Using a ruler or straight edge, draw a faint pencil line horizontally across both canvases, positioned slightly below the vertical center. This line separates the sky from the water reflection. -
Mix the Sunset Hues:
Prepare a gradient palette. Mix a soft peach color (White + Yellow + tiny touch of Crimson), a deeper rose pink, and a pale lavender (White + Crimson + tiny touch of Blue). -
Paint the Upper Sky:
Start at the very top of both canvases with the pale lavender mix. Use your large flat brush with long, horizontal strokes to lay down the color. -
Blend Downwards:
While the lavender is still wet, pick up the rose pink on your brush without cleaning it. Paint the middle section of the sky, overlapping slightly with the lavender to create a soft transition. -
Add the Horizon Glow:
Clean your brush thoroughly. Use the peach/yellow mix for the area just above the horizon line. Blend it upwards into the pink layer so the sky looks like it’s glowing near the mountains.
Step 2: Reflections and Mountains
-
Mirror the Water:
The water is a direct reflection of the sky but slightly darker and more muted. Repeat the gradient process in reverse order below the horizon line: peach near the horizon, fading into pink, then lavender at the bottom. -
Soften the Water:
While the water paint is wet, wipe your large brush dry and gently drag it horizontally across the entire water area. This blurs the brushstrokes and makes the reflection look glassy. -
Paint Distant Mountains:
Mix a dark purple-grey using Ultramarine Blue, Alizarin Crimson, and a touch of Burnt Umber. With a medium flat brush, paint a mountain range silhouette right along the horizon line, spanning across the gap between both canvases. -
Paint the Reflection of Mountains:
Using a slightly watered-down version of the mountain color, paint the inverted shape of the mountains directly below them in the water area. Soften the edges to make it look submerged. -
Add Cloud Streaks:
Using a dry brush with a tiny amount of the dark purple-grey mix, lightly maintain horizontal strokes in the sky to suggest thin, wispy clouds. Repeat these streaks faintly in the water reflection.
Seamless Horizons
Use a long ruler or yardstick to draw your horizon line across both canvases simultaneously before separating them to paint sides.
Step 3: Foreground Silhouettes
-
Separate Canvases:
Carefully remove the tape from the back and separate the canvases by an inch or two. This lets you paint the inner edges (the sides of the canvas depth) so the image wraps around neatly. -
Mix the Foreground Dark:
Create a near-black color by mixing Mars Black with a bit of Burnt Umber. This warms up the black so it looks natural rather than synthetic. -
Block in the Shoreline:
Paint an uneven, grassy shoreline at the very bottom of both canvases using the dark mix. Vary the height slightly to make it look organic. -
Create Tree Structure:
Switch to your small round brush or a fine liner. Paint vertical lines extending up from the shoreline to represent tree trunks. Group them in clusters rather than spacing them evenly. -
Add Tree Foliage:
Using the tip of a fan brush or an old, splayed bristle brush, tap gently onto the tree trunks to create lacy, silhouette foliage. Keep the leaves sparse to show the sunset through the branches. -
Detail the Grass:
Use the small round brush to flick tiny upward strokes along the top of the dark shoreline area, mimicking tall grasses and reeds catching the last light. -
Refine the Edges:
Paint the sides (the canvas depth) of each canvas to match the image on the front. For example, where the mountain line hits the edge, wrap that dark line around the side.
Blending Trouble?
If acrylics are drying too fast to blend the sky gradient, mist the canvas lightly with water or mix a slowing medium into your paint.
Once dry, display your canvases with a small gap between them to enjoy the sophisticated split-view effect you created
Night City Skyline Color-Block Paint Night

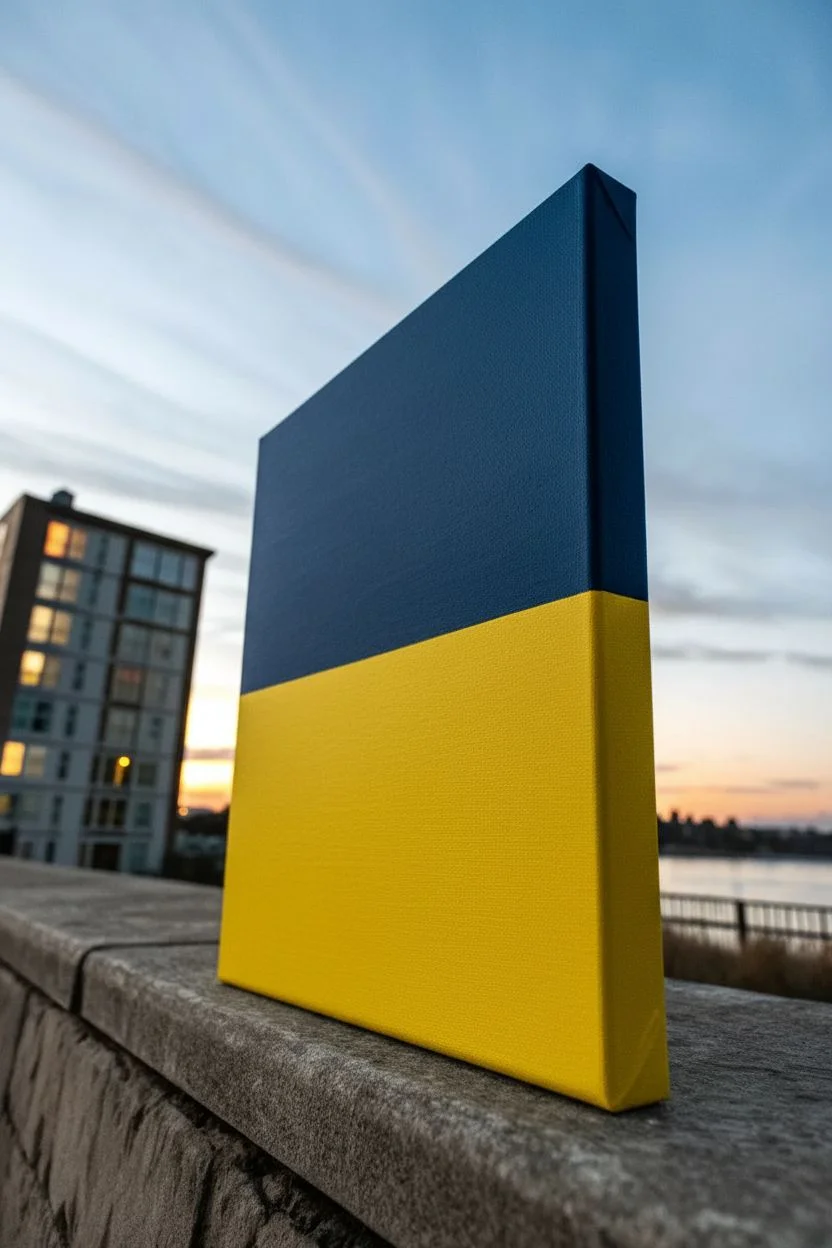
Capture the quiet beauty of a city sleeping under the stars with this bold, graphic painting. Using distinct color blocks and crisp silhouettes, you’ll create a modern piece of art that looks striking on any shelf.
Step-by-Step
Materials
- Stretched canvas block (thick edge)
- Acrylic paint: Navy Blue or Phthalo Blue
- Acrylic paint: Bright Yellow or Cadmium Yellow
- Acrylic paint: Mars Black
- Acrylic paint: Titanium White
- Painter’s tape (1-inch width)
- Flat brush (1-inch width)
- Small round detail brush
- Medium flat brush
- Ruler
- Pencil
Step 1: Setting the Background
-
Tape the skyline:
Measure about one-third of the way up from the bottom of your canvas. Place a strip of painter’s tape horizontally across the canvas to mark the separation between the yellow city glow and the blue night sky. -
Paint the night sky:
Using your large flat brush, apply the Navy Blue paint to the upper two-thirds of the canvas. Ensure your brushstrokes move horizontally for a smooth finish. -
Wrap the edges:
Don’t stop at the front! Continue the blue paint onto the top edge and the upper side edges of the canvas block. This gives the artwork a polished, sculptural 3D look. -
Let it dry completely:
Allow the blue section to dry fully. Acrylics dry fast, but wait until it’s cool to the touch before peeling off the tape to ensure a crisp line. -
Tape the horizon:
Once the blue is cured, place a new strip of tape directly over the bottom edge of the blue paint to protect it. This creates a perfect seal for the yellow section. -
Apply the city glow:
Paint the entire remaining bottom third of the canvas in Bright Yellow. You may need two coats here to ensure the white canvas helps the yellow pop without being streaky. -
Wrap the yellow edges:
Just like the sky, paint the yellow onto the bottom edge and lower side edges. Remove the tape carefully immediately after painting the last coat of yellow.
Bleeding Lines?
If paint bleeds under the tape, wait for it to dry completely. Then, use a small brush and the background color (blue or yellow) to ‘erase’ the mistake.
Step 2: Building the City
-
Sketch the skyline:
Once the yellow background is completely dry, lightly pencil in the varying heights of your buildings along the bottom edge. Keep the shapes simple—rectangles and squares work best. -
Block in the silhouettes:
Use Mars Black and a medium flat brush to fill in the building shapes. I prefer to outline the top edges first for sharpness, then fill in the bodies. -
Paint the deep foreground:
Fill the bottom-most area of the canvas solid black, merging it with your building shapes to create a solid skyline base. -
Add side details:
Carry the black paint around the side edges of the canvas, matching up with the building heights on the front so the image wraps seamlessly. -
Create illuminated windows:
This is the crucial step. Since we already have a yellow background, we are using ‘negative space’ logic. Paint black over everything *except* small rectangular grids where you want the windows to be bright yellow. -
Refine the windows:
If painting around the yellow feels too hard, you can paint the buildings solid black first, let them dry, and then dab yellow squares on top. However, leaving the original yellow background visible usually looks brighter.
Step 3: Celestial Details
-
Paint the crescent moon:
Switch to your smallest detail brush and Titanium White. In the upper right corner, carefully paint a thin crescent moon shape. -
Add the stars:
Dip the tip of your detail brush or even a toothpick into the white paint. Gently dot random stars across the blue sky. Vary the pressure to create different sized distant suns. -
Final touch-ups:
Check your edges. If any black paint smudged into the yellow sky, use a tiny bit of yellow to clean up the lines once the black is dry.
Make It Glow
Mix a tiny drop of neon yellow into your standard yellow paint for the window sections. This makes the city lights appear to actually glow in low light.
Place your finished canvas on a desk or mantelpiece and enjoy the calm vibe of your personal city skyline
Galaxy Swirl Pour-Style Paint Night
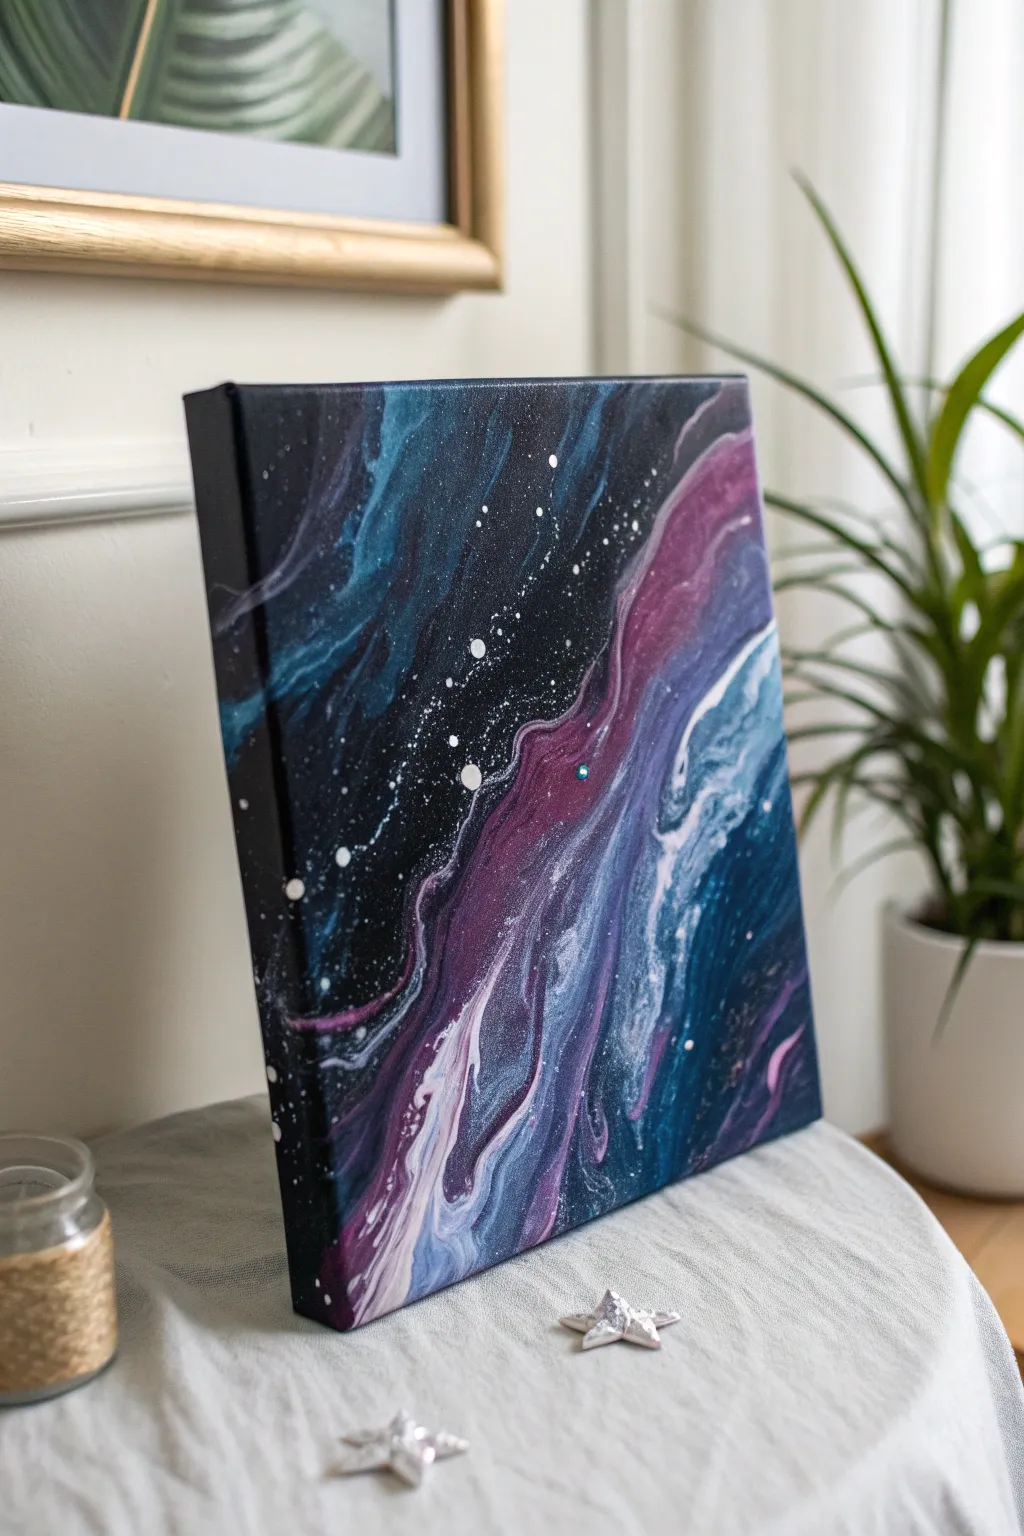
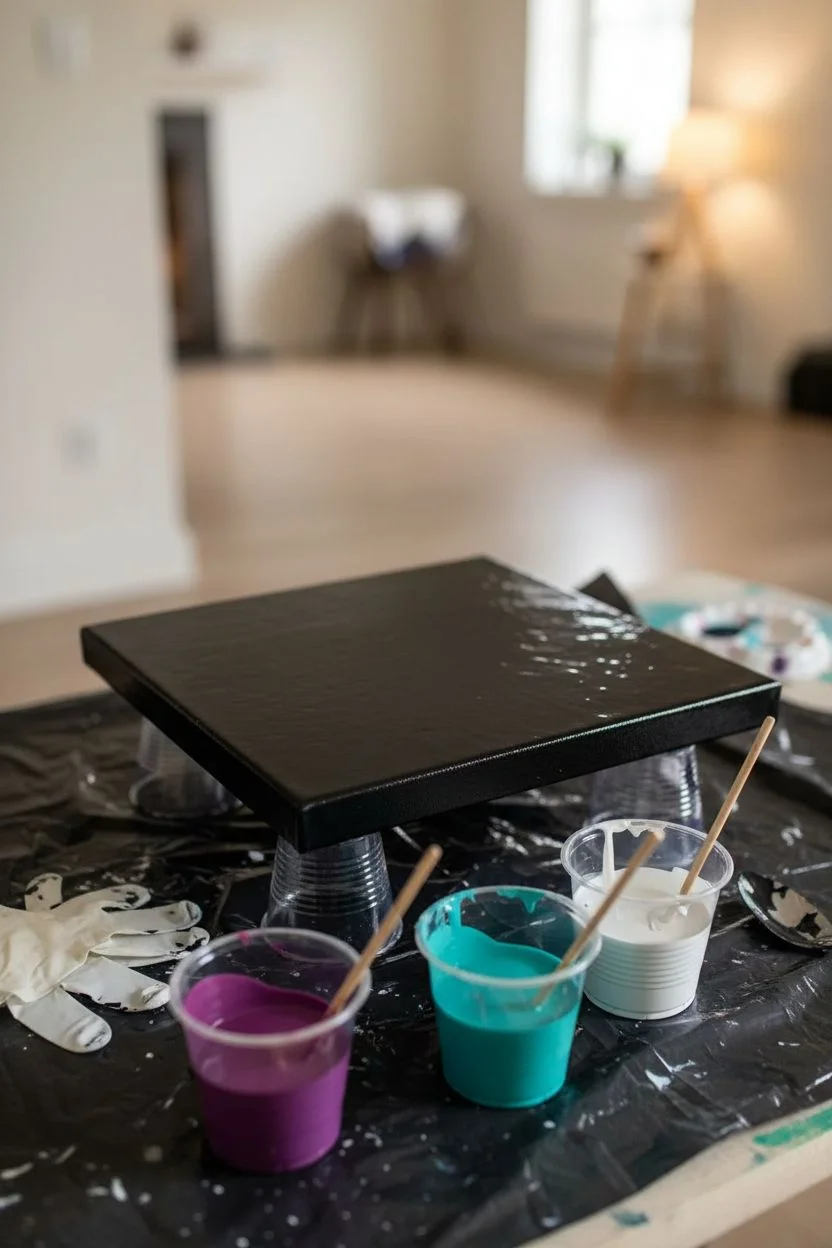
Capture the ethereal beauty of deep space with this fluid art project that features swirling ribbons of indigo, violet, and teal against a starry abyss. This technique creates organic, flowing lines that mimic a galaxy without requiring precise brushwork.
How-To Guide
Materials
- Square stretched canvas (e.g., 10×10 or 12×12 inches)
- Black acrylic paint (heavy body)
- Violet or magenta acrylic paint
- Teal or turquoise acrylic paint
- Titanium white acrylic paint
- Pouring medium (Floetrol or Liquitex)
- Silicone oil (optional, for cells)
- Plastic cups and stirring sticks
- Hair dryer or straw
- Toothbrush or stiff bristle brush
- Gloves and workspace covering
- Small craft rhinestone (optional)
Step 1: Mixing and Preparation
-
Prepare the workspace:
Fluid art gets messy, so cover your table with plastic sheeting or a large garbage bag. Elevate your canvas on four upside-down cups to allow paint to drip off the edges freely. -
Create your pouring mixes:
Mix each paint color in separate cups with your pouring medium. A standard ratio is 1 part paint to 2 parts medium, but adjust until the consistency resembles warm honey. -
Check consistency:
Lift your stirring stick; the paint should flow in a continuous stream without breaking. If it mounds up on the surface, add a few drops of water to thin it out. -
Prepare the negative space color:
Mix a larger amount of black paint than the other colors, as this will form your background. You want enough to cover the entire canvas easily.
Muddy Colors?
If your galaxy looks brown or grey, you likely over-mixed the paints on the canvas. Try blowing the paint just once or twice per section and stop while the colors are distinct.
Step 2: The Pour and Swirl
-
Flood the canvas:
Pour the black paint mixture over the entire canvas. Use a palette knife or the back of a spoon to spread it to the edges and corners, ensuring full coverage. -
Layer the colors:
Pour a line of violet diagonally across the canvas, directly on top of the wet black paint. Follow this with a parallel or intertwining line of teal. -
Add highlights:
Add a thinner stream of white paint alongside or on top of your colored lines. This will mix with the darker colors to create those milky, nebular effects. -
Blow out the paint:
Using a hair dryer on the ‘cool’ and ‘low’ setting, or simply using your own breath through a straw, gently push the colored paints outward over the black base. Start from the center of the color line and push out. -
Create the swirl:
Guide the air to stretch the colors into wispy, wave-like shapes. Don’t overwork it; let the paints mingle naturally to create violet gradients and teal transitions. -
Tip the canvas:
If the paint looks too pooled in one spot, gently tilt the canvas to stretch the design. I like to let the paint run over the corners slightly to create a continuous look.
Step 3: Stars and Details
-
Create huge stars:
Dip the end of a paintbrush handle into pure white paint and gently dot a few larger ‘planets’ or bright stars into the black negative space. -
Prepare the star splatter:
Thin a small amount of white paint with water until it is very fluid, almost like ink. -
Flick the stars:
Dip a toothbrush or stiff brush into the thinned white paint. Holding it about a foot away from the canvas, flick the bristles with your thumb to spray a fine mist of stars across the black areas. -
Control the galaxy:
Focus the star splatter primarily on the black voids to create depth, but allow some to overlap the colored swirls for a layered 3D effect. -
Add a gem focal point:
While the paint is still wet, carefully place a small iridescent rhinestone into a central part of the swirl if you want an extra cosmic sparkle. -
Dry properly:
Let the painting dry undisturbed on a level surface for at least 24 hours. Acrylic pours take much longer to dry than standard paintings.
Make it Sparkle
Once fully dry, coat the painting with a layer of resin or high-gloss varnish mixed with a pinch of ultra-fine holographic glitter for a true deep-space shimmer.
Hang your new nebula on the wall and get lost in your own personal slice of the universe
Texture Play Clouds and Sky Paint Night
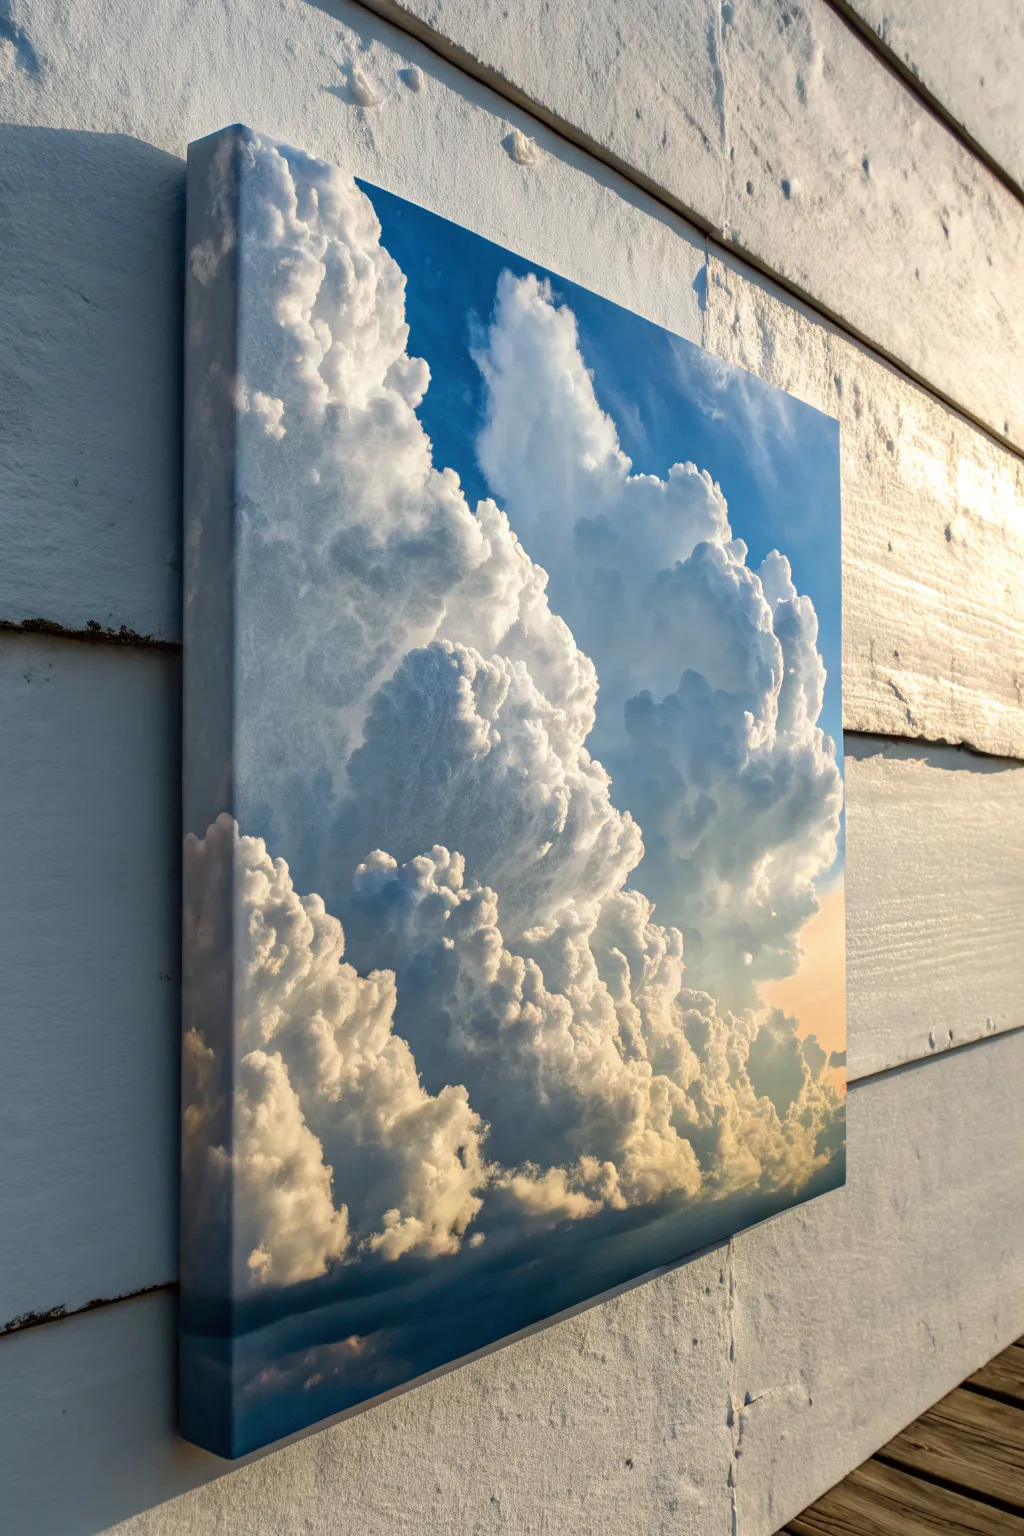
Capture the majestic drama of towering cumulus clouds in this acrylic painting project. You will focus on building distinct layers of shadow and light to create volume, resulting in a sky that feels expansive and alive.
Step-by-Step Guide
Materials
- Square stretched canvas (12×12 or 16×16 inches)
- Acrylic paints: Titanium White, Ultramarine Blue, Cerulean Blue, Payne’s Gray, Burnt Sienna, Yellow Ochre
- Large flat brush (1 inch)
- Medium filbert brush
- Small round brush for details
- Old scruffy brush or sponge for texture
- Palette and water cup
- Paper towels
Step 1: Setting the Atmosphere
-
Prepare the Gradient:
Start by mixing a deep blue using Ultramarine Blue and a touch of Payne’s Gray. Paint the top left corner of the canvas with this dark mix. -
Transition to Light:
Gradually mix in Titanium White and a bit of Cerulean Blue as you move diagonally downward towards the bottom right. The sky should be lightest near the horizon line. -
Add Warmth:
In the bottom right corner, blend a tiny amount of Yellow Ochre and White into the wet blue paint to suggest a faint sunset glow or warm atmosphere. -
Wrap the Edges:
Don’t forget to carry your sky gradient paint around the thick sides of the canvas for a polished, gallery-ready look. Let this background layer dry completely.
Step 2: Blocking the Cloud Shapes
-
Map the Masses:
Using a thinned mixture of White and a tiny drop of Blue, sketch out the large, billowing shapes of the clouds. Focus on the main diagonal composition, creating a towering formation rising from left to right. -
Mix a Shadow Tone:
Create a cloud shadow color using Payne’s Gray, a touch of Ultramarine, and White. It should be a cool, blue-grey. -
Establish Shadows:
Apply this shadow mix to the undersides and left-facing pockets of the cloud formation. Use a scruffy brush to keep the edges soft and organic, avoiding hard lines. -
Deepen the Crevices:
Mix a slightly darker version of your shadow tone by adding less White. Paint the deepest recesses within the cloud mass to create depth. -
Warming the Low Shadows:
For the lower clouds near the horizon, mix a tiny bit of Burnt Sienna into your grey shadow color. This subtle warmth mimics the light filtering through the atmosphere.
Muddy Clouds?
If your whites are turning grey/blue, let the shadow layer dry completely before applying highlights. Wet-on-wet mixing kills the bright white pop.
Step 3: Building Volume and Texture
-
Mid-tone Application:
Mix a ‘dirty white’ using mostly Titanium White with a speck of your shadow grey. Apply this to the areas between the deep shadows and the eventual highlights. -
Scumbling Technique:
Using a dry filbert brush with very little paint, scumble (scrub lightly) the mid-tone over the edges of the shadows to blend them softly. This creates the fluffy, vaporous look. -
First Highlights:
Load a clean brush with pure Titanium White. Start dabbing onto the top-right edges of the cloud billows where the sun would hit them most directly. -
Shaping the cauliflower:
Build the ‘cauliflower’ texture by painting small, rounded overlapping strokes. Concentrate these on the upper contours of the cloud formation. -
Refining Edges:
Soften the back edges of the clouds where they meet the blue sky using a clean, slightly damp brush. I like to let the edges fade slightly to show distance.
Add Drama
Use a palette knife to apply the final bright white highlights. The raised texture will physically catch the light in the room, adding 3D depth.
Step 4: Final Details
-
Brightest Whites:
Go back in with thick, un-thinned Titanium White. Apply this impasto style (thick texture) only on the very highest peaks of the clouds for maximum contrast. -
Lower Atmosphere:
At the very bottom of the canvas, glaze a thin layer of the dark blue-grey horizontally to create a distant horizon line or cloud base. -
Warm Glaze:
Once the painting is dry to touch, mix a transparent glaze of water and a tiny dot of Yellow Ochre. Generally brush this over the lower right highlights to enhance the sunlit feel. -
Review Contrast:
Step back and check your values. If the clouds look flat, deepen the darkest shadows with a little more Payne’s Gray. -
Edge Check:
Ensure the cloud painting continues correctly around the sides of the canvas, matching the shapes on the front.
Hang your finished sky portrait where it can catch natural light to emphasize those fluffy textures


Have a question or want to share your own experience? I'd love to hear from you in the comments below!