Choosing the right paint party painting idea makes everything feel easier—especially when you want big results without stressing the details. I pulled together crowd-pleasing, beginner-friendly designs that look impressive fast, so you can spend more time laughing and less time second-guessing your brushstrokes.
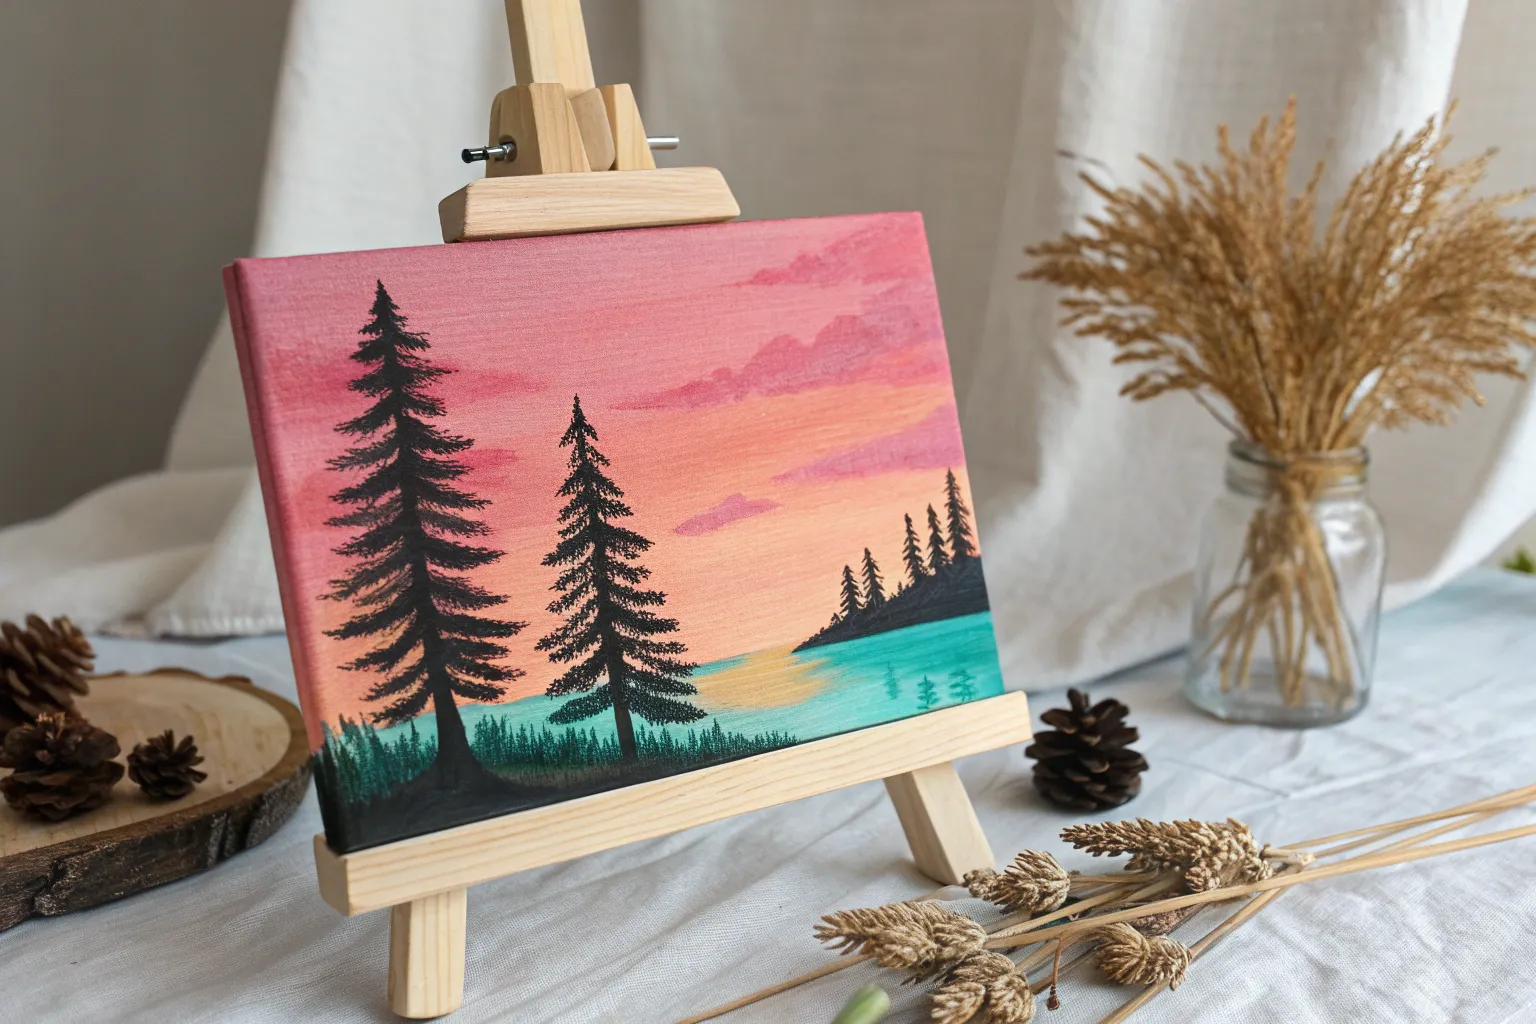
Classic Sunset Silhouette over a Lake
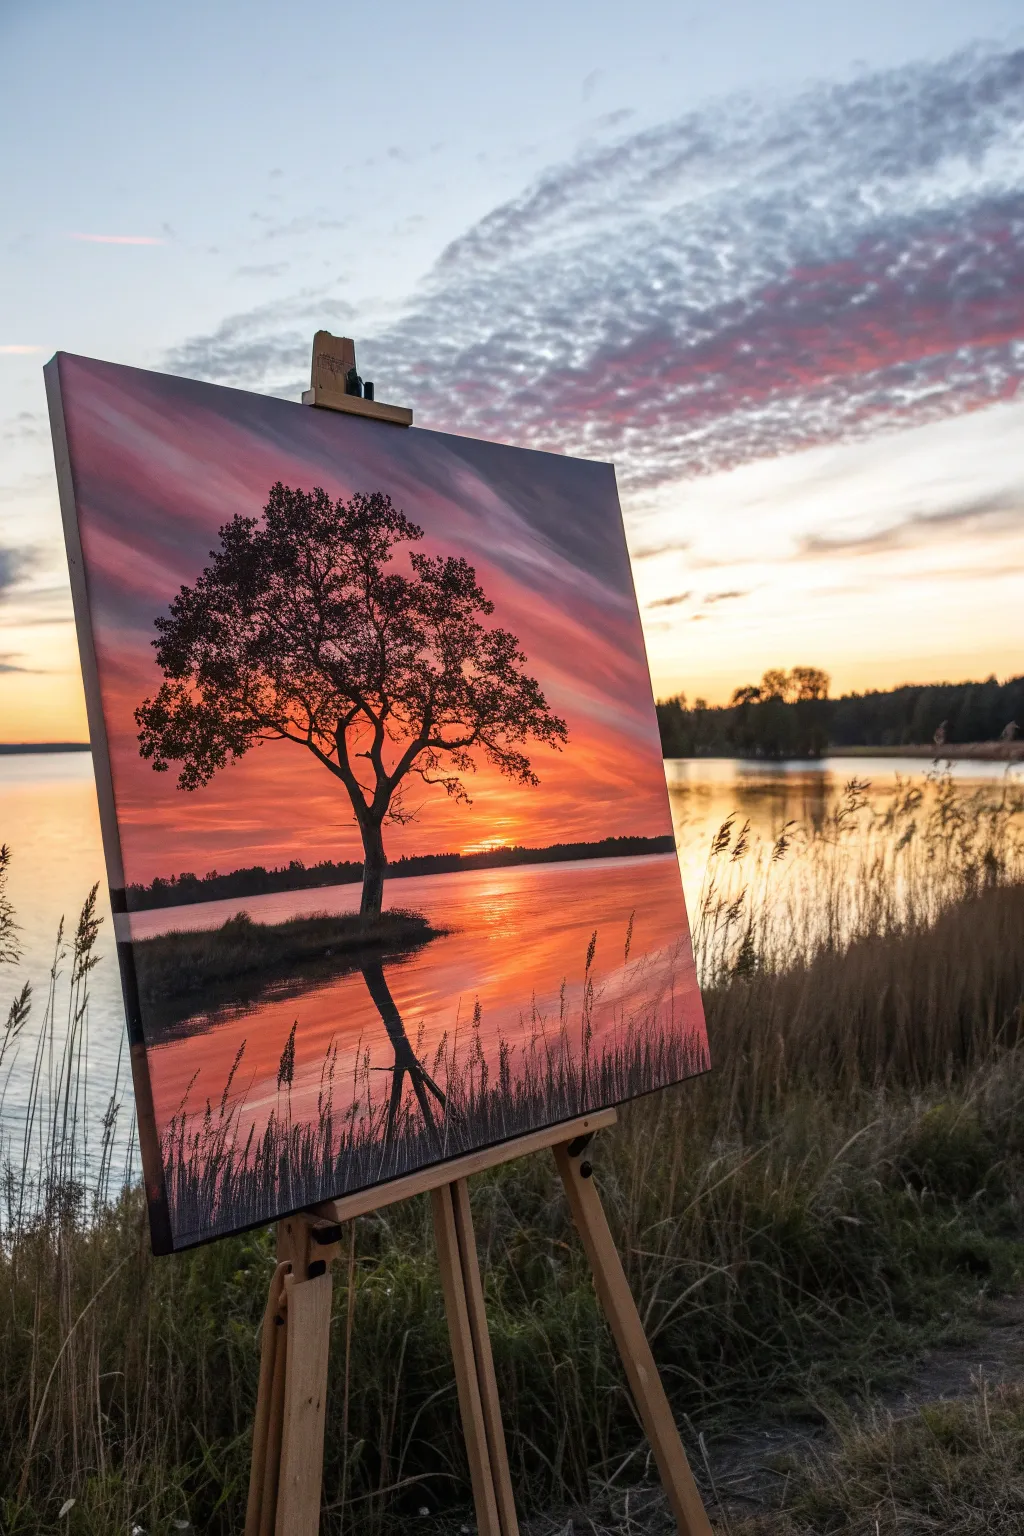
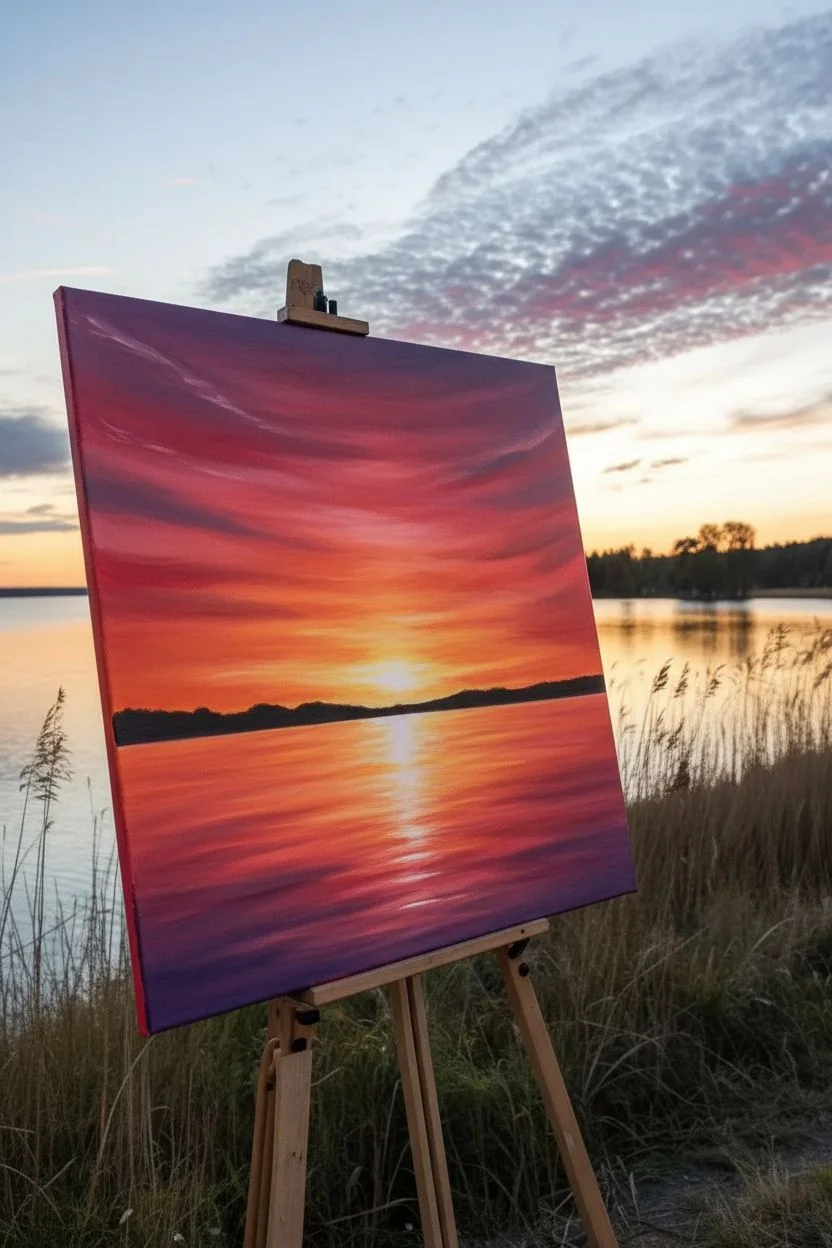
Capture the breathtaking beauty of twilight with this calm and vibrant sunset scene. You’ll layer glowing oranges and purples to create a dramatic sky that perfectly reflects onto still water, framed by a striking tree silhouette.
Step-by-Step Tutorial
Materials
- Canvas (16×20 or similar)
- Acrylic paints: Titanium White, Cadmium Yellow, Orange, Alizarin Crimson, Purple, Mars Black
- Large flat brush (1-2 inch) for background
- Medium flat brush
- Small round brush (size 2-4) for details
- Palette or paper plate
- Cup of water and paper towels
- Pencil (optional)
Step 1: Sky Gradient
-
Establish the Horizon:
Visualize a line about one-third of the way up from the bottom of your canvas. This will be your horizon line. Everything above this is sky, and everything below is water. -
Start with Brightest Light:
Using your large flat brush, mix Titanium White with a small touch of Cadmium Yellow. Paint a horizontal band just above the horizon line where the sun sits low; keep this area very bright. -
Add Warm Orange:
Without cleaning your brush fully, dip into Orange. Paint horizontal strokes blending upwards from the yellow glow, letting the colors merge softly to avoid harsh lines. -
Introduce Pinks and Reds:
Mix Alizarin Crimson with a little White to make a vibrant pink. Continue painting upward, blending this pink into the orange section effectively creating a seamless transition. -
Deepen the Sky:
At the very top and corners, apply Purple mixed with a bit of crimson. Blend this downwards into the pink area. I find painting in long, sweeping horizontal strokes helps create that wispy cloud effect. -
Create Cloud Striations:
While the sky paint is still slightly wet, use a clean, dry medium brush to drag faint streaks of lighter pink or purple diagonally across the upper corners to suggest moving clouds.
Natural Leaves
Don’t paint individual leaves. Instead, bunch the bristles of an old brush and tab gently. This creates random, organic clusters that look much more realistic than perfect smooth shapes.
Step 2: Reflective Water
-
Mirror the Sky Colors:
Now, reverse your process for the water below the horizon line. Start with the same bright yellow-white mix right under the horizon. -
Blend the Water Downwards:
Move downwards with your orange, then pinks. The reflection doesn’t need to be as perfect as the sky; allow visible horizontal brushstrokes to mimic ripples on the surface. -
Darken the Foreground Water:
Near the very bottom edge of the canvas, use your purple mix to show the depth of the water close to the shore. Ensure the transition from light to dark mirrors the sky above. -
Let it Dry:
Pause here and let the entire background dry completely. This step is crucial so your sharp black silhouettes don’t smudge into the colorful background.
Step 3: Silhouette Details
-
Paint the Horizon Line:
Using Mars Black and a medium flat brush, paint a thin, distant strip of land across the horizon. Vary the height slightly to suggest distant trees or hills. -
Form the Island Base:
On the left side, paint a small, rounded mound of land extending into the water. This will be the anchor for your main tree. -
Outline the Trunk:
Switch to a small round brush and Mars Black paint. Draw a slightly curved line rising from the island for the trunk. Trees aren’t perfect poles, so give it a little wiggle and character. -
Branch Out:
Extend thicker main branches outward from the trunk, splitting them into thinner twigs as you move away from the center. Imagine shapes like the letter ‘Y’ connecting over and over. -
Stipple the Leaves:
Use an old, frayed brush or the tip of a round brush to tap (stipple) clusters of black leaves onto the branches. Leave plenty of ‘sky holes’ where the sunset peeks through the foliage. -
Add the Reflection Shadow:
Paint a softer, slightly blurry black shape directly below the island in the water. Gently pull vertical strokes downward to look like the tree’s reflection distorted by water. -
Detail the Foreground Reeds:
Using your finest brush, flick quick, upward strokes of black along the very bottom edge and corners to create tall grasses or reeds framing the view. -
Final Highlights:
Mix a tiny amount of yellow-white. Add a few very thin horizontal lines across the water’s surface, crossing over the tree’s reflection to make the water look wet and shimmering.
Correcting Smudges
If you accidentally drip black paint onto your sunset, don’t wipe it! Let it dry completely, then paint over the spot with the matching sky color using a small brush.
Step back and admire the peaceful atmosphere you have created with just color and contrast


Tropical Palm Tree Sunset Gradient
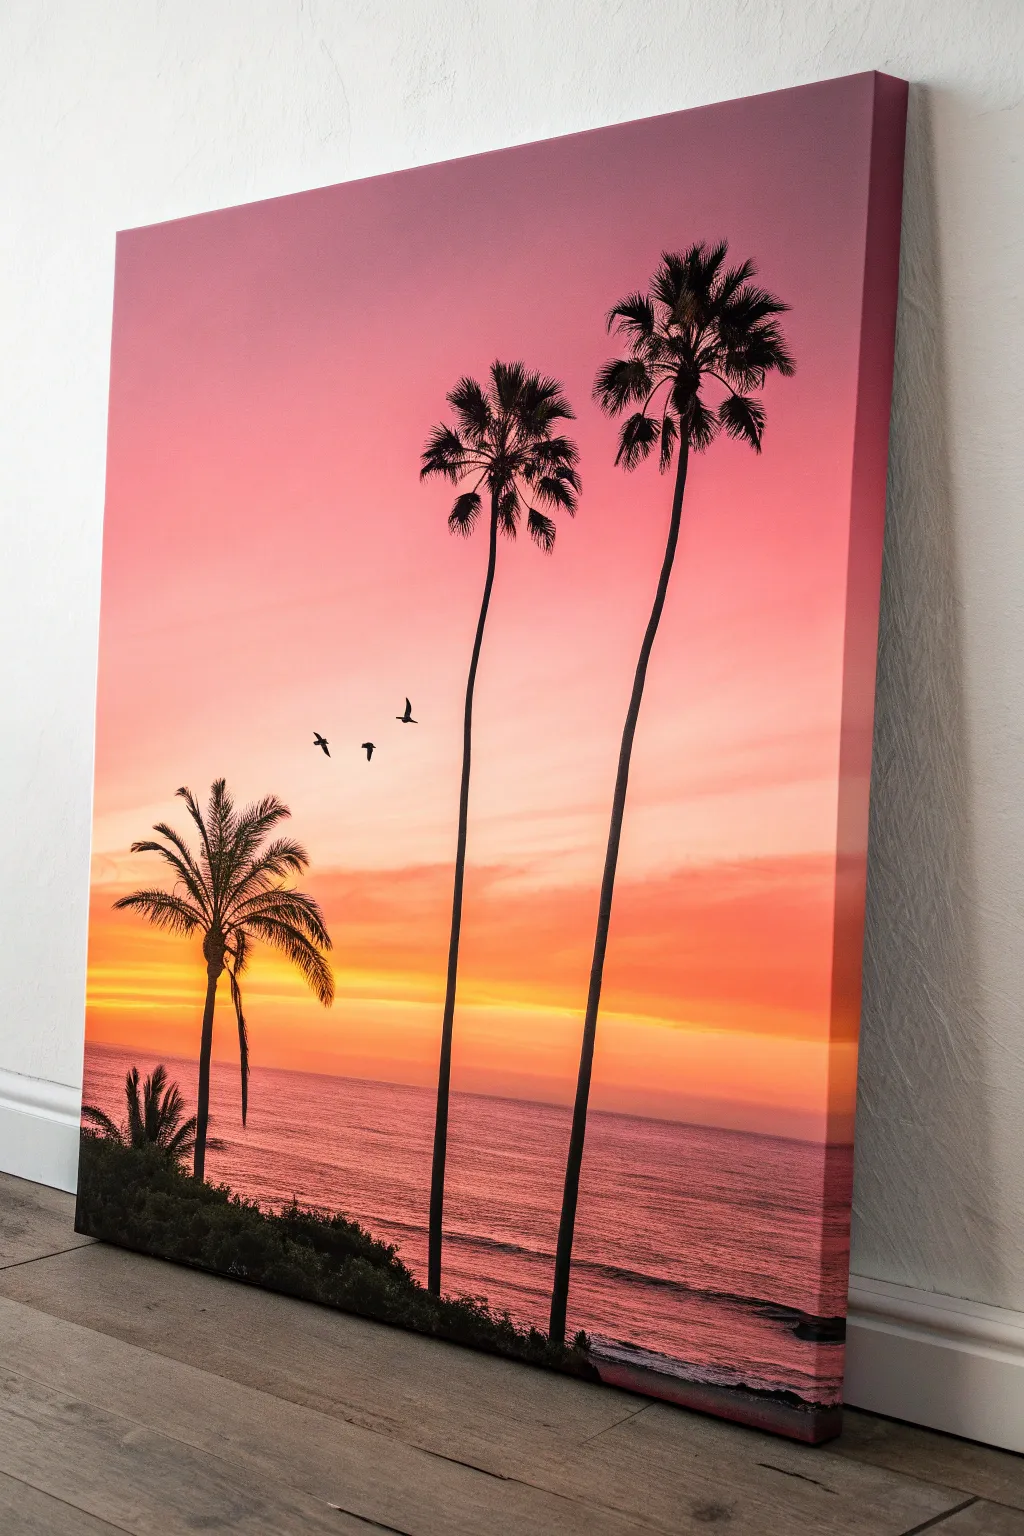
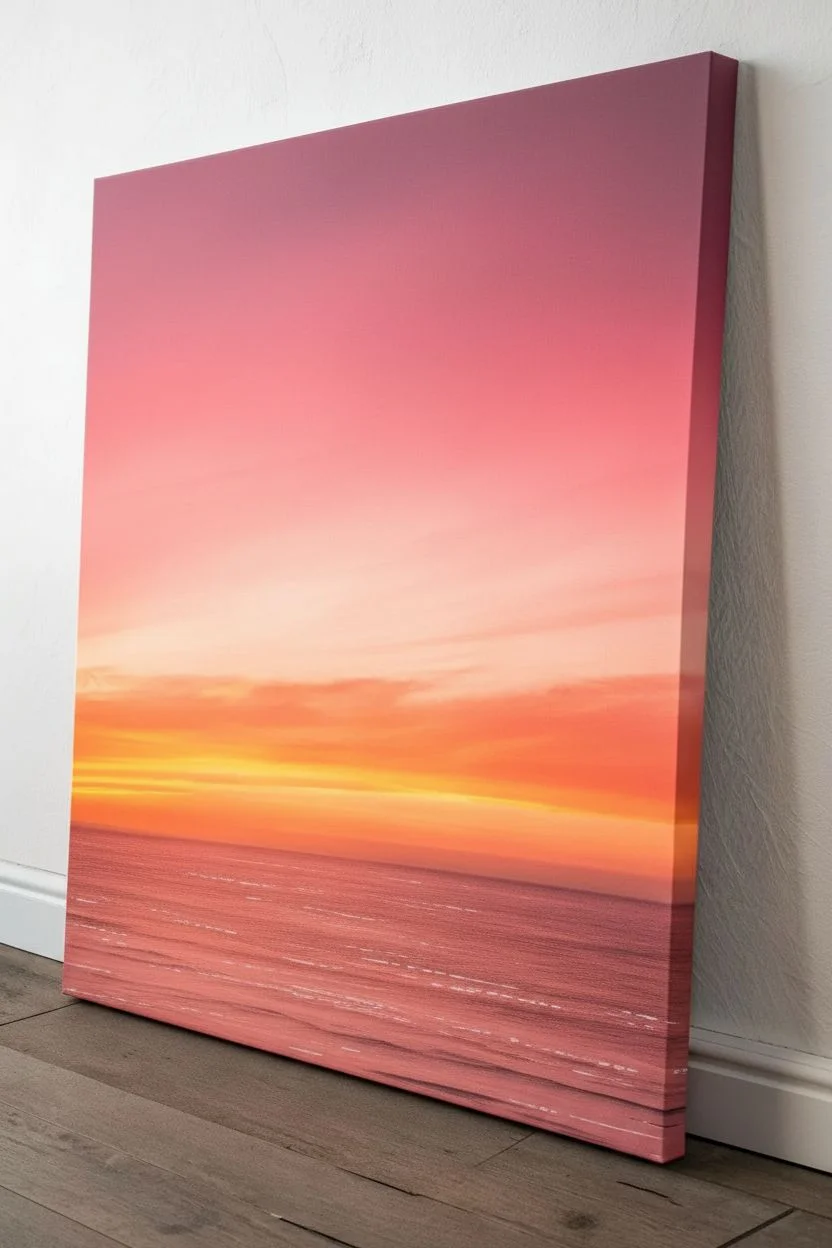
Transport yourself to a peaceful beach with this stunning vertical canvas featuring tall, silhouetted palm trees against a vibrant pink and orange gradient sky. This project focuses on mastering smooth blending techniques to create that perfect glowing sunset transition.
Step-by-Step Guide
Materials
- Tall rectangular canvas (e.g., 16×20 or 12×24)
- Acrylic paints: Titanium White, Magenta or Deep Pink, Orange, Yellow, Black
- Large flat wash brush
- Medium flat brush
- Small round detail brush (size 1 or 2)
- Fan brush (optional)
- Cup of water
- Paper towels
- Palette or paper plate
Step 1: Creating the Sunset Gradient
-
Prime the sky:
Begin by dampening your large flat brush slightly. This helps the acrylics blend smoother on the canvas. -
Apply the top color:
Load your large brush with Magenta or Deep Pink. Start at the very top edge of the canvas and paint horizontal strokes, covering about the top 1/3 of the canvas. -
Blend downward:
While the pink is still wet, add a touch of White to your dirty brush. Paint just below the pure pink area, blending upwards into it to create a softer, lighter pink transition. -
Introduce the orange:
Wipe your brush (don’t rinse completely). Pick up Orange paint and start painting below the pink section. Use long horizontal strokes, overlapping slightly with the light pink area above to create a seamless peach-colored transition. -
Add the golden horizon:
Rinse your brush thoroughly. Load it with Yellow and a tiny bit of White. Paint the area just above where your horizon line will be. Blend this upward into the orange to create a glowing effect. -
Paint the water base:
Below your yellow horizon line, define the water area. Use a mix of Pink and a tiny bit of Purple (or mix Pink/Black very lightly) to create a dusty rose color. Fill the bottom 1/4 of the canvas with horizontal strokes. -
Add water highlights:
While the water layer is wet, take a clean medium brush with a little White and light Pink. Add thin, horizontal dashes across the water to mimic ripples reflecting the sky.
Step 2: Painting the Silhouettes
-
Sketch the horizon:
Once the background is dry to the touch, use a ruler or steady hand to confirm your horizon line is straight. If the paint covered it, re-establish it lightly. -
Paint the tall trunks:
Using Black paint and a small round brush, paint two very tall, thin lines for the main palm trees. Make them slightly curved—nothing in nature is perfectly straight. The right tree should be tallest. -
Add the palm fronds:
At the top of each trunk, paint 5-7 curved lines radiating outward like fireworks. These are the spines of the leaves. -
Detail the leaves:
For the feathery look, use the very tip of your small brush to flick quick, short strokes downward from each spine. Keep these strokes loose and jagged. -
Create the smaller palm:
On the left side, paint a shorter, thicker palm tree silhouette. This one is closer to the viewer, so the fronds can be slightly more detailed and larger. -
Add landscape foliage:
At the very bottom of the canvas, use Black to stipple (tap repeatedly) irregular shapes to form bushes and shrubs. This grounds the painting and hides the bottom edge of the trees. -
Add tiny birds:
Using your smallest brush with watered-down Black paint, add three small ‘V’ or ‘M’ shapes in the sky between the trees to represent birds in flight. -
Final touches:
Check your silhouettes for opacity. If the sunset colors represent showing through the black, apply a second coat of black to the trunks and bushes once the first layer is dry.
Blending Trouble?
If acrylics dry too fast while blending the sky, mist the canvas lightly with water or use a ‘slow-dry medium’ to keep paints workable longer.
Make it Sparkle
Add a literal shine to the water! Once fully dry, paint a thin line of metallic gold or iridescent glitter glaze along the brightest part of the horizon.
Step back and admire the warm, tropical glow you have brought into your home


Misty Mountain Sunrise in Simple Layers
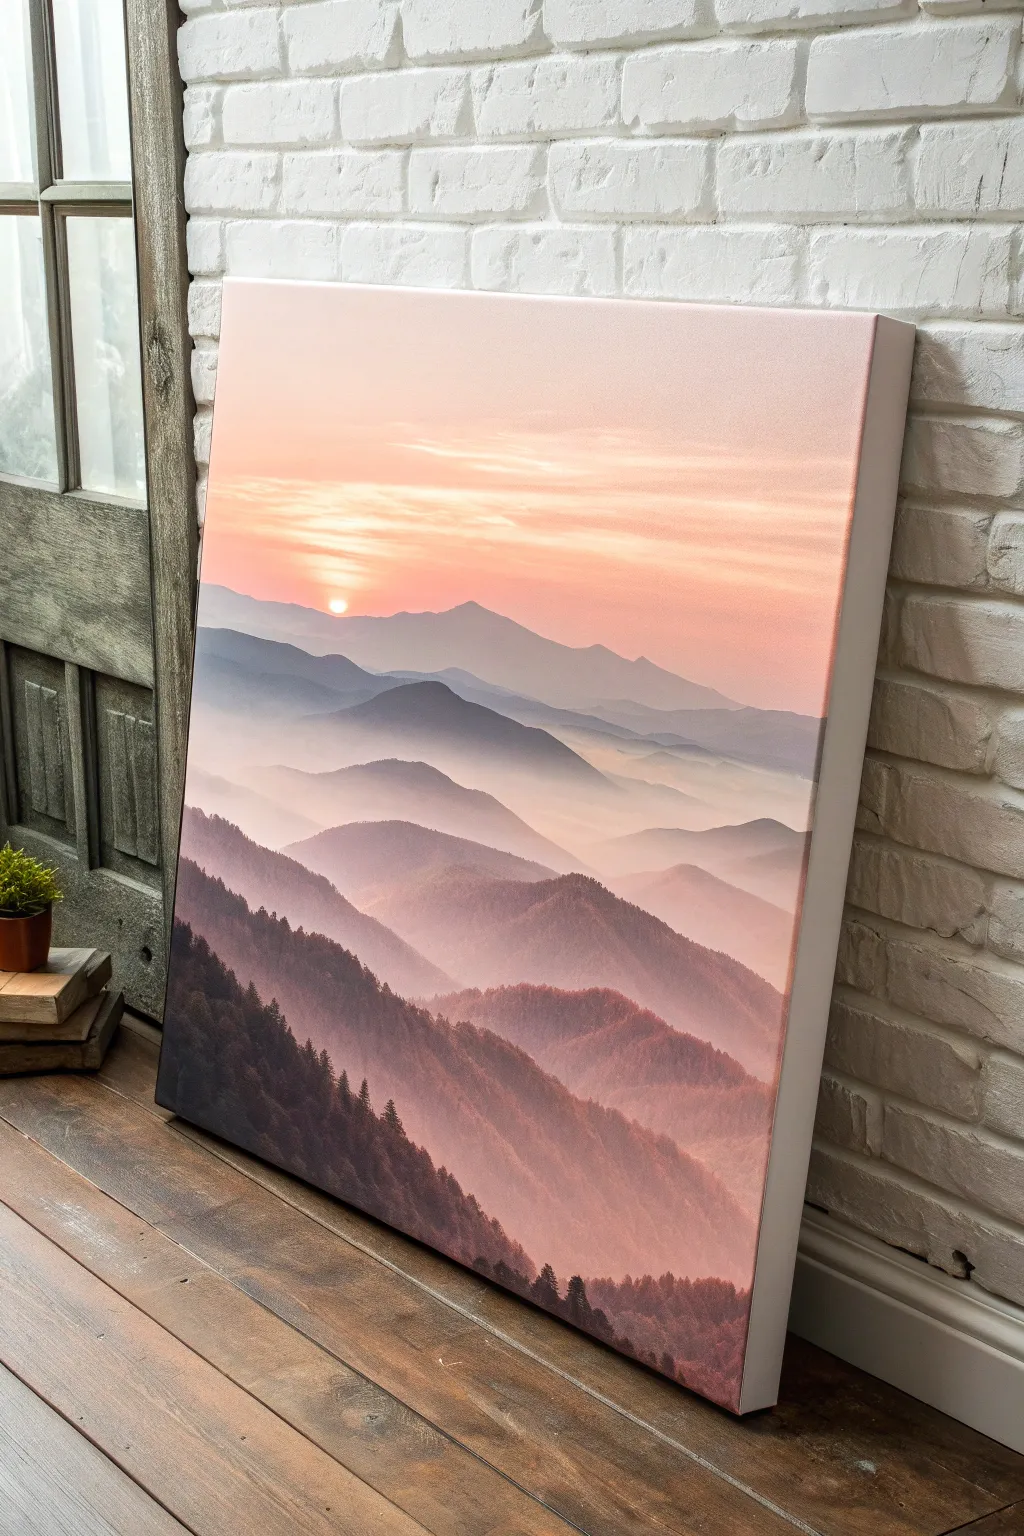
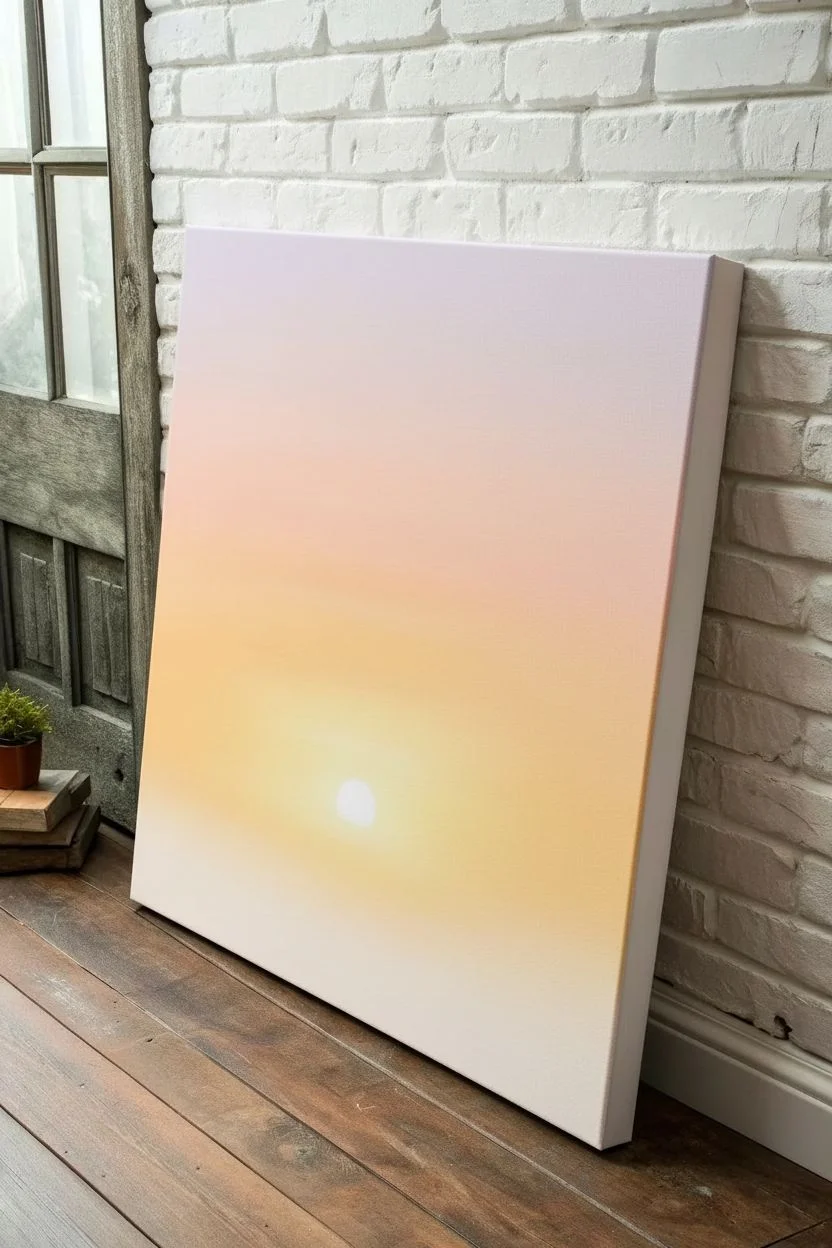
Capture the serene beauty of a mountain dawn with this layered landscape painting. By working from the furthest peaks forward, you’ll master atmospheric perspective using soft blends and striking silhouettes.
How-To Guide
Materials
- Stretched canvas (16×20 or size of choice)
- Acrylic paints: Titanium White, Primary Blue, Alizarin Crimson, Cadmium Yellow, Mars Black, Burnt Sienna
- Large flat wash brush (1-2 inch)
- Medium flat brush
- Small round detail brush
- Palette or paper plate
- Water cup and paper towels
Step 1: Setting the Sky
-
Mix the sky gradient:
Begin by creating three distinct mixtures on your palette: a pale peach (White + tiny touch of Crimson + tiny touch of Yellow), a soft golden yellow (White + more Yellow), and a very pale lavender (White + tiny touch of Blue + very tiny Crimson). -
Apply the upper sky:
Using your large wash brush, paint the top third of the canvas with the pale lavender mixture. Use long, horizontal strokes to ensure smooth coverage. -
Blend the sunset hues:
While the lavender is still wet, pick up your peach mixture and paint the middle section. Allow the colors to overlap slightly, brushing back and forth gently to create a seamless, soft transition between the cool top and warm middle. -
Create the horizon glow:
Finish the bottom third of the sky area with the golden yellow mixture. This will act as the light source behind the mountains. Again, blend it wet-in-wet with the peach section above. -
Add the sun:
Rinse your small round brush completely. Dip into pure Titanium White and tap a small, crisp circle right where the yellowest part of the sky meets where your first mountain will be. Soften the edges slightly if you prefer a hazy look.
Sticky Blending?
If acrylics dry too fast while blending the sky, mist the canvas lightly with water or add a slow-drying medium to keep the paint workable longer.
Step 2: Layering the Mountains
-
Mix the distant mountain color:
Create a very pale, hazy purple-grey. Mix plenty of White with a small amount of Blue and a speck of Black. The goal is for this to be only slightly darker than your sky. -
Paint the furthest range:
With the medium flat brush, paint a jagged, uneven line about one-third down from the top. Fill in the area below this line down to the bottom of the canvas with this pale mixture. This initial fill creates a base for the mist. -
Create the mist effect:
While the paint is wet, take a clean, slightly damp brush and gently drag it horizontally at the base of this mountain shape to blur it into nothingness. -
Darken for the second range:
Add a bit more Blue and a touch of Crimson to your previous mountain pile to make a slightly darker, purpler shade. Paint the next range lower down, overlapping the first one. -
Layer the middle grounds:
Continue this process, moving down the canvas. For each new mountain range closer to the bottom, add increasing amounts of Crimson and Burnt Sienna to your mix. This warms up the color and darkens the value. -
Add cloudy valleys:
Between layers, if the paint feels too solid, mix a watery glaze of white and scumble it into the ‘valleys’ between peaks to suggest settling fog.
Step 3: Foreground Details
-
Mix the darkest tone:
For the closest mountain range at the bottom, mix Burnt Sienna with a little Mars Black and Crimson. It should be a rich, dark maroon-brown, but not solid black. -
Paint the foreground slope:
Paint a steep slope starting from the bottom left or right corner, rising up diagonally. Use choppy, downward strokes to mimic the texture of a tree-covered hillside. -
Start the tree silhouettes:
Switch to your small round detail brush or a fan brush. Using the dark foreground color, tap in tiny vertical lines along the ridge of this closest mountain. -
Define the pines:
From those vertical lines, use the very tip of your brush to tap small zigzag patterns downward, getting wider at the base, to create the shape of distant pine trees. -
Add individual trees:
I like to pick a few spots on the slope to add taller, more distinct trees that break the skyline of the mountain behind it. This exaggerates the depth. -
Final texture:
Stipple (tap repeatedly) some texture into the main body of the foreground mountain to simulate dense forest canopy, rather than leaving it a flat block of color.
Pro Tip: Atmospheric Depth
Remember the rule of atmospheric perspective: things get lighter, bluer, and less detailed the further away they are. Keep dark, warm colors only in the front.
Step back and admire how the simple value changes create miles of depth in your landscape


Starry Night Sky with Easy Pine Trees
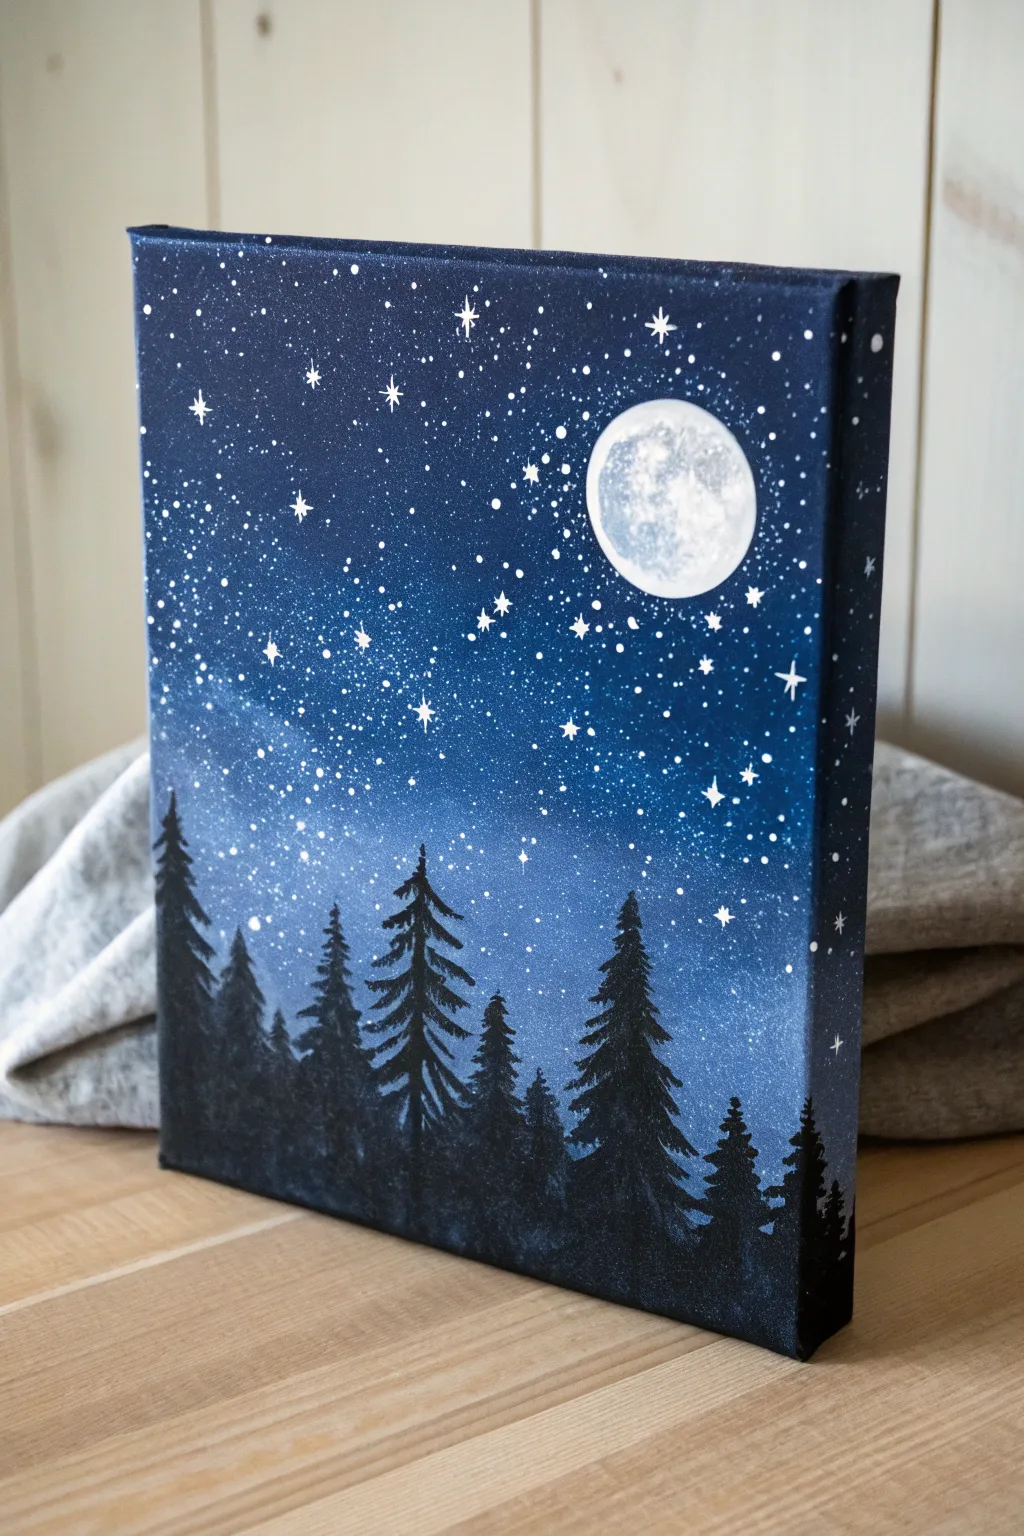
Create a serene winter scene with this striking starry night painting, featuring a luminous moon and a dense forest of silhouetted pines. The clever use of spattered stars and deep blues gives this canvas a magical, dreamlike depth perfect for a cozy paint night.
Step-by-Step Tutorial
Materials
- Canvas (rectangular, e.g., 11×14 or 16×20 inches)
- Acrylic paints: Navy Blue, Phthalo Blue (or Primary Blue), Black, and Titanium White
- Large flat brush (1-inch or larger)
- Medium flat brush
- Small round brush or liner brush
- Fan brush (optional, for trees)
- Old toothbrush (stiff bristles)
- Cup of water and paper towels
- Palette or paper plate
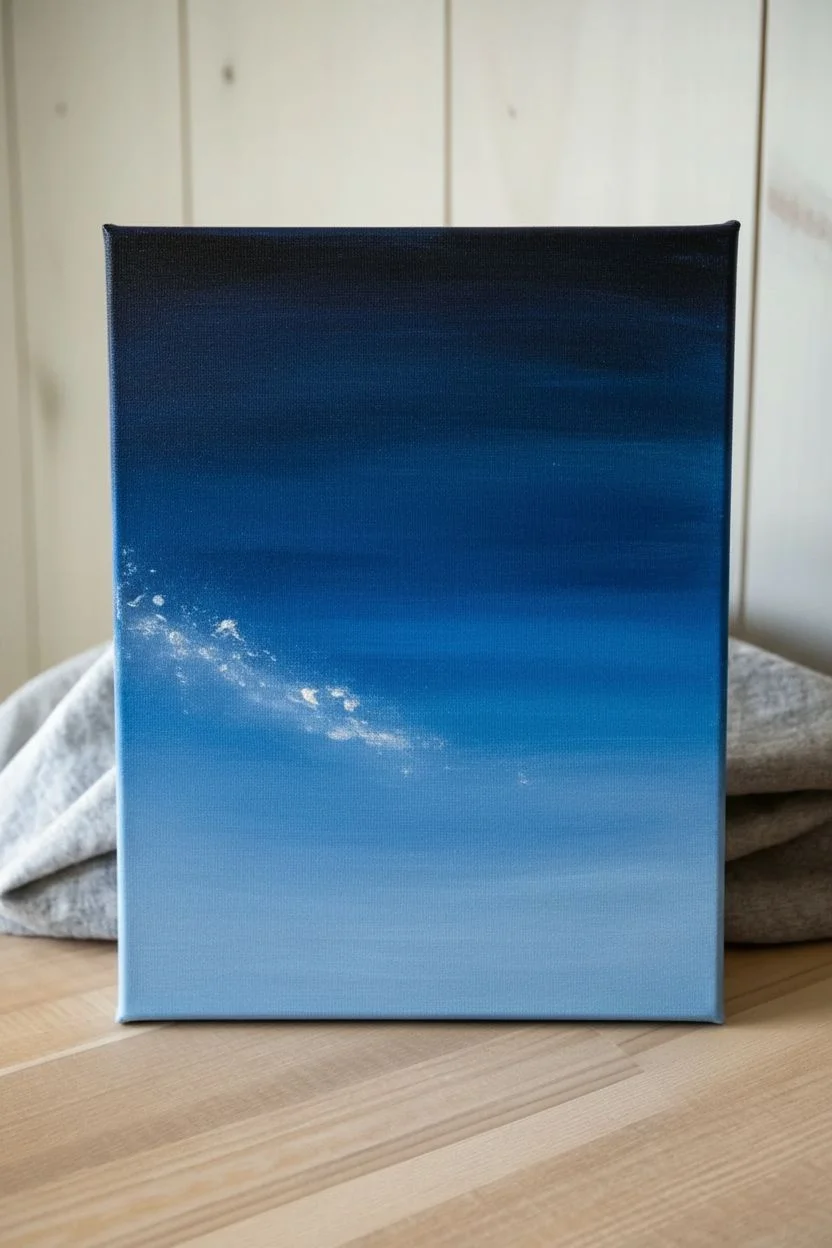
Step 1: Setting the Midnight Stage
-
Base Gradient:
Begin by double-loading your large flat brush with Navy Blue and a touch of Black. Paint the top third of the canvas using long, horizontal strokes to create a deep, dark sky. Don’t forget to wrap the color around the sides of the canvas for a finished look. -
Blending Down:
As you move toward the middle of the canvas, start mixing in your Phthalo Blue (or brighter blue) with the Navy. Blend these colors while the paint is still wet to create a smooth transition from the midnight darkness into a slightly lighter royal blue. -
Creating the Glow:
For the bottom third, mix white with your blue to create a lighter, hazy blue. Blend this upward into the mid-blue section. This lighter area will sit behind the trees, making them stand out and giving the illusion of atmospheric light. -
Milky Way Effect:
While the background is still slightly tacky, take a clean, dry brush with a tiny amount of white paint. Gently scrub or stipple a diagonal cloud-like shape across the sky to hint at a galaxy or Milky Way band. Keep this very subtle and soft.
Starry Splatter Secret
Test your splatter on a scrap paper first! If the paint is too thick, you get blobs; too thin, you get drips. Aim for an ink-like consistency.
Step 2: Stars and Lunar Light
-
Spattering Stars:
Wait for the background to dry completely. Dilute a small amount of white paint with water until it’s inky. Dip an old toothbrush into this mixture. -
Flicking Technique:
Hold the toothbrush over the canvas and run your thumb across the bristles to flick tiny white specks onto the sky. Focus more splatter near the Milky Way area and the top corners for density. -
Hand-painting Big Stars:
Use your smallest round brush or a liner brush to dot in larger, distinct stars randomly. For a few of the brightest ones, paint a small cross shape to create a twinkling effect. -
Moon Base:
Decide where you want your moon—the upper right quadrant works well for composition. Paint a solid white circle. It doesn’t need to be perfect; you can use a small lid to trace it if you’re nervous. -
Moon Details:
While the white is wet, pick up a tiny bit of light grey (mix white with a speck of black/blue). Dab this onto the moon’s surface in random blots to create craters and texture. I like to keep the edges slightly soft to make it look glowing.
Step 3: The Forest Silhouette
-
Mixing Shadow Black:
Mix pure Black with a tiny bit of Navy Blue. This creates a rich, cold black that looks more natural for night scenes than black straight from the tube. -
Tree Trunks:
Using a small round brush, paint vertical lines of varying heights starting from the bottom edge. These are the spines of your pine trees. Make some taller and some shorter to create a natural, uneven forest line. -
Starting the Branches:
Switch to a fan brush or a small flat brush turned on its chiseled edge. Starting at the top of a trunk, tap the brush gently to create small, narrow branches. -
Building Volume:
As you move down the tree trunk, press harder and make your tapping strokes wider. Pine trees generally have a triangular shape, so flare the branches out as you reach the bottom. -
Adding Density:
For the foreground trees (the tallest ones), ensure the branches overlap the trunk completely so it looks solid. Leave tiny gaps of light showing through the branches near the tops. -
Filling the Bottom:
Use a larger brush to fill in the very bottom of the canvas with solid black darkness, connecting all the tree bases and grounding the forest floor. -
Final Tree Details:
Go back with your smallest brush and add tiny, sharp peaks to the very tops of the trees so they don’t look blunt. Check the edges for any necessary touch-ups where the sky might need to peek through.
Make It Magical
Mix a tiny amount of glitter medium into your white paint for the stars, or use metallic silver for the larger twinkling stars to catch the light.
Step back and admire your peaceful winter night sky, ready to hang or give as a gift
BRUSH GUIDE
The Right Brush for Every Stroke
From clean lines to bold texture — master brush choice, stroke control, and essential techniques.
Explore the Full Guide
Bright Sunflower Field with a Rustic Barn
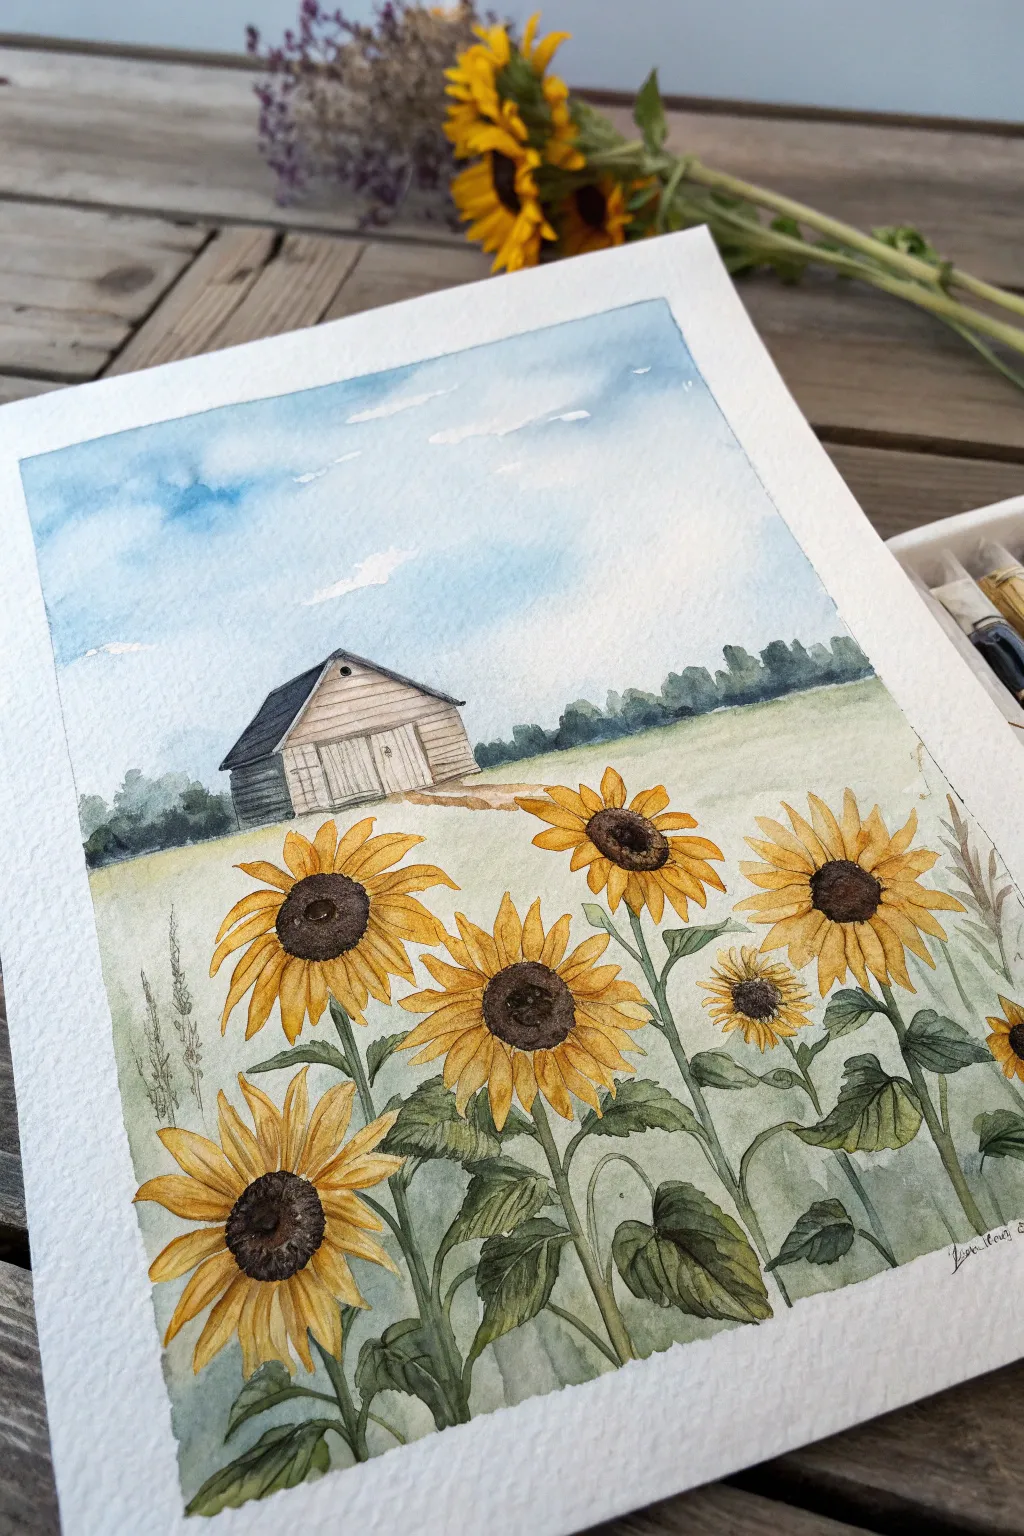
Capture the charm of a sun-drenched countryside with this delightful watercolor scene. Featuring bold, happy sunflowers in the foreground and a weathered barn resting under a wide blue sky, this project balances detailed florals with soft landscapes.
Step-by-Step Guide
Materials
- Cold press watercolor paper (140lb/300gsm)
- Watercolor paints (Yellow Ochre, Lemon Yellow, Sap Green, Burnt Umber, Payne’s Grey, Cobalt Blue, Burnt Sienna)
- Round brushes (sizes 2, 6, and 10)
- Masking tape
- Pencil and eraser
- Two jars of water
- Paper towels
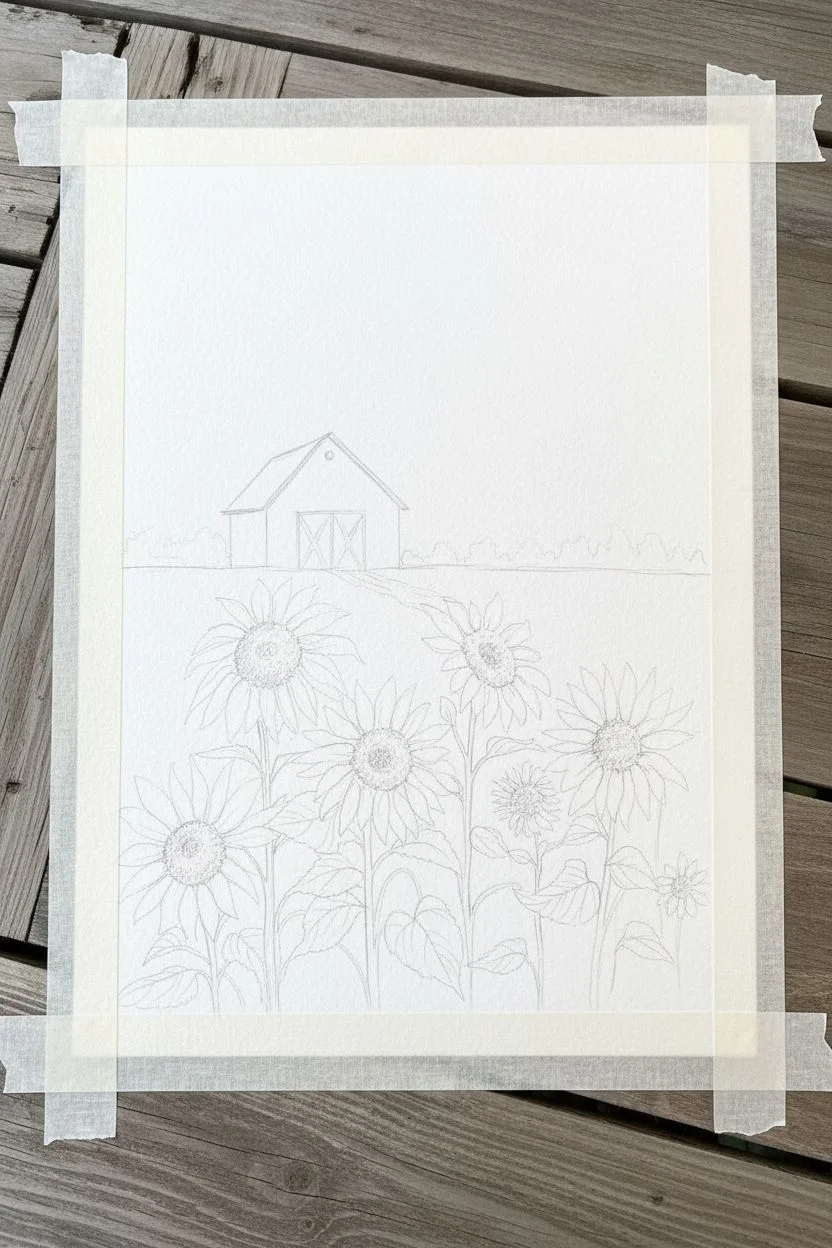
Step 1: Sketching the Composition
-
Tape down your paper:
Secure your paper to a board or table with masking tape on all four sides. This prevents buckling when we add water and creates a crisp white border. -
Establish the horizon:
Lightly sketch a horizontal line across the paper, positioning it just below the halfway point. This separates your sky from the field. -
Draw the main sunflowers:
Sketch five main sunflower heads in the foreground. Vary their sizes and angles subtly; make the two on the left slightly larger to create depth. -
Add the stems and leaves:
Draw simple lines for stems leading down off the page. Add large, heart-shaped leaves clustering around the stems, keeping the pencil lines light so they don’t show through the paint. -
Outline the barn:
Place the barn on the horizon line, slightly off-center to the left. Draw a simple peaked roof and markings for the barn doors and side planks.
Bleeding Colors?
If your sunflower petals are bleeding into the blue sky, you didn’t let the background dry completely. Use a hair dryer on a low setting to speed up drying between phases.
Step 2: Painting the Sky and Field
-
Wash the sky:
Wet the sky area with clean water first. Drop in a diluted mix of Cobalt Blue, starting stronger at the top corners and fading as you reach the horizon. Leave a few irregular white spaces for wispy clouds. -
Add cloud definition:
While the sky is still damp, lift out pigment with a clean, thirsty brush or paper towel to create softer cloud shapes. -
Paint the background trees:
Mix Sap Green with a touch of Payne’s Grey. While the sky is almost dry but not quite, tap in a jagged line of distant trees right on the horizon line behind the barn, letting the edges blur slightly. -
Create the field wash:
Using a very watery mix of Sap Green and Yellow Ochre, paint the area between the horizon and the sunflowers. Keep this wash heavily diluted so it looks like distant grass.
Dynamic Greens
Avoid using green straight from the tube. Mix it with your yellows for sun-hit leaves and with burnt umber or blue for deep, shadowy foliage to create realistic depth.
Step 3: Bringing the Barn to Life
-
Paint the barn walls:
Mix a light wash of Burnt Sienna and a tiny bit of Payne’s Grey for a weathered wood look. Paint the front and side of the barn, keeping the strokes horizontal. -
Detail the roof:
Use a darker concentration of Payne’s Grey to paint the roof. Add a shadow under the eave to give the structure dimension. -
Define the planks:
Once the walls are dry, use your size 2 brush and a mix of Burnt Umber to draw thin lines suggestions wood planks and the barn door outline.
Step 4: Detailed Sunflowers
-
Petal base layer:
For the petals, mix Lemon Yellow with a bit of Yellow Ochre. Paint each petal individually, leaving tiny gaps between them so they don’t merge into a blob. -
Add petal shadows:
Once the first layer dries, add a second layer of slightly darker yellow-orange (Yellow Ochre mixed with a touch of Burnt Sienna) to the base of the petals near the center. -
Texture the centers:
Paint the round centers with Burnt Umber. While wet, dab in concentrated dark brown or black spots to simulate seeds. I find this stippling texture really brings the flower to life. -
Paint the stems and leaves:
Use Sap Green mixed with a little Yellow Ochre for the stems and leaves. Vary your greens—add more blue to the mix for shadowed areas under the leaves. -
Final leaf details:
Use the size 2 brush and a dark green mix to paint veins on the leaves and add definition where leaves overlap stems. -
Add foreground grasses:
With a dry brush technique and faint grey-green paint, flick upward strokes near the bottom edges to suggest tall grasses and weeds around the sunflower stalks.
Now step back and admire the sunny warmth your new landscape brings to the room
Coastal Lighthouse at Dusk with Simple Waves
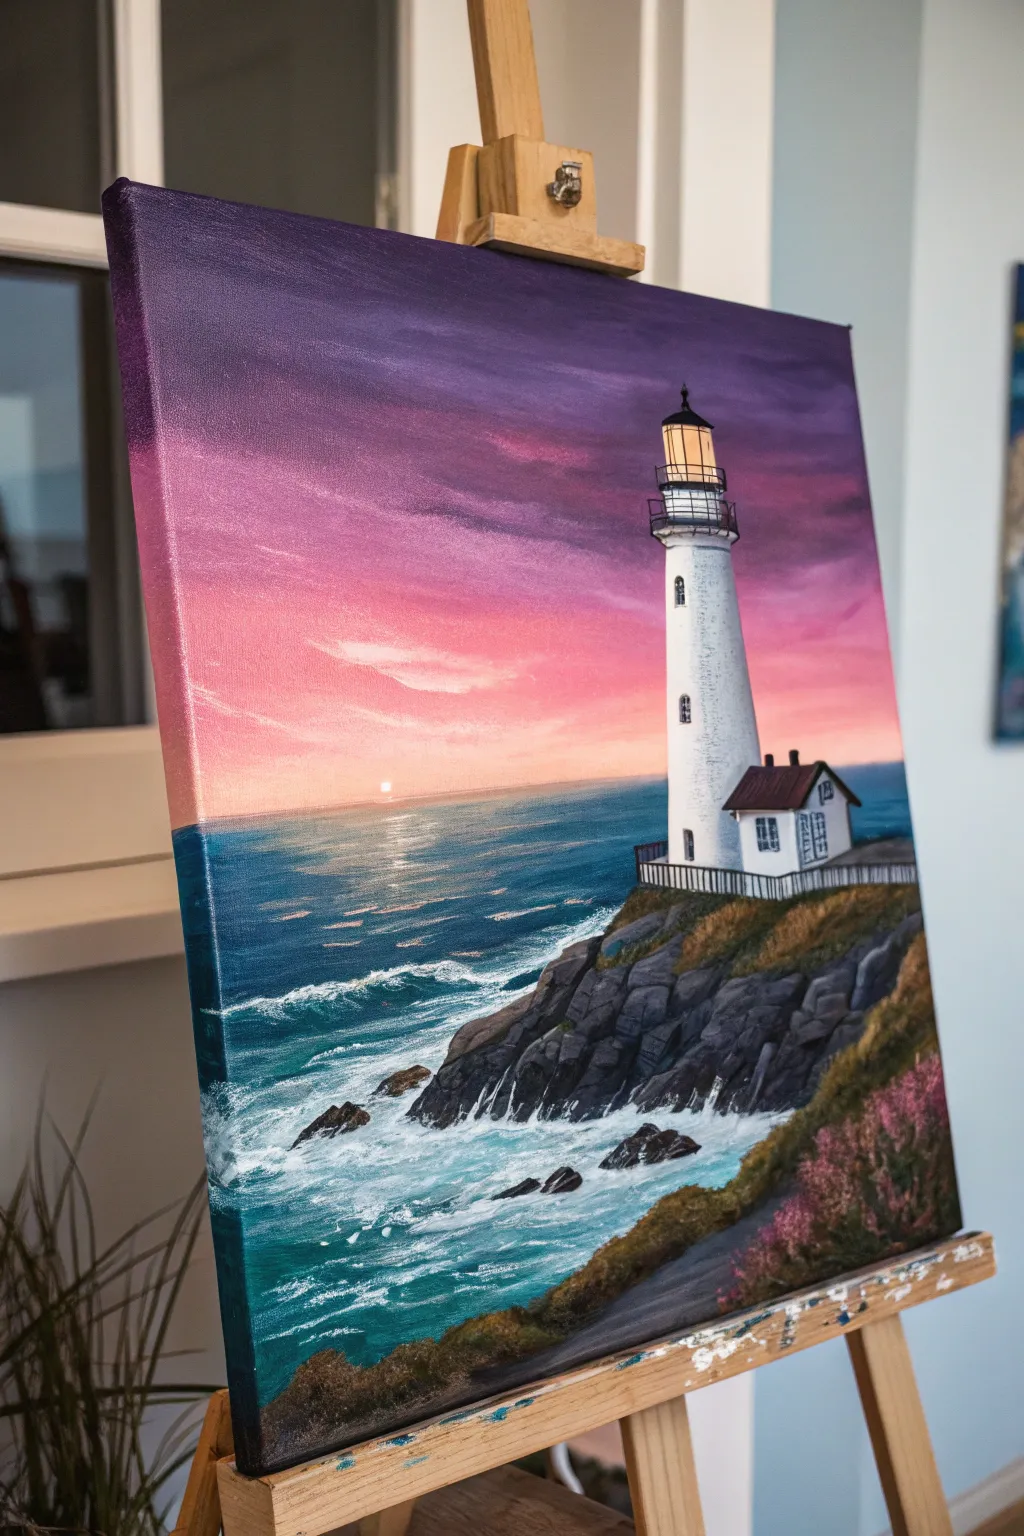
Capture the serene beauty of twilight with this stunning seascape painting featuring a glowing lighthouse perched on rocky cliffs. You’ll master blending vibrant sunset hues and creating realistic crashing waves against jagged rocks.
Step-by-Step Guide
Materials
- Stretched canvas (16×20 inches recommended)
- Acrylic paints: Titanium White, Mars Black, Phthalo Blue, Dioxazine Purple, Magenta/Pink, Cadmium Orange, Burnt Umber, Yellow Ochre
- Large flat brush (1 inch)
- Medium flat brush (1/2 inch)
- Small round brush for details
- Fan brush (optional but helpful for foliage)
- Palette knife (optional for mixing)
- Cup of water and paper towels
- Easel
Step 1: Setting the Scene
-
Create the horizon line:
Start by drawing or lightly painting a straight horizontal line about one-third of the way up from the bottom of your canvas to separate the sky from the sea. -
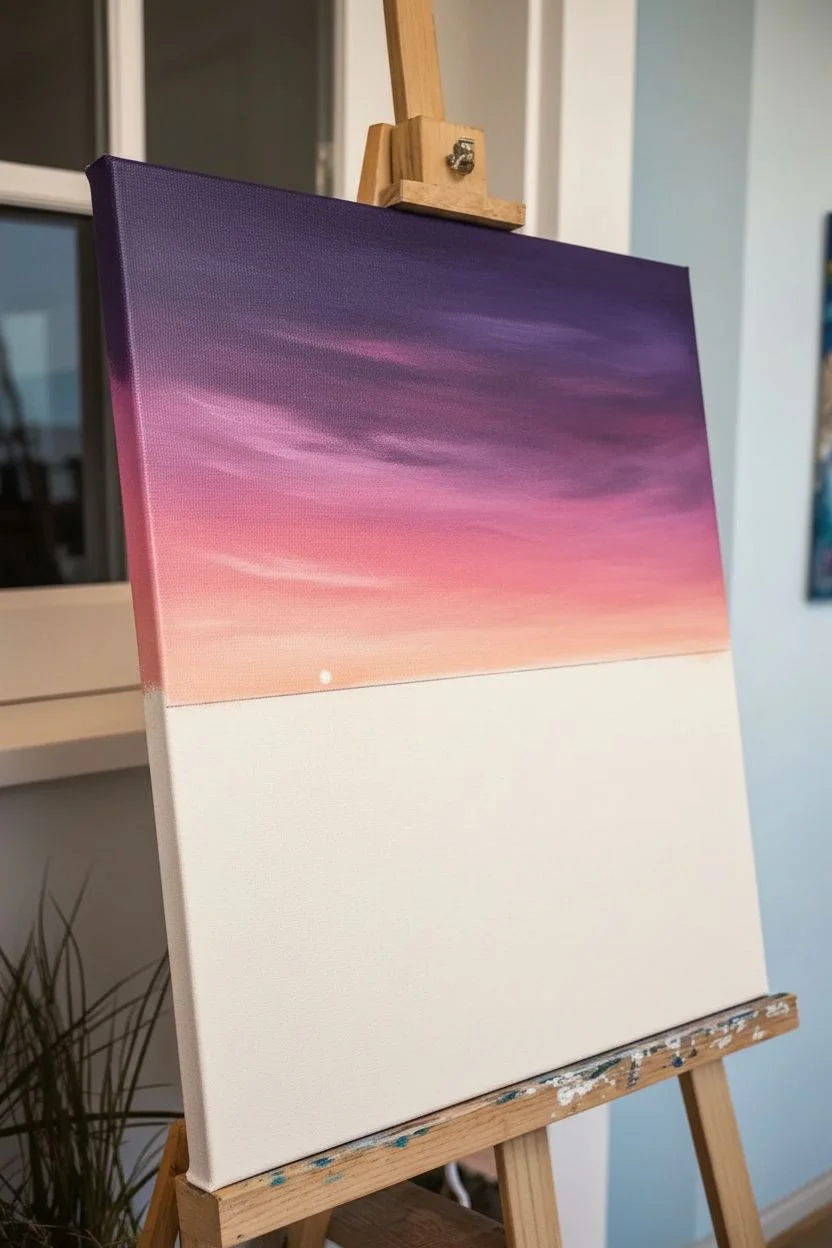
Paint the upper sky:
Using your large flat brush, mix Dioxazine Purple with a touch of Titanium White and paint the top third of the canvas using long, horizontal strokes. -
Blend the sunset gradient:
While the purple is still wet, introduce Magenta/Pink below the purple section, blending the edges where they meet to create a smooth transition. -
Add the glowing horizon:
Mix Cadmium Orange with Titanium White to create a soft peach color. Apply this near the horizon line, blending upward into the pink. Add a tiny dot of pure white right at the horizon on the left side to represent the setting sun.
Smooth Gradients
Keep your brush slightly damp and work quickly while acrylics are wet to get that seamless fade from purple to orange in the sky.
Step 2: The Sea and Horizon
-
Block in the ocean:
For the water, mix Phthalo Blue with a little Mars Black and a touch of Burnt Umber to get a deep, dark teal. Paint the entire water area below the horizon line. -
Add distance highlights:
While the blue paint is wet, take a clean brush with a tiny bit of White and lightly sweep horizontal streaks across the water surface, specifically reflecting the light under the sun area. -
Sketch the cliff outline:
Using Burnt Umber on a medium brush, block in the dark shape of the rocky cliff on the bottom right side. Make the top edge jagged and uneven to look like natural terrain.
Step 3: Constructing the Lighthouse
-
Paint the lighthouse base:
Mix a very light grey (White with a speck of Black). Paint the vertical column of the lighthouse. Make it wider at the bottom and slightly tapered at the top. It should stand tall on the cliff area. -
Add dimensions to the tower:
Take a slightly darker grey mix and shade the right side of the lighthouse cylinder to give it roundness. Keep the left side facing the sunset bright white. -
Detail the lantern room:
Use Black on a small round brush to paint the railing, the top cap, and the lantern frame. Fill the window sections with Yellow Ochre mixed with White to make the light look like it’s glowing. -
Add the keeper’s house:
Paint a small, simple house shape attached to the base of the lighthouse. Use White for the walls and dark Brown/Black for the roof shingles. Add tiny squares for windows with blue-grey interiors.
Texture Trick
Use a palette knife to apply the white foam on the waves. The thick, raised paint adds physical texture that resembles real splashing water.
Step 4: Rocks and Waves
-
Define the rock textures:
On your dark brown cliff base, use a mixture of grey and lighter brown to paint geometric, blocky shapes. This creates the illusion of individual boulders and crags. -
Add moss and foliage:
Using a fan brush or by broken stippling with an old brush, tap dark green and touches of pink/purple along the top ridge of the cliff and down the slope to create wild scrub bushes. -
Paint the crashing foam:
Load a medium brush with thick Titanium White. Dab and stipple paint where the water creates a shoreline against the rocks. Make this messy and organic to look like sea spray. -
Create water movement:
Drag some of that white paint horizontally out from the rocks into the blue water to suggest turbulent currents and waves rolling in. -
Final highlights:
Add pure white highlights to the sun reflection on the water, the brightest part of the lighthouse lamp, and the tops of the waviest foam to make the painting pop.
Step back and admire your peaceful twilight coast, ready to hang or give as a thoughtful gift

PENCIL GUIDE
Understanding Pencil Grades from H to B
From first sketch to finished drawing — learn pencil grades, line control, and shading techniques.
Explore the Full Guide
Bold Butterfly Wings on a Dark Background
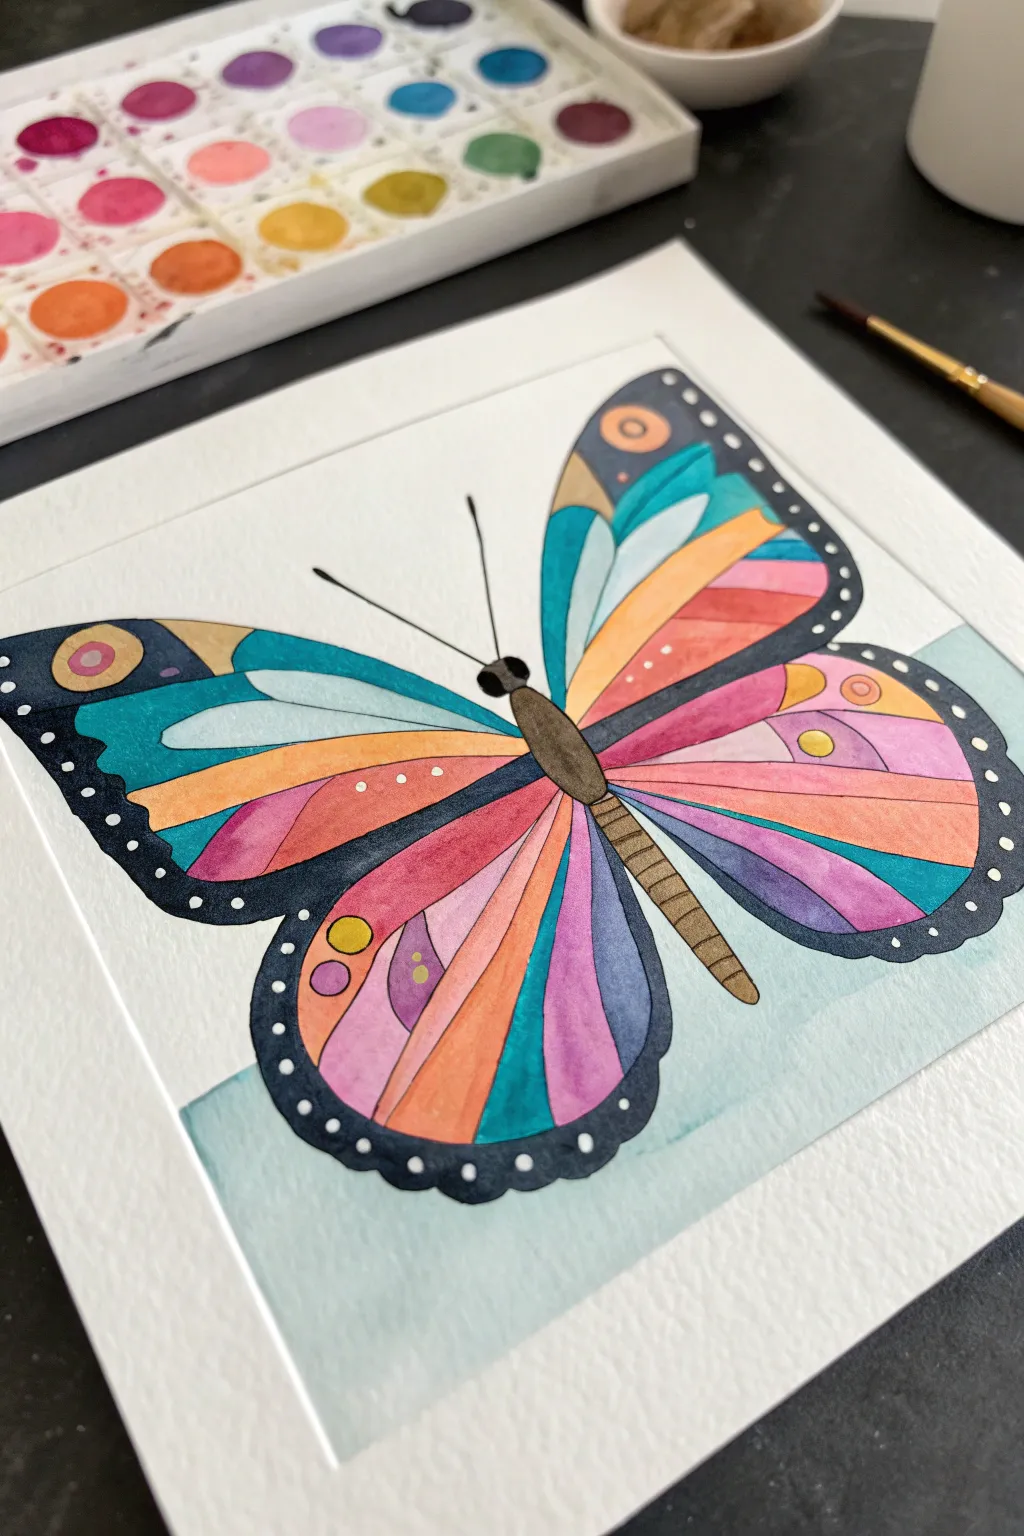
Capture the delicate beauty of butterfly wings with this vibrant and geometric watercolor study. Featuring a striking mix of pinks, oranges, and teals against a soft blue wash, this project is perfect for exploring bold color saturation and precise brushwork.
Detailed Instructions
Materials
- Cold press watercolor paper (square format)
- Watercolor paint set (essential colors: pink, orange, teal/turquoise, yellow, purple, indigo)
- Round watercolor brushes (sizes 2, 4, and 6)
- Pencil (HB or H)
- Kneaded eraser
- Fine liner brush or black pens (optional, for details)
- Masking tape
- Painting board
- Water cups and paper towels
Step 1: Drawing the Base
-
Prepare the workspace:
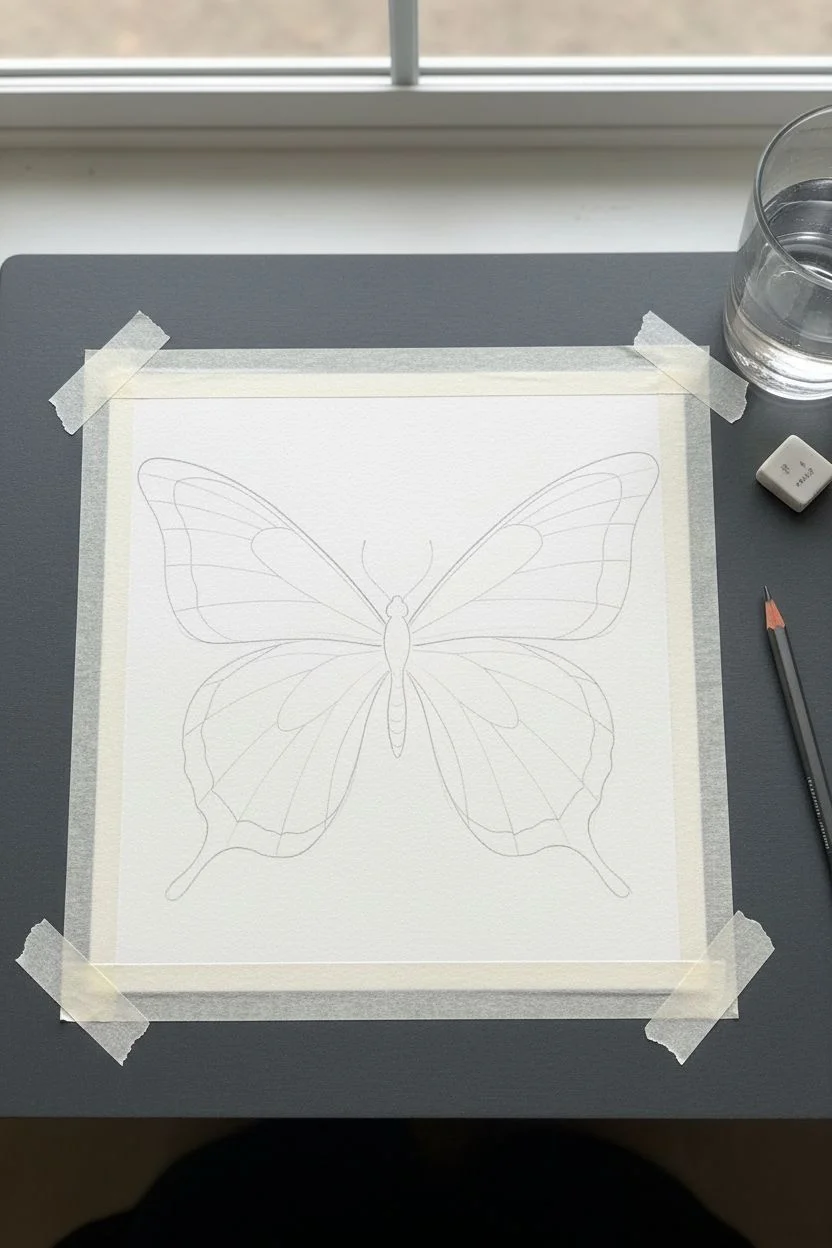
Begin by taping down all four edges of your watercolor paper to your board. This prevents the paper from buckling when you add the wet washes later and gives you a crisp white border if you paint to the edge. -
Sketch the body:
Lightly sketch a long, slender oval for the butterfly’s body in the center of the page. Make the top part (the thorax) slightly thicker than the bottom (the abdomen). -
Outline the wings:
From the thorax, draw two large, sweeping curves upward for the top wings, bringing them down to a rounded point. Then, draw two rounded lobes below for the bottom wings. Aim for symmetry, but don’t stress over imperfection. -
Block in wing patterns:
Inside the wings, sketch long, radiating sections that fan out from the body like stained glass panels. Add a distinct border area along the outer edges of all four wings, which will later be painted dark.
Clean Edges Trick
To keep colors from bleeding into each other, paint non-adjacent sections first (e.g., paint a pink stripe, skip a space, paint a teal one). Let them dry before filling the gaps.
Step 2: Vibrant Wing Colors
-
Start with warm tones:
Load your size 4 brush with a bright, watery pink. Fill in a few of the segmented sections on the lower and middle wings. I like to skip sections between colors so the wet paint doesn’t bleed into neighbors. -
Introduce orange and yellow:
While the pink dries, mix a vibrant orange. Paint the large, curved sections near the top of the wings and stripes in the lower wings. Add a touch of yellowochre or gold to the small circular details near the tips. -
Add cool contrasts:
Switch to a teal or turquoise shade. Paint the broad strokes on the upper wings and the vertical accents in the lower wings. The cool blue-green makes the earlier warm tones pop visually. -
Deepen with purple:
Use a violet or deep purple hue to fill in remaining segments, specifically targeting the lower wing areas and small geometric accents near the body. Let this layer dry completely. -
Paint the body:
Mix a warm brown using orange and a tiny bit of blue. Paint the main body segment with this earthy tone. Once dry, add thin horizontal lines using a darker brown to suggest segmentation.
Metallic Accent
Once the painting is completely dry, re-paint the yellow circles or the antennae tips with gold metallic watercolor or ink for a shimmering effect that catches the light.
Step 3: Dark Borders & Details
-
Mix a deep indigo:
Create a very dark, near-black color by mixing indigo with a bit of dark brown or purple. Avoid using straight black from a tube, as it can look flat. -
Fill the outer borders:
Using a size 2 brush for precision, carefully fill in the outer rim of the wings that you sketched earlier. Go slow around the curved edges to keep the lines smooth. -
Add the dots:
While the dark border is wonderful, the white spots make it special. You can carefully paint around small circles if you have a steady hand, or simply use white gouache or a white gel pen over the dark paint once it’s bone dry. -
Refine the antenna:
Using your finest brush or a black pen, draw two thin antennae extending from the head. Top them with tiny teardrop shapes.
Step 4: Background & Finish
-
Wet the background area:
Clean your water and brushes. Using clean water, wet the bottom third of the paper behind the butterfly, being careful not to touch the painted wings. -
Apply a soft wash:
Drop a very pale, watery blue-green wash into the wet paper. Let it diffuse gently to create a soft, ethereal ground that grounds the butterfly without distracting from it. -
Final check:
Look for any pencil lines that show through light paint and gently erase them if possible. Ensure your dark borders are opaque and solid.
Peel off your tape to reveal the clean edges and admire your colorful creation
Love Birds on a Branch with a Heart Moon
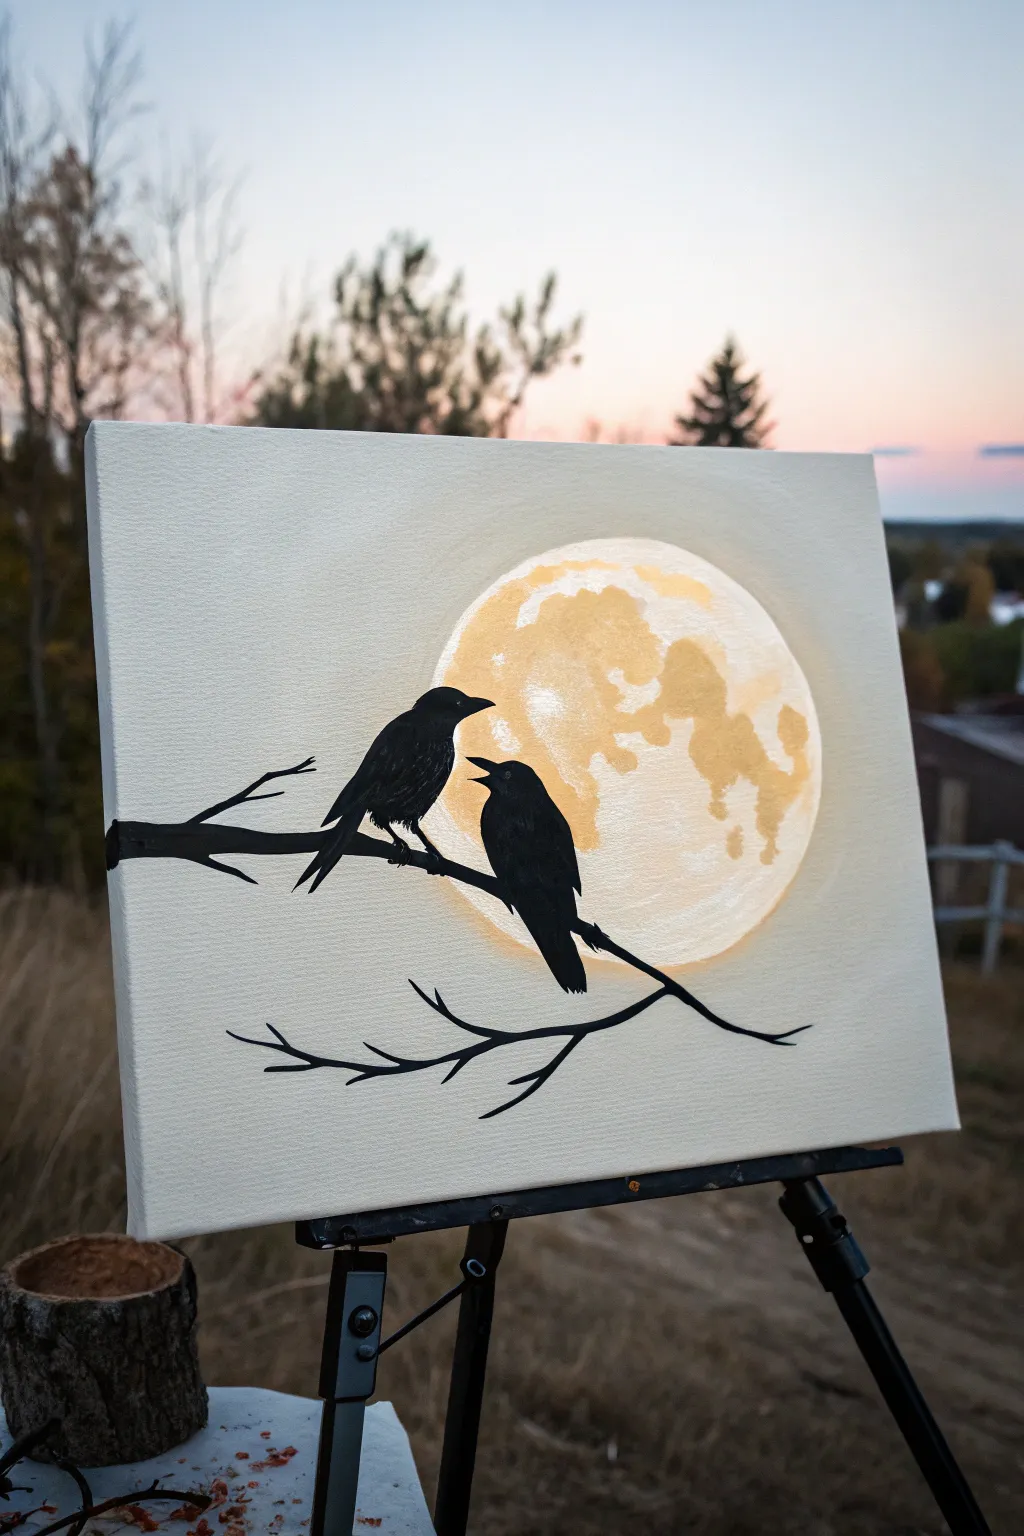
Capture the mystic beauty of twilight with this striking silhouette painting. Featuring a pair of birds against a textured, glowing moon, this project uses simple shapes to create a heartwarming and dramatic composition.
How-To Guide
Materials
- Square stretched canvas (e.g., 12×12 or 16×16 inches)
- Acrylic paints: Titanium White, Mars Black, Yellow Ochre, Gold Metallic
- Large flat brush (1-inch)
- Medium round brush
- Small liner brush (for details)
- Circular object for tracing (plate or bowl)
- Pencil
- Palette or paper plate
- Water cup and paper towels
Step 1: Setting the Sky
-
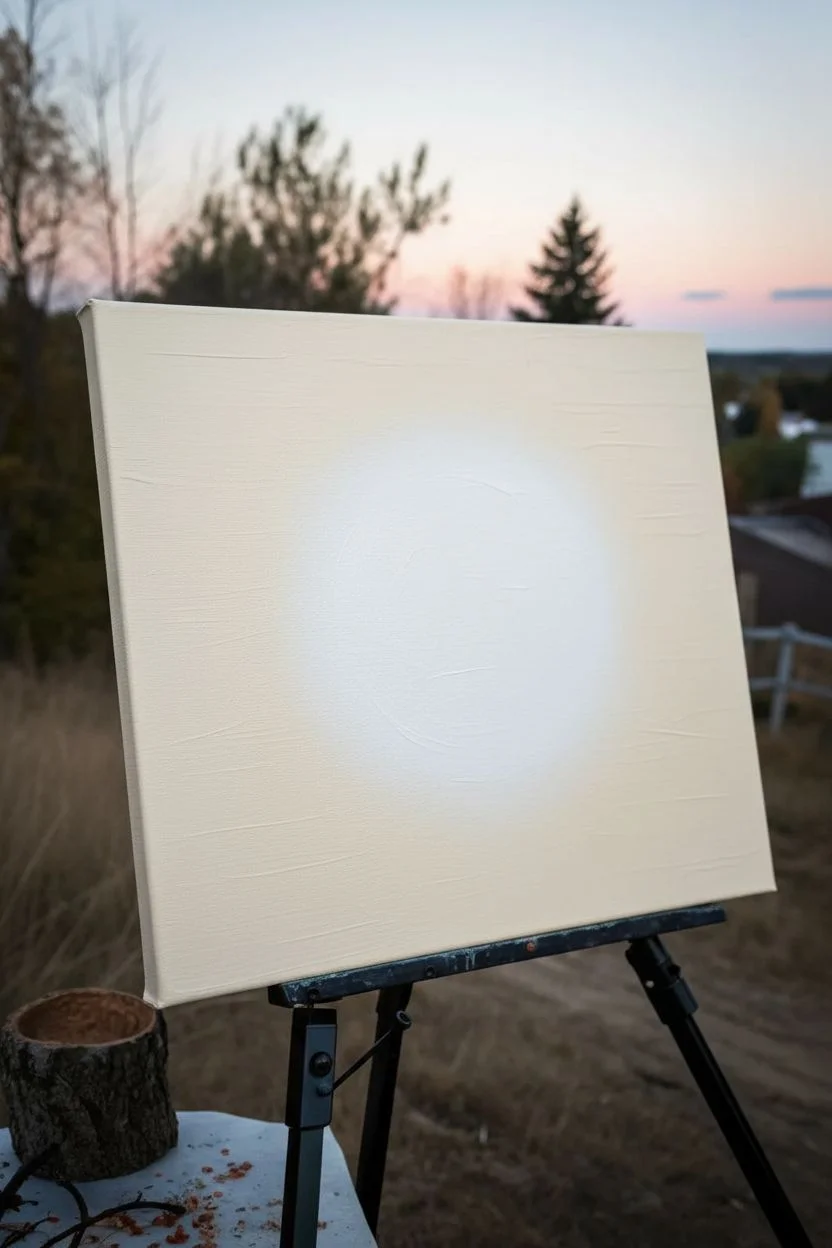
Prepare the Background:
Start by mixing a very large amount of Titanium White with a tiny dot of Yellow Ochre. You want an extremely pale, warm off-white color that covers the entire canvas. -
Apply the Base Coat:
Using your large flat brush, paint the entire canvas with your off-white mixture. Use long, horizontal strokes to ensure smooth coverage. -
Create the Glow:
While the paint is still wet, mix a little more Titanium White into the center area where the moon will go, blending it outwards to create a subtle, hazy glow effect. -
Dry Completely:
Let this background layer dry fully before moving to the next step. If the canvas feels cool to the touch, it needs more time.
Crisp Edges
Add a few drops of water to your black paint for the liner brush work. Thinner paint flows better, making it easier to get sharp points on beaks and twig ends.
Step 2: Painting the Textured Moon
-
Trace the Shape:
Place your circular object (like a dessert plate) slightly off-center to the right on the canvas. Lightly trace around it with a pencil to define your moon’s boundary. -
Initial Moon Layer:
Mix Titanium White with a small amount of Yellow Ochre. Paint the entire circle with this pale yellow base. -
Adding Texture:
While the moon base is wet, pick up pure Yellow Ochre on a medium round brush. Dab the paint onto the moon in random blotches to simulate craters and lunar seas. -
Metallic Highlights:
I like to add a touch of Gold Metallic paint now, dabbing it over the ochre areas to give the moon a subtle shimmer. -
Soften the Edges:
Clean your brush and use it slightly damp to gently tap the edges of your texture spots, blending them softly into the pale background so the craters aren’t too harsh. -
Review and Dry:
Step back to ensure your moon looks organic and cratered. Let this layer dry completely so the black silhouette won’t muddy the colors later.
Step 3: Silhouettes and Details
-
Drafting the Branch:
Using your pencil, lightly sketch a main branch line coming from the left side, curving slightly downwards and then up across the bottom of the moon. -
Drafting the Birds:
Sketch two bird shapes sitting on the branch. The left bird should face right, and the right bird should face left, perhaps with an open beak as if singing. -
Painting the Branch:
Load your medium round brush with Mars Black. detailed branch following your sketch lines. Vary the pressure: press harder for thick parts and lift up for tapering ends. -
Adding Twigs:
Switch to your small liner brush to paint thinner twigs branching off the main limb. Let them cross over each other slightly for a natural look. -
Filling the Birds:
Outline the bird shapes carefully with black paint on a small brush. Fill in the bodies completely, ensuring the pigment is opaque. -
Refining Shapes:
Use the liner brush to sharpen details like the beaks and tail feathers. The silhouette against the bright moon needs crisp edges to look professional. -
Final Touches:
Check for any transparent spots in your black paint and apply a second coat if needed for a solid, dark silhouette.
Make it Romantic
Paint two small hearts floating above the birds’ beaks using the gold or black paint to emphasize the ‘love bird’ theme.
Hang your finished masterpiece where it can catch the evening light and enjoy the peaceful mood it creates


Cozy Cat Silhouettes on a Fence under the Moon
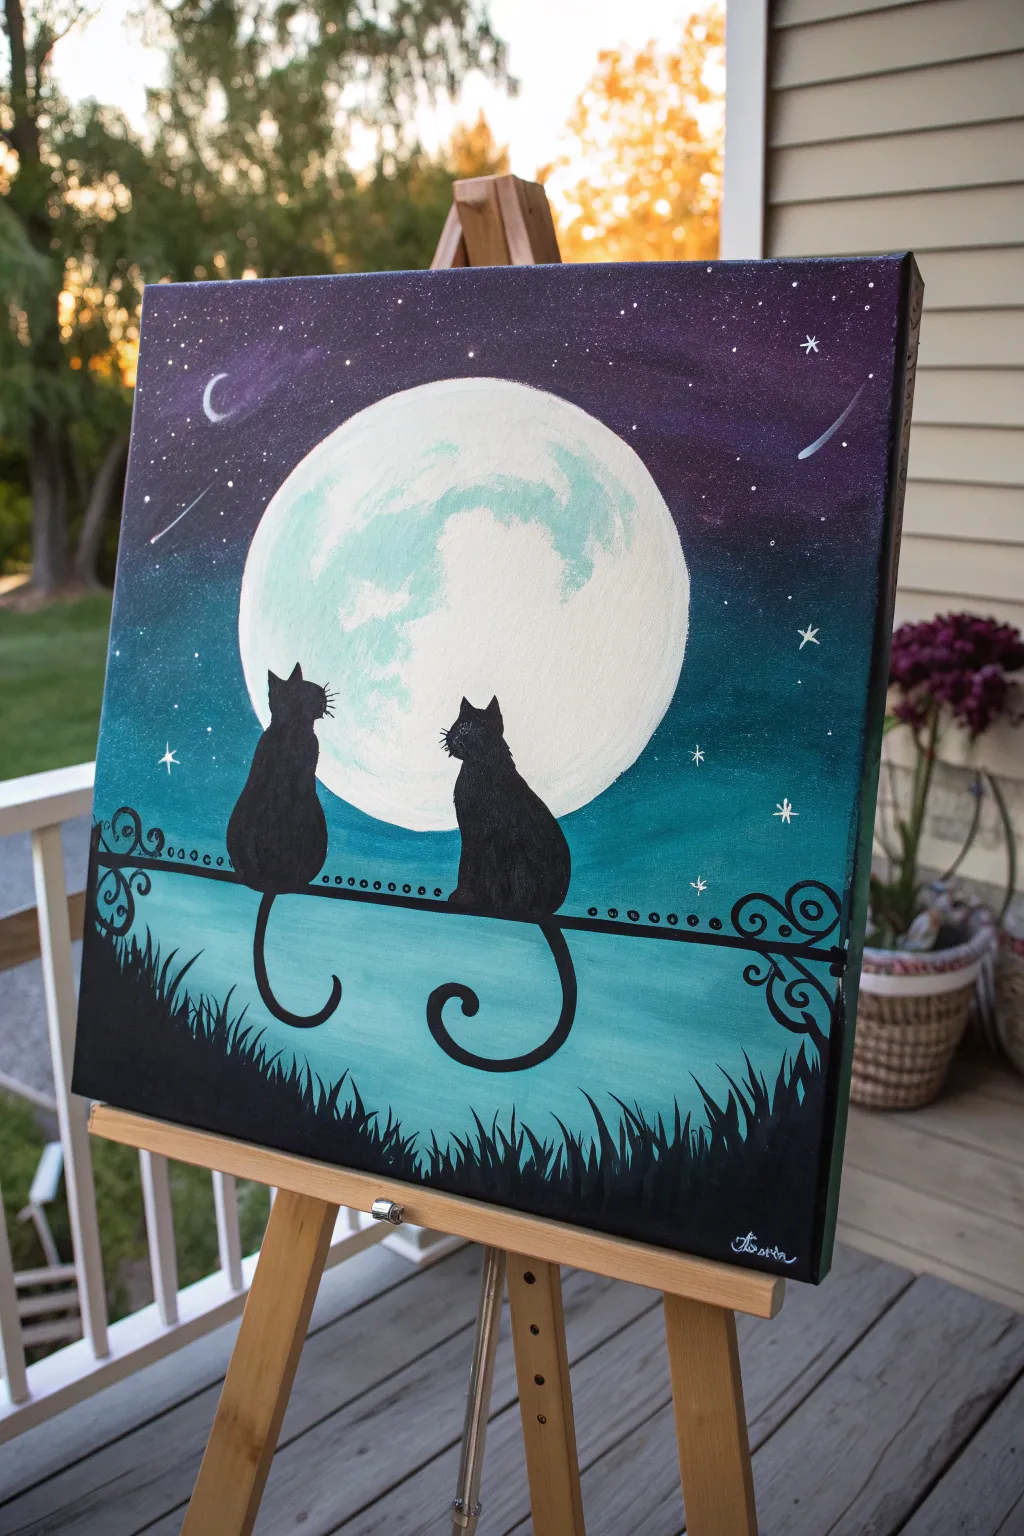
Capture the magic of a quiet evening with this charming acrylic painting. Featuring two feline friends gazing at a luminous moon, this project blends vibrant night sky gradients with bold, simple silhouettes for a striking result.
Step-by-Step Tutorial
Materials
- Canvas (square, e.g., 12×12 or 16×16 inches)
- Acrylic paints: Titanium White, Black, Phthalo Blue (or Turquoise), Purple (Violet)
- Large flat brush (1 inch)
- Medium round brush
- Small fine liner brush
- Medium-sized circular object (plate or lid) for tracing
- Pencil or chalk
- Cup of water and paper towels
- Easel (optional)
Step 1: Setting the Sky Scene
-
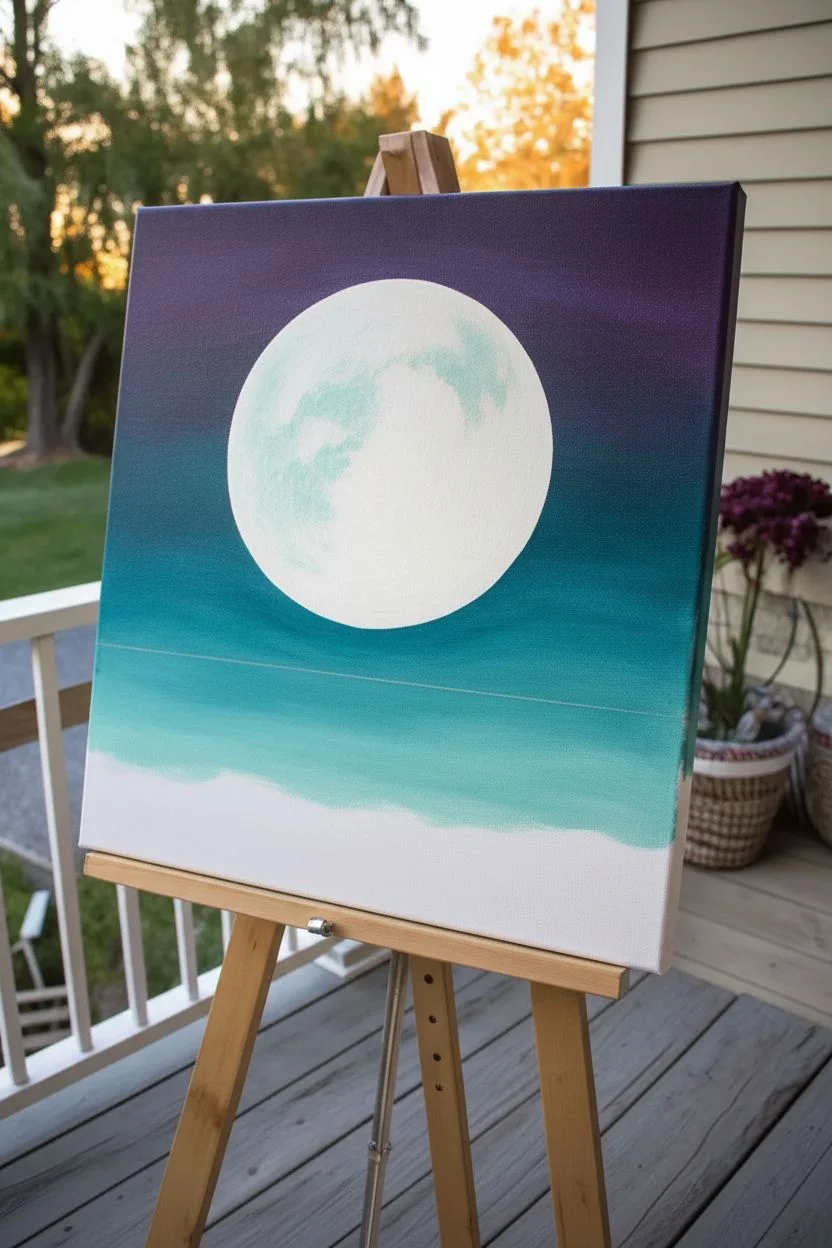
Trace the Moon:
Begin by placing your circular object in the upper center of the canvas. Use a pencil or stick of chalk to lightly trace the circle. This reserves the space for your bright moon so you don’t paint dark colors over it. -
Start the Gradient:
Load your large flat brush with deep purple paint. Start painting the very top edge of the canvas using long, horizontal strokes, ensuring you cover the top corners thoroughly. -
Blend Downward:
While the purple is still wet, pick up some of the turquoise or blue on your dirty brush. Begin painting just below the purple section, blending the two colors where they meet to create a soft transition. -
Complete the Teal Sky:
Continue painting downward with pure turquoise, gradually adding a tiny touch of white as you reach the bottom third of the canvas. This creates a hazy, glowing effect near the horizon line. -
Create the Moon Base:
Once the sky is mostly dry, wash your brush and fill in the traced circle with solid Titanium White. You might need two coats to ensure it’s fully opaque against the surrounding colors. -
Add Moon Texture:
Mix a very tiny amount of turquoise with white to create a pale icy blue. Using a crumpled paper towel or a dry round brush, lightly dab this color onto parts of the white moon to mimic craters and lunar seas.
Step 2: Painting the Fence & Cats
-
Sketch the Layout:
Once the background is completely dry, use your pencil/chalk to sketch a horizontal line across the lower third of the canvas for the fence rail. Then, sketch the outlines of two seated cats and the curly decorative elements at the ends of the fence. -
Paint the Fence Line:
Switch to your medium round brush and black paint. Paint a solid, thick horizontal line over your sketch. For the decorative scrolls on the far left and right, carefully follow your sketched curls. -
Fill the Cat Silhouettes:
Using the same black paint, fill in the bodies of the cats. I like to start with the outline and work inward. Make sure their shapes are distinct—one slightly taller or wider than the other adds character. -
Add Whiskers and Details:
Switch to your finest liner brush. With a steady hand, add tiny, delicate lines for the whiskers extending from their faces. Add small triangular points for ears if they got lost during the fill-in step. -
Paint the Tail Curls:
This is a fun part—paint long, swooping tails that hang down below the fence line. Curve the ends into distinct spirals, mirroring each other for a balanced composition. -
Add Decorative Dots:
Using the back end of a paintbrush handle dipped in black paint, stamp a row of small dots along the top of the fence rail. This easy technique creates perfect little circles.
Uneven Moon?
If your circle edges look wobbly, wait for the paint to dry completely. Then, re-place your tracing plate over the moon and paint the sky color around the specific edges to tidy them up.
Step 3: Finishing Touches
-
Paint the Grass:
At the very bottom of the canvas, use black paint to create a silhouette of grass. Use quick, upward flicking motions with your brush to create sharp, taper-edged blades that overlap slightly. -
Add Large Stars:
Rinse your liner brush and load it with pure Titanium White. Paint a few four-pointed stars or small crosses scattered in the purple and blue sections of the sky. -
Create a Starfield:
Dip an old toothbrush or stiff brush into watered-down white paint. Run your thumb across the bristles to flick a fine mist of specks across the darker upper sky for a galaxy effect. -
Add Shooting Stars:
If you wish, add one or two shooting stars by painting a small white dot and dragging a faint, fading tail behind it using a dry brush. -
Sign Your Work:
Pick a corner—usually the bottom right within the black grass area—and sign your name using a small brush with white or metallic silver paint.
Make it Glow
Mix a tiny drop of glow-in-the-dark medium into your white paint for the moon and stars. When the lights go out, your night sky will actually shine.
Step back and admire your serene moonlit evening scene
Rainy Umbrella Street with Shiny Reflections
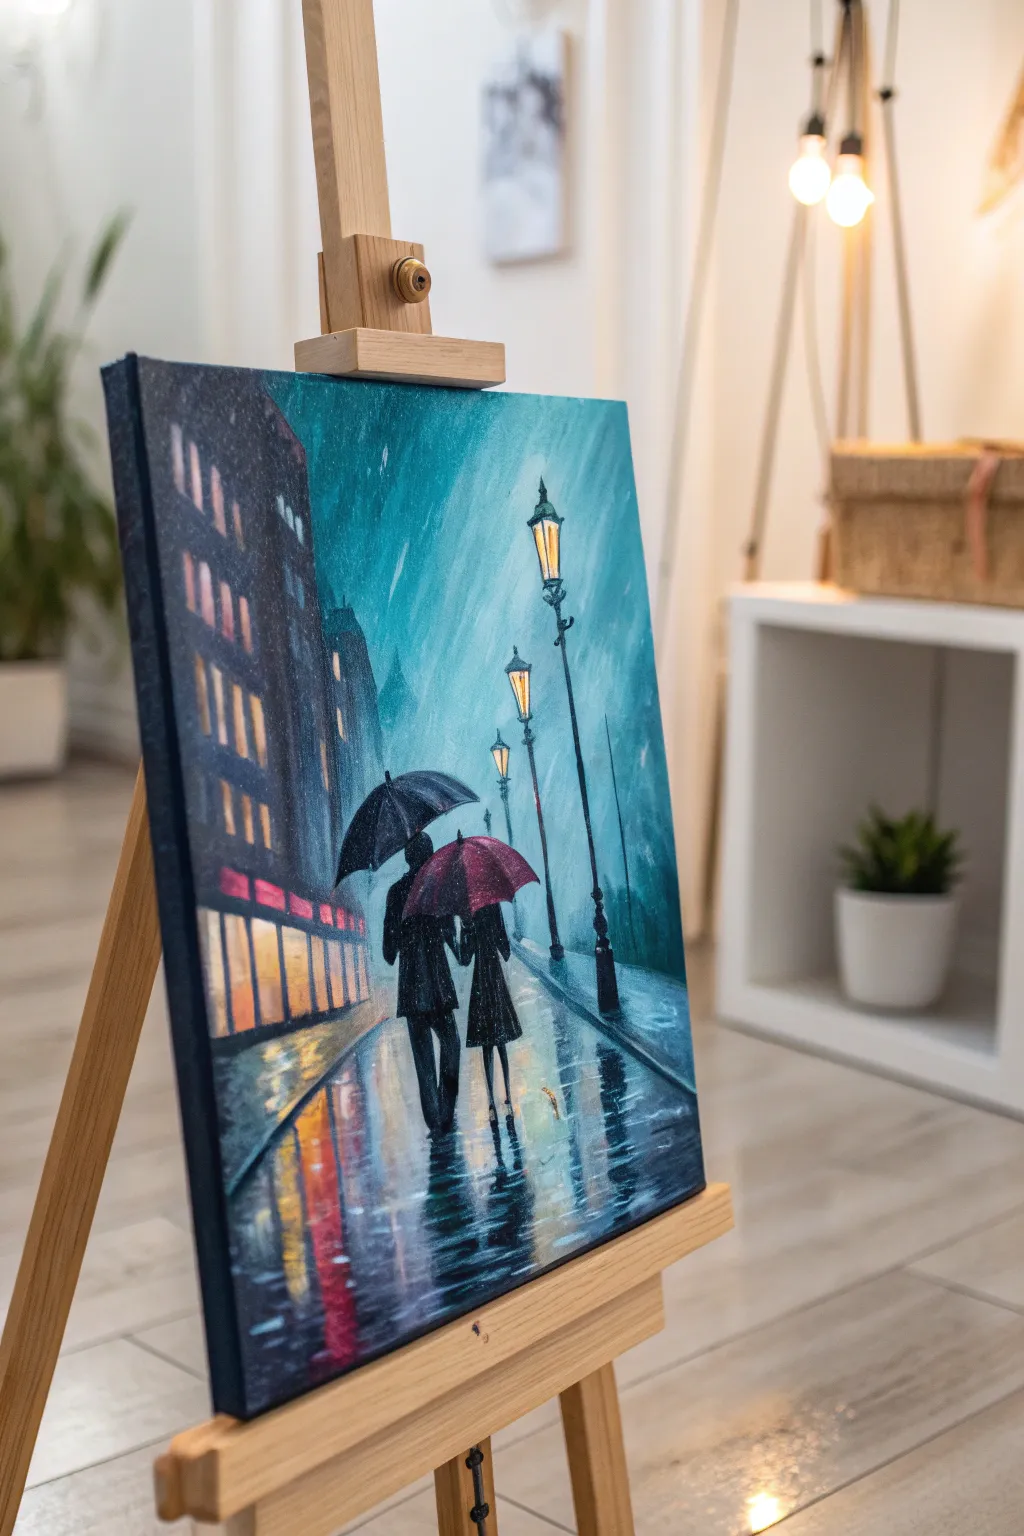
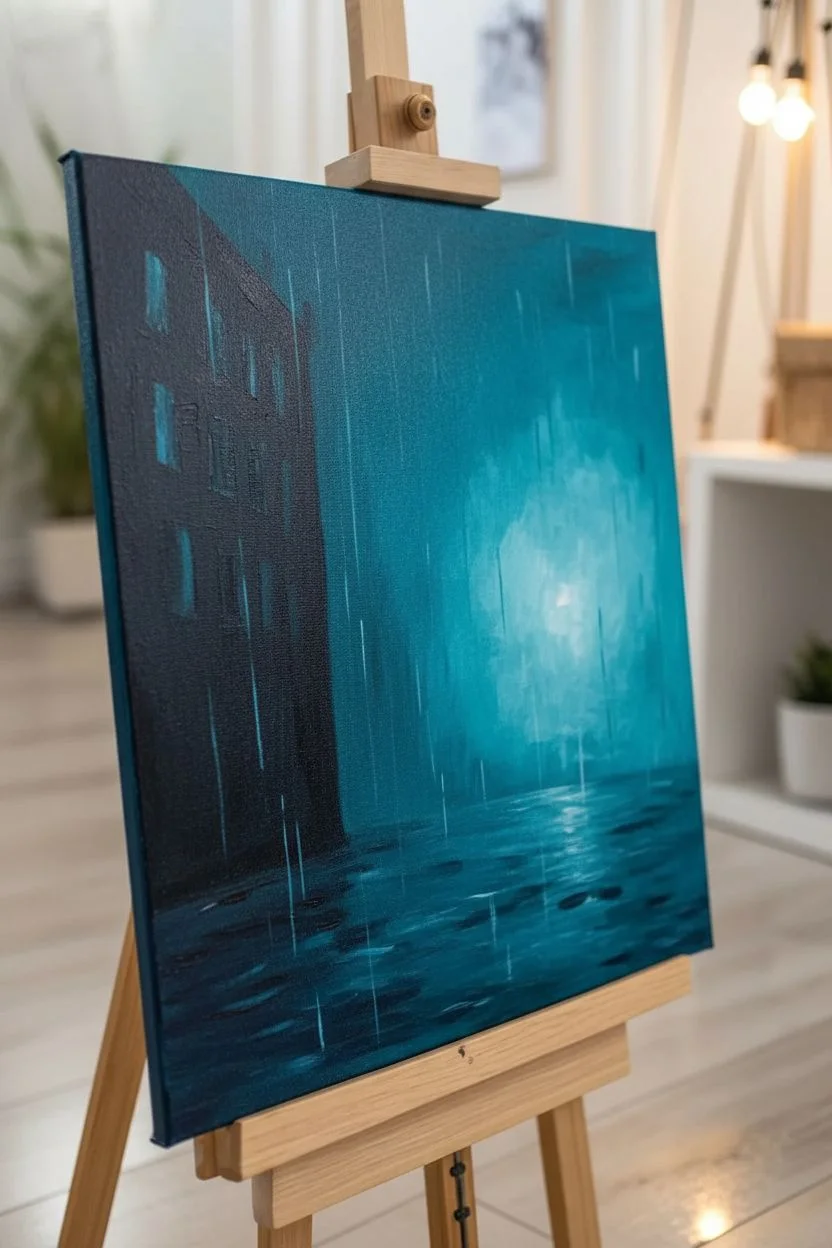
Capture the romance of a rainy evening with this moody acrylic painting featuring a couple walking under streetlights. The piece focuses on striking reflections and a cool, atmospheric color palette that contrasts with the warmth of the glowing windows.
Step-by-Step Guide
Materials
- Canvas (11×14 or similar size)
- Acrylic paints: Phthalo Blue, Mars Black, Titanium White, Cadmium Red, Cadmium Yellow, Burnt Umber
- Large flat brush (1 inch)
- Medium flat brush
- Small round detail brush
- Palette knife (optional but helpful)
- Cup of water and paper towels
- Easel
Step 1: Creating the Atmosphere
-
Mix the background color:
Start by mixing a large amount of teal-blue. Combine Phthalo Blue with a touch of Titanium White and a tiny dot of Black to desaturate it slightly. You want a cool, misty evening tone. -
Paint the background wash:
Using your large flat brush, cover the entire canvas with vertical strokes of your teal mixture. While the paint is still wet, blend in a little extra white in the center-right area to create a diffused light source where the streetlamps will go. -
Add rain texture:
Before the background is fully dry, take a nearly dry brush with a lighter version of your teal and streak it vertically downwards. This creates the illusion of falling rain and mist. -
Block in the building:
Mix Mars Black with a little Phthalo Blue to create a deep, cool dark. Use the medium flat brush to paint the large vertical silhouette of the building on the left side, angling it slightly to show perspective.
Step 2: Reflections and Light
-
Establish the ground:
Using horizontal strokes, paint the wet pavement. Use the same dark blue-black mix from the building for the shadows, but intersperse it with lighter teal strokes to show the wet surface. -
Paint the window glow:
Mix Cadmium Yellow with a touch of White and a tiny bit of Red to make a warm orange-gold. With a clean medium brush, paint blocking shapes for the storefront windows at the bottom left and smaller squares for the upper windows. -
Create window reflections:
Take that same warm orange-gold mix and pull vertical, wavy strokes downwards from the building into the ‘wet street’ area. The strokes should be loose and zig-zag slightly to mimic distortion on wet pavement. -
Add the streetlamps:
Switch to your small round brush. Using black, paint the tall, thin poles of the streetlamps. Make the foreground one tallest and the background ones shorter to create depth. -
Light up the lamps:
Fill the glass areas of the lamps with pure Yellow/White mix. Then, dry-brush a faint halo of this light around the lamp heads into the blue sky to make them glow.
Muddy colors?
If your window reflections turn green when painting over the blue street, let the blue layer dry completely first. Then apply the yellow-orange paint thickly.
Step 3: The Couple
-
Sketch the figures:
Using thinned black paint and a small brush, lightly outline the two figures walking away. Place them in the lower center of the canvas. -
Paint the umbrellas:
Fill in the left umbrella with black. For the right umbrella, use Cadmium Red mixed with a touch of Burnt Umber for the shadow side, and pure Red for the top where the light hits. -
Fill the silhouettes:
Paint the figures’ coats and legs in solid black. I like to add a tiny highlights of grey or white on the shoulders to show the streetlamp light hitting them. -
Add figure reflections:
Just like the windows, pull wavy black lines directly beneath the couple’s feet. These reflections anchor them to the ground.
Make it yours
Personalize the painting by changing the umbrella colors to match your home decor, or add a small dog walking alongside the couple for a cute touch.
Step 4: Final Details
-
Intensify highlights:
Mix pure Titanium White with a tiny bit of yellow. Add crisp, bright lines to the center of the streetlamps and the brightest parts of the window reflections. -
Add rain streaks:
Using a very small brush or the edge of a palette knife, flick very thin white/light blue lines diagonally across the canvas to suggest noticeable raindrops. -
Refine the wet street:
Add a few horizontal streaks of white across the pavement reflections to show water pooling on the ground.
Step back and admire the moody, romantic atmosphere you have created on your canvas
Bicycle with Flower Basket by a Picket Fence
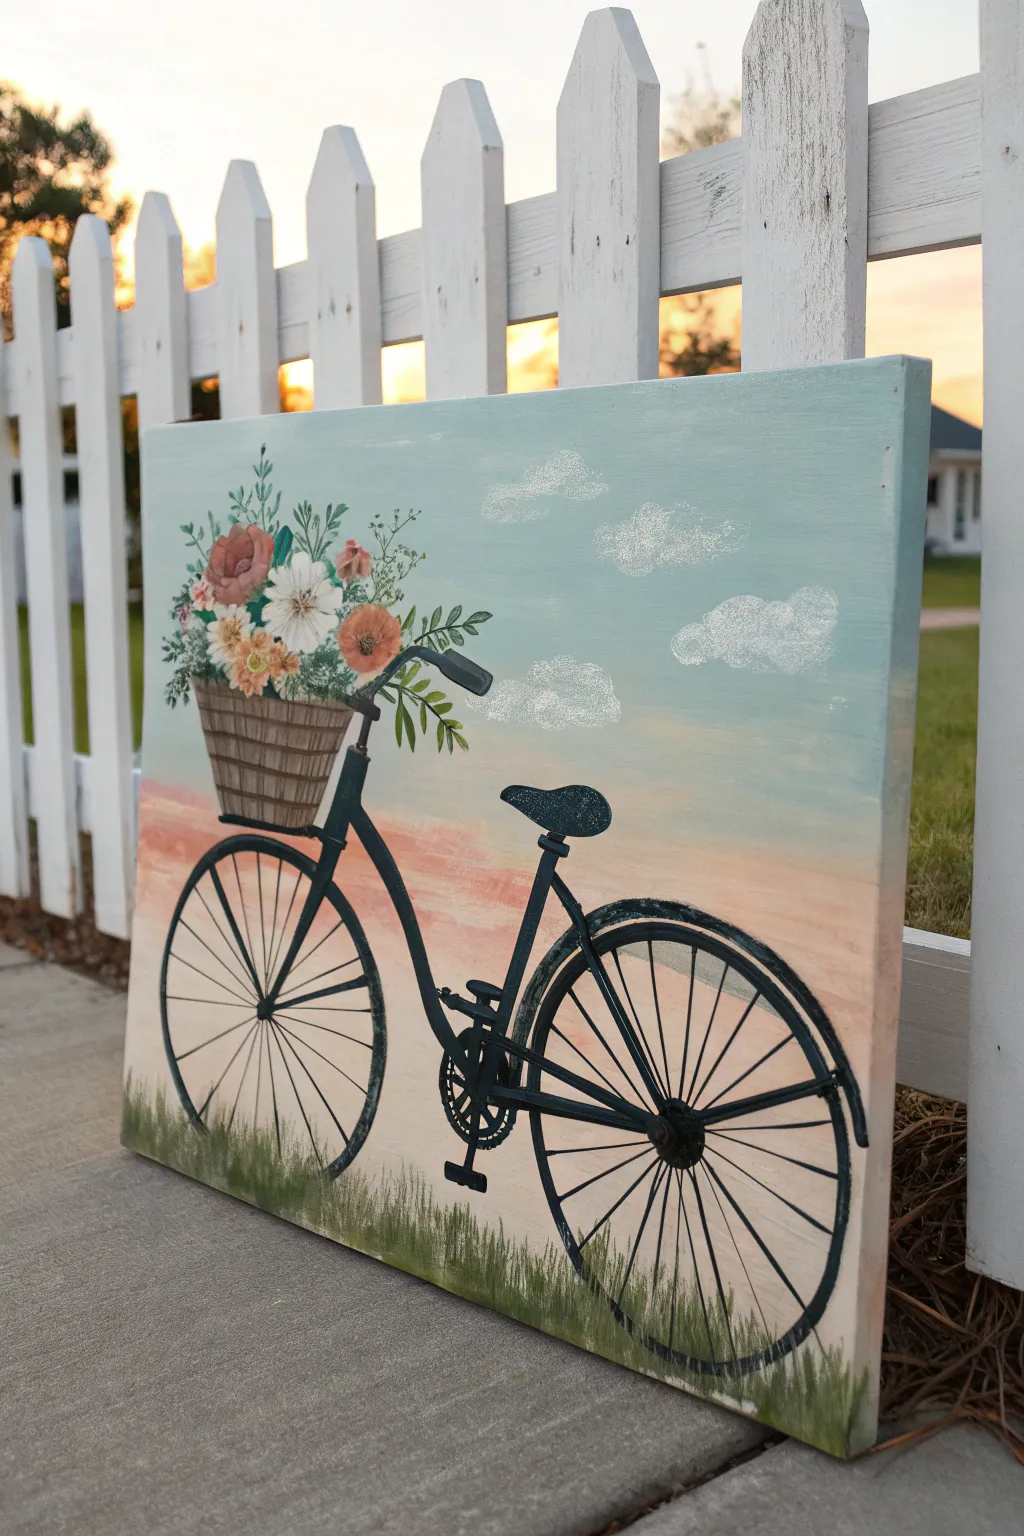
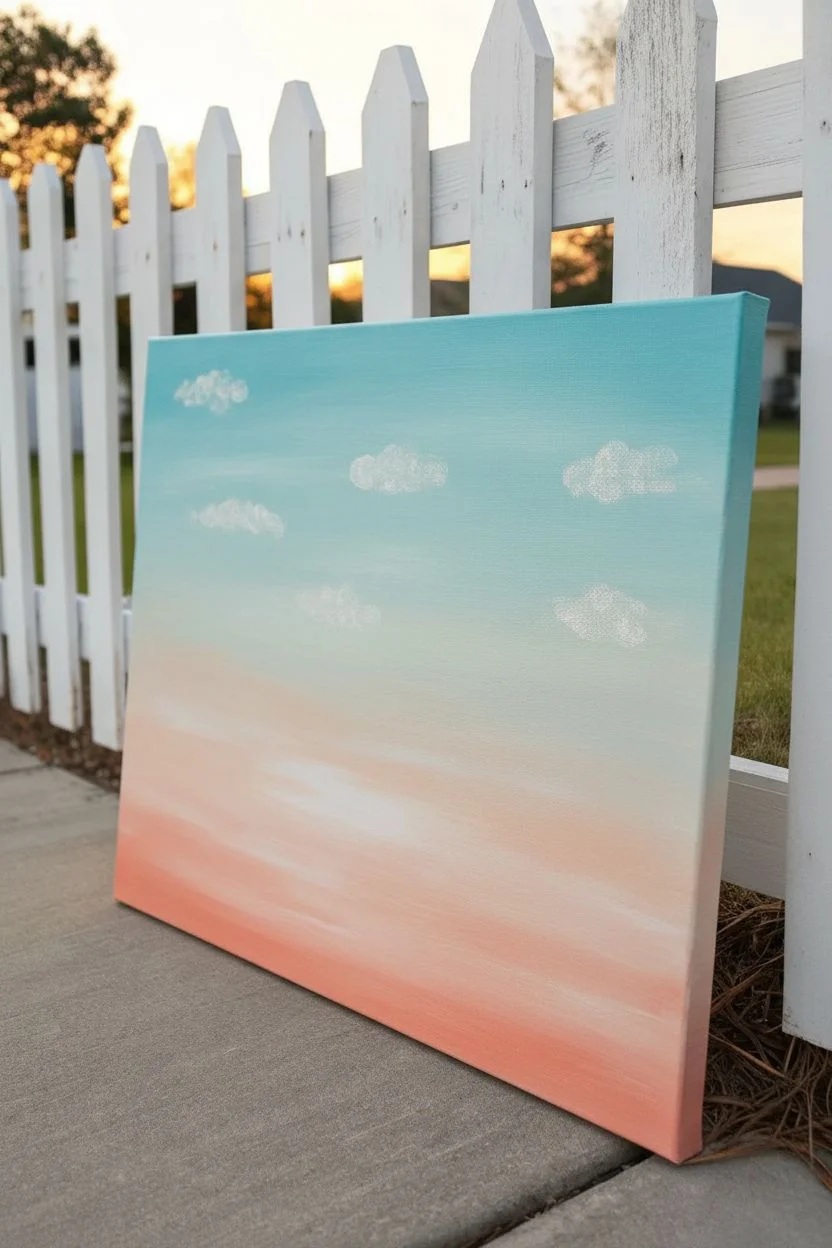
Capture the nostalgic feeling of a summer evening ride with this charming acrylic painting featuring a vintage bicycle laden with blooms. The soft, gradient sky creates a peaceful backdrop for the crisp, joyful details of the bike and flowers.
Step-by-Step Tutorial
Materials
- 16×20 canvas
- Acrylic paints: Titanium White, Light Blue, Turquoise, Peach or Coral, Burnt Umber, Black, various greens (Sap Green, Olive)
- Set of brushes: 1-inch flat wash brush, medium flat brush, small round detail brush, liner brush
- Pencil for sketching
- Small sea sponge or round stencil brush (for clouds)
- Palette
- Cup of water and paper towels
Step 1: Setting the Scene
-
Paint the Sky Gradient:
Start at the top of your canvas with a mix of Light Blue and a touch of Turquoise. As you work your way down the canvas, gradually mix in Titanium White to lighten the blue. Stop about two-thirds of the way down. -
Add the Sunset Glow:
While the lower edge of the blue is still slightly tacky, introduce your Peach or Coral color mixed with plenty of White. Blend this upward into the pale blue to create a soft, hazy transition. Continue this peach tone down to the bottom of the canvas, darkening it slightly near the grass line. -
Texture the Clouds:
Once the background is dry, dampen a sea sponge or round stencil brush. Dip it lightly into Titanium White (off-load excess paint on your palette first). Dab gently onto the blue sky area to create fluffy, scattered clouds. Keep the edges soft and irregular.
Steady Hands
For straight spokes and frame lines, dilute your black paint slightly with water. Inky paint flows smoother than thick paint.
Step 2: Sketching and Blocking
-
Sketch the Bicycle:
Use a pencil to lightly outline the bicycle frame. Draw two large circles for wheels, a curved connecting bar, handlebars, and a seat. Don’t worry about perfection; this is just a guide. Position the bike slightly to the right to leave room for the basket. -
Outline the Basket:
Sketch a tapered rectangle shape hanging from the handlebars. This will be your woven basket. -
Paint the Bike Frame:
Using a small round brush and Black paint, carefully trace over your pencil lines for the bike frame. Make the lines smooth and confident. Add thickness to the main bar and seat post. -
Detail the Handlebars and Seat:
Fill in the seat shape with solid Black. Add the handlebars, ensuring they curve gracefully outward. If you want a highlight on the seat later, you can leave a tiny sliver unpainted or add grey later.
Step 3: Wheels and Mechanics
-
Paint the Tires and Rims:
With the same black paint, go over the wheel circles. You might need a steady hand or a jar lid to help guide you, but a slightly organic circle adds character. Make the tire line distinct. -
Add the Spokes:
Switch to your thinnest liner brush. Paint thin lines radiating from the center hub to the tire rim. They don’t need to be perfectly spaced, just numerous enough to look functional. -
Gears and Pedals:
Paint the chain guard (a curved line connecting the pedals to the back wheel) and the small circles for the gears. Add the pedals sticking out from the center crank.
Personalize It
Swap the generic flowers for your favorite blooms, or paint the bicycle frame in a bright retro color like teal or cherry red.
Step 4: The Basket and Blooms
-
Base Coat the Basket:
Fill in the basket shape with a mix of Burnt Umber and White to make a light tan color. Let this dry completely. -
Weave the Texture:
Using pure Burnt Umber and a small flat brush, paint horizontal stripes across the basket. Then, add short vertical dashes between the horizontal lines to mimic a woven wicker pattern. -
Place the Greenery:
Use various shades of green to paint stems and leaves spilling out of the basket. Let some trail down the side and others reach high up. Vary your brushstrokes to create different leaf shapes. -
Paint the Large Flowers:
Add your main flowers—some large circles in Coral or Red and white for daisies. Use a dabbing motion for the petals to give them texture. -
Add Filler Flowers:
With the tip of a small brush, dot in clusters of smaller flowers in yellow or light blue to fill the gaps between the larger blooms and greenery.
Step 5: Finishing Touches
-
Anchor with Grass:
Mix Sap Green with a little Black or Brown. Use an old, frayed brush or a fan brush to flick upward strokes along the very bottom of the canvas. This creates the grass the bike rests in. -
Highlight the Bike:
Take a tiny amount of White or Light Grey on a liner brush and add thin highlight lines on the top dominant curves of the bike frame and fenders to make it look metallic.
Step back and admire your breezy, floral creation as it brings a touch of eternal summer to your wall
Winter Aurora Sky over a Snowy Cabin

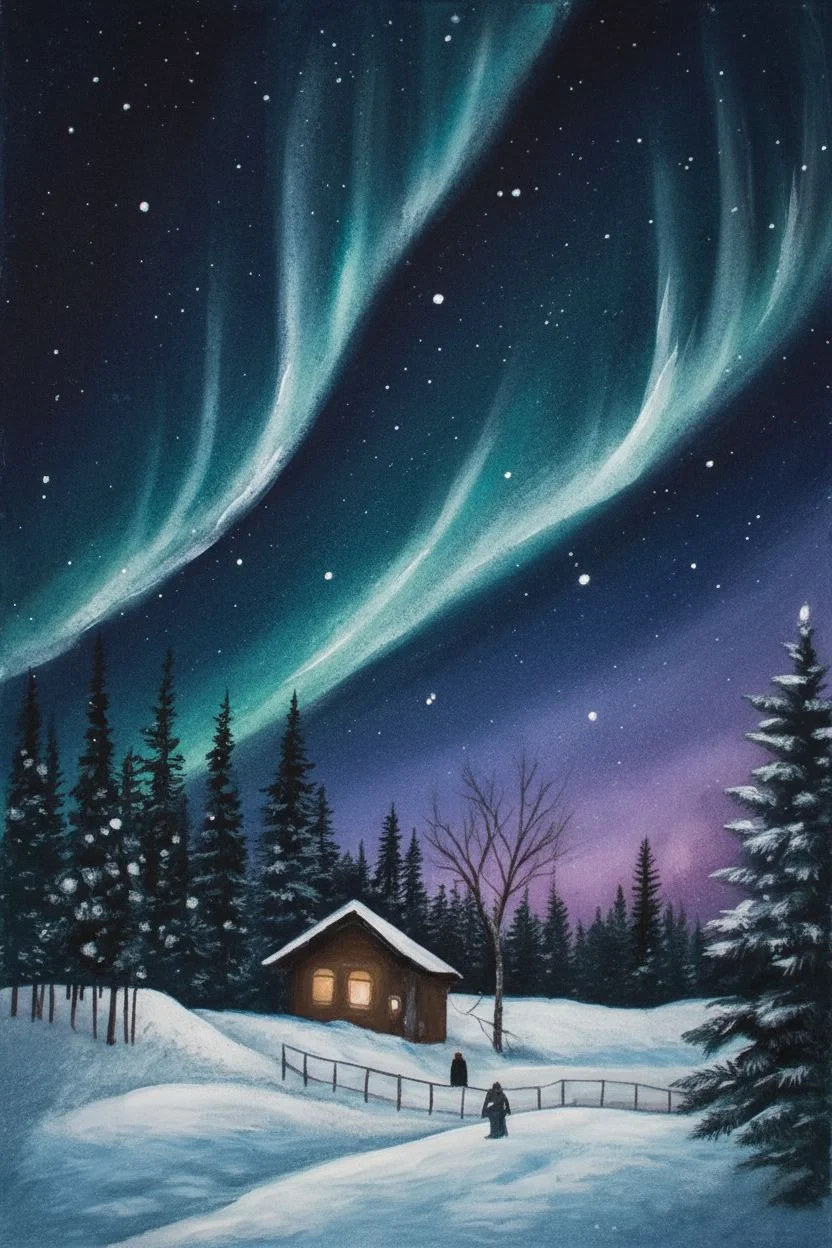
Capture the magic of an arctic night with this stunning acrylic painting featuring sweeping green auroras over a cozy winter cabin. You’ll learn how to blend a galaxy sky and detail snow-covered pines to create a truly enchanting winter scene.
Step-by-Step Tutorial
Materials
- Canvas or heavy watercolor paper (portrait orientation)
- Acrylic paints (Phthalo Blue, Prussian Blue, Titanium White, Hooker’s Green, Lemon Yellow, Burnt Umber, Mars Black, Violet/Purple)
- Large flat brush (1-inch)
- Medium round brush
- Small liner brush (for details)
- Old toothbrush (for stars)
- Palette for mixing
- Water cup and paper towels
- Masking tape (for clean edges, optional)
Step 1: Setting the Sky Foundation
-
Prime the background:
Start by painting the top two-thirds of your canvas with a deep, dark mix. Combine Prussian Blue and touches of Mars Black to create a midnight blue base. Don’t worry about perfect blending yet; just get good coverage. -
Create the horizon glow:
While the dark blue is still slightly wet, blend a soft purple-violet hue near the bottom third of the sky area. This transition simulates the faint atmospheric glow often seen on winter nights. -
Map the aurora path:
Using Titanium White mixed with a tiny bit of water to make it translucent, paint sweeping, diagonal curves across the sky. These ghostly white streaks will serve as the bright core of your aurora.
Star Splatter Mess?
If your toothbrush stars made big blobs instead of mist, wait for them to dry completely, then paint over the bloops with your dark sky mix before trying again.
Step 2: Painting the Aurora Borealis
-
Add first green layer:
Mix Titanium White with Hooker’s Green and a touch of Lemon Yellow. Glaze this neon green over your white streaks, focusing on the center of the curves. -
Blend the edges:
Take a dry brush and very gently feather the edges of your green streaks outward into the dark blue sky. You want a soft, misty look, not hard lines. -
Deepen the contrast:
To make the lights pop, add a darker teal (Phthalo Blue + Green) to the outer edges of the aurora bands. This creates depth and makes the center light appear to glow intensely. -
Sprinkle the stars:
Dilute some white paint with water until it’s inky. Dip an old toothbrush into it and flick the bristles with your thumb to spray tiny stars across the sky. Concentrate them in the darker blue areas.
Step 3: Constructing the Landscape
-
Define the snow line:
Sketch a rolling hill shape for the foreground using light blue (White + tiny dot of Blue). This separates the sky from the snowy ground. -
Paint the background trees:
Mix a dark, almost black green. Using the tip of a flat brush held vertically, dab in a row of distant pine trees along the horizon line. Keep them small and somewhat indistinct. -
Add the main pine trees:
On the left side, paint taller, more detailed pine trees. Use a fan brush or the corner of a flat brush to tap branches downward in a triangular shape. -
Snow on boughs:
Once the dark trees are dry, take your white paint and gently tap ‘snow’ onto the tops of the pine branches. Be sparing; let the dark green peek through. -
Create the deciduous tree:
Right of center, use your thinnest liner brush and dark brown mixed with purples to paint a bare tree with delicate, reaching branches against the glowing violet sky.
Make It Sparkle
Once the painting is fully dry, brush a thin layer of iridescent glitter glaze over the snow drifts. It mimics the way fresh snow glistens under moonlight.
Step 4: The Cabin & Final Details
-
Build the cabin:
Paint a simple house shape with Burnt Umber in the middle ground. Add a dark brown roof, then layer white on top of the roof to show heavy snowfall. -
Light the windows:
Paint two small squares with bright yellow mixed with white. I like to add a tiny halo of yellow glaze around the windows to show the light spilling out. -
Paint the path and fence:
Using light blue-grey, shadow in a winding path leading from the foreground toward the cabin. Add tiny vertical brown strokes for a fence lining the path. -
Add figures:
With your smallest brush, dot in two tiny silhouette figures walking along the snowy path. Just a simple shape suggests a story. -
Foreground texture:
Finish by adding sweeping strokes of white and very light blue in the immediate foreground to create the texture of wind-swept snow drifts.
Step back and admire the glowing atmosphere you have created in your winter masterpiece
Magical Mermaid Tail with Shimmery Scales
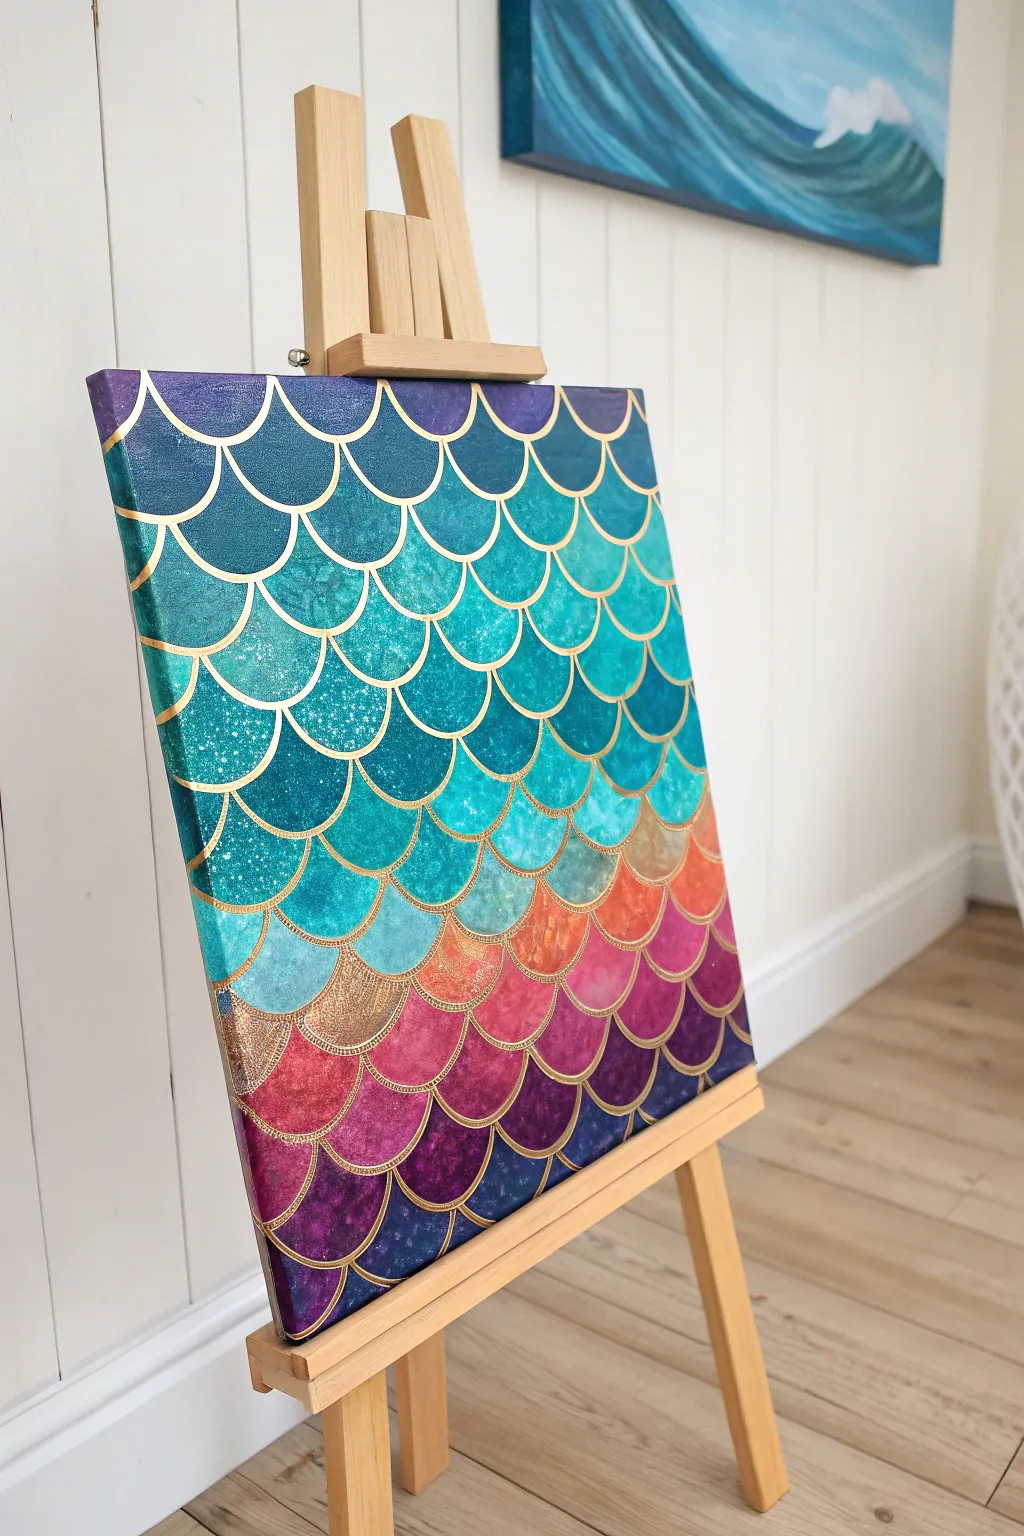
Dive into a sea of color with this vibrant canvas featuring a gradient of mermaid scales. Starting from deep purples and pinks at the bottom and rising to sparkling teals, the design is brought to life with elegant gold outlining.
How-To Guide
Materials
- Square canvas (e.g., 12×12 or 16×16 inches)
- Acrylic paints (Deep violet, magenta, orange, turquoise, teal, deep blue, white)
- Gold paint pen or fine liner brush with metallic gold acrylic paint
- Flat shader brushes (medium size)
- Small round brush for details
- Pencil and eraser
- Paper plate or palette
- Cup of water and paper towels
- Optional: iridescent medium or glitter paint
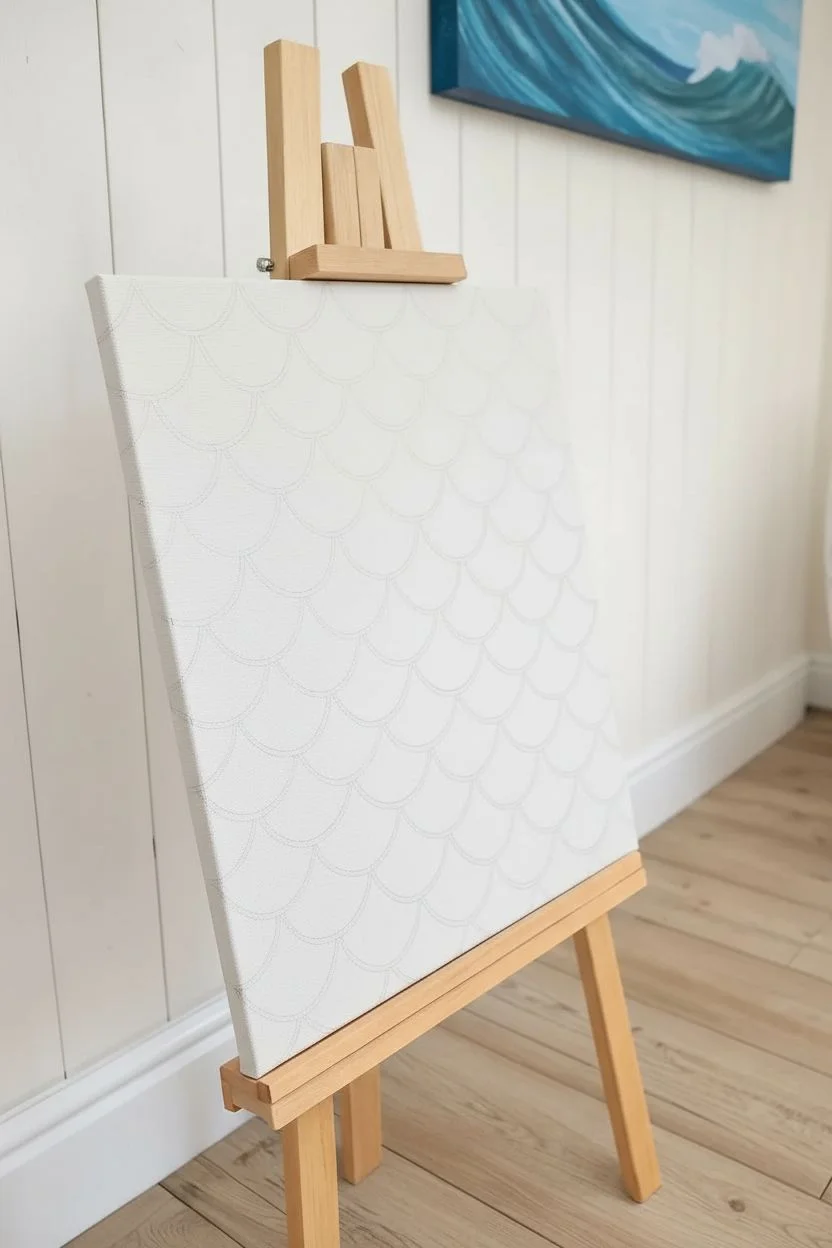
Step 1: Preparation & Sketching
-
Prime the background:
Start by giving your canvas a solid base coat. A very light grey or white works well to make the subsequent colors pop. Let this layer dry completely before moving on. -
Map out the pattern:
Using a pencil, lightly sketch the scale pattern. Start from the bottom edge. Draw a row of ‘U’ shapes connected side-by-side. -
Stagger the scales:
For the second row, begin the ‘U’ shape from the center point of the scale below it. This brick-laying pattern creates the classic fish scale look. -
Fill the canvas:
Continue this staggered pattern all the way to the top of the canvas. Don’t worry if your pencil lines are slightly messy; they will be painted over later.
Wobbly Lines?
If your gold lines feel shaky, rest your pinky finger on a dry part of the canvas for stability. Paint pens are often easier to control than brushes for beginners.
Step 2: Painting the Gradient
-
Mix your base colors:
Squeeze out your violet, magenta, orange, and teal paints onto your palette. You want to visualize the gradient from bottom (dark warm tones) to top (cool ocean tones). -
Start at the bottom:
Begin painting the bottom-most row of scales with your deepest violet and indigo shades. Fill each scale shape completely. -
Transition to pinks:
As you move up to the next few rows, start mixing magenta into your violet. Paint the next band of scales in this rich berry color. -
Add warmth:
Progressing upward, introduce red and orange tones. The middle section should transition from hot pink to a soft, coral orange. -
Shift to cool tones:
This is the trickiest transition. I find it helpful to wash my brush thoroughly here. Paint a row involving a mix of teal and a tiny bit of gold or light green to bridge the gap between the warm orange and cool blue. -
Paint the turquoise waves:
Move into the upper section with vibrant turquoise and teal paints. You can mix in a little titanium white to create variety in the shades. -
Finish the top edge:
For the very top rows, use your deepest blue-green or teal to frame the composition nicely. Ensure the paint covers the canvas grain fully. -
Add texture (Optional):
While the paint is still slightly tacky, you can dab a scrunched-up paper towel or sponge on a few scales to give them a textured, organic look. -
Apply shimmer:
If you have glitter paint or iridescent medium, apply a thin coat over random scales once the base color is dry. This gives that ‘wet’ look.
Add Extra Magic
Glue small flat-back rhinestones or sequins to the intersection points of the scales for a 3D jeweled effect that catches the light.
Step 3: Gilded Details
-
Outline preparation:
Ensure the entire canvas is 100% dry. If the paint is wet, your gold lines will smudge or bleed. -
Start the gold lining:
Using a gold paint pen (shake it well first!) or a fine liner brush with metallic gold acrylics, trace over your original pencil lines. -
Create the scalloped edge:
Work slowly, outlining each ‘U’ shape. The gold line acts as a border between the different colored scales and hides any uneven paint edges. -
Refine the thickness:
Go over lines that look too thin. A consistent line width helps the pattern look cohesive and professional. -
Wrap the edges:
Don’t forget the sides of the canvas. Extend the scale pattern and the gold lines around the edges for a finished, gallery-ready appearance.
Step back and admire how the colors flow together like a magical underwater scene
Color-Pop Cactus on Black with Simple Shapes
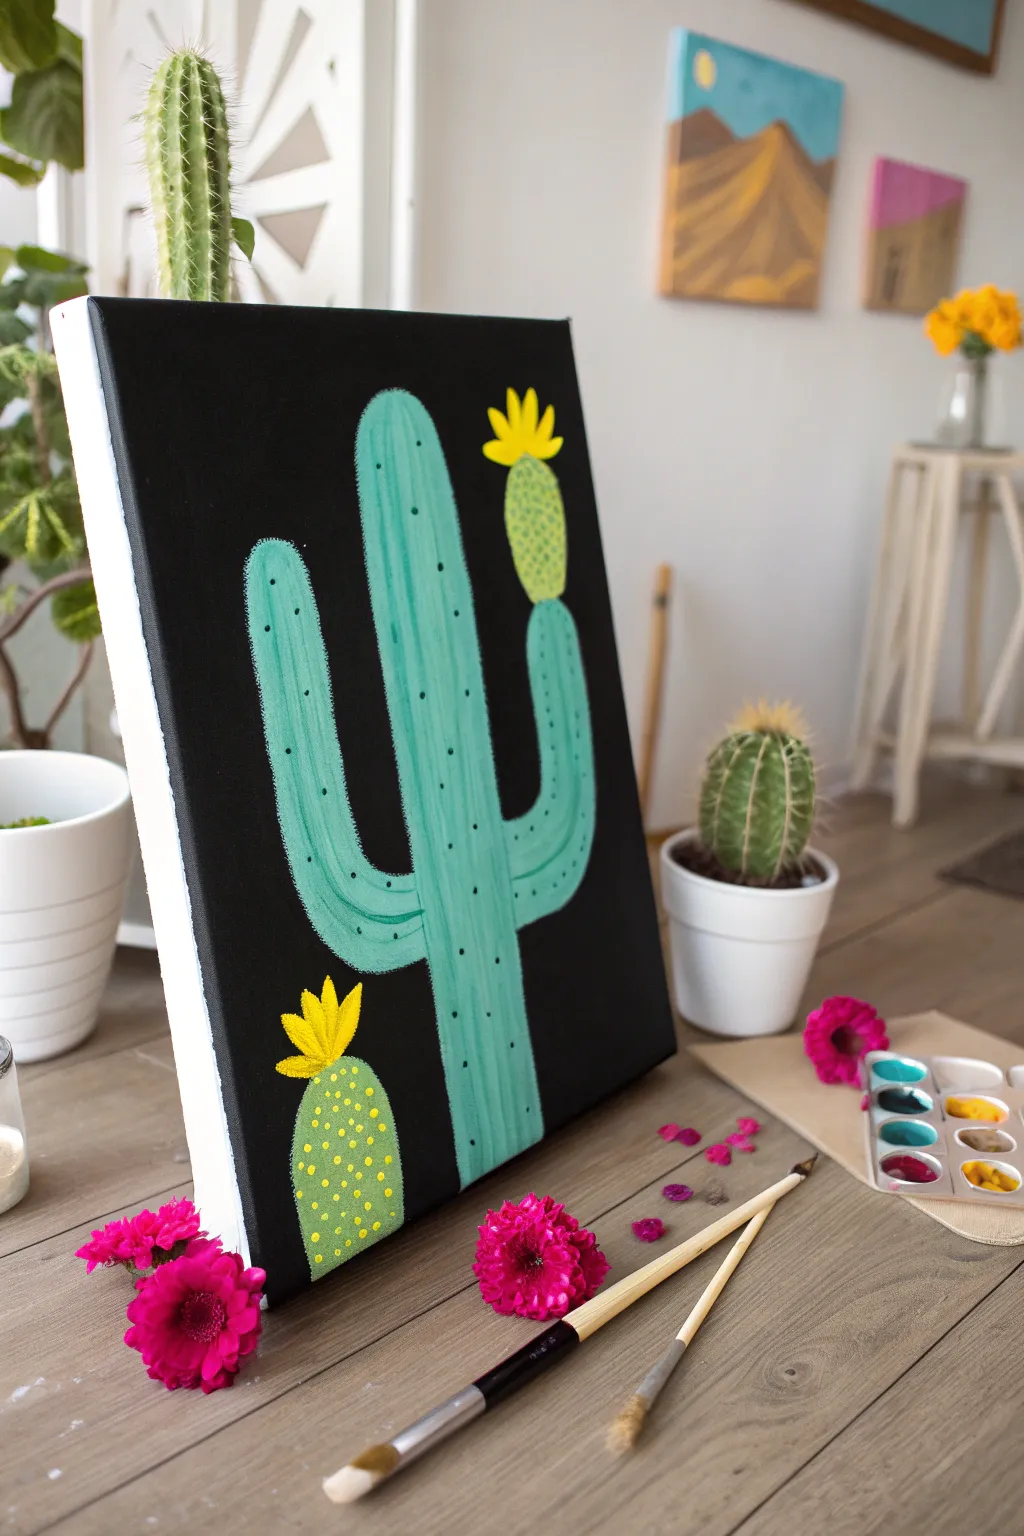
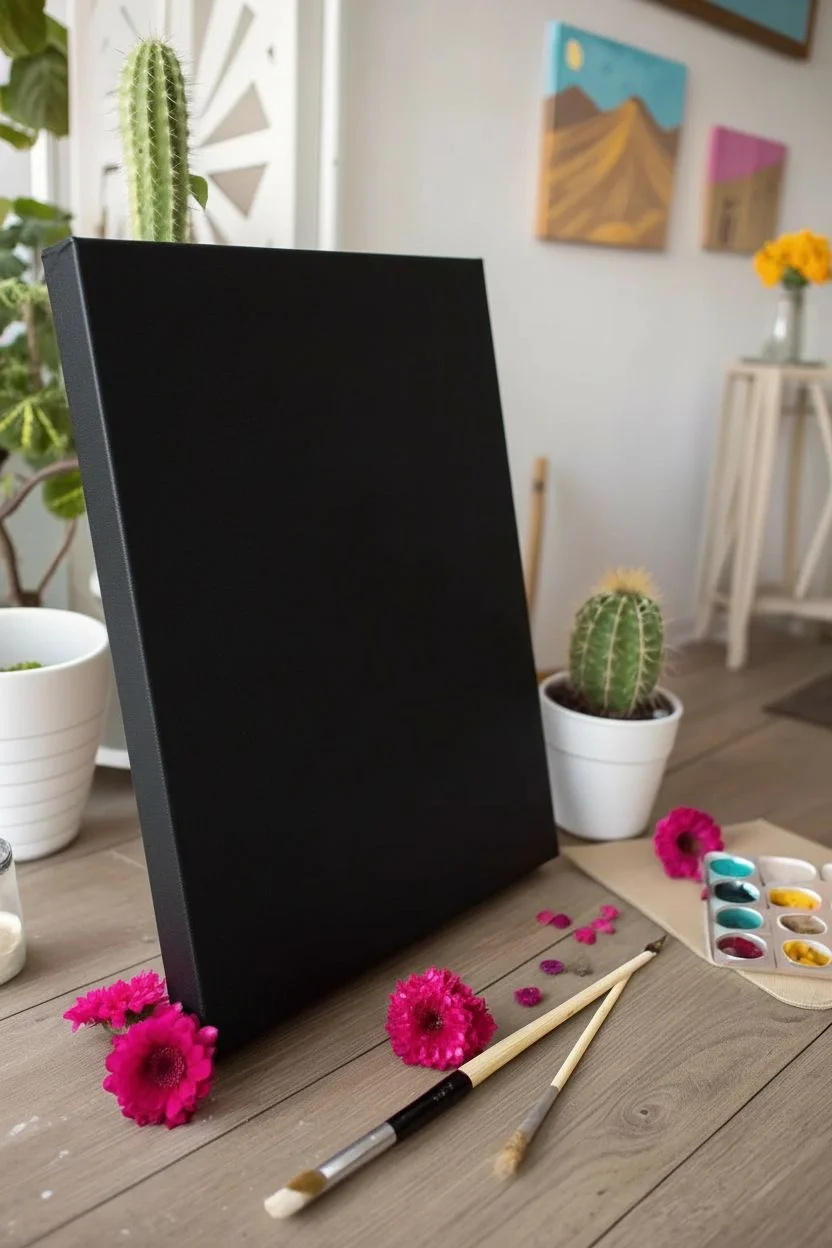
Bring the desert to life with this striking high-contrast painting that pairs a bold black background with vibrant teal and lime tones. The simple shapes and playful details make this an ideal project for beginners looking to experiment with color popping.
Step-by-Step Guide
Materials
- Rectangular stretched canvas (e.g., 11×14 or 12×16 inch)
- Acrylic paints: Black, Teal/Turquoise, Lime Green, Bright Yellow, White
- Large flat brush (for background)
- Medium round brush (for cactus body)
- Small detail brush (for spines and flowers)
- Palette or paper plate
- Cup of water and paper towels
Step 1: Setting the Scene
-
Paint the background:
Begin by covering your entire canvas with black acrylic paint. Use your largest flat brush to get smooth, even coverage. Don’t forget to paint the sides of the canvas for a finished look. -
Wait for drying:
Allow the black background to dry completely. This is crucial because if the black is wet, it will muddy the bright colors you apply next. You can use a hair dryer on a cool setting to speed this up.
Paint Transparency?
If your teal or lime paint looks sheer against the black, paint a layer of white over the shape first. Let it dry, then paint the color on top for maximum brightness.
Step 2: Growing the Cactus
-
Map out the shape:
With a damp medium round brush and your teal paint, lightly sketch the central column of the cactus. It should be a tall, rounded pillar that starts at the bottom edge and stops about three-quarters of the way up. -
Add the arms:
Paint the left arm curving upward in a ‘U’ shape attached to the main body. Then, add a smaller arm on the right side, placed slightly higher than the left one. Keep the edges rounded and soft. -
Fill in the color:
Load your brush with plenty of teal paint and fill in the cactus shape. You may need two coats to get a solid, opaque color against the dark black background. Let the first coat dry slightly before adding the second. -
Add textural ribs:
Mix a tiny amount of white or a lighter turquoise into your teal paint. Using the medium brush, paint subtle vertical streaks down the main body and arms to suggest the ribbed texture of the cactus skin.
Step 3: Fruity Details
-
Paint the cactus pears:
Switch to a clean brush and mix lime green with a touch of white to make it pop. Paint an oval shape sitting on top of the right cactus arm. Paint a second, larger oval sitting independently at the bottom left of the canvas. -
Solidify the green:
Just like the teal, these lime green shapes might need a second coat to stand out brightly against the black. Ensure the edges are neat. -
Add the spines:
Using your smallest detail brush and black paint, add rows of tiny dots on the main teal cactus body. Arrange them in vertical lines following the curve of the plant to simulate spines. -
Dot the fruit:
Clean your detail brush and pick up bright yellow paint. Add small, evenly spaced dots all over the two lime green ‘pear’ shapes for texture.
Make It 3D
Glue small pink pompoms or tissue paper bunches where the yellow flowers are for a fun mixed-media texture that practically jumps off the canvas.
Step 4: Flowering Finish
-
Create the blooms:
Using the bright yellow paint and a small brush, paint a jagged, crown-like flower on top of the upper green pear. Repeat this for the bottom left pear. -
Refine the petals:
Add a second layer of yellow to the flowers if the black shows through. Make the tips of the petals sharp and pointy for a succulent flower look. -
Check your edges:
Look over the painting for any rough edges where the background meets the cactus. You can use a small brush with black paint to tidy up the outlines and make everything look crisp.
Hang your desert masterpiece in a sunny spot to enjoy those vibrant colors all year round
Two-Canvas Split Horizon Partner Painting
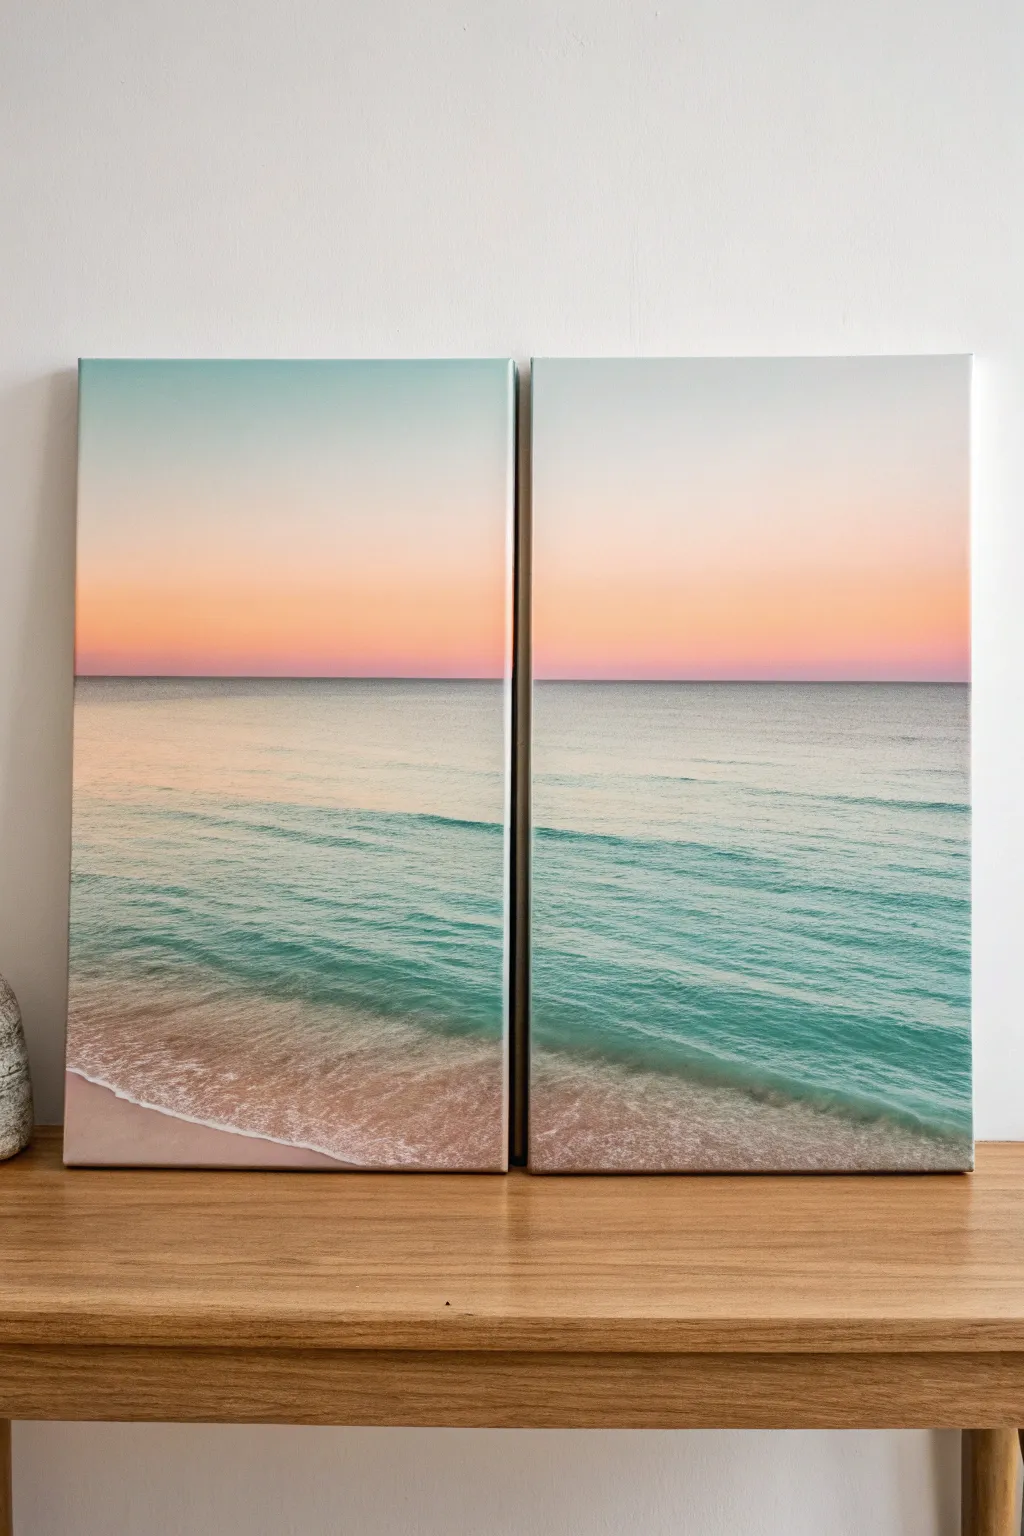
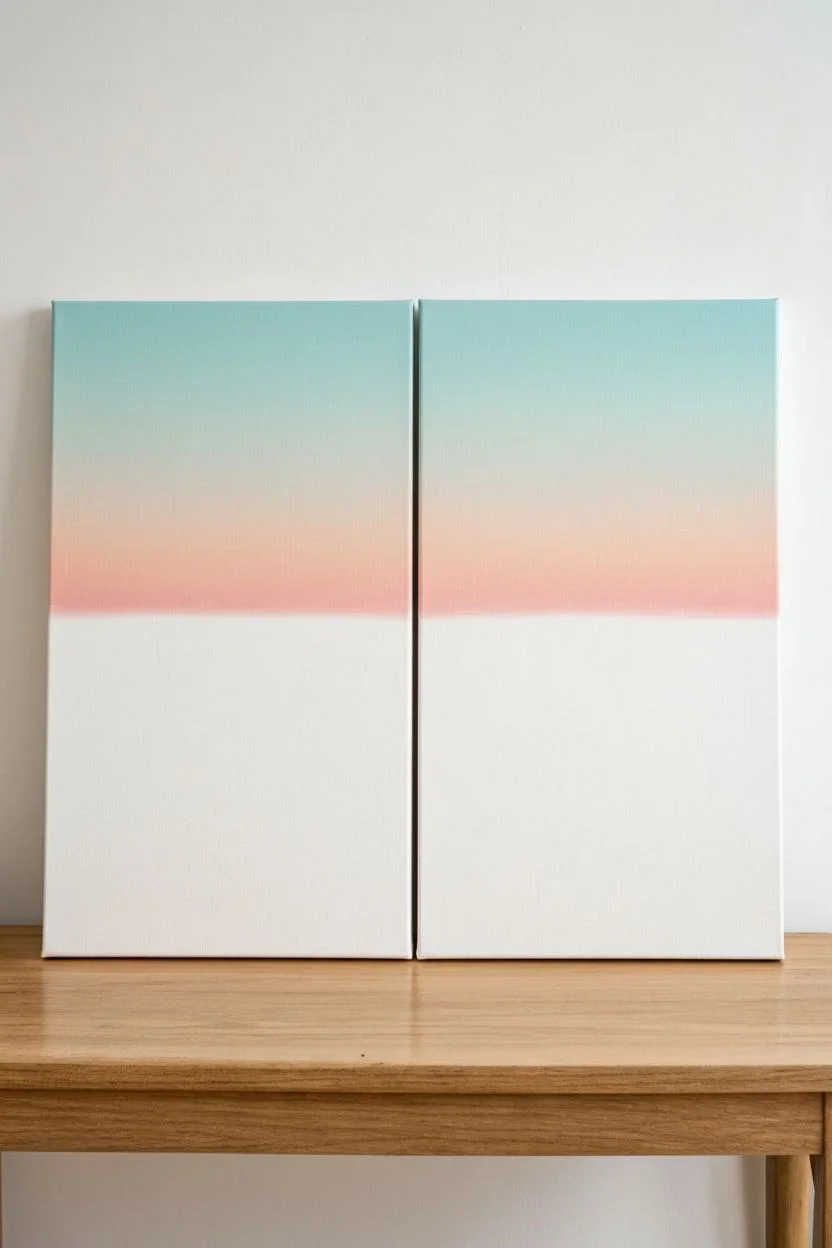
Capture the serene beauty of a pastel shoreline shared across two canvases, perfect for painting with a partner or as a solo immersive project. This diptych creates a seamless horizon where soft sunset gradients meet gentle teal waves.
Step-by-Step Tutorial
Materials
- Two stretched canvases (same size, e.g., 16×20 inches)
- Acrylic paints: Titanium White, Phthalo Blue (or Turquoise), Primary Cyan, Magenta, Cadmium Orange, Yellow Ochre, Burnt Sienna
- Large flat brush (2-inch) for blending
- Medium filbert brush
- Small flat brush
- Palette knife (optional for mixing)
- Water cups and paper towels
- Easel or flat table surface
Step 1: Setting the Sky Gradient
-
Align the canvases:
Place both canvases side-by-side on your easel or table, ensuring they touch. Treat them as one giant surface for the initial steps to ensure the horizon lines up perfectly. -
Mix the sky colors:
Prepare three piles of paint for the sky: a pale cyan (blue mixed with lots of white), a soft peach (orange mixed with white), and a gentle pink (magenta mixed with white). -
Apply the top blue:
Using your large flat brush, paint the top third of both canvases with the pale cyan mix. Use long, horizontal strokes that span across the gap between the canvases. -
Blend in the sunset:
While the blue is still wet, introduce the peach color below it. Brush back and forth where the colors meet to create a smooth, hazy transition. This wet-on-wet technique is key for that soft glow. -
Establish the horizon line:
Paint a straight horizontal strip of the pink mix right at the horizon level (about halfway down). Blend this upwards into the peach, keeping the line relatively sharp at the bottom where it will meet the water.
Horizon Hysteria?
If your horizon line is crooked, apply a strip of masking tape across both dry canvases. Paint over the edge, then peel it off for a razor-sharp line.
Step 2: Painting the Ocean
-
Mix the deep water color:
Create a teal shade by mixing Phthalo Blue (or Turquoise) with a little white and a tiny touch of Primary Cyan. It should be darker than the sky but still vibrant. -
Block in the distant water:
Paint a strip of this teal directly under the pink horizon line. Carefully cut in a straight line so the horizon is level across both canvases. -
Create a gradient downwards:
As you move down the canvas, gradually mix more white into your teal paint. This creates the effect of the water becoming shallower and clearer as it approaches the shore. -
Add surface movement:
Switch to a medium filbert brush. Using a slightly darker teal mix, add thin, horizontal streaks in the mid-section of the water to suggest gentle ripples and depth. -
Paint the sand:
Mix white, a touch of Yellow Ochre, and a tiny dot of Burnt Sienna to create a warm beige. Paint the bottom corners of the canvases, starting from the bottom edge and curving upwards. -
Blend sand and water:
Where the pale teal water meets the wet sand color, blend them gently. I find this creates that distinctive ‘wet sand’ color found under the shoreline.
Paint the Wrap
Don’t forget to paint the outer sides of your canvases! Extending the image onto the sides gives a professional gallery-wrap look without needing a frame.
Step 3: Creating the Waves and Foam
-
Draft the shoreline:
Using pure white paint, sketch a wavy, organic line where the water crashes onto the sand. Ensure this line flows naturally from the left canvas onto the right one. -
Scumble the seafoam:
Load a small flat brush with Titanium White. Use a ‘scumbling’ motion (scrubbing lightly in circles) along your shoreline to create the frothy, foamy texture of the wave. -
Add wave highlights:
Add thin lines of white horizontally in the teal water area, focusing on the foreground. These represent the crests of smaller waves rolling in. -
Refine the transparency:
Mix a very watery glaze of teal and brush it lightly over the back edge of the white foam to make the wave look translucent. -
Final smooth check:
Separate the canvases slightly and paint the inner edges (the sides that touch) with the corresponding colors so the image wraps around seamlessly.
Step back and admire how the two halves come together to form one peaceful coastal view
Paint Your Pet Party Portrait (Pre-Sketched Outline)
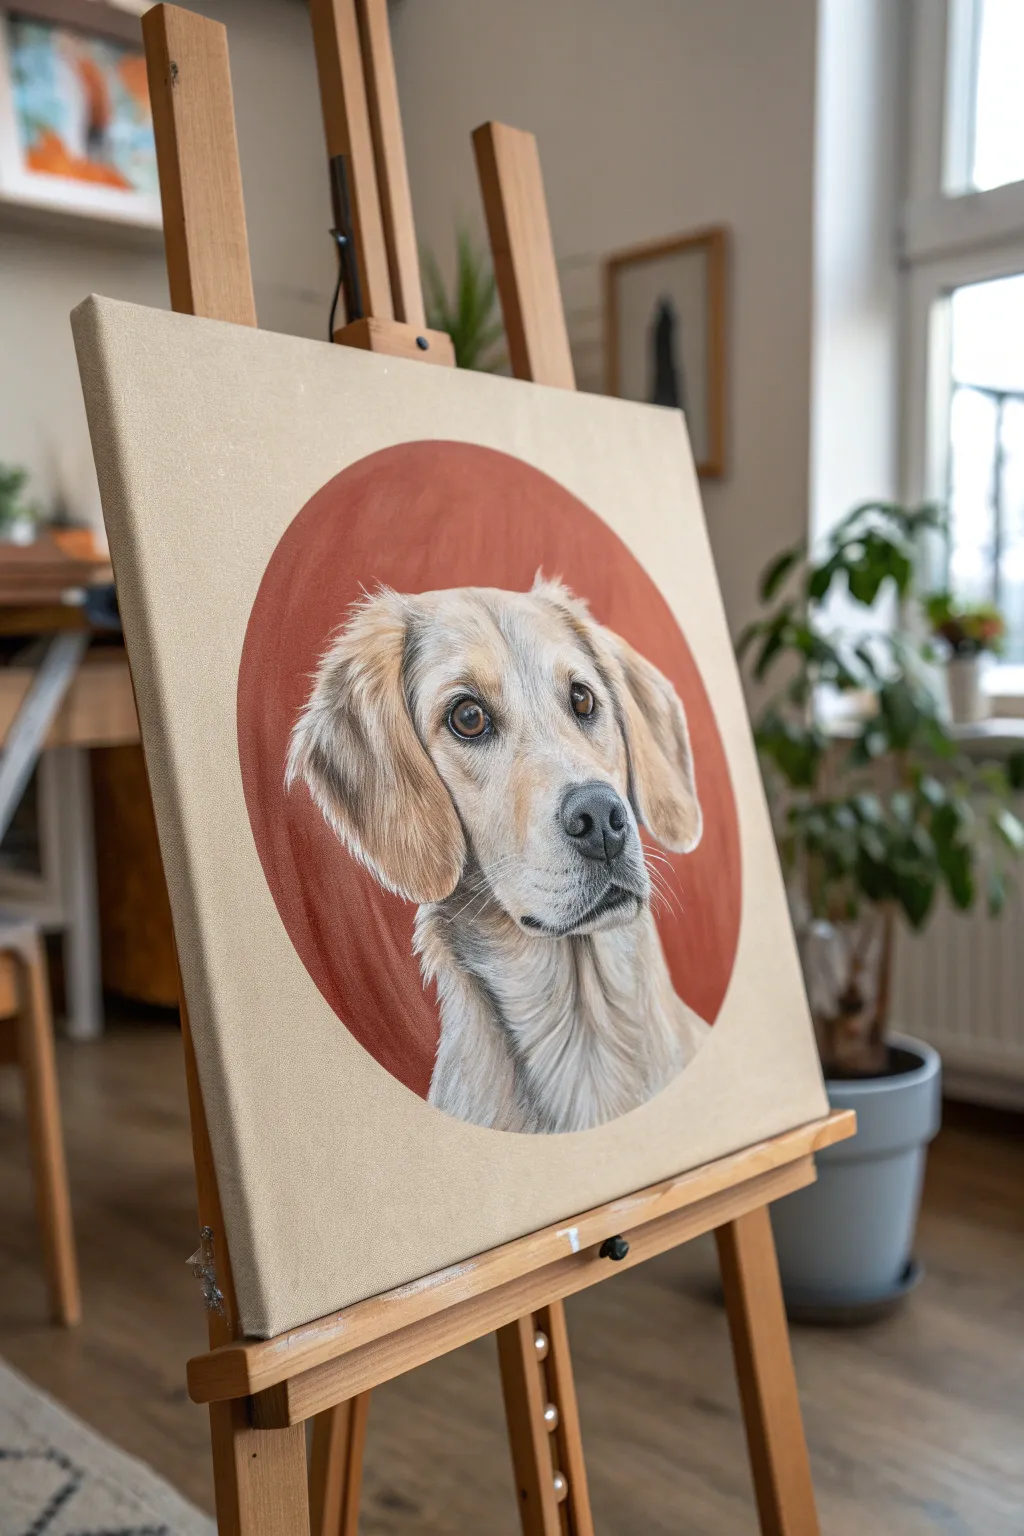
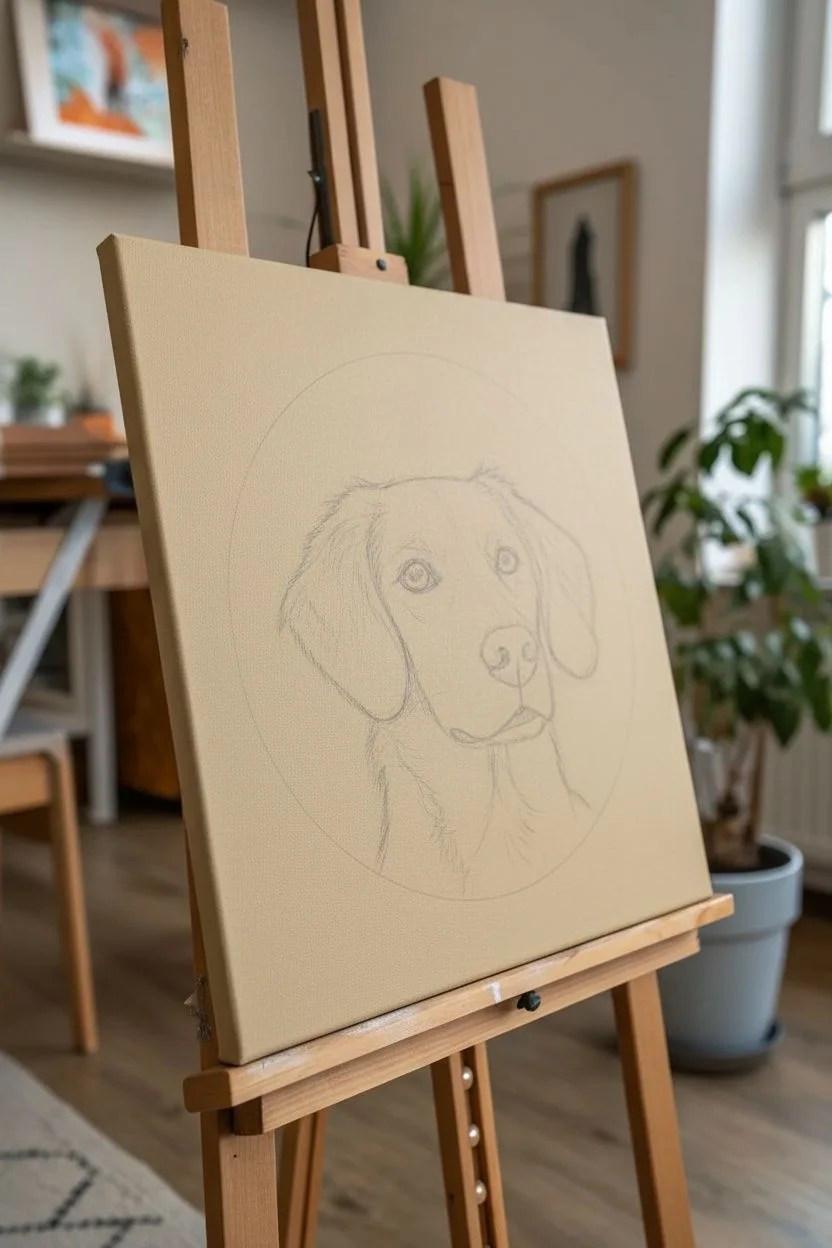
Capture the soulful gaze of your furry best friend with this elegant circle-framed portrait technique. By isolating the subject against a warm, solid geometric background, you create a modern and striking piece that highlights your pet’s features without the distraction of a complex background.
How-To Guide
Materials
- Square stretched canvas (12×12 or similar)
- Acrylic paints (Titanium White, Burnt Umber, Yellow Ochre, Mars Black, Burnt Sienna)
- Round synthetic brushes (sizes 2, 6, and 10)
- Fine liner brush (size 0 or 00)
- Photo of your pet
- Pencil and eraser
- Large circular object (like a dinner plate) or compass
- Palette or paper plate
- Water cup and paper towels
Step 1: Preparation & Sketching
-
Tone the canvas:
If your canvas is bright white, give it a quick wash of diluted Yellow Ochre mixed with a tiny bit of White. This creates that warm, sandy beige tone seen in the reference, which serves as a lovely neutral base. -
Define the circle:
Once the base tone is dry, place a dinner plate or use a compass to draw a large circle in the center of your canvas. The circle should be big enough to encompass the pet’s head and neck comfortably. -
Sketch the portrait:
Lightly sketch your pet’s outline inside the circle. Focus on the big shapes first: the block of the snout, the triangle of the ears, and the position of the eyes. Don’t worry about fur details yet; just get the proportions right.
Eyes look spooky?
If the eyes look staring or unnatural, check the white highlights. You usually only need one strong highlight per eye. Also, verify that the upper eyelid casts a tiny shadow over the top of the iris.
Step 2: Blocking the Background
-
Mix the background color:
Create the warm terracotta shade for the circle’s background by mixing Burnt Sienna with a touch of Burnt Umber and a tiny bit of White to make it opaque. -
Paint the circle negative space:
Using your size 10 round brush, carefully paint the negative space inside the circle around your pencil sketch. This ‘carves out’ the shape of the dog. Ensure the edges of the circle are crisp and smooth. -
Refine the edges:
While the paint is wet, use a smaller brush to tidy up the outline where the background meets the dog’s fur. Let this layer dry completely before moving on.
Step 3: Underpainting the Dog
-
Base coat the fur:
Mix a light cream color using White and a drop of Yellow Ochre. Block in the main areas of the face—the forehead, snout, and chest—using a size 6 brush. This doesn’t need to be perfect; it’s just a map for the fur. -
Shadow mapping:
Mix a light brown using Burnt Umber and White. Paint the shadow areas: generally under the ears, beneath the chin, and the sides of the snout. This establishes the 3D form of the head. -
Darker ear tones:
The ears often have darker fur. Use a mix of Yellow Ochre and Burnt Sienna to fill in the ear shapes, keeping the strokes directionally consistent with how the ear fur flows downward.
Pro Tip: Fur Direction
Don’t paint every single hair individually. Paint clumps of fur instead. Look at your pet’s photo and treat the fur as groups of shapes, only adding single hair lines for the final top layer.
Step 4: Building Features & Texture
-
Paint the eyes:
Switch to your size 2 brush. Paint the iris with a mix of Burnt Sienna and Black. Once dry, add a pure Black pupil. The most crucial part is a tiny dot of pure White for the reflection, which brings the dog to life. -
Define the nose:
Use dark grey (Black mixed with a little White) for the nose leather. Pure black can look like a hole, so save it only for the nostrils themselves to create depth. Add a tiny highlight on the top curve of the nose for wetness. -
Start the fur texture:
I like to start layering fur from the bottom up. Using a mix slightly lighter than your base coat, paint short, flicking strokes on the chest and neck. Follow the direction of hair growth—this generally flows downward and outward. -
Mid-tone fur details:
Move to the face. With a size 2 brush and a golden-brown mix, add strokes around the eyebrows, cheeks, and ears. Keep strokes shorter on the face and longer on the ears. -
Deepen the shadows:
Go back in with a darker brown wash (dilute your paint slightly with water) to deepen the crevices between ear layers and under the jawline to pop the head forward.
Step 5: Final Details
-
Highlighting the fur:
Mix Titanium White with just a whisper of Ochre. Using your finest liner brush or simply the tip of a round brush, add the lightest hairs on top of the other layers. Focus these on the bridge of the nose, the chest fluff, and the tips of the ears. -
Whiskers and fine hairs:
Using a very fluid, inky white paint and your liner brush, enact quick, confident strokes for the whiskers on the muzzle and eyebrows. Hesitation makes shaky lines, so go fast. -
Breaking the frame:
For a dynamic look, allow just a few wisps of fur (like ear tips or chest hair) to slightly overlap the edge of the terracotta circle. This adds dimension and prevents the painting from looking like a sticker. -
Clean up:
Check the outer unpainted canvas area. If you got any smudges, clean them up with a little of your original sand-beige base mix.
Step back and admire how the simple geometry makes your pet’s personality shine right from the canvas
Group Collaborative Mural Made from Mini Canvases
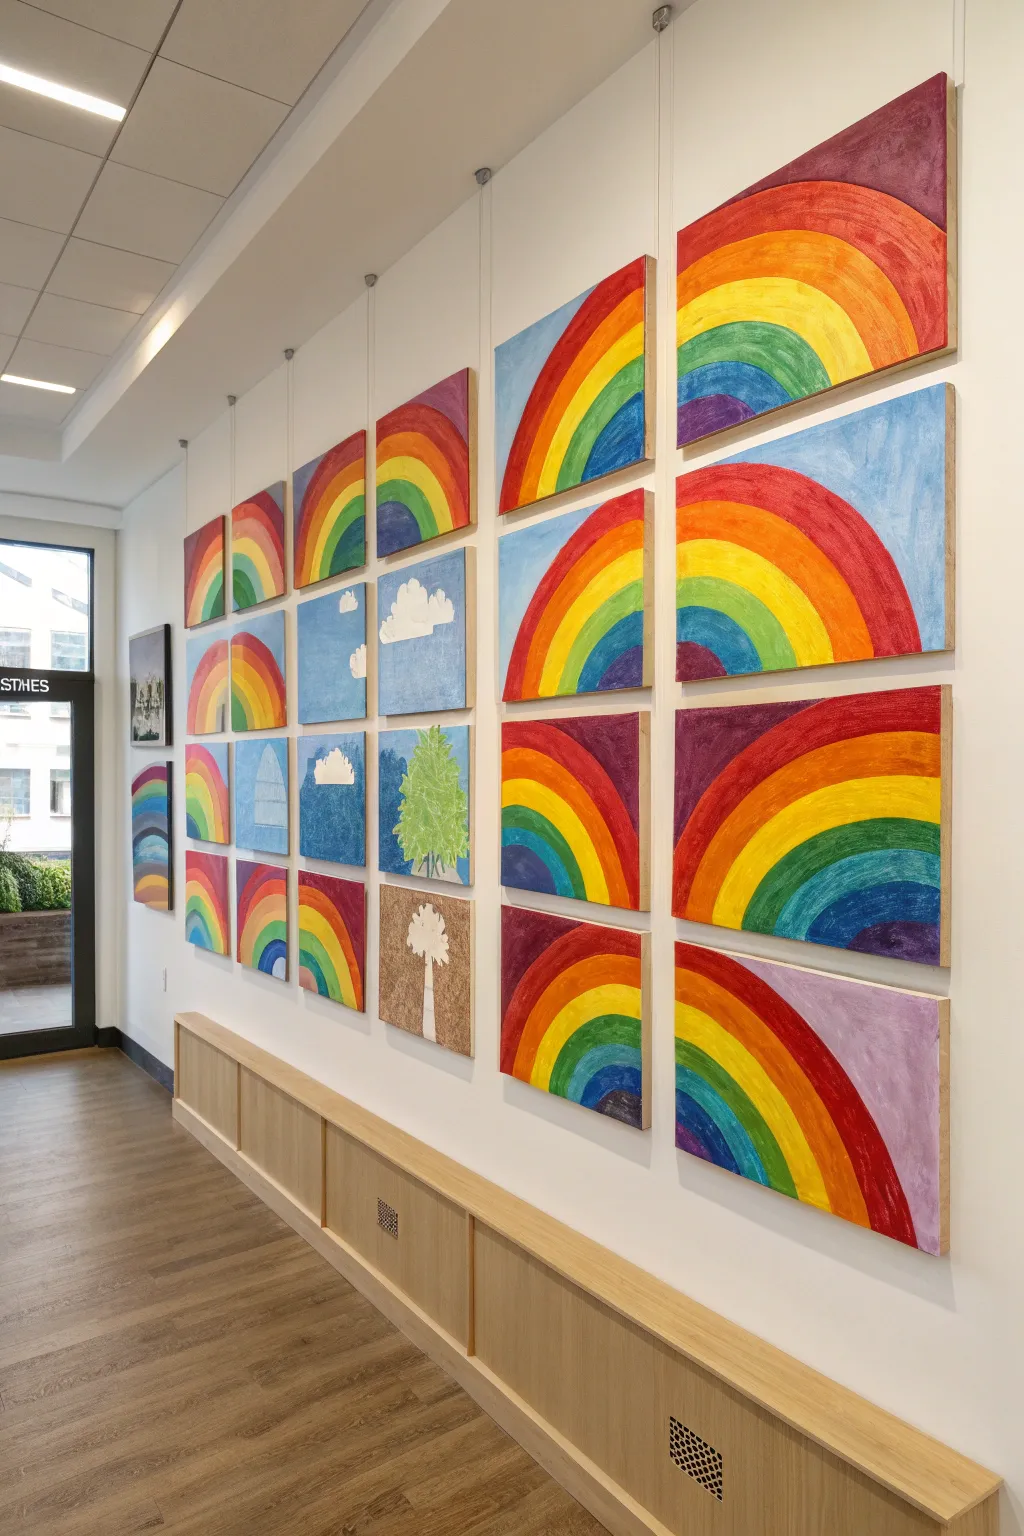
This vibrant group project transforms a blank wall into a stunning, segmented masterpiece where individual creativity contributes to a larger, cohesive vision. By breaking a massive rainbow design into manageable square panels, you create a collaborative mural that feels both unified and unique.
Step-by-Step
Materials
- 24 square wood panels or deep-edge canvases (approx. 12×12 inches)
- Acrylic paints (primary colors, white, black)
- Large flat brushes (1-2 inch)
- Medium round brushes
- Pencil and eraser
- Long ruler or yardstick
- Paper plates or palettes
- Water cups and paper towels
- Large sheet of butcher paper or cardboard (for layout)
- Hanging hardware (wires and hooks as seen in photo, or simple nails)
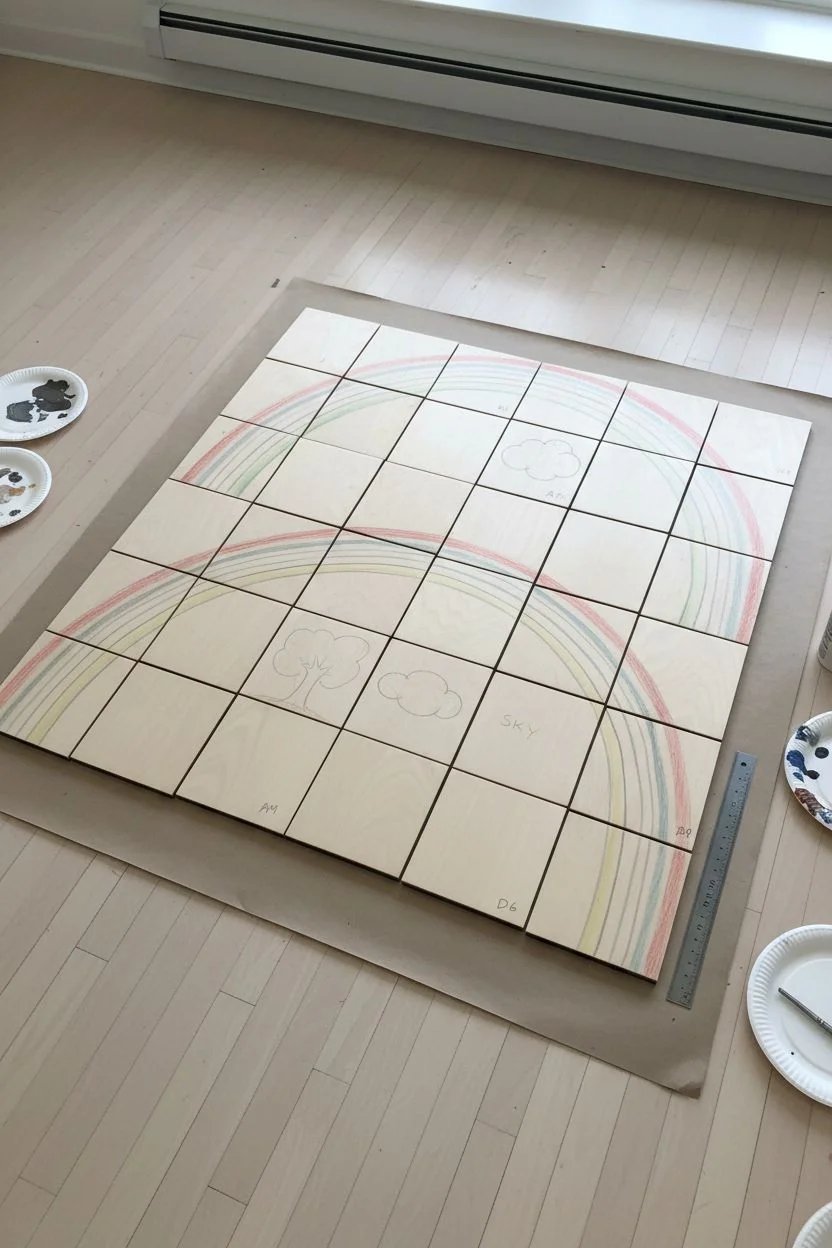
Step 1: Planning and Mapping
-
Arrange the Layout:
Before anyone picks up a brush, lay out all your canvases on a large floor space or a table covered in butcher paper. Arrange them in a grid—based on the photo, aim for a grid that fits your wall, like 4 high by 6 wide. -
Sketch the Arcs:
Using a pencil, lightly sketch the continuous arcs of the rainbows across the entire grid. Don’t worry about individual canvas borders yet; treat the whole grid as one giant surface. Draw large, sweeping curves that start from bottom corners and arch upward. -
Define the Bands:
Go back over your arcs to create the specific color bands. Make sure the lines are bold enough to be seen. You should have defined sections for red, orange, yellow, green, blue, and purple. -
Mark the Grid:
Number the back of each canvas with a row and column number (e.g., A1, A2, B1, B2) so you can easily reassemble the puzzle later. This is crucial for keeping the design aligned. -
Assign Special Panels:
Choose a few random panels to break the pattern. Sketch a simple tree, a fluffy cloud, or a patch of solid sky on just 3-4 specific canvases to add visual interest.
Color Consistency
Mix large batches of each rainbow color in cups before starting. If everyone mixes their own red, the final arc will look patchy. Shared paint cups ensure unity.
Step 2: Painting the Panels
-
Distribute the Work:
Hand out the canvases to your grooup. Each person is responsible for painting just their square. It helps to have a common palette mix prepared so the ‘Red’ on one panel matches the ‘Red’ on its neighbor. -
Paint the Sky Background:
Start by painting the negative space—the sky areas. Use a light blue mix. I find it works best to add a little white into the blue while it’s wet to create subtle atmospheric texture rather than a flat color. -
Fill the Rainbow Bands:
Using the large flat brushes, fill in the color arcs. Apply smooth, confident strokes that follow the curve of the pencil line. Two coats may be necessary for opacity, especially tailored for the yellow and orange bands. -
Detail the Special Panels:
For the panels with trees or clouds, paint those elements now. Keep the style simple and graphic—dab greens for leaves or use pure white circles for clouds—so they fit the bold aesthetic of the mural. -
Tidy the Edges:
If using gallery-wrapped canvases or wood panels, painting the side edges clean white or continuing the design around the corner gives the whole installation a polished, professional look. -
Let Dry Completely:
Allow all panels to dry flat for at least 2-3 hours. This prevents drips and ensures the paint cures enough to be handled during installation.
Varied Texture
Encourage painters to use different brush strokes within their color bands—some vertical, some swirling. This adds subtle variety when viewed up close.
Step 3: Installation
-
Determine Spacing:
Measure your wall space. You want a small, uniform gap between each panel (about 1-2 inches) to emphasize the grid effect shown in the image. -
Install Hanging Hardware:
Depending on your wall, install a rail system with hanging wires (as shown in the reference) or measure and mark nail spots for each canvas center. Accuracy is key here to keep the arcs aligning visually. -
Hang and Align:
Hang the panels according to the numbers on the back. Step back frequently to check that the rainbow lines ‘connect’ visually across the gaps.
Step back and admire how individual efforts seamlessly connect into a grand, colorful display
Glow-in-the-Dark Cosmic Garden Night Scene
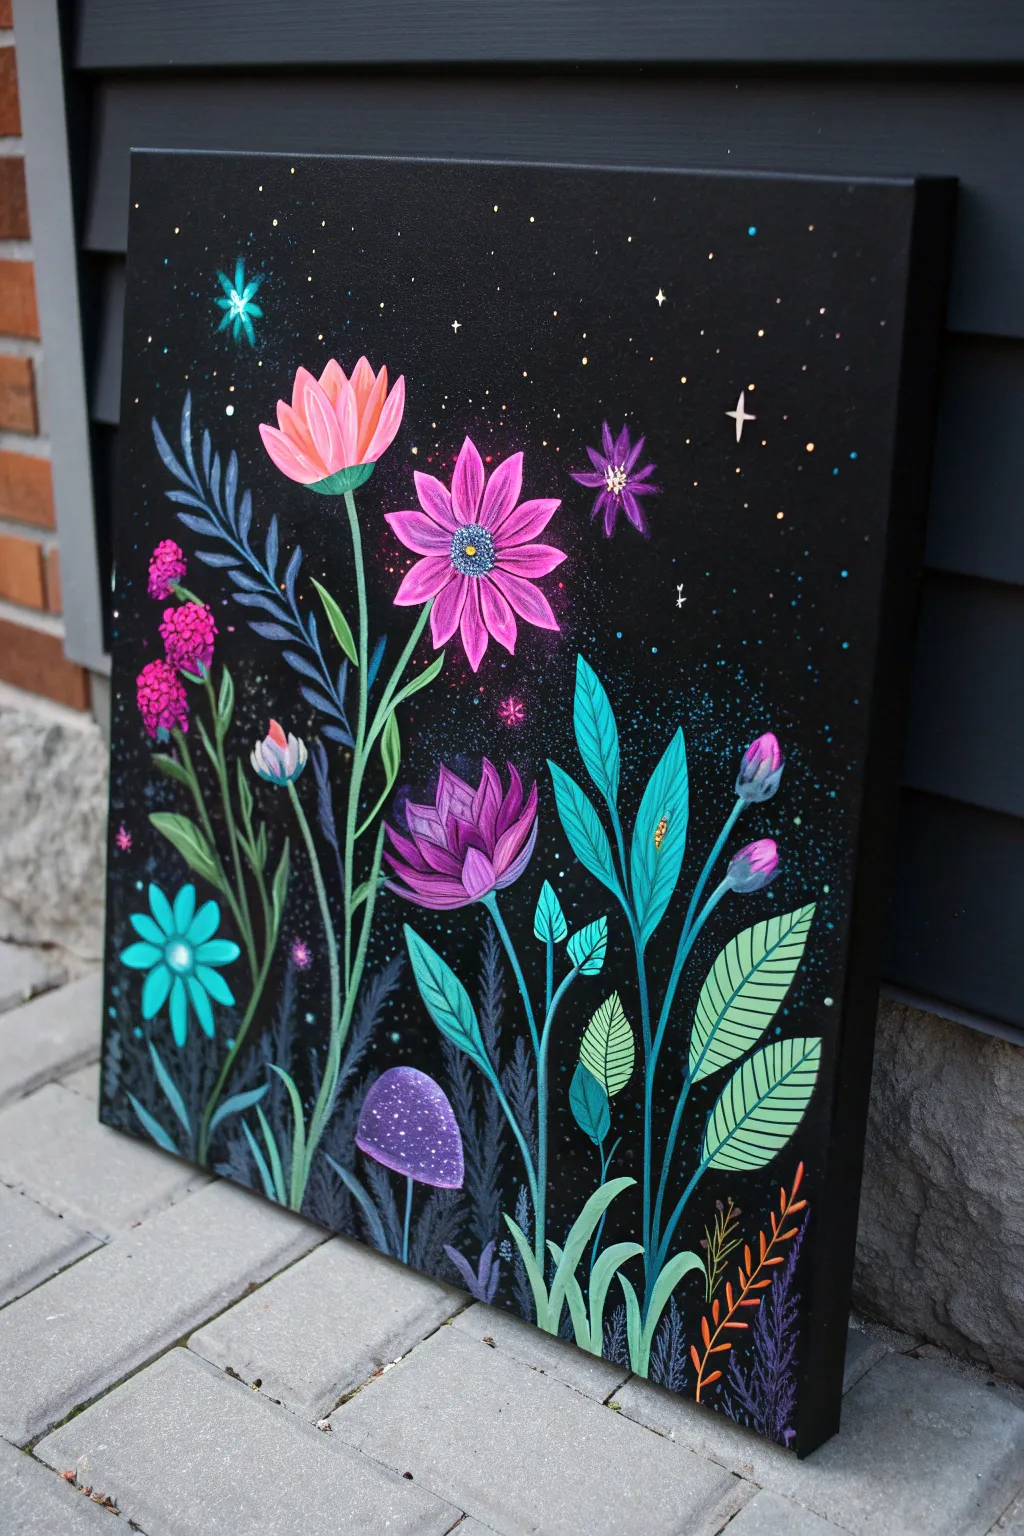
Step into a magical world where flora meets the cosmos with this enchanting acrylic painting. Against a deep black canvas, vibrant jewel-toned flowers and glowing speckles create a mesmerizing scene that looks beautiful by day but can truly come alive under blacklight if you use neon paints.
Step-by-Step Guide
Materials
- Rectangular canvas (16×20″ recommended)
- Black acrylic paint (matte or satin)
- Acrylic paints: Teal, magenta, light pink, purple, lime green, royal blue, white, metallic gold
- Optional: Neon/glow-in-the-dark acrylics in pink, blue, and green
- Brush set: Large flat wash, medium filbert, lush round brushes (sizes 4-6), fine liner
- Toothbrush (for spattering)
- Cup of water and palette
- Chalk or white pencil
Step 1: Setting the Night Sky
-
Base coat:
Begin by covering your entire canvas with black acrylic paint. Use a large flat brush to ensure smooth, opaque coverage. Paint the sides of the canvas for a finished look. -
Cosmic dusting:
While the black dries completely, mix a watery slurry of teal and white paint. Dip an old toothbrush into this mix and run your thumb across the bristles to flick tiny stars across the upper half of the canvas. -
Adding distinct stars:
Using your smallest detail brush or dotting tool, place specific larger stars using white or pale yellow. Add a few four-pointed star shapes and tiny clusters of dots to suggest galaxies.
Opacity Pro Tip
Painting bright colors on black often requires two coats. Let the first layer dry completely before adding the second to ensure the pinks and teals look vivid, not muddy.
Step 2: Planning and Underpainting
-
Sketch the layout:
Once the background is utterly dry, lightly sketch your floral composition using white chalk. Place the large pink daisy shape in the center and the tulip-like flower to its left as your main anchors. -
Mapping the stems:
Draw long, flowing lines for stems reaching up from the bottom edge. Vary the heights—some short for the mushroom, some tall for the buds on the right. -
First layer of stems:
Load a round brush with a mix of teal and forest green. Paint the thick, swooping stems and the large, pointed leaves on the right side. Don’t worry about perfect opacity yet.
Level Up: UV Magic
Trace over your white highlights and the mushroom spots with invisible UV reactive paint. Under normal light it looks standard, but hit it with a blacklight and it glows.
Step 3: Painting the Blooms
-
The central pink daisy:
Mix magenta with a little white. Paint the elongated petals of the central flower, radiating outward from a blank center. Let the brushstrokes follow the curve of the petals. -
The tulip shape:
For the flower on the upper left, use a lighter salmon pink. Paint broad, upward strokes to form a cup shape, adding darker pink at the base for depth. -
Purple accents:
Using a rich purple, paint the pointed petals of the lower central flower and the small star-flower near the top right. Add a touch of white to the tips while the paint is wet to create a gradient. -
Teal daisy:
In the bottom left corner, paint a simple teal daisy shape. Contrast is key here, so ensure this blue-green pops against the black background. -
Cluster buds:
For the cluster of blooms on the far left, dab small irregular spots of hot pink or magenta to create a textured, berry-like effect.
Step 4: Foliage and Atmosphere
-
Leaf detailing:
Go back to your large green leaves on the right. Using a lighter mint green and a liner brush, paint delicate veins over the dried base coat. -
Ferns and wisps:
Use a blue-grey mix to paint feathery, fern-like leaves behind the main flowers on the left. These should look slightly translucent and recede into the background. -
The glowing mushroom:
Paint the mushroom cap near the bottom center with purple. Once dry, stipple tiny white dots over the top to give it a speckled texture.
Step 5: Final Cosmic Details
-
Brightening the centers:
Add centers to your flowers using yellow or gold dots. For the main pink flower, create a dense cluster of dots in distinct blue and yellow. -
Magic dust:
I like to take a dry brush with just a whisper of neon blue or purple and gently scumble (scrub) paint around the flower heads to create a faint, glowing aura. -
Highlighting:
Use your finest brush and pure white paint to add tiny highlights to the tips of the petals and the brightest stars. This makes the image pop. -
Cleanup:
If any chalk lines are still visible, gently wipe them away with a damp cloth or cotton swab.
Hang this piece in a dimly lit corner to fully appreciate your personal slice of the galaxy


Have a question or want to share your own experience? I'd love to hear from you in the comments below!