A painted interior door is one of my favorite sneaky-big-impact upgrades—it’s like giving your home a little piece of art that you get to use every day. If you’ve been side-eyeing all that white and craving something richer, bolder, or just more “you,” these ideas will get your brush moving.
Classic Black Statement Doors
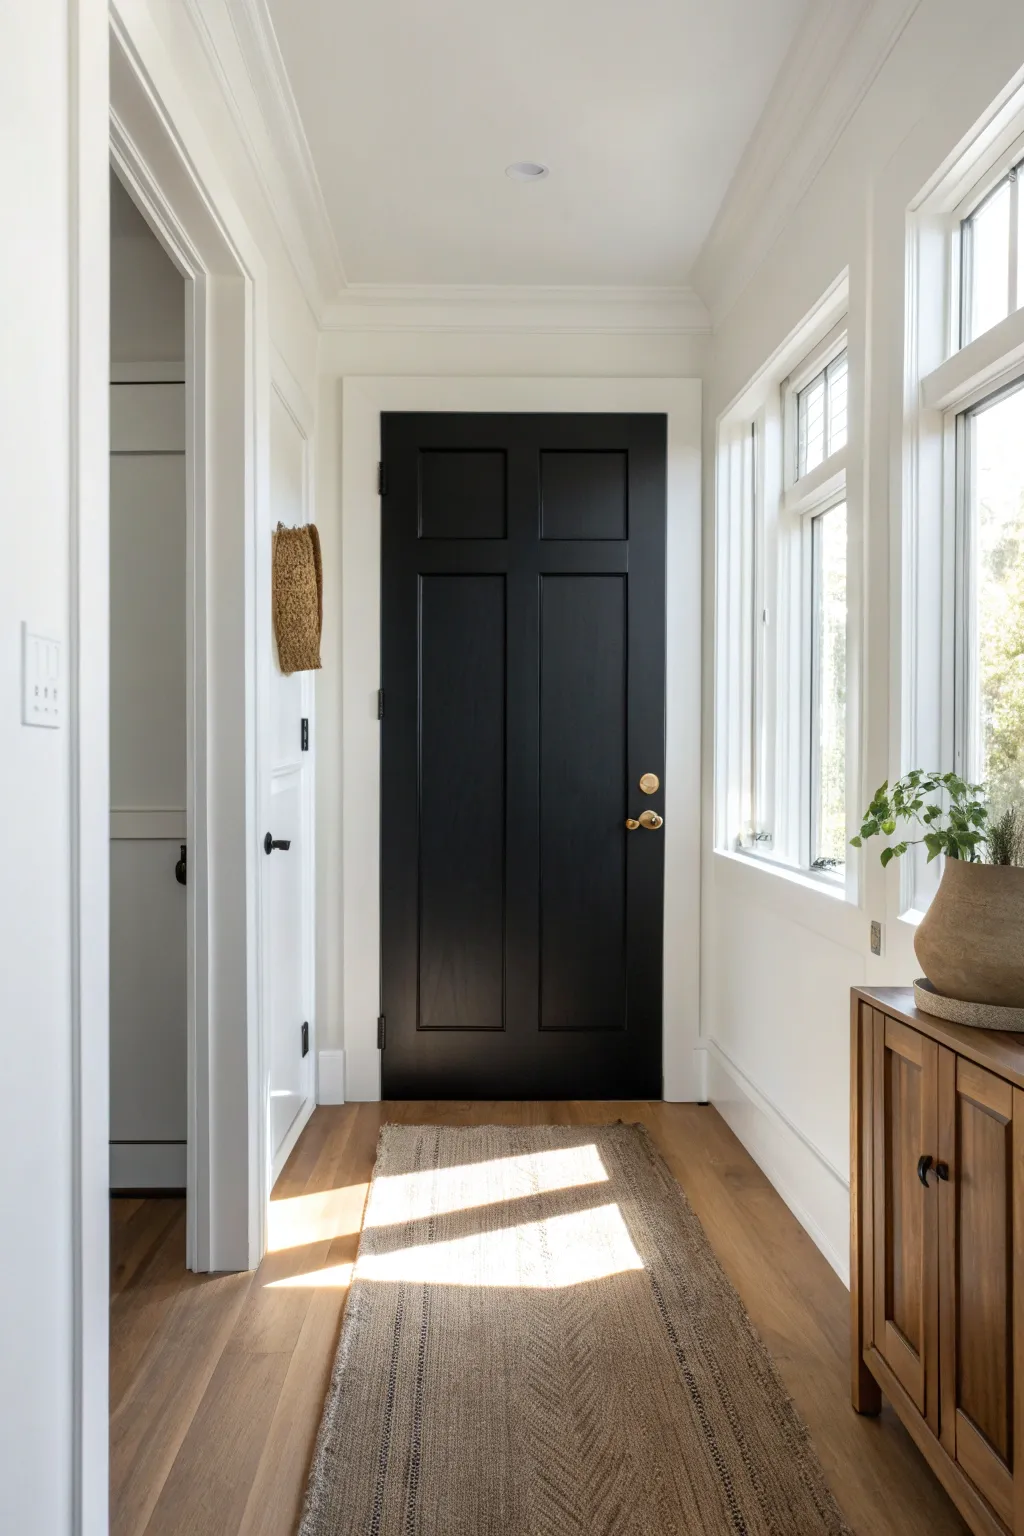
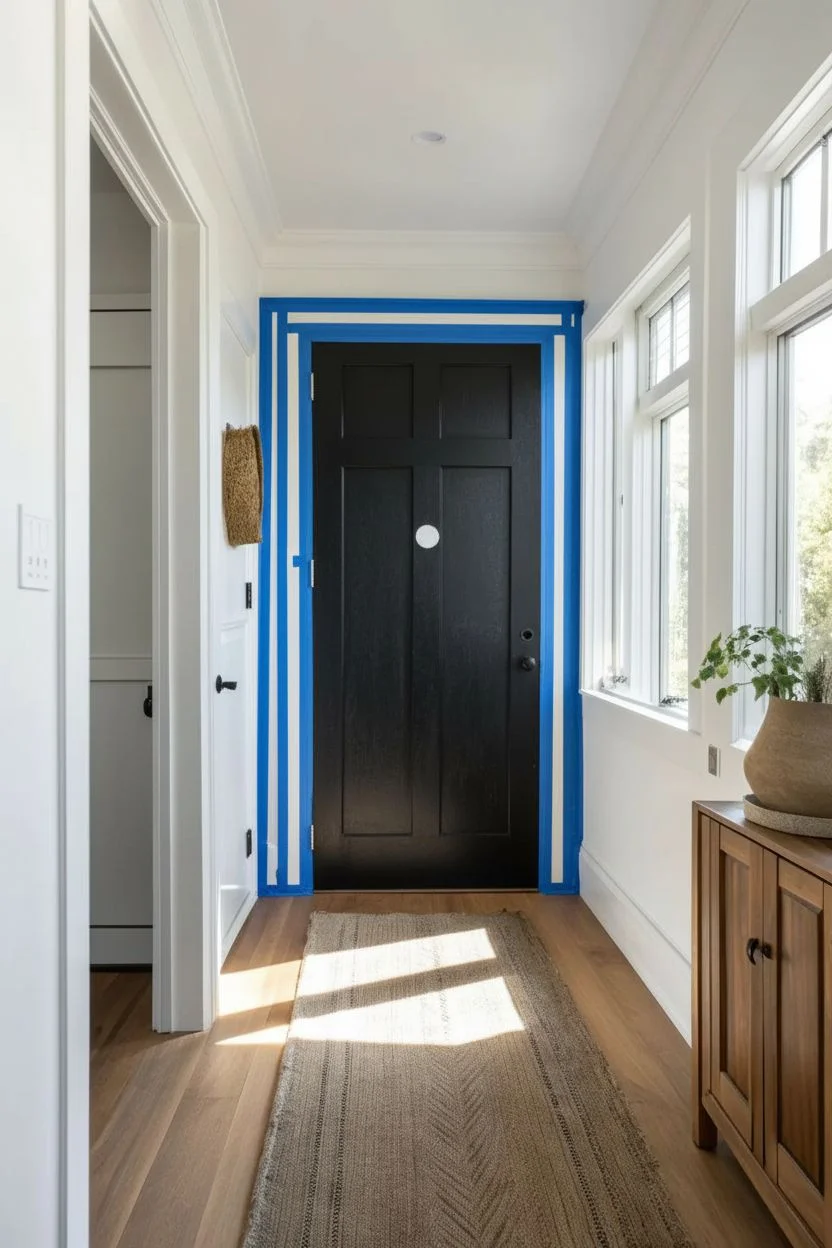
Elevate your entryway with the timeless sophistication of a matte black door, a design choice that adds instant drama and anchors a bright space. This project turns a standard door into a high-contrast focal point that feels both modern and classic.
Detailed Instructions
Materials
- High-quality interior/exterior paint (Black, Satin or Semi-Gloss finish)
- Bonding primer (specifically for glossy surfaces)
- 220-grit sandpaper or sanding sponge
- Tack cloth or microfiber rags
- Painter’s tape (1.5 or 2 inch width)
- Small angled sash brush (2-inch)
- 4-inch foam roller
- Small paint tray
- Drop cloth
- Screwdriver (for hardware removal)
- Mild degreaser or TSP substitute
Step 1: Preparation & Cleaning
-
Clear and clean:
Begin by removing all hardware from the door, including the handle, deadbolt, and any kickplates. If you can’t remove the hinges, tape them off meticulously later. -
Degrease the surface:
Wipe down the entire door with a mild degreaser or TSP substitute to remove oils, fingerprints, and dirt. This ensures maximum adhesion for your new paint. -
Scuff sanding:
Using 220-grit sandpaper, lightly scuff the entire surface of the door. You aren’t trying to strip the old paint, just creating a ‘tooth’ for the primer to grip. -
Dust removal:
Vacuum up the sanding dust, then wipe the door thoroughly with a tack cloth to capture every last particle. -
Tape the edges:
Apply painter’s tape carefully around any glass inserts and along the door jamb if you are painting the door in place.
Step 2: Priming the Surface
-
Spot prime or full prime:
If your door was previously painted with oil-based paint or is very glossy, apply a coat of high-adhesion bonding primer. If the previous surface is standard latex, you may only need to spot-prime raw wood areas. -
Brush the details:
Use your angled sash brush to apply primer into the recessed corners and molded edges of the panels first. -
Roll the flat areas:
Follow up immediately with the foam roller on the flat panels and stiles to smooth out the primer coat. -
Light sand:
Once dry, verify smoothness. I like to do a very quick, light pass with fine sandpaper to knock down any bumps, then wipe clean again.
Sticky Situation?
If the door sticks to the weatherstripping after closing, rub a plain white candle or a little paraffin wax along the edges of the door once the paint is fully cured to reduce friction.
Step 3: Painting the Black Finish
-
Start with panels:
Dip your angled brush into the black paint and coat the recessed molding details of the top panels first. Work from the top down to catch drips. -
Roll the center panels:
While the molding paint is still wet, use your foam roller to paint the flat center of the panel. This blends the brush strokes for a sprayed-on look. -
Paint the vertical center stile:
Paint the vertical strip that runs down the center of the door, between the panels, using vertical strokes. -
Paint the horizontal rails:
Next, paint the horizontal rails (the cross-pieces), starting at the top and working your way down. Carefully feather the edges where they meet vertical sections. -
Finish with outer stiles:
Finally, paint the two long vertical stiles on the far left and right edges of the door. Use long, continuous strokes from top to bottom. -
Check for pooling:
Inspect the corners of the recessed panels immediately; black paint shows texture easily, so smooth out any pooled paint before it dries. -
Dry and recoat:
Let the first coat dry completely according to the can’s instructions. Apply a second coat following the exact same order (panels, center, rails, outer stiles).
Add Dimension
For a richer look, choose a ‘Soft Black’ or ‘Iron Ore’ shade rather than stark jet black. These softer hues have subtle charcoal undertones that look incredibly luxurious in natural light.
Step 4: Finishing Touches
-
Remove tape:
Score the edge of the painter’s tape with a utility knife before peeling it off to ensure a crisp line that doesn’t pull up your fresh paint. -
Cure time:
Allow the door to cure for at least 24 hours before reattaching heavy hardware to prevent denting the soft paint. -
Reinstall hardware:
Reattach your brass handle and locks carefully. The contrast of gold or brass against the black paint really makes the look pop.
Step back and admire how this single change completely redefines the character of your hallway


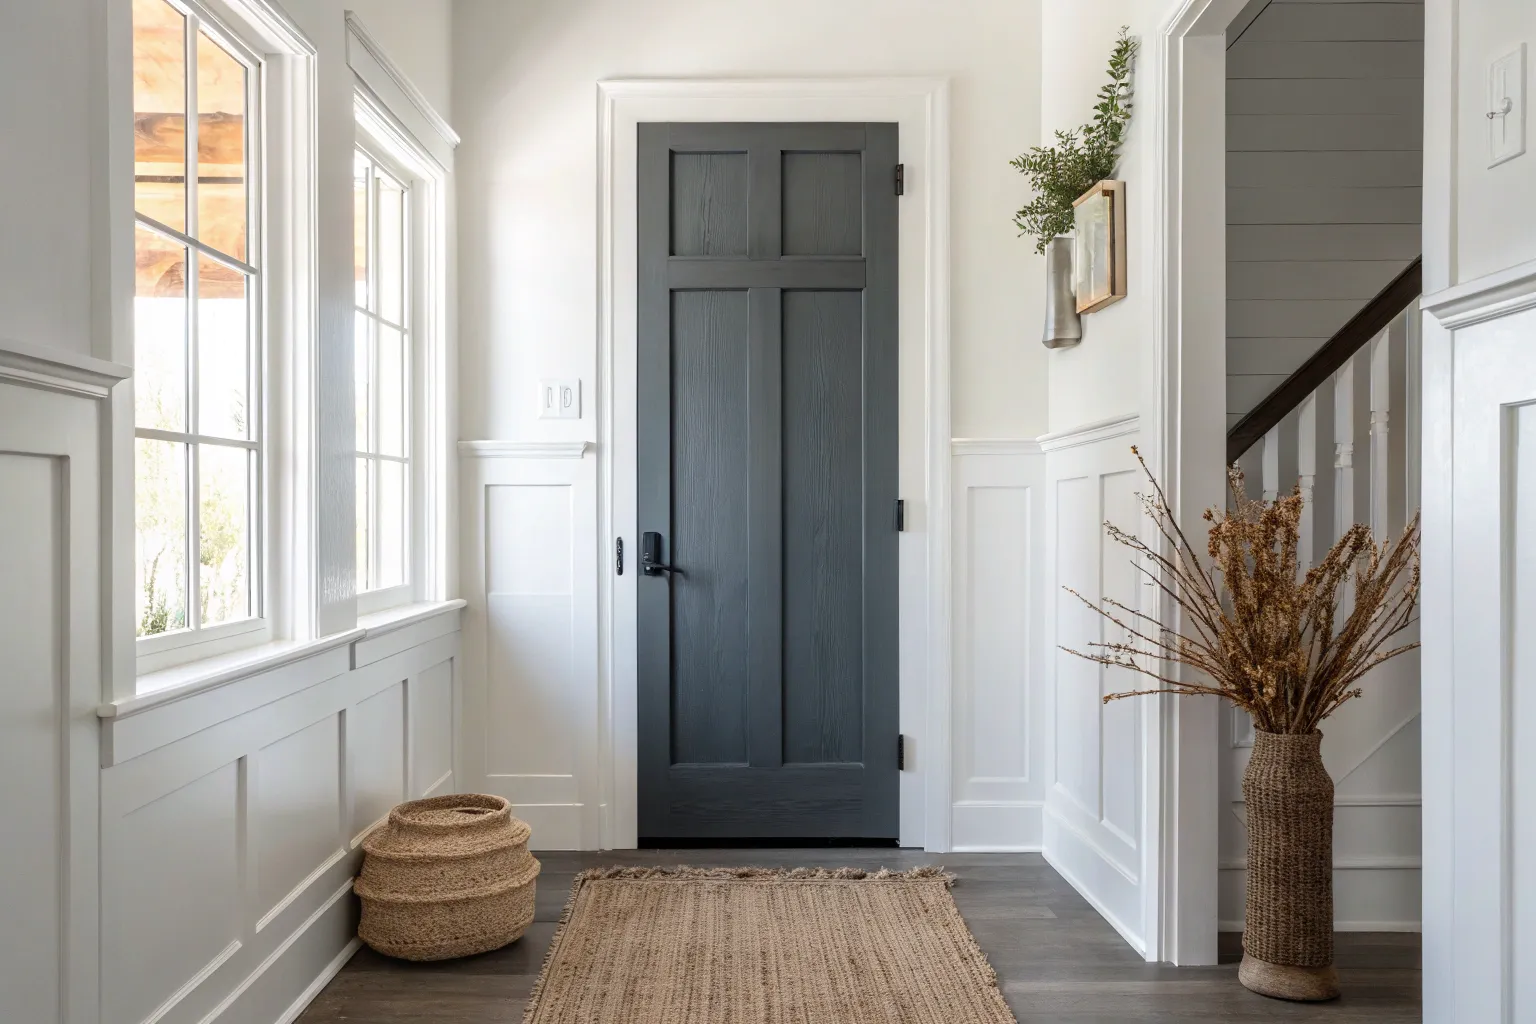
Moody Charcoal for a Soft Black Look
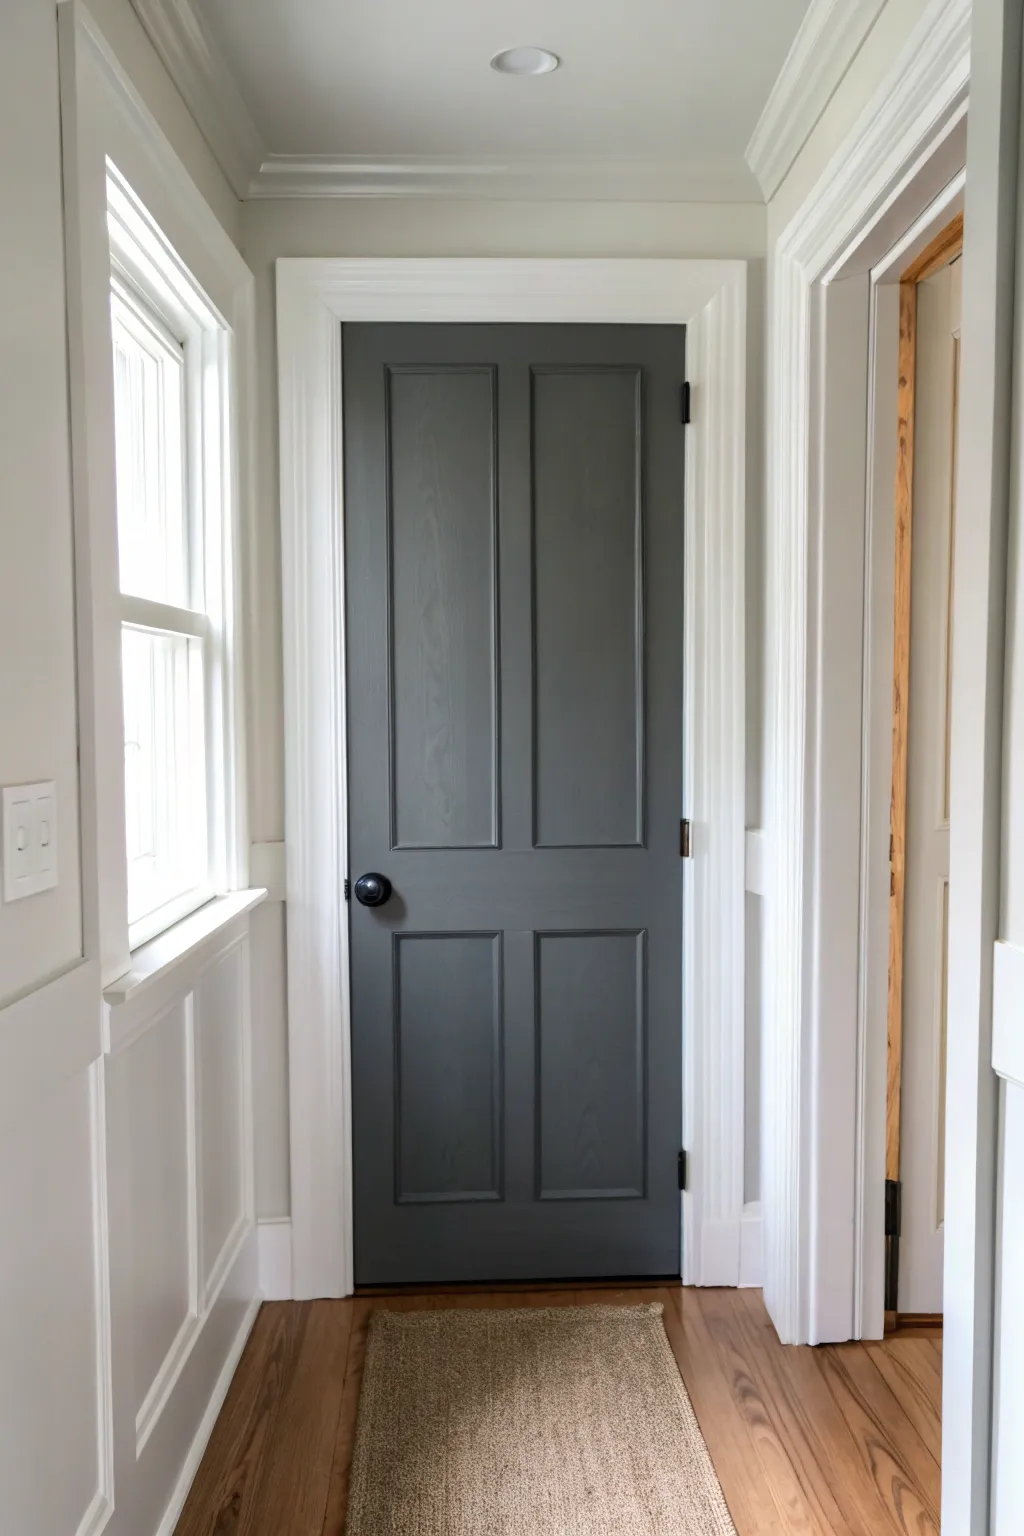
Transform a standard interior door into a sophisticated statement piece with this moody charcoal finish. This project delivers a soft, almost-black look that adds depth and modern elegance without the harshness of pure black paint.
Step-by-Step Tutorial
Materials
- Interior door (wood or composite)
- High-quality interior paint (Charcoal/Soft Black, Satin or Semi-Gloss finish)
- Primer (stain-blocking, tinted grey if possible)
- 220-grit sandpaper
- Sanding block or sponge
- Tack cloth
- Painter’s tape
- Drop cloth
- Screwdriver (for hardware removal)
- 2-inch angled sash brush (synthetic bristles)
- 4-inch foam roller
- Small paint tray
- Clean rag
- Mild degreaser or TSP substitute
Step 1: Preparation
-
Clear the area:
Lay down your drop cloth to protect the flooring underneath the door. Open windows for ventilation. -
Remove hardware:
Use your screwdriver to remove the doorknob and lock mechanism. While you can tape around them, removing them guarantees a pro-level finish with no accidental paint splatters. -
Clean the surface:
Wipe down the entire door with a mild degreaser or TSP substitute. Doors collect surprising amounts of hand oils and dust that ruin paint adhesion, so scrub thoroughly and let it dry. -
Sand for grip:
Lightly sand the entire door using 220-grit sandpaper. You aren’t trying to strip the old paint, just scuffing the surface to give the new primer something to hold onto. -
Clean dust:
Wipe away all sanding dust with a clean rag, followed by a tack cloth to pick up the finest particles. Any leftover dust will create tiny bumps in your finish. -
Tape the hinges:
If you left the door on its hinges, carefully apply painter’s tape to the metal hinges. Press the tape edges down firmly with a fingernail or putty knife to prevent bleed-through.
Sticky Situation?
If the door feels sticky after drying (blocking), apply a thin layer of clear furniture wax along the edges where it meets the frame to prevent peeling.
Step 2: Priming
-
Prime the details:
Dip your angled brush into the primer and coat the recessed areas of the panels first. Brush into the corners and smooth out any drips immediately. -
Roll the flat areas:
Use the foam roller to apply primer to the flat vertical and horizontal surfaces. A foam roller helps achieve a smooth, spray-like texture. -
Dry and sand:
Let the primer cure according to the can’s instructions. Once dry, run your hand over it; if it feels rough, do a very light pass with the sanding sponge and wipe clean again.
Step 3: Painting
-
Start with panels:
Stir your charcoal paint thoroughly. Using the angled brush, paint the recessed molding of the top two panels first. -
Feather the edges:
As you brush the molding, feather the paint slightly outward onto the flat panel surface to avoid hard buildup lines later. -
Roll the panels:
Immediately switch to your foam roller to paint the flat center of the panels. I like to do this while the brushed edges are still wet to blend them seamlessly. -
Paint the center stile:
Paint the vertical strip of wood running down the center of the door, between the panels. Roll vertically with the grain. -
Paint horizontal rails:
Paint the horizontal rails (top, middle, and bottom sections). Roll horizontally, starting your stroke on the painted center stile and moving outward to blend. -
Finish with outer stiles:
Finally, paint the long vertical stiles on the far left and right edges of the door. Run the roller from top to bottom in long, continuous strokes for a uniform finish. -
Check for drips:
Inspect the corners of the panels immediately. Dark paint shows drips clearly, so gently brush out any pooling paint before it sets. -
Apply second coat:
Allow the first coat to dry completely (usually 4-6 hours). Follow the exact same order—moldings, panels, center stile, rails, outer stiles—for the second coat to ensure rich, opaque coverage.
Modern Edge
Swap out standard brass hinges and knobs for matte black hardware. The monotone look against charcoal paint creates an incredibly high-end, custom feel.
Step 4: Finishing Touches
-
Remove tape:
Carefully peel away the painter’s tape from the hinges while the final coat is still slightly tacky to prevent peeling the dry paint film. -
Reinstall hardware:
Wait at least 24 hours for the paint to cure effectively before screwing the doorknob back on. This prevents the hardware from digging into soft paint.
Enjoy the dramatic, cozy shift this simple color change brings to your hallway.


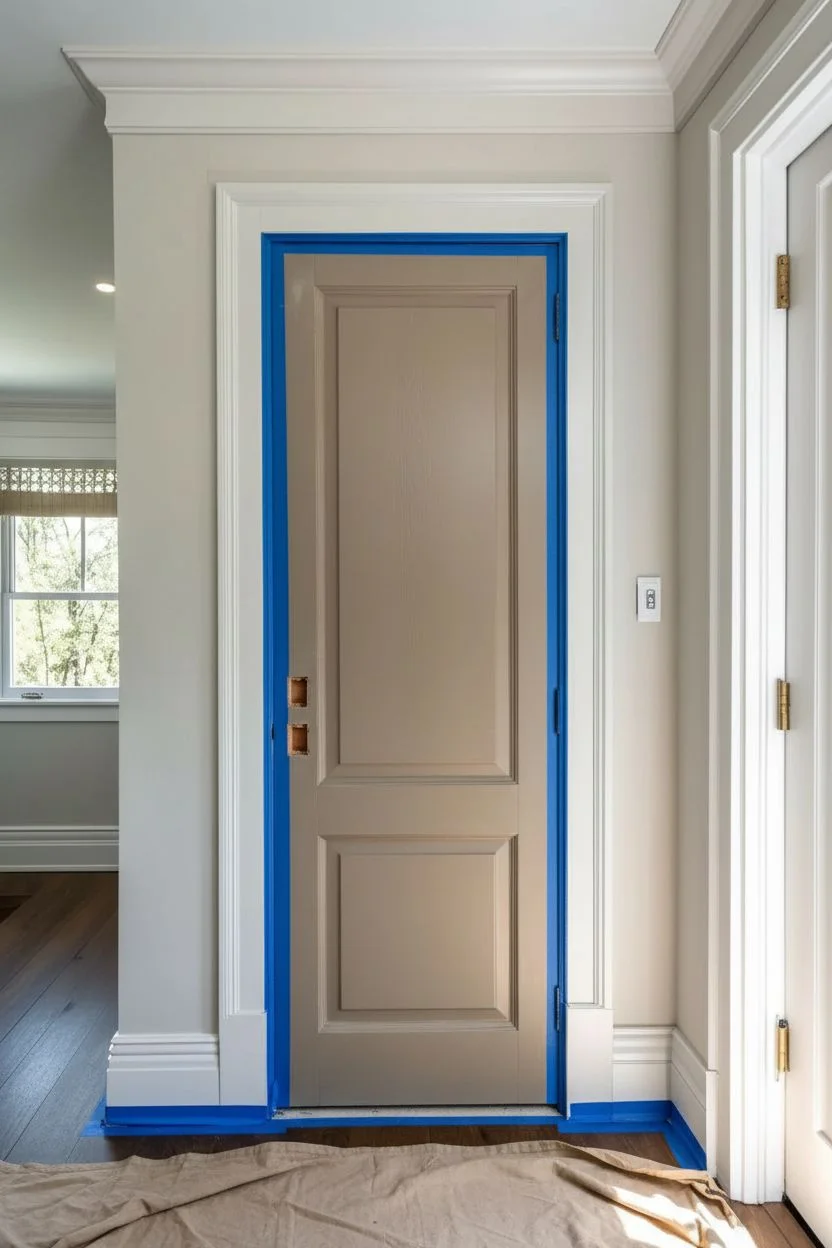
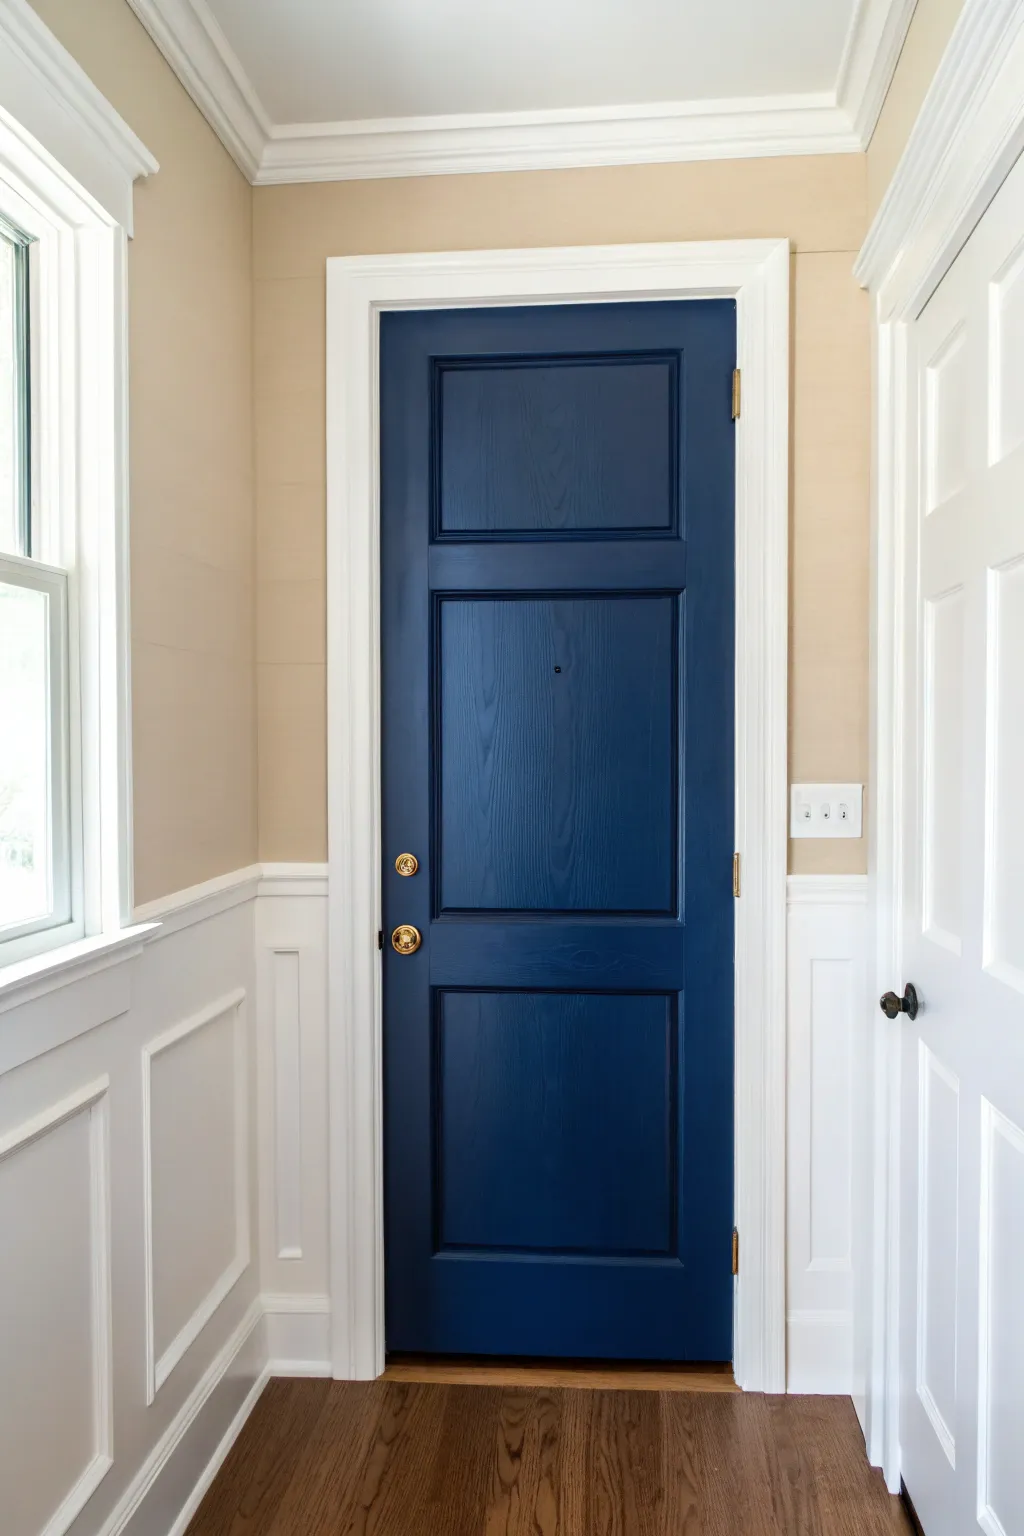
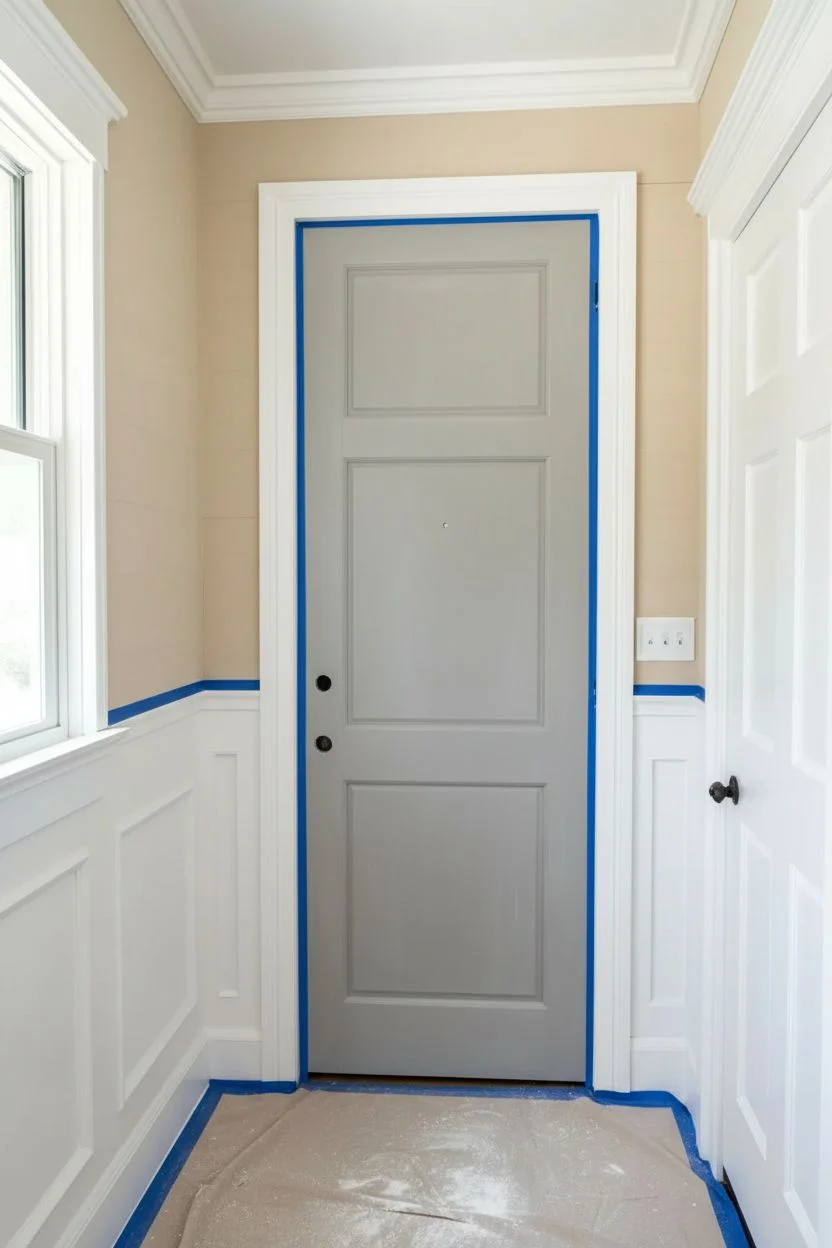
Navy Doors That Feel Polished

Transform a standard entryway door into a sophisticated focal point using a rich navy hue that contrasts beautifully with crisp white trim. This project proves that a simple coat of paint can elevate the entire architectural feel of your hallway, adding depth and a polished finish.
Step-by-Step Guide
Materials
- High-quality navy blue interior door paint (semi-gloss or satin finish)
- White trim paint (semi-gloss)
- Fine-grit sandpaper (220-grit)
- Tack cloth or microfiber rags
- Painter’s tape
- Liquid deglosser (optional but recommended)
- Angled sash brush (2 inch)
- Mini foam roller or short-nap roller
- Small paint tray
- Drop cloth or masking paper
- Screwdriver (for hardware removal)
- Metal polish (optional for cleaning hardware)
Step 1: Preparation & Cleaning
-
Clear the area:
Begin by opening the door wide and placing a drop cloth underneath to catch any drips protected from the floor. -
Remove hardware:
Using a screwdriver, carefully remove the doorknob, deadbolt, and any strike plates. It is much easier to get a professional finish by removing these rather than taping around them. -
Clean surface thoroughly:
Wipe down the entire door with a mild detergent or TSP substitute to remove oils and fingerprints, which are common on frequently used doors. -
Light sanding:
Scuff sand the surface lightly with 220-grit sandpaper to give the new paint a surface to grip. You don’t need to strip the old paint, just dull the shine. -
Remove dust:
Wipe away all sanding dust using a tack cloth. Even tiny specks of dust will show up clearly against dark navy paint. -
Protect the trim:
Apply painter’s tape carefully along the edges of the white door casing and wainscoting to ensure crisp lines.
Sticky Situation?
If the door feels sticky after drying (blocking), dust the edges lightly with talcum powder. This prevents the paint from peeling off when the door shuts against the jamb.
Step 2: Painting the Panels
-
Start with panels:
Dip your angled sash brush into the navy paint and begin with the recessed areas of the molded panels. Push paint into corners but watch for pooling. -
Paint panel faces:
Still using the brush or switching to a mini roller, paint the flat center faces of the panels. Smooth out the strokes to follow the vertical grain. -
Check for drips:
Inspect the corners of the panels immediately. Dark paint tends to pool in corners, so brush out any excess before it becomes tacky.
Brushwork Pro Tip
Add a paint conditioner like Floetrol to your latex paint. It slows drying time, allowing brush marks to level out perfectly for a factory-smooth finish on dark colors.
Step 3: Painting Surface & Stiles
-
Handle the vertical center:
Paint the vertical strip (mullion) that runs down the center of the door between the panels using long, smooth strokes. -
Paint horizontal rails:
Move on to the horizontal rails (top, middle, and bottom). I find it helps to feather the edges lightly where they meet the vertical stiles to avoid buildup. -
Finish with vertical stiles:
Paint the two long vertical stiles on the far left and right sides of the door, running your brush or roller from top to bottom for a seamless look. -
Let dry completely:
Allow this first coat to dry according to the manufacturer’s instructions. Dark colors often take a bit longer to cure to the touch.
Step 4: Finishing Touches
-
Assess coverage:
Check for any light spots. Navy often requires two or even three thin coats for full, rich opacity. -
Apply second coat:
Repeat the painting order relative to the panels and stiles for the second coat, ensuring an even sheen. -
Remove tape:
Carefully peel away the painter’s tape while the final coat is still slightly wet to prevent pulling up any dried paint film. -
Reinstall hardware:
Once the door is fully cured—ideally waiting 24 hours to prevent sticking—reinstall your clean gold or brass hardware for that polished pop.
Now step back and admire how a bold color choice completely redefines your hallway space


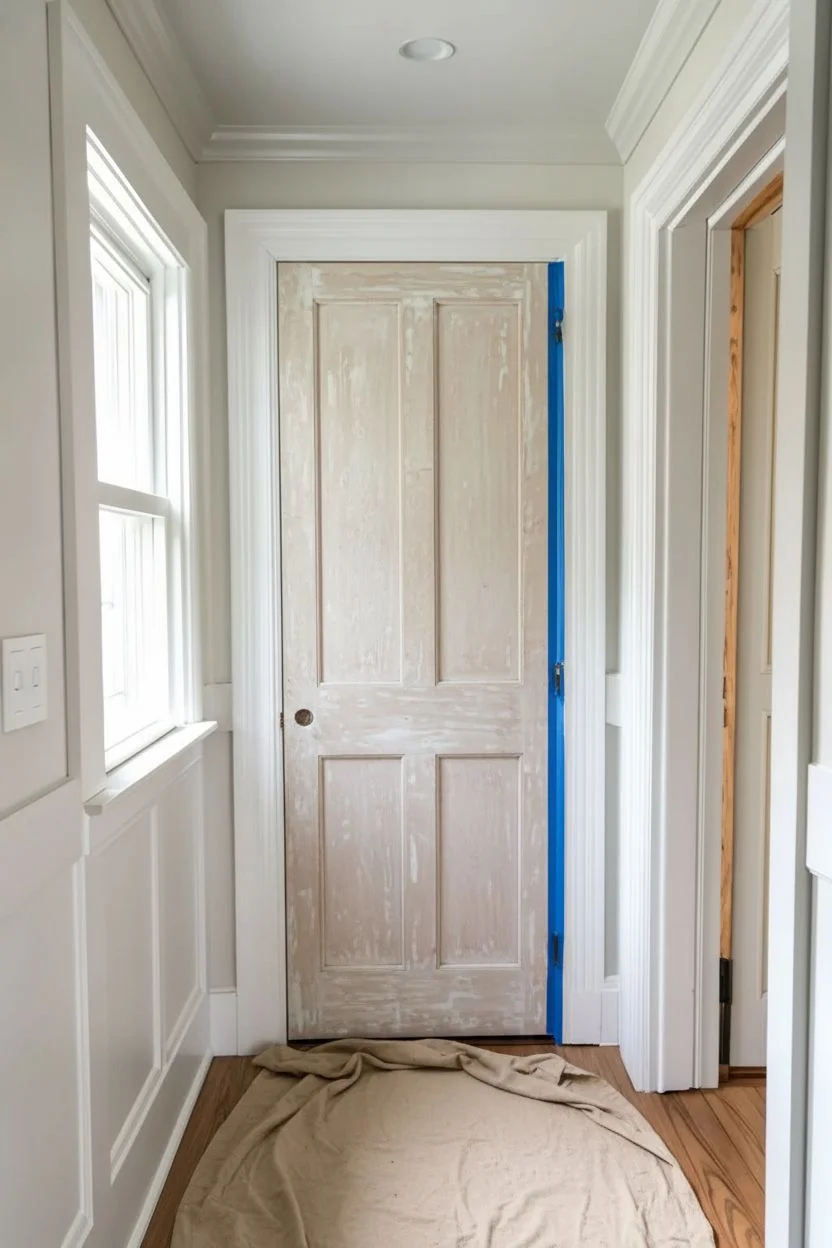
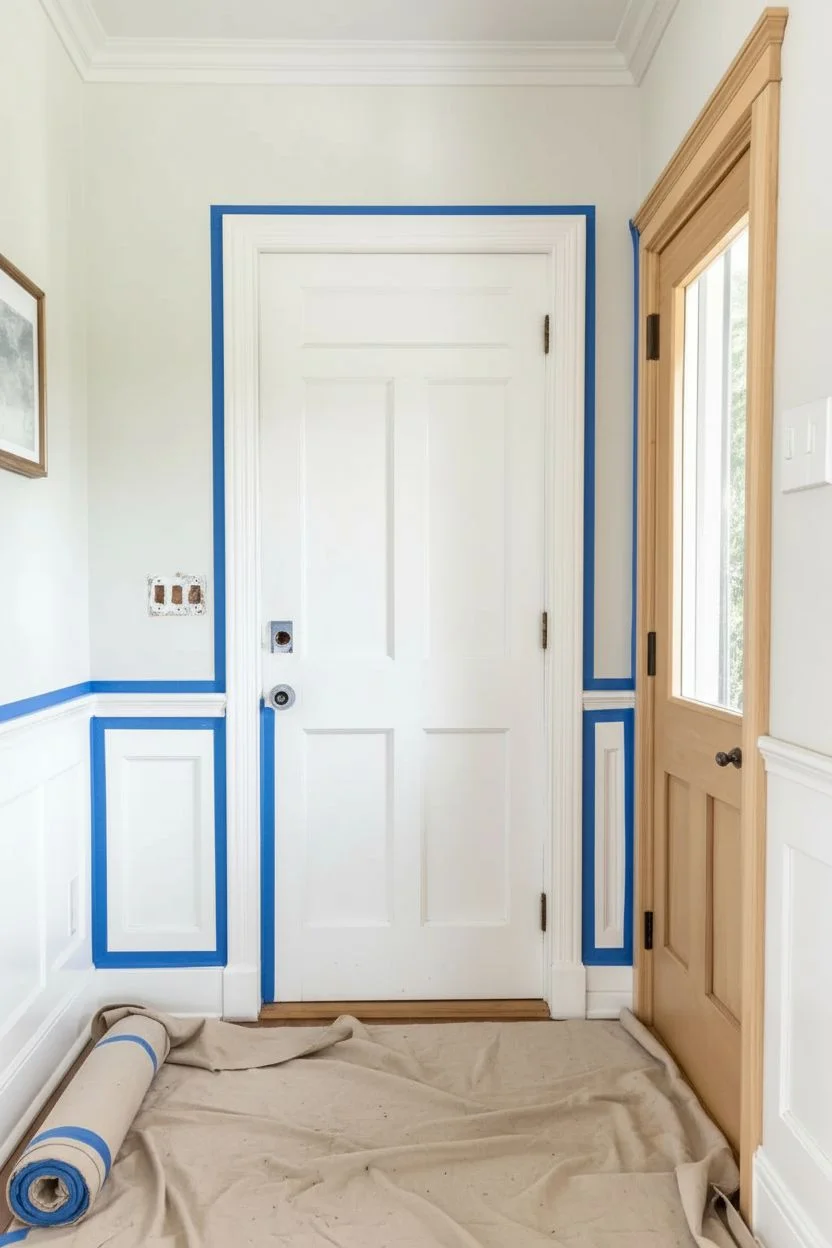
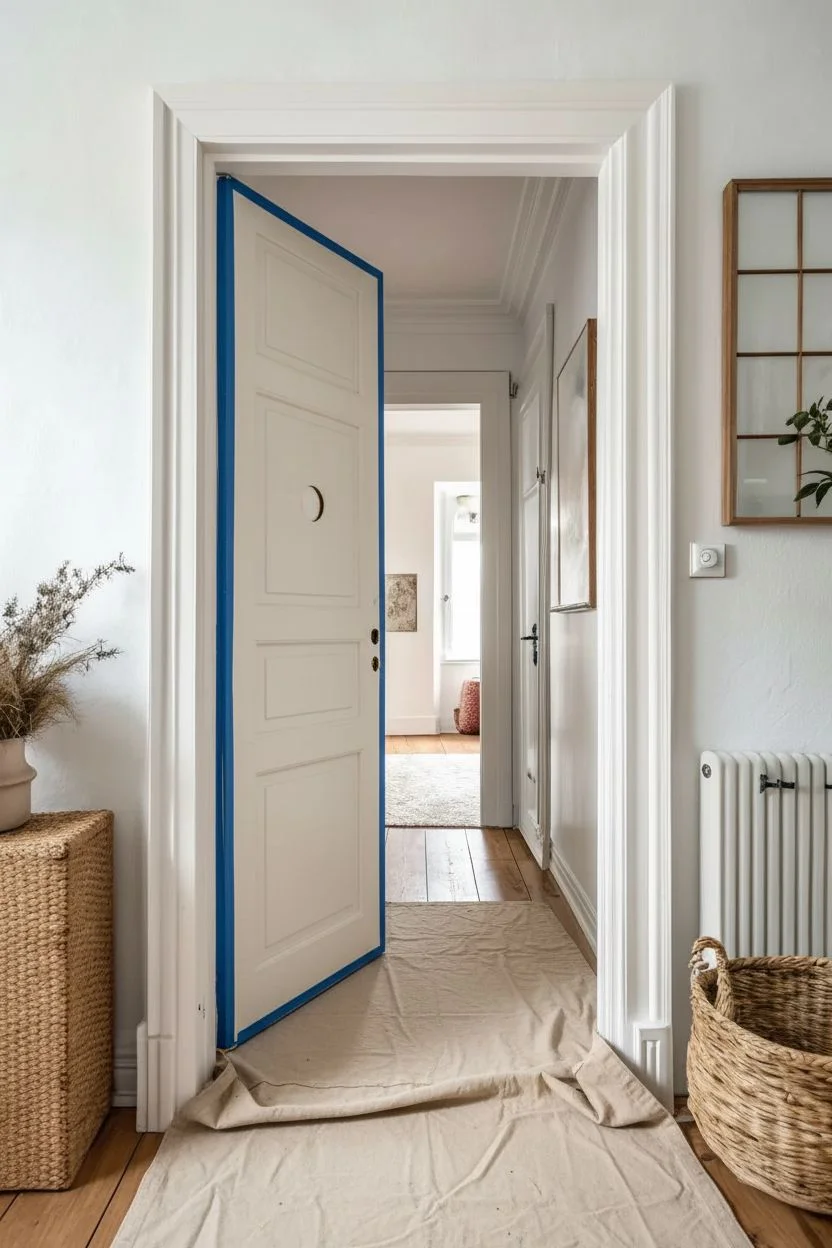
Dusty Blue for Calm, Airy Rooms
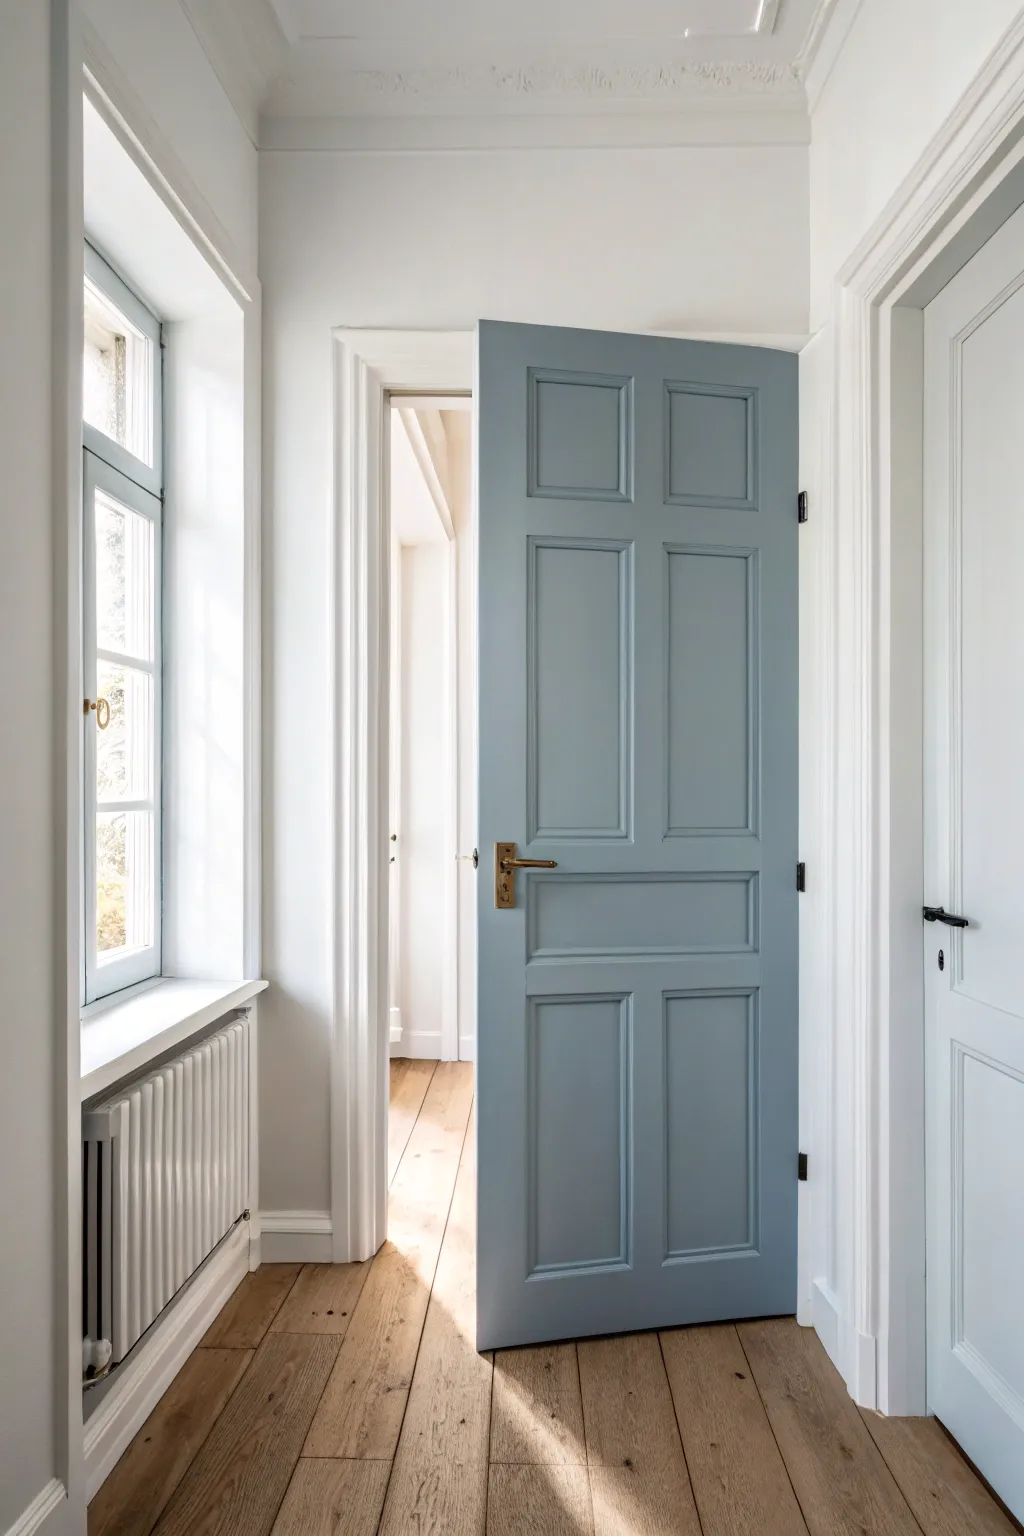
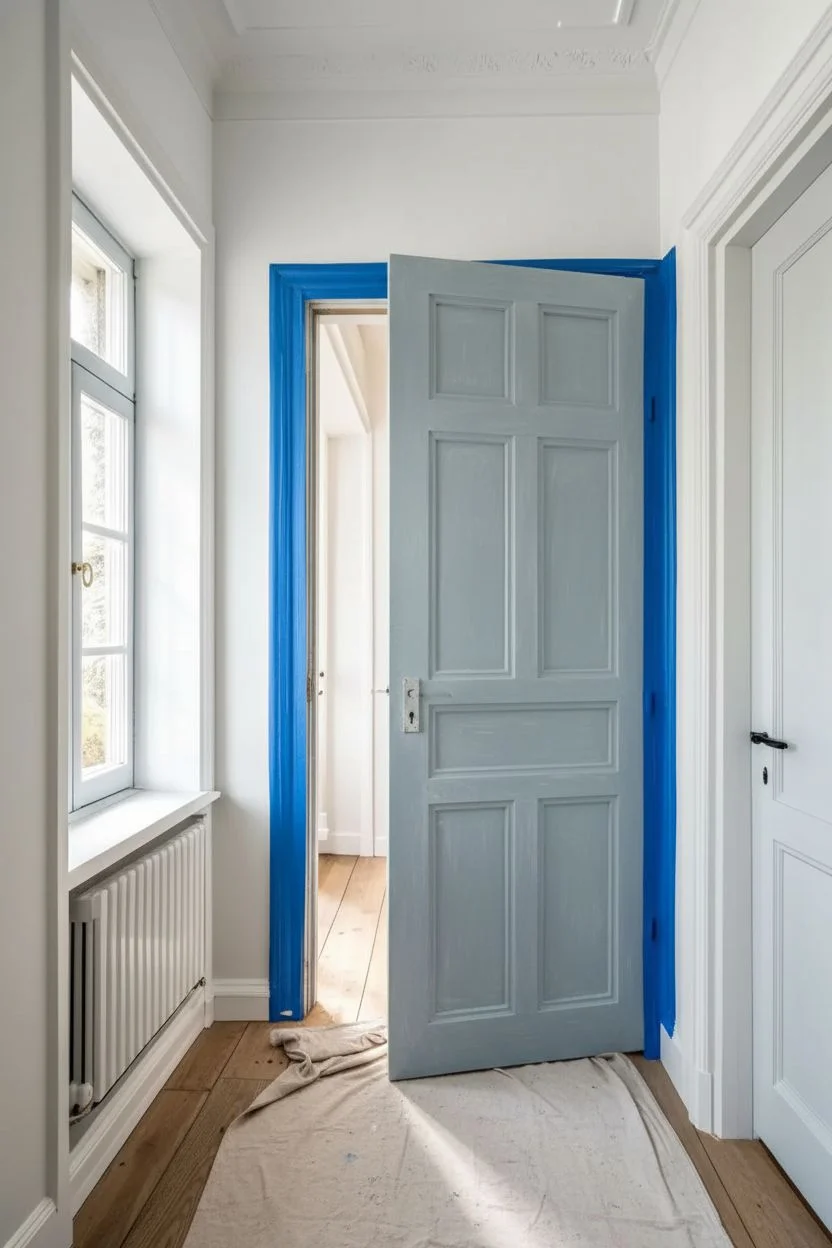
Transform a standard interior door into a serene focal point with this airy, dusty blue finish. This project creates a calming Scandinavian-inspired vibe that pairs beautifully with crisp white trim and natural wood floors.
Step-by-Step
Materials
- Interior wood door (solid or paneled)
- Sandpaper (120 and 220 grit)
- Painter’s tape
- High-quality primer (oil-based or latex aiming for good adhesion)
- Dusty blue interior semi-gloss or satin paint
- 2-inch angled sash brush
- 4-inch foam or microfiber roller
- Paint tray and liners
- Screwdriver
- Clean tack cloths
- Brass door hardware set (optional upgrade)
Step 1: Preparation
-
Remove Hardware:
Begin by removing all door handles, hinges, and strike plates using a screwdriver. While it is possible to tape around them, taking them off ensures a truly professional, seamless finish without jagged paint edges. -
Clean Surfaces:
Wipe the entire door down with a mild degreaser or TSP alternative to remove hand oils and dust. Let it dry completely. -
Protect Surroundings:
Apply painter’s tape to the adjacent doorframe if you are painting the door in place. Lay down a drop cloth underneath to catch any drips. -
Initial Sanding:
Scuff sand the entire surface of the door with 120-grit sandpaper. You aren’t trying to strip the old paint entirely, just roughening the surface so the new primer adheres properly. -
Dust Removal:
Vacuum up the sanding dust, then wipe the door thoroughly with a tack cloth to capture remaining fine particles.
Pro Tip: Order Matters
Always paint paneled doors from the inside out: recessed bevels first, flat panels second, horizontal rails third, and vertical stiles last for no lap marks.
Step 2: Priming
-
Prime Details:
Using your 2-inch angled brush, apply primer to the recessed panels and corners first. Work the primer into the crevices but watch out for pooling in the corners. -
Roll Flat Surfaces:
Use the 4-inch roller to apply primer to the flat vertical stiles and horizontal rails. Roll in the direction of the wood grain for the smoothest texture. -
Light Sanding:
Once the primer is fully dry (check the can for times), lightly sand the surface with fine 220-grit sandpaper to knock down any raised grain or brush marks. Wipe away dust with a tack cloth.
Step 3: Painting
-
First Coat – Recesses:
Dip your angled brush into the dusty blue paint. Start by painting the molded edges inside the panels. I find it helpful to feather out the edges onto the flat surfaces immediately to avoid hard ridges drying later. -
First Coat – Panels:
Switch to your small roller or use the brush to fill in the flat center of the panels. Keep the coat thin and even. -
First Coat – Rails and Stiles:
Paint the horizontal rails (the cross pieces) first, then finish with the vertical stiles (the side pieces). This order mimics how a wood door is constructed and keeps brush strokes logical. -
Dry Time:
Allow the first coat to dry for at least 4-6 hours, or overnight if humidity is high to ensure a hard finish. -
Second Coat:
Repeat the exact painting process for the second coat. This layer will provide the true depth of color and hide any streakiness from the first pass. -
Optional Third Coat:
If the blue looks uneven or the previous color is shadowing through, apply a light third coat for perfect opacity.
Troubleshooting: Sticky Door
If the door sticks to the frame after painting, rub a plain white candle or clear wax along the edge where it touches the jamb to reduce friction.
Step 4: Finishing Touches
-
Remove Tape:
Carefully peel away the painter’s tape while the final coat is still slightly tacky to prevent peeling the fresh paint film. -
Curing:
Let the door cure. While it may feel dry to the touch in hours, aim to leave the door open and untouched for at least 24 hours before closing it tightly to prevent sticking. -
Reinstall Hardware:
Screw the hinges and handles back into place. Upgrading to unlacquered brass hardware, as seen in the inspiration photo, really makes the blue pop.
Enjoy the gentle pop of color whenever you walk through your hallway
BRUSH GUIDE
The Right Brush for Every Stroke
From clean lines to bold texture — master brush choice, stroke control, and essential techniques.
Explore the Full Guide
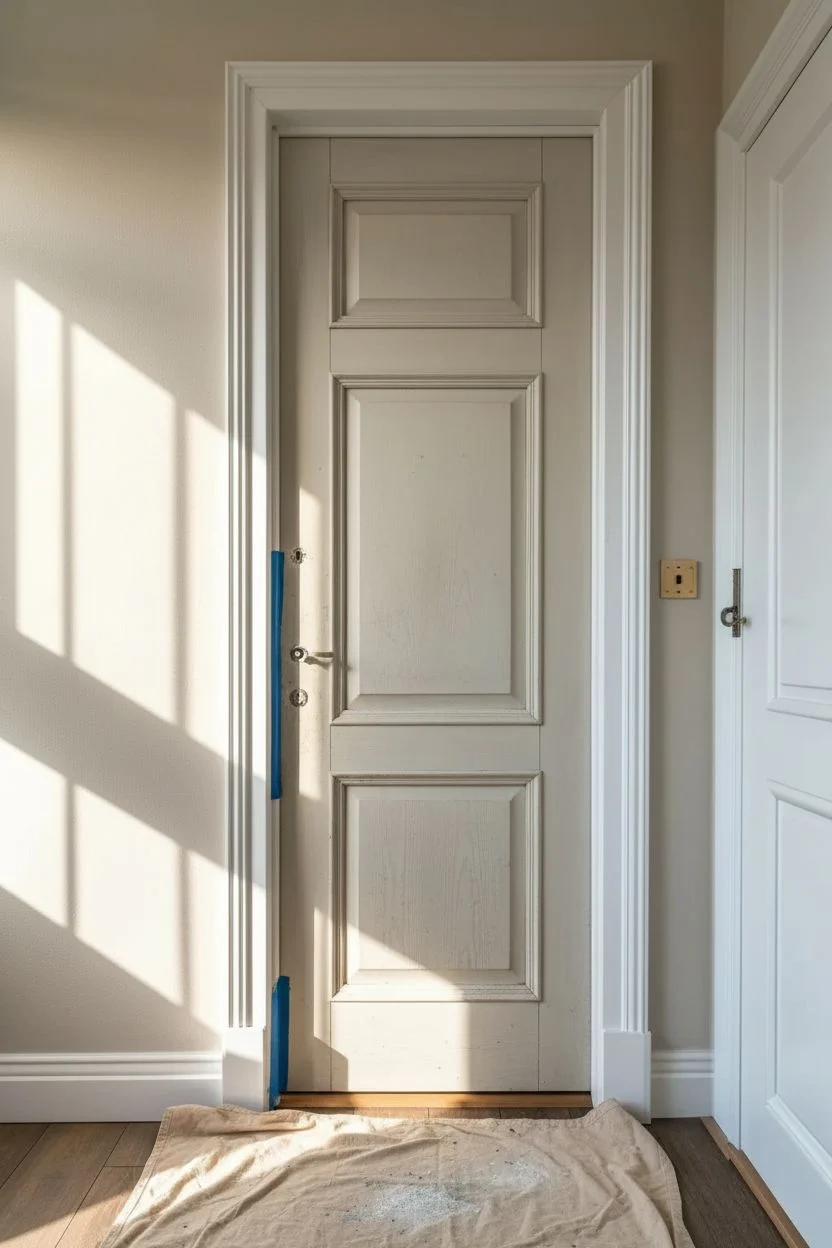
Warm Greige for Subtle Contrast
Transform a standard interior door into a sophisticated focal point using a rich, warm greige tone that bridges the gap between beige and grey. This finish adds depth and subtle contrast without overwhelming your hallway’s airy atmosphere.
Detailed Instructions
Materials
- Interior wood door (pre-existing or new)
- Sandpaper (120 and 220 grit)
- Deglosser or liquid sander (optional)
- Painter’s tape (high quality)
- High-quality angled sash brush (2-inch)
- Mini foam roller and tray
- Primer (bonding primer highly recommended)
- Interior satin or semi-gloss paint in ‘Warm Greige’
- Screwdriver (for hardware removal)
- Drop cloths
- Tack cloth
Step 1: Preparation
-
Clear the Area:
Begin by laying down drop cloths to protect your beautiful wooden floors and surrounding trim. -
Hardware Removal:
Using a screwdriver, carefully remove the door handle, lock mechanism, and any other attached hardware. It is much cleaner to paint the door slab without taping around these tricky shapes. -
Clean Surfaces:
Wipe the door down thoroughly to remove dust and grime. If the door was previously painted with gloss, use a deglosser to help the new paint adhere better. -
Sand for Adhesion:
Give the entire door a light scuffing with 120-grit sandpaper. You aren’t trying to strip it bare, just creating a tooth for the primer to grab onto. -
Dust Removal:
Vacuum up the sanding dust, then wipe the surface with a tack cloth to ensure it is perfectly clean before painting.
Brush Technique
Feather out your brush strokes where vertical and horizontal rails meet. This mimics the natural wood grain direction and hides start/stop marks.
Step 2: Painting
-
Prime the Surface:
Apply a coat of bonding primer. This is crucial if painting over an oil-based finish or bare wood to prevent bleed-through. -
Smooth the Primer:
Once the primer is fully dry, lightly sand it with 220-grit sandpaper for a professional, glass-smooth base. -
Painting the Panels:
Start applying your greige paint with the angled brush. Paint the recessed panel details first, working the paint into the corners and edges. -
Center Verticals:
Next, use a mini roller or brush to paint the vertical stiles running down the center of the door. -
Horizontals:
Paint the horizontal rails across the top, middle, and bottom of the door. Brush inward to blend with the vertical strokes. -
Outer Verticals:
Finish by painting the two long outer vertical stiles on the left and right edges. Long, steady strokes work best here. -
Check for Drips:
Immediately inspect corners and recessed areas for drips or pooling paint and smooth them out with your brush tip. -
Drying Time:
Allow the first coat to dry according to the manufacturer’s instructions, typically 2-4 hours for latex paint.
Step 3: Finishing Touches
-
Light Sanding (Optional):
For an ultra-refined finish, I like to do a very light pass with fine sandpaper between coats to knock down any bumps. -
Second Coat:
Apply the second coat of greige paint following the same order: panels, center verticals, horizontals, then outer verticals. -
Final Cure:
Let the door cure for at least 24 hours before reattaching hardware to prevent the fresh paint from sticking or peeling. -
Reinstall Hardware:
Screw the door handle and plates back into place. Polished brass looks particularly stunning against this warm greige tone.
Sticky Door?
If the door sticks to the frame after painting, try applying a small amount of clear wax or paraffin to the edges once the paint has cured for a few days.
Enjoy the gentle warmth and sophisticated character this simple color update brings to your hallway
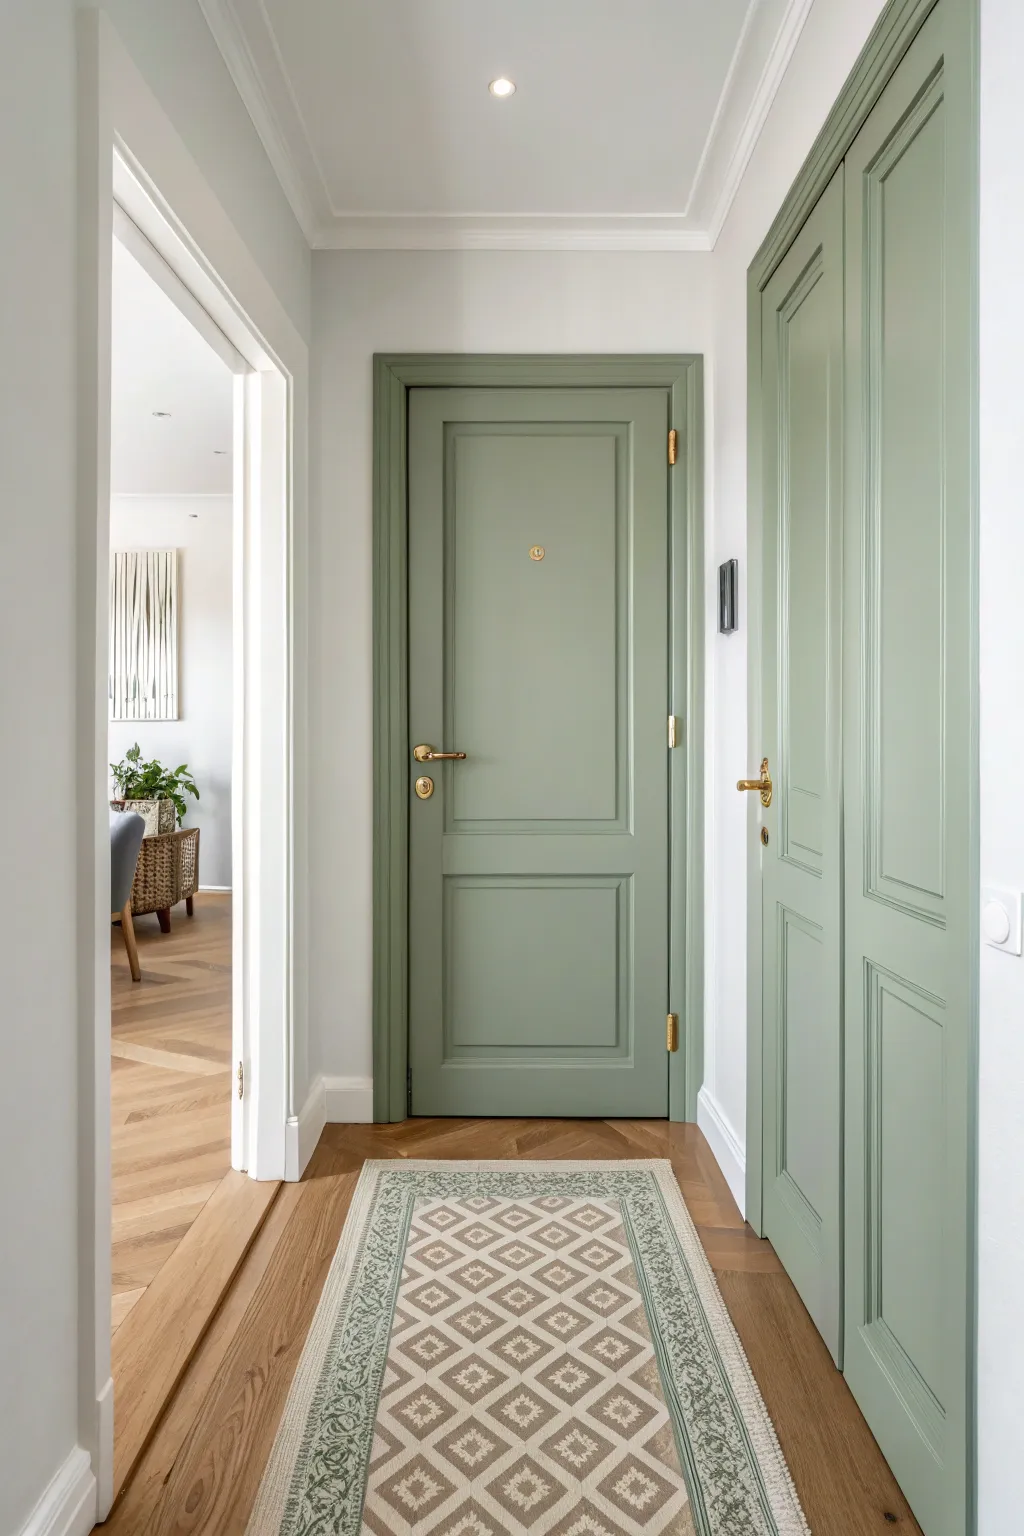
Sage Green Doors for Nature Vibes
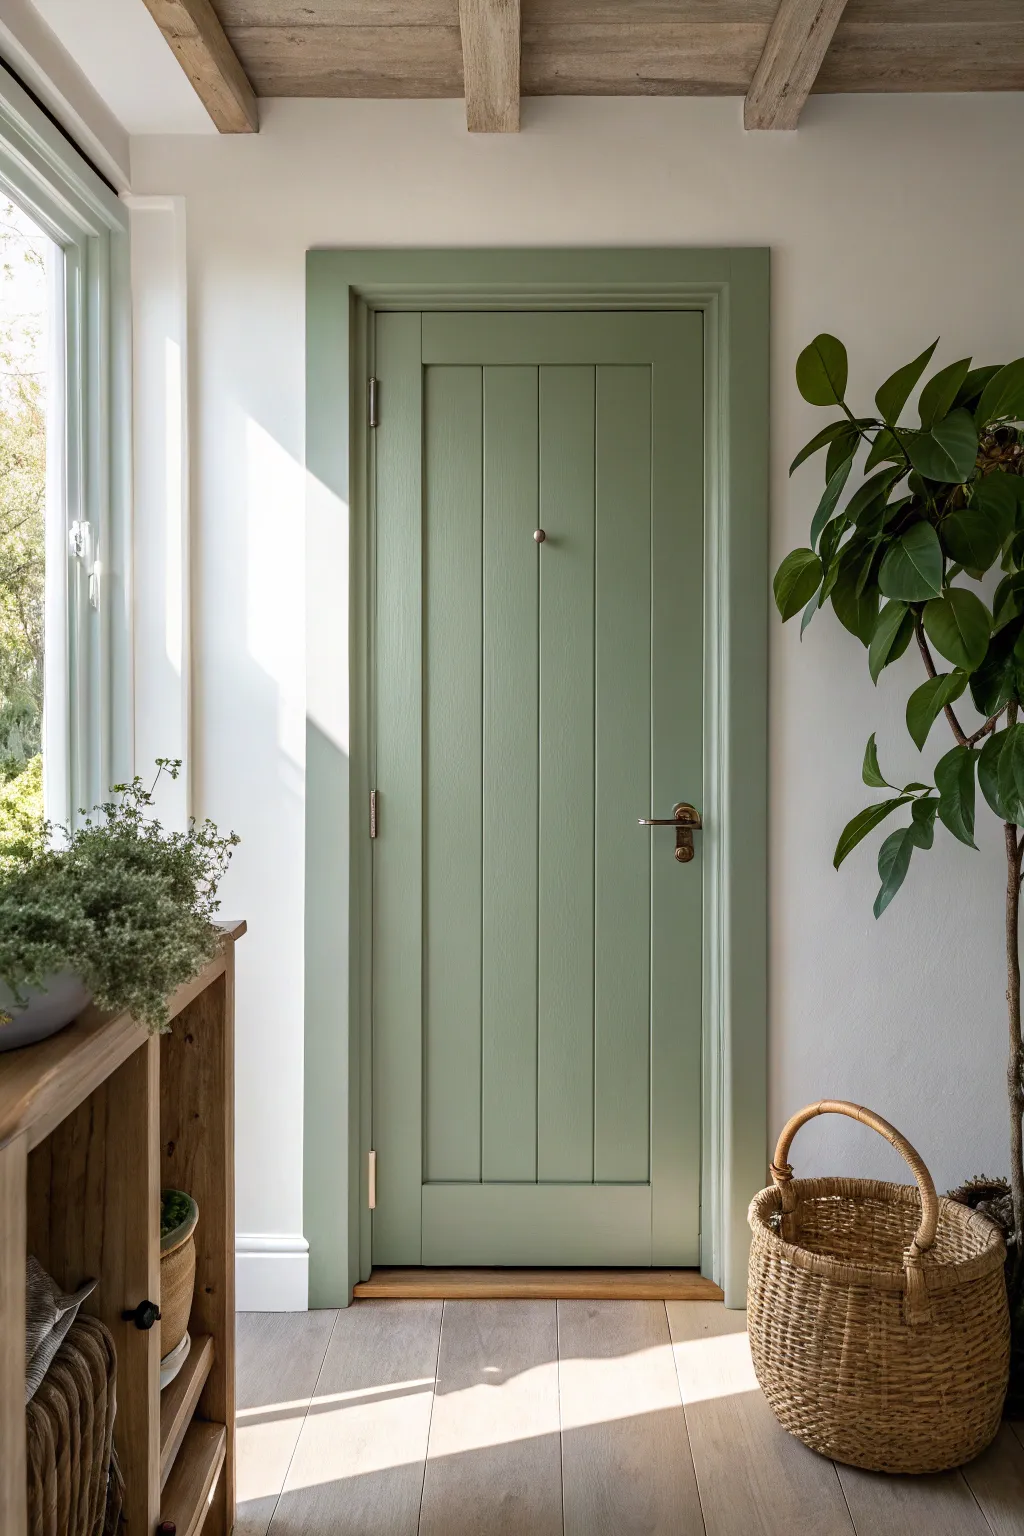
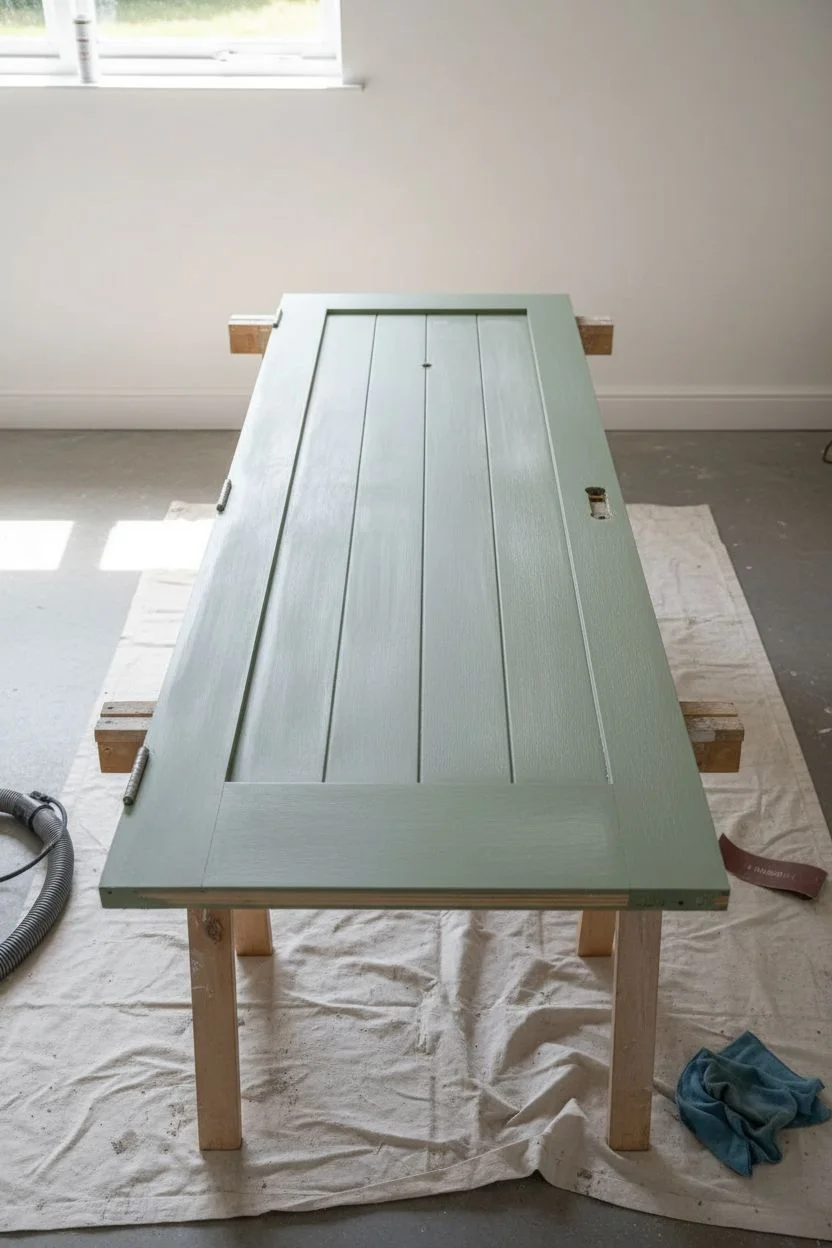
Transform a standard interior door into a calming focal point with this sage green makeover. The soft, earthy hue pairs beautifully with vertical paneling to create an inviting, nature-inspired entryway that brings the outdoors in.
Step-by-Step Tutorial
Materials
- Interior wood door (solid or hollow core)
- Sage green satin or semi-gloss interior paint
- High-quality primer (bonding primer if painting over gloss)
- Painter’s tape (multi-surface)
- 120-grit and 220-grit sandpaper
- Sanding block or electric orbital sander
- High-density foam roller (mini)
- 2-inch angled sash brush
- Paint tray and liners
- Drop cloths
- Screwdriver or power drill
- Tack cloth
- Optional: Wood filler and putty knife
Step 1: Preparation
-
Clear and Clean:
Begin by removing the door from its hinges if possible; laying it flat prevents drips. If you must paint it vertically, wedge the door open securely. Remove all hardware—handles, hinges, and locks—with a screwdriver. -
Surface Cleaning:
Clean the entire door thoroughly with a mild degreaser or TSP substitute to remove oils, dirt, and fingerprints. Let it dry completely. -
Initial Sanding:
Scuff sand the entire surface using 120-grit sandpaper. You aren’t trying to strip the paint, just de-glossing the old finish so the new paint adheres. -
Dust Removal:
Vacuum up the sanding dust, then wipe the door down with a tack cloth to pick up fine particles. -
Tape and Protect:
If you left the hinges on or the door hanging, tape off the hinges and the floor underneath. protect the glass if your door has window panes.
Step 2: Priming
-
Apply Primer:
Using your angled brush, cut in the primer along any molded edges, corners, or recessed panel grooves first. -
Roll the Flat Areas:
Use the foam roller to apply primer to the larger flat rails and stiles. Aim for a thin, even coat rather than a thick one. -
Check for Imperfections:
Once the primer is dry, look for any dents or scratches. Fill them with wood filler now, let dry, and sand smooth. -
Light Sanding:
Give the primed surface a very quick hand-sand with 220-grit paper to knock down any raised grain or brush strokes, then wipe with the tack cloth.
Brushwork Master Tip
Add a conditioner like Floetrol to water-based paint. It slows drying time, allowing brush marks to level out for a silky, factory-like finish.
Step 3: Painting
-
Cut In Details:
Stir your sage green paint well. Start with the angled brush, painting the recessed areas and the edges of any vertical panels or molding details. -
Section Strategy:
Work in sections to keep a ‘wet edge.’ Start with the inner panels, moving top to bottom. -
Roll the Vertical Rails:
Use the roller to paint the vertical stiles (the sides of the door). Roll with the grain of the wood imitation or structure. -
Roll the Horizontal Rails:
Paint the horizontal rails (top, middle, bottom) last. Feather the edges where the horizontal and vertical strokes meet for a seamless look. -
Dry and Assess:
Allow the first coat to dry according to the manufacturer’s instructions (usually 4-6 hours). Don’t rush this step or the paint may drag. -
Second Coat Application:
Apply the second coat in the exact same order: details first, then flat surfaces. I prefer a light touch on this final coat to minimize texture. -
Hardware Cleaning:
While the door dries, clean your old hardware or unbox new antique brass handles to match the sage aesthetic.
Style Level Up
Swap standard silver hinges for antique brass or matte black ones. Matching the hinges to the handle instantly elevates the custom look.
Step 4: Finishing
-
Remove Tape:
Carefully score the edge of the painter’s tape with a utility knife before pulling it off to ensure clean, crisp lines. -
Cure Time:
Let the door cure for at least 24 hours before closing it tight, as fresh paint can stick to the jambs. -
Reinstall Hardware:
Screw the hinges and door handle back into place. Ensure the latch moves freely without scraping the new paint.
Enjoy the peaceful atmosphere your newly refreshed entryway brings to your home

PENCIL GUIDE
Understanding Pencil Grades from H to B
From first sketch to finished drawing — learn pencil grades, line control, and shading techniques.
Explore the Full Guide
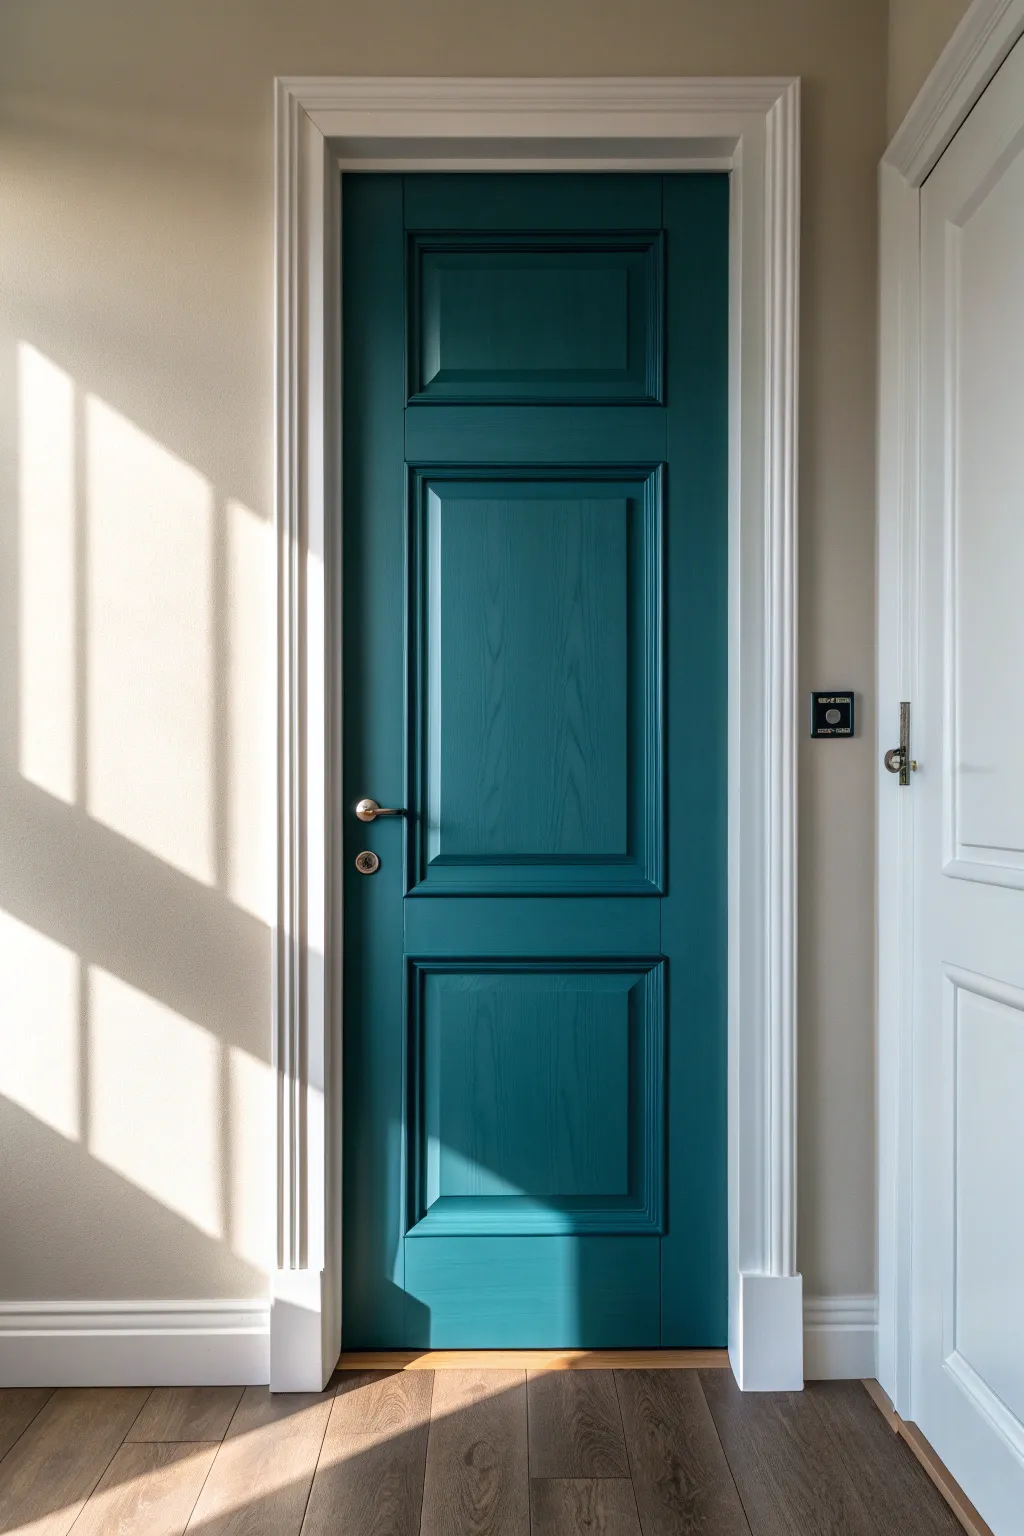
Smoky Teal for a Modern Twist
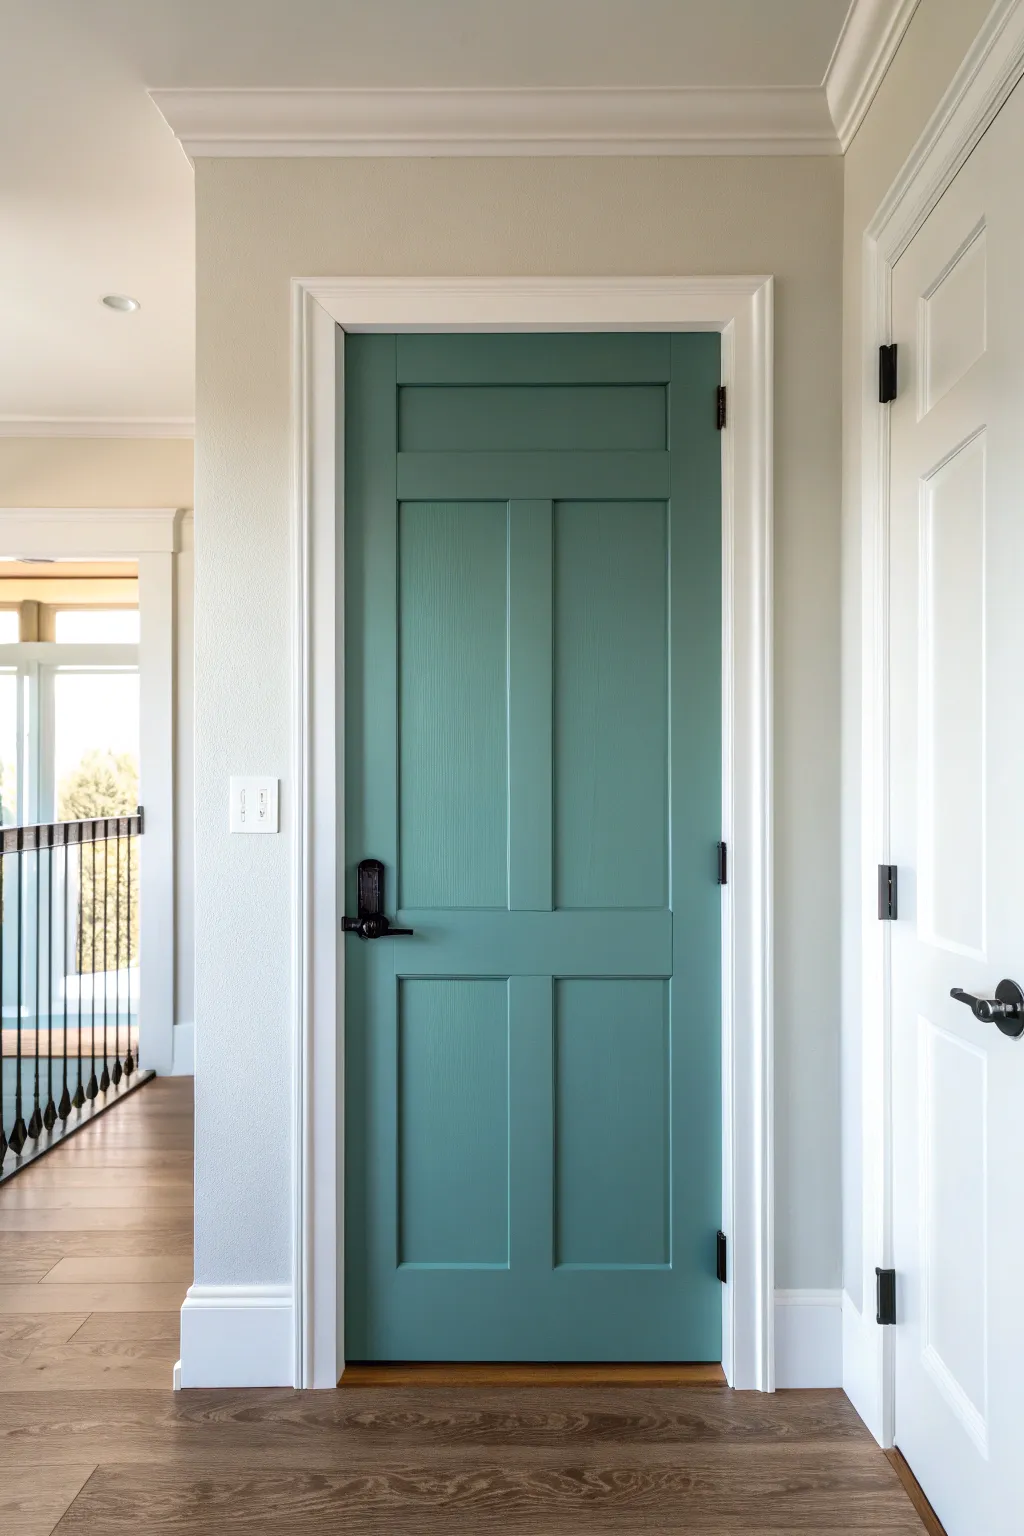
Transform a standard interior door into a modern farmhouse statement piece with a rich coat of smoky teal paint. This project adds a sophisticated pop of color that pairs beautifully with neutral walls and dark hardware, instantly elevating your hallway’s character.
Detailed Instructions
Materials
- Interior door (5-panel style shown)
- Sandpaper (120 and 220 grit)
- Painter’s tape
- Degreaser or mild soap solution
- Clean rags
- High-quality interior primer (bonding style)
- Satin or semi-gloss interior paint in Smoky Teal color
- 2-inch angled sash brush
- 4-inch foam roller or short-nap microfiber roller
- Paint tray and liners
- Drop cloth
- Screwdriver (for hardware removal)
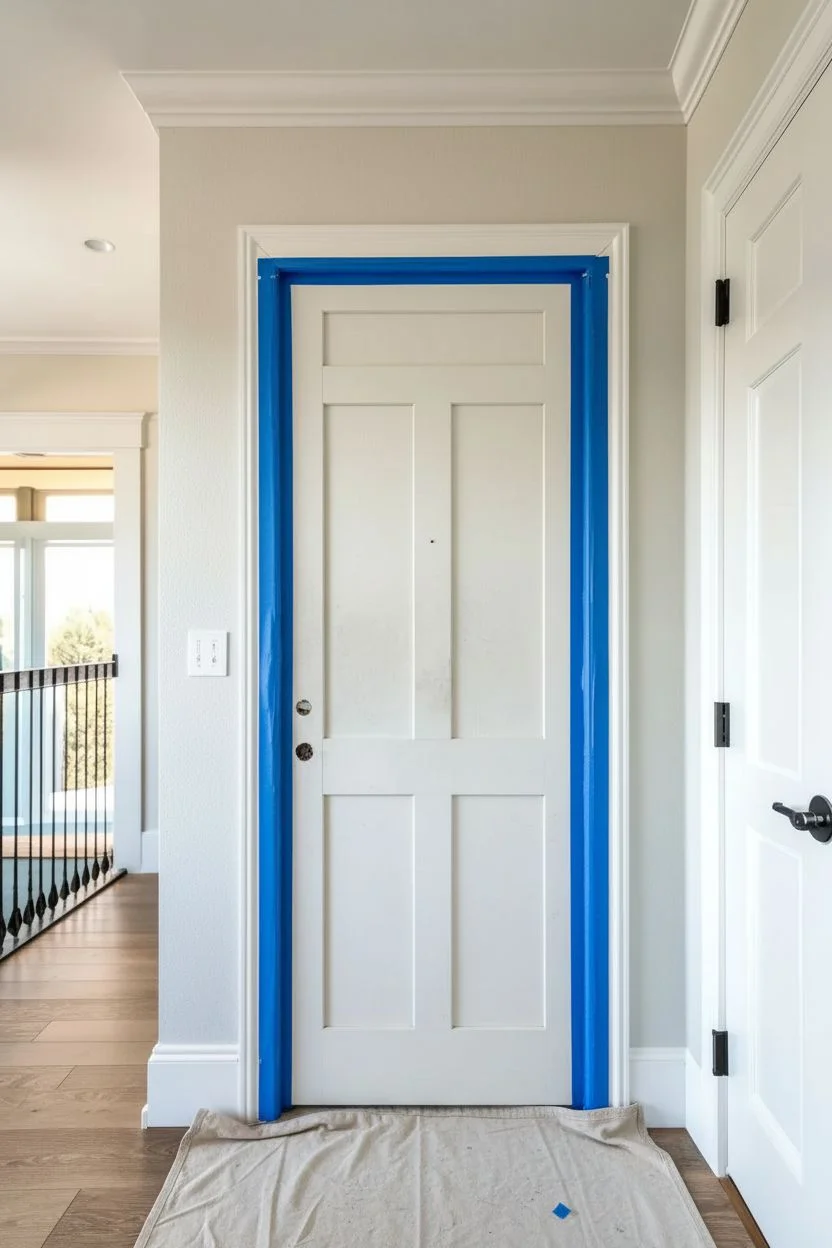
Step 1: Prep Work
-
Clear the area:
Before you begin, lay down a drop cloth underneath the door to protect your flooring from drips. Though painting the door on its hinges is possible and often easier, ensure you have full access to all edges. -
Remove hardware:
Using a screwdriver, carefully remove the door knob, lock mechanism, and strike plates. Removing these items entirely yields a much cleaner finish than taping around them. -
Clean thoroughly:
Wipe down the entire door surface with a degreaser or a mild soap and water solution. Doors collect oils from hands over time, and paint won’t adhere well to greasy spots. -
Sand the surface:
Lightly scuff the entire door with 120-grit sandpaper. You aren’t trying to strip the old paint completely, just creating a rough surface for the new paint to grip. Wipe away all dust with a damp rag or tack cloth. -
Tape the hinges:
If you left the door on the hinges, carefully apply painter’s tape to cover the metal hinge plates completely. Press the edges of the tape down firmly with your fingernail or a putty knife to prevent bleed-through.
Step 2: Priming
-
Apply primer to recessed areas:
Dip your 2-inch angled brush into the primer. Start by painting the recessed moldings and corners of the panels. Use long strokes to avoid pooling in the corners. -
Roll the flat surfaces:
Pour primer into your tray and switch to the foam or short-nap roller. Roll the flat panels, horizontal rails, and vertical stiles. Work quickly to maintain a wet edge. -
Sand lightly:
Allow the primer to dry completely according to the can’s instructions. Once dry, give it a very light pass with 220-grit sandpaper to smooth out any brush marks or raised grain, then wipe clean.
Smooth Paint Pro Tip
Add a paint conditioner like Floetrol to your latex paint. It slows drying time, reducing brush marks and helping the paint self-level perfectly.
Step 3: Painting
-
Paint the panels:
Start applying your Smoky Teal paint with the angled brush. Paint the interior molding of the top panel first, then use the roller to fill in the flat center of the panel. Repeat for all five panels. -
Paint the center stile:
Using your roller, paint the vertical strip running down the center of the door between the panels. Roll with the grain (vertically). -
Paint the rails:
Move onto the horizontal rails (the cross-pieces). Paint the top rail, the intermediate rails between panels, and the bottom rail. Feather your edges slightly where they meet the vertical stiles. -
Paint the outer stiles:
Finally, paint the two long vertical stiles on the far left and right sides of the door. Run your roller from top to bottom in long, continuous strokes to minimize lap marks. -
Check the edges:
Don’t forget the side edge of the door! If the door opens inward, paint the hinge edge; if it opens outward, paint the latch edge. I usually check for drips on the faces immediately after doing this step. -
Dry and assess:
Let this first coat dry for at least 2-4 hours, or as recommended by your paint manufacturer. Don’t rush; tacky paint will pull up if you recoat too soon. -
Second coat:
Apply a second coat following the exact same order: panels first, center stile, horizontal rails, then outer stiles. This second layer provides that rich, deep color opacity seen in the photo.
Level Up: Hardware
Swap standard round knobs for rectangular matte black levers like those in the photo. It instantly modernizes the door without extra painting effort.
Step 4: Finishing
-
Remove tape:
While the final coat is still slightly tacky (not fully dry), carefully peel off the painter’s tape from the hinges. Pulling it at a 45-degree angle helps ensure a crisp line. -
Cure time:
Let the door cure for at least 24 hours before closing it tight. This prevents the paint from sticking to the door jamb and peeling off. -
Reinstall hardware:
Once the paint has cured hard, screw your black hardware back into place. The contrast of the matte black handle against the teal is the final touch that makes the look pop.
Enjoy the fresh, modern vibe your newly painted door brings to your hallway
Sunny Yellow to Wake Up a Hallway
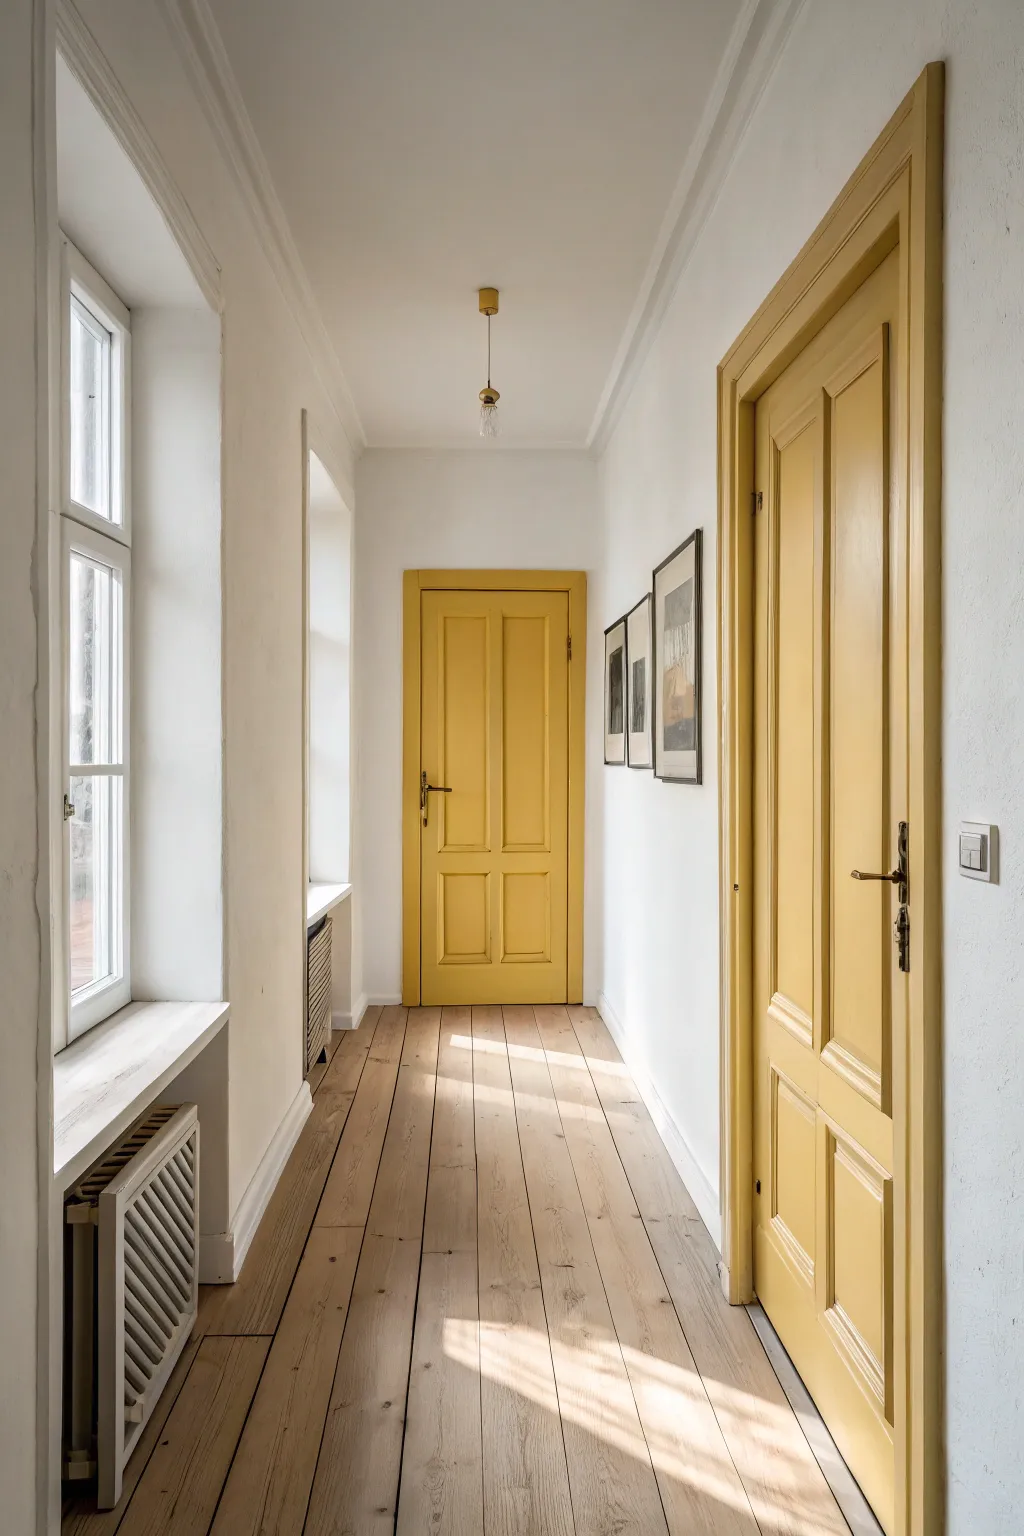
Transform a dim or neutral hallway into a warm, inviting space by painting your interior doors a cheerful shade of mustard yellow. This project brings a classic European farmhouse feel to your home, using light and color to energize the transition between rooms.
Step-by-Step Tutorial
Materials
- Interior wood primer (high adhesion)
- Satin or semi-gloss interior paint (Mustard Yellow shade)
- Medium-grit sandpaper (120-grit)
- Fine-grit sandpaper (220-grit)
- Painter’s tape
- Liquid deglosser or TSP substitute
- Wood filler (if repairing old doors)
- 2-inch angled sash brush
- 4-inch foam roller
- Roller tray
- Drop cloths
- Screwdriver (for hardware removal)
- Tack cloth
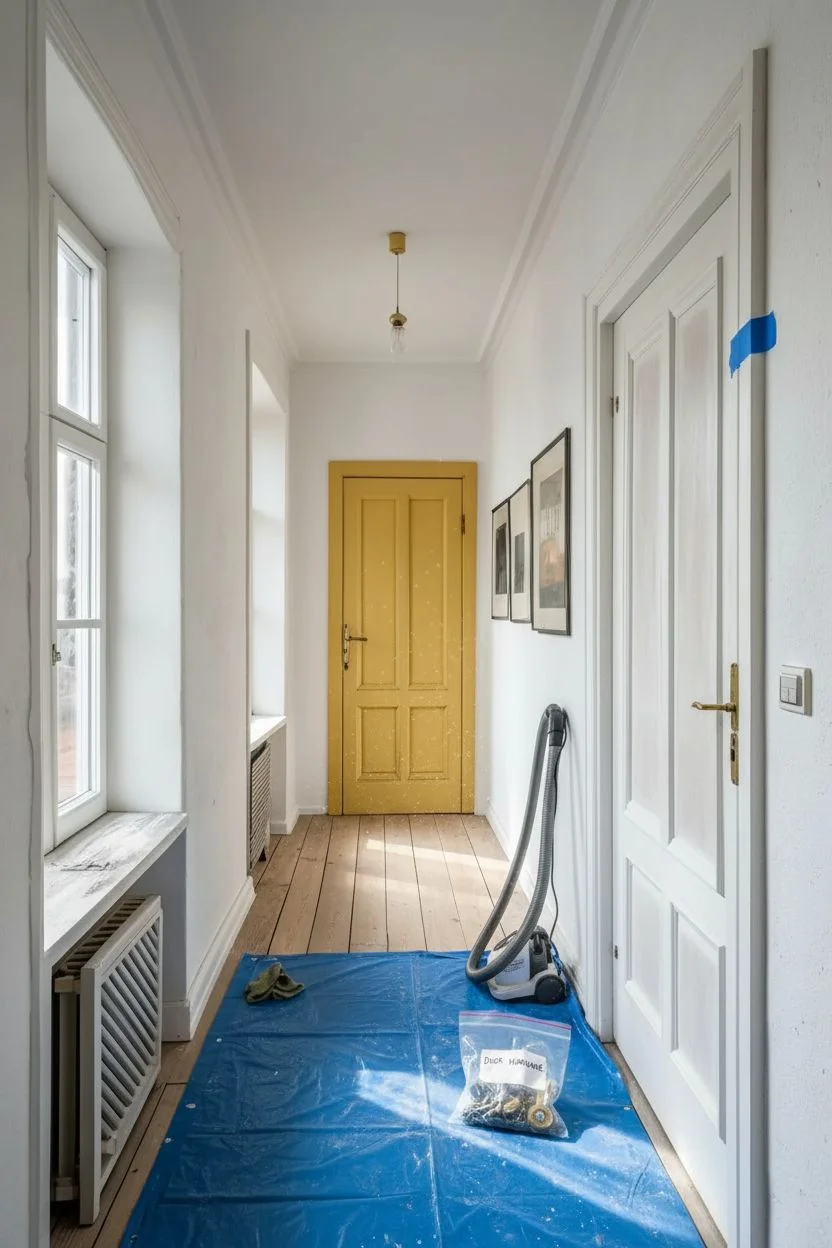
Step 1: Preparation
-
Remove Hardware:
Before touching a brush, use your screwdriver to remove the door handles, plates, and locking mechanisms. Place all screws and parts in a labeled bag so nothing gets lost. -
Clean Thoroughly:
Wipe down the entire door surface with a TSP substitute or liquid deglosser. This removes invisible oils from hands and ensures your new paint will bond properly. -
Sand the Surface:
Scuff sand the entire door using 120-grit sandpaper. You aren’t trying to strip the paint entirely, just creating a rough surface for the new coat to grip. Focus on getting into the corners of the recessed panels. -
Repair Imperfections:
Inspect the woodwork for deep scratches or dents. Fill these with wood filler, let it dry completely, and sand smooth with 220-grit paper until it’s flush with the surface. -
Remove Dust:
Vacuum the door and surrounding area, then wipe the door with a tack cloth to pick up every last speck of dust. Any left-behind dust will create a gritty finish. -
Protect the Area:
Lay down drop cloths under the door. If you are painting the door while it hangs, wedge a doorstop underneath to keep it steady. Apply painter’s tape to the hinges if you didn’t remove the door.
Sticky Situation?
If the door sticks to the frame after painting, rub a plain white candle or a little clear wax along the edge of the door where it meets the jamb. This creates a barrier against friction.
Step 2: Priming
-
Cut In the Edges:
Using your angled sash brush, apply primer to the recessed corners of the panels first. Brush outward to smooth any pools of primer in the crevices. -
Roll the Flat Surfaces:
Switch to your 4-inch foam roller for the flat stiles, rails, and panels. The foam roller helps achieve a smooth, spray-like finish without brush marks. -
Dry and Sand:
Allow the primer to dry according to the can’s instructions. Once dry, lightly sand with 220-grit paper to knock down any raised grain or bumps, then wipe with the tack cloth again.
Antique Finish
To add age to your new yellow door, apply a subtle dark wax or glaze into the corners of the panels after the paint cures. This mimics the patina seen in historic homes.
Step 3: Painting
-
Paint the Panels First:
Dip your angled brush into the yellow paint and coat the recessed molding around the panels. I find it best to work from the top panels down to avoid accidental drips ruining lower work. -
Fill the Panel Centers:
Use the roller to paint the flat center of each panel. Feather the edges gently with a brush if the roller can’t reach the very edge without creating a ridge. -
Paint the Center Vertical Stile:
Paint the vertical strip of wood that runs down the center of the door (between the panels). Use vertical brush strokes or the roller, ensuring you don’t overlap messy edges onto the horizontal rails yet. -
Paint the Horizontal Rails:
Move on to the horizontal rails (top, middle, and bottom). Paint these using horizontal strokes. Be careful at the intersections where the rails meet the stiles to keep the texture consistent. -
Paint the Outer Stiles:
Finish by painting the long vertical stiles on the far left and right of the door. Run your brush or roller from top to bottom in long, continuous strokes. -
Paint the Door Edges:
Don’t forget the side edge of the door that is visible when it opens. Paint the top edge only if it’s visible from a staircase. -
Apply Second Coat:
Wait for the first coat to fully cure (usually 4-6 hours for water-based enamels). Repeat the painting steps for a second coat to get that rich, opaque yellow color. -
Reinstall Hardware:
Ideally, wait 24 hours before reattaching the hardware to prevent the fresh paint from sticking to the metal plates. Your sunny hallway transformation is complete.
Enjoy the bright and welcoming atmosphere your new yellow doors bring to the hallway


Terracotta and Clay for Cozy Warmth
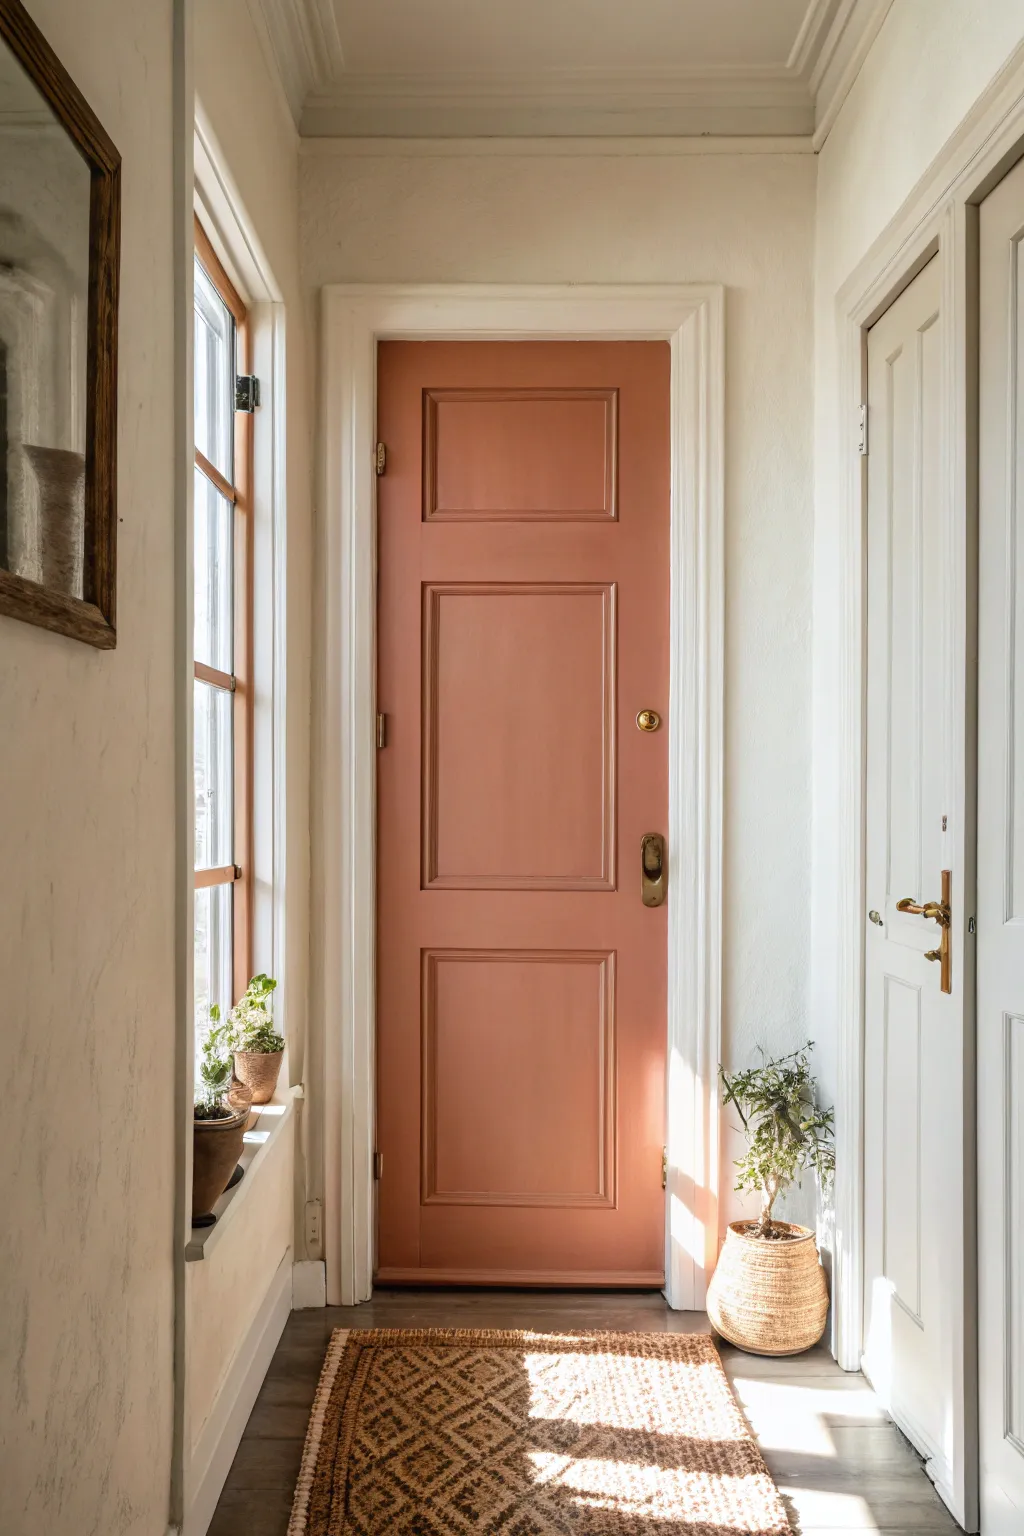
Bring the earthy, grounding warmth of clay right into your hallway by transforming a standard interior door with this rich terracotta hue. This project balances rustic charm with modern elegance, creating an inviting focal point that glows in natural light.
Detailed Instructions
Materials
- Interior door (wood or primed composite)
- High-quality interior paint (satin or semi-gloss finish) in a terracotta/clay shade
- Primer (if painting over dark colors or raw wood)
- Sandpaper (120 and 220 grit)
- TSP substitute or degreaser
- Painter’s tape (1.5 – 2 inch width)
- Screwdriver (for removing hardware)
- Angled sash brush (2 inch)
- Mini foam roller or short-nap microfiber roller (4 inch)
- Paint tray and liners
- Drop cloths
- Clean tack cloths
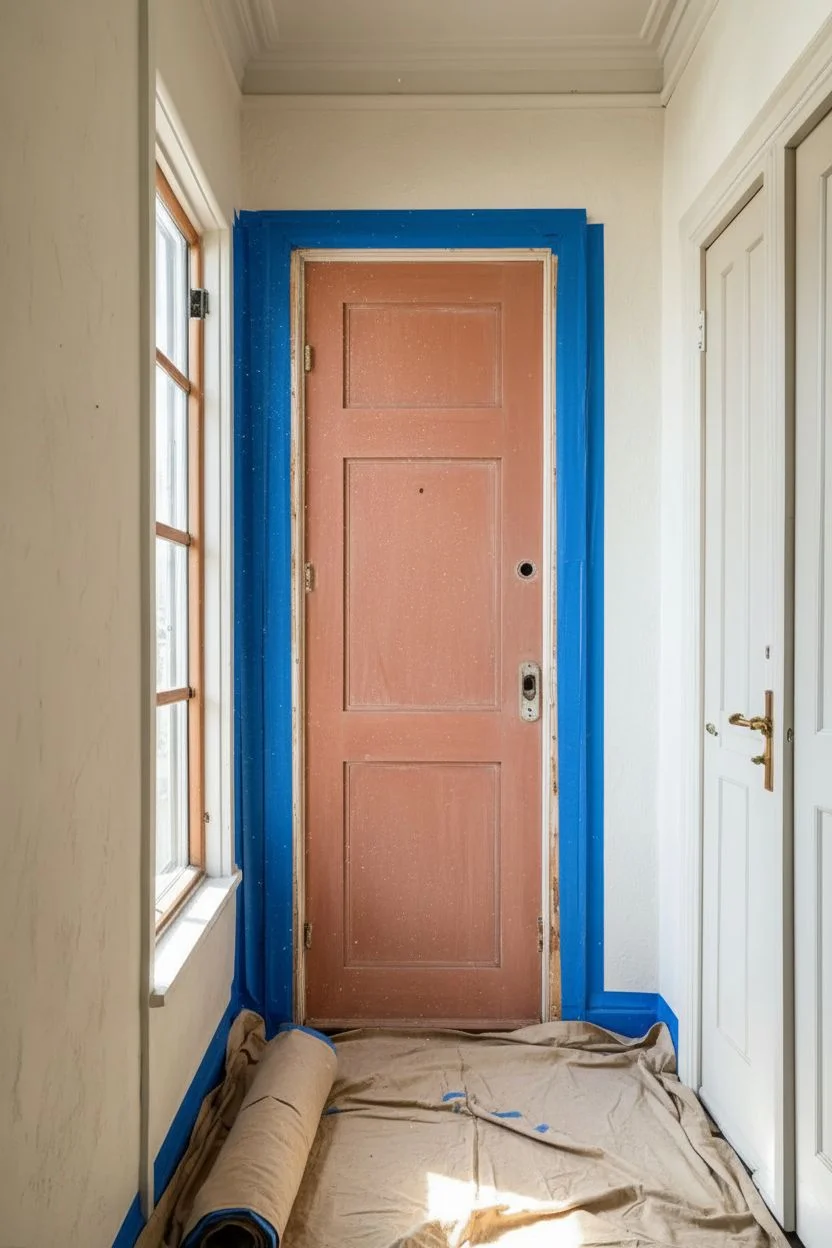
Step 1: Preparation and Cleaning
-
Clear the area:
Start by removing any rugs, plants, or decor items near the door to give yourself ample working space. Lay down a drop cloth to protect your flooring from drips and dust. -
Remove hardware:
Using your screwdriver, carefully remove the doorknob, deadbolt, and latch plates. Place all screws and parts in a labeled bag so nothing gets lost. Doing this ensures a professional finish without paint splotches on your hardware. -
Clean the surface:
Wipe the entire door down thoroughly with a TSP substitute or a strong degreaser. Doors accumulate hand oils and dust that can prevent paint adhesion, so scrubbing this clean is crucial. -
Protect the perimeter:
Apply painter’s tape carefully along the door jambs, hinges (if you aren’t removing the door), and any glass panes if your door has a window. Run a credit card or putty knife over the tape edge to seal it tight.
Pro Tip: Rolling Direction
Always finish your roller strokes in the direction of the wood grain. For vertical stiles, roll up and down. For horizontal rails, roll side to side.
Step 2: Sanding and Priming
-
Scuff sand:
Using 120-grit sandpaper, lightly sand the entire surface of the door. You aren’t trying to strip the paint, just creating a ‘tooth’ for the new coat to grab onto. Wipe away the dust with a barely damp cloth. -
Fill imperfections:
Inspect the door for deep scratches or dents. Fill these with wood filler, let dry, and sand smooth with 220-grit paper. -
Clean with tack cloth:
Go over the entire door one last time with a tack cloth to pick up even the finest dust particles. This ensures a silky smooth final texture. -
Apply primer:
If your door was previously glossy or is a very dark color, roll on a coat of high-quality bonding primer. Use your angled brush for the recessed panel corners first, then roll the flat surfaces. Let this dry completely according to the can’s instructions.
Step 3: Painting the Terracotta Finish
-
Start with panels:
Stir your terracotta paint thoroughly. Begin by painting the recessed panels. Use your angled sash brush to get into the corners and molding details of the top panel first. -
Feather the edges:
As you brush the molding, I like to feather out any paint that pools in the corners immediately to avoid drips. Keep a wet edge to prevent lap marks. -
Paint center stiles:
Move on to the vertical center stile (the strip of wood down the middle). Use your mini roller here for a smooth, brush-mark-free finish, rolling with the grain of the wood. -
Paint horizontal rails:
Next, paint the horizontal rails (the cross pieces). Paint the top rail, then the middle rails, and finally the bottom rail. Again, follow the wood grain direction. -
Paint vertical stiles:
Finish by painting the two long vertical stiles on the far left and right edges of the door. Roll from top to bottom in long, continuous strokes. -
Check for drips:
While the paint is still wet, quickly inspect the corners of the panels again. Gravity often pulls paint down here; gently smooth out any developing drips with a dry brush. -
Allow to dry:
Let the first coat dry completely. Terracotta pigments can sometimes look patchy on the first pass, but don’t worry—the second coat creates that rich depth. -
Sand lightly:
Once dry, very lightly run 220-grit sandpaper over the surface to knock down any bumps or dust nibs. Wipe clean with a tack cloth. -
Apply second coat:
Repeat the painting process in the exact same order: panels, center stile, rails, then outer stiles. This builds up the opaque, warm color saturation shown in the photo.
Level Up: Aged Patina
For an old-world look, mix a tiny amount of dark glaze into clear wax and lightly buff it into the panel corners to accentuate the door’s depth.
Step 4: Finishing Touches
-
Remove tape:
Score the edge of the painter’s tape with a utility knife while the paint is still slightly tacky, then peel it away slowly at a 45-degree angle. This prevents the dry paint from peeling up with the tape. -
Reinstall hardware:
Once the door has cured (ideally 24 hours to avoid tackiness), reinstall your doorknobs and plates. If you want to update the look further, consider swapping old silver hardware for antiqued brass to match the warm tones.
Step back and admire how this simple color change instantly warms up your entire hallway space
Blush or Barely-There Pink Doors
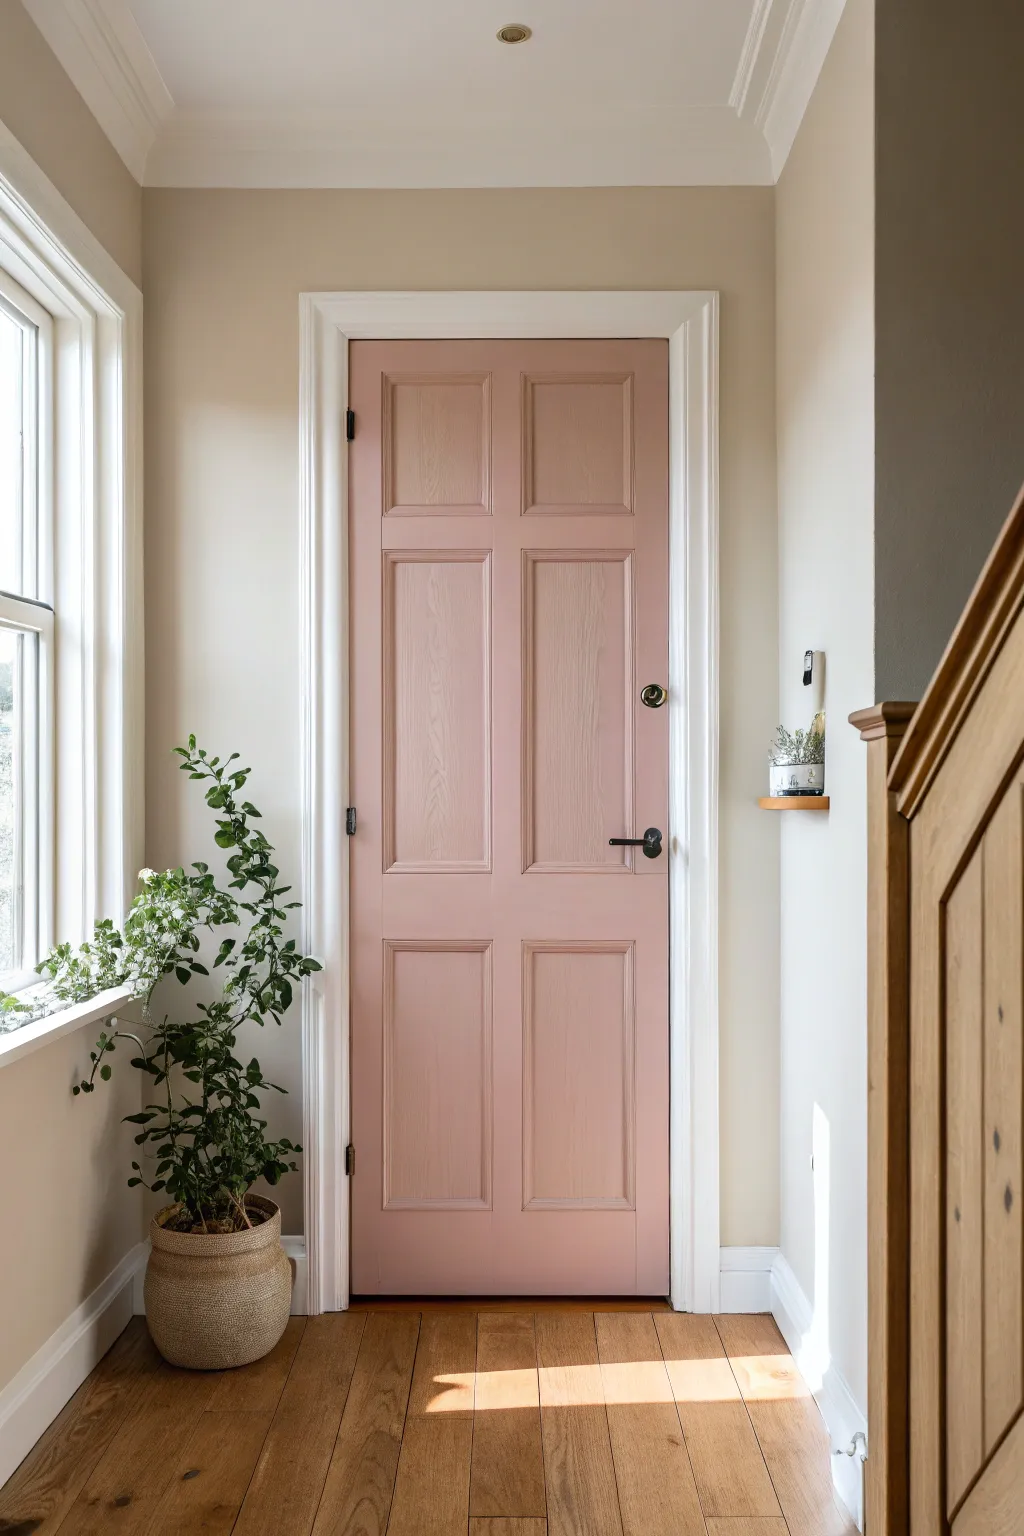
Transform a standard interior door into a subtle statement piece with a coat of soft blush pink. This gentle color adds warmth and personality without overwhelming a neutral hallway, creating an inviting entryway that feels both modern and timeless.
How-To Guide
Materials
- High-quality interior wood paint (eggshell or satin finish) in a muted blush pink
- Primer (if binding to previous gloss or bare wood)
- Medium-grit sandpaper (120-grit)
- Fine-grit sandpaper (220-grit)
- Tack cloths
- Painter’s tape
- Drop cloth
- Screwdriver (for hardware removal)
- Small angled sash brush (1.5 – 2 inch)
- Mini foam roller or flocked roller for smooth surfaces
- Paint tray
- Cleaning solution (TSP substitute or mild degreaser)
- Wood filler (optional)
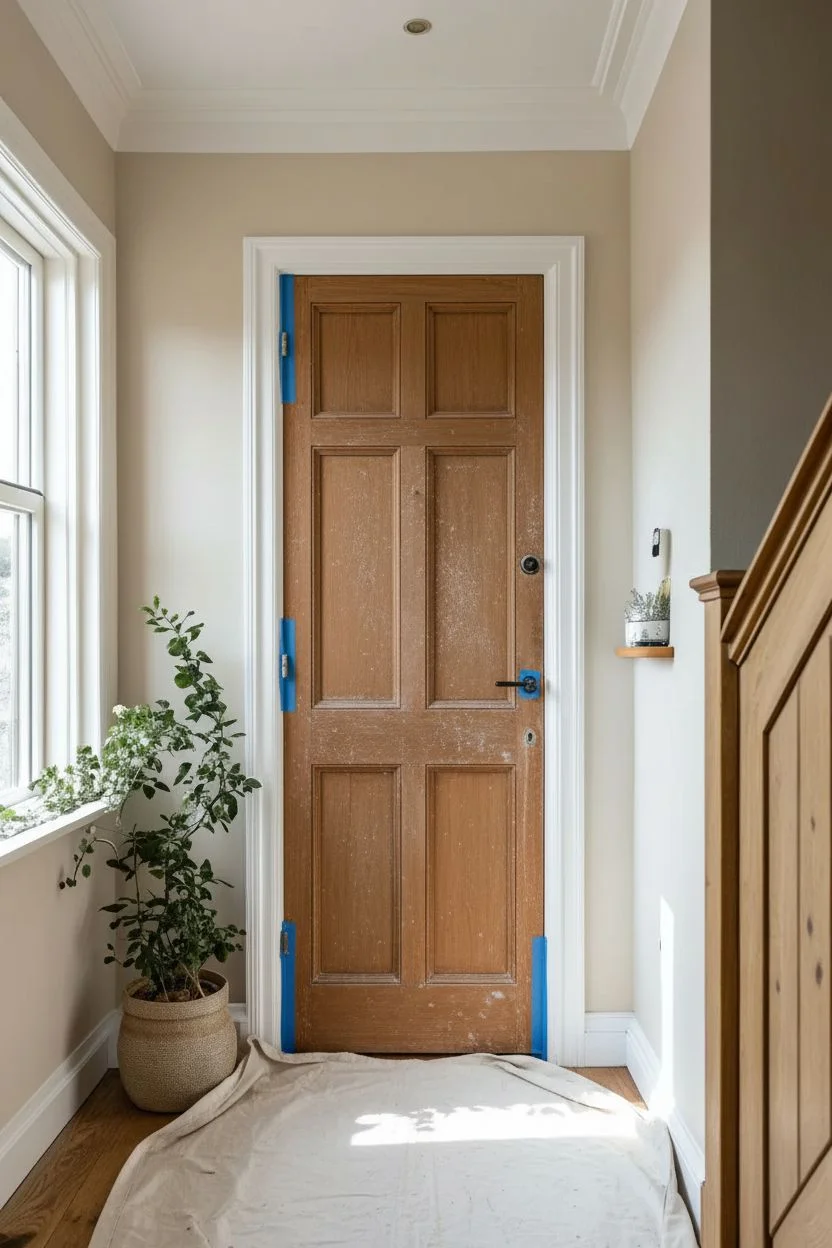
Step 1: Preparation
-
Hardware Removal:
Begin by removing the door handle, lock escutcheons, and any other hardware like the peephole cover using a screwdriver. Keep all screws and parts organized in a small bag so nothing gets lost. -
Clean Generally:
Wipe down the entire door surface with a mild degreaser or TSP substitute to remove hand oils and dust. This ensures the paint will adhere properly. -
Surface Sanding:
Lightly sand the entire door using 120-grit sandpaper. You aren’t trying to strip it to bare wood, just scuffing up the previous finish to give the new paint ‘tooth’ to grab onto. -
Clear Dust:
Use a tack cloth to thoroughly remove all sanding dust. Even tiny specks can ruin the smooth final finish of a door. -
Protect Surroundings:
Apply painter’s tape carefully around the hinges if you haven’t removed the door from the frame. Lay down a drop cloth underneath the door to catch drips.
Smooth Operator
Add a paint conditioner like Floetrol to water-based paint. It slows drying time, helping brush marks level out for a factory-smooth finish.
Step 2: Painting Technique
-
Priming (Optional but Recommended):
If the door was previously glossy or is dark wood, apply a coat of high-quality primer. Let it dry completely according to the can’s instructions. -
Begin with Moldings:
Start painting the recessed moldings around the panels first. Use your angled sash brush here to get into the corners and grooves without pooling paint. -
Paint the Panels:
Moving quickly while the molding paint is wet, paint the flat interior panels using a mini roller or brush. I like to smooth this out immediately with light brush strokes to match the wood grain. -
Center Stiles:
Paint the vertical center stile (the strip between the panels) next. Keep your brush strokes vertical, following the direction of the wood grain. -
Horizontal Rails:
Paint the horizontal rails (the crossing sections). Carefully feather the edges where they meet the vertical stiles to avoid harsh lap marks. -
Outer Stiles:
Finish by painting the two long vertical stiles on the far left and right edges of the door. Run your brush or roller from top to bottom in long, even strokes. -
Check Edges:
Don’t forget the door edges. Generally, you paint the edge that is visible when the door is open into the room you are painting.
Step 3: Finishing Touches
-
First Coat Drying:
Allow the first coat to dry completely. This usually takes 4 to 6 hours for water-based paints, but check your specific product. -
Light Sanding In-Between:
Once dry, very lightly run 220-grit sandpaper over the surface to knock down any raised grain or dust nibs. Wipe clean with a tack cloth again. -
Second Coat Application:
Apply the second coat following the exact same order: moldings, panels, center stile, rails, then outer stiles. -
Remove Tape:
Carefully peel away the painter’s tape while the final coat is still slightly tacky to prevent peeling the fresh paint film. -
Cure Time:
Let the door cure for at least 24 hours before reinstalling heavy hardware. The paint may feel dry to the touch sooner, but it remains soft and vulnerable to scratches. -
Reinstall Hardware:
Screw the handles and lock plates back into place. Enjoy the soft glow your new door brings to the hallway.
Hardware Upgrade
Swap old hinges and handles for matte black hardware. The high contrast against the soft pink makes the door feel modern and intentional.
This simple change creates a warm focal point that greets you every time you walk through the hall
Deep Forest Green for Library Energy
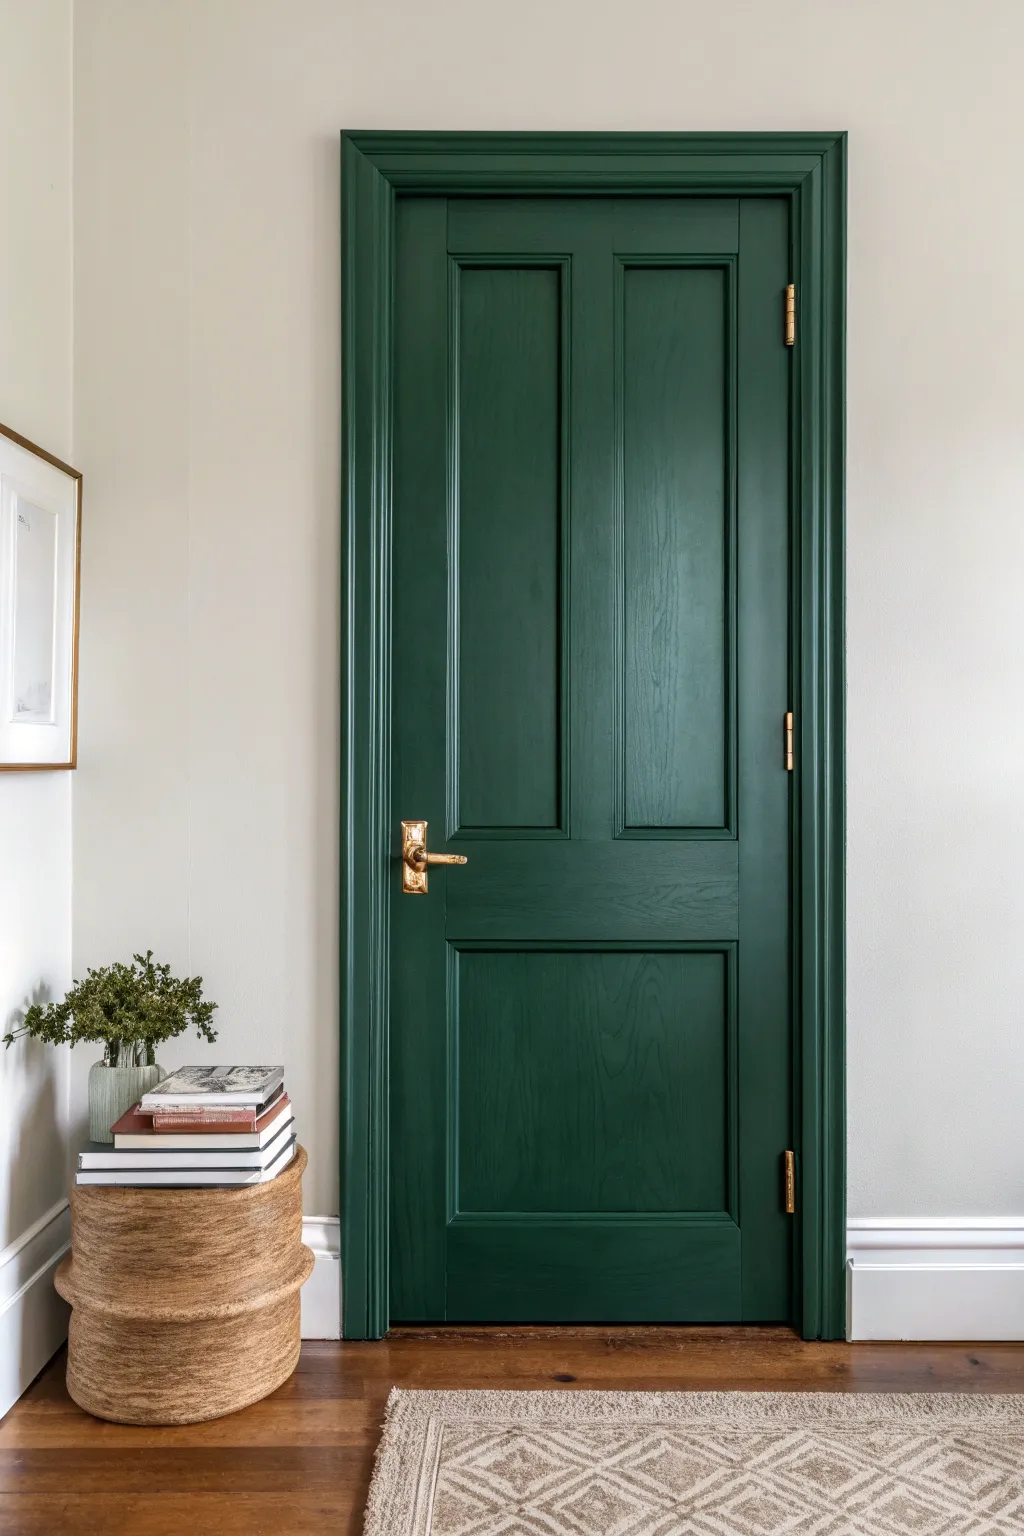
Transform a standard interior door into a statement piece with this rich, moody green finish that evokes the quiet elegance of a classic study. The deep forest hue pairs beautifully with warm brass hardware, creating an instant focal point that feels sophisticated and grounded.
Step-by-Step
Materials
- Interior wood door (pre-hung or slab)
- Deep forest green interior paint (Satin or Semi-Gloss finish)
- High-quality primer (stain-blocking)
- Sandpaper (120-grit and 220-grit)
- Sanding block or sponge
- Tack cloth
- Painter’s tape (1.5 or 2 inch width)
- 2-inch angled sash brush (synthetic bristles)
- 4-inch foam roller or short-nap ambient roller
- Small paint tray
- Drop cloths
- Screwdriver (for hardware removal)
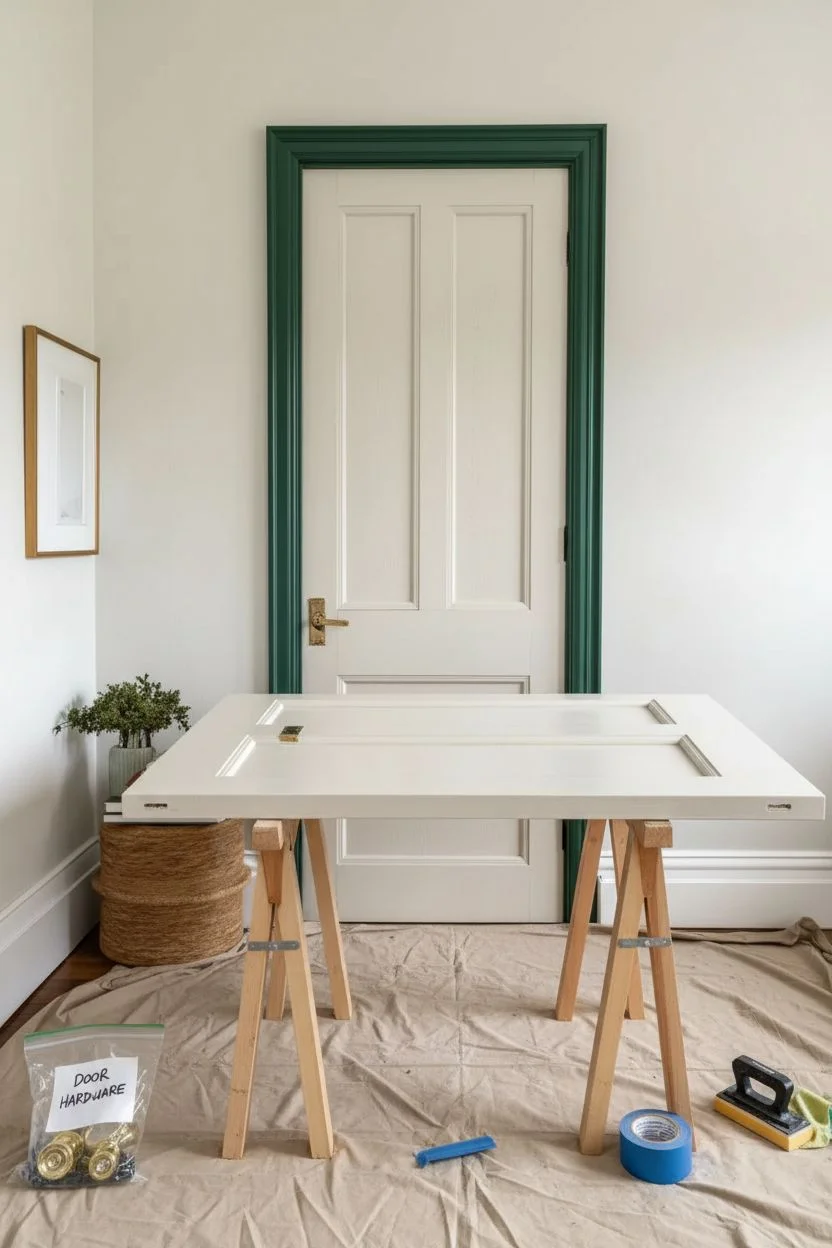
- Sawhorses (optional, if removing door)
Step 1: Preparation & Disassembly
-
Setup the workspace:
Lay down drop cloths to protect your flooring. While you can paint a door while it’s hanging, I prefer to take it off the hinges for the most professional, drip-free finish. If removing it, place the door flat on sawhorses. -
Remove hardware:
Using a screwdriver, carefully remove the doorknob, latch plate, and hinges. Place all screws and hardware in a labeled bag so nothing gets lost during the painting process. -
Clean surface:
Wipe the entire door down with a mild degreaser or soapy water to remove hand oils and dust. Let it dry completely before moving on. -
Initial sanding:
Scuff sand the entire surface using 120-grit sandpaper. You aren’t trying to strip the old paint entirely, just roughening the surface to give the new primer something to grip. -
Dust removal:
Vacuum up the sanding dust, then wipe the door thoroughly with a tack cloth to ensure a perfectly clean base.
Step 2: Priming the Surface
-
Tape edges (if hanging):
If you left the door on its hinges, carefully apply painter’s tape to the hinges and the latch mechanism to protect them from stray brushstrokes. -
Prime the details:
Stir your primer well. Using the 2-inch angled brush, apply primer into the recessed panels, corners, and molding profiles first. Keep the layer thin to avoid pooling in the corners. -
Roll the flat areas:
Switch to your 4-inch roller for the flat panels, horizontal rails, and vertical stiles. Roll in the direction of the wood grain for a seamless look. -
Sand the primer:
Once the primer is fully dry (check the can for times), lightly sand the surface with fine 220-grit sandpaper to knock down any bumps. Wipe away the dust with a fresh tack cloth.
Pro Tip: Order Matters
Always paint in sectional order: panels first, then the center vertical stile, then horizontal rails, and finally the outer vertical stiles. This mimics how real wood doors are constructed.
Step 3: Painting & Reassembly
-
Cut in the panels:
Dip your angled brush into the deep green paint. Start by painting the recessed moldings around the panels. Work one panel at a time to maintain a wet edge. -
Paint the panels:
Use the roller or brush to fill in the flat center of the panels. If brushing, finish with light vertical strokes (feathering) to minimize brush marks. -
Paint the center stile:
Paint the vertical strip of wood running down the center of the door, between the panels, ensuring you brush securely into the edges where it meets the rails. -
Paint the rails:
Move on to the horizontal rails (the top, middle, and bottom cross-pieces). Brush horizontally, careful not to overlap messily onto the vertical stiles you just painted. -
Paint outer stiles:
Finish by painting the long vertical stiles on the far left and right edges of the door. Use long, continuous strokes from top to bottom. -
Check for drips:
Inspect the corners of the molding immediately for pooling paint and smooth it out with a dry brush tip if necessary. -
Apply second coat:
Allow the first coat to dry completely according to the manufacturer’s instructions. Apply a second coat following the exact same order (moldings, panels, center stile, rails, outer stiles) for full depth of color. -
Cure time:
Let the door cure for at least 24 hours before handling it heavily. Dark pigments often take slightly longer to harden fully. -
Reinstall hardware:
Once dry, reattach the hinges, latch, and doorknob. If you updated your hardware to brass to match the look, install the new pieces now. -
Hang the door:
If you removed the door, get a helper to lift it back onto the hinges and insert the pins. Remove any remaining tape.
Level Up: Antique Brass
To truly match the library vibe, swap standard hardware for unlacquered brass. Use Rub ‘n Buff in ‘Antique Gold’ on existing hinges if you can’t replace them.
Enjoy the dramatic entrance this sophisticated color brings to your space
Two-Tone Doors with a Painted Center Panel
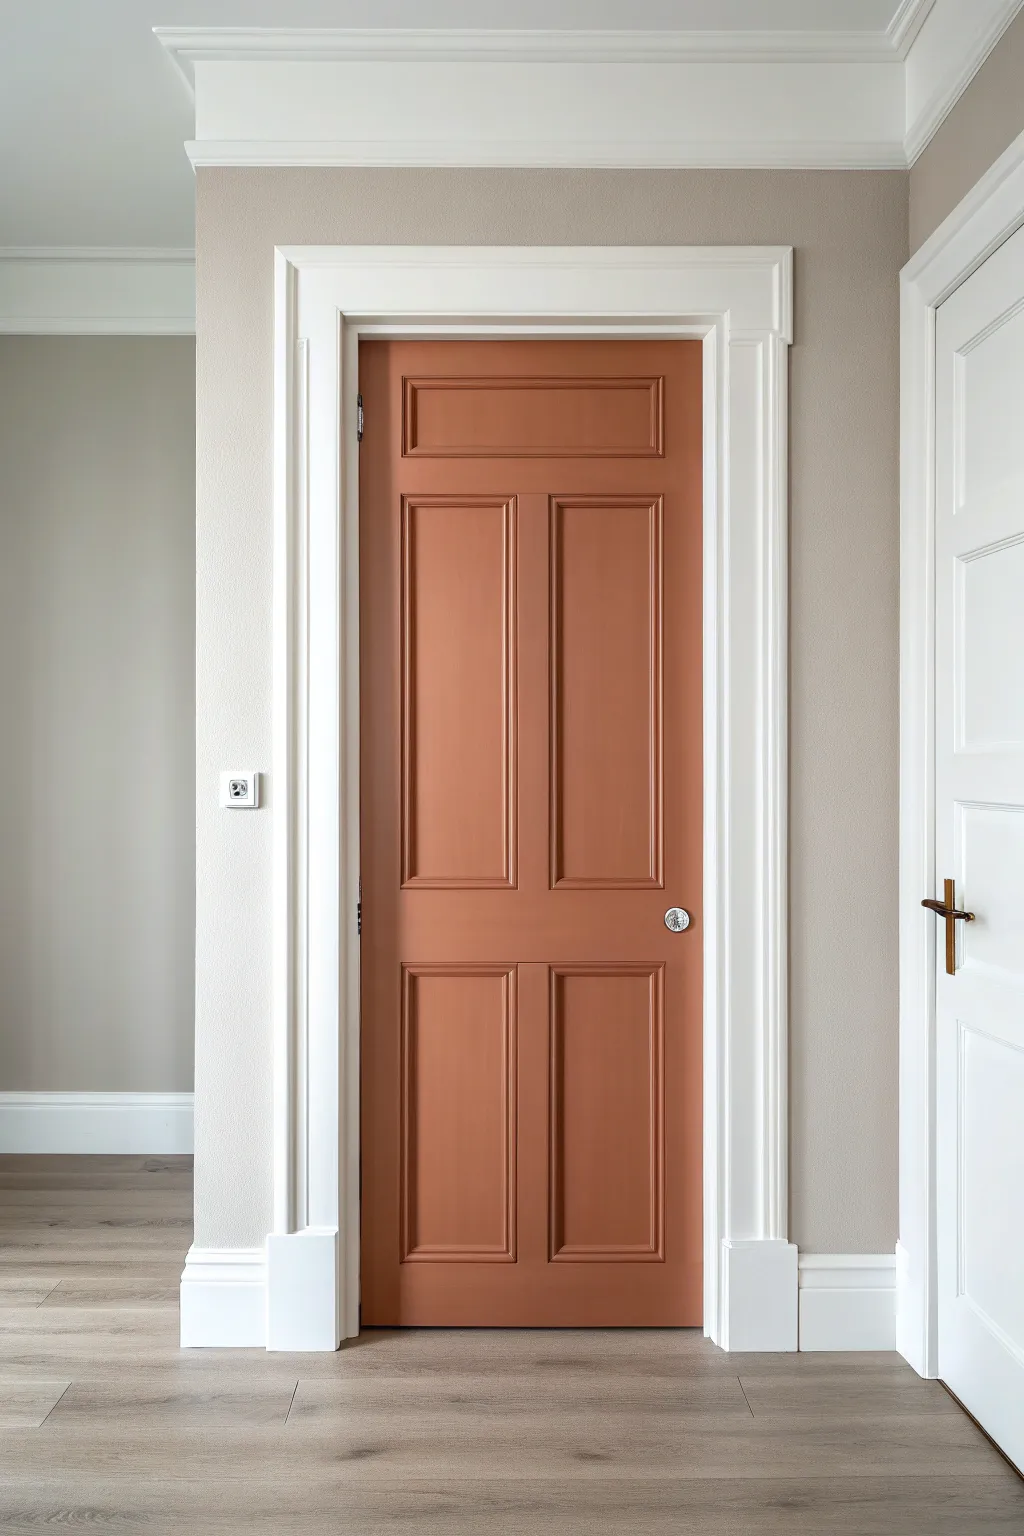

This project transforms a standard paneled interior door into a striking architectural feature using a warm, earthy terracotta hue. The contrast between the rich, burnt orange door and the crisp white trim creates a sophisticated focal point that instantly warms up any hallway or room.
Step-by-Step Guide
Materials
- Interior door (5-panel style shown)
- Sandpaper (120-grit and 220-grit)
- Tack cloth or microfiber rags
- Painter’s tape (high quality)
- Screwdriver (for hardware removal)
- Interior primer (high-adhesion)
- Satin or semi-gloss interior paint (Terracotta/Burnt Orange color)
- 2-inch angled sash brush
- 4-inch foam roller or short-nap microfiber roller
- Paint tray and liners
- Drop cloth
- Wood filler (optional)
Step 1: Preparation
-
Clear the area:
Begin by laying down a drop cloth underneath the door to protect your flooring. Open windows for ventilation if possible. -
Remove hardware:
Using a screwdriver, carefully remove the door handle and lock mechanisms. While you can tape around them, removing them guarantees a much cleaner, professional finish. Place screws and parts in a small bag so they don’t get lost. -
Clean surface:
Wipe down the entire door with a mild degreaser or soapy water to remove hand oils and dust. Let it dry completely. -
Sand the door:
Lightly sand all surfaces with 120-grit sandpaper. You aren’t trying to strip the old paint entirely, just scuffing it up to give the new paint ‘teeth’ to grab onto. Pay special attention to the recessed corners of the panels. -
Dust removal:
Thoroughly wipe away all sanding dust using a tack cloth. Any leftover dust will create a gritty texture in your final finish. -
Masking trim:
Apply painter’s tape along the white casing trim where it meets the door hinges and stop molding. Press the tape edges down firmly with a putty knife or your fingernail to prevent bleed-through.
Step 2: Priming
-
Spot prime or full prime:
If you are painting over a dark color or bare wood, apply a full coat of high-adhesion primer. If the door was previously white and in good condition, a spot prime on any repairs might suffice, though I always prefer a full prime for durability. -
Brush recessed areas:
Use your angled sash brush to prime the detailed molding inside the panels first. Get into the corners but watch for drips pooling at the bottom. -
Roll flat surfaces:
Use the small roller to prime the flat panels, horizontal rails, and vertical stiles. Let the primer dry according to the manufacturer’s instructions, usually about an hour. -
Light sand:
Once dry, give the primed surface a very quick, light pass with 220-grit sandpaper to smooth out any brush marks or raised grain/fibers. Wipe clean with a tack cloth.
Floetrol for Flow
Add a small splash of paint conditioner like Floetrol to your water-based paint. It slows drying time slightly, allowing brush marks to level out for a sprayed-on look.
Step 3: Painting
-
First coat – recessed molding:
Dip your angled brush into the terracotta paint. Start by painting the recessed molding around each of the five panels. Work from the top panels down to avoid dragging your arm through wet paint. -
First coat – panels:
Switch to your roller. Paint the flat center of each panel. Roll vertically with light pressure to ensure an even coat without leaving thick roller edge lines. -
First coat – center vertical stiles:
Paint the vertical strip running down the center of the door (between the panels). Use the brush for precision if the roller is too wide, feathering the edges to blend. -
First coat – horizontal rails:
Paint the horizontal rails (the cross pieces). Start at the top rail, then do the ones between the panels, and finally the bottom rail. Brush strokes should follow the direction of the wood grain—horizontal for rails. -
First coat – outer stiles:
Finish by painting the long vertical stiles on the far left and right edges of the door. Paint these from top to bottom in long, smooth strokes. -
Dry time:
Allow the first coat to dry fully. This darker, earthy color often needs longer drying to ensure the pigments settle properly, usually 4-6 hours depending on humidity. -
Second coat:
Apply the second coat following the exact same order: molding, panels, center stile, rails, outer stiles. This second layer provides the true depth and richness of the terracotta color. -
Remove tape:
Ideally, score the edge of the tape lightly with a utility knife and peel it away while the paint is still slightly tacky (not soaking wet, but not rock hard) to keep the line crisp. -
Reinstall hardware:
Wait at least 24 hours for the paint to cure enough to handle before screwing the door knob and lock plate back into place.
Hardware Swap
Upgrade the look by replacing standard brass knobs with matte black or crystal hardware. The contrast against the warm terracotta paint looks incredibly modern.
Enjoy the rich splash of color every time you walk through your newly transformed entryway
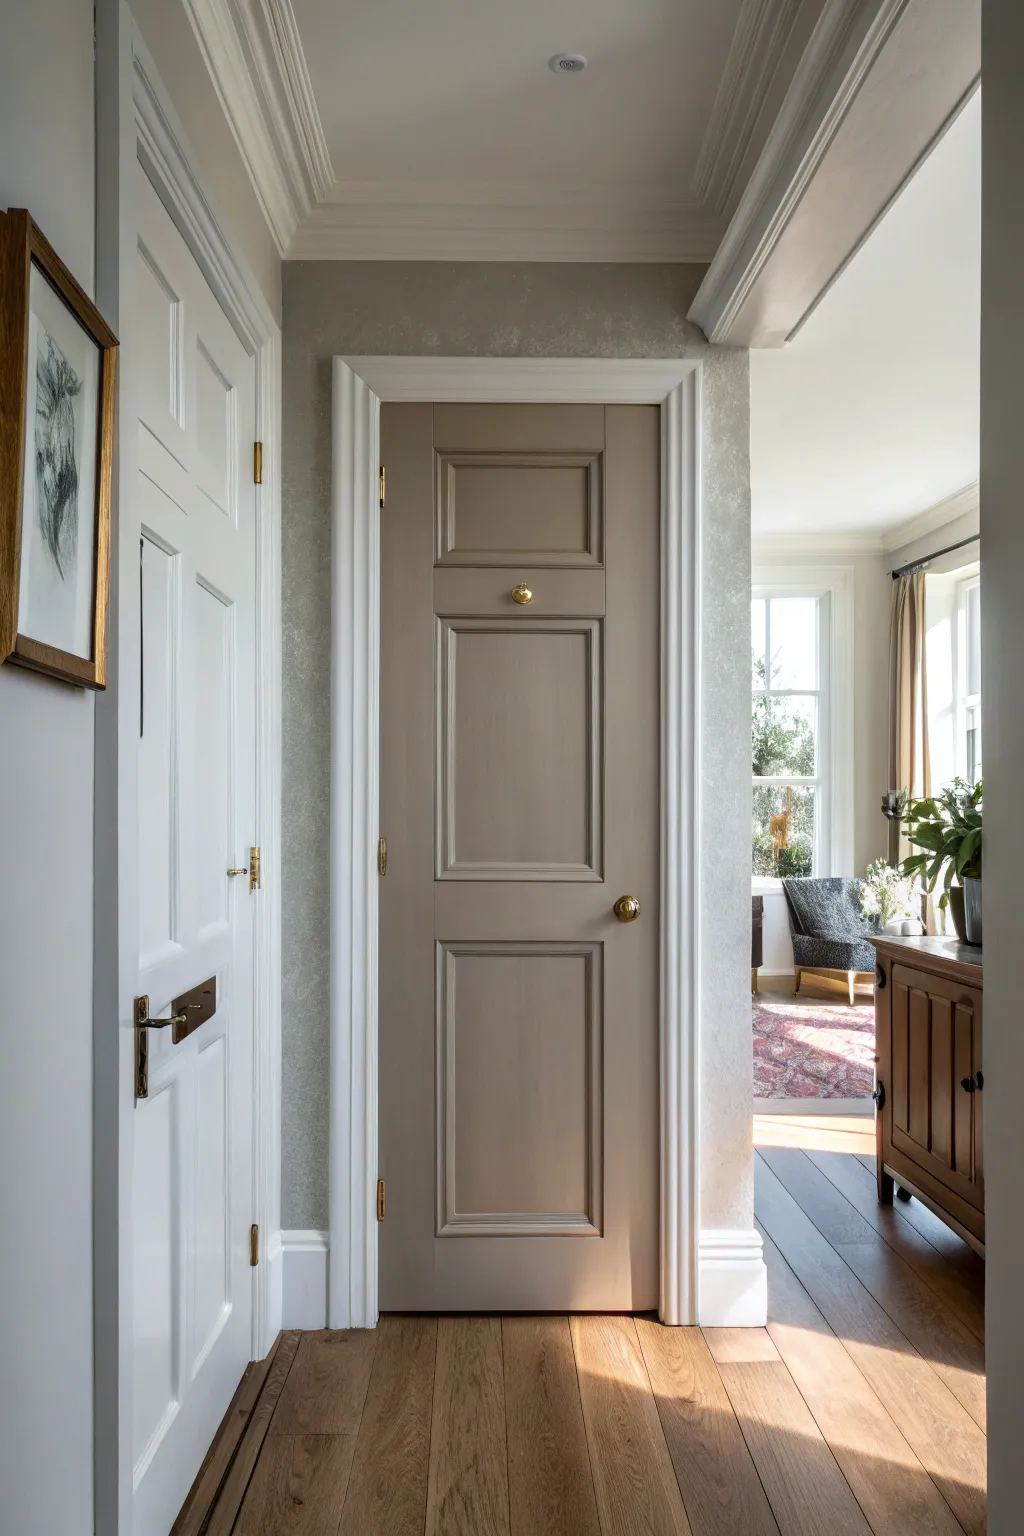
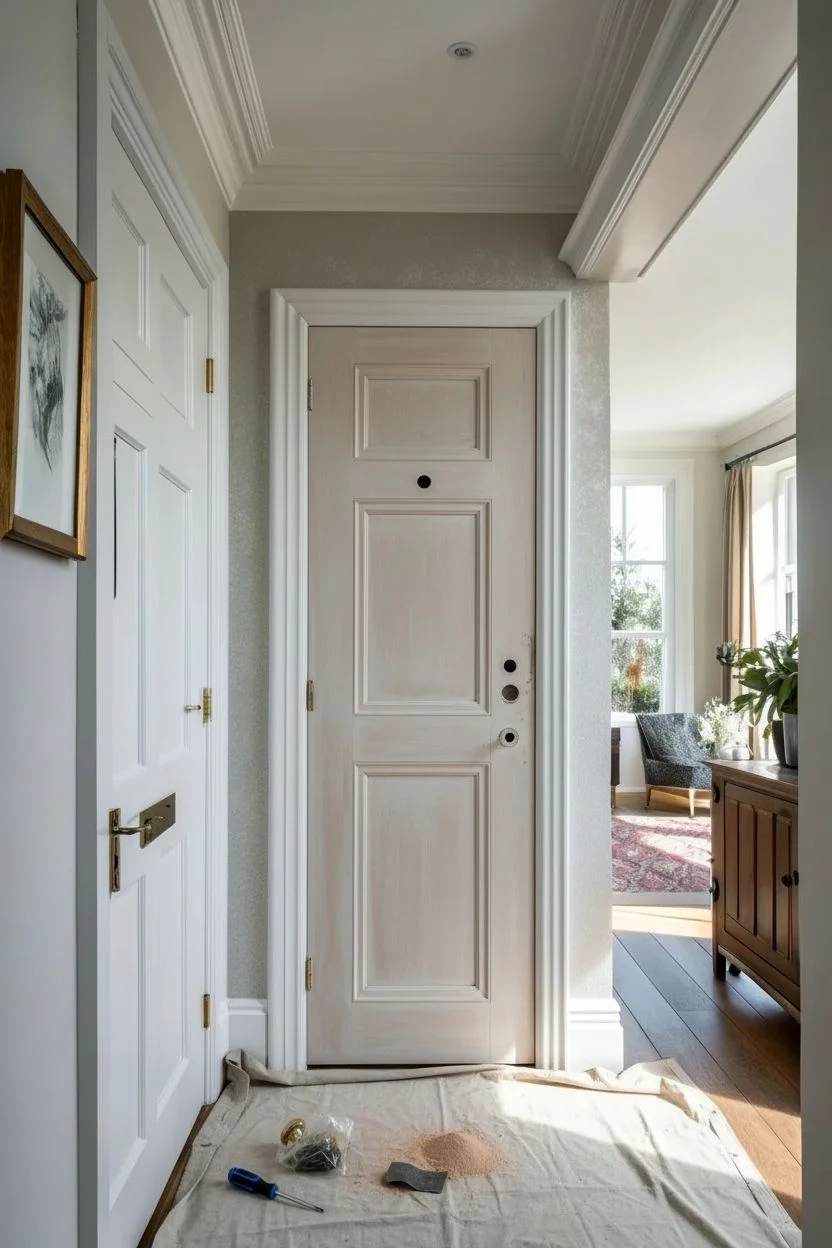
Monochrome Door and Trim for a Built-In Look
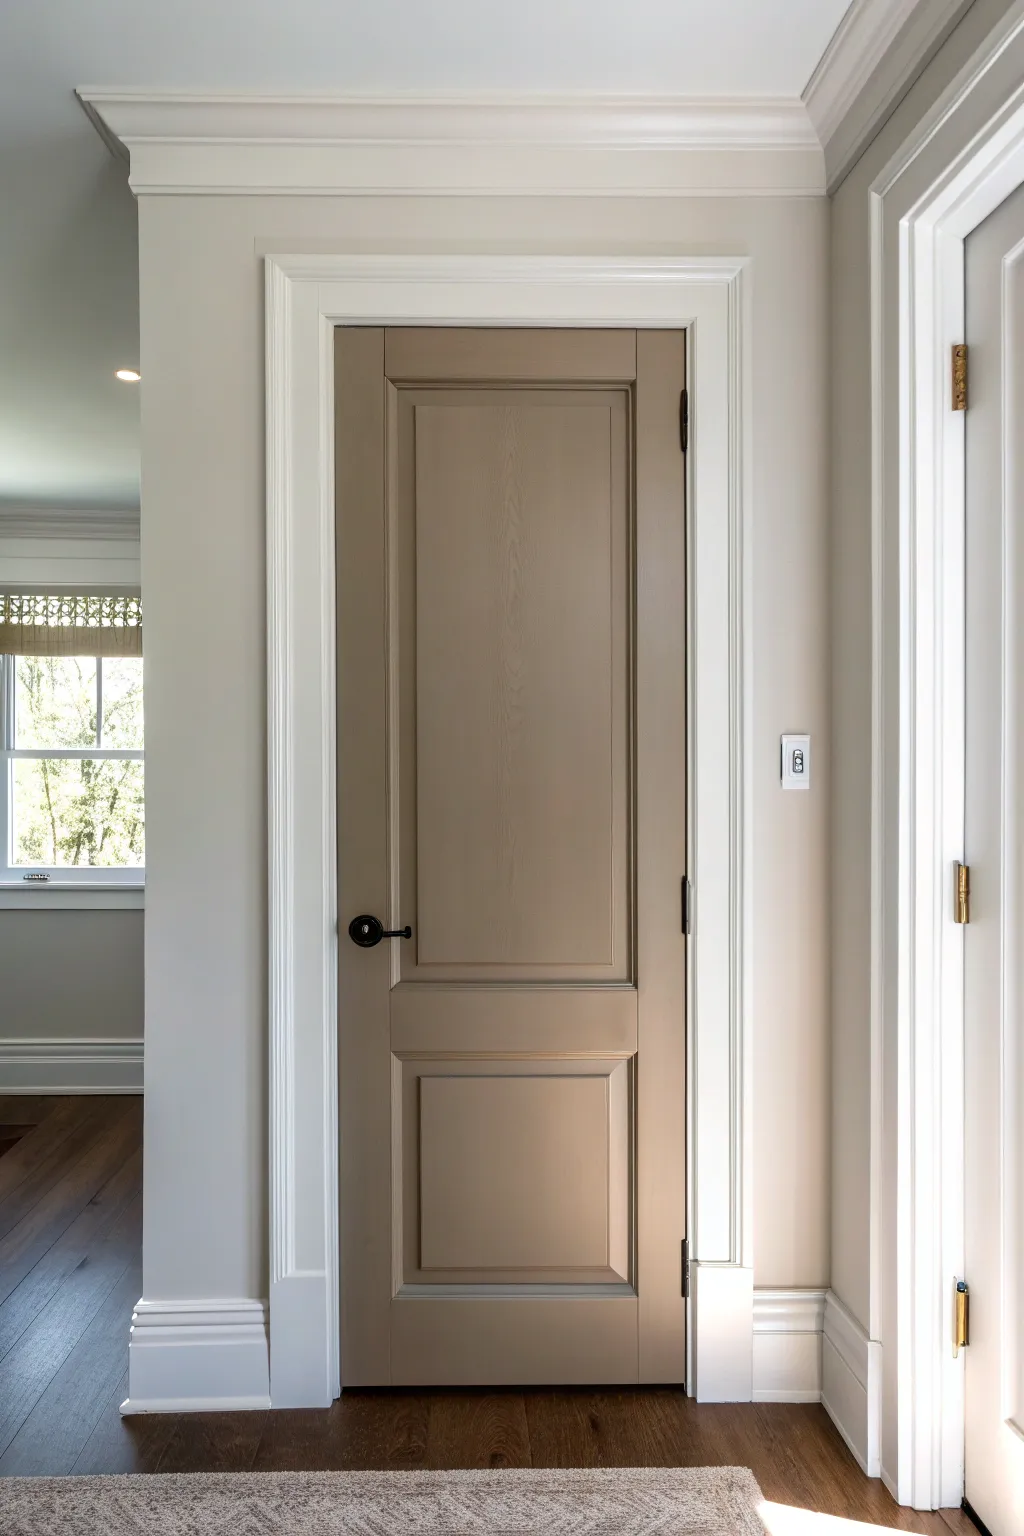
Transform a standard interior door into a sophisticated design feature using a warm taupe finish contrasted against crisp white trim. This project creates a soft, modern monochrome look that adds depth and elegance to any hallway or bedroom entrance.
Step-by-Step
Materials
- Interior semi-gloss or satin paint (Taupe/Beige shade)
- Interior semi-gloss paint (Bright White)
- High-quality 2-inch angled sash brush
- 4-inch foam or microfiber roller
- Paint tray and liners
- 220-grit sandpaper or sanding sponge
- Painter’s tape (blue or green)
- Tack cloth
- Drop cloths
- Screwdriver or drill (for hardware removal)
- Cleaner/degreaser
- Wood filler (if repairing dents)
Step 1: Preparation
-
Clear the area:
Begin by laying down drop cloths to protect your hardwood flooring. Ensure the space is well-ventilated by opening nearby windows if possible. -
Remove hardware:
Using your screwdriver or drill, carefully remove the door knob, latch plate, and strike plate. Store these screws and parts in a labeled bag so nothing gets lost. -
Clean the surface:
Wipe down the entire door and the surrounding trim with a degreaser or mild soap solution. This removes hand oils and dust that prevent paint adhesion. -
Sand for adhesion:
Lightly scuff the door and trim with 220-grit sandpaper. You don’t need to strip the old paint entirely; just create a matte surface that the new paint can grip. -
Dust removal:
After sanding, vacuum the dust from the crevices and follow up with a tack cloth to ensure the surface is perfectly clean. -
Masking:
Apply painter’s tape carefully around the hinges if you aren’t removing the door from the frame. Also, tape off the floor where the baseboards meet the hardwood to ensure a crisp line.
Sticky Situation?
If the door feels sticky after drying, dust the edges with a tiny bit of talcum powder. This prevents the fresh paint from bonding to the door stop or weatherstripping.
Step 2: Painting the Trim
-
Cut in edges:
Start with the bright white trim paint. Use your angled sash brush to cut in along the wall edges and the floor line. -
Fill the trim face:
Paint the flat faces of the casing and the baseboards. I find long, smooth strokes help minimize brush marks here. -
Check for drips:
Inspect the corners of the molding for any pooling paint and smooth it out instantly before it begins to set. -
Double coat:
Allow the first coat to dry according to the can’s instructions, then apply a second coat for full, opaque coverage.
Step 3: Painting the Door
-
Paint the panels first:
Open your taupe paint. Use the angled brush to paint the recessed molding profiles inside the two main panels first. -
Roll the flat panels:
Switch to your 4-inch roller to paint the flat center rectangles of the panels. This creates a smoother finish than brushing. -
Paint the center stile:
Paint the vertical strip of wood running down the center of the door, between the panels. -
Paint the rails:
Paint the horizontal rails (top, middle, and bottom) next. Feather the edges where they meet the vertical stiles to keep the texture even. -
Paint the outer stiles:
Finish by painting the two long vertical stiles on the far left and right edges of the door. -
Allow to cure:
Let the first coat dry completely. Lightly sand any rough spots with fine grit paper, wipe clean, and apply your second coat following the same order.
Level Up: Hardware pop
Swap standard silver hinges and knobs for matte black or oil-rubbed bronze before reinstalling. The dark contrast against taupe looks incredibly high-end.
Step 4: Finishing Touches
-
Remove tape:
carefully peel back the painter’s tape while the final coat is still slightly tacky to prevent peeling the dry paint film. -
Reinstall hardware:
Once the door is fully cured (give it at least 24 hours for heavy use), screw the door handle and latch back into place. -
Final wipe:
Check for any stray dust or smudges and give the new hardware a quick polish to complete the look.
Now you have a beautifully updated entryway that balances warmth and modern clarity
White Trim to Frame Bold Door Color
Transform a plain interior door into a striking focal point with a bold navy hue that contrasts beautifully against crisp white trim. This project uses a rich, deep blue paint to highlight the architectural details of a paneled door while keeping the surrounding framework clean and bright.
Step-by-Step Tutorial
Materials
- Interior semi-gloss or satin paint (Navy Blue)
- Interior semi-gloss paint (Bright White)
- Sandpaper (120 and 220 grit)
- Tack cloth
- Painter’s tape
- Screwdriver
- Degreaser or TSP substitute
- High-quality angled sash brush (2-inch)
- Small foam roller (4-inch) with tray
- Primer (stain-blocking advised)
Step 1: Preparation
-
Remove Hardware:
Begin by removing the door knob, deadbolt, and any other hardware using a screwdriver. Keep the screws and parts together in a labeled bag so nothing gets lost during the painting process. -
Clean Thoroughly:
Wipe down the entire door and the surrounding trim with a degreaser or TSP substitute to remove dirt, oils, and grime. This step is crucial for ensuring the primer bonds properly. -
Sand Surfaces:
Lightly sand both the door ledges and the trim framework using 120-grit sandpaper. You aren’t trying to strip the old paint completely, just scuffing the surface to give the new paint ‘teeth’ to grip onto. -
Dust Removal:
Vacuum up the sanding dust, then wipe the door and trim with a tack cloth to capture any remaining fine particles. A clean surface ensures a smooth final finish. -
Protect Surroundings:
Apply painter’s tape carefully along the edges where the trim meets the wall. Place a drop cloth on the floor to catch any drips.
Step 2: Priming and Base Work
-
Apply Primer to Door:
Using your foam roller for flat areas and brush for corners, apply a coat of stain-blocking primer to the door. Since we are going dark, a tinted grey primer can help achieve better coverage later, though white works fine too. -
Prime the Trim:
While the door dries, apply primer to the door casing and wainscoting if needed. Since this will be white, a standard white primer is perfect here. -
Light Sanding:
Once the primer is fully dry, give everything a very quick, light pass with 220-grit sandpaper to smooth out any brush strokes or texture, then wipe clean with the tack cloth.
Wet Edge Pro Tip
Keep a wet edge by working quickly in sections. Don’t go back over paint that has started to tack up or you’ll create drag marks.
Step 3: Painting the Trim
-
Cut in Edges:
Start with the white trim paint. I prefer to cut in the edges near the wall first using the angled sash brush for a crisp line. -
Paint Flat Surfaces:
Fill in the flat faces of the casing and adjacent wainscoting. Apply thin, even coats to avoid drips. -
Second Coat:
Allow the first coat to dry according to the can’s instructions, then apply a second coat for a solid, bright finish. Let this cure completely before moving to the door color to avoid smudging.
Level Up: Hardware Pop
Swap standard silver hinges and knobs for unlacquered brass or antique gold. The warm metal tones contrast stunningly with deep navy.
Step 4: Painting the Navy Door
-
Paint Recessed Panels:
Dip your angled brush into the navy paint and start with the recessed areas of the panels. Work the paint into the corners and edges, brushing it out smooth. -
Vertical Stiles and Center:
Next, paint the vertical center stile (the strip between the panels). Use the brush or a small roller, keeping your strokes vertical to follow the wood grain. -
Horizontal Rails:
Move onto the horizontal rails (the top, middle, and bottom sections). Paint across these horizontally, blending carefully where they meet the wet edges of the vertical stiles. -
Outer Stiles:
Paint the two long vertical sections on the far left and right of the door last. Run long, smooth strokes from top to bottom. -
Evaluate Coverage:
Let the first coat dry. Dark colors often look patchy after one coat, so don’t panic. Lightly sand any imperfections if necessary before the next step. -
Final Coat:
Apply a second coat of navy paint, following the same order: panels, center stile, rails, then outer stiles. This builds that rich, deep opacity. -
Remove Tape:
Carefully peel away the painter’s tape while the final coat is still slightly tacky to prevent peeling dry paint film. -
Reinstall Hardware:
Once the door is fully cured—ideally wait 24 hours to prevent sticking—reattach your gold or brass hardware for that classic finished look.
Enjoy the sophisticated contrast your new bold door brings to the hallway
Painted Door Interior Only for a Surprise Pop
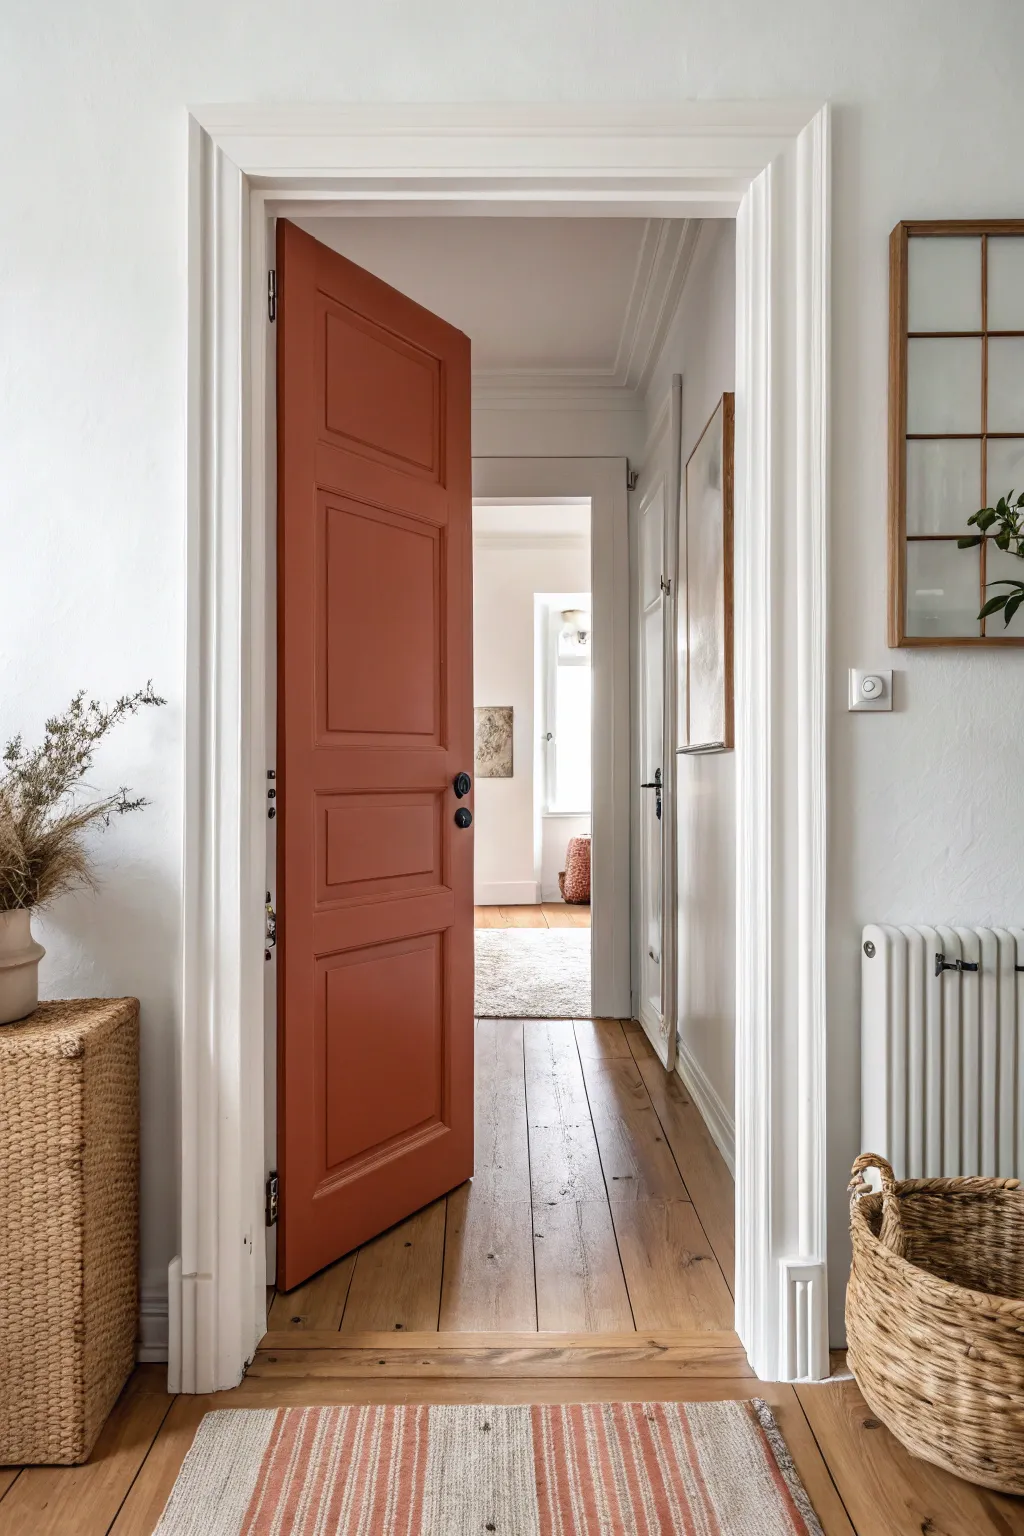
Transform a standard hallway by painting just the inside face of a door in a warm, earthy terracotta tone. This project creates a delightful burst of color that is only revealed when the door is ajar, adding depth and personality to a neutral space without overwhelming it.
Step-by-Step Guide
Materials
- Interior wood semi-gloss or satin paint (Terracotta/Rust color)
- High-quality white semi-gloss trim paint
- 2-inch angled sash brush
- 4-inch foam or microfiber mini roller
- Paint tray and liners
- Fine-grit sandpaper (220-grit)
- Clean tack cloths
- Painter’s tape
- Drop cloths
- Screwdriver (for removing hardware)
- Wood filler (optional)
- Primer (stain-blocking)
Step 1: Preparation
-
Clear the area:
Begin by laying down drop cloths to protect your beautiful wooden floors. Ensure the cloth extends well beyond the swing radius of the door to catch any accidental drips. -
Remove hardware:
For the cleanest finish, use a screwdriver to remove the door handle, lock mechanisms, and strike plates. It’s tempting to tape around them, but taking them off ensures professional edges. -
Clean surfaces:
Wipe down the entire door and frame with a damp cloth and mild degreaser to remove dust, hand oils, and grime. A clean surface is crucial for paint adhesion. -
Sand the wood:
Lightly sand the door surface and the white casing with 220-grit sandpaper. You aren’t trying to strip the paint, just scuffing it up to give the new coat something to grab onto. -
Dust removal:
Wipe away all sanding dust thoroughly using a tack cloth. I find that skipping this small step often leads to a gritty texture later, so take your time here. -
Tape the edges:
Apply painter’s tape to the hinges if you haven’t removed the door from the frame. If you are painting the door face a color but keeping the edge white (or vice versa), tape off the separation line carefully.
Edge Decision
Decide which color the door edge gets: usually, the latch edge is painted the same color as the door face that opens into the room, while the hinge edge matches the other side.
Step 2: Painting the Door
-
Prime the surface:
If you are making a drastic color change or if the old paint is oil-based, apply a coat of stain-blocking primer. Let it dry completely according to the manufacturer’s instructions. -
Start with panels:
Dip your angled sash brush into the terracotta paint. Begin by painting the recessed areas and molding profiles of the door panels first. -
Paint center stiles:
Once the molding is cut in, use your mini roller or brush to paint the vertical center stiles (the vertical wood pieces in the middle of the door). -
Paint horizontal rails:
Next, paint the horizontal rails. Using long, smooth strokes helps minimize brush marks where the horizontal and vertical pieces meet. -
Paint outer stiles:
Finish by painting the long vertical stiles on the outer left and right edges of the door. Always brush in the direction of the wood grain. -
Check for drips:
Immediately inspect corners and molding crevices for pooling paint. Smooth them out gently with a dry brush tip before they get tacky. -
Second coat:
Allow the first coat to dry for at least 4-6 hours. Lightly sand with very fine grit if needed, wipe dust, and apply a second coat for that rich, opaque terracotta saturation.
Step 3: Finishing the Frame
-
Cutting in the white:
Switch to your white trim paint. Use a clean angled brush to cut in sharply along the wall edge and around the hinges. -
Painting the casing:
Paint the face of the door casing with long, continuous strokes. White frames contrast beautifully against the warm door color. -
Reinstall hardware:
Wait at least 24 hours for the paint to cure fully—soft paint can stick to hardware. Reattach your handles and plates carefully. -
Clean up:
Remove all tape slowly at a 45-degree angle to ensure a crisp line, then pick up your drop cloths.
Sticky Door?
If the door sticks after painting, rub a clear candle or paraffin wax along the edges where it touches the jamb. This lubricates the surface and prevents paint transfer.
Enjoy the warm invitation your new colorful door adds to your hallway passageway
Highlight Paneling with Subtle Sheen Shifts
Transform a standard paneled door into a sophisticated design statement using a rich teal hue and strategic sheen placement. By playing with light reflection on the bevels and flat surfaces, you’ll create depth and architectural interest that changes throughout the day.
Step-by-Step Tutorial
Materials
- Interior wood primer (high adhesion)
- Satin finish interior paint (Deep Teal)
- Semi-gloss finish interior paint (Deep Teal – exact color match)
- 180-grit sandpaper
- 220-grit sandpaper
- Tack cloth
- Painter’s tape (delicate surface)
- 2-inch angled sash brush (synthetic)
- 4-inch foam roller or short-nap microfiber roller
- Small artist brush
- Degreaser or TSP substitute
- Drop cloths
- Screwdriver (for hardware removal)
Step 1: Preparation
-
Remove Hardware:
Before you even touch a paintbrush, use a screwdriver to remove the handle, lock plates, and any other hardware. It’s tempting to tape around them, but removing them ensures a truly professional, clean edge. -
Clean Thoroughly:
Wipe down the entire door surface with a degreaser or TSP substitute. Doors accumulate oils from hands over time, and paint won’t adhere well to greasy spots. -
Initial Sanding:
Scuff sand the entire door using 180-grit sandpaper. You aren’t trying to remove the old paint entirely, just de-glossing the surface to give the new primer something to grab onto. -
Dust Removal:
Vacuum up the dust, then wipe the door down carefully with a tack cloth. Even tiny specks of dust will be visible in the final finish, especially on the darker teal color. -
Protect Surroundings:
Apply painter’s tape to the hinges if you haven’t removed the door from the frame. Lay down drop cloths to protect the flooring underneath.
Pro Tip: Light Check
Work with a moveable work light. Place it at a low angle to the door surface while painting; this ‘raking light’ reveals drips or brush strokes you might miss otherwise.
Step 2: Priming and Base Coat
-
Prime the Surface:
Apply a coat of high-quality adhesion primer. Use a brush for the recessed panel corners and molding details first, then follow up with a roller on the flat surfaces to smooth it out. -
Sand the Primer:
Once the primer is fully dry, lightly sand it with 220-grit sandpaper. This step is crucial for that buttery-smooth final texture. Wipe away the dust with a tack cloth again. -
Apply Satin Base Coat (Details):
Open your satin finish teal paint. Start by painting the recessed moldings and panel bevels using the 2-inch angled sash brush. Watch for drips pooling in the corners. -
Apply Satin Base Coat (Flats):
While the details are still wet, use your roller to apply the satin paint to the flat center panels, vertical stiles, and horizontal rails. Maintain a wet edge to avoid lap marks. -
Second Satin Coat:
Allow the first coat to dry according to the manufacturer’s instructions, then apply a second full coat of satin teal paint over the entire door. Let this cure for at least 24 hours.
Level Up: Gloss Contrast
For a bolder look, swap the semi-gloss for a high-gloss lacquer on just the outermost frame of the door panels. The higher contrast makes the architectural details pop even more.
Step 3: Creating the Sheen Shift
-
Tape Off Panels:
Here is where the magic happens. Carefully tape off the flat center panels and the flat outer rails/stiles, exposing only the beveled molding or trim that frames the panels. -
Semi-Gloss Detail Work:
Open your semi-gloss paint can (must be the exact same color code). Using a small artist brush or a very precise sash brush, paint just the exposed molding/trim areas. -
Feathering Edges:
If you aren’t using tape for a hard line (a more advanced method), carefully freehand the semi-gloss onto the molding, feathering it slightly where it meets the satin flat panel for a softer transition. -
Check for Drips:
The semi-gloss paint reflects light differently, so inspect your work from multiple angles to ensure smooth coverage without runs. -
Remove Tape:
If you used tape, remove it while the semi-gloss paint is still slightly tacky—don’t wait for it to dry completely or it might peel up the edge. -
Reinstall Hardware:
Once the door has cured for a few days (so the paint hardens fully), screw your hardware back into place. Polished brass or gold hardware looks particularly striking against this teal.
Enjoy the refined look of your new feature door, catching the window light beautifully
Color-Matched Doors to Coordinate with a Runner Rug

Transform a plain hallway into a sophisticated entryway by coordinating your door color with a runner rug. This project focuses on achieving a professional, smooth finish on interior doors using a calming sage green that ties the space together effortlessly.
Step-by-Step Guide
Materials
- High-quality interior satin or semi-gloss paint (Sage Green)
- Bonding primer
- Medium grit sandpaper (120-150 grit)
- Fine grit sandpaper (220 grit)
- Painter’s tape
- Drop cloths
- Screwdriver or chill driver
- Degreaser or TSP substitute
- 4-inch foam roller
- 2-inch angled sash brush
- Tack cloth
- Wood filler (optional)
Step 1: Preparation & Hardware Removal
-
Assess the doors:
Begin by inspecting your doors. If they are previously painted with gloss, you’ll need to be extra thorough with sanding. If they are raw wood, priming is non-negotiable. -
Remove hardware:
It is always best to remove handles, locks, and strike plates rather than painting around them. Use a screwdriver to carefully take off all metal hardware and store the screws in a labeled bag so nothing gets lost. -
Protect the area:
Lay down drop cloths to protect your beautiful wooden floors. If you can’t remove the doors from their hinges, use painter’s tape to mask off the hinges entirely to keep them clean. Mask the floor edges near the door frame as well. -
Clean surfaces thoroughly:
Doors accumulate hand oils over time. Scrub the entire surface with a degreaser or TSP substitute to ensure the paint adheres properly. -
Fill imperfections:
Inspect for dents or deep scratches. Fill these with a small amount of wood filler. Let it dry completely according to the package instructions.
Sticky Situation?
If the door feels sticky after drying (blocking), dust the edges with a tiny bit of talcum powder. For long-term prevention, ensure you used enamel or door-specific paint, not standard wall latex.
Step 2: Sanding & Priming
-
Initial sanding:
Sand the entire door surface with medium 120-grit sandpaper. You aren’t trying to strip the paint, just de-gloss the surface to give it ‘tooth’ for the new coat. -
Dust removal:
Vacuum up the bulk of the dust, then wipe the door down with a tack cloth. Any remaining dust will create a gritty texture in your final finish. -
Apply bonding primer:
Using your foam roller for flat areas and the angled brush for corners and molding details, apply a coat of high-quality bonding primer. This ensures the sage green color will be true and durable. -
Sand the primer:
Once the primer is fully dry, lightly sand it with fine 220-grit sandpaper. This feels like an extra step, but I find it makes the huge difference between a DIY look and a factory finish. Wipe away the dust again.
Step 3: Painting
-
Paint the panels first:
Start with the recessed areas and molding profiles of the door panels. Use your 2-inch angled brush. Don’t overload the brush to avoid drips in the corners. -
Roll the flat center panels:
Immediately after brushing the molding, use the foam roller to paint the flat center panels. Smooth out any brush marks that spilled over from the molding. -
Paint the vertical stiles:
Paint the vertical center stile (the strip between panels) next. Keep a wet edge to avoid lap marks. -
Paint horizontal rails:
Move on to the horizontal rails (top, middle, bottom). Paint with the grain of the wood or the simulated grain. -
Finish with outer verticals:
Paint the long vertical stiles on the far left and right edges of the door last. Check for potential drips at the corners where rails meet stiles. -
Paint the frame:
While the door dries, paint the door casing and jambs. Use the brush for the intricate edges where the trim meets the wall. -
Apply second coat:
Allow the first coat to dry for the time recommended on your paint can (usually 4-6 hours). Lightly sand with very fine grit if there represent bumps, tack it clean, and apply the second coat following the same order.
Elevate the Look
For a truly custom feel, paint the ceiling trim or crown molding in the hallway the same sage green as the doors. This ‘color drenching’ technique adds incredible height and drama.
Step 4: Reassembly
-
Cure time:
Let the paint cure for at least 24 hours before reinstalling hardware. The paint may feel dry to the touch sooner, but it remains soft and scratch-prone while curing. -
Reinstall hardware:
Reattach your handles, locks, and peep holes. Now is a great time to polish the brass hardware to make it pop against the new green background. -
Style with the rug:
Place your coordinated runner rug in the hallway. The connection between the door color and the rug pattern creates that seamless designer look shown in the inspiration image.
Now you have a coherent, professionally finished entryway that greets you with color every time you walk in
Painted Pantry or Utility Door as a Design Accent
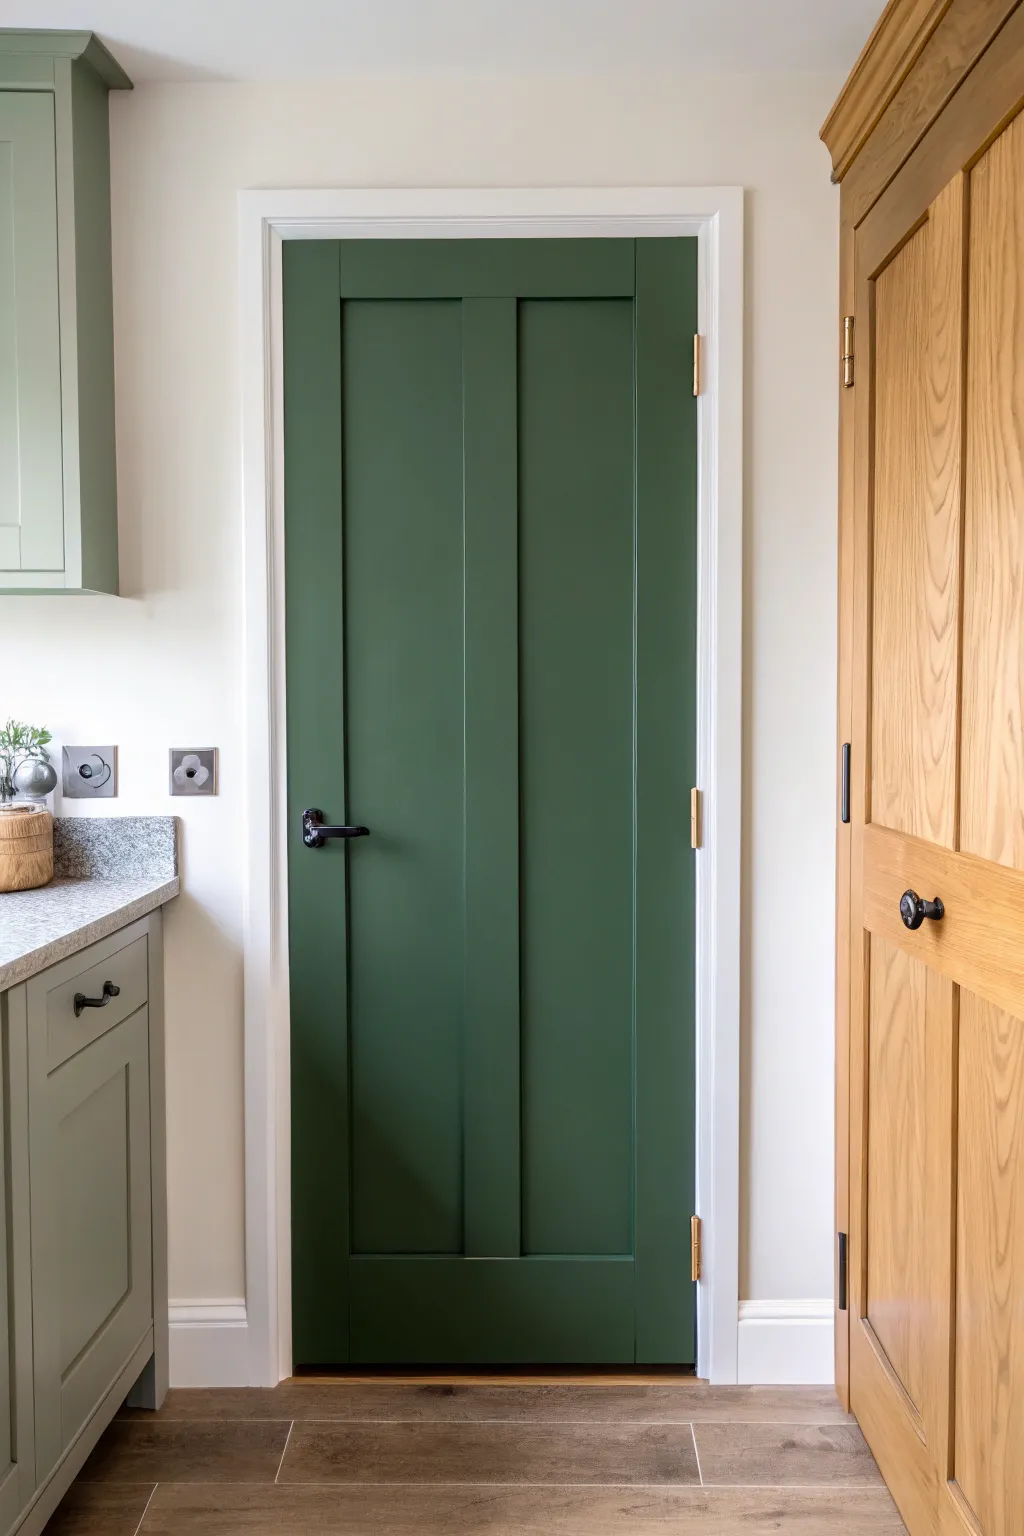
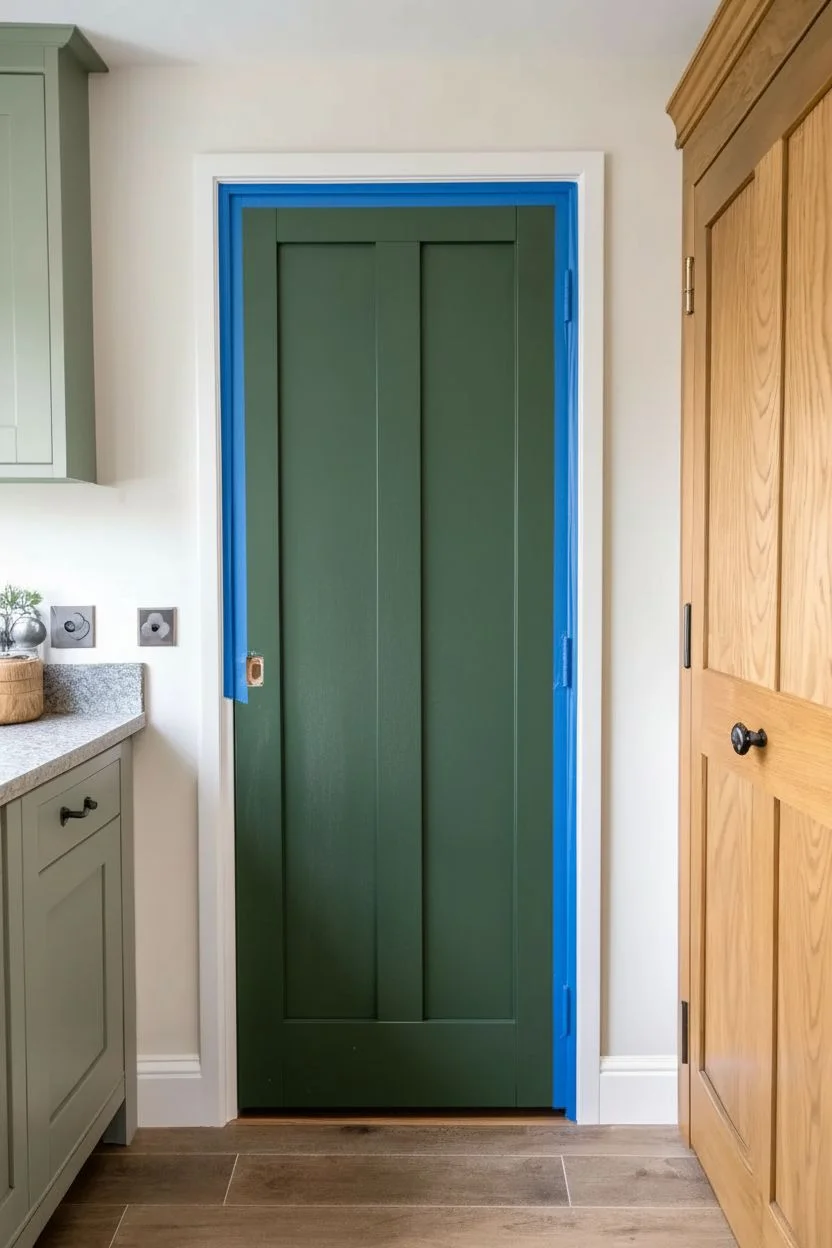
Transform a plain pantry or utility door into a sophisticated focal point by painting it a rich, forest green. This simple project adds depth and character to your kitchen area, creating a striking contrast against lighter walls and cabinetry.
Step-by-Step Tutorial
Materials
- Interior wood door (pre-primed or existing finish)
- High-quality interior trim paint (Satin or Semi-Gloss finish, deep forest green color)
- Primer (tinted gray recommended for dark topcoats)
- Sandpaper (120 and 220 grit)
- Sanding block
- Painter’s tape
- Drop cloth
- Screwdriver or drill
- Tack cloth
- High-quality angled sash brush (2 inch)
- Mini foam roller or flock roller for smooth surfaces
- Paint tray and liners
Step 1: Preparation
-
Remove hardware:
Start by taking the door off its hinges if possible, setting it on sawhorses for easier access. If leaving it hung, carefully remove the door handle, latch plate, and use tape to cover the hinges completely. -
Clean deeply:
Scrub the entire door surface with a degreasing cleaner to remove kitchen oils, fingerprints, and dust. This step is crucial for paint adhesion, especially on older doors. -
Initial scuff sanding:
Using 120-grit sandpaper on a sanding block, thoroughly scuff the entire surface of the door. You aren’t trying to remove old paint entirely, just roughening the finish so the new primer grabs hold. -
Dust removal:
Vacuum up the sanding dust and wipe the door down with a tack cloth to ensure absolutely no debris remains. -
Masking:
Apply painter’s tape carefully around any glass inserts (if applicable) or adjacent wall trim if painting the door while it hangs.
Step 2: Priming
-
Choose the right primer:
Since we are using a deep green color, I always recommend asking the paint store to tint your primer gray. This helps the dark topcoat achieve better coverage with fewer layers. -
Prime the details first:
Use your angled sash brush to apply primer into the recessed corners of the panels and any molding details. -
Roll the flat areas:
Switch to your mini roller to prime the flat panels, rails, and stiles. Apply a thin, even coat without overloading the roller. -
Sand the primer:
Once the primer is fully dry (check the can for times), lightly sand the surface with 220-grit paper to knock down any bumps or brush marks, then wipe with a tack cloth again.
Pro Tip: Gray Primer
Using a dark gray primer isn’t just a suggestion—it’s essential for deep greens. White primer often peeks through or makes the topcoat look muddy and less saturated.
Step 3: Painting
-
Brush the panels:
Open your dark green paint and stir well. Begin by brushing the recessed molding of the interior panels first. Feather out any drips immediately. -
Roll the center panels:
Use the mini roller to paint the flat center panels. Roll vertically with the grain of the wood structure. -
Paint the center stile:
Paint the vertical strip of wood running down the center of the door (between the panels), carefully brushing or rolling vertically. -
Paint the horizontal rails:
Next, paint the horizontal top, middle, and bottom rails. When the horizontal strokes meet the vertical stiles, carefully blend the paint so you don’t build up a ridge. -
Paint the vertical stiles:
Finish by painting the long vertical side pieces (stiles) that run the full height of the door. Keep a wet edge to avoid lap marks. -
Allow to dry:
Let this first coat dry completely. Dark colors often require longer drying times to avoid tackiness. -
Apply second coat:
Repeat the painting process for a second coat. Dark greens often need two or even three thin coats for true depth and richness. Lightly sand with 220-grit paper between coats for a professional-smooth feel.
Troubleshooting: Sticky Door
If the door sticks to the jamb after closing, the paint hasn’t fully cured. Dust the edges lightly with talcum powder to prevent sticking until it hardens completely.
Step 4: Finishing Touches
-
Remove tape:
Carefully score the edge of the painter’s tape with a craft knife before the paint is 100% cured to prevent peeling, then pull the tape away slowly. -
Reinstall hardware:
Once the paint has cured for at least 24 hours (longer is better for hardness), reattach your handles and hinges.
Enjoy the dramatic and elegant update your new green door brings to the space
Geometric Color Blocking on Flat Doors
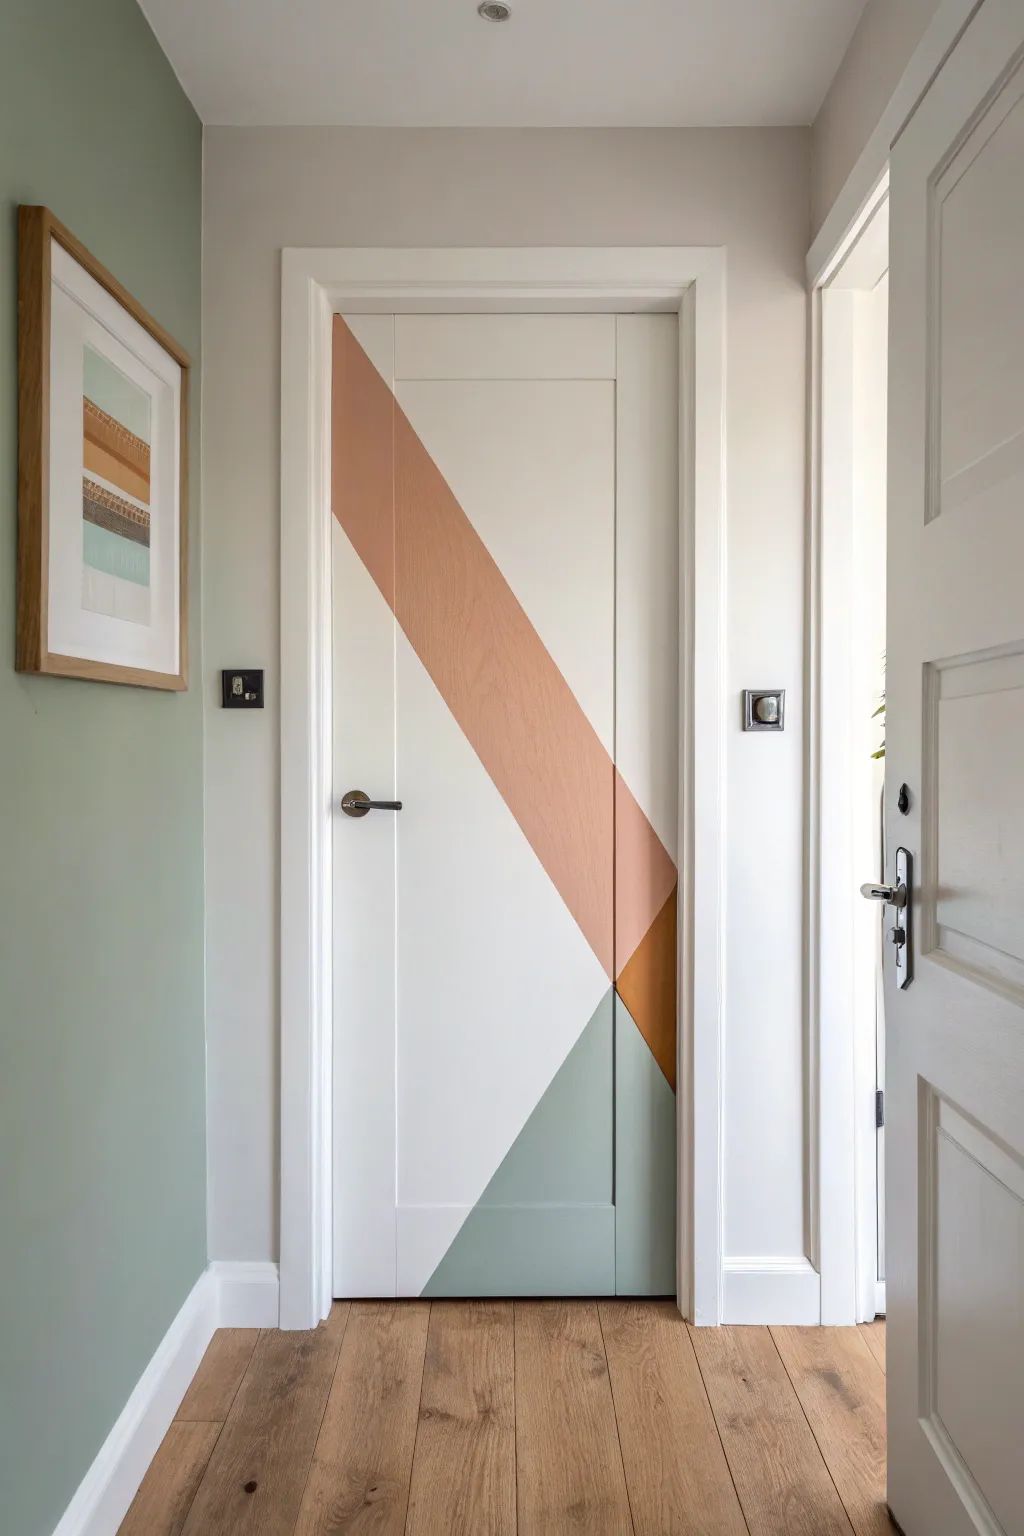
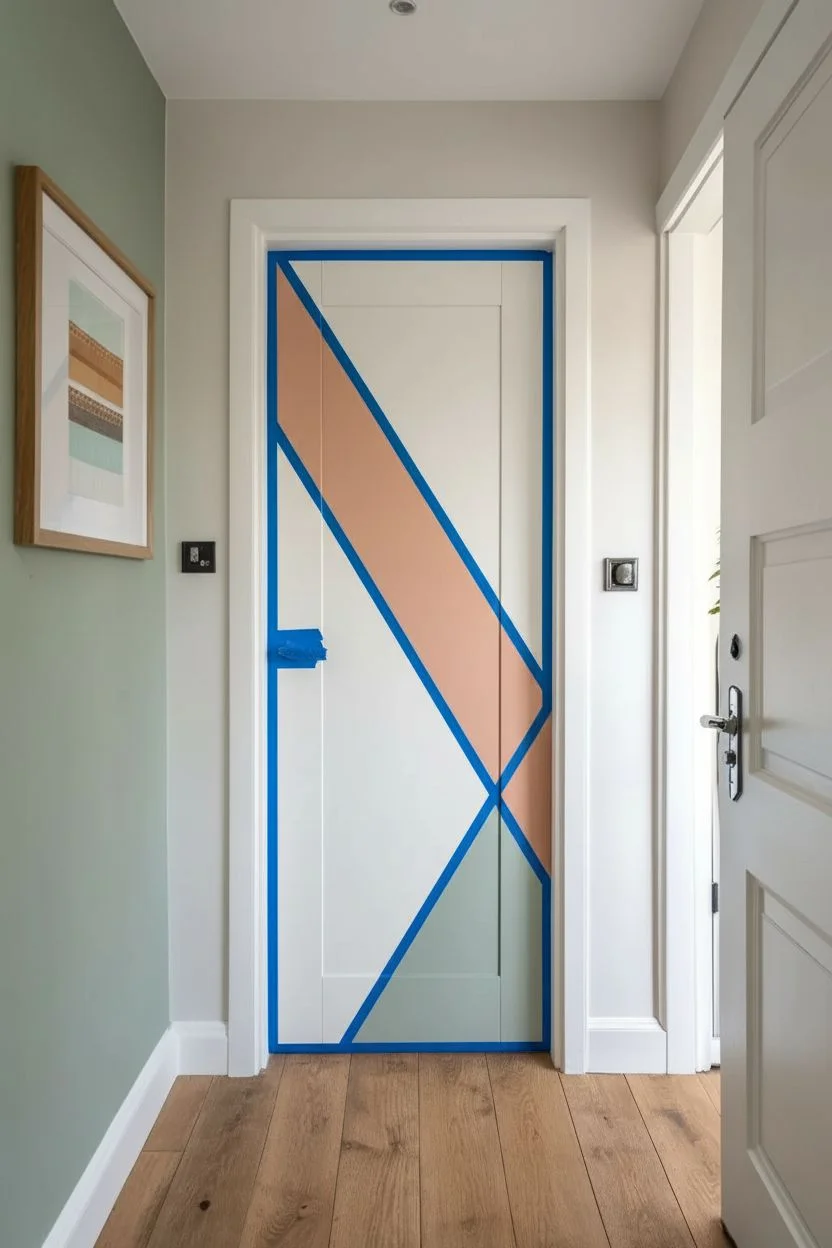
Transform a standard flat or paneled interior door into a statement piece with this bold color-blocking technique. The sharp diagonal lines and earthy palette of sage, terracotta, and ochre create a sophisticated modern look that adds instant architectural interest to any hallway.
How-To Guide
Materials
- Interior wood door (existing or new)
- Sandpaper (120 and 220 grit)
- Sugar soap or mild degreaser
- Painter’s tape (high-quality, preferably FrogTape meant for delicate surfaces)
- Primer suitable for wood/interior trim
- White or off-white base paint (satin or semi-gloss finish)
- Terracotta/Peach paint sample pot
- Sage Green paint sample pot
- Mustard/Ochre paint sample pot
- Small foam roller and tray
- Small angled sash brush
- Ruler or long straight edge
- Pencil
- Craft knife or box cutter
- Clean lint-free cloths
Step 1: Preparation and Base Coat
-
Clean the surface:
Start by thoroughly cleaning the entire door with sugar soap or a mild degreaser to remove any hand oils, dirt, or grime. Wipe it dry with a lint-free cloth. -
Sand for adhesion:
Lightly sand the entire surface of the door with 120-grit sandpaper. You aren’t trying to strip it bare, just scuffing the surface to give the new paint ‘teeth’ to grip onto. -
Mask hardware:
Protect your door handle, hinges, and the surrounding door frame with painter’s tape. If you can easily remove the handle, I usually prefer to take it off completely for a cleaner finish. -
Apply primer:
Roll on a coat of high-quality wood primer. Let this dry completely according to the manufacturer’s instructions before moving on. -
Apply the base color:
Paint the entire door in your chosen base white or off-white color using a foam roller for smooth flat areas and a brush for any panel grooves. Apply two coats if necessary for full opacity, allowing sufficient drying time between coats. -
Cure time:
Allow the base coat to cure for at least 24 hours. This is crucial—if the base paint is still soft, the tape you apply next might peel it off.
Step 2: Mapping the Design
-
Mark anchor points:
Using a pencil and ruler, lightly mark where your lines will start and end. For the main diagonal, measure approximately one-third down from the top left corner and mark it. Then mark a corresponding point on the right side. -
Apply the first tape line:
Stretch your painter’s tape across the door to connect your marks, creating the top edge of the large terracotta diagonal stripe. Press the tape down firmly. -
Define the second stripe edge:
Apply a second piece of tape parallel to the first one, determining the width of your terracotta stripe. This creates the channel where your first color will go. -
Seal the tape edges:
To get those razor-sharp lines, run a thin layer of your *base* white paint along the edge of the tape where you’ll be painting the color. This seals the tape and prevents the colored paint from bleeding underneath.
Seal the Deal
Always ‘seal’ your painter’s tape by brushing a tiny amount of the BACKGROUND color over the tape edge first. This fills gaps, so your accent color creates a perfectly crisp line.
Step 3: Painting the Colors
-
Paint the main diagonal:
Using a small brush or mini roller, fill in the diagonal stripe with your terracotta/peach paint. Apply two thin coats rather than one thick one to avoid drips. -
Remove tape while damp:
Peel off the tape gently while the second coat of terracotta paint is still slightly tacky. Pull the tape away from the wet paint at a 45-degree angle. -
Wait for drying:
Let the terracotta section dry completely. I like to wait overnight here to ensure the finish is hard enough to handle more tape. -
Tape the bottom triangles:
Apply new tape lines to define the sage green triangle at the bottom left and the small mustard triangle on the right edge. Ensure these lines intersect cleanly with your dried terracotta stripe. -
Paint the accent colors:
Fill in the bottom corner with sage green and the small side triangle with mustard ochre. Again, two light coats work best. -
Final reveal:
Remove the remaining tape carefully. If you notice any tiny imperfections or bleeds, touch them up with a small detail artist’s brush. -
Reassemble:
Once the paint is fully cured (usually a few days to reach full hardness), reattach your door handle or remove the protective tape from the hardware.
Go Metallic
For a touch of glam, replace the mustard/ochre triangle with a metallic gold or copper paint. It catches the light when the door opens and looks high-end against the matte colors.
Enjoy the custom, artistic flair this modern design brings to your entryway every time you walk through the door
Hand-Painted Door Motifs for an Artsy One-of-One
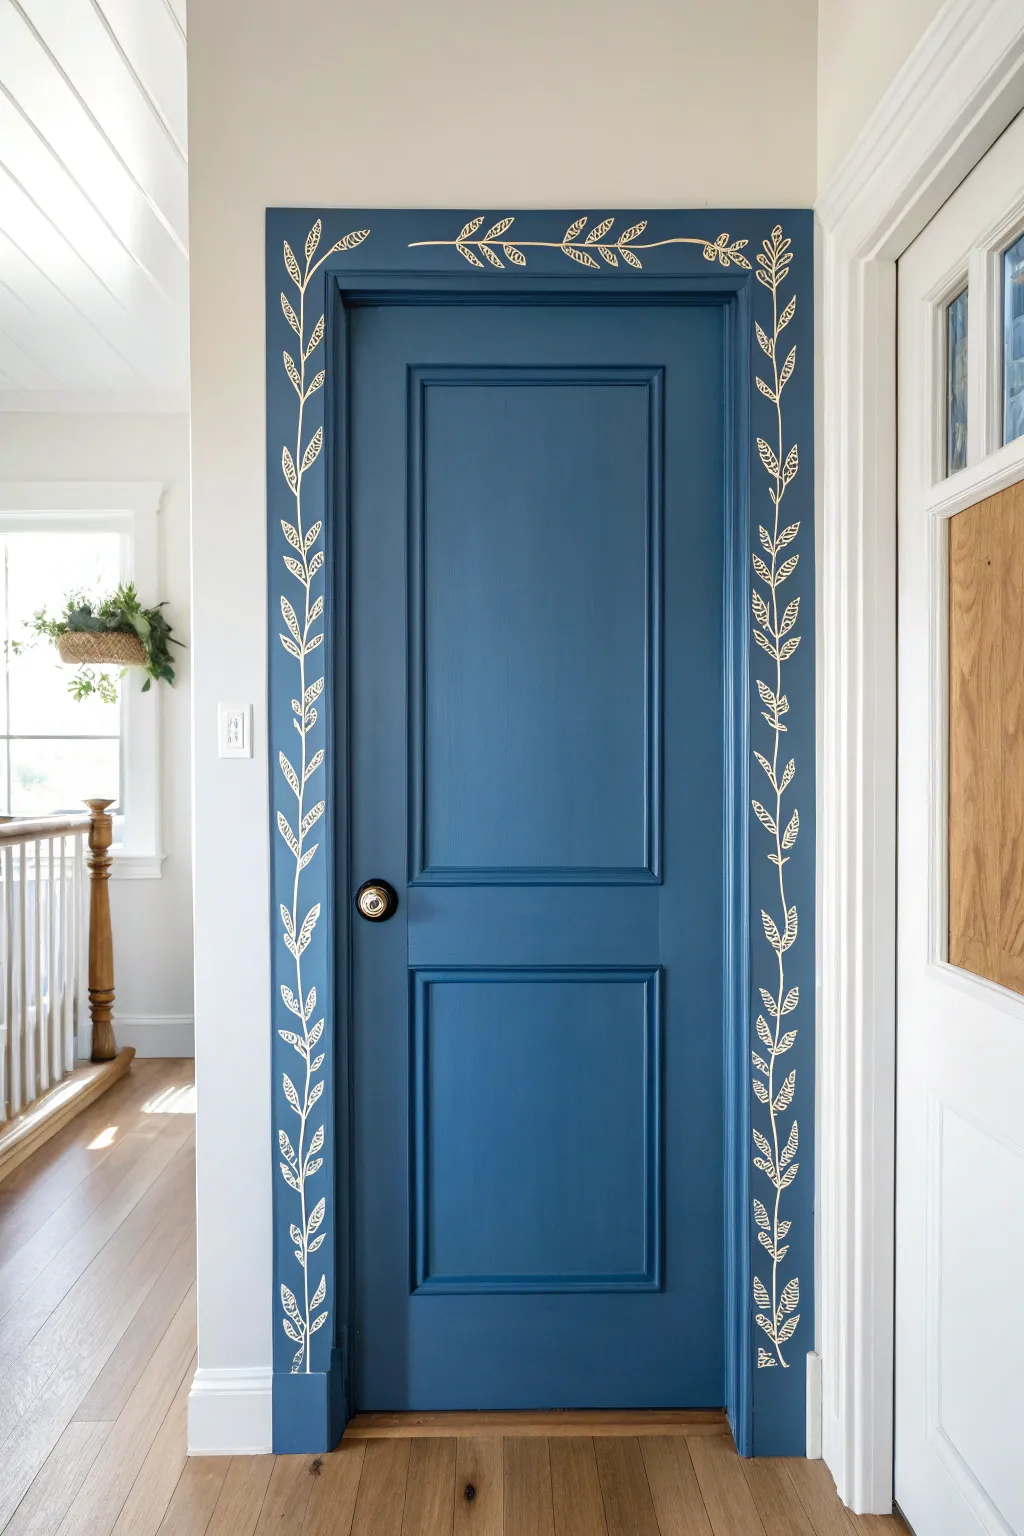
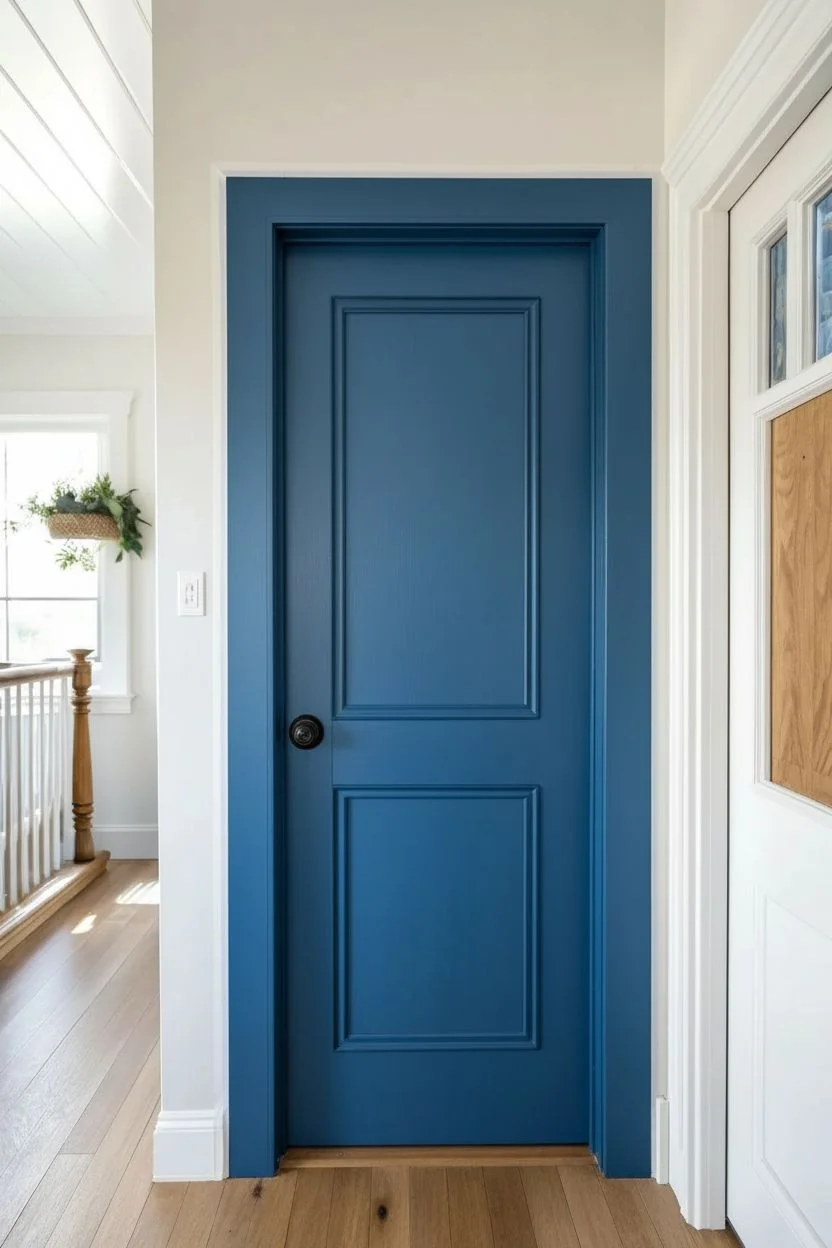
Transform a standard interior door into a bespoke art piece with this elegant DIY project. By extending a deep blue base color onto the casing and adding delicate hand-painted golden vines, you create a stunning architectural focal point that feels both whimsical and sophisticated.
Detailed Instructions
Materials
- Deep blue interior semi-gloss paint (e.g., Prussian Blue or Navy)
- Gold paint pen (fine tip) or gold acrylic paint with a liner brush
- Painter’s tape (frog tape recommended)
- Sandpaper (medium grit, 120-150)
- Tack cloth
- Small foam roller and tray
- Angled sash brush (2 inch)
- Pencil
- Ruler or tape measure
- White eraser
- Piece of chalk (optional for drafting)
- Clear polyurethane topcoat (optional)
Step 1: Preparation & Base Coat
-
Clean the surface:
Begin by thoroughly cleaning the door and the surrounding trim casing with a mild degreaser or soapy water to remove any oils or dust. -
Light sanding:
Ideally, sand the door and trim lightly to scuff the previous finish; this ensures your deep blue paint adheres properly without peeling later. -
Wipe down:
Use a tack cloth to remove every speck of sanding dust, as even small particles will show up clearly against the dark paint. -
Tape off boundaries:
Apply painter’s tape carefully along the wall where it meets the trim, pressing the edges down firmly to prevent bleed-through. -
Cut in the edges:
Using your angled sash brush, paint the recessed areas of the door panels and the detailed grooves of the door casing first. -
Roll the flat surfaces:
Use the foam roller to apply paint to the flat expanses of the door and the face of the trim for a smooth, brush-mark-free finish. -
Apply second coat:
Allow the first coat to dry completely according to the can’s instructions, then apply a second coat for full, rich opacity.
Fixing Wobbly Lines
If a line goes astray, quickly wipe it with a damp Q-tip before it dries. If dried, touch up with a small brush and your base blue paint.
Step 2: Drafting the Design
-
Let paint cure:
Ensure the blue base coat is fully dry and non-tacky before starting any intricate work; I usually wait overnight just to be safe. -
Plan the vine structure:
Using a piece of chalk or a very light pencil touch, sketch a wavy, meandering line going up the center of the vertical trim pieces and across the header. -
Mark leaf placement:
lightly mark where your leaves will branch off the main stem, alternating sides to keep the design balanced and organic. -
Test your tool:
Practice drawing your leaf shape on a scrap piece of paper or cardboard using your gold pen or brush to get the flow right before touching the door.
Step 3: Painting the Gold Motifs
-
Draw the main stem:
Start at the bottom of the door casing and trace over your chalk line with the gold paint pen, moving steadily upwards to create the central vine. -
Create leaf outlines:
Draw the outline of each leaf shape stemming from the vine; pointed ovals work best for this specific botanical look. -
Add inner details:
Inside each leaf outline, draw a central vein line and small diagonal veins branching out to mimic the texture of a real leaf. -
Complete the header:
Continue the pattern across the top trim piece, ensuring the vines from the sides meet or curve elegantly in the center. -
Check for consistency:
Step back periodically to ensure your pattern density looks consistent from top to bottom. -
Clean up sketch lines:
Once the gold paint is fully dry, gently erase any visible chalk or pencil marks with a soft, clean eraser or a damp cloth. -
Seal the work (optional):
For high-traffic areas, you might choose to apply a clear, water-based polyurethane over the trim to protect your hand-painted design.
Level Up: Metallic Leaf
Instead of paint pens, use gold leaf size and genuine gold leaf sheets for a textured, ultra-reflective finish that catches the light beautifully.
Now you have a custom entryway that turns a functional element into a conversation piece every time you walk through


Have a question or want to share your own experience? I'd love to hear from you in the comments below!