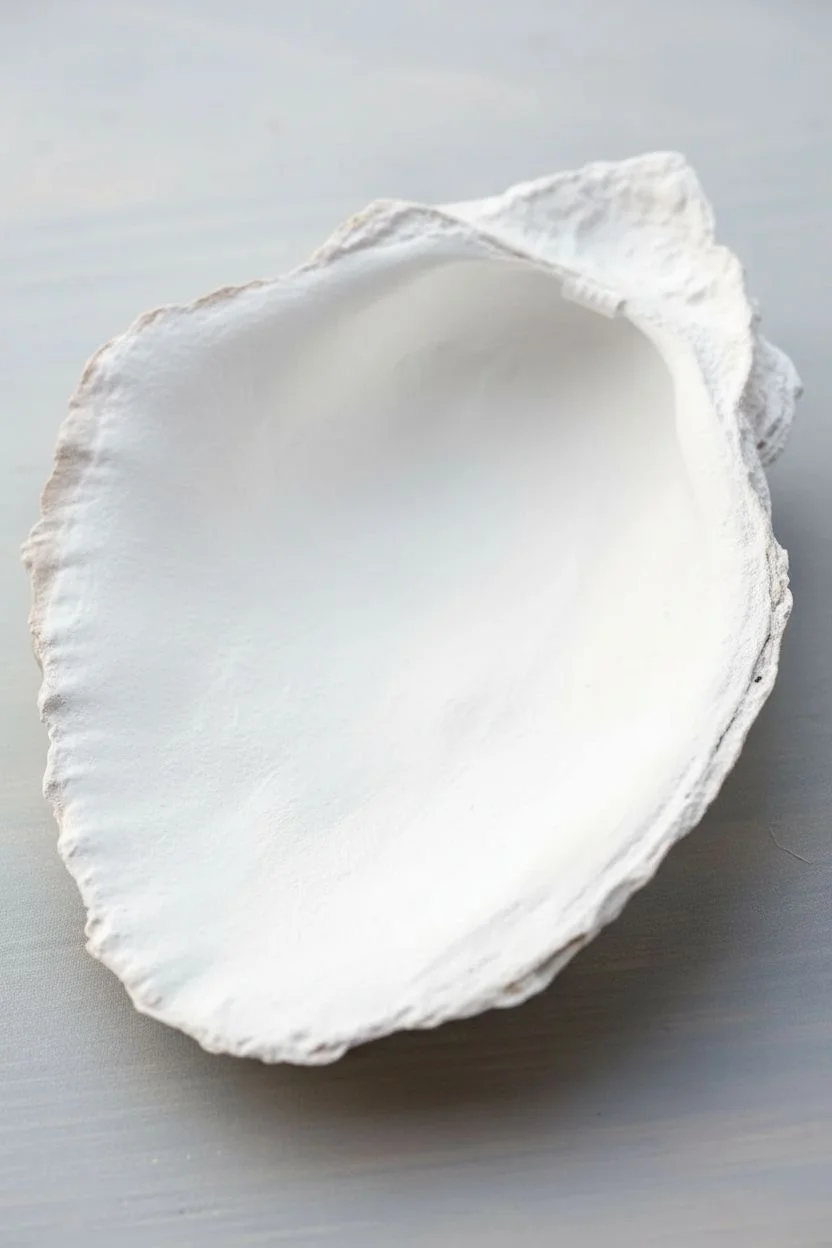
There’s something seriously satisfying about turning a rough, salty shell into a tiny piece of art you can actually use. Here are my favorite painted oyster shells ideas—starting with the classics and sliding into the more unexpected, artsy experiments.
Coastal Stripe Interior
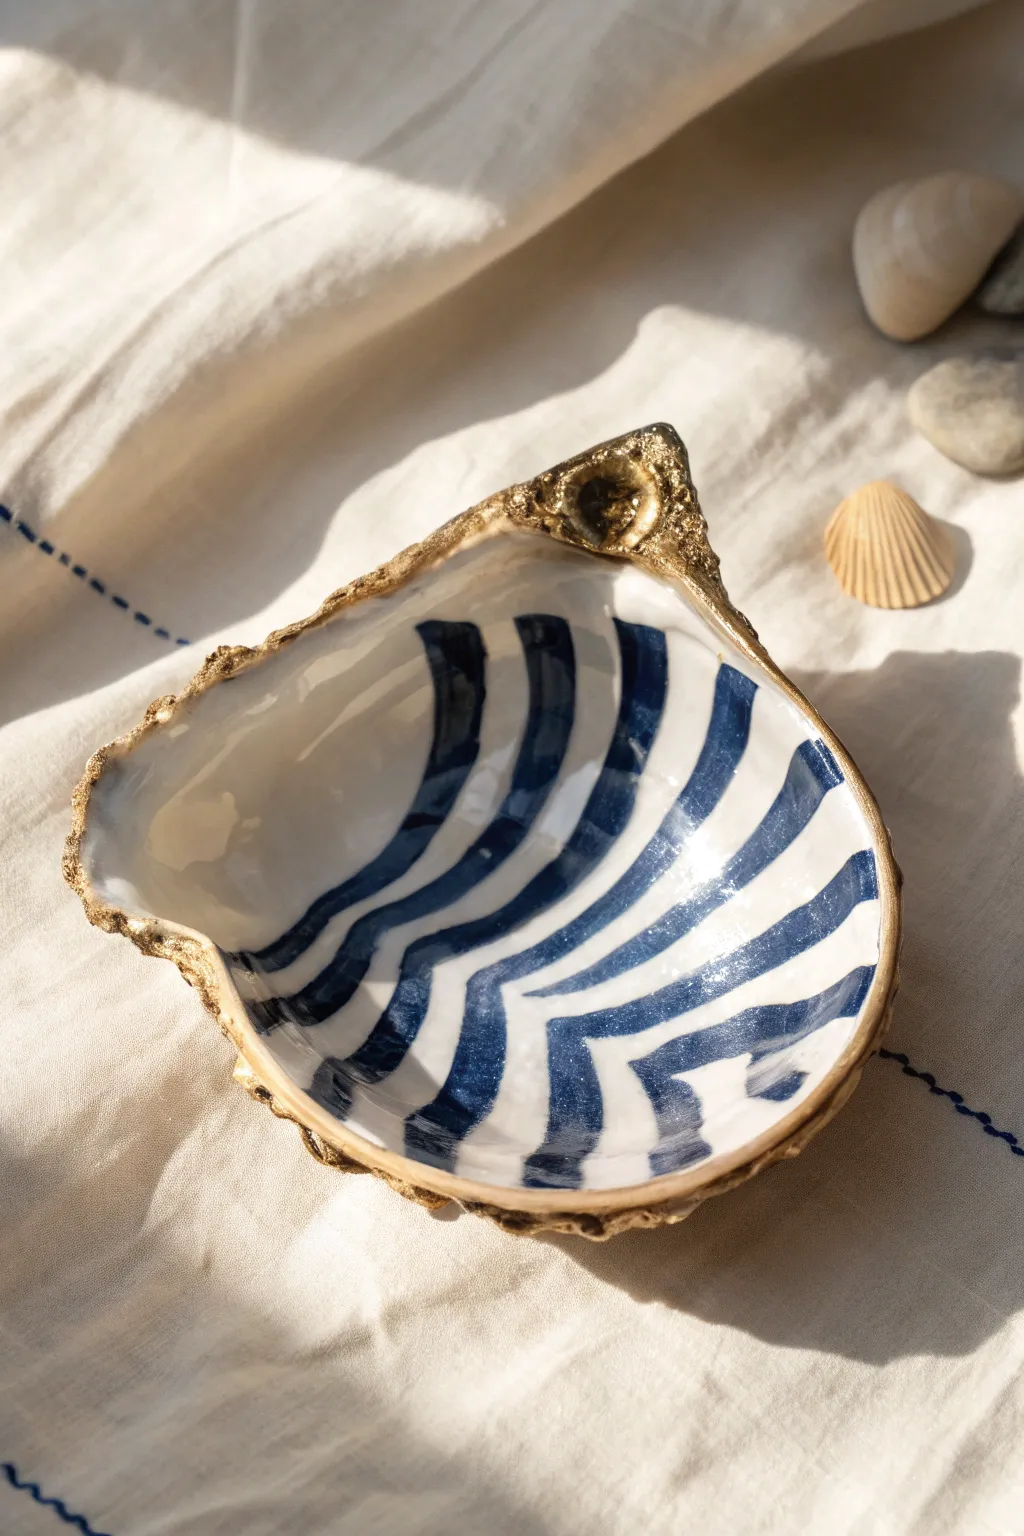
Transform a humble oyster shell into a piece of high-end coastal decor with this crisp, striped design. The combination of deep navy chevron patterns against a glossy white background, framed by a luxurious gold edge, creates a sophisticated trinket dish perfect for holding rings or simply admiring.
Step-by-Step
Materials
- Clean, large oyster shell (at least 3-4 inches wide)
- White acrylic paint (high gloss or multi-surface)
- Navy blue acrylic paint
- Gold leaf paint or liquid gilding
- Flat shader brush (size 4 or 6)
- Small round detail brush (size 0 or 1)
- High-gloss decoupage medium or clear varnish
- Pencil (optional)
- Palette or small dish
- Paper towels
- Cup of water
Step 1: Preparing the Canvas
-
Clean the shell thoroughly:
Before you begin, ensure your shell is scrubbed clean of any debris, salt, or sand and is completely dry. A quick soak in a weak bleach solution followed by a thorough rinse helps eliminate any lingering ocean smells. -
Apply the base coat:
Using your larger flat brush, paint the entire interior of the shell with white acrylic paint. You want a solid, opaque background, so don’t be afraid to apply a generous amount. -
Dry and repeat:
Let the first coat of white dry completely. Depending on the opacity of your paint, apply a second or even third coat until the natural colors of the shell are fully covered and the surface looks smooth and porcelain-like.
Uneven Lines?
If your blue stripes look shaky, don’t worry. Once dry, use a fine-tip white paint pen to clean up the edges. The sharp nib offers more control than a brush for corrections.
Step 2: Creating the Chevron Pattern
-
Map out the center line:
Visualizing the design is key. Imagine a vertical line running down the deep center of the shell’s cup; this is where your stripes will dip to form the ‘V’ or chevron shape. -
Draft the stripes (optional):
If painting freehand feels daunting, lightly sketch the chevron wavy lines with a pencil on the dried white paint. Focus on spacing them evenly, radiating outward from the hinge. -
Start the first stripe:
Load your round detail brush with navy blue paint. I find it easiest to start with the central stripe near the middle of the shell to establish the angle. -
Paint the left side:
Paint a curved line sweeping down from the left rim toward the center bottom of the shell. Keep the stroke swift for a smoother edge. -
Connect the right side:
From the bottom center point where your previous line ended, sweep the brush upward toward the right rim, creating a soft ‘V’ shape. -
Thicken the lines:
Go back over your initial guide line to thicken it into a bold stripe. The line should be slightly organic and wavy rather than perfectly geometric, mimicking ripples in water. -
Add radiating stripes:
Continue painting parallel chevron stripes above and below your first one. As you move toward the wider outer edge of the shell, the stripes naturally become longer. -
Refine the edges:
Use the very tip of your small brush to clean up any shaky edges on the blue stripes. If you make a mistake, let it dry and touch it up with white paint.
Coastal Set
Create a trio by painting two other shells with complementary patterns: one with simple polka dots and another with a solid navy interior and white rim.
Step 3: Gilding and Sealing
-
Prepare the gold accent:
Once the blue paint is fully dry to the touch, shake your liquid gilding or gold leaf paint well. -
Paint the rim:
Using a separate small brush (or one you don’t mind ruining, as liquid leaf can be tough to clean), dab gold paint along the rough, jagged edge of the shell. -
Extend the gold slightly:
Don’t just paint the top edge; bring the gold down slightly onto the outer back of the shell and a tiny bit onto the inner white rim to create a framed look. -
Fill the hinge area:
Pay special attention to the ‘hinge’ area (the pointed top). Dab extra gold here to highlight the natural texture and create a focal point. -
Apply the gloss seal:
After the gold has cured (usually 1 hour), apply a thick coat of high-gloss varnish or decoupage medium over the painted interior. This gives it that wet, ceramic shine and protects the design. -
Final drying time:
Set the shell aside in a dust-free area for at least 24 hours to let the varnish cure into a hard, durable finish.
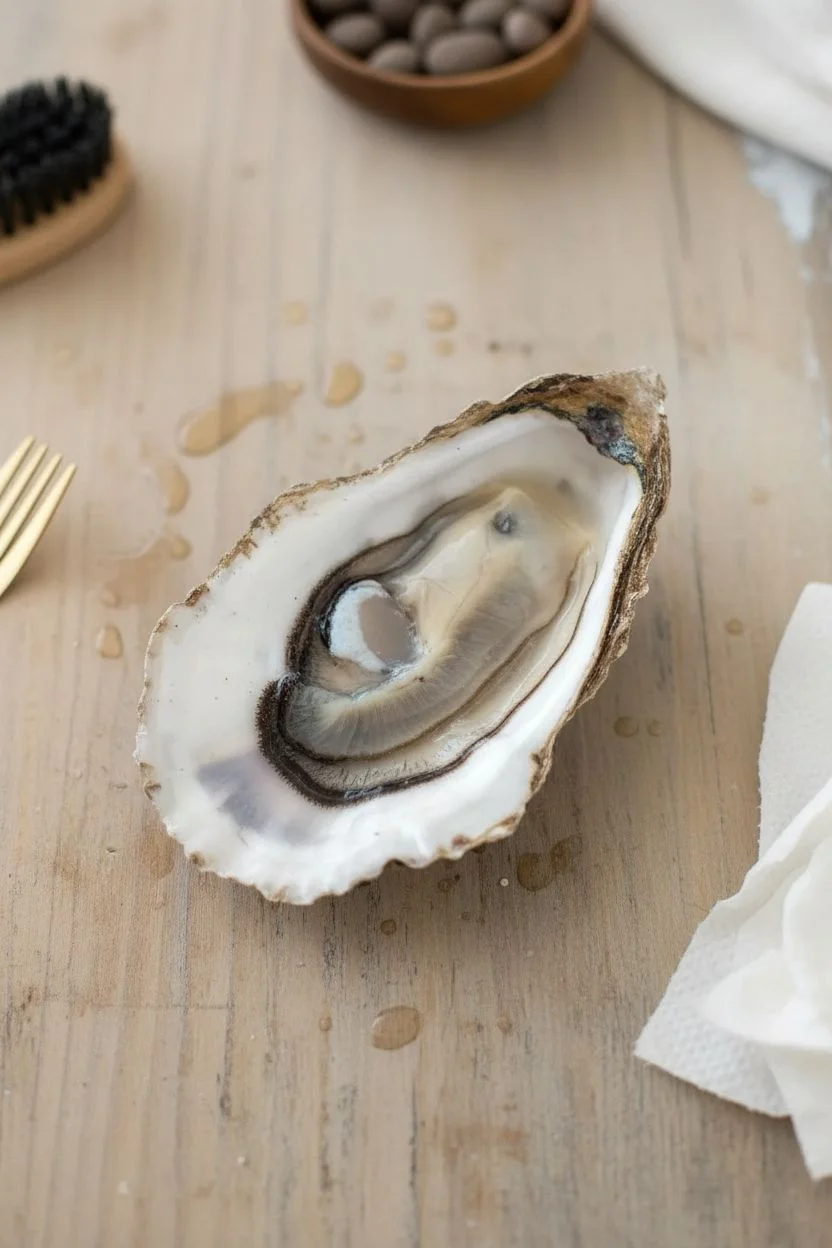
Place your finished shell on a bedside table or stack it on a coffee table book for an instant touch of seaside elegance


Mini Lighthouse Scene
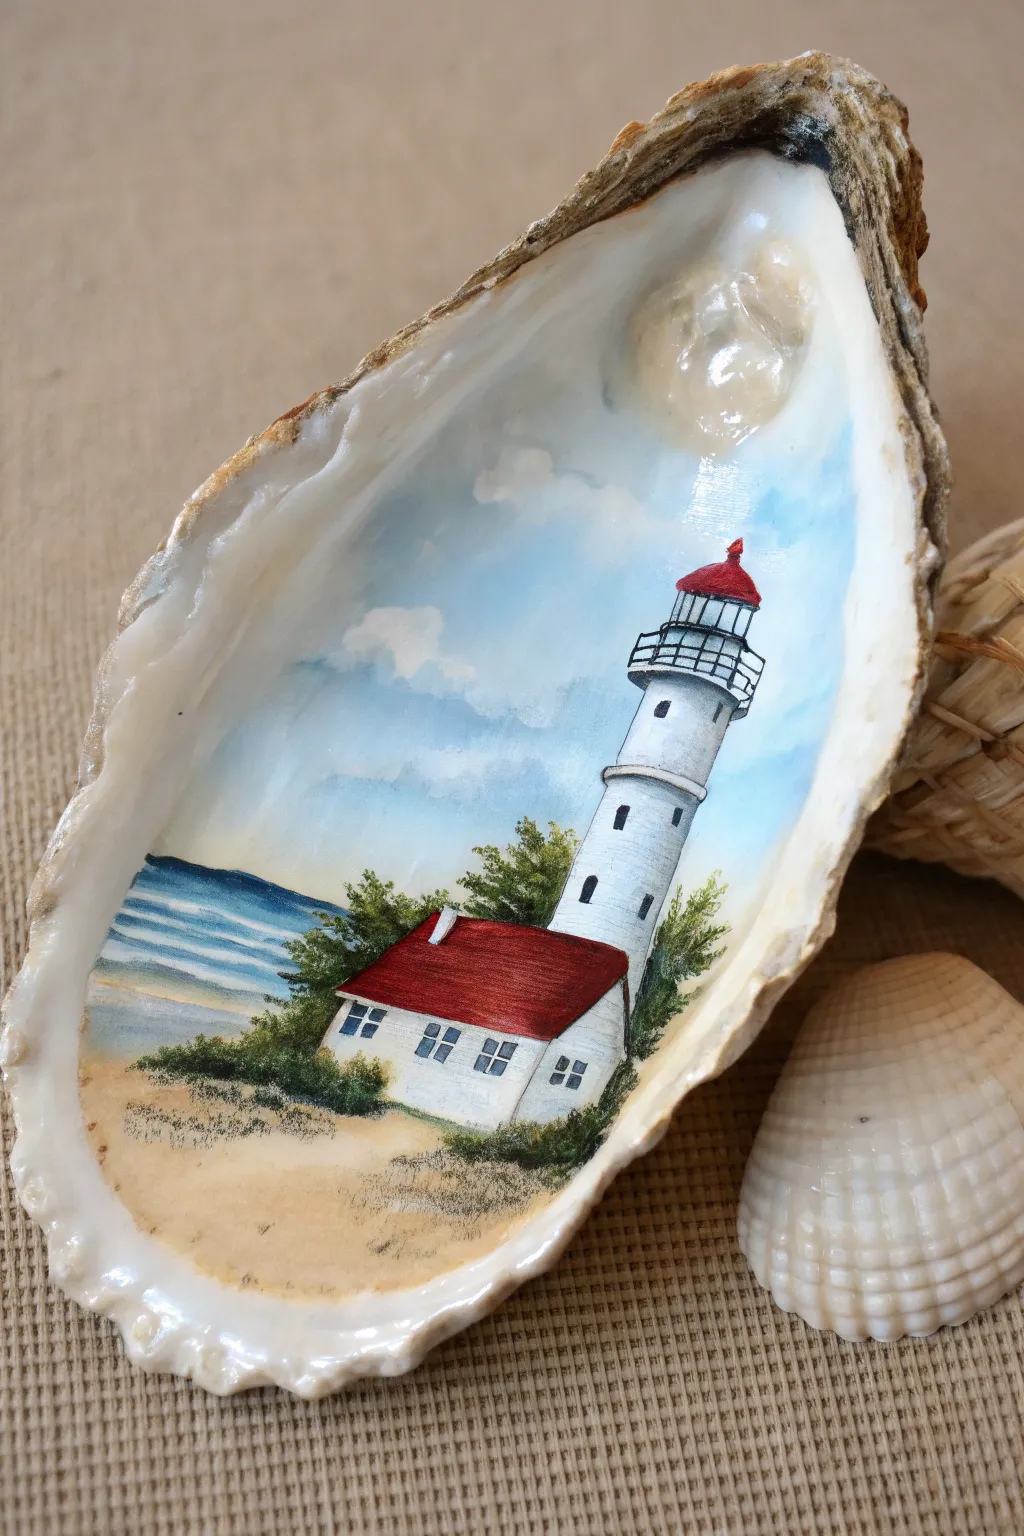
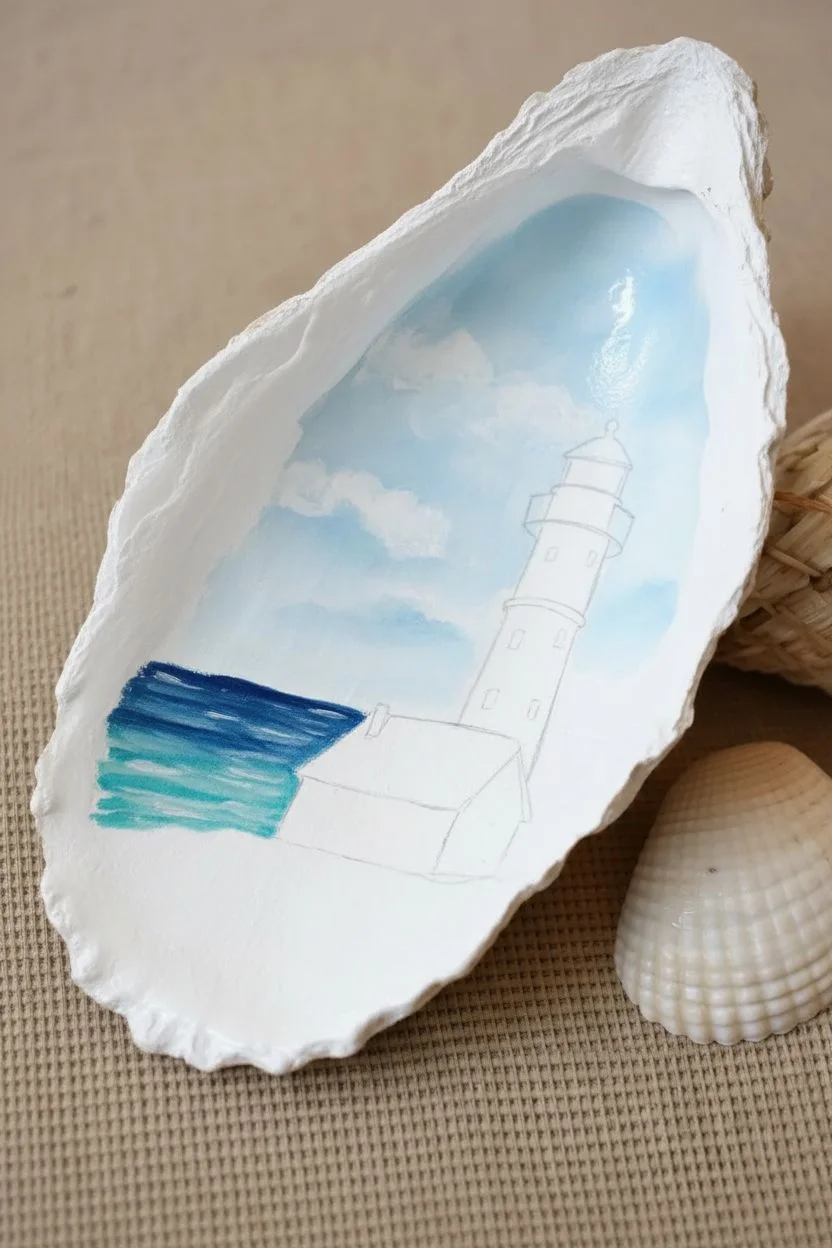
Transform a humble oyster shell into a stunning maritime vignette featuring a classic red-roofed lighthouse standing tall against a breezy sky. This detailed miniature painting captures the romance of the coast, utilizing the shell’s natural curve to add depth to the sky and sandy foreground.
Detailed Instructions
Materials
- Large, clean oyster shell (deeply cupped)
- Acrylic paints (Titanium White, Phthalo Blue, Burnt Sienna, Yellow Ochre, Cadmium Red, Hooker’s Green, Carbon Black)
- Gesso (white primer)
- Fine detail brushes (sizes 00, 0, and 2)
- Small flat shader brush (size 4)
- Palette for mixing
- Water cup and paper towels
- High-gloss varnish or resin (optional)
Step 1: Preparation & Sky
-
Prime the surface:
Begin by scrubbing your shell thoroughly and letting it dry completely. Apply two thin coats of white gesso to the entire interior of the shell. This creates a smooth, grippy surface for your acrylics and prevents the dark shell from dulling your colors. -
Map the horizon:
Lightly sketch your composition with a diluted pencil or very thin paint wash. Place the horizon line about one-third of the way up from the bottom. Locate where the lighthouse tower will stand on the right side. -
Paint the sky gradient:
Mix Titanium White with a tiny touch of Phthalo Blue. Using your flat brush, paint the upper concave section of the shell. As you move down towards the horizon, add more white to the mix to create a natural atmospheric fade. -
Add soft clouds:
While the blue is still tacky, use a small, dry brush with pure white to scumble in fluffy cloud shapes. Keep the edges soft to suggest distance. -
Paint the ocean:
On the left side, below the horizon, paint horizontal bands of deep blue. Mix in a little white for lighter turquoise streaks closer to what will be the shoreline.
Use the Pearl
If your shell has a natural pearlescent bump or ‘blister’ inside, don’t cover it! Paint around it and turn it into the moon or sun in your sky.
Step 2: Architecture & Landscape
-
Block in the sand:
Mix Yellow Ochre with plenty of Titanium White and a dot of Burnt Sienna to get a warm sand color. Fill in the bottom area, sweeping the brush gently to mimic drifting dunes. -
Structure the lighthouse:
Using Titanium White and a size 2 brush, paint the main column of the lighthouse. It should be slightly wider at the base and taper gently as it goes up. -
Paint the keeper’s house:
Block in the small rectangular shape of the house at the base of the tower using white paint. Add a slanted roof shape on top. -
Roof details:
Paint the roof of the house and the lantern top of the lighthouse with Cadmium Red mixed with a tiny bit of Burnt Sienna to tone it down. This prevents the red from looking too cartoonish. -
Texture the dunes:
Stipple dark green (Hooker’s Green mixed with a little black) around the base of the house and along the shoreline to create scrubby bushes. Keep the strokes jagged and irregular.
Step 3: Fine Details
-
Define the tower:
Mix a very light grey wash. Paint a thin shadow line down the right side of the lighthouse tower and under the walkway rim to give it cylindrical volume. -
Add windows and railing:
Switch to your smallest 00 brush. Use thinned black paint to carefully draw the gallery railing around the top of the tower and the small windows on the side. -
House features:
Paint tiny blue squares for the house windows, then outline them delicately with thin white lines to create panes. Don’t forget a small white chimney on the roof. -
Ocean waves:
Return to the water and use pure white to paint thin, wavy lines where the water meets the sand, creating the look of gentle surf rolling in. -
Foreground texture:
I like to take a dry brush with a bit of brown paint and lightly dab the foreground sand to create texture and pebbles.
Gilded Edge
Finish the piece by painting the rough, raw edge of the oyster shell with liquid gold leaf or metallic gold paint to frame your miniature scene elegantly.
Display your finished miniature on a small easel or nestle it among other beach finds to bring a permanent piece of summer into your home


Sailboat on a Calm Horizon
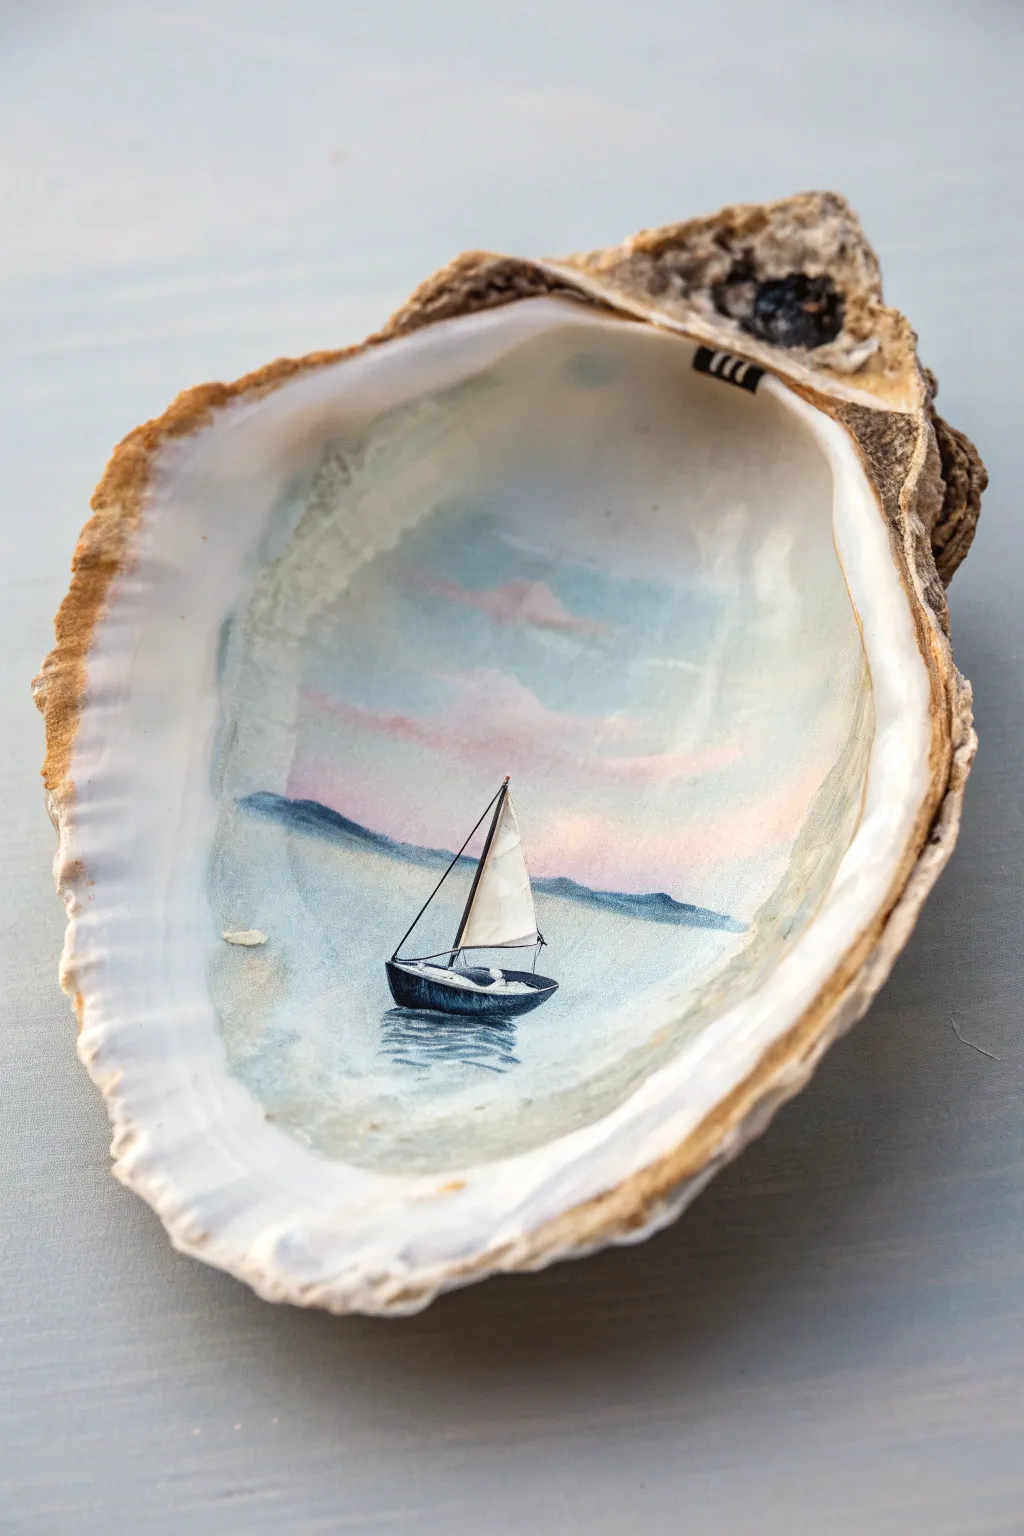
Transform a discarded oyster shell into a delicate window looking out onto a peaceful sea. The natural concavity of the shell creates a unique sense of depth for this miniature seascape, perfect for capturing a distant horizon.
How-To Guide
Materials
- Large, clean oyster shell (deep cup shape preferred)
- Acrylic paints (primary colors plus white and Payne’s gray)
- Gesso or white acrylic primer
- Paintbrushes: small flat brush, liner brush (00 or 000)
- Small cup of water
- Paper towels
- Clear acrylic sealer (glossy or satin)
Step 1: Preparation & Base
-
Clean the Canvas:
Scrub your oyster shell thoroughly with warm soapy water and a stiff brush to remove any grit or salt. Let it dry completely, preferably in the sun. -
Prime the Surface:
Apply a coat of gesso or white acrylic primer to the interior of the shell. The nacre creates a slippery surface, so this primer is crucial for paint adhesion. -
Second Coat:
Once dry, add a second thin layer of white primer to ensure an opaque, bright background that will make your sky colors pop.
Paint Stripping?
If acrylic peels off the shiny shell surface, lightly sand the interior with fine-grit sandpaper before priming to create ‘tooth’ for grip.
Step 2: Painting the Sky & Sea
-
Sky Gradient:
Mix a very pale blue using white and a tiny touch of blue. Start painting at the top inside lip of the shell, blending downwards. -
Sunset Tones:
While the blue is still slightly wet, mix a faint pink-peach tone. Blend this into the lower third of the sky area, leaving space at the bottom for the water. -
Cloud Structure:
Use a dry brush technique with pure white to dab in soft, pillowy clouds over the blue and pink transition area. Soften edges with a clean, damp brush. -
Horizon Line:
Identify where your sea meets the sky. Paint a soft, pale blue-grey band across the shell’s curve to establish the horizon. -
Distant Mountains:
Mix a muted blue-violet. Paint faint, undulating shapes along the horizon line to represent distant land, keeping the color wash-like and subtle. -
Water Base:
Fill the bottom portion of the shell with a light teal-blue mix, blending it lighter as it comes toward the front lip of the shell to mimic shallow water.
Gold Rim Finish
Use liquid gold leaf paint along the rough, raw edge of the oyster shell to frame your painting and give it a high-end, jewelry-dish look.
Step 3: The Sailboat Detail
-
Hull Shape:
Using your smallest liner brush and dark navy or Payne’s gray, paint the small crescent shape of the boat’s hull in the lower center. -
The Mast:
Draw a very fine, straight line extending upward from the hull for the mast. A steady hand is key here; you might want to brace your pinky against the table. -
Main Sail:
With white paint, fill in a triangular shape to the right of the mast. It should be wide at the bottom and taper to a point near the top. -
Jib Sail:
Paint a smaller, narrower triangle on the left side of the mast. -
Rigging Lines:
I like to use a nearly dry liner brush with watered-down black to sketch the faint rigging lines connecting the mast to the hull. -
Sail Details:
Add a tiny outline or shadow on the edge of the white sails using a very pale grey to give them dimension against the sky. -
Reflection:
Paint horizontal, broken squiggles directly under the boat using the dark hull color to create a rippled reflection on the water.
Step 4: Finishing Touches
-
Highlights:
Add tiny dots of pure white on the water around the reflection to suggest sparkling sunlight. -
Dry Time:
Allow the paint to cure fully for at least an hour. -
Sealing:
Apply a glossy acrylic sealer over the painted area. This mimics the wet look of water and restores the natural sheen of the shell border.
Place your finished shell on a small stand or use it to hold rings and enjoy the calm view


Sea Turtle Motif
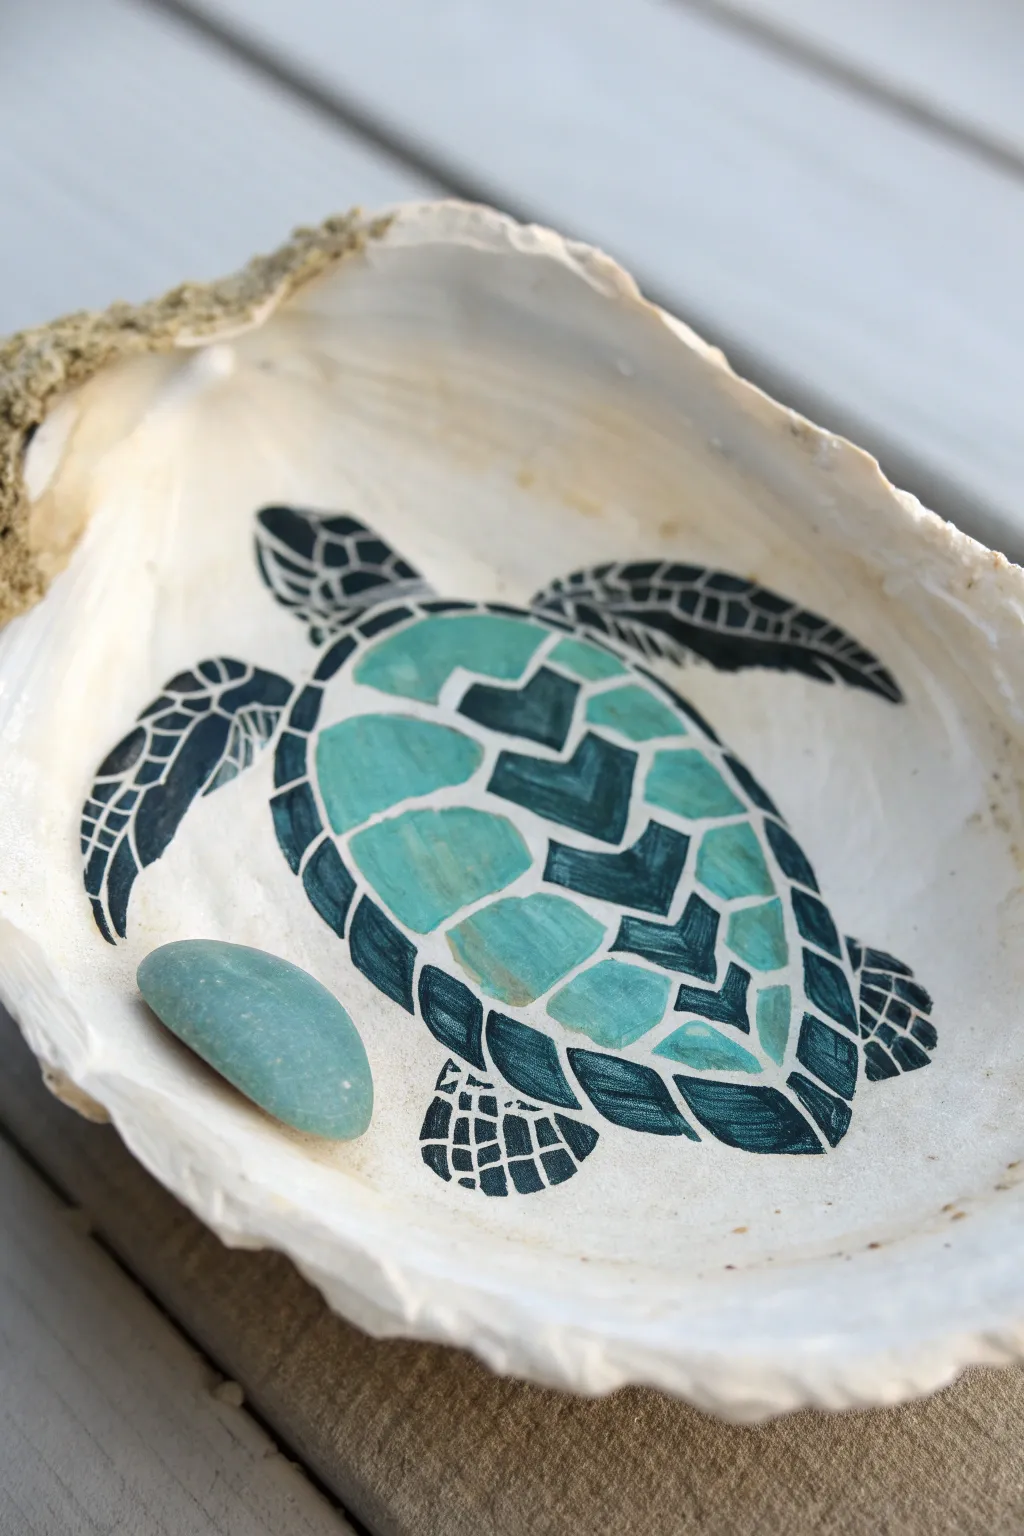
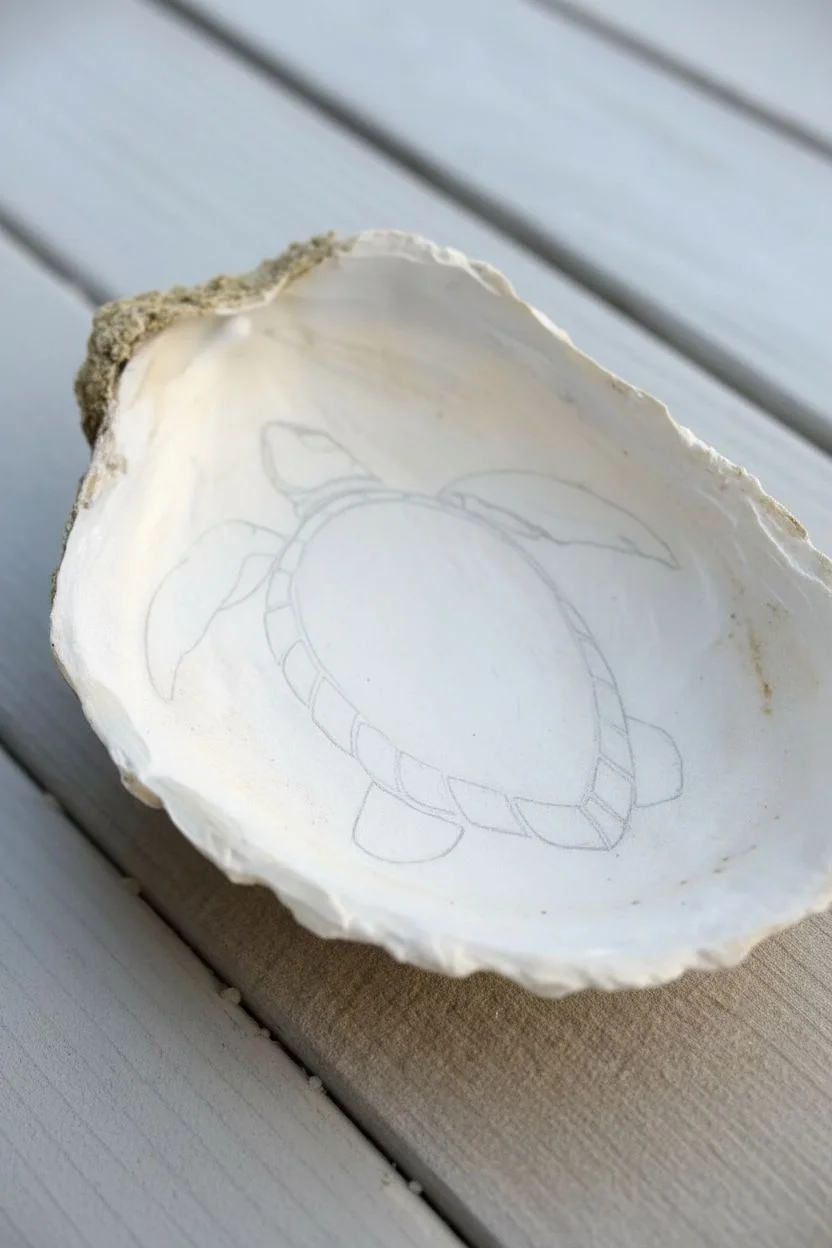
Transform a humble oyster shell into a coastal treasure with this stylized sea turtle design. The painted turquoise mosaic pattern pops beautifully against the shell’s pearlescent interior, creating a sophisticated piece of beach decor.
Step-by-Step Tutorial
Materials
- Large, clean oyster shell (flatter shape is easier)
- White matte acrylic paint or gesso
- Teal or turquoise acrylic paint
- Dark navy blue or flat black acrylic paint
- Small sea glass piece or smooth pebble (teal/blue)
- Fine-point detail brush (size 0 or 00)
- Small flat brush
- Pencil
- Gloss varnish or decoupage glue (optional)
- Strong craft glue (e.g., E6000)
Step 1: Preparation & Base
-
Clean the canvas:
Begin by scrubbing your oyster shell thoroughly with soap and water to remove any grit or salt residues. Let it dry completely in the sun or use a hairdryer to speed things up. -
Prime the interior:
Using a small flat brush, apply a thin coat of white matte acrylic paint or gesso to the inside bowl of the shell. This creates a uniform surface that makes your colors stand out, though you can skip this if you prefer the natural shell texture. -
Sketch the outline:
Lightly sketch the outline of a sea turtle in the center of the shell with a pencil. Draw an oval for the body, four flippers extending outward, and a small head at the top.
Clean Lines Hack
If your brush feels too shaky for the fine grid lines, try using an ultra-fine tip acrylic paint marker or a permanent ink pen over the dried paint instead.
Step 2: Painting the Shell Pattern
-
Block in the main shell:
Mix a vibrant teal or turquoise shade. Paint a large oval shape for the turtle’s back, leaving a small gap between this color and your original pencil outline. -
Create the mosaic segments:
Once the teal base is dry, use your pencil to lightly draw the geometric plates on the turtle’s back. A central column of irregular hexagons flanked by creating smaller side plates works best. -
Outline the plates:
Switch to your fine-point detail brush and dark navy paint. Carefully paint thick lines over your pencil marks on the shell, effectively separating the teal into individual ’tiles’ or scutes. -
Refine the lines:
Go back over your navy lines to ensure they have crisp, clean edges. The contrast between the dark lines and the bright teal is what gives it that mosaic look.
Gold Leaf Accent
Elevate the look by painting the outer rim of the oyster shell with liquid gold leaf or metallic gold acrylic for a gilded, high-end finish.
Step 3: Limbs & Details
-
Outline the appendages:
Using the dark navy paint, color in the silhouettes of the head and flippers. I find it helpful to look at a reference photo to get the curve of the front flippers just right. -
Add flipper details:
While the navy paint is still wet, or by waiting for it to dry and using a lighter blue/white, add small geometric shapes inside the flippers to mimic scales. -
Detailed scale work:
Alternatively, you can paint the flippers as outlines first, then fill them with tiny grid-like patterns using the very tip of your brush for a more intricate style. -
Connect the body:
Ensure the navy outline of the main shell connects smoothly to the head and flippers, creating a cohesive silhouette. -
Clean up edges:
If any paint strayed outside the design, use a clean brush with a tiny bit of white paint to cover the mistake and sharpen the outer silhouette.
Step 4: Finishing Touches
-
Seal the painting:
Once all paint is fully dry, apply a very light coat of gloss varnish just over the painted turtle to make it look wet and shiny. -
Placement check:
Take your small piece of sea glass or smooth pebble and test fit it near the bottom of the shell. It should balance the composition without touching the turtle. -
Secure the accent:
Apply a small dot of strong craft glue to the back of the sea glass and press it firmly into place. This adds a lovely 3D element that mimics a rock on the ocean floor. -
Final cure:
Set the finished shell in a warm, dry place for at least 24 hours to let the glue and varnish fully cure before displaying.
Place your finished shell on a coffee table or use it as a unique ring dish to bring a little ocean calm to your home
BRUSH GUIDE
The Right Brush for Every Stroke
From clean lines to bold texture — master brush choice, stroke control, and essential techniques.
Explore the Full Guide
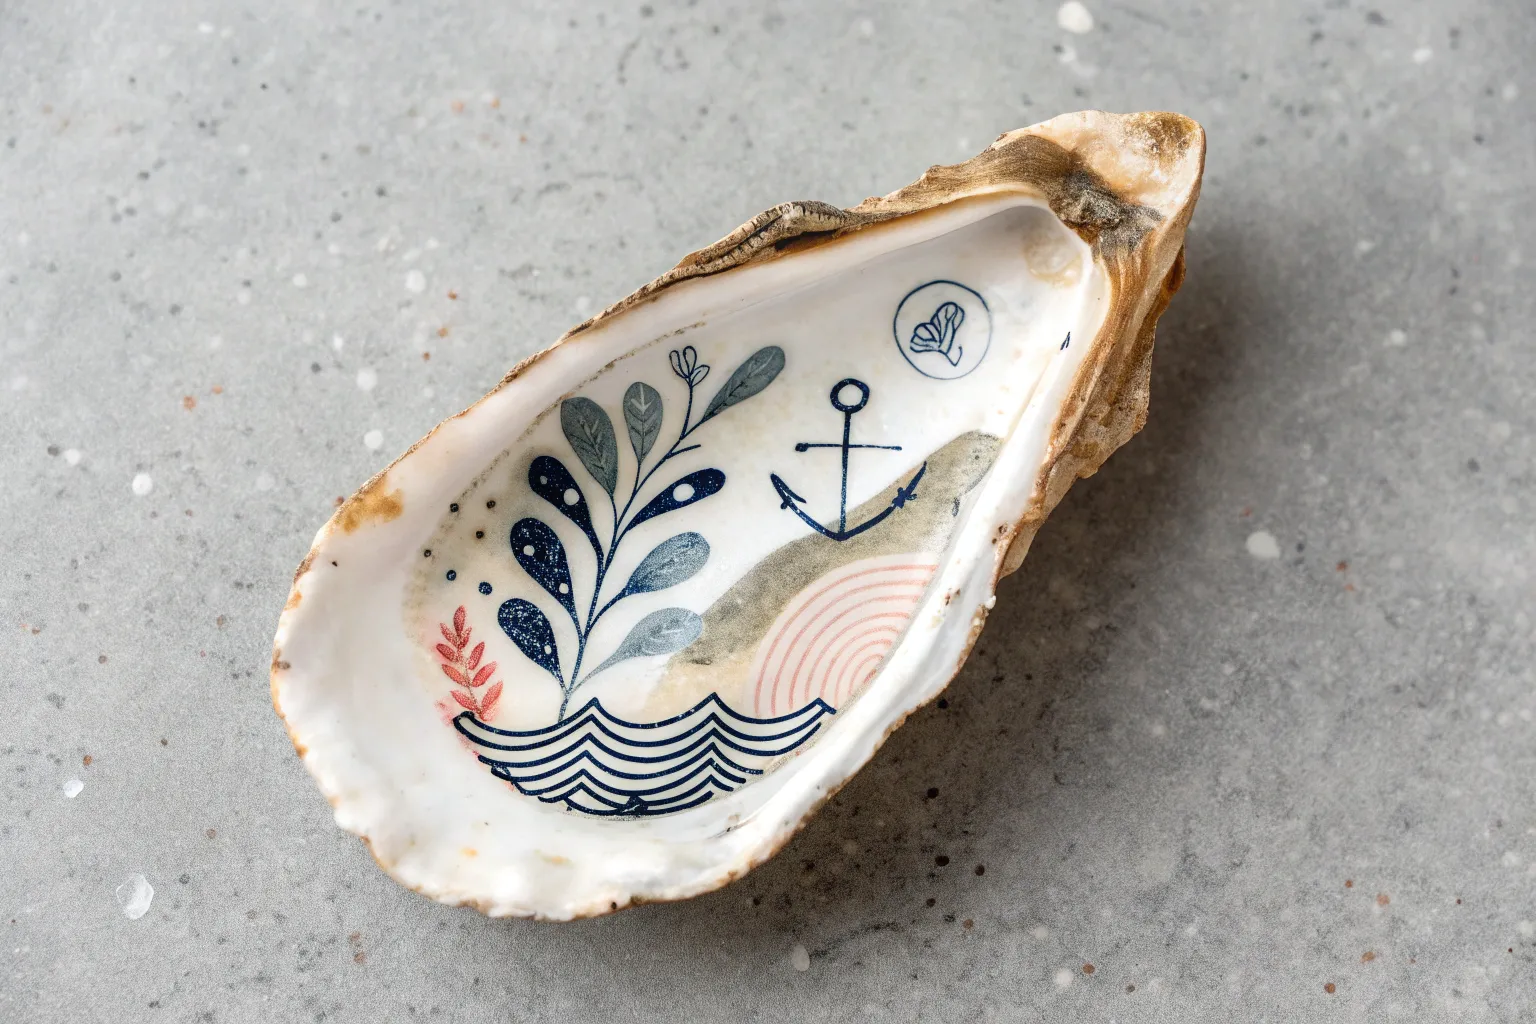
Simple Palm and Sunset Wash
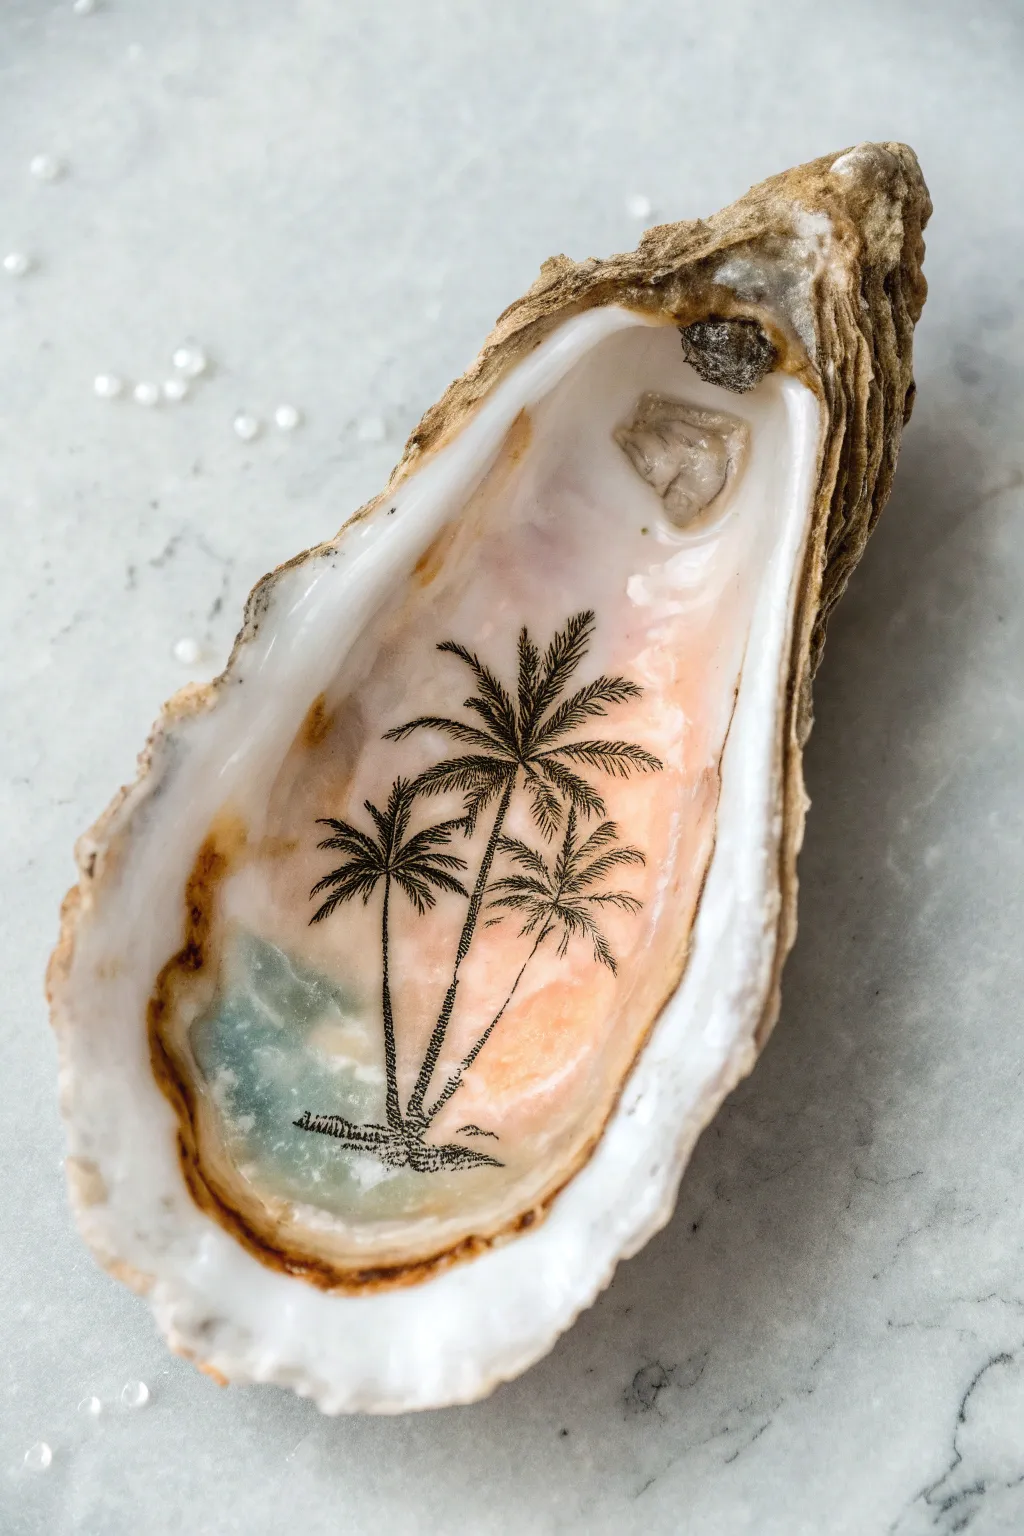
Capture the serene vibes of a beach sunset within the delicate curve of an oyster shell. This project combines a soft, ethereal watercolor wash with crisp botanical line art for a sophisticated coastal keepsake.
Step-by-Step
Materials
- Cleaned and dried oyster shell
- Liquid gilding or gold leaf paint (optional, for rim)
- Watercolor paints (Peach, Soft Pink, Teal, Phthalo Blue)
- Small soft watercolor brush (round, size 2 or 4)
- Ultra-fine tip permanent marker (Black, 0.05 or 0.1mm) or waterslide decal paper
- Gloss varnish or clear decoupage medium
- Water cup and paper towels
Step 1: Preparing the Canvas
-
Clean Thoroughly:
Before starting, ensure your oyster shell is completely scrubbed clean of any grit or ocean residue and is fully dry. The nacre (inner mother-of-pearl) needs to be free of oils for the paint to adhere properly. -
Observe the Shape:
Hold your shell vertically. Identify the deepest part of the cup (the ‘bowl’) and the flatter top section. This natural anatomy will guide your horizon line.
Ink Smearing?
If permanent marker smears on the shell surface, switch to a delicate liner brush and black acrylic paint. Acrylic adheres better to the slick nacre surface without bleeding.
Step 2: Creating the Sunset Wash
-
Mix the Peach Tone:
Dilute a small amount of Peach or Soft Pink watercolor with plenty of water. You want a very transparent, watery consistency, almost like tinted water rather than opaque paint. -
Apply the Sky:
Start painting smoothly from the top third of the shell, brushing downward. Let the color pool slightly in the natural ridges of the shell but keep the coverage sheer so the pearlescent shine peeks through. -
Mix the Ocean Tone:
Rinse your brush and pick up a tiny bit of Teal or Phthalo Blue. Dilute this heavily as well; we are aiming for a soft sea glass look. -
Paint the Water:
Apply the blue wash to the bottom left section of the shell interior. Gently feather the edge where the blue meets the pinkish sky so there isn’t a hard line, creating a dreamy transition. -
Dry Completely:
Set the shell aside to dry fully. Because the surface is non-porous, watercolor takes longer to set here than on paper. I usually wait at least an hour to ensure no smudging occurs in the next phase.
Step 3: Adding the Silhouettes
-
Plan the Composition:
Visualize where your three palm trees will sit. The tallest one should take center stage, reaching up into the pink sky, while the two smaller ones flank it slightly lower. -
Draw the Trunks:
Using your ultra-fine permanent marker, draw the three trunks first. Make them slightly curved and textured—not straight lines—to mimic the segmented look of palm bark. -
Start the Fronds:
For the leaves, draw the central spine of each frond arching outward from the top of the trunk. Imagine a fireworks burst shape. -
Add Leaf Detail:
With quick, feather-light strokes, draw the individual leaflets coming off the spines. Keep these strokes somewhat jagged and loose to capture a windswept tropical feel. -
Ground the Trees:
At the base of the trunks, add small scribbles and horizontal dashes to represent the solid ground or sandy base, anchoring your trees so they aren’t floating. -
Alternative: Decal Method:
If you aren’t confident drawing, you can print a palm tree silhouette onto clear waterslide decal paper, cut it out, and slide it onto the dried watercolor surface instead.
Pro Tip: Depth effect
Add a second layer of gloss varnish just over the water area (the blue section). This builds up physical texture and makes the ‘ocean’ look deeper and wetter than the sky.
Step 4: Finishing Touches
-
Define the Rim (Optional):
If you want to frame your artwork, carefully brush a thin line of liquid gilding or gold paint along the jagged edge of the shell. -
Seal the Art:
Once the ink is bone dry, apply a coat of high-gloss varnish or clear decoupage medium over the entire interior. This protects the watercolor from moisture and restores the shell’s natural wet look.
Place your finished shell on a small stand or use it as a stunning ring dish to hold your daily treasures
Blue-and-White Pattern Look
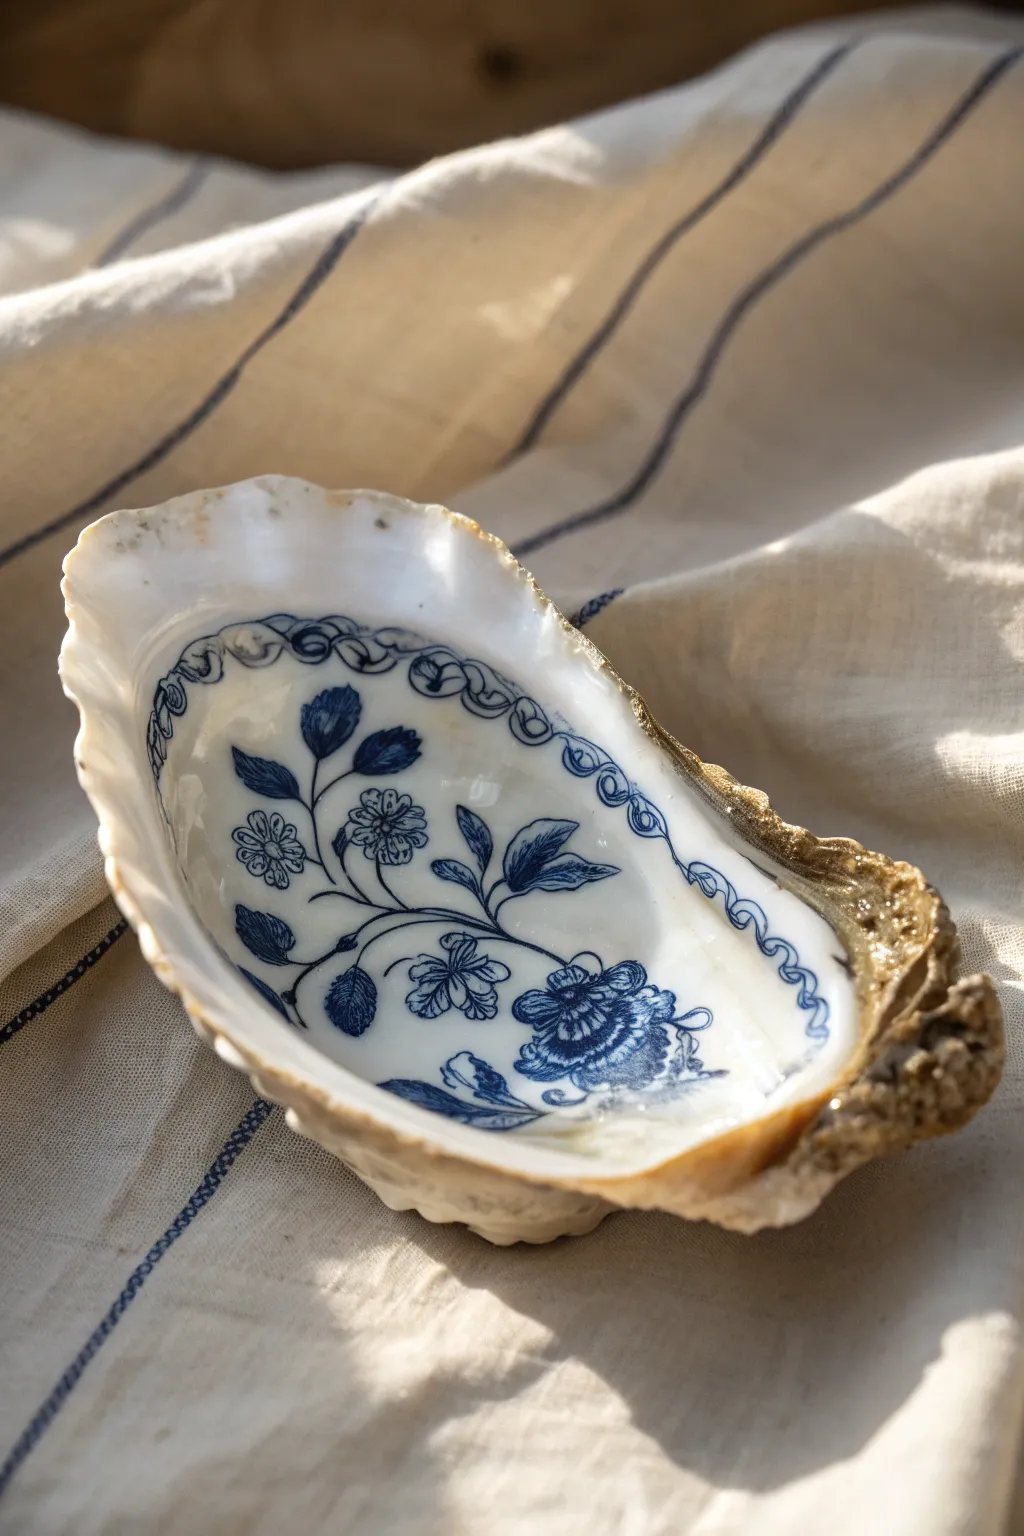
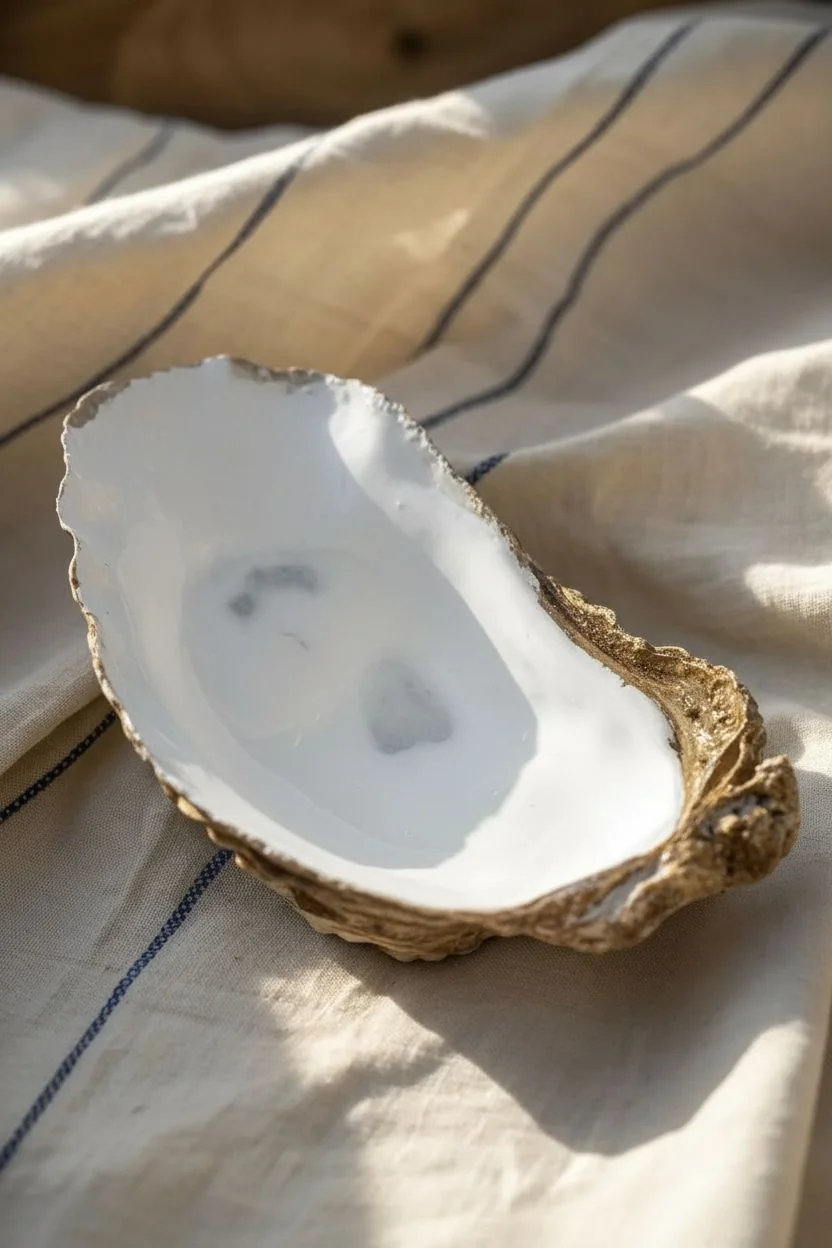
Transform a humble oyster shell into a stunning piece of faux-Delftware art using a clever decoupage technique. This project captures the timeless elegance of blue-and-white porcelain without requiring you to paint complex floral motifs by hand.
Step-by-Step Tutorial
Materials
- Large, clean oyster shell (approx. 4-5 inches)
- Decorative paper napkin with blue floral pattern
- Glossy Mod Podge or similar decoupage medium
- High-gloss white acrylic pearl paint
- Gold liquid gilding or gold leaf paint
- Small flat synthetic brush
- Fine-point detail brush
- Scissors
- Water cup and paper towels
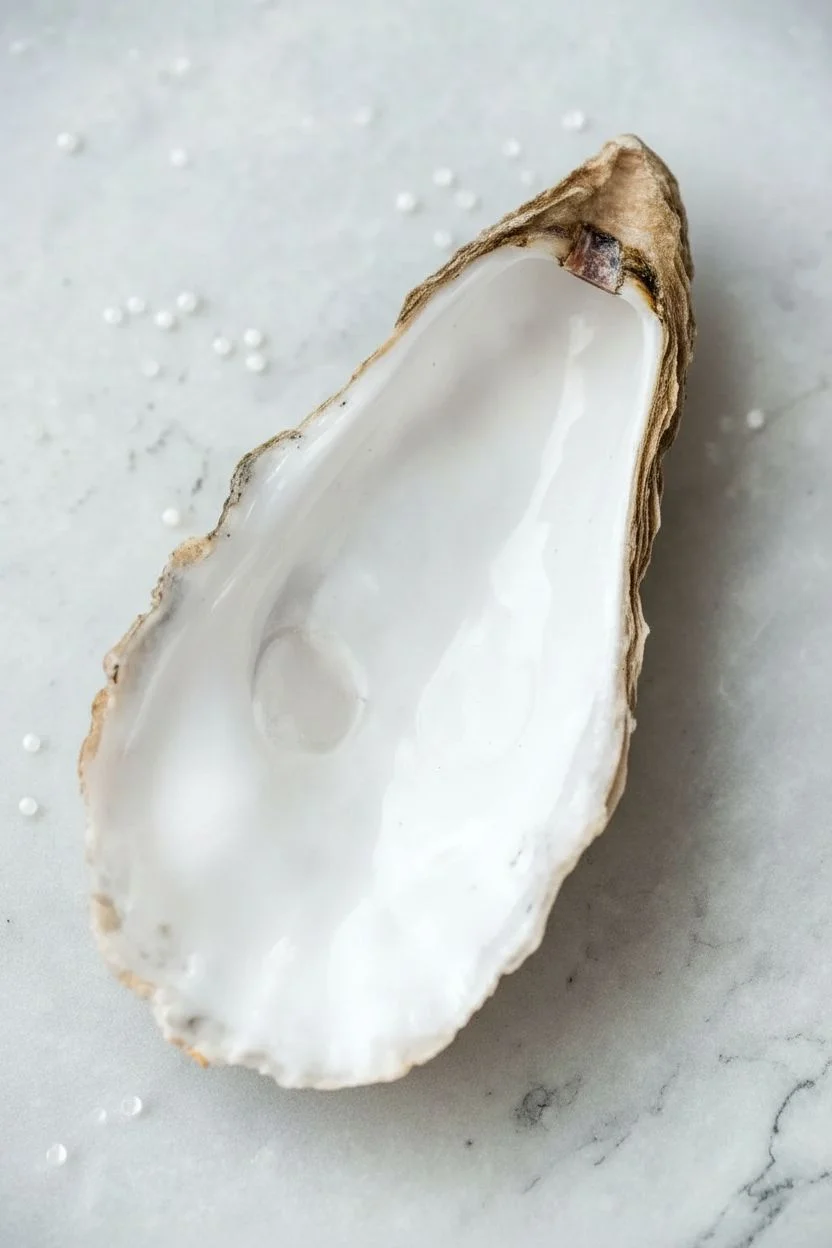
Step 1: Shell Preparation
-
Clean and sanitize:
Begin by scrubbing your oyster shell thoroughly with warm soapy water and a stiff brush to remove any grit or salty residue. If it’s fresh from the ocean, boiling it for a few minutes ensures it is completely sanitized. -
Dry completely:
Let the shell air dry in the sun or use a hairdryer on a low setting. The surface must be bone-dry before you apply any paint, or moisture will get trapped underneath. -
Base coat application:
Paint the entire interior of the shell with white acrylic paint. Since oyster shells often have dark spots or gray interiors, a solid white base ensures your blue pattern will pop brightly. -
Second coat:
Allow the first coat to dry, then apply a second layer of white paint. Look for a glossy or pearl finish paint here if possible, as it adds a ceramic-like sheen to the background.
Step 2: Creating the Design
-
Separate the napkin layers:
Take your floral paper napkin and carefully peel away the back ply layers. You only want the topmost, single ply that has the printed design on it. This thinness is crucial for melting into the shell’s texture. -
Isolate the motifs:
Using small scissors, cut closely around the floral elements you want to use. You’ll likely need a central floral bouquet and perhaps a border strip if your napkin has one, just like the rim detailing in the reference photo. -
Plan the layout:
Dry-fit your paper pieces inside the shell to see how they sit. The deep cup of the oyster can distort the paper, so plan where your main flower will rest—usually in the deepest part looks best. -
Apply decoupage medium:
Brush a thin layer of Mod Podge onto the white painted interior of the shell. Don’t let it pool at the bottom; you just want a tacky surface. -
Place the central design:
Gently lay your main floral cutout onto the wet medium. Start pressing from the center outwards to smooth it down. -
Smoothing texture:
I like to use a slightly wet brush or my finger to tap the paper into the ridges of the shell. The paper might wrinkle slightly due to the curved surface, but this actually adds to the hand-painted porcelain effect. -
Adding border details:
If you are adding a rim pattern like the chain-link design shown, apply those strips now. Gently press them along the upper inner curve of the shell, overlapping the ends slightly if necessary.
Wet Brush Trick
Use a damp artist brush to gently tear the edges of your napkin cutouts instead of cutting them perfectly straight. The feathery soft edges vanish seamlessly into the background paint.
Step 3: Sealing and Finishing
-
Seal the design:
Once the paper is dry to the touch, apply a top coat of glossy Mod Podge over the entire interior. Extend this coat slightly over the lip of the shell to seal the paper edges completely. -
Add a second seal:
Let the first coat dry clear, then add one final layer for extra durability and a high-gloss, ceramic-like shine. This makes the paper layer virtually disappear. -
Gild the edge:
To frame the artwork, dip your detail brush into gold liquid gilding. Paint a thin, organic line along the rough, raw edge of the shell rim. -
Refine the exterior:
Inspect the jagged outer edge. If you want a cleaner look, you can gently dab a little gold onto the rough exterior texture near the rim, highlighting the natural ridges. -
Final cure:
Set the finished shell aside in a dust-free area to cure overnight. The decoupage medium may feel dry quickly, but a full cure ensures it won’t feel tacky.
Make it a Dish
Turn this into a functional trinket dish by gluing three small wooden beads or real freshwater pearls to the bottom of the shell to act as stabilizing feet.
Display your new coastal masterpiece on a bedside table to hold rings or group several together for a striking centerpiece

PENCIL GUIDE
Understanding Pencil Grades from H to B
From first sketch to finished drawing — learn pencil grades, line control, and shading techniques.
Explore the Full Guide
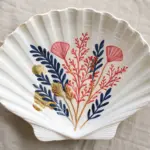
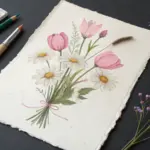
Floral Decoupage Finish
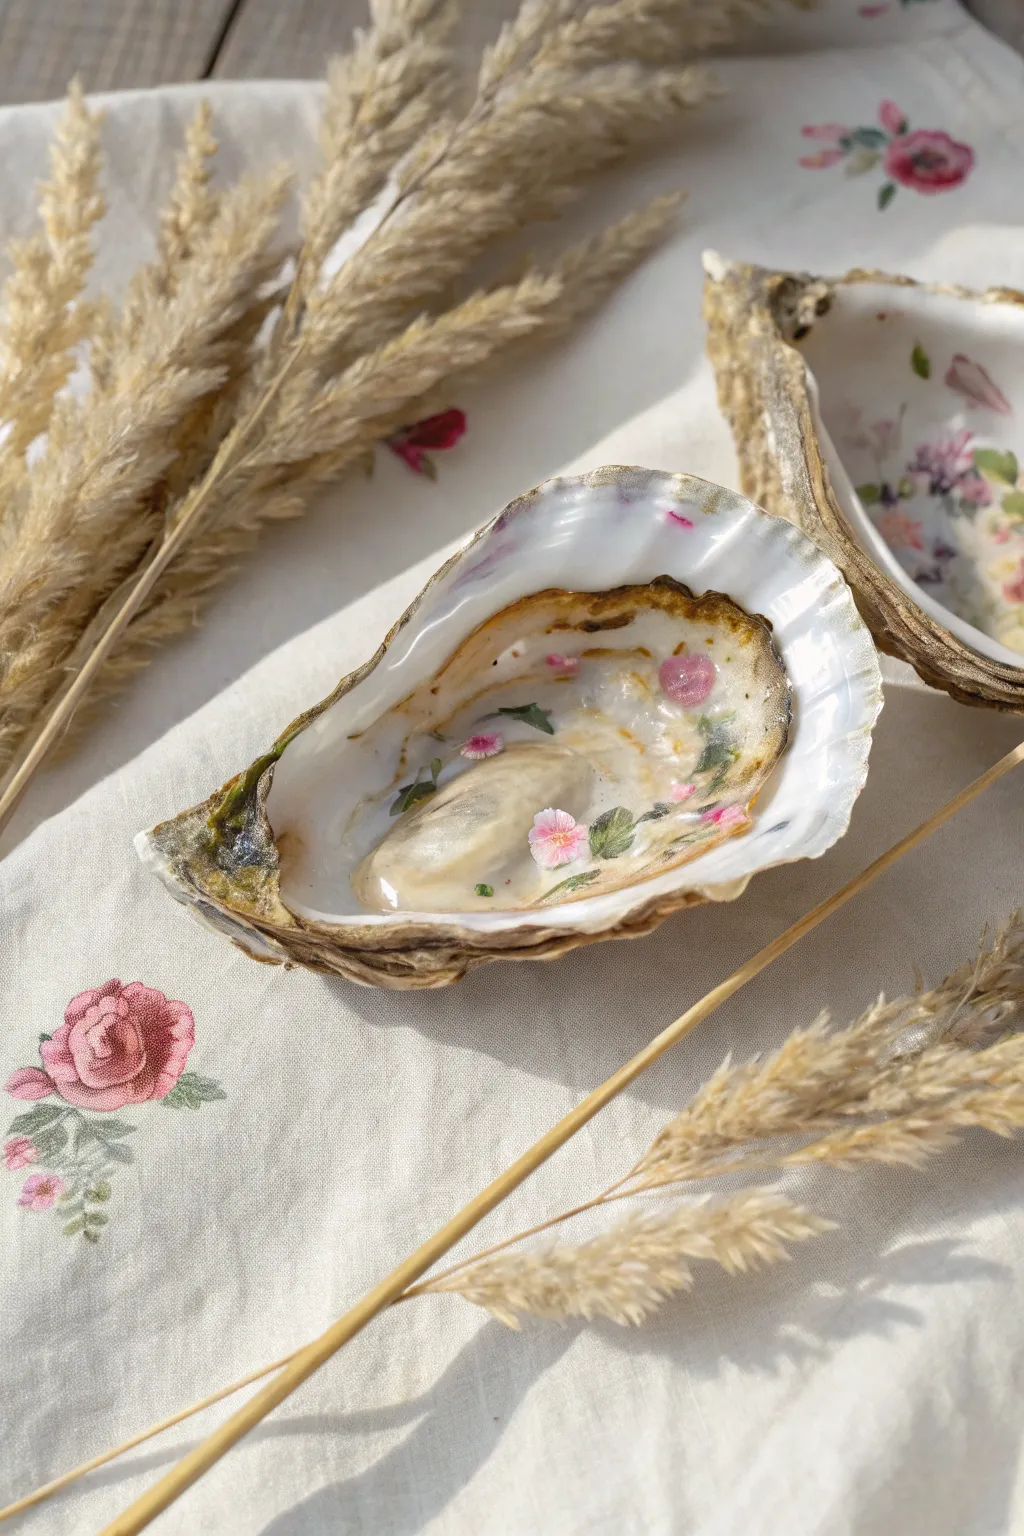
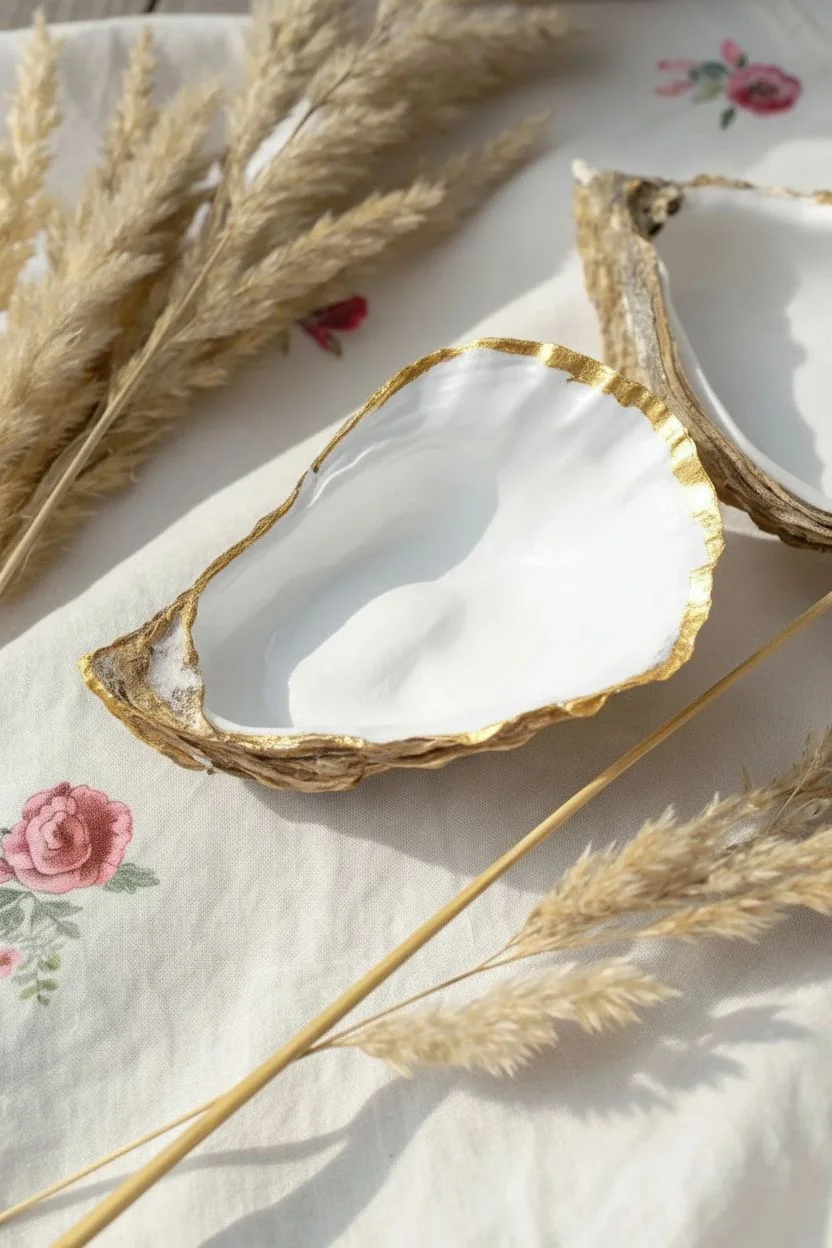
Transform raw oyster shells into ethereal trinket dishes using the delicate art of napkin decoupage. This project captures the romance of a vintage garden, sealing tiny floral motifs beneath a glossy, glass-like finish that mimics the shell’s natural wetness.
How-To Guide
Materials
- Large, clean oyster shells (scrubbed and dried)
- Decorative paper napkins with small floral print (pink flowers/green leaves)
- White acrylic paint
- Gold acrylic paint or gold leafing pen (liquid gold)
- Mod Podge (Gloss) or similar decoupage medium
- Small detail scissors
- Soft flat paintbrushes (various sizes)
- High-gloss varnish or UV resin (for the final finish)
- Small cup of water
Step 1: Shell Preparation & Painting
-
Clean deeply:
Begin by soaking your oyster shells in a bleach and water solution for at least an hour to sanitize them. Scrub vigorously with a stiff brush to remove any grit or organic matter, then let them dry completely in the sun. -
Prime the interior:
Paint the inside bowl of the shell with white acrylic paint. This opaque base is crucial because napkin tissue becomes transparent when glued; without the white background, the shell’s dark markings would muddy your floral colors. -
Dry and repeat:
Allow the first coat of white paint to dry fully. If you can still see dark gray spots from the shell underneath, apply a second coat for a pristine, bright canvas. -
Gild the rim:
Using a small brush and gold acrylic paint (or a gold leafing pen), carefully trace along the jagged edge of the shell. I like to let the gold bleed slightly onto the inner rim to frame the upcoming artwork.
Step 2: Decoupage Artwork
-
Separate napkin layers:
Take your floral paper napkin and peel away the unprinted white backing layers. You want only the single, ultra-thin top sheet with the printed design. -
Fussy cut the motifs:
Using subtle detail scissors, cut out individual small flowers, petals, and leaves. Cut as close to the printed edge as possible so there is no white halo around the design. -
Plan your composition:
Dry-fit your cutouts inside the painted shell. Arrange them organically—perhaps clustering a few near the ‘hinge’ of the shell or drifting them along the curve like fallen petals. -
Apply base medium:
Brush a thin, even layer of Mod Podge (or decoupage glue) onto the specific spot where your first flower will go. -
Place the bloom:
Gently pick up the tissue cutout—tweezers can be helpful here—and place it onto the wet glue. -
Smooth it out:
Dip your finger in a tiny bit of water or glue and very gently tap the flower from the center outward to smooth out wrinkles. Be extremely gentle, as wet tissue tears easily. -
Seal the motif:
Immediately brush another thin layer of Mod Podge over the top of the flower to sandwich it in place. Repeat this process for all your floral elements. -
Painting enhancements:
If transparency caused any flowers to fade, you can use a tiny brush and diluted acrylic paint to carefully touch up the pinks or greens directly on top of the dried decoupage.
Tear, Don’t Cut
For a softer, vintage look, use a wet paintbrush to trace around the napkin design and gently tear the paper. This creates feathered edges that blend seamlessly into the shell.
Step 3: Finishing Touches
-
Define the nacre:
To bring back some of the shell’s natural depth, mix a drop of water with brown or ochre paint. lightly glaze the very outer edges of the white interior, creating a soft, aged transition near the gold rim. -
Final gloss coat:
For that wet, high-end look seen in the photo, pour a clear self-leveling gloss medium or UV resin into the shell. -
Spread the finish:
Tilt the shell or use a clean stick to guide the gloss/resin to the edges, ensuring it covers all the paper edges completely. -
Cure or dry:
Allow to dry undisturbed for 24 hours (for varnish) or cure under a UV lamp (for resin) until the surface is rock-hard and glassy.
Wrinkle Rescue
If the napkin wrinkles badly while gluing, don’t panic. Gently dab it with a wet brush to saturate it, then use plastic wrap to smooth it out with your finger.
Now you have a stunning, jewelry-like piece that brings a coastal floral touch to any vanity or table setting
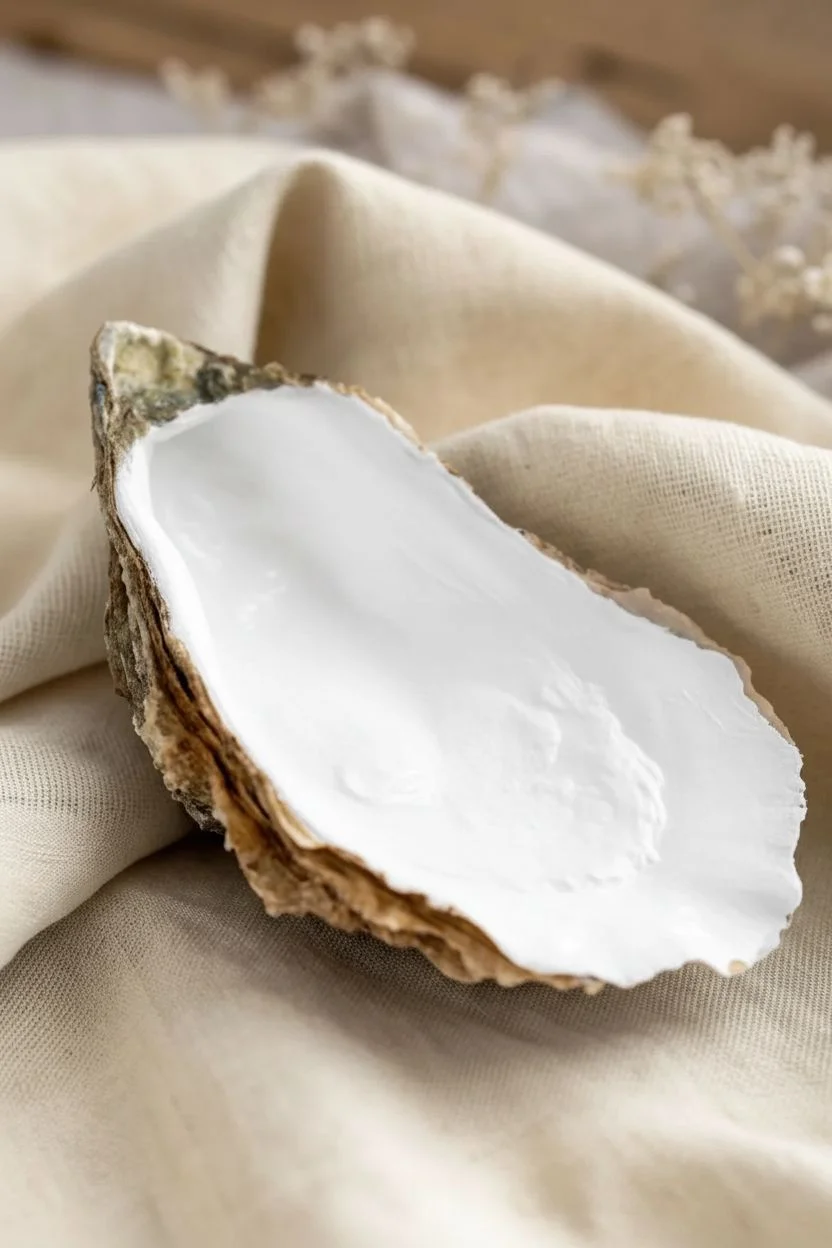
Candy Holder Place Setting Shells
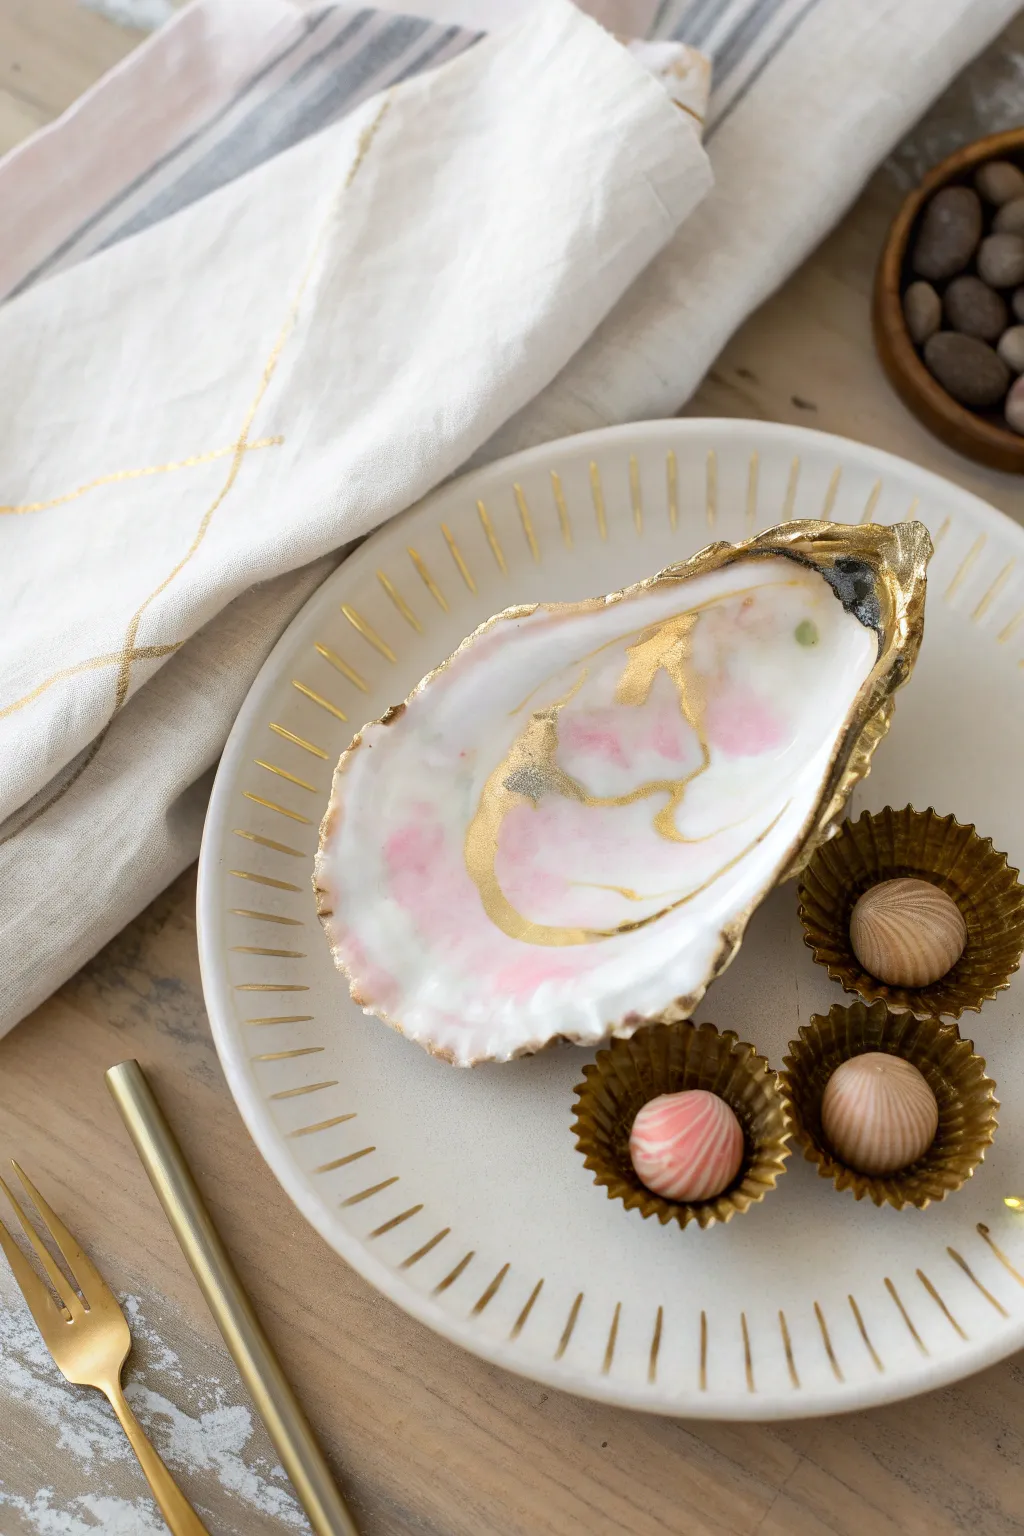
Transform a humble oyster shell into an elegant, food-safe candy dish that adds a touch of coastal luxury to any table setting. This project features a soft white base swirled with delicate pink and gold marbling, finished with a striking gilded rim.
Step-by-Step Tutorial
Materials
- Large, clean oyster shell (approx. 4-5 inches)
- White acrylic paint or gloss enamel
- Soft pink acrylic paint
- Liquid gold leaf or metallic gold acrylic paint
- Food-safe resin or non-toxic gloss sealant
- Small fine-tip paintbrush
- Medium flat paintbrush
- Small cup of water for mixing
- Paper towels
- Disposable mixing surface (like a paper plate)
- Sandpaper (optional, for smoothing rough edges)
Step 1: Cleaning & Preparation
-
Scrub the shell:
Begin by thoroughly cleaning your oyster shell with warm soapy water and a stiff brush to remove any debris or sand. -
Soak in bleach solution:
To ensure the shell is completely sanitized and odorless, soak it in a solution of water and bleach (10:1 ratio) for about an hour. -
Dry completely:
Rinse the shell well with fresh water and let it air dry completely, preferably in the sun. The surface must be bone-dry before painting. -
Smooth the edges (optional):
If the rim of your shell feels particularly sharp or jagged, lightly run a piece of sandpaper over the edge to soften it without losing the natural shape.
Pro Tip: Marbling Magic
Add a tiny drop of water to your swirling brush before dipping into the accent colors. This helps the paint flow more fluidly into the wet white base for a softer effect
Step 2: Painting the Base & Marbling
-
Paint the interior white:
Using a medium flat brush, apply a generous coat of white acrylic paint to the entire inside of the shell. -
Add a second coat:
Allow the first layer to dry, and then add a second coat of white to ensure full, opaque coverage over the dark spots of the shell. -
Prepare the marbling colors:
While the white paint is still wet on the second coat, squeeze a tiny drop of pink paint and a drop of gold paint onto your mixing palette. -
Create the pink swirls:
Dip a fine-tip brush into the pink paint and lightly touch it to the wet white surface. Use a gentle swirling motion to drag the pink through the white, creating soft, cloud-like patches. -
Add gold accents:
Clean your brush, then pick up a small amount of liquid gold or metallic paint. Drag thin veins of gold through the wet paint, allowing it to pool slightly in the shell’s natural depressions. -
Let the design settle:
Allow the paints to swirl naturally as they dry. I find that lightly tilting the shell back and forth can help the paint marble more organically. -
Dry thoroughly:
Set the shell aside to dry completely. This may take a few hours depending on how thick the paint layers are.
Level Up: Personalized Place Card
Before the final sealing step, use a fine gold paint pen to write a guest’s name in calligraphy inside the shell bowl for a custom place setting
Step 3: Gilding & Sealing
-
Outline the rim:
Load a small detail brush with liquid gold leaf or metallic gold paint. Carefully paint along the very edge of the shell rim. -
Extend the gold slightly:
Let the gold paint extend just slightly onto the inside painted surface and wrap around to the back edge to give it a dipped look. -
Seal the interior:
Once all paint is 100% dry, apply a coat of food-safe resin or a non-toxic high-gloss sealant to the inside of the shell. -
Cure the sealant:
Follow the manufacturer’s instructions for curing times. If using resin, cover the shell to protect it from dust while it cures overnight. -
Final inspection:
Check the finish for a smooth, glossy surface. It should look like polished porcelain when complete.
Now your stunning oyster shell dish is ready to hold sweet treats for your guests to enjoy


Drilled and Hung Shell Ornament
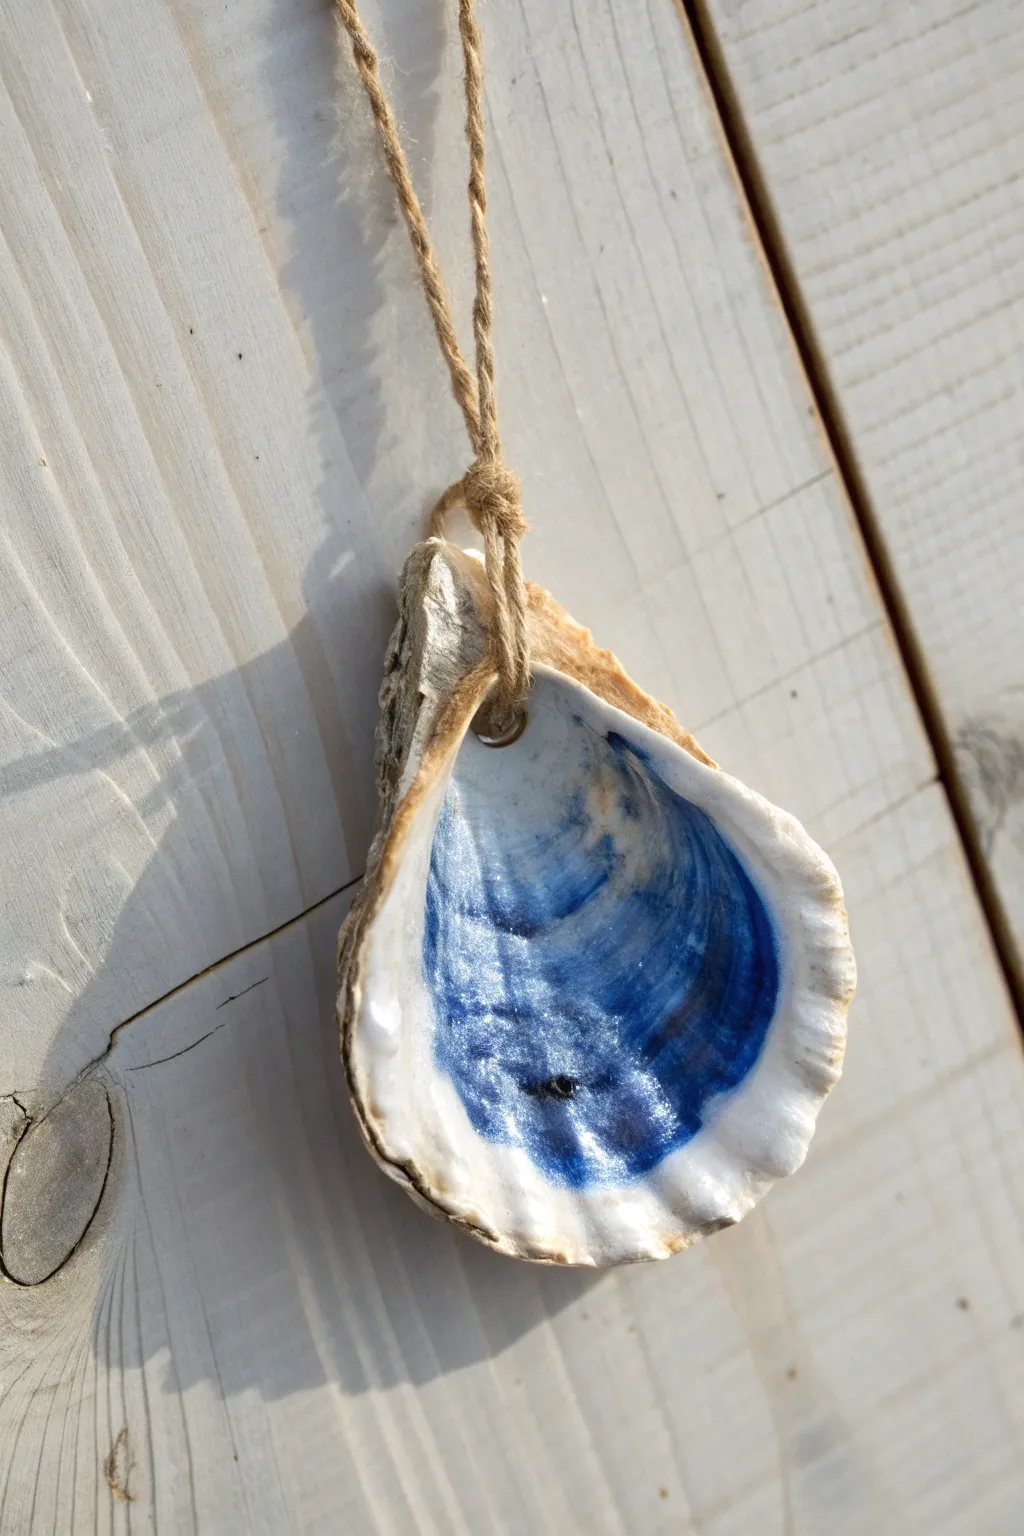
Transform a humble oyster shell into a striking piece of decor with a deep, oceanic blue pearlescent finish. This simple project emphasizes the natural texture of the shell while adding a sophisticated touch of color perfect for holiday trees or coastal garlands.
Step-by-Step Tutorial
Materials
- Clean oyster shell (medium size preferable)
- Metallic blue acrylic paint (or pearlescent navy)
- White pearl acrylic paint (optional for blending)
- Small flat paintbrush
- Soft detail brush
- Jute twine or hemp cord
- Power drill
- Small masonry or glass drill bit (1/8 inch)
- Small cup of water
- Paper towels
- Clear gloss varnish (optional)
Step 1: Preparing the Shell
-
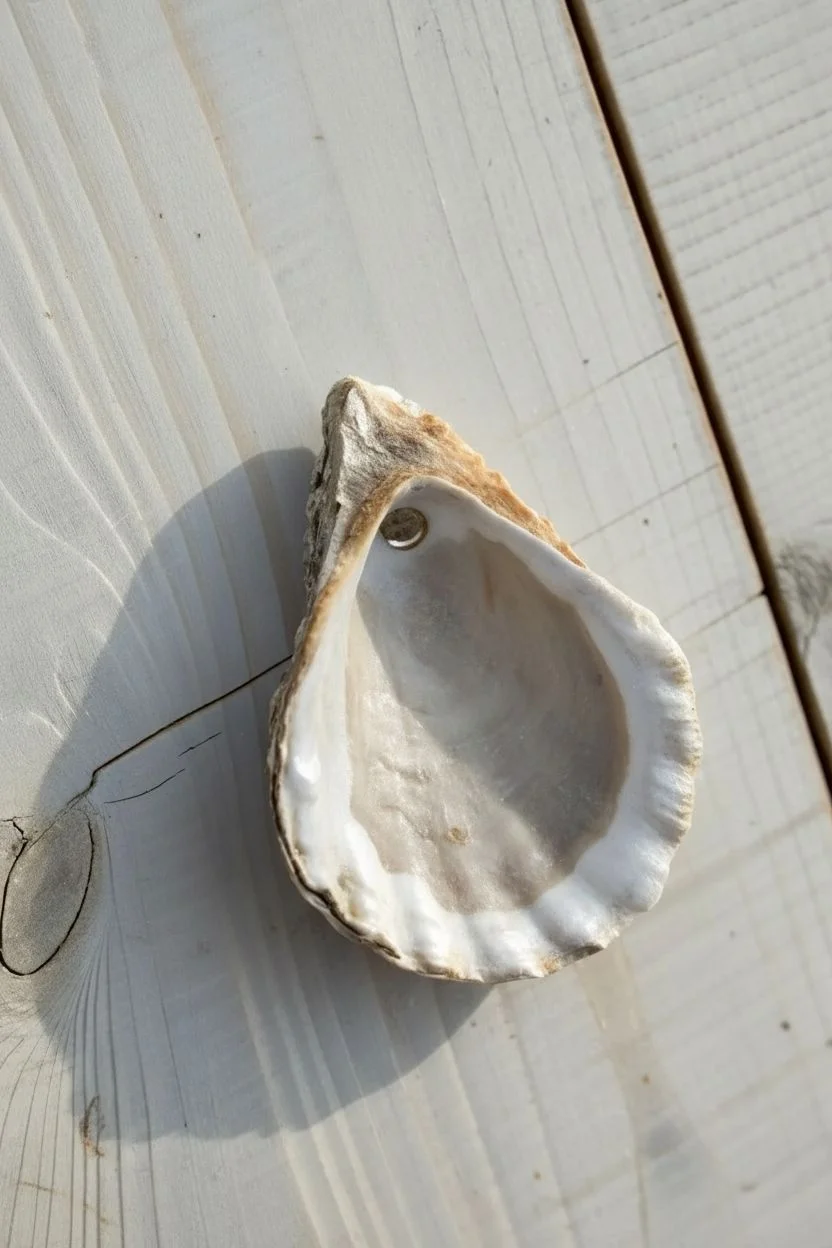
Select your shell:
Choose an oyster shell with a deep cup and an interesting shape. Look for one that hasn’t been overly smoothed by the ocean if you want more texture, or a smoother one for a sleeker look. Ensure it is completely clean and dry before starting. -
Mark the drill spot:
Hold the shell up to see how it hangs naturally. You typically want to drill near the hinge (the pointy end) so the cup faces forward. Use a pencil or marker to place a small dot about a quarter-inch from the edge where you plan to drill. -
Drill the hole:
Place the shell on a piece of scrap wood. Using a masonry or glass bit, drill slowly and steadily through the marked spot. Apply light pressure to avoid cracking the shell. I find dipping the bit in water occasionally helps keep it cool. -
Clean up dust:
Rinse the shell underwater to remove any fine dust created during drilling. Dry it thoroughly with a paper towel or let it air dry completely before painting.
Step 2: Painting the Interior
-
Base coat application:
Squeeze out a small amount of your metallic blue paint. Using a small flat brush, apply the paint to the deepest part of the shell’s cup first. -
Feather the edges:
As you move the paint toward the ragged edges of the shell, lighten your touch. You want the color to fade slightly before it hits the rough, unpainted rim. This creates a natural ‘contained’ look for the color. -
Adding dimension:
While the first layer is still slightly wet, dab a tiny amount of extra metallic pigment into the deepest crevices. This emphasizes the natural ridges of the oyster. -
Optional highlighting:
If you want that pearlescent shimmer seen in the photo, mix a tiny drop of pearl white with your blue. Lightly brush this lighter mix onto the raised ridges inside the shell cup to catch the light. -
Let it dry:
Allow the paint to dry fully. Metallic acrylics usually dry quickly, but give it about 20-30 minutes to set completely so you don’t smudge the finish. -
Sealing (Optional):
For a ‘wet’ look, brush a thin layer of high-gloss clear varnish over the painted area. This mimics the look of water inside the shell.
Cracked Shell?
If the shell cracks while drilling, try reducing your pressure or start with a smaller drill bit as a pilot hole before widening it. Placing masking tape over the drill spot can also prevent slipping.
Step 3: Finishing Touches
-
Cut the twine:
Cut a length of jute twine roughly 12 to 15 inches long. This gives you plenty of slack for knotting and creating a loop. -
Thread the hole:
Fold the twine in half to create a loop at one end. Push the folded loop through the hole in your shell from front to back. -
Create a cow hitch knot:
Once the loop is through the hole, thread the loose ends of the twine through that loop. Pull the ends tight to secure the shell. This creates the knot visible in the example image at the top of the shell. -
Tie the top knot:
Determine how long you want your ornament to hang. Tie a simple overhand knot with the two loose ends to close the hanging loop. -
Trim excess thread:
Snip off any extra twine sticking out from your top knot for a tidy finish.
Pro Tip: Depth Effects
Layering is key for that shimmery look. Start with a darker navy matte base coat, then dry-brush the metallic blue on top. The dark base makes the shimmer pop more intensely.
Hang your beautiful new ornament in a sunny spot to catch the glistening blue reflections
Galaxy Night Sky in a Shell
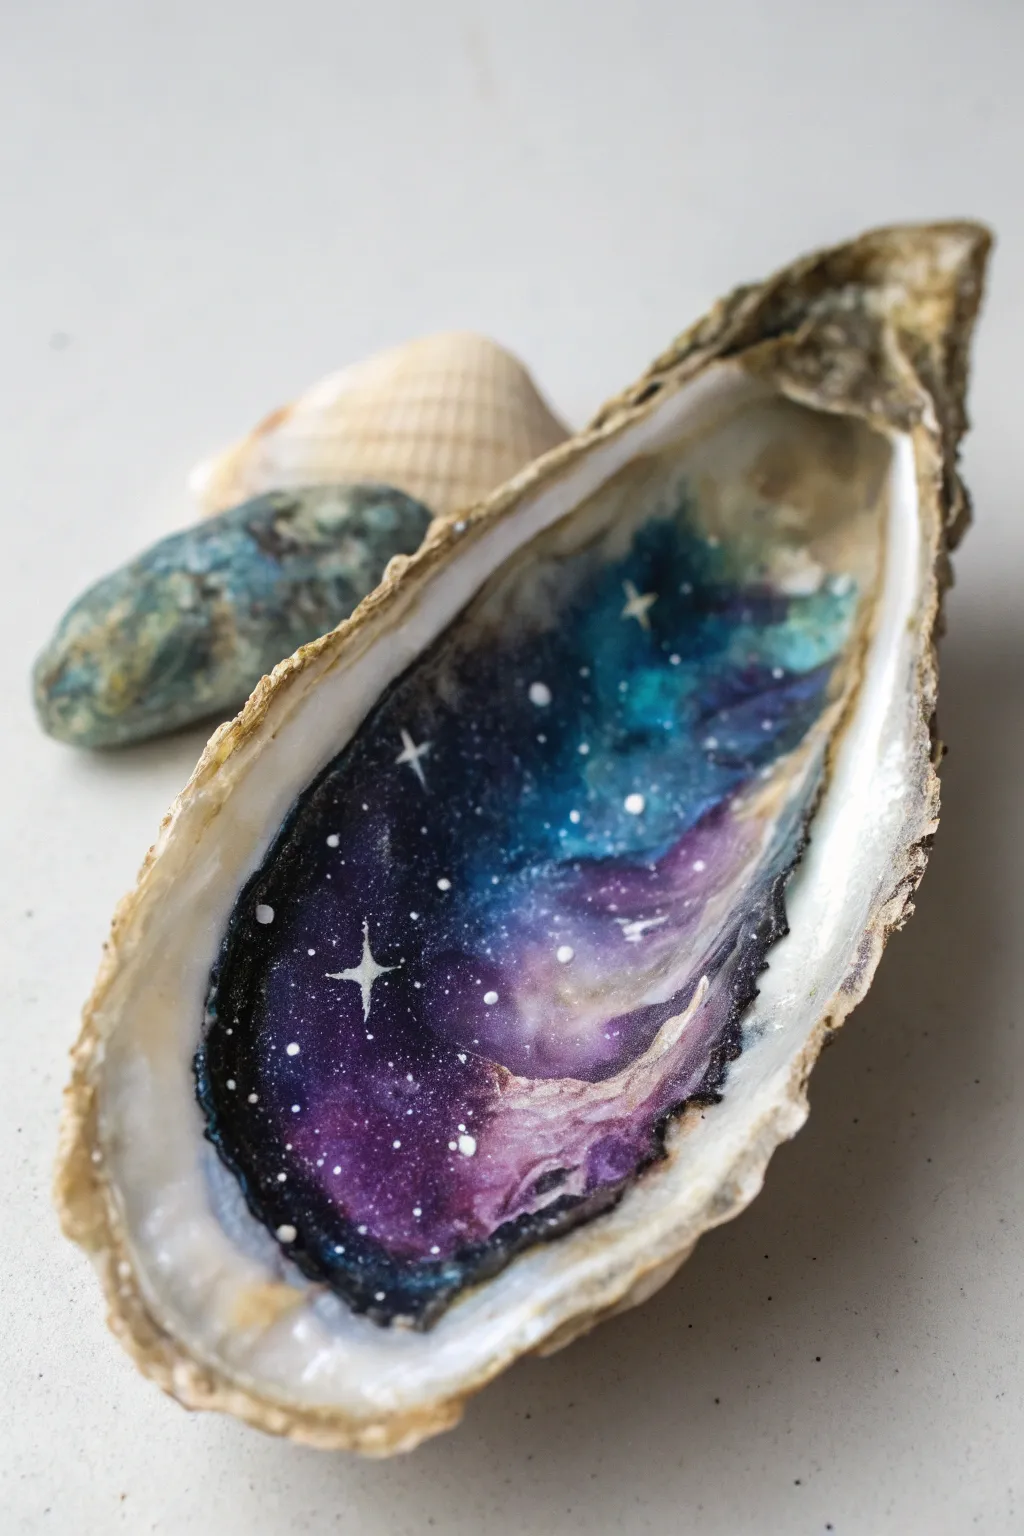
Transform a humble oyster shell into a portal to deep space with this mesmerizing galaxy painting project. By layering translucent acrylics and adding delicate stars, you can capture the swirling beauty of a nebula right inside the shell’s natural curve.
Step-by-Step
Materials
- Clean, dry oyster shell (large, deep cup preferred)
- Acrylic paints: Black, Pthalo Blue, Dioxazine Purple, Titanium White, Teal/Turquoise
- Soft synthetic brushes: Small flat shader, small filbert, fine round (size 0 or 00)
- Glazing medium or water for thinning
- Palette or small dish
- Paper towels
- Clear gloss varnish (spray or brush-on)
- Old toothbrush (optional for stars)
Step 1: Preparation & Base
-
Clean the canvas:
Ensure your oyster shell is completely scrubbed clean and bone dry. If the interior is very rough, you can lightly sand any jagged bits, but keeping the natural texture adds character to the nebula. -
Prime the surface:
Paint a thin layer of Titanium White inside the deepest part of the cup where your galaxy will live. This doesn’t need to be opaque; it just helps the upcoming bright colors pop against the shell’s natural gray.
Blending Secret
Work wet-on-wet for the nebula clouds. If the paint dries too fast, mist it lightly with water or use a slow-drying blending medium.
Step 2: Creating the Nebula
-
Start with the abyss:
Mix a tiny bit of water into your Black acrylic. Paint the outer edges of the shell’s interior, creating an irregular border that frames the central area. -
Add deep blue depths:
While the black is still slightly tacky, introduce Pthalo Blue just inside the black edge. Blend the two where they meet to create a dark navy transition. -
Introduce the purple:
Load your filbert brush with Dioxazine Purple. Paint a swooping, cloud-like shape through the middle-left section, blending it softly into the blue areas. -
Brighten with teal:
Clean your brush thoroughly. Apply the Teal or Turquoise paint in the upper right section and small patches near the purple. This creates that ethereal gas cloud effect. -
Blend the transitions:
Use a barely damp, clean brush to gently feather the edges between the black, blue, purple, and teal. You want soft, smoky transitions rather than hard lines. -
Intensify the blacks:
Go back in with pure Black to deepen the darkest shadows at the very edges and in small pockets between the color clouds to add dimension. -
Create light sources:
Mix a very small amount of White with the Purple to make a lilac shade. Dab this lightly into the center of the purple cloud to make it look like it’s glowing from within. -
Add a milky way streak:
Using a very watery wash of Titanium White, drag a faint, transparent streak diagonally across the blue and purple sections to suggest cosmic dust.
Gilded Edge
Outline the rough rocky rim of the oyster shell with liquid gold leaf or metallic gold paint to frame your galaxy like a locket.
Step 3: The Starfield
-
Prepare the stars:
Slightly water down your Titanium White paint until it has an ink-like consistency. -
Flick the distant stars:
I prefer to use a stiff brush or toothbrush loaded with the thin white paint for this. Run your thumb across the bristles to flick tiny speckles onto the dark areas. Practice on paper first! -
Hand-paint larger stars:
Switch to your finest round brush (size 00). Dot several distinctive white points manually where you want brighter stars. -
Draw the main sparkle:
Choose a focal point in the dark purple area. Paint a small cross shape with elongated vertical and horizontal lines to create a twinkling ‘hero’ star. -
Add secondary sparkles:
Add two or three smaller cross-shaped stars in the teal or blue sections to balance the composition.
Step 4: Finishing Touches
-
Refine the border:
If any paint strayed onto the rim of the shell where you want it natural, wipe it away with a damp cloth or scrape it gently once dry. -
Let it cure:
Allow the painting to dry completely for at least an hour. The thickest parts of the nebula need to set fully. -
Seal the galaxy:
Apply a coat of high-gloss clear varnish. The gloss finish mimics the wet look of the ocean and deepens the contrast of the galaxy colors significantly.
Place your finished cosmic shell on a stand or use it as a stunning jewelry dish.
Abstract Color-Block Modern Shell
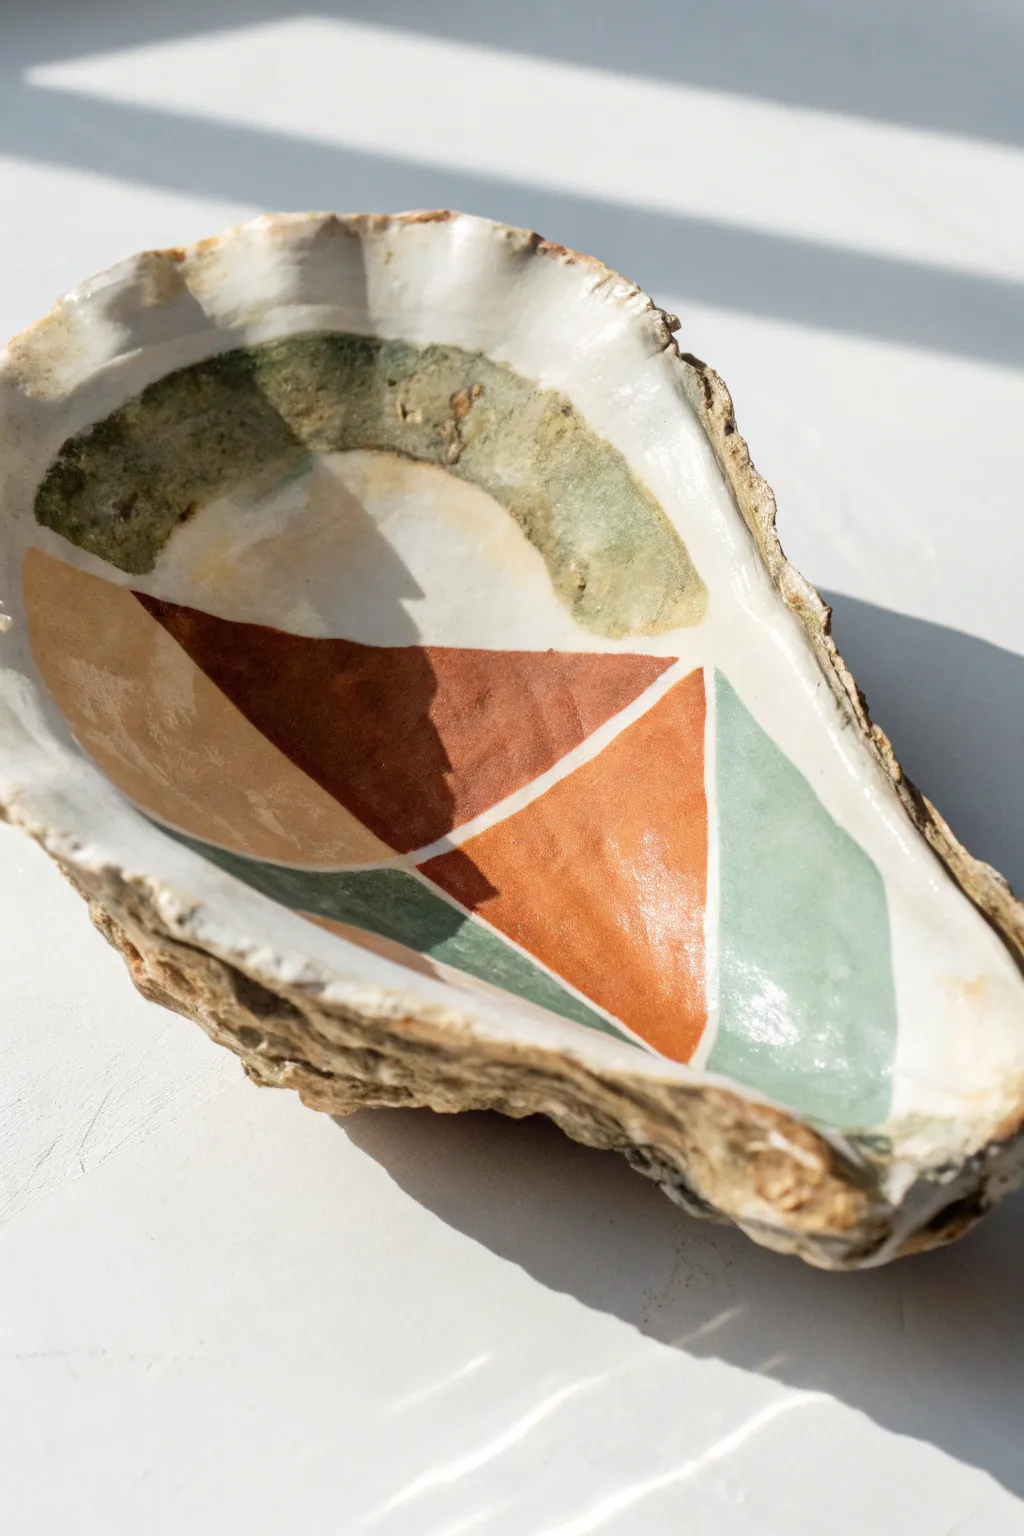
Transform a natural briny treasure into a stunning piece of modern decor with this abstract color-block design. Using warm earth tones and clean lines, this project highlights the shell’s organic texture while adding a sophisticated touch perfect for holding rings or salts.
Step-by-Step Guide
Materials
- Large, clean oyster shell (deep cup preferred)
- White acrylic paint or gesso
- Acrylic paints (olive green, rust orange, deep sienna brown, tan/beige, sage green)
- High-gloss varnish or decoupage medium (like Mod Podge)
- Fine-grit sandpaper (optional)
- Small flat brush
- Detail liner brush
- Palette or small mixing dish
- Washi tape or low-tack painter’s tape (optional)
Step 1: Preparation and Base Coat
-
Clean the canvas:
Begin by scrubbing your oyster shell thoroughly with warm soapy water and a stiff brush to remove any ocean debris. Let it dry completely in the sun or overnight to ensure no moisture remains in the layers. -
Smooth the surface:
If the interior of your shell has very rough flakey ridges that might interfere with painting precise lines, gently lightly sand the highest points with fine-grit sandpaper. Wipe away all dust with a damp cloth. -
Apply the primer:
Paint the entire interior of the shell with a solid coat of white acrylic paint or gesso. You want to hide the grey nacre but leave the texture visible. -
Refine the edges:
As you paint the white base, carefully follow the natural lip of the shell. I like to stop the paint exactly at the rim where the smooth interior meets the rough exterior for a clean, professional finish. -
Dry and repeat:
Allow the first coat of white to dry completely. If the shell’s original markings are still showing through, apply a second coat of white for a truly opaque, bright canvas.
Step 2: Creating the Geometric Design
-
Map out the arc:
Start with your olive green paint. Near the hinge (the narrow top part) of the shell, freehand a wide, curved arc that follows the shell’s natural cupping shape. -
Create texture:
For the olive arc, tap your brush slightly rather than dragging it smoothly. This mimics the organic feel of seaweed or moss and adds depth to that specific block of color. -
Define the first triangle:
Using a detail brush and the deep sienna brown, paint a sharp triangle pointing downwards in the center left. The tip should aim toward the center of the shell’s bowl. -
Add the rust contrast:
Mix a vibrant rust orange. Paint a large triangle adjacent to the brown one, mirroring the angle but extending toward the right side of the shell. -
Incorporate the tan section:
On the far left, curving up the side wall of the shell, paint a soft tan or beige segment. Let this shape follow the curve of the shell wall naturally rather than forcing a straight line. -
Leave negative space:
The key to this design is the white lines separating the shapes. As you paint each color block, deliberately leave a thin, consistent gap of the white background visible between them. -
Paint the sage accent:
Fill the remaining space on the bottom right with a muted sage green. This balances out the warmer rust and brown tones and completes the composition. -
Tidy the lines:
Once the colors are touch-dry, inspect your negative space lines. If any paint bled, use a very fine brush with white paint to carefully clean up the boundaries and sharpen the geometry.
Clean Lines Hack
Use thin strips of washi tape or painter’s tape to block off your geometric shapes. Peel the tape away while the paint is still slightly wet to get crisp edges.
Step 3: Finishing Touches
-
Final drying time:
Let your color work dry completely. Since acrylics can feel dry to the touch before they are fully cured, give it an hour to be safe. -
Apply the gloss:
Using a soft, wide brush, apply a coat of high-gloss varnish or decoupage medium over the entire painted interior. This will make the colors pop and look like ceramic. -
Checking for bubbles:
Inspect the varnish immediately after application. If you spot any tiny bubbles in the pooling liquid at the deepest part of the shell, pop them with a toothpick or blow gently on them. -
Second coat:
For a truly porcelain-like finish, apply a second coat of gloss once the first is dry. This extra layer adds durability if you plan to use the shell as a trinket dish. -
Exterior gold (optional):
For a bit of luxury, you can dry-brush a tiny amount of gold paint onto the rough exterior ridges, though leaving it natural provides a nice rustic contrast.
Gilded Edges
Enhance the look by painting the very rim of the shell with liquid gold leaf or a metallic paint marker. It frames the artwork beautifully.
Place your finished shell on a bedside table or vanity to add a splash of artistic color to your daily routine
Textured Sand and Wave Mixed Media
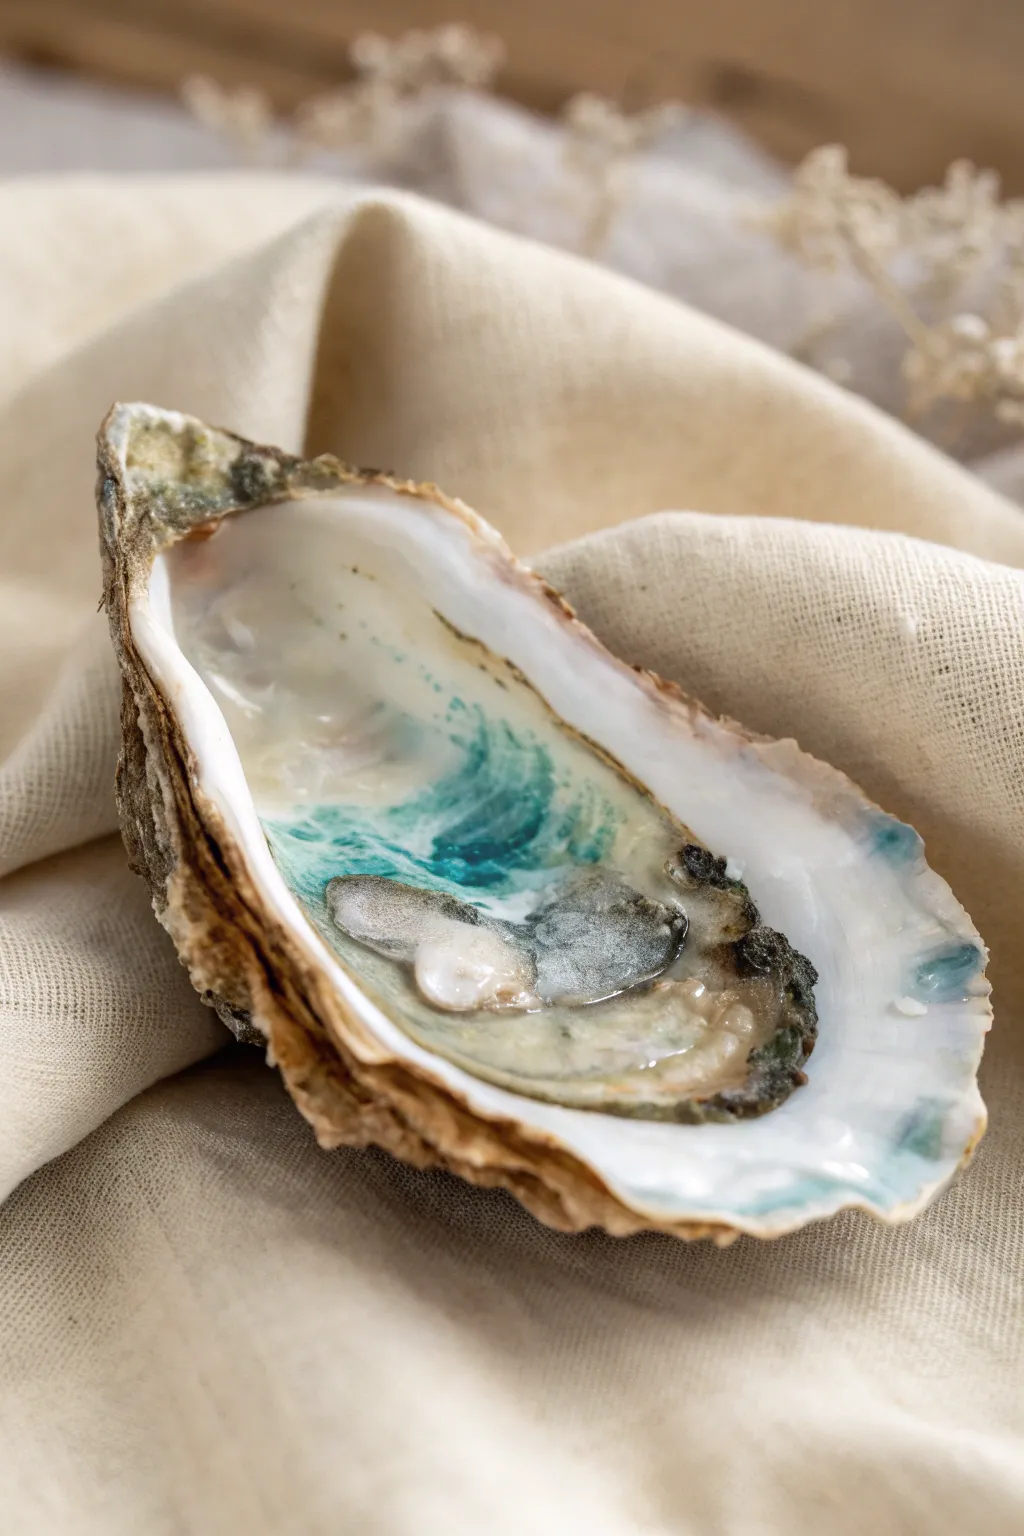
Transform a humble oyster shell into a captivating coastal keepsake with this textured mixed media project. By layering paints and high-gloss mediums, you’ll create a realistic, glistening tide pool nestled right inside the shell’s natural curve.
Detailed Instructions
Materials
- Large, clean oyster shell (sanitized and dry)
- Acrylic paints (Teal, Phthalo Blue, Titanium White, Raw Sienna)
- Texture paste or fine sand mixed with white acrylic
- High-gloss varnish or UV resin
- Small flat synthetic brush
- Detail liner brush
- Heat gun or lighter (if using resin)
- Palette knife
- Water cup and paper towels
Step 1: Preparation and Base
-
Clean the canvas:
Begin by scrubbing your oyster shell thoroughly with warm soapy water and a stiff brush to remove any ocean debris. Let it dry completely for several hours or overnight; moisture trapped in the shell can ruin your paint adhesion. -
Identify the composition:
Visualize the deepest part of the shell as the deep ocean water and the shallower, flatter edge as the shoreline. The natural ‘cup’ shape works perfectly to mimic depth. -
Prime the interior:
Apply a thin wash of Titanium White to the entire inner surface of the shell. This acts as a primer and helps the subsequent blue tones pop against the naturally dark or pearlescent shell interior.
Pro Tip: Translucency
Mix a clear glazing medium into your teal paint layers. This makes the color semi-transparent, allowing the natural pearlescence of the shell to shine through like sunlight hitting water.
Step 2: Creating the Ocean Floor
-
Mix the sandy texture:
On your palette, mix a small amount of texture paste with a dot of Raw Sienna and a touch of white. If you don’t have paste, mixing real fine sand into heavy-body acrylic paint works beautifully. -
Apply the beach:
Using a palette knife or an old brush, dab this sandy mixture into the bottom third of the shell, focusing on the area where the muscle scar (the dark spot) usually is. Keep it uneven and organic. -
Blend the transition:
While the texture is still wet, gently feather the edges outward so the ‘sand’ fades naturally into the smoother white area of the shell rather than ending in a hard line.
Step 3: Painting the Waters
-
Lay the deep water:
Loading your flat brush with Phthalo Blue and a tiny bit of Teal, paint the upper, deeper section of the shell. Use horizontal, sweeping strokes that follow the curve of the shell. -
Create the teal mid-tones:
Mix a vibrant Teal with a little white to create a translucent turquoise. Paint this in the middle section, overlapping slightly with the dark blue above and the sand below. -
Wet blending:
Use a clean, slightly damp brush to blur the line between the deep blue and the teal. You want a soft gradient that suggests water getting shallower. -
Adding wave movement:
With your detail liner brush and pure Titanium White, paint thin, wiggly lines horizontally across the teal section. These represent the ripples on the water surface.
Troubleshooting: Peeling Paint
If paint peels off the slick shell surface, lightly sand the interior with fine-grit sandpaper before painting to give the surface some ‘tooth’ for the acrylics to grab onto.
Step 4: The Crashing Wave and Foam
-
Form the main wave:
Identify where the water meets the textured sand area. Use a heavier application of white paint here, dabbing it rather than stroking it, to simulate sea foam crashing on the shore. -
Create depth in the foam:
Once the main white foam is tacky, add tiny dots of watered-down grey or light blue underneath the white clumps to create a subtle shadow. This lifts the ‘foam’ off the surface visually. -
Dry break:
Allow the acrylic paint layers to dry completely. Since the shell is non-porous, this might take a bit longer than on paper. I usually wait about 20 minutes here.
Step 5: Finishing Glaze
-
Prepare the gloss:
If using gloss varnish, pour a generous amount into the ‘cup’ of the shell. If using UV resin, squeeze it directly over the painted water area. -
Distribute the medium:
Tilt the shell gently to let the gloss coat the painted areas. Use a toothpick to guide it to the edges without overflowing onto the raw outer shell. -
Pop bubbles:
If bubbles appear in your resin or varnish, quickly wave a lighter or heat gun over the surface to pop them for a crystal-clear finish. -
Final cure:
Let the shell sit on a level surface until the top coat is hard and glass-like. This final step is what gives the water that wet, realistic look.
Place your finished shell on a stand or use it as a trinket dish to bring a splash of the ocean into your home
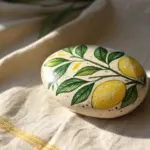
Tiny Still-Life Trinket Bowl Scene
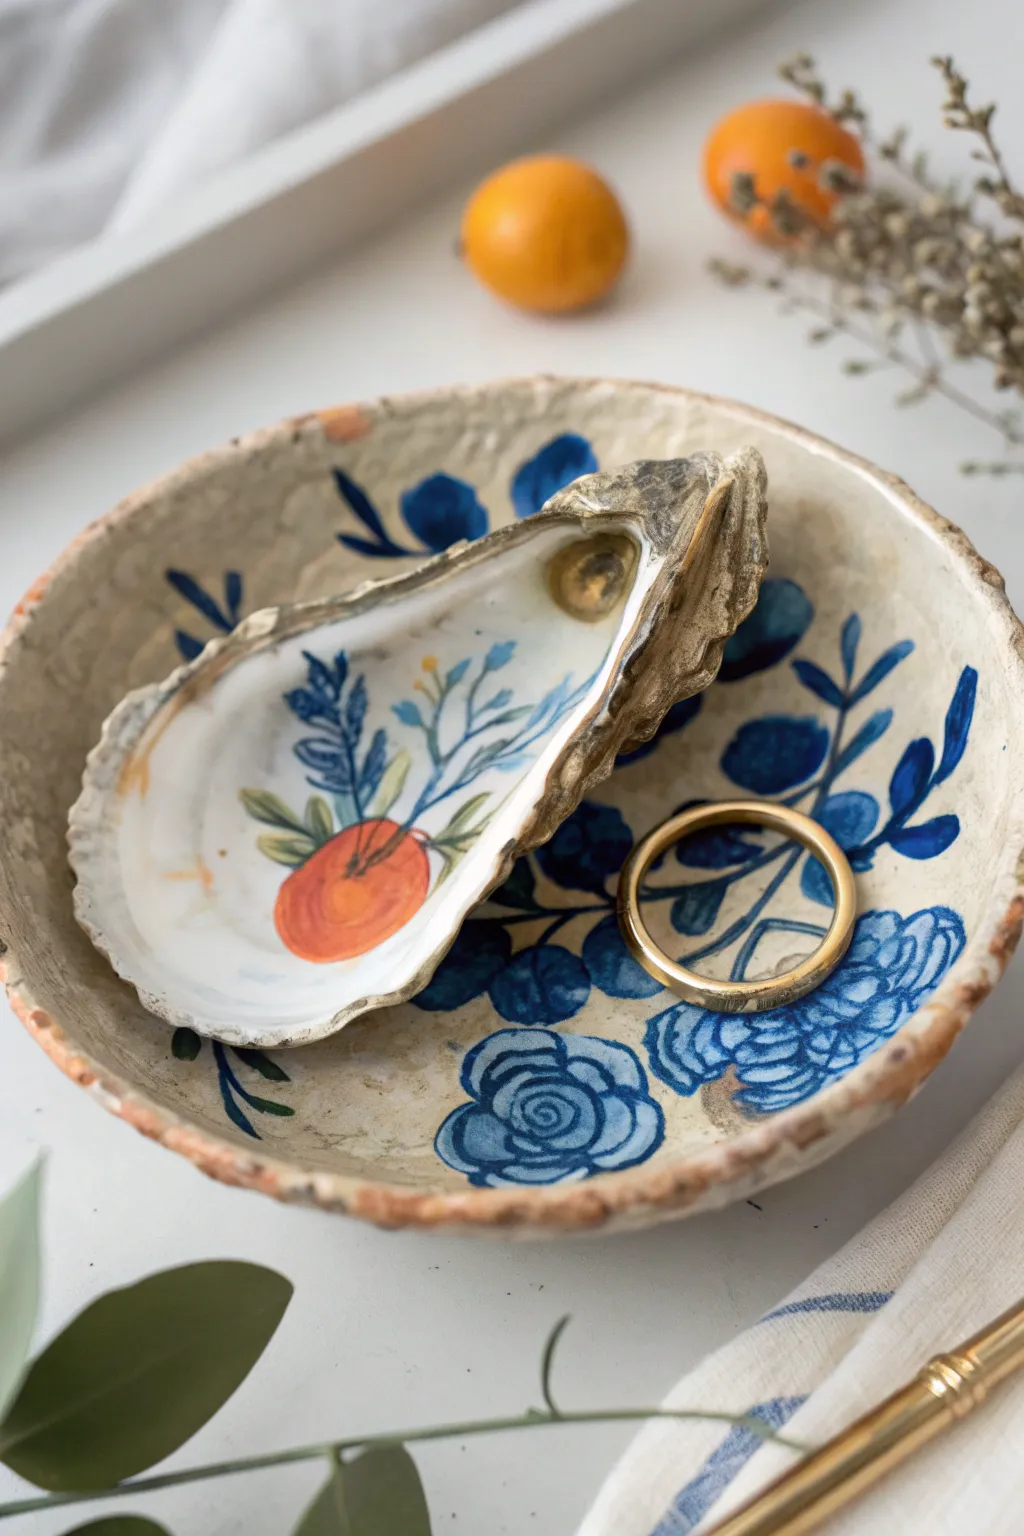
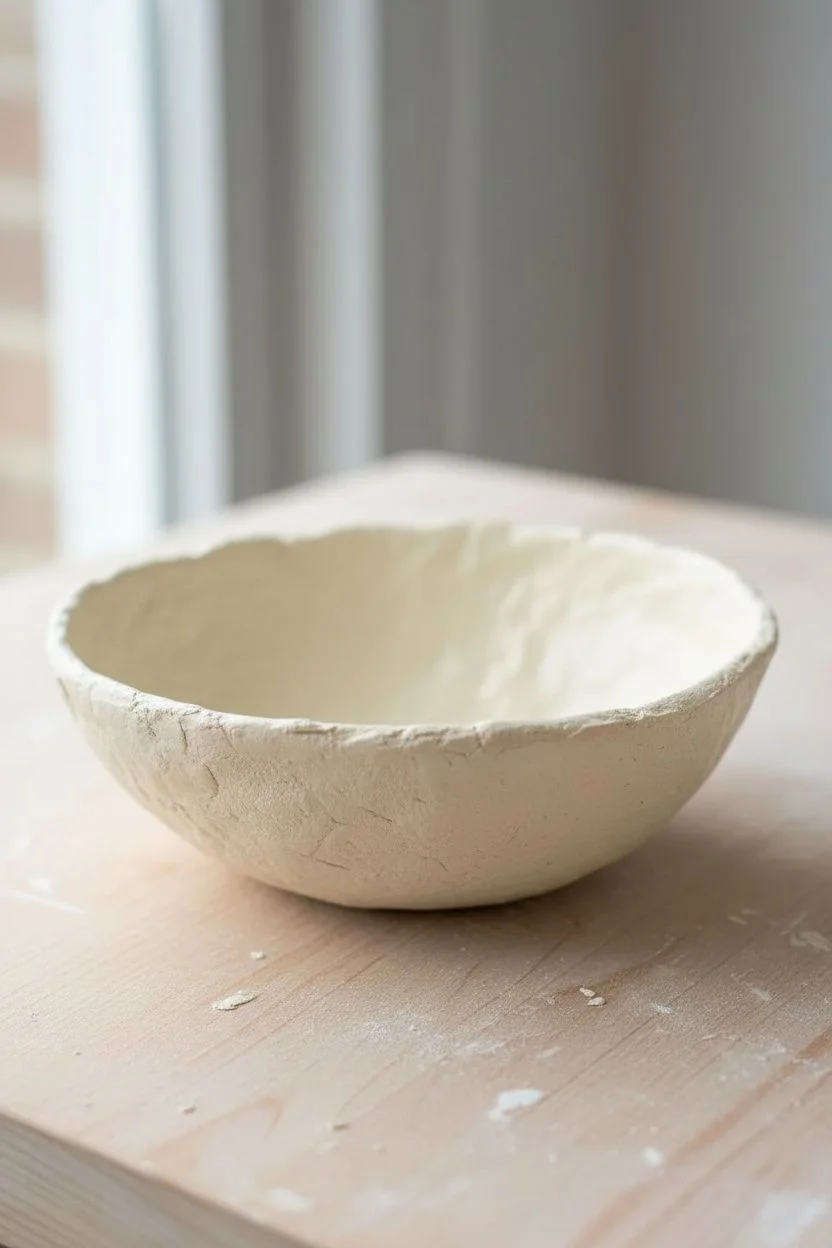
Transform a scavenged oyster shell and a simple clay bowl into a harmonious, vintage-inspired jewelry dish set. The delicate blue florals and warm citrus motifs create a cohesive look that feels like a treasured antique find.
Step-by-Step
Materials
- Large, clean oyster shell (deep cup preferred)
- Air-dry clay or polymer clay (white or cream)
- Small bowl mold (or a small existing bowl to drape clay over)
- Acrylic paints: Cobalt Blue, Burnished Gold, Cream/Off-White, Deep Green, Persimmon Orange
- Detail brushes (sizes 0 and 00)
- Small flat brush
- Gloss varnish or clear resin
- Sandpaper (fine grit)
- Water and paper towels
Step 1: Crafting the Rustic Bowl
-
Form the Base:
Roll out a slab of air-dry clay to about 1/4 inch thickness. It doesn’t need to be perfectly smooth; a little texture adds to the handmade charm. -
Shape the Bowl:
Drape the clay over an upside-down small bowl or press it into a mold to establish the shape. Gently tear or ruffle the edges so they look uneven and organic, rather than perfectly round. -
Dry and Refine:
Allow the clay to dry completely according to the package instructions (usually 24-48 hours). Once dry, gently sand any sharp or uncomfortable jagged bits on the rim, but keep the overall rough texture. -
Base Coat:
Paint the entire interior and exterior of the bowl with a wash of Cream/Off-White paint. I like to water this down slightly so it sinks into the clay’s natural texture, giving it an aged ceramic look.
Step 2: Designing the Bowl Patterns
-
Map the Roses:
Using your Cobalt Blue paint and a detail brush, start painting loose, abstract rose shapes on the inside bottom of the bowl. Think of these as concentric C-curves growing outward. -
Add Foliage:
Paint vines and simple leaves connecting the blue roses. Vary the pressure on your brush to create thick-to-thin lines for the stems. -
Antique the Rim:
With a dry brush and a tiny amount of Persimmon Orange or a rusty brown mix, lightly dab the uneven rim of the bowl to simulate aged terracotta showing through.
Paint Slipping?
If acrylic paint beads up on the smooth inner shell surface, sand it very lightly with fine-grit sandpaper to create a ‘tooth’ for the paint to grip.
Step 3: Painting the Oyster Shell
-
Prime the Shell:
Ensure your shell is scrubbed clean and bone dry. Paint the interior cup with two coats of Cream/Off-White to create a smooth, porcelain-like canvas, avoiding the rough outer edges. -
Paint the Citrus:
Near the bottom or center of the shell cup, paint a small circle using Persimmon Orange. This will be your kumquat or orange motif. -
Add Greenery:
Using Deep Green and your finest brush, paint delicate stems rising from the orange fruit. Add tiny, fern-like leaves branching off these stems. -
Floral Touches:
Touch in tiny blue buds or flowers at the tips of the green stems to visually connect the shell to the blue bowl design. -
Golden Edge:
Dip a small brush into Burnished Gold paint and carefully trace the jagged natural rim of the oyster shell. Let the gold follow the bumps and ridges for a luxury finish. -
Add Highlights:
If desired, add a tiny dot of Gold inside the shell near the hinge or on the painted orange for a little extra shimmer.
Decoupage Twist
Instead of painting the shell interior, use floral patterned napkins and Mod Podge to decoupage a design, then seal with gold edges for a similar vibe.
Step 4: Finishing Touches
-
Seal the Bowl:
Once the paint is fully dry, apply a coat of gloss varnish to the inside of the bowl to protect the paint and give it a glazed ceramic appearance. -
Seal the Shell:
Apply a thicker coat of gloss varnish or a thin layer of UV resin to the inside of the shell. This amplifies the colors and makes the surface durable for holding rings. -
Final Cure:
Let both pieces cure completely in a dust-free area before nesting the shell inside the bowl.
Place your favorite gold ring inside the shell and enjoy your beautiful new bedside vignette


Have a question or want to share your own experience? I'd love to hear from you in the comments below!