Plain terracotta pots are basically begging for a little color, and once you paint one, it’s hard to stop. I pulled together my favorite painted terracotta pots ideas—from classic patterns you can finish in an afternoon to artsy techniques that look way fancier than they are.
Classic Color-Blocked Terracotta Pots
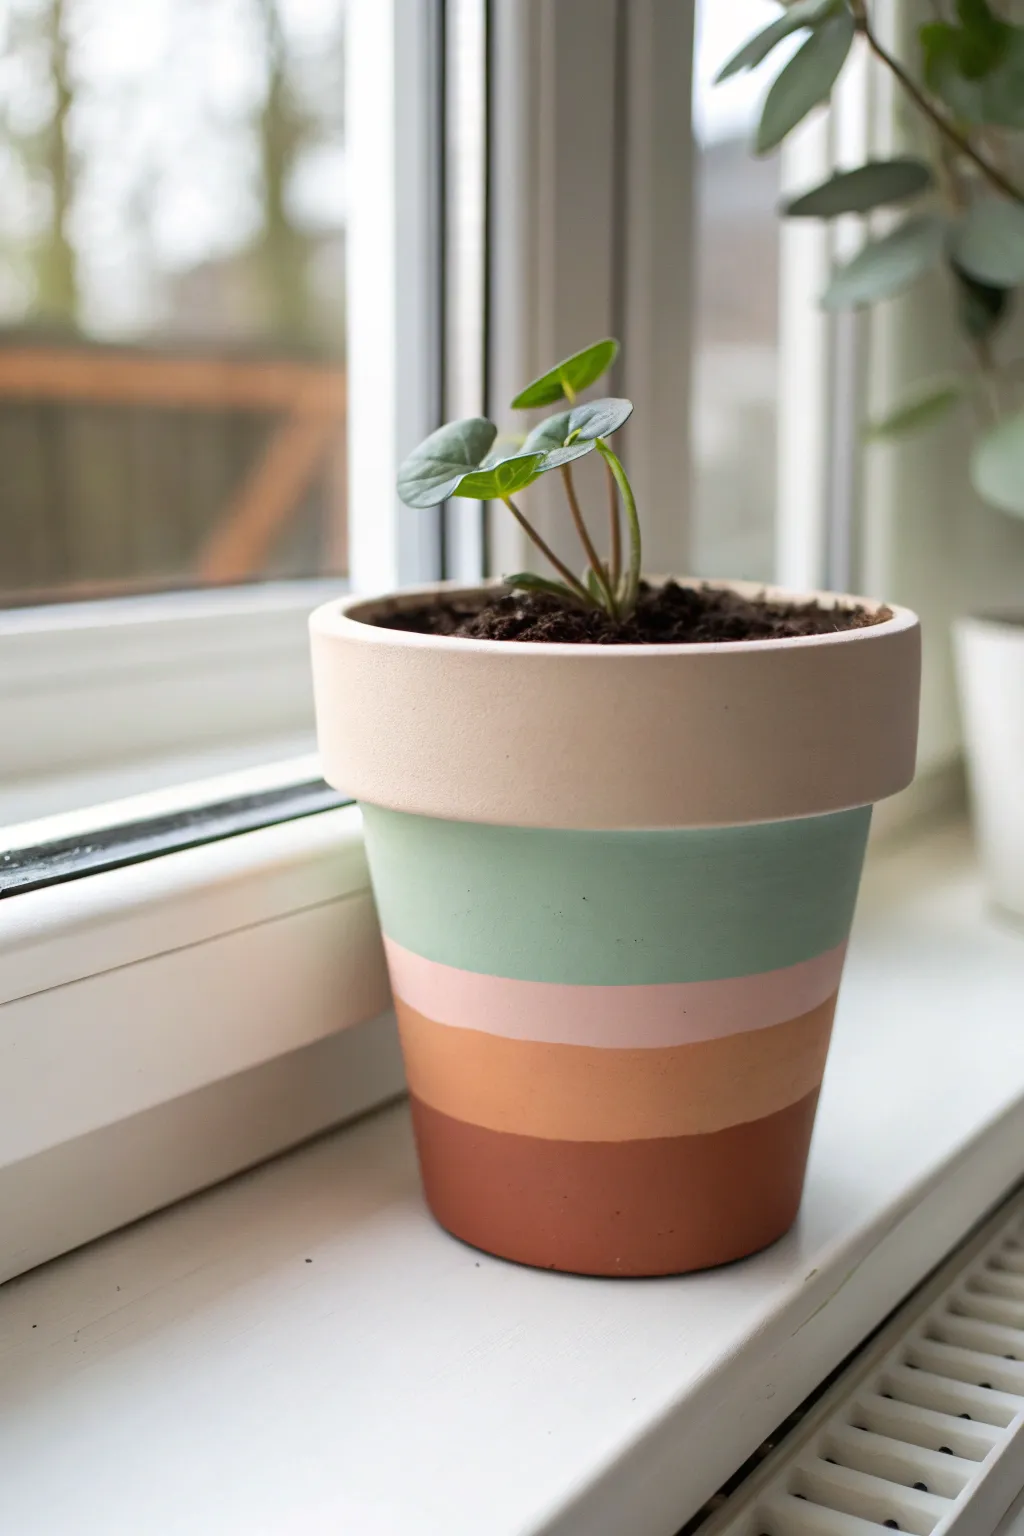
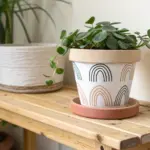
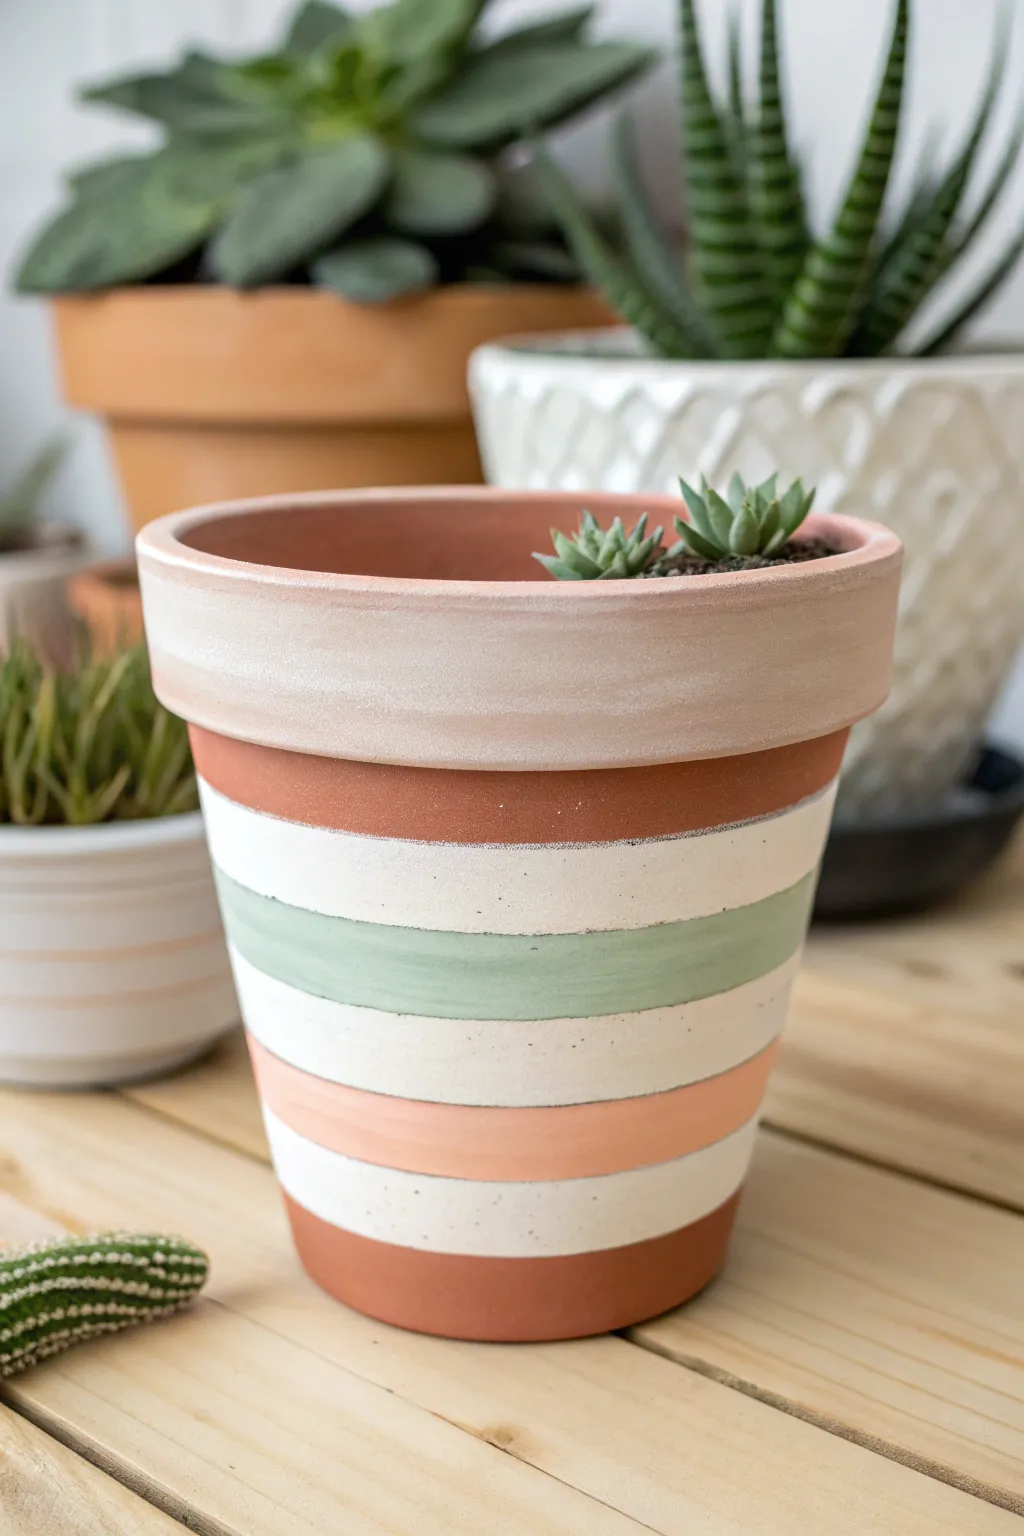
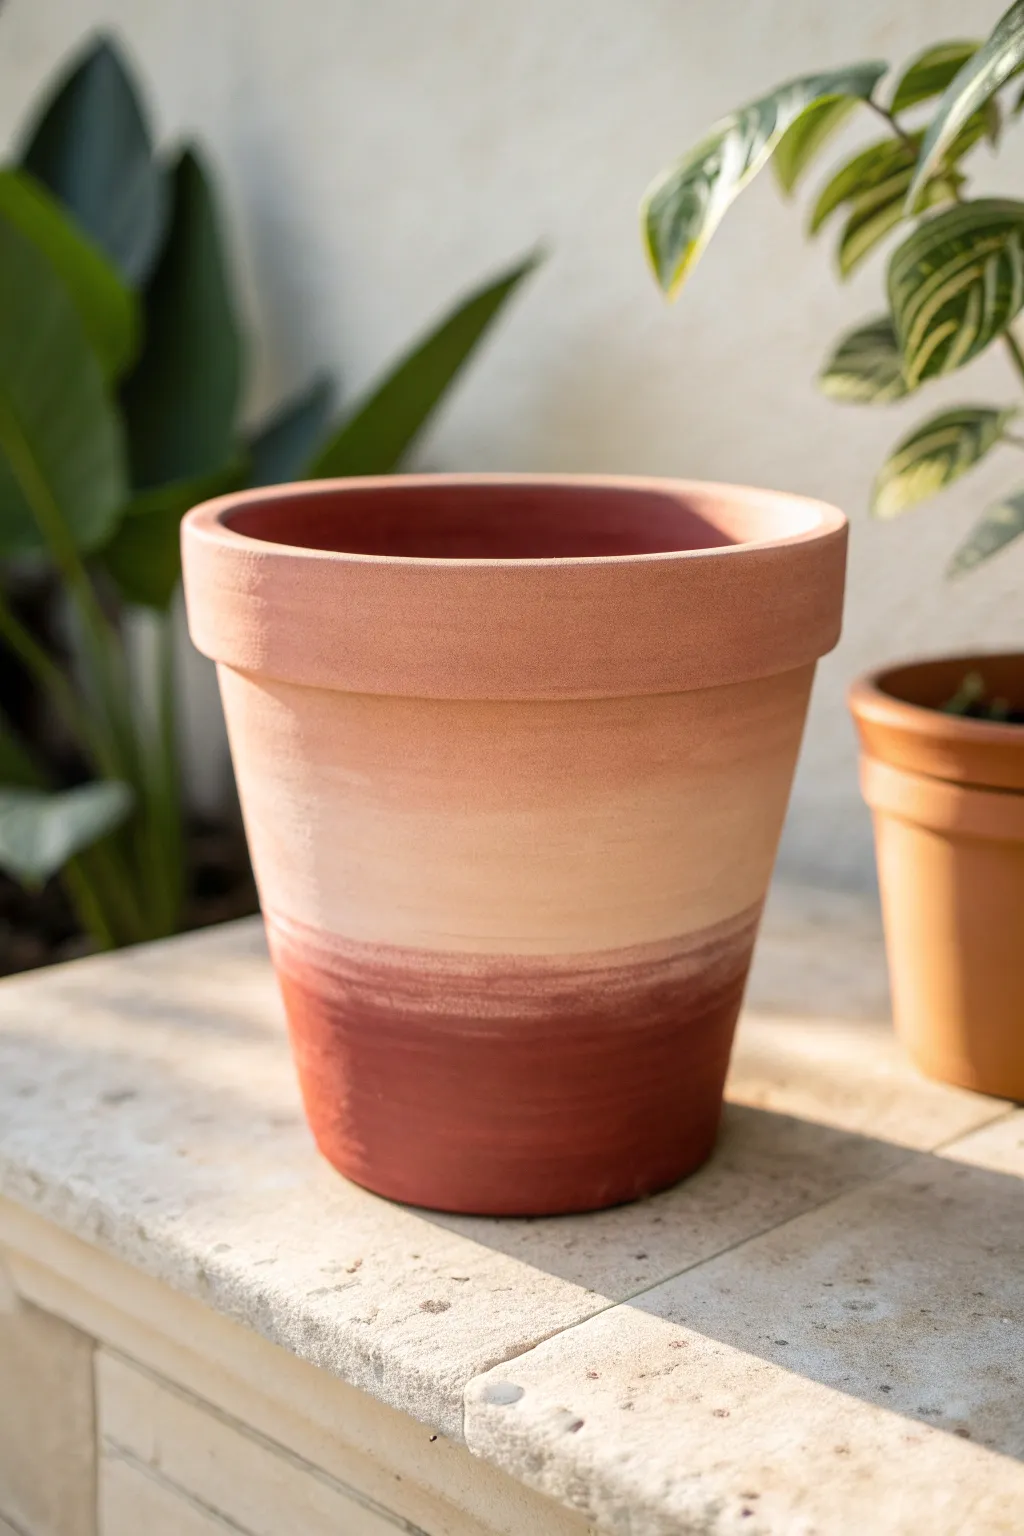
Transform a plain clay planter into a modern decor piece with this soft, layered color-blocked design. The soothing palette of sage, blush, and ochre creates a lovely transition from the natural terracotta base to a finished, matte look.
Step-by-Step Guide
Materials
- Standard terracotta pot (4-6 inch diameter)
- Acrylic craft paints (Sage Green, Blush Pink, Mustard Yellow/Ochre, Burnt Sienna)
- Painter’s tape or Washi tape (varying widths if available)
- Flat paintbrush (medium width)
- Small detail brush (optional for touch-ups)
- Clear matte sealer spray
- Paper plate or palette
- Water cup for rinsing
- Paper towels
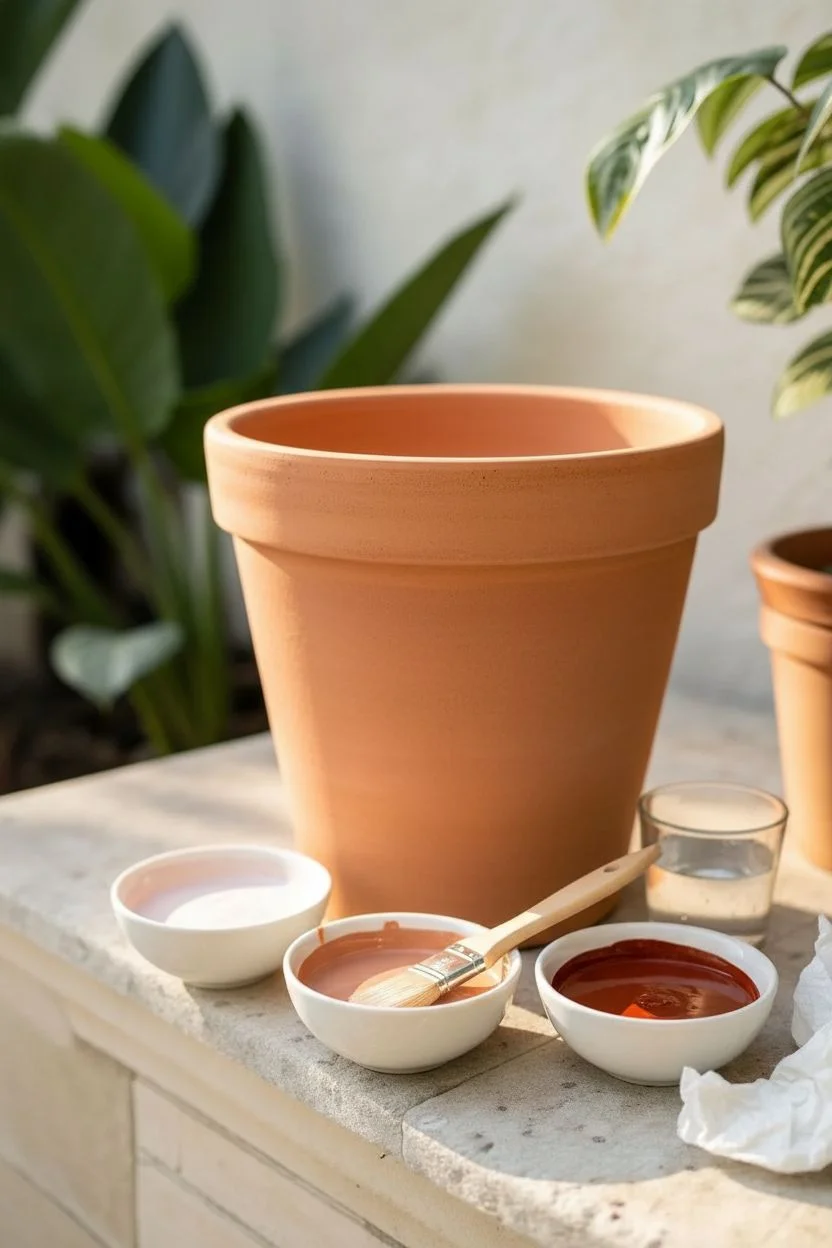
Step 1: Preparation & Base
-
Clean the Surface:
Begin by wiping the terracotta pot with a damp cloth to remove any warehouse dust or loose clay particles. Let it dry completely so the moisture doesn’t trap bubbles under the paint. -
Mix the Rim Color:
To achieve that soft, pinkish-beige seen on the very top rim, mix a tiny drop of burnt sienna into a large amount of white paint, or use a ‘bisque’ colored acrylic. You want it to look like a smoother, lighter version of the natural clay. -
Paint the Top Band:
Paint the wide rim of the pot with your mixed beige color. Carry this color down just slightly below the lip of the pot where the rim structure ends. -
Inner Rim Detailing:
Don’t forget to paint about an inch down into the inside of the pot. This ensures the raw clay doesn’t show when soil levels settle later on.
Crisp Line Secret
Before painting your color, brush a thin layer of the *base* color (or clear matte medium) over the tape edge. This seals the tape so no color bleeds under.
Step 2: Creating the Green Stripe
-
Tape the Upper Line:
Once the rim paint is bone dry to the touch, apply a strip of painter’s tape horizontally around the pot, right along the bottom edge of the rim indentation. Press the edge down firmly with your thumbnail to prevent bleeding. -
Tape the Lower Boundary:
Decide how wide your green band will be (roughly 1.5 to 2 inches). Place another strip of tape around the circumference of the pot at this level. -
Apply the Sage Green:
Using your flat brush, fill in the space between the two tape lines with sage green acrylic paint. Use horizontal strokes that follow the curvature of the pot. -
Remove Tape While Tack-Dry:
Carefully peel off both strips of tape while the paint is still slightly tacky, not completely dry. This helps keep the edges crisp and prevents the paint from chipping off with the tape.
Uneven Lines?
Terracotta pots are rarely perfectly cylindrical, making straight tape lines hard. Apply tape in small sections, overlapping slightly, to navigate the curve better.
Step 3: The Center Stripes
-
Prepare for the Pink Line:
Wait until the green band is fully dry. Now, place a strip of tape right over the bottom edge of the green paint to protect it. -
Define the Pink Width:
Place a second piece of tape just below the first, leaving a narrow gap (about 1/4 to 1/2 inch) exposed. This will be your thin pink accent stripe. -
Paint the Blush Stripe:
Fill this narrow gap with your blush pink paint. Since this is a thin area, be careful not to overload your brush, which could cause ridges. -
Reveal the Stripe:
Gently remove the tape strips to reveal your clean pink line.
Step 4: Finishing the Bottom
-
Tape for the Ochre Band:
Once the pink line is dry, protect its bottom edge with a fresh piece of tape. -
Set the Base Line:
Place your final piece of tape roughly an inch from the bottom of the pot. This leaves the very bottom section exposed for the darker color later. -
Paint the Mustard Section:
Fill the area between the pink line and your bottom tape with the mustard or ochre yellow paint. I usually do two thin coats here for solid opacity. -
Paint the Base:
Remove the bottom tape. Paint the remaining bottom section of the pot with a burnt sienna or reddish-brown color that mimics a darker terracotta tone. -
Final Touch-Ups:
Inspect your lines. If any paint bled, use a small detail brush with the appropriate color to carefully straighten the edges. -
Seal the Work:
Take the pot outside or to a ventilated area and spray it lightly with a clear matte sealer. This protects the acrylic from water damage when you water your plant.
Once dry, pot your favorite pilea or succulent and enjoy the warm, earthy vibes on your windowsill

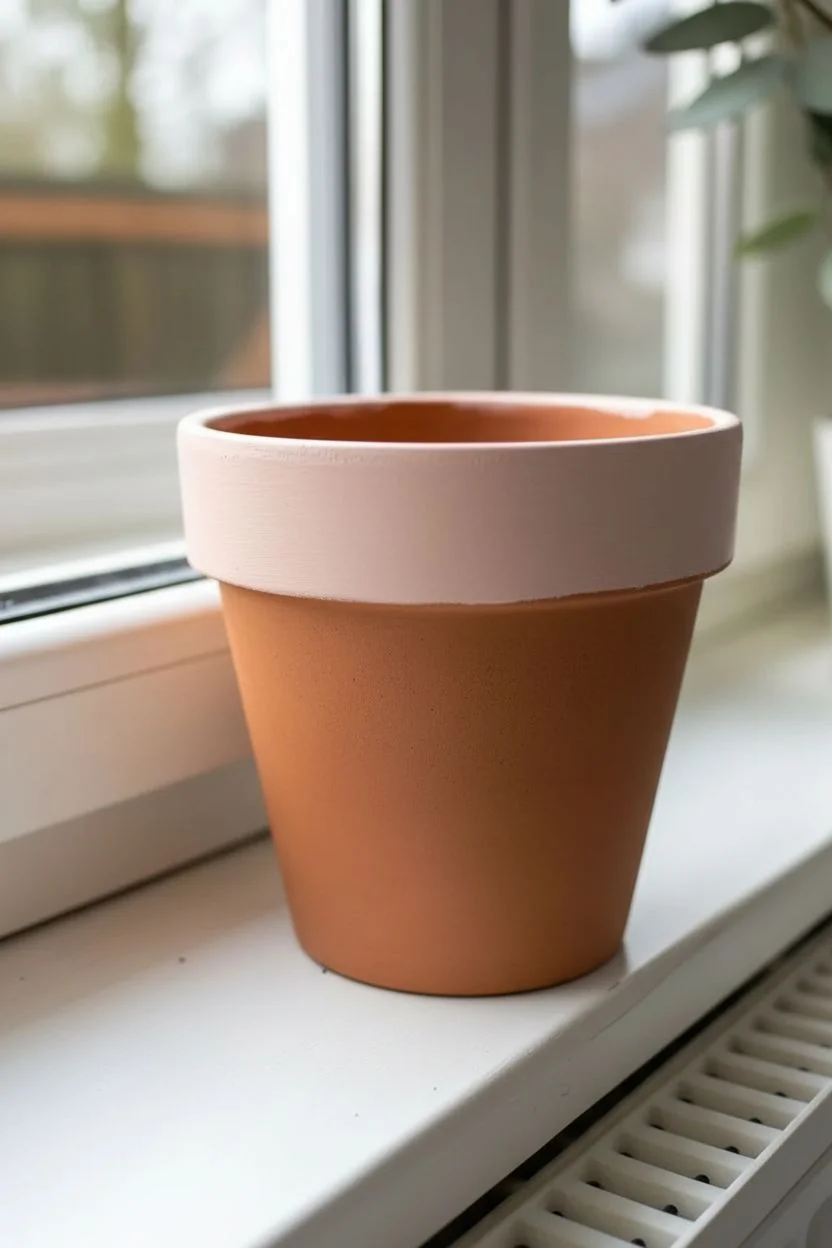
Simple Stripes With Painter’s Tape
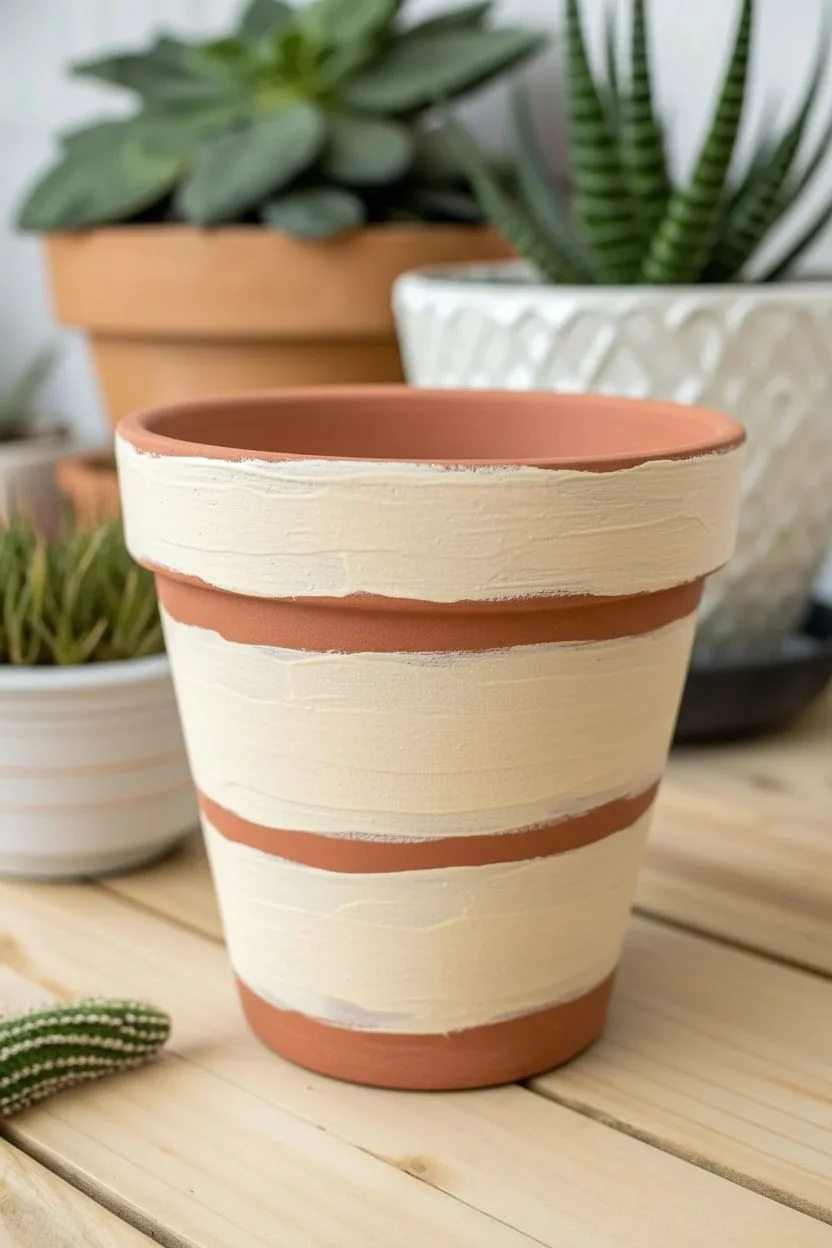
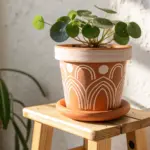
Transform a plain terracotta vessel into a soft, contemporary planter featuring clean horizontal bands of color. This design uses a muted palette of sage, cream, and peach to create a calming, earthy aesthetic that complements succulents perfectly.
Detailed Instructions
Materials
- Terracotta pot (clean and dry)
- Painter’s tape (various widths if available, or just standard 1-inch)
- Acrylic craft paints (White/Cream, Sage Green, Peach/Salmon, Terracotta color)
- Flat paintbrush (medium width)
- Small detail brush (for touch-ups)
- Clear matte sealant spray or Mod Podge
- Paper plate or palette
- Glass of water
- Paper towels
Step 1: Preparation and Base Layer
-
Clean the surface:
Ensure your terracotta pot is completely free of dust and dirt. Wiiping it down with a damp cloth and letting it dry fully is usually sufficient, as paint won’t adhere well to a dusty surface. -
Mix the cream base:
Squeeze out white acrylic paint and mix in just a tiny drop of yellow or brown to create a warm, off-white or cream color. Pure white can sometimes look too stark against the earthy clay. -
Paint a white band:
Freehand a wide band of your cream paint around the upper-middle section of the pot. Don’t worry about perfect edges yet, as the tape in later steps will define the lines. -
Add a second white band:
Paint a second, slightly narrower band of cream near the bottom of the pot. You want these white sections to serve as the background for your colored stripes later. -
Allow to dry completely:
Let these base layers of cream paint dry thoroughly. Since terracotta is porous, it dries relatively quickly, but wait at least 20-30 minutes to ensure the tape won’t peel up the paint.
Bleeding Lines?
If paint bleeds under the tape, seal the tape edges first by painting a thin layer of the *base* color (or clear matte medium) over the tape edge before adding the stripe color.
Step 2: Taping and Striping
-
Apply the first tape line:
Place a strip of painter’s tape horizontally around the pot, just below the rim. Press the edges down firmly with your fingernail to prevent paint bleed. -
Mask off the colored zones:
Apply additional rings of tape to mask off the areas you want to remain terracotta or cream. In the image, we want to leave the natural clay exposed at the bottom and top. -
Create the sage stripe:
In the middle of your upper cream band, paint a ring of sage green. You can use tape to guide this, or carefully freehand it if you have a steady hand, letting the brush bristles create a soft, slightly organic edge. -
Paint the peach stripe:
Below the sage stripe, leaving a gap of cream in between, paint a band of peach or salmon color. This should be positioned on the lower cream section we painted earlier. -
Refine the rim:
The rim in the reference photo has a soft, whitewashed look. Dilute a little white paint with water (about 50/50) and brush it loosely over the rim for a semi-transparent effect. -
Remove tape carefully:
Once the stripes are tacky but not fully hardened, gently peel away your painter’s tape at a 45-degree angle. This helps ensure a crisp line without chipping the dried paint.
Step 3: Finishing and Sealing
-
Check for errors:
Inspect your stripes. If any paint bled under the tape, use a small detail brush or a damp toothpick to gently scrape or paint over the mistake. -
Enhance the texture:
If you want that slightly rustic, hand-thrown clay look shown in the top band, lightly sand the painted rim with fine-grit sandpaper to distress it slightly. -
Seal the exterior:
To protect your design from water damage, apply a coat of clear matte sealant spray or brush on a layer of matte Mod Podge over the entire exterior. -
Seal the interior (optional):
I like to seal the inside of the pot as well; this prevents moisture from seeping through the clay and bubbling your exterior paint job over time. -
Let it cure:
Allow the final sealant to cure for 24 hours before adding soil and plants.
Level Up: Texture
Mix a teaspoon of baking soda into your acrylic paint before applying the stripes. This creates a trendy, gritty ceramic texture that mimics expensive artisan pottery.
Now your custom planter is ready to be the perfect cozy home for your favorite succulent
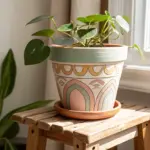


Polka Dots for Instant Cheer
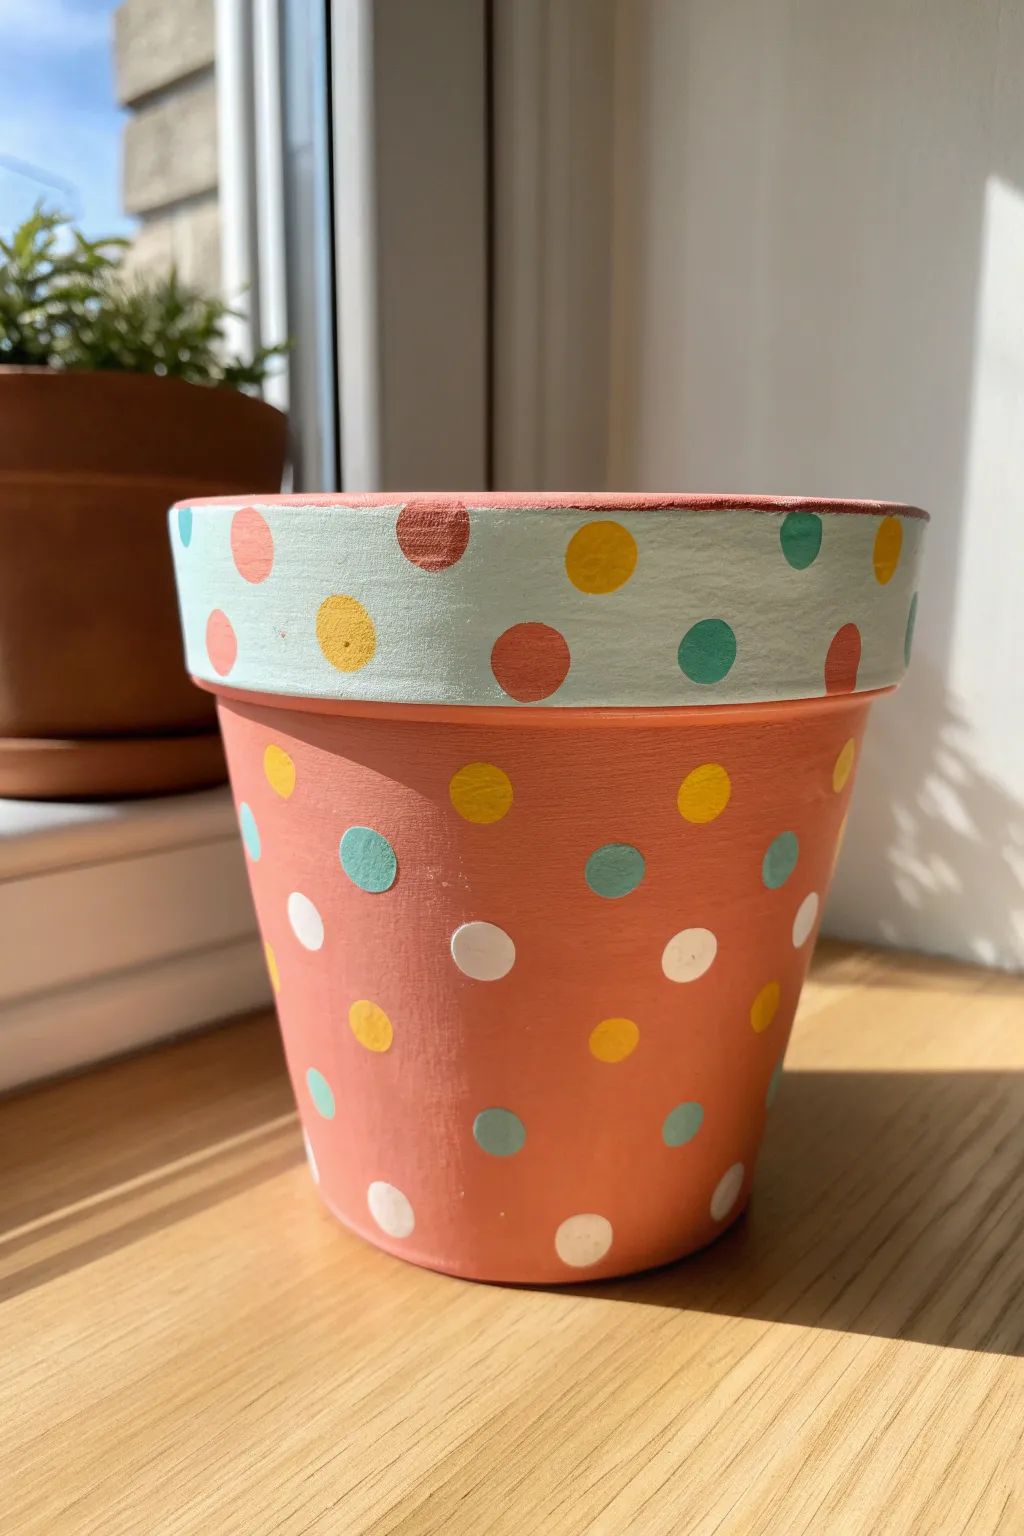
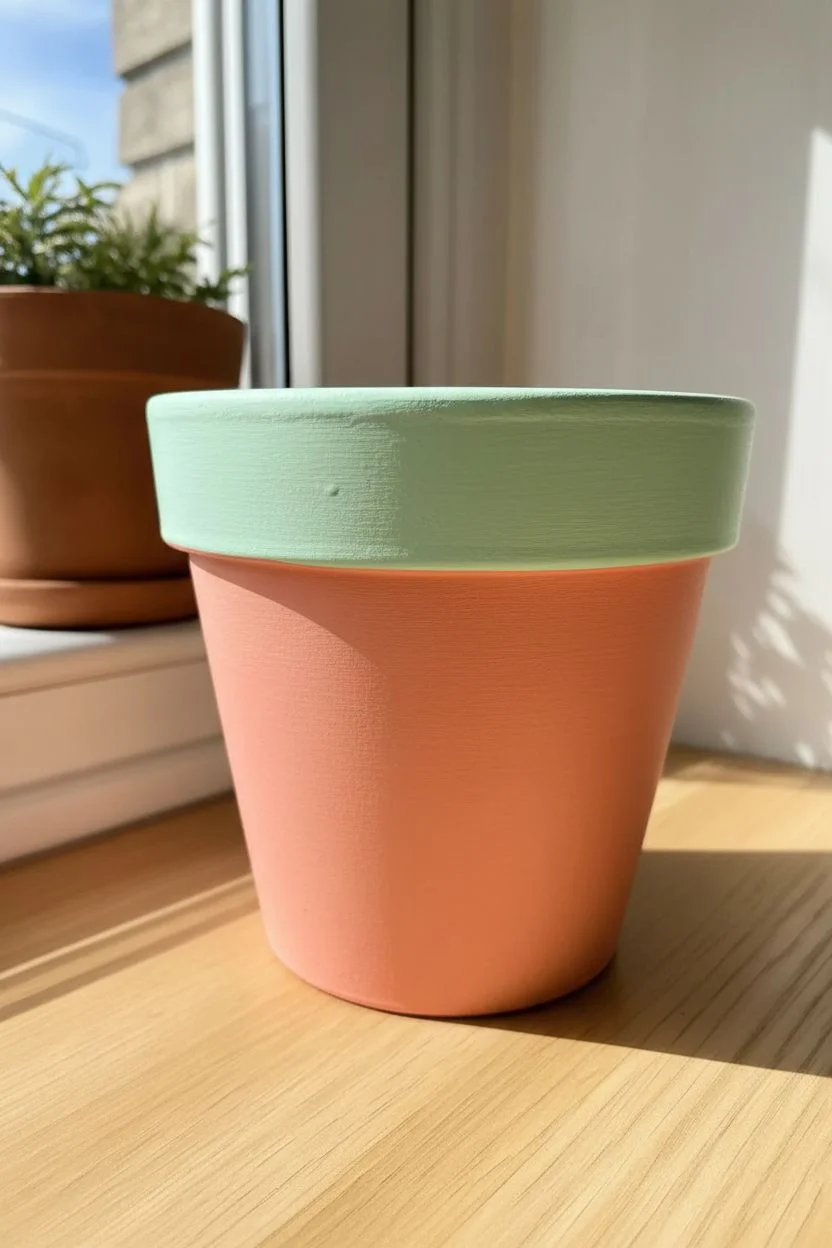
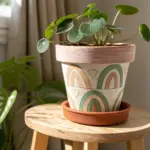
Transform a plain terracotta pot into a cheerful home for your plants with this soft, playful design. Featuring a coral pink base and a mint green rim, this pot is sprinkled with irregular polka dots for a charming, hand-painted feel.
Step-by-Step Tutorial
Materials
- Terracotta pot (standard size)
- Acrylic craft paints: light coral/salmon pink, pastel mint green, white, pastel yellow, teal/turquoise, darker coral
- Flat paintbrush (medium width ~1/2 inch) for base coating
- Small round paintbrush (size 2 or 4) for dots
- Palette or paper plate
- Cup of water and paper towels
- Clear acrylic sealer (spray or brush-on matte finish)
Step 1: Base Coating
-
Prep the surface:
Begin by wiping down your terracotta pot with a damp cloth to remove any dust or debris. Let it dry completely—terracotta is porous and holds moisture, which can affect paint adhesion. -
Paint the rim:
Using your flat paintbrush, apply the pastel mint green paint to the entire upper rim of the pot. Don’t worry about getting a perfect line on the underside of the lip yet, but ensure the top edge is covered. -
Cover the inside rim:
Extend the mint green paint about one to two inches down the inside of the pot. This ensures the clay color doesn’t show when you add soil. -
Apply the body color:
Switch to a clean flat brush and apply the light coral/salmon pink paint to the main body of the pot. Carefully meet the mint green line under the rim. -
Refine the edges:
Use the edge of your flat brush to create a clean horizon line where the coral body meets the mint rim. You might need a steady hand here. -
Add second coats:
Once the first layer is touch-dry, apply a second coat of both the mint green and coral pink. This ensures the rich, opaque finish seen in the photo without the terracotta showing through. -
Let it cure:
Allow the base coats to dry fully. I usually give it about an hour to ensure the surface is hard enough to paint details on without dragging the bottom layer.
Step 2: Dotting the Details
-
Mix your palette:
Squeeze out small amounts of white, pastel yellow, teal, and the darker coral paint onto your palette. You’ll want easy access to all colors as you work. -
start with the rim:
Using the small round brush, paint fairly large dots on the mint green rim. Alternate colors between the darker coral, yellow, and teal. Space them out generously so the background color breathes. -
Paint body dots (Yellow):
Moving to the pink body, paint several yellow circles randomly. Notice in the image these aren’t perfectly round stencils; hand-painting them gives them character. -
Add the teal dots:
Rinse your brush and add teal circles to the pink body. Try to place them in the gaps between the yellow dots to keep the distribution balanced. -
Layer in the white:
Paint white polka dots scattered throughout the pink section. The white adds a bright pop that breaks up the other colors nicely. -
Touch up transparency:
The yellow and white paints can sometimes be a bit translucent. If they look streaky, dab a little extra paint on top of those specific dots once the first layer is dry. -
Check the spacing:
Step back and look at the overall pattern. If there’s a large empty space on the pink section, drop in another dot to even it out.
Uneven Circles?
Don’t stress about perfect circles! If a dot looks lumpy, wait for it to dry, then use the background color (pink or mint) to carefully ‘erase’ or reshape the edges.
Step 3: Finishing Up
-
Clean up the bottom:
If any paint smudged onto the very bottom of the pot or the drainage hole area, wipe it clean or paint it neatly for a professional look. -
Seal the deal:
Once all paint is completely dry (preferably overnight), apply a clear matte acrylic sealer. This protects the paint from water damage when you water your plant.
Sponge Stippler
For perfectly uniform dots without brushstrokes, dip a round foam pouncer or the eraser end of a pencil into the paint and stamp it directly onto the pot.
Pop your favorite succulent inside and enjoy the burst of color on your windowsill


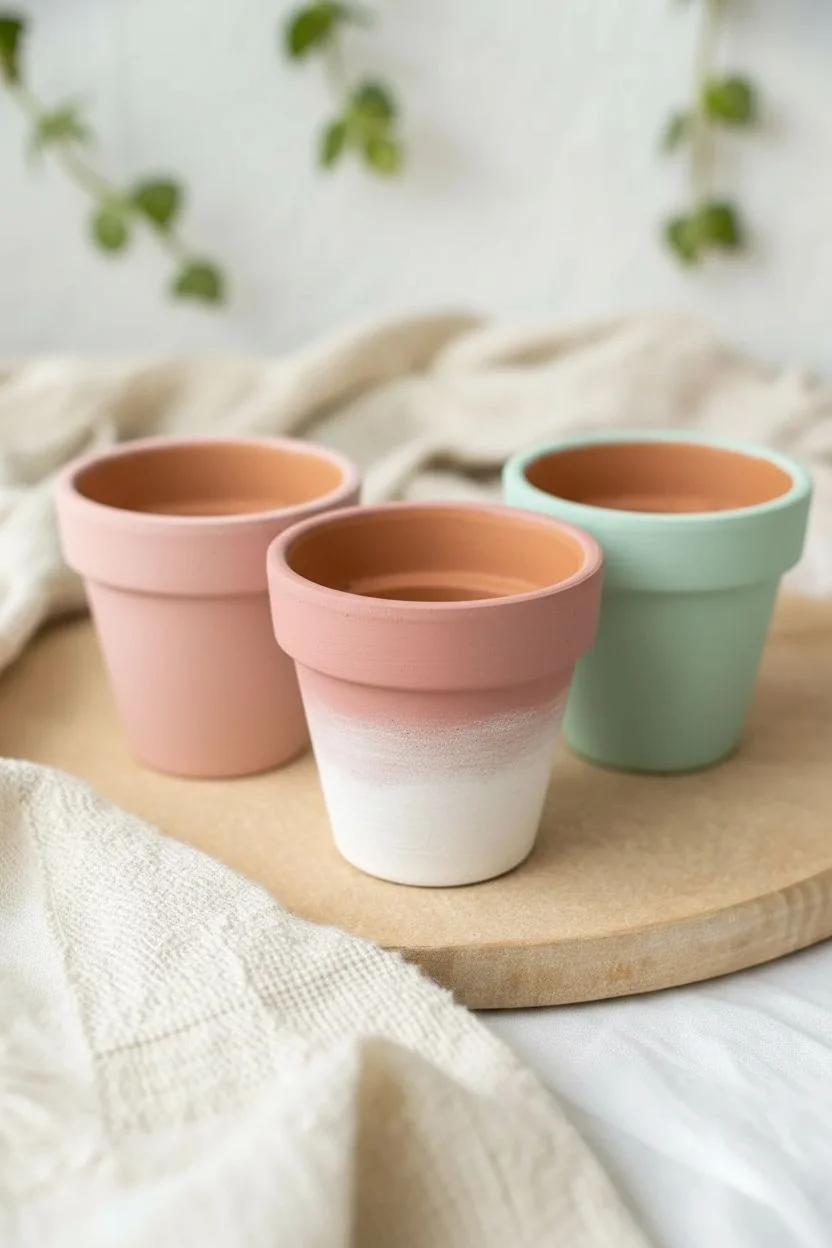
Ombre Fade in One Color Family
Transform a plain terracotta vessel into a warm, sun-baked statement piece using a subtle three-tone gradient. This project mimics the natural shifting hues of desert sandstone, blending deep rust tones into a soft, airy blush.
Step-by-Step
Materials
- Clean terracotta pot (ensure it is dry)
- White acrylic paint (for priming and mixing)
- Deep rust or burnt sienna acrylic paint
- Terracotta or warm beige acrylic paint
- Medium flat paintbrush (approx. 1 inch)
- Small mixing bowls or palette
- Cup of water
- Paper towels
- Matte sealer spray (optional)
Step 1: Preparation and Base Mixing
-
Clean surface:
Begin by wiping down your terracotta pot with a damp cloth to remove any dust or warehouse grit. Let it dry completely so the paint adheres properly. -
Mix the lightest shade:
Creating your gradient starts with having your colors ready. In your first mixing bowl, combine a large amount of white paint with a tiny drop of your warm beige or terracotta color. You want a very pale, off-white blush tone. -
Prepare the medium shade:
In a second bowl, pour out your standard terracotta or warm beige paint plain. This will serve as the transition color in the middle of the pot. -
Prepare the darkest shade:
In a third bowl, have your deep rust or burnt sienna paint ready. If it feels too bright, you can mix in a tiny dot of black or dark brown to ground it.
Pro Tip: Keep it Wet
Acrylics dry fast! Keep a mister bottle handy to lightly spritz the pot surface. Keeping the paint damp makes blending the transition lines much smoother and easier.
Step 2: Applying the Gradient
-
Paint the top section:
Dip your clean brush into the lightest blush mixture. Paint the rim of the pot (inside and out) and the top third of the pot exterior. Don’t worry about a perfect straight line at the bottom ensuring good coverage is key here. -
Apply the middle band:
While the top layer is still slightly tacky but mostly dry, clean your brush and switch to the medium terracotta shade. -
Create the first transition:
Paint the middle third of the pot with this medium color. As you approach the lighter top section, lighten your brush pressure slightly. -
Blend the upper seam:
With a slightly damp brush (remove most paint on a paper towel), gently brush back and forth horizontally where the light top and medium middle colors meet. This softens the line. -
Paint the bottom section:
Rinse your brush thoroughly. Dip into the darkest rust color and paint the bottom third of the pot right down to the base. -
Create the lower transition:
Just like before, bring this dark color up to meet the medium band. I find dragging the brush horizontally across the ‘seam’ works best to start the blend. -
Wet blending technique:
Dip your brush barely into water, then pick up a tiny bit of the medium color. Brush this over the transition line between the dark bottom and medium middle to blur them together.
Step 3: Refining and Sealing
-
Review the gradient:
Step back and look at the pot from a distance. If the bands look too distinct, use a slightly damp brush to feather the edges further while the paint is movable. -
Add texture (optional):
For a more rustic, earthen look like the example, use a mostly dry brush with the darker color and create very subtle horizontal streaks into the lighter areas. -
Handling the rim:
Double-check the top rim. Since this is highly visible, ensure the light blush color covers the top edge evenly without streak marks. -
Allow to dry:
Let the pot sit undisturbed for at least an hour. Terracotta is porous and absorbs moisture, so fully drying might take longer than painting on canvas. -
Seal the work:
If you plan to plant directly in the pot, spray the exterior with a clear matte sealer. This prevents bubbling when you water your plants later. -
Final cure:
Allow the sealer to cure according to the can’s instructions, usually 24 hours, before introducing any soil.
Level Up: Faux Texture
Mix a teaspoon of baking soda into your acrylic paints before applying. This creates a gritty, ceramic texture that makes the pot look like hand-thrown clay.
Once fully dry, your new pot will have a lovely sophisticated warmth ready to house your favorite greenery
BRUSH GUIDE
The Right Brush for Every Stroke
From clean lines to bold texture — master brush choice, stroke control, and essential techniques.
Explore the Full Guide
Rainbow Ombre for a Statement Pot
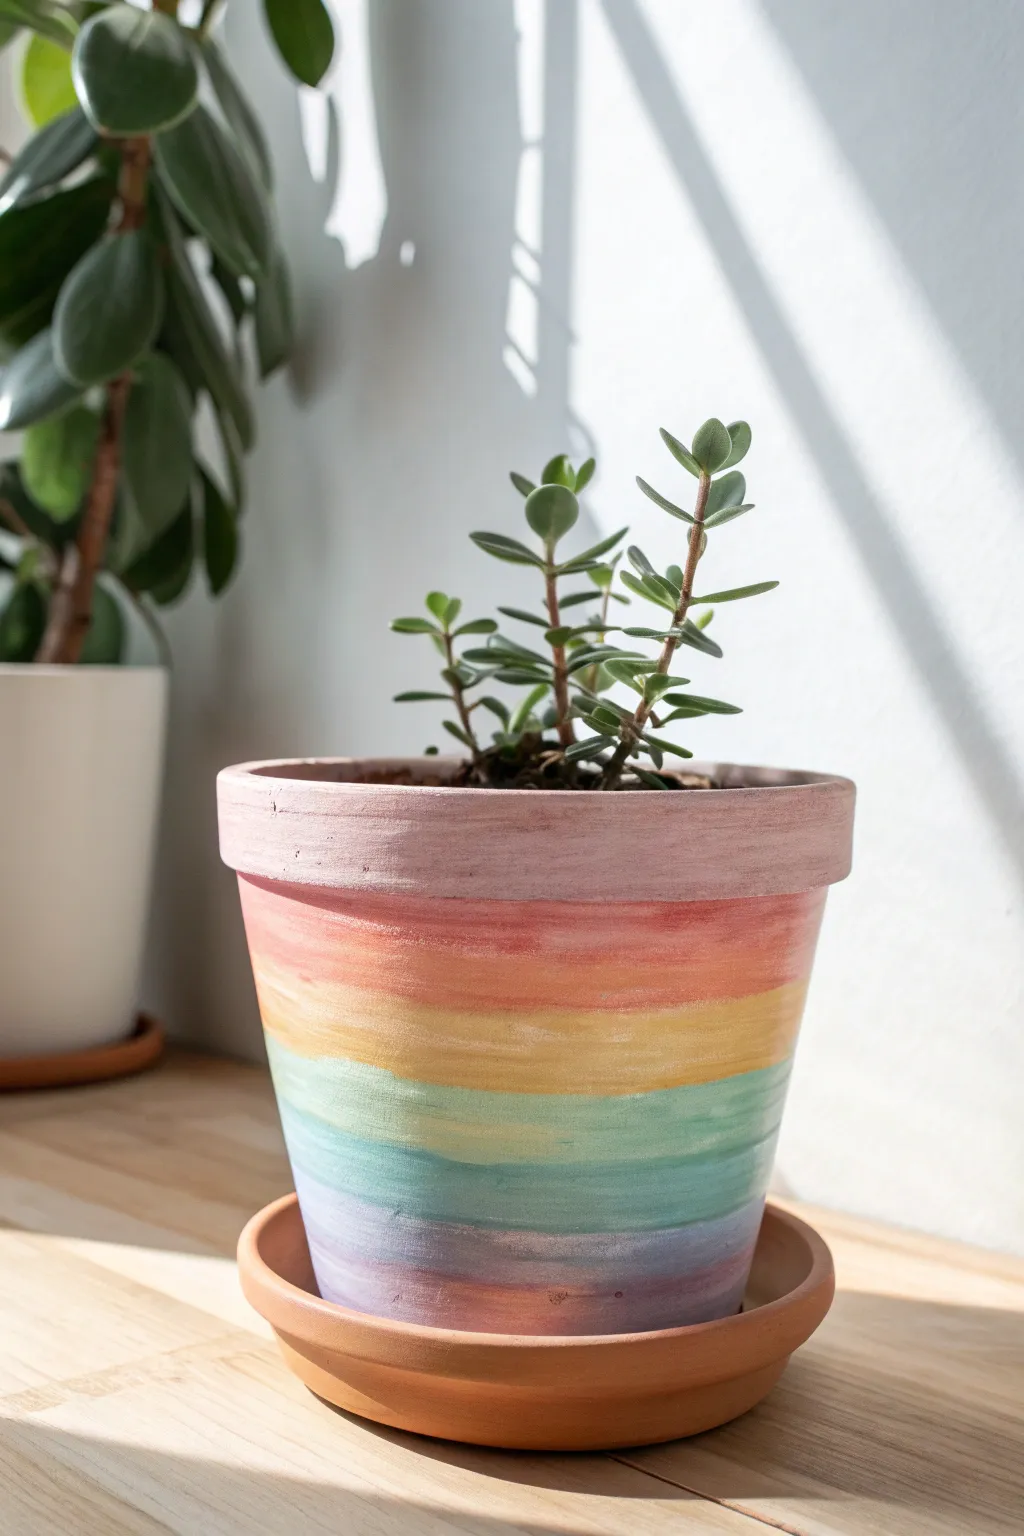
Bring a gentle splash of color to your indoor garden with this soft, rainbow ombre terracotta pot. The design blends pastel hues seamlessly around the planter, creating a dreamy, watercolor-like effect that brightens up any corner.
How-To Guide
Materials
- Terracotta pot (cleaned and dried)
- White acrylic paint (as a primer)
- Acrylic craft paints in pastel rainbow colors: Soft Pink, Coral, Butter Yellow, Mint Green, Sky Blue, Lavender
- Small to medium flat paintbrushes
- Palette or paper plate for mixing
- Cup of water for rinsing
- Paper towels
- Clear matte acrylic sealer spray
Step 1: Preparation and Base Coat
-
Clean the pot:
Start by ensuring your terracotta pot is completely clean. Wipe away any dust or dirt with a damp cloth and let it dry fully before painting. -
Apply the primer:
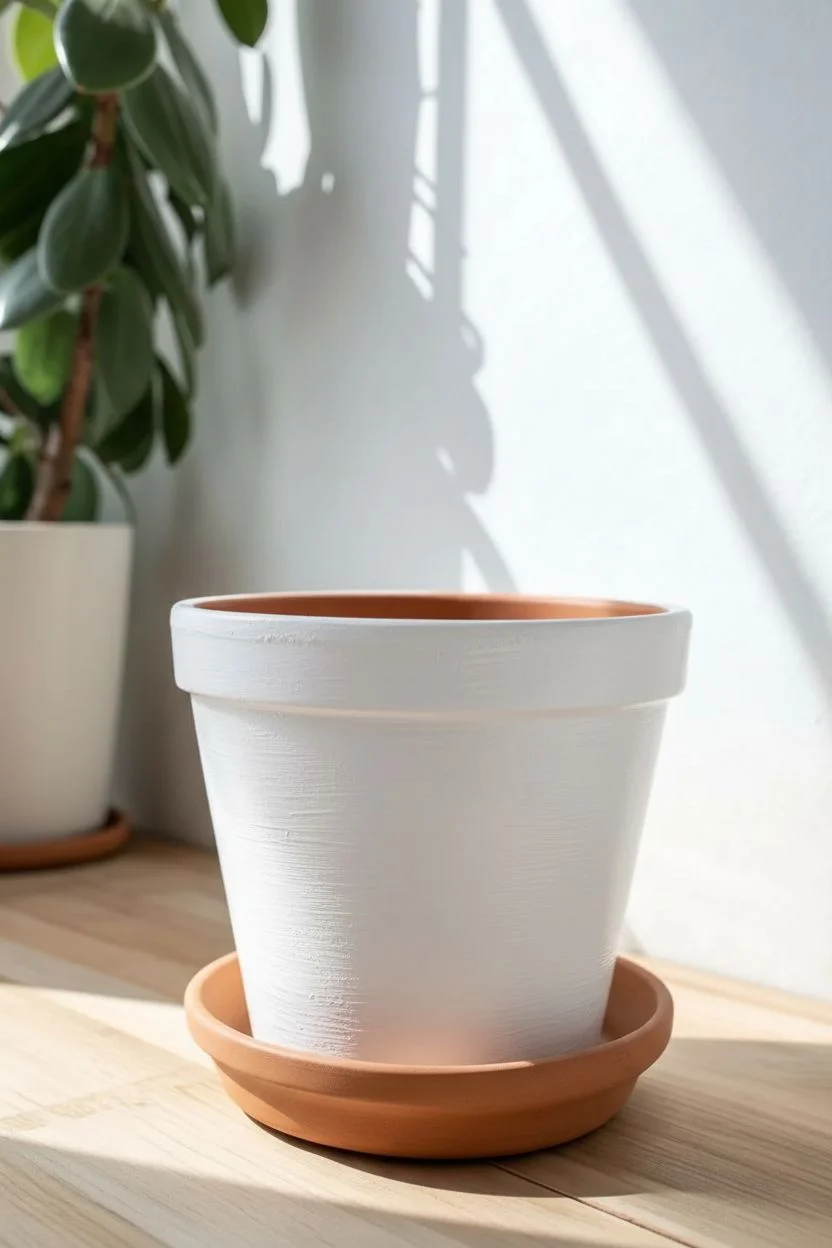
Squeeze a generous amount of white acrylic paint onto your palette. Using a medium flat brush, apply a thin, even coat of white paint over the entire exterior of the pot. -
Paint the rim:
Don’t forget to paint the top inch of the inside rim, as this part will be visible once your plant is potted. -
Let it dry:
Allow the white base coat to dry completely. A second coat is recommended to ensure the terracotta color doesn’t show through and dull your pastels.
Step 2: Painting the Rainbow Stripes
-
Prepare your palette:
Layout your pastel colors in rainbow order: pink, coral, yellow, green, blue, and lavender. Keep them slightly separate for now. -
Start with pink:
Load your brush with the soft pink paint. Apply a horizontal stripe just under the rim of the pot. It doesn’t need to be perfectly straight; an organic edge looks better for blending. -
Add the coral stripe:
Clean your brush or pick up a new one. Paint a coral stripe directly beneath the pink one, ensuring the wet edges touch slightly. -
Blend the first transition:
I like to take a slightly damp, clean brush and gently run it horizontally where the pink and coral meet to soften the line. -
Paint the yellow stripe:
Continue moving down the pot. Apply a band of butter yellow paint below the coral stripe. -
Create the orange transition:
While the yellow and coral paints are still wet, gently blend them at the seam. If needed, mix a tiny dot of yellow and coral on your palette to create a transition shade. -
Apply mint green:
Paint the next stripe in mint green. This central band should sit roughly in the middle-lower section of the pot. -
Blend yellow and green:
Feather the green paint upwards into the yellow slightly. The goal is to avoid harsh lines, aiming for a soft gradient instead. -
Add blue tones:
Apply the sky blue paint below the green. The pot is likely tapering now, so your stripes might naturally become slightly thinner. -
Finish with lavender:
Paint the final band at the very bottom of the pot in lavender. Ensure you cover down to the bottom edge. -
Paint the rim pink:
Go back to the top rim. Paint the thick rim of the pot with your soft pink color to cap off the design.
Keeping Colors Clean
Rinse your brush thoroughly and wipe it on a paper towel between every color change. Muddy water will dull your soft pastels instantly.
Step 3: Finishing Touches
-
Check for gaps:
Look over the pot for any spots where the white primer is peeking through too strongly and touch up with the appropriate color. -
Soften harsh lines:
If any lines dried too sharply, take a very slightly damp brush with a tiny amount of the adjacent color and lightly dry-brush over the hard edge. -
Distress lightly (Optional):
For the textured look seen in the photo, you can lightly sand the dried paint with fine-grit sandpaper, revealing tiny hints of the texture underneath. -
Seal the artwork:
Once the paint is thoroughly dry (give it a few hours), take the pot to a well-ventilated area and spray it with a clear matte acrylic sealer. -
Add a saucer:
Place a matching terracotta saucer underneath to catch water, keeping the natural clay look for the base.
Go Metallic
For a glamorous twist, paint a thin line of gold leaf or metallic gold paint between each color block to make the transitions pop.
Your vibrant new planter is ready to be the perfect home for your favorite succulent or houseplant
Cute Kawaii-Style Faces on Mini Terracotta Pots
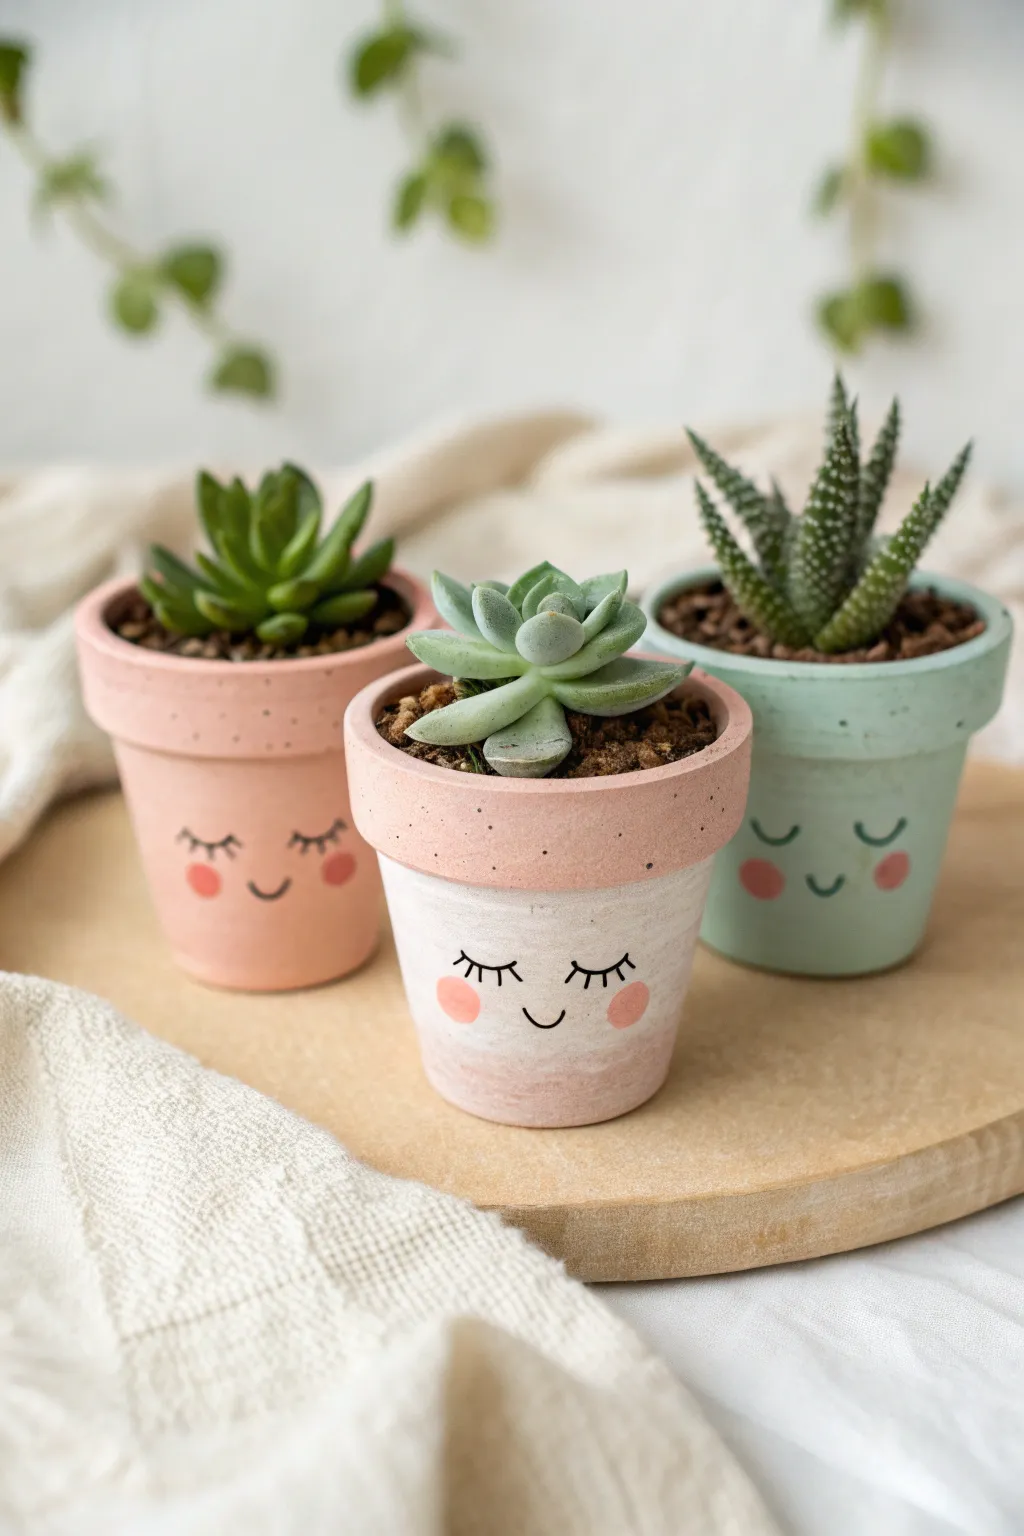
Transform ordinary mini terracotta pots into a trio of snoozing friends with soft pastel paints and sweet, sleepy expressions. This beginner-friendly project adds a touch of whimsical charm to any windowsill or desk space.
How-To Guide
Materials
- 3 mini terracotta pots (2-3 inch diameter)
- Acrylic craft paints (matte finish): Soft Pink, Mint Green, White
- Small flat paintbrush (size 4 or 6)
- Fine tip detail brush (size 0 or 00) or extra-fine black paint pen
- Small round sponge dobber or Q-tips
- Water cup and paper towels
- Succulents and potting soil (optional, for finishing)
- Matte spray sealer (optional)
Step 1: Base Coat Preparation
-
Clean the surface:
Before you begin, wipe down your terracotta pots with a slightly damp cloth to remove any dust or manufacturing residue. Let them dry completely, which usually only takes a few minutes since terracotta is so porous. -
Mix your mint:
For the green pot, mix your Mint Green paint. If it looks too vibrant, tone it down with a drop of white to achieve that chalky, pastel look seen in the photo. -
Paint the green pot:
Apply the mint mixture to the first pot, covering the outside completely, including the rim. You likely won’t need to paint the inside unless you plan to leave it empty. -
Paint the pink pot:
For the second solid pot, use your Soft Pink paint. Apply a smooth, even coat over the entire exterior surface and the top rim. -
Start the two-tone pot:
For the middle pot, start by painting the top rim and a band about 1/2 inch down the side with a slightly darker, dusky pink shade. -
Add the white base:
While the top pink band is drying, paint the bottom two-thirds of the middle pot with white acrylic paint. -
Blend the ombré:
To create the soft transition seen on the middle pot, take a slightly damp brush with a tiny amount of pink and lightly feather it over the line where the white meets the pink band. This creates a distressed, cloudy effect rather than a sharp line. -
Second coats:
Terracotta absorbs paint quickly, so you will almost certainly need a second coat on all three pots to get full, opaque coverage. Let the first layers dry for about 15 minutes before re-applying.
Step 2: Adding the Kawaii Faces
-
Practice your expressions:
Sketch the faces on a scrap piece of paper first. Notice the shape: two curved ‘U’ shapes for sleeping eyes and a tiny ‘u’ for the smiling mouth. -
Pencil placement:
Lightly sketch the face placement onto the dry pots with a pencil. aim for the center of the pot’s body, keeping the features close together for maximum cuteness. -
Paint the lashes:
Using your finest detail brush and black paint, carefully trace over your pencil lines. For the pink pot, add three tiny vertical lashes to each eye curve. -
Create the simple eyes:
For the green pot, keep the eyes as simple, unadorned curves. This subtle difference gives each pot its own personality. -
Detail the middle pot:
On the two-tone pot, draw the eyes slightly wider and add longer, sweeping eyelashes that curl outward. I find steadying my pinky finger against the table helps keep the lines crisp. -
Add the rosy cheeks:
Dip a small round sponge dobber or the tip of a Q-tip into pink paint (use a darker coral shade for the green pot). gently stamp a circle on either side of the smile. -
Add freckles:
To mimic the speckled texture seen on the clay rims, you can use an old toothbrush to flick tiny specks of watered-down brown or grey paint onto the pots, or simply leave the natural texture of the paint strokes. -
Seal the work:
If these pots will hold real plants and be exposed to water, spray them with a matte sealer to protect your artwork from bubbling or peeling.
Uneven Lines?
If painting the eyes with a brush feels too shaky, swap the paint for an ultra-fine tip black Posca marker or permanent ink pen for better control.
Make it Sparkle
After the paint is dry, apply a very thin layer of Mod Podge mixed with fine iridescent glitter over just the rosy cheeks for a magical highlight.
Now you can tuck your favorite succulents into their new cozy homes for a sweet display

PENCIL GUIDE
Understanding Pencil Grades from H to B
From first sketch to finished drawing — learn pencil grades, line control, and shading techniques.
Explore the Full Guide
Herb Label Terracotta Pots With Hand-Lettering
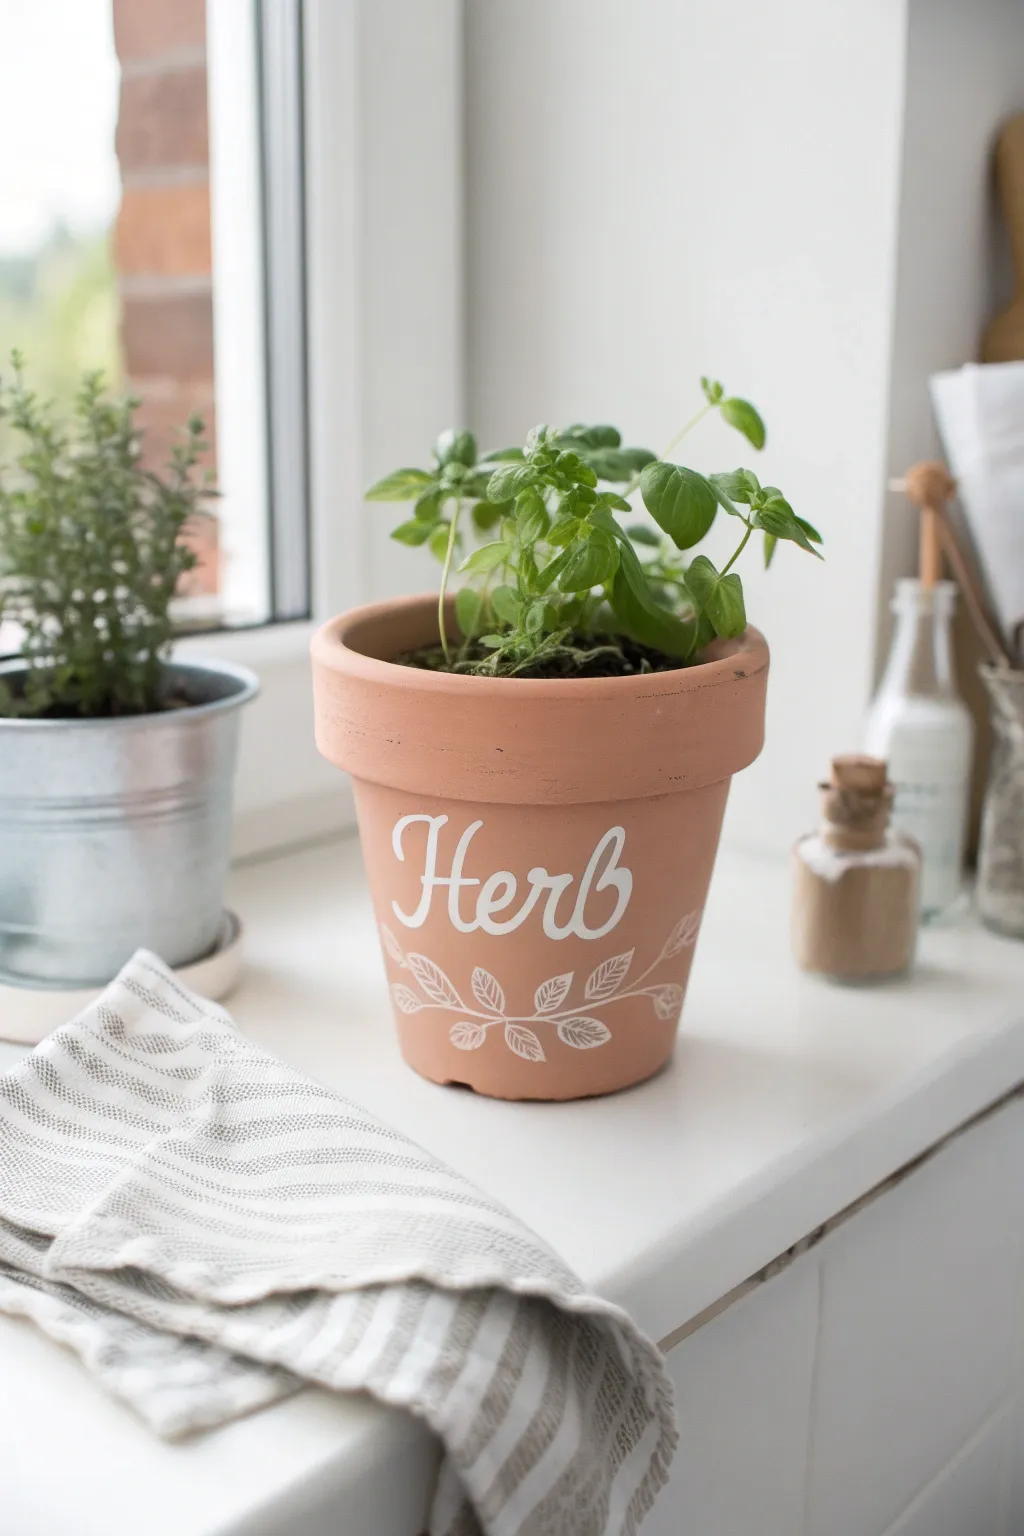
Bring a touch of customized charm to your windowsill with this simple yet elegant hand-lettered terracotta pot. The clean white script against the classic earthy clay creates a timeless look that perfectly highlights your fresh basil or thyme.
Detailed Instructions
Materials
- Standard terracotta pot (4-6 inch diameter)
- White acrylic paint pen (medium tip)
- White acrylic paint pen (fine tip, optional)
- Pencil
- Eraser
- Tracing paper (optional)
- Soft measuring tape
- Paper towel or rag
- Clear matte acrylic sealer spray
Step 1: Preparation & Cleaning
-
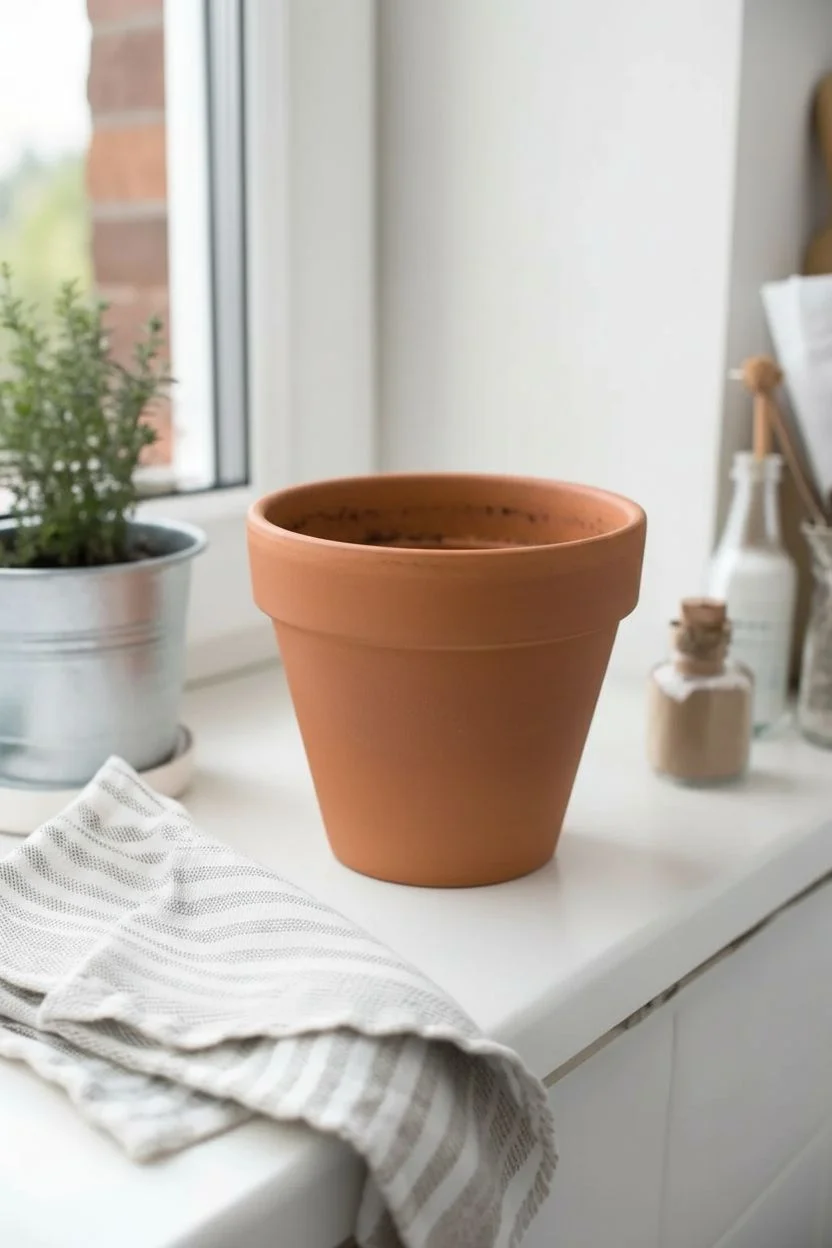
Clean the surface:
Before doing anything, ensure your terracotta pot is completely clean. Wipe it down thoroughly with a damp cloth to remove any clay dust or store grime. -
Allow to dry:
Let the pot air dry completely. Terracotta absorbs moisture easily, and paint pens won’t adhere well to a damp surface. -
Dust check:
Run your finger over the surface one last time. If you pick up red dust, wipe it again with a dry paper towel until it comes away clean.
Uneven Ink Flow?
Terracotta is porous and can dry out pen tips. Press the nib on scrap paper frequently to re-saturate it, rather than pressing harder on the pot.
Step 2: Drafting the Design
-
Find the center:
Decide which side of the pot is the ‘front.’ Use your soft measuring tape to find the vertical center ensuring your text will be balanced. -
Write the text lightly:
Using a pencil, lightly sketch the word ‘Herb’ (or your specific plant name) in the center of the pot. Aim for a flowing, cursive style with a slightly larger capital ‘H’. -
Sketch the laurel branches:
Below the text, lightly draw two curved lines stemming from a central point, extending outward to the left and right to form the base of the laurel wreath. -
Add leaf outlines:
Sketch small almond-shaped leaves along the branch stems. Keep them simple and relatively symmetrical, pointing outwards toward the ends of the branches. -
Refine the sketch:
Step back and look at your pencil marks. Adjust any spacing issues now before committing with ink; erasing pencil from terracotta is easy, but paint is forever.
Step 3: Lettering & Painting
-
Prime the paint pen:
Shake your white medium-tip acrylic paint pen vigorously. Press the nib down on a scrap piece of paper until the white ink flows smoothly. -
Outline the text:
Carefully trace over your pencil lettering for the word ‘Herb.’ Use steady, slow strokes to prevent the nib from catching on the rough clay texture. -
Thicken the downstrokes:
To create a faux-calligraphy look, go back over the downward strokes of your letters (the parts where your hand moved down) to make them twice as thick. -
Fill the letters:
Fill in the thickened areas solid white. I usually find that a second pass after a minute of drying creates the brightest, most opaque white. -
Trace stem lines:
Move down to the laurel design. Trace the main center stems of your branches with a single clean stroke. -
Outline the leaves:
Outline each almond-shaped leaf attached to the stems. Try to keep your hand relaxed so the curves look organic rather than stiff. -
Add leaf details:
Inside each leaf outline, draw extremely fine diagonal lines or veins. You might want to switch to a fine-tip pen here if you have one for cleaner details. -
Clean up edges:
Inspect your lines. If any edges look ragged due to the pot’s texture, carefully smooth them out with the tip of the pen.
Level Up: Vintage Shade
Before painting, whitewash the pot by brushing on a mix of 1 part white paint to 2 parts water, then wiping it off with a rag for a cloudy, aged look.
Step 4: Finishing Touches
-
Erase guidelines:
Wait at least 30 minutes for the paint to fully cure. Once bone dry, gently erase any visible pencil marks with a soft eraser. -
Seal the art:
Take the pot to a well-ventilated area. Spray a light, even coat of matte clear acrylic sealer over the painted design to protect it from water damage. -
Final cure:
Let the sealer dry securely according to the can’s instructions before potting your soil and plants.
Once planted, your custom labelled pot is ready to sit beautifully on a sunny ledge.
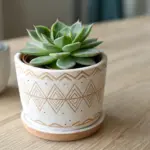
Stencil Patterns for Clean, Repeatable Designs
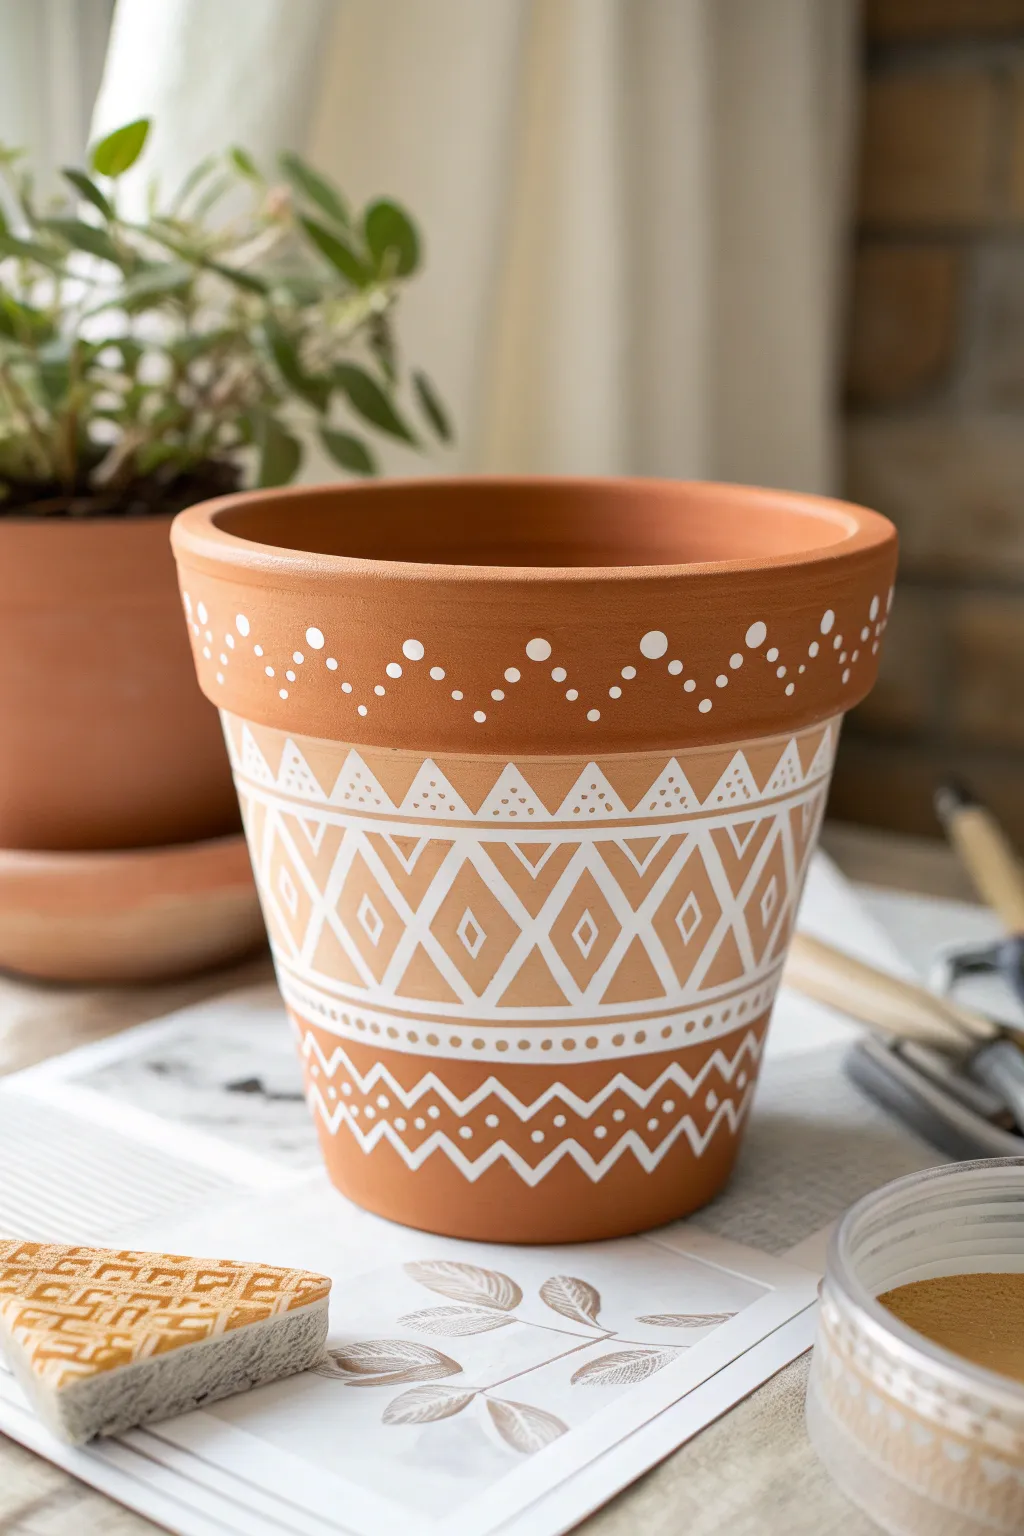
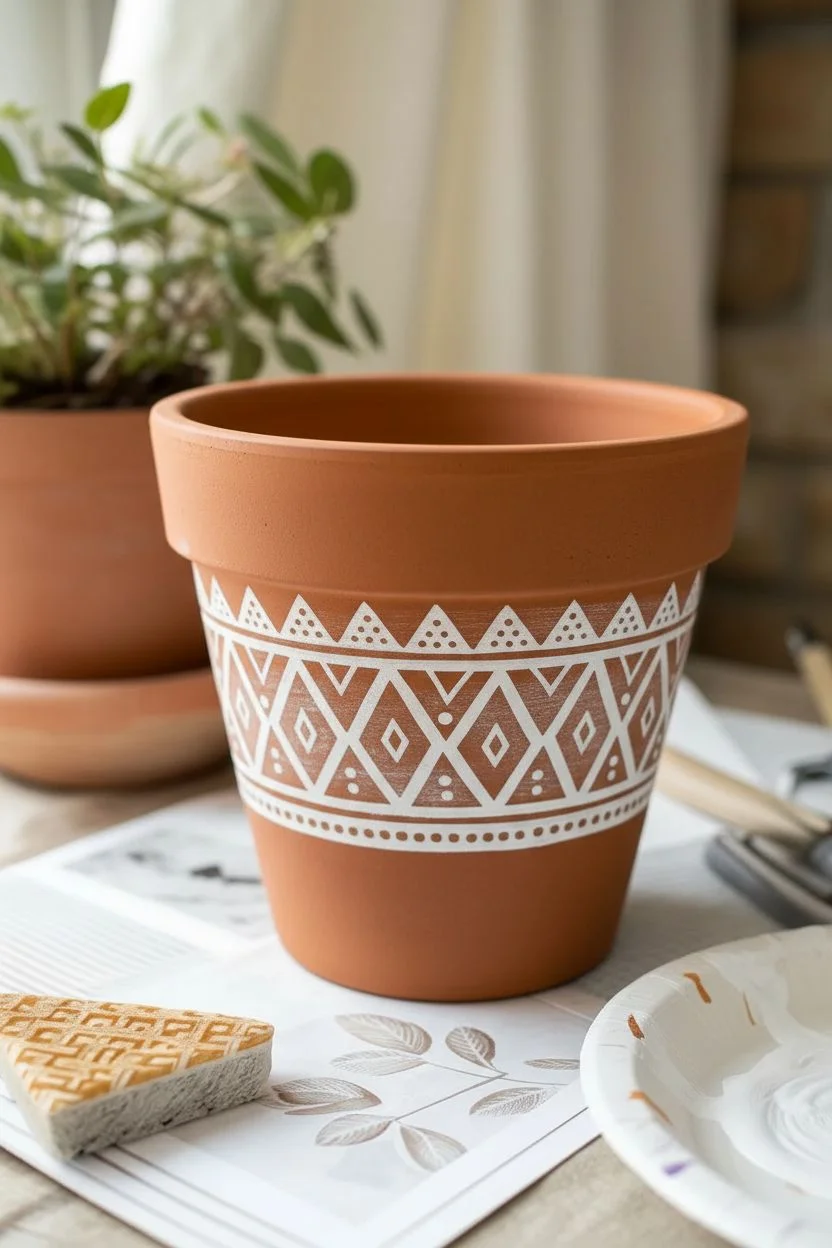
Transform a plain terracotta pot into a stylish bohemian planter using clean white paint and repeating geometric patterns. This design combines classic zigzags, diamonds, and delicate dots to create a structured yet airy look that perfectly complements green foliage.
Step-by-Step Tutorial
Materials
- Clean terracotta pot (standard size)
- White acrylic craft paint (outdoor/multi-surface preferred)
- Detailed stencil sheet (geometric/tribal patterns)
- Small stencil brushes or sponge daubers
- Painter’s tape or stencil adhesive spray
- Fine-point detail brush (size 0 or 1)
- Dotting tool or toothpick
- Matte sealant spray
- Paper plate or palette
- Damp paper towel
Step 1: Preparation & Base Stenciling
-
Surface Prep:
Ensure your terracotta pot is completely clean and dry. If it’s brand new, wipe it down with a damp cloth to remove any fine clay dust that might prevent the paint from sticking. -
Position the Main Stencil:
Select a stencil featuring a diamond or triangle geometric lattice pattern. Wrap this stencil around the middle section of the pot’s body. Use painter’s tape to secure it firmly, ensuring the stencil lies flat against the curved surface. -
Load the Sponge:
Pour a small amount of white acrylic paint onto your palette. Dip your sponge dauber lightly into the paint, then dab off significantly on a paper towel until the sponge is almost dry. This ‘dry brush’ technique is crucial to prevent paint bleeding under the stencil. -
Apply the Central Pattern:
Gently dab the paint over the diamond stencil openings using a vertical up-and-down motion. Do not drag the sponge. Build up coverage slowly with thin layers rather than one thick gloppy coat. -
Connect the Pattern:
If your stencil doesn’t cover the full circumference, carefully un-tape it once the paint is touch-dry. Align the stencil with the last painted section to ensure the pattern continues seamlessly, re-tape, and continue painting until the band is complete.
Step 2: Adding Detail Bands
-
Top Rim Preparation:
For the upper rim, choose a stencil with a simple zigzag or dot wave pattern. Position this stencil just underneath the lip of the pot. -
Stencil the Rim:
repeat the dry-dabbing process with your sponge dauber. Since the rim flares out, work in smaller sections to keep the stencil flat against the clay. -
Lower Band Stenciling:
Select a different geometric border stencil—like the sawtooth or jagged line seen at the bottom of the pot in the image. Secure this near the base and apply paint using the same careful dabbing method. -
Solid Line Accents:
Once the main stencil work is dry, take a fine-point detail brush. Carefully paint thin, horizontal white lines to separate the different pattern sections (above the diamonds and below the diamonds) to frame the design.
Bleeding Lines?
If paint seeps under the stencil, your brush was too wet. Wait for it to dry completely, then gently scrape the error away with an X-Acto knife or sandpaper.
Step 3: Freehand Accents & Finishing
-
Rim Dotting:
Dip a dotting tool (or the non-brush end of a paintbrush) into the white paint. create a repeating pattern of dots along the thick upper lip of the pot. Create a rhythm, like one large dot followed by two smaller ones, moving all the way around. -
enhancing the Triangles:
Look at your central band. Use your detail brush to add small freehand triangles or dots inside the larger stenciled shapes to add complexity. -
Final Dot Details:
Add tiny dots at the points of your bottom zigzag pattern. I find that adding these tiny freehand elements really helps blend the stenciled look with a hand-painted artisan feel. -
Clean Up Edges:
If any paint bled under the stencil, use a damp Q-tip or a craft knife to gently scrape away the excess paint while it’s still semi-soft to sharpen the lines. -
Sealing the Work:
Allow the pot to cure for at least 24 hours. Take the pot to a well-ventilated area and apply a clear matte sealant spray to protect your design from moisture when watering your plants.
Make it Pop
For a higher contrast look, paint the entire pot with a dark base coat like charcoal or navy blue before applying the white stenciled patterns.
Your new custom planter is ready to add a touch of modern elegance to your windowsill or patio garden


Geometric Triangles and Modern Shapes
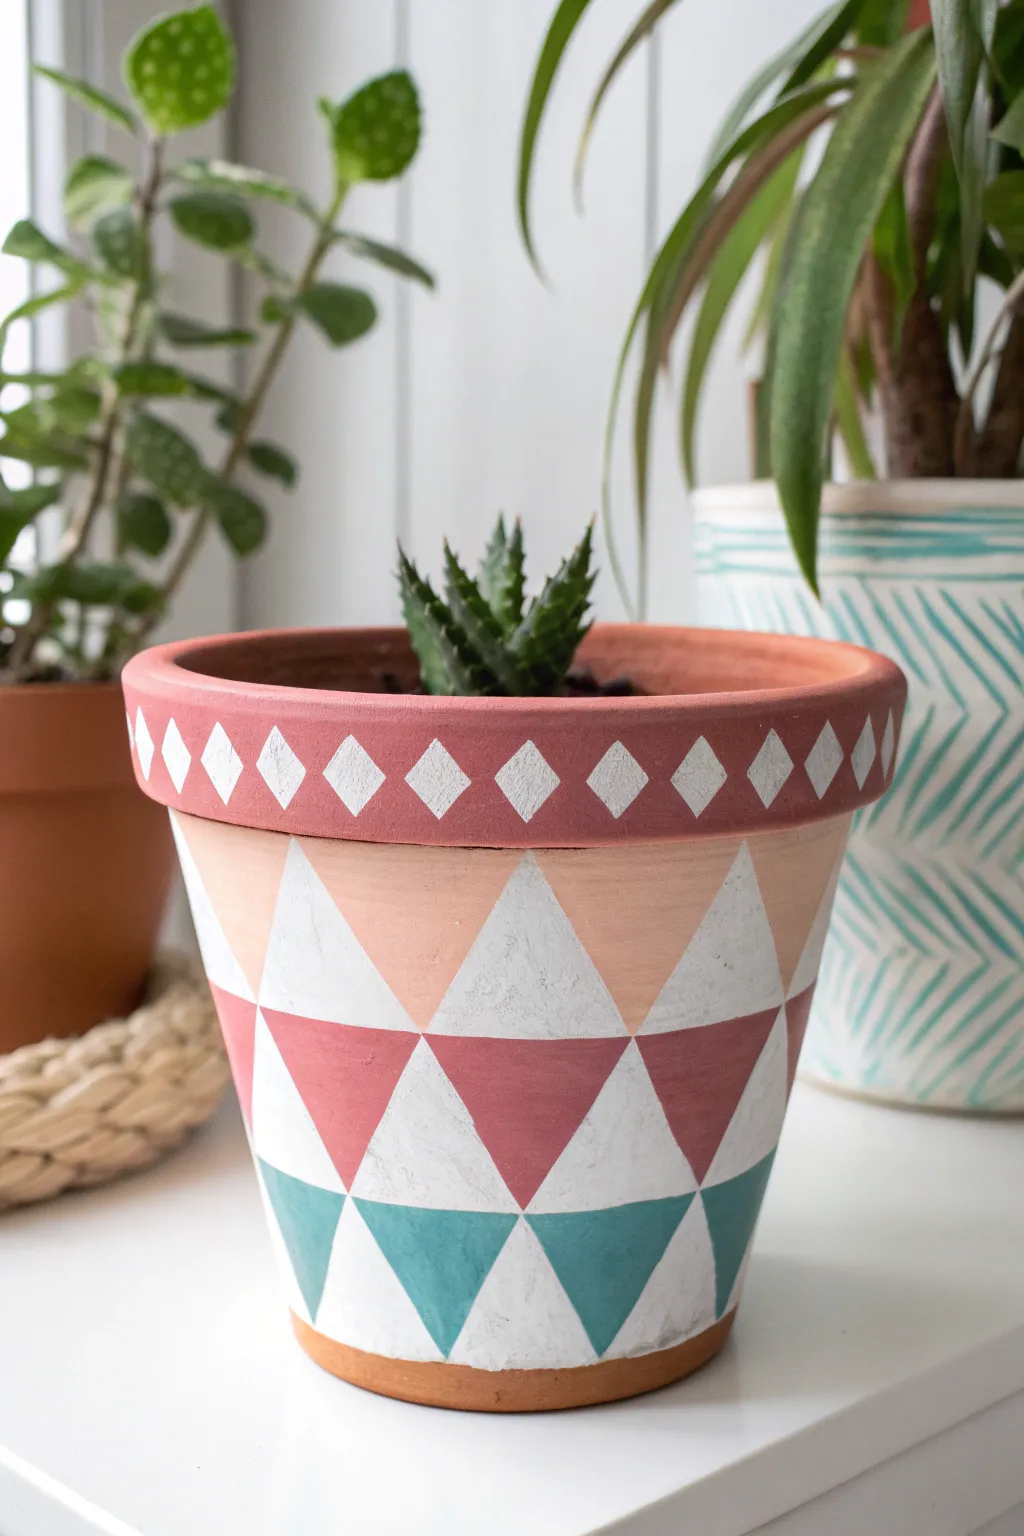
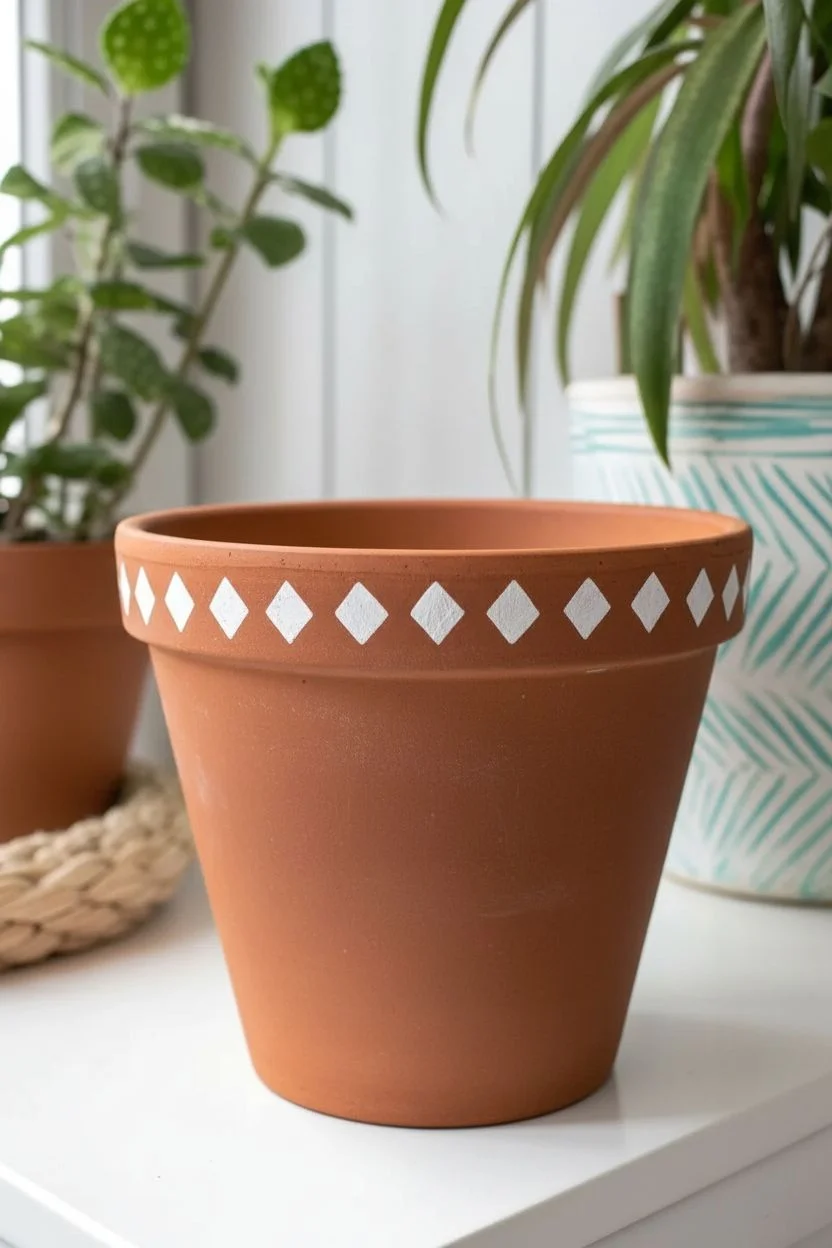
Transform a plain terracotta pot into a modern art piece with this clean, geometric design featuring alternating rows of triangles. The crisp white lines played against dusty pink, rose, and teal sections create a balanced, contemporary look perfect for succulents.
Detailed Instructions
Materials
- Standard terracotta pot (approx. 4-6 inches)
- Acrylic craft paints (White, Dusty Pink, Terracotta/Rose, Teal)
- Small flat tip paintbrush (1/2 inch or smaller)
- Fine detail paintbrush
- Pencil
- Low-tack masking tape or painter’s tape
- Ruler or measuring tape
- Clear matte acrylic sealer spray
Step 1: Preparation and Base Layer
-
Clean the pot:
Ensure your terracotta pot is completely clean and dry. Wipe away any dust with a damp cloth and let it air dry for at least 30 minutes to ensure paint adhesion. -
Seal the interior (optional):
If you plan to plant directly into the pot, I like to apply a coat of sealer to the inside to prevent moisture from bubbling your exterior paint later. -
Paint the rim:
Using the terracotta/rose colored paint, cover the entire outer rim of the pot. Bring the paint just inside the top edge for a clean finish. -
Paint the rim diamonds:
Once the rim base is dry, switch to a small detail brush and white paint. Hand-paint a repeating pattern of small diamonds horizontally across the center of the rim.
Wobbly Lines?
If you struggle with freehand straight lines, use thin strips of washi tape or painter’s tape to mask off the triangles before painting.
Step 2: Drafting the Pattern
-
Measure the body:
Measure the height of the main body of the pot (below the rim). Divide this space roughly into three equal horizontal sections. -
Mark horizontal guides:
Lightly sketch horizontal rings around the pot with a pencil to mark your three tiers. These don’t need to be perfect, just a guide. -
Sketch the triangle grid:
Using your pencil, draw a continuous zigzag line between your horizontal guides to form triangles. The points should meet at the guide lines. -
Align the points:
Try to ensure the top point of a lower triangle aligns vertically with the bottom point of the triangle in the row above it.
Add Metallic Pop
Replace the white triangles with gold or copper metallic paint for a glamorous, high-contrast twist on this geometric look.
Step 3: Painting the Triangles
-
Paint the top row (upward):
For the top tier, paint the upward-pointing triangles with white acrylic paint. You may need two thin coats for full opacity. -
Paint the top row (downward):
Fill the downward-pointing triangles in this top row with the light dusty pink shade. -
Paint the middle row (upward):
Moving to the middle tier, paint the upward-pointing triangles white, matching the placement of the row above. -
Paint the middle row (downward):
Fill the downward-pointing triangles in the middle row with the deeper rose/terracotta color. -
Paint the bottom row (upward):
For the final bottom tier, paint the upward-pointing triangles white again. -
Paint the bottom row (downward):
Fill the downward-pointing triangles in the bottom row with the teal paint. -
Touch up lines:
Once all colors are dry, use your fine detail brush and a steady hand to sharpen any edges where colors meet. White is usually best for cleaning up these intersections.
Step 4: Finishing Touches
-
Check opacity:
Inspect the pot in good lighting. If the terracotta shows through the white triangles, apply one final thin layer just to those sections. -
Let it cure:
Allow the pot to sit undisturbed for 24 hours to let the paint fully cure. -
Seal the exterior:
Spray the entire exterior with a clear matte acrylic sealer. This protects your hard work from water damage and scratches.
Now you have a stylish home for your favorite succulent that looks professionally designed
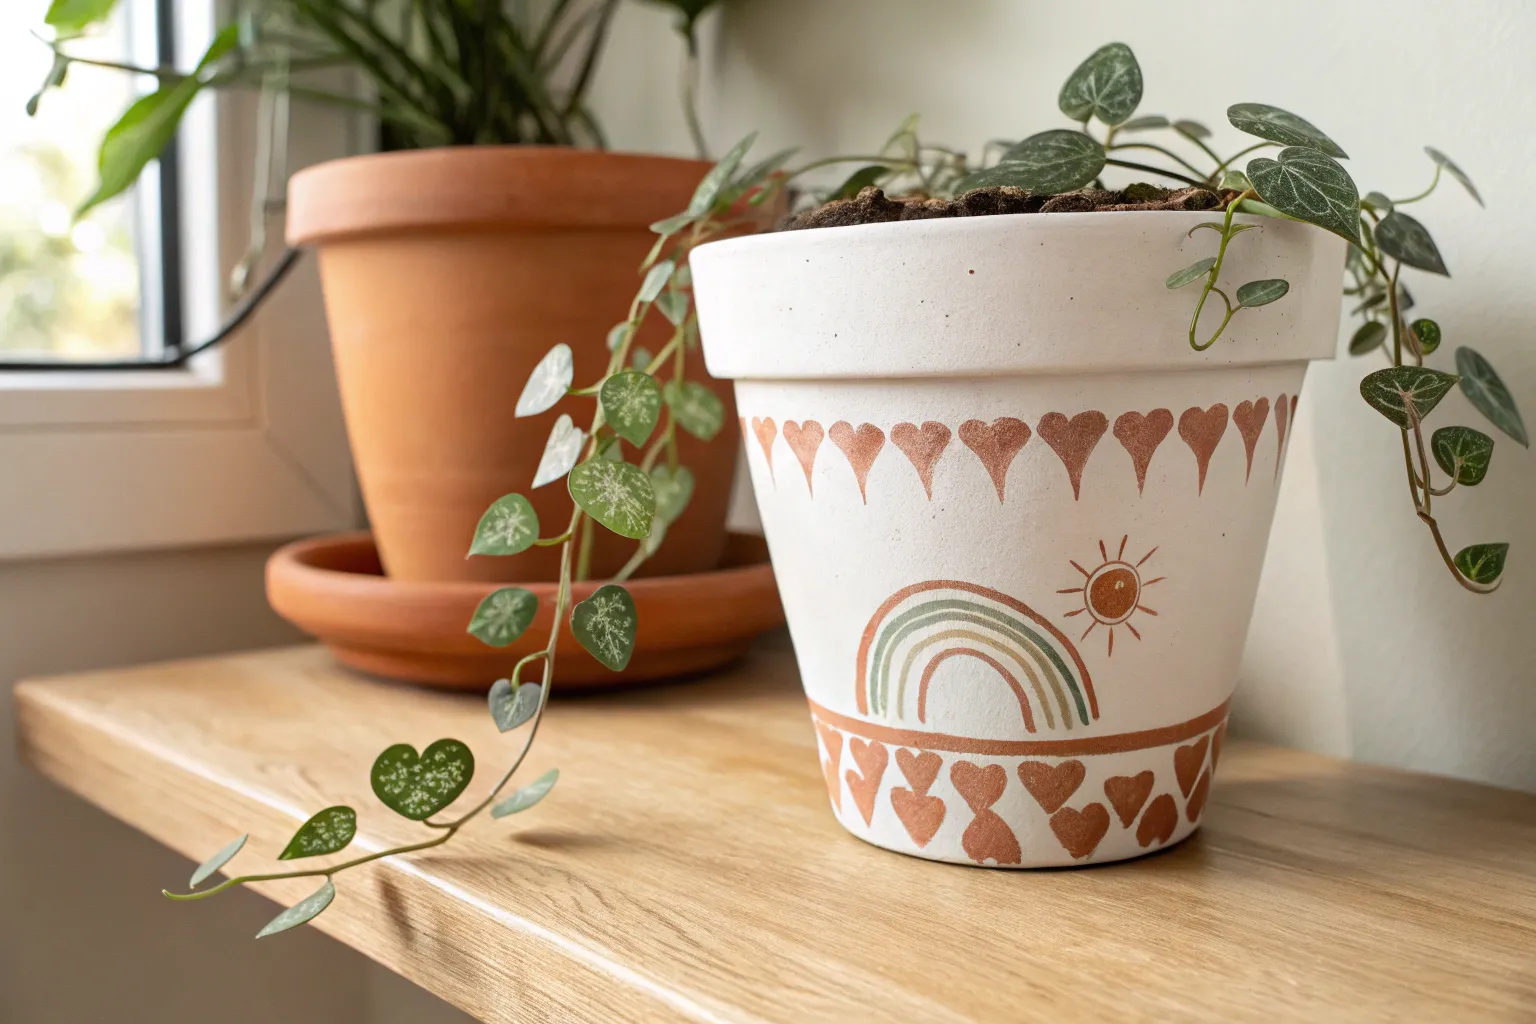
Mandala-Inspired Dot Painting Around the Rim
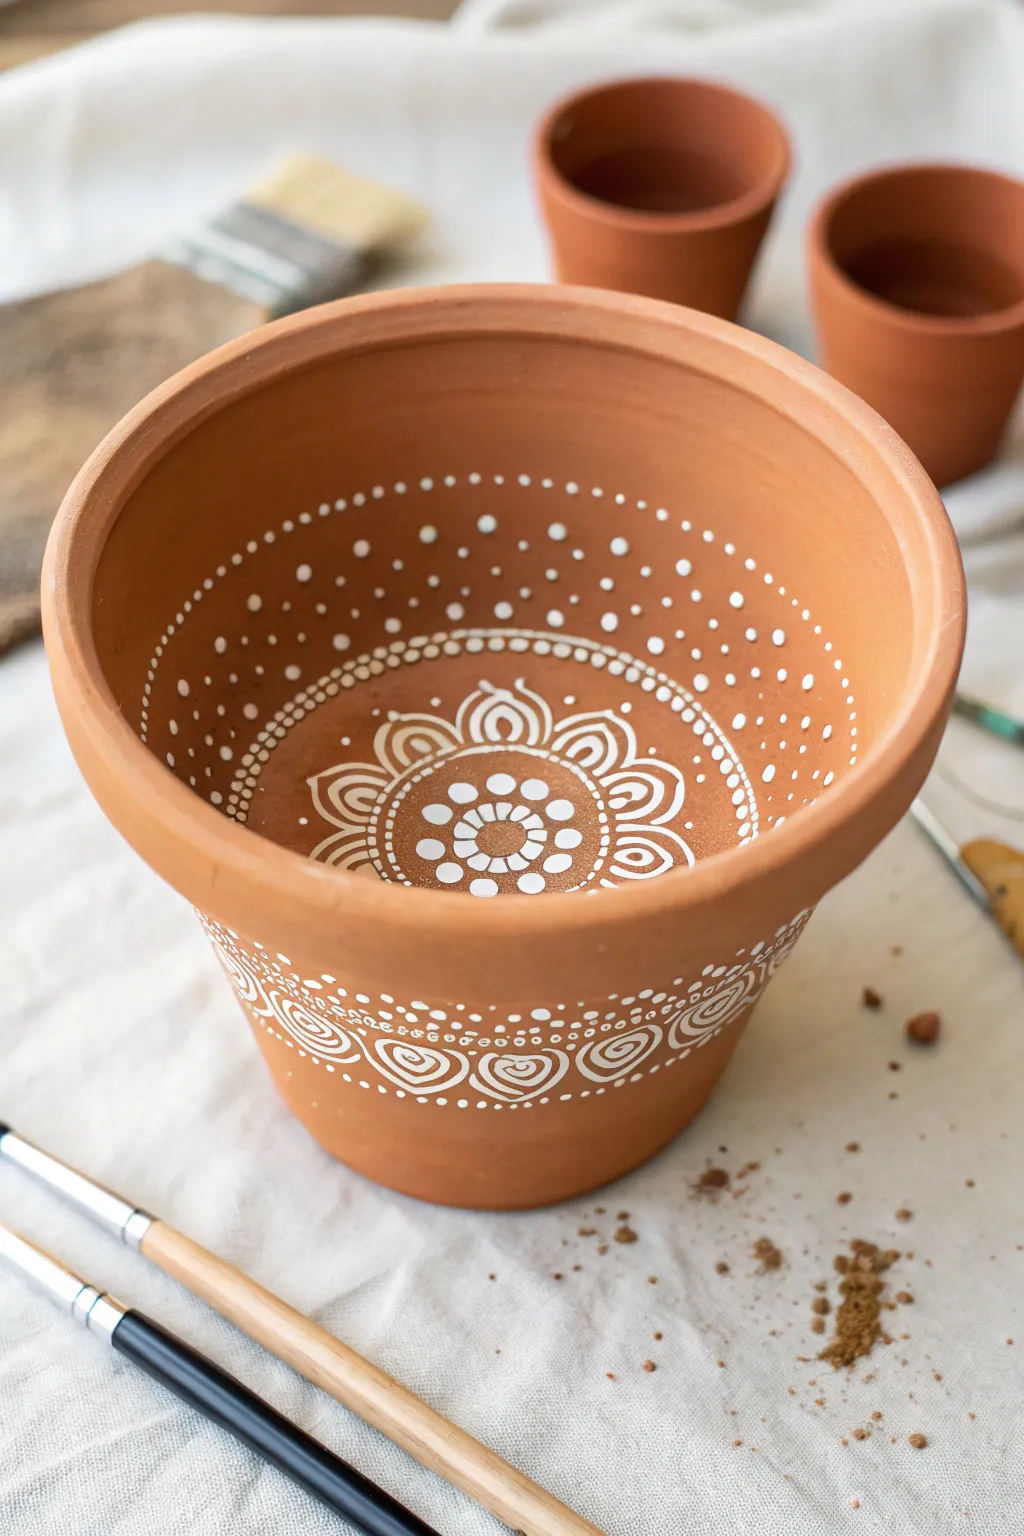
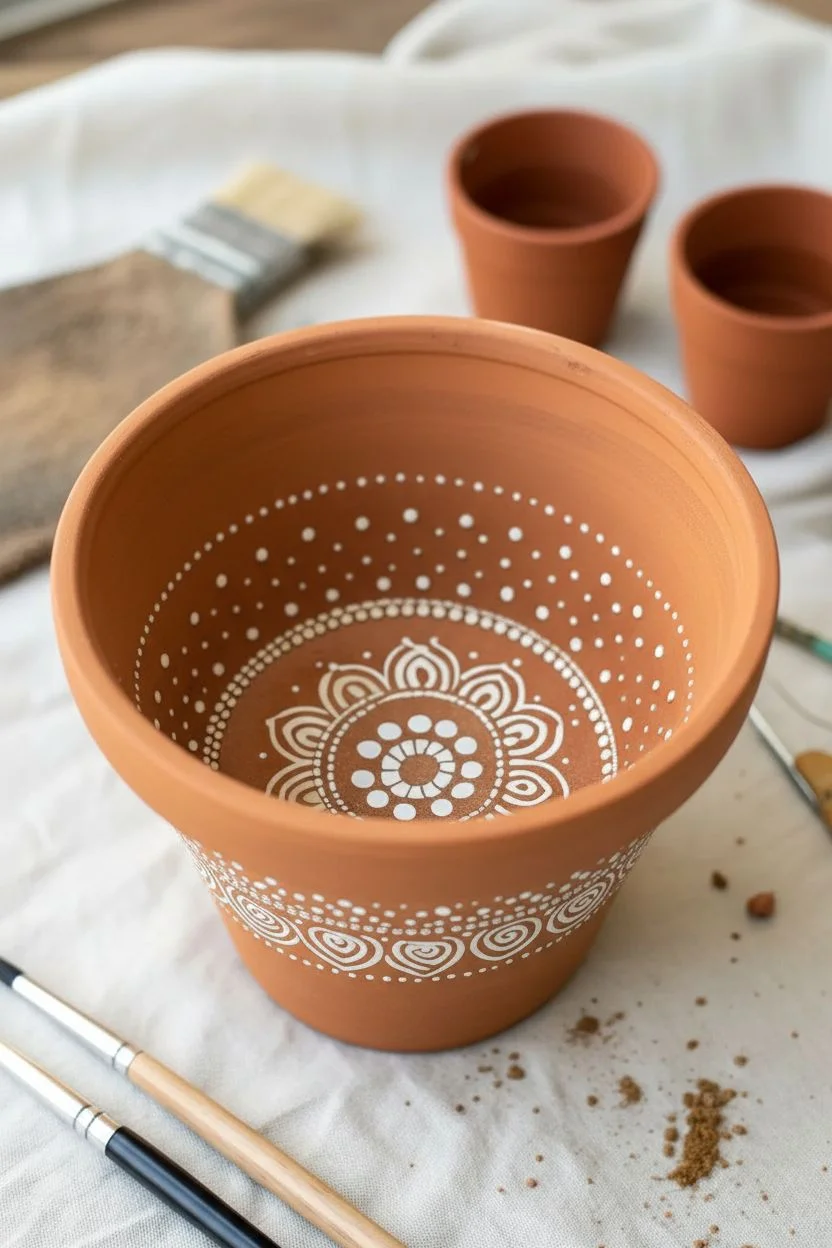
Transform a plain terracotta pot into a mesmerizing piece of art by painting detailed mandala patterns not just on the outside, but leading the eye deep into the interior. This project uses stark white acrylics against the warm clay background for a beautiful, high-contrast bohemian look.
Step-by-Step
Materials
- Terracotta pot (clean and dry)
- White acrylic paint (high opacity)
- Small round paintbrushes (sizes 0, 1, and 2)
- Dotting tools (optional, but helpful for uniformity)
- Palette or small dish
- Paper towels
- Water cup
- Matte or satin clear sealant spray
Step 1: Painting the Interior Mandala
-
Begin the center:
Start at the very center of the inside bottom of the pot. Paint a small, solid white circle about the size of a dime. -
Add the first petals:
Paint a ring of small, simple dots immediately surrounding your central circle to create a flower center effect. -
Layer the scallops:
Using a fine liner brush, draw a series of scalloped, U-shaped petals around the center dots. Double-line these petals to give them visual weight. -
Fill the details:
Inside each double-lined petal, paint a teardrop shape or a smaller arch to fill the negative space. -
Create the border ring:
Moving outward from your flower, paint a distinct ring of larger dots that circles the entire floral design. This acts as a boundary for the next layer. -
Dot the interior walls:
Transition from the bottom to the vertical walls of the pot. Paint concentric rings of dots, starting small near the bottom and spacing them out more as you move up toward the rim. -
Vary dot density:
For a ‘falling snow’ effect, make sure the dots are denser near the bottom mandala and become more sparse and random as they reach the top rim.
Pro Tip: Consistency Matters
Add a single drop of water to your acrylic paint to improve flow. This helps create smooth, crisp lines for the petals without the brush dragging on the dry clay surface.
Step 2: Decorating the Exterior
-
Outline the exterior scallops:
Flip the pot over or hold it steadily on its side. On the lower half of the pot’s exterior, sketch the outlines of large, connected heart-shaped or scalloped swirls using white paint. -
Thicken the lines:
Go over your initial outlines a second time to ensure the white paint is opaque and stands out clearly against the terracotta. -
Add internal spirals:
Inside each large scallop shape, paint a smaller spiral or concentric heart shape to mimic the intricacy of the interior design. -
Create the upper border:
Paint a horizontal line or a tight row of dots just above your scalloped designs to frame the pattern. -
Add decorative upper dots:
Above the border line, add a few rows of tiny, controlled dots. I like to graduate the size of these dots from large to small for added texture. -
Fill negative space:
Look for any gaps in your exterior pattern and fill them with tiny accent dots. This technique makes the design look intricate and complete. -
Let it cure:
Allow the paint to dry completely for at least 24 hours. Terracotta is porous, so ensure the paint is fully set before handling too much. -
Seal the work:
To protect your design from moisture and soil, spray the entire pot (inside and out) with a clear matte or satin sealant.
Troubleshooting: Oops!
If you make a mistake or smudge a dot, don’t panic. Wait for the white paint to dry completely, then gently scrape it off with a craft knife or sandpaper, or paint over it with a terracotta-colored mix.
Now step back and admire how the patterns flow from the inside out, creating a stunning home for your favorite plant
Splatter Paint Terracotta Pots for Creative Chaos

Transform a plain clay pot into a playful piece of modern decor using the timeless art of splatter painting. This project embraces imperfection, resulting in a unique, confetti-like design with energetic pops of teal and white against a warm terracotta base.
Detailed Instructions
Materials
- Clean terracotta pot (standard rimmed style)
- Acrylic craft paint (teal/turquoise)
- Acrylic craft paint (white)
- Acrylic craft paint (bright orange/coral for contrast)
- Stiff-bristled paintbrushes (old toothbrushes work great too)
- Palette or paper plate
- Water cup
- Drop cloth or kraft paper (essential for mess control)
- A cardboard box (optional, to contain splatters)
- Matte spray sealer (optional)
Step 1: Preparation
-
Clean the Surface:
Begin by wiping down your terracotta pot with a damp cloth to remove any warehouse dust or loose clay particles. Let it dry completely before starting; terracotta is porous and needs to be bone-dry for the paint to adhere properly. -
Set the Stage:
Lay down a generous amount of kraft paper or a drop cloth. Splatter painting is inherently messy—that’s part of the fun—so protect a wide area around your workspace. I sometimes like to place the pot inside a large, shallow cardboard box to catch flying droplets. -
Prepare Your Palette:
Squeeze dime-sized amounts of your teal, white, and coral paints onto your palette. You want the paint to be fluid but not watery. If your acrylics are very thick, mix in a tiny drop of water to improve flow, aiming for a consistency similar to heavy cream.
Paint Too Thick?
If you’re getting blobs instead of specks, your paint is likely too thick. Thin it with a few drops of water until it flows easily off the bristles when flicked.
Step 2: Splattering Technique
-
Load the Brush:
Dip a stiff-bristled brush into your main accent color—in this case, the teal. Avoid overloading the brush; you want just enough paint on the tips of the bristles. -
Test Run:
Do a quick test splatter on a piece of scrap paper. Run your thumb or forefinger across the bristles, pulling them back and releasing them quickly to fling tiny droplets forward. Adjust your distance and pressure until you get the dot size you like. -
Apply the Teal Layer:
Beginning with the teal paint, flick the bristles at the pot. Move randomly around the circumference, aiming for an uneven, organic distribution. Don’t worry about perfect spacing; clusters of dots look more natural. -
Address the Rim:
Make sure to target the rim specifically. Hold the brush slightly above the pot and flick downward to ensure the top edge gets a nice dusting of color, creating a seamless look. -
Dry Briefly:
Let the teal layer sit for about 5-10 minutes. It doesn’t need to be fully cured, but surface dryness prevents the colors from muddying if different wet droplets collide. -
Add White Highlights:
Clean your brush thoroughly or switch to a fresh one. Load it with white paint and repeat the flicking motion. The white adds depth and brightness, breaking up the warm clay tone. -
Layering Contrast:
If you are using a third color like coral or bright orange, add those splatters now. Use this color sparingly compared to the teal and white to keep it as a subtle accent rather than a dominant hue. -
Check for Balance:
Step back and rotate the pot slowly. Look for any large empty spaces that feel unbalanced. Add a few targeted flicks to fill these gaps, but remember that negative space is important for this aesthetic.
Step 3: Finishing Up
-
Clean the Interior:
If significant splatter landed inside the rim where soil will go, you can wipe it away with a damp paper towel while wet, or leave it for a truly messy, artistic feel. -
Full Cure:
Allow the pot to dry undisturbed for at least an hour. Terracotta absorbs moisture, so while the surface feels dry quickly, the paint in the pores needs time to set. -
Sealing (Optional):
If you plan to plant directly into the pot, spray the exterior with a matte clear coat. This protects your design from water damage when the clay sweats during watering. -
Final Styling:
Once fully dry, pot your favorite cactus or succulent. The green of the plant will really make that teal splatter pop against the terracotta background.
Pro Tip: Tool Swap
For finer, mist-like speckles, swap your paintbrush for an old toothbrush. The dense bristles create a lovely micro-splatter effect that looks very professional.
Place your new speckled masterpiece near a window where natural light can highlight the energetic texture of the paint
Fruit-Themed Watermelon Terracotta Pots
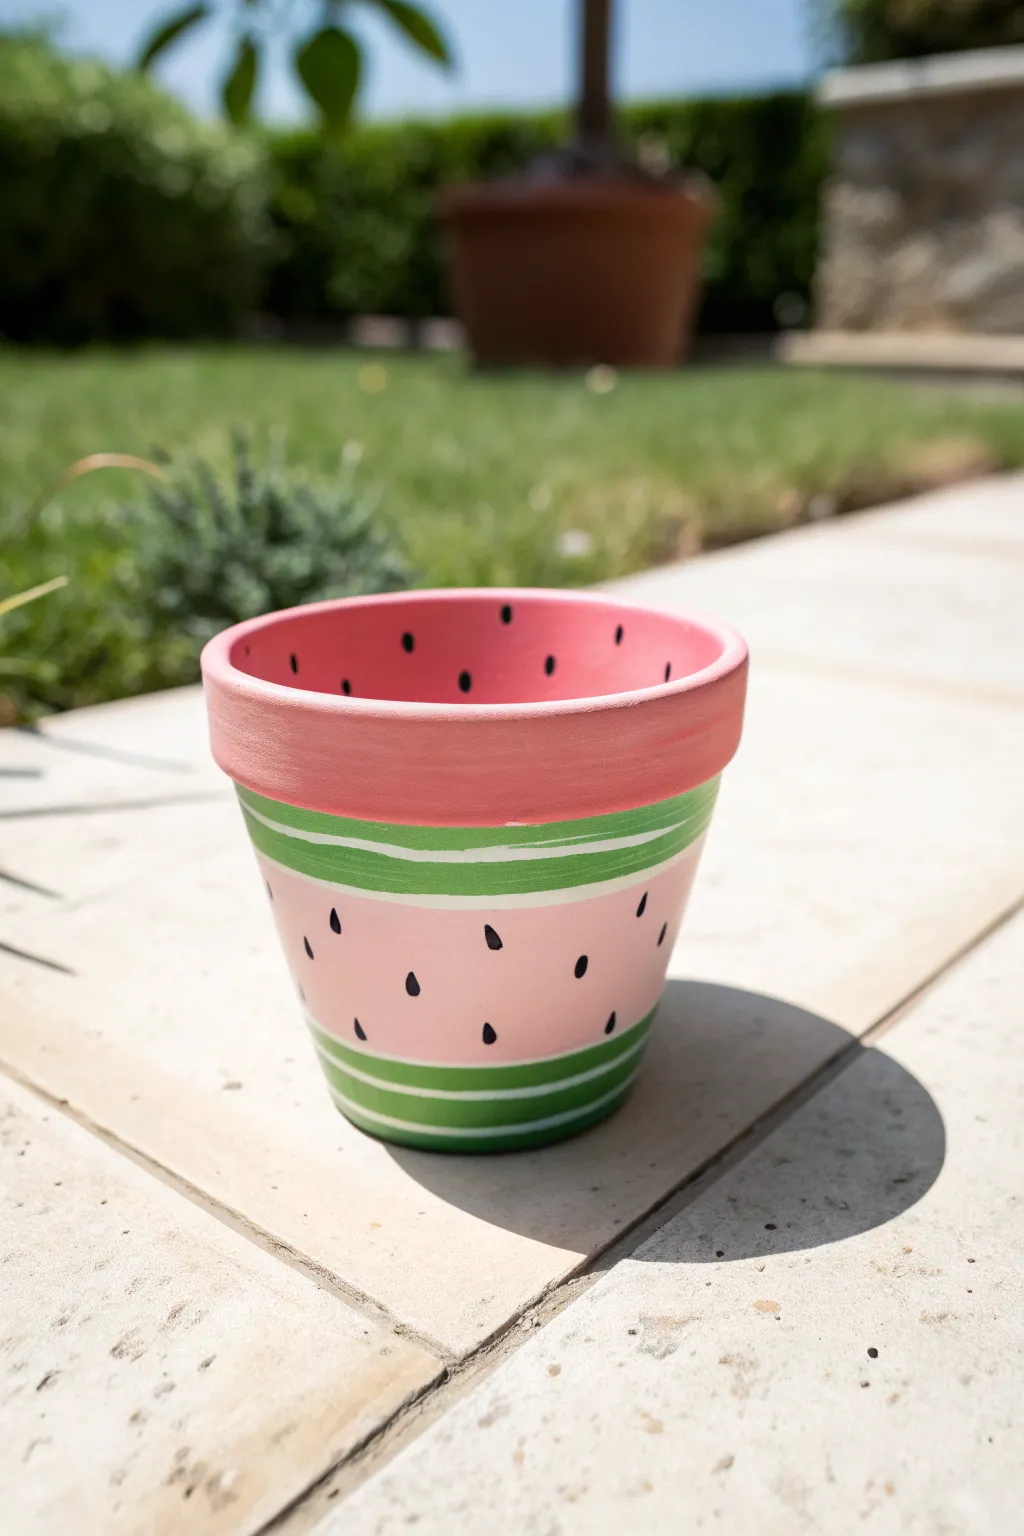

Transform a plain terracotta pot into a slice of summer with this cheerful watermelon design. The project combines bold color blocking with delicate seed detailing for a fresh, delightful planter that looks good enough to eat.
Step-by-Step Guide
Materials
- Small terracotta pot (4-6 inch diameter)
- White acrylic paint (primer/base)
- Light pink acrylic paint (pastel shade)
- Dark pink or coral acrylic paint (rim)
- Medium green acrylic paint
- Black acrylic paint
- Flat paintbrush (medium width)
- Line brush or very small round brush
- Palette or paper plate
- Water cup and paper towels
- Clear acrylic sealer spray (optional but recommended)
Step 1: Preparation and Base Coat
-
Clean the surface:
Begin by wiping down your terracotta pot with a damp cloth to remove any dust or debris. Let it dry completely before starting, as terracotta is very porous. -
Prime with white:
Apply a solid coat of white acrylic paint to the exterior of the pot, stopping just below the rim. This white base is crucial because it makes the pastel colors pop later. -
Check for coverage:
Once the first white coat feels dry to the touch, inspect it for streaks. Apply a second coat of white if you can still see the orange clay showing through. -
Let it cure:
Set the pot aside for about 15-20 minutes to ensure the base layer is fully dry so your colors won’t mix.
Seed Spacing Trick
Visualize triangles when placing your seeds. Place one seed, then two below it, offset to the sides. This prevents your pattern from looking too rigid or lined up.
Step 2: Painting the Fruit Flesh
-
Mix your pink:
Prepare your light pink paint. If you only have a standard pink, mix in a significant amount of white to achieve that soft, pastel watermelon flesh tone seen in the image. -
Apply the main body color:
Paint the main body of the pot with your light pink mixture. Start just below the rim and work your way down, leaving the bottom quarter of the pot unpainted for now. -
Smooth the strokes:
While the paint is wet, use long horizontal strokes to minimize brush marks. Allow this section to dry completely. -
Paint the rim:
Take your darker pink or coral paint and apply it to the rim of the pot. Don’t forget to paint the very top edge and about an inch inside the pot for a finished look. -
Check the interior:
Paint the entire interior of the pot with the darker pink/coral color as well. This creates a really cohesive look, as seen in the reference photo.
Make It Glossy
Use a high-gloss Mod Podge or varnish as your final topcoat instead of a matte spray. This mimics the wet, juicy texture of real watermelon flesh.
Step 3: Creating the Rind
-
Apply the green base:
Paint the bottom section of the pot (the area you left blank earlier) with your medium green paint. You can also paint the underside of the pot. -
Create the upper stripe:
Using a smaller brush, paint a green stripe just below the rim of the pot, overlapping slightly with the light pink body. It doesn’t need to be perfectly straight; a hand-painted look adds charm. -
Add white rind details:
Dip a thin liner brush into white paint. Carefully paint two thin horizontal stripes over the green section at the bottom to mimic the varied colors of a watermelon rind. -
Detail the upper rind:
Paint a similar thin white line through the green band just below the rim. I find that resting my pinky finger on the pot helps stabilize my hand for these thinner lines.
Step 4: Adding Seeds and Finishing
-
Prepare the black paint:
Squeeze a small amount of black acrylic paint onto your palette. You want a creamy consistency that flows easily off a small brush. -
Practice the shape:
Before painting the pot, practice making ‘teardrop’ shapes on a piece of paper. Press down for the round bottom and lift up quickly to create the point. -
Paint body seeds:
Randomly scatter black teardrop seeds across the light pink section of the pot. Aim for varied spacing rather than a strict grid pattern. -
Paint interior seeds:
Don’t forget the inside! Add a row of black seeds along the inner pink wall of the pot for that sliced-open watermelon effect. -
Touch up the rim:
Add a few small seeds to the inner rim or the top of the outer rim if you like, but keep them sparse compared to the body. -
Seal the deal:
Allow the pot to dry overnight. Once cured, spray the entire pot with a clear acrylic sealer to protect your artwork from water damage and fading.
Now you have a refreshing centerpiece ready for your favorite succulent or herb
Fruit-Themed Pineapple Terracotta Pots With Texture
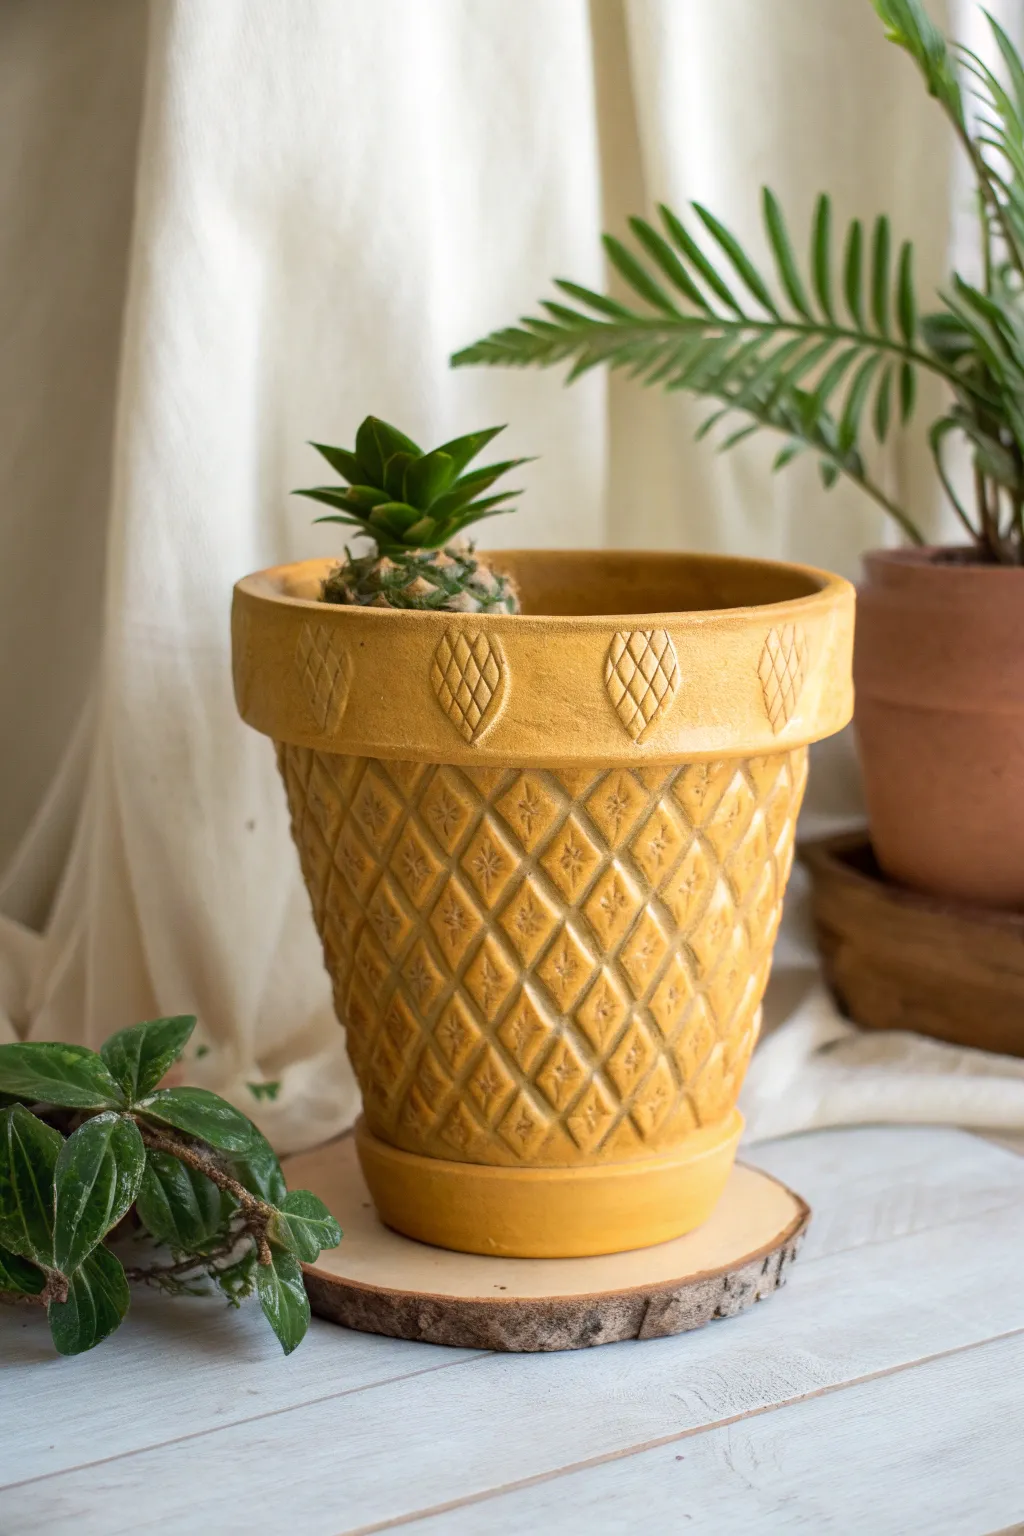
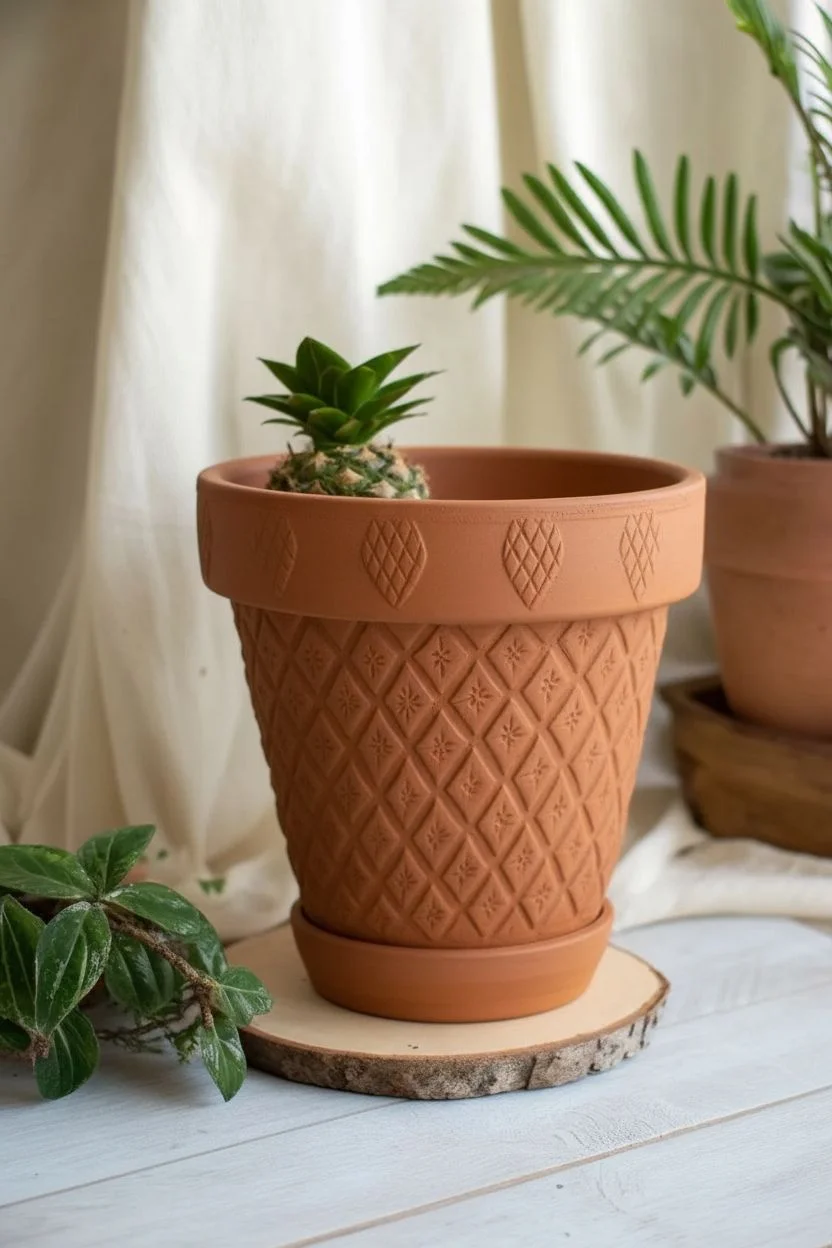
Transform a plain terracotta pot into a textural delight inspired by fresh tropical fruit. This project uses a clever combination of textured paste and warm yellow paint to create a stunning pineapple effect that brings summer vibes to any windowsill.
Detailed Instructions
Materials
- Standard terracotta pot with rim
- Terracotta saucer
- Mod Podge or craft glue
- Texture paste or spackling compound
- Piping bag with fine tip (or sturdy ziplock bag)
- Acrylic paint: Mustard Yellow
- Acrylic paint: Warm Gold or Ochre
- Acrylic paint: Burnt Sienna (for antiquing)
- Matte spray sealer
- Medium flat paintbrush
- Fine detail paintbrush
- Soft cloth or paper towel
- Pencil
Step 1: Preparation & Mapping
-
Clean surface:
Begin by wiping down your terracotta pot and saucer with a damp cloth to remove any dust or debris, ensuring a clean surface for adhesion. -
Base sketch:
Using a pencil, lightly draw a diamond grid pattern around the main body of the pot. Aim for diamonds that are about 1 inch tall. -
Mark the centers:
Inside each diamond on your grid, mark a small ‘x’ or dot where the starburst detail will go. -
Rim details:
Sketch oval or tear-drop shapes along the rim of the pot, spaced evenly apart. These will represent the pineapple’s outer leafy scales.
Smooth Piping Trick
If your piping lines look jagged, dip your finger in water and gently smooth them down before the paste dries for a cleaner, pottery-like finish.
Step 2: Adding Texture
-
Prepare the paste:
Fill your piping bag with texture paste or lightweight spackling. If the paste is too thick, mix in a tiny drop of water to improve flow. -
Pipe the grid:
Carefully pipe over your pencil grid lines on the body of the pot. Keep a steady hand to create raised ridges that mimic the texture of pineapple skin. -
Create starbursts:
Pipe a small star or cross shape in the center of each diamond where you made your marks. This adds that crucial prickly detail. -
Detail the rim:
Pipe the outline of your tear-drop shapes on the rim. Fill the interior of these shapes with a cross-hatch pattern for added dimension. -
Dry completely:
Allow the texture paste to dry fully. This usually takes 3-4 hours, though I prefer leaving it overnight to ensure it’s rock hard before painting.
Step 3: Painting & Finishing
-
Base coat:
Paint the entire pot and saucer with your Mustard Yellow acrylic paint. Use a flat brush and work the paint into all the crevices created by the texture paste. -
Second coat:
Apply a second coat of yellow if the terracotta color is still showing through, ensuring solid, opaque coverage. -
Create a wash:
Mix a small amount of Burnt Sienna paint with water (about 1 part paint to 4 parts water) to create a thin antiquing wash. -
Apply the wash:
Brush the wash over small sections of the textured area. The dark color should settle into the low points of the diamonds and grid. -
Wipe back:
Immediately wipe the high points of the texture with a damp cloth. This leaves the brown in the crevices while revealing the bright yellow on the raised ridges. -
Highlighting:
Using a dry brush technique with the Warm Gold or Ochre paint, lightly graze over the raised piped details to make them pop against the shadowed background. -
Seal the work:
Once all paint is bone dry, spray the pot and saucer with a matte sealer to protect your design from moisture and UV fading.
Go Green
Plant the crown of a real pineapple (rooted in water first) into your finished pot to complete the literal fruit look.
Place your new creation in a sunny spot and enjoy the tropical warmth it adds to your space
Bee and Ladybug Terracotta Pots for Garden Charm
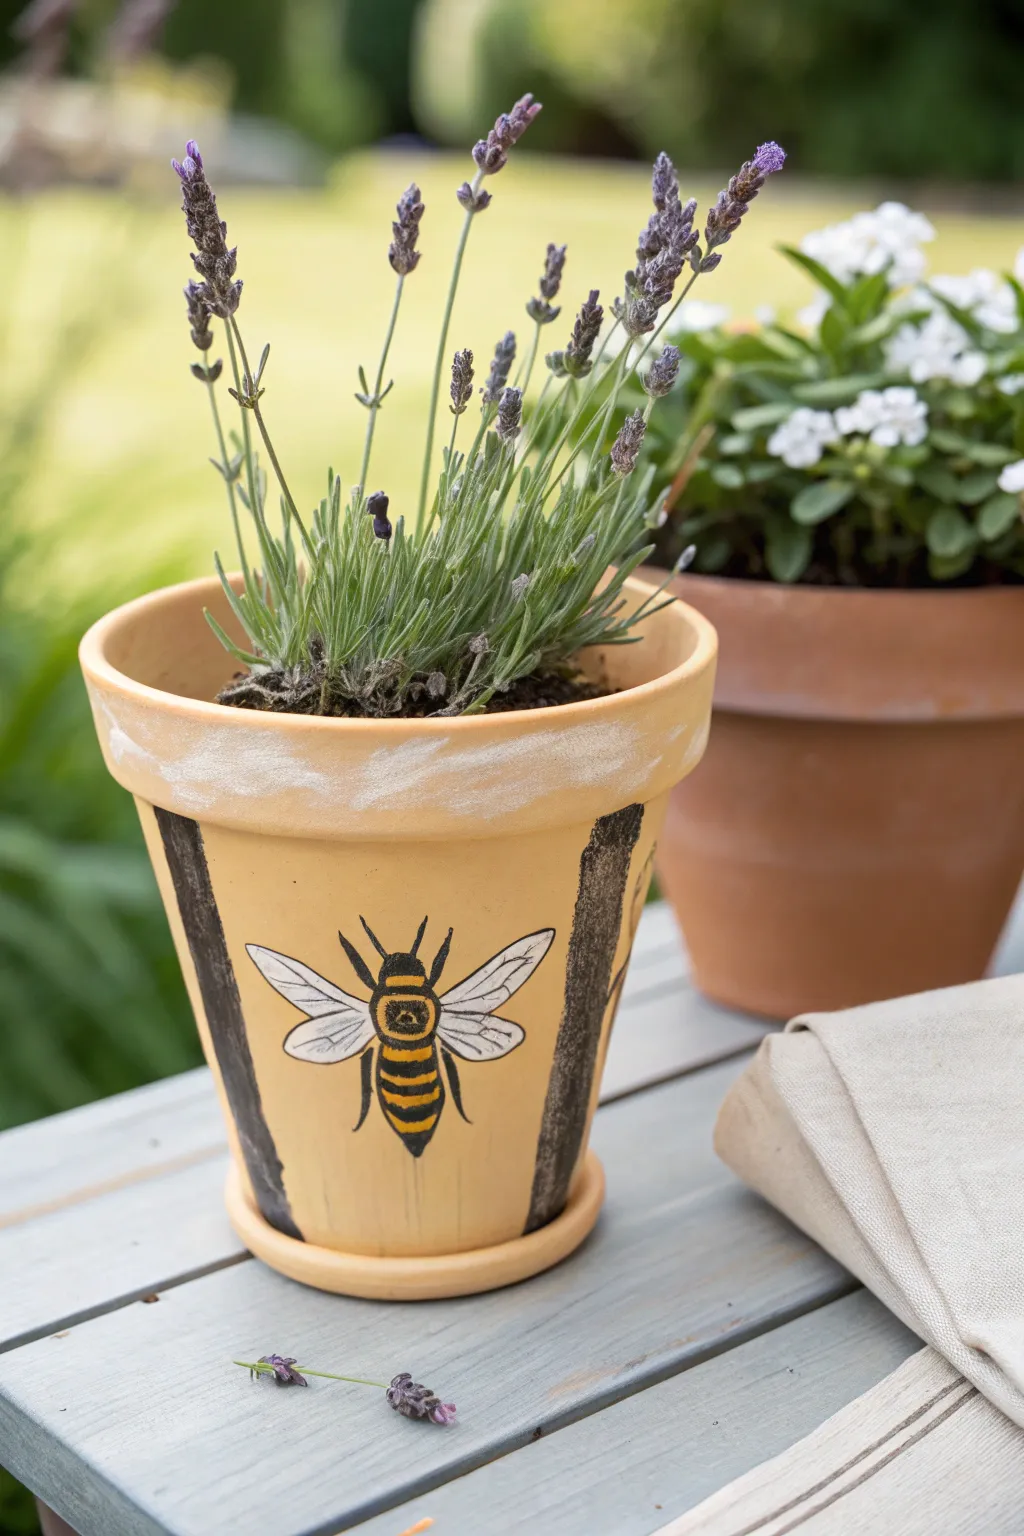
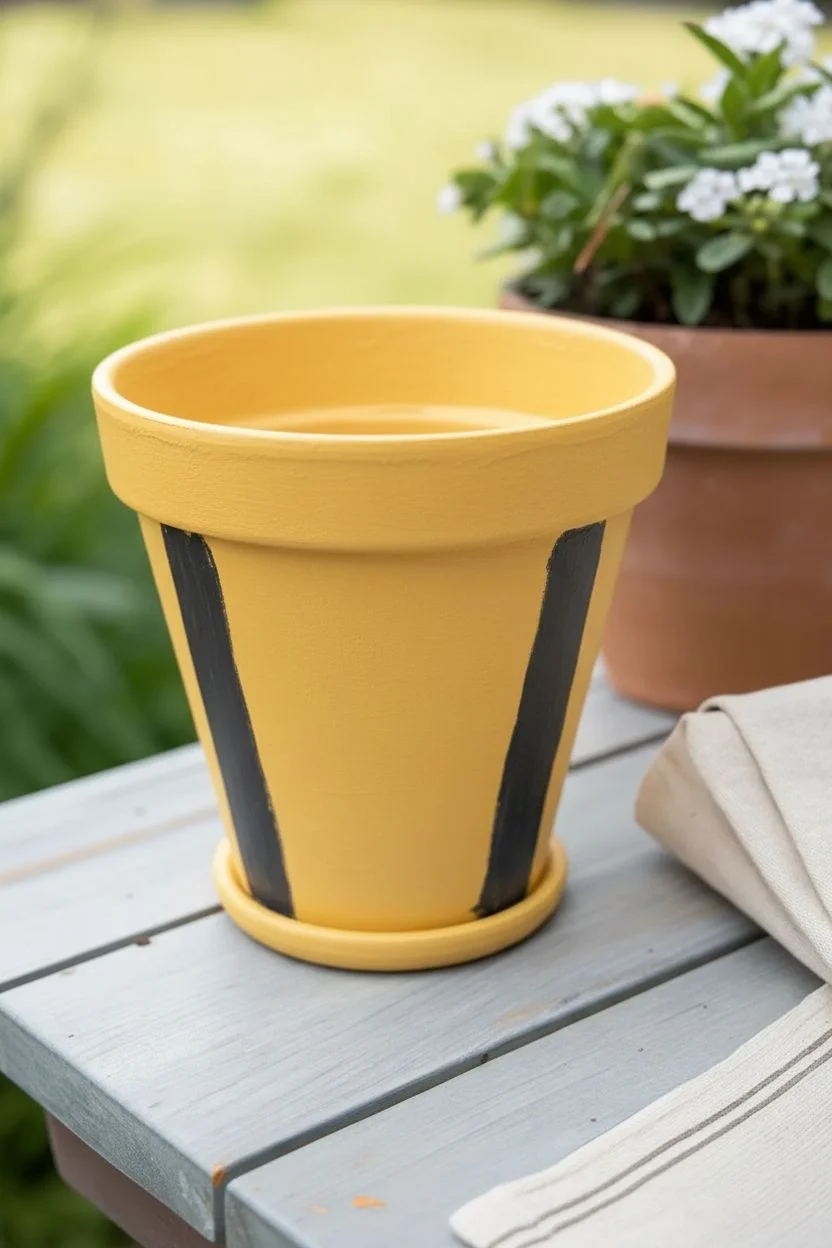
Bring a buzz to your patio with this charming terracotta pot featuring a hand-painted bee design. The warm yellow base and distressed white rim give it a lovely rustic feel that perfectly complements lavender or herbs.
Step-by-Step Tutorial
Materials
- Terracotta pot and matching saucer (standard 6-inch is good)
- Acrylic craft paints: Golden yellow, black, bright white, grey
- Pencil and eraser
- Wide flat paintbrush (1 inch)
- Medium round paintbrush
- Fine liner or detail paintbrush
- Old dry brush or stencil brush
- Matte or satin outdoor clear sealer spray
- Water cup and paper towels
Step 1: Base Painting
-
Clean the pot:
Ensure your terracotta pot is clean, dry, and free of any stickers or dust before beginning. Wipe it down with a damp cloth if needed and let it dry completely. -
Paint the background:
Using your wide flat brush, paint the entire exterior of the pot and the outer rim with a golden yellow acrylic paint. I usually apply two coats for solid coverage, letting the first coat dry for about 20 minutes before applying the second. -
Add the saucer:
Don’t forget to paint the saucer to match. Apply the golden yellow paint to the visible parts of the saucer rim and sides. -
Create the heavy stripes:
Once the yellow is dry, mix a dark charcoal grey or use soft black paint. Paint two thick, vertical stripes on either side of where your central bee will go. These don’t need to be perfect; a rougher edge adds to the rustic look.
Paint Peeling?
Terracotta is porous and absorbs water, which bubbles paint. Always seal the INSIDE of the pot with a waterproof sealer before adding soil to keep moisture from pushing the paint off.
Step 2: Painting the Bee
-
Sketch the outline:
Lightly sketch the bee shape in the center using a pencil. Draw an oval for the thorax (middle), a slightly pointed oval for the abdomen (bottom), and a small circle for the head. -
Start with black:
Using your fine liner brush and black paint, fill in the head, outline the thorax, and paint the alternating black stripes on the abdomen. Leave spaces for the yellow stripes. -
Fill the yellow stripes:
Carefully paint the spaces between the black abdomen stripes with a bright yellow. You might want to mix a tiny bit of orange into your yellow to make the bee stand out against the yellow pot background. -
Detail the thorax:
For the fuzzy middle section, stipple (dab repeatedly) a mix of black and brownish-yellow paint in the center of the thorax circle to create a textured appearance. -
Add the legs and antennae:
With your finest brush and thinned black paint, draw two antennae coming from the head and the spindly legs extending from the thorax. -
Paint the wings:
Paint the four wing shapes with white paint. Since acrylics can be transparent, you may need two coats to make them opaque enough. -
Outline the wings:
Once the white is dry, use your finest liner brush with black paint to very delicately outline the wings and draw the internal vein lines.
Step 3: Distressing and Finishing
-
Dry brush the rim:
Dip an old, dry brush into white paint and wipe most of it off on a paper towel. Lightly sweep the brush horizontally across the terracotta rim to create a weathered, chalky effect. -
Distress the black stripes:
Use the same dry brush technique with a tiny amount of grey or white to lightly scuff over the thick black side stripes, making them look worn. -
Seal the artwork:
Allow the pot to cure for at least 24 hours. Once fully dry, spray the entire pot (inside and out) with a clear outdoor sealer to protect the paint from moisture and UV rays. -
Plant:
Fill your new pot with potting soil and your favorite plant, like the lavender shown here, which pairs beautifully with the bee theme.
Add Some Sparkle
Mix a tiny pinch of iridescent glitter into the white paint for the wings. It adds a subtle shimmer that mimics real insect wings when the sun hits the pot.
Place your finished pot on a sunny ledge and enjoy the cheerful pop of color in your garden
Terracotta Pot Fairy House With a Painted Door
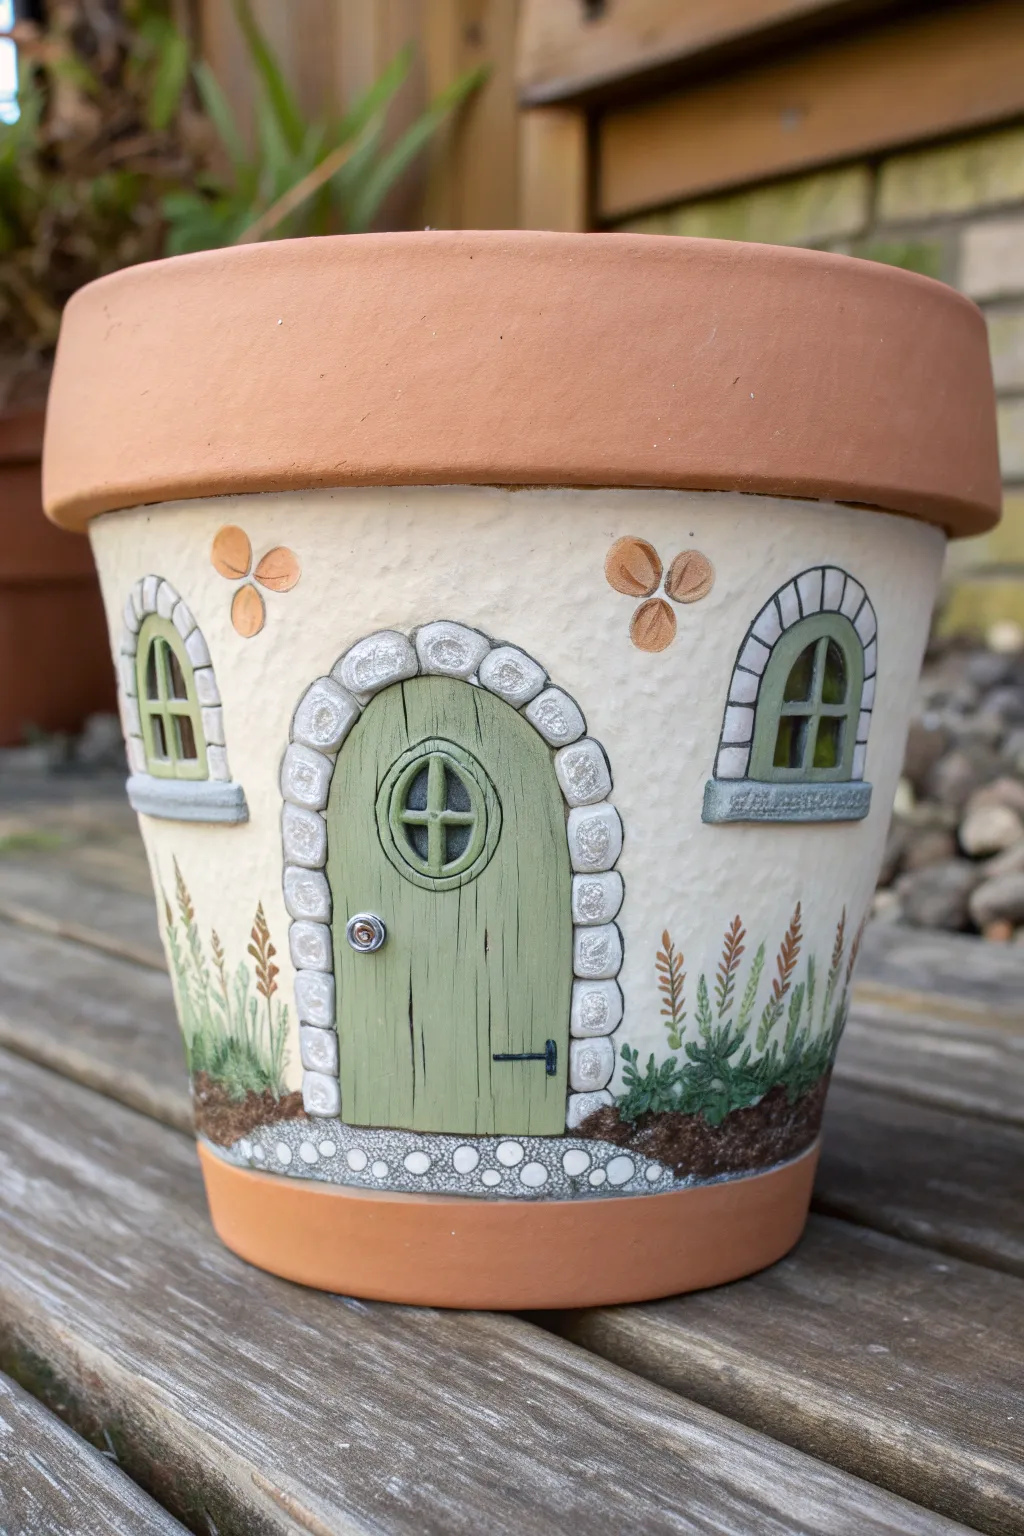
Transform a plain clay pot into an enchanting miniature dwelling complete with a charming arched door and stone details. The textured cream walls and soft sage green accents give this planter a cozy, rustic cottage feel perfect for housing your favorite succulents.
How-To Guide
Materials
- Standard terracotta pot (cleaned and dried)
- Acrylic paints (pale cream/off-white, sage green, dark green, grey, white, metallic silver, terracotta/rust orange)
- Texture medium or thick gesso (optional for stucco effect)
- Painters tape
- Pencil and eraser
- Fine detail brushes (sizes 0 and 1)
- Flat shader brushes (medium and small)
- Black fine-liner paint pen or permanent marker
- Matte outdoor varnish/sealer
Step 1: Preparation and Base Coat
-
Prime the surface:
Begin by cleaning your terracotta pot thoroughly to remove any dust. Once dry, tape off the top rim and the very bottom rim if you want to keep the natural terracotta color exposed as seen in the photo. -
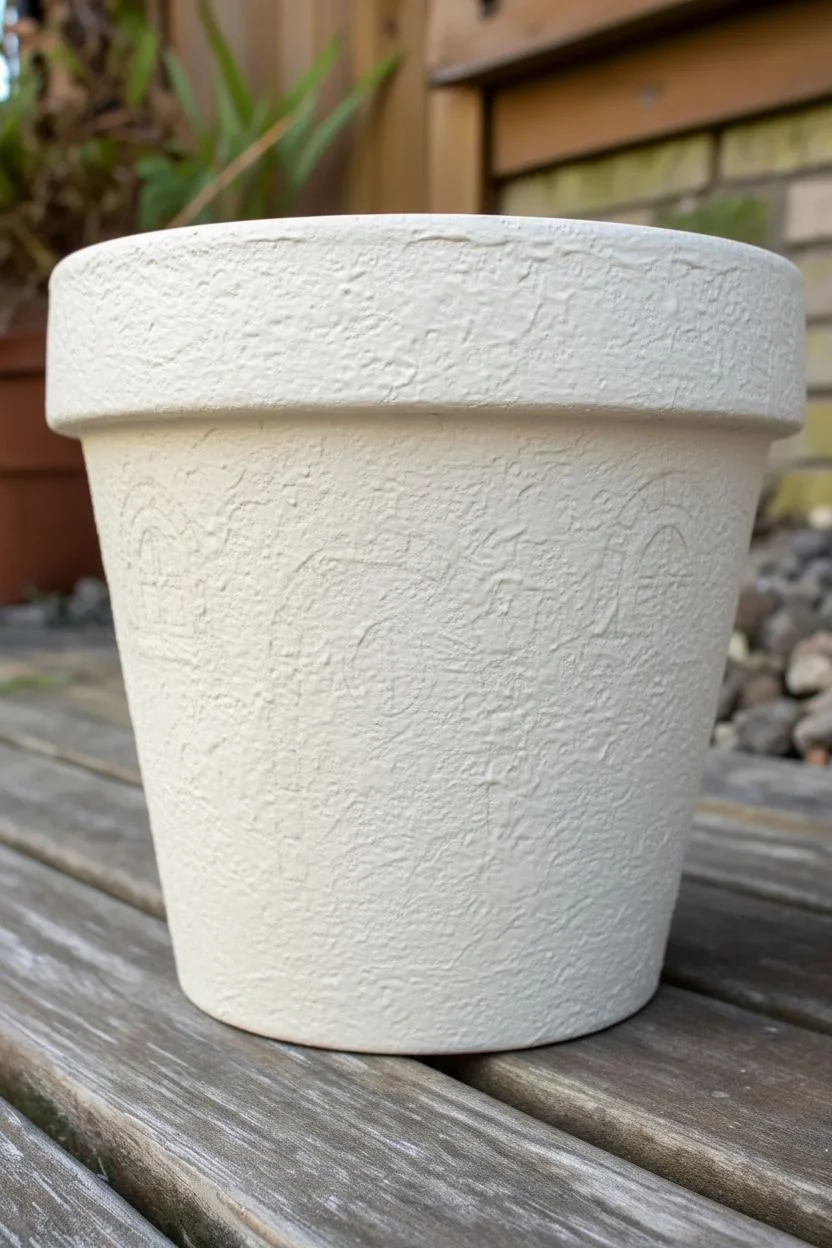
Create the stucco texture:
To mimic the rough wall texture, mix a little texture paste or baking soda into your pale cream acrylic paint. Dab this mixture onto the main body of the pot using a sponge or an old brush to create an uneven, stucco-like surface. Let this dry completely. -
Sketch the layout:
Using a pencil, lightly sketch the outline of the central arched door and two smaller arched windows on either side. Don’t press too hard, as graphite can be tricky to erase from the textured paint.
Uneven Lines?
If your outlines feel shaky, steady your painting hand by resting your pinky finger on a dry part of the pot while you work. A paint pen is often easier than a brush for beginners.
Step 2: Painting the Architectural Features
-
Paint the door base:
Fill in the door shape with a muted sage green paint. You may need two coats for opaque coverage. -
Create the stone archway:
Paint the oval stones surrounding the door using a light grey. Vary the shades slightly by mixing in tiny bits of white or dark grey to make the stones look natural and distinct from one another. -
Paint the windows:
Fill the window shapes with a very dark green or black to simulate depth behind glass. Paint a grey stone border around the top arch and a flat grey sill at the bottom of each window. -
Add window details:
Using a fine liner brush and sage green paint, carefully draw the grid lines (muntins) over the dark window panes. -
Add decorative flowers:
Near the top rim, paint simple three-petal flower shapes using a terracotta or rust-orange color to tie in with the natural pot rim.
Texture Trick
For the stone texture around the door, dab the wet grey paint with a crumpled piece of plastic wrap or a rough sponge before it dries to give it a realistic, pitted rock surface.
Step 3: Adding Details and depth
-
Detail the door:
Mix a slightly darker green shade and paint vertical lines on the door to simulate wooden planks. Add a small circular window near the top center of the door. -
Add hardware:
Use a dot of silver paint to create the doorknob. Use a fine black pen or black paint to draw the hinges and outline the doorknob for contrast. -
Highlight the stonework:
I like to take a very dry brush with white paint and lightly dust the tops of the grey stones around the door and windows. This highlights the texture and makes them look 3D. -
Outline for definition:
Use your black paint pen or a very fine brush with watered-down black paint to outline the stones, the door, and the windows. This ‘illustrative’ style makes the features pop against the cream wall.
Step 4: Landscaping and Finishing
-
Paint the ground:
Along the bottom edge of your painted area, dab dark brown paint to create a soil line. -
Grow the garden:
Using short, upward flicking strokes with various shades of green, paint grass growing out of the soil line. Add taller stalks with reddish-brown tips to mimic wildflowers or wheat. -
Lay the cobblestone path:
Directly under the door, paint small, irregular circles in grey and white to create a cobblestone threshold or path. -
Shadowing the door:
Add a thin line of watered-down black or dark grey just inside the stone archway on one side of the door to create a cast shadow, adding depth. -
Seal the work:
Once all paint is thoroughly dry (give it at least 24 hours), apply two coats of matte outdoor sealer to protect your miniature home from the elements and watering.
Place this adorable pot in your garden or on a sunny windowsill to welcome the local fairies to their new home
Stacked Topsy-Turvy Painted Terracotta Pot Tower
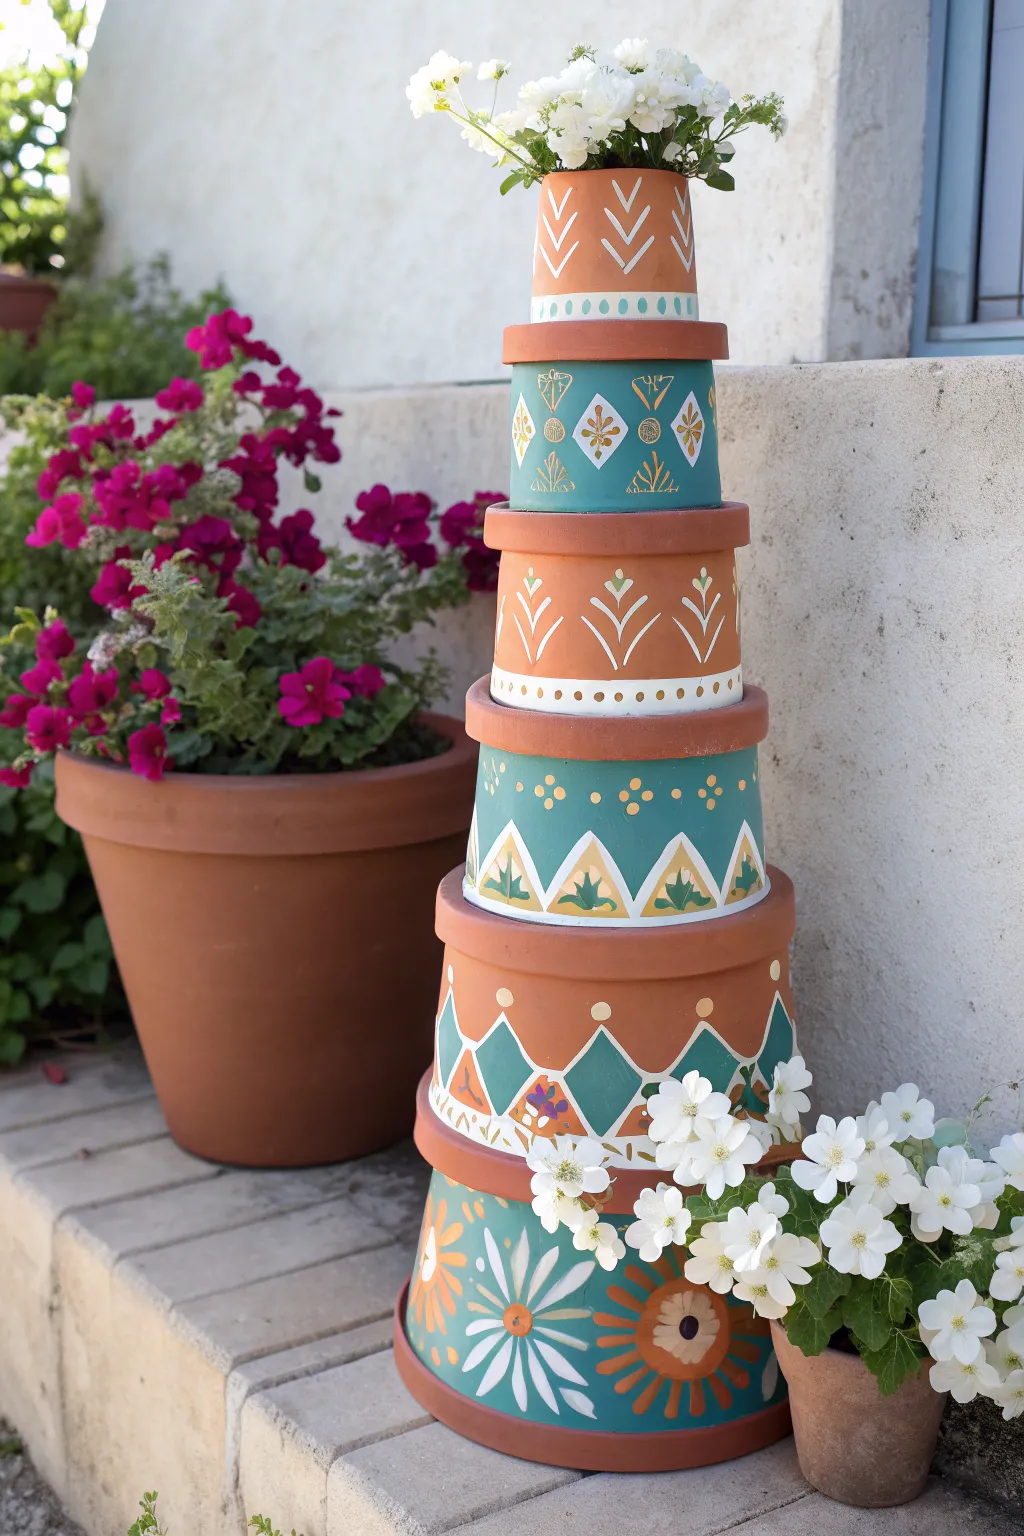
Transform ordinary terracotta pots into a striking vertical garden feature with this beautifully painted stacked tower. Featuring alternating teal and clay-toned tiers adorned with varied geometric and floral motifs, this piece creates an instant focal point for any patio or garden entrance.
Detailed Instructions
Materials
- 5 terracotta pots in graduated sizes (e.g., 4″, 6″, 8″, 10″, 12″)
- Heavy-duty construction adhesive (e.g., E6000 or Liquid Nails)
- Acrylic craft paints: Teal (turquoise), Burnt Orange/Terracotta, Cream/Off-White, Metallic Gold
- Flat paintbrushes (1-inch and ½-inch)
- Detail round brushes (sizes 0 and 2)
- Pencil and eraser
- Painter’s tape or masking tape
- Clear outdoor sealant (spray or brush-on)
- A sturdy metal rod or rebar (optional, for extra stability)
Step 1: Preparation & Base Coating
-
Clean and dry:
Before starting, ensure all pots are clean and completely free of dust or grease. Give them a quick wipe with a damp cloth and let them dry fully. -
Plan the color scheme:
This design alternates base colors. The largest pot (base) is teal, the next is terracotta, then teal, then terracotta again, and the top smallest pot is terracotta. Map out which pot gets which color. -
Apply the teal base coats:
Using a 1-inch flat brush, paint the exterior of the largest pot and the middle pot with your teal or turquoise acrylic paint. Apply 2-3 coats for opaque coverage, allowing 20 minutes of drying time between layers. -
Enhance the terracotta bases:
Even though the other pots are already terracotta, painting them with a burnt orange or matching terracotta paint gives a smoother, more uniform finish than raw clay. Paint the second largest, second smallest, and smallest pots with this color. -
Paint the rims:
For a cohesive look, paint the thickened rim of every single pot in the burnt orange/terracotta color. This ties the design together vertically.
Step 2: Painting the Geometric Designs
-
Draft the patterns:
Once the base coats are fully dry, lightly pencil in your designs. Refer to the photo: the base pot has large daisies, the next has triangles, the middle teal pot has a dot pattern, the next has arrows/chevrons, and the top features simple V-shapes. -
Detail the base pot (Large Daisy):
On the largest teal pot, use a round brush and cream paint to create large, elongated petal shapes radiating from a center point. Once dry, paint the centers with burnt orange and a tiny dark dot, adding small V-shapes between petals for depth. -
Detail the second pot (Triangles):
On the second largest pot, paint a row of cream triangles along the bottom edge. Inside these triangles, add smaller teal triangles or simple botanical sprigs using your detail brush. -
Detail the middle pot (Dots & Diamonds):
On the middle teal pot, paint small cream diamonds spaced evenly around the center. Use a dotting tool or the back of a paintbrush to add small gold or cream dots above and below the diamond band. -
Detail the fourth pot (Chevrons):
For the second smallest pot, paint upright, stylized arrow shapes that look like simplified plants. Use cream paint for the stems and V-shapes, adding small dots at the tips of the ‘leaves’ for extra flair. -
Detail the top pot (Simple V-pattern):
On the smallest top pot, paint rows of simple V-shapes or chevrons pointing downward using cream paint. This mimics the larger patterns below but keeps the scale appropriate for the small surface area. -
Add rim accents:
Add finishing touches to the rims. Paint a thin cream line or a row of small dots along the bottom edge of the rims on the teal pots to separate the rim color from the body color.
Paint Peeling?
Terracotta is porous and moisture can push paint off from the inside out. Seal the *inside* of the pots with a waterproof sealant before painting the outside.
Step 3: Assembly & Finishing
-
Seal the artwork:
Take the assembled pots outside and spray them with two thin coats of clear outdoor sealant. I find a matte or satin finish looks best for this earthy style. -
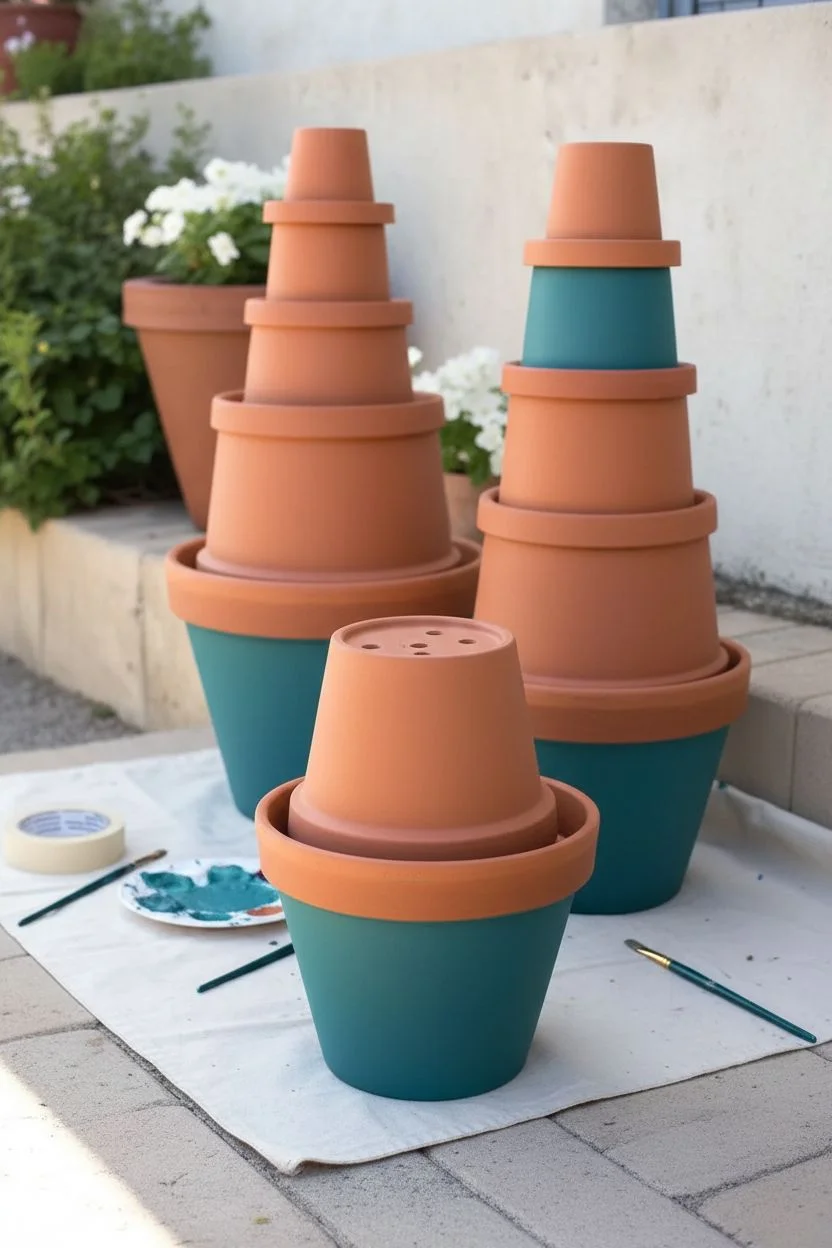
Prepare for stacking:
Turn the second-largest pot upside down. Apply a generous ring of heavy-duty construction adhesive to the bottom (now top) surface. -
Begin the stack:
Place the largest pot right-side up. For a ‘topsy-turvy’ look like the image, you can run a rebar rod through the drain holes and tilt the pots slightly. However, for a straight tower, simply stack the pots by size. -
Glue the layers:
Assuming a straight stack for stability: Apply adhesive to the bottom rim of the second pot and place it inside the first. Repeat upward, nesting each pot into the one below it. Let the adhesive cure for at least 24 hours. -
Add plants:
Once fully cured, fill the top pot with soil and flowers. If you left space around the rims of the lower pots (exposed soil), you can tuck small succulents or trailing plants there too.
Get Topsy-Turvy
To get the tilted look safely, hammer a 4-foot rebar rod into the ground. Thread pots onto the rod through their drain holes, angling them in alternating directions as you stack.
Place your completed tower in a sunny spot to let those vibrant colors truly shine


Have a question or want to share your own experience? I'd love to hear from you in the comments below!