A painted walkway can turn the most forgettable strip of concrete into a little outdoor art moment you get to walk through every day. I love how a few smart patterns, faux-finish tricks, and color choices can make a path feel intentional, polished, and totally you.
Faux Flagstone With Painted Grout Lines
Transform a boring concrete slab into a high-end natural stone path using only paint and some patience. This technique mimics the varied textures and colors of real flagstone so convincingly your guests might bend down to touch it.
Detailed Instructions
Materials
- Concrete cleaner/degreaser
- Pressure washer (recommended)
- Exterior concrete primer
- Exterior porch and floor paint (base coat color for grout)
- Exterior acrylic latex paints (3-4 stone colors: tan, beige, gray, charcoal)
- Wide masking tape or painter’s tape (1/4 inch or 1/2 inch width)
- Sea sponge or natural sponge
- 4-inch roller and tray
- Small angled brush
- Clear concrete sealer (matte finish)
- Chalk line or pencil
- Knee pads
Step 1: Cleaning and Base Work
-
Deep Clean the Surface:
Before putting any paint down, the concrete needs to be spotless. Scrub the entire walkway with a concrete degreaser and a stiff bristle broom to remove dirt, oils, and mildew. -
Rinse Thoroughly:
Rinse the surface completely, preferably with a pressure washer to blast out any hidden debris from the concrete pores. Let the walkway dry for at least 24 hours to ensure no moisture is trapped. -
Apply Primer:
Roll on a coat of high-quality exterior concrete primer. This is crucial for adhesion and ensures your hard work lasts through the seasons. -
Paint the Grout Base:
Once the primer is dry, apply two coats of your chosen grout color (usually a light gray or off-white) using a standard roller. This will be the color visible between your ‘stones’ later.
Natural Edges Pro Tip
Avoid perfectly straight tape lines. Tear the tape lengthwise periodically or overlap pieces at slight angles to mimic the chipped, irregular edges of quarried stone.
Step 2: Designing the Stones
-
Draft Your Pattern:
Visualize a random, organic stone pattern. You can lightly sketch irregular shapes onto the base coat with a pencil or chalk to guide your tape placement. -
Tape the Grout Lines:
Apply masking tape over your grout base color to define the shapes of the stones. Press the tape down firmly to prevent bleed-under. I like to tear small pieces to create angled corners rather than just straight grids. -
Create the Border:
If you want the cobblestone border look shown in the image, tape off a distinct row of smaller, rectangular shapes along just the edges of the walkway. -
Seal the Tape Edges:
Lightly brush a tiny amount of your base grout color over the edges of the tape. This seals the tape line and ensures crisp, sharp edges when you peel it up later.
Step 3: Painting the Stones
-
Mix Your Stone Colors:
Pour your 3-4 stone colors into separate small containers. You want a palette that includes a warm tan, a cool gray, and perhaps a darker accent beige. -
Apply the Base Stone Color:
Work in sections, painting a solid base color inside a taped area. Vary the base colors so neighbors aren’t identical—paint one stone tan, the next gray. -
Sponge for Texture:
While the base stone paint is still wet, dip a dampened sea sponge into a contrasting color. Dab it lightly over the wet surface to create a mottled, natural stone look. -
Blend the Colors:
Soften the sponged texture by dabbing gently with a clean, dry rag if the contrast looks too sharp. The goal is subtle variation, not polka dots. -
Add Depth with Darker Tones:
For the border stones, use slightly more gray or charcoal paint to distinguish them visualy from the main path, mimicking the cobblestone edging. -
Let the Paint Cure:
Allow your faux stones to dry completely, following the manufacturer’s suggested drying times on the paint can.
Level Up: Texture
Mix a handful of fine sand into one of your stone paint colors. This adds physical grainy texture that catches the sunlight and feels real underfoot.
Step 4: Finishing Touches
-
Peel the Tape:
Slowly peel up the masking tape to reveal your clean grout lines. This is the most satisfying part of the process, seeing the pattern emerge clearly. -
Touch Up Imperfections:
Use a small artist’s brush to fix any spots where paint might have bled or where the tape pulled up too much base coat. -
Apply Sealer:
Roll on at least two coats of a clear, matte concrete sealer. This protects the paint from UV rays and foot traffic while locking in your design. -
Add Grit (Optional):
For safety, consider sprinkling a non-slip additive into the first coat of sealer to prevent the walkway from becoming slippery when wet.
Now you have a durable, custom walkway that adds incredible curb appeal for a fraction of the cost of real masonry


Black-and-White Checkerboard Entry Walkway
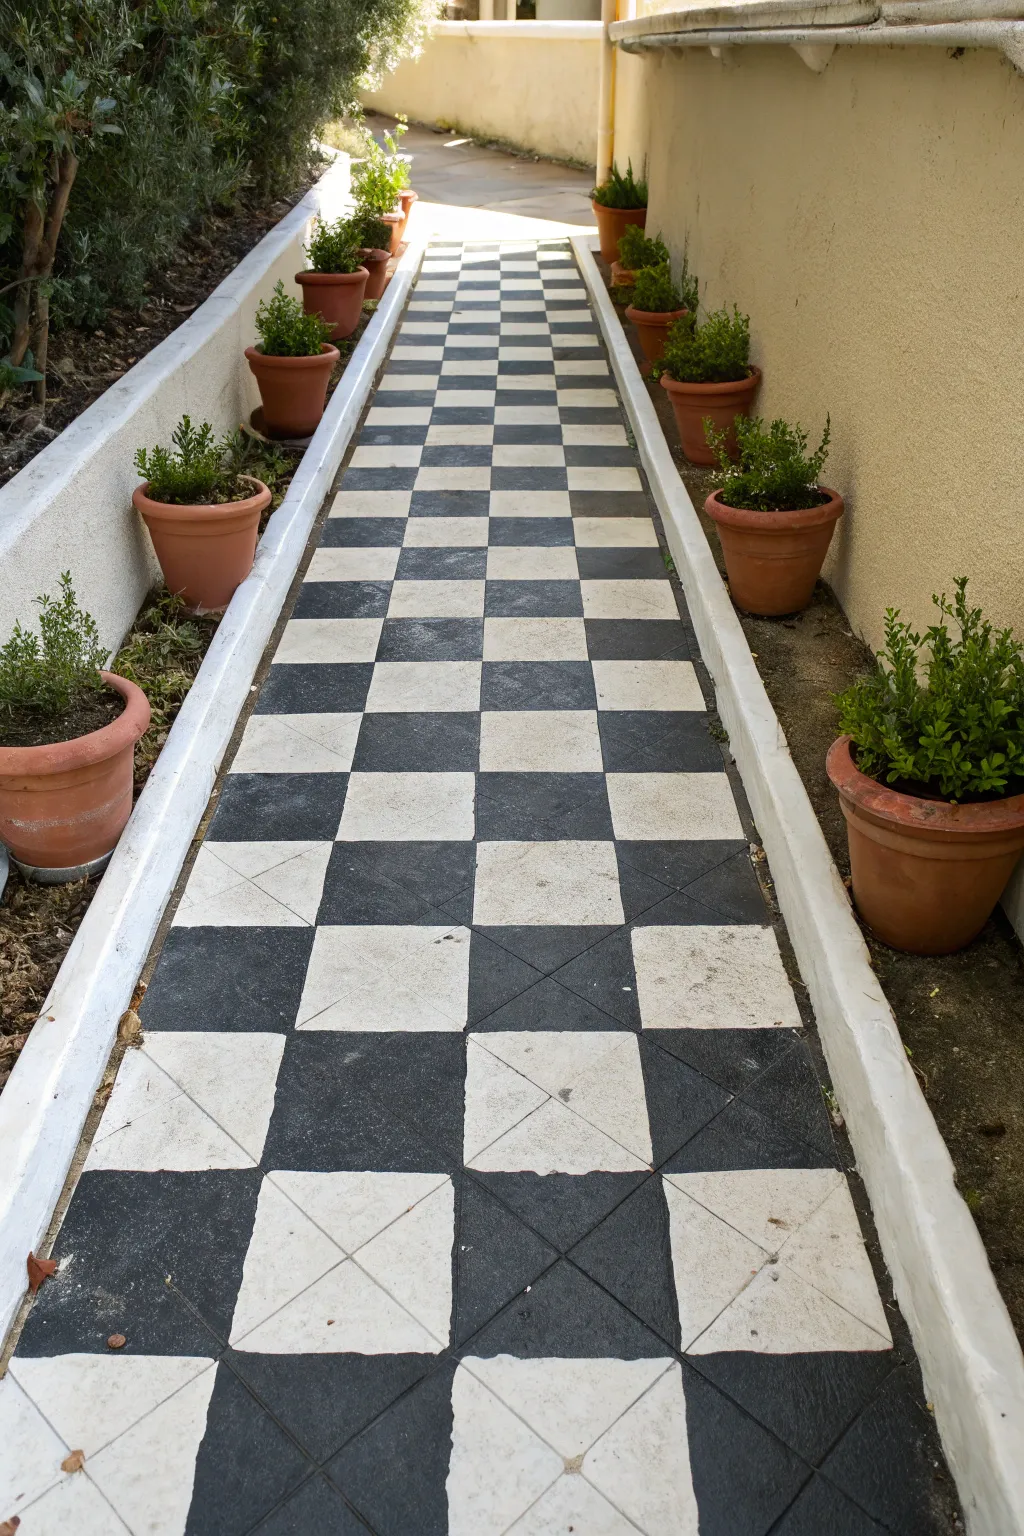
Transform a plain concrete path into a grand, Alice-in-Wonderland style entrance with this striking black-and-white checkerboard design. This high-contrast pattern instantly adds depth and classic elegance to even the narrowest of garden walkways.
Step-by-Step
Materials
- Exterior masonry paint (black)
- Exterior masonry paint (white or off-white)
- Concrete primer
- Pressure washer or stiff bristle brush
- Degreasing cleaner
- Painter’s tape (2-inch width)
- Chalk line tool
- Measuring tape
- Framing square
- Paint rollers (medium nap for textured concrete)
- Angled sash brush (for edges)
- Extension pole
- Concrete sealer (matte or satin finish)
Step 1: Preparation & Cleaning
-
Assess the surface:
Examine your existing concrete or paving stones. If there are significant cracks, fill them with concrete filler and allow it to cure completely before beginning. -
Deep clean:
Scrub the entire walkway vigorously using a stiff brush and a degreasing cleaner to remove dirt, moss, and oils. A pressure washer makes this step much faster if available. -
Let it dry:
Allow the walkway to dry completely for at least 24 hours. Painting on damp concrete will trap moisture and cause peeling later. -
Prime the surface:
Apply a coat of high-quality concrete primer using a roller. This ensures the paint adheres properly and increases durability against foot traffic.
Bleed-Through Blues?
If paint bleeds under the tape, wait for it to dry fully. Then, use a small artist’s brush and the contrasting paint color to carefully touch up the line
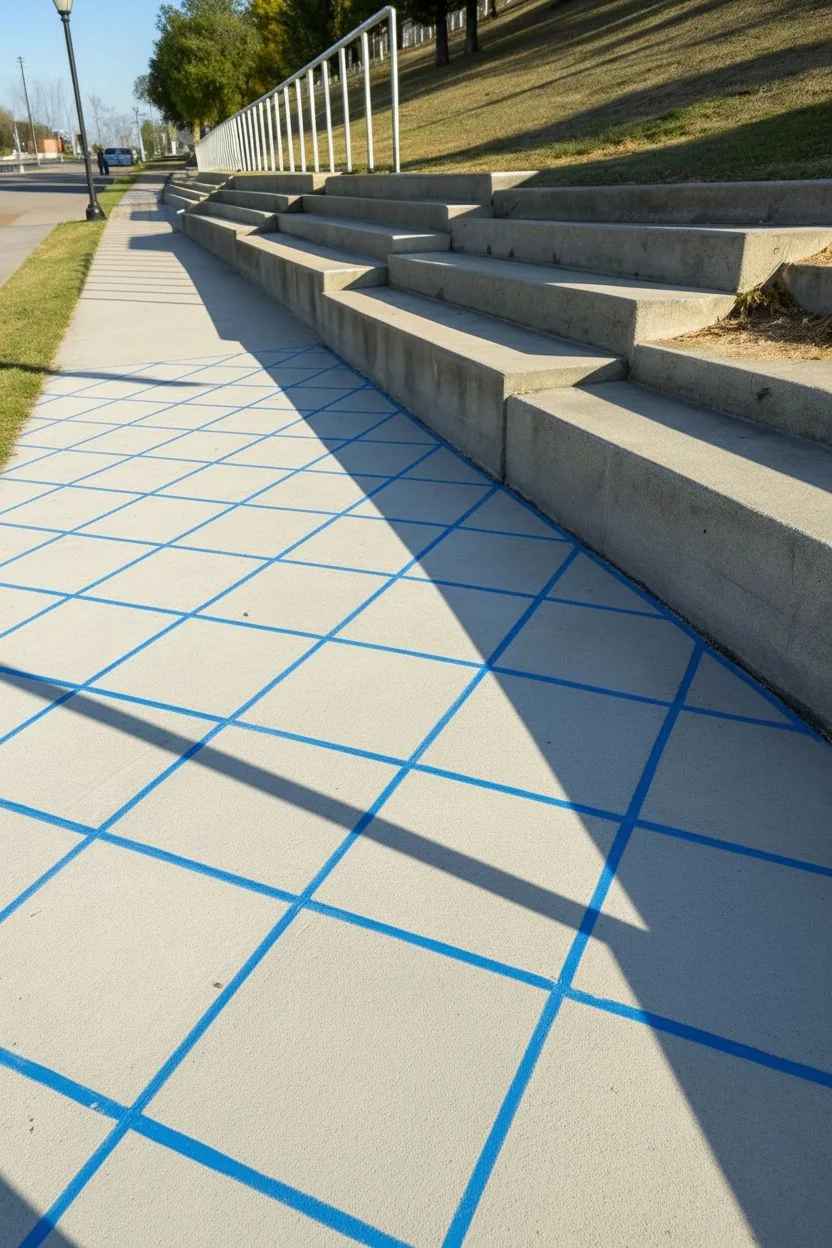
Step 2: Mapping the Grid
-
Determine the centerline:
Measure the width of your path to find the exact center. Snap a chalk line down the entire length of the walkway to establish your central guide. -
Choose square size:
Decide on your square size (e.g., 12×12 inches). Starting from the centerline, mark horizontal lines at these intervals using your framing square to ensure 90-degree angles. -
Complete the grid:
Snap the remaining vertical and horizontal chalk lines to create a full grid pattern over the length of the path. -
Mark the ‘black’ squares:
Place a small piece of painter’s tape or a light ‘X’ made of chalk inside every other square. This visual guide prevents confusion once you start painting.
Step 3: Painting the Pattern
-
Tape the first set:
Apply painter’s tape firmly along the outside edges of your ‘white’ squares. You are isolating the squares you intend to paint white first. -
Seal the tape edges:
Run a dry brush or a credit card over the tape edges to ensure a tight seal, preventing paint bleed on textured concrete. -
Paint the light squares:
Roll two coats of your white or off-white masonry paint onto the taped-off sections, allowing recommended drying time between coats. -
Remove tape and cure:
Peel off the tape while the second coat is still slightly tacky to avoid pulling up paint. Let the white squares dry fully, ideally overnight. -
Tape for dark squares:
Once the white paint is fully cured, apply fresh tape over the dried white edges to protect them while you paint the black squares. -
Paint the dark squares:
Apply two coats of black masonry paint to the remaining squares. I find using an angled brush for the corners and a mini-roller for the centers works best here. -
Paint the curb:
While you have the white paint out, paint the raised curb borders along the walkway to create a clean, bright frame for your checkerboard. -
Reveal the pattern:
Carefully remove all remaining tape to reveal your crisp checkerboard design.
Faux Tile Effect
Instead of scoring the concrete for the ‘X’ pattern, use a stencil and a slightly lighter shade of gray paint to sponge a subtle texture onto the center
Step 4: Adding the ‘X’ Detail & Sealing
-
Scribe the diagonals:
To recreate the subtle scored look in the image, take a straight edge and a sharp tool (or a thin paintbrush with gray paint) and create diagonal ‘X’ lines connecting the corners of each square. -
Seal the walkway:
Once all paint is cured (wait 48-72 hours), apply two thin coats of clear concrete sealer. This protects against UV fading and scuff marks. -
Style the path:
Finish by placing terracotta pots planted with greenery along the white curb edges to soften the geometric lines.
Enjoy walking down your sophisticated new entryway that combines timeless style with major curb appeal


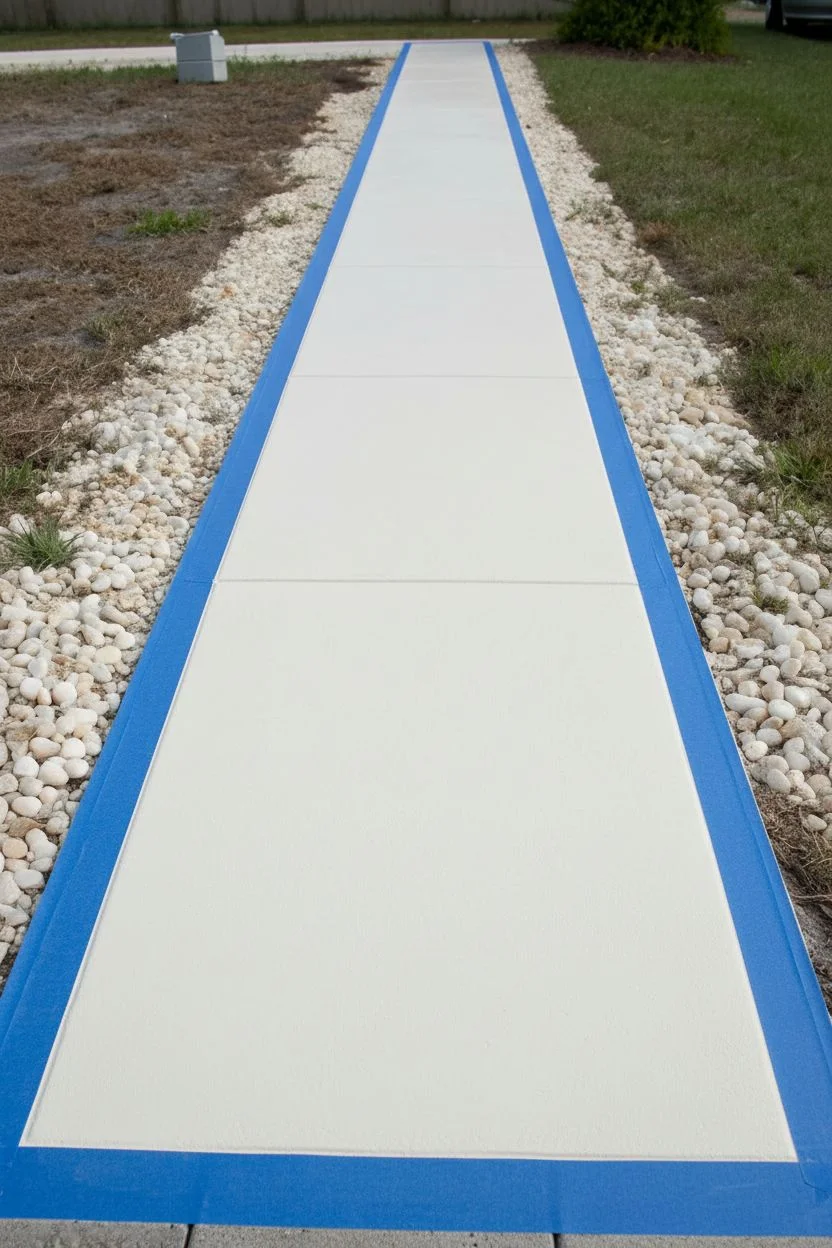
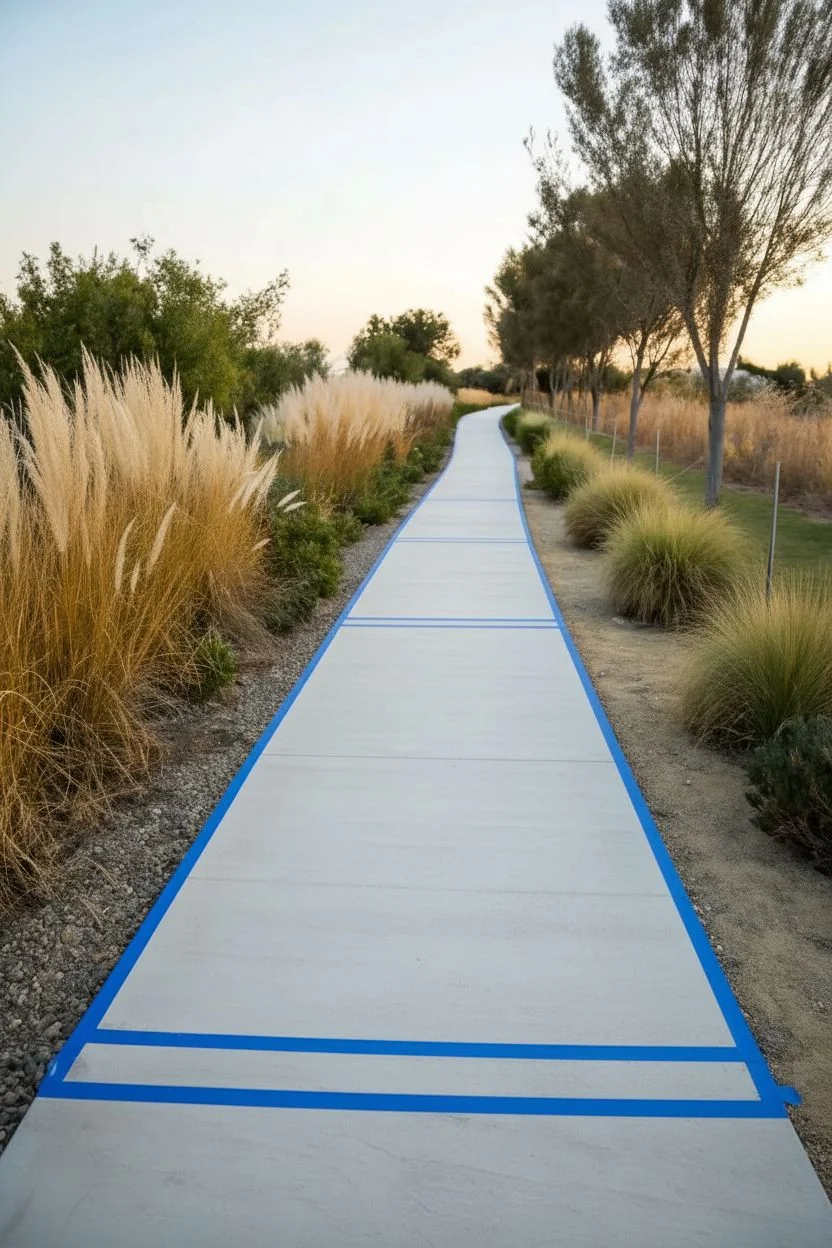
Painted Border and Center Stripe for Instant Polish
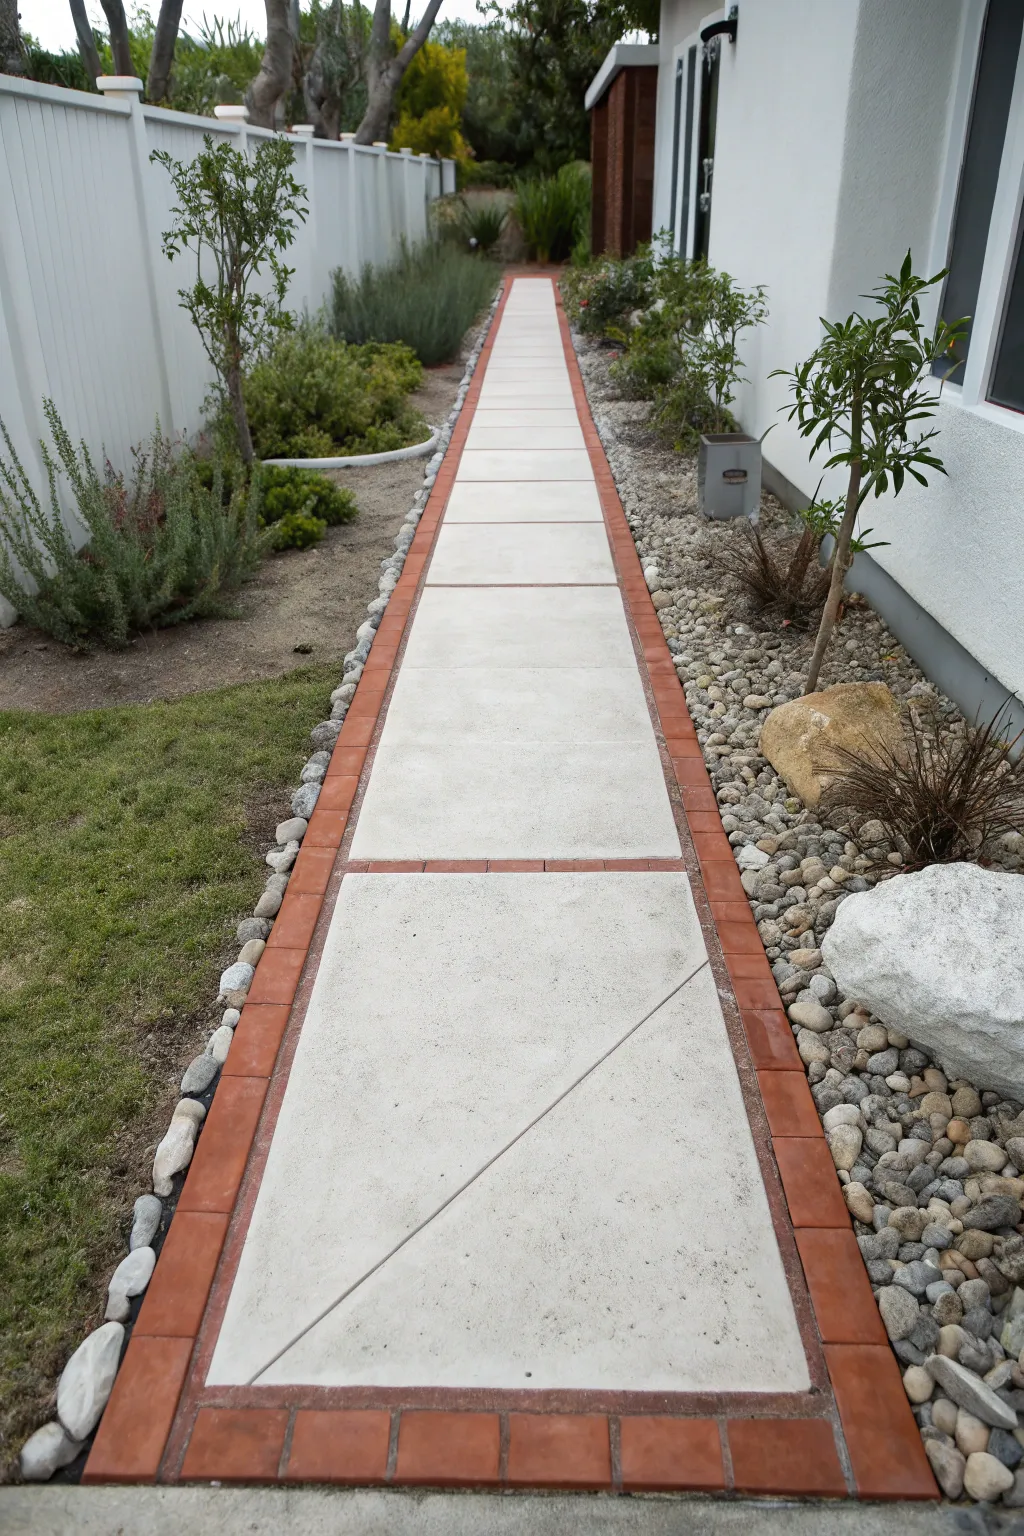
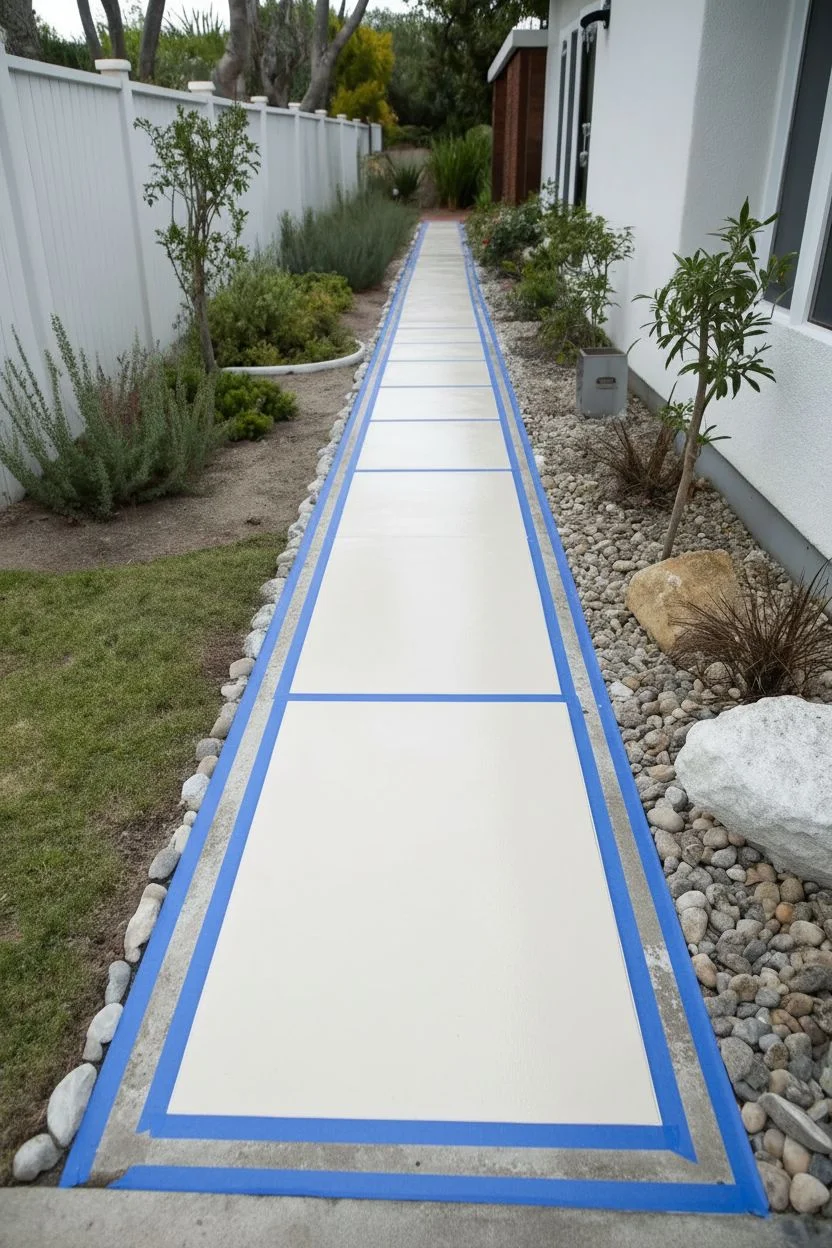
Transform a plain, monochromatic concrete path into an elegant feature by painting a faux brick border and crisp geometric squares. This illusion adds instant structure and warmth to your garden path without the heavy labor of actually laying new masonry.
Detailed Instructions
Materials
- Concrete cleaner or pressure washer
- Concrete primer (exterior grade)
- Exterior concrete paint (Cream/Off-White for centers)
- Exterior concrete paint (Terracotta/Brick Red for borders)
- Painter’s tape (1-inch and 2-inch widths)
- Measuring tape
- Chalk line or long straight edge
- Roller frame with extension pole
- Medium nap roller covers (3/8 or 1/2 inch)
- 2-inch angled sash brush
- Small detail brush (for touch-ups)
- Concrete sealer (clear, non-yellowing)
Step 1: Preparation & Mapping
-
Clean surface thoroughly:
Begin by scrubbing the entire walkway with a stiff brush and concrete cleaner to remove dirt, moss, and grease. If you have access to one, a pressure washer is even better for getting into the pores. Let the concrete dry completely for at least 24 hours. -
Measure the border:
Decide on the width of your faux brick border. In this project, the border looks to be about 4-6 inches wide. Measure this distance from both edges of the walkway inward and mark it periodically with a pencil. -
Snap chalk lines:
Using a chalk line or a very long straight edge, connect your pencil marks to create two long, straight lines running down the length of the walkway. These lines define where the red brick border ends and the center squares begin. -
Map out center squares:
Measure the total width of the inner section (between your chalk lines). To create perfect squares, use this same measurement to mark horizontal intervals down the length of the path. -
Create center dividers:
Snap horizontal chalk lines at each interval you just marked. These lines will eventually become the thin brick-colored strips separating the large cream squares.
Bleeding Lines?
If your concrete is very pitted, burnish the tape edge by painting a thin layer of the *base* color over the tape first to seal gaps.
Step 2: Taping the Design
-
Tape the inner squares:
Apply painter’s tape along the *inside* of the long vertical border lines you drew. This protects the center area while you paint the borders, or vice-versa. For the crispest look, I prefer to paint the lighter center color first. -
Prime the surface:
Roll a layer of high-quality exterior concrete primer over the entire walkway. This step is crucial for ensuring the paint adheres properly and lasts through weather changes. Let it dry according to the can instructions. -
Paint the base color:
Using a roller on an extension pole, apply two coats of the Cream/Off-White concrete paint to the entire central area. Allow sufficient drying time between coats.
Add Texture
While the terracotta paint is wet, lightly dab a sponge with a slightly darker brown paint onto the ‘bricks’ to simulate real baked clay texture.
Step 3: Creating the Border & Details
-
Mask the center squares:
Once the cream paint is fully cured (give it 24 hours to be safe), lay down tape exactly on the edge of the cream paint to protect your fresh work. You also need to tape out the horizontal divider lines. Use thin tape (1/4 or 1/2 inch) to create the narrow separation between the large squares. -
Paint the borders:
Apply your Terracotta/Brick Red paint to the outer borders and over the thin horizontal tape strips you just laid down. Use a brush for edges near the grass or stones for precision, and a small roller for the flat sections. -
Add brick grout lines (optional):
To mimic individual bricks in the side borders, place small strips of thin tape perpendicular to the path every 8 inches along the red border before painting the final coat. Without this step, you will have a solid red border, which is also a nice clean look. -
Apply second coat:
Roll on a second coat of the terracotta paint to ensure rich, opaque coverage that hides the concrete texture beneath. -
Remove tape:
While the final coat of red paint is still slightly tacky (not fully dry), carefully peel back all the tape. Pulling at a 45-degree angle helps prevent the paint from lifting or chipping.
Step 4: Finishing Up
-
Touch up edges:
Inspect your lines. If any paint bled under the tape, use a small detail brush and the appropriate color to clean up the edges once everything is dry. -
Seal the surface:
Apply a clear, non-yellowing concrete sealer over the entire walkway. This acts as a shield against UV rays, rain, and foot traffic, keeping your new design looking fresh.
Now you have a structured, custom-looking path that guides the eye beautifully through the garden


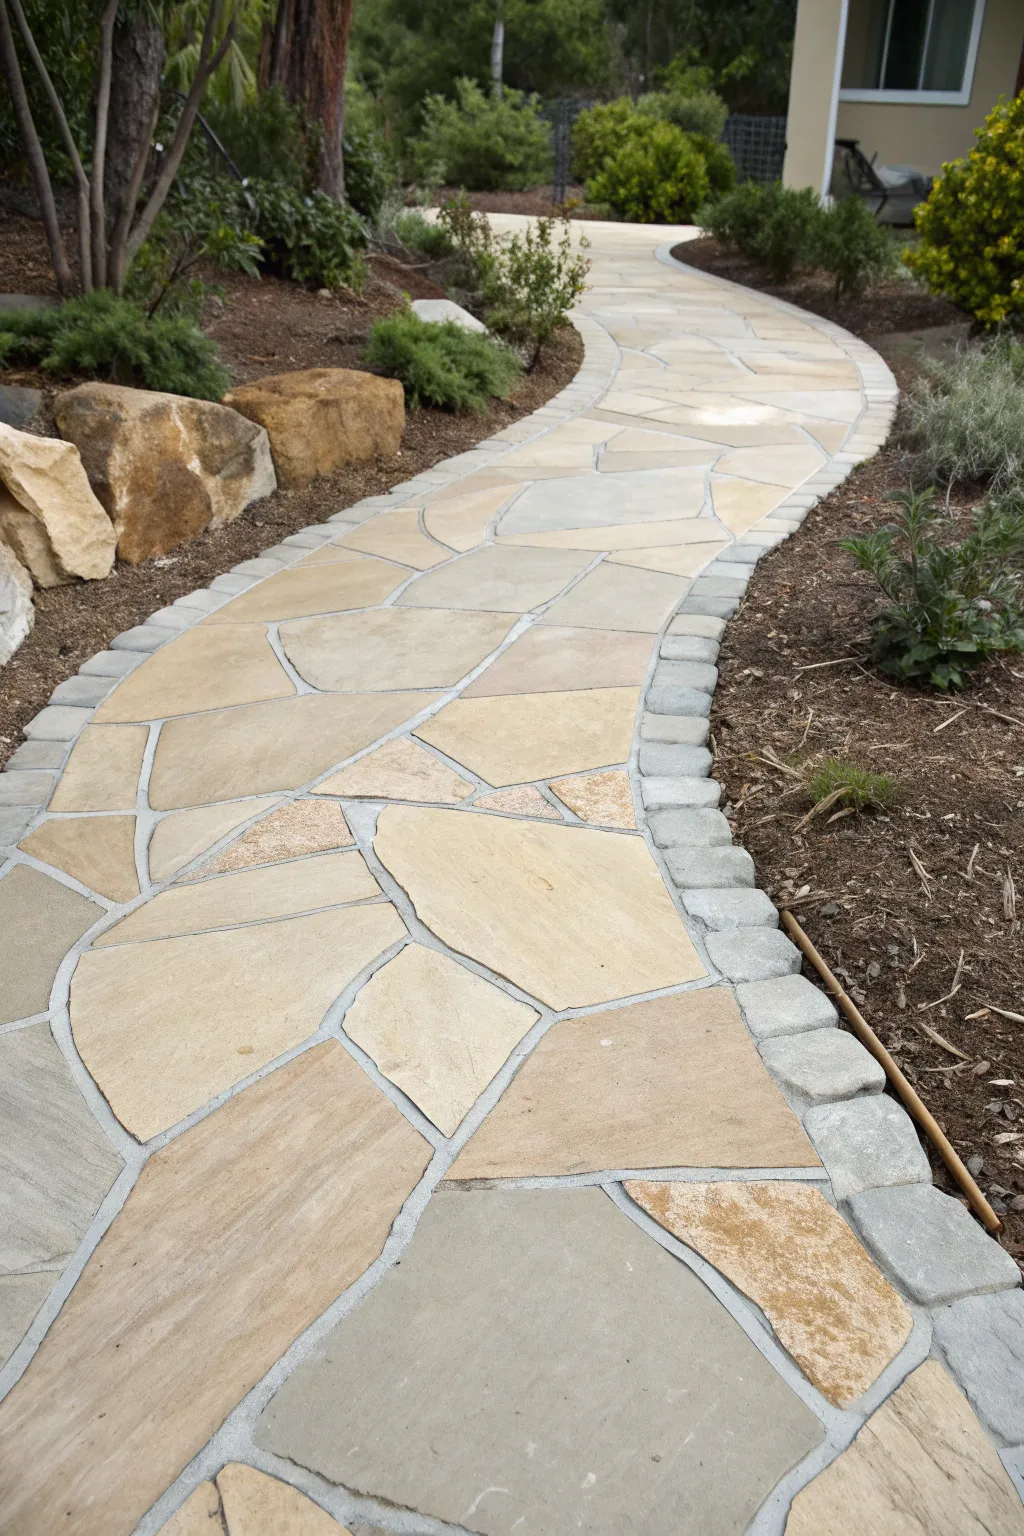
Stenciled Paver Blocks for a Neat, Repeating Look
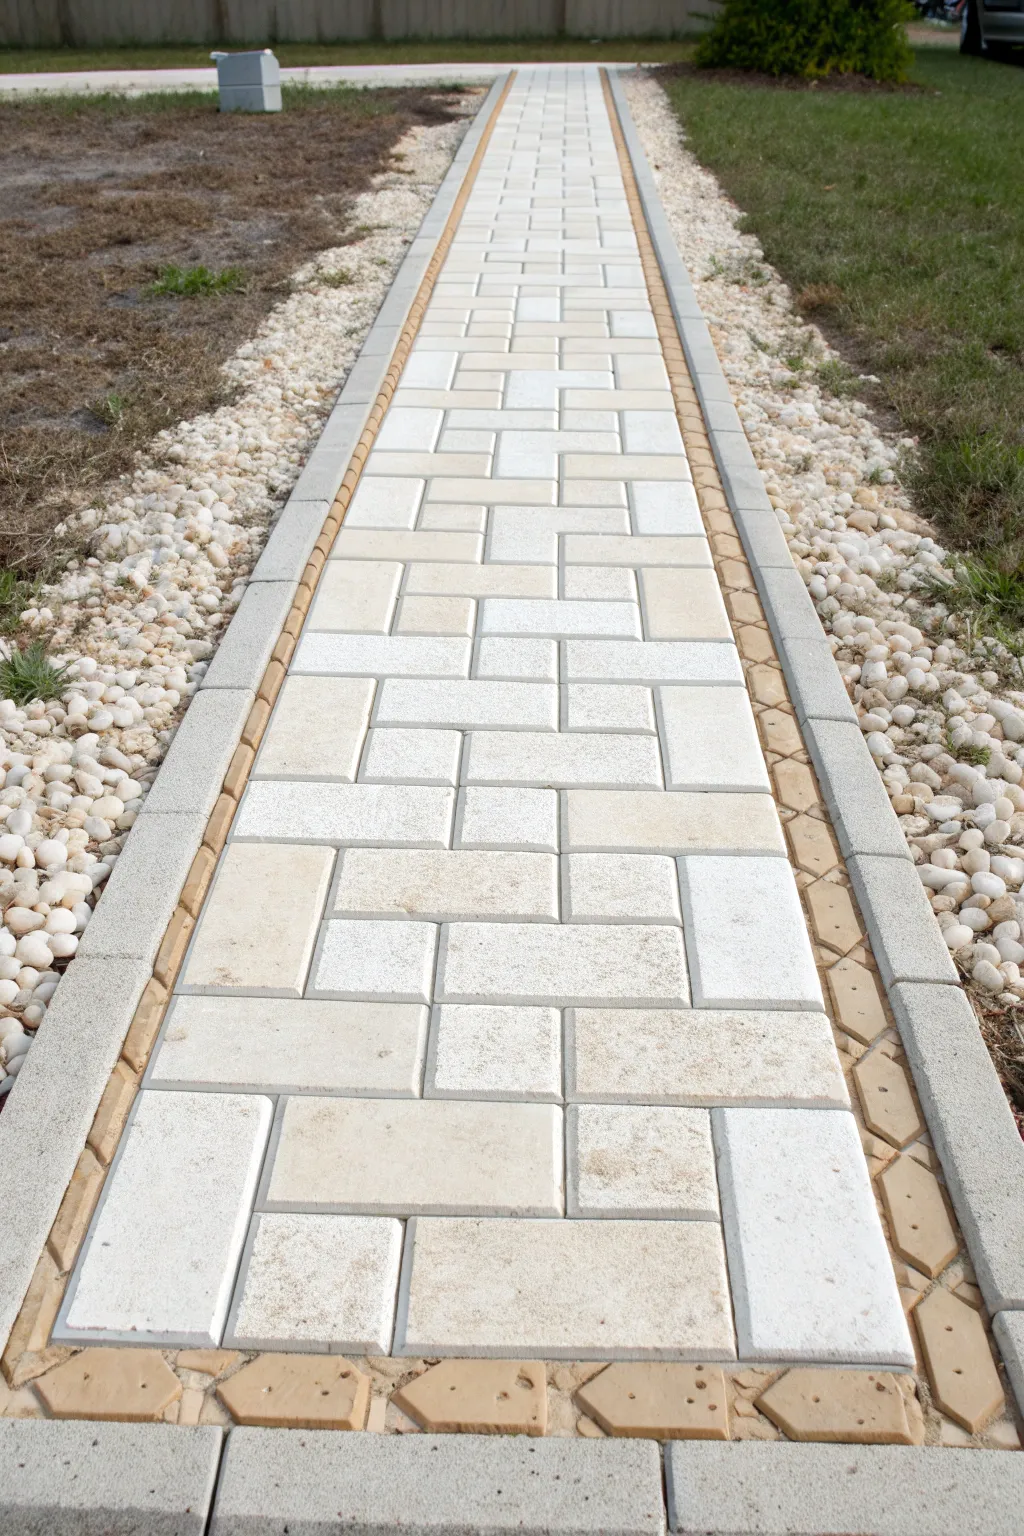
Transform a plain concrete walkway into a high-end paver path using simple stencil techniques. This project replicates the clean lines and varying textures of natural stone and brick using only paint and patience.
Step-by-Step Tutorial
Materials
- Concrete porch and floor paint (Off-White/Cream base)
- Concrete porch and floor paint (Light Tan/Beige)
- Concrete porch and floor paint (Medium Grey)
- Concrete porch and floor paint (Terracotta/Brick Orange)
- Adhesive stencil (Paver/Brick pattern)
- Painter’s tape (1-inch and 2-inch widths)
- High-density foam roller and tray
- Small stencil brushes or sponge daubers
- Sea sponge (natural texture)
- Concrete sealer (matte or satin finish)
- Pressure washer or stiff scrub brush
- Concrete cleaner/degreaser
Step 1: Preparation & Base Coat
-
Clean the Surface:
Begin by thoroughly cleaning the existing concrete walkway. Use a pressure washer or a stiff brush with a concrete degreaser to remove all dirt, moss, and loose debris. Let the surface dry completely for at least 24 hours. -
Tape the Borders:
Define the width of your new ‘paver’ path. Use 2-inch painter’s tape to mark off the outer edges where the grey border stones will go. Ensure these lines are perfectly straight and parallel. -
Prime the Surface:
If your concrete is bare or stained, apply a high-quality masonry primer to ensure the paint adheres properly and lasts through the seasons. -
Apply the Base Color:
Roll on the base coat using the Off-White/Cream concrete paint. This will serve as the ‘grout’ color between your faux stones. Apply two even coats, allowing sufficient drying time between them.
Step 2: Creating the Border
-
Mark the Grey Border:
Once the base coat is bone dry, tape off the inner section of the walkway, leaving only a 4-to-6-inch strip exposed along the very edges for the grey border ‘stones’. -
Paint the Border Base:
Paint this exposed strip with your Medium Grey concrete paint. You may need two coats for solid coverage. -
Score the Joints:
While the grey paint is still slightly tacky (or after it dries, using a thin brush and the cream base paint), create the look of separate stones by hand-painting thin grout lines every 12 to 18 inches.
Clean Edges Pro-Tip
Before painting over your stencil or tape, seal the edges by brushing a tiny amount of the BASE color over them first. This blocks bleed-under for razor-sharp lines.
Step 3: Stenciling the Inner Walkway
-
Position the Stencil:
Secure your large rectangular paver stencil in the center of the walkway. Start at the top of the path to ensure the pattern remains square. -
Secure with Tape:
Use painter’s tape to hold the stencil firmly in place. Any movement will blur the sharp lines needed for a realistic paver look. -
Apply the Main Tone:
Load a foam roller lightly with the Light Tan/Beige paint. Offload excess paint onto the tray—this is crucial to prevent bleed-under. Roll over the stencil with light, even pressure. -
Add Texture:
While the stencil is still in place, dip a sea sponge into a slightly darker shade or a mix of the tan and grey. Lightly dab random areas of the ‘stones’ to create a natural, weathered texture. -
Highlighting Stones:
Select a few random rectangular sections within the stencil and paint them a solid, lighter Cream color using a small brush. This variation mimics the natural color differences found in real stone lots. -
Lift and Repeat:
Carefully lift the stencil straight up to avoid smudging. Align the stencil with the previously painted section, using the registration marks or the edge of the pattern as a guide, and repeat down the entire path.
Paint Peeling?
If paint lifts with the stencil, you’re likely applying it too thick or waiting too long to remove the stencil. Lift the stencil while the paint is still wet, not dry.
Step 4: The Decorative Inlay
-
Taping the Inlay:
Create the decorative strip between the grey border and the central pavers. Tape off a narrow 2-inch strip on either side of the main pattern. -
Apply Stencil or Tape Design:
Use a specialized narrow geometric stencil or carefully create diamond shapes using thin painter’s tape. -
Paint the Terracotta Detail:
Using a small sponge dauber or brush, fill in these geometric shapes with the Terracotta/Brick Orange paint. This provides a warm contrast to the cool greys and creams. -
Add Dimension:
I like to take a tiny detail brush with a drop of dark grey paint and add a ‘shadow’ line on one side of each terracotta shape to give it a 3D bevelled effect.
Step 5: Finishing Touches
-
Remove Tape:
Slowly peel away all remaining painter’s tape at a 45-degree angle. Do this while the final paint layer is still slightly tacky to prevent chipping. -
Touch Up:
Inspect the grout lines. If any paint bled under the stencil, use a small artist’s brush and your base Cream color to sharpen the edges. -
Seal the Project:
After allowing the paint to cure for at least 72 hours, apply two coats of a high-quality matte or satin concrete sealer. This protects your artwork from UV rays, rain, and foot traffic.
Enjoy the durable beauty of your new custom walkway that requires zero heavy lifting
BRUSH GUIDE
The Right Brush for Every Stroke
From clean lines to bold texture — master brush choice, stroke control, and essential techniques.
Explore the Full Guide
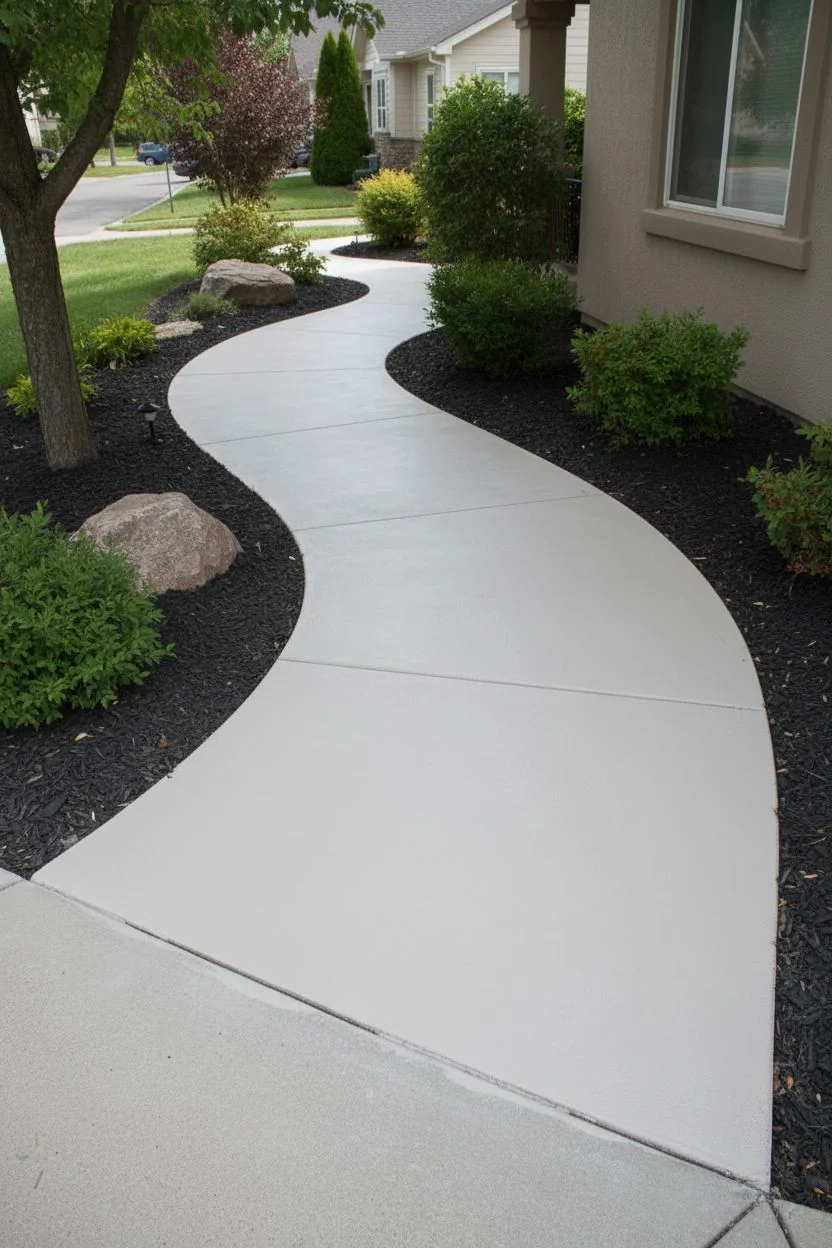
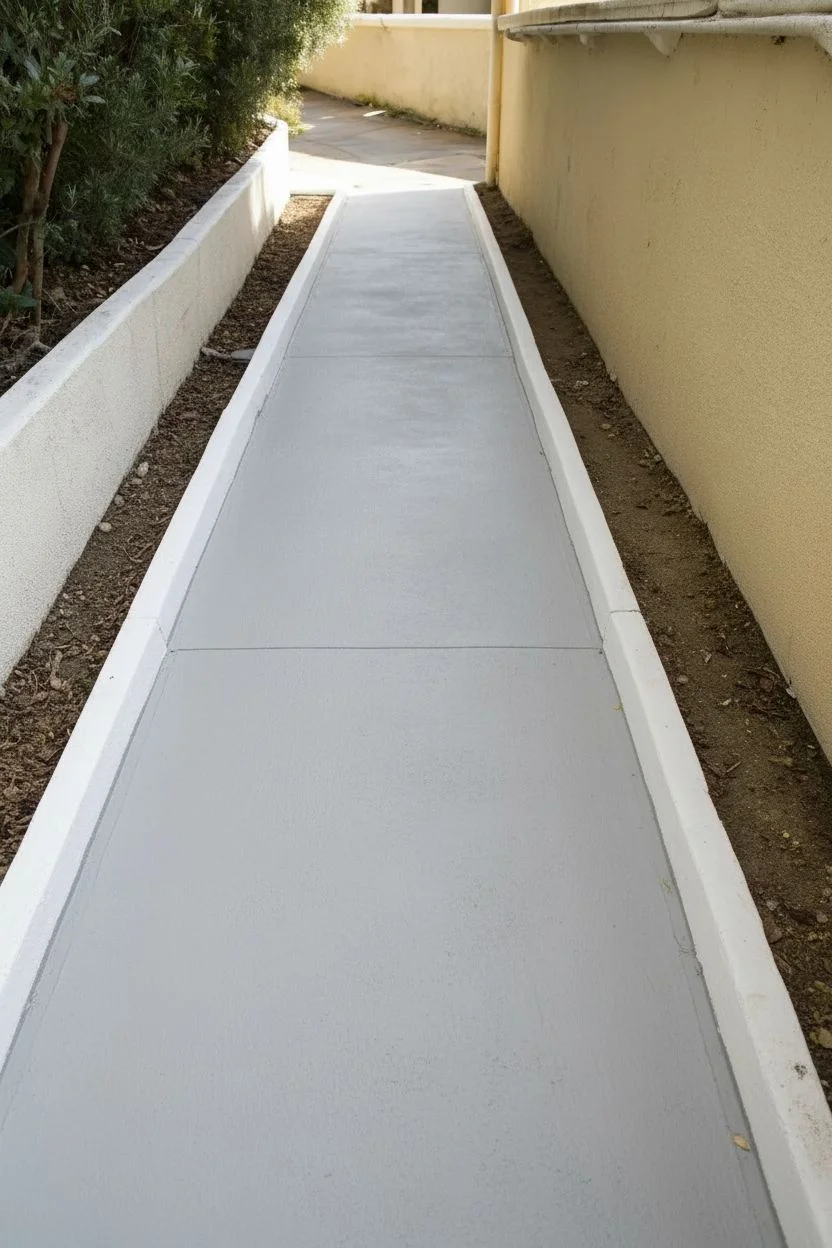
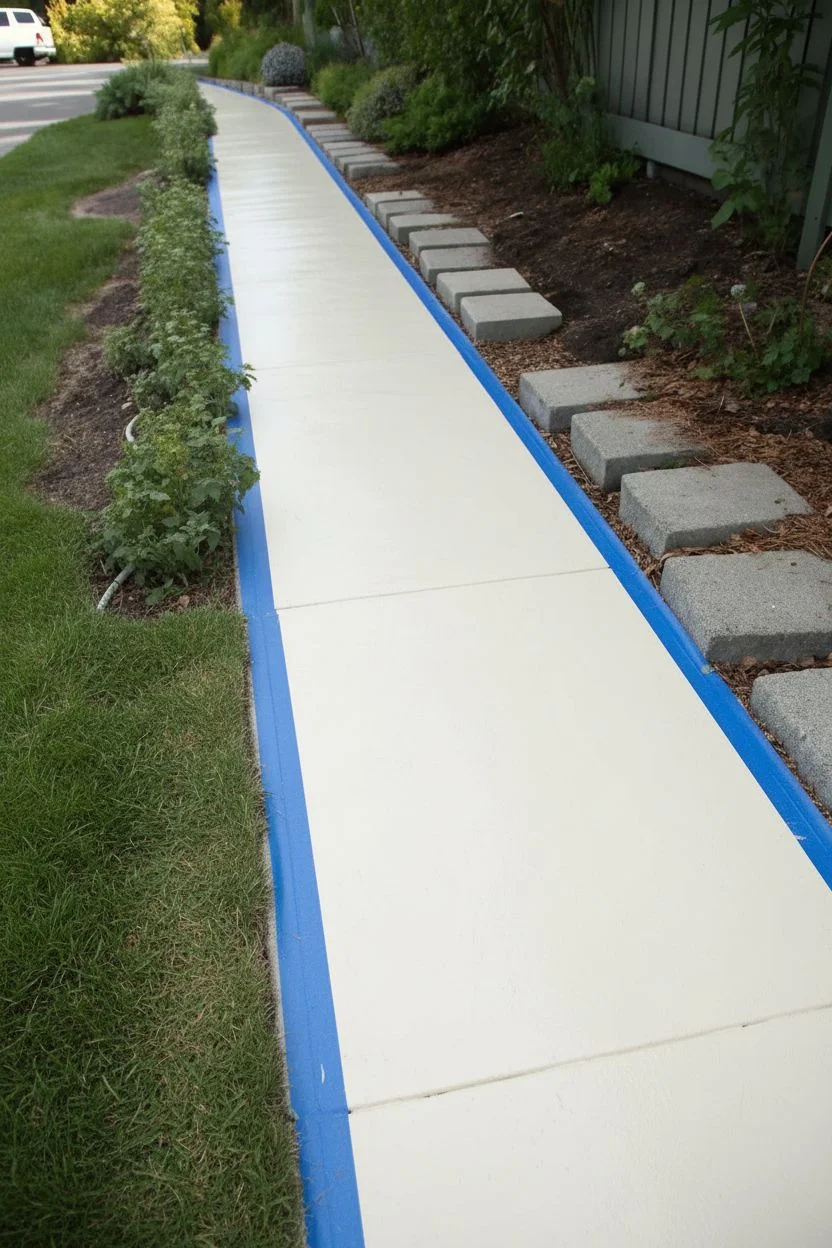
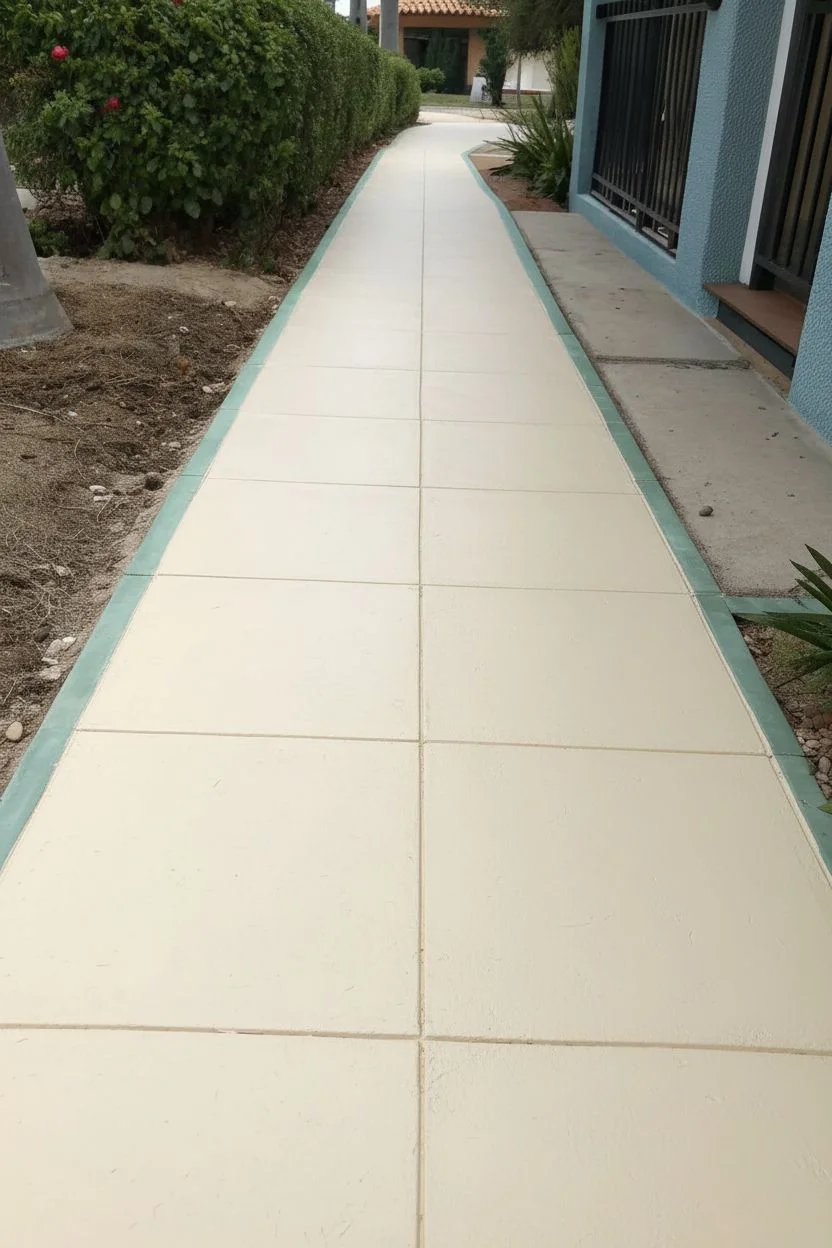
Soft Ombre Walkway That Fades From Dark to Light
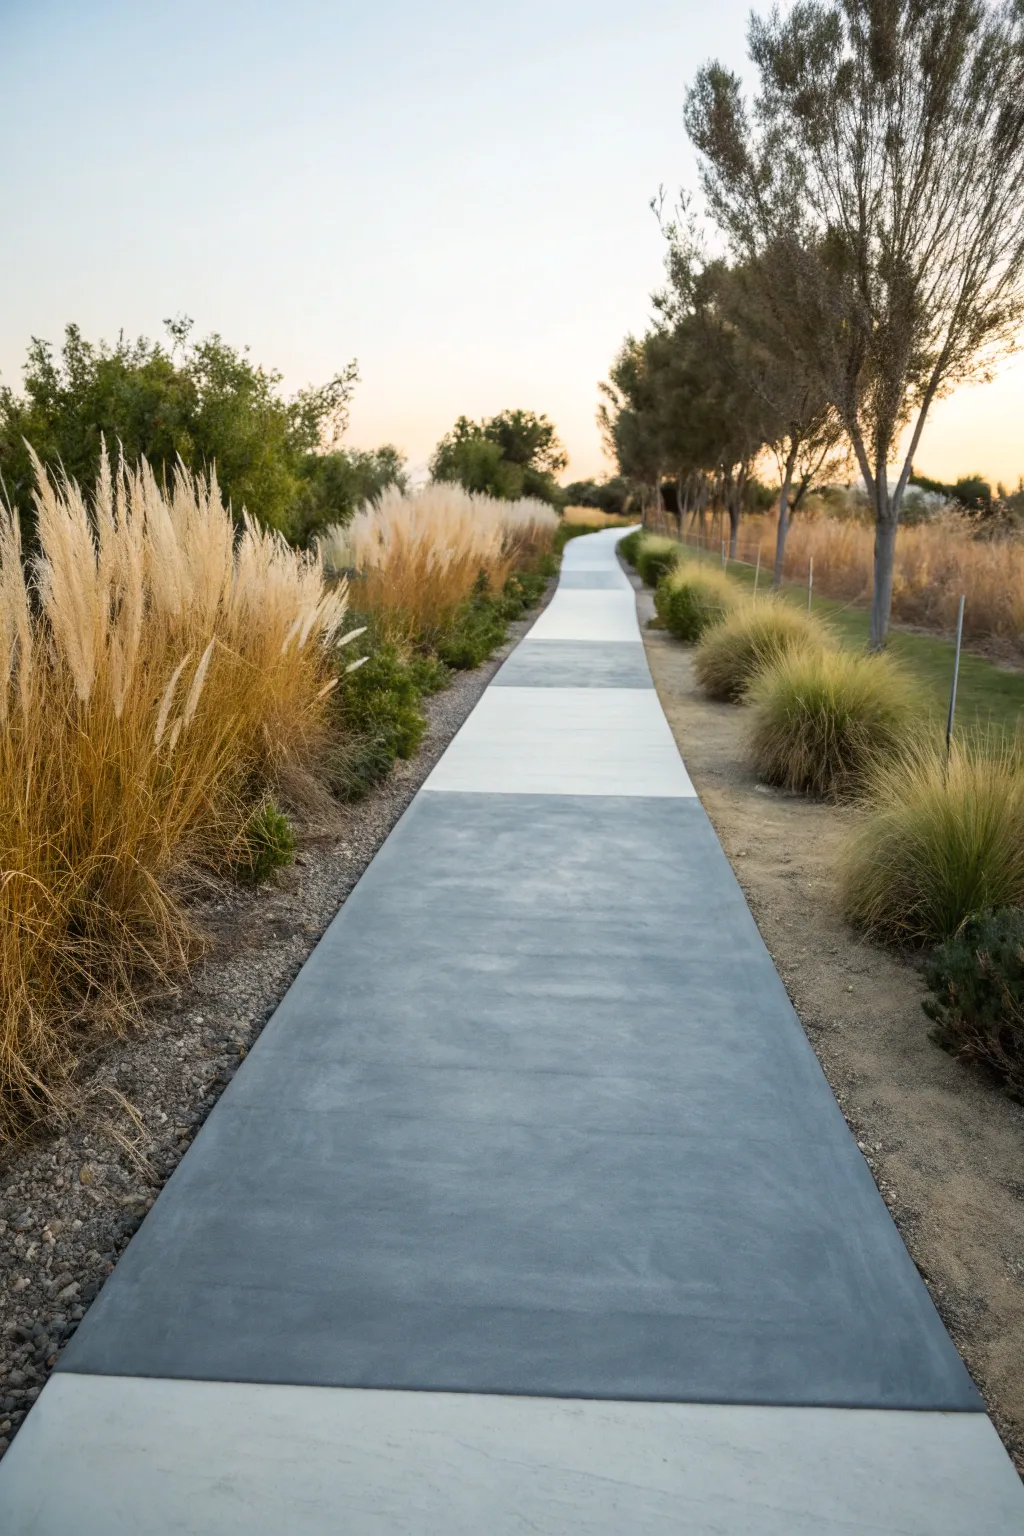
Transform a plain concrete path into a stunning visual journey with this ombre painting technique. By blending dark slate hues into airy whites across defined sections, you create a sense of movement and tranquility that mimics the transition from dusk to dawn.
Step-by-Step
Materials
- High-quality exterior concrete paint or stain (dark charcoal)
- High-quality exterior concrete paint or stain (white or very light grey)
- Concrete primer
- Pressure washer
- Painter’s tape (wide width)
- Measuring tape
- Chalk snap line
- Long-handled paint rollers
- Roller trays
- Stiff-bristle broom
- Concrete sealer (matte finish)
Step 1: Preparation & Mapping
-
Clean the surface thoroughly:
Begin by pressure washing the entire walkway to remove dirt, moss, and any loose debris. This step is crucial for paint adhesion, so take your time and ensure every inch is scrubbed clean. -
Let it dry completely:
Allow the concrete to dry for at least 24 to 48 hours. Trapped moisture can cause bubbling later, so patience here ensures a lasting finish. -
Sweep away fine dust:
Once dry, use a stiff-bristle broom to sweep away any lingering dust or sand that might have settled during the drying period. -
Measure your sections:
Determine the length of your path and divide it into equal rectangular segments. I find that sections around 4 to 6 feet long work best to create a gradual, noticeable transition. -
Mark the lines:
Use a measuring tape and a chalk snap line to mark the horizontal boundaries of each section directly on the concrete. -
Tape the boundaries:
Apply wide painter’s tape along your chalk lines. Since you are painting adjacent blocks different shades, you will tape the ‘inside’ of the section you aren’t painting first, or work in alternating sections. -
Prime the surface:
Roll a coat of concrete primer over the entire walkway. This helps neutralise the surface pH and ensures your custom colors will show up true and stick well.
Tape Trick
To prevent paint bleed, seal the edges of your painter’s tape by brushing a tiny amount of the base primer over the tape edge before applying your colored paint.
Step 2: Mixing & Painting the Gradient
-
Mix your base colors:
Set up a mixing station. You will need your pure dark charcoal for the first section and your pure white for the final section. The middle sections will need custom blends. -
Calculate your ratios:
For a smooth ombre, mix the dark and light paints in graduated ratios. For example: 80% dark/20% light, then 60%/40%, then 40%/60%, and so on, until you reach pure light. -
Paint the darkest section:
Start at the end of the path you want to be darkest. Apply the pure charcoal paint using a long-handled roller, ensuring even coverage within the taped lines. -
Apply the next shade:
Move to the next section. Clean your roller or switch to a fresh one, and apply your first mixed shade (e.g., the 80% dark blend). Work carefully up to the tape line. -
Continue the progression:
Work your way down the path, applying each progressively lighter partial mix to its specific block. Painting every other block first, letting them dry, and then taping and painting the remaining blocks can give you crisper lines. -
Paint the lightest section:
Finish at the far end of the path with your pure white or lightest grey paint. This creates that ‘fading into the distance’ visual effect. -
Assess coverage:
Once the first coat is dry to the touch, check for patchiness. Apply a second coat to any sections that look thin or uneven to enrich the color depth. -
Remove the tape:
While the final coat is still slightly tacky (not fully cured), carefully peel up the painter’s tape at a 45-degree angle to reveal sharp, clean lines between your color blocks.
Step 3: Sealing & Protection
-
Allow full cure time:
Let the paint cure according to the manufacturer’s instructions, typically 24-72 hours, before walking on it or applying sealer. -
Apply clear sealer:
Roll on a high-quality matte concrete sealer over the entire path. This protects your artwork from UV fading, rain, and foot traffic wear. -
Wait for final drying:
Keep foot traffic off the path for another 24 hours to let the sealer harden completely.
Softer Transitions
For a less blocky look, skip the tape between sections and wet-blend the edges where two colors meet using a dry brush technique.
Step back and admire how your new walkway guides the eye and adds a sophisticated, modern touch to your landscape.
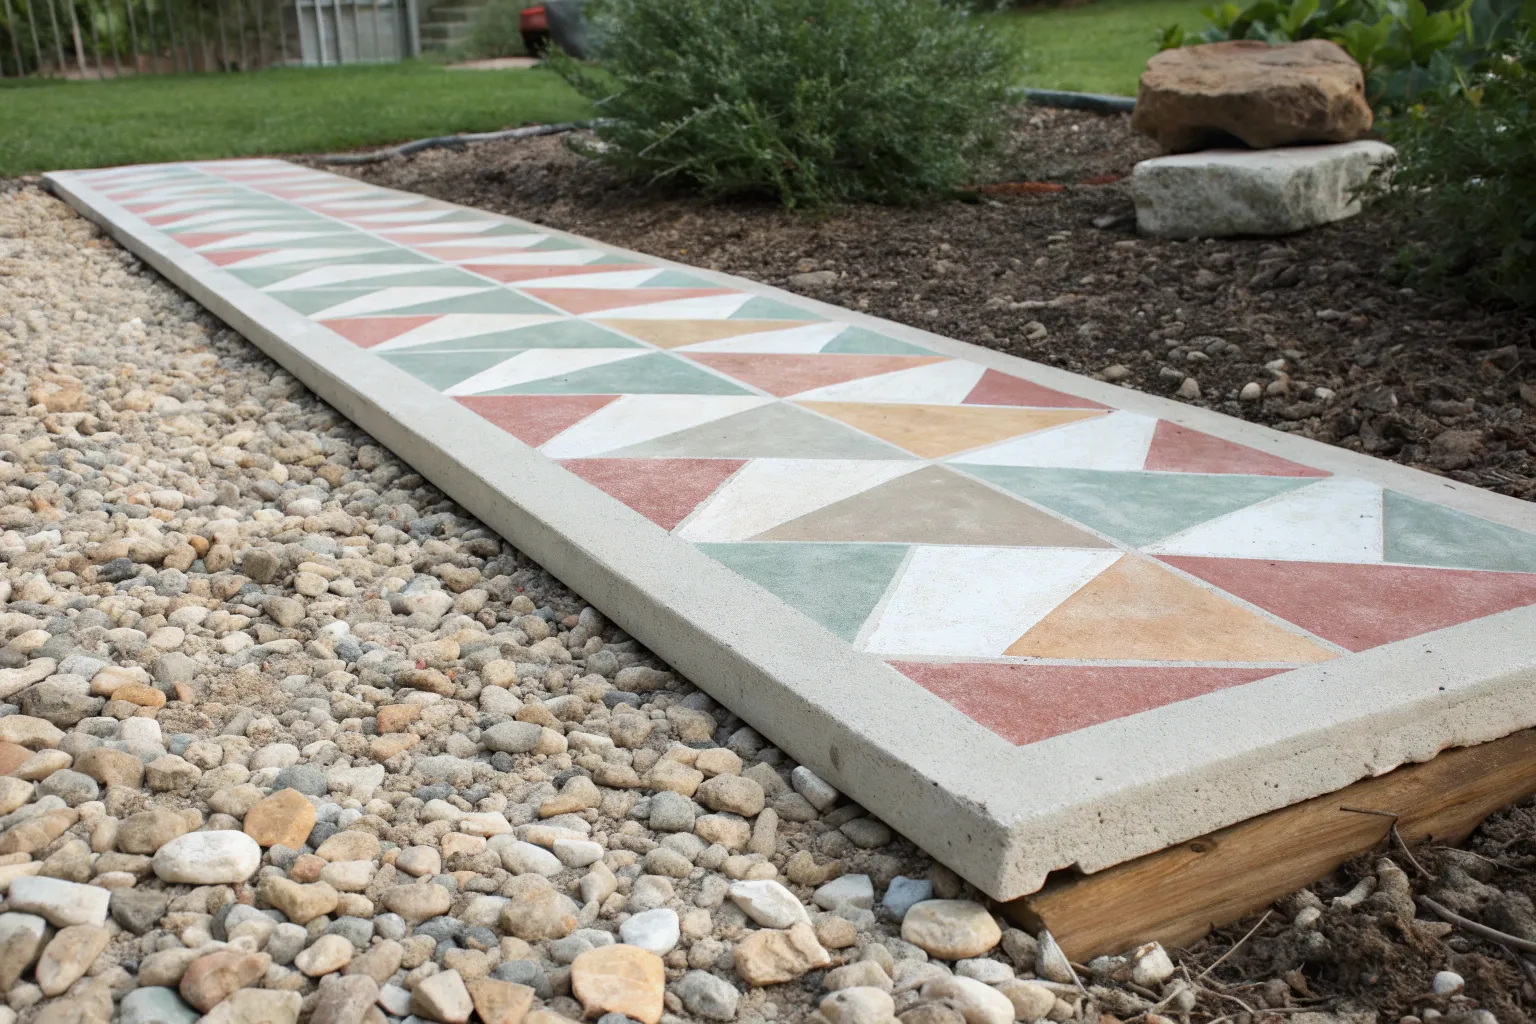
Geometric Color Blocks for a Modern Walkway
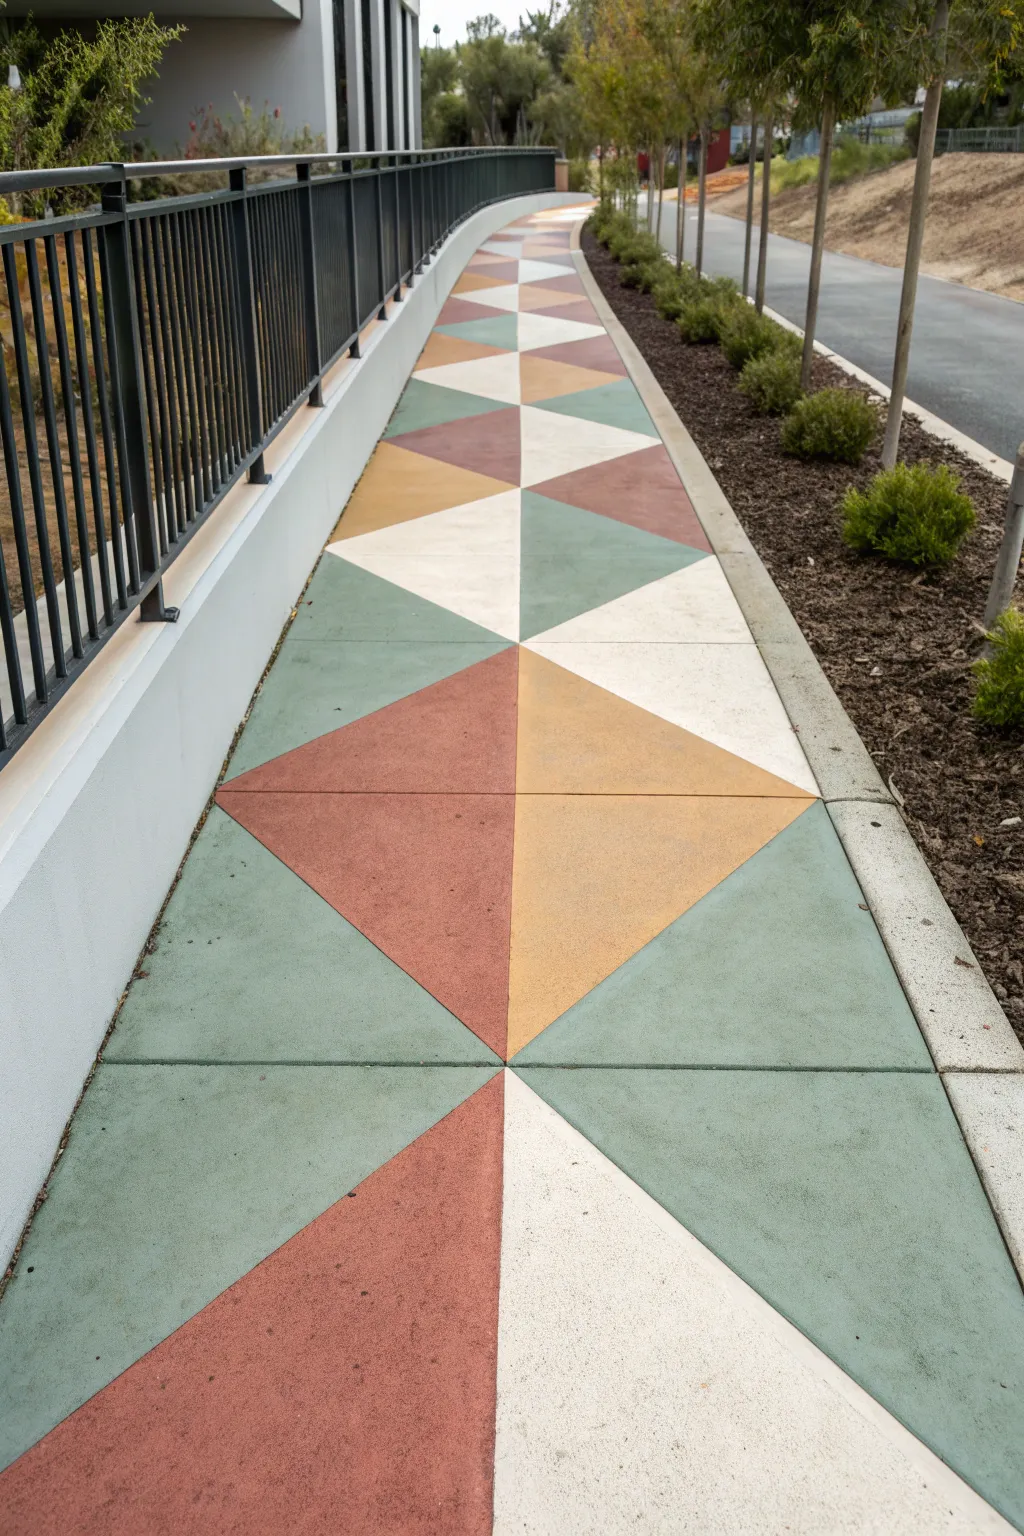
Transform a plain concrete sidewalk into a stunning modern focal point with this large-scale geometric design. Featuring a repeating pattern of triangles in muted earth tones like sage, terra cotta, and sand, this project brings artistic flair and structural rhythm to any outdoor space.
How-To Guide
Materials
- Concrete porch and floor paint (white, sage green, terra cotta, sandy beige)
- Concrete cleaner/degreaser
- High-quality painter’s tape (multi-surface, 1-2 inch width)
- Stiff bristle scrub brush
- Pressure washer (optional but recommended)
- Long straight edge or chalk line tool
- Measuring tape
- Pencil or chalk
- Paint rollers (3/8 inch nap) with extension pole
- Small angled paintbrush (for edging)
- Paint tray and liners
- Concrete sealer (clear, non-yellowing)
Step 1: Preparation
-
Clean the surface:
Begin by thoroughly cleaning the concrete walkway. Use a stiff bristle brush and a concrete degreaser to remove any dirt, oil, or existing coatings. If possible, use a pressure washer for the deepest clean. -
Repair imperfections:
Inspect the concrete for deep cracks or chips. Fill these with a concrete patch compound and sand them smooth once dry so your geometric lines stay crisp. -
Dry completely:
Allow the concrete to dry for at least 24 hours. Painting on damp concrete can trap moisture and cause bubbling later. -
Base coat application:
Roll on a coat of white concrete paint over the entire walkway. This acts as a primer and also serves as the ‘white’ color in your final design, saving you time later. -
Second base coat:
Once the first coat is dry to the touch (usually 4-6 hours), apply a second coat of white to ensure distinct, opaque coverage. Let this cure fully, ideally overnight.
Bleed-Through Blues?
If paint sneaks under the tape, don’t panic. Wait for it to dry fully, re-tape precisely over the line, and touch up with the original base color to cover the mistake.
Step 2: Mapping the Design
-
Find the center:
Measure the total width of your walkway to find the exact center point. Snap a chalk line down the entire length of the path to create a central guide. -
Mark the squares:
Along the center line, mark intervals equal to half the width of your path. If your path spans 4 feet wide, mark every 2 feet. These points will form the corners where your triangles meet. -
Draw the diagonals:
Use your chalk line to connect the center marks to the edges of the walkway in a zig-zag pattern. This creates the large ‘X’ shapes that define the four meeting triangles. -
Tape the lines:
Apply painter’s tape firmly along your chalk lines. Important: Tape on the *outside* of the shape you intend to paint first, or split the difference if painting adjacent shapes essentially. I prefer to tape selectively to paint all colors of one type first. -
Seal the tape edges:
Run a dry credit card or putty knife firmly over all tape edges to prevent bleed-under. For perfect lines, lightly brush a tiny amount of the base color (white) over the tape edge to seal it.
Add Subtle Texture
For a stone-like look, sponge a slightly lighter or darker shade over each color block while wet. This adds depth and hides dirt better than flat color.
Step 3: Painting the Colors
-
Plan your color map:
To avoid mistakes, lightly mark each triangle with a piece of chalk indicating its color (e.g., ‘G’ for Green, ‘R’ for Red, ‘Y’ for Yellow/Beige) following a repeating pattern. -
Paint the first color:
Start with the terra cotta sections. Use a small angled brush to cut in along the tape edges, then fill the center with a roller. Don’t overload the roller. -
Remove tape while wet:
Carefully peel up the tape for these sections while the paint is still slightly tacky. This prevents the dried paint film from ripping. -
Let dry and re-tape:
Allow the first color blocks to dry completely. Re-tape the edges of the dry painted sections to protect them while you paint the adjacent colors. -
Paint the second color:
Repeat the process for the sage green triangles. Cut in carefully near the terra cotta sections if they touch, or trust your fresh taping job. -
Paint the third color:
Apply the sandy beige paint to the remaining assigned triangles. Ensure you leave the white sections unpainted (revealing the base coat) as per the design. -
Touch ups:
Once all tape is removed and paint is dry, use a small artist’s brush to fix any bleed-through or uneven lines with the appropriate color.
Step 4: Finishing
-
Apply sealer:
After the patterned paint has cured for at least 3-5 days (check your paint can for specific cure times), roll on a layer of clear, non-yellowing concrete sealer. -
Add anti-slip (optional):
If this walkway gets wet often, consider mixing a clear anti-slip additive into your sealer coat for safety.
Your walkway is now a durable, walkable piece of geometric art that guides guests to your door with style

PENCIL GUIDE
Understanding Pencil Grades from H to B
From first sketch to finished drawing — learn pencil grades, line control, and shading techniques.
Explore the Full Guide
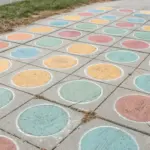
Painted “Stepping Stone” Circles Along a Straight Path
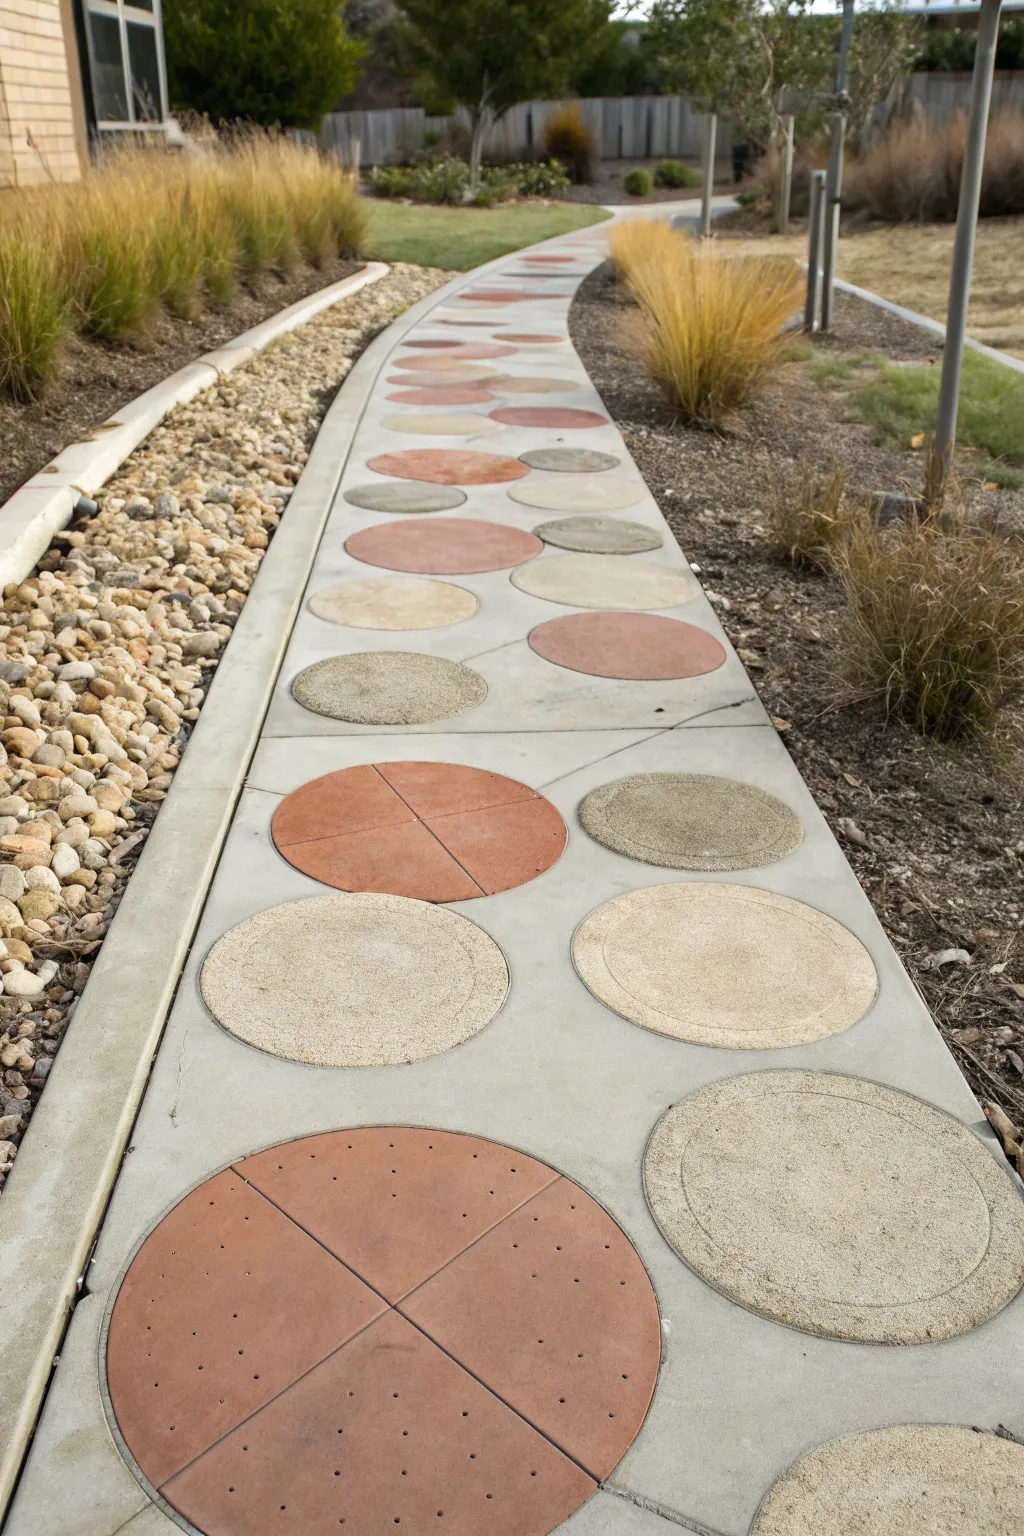
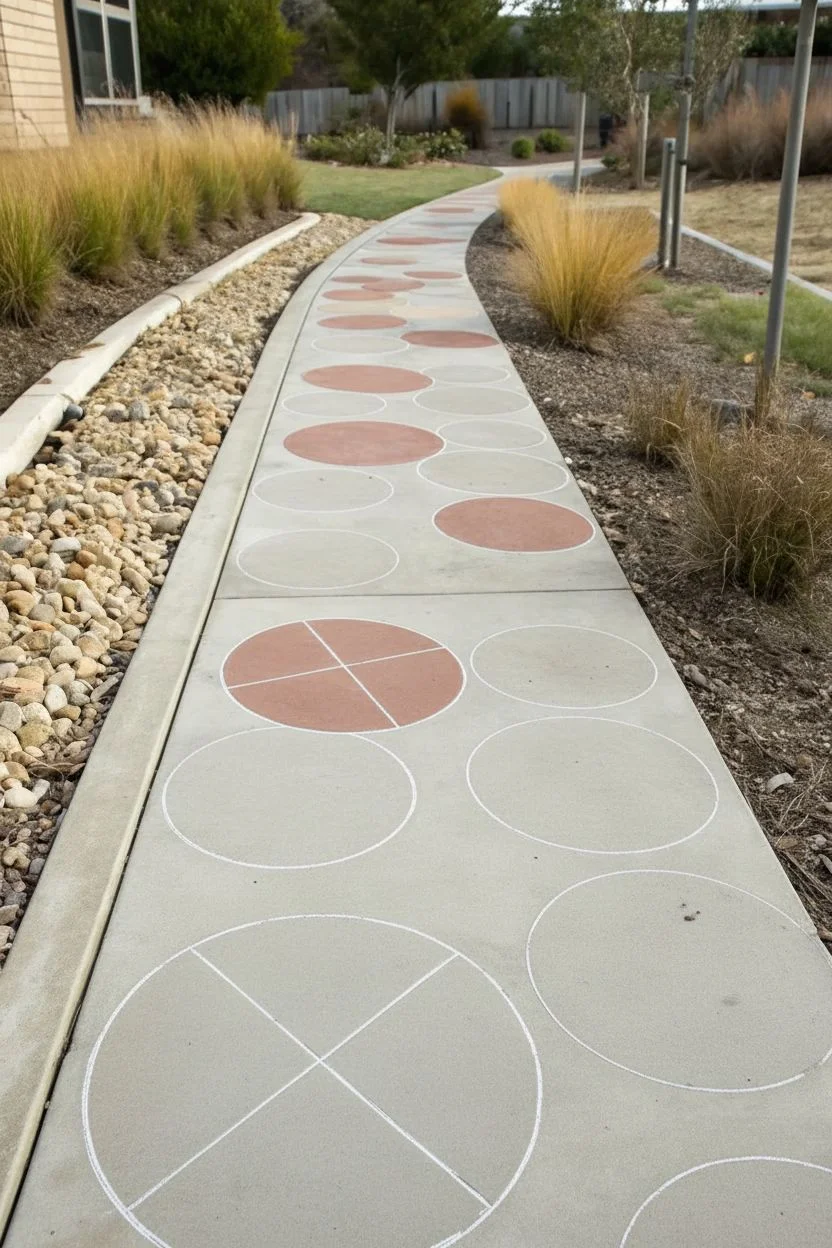
Transform a plain concrete path into a customized garden feature with this trompe l’oeil technique. By using large stencils and textured paint effects, you can mimic the look of inlaid colored stones without pouring any new concrete.
Step-by-Step Tutorial
Materials
- Exterior concrete paint or porch & floor enamel (terracotta/rust color)
- Exterior concrete paint (beige/sand color)
- Exterior concrete paint (grey/taupe color)
- Dark grey thin-line tape (1/8 inch)
- Circular stencils (various sizes) or large circle cutter template
- Chalk or pencil
- Measuring tape
- Pressure washer or stiff scrub brush
- Concrete cleaner/degreaser
- 3-inch roller covers and handle
- Small artist brushes or sponge brushes
- Sea sponge (natural texture)
- Exterior masonry sealer (clear matte)
Step 1: Preparation and Layout
-
Clean the Surface:
Begin by thoroughly cleaning the concrete walkway. Use a pressure washer or a stiff brush with concrete cleaner to remove dirt, moss, and grease. Let the path dry completely for at least 24 hours. -
Plan the Pattern:
Before committing with paint, lay out your circular stencils or cardboard cutouts on the path to visualize the flow. Aim for an organic scatter pattern, alternating sizes and spacing to create a whimsical, stepping-stone feel. -
Trace the Circles:
Once satisfied with the arrangement, lightly trace around your templates with chalk or a pencil. Ensure some circles are grouped in pairs or trios while others stand alone. -
Create the Divisions:
For the larger circles that feature quadrants (like the terracotta ones in the image), use a ruler to draw a cross through the center, dividing the circle into four equal pie slices.
Stone Texture Trick
Mix a small amount of clean play sand into your paint before applying the final coat. This adds genuine grit and slip-resistance that feels like real stone.
Step 2: Painting the Circles
-
Base Color Application – Terracotta:
Start with the large divided circles. Use the rust or terracotta paint. Carefully paint inside the traced lines, using a small brush for the edges and a roller for the center. -
Base Color – Sand and Grey:
Proceed to the smaller circles, alternating between the beige/sand color and the grey/taupe shade. I find it helps to mark the intended color inside the circle with chalk first so you don’t lose track of the pattern. -
Add Texture with Sponging:
While the base coat is still tacky or just after applying a second coat, lightly dab a damp sea sponge over the surface. Use a slightly lighter or darker shade of the same color to create a mottled, stone-like texture rather than flat color. -
Simulate Granules:
For an even more realistic stone look, dip an old toothbrush into diluted dark grey paint and flick speckles onto the dry beige and tawny circles. This mimics the aggregate texture found in real concrete pavers. -
Detail the Dividers:
Once the large terracotta circles are fully dry, apply the 1/8-inch dark grey tape over the cross lines you drew earlier. Alternatively, paint these lines carefully with a liner brush and dark grey paint to create the separation between the ‘paver’ quadrants. -
Add Polka Dots:
The image shows small divots or texture dots on the terracotta circles. Recreate this by using the handle end of a paintbrush, dipped in dark grey paint, to stamp small, organized dots in each quadrant. -
Inner Ring Details:
For the beige circles, sketch a slightly smaller circle inside the painted area. painting a thin line creates a ‘rim’ effect, adding dimension to the faux stone.
Step 3: Finishing Touches
-
Clean Up Edges:
Check the perimeter of each circle. If any paint bled out, use a small stiff brush with a bit of solvent or water (depending on paint type) to clean it up, or touch up the surrounding concrete color if you painted the background. -
Cure Time:
Allow the painted designs to cure for at least 48 hours. Avoid walking on them during this time to prevent lifting or smudging. -
Seal the Deal:
Apply two coats of clear, matte exterior masonry sealer over the entire walkway. This unifies the sheen and protects your artwork from UV fading and foot traffic wear.
Glow-in-the-Dark Upgrade
Mix phosphorescent powder into your clear sealer or use glow-in-the-dark paint for the small dots on the terracotta circles to light the path at night.
Now you have a charming, custom pathway that invites guests to take a stroll through your garden
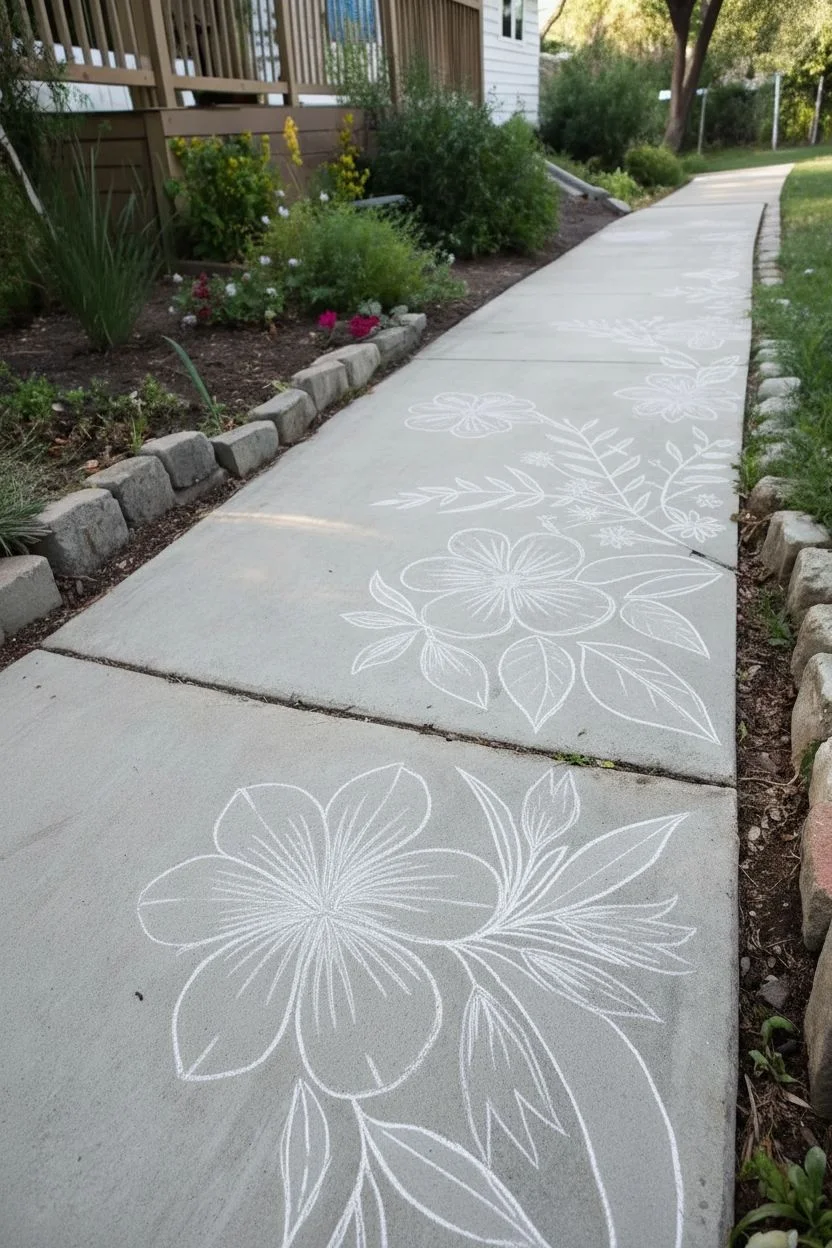
Nature Vine Border That “Crawls” Along the Walkway

Transform a plain concrete path into an enchanted garden walk with this elegant vine design. Using a custom stencil and durable exterior paint, you can create a seamless, winding pattern that looks like it grew straight out of a storybook.
How-To Guide
Materials
- Pressure washer or stiff scrub brush
- Concrete cleaner/degreaser
- Exterior masonry paint (base color – creamy white/beige)
- Exterior masonry paint (vine color – sage green)
- Large polyester roller and tray (for base coat)
- Mylar stencil sheets or heavy acetate
- Craft knife or stenciling cutter
- High-density foam roller (4-inch size)
- Painter’s tape (1.5-inch width)
- Small artist brush (for touch-ups)
- Chalk line or laser level
- Clear concrete sealer (matte finish)
Step 1: Preparation & Base Coat
-
Clean the Surface Deeply:
Before thinking about paint, scrub the concrete vigorously with a cleaner or degreaser to remove dirt, moss, and oils. A pressure washer is ideal here to ensure the pores are open for the paint to adhere properly. -
Dry Completely:
Allow the walkway to dry for at least 24 to 48 hours. If moisture is trapped underneath, your beautiful vines will eventually bubble and peel. -
Tape Off the Edges:
Apply painter’s tape along the outer edges of your walkway stones or pavers to protect the surrounding grass and garden beds. Ensure the tape is pressed down firmly. -
Apply the Base Coat:
Using a large roller, apply your creamy white or beige masonry paint. Work in sections to ensure even coverage. -
Add a Second Coat:
Once the first layer is dry to the touch, roll on a second coat to create an opaque, solid canvas for your artwork. Let this cure fully, ideally overnight.
Pro Tip: Spray Adhesive
Lightly mist the back of your stencil with repositionable spray adhesive. It creates a temporary tack that seals the stencil edges to the concrete, preventing paint bleed on rough surfaces.
Step 2: Creating the Design
-
Design Your Stencil:
Draw a vine pattern on paper that includes a central wavy stem, leaves of varying sizes, and swirling tendrils. The design should be repeatable so the end of the stem connects to the start. -
Cut the Stencil:
Place your mylar sheet over the drawing and carefully cut out the pattern using a sharp craft knife. Remember to leave ‘bridges’ (small strips of plastic) to hold floating elements in place. -
Mark the Guide Lines:
Snap a chalk line down the center of your walkway. Measure outwards from the center to mark the width of your vine path, snapping two parallel chalk lines to act as the outer borders where the solid green rails will go. -
Paint the Border Rails:
Apply tape along the inside of your chalk lines to mask off the center, leaving a thin strip exposed. Paint this strip with your sage green paint to create the solid green borders shown in the image.
Step 3: Stenciling the Vines
-
Position the Stencil:
Starting at the near end of the walkway, place your vine stencil between the two painted border rails. Secure it firmly with painter’s tape on all four corners. -
Load the Foam Roller:
Dip your 4-inch foam roller into the sage green paint, then roll it off onto a paper towel until it feels almost dry. Removing excess paint is critical to prevent bleeding under the stencil. -
Roll the Pattern:
Apply the paint over the stencil using light to medium pressure. I find doing two thin passes works much better than one heavy one to keep lines crisp. -
Shift and Repeat:
Carefully lift the stencil straight up. Move it down the path, aligning the start of the stencil stem with the end of the painted section you just finished. -
Continue Down the Path:
Repeat the stenciling process for the entire length of the walkway. Wipe the back of your stencil periodically if paint starts to accumulate. -
Connect the Gaps:
Once the stenciling is done and dry, use a small artist brush to carefully paint over any ‘bridges’ from the stencil, making the vine look like one continuous, hand-painted line.
Troubleshooting: Bleeding Paint
If paint bleeds under the stencil, wait for it to dry completely. Don’t wipe it wet! Once dry, touch it up with the base coat color using a tiny detail brush for a perfect correction.
Step 4: Sealing and Finishing
-
Clean Up Edges:
Inspect the design for any smudges or bleed-through. Use a small brush and your base color paint to ‘erase’ any mistakes by painting over them. -
Apply Sealer:
Once the green vines have cured for at least 24 hours, apply two coats of clear matte concrete sealer with a clean roller. This protects your hard work from UV rays and foot traffic. -
Remove Tape:
Peel off all remaining painter’s tape to reveal your crisp, finished edges.
Step back and enjoy the organic flow this custom path brings to your garden landscape


Oversized Floral Corners for a Garden-Path Pop
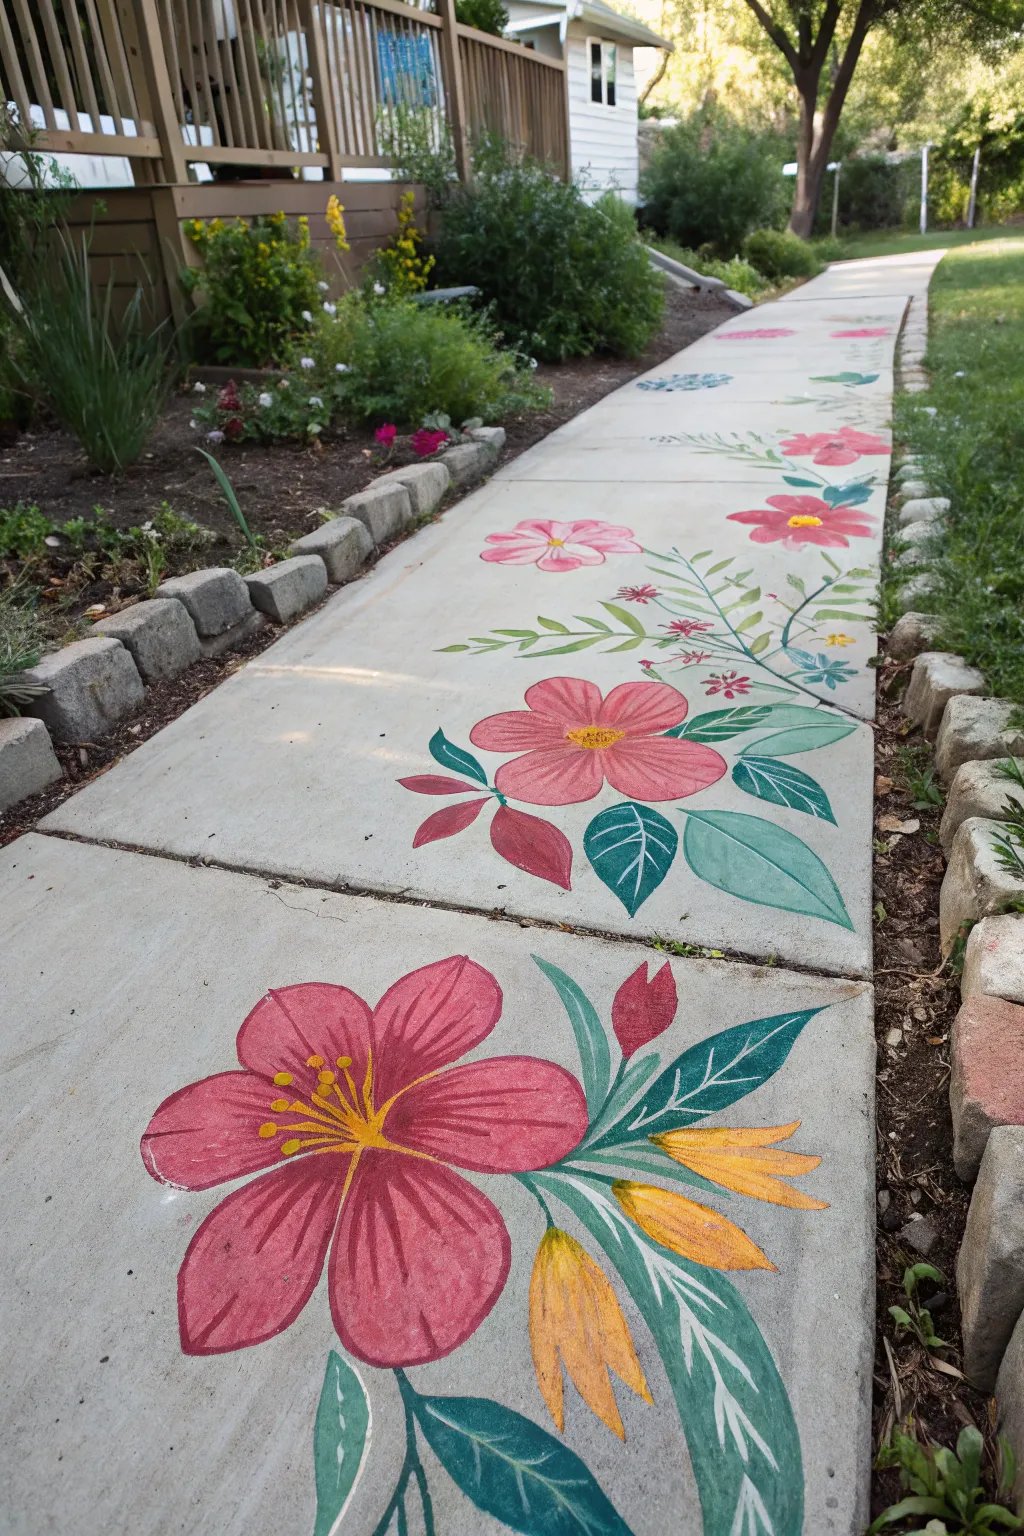
Transform a plain concrete path into an enchanting garden journey with these oversized, folk-art inspired floral motifs. The design uses bold, trailing vines and large blossoms to create an organic flow that leads visitors toward your front door.
Step-by-Step
Materials
- Exterior concrete paint or porch & floor enamel (White/Base coat)
- Exterior acrylic craft garden paints (Deep Red, Rose Pink, Bright Yellow, Teal Green, Emerald Green)
- Set of angled shader brushes (1-inch, 1/2-inch)
- Round detail brushes (Size 4, Size 6)
- Chalk for sketching
- Pressure washer or stiff broom
- Concrete sealer (matte or satin)
- Paper plates for palettes
- Water bucket and rags
Step 1: Preparation & Planning
-
Clean the canvas:
Before putting brush to concrete, ensure the surface is pristine. Pressure wash the entire walkway to remove moss, dirt, and loose debris. If you don’t have a pressure washer, a stiff broom and scrubbing with soapy water works well. Let the concrete dry completely. -
Map the flow:
Use chalk to lightly sketch the ‘spine’ of your design. Draw a wandering vine line that meanders from one side of the path to the other, creating natural curves where your flowers can nestle. -
Sketch the blooms:
Draw large five-petal flower shapes along your vine line. Place the largest blooms near corners or edges for the ‘oversized corner’ effect, and scatter smaller buds further down the path. Keep the shapes simple and open.
Step 2: Painting the Blooms
-
Base the petals:
Using a 1-inch angled brush, fill in the flower petals with your Rose Pink. Don’t worry about perfect coverage on the first pass; concrete is thirsty and may need two coats for vibrancy. -
Add depth:
While the pink is still tacky or just after drying, use the Deep Red paint. Load the brush and sweep color from the center of the flower outward into the petals to create a shadow gradients. -
Create highlights:
Mix a little white base paint with your Rose Pink to make a lighter shade. Use this to stroke the outer tips of the petals, adding dimension and a ‘sun-kissed’ look. -
Detail the center:
Once the petals are dry to the touch, use a round brush loaded with Bright Yellow to paint the flower centers. Add stamen lines radiating outward using thin, confident strokes. -
Buds and fillers:
For the unopened buds along the vine, paint simple teardrop shapes in Deep Red, adding a small green cap at the bottom where it connects to the stem. -
Secondary yellow flowers:
To break up the red and pink dominance, paint elongated, lily-like shapes using the Bright Yellow. Give them a quick stroke of orange or red at the base for visual interest.
Knees First!
Since you will be working on the ground for an extended period, wear heavy-duty knee pads or use a thick gardening foam mat to stay comfortable while painting detailed petals.
Step 3: Leaves & Vines
-
Paint the stems:
Go over your initial chalk vine lines with Emerald Green. Use a thinner brush for the connecting stalks to keep them elegant rather than bulky. -
Block in leaves:
Paint large, almond-shaped leaves branching off the main vine using the Teal Green shade. Vary the sizes—larger near the big flowers, smaller near the tips of the vines. -
Two-tone shading:
For a stylized look, paint half of each leaf with the darker Emerald Green and the other half with Teal, blending slightly where they meet in the middle vein. -
Adding veins:
Using a small round brush and your lightest white-green mix (or plain white), paint delicate veins on top of the dried green leaves. This mimics the tole painting style seen in the inspiration image.
Glow Up
Mix a small amount of fine distinct reflective glass beads or ‘highway glitter’ into your final sealer coat. The flowers will subtly sparkle when porch lights hit them at night.
Step 4: Finishing Touches
-
Clean up edges:
Step back and look for any smudges or rough edges. Use a small brush with your gray concrete color (or just water if the paint is fresh) to tidy up the outlines. -
Let it cure:
Allow the paint to cure for at least 24 hours. The concrete must be perfectly dry before the final step. -
Seal the deal:
Apply a clear, non-yellowing concrete sealer over the painted areas (or the whole path for uneven wear protection). I find a second coat of sealer is crucial for high-traffic walkways. -
Final dry:
Keep foot traffic off the path for the time recommended on your sealer can to prevent tackiness.
Now you have a permanent garden path that blooms vividly regardless of the season
Mediterranean-Inspired Tile Grid With Simple Motifs
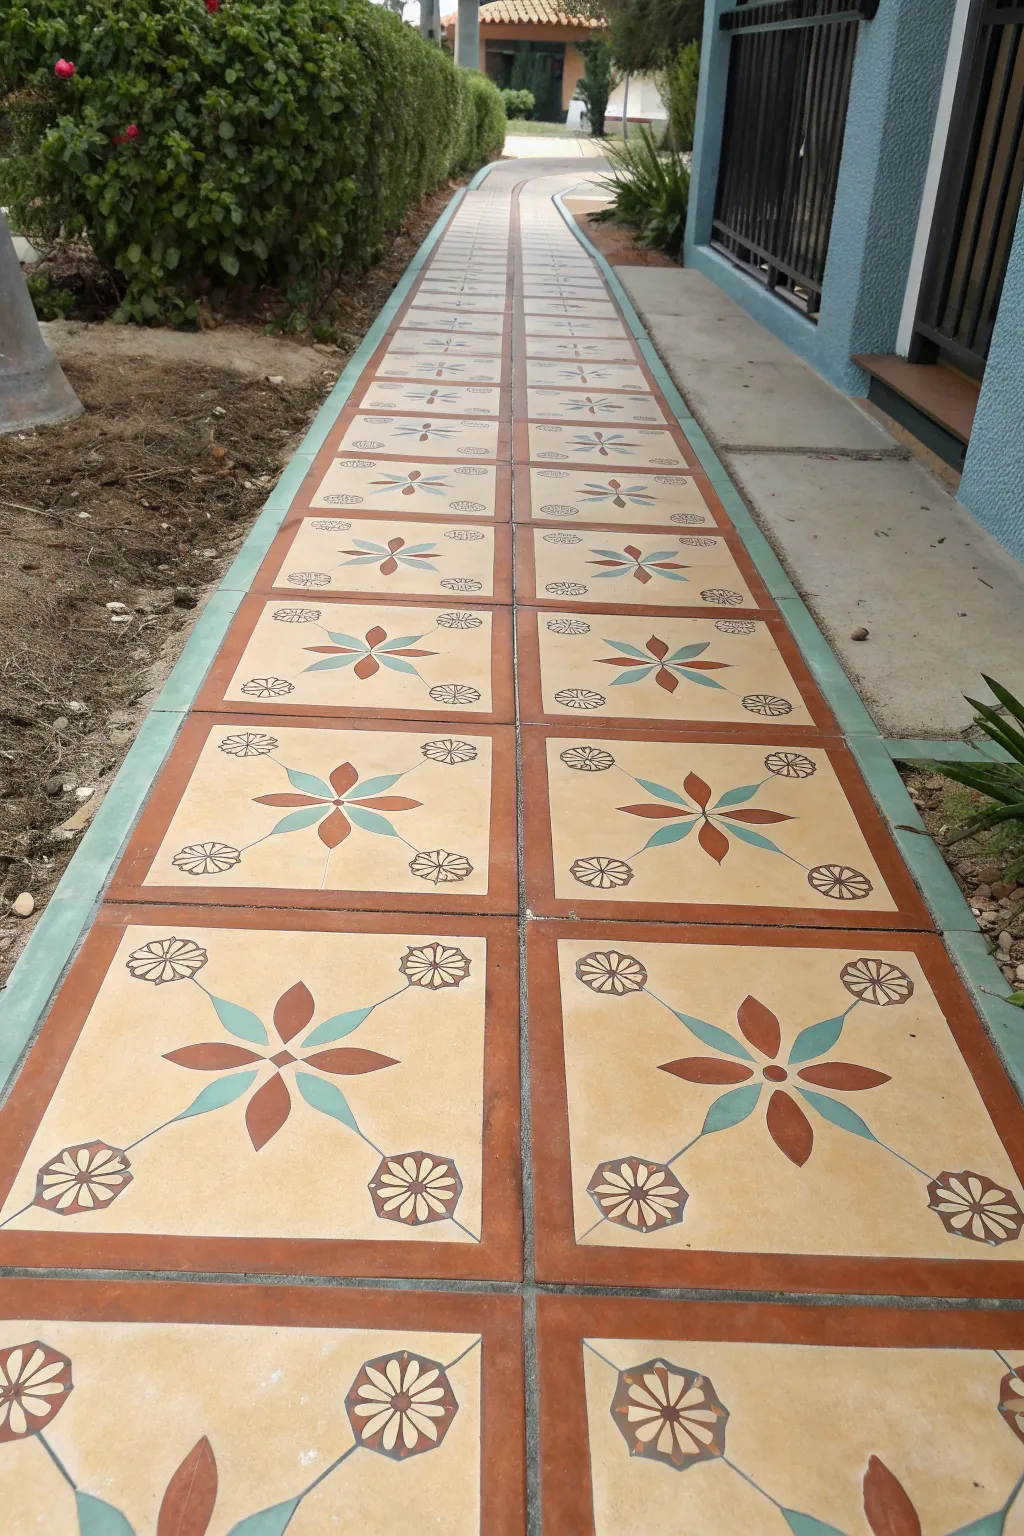
Transform a plain concrete path into a welcoming Mediterranean escape with this clever painted tile illusion. By using a repeating grid and warm terracotta tones paired with cool teal accents, you’ll create the look of expensive custom pavers without the heavy lifting.
How-To Guide
Materials
- Concrete cleaner/degreaser
- Pressure washer (optional but recommended)
- Exterior masonry primer
- Exterior porch & floor paint (Cream/Base color)
- Exterior porch & floor paint (Terracotta/Red-Brown)
- Exterior porch & floor paint (Teal/Blue-Green)
- Painters tape (1-inch width for borders)
- Writer’s tape or 1/4-inch detailing tape (for grout lines)
- Measuring tape
- Chalk line
- Long straight edge or level
- Large floral stencil (custom cut or purchased)
- Stencil brushes (various sizes)
- Small detail brushes
- Paint rollers and tray extension pole
- Clear concrete sealer (exterior grade matte or satin)
Step 1: Preparation & Base Coat
-
Clean the Surface:
Begin by thoroughly cleaning the concrete walkway. Sweep away loose debris and scrub with a concrete cleaner or degreaser to remove dirt and oils. If possible, pressure wash the surface and let it dry completely for 24 hours. -
Apply Primer:
Roll on a coat of high-quality exterior masonry primer. This step ensures your painted design adheres properly and lasts through weather changes. -
Paint the Base Color:
Once the primer is dry, apply two coats of your cream-colored porch and floor paint. This will serve as the ‘background’ for your tiles and needs to be fully opaque. -
Measure the Grid:
Determine the size of your faux tiles. Based on the walkway width, divide the space into equal squares (likely two wide, as shown). Mark your intervals along the edges. -
Snap Chalk Lines:
Use a chalk line to snap a central vertical line down the entire path, followed by horizontal lines at your marked intervals to create a grid of squares.
Bleeding Lines?
If paint bleeds under the tape, wait for it to fully dry. Then, use a small flat brush and the base cream color to carefully ‘erase’ the smudge by painting over it.
Step 2: Creating the Grid & Borders
-
Tape the Grout Lines:
Apply thin detailing tape (1/4 inch) directly over your chalk lines to simulate grout. Press the tape down firmly to prevent paint bleed. -
Tape the Borders:
Create the thicker border frames for each tile. Using 1-inch painters tape, mask off uniform squares inside your grid, leaving a thick band of exposed cream base around the perimeter of each square. -
Seal the Tape Edges:
Lightly brush a small amount of the cream base paint over the edges of your tape. This seals the tape line and ensures your next colors will have crisp, sharp edges. -
Paint the Tile Borders:
Paint the exposed perimeter bands with your terracotta color. This creates the reddish-brown frame that defines each individual tile.
Step 3: Stenciling the Motifs
-
Position Center Stencil:
Place your large floral stencil in the exact center of a square. Secure it with delicate surface tape to keep it from shifting. -
Stipple the Leaves:
Using a stencil brush with very little paint (dry brush technique), stipple the teal color into the leaf sections of the design. I like to build the color up slowly here to avoid globs. -
Stipple the Petals:
Switch to a clean brush and apply the terracotta paint to the flower petals. Be careful not to smudge into the wet teal areas. -
Add Corner Details:
Position your smaller corner stencils (the wheel/flower shapes) in each corner of the cream square. Stencil these using a dark brown or deep terracotta to contrast slightly with the main flower. -
Connect the Design:
Use a small liner brush to hand-paint the thin lines connecting the central flower to the corner motifs in teal, mimicking the delicate stem work seen in traditional tiles. -
Repeat the Process:
Continue this stenciling process for every square down the walkway. Clean your stencil periodically if paint buildup starts to affect the crispness of the lines.
Antique Finish
For an aged look, mix a little dark gray paint with glaze and lightly sponge it over the dried tiles before sealing. This mimics the dirt and wear of old-world stone.
Step 4: Finishing Touches
-
Remove the Tape:
Once the paint is tacky but not fully dry, carefully peel back all tape. Pull at a 45-degree angle to reveal your clean cream ‘grout’ lines and borders. -
Touch Ups:
Inspect the walkway for any bleed-through or mistakes. Use a small artist’s brush and your base cream paint to tidy up any messy edges. -
Side Borders:
If desired, paint the vertical edges of the walkway (the curb) in a solid teal or terracotta to frame the entire path, as seen in the inspiration image. -
Apply Sealer:
After the paint has cured for at least 48 to 72 hours, roll on two coats of clear, non-yellowing exterior concrete sealer to protect your handiwork from foot traffic and UV rays.
Now you have a stunning, durable pathway that brings a permanent splash of Mediterranean sunshine to your garden.
Diagonal Stripes That Make a Narrow Walkway Feel Wider
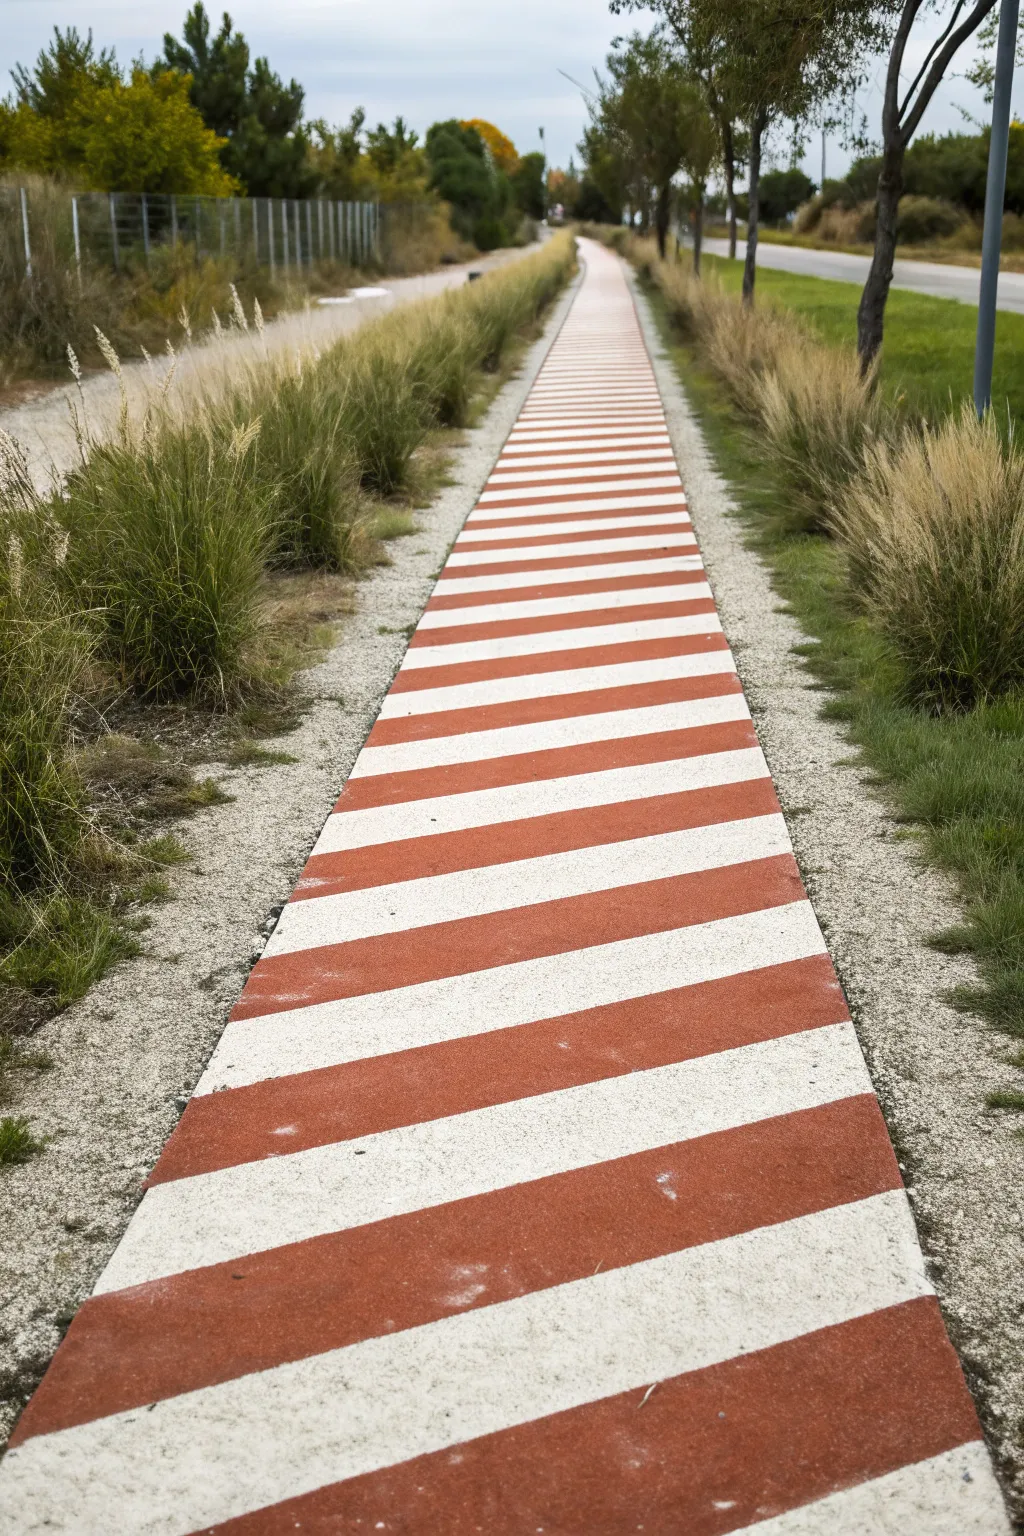

Transform a narrow, unassuming concrete path into a visually striking feature with bold diagonal stripes. This high-contrast red and white pattern not only adds curb appeal but creates an optical illusion that helps the walkway feel significantly wider.
Step-by-Step Tutorial
Materials
- Outdoor concrete/porch paint (white)
- Outdoor concrete/porch paint (terracotta red)
- Pressure washer or stiff broom and hose
- Concrete primer
- Painters tape (2-inch width recommended based on the image)
- Measuring tape
- Chalk line reel or long straight edge
- Pencil or chalk
- Paint roller with extension pole
- Roller covers (3/8 nap for smoother concrete, 1/2 nap for rougher)
- Small paintbrush for edges
- Paint tray and liners
Step 1: Preparation
-
Clean surface thoroughly:
Begin by removing all dirt, moss, and loose debris from the walkway. A pressure washer serves best here to ensure the paint adheres properly, but a stiff scrub brush with a concrete cleaner and a hose works too. -
Repair cracks:
Inspect the concrete for significant cracks or pits. Fill these with a concrete patch compound and allow it to cure completely according to the manufacturer’s instructions before proceeding. -
Apply primer:
Once dry and clean, roll on a coat of high-quality concrete primer. This step is crucial for longevity and ensures your red and white colors stay vibrant against the gray base.
Seal the Deal
For high-traffic paths like this, applying a clear, non-slip concrete sealer as a final topcoat will protect your geometric design from UV fading and scratches.
Step 2: Base Coat Application
-
Cut in the edges:
Using your white outdoor paint and a small brush, carefully paint the outer edges of the walkway where a roller might not reach neatly. -
Roll the first coat:
Pour the white paint into your tray. Using the roller on an extension pole, apply the first coat of white paint tailored for outdoor surfaces over the entire walkway. -
Apply second coat:
Allow the first coat to dry fully—usually 4 to 6 hours—before rolling on a second coat of white. This ensures a solid, opaque background for your stripes. -
Let cure distinctively:
Wait at least 24 hours for the base coat to cure hard. If you tape too soon, you risk peeling up your fresh white base.
Bleeding Lines?
If paint bleeds under the tape, wait until completely dry. Then, re-tape the line slightly over the mistake and touch up with the original background color.
Step 3: Marking and Taping
-
Determine stripe angle:
Decide on your angle; a 45-degree angle is standard for this look. Mark a starting point on one edge of the path. -
Measure stripe width:
This project features uniform stripe widths. Measure out equal increments—around 6-8 inches looks effective here—along both edges of the walkway. -
Snap chalk lines:
Using a partner to hold the other end, snap chalk lines diagonally connecting your marks to create guidelines for every single stripe. -
Apply the tape:
Apply your painter’s tape along the OUTSIDE of the stripes that will remain white. I find it helpful to place a small piece of tape inside the ‘stay white’ zones as a reminder so I don’t accidentally paint the wrong stripe. -
Seal tape edges:
Press the tape down firmly. For crisp lines, paint a very thin layer of the *base white* color over the edge of the tape. This seals the tape so any bleed-through is white-on-white, invisible later.
Step 4: Painting the Contrast
-
Mix the accent color:
Stir your terracotta red paint thoroughly to ensure the pigment is evenly distributed. -
Paint the red stripes:
Using a fresh roller cover, apply the red paint to the exposed diagonal sections. Be careful not to overload the roller, which can cause drips. -
Check for coverage:
Inspect the coverage after the first pass. Outdoor concrete absorbs paint greedily, so a second coat of red is almost always necessary for a rich color. -
Remove tape promptly:
Carefully peel back the painter’s tape while the final coat of red is still slightly tacky—don’t let it dry completely, or it might pull the paint film. -
Touch up details:
Once the tape is removed, inspect your lines. Use a small artist’s brush to fix any small bleeds or uneven edges. -
Final cure:
Allow the entire walkway to cure for at least 72 hours (or as directed by the paint can) before walking heavily on it to prevent scuffs.
Now you have a dynamic, widened walkway that guides the eye and greets guests with energy
Sunburst or Mandala Medallion Centered on a Landing

Transform a plain concrete slab into a stunning entryway feature with this intricate mandala design. Using a large-scale stencil and a palette of earthy greens, soft pinks, and creams creates a welcoming, bohemian vibe right at your doorstep.
Step-by-Step Guide
Materials
- Large mandala stencil (approx. 36-40 inches diameter)
- Small detail paintbrushes (liner or spotter size)
- Stencil brushes (flat-topped)
- Concrete primer
- Concrete patio paint (sage green, terra cotta pink, cream, white, dark brown)
- Painter’s tape
- Measuring tape
- Exterior clear matte sealer
- Soap and water for cleanup
- Pressure washer or stiff scrub brush
Step 1: Preparation & Base Coat
-
Clean the Surface:
Begin by thoroughly cleaning the concrete slab where your medallion will go. Use a pressure washer or a stiff brush with soapy water to remove all dirt, moss, and loose debris, ensuring the paint will adhere properly. -
Dry Completely:
Allow the concrete to dry completely for at least 24 hours. If moisture is trapped underneath, your paint will eventually bubble and peel. -
Measure and Mark Center:
Find the exact center of your concrete square by measuring diagonally from corner to corner. Mark the intersection lightly with a pencil or chalk so you know exactly where to place your stencil. -
Prime the Area:
Apply a coat of concrete primer to the area you plan to paint. This step is crucial for longevity and helps the colors pop against the grey background.
Use Spray Adhesive
For crisper lines, spray the back of your stencil with a temporary repositionable spray adhesive. It holds the intricate plastic bridges flat against the rough concrete surface.
Step 2: Stenciling the Design
-
Secure the Stencil:
Lay your large mandala stencil over the center mark. Secure it firmly on all sides with painter’s tape to prevent it from shifting while you work. -
Block Out Color Zones:
Plan your color scheme mentally or with a sketch. This design uses alternating rings of sage green and terra cotta pink. I like to mark small dots of paint on the stencil plastic itself to remind me which section gets which color. -
Apply the Base Colors:
Using a stencil brush, stipple (dab up and down) the sage green into the appropriate leaf and outer rim sections. Use a dry brush technique—offload most paint onto a paper towel first—to prevent bleed-under. -
Paint the Pink Sections:
Switch to a clean brush and stipple the terra cotta pink into the star-shaped points and the secondary inner ring. -
Fill the Center:
Paint the central floral motif using your white and cream paints, blending them slightly for a soft, radiant look in the middle. -
Let the Base Dry:
Allow this initial stencil layer to dry to the touch before moving on to detailing. This usually takes about 30-60 minutes depending on the temperature.
Fixing Bleeds
If paint bleeds under the stencil, wait for it to dry completely. Then, use a small flat brush and the concrete’s original base color (or grey paint) to touch up and ‘erase’ the mistake.
Step 3: Hand-Painted Details
-
Remove the Stencil:
Carefully lift the stencil straight up to reveal the base design. Don’t worry if edges are slightly fuzzy; we will fix them in the next steps. -
Outline with White:
Using a very fine liner brush and cream or white paint, carefully trace the edges of the green leaf shapes and the pink geometric spikes. This creates that crisp, printed look. -
Add Decorative Dots:
Dip the handle end of a paintbrush into white paint to create the uniform dot border around the outermost circle. -
Enhance the Center:
With a dark brown paint, define the very center flower petals and add small dots around the inner circle for contrast. -
Paint Leaf Veins:
Go back into the sage green leaf sections with your thin brush and white paint to hand-paint the delicate vein lines within each leaf shape. -
Create Depth:
Add tiny white ‘sparkle’ shapes or simple lines to the pink sections to mimic the intricate cutouts of the original stencil design.
Step 4: Protection
-
Cure Time:
Allow your artwork to cure for at least 24 to 48 hours. The paint needs to harden fully before you apply any topcoat. -
Seal the Project:
Apply two thin coats of a clear, matte exterior masonry sealer. This protects the colors from UV fading and foot traffic wear.
Step back and admire how this single geometric addition completely redefines the character of your walkway
Painted Shadow Play for a 3D Optical Illusion Walkway
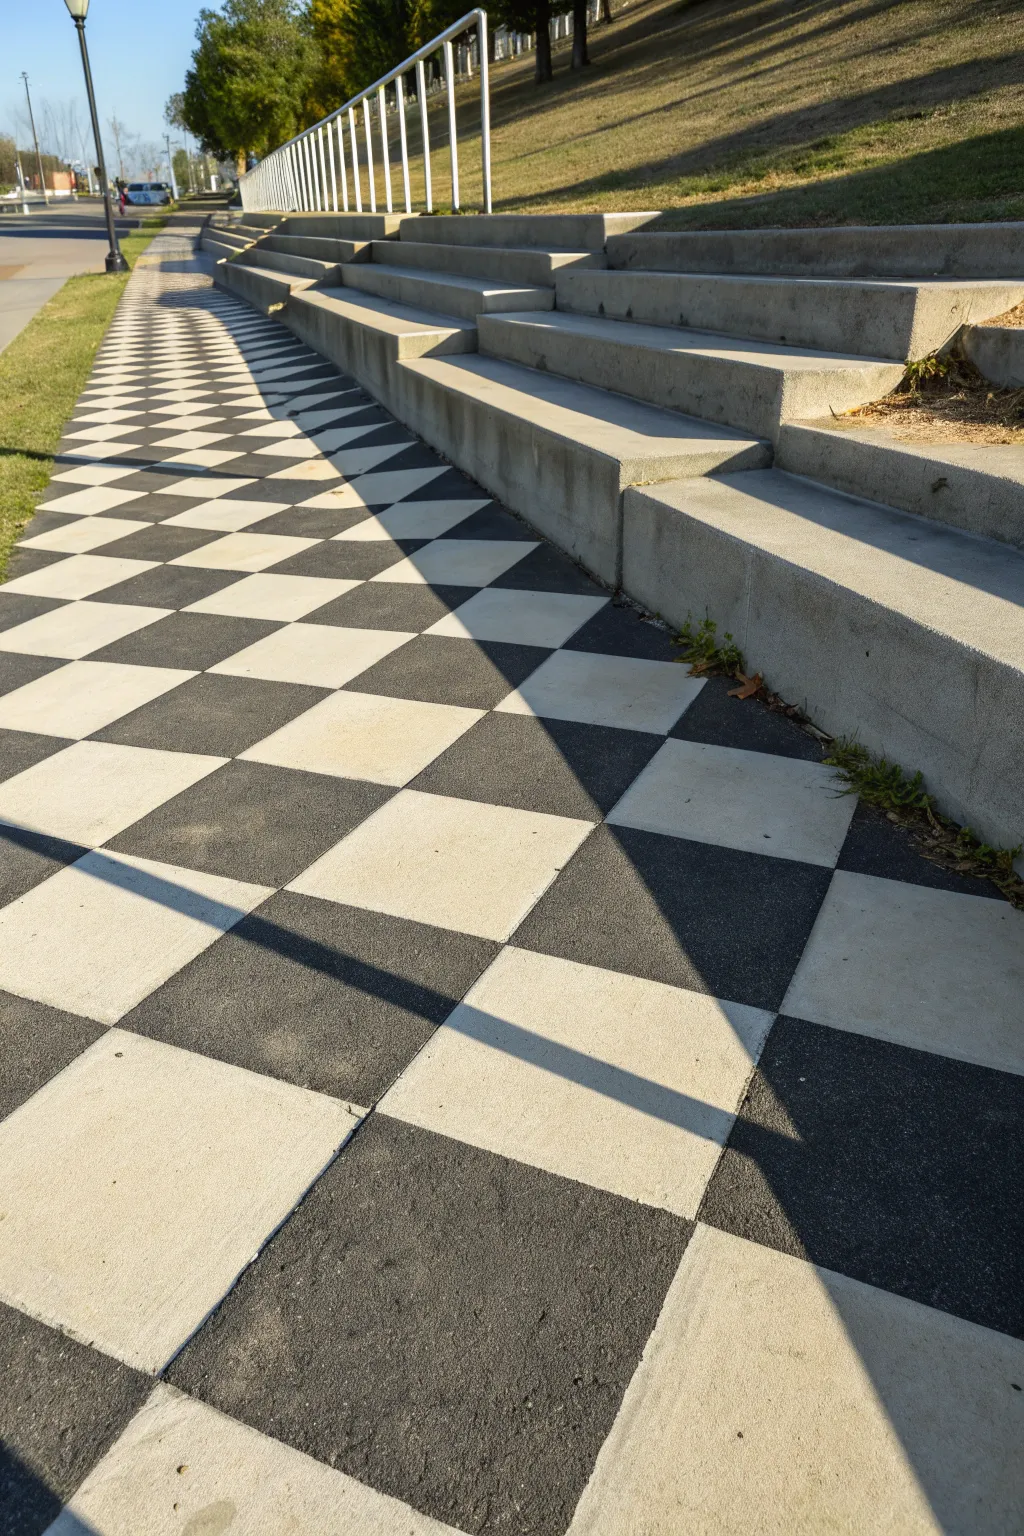
Transform a plain concrete path into a mind-bending feature with this large-scale checkerboard illusion. By strategically painting ‘shadows’ across the geometric pattern, you can create a striking 3D effect that mimics the interplay of light and structure.
Step-by-Step
Materials
- High-quality exterior concrete paint (black or very dark charcoal)
- High-quality exterior concrete paint (off-white or cream)
- Concrete primer
- Pressure washer
- Chalk snap line
- Long straight edge or level (4-6 ft)
- Painter’s tape (2-inch width for masonry)
- Paint rollers with extension pole
- Small angled sash brush for edges
- Measuring tape
- Sealant (optional, for longevity)
Step 1: Preparation & Layout
-
Clean surface thoroughly:
Before laying down any paint, the concrete needs to be spotless. Use a pressure washer to remove dirt, moss, and loose debris, ensuring the paint adheres properly to the porous surface. -
Dry and prime:
Allow the concrete to dry completely, which is crucial for durability. Apply a coat of concrete primer to seal the surface and provide a uniform base for your topcoats. -
Determine square size:
Measure the total width of your walkway. Divide this width by the number of squares you want across (e.g., 3 or 4) to determine the dimension of each individual square in your grid. -
Snap longitudinal lines:
Using your calculated measurements, mark intervals along the top and bottom of the path. Have a friend help you hold the chalk snap line taut and snap long, straight lines running the length of the walkway. -
Snap perpendicular lines:
Using the same measurement interval, snap perpendicular lines across the width of the path to create a perfect grid of squares. I like to double-check my corners with a carpenter’s square to ensure they are true 90-degree angles. -
Plan the shadow path:
Identify where the ‘shadow’ will fall. In the reference image, this is a large, triangular dark region that cuts across the checkerboard. Mark the diagonal boundary lines of this shadow area lightly with chalk or tape.
Step 2: Painting the Base Layer
-
Tape the light squares:
Apply painter’s tape along the inside edges of the squares destined to be light-colored. Press the tape down firmly to prevent paint bleed. -
Apply light paint:
Roll on the off-white or cream paint into the designated squares. Use an extension pole to save your back and apply two coats for solid opacity, letting the first coat dry to the touch before adding the second. -
Remove tape and cure:
Peel up the tape while the second coat is still slightly tacky to get a crisp edge. Allow these light squares to dry fully, ideally overnight, so the fresh paint isn’t damaged during the next phase.
Bleed Prevention
Before painting your main color, brush a thin layer of the base color (or clear matte medium) over the tape edge. This seals the gap so lines stay crisp.
Step 3: Creating the Shadow Effect
-
Tape for dark squares:
Once the light squares are cured, tape off their outer edges to protect them. This sets the stage for painting the contrasting black squares. -
Analyze the pattern:
This is the critical step for the illusion. Normally, you would just paint alternating squares black. However, for the shadow area, the logic changes. The shadow ‘darkens’ whatever implies it touches. -
Paint standard dark squares:
Outside the marked shadow zone, paint the alternating empty squares with your dark charcoal or black paint. -
Execute the shadow crossing:
Inside the diagonal shadow zone you marked earlier, you need to paint *over* the pattern. If a light square falls INSIDE the shadow zone, it must be painted a darker tone (or fully black) to maintain the illusion that a large shadow is cast over it. -
Refine the edges:
Where the diagonal shadow line cuts through a square, use your angled brush to paint precisely up to that diagonal line. This creates the sharp ‘sunlight vs. shadow’ boundary seen in the image. -
Remove final tape:
Carefully remove all remaining painter’s tape. Move slowly to avoid peeling up any of the base layers. -
Touch ups:
inspect the grid for any bleed-under. Use a small artist’s brush and the appropriate color to clean up fuzzy lines particularly where the diagonal shadow intersects the grid. -
Seal the surface:
Once the entire artwork has cured for at least 24-48 hours, apply a clear concrete sealer. This protects the sharp contrast from UV fading and foot traffic wear.
Level Up: Double Shadows
Mix a mid-tone grey paint. Use this color where the shadow hits the ‘white’ squares, and pure black where it hits ‘black’ squares for realistic transparency.
Step back and enjoy the permanent sunshine and shadow play you’ve created on your walkway
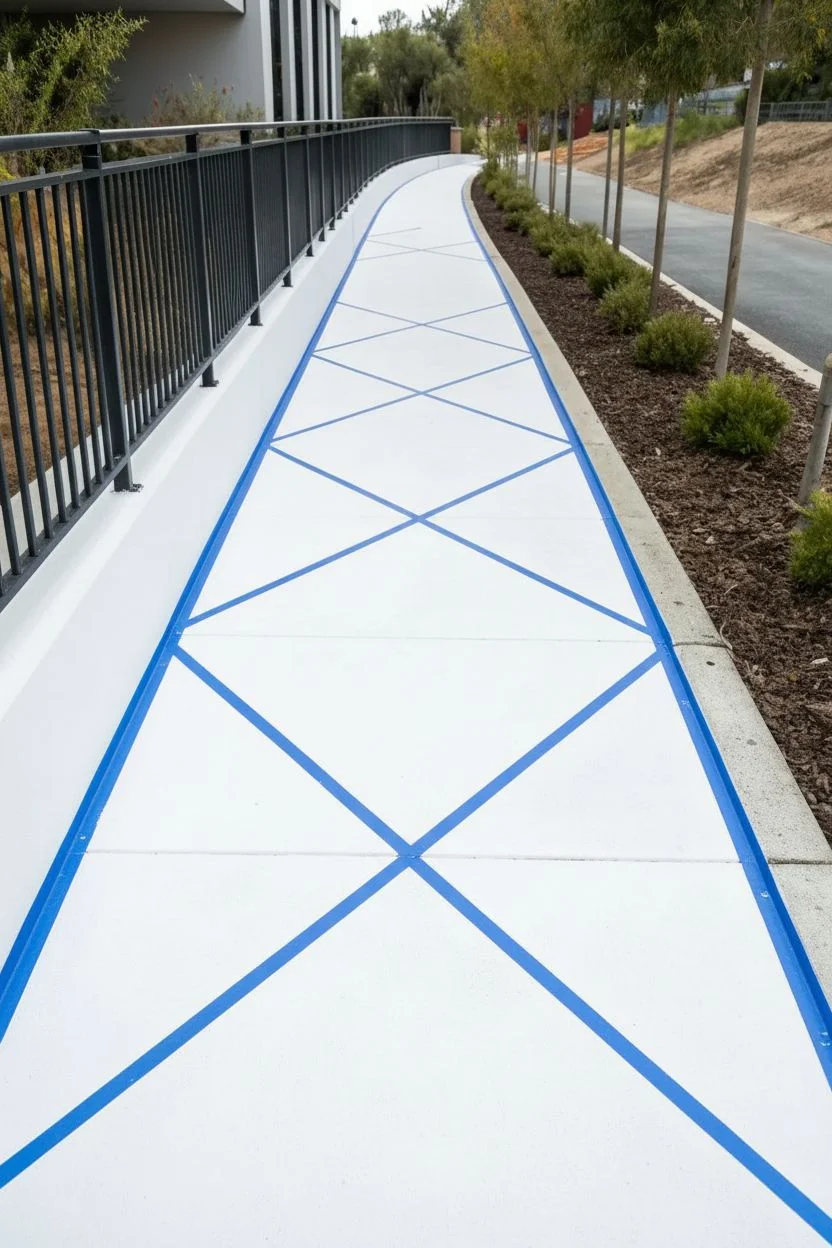
Night-Glow Accents for a Magical After-Dark Path
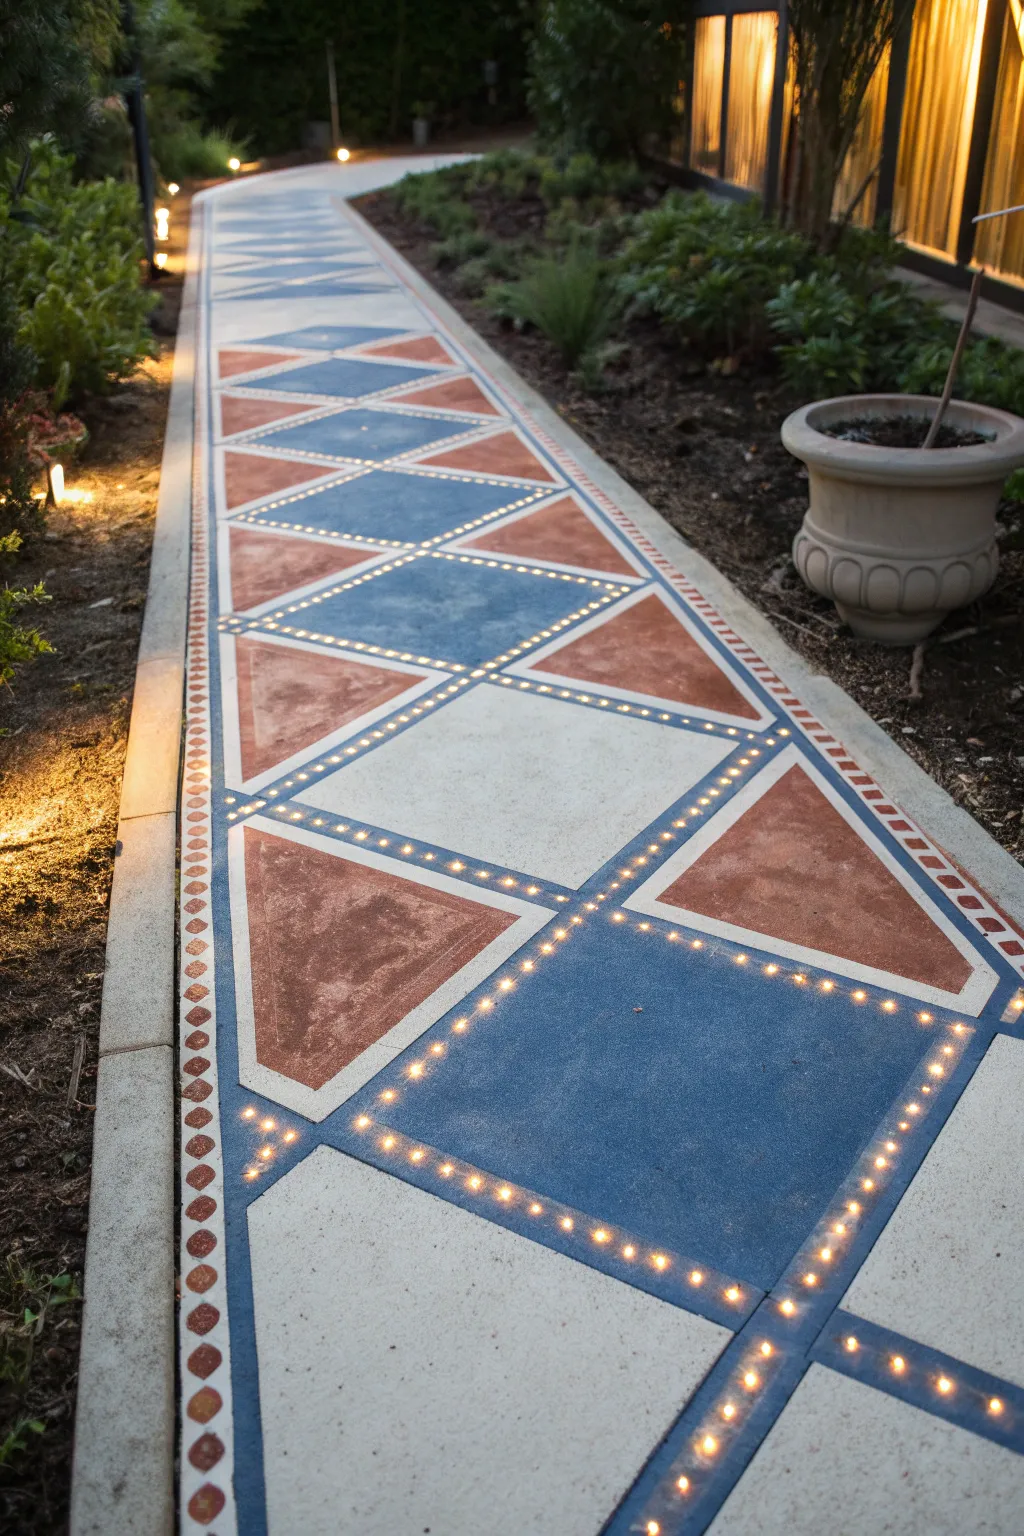
Transform a plain concrete path into a mesmerizing mosaic of light and color with this geometric overlay project. By combining bold acrylic paint shapes with embedded LED light strips, you create a walkway that looks classic by day and magical by night.
Detailed Instructions
Materials
- Outdoor concrete paint (Terracotta, Royal Blue, Off-White)
- Concrete primer
- Concrete sealer (matte or satin)
- Painter’s tape (various widths)
- Chalk line
- Measuring tape and straight edge
- Outdoor LED strip lights (flexible, warm white)
- LED mounting channel or clear silicone caulk
- Dremel or angle grinder with masonry cutting wheel (for embedding lights)
- Stencil for border details (small circles)
- Small stencil brush
- High-quality paint rollers and extension pole
- Power source for LEDs (solar or low voltage transformer)
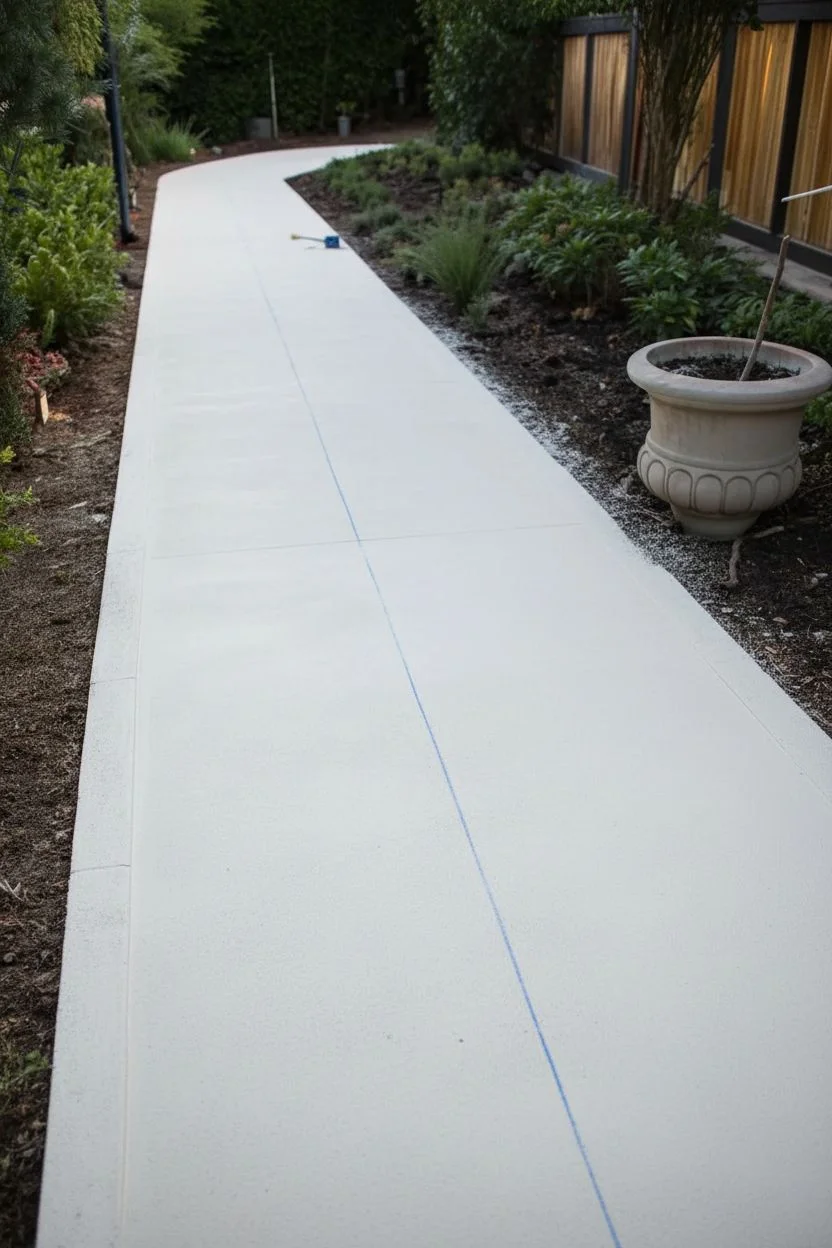
Step 1: Cleaning and Prep
-
Surface scrub:
Begin by thoroughly pressure washing the entire concrete walkway. Remove all dirt, moss, and loose debris to ensure the paint adheres properly to the surface. -
Prime the path:
Once the concrete is completely dry, apply a generous coat of high-quality concrete primer. Use a roller on an extension pole to save your back and ensure even coverage.
Step 2: Mapping the Geometry
-
Establish the centerline:
Find the exact center of your walkway width and snap a chalk line down the entire length. This is crucial for symmetry. -
Draft the master diamond:
Measure and mark out large diamond shapes along the centerline. For the pattern shown, these diamonds should touch corner-to-corner down the middle of the path. -
Create the subdivisions:
Inside each large central diamond, use your straight edge to draw a smaller internal diamond. This creates the thick border effect where the blue paint will go. -
Mark the side triangles:
From the points of your central diamonds, draw lines extending to the walkway edge to create the flanking triangular sections.
Clean Cuts Matter
When cutting grooves for lights, use a chalk line to guide your saw. Wet specific masonry blades reduce dust significantly and keep the cut cleaner.
Step 3: Embedded Lighting Installation
-
Groove cutting:
This is the most technical step: using an angle grinder or Dremel with a masonry wheel, carefully cut shallow channels along the lines of your central diamond pattern. These grooves will house your lighting. -
Clean the channels:
Vacuum or blow out all dust from the newly cut grooves to ensure the adhesive will stick. -
Install the lights:
Lay your waterproof LED strips into the channels. Secure them with clear outdoor silicone or specific mounting clips, ensuring they sit flush or slightly below the surface level.
Smart Power
Wire the LED strips to a smart outdoor plug. You can set schedules for the path to light up automatically at sunset and turn off at dawn.
Step 4: Painting the Design
-
Masking the lights:
Carefully place painter’s tape over your installed lighting strips to protect them from paint. I find it helpful to press the edges down firmly with a putty knife. -
Base coat colors:
Paint the large central diamond interiors with the off-white concrete paint tailored for outdoor use. Let this dry completely. -
Applying the colors:
Tape off the white sections, then paint the thick borders and large separating bands in Royal Blue. Allow to dry, then tape off the blue to paint the triangular accents in Terracotta. -
Border details:
On the far edges of the walkway, layout two parallel strips of tape about 4 inches apart. Paint the background white, and once dry, use your circle stencil and Terracotta paint to dab in the decorative dot pattern.
Step 5: Finishing and Sealing
-
The reveal:
Slowly peel away all painter’s tape, including the strips covering your LED lights. Do this while the final coat is tacky but not fully wet for the crispest lines. -
Sealing the work:
Apply two coats of clear concrete sealer over the entire walkway. This protects the paint from UV fading and weather while also adding a final layer of protection over your embedded lights.
Step back and enjoy the stunning geometric glow of your new walkway as dusk settles in


Have a question or want to share your own experience? I'd love to hear from you in the comments below!