If you’ve got a stack of wood slices and a craving to paint something festive, you’re in the perfect place. I love how painted wood ornaments let you make tiny, meaningful art pieces that feel both rustic and personal.
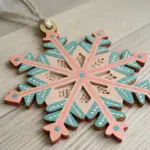
Classic White Snowflakes on Rustic Wood Slices
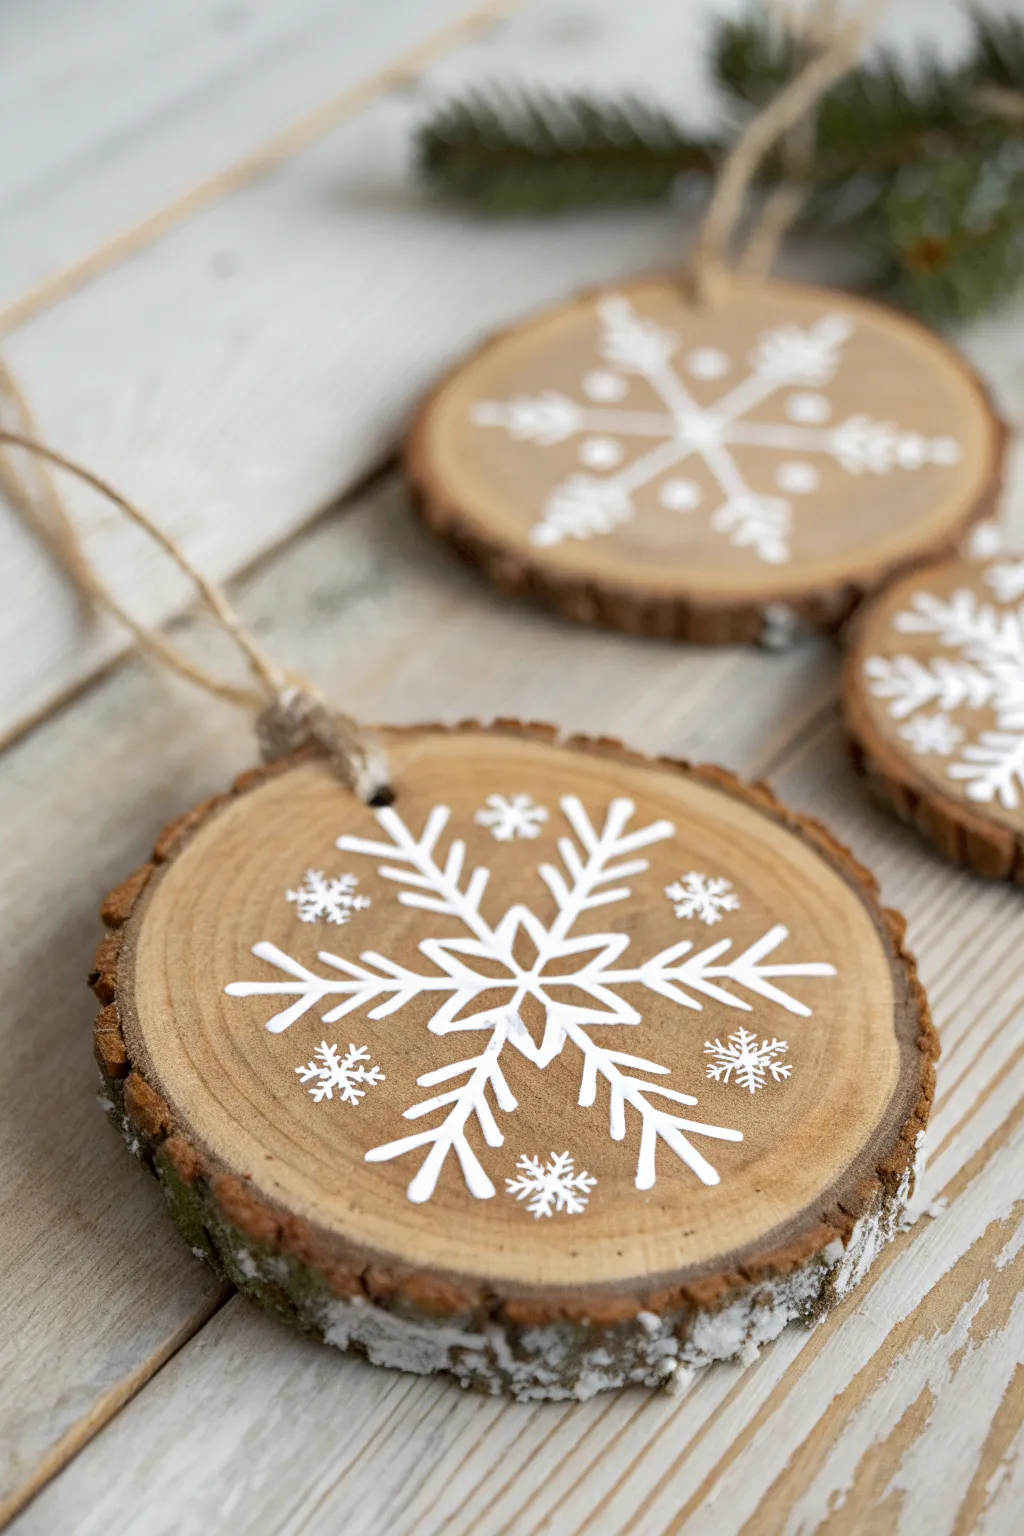
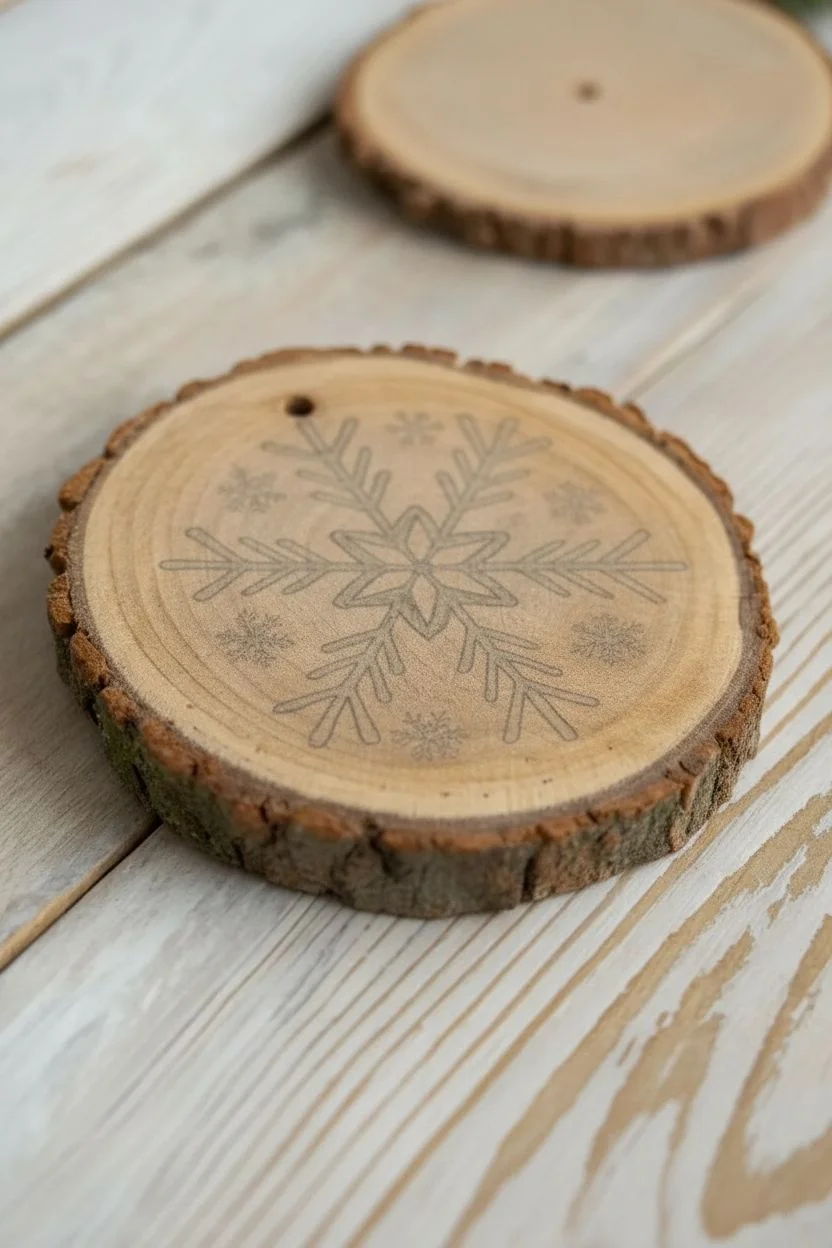
Bring the serene beauty of falling snow indoors with these charming rustic ornaments. The contrast between crisp white paint and warm, natural wood grain creates a timeless look that feels right at home on any Christmas tree.
Step-by-Step Tutorial
Materials
- Natural wood slices (predrilled)
- White acrylic paint or a white fine-tip paint pen
- Jute twine or rustic string
- Small round paintbrush (sz 0 or 1)
- Faux snow paste or white glitter (optional)
- Matte finish varnish or sealer
- Pencil for sketching
- Paper plate or palette
- Cup of water and paper towels
Step 1: Preparation
-
Surface Prep:
Begin by wiping down your wood slices with a slightly damp cloth to remove any sawdust or loose bark. Let them dry completely, as moisture can prevent the paint from adhering properly. -
Practice Sketch:
Before committing to the wood, sketch a few snowflake designs on a piece of scrap paper. Focus on radial symmetry, drawing a central cross and then an ‘X’ over it to create six or eight points to establish your base structure. -
Drafting on Wood:
Lightly trace your chosen snowflake design onto the wood slice using a pencil. Keep your lines very faint so they can be easily covered by paint later, centering the design around the pre-drilled hole if possible.
Paint Bleeding?
If paint bleeds into the wood grain, your paint is too thin. Use heavy body acrylics or let your paint sit on the palette for a few minutes to thicken slightly before applying.
Step 2: Painting the Snowflake
-
Loading the Brush:
Squeeze a small amount of white acrylic paint onto your palette. If using a brush, dip just the tip into the paint; you want control rather than a glob. If using a paint pen, pump it on a scrap paper until the ink flows smoothly. -
The Central Skeleton:
Paint the main structural lines of the snowflake first. Start from the center and pull your strokes outward to create the primary arms. I find creating a simple cross first, then adding diagonal lines between them, yields the most balanced shape. -
Adding the Vs:
Once the main arms are painted, add ‘V’ shapes facing outward along each arm. These create that classic crystallized look. Keep your hand steady and try to match the placement on each arm for symmetry. -
Inner Details:
Connect the inner parts of the arms near the center with small diamond shapes or tiny starburst lines. This fills the negative space and makes the snowflake look intricate and dense. -
Second Coat:
Let the first layer of white paint dry for about 10-15 minutes. If the wood grain is showing through too much, carefully go over your lines a second time to make the white pop against the timber. -
Filler Flakes:
In the empty spaces around the main snowflake, paint tiny asterisks or dots to represent smaller, distant snowflakes. This adds depth and makes the ornament feel fuller.
Make It Sparkle
While the white paint is still wet, sprinkle ultra-fine iridescent glitter over the snowflake. Shake off the excess once dry for a magical, shimmering frost effect.
Step 3: Finishing Touches
-
Bark Enhancement:
For a frosty edge like the one in the photo, dab a little bit of texture paste or thick white paint onto the rough bark edges of the wood slice. You can sprinkle a pinch of glitter here while wet for extra sparkle. -
Sealing:
Once all paint is completely dry (give it at least an hour), apply a thin coat of matte varnish over the face of the ornament. This protects the design from scratching off over years of storage. -
Cutting the Twine:
Cut a piece of jute twine approximately 8 inches long. This length usually allows for a good hanging loop without being too long for typical tree branches. -
Threading:
Fold the twine in half and push the looped end through the pre-drilled hole in the wood slice from front to back. -
Securing the Loop:
Pull the loose ends of the twine through the loop you just pushed through the hole and pull tight creates a lark’s head knot that sits securely at the top of the ornament. -
Final Knot:
Tie the two loose ends of the twine together in a simple overhand knot to close the loop, trimming any excess fray if desired.
Hang these rustic treasures on your tree or tie them onto gift packages for a personalized touch
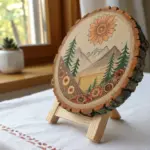
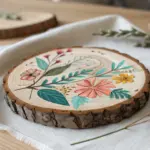
Simple Evergreen Tree Trio in Acrylic Paint
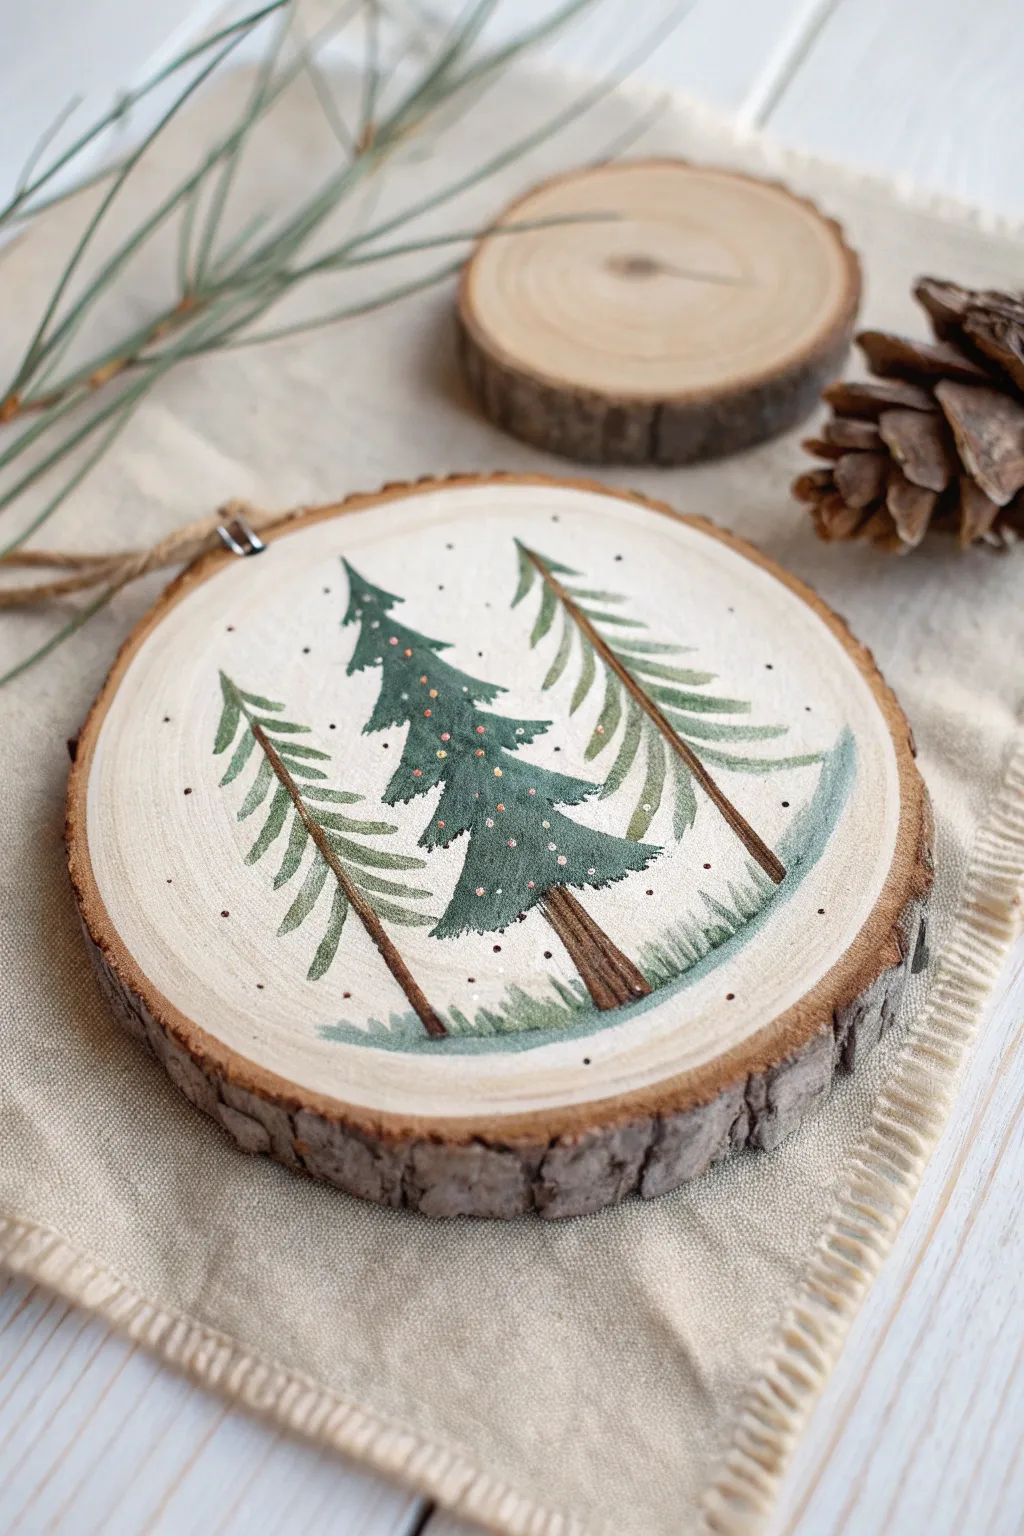
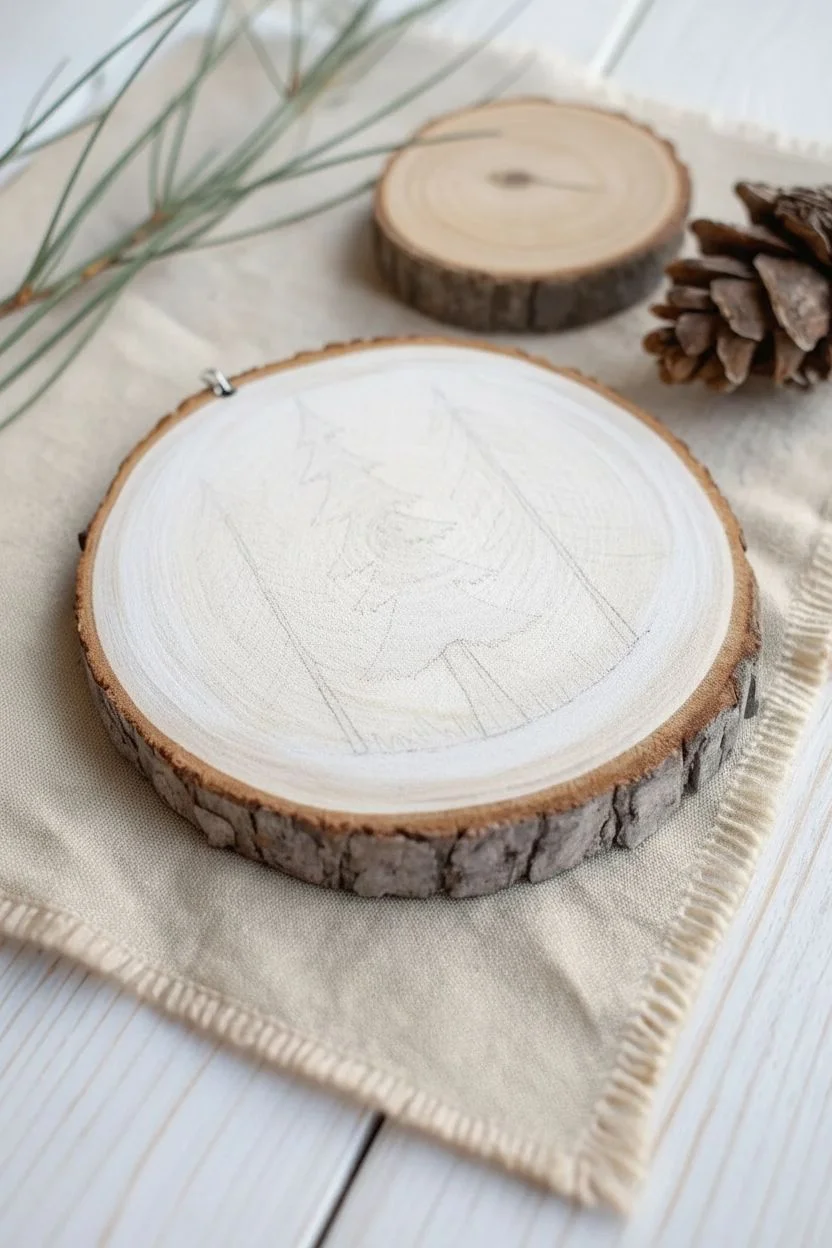
Capture the serenity of a winter forest with this charming wood slice ornament featuring three distinct evergreen trees. Using simple brushstrokes and gentle acrylic colors, you’ll create a rustic keepsake perfect for your holiday decor.
Detailed Instructions
Materials
- Wood slice (approx. 3-4 inches diameter) with bark edge
- Fine grit sandpaper
- Acrylic paints: White, dark green, sage green, brown, pink/red (for dot details)
- Small flat brush
- Fine liner brush or detail brush
- Paper towel
- Water cup
- Palette or paper plate
- Pencil (optional)
- Jute twine for hanging
Step 1: Preparation & Background
-
Prep the surface:
Start by lightly sanding the face of your wood slice to ensure a smooth painting surface. Wipe away any dust with a damp cloth or paper towel. -
Base coat:
Using your flat brush, apply a thin layer of white acrylic paint mixed with a tiny drop of water to create a wash. You want the wood grain to slightly show through, giving it a natural feel. Let this dry completely. -
Light sketch:
If you feel unsure about freehanding, use a pencil to very faintly mark where the three tree trunks will go. Place the center one slightly forward and the side trees further back.
Brush Control Pro Tip
For the wispy side trees, steady your painting hand by resting your pinky finger on the dry outer edge of the wood slice while you paint the fine lines.
Step 2: Painting the Trees
-
Center trunk:
Mix a warm brown shade and use your fine liner brush to paint the central tree trunk. Make the base slightly wider than the top. -
Center foliage shape:
Switch to dark green. With a small brush, dab on the foliage for the center tree, starting narrow at the top and widening as you go down. Use a stippling motion to mimic needle texture. -
Side trunks:
Using a slightly thinner brown line, paint the trunks for the two flanking trees. These should be taller and leaner than the central tree. -
Side tree branches:
For the side trees, mix sage green with a touch of white. Paint downward-sweeping, individual branches rather than a solid mass. These should look wispy and lighter than the center tree. -
Adding depth:
Go back to the central tree. Add a few dabs of lighter green on the tips of the branches to create dimension and make it look like light is hitting them. -
Grounding the scene:
Mix a muted green-grey color. Paint a soft, uneven horizontal patch at the base of the trees to represent grassy, snowy ground. Blend the edges out so they fade into the wood.
Sparkle Level Up
While the white snow dots are still wet, sprinkle a tiny pinch of iridescent glitter over them to make your winter scene catch the light on the Christmas tree.
Step 3: Details & Finishing Touches
-
Tiny ornaments:
Using the very tip of your smallest brush or a toothpick, add tiny dots of pink or red to the central dark green tree. Keep them subtle and scattered. -
Falling snow:
Dip the back end of a brush handle or a toothpick into white paint. Dot small ‘snowflakes’ randomly around the sky area and a few on the trees themselves. -
Atmospheric touches:
I like to add extremely fine brown dots near the ground area to suggest fallen needles or dirt, adding to the rustic look. -
Install hardware:
If your wood slice didn’t come with one, screw a small eye hook into the top bark edge. -
Add the hanger:
Thread a piece of jute twine through the eye hook and knot it securely to create a rustic loop for hanging.
Now you have a quaint, hand-painted ornament that brings a breath of fresh forest air to your holiday collection


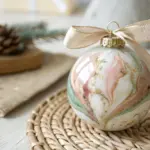
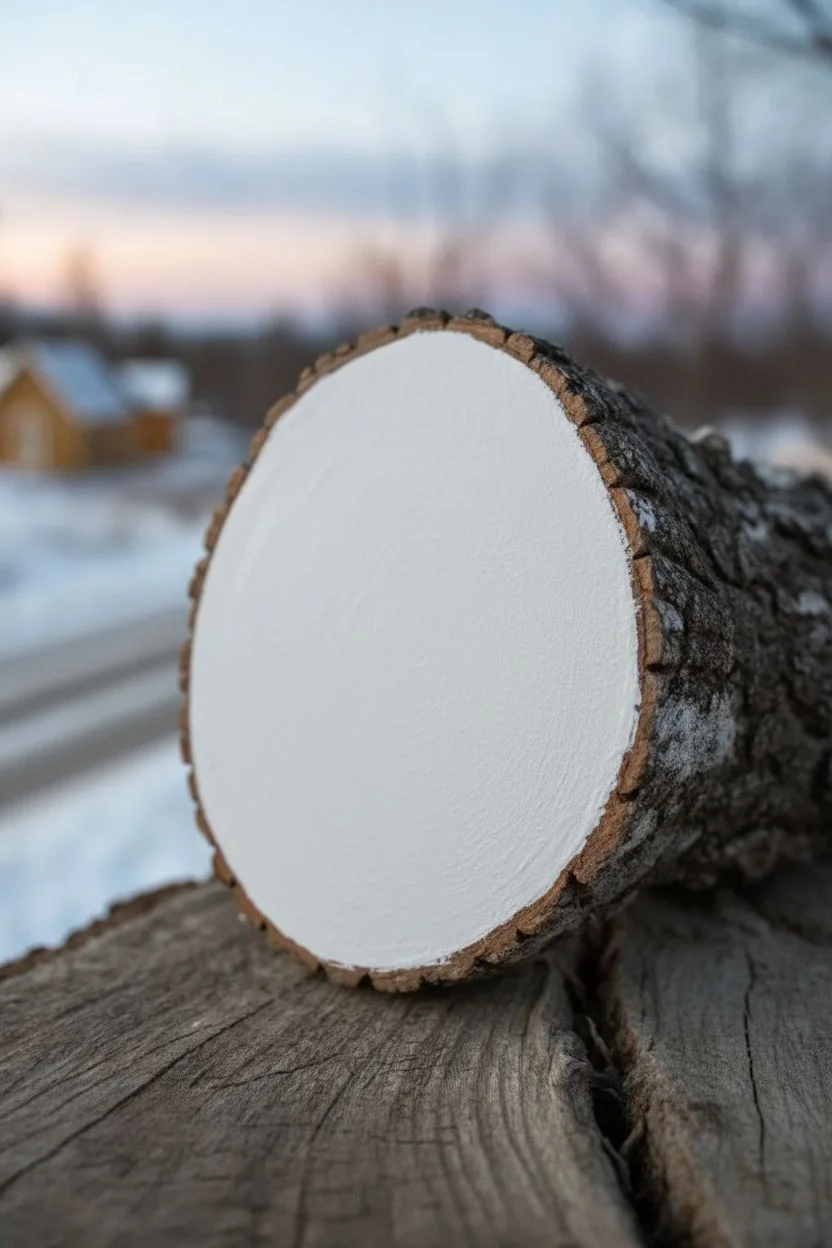
Cozy Snowman Faces With Carrot Noses
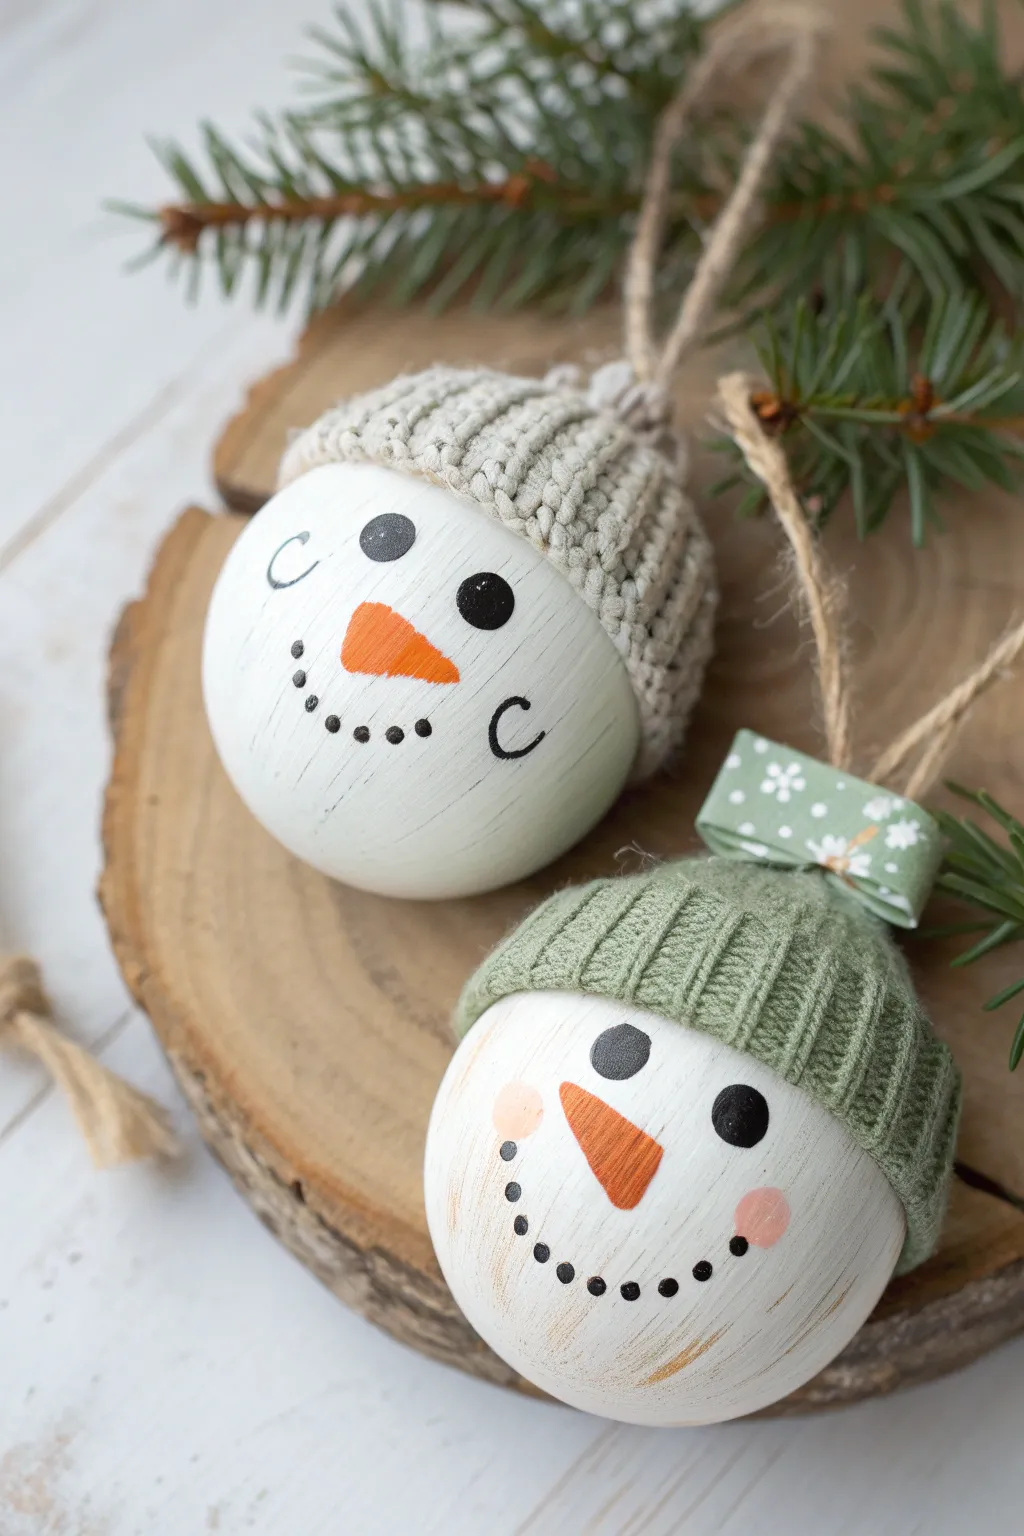
These charming ornaments combine the rustic look of painted wood with the warmth of tiny textiles. Featuring sweet hand-painted expressions and upcycled knitwear hats, they bring a cozy cabin feel to any holiday tree.
How-To Guide
Materials
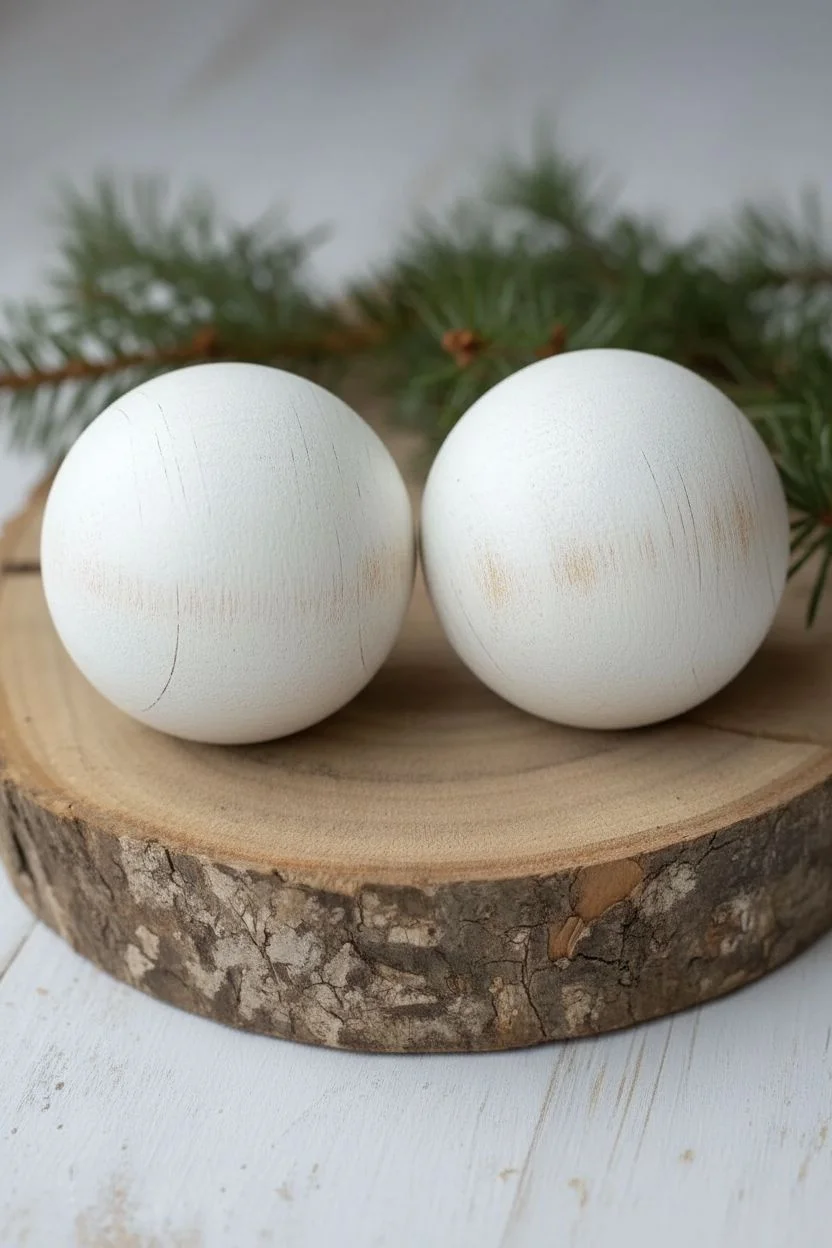
- 2.5 to 3-inch wooden balls (unfinished)
- White acrylic craft paint
- Chalk or matte finish paint in black, orange, and rosy pink
- Old sweater sleeve or ribbed knit fabric scraps (gray and green)
- Jute twine
- Small patterned ribbon (green with snowflakes)
- Hot glue gun and glue sticks
- Fine grit sandpaper
- Small round detail brush
- Medium flat brush
- Pencil for sketching
Step 1: Preparing the Wooden Base
-
Sand the surface:
Start by lightly sanding your wooden balls to remove any rough patches or splinters. Wipe them clean with a dry cloth to ensure the paint adheres smoothly. -
Apply the base coat:
Using a flat brush, paint the entire wooden ball with white acrylic paint. You don’t need opaque coverage; a slightly streaky application allows the wood grain to peek through for a vintage texture. -
Add texture strokes:
Once the first coat is dry, take a very dry brush with a tiny bit of grey or beige paint and lightly whisk it vertically over the white. This enhances the ‘wood grain’ look shown in the photo.
Knit-Picking
Use the cuffs of old sleeves for the hats. The finished hem creates a perfect, hassle-free brim without needing to fold or glue the edge.
Step 2: Painting the Faces
-
Sketch the features:
Lightly sketch the placement of the eyes, nose, and mouth using a pencil. Position them slightly lower than center to leave room for the hats. Notice the variation: one snowman has ‘C’ shaped cheeks, while the other has rosy round cheeks. -
Paint the carrot nose:
Using a small detail brush and bright orange paint, fill in the triangle nose shapes. Keep edges slightly rounded for a cartoonish, friendly look. -
Add the eyes:
Dip the handle end of a paintbrush into black paint to dot perfectly round eyes on the second snowman. For the first snowman, hand-paint slightly larger circles. -
Create the smiles:
With your finest brush tip or a black paint pen, carefully dot the mouth in a U-shape. Vary the spacing of the dots to give each snowman personality. -
Final facial details:
For the rosy-cheeked snowman, dab a very small amount of pink paint onto your finger or a dry brush and gently stipple circles on the cheeks. For the other, use a fine liner brush to paint thin ‘C’ curves in black.
Streaky Paint?
If your white paint looks too transparent or streaky, let it dry fully and sponge on a second coat. Sponging hides brush strokes better than brushing.
Step 3: Crafting the Hats
-
Cut the fabric:
Cut a rectangular piece from your sweater scrap or ribbed knit fabric. It should be wide enough to wrap around the top of the ball and tall enough to fold up at the brim. -
Form the tube:
Wrap the fabric around the top third of the snowman head to test the fit. Use hot glue to seal the back seam, creating a fabric tube that fits snugly. -
Create the brim:
Fold the bottom edge of the fabric upward about a half-inch to create a classic beanie brim. Secure this fold with a few tiny dots of hot glue so it doesn’t unroll. -
Attach the hat:
Apply a ring of hot glue around the top of the wooden ball, just above the eyes. Quickly press the fabric tube onto the glue. -
Cinch the top:
Gather the loose fabric at the top of the hat together. Tie a piece of jute twine tightly around the gathered fabric to close the top of the beanie. -
Trim the excess:
Trim any excess fabric above the twine tie, leaving just a little tuft to resemble a pom-pom or gathered top. -
Add the hanger loop:
Cut a distinct length of jute twine for the hanger. Tie it into a loop and hot glue the knot securely into the center of the gathered hat top so it is hidden.
Step 4: Finishing Touches
-
Create a bow:
For the green-hat snowman, take a small piece of patterned ribbon and fold it into a simple loop bow. -
Secure the bow:
Glue the ribbon accent to the top of the hat where the fabric is gathered, adding a sweet decorative detail. -
Final inspection:
Check for any hot glue strings or pencil marks and clean them up. I like to re-check the eyes once the hats are on to ensure they don’t look covered up.
Hang your cheerful duo on a sturdy branch where their textured hats can be admired up close


Reindeer Silhouettes With a Red Nose Dot
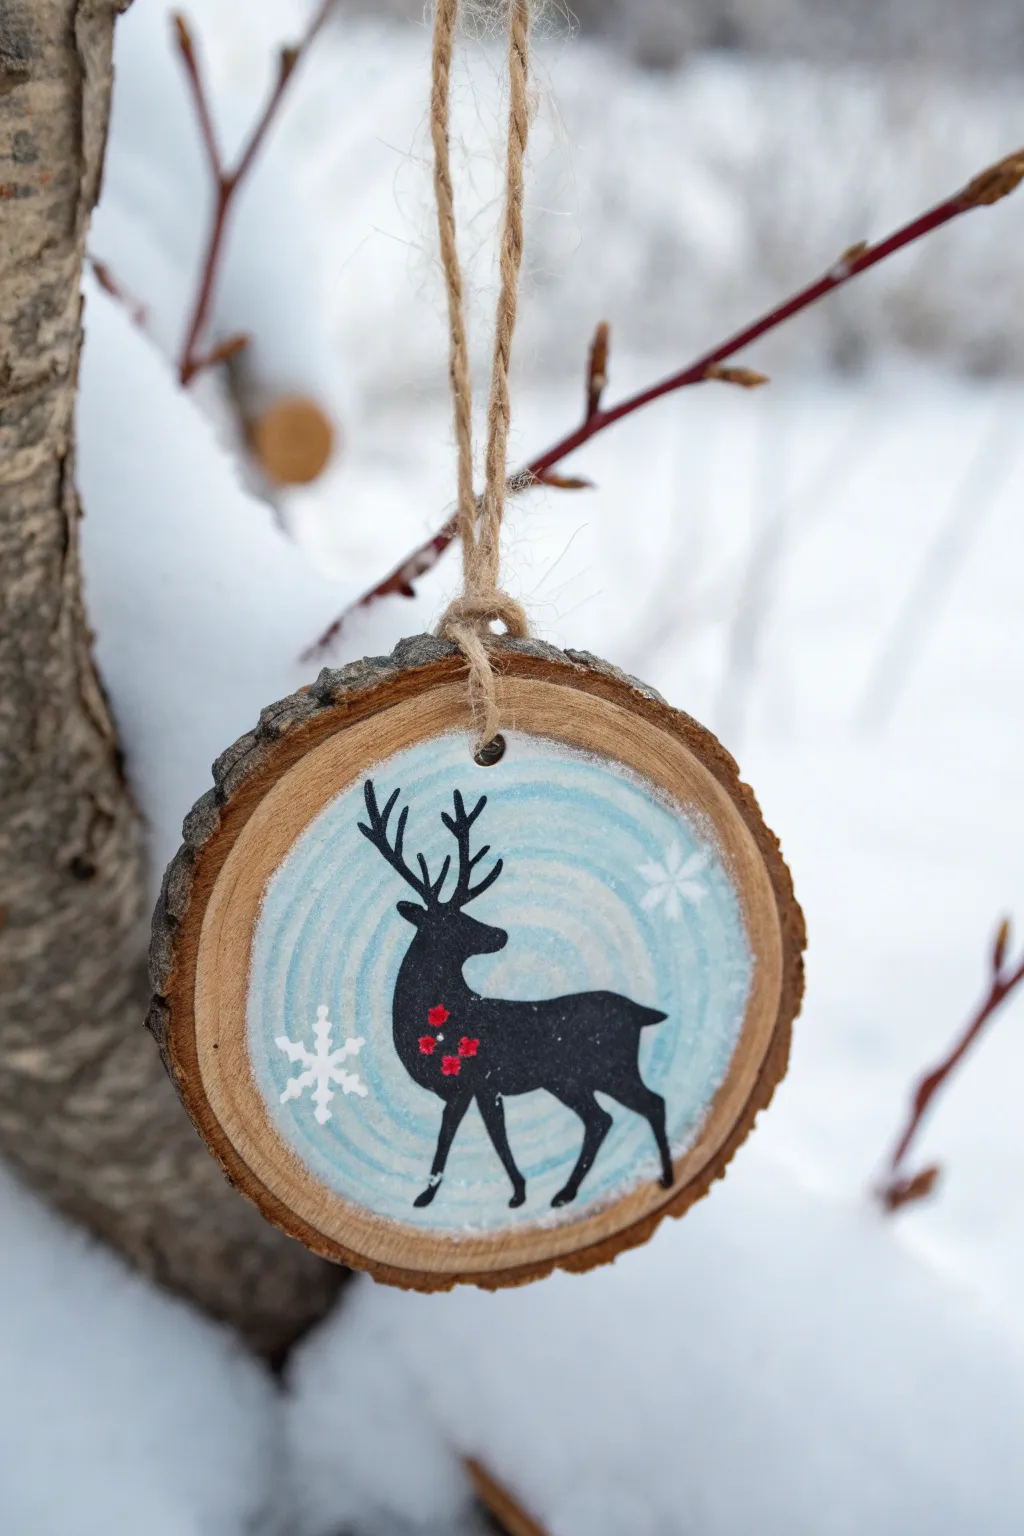
Capture the stillness of a snowy forest with this rustic wood slice ornament featuring a sleek black reindeer silhouette. The pale blue swirled background and delicate white snowflakes create a frosty atmosphere perfect for winter decor.
Step-by-Step Tutorial
Materials
- Small wood slice with bark edge (approx. 3-4 inches diameter)
- Fine grit sandpaper
- Pale blue acrylic paint
- White titanium acrylic paint
- Black acrylic paint
- Red acrylic paint
- Flat shader brush (size 6 or 8)
- Round detail brush (size 0 or 1)
- Jute twine
- Small drill with bit (if wood slice is undrilled)
- Pencil (optional)
- Matte spray varnish
Step 1: Preparing the Slice
-
Smooth the surface:
Before painting, take a moment to lightly sand the face of your wood slice with fine grit sandpaper. You want a smooth canvas so your silhouette lines stay crisp, but avoid sanding the bark edge. -
Drill the hole:
If your wood slice didn’t come pre-drilled, carefully drill a small hole near the top edge, centered above where your scene will be. Ensure it’s large enough to thread your twine through later. -
Dust it off:
Wipe the surface with a dry cloth or tack cloth to remove every speck of sawdust. Any remaining dust will create bumps in your paint finish.
Uneven Paint Coverage?
If the black paint looks streaky or gray after drying, don’t press harder. Apply a second thin coat after the first is fully dry for solid opacity.
Step 2: Painting the Frosty Background
-
Mix the background color:
Create a very pale, icy blue by mixing a drop of pale blue paint with a generous amount of white. Keep it light; you want contrast for the black deer later. -
Apply the base coat:
Using a flat shader brush, paint the inner face of the wood slice. Leave a small rim of natural wood showing just inside the bark to frame the image nicely. -
Create the swirl effect:
While the paint is still wet, add a tiny touch of pure white to your brush without cleaning it. Paint in a circular motion, swirling from the center outward to create subtle streaks that mimic wind or ice. -
Let it dry:
Allow this background layer to dry completely. A hairdryer on a cool setting can speed this up if you’re impatient.
Step 3: Creating the Reindeer
-
Sketch the outline:
Lightly sketch the reindeer silhouette with a pencil. Start with a simple oval for the body and a smaller shape for the head, connecting them with a sturdy neck. -
Refine the legs:
Draw the legs, ensuring the back legs have that characteristic bend at the hock and the front legs appear straight and elegant. -
Add the antlers:
Sketch the antlers branching upwards. Don’t worry about perfect symmetry here; natural antlers are unique. -
Fill the silhouette:
Switch to your round detail brush and black acrylic paint. Outline your pencil marks first, then fill in the body of the deer with solid black color. -
Sharpen the details:
Use the very tip of your smallest brush to pull the paint upwards for the antler tips and downwards for the hooves, keeping points sharp. -
Add festive touches:
Once the black paint is dry, dip the end of a paintbrush handle or a toothpick into red paint. Dot three small clusters on the deer’s chest to resemble holly berries.
Pro Tip: Use a Stencil
Not confident in your freehand drawing? Print a small reindeer silhouette, cut it out, and trace around it lightly with a pencil before painting.
Step 4: Final Details & Assembly
-
Paint snowflakes:
Mix a slightly watery white paint. Use your fine liner brush to paint two simple snowflakes—one large and one small—on either side of the deer. -
Paint a simple snowflake shape:
For the snowflakes, just paint a simple cross, then an ‘X’ over it. Add tiny ‘V’ shapes at the ends of the lines if you feel steady-handed. -
Seal the artwork:
Protect your work with a light coat of matte spray varnish. I prefer matte over glossy here to maintain that rustic, natural look. -
Add the hanger:
Cut a length of jute twine, thread it through the hole, and tie a secure knot at the top to create a hanging loop.
Hang this charming piece on your tree or attach it to a gift for a personalized touch
BRUSH GUIDE
The Right Brush for Every Stroke
From clean lines to bold texture — master brush choice, stroke control, and essential techniques.
Explore the Full Guide
Candy Cane Stripes Using Tape Masking
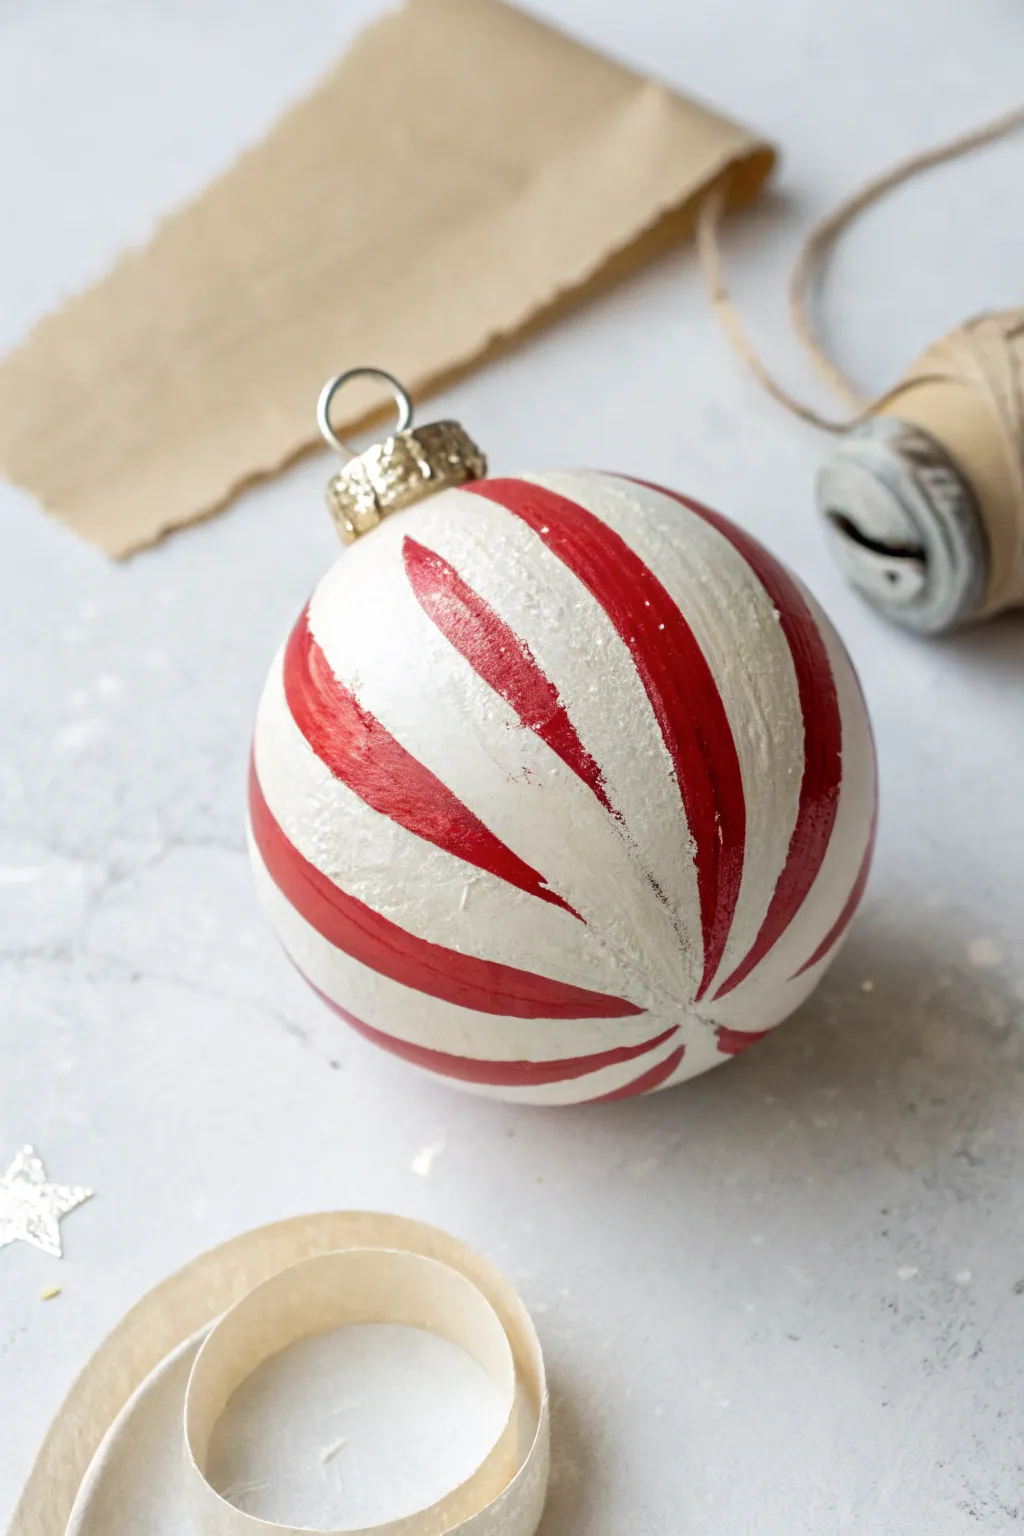
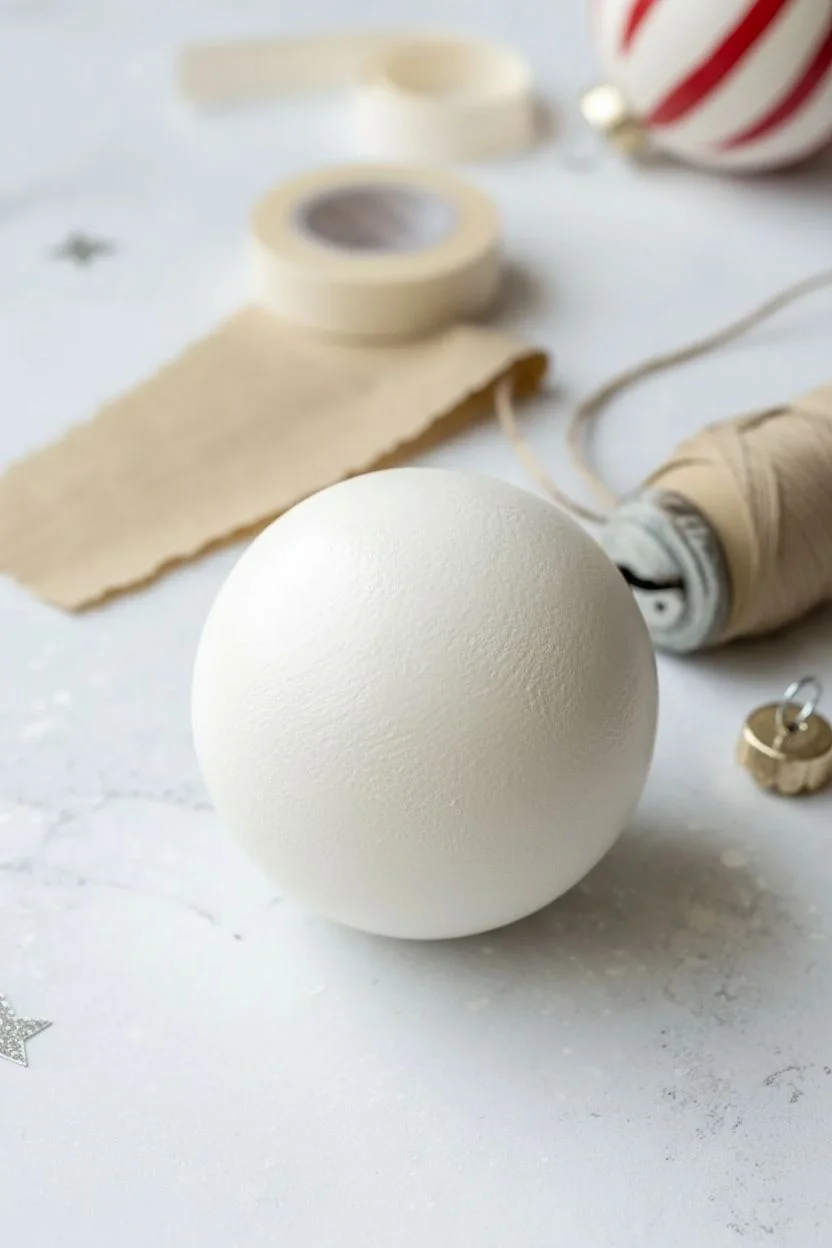
Transform a plain wooden bauble into a classic holiday treat with this peppermint-inspired design. The swirling red and white stripes create a nostalgic, textured look that perfectly mimics a giant candy cane.
Step-by-Step
Materials
- Round wooden ornament blank
- White acrylic paint (matte)
- Red acrylic paint (bright crimson)
- Painter’s tape or masking tape (1/4 inch width is best)
- Scissors
- Medium flat paintbrush
- Small detail brush
- White glitter (fine or iridescent)
- Mod Podge or craft glue
- Gold ornament cap (if separated)
- Small cup for water
- Paper towels
Step 1: Base Preparation
-
Surface check:
Begin by inspecting your wooden ornament for any rough patches. Use fine-grit sandpaper to smooth out the surface if necessary, wiping away any dust with a damp cloth. -
Primary base coat:
Apply a solid coat of white acrylic paint over the entire wooden sphere. Use long, even strokes to ensure full coverage. -
Drying and recoating:
Let the first layer dry completely. Given that wood absorbs paint, I usually apply a second or even third coat to get that crisp, opaque white finish. -
Cap consideration:
If your ornament has a removable metal cap, take it off now to keep it clean. If it’s fixed, wrap a small piece of painter’s tape around it for protection.
Step 2: Creating the Stripes
-
Mapping the center:
Identify the bottom center point of the ornament. This is where all your stripes will converge, creating that iconic peppermint swirl effect. -
Applying the first tape strip:
Cut a strip of painter’s tape. Place one end at the top near the hanger and smooth it down in a curved diagonal line toward the bottom center point. -
Creating the pattern:
Continue placing strips of tape around the sphere. Leave gaps between the tape strips that are roughly equal in width to the tape itself. These gaps will become your red stripes. -
Securing the edges:
Run your fingernail or a credit card firmly along the edges of every piece of tape. This burnishing step is crucial to prevent the red paint from bleeding underneath. -
The white seal technique:
Before reaching for the red paint, lightly brush a very thin layer of *white* paint over the tape edges. This seals any tiny gaps; if paint bleeds, it will be white-on-white and invisible.
Seal the Deal
Painting a layer of the *base* color (white) over the tape edges before applying the contrast color creates perfectly crisp lines every time.
Step 3: Adding Color and Finish
-
Painting the red:
Load your brush with bright crimson acrylic. Paint the exposed wood spaces between the tape strips. -
Stroke direction:
Brush vertically from the top down to the bottom convergence point to keep the texture consistent. -
Second red coat:
Allow the red paint to dry to the touch, then apply a second coat to ensure the color is vibrant and opaque. -
Wait time:
Wait until the paint is tacky but not fully hardened. Removing tape too late can sometimes peel up the acrylic skin. -
The reveal:
Carefully peel back the painter’s tape at a 45-degree angle. Reveal the crisp white stripes beneath. -
Touch-ups:
If any tiny bleeds occurred, use your small detail brush and a bit of white paint to tidy up the lines. -
Glitter application:
Mix a small amount of fine white glitter into a gloss glaze or Mod Podge. Brush this lightly over the entire ornament to give it a sugary, frosted texture. -
Final assembly:
Once everything is perfectly dry, reattach the gold cap. Your sweet, striped ornament is ready to hang.
Vintage Patina
For an aged look, lightly sand the dried ornament with fine-grit sandpaper, then rub a tiny amount of brown antique wax over the surface.
Hang this delightful peppermint creation on your tree for a touch of handmade sweetness
Holly Leaves and Bright Red Berries Border
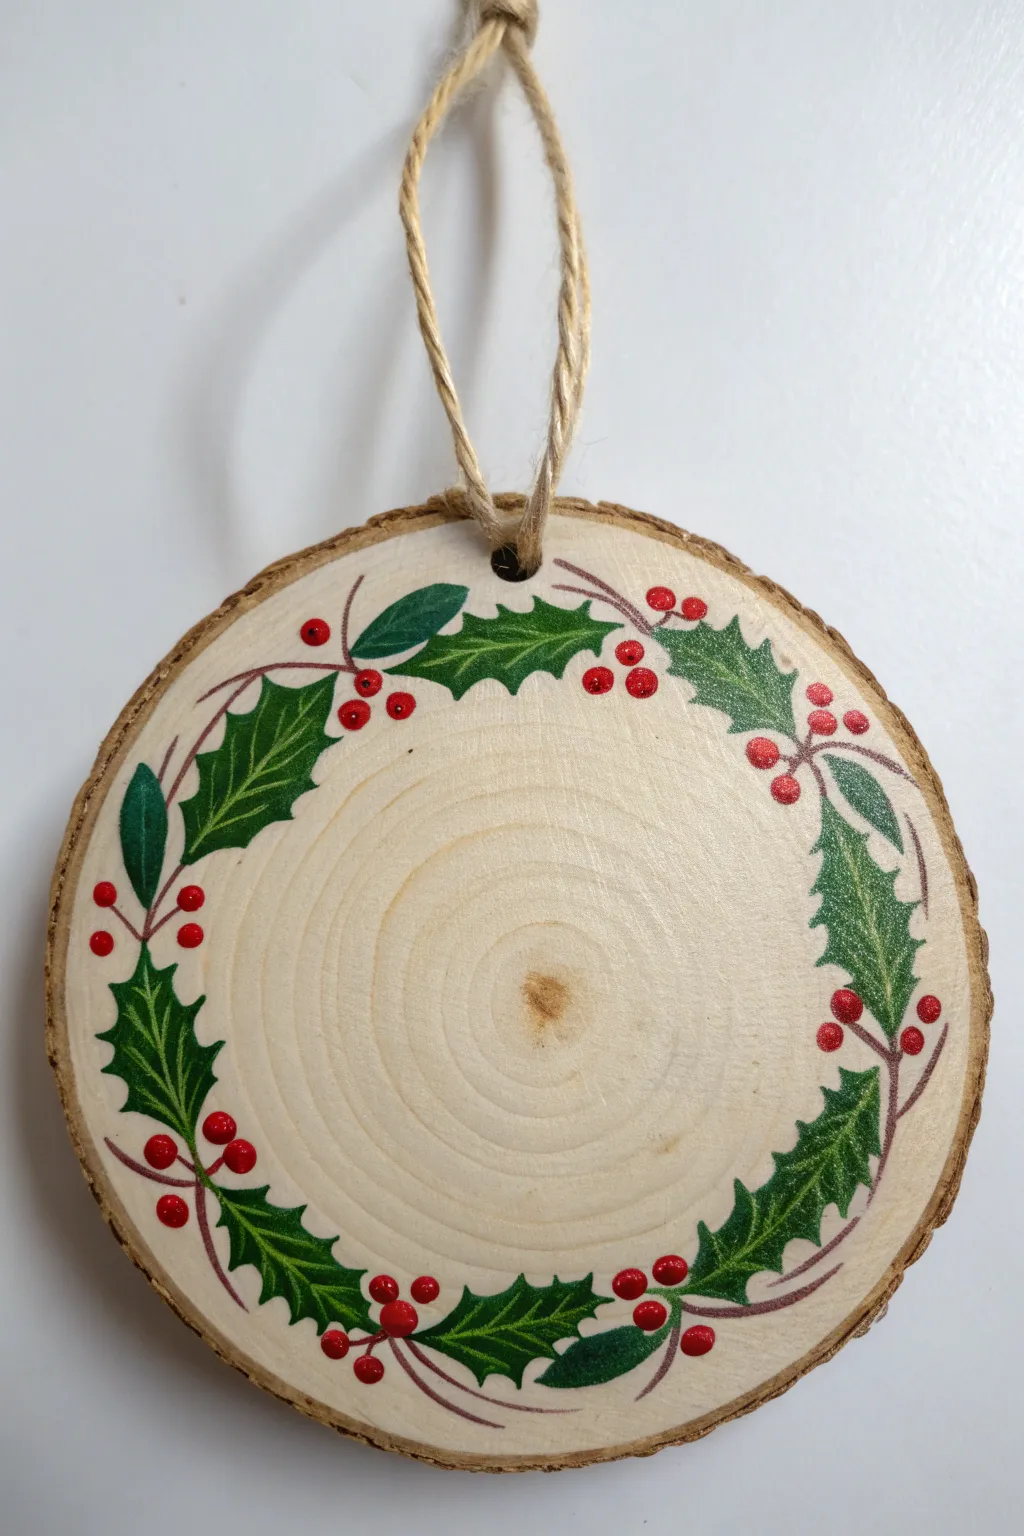
Create a classic Christmas border on a rustic wood slice with this simple holly leaf design. The vibrant green leaves and glossy red berries frame the natural wood grain beautifully, leaving the center open for personalization or letting the organic texture shine.
Step-by-Step Tutorial
Materials
- Pre-drilled natural wood slice (approx. 3-4 inches diameter)
- Jute twine for hanging
- Acrylic paints: Dark Hunter Green, Leaf Green, Bright Red
- Fine detail paintbrush (size 0 or 00)
- Small round paintbrush (size 1 or 2)
- Pencil
- Eraser
- Palette or paper plate
- Cup of water and paper towels
- Sealer (spray or brush-on varnish)
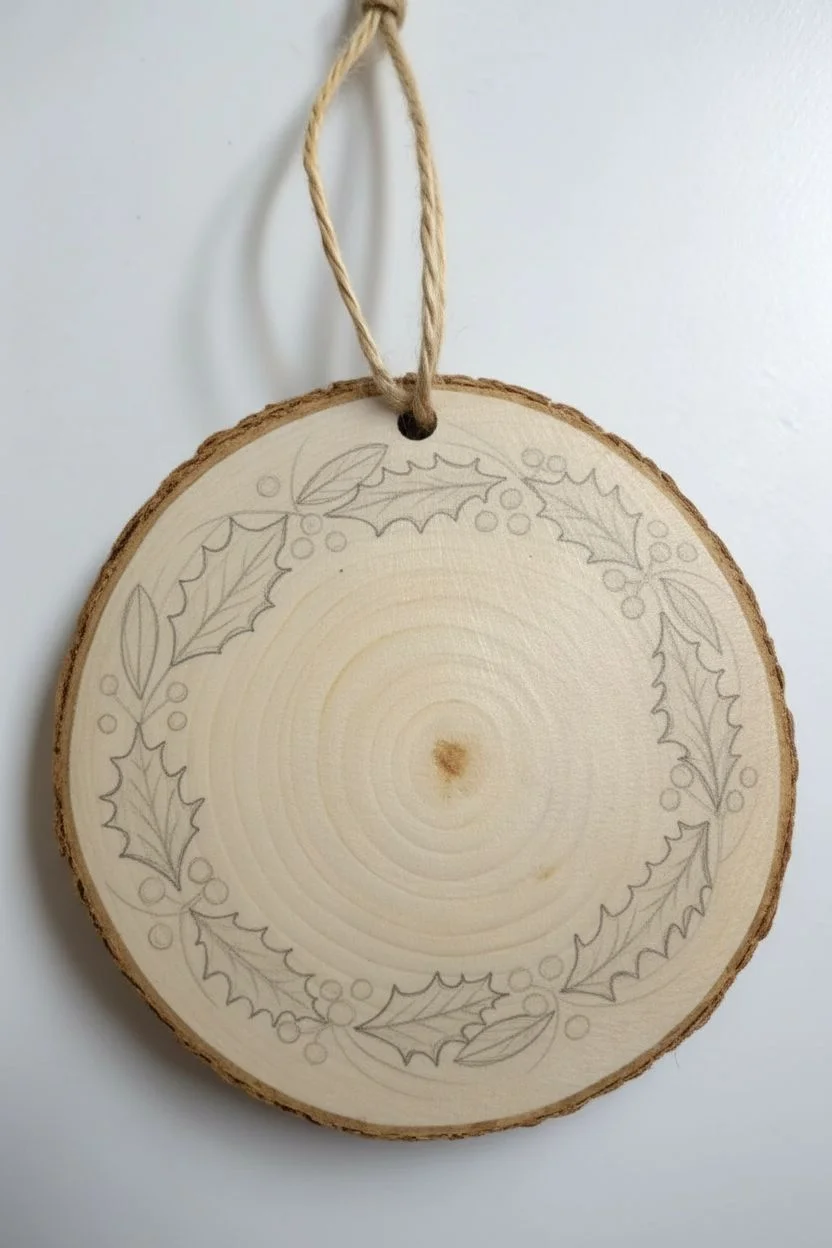
Step 1: Preparation & Sketching
-
Surface Prep:
Ensure your wood slice is clean and smooth. If the surface feels rough, give it a very light sanding with fine-grit sandpaper and wipe away the dust. -
Light Sketching:
Using a pencil, very lightly draw a circle about half an inch inward from the bark edge to guide your wreath placement. This won’t be painted, but it helps keep your border symmetrical. -
Outline Leaves:
Sketch the shapes of the holly leaves along your guide circle. Holly leaves have distinct scalloped edges with points. Draw them in pairs or small clusters, leaving some gaps for berries. -
Vine Connections:
Lightly sketch thin, curved lines connecting the leaf clusters. These vines help create a continuous flow around the circle.
Paint Bleeding?
Wood grain can sometimes wick paint. Use a clear matte medium or sealer on the raw wood *before* painting to create a barrier and keep crisp lines.
Step 2: Painting the Foliage
-
Base Green Layer:
Load your small round brush with Leaf Green. Fill in the leaf shapes you sketched. Don’t worry about perfect coverage yet; a slightly translucent first layer is fine. -
Second Coat:
Once dry to the touch, apply a second coat of Leaf Green to make colors solid and opaque. -
Adding Veins:
Switch to your fine detail brush and Dark Hunter Green paint. Carefully paint a thin central vein down the middle of each leaf. -
Leaf Detailing:
Using the same dark green, add tiny branching veins extending from the center line to the points of the leaves. This adds realistic depth. -
Shading Edges:
While you have the dark green on your brush, lightly outline just one side of each leaf to give it a shadowed effect, making them pop against the pale wood. -
Painting Vines:
Use the fine detail brush to trace over your pencil vine lines with a mix of brown (or mix red/green) to connect the elements. Keep these lines very delicate.
Step 3: Berries & Finishing Touches
-
Berry Placement:
Identify the empty spaces between leaf clusters. These are perfect spots for your red accents. -
Painting Berries:
Using the small round brush or the handle end of a brush for perfect circles, dot on groups of three berries using Bright Red paint. -
Scattered Accents:
Scatter single red berries randomly along the vine lines to balance the composition. -
Highlighting (Optional):
I like to add a tiny white spectral highlight dot on each berry once the red is dry to make them look glossy and dimensional. -
Erase Marks:
Ensure all paint is completely dry, then gently erase any visible pencil lines from your initial sketch. -
Sealing:
Apply a clear varnish or sealer over the entire face of the wood slice to protect the paint from chipping and fading. -
Adding the Hanger:
Cut a length of jute twine, thread it through the pre-drilled hole, and tie a secure knot at the top to create a loop.
Add a Personal Touch
The empty center is perfect for calligraphy. Use a fine-point paint pen to add a year, a family name, or a short word like ‘Joy’ or ‘Peace’.
Hang this rustic beauty on your tree or use it as a custom gift tag for a special present

PENCIL GUIDE
Understanding Pencil Grades from H to B
From first sketch to finished drawing — learn pencil grades, line control, and shading techniques.
Explore the Full Guide
Mini Winter Village Skyline at Dusk
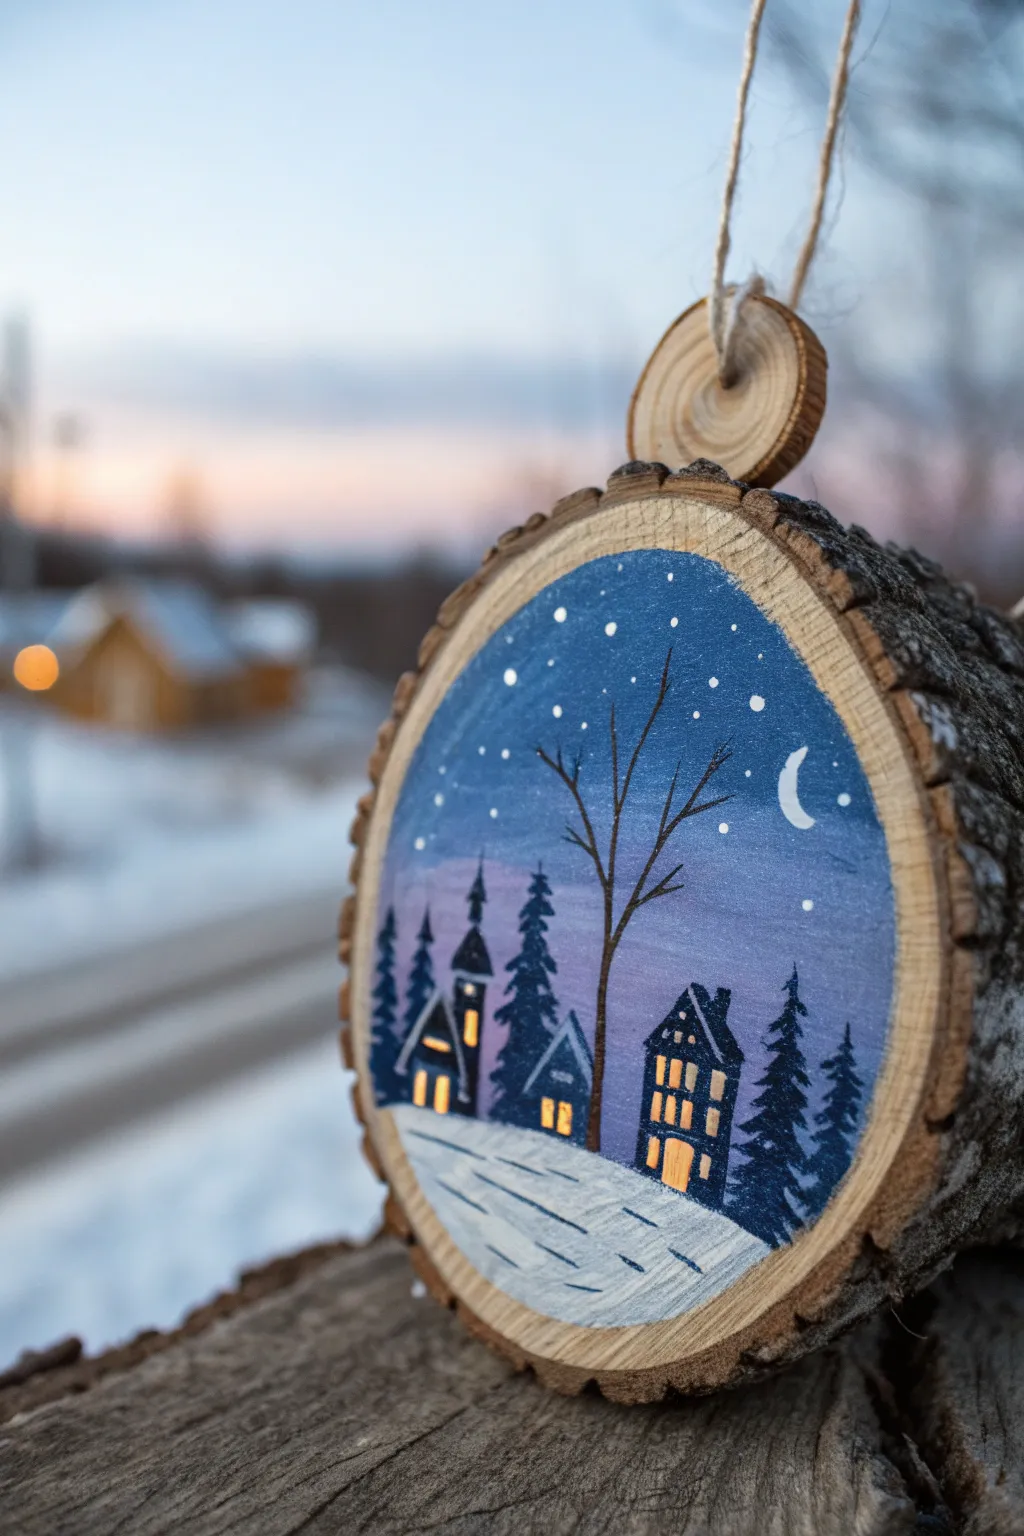
Capture the serene magic of a sleepy winter evening on a rustic wood slice with this charming ornament. The deep blue sky fading into violet, dotted with glowing windows and crisp stars, brings a cozy atmosphere to your holiday decor.
Step-by-Step Guide
Materials
- Wood slice with bark (approx. 3-4 inch diameter)
- Acrylic paints: Navy blue, titanium white, black, violet/purple, warm yellow, burnt umber
- Gesso or white primer (optional but recommended)
- Flat shader brush (size 6 or 8)
- Small round detail brush (size 0 or 00)
- Liner brush (size 000)
- Old toothbrush (for splatter stars)
- Palette or mixing plate
- Cup of water and paper towels
- Small screw eye hook
- Jute twine for hanging
Step 1: Preparing the Canvas
-
Prime the surface:
Begin by painting a thin layer of white gesso or white acrylic paint in the center of the wood slice, leaving a small border of raw wood near the bark. This ensures your sky colors will pop rather than soaking into the grain. -
Dry thoroughly:
Let the primer layer dry completely before moving on to the background colors. You can use a hairdryer on a low setting to speed this up if you’re eager to start painting.
Step 2: Painting the Dusk Sky
-
Mix the sky gradient:
On your palette, prepare a navy blue and a soft violet. You’ll want to create a gradient effect, so have a little white handy to blend them. -
Paint the upper sky:
Using your flat shader brush, apply the navy blue to the top half of the painted circle, curving it slightly to follow the wood’s shape. -
Blend downward:
While the blue is still wet, introduce the violet paint in the middle section. Use back-and-forth strokes to blend the blue into the purple, creating a seamless transition. -
Lighten the horizon:
Mix a tiny bit of white into your violet to create a hazy, pale purple for the horizon line just above where the snow will be. Blend this upward into the darker violet. -
Add the snowy ground:
Clean your brush and paint a rolling hill of white at the bottom third of the circle. Let the top edge overlap the pale purple sky slightly to create a soft horizon.
Star Splatter Mess?
If the toothbrush spray gets on the trees or houses, just wait for it to dry and paint over the white dots with your dark silhouette color. It’s easier than wiping wet paint.
Step 3: Adding the Stars and Moon
-
Create the stars:
Dilute a small drop of white paint with water until it’s the consistency of ink. Dip an old toothbrush into this mix and gently flick the bristles with your thumb to spray tiny stars across the blue sky. -
Paint the crescent moon:
Using your liner brush and pure white paint, carefully draw a thin ‘C’ shape in the upper right quadrant for a delicate crescent moon. -
Add larger stars:
Take your detail brush and dot a few larger, deliberate stars among the splatter to create depth in the night sky.
Make It Sparkle
While the white snow paint is still wet, sprinkle a tiny pinch of extra-fine iridescent glitter over the bottom area. It mimics the way fresh snow glistens in the moonlight.
Step 4: Building the Village
-
Outline the houses:
Mix a dark navy or charcoal color (black with a touch of blue). Using the detail brush, paint the silhouettes of two or three small houses or a church. Varied roof heights make the village look more organic. -
Paint the pine trees:
With the same dark mixture, dab in pine trees between and behind the houses. Use a stippling motion (tapping the brush tip) to create the texture of pine boughs. -
Let silhouettes dry:
Allow the dark shapes to dry completely. This is crucial so the yellow window light applied next doesn’t turn muddy. -
Paint the windows:
Load the smallest brush with warm yellow paint. Carefully paint tiny squares and rectangles on the house silhouettes to look like glowing windows. -
Add window frames:
For extra detail, once the yellow is dry, you can use the liner brush with the dark house color to paint extremely thin crosses over the larger yellow windows to create panes.
Step 5: The Foreground Tree
-
Paint the trunk:
Mix a dark brown (burnt umber with a touch of black). Using the liner brush, paint a thin, slightly wavy line extending from the snow up through the sky, slightly off-center. -
Add branches:
Paint thin branches reaching upward and outward from the trunk. Make the lines thinner as they move away from the trunk, letting them overlap the moon or stars for a realistic layering effect. -
Highlight the snow:
Mix a very pale blue-grey. Add subtle horizontal streaks across the white snow area to suggest shadows and uneven terrain.
Step 6: Final Assembly
-
Attach the hardware:
Locate the top center of the wood slice. Firmly screw in the small eye hook into the bark edge. -
Thread the twine:
Cut a length of jute twine, thread it through the eye hook, and tie a secure knot to create the hanging loop. -
Mount the mini slice:
Thread the smaller mini wood slice onto the twine before tying the final knot if you want to replicate the stacked look in the photo.
Hang your miniature winter world on the tree and enjoy the peaceful view all season long
Starry Night Sky With Splattered Stars
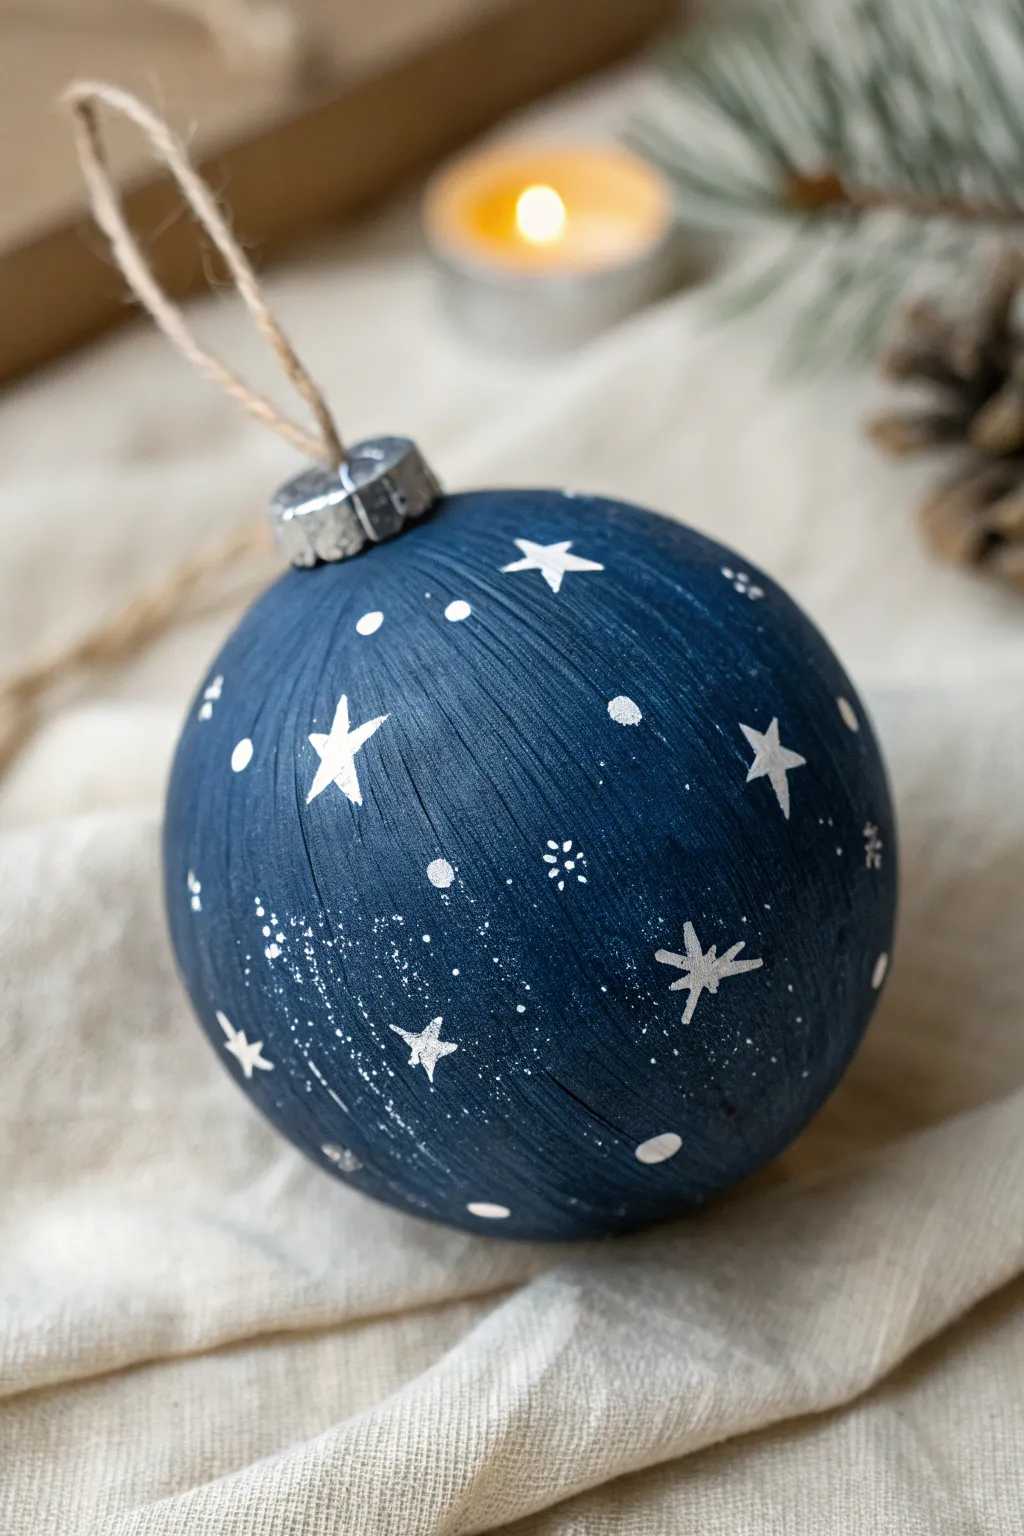
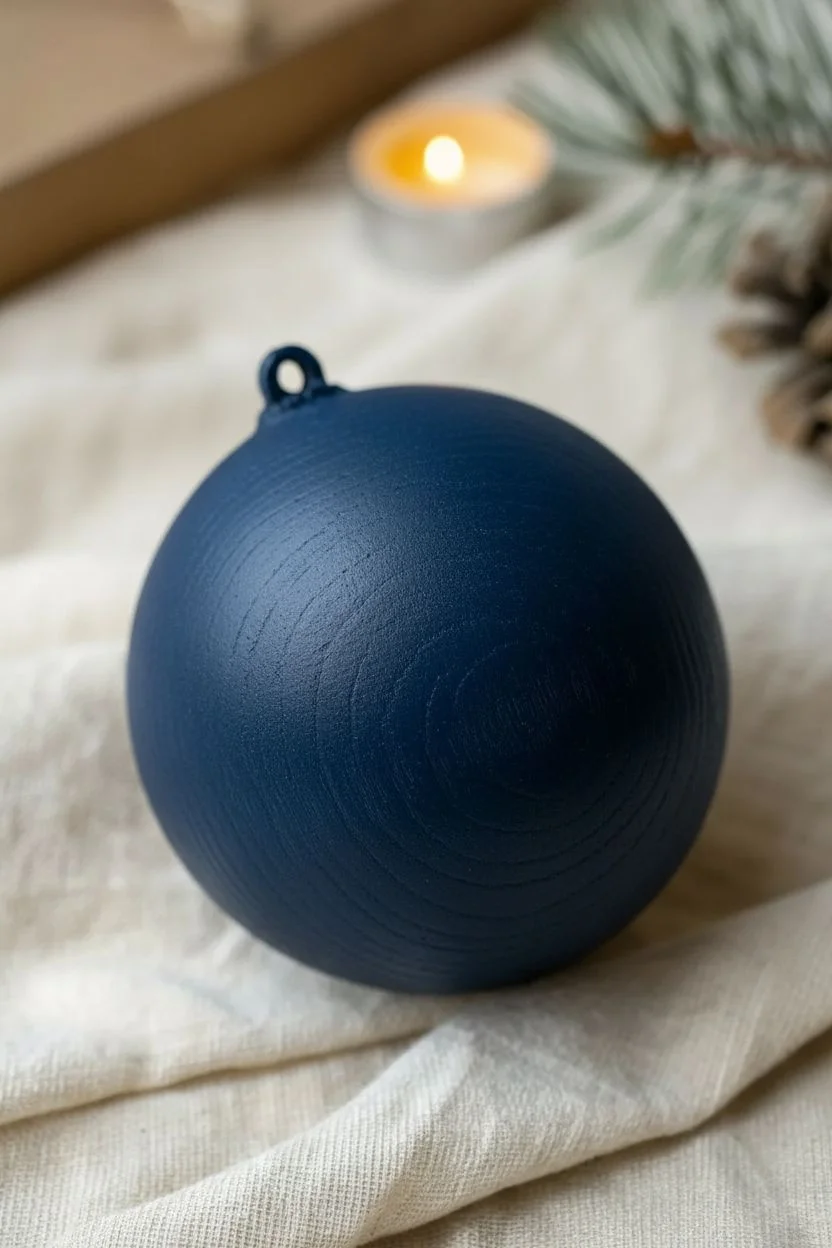
Capture the magic of a clear winter evening with this simple yet striking painted wood ornament. By combining deep midnight blue with crisp white details, you’ll transform a plain wooden bauble into a tiny, held-in-your-hand galaxy.
How-To Guide
Materials
- Unfinished wooden ball ornament
- Jute twine or string
- Dark navy blue acrylic paint
- White acrylic paint
- Flat paintbrush (medium size)
- Fine detail paintbrush (size 0 or 00)
- Old toothbrush or stiff bristle brush
- Water cup and palette (or paper plate)
- Paper towels
- Clear matte sealer (optional)
Step 1: Preparing the Canvas
-
Remove hardware:
Before you begin painting, carefully remove the metal cap and hanger loop from the top of the wooden ornament. This keeps the hardware clean and allows you to paint the entire surface right up to the neck. -
Sand gently:
Run a piece of fine-grit sandpaper over the wooden ball if there are any rough patches. Wipe away the dust with a slightly damp paper towel to ensure a smooth painting surface. -
Base coat application:
Using your flat paintbrush, apply a generous coat of dark navy blue acrylic paint. Make sure to brush in the direction of the wood grain so the texture enhances the final look rather than fighting against it. -
Dry and assess:
Let this first coat dry completely, which should take about 15-20 minutes. Inspect the coverage; if the wood color is still showing through too much, apply a second coat of navy blue for a deeper, richer night sky background.
Splatter Too Blotchy?
If your paint splatter created huge blobs instead of mist, wipe it off quickly with a wet rag. Next time, tap off excess paint on a paper towel before flicking the bristles.
Step 2: Creating the Galaxy
-
Prepare the splatter:
While the base coat dries, mix a small amount of white acrylic paint with a drop or two of water. You want a consistency that is thinner than paint but thicker than milk—runny enough to flick easily. -
Protect your workspace:
This next step can be messy. Lay down extra paper towels or newspaper around your work area to catch stray droplets. -
Splatter stars:
Dip an old toothbrush or a stiff bristle brush into the thinned white paint. Hold the ornament in one hand and use your thumb to flick the bristles of the brush toward the ornament. This creates the fine galaxy dust effect. -
Control the density:
Rotate the ball as you splatter to ensure even coverage. Create denser clusters of ‘stars’ in some areas to mimic the Milky Way, leaving other areas darker for contrast. -
Let the splatter set:
Allow the splatter to dry completely before moving on to hand-painting. If you touch wet splatter spots, they will smear and ruin the crisp effect.
Metallic Magic
Swap the white paint for silver or gold metallic acrylics for the stars. It catches the holiday lights beautifully while maintaining that rustic celestial vibe.
Step 3: Adding Constellations
-
Paint large stars:
Switch to your fine detail brush and straight white paint (unthinned). Paint a few larger, five-pointed stars scattered randomly across the surface. Don’t worry about perfection; slightly organic shapes look more charming. -
Add simple bursts:
In between the five-pointed stars, paint simple starbursts. Draw a small vertical line crossed by a horizontal line, then add tiny diagonal strokes for an eight-point glimmer. -
Create distinct planets:
Use the very tip of your brush handle or a dotting tool dipped in white paint. Press gently onto the surface to create larger, perfectly round dots that represent planets or brighter stars. -
Fill the gaps:
Look for empty dark spaces and add tiny freehand dots with your fine brush. Varing the size of these dots creates depth and dimension in your starry sky. -
Optional texture:
If you want a distressed look similar to the inspiration image, very lightly dry-brush a tiny amount of white over a few sections of the splatter. This highlights the wood grain texture beneath the blue paint.
Step 4: Finishing Touches
-
Clear coat:
Once all paint is thoroughly dry (give it at least an hour), apply a layer of clear matte sealer. This protects your artwork from scratching and gives it a professional finish. -
Reassemble:
Place the silver metal cap back onto the neck of the ornament. Press it down firmly until it grips the wood securely. -
Add the hanger:
Cut a length of jute twine, thread it through the metal loop, and tie a knot to create your rustic hanger. The natural brown tone contrasts beautifully with the deep blue.
Hang your new starry creation on the tree and enjoy the peaceful winter atmosphere it brings to your decor


Tiny Mountain Landscape With Misty Layers
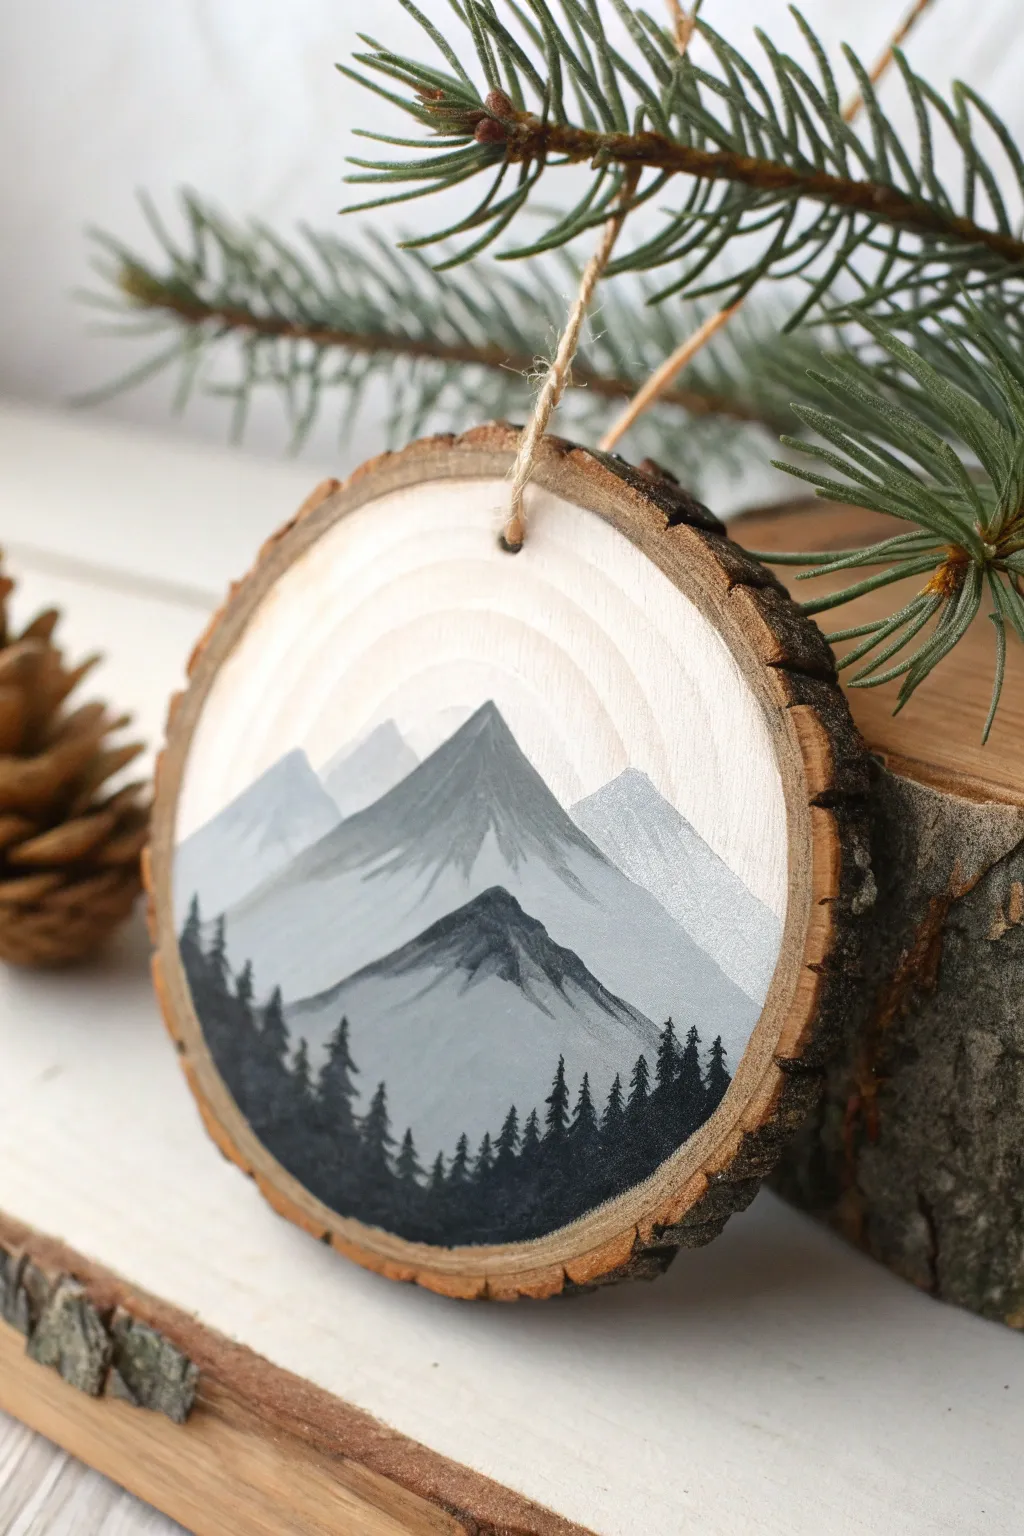
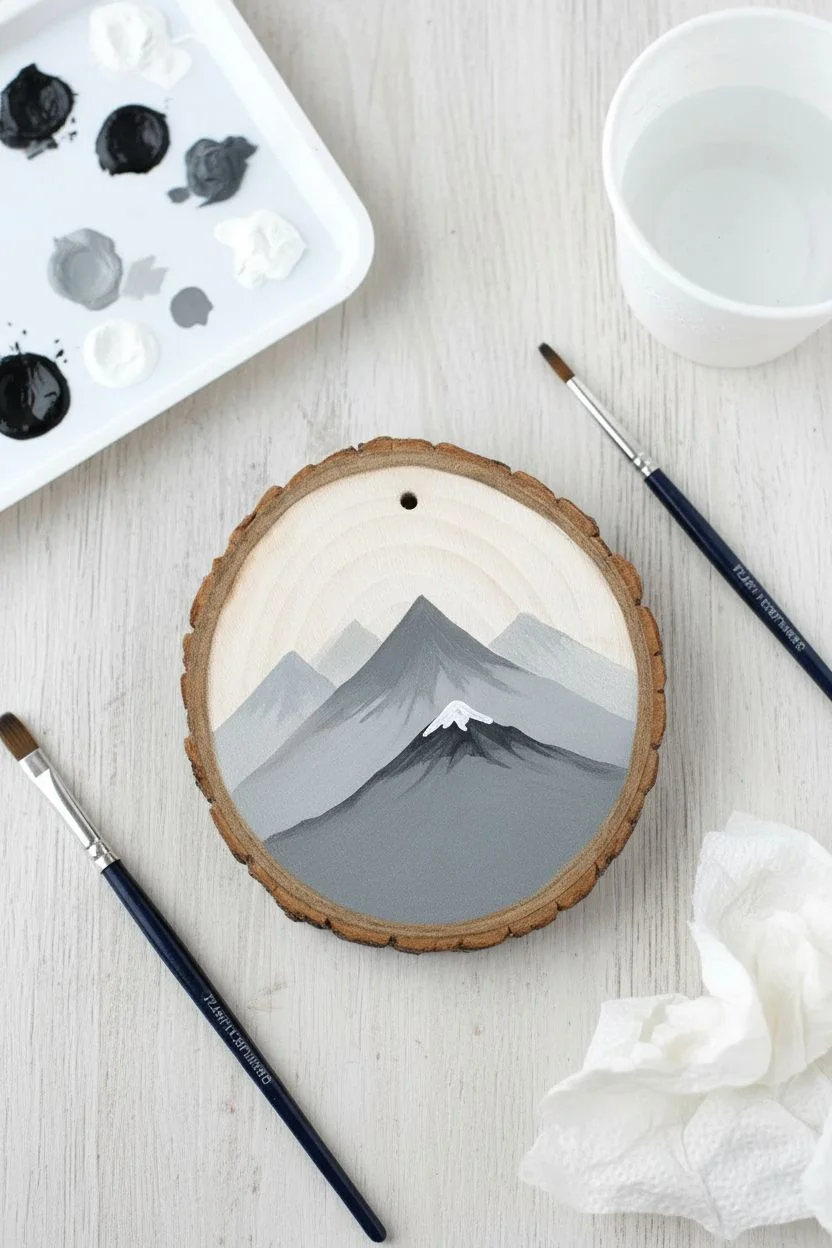
Capture the serene beauty of a foggy alpine morning on a rustic wood slice canvas. This monochromatic design relies on simple layering techniques to create depth, moving from faint background peaks to sharp, dark foreground trees.
Step-by-Step
Materials
- Small wood slice (predrilled with hole)
- Acrylic paints: Titanium White, Mars Black
- Small flat brush (size 2 or 4)
- Fine liner brush (size 00 or 000)
- Jute twine for hanging
- Paper palette or plate
- Cup of water
- Paper towels
- Varnish (matte or satin finish)
Step 1: Preparing the Base
-
Surface Prep:
Ensure your wood slice is clean and free of loose sawdust. If the surface feels rough, give it a quick pass with fine-grit sandpaper, but leave the bark edges intact for that rustic frame. -
Planning the Sky:
The natural wood grain serves as the sky in this design, so you don’t need to paint the entire background. Look at the rings of the wood; orient the slice so the arched grain mimics a halo or sun rays above where your mountains will sit.
Uneven Wood Texture?
If the wood grain is making your paint bleed or spread, apply a clear matte medium or a thin layer of clear gesso to the wood first. This seals the pores for crisper lines.
Step 2: Painting the Mountains
-
Mixing the Background Grey:
On your palette, mix a very pale grey. Use a large amount of white with just the tiniest dot of black. You want this first layer to be almost ghostly to create the illusion of distance. -
Painting the Furthest Peaks:
Using the flat brush, paint two or three triangular shapes about halfway up the wood slice. Keep the edges soft and don’t worry about texture yet; these are the mountains furthest in the distance. -
Mixing the Mid-Tone:
Add a little more black to your previous mix creating a medium, steel-grey tone. I find it helps to test the shade on a scrap paper first to ensure there is enough contrast against the first layer. -
The Second Mountain Range:
Paint a large, central mountain peak overlapping your background mountains. Position the peak slightly off-center for a more natural look. Use the edge of your flat brush to create the downward sloping sides. -
Adding Snow Highlights:
While the mid-tone grey is still wet, dip a corner of your brush into pure white paint. Drag it gently down the right side of the mountain peak to suggest sunlight hitting a snowy slope. Blend it slightly so it isn’t too harsh. -
Creating the Shadow Side:
Mix a slightly darker charcoal grey and paint the foreground mountain peak, which should sit lower than the central peak. This mountain acts as the anchor for the mid-ground scenery. -
Detailing the Foreground Peak:
Use your fine liner brush to add jagged ridges to this closest mountain. Add darker streaks running down the slopes to mimic craggy rocks and crevices.
Step 3: The Forest Line
-
Mixing the Blackest Tone:
For the tree line, you want a deep, solid color. Use pure Mars Black. If the paint feels too thick to make sharp lines, water it down just a tiny bit until it flows like ink. -
Establishing the Horizon:
Paint a solid black, undulating curve along the very bottom of the wood slice. This covers the base of your mountains and serves as the ground for your forest. -
Starting the Trees:
Switch to your finest liner brush. Start by painting vertical lines of varying heights sticking up from the black ground layer. These lines are the trunks of your pine trees. -
Forming the Branches:
Starting at the top of a trunk line, use a tiny stippling or tapping motion to create branches. Keep the top very narrow and widen the tree as you move down, forming a triangular silhouette. -
Varying Textures:
Don’t make every tree identical. Make some tall and sparse, and others short and bushy. I like to group them in clusters of three or five for a more organic forest feel. -
Filling the Gaps:
Go back and fill in the bottom area between trees with solid black to ensure the forest feels dense and shadowy. Ensure the transition from the tree line to the bottom edge of the wood is seamless.
Add a Metallic Pop
Mix a tiny amount of metallic silver paint into your lightest grey layer or dry-brush silver over the mountain peaks for a shimmering, frosty morning effect.
Step 4: Finishing Touches
-
Drying Time:
Allow the paint to dry completely. Since acrylics dry efficiently, 20 minutes should be sufficient, but thick black sections may take a bit longer. -
Sealing the Artwork:
Apply a coat of matte or satin varnish over the entire painted face of the wood slice. This protects the paint from scratching and seals the raw wood grain. -
Stringing the Ornament:
Cut a 6-inch length of jute twine. Thread it through the pre-drilled hole at the top and tie a secure knot to create the hanging loop.
Hang this rustic piece on your tree or use it as a charming gift tag for a nature lover
Aurora-Inspired Sky Wash Over Dark Pines
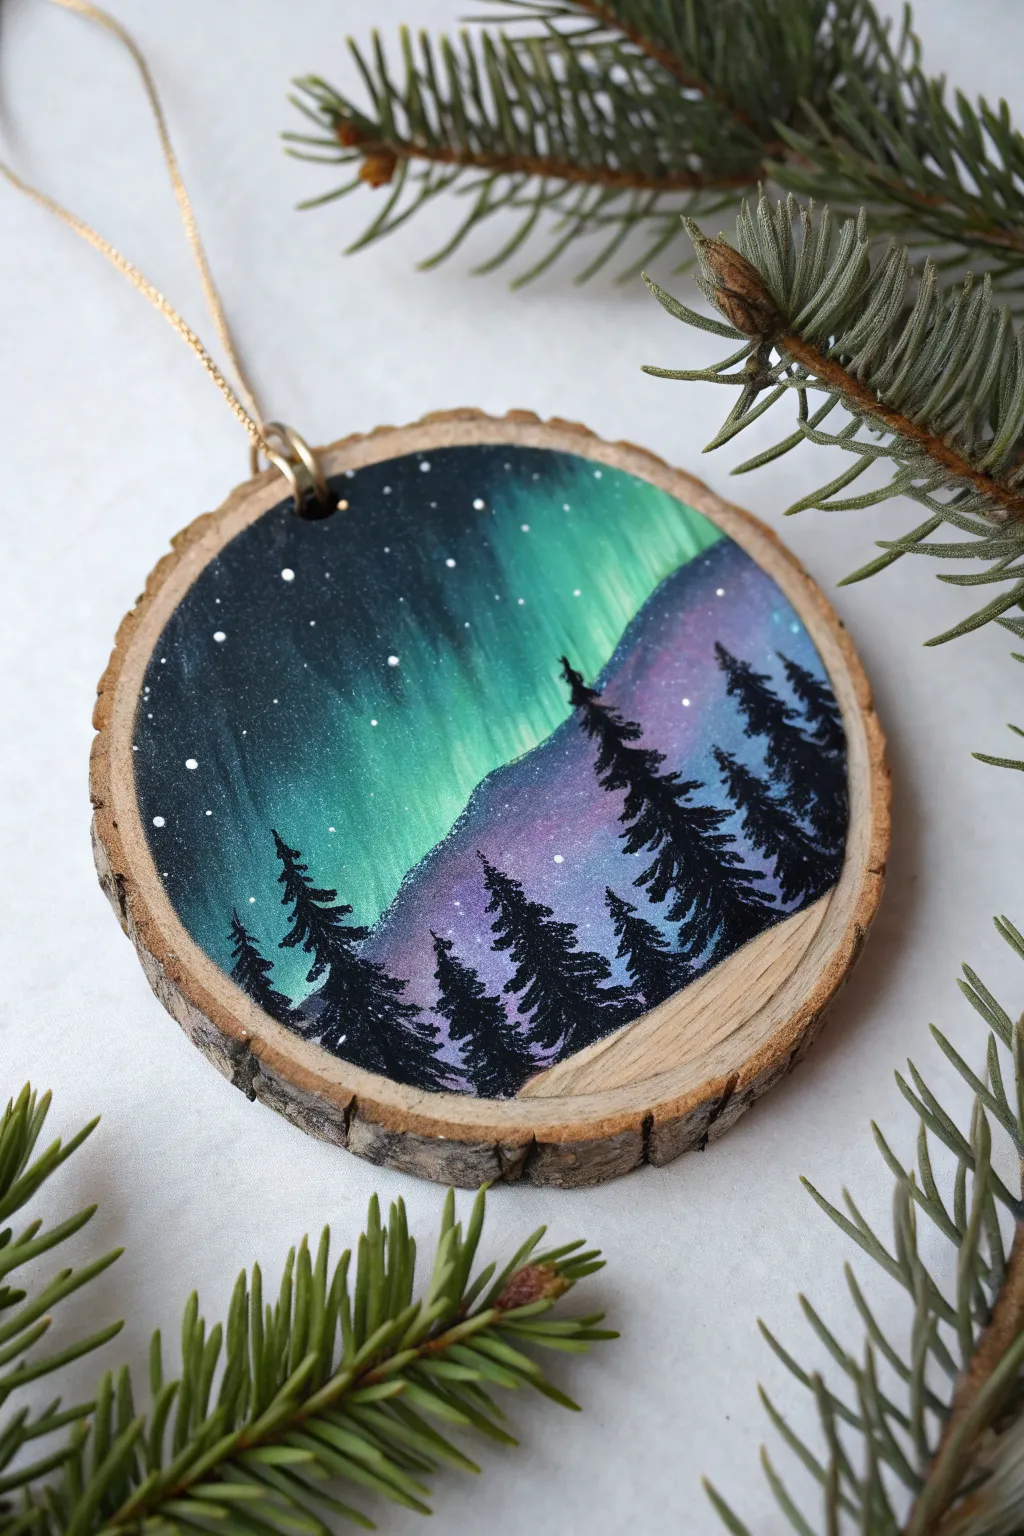
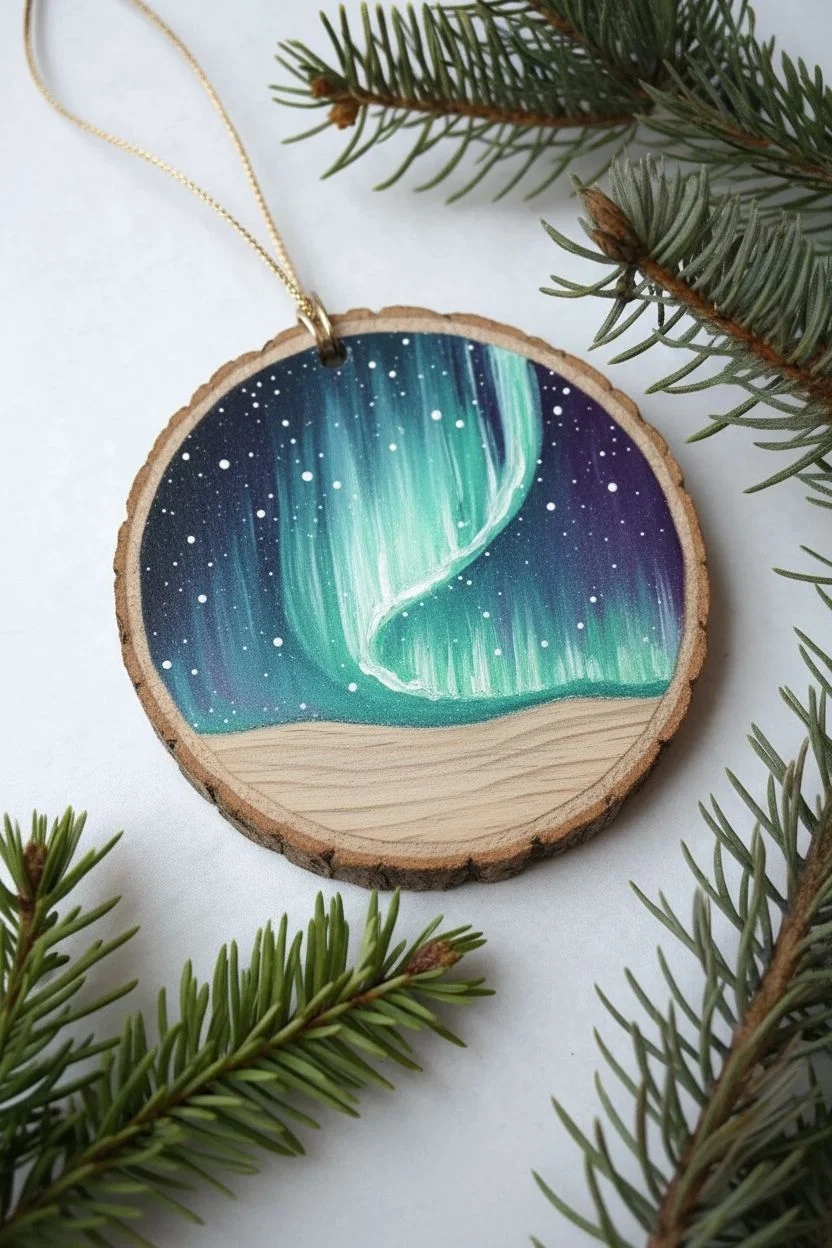
Capture the magic of the polar night on a rustic wood slice with this stunning Aurora Borealis ornament. With vivid washes of teal and purple set against a starry sky, this keepsake brings a celestial glow to your holiday tree.
Detailed Instructions
Materials
- Wood slice with bark edge (approx. 3-4 inch diameter)
- Acrylic paints (black, white, teal/emerald green, violet/purple, navy blue)
- Small flat wash brush
- Fine detail liner brush (size 00 or 000)
- Old toothbrush (optional for stars)
- Water cup and paper towels
- Small eye hook screw
- Gold thread or twine
Step 1: Painting the Celestial Sky
-
Prime the Surface:
Begin by deciding if you want the natural wood grain to show through slightly or not. For this look, paint a very thin, watery layer of white gesso or white acrylic just on the area where the sky will be to make the subsequent colors pop, leaving the bottom curve unpainted for a natural ground effect. -
Lay the Dark Base:
Using your flat brush, apply a deep navy blue or black mixed with blue to the upper left quadrant of the wood slice. Blend this outwards, keeping the paint wet. -
Introduce the Purple:
While the dark base is still slightly tacky, load your brush with violet paint. Apply this to the right side of the slice, blending it gently into the dark edge where they meet to create a soft transition. -
Create the Aurora Glow:
Clean your brush thoroughly. Pick up a mix of emerald green and a touch of white to make a glowing teal. Paint vertical, sweeping strokes starting from the center and pulling upwards into the dark blue sky. The strokes should look like dancing curtains of light. -
Blend the Transitions:
With a slightly damp, clean brush, very gently blur the edges where the teal meets the blue and purple. We want the aurora to look diaphanous and ghostly, not like solid stripes. -
Intensify the Light:
Once the first layer is dry, add a few smaller, brighter streaks of teal mixed with more white right in the center of the green section to create a glowing core. -
Add the Stars:
Dilute a small drop of white paint with water until it’s inky. Dip a toothbrush or stiff brush into it and flick the bristles to spray tiny stars across the sky. Use the tip of your detail brush to manually add a few larger, brighter stars.
Starry Night Trick
Cover the bottom unpainted wood section with a piece of paper or masking tape before flicking the white paint stars. This keeps your natural wood grain clean and free of accidental speckles.
Step 2: Adding the Silhouettes & Finish
-
Draft the Slope:
Visualize a sloping hill starting lower on the left and rising to the right. This separates your sky from the natural wood grain ‘ground’ below. -
Paint the Forest Floor:
Using black acrylic and a small brush, paint a solid, undulating line to define the horizon. Fill in the space immediately below the trees if you want a solid ground, or let the trees root directly into the unpainted wood as shown in the example. -
Start the Tree Trunks:
Switch to your fine liner brush. Paint thin, vertical lines for the tree trunks. Vary their heights, placing taller trees in the foreground and shorter ones in the back for depth. -
Detailed Branches:
Starting from the top of each trunk, use a stippling or tapping motion to create the evergreen boughs. Keep the tops narrow and pointy, widening the branches as you move down the trunk. -
Layering the Trees:
I like to ensure the trees overlap slightly. Paint the trees in the ‘back’ first, let them dry for a moment, and then paint the larger, foreground trees over them to build a dense forest feel. -
Refine the Edges:
Use the very tip of your liner brush to pull out tiny, wispy branches at the tips of the trees. This creates a realistic, feathery pine texture rather than a solid triangle block. -
Protect the Art:
Allow the paint to cure completely (at least an hour). Apply a coat of clear satin or matte varnish over the painted area to seal the wood and protect the design from scratches. -
Attach Hardware:
Find the top center of the wood slice. Carefully screw in a small eye hook by hand until it is secure. -
String It Up:
Thread a piece of gold metallic twine or ribbon through the eye hook, knot it securely, and your boreal masterpiece is ready to hang.
Add Subtle Shimmer
Mix a tiny amount of iridescent medium or fine glitter glaze into your teal aurora paint. It won’t show much in the dark, but will catch the Christmas tree verify lights beautifully.
Now you have a miniature window into a northern winter night ready to adorn your home
Cute Penguin in a Scarf for Beginner Brushwork
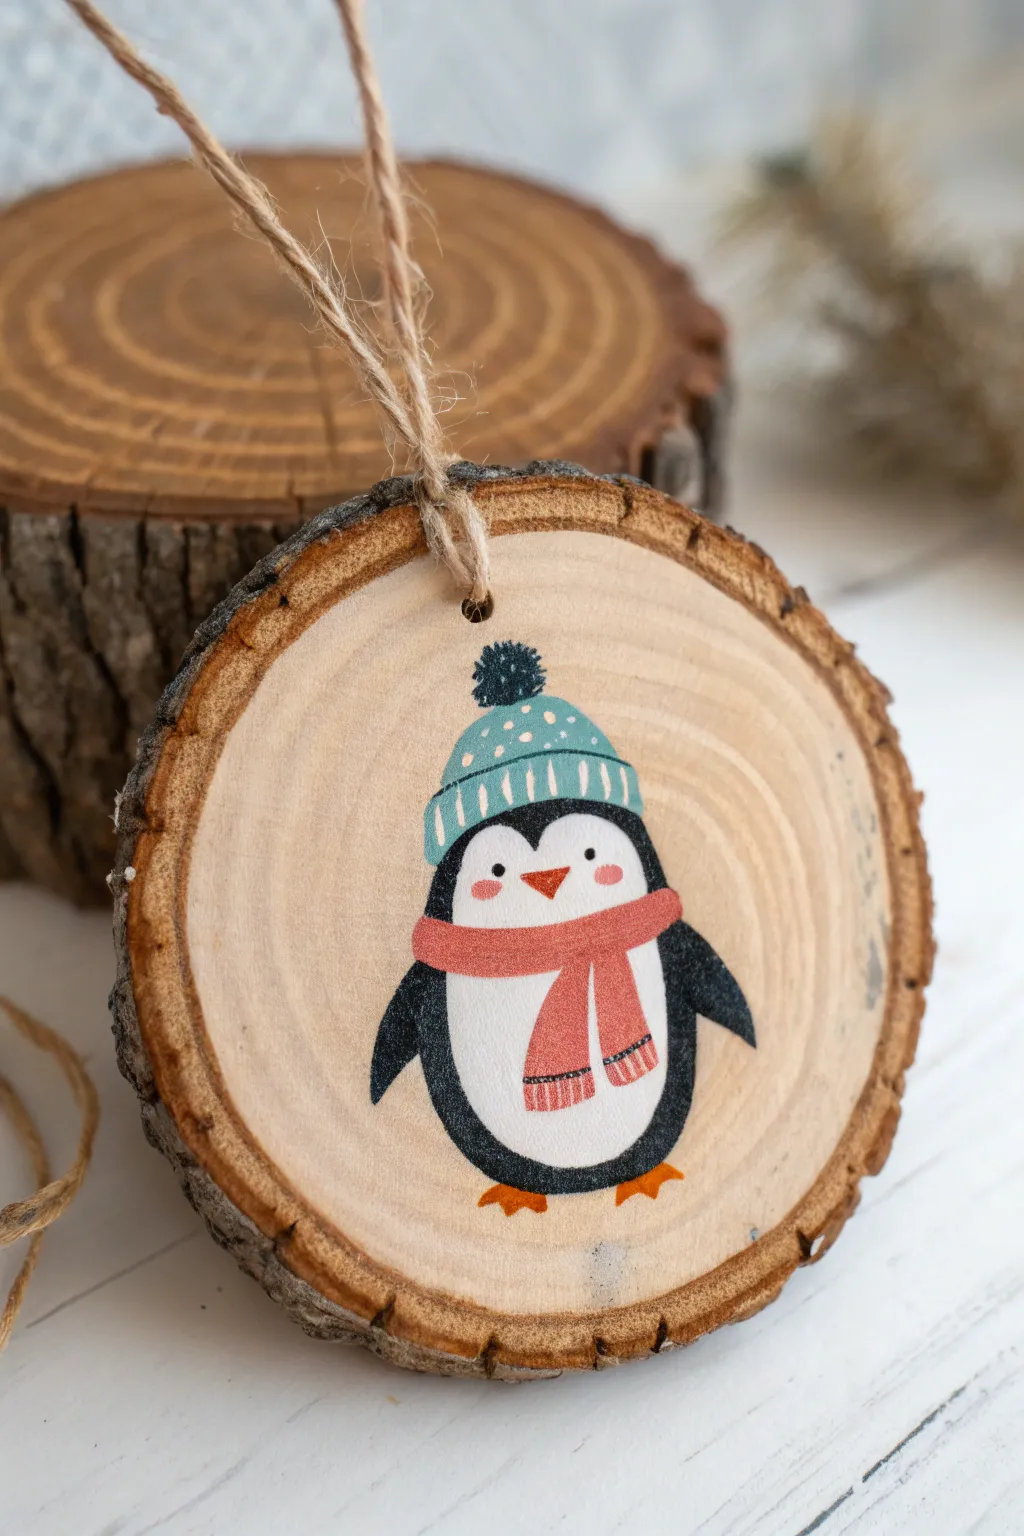
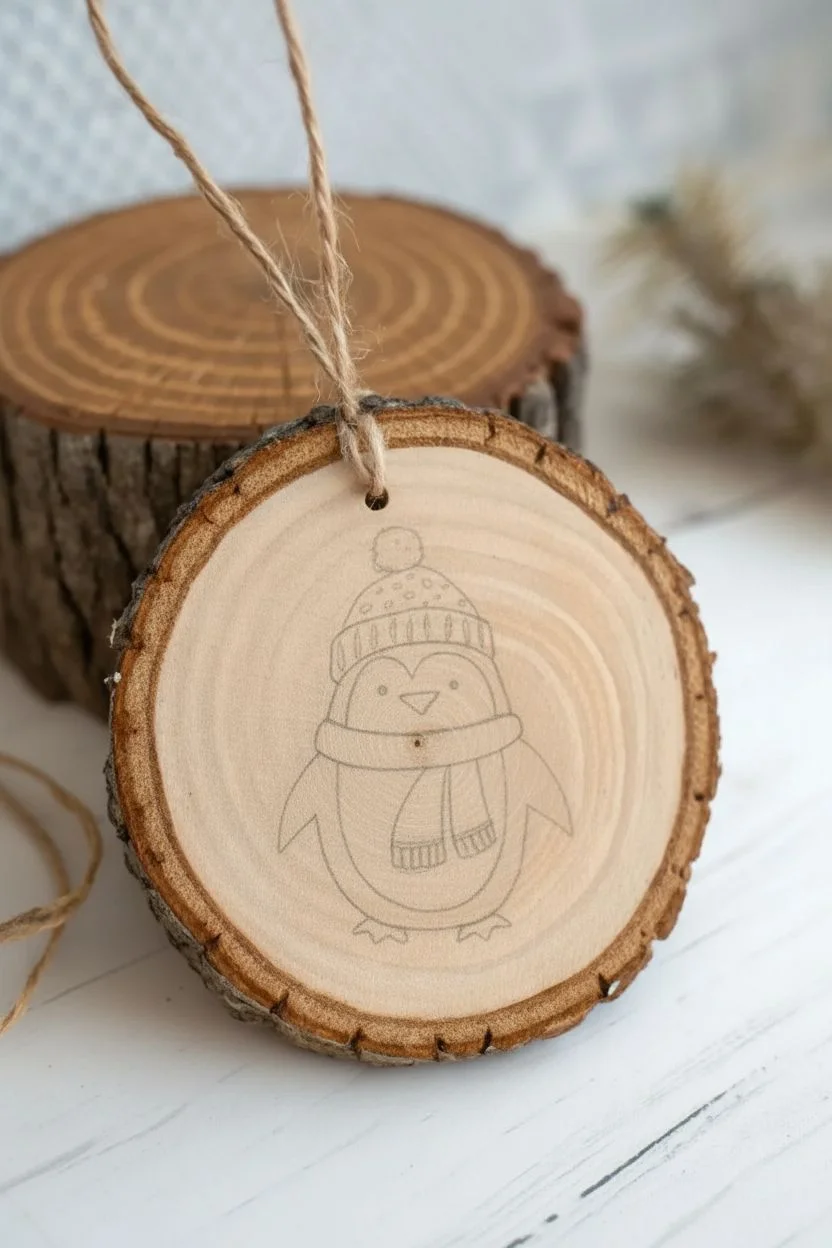
This charming little penguin, bundled up in a teal beanie and coral scarf, makes for a delightful rustic addition to your tree. Painted on a natural wood slice, the warm timber grain shines through the background, giving the finished piece a cozy, handcrafted feel perfect for winter.
Step-by-Step Guide
Materials
- Wood slice ornament (approx. 3-4 inches) with pre-drilled hole
- Acrylic paints: White, black, teal/turquoise, coral/salmon pink, light pink (for cheeks), orange
- Fine detail brushes (sizes 0 and 00)
- Small flat brush (size 2 or 4)
- Pencil for sketching
- Jute twine for hanging
- Matte or satin clear sealant (optional)
- Cup of water and paper towels
Step 1: Preparation & Sketching
-
Select your canvas:
Choose a wood slice that is relatively smooth and free of large knots in the center area where you plan to paint. A smooth surface makes delicate brushwork much easier. -
Lightly sand:
If the wood slice feels rough to the touch, give it a very quick sanding with fine-grit sandpaper to ensure your paintbrush glides smoothly. -
Plan the placement:
Visualize where the penguin will sit. You want the penguin centered horizontally, but situated slightly lower on the slice so there is room for the hat pom-pom without hitting the bark edge or the hole. -
Sketch the outline:
Using a pencil very lightly, draw an oval shape for the body. Add a rounded triangle shape on top for the hat, and sketch the flowing scarf lines across the ‘neck’ area.
Fixing Bleeding Lines
If paint bleeds into the wood grain, let it dry completely. Then, use a stiff brush with a tiny bit of water to gently scrub the rogue paint, or paint over it with a skin-tone mix that matches the wood.
Step 2: Blocking Colors
-
Paint the white belly:
Using your small flat brush, fill in the center oval of the penguin’s body with white acrylic paint. You may need two coats here to cover the wood grain completely. -
Create the black body:
With a steady hand, paint the black outer shape of the penguin, carefully outlining the white belly you just painted. Extend two small triangles out to the sides for the flippers. -
Add the feet:
Load a detail brush with orange paint and add two small, triangular feet at the very bottom of the black body. Let these base layers dry completely before moving on. -
Base coat the hat:
Mix a soft teal or turquoise color. Paint the main dome of the beanie cap. Don’t worry about the rim or the pom-pom yet; just get that main color solid. -
Paint the scarf base:
Using a coral or salmon pink shade, fill in the scarf area. Ensure the scarf wraps around the neck and has two ‘tails’ hanging down over the white belly.
Step 3: Adding Details
-
Define the hat rim:
Using a slightly lighter shade of your teal (mix in a tiny dot of white), paint the horizontal band/rim of the hat just above the penguin’s eyes. -
Texture the hat:
With your finest brush and white paint, add tiny vertical dashes along the rim of the hat to look like ribbing. Add small white polka dots to the top dome of the hat for extra winter flair. -
Add the pom-pom:
Dip a small round brush or the back of a paintbrush handle into black paint (or a very dark teal) to create the fuzzy pom-pom on top. -
Detail the scarf:
I prefer using a very fine liner brush here to add the fringe at the bottom of the scarf tails. Use a darker grey or thin black line to define the fringe and adds subtle stripes to the scarf fabric. -
Paint the face:
Using the tip of a toothpick or a 00 brush, place two small black dots for eyes. Paint a small, inverted orange triangle for the beak right between them. -
Rosy cheeks:
Take extremely watered-down light pink paint and dab two soft circles on the cheeks just below the eyes.
Pro Tip: Eye Placement
Place the eyes lower on the face than you think you should—aligned with the top of the beak. This ‘low face’ technique is a classic trick for making characters look instantly cuter.
Step 4: Finishing Touches
-
Final outlines:
Use a diluted black paint or a very fine marker to lightly outline the scarf and hat rim if you want them to pop more against the wood, though leaving them soft works too. -
Seal the wood:
Once the paint is 100% dry, apply a thin layer of matte or satin varnish over the painted area (or the whole slice) to protect it from moisture. -
String it up:
Cut a length of jute twine, thread it through the pre-drilled hole, and tie a secure knot to create the hanging loop.
Hang your new wintry friend on the tree and enjoy the warmth of handmade holidays
Polar Bear Portrait With Soft Dry Brushing
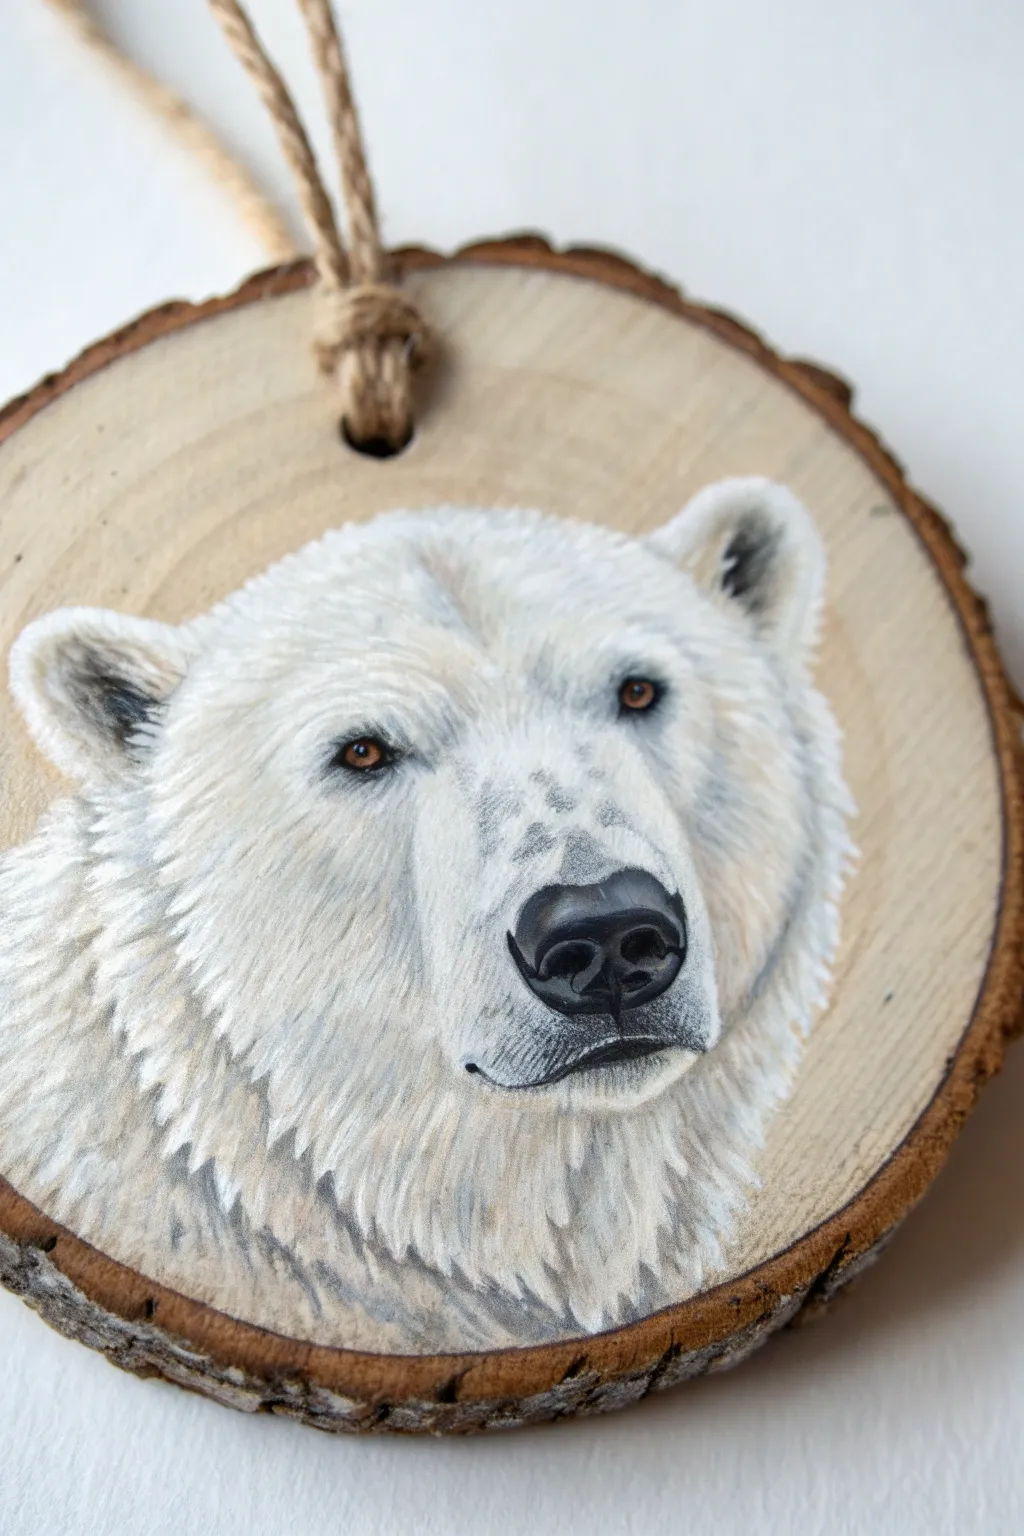

Capture the majestic calmness of a polar bear on a rustic wood slice using acrylic paints. This project focuses on building layers of white and grey to create realistic fur texture without needing single-hair precision.
Step-by-Step Tutorial
Materials
- Wood slice ornament (approx. 3-4 inches diameter) with pre-drilled hole
- Jute twine for hanging
- Gesso (clear or white)
- Acrylic paints: Titanium White, Mars Black, Burnt Umber, Payne’s Grey, Unbleached Titanium
- Brushes: Small flat brush (size 4), round liner brush (size 0 or 00), small filbert brush
- Pencil for sketching
- Palette for mixing
- Paper towels
- Matte spray varnish
Step 1: Preparation & Sketching
-
Prime the Surface:
Begin by applying a thin layer of clear gesso to the wood slice. This seals the wood grain ensuring your paint doesn’t soak in too quickly, while keeping that lovely rustic background visible. Let it dry completely. -
Map the Face:
Lightly sketch the outline of the polar bear’s head using a pencil. Start with a large oval shape, then add the ears at the top corners. Mark the position for the eyes, nose, and muzzle, keeping the bear’s snout relatively long and broad. -
Establish the Base:
Mix a small amount of Unbleached Titanium with Titanium White to create a warm off-white. Using the flat brush, fill in the entire shape of the bear’s head with a solid, opaque coat. This creates a neutral foundation for the fur.
Step 2: Blocking in Shadows
-
Mix Shadow Colors:
Create a soft grey by mixing a tiny dot of Payne’s Grey and a touch of Burnt Umber into your White. You want a very pale, cool grey—not a dark storm cloud color. -
Define the Features:
Using the filbert brush, gently glaze this grey mixture around the eye sockets, down the sides of the snout, and under the chin. This establishes the three-dimensional form of the bear’s skull before you add texture. -
Deepen the Ears:
Use a slightly darker grey mix to block in the inner ears. Keep the edges soft; polar bear ears are very furry and rarely have sharp outlines.
Fur Formula
For realistic white fur, never use just plain white. Always mix in tiny amounts of blue or brown to create ‘dirty’ shadows first, so the white top highlights really pop.
Step 3: Painting the Features
-
Paint the Nose:
Mix Mars Black with a tiny bit of White to make a dark charcoal color. Use the liner brush to paint the nose shape. It should look like a soft, inverted triangle with rounded corners. Leave the nostrils absolute black. -
Add Nose Highlights:
While the nose is drying, mix a medium grey and add a subtle curve to the top of the nose bridge. Once dry, add a tiny sharp highlight of pure white or very pale grey to the top of the leather to make it look wet. -
Create the Eyes:
Paint the eyes using Burnt Umber. They should be small and almond-shaped. Outline them very thinly with black using your finest liner brush to give them depth. -
Spark Life:
This is crucial: place a microscopic dot of Titanium White in the upper right side of each pupil. This ‘catchlight’ instantly makes the bear look alive and alert. -
Define the Mouth:
Paint the mouth line using dark grey. Give it a very slight downward curve at the edges, which is characteristic of polar bear anatomy.
Winter Sparkle
Mix a tiny pinch of extra-fine iridescent glitter into your final white highlight layer on the fur. It will mimic the look of frost caught in the bear’s coat.
Step 4: Creating Fur Texture
-
Start the Fur Layers:
Load your small flat brush or filbert brush with pure Titanium White. Wipe most of the paint off onto a paper towel until the brush is almost dry. -
Directional Brushing:
Start dry brushing from the center of the nose bridge outward. Follow the natural growth of the fur: up towards the forehead, and back towards the cheeks. The strokes should be short and overlapping. -
Build the Mane:
Move to the neck area. Here, the fur is longer and thicker. Use slightly heavier strokes, pulling the brush down and outward to simulate the thick neck ruff. -
Recover Highlights:
Go back over the tops of the ears, the eyebrows, and the bridge of the nose with fresh, bright Titanium White. These are the areas the light hits most directly. -
Refine the Edges:
Use your liner brush with thinned white paint to flick tiny hairs along the outer edges of the bear against the wood background. This breaks up the solid outline and makes the fur look fluffy. -
Final Contrast Check:
Step back and look at your ornament. If the face looks too flat, glaze a very watery translucent grey into the deepest shadows (under the chin and near the ears) to push them back.
Step 5: Finishing
-
Seal the Work:
Once the paint is fully cured (give it at least an hour), spray the ornament with a matte varnish. A glossy finish tends to look unnatural on animal portraits, so matte is best here. -
Add Hanging Hardware:
Thread a length of natural jute twine through the pre-drilled hole. Tie a simple knot at the top to secure the loop.
Hang this noble creature on your tree and enjoy the serene winter atmosphere it brings to your decor
Woodland Fox With a Winter Wreath Accent
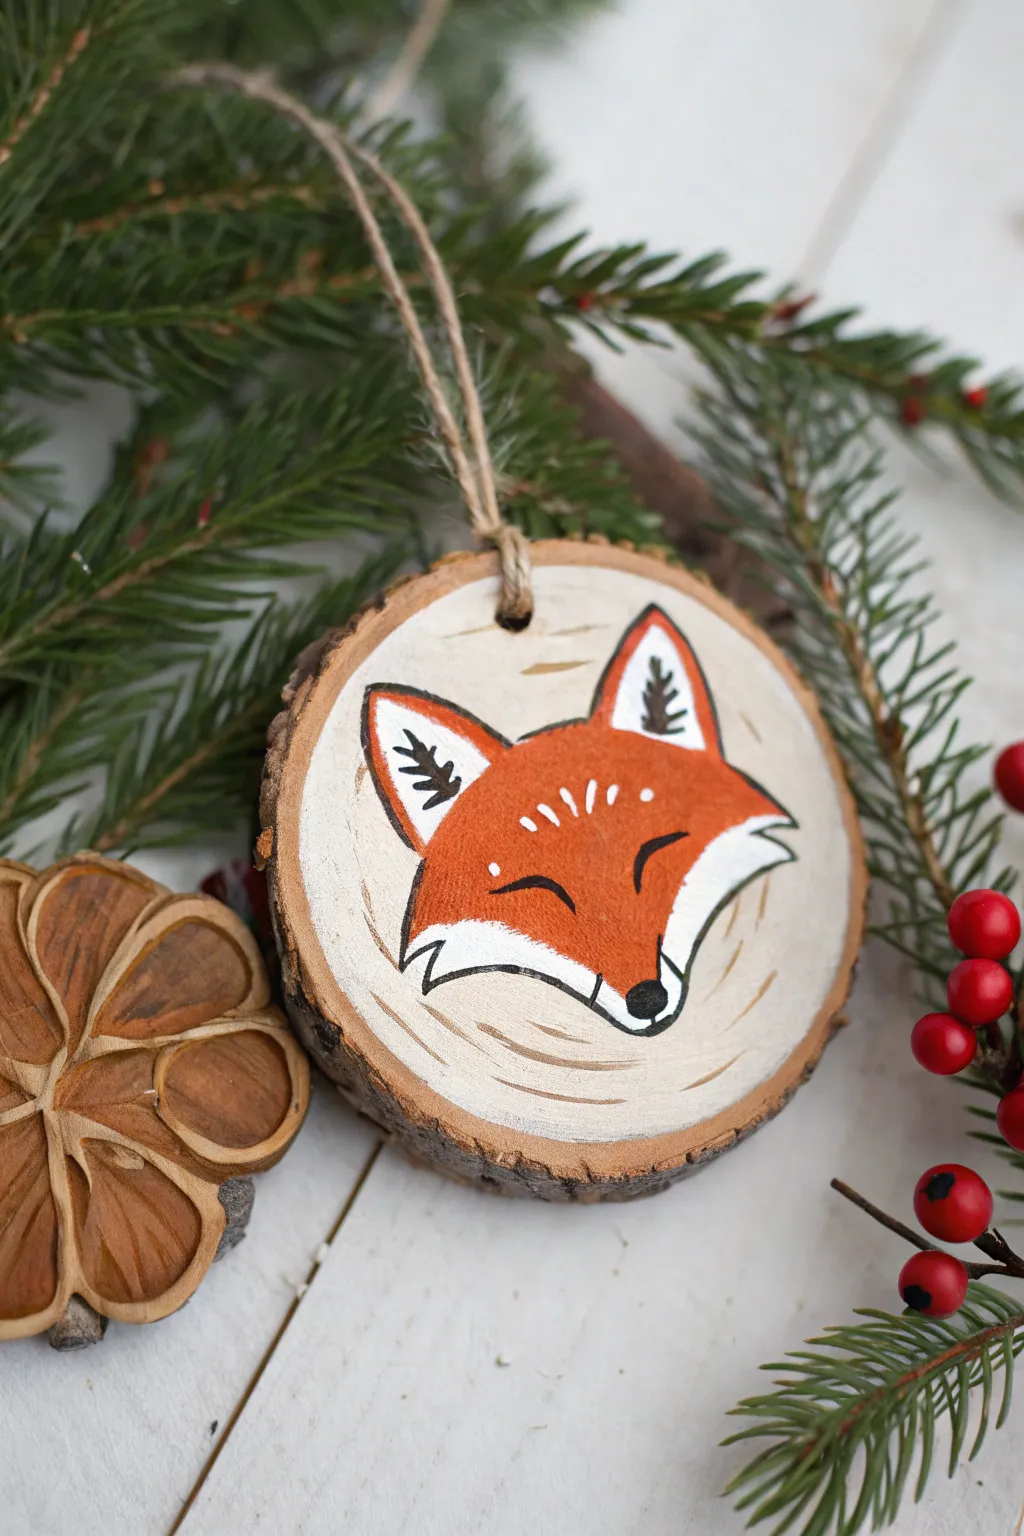
Capture the magic of a winter forest with this adorable hand-painted fox ornament. The simple illustrative style and warm orange tones create a charming, rustic addition to any holiday tree.
Step-by-Step Guide
Materials
- Unfinished wood slice (2.5-3 inches diameter) with pre-drilled hole
- Acrylic paints: Bright Orange/Terracotta, Titanium White, Black, Cream/Off-White
- Small flat brush (size 4 or 6)
- Fine detail brush (size 0 or 00)
- Pencil
- Jute twine or rustic string
- Paper towel
- Water cup
- Sealer (Mod Podge or clear acrylic spray)
Step 1: Preparing the Base
-
Surface Prep:
Begin by gently wiping your wood slice with a dry cloth to remove any sawdust. If the surface feels rough, give it a quick pass with fine-grit sandpaper to ensure your paint glides on smoothly. -
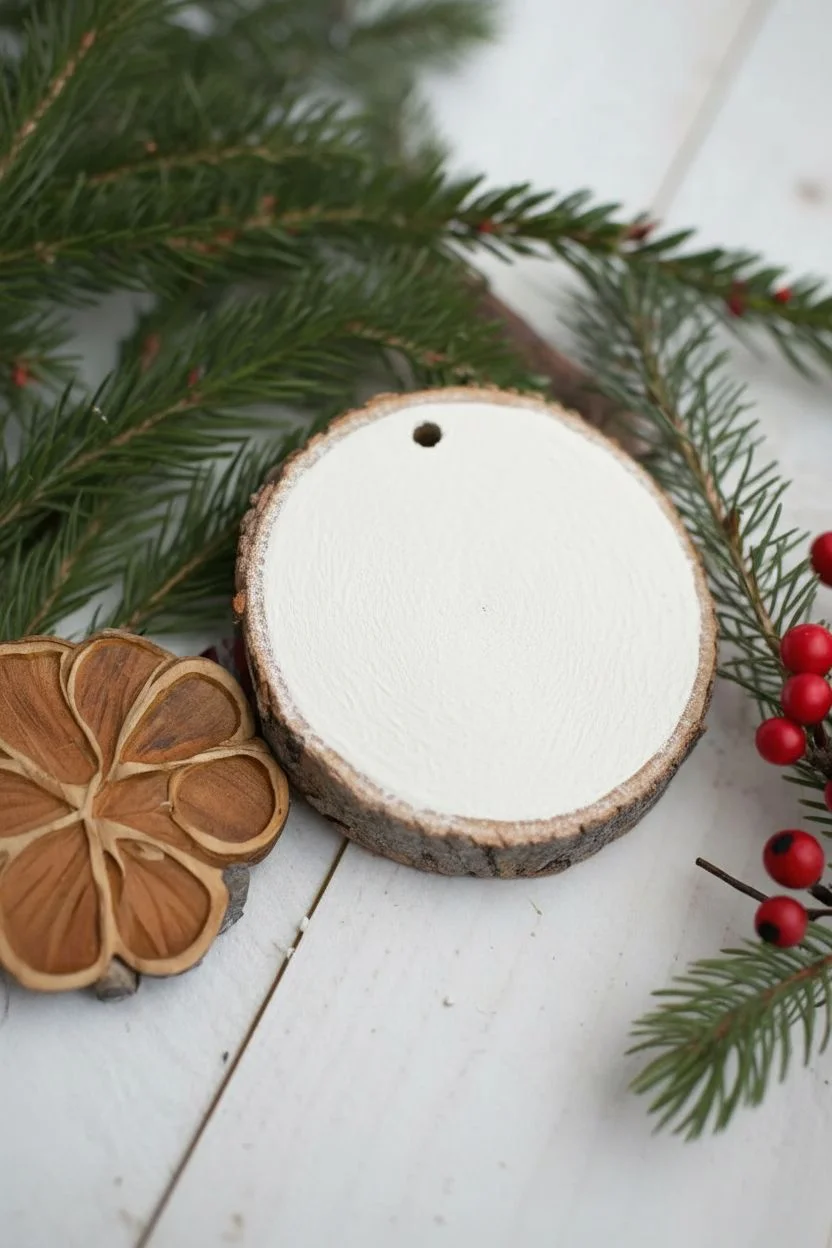
Background Color:
Using your flat brush, paint a circle of Cream or Off-White in the center of the wood slice. Leave a small rim of natural wood showing around the edges to frame the illustration. -
Second Coat:
Let the first layer dry completely. Acrylics on raw wood soak in quickly, so apply a second coat of the cream color to get opaque, solid coverage. Allow this to dry fully before sketching.
Steady Hand Trick
For the thin black outlines, rest your pinky finger on the unpainted edge of the wood slice to stabilize your hand while painting details.
Step 2: Sketching the Fox
-
Basic Shapes:
Lightly sketch the fox’s head shape with a pencil. Start with a wide ‘V’ shape for the face, curving slightly at the bottom for the snout. -
Adding Ears:
Draw two large triangles on top of the head for the ears. Make them generous in size to give the fox a cute, distinctive look. -
Defining Details:
Sketch the inner ear triangles and mark the curved lines where the orange fur meets the white fur on the cheeks. Don’t worry about perfection; faint lines are easily covered by paint.
Level Up: Snow Effect
Use an old toothbrush to gently flick tiny speckles of watered-down white paint over the finished fox to look like fresh falling snow.
Step 3: Painting the Fox
-
Applying Orange:
Load your small flat brush or a larger round brush with bright Orange paint. Carefully fill in the main head shape and the outer triangles of the ears. -
Defining the Cheeks:
While the orange is drying, use a clean brush to paint the lower cheek areas and the inner triangles of the ears with Titanium White. You may need two coats here to make the white pop against the background. -
Refining Edges:
Check your edges where orange meets white. If they are messy, that’s okay—we will outline them later, but try to keep the color blocks relatively distinct.
Step 4: Detailing and Outlining
-
Mixing Outline Color:
Slightly water down a small amount of Black paint. This helps the paint flow more like ink from your liner brush, giving you sharper lines. -
Painting the Eyes:
Using your finest detail brush (size 0), paint two downward-curving crescents for the sleepy, closed eyes. Position them in the lower center of the orange section. -
Nose and Mouth:
Paint a small, rounded inverted triangle for the nose at the very tip of the snout. Add a tiny vertical line coming down from the nose to suggest the mouth. -
Adding Fur Texture:
Inside the white inner-ear triangles, use the very tip of your brush to make small, jagged black strokes. This mimics the look of tufted ear fur. -
Outlining the Head:
Carefully trace the outer edge of the entire head, including the ears, with your thin black paint. A broken line style—where you lift the brush occasionally—adds a nice sketched characteristic. -
Decorative Accents:
Switch back to your white paint and a fine brush (or a toothpick). Add tiny dashes or dots along the forehead area and the bridge of the nose for highlights and texture.
Step 5: Finishing Touches
-
Sealing:
Once the paint is completely bone dry, apply a layer of clear sealer or Mod Podge over the painted area. This protects the artwork and gives it a finished sheen. -
Stringing:
Cut a 6-inch length of jute twine. Thread it through the pre-drilled hole at the top of the wood slice. -
Final Loop:
Tie the ends of the twine in a secure knot to create the hanging loop, trimming any excess string for a tidy look.
Now your woodland friend is ready to add a peaceful touch to your holiday decor
Songbird on a Branch With Snowy Highlights
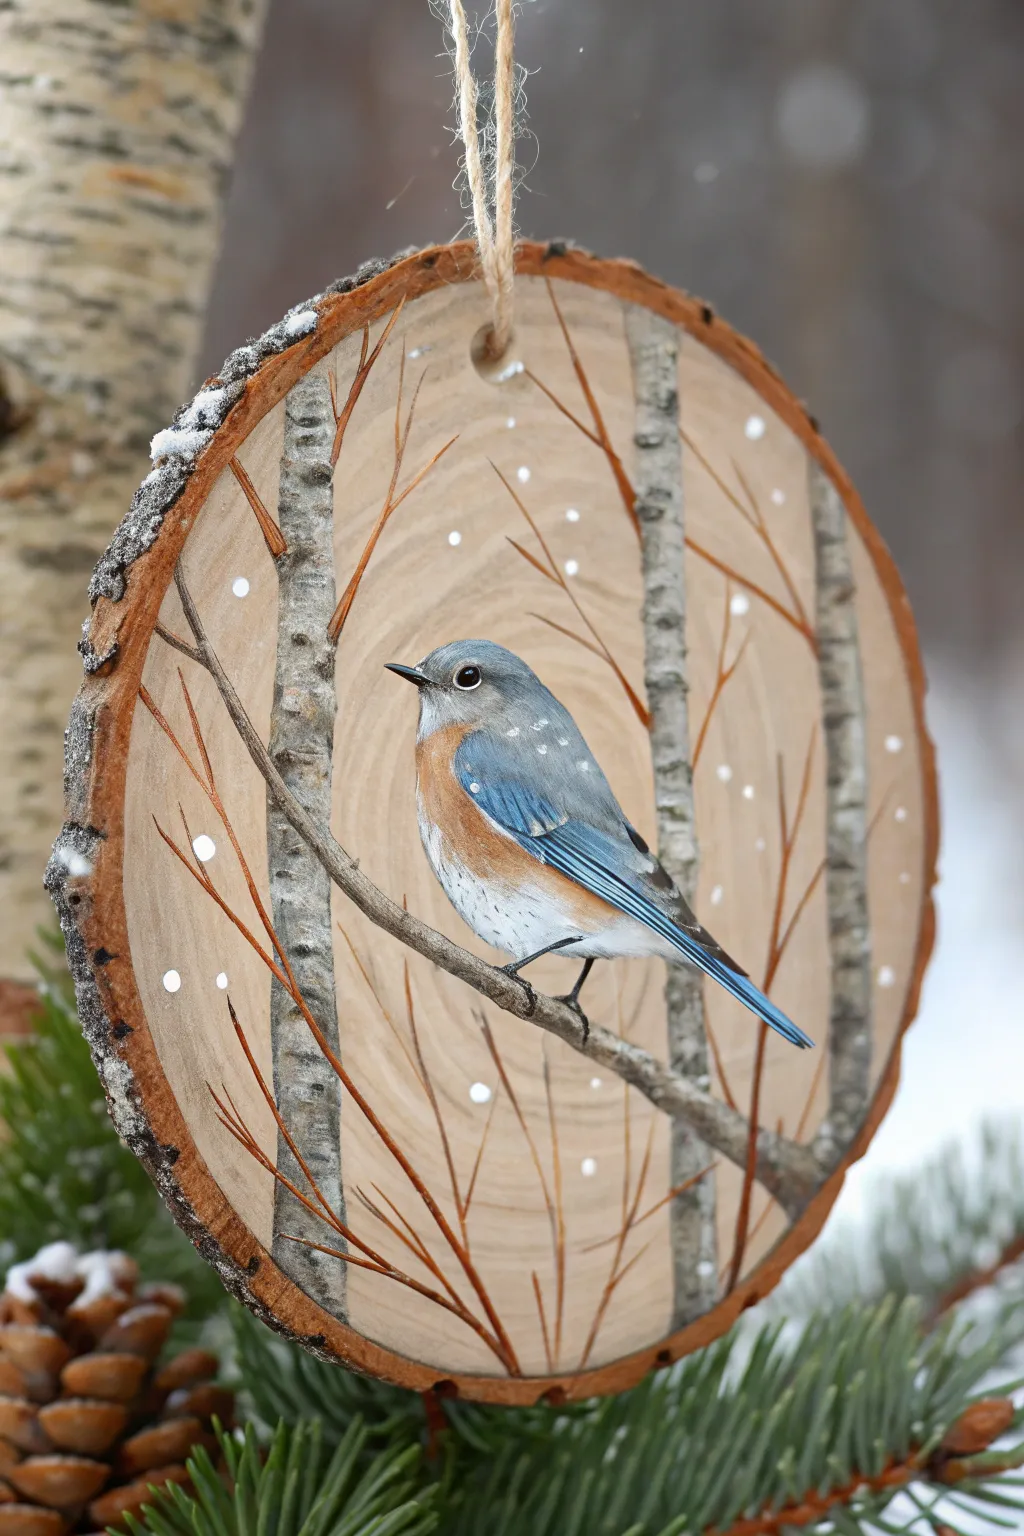
Capture the stillness of a snowy forest with this delicate wood slice ornament featuring a vibrant bluebird. The rustic bark edge frames a serene wintry scene, making it a perfect addition to your holiday decor or a thoughtful handmade gift.
Step-by-Step Tutorial
Materials
- Wood slice with bark edge (approx. 3-4 inches diameter)
- Acrylic paints: Titanium White, Lamp Black, Burnt Umber, Cerulean Blue, Ultramarine Blue, Burnt Sienna, Raw Sienna
- Fine detail brushes (sizes 0, 00, and 1)
- Small flat brush (size 2 or 4)
- Jute twine or ribbon for hanging
- Spray sealer or varnish (matte or satin)
- Palette or small plate
- Water cup and paper towels
- Pencil for sketching
- Drill with small bit (if wood slice isn’t pre-drilled)
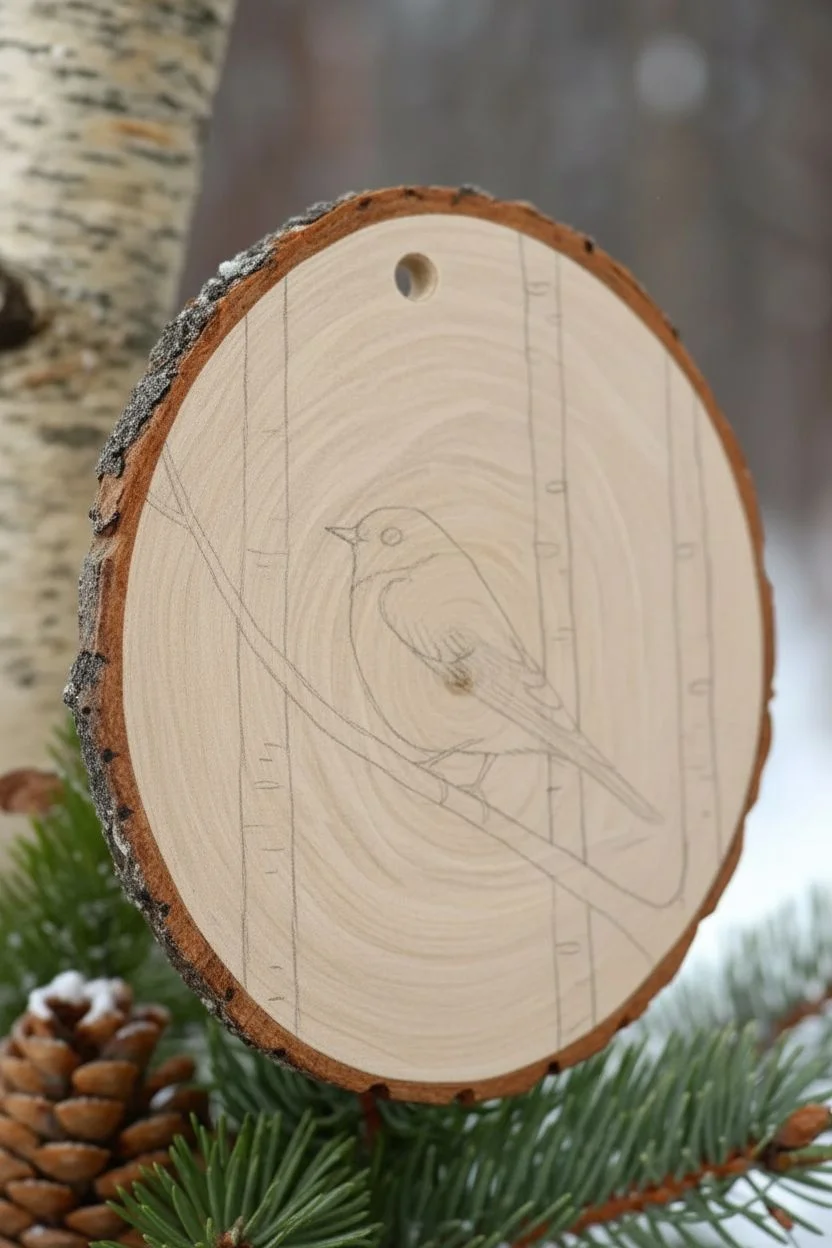
Step 1: Preparation & Background
-
Surface Prep:
Ensure your wood slice is clean and dry. If the surface feels rough, give it a quick sanding with fine-grit sandpaper to ensure your brush strokes glide smoothly. Wipe away any dust. -
Drill the Hole:
If your wood slice doesn’t already have one, carefully drill a small hole near the top edge for the hanger later. Doing this now prevents ruining your paint job if the wood splits. -
Sketch the Layout:
Lightly sketch the main elements with a pencil. Draw three vertical lines for the birch trunks—one left, one right, and one slightly off-center. Sketch a diagonal branch crossing the foreground for the bird to perch on. -
Outline the Bird:
Draw the simple shape of the bluebird perched on the diagonal branch. Focus on the round belly and the angle of the tail pointing downwards.
Step 2: Painting the Trees
-
Base Coat Trunks:
Mix a tiny amount of Raw Sienna with Titanium White to create a creamy off-white. Use your flat brush to fill in the vertical birch tree trunks. Let this dry completely. -
Birch Markings:
Dilute Burnt Umber or Black with a drop of water to make it inky. Using your finest liner brush (00), paint horizontal dashes and small lenticular shapes on the trunks to mimic birch bark texture. -
Main Branch:
Paint the diagonal perch branch using a mix of Burnt Umber and a touch of Burnt Sienna. Add a thin line of white on the top edge of the branch to represent snow or highlight. -
Fine Twigs:
With the thinned brown paint and your liner brush, pull very delicate, wispy branches extending from the main trunks. Keep your hand loose to avoid stiff lines; these should curve naturally upward.
Paint Bleeding?
If paint bleeds into the wood grain, apply a coat of clear matte medium or Mod Podge to the raw wood first. This seals the pores, creating a barrier for crisp lines.
Step 3: The Bluebird
-
Body Base:
Block in the bird’s head, back, and wings with a mix of Cerulean and Ultramarine Blue to get that steely bluebird color. -
Chest Colors:
Paint the chest and flank area with Burnt Sienna. While the paint is still slightly wet, blend the bottom edge into white for the belly, creating a soft gradient. -
Wing Details:
Use a darker blue (Ultramarine with a dot of Black) to add the primary flight feathers on the wing and tail. Add tiny streaks of white on the wing bars for texture. -
Facial Features:
Using your smallest brush and black paint, carefully paint the eye. Add a tiny dot of white as a catchlight to bring the bird to life. Paint the beak black/grey.
Go 3D
Instead of painted snow, use a tiny bit of texture paste or dab white glue and sprinkle fine glitter on the branch tops for a sparkling, tactile frost effect.
Step 4: Final Touches
-
Snowfall:
Dip the handle end of a brush or a toothpick into Titanium White paint. Dot snow casually around the background, varying the sizes slightly for depth. -
Snow on the Bird:
Add a few tiny specks of white on the bird’s back and head, as if it is sitting in the falling snow. -
Natural Highlights:
Add very subtle white highlights to the birch bark and the tips of the thin twigs. This creates a frosty, cold feel. -
Sealing:
Once the painting is 100% dry (give it at least an hour), spray it with a matte or satin sealer to protect the wood and paint from moisture. -
Assembly:
Cut a length of jute twine, thread it through the hole, and tie a secure knot to finish your ornament.
Hang your miniature masterpiece on the tree and enjoy the pop of nature indoors
Buffalo Plaid Background for a Classic Cabin Look
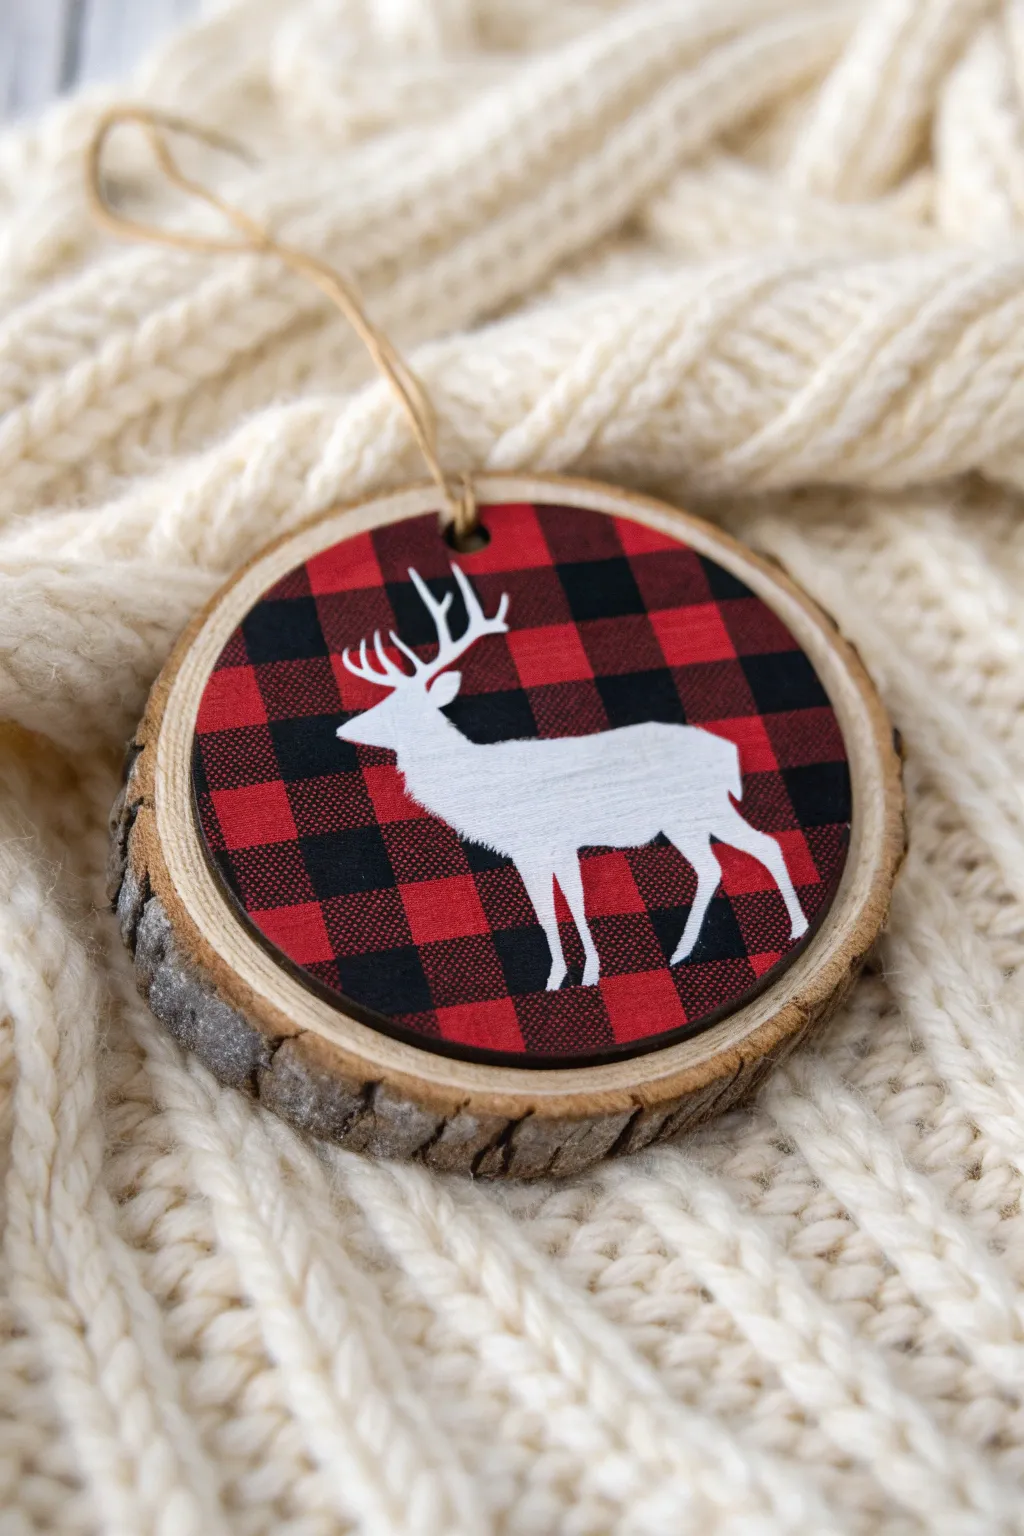
Bring cozy cabin vibes to your holiday tree with this rustic wood slice ornament featuring a bold red and black buffalo check pattern. The crisp white deer silhouette pops beautifully against the flannel-inspired background, creating a timeless winter look.
Step-by-Step Guide
Materials
- Wood slice with bark edge (approx. 3-4 inches diameter)
- Red acrylic craft paint
- Black acrylic craft paint
- White acrylic craft paint
- Flat shader brush (small to medium)
- Small fine liner brush or detail brush
- Deer silhouette stencil or adhesive vinyl
- Painter’s tape or masking tape
- Small eye hook or drill with small bit
- Jute twine
- Mod Podge or clear sealant (optional)
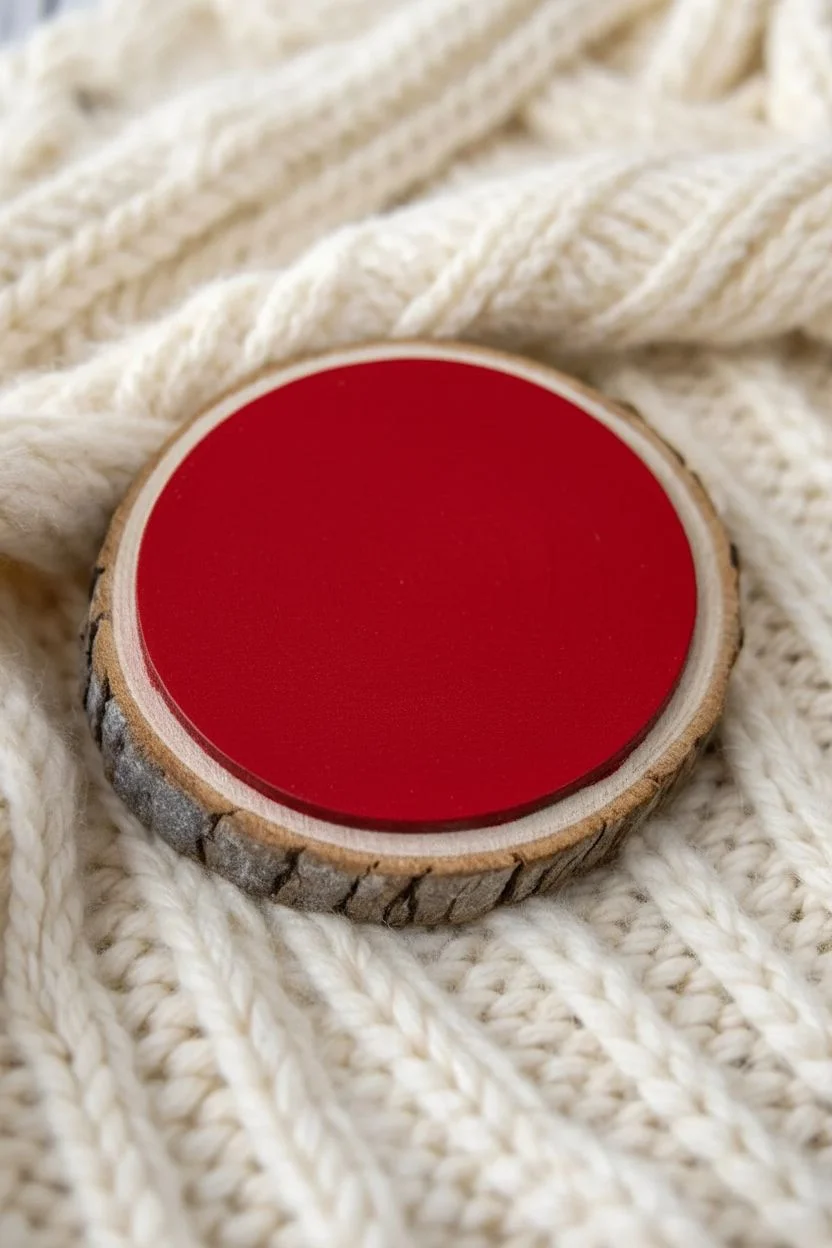
Step 1: Preparing the Base
-
Surface Prep:
Ensure your wood slice is clean and smooth. If the surface feels rough, give it a quick sanding with fine-grit sandpaper to prevent paint bleeding later. -
Base Coat:
Paint the inner circle of the wood slice with a solid coat of bright red acrylic paint leaving the bark edge natural. -
Second Coat:
Depending on the opacity of your red paint, apply a second coat to ensure a rich, vibrant base color. Let this dry completely before moving on to the pattern.
Step 2: Painting the Buffalo Plaid
-
Taping Vertical Stripes:
Place strips of painter’s tape vertically across your ornament. Use the width of the tape to determine your spacing, or aim for roughly 1/2 inch gaps between tape strips. -
Painting Vertical Lines:
Mix a very small amount of black into your red paint to create a dark maroon shade. Paint the exposed vertical strips with this maroon color. -
Remove and Dry:
Carefully peel up the tape while the paint is still slightly wet to keep edges clean, then let the paint dry fully. -
Taping Horizontal Stripes:
Once dry, place strips of tape horizontally across the ornament, perpendicular to your first set of lines. -
Painting Horizontal Lines:
Paint these exposed horizontal strips with the same dark maroon mixture you used previously. -
Creating the Intersection:
Without removing the tape yet, look for the squares where your new horizontal paint lines cross over the previous vertical maroon lines. Paint *only* these intersection squares with pure black paint. -
Reveal the Pattern:
Gently remove the horizontal tape strips. You should now have a classic buffalo plaid pattern with red squares, maroon connecting strips, and solid black intersections.
Bleeding Edges?
If paint bleeds under your tape, use a stiff brush dampened with water to gently scrub away the excess while wet, or touch up with the base red color later.
Step 3: Adding the Deer Silhouette
-
Stencil Placement:
Once the plaid background is 100% dry, center your deer stencil on the ornament. Press it down firmly, especially around the antlers and legs, to prevent paint seepage. -
Apply White Paint:
Load a small stencil brush or sponge with white acrylic paint. Dab off excess paint onto a paper towel until the brush is almost dry. -
Stippling Motion:
Apply the white paint over the stencil using a straight up-and-down pouncing or stippling motion. I find this technique helps avoid pushing paint under the stencil edges. -
Layering:
Apply 2-3 thin coats of white paint rather than one thick one, allowing brief drying time in between layers for the brightest white. -
Remove Stencil:
Carefully lift the stencil straight up while the last coat is still slightly tacky. -
Touch Ups:
Use a fine liner brush and white paint to clean up any rough edges or fill in small gaps in the deer’s body or antlers.
Add Dimension
Mix a tiny drop of grey into white paint and add subtle shading to the bottom of the deer’s belly and legs to make it look less flat and more dimensional.
Step 4: Finishing Touches
-
Drilling the Hole:
If your wood slice wasn’t pre-drilled, carefully drill a small hole near the top center, just below the bark line. -
Sealing:
Protect your artwork by applying a layer of matte Mod Podge or clear spray sealer over the painted surface. -
Hanging:
Cut a length of jute twine, thread it through the hole, and tie a secure knot to create a rustic hanger.
Now you have a charming rustic ornament ready to hang on the tree or give as a handmade gift
Nordic Sweater Pattern Bands Around the Edge
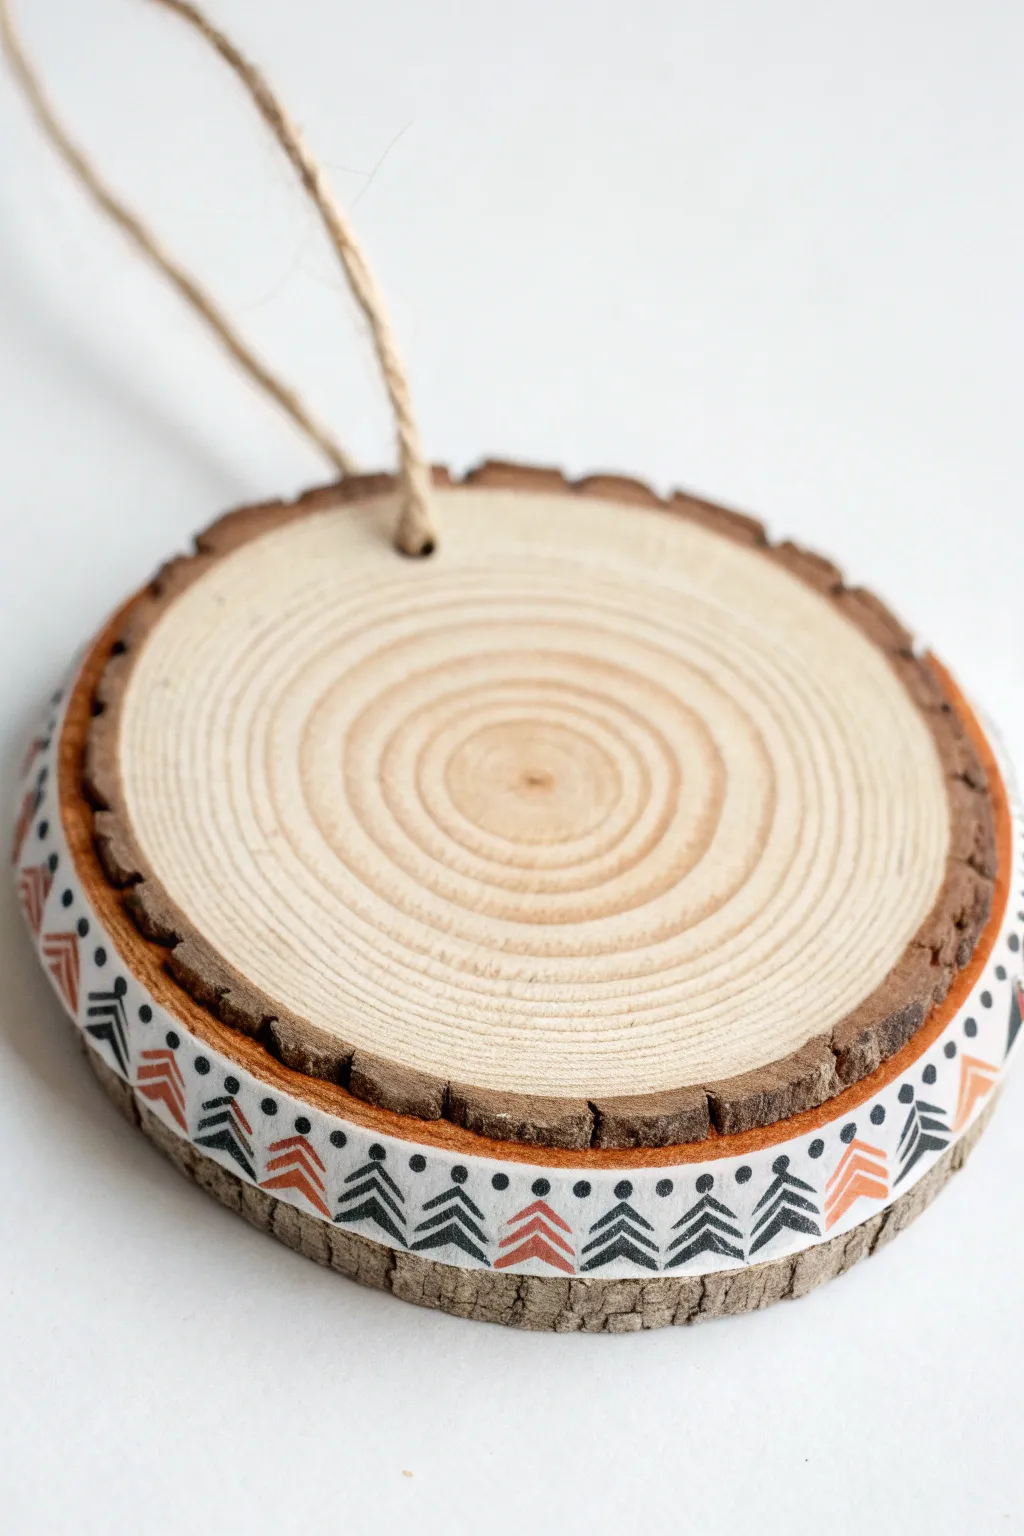
Give your rustic wood slice ornaments a touch of Scandinavian charm by focusing on the edge rather than the face. This project uses a simple repeated pattern technique to create a festive, sweater-inspired band that contrasts beautifully with the natural wood grain.
How-To Guide
Materials
- Wood slice ornament (pre-drilled)
- White acrylic paint (matte finish)
- Black acrylic paint or paint pen (fine tip)
- Burnt orange or rust acrylic paint
- Fine detail paintbrush (size 0 or 00)
- Flat shader brush (small, approx 1/4 inch)
- Jute twine
- Pencil
- Ruler or measuring tape
- Clear matte sealer (optional)
Step 1: Base Preparation
-
Clean the surface:
Ensure your wood slice is clean and free of loose bark dust. Wipe the edge gently with a dry cloth. -
Define the painting area:
Using a pencil, lightly mark the width of your band on the bark edge if the bark is very rough. If the bark is smoother, like the example, you can paint directly onto the center of the bark ring. -
Apply the white base:
Load your flat shader brush with white acrylic paint. Paint a continuous band around the entire circumference of the wood slice’s edge. -
Build opacity:
The bark is dark and textured, so the first coat will look streaky. Allow it to dry completely, then apply a second coat for a solid, opaque white background. -
Refine the edges:
Check the top and bottom edges of your white band. If they look too ragged, use the tip of your brush to neaten the line, leaving a small rim of natural bark visible above and below the paint.
Step 2: Creating the Pattern
-
Mark spacing intervals:
Once the white paint is bone dry, use a pencil to lightly mark small tick marks around the band every half-inch or so to help keep your pattern evenly spaced. -
Paint the black chevrons:
Using your fine detail brush or a black paint pen, draw a stack of three small chevrons (inverted V-shapes) at your first mark. -
Repeat the black motif:
Skip the next pencil mark, and draw another stack of three black chevrons at the third mark. Continue this pattern of ‘black stack, skip space, black stack’ all the way around the ornament. -
Add orange accents:
Clean your brush thoroughly or switch to an orange paint pen. In the empty spaces between the black stacks, paint a matching stack of three rust-orange chevrons. -
Dry check:
Let these chevron stacks dry completely to avoid smudging the fine lines. -
Add the dots:
Dip the non-brush end of your paintbrush (or a toothpick) into black paint. Gently dot the paint between each chevron stack along the top edge of the white band. -
Complete the dot border:
Repeat the dotting process along the bottom edge of the white band, aligning these dots directly below the top ones for symmetry.
Smoother Surface Trick
If the bark is too rough to paint detailed lines on, apply a layer of matte Mod Podge first. It fills the deepest crevices and creates a smoother surface for your brush.
Step 3: Finishing Touches
-
Inspect the pattern:
Look for any gaps or uneven lines. I find using a very fine black permanent marker can be easier for touching up tiny mistakes than re-opening the paint. -
Seal the work:
To protect your intricate work from chipping off the textured bark, apply a light coat of clear matte sealer over the painted band once everything is dry. -
Attach the hanger:
Cut a length of jute twine, about 8 inches long. -
Thread the loop:
Push the folded end of the twine through the pre-drilled hole in the wood slice. -
Secure the knot:
Pull the loose ends of the twine through the loop you just created and tighten it against the wood to secure the hanger.
Wobbly Lines?
Painting on a curved, rough surface is hard! If your chevrons look shaky, swap the brush for fine-tip acrylic paint pens. They offer much better control on wood bark.
Now you have a cozy, custom ornament ready to hang on the tree or gift to a friend
Family Photo Transfer Center With Painted Frame Details
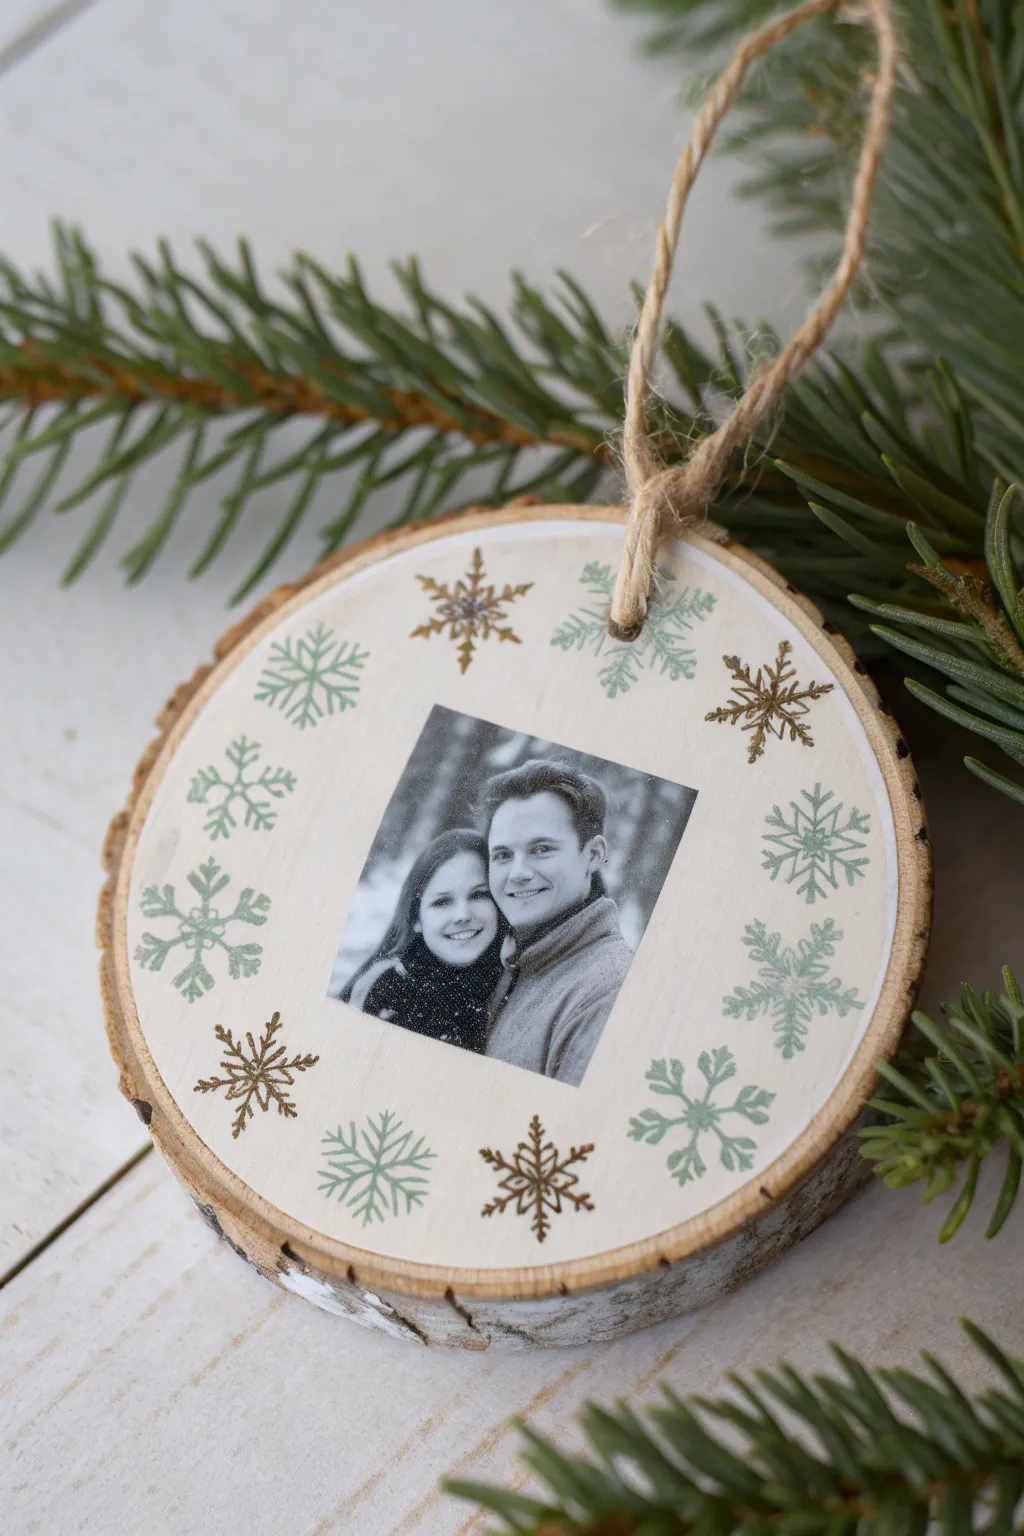
Capture a cherished moment on a rustic wood slice with this beautiful photo transfer ornament. Featuring a crisp black-and-white image surrounded by a delicate ring of painted snowflakes, this project blends natural textures with personalized nostalgia.
Step-by-Step Guide
Materials
- Small wood slice (approx. 3-4 inches diameter) with bark edge
- Laser-printed photo (black and white) on regular printer paper
- Mod Podge (Matte finish)
- Acrylic craft paint: Sage Green and Antique Gold
- Small flat paintbrush
- Detailed liner brush (size 0 or 00)
- Small bowl of water
- Sponge or soft cloth
- Jute twine
- Scissors
- Drill with small bit (if wood slice isn’t pre-drilled)
Step 1: Preparing the Transfer
-
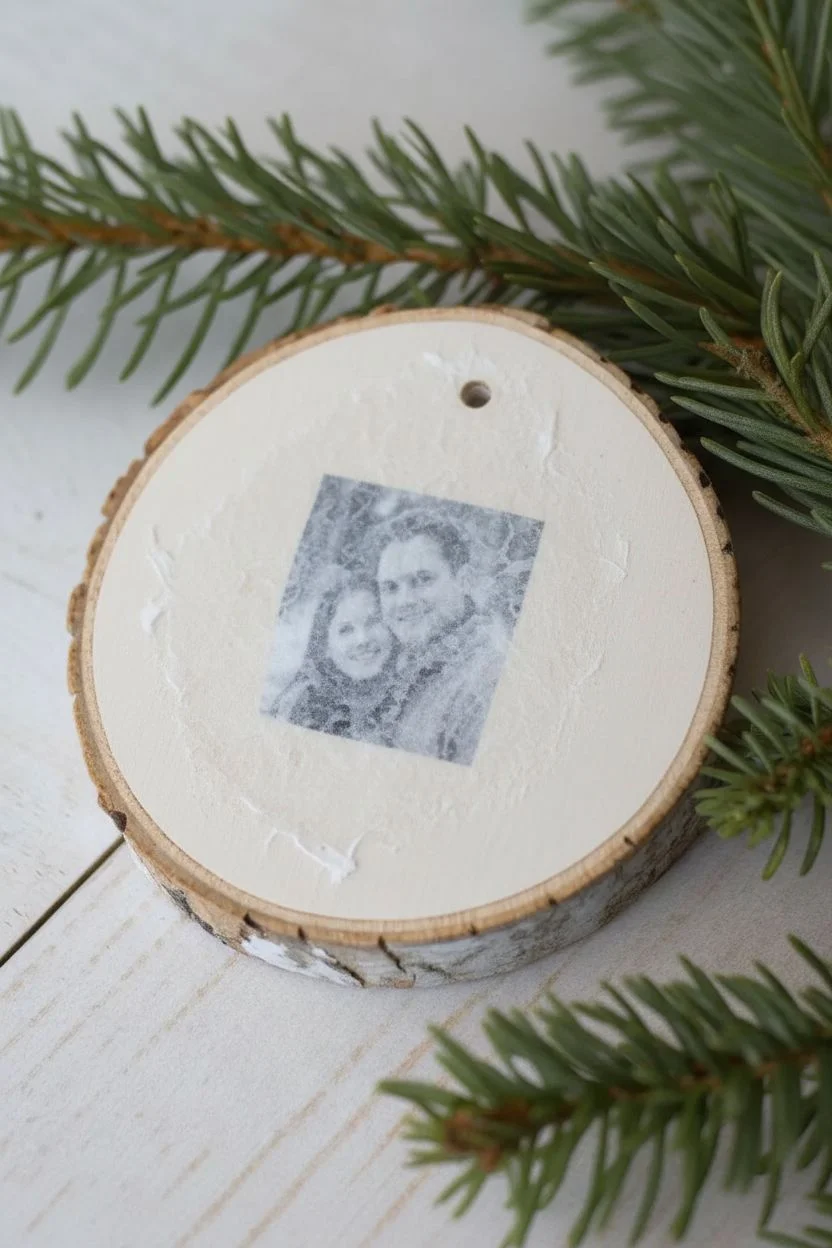
Print your photo:
Size your digital photo on a computer so it fits comfortably within the center of your wood slice, leaving about a 3/4-inch border for the painted design. Print this on regular printer paper using a laser printer. If using an inkjet, the ink may bleed, so photocopies work best. -
Trim the image:
Cut out your photo into a square or rectangle. You don’t need to be perfectly precise with the edges yet, but trimming away excess white space helps with placement. -
Apply the medium:
Brush a moderate layer of matte Mod Podge directly onto the face of the printed photo. Ensure you cover the entire image area evenly, but avoid big globs. -
Adhere to wood:
Place the photo face-down onto the center of the wood slice. Press it down firmly starting from the center and working outward to push out any air bubbles. -
Let it cure:
Allow the transfer to dry completely. This is crucial—I usually let mine sit for at least 8 hours or overnight to ensure the bond is permanent before wetting it.
Reverse It First
Remember to mirror your image horizontally on your computer before printing! This ensures any text or specific features appear correctly once transferred face-down.
Step 2: Revealing the Image
-
Dampen the paper:
Dip a sponge or cloth into water and gently wet the back of the paper. Let the water soak in for about a minute until the paper becomes semi-translucent. -
Rub away paper:
Using the pad of your finger, gently rub the paper in circular motions. The paper fibers will start to roll off, revealing the ink underneath. Be gentle to avoid rubbing off the image itself. -
Repeat as needed:
Let the wood dry briefly. You will likely see a hazy white film of leftover paper appearing. Rewet slightly and rub again until the image is clear and crisp. -
Seal the image:
Once all paper fibers are removed and the wood is dry, apply a thin coat of Mod Podge over the photo and the surrounding bare wood to seal everything and create a uniform surface.
Cloudy Image Fix
If your image looks hazy when dry, apply a tiny drop of vegetable or baby oil on a cloth and buff it. The oil makes the remaining paper fibers transparent.
Step 3: Adding Decorative Details
-
Plan the snowflake ring:
Visualize a circle surrounding the photo where your snowflakes will go. Aim for an alternating pattern of colors to create visual interest. -
Paint sage snowflakes:
Using your fine liner brush and sage green paint, create star-shaped snowflakes. Start with a simple cross, add an ‘X’ over it, and add tiny V-shapes at the tips of the lines. -
Add gold accents:
In the spaces between the green flakes, paint smaller, simpler snowflakes or stars using the antique gold paint. The metallic shimmer adds a lovely festive touch. -
Let paint dry:
Allow your painted design to dry completely for about 20-30 minutes.
Step 4: Finishing Up
-
Seal the artwork:
Apply one final, thin coat of matte Mod Podge or a spray sealer over the entire face of the ornament to protect your painting and the photo transfer. -
Drill a hole:
If your wood slice didn’t come with a hole, carefully drill a small hole near the top edge, centered above the photo. -
Add the hanger:
Cut a length of jute twine, thread it through the hole, and tie a secure knot to create a loop for hanging on the tree.
Hang your new personalized ornament on the tree and enjoy the memories it brings back year after year
Wood-Burned Lines Filled With Translucent Color Washes
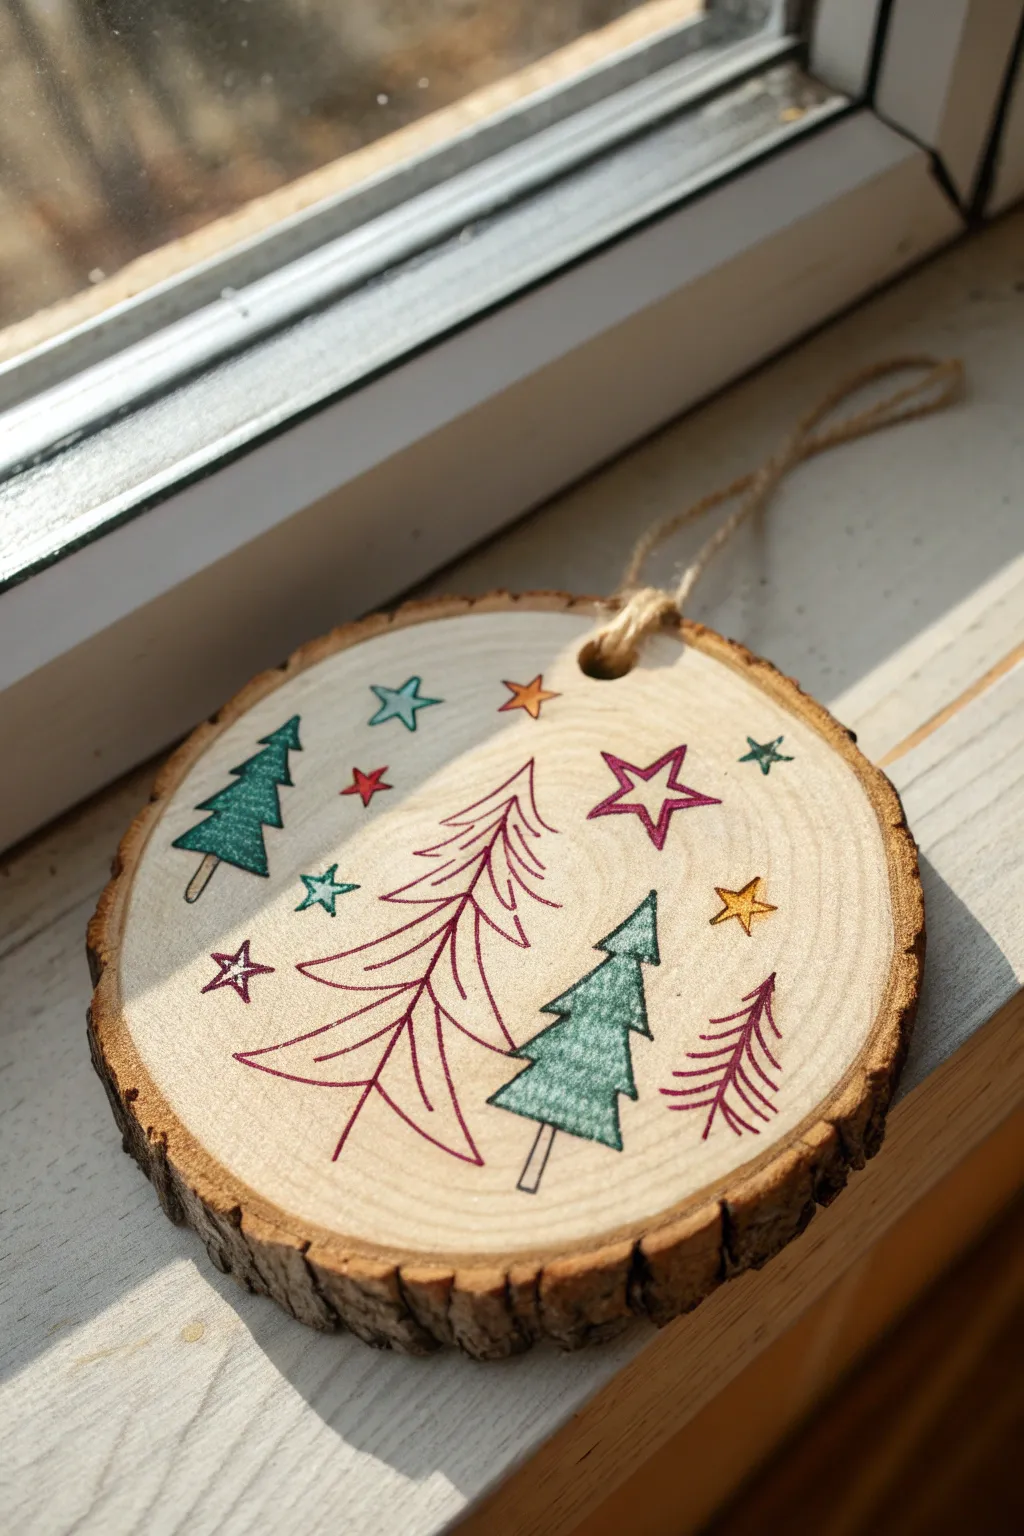
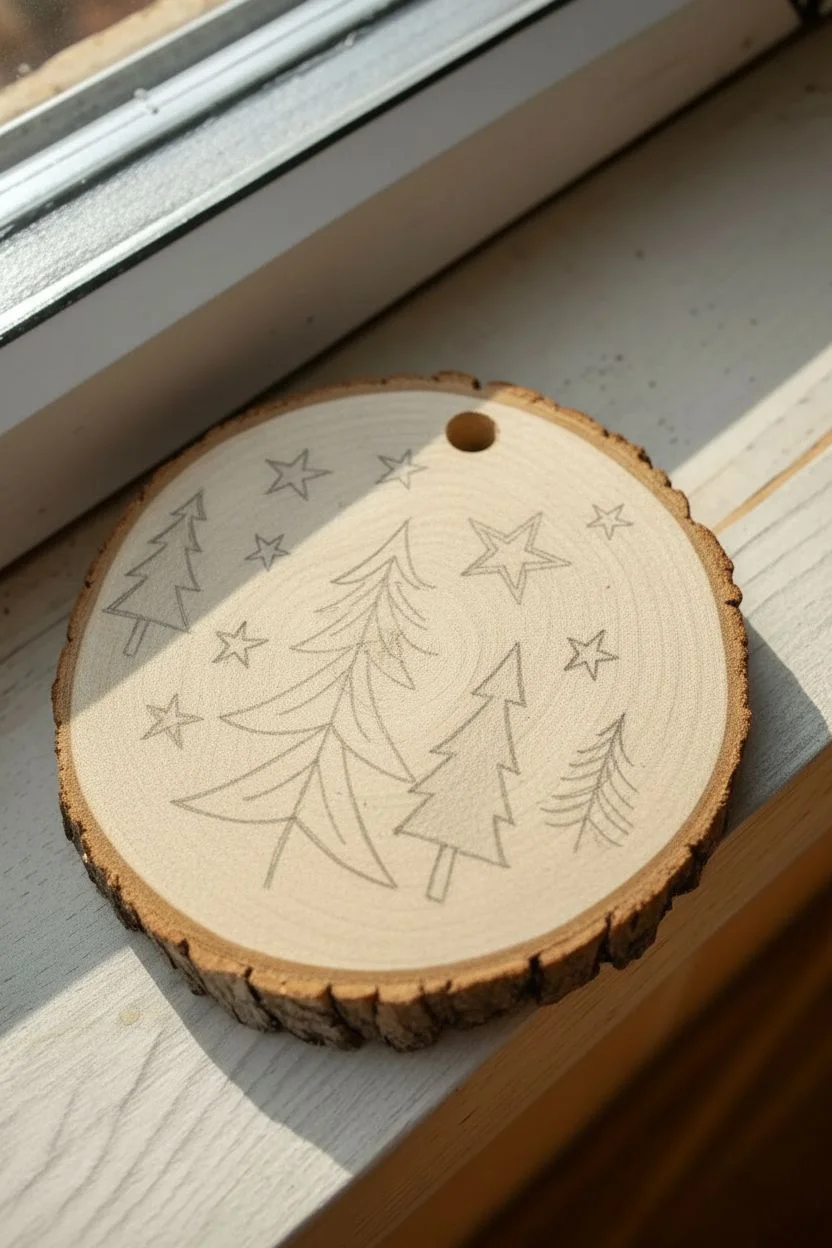
This rustic yet charming project combines the natural beauty of raw wood slices with delicate line art and soft washes of color. The result is a simple, festive scene of evergreen trees and stars that feels hand-drawn and cozy.
Step-by-Step Tutorial
Materials
- Unfinished wood slice with bark edge (pre-drilled)
- Fine-point permanent marker (brown or reddish-brown)
- Watercolor pencils or diluted acrylic paint
- Soft detail brush (if using paint)
- Jute twine or hemp cord
- Pencil and eraser
- Clear matte sealer (spray or brush-on)
Step 1: Planning and Sketching
-
Surface Prep:
Begin by ensuring your wood slice is clean and smooth. If the surface feels rough, give it a very light sanding with fine-grit sandpaper to prevent your pens from snagging, then wipe away the dust. -
Rough Layout:
Using a pencil with a very light hand, sketch the positions of your trees. Place a large, stylized pine tree in the center, and two smaller, filled-in trees on either side to create balance. -
Adding Stars:
Sketch various sizes of five-pointed stars scattered in the empty spaces around the trees. Include a mix of larger open stars and tinier solid ones.
Bleeding Ink?
If your marker bleeds into the wood grain, switch to a finer tip pen or apply a clear spray sealer *before* drawing to create a barrier.
Step 2: Drawing the Lines
-
Outlining the Center Tree:
Switch to your fine-point reddish-brown permanent marker. Carefully trace the center tree, using sweeping, curved lines to create the drooping branches. Keep these lines open and airy rather than coloring the tree in. -
Outlining the Side Trees:
Draw the outlines for the two smaller triangular trees. For these, use a standard dark green fine liner or the same brown marker if you prefer a uniform outline look. -
Detailing the Stars:
Trace over your pencil stars. For variety, you can outline some in red or brown and others in teal or green ink, or stick to a single color palette for a more unified look. -
Drawing the Bare Tree:
Add a small, skeletal tree on the bottom right using just a few simple lines to represent a different species, perhaps a deciduous sapling. -
Erase Guidelines:
Wait a few minutes to ensure the ink is completely dry, then gently erase any visible pencil marks so they don’t muddy your colors later.
Make it Sparkle
Add tiny dots of liquid gold leaf or glitter glue to the tips of the tree branches for a subtle shimmer that catches holiday lights.
Step 3: Adding Color Washes
-
Coloring the Green Trees:
Using a dark green watercolor pencil, lightly shade inside the two triangular trees. You want to see the wood grain through the color, so don’t press too hard. -
Activating the Pencil:
Dip a small brush in water and lightly wash over the green pencil shading. This will blend the strokes into a smooth, translucent stain. -
Coloring the Stars:
Fill in your stars using different colored pencils—teal, yellow, and red work well. Apply the color gently to maintain that soft, washed effect. -
Drying Time:
Let the moisture evaporate completely. Because raw wood differs in absorbency, I usually give this about 15 minutes to be safe.
Step 4: Finishing Touches
-
Sealing the Wood:
To prevent the color from fading or the wood from changing color over time, apply a thin coat of clear matte sealer. -
Creating the Hanger:
Cut a length of jute twine, roughly 8 inches long. -
Threading:
Fold the twine in half and push the loop end through the pre-drilled hole at the top of the ornament. -
Securing the Loop:
Pull the loose ends of the twine through the loop and tighten it against the wood to create a lark’s head knot. -
Tying Off:
Tie the two loose ends together in a simple overhand knot to close the loop, trimming any excess twine if necessary.
Now you have a charming, rustic ornament ready to hang on the tree or give as a thoughtful gift

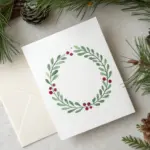


Have a question or want to share your own experience? I'd love to hear from you in the comments below!