If you’re painting for your boyfriend, the magic is in making it feel like it could only belong to the two of you. These ideas are all about romance, personal details, and little symbols that say “this is us” without needing perfect realism.
Starry Night “Us” Scene
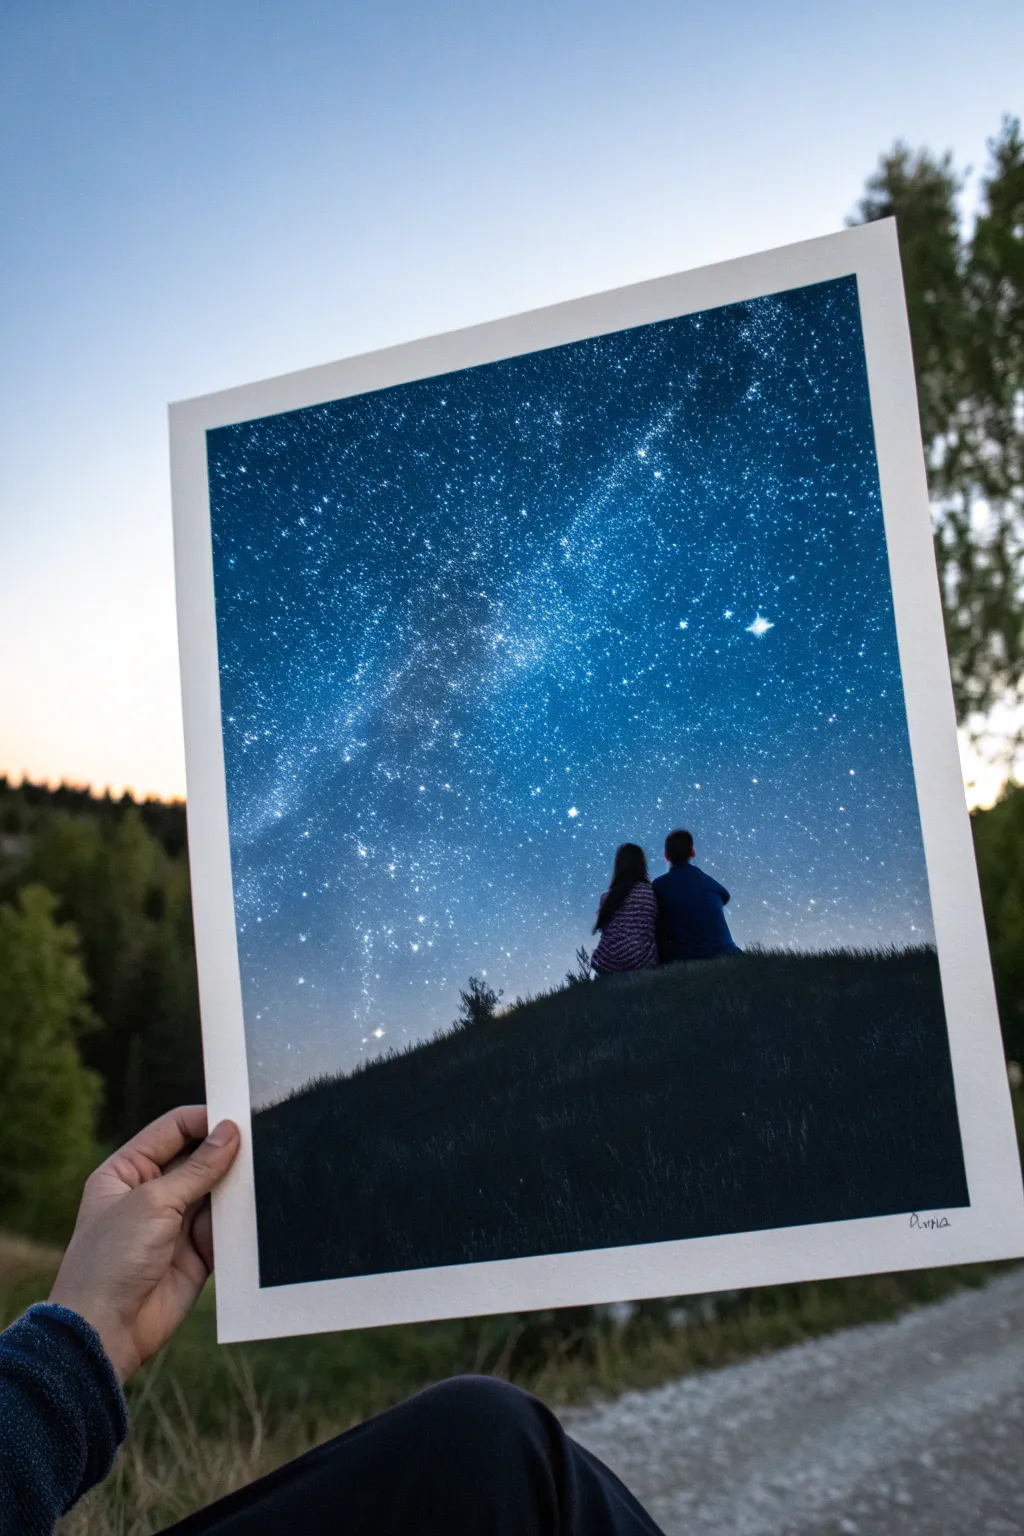
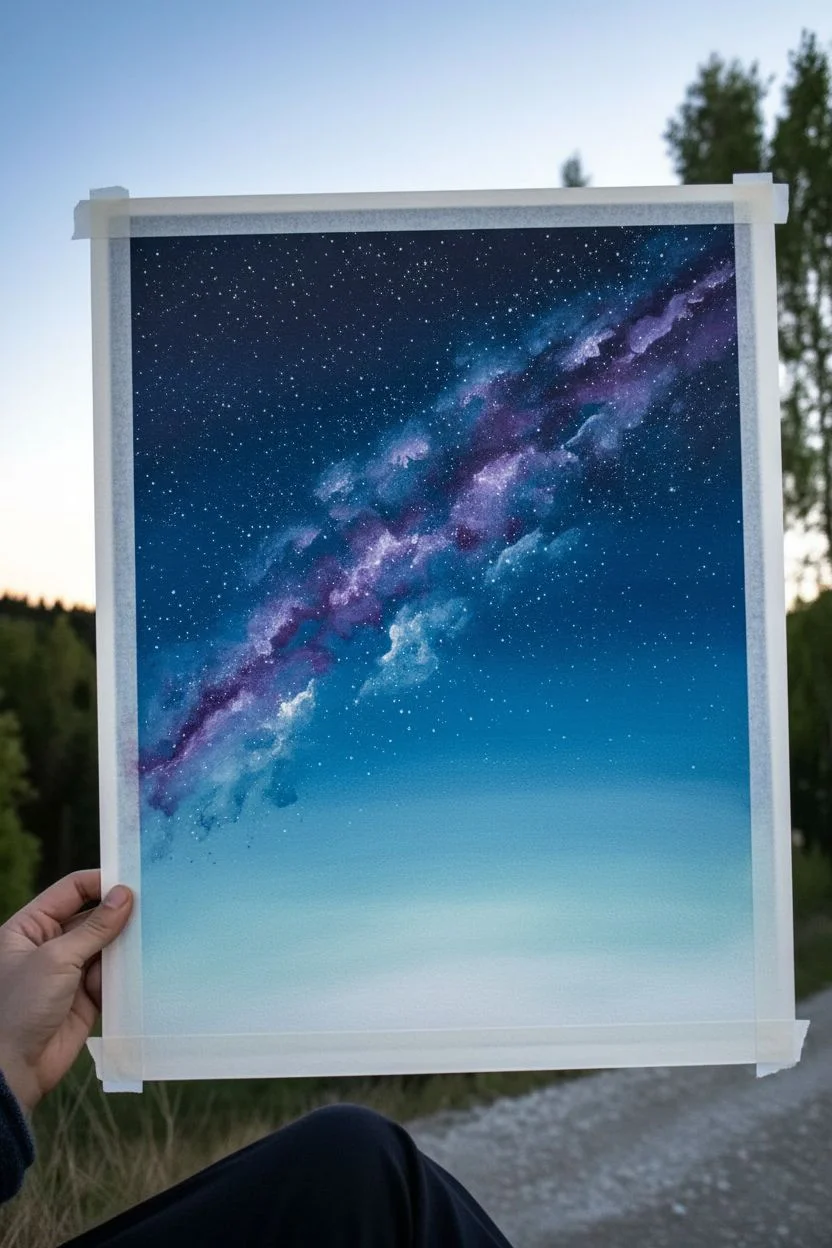
Capture a special moment with this breathtaking starry night painting featuring two silhouettes gazing at the cosmos. Using clever spattering techniques and layered blending, you can create a professional-looking galaxy effect that serves as a perfect romantic gift.
Step-by-Step
Materials
- High-quality watercolor paper or canvas panel (A4 or A3 size)
- Acrylic paints (Phthalo Blue, Ultramarine Blue, Black, Titanium White, Purple/Violet)
- Wide flat brush (1-inch)
- Medium round brush
- Small liner brush (size 0 or 00)
- Old toothbrush (for stars)
- Painter’s tape
- Palette or paper plate
- Pencil
- Cup of water and paper towels
Step 1: Creating the Galaxy Background
-
Tape edges:
Begin by taping down all four edges of your paper to a flat surface. This creates the crisp white border seen in the example and keeps the paper from buckling. -
Base gradient:
Mix a dark blue using Phthalo Blue and a touch of Black. Apply this to the top 2/3 of the canvas using your wide flat brush, brushing horizontally. -
Lighten the horizon:
While the top is still wet, mix Titanium White with a little light blue or teal. Blend this into the bottom third of the sky area, creating a smooth transition from the deep midnight blue above to a glowing, lighter horizon line. -
Add depth:
To create the ‘Milky Way’ band, sponge or dab a mixture of Purple and Ultramarine Blue diagonally across the sky. Keep this layer semi-transparent so the blue beneath shows through. -
Brighten the nebula:
Take a tiny amount of white paint on a dry brush (wipe most of it off). Gently dab cloud-like shapes through the center of your purple band to create the glowing gas clouds of the galaxy.
Muddy Stars?
If your stars are mixing with the blue background and turning light blue instead of white, your background layer wasn’t dry enough. Let it dry completely or use a hair dryer before splattering.
Step 2: The Starfield
-
Prepare splatter paint:
Mix Titanium White with a few drops of water until it reaches an ink-like consistency. It needs to be fluid enough to fly off bristles but not so watery that it drips. -
Create distant stars:
Dip an old toothbrush into the watered-down white paint. Hold it over the painting and run your thumb across the bristles to spray a fine mist of stars across the entire sky. -
Add main stars:
Using your smallest liner brush, dot slightly larger stars randomly throughout the sky. I like to concentrate a few of these near the galaxy band for focus. -
Paint the hero star:
Choose one spot for a bright, shining star (like the one in the right center). Paint a small white dot, then use a very dry brush to drag tiny lines outward in a cross shape to create a twinkling flare effect. -
Let it dry:
Allow the entire sky layer to dry completely before moving on to the silhouette. If you paint the black over wet sky, it will turn muddy.
Make It Personal
Instead of a generic couple, reference a specific photo of you and your boyfriend. Try to capture distinct details like a messy bun, a baseball cap, or even a pet sitting beside you.
Step 3: The Silhouettes
-
Sketch the hill:
Lightly sketch a sloping hill line at the bottom of the paper with a pencil. Make sure it curves gently upward to give the composition some movement. -
Sketch the couple:
Draw the outline of two figures sitting close together. Focus on simple shapes: a rounded curve for the back, a circle for the head, and sloping lines for the arms. -
Paint the hill:
Using pure Black paint and a flat brush, fill in the entire hill area below your pencil line. Ensure the top edge is sharp and clean against the sky. -
Detail the grass:
While the black hill is drying, use a small dry brush or fan brush to flick tiny upward strokes along the top edge of the hill to simulate blades of grass against the light sky. -
Fill the figures:
Carefully fill in the couple’s silhouettes with black. Use your smallest brush for the edges to keep the profiles of the faces or hair distinct. -
Add pattern (Optional):
If you want to mimic the example closely, mix a dark grey or purple-grey and paint faint horizontal stripes or patterns on the girl’s shirt, keeping it subtle so it barely stands out from the shadow. -
Sign the work:
Once the black paint is fully dry, use a fine tip pen or a liner brush with white paint to sign your name in the corner of the white border. -
Remove tape:
Peel the painter’s tape away slowly at a 45-degree angle to reveal your crisp, clean edges.
Frame this beautiful piece in a simple white or black frame to let the galaxy colors truly shine


Minimal “I Love You” Typography
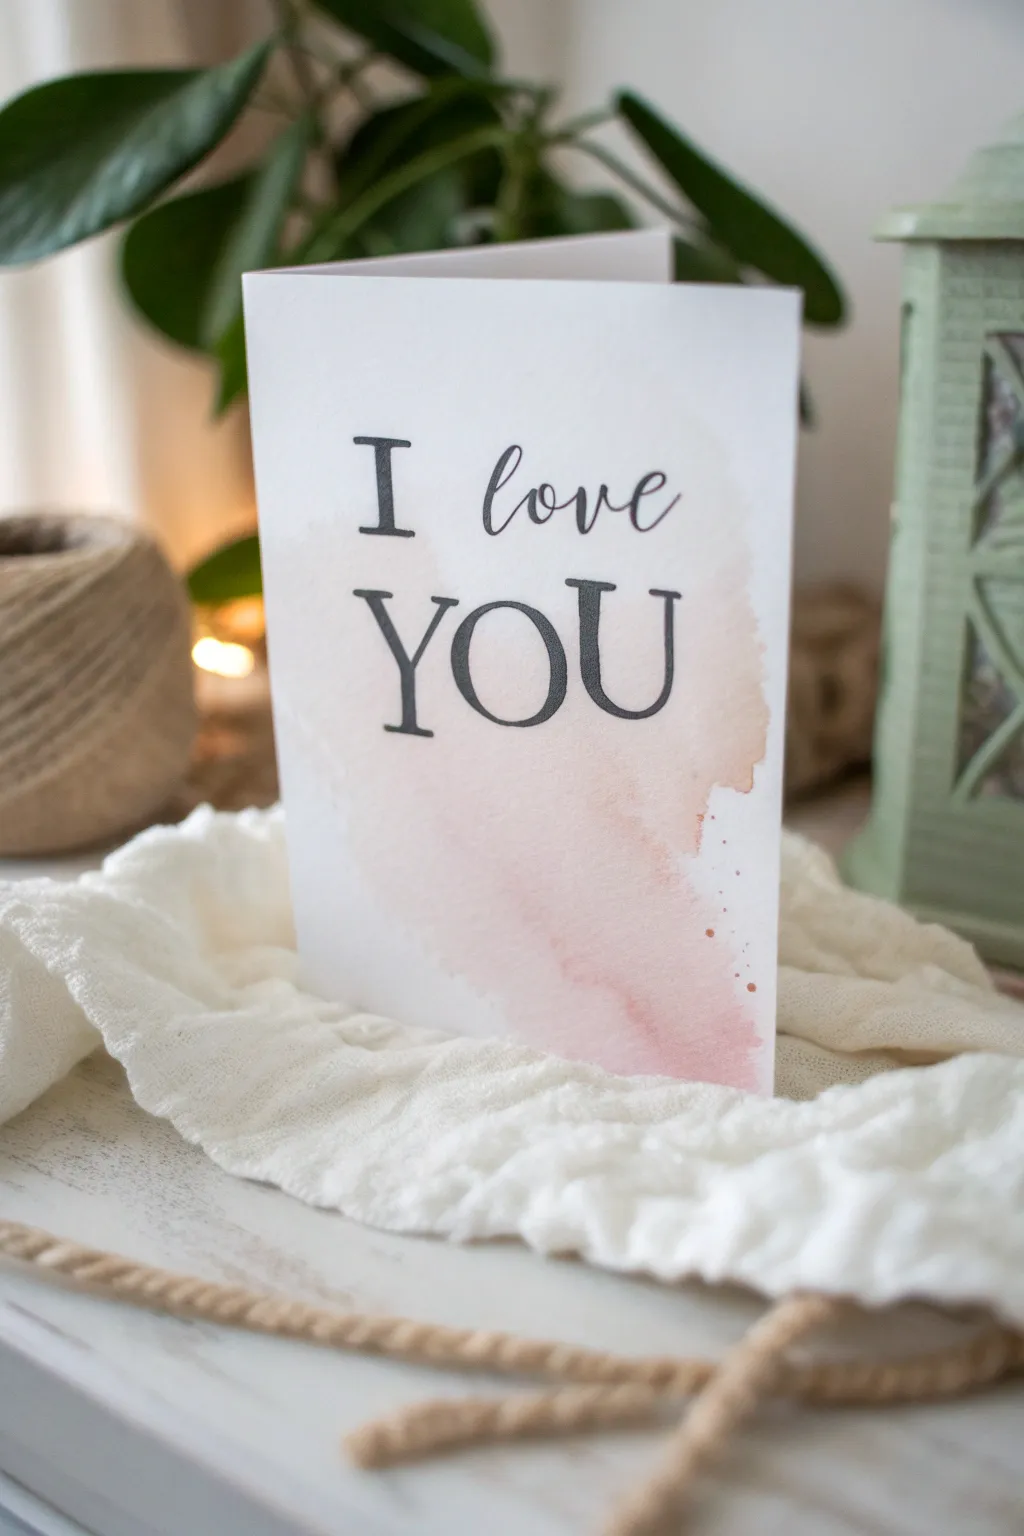
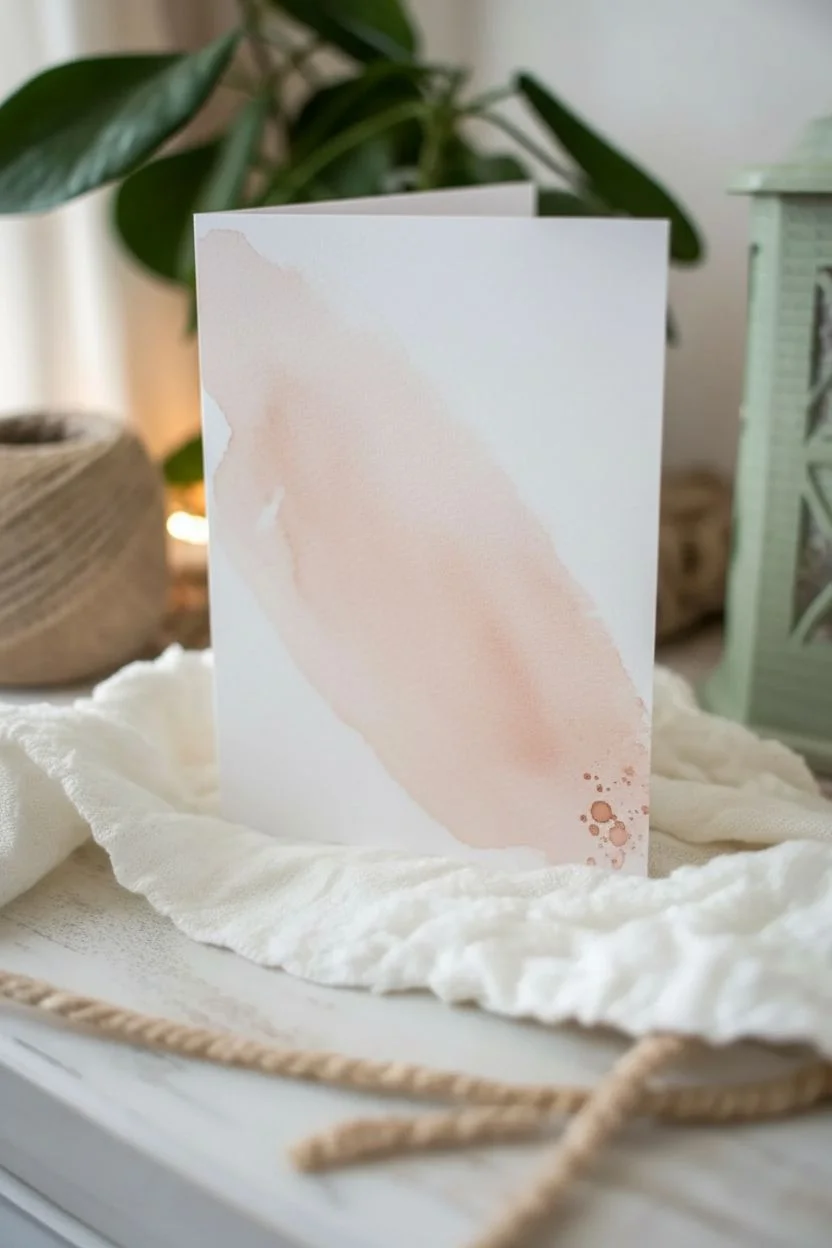
This elegant card combines a soft, abstract watercolor wash with bold, mixed-style typography for a modern romantic look. The juxtaposition of the airy pink tones against crisp black lettering creates a professional yet heartfelt finish.
Step-by-Step Tutorial
Materials
- Heavyweight watercolor paper (300gsm cold press suggested)
- Watercolor paints (Peach, Soft Pink, or diluted Burnt Sienna)
- Large round watercolor brush (size 10 or 12)
- Black ink fineliner pens (0.3mm and 0.8mm)
- Or: Black acrylic paint and a fine liner brush
- Pencil and eraser
- Ruler
- Bone folder (optional for folding)
- Paper towels
- Water cup
Step 1: Creating the Base Wash
-
Prepare the card stock:
Cut your watercolor paper to the desired card size. A standard 5×7 inch folded card works beautifully here. Score the center line gently for a clean fold later, but keep it flat for painting. -
Mix your color:
On your palette, mix a very watery, transparent wash. You want a soft peach or blush pink tone. I like to mix a tiny touch of brown into my pink to make it look more earthy and less like bubblegum. -
Establish the wash outline:
Load your large round brush with the watery paint. Using the side of the brush rather than the tip, sweep a broad stroke diagonally across the bottom right and center of the paper. -
Soften edges:
While the paint is crucial wet, dip your brush in clean water and touch the edges of your stroke to let the pigment bleed out naturally, creating soft, undefined boundaries. -
Creating the drip effect:
Add a little more pigment to the bottom right corner. Tilt the paper slightly if needed to encourage the paint to pool and create those beautiful, organic textures. -
Adding texture:
Create the signature splatter effect by loading your brush with slightly more concentrated paint and tapping the handle against your finger over the bottom right area. -
Let it dry completely:
This step is non-negotiable. The paper must be bone dry before you add text, or the ink will bleed into spiderwebs. Use a hairdryer on low heat if you are impatient.
Ink Bleeding Control
If your ink feathers into the paper, the wash wasn’t dry enough. If you struggle with this, draft text first with waterproof ink, then paint the wash over it.
Step 2: Adding the Typography
-
Draft the layout:
Using a pencil and a very light hand, sketch the positions for your words. The layout relies on centering. -
Sketch the letters:
Draw the ‘I’ at the top and ‘YOU’ at the bottom in a classic serif font (like Times New Roman). Notice how the ‘I’ and ‘YOU’ anchor the design visually. -
Sketch the script:
In the middle space, lightly sketch the word ‘love’ in a relaxed, cursive script. Connect the letters fluidly. -
Outline the serif text:
Using your 0.3mm fineliner, carefully trace the outline of your serif letters (‘I’ and ‘YOU’). Pay attention to the little ‘feet’ (serifs) on the letters. -
Fill the serif text:
Switch to the thicker 0.8mm pen or use black paint to fill in these letters. Ensure the black is solid and opaque to contrast against the watercolor. -
Ink the script:
For the word ‘love,’ use the thinner pen. This text isn’t block-filled; it remains a single, elegant line. Vary your pressure slightly to mimic a calligraphy nib. -
Erase guidelines:
Wait until the black ink is absolutely fully dry—give it extra time just to be safe. Then, gently erase any visible pencil marks. -
Final fold:
Fold the card along your scored line. Use a bone folder or the back of a spoon to crease the edge sharply without cracking the creating fibers.
Pro Tip: Masking
For ultra-crisp letters, print your text onto the watercolor paper first using a laser printer, then paint your wash right over the top.
Write a heartfelt message inside and present this chic, handmade token of affection to your boyfriend


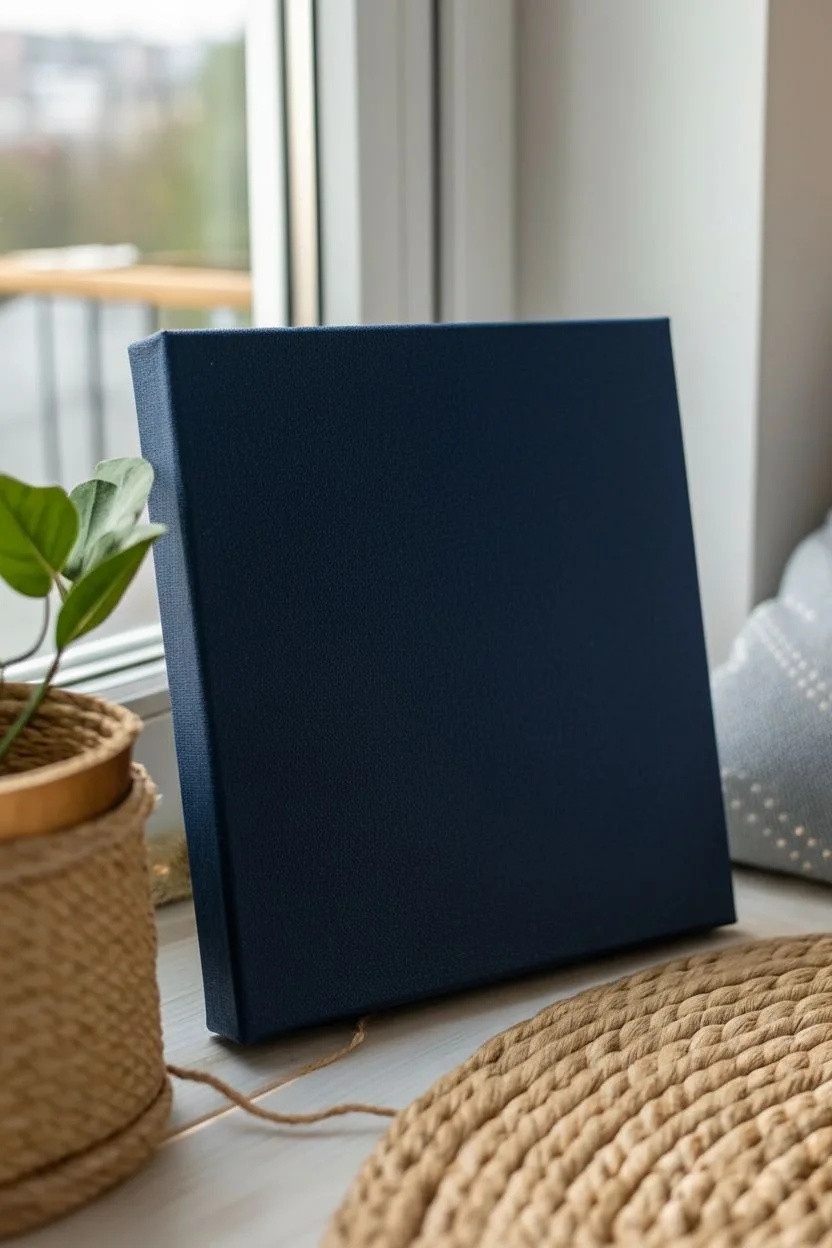
Heart-Shaped Branch Diptych
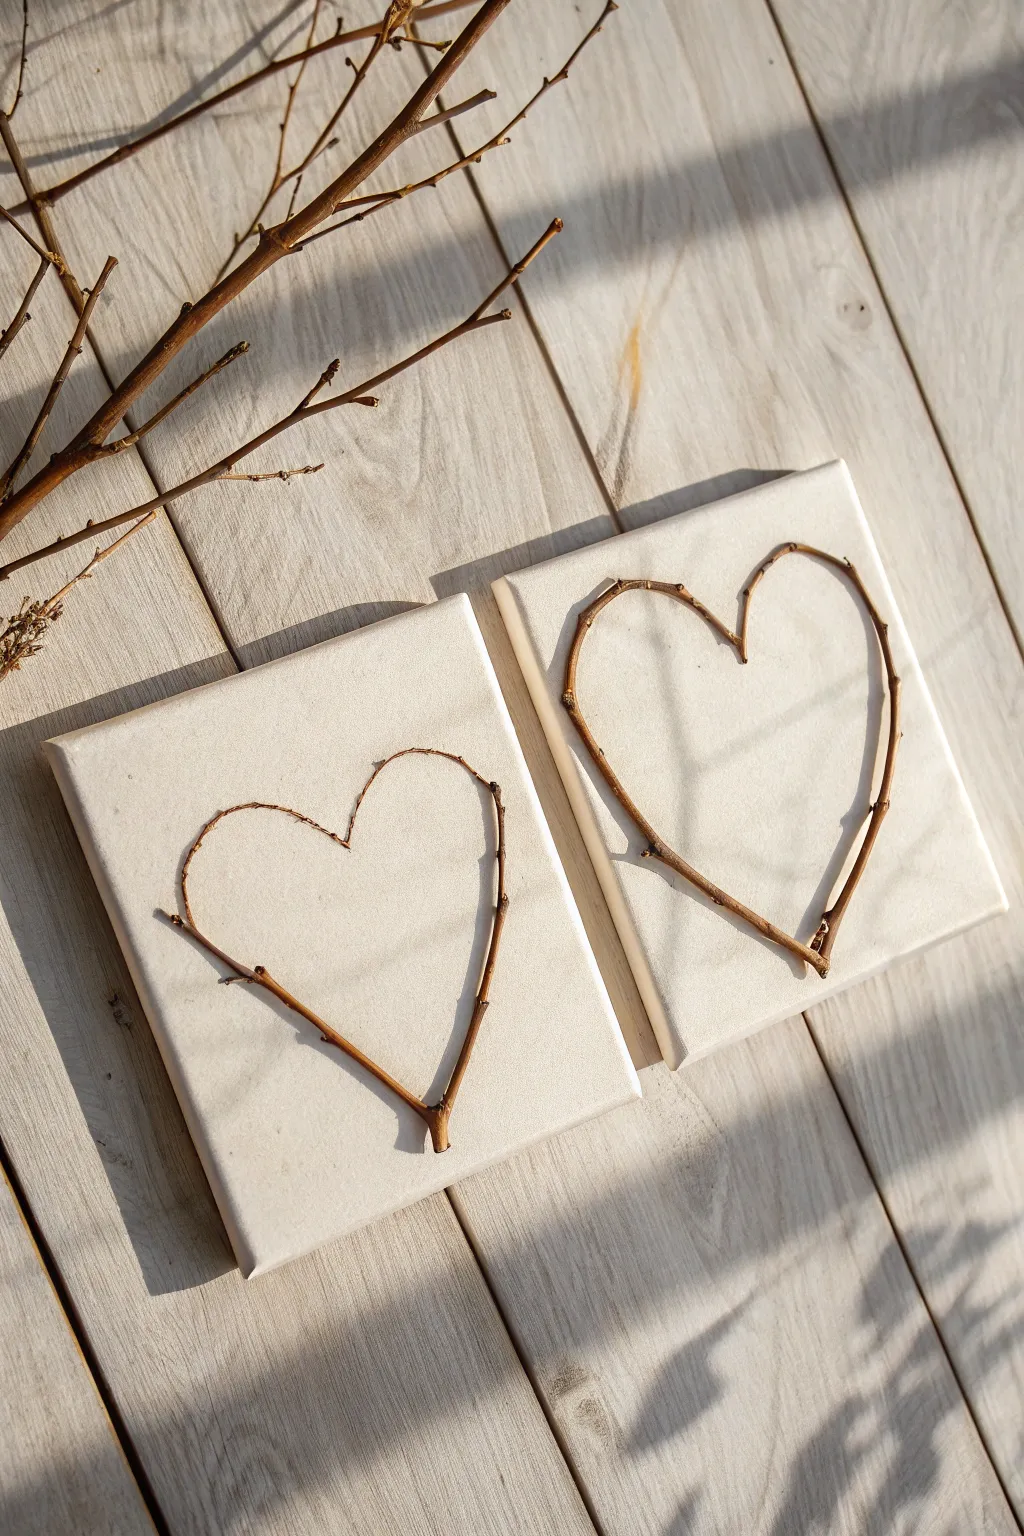
This minimalist project uses natural elements to create a symbolic diptych, perfecting for gifting. Thin, pliable twigs are shaped into open hearts and mounted on canvas for a textured, organic look that blends rustic charm with modern simplicity.
Step-by-Step
Materials
- Two small square canvases (approx. 6×6 or 8×8 inches)
- Thin, flexible twigs or vine branches (willow or birch work best)
- Strong craft glue (clear-drying wood glue or a hot glue gun)
- Pruning shears or strong scissors
- Pencil
- Paper (for sketching templates)
- Matte finish spray sealant (optional)
- Heavy books or weights
Step 1: Preparing the Base
-
Select your canvases:
Start with two identical square canvases. The texture of the canvas adds a nice contrast to the smooth wood, but ensure they are clean and free of dust. -
Gather natural materials:
Collect several thin twigs. Look for ones that are still green or freshly fallen so they have flexibility; dry, brittle twigs will snap when you try to curve them. -
Soak the twigs:
If your branches feel stiff, soak them in warm water for about an hour. This makes the wood fibers pliable and easier to shape without breaking. -
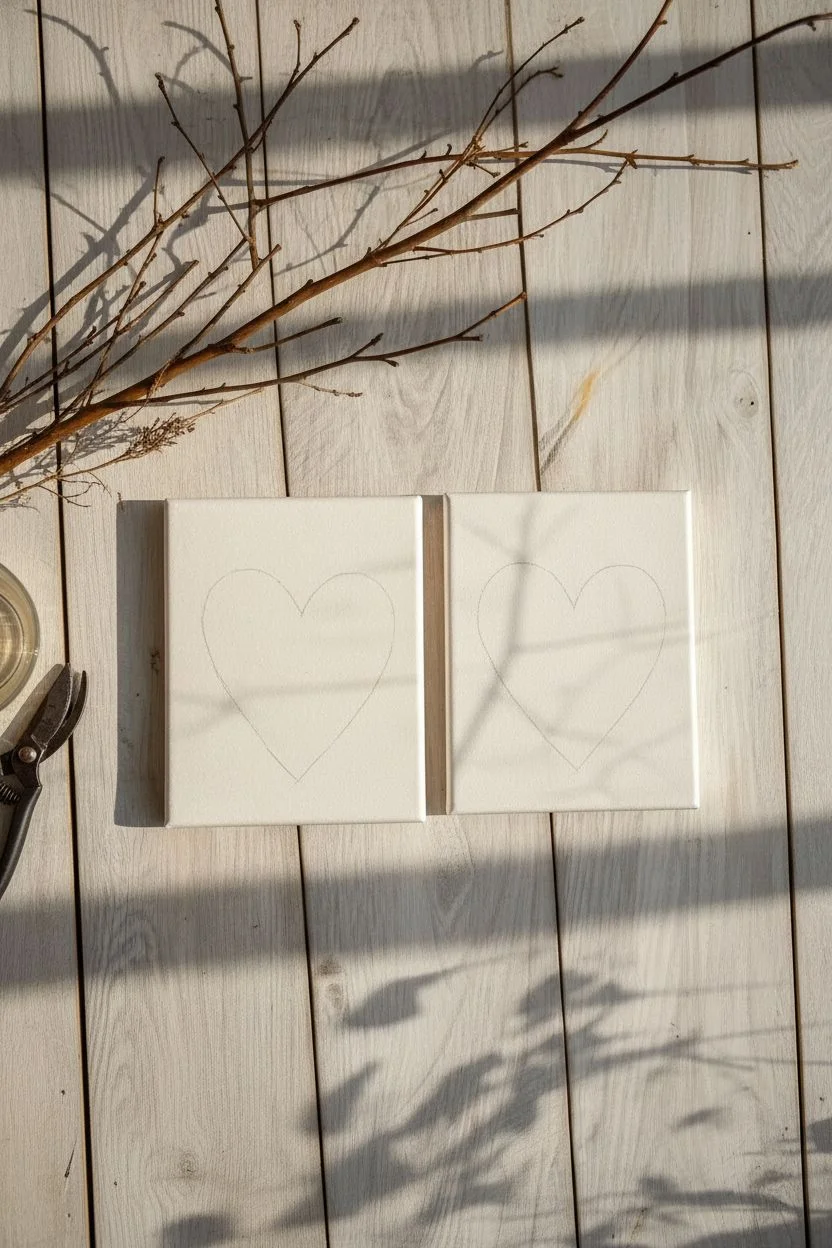
Create a template:
Draw a heart shape on a piece of paper that fits well within the dimensions of your canvas. I find it helpful to fold the paper in half to ensure the heart is perfectly symmetrical. -
Mark the canvas:
Place your paper template lightly on the canvas and make tiny, faint pencil marks at the top dip of the heart and the bottom point to guide your placement.
Glue Won’t Hold?
If the tension of the bent wood keeps popping the twig off the canvas, use tiny dots of hot glue for an instant hold, then reinforce the rest of the branch with wood glue for longevity.
Step 2: Shaping the Hearts
-
Cut primary branches:
Select two long, thin twigs for the main arches of the heart. Use your shears to trim them to a length slightly longer than one side of your heart template. -
Pre-bend the wood:
Gently flex the twigs with your hands to establish a curve. Don’t force them all at once; work the curve gradually down the length of the branch. -
Form the first arch:
Take one twig and align the thicker end with the top center of your heart mark. Curve it down towards the bottom point. -
Trim to fit:
Once the curve looks right against your pencil marks, trim the bottom end at an angle so it will sit flush against the other side of the heart later. -
Form the second arch:
Repeat the process for the other side of the heart. The two top ends should meet or overlap slightly at the center dip, and the bottom ends should meet at a point. -
Refine the shape:
If the wood is fighting the shape, you can gently crack the branch at the sharpest curve points (without snapping it apart completely) to create a more angular, rustic heart shape.
Step 3: Assembly and Finishing
-
Apply adhesive:
Run a thin bead of clear-drying strong glue along the underside of your first twig. I prefer using a precision tip to avoid excess glue spilling out. -
Secure the first side:
Press the glued twig onto the canvas, following your guide marks. Hold it in place for a minute until the glue becomes tacky enough to hold the tension. -
Attach the second side:
Glue and place the second twig, ensuring the bottom points meet cleanly. At the top, let the twigs touch naturally; a small gap or overlap adds character. -
Weight it down:
Since bent wood wants to straighten out, place a piece of parchment paper over the wet glue and set a heavy book on top while it dries completely. -
Clean up details:
Once fully dry, remove the weights. If there are any visible globs of glue, carefully scrape them away with a craft knife. -
Seal the artwork:
To preserve the wood color and prevent dismantling over time, give the entire piece a light coat of matte spray sealant.
Add a Date
Customize the diptych by painting tiny initials or a significant date (like an anniversary) in the bottom corner of the canvas using a fine-tip paintbrush and gold paint.
Hang these side-by-side to symbolize two halves making a whole.


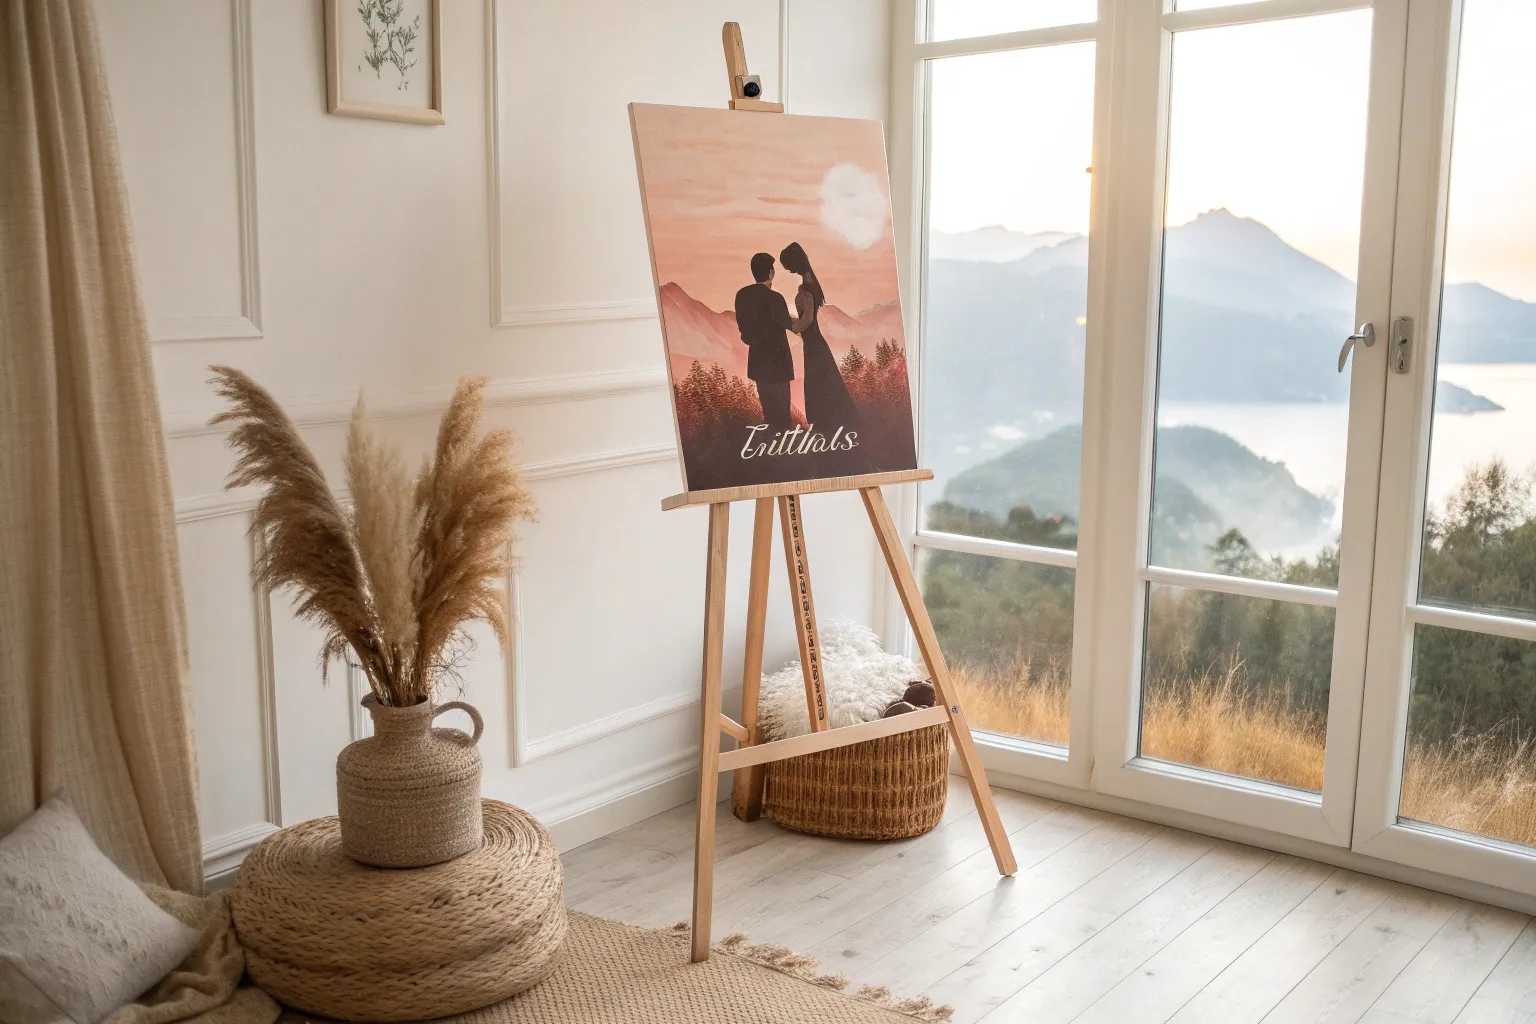
Couple Under a Big Moon
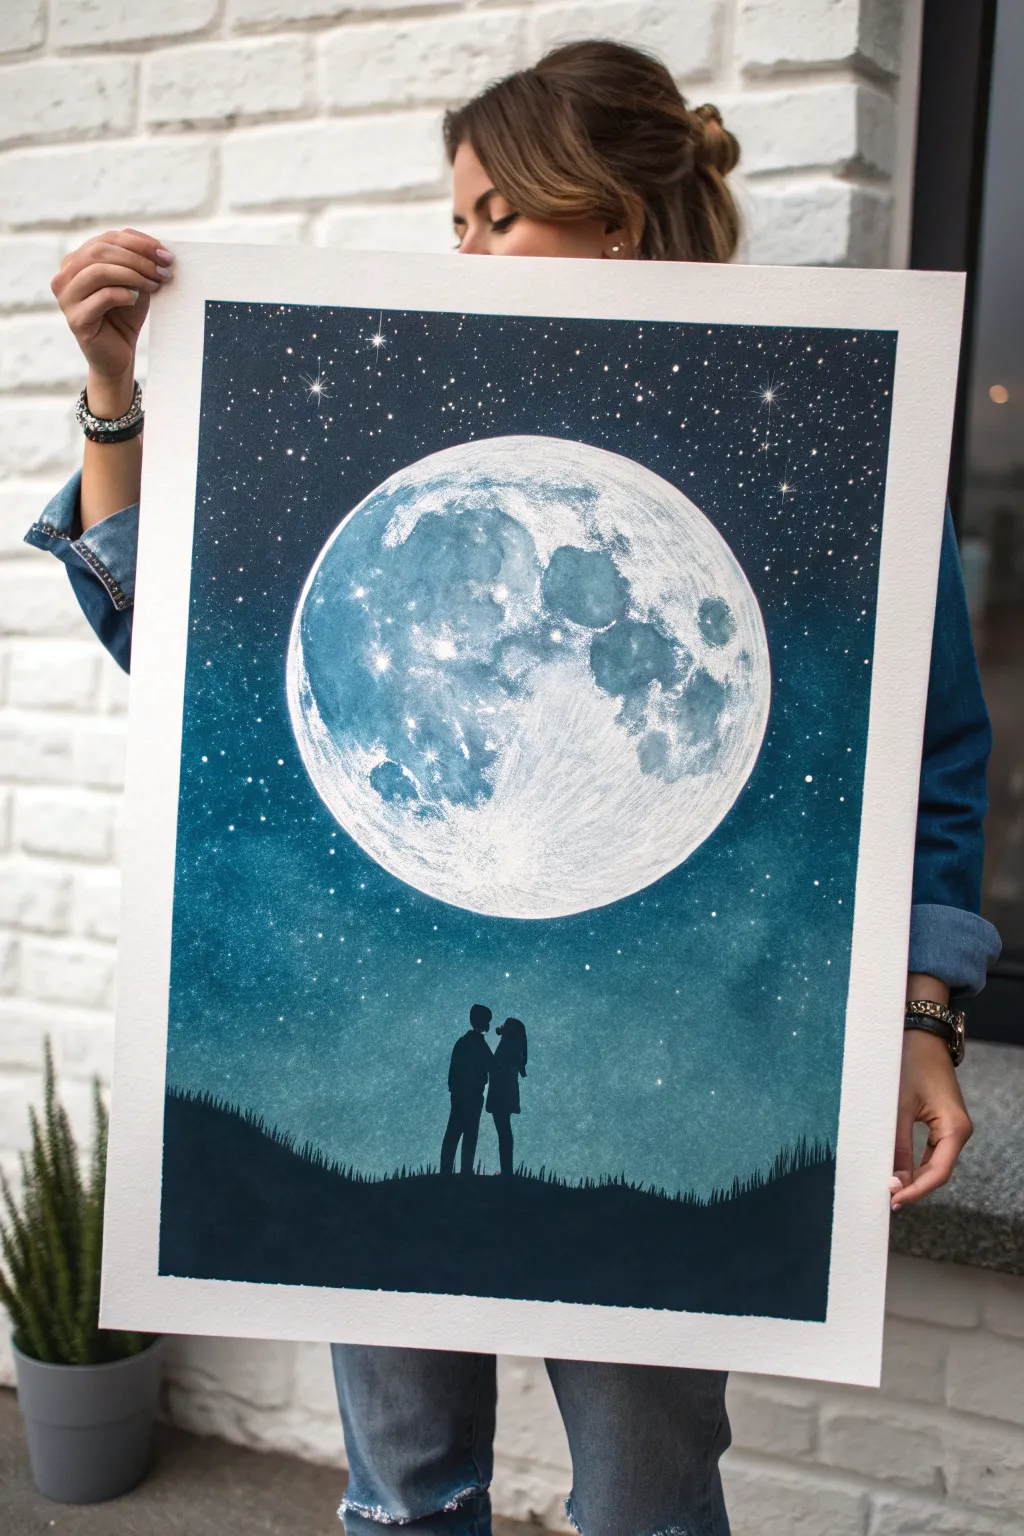
Capture the magic of a romantic night with this striking large-scale painting featuring a hyper-detailed moon and a sweet couple silhouette. The contrast between the brilliant lunar surface and the deep, starry indigo sky creates a mesmerizing focal point for any room.
Step-by-Step
Materials
- Large heavy-weight watercolor or mixed media paper (A2 or similar size)
- Watercolor paints (Indigo, Payne’s Gray, Turquoise, Black)
- White acrylic paint or white gouache (for opacity)
- Masking tape
- Large flat wash brush
- Medium round brush
- Fine detail brush (size 0 or 00)
- Old toothbrush (for stars)
- Pencil and large circular object (plate/bowl) for tracing
- Paper towels
- Hairdryer (optional for speeding up drying)
Step 1: Setting the Scene
-
Secure Your Canvas:
Begin by taping down all four edges of your large paper to a flat, hard surface. This framing not only creates a crisp white border but prevents the paper from buckling under the heavy washes of paint we’re about to apply. -
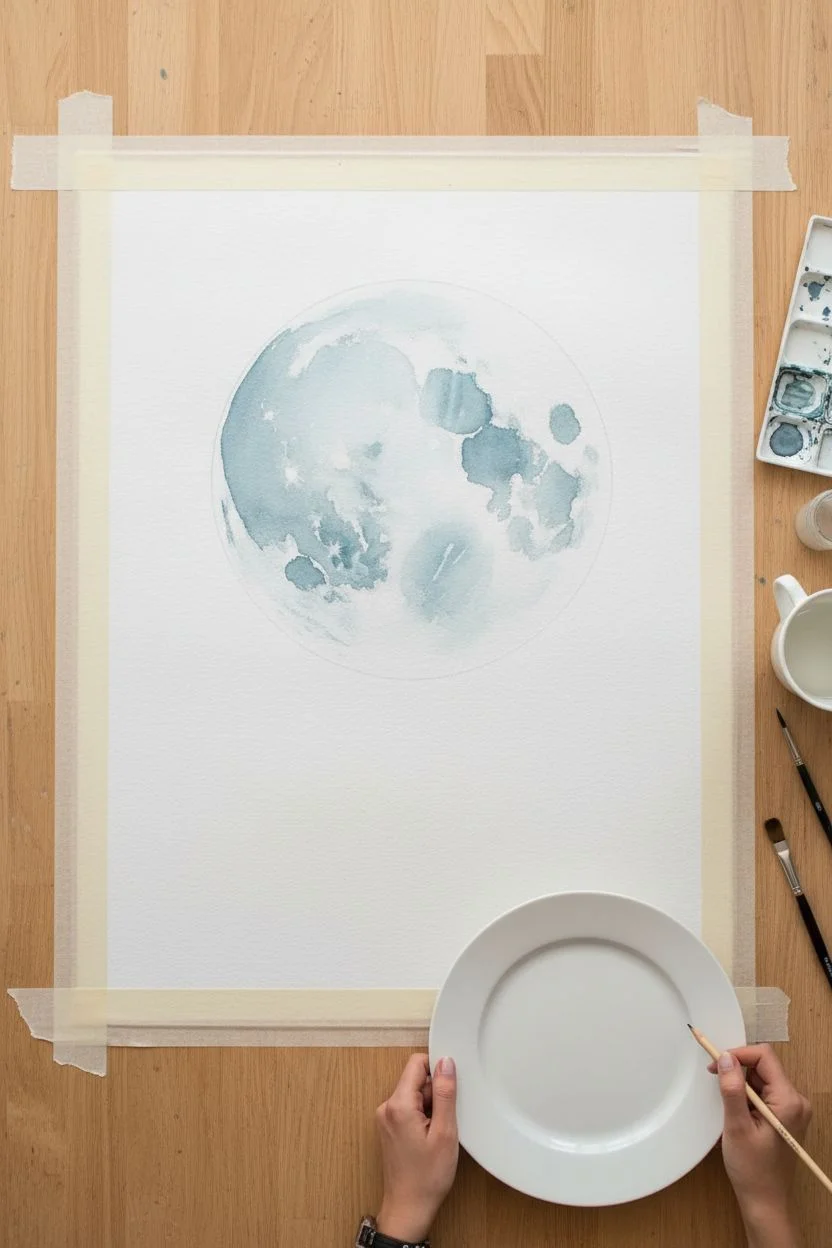
Trace the Moon:
Position a large circular object—like a dinner plate or a mixing bowl—in the upper center of your paper. Lightly trace around it with a pencil to define the moon’s shape. This circle needs to be prominent, taking up about a third of the vertical space. -
Initial Moon Texture:
Inside your circle, wet patches of the paper with clean water, leaving other areas dry. This wet-on-dry technique is perfect for craters. Drop in very watered-down blue-grey watercolor (mix a tiny bit of Payne’s Gray with plenty of water) and let it bloom naturally on the wet sections.
Uneven Moon Shape?
If your hand-painted moon isn’t perfectly round, don’t panic. Use the background sky color (Indigo) to carefully ‘cut in’ and reshape the edge from the outside, refining the circle.
Step 2: The Cosmic Background
-
Protect the Moon:
Before painting the sky, ensure your moon sketch is protected. You can carefully paint around the edge, but for safety, mask the circle with masking fluid or a cut-out piece of paper held in place temporarily. -
Base Sky Wash:
Using your large flat brush, apply a wash of deep turquoise and lighter blue around the moon area. Keep this layer relatively wet and uneven; we want a glowing effect around the celestial body. -
Deepening the Night:
While the paper is still slightly damp, introduce your darker pigments—Indigo and black—starting from the corners and edges of the paper. Blend these inward towards the moon, but stop before you hit the moon’s edge to preserve that lighter ‘glow’ halo. -
Building Saturation:
Let the first layer dry completely. I prefer to add a second layer of indigo and black to the outer edges to get that rich, velvety abyss look. The darker the corners, the brighter the moon will appear. -
Starry Splatter:
Once the sky is bone dry, mix white acrylic paint with a tiny drop of water to make it fluid. Dip an old toothbrush into the mixture and flick the bristles with your thumb to spray fine stars across the sky. Focus more splatter near the top corners. -
Specific Constellations:
Use your smallest detail brush and pure white acrylic to hand-paint a few larger, cross-shaped stars to create focal points among the splatter.
Step 3: Painting the Moon
-
Defining Craters:
Now, focus back on the moon. Using a medium round brush and a mix of blue and grey, dab erratic shapes to form the ‘seas’ (maria) of the moon. Look at a reference photo of the moon to get naturally organic shapes. -
Adding Highlights:
With white gouache or acrylic, paint the bright highlights on the crater ridges. Use a dry-brush technique—wiping most paint off the brush first—to drag texture across the surface, giving it a rough, rocky appearance. -
Softening Edges:
If any crater edges look too sharp, use a clean, damp brush to gently scrub and soften the boundaries, blending them slightly into the lighter background.
Pro Tip: Glowing Effect
Before the dark sky paint dries, lift a little pigment right around the moon’s rim with a clean, damp brush. This subtle halo makes the moon look like it’s truly emitting light.
Step 4: The Silhouette
-
Drafting the Ground:
At the bottom of the painting, lightly sketch a wavy horizon line for the grassy hill. Ensure it curves gently to add movement to the composition. -
Sketching the Couple:
Lightly pencil in the outline of the couple standing centrally on the hill. Keep the shapes simple; since it’s a silhouette, facial features aren’t necessary, just the posture of heads leaning together. -
Filling the Black:
Using opaque black paint (acrylic works best here for solid coverage), fill in the entire hill area first. Work carefully along the top edge to create small, upward-flicking strokes that mimic tufts of grass. -
Refining the Figures:
Switch to your fine detail brush to fill in the couple. Paint slowly to keep the edges sharp. Ensure their feet engage with the ‘grass’ rather than floating above it. -
Final Reveal:
Wait until absolutely every drop of paint is dry to the touch. Gently peel away your masking tape at a 45-degree angle to reveal your clean, professional borders.
Frame this piece behind glass to protect the delicate surface and present it as a truly heartfelt gift
BRUSH GUIDE
The Right Brush for Every Stroke
From clean lines to bold texture — master brush choice, stroke control, and essential techniques.
Explore the Full Guide
The Playlist Songwave Painting
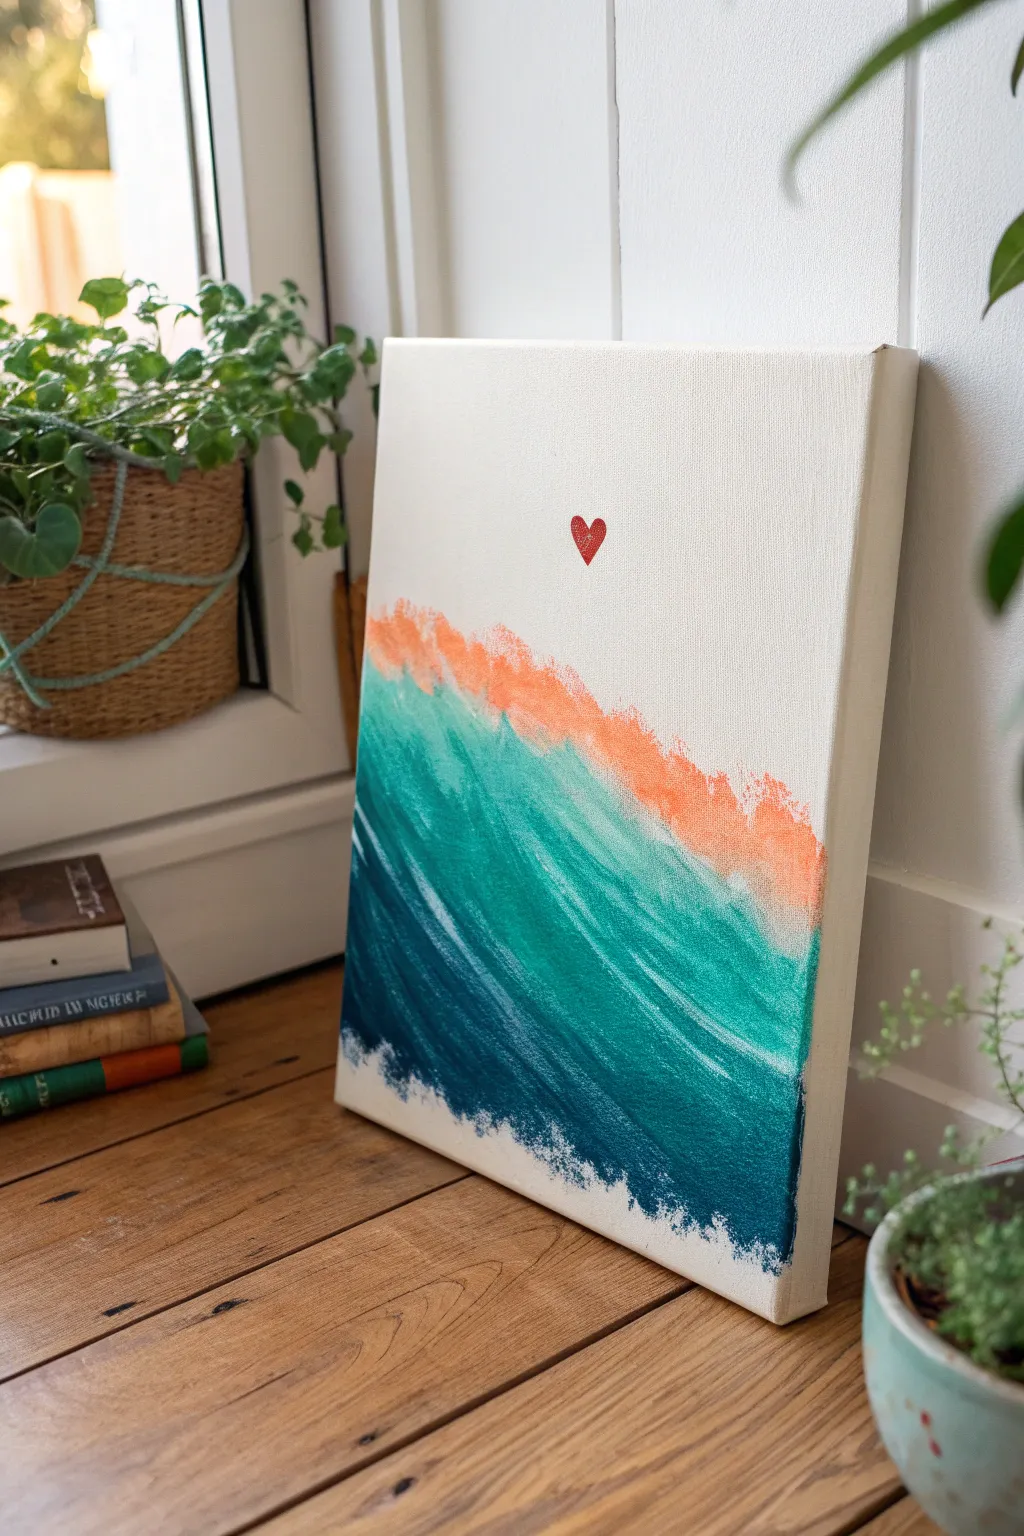
Transform a favorite song or voice recording into a modern, abstract visual. This minimalist piece uses layered gradients and dry-brush textures to mimic the look of an audio waveform, topped with a delicate heart for a romantic focal point.
How-To Guide
Materials
- Stretched canvas (rectangular)
- Acrylic paints: Navy blue, Teal/Turquoise, Peach/Coral, White, Red
- Flat shader brushes (medium and large)
- Small detail brush
- Palette or paper plate
- Jar of water
- Paper towels
Step 1: Setting the Foundation
-
Prepare your palette:
Squeeze out your navy blue, teal, and peach paints. You’ll want them ready to go so you can blend while the paint is still workable. -
Start with the darkest hue:
Load your large flat brush with navy blue paint. Don’t add water; you want the paint to be thick and opaque. -
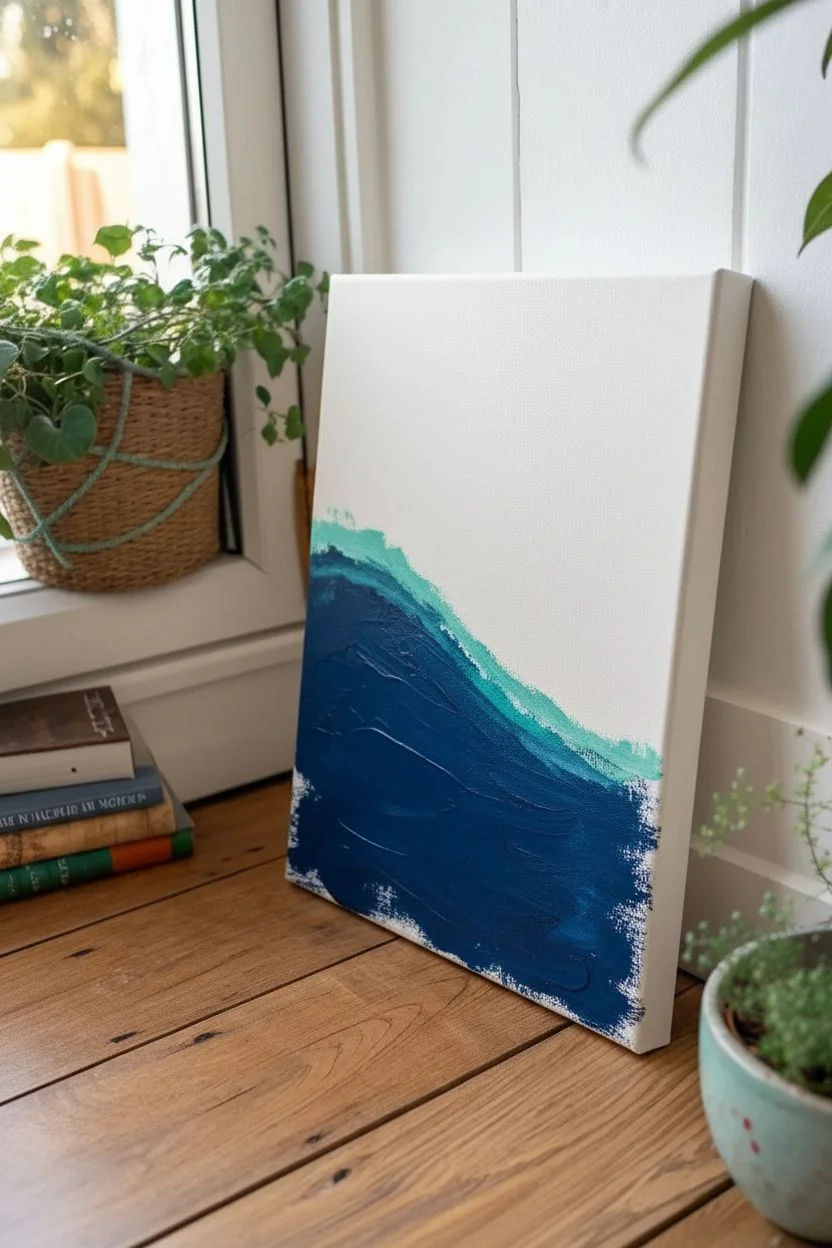
Paint the base:
Apply the navy blue to the bottom left corner of the canvas. Sweep the brush diagonally upwards towards the right, covering about the bottom third of the abstract shape’s intended area. -
Create the rough edge:
At the bottom and left edges of the navy section, use a ‘dry brush’ technique. Wipe most of the paint off your brush onto a paper towel, then flick the bristles outward to create that scuffed, feathery texture along the borders.
Muddy colors?
If the teal and peach mix into brown, stop blending immediately. Let the teal layer dry completely before dry-brushing the peach layer over it for a clean overlay.
Step 2: Building the Gradient
-
Transition to teal:
Without fully cleaning your brush (a little dark blue left is okay for blending), pick up the teal paint. Apply this directly above the navy section, following that same diagonal upward sweep. -
Blend the boundary:
Where the teal meets the navy, work the wet paints together on the canvas using back-and-forth strokes. You want a soft transition, but keep distinct streaks visible to mimic soundwaves. -
Add highlights:
Mix a tiny dot of white into your teal to create a lighter turquoise. Add a few streaks of this lighter shade into the middle section to give the wave depth and movement. -
Extend the texture:
Continue the diagonal motion, ensuring the brushstrokes look energetic and directional. Just like the bottom layer, let the paint fade out naturally on the right side with a dryer brush for a textured finish.
Make it Mean More
Use an actual screenshot of the soundwaves from ‘your song’ or a voice memo as a reference for the shape of the peaks and valleys you paint.
Step 3: The Top Layer
-
Apply the peach tone:
Clean your brush thoroughly or switch to a fresh medium flat brush. Load it with the peach or coral paint. -
Feather the top edge:
Apply this color along the top ridge of your wave shape. Use quick, upward flicking motions to create rugged peaks that look like the highs of an audio track. -
Create the fade:
Drag the peach paint slightly down into the teal area. Since teal and orange are complementary, be careful not to over-mix them or it will turn muddy; just overlap them lightly for a transparent effect. -
Soften the top:
Ensure the very top edge of the peach section isn’t a solid line. Dab the brush lightly to leave varying heights, mimicking the erratic nature of sound. -
Let it dry:
Allow the main wave section to dry completely. This usually takes about 15-20 minutes depending on how thick your application was.
Step 4: The Final Detail
-
Position the heart:
Locate the center point above your wave formation. Depending on the ‘loudness’ of your painted wave, you might place it centered or slightly off-center for balance. -
Paint the heart shape:
Using your smallest detail brush and red paint, carefully outline a tiny heart. It should look like it’s floating freely in the negative white space. -
Fill it in:
Fill the heart with solid red. You may need a second coat once the first dries to ensure it pops vibrantly against the white canvas. -
Review edges:
Check the surrounding white canvas for any accidental smudges. If found, touch them up with a little white paint to keep the background crisp and clean.
Now you have a sentimental piece of art that visualizes the rhythm of your relationship
Polaroid-Style Painted Memory
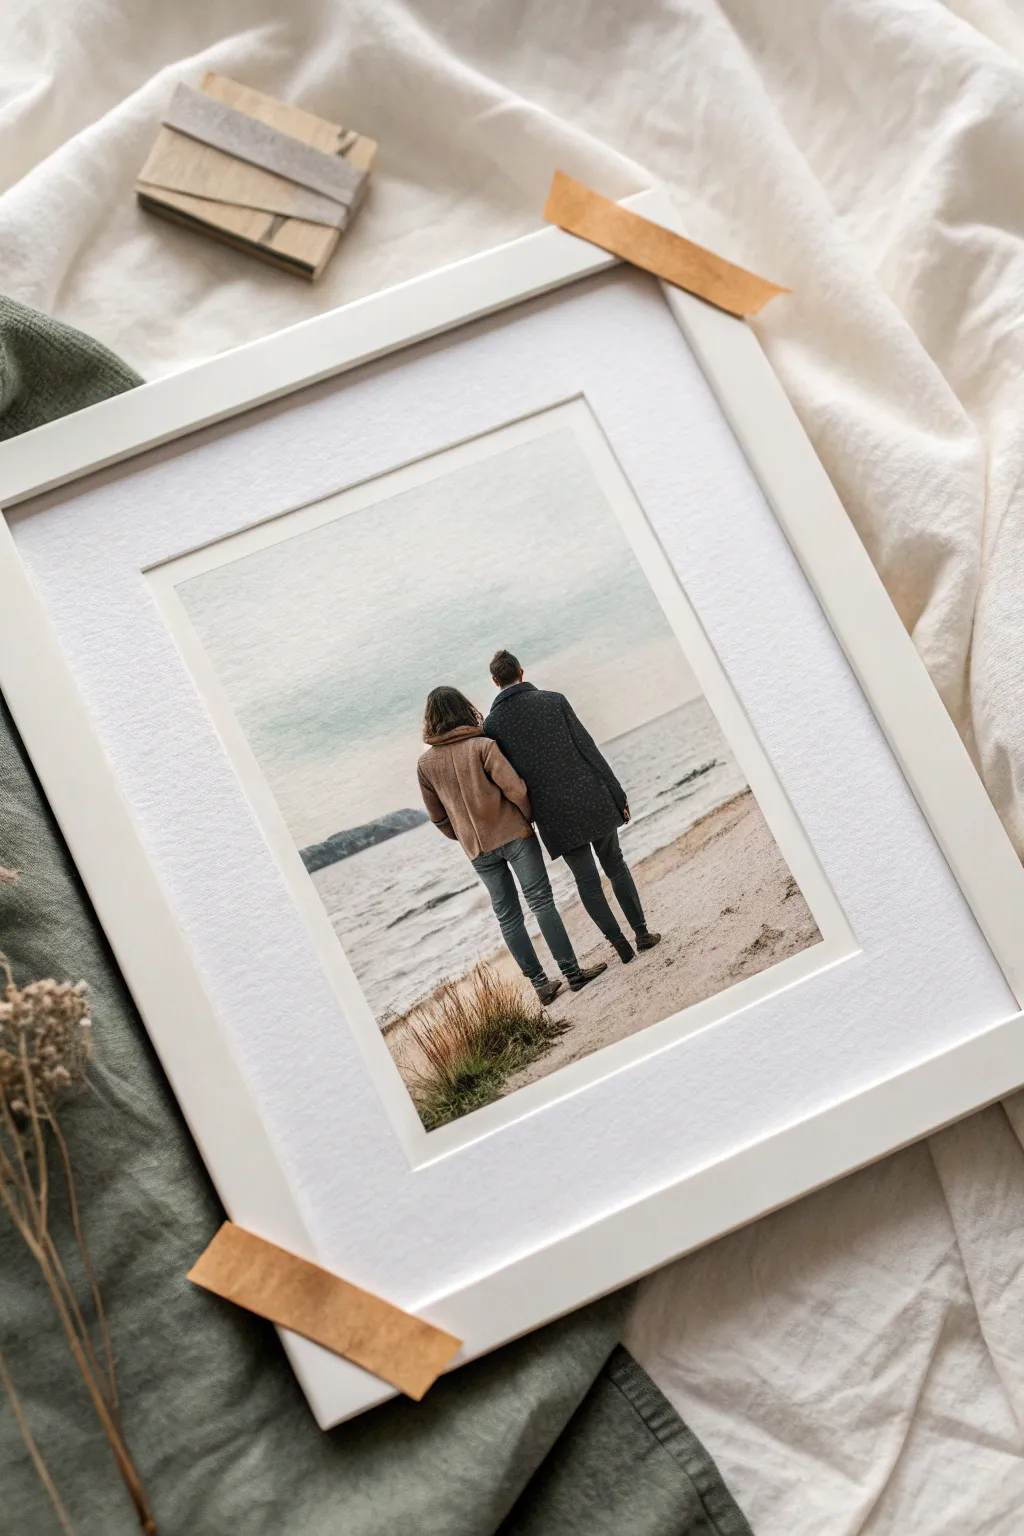

Capture a tender moment of togetherness with this soft, Polaroid-inspired watercolor painting. The artwork features a couple walking away on a sandy beach, characterized by muted earth tones, gentle textures, and a nostalgic, dreamy atmosphere perfect for a romantic gift.
Step-by-Step Guide
Materials
- Heavyweight cold-press watercolor paper (at least 300gsm)
- Watercolor paints (Payne’s Grey, Burnt Sienna, Yellow Ochre, Ultramarine Blue, Alizarin Crimson)
- Round watercolor brushes (sizes 2, 6, and 10)
- Masking tape or painter’s tape
- Pencil (HB) and kneaded eraser
- Reference photo of you and your boyfriend
- White mat board with a square opening
- White or light wood frame
- Paper towels and two jars of water
Step 1: Preparation and Sketching
-
Tape the borders:
Begin by taping down your watercolor paper to a hard board. Since we want that classic Polaroid look, measure a wide margin—leave slightly more space at the bottom than on the top and sides—and press the tape down firmly to ensure crisp edges. -
Establish the horizon:
Lightly sketch a horizontal line about two-thirds of the way up the paper. This will separate your calm sea from the overcast sky. -
Outline the figures:
Using your reference photo, sketch the basic shapes of the two figures. Focus on the relationship between the shoulders and the lean of the bodies as they walk. Keep the pencil lines very faint so they don’t show through the paint later. -
Add background details:
Sketch a faint, uneven line for the distant landmass on the left side and mark the diagonal line where the sand meets the water.
Texturing Tip
To mimic the grainy look of the reference photo, sprinkle table salt over the damp sand-colored paint. Let it dry completely, then brush the salt off for instant texture.
Step 2: Painting the Scenery
-
Wash the sky:
Wet the sky area with clean water first. Mix a very dilute wash of Ultramarine Blue with a touch of Payne’s Grey to get a stormy, muted blue-grey. Apply this to the top, letting it fade almost to white as you reach the horizon line. -
Paint the distant water:
While the sky is drying, mix a slightly darker teal-grey for the ocean. Ensure your brush strokes are horizontal to mimic the calm movement of water. -
Create the shoreline foam:
Leave a thin, irregular strip of unpainted white paper where the water meets the sand to represent sea foam. Following that, paint the wet sand using a mix of Burnt Sienna and a tiny drop of violet for a cool, darker sand tone. -
Texture the dry sand:
For the foreground sand, use a warm mix of Yellow Ochre and Burnt Sienna. Use a ‘dry brush’ technique here—dab excess paint onto a paper towel before painting—to catch the texture of the paper and create a sandy, grainy effect. -
Add the distant hills:
Once the sky layer is totally dry, paint the distant landmass with a flat, dark grey-blue. Keep the edges soft to suggest atmospheric distance.
Step 3: Painting the Figures
-
Block in the jacket colors:
Start with the lighter jacket. Mix a warm taupe using Burnt Sienna and a touch of white or water dilution. Paint the shape carefully. For the darker coat, use a mix of Payne’s Grey and Ultramarine Blue for a deep, rich navy. -
Add shadows and folds:
While the base coat of the jackets is still slightly damp, drop in concentrated pigment in the creases—under the arms and along the back seams—to create natural volume and shadows. -
Paint the jeans:
Use a faded denim blue mix. I find it helpful to lift out a little pigment with a dry brush down the center of the thighs and calves to create a highlight, making the legs look rounded rather than flat. -
Detail the hair:
Switch to your smallest size 2 brush. Paint the hair using short, directional strokes that follow the natural growth pattern. Leave tiny specks of white paper for highlights. -
Ground the figures:
Mix a dark, watery shadow color (brown-grey). Paint horizontal shadows extending from the feet to the right side, anchoring the couple to the ground so they don’t look like they are floating.
Fixing Water Blooms
If a water ‘cauliflower’ bloom ruins a smooth sky, dampen the area slightly with a clean brush and use a paper towel to gently lift the pigment, then re-glaze once dry.
Step 4: Finishing Touches
-
Add foreground grasses:
Using your small brush and a mix of Green and Burnt Sienna, flick upward strokes in the bottom left corner to create wild beach grass. Vary the pressure to make thick and thin blades. -
Peel the tape:
Wait until the painting is bone dry—touch it with the back of your hand to check. Slowly peel the tape away at a 45-degree angle to reveal those satisfying, crisp white borders. -
Frame the memory:
Place your dry painting behind a pristine white mat. Secure it with archival tape on the back, and place it into your white wooden frame to complete the modern, minimalist look.
This serene, personalized artwork serves as a timeless reminder of your shared path and quiet moments together

PENCIL GUIDE
Understanding Pencil Grades from H to B
From first sketch to finished drawing — learn pencil grades, line control, and shading techniques.
Explore the Full Guide
Painted Love Letter Background
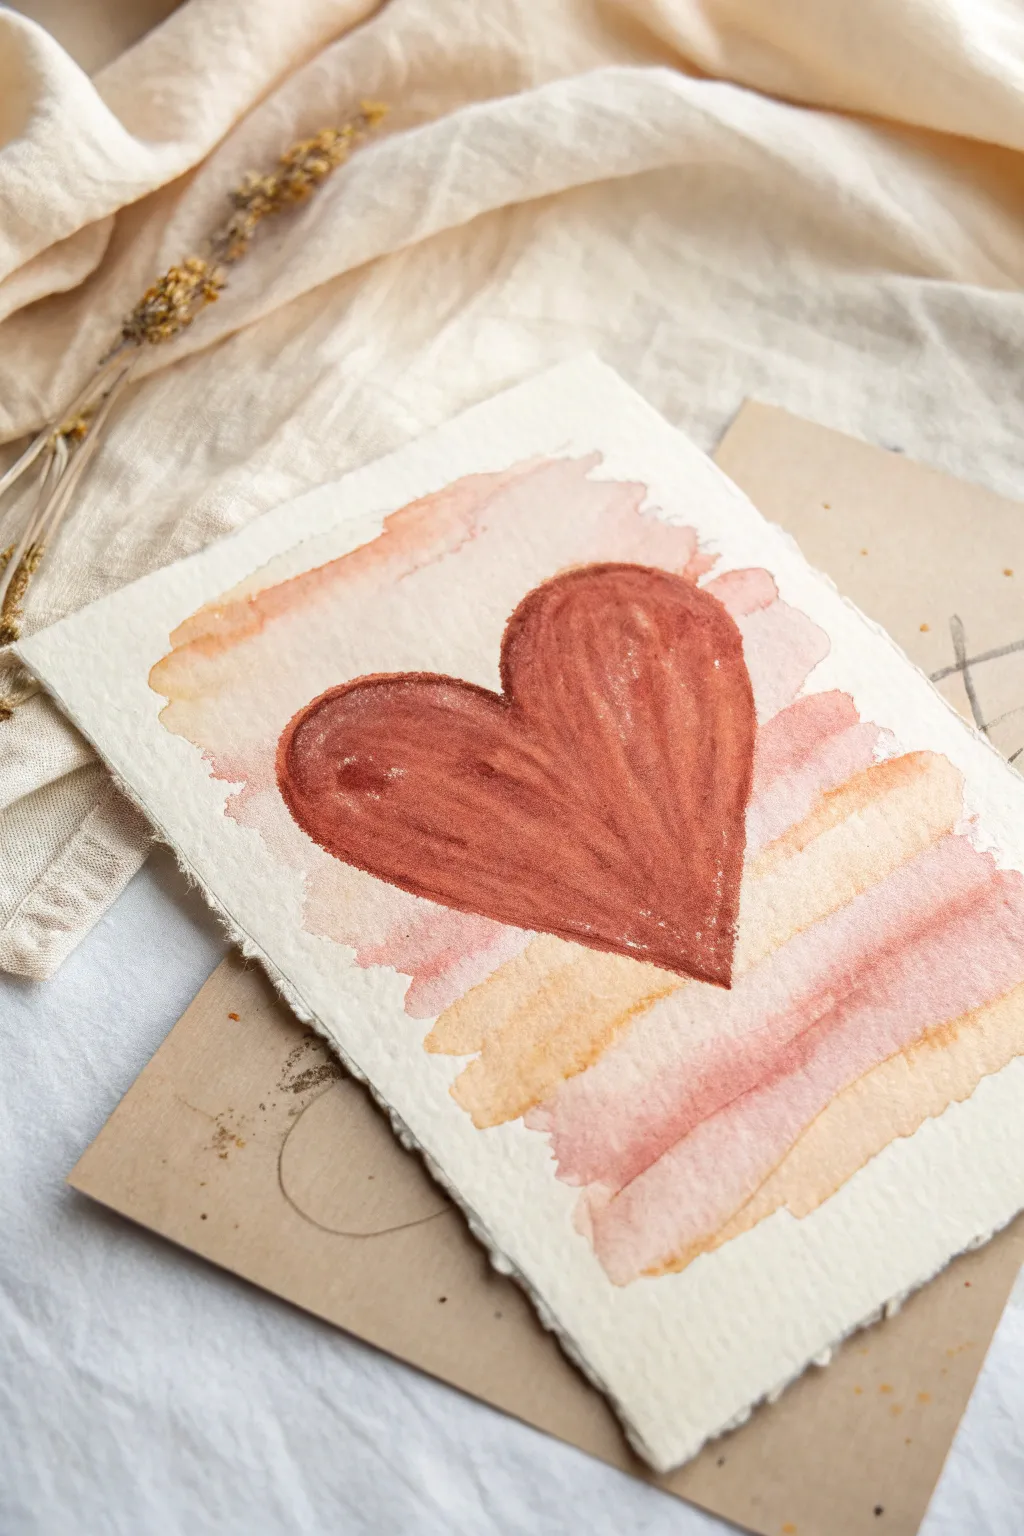
This rustic, heartfelt card combines soft, washed-out stripes with a focused, textured heart centerpiece. The result is a romantic piece of art formed on deckle-edged paper that feels both vintage and handmade.
Step-by-Step
Materials
- Heavyweight cold-press watercolor paper (300gsm, preferably with deckle edge)
- Watercolor paints (Alizarin Crimson, Burnt Sienna, Yellow Ochre, Rose Madder)
- Flat wash brush (3/4 inch or similar)
- Round brush (size 6 or 8)
- Hog bristle brush or scruffy old brush (for texture)
- Clean water
- Paper towels
- Pencil (optional)
- Mixing palette
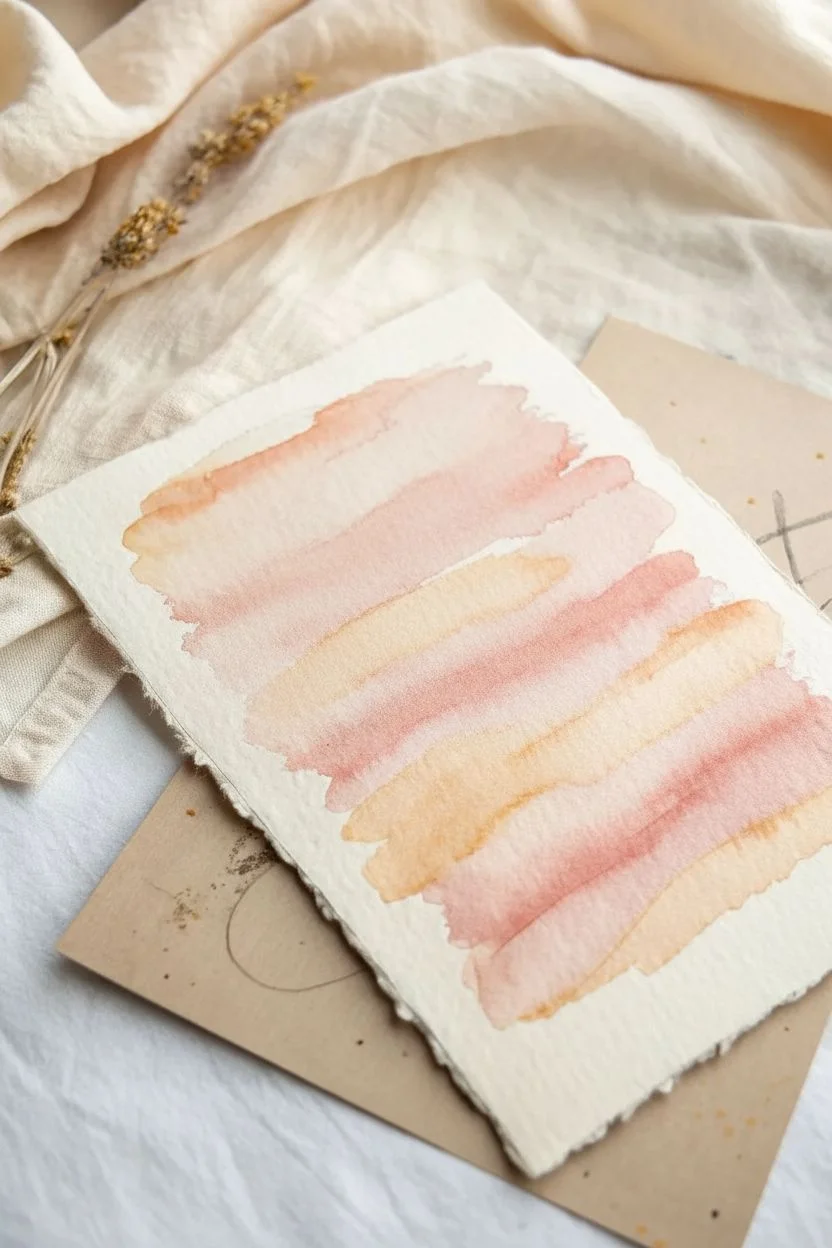
Step 1: Creating the Striped Background
-
Prepare your palette:
Mix two very dilute washes of color. For the first, create a soft, dusty pink by watering down Rose Madder with a touch of Burnt Sienna. For the second, mix Yellow Ochre with plenty of water to create a pale sandy peach. -
Load the flat brush:
Dip your flat wash brush into the watery peach mixture. You want the brush fully loaded but not dripping uncontrollably. -
Paint the first stripe:
Starting near the top left, drag your brush across the paper at a slight diagonal angle. Let the bristles naturally separate at the end of the stroke to create a ragged, organic edge. -
Alternate colors:
Rinse your brush quickly and pick up the dusty pink wash. Paint a second stripe parallel to the first, leaving a tiny sliver of white paper between them so the colors don’t bleed messily. -
Continue the pattern:
Work your way down the paper, alternating between the peach and pink washes. Don’t worry about making the lines perfectly straight or even; the charm lies in the wobbly variation. -
Soften edges:
I like to touch a clean, damp brush to the very ends of a few stripes while they are still wet. This encourages the pigment to bloom slightly, creating that dreamy watercolor look. -
Let it dry completely:
This step is crucial. If the paper is damp, the heart layer will spiderweb into the background stripes. Wait until the paper is bone dry to the touch.
Pro Tip: Deckle Edge
If you don’t have handmade paper, create a faux deckle edge by painting a line of water along the paper’s edge, waiting a moment, and gently tearing the strip off.
Step 2: Painting the Textured Heart
-
Mix the heart color:
Create a rich, deep red. Mix Alizarin Crimson with more Burnt Sienna to get a rusty, earthy tone rather than a bright candy apple red. Keep the consistency creamy, like melted ice cream. -
Outline lightly:
If you aren’t confident freehanding, very lightly sketch a wide heart shape over the dried stripes with a pencil. -
Block in the shape:
Using your round brush, fill in the heart shape with the rusty red mix. Use long strokes that follow the curvature of the heart lobes. -
Add darker values:
While the heart is wet, drop slightly more concentrated pigment into the upper lobes and the outer edges to create subtle dimension. -
Lift for highlights:
Rinse your brush and dab it on a paper towel until it’s just thirsty, not wet. Gently lift a little pigment from the center of the left lobe to suggest a highlight. -
Create texture:
Switch to your dry, scruffy hog bristle brush. Gently drag it through the wet paint in the direction of the heart’s curve to create striations and scratchy texture. -
Refine the edges:
The edges shouldn’t be too sharp. If they look too crisp, run a barely damp brush along the perimeter to soften the transition into the background stripes. -
Final drying time:
Allow the heart to dry completely. The thicker paint application will take longer than the background washes.
Level Up: Hidden Message
Use white gouache or a white gel pen to write a tiny, subtle love note or date inside the darker shaded area of the heart once the painting is fully dry.
Once dry, you can mount this piece onto a folded card base or frame it as a standalone keepsake for your partner
Constellation Initials in the Sky
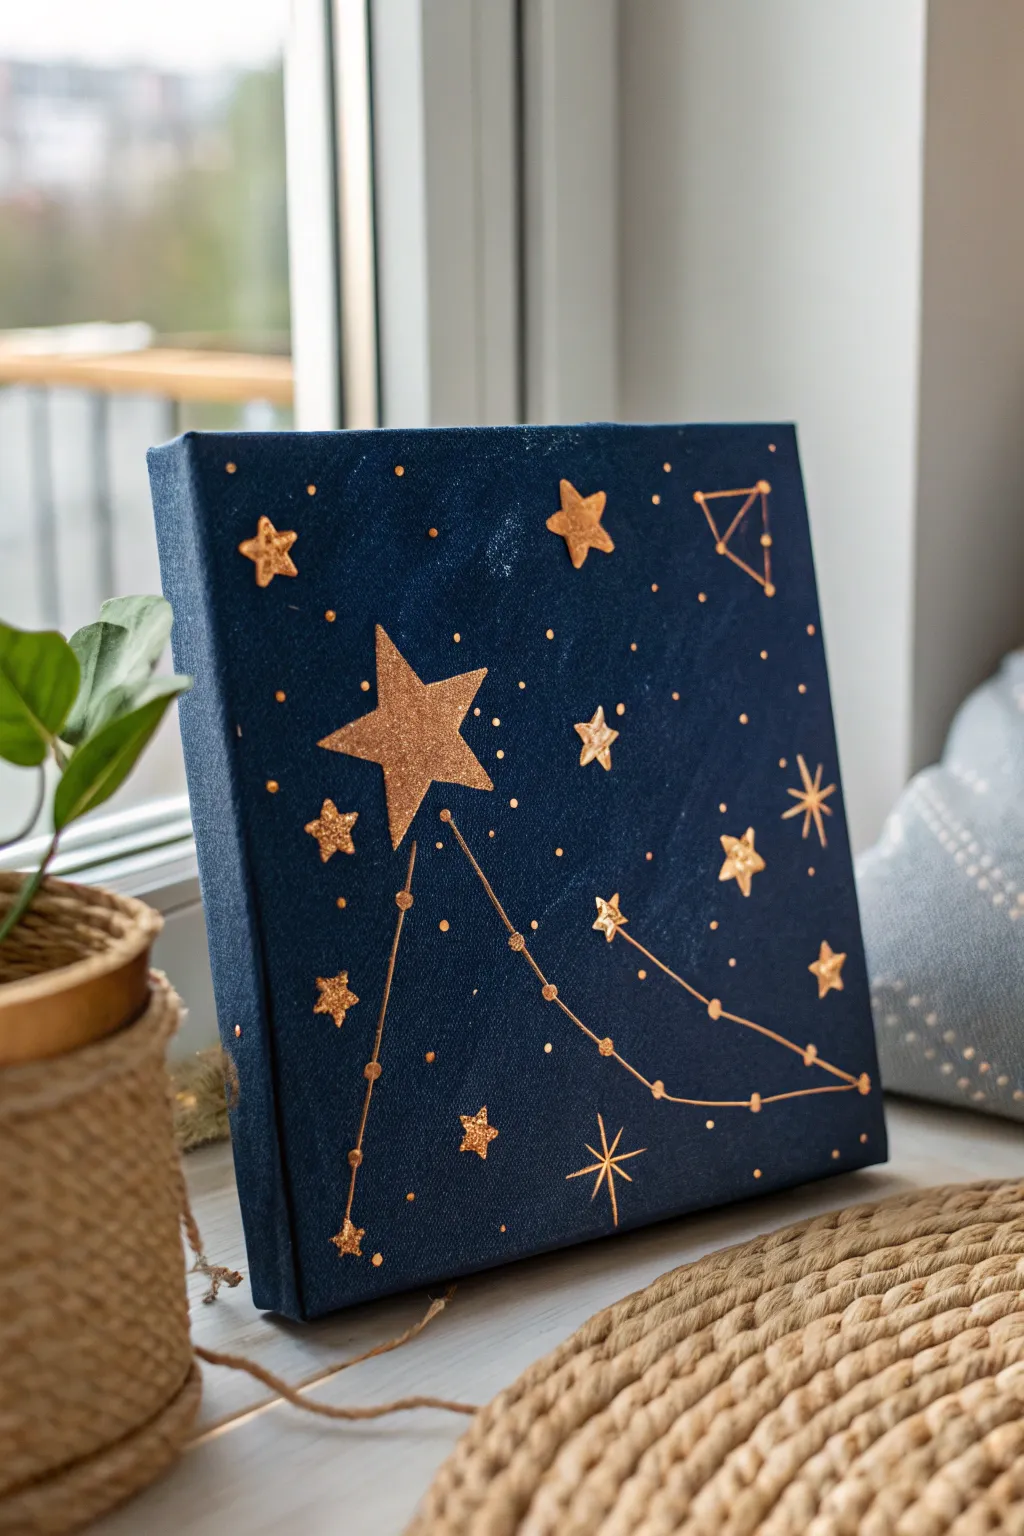
Capture the magic of the night sky with this personalized constellation art that uses rich navy hues and shimmering gold accents. It creates a romantic and thoughtful gift by mapping out special initials or zodiac signs among the stars.
How-To Guide
Materials
- Small square stretched canvas (e.g., 8×8 or 10×10 inches)
- Acrylic paint: Navy Blue, Black, and Gold
- Gold glitter foam sheet or heavy cardstock
- Scissors
- Glue (craft glue or hot glue gun)
- Gold metallic paint pen (fine tip)
- Sponge brush
- Fine detail paintbrush
- Pencil
- Ruler
Step 1: Setting the Scene
-
Prepare the canvas base:
Start by squeezing a generous amount of navy blue acrylic paint onto your palette. To give the sky real depth, mix in a tiny drop of black paint to darken the blue slightly without making it pure black. -
Apply the background color:
Using a sponge brush, coat the entire front of the canvas with your dark blue mixture. Use long, smooth strokes to ensure even coverage. -
Don’t forget the edges:
Paint the sides of the canvas as well so the artwork looks finished from every angle when displayed on a shelf. -
Add subtle texture:
while the paint is still wet, you can dab the sponge lightly in a few random spots to create a slightly mottled texture, mimicking the organic feel of the night sky. Let the canvas dry completely.
Sticky Situation
Self-adhesive glitter foam works great, but add a dot of extra super glue anyway. Canvas texture can make peel-and-stick backing lift over time.
Step 2: Creating the Stars
-
Cut the main stars:
Take your gold glitter foam sheet. Cut out one large, five-pointed star to serve as the focal point of your constellation. -
Cut smaller stars:
Cut out 6-8 smaller stars from the same gold foam. Vary their sizes slightly to keep the composition interesting. -
Arrange the layout:
Place your foam stars onto the dry canvas without gluing them yet. Arrange them to form the rough shape of an initial or a specific constellation pattern you have in mind. -
Mark the positions:
Once you are happy with the placement, make tiny pencil marks where each star will sit, then set the foam stars aside for a moment.
Step 3: Mapping the Constellation
-
Draw the connections:
Using a ruler and a gold metallic paint pen, draw straight lines connecting your marked star positions to form the constellation structure. -
Add connection nodes:
At every point where lines intersect or change direction, use the paint pen to draw a small solid gold circle. -
Draw decorative stars:
In the negative space around your main shape, use the paint pen to draw a few ‘burst’ style stars—a simple cross with an ‘X’ over it creates a classic twinkling effect. -
Create background stars:
Dot the rest of the canvas with the paint pen to create distant stars. Vary the pressure to make some dots tiny and others slightly larger. -
Attach the foam stars:
Apply a dab of glue to the back of each gold foam star you cut earlier. Press them firmly onto the canvas over your pencil marks or at key points in the design.
Make it Personal
Look up the actual star map for a specific significant date (like an anniversary) online and replicate that exact star arrangement.
Step 4: Finishing Touches
-
Add painted details:
Dip a fine paintbrush into gold acrylic paint. Carefully paint a few extra hand-drawn stars scattered between the foam ones for a mix of textures. -
Highlight the connections:
If the paint pen lines look too faint against the dark blue, trace over them gently with the fine brush and gold paint to make them pop. -
Seal the glitter:
If your foam is shedding glitter, you can lightly dab a little clear craft glue or mod podge over the stars to seal them in. -
Final inspection:
Check the edges and corners for any missed blue spots and touch them up. Let the entire piece cure overnight before wrapping or displaying.
This sparkling celestial piece is ready to brighten up any room with a touch of cosmic romance


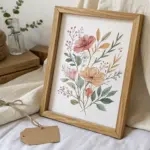
Kiss Print and Painted Details

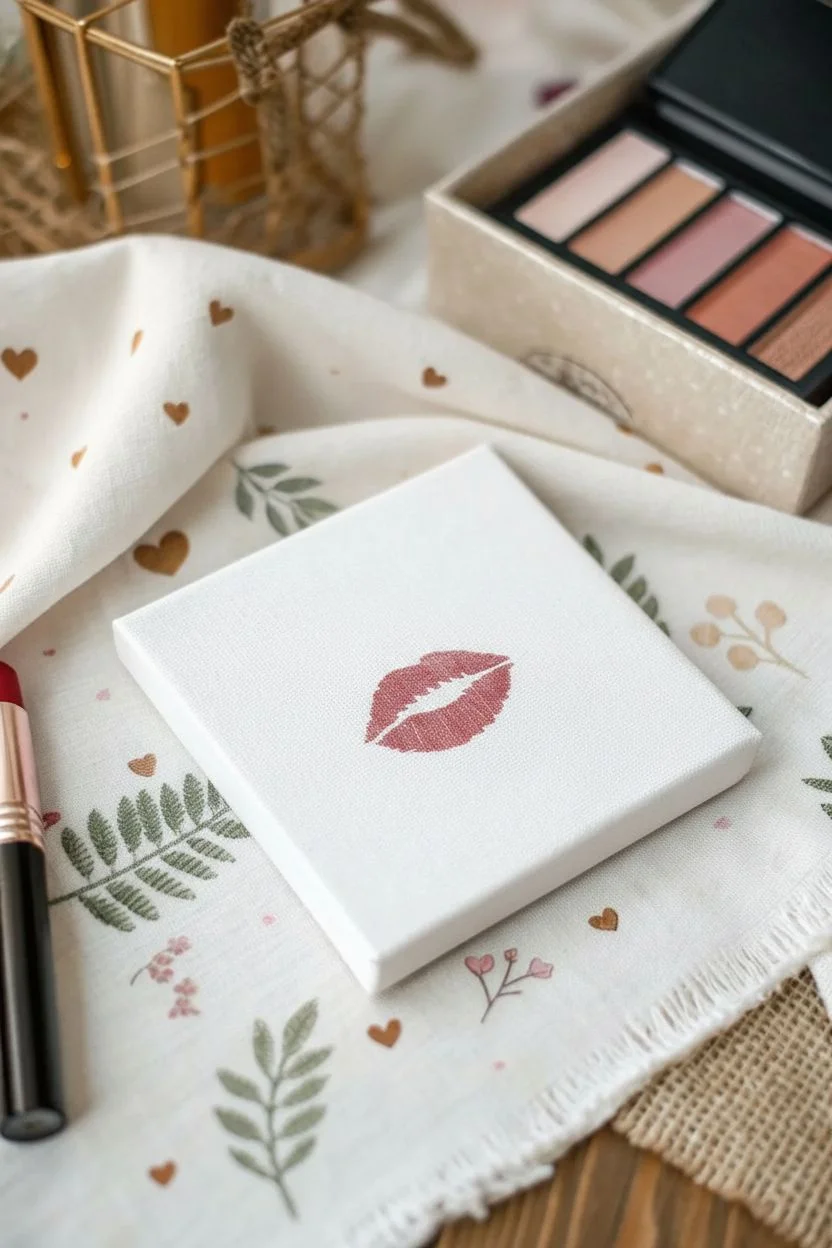
This romantic DIY project combines a personal touch with delicate floral artistry to create a keepsake your boyfriend will cherish. By centering a real lip print on a small canvas and framing it with painted botanical details, you’ll craft a sweet, enduring reminder of your affection.
Step-by-Step Tutorial
Materials
- Small square canvas (e.g., 4×4 or 6×6 inches)
- Small paintbrush (round size 2 or 4)
- Very fine detail brush (liner size 00)
- Red or berry-colored lipstick (cream finish works best, matte is harder to transfer)
- Acrylic paints: sage green, muted pink, terracotta, darker red, white
- Clear acrylic sealant spray (matte or satin finish)
- Paper plate or palette
- Cup of water
- Paper towels
- Pencil (optional)
Step 1: The Kiss Print
-
Prep your canvas:
Ensure your small canvas is clean and dry. If the texture is very rough, you might want to apply a thin layer of white acrylic gesso first to smooth it out, but the raw texture works too. -
Apply the lipstick:
Apply a generous, even layer of your chosen red or berry lipstick to your lips. You want enough product to transfer clearly, but not so much that it smudges excessively. -
Make the mark:
Ideally, practice on a scrap piece of paper first to gauge the pressure needed. Once confident, press your lips firmly against the center of the canvas. Don’t slide! Just press and pull straight back. -
Touch up edges:
If the print is a little patchy, use your fine detail brush and a tiny bit of lipstick (or matching acrylic paint) to gently fill in the gaps while maintaining the natural lip lines. -
Seal the lipstick:
This is crucial: lipstick never fully dries on canvas. Lightly spray the center area with a fixative or clear acrylic sealer and let it dry completely before painting near it to prevent smearing.
Lipstick Longevity
Lipstick contains oils that can degrade canvas over time. For a permanent archival version, paint your lips with body-safe acrylic paint instead of lipstick for the kiss.
Step 2: Painting the Wreath
-
Sketch the layout (optional):
If you are nervous about freehanding, use a pencil to very lightly mark where your main flowers will go around the lips to balance the composition. -
Mix your colors:
On your palette, prepare your floral colors. I like to mix a little white into the pinks and terracotta to give them that soft, muted look shown in the photo. -
Paint main blooms:
Using the small round brush, paint simple five-petal flowers. Place a large terracotta one at the bottom right and smaller pink ones clustered on the left. Keep the paint relatively thin for a watercolor effect. -
Add floating petals:
Paint a few loose heart shapes or single petals floating near the top center to bridge the gap between the two floral sides. -
Paint larger leaves:
Switch to your sage green mix. Paint elongated, simple leaves extending out from the flower clusters. Press down on the brush to widen the leaf and lift up to create a point. -
Add filler greenery:
Using the tip of the brush, add delicate fern-like stems with tiny leaves to fill the empty spaces and create a circular flow around the lips. -
Add flower centers:
Dip the handle end of your brush layout into dark red or brown paint and dot the centers of your flowers for a crisp, finished look. -
Detail work:
With your finest liner brush, add tiny dots or ‘berries’ in white or pale pink around the wreath to add texture and whimsy. -
Final dry:
Let the acrylic paint dry completely, which should take about 20 minutes. -
Final seal:
Apply one last light coat of clear sealant over the entire canvas to protect both the lipstick and the acrylic paint from dust and fading.
Hidden Messages
Hide a tiny painted initial or a significant date within the leaves of the wreath for a secret detail only he will notice.
Wrap this personalized masterpiece in tissue paper for a gift that speaks volumes without saying a word


Have a question or want to share your own experience? I'd love to hear from you in the comments below!