
If you’re making Christmas gifts this year, a small, heartfelt painting can feel like the most personal thing you tuck into a wrapping paper pile. I pulled together my favorite festive, giftable projects that look special without requiring months of studio time.
Watercolor Christmas Cards
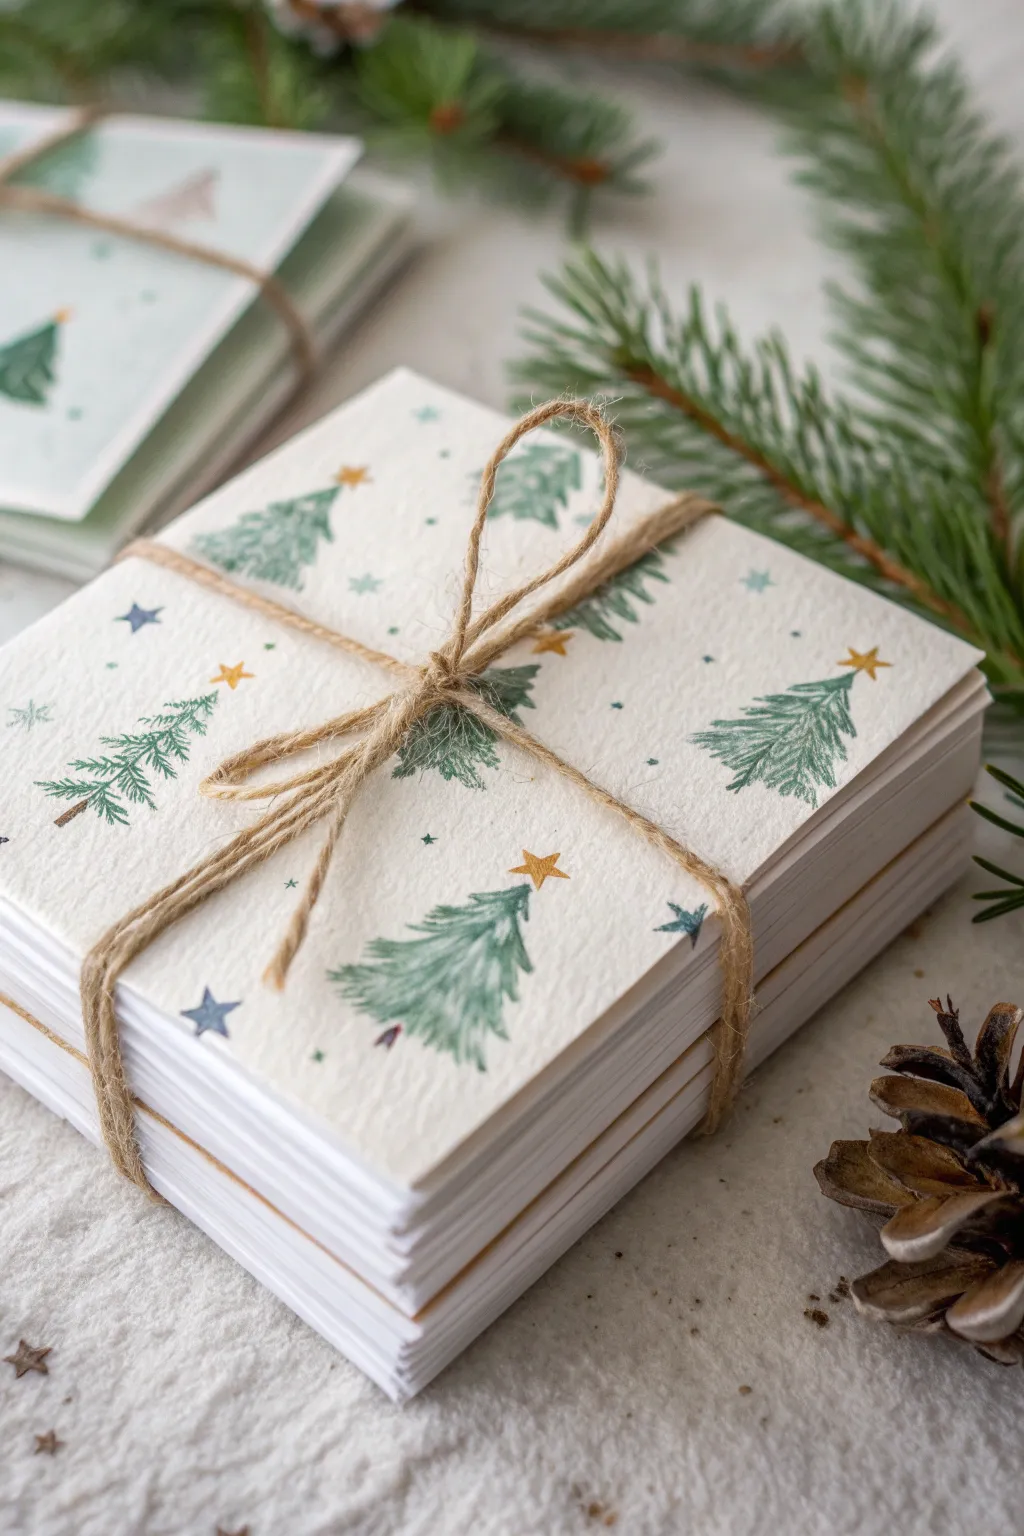
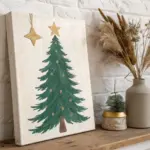
Create a charming set of rustic holiday cards featuring a simple, repeating pattern of evergreen trees and celestial stars. This project relies on loose, expressive brushwork and textured paper to achieve a cozy, handcrafted feel that looks beautiful when stacked and tied with twine.
Step-by-Step Guide
Materials
- Cold press watercolor paper (cut into 4×4 or 5×5 inch squares)
- Watercolor paints (Sap Green, Hooker’s Green, Indigo, Yellow Ochre, Burnt Sienna)
- Round watercolor brush (size 4 or 6)
- Small detail brush (size 0 or 1)
- Pencil and eraser
- Jute twine
- Ruler
- Paper trimmer or scissors
- Clean water and paper towels
Step 1: Preparation & Layout
-
Cut the paper:
Start by measuring and cutting your cold press watercolor paper into uniform squares. A size of 4×4 inches or 5×5 inches works perfectly for these gift enclosures. -
Plan the pattern:
Lightly visualize where your trees will go. You want a scattered, random pattern rather than perfect rows. Imagine triangles floating across the white space. -
Mix your greens:
On your palette, create a few variations of green. Mix Sap Green with a touch of Burnt Sienna for an earthy olive tone, and Hooker’s Green with a tiny drop of Indigo for a deep, shadowy forest color.
Dry Brush Texture
Blot your brush on a paper towel before painting branches. The ‘dry brush’ leaves gaps on the textured paper, looking exactly like pine needles.
Step 2: Painting the Evergreens
-
Paint the tree spine:
Using the size 4 or 6 round brush, paint a very faint, thin vertical line with watered-down green to act as the central spine of your first tree. -
Add top branches:
Starting at the top of the spine, use just the tip of your brush to flick short, downward strokes outward. Keep these strokes very small and narrow at the peak. -
Widen the middle:
As you move down the spine, press a little harder on the brush to create wider branches. Use a mix of your light and dark green puddles here to add natural dimension. -
Finish the bottom branches:
Broaden your strokes at the base of the tree triangle. Leave plenty of white space between the ‘needles’ so the tree doesn’t look like a solid blob. -
Add the trunk:
With your detail brush, pick up a tiny amount of Burnt Sienna (brown). Paint a small, simple dash at the very bottom center of the greenery for a trunk. -
Repeat the process:
Move across the paper, painting trees at different angles and varying heights. I like to let some trees run off the edge of the paper to make the pattern feel continuous. -
Vary the saturation:
Make some trees dense with pigment and others more watered down and translucent. This creates visual depth, as if some trees are further away in a snowy forest.
Metallics Level-Up
Swap the yellow ochre paint for gold watercolor or ink. When the light hits the card stack, the stars and tree-toppers will shimmer elegantly.
Step 3: Celestial Details
-
Paint golden stars:
Once the trees are mostly dry, load your small detail brush with Yellow Ochre. Paint small five-point stars or simple asterisks in the larger gaps between trees. -
Add blue stars:
Rinse your brush and switch to a diluted Indigo or blue-grey. Paint a few additional small stars or diamond shapes to cool down the color palette. -
Sprinkle distinct dots:
Using the tip of the small brush, add tiny dots of green or blue around the trees to represent falling snow or distant magic, filling empty voids without cluttering the design. -
Top the trees:
On a few select trees, paint a small gold star right on the very tip top to turn them into decorated Christmas trees.
Step 4: Artist’s Assembly
-
Complete the set:
Repeat the painting process for as many cards as you wish to gift. A set of 6 or 8 makes for a substantial bundle. -
Allow to dry fully:
Ensure the cards are completely bone-dry. If the paper has buckled slightly, place them under a heavy book overnight to flatten them out. -
Stack the cards:
Gather your finished cards into a neat pile, embracing the raw edges of the watercolor paper. -
Measure the twine:
Cut a long length of jute twine, approximately 24 inches, to ensure you have enough for wrapping and bowing. -
Wrap and tie:
Place the stack in the center of the twine. Wrap the string around the bundle cross-wise (like a present), pull tight, and finish with a simple bow on top.
Share this handmade bundle with a friend or use individual cards to elevate your gift wrapping this season


Classic Christmas Wreath Painting
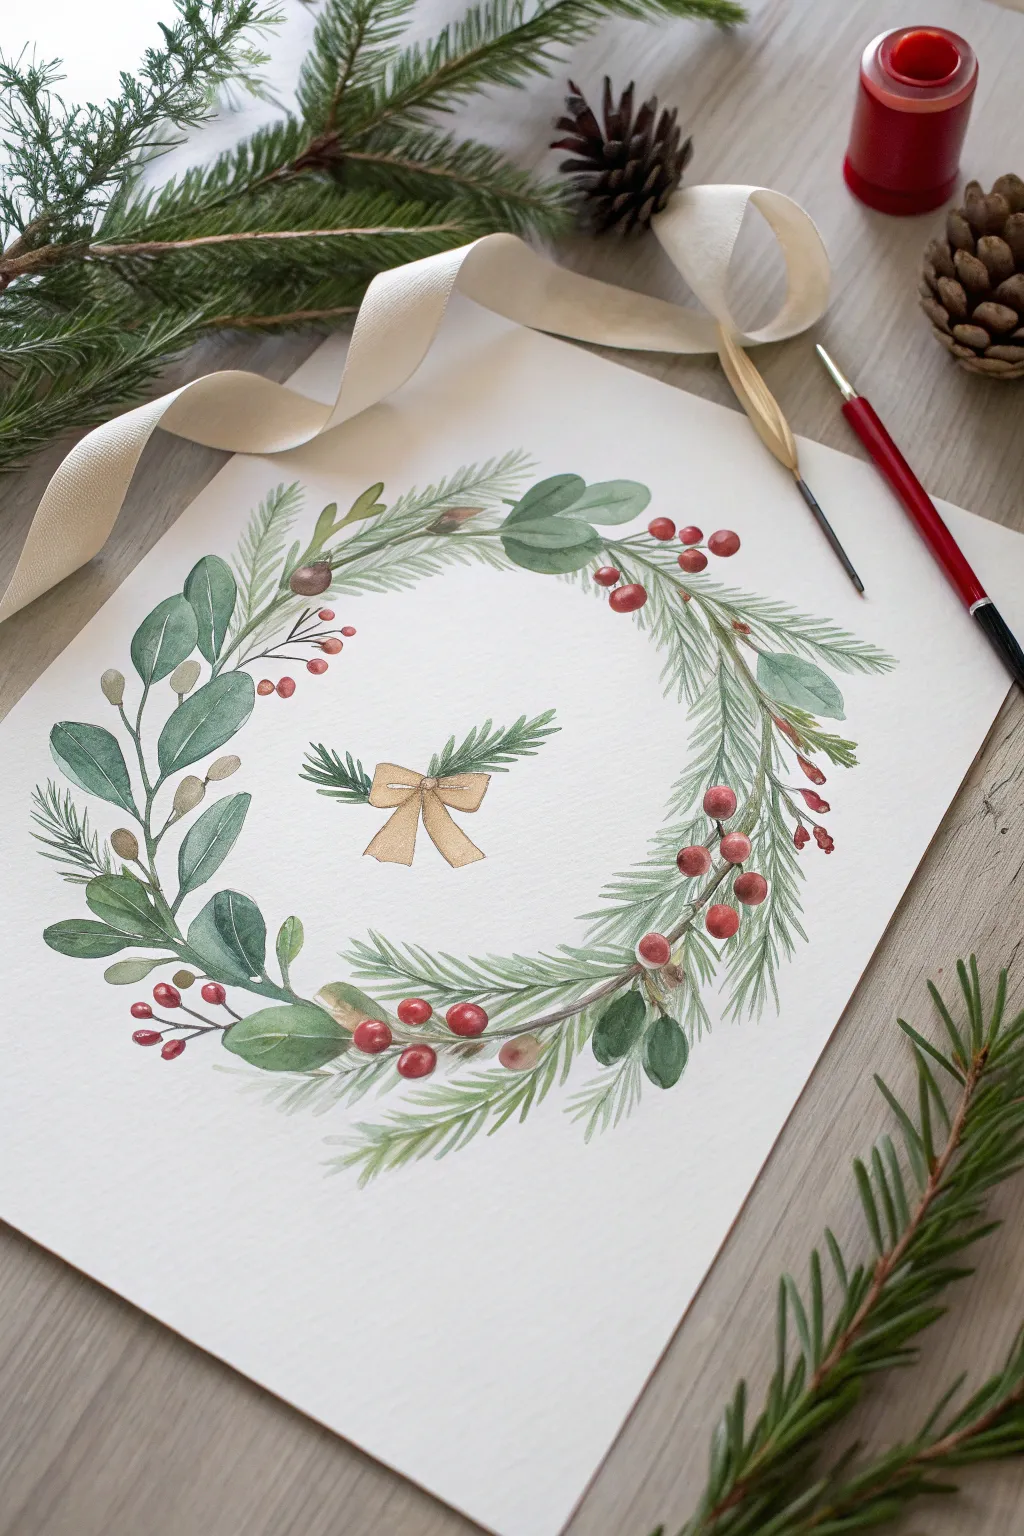
Capture the delicate beauty of the season with this elegant watercolor wreath tutorial featuring eucalyptus leaves, pine needles, and bright red berries. The soft, botanical style makes for a thoughtful, handmade holiday card or a framed gift for a loved one.
Detailed Instructions
Materials
- Cold press watercolor paper (A4 or similar)
- Watercolor paints (Sap Green, Hooker’s Green, Alizarin Crimson, Burnt Sienna, Payne’s Gray, Yellow Ochre)
- Round brushes (flats sizes 2, 4, and 6)
- HB pencil for sketching
- Kneaded eraser
- Circular object or compass for tracing
- Two jars of water
- Paper towels
Step 1: Sketching the Foundation
-
Draw the guide circle:
Start by lightly tracing a circle on your paper using a bowl or compass. This will be the spine of your wreath. Keep your pencil pressure very light so the graphite doesn’t show through the transparent watercolor later. -
Sketch the main branches:
Lightly sketch the flow of the main stems along the circle. Instead of a perfect line, let the stems weave in and out slightly to look organic. -
Placement of major leaves:
Roughly mark where the larger, broad leaves will go, clustering them more heavily on the left side of the wreath. -
Center detail sketch:
In the exact center of the wreath negative space, lightly sketch a small bow with two springs of pine coming out from behind it.
Step 2: Painting the Greenery
-
Mix your eucalyptus green:
Create a cool, muted green for the broad leaves. I like to mix Hooker’s Green with a touch of Payne’s Gray and a tiny bit of Burnt Sienna to de-saturate it. -
Paint the first layer of leaves:
Using a size 6 brush, paint the broad, rounded leaves on the left side. Use the wet-on-dry technique, letting the water pool slightly at the base of the leaves for natural variation. -
Vary the values:
While the leaves are still wet, drop a slightly darker mix of green into the shadows where leaves overlap to create depth. -
Mix your pine green:
For the pine needles, mix a warmer, fresher green using Sap Green and a touch of Yellow Ochre. -
Paint the pine needles:
Switch to your size 2 brush. Using quick, flicking strokes, paint the pine branches, particularly focusing on the right side of the wreath. Ensure the strokes follow the direction of growth along your circular guide. -
Layering the pine:
Once the first layer of pine needles is dry, go back in with a slightly darker green mixture to add density and volume, painting new needles between the lighter ones.
Natural Variation
Don’t use the exact same green for every leaf. Vary the water-to-paint ratio constantly to create a lively mix of translucent and opaque foliage.
Step 3: Berries and Details
-
Adding red berries:
Mix a vibrant Alizarin Crimson. With your size 4 brush, paint small clusters of round berries scattered throughout the wreath. Leave a tiny speck of white paper on each berry to represent a highlight. -
Connecting the berries:
Use a very fine brush (size 0 or 2) and a brown mix (Burnt Sienna with a touch of green) to paint thin delicate stems connecting the berry clusters to the main branch. -
Painting the center bow:
Mix a watery wash of Yellow Ochre with a tiny hint of brown. Paint the bow in the center, keeping the edges crisp. Let it dry, then add a darker glaze to the folds for dimension. -
Center sprigs:
Paint the two small pine sprigs emerging from behind the bow using the same technique as the main wreath, keeping them small and delicate. -
Final stem details:
Go around the wreath and strengthen the main brown stems where they are visible between leaves, ensuring everything looks connected. -
Cleanup:
Once the painting is completely bone dry, gently erase any visible pencil lines with your kneaded eraser.
Muddy Colors?
If your greens look muddy, you might be overworking them while wet. Let layers dry completely before glazing over them to keep colors fresh and crisp.
Now frame your beautiful botanical wreath or scan it to create custom holiday greeting cards for friends and family


Poinsettia Gift Painting
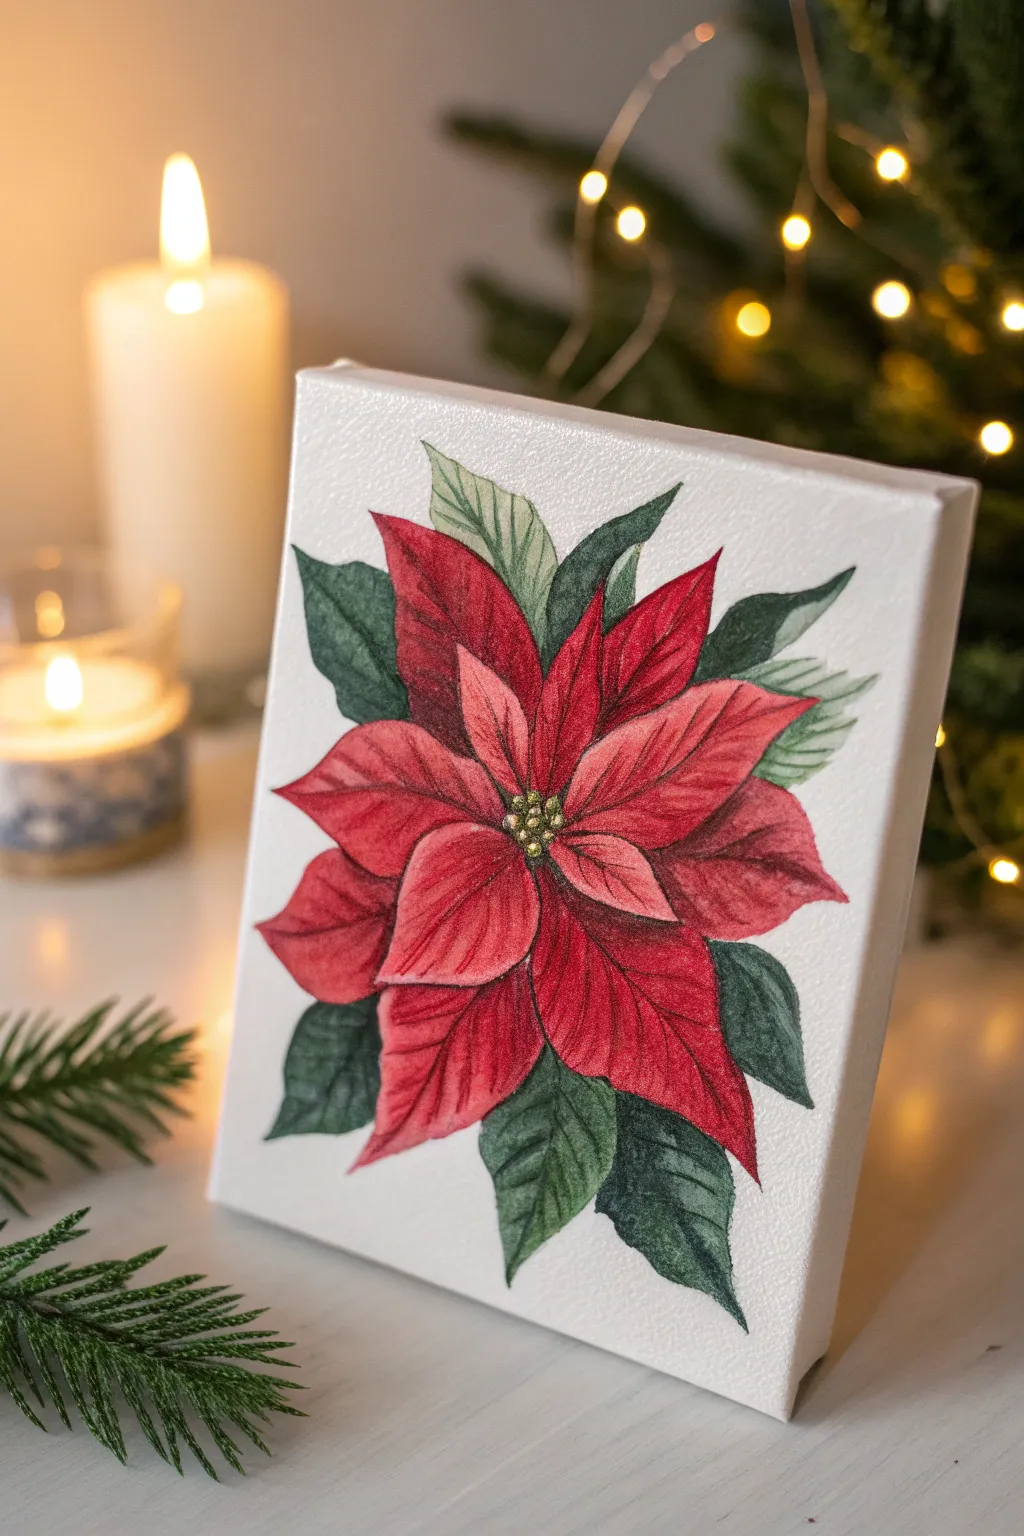
Capture the essence of the season with this vibrant poinsettia study, painted on a small canvas for the perfect thoughtful holiday gift. The high-contrast red petals and deep green foliage pop beautifully against the stark white background, creating an elegant and classic look.
How-To Guide
Materials
- Small square canvas (6×6 or 8×8 inches)
- Acrylic paints (primary red, deep red/alizarin crimson, sap green, viridian green, titanium white, yellow ochre, metallic gold)
- Round synthetic brushes (sizes 2, 4, and 6)
- Fine liner brush (size 0 or 00)
- Pencil and eraser
- Palette for mixing
- Paper towels
- Cup of water
Step 1: Sketching the Bloom
-
Center placement:
Begin by lightly sketching a small cluster of circles in the very center of your canvas. This will be the cyathia (the yellow center buds) of your poinsettia. -
Primary bracts:
Around the center cluster, sketch the first layer of red leaves (bracts). These should be smaller and somewhat pointed, radiating outward like a star. -
Secondary layers:
Draw the larger, wider red bracts behind the first layer. Ensure they overlap naturally, filling in the gaps between the smaller front leaves to create a full bloom. -
Foliage foundation:
Sketch the green leaves peeking out from behind the red flower head. These should be larger and slightly more jagged or textured at the edges compared to the red petals.
Muddy Reds?
If your red shadows look brown or dirty, ensure you are letting the base layer dry fully. Don’t mix complementary colors (red/green) directly on the canvas; mix on the palette first.
Step 2: Painting the Bracts
-
Base red layer:
Mix a bright primary red with a tiny touch of water to improve flow. Paint all the red bracts with a flat, even coat. Don’t worry about shading yet; just get a solid color down. -
Defining shadows:
Once the base is dry, mix your deep red or alizarin crimson with a tiny bit of leafy green to darken it without making it muddy. Paint this dark shadow color into the center of the flower and along the veins of the petals. -
Feathering the shadows:
While the shadow paint is still slightly wet, use a clean, damp brush to feather the edges of the dark lines outward, softening the transition into the bright red base. -
Adding highlights:
Mix primary red with a touch of tangerine or white. Apply this lighter shade to the tips and outer edges of the overlapping petals to separate them visually from the layers beneath. -
Deepening contrast:
I find that going back in with your darkest red mix right where the petals meet the center adds incredible depth. Use your smallest brush for these tiny crevices.
Step 3: Lush Greenery
-
Base green coat:
Mix sap green with a little white to create a mid-tone green. Paint the surrounding leaves with this shade. -
Leaf texture:
Using pure viridian or a dark forest green, paint the central veins of the leaves. Poinsettia leaves have distinct texture, so use short, outward strokes from the central vein to mimic this. -
Fading edges:
For the lighter green leaves near the top, mix a very pale green wash. Apply this gently, letting the white canvas show through slightly for a translucent effect. -
Shadowing foliage:
Tuck deep green shadows underneath the red petals where they rest on the leaves. This makes the red flower appear to pop forward off the canvas.
Festive Sparkle
Mix a tiny amount of iridescent medium or fine glitter into your final red glaze layer. It gives the petals a subtle, frosty shimmer when it catches the candlelight.
Step 4: Final Details
-
The golden center:
Paint the small center circles with yellow ochre. Let them dry completely. -
Metallic accents:
Dot the very tops of the yellow centers with metallic gold paint or a gold paint pen for a festive shimmer. -
Crisp white edges:
If any paint smudged onto the background, take pure titanium white and carefully clean up the negative space around the flower to ensure a sharp, clean silhouette. -
Detail lining:
Use your finest liner brush with watered-down dark red or black to add very subtle, thin definition lines to the very tips of the petals if they look too soft.
Wrap this lovely canvas in brown paper and twine for a rustic, handmade holiday presentation


Holly and Berries Botanical Study
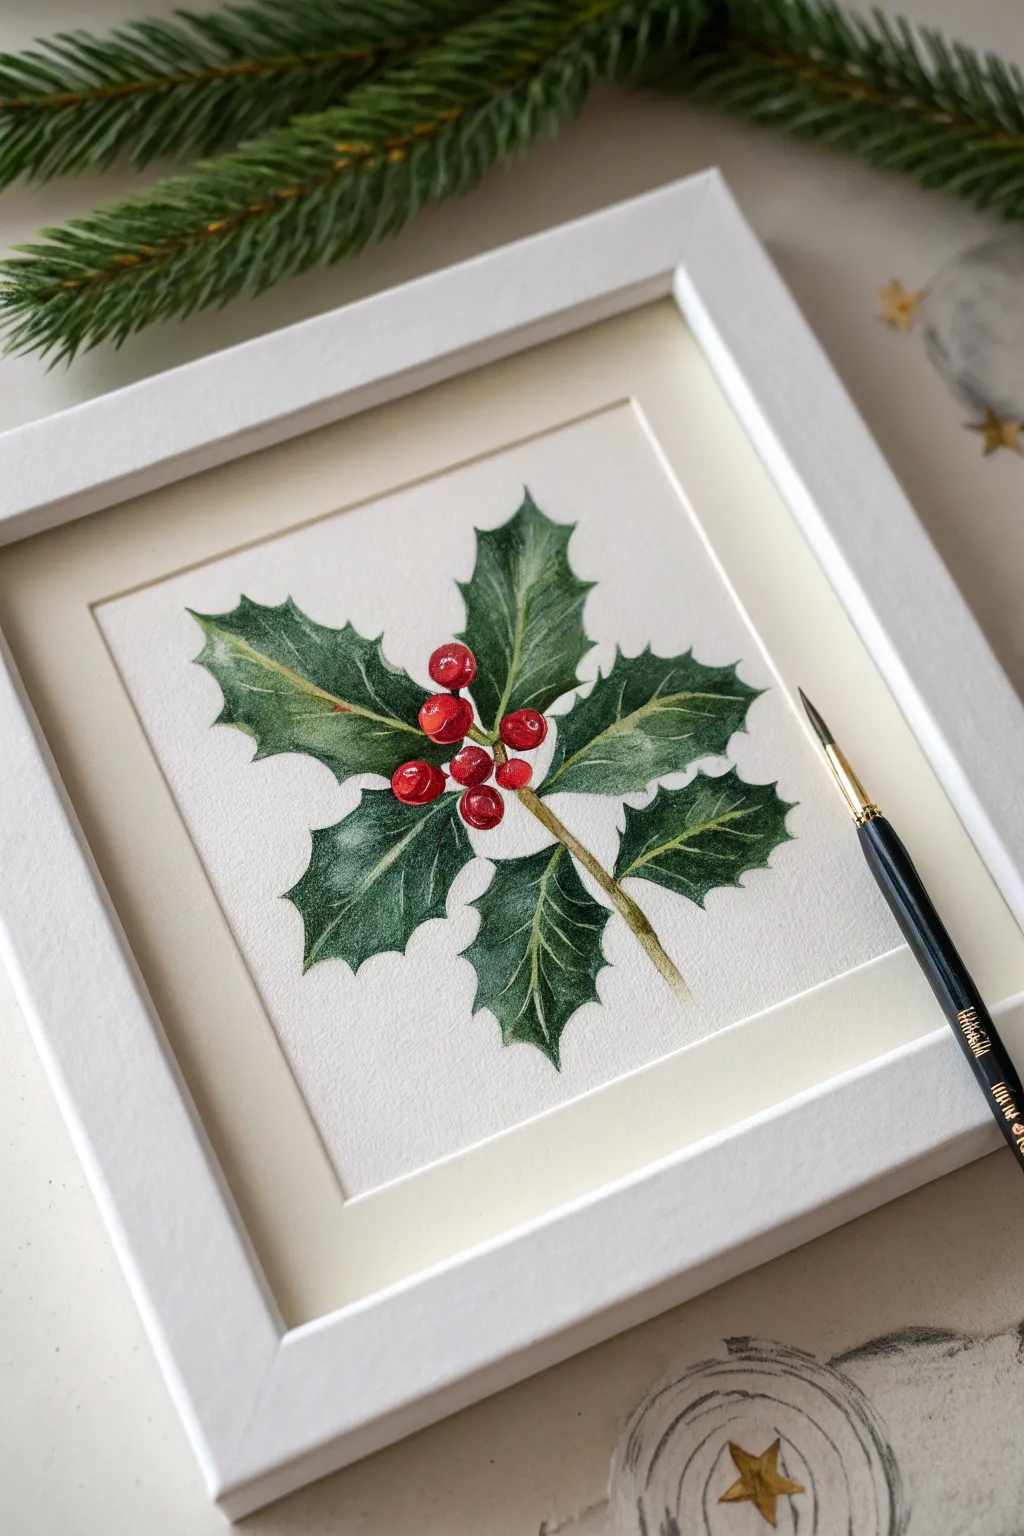
Capture the classic symbol of winter with this detailed botanical study of holly leaves and bright red berries. The contrasting textures of the glossy leaves and the round, lustrous fruit make for a striking piece that looks beautiful framed in white.
Detailed Instructions
Materials
- Hot press watercolor paper (300 gsm)
- Watercolor paints (Sap Green, Hooker’s Green, Indigo, Alizarin Crimson, Cadmium Red, Burnt Umber)
- Round sable brushes (sizes 2, 4, and 0 for details)
- H or HB pencil
- Kneaded eraser
- White gouache or a white gel pen
- Two jars of water
- Paper towels
Step 1: Sketching the Composition
-
Map the center:
Begin by lightly marking the center of your paper. Draw a very faint vertical line and a horizontal one to create a subtle crosshair; this helps center the cluster of berries which acts as the focal point. -
Outline the berries:
Sketch a cluster of about six or seven small circles in the center. Vary the sizes slightly and overlap a few of them to create a sense of depth rather than having them all sit flat on the page. -
Draw the main stems:
Extend a main woody stem downwards from the berry cluster. Then, draw shorter stems radiating outwards to support the leaves. Keep the lines slightly jagged to mimic natural wood textures. -
Sketch the leaf shapes:
Draw the outlines of five to six leaves surrounding the berries. Holly leaves have distinct curves with sharp, spiky points. Pay attention to how the leaves curve and twist—some should facing more forward, while others might turn away. -
Refine the sketch:
Add the central vein line down the middle of each leaf. Use your kneaded eraser to gently lift the graphite until the sketch is barely visible, ensuring your pencil lines won’t show through the transparent watercolor later.
Wet-on-Dry for Control
For the crisp, sharp edges of holly leaves, use a wet-on-dry technique. Let previous layers dry completely before painting adjacent sections to prevent unwanted blooming.
Step 2: Painting the Berries
-
First berry wash:
Mix a watery wash of Cadmium Red. Paint each berry carefully, but leave a small, unpainted white oval on the upper left side of each one to represent the highlight. This is crucial for making them look shiny. -
Deepen the shadows:
While the first layer is still slightly damp, drop in a thicker mix of Alizarin Crimson mixed with a tiny touch of Indigo on the bottom right side of each berry. This creates the shadow side. -
Smooth the transition:
Clean your brush, dry it slightly, and gently blend the dark shadow into the lighter red middle tone. Be careful not to paint over your preserved white highlight. -
Cast shadows:
Where one berry sits behind another, paint a darker shadow using the Alizarin mixture to define the separation.
Level Up: Festive Sparkle
Mix a tiny amount of iridescent medium into your final glaze over the berries, or add fine gold ink details to the leaf veins for a magical, holiday card feel.
Step 3: Painting the Leaves
-
Base green layer:
Mix Sap Green with plenty of water. Paint the entire leaf surface, avoiding the central vein. I like to work one leaf at a time to control the drying. -
Building leaf structure:
While the leaf is wet, drop in a darker mix of Hooker’s Green along the central vein and near the base of the leaf. Let these colors bleed softly outward. -
Defining the edges:
Once the base layer is dry, mix a dark shadow green using Hooker’s Green and Indigo. Use your size 2 brush to paint the ‘valleys’ of the leaves—the areas between the veins that dip down. -
Highlighting the spines:
Leave the areas near the spiky edges slightly lighter. If your paint gets too dark, lift a little pigment out with a clean, damp brush or thirst brush. -
Adding texture:
Use the size 0 brush with your darkest green mixture to paint fine, short strokes radiating from the center vein, mimicking the texture of the waxy leaf surface.
Step 4: Refining Details
-
Painting the stem:
Paint the woody stem with a mix of Burnt Umber and a touch of Sap Green. Add a darker brown on the underside of the stem for shadow. -
Vein details:
If you accidentally painted over the central veins, use a very fine brush with a pale yellow-green (Sap Green + Yellow) to restate them, or use a opaque gel pen if needed. -
Sharp points:
Use your smallest brush to ensure the tips of the holly leaves are sharp and defined. A crisp point makes the holly look realistic. -
Enhancing shine:
Assess the berry highlights. If the white paper wasn’t preserved perfectly, add a tiny dot of white gouache to the brightest point of each berry for that pop of gloss. -
Final assessment:
Step back and look at the contrast. Deepen the darkest shadows under the leaves where they meet the berries to make the red fruit really stand out against the dark foliage.
Frame this piece in a simple square frame to create a timeless holiday decoration or a thoughtful handmade gift.
BRUSH GUIDE
The Right Brush for Every Stroke
From clean lines to bold texture — master brush choice, stroke control, and essential techniques.
Explore the Full Guide
Snowflake on a Dark Background
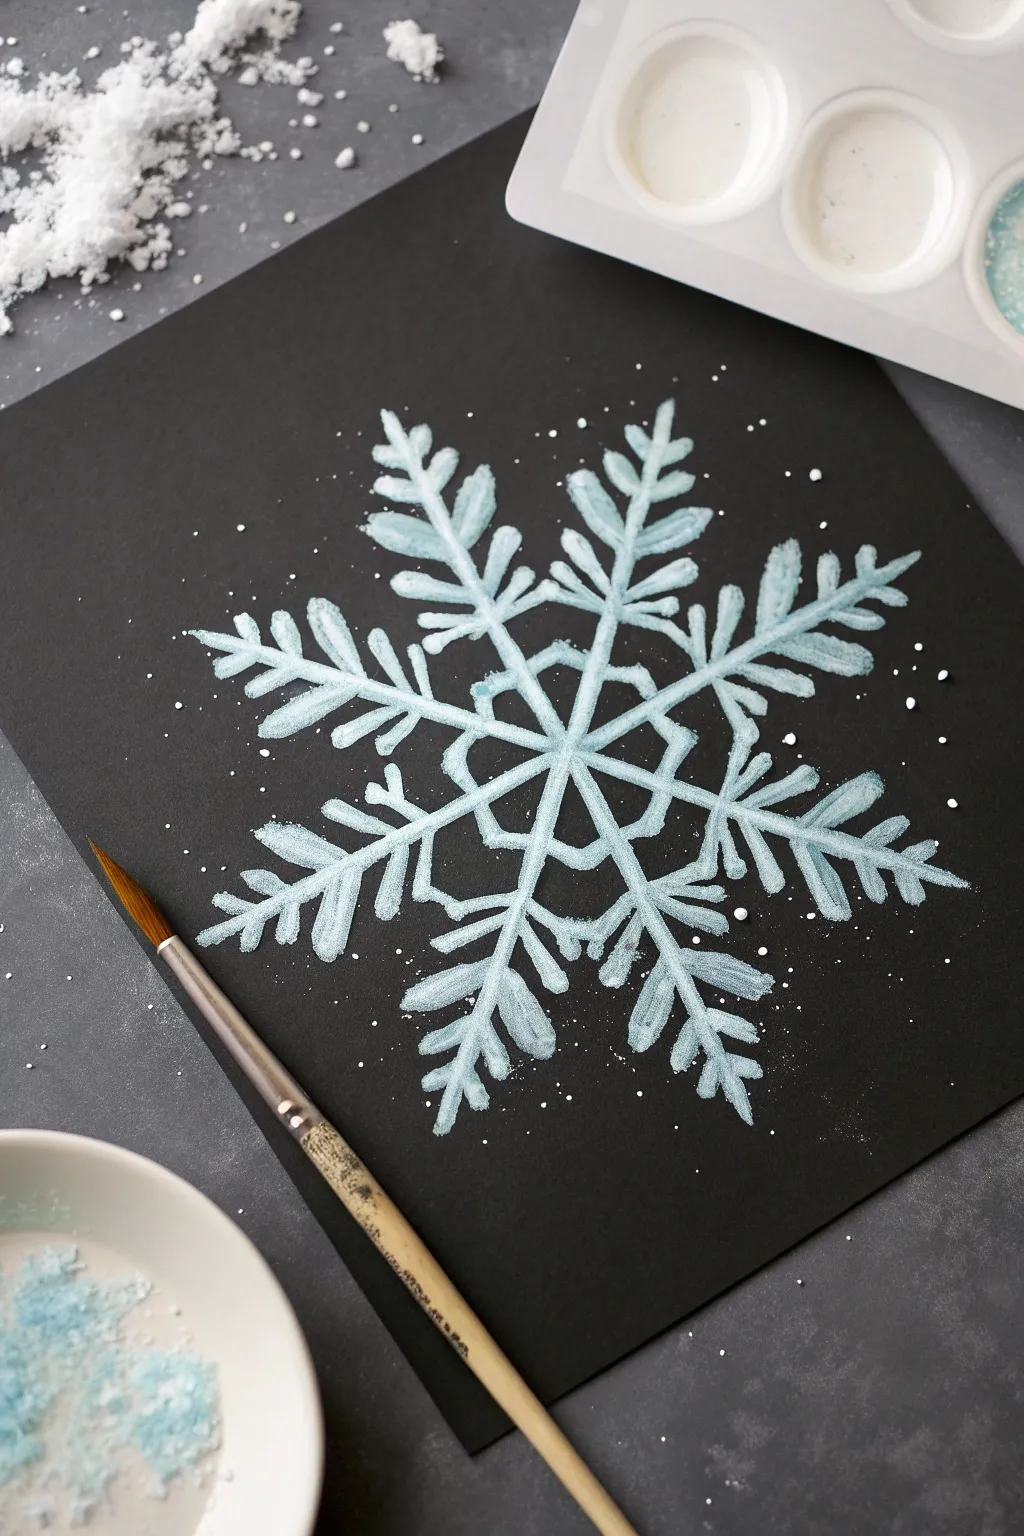
Capture the delicate beauty of winter with this striking snowflake art project that pops against a dark background. Using a salt-resist or salt-texture technique, you’ll create an icy, crystallized effect that gives the snowflake a magical, frozen appearance.
Step-by-Step Tutorial
Materials
- Heavyweight black cardstock or watercolor paper
- White liquid watercolor paint or white acrylic ink
- Light blue liquid watercolor or transparent acrylic wash (optional)
- Table salt or coarse sea salt
- Round paintbrush (size 4 or 6)
- White or metallic silver gel pen (optional for details)
- Pencil and ruler
- Palette for mixing paint
- Paper plate or tray to catch salt
Step 1: Preparation and Sketching
-
Prepare your workspace:
Lay down a protective covering on your table, as salt art can get a little messy. Have your black paper ready and place it on a flat surface. -
Mark the center:
Using a ruler and a very light pencil touch, find the exact center of your paper. Make a tiny dot to guide your snowflake’s symmetry. -
Draw guide lines:
Sketch three intersecting lines through the center point to create a six-pointed star shape. Visualize a clock face and draw lines connecting 12 to 6, 2 to 8, and 4 to 10. -
Form the hexagon:
Near the center point, lightly sketch a small hexagon connecting your six radial lines. This creates the structural core of the snowflake. -
Draft the arms:
Lightly sketch the fern-like branches extending from the six main arms. Keep your pencil lines extremely faint so they won’t show through the translucent paint later.
Step 2: Painting the Structure
-
Mix your frosty color:
On your palette, pour out white liquid watercolor or acrylic ink. If you want that icy blue tint seen in the example, mix a tiny drop of cyan or light blue into the white base. -
Test consistency:
The paint needs to be wet enough to hold salt but thick enough to show up opaque on black paper. Test a stroke on a scrap piece of black paper first. -
Paint the center star:
Dip your round brush into the paint mixture. Start by painting the central hexagon and the inner connecting spokes with confident, fluid strokes. -
Extend the main arms:
Paint the six long lines radiating outward from the center. Keep the brush loaded with paint so the lines are juicy and wet. -
Add the branches:
Working quickly before the paint dries, add the V-shaped branches (feathers) coming off each main arm. I find it easiest to paint all the left-side branches first, then the right side. -
Refine the shape:
Go back over any areas that look too thin or dry. The paint must be glistening wet for the next step to work properly.
Salty Science
Use coarse sea salt for larger, chunkier crystal bursts and regular table salt for a finer, frosty rim. Mixing both creates varied texture.
Step 3: Creating the Crystal Effect
-
Sprinkle the magic:
While the paint is still very wet, take a pinch of salt and sprinkle it generously over the painted snowflake branches. -
Apply strategically:
Focus the salt concentration on the thicker parts of the snowflake arms where the paint is pooled heaviest. -
Add background splatter:
Dip your brush in clean water or very diluted white paint. Tap the handle against your finger to flick tiny droplets of ‘snow’ onto the surrounding black background. -
Add salt to background:
Sprinkle a few rogue grains of salt onto the wet splatter dots to create mini frozen stars in the background. -
Let it dry completely:
This is the hardest part—patience! Let the artwork sit undisturbed until the paint is bone dry. The salt needs time to absorb the moisture and create the texture. -
Remove excess salt:
Once fully dry, gently brush off the loose salt over a trash can or sink. Some salt will remain stuck in the paint, which gives it that beautiful sparkling texture. -
Enhance details:
If any lines look disconnected after removing the salt, use a fine tip brush or a white gel pen to bridge the gaps or sharpen the tips of the snowflake arms. -
Final touches:
Add a few distinct white dots with a gel pen or thick white paint around the snowflake to enhance the snowy atmosphere.
Sparkle Boost
Before sprinkling the salt, mix a tiny amount of iridescent glitter into your salt pile. When the paint dries, your snowflake will shimmer.
Frame this sparkling creation under glass to protect the textured surface and gift a piece of winter wonder.
Mini Snowy Pine Landscape
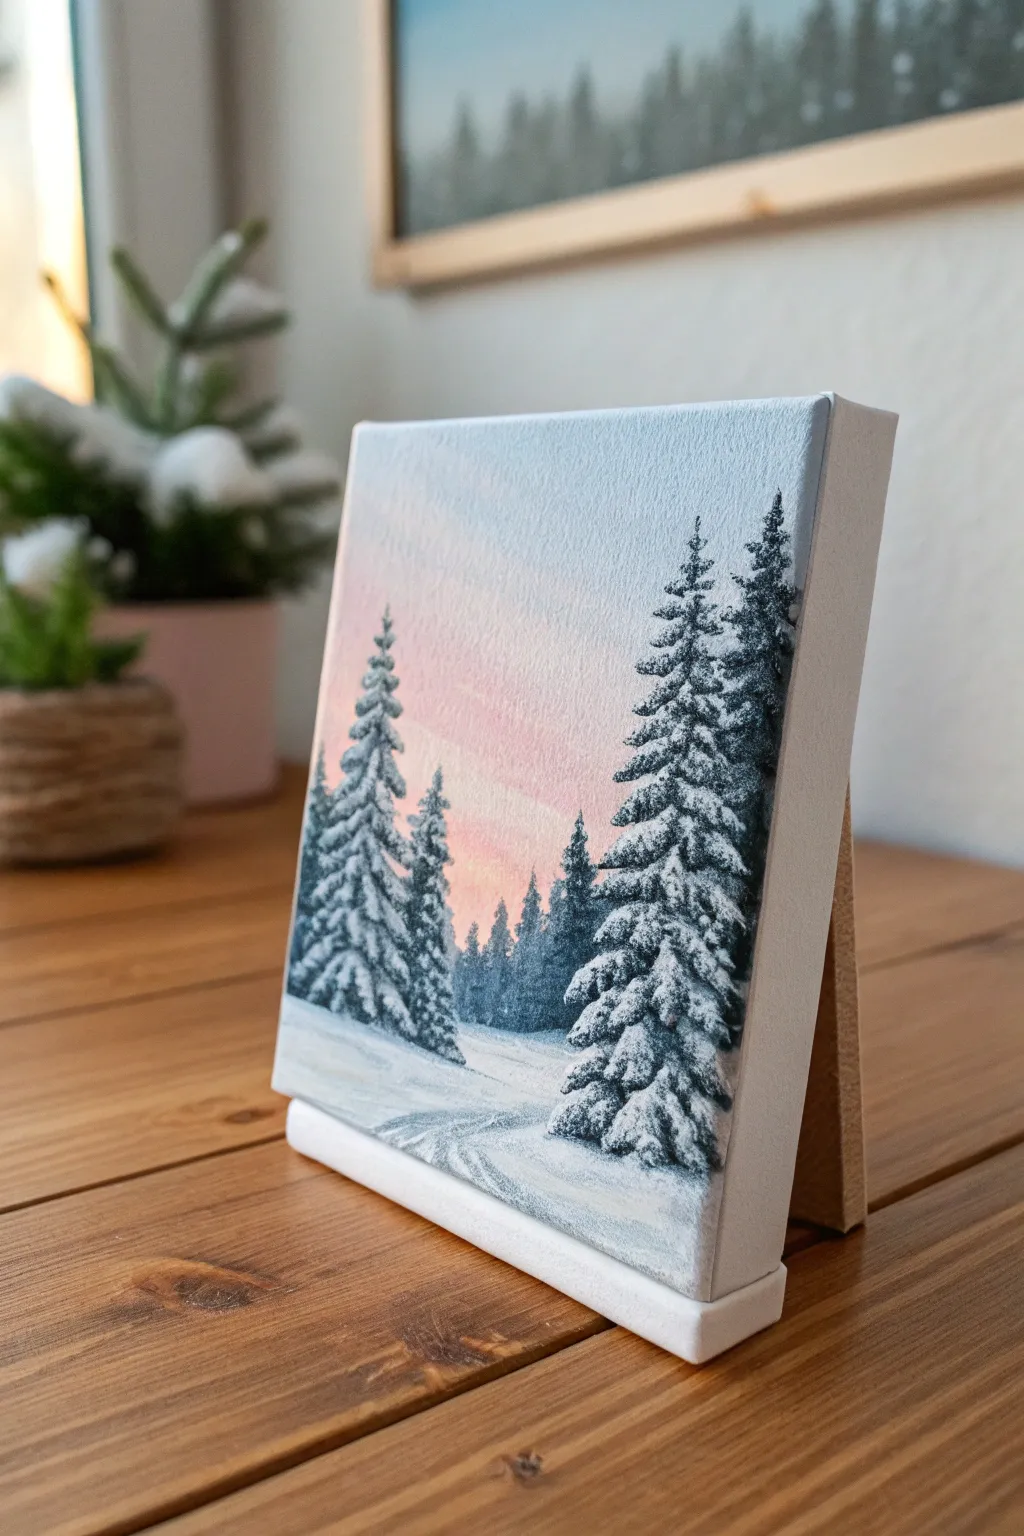
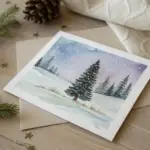
Capture the serene beauty of a snowy forest at dusk on a charming miniature scale. This project uses soft blending techniques to create a glowing pastel sky that contrasts beautifully with crisp, snow-laden evergreen trees.
Step-by-Step Guide
Materials
- Miniature stretched canvas (4×4 or 5×5 inch)
- Acrylic paints (Titanium White, Phthalo Blue, Alizarin Crimson, Burnt Umber, Mars Black)
- Small tabletop easel (optional for display)
- Flat brush (1/2 inch)
- Small angle brush
- Fine liner brush (size 0 or 00)
- Fan brush (small, optional)
- Palette and water cup
- Paper towels
Step 1: Setting the Sky
-
Prime the canvas:
If your mini canvas isn’t pre-primed, apply a thin coat of gesso. Even on pre-primed canvases, a quick coat of white paint helps the subsequent colors glide more smoothly. -
Mix the sky blue:
Take a generous amount of Titanium White and add the tiniest speck of Phthalo Blue. You want a very pale, icy blue. Apply this to the top third of the canvas using your flat brush, brushing horizontally. -
Create the pink horizon:
Wipe your brush clean. Mix Titanium White with a very small touch of Alizarin Crimson to make a soft baby pink. Apply this to the middle third of the canvas, blending upwards into the wet blue paint to create a seamless, purple-hued transition. -
Ground the painting:
For the bottom third, use pure Titanium White. Blend this slightly into the bottom of the pink section so the horizon line looks soft and distant rather than sharp. -
Add diagonal movement:
While the sky is still tacky, use a dry, soft brush to gently sweep diagonally across the sky from top-right to bottom-left. This mimics soft cloud streaks and movement.
Muddy Snow?
If your white snow highlights turn green, stop! It means the underlayer is wet. Let it dry fully, or use a hair dryer, then re-apply thick white paint.
Step 2: Painting the Forest
-
Mix a dark green:
Combine Phthalo Blue, a touch of Mars Black, and a little Burnt Umber. You want a very deep, almost black-green color for the base of the trees. -
Establish the background trees:
Using a small flat brush, tap in a row of distant trees along the horizon line. Keep these shapes vague and slightly paler by mixing in a little sky color; atmospheric perspective makes distant objects lighter. -
Blocking the main trees:
Switch to your angle brush or liner brush. Paint vertical lines to mark the trunks of your main foreground trees—one large one on the right, and two smaller ones on the left. -
Adding pine branches:
Dip your angle brush into the dark green mix. Starting from the top of the trunk, use a tapping motion to create branches that flare downwards. Keep the top narrow and widen the tree as you move down. -
Let it cure:
Allow the dark green layer to dry completely. If you add the snow highlights too soon, they will turn muddy and grey.
Sparkle Finish
Once the painting is 100% dry, brush a thin layer of iridescent glitter glaze over the snowy parts to make the landscape glisten under Christmas lights.
Step 3: The Snowy Details
-
Highlight mix:
Squeeze out fresh Titanium White. You can use it pure or mix it with a tiny hint of the sky blue for shadowed snow areas. -
Snow on branches:
Load a small round brush with thick white paint. Gently ‘clump’ the paint onto the top edges of your dried dark pine branches. I find a stippling motion works best here to build texture. -
Layering the snow:
Focus the brightest white on the tips of the branches that would catch the most light. Leave the dark green visible underneath and in the recesses to maintain depth. -
Foreground snow:
Refine the snowy ground at the bottom. Use clean white paint to sweep horizontal strokes across the bottom, slightly covering the base of the tree trunks to look like drifts. -
Adding tracks:
Mix a very pale blue-grey (white plus a dot of your dark tree mix). Use a fine liner brush to paint winding tracks or subtle shadows in the snow, leading the eye into the forest. -
Final touches:
Take a step back. Add a few tiny dots of white on the background trees to suggest light snowfall, and ensure your canvas edges are painted for a finished look.
Place your mini masterpiece on its easel and wrap it up for a thoughtful, handmade holiday surprise

PENCIL GUIDE
Understanding Pencil Grades from H to B
From first sketch to finished drawing — learn pencil grades, line control, and shading techniques.
Explore the Full Guide
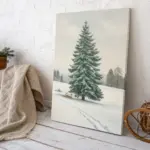
Simple Christmas Tree Forest

Bring the quiet beauty of a winter forest indoors with this charming set of three hand-painted canvases. Each miniature painting features a unique evergreen tree style, creating a cohesive yet varied display perfect for mantels or shelves.
How-To Guide
Materials
- Three small stretched canvases (e.g., 5×7 or 6×8 inches)
- Acrylic paints: Sap Green, Hooker’s Green, Phthalo Green, Burnt Umber, White, Yellow Ochre
- Flat shader brush (size 6 or 8)
- Small round brush (size 2)
- Fan brush (optional, for texture)
- Palette or paper plate
- Cup of water and paper towels
Step 1: Preparation and Base Colors
-
Set up your workspace:
Lay out your three canvases side-by-side. This helps you visualize them as a set while you work, ensuring the trees are centered and sized proportionally to one another. -
Prepare your greens:
Squeeze out your various green paints onto the palette. Create a few mixes: a dark shadow green (Hooker’s Green + touch of Burnt Umber), a mid-tone true green (Sap Green), and a highlight mix (Sap Green + Yellow Ochre or White). Having these ready prevents stopping mid-stroke. -
Mark the centers:
Using a very light pencil mark or just a dab of thinned paint, mark the top peak and bottom trunk location for each tree on the canvases. This ensures your trees stand straight and stay centered.
Step 2: Painting Tree One: The Slender Pine
-
Paint the trunk line:
On the first canvas, use your small round brush and Burnt Umber to paint a thin vertical line for the trunk. Don’t make it too solid; let it fade near the top. -
Start the top branches:
Using the flat brush turned on its chisel edge, load it with your mid-tone green. Start at the very top peak and dab downward in short, angled strokes that flare out slightly. -
Build the silhouette:
Continue working down the tree, making your strokes longer and wider as you descend. For this tree, keep the branches sweeping slightly upward and the overall shape narrow and tall. -
Add depth:
While the paint is tacky, mix a little dark green and add strokes underneath the main branches to create shadows. This gives the tree volume.
Brushwork Tip
Keep your wrist loose! Stiff hands make stiff trees. Hold the brush further back on the handle to encourage more natural, organic branch shapes.
Step 3: Painting Tree Two: The Textured Fir
-
Create a rough guide:
For the middle canvas, sketch a faint triangle shape with your brush to guide the fuller shape of this tree. -
Dab for texture:
Load your brush—or a fan brush if you have one—with a mix of Phthalo Green and White for a cooler, frostier tone. Instead of long strokes, use a stippling or dabbing motion. -
Layer the foliage:
Work from the top down, layering these dabs over each other. I like to leave small gaps of white canvas showing through here and there to mimic snow or light passing through branches. -
Define the edges:
Use the edge of your brush to tap uneven, jagged edges along the silhouette so the tree doesn’t look too perfectly triangular. -
Ground the tree:
Add a small, rectangular trunk at the bottom with Burnt Umber, keeping it short and sturdy.
Make It Snow
Mix white paint with a tiny drop of water. Load an old toothbrush and flick it over the dry paintings to create a fine mist of falling snow.
Step 4: Painting Tree Three: The Sweeping Spruce
-
Plan the swoops:
For the third canvas, you’ll be creating long, sweeping branches that curve downward like a heavy spruce. Start with a strong central trunk line in brown. -
Paint the main branches:
Using a loaded flat brush and dark green, start at the trunk and pull the paint outward and downward in curved “smile” shapes. -
Layer lighter tones:
Mix a lighter olive green (Sap Green + Yellow Ochre). On top of your dark swoops, add shorter highlighting strokes that follow the same curve. -
Add golden highlights:
For a bit of warmth, mix a tiny amount of plain Yellow Ochre into your brush without cleaning it fully. Apply very sparing highlights to the tips of the branches where ‘sunlight’ would hit. -
Finish the trunk:
Paint a slightly wider trunk base at the bottom, blending a little dark green into the brown where the lowest branches meet the wood.
Step 5: Final Touches
-
Evaluate the set:
Step back and look at all three canvases together. Check if one tree looks too faint or too bold compared to the others. -
Refine details:
Use your small round brush to add tiny defining twigs or extra dark shadows deep in the center of the trees if they feel flat. -
Seal the work:
Once fully dry (give it at least an hour), you can apply a light coat of matte varnish to protect the paint, though this is optional for seasonal decor.
Arrange your mini forest on a shelf and enjoy the handmade woodland vibe they add to your holiday home
Cute Snowman Portrait
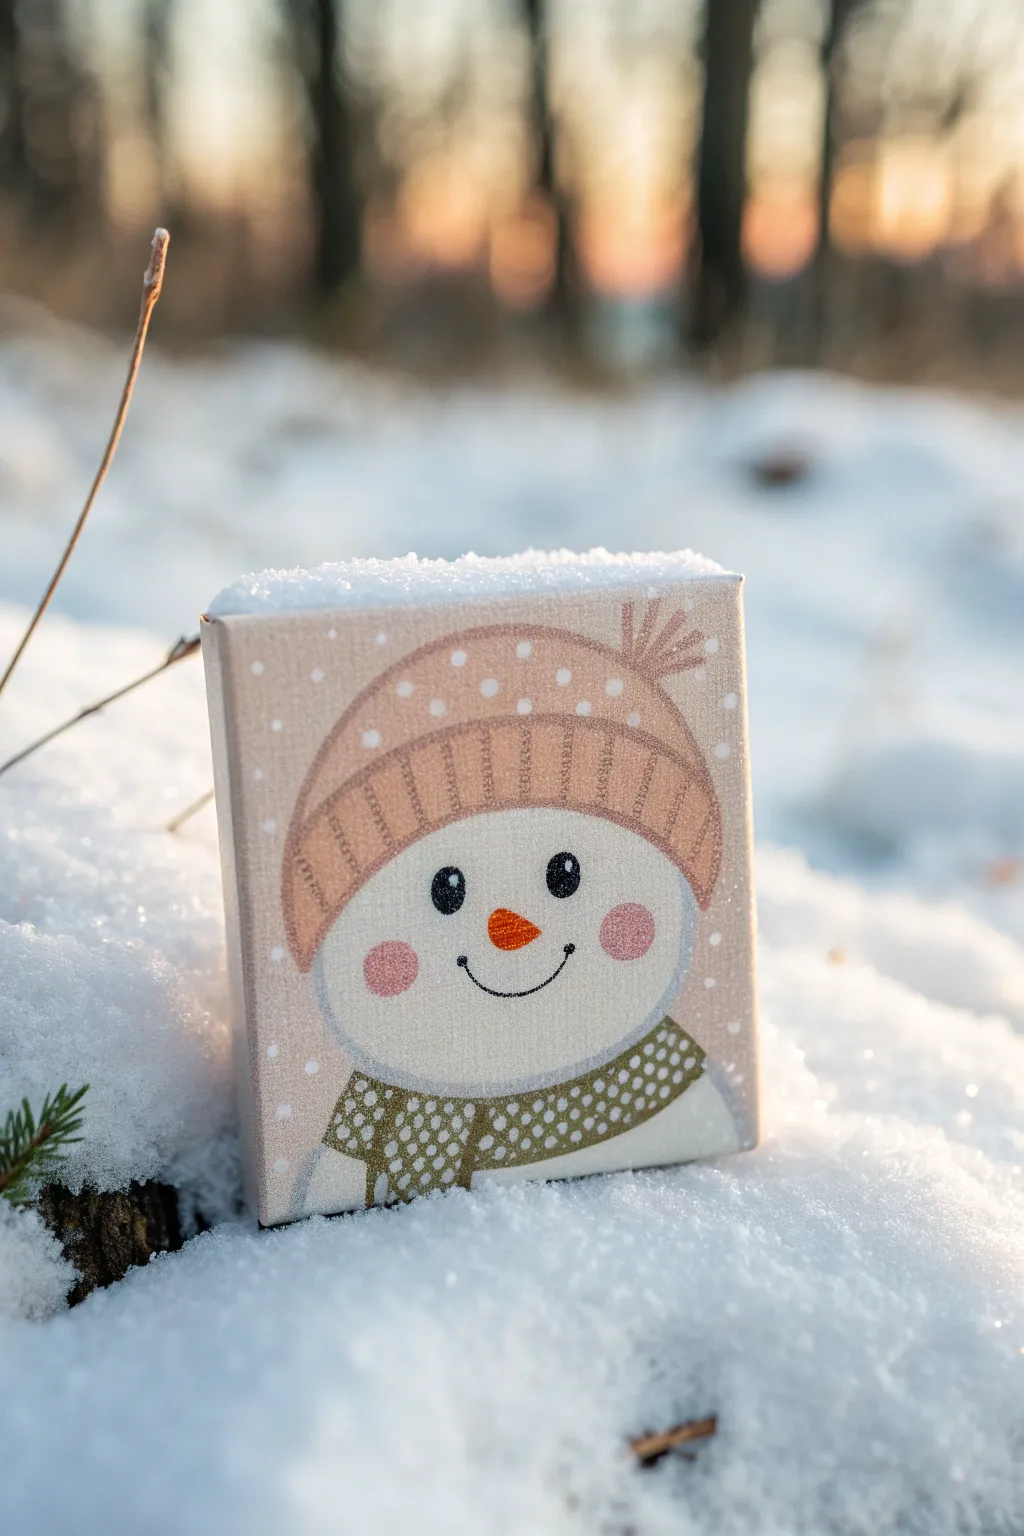
This adorable mini-canvas features a cheerful snowman bundled up in a polka-dot hat and scarf, painted in soft, inviting tones. Perfect for a stocking stuffer or holiday decor, this project uses simple shapes and charming details to create a festive portrait.
Step-by-Step Guide
Materials
- Small square wrapped canvas (4×4 or 6×6 inches)
- Acrylic paints: Titanium White, Unbleached Titanium (beige), Burnt Sienna, Orange, Black, muted Pink, Olive Green
- Gesso (optional)
- Flat shader brush (size 6 or 8)
- Round detail brushes (size 0 and 2)
- Pencil and eraser
- Palette for mixing
- Dotting tool or handle end of a paintbrush
- Cup of water and paper towels
Step 1: Planning and Base Coats
-
Prime surface:
If your canvas isn’t pre-primed, apply a coat of gesso to smooth out the texture slightly. Let it dry completely before starting. -
Sketch the outline:
Using a pencil, lightly draw a large circle for the snowman’s head in the center-bottom of the canvas. Draw the beanie outline sitting snugly on top, making sure to include the wide ribbed brim. -
Refine details:
Sketch the scarf wrapping around the ‘neck’ area at the very bottom. Mark placement for the eyes, carrot nose, and rosy cheeks. -
Paint background:
Mix Titanium White with a tiny drop of Unbleached Titanium to create a creamy beige. Paint the entire background around the snowman, extending over the canvas edges for a finished look.
Step 2: Painting the Snowman
-
Fill the face:
Use pure Titanium White to paint the snowman’s face and lower body. Apply two thin coats rather than one thick one to ensure solid coverage without brushstrokes showing. -
Base color for accessories:
Mix Unbleached Titanium with a touch of Burnt Sienna to get a warm, light tan color. Paint the main part of the beanie hat with this shade. -
Paint the brim:
Add a little more Burnt Sienna to your tan mix to make it slightly darker. Use this to paint the ribbed brim of the hat for gentle contrast. -
Color the scarf:
Mix Olive Green with a bit of the tan color to desaturate it. Paint the scarf area with this earthy olive tone.
Stamp Master
Don’t have a dotting tool? A Q-tip head creates fluffy soft dots, while a toothpick makes tiny precision specks for eyes.
Step 3: Features and Details
-
Add cheeks:
Dilute your pink paint heavily with water or glaze medium to make it translucent. Gently paint two soft circles for the rosy cheeks. -
Paint the nose:
Use bright orange paint for the carrot nose. Use a small round brush to keep the triangle shape sharp. -
Add eyes and mouth:
Using your smallest detail brush and black paint, carefully fill in the two oval eyes. Paint a thin, curved line for the smile, adding tiny vertical ticks at the ends. -
Eye highlights:
Once the black is dry, dip the very tip of a brush handle or a refined dotting tool into white paint. Place a tiny white speck in the upper right of each eye.
Glitter Finish
While the paint is still wet on the background snow dots, sprinkle a pinch of iridescent white glitter for a magical frosty shimmer.
Step 4: Texture and Pattern
-
Add ribbing texture:
Mix a darker version of your brim color (add a tiny bit of brown). Use a thin liner brush to paint vertical lines across the hat brim to mimic knitting ribbing. -
Hat polka dots:
Using a dotting tool or the back of a brush, dip into white paint and stamp polka dots evenly across the top part of the beanie. -
Scarf pattern:
Clean your dotting tool and dip it into the light tan color used for the hat. Stamp small dots across the green scarf. -
Background snow:
Dilute white paint slightly so it flows well. Add random white dots of varying sizes to the background to look like falling snow. -
Final outline:
To make the character pop like an illustration, use a very steady hand (or a fine-tip paint pen) to add a thin, broken dark grey outline around the hat and snowman. -
Pom-pom detail:
Using the tan hat color, paint small, loose strokes at the very top of the hat to create a fuzzy pom-pom effect.
Allow your mini masterpiece to dry completely before gifting it to a friend or displaying it on a mantle


Playful Reindeer Painting

Capture the magic of the season with this charming watercolor illustration of a gentle reindeer wearing a festive scarf. The delicate textures and snowy setting make this piece perfect for handmade holiday cards or framed gifts.
Detailed Instructions
Materials
- Cold press watercolor paper (300 gsm)
- Watercolor paints (shades of brown, burnt sienna, crimson red, dark green, black, and white)
- Round watercolor brushes (sizes 2, 4, and 6)
- White gel pen or white gouache
- Pencil (HB) and kneaded eraser
- Two jars of water
- Paper towel
Step 1: Sketching the Outline
-
Basic shapes:
Begin lightly with your HB pencil. Draw a teardrop shape for the head pointing left, and a larger oval for the body, connected by a gentle curve for the neck. -
Adding details:
Sketch the legs, making them slender and tapered. Add the distinctive branched antlers reaching upwards from the forehead and the large, pointed ears just below them. -
Refining features:
Define the snout, adding a small nose at the tip. Draw a wrapped scarf around the neck area, making it look slightly bulky and warm. Sketch two small triangular trees at the bottom corners. -
Lighten the lines:
Using your kneaded eraser, gently roll over the entire sketch to lift up excess graphite. You want the lines to be barely visible guideposts so they don’t show through the transparent paint.
Step 2: Painting the Reindeer
-
Base wash:
Mix a light, watery brown using Burnt Sienna and plenty of water. Using a size 6 brush, apply this wash to the entire body, head, and legs, avoiding the scarf, eyes, nose, and inner ears. -
Adding warmth:
While the paper is still slightly damp, drop a richer, more saturated reddish-brown onto the top of the back and the back of the neck to create a soft, rounded dimension. -
Facial details:
Switch to a size 2 brush. Paint the nose black and fill in the eye, leaving a tiny speck of white paper for the highlight (or add it later with white gel pen). Use a diluted pinkish-brown for the inner ears and the snout tip. -
Fur texture:
Once the base layer is completely dry, use a size 2 brush with a darker brown mix. Paint tiny, short strokes on the chest and neck area to suggest fur texture. -
Painting the antlers:
Mix a pale, sandy beige color. Carefully paint the antlers, keeping the edges crisp. If you want more depth, add a tiny line of darker brown along the bottom edge of each branch as a shadow. -
Defining the legs:
Darken the far legs slightly to push them into the background. Paint the hooves with a dark charcoal or black mix. -
The spotted coat:
If you masked the white spots, remove the fluid now. If not, use white gouache or a gel pen to add the characteristic white fawn spots on the rear flank and back.
Fuzzy Texture Tip
For a softer, fur-like appearance, gently soften the edges of your paint while it’s still wet using a clean, damp brush. This prevents harsh outlines.
Step 3: Accessories and Environment
-
Scarf base:
Paint the scarf stripes using alternate bands of crimson red and a muted mauve or dark pink. Let the colors touch slightly for a soft, woven look. -
Scarf texture:
When the scarf is dry, use your smallest brush to add tiny vertical lines at the ends to mimic fringe. -
Painting the trees:
Use a deep sap green for the pine trees. Use a stippling motion (dotting the brush) to create the prickly texture of pine needles, building up the triangular shape. -
Adding foliage:
Between the reindeer’s legs and the left tree, paint a simple sprig of leaves using a muted olive tone to add variety to the landscape. -
Snowy ground:
Dilute a tiny amount of ultramarine blue or grey with lots of water. Paint a very faint, uneven wash along the bottom to suggest a snowy surface beneath the hooves. -
Snowy highlights:
Using opaque white gouache or a white gel pen, dab small dots onto the green trees to look like settled snow.
Make it Sparkle
Incorporate tiny dots of metallic gold paint in the background or on the scarf fringe to make the card shimmer beautifully under Christmas tree lights.
Now let your painting dry completely before carefully erasing any remaining pencil marks to reveal your winter masterpiece
Gingerbread House Illustration
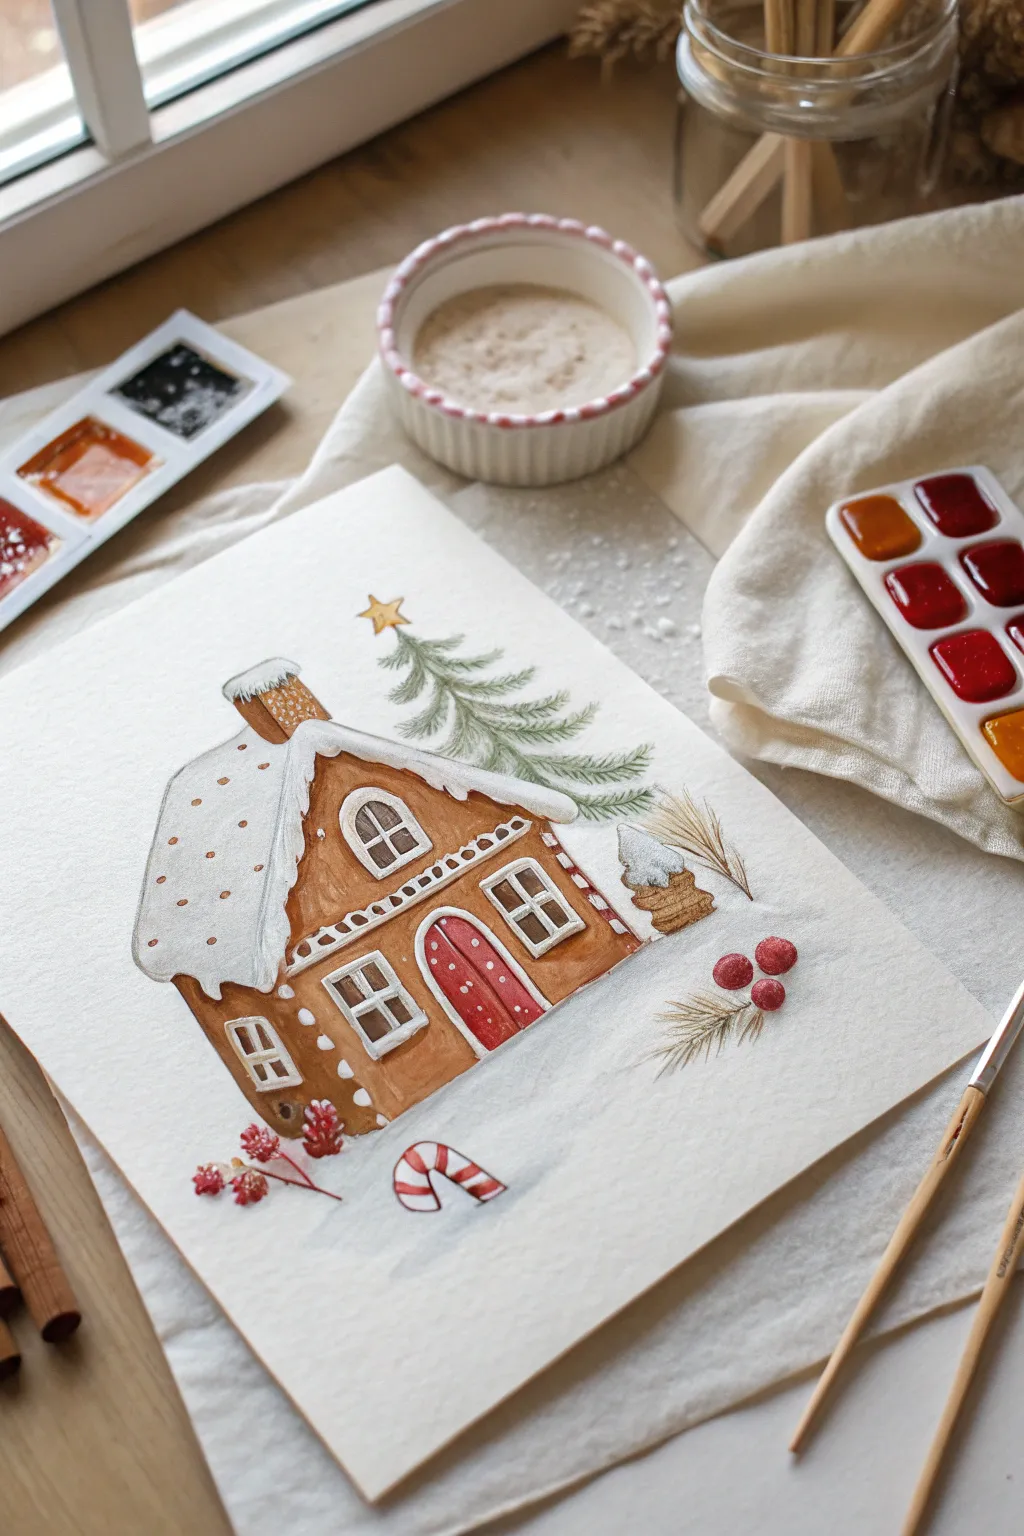
Capture the cozy magic of the holidays with this charming watercolor illustration of a snow-dusted gingerbread cottage. With its warm cookie hues and delicate sugary details, this project makes for a heartwarming handmade card or a festive framed gift.
Step-by-Step Guide
Materials
- Cold-press watercolor paper (300 gsm)
- Watercolor paints (Burnt Sienna, Red Ochre, Sap Green, Scarlet Red, Sepia)
- White gouache or opaque white ink
- Round watercolor brushes (sizes 2, 4, and 6)
- Fine liner brush or size 0 brush
- Pencil (HB) and kneaded eraser
- Palette for mixing
- Jar of clean water
- Paper towels
Step 1: Sketching the Structure
-
Draft the outline:
Start with a light pencil sketch. Draw the main shape of the house with a high-pitched roof and a smaller side section. Keep your lines faint so they don’t show through the transparent watercolor later. -
Add architectural details:
Pencil in the arched door, two lower windows, an upper window in the gable, and the chimney. Don’t worry about perfect straight lines; a little wobble adds to the baked-good charm. -
Define the frosting:
Sketch the thick layer of snow on the roof. Make the edges wavy and irregular, suggesting heavy, dripping icing hanging over the eaves.
Preserve the Pure White
For the crispest white snow on the roof, avoid painting it altogether. Let the paper shine through and only paint faint blue-grey shadows for volume.
Step 2: Painting the Gingerbread
-
Mix the cookie color:
Create a warm gingerbread hue by mixing Burnt Sienna with a touch of Red Ochre. You want a rich, golden-brown tone. -
Apply the first wash:
Using a size 6 brush, paint the walls of the house with your gingerbread mix. Work carefully around the windows and door frames to keep them white. -
Deepen the edges:
While the first layer is still slightly damp, drop a more concentrated mix of Burnt Sienna or a tiny bit of Sepia into the corners and under the eaves to create baked edges. -
Paint the chimney:
Use the same brown mixture for the chimney stack, perhaps adding a touch more red to distinguish it slightly from the roof if desired, or keeping it uniform.
Step 3: Adding Festive Details
-
Paint the door:
Mix a vibrant Scarlet Red. Using a size 4 brush, carefully fill in the arched door. Let the vibrant red contrast beautifully with the warm brown walls. -
Background tree:
Mix a diluted Sap Green. Paint a loose, stylized pine tree behind the house. Use quick, upward strokes for the branches to keep it airy and less detailed than the house itself. -
Grounding shadows:
Mix a very watery grey-blue. Add a subtle wash beneath the house and around the base of the tree to suggest snow shadows on the ground. -
Botanical accents:
Paint the small red berries and dried wheat-like sprigs on either side of the house. Use a fine brush for the thin stems. -
Candy cane:
Paint the small candy cane lying in the snow with alternating stripes of red and clean white paper.
Add Real Sugar Texture
While the brown paint is still wet, sprinkle a tiny pinch of salt on the walls. It dries into a texture that looks just like baked cookie crumbs!
Step 4: Icing and Highlights
-
Roof shading:
To make the white roof look dimensional, add very faint shadows using a diluted grey-blue mix along the bottom edge where the ‘snow’ drips, and under the snow clumps on the chimney. -
White gouache details:
Switch to white gouache and a fine liner brush. Paint the window frames, the decorative dots on the roof, and the icing details along the rooflines. -
Decorative piping:
Add fine white lines or dots around the door frame and along the edges of the walls to mimic piped royal icing. -
Snow texture:
I like to splatter a tiny bit of white gouache over the tree and the immediate ground area to create falling snow. Tap your brush handle gently to control the splatter. -
Final touches:
Add a small yellow star atop the tree and deepen any shadows under the windows with a mix of Sepia to make the features pop.
Your sweet architectural masterpiece is now ready to warm hearts this holiday season
Red Truck With Tree Scene
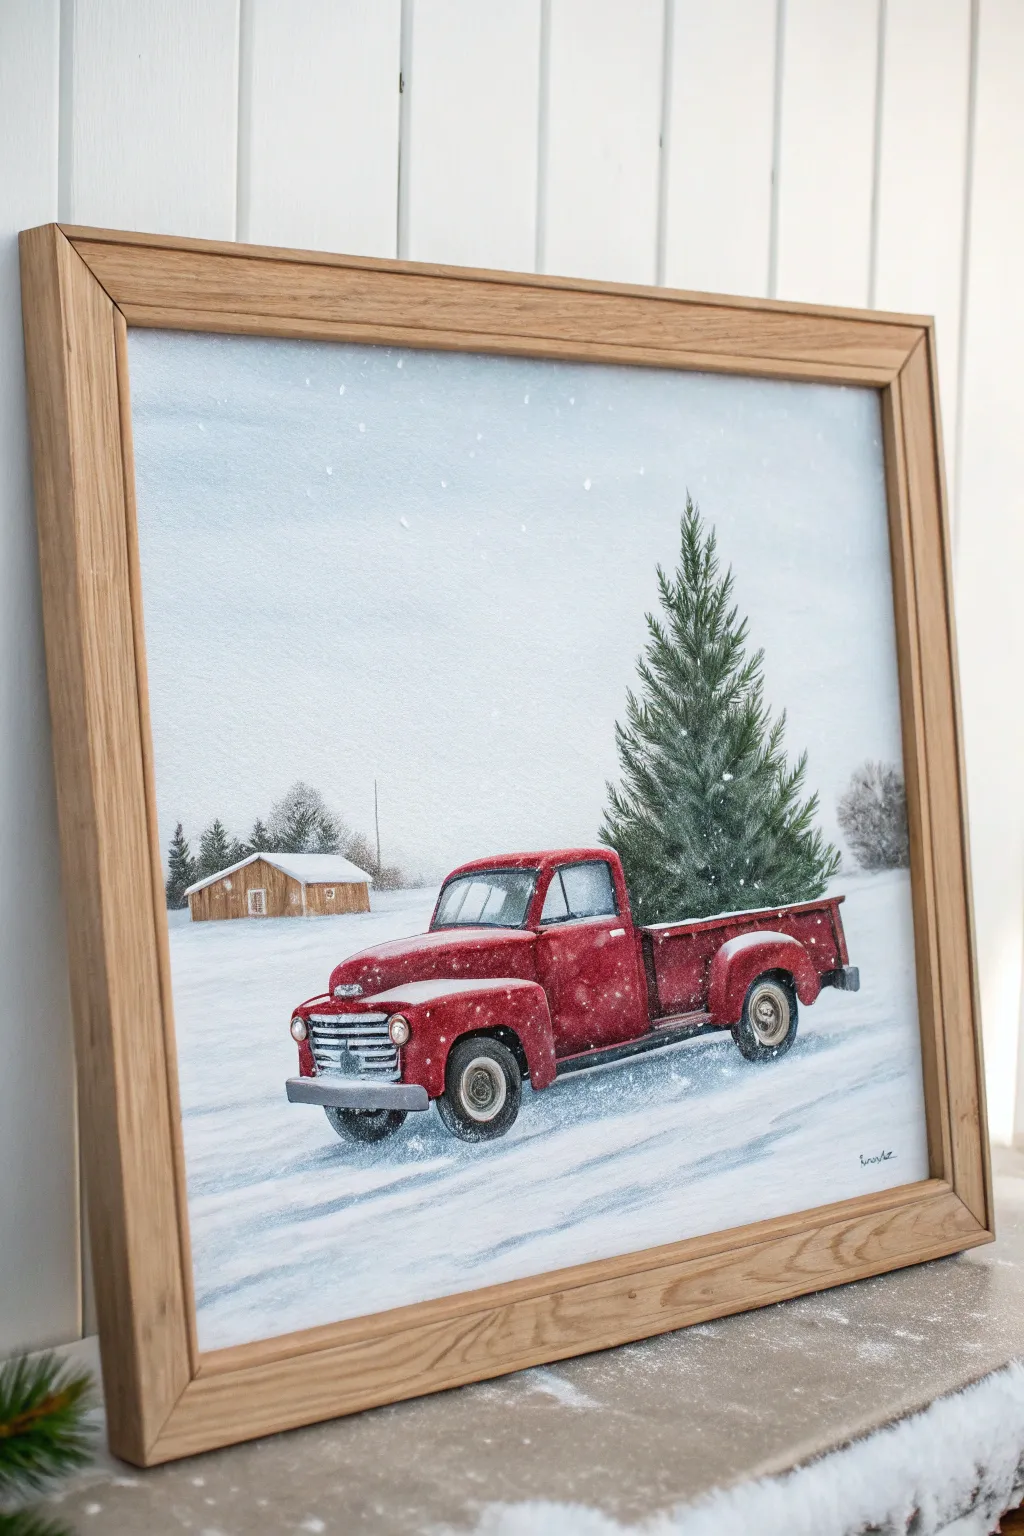
Capture the magic of a classic country Christmas with this nostalgic painting of a red pickup truck hauling a fresh evergreen. This piece combines soft snowy textures with vibrant reds and greens to create a heartwarming holiday keepsake.
Step-by-Step Tutorial
Materials
- Canvas panel or stretched canvas (11×14 or similar)
- Acrylic paints (Titanium White, Mars Black, Cadmium Red, Burnt Umber, Phthalo Blue, Sap Green, Hookers Green)
- Set of brushes: flat shader (3/4 inch), round brush (size 4), liner brush (size 1), fan brush
- Palette knife
- Water container and paper towels
- Graphite paper for tracing (optional)
- Natural wood frame
Step 1: Setting the Winter Scene
-
Sketch the Composition:
Begin by lightly sketching the horizon line just below the middle of the canvas and the basic shapes of the truck and barn. Don’t worry about tiny details yet; just get the proportions right, ensuring the truck bed is large enough for the tree. -
Paint the Sky:
Mix Titanium White with a tiny touch of Phthalo Blue and black to create a very pale, overcast grey-blue. Paint the entire sky area using your large flat brush, keeping horizontal strokes for a smooth finish. -
Block in the Snow:
Using Titanium White with just a hint of the sky mix, paint the ground area. Use slightly curved strokes in the foreground to suggest drifts and tire tracks later on. -
Add Distant Trees:
Mix a soft grey using white and a touch of black. With an old, scruffy brush, dab in the distant treeline along the horizon. These should be soft and out of focus.
Chrome Effect
To make the bumper and grill look like real metal, paint a distinct horizon line reflection in the metal shapes: sky blue on top, dark ground color on the bottom, then blend slightly.
Step 2: Painting the Barn and Truck
-
Paint the Barn Base:
Mix Burnt Umber with a little yellow or orange if you have it, or use raw sienna for a wood tone. Fill in the barn shape. While wet, streak in darker brown vertical lines to suggest wood planks. -
Add the Snow Roof:
Paint a thick layer of white on top of the barn roof, letting it slightly overhang the edges. -
Base Coat the Truck:
Load your round brush with Cadmium Red and a touch of Burnt Umber for a deep vintage red. Fill in the main body of the truck, avoiding the windows, wheels, and grill. -
Add Highlights and Shadows:
While the red is still slightly tacky, mix a darker red with a bit of black for shadows under the wheel wells and door frame. I like to adding a touch of pure bright red on top of the hood and fenders where the light hits. -
Paint the Windows:
Mix a light greyish-blue (lighter than your sky) and fill in the windshield and side window. Add a sharp white diagonal line later for a reflection. -
Details and Chrome:
Use a small liner brush and grey paint to create the grill, bumpers, and side mirrors. Add highlights of pure white to make them look like shiny chrome. -
Wheels and Tires:
Paint the tires black. For the hubcaps, use the same grey and white chrome technique used on the bumpers.
Step 3: The Evergreen and Finishing Touches
-
Base Layer of the Tree:
Mix Hookers Green with a little black for a deep shadow green. Using a fan brush turned vertically or a flat brush on its chisel edge, tap in the dark inner branches of the tree in the truck bed. -
Add Texture to the Tree:
Switch to a lighter mix of Sap Green and White. Layer this over the dark branches, focusing on the tips and outer edges to create volume and shape. -
Create Movement with Snow:
To make the truck look like it’s driving, streak white and light blue horizontally from the tires backward along the ground. This mimics kicked-up snow. -
Falling Snow Splatter:
Thin down some white paint with water until it’s inky. Load an old toothbrush or stiff brush and flick it over the canvas to create falling snow. -
Accumulated Snow:
Take thick white paint on a small round brush and gently dab it onto the top of the truck cab, the hood, the fenders, and the tops of the tree branches. -
Shadows:
Mix a watery blue-grey glaze and paint a soft shadow underneath the truck and casting slightly to the right to ground the vehicle.
Make it 3D
Mix a texture paste or modeling paste into your white paint for the snow on the hood and tree. This physically raises the paint off the canvas for a real snowy texture.
Place your dried painting into a natural wood frame to complete the rustic farmhouse look
Nativity Silhouette Night Sky
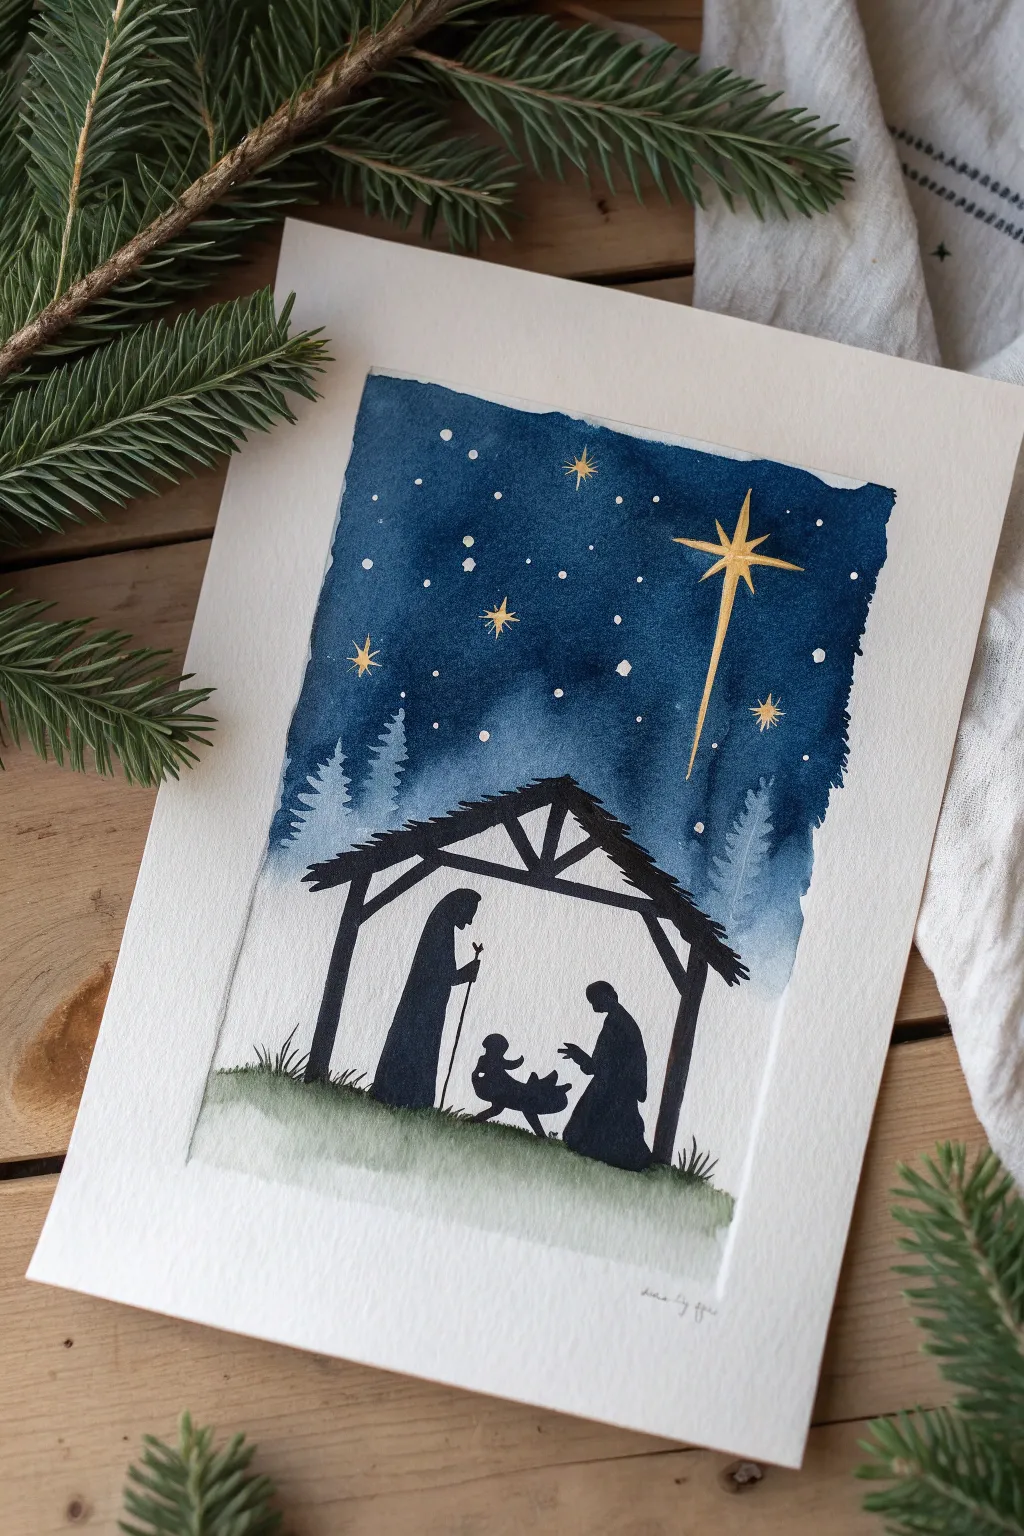
Capture the serene beauty of the first Christmas with this elegant watercolor and ink project. The contrast between the deep, starry indigo sky and the sharp black silhouette creates a striking focal point perfect for a thoughtful holiday gift.
Detailed Instructions
Materials
- Cold press watercolor paper (minimum 140lb)
- Painter’s tape or masking tape
- Watercolor paints: Indigo, Prussian Blue, Paynes Gray, Sap Green
- Black waterproof ink or black gouache
- Gold metallic watercolor or gold gel pen
- White gouache or white gel pen
- Round brushes (sizes 2, 6, and 10)
- Fine liner brush or size 0 brush
- Pencil and eraser
- Clean water and paper towels
Step 1: Preparation and Sketching
-
Secure the paper:
Tape your watercolor paper down to a hard board on all four sides. This creates a clean, crisp border around your painting and prevents the paper from buckling when wet. -
Sketch the horizon:
Lightly draw a gentle, sloping hill near the bottom third of the paper. Keep your pencil marks very faint so they do not show through the final layers. -
Outline the stable:
Sketch the basic triangular shape of the roof and the supporting beams. Don’t worry about filling it in yet; just get the proportions right for the silhouette. -
Position the figures:
Lightly sketch the outlines of Joseph standing, Mary kneeling, and the manger in the center. I find it helpful to focus on just the outer shapes rather than details, as these will become solid block colors.
Step 2: Painting the Sky
-
Wet the sky area:
Using your largest round brush and clean water, wet the entire sky area from the top down to just above your hill line. Be careful to paint around the stable roof if you can, but it’s okay if overlaps slightly since the black will cover it. -
Drop in color:
Load your brush with Indigo and Prussian Blue. Start at the top of the paper with the darkest pigment and let the color flow downward. -
Create a gradient:
As you move down toward the horizon, dilute the paint slightly with water or mix in a touch of Paynes Gray to soften the blue. The sky should be darkest at the top edges. -
Add subtle trees:
While the blue wash is still damp (but not soaking), paint faint, watery tree shapes in the distance using a dilute blue-green mix. Let the wet paper diffuse the edges for a soft, misty forest effect. -
Let it dry completely:
This is crucial. Allow the sky to dry 100% before moving on. Use a hairdryer on a low setting if you are impatient to move to the next phase.
Clean Edges Tips
To prevent paint bleeding under the tape, run a clean, damp brush or a bone folder firmly along the inner tape edge before you start painting.
Step 3: Creating the Stars
-
Splatter stars:
Dilute a small amount of white gouache with water. Tap your brush handle against another brush over the sky area to create fine white splatters representing distant stars. -
Paint larger stars:
Using a fine brush or white gel pen, manually dot in a few larger, distinct stars in the open spaces of the blue sky. -
Paint the North Star:
With your gold metallic paint or gel pen, carefully draw the large Star of Bethlehem. Start with a central cross and extend the bottom tail longer than the others, adding smaller rays between the main points.
Water Control Fix
If your sky creates ‘blooms’ or cauliflower shapes, you likely added water to a drying wash. Wait for it to dry completely, then glaze over a thin new layer.
Step 4: The Manger Scene
-
Paint the ground:
Mix Sap Green with a little gray or indigo for a muted night-time grass color. Paint a wash below the horizon line, letting it be uneven and textured. -
Fill the stable structure:
Switch to your black ink or black gouache. Using a size 2 or 6 brush, carefully fill in the beams and roof of the stable. Use the tip of the brush to create the rough texture of straw hanging from the roof. -
Fill the figures:
Paint the silhouettes of Joseph, Mary, and the manger in solid black. Ensure the edges are crisp and clean against the lighter background. -
Add grass details:
Use a liner brush or very fine tip with black paint to flick upward strokes along the ground line, simulating tufts of grass growing around the stable base. -
Final touches:
Once everything is dry, remove the tape carefully at an angle to reveal your crisp white border.
Now frame your beautiful nativity scene or adhere it to a card base for a meaningful handmade greeting
Christmas Still Life on a Small Canvas
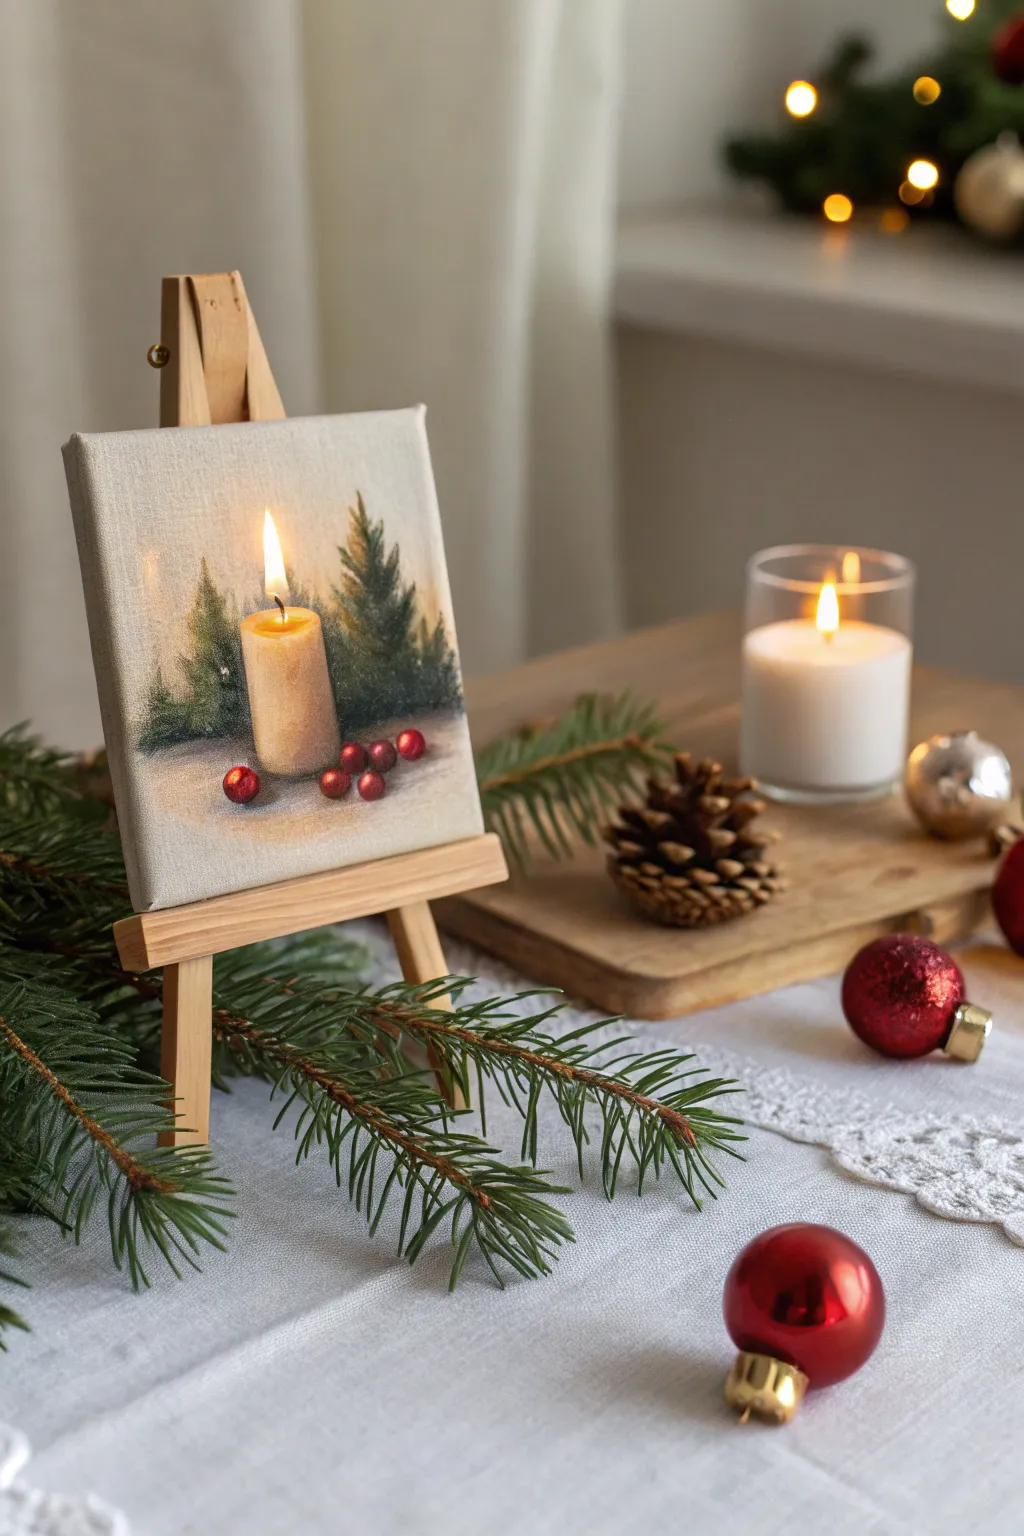
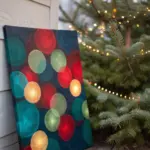
Capture the warmth of the holiday season with this intimate, small-scale acrylic painting of a glowing candle amidst a winter forest. This project creates a charming, personalized gift that fits perfectly on a mantelpiece or desk.
Step-by-Step Guide
Materials
- Small square canvas (4×4 or 5×5 inches)
- Mini wooden display easel
- Acrylic paints: Titanium White, Burnt Umber, Yellow Ochre, Cadmium Yellow, Hooker’s Green, Mars Black, Cadmium Red
- Small flat shader brush (size 2 or 4)
- Detail round brush (size 0 or 00)
- Palette paper or mixing plate
- Cup of water and paper towels
- Slow-drying medium (optional, for blending)
Step 1: Setting the Scene
-
Prepare the Background:
Begin by mixing Titanium White with a tiny touch of Burnt Umber or gray to create a soft, off-white base color. Paint the entire canvas with this mixture to eliminate the harsh white texture and create a snowy, overcast atmosphere. -
Sketch the Composition:
Once the base is dry, use a very watery wash of Burnt Umber and your round brush to lightly outline the central cylinder shape for the candle. Keep it slightly off-center for interest. -
Block in the Shadows:
Mix Hooker’s Green with a touch of Mars Black. Using the flat brush, dab in rough, triangular shapes behind the candle outline to represent the distant pine trees. Keep the edges soft and feathery rather than sharp.
Pro Tip: Glowing Edges
To make the flame look truly luminous, glaze a very thin, transparent layer of orange over the dark green trees immediately surrounding the flame halo. This simulates warm light hitting the branches.
Step 2: Painting the Candle
-
Base Coat the Wax:
Mix Titanium White with Yellow Ochre and a small amount of Burnt Umber to get a warm beige. Fill in the body of the candle with this color. -
Add Dimension:
While the base coat is still slightly tacky, mix a slightly darker version of your beige (add more Umber). Paint this along the bottom and right side of the candle to suggest curvature and shadow. -
Create the Glow:
Mix Cadmium Yellow with Titanium White. Paint the top rim of the candle, making it brighter near the center where the wick sits. -
Paint the Wick:
Using your smallest detail brush and Mars Black, paint a thin, curved line for the wick in the center of the candle top. -
Ignite the Flame:
Paint a teardrop shape around the wick using pure Cadmium Yellow. Add a tiny dot of pure White in the very center of the flame for the hottest point. -
Add Halo Effect:
Take a very dry brush with a tiny amount of watered-down yellow-white paint. Gently scumble (rub lightly) around the flame onto the background trees to create a soft, glowing halo effect.
Level Up: Texture Play
Use a palette knife to apply the snow at the bottom of the canvas. The thick, impasto texture will contrast beautifully with the smooth candle wax, giving the piece a realistic 3D feel.
Step 3: Snow and Details
-
Ground the Scene:
Mix Titanium White with a microscopic dot of blue or gray for the snow. Paint horizontal strokes at the base of the candle, blending slightly into the green tree bottoms to ground them in the snow. -
Add the Berries:
Using the round brush and Cadmium Red, paint small clusters of circles at the base of the candle. I like to vary the sizes slightly so they look more organic and less like polka dots. -
Highlight the Berries:
Mix a light pink or use pure white to add a tiny reflective dot on the top-left of each berry. This makes them look shiny and round. -
Refine the Trees:
Go back to your dark green mixture. Use the tip of your brush to tap in some specific pine needle textures on the edges of the trees, making them look fuller. -
Cast Shadows:
Use a watered-down gray or brown wash to paint soft shadows underneath the berries and the base of the candle, stretching slightly to the right. -
Final Polish:
Check the candle flame one last time. If needed, add another dot of bright white to the flame’s center and a touch of yellow reflection on the top rim of the wax.
Place your finished miniature on the easel and enjoy the cozy atmosphere it brings to the space
Slate Tile Christmas Coaster Set
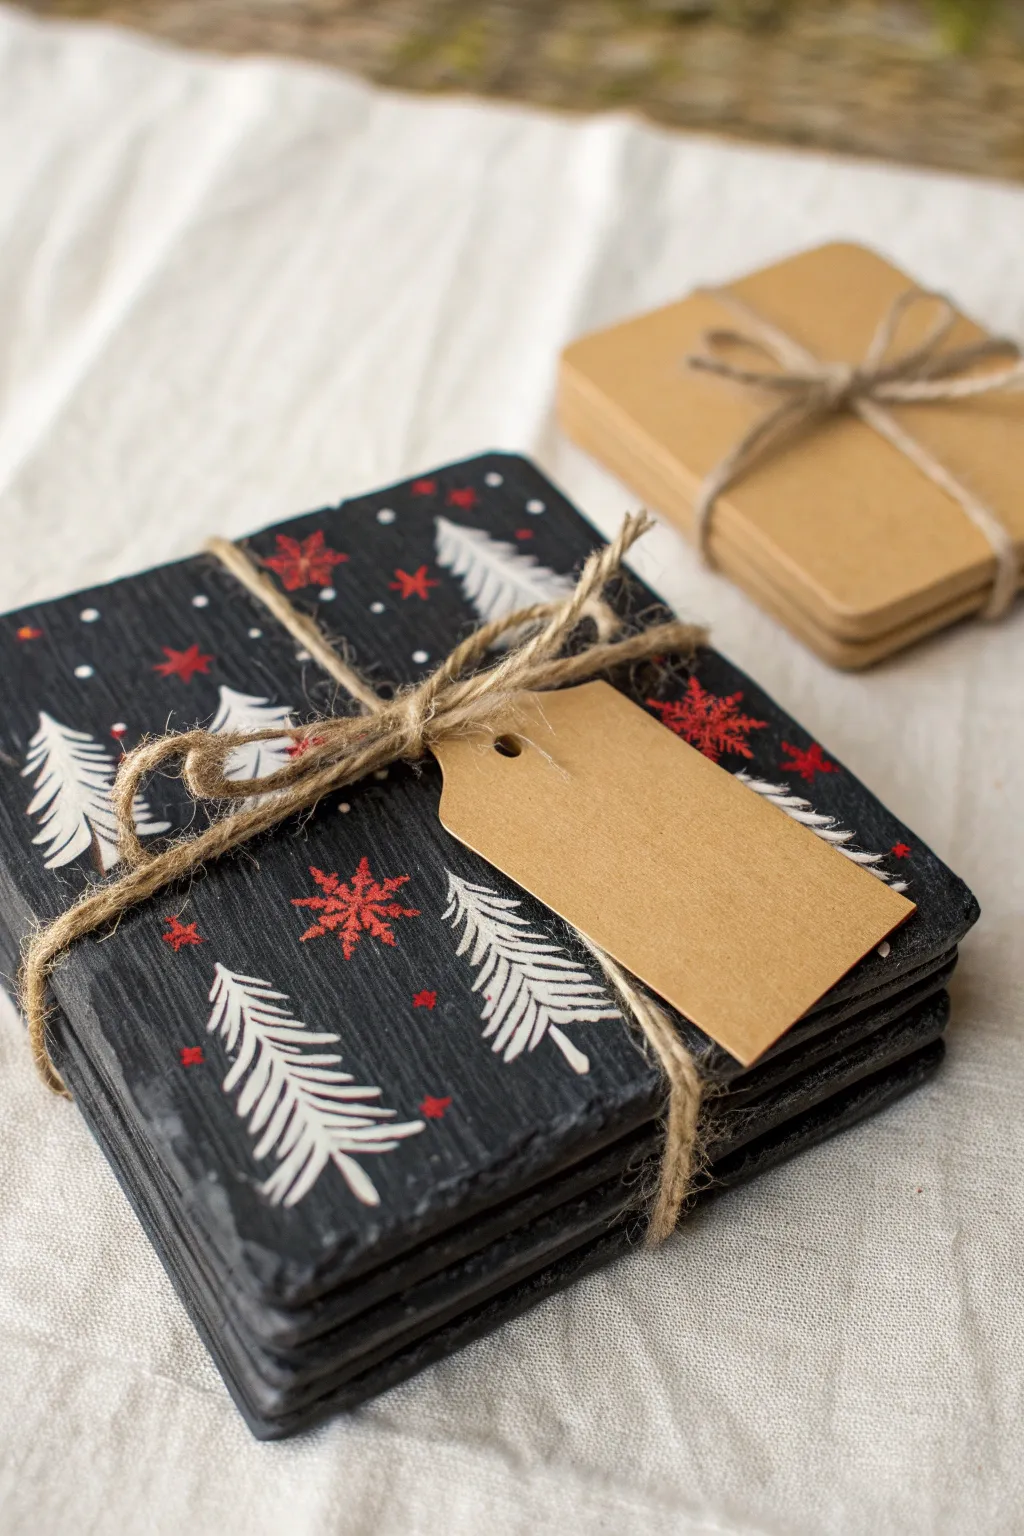
Transform rugged slate tiles into an elegant, winter-themed gift set featuring delicate white pine trees and striking red snowflakes. The dark, natural texture of the slate provides the perfect midnight backdrop for this crisp and festive design.
Step-by-Step Guide
Materials
- 4 square slate coasters (approx. 4×4 inches)
- White acrylic paint or opaque paint pen (fine tip)
- Red acrylic paint or opaque paint pen (fine tip)
- Small round detail brush (size 0 or 00) if using bottled paint
- Spray-on clear sealant (matte or satin finish)
- Jute twine
- Kraft paper gift tag
- Pencil (optional)
- Paper plate or palette
- Cup of water and paper towels
Step 1: Preparation & Planning
-
Clean surface:
Begin by wiping down your slate coasters with a damp cloth to remove any dust or loose slate particles. Let them dry completely before applying any paint. -
Test spacing:
Visualize your layout. You will be alternating between white trees and red snowflakes. If you feel unsure about freehanding, you can lightly mark positioning points with a pencil, though slate can be tricky to sketch on.
Paint Slipping?
If the paint beads up or slides off the slate, the surface might be too sleek or oily. Wipe it again with rubbing alcohol to degrease the stone before trying again.
Step 2: Painting the Trees
-
Start the trunk:
Using your white paint pen or a fine brush loaded with white acrylic, draw a central vertical line for the tree trunk. Curve the line slightly to give the tree a sense of movement. -
Add lower branches:
Starting near the bottom, paint downward-sloping strokes extending from the trunk. These strokes should be slightly thicker near the trunk and taper out to a fine point. -
Build the canopy:
Work your way up the trunk, making the branches progressively shorter. Keep the strokes loose and feathery to mimic pine needles. -
Cap the tree:
Finish with a small pointed tip at the very top of the tree. Repeat this process to add 2-3 trees per coaster, varying their angles slightly.
Step 3: Adding Red Accents
-
Snowflake centers:
Switch to your red paint. Locate the empty spaces between your trees and paint a small ‘X’ as the base for your snowflakes. -
Snowflake spokes:
Draw a vertical line and a horizontal line through the center of the ‘X’ to create an eight-pointed star shape. -
Detailed flourishes:
Add tiny ‘V’ shapes to the ends of the main spokes to create a more intricate crystal look. Vary the size of your snowflakes, making some prominent features and others smaller fillers. -
Tiny stars:
Fill any remaining large gaps with simple five-pointed red stars for variety.
Make it Sparkle
While the white paint on the ‘snow’ dots is still wet, sprinkle a tiny pinch of extra-fine iridescent glitter over them. Shake off the excess once dry for a frosty shimmer.
Step 4: Finishing Touches
-
Falling snow:
Using the tip of your white brush or pen, gently dot the background with small white specks to represent falling snow. Keep them random and sparse to avoid cluttering the design. -
Dry thoroughly:
Allow the paint to cure completely. I prefer to let these sit overnight to ensure the paint bonds well to the uneven stone surface. -
Seal the slate:
Ideally in a well-ventilated area, apply a light coat of spray sealant. This protects the design from condensation when drinks are placed on them. -
Stack and wrap:
Once the sealant is dry, stack the four coasters neatly. Create a bundle by wrapping jute twine around the stack several times in both directions. -
Attach the tag:
Thread a blank kraft paper tag onto the twine and tie a secure bow on top to complete the rustic gift presentation.
Your custom slate coaster set is now ready to bring a touch of snowy charm to any coffee table.


Have a question or want to share your own experience? I'd love to hear from you in the comments below!