
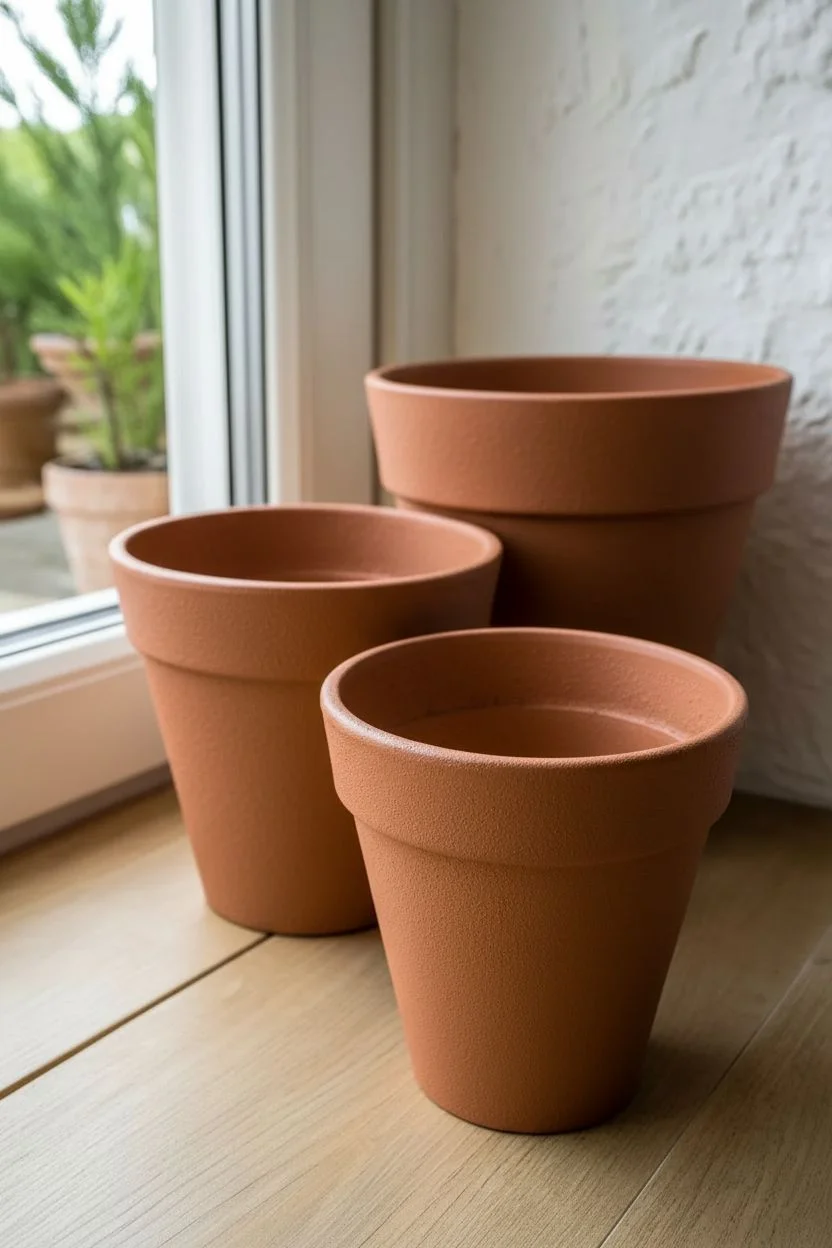
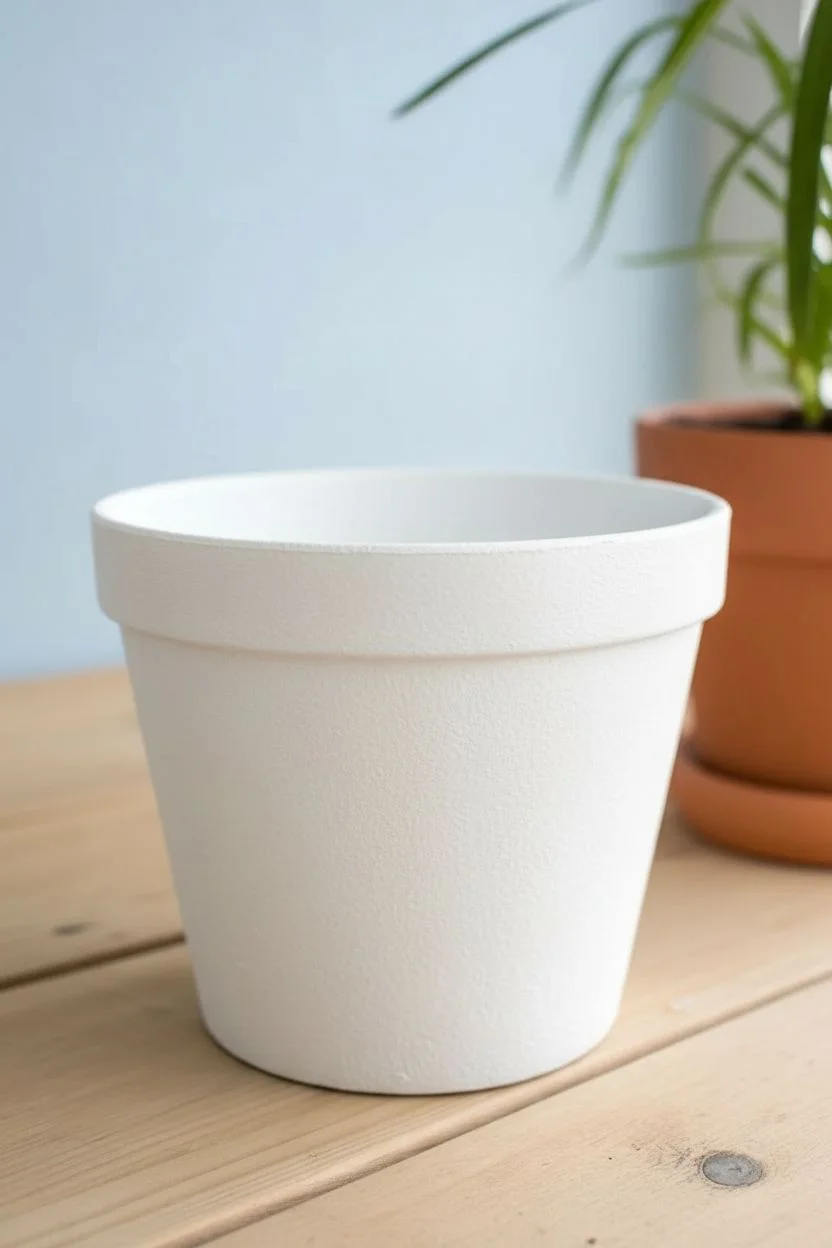
If you’ve got a stack of boring plastic flower pots, you’re sitting on a goldmine of easy, affordable mini canvases. I love how a few smart paint tricks can make plastic look like stylish decor—sleek, playful, or surprisingly high-end.
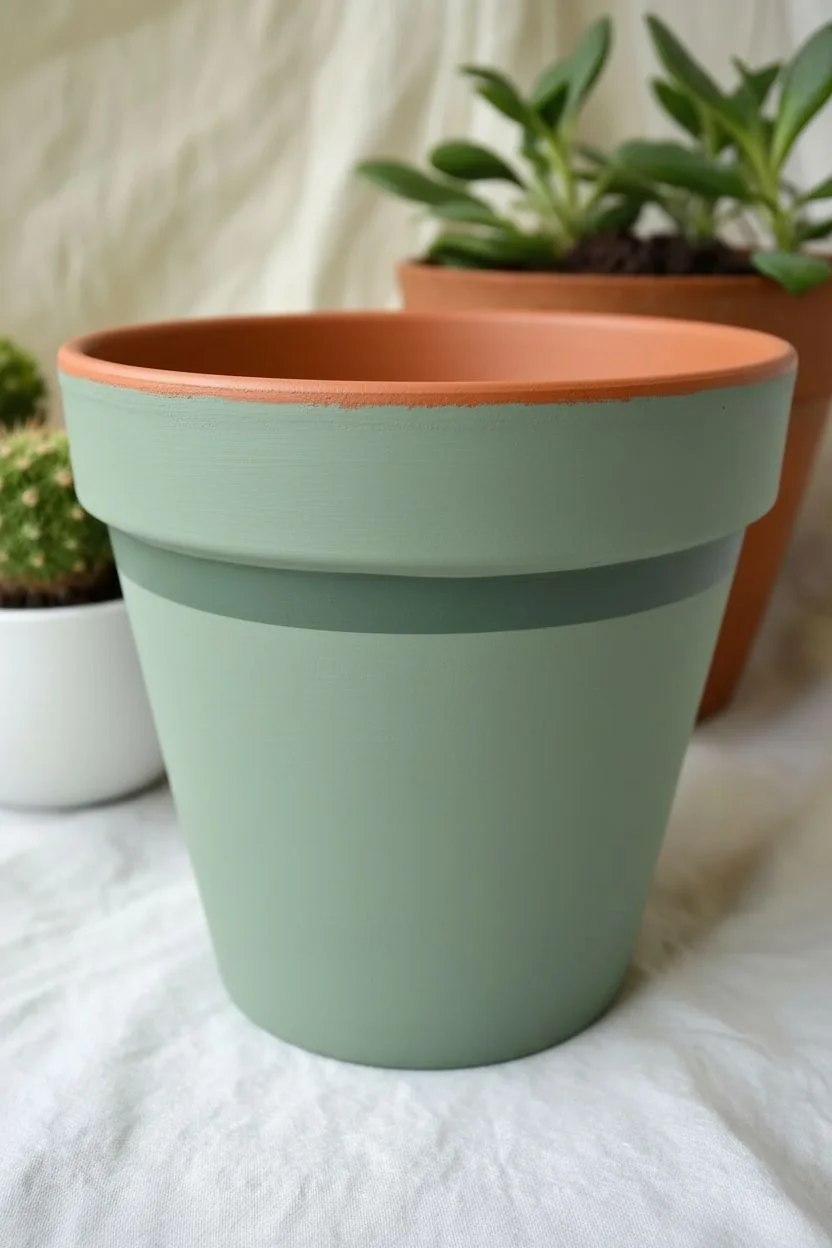
Crisp Two-Tone Rim Paint for a Clean, Modern Look
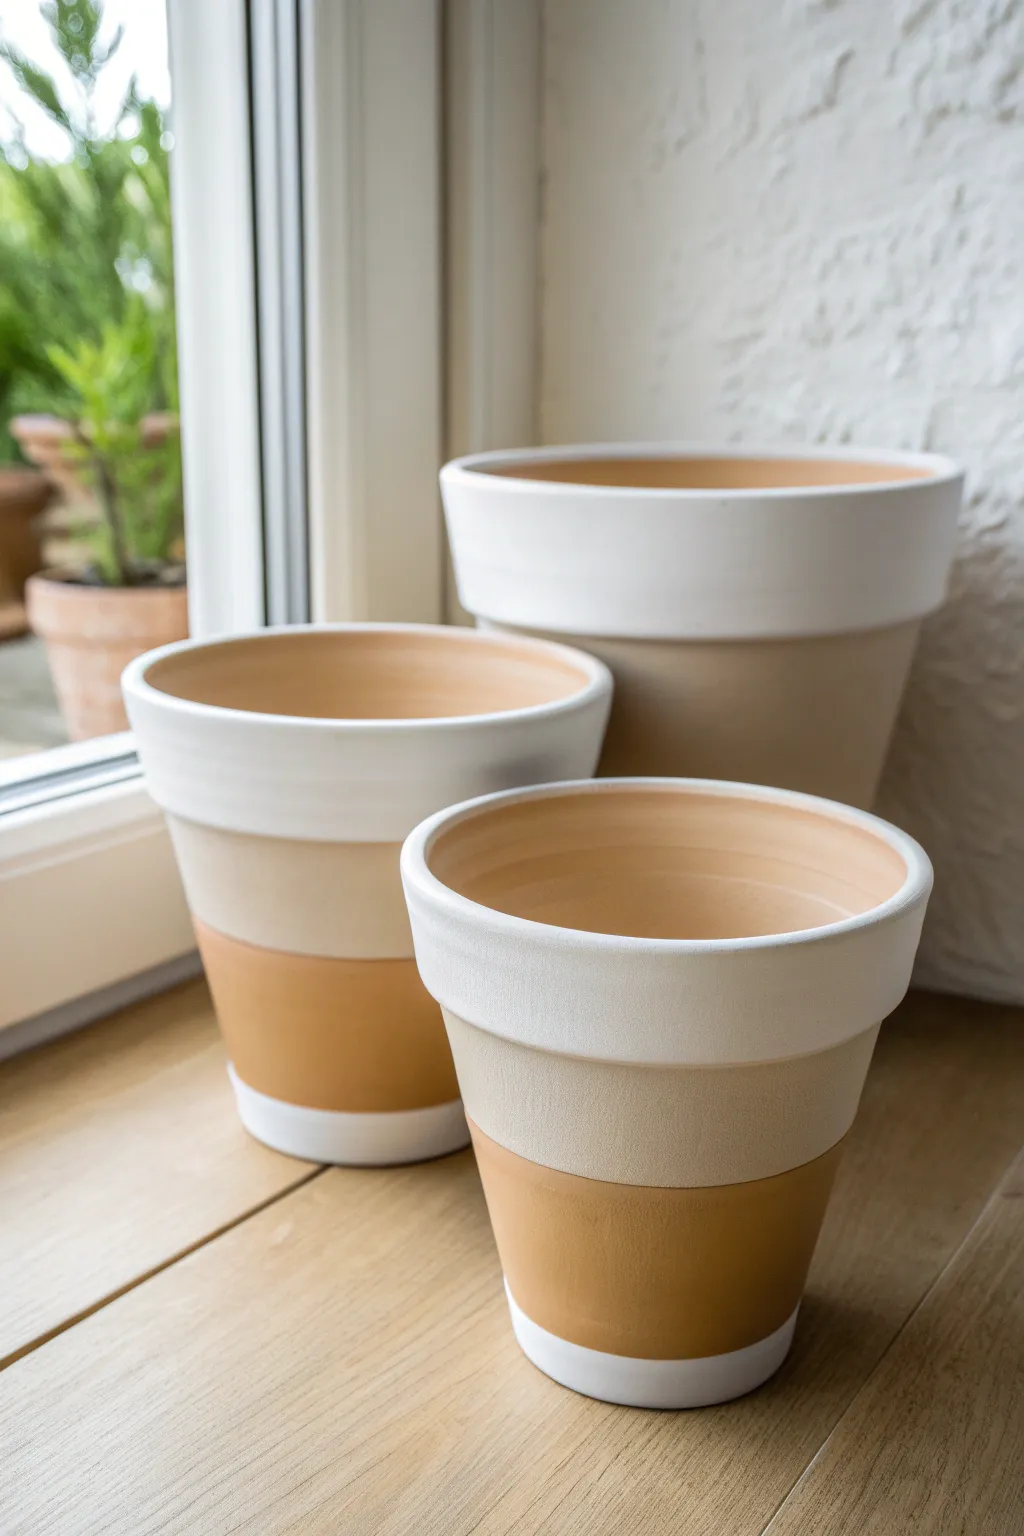
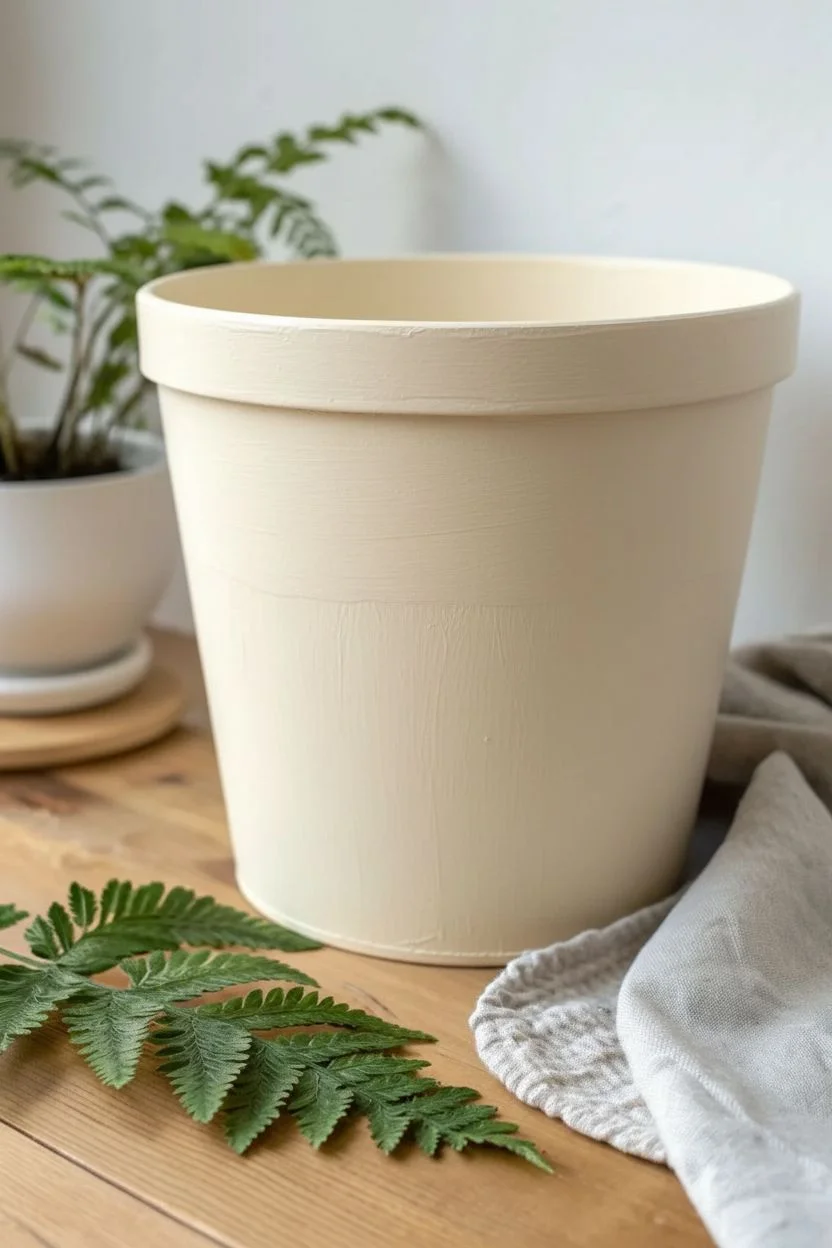
Transform inexpensive plastic into what looks like high-end modern pottery with this surprisingly simple technique. By combining textured spray paints with crisp white bands, you achieve a clean, layered aesthetic that brightens up any windowsill.
Detailed Instructions
Materials
- Plastic flower pots (varying sizes)
- Fine-grit sandpaper (220 grit)
- Terra cotta colored spray paint (matte finish)
- Beige or oatmeal colored chalk paint or acrylic paint
- Bright white acrylic paint
- Painter’s tape
- Wide flat paintbrush
- Foam brush
- Clear matte sealer spray
Step 1: Base Prep
-
Clean surface:
Begin by thoroughly washing your plastic pots with warm soapy water to remove any manufacturing oils or stickers. Dry them completely with a lint-free cloth. -
Sand for adhesion:
Lightly scuff the entire exterior surface of the plastic pots using fine-grit sandpaper. This step is crucial for helping the paint stick to the slick plastic surface. -
Wipe down:
Use a damp cloth to wipe away all the sanding dust, ensuring the surface is perfectly clean before painting. -
Apply base color:
In a well-ventilated area, spray the entire exterior of the pots with the matte terra cotta colored spray paint. Hold the can about 8–10 inches away and use sweeping motions. -
Dry and repeat:
Let the first coat dry for about 20 minutes. If the plastic is still showing through, apply a second light coat for full coverage and let it cure fully, ideally overnight.
Bleed-Through Blues?
If paint seeps under your tape, don’t panic. Once dry, simply use a stiff, damp angled brush to gently scrape away the excess, or touch up with the base color.
Step 2: Creating the Color Blocks
-
Tape the first line:
Once the base is 100% dry, apply a strip of painter’s tape horizontally around the pot. Position it roughly one-third of the way up from the bottom to define where the terra cotta color will remain visible. -
Paint the middle section:
Using a flat paintbrush, paint the area above the tape with your beige or oatmeal paint. This creates the soft middle band color seen in the photo. -
Remove tape:
Carefully peel off the painter’s tape while the beige paint is still slightly wet to ensure a cleaner edge. -
Dry middle section:
Allow this beige section to dry completely. Chalk paint dries quickly, usually within an hour, but acrylics might take a bit longer. -
Tape for the rim:
Now, place a new line of painter’s tape right at the heavy rim of the pot, or where the beige section meets the upper lip if your pot doesn’t have a distinct rim. -
Prepare the rim:
I usually press the edge of the tape down firmly with a credit card or fingernail to prevent any white paint from bleeding underneath. -
Paint the rim:
Apply the bright white acrylic paint to the top rim section using a foam brush for a smooth, streak-free finish. -
Paint inside rim:
Carry the white paint just over the top lip and down about an inch into the interior of the pot for a polished, finished look. -
Paint the bottom accent:
For the smallest pot shown, you can also add a distinct white band at the very bottom. Tape off a small section at the base and paint it white to match the rim. -
Reveal the lines:
Gently remove the tape from the rim area. Pull the tape away at a 45-degree angle for the sharpest possible line.
Step 3: Finishing Touches
-
Touch ups:
Inspect your lines. If any paint bled through, use a tiny detailed brush and the base terra cotta color to carefully correct the edges. -
Standardize the finish:
Since you used different types of paint, the sheen might vary. Lightly mist the entire pot with a clear matte sealer to unify the finish and protect the paint from water damage. -
Final cure:
Let the sealer cure for at least 24 hours before adding soil and plants to ensure the finish remains durable.
Pro Tip: Texture Trick
To make plastic look truly like clay, mix a teaspoon of baking soda into your beige and white paints. This adds a grainy texture that mimics real pottery.
Enjoy styling your fresh, modern pots with your favorite greenery to complete the look


Easy Striped Plastic Pots That Look Store-Bought
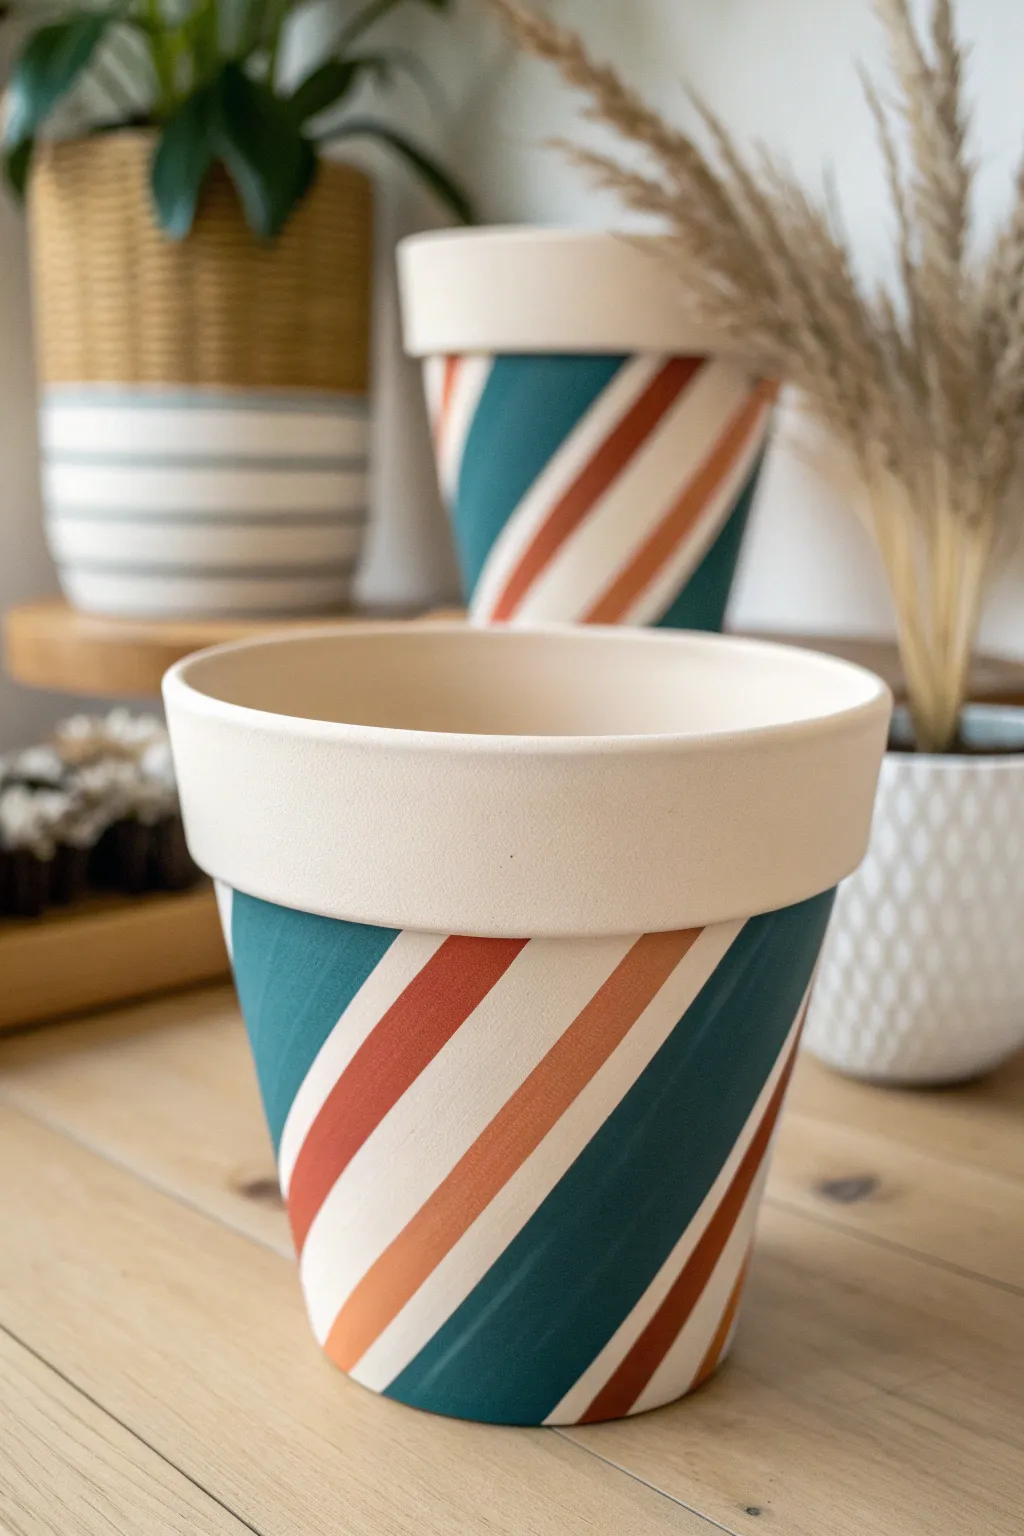
Transform inexpensive plastic planters into high-end decor with this modern, geometric painting technique. The crisp diagonal lines and warm, earthy color palette create a sophisticated look that rivals expensive ceramic versions found in boutique shops.
Step-by-Step
Materials
- Plastic flower pot (terra cotta color or beige works best)
- Sandpaper (medium grit)
- Painter’s tape (various widths recommended)
- Acrylic craft paints (creamy white, deep teal, burnt orange, peach)
- Flat paintbrushes
- Matte spray sealer or clear acrylic varnish
- Scissors
Step 1: Preparation
-
Clean the surface:
Start by thoroughly washing your plastic pot with warm soapy water to remove any manufacturing oils or dust. Dry it completely with a lint-free towel. -
Sand for adhesion:
Lightly scuff the exterior surface of the pot using medium-grit sandpaper. This step is crucial for plastic pots, as it gives the paint something to grip onto so it won’t peel later. -
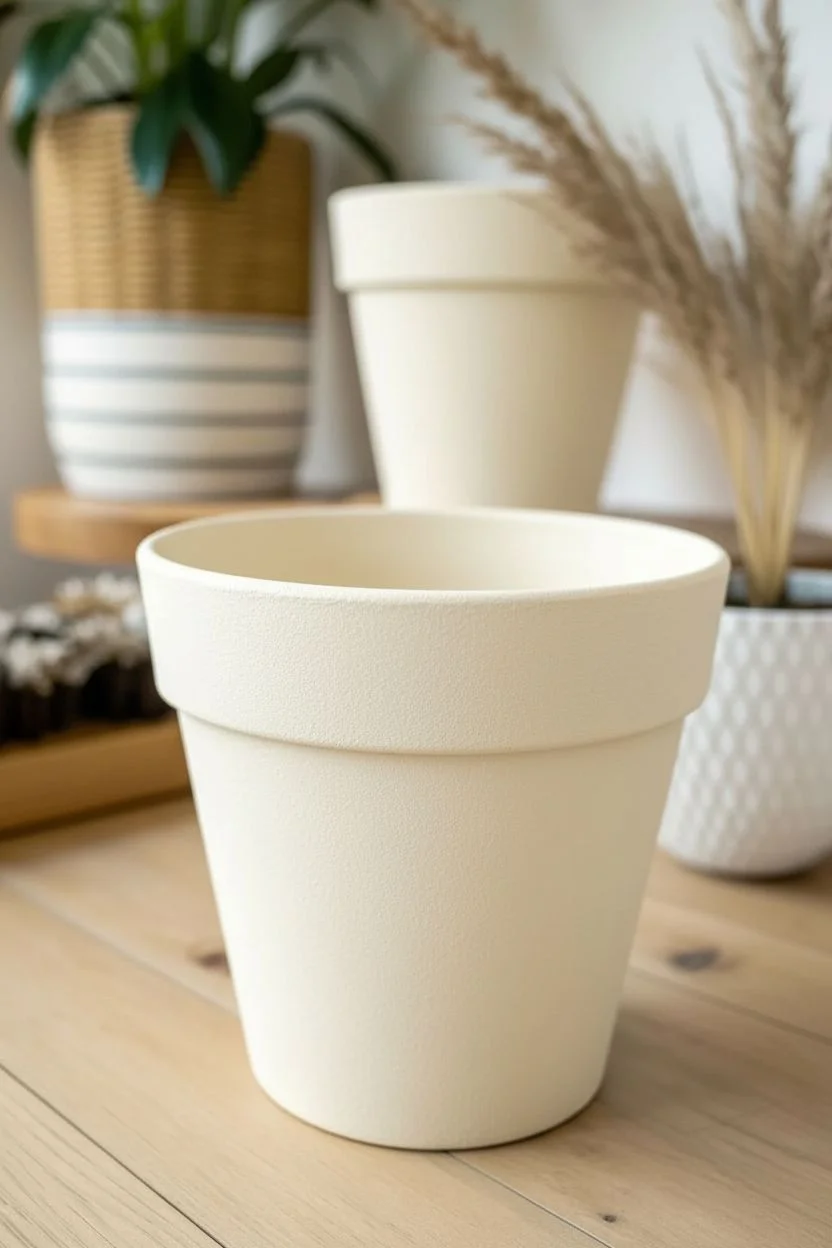
Prime the base:
Apply a base coat of creamy off-white or beige paint to the entire exterior of the pot, including the upper rim. This serves as your lightest stripe color later on. Let this dry completely. -
Add a second coat:
If your plastic pot had a dark original color, apply a second coat of the base color to ensure full, opaque coverage. Allow to dry for at least an hour.
Step 2: Taping the Design
-
Start the rim:
Place a strip of painter’s tape horizontally just under the rim of the pot. Often, I like to leave the rim solid cream to frame the pattern below. -
Apply first diagonal:
Begin your pattern by placing a long piece of painter’s tape diagonally across the body of the pot. Smooth it down firmly with your fingernail. -
Create spacing:
Place a second piece of tape parallel to the first one. You can vary the distance to create wide or thin stripes. Remember, the area covered by tape will remain your base cream color. -
Vary strip widths:
Continue adding diagonal tape strips around the entire circumference. For a dynamic look like the photo, try mixing wider tape pieces with thinner ones. -
Seal the edges:
Before painting, run your finger or a credit card firmly over all tape edges. This prevents paint from bleeding under the tape and ensures crisp lines.
Bleeding Lines?
If paint seeps under the tape, wait for it to dry fully. Then, lightly scrape the excess away with a craft knife or toothpick before doing touch-ups.
Step 3: Painting the Stripes
-
Plan your palette:
Decide on your color order. The image uses a repeating pattern of dark teal, burnt orange, and peach. Group your paints so you’re ready to go. -
Paint the first color:
Fill in a specific open stripe section with your deep teal paint. Use a flat brush and paint away from the tape edge rather than into it to minimize bleed. -
Add secondary colors:
Skip the next open section (or paint it your next color) and apply the burnt orange shade. Continue rotating through your colors—teal, orange, peach—until all exposed plastic is covered. -
Apply second coats:
Let the first layer dry to the touch, then apply a second coat to each colored stripe to make the colors rich and solid. -
Dry partially:
Allow the paint to set until it is tacky but not fully hardened. Removing tape too late can sometimes pull up the dried paint film.
Textured Effect
Mix baking soda into your acrylic paint (1 part soda to 2 parts paint) to give the stripes a gritty, authentic ceramic terracotta texture.
Step 4: Finishing Touches
-
Remove the tape:
Carefully peel back the painter’s tape at a 45-degree angle. Pull slowly and steadily to reveal your crisp cream lines underneath. -
Touch up imperfections:
If any paint bled through, use a very small detail brush and your base cream paint to neaten up the lines. -
Seal the project:
Once fully cured (usually 24 hours), spray the entire pot with a matte clear sealer. This protects your hard work from water damage and UV fading.
Place your favorite leafy plant inside and enjoy the custom pop of color it adds to your shelf

Relaxed Mandala Ring Designs for Meditative Pot Painting
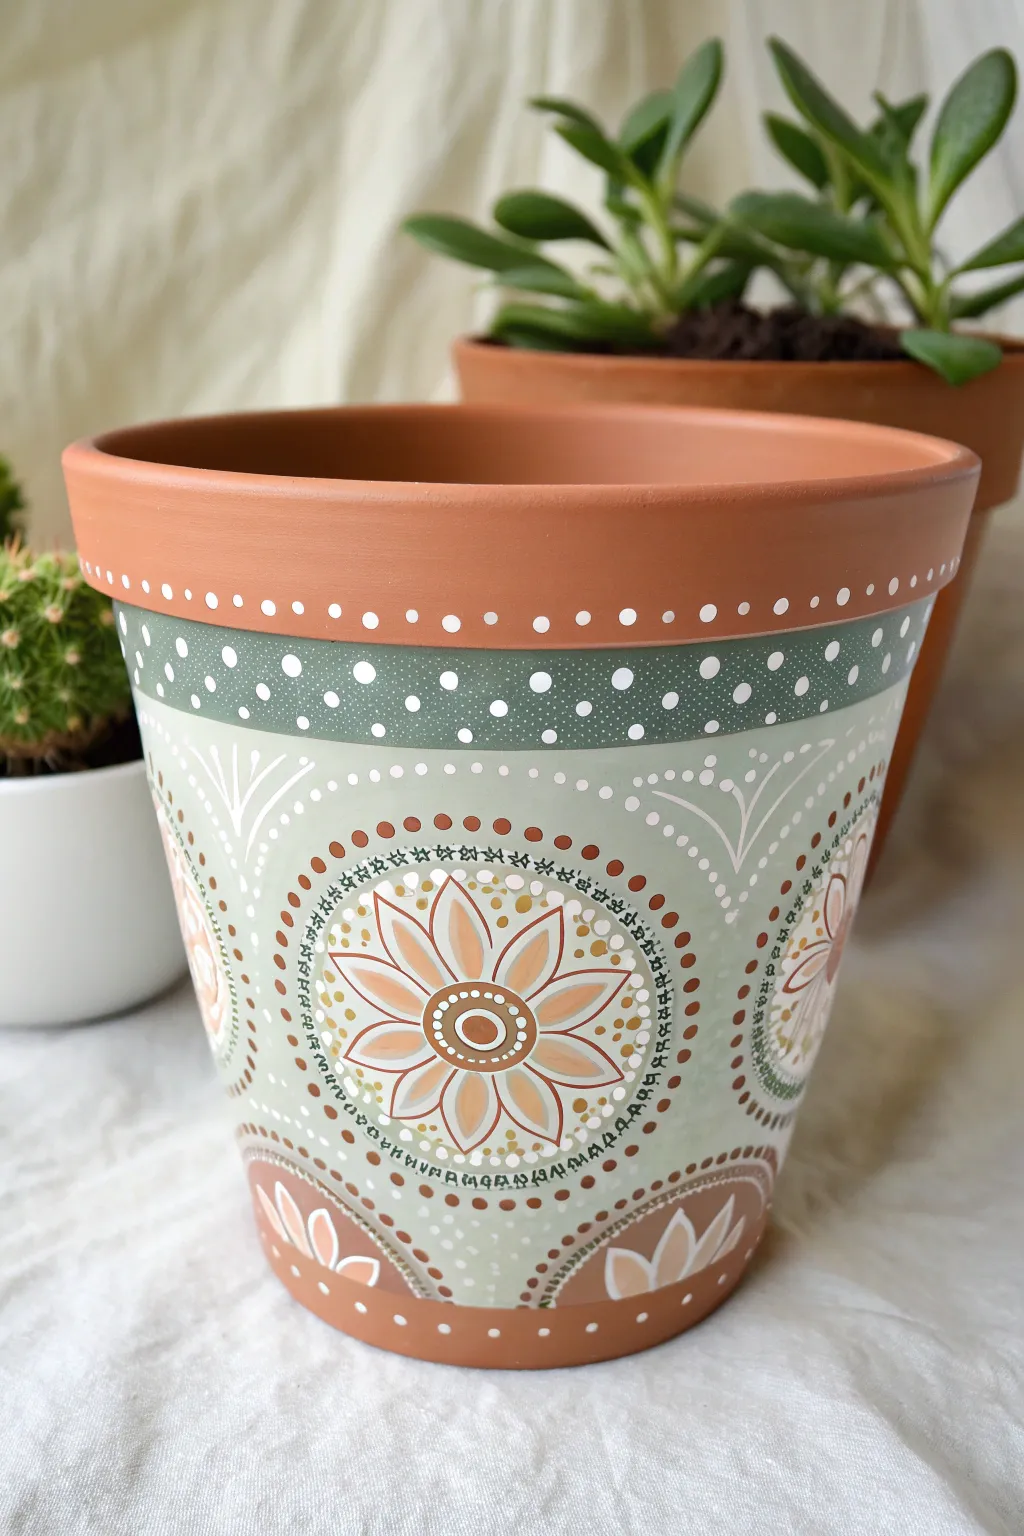
Transform a plain terracotta or plastic pot into a calming piece of decor with this sage green and white mandala design. The soothing color palette and repetitive floral patterns make this project as meditative to paint as it is beautiful to look at.
Detailed Instructions
Materials
- Flower pot (terracotta or plastic)
- Acrylic paints (sage green, white, burnt orange/terracotta, beige)
- Wide flat brush
- Small round detail brush (size 0 or 1)
- Dotting tools (various sizes)
- Pencil
- Compass or round objects for tracing
- Sealant spray (matte finish)
Step 1: Base Preparation
-
Clean the Pot:
Before picking up a brush, ensure your pot is completely clean and dry. If using a plastic pot, lightly sand it to help the paint adhere better. -
Paint the Upper Rim:
Using your terracotta or burnt orange paint, coat the top rim of the pot. Since we want an earthy look, you can skip this if you are using a real terracotta pot, but for plastic, painting this rim creates a faux-clay effect. Let it dry completely. -
Base Coat the Body:
Mix a soft sage green shade by combining green, a touch of beige, and white. Paint the entire body of the pot below the rim with this color. Apply two coats for even coverage, allowing drying time between layers. -
Create the Top Band:
Paint a darker band of green (mix sage with a tiny drop of black or dark green) right below the rim, about one inch wide. This creates a defined border for your dot work later.
Steady Hands
Rest your painting hand’s pinky finger on the pot surface as you paint. This acts as an anchor, stabilizing your brush strokes for cleaner lines.
Step 2: Mapping the Design
-
Mark the Centers:
Using a pencil, lightly mark four or five equidistant points around the middle of the pot. These will be the centers of your large flower mandalas. -
Draw Circles:
Use a compass or trace a jar lid to draw circles around these center points. This ensures all your main flower motifs remain the same size. -
Sketch the Petals:
Lightly sketch eight large, pointed petals inside each main circle. Don’t worry about perfection; the paint will refine the shapes.
Step 3: Detailed Painting
-
Paint the Petals:
Fill in the sketched petals with a soft beige or diluted terracotta color. Use your small round brush to get sharp points at the tips. -
Outline in White:
Once the beige is dry, carefully outline each petal with thin white lines. I like to stabilize my hand against the table for these delicate strokes. -
Add Inner Floral Details:
Inside the center of the flower, paint a small terracotta circle. Surround this with tiny white dots using a small dotting tool or the back of a paintbrush. -
Create the Dotted Halo:
Around the outer edge of your main flower, use a medium dotting tool to create a ring of sage green dots. Add a second ring of slightly smaller terracotta dots just outside or between them. -
Paint the Black Details:
Using a very fine brush and black paint, add tiny geometric scribbles or ‘x’ shapes between the outer dot ring and the petal tips to create contrast.
Oops, Smudged It?
Keep a damp Q-tip nearby. If you smear a dot or line while the paint is wet, quickly wipe it away with the Q-tip rather than rubbing with a cloth.
Step 4: Adding Fillers and Accents
-
Dot the Top Rim:
Returning to the very top terracotta rim, place evenly spaced white dots along the lower edge using a medium dotting tool. -
Embellish the Dark Green Band:
On the dark green band below the rim, use white paint to create a pattern of large and small dots. Try alternating sizes for a rhythmic look. -
Add Swirl Designs:
In the negative space between the large flower medallions, paint delicate white curved lines or ‘swags’ that connect the tops of the circles. -
Bottom Accents:
Paint half-circle designs at the very bottom edge of the pot, mirroring the petal colors and shapes from the main flowers. -
Final White Dots:
Fill any remaining large empty spaces on the sage background with tiny, scattered white specks to add texture and whimsy. -
Seal the Work:
Allow the pot to cure for 24 hours. Finish by spraying a clear matte sealer over the entire surface to protect your hard work from moisture and dirt.
Now your peaceful mandala pot is ready to house a succulent or spider plant


Simple Leafy Botanical Illustrations on Plastic Flower Pots
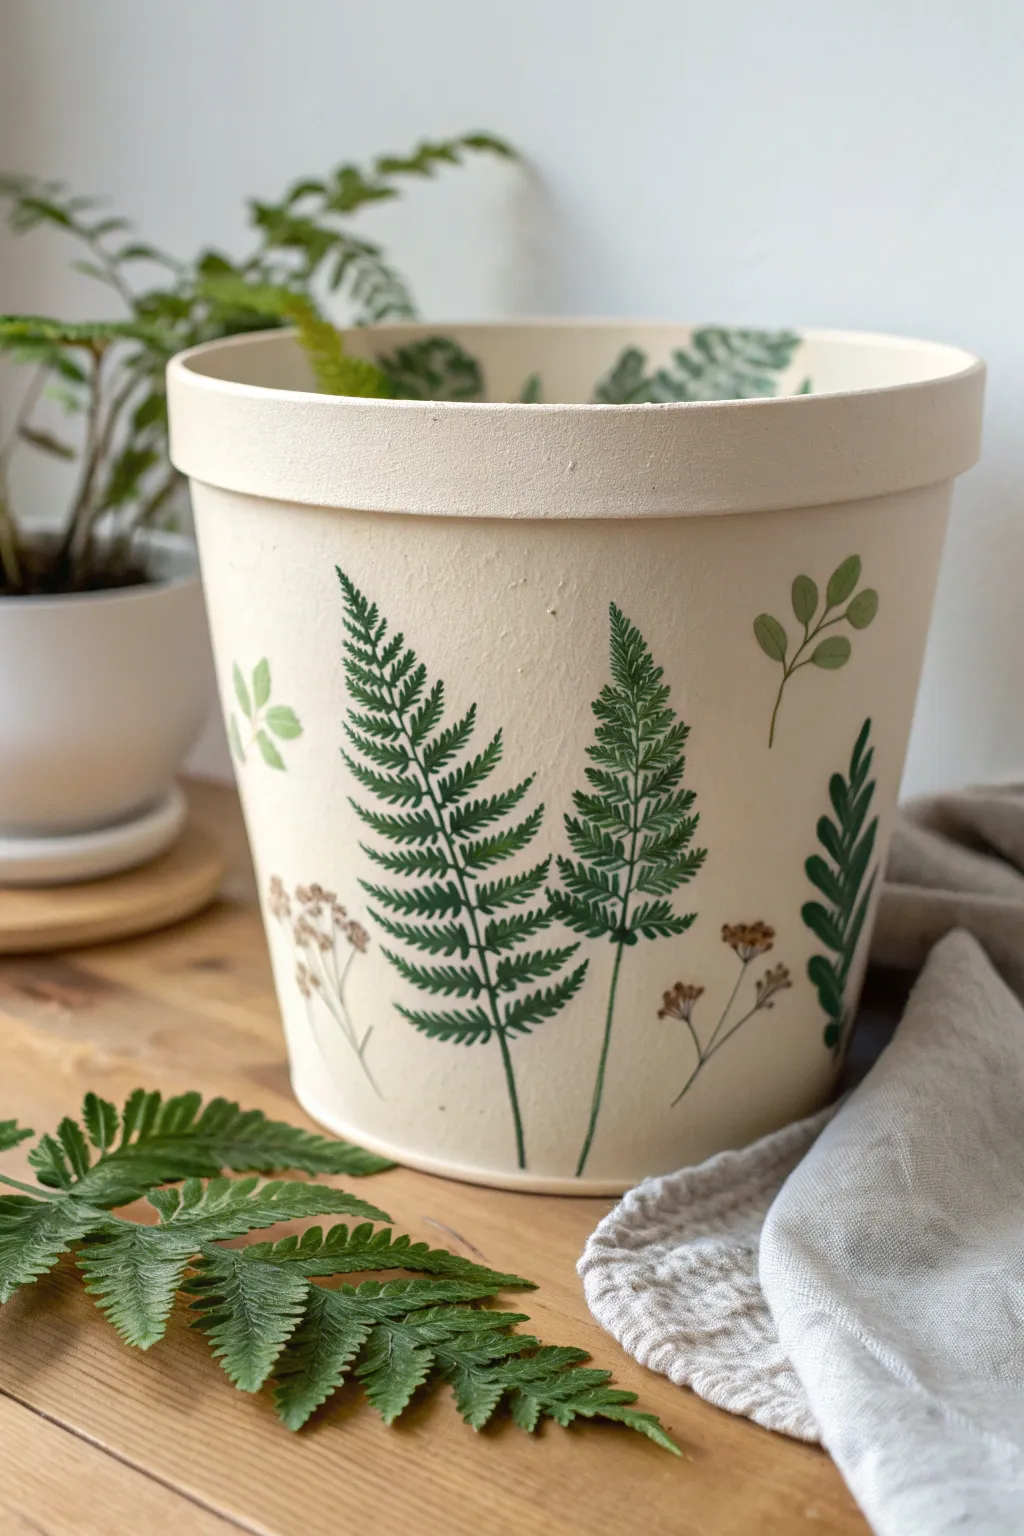
Transform a plain plastic planter into a high-end botanical accent piece using a soft, neutral base and detailed greenery illustrations. This project mimics the look of expensive ceramic ware with a smooth matte finish and delicate, scientifically accurate fern fronds.
Step-by-Step
Materials
- Plastic flower pot (medium size)
- Sandpaper (120-150 grit)
- Primer spray paint (plastic-bonding)
- Cream or off-white acrylic paint (matte finish)
- Foam brush or wide flat brush
- Various shades of green acrylic paint (forest, olive, sap)
- Brown acrylic paint (burnt umber or sienna)
- Fine detail brushes (size 0 and 00 round)
- Small flat brush (size 2 or 4)
- Matte clear acrylic sealer spray
- Palette for mixing
Step 1: Preparation & Base Coat
-
Surface Prep:
Begin by thoroughly cleaning the plastic pot with soap and water to remove any oils or manufacturing residue. Once dry, lightly scuff the entire exterior surface with sandpaper. This crucial step gives the plastic distinct ‘teeth’ for the paint to grip onto. -
Prime to Bond:
Apply a bonding primer spray specifically designed for plastic. Keep the can about 8-10 inches away and do light, sweeping passes to avoid drips. Let this layer dry completely according to the can’s instructions. -
First Base Layer:
Using a foam brush or wide flat brush, apply your cream-colored acrylic paint. Stroke horizontally around the rim and vertically on the body for a subtle texture. -
Achieving Opacity:
Let the first coat dry to the touch, then apply a second coat. Several thin layers are always better than one thick, gloopy one. I find three layers usually create that solid, ceramic-like finish. -
Full Cure:
Allow the base coat to dry completely, preferably overnight, before attempting any detailed painting on top.
Paint Slipping?
If acrylic paint slides off the plastic base coat, your base layer might be too glossy. Lightly sand the cream paint with fine sandpaper to dull it before painting the ferns.
Step 2: Painting the Ferns
-
Planning the Layout:
Visualize where your main fern fronds will go. You want varying heights—some reaching high, others lower—spaced unevenly around the pot for a natural, organic look. -
Stem Structure:
Mix a dark green with a tiny touch of brown. Using your size 0 liner brush, paint thin, slightly curved vertical lines to serve as the main stems (rachis) of the ferns. -
Leaf Base Shape:
Switch to a medium green. Starting at the bottom of a stem, paint small, angled dashes outward on both sides. These should start shorter at the bottom, get wider in the middle, and taper to a point at the top. -
Defining the Fronds:
Using your smallest detail brush (00), refining the ‘dashes’ into individual leaflets. For ferns like the ones shown, edges should be slightly serrated or jagged, not perfectly smooth loops. -
Adding Depth:
Mix a darker forest green shade. Carefully paint the inner section of each leaflet (where it connects to the stem) to create a shadow effect, giving the fern dimension. -
Highlighting:
Mix a lighter sap green or add a drop of yellow to your base green. Add tiny touches to the tips of the upper leaves where the light would naturally hit.
Make It 3D
Decoupage actual pressed dried ferns onto the pot surface using Mod Podge for an incredibly realistic look, then seal heavily with matte spray.
Step 3: Adding Variety
-
Different Leaf Types:
To break up the pattern, paint a few stems of a different foliage type, such as rounded eucalyptus leaves. Use a darker olive green and paint opposite pairs of small ovals climbing a thin stem. -
Dried Flower Accents:
Mix a diluted brown paint. Add delicate, twiggy stems low on the pot, filling gaps between the large ferns. Their lines should be very fine and brittle-looking. -
Seed Heads:
At the ends of the twiggy stems, dab tiny clusters of brown and tan dots to resemble dried seed heads or withered baby’s breath.
Step 4: Finishing and Sealing
-
Rim Clean Up:
Check the upper rim of the pot. If any green detail paint went astray, touch it up with your cream base color for a crisp edge. -
Final Inspection:
Look over your botany. If any area looks too sparse, add a small floating leaf or a tiny sprig to balance visual weight. -
Sealing the Work:
Once the artwork is bone dry (wait a few hours), take the pot outside and spray it with a matte clear acrylic sealer. This protects your handiwork from water drips and soil stains.
Place your favorite houseplant inside and enjoy the calm, natural vibe this piece brings to your shelf
BRUSH GUIDE
The Right Brush for Every Stroke
From clean lines to bold texture — master brush choice, stroke control, and essential techniques.
Explore the Full Guide
Kid-Friendly Animal Faces on Plastic Flower Pots
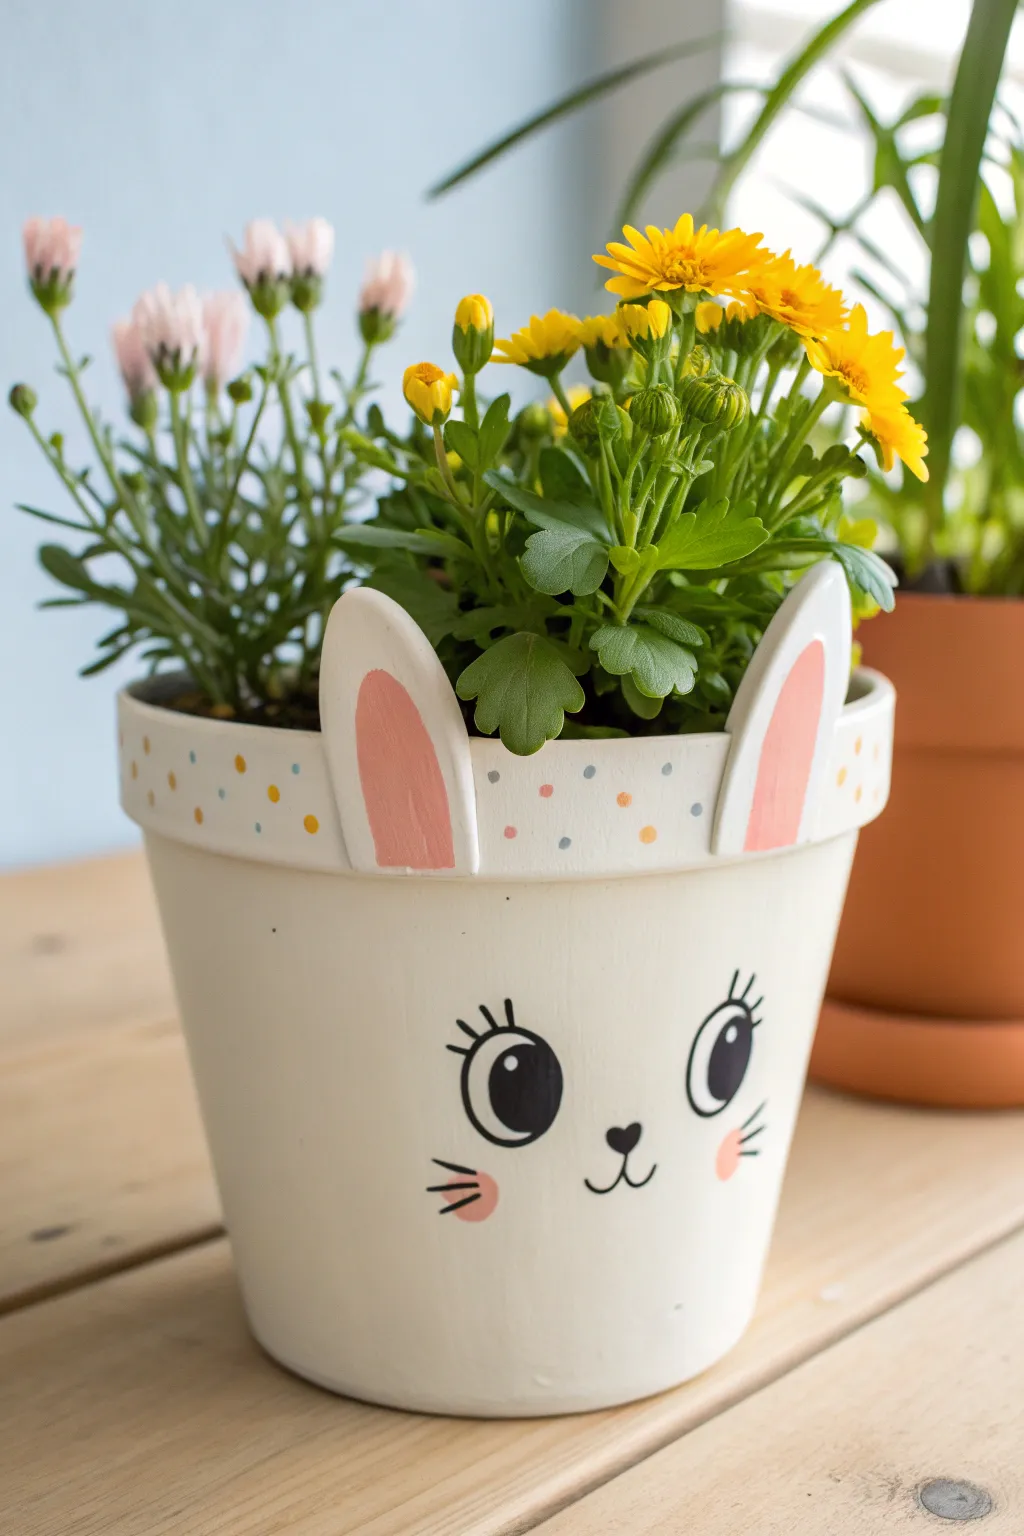
Transform a plain pot into an adorable bunny friend complete with perky ears and a sweet face. This charming project combines simple painting techniques with a clever use of craft foam to bring the character to life.
Step-by-Step Guide
Materials
- Plastic flower pot (with a rim)
- White acrylic paint (multi-surface or outdoor formula recommended)
- Pink acrylic paint
- Black acrylic paint
- Yellow, blue, and orange acrylic paint (for confetti dots)
- White craft foam sheet
- Hot glue gun and glue sticks
- Sponge brush
- Small round detail brush
- Medium flat brush
- Scissors
- Pencil
- Toothpick or dotting tool
- Sandpaper (fine grit)
Step 1: Prepping the Base
-
Clean the surface:
Before anything else, wipe down your plastic pot with warm soapy water to remove any oils or dust. Let it dry completely. -
Light sanding:
Since plastic can be slick, gently scuff the surface with fine-grit sandpaper. This creates a ‘tooth’ for the paint to grab onto. -
Apply base coat:
Using a sponge brush, apply a layer of white acrylic paint over the entire exterior of the pot. Don’t worry if it looks streaky at first. -
Layer up:
Let the first coat dry fully, then apply 2-3 additional coats of white until you have a solid, opaque coverage.
Paint Peeling?
If the paint scratches off the plastic easily, apply a layer of spray primer specifically designed for plastic bonding before you start your white base coat.
Step 2: Creating the Ears
-
Sketch the shape:
On your white craft foam, lightly draw two long, rounded bunny ear shapes. Make sure the bottom edge is straight so it can sit flush against the rim. -
Cut them out:
Carefully cut out your foam ears with scissors. -
Paint the inner ears:
Mix a soft pink color and paint an elongated oval shape inside each foam ear, leaving a nice white border around the edges. -
Dry and attach:
Once the pink paint is dry, use a hot glue gun to attach the ears to the inside top edge of the pot’s rim. Position them so they peek up cheerfully.
Fluffy Texture
Mix a tiny amount of baking soda into your white paint for the body. This creates a slightly textured, matte finish that mimics soft fur.
Step 3: Painting the Face
-
Sketch the features:
Lightly trace the large oval eyes, nose, and mouth onto the white pot with a pencil to ensure everything is centered. -
Fill the eyes:
Using a small round brush and black paint, carefully fill in the large oval shapes for the eyes. -
Add the nose:
Paint a small, upside-down heart shape in black for the nose, placed centrally between the eyes. -
Draw the mouth:
With the very tip of your detail brush (or a permanent marker if you prefer), draw two curved lines coming down from the nose to form the mouth. -
Create the cheeks:
Dip your finger or a small round sponge into the pink paint and dab two soft circles onto the cheeks. I like to blot excess paint on a paper towel first for a softer look. -
Add whiskers:
Paint three short black lines extending from each pink cheek area. -
Eye highlights:
Dip the handle end of a paintbrush into white paint and add a large dot near the top of the black pupil and a smaller dot below it to make the eyes sparkle. -
Eyelashes:
Add three small, curved lashes to the top of each eye using your finest brush.
Step 4: Adding the Confetti Rim
-
Prepare the colors:
Squeeze out small amounts of yellow, pink, blue, and orange paint onto your palette. -
Dot the rim:
Using a toothpick or a dotting tool, randomly place colorful polka dots all around the rim of the pot. -
Vary the spacing:
Keep the dots relatively sparse and random so it looks like confetti sprinkles. -
Seal the deal:
Once all paint is totally dry (give it overnight to be safe), brush on a clear acrylic sealer to protect your bunny from water and dirt.
Fill your new planter with colorful blooms like chrysanthemums to give your bunny a beautiful floral crown


Have a question or want to share your own experience? I'd love to hear from you in the comments below!