Paper mache is basically a blank, bumpy little playground just waiting for paint—and that texture can make even simple designs look extra charming. Here are my favorite paper mache painting ideas that start with classic, beginner-friendly wins and gradually drift into the “okay, that’s seriously cool” zone.
Color-Blocked Paper Mache Bowl
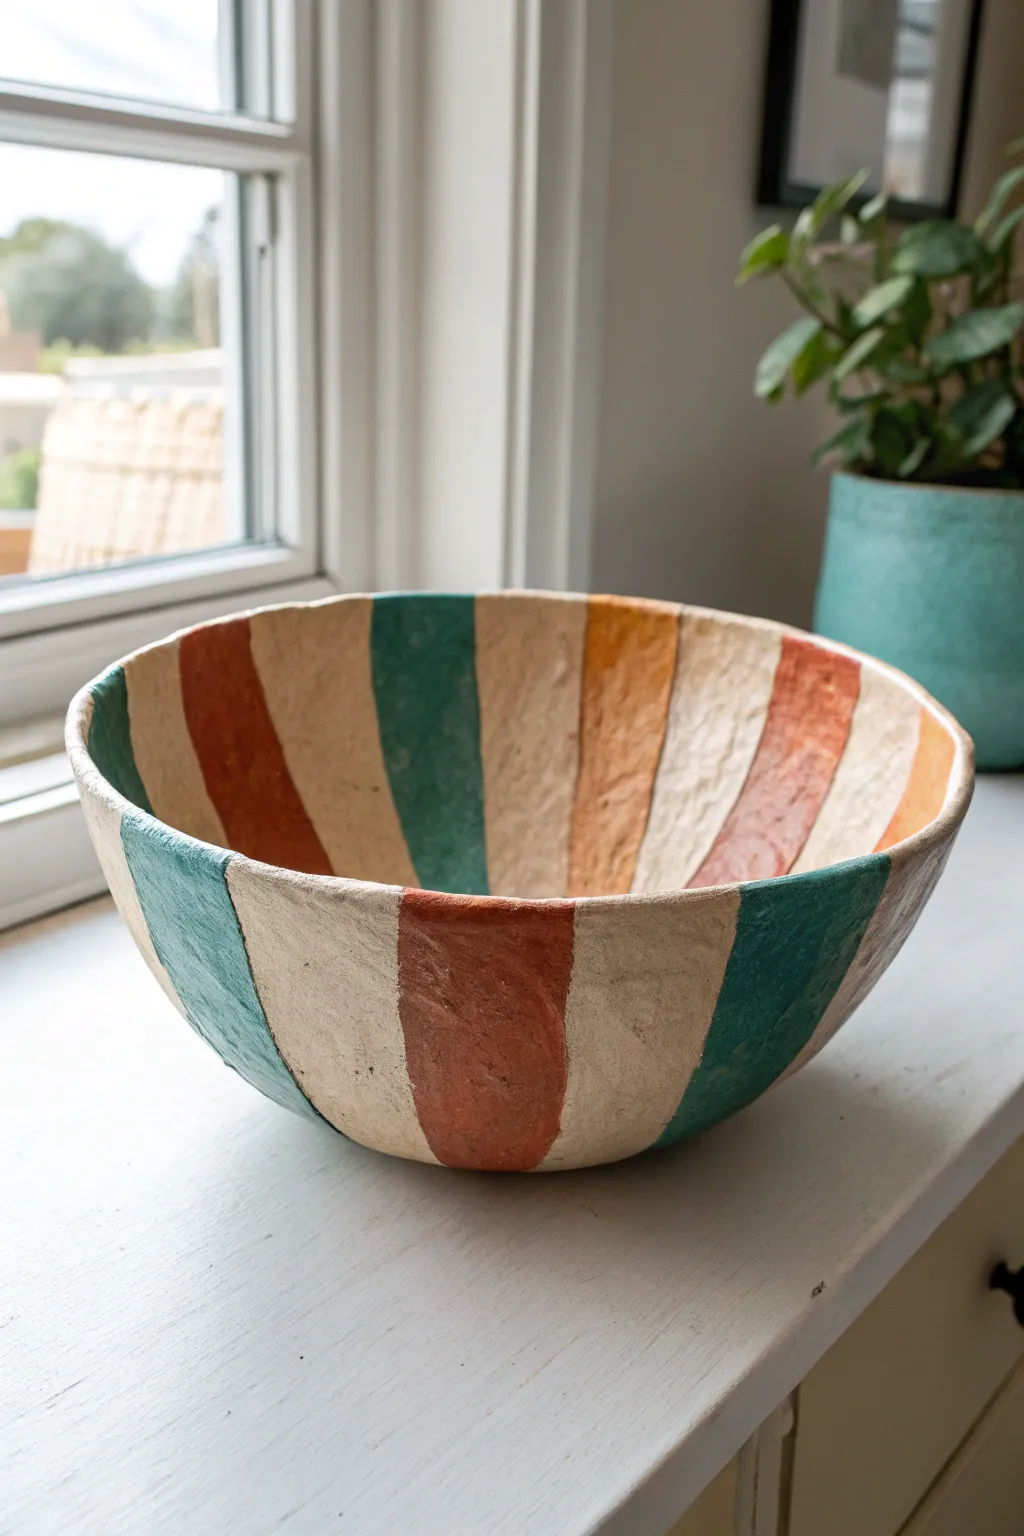
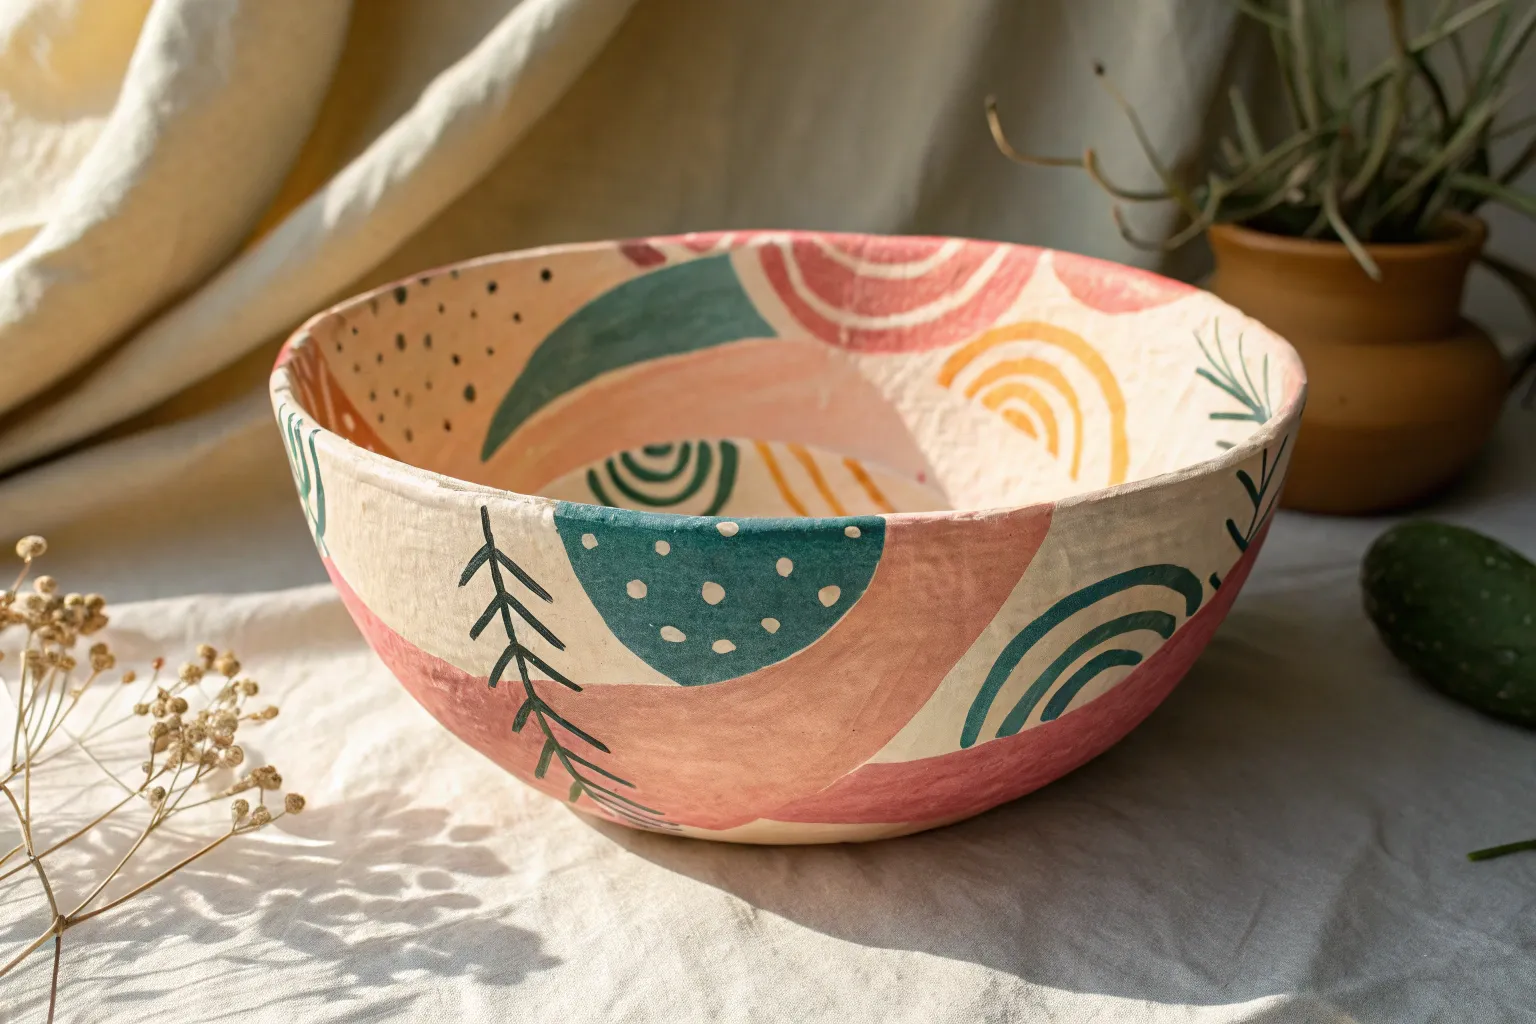
Bring a touch of artisan charm to your home with this textured paper mache bowl featuring bold, vertical stripes. Its muted palette of rust, teal, and cream gives it a sophisticated, earthy feel perfect for shelf styling.
How-To Guide
Materials
- Balloon or bowl to use as a mold
- Newspaper strips
- Paper mache paste (flour and water or PVA glue and water)
- White acrylic gesso or primer
- Acrylic paints: Cream/Off-white, Rust/Terracotta, Teal/Deep Green-Blue, Golden Ochre
- Plastic wrap or petroleum jelly (release agent)
- Flat paintbrushes (medium and large)
- Fine grit sandpaper
- Matte varnish or sealant
- Pencil
Step 1: Building the Form
-
Prepare your mold:
Choose a bowl from your cupboard that has a shape you like, or inflate a balloon for a rounder bottom. If using a bowl, cover the outside tightly with plastic wrap to ensure your paper mache doesn’t stick permanently. -
Mix the paste:
Create a smooth paper mache paste by mixing one part flour with two parts water (or use a 1:1 mixture of PVA glue and water). Whisk it thoroughly until there are no lumps. -
Tear the paper:
Rip your newspaper into strips approximately 1 inch wide and 4-6 inches long. Tearing the paper rather than cutting it creates softer edges that blend together more seamlessly. -
Apply the first layer:
Dip a strip into the paste, squeegee off the excess with your fingers, and lay it across your mold. Smooth it down completely. Continue until the mold is covered. -
Build thickness:
Apply 4 to 5 layers of paper strips, alternating the direction of the strips (horizontal then vertical) with each layer to add structural strength. Let the bowl dry completely between every couple of layers to prevent mold growth. -
Remove from mold:
Once the final layer is completely bone-dry and hard, carefully pop the paper shell off your mold. Peel away any plastic wrap from the inside. -
Trim the rim:
Using sharp scissors, trim the uneven edge of the rim. You can cut it perfectly straight or leave a slight, organic wave to mimic the handmade look in the photo.
Step 2: Priming and Mapping
-
Smooth the edges:
Take a strip of paper dipped in paste and fold it over the cut rim to seal the raw edge. Do this all around the circumference and let it dry. -
Sand lightly:
Give the entire surface a quick sanding with fine-grit sandpaper to knock down any large rough patches, but don’t over-smooth it—texture is part of the charm. -
Apply gesso:
Coat the entire bowl, inside and out, with white gesso or primer. This creates a solid, bright base that will make your stripe colors pop. -
Sketch the stripes:
Using a pencil, lightly mark out your vertical sections. Ideally, aim for somewhat equal widths, but don’t worry about mathematical precision. The stripes should run continuously from the outside rim down to the base and up the inside.
Textural Depth
For a stone-like finish, mix a teaspoon of baking soda into your acrylic paint before applying. It creates a gritty, matte texture that looks very high-end.
Step 3: Painting the Design
-
Paint the base color:
Select the stripes that will be your neutral cream color. Paint these sections first, filling them in completely on both the interior and exterior. -
Add the rust stripes:
Mix a warm terracotta or rust shade. Paint specific alternating stripes with this color. I find it easiest to paint the exterior stripe first, then carry the color over the rim to the interior to ensure they align. -
Apply the teal accents:
Using a separate brush, apply your deep teal or green-blue paint to the designated sections. Be careful near the edges where colors meet; a slightly shaky hand actually adds to the organic aesthetic. -
Fill the ochre sections:
Paint the remaining stripes with a golden ochre or mustard yellow tones. If your paint is translucent, apply a second coat after the first dries. -
Touch up lines:
Inspect the vertical lines where colors touch. You want them distinct but not perfectly taped-off. Use a small brush with the appropriate color to fix any major bleeds. -
Seal the work:
Finish with a coat of matte varnish. This seals the porous paper and paint, giving the bowl a finished look and protecting it from dust.
Warping Walls
If the bowl warps while drying, it usually means the layers were too wet. Place a heavy object inside or prop the sides with jars while it dries to reshape it.
Now you have a stunning, bespoke vessel ready to display your favorite trinkets

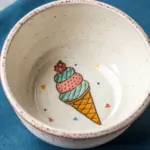
Watermelon Slice Bowl Paint Job

Transform a simple paper mache bowl into a refreshing slice of summer with this vibrant watermelon paint job. The whimsical combination of a striped rind exterior and a juicy, seed-flecked interior makes for a delightful and functional decorative piece.
Detailed Instructions
Materials
- Paper mache bowl (dried and primed white)
- Acrylic paints: Bright Red, Titanium White, Light Green (Lime), Dark Forest Green, Black
- Medium flat brush (approx. 3/4 inch)
- Small round detail brush
- Palette or paper plate for mixing
- Cup of water
- Paper towels
- Clear acrylic sealer (glossy)
Step 1: Painting the Juicy Interior
-
Mix the perfect pink-red:
Start by squeezing out a generous amount of Bright Red paint onto your palette. Add a very small touch of Titanium White to soften it slightly into a ‘watermelon flesh’ pinkish-red color. -
Apply the base coat:
Using your medium flat brush, paint the entire interior of the bowl with your red mixture. Use long, smooth strokes to ensure even coverage. -
Create depth variations:
While the paint is still slightly wet, I like to dip the brush into just a hint of pure red or slightly more white and streak it gently into the wet base. -
Smooth the texture:
This subtle blending creates a natural, fleshy fruit texture rather than a flat block of color. Let this interior coat dry completely before moving on.
Uneven Stripes?
If your dark green stripes look too stiff, dry-brush a little lime green back over the edges. This jagged blending mimics the natural mottling of real watermelon rind.
Step 2: Creating the Rind Exterior
-
Base coat the outside:
Clean your flat brush thoroughly. Paint the entire exterior of the bowl with your Light Green (Lime) paint. This will be the lighter parts of the watermelon skin. -
Paint the rim:
Don’t forget the top rim edge of the bowl. Paint this with a very pale green—mix a lot of Titanium White with a tiny dot of your Light Green. This mimics the white rind layer found on real melons. -
Let it dry:
Allow the exterior green base coat to dry to the touch to prevent smearing when you add the stripes. -
start the dark stripes:
Load your brush with Dark Forest Green. Starting from the bottom center of the bowl, paint wavy, vertical lines upward toward the rim. -
Vary the line width:
Make these dark stripes irregular—some thicker, some thinner. Real watermelons aren’t perfect, so wiggle your brush slightly as you pull the paint up. -
Feather the edges:
To make the stripes look organic, use a drier brush to feather the edges of the dark green stripes slightly into the lime green background. -
Connect the bottom:
Ensure all your dark stripes meet or overlap naturally at the very bottom center of the bowl, grounding the pattern.
Level Up: Bite Marks
For a playful twist, use scissors or a craft knife to cut a jagged ‘bite’ out of the rim before painting, then paint the exposed paper mache edge white like the rind.
Step 3: Adding Seeds and Details
-
Switch to the detail brush:
Once the red interior is fully dry, switch to your small round detail brush and load it with Black paint. -
Paint teardrop shapes:
Paint small teardrop shapes scattered randomly inside the bowl. Point the narrow end of the teardrop toward the center of the bowl. -
Create a pattern:
Distribute the seeds evenly but randomly. You can place a rough circle of seeds near the bottom and scatter more up the sides. -
Add rim definition:
If your rim edge got messy, use the pale green/white mixture to carefully tidy up the top edge, creating a crisp separation between the red interior and green exterior. -
Protect the finish:
Once all paint is completely bone dry (leave it overnight if possible), apply a coat of glossy clear acrylic sealer. -
Final gloss check:
The gloss sealer will give the ‘fruit’ interior a permanent juicy, wet look and protect your paint from chipping.
Now you have a cheerful splash of color ready to brighten up any table setting


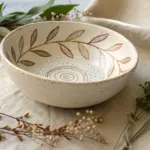
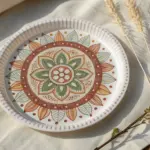
Lemon or Citrus Ombre Bowl
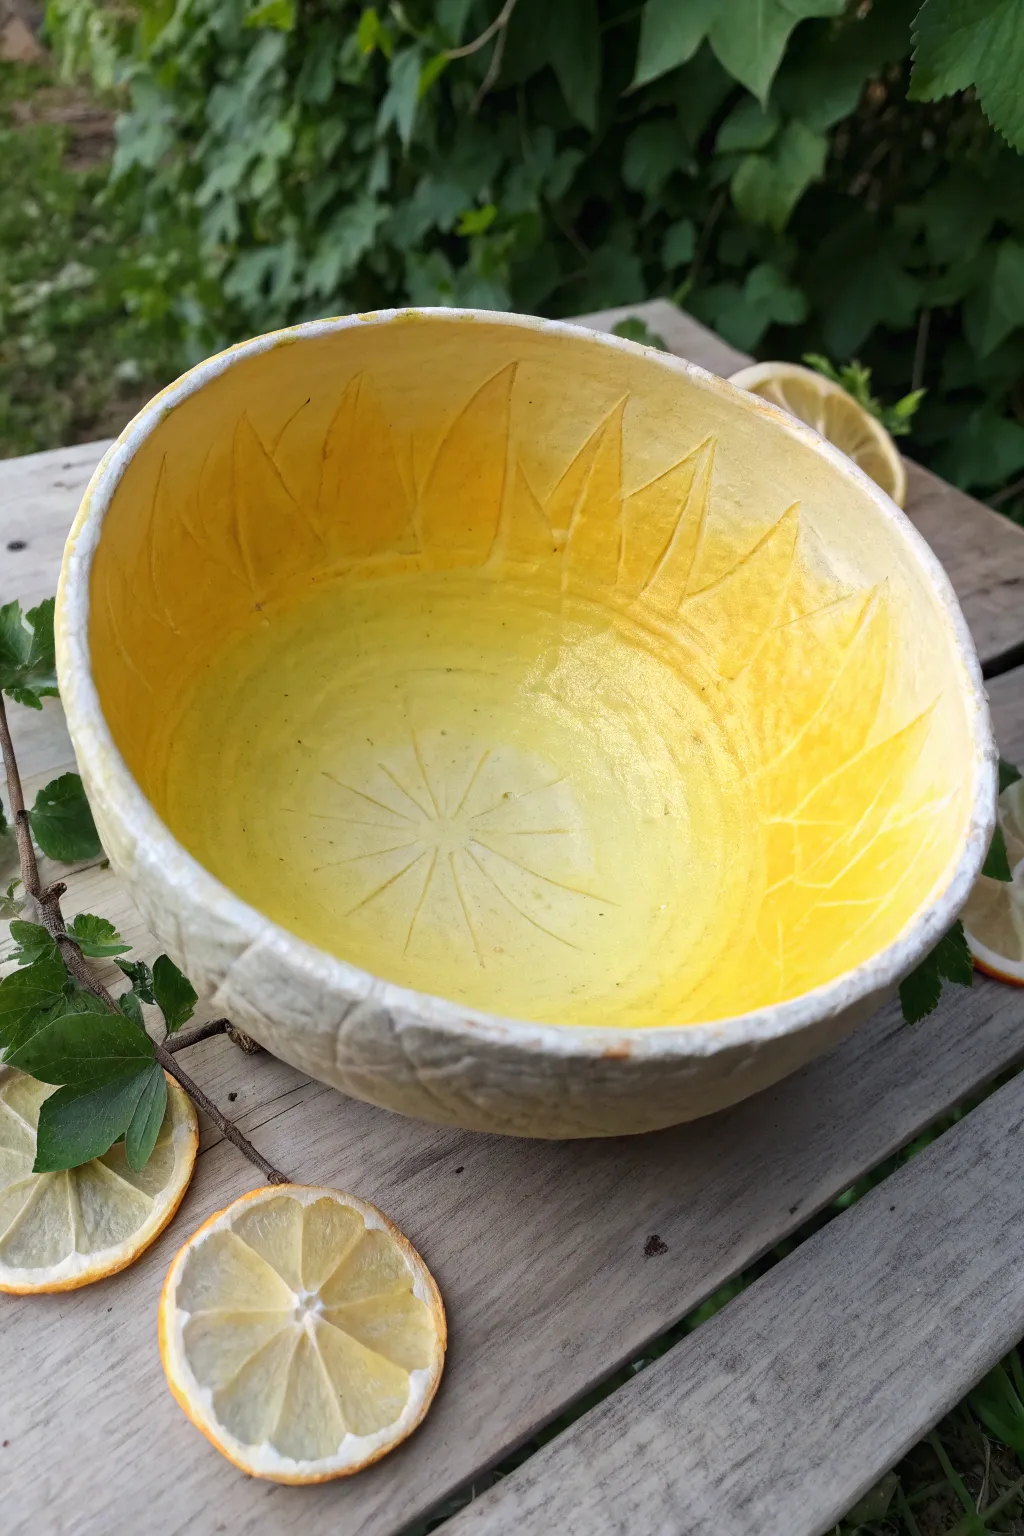
Brighten up your home decor with this cheerful paper mache bowl inspired by the cross-section of a lemon. This project combines simple molding techniques with clever carving and a radiant yellow gradient to mimic the juicy segments of fresh citrus.
How-To Guide
Materials
- Paper mache clay or instant papier-mâché mix
- Bowl for a mold (plastic or ceramic)
- Plastic wrap
- Cooking oil or release spray
- Sandpaper (medium and fine grit)
- Acrylic paints: White, bright lemon yellow, dark mustard yellow
- Gesso (white primer)
- Carving tools or linocut gouges
- Clear matte or satin varnish
- Paintbrushes (flat shader and detail round)
Step 1: Creating the Base Form
-
Prepare your mold:
Select a bowl from your kitchen to use as a mold. A medium-sized cereal or soup bowl works well. Cover the outside completely with plastic wrap, pulling it tight to minimize wrinkles. You can also lightly grease the plastic with a bit of cooking oil. -
Apply the paper mache:
Mix your paper mache clay according to the package instructions until it has a smooth, dough-like consistency. Press a layer of clay over your mold, aiming for a thickness of about 1/4 inch. -
Smooth the exterior:
Dip your fingers in water and smooth out the exterior surface as much as possible while the clay is wet. This will save you significant sanding time later. -
Dry the bowl:
Allow the bowl to dry completely. This can take 24 to 48 hours depending on humidity. Don’t rush this step; cool, damp clay is impossible to carve cleanly. -
Demold and sand:
Gently pop the dried paper mache off the mold and peel away the plastic wrap. Sand the rough edges of the rim and any bumps on the interior surface until smooth.
Step 2: Carving the Citrus Detail
-
Mark the center:
Using a pencil, lightly mark the exact center of the inside of the bowl. Draw a small circle here to represent the pith core. -
Draw the segments:
Sketch radiating lines from the center circle up to the rim, creating triangular wedges like lemon slices. Don’t worry about being perfectly geometric; a little organic variation looks more natural. -
Carve the dividing lines:
Using a V-gouge or a sharp craft knife, carve shallow grooves along your pencil lines. These grooves represent the membranes between the fruit segments. -
Create texture:
Inside the triangular segments, use a small U-gouge to gently scrape away tiny bits of the surface. This creates a pitted texture that mimics juicy fruit pulp once painted. -
Define the rim:
Carve a distinct line about half an inch below the rim on the inside. This separates the ‘fruit’ area from the white pith rind at the top.
Clean Carving
If the paper mache crumbles while carving, dampen the area slightly with a wet sponge. Wait a minute, then carve—the moisture helps bind the fibers for a cleaner cut.
Step 3: Painting the Ombre Effect
-
Prime the surface:
Coat the entire bowl, inside and out, with a layer of white gesso. This seals the paper mache and provides a bright base for the yellow to pop against. -
Base coat the exterior:
Paint the outside of the bowl either a creamy white or a very pale textural grey to mimic a lemon rind’s skin. I find a slightly messy, textured application looks best here. -
Start the center gradient:
Mix a very pale yellow (white with a drop of lemon yellow). Paint the center circle and the bottom third of the interior bowl with this pale shade. -
Apply the mid-tone:
Switch to pure lemon yellow. Paint the middle band of the bowl interior, blending the wet edge into the pale center color while the paint is still workable. -
Deepen the upper edge:
Mix a touch of dark mustard into your lemon yellow. Apply this to the top portion of the segments, just below the white rim line, blending downward into the pure yellow. -
Highlight the membranes:
Using a very fine brush and slightly watered-down white paint, carefully re-trace the carved grooves between the segments. Let the paint settle into the recesses. -
Dry brush texture:
Dip a dry brush into a tiny amount of white paint and lightly whisk it over the textured ‘pulp’ areas. This catches the high points and emphasizes the juiciness. -
Seal the work:
Once fully dry, apply two coats of clear matte or satin varnish to protect your artwork.
Scented Finish
Mix a few drops of lemon essential oil into your final varnish layer. The bowl will release a subtle, fresh citrus scent whenever it warms up in a sunbeam.
Place your vibrant bowl in a sunny spot to catch the light and show off those beautiful carved textures


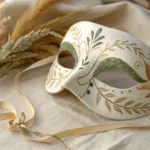
Bold Pattern Paper Mache Mask
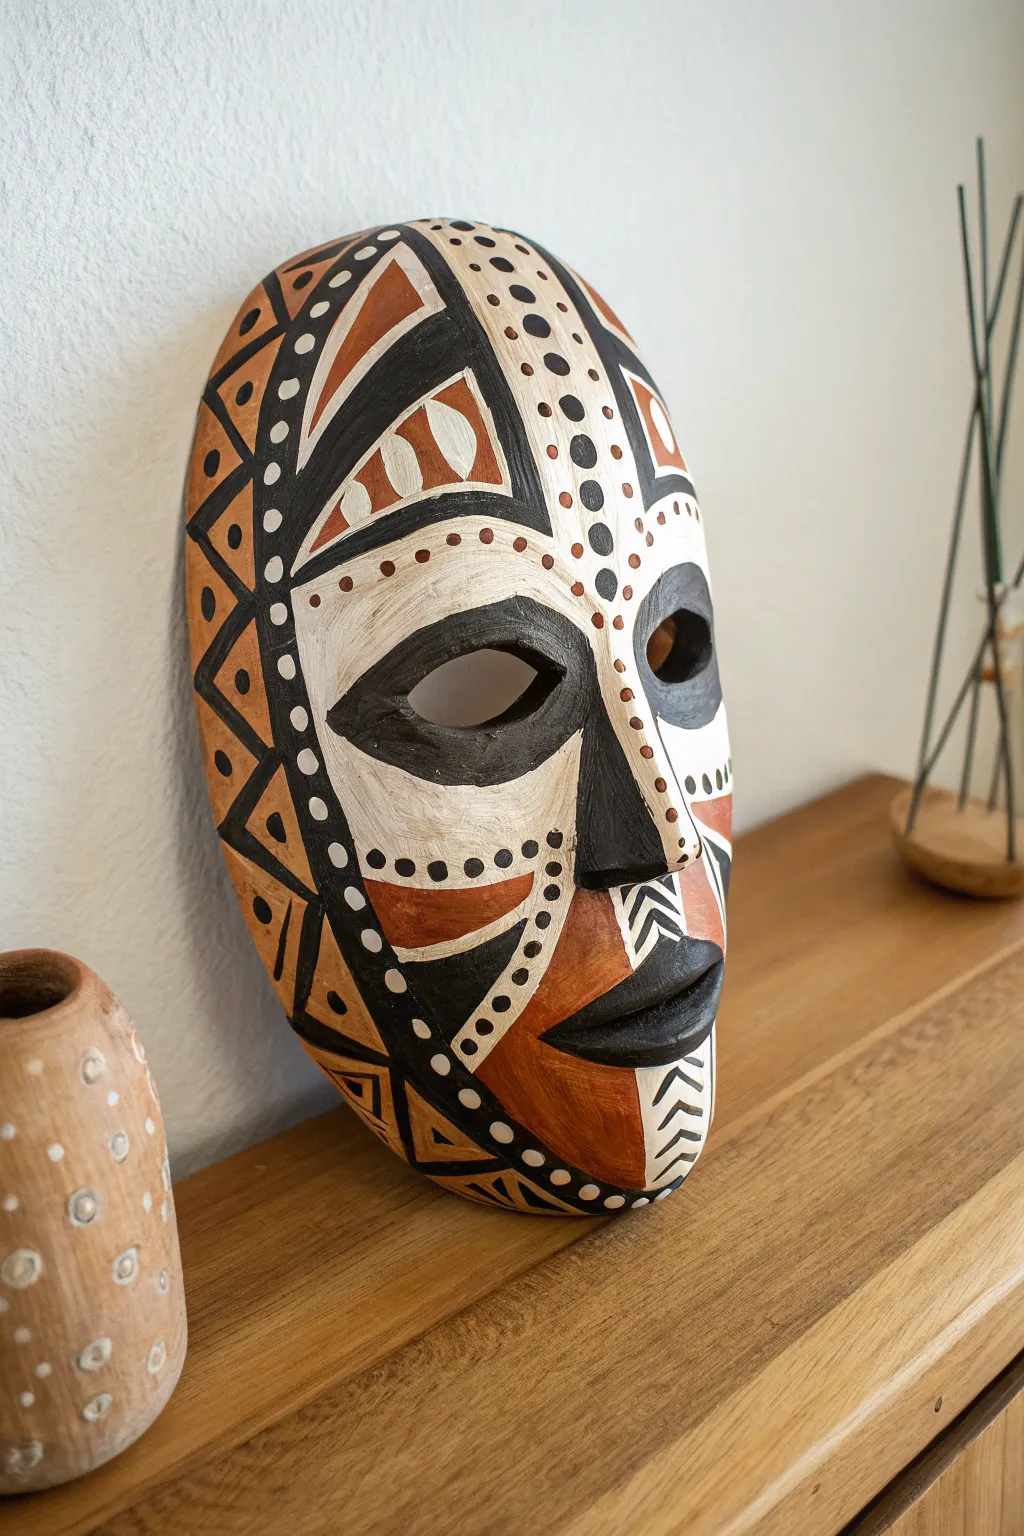
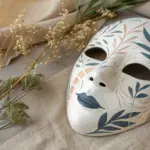
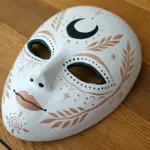
Bring bold character to your wall with this striking paper mache mask project. Featuring high-contrast black, white, and terracotta earth tones, this design uses repetitive geometric patterns and dots to create a mesmerizing, textured look.
Step-by-Step Guide
Materials
- Paper mache mask base (store-bought or handmade)
- Acrylic paints: Black, Titanium White, and Terracotta/Burnt Sienna
- Gesso or white primer
- Fine grit sandpaper (220 grit)
- Pencil and eraser
- Flat shader brushes (medium and small)
- Fine round detail brush
- Dotting tools or wooden skewer ends
- Matte or satin varnish spray
- Palette for mixing
Step 1: Preparation and Base Coat
-
Smooth the Surface:
Before painting, inspect your paper mache mask for any rough textures. Lightly sand the entire surface with 220-grit sandpaper to knock down high spots, ensuring a smoother canvas for your detailed painting. -
Apply Primer:
Coat the entire mask, front and back, with a layer of white gesso. This seals the porous paper mache and ensures your paint colors will appear vibrant and opaque later on. Let this dry completely. -
Establish the Base Color:
Paint the entire front face of the mask with a layer of titanium white acrylic. This might seem redundant after gesso, but it provides a consistent, clean finish for the white sections of the final design.
Step 2: Sketching the Design
-
Map Main Features:
Using a pencil very lightly, draw the prominent nose shape, the oval eye sockets, and the mouth area. These central features anchor the rest of the symmetrical design. -
Define the Forehead:
Sketch a large, central triangle pointing upwards from the bridge of the nose to the top of the forehead. Flank this with curving bands that follow the rounded shape of the mask’s edge. -
Create Geometric Zones:
Divide the cheek and chin areas into angled sections. Draw triangular zones on the outer edges and a diamond or chevron pattern on the chin. Don’t worry about the tiny dots yet; just map the blocks of color.
Wobbly Lines?
If your hands are shaky while painting fine lines, try resting your pinky finger on a dry part of the mask to stabilize your hand as you pull the brush.
Step 3: Blocking in Color
-
Paint the Black Areas:
Start with your black acrylic and a medium flat brush. Fill in the deep eye sockets, likely covering the eye holes themselves if you want that depth, and the long, triangular nose bridge. Paint the lips black as well. -
Add Terracotta Accents:
Switch to your terracotta or burnt sienna paint. Fill in the specific geometric bands on the cheeks, the triangles on the forehead, and the outer rim stripes. Mixing a tiny bit of white into this color can help it cover uneven paper textures better. -
Refine the White Spaces:
Go back with fresh white paint to sharpen the edges where the white meets the black or terracotta. Clean lines are crucial for this graphic style.
Dotting Perfection
For perfectly round dots, reload your tool with fresh paint after every single dot. Ensure the paint consistency is fluid, like heavy cream, so it doesn’t peak.
Step 4: Detailed Patterning
-
Outline the Shapes:
Using your thinnest round brush and black paint, carefully outline the terracotta shapes. Add thick black borders around the main forehead triangle and the cheek sections to separate the color zones. -
Paint the Chevron Patterns:
On the white strip running down the center of the chin (below the nose), use the fine brush to paint small, inverted V-shapes or chevrons. Repeat this motif in the white sections above the eyebrows if desired. -
Add Triangular Details:
Inside the large black forehead triangle, paint smaller white/terracotta shapes. On the outer black rim of the mask, paint small terracotta triangles to create a sawtooth border.
Step 5: Dot Work and Finishing
-
Create Large Dots:
I like using the back end of a paintbrush for this part. Dip it into black paint and stamp a row of large dots along the white band separating the face from the outer rim. -
Add Medium Dots:
Using a smaller dotting tool or a skewer, add rows of white dots on top of the black lines surrounding the eyes and nose. This high-contrast stippling gives the mask its traditional beaded look. -
Detail the Forehead:
Add a vertical row of black dots running up the center of the forehead and smaller brown dots framing the upper brow area. Keep the spacing consistent for a professional finish. -
Final Inspection:
Step back and look for symmetry. If a black line looks wobbly, touch it up with the background color. Ensure all pencil marks are covered or erased. -
Seal the Mask:
Once the paint is fully cured (give it at least 24 hours), spray the mask with a matte or satin varnish. This protects the paint from dust and unifies the sheen of the different colors.
Hang your finished masterpiece on a white wall to let those earth tones and bold contrast really pop
BRUSH GUIDE
The Right Brush for Every Stroke
From clean lines to bold texture — master brush choice, stroke control, and essential techniques.
Explore the Full Guide
Whimsical Painted Paper Mache Fish
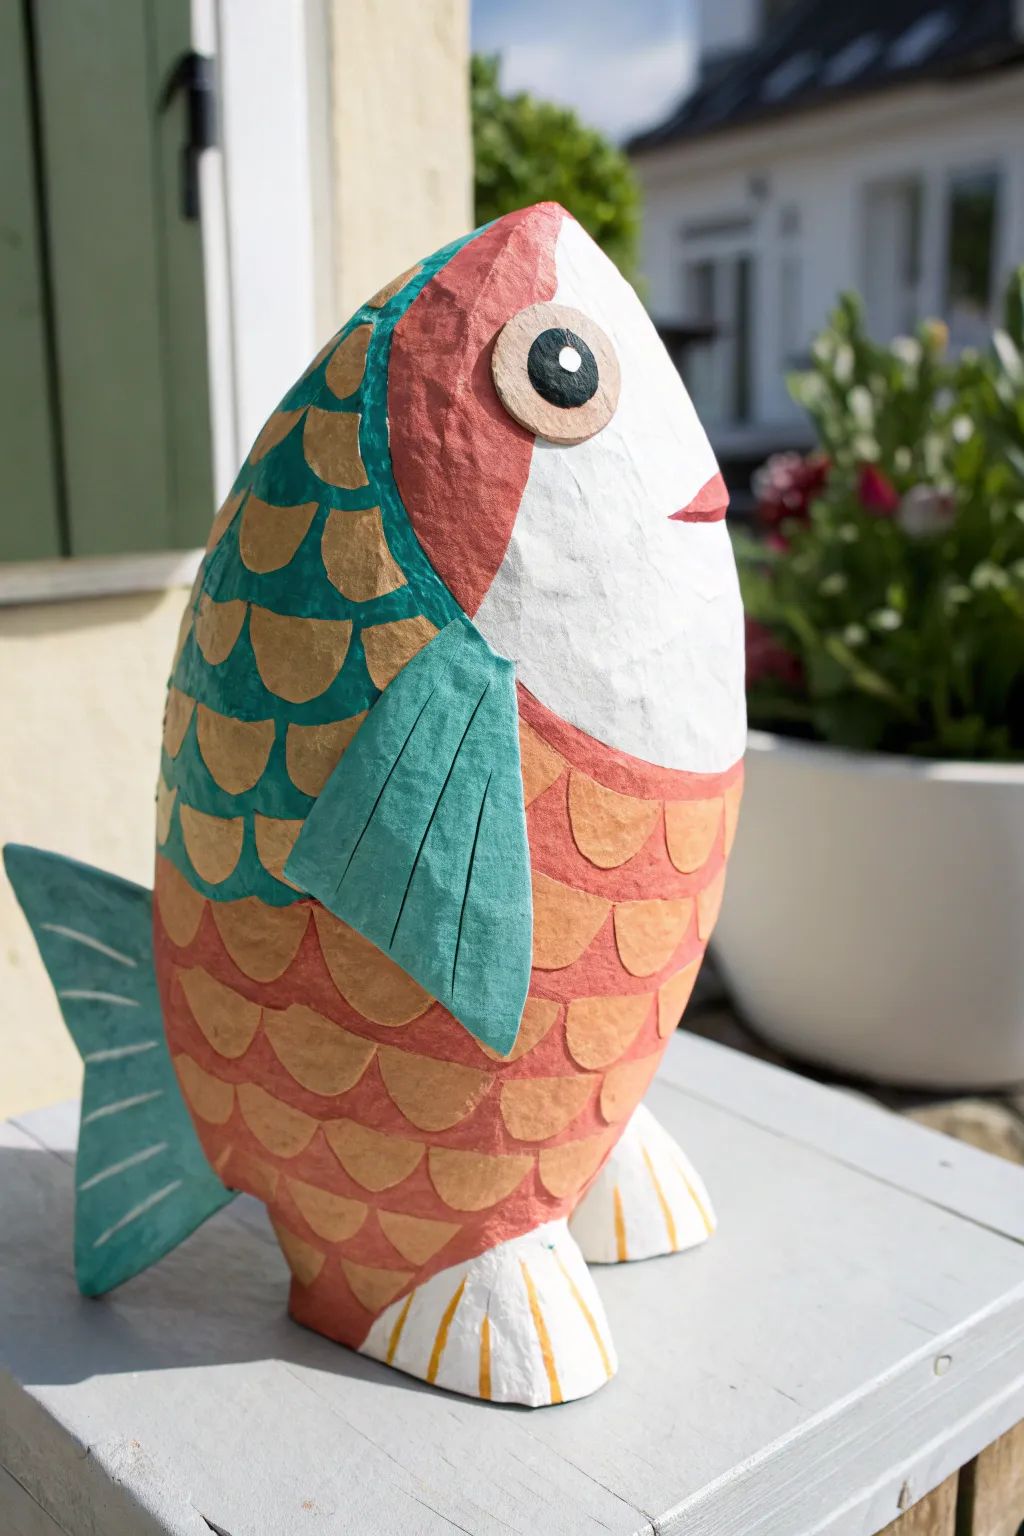
Brighten up your living space with this charming, folk-art inspired paper mache fish. Its sturdy, freestanding form and layered scale patterns give it a quirky personality that looks perfect perched on a windowsill or garden table.
Detailed Instructions
Materials
- Newspaper stripes and cardboard
- Masking tape
- Paper mache paste (flour/water or glue based)
- White acrylic gesso or primer
- Acrylic paints (teal, coral red, gold/mustard, white, black)
- Flat shader brushes (medium and small)
- Detail round brush
- Scrap booking paper or thin cardstock (optional for fins)
- Scissors
- Gloss or satin varnish
Step 1: Building the Form
-
Construct the armature:
Cut a simple fish profile shape from sturdy cardboard to act as the spine. Crumple newspaper into balls and tape them to both sides of the cardboard to build up a plump, rounded body volume. -
Shape the tail and base:
Cut a tail fin shape from cardboard and tape it securely to the back. For the feet, create two sturdy, wedge-shaped mounds of foil or condensed paper at the bottom so the fish can stand upright on its own. -
Apply the first paper mache layer:
Dip strips of newspaper into your paste, removing excess glue with your fingers. Apply them smoothly over the entire form, overlapping edges to lock everything together. -
Add the pectoral fin:
While the body is drying, cut a triangle shape from cardstock for the side fin. Attach it to the side of the body with masking tape, slightly bending it outwards for dimension. -
Smooth the surface:
Apply 2-3 additional layers of paper mache. I find that using smaller strips around curves like the face and tail helps avoid wrinkles. Let the project dry completely between layers until rock hard.
Step 2: Ornate Painting
-
Prime the sculpture:
Cover the entire fish with white acrylic gesso. This not only provides a bright base for the colors but also smooths out the newsprint texture significantly. -
Block in the face:
Paint the front third of the fish (the face area) with solid white acrylic paint. This creates a clean separation from the patterned body. -
Paint the upper body base:
Paint the upper back section of the fish, behind the head, with a deep teal or turquoise color. Extend this color onto the tail fin. -
Paint the lower body base:
Coat the belly area and the lower half of the fish with a coral or salmon-red color. Don’t worry about perfect edges yet, as the scales will cover the transition. -
Detail the pectoral fin:
Paint the side fin in a lighter shade of teal or aqua green. Once dry, use a thin brush to add vertical dark lines to simulate the fin’s ribbing. -
Create the scale pattern (Upper):
Using a gold or mustard yellow paint, paint small semi-circles over the teal section. Start from the back and move forward, layering them like shingles so they overlap slightly. -
Create the scale pattern (Lower):
Switch to a lighter peach or orange color for the scales on the lower coral section. Repeat the semi-circle painting technique, keeping the rows relatively neat. -
Paint the eyes:
Paint a large circle of beige or light cardboard-color near the top of the white face area. Inside this, add a large black pupil with a tiny white reflection dot for life. -
Add facial features:
using a fine brush and red paint, add a small, simple curved mouth at the very front edge of the face. -
Detail the feet:
Paint the feet white. Once dry, paint bold gold or mustard stripes vertically down the feet to mimic fin-like structures. -
Add fin details:
Go back to the tail fin and paint white diagrammatic lines or stripes to match the style of the feet. -
Seal the work:
Protect your painting with a coat of satin or gloss varnish. This gives the fish a ceramic-like sheen and protects it from dust.
Wobbly Fish?
If your fish tips over, glue a heavy metal washer or a small flat stone to the bottom of the feet before painting, or create a wider base using paper clay.
Scale Stamper
Instead of free-handing scales, cut a ‘U’ shape out of a raw potato or a dense sponge. Dip it in paint and stamp your scales for a uniform look.
Set your colorful companion on a shelf and enjoy the splash of artistic cheer it brings to the room.
Big-Eyed Paper Mache Monster Head
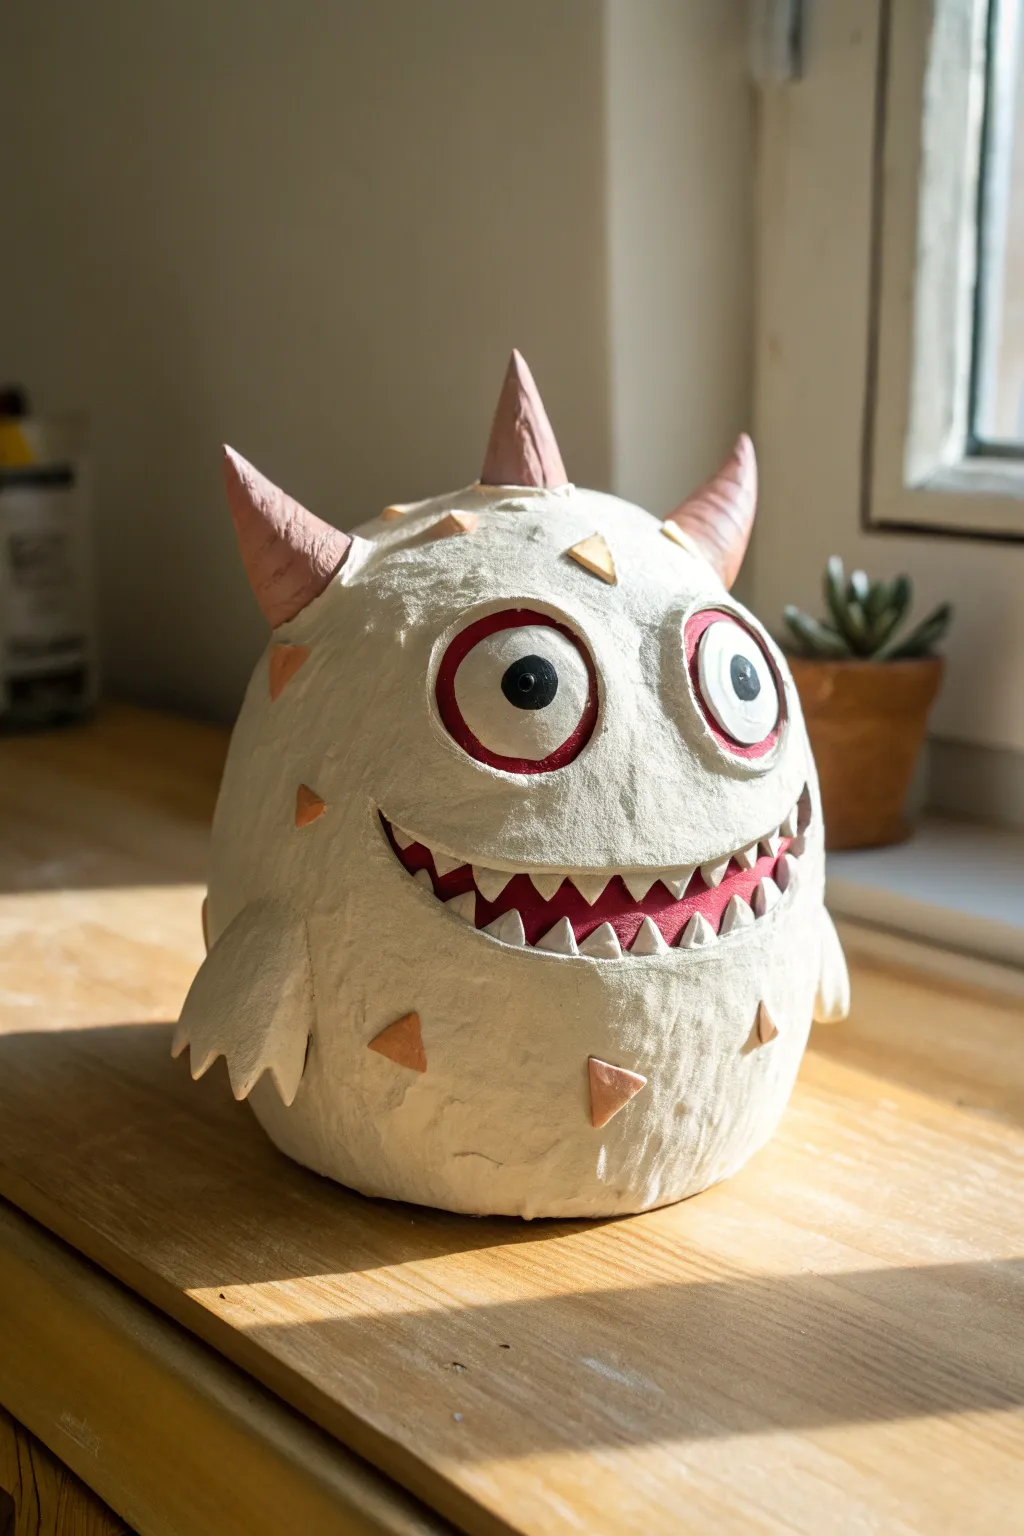
This whimsical little monster features a charmingly toothy grin, enormous eyes, and quirky pink horns that poke out from its textured white body. With a sturdy, rounded shape and playful details, it makes for a delightful desk companion or a fun room decoration.
How-To Guide
Materials
- Balloon (round variety)
- Newspaper strips
- Flour and water paste (or white glue/water mix)
- Cardboard or cardstock
- Masking tape or painter’s tape
- Paper clay or toilet paper pulp (optional for texture)
- White acrylic paint or gesso
- Acrylic paints (pink/salmon, red, black)
- Small paintbrush
- Clear matte varnish
- Scissors
Step 1: Building the Armature
-
Inflate the base:
Blow up a round balloon to the desired size of your monster’s body. Don’t overinflate it; you want a nice, squashy round shape rather than a tight pear shape. -
Craft the horns:
Cut circles out of cardstock or thin cardboard. Cut a slit to the center of each circle and overlap the edges to form cones. Make three distinct cones: one slightly larger for the top center, and two matching ones for the sides. -
Attach the horns:
Tape the cones securely to the top of the balloon using plenty of masking tape. Ensure the bottom of the cones sit flush against the curve of the balloon. -
Form the arms and spikes:
Cut small, flat triangle shapes from cardboard for the body spikes. For the arms, cut two wing-like shapes with jagged ‘fingers’ at the bottom. Tape these flat against the sides of the balloon.
Step 2: Paper Mache Application
-
Prepare the paste:
Mix flour and water to a pancake batter consistency, or dilute white PVA glue with a little water until it’s milky but sticky. -
Apply the first layer:
Dip strips of newspaper into your adhesive, squeegee off the excess with your fingers, and smooth them over the balloon and cardboard features. Cover the entire form. -
Add structural layers:
Let the first layer dry completely, then apply 2-3 more layers of newspaper strips. Crossing the strips in different directions adds strength. -
Create surface texture:
For that slightly bumpy, organic look seen in the photo, dip toilet paper or paper towels into the paste and stipple it onto the surface, or apply a thin layer of paper clay over the dry newspaper base. -
Sculpt the eyes and mouth:
Roll thin snakes of paper clay or twisted paper towels dipped in paste to create the raised ridges for the eye sockets and the upper and lower lips of the mouth. Adhere these to the face.
Wrinkly Paper?
If your newspaper strips are wrinkling too much, tear them into smaller, shorter pieces. Smaller strips conform better to the round curves of the balloon.
Step 3: Painting and Details
-
Prime the beast:
Once the sculpture is bone dry, paint the entire monster with a solid coat of white acrylic paint or gesso. You may need two coats to fully hide the newsprint. -
Define the mouth:
Paint the inside of the mouth area a dark red or maroon. This creates depth behind the teeth. -
Paint the teeth:
Using white paint, carefully fill in the sharp, triangular teeth. Contrast is key here, so ensure lines are crisp against the red background. -
Color the horns and spikes:
Mix a soft salmon-pink color. Paint the three horns on top and the scattered triangle spikes on the body. I like to keep this color somewhat muted to match the natural aesthetic. -
Detail the eyes:
Paint the large circular eyeballs white. Outline the iris area with a thick red ring, then fill the center with black for the pupil. Add a tiny white dot in the black pupil to simulate a reflection. -
Add subtle shading:
Using a very dry brush with a tiny amount of grey or beige paint, lightly dust the textured areas of the ‘skin’ to enhance the bumpy surface. -
Seal the work:
Apply a coat of clear matte varnish to protect the paint and give the monster a unified finish.
Weighted Base
To stop it rolling away, glue a small stack of coins or washers inside the bottom before sealing the final layer, or simply press the bottom flat while wet.
Place your finished monster on a shelf where its big eyes can keep watch over the room

PENCIL GUIDE
Understanding Pencil Grades from H to B
From first sketch to finished drawing — learn pencil grades, line control, and shading techniques.
Explore the Full Guide
Glowing Constellation Paper Mache Lantern
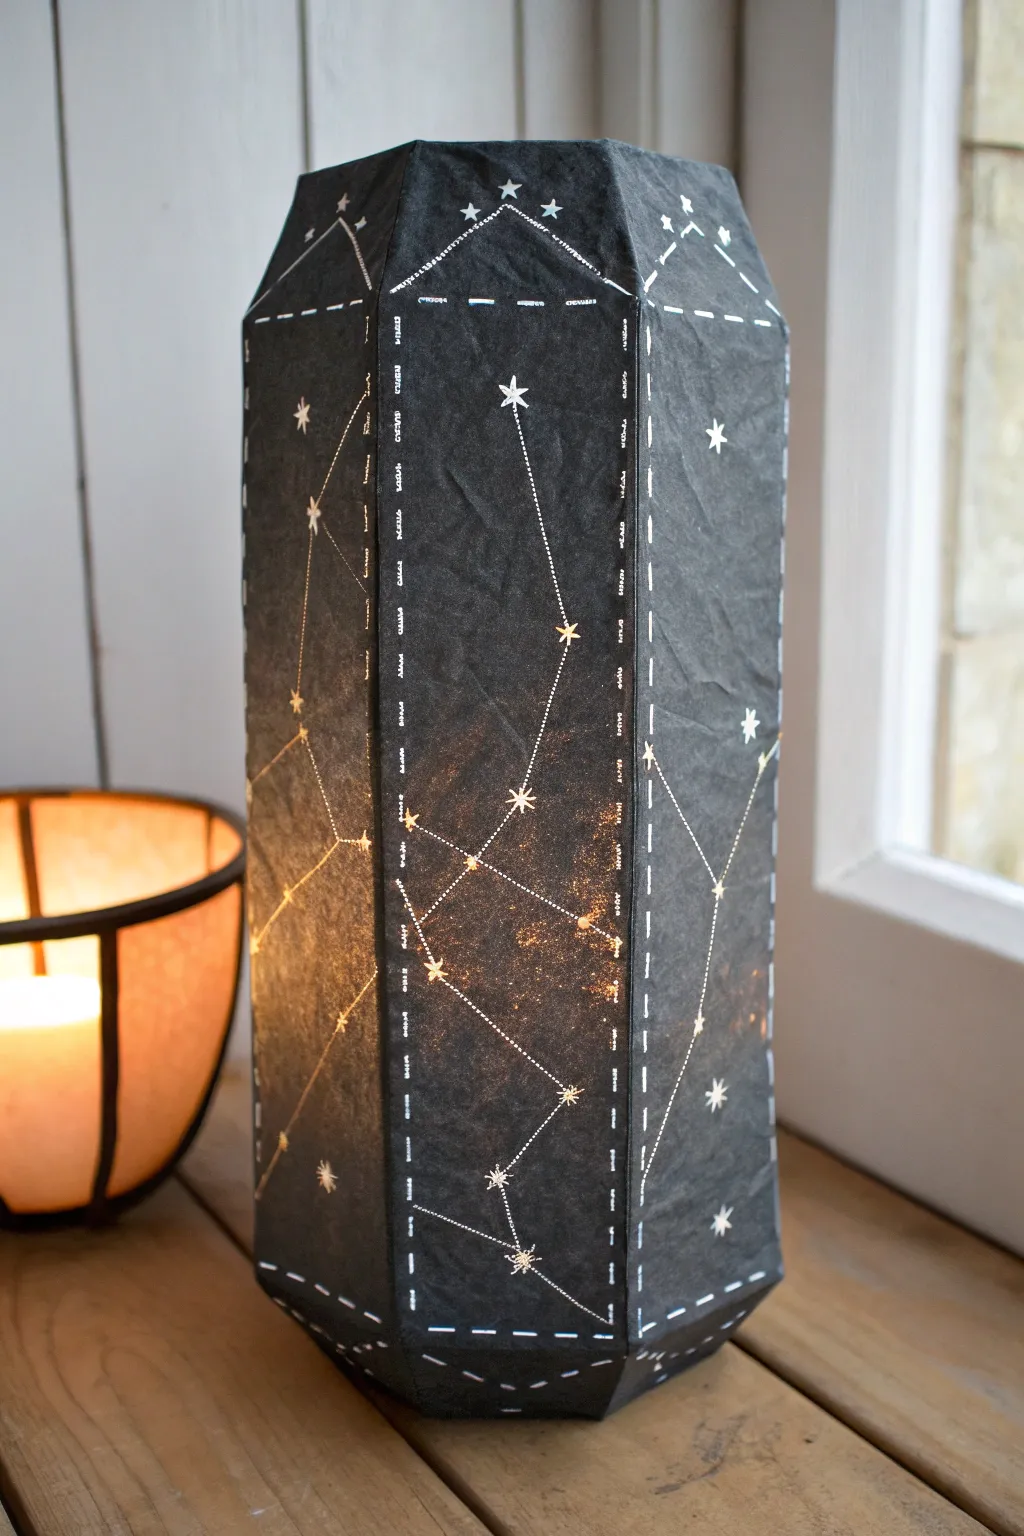
Transform ordinary paper into a celestial masterpiece with this striking geometric lantern. The dark, textured finish mimics the night sky, while pinpricks of light bring your favorite constellations to life from within.
How-To Guide
Materials
- Cardboard or cardstock (for the main structure)
- Black tissue paper or thin mulberry paper
- PVA glue or Mod Podge
- Water (for diluting glue)
- White gel pen or fine-tip paint marker
- Pin or sewing needle
- Battery-operated LED pillar candle (crucial – do not use real flame)
- Ruler
- Craft knife
- Masking tape
- Pencil
Step 1: Constructing the Geometric Form
-
Draft the template:
Begin by deciding on the dimensions of your lantern. You’ll need four long rectangular panels for the sides and eight smaller trapezoidal shapes for the angled top and bottom sections to create that elongated hexagonal prism look. -
Cut the panels:
Using a ruler and craft knife, carefully cut out your cardboard pieces. Accuracy here ensures the lantern stands straight, so take your time measuring. -
Assemble the body:
Tape the long rectangular panels together along their long edges to form a tall, open-ended box. Use masking tape on the outside seams first to hold them in place. -
Add the angled ends:
Attach the trapezoidal pieces to the top and bottom edges of your main body, angling them inward slightly. Tape all seams securely. -
Reinforce the structure:
Go over the inside seams with additional tape or a strip of paper dipped in glue to ensure the structure is rigid enough to handle the paper mache layers.
Step 2: Applying the Dark Sky Texture
-
Prepare the adhesive:
Mix your PVA glue with a small amount of water to create a milky consistency that spreads easily but isn’t too runny. -
Tear the paper:
Rip your black tissue paper into medium-sized irregular strips. Torn edges blend better than cut edges, creating a smoother final seamless look. -
Apply the first layer:
Coat a section of the cardboard with your glue mixture and lay down a strip of black tissue paper. Gently smooth it out with a brush. -
Build up opacity:
Continue covering the entire lantern. I find that applying 3-4 layers works best to get that deep, rich black color that blocks enough light to make the pinholes pop. -
Let it dry completely:
Set the lantern aside to dry fully. The paper will tighten as it dries, creating a drum-tight skin over the cardboard frame.
Wrinkled Paper?
If the tissue wrinkles significantly, don’t panic. Gently press it down with a damp brush. Slight texture actually adds to the organic, atmospheric look of the night sky.
Step 3: Mapping the Stars
-
Draft your constellations:
Once the surface is bone dry, lightly sketch your constellation designs onto the sides using a pencil. You can copy real star charts or invent your own geometric patterns. -
Mark the stars:
Using a white gel pen or paint marker, draw small stars over your pencil marks. Vary the size—some as simple dots, others as five-pointed stars—to create visual interest. -
Connect the dots:
Draw the connecting lines between your main stars using a dashed line pattern. Use the ruler again here to keep these lines crisp and navigational. -
Add decorative borders:
enhance the geometric shape by drawing dashed stitch-lines along the vertical edges and the angled seams of the lantern. -
Create the light points:
Take a pin or needle and carefully poke holes through the center of your drawn stars. This allows the light from inside to shine through like real starlight.
Galaxy Glow
Before the final black layer dries, spatter a tiny amount of diluted white or gold paint onto the wet tissue for a distant nebulae effect.
Place your LED candle inside and watch your personal galaxy illuminate clearly

Have a question or want to share your own experience? I'd love to hear from you in the comments below!