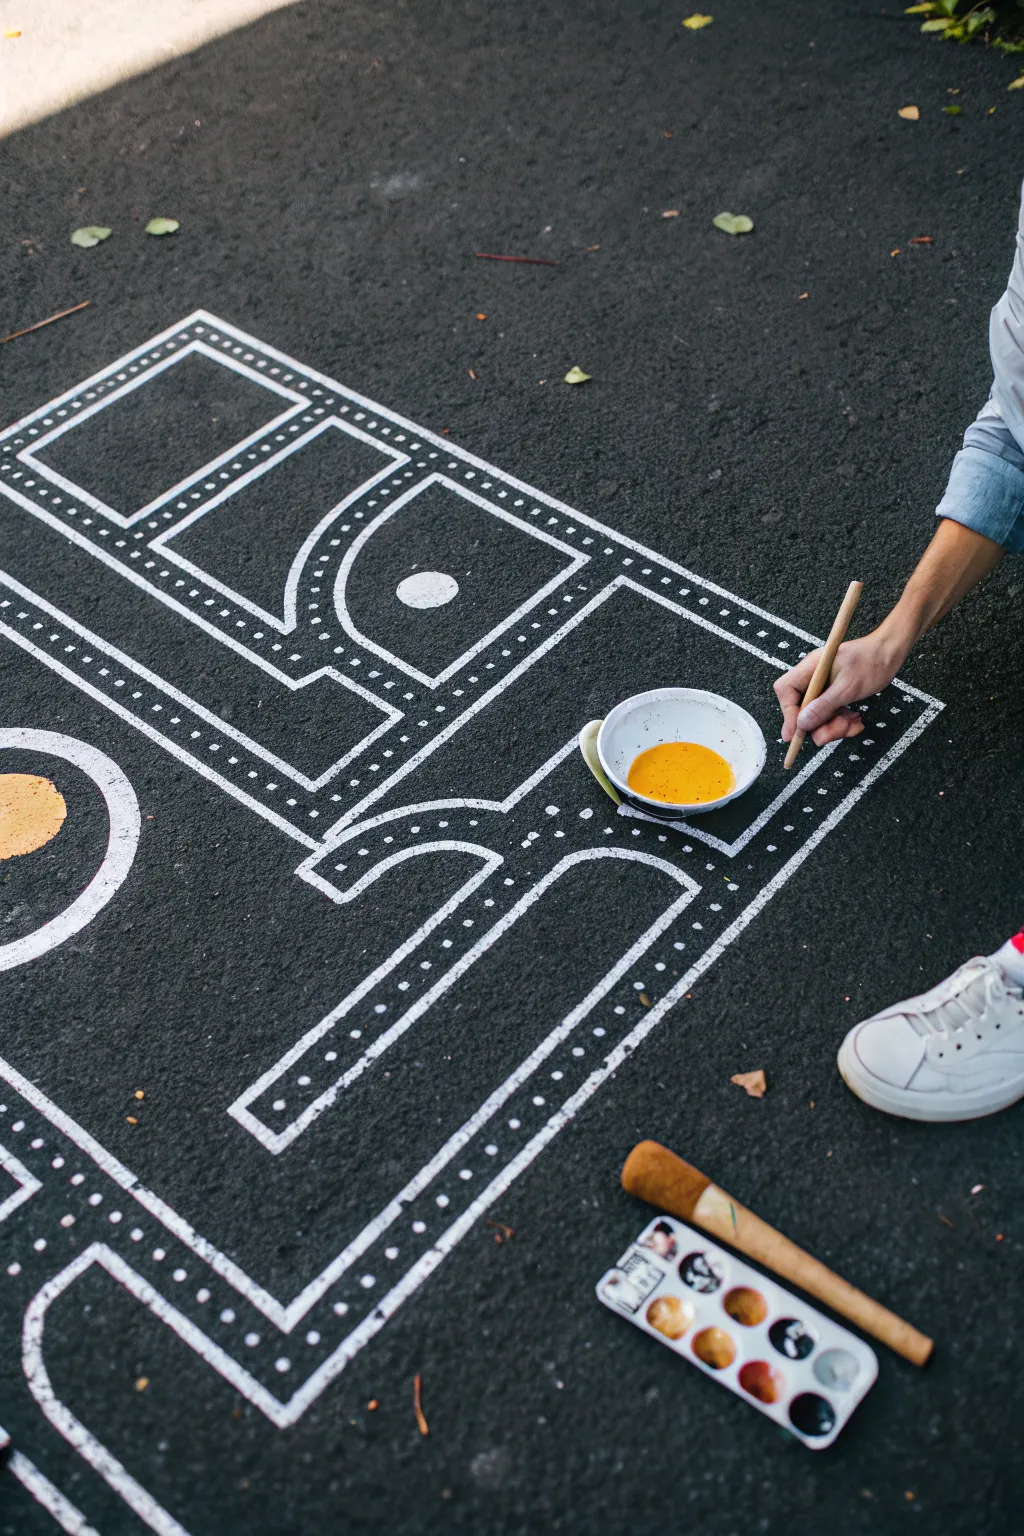
Transforming a slab of asphalt into a personal masterpiece is one of the most exciting rites of passage for your senior year, allowing you to leave a colorful mark on campus before you graduate. It is the perfect opportunity to experiment with exterior paint on a massive, rough-textured canvas while expressing your unique personality to the entire school.
establishing the base coat
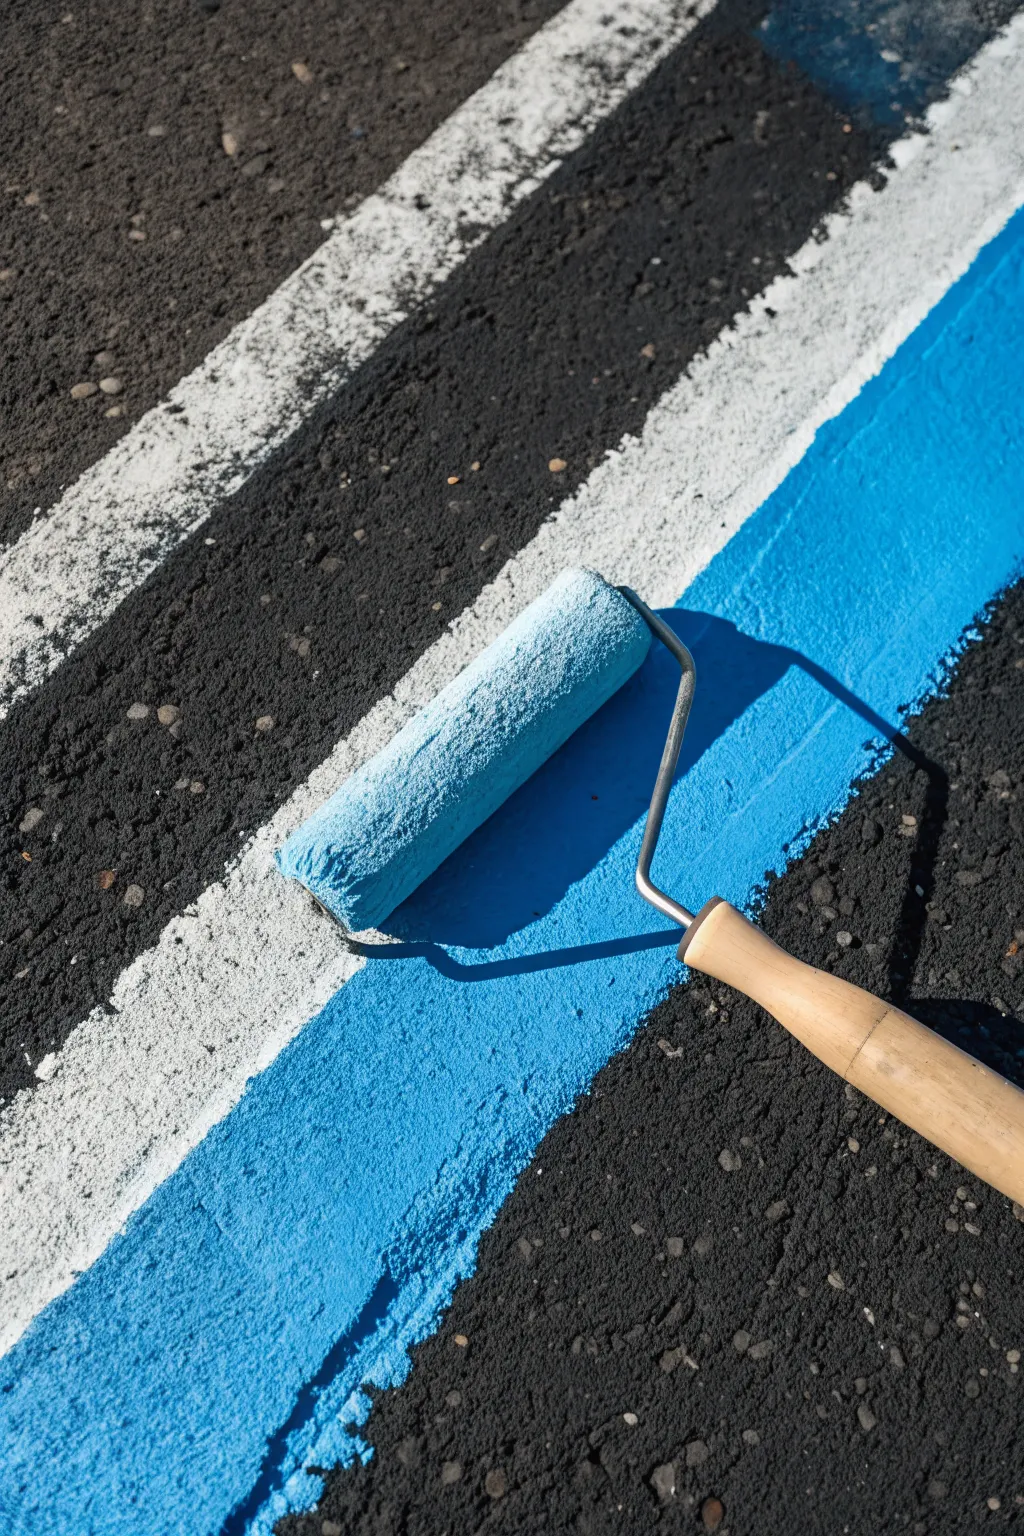
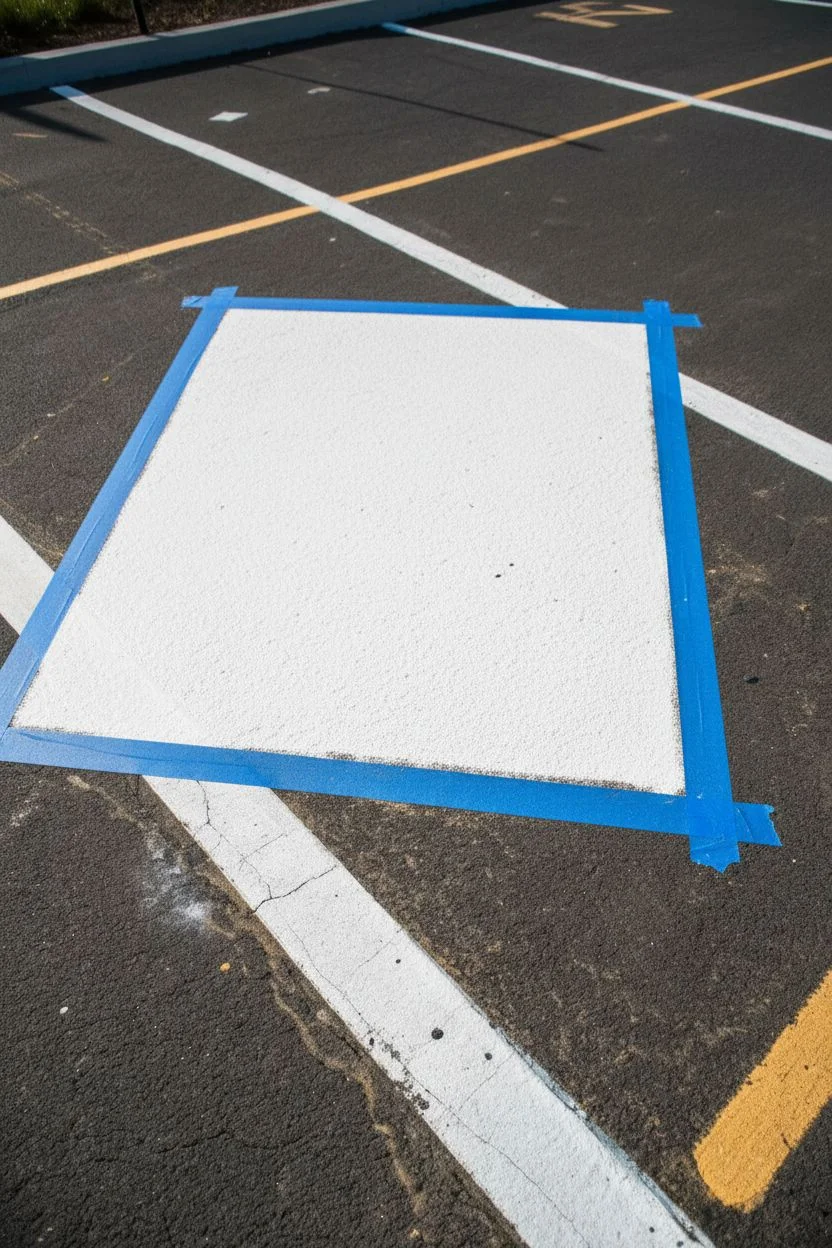
Transform a dark parking surface into a vibrant canvas with these high-contrast diagonal stripes. This project creates a professional-looking foundation for a parking spot design, featuring crisp white and electric blue lines separated by natural pavement texture.
Detailed Instructions
Materials
- Exterior masonry or pavement paint (White)
- Exterior masonry or pavement paint (Bright Blue)
- Roller frame with short handle
- 3/4-inch nap roller covers (for rough surfaces)
- Heavy-duty duct tape
- Chalk snap line
- Stiff bristle broom
- Paint tray
Step 1: Surface Preparation
-
Clean the canvas:
Sweep the asphalt area vigorously with a stiff bristle broom to remove loose gravel, dirt, and debris that could ruin your paint texture. -
Wash and dry:
Rinse the spot down with water to remove fine dust and allow it to dry completely in the sun; moisture will prevent the paint from bonding. -
Plan the geometry:
Determine the width of your stripes—around 4 to 6 inches works well for visibility—and mark the intervals along the edge of the parking spot. -
Snap the guides:
Use a chalk snap line to connect your marks diagonally across the pavement, creating a visual guide for where your stripes will flow.
Step 2: Painting the White Bands
-
Mask the white zones:
Apply heavy-duty duct tape along the outer edges of your planned white stripes, following the chalk lines precisely. -
Secure the edges:
Walk along the taped lines, stepping firmly on the edges to push the tape into the rough asphalt texture and minimize bleeding. -
Load the white paint:
Pour your white pavement paint into the tray and saturate the roller cover, ensuring it absorbs enough paint for the rough ground. -
Roll the first coat:
Apply the white paint between your taped lines, using moderate pressure to force the paint into the pits of the asphalt. -
Peel and reveal:
Once the white paint is tacky but not fully hard, carefully peel away the tape to reveal your first set of crisp lines.
Pro Tip: Tape Choice
On rough asphalt, standard blue painter’s tape often fails. Use strong duct tape instead, and use your foot to stomp it down into the crevices for a tighter seal.
Step 3: Applying the Blue Accent
-
Create the spacing:
Once the white stripes are dry to the touch, measure a gap of about 2 inches from the white edge to leave a strip of raw black asphalt exposed. -
Tape the blue zone:
Apply new strips of tape to define the boundaries of your blue stripe, maintaining that consistent gap from the white line. -
Switch rollers:
Equip your frame with a fresh roller cover or thoroughly clean the previous one to ensure the blue pigment stays pure. -
Saturate the roller:
Dip the roller into the bright blue paint, rolling it back and forth in the tray until the nap is fully loaded with color. -
Roll the blue stripe:
Begin rolling the blue section, starting from the center and working toward the taped edges to avoid pushing too much paint under the tape. -
Even out the texture:
I like to go over the area a second time with a barely-loaded roller to smooth out ridges and ensure uniform coverage. -
Final reveal:
Remove the tape immediately after finishing the blue section while the paint is still wet to ensure the cleanest possible edge. -
Curing time:
Allow the entire project to cure for at least 24 hours (or as directed by your paint can) before driving or walking on it.
Troubleshooting: Bleeding
If paint bleeds under the tape, don’t wipe it while wet. Let it dry completely, then carefully touch up the jagged edge with a small brush and matte black paint.
Now you have a striking, durable base that sets the stage for the rest of your creative parking spot design.


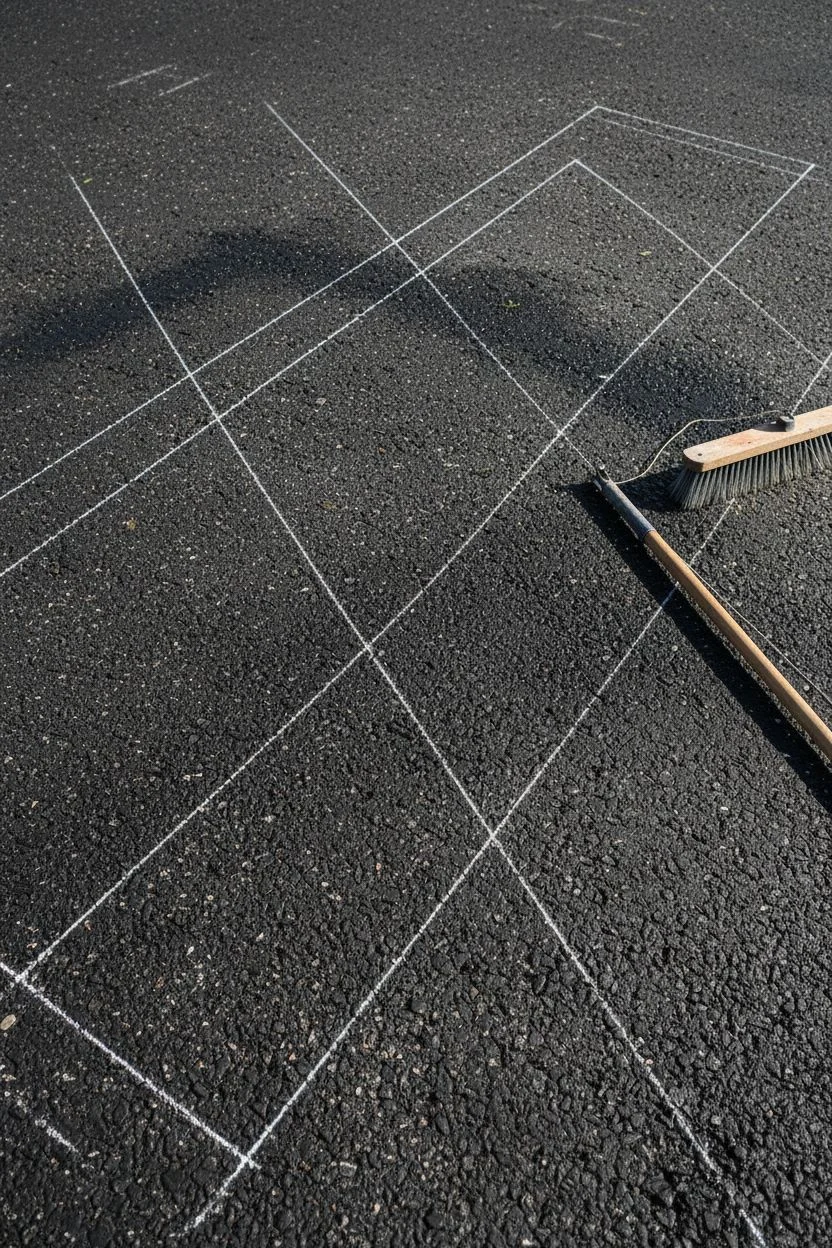
chalk grids and painter’s tape
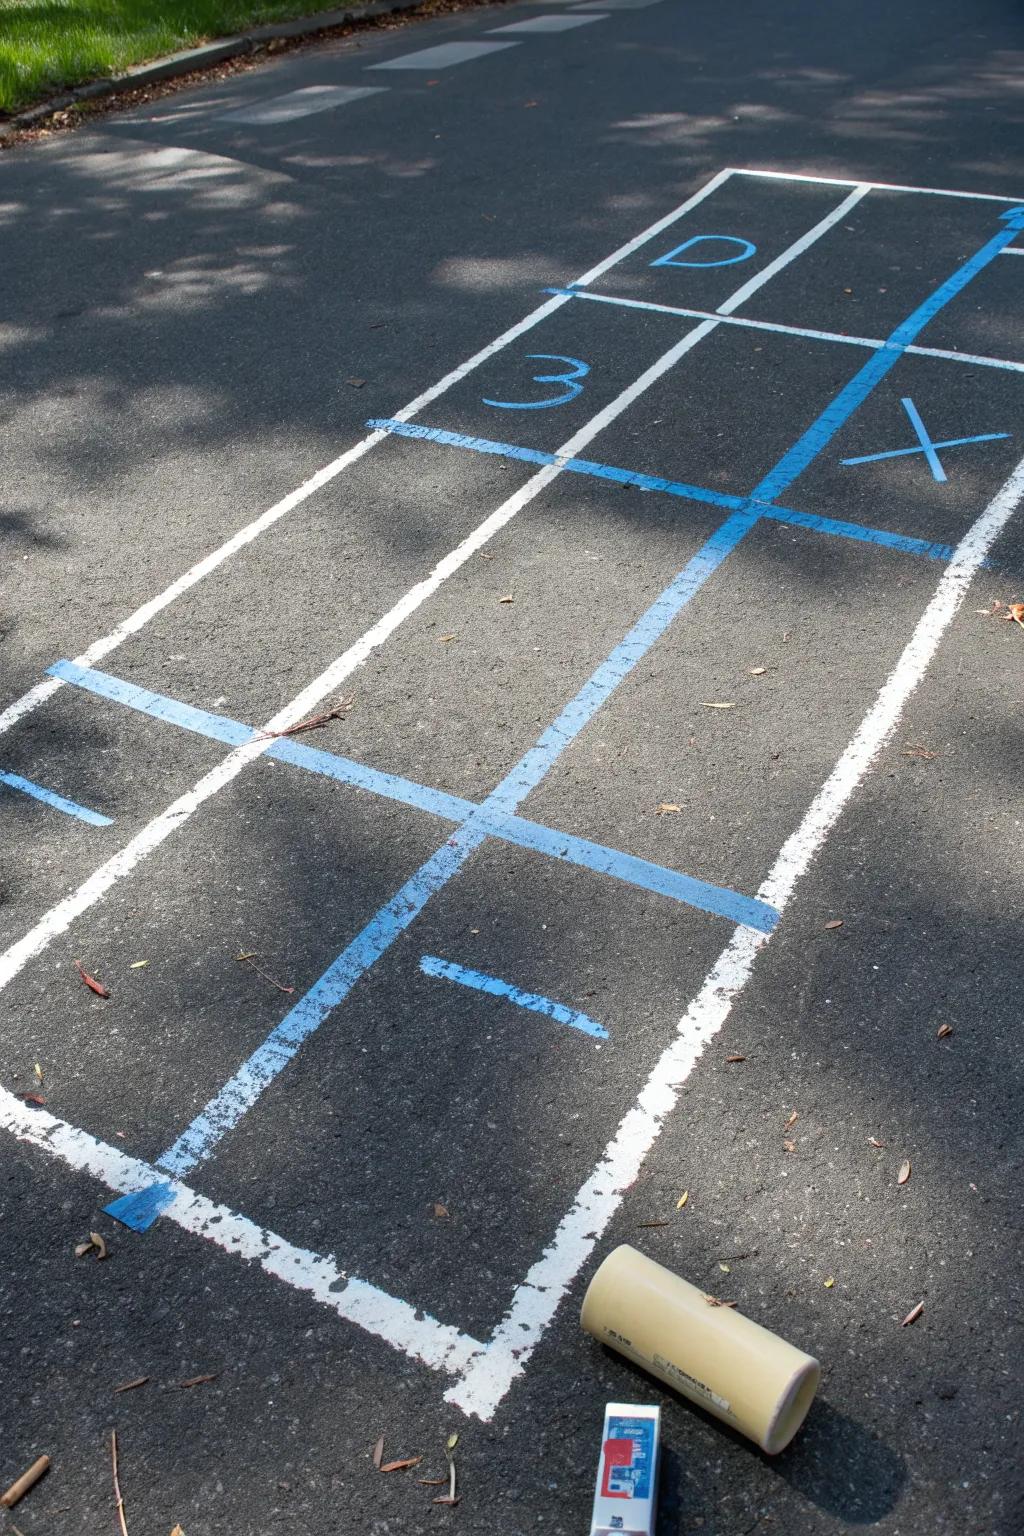
Transform a plain patch of asphalt into a structured game court with incredibly crisp lines using vivid spray chalk or pavement paint. This technique uses simple masking methods to create a professional-looking ladder grid that serves as the perfect base for four-square, hopscotch, or custom throwing games.
Step-by-Step Tutorial
Materials
- White spray chalk or inverted marking paint
- Blue spray chalk or inverted marking paint
- Wide blue painter’s tape (2-inch width recommended)
- Measuring tape
- Sidewalk chalk (for initial guide marks)
- Stiff broom
- Scrap cardboard piece
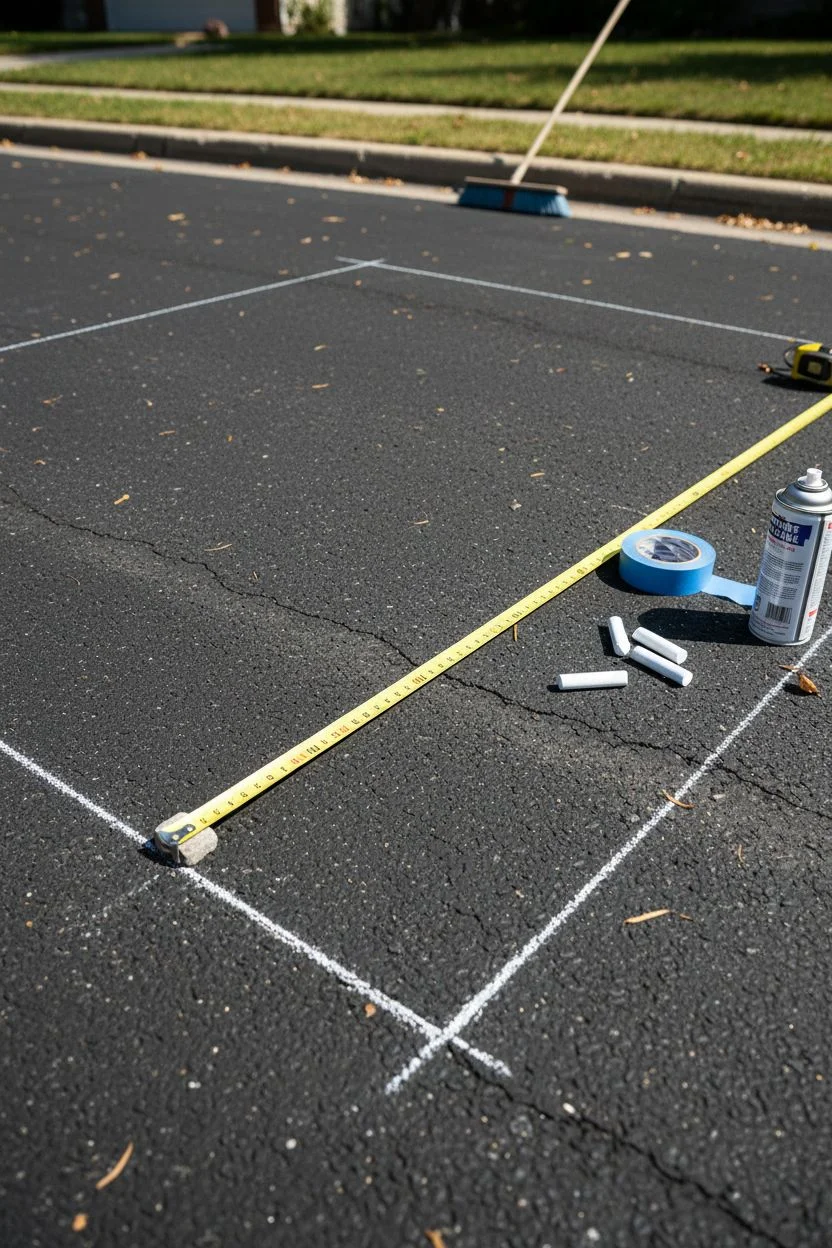
Step 1: Preparation and Layout
-
Clear the canvas:
Start by vigorously sweeping the pavement area to remove loose dirt, pebbles, and dust, as tape won’t stick well to a gritty surface. -
Map the boundaries:
Use a piece of standard sidewalk chalk and your measuring tape to mark small dots where the four corners of your large rectangular grid will be. -
Define the columns:
Mark the center point at the top and bottom of your rectangle to guide where the middle dividing line will go.
Beat the Texture
Asphalt is bumpy! To get the sharpest lines possible, step firmly on the tape edges right before spraying. For extra protection, hold a piece of cardboard along the outside of the tape while spraying.
Step 2: Taping the Vertical Structure
-
Lay the first outer guide:
Run a long strip of blue painter’s tape from the top-left corner mark to the bottom-left mark to define the left edge of your court. -
Create the line width:
Place a second parallel strip of tape about 2 to 3 inches away from the first strip, creating a narrow open channel of asphalt between them. -
Repeat for the center:
Move to your center marks and lay down two parallel strips of tape, keeping that same 2-inch gap for the paint to fill. -
Tape the right edge:
Repeat the taping process for the far right vertical border, ensuring your channels are consistent in width. -
Seal the deal:
Walk over the tape lines or use a tennis ball to press the edges firmly into the asphalt texture to prevent the spray from bleeding underneath.
Step 3: Painting the Grid
-
Apply the white base:
Shake your can of white spray chalk or marking paint thoroughly until you hear the ball rattling freely. -
Spray the verticals:
Holding the can about 4-6 inches from the ground, spray steadily inside the taped channels to create the three long vertical white lines. -
Wait briefly:
I prefer to let the white lines dry to the touch—usually about 10 to 15 minutes depending on the sun—before crossing them with new tape. -
Remove vertical masking:
Carefully peel up the tape used for the vertical lines to reveal your three crisp white stripes. -
Mask the horizontal rungs:
Lay down parellel strips of tape horizontally across the white lines to create channels for your blue cross-sections. -
Spray the blue lines:
Fill these horizontal tape channels with the blue spray chalk, moving quickly to avoid puddling. -
Peel and reveal:
Once the blue paint sets slightly, gently pull up the remaining tape to see your complete grid.
Glow Up
For a nighttime version of this parking spot game, trace the inner edges of your dried paint lines with glow-in-the-dark dimensional fabric paint or adhere reflective driveway tape.
Step 4: Adding Game Details
-
Freehand the symbols:
Using the blue spray can, carefully freehand draw the large ‘X’ in the top right square. -
Add the numbers:
Spray the number ‘3’ (or your chosen scoring numbers) in the adjacent squares, aiming for a distinct, bold font style. -
Clean up edges:
If you have any overspray spots, use a little water and a stiff brush to scrub them away immediately while the chalk is fresh.
Grab a ball or beanbag and enjoy your professionally painted court that looks sharp enough for tournament play.


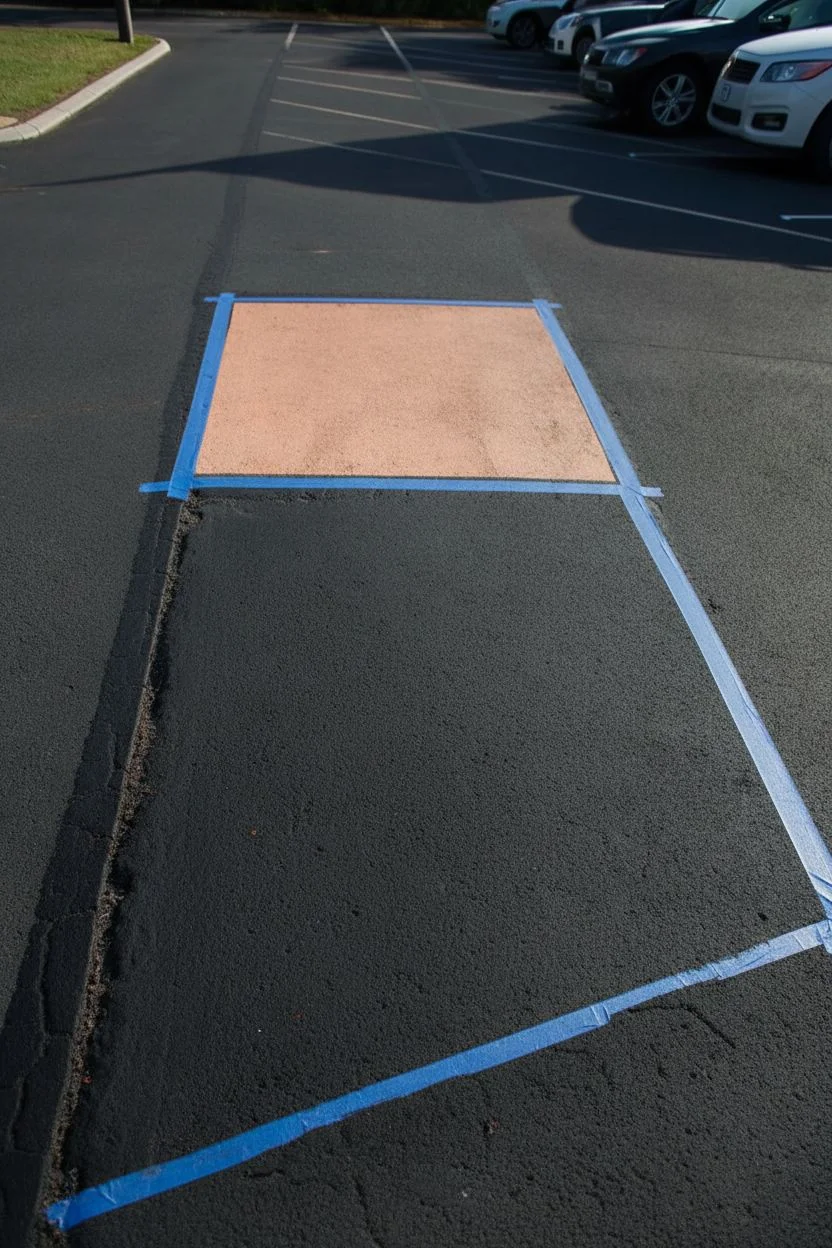
retro floral aesthetic
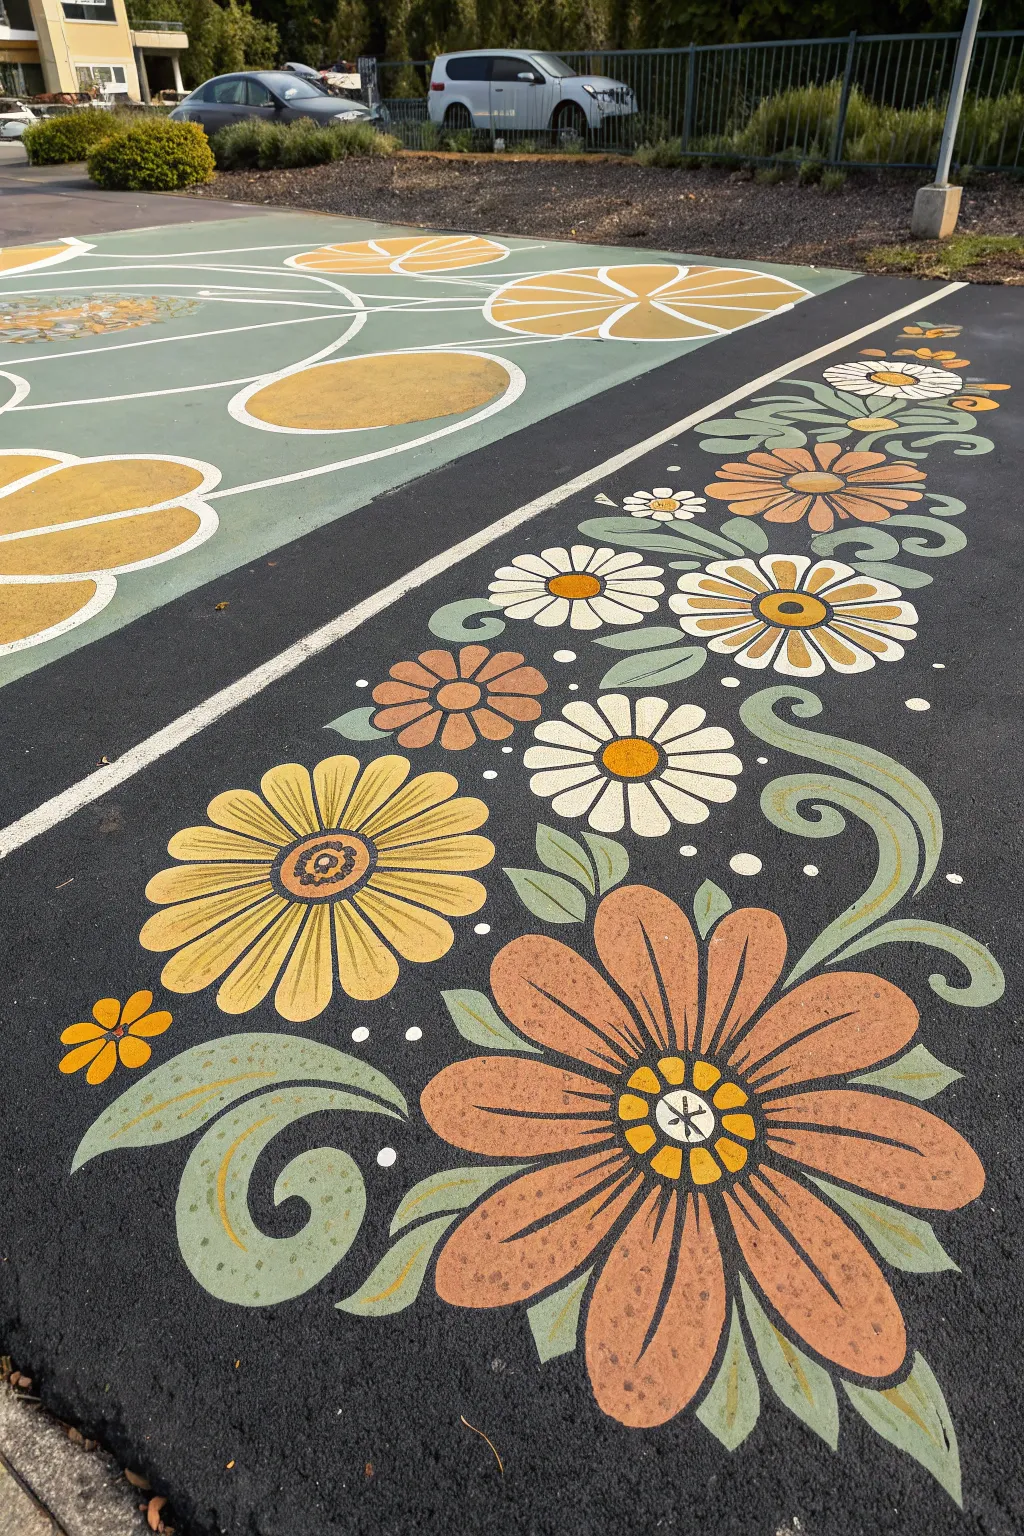
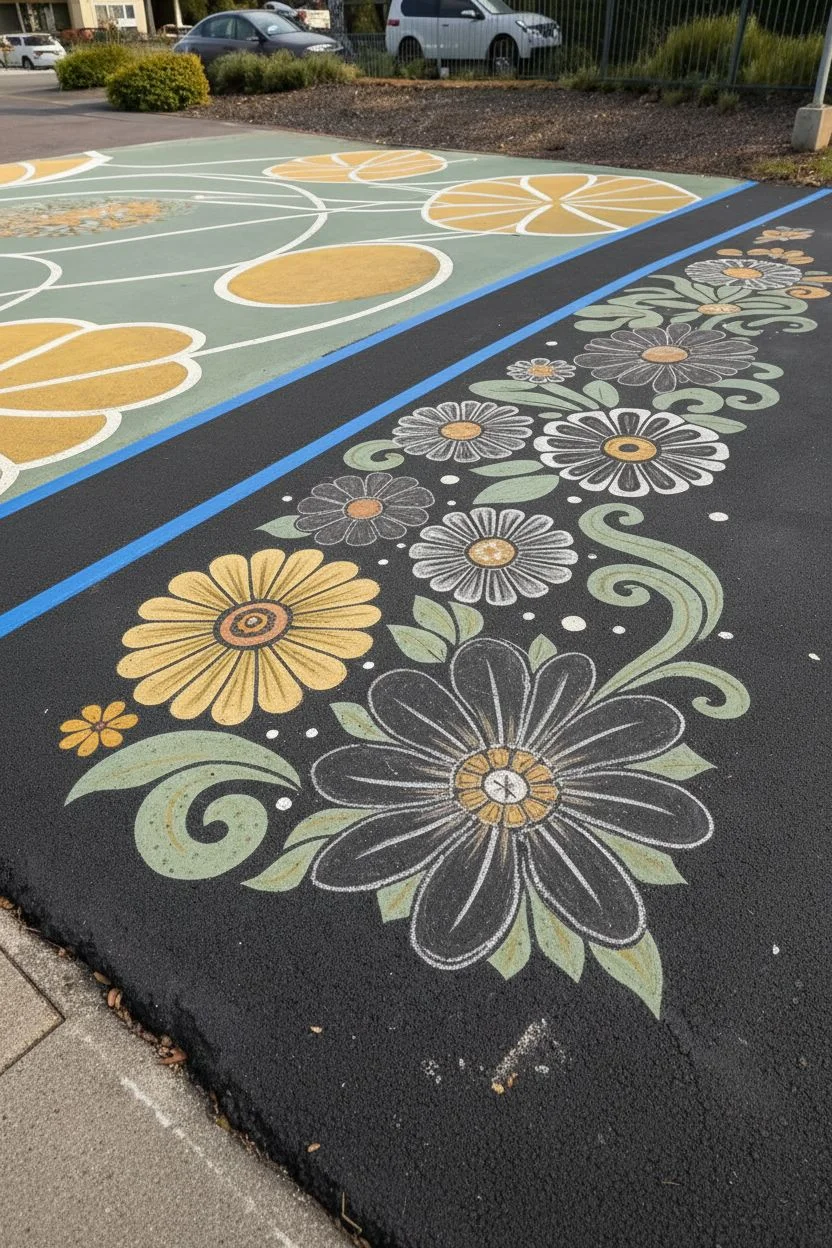
Bring a groovy, retro vibe to your pavement with this earth-toned floral border. Using a palette of rust, mustard, and sage, you will create a durable outdoor mural featuring nostalgic daisy motifs and strolling vines.
How-To Guide
Materials
- Outdoor pavement/porch paint (Rust Orange, Mustard Yellow, Cream/Warm White, Sage Green)
- Wide painters tape
- Large sidewalk chalk
- Stiff-bristled paintbrushes (various sizes)
- Small angled brush for edging
- Measuring tape
- Broom or leaf blower
- Knee pads (highly recommended)
Step 1: Preparation & Layout
-
Clean the surface:
Sweep the asphalt area thoroughly to remove all loose gravel, dirt, and debris. Use a leaf blower if available to clear dust from the crevices, as paint won’t stick to dirt. -
Tape the border:
Measure the width of your desired parking strip. Apply a long, straight strip of wide painters tape to define the boundary between the artwork and the rest of the parking spot. -
Paint the dividing line:
Paint a solid cream or white line alongside your tape to create the clean border visible in the reference. Allow this to dry to the touch before chalking the design nearby. -
Sketch the vine structure:
Using your sidewalk chalk, sketch large, sweeping ‘S’ curves to act as the vine stems. These organic lines will anchor the composition and guide where the flowers sit. -
Outline flower placement:
Draw circles along the vines to mark where the flower heads will go. Vary the sizes, placing the largest blooms at the focal points and smaller daisies in the gaps.
Retro Consistency
Cut a single petal shape from cardboard to use as a tracing template. This ensures your flower petals remain uniform in size and shape along the entire strip.
Step 2: Painting the Blooms
-
Paint the rust flowers:
Dip a medium brush into the rust orange paint. Fill in the petals for the largest flower, using the chalk outline as a guide but keeping the edges slightly rounded for that retro look. -
Add mustard yellow blooms:
Move on to the medium-sized flowers using the mustard yellow paint. I find it helpful to paint the petals individually, pulling the brush from the outside in toward the empty center. -
Fill in cream daisies:
Paint the smaller daisy shapes with the cream or warm white paint. These should be scattered between the darker flowers to provide contrast and brightness. -
Paint the foliage:
Using the sage green, fill in the thick scrolling vine stems you sketched earlier. Add teardrop-shaped leaves extending from the curves, tapering them to a sharp point. -
Apply a second coat:
Asphalt is thirsty and dark; once the first layer is dry to the touch, apply a second coat to all petals and leaves to ensure the colors pop against the black background.
Step 3: Details & Finish
-
Fill flower centers:
Paint the circular centers of the flowers. Use contrasting colors—yellow centers for rust flowers, and rust or dark centers for the yellow and cream flowers. -
Detail the large flower:
On the large rust flower, use a fine brush with yellow paint to add a small ‘star’ or cross shape in the very middle of the center circle for extra detail. -
Add inner rings:
For the medium daisies, carefully paint a thin ring of dots or a dashed line inside the center circle to mimic the texture of a real flower. -
Paint filler flowers:
For the tiny orange filler flowers, just dab five small dots in a circle with a small brush. These don’t need detailed petals; simple shapes read better at this scale. -
Add decorative dots:
Dip the handle end of a large brush or a round sponge tool into cream paint and stamp random dots around the vines to fill empty negative space. -
Clean lines:
Walk along the strip and check for any rough edges. Use your smallest angled brush to sharpen the tips of the leaves or smooth the curves of the petals. -
Remove tape:
While the paint is still slightly tacky (but not wet), slowly peel up the long strip of painters tape at a 45-degree angle to reveal a crisp edge. -
Cure time:
Let the project dry completely for at least 24 hours before driving or walking on it, ensuring the weather forecast is clear of rain.
Rough Surface Fix
Asphalt absorbing too much paint? Use a stippling motion (dabbing vertically) rather than long strokes to push pigment deep into the rocky texture.
Enjoy your durable, customized parking spot that brings a touch of classic garden style to the concrete jungle


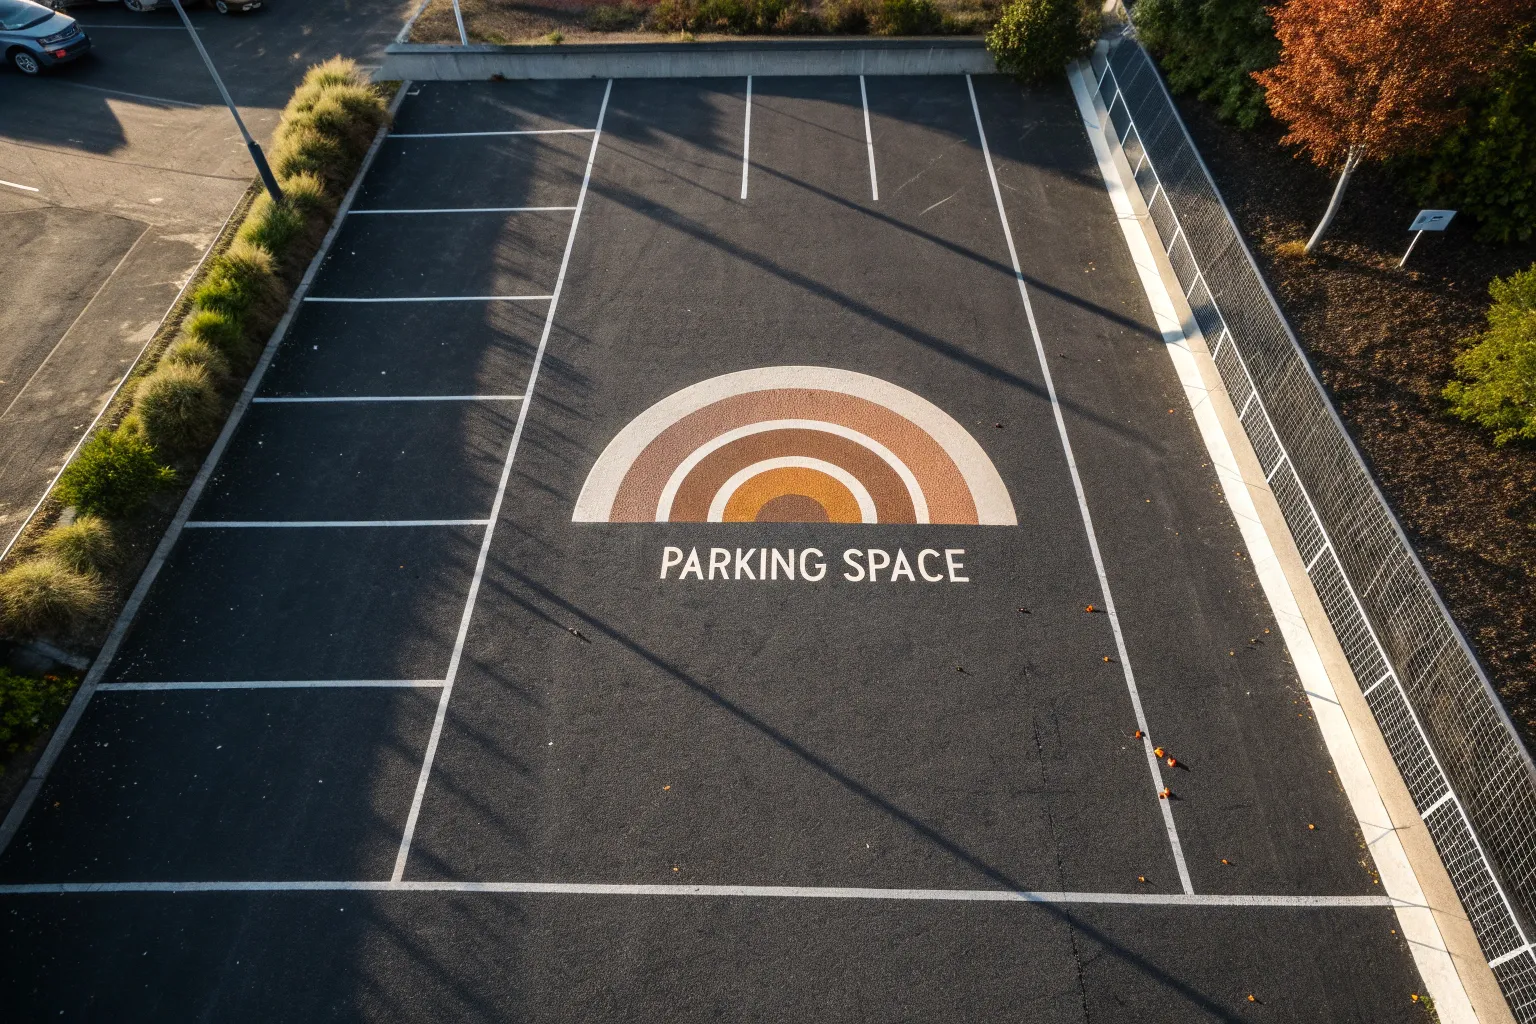
the golden year sunburst
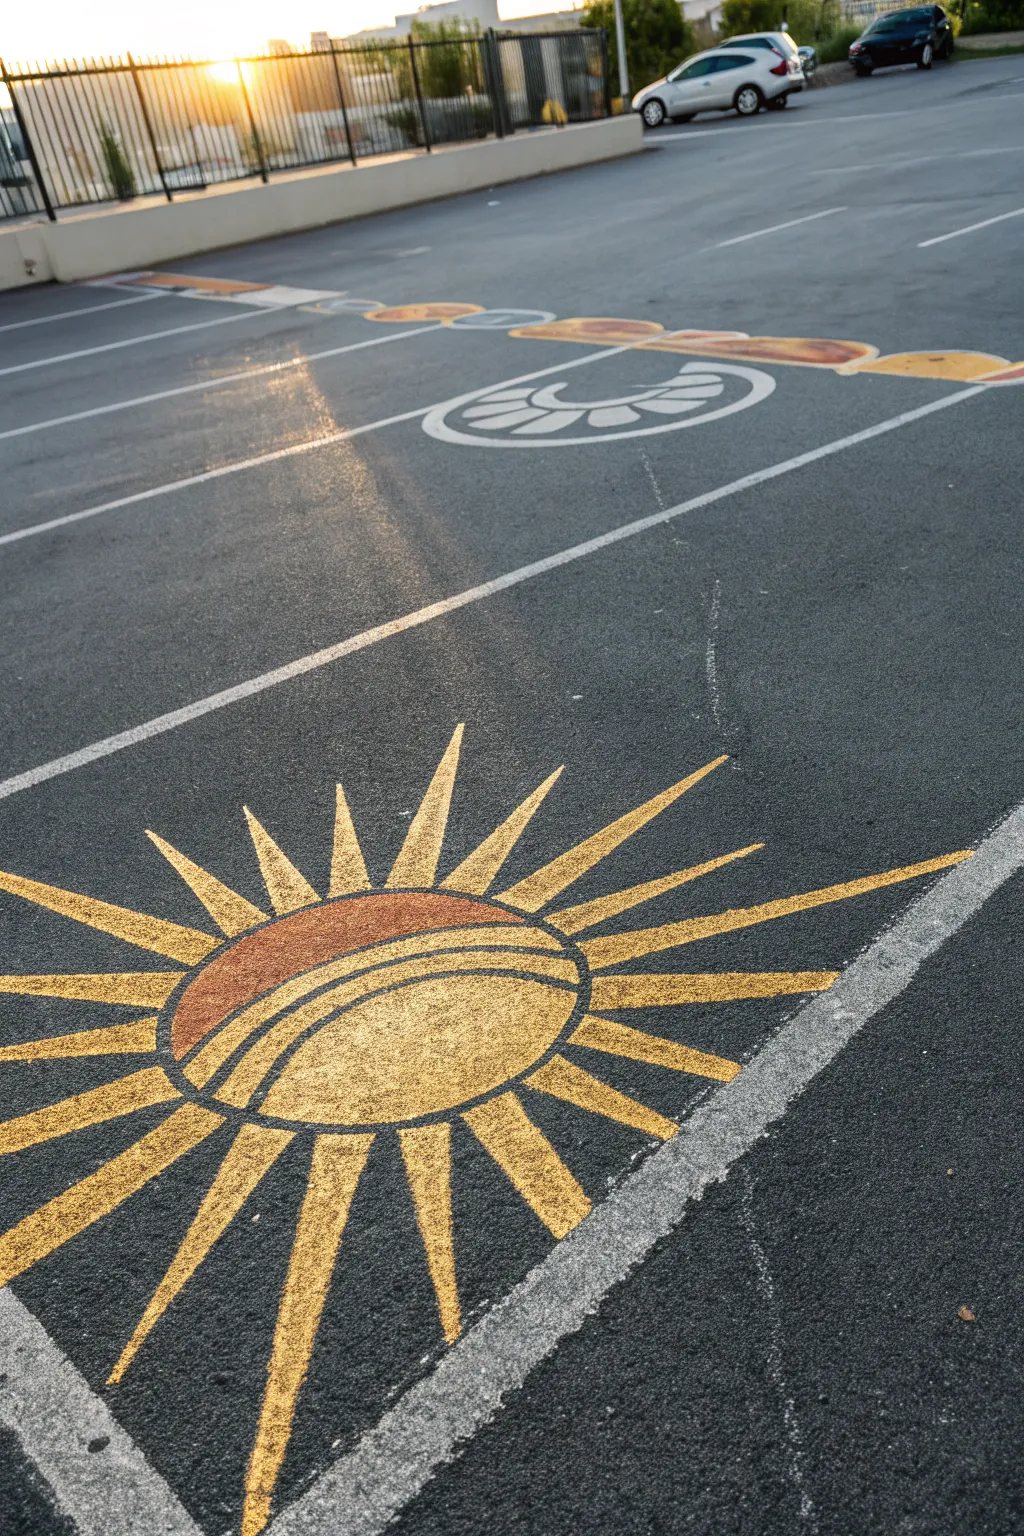

Capture the optimism of a new beginning with this radiant, stylized sun design that turns a standard asphalt rectangle into a piece of art. The contrasting warm tones and dynamic rays look striking against the dark pavement, making it the perfect project for a senior parking spot or driveway mural.
Step-by-Step
Materials
- Exterior masonry or concrete paint (White, Golden Yellow, Burnt Sienna/Reddish-Brown)
- Wide painter’s tape (2-inch)
- Sidewalk chalk in a bright color
- String and a nail or heavy washer
- Tape measure
- Paint rollers with a thick nap (3/4 inch) and handle extension
- Angled sash brush (2-inch)
- Small detail brush (1-inch)
- Broom and leaf blower
- Paint tray and liners
Step 1: Preparation & Layout
-
Clean the canvas:
Begin by thoroughly sweeping the designated parking spot with a stiff broom to remove loose gravel and dirt. Use a leaf blower if available to clear fine dust from the pores of the asphalt, as this ensures your paint adheres properly. -
Find the center:
Measure the width of your parking spot to find the exact center point. Mark this spot clearly with your sidewalk chalk. -
Draw the central circle:
Cut a piece of string to 2.5 feet (or your desired radius). Have a friend hold one end at the center mark (or weigh it down), tie chalk to the other end, and draw a perfect circle by using the string like a compass. -
Sketch the rays:
Using the circle as your base, freehand the radiating sun rays with chalk. Vary the lengths, making the cardinal direction rays (top, bottom, left, right) slightly longer to create that dynamic, bursting effect seen in the image. -
Tape the edges:
Apply wide painter’s tape along the outside edges of every chalked ray line. Press the tape down firmly continuously to prevent paint from bleeding under on the rough surface.
Step 2: Base Coat & Coloring
-
Prime with white:
Because asphalt is black, yellow paint will look muddy if applied directly. I strongly suggest rolling a coat of white exterior primer or white paint inside all your taped areas first and letting it dry for 30 minutes. -
Apply the gold:
Once the white base is dry to the touch, use a roller or large brush to fill in the rays and the bottom two-thirds of the central circle with your Golden Yellow paint. -
Section the sun:
Use a piece of chalk to draw a curved line across the upper third of the central circle, creating a crescent cap shape. -
Add the contrast color:
Paint this upper crescent section with the Burnt Sienna or Reddish-Brown paint. Use the angled sash brush here to keep the line between the red and yellow crisp. -
Create the dividing bands:
Dip a smaller brush into the Burnt Sienna paint and carefully add two curved stripes swooping through the yellow section, parallel to the red cap you just painted. -
Add a second coat:
Asphalt absorbs a lot of pigment, so apply a second coat of yellow to the rays and circle body to achieve that vibrant, solid opacity.
Rough Road Ahead?
If the asphalt is extremely pitted, painter’s tape might not seal perfectly. After taping, paint a thin layer of the *base* color (white) over the tape edge first to seal any gaps before adding color.
Step 3: Detailing & Cleanup
-
Sharpen the tips:
Use your small detail brush to fill in the very tips of the sun rays where the roller couldn’t quite reach, ensuring they come to sharp, clean points. -
Remove the tape:
While the paint is still slightly tacky (not fully cured), slowly peel back the painter’s tape at a 45-degree angle to reveal your crisp lines. -
Touch up edges:
Inspect the edges for any bleed-through. If you spot fuzzy lines, use a small brush and a tiny bit of black paint (or whatever color matches the asphalt) to neat up the boundaries. -
Optional sealing:
If you are allowed to use a clear concrete sealer, roll a thin layer over the dry design to protect your hard work from tire marks and UV fading. -
Final dry time:
Let the project cure for at least 24 hours before parking a car on it to prevent the hot tires from lifting the fresh paint.
Pro Tip: Comfort Matters
Bring a kneeling pad or a folded piece of cardboard! You will be spending a lot of time near the ground for the taping and detailing steps, and asphalt is unforgiving on the knees.
Park your car with pride knowing your spot is the brightest one on the lot.
BRUSH GUIDE
The Right Brush for Every Stroke
From clean lines to bold texture — master brush choice, stroke control, and essential techniques.
Explore the Full Guide
the chill sea turtle
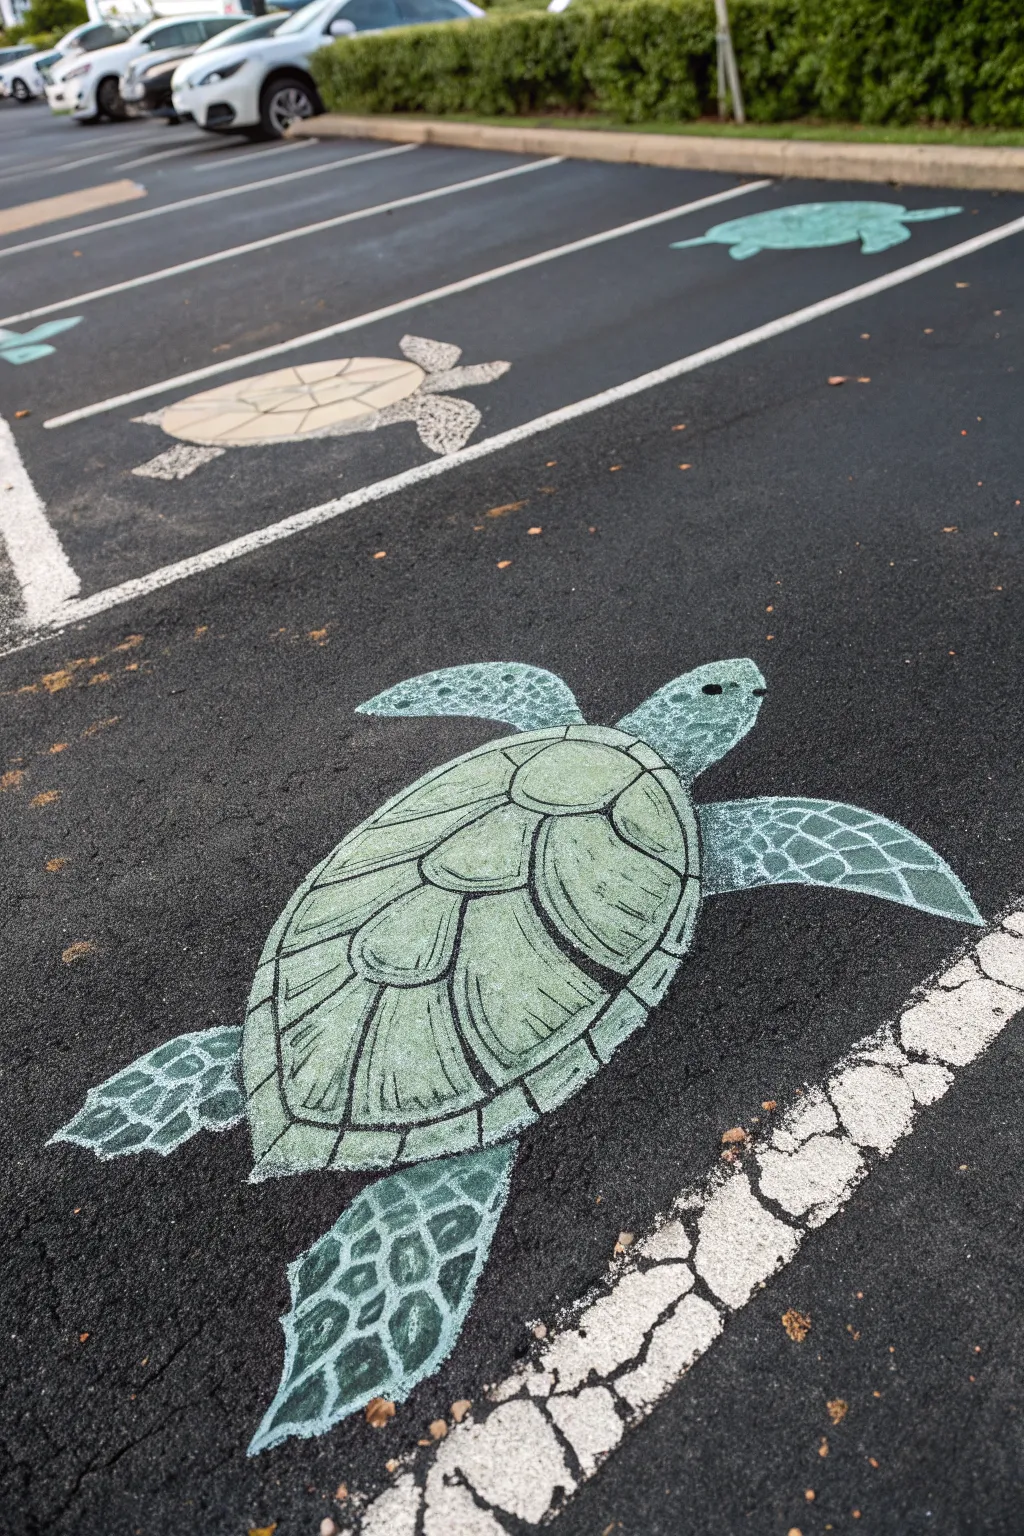
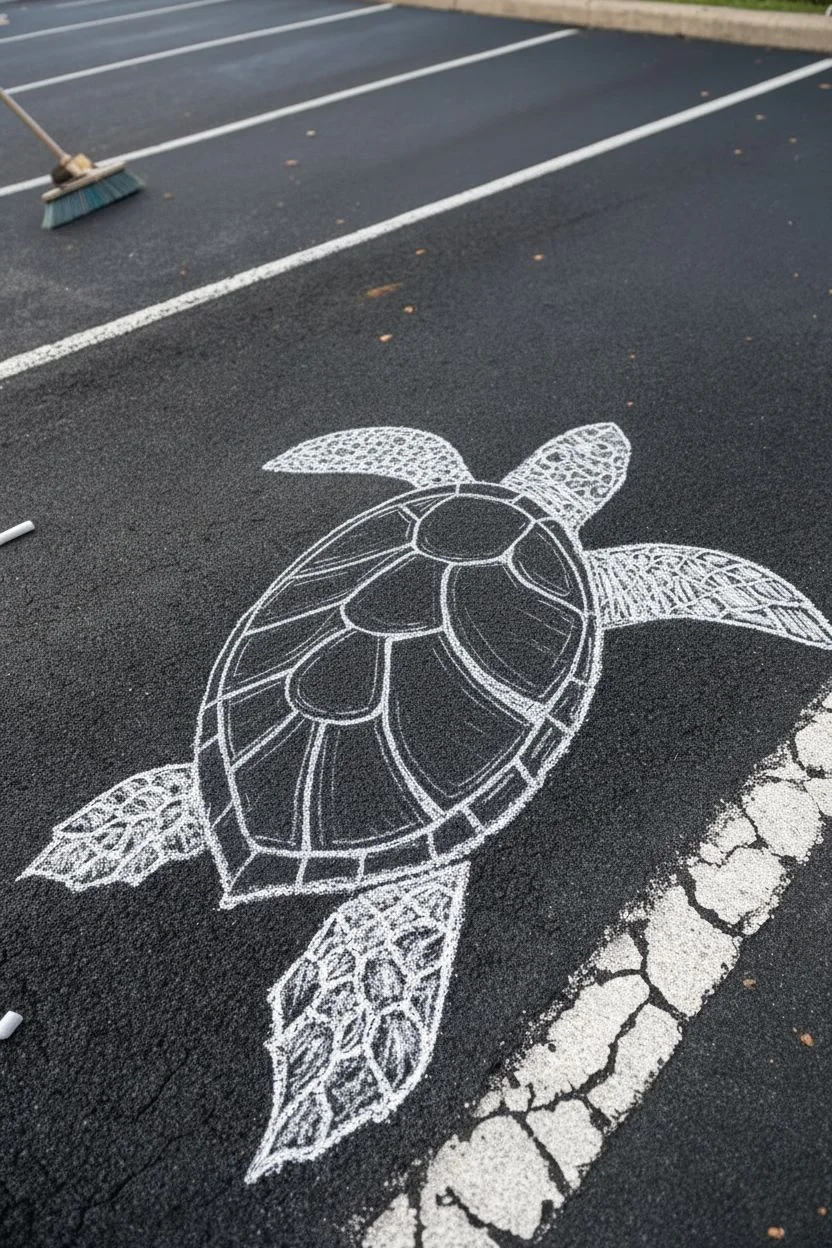
Bring the calming vibes of the ocean to your designated parking spot with this stylized, slightly geometric sea turtle. The design relies on high-contrast outlines and a clever use of negative space to create a mosaic-like effect on the asphalt.
Step-by-Step
Materials
- Exterior latex paint (Sage Green, Teal, Black, White)
- Thick sidewalk chalk
- 2-inch synthetic angle brush
- 0.5-inch flat brush
- Small round detail brush
- Broom or leaf blower
- Mixing cups
- Water for rinsing
- Knee pads or gardening mat
Step 1: Preparation & Sketching
-
Clean the surface:
Vigorously sweep the parking spot to remove loose gravel, dirt, and dust. If you have access to a blower, use it to ensure the asphalt pores are clear for better paint adhesion. -
Outline the body:
Using sidewalk chalk, draw a large oval for the shell directly in the center of your painting area. Tilt it slightly diagonally to give the turtle a swimming motion. -
Add appendages:
Sketch the head at the top front, followed by two large, curved front flippers extending outward. Add two smaller, triangular rear flippers at the back. -
Map the shell pattern:
Inside the oval, draw the ‘scutes’ (shell plates). Start with a central row of hexagonal shapes running down the spine, then draw a ring of smaller, encircling shapes around the perimeter. -
Draft the scale zones:
Lightly sketch the general direction of the scales on the flippers and head so you know which way the pattern flows.
Save Your Knees
Asphalt is unforgiving! Definitely use a thick gardening mat or heavy-duty construction knee pads. You will be on the ground for hours, and comfort is key to steady painting.
Step 2: Painting the Shell
-
Base coat the shell:
Load your 2-inch brush with Sage Green paint. Fill in the entire shell area solid. Don’t worry about the chalk lines for the individual plates yet; just get a good solid opaque shape down. -
Define the plates:
Once the green base is dry to the touch, take your black paint and a steady hand. Paint medium-thickness lines over your original chalk design to separate the individual scutes. -
Add inner details:
Use the small round brush and black paint to add thinner, sketched lines inside each green plate. These should mimic growth rings or texture lines, following the shape of the scute. -
Highlight the shell:
Mix a little white into your Sage Green to create a pale tint. Dry-brush this color lightly into the center of each plate to give the shell a weathered, 3D appearance.
Step 3: Scales & Flippers
-
Create the mosaic scales:
For the flippers and head, switch to your Teal paint. Instead of painting the limbs solid, paint individual irregular polygons (shapes like warped squares and triangles) to act as scales. -
Mind the gap:
Leave a small gap of unpainted asphalt (or paint it black if your pavement is light) between each teal scale. This creates the dark ‘grout’ lines naturally without needing to outline everything later. -
Vary scale sizes:
I prefer to paint larger, blockier scales on the broad parts of the front flippers and get progressively smaller and more dot-like as I move toward the tips of the fins. -
Paint the head details:
Continue the mosaic technique on the head color, using very small scales around the mouth and eyes, and larger ones on the neck. -
The eye:
Paint a small, solid black almond shape for the eye on the side of the head.
Ocean Current
Add movement by dry-brushing faint, swirling waves of pale blue or white in the background around the fins, suggesting the turtle is gliding through water.
Step 4: Finishing Touches
-
Highlight the scales:
Mix a lighter Teal (add white) and dab a small highlight onto the top edge of the larger flipper scales to make them look wet and rounded. -
Spark of life:
Using the tip of your smallest brush, place a tiny white dot in the upper corner of the black eye to create a reflection. -
Clean up outlines:
Walk around the turtle and check edges. If any green or teal spilled over, use black paint to crisp up the outer silhouette. -
Clear the chalk:
Once the paint is fully cured, use a splash of water to rinse away any visible construction chalk lines.
Step back and admire your new slow-moving friend as it basks in the sun.
hip-hop album cover parody
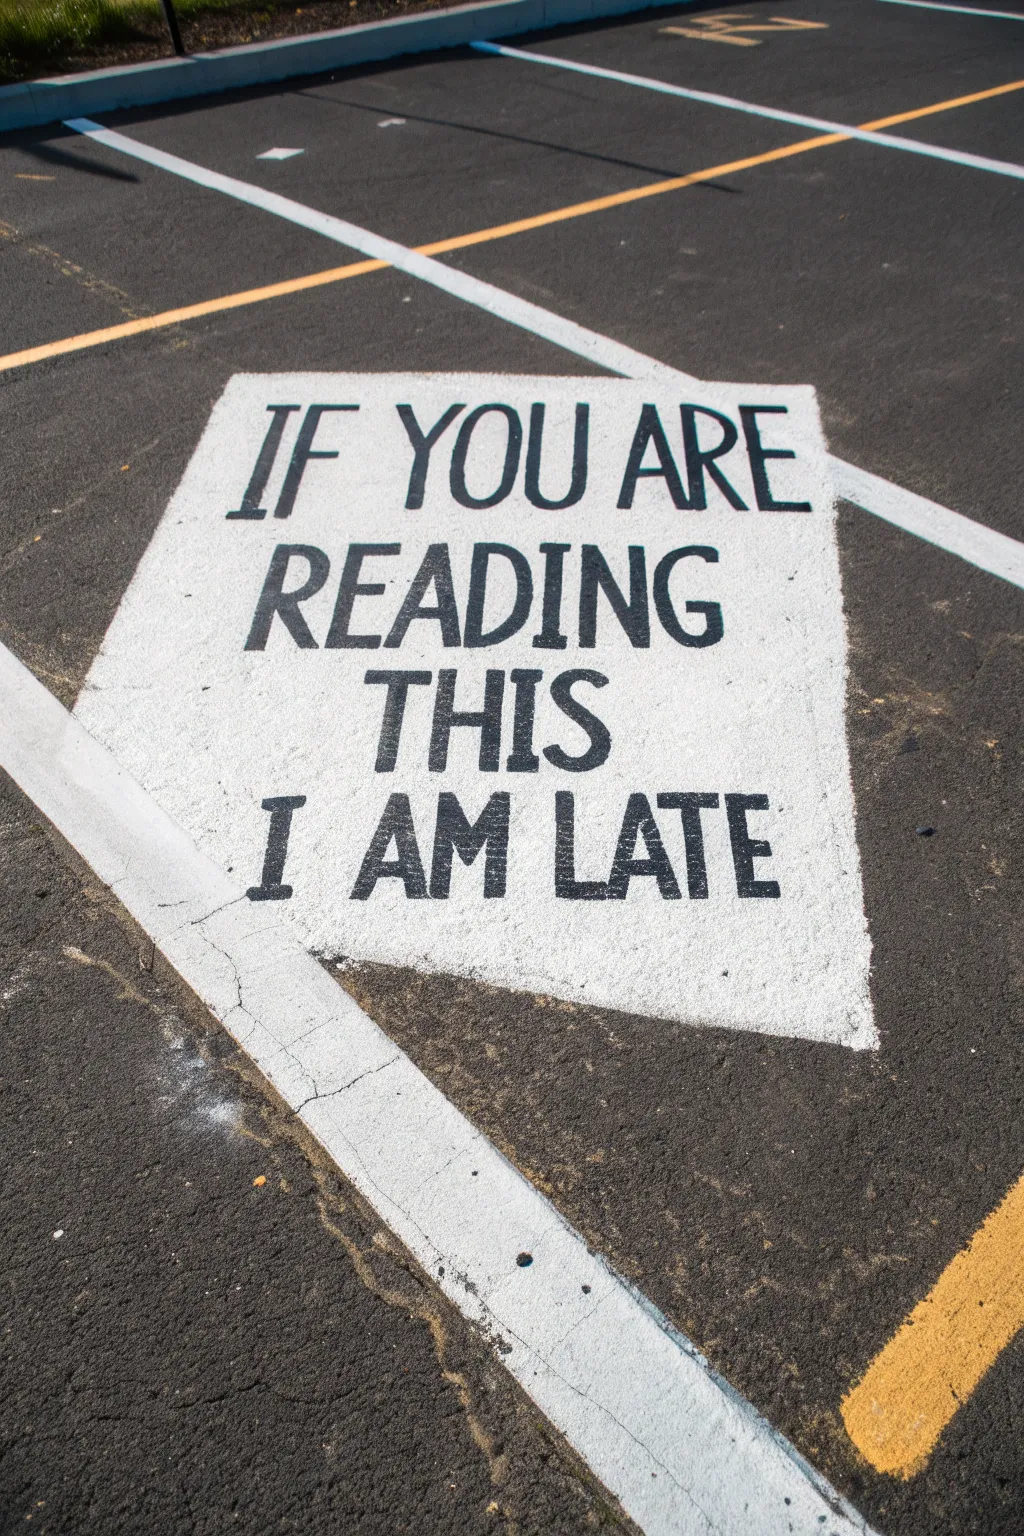
Channel iconic hip-hop energy with this high-contrast parking spot design that playfully tweaks a famous album cover to explain your punctuality. The design relies on a jagged, hand-written font style and a stark monochrome palette to make a bold statement on the asphalt.
Detailed Instructions
Materials
- White exterior masonry or traffic paint (1 gallon)
- Black exterior masonry or traffic paint (quart)
- 3/4-inch nap paint roller cover
- Roller frame and extension pole
- Wide painter’s tape (2-inch)
- Sidewalk chalk
- Assorted bristle brushes (1-inch and 2-inch)
- Stiff broom
- Measuring tape
- Degreaser (optional)
Step 1: Surface Preparation
-
Clear the area:
Vigorously sweep the entire parking spot with a stiff broom to remove loose gravel, dirt, and debris that could ruin your paint adhesion. -
Deep clean:
If there are oil stains, scrub them with a degreaser and rinse thoroughly. Allow the pavement to dry completely before applying any paint, usually for at least 24 hours. -
Measure boundaries:
Use your measuring tape to determine the center of the spot, marking the dimensions for a large rectangle roughly 5 feet wide by 6 feet tall. -
Mark the perimeter:
Use sidewalk chalk to draw the outline of your large rectangle, keeping the lines relatively straight but allowing for slight organic variation to mimic the source material. -
Tape the zone:
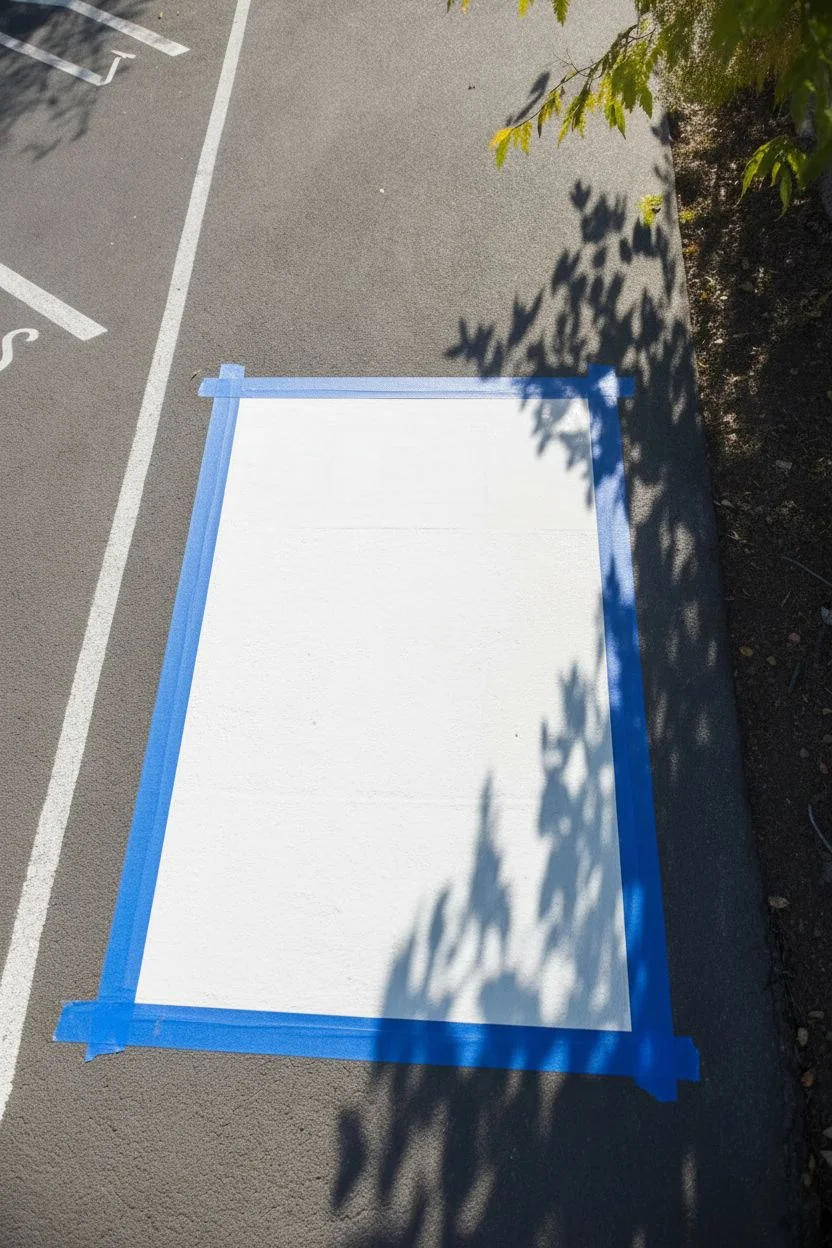
Apply wide painter’s tape along the outside of your chalk lines to create a crisp border for the white background.
Step 2: Painting the Base
-
Seal the edges:
Using a small brush, paint a thin layer of white paint along the inner edge of the tape to prevent bleeding and ensure a sharp line. -
Load the roller:
Pour your white masonry paint into a tray and fully saturate the 3/4-inch nap roller. -
Apply the first coat:
Roll the white paint inside the taped area, applying heavy pressure to force the paint into the nooks and crannies of the asphalt texture. -
Let it cure:
Allow the first coat to dry to the touch, which usually takes about 30 to 60 minutes depending on the sun and heat. -
Second coat:
Roll a second layer of white paint perpendicular to the first coat to ensure solid opacity and a bright, canvas-like finish. -
Remove tape:
I like to peel up the tape while the second coat is still slightly tacky to avoid pulling up dry paint chips.
Asphalt Texture Tip
Use a thick nap roller (at least 3/4 inch) to push paint deep into the pavement’s crevices for a smooth, opaque look.
Step 3: Lettering
-
Dry time:
Wait until the white base is completely dry and safe to walk on before starting the text layout. -
Mark text guidelines:
Using chalk, lightly draw four horizontal lines evenly spaced down the white box to serve as baselines for your text. -
Draft the letters:
Sketch the words ‘IF YOU ARE’, ‘READING’, ‘THIS’, and ‘I AM LATE’ on the respective lines using chalk. Mimic the slightly messy, handwritten serif font seen in the photo. -
Outline in black:
Dip a 1-inch angled brush into the black exterior paint and carefully trace the outline of each letter, covering your chalk marks. -
Fill the text:
Fill in the bodies of the letters with black paint, ensuring the strokes look solid and bold. -
Review alignment:
Step back frequently to check the legibility and balance of the words, correcting any thin lines while the paint is wet. -
Touch-ups:
If you drip any black paint on the white background, wait for it to dry and then dab a little white paint over the mistake. -
Final cure:
Let the entire project cure for at least 24 hours before parking a vehicle on it.
Troubleshooting Text
If your letters look too neat, thicken the vertical strokes unevenly to recapture the messy, handwritten vibe of the original.
Now you have a clever, custom spot that handles the excuses for you before you even step out of the car.

PENCIL GUIDE
Understanding Pencil Grades from H to B
From first sketch to finished drawing — learn pencil grades, line control, and shading techniques.
Explore the Full Guide
music player interface

Celebrate your final year with a sleek, modern parking spot design inspired by a digital music interface. This project uses crisp geometric shapes and bold high-contrast colors to turn your assigned space into a personal playlist of memories.
Step-by-Step Tutorial
Materials
- White exterior masonry/concrete paint
- Maroon or Burgundy exterior paint
- Black exterior paint
- Large paint roller with extension pole
- 2-inch angled sash brush
- Source of straight edges (yardstick or straight lumber)
- Wide blue painter’s tape
- Chalk for sketching
- Circular object for tracing (like a bucket lid)
- Broom or leaf blower
Step 1: Preparation and Base Layer
-
Clean the surface:
Start by vigorously sweeping the parking spot to remove all gravel, dirt, and debris. If allowed, pressure wash the area a day in advance to ensure the paint adheres properly. -
Tape the perimeter:
Measure a large rectangle in the center of your spot to serve as the main interface. Apply painter’s tape to the outside of these lines to create a crisp border. -
Apply the white base:
Pour white masonry paint into a tray and use a roller to fill in the entire taped rectangle. This will serve as the background for the text and buttons. -
Add a second coat:
Once the first layer is dry to the touch, roll on a second coat of white to ensure distinct opacity against the dark asphalt. Let this dry completely before moving to the next phase.
Bleeding Lines?
To get razor-sharp lines on rough asphalt, seal your painter’s tape by brushing a little bit of the *base* color (white) over the tape edge first. This blocks voids so the maroon won’t seep under.
Step 2: Creating the Header
-
Mark the top section:
Measure about 18-24 inches down from the top of your white rectangle. Run a strip of painter’s tape horizontally across the box to separate the header from the text area. -
Paint the background block:
Fill this top section with maroon paint using a smaller roller or a wide brush. Ensure you get solid coverage. -
Sketch the screen icon:
Once the maroon paint is dry, use chalk to lightly draw a rectangle in the center resembling a phone or tablet screen, including the ‘Play’ triangle in the middle. -
Paint the icon details:
Using a small detail brush and your white paint, carefully fill in the phone outline and the play button symbol.
Step 3: Typography and Controls
-
Layout the text:
In the large middle white section, use chalk to sketch grid lines for your lettering to keep it centered and straight. -
Sketch the letters:
Draw the words ‘SENIOR YEAR’ in a tall, narrow sans-serif font. Take your time here to ensure the kerning (spacing between letters) looks even. -
Paint the text:
Use your maroon paint and an angled sash brush to carefully paint the letters. I find it helpful to outline the edges first before filling in the centers. -
Create the bottom divider:
Measure a section at the bottom for the buttons. Use painter’s tape to mask off a thin horizontal line separating this section from the text area, and paint it black. -
Add the vertical split:
Find the exact center of the bottom section and paint a thick vertical black line to create two distinct button areas. -
Trace the button circles:
Place a bucket lid or large circular stencil in the center of each bottom square and trace the outline with chalk. -
Paint the music icons:
Paint the circle outlines black with a steady hand. Inside each circle, sketch and paint a different music note.
Level Up
Add a darker ‘progress bar’ line just under the top maroon block. You can even fill the bar partially to represent how far through the school year you are!
Step 4: Final Touches
-
Remove tape:
Slowly peel up the perimeter tape at a 45-degree angle while the paint is still slightly tacky to prevent chipping. -
Clean up edges:
If any paint bled under the tape, use a small brush and a bit of black or grey paint (matching the asphalt) to tidy up the outer lines.
Now you have a stylish spot that hits all the right notes for a memorable final year.
the final level arcade maze
Transform a dull stretch of asphalt into a nostalgic gaming zone with this high-contrast arcade design. This project uses durable outdoor paints to create crisp geometric lines and vibrant power pellets that stand out against a dark background.
Detailed Instructions
Materials
- Blacktop sealer or black outdoor concrete paint
- White traffic marking paint or masonry paint
- Yellow exterior acrylic or masonry paint
- Chalk line tool and stick chalk
- Long straight edge (yardstick or straight lumber)
- Wide painter’s tape (optional)
- Small mixing bowls
- 1-inch flat synthetic brush
- Small round detail brush
- Knee pads or kneeling mat
Step 1: Surface Preparation
-
Clean the canvas:
Sweep the asphalt thoroughly to remove all rocks, loose dust, and debris that could ruin the paint adhesion. -
Apply the base:
Roll on a fresh coat of blacktop sealer or black concrete paint to create a deep, uniform background that makes the design pop. -
Let it cure:
Allow the black base coat to dry completely according to the manufacturer’s instructions before walking on it.
Curve Control
To get consistent rounded corners on your maze walls, trace around a heavy dinner plate or a gallon paint can lid with your chalk during the drafting phase.
Step 2: Drafting the Level
-
Establish the perimeter:
Measure the width of your parking spot and mark the center point to ensure your maze design is symmetrical. -
Snap grid lines:
Use a chalk line tool to snap a grid onto the asphalt; this helps keep vertical and horizontal maze walls perfectly straight. -
Sketch the walls:
Draw the double-lined walls of the maze using a stick of chalk and your straight edge, leaving a uniform path width throughout. -
Draft the curves:
Sketch rounded corners connecting the straight corridors, trying to keep the arc radius consistent for that authentic arcade look. -
Mark the pellets:
Make small tick marks down the center of the pathways where the white dots (pellets) will eventually go.
Step 3: Painting the Maze
-
Outline the walls:
Dip a 1-inch flat brush into the white traffic paint and carefully paint over your chalk lines. -
Refine the edges:
Go slowly on the long straight sections; you can use painter’s tape here, but I generally find freehanding with a steady arm works better on rough asphalt. -
Paint the curves:
Use the flat edge of the brush to navigate the curves, turning your wrist smoothly to maintain line thickness. -
Create the pellets:
Using a small round brush, paint the small white dots along the center of the path at your pre-marked distinct intervals. -
Whiten the centers:
Apply a second coat to the white dots if the black asphalt is showing through, ensuring they are opaque.
High Score Mode
Personalize the design by painting your house number or initials in the 8-bit arcade font style inside the center ‘ghost house’ box of the maze.
Step 4: Power Ups & Details
-
Outline larger elements:
Draw circles for the larger power pellets or character zones in the open rectangular areas of the maze. -
Mix the yellow:
Pour a small amount of yellow exterior paint into a bowl; masonry paint is best as it resists fading in the sun. -
Fill the power pellets:
Paint the larger circles with the yellow paint, starting from the center and working outward to the chalk rim. -
Clean up borders:
Use a small detail brush to neaten the outer edge of the yellow circles so perfectly round against the jagged asphalt texture. -
Final drying details:
Check for any paint splatters on the black background and touch them up with a little black paint before the art fully sets. -
Clear guides:
Once the paint is 100% dry (give it a few hours), gently sweep or rinse away any remaining visible chalk lines. -
Seal the deal:
Optionally, apply a clear concrete sealer over the painted areas to protect your artwork from tire friction and weather.
Park your car in style and enjoy the retro flair every time you pull into the driveway.


cartoon time cards
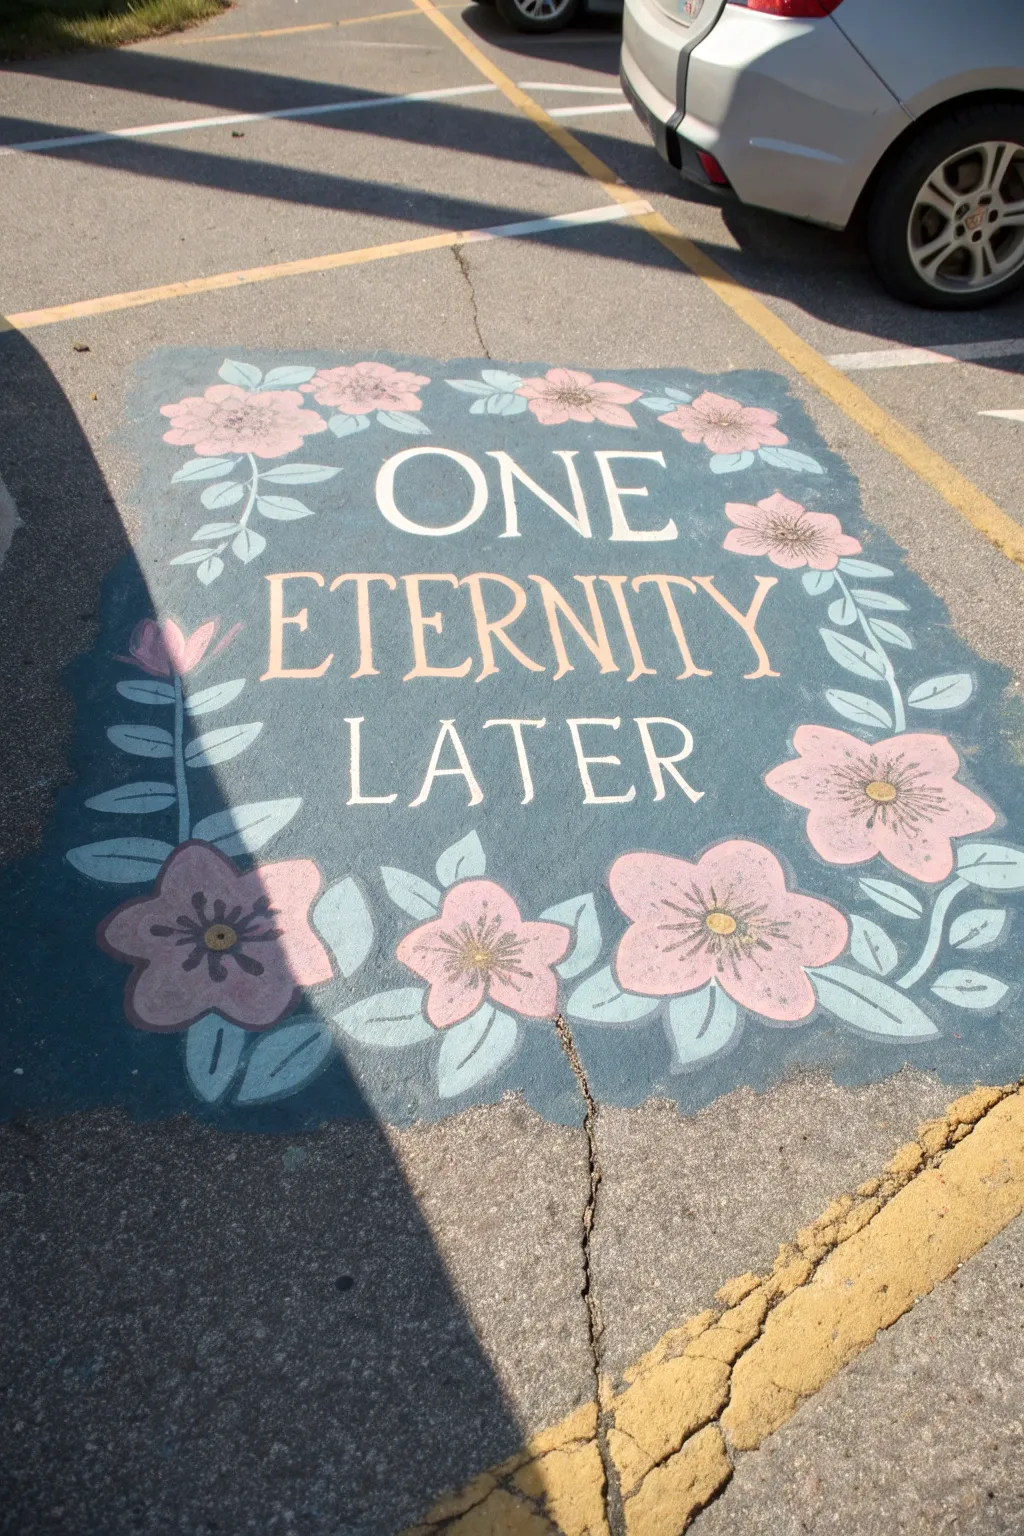
Transform your parking space into an iconic cartoon time card with this playful, nostalgic design. This project uses a muted slate blue background and intricate floral borders to recreate the famous ‘One Eternity Later’ scene, perfect for showcasing your sense of humor.
Step-by-Step
Materials
- Exterior latex paint (slate blue, white, peach, dusty pink, mint green, yellow, dark brown)
- Wide paint roller with extension pole
- 3/4 inch nap roller cover (rough surface)
- Assorted synthetic bristle brushes (1-inch flat, medium round, small detail)
- Sidewalk chalk
- Cardboard or stencil material (optional)
- Concrete/Asphalt sealer (clear, non-yellowing)
- Broom or leaf blower
Step 1: Preparation & Base Layer
-
Clean the surface:
Sweep the asphalt thoroughly with a stiff broom and use a leaf blower to remove fine dust. The paint needs a debris-free surface to adhere properly. -
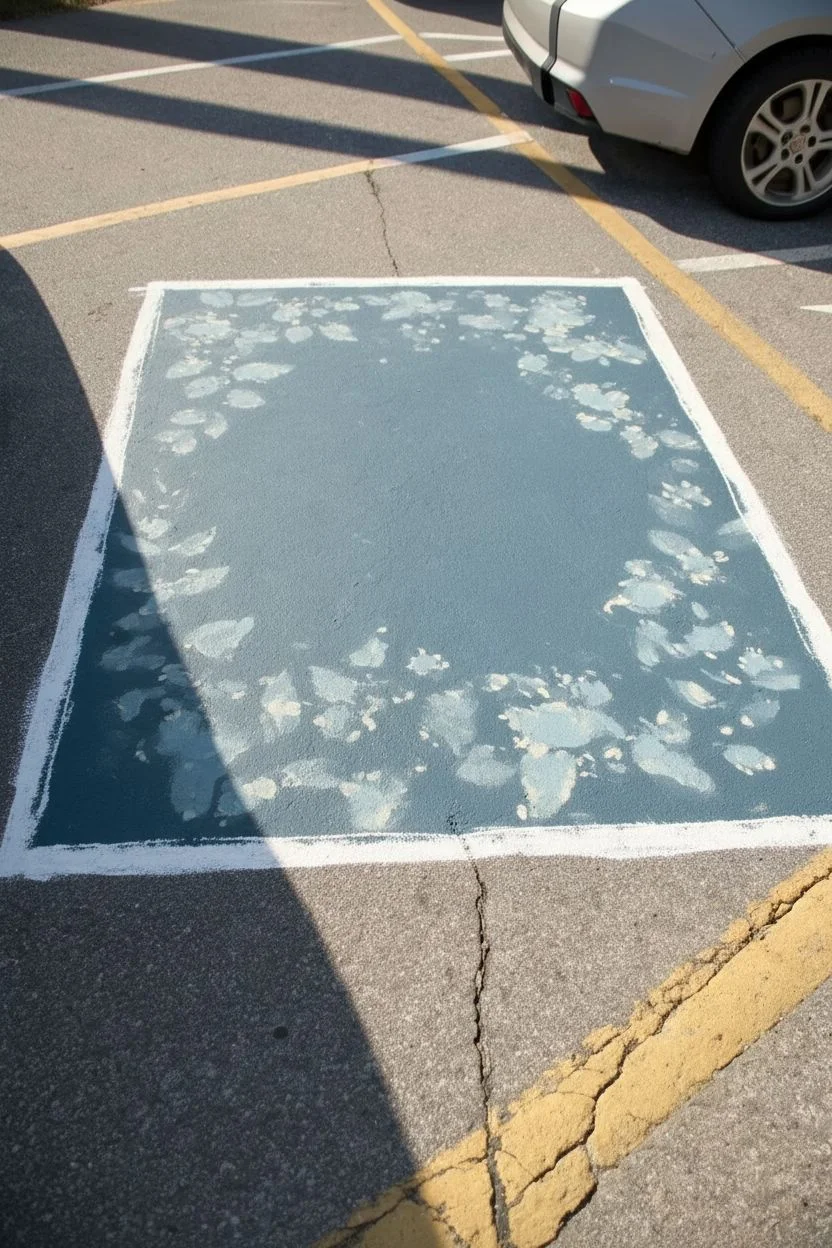
Outline the card shape:
Use sidewalk chalk to draw a large rectangle in the center of the spot. Don’t worry about using a ruler for rigid straight lines; the original style has a slightly organic, painted look to the edges. -
Apply the base coat:
Pour your slate blue exterior paint into a tray. Using the heavy nap roller, apply a thick coat to fill in the texture of the asphalt within your chalk outline. -
Add texture:
While the blue is still slightly wet, I like to take a rag or a dry brush with a tiny bit of lighter blue or white mixed in and dab it randomly across variables areas to create that subtle ‘underwater’ unequal paint density look. -
Let it cure:
Allow the base coat to dry completely to the touch, usually 1-2 hours depending on the sun and heat.
Step 2: Drafting the Design
-
Sketch the layout:
Using your chalk again, lightly sketch the words ‘ONE ETERNITY LATER’ in the center. Refer to the image to gauge the different sizes; ‘ONE’ and ‘LATER’ are slightly smaller than the central ‘ETERNITY’. -
Sketch the border:
Draw the rough shapes of the flowers in the corners and the vines climbing up the sides. Don’t worry about details yet, just place the circles for flowers and curved lines for vines.
Rough Surface Woes?
Asphalt is incredibly porous. Use a ‘stippling’ motion (straight up and down dabbing) with your brush rather than long strokes when doing details to force paint into the deep crevices.
Step 3: Lettering & Floral Details
-
Paint the white text:
Using a 1-inch flat brush, carefully paint the words ‘ONE’ and ‘LATER’ using the creamy white paint. Use the straight edge of the brush to create crisp serifs on the letters. -
Paint the peach text:
Switch to the peach-colored paint for the word ‘ETERNITY’. This creates the classic two-tone text hierarchy found in the original cartoon title cards. -
Block in the flowers:
Fill in the flower silhouettes with dusty pink paint. Apply two coats if the slate blue background shows through too much. -
Paint the vines and leaves:
Using the mint green paint and a round brush, paint the flowing stems connecting the flowers and add the leaf shapes extending outward. -
Add flower centers:
Once the pink is dry, paint a small yellow circle in the center of each flower. -
Detail the flowers:
Using a small detail brush and dark brown paint, add tiny dots inside the yellow centers and five radiating lines (stamen) extending slightly onto the pink petals. -
Highlight the petals:
Mix a little white into your dusty pink to create a lighter shade. Paint curved strokes on the tips of the petals to give them dimension and a slight cartoonish glow. -
Detail the leaves:
With a mix of mint green and a touch of white (or very light blue), paint simple central vein lines on each leaf to separate the halves. -
Refine the edges:
Walk around the design and use a small brush with the original slate blue base color to touch up any accidental drips or clean up the text edges.
Font Perfection
The text style is crucial for the meme effect. Print the words in a font like ‘Times New Roman’ on paper first to use as a visual reference guide while you sketch with chalk.
Step 4: Protection
-
Seal the deal:
Wait at least 24 hours for all paint layers to cure fully. Then, apply a clear concrete sealer with a clean roller to protect your artwork from tire marks and weather.
Now you have a hilarious, durable masterpiece that makes every arrival feel worth the wait
bold license plate typography
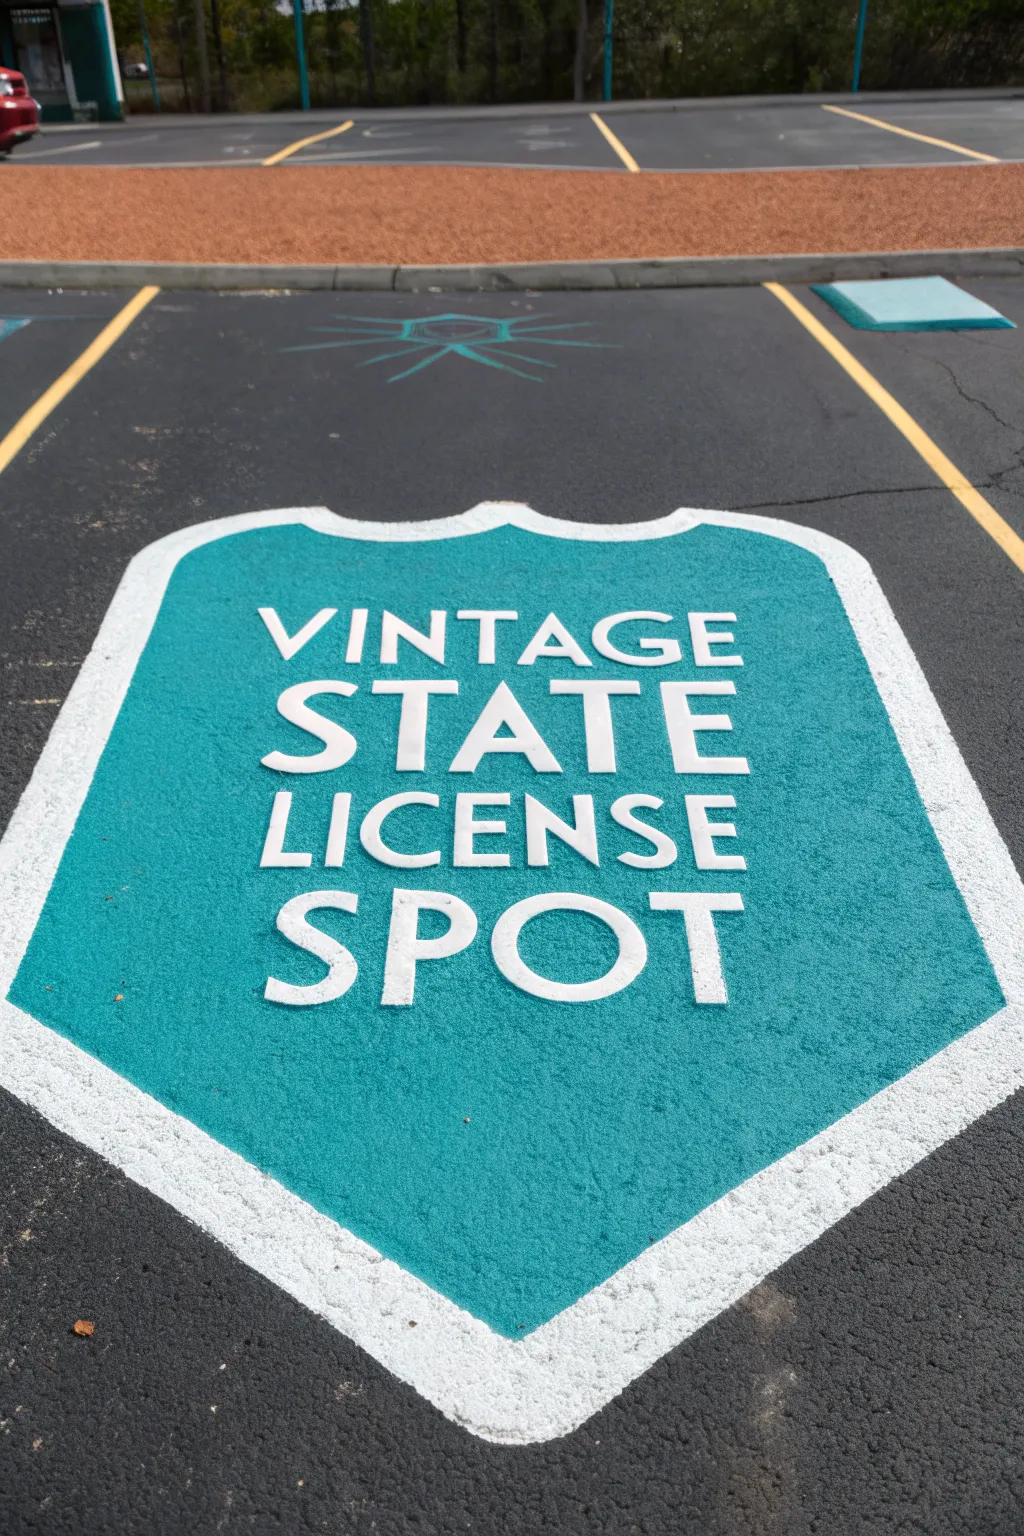
Turn your assigned parking space into a retro roadside attraction with this bold, graphic typographic design. By using a smart reverse-masking technique, you’ll achieve crisp white lettering against a vibrant teal background that captures the nostalgia of old-school license plates.
Detailed Instructions
Materials
- Exterior masonry or asphalt paint (White)
- Exterior masonry or asphalt paint (Teal or Turquoise)
- 2-inch wide blue painter’s tape
- Large adhesive vinyl letters (or adhesive stencil film)
- Sidewalk chalk
- Tape measure
- Paint roller frame and covers for rough surfaces
- Small stiff-bristled brush
- Broom and heavy-duty cleaner
Step 1: Preparation & Outline
-
Clean the surface:
Sweep the parking spot thoroughly to remove loose woven gravel and dust. Scrub with water and a heavy-duty cleaner, then let the asphalt dry completely before painting. -
Mark the center:
Use your tape measure to find the exact center of the parking stall. snap a chalk line or draw a faint vertical line down the middle to act as your anchor. -
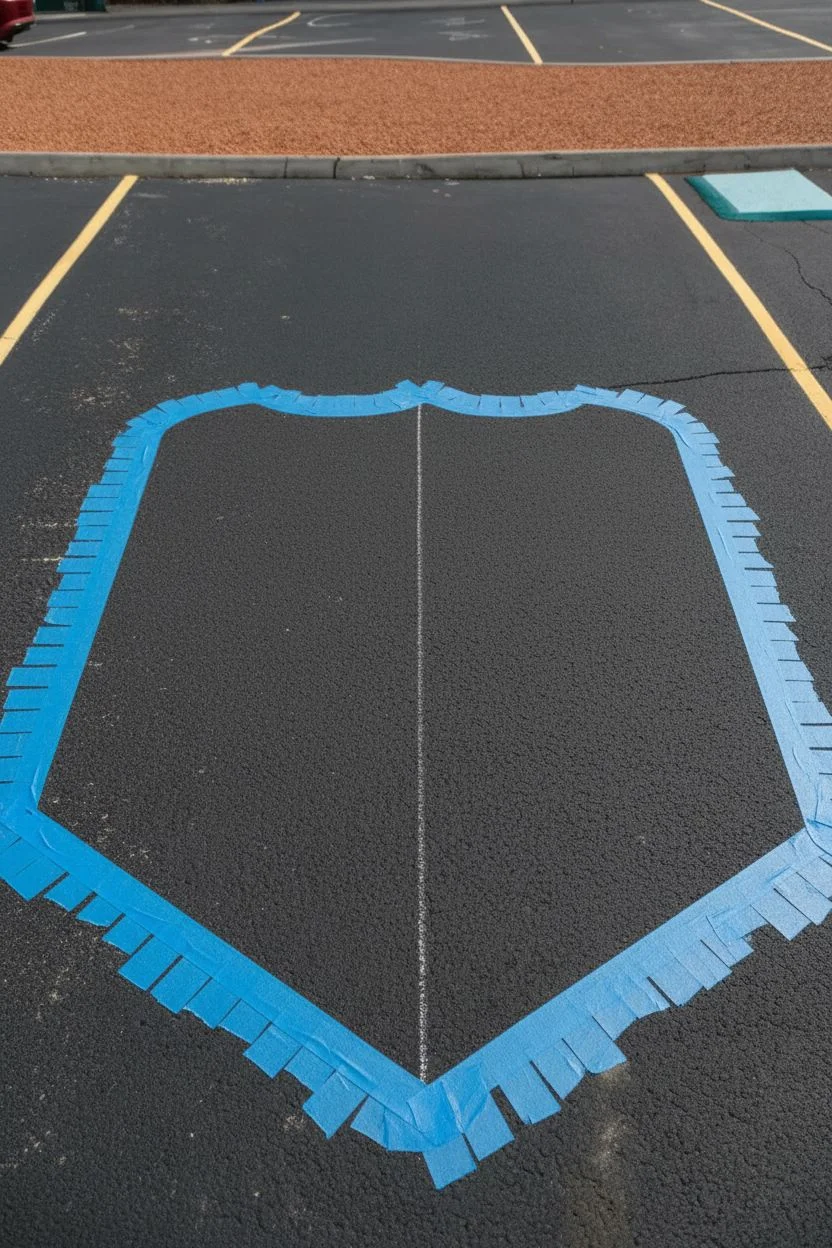
Sketch the shield:
Draw the U.S. highway shield shape with sidewalk chalk. Start with a flat top that has three points (like a gentle crown) and curve the sides down to a point at the bottom. -
Tape the perimeter:
Apply painter’s tape along the outside of your chalk lines. For the curved bottom, tear the tape into smaller 3-inch strips and overlap them to navigate the bend smoothly.
Pro Sealing Tip
Before painting the teal layer, brush a thin layer of clear matte sealer over the tape edges and vinyl letters. This seals the gaps in the asphalt so the teal paint won’t bleed under.
Step 2: The White Foundation
-
Roll the base coat:
Using a roller designed for rough surfaces, paint the entire interior of the taped shield shape with your white masonry paint. -
Ensure opacity:
Asphalt eats paint, so apply a second heavy coat of white once the first is dry to the touch. This white layer will eventually become your text and border. -
Allow full drying:
Wait for the white paint to dry completely. This is crucial because you will be sticking adhesive masks directly onto this fresh paint.
Step 3: Masking the Design
-
Create the border:
Run a strip of 2-inch painter’s tape along the inside edge of your painted shape. This tape covers the white paint that will become the clean white border seen in the photo. -
Layout the text:
Arrange your adhesive vinyl letters on the white surface to spell out your message. Measuring from the center line ensures everything remains symmetrical. -
Adhere the letters:
Press the letters down firmly. I like to walk on them with clean sneakers to ensure they adhere into the texture of the asphalt so paint doesn’t seep under.
Level Up: Graphic Accents
Use a thin detail brush and diluted black paint to add a faint shadow line under the white border and text. This creates a 3D embossed metal effect.
Step 4: Teal Application & Reveal
-
Apply the teal:
Paint the teal color over the entire interior area, rolling directly over the vinyl letters and up to the inner border tape. -
Seal the edges:
Use the stiff brush to stipple (jab) teal paint around the edges of the letters rather than brushing across them, which helps prevent bleeding. -
Add a second coat:
Once the first teal coat is tacky, roll on a second layer to get that rich, opaque vintage color. -
Peel the letters:
While the teal paint is still slightly wet (do not wait for it to fully cure), carefully use a craft knife or fingernail to lift the edge of the vinyl letters and peel them off to reveal the white underneath. -
Remove the border tape:
Slowly pull up the inner tape strip to reveal the white border. -
Remove outer tape:
Finally, remove the exterior perimeter tape for the finished edge. -
Final touches:
Use a small brush to touch up any areas where the asphalt texture might have caused jagged lines.
Allow the project to cure according to the paint can’s instructions before parking your car on your new retro masterpiece.
monopoly board ownership
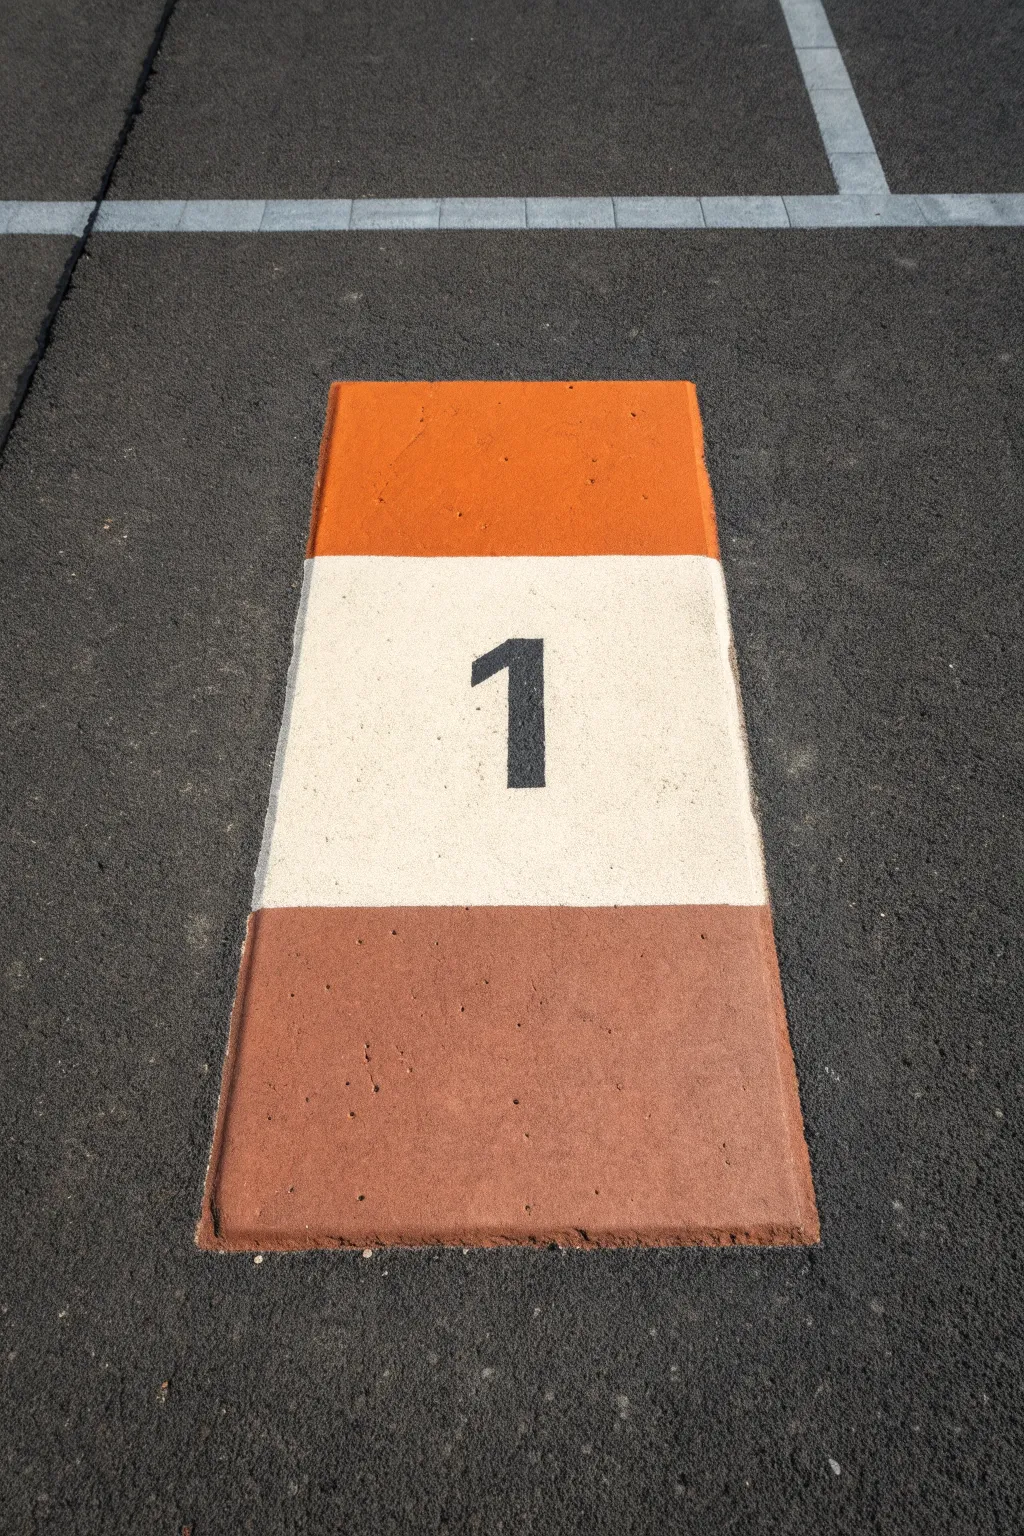
Transform a dull patch of pavement into a nostalgic piece of prime real estate with this board game-inspired design. Utilizing durable exterior paints and simple geometric blocking, this project creates a clearly defined and fun parking designation that withstands the elements.
Step-by-Step
Materials
- Exterior masonry or concrete paint (White, Orange, Terracotta/Brown, Black)
- Heavy-duty exterior painter’s tape (2-inch width)
- Rough-surface paint roller and tray
- Stiff bristle paintbrush
- Measuring tape
- Chalk
- Large number stencil
- External concrete sealer (optional)
- Wire brush or stiff boom
Step 1: Surface Preparation & Layout
-
Clean the zone:
Vigorously sweep the asphalt area with a wire brush or stiff broom to remove loose gravel, dirt, and moss. -
Wash down:
Scrub the spot with water and let it dry completely—moisture will trap under the paint and cause peeling later. -
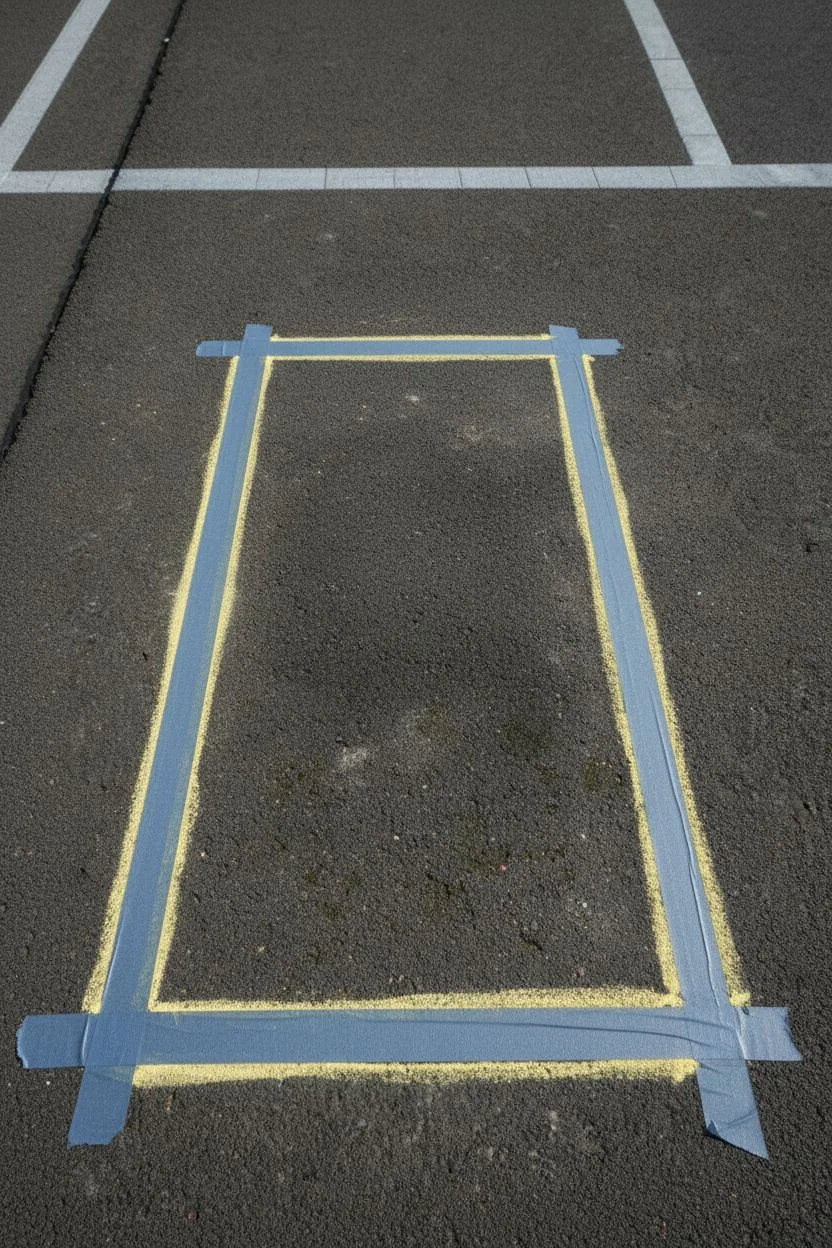
Define the perimeter:
Measure a rectangle approximately 18 inches wide by 36 inches long to mimic the proportions of a game card. -
Mark with chalk:
Draw your rectangular outline directly on the asphalt using chalk to ensure your angles are square before taping. -
Apply outer tape:
Run your exterior heavy-duty tape along the outside of your chalk lines to frame the entire card shape.
Step 2: Blocking the Colors
-
Section the rectangle:
Use tape to divide the interior of the rectangle into three horizontal sections: a top header, a larger middle body, and a bottom footer. -
Seal the tape edges:
Press the tape firmly into the asphalt texture using a rubber mallet or your shoe; I prefer to run a thin line of white paint along the tape edges first to lock them down. -
Paint the center:
Roll a coat of white exterior masonry paint into the middle section, pressing hard to get paint into the asphalt crevices. -
Apply the header:
Paint the top section with vibrant orange concrete paint, using a brush to work the pigment right up to the tape line. -
Paint the footer:
Fill in the bottom section with a terracotta or reddish-brown masonry paint to balance the design. -
Apply second coats:
Once the first layer is dry to the touch (usually 30-60 minutes outdoors), apply a second coat to all three colors for solid opacity. -
Remove divider tape:
Carefully peel up the horizontal strips separating the colors while the paint is still slightly tacky to ensure crisp lines.
Asphalt Texture Tip
On very rough tarmac, skip the roller for the edges. Use an old brush to ‘stab’ the paint downward into the pits for a cleaner, sharper line definition.
Step 3: Numbering & Detailing
-
Position the stencil:
Wait until the white center section is fully cured, then center your large number stencil in the middle of the white field. -
Secure the stencil:
Tape the stencil usage corners down securely so it doesn’t shift on the rough surface. -
Stipple the number:
Using a stiff brush and black exterior paint, use an up-and-down dabbing motion (stippling) to fill the number without bleeding under the edges. -
Reveal the number:
Lift the stencil straight up promptly to prevent smearing the black paint. -
Clean outer edges:
Remove the main perimeter tape frame to reveal the sharp edges against the dark asphalt. -
Touch ups:
Use a small artist’s brush to fix any areas where the asphalt texture caused the paint to skip or bleed.
Level Up: Price Tag
Make it authentic by using a smaller stencil or white paint pen to write a property price (e.g., ‘$200’) centered in the interior of the colored blocks.
Your reserved spot is now officially claimed with a playful pop of color appropriate for any landlord or parking pro.
minimalist magazine cover

Transform your parking space into a chic, high-fashion statement with this magazine-inspired design. The contrast between the matte black background and the muted peach header creates a sophisticated aesthetic that perfectly commemorates your final year.
How-To Guide
Materials
- Exterior concrete or masonry paint (Matte Black, Muted Peach/Terracotta, Bright White)
- 3/4-inch nap roller covers and roller frame
- Extension pole
- 2-inch blue painter’s tape
- Sidewalk chalk
- Assorted synthetic paintbrushes (2-inch angled, 1-inch flat, and fine detail brushes)
- T-square or long straight edge
- Measuring tape
- Broom and leaf blower
Step 1: Preparation and Base Coat
-
Clean the surface:
Sweep the parking spot thoroughly to remove loose rocks and debris. If access to water is available, hose it down and let it dry completely before starting; paint won’t stick to dust. -
Tape the perimeter:
Apply painter’s tape along the left and right lane lines to ensure crisp outer edges. Measure a rectangle at the top of the spot (roughly 4 feet deep) for the peach header and run a horizontal line of tape to separate it from the bottom section. -
Apply the dark base:
Pour matte black paint into a tray and use a roller with a thick nap to cover the large bottom section of the spot. This fresh coat is essential to make the white graphics pop like the reference photo. -
Paint the header box:
Using a fresh roller cover, fill in the top rectangular section with your muted peach or terracotta paint. I like to apply a second coat here once the first is dry to ensure the asphalt texture is fully covered. -
Dry time:
Allow the base coats to dry until they are distinct and touch-dry, usually about 30 to 60 minutes depending on the sun and heat.
Troubleshooting: Jagged Edges
If paint bleeds under the tape due to rough asphalt, don’t panic. Once dry, use a small artist’s brush and the base color (black or peach) to touch up and straighten the lines manually.
Step 2: Typography and Graphics
-
Sketch the header text:
Using sidewalk chalk and a T-square, lightly draw guidelines inside the peach box to keep your letters straight. Sketch the words ‘SENIOR’ and ‘ISSUE’ in a bold serif font (similar to Didot or Bodoni), centering them horizontally. -
Paint the header letters:
Fill in your chalk sketches with white paint using a 1-inch flat brush for the thick vertical strokes and a fine detail brush for the thin serifs and horizontal lines. -
Draft the bottom graphic:
In the black section, use chalk to sketch a large, stylized monogram. Create a long diagonal line or sword graphic running from top-left to bottom-right, then interlock the initials ‘S’ and ‘R’ (or your own initials) around it in a cursive style. -
Paint the monogram:
carefully paint over the bottom chalk design with white paint. Since the asphalt is rougher here, use a dabbing motion with your brush to work the paint into the crevices for a solid, opaque line. -
Clean up:
Once all paint is dry to the touch, slowly peel back the painter’s tape at a 45-degree angle to reveal your crisp, clean edges. -
Wash away guides:
If any chalk lines are still visible after the paint has fully cured, gently rinse them away with a little water.
Pro Tip: Comfort is Key
Bring a gardening kneeling pad or a folded towel. You will be spending a lot of time on the ground painting those serif details, and the asphalt can be brutal on your knees!
Enjoy your stylish, magazine-worthy parking spot that celebrates your senior year with elegance.
collaborative bestie spots
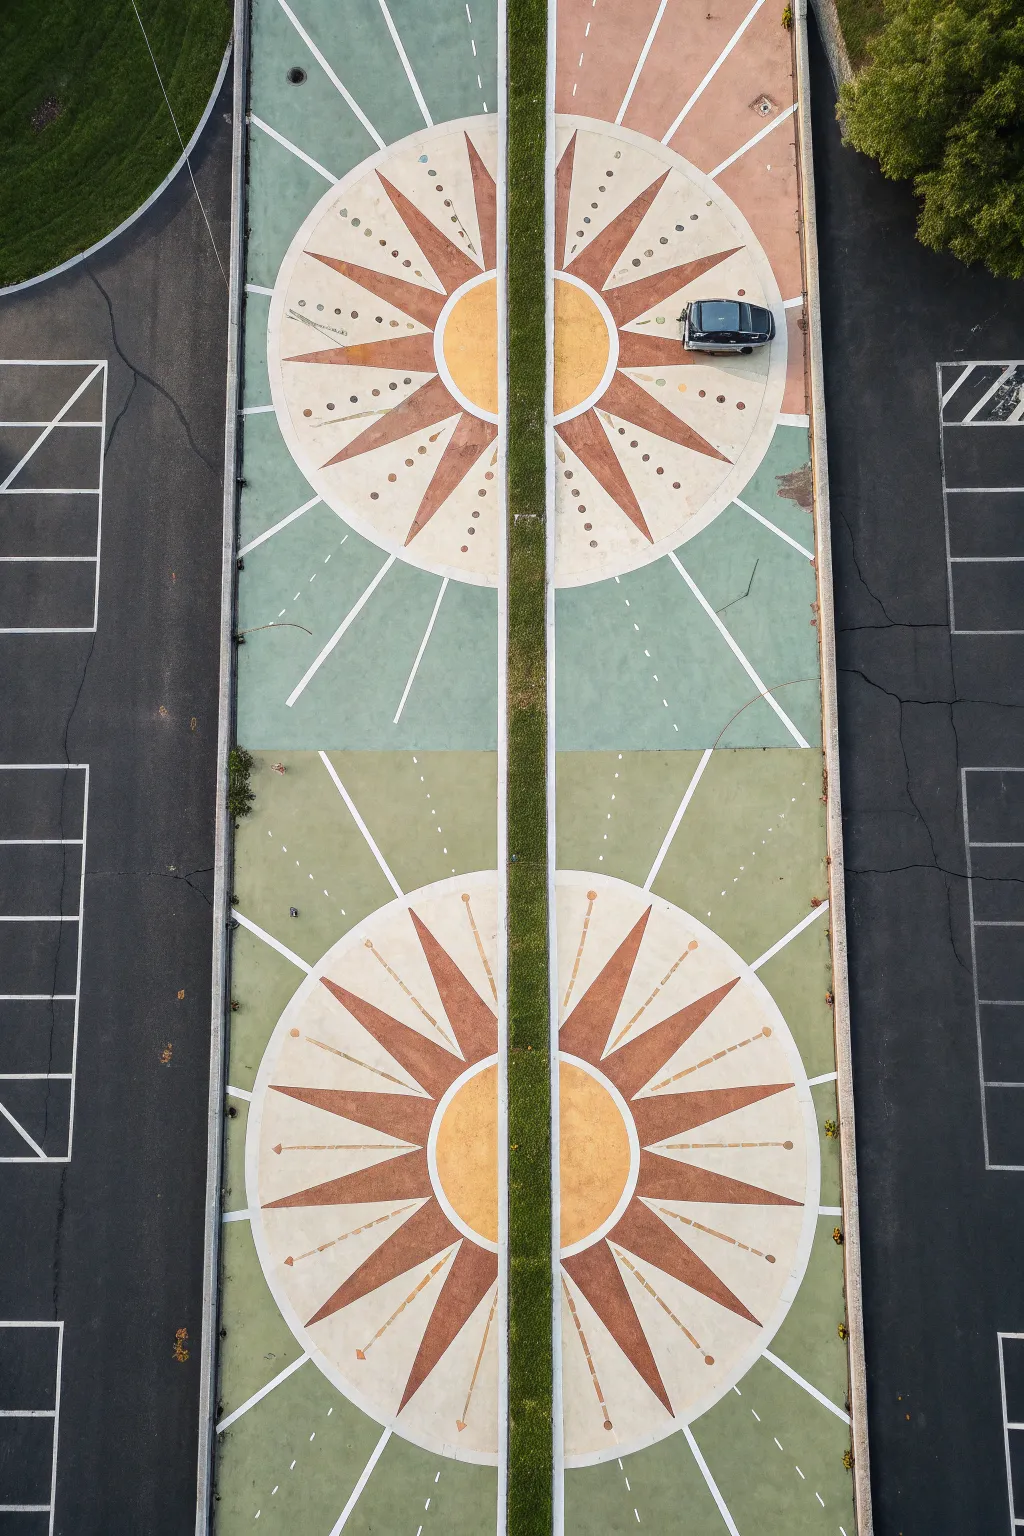
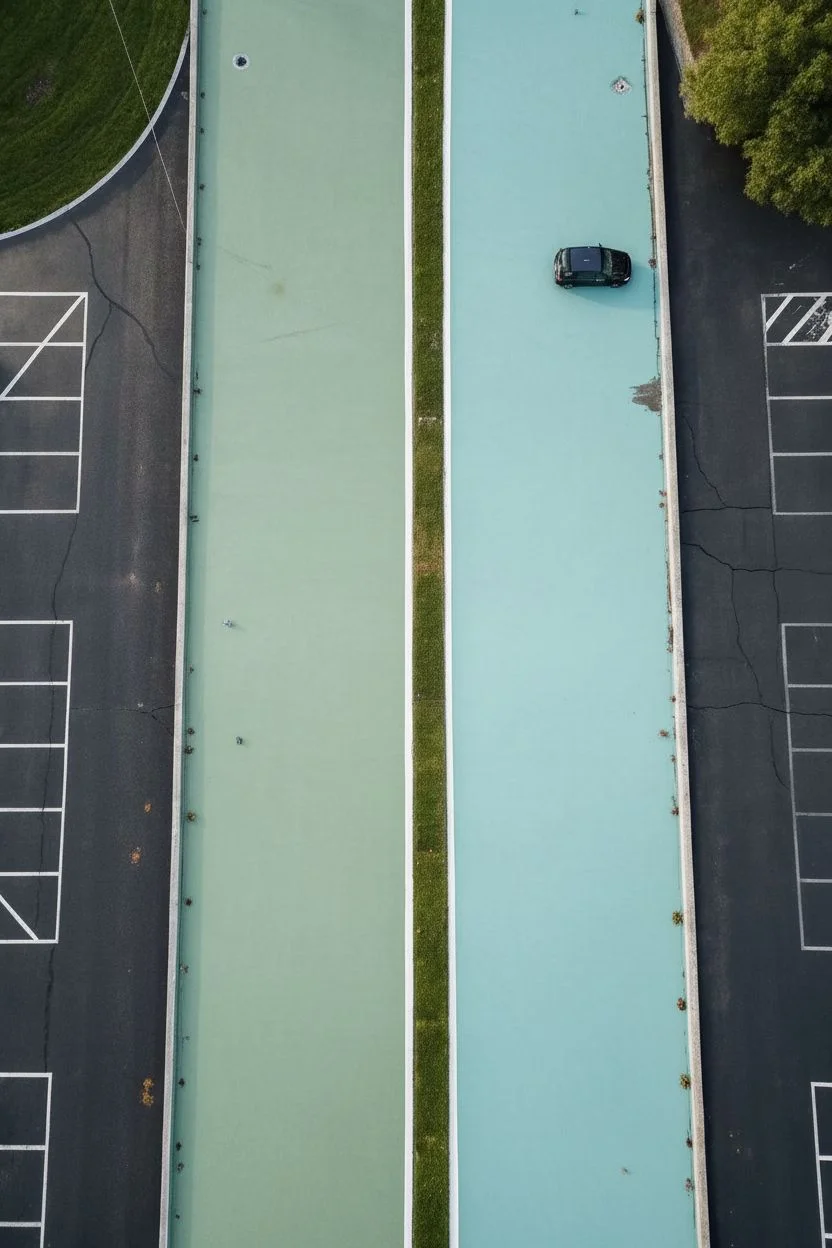
Coordinate with your parking neighbor to create this stunning mirror-image sunburst design that spans across the median. The geometric compass style uses earthy terracotta and mustard tones against contrasting sage and mint backgrounds for a cohesive look.
Step-by-Step Guide
Materials
- Exterior masonry/concrete paint (Sage Green, Minty Blue, Terracotta, Mustard Yellow, White)
- White concrete primer
- Long-handled paint rollers with extension poles
- 3-inch and 1-inch angular paint brushes
- Industrial painter’s tape (2-inch width)
- Chalk line tool (snap chalk)
- String and chalk (for compass circles)
- Measuring tape
- Concrete sealer (non-slip additive recommended)
Step 1: Base & Background
-
Surface prep:
Start by vigorously sweeping the asphalt to remove loose gravel and dirt, then power wash both spots if possible to ensure the paint adheres properly. -
Priming the asphalt:
Roll a thick coat of white concrete primer over both parking spots; this neutralizes the black asphalt so your pastel greens and blues will show up true to color. -
Dividing the palettes:
Assign one spot for the Sage Green background and the adjacent spot for the Minty Blue background to create the mirrored effect shown in the photo. -
Rolling the base color:
Using long-handled rollers, apply two coats of your chosen background color to your respective spots, ensuring solid coverage right up to the painted white parking lines and the grassy median curb. -
Drying time:
Allow the base coats to dry completely to the touch—usually about 2 to 4 hours in direct sun—before attempting to apply tape for the design.
Pro Tip: Sharp Points
To prevent paint bleed under the tape on rough asphalt, brush a tiny bit of your *background* color over the tape edges first to seal them before painting the red rays.
Step 2: Geometric Layout
-
Finding center:
Measure the length of the parking spot’s inner curb (the grassy median side) and mark the exact center point with chalk; do this for both spots so the suns align perfectly. -
Drawing the sun center:
Have a friend hold a string at the center mark on the curb while you tie a piece of chalk to the other end at a 3-foot distance, then swing an arc to create the central circle outline. -
Mapping the rays:
Extend your string compass to about 8 feet and draw a faint outer arc to mark where the tips of the sun rays will end. -
Marking the angles:
Use a large protractor or simple geometry to mark 16 evenly spaced points along your outer arc to determine the tips of the starburst rays. -
Taping the triangles:
Connect your center circle to the outer marks using painter’s tape to create the sharp triangular shapes of the sun rays.
Step 3: The Sunburst & Details
-
Painting the rays:
Fill in the triangular taped sections with Terracotta paint using a smaller brush to ensure you stay strictly within the lines. -
Painting the core:
I like to use a small roller to fill in the central semi-circle with Mustard Yellow while the rays are drying. -
The reveal:
Once the paint is tacky but not fully dry, carefully peel back the tape at a 45-degree angle to reveal crisp, clean lines. -
Adding directional lines:
Use a snap chalk line tool to create long, straight guide lines radiating outward from the sun toward the outer edges of the parking spot. -
Painting white accents:
Hand-paint over these chalk lines with white paint using a steady hand and a 1-inch brush, stopping the lines abruptly as they hit the painted divider stripes. -
Detail work:
Dip the handle end of a paintbrush into the Terracotta paint and dot it onto the background between each ray tip for that extra decorative flair. -
Sealing the deal:
Roll a clear concrete sealer over the entire finished artwork to protect it from tire marks and UV fading.
Level Up: Personalize It
Instead of a solid yellow sun center, use that space to paint your graduation year, initials, or a monogram in a contrasting color like white or navy blue.
Park your cars and admire how your collaborative masterpiece turns a standard lot into a work of art


Have a question or want to share your own experience? I'd love to hear from you in the comments below!