Transforming old frames with a fresh coat of paint is one of my favorite ways to breathe new life into a room without spending a fortune. Whether you found a vintage gem at a flea market or want to update a basic store-bought piece, there are so many creative techniques to explore.
Classic Matte Black for Modern Minimalists

Transform a tired wooden frame into a sophisticated statement piece with this high-contrast makeover. The rich, matte black finish emphasizes the natural wood grain while adding a sleek, modern edge to any gallery wall.
Step-by-Step Tutorial
Materials
- Wooden picture frame (wide profile works best)
- Sandpaper (150 and 220 grit)
- Tack cloth or microfiber rag
- Painter’s tape
- Gray or black spray primer
- Matte black spray paint
- Matte clear polychrylic spray or furniture wax
- Drop cloth or cardboard
- Respirator mask
Step 1: Preparation
-
Disassemble the frame:
Remove the backing board, artwork, and glass from the frame carefully. If the glass is glued in, cover it completely with paper and secure the edges with painter’s tape. -
Clean the surface:
Wipe the wood down with a damp cloth and mild soap to remove dust, old wax, or grime, then let it dry thoroughly. -
Initial sanding:
Scuff the entire surface with 150-grit sandpaper. You don’t need to strip it to bare wood, but you must remove the glossy sheen of the previous finish so the new paint sticks. -
Detail sanding:
Fold your sandpaper to get deep into the interior ridges and bevels of the frame profile, ensuring every nook is scuffed. -
Smooth the grain:
Do a quick pass with 220-grit sandpaper to smooth out any rough scratches from the previous step. -
Dust removal:
Wipe the entire frame with a tack cloth to pick up every speck of sawdust. This is crucial for a smooth black finish.
Step 2: Priming
-
Set up workspace:
Place your frame on a drop cloth or cardboard in a well-ventilated area, elevating it on scrap blocks or cans so the edges don’t stick to the ground. -
Apply primer:
Shake your gray or black primer can vigorously. Apply a very thin, even coat, keeping the can moving to avoid pooling. -
Check the angles:
Move around the frame to spray the inside and outside edges of the rim, not just the top face. -
Dry and de-nib:
Let the primer try clearly for about 30 minutes. If the wood grain raised up and feels fuzzy, lightly run your 220-grit sandpaper over it and wipe clean again.
Drips Happened?
Don’t wipe wet drips! Let them dry completely, then sand the bump flat with fine-grit sandpaper before applying a final light coat to blend it in perfectly.
Step 3: Painting
-
First black coat:
Shake your matte black spray paint. Apply the first coat in light, sweeping passes, starting the spray off the frame and ending off the frame. -
Preserve the texture:
I like to keep the layers thin rather than heavy; this ensures the natural texture of the wood grain remains visible through the paint. -
Drying time:
Allow the first coat to dry for roughly 15 to 20 minutes, or as directed on your specific paint can. -
Second coat:
Apply a second light coat, focusing specifically on any corners or deep crevices inside the frame molding that might look a bit light. -
Inspect coverage:
Look at the frame from different angles under good light to spot any missed patches.
Level Up: Wax Finish
For a luxurious feel, skip the spray sealer and apply clear furniture wax with a soft cloth. Buffing it gently creates a soft, hand-rubbed sheen that feels expensive.
Step 4: Sealing
-
Choose your finish:
To maintain the ‘dead flat’ look shown in the image, use a matte clear spray sealer. -
Apply sealer:
Spray a single, light coat of sealer over the frame to protect the black pigment from fingerprints and dust. -
Final cure:
Let the frame cure for at least 24 hours before inserting the glass and hanging it, to prevent the paint from sticking to the wall or artwork.
Now you have a stunning, modern frame ready to highlight your favorite art or black-and-white photography


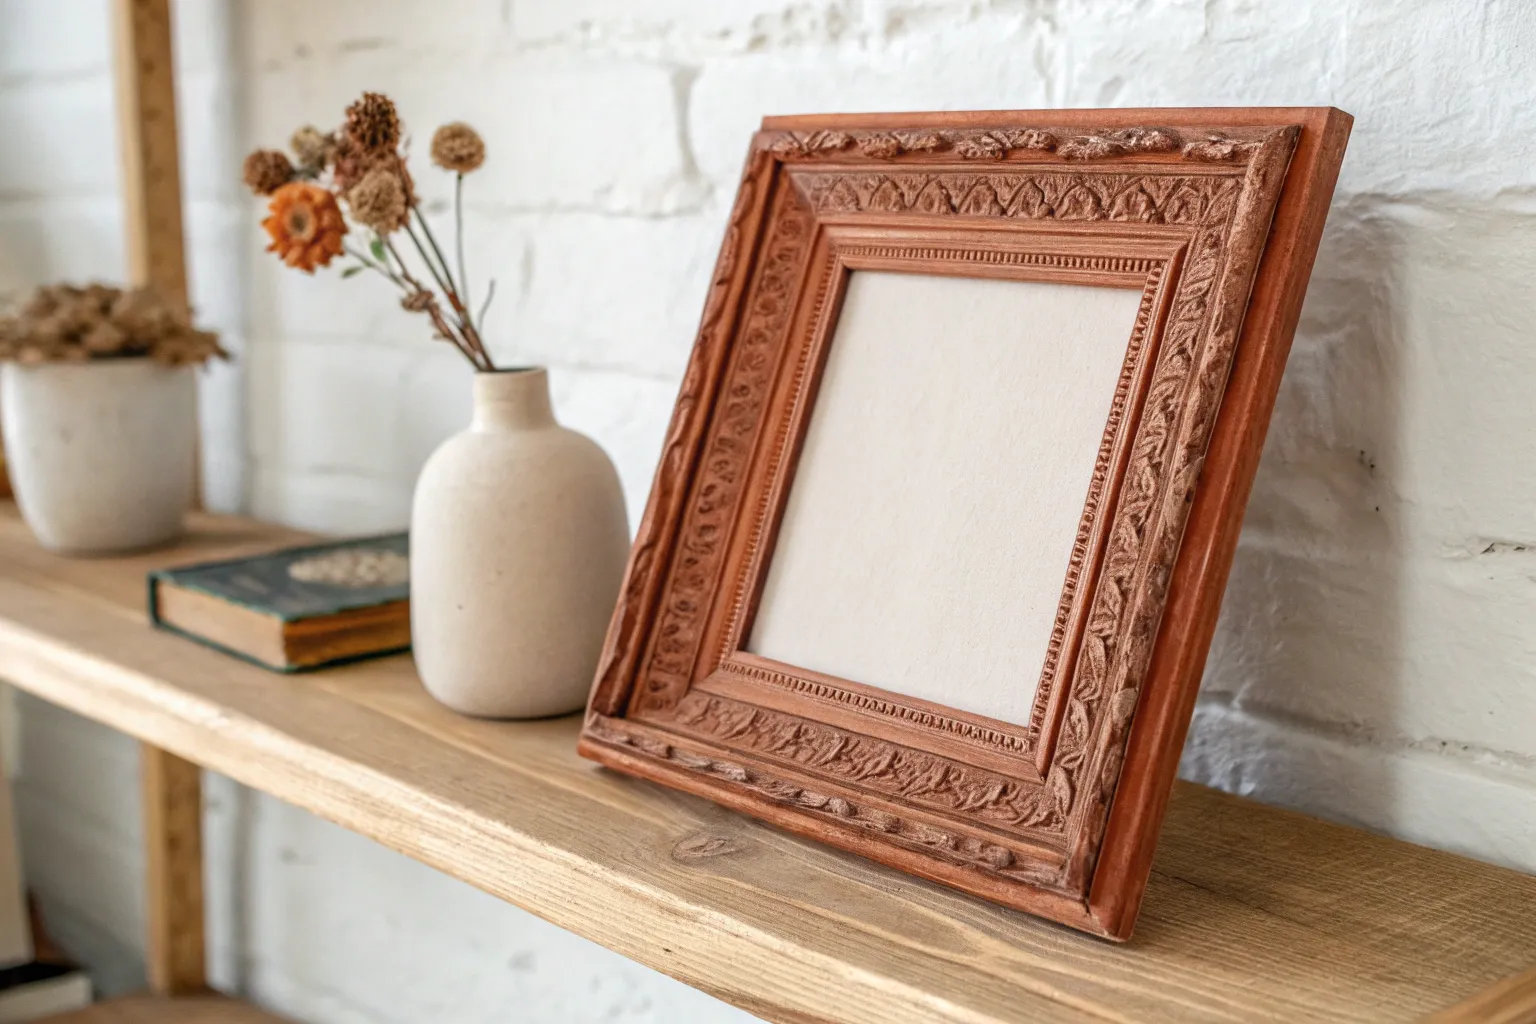
Restoring Ornate Gold Elegance
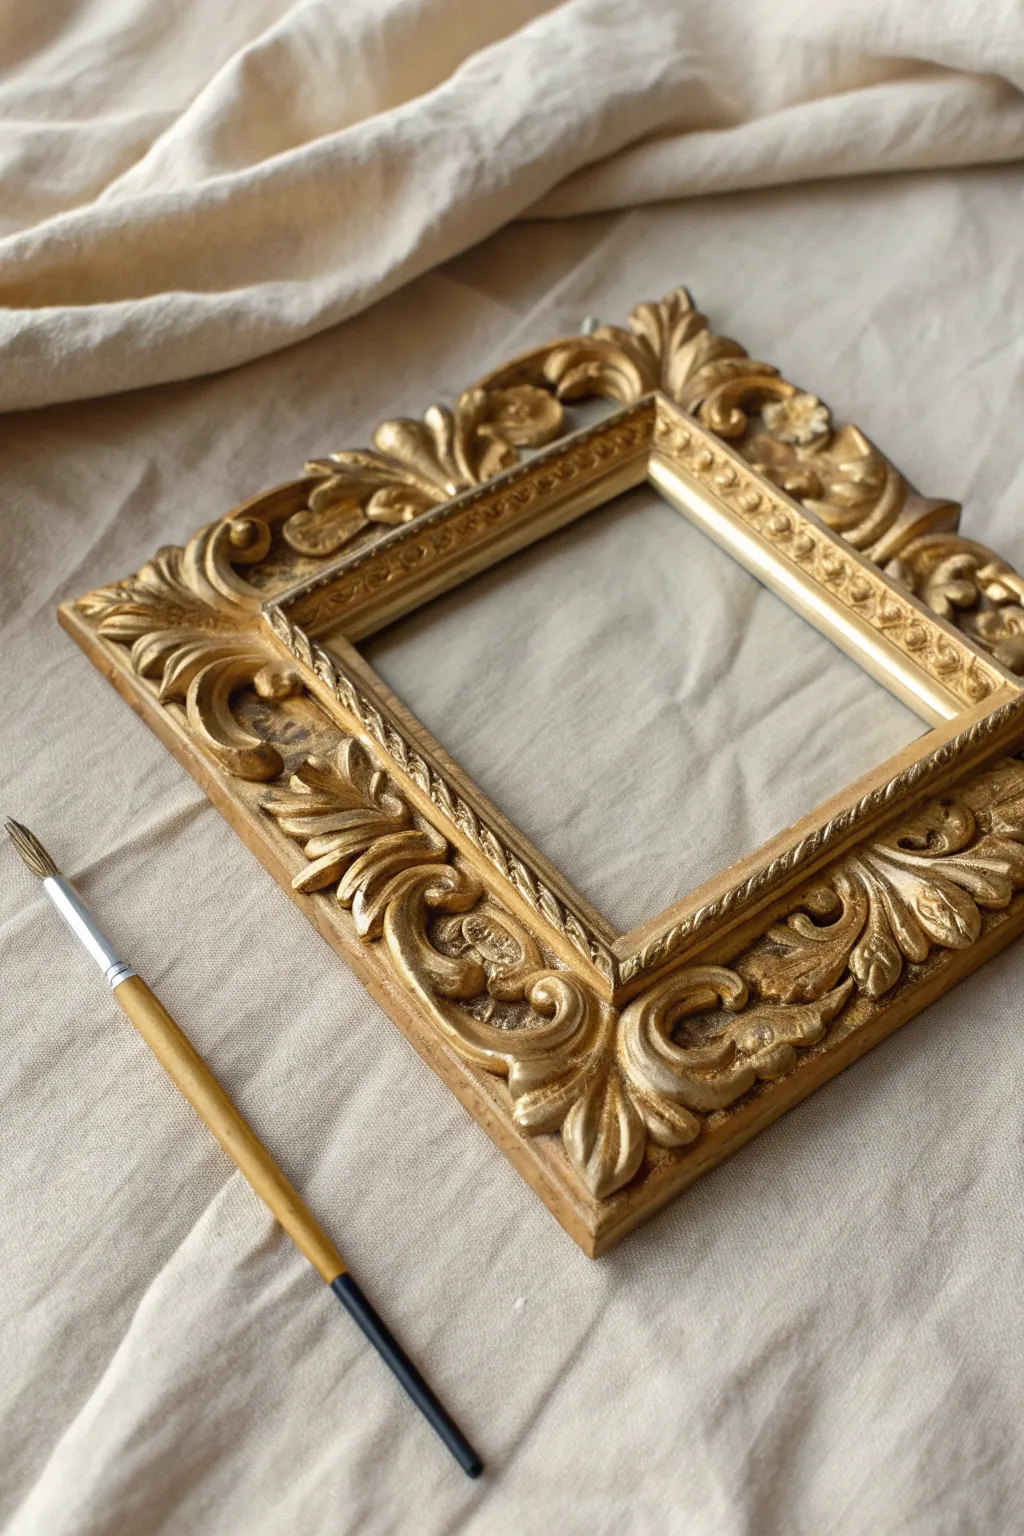
Transform a weary thrift store find into a museum-worthy masterpiece with this rich, gilded finish. By layering metallic tones over intricate molding, you will bring out the definition and warmth of a classic antique frame.
Detailed Instructions
Materials
- Ornate picture frame (wood or resin)
- Dish soap and water
- Old toothbrush
- Fine-grit sandpaper (220-grit)
- Dark acrylic paint (Burnt Umber or Black)
- Liquid gold leaf or high-quality metallic gold acrylic paint
- Soft synthetic flat brush (1/2 inch)
- Small round detail brush
- Lint-free cloth
- Clear acrylic sealer spray (satin or gloss)
Step 1: Preparation and Cleaning
-
Disassemble the frame:
Flip the frame over and carefully bend back the flex points or remove the nails holding the backing in place. Remove the backing board, the artwork, and the glass, setting them aside safely. -
Scrub the details:
ornate frames collect dust in deep crevices. Mix a little dish soap with warm water and use an old toothbrush to gently scrub the molded leaves and scrolls. This ensures your paint adheres properly. -
Dry completely:
Wipe the frame down with a clean towel. Let it sit for about an hour to ensure all moisture has evaporated from the wood or resin pores. -
Scuff sand the surface:
Lightly rub the existing finish with 220-grit sandpaper. You aren’t trying to remove the old finish, just creating a ‘tooth’ for the new layers to grab onto. -
Remove sanding dust:
Use a damp lint-free cloth or a tack cloth to wipe away every speck of dust generated by sanding.
Too bright?
If you accidentally covered too much of the dark base, mix a tiny drop of black paint with water to make a thin wash. Paint it into the crevices and wipe the raised areas immediately with a cloth.
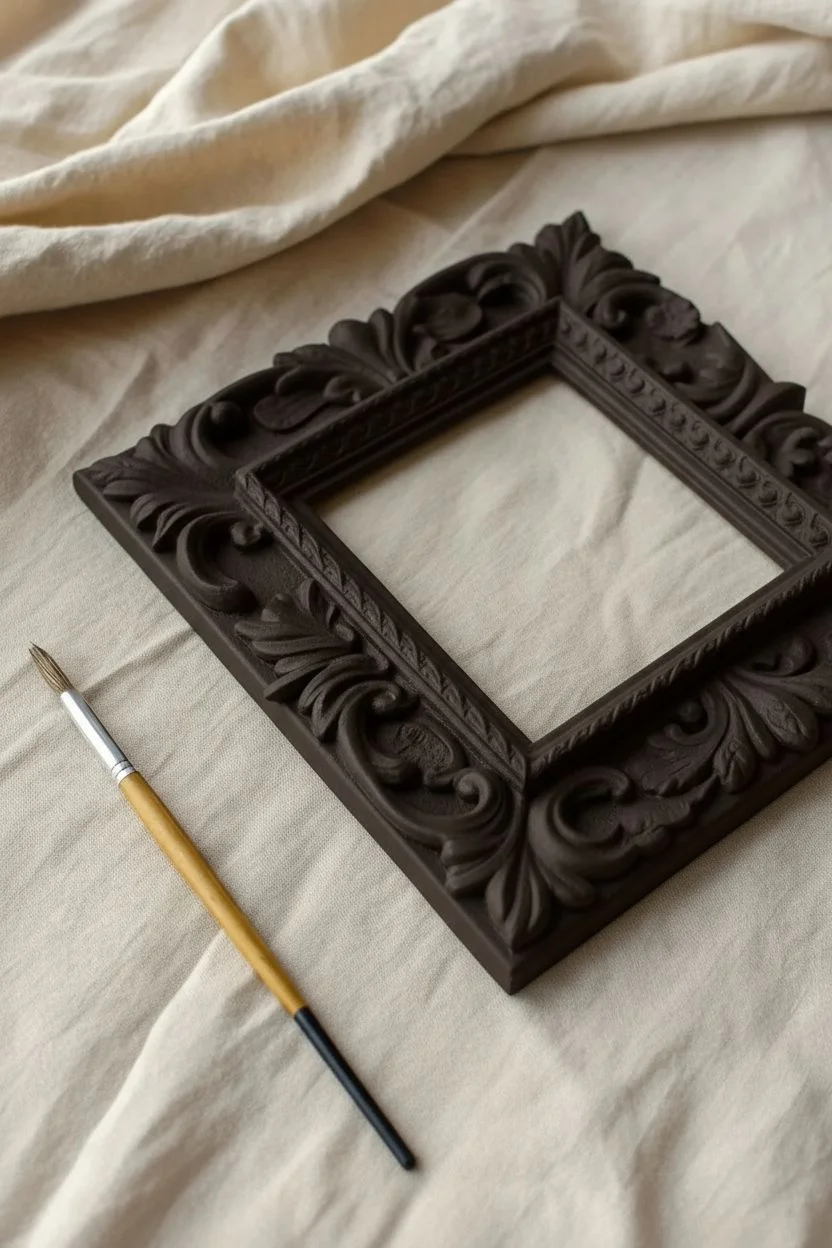
Step 2: Creating the Base
-
Apply the dark base coat:
Using your flat brush, paint the entire frame with Burnt Umber or Black acrylic paint. This dark underlayer is crucial for creating the shadow effects seen in antique gold finishes. -
Target the crevices:
Pay special attention to the deep recesses of the molding. Jam your brush bristles gently into the corners to ensure no original color peeks through. -
Allow to dry:
Paint dries quickly, but I prefer to let this base coat cure for at least two hours so it creates a rock-solid foundation for the metallics.
Pro Tip: Depth
For a true antique look, use two shades of gold. Apply a darker ‘antique gold’ first, then dry brush a brighter ‘champagne’ or ‘yellow gold’ only on the very highest tips of the carving.
Step 3: Gilding the Frame
-
Load the brush sparingly:
Dip your flat brush into your gold paint or liquid gold leaf. Offload most of the paint onto a paper towel until the brush is almost dry. -
Begin dry brushing:
Lightly sweep the brush across the raised textures of the frame using a horizontal feathering motion. The gold should catch the high points of the leaves and scrolls, leaving the dark base coat visible in the deep cracks. -
Build intensity slowly:
Apply a second layer of dry-brushed gold. It is much easier to add more brightness gradually than to fix it if you accidentally cover up all your shadows. -
Highlighting details:
Switch to your small detail brush. Dip it in the gold (fully loaded this time) and carefully paint the very tips of the most prominent floral elements to make them shine brilliantly. -
Check side angles:
Rotate the frame and look at the inner and outer edges. Ensure the gold fades naturally from the face of the frame to the sides. -
Inspect from a distance:
Step back a few feet. If any areas look uniform and dark, spot-apply a little more gold to balance the composition. -
Seal the finish:
Once the gold is fully dry (liquid leaf may take longer than acrylics), spray the frame with a clear acrylic sealer to prevent tarnishing and protect the paint. -
Clean the glass:
While the sealer dries, use glass cleaner on the original glass pane to remove any old fingerprints or haze. -
Reassemble:
Place the glass, art, and backing board back into the frame and secure the clips or nails.
Hang your newly restored frame and enjoy the warmth and sophisticated history it adds to your wall


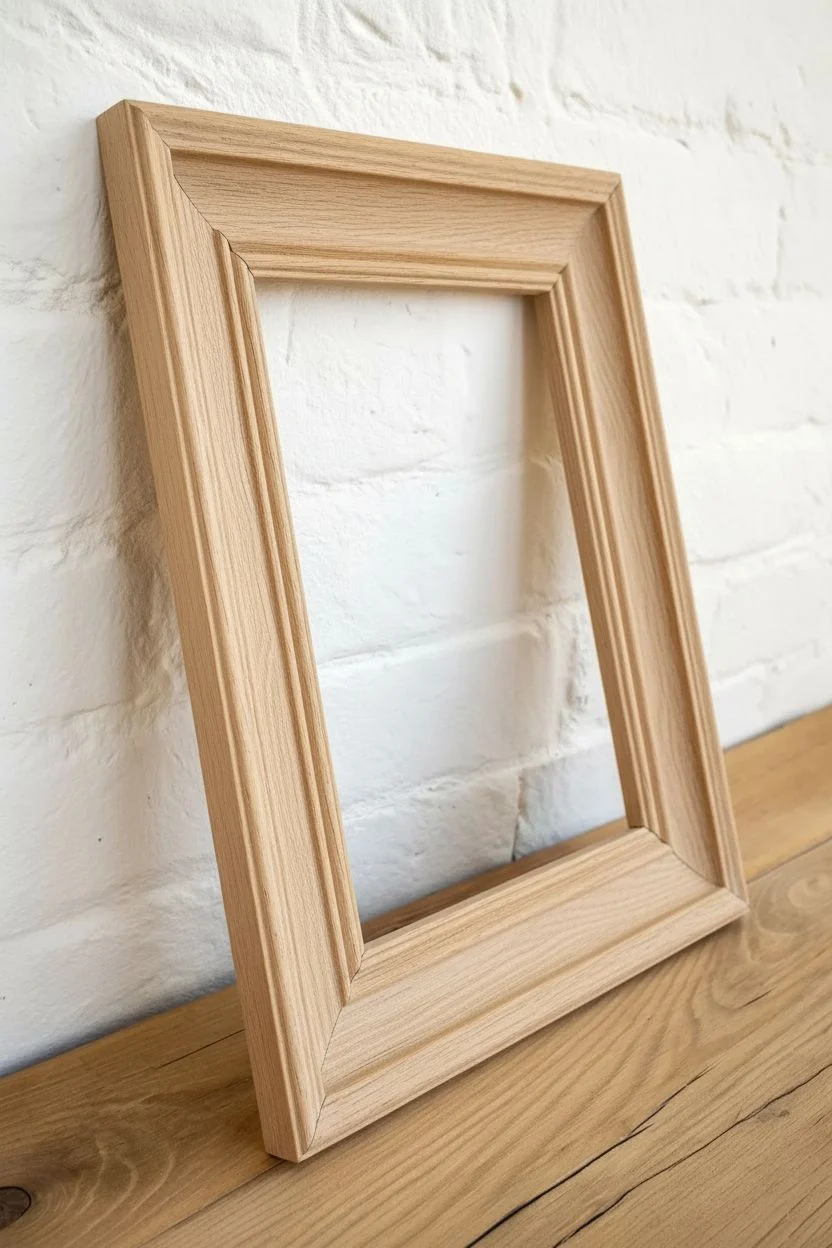
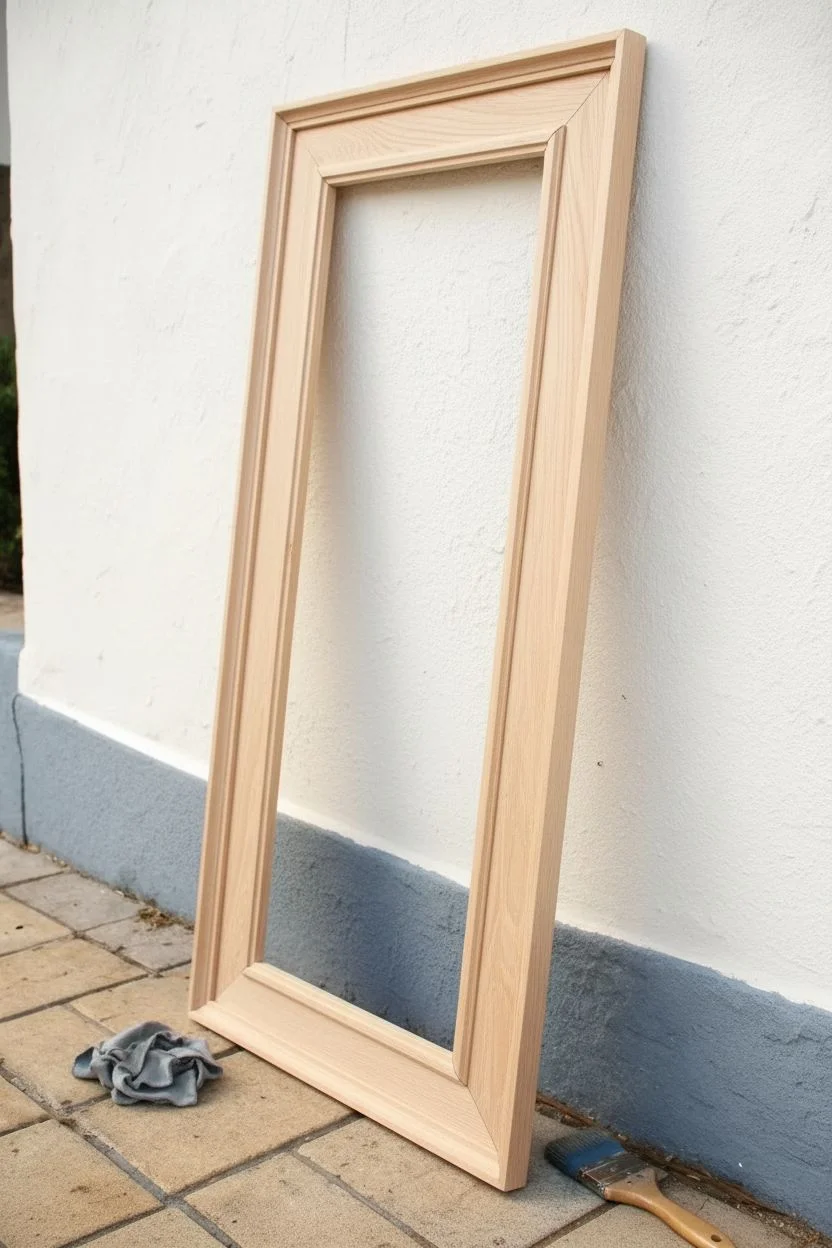
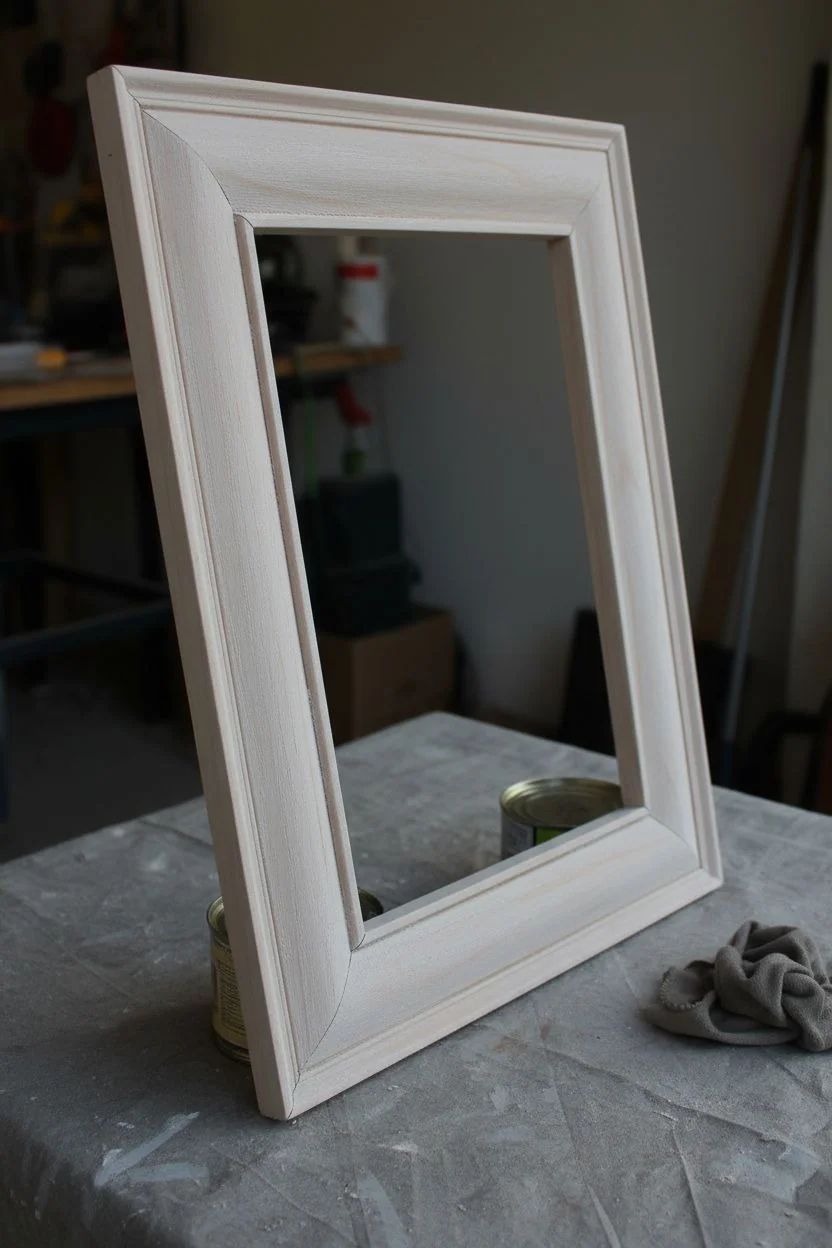
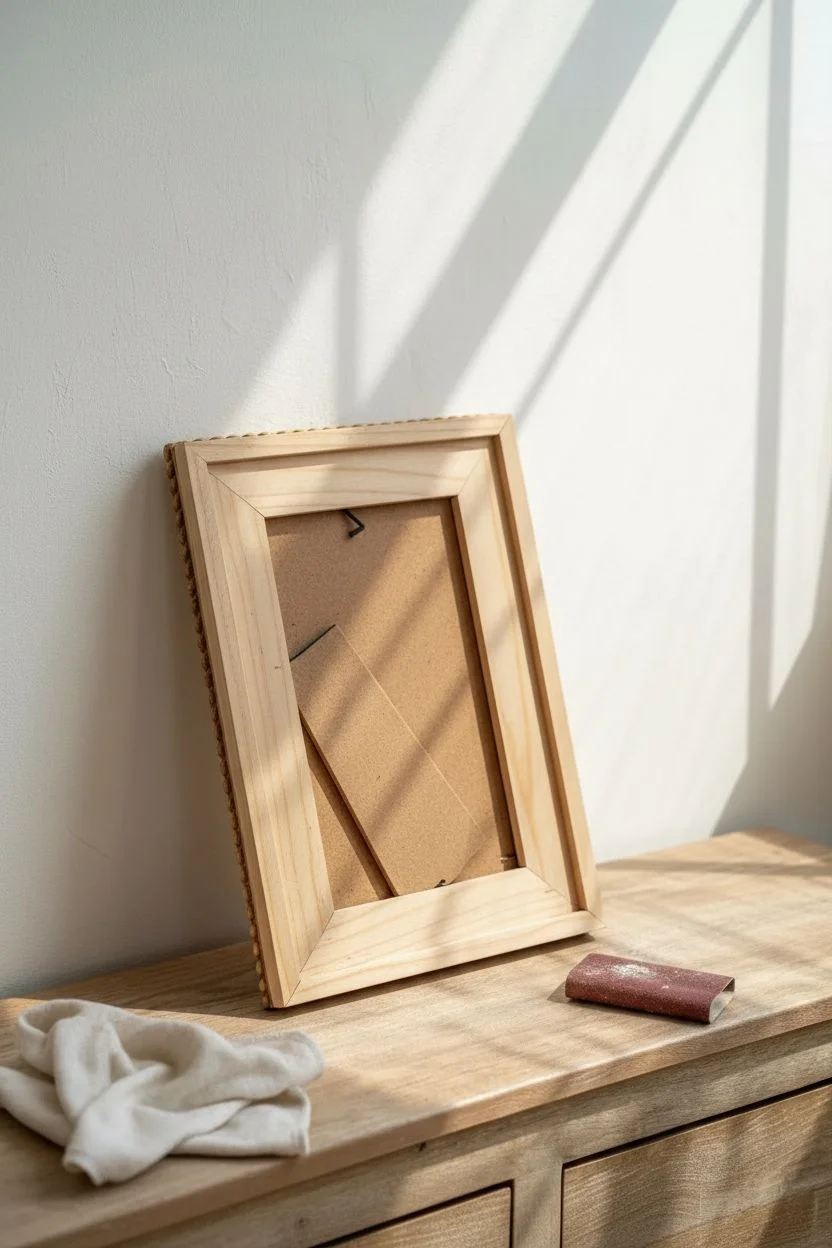
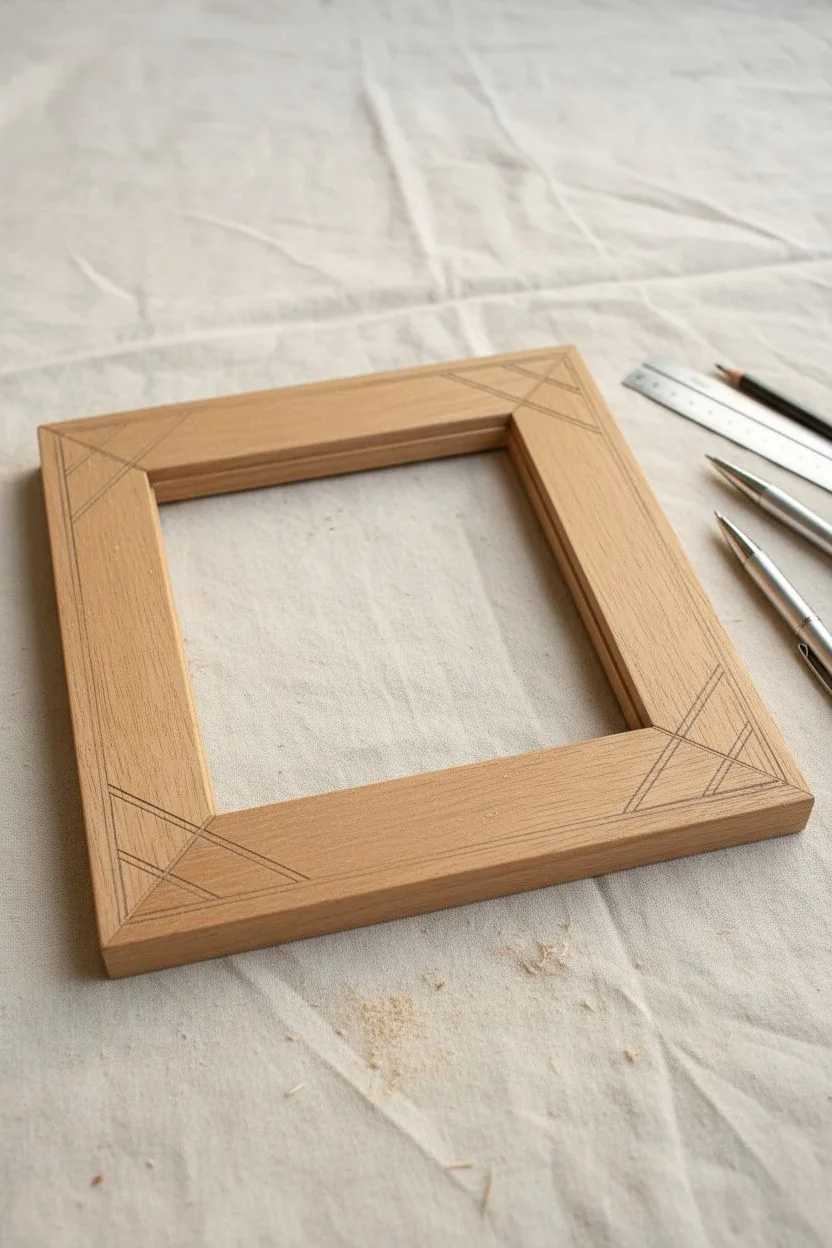
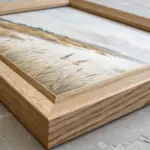
The Distressed Farmhouse Look

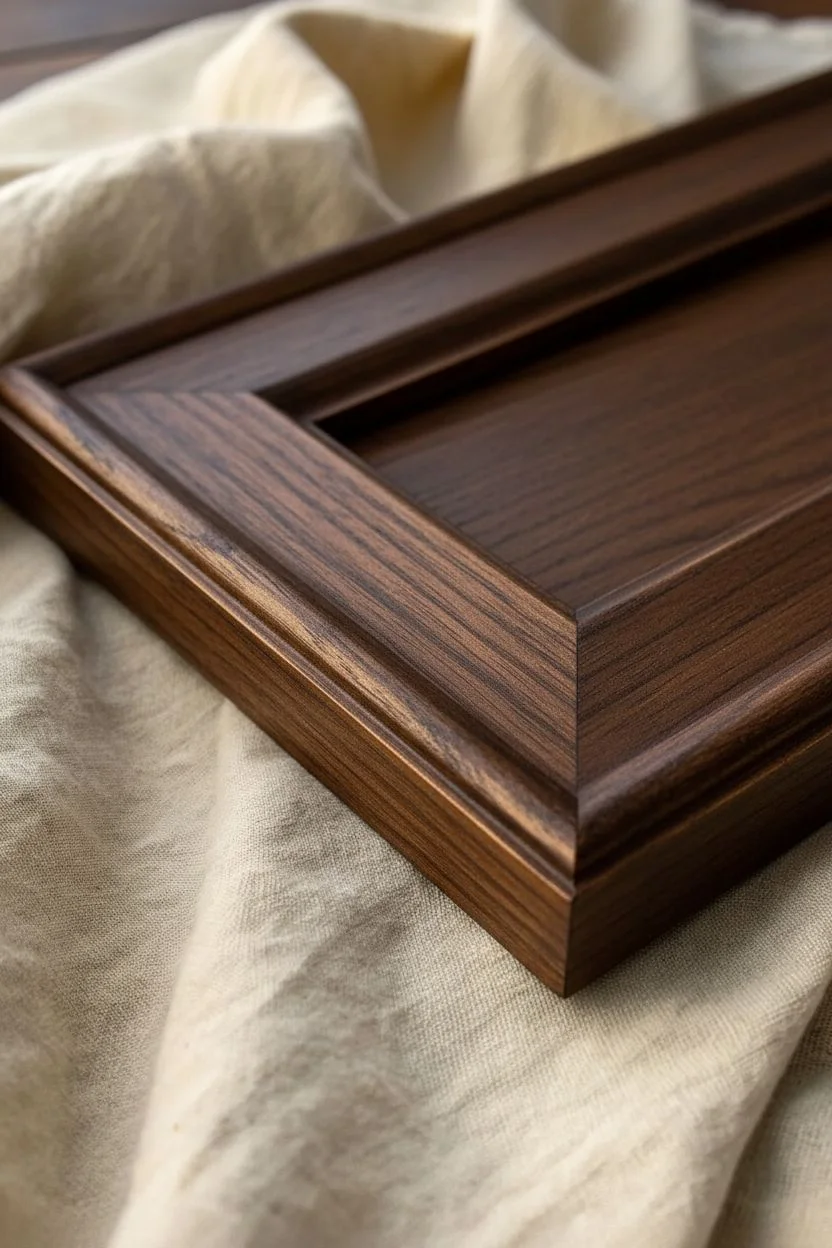
Achieve that coveted chippy, vintage aesthetic by layering crisp white paint over dark wood tones using a clever resist technique. This project transforms a plain wood frame into a textured statement piece that looks authentically worn by time.
Step-by-Step Guide
Materials
- Unfinished wood picture frame
- Dark wood stain (e.g., Espresso or Dark Walnut)
- Lint-free staining rags
- Clear paraffin wax candle (tea light or taper)
- White chalk-style paint
- 1-inch flat synthetic paintbrush
- 150-grit sandpaper
- 220-grit sandpaper
- Clear furniture wax
- Clean cotton cloth for buffing
Step 1: Setting the Foundation
-
Surface Prep:
Begin by lightly scuffing your unfinished wood frame with 220-grit sandpaper to open up the wood pores. -
Dust Removal:
Wipe the frame down thoroughly with a tack cloth or slightly damp rag to ensure no sawdust remains. -
Apply Stain:
Dip a lint-free rag into your dark wood stain and rub it generously into the wood, moving with the grain. -
Wipe Back:
After letting the stain sit for about 2-3 minutes, wipe away any excess liquid with a clean rag to ensure an even tone. -
Dry Time:
Allow the stain to dry completely according to the manufacturer’s instructions; usually, overnight is best to prevent bleeding.
Pro Tip: The Candle Trick
Using a generic paraffin candle acts as a ‘resist.’ Paint cannot adhere to the wax, so when you sand later, the paint flakes off effortlessly in those spots.
Step 2: The Wax Resist Technique
-
Target the Edges:
Take your clear paraffin candle and rub it firmly along the sharp edges of the frame where dragging and bumping natural occur. -
Randomize Placement:
Scuff the candle sporadically across the flat face of the frame as well, leaving invisible deposits of wax that will repel the paint later. -
Check Coverage:
Run your finger over the wood; you should feel waxy ridges on the corners and edges.
Level Up: Aged Patina
For a dirtier, antique look, mix a tiny dabb of dark wax with your clear wax. Apply it into the corners and wipe back immediately to shadow the crevices.
Step 3: Painting and Distressing
-
First Coat:
Load your brush with white chalk-style paint and apply a medium coat, brushing in the direction of the wood grain. -
Ignore Imperfection:
Don’t worry if the paint separates slightly over the waxed areas; this is exactly what we want for that chipped look. -
Second Coat:
Once the first layer is touch-dry, apply a second coat for solid opacity on the non-waxed sections. -
Full Cure:
Let the paint dry completely until it is hard to the touch. -
Heavy Distressing:
Take your 150-grit sandpaper and sand vigorously over the edges and corners where you applied the candle wax. -
Paint Removal:
The paint should flake off easily in chunks over the wax, revealing the dark walnut stain underneath instantly. - The Finish Line:
Now your frame has a beautiful history to it, ready to perfectly showcase your favorite memories


The Paint-Dipped Aesthetic
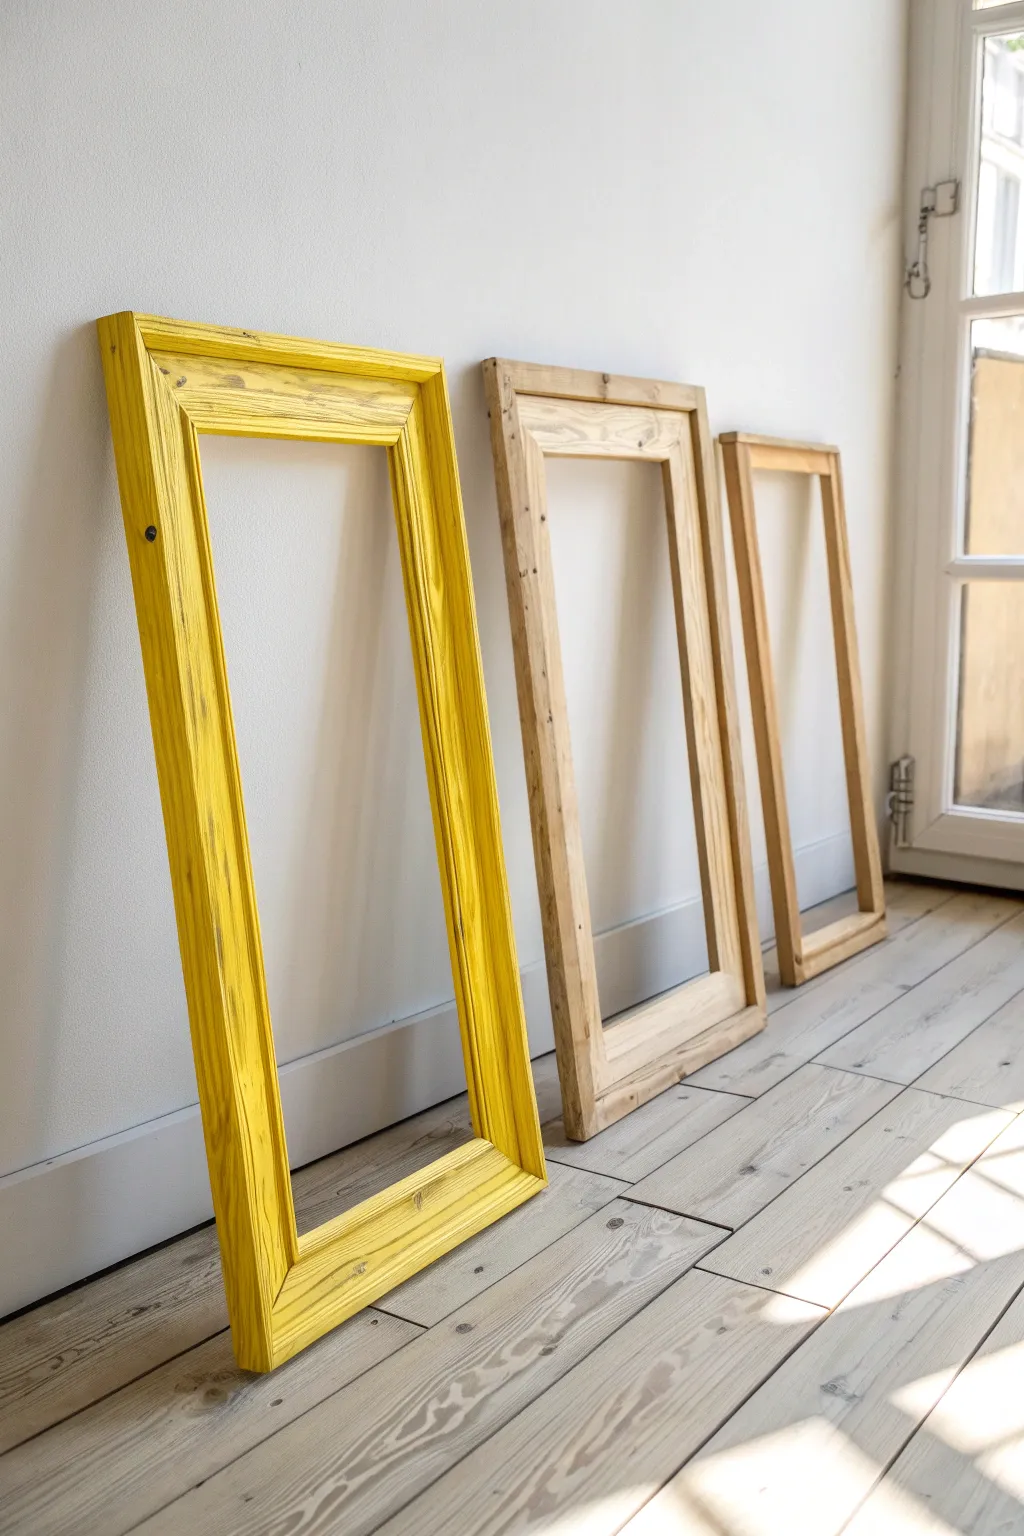
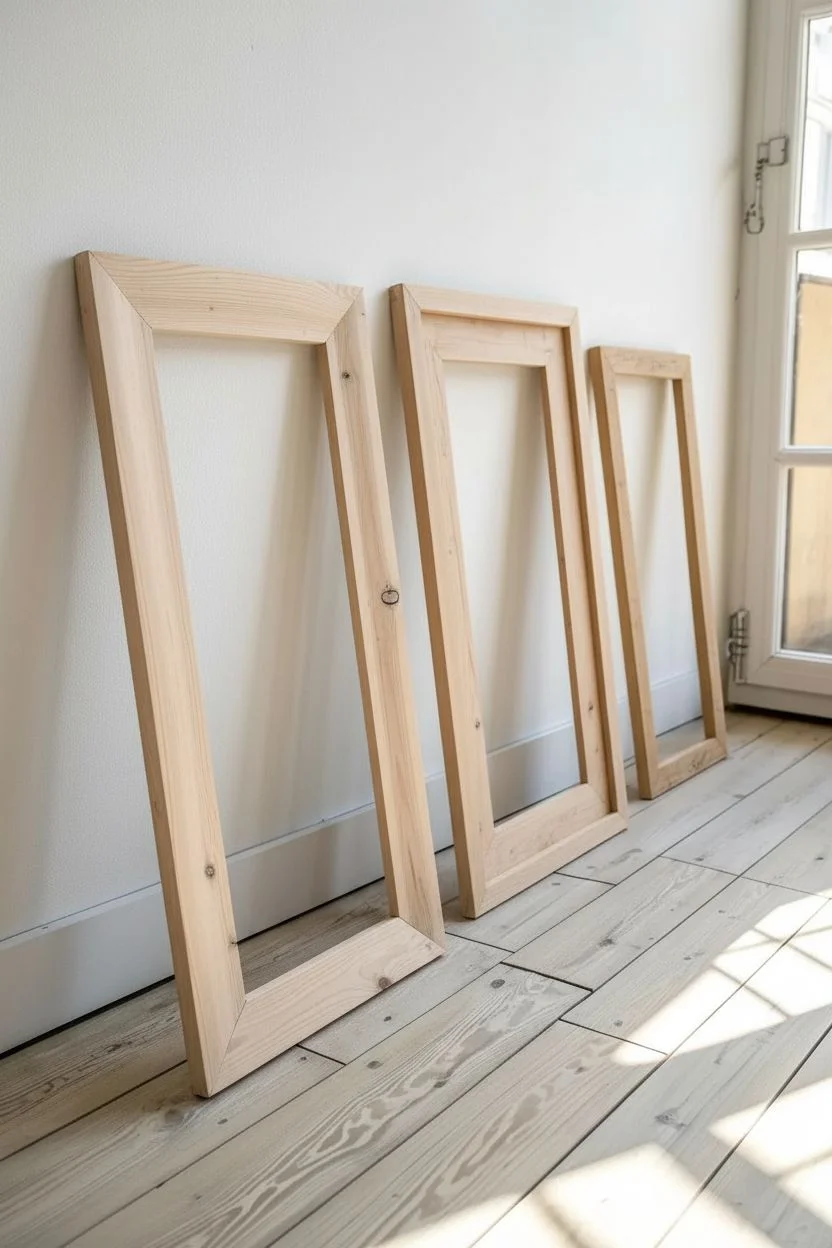
Bring a burst of sunshine into your gallery wall with this high-contrast, distressed frame project. By pairing vibrant color with exposed wood grain, you create a look that feels both modern and effortlessly vintage.
Step-by-Step Guide
Materials
- Raw wooden picture frames (pine works best)
- Bright yellow chalk-finish paint
- Medium-grit sandpaper (120-grit)
- Fine-grit sandpaper (220-grit)
- Small synthetic paint brush
- Clear matte sealing wax
- Lint-free cotton rags
- Tack cloth
- Drop cloth
Step 1: Preparation
-
Disassemble the frame:
Flip the frame over and carefully bend back finish nails or flexible tabs to release the backing board and glass. Place these aside in a safe spot. -
Clean the surface:
Inspect the raw wood for any sticker residue or factory glue. Scrape these away completely, as paint won’t adhere to adhesive. -
Initial coarse sanding:
Rub the entire frame briskly with 120-grit sandpaper. You aren’t trying to smooth it perfectly; you want to roughen the fibers slightly to accept the paint. -
Remove dust:
Wipe the frame thoroughly with a tack cloth to pick up every speck of sawdust.
Wire Brush Trick
Before painting, run a wire grill brush firmly along the wood grain. This digs out softer wood fibers, creating deeper grooves that hold more yellow paint for intense texture.
Step 2: Painting
-
Stir the paint:
Open your yellow chalk paint and stir well. Chalk paint is heavy and pigments settle, so ensure the consistency is creamy and uniform. -
First coat application:
Apply a coat of yellow paint, brushing in strictly long strokes that follow the direction of the wood grain. -
Coverage check:
Ensure the paint gets into the mitered corners and any deep natural grooves in the wood, but avoid letting it pool or drip. -
Drying time:
Let this coat dry completely. I generally like to wait about 45 minutes to an hour for chalk formulas. -
Optional second coat:
If the wood is still showing through too much for your taste, add a second thin coat. For the distressed look in the photo, one thick coat often suffices.
Level Up: The Dip
To create a literal ‘paint-dipped’ variation, use painter’s tape to mark a crisp line on the raw frames. Paint only below the line for a modern, geometric set.
Step 3: Distressing & Finishing
-
Reveal the grain:
Once the paint is bone-dry, take your 220-grit sandpaper and sand the flat surfaces of the frame. The goal is to remove the top layer of paint so the wood grain shows through. -
Edges and corners:
Apply slightly more pressure when sanding the sharp edges and corners, mimicking where the frame would naturally wear down over time. -
Clean up:
Use a fresh tack cloth to wipe away all the yellow paint dust generated by the sanding process. -
Wax application:
Scoop a nickel-sized amount of clear wax onto a lint-free rag. -
Seal the color:
Rub the wax into the painted wood in a circular motion. This deepens the yellow color and protects the exposed raw wood. -
Buff to finish:
After the wax sits for 5-10 minutes, buff it briskly with a clean cloth to achieve a soft, satellite satin sheen. -
Reassembly:
Once the finish is dry to the touch, place the glass, artwork, and backing board back into the frame.
Lean your trio of frames against the wall to let that new pop of yellow energize your living space.
BRUSH GUIDE
The Right Brush for Every Stroke
From clean lines to bold texture — master brush choice, stroke control, and essential techniques.
Explore the Full Guide
Creating a Cohesive Gallery Wall
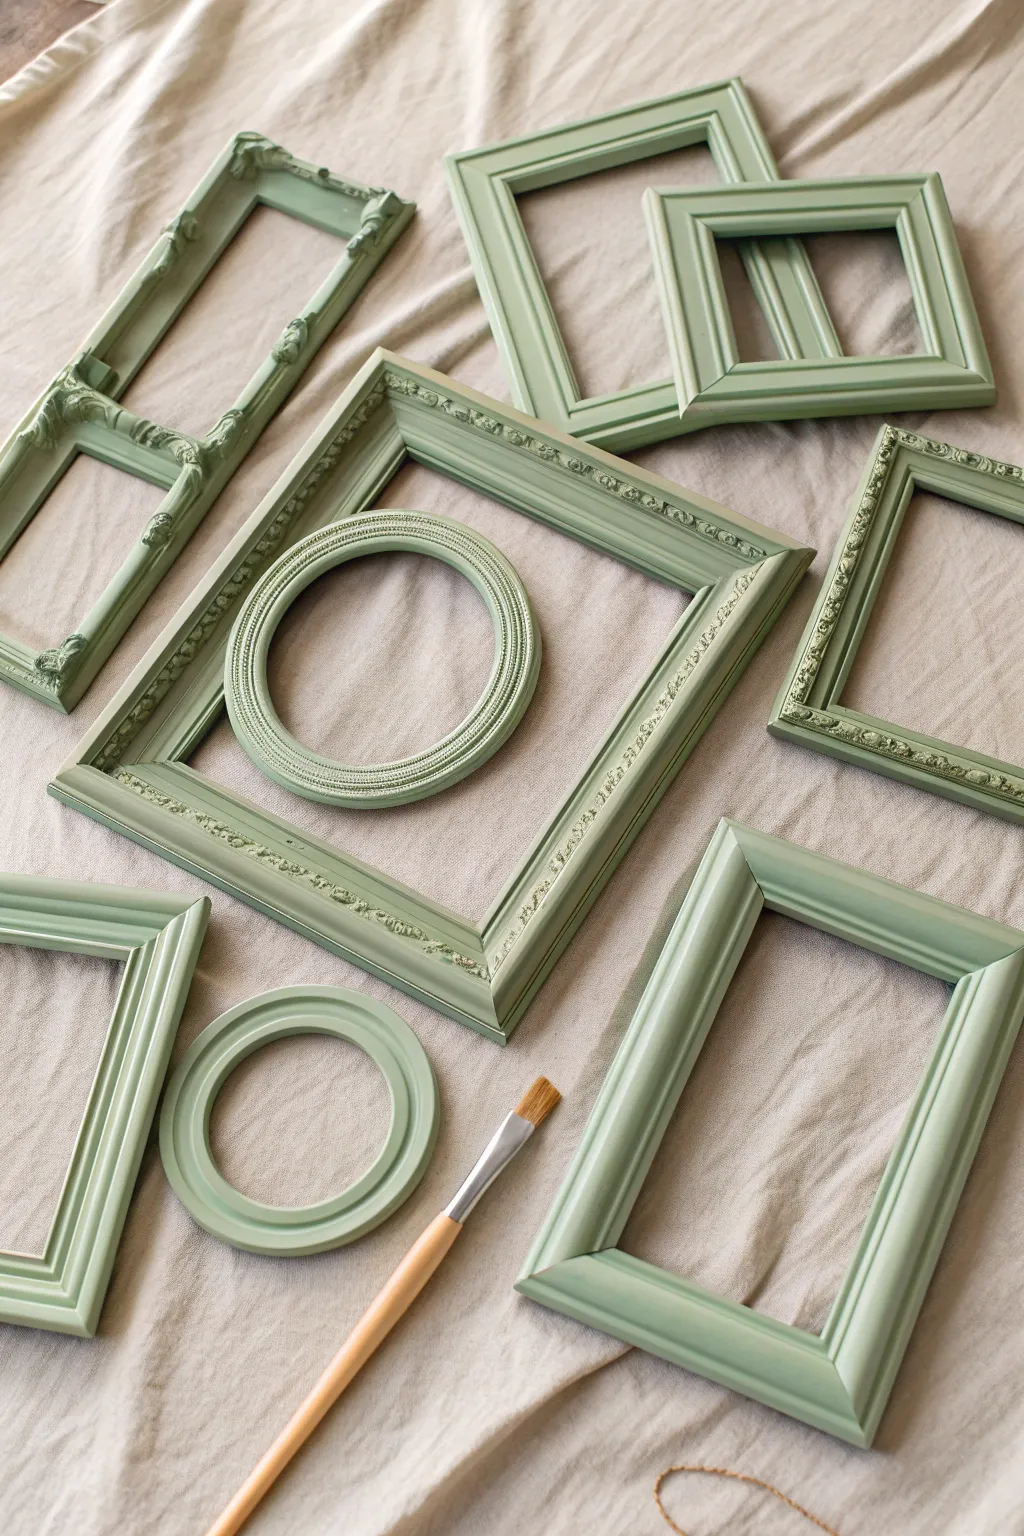
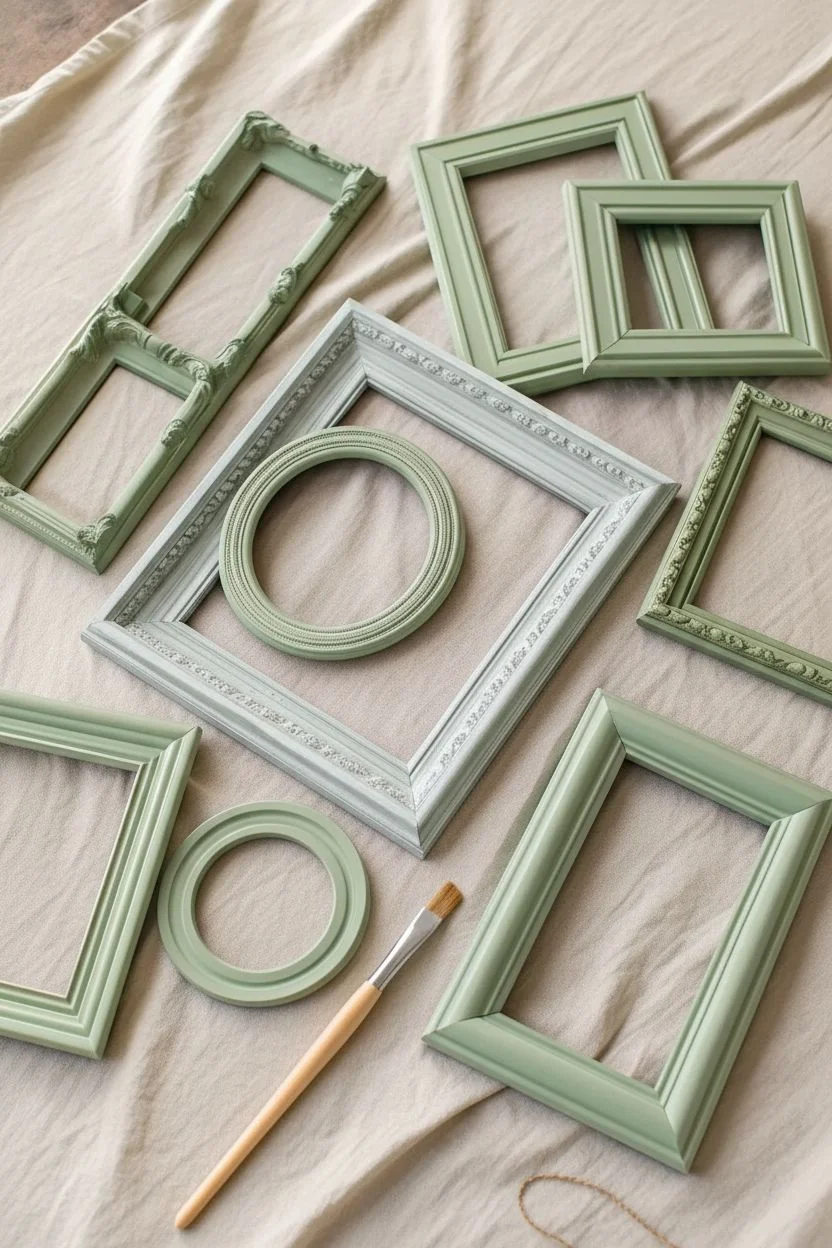
Transform a chaotic collection of mismatched thrift store frames into a harmonious design element using a unifying color palette. This project uses a soft sage green with a matte finish to bring varied textures together for a sophisticated gallery wall.
Step-by-Step
Materials
- Assorted picture frames (wood, plastic, or metal)
- Sage green chalk-finish or matte acrylic paint
- High-adhesion primer
- Medium-grit sandpaper (120-150 grit)
- Tack cloth
- Dish soap and water
- Synthetic bristle paintbrush (1-inch roughly)
- Beige drop cloth or old sheet
- Painter’s pyramids or soup cans (for elevation)
Step 1: Preparation
-
Disassemble the frames:
Flip all your frames over and carefully remove the backing boards, artwork, and glass to prevent accidental paint splatters. -
Clean thoroughly:
Mix a mild solution of dish soap and warm water, then scrub the frames to remove years of dust, paying special attention to deep carvings. -
Dry completely:
Wipe the frames down with a clean towel and let them air dry fully to ensure no moisture is trapped in the wood. -
Scuff sand:
Use 120-grit sandpaper to rough up the surfaces of the frames, which knocks down glossy finishes and helps the new paint adhere. -
Remove dust:
Run a tack cloth over every inch of the frames to pick up the fine sanding dust that could ruin your smooth finish.
Drip Patrol
Keep a clean, dry detail brush nearby while you work. Use it to quickly soak up excess paint that pools in the deep corners of ornate frames before it dries into a glob.
Step 2: Priming
-
Set the stage:
Spread out your beige drop cloth to protect your work surface and arrange the frames with space between them. -
Apply primer:
Brush on a thin coat of high-adhesion primer, which is crucial if you are mixing frame materials like plastic and wood. -
Check the crevices:
Make sure the primer reaches into the ornate details, but keep the layer thin to avoid clogging the design. -
Let it cure:
Allow the primer to dry completely according to the manufacturer’s instructions before opening your colored paint.
Step 3: Painting
-
Mix the color:
Stir your sage green matte paint thoroughly to ensure the pigments are evenly distributed. -
Paint the inner lip:
Start by painting the inside edge (the lip) of the frame first, as this is the hardest angle to reach without touching wet paint later. -
Elevate the work:
I like to prop the frames up on small blocks or cans here so I can paint the outer edges without them sticking to the cloth. -
Tackle the details:
Use a stabbing or stippling motion with your brush to push the green paint deep into the carved floral or scrollwork details. -
Smooth the flats:
On the flat, simple sections of the frames, use long, unidirectional strokes to create a smooth, modern finish. -
Check for pooling:
Keep an eye on the corners where paint tends to gather and gently brush excess away before it starts to tack up. -
Dry the first coat:
Let the first coat dry to the touch; don’t worry if it looks slightly streaky at this stage. -
Apply second coat:
Apply a second layer of sage green, focusing on achieving full opacity and covering any spots where the primer shows through.
Vintage Vibe
Once the green paint is dry, gently sand the highest points of the ornate carvings with 220-grit paper to reveal a peek of the original gold or wood underneath.
Step 4: Finishing
-
Inspect angles:
Look at the frames from the side to ensure you didn’t miss painting the outer depth of the frame. -
Cure time:
Let the frames dry overnight to ensure the paint hardens sufficiently before handling. -
Clean the glass:
While the frames cure, clean both sides of the glass panes with glass cleaner to remove fingerprints. -
Reassemble:
Place the glass, art, and backing back into the frames and secure the tabs.
Now you have a stunning, cohesive set of frames ready to anchor your wall display.
Dry Brushing to Highlight Texture
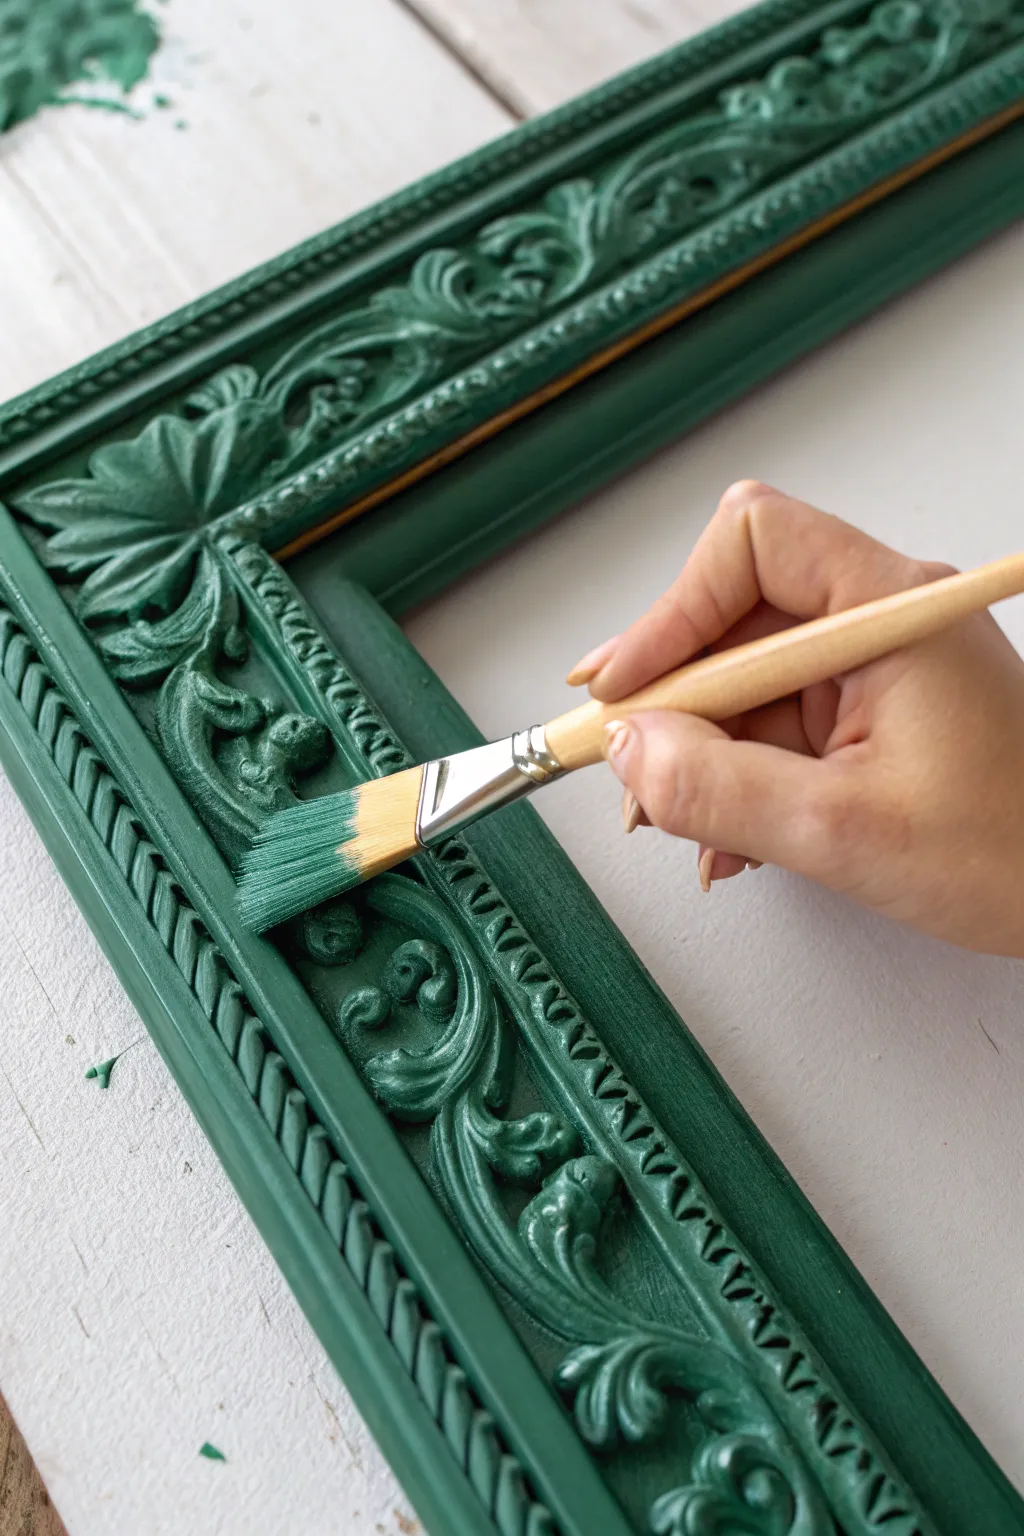
Transform a dated or plain ornate frame into a rich, textural masterpiece using a deep green matte finish. This project relies on a careful dry-brush application to coat the relief details without flooding the intricate carvings, resulting in a crisp, professional look.
Step-by-Step Guide
Materials
- Ornate picture frame (wood or resin)
- Deep emerald green chalk-style paint
- Flat synthetic shader brush (approx. 3/4 inch wide)
- Paper plate or palette
- Paper towels
- Mild soap and cleaning cloth
- Clear finishing wax (optional)
Step 1: Preparation
-
Clean the surface:
Wipe down the entire frame with a damp cloth and mild soap to remove dust and oils, ensuring the paint adheres properly. -
Dry completely:
Allow the frame to air dry fully before starting; moisture can prevent the paint from gripping the surface. -
Set up your workspace:
Lay down a drop cloth or old newspaper to protect your table from accidental splatters.
Brush Control
Use a stiff synthetic brush for this technique. Soft watercolor brushes are too flimsy to push the heavy chalk paint over the textured ridges effectively.
Step 2: Applying the Base
-
Prepare the paint:
Shake your chalk paint container well and pour a small amount onto a paper plate. -
Load the brush:
Dip just the tip of your flat synthetic brush into the green paint; you don’t want to overload the bristles. -
Offload excess:
Dab the brush firmly onto a paper towel to remove heavy, wet paint. I find this step crucial for preventing globs in the crevices. -
Begin the stroke:
Hold the brush at a low angle, almost parallel to the surface, and gently sweep it across the highest points of the ornate details. -
Work against the grain:
Brush across the texture rather than digging into it to keep the paint sitting beautifully on the raised leaf patterns. -
Feather the paint:
Use short, flicking motions to spread the color, ensuring the green covers the relief without settling thickly into the deepest recesses. -
Address the sides:
Run the brush along the inner and outer flat edges of the molding, applying a smoother, more solid coat here compared to the textured top.
Step 3: Building Coverage
-
Reload sparingly:
Continue to dip and dab off paint, working in small sections around the frame perimeter. -
Check angles:
Tilt the frame occasionally to spot any missed high points or bald patches on the relief work. -
Layer up:
Once the first pass is dry to the touch, apply a second light coat if you want a more opaque, solid emerald color. -
Dry brush the highlights:
For the final layer, use an extremely dry brush with a tiny amount of fresh paint to hit just the very tips of the carving, making the texture pop.
Flooded Details?
If paint pools in a crevice, use a clean, dry brush to wick it out immediately. Do not try to wipe it with a cloth, or you might smear the texture.
Step 4: Finishing
-
Let it cure:
Allow the painted frame to sit undisturbed for at least 24 hours so the paint hardens completely. -
Seal (Optional):
If desired, brush on a thin layer of clear wax and buff it gently with a lint-free cloth to protect the finish and add a subtle sheen.
Hang your newly transformed frame and enjoy the sophisticated pop of color it brings to your wall!

PENCIL GUIDE
Understanding Pencil Grades from H to B
From first sketch to finished drawing — learn pencil grades, line control, and shading techniques.
Explore the Full Guide
Dreamy Ombre Gradients
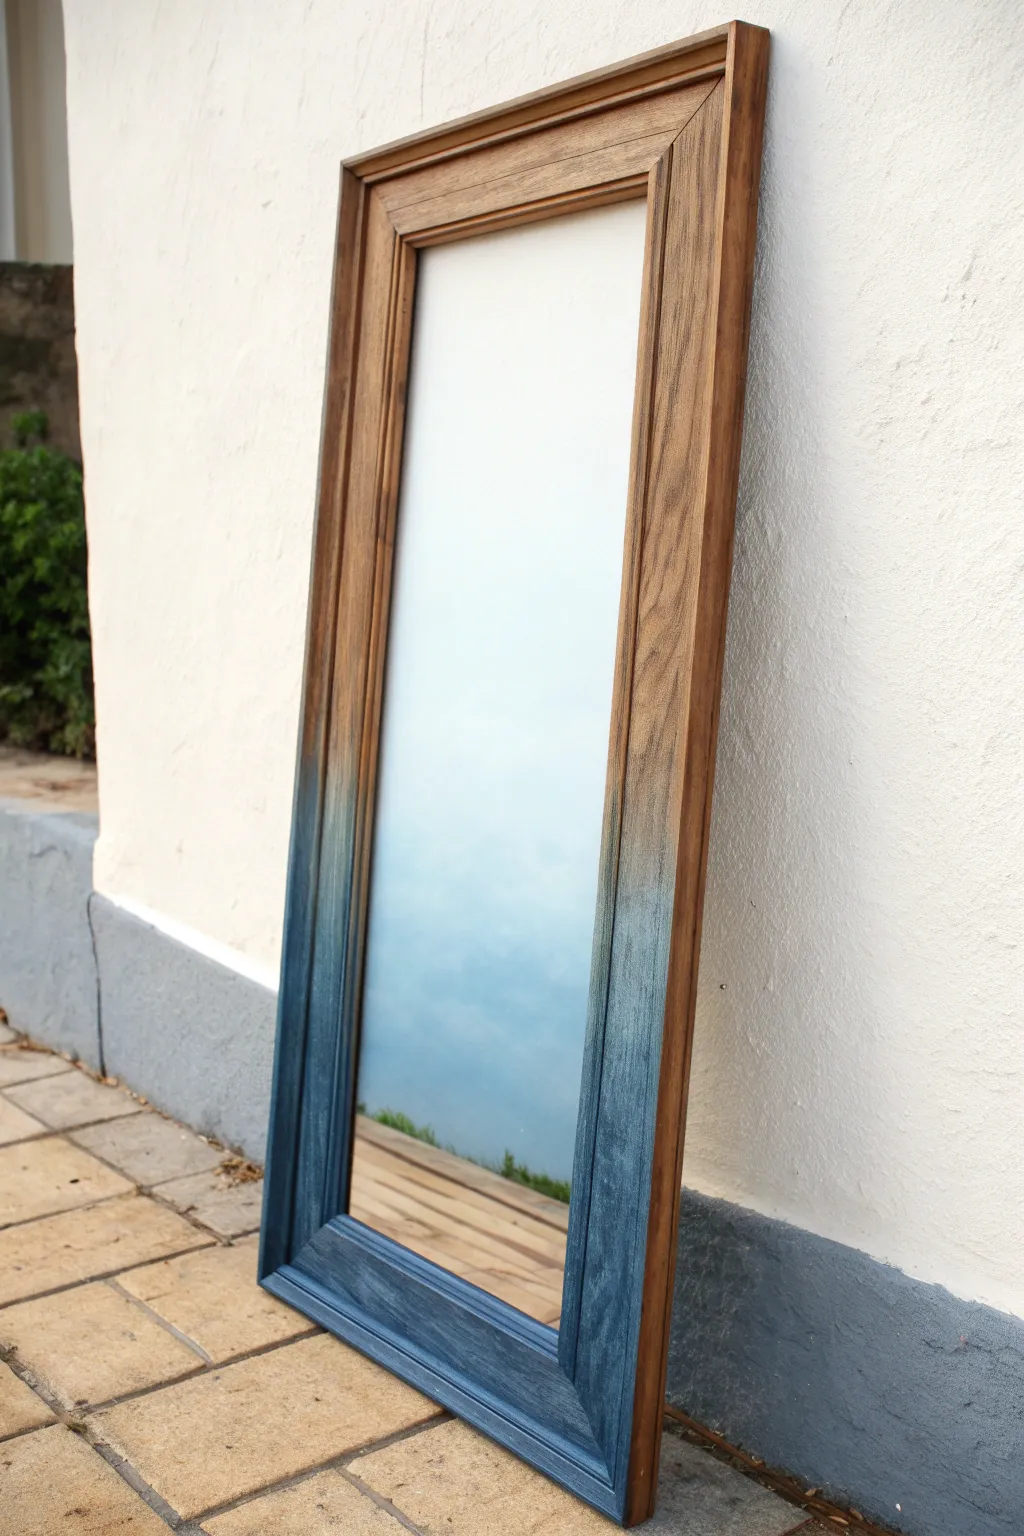
Capture the serene beauty of the horizon where sea meets sky with this stunning gradient frame makeover. By gently blending rich blue tones into natural wood grain, you create a modern, artistic piece that adds depth and character to any wall.
How-To Guide
Materials
- Raw or stripped wooden picture frame
- Slate blue chalk-finish paint
- Clear furniture wax
- Painters tape
- Sandpaper (220 grit)
- Medium paintbrush
- Clean chip brush (for blending)
- Lint-free rags
- Water container
- Tack cloth
Step 1: Preparation
-
Disassemble the frame:
Remove the glass, backing board, and any existing artwork from the frame. If these are permanently fixed, mask them off meticulously with painter’s tape. -
Clean the surface:
Wipe down the wood thoroughly with a damp rag to remove dust, old oils, or grime that might prevent paint adhesion. -
Sand the wood:
Lightly scuff smooth the entire frame using 220-grit sandpaper. This opens the grain and provides a better surface for the gradient to bite into. -
Remove dust:
Use a tack cloth to pick up every speck of sanding dust so your finish remains perfectly smooth.
Pro Tip: The Water Trick
Keep a misting bottle handy. A light spritz of water on the transition area reactivates chalk paint, giving you more time to blend for that perfect dreamy look.
Step 2: Creating the Gradient
-
Plan the fade line:
Decide where you want the transition to occur. For this look, the fade starts roughly halfway up the sides. -
Paint the base:
Load your medium brush with slate blue chalk paint and apply a solid, opaque coat to the bottom rail of the frame. -
Start the sides:
Paint up the side rails starting from the bottom corners, keeping the color solid and heavy for the first lower third. -
Begin the transition:
As you move higher up the sides, stop reloading your brush. Allow the paint to naturally thin out as it runs low. -
Dry brush technique:
Once your brush is nearly empty, wipe any remaining excess onto a paper towel until it is ‘dry’. -
Feather the edge:
With the dry brush, lightly flick upward from the wet paint into the bare wood area, following the direction of the wood grain. -
Create the mist:
Dip just the tips of your clean chip brush into water and gently drag it over the transition line to dilute the paint slightly. -
Blend manually:
I keep a damp rag handy to lightly dab the transition area, blurring any harsh brush strokes into the wood for a smoky effect. -
Check symmetry:
Step back and look at the frame from a distance to ensure the gradient reaches the same height on both the left and right sides. -
Refine the fade:
If one side looks too stark, add a tiny amount of water to your rag and rub the edge in circles to soften it further. -
Let it dry:
Allow the paint to dry completely. Chalk paint dries fast, but give it at least an hour to truly set.
Step 3: Finishing Touches
-
Distress (Optional):
For a worn, beachy look, lightly sand the edges of the painted section to reveal a peek of wood underneath. -
Clean up again:
Wipe away any new dust created from distressing. -
Apply wax:
Using a clean lint-free rag, apply a thin layer of clear furniture wax over the entire frame—both the wood and painted sections. -
Buff to finish:
Wait for the wax to cure according to the package instructions, then buff it briskly with a soft cloth to achieve a subtle satin sheen. -
Reassemble:
Once fully cured, place your glass and artwork back into the frame, ready to hang.
Level Up: Two-Tone Fade
Mix a drop of white paint into your blue for the very top edge of the gradient. This intermediate lighter shade bridges the gap between the dark blue and wood seamlessly.
You now have a stunning statement piece that perfectly balances rustic warmth with a cool, modern splash of color
High-Gloss Statement Pieces

Transform a basic wooden frame into a striking architectural element using bold, high-gloss red paint. This project focuses on achieving a mirror-like finish that contrasts beautifully against rugged textures like stucco or brick.
Step-by-Step Guide
Materials
- Wooden picture frame
- Sandpaper (150-grit and 320-grit)
- Tack cloth
- White spray primer
- High-gloss red spray enamel
- Drop cloth
- Small screw eyes
- Copper wire or sturdy twine
Step 1: Surface Preparation
-
Disassemble:
Remove any glass, backing board, and old hardware from your wooden frame so you are working with just the empty shell. -
Clean:
Wipe the wood thoroughly with a damp cloth and mild degreaser to remove oils or dust that might repel paint. -
Scuff Sand:
Sand the entire surface with 150-grit sandpaper to scuff up the existing varnish, which helps the new paint stick properly. -
Dust Removal:
Wipe away the sanding residue completely using a tack cloth, as even tiny dust specks will show through a high-gloss finish.
Smooth Finish Secret
Warm the spray can in a bowl of warm water for 5 minutes before painting; this thins the paint for a finer mist and a smoother, glass-like finish.
Step 2: Creating the Base
-
Setup:
Place your frame on a drop cloth in a well-ventilated area, elevating it on small blocks or soup cans to reach the edges easily. -
Prime:
Apply a coat of white spray primer, holding the can about 8-10 inches away and moving in steady, sweeping motions. -
Dry:
Allow the primer to dry completely according to the can’s instructions, usually about 30 minutes to an hour. -
Fine Sanding:
Gently sand the primed surface with fine 320-grit sandpaper to knock down any fuzz. I like to close my eyes and feel for imperfections here to ensure it’s glass-smooth. -
Check Corners:
Inspect the frame for any gaps in the corner miters; fill them with a dab of wood filler if necessary and sand smooth again. -
Final Wipe:
Clean the frame once more with a tack cloth to ensure absolutely no dust remains before the color application.
Step 3: Applying the Gloss
-
Mix Paint:
Shake your can of high-gloss bright red spray enamel vigorously for at least one minute to fully mix the pigments and solvents. -
Tack Coat:
Spray a very light initial layer—this shouldn’t fully cover the white primer but gives the next layers something to grip. -
Flash Dry:
Wait about 10 to 15 minutes for the paint to become sticky but not fully dry. -
Wet Coat:
Apply the second coat, moving slightly slower to lay down a ‘wet’ layer that looks shiny, being careful not to linger in one spot to prevent drips. -
Angle Check:
Check the interior beveled edges and outer sides from different angles to ensure you haven’t missed any hidden spots. -
Optional Third Coat:
If the red isn’t deep enough, wait the recommended time and apply a third light coat to solidify the color saturation. -
Cure:
Move the frame to a safe, dust-free area and let it cure for a full 24 hours so the enamel hardens completely.
Style Upgrade
Use bright copper wire for the hanging loop to create a chic metallic contrast against the deep red frame.
Step 4: Assembly
-
Hardware:
Twist small screw eyes into the top edge of the frame, spacing them evenly from the corners. -
Stringing:
Thread a length of copper wire or rustic twine through the eyes, creating a visible triangle shape for hanging as seen in the photo. -
Secure:
Twist the wire ends tightly onto themselves and trim any excess before hanging your vibrant new piece.
Enjoy the brilliant pop of color this sleek frame brings to your wall


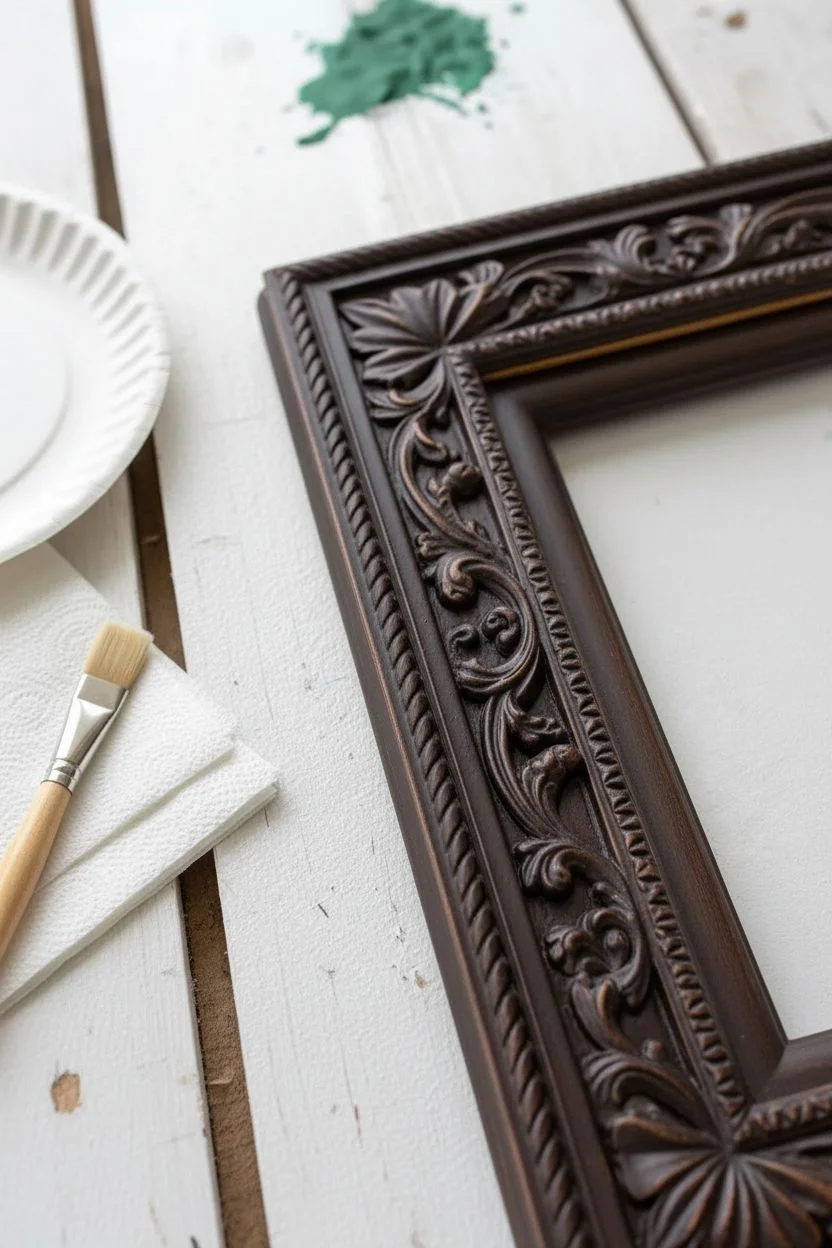
Antique Wax Aging Technique
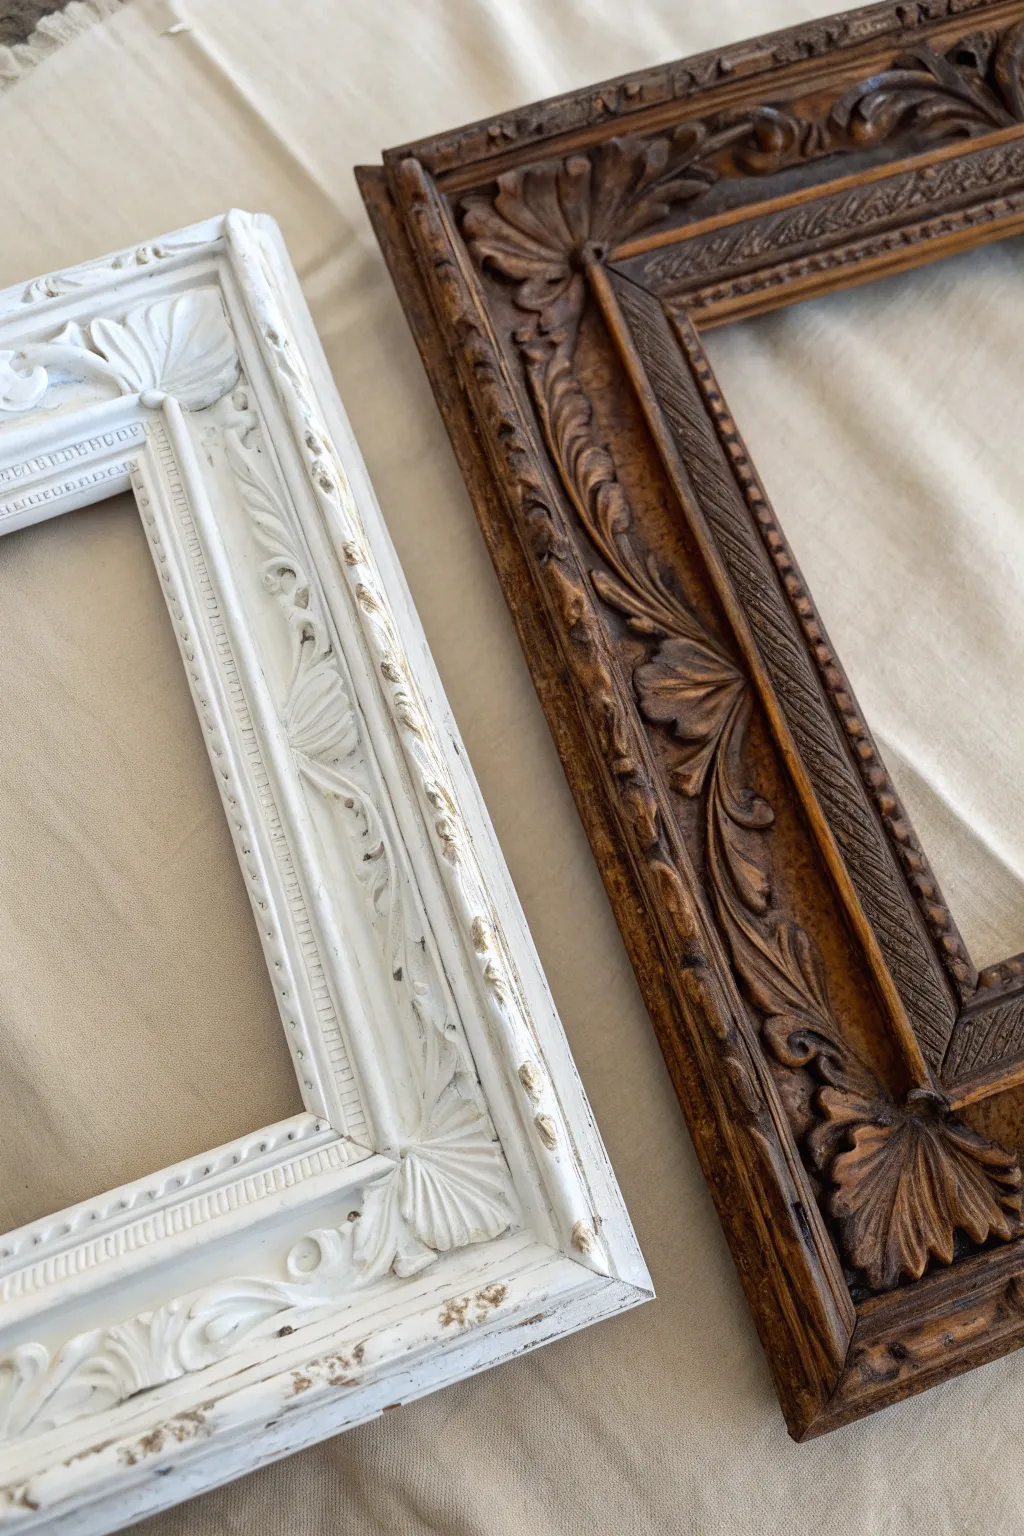
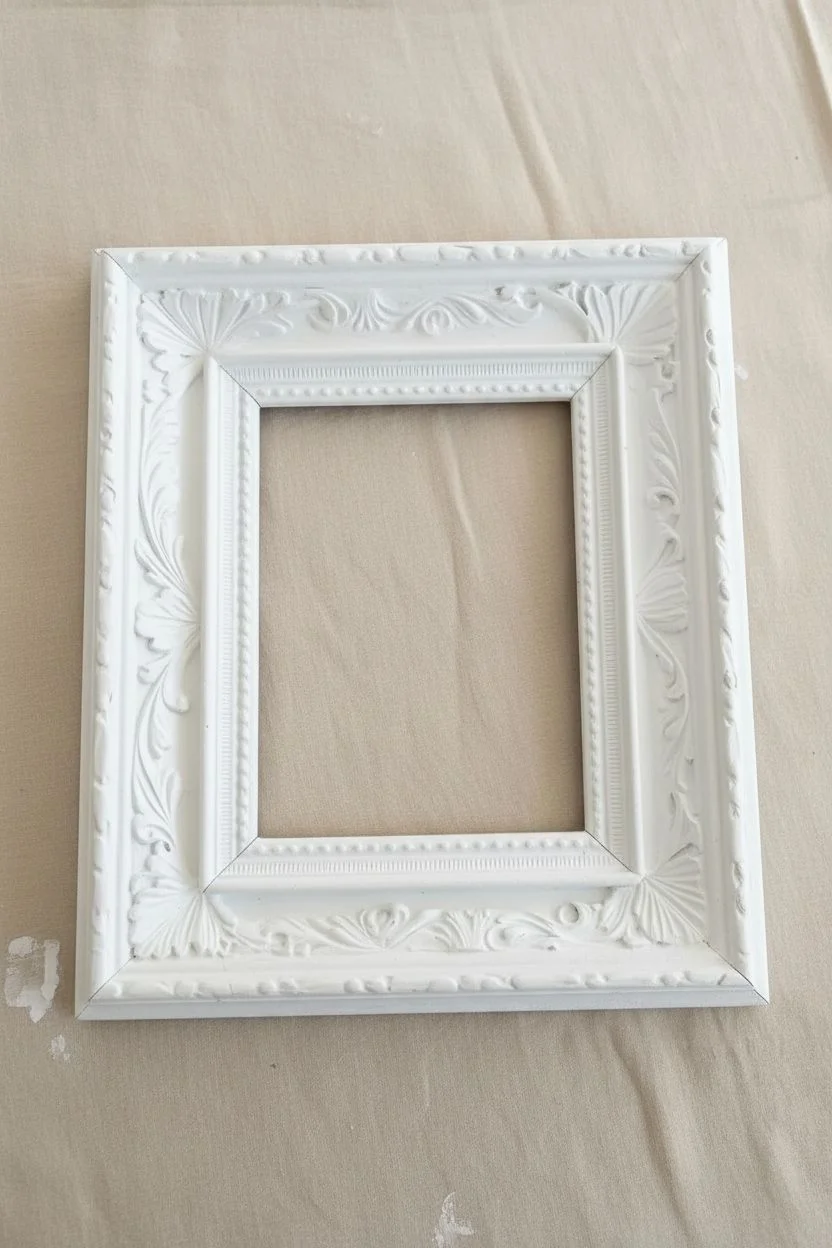
Transform a standard frame into a timeless, heirloom-style piece using the magic of antique wax. This technique highlights intricate carvings and adds a soft, time-worn patina that brings immediate warmth and character to your decor.
How-To Guide
Materials
- Ornate picture frame (wood or resin)
- White or cream chalk-style paint
- Clear furniture wax
- Dark antiquing wax (brown or espresso)
- Round wax brush or stiff bristle brush
- Synthetic painting brush
- Lint-free white cotton rags
- 220-grit sandpaper
Step 1: Base Coat Application
-
Disassemble the frame:
Remove the glass, backing, and any existing artwork from the frame and set them aside safely. -
Clean surface:
Wipe the frame down with a damp cloth and mild dish soap to remove years of dust or oils. -
Apply first coat:
Using your synthetic brush, apply a generous coat of white chalk paint, pushing the bristles into the deep carvings. -
Let dry:
Allow the paint to dry to the touch, which typically takes about 30 to 60 minutes depending on humidity. -
Apply second coat:
Paint a second layer to ensure solid opaque coverage, carefully smoothing out any obvious drips. -
Full cure time:
Let the frame dry completely overnight or for at least a few hours so the paint hardens fully.
Clear Wax Magic
Always apply clear wax before the dark wax. It seals the porous paint, allowing you to move the dark wax around and wipe it off high points cleanly without permanently staining the white.
Step 2: Distressing the Details
-
Sand edges:
Take a small piece of 220-grit sandpaper and gently rub the outer edges and corners of the frame. -
Highlight relief:
Lightly sand the highest points of the ornate carvings to reveal a bit of the original dark material underneath. -
Clean dust:
Use a dry paintbrush or a tack cloth to thoroughly sweep away all sanding dust from the crevices.
Too Dark?
If you applied too much dark wax and the frame looks muddy, don’t panic. Put a dollop of clear wax on a clean rag and rub the area. The clear wax acts as an eraser to lift the excess pigment.
Step 3: Waxing and Aging
-
Load clear wax:
Dip your wax brush into the clear wax and offload any large clumps onto a cardboard scrap. -
Apply clear base:
Brush a thin layer of clear wax over a manageable section of the frame; this is crucial for controlling the dark stain. -
Apply dark wax:
While the clear wax is still wet, dip the tip of your brush into the dark antiquing wax. -
Work into crevices:
Stipple and push the dark wax deep into the intricate recessed areas and corners of the molding. -
Wipe back:
Take a clean, lint-free rag and gently wipe over the surface to remove dark wax from the high points. -
Blend the look:
Continue wiping until the dark wax sits only in the cracks. I find light, sweeping motions help keep the pigment in the deep textures. -
Finish the frame:
Repeat the clear and dark wax process on the remaining sections of the frame until completed. -
Final buff:
Once the wax has hazed over (usually after 20 minutes), buff the frame briskly with a clean cloth for a silky sheen.
Reassemble your frame and enjoy the rich, historic feel this simple waxing technique adds to your space
Hand-Painted Floral Vines
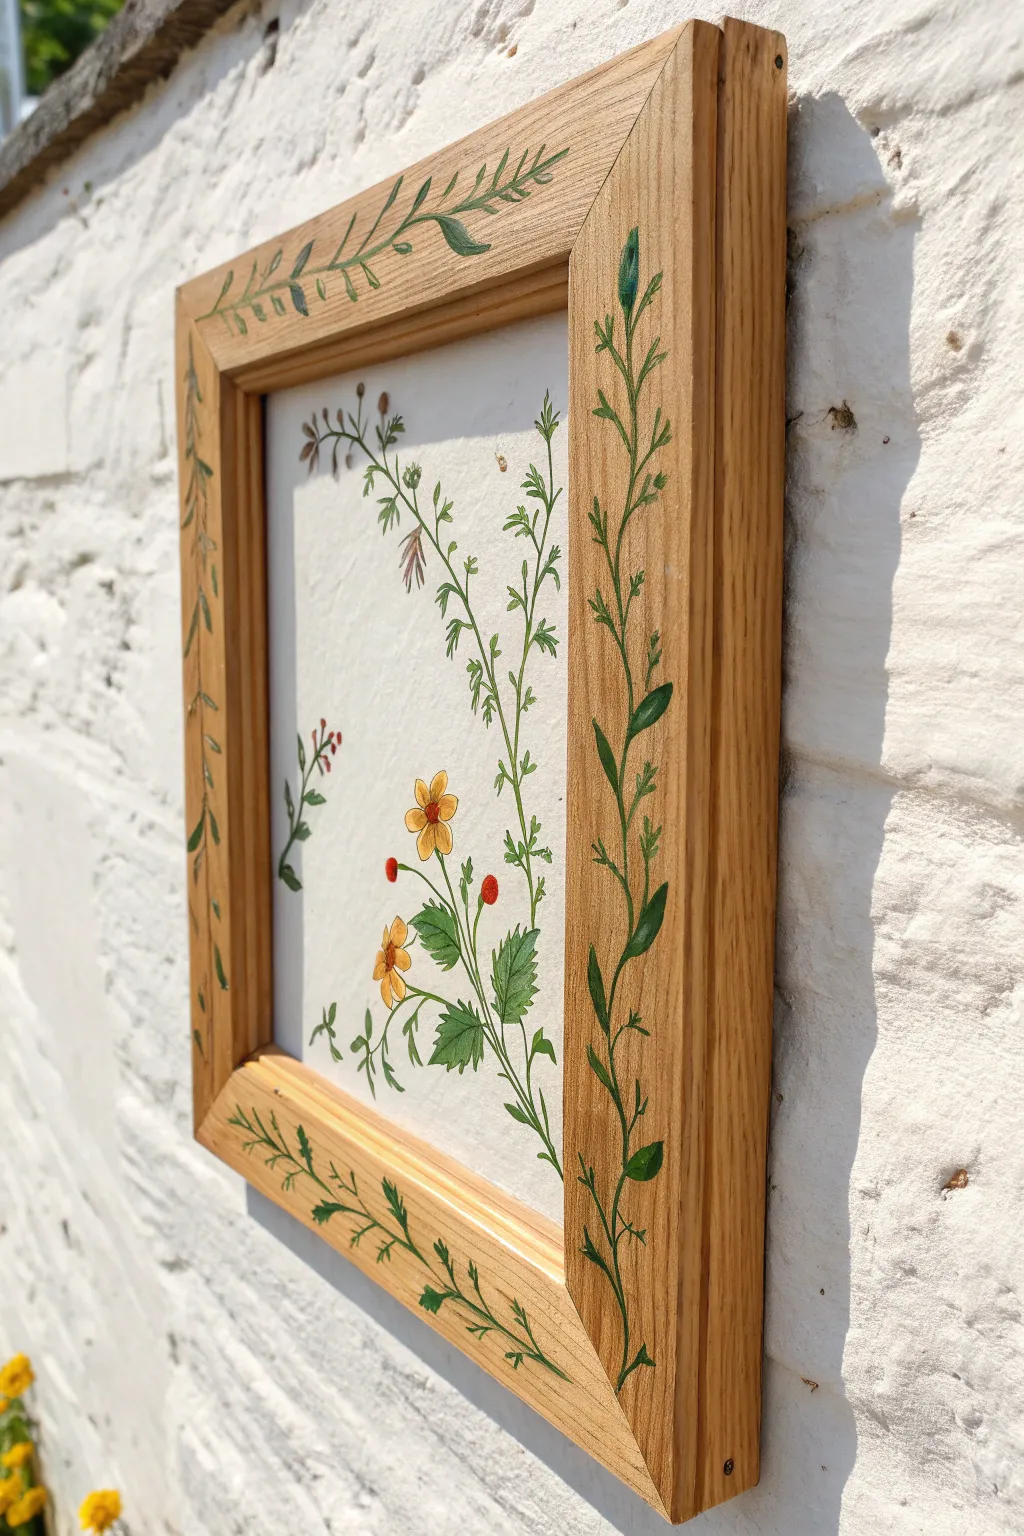
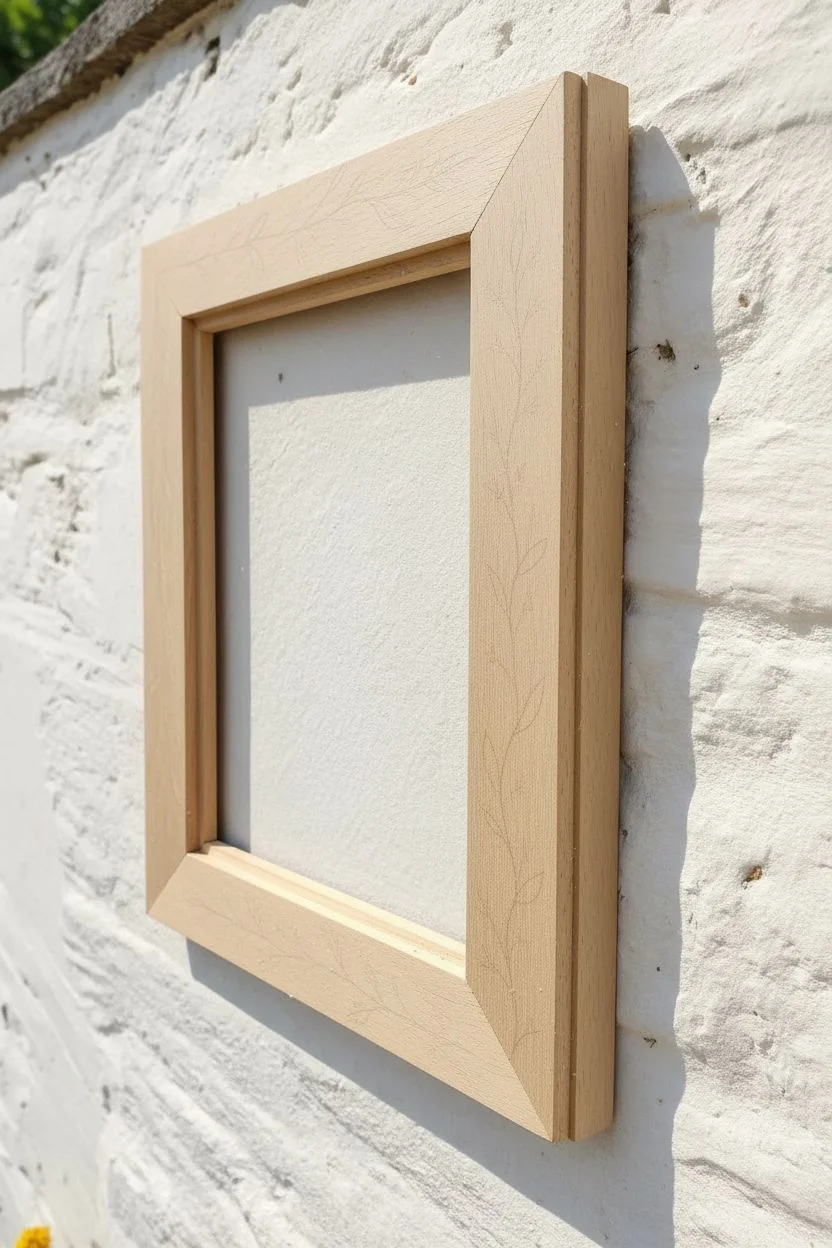
Transform a plain wooden frame into a piece of living art with delicate hand-painted greenery. This project creates a seamless flow between the artwork and its border, bringing a touch of the outdoors into your home decor.
Step-by-Step
Materials
- Unfinished wood picture frame (flat profile)
- Acrylic paints (Sap Green, Olive Green, Yellow Ochre, Burnt Umber, White, Red)
- Fine liner brush (size 00 or 0)
- Small round brush (size 2)
- Sandpaper (220 grit)
- Matte varnish or sealant
- Watercolor paper or cardstock (for the center art)
- Pencil and eraser
- Palette and water cup
Step 1: Preparing the Wood Surface
-
Disassemble the frame:
Remove the glass, backing board, and any existing artwork from the frame so you are working only with the wooden rim. -
Sand for smoothness:
Lightly sand the entire face of the wooden frame with 220-grit sandpaper. This removes any rough grain and ensures your paint glides on smoothly. -
Clean dust:
Wipe the surrounding wood firmly with a tack cloth or slightly damp rag to remove all sawdust. -
Sketch the path:
Using a pencil, very lightly draw a wavy, meandering line down the center of each side of the frame. This will act as the guide for your main vine stem.
Step 2: Painting the Vines
-
Mix your base green:
On your palette, mix Sap Green with a tiny touch of Burnt Umber to create a natural, earthy vine color. -
Check consistency:
Add a drop of water to the paint mixture until it has an inky consistency. I find this helps create long, uninterrupted lines without drag. -
Paint the stems:
Use the fine liner brush to trace your pencil guides. Apply gentle pressure and try to keep the line width relatively consistent, allowing it to curve organically. -
Connect the corners:
Ensure the vine lines meet or cross at the frame corners so the design feels continuous rather than four separate sides. -
Mix leaf colors:
Create two shades of green for the leaves: one using your base mix and another slightly lighter shade by adding Yellow Ochre. -
Paint base leaves:
Using the size 2 round brush, paint small, teardrop-shaped leaves along the stem. Vary the angle and spacing so it doesn’t look too uniform. -
Add variety:
interspersed the teardrop leaves with a few longer, fern-like fronds using the darker green mix to add textural interest. -
Layering details:
Once the base leaves are dry, go back in with your liner brush and the darker green to add tiny veins or stems connecting the leaves to the main vine.
Flow Mechanic
Add a drop of water or flow medium to your acrylics before starting the stems. This helps the paint glide smoothly for long lines without breaking.
Step 3: Creating the Centerpiece
-
Prepare the insert:
Cut a piece of watercolor paper or stiff cardstock to fit exactly inside your frame. -
Sketch the flowers:
Lightly sketch a tall, slender wildflower arrangement in the center. Allow the design to be airy with plenty of negative space. -
Paint the foliage:
Use the same green mixtures from the frame to paint the stems and leaves on the paper. This creates a visual link between the frame and the art. -
Add floral color:
Mix Yellow Ochre and White for the flower petals, painting small five-petal blooms. Use a dot of Red and Umber for the centers. -
Add berry accents:
Paint tiny red dots near the leaves on the paper insert to mimic small wild berries or buds.
Oops, Smudged It?
If you make a mistake on raw wood, don’t wipe it wet! Let it dry completely, then gently sand the error away with fine sandpaper before retrying.
Step 4: Finishing Touches
-
Erase guidelines:
Once the paint on the frame is 100% dry, gently erase any visible pencil marks from the sketching phase. -
Seal the wood:
Apply a thin coat of matte varnish over the painted wooden frame to protect the acrylics and bring out the warmth of the wood grain. -
Reassemble:
Place the glass (optional, depending on the look you want), your new painting, and the backing board back into the frame and secure them.
Now you have a charming, cohesive piece of art where the frame is just as important as the picture inside.
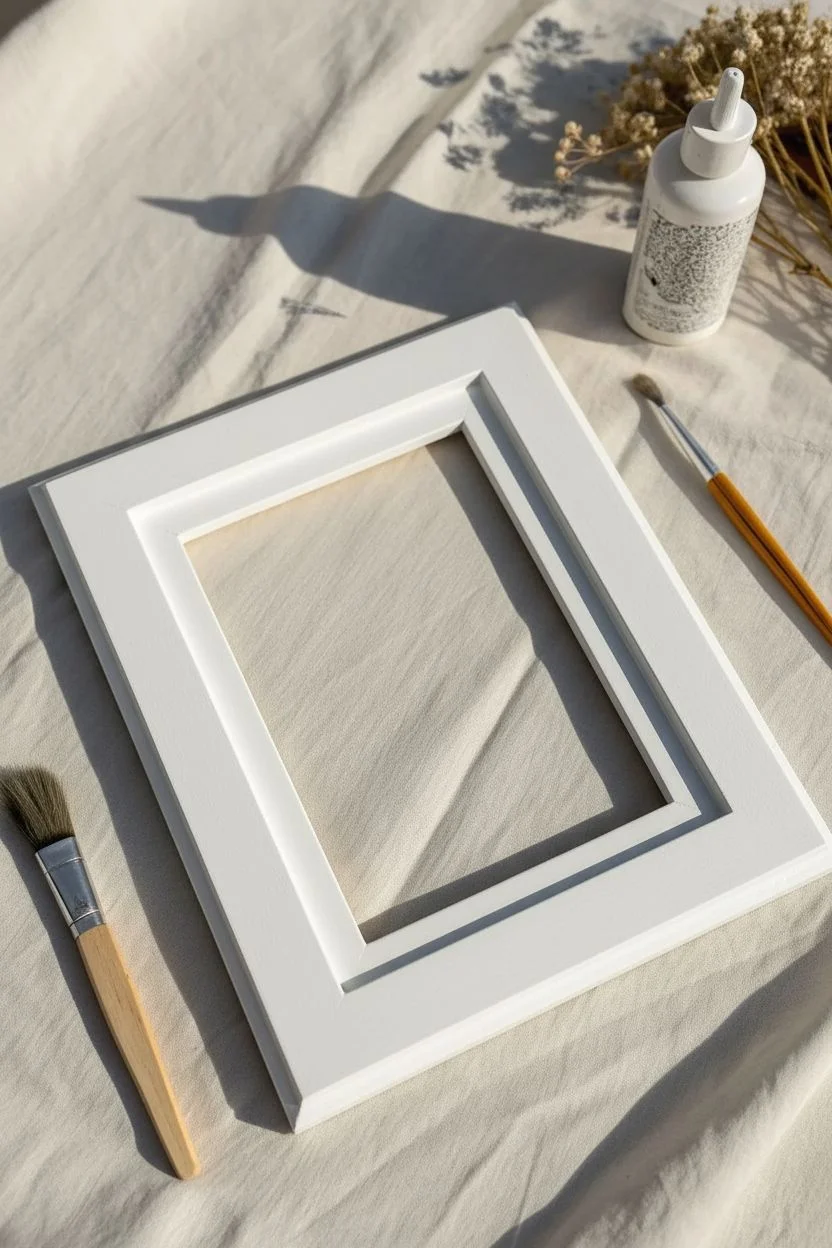
Playful Polka Dots
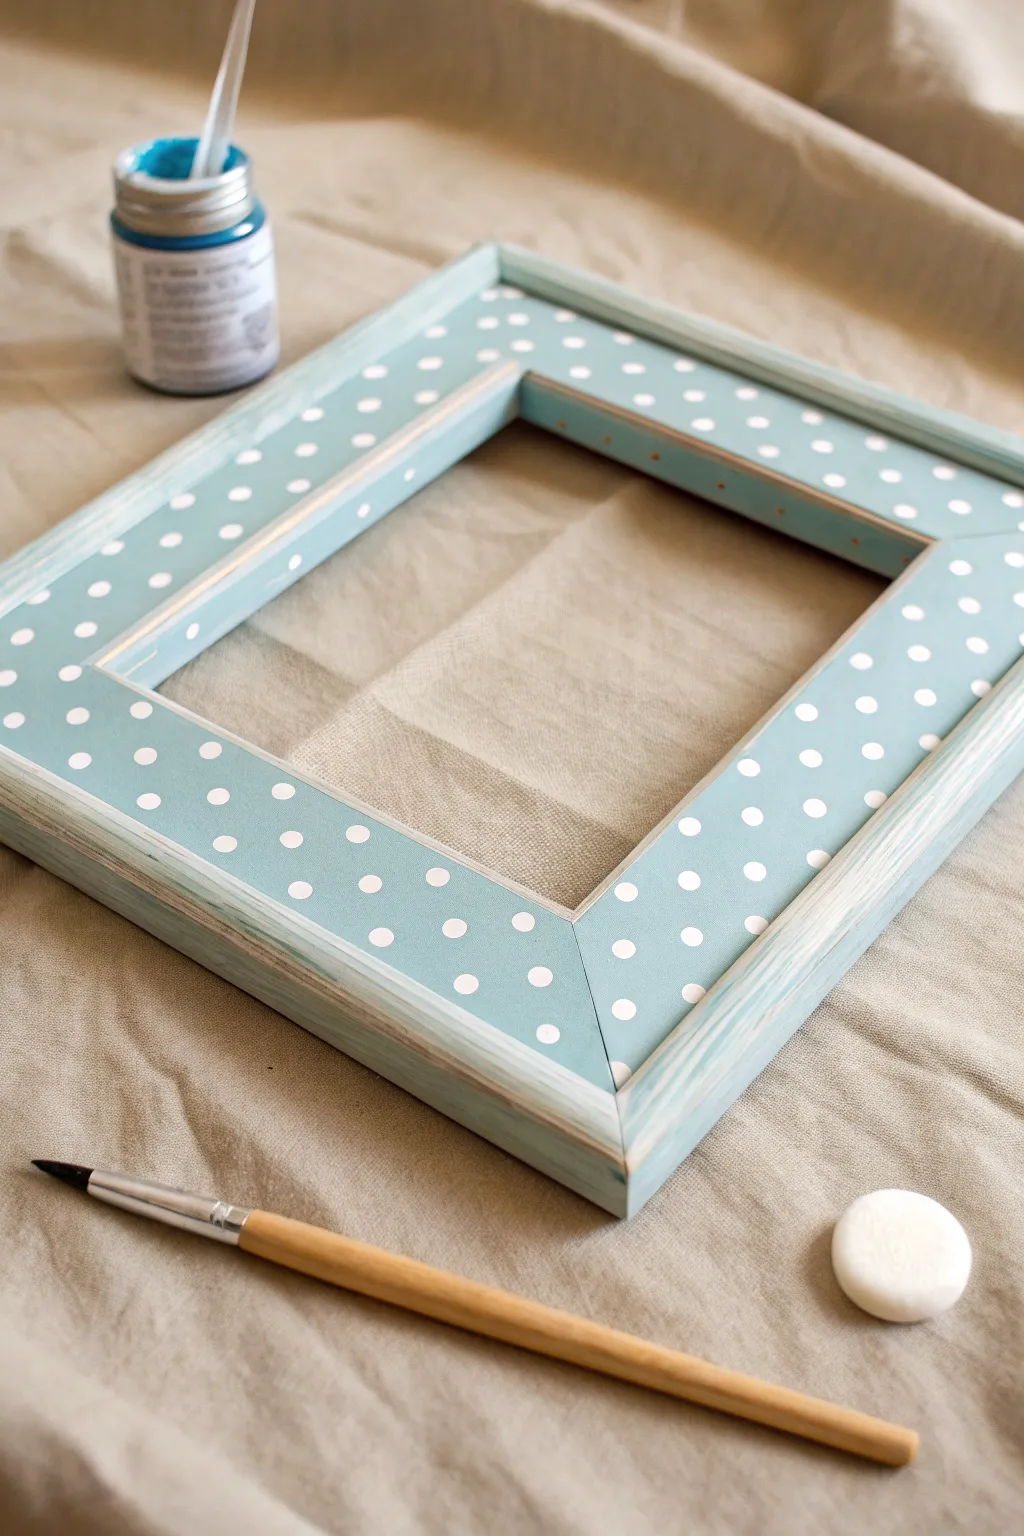
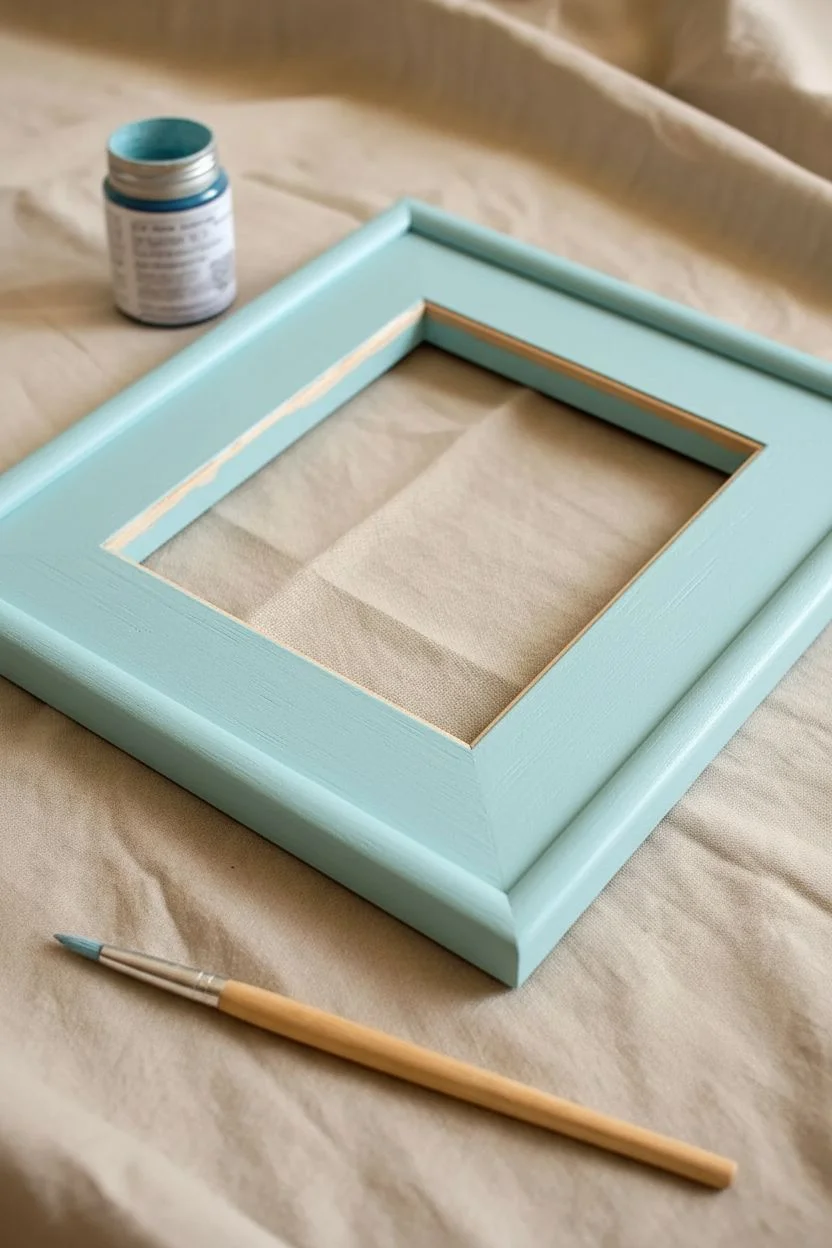
Bring a breath of fresh air to your decor with this cheerful, shabby-chic inspired project. Using a soft blue base and crisp white accents, you will transform a plain wooden frame into a playful statement piece perfect for nurseries or bright living spaces.
Step-by-Step Guide
Materials
- Wooden picture frame (flat profile preferred)
- Light blue or turquoise acrylic paint (matte or chalk finish)
- White acrylic paint
- Flat synthetic paintbrush (1 inch)
- Round foam pouncer or sponge dauber (small/medium size)
- Fine-grit sandpaper (220 grit)
- Paper plate or palette
- Paper towels
- Clear matte varnish or wax
Step 1: Preparation and Base Coat
-
Disassemble the frame:
Turn the frame over and carefully remove the backing, the glass, and any matting so you are working only with the wood. -
Sand the surface:
Lightly scuff the entire surface of the frame with fine-grit sandpaper to remove any existing glossy varnish and help the paint adhere better. -
Clean the dust:
Wipe the frame down thoroughly with a slightly damp paper towel to ensure no sawdust remains. -
Apply the first coat:
Using your flat brush, apply a smooth layer of light blue paint, following the natural grain of the wood. -
Cover the edges:
Don’t forget to paint the inner beveled edge and the outer sides of the frame for a professional finish. -
Let it dry:
Allow the first coat to dry completely to the touch, which usually takes about 20 to 30 minutes depending on your paint brand. -
Apply the second coat:
Add a second layer of blue paint to ensure opaque coverage so no bare wood shows through the main flat areas. -
Smooth out strokes:
While the second coat is wet, use long, light brushstrokes from end to end to minimize texture marks.
Smudge Fixer
Mess up a dot? Don’t wipe it wet! Let it dry fully, paint over the mistake with your blue base color, let that dry, and then re-stamp your white dot.
Step 2: Creating the Pattern
-
Prepare the stencil tool:
Pour a small pool of white acrylic paint onto your paper plate. -
Load the pouncer:
Dip your round foam pouncer straight down into the white paint, ensuring the distinct circle shape is fully covered. -
Offload excess paint:
Tap the pouncer once or twice on a clean part of the paper plate/towel; I find this prevents the paint from squishing out under the edges when stamping. -
Practice first:
Stamp a few dots on a piece of scrap paper to get a feel for how much pressure creates a perfect circle. -
Start the pattern:
Begin stamping your dots in the corners of the frame first to ensure the design looks symmetrical. -
Fill in the rows:
Continue stamping dots along the sides, trying to keep uniform spacing; eyeballing it adds to the handmade charm. -
Add offset rows:
If your frame borders are wide enough, create a second row of dots that are staggered (placed in the gaps between the first row’s dots).
Step 3: Finishing Touches
-
Dry generally:
Let the white polka dots dry completely, preferably for at least an hour to avoid smearing. -
Distress the edges:
Take your sandpaper and very gently sand the edges and corners of the frame to reveal a little wood, recreating the rustic look seen in the photo. -
Wipe clean:
Remove any sanding dust with a dry cloth or tack cloth. -
Seal the work:
Apply a coat of clear matte varnish or wax to protect the paint and give the frame a soft, durable sheen. -
Reassemble:
Once the sealer is fully cured, place the glass and backing back into the frame.
Modern Twist
Swap the white acrylic paint for a metallic gold or silver to give this playful pattern a touch of modern glamour.
Now your charming polka dot frame is ready to add a pop of color to your wall or shelf
Faux Terracotta Texture
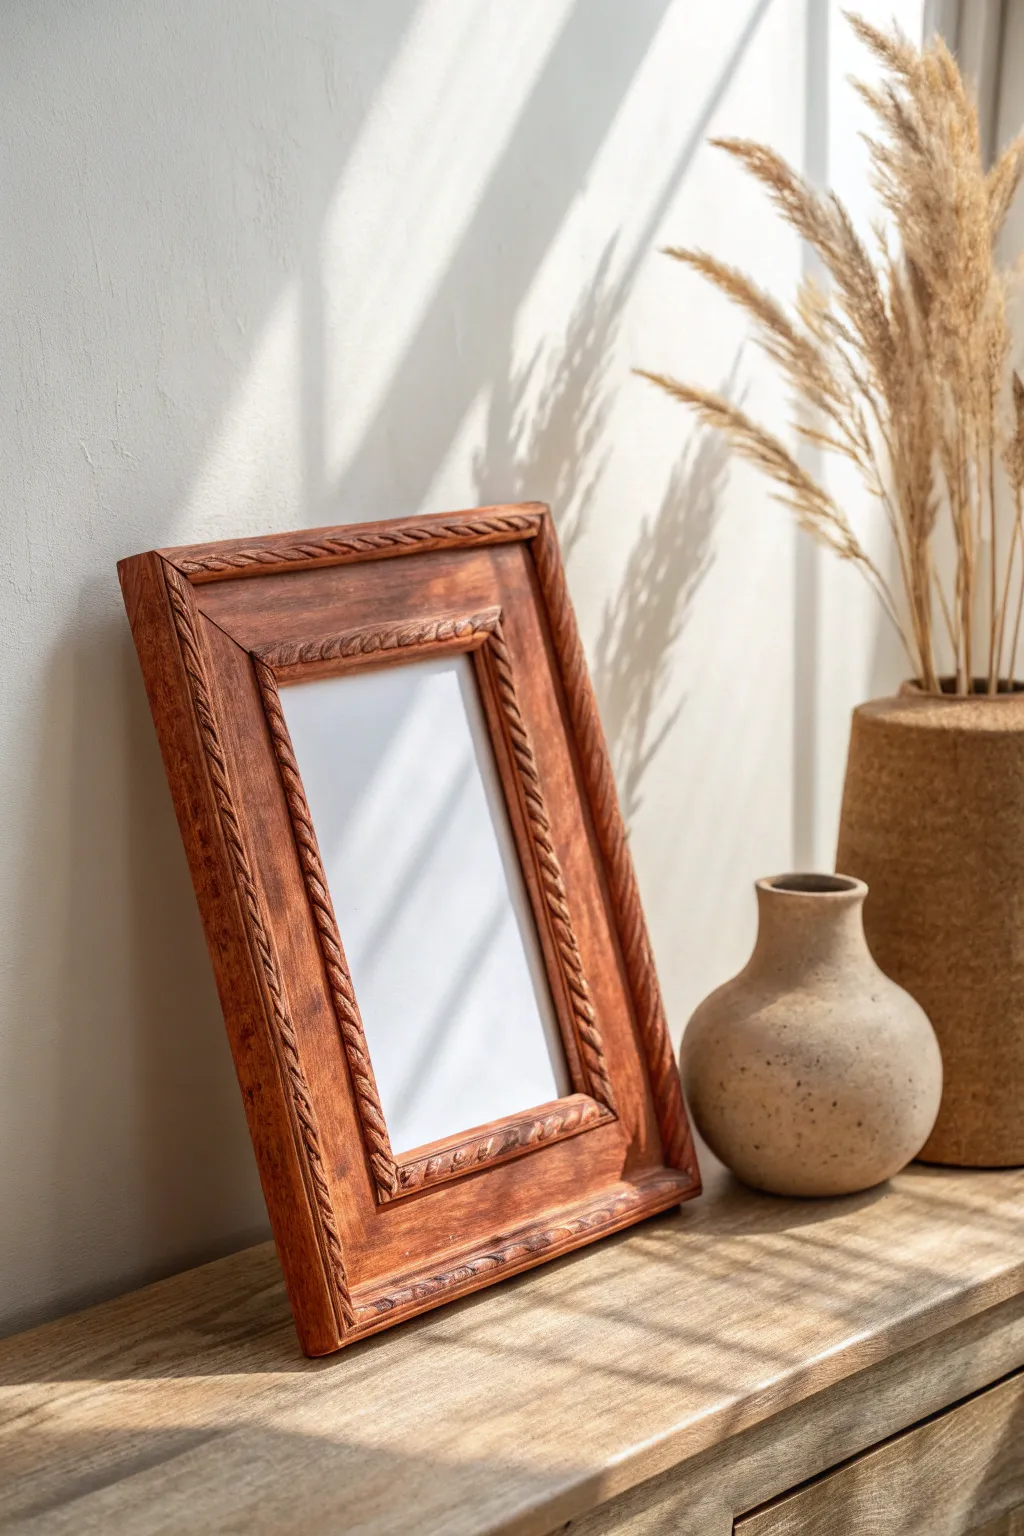
Give a standard wooden frame the warm, sun-baked look of rustic pottery with this simple texturing technique. This project uses a custom paint mix to create a gritty, matte finish that mimics authentic terracotta clay perfectly.
Detailed Instructions
Materials
- Wooden picture frame (carved details work best)
- Acrylic paint (Burnt Sienna, Raw Umber, Cream/White)
- Baking soda
- Mixing cup and craft stick
- Stiff bristle paintbrush (chip brush)
- Soft detail brush
- Paper towels
- Matte clear spray sealer
Step 1: Preparation
-
Disassemble the frame:
Turn the frame over and carefully remove the backing board, any existing artwork, and the glass panel so you are left with just the frame shell. -
Clean surface:
Wipe the frame down with a damp cloth to remove dust. If the frame has a slick or glossy varnish, scuff it gently with sandpaper to help the paint adhere.
Fresh Batches
Baking soda paint dries out much faster than regular acrylics. Mix small batches at a time so the paste doesn’t harden in your cup while you are working on detailed areas.
Step 2: Mixing the Clay Paint
-
Create the base color:
In your mixing cup, combine a generous amount of Burnt Sienna paint with a small dollop of Raw Umber. Aim for a rich, rusty reddish-brown hue. -
Add the texture agent:
Gradually sprinkle baking soda into the paint mixture. I like to start with a 1:1 ratio of paint to powder. -
Achieve consistency:
Stir well with a craft stick until the mixture resembles fluffy frosting or mousse. It should be thick enough to hold peaks but spreadable. -
Adjust if necessary:
If the paste feels too stiff or dry to move, add a tiny drop of water—but keep it thick to ensure that gritty pottery texture.
Step 3: Applying Texture
-
Load the brush:
Dip your stiff bristle brush generously into the textured paint mix. -
Stipple the base coat:
Apply the paint to the frame using a dabbing or stippling motion (up and down) rather than long smooth strokes. This builds up the ceramic-like surface. -
Mind the details:
Work the paint into the carved rope details, but be careful not to completely fill the grooves; you want the pattern to remain distinct. -
First drying phase:
Allow this first heavy coat to dry for about 30 minutes. It will look chalky and lighter as moisture evaporates. -
Refine coverage:
Inspect for any spots where the original frame shows through and dab on a second coat where needed. Let it dry completely for an hour.
Cracking Up?
If the paint cracks excessively as it looks dry, your layer was likely too thick. Simply dab a little wet paint (without soda) into the cracks to fill them, or leave them for an antique vibe.
Step 4: Weathering & Finishing
-
Mix highlight color:
Create a lighter shade by mixing a dime-sized amount of Cream or White paint with a tiny touch of your original Burnt Sienna. -
Prepare for dry brushing:
Dip a dry brush into the lighter paint, then wipe almost all of it off onto a paper towel until the brush leaves barely any mark. -
Highlight the ridges:
Gently whisk the dry brush over the raised rope patterns and edges of the frame. This catches the high points and mimics that dusty, sun-bleached look. -
Soften the effect:
If any white streaks look too harsh, use your finger to smudge them gently into the base coat for a natural dusty fade. -
Add depth (Optional):
For extra contrast, you can mix a watery brown wash and paint it into the deepest crevices, wiping away the excess immediately with a rag. -
Seal the texture:
Once fully dry, take the frame to a ventilated area and spray with a matte clear sealer. This prevents the baking soda texture from flaking off over time. -
Reassemble:
Wait for the sealer to cure completely, then place your glass and artwork back into the frame.
Place your newly textured frame next to some dried pampas grass for an effortlessly chic and organic vignette.
Abstract Brushstroke Art
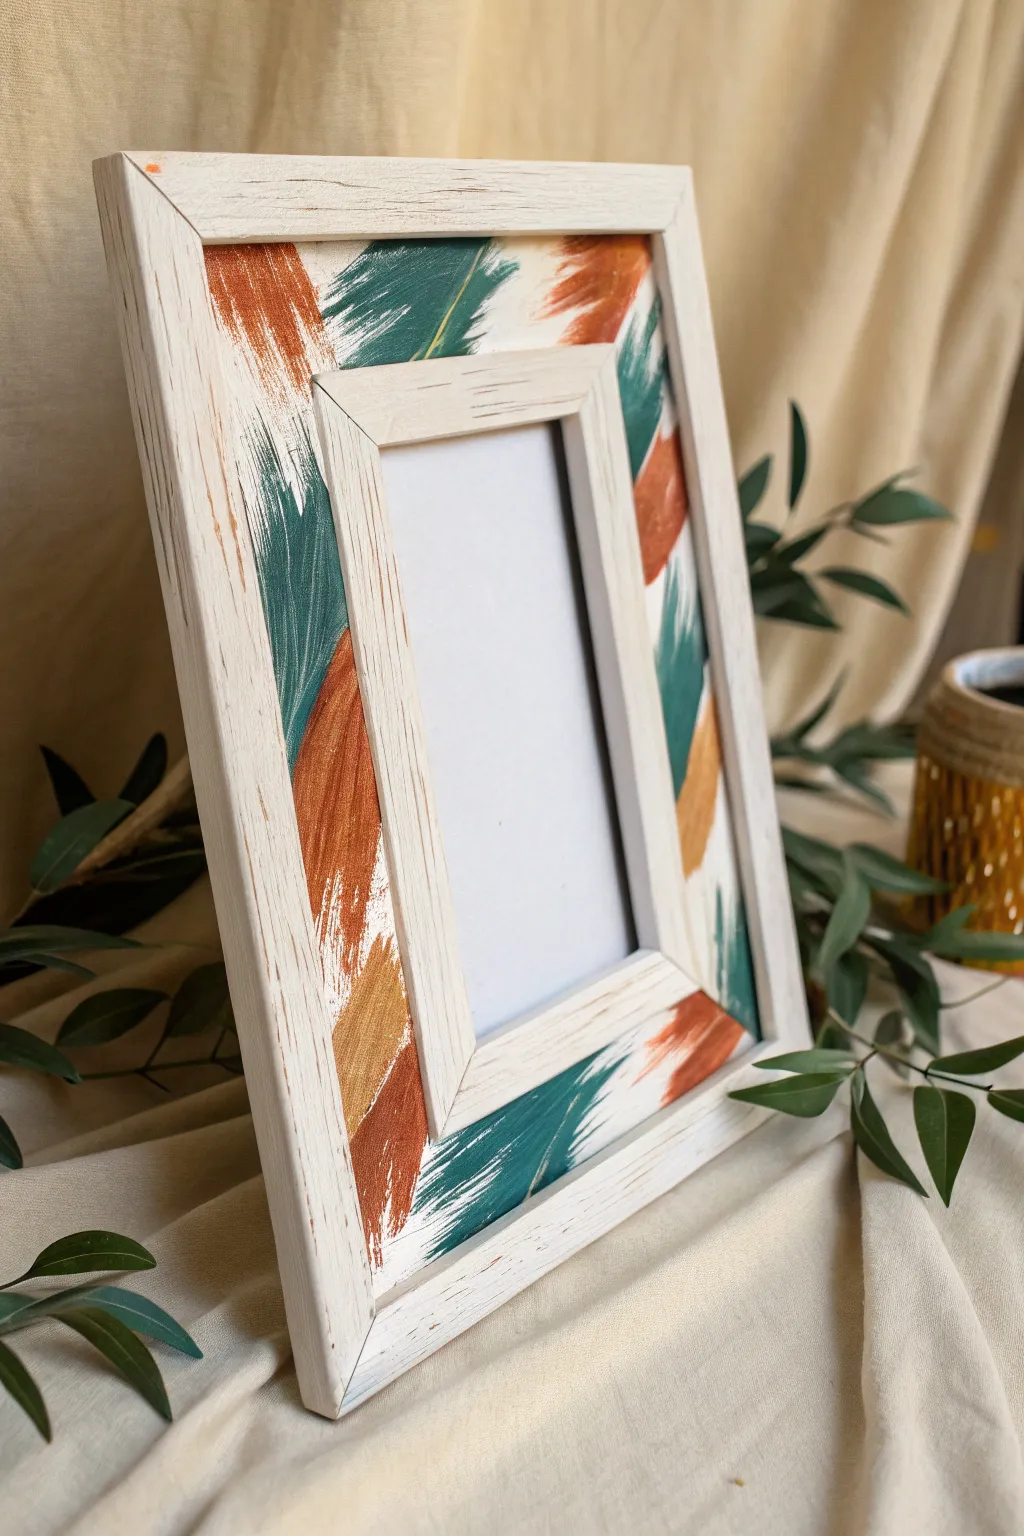

Transform a plain, wide-brimmed wooden frame into a piece of modern art with this simple painting technique. Using earthy tones and expressive, dry-brush strokes, you will create a textured, ikat-inspired look that mimics the appearance of woven fabric.
Step-by-Step Guide
Materials
- Wide flat wooden picture frame
- White or cream chalk paint (base)
- Acrylic paints (Deep Teal, Burnt Terracotta, Metallic Gold)
- Flat synthetic bristle brushes (1 inch and 1/2 inch)
- low-tack painter’s tape
- Sandpaper (220 grit)
- Paper plate or palette
- Clear matte polycrylic sealer or varnish
Step 1: Preparation & Base Coat
-
Disassemble the frame:
Flip the frame over and gently bend the tabs to remove the backing board, any matting, and the glass. Set these aside in a safe spot so you are working only with the wooden frame. -
Sand the surface:
Lightly scuff the entire surface of the frame using 220-grit sandpaper. This helps remove any existing glossy finish and gives the new paint a surface to grip. -
Clean the wood:
Wipe the frame down thoroughly with a damp cloth to remove all sanding dust, then let it dry completely. -
Apply the base color:
Paint the entire frame, including the sides and inner lip, with a coat of white or cream chalk paint. Chalk paint adheres well and gives a lovely matte finish. -
Apply a second coat:
Once the first layer is dry to the touch, apply a second coat of white paint to ensure solid, opaque coverage. intricate wood grain is hidden.
Clean Lines
If paint bled under the tape, don’t panic. Wait for it to dry completely, then use a small angled brush with your white base paint to essentially ‘erase’ the mistakes.
Step 2: Creating the Brushstroke Design
-
Mask the edges:
Apply painter’s tape along the outer rim and the inner beveled lip of the frame. This ensures your colorful brushstrokes stay confined to the flat front face of the frame. -
Prepare the Teal:
Squeeze a dollop of Deep Teal paint onto your palette. If the paint is very thick, add a tiny drop of water to improve flow, but keep it mostly undiluted for texture. -
Paint the first strokes:
Dip your 1-inch flat brush into the teal. Starting from the inner tape line, pull the brush diagonally outward toward the outer edge. Use a quick, flicking motion so the stroke tapers off at the end. -
Vary the placement:
Continue adding teal strokes around the frame. Leave significant white gaps between them for the other colors. I find that grouping two or three strokes together creates a nice organic rhythm. -
Switch to Terracotta:
Rinse your brush thoroughly or switch to a clean one. Load it with the Burnt Terracotta paint. -
Fill the gaps:
Apply terracotta strokes in the empty white spaces, keeping the same diagonal angle as the teal. It is okay if they slightly overlap the green strokes; this adds depth. -
Dry brush technique:
As you paint, allow the brush to run out of paint slightly at the tail of the stroke. This ‘dry brush’ look creates the feathery, textured edges seen in the example. -
Add Metallic Gold accents:
Using a smaller 1/2-inch brush, add streaks of Metallic Gold. Place these sparingly over the other colors or in small remaining gaps to catch the light. -
Review and refine:
Step back and look at the frame as a whole. Add small touches of color where the pattern feels too sparse, ensuring the white background still peeks through for contrast.
Level Up
Mix a texture medium or modeling paste into your colored acrylics before painting. This will give the brushstrokes physical height, making the frame look like an oil painting.
Step 3: Finishing Touches
-
Remove tape:
While the paint is dry to the touch but not fully cured, carefully peel back the painter’s tape at a 45-degree angle to reveal crisp white edges. -
Distress the edges:
Take your sandpaper and gently lightly sand the white inner lip and outer edges that you taped off. This reveals a bit of the raw wood beneath for a rustic, shabby-chic vibe. -
Seal the artwork:
Apply a thin layer of clear matte sealer over the painted face of the frame. This protects the acrylic design from chipping and dust. -
Reassemble:
Once the sealer is fully dry, place the glass, photo, and backing board back into the frame and secure the tabs.
Now you have a stunning, custom-painted frame ready to highlight your favorite memories with artistic flair.
Metallic Corner Accents
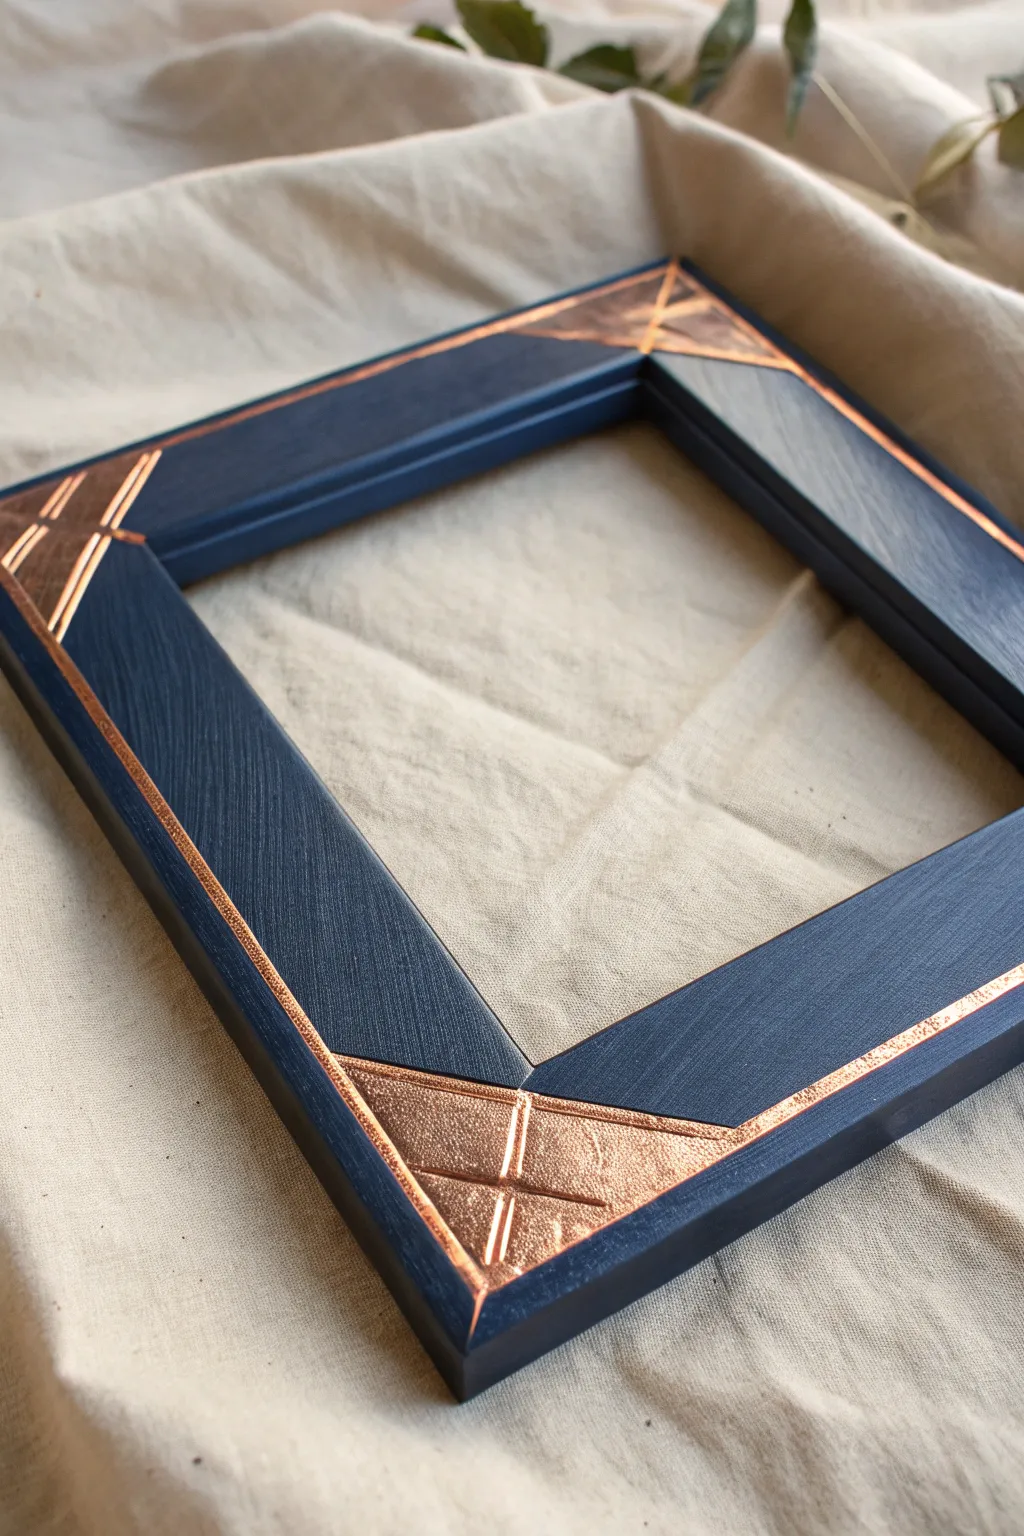
Transform a plain wooden frame into a sophisticated Art Deco-inspired piece featuring deep matte blue contrasted with striking copper geometry. This project uses a clever reverse-masking technique to achieve crisp metallic lines and textured corner details without needing a steady hand for pinstriping.
Step-by-Step Tutorial
Materials
- Flat wooden picture frame (wide profile works best)
- Sandpaper (220 grit)
- Navy blue matte acrylic paint or chalk paint
- High-pigment copper metallic acrylic paint
- Painter’s tape (standard width)
- Pinstriping tape or 1/8 inch masking tape
- Ruler and pencil
- Stylus or empty ballpoint pen
- Flat paintbrushes
- Matte spray varnish
Step 1: Preparation & Design
-
Dissasemble the frame:
Remove the glass, backing board, and any existing artwork from the frame firmly so you are working only with the wooden shell. -
Sand the surface:
Lightly sand the entire front and sides of the frame with 220-grit sandpaper to remove any glossy varnish and create a key for the paint to adhere to. -
Clean thoroughly:
Wipe away all sanding dust with a damp cloth or tack cloth. A dusty surface will ruin the crisp lines we are aiming for. -
Mark the corners:
Using your ruler, measure about 2 inches out from each corner along both the inner and outer edges. Connect these points diagonally to mark off a triangular section at each of the four corners. -
Score the details:
Draw an ‘X’ or cross shape inside your marked corner triangles. Using a stylus or a firm empty pen, press down hard to trace these lines, physically indenting the wood. This slight embossing adds the texture visible in the final piece.
Pro Tip: Crisper Lines
Before painting the blue layer, paint a thin layer of the *copper* paint over the tape edges. This seals any tiny gaps with copper, so if any bleed occurs, it matches the line underneath!
Step 2: The Metallic Base
-
Paint the corners:
Apply the copper metallic paint to the four corner areas. Don’t worry about staying perfectly inside the lines yet; overlap is fine. -
Create texture:
When painting the corners, use a dabbing motion with your brush rather than smooth strokes. This helps the metallic pigment catch the light and enhances the scored ‘X’ lines. -
Paint the border paths:
Paint a strip of copper completely around the inner and outer rectangular perimeters where the thin lines will eventually be. Again, paint wider than the final line will be. -
Allow to cure:
Let this metallic base layer dry completely. I prefer to wait overnight if possible, as we will be applying tape directly over this paint.
Troubleshooting
If paint peeled up with the tape, use a tiny detail brush to touch up the spots. If the edge is jagged, wait for it to dry fully, lightly sand the ridge, and touch up with blue.
Step 3: Masking the Design
-
Mask the corners:
Apply painter’s tape to cover the corner triangles exactly along the diagonal pencil line you drew earlier. Trim the excess tape with scissors or a craft knife for a sharp edge. -
Apply pinstriping:
Run the thin 1/8 inch pinstriping tape along the frame, connecting the corner triangles. Place one line near the inner edge and one near the outer edge, covering the copper paint you applied earlier. -
Seal the edges:
Run your fingernail or a credit card firmly along the edges of all the tape strips. This burnishing step is critical to prevent the blue paint from bleeding under the tape. -
Safety check:
Ensure the scored ‘X’ marks in the corners are completely covered by your corner masking tape so they remain copper.
Step 4: The Navy Overlay
-
Apply the blue base:
Paint the entire frame with the navy blue matte paint, going right over the tape. Use long, smooth strokes in the direction of the wood grain. -
Second coat:
Once dry to the touch, apply a second coat of blue to ensure full opacity. The dark color needs to completely block out any copper underneath. -
The reveal:
While the second coat is still slightly tacky (not fully cured), carefully peel away the tape. Pull the tape slowly at a 45-degree angle away from the paint line for the sharpest edge. -
Clear coat:
Once the paint is fully cured (give it 24 hours), spray the entire frame with a matte varnish to protect the finish and unify the sheen.
Reassemble your frame and enjoy the geometric elegance of your new custom decor piece
Splatter Paint Fun
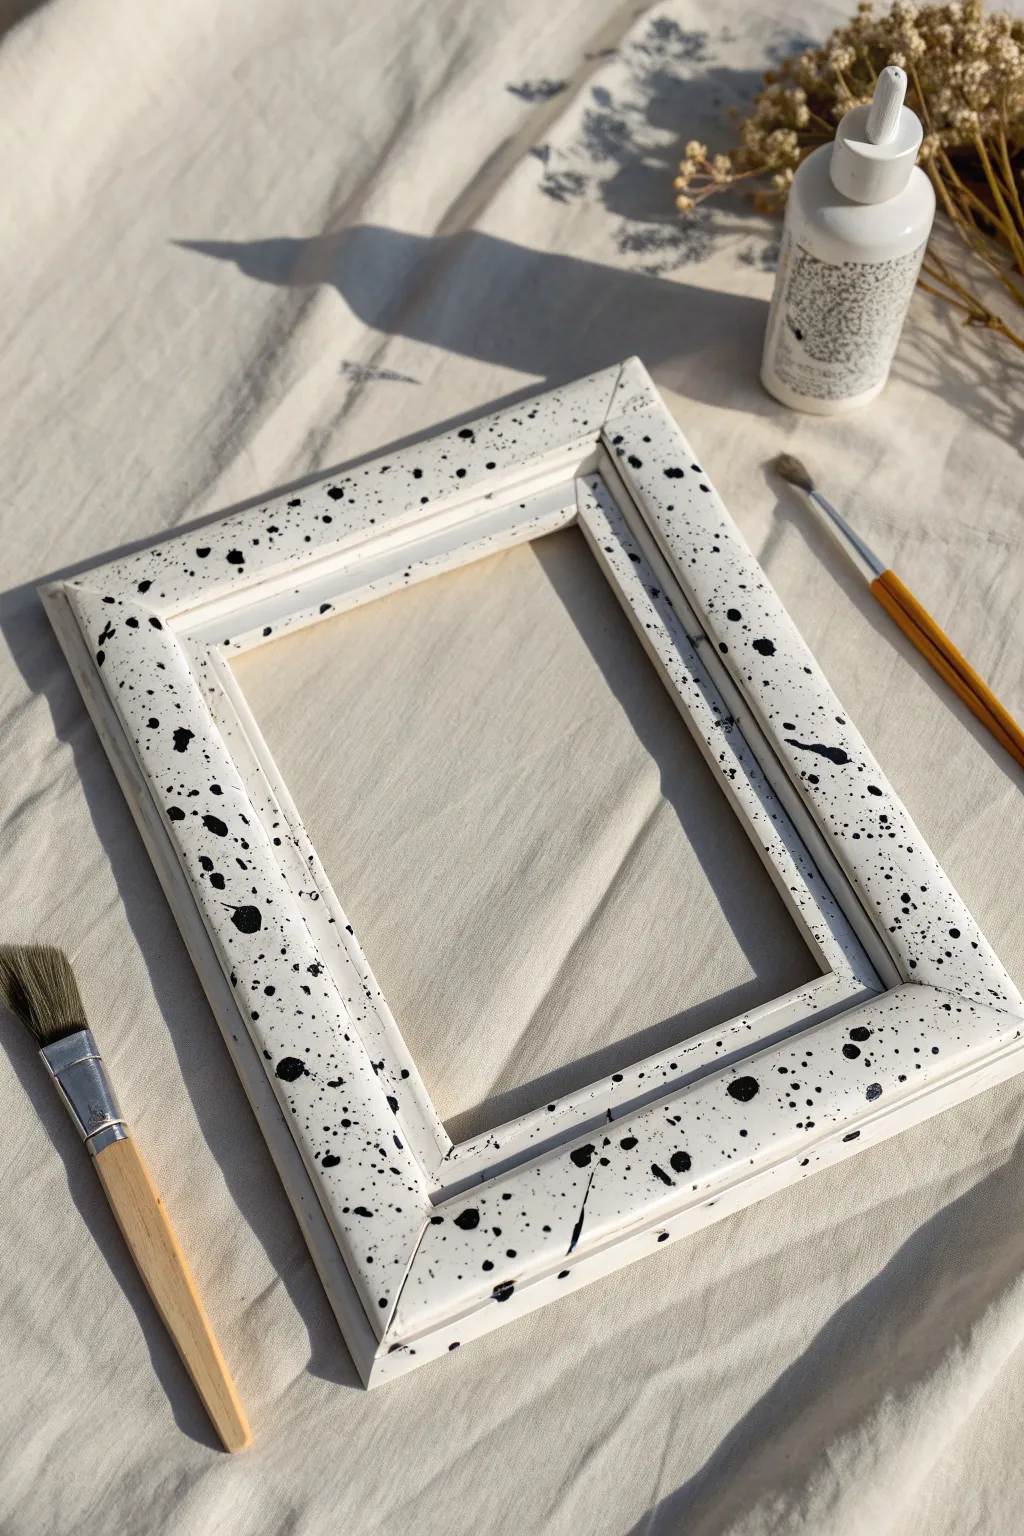
Turn a plain wooden frame into a piece of modern art with this high-contrast splatter technique. This project embraces the beauty of random patterns, resulting in a chic, Dalmatian-style accessory that pops in any room.
How-To Guide
Materials
- Wooden picture frame
- White acrylic paint (matte finish recommended)
- Black acrylic paint
- Flat paintbrush (1 inch width)
- Stiff-bristled brush or clean toothbrush
- Drop cloth or old newspapers
- Small mixing cup
- Sandpaper (fine grit)
- Water
Step 1: Base Preparation
-
Disassemble the frame:
Remove the glass, backing board, and any existing artwork from your frame so you are working only with the wooden rim. -
Surface prep:
Lightly scour the surface of the frame with fine-grit sandpaper to rough up any existing finish, which helps the new paint stick better. -
Clean the dust:
Wipe the entire frame down with a barely damp cloth or paper towel to remove all sanding dust carefully. -
First white coat:
Using your flat paintbrush, apply an even coat of white acrylic paint to the front and sides of the frame. -
Detailing edges:
Don’t forget to paint the inside lip where the glass sits; this area will be visible from certain angles. -
Dry and repeat:
Let the first layer dry for about 20 minutes. If the wood grain still shows through, apply a second coat for a solid, opaque finish. -
Final drying:
Ensure the white base is completely dry before moving on to the messy part, otherwise the black splatters might bleed into the white.
Splatter Control
If a paint glob looks too large or messy, lightly touch the tip of a rolled paper towel to the center of the wet spot to lift excess pigment.
Step 2: The Splatter Technique
-
Protect your zone:
Lay down a wide area of newspapers or a drop cloth. Splatter paint has a tendency to travel much further than you expect! -
Prepare the black paint:
Squeeze a dollop of black acrylic paint into a small mixing cup. -
Thin the mixture:
Add water drop by drop, mixing constantly, until the paint reaches the consistency of heavy cream or ink. -
Load the tool:
Dip the tips of your stiff-bristled brush into the thinned black paint. Don’t overload it, or you might get unintended giant drips. -
Test run:
Flick the bristles over a piece of scrap paper first to test the spray pattern and adjust paint consistency if needed. -
Create fine mist:
Hold the brush near the frame and pull your finger or thumb briskly back across the bristles to release a spray of small dots. -
Add larger spots:
For bigger, more dramatic spots, I generally load the brush heavily and tap the handle firmly against my other hand over the project. -
Vary the coverage:
Move around the frame to ensure even coverage, aiming for a dynamic mix of dense clusters and open white space. -
Check the sides:
Ensure you splatter the outer edges of the frame as well so the design looks continuous from the side view.
Step 3: Finishing Up
-
Patience is key:
Leave the frame flat to dry. Heavier globs of paint will take significantly longer to cure than the fine mist. -
Clean backing:
If any paint made its way onto the back of the frame where it shouldn’t be, wipe it off now before reassembling. -
Reassemble:
Once everything is bone dry, put the glass and backing back in place to complete your artwork.
Go Graphic
To switch up the vibe, try reversing the colors—paint the frame matte black and use white or metabolic gold paint for the splatter.
Place your favorite photo inside and enjoy your bold new decor piece
Seasonal Motif Doodles
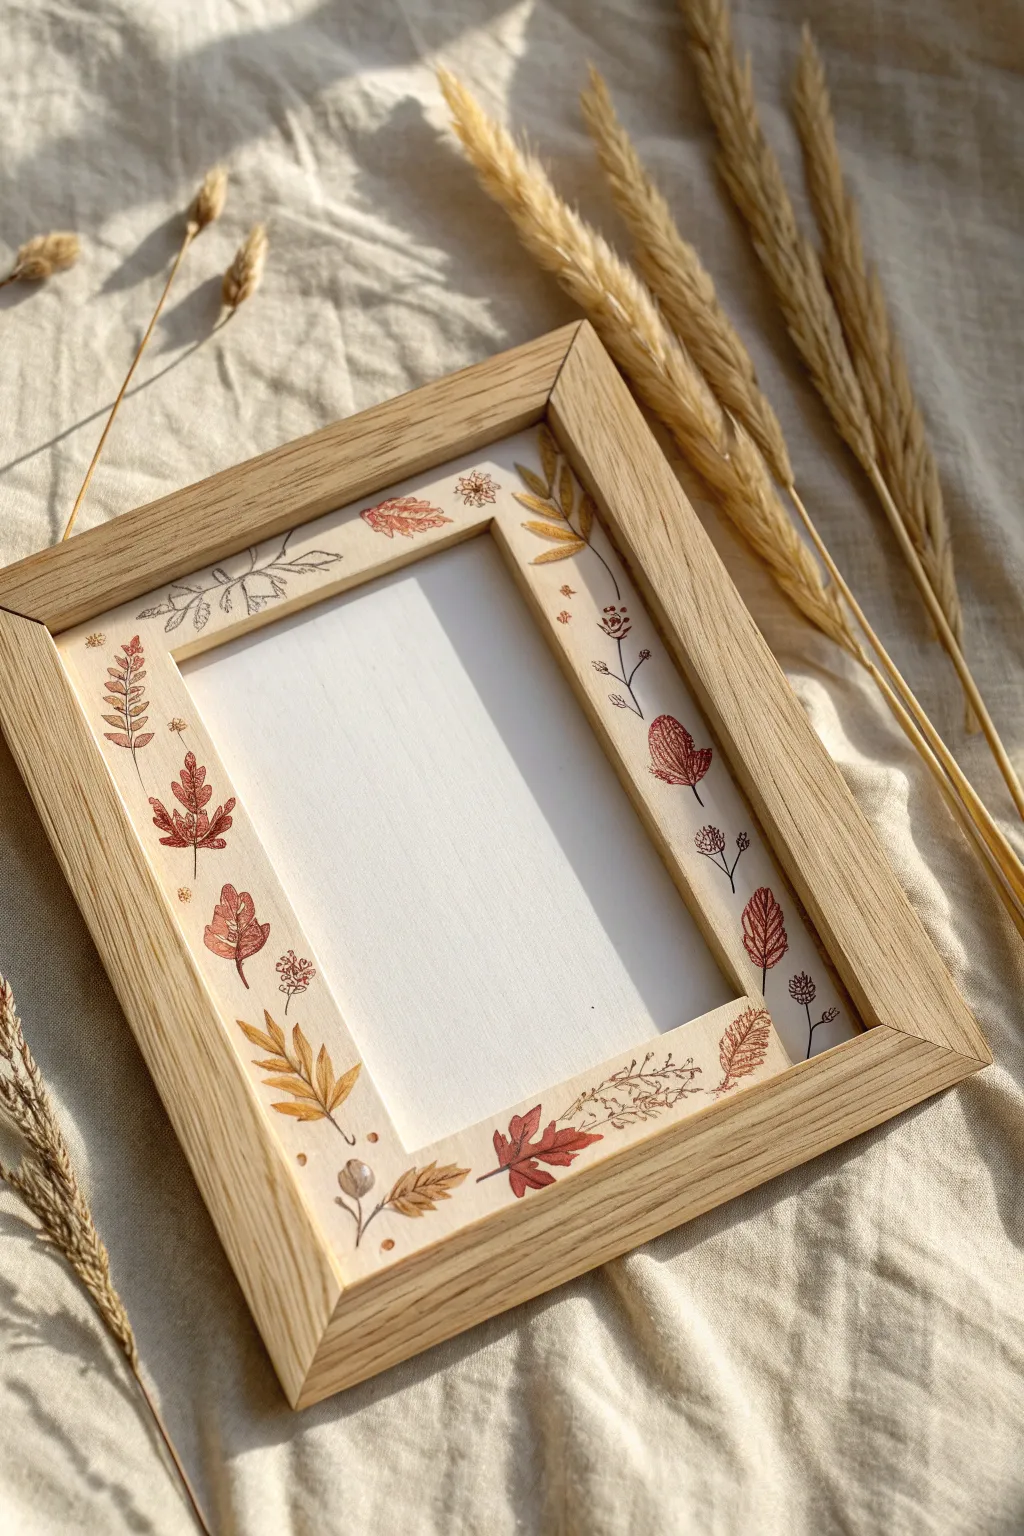

Transform a standard picture frame into a seasonal keepsake by creating a custom hand-painted mat featuring delicate fall motifs. This project combines soft watercolor washes with crisp ink doodling to frame your memories with the warmth of autumn leaves.
Detailed Instructions
Materials
- Light wood picture frame with glass
- Heavyweight cold-press watercolor paper (300 gsm)
- Watercolor paints (Burnt Sienna, Yellow Ochre, Alizarin Crimson, Sepia)
- Round watercolor brush (size 2 or 4)
- Fine liner pen (0.1mm or 0.3mm, Sepia or Black)
- HB Pencil and kneadable eraser
- Ruler and craft knife
Step 1: Preparing the Canvas
-
Disassemble the frame:
Flip the frame over and carefully bend back the flexible tabs to remove the backing board and glass. Set these aside safely. -
Measure and cut:
Trace the size of the glass onto your watercolor paper. Cut the paper to size so it fits perfectly inside the frame. -
Define the photo window:
Decide on the size of the photo you want to display. Measure and lightly draw a rectangle in the center of the paper to mark where the photo will sit. -
Sketch the flow:
Using your pencil very lightly, sketch a loose waving line around the photo border to guide where your leaves will grow, ensuring a balanced composition.
Step 2: Painting the Foliage
-
Mix your autumn palette:
Prepare your watercolors on a palette. You want watery, transparent mixes of rusty orange, golden yellow, and deep muted red. -
Paint the oak leaves:
Dip your brush into the rusty orange mix. Paint small, lobed oak leaf shapes at random intervals along your pencil guide. Keep them loose; they don’t need to be botanically perfect. -
Add golden leaves:
Clean your brush and switch to the yellow ochre. Paint simple, elongated oval leaves interspersed between the oak leaves. -
Create variation:
I like to drop a tiny dot of crimson into the wet yellow leaves while they are still damp to create a natural, turning-leaf gradient. -
Paint accent berries:
Using the tip of the brush and a dark sepia or red mix, dab small clusters of dots to represent berries or acorns. -
Dry completely:
Let the paper sit flat until the paint is bone dry. This is crucial before moving to the next step to prevent ink bleeding.
Ink Smearing?
If your fine liner bleeds into the watercolor leaves, the paper acts like a sponge because it’s still damp. Wait until the paper feels room temperature to the touch before inking.
Step 3: Inking the Details
-
Test your pen:
Scribble on a scrap piece of watercolor paper to ensure your fine liner is flowing smoothly. -
Vein the painted leaves:
Draw delicate central veins and branching lines inside your dried watercolor shapes. Don’t outline the paint; just add the internal details. -
Doodle filler leaves:
In the white spaces between painted leaves, draw line-art leaves that represent withered flora. Use jagged lines for texture. -
Add shading:
Use tiny diagonal hatch marks on the ink-only leaves to give them depth and distinguish them from the painted ones. -
Draw fine sprigs:
Sketch very thin, wire-like stems with tiny buds or seed pods sprouting outward from the main border flow. -
Final ink touches:
Add tiny stippling dots around the berries to ground them.
Seasonal Switch
Swap the palette and motifs for different seasons: use holly and bright red berries for Winter, or pastel wildflowers and green vines for a Spring version.
Step 4: Assembly
-
Erase guidelines:
Once the ink is fully set, gently roll a kneadable eraser over the paper to pick up any visible pencil marks. -
Cut the center (Optional):
If you want a true mat, carefully cut out the center rectangle using a craft knife and ruler. Otherwise, simply mount your photo on top of the center space. -
Reframe:
Clean the glass, place your new artwork inside, add the backing, and secure the tabs.
Place your framed artwork on a shelf where the light catches the watercolor details, celebrating the season in style.


Have a question or want to share your own experience? I'd love to hear from you in the comments below!