
Whenever I’m stuck on what to paint, I come back to planets—they’re basically permission to play with color, texture, and dreamy lighting. Here are my favorite planet painting ideas, starting with the classics and then drifting into the fun, weird corners of space.
Classic Shaded Sphere Planet
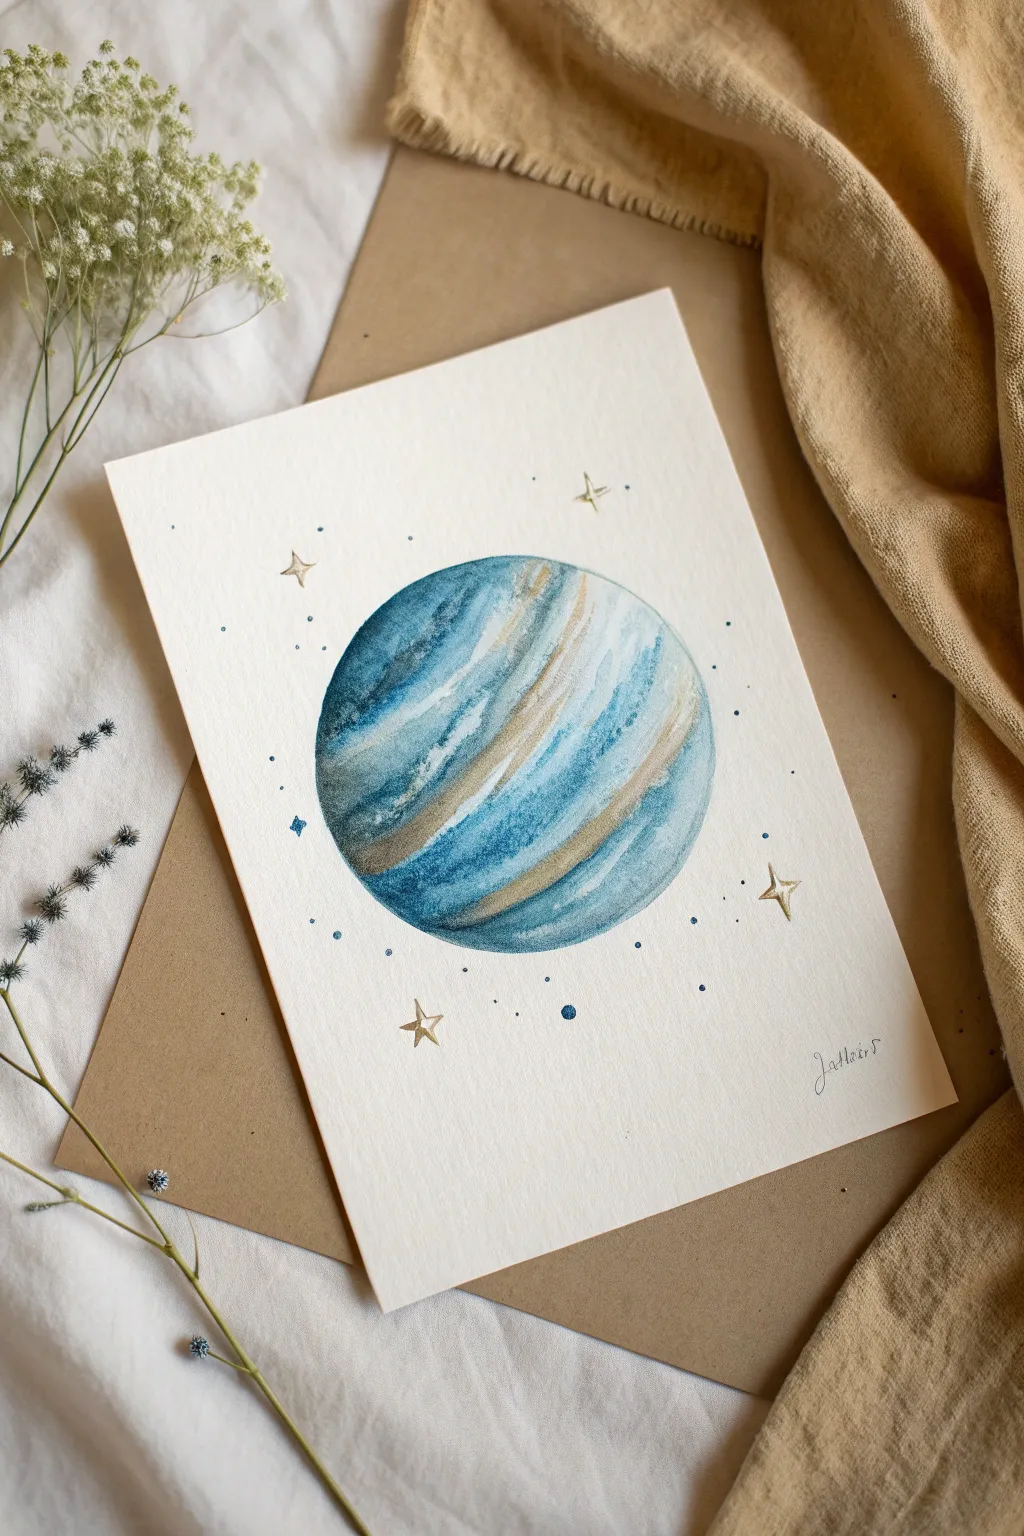
This celestial watercolor piece captures the beauty of a gas giant with elegance, featuring deep blues, ethereal teals, and striking ribbons of gold. The composition is simple yet impactful, using a perfectly circular planet surrounded by delicate stars on textured paper.
How-To Guide
Materials
- Cold press watercolor paper (300gsm recommended)
- Watercolor paints (Indigo, Prussian Blue, Teal/Turquoise)
- Metallic gold watercolor paint or gold ink
- Round watercolor brushes (sizes 2, 6, and a finer detail brush)
- Pencil
- Compass or a circular object to trace (approx. 4-5 inches)
- Clean water and paper towels
- White gouache or white gel pen (optional for tiny stars)
Step 1: Preparation & Base Sketch
-
Paper Setup:
Begin by taping down your watercolor paper to a board with masking tape. This prevents the paper from buckling when it gets wet and creates a clean border if you prefer one. -
Outline the Planet:
Use a compass or trace a circular object like a bowl or large lid to draw a perfect circle in the center of your page. Keep the pencil line very faint so it won’t show through the lighter parts of the paint later.
Clean Edges Pro-Tip
For a perfect circle without tracing, lightly wet the rim of a clean glass and press it onto the paper. Paint inside the watermark before it dries for a flawless edge.
Step 2: Painting the Planet Base
-
Wet-on-Wet Technique:
Load your medium-sized brush (size 6) with clean water and dampen the entire inside of the circle. The paper should be glistening but not forming puddles. -
First Layer of Blue:
Mix a watery wash of teal or turquoise. Gently touch the brush to the wet paper, sweeping it in curved bands across the planet. Leave some white space between the bands to create texture. -
Adding Depth:
While the first layer is still damp, pick up a stronger concentration of Prussian Blue. Apply this to the top left and bottom right edges to start establishing a spherical form. -
Creating Texture:
Dab a darker indigo into the wet blue areas to create the look of stormy clouds. Allow the colors to bleed naturally into one another, but try to maintain the directional curve of the bands. -
Planning for Gold:
Visualizing where your gold stripes will go is important. I like to leave specific bands lighter or even completely unpainted right now, so the gold will pop later without getting muddy. -
Lifting Color:
If an area gets too dark, clean and dry your brush, then use it to lift pigment off the paper in a sweeping motion. This creates soft highlights that mimic cloud layers. -
Drying Time:
Let this first stage dry completely. This is crucial—if the paper is still wet, your sharp gold lines will fuzz out and lose their definition.
Step 3: Adding Metallic Accents
-
Mixing the Gold:
Activate your metallic gold watercolor with a few drops of water until it reaches a creamy, opaque consistency. It should flow smoothly but cover well. -
Painting Gold Ribbons:
Using a smaller brush (size 2), paint curved bands of gold into the lighter spaces you reserved. Follow the spherical curve of the planet to enhance the 3D effect. -
Layering Gold:
For extra richness, add a second layer of gold over the bands once the first pass is dry. You can also drag a very dry brush with a little gold over the blue areas for a sparkling, dry-brush texture. -
Detailing the Edge:
Carefully run the tip of your brush along the very edge of the circle where the dark blue meets the background, sharpening the silhouette. Don’t outline the whole planet, just tidy up any messy edges.
Level Up: Cosmic Splatter
Load a toothbrush with white gouache and flick the bristles to create a fine mist of stars over the dry painting for a deep space effect.
Step 4: Stars & Finishing Touches
-
Drawing the Stars:
Using your smallest detail brush and the gold paint, draw four-pointed stars around the planet. Start with a vertical line, then cross it with a horizontal one, tapering the ends to sharp points. -
Adding Stardust:
Dip the tip of your brush into blue paint and dot tiny specks around the planet. Vary the size of the dots—some microscopic, some slightly larger. -
Gold Speckles:
Do the same with your gold paint, adding metallic specks amongst the blue ones. This creates a shimmering atmosphere around the sphere. -
Optional White Highlights:
If you want extra sparkle, use a tiny dot of white gouache or a gel pen in the center of the gold stars to make them shine brighter. -
Sign and Dry:
Once everything is perfectly dry, gently erase any visible pencil marks from the original circle outline and sign your artwork in the corner.
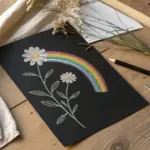
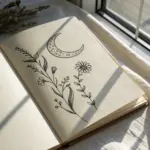
Frame your cosmic creation alongside some dried florals for a truly dreamy display


Earth With Clouds and Glow
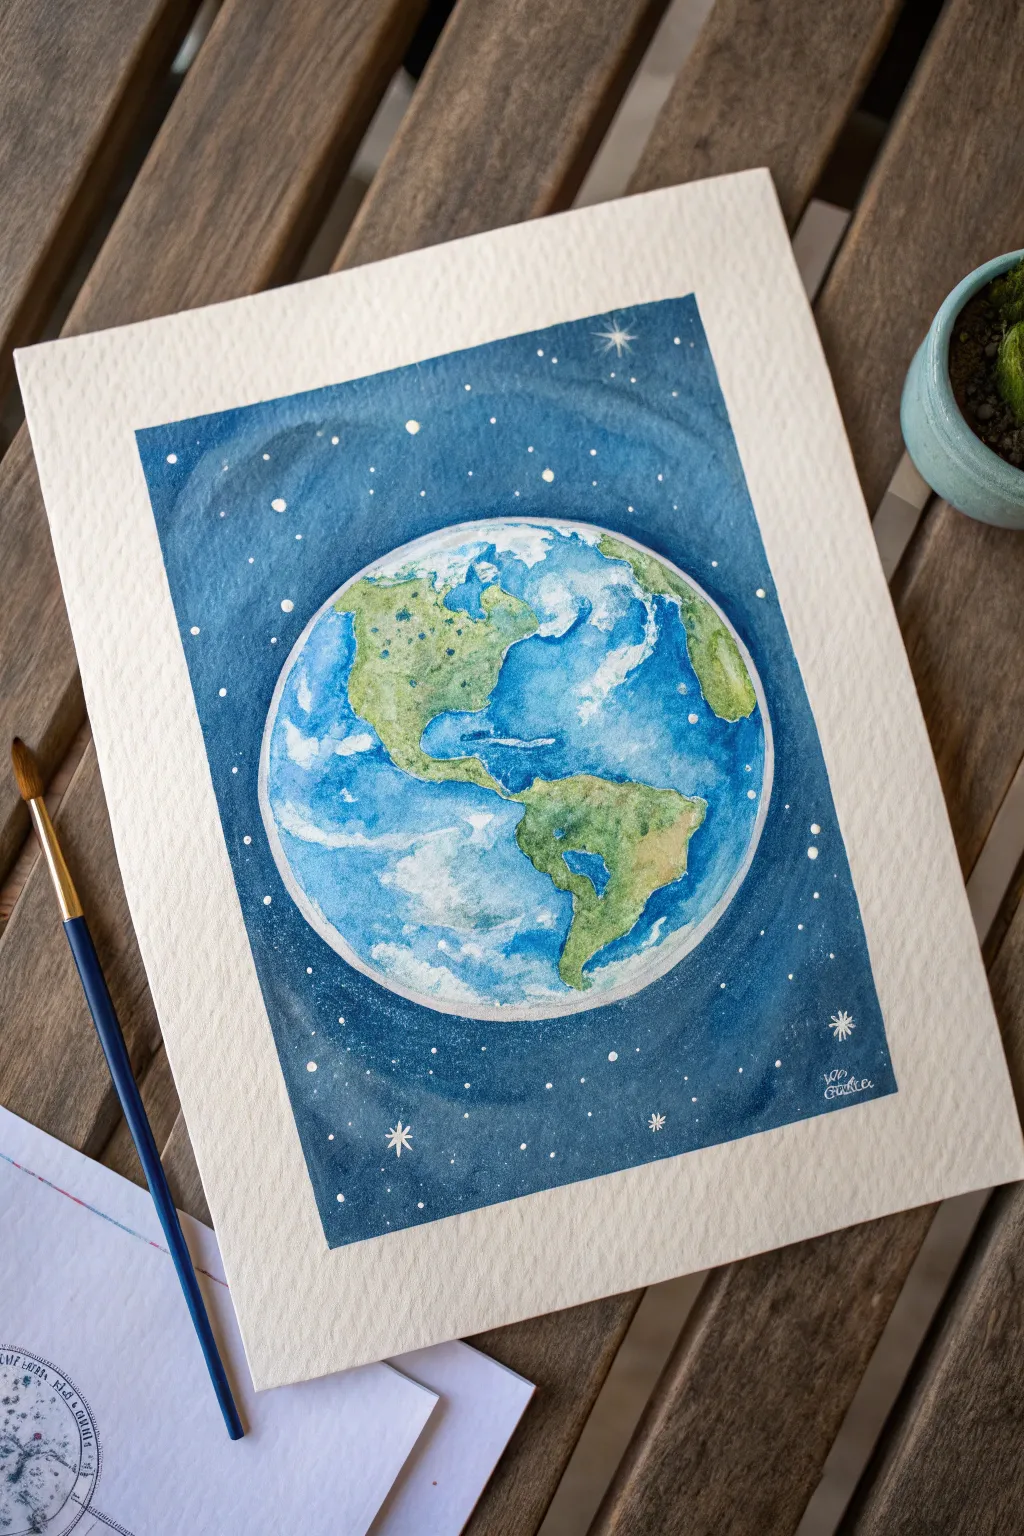
Capture the beauty of our home planet suspended in a starry void with this vibrant watercolor project. The painting features lush green continents, deep blue oceans swirling with clouds, and a magical glowing atmosphere.
How-To Guide
Materials
- Cold press watercolor paper (140lb/300gsm)
- Watercolor paints (Phthalo Blue, Ultramarine, Sap Green, Burnt Umber)
- White gouache or white gel pen
- Round watercolor brushes (size 2, 6, and 10)
- Masking tape
- Compass or circular object for tracing
- Clean water and paper towels
- Pencil and eraser
Step 1: Preparation and Sketching
-
Border and tape:
Begin by taping down all four edges of your watercolor paper to a board. This creates the crisp white frame seen in the reference and prevents buckling when the paper gets wet. -
Outline the planet:
Using a compass or a circular object like a bowl, lightly draw a large circle in the center of the paper. Keep the pencil pressure light so the graphite doesn’t smudge later. -
Map the continents:
Lightly sketch the outlines of North and South America. Don’t worry about perfect cartographic accuracy; aim for recognizable shapes that fit comfortably within the circle.
Step 2: Painting the Earth
-
First land wash:
Mix a watery Sap Green with a touch of blue. Paint the landmasses, letting the color be uneven to suggest terrain and vegetation. -
Adding terrain depth:
While the land is still slightly damp, drop in small amounts of Burnt Umber or a darker green into the mountainous areas (like the Rockies and Andes) to create texture. -
Ocean base layer:
Once the land is dry, wet the ocean areas with clean water. Drop in a light wash of Phthalo Blue, carefully painting around the continents. -
Deepening the waters:
While the ocean layer is wet, charge in darker Ultramarine Blue at the edges of the circle and in the deep Atlantic. Leave lighter areas near the center to suggest spherical volume. -
Lifting clouds:
Before the ocean dries completely, use a clean, thirsty brush or a crumpled paper towel to lift out pigment in swirling shapes. This creates soft, atmospheric cloud formations. -
Atmospheric rim:
Painting carefully, leave a very thin rim of unpainted white paper along the top edge of the circle. Paint a pale blue fading into white just inside the circle’s edge to emphasize the glowing atmosphere.
Clean Edges Solution
If you struggle to paint a perfect circle freehand, use liquid masking fluid to cover the Earth area before painting the dark background wash.
Step 3: The Cosmic Background
-
Protecting the planet:
Ensure the Earth is bone dry before starting the background. It helps to work slowly around the planet’s edge to maintain a perfect circle. -
Dark space wash:
Mix a heavy concentration of Prussian Blue or Indigo. Apply this dark wash to the entire background outside the Earth, keeping the paint wet so you don’t get hard lines. -
Building the void:
While the first layer is wet, drop in even darker pigment (payne’s gray or black mixed with blue) near the edges of the paper to create a vignette effect. -
Lighter halos:
Around the planet itself, let the blue remain slightly lighter. This subtle gradient makes the Earth appear to be glowing against the darkness.
Add Metallic Magic
Mix a small amount of iridescent watercolor medium or silver metallic paint into your final cloud layer for clouds that shimmer in the light.
Step 4: Final Details
-
Defined clouds:
Once the oceans are totally dry, mix white gouache to a creamy consistency. Paint distinct, brighter cloud swirls over the oceans and overlapping parts of the land. -
Atmosphere glow:
Run a very thin line of white gouache along the upper arc of the planet, blending it softly inward to enhance the atmospheric shine. -
Star field:
Load a toothbrush or stiff brush with white gouache. Flick the bristles to splatter tiny stars across the dark blue background. -
Hero stars:
Use a white gel pen or a fine brush to hand-paint a few larger, four-pointed sparkle stars for visual interest. -
The reveal:
Wait until the painting is completely dry to the touch before carefully peeling away the masking tape at a 45-degree angle.
Now you have a stunning portrait of our world ready to frame or gift to a space enthusiast

Jupiter Bands and Storm Spot
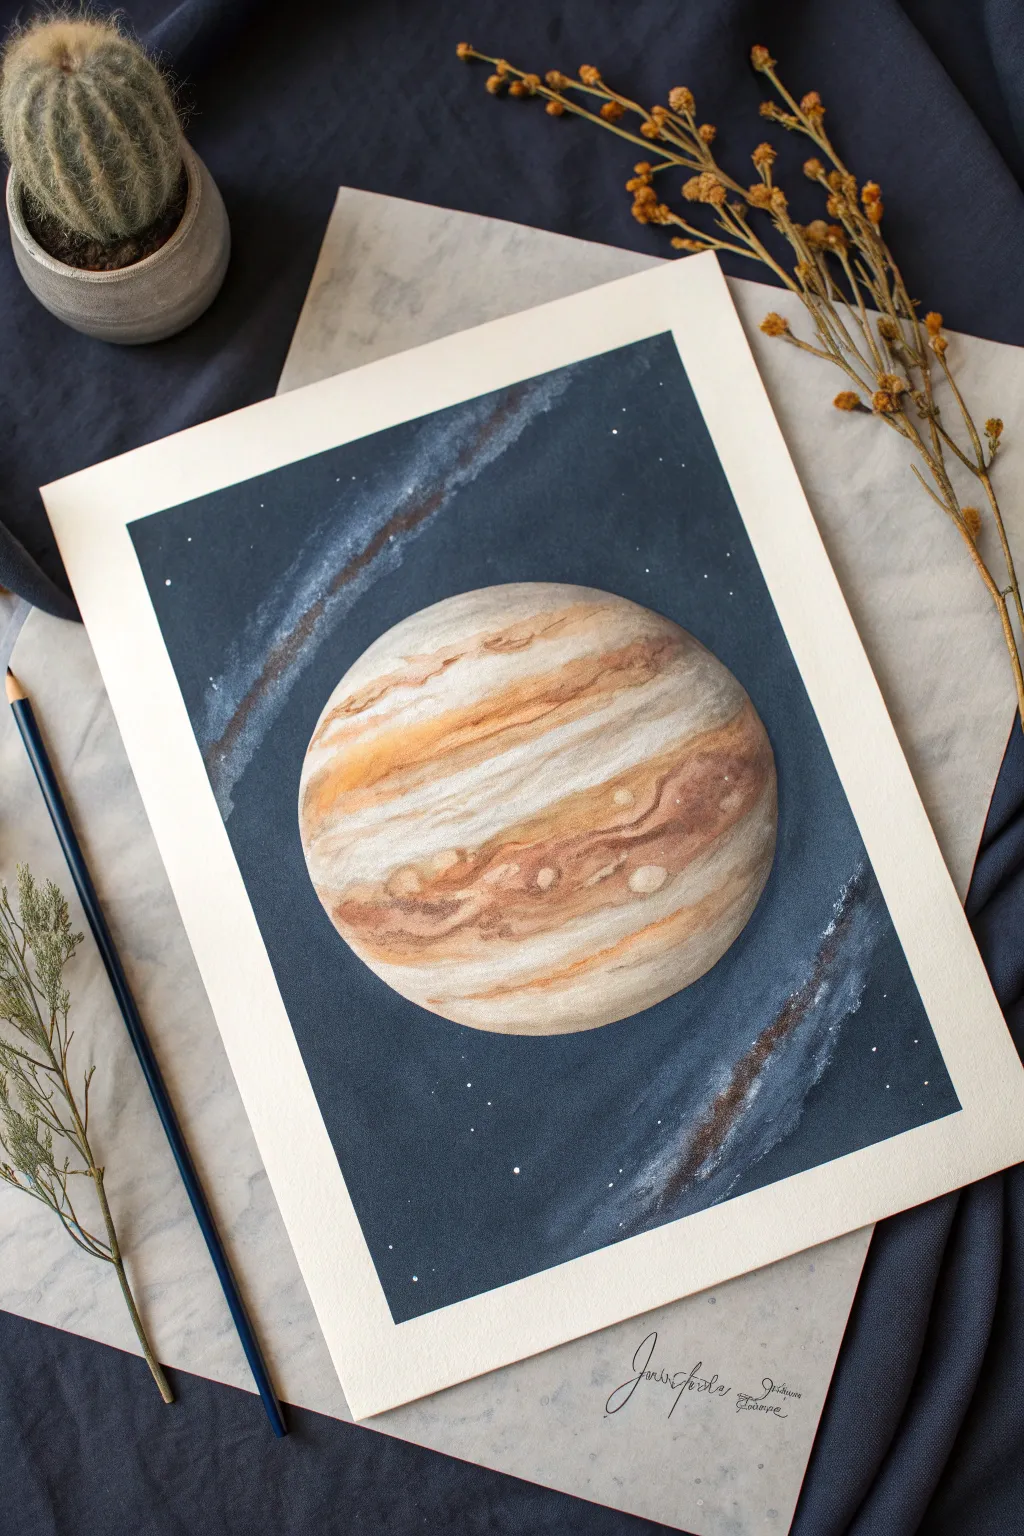
Capture the swirling majesty of the gas giant with this detailed watercolor tutorial. You’ll create a striking contrast between the deep, starry abyss and Jupiter’s warm, banded atmosphere.
Step-by-Step Guide
Materials
- Heavyweight watercolor paper (300gsm, cold press)
- Watercolor paints (Payne’s Grey, Indigo, Burnt Sienna, Yellow Ochre, Burnt Umber, White Gouache)
- Round brushes (sizes 2, 6, and 10)
- Compass or circular object for tracing
- HB pencil
- Masking fluid (optional)
- Two jars of water
- Paper towels
- Painter’s tape
Step 1: Preparation and Background
-
Secure your paper:
Tape your paper down to a board on all four sides. This ensures a clean white border and prevents buckling when we apply heavy washes. -
Sketch the planet:
Use a compass or trace a bowl to draw a large, perfect circle in the center of your page. Keep your pencil lines extremely light so they don’t show through the paint later. -
Mask the planet (optional):
If you have masking fluid, apply a thin layer over the entire circle to protect it while painting the background. If not, you’ll need to paint carefully around the edge. -
Mix your space color:
Create a deep, dark blue-black mixture using Indigo and Payne’s Grey. You want a very saturated, dark value for the vacuum of space. -
Paint the abyss:
Using your largest brush, paint the background around Jupiter. Work efficiently to keep a wet edge, ensuring a smooth, flat wash without streak marks. -
Create the nebula wisps:
While the background is still slightly damp but not soaking, lift out a diagonal streak of color using a clean, damp brush. Then, drop in a watery mix of diluted white gouache or a lighter blue-grey to create a faint, milky way effect. -
Add the stars:
Once the background is completely bone-dry, load a small brush with thick white gouache. Tap the handle against another brush to spatter tiny stars across the dark areas. Paint a few larger specific stars with a fine tip.
Clean Edges
Can’t paint a perfect circle? Cut a circular hole in a piece of scrap paper and use it as a stencil to protect the background while you paint the planet’s edges.
Step 2: Painting Jupiter
-
Remove masking:
If you used masking fluid, gently rub it away with your finger or an eraser once the background is fully dry to reveal the pristine white circle. -
Lay the base tone:
Wet the entire circle with clean water. Drop in very faint horizontal bands of pale Yellow Ochre and diluted Burnt Sienna. Let these colors bleed softly into each other. -
Build the bands:
While the paper is still damp, charge your brush with a stronger mix of Burnt Sienna and Burnt Umber. Paint distinct horizontal stripes, following the curvature of the planet. -
Create texture:
I like to use a ‘thirsty’ clean brush to lift paint back out in certain spots, creating lighter clouds and swirling eddies within the darker bands. -
The Great Red Spot:
Identify the location for Jupiter’s famous storm. Paint an oval shape using a reddish-brown mix, softening the edges so it integrates with the surrounding bands rather than looking like a sticker. -
Deepen the shadows:
Once the initial layers are dry, glaze a transparent shadow on the right side of the planet (or whichever side is away from your light source) using a watery grey or purple mix to give the sphere 3D form. -
Add fine details:
Switch to your smallest brush (size 0 or 2). With a fairly dry mix of Burnt Umber, add thin, squiggly lines to define the turbulent borders between the atmospheric bands. -
Final highlights:
Use a touch of white gouache to bring back the brightest highlights on the lightest bands, emphasizing the spherical shape.
Cosmic Depth
For a richer black background, don’t use black paint straight from the tube. Mix Alizarin Crimson with Phthalo Green for a deep, complex chromatic black.
Peel off the tape carefully to reveal your crisp borders and admire your personal window into the solar system


Rusty Mars Texture Study
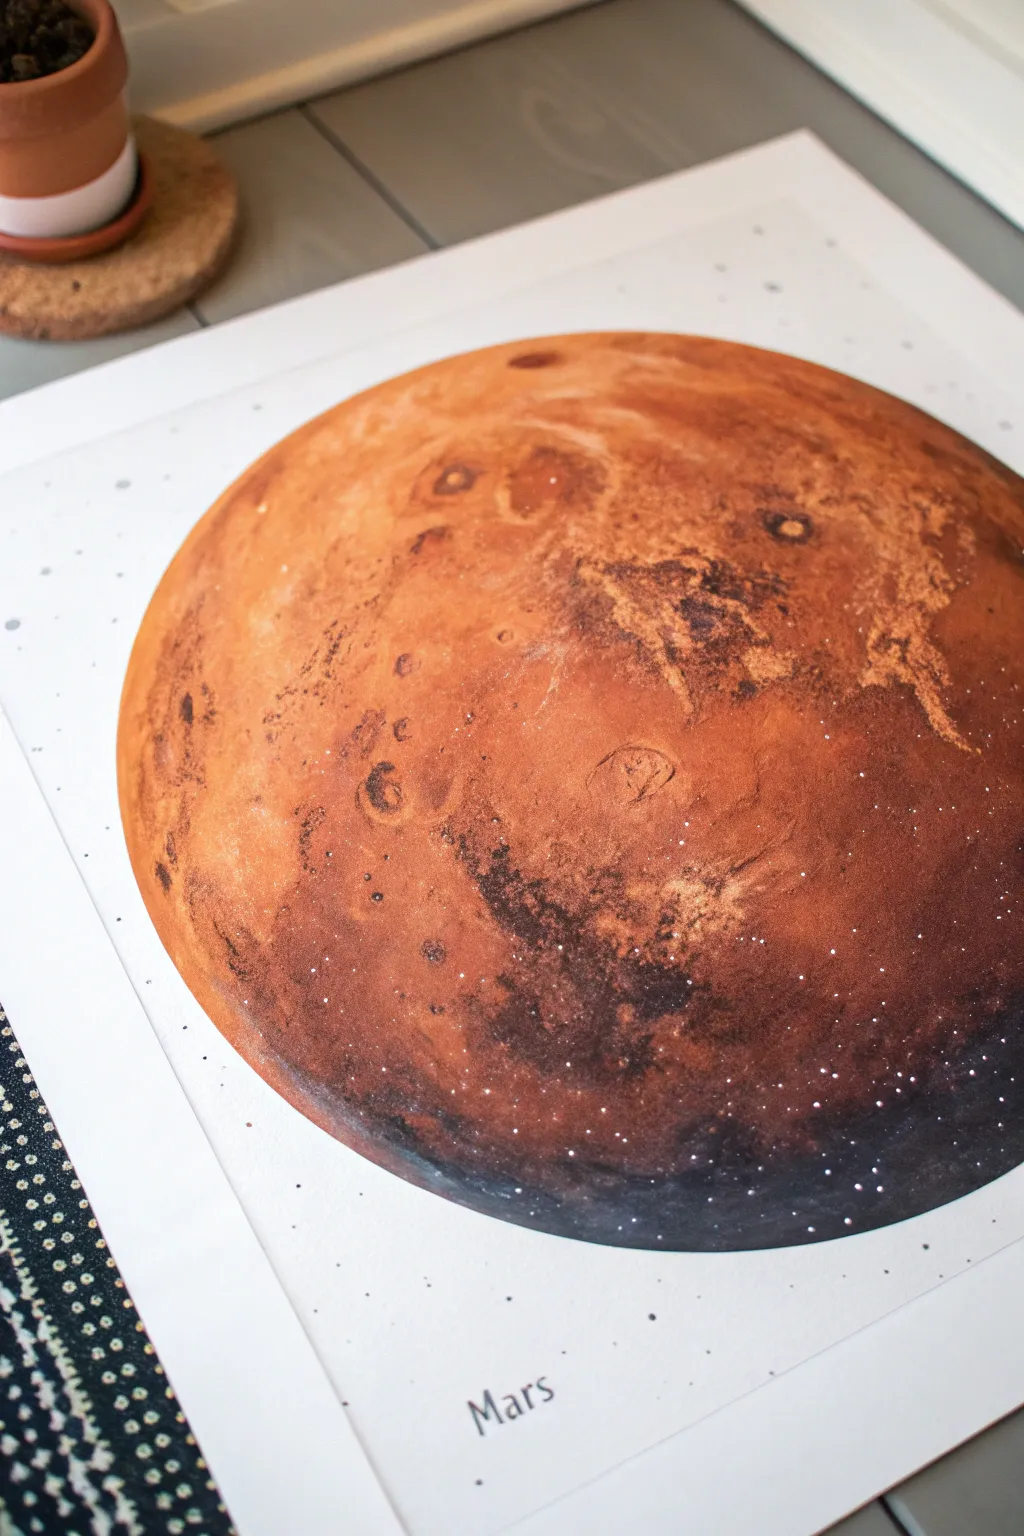
Capture the dusty, oxidized beauty of the Red Planet with this textured watercolor study. Using layers of burnt orange, sienna, and deep umber, you’ll build a rich, dimensional sphere that glows against a stark white background.
Step-by-Step Tutorial
Materials
- High-quality watercolor paper (cold press recommended for texture)
- Watercolor paints (Burnt Sienna, Red Ochre, Burnt Umber, Payne’s Grey, Mars Black)
- White gouache or white gel pen
- Round watercolor brushes (sizes 4, 8, and 12)
- Sea sponge or crumpled paper towel
- Pencil and large circular object (bowls work well) or compass
- Painter’s tape
- Jar of clean water
Step 1: Preparation and Base Layers
-
Outline the planet:
Begin by taping down your paper to prevent buckling. Place a large bowl or use a compass to lightly trace a perfect circle in the center of your page. Keep the pencil line faint so it vanishes under the paint later. -
Wet-on-wet wash:
Load your largest brush with clean water and wet the entire inside of the circle. You want the paper glistening but not swimming in a puddle. This primes the surface for soft blending. -
First color drop:
Mix a watery wash of Burnt Sienna and drop it onto the wet paper, focusing mainly on the upper left and center areas. Let the pigment bloom and spread naturally towards the edges. -
Introduce variation:
While the surface is still damp, dab in touches of Red Ochre or a brighter orange in random patches to create underlying warmth. Leave the bottom right curve slightly lighter for now.
Salt the Earth
While the base orange wash is still wet, sprinkle a pinch of table salt onto the paint. Brush it off once dry to create amazing, natural geological textures.
Step 2: Building Texture and Shadows
-
Create the crater texture:
As the shine begins to leave the paper but it’s still cool to the touch, use a natural sea sponge or a crumpled paper towel to dab at the paint. This lifts some pigment and creates that pitted, rocky surface look essential for Mars. -
Deepen the shadows:
Mix a stronger concentration of Burnt Umber with a touch of Burnt Sienna. Apply this to the bottom right crescent of the sphere to start establishing the planet’s dark side. -
Blend the transition:
Clean your brush, damp wipe it, and gently soften the edge where the dark shadow meets the lighter orange surface. We want a curved, gradual transition rather than a hard line. -
Add surface details:
Using a smaller size 4 brush and a fairly dry mix of Burnt Umber, paint irregular shapes, spots, and squiggle lines to represent canyons and major craters. I find irregular, shaky hand movements work best here for realism. -
Enhance the darkness:
Mix Payne’s Grey with Mars Black for your deepest shadow tone. Paint this along the very bottom right edge of the sphere, blending it upward into the brown tones to create a dramatic 3D effect.
Step 3: Finishing Details
-
Dry lifting for highlights:
If some areas look too flat, take a clean, stiff damp brush and gently scrub small circles to lift paint back to the white paper. This creates the illusion of raised crater rims catching the light. -
Splatter texture:
Cover the surrounding white paper with scrap paper. Load a stiff brush with dark brown paint and flick the bristles to create tiny speckles across the planet’s surface for added grit. -
Let it dry completely:
Patience is key here. Let the painting dry fully before moving on to the stars, otherwise, the white gouache will turn pink. -
Create the starfield:
Using opaque white gouache or a gel pen, dot tiny stars across the dark shadowed crescent of the planet. Then, continue adding stars outside the planet’s boundary onto the white paper for a stylized effect. -
Vary star sizes:
Make sure some stars are tiny pinpricks and others are slightly larger dots to create depth. You can concentrate a few more near the dark edge of the planet. -
Add the label:
Using a fine liner pen or a small brush with black paint, carefully write ‘Mars’ centered below the planet. A serif font gives it a classic, scientific diagram feel.
Cosmic Glow
Mix a tiny amount of iridescent bronze or copper medium into your orange paint. The planet will shimmer subtly when viewing the artwork from different angles.
Frame your planetary study in a simple wooden frame to complement those warm, earthy tones
BRUSH GUIDE
The Right Brush for Every Stroke
From clean lines to bold texture — master brush choice, stroke control, and essential techniques.
Explore the Full Guide
Venus in Misty Atmosphere
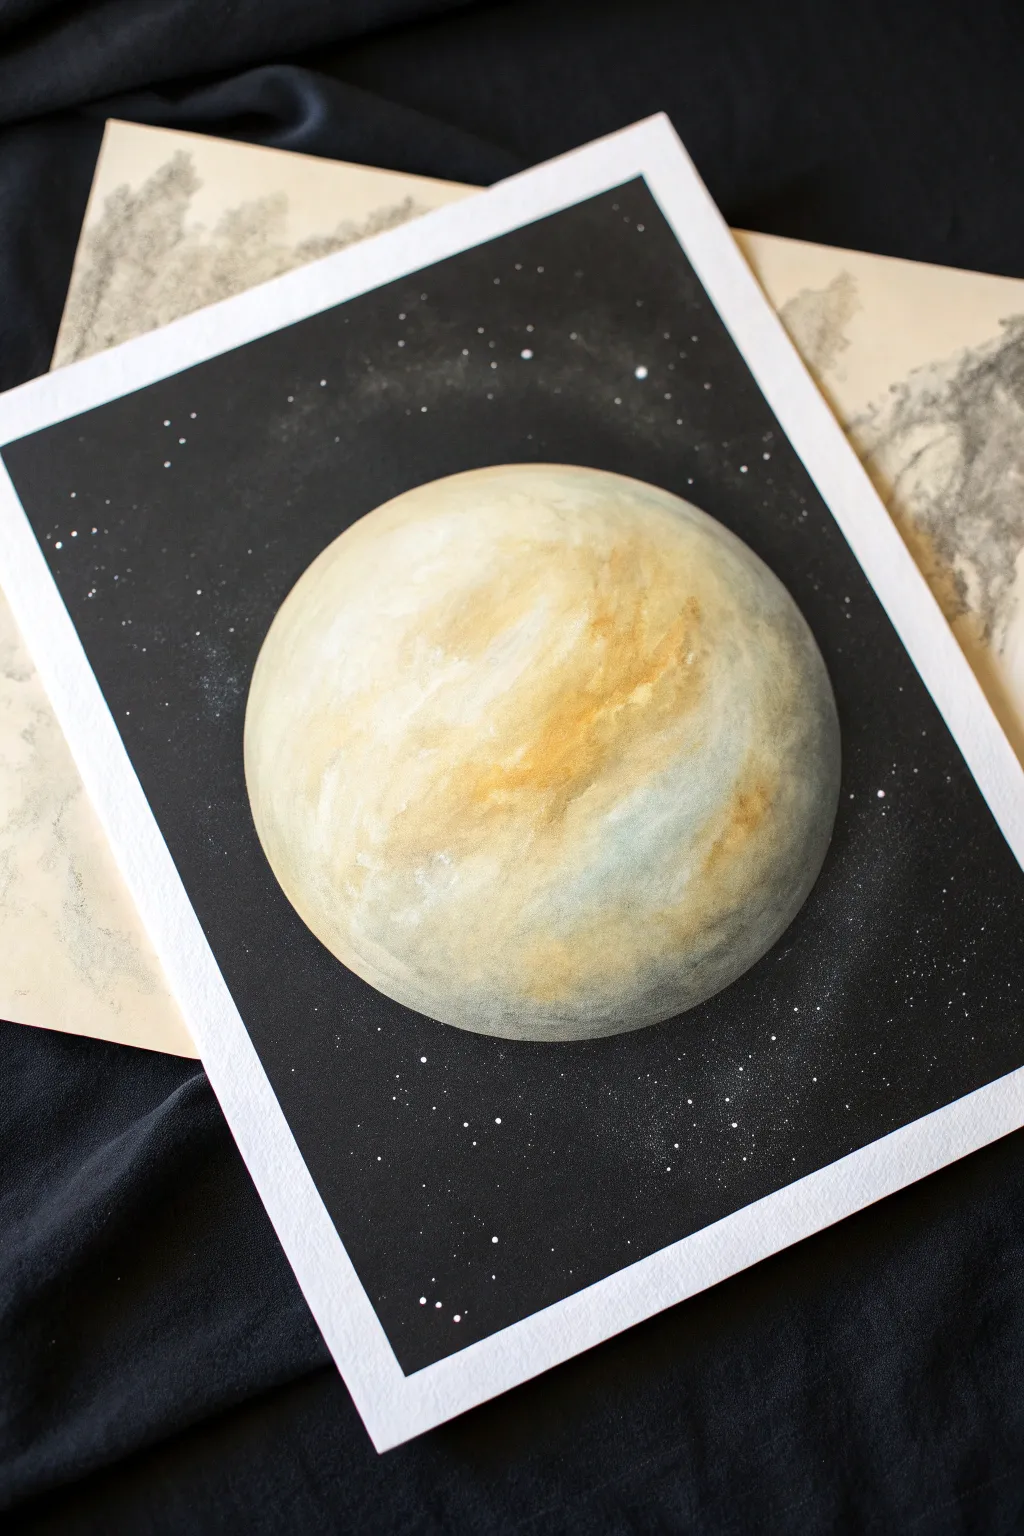
Capture the ethereal beauty of the hottest planet in our solar system with this mixed-media project. By layering soft watercolor washes with opaque gouache, you’ll create a glowing, spherical effect set against the stark backdrop of infinite space.
Detailed Instructions
Materials
- Heavyweight watercolor paper (300gsm, cold press)
- Painter’s tape or masking tape
- Compass or circular template (bowl or lid)
- Watercolors (Yellow Ochre, Burnt Sienna, Payne’s Grey, Alizarin Crimson)
- White Gouache or opaque white watercolor
- Soft round brushes (sizes 4, 8, and 12)
- Black ink or black acrylic paint for the background
- Old toothbrush or stiff fan brush
- Palette for mixing
- Paper towels
Step 1: Preparation and Base Layer
-
Secure the paper:
Tape your watercolor paper down to a board or table on all four sides. This ensures a clean white border when you’re finished and prevents the paper from buckling during the heavy washes. -
Outline the planet:
Using a compass or a circular object like a bowl, lightly trace a large circle in the center of your page with a pencil. Keep the line extremely faint so it won’t show through the pale paint later. -
Mask the planet:
You need to protect the planet area while painting the background. Carefully apply masking fluid inside the circle, or cut a piece of masking tape/paper to the exact size of your circle and stick it down gently. -
Paint the void:
Using black ink or heavy black acrylic, paint the entire area outside the circle. Ensure you get solid, opaque coverage, right up to the masked edge. -
Create the stars:
While the background is totally dry, mix a little water into your white gouache. Dip an old toothbrush into it and flick the bristles with your thumb to spray tiny stars across the black space. Let this dry completely before removing the mask.
Bleeding Edges?
If black paint bled into your planet circle, don’t panic. Use opaque white gouache to paint over the mistake, let it dry, and then paint your planet colors on top.
Step 2: Painting the Planet Surface
-
Wet-on-wet start:
Once the mask is removed and the black background is safe, wet the entire white circle with clean water using your largest brush. You want the paper glistening but not swimming in a puddle. -
First wash of color:
Drop in dilute washes of Yellow Ochre and a touch of very pale Burnt Sienna on the left side and center of the sphere. Let the colors bleed naturally into the wet paper. -
Adding shadow:
To create the 3D spherical effect, mix a watery grey using Payne’s Grey and a tiny bit of blue. Apply this crescent-shaped shadow along the bottom right curve of the planet while the paper is still damp to ensure soft edges. -
Building textures:
Wait for the shine to leave the paper (damp, not wet). Dab in stronger concentrations of Yellow Ochre and Burnt Sienna in cloud-like formations across the middle band of the planet. -
Creating atmospheric depth:
I like to lift a little color out near the top left edge using a clean, damp brush. This creates a highlight that enhances the roundness of the object. -
Second shadow layer:
Once the first shadow layer is semi-dry, deepen the bottom right edge with a slightly more saturated mix of grey and blue. This contrast makes the planet pop off the page.
Step 3: Atmosphere and Details
-
Adding the misty veil:
Venus is covered in thick clouds. Mix a semi-transparent white gouache. lightly glaze over the transitional areas between the yellow clouds and the grey shadow to soften the look. -
Highlighting:
Use thicker, more opaque white gouache to dry-brush gentle swirls near the brightest part of the planet (top left). Keep these strokes loose and organic. -
Refining the edge:
Check the perimeter of your circle. If paint bled or the edge is messy, carefully use a small brush with thick white gouache to tidy up the curve against the black background. -
Adding texture variance:
Mix a small amount of Alizarin Crimson with your ochre to create a warm, rusty tone. Add tiny, faint touches of this into the darkest yellow distinct bands for visual interest. -
Final shadow glaze:
To truly push the sphere shape, apply one last very sheer glaze of cool blue-grey over the entire shadow side (bottom right) once the previous layers are bone dry. -
Re-establishing stars:
If your planet painting accidentally covered any nearby stars, use a tiny brush to dot a few fresh white stars right near the planet’s edge for depth. -
The reveal:
Ensure the artwork is 100% dry. Slowly peel away the painter’s tape at a 45-degree angle away from the artwork to reveal your crisp, clean white border.
Pro Tip: Soft Transitions
To get that ‘misty’ atmosphere, avoid hard lines inside the planet. If a paint edge looks too sharp, run a damp, clean brush along it to blur it while it’s still wet.
Now you have a stunning, celestial portrait ready to adhere to a notebook or frame.
Cratered Mercury Close-Up
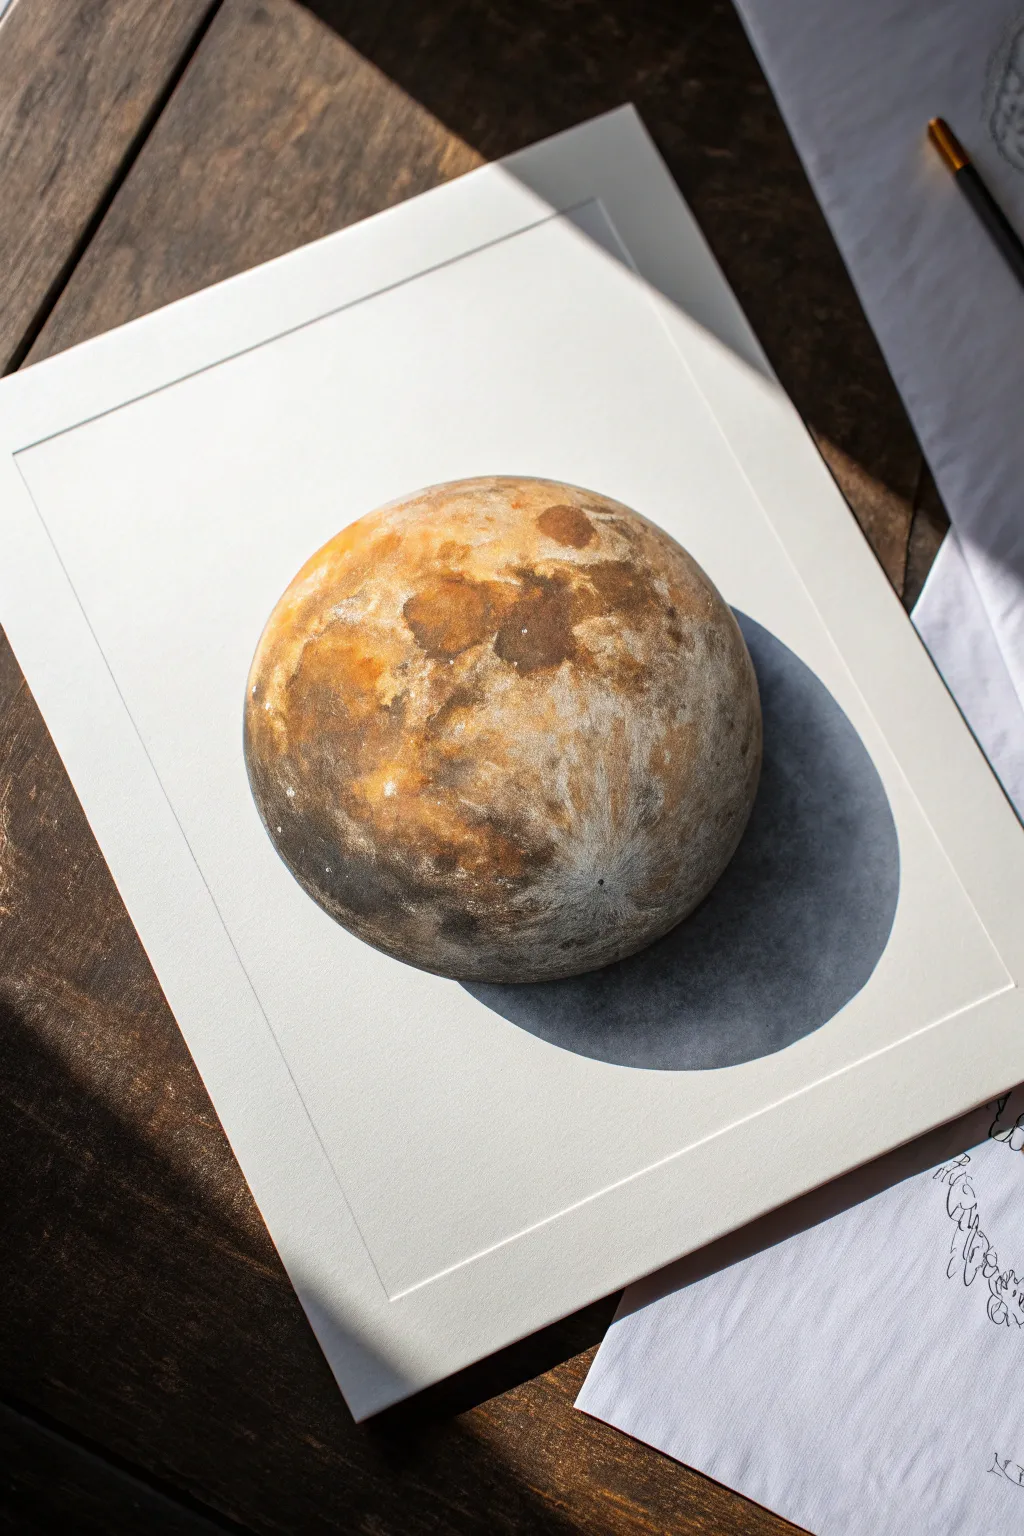
Capture the cratered beauty of a rocky planet with this realistic illustration that seems to pop right off the paper. Using watercolor or gouache with careful shading, you will create a stunning 3D sphere complete with a convincing drop shadow.
Step-by-Step
Materials
- Heavyweight watercolor paper or illustration board
- Compass or circular object (for tracing)
- Pencil (HB or 2B)
- Kneaded eraser
- Gouache or opaque watercolor paints (Burnt Sienna, Yellow Ochre, Burnt Umber, Payne’s Grey, Titanium White)
- Round soft bristle brushes (Sizes 2, 4, and 8)
- Mixing palette
- Ruler
Step 1: Preparation and Base Layer
-
Define the boundary:
Begin by drawing a faint rectangle on your illustration board to create a framed border, leaving about an inch of white space around the edges. -
Draw the sphere:
Use a compass or trace a bowl to draw a perfect circle in the center of your framed area. Press lightly so the graphite doesn’t show through later. -
Mix the base tone:
On your palette, mix a warm, mid-tone beige using Titanium White, a touch of Yellow Ochre, and a tiny bit of Burnt Sienna. It should be opaque and creamy. -
Apply the wash:
Using your largest brush, fill in the entire circle with this base color. Work relatively quickly to ensure an even coat without streaky edges. -
Dry completely:
Let this base layer dry fully before adding any texture. Gouache reactivates with water, so a dry foundation is crucial.
Shadow Realism Tip
Make the cast shadow slightly cool (bluish) to contrast with the warm orange tones of the planet. This color theory trick increases visual depth.
Step 2: Building Texture and Craters
-
Map the darks:
Mix a darker, muddy brown using Burnt Umber and a touch of Payne’s Grey. With a size 4 brush, lightly sponge or dab irregular patches onto the sphere to represent large crater basins, keeping them mostly to the left and top areas. -
Add warm highlights:
Clean your brush and mix a vibrant golden orange using Yellow Ochre and Burnt Sienna. Dab this into the lighter areas of your planet to create variation in the terrain. -
Soften the transitions:
With a slightly damp, clean brush, gently blur the edges where the dark browns meet the lighter base tone. This creates a weathered, atmospheric look rather than sharp cartoonish lines. -
Create the terminator:
Mix a dark, cool grey shadow tone. Paint a crescent shape along the bottom right edge of the sphere to establish the main form shadow, blending it smoothly inward toward the center. -
Detailing craters:
Switch to your smallest brush (size 2). Use pure White mixed with a pinch of the base tone to paint tiny dots and small rings. Place these strategically near the dark patches to look like crater rims catching the light. -
Refine the surface:
Add very thinned-down white lines radiating from a few impact points to simulate ‘ejecta rays’—the debris thrown out during asteroid impacts.
Level Up: Embossing
Before painting, carefully press a spoon into the paper where the planet will be. This physical indentation adds literal depth to your trompe l’oeil.
Step 3: The 3D Illusion
-
Draft the cast shadow:
Visualize the light coming from the top left. Lightly sketch a long, oval shadow stretching out to the bottom right of the sphere. -
Paint the deep shadow:
Mix a strong dark grey using Payne’s Grey and a little Burnt Umber. Paint the area of the shadow directly touching the planet; this needs to be the darkest point to anchor the object. -
Fade the shadow out:
As you move the shadow further away from the planet, dilute your paint with water. The shadow should become lighter and the edges softer the further it gets from the sphere. -
The curved shadow edge:
Ensure the shadow on the paper follows a precise curve that mimics the sphere’s edge. This specific curve is what sells the illusion that the ball is sitting *on top* of the paper. -
Clean up:
Use your white paint or an opaque white pen to tidy up the perfect circular edge of the planet if any paint went outside the lines. -
Final assessment:
Step back and check the contrast. I like to add one final highlight of pure white on the top left curvature to maximize the 3D shiny effect.
Display your artwork on a flat surface to fully appreciate the optical illusion you have created

PENCIL GUIDE
Understanding Pencil Grades from H to B
From first sketch to finished drawing — learn pencil grades, line control, and shading techniques.
Explore the Full Guide
Neptune Blues With a Dark Storm
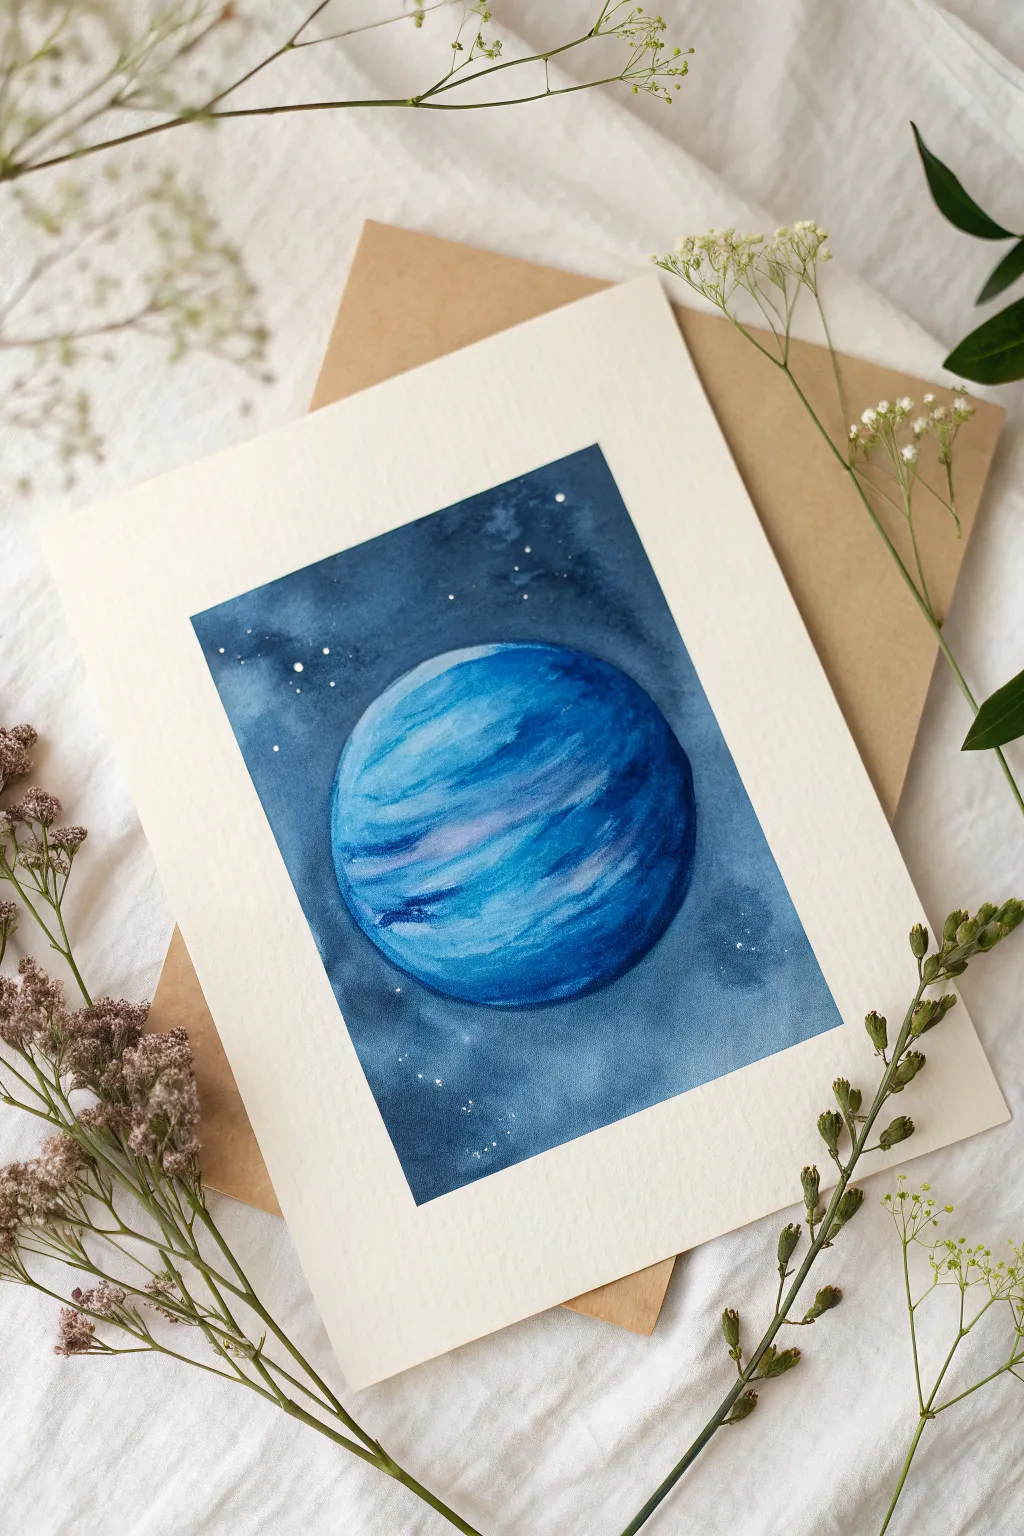
Capture the mystic beauty of the ice giant with this atmospheric watercolor tutorial. Using moody blues and wet-on-wet techniques, you will create a swirling planet set against a deep cosmic void.
Step-by-Step Tutorial
Materials
- Cold press watercolor paper (300 gsm)
- Watercolor paints (Prussian Blue, Ultramarine, Indigo, Purple, Black)
- White gouache or white gel pen
- Round watercolor brushes (Size 4, Size 8, Size 0 for details)
- Masking fluid (optional)
- Compass or circular object for tracing
- Pencil and eraser
- Painter’s tape
- Two jars of water
- Paper towels
Step 1: Preparation & Mapping
-
Secure the paper:
Tape down all four edges of your watercolor paper to a board or table to prevent buckling when we apply heavy washes later. -
Trace the planet:
Using a compass or a small bowl, lightly trace a perfect circle in the center of your paper. Keep the pencil lines faint so they don’t show through the transparency of the paint.
Pro Tip: The Glow
For a magical halo, lift pigment right at the edge of the background wash using a clean, damp brush before the dark paint dries completely.
Step 2: Painting the Planet
-
Wet the circle:
With clean water and your size 8 brush, wet the entire inside of the circle. You want a consistent sheen, not a puddle. -
Base layer of blue:
Drop in a light wash of Ultramarine Blue, letting the water carry the pigment to the edges. Leave a few random areas slightly lighter to suggest atmospheric depth. -
Adding the bands:
While the surface is still damp, mix a stronger concentration of Prussian Blue. Use horizontal, sweeping strokes to create the characteristic wind bands of Neptune, letting them bleed softly into the base layer. -
Deepening the shadows:
Mix Indigo with a touch of Purple. Apply this dark mixture to the bottom right curve of the sphere to create a shadow side, giving the planet three-dimensional form. -
Lifting highlights:
Rinse your brush and dry it on a paper towel. Gently lift distinct streaks of paint across the upper left section to create lighter, icy bands. -
The Great Dark Spot:
Neptune is famous for its storms. While damp (but not soaking), drop a concentrated spot of Indigo into the middle-left area to create a dark storm vortex. -
Dry completely:
This is crucial. Let the planet layer dry entirely before moving on to the background, or the colors will bleed out.
Troubleshooting: Cauliflowers
If jagged edges appear in your smooth wash, you likely added water to paint that was already drying. Wait for it to dry fully, then glaze over to fix.
Step 3: The Cosmic Background
-
Wet the background:
Carefully wet the paper around the outside of the planet circle with clean water avoiding the painted planet edge. -
Dark wash application:
Load your largest brush with a heavy mixture of Indigo and Black. Start panting from the corners inwards, creating a deep, opaque void. -
Creating the glow:
As you approach the edge of the planet, switch to a slightly more watered-down Prussian Blue. This creates a subtle glowing halo effect around the planet rather than a hard black outline. -
Blending the void:
Work quickly to ensure the transition from the deep black corners to the blue halo is smooth and misty. -
Adding texture:
While the background is still wet, drop in tiny touches of clear water or salt grains in the corners to create interesting blooms that look like distant nebulae. -
Second drying phase:
Allow the background to dry completely. The paper should be flat and warm to the touch.
Step 4: Final Details
-
Star splatter:
Cover your painted planet with a scrap piece of paper to protect it. Loading a brush with white gouache, tap the handle against another brush to splatter tiny stars across the dark background. -
Specific stars:
Use a white gel pen or a size 0 brush with gouache to place specific, brighter stars. I like to group a few near the dark storm spot for balance. -
Cloud accents:
Add thin, crisp white lines over the planet’s surface with gouache to represent high-altitude methane ice clouds, softening them slightly with a damp brush. -
Remove tape:
Once absolutely dry, peel the painter’s tape away slowly at a 45-degree angle to reveal the crisp white border.
Frame your cosmic masterpiece in a simple mount or use it as a stunning handmade card for a space lover
Uranus Tilt and Thin Rings
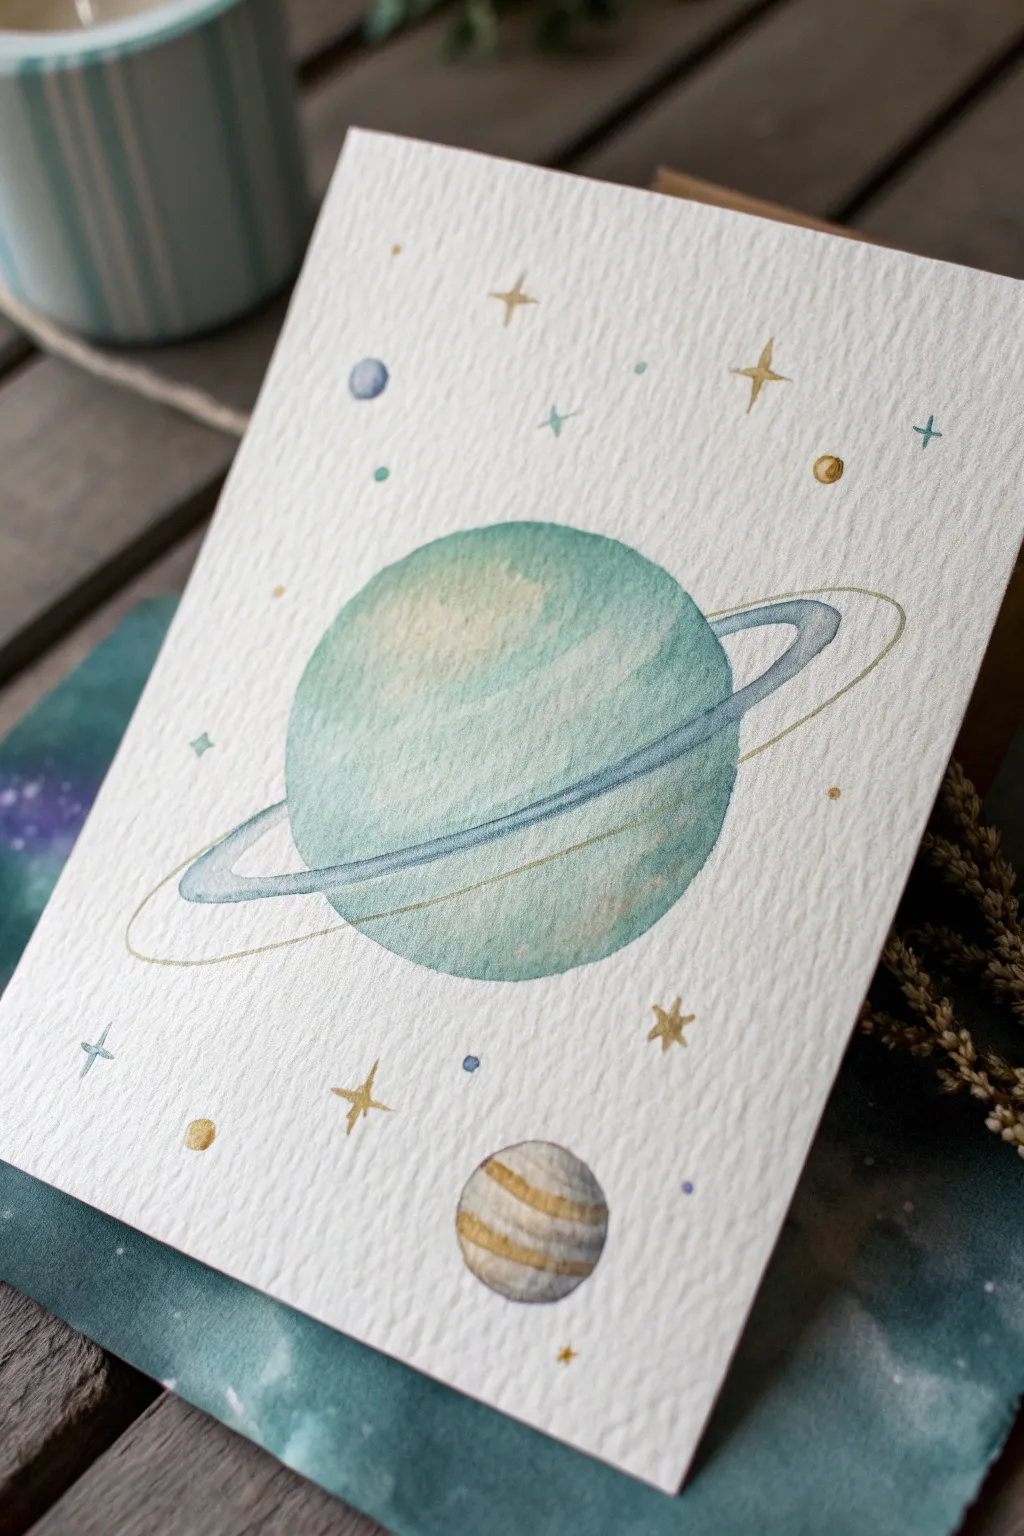
Capture the magic of space with this soft, textured watercolor painting of Uranus, featuring its signature tilt and delicate rings. The finished piece has a lovely illustrative quality, perfect for a greeting card or nursery wall art.
Step-by-Step
Materials
- Cold press watercolor paper (300gsm/140lb)
- Watercolor paints (teal, turquoise, indigo, yellow ochre, light grey)
- Round watercolor brushes (size 6 for washes, size 2 for details)
- White gel pen or gouache (optional)
- Jar of clean water
- Paper towel
- Pencil (HB or H)
- Eraser
- Compass or circular object for tracing
Step 1: Sketching the Composition
-
Light circle:
Start by drawing a large circle in the center of your paper. Keep your pencil pressure very light so the graphite doesn’t show through the translucent watercolor later. -
Drafting the rings:
Draw an elongated oval shape that cuts across the sphere. Tilt it significantly to represent Uranus’s unique rotation. The oval should extend past the planet on both sides. -
Adding ring details:
Draw a smaller oval inside the first one to create the width of the ring. Erase the parts of the ring that are ‘behind’ the planet to establish depth. -
Space elements:
Sketch a smaller circle below the main planet for a moon or smaller planet. Scatter tiny stars, plus signs, and dots randomly around the empty space to fill the background.
Make it Sparkle
Mix a tiny amount of metallic watercolor or iridescent medium into your paint for the rings. It adds a magical shimmer visible when the paper catches the light.
Step 2: Painting the Main Planet
-
Wet-on-wet base:
Wet the inside of the large circle with clean water using your size 6 brush. You want the paper damp and glistening, but not forming a puddle. -
Dropping in color:
Load your brush with a watery mix of teal or light turquoise. Touch the wet paper and let the color bloom naturally across the surface. -
Creating dimension:
While the first layer is still wet, drop a slightly more concentrated teal along one side of the sphere to create a shadow. This gives the planet a 3D rounded look. -
Lifting highlights:
Rinse your brush and dry it on a paper towel. Use the damp brush to ‘lift’ some paint from the upper left area, creating a soft highlight. -
Drying time:
Let this layer dry completely. If the paper is cool to the touch, it’s still wet.
Step 3: Painting Rings and Details
-
The main ring:
Use your smaller size 2 brush and a pale grey-blue mix to carefully paint the visible ring sections. Keep the paint transparent so it looks delicate. -
Secondary ring line:
For the subtle outer ring line shown in the reference, use a very diluted yellow ochre or gold paint. Draw a thin, devastatingly steady line parallel to your blue ring. -
Planet texture:
Once the main planet is fully dry, mix a slightly darker teal. Paint curved, horizontal bands across the planet’s surface to mimic cloud layers, softening the edges with a clean, damp brush. -
The small moon:
Paint the smaller sphere at the bottom with alternating stripes of light grey and yellow ochre. Let the colors bleed slightly for a soft transition, but keep the stripes distinct.
Level Up: Card Design
Cut your paper to 5×7 inches before painting. Once finished, mount it onto a blank folded card for a beautiful, hand-painted birthday greeting.
Step 4: Starry Background
-
Gold stars:
Mix a warm yellow ochre or metallic gold watercolor. Paint the four-pointed stars and small circles you sketched earlier. -
Blue stars:
Switch to a light blue to paint the tiny cross-shaped stars. Varying the colors of your ‘stars’ adds nice visual interest to the composition. -
Tiny dots:
Use the tip of your smallest brush to add tiny dots of blue and gold in the empty spaces. These distant stars help the composition feel full without being cluttered. -
Final check:
Step back and assess your work. If any pencil lines are still visible and distracting, gently erase them, but only after ensuring the paint is bone dry.
Your celestial painting is now ready to be framed or gifted to a space lover


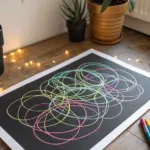
Depth Trick With Tiny and Giant Planets
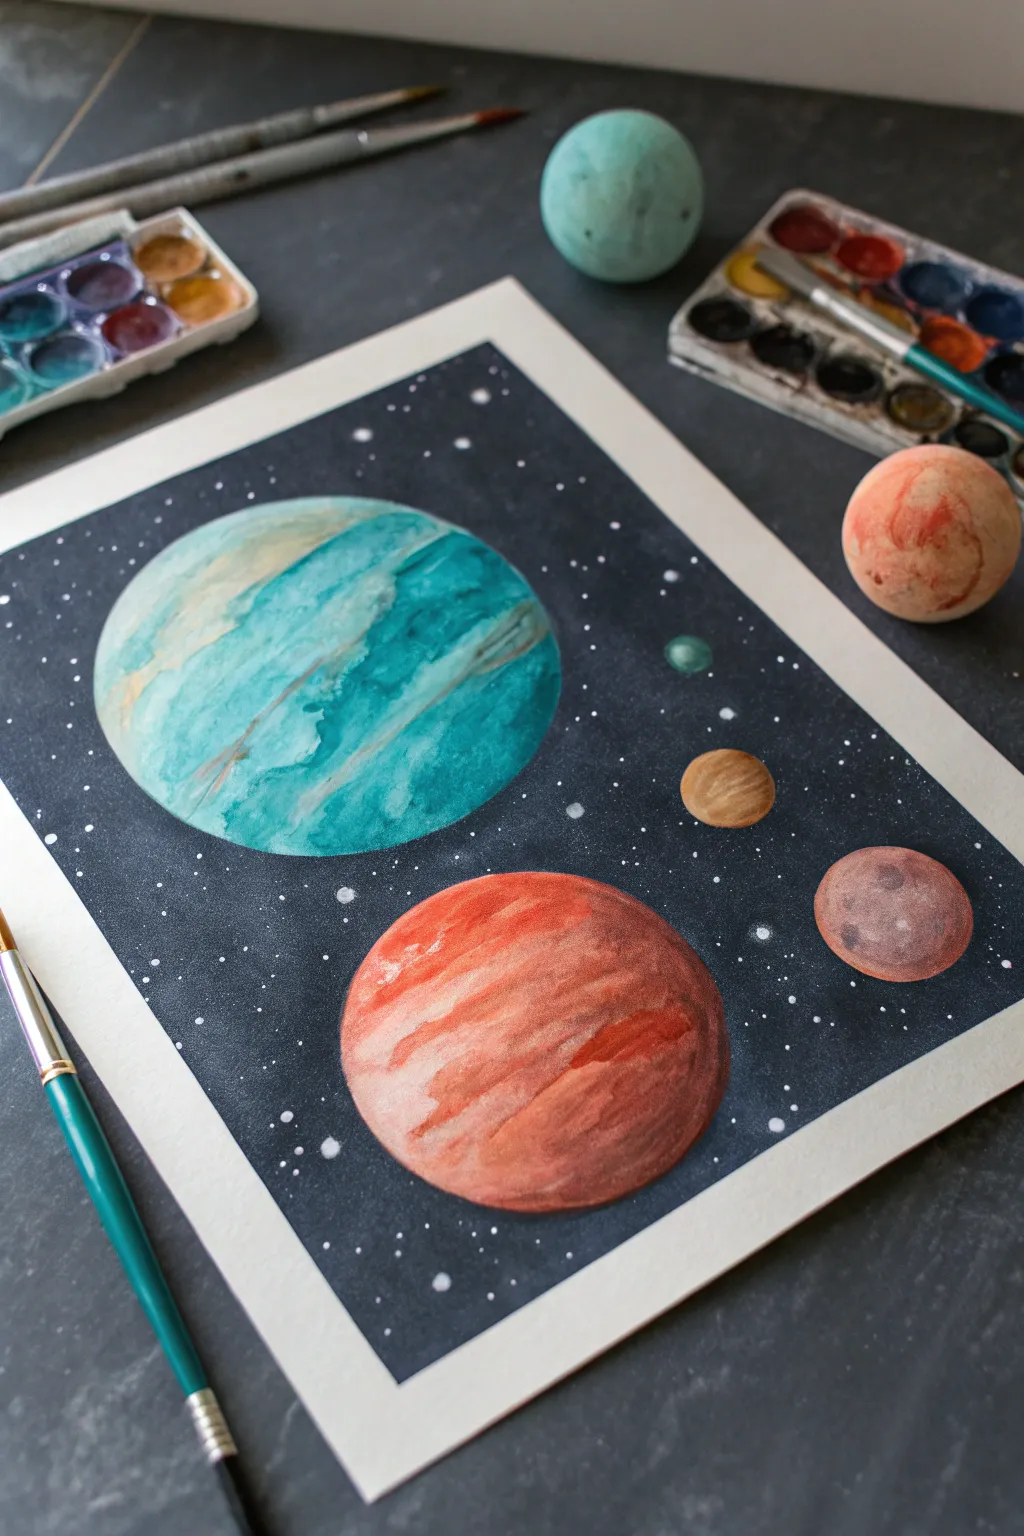
Create a sense of vast space by playing with scale in this watercolor project, featuring two dominant planets and their distant companions. The striking contrast between the vibrant, textured planets and the deep, dark void of space makes for a captivating composition.
Step-by-Step Tutorial
Materials
- Watercolor paper (cold press, at least 140lb)
- Watercolor paints (teal, indigo, burnt sienna, rust orange, yellow ochre)
- Black ink or highly concentrated Payne’s Gray watercolor
- Compass or various round objects to trace (cups, lids)
- Graphite pencil (HB or 2H)
- Masking fluid (optional but recommended)
- Round brushes (sizes 2, 6, and 10)
- White gel pen or white gouache
- Tissues or paper towel
- Clean water
Step 1: Planning the Cosmos
-
Trace your orbits:
Begin by arranging your circular templates on the paper. Place one large circle (about 3-4 inches) in the upper-left quadrant and another similarly sized one in the lower-center. Add two or three tiny circles (dime or nickel-sized) scattered in the remaining space. -
Lightly sketch:
Using a light hand, trace these circles with your pencil. Keep the lines faint so they don’t show through the lighter watercolor layers later. -
Protect the planets:
If you have masking fluid, carefully fill in all the circular planet shapes. This essential step allows you to paint the dark background freely without worrying about ruining your perfect spheres. If you lack masking fluid, you will need to paint very carefully around the circles in the next phase.
Uneven Background?
If your black background looks patchy after drying, don’t panic. Apply a second coat of the dark wash. It often takes two layers to get that deep, infinite space look.
Step 2: The Void of Space
-
Prepare the dark wash:
Mix a large amount of your darkest color. I prefer using a deep indigo mixed with black ink to get that velvety space look, but intense black watercolor works too. -
Apply the background:
Using your largest brush, paint the entire area outside the planets. Work quickly to keep a wet edge, ensuring a smooth, flat finish without streaky drying lines. -
Let it dry completely:
Allow the background to dry fully. If the paper feels cool to the touch, it’s still damp. If you used masking fluid, gently rub it away with your finger or an eraser once the paint is bone dry to reveal pristine white circles.
Salt Texture Trick
While the planet paint is still wet, sprinkle a tiny pinch of table salt on the shadow side. Brush it off when dry for an amazing, crater-like texture.
Step 3: The Teal Giant
-
Base wash:
Wet the upper-left large circle with clean water. Drop in a pale wash of teal mixed with a touch of yellow ochre on the left side to establish a light source. -
Adding atmosphere:
While the paper is still wet, charge your brush with a more concentrated teal and drop it onto the right side of the planet, letting it bleed toward the center. -
Creating texture:
Use a dry, crumpled tissue to dab certain wet areas gently. This lifts the pigment and creates cloud-like atmospheric bands across the surface. -
Deepening the shadow:
Mix a little indigo into your teal. Paint a crescent shape along the bottom-right edge of the sphere to give it 3D form and shadow.
Step 4: The Red Giant
-
Warm underpainting:
Move to the lower large planet. Wet the surface and apply a wash of yellow ochre and pale burnt sienna, keeping the upper-left area lighter. -
Layering bands:
Using a size 6 brush, paint horizontal, slightly curved bands of rust orange and red across the planet. Leave gaps between the strokes to let the lighter underpainting shine through. -
Softening edges:
Rinse your brush and use it damp (not dripping) to soften the hard edges of your red bands, blending them slightly into the background color. -
Shadow definition:
Add a mix of burnt sienna and a tiny touch of black to the bottom right curve, intensifying the shadow to match the lighting direction of the teal planet.
Step 5: Distant Moons & Stars
-
Tiny worlds:
Paint the small floating circles. Treat them like mini-planets: paint one half lighter (facing the light source) and the other half darker. -
Splatter stars:
Cover your painted planets with scrap paper to protect them. Load a brush with white gouache or diluted white acrylic, and tap the handle against another brush to splatter tiny stars across the black background. -
Star placement:
Use a white gel pen to add specific, larger stars or clusters where the splatter didn’t reach, creating a balanced starfield.
Now step back and admire how the simple contrast of size creates a massive sense of scale in your galaxy painting
Planet Wrapped in Nebula Clouds
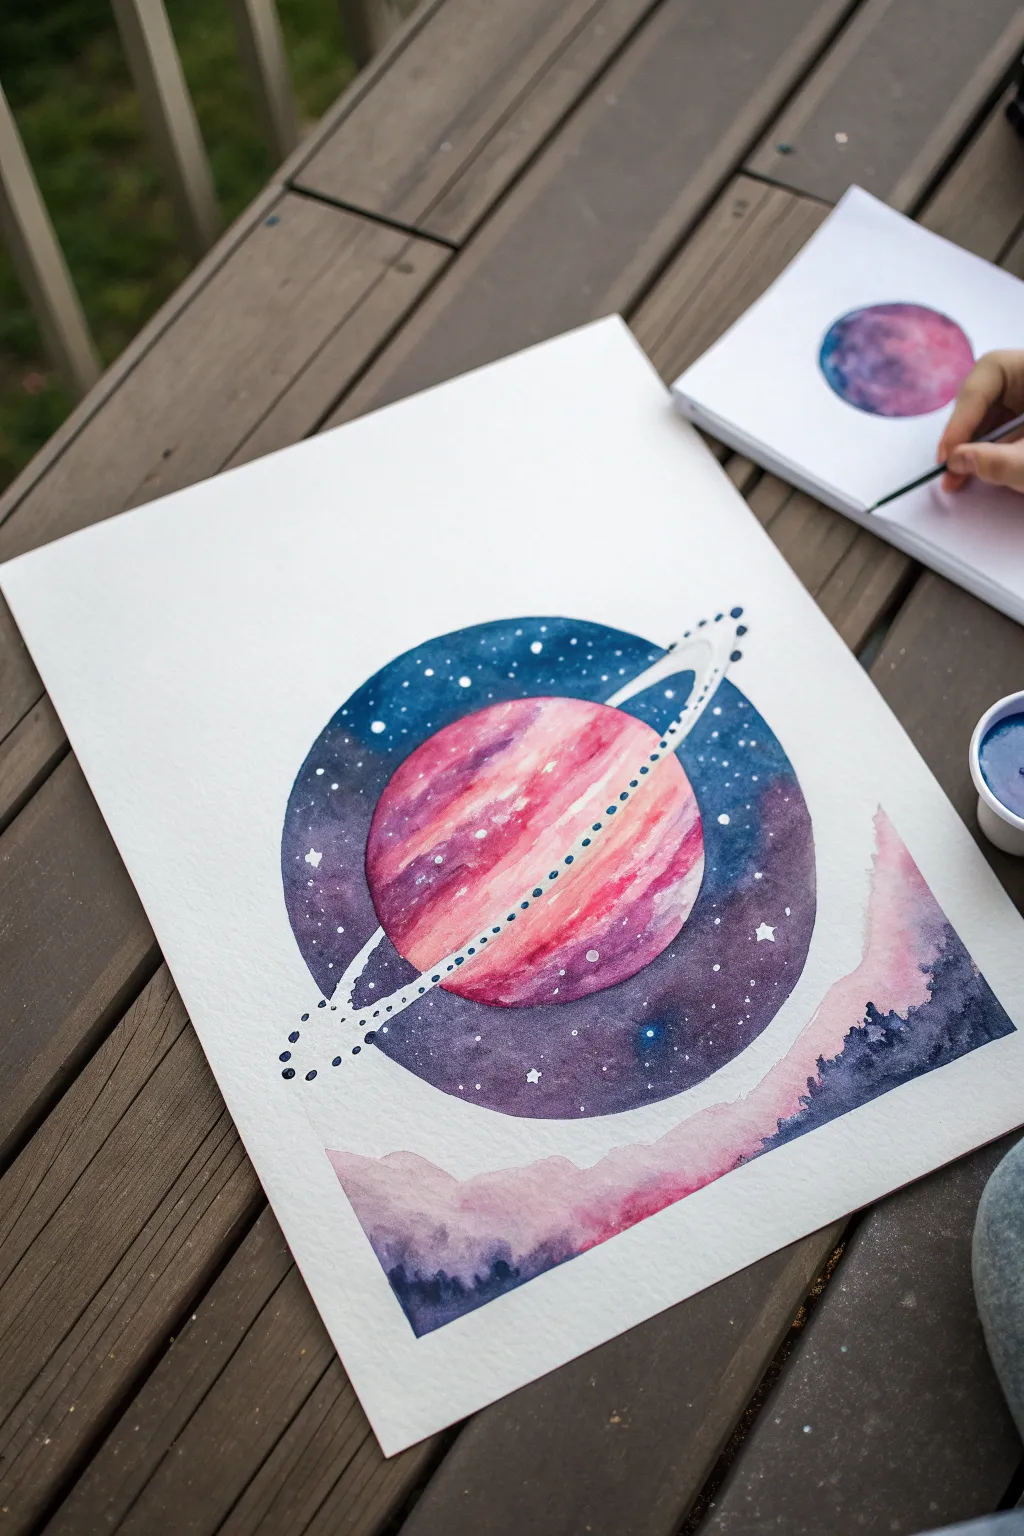
Capture the magic of a celestial body suspended in space with this vibrant watercolor project. This painting features a striking pink planet with a glittering ring, set against a deep cosmic background and rising above ethereal mountains.
Detailed Instructions
Materials
- Cold-press watercolor paper (at least 140lb/300gsm)
- Watercolor paints (indigo, violet, magenta, pink, black)
- White opacity medium (white gouache, thick white watercolor, or acrylic ink)
- Masking tape
- Round brushes (sizes 4, 8, and a tiny detail brush like 00)
- Pencil and compass (or circular object to trace)
- Two jars of water
- Paper towels
Step 1: Setting the Scene
-
Tape your edges:
Begin by taping down all four edges of your watercolor paper to a board or table to create a crisp border and prevent buckling. -
Establish the horizon:
Lightly sketch the outlines of your mountain range or nebula clouds at the bottom third of the paper. Keep the lines irregular and organic. -
Outline the planet:
Use a compass or trace a circular object (like a roll of tape or a jar lid) to draw a perfect circle in the center of the page. -
Sketch the ring:
Draw an elliptical ring around the planet. The ring should cut across the front of the planet and loop behind it.
Bleeding Colors?
If the dark space background bleeds into your planet, blot it immediately with a paper towel. Wait for it to dry, then re-apply opaque pink or white gouache to fix the edge.
Step 2: Painting the Planet
-
Wet-on-wet base:
Using clean water, wet the inside of your planet circle, being careful to stay within the lines. -
Apply planetary stripes:
While the paper is wet, stroke in curved bands of pink and magenta. Let the colors bleed slightly into each other to create a soft, gaseous look. -
Deepen the shadow:
While the paint is still damp, add a touch of violet or indigo to the bottom right curve of the planet to create a 3D spherical shadow. -
Let it dry completely:
Allow the planet section to dry fully before moving on. This is crucial to prevent the dark background from bleeding into your pink planet.
Step 3: Creating the Cosmos
-
Start the background:
Wet the area outside the planet circle (the space background). Work in sections if necessary to keep the paper manageable. -
Drop in deep colors:
Drop in heavy concentrations of indigo, violet, and black paint into the wet background. Aim for a deep, saturated look, getting darker near the edges of the planet to make it pop. -
Lift clouds:
While the background is wet, use a clean, thirsty brush or scrunched tissue to gently lift a little pigement in swirling shapes to suggest distant galaxy clouds. -
Add background stars:
Before the background dries completely, you can sprinkle a tiny bit of salt for texture, or wait until dry to spatter white paint for stars.
Pro Tip: Masking Fluid
For a super crisp ring, apply masking fluid over your ring sketch before painting. Rub it off at the end to reveal white paper, then add your dots on top.
Step 4: Mountainous Terrain
-
First mountain layer:
Paint the bottom landscape area with a wash of pale pink and violet. Let the top edge be jagged to resemble distant peaks. -
Add contrast:
While the wash is damp, drop darker purple or indigo into the lowest parts of the mountains to give them weight and shadow. -
Dry the landscape:
Wait for this section to dry completely before adding final details.
Step 5: Finishing Touches
-
Paint the ring:
Using opaque white gouache or ink on a fine detail brush, paint the ring by making a series of small, closely spaced dots along your pencil guideline. -
Enhance the sparkle:
Add larger white stars or distinct dots over the dried dark background using the tip of your smallest brush. -
Clean up borders:
Once everything is bone dry, carefully peel away the masking tape at a 45-degree angle to reveal your clean white edges.
Step back and admire your colorful window into a new watercolor galaxy
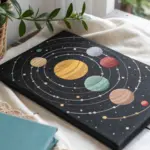
Dwarf Planet Mini Set
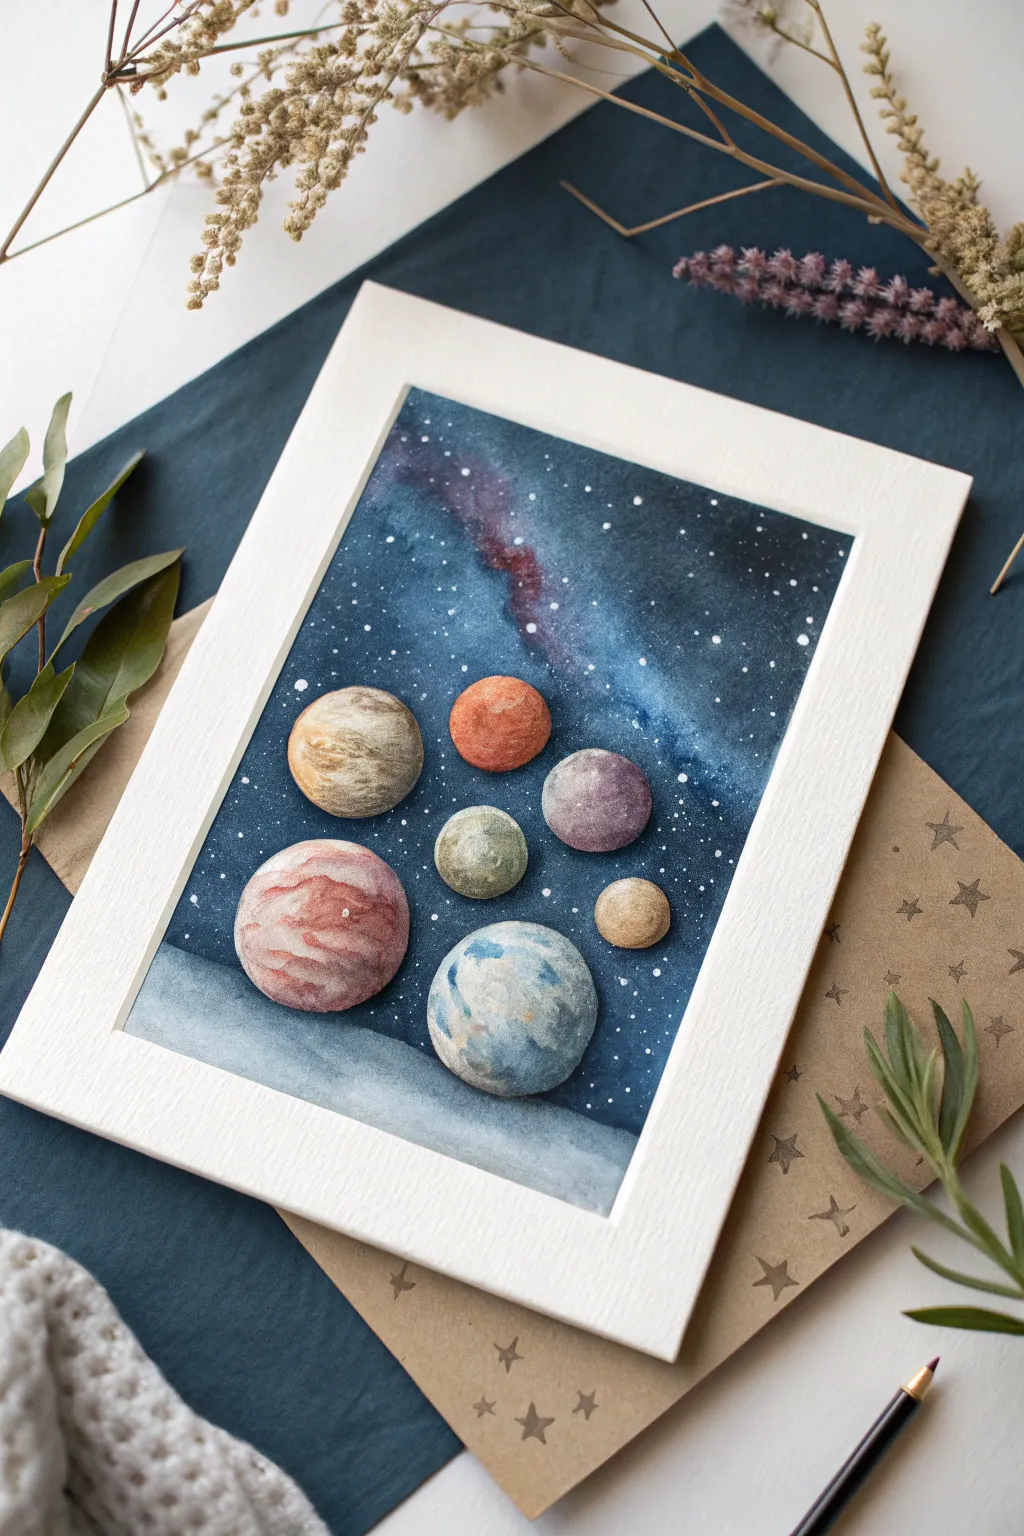
Capture the mysterious beauty of our solar system’s smaller inhabitants with this delicate watercolor arrangement. You will build a deep, cosmic background before bringing seven unique, textured celestial bodies to life in vibrant detail.
Step-by-Step Tutorial
Materials
- Cold press watercolor paper (300 gsm)
- Watercolor paints (Indigo, Prussian Blue, Milky White, Burnt Sienna, Yellow Ochre, Alizarin Crimson, Sepia)
- White gouache or white ink
- Flat wash brush (1 inch)
- Round brushes (sizes 2, 4, and 6)
- Pencil and circle template (or small round objects to trace)
- Artist tape
- Palette
- Two jars of water
- Paper towels
Step 1: Setting the Cosmic Stage
-
Secure your surface:
Begin by taping down all four edges of your watercolor paper to a board. This prevents warping when we apply heavy water washes later. -
Sketch the spheres:
Using a circle template or small caps, lightly trace seven circles in a scattered formation near the bottom two-thirds of the paper. Vary the sizes from dime-sized to quarter-sized to create depth. -
Protect the planets:
We need to keep the circles pristine white while painting the dark sky. Carefully paint masking fluid inside each circle, or simply be very mindful to paint around them with your dark wash. -
Prepare the background wash:
Mix a large puddle of Indigo and Prussian Blue. Wet the entire background area (avoiding the circles) with clean water until it glistens but isn’t dripping. -
Drop in the cosmos:
Load your flat brush with the dark blue mix and touch it to the wet paper. Let the color bloom and spread. Intentionally leave a diagonal swath slightly lighter to suggest a galactic band or nebula. -
Deepen the void:
While the paper is still damp, drop concentrated Indigo and tiny touches of Black or Sepia into the corners and edges to create a vignette effect. Let this background dry completely. -
Add the stars:
Once the blue is bone dry, load a stiff brush or toothbrush with white gouache. Flick the bristles to spray a fine mist of stars across the sky, concentrating some larger dots within the lighter diagonal band.
Pro Tip: Salt Textures
For realistic craters, drop a few grains of table salt onto the planets while the paint is still wet. Brush it off once dry for amazing texture.
Step 2: Painting the Dwarf Planets
-
The ruddy sphere:
Start with the mid-sized red planet. Wet the circle, then drop in Burnt Sienna and Alizarin Crimson. While wet, dab the color with a thirsty brush to create a mottled, cratered texture. -
The icy giant:
For the large blue-grey sphere at the bottom, mix a very diluted Indigo with a touch of Burnt Sienna. Paint varied horizontal bands, leaving some white paper showing for icy highlights. -
The striated traveler:
Move to the large striped sphere on the left. Paint curved bands using watery Alizarin Crimson and touches of Yellow Ochre, following the spherical curve to give it volume. -
The golden wanderer:
For the yellowish sphere above the striped one, use Yellow Ochre and Sepia. Apply the paint in a swirling motion, keeping the center slightly lighter to simulate a spherical highlight. -
The muted companions:
Paint the small green planet with a mix of Prussian Blue and Yellow Ochre (make it earthy). Paint the purple planet with Alizarin Crimson and Indigo. Keep these washes translucent. -
Create shadows:
Determine your light source (e.g., top right). Mix a transparent greyish-purple. Glaze a crescent shadow on the bottom-left edge of every single planet to make them look 3D and round. -
Add surface details:
Once the planets are dry, use your smallest size 2 brush to dry-brush texture. Add tiny stripes to the red planet and subtle craters to the golden and purple ones. -
Ground the scene:
Dilute your dark background mix significantly to create a pale grey wash. Paint a soft, undulating horizon line at the very bottom, beneath the lowest planets, to suggest an icy alien surface.
Step 3: Finishing Touches
-
Highlighting:
Use opaque white gouache to add a tiny, crisp reflection dot on the upper right side of each planet. This small step brings the spheres into focus. -
Final assessment:
Step back and look at your contrast. If the planets feel too flat, add another layer of shadow glaze to the dark side of the spheres. -
The reveal:
Carefully peel away your masking tape at a 45-degree angle to reveal the clean white border. Frame the piece with a wide white mat to emphasize the cosmic darkness.
Level Up: Metallic Shine
Mix metallic watercolor or gold ink into your highlight color. When the light hits your framed painting, the planets will have an ethereal glow.
Now you have a stunning, scientifically inspired piece of art ready to hang in your study or bedroom
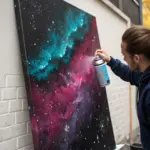
Smooshed Marble Paint Planets
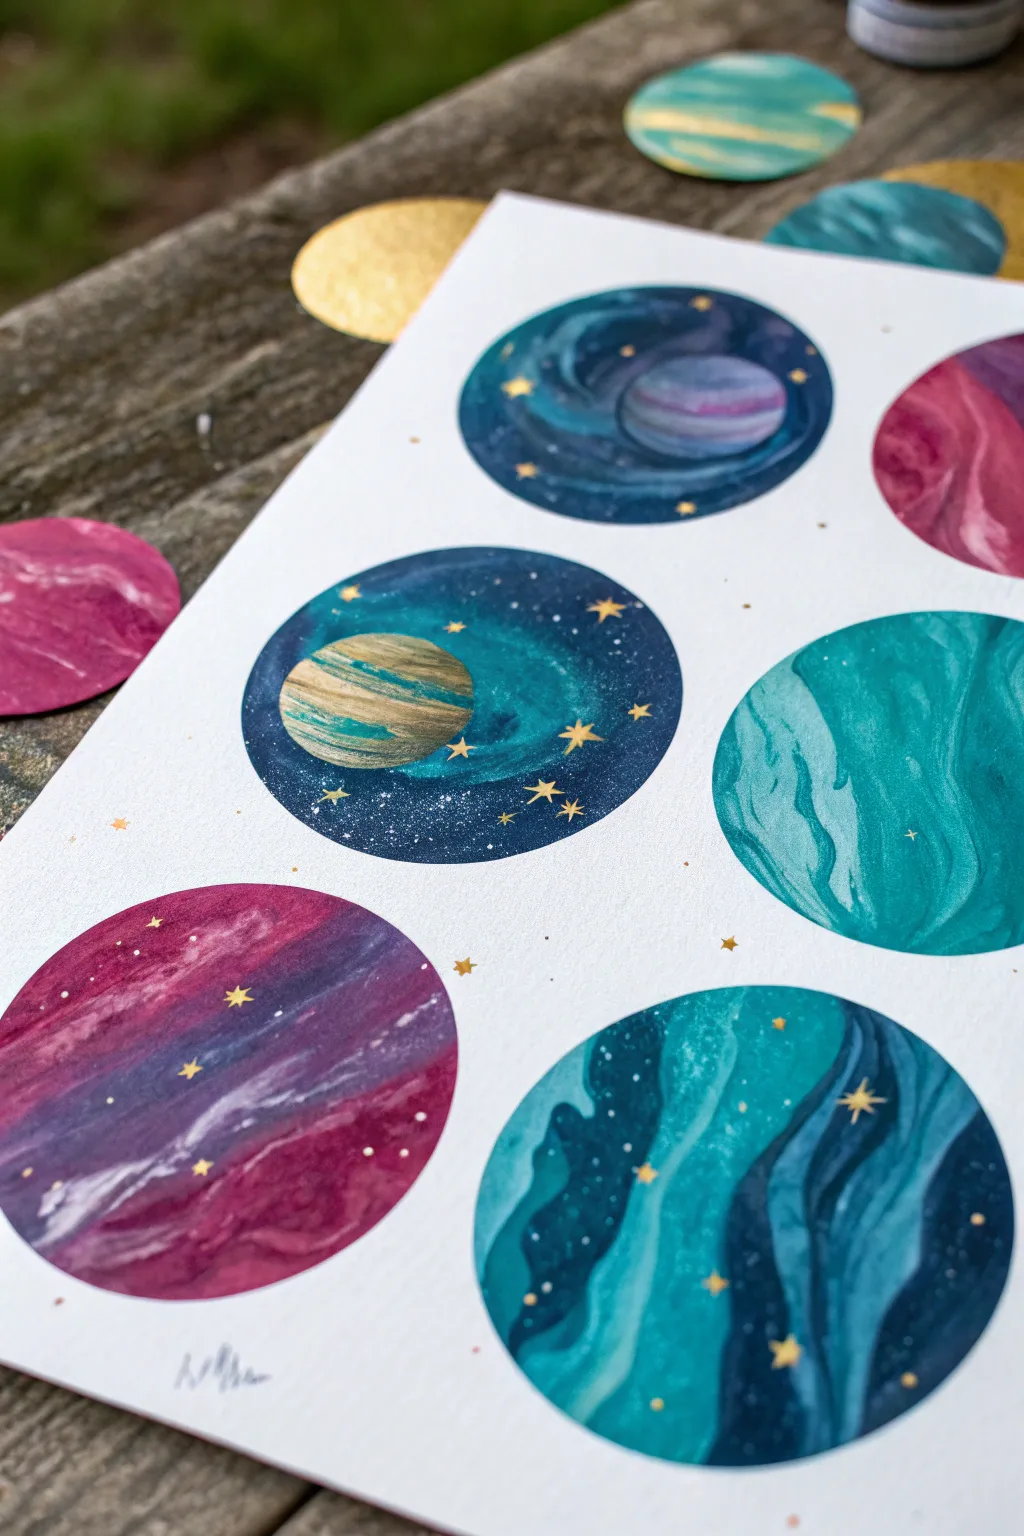
Capture the swirling beauty of distant galaxies with this surprisingly simple ‘smooshing’ technique that mimics marble. By pressing paint onto paper, you’ll create organic, fluid textures that look like professional watercolor illustrations.
Step-by-Step Tutorial
Materials
- Heavyweight watercolor paper or mixed media paper
- Acrylic craft paints (blues, teals, purples, violets, gold)
- Small piece of acetate, plastic sheet, or plastic wrap
- Circular stencils or a compass
- Pencil
- Paintbrushes (flat for application, fine liner for stars)
- Gold paint pen or metallic gold acrylic
- Paper towels for cleanup
- Scissors (optional, if cutting out)
Step 1: Setting the Stage
-
Map out your universe:
Begin by lightly tracing several circles onto your watercolor paper using a circular stencil, a jar lid, or a compass. Vary the sizes slightly if you want a more diverse galaxy. Space them out enough so you can work on them individually without smudging. -
Prepare the plastic:
Cut your acetate or plastic sheet into manageably sized squares—slightly larger than your drawn circles. You’ll need one clean side for each planet, so having a few squares ready helps flow.
Don’t over-mix!
Stop manipulating the paint under the plastic sooner than you think. Over-mixing turns the distinct ribbons of color into a single, muddy gray blob.
Step 2: Creating the Marble Effect
-
Choose a color palette:
For the first planet, select 2-3 analogous colors (like teal, dark blue, and a touch of white) plus a metallic accent like gold. Avoid mixing too many opposing colors to prevent muddy distinct hues. -
Apply paint dots:
Squeeze small drops or brush dabs of your chosen acrylic paints directly into the center of one of your traced circles. Keep the paint relatively thick and wet; do not spread it out yet. -
The smoosh:
Gently place a square of plastic over the wet paint dots. Using your fingers, press down and smoosh the paint outward towards the edges of your pencil circle. -
Swirl and blend:
While the plastic is still down, gently glide your finger over the plastic to swirl the colors together. Create waves or circular bands to mimic planetary atmospheres. Stop before the colors fully mix into a single shade. -
Reveal the texture:
Carefully peel the plastic sheet off. Lift it slowly from one corner to create interesting vein-like textures as the paint separates from the plastic. This suction creates that distinct marbled look. -
Repeat the process:
Move on to your next circle, perhaps trying a different color scheme like purples and pinks. I find it helpful to wipe down my plastic between uses or grab a fresh sheet to avoid color contamination.
Step 3: Refining the Shapes
-
Dry thoroughly:
Let the paint dry completely. Because the paint was applied somewhat thickly, this might take a bit longer than a standard wash—give it at least 20-30 minutes. -
Clean up the edges:
Is your planet spilling over the lines? Use a clean, slightly damp brush to gently lift excess paint from outside the circle, or simply paint over the white background with white gouache later to crisp up the edges. -
Add floating spheres:
Notice in the reference image how some circles have smaller planets inside them? To do this, simply paint a smaller circle on top of a larger dry one using opaque metallic gold or a contrasting color, adding horizontal brush strokes for contrast.
Add planetary rings
Use a gold paint pen to draw an elliptical ring around one of your finished dried planets to give it a Saturn-like appearance.
Step 4: Cosmic Details
-
Adding starlight:
Dip a fine liner brush or the very tip of a toothpick into metallic gold paint. Gently dot tiny stars onto the darker areas of your planets. -
Draw star crosses:
For larger, twinkling stars, use a gold gel pen or a very fine brush to draw small crosses or four-pointed stars scattered across the planets. -
Splatter stars:
For a dense nebula effect, load a stiff brush or old toothbrush with white or gold paint, flick the bristles with your thumb, and spray a fine mist of stars over select areas. -
Enhance swirling currents:
If some areas flattened out too much while drying, use your gold pen to trace along the natural marble veins, accentuating the flow of your atmospheric storms. -
Final touches:
Erase any visible pencil lines around the exterior of the circles once everything is bone dry. You can now leave them on the sheet or cut them out for collaging.
Now you have a whole system of unique celestial bodies ready to be framed or turned into greeting cards
Invent an Exoplanet Color Story
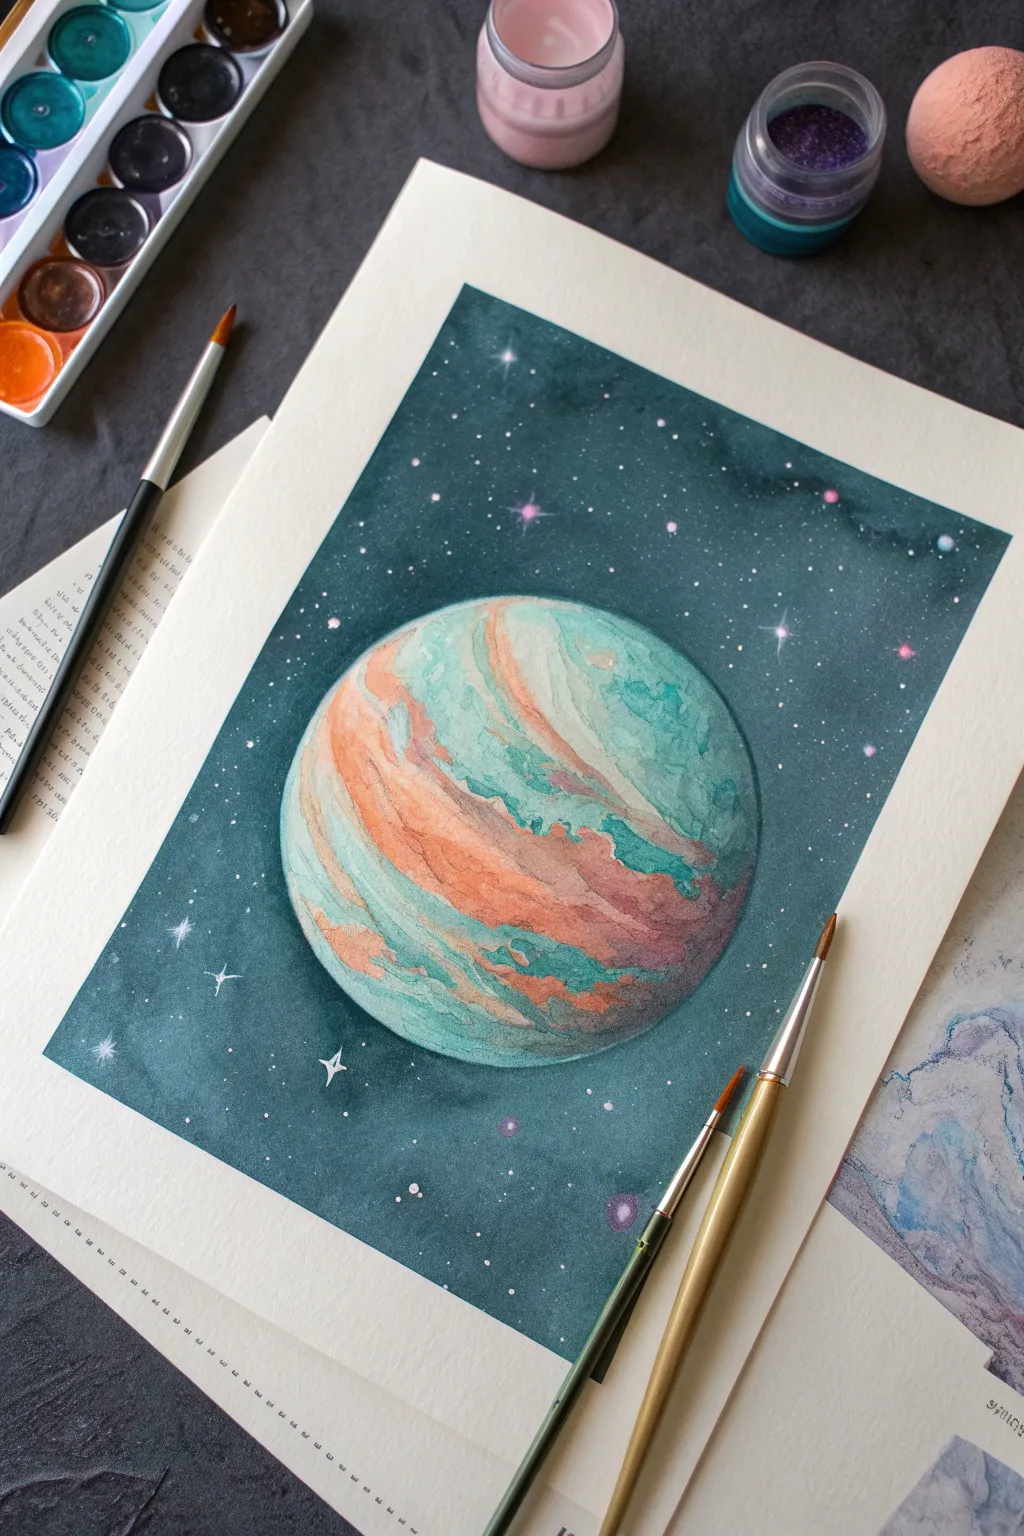
Capture the otherworldly beauty of an imagined exoplanet with this watercolor tutorial, featuring swirling bands of teal and coral set against a deep, starry expanse. This project balances free-flowing wet-on-wet techniques for the planet with careful layering to create a rich, dimensional galaxy background.
Detailed Instructions
Materials
- Cold press watercolor paper (140lb/300gsm suggested)
- Watercolor paints (teal, turquoise, burnt sienna/coral, peach, indigo, violet)
- White gouache or white ink
- Painter’s tape
- Round brushes (sizes 2, 6, and 10)
- Compass or circular object for tracing
- Pencil and eraser
- Two jars of water
- Paper towels
Step 1: Drafting and Masking
-
Prepare the paper:
Begin by taping down all four edges of your watercolor paper to a board or table. This prevents buckling when we apply heavy washes later. -
Trace the planet:
Use a compass or trace a circular object (like a bowl or large jar lid) to place your planet in the center of the paper. Keep your pencil lines very faint so they don’t show through the final paint.
Pro Tip: Liquid Frisket
Apply liquid masking fluid over your initial stars before painting the dark background. Rub it off later to reveal pure white paper stars without using gouache.
Step 2: Painting the Planet Surface
-
Pre-wet the circle:
Using your size 10 brush and clean water, wet the entire inside of the circle. The paper should be glisten, but ensure no puddles form. -
Lay down the teal base:
Load a size 6 brush with a watery teal or turquoise mix. Touch the wet paper in curved, horizontal bands, letting the pigment bloom naturally. Leave some areas white or very pale. -
Add warm contrast:
While the paper is still damp, introduce bands of peach and burnt sienna. Allow these warm tones to touch and bleed slightly into the teal edges, creating soft, marble-like transitions. -
Deepen the shadows:
Mix a darker version of your teal by adding a touch of indigo. Apply this to the bottom right curve of the planet to establish a shadow side, giving the sphere three-dimensional form. -
Introduce texture:
While the paint is drying but still has a sheen, drop in tiny spots of water or concentrated pigment to create ‘cauliflower’ blooms that mimic rocky terrain or cloud storms. -
Refine the bands:
Use a smaller size 2 brush to sharpen the edges of some cloud bands. I like to lift out pigment with a thirsty, damp brush to create highlights on the upper left curve. -
Dry completely:
Let the planet dry fully. Use a hairdryer on a low setting if you are impatient, but air drying is safest to preserve the texture.
Step 3: The Galactic Background
-
Outline the planet:
Switch to your indigo or dark teal paint. Carefully paint around the outer edge of your dried planet circle. This ‘cutting in’ requires a steady hand, so take your time. -
Fill the void:
Continue painting outward from the planet to the taped edges using a mix of indigo, dark teal, and a touch of violet. Vary the water ratio slightly to create subtle clouds in the darkness. -
Create a glow:
While the dark background paint is wet near the planet’s upper left edge (the light source), lift a little pigment or dilute it to suggest an atmospheric glow. -
Layer for depth:
Once the first background layer is dry, add a second coat of indigo in the corners and furthest areas from the planet to make the space feel infinite and deep.
Level Up: Metallic Rings
Once dry, paint a thin, elliptical ring around your planet using gold or iridescent watercolor paint for a magical, sci-fi shimmer effect.
Step 4: Stars and Details
-
Splatter the stars:
Cover your painted planet with a scrap piece of paper to protect it. Load a brush with opaque white gouache or white ink and tap the handle against another brush to splatter tiny white stars across the dark background. -
Paint larger stars:
Use your smallest detail brush (size 0 or 2) and white gouache to manually paint a few larger, brighter stars. Add tiny cross shapes to give them a twinkling effect. -
Add colored starlight:
Mix a tiny amount of pink or violet into your white gouache. Dot a few colored stars into the background to echo the warm tones on the planet. -
Final highlights:
If the planet looks too flat, add a thin, crescent-shaped line of white gouache along the very top-left edge to represent intense atmospheric reflection. -
Remove tape:
Wait until the painting is bone dry. Peel the masking tape away slowly at a 45-degree angle to reveal crisp, clean borders.
Frame your new celestial discovery as a reminder to always keep looking up


Have a question or want to share your own experience? I'd love to hear from you in the comments below!