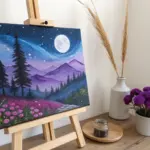
Pop art is where bold color and everyday imagery get to be unapologetically loud. Here are my favorite pop art painting ideas to play with when you want something graphic, punchy, and seriously fun to paint.
Classic Comic-Panel Close-Up Portrait

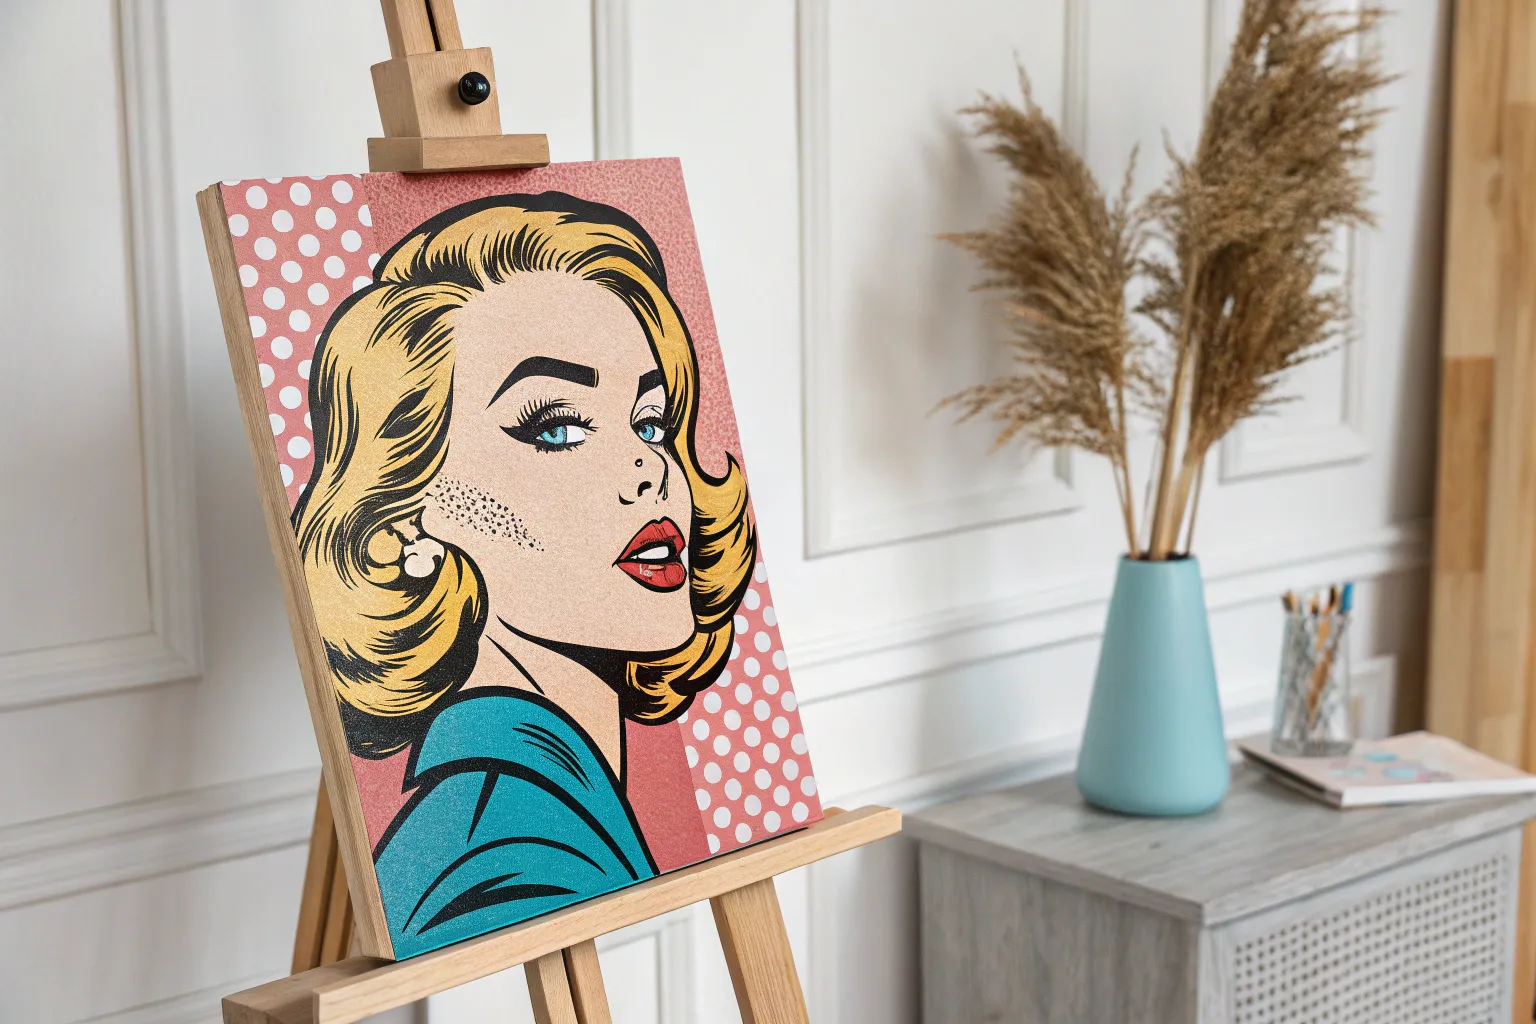
Capture the emotional intensity of mid-century romance comics with this bold, graphic portrait inspired by Roy Lichtenstein. Using crisp lines and classic Ben-Day dots, you’ll transform a simple canvas into a museum-worthy piece of pop art history.
Step-by-Step
Materials
- Square canvas or heavy illustration board (12×12 inches suggested)
- Acrylic paints: Primary Yellow, Cyan/Light Teal, Bright Red, Black, White
- Pencil and eraser
- Ruler
- Fine liner brushes (sizes 0 and 00)
- Flat shader brushes (sizes 4 and 6)
- Painter’s tape or masking tape
- Bubble wrap or a stencil (for the dots)
- Black acrylic marker (medium tip)
- Black picture frame
Step 1: Preparation and Sketching
-
Prime the surface:
Begin with a clean white surface. If using a canvas, ensure it’s gessoed. For this specific look, I prefer painting the entire background a soft, creamy off-white or very pale flesh tone first to serve as the ‘paper’ color for the skin. -
Create the border:
Measure about one inch in from all four sides of your canvas. Use painter’s tape to mask off this outer edge, creating a crisp white border that mimics a printed comic panel. -
Sketch the subject:
Lightly sketch your portrait using a pencil. Focus on the ‘Lichtenstein girl’ archetypes: flowing blonde hair, parted lips, and a dramatic, worried glance. Keep the lines simple, as they will be inked heavily later. -
Define the shadows:
Mark out where your heavy black shadows will go—specifically in the deep waves of the hair, under the chin, and the eyelashes. These high-contrast areas define the style.
Step 2: The Ben-Day Dot Technique
-
Mix the skin tone:
For the skin texture, mix a very small amount of red into your white paint to create a pale pink. The dots shouldn’t be too dark. -
Apply the dots:
This is the signature step. You can use a dedicated dot stencil or, for a DIY hack, lightly paint the bubbles of a piece of bubble wrap. Press the texture gently onto the face area of your sketch, avoiding the eyes, lips, and hair. -
Clean up edges:
Once the dots are applied, use a damp brush to create clean boundaries where the skin meets the hair or background. The dots should look mechanically produced.
Use Bubble Wrap
For easy Ben-Day dots: paint a layer of pink on bubble wrap, then press it onto paper first to remove excess. Stamp the face for uniform texture.
Step 3: Applying Flat Colors
-
Paint the background:
Fill in the negative space behind the head with a solid, flat teal or cyan paint. Use a flat shader brush to get an even coat without visible brushstrokes. You may need two coats for full opacity. -
Fill the hair:
Paint the hair sections with a bright, primary yellow. leave the shadowed areas unpainted for now, or paint around your sketch lines carefully. -
Add red accents:
Carefully paint the lips and the visible portion of the clothing with bright red. Keep the edges sharp. -
Detail the earring:
Paint the pearl earring solid white. Add a tiny arc of light grey on one side to suggest spherical dimension. -
Color the eyes:
Paint the irises a vibrant blue. Leave a small white circle in each pupil for the ‘catchlight’ reflection.
Add a Speech Bubble
Cut a speech bubble shape from thin white cardboard or foam core. Write a melodramatic phrase like “Oh, Brad!” and glue it onto the canvas for 3D flair.
Step 4: Inking and Outlining
-
Start the outlines:
Using a fine liner brush and fluid black acrylic, or a high-quality black acrylic marker, begin tracing your original pencil lines. Confidence is key here; shaky lines ruin the ‘printed’ illusion. -
Thicken the lines:
Go back over key contours—the jawline, the hair waves, the eyebrows—and thicken them. Vary the line weight; lines should be thicker on the shadowed side of the face. -
Fill deep shadows:
Fill in the large black areas in the hair and neck shadow. Ensure this black is solid and opaque. -
Add facial details:
Draw the eyelashes as thick, triangular spikes. Add a small ‘beauty mark’ mole if desired, and outline the lips. -
Hatch marks:
Add small hatch marks near the cheekbones or neck using thin, parallel black lines. This suggests shading in the comic book medium without blending colors. -
Remove tape:
Once everything is completely dry, peel off the painter’s tape to reveal the clean border.
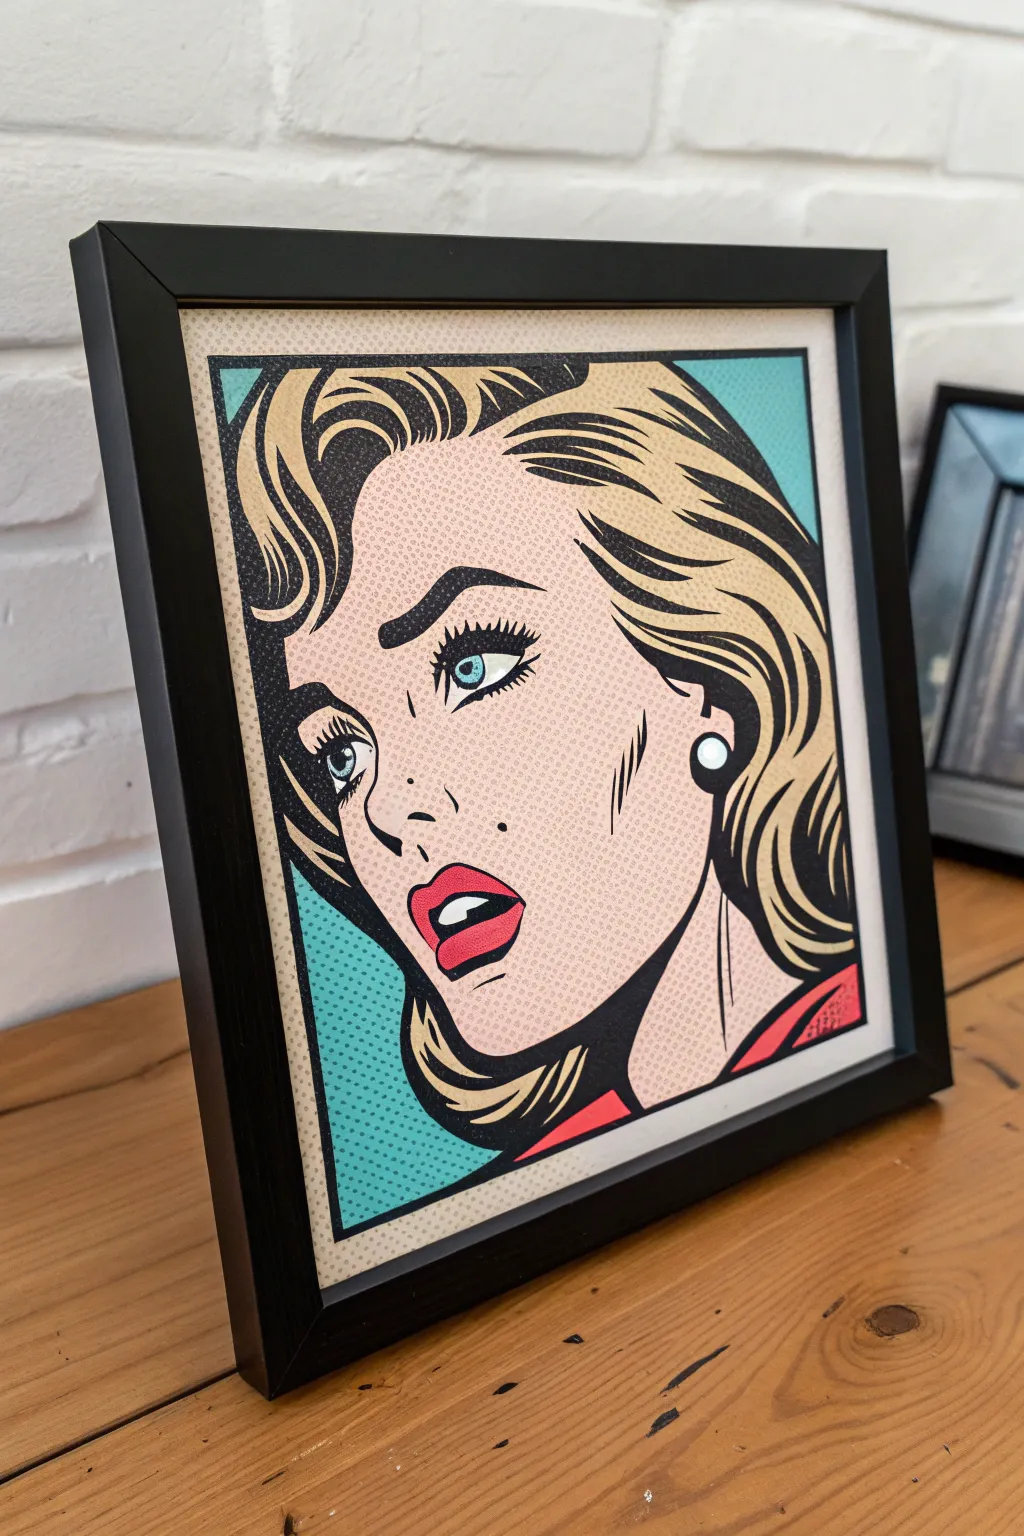
Place your finished masterpiece in a simple black frame to enhance those comic book vibes and hang it where it can make a bold statement


Ben-Day Dot Skin Tones With Primary Color Shadows
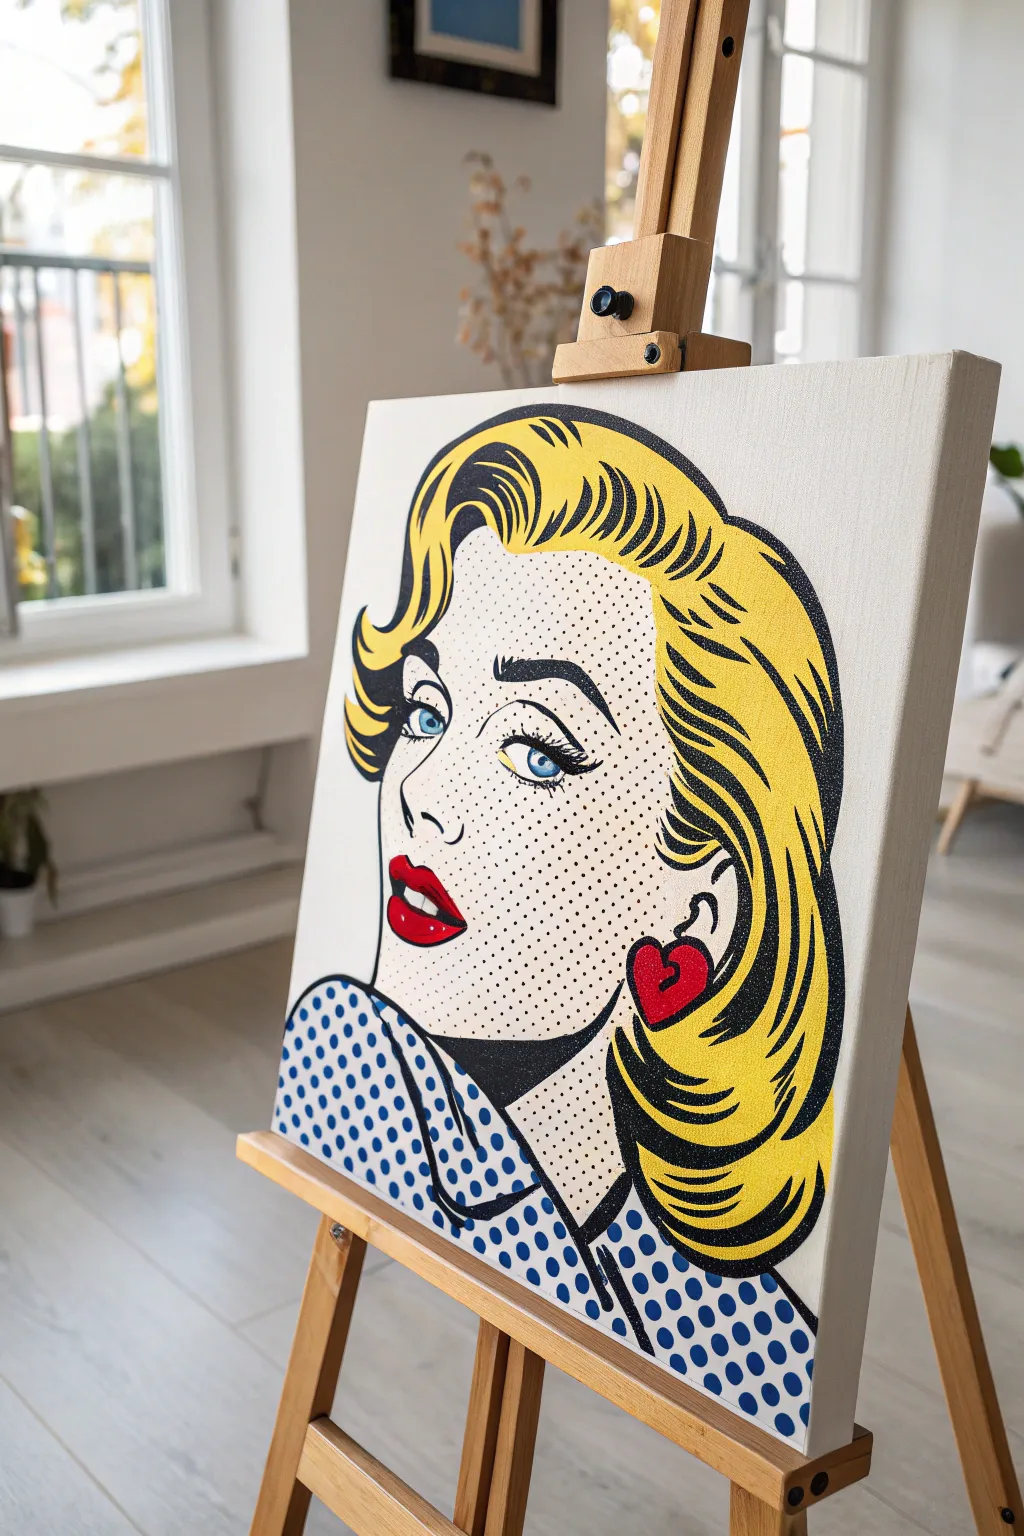
Capture the nostalgic drama of mid-century romance comics with this bold pop art portrait. Using stark black outlines and the signature Ben-Day dot technique, you’ll transform a simple canvas into a vibrant masterpiece that looks like it jumped straight off the printing press.
Step-by-Step Guide
Materials
- Stretched canvas (e.g., 16×20 inches)
- Acrylic paints (Titanium White, Mars Black, Cadmium Yellow, Napthol Red, Phthalo Blue)
- Graphite transfer paper
- Pencil
- Black acrylic paint marker (fine and medium tips)
- Bubble wrap (small bubble size) or a stencil for dots
- Flat synthetic brushes (various sizes)
- Round detail brushes
- Painter’s tape
- Palette knife
Step 1: Preparation and Sketching
-
Prime the background:
Start with a clean slate by painting your entire canvas with two coats of Titanium White. Let the first coat dry completely before applying the second to ensure a bright, opaque base that will make your colors pop. -
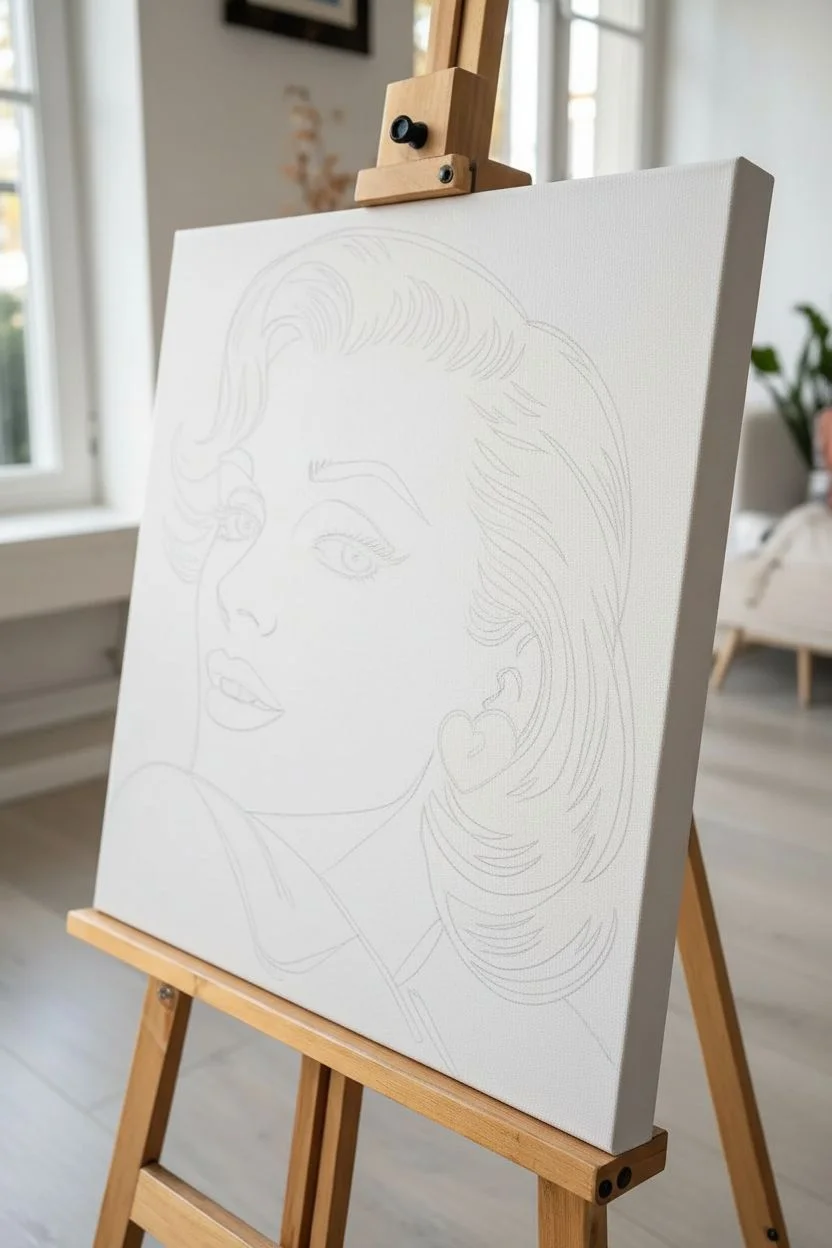
Transfer the design:
Once the white base is bone dry, place your graphite transfer paper face down on the canvas. Lay your reference sketch (a classic comic female face) on top and trace the major contour lines firmly with a pencil. -
Refine the lines:
Remove the paper and inspect your transferred lines. If any areas are faint, go over them lightly with a pencil so you have a clear roadmap for painting.
Uneven Dots?
If your hand-painted dots look messy, use the eraser end of a pencil. Dip it in paint and stamp it onto the canvas for perfectly round, consistent circles every time.
Step 2: Blocking in Solid Colors
-
Paint the hair:
Load a medium flat brush with bright Cadmium Yellow. Paint the large shapes of the hair, carefully avoiding the areas where black shadows will eventually go. You may need two coats for full opacity. -
Add the lips and accessories:
Switch to a smaller brush and fill in the lips with a bold Napthol Red. Leave a small white sliver on the lower lip to simulate a glossy reflection. Use the same red for the heart-shaped earring. -
Create the blue accents:
Mix a small amount of white into your Phthalo Blue to create a bright, comic-book blue. Paint the irises of the eyes. -
Paint the dot pattern base:
For the clothing, paint the shirt area white if it isn’t already pristine. We will apply blue dots over this later to create the pattern.
Step 3: The Ben-Day Dot Technique
-
Prepare the skin tone dots:
This is the defining step. Mix a very fluid, slightly watered-down red or light flesh tone. I find using a stencil gives the most uniform look, but you can also dip small bubble wrap into the paint. -
Apply skin texture:
Carefully apply the dot pattern across the face and neck area. If using a stencil, tape it down gently and dab paint through with a sponge. If using bubble wrap, press lightly and lift straight up. -
Clean up boundaries:
Don’t worry if the dots go slightly over the lines; the thick black outlines we add later will cover messy edges. Let this layer dry completely. -
Add clothing pattern:
Repeat the dot process for the shirt using your Phthalo Blue mix. Ensure the dots here are distinct and bold against the white background.
Add a Speech Bubble
Make it narrative! Paint a white oval speech bubble in the background and add classic comic lettering like ‘OH NO!’ or ‘WOW!’ for extra pop art flair.
Step 4: Outlining and Final Details
-
Start the black outlines:
Using a medium round brush or a black acrylic paint marker, begin tracing the main contours of the face. The marker allows for crisp, consistent line width which mimics ink printing. -
Define the hair volume:
Paint the thick, sweeping black curves inside the yellow hair. Notice how the lines taper—thick in the shadows and thin at the ends. This gives the hair its classic voluminous wave. -
Detail the eyes:
Outline the eyes carefully. Add the thick upper lash line and the thinner lower lashes. Draw the pupil in black and create the eyebrows with expressive, arched strokes. -
Refine facial features:
Outline the nose and lips. Keep the nose line minimal—often just a nostril and a small curve—to maintain the stylized comic look. -
Create deep shadows:
Look for areas requiring heavy shadow, like under the chin or the hair behind the neck. Paint these solid black to create high contrast against the dots. -
Outline the clothing:
Trace the collar and folds of the shirt. These lines should be bold and confident to contain the busy blue dot pattern. -
Final inspection:
Step back and look for any gaps in your black lines or yellow paint. Touch up the white highlights in the eyes and on the lips with a small detail brush for that final sparkle.
Hang your finished canvas in a bright room and enjoy the instant retro drama it brings to your space


Four-Panel Color-Shift Portrait Grid
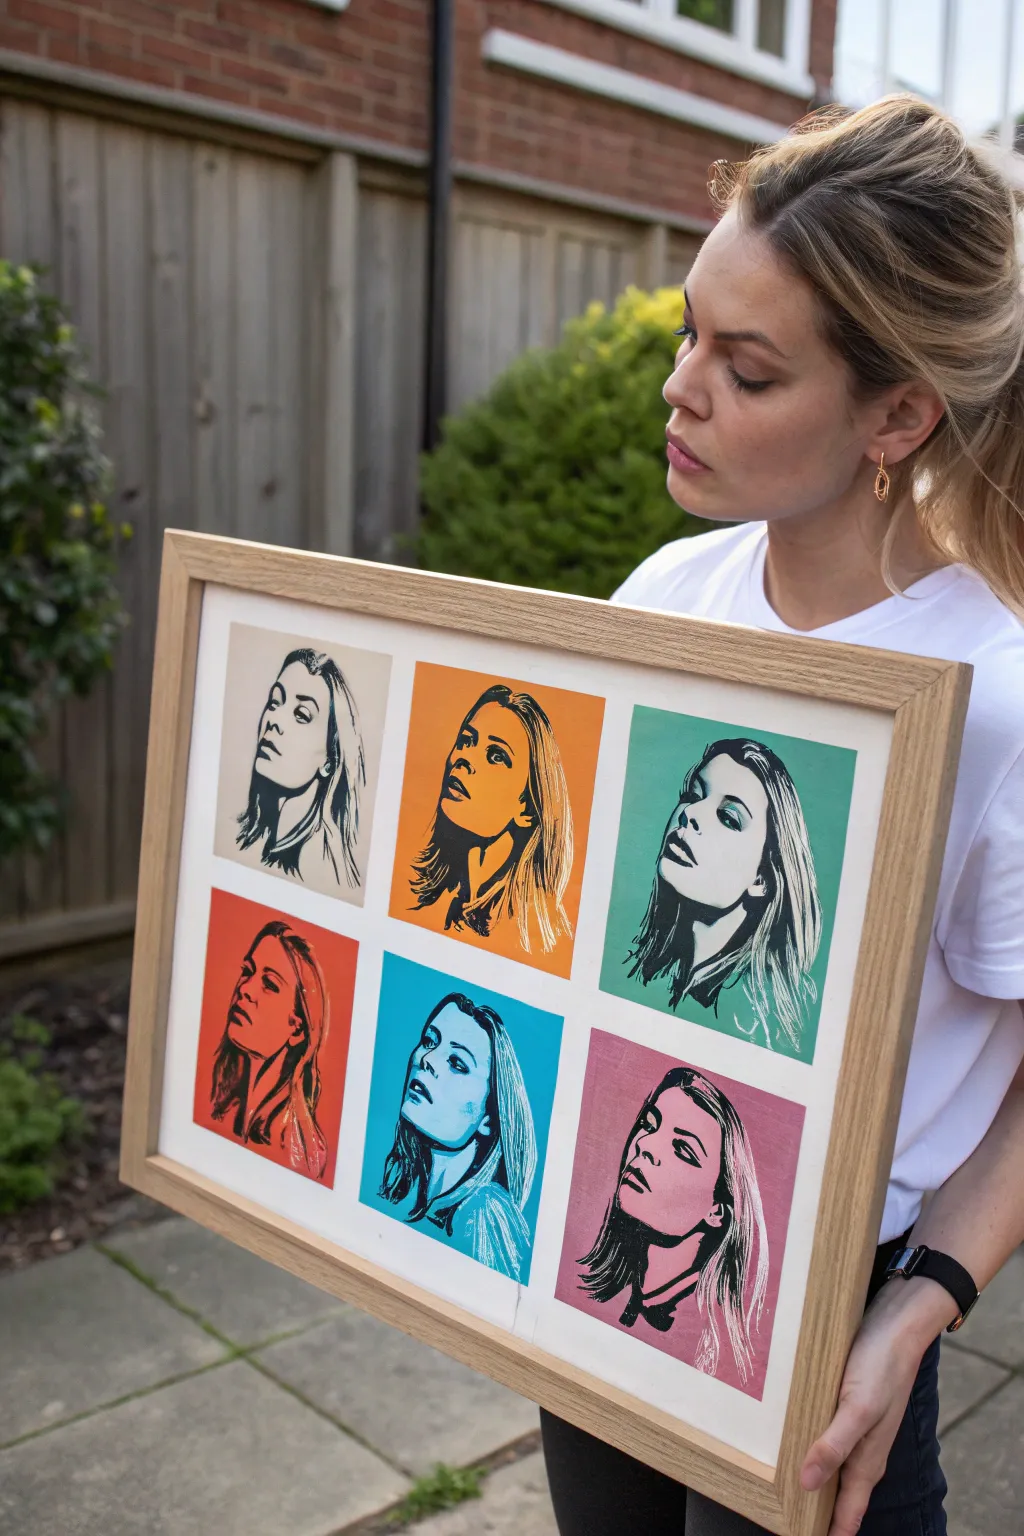
Master the iconic Warhol aesthetic with this striking six-panel grid project. By repeating a high-contrast portrait across vibrant, shifting color blocks, you will create a gallery-worthy statement piece that feels both retro and modern.
Step-by-Step Tutorial
Materials
- High-quality heavy cardstock or mixed media paper (white)
- Black linocut ink or block printing ink
- Lino block (soft cut or traditional)
- Linocut carving tools (V-gouge and U-gouge)
- Acrylic paints (Teal, Orange, Pink, Pale Yellow, Red, Sky Blue)
- Flat shader brushes (medium size)
- Brayer (rubber roller)
- Glass or acrylic sheet for ink rolling
- Baren or a clean wooden spoon
- Ruler and pencil
- Large wooden frame aimed for 6-panel display
- Mounting board
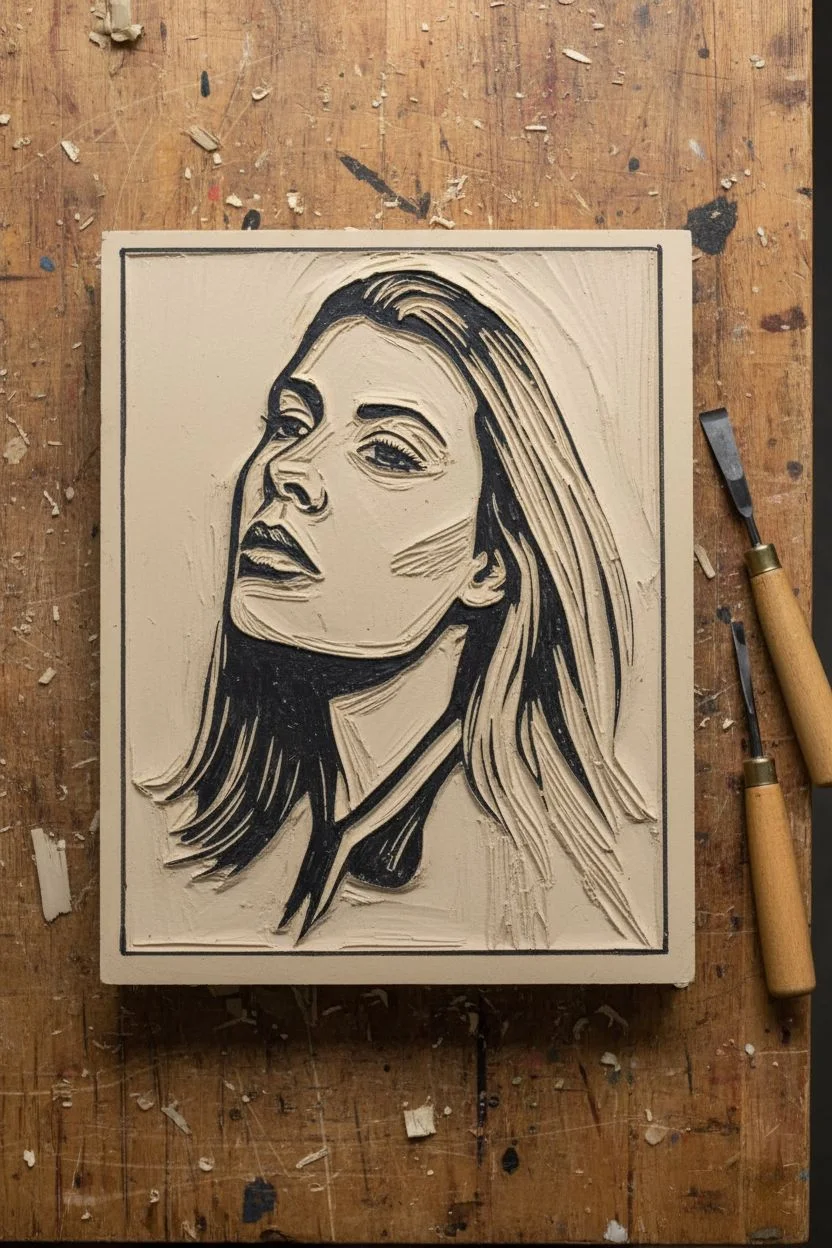
Step 1: Preparation & Carving
-
Choose your subject:
Select a photo with strong lighting and distinct shadows. Convert it to high contrast black and white on your computer or phone to visualize the ‘threshold’ clearly. -
Transfer the image:
Print your high-contrast image to the size of your individual blocks. Transfer the design onto your lino block using carbon paper or the graphite transfer method. -
Designate negative space:
Mark the areas that will remain white (or background color) with a permanent marker on the block itself so you don’t accidentally carve away the wrong parts. -
Carve the details:
Using a fine V-gouge, carefully carve outline of hair, facial features, and the distinct shadow lines. Always carve away from your body for safety. -
Clear larger areas:
Switch to a wider U-gouge to clear away the large negative spaces around the face. You want deep, clean cuts to avoid getting ink on the background areas.
Pro Tip: Hair Texture
When carving hair, use quick, flicking motions with your V-gouge. These jagged, uneven lines mimic natural strands better than long continuous cuts and add energy to the print.
Step 2: Painting the Backgrounds
-
Measure your grid:
Cut six square pieces of heavy cardstock that fit your frame dimensions. Ensure they are all exactly the same size for a professional grid look. -
Mix your palette:
Prepare six distinct acrylic colors. Aim for variety: a dusty teal, vivid orange, muted rose, bright red, sky blue, and a creamy sand color. -
Apply base coats:
Paint each square card solid with one of your chosen colors. Use a flat shader brush to get smooth, opaque coverage without heavy texture. -
Wait for curing:
Let these colored squares dry completely. I prefer to let them sit for at least an hour, as printing ink on damp paint can cause smudging or paper warping.
Troubleshooting: Blurry Lines
If your printed black lines look squashed or blurry, you likely used too much ink or pressed too hard. Use less ink on the brayer and apply lighter pressure when burnishing.
Step 3: Printing the Portraits
-
Prepare the ink:
Squeeze a small line of black block printing ink onto your glass sheet. Use the brayer to roll it out until you hear a sticky, singular ‘hissing’ sound. -
Ink the block:
Roll the brayer evenly over your carved lino block. Ensure all raised surfaces are shiny with ink, but avoid flooding the fine carved lines. -
Align the print:
Carefully place your first painted square face-down onto the inked block (or place the block face-down onto the paper if you have a registration jig). -
Burnish the image:
Using a baren or the back of a wooden spoon, rub firmly in circular motions over the back of the paper to transfer the ink. -
Reveal the print:
Peel the paper back slowly from one corner to check coverage. If it looks patchy, lay it back down and burnish more before fully removing. -
Repeat the process:
Re-ink the block for every single print. Repeat this step for all six colored backgrounds to create your uniform series. -
Dry the prints:
Block printing ink takes longer to dry than acrylics. Lay prints flat in a safe, dust-free area for at least 24 hours.
Step 4: Assembly & Framing
-
Arrange the composition:
Lay your dried prints out on a table to decide the best color arrangement. Try to balance warm tones (orange, red) against cool tones (teal, blue) so the eye travels across the piece. -
Mount to backing:
Adhere the prints to a large white mounting board using archival double-sided tape or spray mount, leaving even spacing between each square. -
Final framing:
Place the mounted grid into a natural wood frame behind glass to protect the surface and unify the separate pieces.
Hang your new vibrant grid where it can catch natural light to really make those pop-art colors sing.


Everyday Object Hero Shot (Snack, Phone, or Shoe)

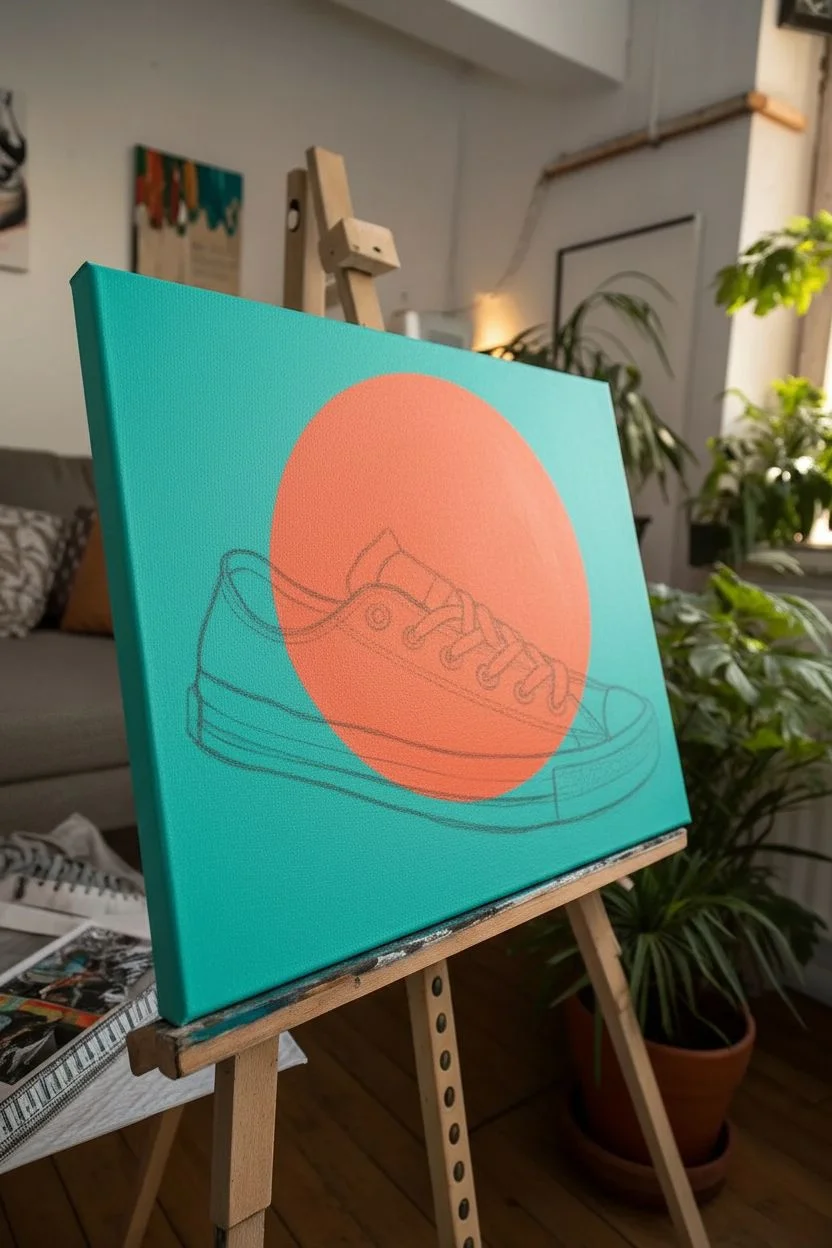
Capture the cool, timeless vibe of street style with this vibrant pop art painting featuring a classic high-top sneaker. By combining a bold, solid background with a graphic central subject, you’ll create a striking piece that celebrates everyday design.
Step-by-Step
Materials
- Stretched canvas (rectangular, e.g., 16×20 inches)
- Acrylic paints: Turquoise/Teal, Bright Red, Black, White, Cream/Off-White
- Pencil and eraser
- Ruler
- Compass or large circular object (like a dinner plate) for tracing
- Flat synthetic paintbrushes (medium and large)
- Fine liner brush or black acrylic paint marker
- Palette for mixing
- Water cup and paper towels
Step 1: Preparation and Sketching
-
Prepare the Background:
Start by mixing a vibrant turquoise or teal color. Using a large flat brush, apply an even coat over the entire canvas. Cover the edges for a finished look. Let this base layer dry completely before moving on. -
Second Coat (Optional):
If your turquoise looks streaky or transparent after the first layer, apply a second coat to ensure a solid, opaque vivid blue field. -
Draft the Circle:
Once the background is bone-dry, lightly mark the center area where your sun will go. Use a large circular object or a compass to trace a perfect circle in the upper middle area of the canvas. Keep the pencil pressure light so it doesn’t dent the paint. -
Sketch the Shoe Outline:
Lightly sketch the profile of the sneaker. Position it so it overlaps the bottom third of the circle. Start with the rubber sole shape, then build the upper canvas structure, curving up towards the ankle. -
Add Shoe Details:
Draw the details inside the shoe shape: the rubber toe cap, the laces zigzagging up the front, the tongue, the eyelets, and the stitching lines along the side. Don’t worry about perfection; a slightly wobbly line adds to the illustrative character.
Step 2: Blocking in Color
-
Paint the Sun:
Using a medium flat brush, fill in the large circle with bright red paint. Carefully cut in around the top edge of the shoe sketch so the red appears to be behind the sneaker. You may need two coats for full opacity. -
Paint the Shoe Upper:
Switch to your black paint. Carefully fill in the canvas parts of the sneaker, working around the white laces, the tongue label, and the stitching lines. Use a smaller brush near the laces to keep them clean. -
Paint the Sole and Toe Cap:
Mix a tiny bit of yellow or brown into your white paint to create a creamy off-white. Use this to paint the thick rubber sole and the toe cap. This slight warmth distinguishes it from the bright white laces. -
Fill the Interior:
Paint the interior lining of the shoe (visible at the ankle opening) with a pale beige or cream color to give the shoe some depth. -
Paint the Laces:
Using pure bright white and a small brush, carefully paint the laces. Make sure they stand out against the black tongue area underneath.
Clean Lines Hack
For the crispest possible line on the red circle, trace your object, then lay masking tape along the curve (or use frisket film) before painting the red inside.
Step 3: Detailing and Outlining
-
Outline the Sole:
Once the cream paint is dry, use a fine liner brush with black paint (or a paint marker) to draw the black stripe that runs through the middle of the rubber sole. -
Add Textures:
Use your liner brush to add the textured cross-hatching pattern on the rubber toe bumper area. This small detail adds a lot of realism to the illustration. -
Detail the Stitching:
Mix a light gray or use thinned white paint to create the stitching lines on the black canvas upper. Short, dashed strokes work best here. -
Refine the Edges:
Go around the outer perimeter of the shoe with a thin black line to separate it clearly from the background colors, giving it that crisp graphic sticker look. -
Eyelets and Aglets:
Add small silver or grey dots for the metal eyelets where the laces pass through. I like to add tiny shadows under the laces with a grey wash to make them pop.
Paint Too Thick?
If your black paint feels gummy or hard to drag for fine details, add a drop or two of water or flow improver. Ink-like consistency makes outlining much smoother.
Now step back and admire how a simple everyday object has transformed into a bold statement piece.
BRUSH GUIDE
The Right Brush for Every Stroke
From clean lines to bold texture — master brush choice, stroke control, and essential techniques.
Explore the Full Guide
Speech Bubbles and Onomatopoeia Lettering
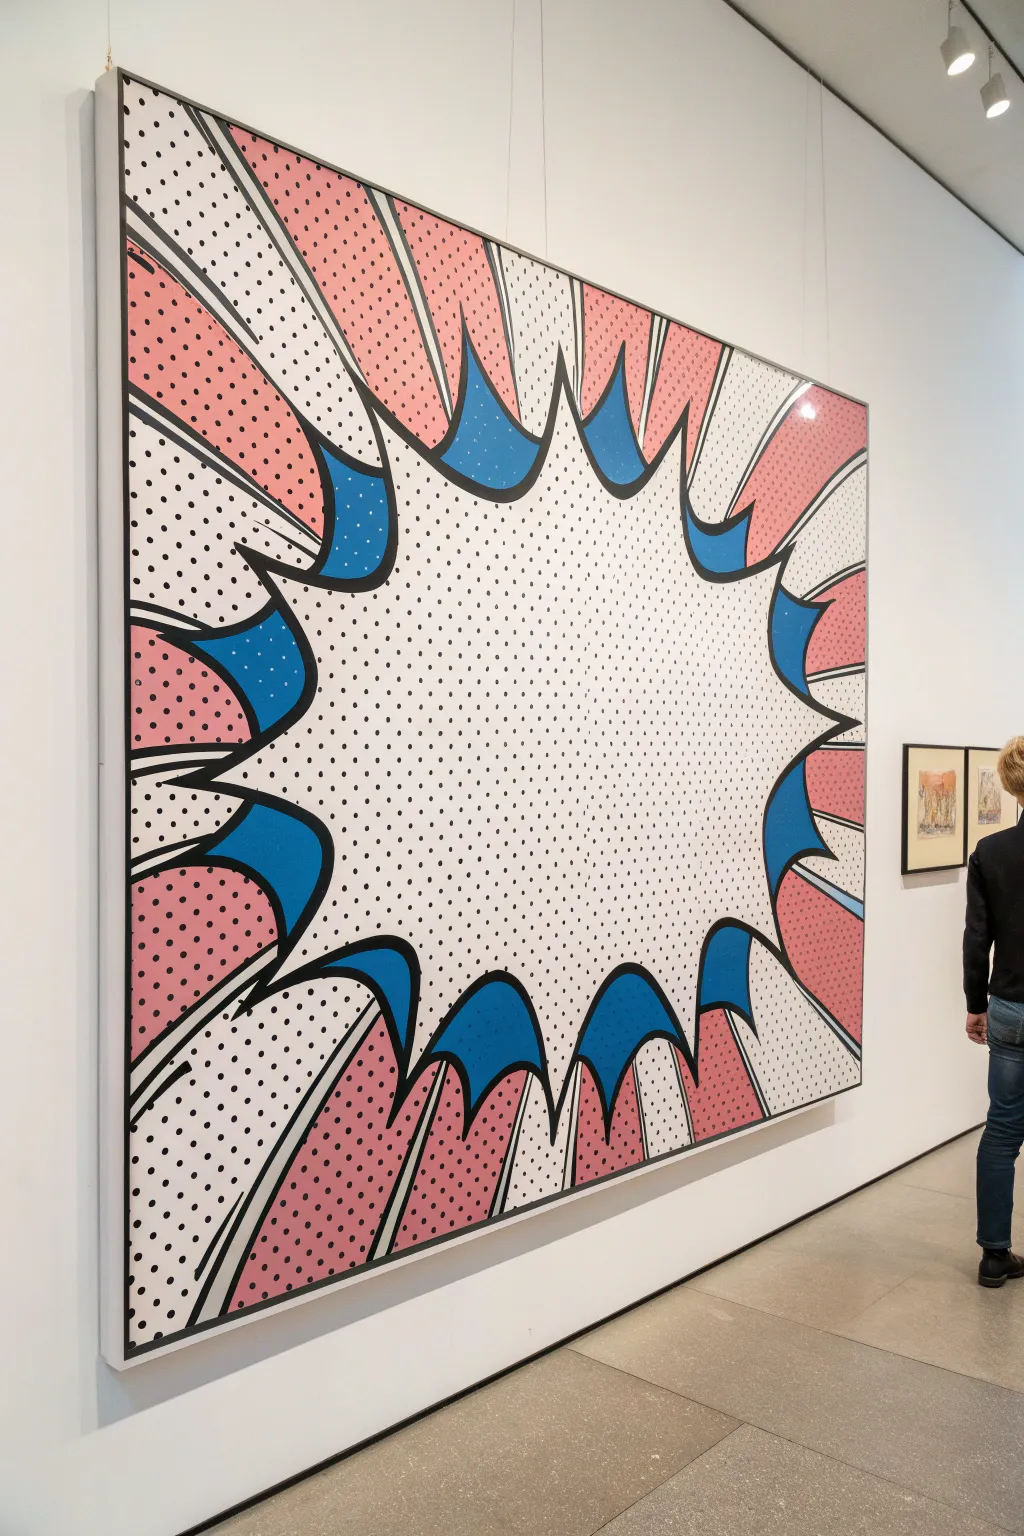
Capture the dramatic energy of classic comic books with this large-scale pop art explosion painting. Featuring iconic Ben-Day dots and bold black outlines, this piece mimics the mechanical printing processes of the mid-20th century on a grand, hand-painted scale.
Detailed Instructions
Materials
- Large rectangular canvas (approx. 36×48 inches)
- Acrylic paints: Titanium White, Mars Black, Primary Blue, bright Bubblegum Pink
- Gesso (primer)
- Pencil and eraser
- Long ruler or T-square
- Painter’s tape (various widths)
- Circle stencil transparency or perforated metal sheet
- Round foam pouncer or stencil brush
- Fine liner brush (size 1 or 2)
- Medium flat brush (size 8 or 10)
- Large flat brush or foam roller
Step 1: Preparation and Sketching
-
Prime the Surface:
Begin by coating your large canvas with two layers of gesso to ensure a smooth, bright white surface. Sand lightly between coats if necessary to reduce canvas texture, as pop art relies on flat, graphical finishes. -
Draft the Focal Point:
Using a pencil, lightly draw a large, jagged, cloud-like shape in the center of the canvas. This will be the main white explosion bubble. Keep the spikes irregular and dramatic. -
Create the Radiating Lines:
Place your ruler at the approximate center of your jagged shape. Draw straight lines radiating outward to the edges of the canvas. These will form the alternating pink and white ‘rays’ typical of comic action scenes. -
Add Secondary Spikes:
Sketch a second layer of jagged shapes tucked behind the main white bubble. These will eventually be painted blue to create depth and contrast against the background rays.
Dot Perfection
Don’t overload your foam pouncer. Offload excess paint onto a paper towel first—too much paint causes bleeding under the stencil.
Step 2: Applying the Ben-Day Dots
-
Prepare the Dot Pattern:
This style relies on Ben-Day dots. I like to secure a circle stencil or a perforated sheet over the areas that will be pink or blue. Alternatively, you can create a custom stencil by punching holes in a sheet of acetate. -
Apply Blue Dots:
Focus on the secondary jagged spikes you sketched earlier. Using a foam pouncer dipped in Primary Blue, dab paint through your stencil. Keep the paint relatively dry on the foam to prevent bleeding under the stencil edges. -
Apply Pink Dots:
Move to the radiating background rays. Select alternating rays to fill with dots. Use the bright Bubblegum Pink and the same stenciling technique, ensuring the dot pattern remains grid-like and consistent. -
Let the Dots Dry:
Allow the dotted sections to dry completely. This step is crucial because smudging the dots ruins the crisp, mechanical illusion.
Step 3: Solid Colors and Outlining
-
Fill Solid Blue Areas:
Once the dots are dry, assess the ‘shadow’ areas of the blue spikes. Paint solid blue sections at the tips or edges of these jagged forms to create a sense of dimension, as seen in the reference image. -
Paint Solid Pink Sections:
Similarly, paint solid pink blocks at the outer edges of the dotted pink rays. The transition from solid color to dots mimics the shading techniques used in vintage comic printing. -
Clean Up the White:
Use Titanium White to crisp up the central explosion shape and the alternating white rays. If any dots strayed into these areas, paint over them now to ensure a stark, high-contrast look. -
Begin the Black Outlines:
Load a medium flat brush with Mars Black paint. Carefully outline the main central white shape. The line should be bold and uniform in thickness, resembling an ink line. -
Outline the Rays:
Use a long ruler as a guide for your brush to paint the long black lines separating the background rays. These lines act as barriers between the chaotic energy of the dots. -
Refine the Sharp Corners:
Switch to a fine liner brush to sharpen the tips of the jagged explosion spikes. The corners must be razor-sharp to convey the feeling of a sudden ‘bang’ or ‘pow’. -
Add Motion Lines:
Paint shorter, tapered black lines within the white rays and the central bubble. These ‘speed lines’ add directional energy and make the explosion feel like it is expanding. -
Final Inspection:
Step back and check for any uneven edges. Touch up any black lines that look shaky or thin. The goal is for the painting to look machine-made, so precision is key.
Add Text
Use the central white space to add a classic comic onomatopoeia like ‘POW!’, ‘WHAM!’, or ‘POP!’ in block letters for extra impact.
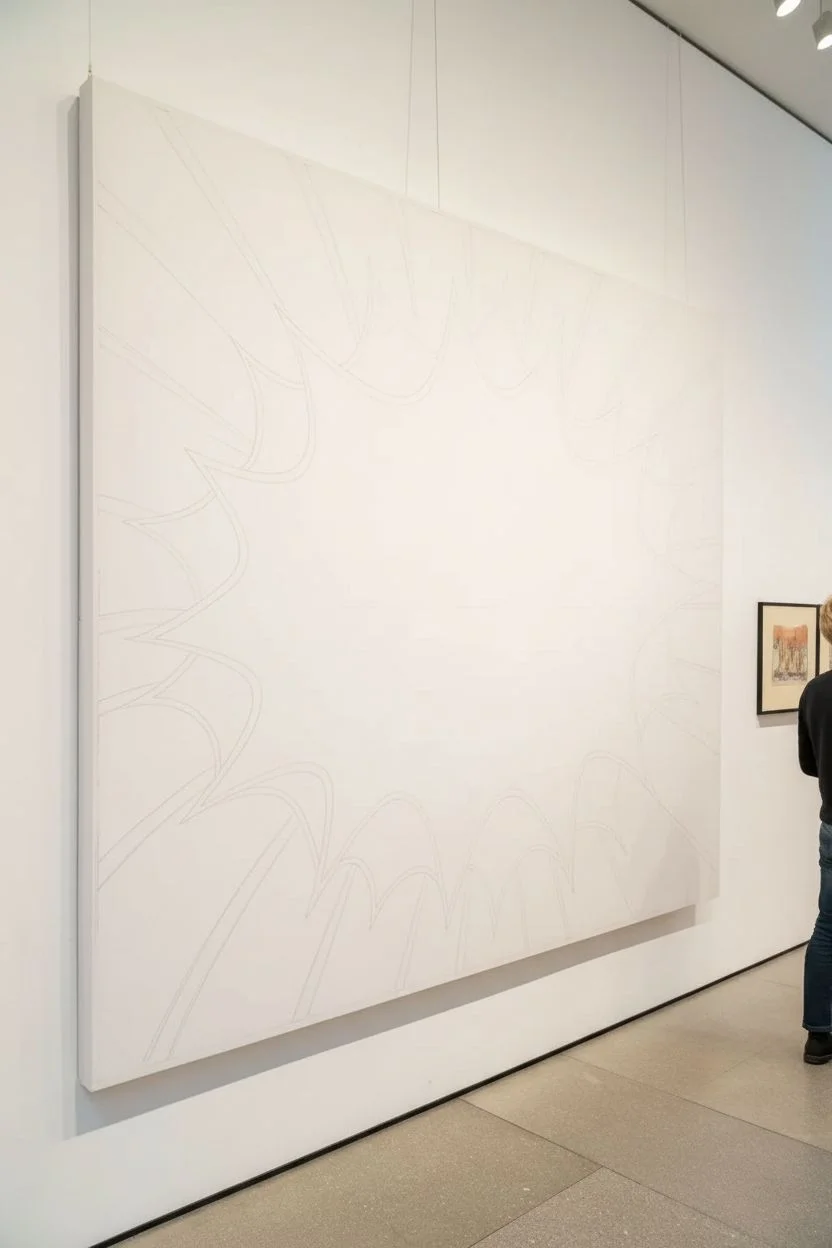
Hang your finished masterpiece on a white wall to let those vivid colors and bold lines truly pop
High-Contrast Complementary Background Blocks
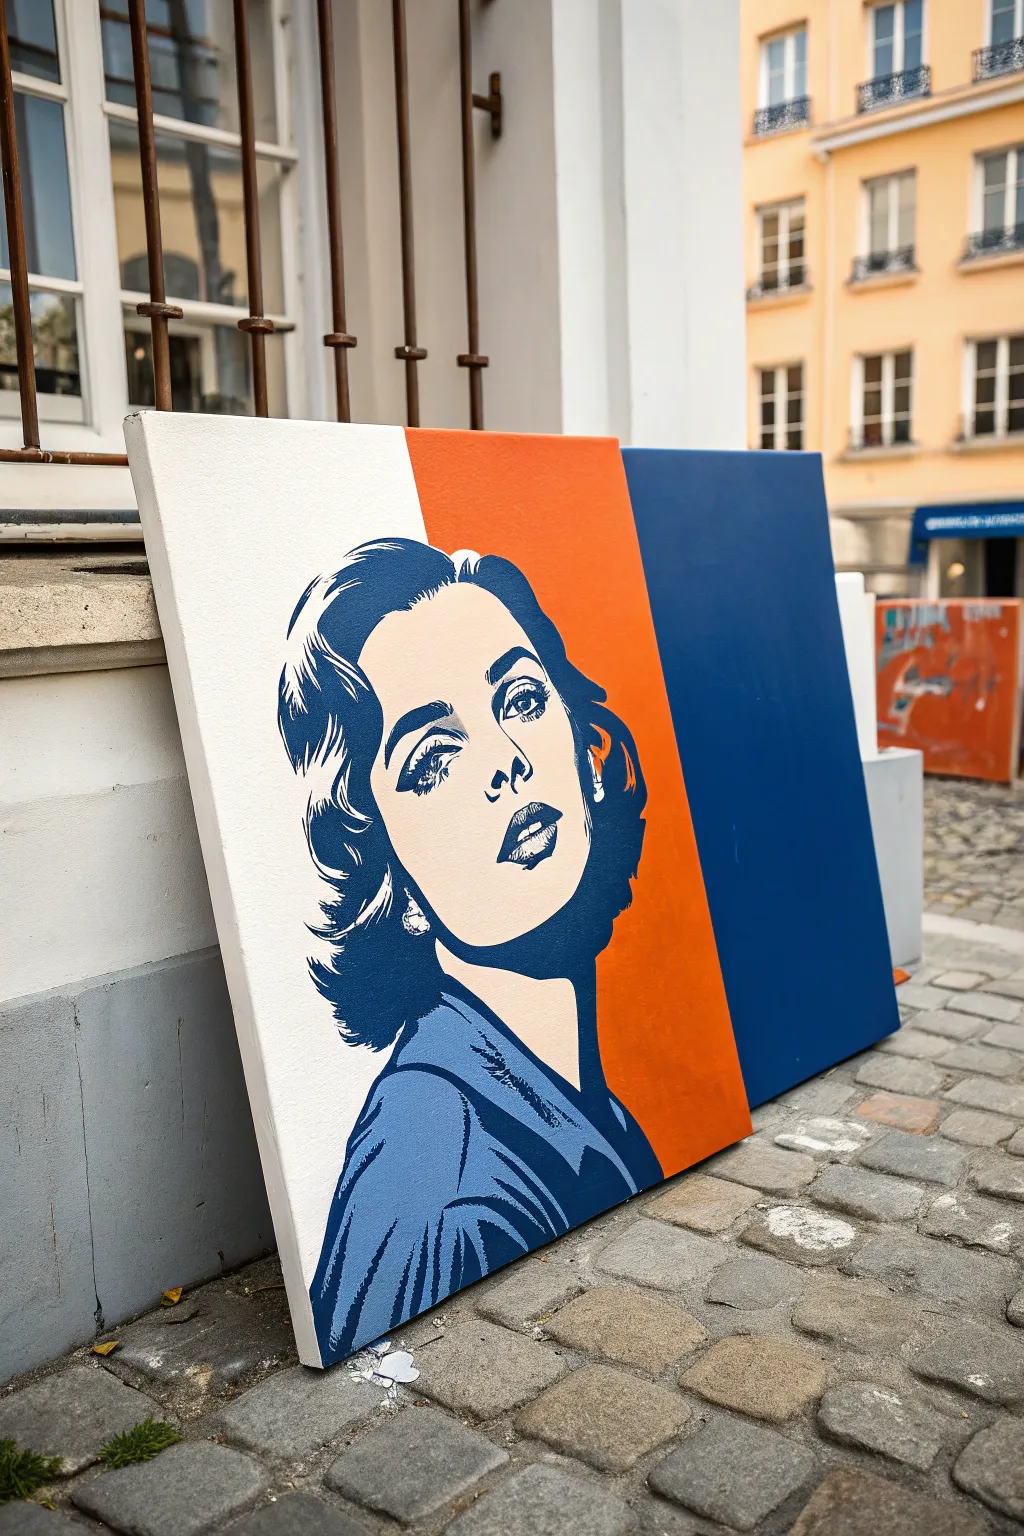
Bring the golden age of cinema to your walls with this striking pop art portrait featuring bold color blocks and high-contrast shading. This project combines geometric precision with the fluidity of screen-print styling for a modern, gallery-worthy piece.
How-To Guide
Materials
- Large rectangular canvas (approx. 24×36 inches)
- Acrylic paints: Titanium White, Vivid Orange, Navy Blue, and Light Blue
- Painters tape or masking tape (1-inch width)
- Graphite transfer paper or overhead projector
- Pencil and eraser
- Assorted brushes: 2-inch flat brush, medium flat shader, and fine liner brush
- Ruler or straight edge
- Palette for mixing
- Printed reference image of the portrait subject (high contrast)
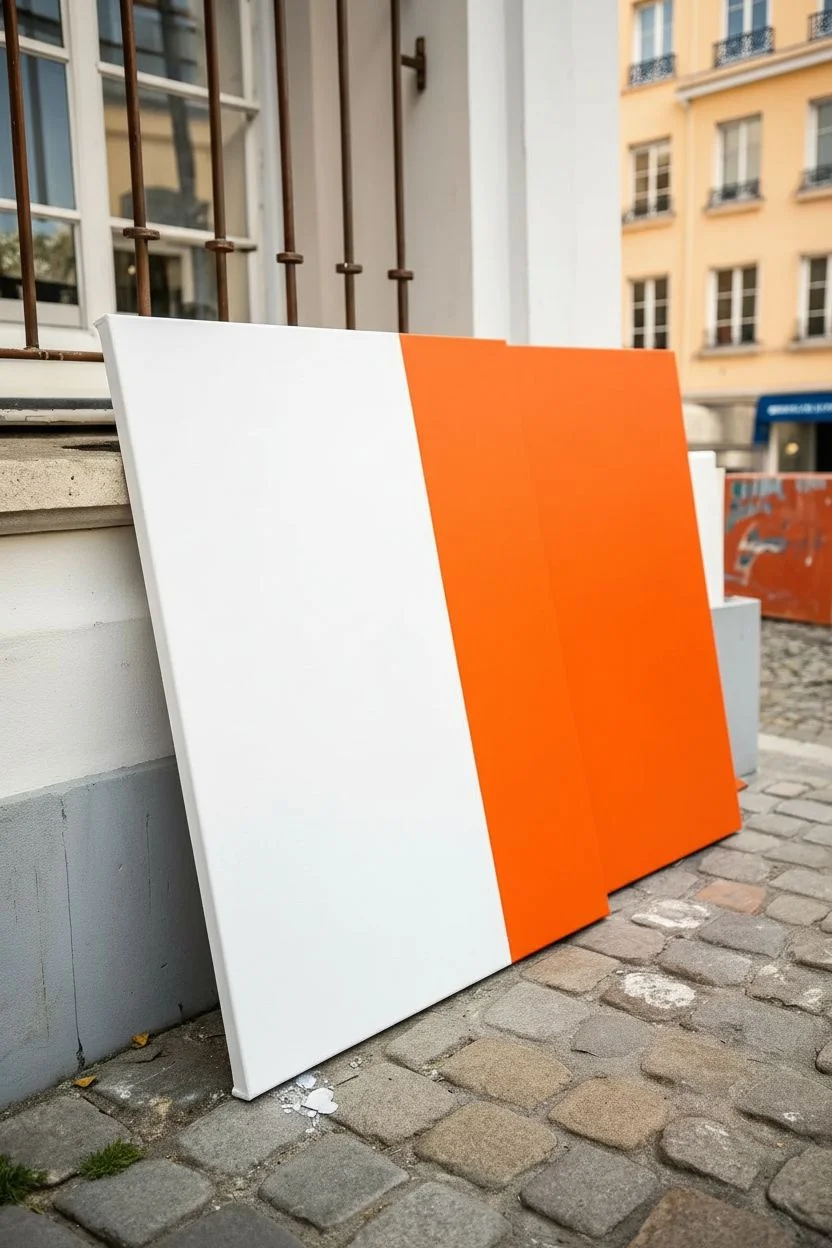
Step 1: Preparing the Background
-
Measure the Divide:
Place your canvas on a flat surface. Using your ruler, measure about one-third of the way across the canvas from the left edge. Mark this spot lightly with a pencil at the top and bottom. -
Tape Section One:
Run a strip of painters tape vertically connecting your marks. Press the edge of the tape firmly down to ensure a crisp line, sealing it against the canvas texture. -
Paint the White Block:
Load your large flat brush with Titanium White acrylic. Paint the entire left section of the canvas, brushing away from the tape edge to prevent paint bleeding underneath. Apply two coats for opacity, letting the first dry completely before the second. -
Paint the Orange Block:
Clean your brush thoroughly. Paint the remaining two-thirds of the canvas with your Vivid Orange. Be bold with your strokes; this color needs to be solid and vibrant. Two to three coats may be necessary for full coverage. -
Reveal the Line:
Once the paint is touch-dry but not fully cured (usually about 20 minutes), carefully peel off the painters tape at a 45-degree angle to reveal a sharp, clean division between the white and orange sections.
Clean Lines Pro-Tip
Before painting your orange section, paint a thin layer of white over the tape edge first. This seals the gap, meaning any bleed-through matches the base color!
Step 2: Sketching the Subject
-
Prepare the Reference:
Edit your reference photo digitally to high contrast (posterise effect) so it only shows three values: black/dark blue, mid-tone blue, and highlights. -
Transfer the Outline:
If using a projector, cast the image onto the dried canvas so the face spans across the color divide. Trace the major shadows and outlines lightly with a pencil. -
Alternative Transfer Method:
If using graphite paper, tape your reference print over the graphite paper onto the canvas. Trace the lines firmly to transfer the design. Focus on the distinct shapes of the shadows rather than small details. -
Clean Up Lines:
Remove the transfer tools and refine your pencil lines. Ensure distinct boundaries exist between where the dark navy shadows will go and where the lighter blue skin tone will be.
Level Up: Texture
Add Ben-Day dots to the face area using bubble wrap dipped in paint or a stencil. This adds authentic comic book texture to the flat color blocks.
Step 3: Painting the Portrait
-
Mix the Skin Tone:
Create a pale blue skin tone by mixing a small amount of Light Blue into a large amount of Titanium White. It should be very subtle, barely darker than the white background. -
Fill the Face:
Using a medium flat brush, fill in the face area with your pale blue mix. Avoid the areas marked for the dark shadows (eyes, hair, mouth). Let this layer dry completely. -
Start the Darkest Shadows:
Switch to your Navy Blue paint. Start filling in the darkest areas: the dense parts of the hair, the pupils, the nostrils, and the deep shadow under the chin. I find it helpful to squint at the reference image to see these shapes clearly. -
Detailing the Features:
Use a fine liner brush with the Navy Blue to carefully define the eyelashes, the outline of the lips, and the strands of hair. Keep your hand steady and use the paint fluidly. -
Add Mid-Tones:
Mix a medium blue (halfway between your navy and pale blue). Use this to add depth to the clothing area and softer shadows in the hair. -
Clothing Blocks:
Paint the shirt or dress area using a combination of the medium blue and navy blue. Use graphic, hatching-style strokes to mimic fabric folds without blending the colors. -
Hair Highlights:
Go back into the dark navy hair sections with small touches of White or Light Blue to suggest shine and volume, typical of comic-book styling. -
Final White Accents:
Using pure Titanium White and a clean detail brush, add the ‘catchlights’ in the eyes and highlights on the lower lip. This brings the character to life. -
Touch Ups:
Step back and check your edges. If any background orange or white needs tidying up near the portrait, use a small brush to sharpen those intersections.
Hang your masterpiece in a well-lit spot to let those bold colors truly pop.

PENCIL GUIDE
Understanding Pencil Grades from H to B
From first sketch to finished drawing — learn pencil grades, line control, and shading techniques.
Explore the Full Guide
Split-Face Color Divide With Hard Edges
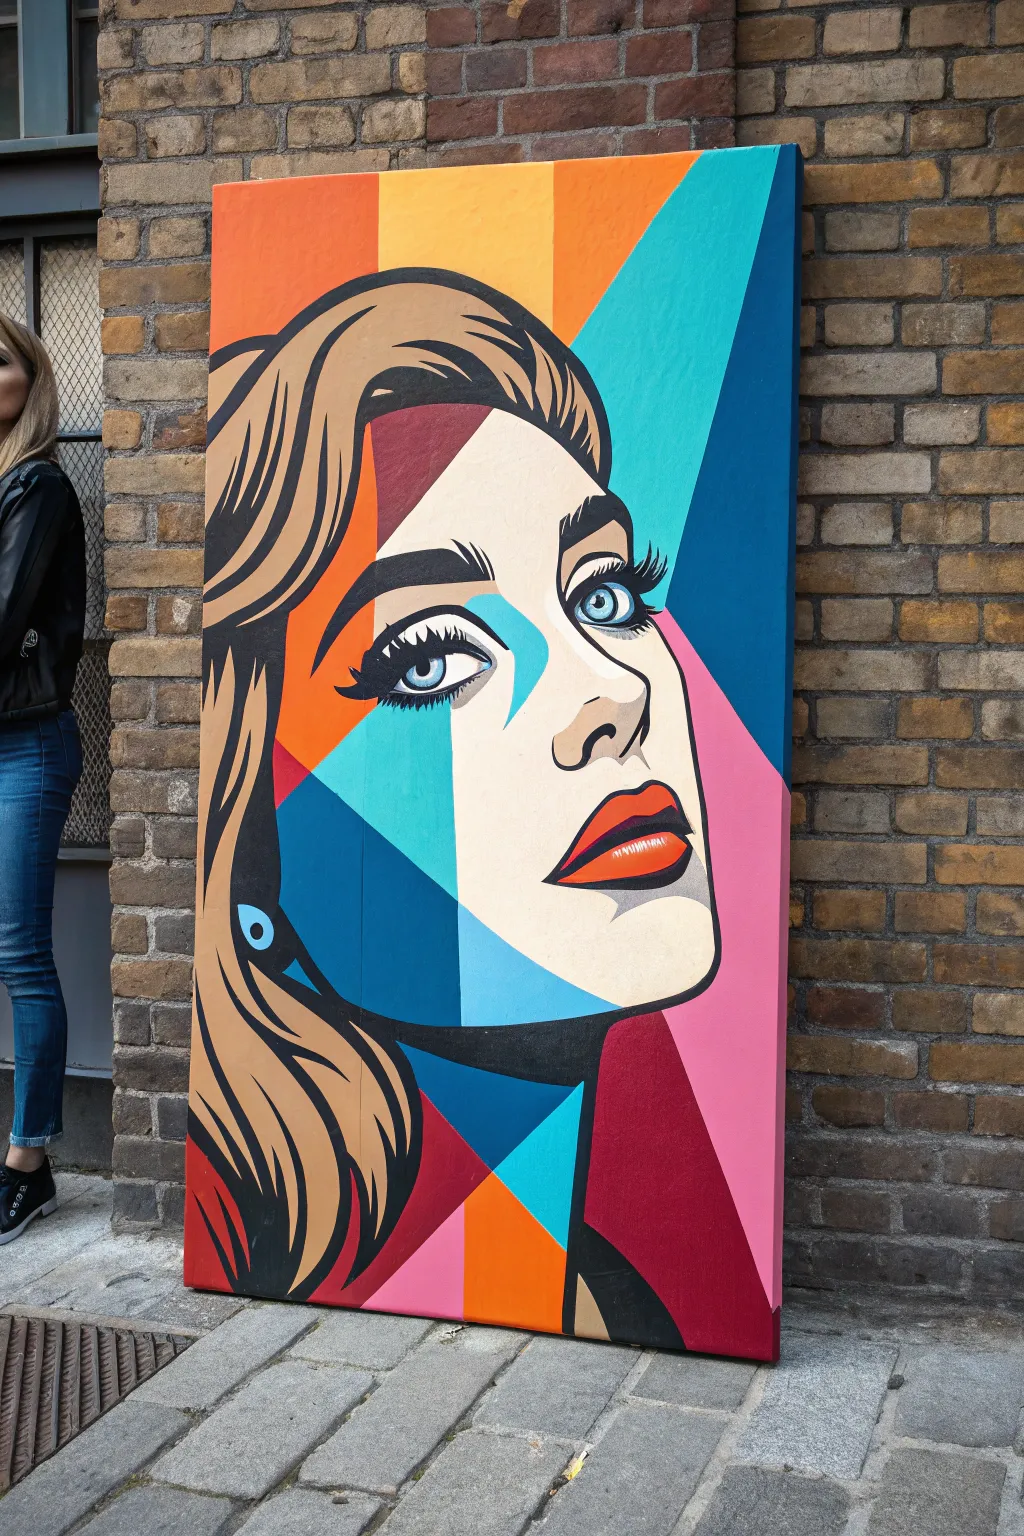

Transform a classic portrait into a vibrant statement piece by merging flowing hair lines with sharp, geometric color blocks. This project balances graphic comic-book contours with an abstract, shattered-glass background for a striking pop art effect.
Detailed Instructions
Materials
- Large rectangular canvas (approx. 24×48 inches)
- Acrylic paints (primary cyan, magenta, yellow, plus black, white, orange, and teal)
- Pencil and eraser
- Protractor or ruler
- Painter’s tape or masking tape (optional for straight edges)
- Flat synthetic brushes (various sizes: 1 inch for backgrounds, medium for blocks)
- Fine round liner brush (size 0 or 1) for black outlines
- Reference photo of a face looking upward
- Palette for mixing skin tones
Step 1: Planning and Sketching
-
Select your subject:
Choose a reference photo with high contrast and defined features. A pose looking upward three-quarters works best for this dynamic composition. -
Sketch the main contours:
Lightly sketch the outline of the face, hair, and neck using a pencil. Focus on simplifying the hair into thick, flowing strands rather than individual hairs. -
Map the geometric zones:
Using a ruler, draw straight lines that intersect through the background and parts of the face. Create large triangles and trapezoids that ‘shatter’ the image, particularly on the shadowed side of the face.
Sharper Lines Hack
For perfectly straight edges on the geometric blocks, use painter’s tape. Peel it off while the paint is still slightly wet to prevent chipping the edge.
Step 2: Color Blocking
-
Mix your base skin tone:
Create a pale, creamy flesh tone using white, a touch of yellow ochre, and a tiny dot of red. Paint the illuminated ‘main’ section of the face with this flat color. -
Paint the background shards:
Fill the background geometric shapes with high-intensity colors. Use bright teal, navy blue, soft pink, and burgundy to create contrast against the skin tone. -
Apply shadow geometry:
For the shadowed side of the face (the left side in the example), avoid realistic blending. Instead, use darker, saturated colors like deep teal, royal blue, and orange to fill the geometric shapes you drew earlier. -
Block in the hair base:
Paint the hair foundation with a flat light brown or dark beige. Don’t worry about texture yet; just get solid coverage. -
Add vibrant accents:
Identify smaller triangles within the composition—like near the neck or shoulder—and fill them with punchy colors like hot pink or bright orange to guide the viewer’s eye.
Step 3: Detailing and Outlining
-
Define the eyes:
Paint the irises a striking blue. Leave a small white circle in the pupil for a ‘catchlight’ to make the eyes look alive. -
Paint the lips:
Use a bright red-orange for the lips. Add a small white highlight on the bottom lip to give them a glossy, pop-art finish. -
Start the black lining:
Load a fine liner brush with fluid black acrylic. I prefer thinning the paint slightly with water so it flows like ink. -
Outline the facial features:
Trace the eyes, eyebrows, nose, and lips with varying line weights. Make the eyelashes thick and graphic, almost like spikes. -
Create hair volume:
Using the black paint, draw flowing, tapered lines through the hair color blocks to suggest waves and movement. These lines should mimic comic book inking. -
Clarify the geometry:
You generally don’t outline every single color block, but use black lines to define where the face separates from the background or hair. -
Clean up edges:
If any color blocks look messy where they meet, you can carefully re-paint the edge to make it razor-sharp.
Shaky Hands?
If you struggle with the long black hair lines, rest your pinky finger on a dry part of the canvas to stabilize your hand while pulling the brush.
Step 4: Final Touches
-
Deepen the shadows:
Add smaller geometric shapes of dark grey or black within the blue face shadows to add depth without breaking the flat style. -
Check consistency:
Step back and ensure your colors are opaque. If the canvas texture shows through, apply a second coat to those specific blocks. -
Varnish the piece:
Once fully dry (give it 24 hours), apply a satin or gloss varnish to make the colors pop and protect that crisp finish.
Hang your geometric masterpiece on a brick or textured wall to really make those modern colors sing
Pop Art Diptych: Two Faces, One Story
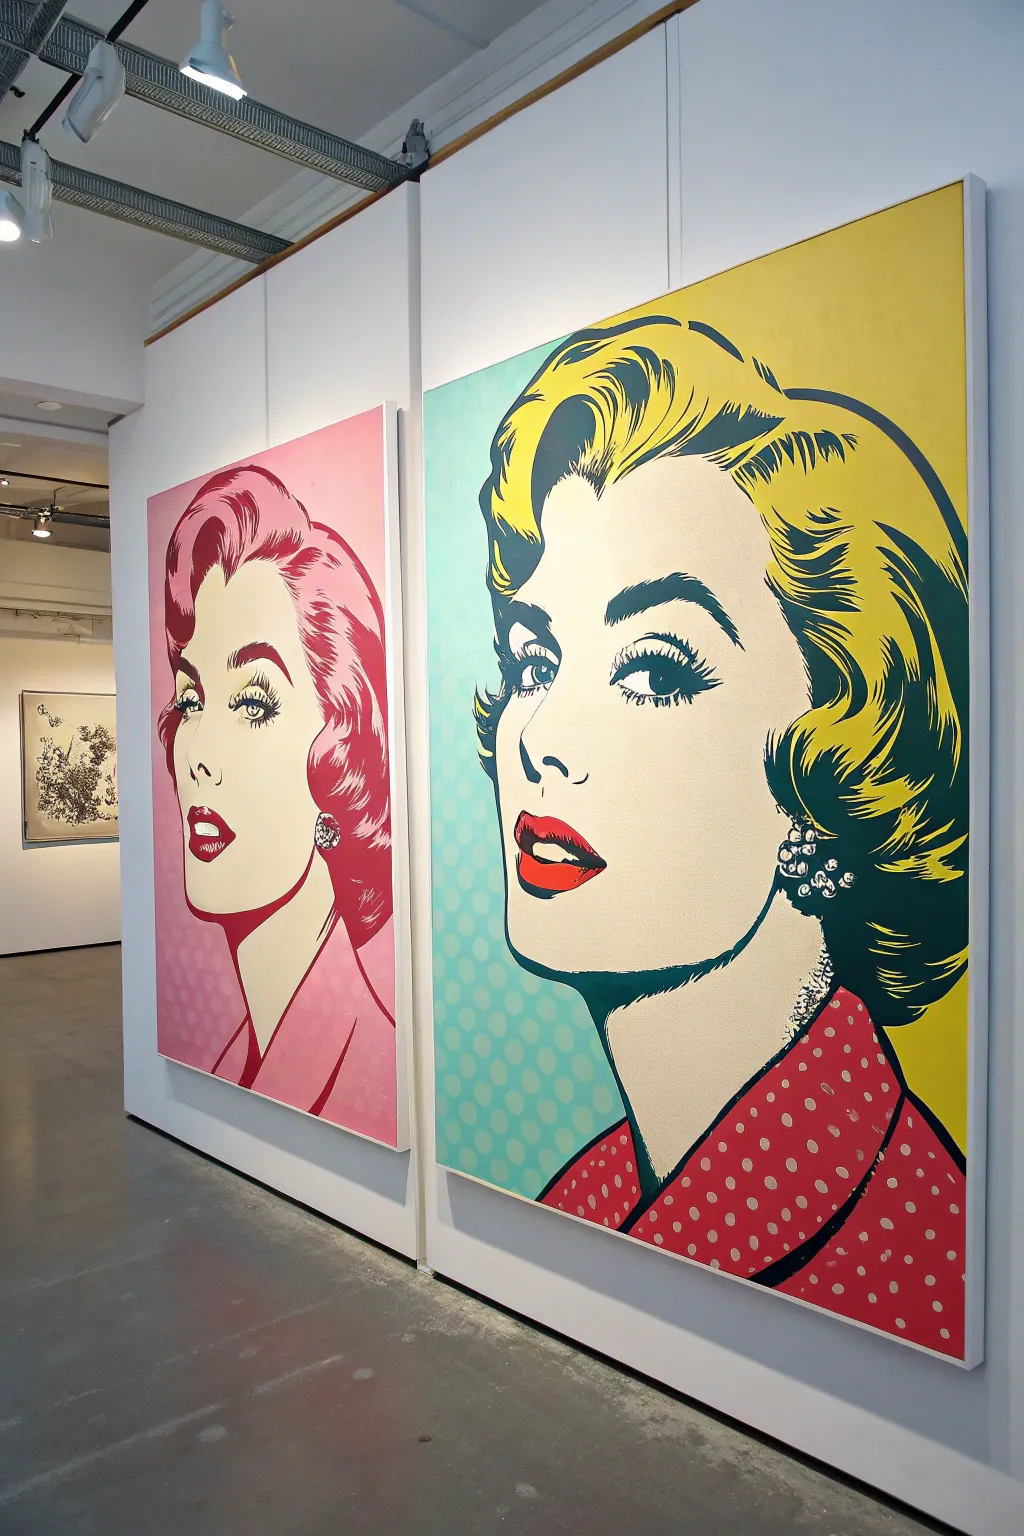
Transform your space with a bold, two-panel statement piece that channels the vibrant energy of 1960s comic book pop art. This project creates a striking diptych featuring the same iconic portrait in two distinct, high-contrast color palettes.
Step-by-Step Tutorial
Materials
- Two large prepared canvases (e.g., 24×36 or larger)
- Acrylic paints (Heavy body preferred)
- Colors: Pale pink, magenta, white, black, cyan/teal, lemon yellow, bright red
- Gesso (optional, for extra priming)
- Graphite transfer paper
- Pencil and eraser
- Painter’s tape or masking tape
- Blooping tape or drafting tape (optional for clean lines)
- Various flat brushes (1/2 inch to 2 inch)
- Fine liner brush (for outlining)
- Circle stencil or dotting tool (for Benday dots)
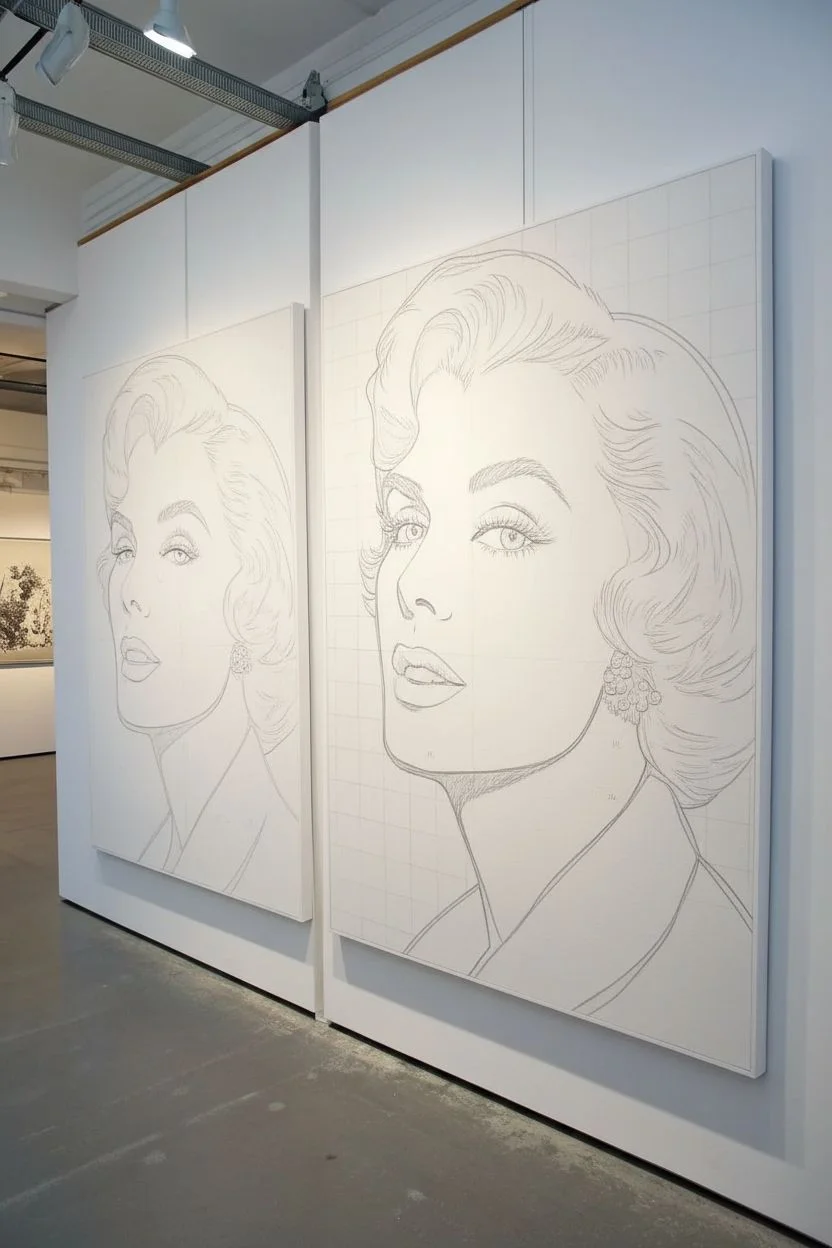
Step 1: Preparation and Sketching
-
Prime the canvases:
Even if your canvases are pre-primed, apply an extra coat of white gesso to ensure a perfectly smooth surface. Pop art relies on flat, opaque color fields, so texture is your enemy here. Let this dry completely before sandling lightly. -
Select your source image:
Choose a black and white portrait photo or a comic-book style drawing. High-contrast images with strong shadows work best. If using a photo, posterize it in editing software to reduce it to 3-4 distinct tonal values before printing it to scale. -
Transfer the design:
Place graphite transfer paper over your first canvas and tape your enlarged reference image on top. Trace the major shapes—hair, facial contours, eyes, and lips—firmly with a pencil. Repeat this exact process on the second canvas to ensure identical composition. -
Refine the lines:
Remove the paper and go over your pencil lines on the canvas to make them darker and cleaner. Mark which areas will be solid black (shadows) and which will be color. I like to write a tiny initial for the intended color in each section to avoid confusion later.
Step 2: Painting the Pink Canvas
-
Block in the face:
Mix a very pale cream or off-white. Using a large flat brush, fill in the skin and face area. You will likely need two coats to achieve full opacity without brushstrokes showing. -
Apply the hair color:
For the left canvas, mix a medium pink. Apply this to the hair sections and the blouse area. Keep your edges crisp. -
Add the background dots:
Create the signature Benday dot background. Mix a slightly darker pink or magenta. Using a stencil or a dedicated dotting tool, apply a grid of dots over the background area. Ensure the spacing is uniform for that mechanical print look. -
Paint the shadows:
Using a deep magenta or dark red, paint the shadowed areas of the hair and the darker details of the lips.
Clean Line Secret
For razor-sharp edges between colors, apply painter’s tape, paint a thin layer of the *base* color over the tape edge first to seal it, and then apply your new color. No bleed-under!
Step 3: Painting the Yellow/Teal Canvas
-
Create the teal background:
On the second canvas, start with the background. Paint a solid teal or aqua base. Once dry, overlay a lighter teal or white dot pattern using your stencil, creating a reverse effect from the first canvas. -
Block in the face and hair:
Paint the face with a pale, creamy flesh tone. For the hair, use a vibrant lemon yellow. This high contrast against the teal background is what makes this panel pop. -
Paint the clothing:
Fill the blouse area with a bright red. Once that red is dry, add white or light pink polka dots to the fabric pattern for added visual texture.
Go Digital First
Before painting, scan your sketch and test color combinations in Photoshop or Procreate. Seeing the diptych colors side-by-side digitally prevents regret before you mix expensive paints.
Step 4: Inking and Finishing
-
Outline major features:
Mix a fluid black acrylic or use a high-quality black paint marker. Carefully outline the jawline, neck, and shoulders. Vary the line weight—thicker on the shadow side, thinner on the light side. -
Detail the face:
Paint the crucial facial features: the eyelashes, eyebrows, nostrils, and the separation of the lips. Use your fine liner brush here. The eyes should be crisp and bold. -
Fill heavy blacks:
Fill in the deep shadow areas in the hair. On the yellow canvas, you might have large chunks of black shadows in the yellow hair to simulate volume. On the pink canvas, these might be dark magenta, but feel free to use black for maximum drama. -
Add highlights:
Finally, add pure white highlights to the eyes, the moisture on the lip, and the highest sheen point of the hair. This brings the character to life. -
Seal the work:
Once both canvases are fully cured (give it 24 hours), apply a satin or gloss varnish. This unifies the sheen and protects those bright colors from fading.
Hang your masterpieces side by side with a few inches of spacing to let the colors vibrate against each other


Patterned Backgrounds: Dots, Diamonds, and Stripes
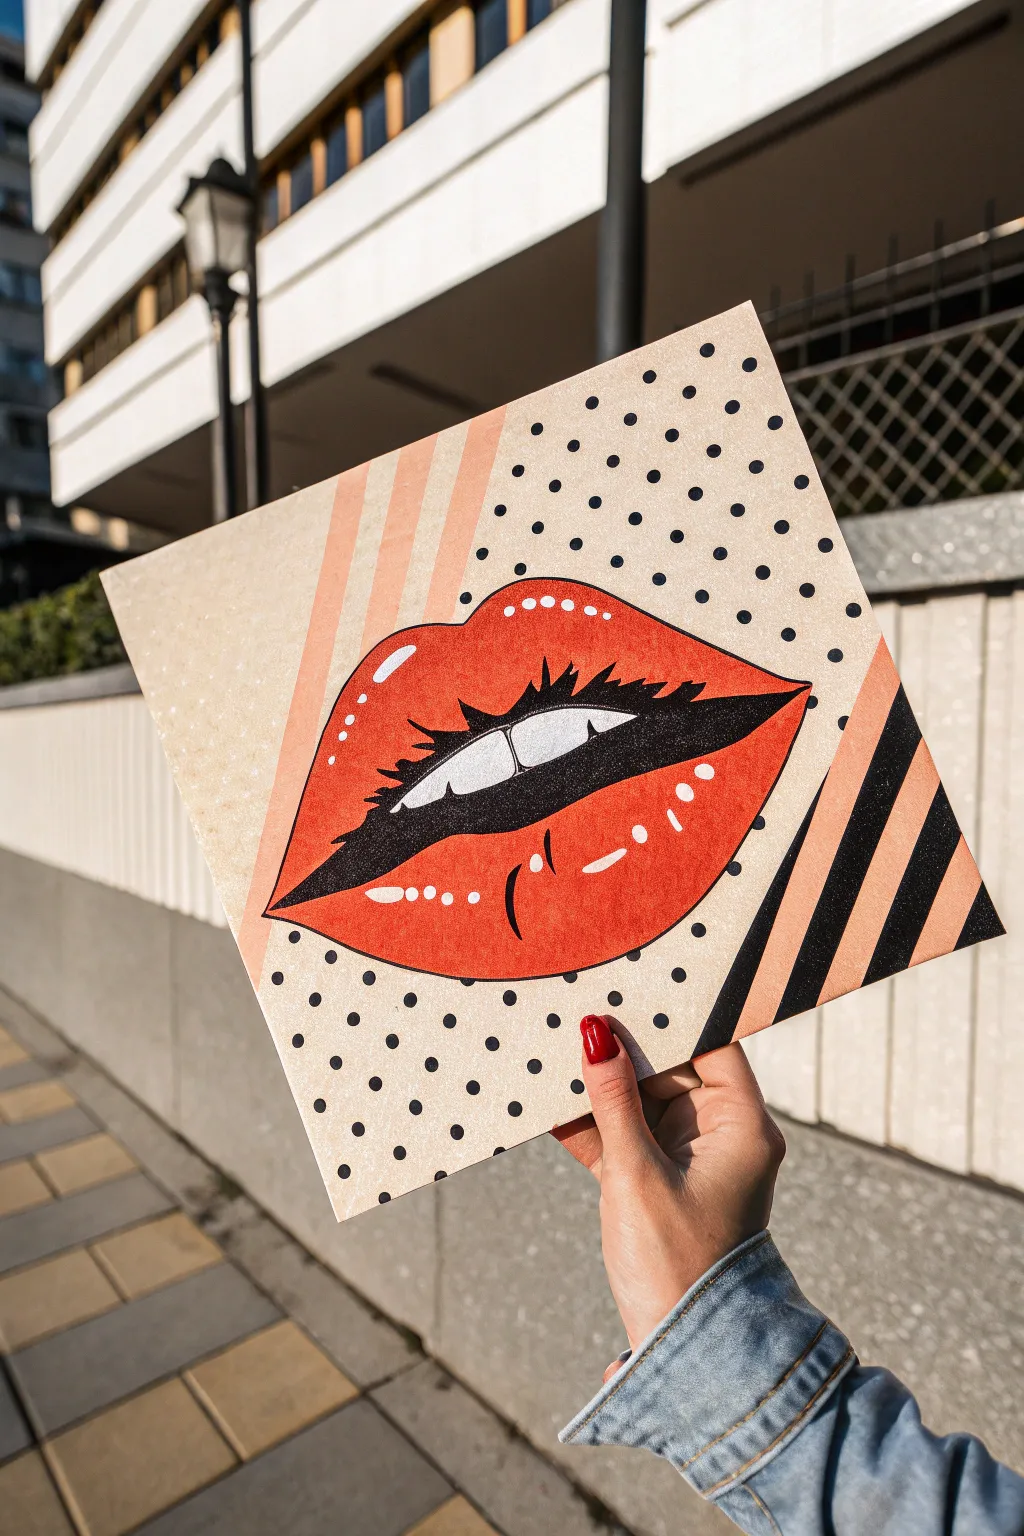
This striking square canvas combines classic pop art elements like bold outlines and comic book-style dots with a modern, mixed-pattern background. It’s a fantastic exercise in masking and precision painting that results in a graphic statement piece perfect for a gallery wall.
Step-by-Step
Materials
- Square canvas board or thick watercolor paper (approx. 8×8 or 10×10 inches)
- Acrylic paints (bright red, black, white, beige/cream, peach)
- Masking tape or painter’s tape
- Pencil and eraser
- Ruler
- Fine liner brush (size 0 or 00)
- Flat shader brush (size 4 or 6)
- Dotting tool or the back end of a brush handle
- Compass or circular stencil (optional for dots)
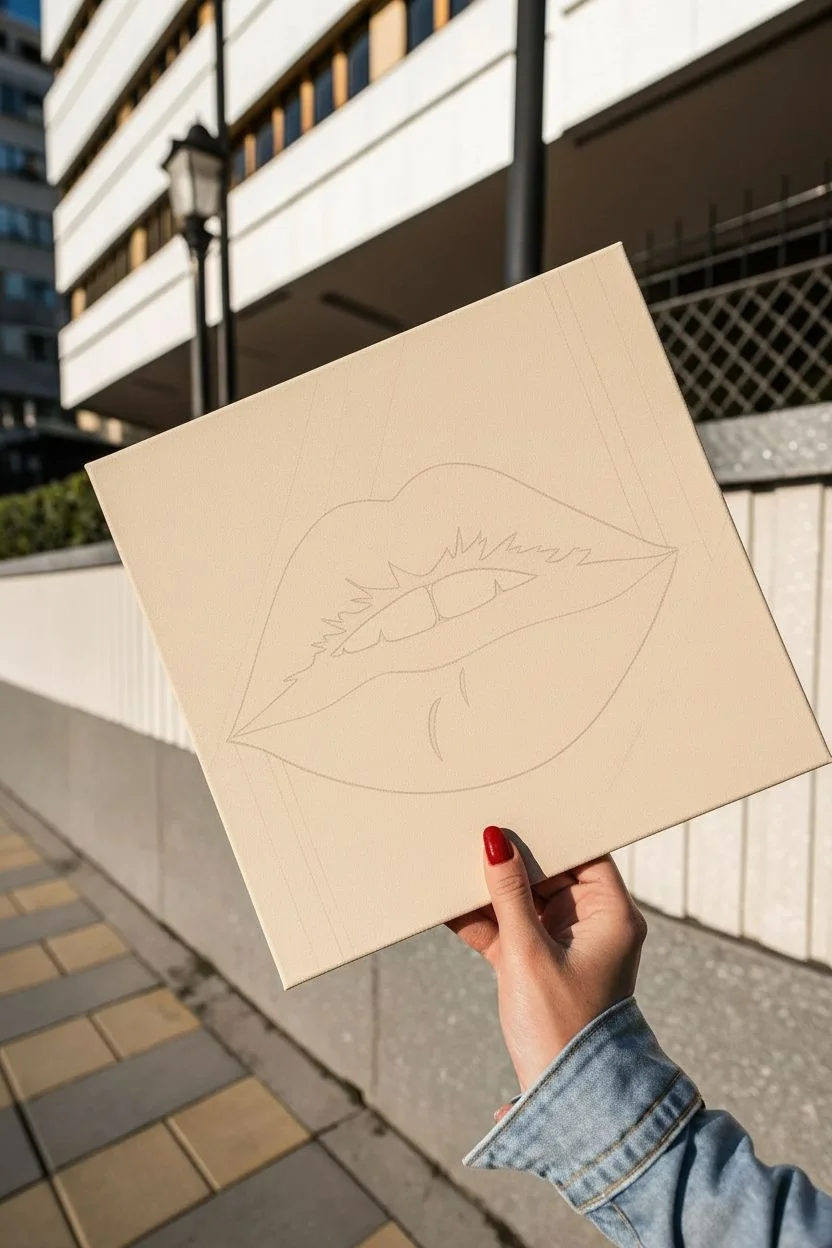
Step 1: Base and Background Structure
-
Prime the surface:
Start by coating your entire canvas board with a layer of beige or cream acrylic paint. Apply two coats if necessary to ensure it is fully opaque and smooth. Let this dry completely before moving on. -
Define the diagonal split:
Use a ruler to lightly draw a diagonal line cutting across the canvas. Position it so the top left area is larger than the bottom right, roughly at a 60/40 split. -
Sketch the lips:
In the center of the canvas, lightly sketch the outline of the open mouth. Focus on the iconic ‘Cupid’s bow’ shape for the top lip and a fuller curve for the bottom lip. -
Add detail lines:
Draw the teeth peeking through the center, leaving a slight gap between the front two. Add the inner mouth shadow shape behind the teeth.
Keep it Clean
For the sharpest stripes, paint a thin layer of your base beige color over the tape edge first. This seals the tape so the next color won’t bleed underneath.
Step 2: Creating the Patterns
-
Draft the stripes:
In the upper left background section (behind where the lips will be painted), use your ruler to draw vertical lines about half an inch apart. These will become your peach stripes. -
Draft the dots:
In the remaining background space (mostly to the right and bottom), lightly mark a grid of small circles. Staggering them usually looks more dynamic than a perfect square grid. -
Paint the stripes:
Carefully paint alternating vertical stripes with peach acrylic paint. Using masking tape here ensures perfectly crisp edges, but be sure the base coat is 100% dry first. -
Paint the side angles:
Notice the bold black and peach diagonal stripes on the far right edge? Tape off that section and paint the black stripes first, followed by the peach ones once dry. -
Dot the background:
Using black paint and a dotting tool (or just the back of a paintbrush handle), dab paint onto your marked circles. Try to keep the pressure consistent for uniform dot sizes.
Step 3: Bringing the Lips to Life
-
Fill the red base:
Paint the main body of the lips with a bright, vibrant red acrylic. You may need two thin coats for full saturation. Avoid the teeth and inner mouth area. -
Whiten the teeth:
Paint the teeth with pure white. I find that doing this before the black outline helps prevent smudging gray into the bright white areas. -
Paint the inner mouth:
Fill the space behind the teeth and between the lips with solid black to create depth. -
Add the bold outline:
Using your finest liner brush and black paint (slightly thinned with water flows better), trace the outer edge of the lips. Vary the line weight—make it thicker at the corners and thinner near the center curves. -
Detail the center line:
Outline the bottom edge of the top lip and the top edge of the bottom lip with black, giving the mouth a defined ‘comic book’ look. -
Create highlights:
Identify where the light hits—usually the top left curve of the upper lip and the center of the bottom lip. Paint crisp white shapes (ovals or curved rectangles) here. -
Add dotted highlights:
To enhance the pop art texture, add a row of very small white dots along the upper ridge of the top lip and a few scattered dots on the bottom lip near the main highlight. -
Clean up edges:
Once everything is dry, erase any visible pencil marks. If any red or black went outside the lines, touch up the background beige carefully.
Add Some Sparkle
Mix a tiny pinch of fine glitter or iridescent medium into the white highlight paint. It adds a subtle shimmer that mimics glossy lipstick.
Step back and admire how the contrasting patterns make the central image pop right off the surface
Glam Accessories: Sunglasses, Earrings, and Bold Lip Color
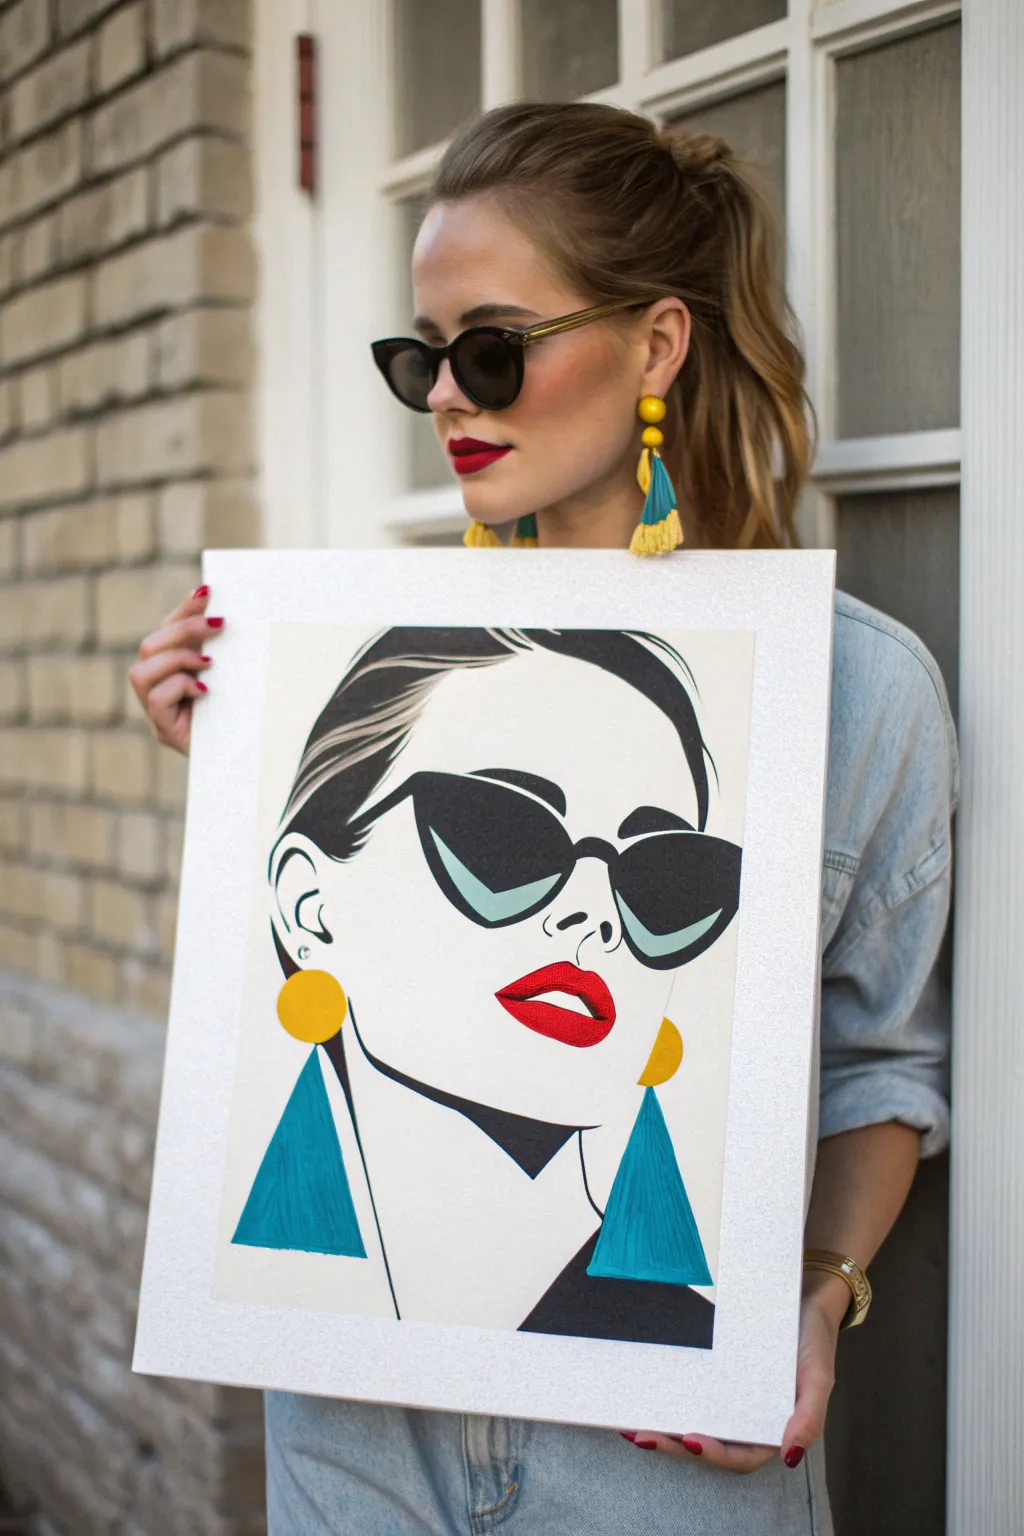
Capture the essence of modern glam with this stylized pop art portrait featuring striking accessories and bold, flat colors. The high-contrast design mimics the clean lines of graphic illustration, making it a perfect project for mastering precision painting.
Detailed Instructions
Materials
- Heavyweight mixed-media paper or canvas board (approx. A3 size)
- Pencil (HB) and eraser
- Black acrylic paint or black India ink
- Acrylic paints (primary cyan, yellow, bright red, white, skin tone base)
- Fine liner brushes (sizes 0 and 00)
- Flat shader brushes (sizes 4 and 6)
- Ruler
- Mixing palette
- Masking tape or painter’s tape
- Silver glitter cardstock or metallic silver paint (for border)
- Glue stick (if using cardstock)
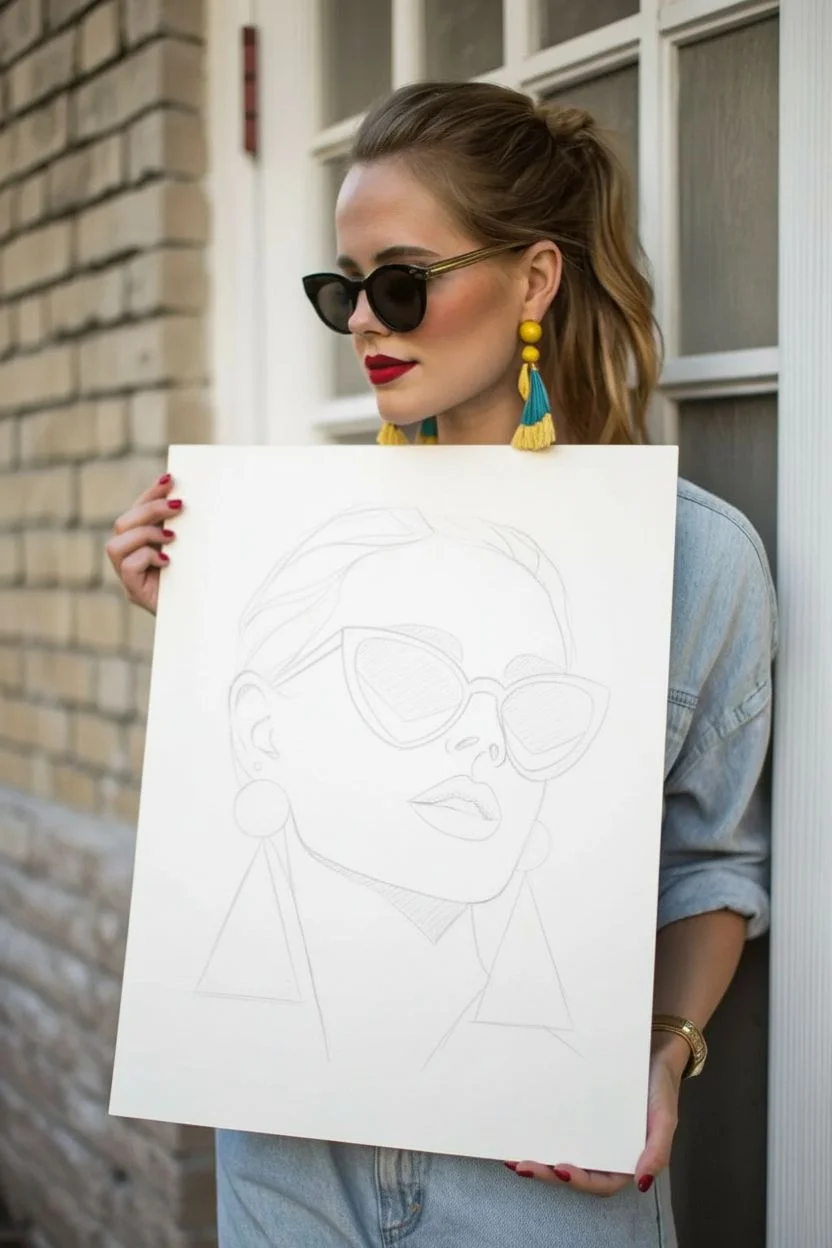
Step 1: Drafting the Design
-
Establish the proportions:
Begin by lightly sketching the outline of the woman’s face. Focus on the tilt of the chin and the long, elegant neck curve. Keep the lines faint so they are easy to erase later. -
Position the accessories:
Sketch the large cat-eye sunglasses dominate the upper face. Ensure the frames are symmetrical. Add the circular stud earring shape just below the jawline on the left side, followed by the large triangular drop shape. -
Detail the features:
Draw the full, parted lips and the stylized nose line. Sketch the hair swept back, keeping the lines fluid to suggest movement. -
Refine the lines:
Go over your sketch to harden the final lines. Pay special attention to the negative space within the sunglasses and the sharp angles of the earrings.
Steady Hand Trick
For the long, smooth curves on the jawline and hair, exhale slowly as you pull the brush toward you. This stabilizes your hand better than holding your breath.
Step 2: Blocking in Color
-
Paint the skin:
Mix a pale, creamy skin tone using white and a tiny drop of your base skin color. Apply this evenly to the face and neck using a flat brush. You may need two coats for opaque coverage. -
Add the lip color:
Using a small round brush, fill in the lips with a vibrant, true red. Leave a tiny sliver of white space between the upper and lower lip to simulate teeth or a highlight. -
Earring base color:
Paint the circular studs of the earrings with a bright, opaque yellow. Ensure the edges are crisp circles. -
Earring drop color:
Mix a teal or turquoise shade using cyan and a touch of white. Carefully fill in the large triangular shapes of the earrings. -
Sunglasses lenses:
Paint the main lens area black. Once dry, add the reflection details—a lighter teal swoosh on the bottom curves to mimic the glass reflecting the earrings.
Add Real Texture
Instead of painting the teal triangles, cut actual fabric or thread tassels and glue them onto the canvas for a mixed-media 3D pop art effect.
Step 3: Inking and Definition
-
Outline the hair:
Using black paint or ink and a fine liner brush, create the heavy black shape of the hair. Use sweeping strokes that taper at the ends to show the hair strands pulled back. -
The decisive black lines:
Outline the jaw, neck, and ear with varying line weights. I like to make the shadow line under the chin slightly thicker to add depth to the flat design. -
Frame the glasses:
Paint the thick black frames of the sunglasses. Use a steady hand or a ruler to get the top edge perfectly straight. -
Detailing the earrings:
Add fine vertical texture lines to the teal triangles using slightly watered-down brighter teal or blue paint to mimic the tassel thread texture. -
Final facial features:
Add the nostril line and the bold, graphic eyebrows peeking out from behind the sunglasses.
Step 4: Finishing Touches
-
Clean up:
Once all paint is completely dry, gently erase any visible pencil marks remaining in the unpainted white background areas. -
Mounting the border:
Cut a frame from silver glitter cardstock that is about 2 inches wider than your artwork on all sides. -
Centering the art:
Use a ruler to center your painted paper onto the glitter cardstock. -
Final adhesion:
Apply glue evenly to the back of your painting and press it firmly onto the glitter backing. Place a heavy book on top while it dries to prevent curling.
Hang your glamorous masterpiece in a well-lit spot to let that glitter border catch the light
Pet Portrait Pop: Your Fur Buddy in Neon Hues


Transform a photo of your beloved pet into a vibrant, Warhol-inspired masterpiece featuring bold lines, neon colors, and classic comic-book style dots. This striking canvas project captures your furry friend’s personality with a modern, graphic twist perfect for brightening any room.
Step-by-Step Tutorial
Materials
- Square stretched canvas (20×20 inches or similar)
- Acrylic paints (Neon pink, lime green, bright purple, cyan blue, black, white)
- High-resolution photo of your pet
- Carbon transfer paper or graphite paper
- Pencil and eraser
- Assorted paintbrushes (large flat brush, medium filbert, fine liner brush)
- Painter’s tape or artist tape
- Circle stencil or foam pouncer (small size)
- Palette for mixing
- Water cup and paper towels
Step 1: Preparation and Sketching
-
Photo selection:
Choose a clear, high-contrast photo of your pet looking slightly to the side. A three-quarter profile works best for capturing depth and character. -
Digital prep:
Using photo editing software or a free app, increase the contrast of your image significantly. Turn it into a black and white threshold image if possible, reducing the details to just shadows and highlights. This creates that high-contrast ‘posterized’ look you need. -
Transfer the image:
Print your edited image to the size of your canvas. Place a sheet of carbon paper between the printout and the canvas, graphite side down. -
Trace the outlines:
Trace the main contours of the dog’s head, ears, nose, and distinct shadow areas. Don’t worry about fur texture yet; focus on the major shapes that define the face. I find it helpful to tape the paper down so it doesn’t shift while I’m tracing. -
Clean up:
Remove the paper and refine your pencil lines directly on the canvas. Strengthen the separation between the dog subject and the background areas.
Step 2: Background Blocking
-
Section the background:
Use a ruler to draw straight lines radiating from behind the dog’s head, dividing the background into four or five energetic shards or sections. -
Taping off:
Apply painter’s tape along the pencil lines of one or two non-adjacent background sections. This ensures crisp, straight edges between your colors. -
First color application:
Paint the exposed sections with your base colors—prime for lime green and bright purple. Apply two thin coats for opaque, flat coverage, letting the first coat dry completely before adding the second. -
Remaining sections:
Once dry, carefully remove the tape. Tape over the painted edges to protect them, then paint the remaining background sections with pink and cyan blue.
Dot Perfection
Don’t have a stencil? Dip the handle end of a large paintbrush into paint and dot it directly onto the canvas for perfectly uniform circles.
Step 3: The Pop Art Dog
-
Base coat the dog:
Paint the entire silhouette of the dog’s head in a solid neon pink. This serves as your mid-tone. You may need three coats to cover the white canvas fully without streaks. -
The blue collar:
Paint the collar area with a bright cyan blue. Keep the edges sharp where it meets the pink fur. -
Adding shadows:
Using black acrylic and a medium round brush, fill in the darkest shadow areas you traced earlier. Focus on the ears, the side of the snout, and the neck shadows. -
Detailing the features:
Switch to a smaller brush to paint the nose black, leaving a small spot of pink or white for a highlight. Carefully fill in the dark pupils and outlines of the eyes.
Metallic Pop
Swap one of the matte background colors for a metallic gold or silver paint. It creates a stunning contrast against the neon matte colors.
Step 4: Texturing and Polka Spots
-
Ben-Day dots prep:
Select two of your background sections to feature the classic comic book dots. Choose a contrasting color for the dots (e.g., purple dots on green, blue dots on pink). -
Stenciling dots:
Place your circle stencil over the dry background paint. Using a stencil brush or foam pouncer with very little paint, dab the contrasting color through the holes. Lift the stencil straight up to avoid smearing. -
Fur texture:
Mix a slightly darker shade of pink (add a tiny touch of purple to your neon pink). Use a fine liner brush to create short, hatching strokes on the dog’s face to suggest fur texture without overwhelming the graphic look. -
Defining outlines:
Use a liner brush with black paint to go over all the major outlines of the dog. Vary the line weight—thicker on the shadow side, thinner on the light side—to add dynamic volume. -
Final highlights:
Add small touches of pure white to the eyes and the wet part of the nose to bring the portrait to life. -
Clean edges:
Check the edges of your canvas. Painting the sides black creates a professional, finished frame effect that pop art is known for.
Hang your vibrant new artwork in a well-lit spot to let those neon hues truly shine
Cut-Paper Collage Pop Art Silhouette Painting
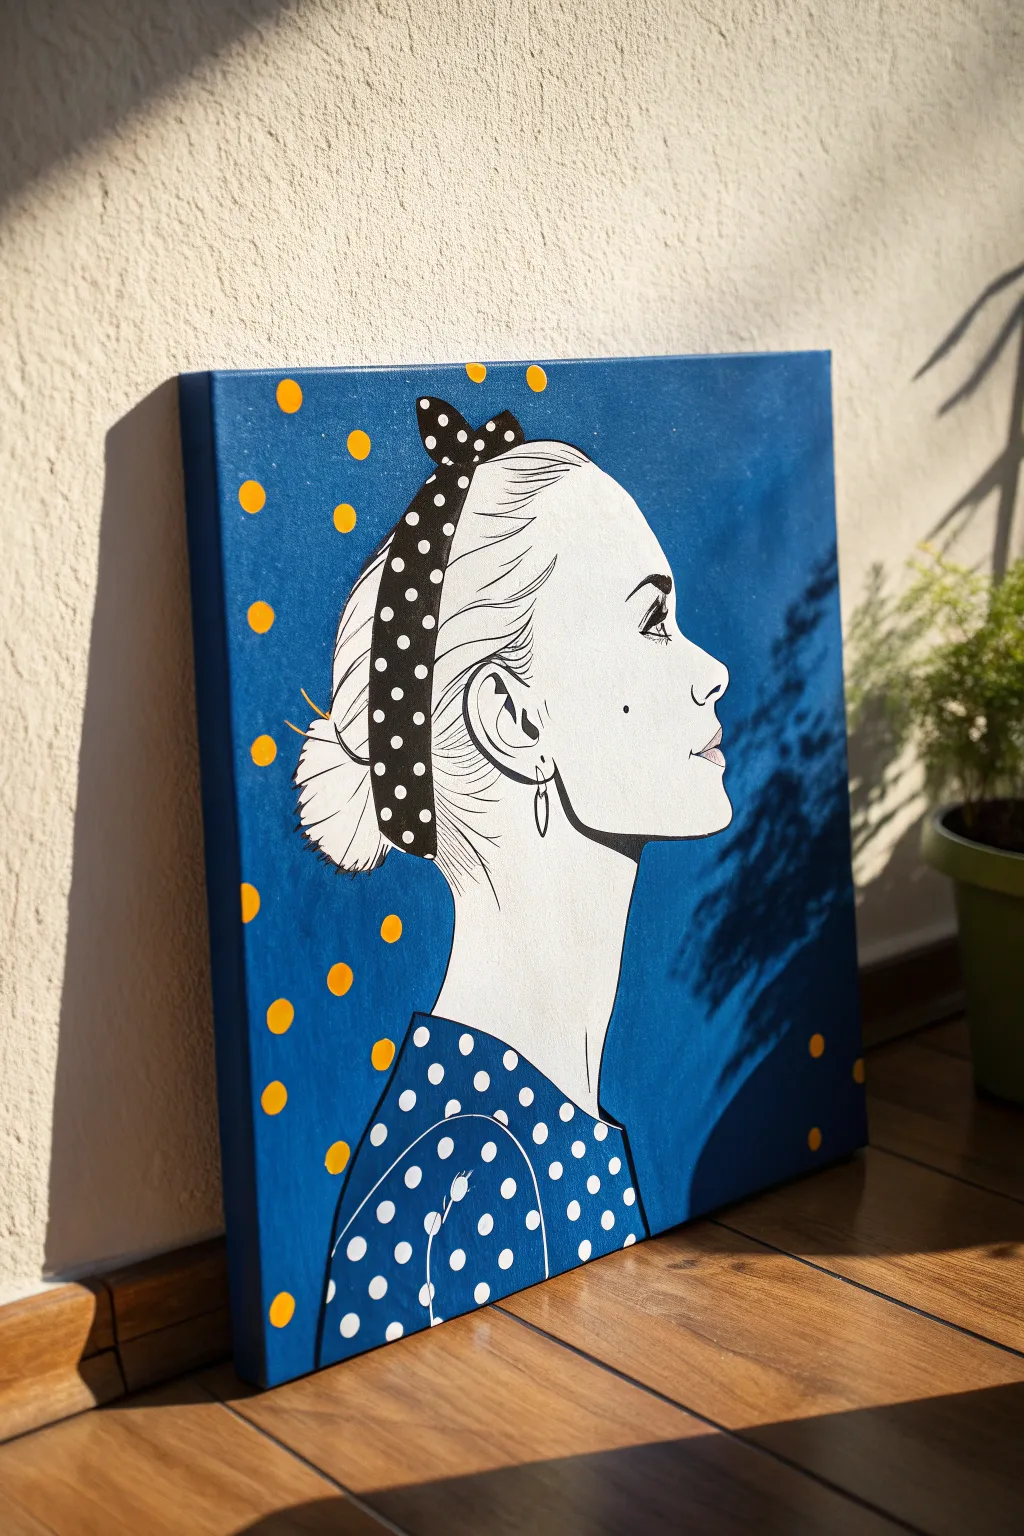
This striking canvas combines the bold simplicity of pop art with the elegance of a vintage fashion illustration. The deep blue background and contrasting polka dots create a vibrant, nostalgic feel that makes a perfect statement piece for any modern room.
Detailed Instructions
Materials
- Rectangular stretched canvas (e.g., 16×20 inches)
- Acrylic paints: Deep royal blue, titanium white, mars black, golden yellow/cadmium orange
- Wide flat brush (for background)
- Fine liner brush (size 0 or 00 for outlines)
- Medium round brush
- Pencil and eraser
- Tracing paper (optional)
- Carbon paper (optional)
- Palette or paper plate
- Water cup and paper towels
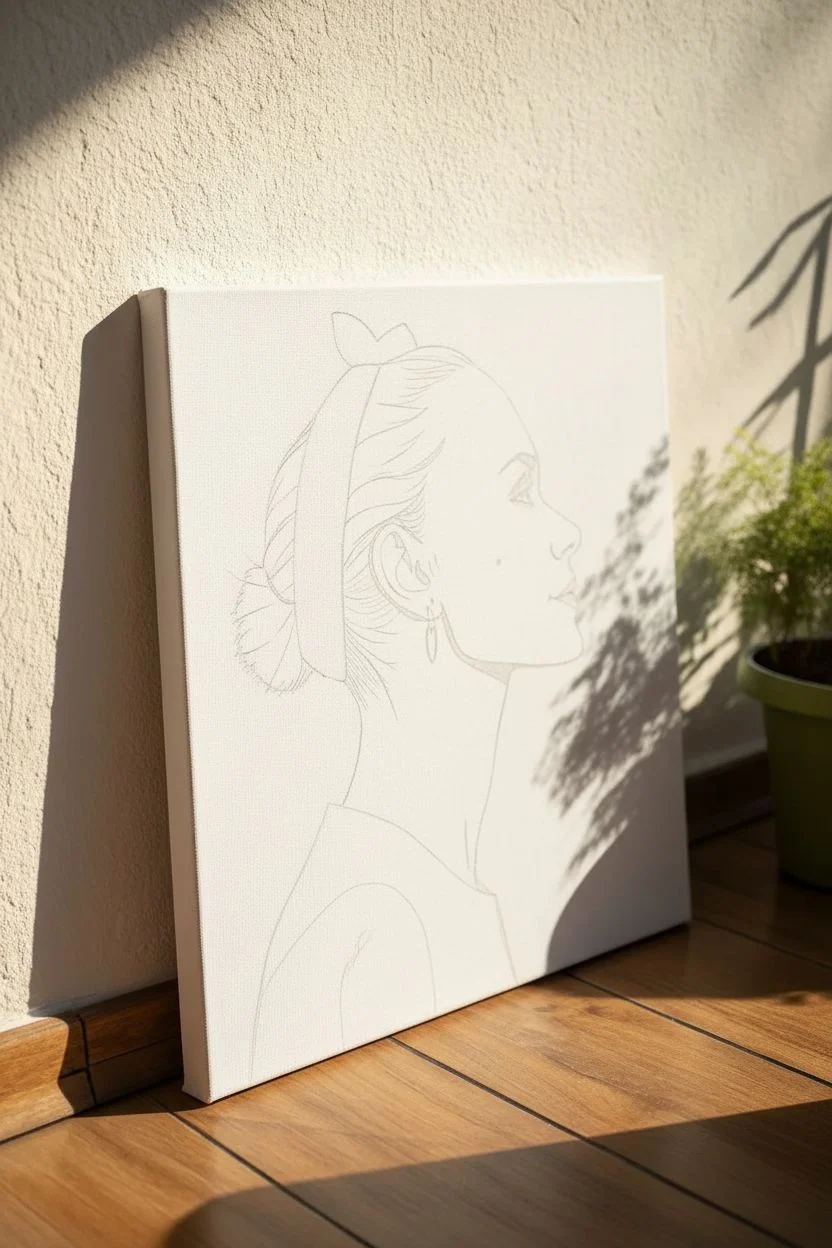
Step 1: Preparation and Sketching
-
Establish the background base:
Begin by painting the entire canvas with a coat of titanium white if it isn’t already primed. This ensures your subsequent colors pop. Once dry, sketch the outline of the woman’s profile lightly in pencil. Position her slightly off-center to the right, leaving negative space on the left. -
Refine the details:
Draw the details of her face, focusing on the upturned nose, the closed mouth, and the detailed sweeping lines of the hair pulled back into a low bun. -
Add the accessory:
Sketch the ribbon headband that wraps around the hair. Make sure to draw the bow section at the top clearly, as this will be a focal point.
Clean Circles Hack
Struggling to paint perfect circles? Use reinforcement ring stickers (for binder paper) as stencils. Stick them on the dry background, paint inside the hole, and peel off.
Step 2: Painting the Backdrop
-
Block in the blue:
Using your wide flat brush and the deep royal blue paint, carefully fill in the negative space around the portrait. Move the brush in smooth, consistent strokes to avoid patchy texture. -
Navigate the edges:
Switch to a smaller round brush when you get close to the pencil lines of the profile. Paint right up to the line, defining the silhouette sharply against the blue background. -
Paint the canvas sides:
Don’t forget to paint the edges and sides of the canvas with the same blue. This gives the artwork displayed frameless a professional, finished look. -
Let it cure:
Allow the blue background to dry completely. If the coverage looks thin, apply a second coat for a truly opaque, rich color.
Troubleshooting: Shaky Lines
If your outlines are shaky, thin your black paint with a few drops of water or flow improver. The paint should glide off the brush like ink, reducing drag.
Step 3: Painting the Portrait
-
Skin tone base:
Mix a very large amount of white with the tiniest dot of yellow or orange to create a warm cream tone. Paint the face and neck area with this mixture. It should look very pale, almost stark white, but warmer. -
Dress pattern base:
Paint the woman’s clothing area with the same deep royal blue used for the background. This creates a clever visual effect where her dress blends into the environment. -
Headband base:
Fill in the ribbon headband shape with solid black acrylic paint. I find using a small flat brush helps keep the edges of the ribbon crisp.
Step 4: Detailing and Linework
-
The black outlines:
This is the most critical step for the illustrative style. Using your finest liner brush and thinned black paint (ink-like consistency), trace the pencil lines of the face, jawline, and neck. -
Hair texture:
Use sweeping, confident strokes to create the strands of hair. Start from the hairline and pull the brush back toward the bun. Vary the line weight—some thick, some thin—to create volume. -
Facial features:
Carefully paint the eye with thick lashes and a defined eyebrow. Add a small ‘beauty mark’ mole on the cheek for retro flair. Outline the lips delicately. -
Earring detail:
Draw a simple hoop earring shape hanging from the earlobe using a fine black line.
Step 5: The Polka Dots
-
Dress dots:
Dip the handle end of a paintbrush into titanium white paint. Dot it onto the blue dress area to create perfect, uniform white polka dots. -
Headband dots:
Clean the handle end and repeat the process on the black headband, adding small white dots to create the pattern. -
Background pattern:
Using a slightly larger round brush or round sponge dabber, apply yellow/orange circles randomly across the blue background. Keep them spaced out and varying slightly in placement to feel organic yet stylized. -
Final touches:
Check your black outlines once more. If any blue or white paint overlapped the lines, touch them up with your fine liner brush for a sharp finish.
Step back and admire the chic vintage vibe you have created with just a few simple colors
Retro Pop Meets Sci-Fi: Galaxy Reflections and UFO Details
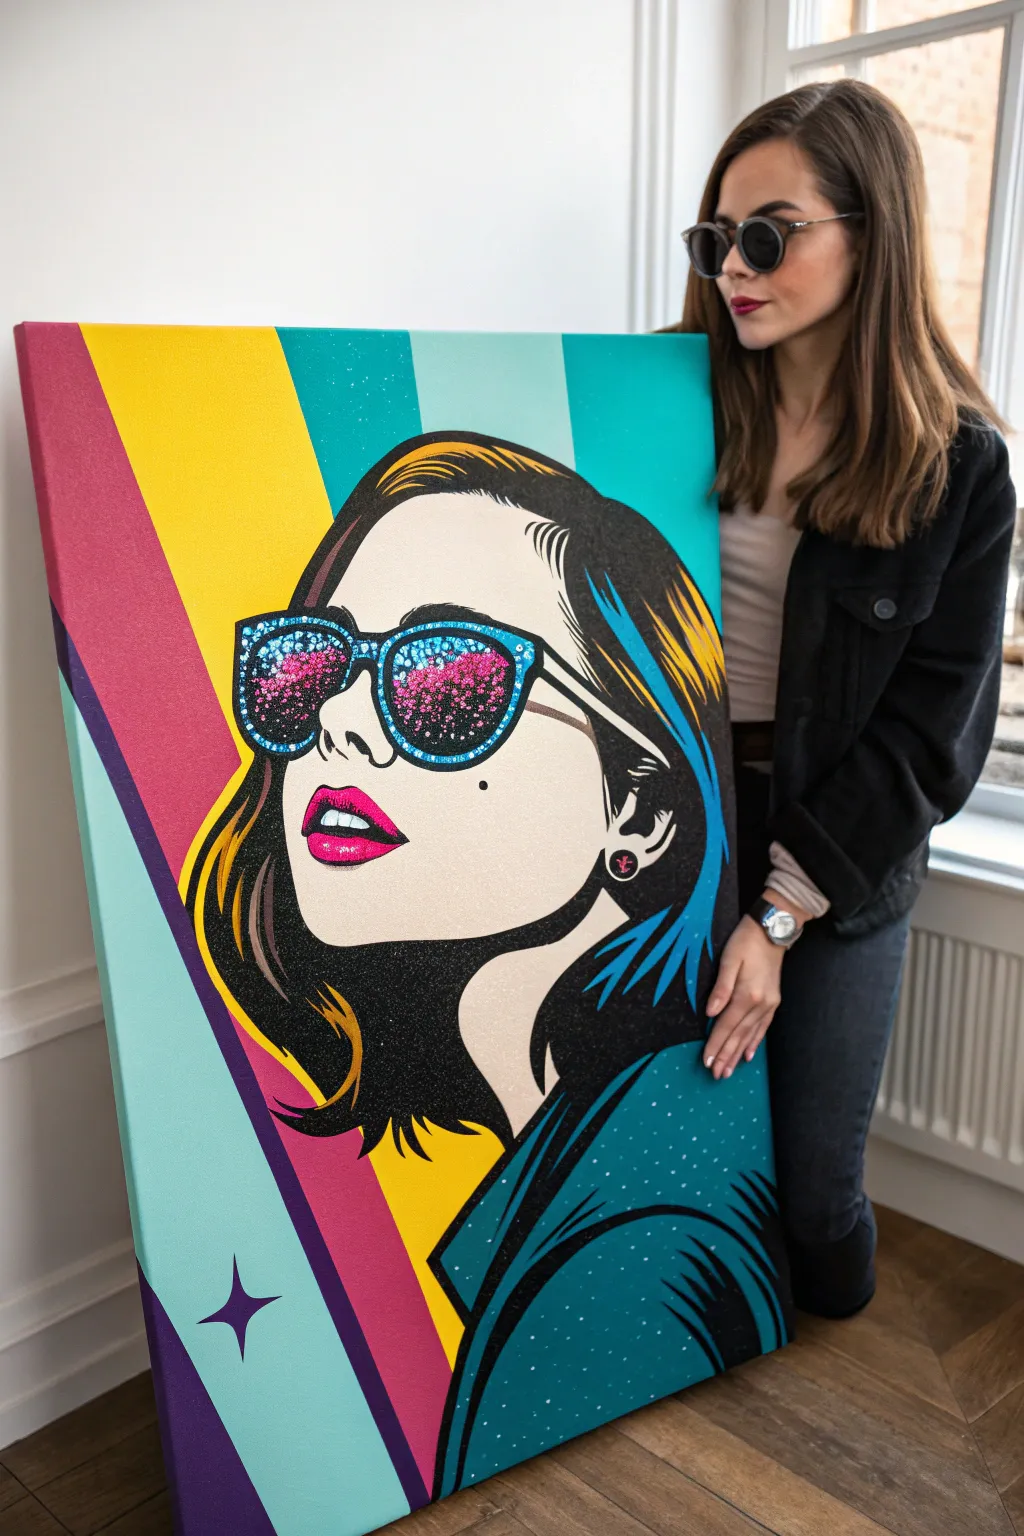
This vibrant, large-scale painting merges the flat, bold lines of classic comic book pop art with a modern, celestial twist. By combining crisp acrylic blocking with a surprise touch of glitter for the galaxy reflections, you create a statement piece that feels both retro and futuristic.
How-To Guide
Materials
- Large stretched canvas (approx. 24 x 36 inches or larger)
- Acrylic paints: Cyan, Magenta, Yellow, White, Black, Deep Purple, Beige/Skin tones
- Fine glitter (pink, blue, silver) or glitter paint medium
- Mod Podge or gloss varnish
- Masking tape (painter’s tape of varying widths)
- Graphite transfer paper and stylus
- Assorted brushes: Large flat brush for backgrounds, liner brush for details, round brushes
- Pencil and eraser
- Ruler or straight edge
- Palette for mixing
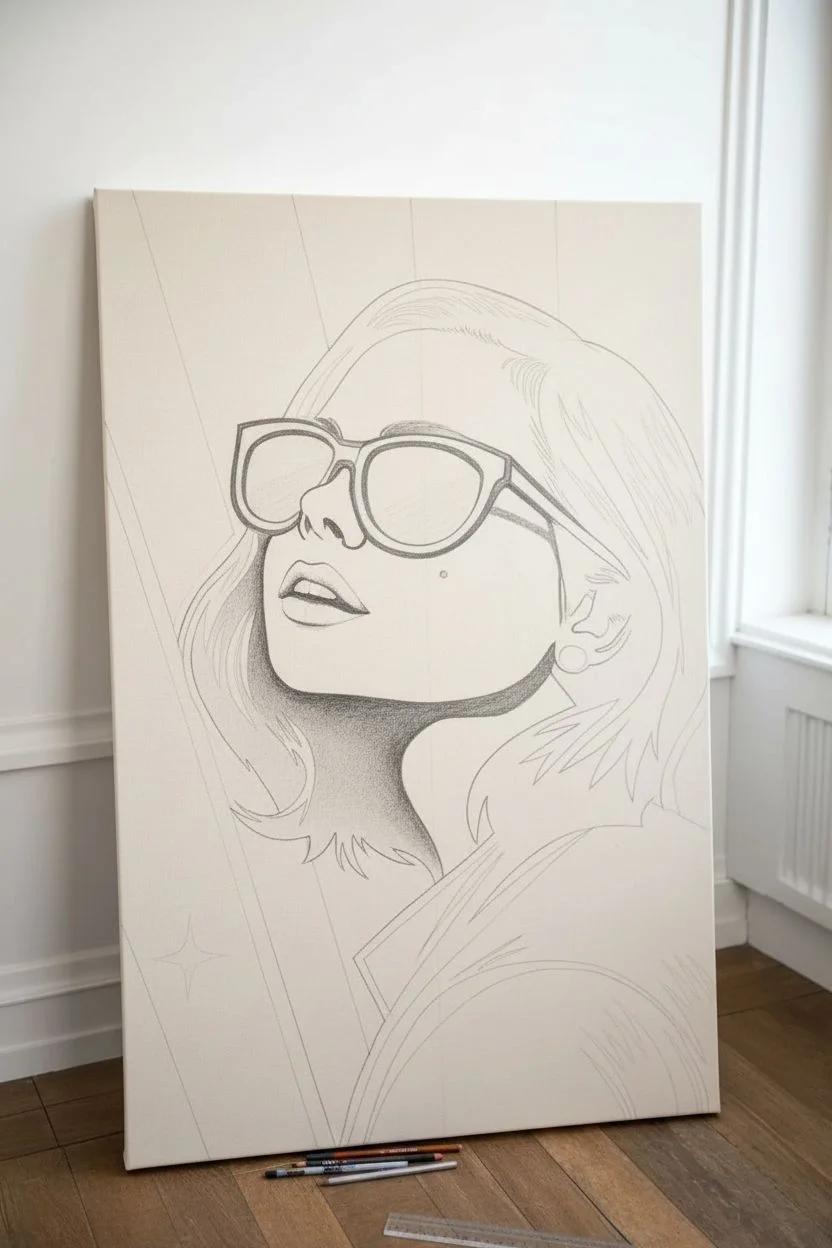
Step 1: Setting the Stage & Sketching
-
Map out the stripes:
Begin by lightly planning the background stripes with a ruler and pencil. The composition relies on dynamic diagonal lines, so draw them slanting from the top left to the bottom right. -
Draft the portrait:
Sketch the woman’s profile in the center. If you aren’t confident drawing freehand, print a reference photo, enlarge it to size, and use graphite transfer paper to trace the main contours onto the canvas. Focus on the hair shapes, the jawline, and the large statement sunglasses. -
Define the shadows:
Mark out where the heavy black shadows will fall in the hair and under the chin. This ‘comic book’ style relies on absolute contrast, so clearly delineating black areas now saves confusion later.
Clean Lines Hack
If paint bleeds under your tape, don’t panic. Wait for it to dry, then use the original background color to touch up the edge. A flat-edged brush works best for these corrections.
Step 2: Blocking the Retro Background
-
Tape the first color set:
Use painter’s tape to mask off the edges of the yellow and purple stripes. Press the tape edges down firmly to prevent bleed-through. -
Fill the background:
Paint the exposed stripes. Use a bright, opaque yellow for the widest stripe and a deep magenta or purple for the thinner accent lines. Apply two coats for solid coverage. -
Complete the stripes:
Once the first set is bone dry, carefully remove the tape. Re-tape to expose the remaining stripes—teal, light blue, and seafoam green—and paint them in. I like to paint slightly over the pencil line of the portrait to ensure no gaps appear later.
Paint Pen Precision
Struggling with the long, smooth black outlines? Switch from a brush to a high-quality acrylic paint marker. You’ll get steady flow and constant width without constantly reloading.
Step 3: Painting the Portrait
-
Base skin tones:
Mix a smooth, pale beige skin tone. Paint the entire face and neck area, avoiding the lips and sunglasses. This usually requires two or three thin layers to look smooth and opaque. -
Vibrant lips:
Fill in the lips with a hot pink or magenta. Leave a small sliver of white on the bottom lip to represent a highlight or teeth. -
Clothing color:
Paint the jacket or collar area in a deep teal or dark cyan. Don’t worry about texture yet; just get the solid colour down. -
The hair highlights:
Before adding the black, paint the highlighted strands of hair. Use yellow and light blue streaks as shown in the reference to give it that stylized, graphic look.
Step 4: The Defining Details
-
The black outlines:
Using a steady hand and a liner brush (or a black acrylic paint marker for easier control), outline every feature. Vary your line weight—thicker on the shadowed side of the face, thinner on the nose bridge. -
Filling the shadows:
Fill in the large sculpted shapes of the hair with Mars Black. This high contrast against the yellow and blue highlights creates the volume. -
Jacket texture:
Add small white or light blue stippling dots over the dark teal jacket area to suggest fabric texture or a starry pattern. -
The star motif:
Paint a four-point star (a ‘sparkle’ shape) in the bottom left purple corner using dark purple or black to balance the composition.
Step 5: The Galaxy Glasses
-
Base layer for lenses:
Paint the inside of the sunglass frames with a dark blue or black base. Let this dry completely. -
Applying the glitter glue:
Mix fine pink and blue glitter into a gloss medium or clear glue. Carefully dab this mixture into the center of the lenses. -
Creating the cosmic reflection:
While the glitter is wet, drop in tiny pinpricks of white paint for stars, or sprinkle a slightly chunkier silver glitter to mimic a galaxy reflection. -
The earring detail:
Don’t forget the small stud earring—paint it black with a tiny pink symbol or dab of glitter in the center. -
Final Varnish:
Once the entire painting has cured for at least 24 hours, apply a clear gloss varnish to seal the acrylics and make the glitter pop even more.
Hang your masterpiece in a well-lit room and watch how the glitter catches the light as you walk by


Have a question or want to share your own experience? I'd love to hear from you in the comments below!