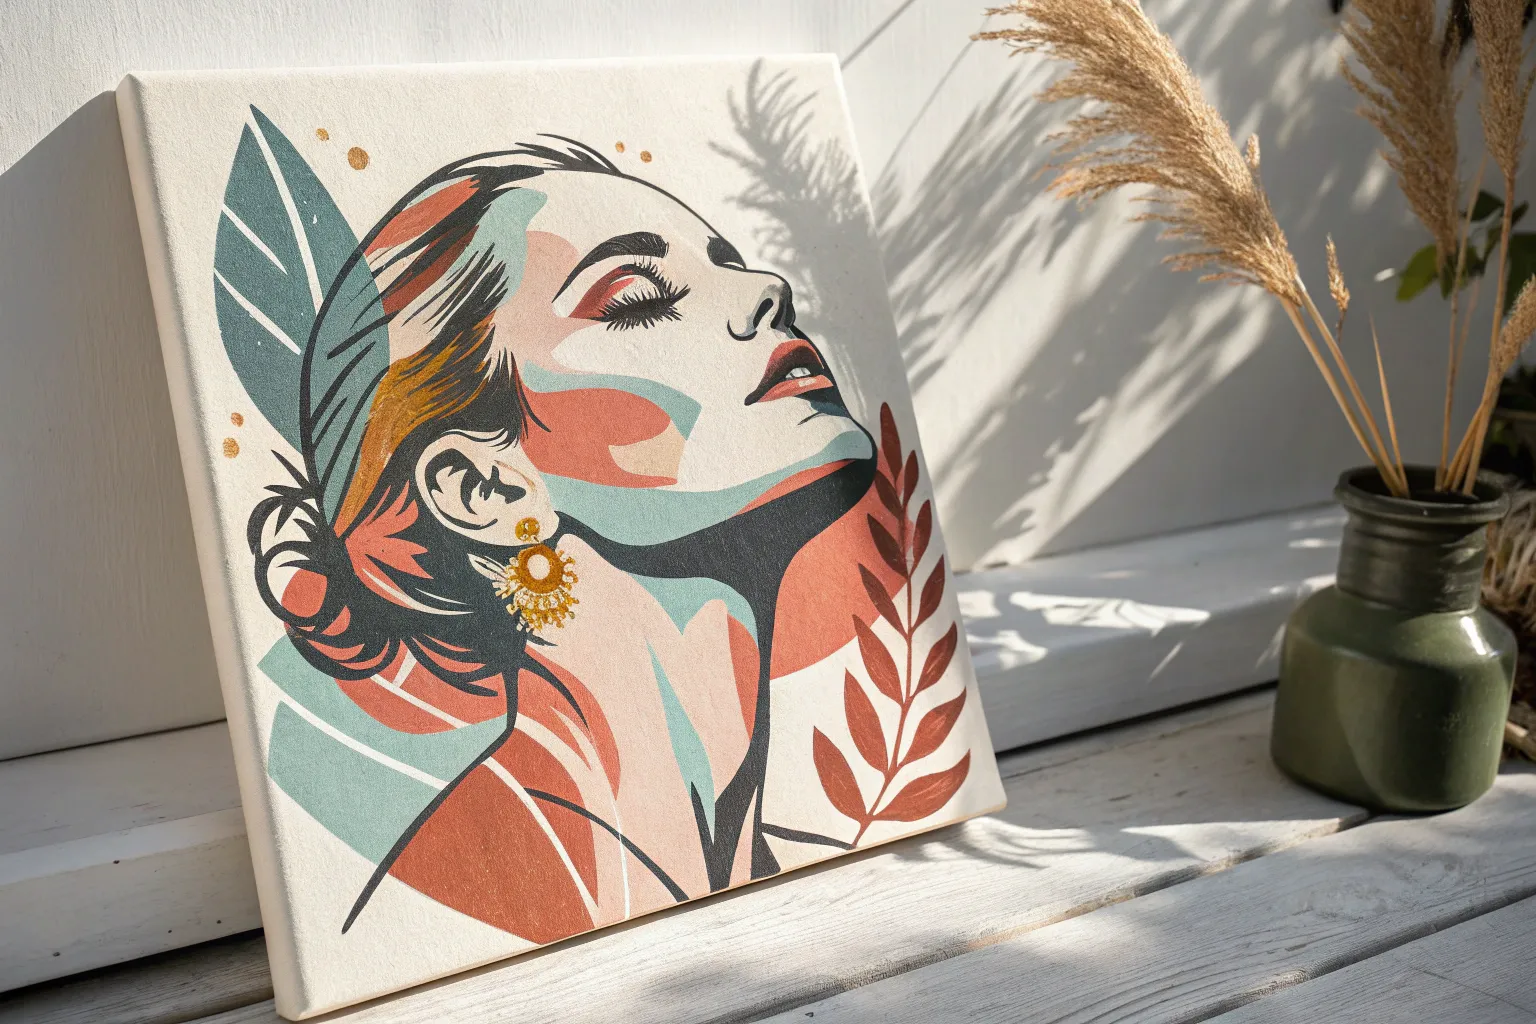
When I need fresh portrait painting ideas, I start by deciding what I want the face to say—quiet and real, or loud and expressive. These ideas will help you play with color, lighting, and style while keeping the human face as the star of the painting.
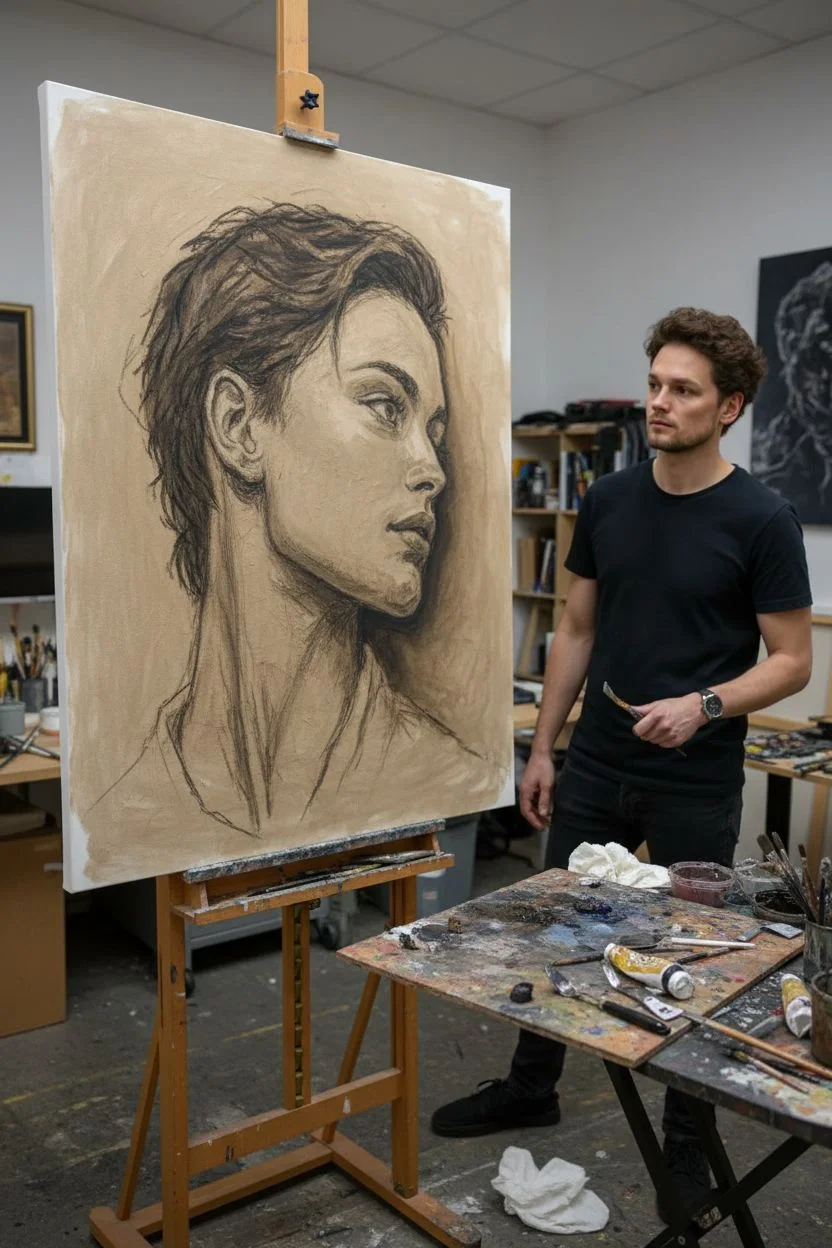
Portrait From a Photo With Big Shape Blocking

This striking portrait project focuses on capturing a likeness through dramatic contrast and voluminous texture. Using charcoal on canvas, you will learn to construct a face by blocking out large masses of hair and shadow before refining delicate facial features.
How-To Guide
Materials
- Stretched canvas (approx. 24×30 inches)
- Vine charcoal sticks (soft and medium)
- Compressed charcoal sticks or charcoal pencils (for deep blacks)
- White acrylic gesso (optional for priming)
- Kneaded eraser
- Blending stump or tortillon
- Soft synthetic brush (large)
- Workable fixative spray
- Reference photo of subject
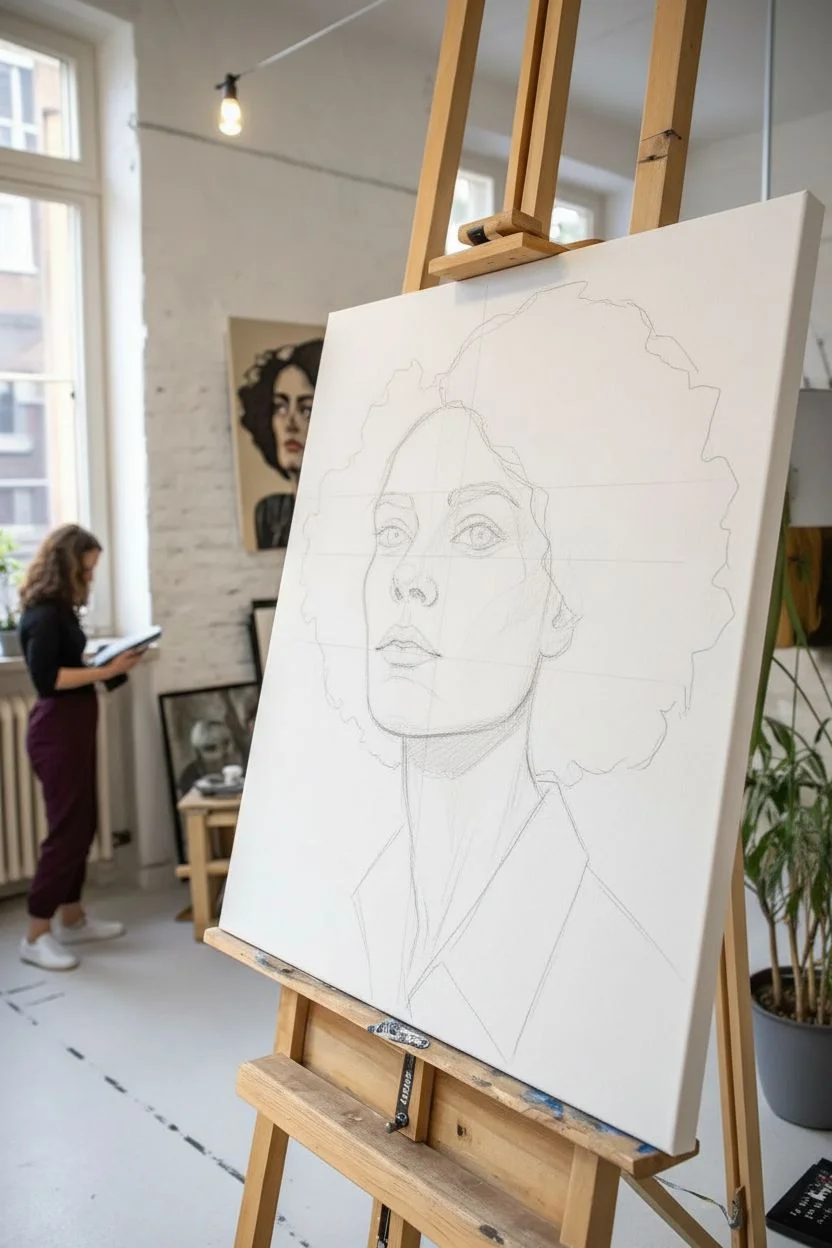
Step 1: Preparation and Initial Sketch
-
Prime surface:
If your canvas is raw or too slick, apply a thin coat of white gesso to give it some ‘tooth.’ This texture helps grab the charcoal dust effectively. -
Establish the envelope:
Using a stick of soft vine charcoal, lightly mark the top of the head, bottom of the chin, and the extreme width of the hair. This ‘envelope’ ensures your composition fits comfortably on the canvas. -
Map facial landmarks:
Draw a vertical centerline for the face and horizontal lines for the eyes, nose base, and mouth. Keep these lines loose and easily erasable. -
Block in the hair mass:
Identify the large, abstract shape of the hair. Don’t draw individual curls yet; sketch the overall silhouette as one big, solid form surrounding the face. -
Sketch features:
Lightly place the eyes, nose, and lips within your guidelines. Focus on the shape of the shadows they cast rather than outlining the features themselves.
Don’t Smudge Too Soon
Avoid blending deeper blacks with your fingers, as the natural oils can make charcoal impossible to erase. Use a dry brush or chamois cloth instead.
Step 2: Blocking Values
-
Fill the darks:
Take a piece of compressed charcoal and aggressively fill in the large hair shape. Use broad strokes to cover the canvas grain, pressing firmly to achieve a deep, rich black. -
Establish facial shadows:
Switch back to vine charcoal for the face. lightly shade the major shadow planes: under the nose, the upper lip, under the chin, and the eye sockets. -
Soften the edges:
Use a large soft brush or a cloth to gently wipe the charcoal on the face. This unifies the tone and creates a smooth, skin-like texture, while keeping the hair distinct and bold. -
Lift out lights:
Use your kneaded eraser to pick out the highlights on the forehead, bridge of the nose, and cheekbones. This subtractive method builds volume instantly. -
Defined edges vs. lost edges:
observe where the hair meets the face. In some areas, create a crisp line; in others, let the shadow of the hair blend seamlessly into the shadow of the face.
Step 3: Refining and Detailing
-
Deepen the eyes:
Sharpen your charcoal pencil to refine the eyes. Darken the pupils and the upper lash line, but leave the whites of the eyes somewhat subdued so they don’t look startling. -
Sculpt the nose and mouth:
Focus on the core shadows—the darkest part of the shadow—on the nose and under the bottom lip. Avoid drawing hard outlines around the lips; let the value change define the shape. -
Texture the hair:
Return to the large black mass of hair. Use the edge of a charcoal stick to add erratic, circular scribbles near the outer edges to suggest loose curls escaping the silhouette. -
Add collar detail:
Sketch the shirt collar with quick, linear strokes. Keep this area looser and lighter than the face to ensure the viewer’s focus remains on the portrait. -
Final highlights:
Press a clean edge of your kneaded eraser firmly onto the paper to lift tiny, bright highlights in the eyes (wetness) and on the tip of the nose. -
Protect the work:
Once you are satisfied, take the canvas outdoors and spray it with a coat of workable fixative. This prevents the heavy charcoal areas from smudging or dusting off.
Muddy Shadows?
If facial shadows look dirty rather than deep, lift them completely with a kneaded eraser and re-apply fresh charcoal layers lightly. Keep your eraser clean.
Step back and admire how the bold contrast brings your subject to life on the canvas


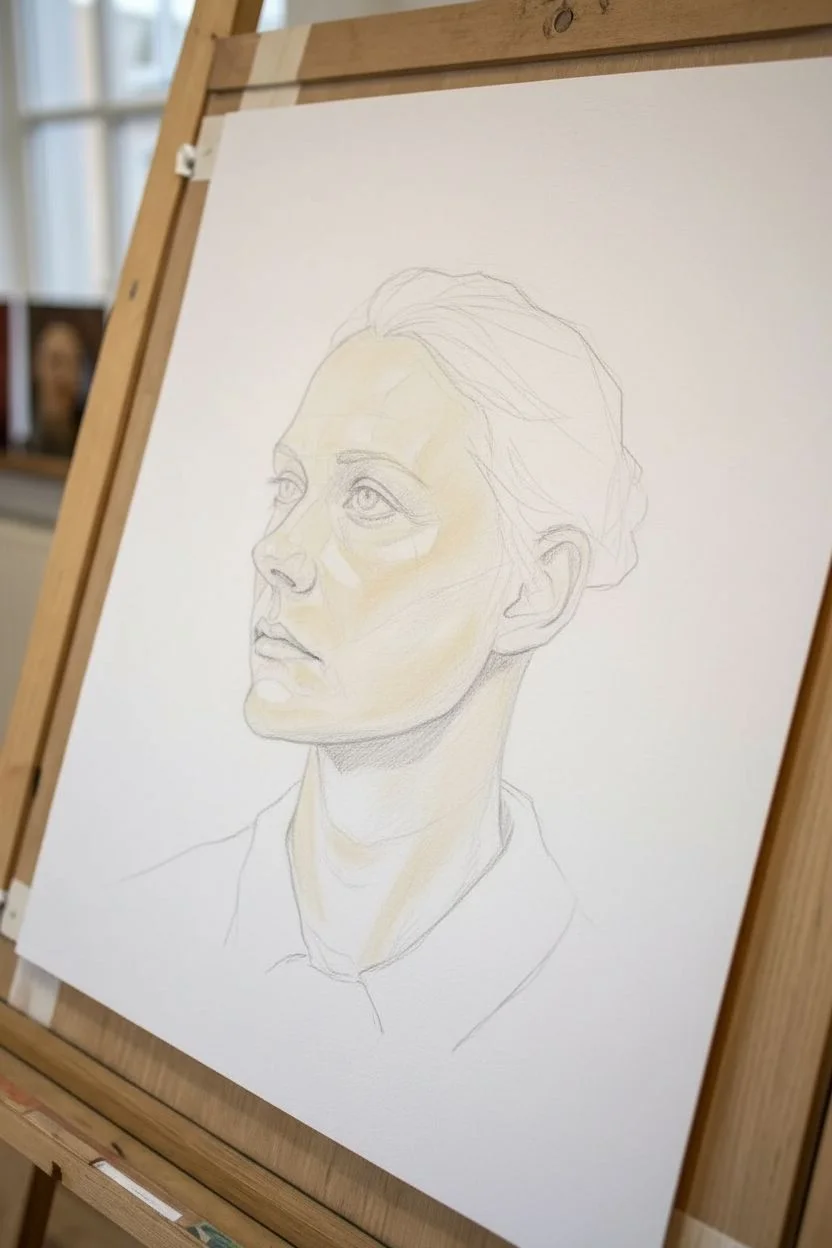
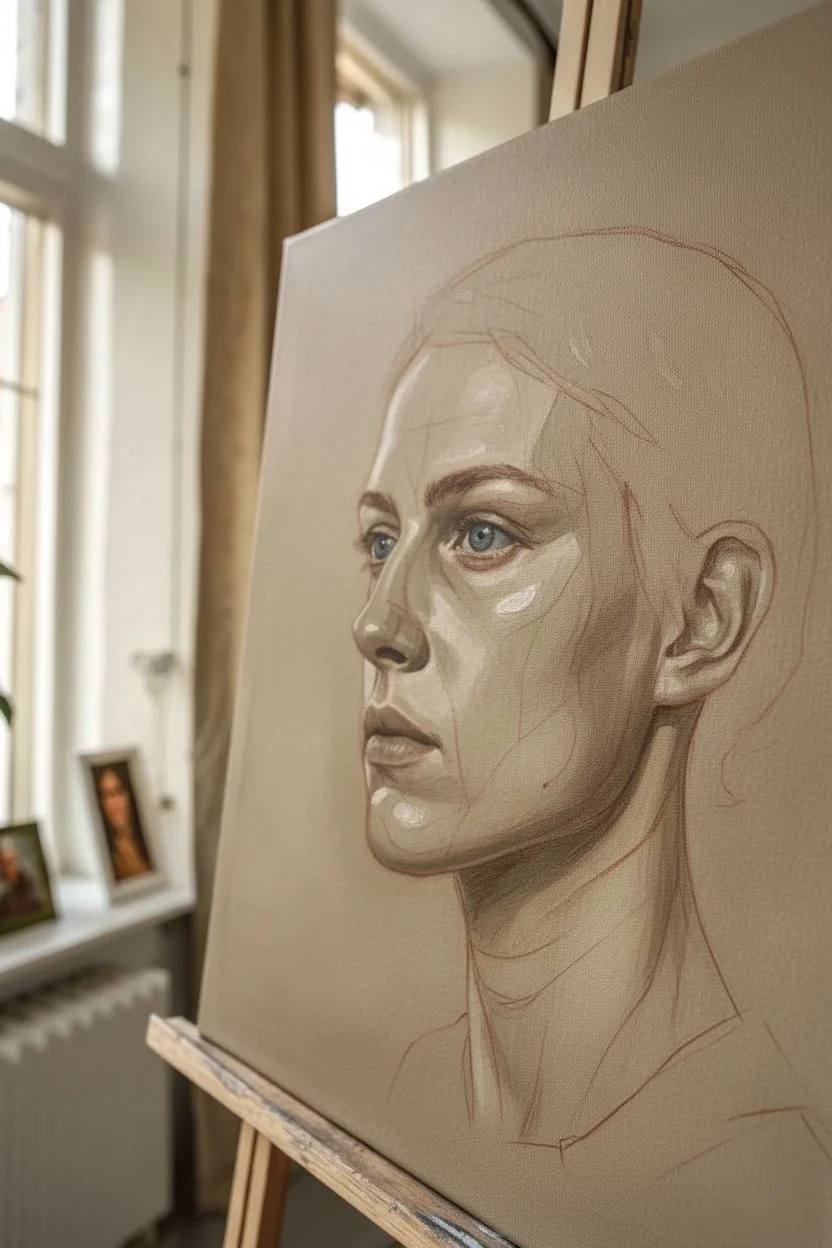
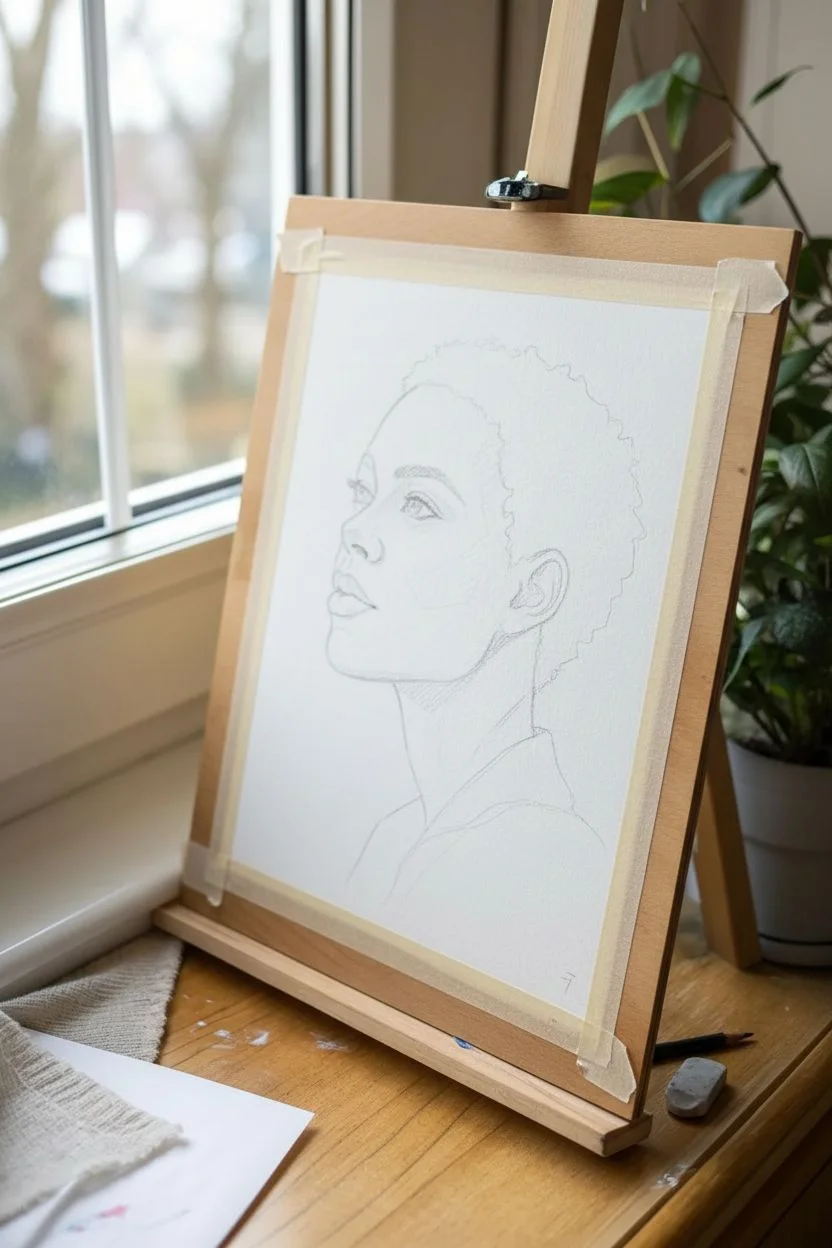
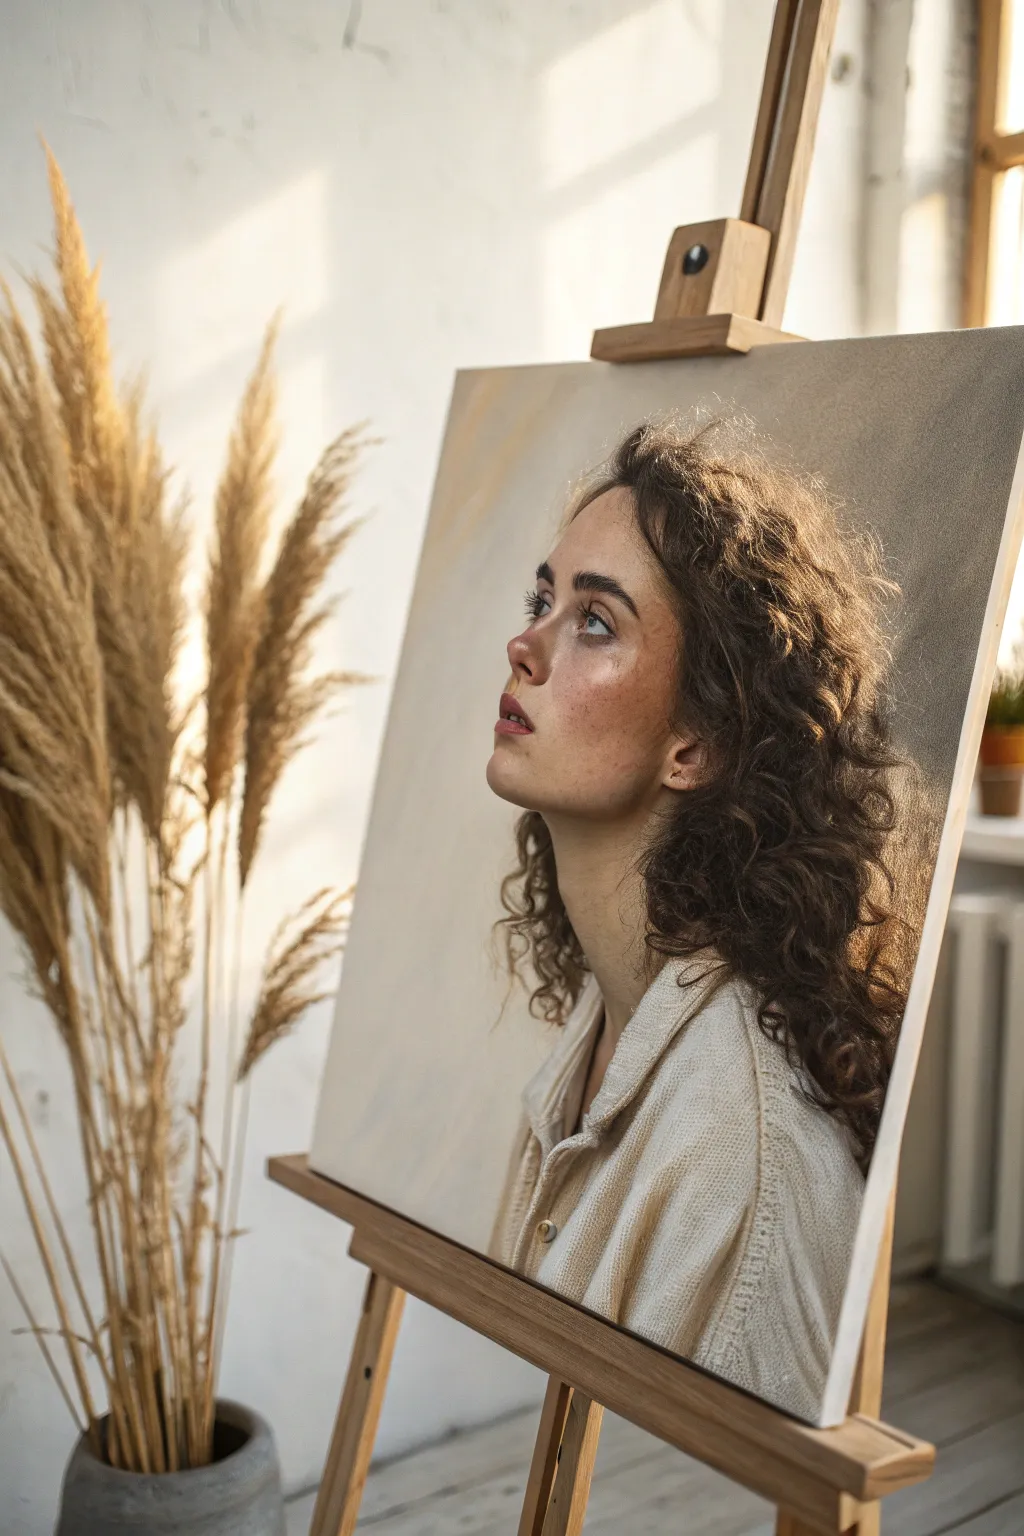
Simple Live-Lighting Portrait Study
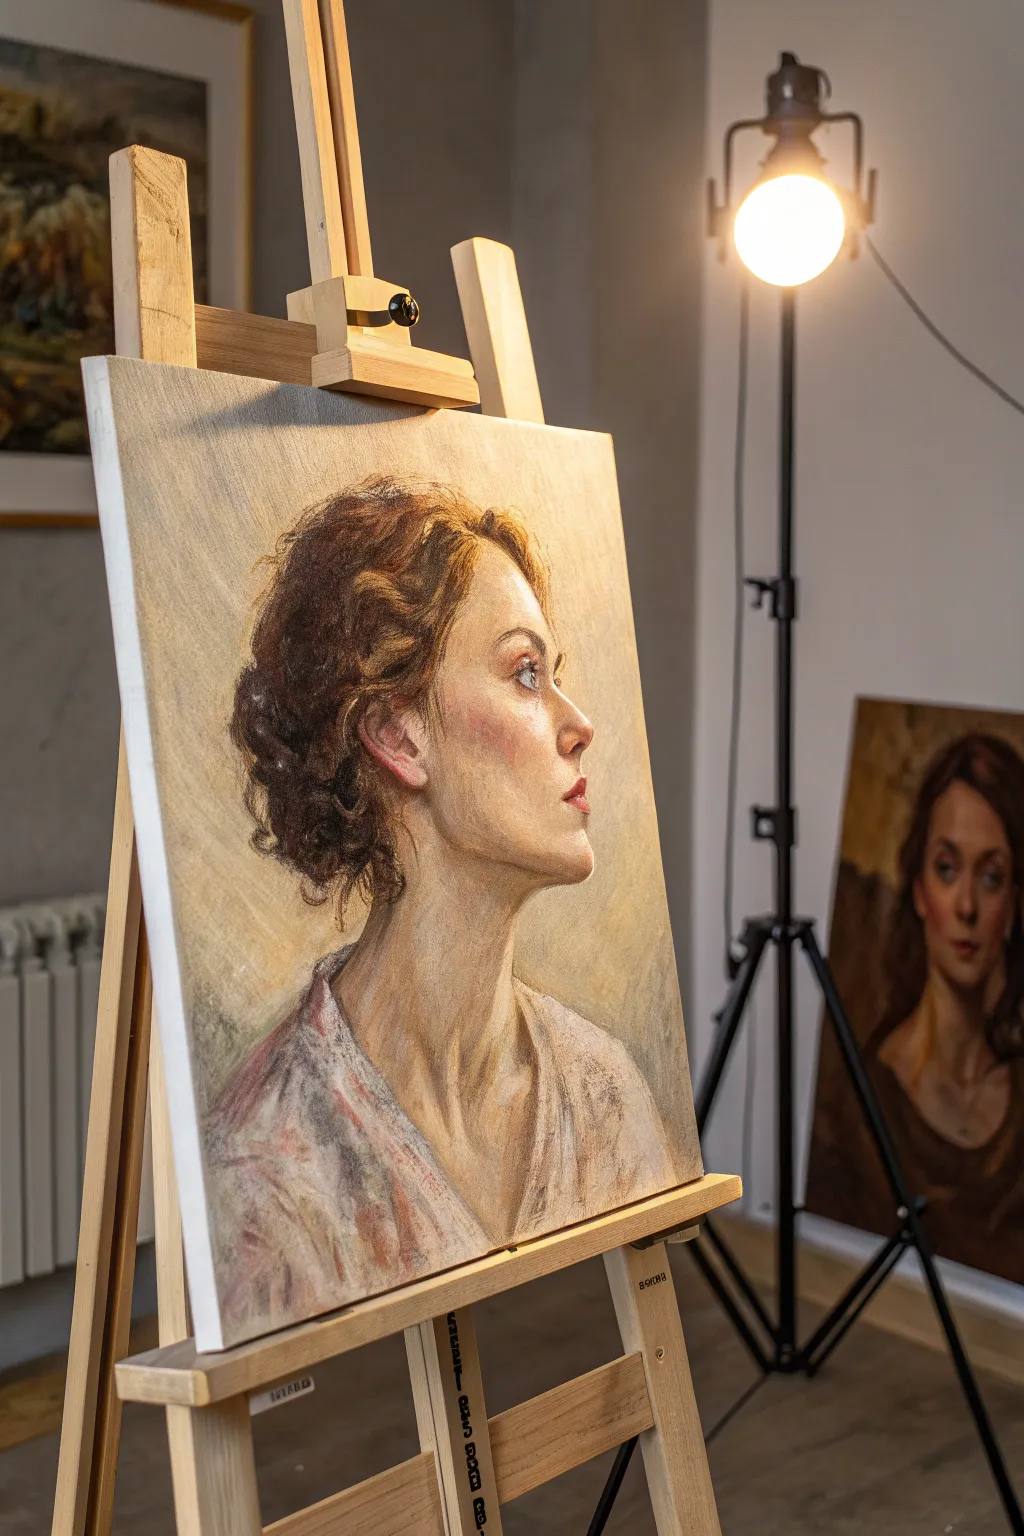
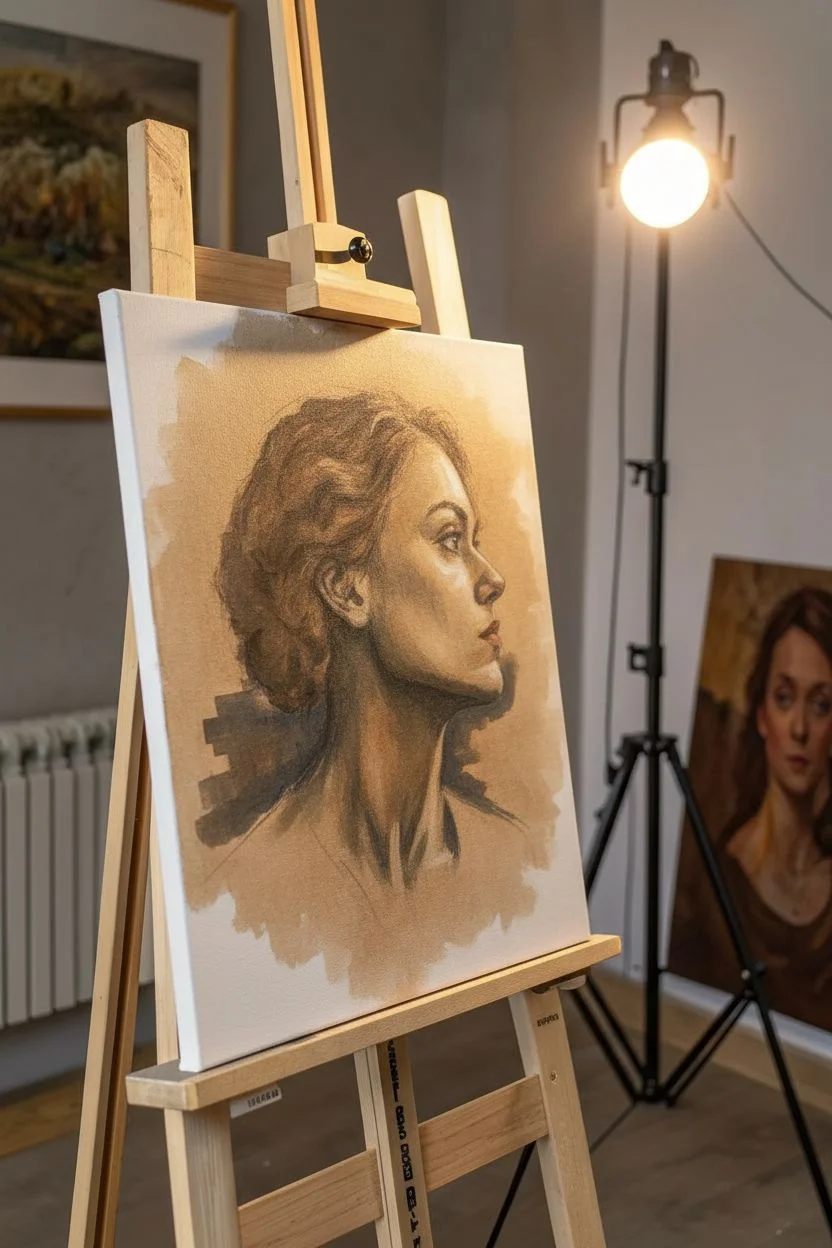
This tutorial guides you through creating a striking profile portrait that emphasizes light, structure, and delicately layered skin tones. The result is a realistic yet painterly study that feels both classical and fresh, perfect for mastering side-lighting effects.
Detailed Instructions
Materials
- Primed stretched canvas or canvas board (approx. 16×20 inches)
- Oil or acrylic paints (Titanium White, Yellow Ochre, Burnt Sienna, Alizarin Crimson, Ultramarine Blue, Cadmium Red, Raw Umber)
- Assorted brushes (filbert sizes 4 and 8, round size 2, flat size 6)
- Palette knife for mixing
- Medium (linseed oil for oils, glazing liquid for acrylics)
- Palette
- Easel
- Sketching pencil (HB or B) and kneaded eraser
Step 1: Initial Sketch and Underpainting
-
Establish the composition:
Begin by lightly sketching the profile of the subject on your canvas. Focus on the major angles of the jaw, the slope of the nose, and the placement of the ear. Keep the lines loose and faint, ensuring there’s space on the right side for the gaze to ‘travel’ into. -
Refine the features:
Tighten up the drawing around the eye, nostril, and lips. Pay close attention to the negative space between the chin and the neck to get the head posture correct. -
toned wash:
Mix a thin wash of Raw Umber and a touch of Burnt Sienna with plenty of medium or water. Apply this loosely over the entire background and the shadowed areas of the hair and neck to kill the stark white of the canvas. -
Map the shadows:
Using a slightly darker mix of Raw Umber and Ultramarine Blue, block in the darkest shadow shapes: under the chin, the back of the neck, and the deep recesses of the hair. This establishes your value structure early on.
Edge Variety
Keep edges sharp near focal points like the eyes and nose, but let the hair and back of the neck remain soft and blurry. This depth-of-field effect leads the viewer’s eye exactly where you want it.
Step 2: Blocking in Flesh Tones
-
Mix the base skin tone:
Create a mid-tone flesh color using Titanium White, Yellow Ochre, and a small amount of Cadmium Red. I like to keep this mixture slightly warm to counteract the cool shadows we’ll add later. -
Apply lights and mids:
Paint the broad planes of the face that are hitting the light—the cheekbone, the bridge of the nose, and the forehead. Use a larger filbert brush (size 8) to keep the strokes confident and avoid fussing with details. -
Turning the form:
Mix a transition tone by adding a tiny bit of Alizarin Crimson and Burnt Sienna to your base mix. Apply this where the light rolls into shadow, specifically around the jawline, the temple, and the side of the neck. -
Cooler shadows:
For the shaded side of the neck and under the jaw, mix a cool grey-violet using White, Alizarin Crimson, and Ultramarine Blue. Lay this next to the warm shadows to create vibration and depth. -
The ear:
Paint the ear with a warmer, reddish tone (Cadmium Red + Yellow Ochre) to indicate the blood flow and thin skin. Keep the details here slightly softer than the facial features.
Muddy Skin Tones?
If skin looks dirty, you likely over-blended warm lights into cool shadows. Stop blending. Allow patches of distinct color (warm next to cool) to sit side-by-side; the eye will mix them optially.
Step 3: Hair and Clothing
-
Block in hair mass:
Using Burnt Sienna and Raw Umber, scumble in the dark mass of the hair. Don’t paint individual strands yet; focus on the overall volume and the shape of the style. -
Add hair highlights:
Mix Yellow Ochre and White with a touch of Burnt Sienna. With a flat brush, add the chunks of light hitting the waves of the hair, following the direction of the curls. -
Suggest the clothing:
Dilute some Alizarin Crimson, White, and a touch of Blue to create a soft, dusty pink/lilac color. Sketch in the clothing loosely with a large brush, allowing the texture of the canvas to show through for a sketchy, ethereal look. -
Refine the background:
Lightly paint the background with a pale, warm grey (White + Raw Umber + hint of Yellow). Keep this transparent and brushy so it feels like atmosphere rather than a solid wall.
Step 4: Final Details and Glazing
-
The eye detail:
Switch to your size 2 round brush. detailed the eye, adding the dark lash line and the specific color of the iris. Crucially, place a crisp highlight on the iris to bring the subject to life. -
Refining the nose and mouth:
Add a touch more red to the nostril and the connection between the lips. Ensure the corner of the mouth has a soft, lost edge so it doesn’t look cut out. -
Highlight hierarchy:
Mix pure Titanium White with just a whisper of yellow. Apply the brightest highlights to the tip of the nose, the highest point of the cheekbone, and the damp part of the lower lip. -
Softening edges:
Use a clean, dry filbert brush to gently feather out any edges that feel too sharp, particularly around the hair profile and the back of the neck. -
Final glazes:
Once the main layers are touch-dry, glaze a very thin transparent layer of Alizarin Crimson over the cheek and ear to heighten the flush of the skin.
Step back and appreciate the subtle interplay of light and form you have captured in this classic profile study


Mirror Self-Portrait With Honest Expression
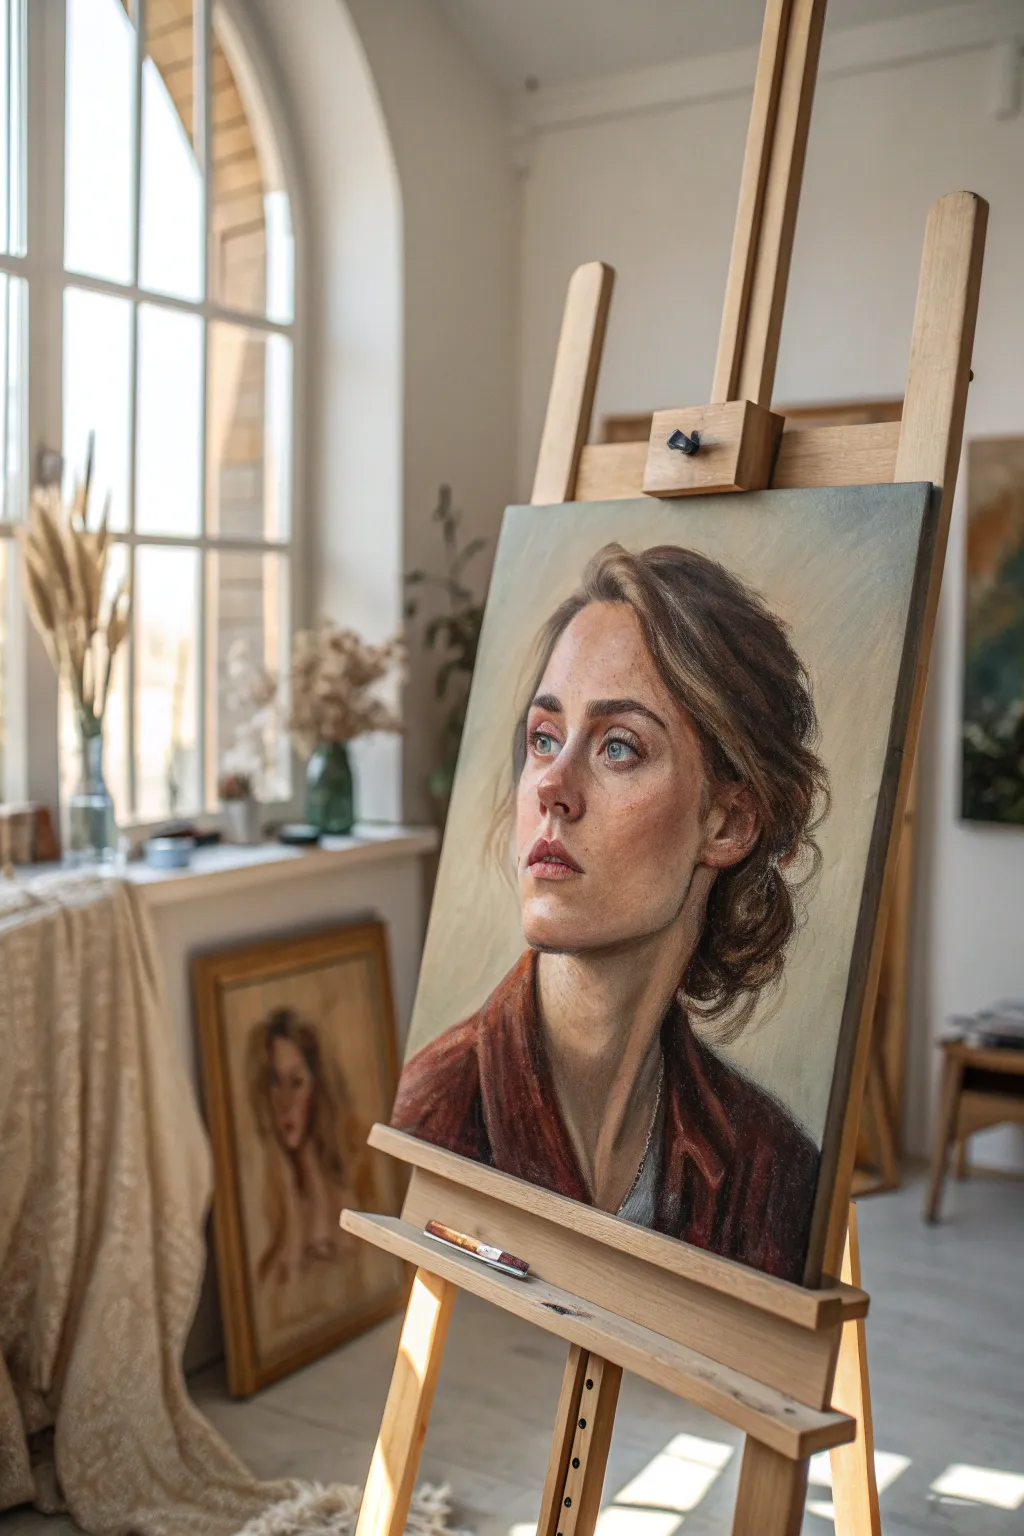
This project captures a moment of quiet introspection, focusing on naturalistic skin tones and an unfiltered expression. By working with soft pastels or oil paints, you’ll learn to render light, subtle freckles, and the delicate turn of the neck.
How-To Guide
Materials
- Canvas board or prepared wooden panel (approx 16×20 inches)
- Oil paints (Titanium White, Yellow Ochre, Burnt Sienna, Alizarin Crimson, Ultramarine Blue, Raw Umber, Cadmium Red)
- Hog bristle brushes (filbert sizes 4, 8; round sizes 2, 6)
- Soft synthetic brush for blending
- Palette knife
- Odorless mineral spirits or turpentine
- Linseed oil medium
- Vine charcoal for sketching
- Mirror (optional, if working from life)
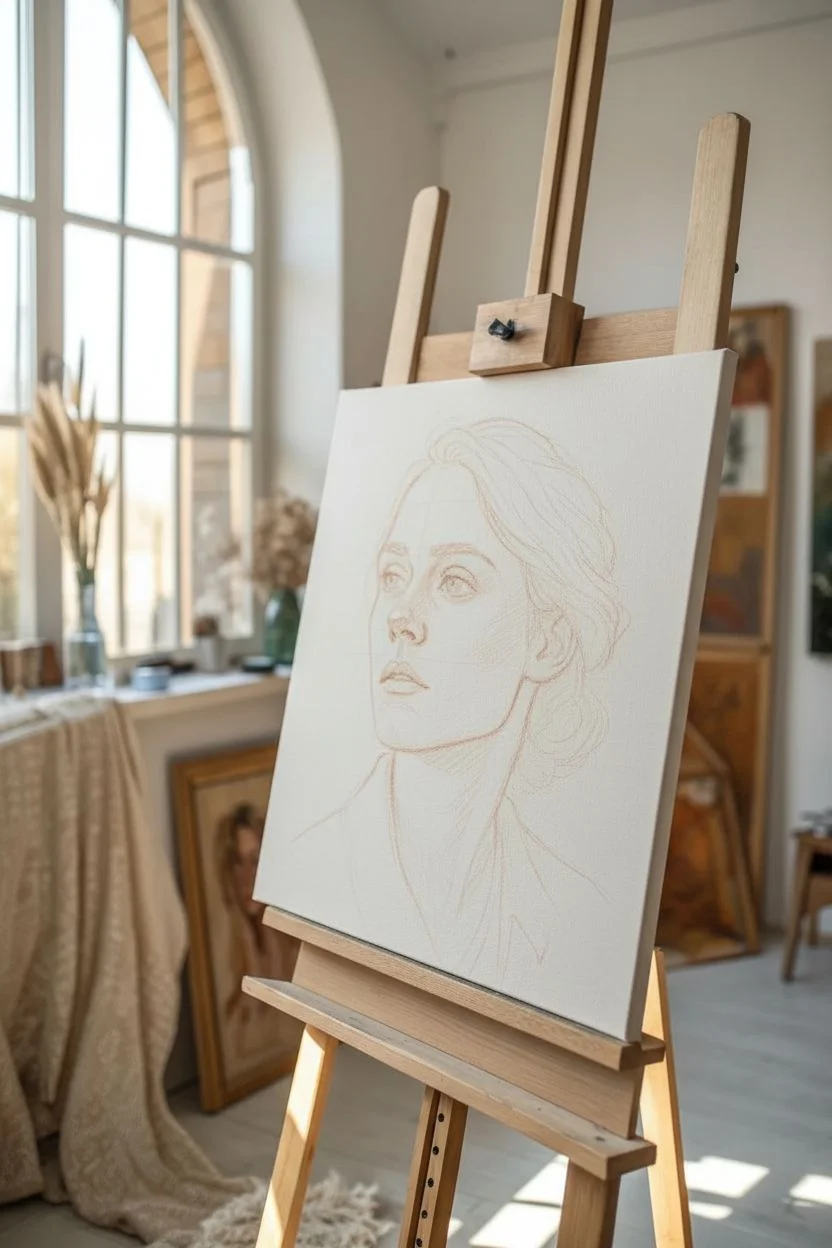
Step 1: Drafting the Composition
-
Establish the pose:
Begin by lightly sketching the head and shoulders with vine charcoal. Position the head slightly off-center to the right, leaving breathing room on the left side where the gaze is directed. Focus on the tilt of the chin upwards. -
Map key features:
Mark the eye line, nose base, and mouth line. Notice how the three-quarter angle foreshortens the far side of the face; ensure the distant eye is properly sized relative to the perspective. -
Secure the drawing:
Once satisfied with the proportions, dust off excess charcoal and re-establish the main lines with a thin wash of Burnt Sienna just to seal the drawing.
Skin Looking Muddy?
Avoid over-mixing directly on the canvas. Clean your brush often. If skin looks grey, introduce cleaner pinks or oranges into the light areas to revive the vitality.
Step 2: Underpainting and Blocking In
-
Tone the background:
Apply a muted, warm beige wash to the background using Yellow Ochre and a touch of Titanium White. Keep this loose and abstract to contrast with the detailed face later. -
Block in shadow shapes:
Mix a transparent shadow tone using Burnt Sienna and Ultramarine Blue. Lay in the major shadows: under the jawline, the eye sockets, under the nose, and the side of the hair mass. -
Establish mid-tones:
Mix a base skin tone with White, Yellow Ochre, and a tiny bit of Cadmium Red. Paint the main planes of the face that are in light—the forehead, cheekbone, and chin. -
Rough in the clothing:
For the jacket, use a mix of Alizarin Crimson and Burnt Sienna to create a deep, rusty red. Block this in roughly, allowing the brushstrokes to follow the drape of the fabric over the shoulder.
Step 3: Refining Features and Skin Tones
-
Model the eyes:
Paint the irises with a muted blue-grey. Keep the whites of the eyes slightly greyed down (never pure white) to make them sit back in the sockets. Add a sharp highlight to the pupil to bring life to the gaze. -
Sculpt the nose:
Pay attention to the soft transition on the bridge of the nose. Add a slightly redder tone around the nostrils and the tip of the nose to simulate blood flow under the skin. -
Define the mouth:
Use a dusty rose mix for the lips. Avoid a hard outline; instead, let the lip color blend softly into the surrounding skin. Emphasize the shadow under the lower lip to create volume. -
Blend the transitions:
Using a clean, soft synthetic brush, gently smooth the transitions between the shadow and light shapes on the cheek and neck. I find this helps create that realistic, soft-skin look. -
Add warmth to the neck:
The neck often sits in shadow but reflects warm light. Glaze a thin layer of transparent orange or sienna over the shadow area of the neck to give it depth and warmth.
Level Up: Color Harmony
Mix a tiny amount of your background color into your shadow mixes. This atmosphere linkage makes the subject look like they truly belong in the space.
Step 4: Texture and Details
-
Develop flighty hair:
Don’t paint every strand. Focus on ‘clumps’ of hair using Raw Umber and Ochre. Use a rigger or small round brush to add just a few loose strands escaping the bun to suggest movement and casualness. -
Add the freckles:
Mix a thin, watery Burnt Sienna. Splatter very gently or dot deliberately with a fine point brush across the nose and cheeks. Soften them immediately with a dry brush so they look like part of the skin, not dirt on top. -
Refine the jacket texture:
Add lighter, chalkier red highlights to the collar and lapels of the jacket to suggest a thick, woven fabric like corduroy or heavy cotton. -
Final highlights:
Place the brightest highlights last: the tip of the nose, the highest point of the cheekbone, and the moisture on the lower eyelid. Use thick, impasto paint for these small touches. -
Background adjustment:
Re-evaluate the background. If the face needs to pop more, lighten the background tone slightly near the shadow side of the face to create contrast.
Step back and appreciate the quiet emotion you have captured in this honest portrait study


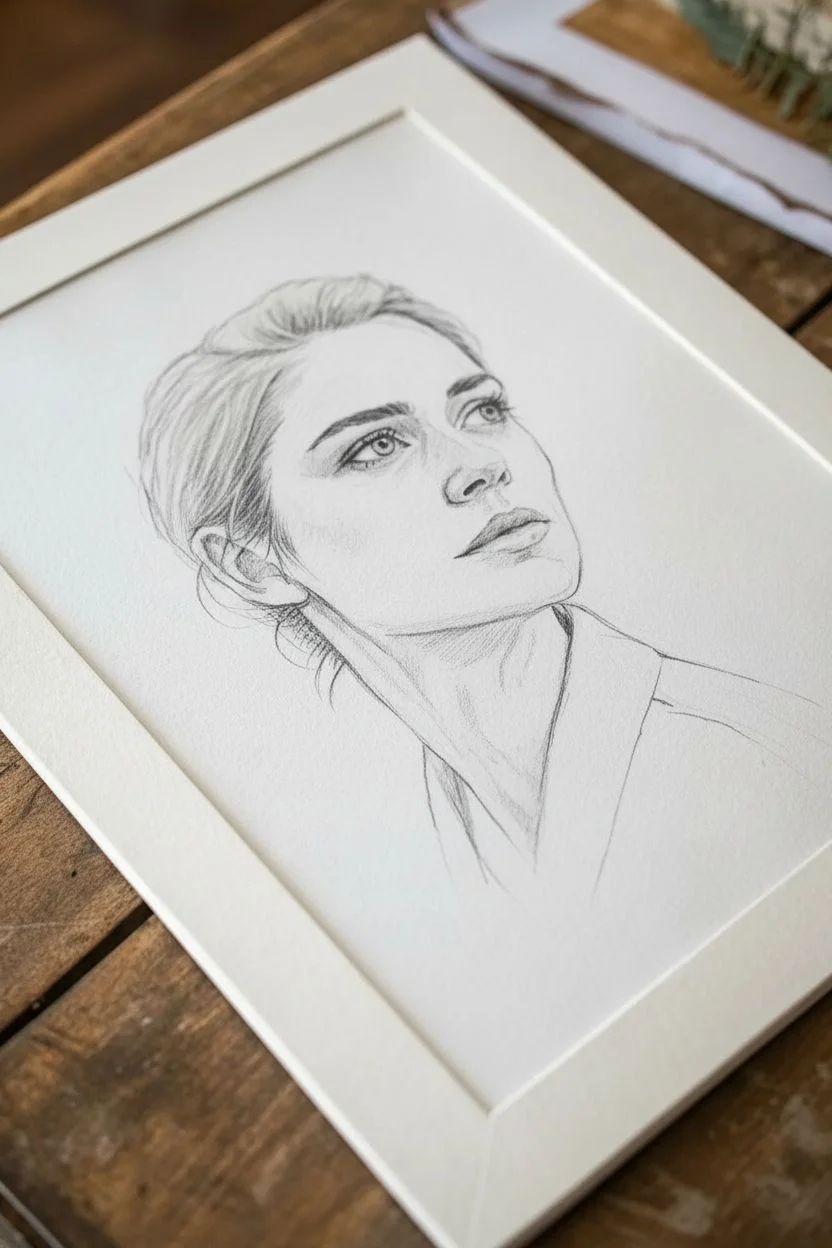
Monochrome Value Portrait for Strong Likeness
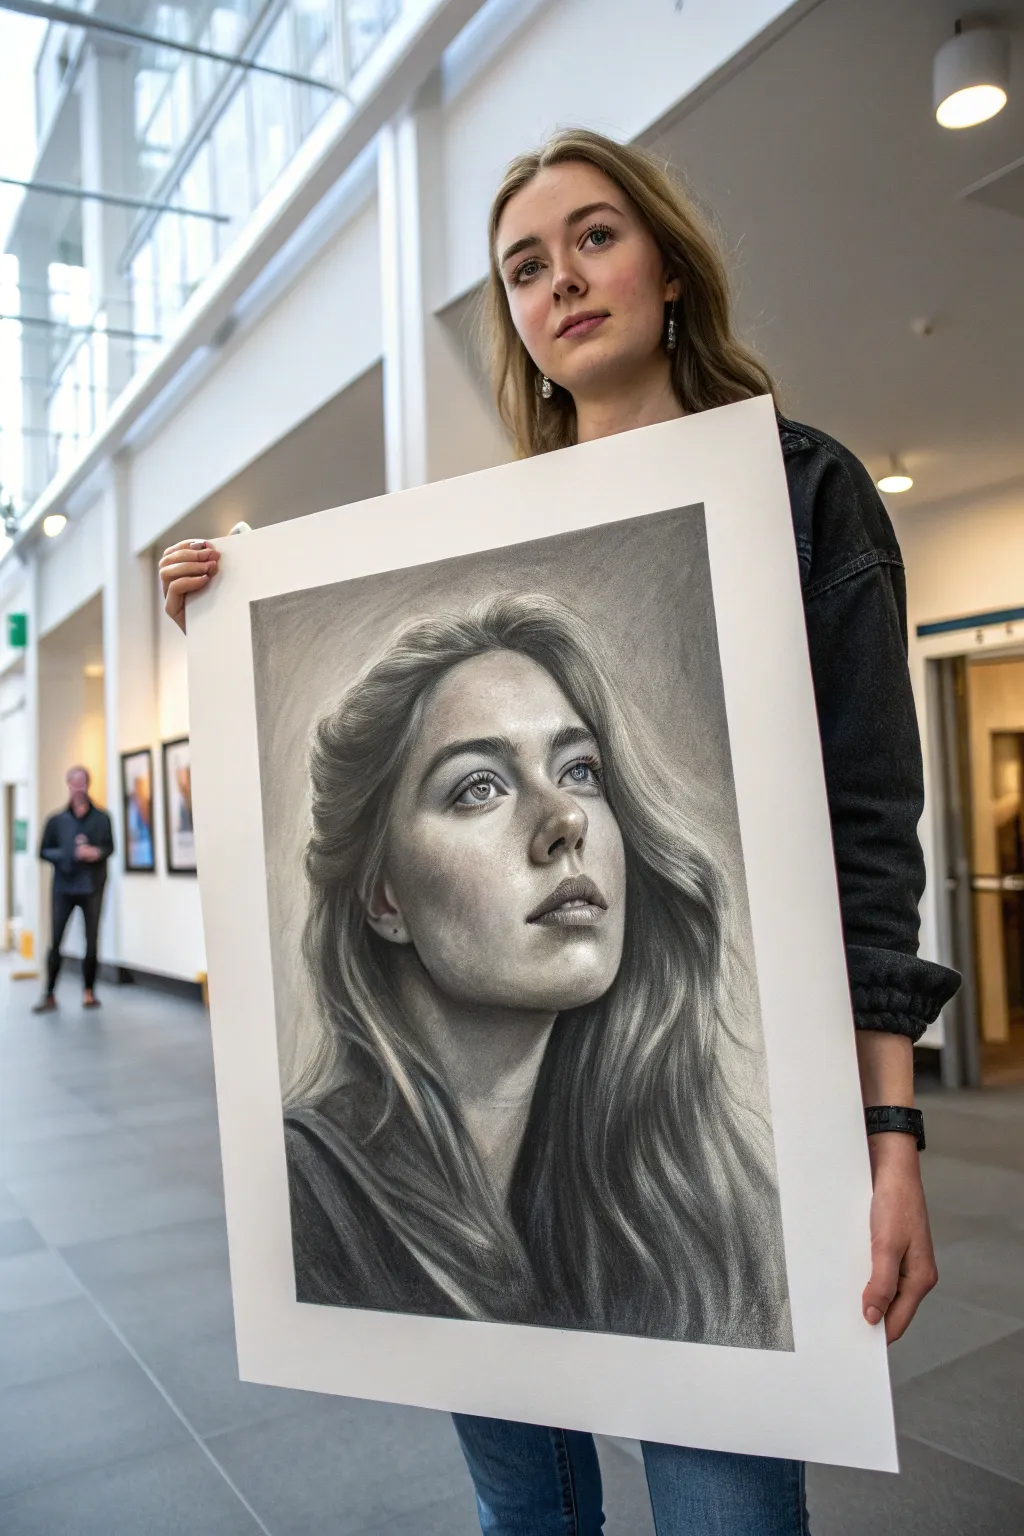
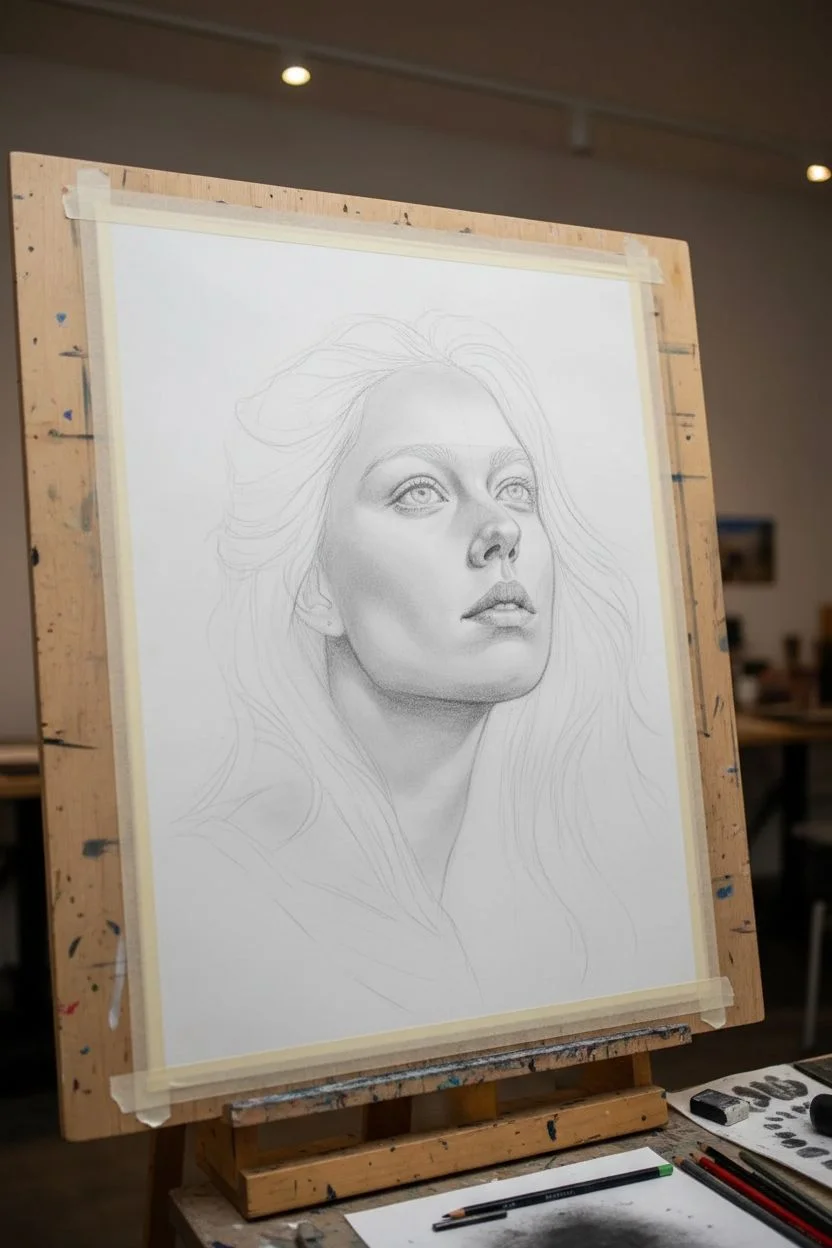
Capture the depth and emotion of a subject using nothing but charcoal and graphite in this dramatic, high-contrast portrait study. The result is a striking, realistic artwork that emphasizes value structure over color, creating a timeless and impactful likeness.
Step-by-Step Guide
Materials
- Large sheet of smooth Bristol board or heavy drawing paper (approx. 18×24″)
- Vine charcoal sticks (soft and medium)
- Compressed charcoal pencils (HB, 2B, 4B, 6B)
- Graphite pencils (H for initial sketching)
- Kneaded eraser
- Precision eraser pen (mono zero)
- Blending stumps (tortillons) in various sizes
- Soft synthetic brush for blending
- Workable fixative spray
- Artist tape
Step 1: Foundations and Structure
-
Prepare the surface:
Tape your large sheet of Bristol board to a drawing board or easel to prevent it from sliding. A clean, smooth surface is crucial for realistic shading. -
Establish the envelope:
Using a light H graphite pencil, gently sketch the ‘envelope’ or general outer shape of the head and hair. Keep your grip loose and your lines extremely faint. -
Map facial features:
Mark the guidelines for the eyes, nose, and mouth. Pay close attention to the tilt of the head; in this reference, the subject is looking slightly upward, so the facial features should follow an upward curve. -
Refine the contour:
Clarify the jawline, the ear position, and the sweeping motion of the hair. Avoid drawing individual strands; instead, outline large clumps or ribbons of hair. -
Initial value block-in:
Switch to a vine charcoal stick. Lightly shade the darkest shadow areas: under the chin, the deep recesses of the hair, and the nostrils. Use a soft brush to sweep this dust into a smooth, mid-tone gray base.
Clean Hands, Clean Art
Place a scrap piece of paper under your drawing hand at all times. This prevents oils from your skin from transferring to the paper and stops your palm from smearing your carefully blended values.
Step 2: Building Form and Depth
-
Sculpt the eyes first:
Using a sharpened 2B charcoal pencil, define the upper eyelid and pupil. Leave the paper white for the highlight in the pupil to create life instantly. -
Shade the iris:
Fill in the iris with radial strokes, darkening the outer ring. Use a small blending stump to soften the transition from the iris to the white of the eye. -
Define the nose structure:
Avoid outlining the nose bridge. Instead, shade the side plane of the nose using vine charcoal and blend it out. Use a 4B pencil for the nostrils, but keep edges soft. -
Render the lips:
Shade the upper lip darker than the lower lip. Use vertical strokes to mimic lip texture, then tap with a kneaded eraser to pull out highlights on the bottom lip. -
Develop skin tones:
I like to use a chamois or soft tissue to rub charcoal dust gently over the cheekbones and forehead. This creates a smooth complexion base. -
Add deep contrast:
Switch to a 6B compressed charcoal pencil for the darkest darks: the corners of the mouth, the lash line, and the deep shadows under the jaw.
Step 3: Texturing Hair and Refining Details
-
Block in hair masses:
Treat the hair as large shapes of value first. Use big, sweeping strokes with a broad stick of charcoal to fill the dark underside of the hair. -
Create hair flow:
Use a medium charcoal pencil to draw long, confident lines following the growth direction. Lift pressure at the end of the stroke for a tapered look. -
Lift out highlights:
Take your kneaded eraser and pinch it into a wedge. ‘Draw’ white lines into the grey charcoal masses to create shiny strands of hair catching the light. -
Refine edges:
Use a clean blending stump to smooth the skin on the cheek and jawline, ensuring the transition into the background is not a harsh outline but a soft turn of form. -
Background atmosphere:
Add a subtle value to the background near the light side of the face. This makes the highlighted skin ‘pop’ forward. -
Final highlights:
Use the precision eraser pen to pick out the brightest spots: the tip of the nose, the wetness in the eye, and stray flyaway hairs. -
Seal the work:
Once satisfied, take the drawing outside and spray a light coat of workable fixative to prevent the charcoal from smudging.
Tinted Paper Twist
Try executing this portrait on grey-toned paper instead of white. This allows you to use white charcoal or white pastel for the highlights, creating a stunning three-value range.
Step back and admire how simple black dust has transformed into a living, breathing portrait.
BRUSH GUIDE
The Right Brush for Every Stroke
From clean lines to bold texture — master brush choice, stroke control, and essential techniques.
Explore the Full Guide
Limited Palette Portrait With Warm-Cool Skin Shifts
This tutorial guides you through creating a striking, realistic portrait using a controlled palette to emphasize the temperature shifts in skin tones. By balancing warm oranges and ochres against cool blues and grays, you’ll achieve a lifelike depth and translucency in your subject’s face.
Step-by-Step
Materials
- High-quality watercolor paper or bristol board (heavyweight)
- Pastel pencils or artist-grade colored pencils (brands like Polychromos or Caran d’Ache)
- Colors: Burnt Sienna, Yellow Ochre, Ultramarine Blue, Venetian Red, Ivory Black, Titanium White, and a cool Grey
- Kneaded eraser
- Detailed blending stump or tortillon
- Sharpener or craft knife
- A clean sheet of paper (to rest your hand)
Step 1: Initial Sketch and Block-in
-
Establish the Head Structure:
Begin with a very faint graphite outline of the head. Focus on the tilt—this model is looking up, so the chin is prominent and the forehead recedes. Use simple geometric shapes to map the eye sockets and the nose bridge. -
Refine the Features:
Tighten your drawing, paying special attention to the angle of the jawline and the neck muscles (sternocleidomastoid) which are stretched due to the head turn. Keep lines light so they don’t show through the color later. -
Base Tone Application:
Using a light Yellow Ochre or creamy flesh tone, lightly scumble a base layer over the illuminated parts of the face—the forehead, nose bridge, and cheekbone. Keep the stroke pressure very low.
Fixing Muddy Colors
If skin tones look muddy/dirty, you likely over-blended warm and cool layers. Lift pigment with a kneaded eraser until faint, then re-layer the colors without heavy smudging.
Step 2: Developing Form with Temperature
-
Mapping the Shadows:
Introduce your cool tones immediately. Use a light wash of cool Grey or a desaturated Ultramarine Blue to block in the shadow side of the face, specifically under the jaw, the eye socket, and the side of the nose. -
The Warm Transition:
Where the light meets the shadow (the terminator line), introduce Burnt Sienna or Venetian Red. Skin often glows warmest at this transition point. Blend this gently into the cool shadow area. -
Building the Eyes:
The eyes are the focal point. Outline the iris with a sharp dark pencil. Leave the white of the paper for the highlight. Use blue-grey for the whites of the eyes—never pure white—to give them roundness. -
Sculpting the Nose:
The nose needs strong structure. Deepen the shadow under the nostril and the tip. Add a touch of pink or red to the nostril area, as thinner skin here allows blood flow to show through more clearly. -
Cheek and Jaw Definition:
Layer a soft pink or terra cotta tone on the cheek. Notice how the jawline is defined not by a hard line, but by the contrast between the lit jaw and the shadowed neck.
Step 3: Refining Details and Hair
-
Neck Texture:
The neck shows strain and texture. Use vertical strokes following the muscle direction. Alternate between warm ochres for the highlights on the tendons and cool greys for the hollows between them. -
Mouth and Lips:
Paint the lips with a mix of Venetian Red and a touch of cool blue for the shadow side. The upper lip is usually darker and cooler than the lower lip, which catches more light. -
Hair Foundation:
Block in the hair mass with a dark brown or dark grey. Don’t draw individual strands yet; focus on the large shapes of the hair and how it wraps around the skull. -
Hair Detail:
Once the mass is established, use a sharp pencil to pull out flyaway strands at the temple and hairline. I find that keeping these edges soft prevents the hair from looking like a helmet. -
The Collar:
Sketch the clothing loosely. The focus is the face, so use broader, rougher strokes for the collar of the shirt. A rough texture here contrasts beautifully with the smooth blending of the skin.
Variant: Dramatic Lighting
Enhance the drama by darkening the background to a deep charcoal or navy. This ‘chiaroscuro’ effect will make your illuminated portrait pop forward intensely.
Step 4: Final Polish
-
Deepening Values:
Step back and squint at your drawing. Re-establish your darkest darks—likely in the pupil, the corner of the mouth, and under the collar—to increase the overall contrast. -
Highlight Reinforcement:
Use your white pencil or a touch of white gouache to hit the highest key highlights: the tip of the nose, the wetness of the lower eyelid, and the sheen on the forehead. -
Edge Softening:
Check the edges of the face against the background. Soften the hair edges and the back of the neck so the form turns away essentially, rather than looking like a cutout.
Finish by fixing your drawing with a light spray of matte fixative to protect those delicate layers
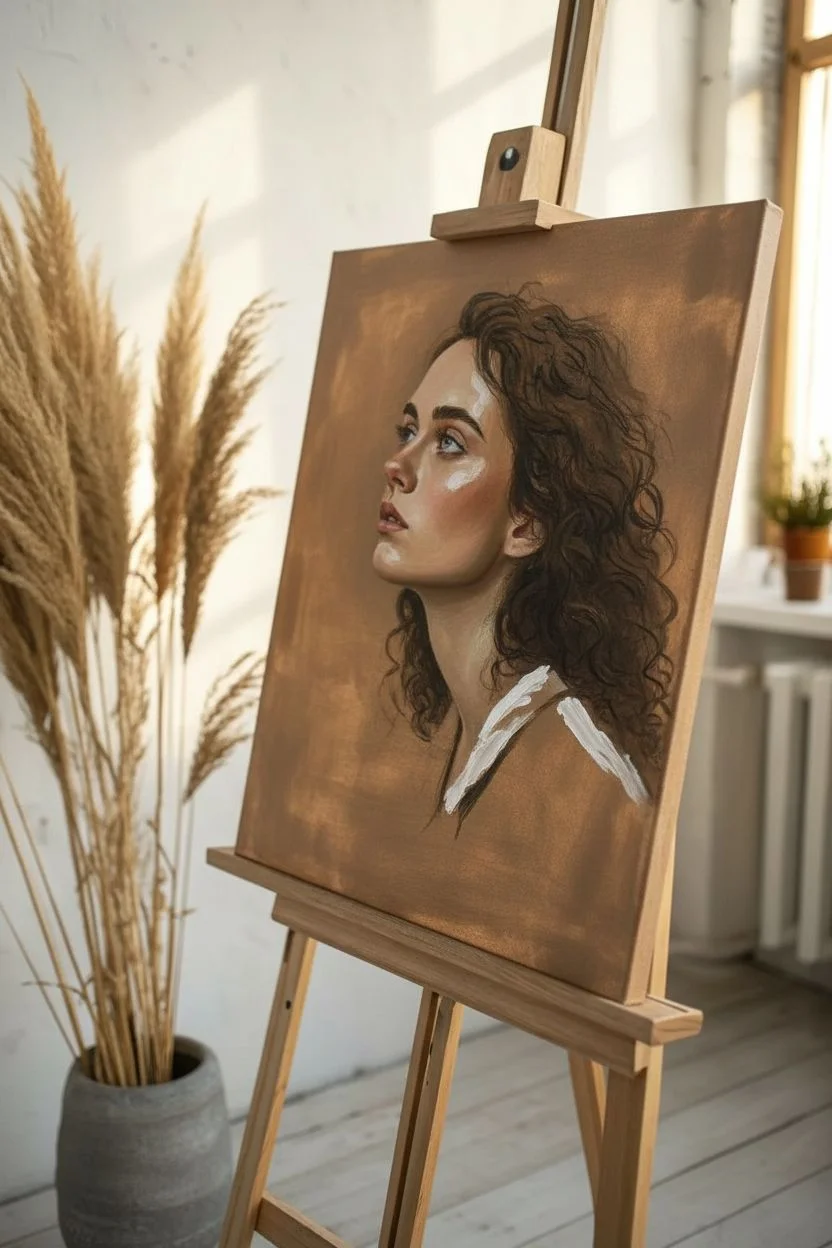
Chiaroscuro Portrait With Dramatic Side Light
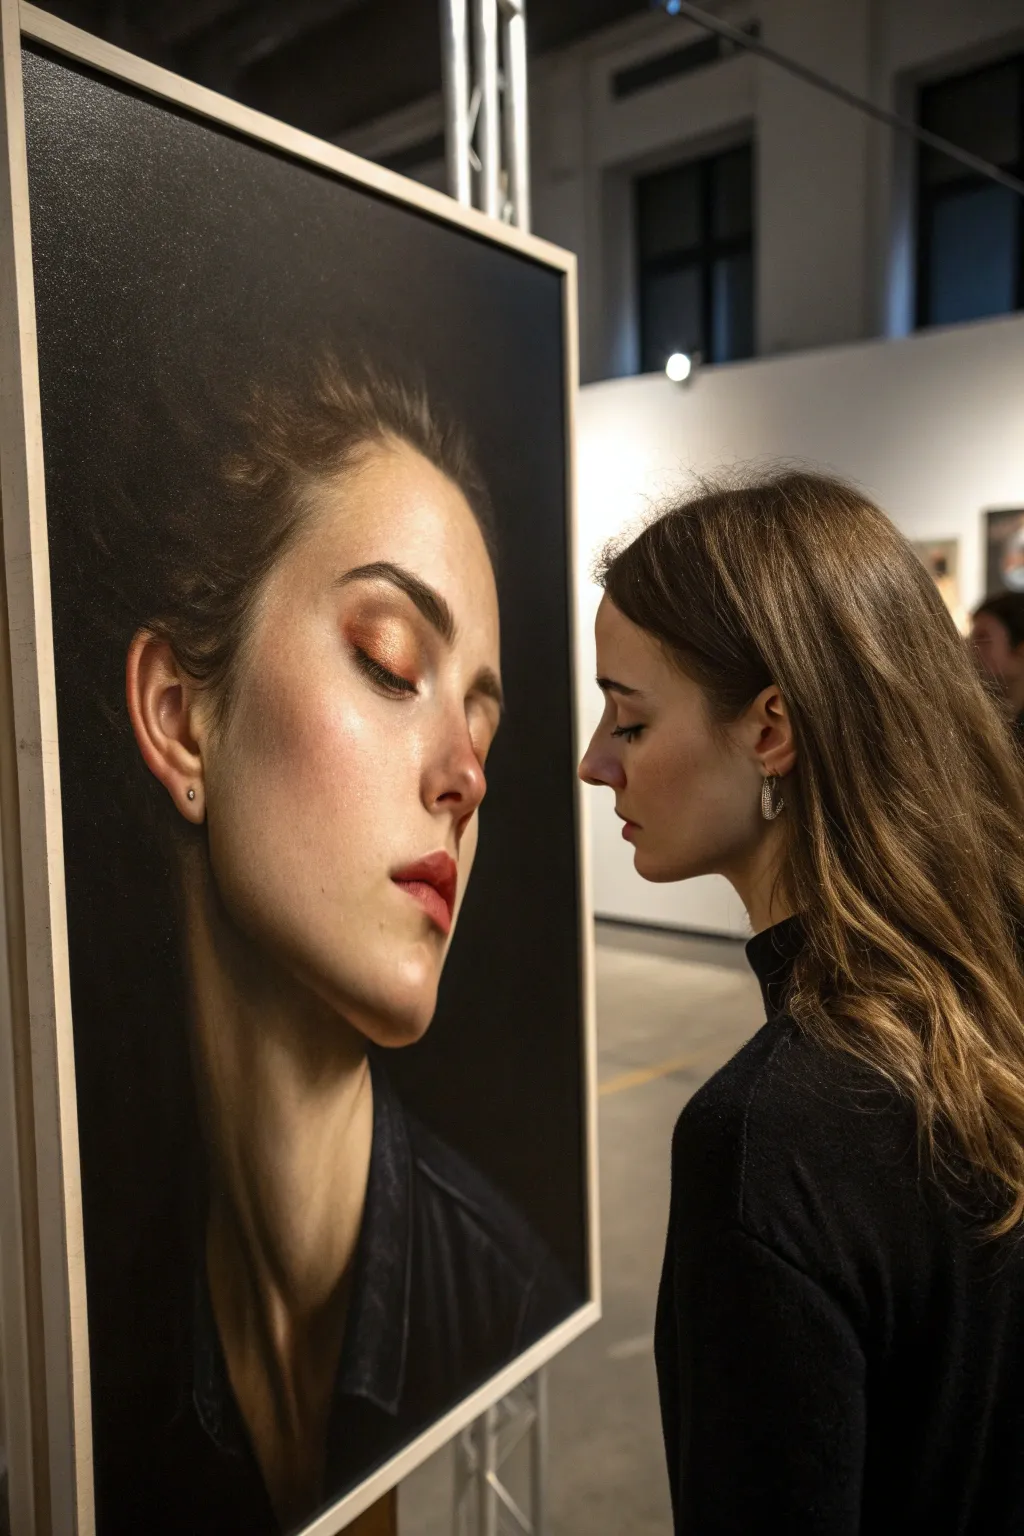
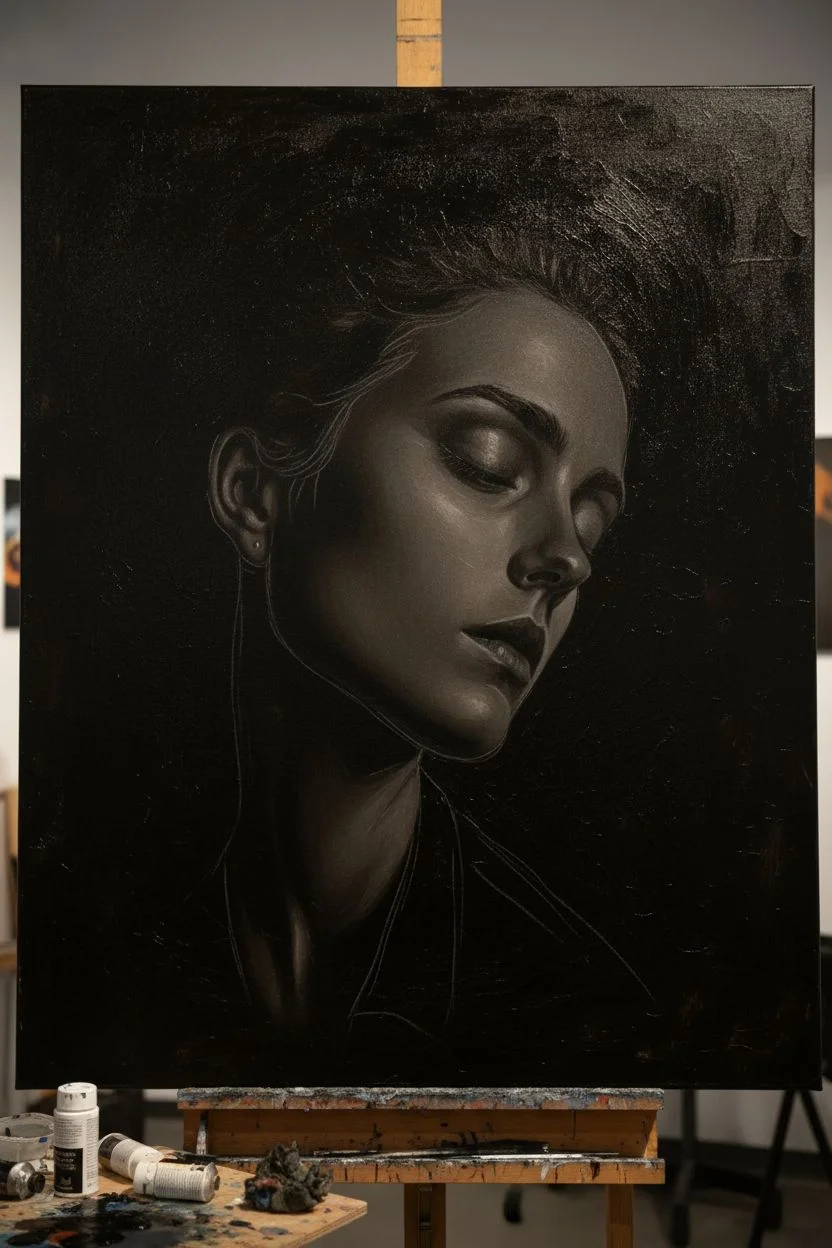
This project captures the serene drama of a woman’s profile emerging from deep shadow, utilizing classical chiaroscuro techniques to sculpt form with light. The interplay between the velvety dark background and the luminous skin tones creates a compelling, hyper-realistic effect that feels almost three-dimensional.
Step-by-Step Tutorial
Materials
- Large canvas (e.g., 24×36 inches) primed black or dark umber
- Oil paints: Titanium White, Burnt Umber, Ivory Black, Yellow Ochre, Alizarin Crimson, Cadmium Red Light, Ultramarine Blue
- Filbert brushes (sizes 2, 6, 10)
- Small round detail brush (size 0 or 00)
- Wide flat brush for background blending
- Slow-drying medium (liquin or painting butter)
- Palette knife
- Lint-free rags
Step 1: Setting the Stage
-
Prime the substrate:
Start by toning your entire canvas with a mix of Ivory Black and Burnt Umber. This dark ground is crucial for chiaroscuro because you will be pulling light out of the darkness rather than painting shadows onto white. -
Map the anatomy:
Using a thin wash of white or light grey, sketch the basic outline of the head. Focus heavily on the profile line—the slope of the forehead, the bridge of the nose, and the protrusion of the lips. -
Establish the shadow shapes:
Reinforce the darkest areas where the hair merges with the background. Since the background is already dark, this step is about identifying the absolute blacks versus the deep browns of the hair.
Step 2: Building the Form
-
Block in mid-tones:
Mix a base skin tone using White, Yellow Ochre, and a touch of Cadmium Red. Apply this to the cheek, jawline, and neck. Keep this layer thin and slightly transparent so the dark ground influences the color. -
Sculpt the profile:
Add more White and a tiny amount of Yellow Ochre to your mix to create a highlight tone. Paint the bridge of the nose, the brow bone, and the chin. These are the planes catching the most direct ‘side light’. -
Define the eye socket:
The closed eye is a focal point. Use a mix of Alizarin Crimson and Burnt Umber for the deep shadow in the eye socket and the crease of the lid. Soften the edges immediately. -
Paint the eyelid highlight:
With a small filbert, place a distinct swatch of shimmering copper or warm peach (using Cadmium Red and White) on the center of the eyelid to show the spherical form of the eyeball underneath. -
Developing the cheekbone:
The cheek needs a soft transition from the highlighted front plane to the shadowed ear area. Use a dry brush technique to feather the edge of your highlight into the shadow, preserving the ‘glow’.
Soft Edges are Key
Realism lives in edges. Never leave a hard line on the skin; smudge every shadow edge slightly into the light for a ‘turning form’ effect.
Step 3: Refining Details
-
Nose and nostril structure:
Paint the underside of the nose with a cooler shadow tone (add a speck of Ultramarine). Differentiate the nostril wing with a highlight on top and deep crimson shadow underneath. -
Lips and philtrum:
Mix Alizarin Crimson with White for the lips. Keep the upper lip slightly darker and cooler. The lower lip catches more light, so add a brighter highlight near the center. -
Softening transitions:
I like to take a clean, dry blending brush at this stage and very gently sweep over the boundaries between light and shadow on the skin to create that buttery, realistic texture. -
Ear detailing:
The ear is distinctively lit in this composition. Paint the helix (outer rim) with a warm pinkish-orange glow, simulating subsurface scattering where the light passes through the thin cartilage.
Add Metallic Shimmer
Mix a tiny amount of iridescent medium or gold mica powder into your eyelid highlight paint for an ethereal, modern makeup look.
Step 4: Final Glazes and Highlights
-
Deepen the background:
Go back over the negative space around the face with pure Ivory Black to ensure the highest possible contrast against the illuminated skin. -
Hair texture:
Using a liner brush and thinned paint, flick in stray hairs along the hairline and the nape of the neck. These should be subtle and hardly visible against the dark background. -
Specular highlights:
With your smallest brush and pure Titanium White (thickly applied), add the tiniest points of reflection: one on the tip of the nose, one on the tear duct area, and one on the fullest part of the lower lip. -
The earring accent:
If you wish to include the earring, use a simple dot of white with a grey shadow underneath to simulate a small stud catching the light. -
Neck muscles:
Define the sternocleidomastoid muscle in the neck with long, vertical strokes of shadow and highlight. This anchors the head and adds physical weight to the pose. -
Final glaze:
Once the painting is dry to the touch, apply a very thin glaze of Alizarin Crimson over the cheek and nose tip to boost the warmth and life-likeness of the skin.
Step back and admire how the dramatic lighting transforms a simple profile into a moment of quiet intensity

PENCIL GUIDE
Understanding Pencil Grades from H to B
From first sketch to finished drawing — learn pencil grades, line control, and shading techniques.
Explore the Full Guide
Soft-Edge Portrait With Eyes as the Sharp Focus
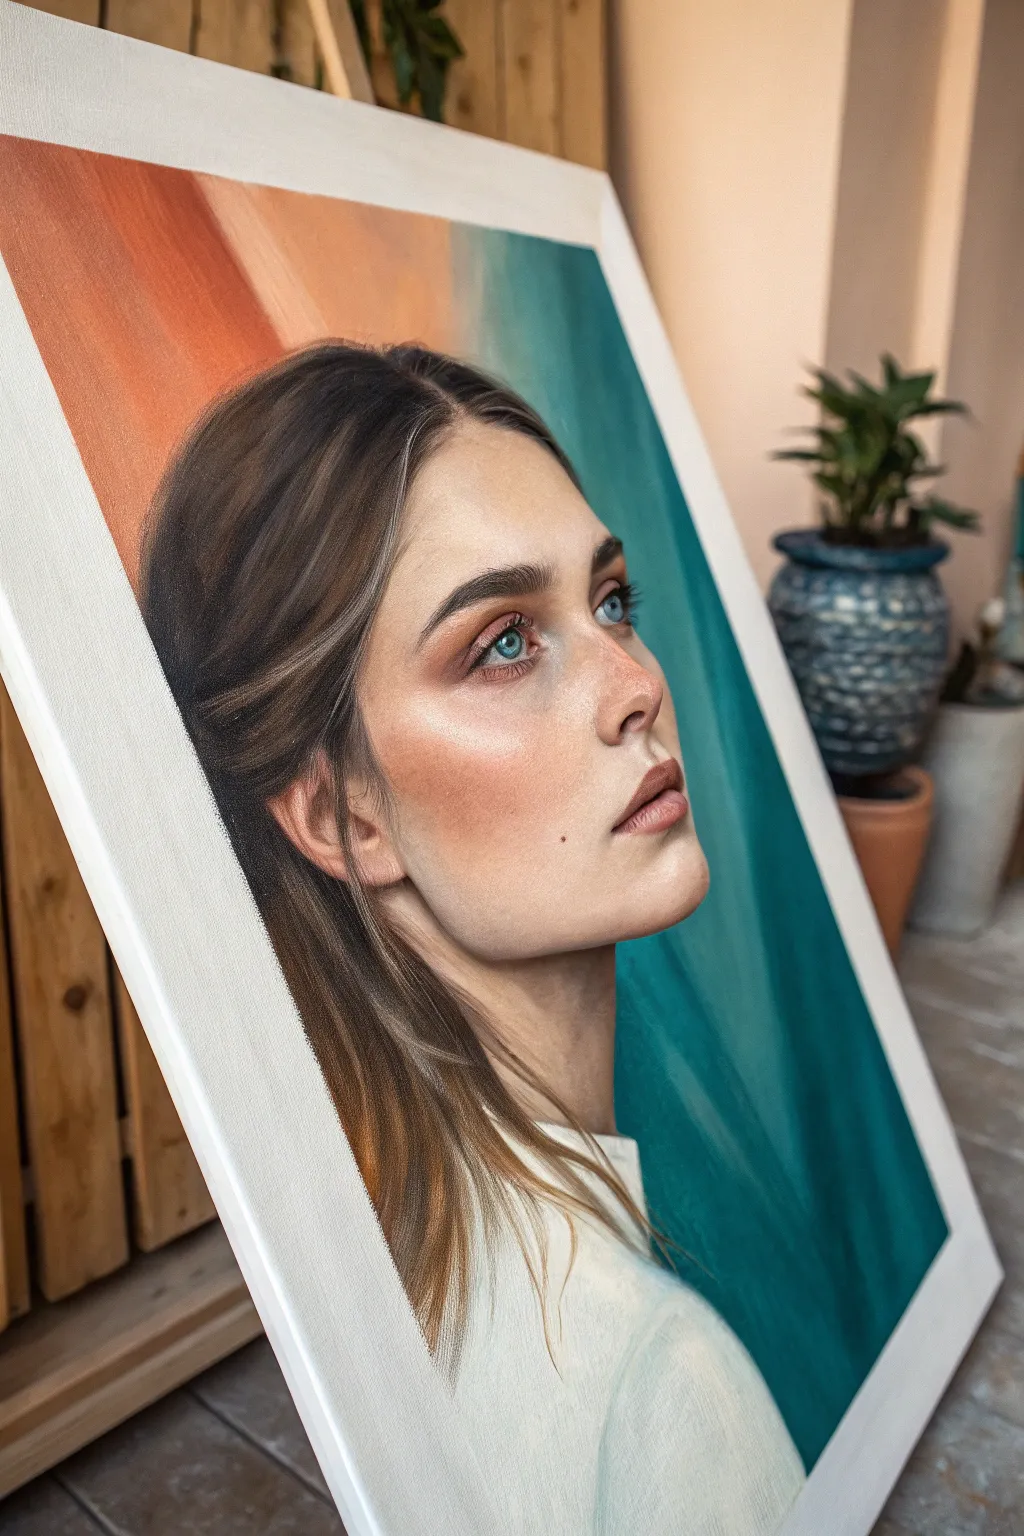
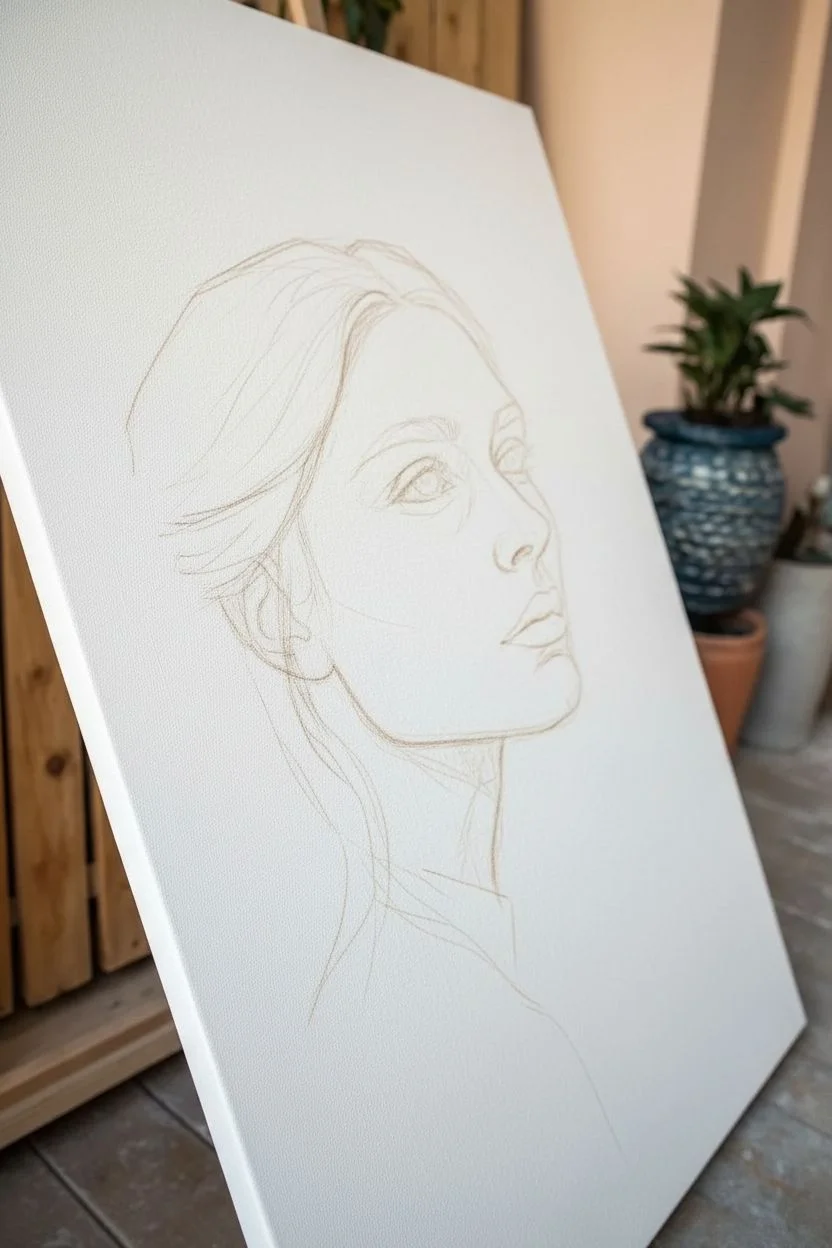
Capture the ethereal beauty of a thoughtful gaze with this portrait tutorial, which emphasizes soft edges and striking, sharp eyes. By juxtaposing a dreamy, abstract teal and ochre background against hyper-realistic facial features, you will create a piece with incredible depth and emotion.
Step-by-Step
Materials
- Stretched canvas (approx 18×24 inches or similar)
- Oil paints (Titanium White, Burnt Umber, Yellow Ochre, Alizarin Crimson, Cadmium Red, Ultramarine Blue, Phthalo Green, Ivory Black)
- Odorless mineral spirits or turpentine
- Medium (Linseed oil or Liquin)
- Assorted brushes: Large filberts (size 8-12), medium flats (size 4-6), fine rounds (size 0-2), and a large soft blending brush
- Palette and palette knife
- Easel
- Paper towels or rags
Step 1: Preparation and Underpainting
-
Prepare the canvas:
Start with a primed canvas. If you prefer a smoother surface for fine details, apply an extra coat of gesso and sand it lightly once dry. -
Sketch the profile:
Using a thinned mixture of Burnt Umber and spirits, lightly sketch the subject’s profile. Pay careful attention to the proportions of the nose, the angle of the jaw, and the placement of the eye, which is the anchor of this composition. -
Block in the shadows:
With a large filbert brush, wash in the darkest shadow areas of the hair and the hollows of the neck using a thin wash of Burnt Umber and a touch of Ultramarine Blue.
Step 2: Establishing the Background
-
Mix the background colors:
Create two main pools of color: a muted, warm ochre-orange (Yellow Ochre, White, touch of Cadmium Red) and a deep, cool teal (Phthalo Green, Ultramarine Blue, White). -
Apply the warm tones:
Paint the upper left corner with the warm mix, using broad, diagonal strokes. Don’t worry about perfect smoothness yet; texture adds interest. -
Apply the cool tones:
Fill the right side of the canvas with the teal mixture. Bring this color right up to the front of the face profile, carefully cutting in against the skin edge. -
Blend the transition:
While the paint is still wet, use a clean, dry blending brush to soften the boundary where the orange meets the hair and where the teal meets the background space. This creates that ‘soft-edge’ out-of-focus look.
Muddiness vs. Cleaning
If facial tones look muddy, stop immediately. Your brush likely has residual dark paint. Clean your brush thoroughly in spirits and wipe dry before mixing fresh high-key skin tones.
Step 3: Painting the Skin Tones
-
Mix skin base tones:
Prepare a gradient of flesh tones: a shadow tone (Burnt Umber + Alizarin Crimson), a mid-tone (White + Yellow Ochre + Cadmium Red), and a highlight (White + trace of Yellow Ochre). -
Apply the mid-tones:
Using a medium flat brush, lay down the mid-tones on the cheek, forehead, and chin. Keep the paint relatively thin at this stage. -
Add warmth and blush:
Glaze a slightly redder mixture onto the apple of the cheek and the tip of the nose to give the skin a healthy, flushed appearance. -
Define the shadows:
Paint the shadows under the jawline, around the eye socket, and the side of the nose. Soften edges immediately with a clean brush to maintain the ‘soft focus’ aesthetic. -
Refine the lips:
Paint the lips using a mix of Alizarin Crimson and White, adding Burnt Umber for the corners and the parting line. Keep the upper lip slightly darker than the bottom lip.
Pro Tip: Lost & Found Edges
To increase realism, intentionally blur the back of the head into the background color. This ‘lost edge’ pushes the sharp facial features forward, creating a believable 3D effect.
Step 4: The Focal Point: The Eye
-
Draft the iris:
Switch to a small round brush. Paint the iris outline carefully. For the color, mix Ultramarine Blue, a touch of Green, and White for a striking pale blue-green. -
Detail the pupil and limbal ring:
Use Ivory Black for the pupil and a dark blue-grey for the outer ring of the iris. Ensure the edges here are significantly sharper than the rest of the painting. -
Add the catchlight:
Place a small, crisp dot of pure Titanium White in the pupil overlapping the iris. This is crucial for bringing the subject to life. -
Shape the eyelashes:
Using a rigger or fine liner brush with thinned dark paint, flick in the eyelashes. Keep them delicate and not too uniform.
Step 5: Hair and Final Touches
-
Build hair volume:
Paint the hair using broad strokes initially for the mass, moving in the direction of growth. Use dark browns for the shadows. -
Add hair highlights:
Mix a lighter tan color and paint individual strands selectively where the light hits the curve of the head and the loose strands falling over the shoulder. -
Blend the hairline:
Soften the hairline where it meets the forehead so it’s not a stark line. I like to gently drag a dry brush across this edge to blur it. -
Final highlights:
Add the brightest skin highlights now: the bridge of the nose, the brow bone, and the cupid’s bow. These should be thickest paint application (impasto) for texture. -
Clothing suggestion:
Keep the clothing simple—a white or cream blocked-in shape at the bottom creates a vignette effect that doesn’t distract from the face.
Step back and admire how the sharp focus of the eyes commands attention against the ethereal softness of the surrounding painting
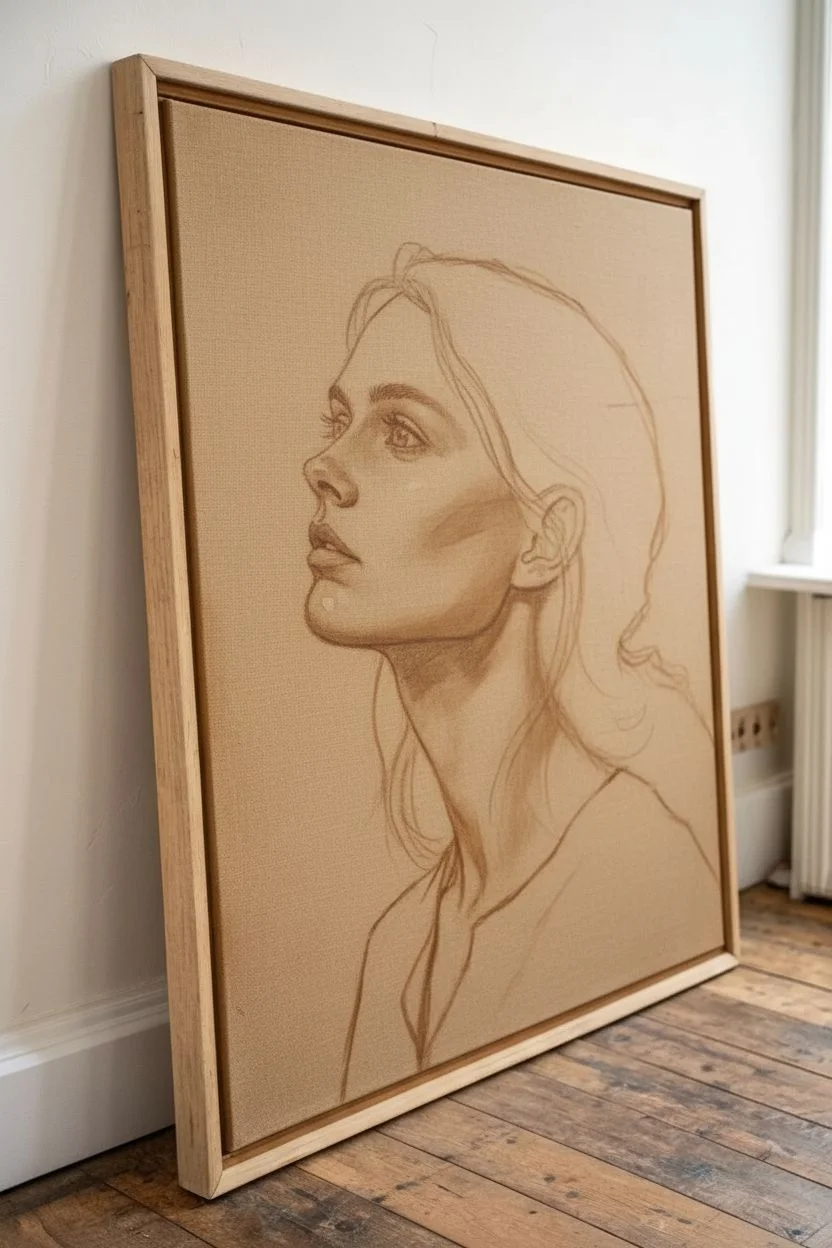
Close-Cropped Portrait That Fills the Frame
Capture the intimate intensity of a subject with this hyper-realistic portrait study. By cropping closely to the face and focusing on subtle skin translucency, you will create a piece that feels both classical and startlingly modern.
Step-by-Step Guide
Materials
- Stretched fine-grain linen canvas (approx. 18×24 inches)
- Oil paints (Titanium White, Yellow Ochre, Burnt Sienna, Alizarin Crimson, Ultramarine Blue, Raw Umber, Cadmium Red)
- Hog bristle brushes (filberts, sizes 4-8)
- Soft synthetic brushes (rounds, sizes 0-2 for details)
- Odorless mineral spirits
- Liquin or similar drying medium
- Wooden palette
- Mahl stick (for steadying your hand)
- Reference photo of subject in profile
Step 1: Underpainting and Structure
-
Prepare the Surface:
Begin with a fine-grain linen canvas to support detailed brushwork. Apply a subtle tone of diluted Raw Umber over the entire surface to kill the stark white. Let this layer dry completely before sketching. -
Establish the Drawing:
Using a thin wash of Burnt Sienna on a small round brush, sketch the outline of the profile. Focus heavily on measuring the proportions of the ear, the slope of the nose, and the jawline. Because this is a close crop, accuracy here is critical. -
Block in Shadows:
Mix Raw Umber and a touch of Ultramarine Blue to create a dark, neutral tone. Paint the darkest areas first: the pupils, the shadow under the chin, the nostril, and the deep recesses of the ear. Keep the edges soft. -
Map the Mid-Tones:
Create a ‘dead layer’ or monochromatic underpainting using just White and Raw Umber. Map out the planes of the face—the forehead, cheekbone, and neck structure—focusing only on value, not color.
Skin Looking Waxy?
If skin looks fake or waxy, you likely over-blended. Re-introduce texture by stippling distinct colors back on top, focusing on ‘zones’: yellow on forehead, red on cheeks, blue/green on chin.
Step 2: Building the Flesh Tones
-
Mix Your Base Palette:
Prepare three piles of flesh tone: a highlight (White + Yellow Ochre), a mid-tone (Yellow Ochre + Cadmium Red + White), and a shadow tone (Alizarin Crimson + Burnt Sienna + small amount of Blue). -
First Color Pass:
Apply the mid-tone paint to the cheek and forehead areas. Use a filbert brush to scumble the paint thinly over your underpainting, allowing the structure underneath to guide you. -
Add Warmth to the Cheeks:
While the paint is wet, blend in slightly redder tones into the cheek, nose tip, and ear. This imitates the blood flow beneath the skin. Be gentle; you want a flush, not a sunburn. -
Cool the Shadows:
In the shadow areas under the jaw and near the hairline, introduce a cooler mixture by adding more Ultramarine or Viridian to your flesh tone. This contrast makes the warm skin pop. -
Refining the Eyes:
Paint the iris using a mix of blue and grey, keeping the top darker where the lid casts a shadow. Add the white of the eye but tone it down with grey; pure white will look unnatural.
Add Subsurface Scattering
Paint a vibrant, saturated orange-red line right along the shadow edge of the nose or ear. This mimics light passing through semi-transparent skin, adding incredible life to the portrait.
Step 3: Refining Texture and Details
-
Smooth the Transitions:
Use a clean, dry blending brush to very lightly sweep over the boundaries between your different skin tones. This creates the soft, seamless gradient characteristic of realistic skin. -
Develop Skin Texture:
Switch to a size 0 synthetic brush. I find it helpful to mix a slightly thicker highlight paint here. Stipple tiny dots of light on the nose bridge, forehead, and upper cheek to suggest pores and oil sheen. -
Detail the Hairline:
Don’t paint every hair. Instead, paint the mass of the hair with broad strokes, then flick fine lines of lighter paint near the forehead and ear where baby hairs catch the light. -
Intensify the Highlights:
Apply pure Titanium White (perhaps with the tiniest dot of yellow) to the highest points: the glistening wetness of the lower eyelid, the tip of the nose, and the brightest spot on the lip. -
Glazing for Depth:
Once the layer is dry to the touch, mix a transparent glaze using Alizarin Crimson and medium. Lightly brush this over the cheek and lips to deepen the saturation without losing the detail underneath. -
Final Adjustments:
Step back from the easel. check the jawline edge against the background. If it looks too cut-out, blur the edge slightly into the background color to turn the form.
Step back and admire how the subtle layering of color brings a breathing presence to your canvas


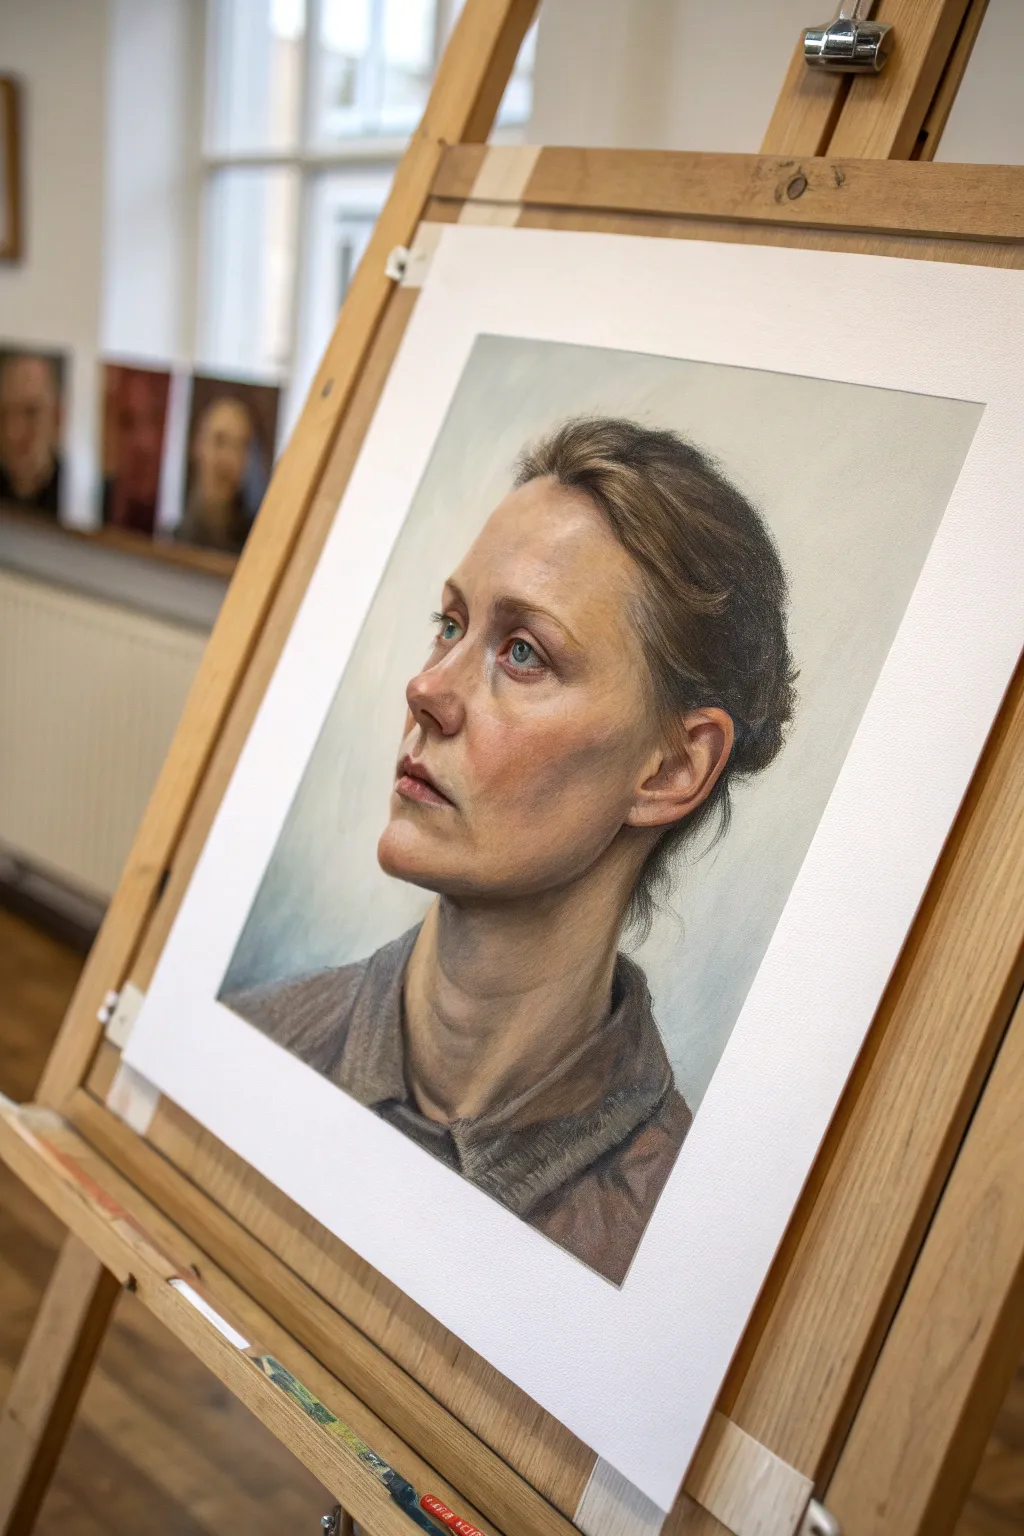
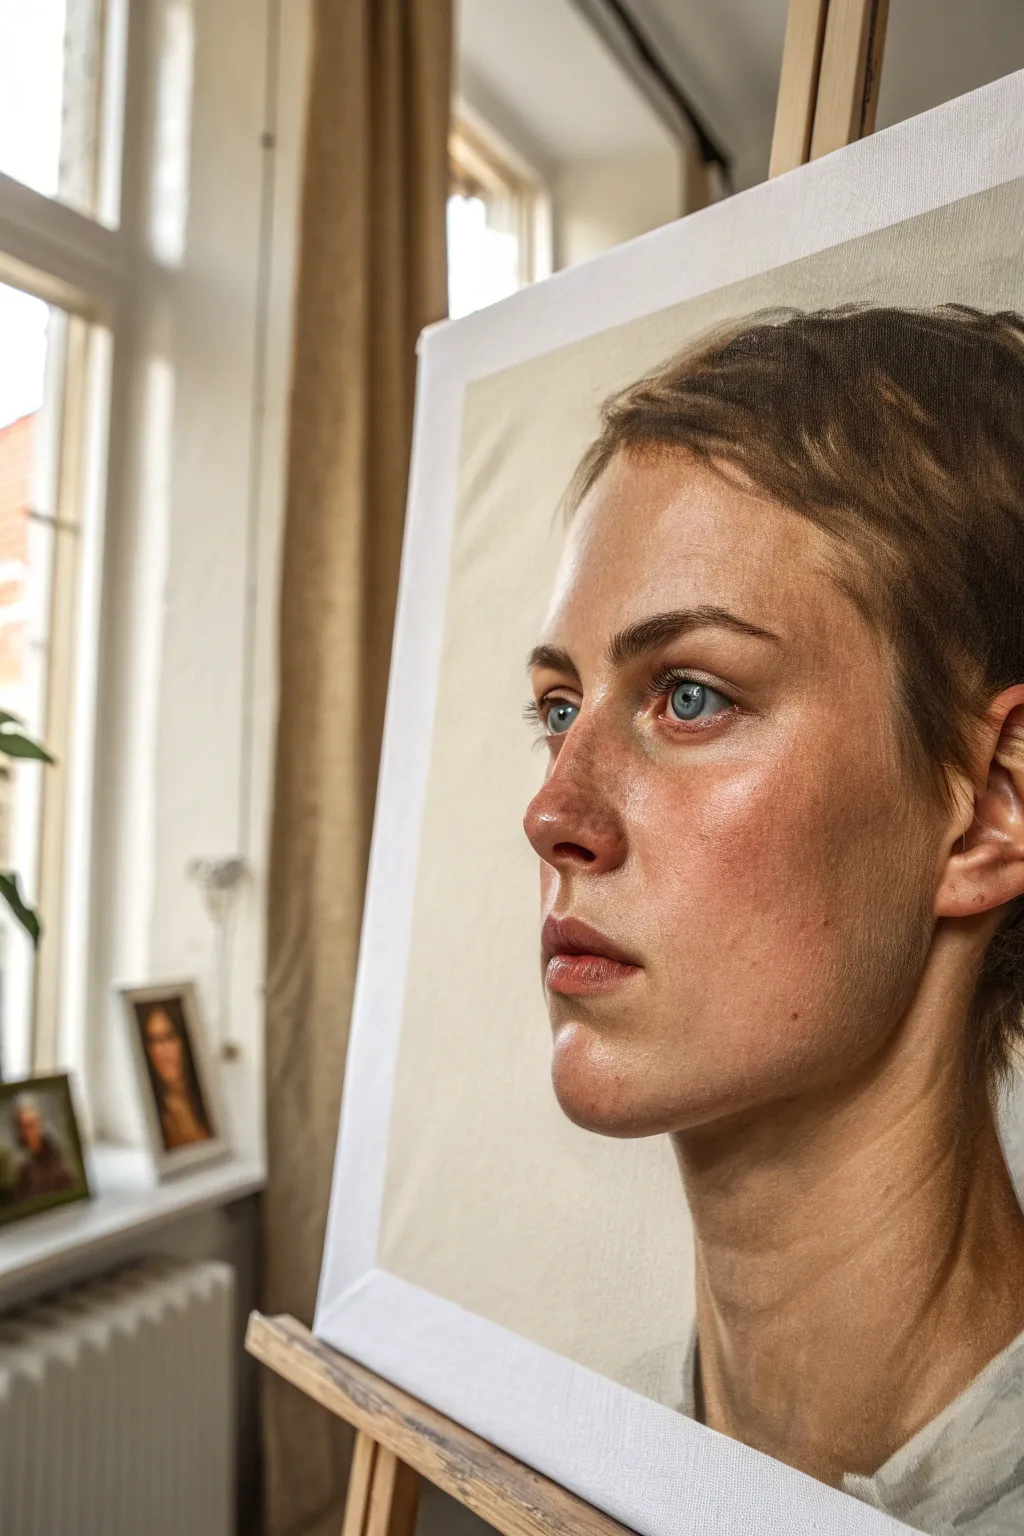
Three-Quarter View Portrait With a Simple Color Field Background
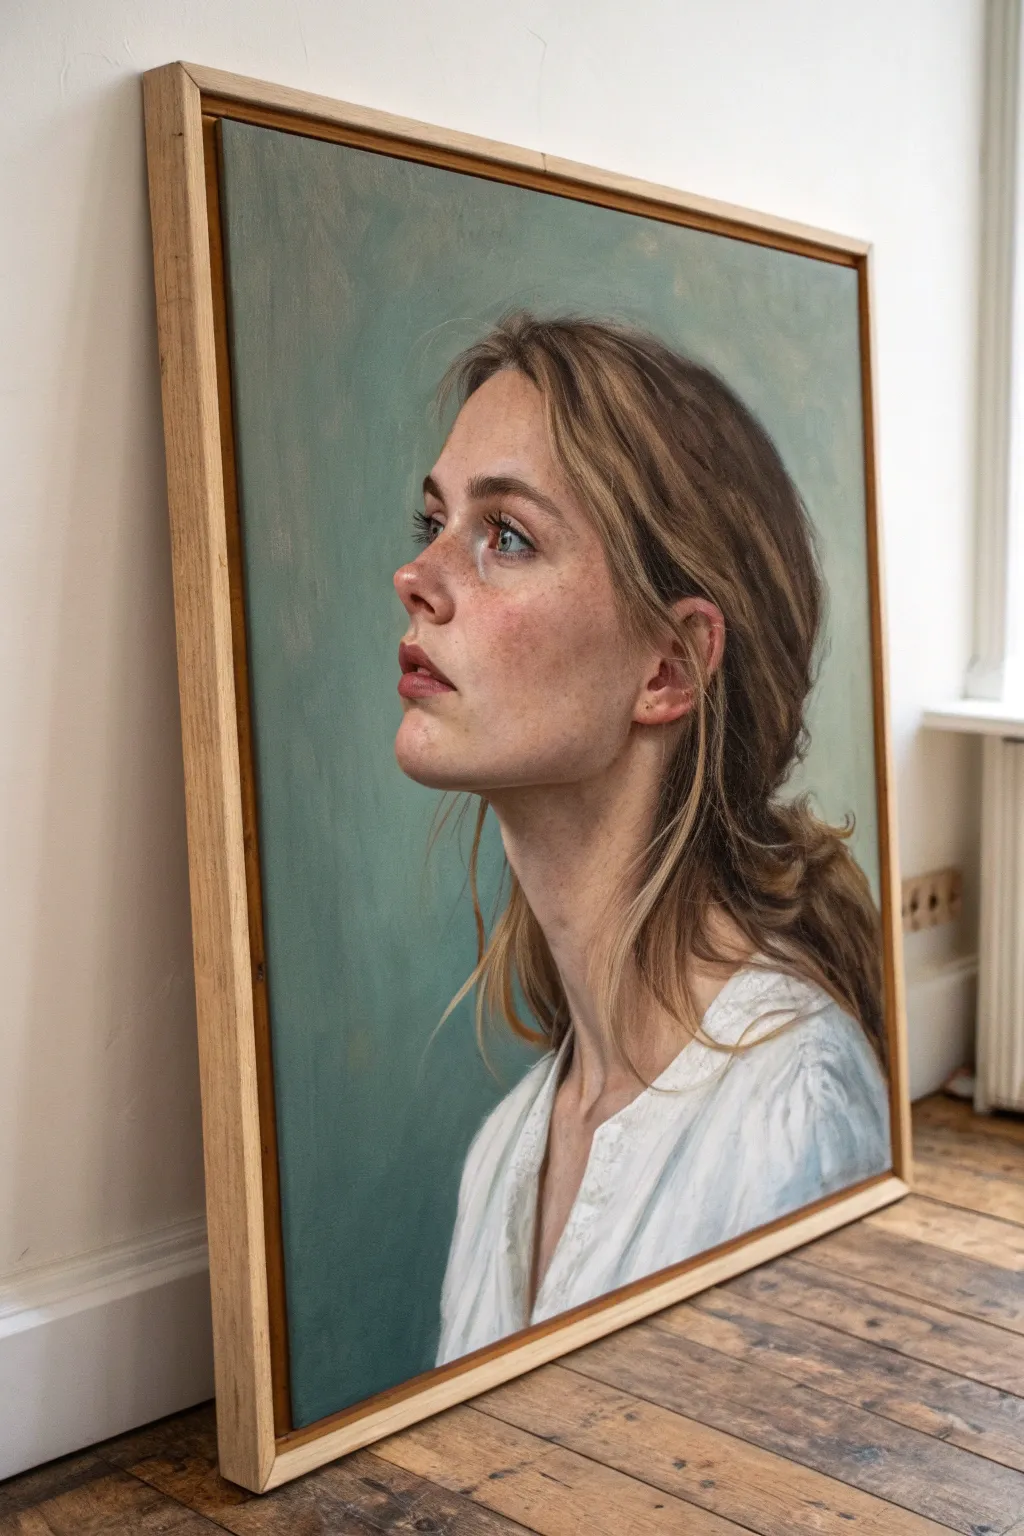
This project captures the delicate interplay of light and expression through a three-quarter profile portrait set against a calming, muted turquoise background. You will learn to render realistic skin tones, soft hair textures, and a luminous gaze using traditional oil painting techniques to create a piece that feels both classic and contemporary.
Step-by-Step
Materials
- Stretched canvas (approx. 18×24 inches)
- Oil paints (Titanium White, Yellow Ochre, Cadmium Red Light, Alizarin Crimson, Burnt Umber, Ultramarine Blue, Viridian Green, Sap Green)
- Solvent-free painting medium or linseed oil
- Odorless mineral spirits for cleaning
- Assorted distinct brushes (filberts sizes 4-8, rounds sizes 0-2, flat sizes 10-12)
- Palette knife for mixing
- Wooden palette
- Floater frame (light oak or maple, optional)
Step 1: Preparation and Underpainting
-
Tone the Canvas:
Begin by applying a thin wash of Burnt Umber mixed with plenty of mineral spirits to the entire canvas. Wipe it back with a rag to create a warm, mid-tone neutral ground. This removes the stark white of the canvas and helps judge values more accurately later. -
Sketch the Contours:
Using a small round brush and thinned Burnt Umber, sketch the basic placement of the head. Focus on the tilt of the neck and the upward angle of the chin. Ensure the ear is placed correctly back on the skull and the jawline leads cleanly to it. -
Map Facial Features:
Lightly block in the eyes, nose, and mouth. Since the subject is looking up, the bottom of the nose will be more visible, and the upper eyelid will be prominent. Mark the hairline loosely to frame the face. -
Establish Shadow Shapes:
With a slightly darker mix of Umber and a touch of Ultramarine, paint in the major shadow areas—under the jaw, the eye sockets, under the nose, and the hair mass behind the neck. Keep these edges soft.
Soft Edges are Key
Avoid outlining the face. The transition from skin to background should be softest at the back of the neck and sharpest at the profile of the nose and forehead to create depth.
Step 2: Building the Color Field
-
Mix the Background Tone:
Create a large pile of the background color. Mix Titanium White with a little Viridian Green, a touch of Sap Green, and a tiny bit of Yellow Ochre to warm it. You want a muted sage-turquoise, not a bright mint. -
Apply the Background:
Use a large flat brush to apply the background, cutting in carefully around the silhouette of the face and hair. I like to keep the brushstrokes somewhat visible and loose here, creating a varied texture rather than a flat wall of color. -
Soften the Edges:
While the background paint is still wet, take a clean, dry brush and very gently blur the edge where the background meets the hair and the back of the neck. This prevents the figure from looking like a cutout.
Step 3: Painting the Portrait
-
Block in Skin Mid-Tones:
Mix a base skin tone using White, Yellow Ochre, and a small amount of Cadmium Red. Apply this to the forehead, cheeks, and neck where the light hits directly. Keep the paint relatively thin for now. -
Add Warmth and Flush:
Mix a pinker tone by adding a bit more Alizarin Crimson to your flesh mix. Glaze this gently onto the cheekbone, the tip of the nose, the ear, and the chin to simulate blood flow under the skin. -
Define the Features:
Switch to smaller filbert brushes. Refine the nose shape, keeping the nostrils soft, and paint the lips using a mix of Alizarin and Burnt Umber. Remember the upper lip is usually in shadow and darker than the lower lip. -
Paint the Eyes:
Paint the iris with a mix of Ultramarine, a touch of Green, and White. Crucial step: add the catchlight (the white reflection) near the top of the pupil to show the upward gaze. Paint the whites of the eyes slightly grey-blue, never pure white. -
Render the Neck and Clavicle:
Pay attention to the anatomy of the neck. Use slightly cooler, darker skin tones (add a tiny bit of Blue to the flesh mix) for the shadow side of the neck to turn the form. Highlight the tendon leading from behind the ear to the collarbone. -
Detailing the Hair:
Block in the main masses of hair using Yellow Ochre and Burnt Umber. Don’t paint individual strands yet. Look for the big shapes of light and dark within the hair. -
Add Hair Strays:
Using a rigger or a fine round brush with thinned paint, flick in loose strands of hair escaping the main mass, especially around the ear and trailing down the neck. This adds movement and realism.
Level Up: Glazing
Once the painting is dry, apply a very thin glaze of transparent red oxide over the shadow side of the face. This unifies the shadows and adds a rich, luminous glow to the skin.
Step 4: Clothing and Finishing Touches
-
suggest the Garment:
For the white shirt, use a mix of White with streaks of Blue-Grey for shadows. Use broad, confident strokes to suggest the folds of the fabric without over-detailing. It should feel looser than the face. -
Refine Highlights:
Add the brightest highlights last with thick Titanium White. place these on the tip of the nose, the highest point of the cheekbone, the bottom lip, and the forehead. -
Add Freckles:
Thicken a mixture of Burnt Sienna and medium. Using a small brush, gently stipple tiny dots across the nose and cheeks. Vary the pressure so some are faint and others distinct. Tap them with a finger to integrate them into the skin. -
Final Assessment:
Step back and check your values. If the background feels too flat, scumble a little lighter green variety into the center area to create a subtle glow behind the head. Let the painting facilitate fully before framing.
Now, capture that final thoughtful expression and let your beautiful portrait dry before displaying it with pride
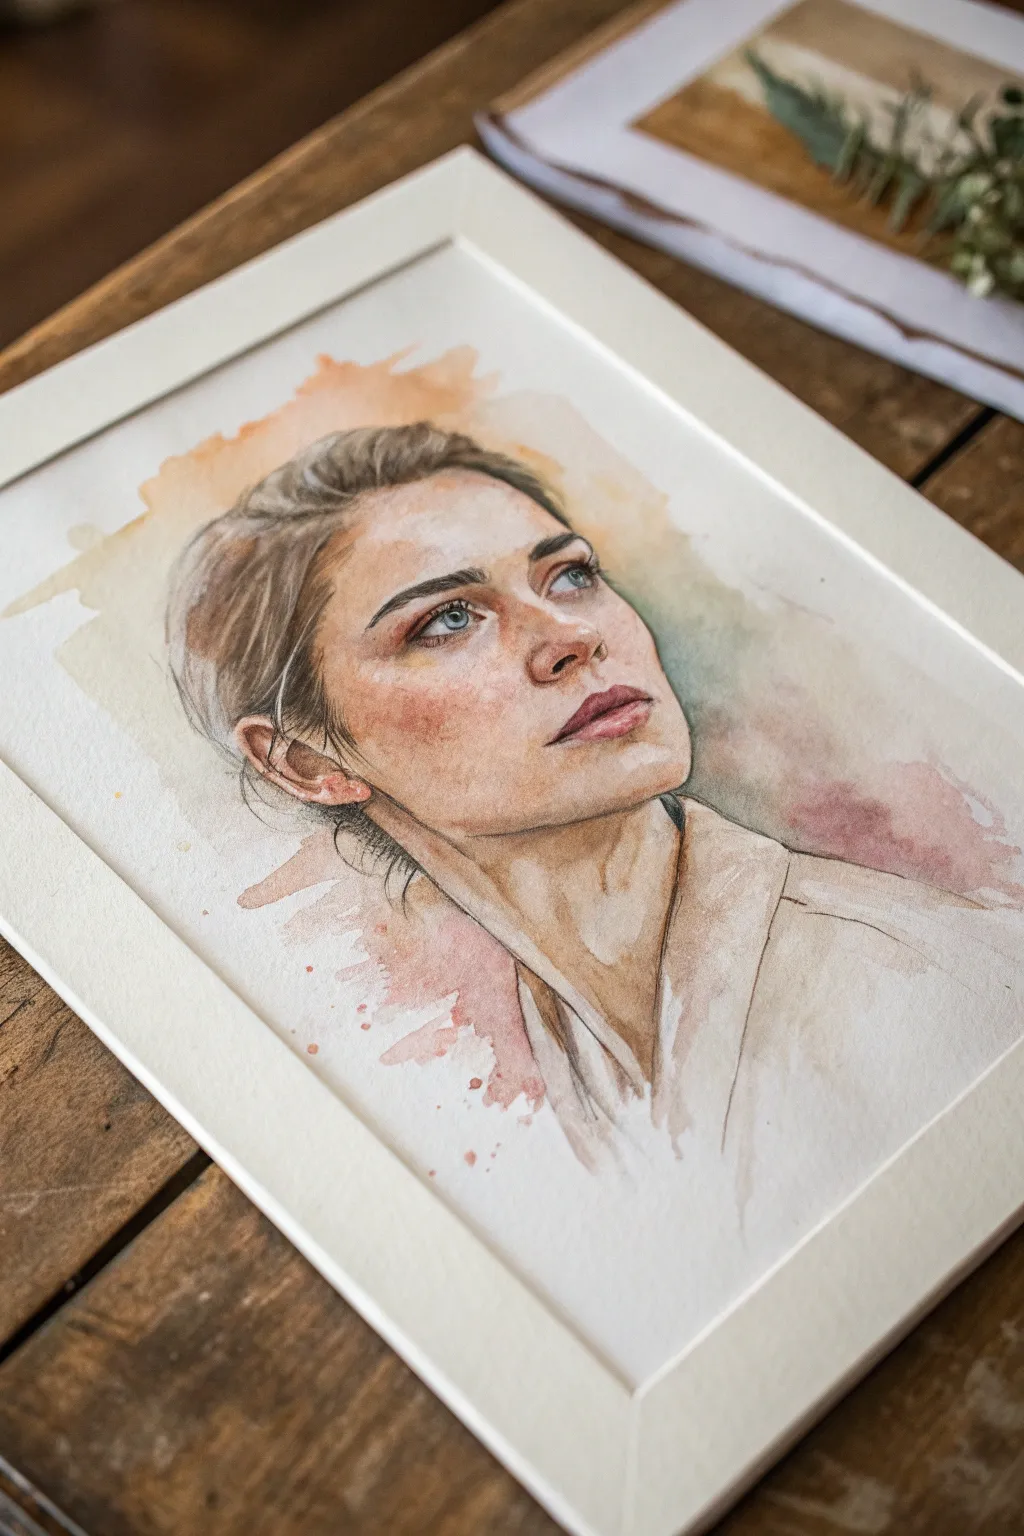
Expressive Color Portrait Using Non-Naturalistic Skin
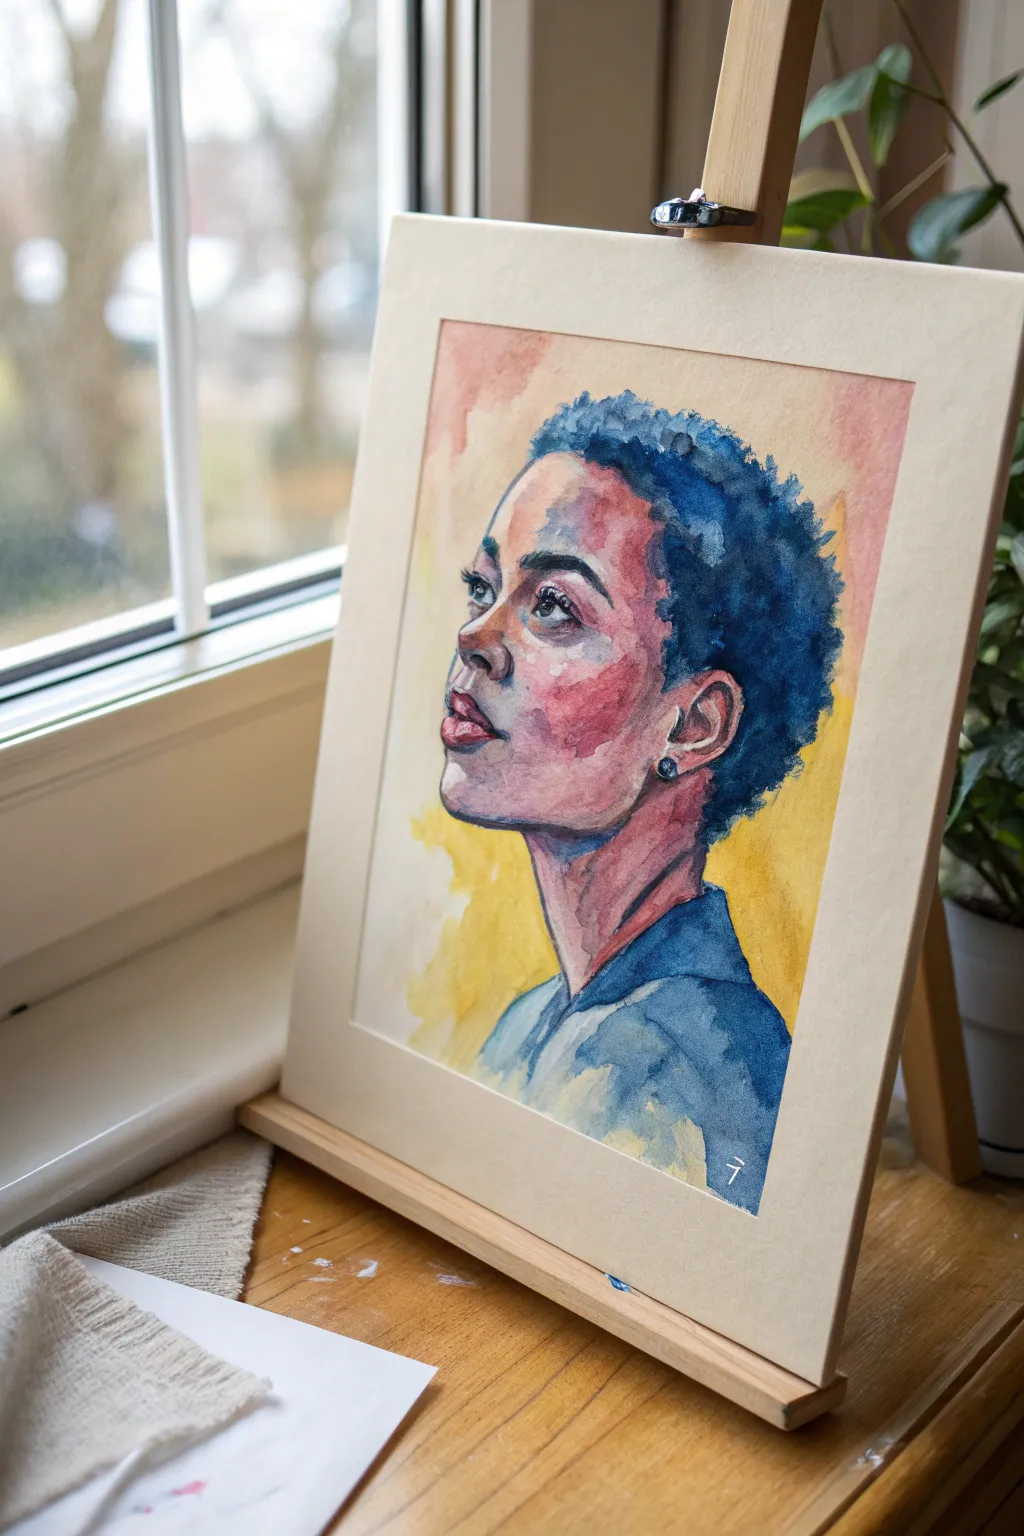
Capture the emotion and vibrancy of a subject using an expressive, non-naturalistic color palette that blends warm skin tones with striking blues and purples. This watercolor project focuses on balancing loose, watery washes with defined facial features to create a portrait that feels both dreamy and structured.
Step-by-Step Tutorial
Materials
- Cold press watercolor paper (140lb/300gsm)
- Watercolor paints (Ultramarine Blue, Alizarin Crimson, Cadmium Yellow, Burnt Sienna)
- Masking tape
- Pencil (HB or 2B) and kneaded eraser
- Round watercolor brushes (Size 4, 8, and a small detail brush like a 0 or 2)
- Clean water jars
- Palette for mixing
- Paper towels
Step 1: Preparation and Sketching
-
Prepare your surface:
Tape down all four edges of your watercolor paper to a board or table to prevent buckling when the paper gets wet. -
Outline the profile:
Using an HB pencil, lightly sketch the profile of the subject. Focus on the upward gaze, defining the jawline, the curve of the ear, and the general mass of the hair. Keep the lines faint so they don’t show through transparent washes later. -
Map the shadows:
Lightly mark where your deepest shadows will fall—under the chin, the hollow of the eye, and beneath the nose—as this will guide your color placement.
Pro Tip: Drying Time
Patience is key with watercolor glazing. Ensure the paper is cool to the touch (bone dry) before adding new layers, otherwise, your crisp details will turn into muddy blobs.
Step 2: Painting the Skin Tones
-
Initial warm wash:
Mix a watery wash of Cadmium Yellow and a touch of Alizarin Crimson. Paint this loosely over the face area, avoiding the highlighted cheekbone and the white of the eye to preserve luminosity. -
Introducing cool shadows:
While the first layer is still slightly damp but not soaking, drop in a mix of Alizarin Crimson and a tiny bit of Ultramarine Blue into the shadow areas: the cheek, the neck, and the temple. Let the colors bleed naturally. -
Deepening the contrast:
Once the previous layer is dry, mix a stronger purple using more pigments and less water. Use a size 8 brush to define the neck shadow and the darker side of the face away from the light source. -
Refining facial features:
Switch to a size 4 brush. Use a mix of Burnt Sienna and Alizarin Crimson to carefully paint the lips, nose nostrils, and the eyelid crease. -
Painting the eye:
With your smallest brush, paint the iris using a dark mix of blue and brown, leaving a tiny spot of white paper for the catchlight to bring the eye to life.
Step 3: Hair and Clothing
-
Base layer for hair:
Load a size 8 brush with diluted Ultramarine Blue. Apply a wash over the hair area, using a stippling motion (dabbing the brush) to mimic the texture of short curls. -
Building hair volume:
While the blue base is wet, drop in concentrated Ultramarine and touches of purple near the scalp and the nape of the neck to create depth and volume. -
Softening hair edges:
I like to take a clean, damp brush and soften the outer edges of the hair so it doesn’t look like a solid helmet, allowing it to fade slightly into the background. -
Painting the shirt:
Use a loose wash of Ultramarine Blue mixed with a little water for the clothing. Let the strokes be casual and indicative rather than overly detailed. -
Shadows on clothing:
Add a darker value of blue to the collar area and folds of the shirt to ground the figure.
Level Up: Salt Texture
Sprinkle a pinch of table salt onto the wet blue wash of the hair. As it dries, the salt absorbs pigment, creating a fantastic starburst texture that mimics tight curls perfectly.
Step 4: Background and Final Touches
-
Applying the background wash:
Mix a large puddle of yellow and orange. Carefully paint the background around the portrait, letting it remain loose and abstract. -
Creating bloom effects:
While the background is wet, touch a wet brush loaded with clean water or a different color (like pink) to the edges to create interesting ‘blooms’ or cauliflower textures. -
Final dark accents:
Use your smallest brush with a concentrated dark mix (Blue + Burnt Sienna) to re-establish the darkest points: the pupil, the corner of the mouth, the earring, and the eyelashes. -
Reviewing values:
Step back and squint at your painting. If the face looks too flat, add a glaze of cool red or purple to the shadow side of the face to increase the three-dimensional form. -
Adding the signature:
Once fully dry, sign your work at the bottom corner, perhaps with a white gel pen or opaque white paint if painting over a dark area. -
Removing the tape:
ensure the paper is 100% bone dry. Peel the masking tape away slowly at a 45-degree angle to reveal crisp, clean edges.
Now you have a striking, emotive portrait ready to frame and display
Split Lighting Portrait With Complementary Color Temperature
Capture the ethereal beauty of natural light with this portrait painting that focuses on dramatic backlighting and soft, reflected shadows. You will learn to render realistic skin tones and the delicate texture of curly hair illuminated by a warm sun.
How-To Guide
Materials
- Stretched canvas (approx 16×20 inches, oil primed)
- Oil paints: Titanium White, Burnt Umber, Yellow Ochre, Cadmium Red Light, Alizarin Crimson, Ultramarine Blue, Ivory Black
- Various flat and filbert brushes (specifically sizes 2, 6, and 12)
- Round detail brush (size 0)
- Odorless mineral spirits or turpentine
- Liquin or linseed oil medium
- Large wooden palette
- Easel
- Paper towels or lint-free rags
- Charcoal stick or graphite pencil for sketching
Step 1: Preparation and Underpainting
-
Tone the Canvas:
Begin by covering your white canvas with a thin wash of Burnt Umber mixed with odorless mineral spirits. Use a large brush or rag to wipe it down to a transparent, neutral mid-tone, which helps judge values accurately later. -
Establish the Drawing:
Using a charcoal stick or a small brush with thinned paint, sketch the profile of the subject. Focus on the angle of the jawline, the upward gaze of the eyes, and the general mass of the hair. Keep lines loose and correctable. -
Block in Shadows:
Mix a dark, warm shadow tone using Burnt Umber and a touch of Ultramarine Blue. Lay this into the darkest areas: the back of the neck, the deep recesses of the curly hair, and the nostril. Avoid pure black at this stage. -
Define the Light Source:
Since the light is coming from behind the subject, identify where the rim light hits. Wipe away your underpainting or apply a rough stroke of white on the edge of the profile (nose, chin, forehead) to remind yourself where the brightest highlights will sit.
Muddy Skin Fix
If skin tones look grey or muddy, you likely over-blended cool and warm colors. Let it dry completely, then glaze a thin layer of transparent orange or pink over the area to bring life back.
Step 2: Flesh Tones and Features
-
Mix the Shadow Flesh Tone:
The face is mostly in shadow. Create a cohesive shadow mix using White, Yellow Ochre, Burnt Umber, and a hint of Cadmium Red. The goal is a muted, warm beige that isn’t muddy. -
Apply the Base Skin Layer:
Paint the entire face area with your shadow flesh tone, keeping the edges soft. Be careful not to paint over your dark underpainting in the hair or neck area. -
Add Subtle Facial Variations:
While the base layer is wet, blend in slightly cooler tones (add a tiny bit of blue to your mix) under the eye and around the jaw. Add warmer, redder tones to the cheek, nose tip, and lips. -
Refine the Eyes:
With a smaller filbert brush, paint the whites of the eyes using a grey-blue off-white, never pure white. Paint the iris looking upward, ensuring the pupil is sharp. Add a tiny, crisp catchlight to make the eye look wet. -
Paint the Lips:
Mix Alizarin Crimson, White, and a touch of Burnt Umber. Paint the lips softly, keeping the edges blurred into the surrounding skin to avoid a ‘cut-out’ look. The upper lip should be slightly darker than the lower lip. -
The Rim Light Effect:
I prefer to use a clean brush for this crucial step. Mix Titanium White with a tiny amount of Yellow Ochre. Carefully paint the thin line of light tracing the profile of the forehead, nose, lips, and chin. This separates the face from the background.
Step 3: Hair and Clothing
-
Block in Hair Mass:
Using a large brush, fill in the hair shape with a dark brown mix. Don’t worry about individual strands yet; focus on the volume and the silhouette against the background. -
Establish Middle Values in Hair:
Mix a lighter brown using Burnt Umber and White. Scumble this over the sun-facing parts of the curls to suggest form and fluffiness without drawing every hair. -
Paint Individual Illuminated Strands:
Switch to your size 0 round brush. Use a mix of Yellow Ochre and White with a fluid medium like Liquin. Flick the brush to create thin, glowing stray hairs catching the backlight, especially top of the head and near the face. -
Render the Sweater:
For the textured clothing, use a loaded filbert brush with a creamy mix of White and Yellow Ochre. Use thick, impasto strokes to mimic the direction of the fabric weave. -
Deepen Clothing Shadows:
Paint the folds of the sweater using a darker beige-grey mix. Keep these transition edges soft to make the material look like soft wool.
Dust Mote Atmosphere
To enhance the backlit vibe, flick a stiff toothbrush with thinned white paint near the light source area to create floating dust motes catching the sun.
Step 4: Final Details
-
Background Atmosphere:
Paint the background using a large brush. Use a very pale, warm grey (White + tiny amount of raw umber). keep the brushwork loose and directional to suggest a wall or open space. -
Freckles and Skin Texture:
Thicken a mix of Burnt Umber and Red slightly. Using a splatter technique or a very fine point, dot a few freckles across the nose and cheeks. Tap them gently with a finger to blend them into the skin. -
Enhance Glow:
Glaze a very thin layer of transparent Yellow Ochre over the lighted edge of the hair and face profile to boost the golden hour effect. -
Final Brightest Highlights:
Add pure Titanium White only to the absolute brightest points: the tip of the nose, the wetness on the lower lip, and the brightest hair strands.
Step back and admire the gentle luminosity of your finished portrait.
Thick Texture Portrait With Visible Brushwork
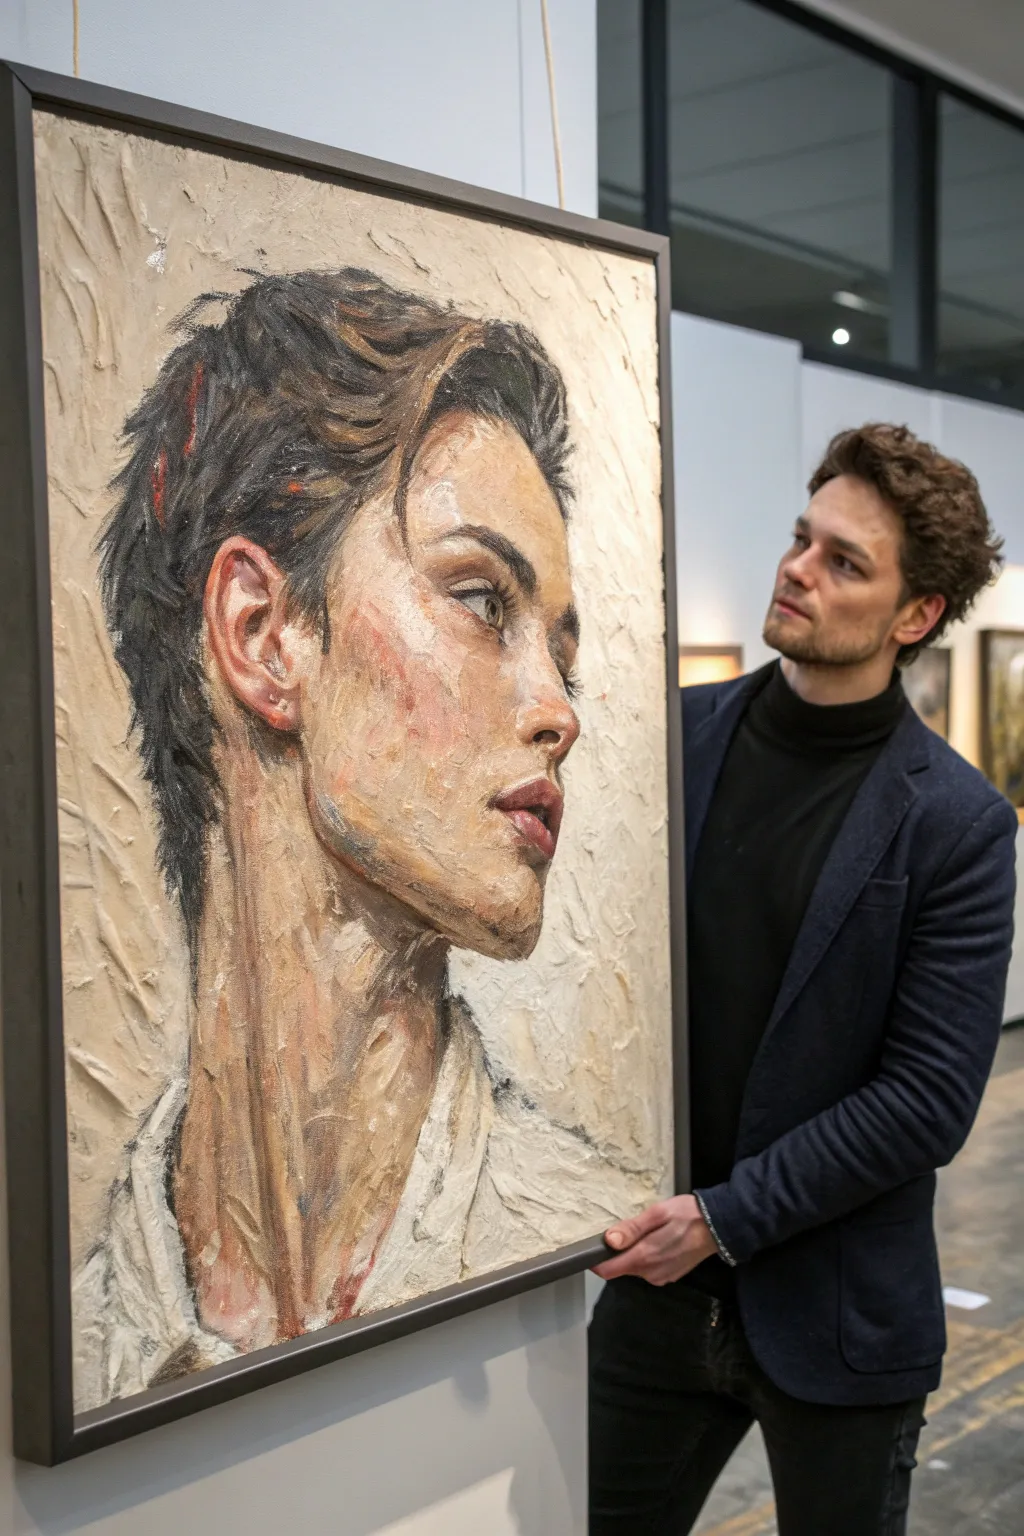
This project explores the tactile beauty of heavy impasto techniques, creating a portrait that feels as much like a sculpture as a painting. By building up layers of thick modeling paste and heavy-body acrylics or oils, you will achieve an expressive, touchable surface that captures light and shadow in a unique way.
Step-by-Step
Materials
- Large sturdy canvas (stretched and primed)
- Heavy body acrylic paints or oil paints (Titanium White, Burnt Umber, Yellow Ochre, Alizarin Crimson, Ivory Black, Ultramarine Blue)
- Acrylic modeling paste or heavy gel medium
- Palette knives (assorted sizes, particularly trowel and diamond shapes)
- Large flat bristle brushes
- Medium filbert brushes
- Pencil or charcoal stick
- Palette (large flat surface like glass or disposable paper palette)
- Rags or paper towels
Step 1: Preparation and Underpainting
-
Surface Prep:
Begin by applying a thin layer of gesso or neutral-toned acrylic wash (like a watered-down raw umber) to your canvas to kill the white. This ensures no stark white canvas shows through the texture later. -
Sketching the Structure:
Using a charcoal stick or a brush with thinned dark brown paint, sketch the basic outline of the head. Focus on the tilt of the head, the long neck, and the profile view. Keep lines loose; accuracy is important for placement, but details will be defined by the texture. -
Blocking in Values:
Mix a thin, dark wash using Burnt Umber and Ultramarine Blue to block in the darkest shadow areas—the hair, the shadow under the chin, and behind the ear. This establishes your value map early on.
Pro Tip: Knife Angle
Hold your palette knife at a low, flat angle to glide over the top of the texture, or hold it at a sharp 90-degree angle to scrape into wet layers and reveal the colors underneath.
Step 2: Building the Relief Texture
-
Mixing the Base Paste:
On your palette, mix a large volume of modeling paste or heavy gel medium. If you are using acrylics, you can mix color directly into this paste now. If using oils, you will apply the texture first and paint over it later, or mix oil paint with a wax medium. -
Applying Background Texture:
Use a large palette knife to spread thick, chaotic strokes of paste around the negative space behind the head. Don’t smooth it out—twist the knife to create ridges and valleys that mimic a rough plaster wall. -
Sculpting the Face Volume:
Switch to a smaller trowel knife. Apply thick dabs of paste to the high points of the face: the cheekbone, the bridge of the nose, the chin, and the forehead. Think of this as adding clay to a sculpture. -
Defining Hair Texture:
For the hair, use the edge of the knife or a stiff brush to drag through the wet paste, following the direction of hair growth. Create deep grooves that will catch the dark paint later. -
Drying Phase:
This is crucial. Let the texture layer dry completely. Depending on the thickness of your paste, this could take 24 to 48 hours. The surface must be hard before proceeding.
Troubleshooting: Cracking Paste
If your modeling paste cracks while drying, don’t panic. Mix a little more paste with fluid medium and fill the cracks, or simply paint over them—it adds to the rugged aesthetic.
Step 3: Painting the Skin Tones
-
Mixing Flesh Base:
Mix a mid-tone skin color using Titanium White, Yellow Ochre, and a touch of Alizarin Crimson. I like to keep this mixture thick, straight from the tube. -
Applying Mid-Tones:
Load a filbert brush heavily and drag it over the dried texture of the face. Allow the brush to skip over the ‘valleys’ of the texture, letting the underpainting show through in the deeper crevices. -
Adding Warmth:
Mix a warmer, reddish tone for the cheeks, nose tip, and ear. Scumble this onto the high points where blood flow is most visible beneath the skin. -
Highlighting:
Mix almost pure Titanium White with a tiny bit of yellow. Using a palette knife, gently scrape this highlight color onto the absolute highest points of the texture—the cheekbone ridge, the brow bone, and the tip of the nose.
Step 4: Details and Hair
-
Darkening the Hair:
Mix a deep, rich black-brown. Paint into the hair structure, ensuring the paint gets into the deep grooves you created earlier. Use a palette knife to scrape lighter brown tones over the top ridges to simulate shine. -
Defining the Eye:
Use a small detail brush to carefully paint the eye. Since the texture is rough, you may need to dilute the paint slightly to get a clean line for the eyelid and iris. -
The Lips:
Paint the lips with a muted red-brown. Use the texture to your advantage; dragging a dry brush across the lip area creates a natural, chapped, or realistic skin variation. -
Neck and Shoulders:
Keep the clothing and neck looser than the face. Use broad, downward strokes with a large brush or knife in a pale, possibly white or cream tone for the shirt, letting the texture delineate the collar. -
Final Contrast Check:
Step back from the work. If the face looks too flat, remix your dark shadow tone and carefully glaze the shadow side of the neck and under the jawline to pop the head forward.
Hang your finished piece in a spot with strong side-lighting to truly emphasize the drama of the surface texture
Loose Wash Portrait With Drips and Splatter Accents
Capture the delicate balance between realism and spontaneity with this watercolor portrait project. You’ll layer soft skin tones over a visible pencil sketch, letting loose washes and intentional splatters add an artistic, unfinished charm.
Detailed Instructions
Materials
- Cold press watercolor paper (300 gsm)
- HB or 2B graphite pencil
- Kneaded eraser
- Watercolor paints (burnt sienna, yellow ochre, alizarin crimson, ultramarine blue, burnt umber)
- Round brushes (sizes 4, 8, and 12)
- Rigger or liner brush for fine details
- Paper towels
- Two jars of water
- Palette
Step 1: The Foundation Sketch
-
Outline the head structure:
Begin with a light graphite sketch to establish the angle of the head. The subject is looking up and away, so focus on the jawline’s upward tilt and the elongation of the neck. -
Refine facial features:
Draw the eyes, nose, and lips with precision. Unlike traditional watercolor where you might erase lines later, this style embraces visible sketch lines, so keep your pencil work confident and slightly dark, especially around the eyes and jaw. -
Indicate hair flow:
Sketch the hair loosely. Instead of drawing individual strands, outline the major masses and the direction the hair is pulled back. Add a few flyaway lines at the nape of the neck for realism.
Muddy colors?
If facial shadows look grey or dirty, your shadow mix has too much blue or black. Warm it up by adding more burnt sienna or red to bring life back to the skin.
Step 2: Layering Skin Tones
-
Mix your base flesh tone:
Create a watery mix of yellow ochre and a touch of burnt sienna or cadmium red. It should be very pale for the first wash. -
Apply the first wash:
Using a size 12 brush, apply this wash over the face and neck, avoiding the whites of the eyes and teeth. Keep the edges wet to avoid hard lines forming where you don’t want them. -
Add warmth to the cheeks:
While the first layer is still slightly damp, drop in a mix of alizarin crimson and burnt sienna onto the cheeks, nose, and ear. Let this bleed naturally into the base wash for that flushed look. -
Define shadows:
Once the paper is dry to the touch, mix a shadow tone using burnt umber and a tiny bit of ultramarine blue. Paint the shadows under the jawline, inside the ear, and in the eye sockets. -
Deepen the shadows:
Add a second layer of the shadow mix to the darkest areas: under the chin, the nostrils, and the corners of the mouth. Soften the edges with a clean, damp brush.
Step 3: Features and Hair
-
Paint the eyes:
Use a small size 4 brush for the iris. Start with a light blue-grey wash, leaving a tiny white highlight unpainted. Once dry, outline the iris with a darker shade and darken the pupil. -
Detail the lips:
Paint the lips with a mix of alizarin crimson and burnt umber. Make the upper lip slightly darker than the lower lip. I like to lift a little pigment from the center of the bottom lip with a damp brush to create volume. -
Initial hair wash:
Use a loose, watery mix of burnt umber and ochre for the hair. Paint in the direction of the growth, leaving some white paper showing for highlights. -
Darken hair roots and shadows:
While the hair wash is damp, drop darker brown pigment near the hairline and behind the ear to create depth. -
Clothing suggestion:
Paint the collar of the shirt with very pale, watery washes of your shadow color (greyish-brown). Keep this extremely loose—just suggest the folds rather than painting the fabric fully.
Add metallic flair
Once the painting is dry, use a metallic gold watercolor pan or ink to add tiny accents to the eyes’ highlights or trace a few prominent hair strands.
Step 4: Splatter and Atmosphere
-
The background wash:
Mix a diluted wash of orange and dull pink. Apple this loosely behind the head, letting it touch the wet hair edges so the colors bleed outward. -
Introduce contrasting cool tones:
While the background is wet, drop in hints of muted green or blue-grey near the back of the neck and hair to push those areas backward in space. -
Create blooms and drips:
Load a brush with watery pigment (reds or oranges) and touch it to the bottom edge of the painting (the shirt area). Tilt your board slightly to encourage a few natural drips. -
Splatter technique:
Load a toothbrush or stiff brush with varying colors (crimson, orange). Tap the brush over the painting to create fine splatters mainly around the neck and background, avoiding the center of the face. -
Final pencil definition:
Once everything is completely bone dry, go back in with your pencil. Re-emphasize the eyelashes, the corner of the jaw, and a few loose hair strands to bring the sketch quality back to the forefront.
Step back and admire artwork that feels both beautifully constructed and effortlessly free


Have a question or want to share your own experience? I'd love to hear from you in the comments below!