
When you’re hunting for pose ideas, it helps to think less about details and more about a clean gesture and solid construction. Here are my favorite poses to practice by blocking in boxes and cylinders first, then building them into characters that actually feel alive.
Relaxed Walking Key Pose
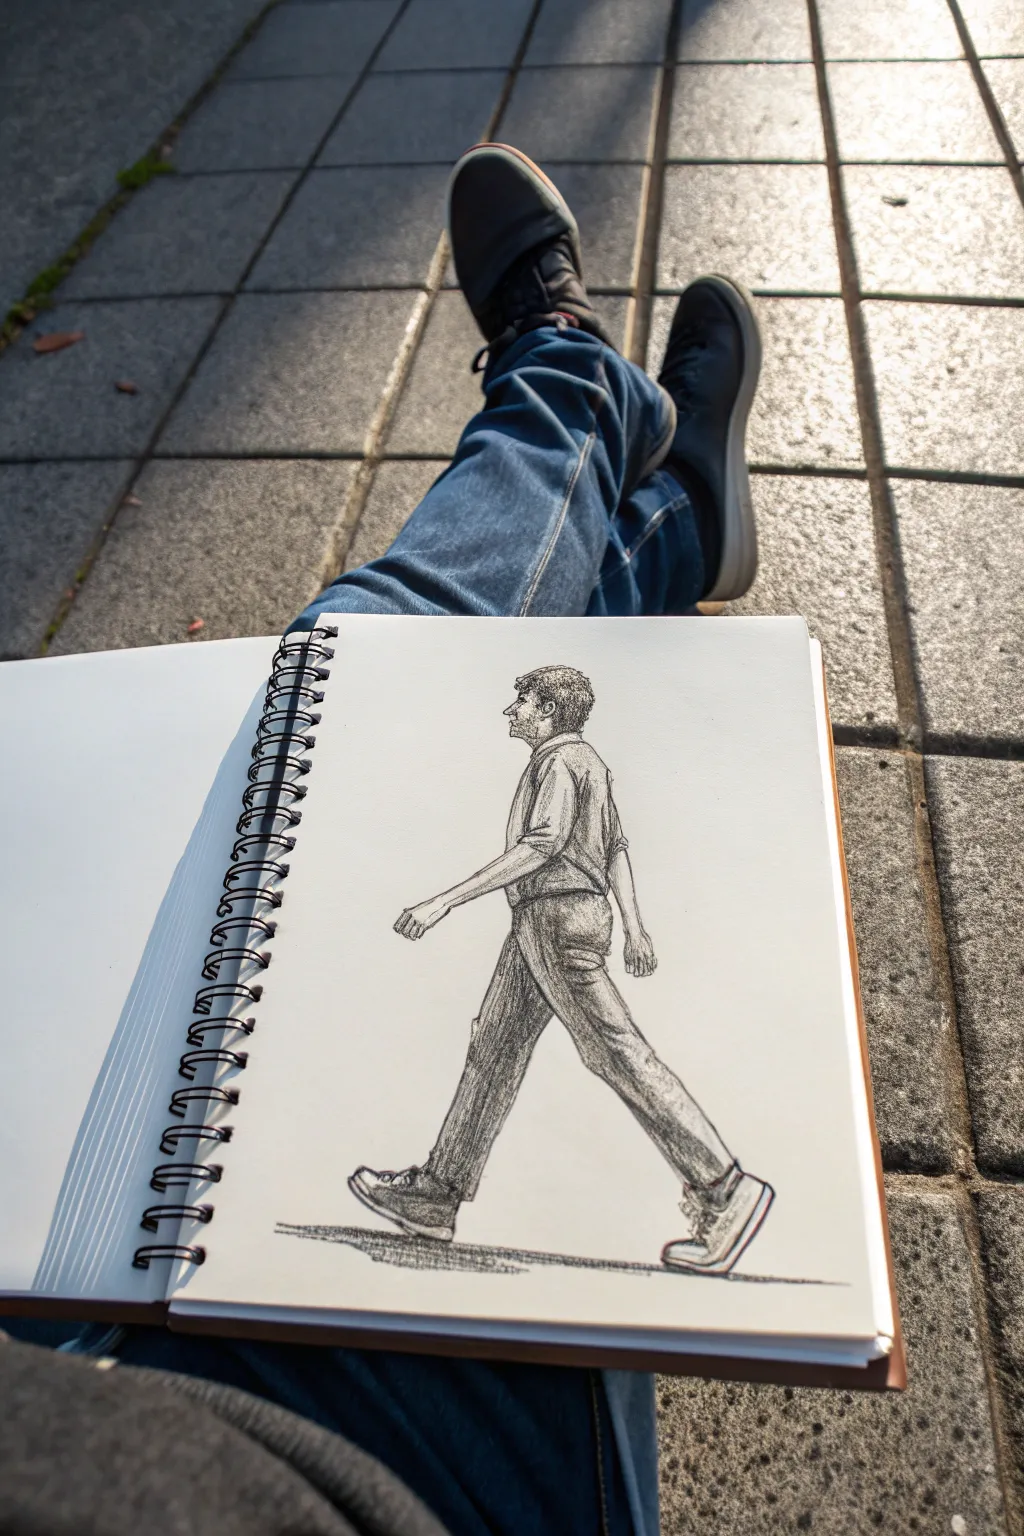
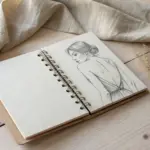
Capture the fluid motion of a casual walk with this pencil and ink study. This project focuses on capturing a relaxed stride in profile, using simple hatching techniques to add volume and texture to the figure’s clothing.
Step-by-Step Tutorial
Materials
- Spiral-bound sketchbook (medium tooth paper)
- HB or 2B graphite pencil
- Fine-point drawing pen (0.3mm or 0.5mm)
- Kneaded eraser
- Reference photo of a walking pose (side profile)
Step 1: Laying the Framework
-
Determine the scale:
Visualize where the figure will stand on your page. Mark a light line for the ground plane and a small tick mark for the top of the head to ensure the figure fits comfortably within the white space. -
Construct the head and torso:
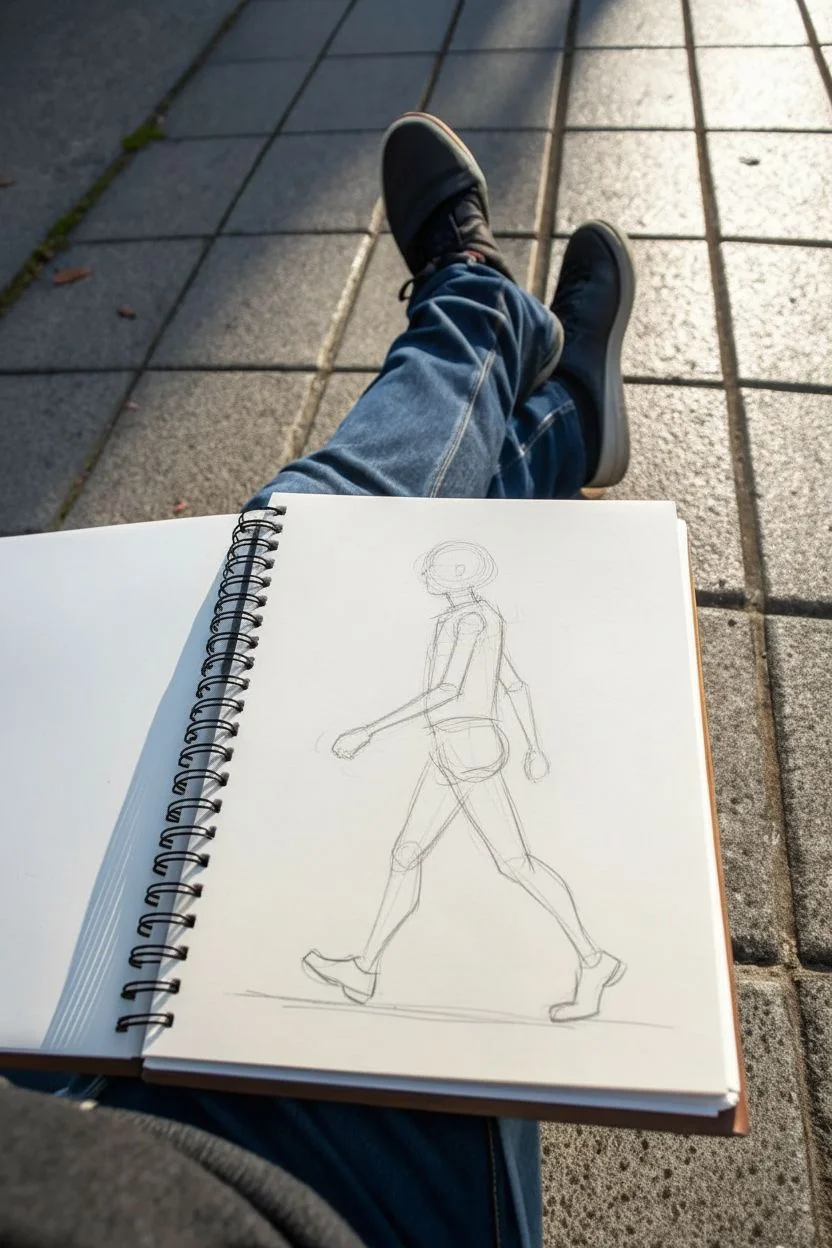
Using your pencil, lightly sketch a circle for the head and a slightly tilted rectangle for the torso. Since the figure is walking forward, the torso should lean just slightly into the movement. -
Map the legs:
Draw the leading leg extending forward with a straight line for the thigh and shin. Sketch the back leg bent at the knee, trailing behind. This specific ‘key pose’ is the moment just before the front heel strikes the ground. -
Add arm gesture:
Indicate the swinging arms. The arm closest to the viewer should be swinging forward (opposite the front leg) or hanging relaxed, while the far arm swings back. Keep the lines loose and gestural.
Stiff posture?
If the walk looks robotic, check the spine. A natural walk usually involves a slight forward lean. Tilt the torso axis forward a few degrees to add momentum.
Step 2: Defining the Form
-
Refine the profile:
Outline the facial profile, paying attention to the nose and chin. Don’t worry about perfect features; focus on the silhouette. Sketch the hair with short, messy strokes to suggest texture. -
Clothe the figure:
Draw the shirt over the torso shapes. Add wrinkles where the fabric bunches near the armpit and waist. Sketch a short sleeve ending mid-bicep. -
Detail the trousers:
Thicken the leg lines to form trousers. Create folds around the knees and crotch area to show how the fabric stretches with the movement. Ensure the pant legs taper slightly towards the ankles. -
Sketch the shoes:
Add sneakers to the feet. The front foot should have the toe pointing up (dorsiflexion) as the heel prepares to land, while the back foot is peeling off the ground. -
Add a ground shadow:
Lightly pencil in a horizontal shadow beneath the feet to ground the figure so they don’t look like they are floating.
Drawing Feet
Don’t overdetail the shoes. Focus on the sole’s angle relative to the ground. The ‘heel strike’ angle is crucial for a convincing walking stride.
Step 3: Inking and shading
-
Outline with ink:
Switch to your fine-point pen. Trace over your pencil lines with a confident hand. You don’t need a single continuous line; broken lines can add energy to a sketch. -
Erase pencil guides:
Once the ink is completely dry (give it a minute or two), gently erase the underlying graphite structure with your kneaded eraser. -
Hatching the pants:
Start adding value to the trousers using vertical hatching lines. Keep the lines close together for darker areas (like the back leg and inner thigh) and further apart for highlights. -
Cross-hatching shadows:
Layer horizontal or diagonal lines over your vertical hatching in the darkest shadow areas, such as under the buttocks and behind the knees, to create deeper contrast. -
Texture the shirt:
Use lighter, sparser marks for the shirt to suggest a lighter color or material. Focus the shading on the side of the torso away from the light source. -
Detail the hair:
Fill in the hair with dense stippling or tight scribbles to distinguish it from the clothing textures. -
Anchor the shadow:
Use heavy, horizontal strokes to darken the ground shadow. Make it darkest directly under the shoe soles and fade it out as it stretches away.
Close your sketchbook knowing you’ve successfully captured a moment of movement in a static image


Sitting on the Floor Hugging Knees

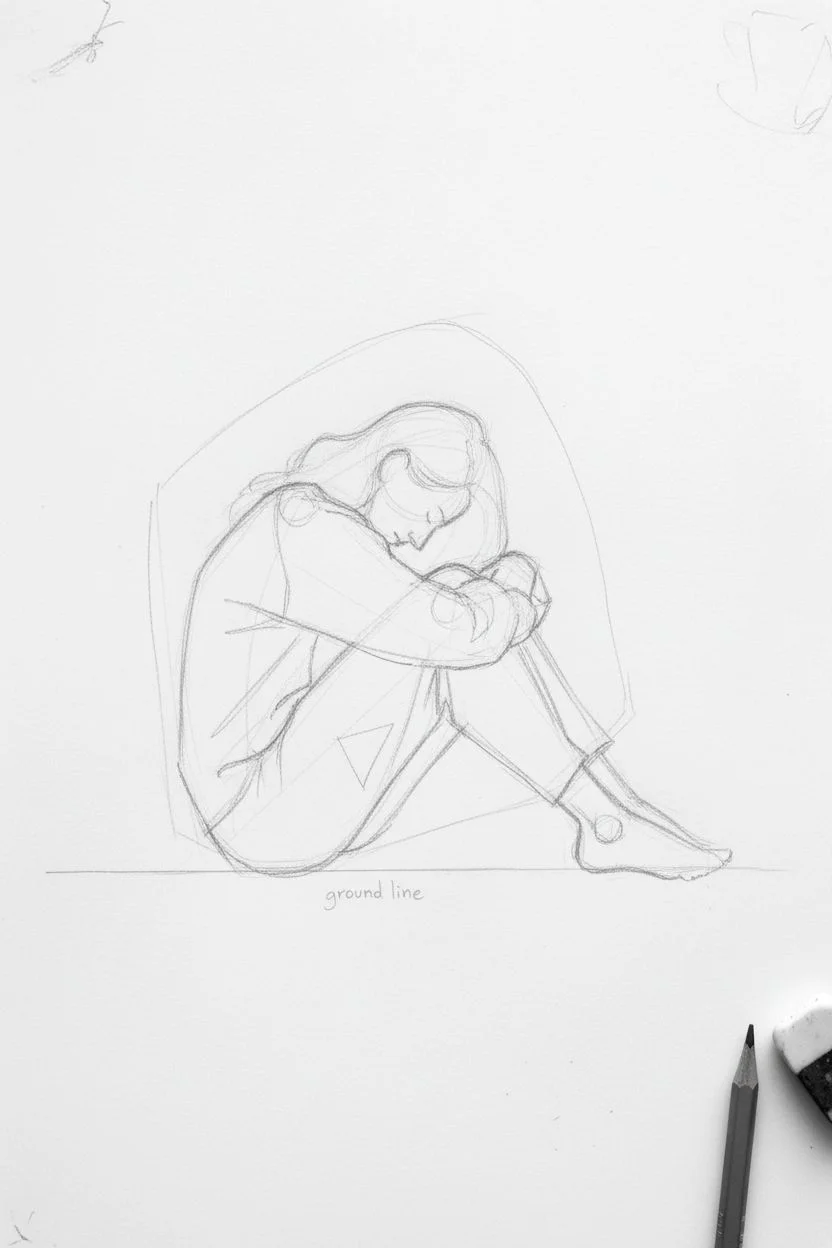
This tutorial guides you through sketching a figure in a contemplative, closed pose, focusing on the interplay of soft fabric folds and anatomical structure. You’ll create a realistic graphite drawing that emphasizes mood through body language and delicate shading.
Detailed Instructions
Materials
- H pencil (for initial layout)
- HB mechanical pencil (0.5mm)
- 2B and 4B graphite pencils
- Smooth bristol board or heavyweight drawing paper
- Kneaded eraser
- Blending stump (tortillon)
- Tombow Mono Zero eraser (small detail eraser)
Step 1: Gesture and Structure
-
Establish the ground line:
Begin by lightly drawing a horizontal line near the bottom of your page to represent the floor. This provides an immediate anchor for the figure. -
Map the primary shape:
Visualize the entire figure as a single, rounded triangle or bean shape. With your H pencil, sketch this large envelope shape lightly to determine the composition’s boundaries. -
Locate key landmarks:
Draw an oval for the head, tilting it downward. Sketch a sloping line for the spine curving into the hips, and indicate the angle of the thigh moving upward toward the chest. -
Define the limbs:
Block in the arms wrapping around the shins. Pay attention to the negative space—the small triangle of air between the chest and the knees is crucial for proportion. -
Refine the anatomy:
Before adding clothes, lightly sketch the underlying structure of the shoulder, elbow, and knee joints to ensure the pose feels weighted and real.
Proportions Off?
If the figure looks stiff, check the spine curve. A ‘C’ curve implies relaxation, while a straight back implies tension. Ensure the head rests heavily on the knees.
Step 2: Clothing and Drapery
-
Outline the sweater:
Draw the oversized texture of the sweater. Focus on how the shoulder seam drops low and how the fabric bunches at the elbow bend. -
Add pant folds:
Sketch the trousers. Notice the long, sweeping folds that run from the knee down towards the hip, creating tension lines where the fabric stretches. -
Detail the hands and feet:
Refine the visible hand clasping the arm. Sketch the bare feet, emphasizing the arch and the relaxed angle of the toes resting on the floor. -
Clean up the lines:
Use your kneaded eraser to lift away the internal structural lines, leaving only the clean outline of the figure and the major clothing folds.
Step 3: Shading and Texture
-
Base tone application:
With an HB pencil, apply a light, even layer of graphite over the shadowed areas—specifically under the thigh, the back of the sweater, and the hair. -
Deepening shadows:
Switch to a 2B pencil. Darken the core shadows where the limbs meet—the crease between the calf and thigh, and the space under the arms. -
Rendering the hair:
Use long, sweeping strokes with the HB pencil to follow the hair’s growth pattern. I like to leave small gaps of white paper to represent the shine on the crown. -
Sweater texture:
Create the knitted texture using small, repetitive ticking marks or C-curves with a duller pencil point. Focus this texture on the lit areas to avoid muddying the shadows. -
Softening the trousers:
Use a blending stump to smooth out the shading on the white pants, keeping the values very light to distinguish the material from the darker sweater. -
Grounding the figure:
Use a 4B pencil to add the cast shadow on the floor and the texture of the rug. This contact shadow should be the darkest part of your drawing to plant the subject firmly.
Level Up: Mood Lighting
Exaggerate the light source by darkening the entire background. This creates a ‘chiaroscuro’ effect, making the solitary figure pop dramatically against the dark.
Step 4: Final Refinements
-
Enhance highlights:
Use the Tombow Mono Zero eraser to lift out sharp highlights on the top of the shoulder, the knuckles, and the bridge of the nose. -
Check values:
Step back and squint at your drawing. Darken the hair near the face to increase contrast and draw the viewer’s eye to the portrait area. -
Environment hints:
Very lightly sketch the vertical line of the wall corner and the edge of the window frame to provide spatial context without overpowering the figure.
Take a moment to admire how the simple lines convey such a complex emotional state in your finished piece


Kneeling Pose With Upright Torso
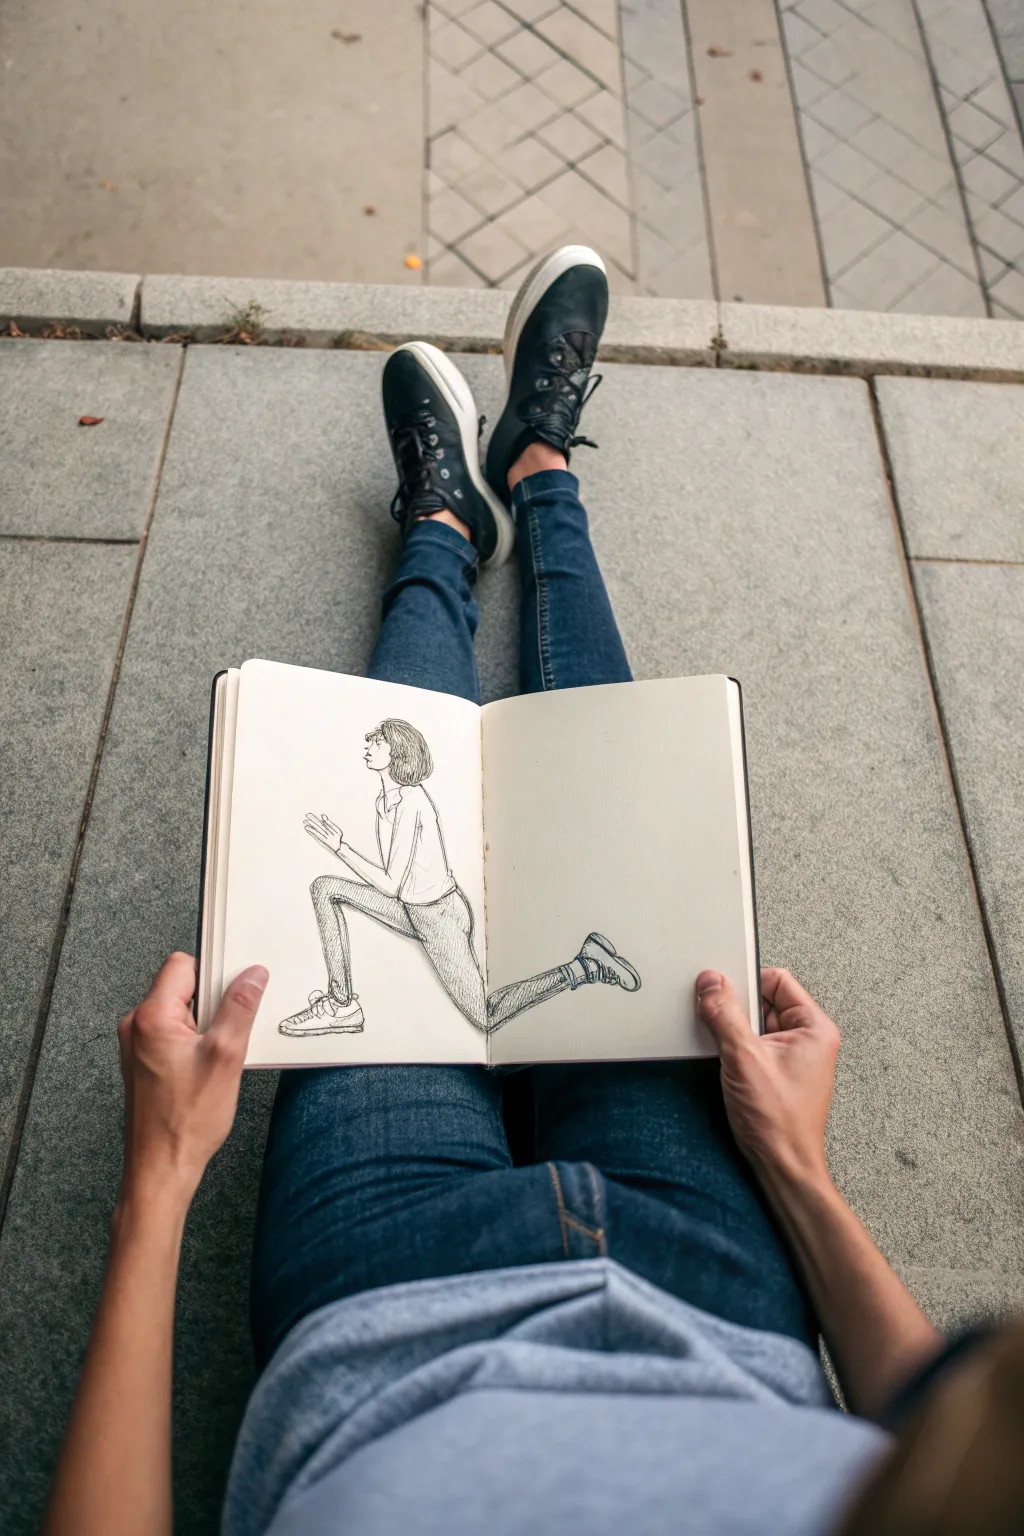
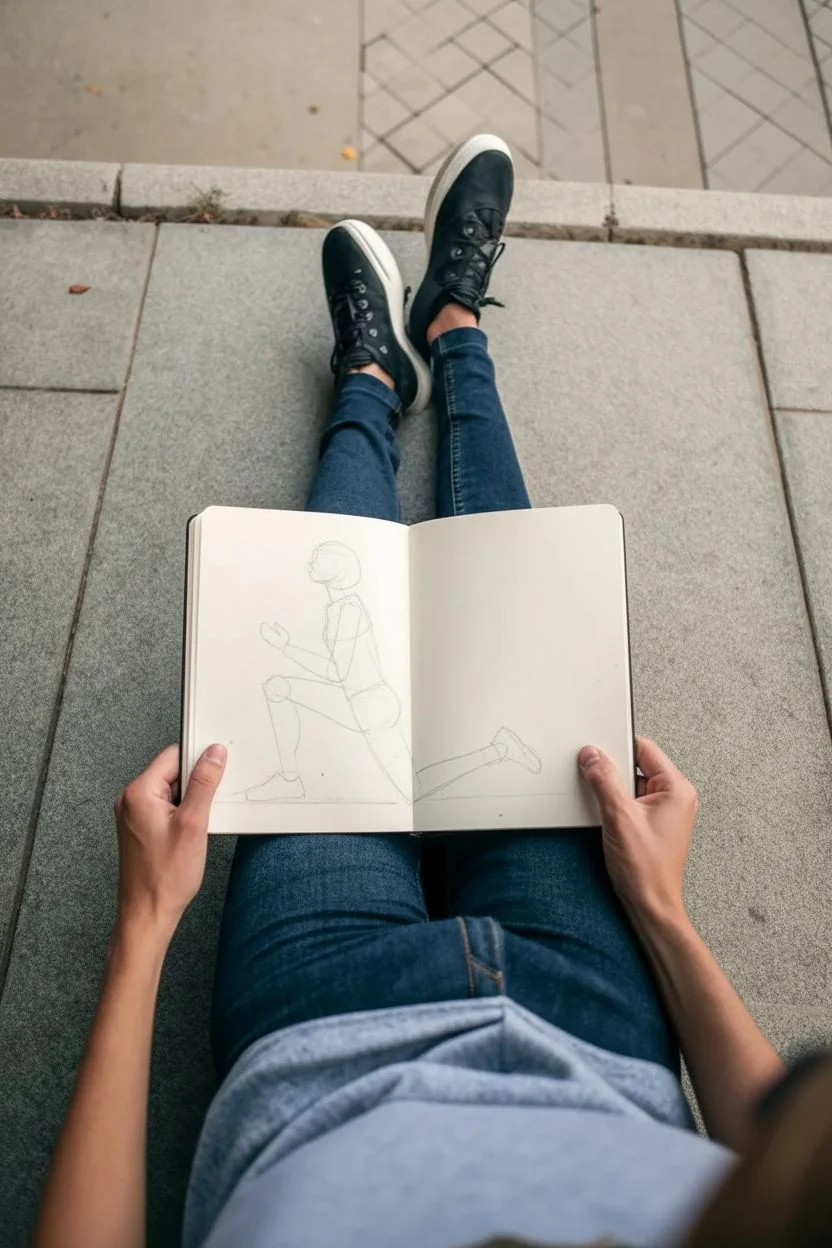
This tutorial guides you through creating a dynamic kneeling pose focusing on clean linework and fabric folds. The result is a crisp, illustrative character sketch that balances anatomical structure with stylistic shading.
How-To Guide
Materials
- Hardcover sketchbook (A5 or similar size)
- HB or 2B pencil for initial sketching
- Fine liner pens (0.1mm, 0.3mm, and 0.5mm)
- Kneaded eraser
Step 1: Laying the Foundations
-
Mark the ground plane:
Visualize where the knees will rest. Lightly mark a horizontal baseline near the bottom of the page to ensure your figure feels grounded. -
Block in the torso:
Start with a simple, upright rectangle or oval for the torso. Since the posture is upright, keep this shape vertical, leaning just slightly forward to suggest balance. -
Position the front leg:
Sketch the front leg bent at a sharp angle. The thigh should angle upward slightly, while the shin drops almost vertically to the foot. Use simple cylinders to map this out. -
Position the back leg:
Draw the rear leg extending backward. The thigh should be nearly horizontal, running along the ground, with the lower leg tucked up or resting flat. In this specific pose, the rear foot is elevated, so angle the shin upward. -
Add the head and arms:
Place an oval for the head in profile view. Sketch the arms bent at the elbows, hands held up near the chest as if in conversation or prayer. Keep these shapes loose for now.
Fixing Stiffness
If the pose looks too rigid, try slightly exaggerating the curve of the spine or the angle of the head. A little rhythmic flow makes the figure feel more alive.
Step 2: Refining the Anatomy and Clothing
-
Outline the profile:
Switch to a darker pencil stroke. Carefully define the side profile of the face, capturing the nose, lips, and chin. Add a short, textured hairstyle that roughly follows the skull shape. -
Dress the torso:
Draw the shirt over your initial torso shape. Add a neckline and a short sleeve. Notice how the shirt bunches slightly at the armpit and waist; sketch these wrinkles with quick, curved lines. -
Define the jeans (Front Leg):
Outline the front leg, making the fabric look stiff like denim. Where the knee bends, add horizontal creases. Show the hem of the jeans resting above the ankle. -
Define the jeans (Back Leg):
Trace the rear leg. Since this leg is stretching, the fabric will pull tight across the thigh. Add wrinkles behind the knee where the material bunches up. -
Draw the shoes:
Sketch sneakers on both feet. Pay attention to the soles—draw them thick and textured. The front foot is flat, while the back foot is visually foreshortened or angled.
Add a Prop
Customize the sketch by placing an object in the character’s hands, like a bird, a flower, or a phone, to give the kneeling pose a specific narrative context.
Step 3: Inking and Detailing
-
Start the initial ink:
Grab your 0.3mm fine liner. Go over the main outline of the body. Keep your hand steady but allow for slight variations in line weight to give the drawing organic character. -
Refine the hands:
Use a 0.1mm pen for the delicate details of the fingers. Since they are clasped or gesturing, ensure the fingers overlap naturally without looking like a solid block. -
Add hair texture:
Using the 0.1mm pen, draw individual strands within the hair outline. Follow the curve of the head, leaving some white space to suggest a glossy shine. -
Shade the pants:
This is crucial for the ‘denim’ look. Use hatching—closely spaced parallel diagonal lines—along the legs. I like to concentrate the strokes on the shadowed underside of the thighs. -
Cross-hatch darker areas:
For deeper shadows, like the crotch area and behind the knees, add a second layer of hatching in the opposite direction (cross-hatching). This adds depth and weight. -
Detail the sneakers:
Ink the laces and the distinct sections of the shoe. Add tiny stippling dots or small dashes to the soles to simulate rubber texture. -
Erase pencil marks:
Wait for the ink to be completely dry to the touch. Gently run your kneaded eraser over the entire drawing to lift the graphite, leaving only the crisp ink lines.
Now you have a cleanly inked figure study ready for your portfolio


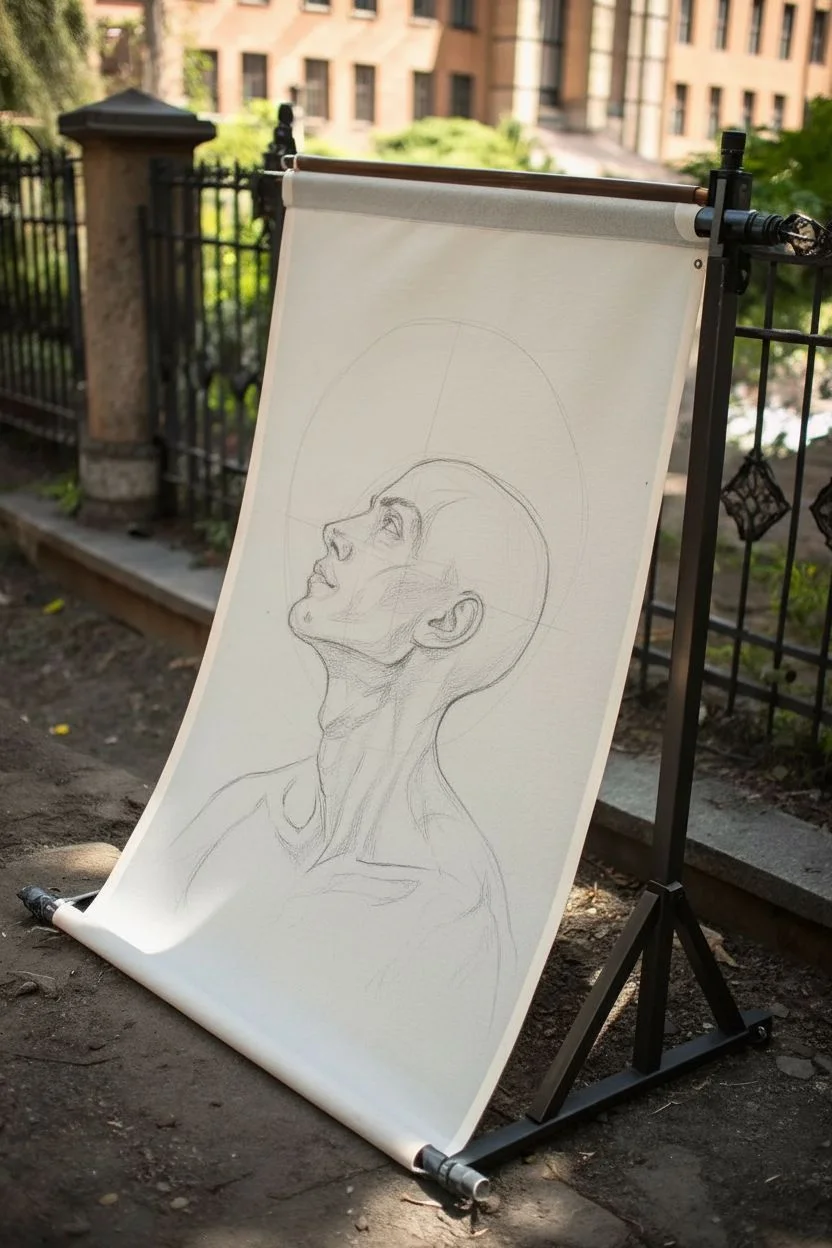
Classic Torso Twist With Counterbalance

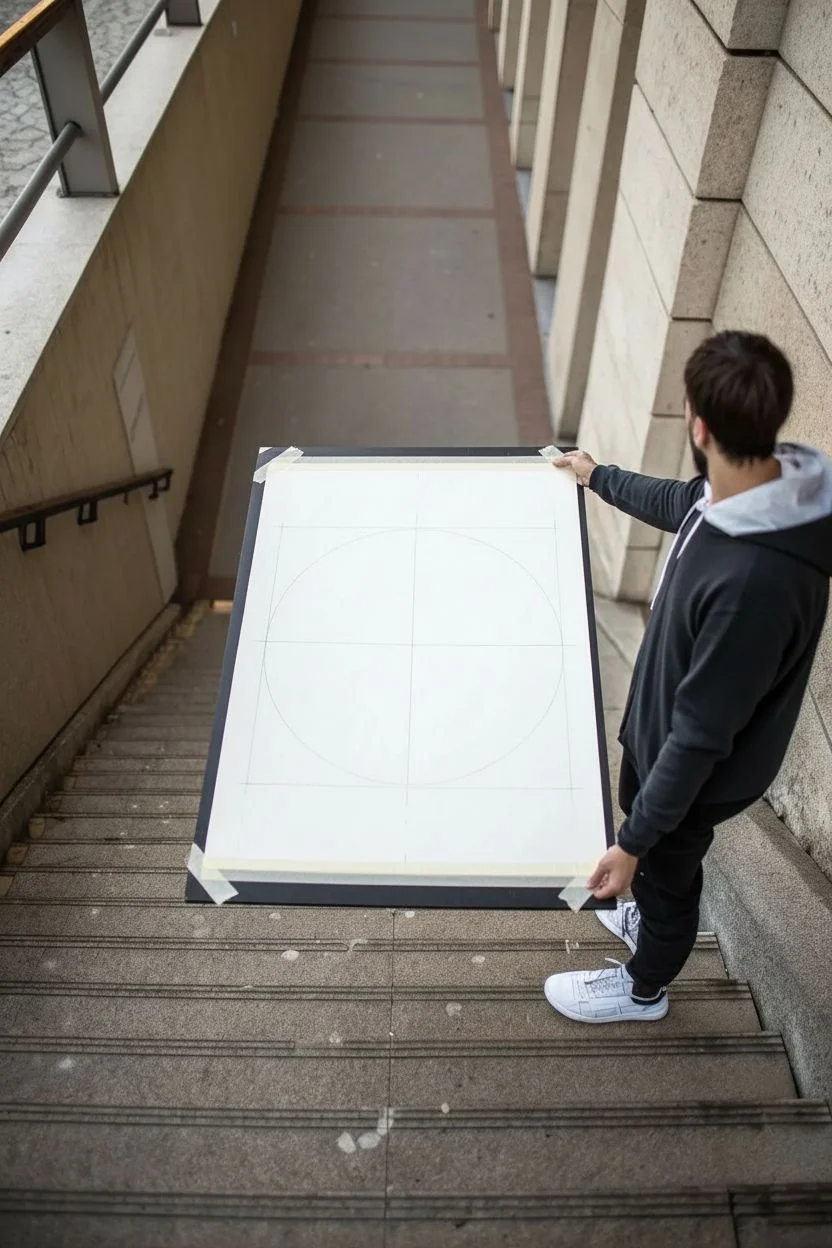
Revisit the Renaissance with a contemporary twist by recreating this large-scale ink study of human anatomical proportions. This project captures the classic balance of da Vinci’s masterpiece while adding bold, stylized shading and a distinct, modern character design.
How-To Guide
Materials
- Large format drawing paper (A1 or 24×36 inches)
- HB graphite pencil
- Kneaded eraser
- Large ruler or T-square
- Compass (or string limitation compass for large circles)
- Fine liner pens (0.1mm, 0.3mm, 0.5mm)
- Brush pen or bold marker (for outer lines)
- Blending stump (optional)
- Masking tape
Step 1: Constructing the Geometry
-
Paper preparation:
Begin by taping down the corners of your large format paper to a flat surface or drawing board to prevent slipping. Use drafting tape or low-tack masking tape. -
Establishing the center:
Use your large ruler to find the absolute center of the page. Draw a faint vertical centerline from top to bottom; this will be the anchor for the figure’s symmetry. -
The Vitruvian square:
Lightly sketch a large square centered on your vertical line. Divide this square horizontally into fourths to help guide the placement of the knees, groin, and chest. -
Drawing the circle:
Using a large compass (or a pin and string method if a standard compass is too small), draw a circle centered on the navel point. The circle’s rim should just touch the bottom corners of your square.
Symmetry Check
If the anatomy looks lopsided, view your drawing in a mirror or snap a photo with your phone. The flipped perspective instantly reveals errors.
Step 2: Anatomical Sketching
-
Torso framework:
Sketch the basic ribcage and pelvic shapes along the centerline. The torso should be upright and symmetrical, establishing the core stability of the pose. -
Limb placement:
Draft the legs spread wide to touch the circle’s lower arc. Similarly, extend the arms horizontally so the fingertips touch the sides of the square and the circle. -
Musculature definition:
Refine the forms into muscles. Focus on the rectus abdominis (six-pack) and pectorals. Keep the lines relatively clean but emphasize the anatomical separation. -
Head and hair:
Draw the head facing forward. Unlike the original, give this figure longer, flowing hair that frames the face, adding that specific stylized look seen in the reference. -
Hands and feet detailed:
Pay close attention to the extremities. The palms face upward (supinated), and the feet are planted firmly. Sketch these lightly first as simple geometric blocks before adding toes and fingers.
Step 3: Inking and Shading
-
The initial outline:
Switch to a 0.5mm fine liner. Carefully go over your main anatomical lines. Avoid the geometry lines for now; focus only on the figure’s silhouette. -
Cross-hatching basics:
Using a 0.1mm pen, begin shading the darker areas using hatching. I find starting with the inner thighs and under the arms helps establish the light source early. -
Defining the core:
Add vertical hatching lines down the stomach muscles and obliques. Keep the strokes uniform to create a classical engraving style. -
Deepening contrast:
Switch to a 0.3mm pen to darken the deepest shadows, particularly around the groin, neck, and under the pectorals. This high contrast makes the drawing pop from a distance. -
Geometrical inking:
Use your ruler and compass to now ink the square and circle borders with a steady, single line. Include the faint construction lines inside the square if you want that raw, schematic aesthetic. -
Hair texture:
Use the brush pen or a bold marker to fill in the darker masses of the hair, leaving small white gaps for highlights to suggest volume. -
Final cleanup:
Once the ink is completely dry, gently erase all underlying pencil marks with the kneaded eraser. Be thorough to leave the paper pristine white. -
Signature:
Sign your work in the bottom corner with a flourish, mimicking the script of an old master’s study.
Aged Parchment Look
Before drawing, lightly wash your paper with diluted tea or coffee and let it dry flat. This gives the paper an authentic, antique Renaissance feel.
Hang your finished anatomical study in a minimal frame to appreciate the timeless blend of art and geometry

PENCIL GUIDE
Understanding Pencil Grades from H to B
From first sketch to finished drawing — learn pencil grades, line control, and shading techniques.
Explore the Full Guide
Over-the-Shoulder Look With Neck Angle
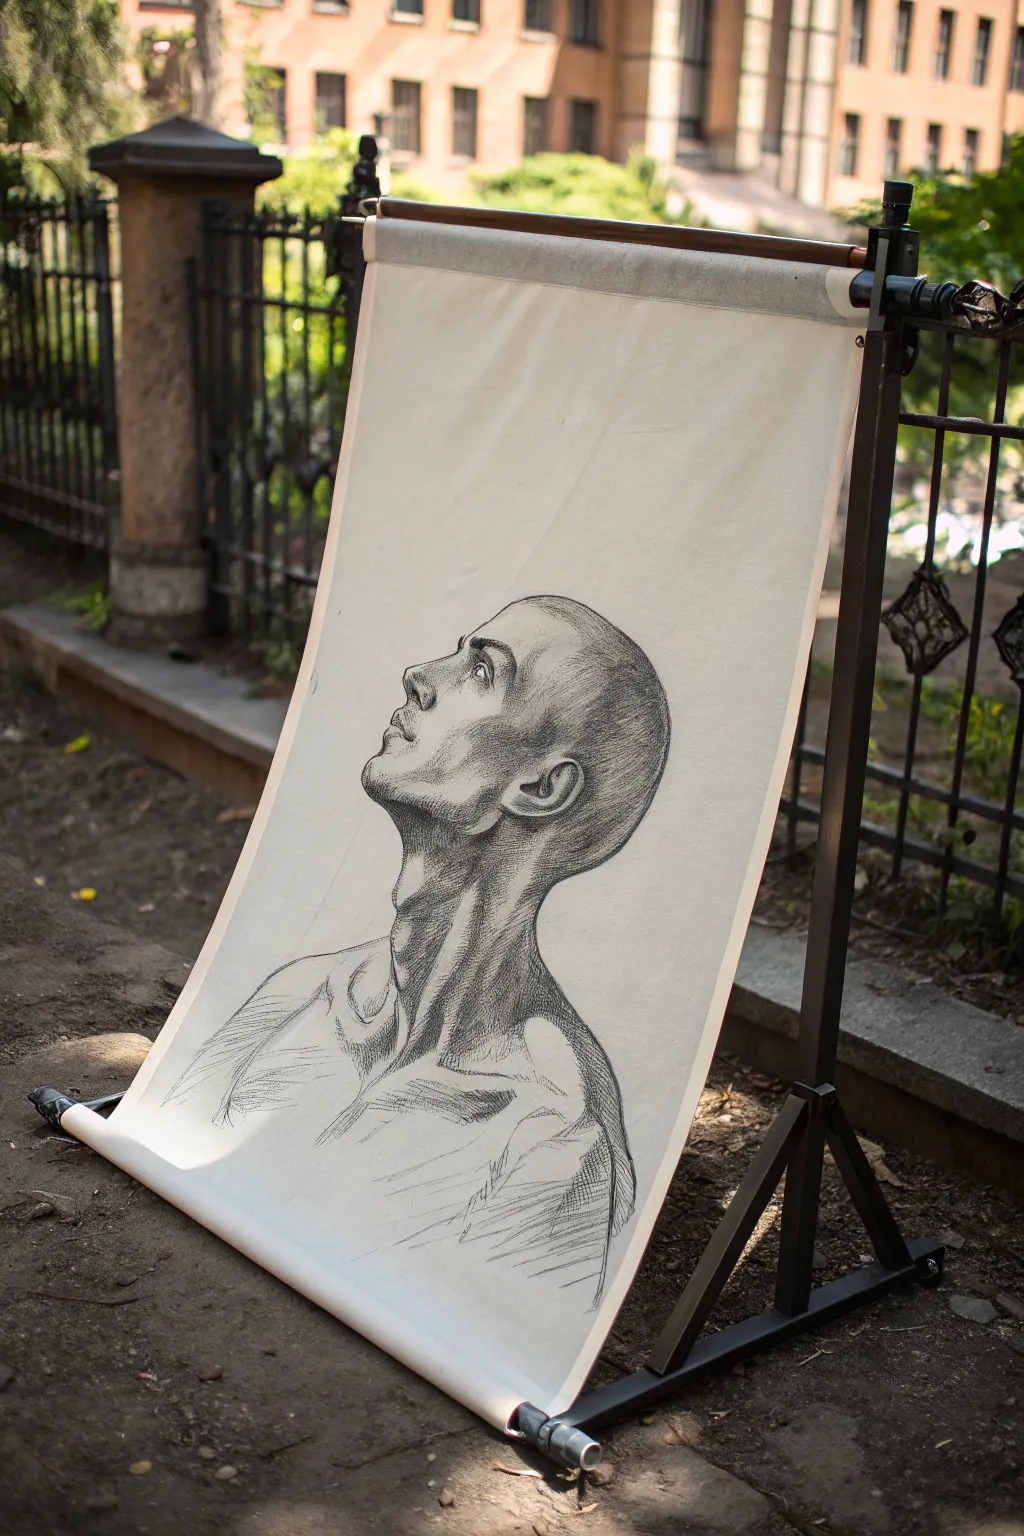
This tutorial guides you through creating a striking charcoal portrait that captures a dramatic upward gaze and tension in the neck muscles. The finished piece has a classical, sculptural quality, achieved through careful shading and directional strokes on textured paper.
Detailed Instructions
Materials
- Large sheet of textured drawing paper (cream or off-white)
- Willow charcoal sticks (medium and soft)
- Compressed charcoal pencil (soft/black)
- Kneaded eraser
- Blending stump or tortillon
- Masking tape
- Workable fixative spray
Step 1: Initial Construction
-
Establish the Head Shape:
Begin by lightly sketching a large oval for the cranium using a stick of willow charcoal. Keep your grip loose. This oval should be slightly tilted back to indicate the upward angle of the head. -
Map the Facial Angle:
Draw a curved centerline down the front of the face to determine the profile direction. Add a horizontal line for the eye level, placing it higher than usual because the chin is lifted. -
Draft the Neck Cylinder:
Extend two lines downward from the base of the skull and the jaw to form the neck. Because the head is turned and lifted, emphasize the length and the curve of the sternocleidomastoid muscle connecting the ear to the collarbone. -
Mark Key Features:
Lightly indicate the placement of the ear (low on the head due to tilt), the nose tip, and the chin. Ensure the chin thrusts forward slightly to exaggerate the upward look.
Smudge Control
Place a scrap piece of paper under your drawing hand as you work. This prevents oils from your skin transferring to the paper and stops your palm from smearing finished areas.
Step 2: Refining the Anatomy
-
Trace the Profile:
Refine the contour of the forehead, nose bridge, lips, and chin. The nose should point distinctly upward. Pay attention to the sharp angle under the jaw where it meets the neck. -
detail the Ear:
Sketch the intricate folds of the ear. Since the head is turned away, the ear is prominent. Use the charcoal pencil for sharper lines here. -
Define the Eye:
Draw the visible eye looking upward. The upper lid should be heavily defined, while the lower lid catches a bit of light. Remember, foreshortening will make this eye appear narrower. -
Shoulder and clavicle:
Sketch the prominent clavicle bone and the slope of the shoulders. These lines anchor the twisting neck and provide a base for the composition.
Step 3: Shading and Texture
-
Establish Core Shadows:
Switch to a softer willow charcoal stick. Lay down broad strokes of tone on the side of the face away from the light source, particularly under the jawline, behind the ear, and the back of the neck. -
Sculpt the Muscles:
Use directional hatching strokes to define the sternocleidomastoid muscle. The strokes should follow the muscle fiber direction—running diagonally from behind the ear down to the center of the chest. -
Deepen the Darks:
Using the compressed charcoal pencil, darken the nostrils, the pupil, the deepest folds of the ear, and the sharp shadow directly under the jaw. This creates high contrast. -
Create Mid-Tones:
Blend the charcoal gently with your finger or a blending stump to create soft grey mid-tones on the cheek and forehead. Leave the paper white for the highest highlights on the nose bridge and cheekbone. -
Cross-Hatching Texture:
Overlay your blended areas with crisp cross-hatching lines. I like to keep these lines visible rather than perfectly smooth to give the drawing an energetic, sketchy feel. -
Suggest Hair Stubble:
Use the side of your charcoal stick to create a subtle, textured tone over the scalp area. Keep it lighter than the shadows but distinct from the skin of the face.
Pro Tip: Line Weight
Vary your pressure. Use heavy, dark lines for the shadow side (like under the jaw) and faint, broken lines for the illuminated side (like the nose bridge) to imply volume.
Step 4: Final Touches
-
Lift Highlights:
Take your kneaded eraser and shape it into a point. ‘Lift’ out charcoal from the tip of the nose, the brow ridge, the top of the ear, and the tendons in the neck to mimic bright light hitting the skin. -
Clean Edges:
Use the eraser to clean up the white space around the profile, ensuring a sharp silhouette against the background. -
Anchor the Base:
Add a few loose, gestural sketching lines at the bottom of the torso area to fade the drawing out artistically, rather than having a hard cutoff. -
Seal the Drawing:
Once satisfied, spray the artwork with a workable fixative in a well-ventilated area to prevent the charcoal from smudging.
Step back and admire the powerful gesture and emotion captured in your charcoal study
Running Stride With Clear Line of Action
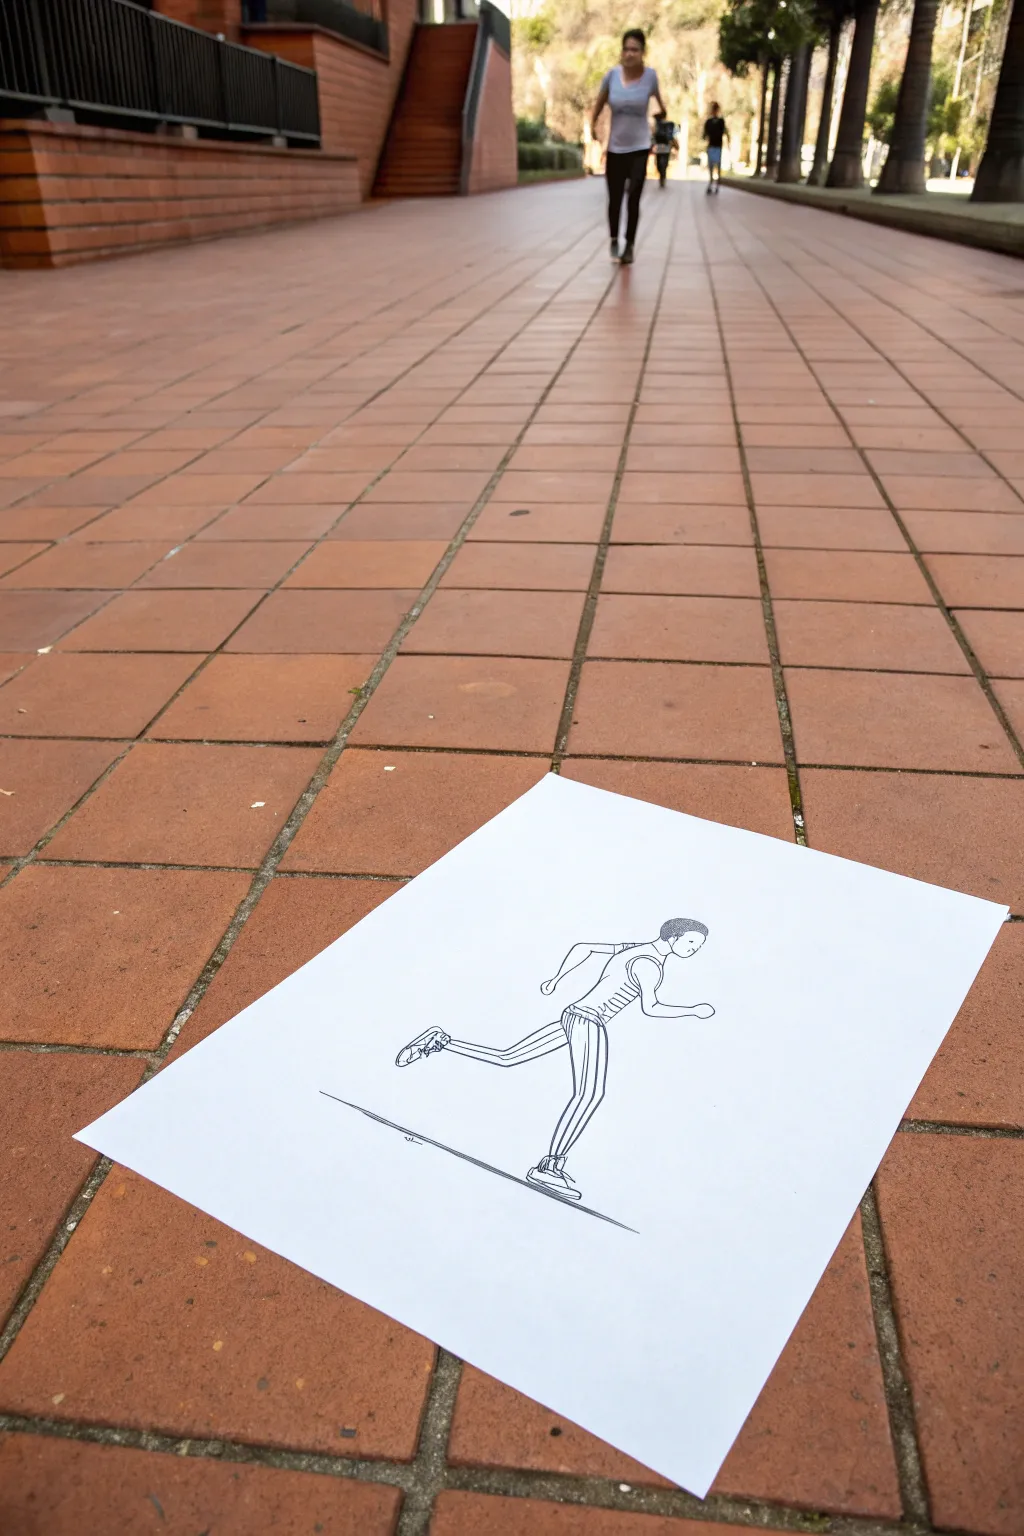
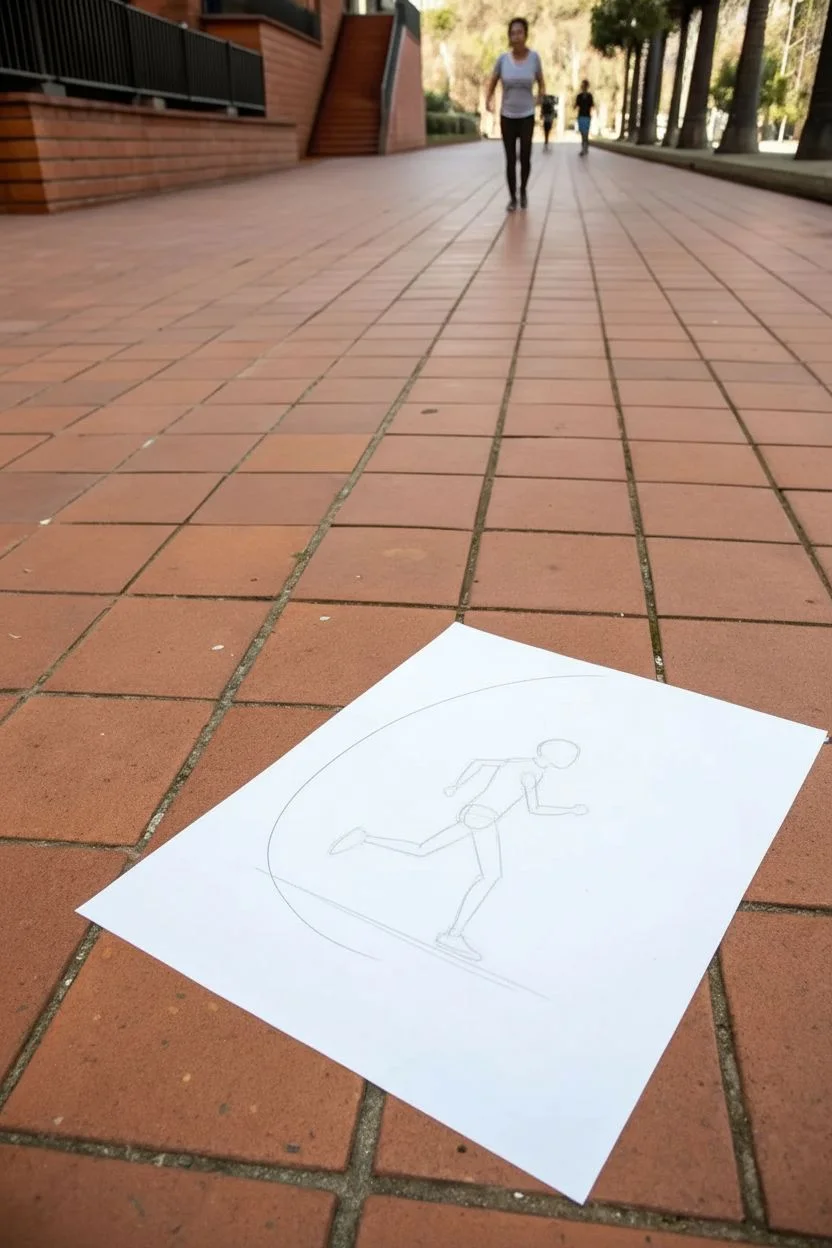
This tutorial teaches you how to capture the energy of a runner in mid-stride with clean, confident line work. By focusing on the line of action and minimal hatching, you’ll create a graphic illustration that feels like it’s springing off the page.
Detailed Instructions
Materials
- A4 or Letter-sized smooth drawing paper (bristol board or bright white bond)
- HB or 2B pencil for sketching
- Fine liner pens (0.3mm and 0.5mm, black ink)
- Eraser (kneaded or soft vinyl)
- Ruler or straight edge
Step 1: Laying the Foundation
-
Analyze the pose:
Before putting pencil to paper, study the reference. Notice how the runner’s back arches slightly forward and the legs are at their widest point of extension. This is the moment of maximum dynamic tension. -
Draw the ground line:
Use your ruler to draw a faint, straight horizontal line near the bottom third of your paper. This anchors your figure so they aren’t floating in space. -
Establish the line of action:
Lightly sketch a sweeping curve that starts from the head, flows down the spine, and extends through the rear leg. This curve dictates the momentum of the run. -
Block in major masses:
Using simple shapes, block in the torso (a tilted rectangle), the head (an oval), and the pelvis. Keep your pencil pressure very light so these marks can be erased later. -
Position the limbs:
Sketch the legs and arms using stick figures first to get the angles right. The front knee should be high, driving forward, while the back leg extends fully. Ensure the arms oppose the legs—left arm forward with right leg forward.
Step 2: Refining the Form
-
Flesh out the figure:
Build volume around your stick figure frame. Give the limbs thickness, tapering slightly at the wrists and ankles. Keep the anatomy stylised and consistent. -
Detail the head and face:
Draw the profile of the face. Since he is running, tilt the chin slightly up or forward. Add the ear and the hair shape, keeping the details minimal for a cartoon-style look. -
Add clothing outlines:
Draw the tank top and running shorts or pants. Note how the fabric might bunch slightly at the waist. Draw the sneakers, ensuring the back foot is visibly pushing off the ground. -
Refine the hands:
Draw the hands in a relaxed fist or open palm shape typical for runners. Don’t over-detail the fingers; simple mitten-like shapes often work best for this scale. -
Check proportions:
Step back and look at your sketch. Does the stride look long enough? Is the head too big? Make any necessary adjustments now before ink is applied.
Stiff Stride Fix
If your runner looks stiff, try tilting the entire torso forward 10 degrees more. Exaggerating the forward lean instantly adds a sense of speed and urgency.
Step 3: Inking and Finishing
-
Ink the main outline:
Switch to your 0.5mm fineliner. Carefully trace over your refined pencil lines. Use confident, single strokes rather than short scratching motions to keep the line work clean. -
Ink the ground line:
Go over your horizon line with the pen. I like to thicken this line slightly right under the feet to suggest a shadow, tapering it off as it moves away. -
Add stripe details:
Using the 0.3mm pen, draw the stripes on the pants and shirt. Follow the curve of the body form—curving the stripes around the thigh creates a 3D cylindrical effect. -
Define muscle and fabric folds:
Add small, sparing lines near the knees and elbows to suggest anatomy. Add a few small creases where the shirt tucks in. -
Erase pencil marks:
Wait until the ink is completely dry—give it a full minute or two to prevent smearing. Then, gently erase all underlying pencil sketches. -
Final assessment:
Inspect your line art. If any lines need connecting or thickening for visual weight, do so now to finalize the piece.
Curve the Stripes
When drawing stripes on clothing, never draw straight lines. Curve them slightly to wrap around the limb. This ‘contour hatching’ creates instant 3D volume.
Now you have a dynamic running figure ready to place into a scene or stand strongly on its own
BRUSH GUIDE
The Right Brush for Every Stroke
From clean lines to bold texture — master brush choice, stroke control, and essential techniques.
Explore the Full Guide
Jumping Pose With Tucked Legs
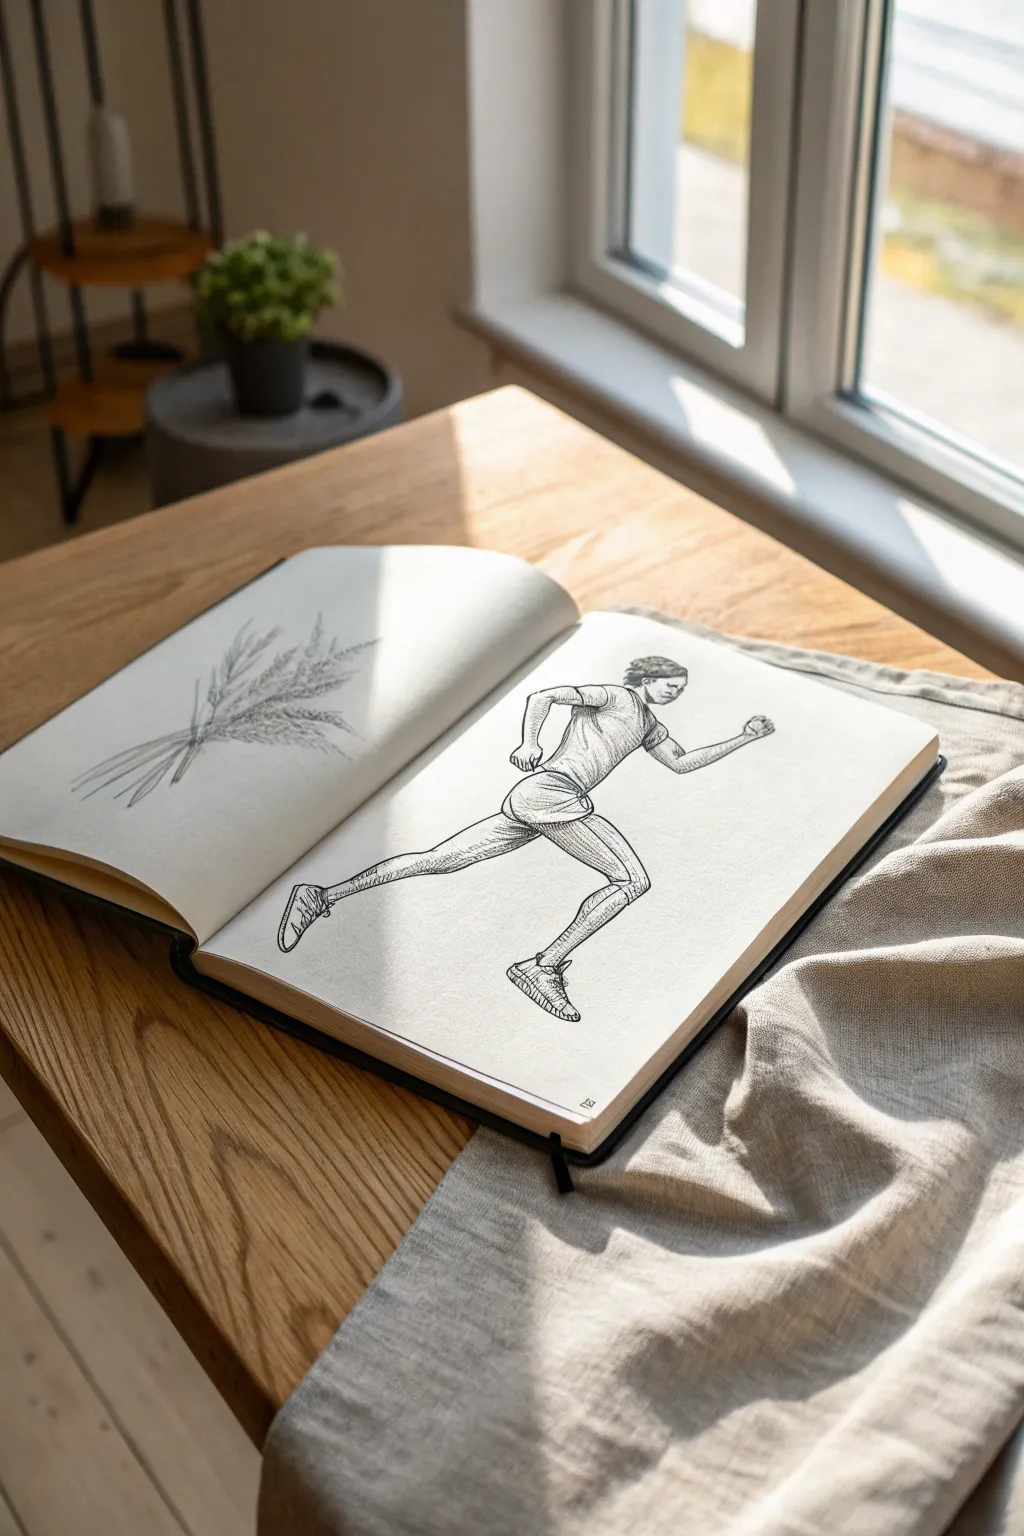
Capture the energy of motion with this clean, illustrative sketch of a runner in mid-stride. Using confident contour lines and subtle cross-hatching, you will create a figure that feels light on its feet and perfectly balanced.
Step-by-Step
Materials
- Sketchbook with smooth, off-white paper
- H or HB pencil (for initial construction)
- Fine liner pen (0.3mm or 0.5mm, black)
- Kneaded eraser
- Mechanical pencil (optional, for details)
Step 1: Constructing the Pose
-
Establish the line of action:
Start by drawing a faint, sweeping curve that represents the spine and the forward momentum. This line should tilt forward, indicating the runner’s lean. -
Block in the torso and hips:
Sketch an oval for the ribcage and a smaller, tilted shape for the pelvis. Connect them with a curved line for the waist, ensuring the torso leans into the run. -
Position the legs:
Draw the leading leg bent at the hip and knee, extending forward. The back leg should be fully extended behind, pushing off the ground. Use stick lines first to get the angles right. -
Add volume to the limbs:
Flesh out the legs with cylindrical shapes. Notice how the muscles in the thigh and calf bulge slightly due to exertion. Keep the ankles distinct. -
Sketch the arms:
Position the arms in opposition to the legs (left arm forward if right leg is forward). Keep elbows bent at roughly 90-degree angles, hands loosely balled into fists. -
Define the head:
Place the head looking forward, aligned with the spine’s curve. Sketch the hair with loose, flowing strokes to suggest movement against the wind.
Pro Shape Tip
Draw the leading knee higher than you think it needs to be. Exaggerating the high-step action makes the run look faster and more athletic.
Step 2: Refining and Inking
-
Outline the clothing:
Draw a fitted t-shirt and running shorts over your body construction. Add folds where the fabric bunches at the waist and armpits. -
Detail the shoes:
Sketch the sneakers, paying attention to the soles. The back foot should show the toe gripping or pushing off, while the front foot is poised to land. -
Clean up the pencil sketch:
Review your proportions. If the legs look too stiff, slightly adjust the knee angle. Lighten your graphite lines with a kneaded eraser until they are barely visible guides. -
Begin inking contours:
Using your fine liner, trace the main outline of the figure. Use confident, continuous strokes rather than short, scratchy ones. -
Add anatomy hints:
Ink the subtle lines defining the knee caps, calf muscles, and elbow creases. Do not close every shape; leaving some lines open keeps the drawing airy. -
Texture the hair:
Use quick, flicking strokes with the pen to create the texture of hair. Group the strands rather than drawing every single hair individually.
Step 3: Shading and Finishing
-
Hatching the shorts:
Apply vertical hatching lines down the thigh area of the shorts to suggest the fabric’s drape and shadow. -
Shading the torso:
Add very light diagonal hatching on the side of the torso away from the light source. This gives the body three-dimensionality. -
Shadowing the limbs:
Use minimal hatching on the underside of the arms and the back of the calves. I find that less is more here—just a few lines define the cylindrical form effectively. -
Final eraser pass:
Once the ink is completely dry, thoroughly erase all remaining pencil construction lines to leave a crisp, clean illustration. -
Evaluate the visual weight:
Check if the figure feels grounded. If needed, add a very small shadow beneath the back toe to indicate contact with the ground.
Level Up: Movement
Add faint ‘action lines’ trailing behind the heels or elbows with a harder pencil (2H) to visually suggest speed and direction.
Now you have a lively figure sketch that captures the essence of human movement
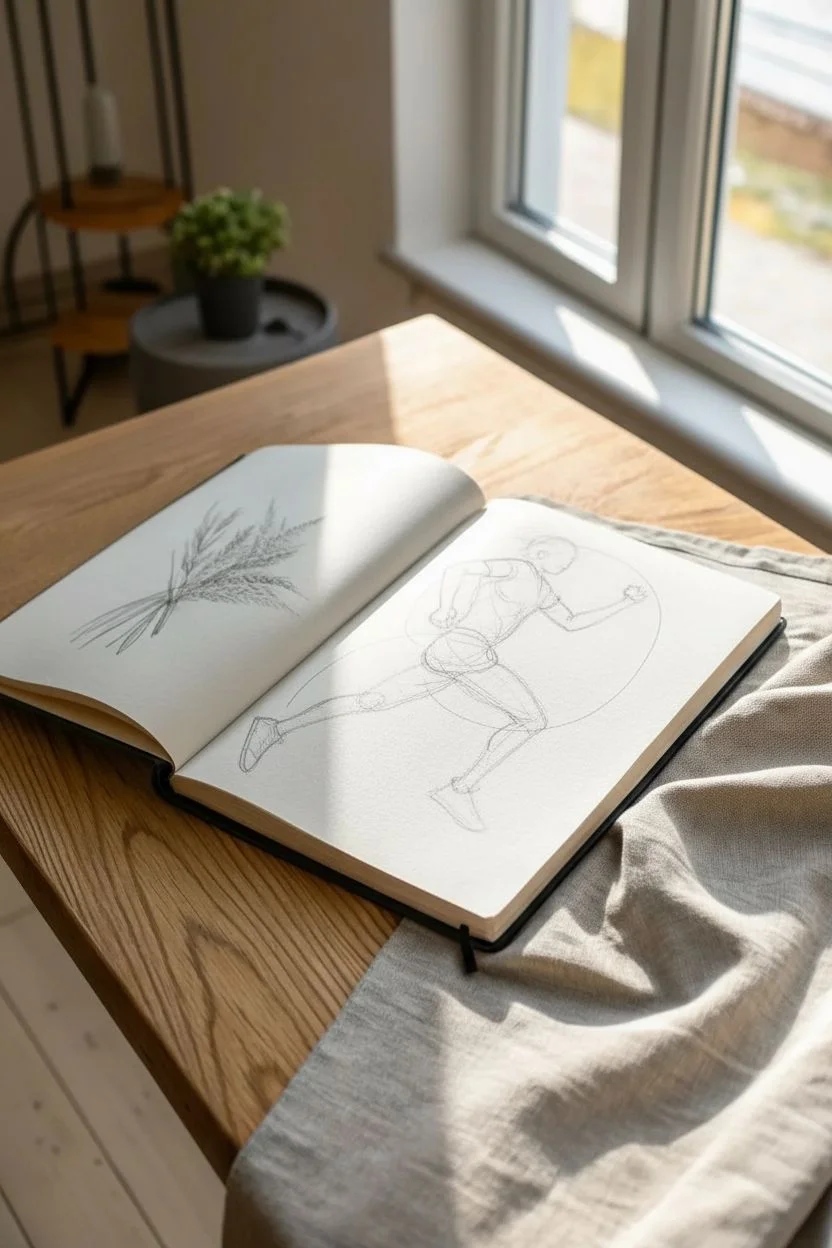
Punching and Blocking Action Pair
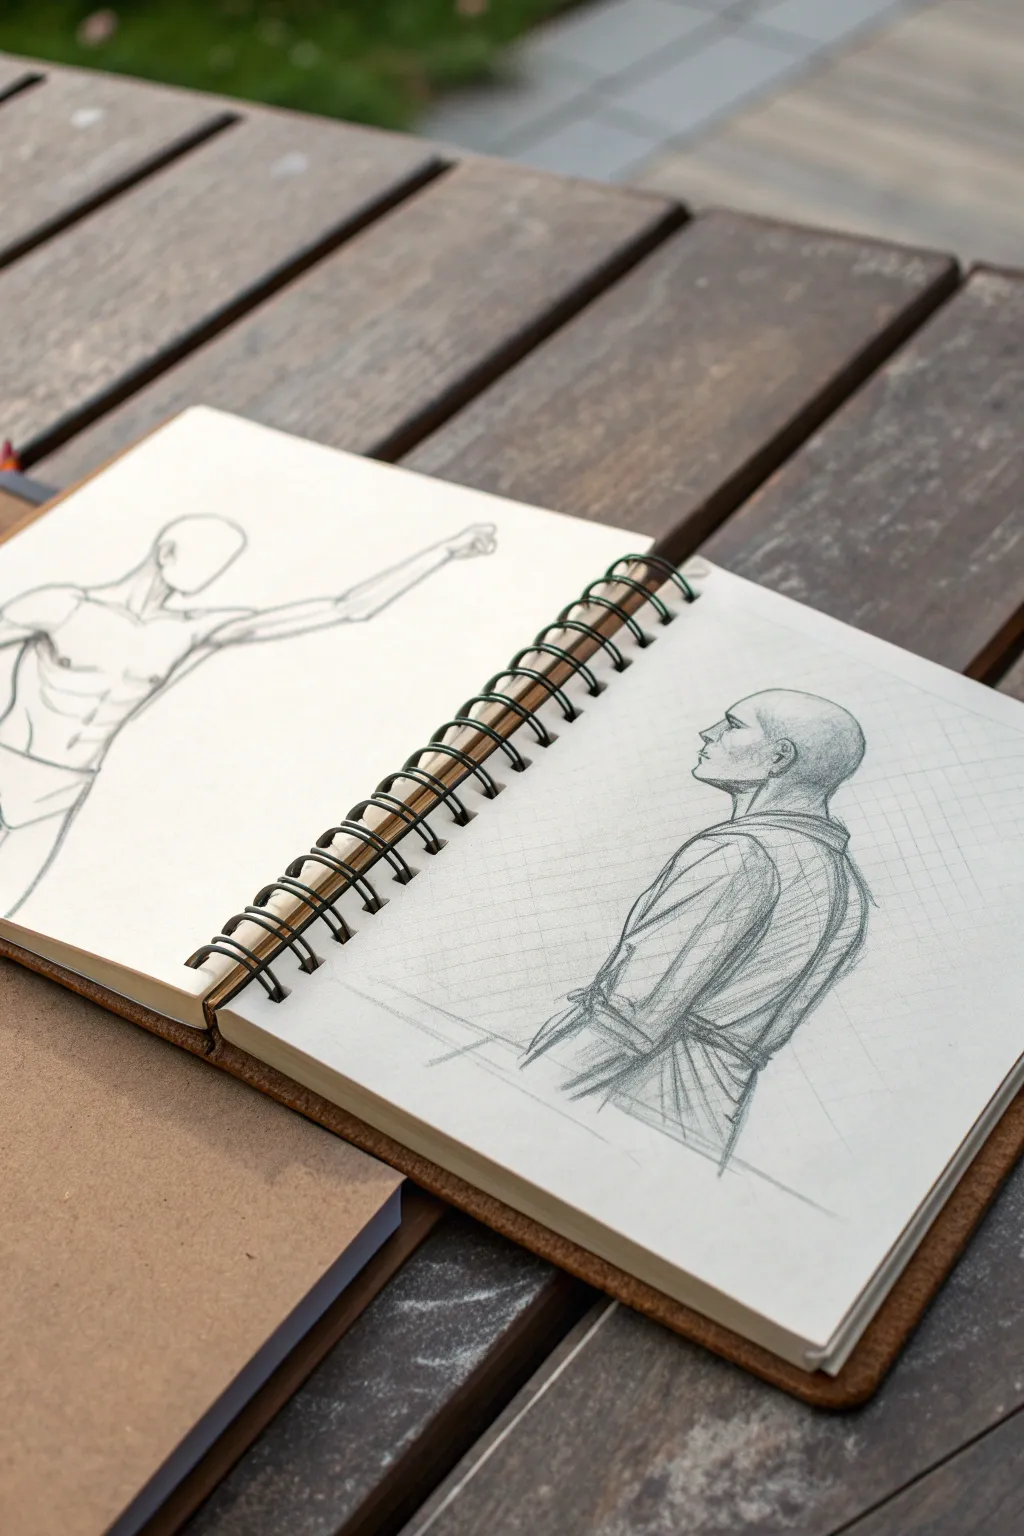
This project captures a quiet moment of focus with a pencil sketch of a profile figure, contrasting with a dynamic gesture drawing on the opposite page. The style is loose yet structural, emphasizing form and subtle shading to create a realistic, academic look in a spiral-bound sketchbook.
How-To Guide
Materials
- Spiral-bound sketchbook (medium weight paper applied)
- H or 2H pencil for initial layout
- HB or 2B pencil for refining lines
- 4B pencil for deeper shading
- Kneaded eraser
- Pencil sharpener or craft knife
- Blending stump (optional)
Step 1: The Dynamic Gesture (Left Page)
-
Establish the Action Line:
On the left page, start with a faint H pencil line curving from the bottom left upwards to the top right to define the energy of the body. -
Block in the Torso:
Sketch a simple oval for the ribcage and a smaller, connected shape for the pelvis, following your action line. -
Add Head and Limbs:
Draw an oval for the head. Extend a long line for the outstretched arm, marking the connection points for the shoulder and elbow with small circles. -
Define the Muscles:
Switch to an HB pencil. Outline the pectoral muscles and abdominals with quick, confident strokes, keeping the lines loose rather than rigid. -
Refine the Arm:
Flesh out the arm’s shape, indicating the bicep and forearm muscles. Keep the hand sketchy and implied rather than detailed. -
Clean Up:
Lightly erase the initial construction guides, leaving the energetic contour lines of the figure visible.
Step 2: The Profile Portrait (Right Page)
-
Construct the Head Shape:
On the right page, begin with a circle for the cranial mass using your H pencil. Add a jawline extending downward to form the chin. -
Initial Profile Line:
Lightly sketch the profile line—forehead, nose bridge, lips, and chin—creating a silhouette looking upward toward the left. -
Map the Shoulders:
Draw a sloping line for the shoulders and a curved vertical line to indicate the back, creating the posture of someone standing relaxed. -
Sketch the Clothing Fold:
Draw the collar of the robe or gi. Use swooping lines that wrap around the neck and cross over the chest, suggesting thick fabric. -
Refine Facial Features:
Using the HB pencil, sharpen the details of the ear, placing it aligned with the nose. Define the eye socket and closed mouth with more pressure. -
Cross-Hatching the Robe:
Create the texture of the clothing using diagonal hatching lines. I find it helpful to follow the form of the body underneath when placing these strokes. -
Add Sleeve Details:
Draw the folds where the sleeve meets the forearm. Use darker, shorter strokes to show the bunching of the fabric. -
Shade the Head:
Switch to a 2B or 4B pencil. Add shading to the back of the head, under the jaw, and beneath the brow ridge to give the skull dimension. -
Deepen the Shadows:
Darken the deepest folds of the clothing, specifically under the arm and along the back seam, to separate the figure from the background. -
Background Texture:
Lightly sketch a grid or faint diagonal cross-hatching behind the figure to give the drawing context and depth without overpowering the subject. -
Final Adjustments:
Use the kneaded eraser to pick out highlights on the forehead and the collar’s edge, enhancing the lighting contrast.
Smudge Control
Does graphite smear on the opposite page? Place a sheet of tracing paper or glassine between pages when closing the book to protect sketches.
Level Up: Color Accents
Use a single colored pencil (like terracotta or indigo) to add subtle tinting to the shadows or the background grid for an artistic pop.
Now you have a dynamic study spread that balances action with quiet observation


Extreme Low-Angle “Hero” Pose
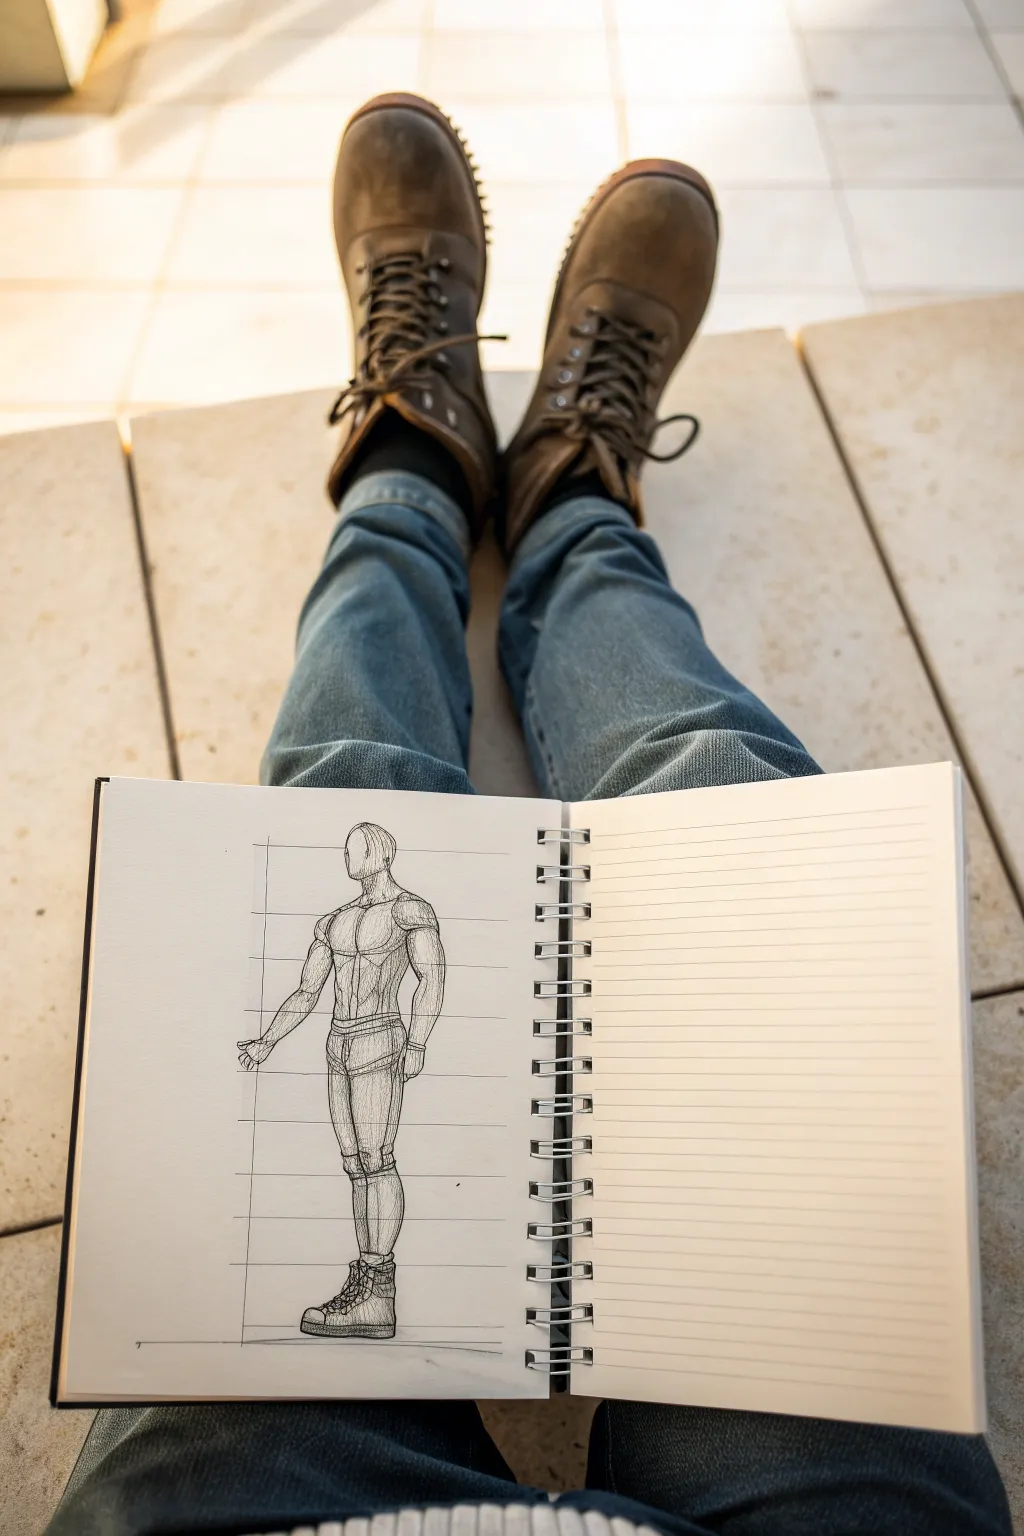
Learn to construct a standing male figure using foundational grid lines and geometric blocking. This tutorial focuses on capturing the solidity and proportions of the human form through a systematic, structural approach.
Step-by-Step Guide
Materials
- Spiral-bound sketchbook (smooth paper)
- H or HB pencil (for construction lines)
- Fine-liner pen (0.3mm or 0.5mm, black)
- Ruler
- Eraser
Step 1: Setting the Framework
-
Establish the vertical axis:
Begin by drawing a long, straight vertical line down the left-center of your page using your ruler. This will serve as the spine of your grid and the center of gravity for the figure. -
Mark head heights:
To keep proportions accurate, divide your vertical line into eight equal sections. Mark horizontal dashes across the line at each interval. These ‘head heights’ act as a map for where major body parts should align. -
Draw horizontal guides:
Extend a light horizontal line from each of your vertical marks across the page to the right. These lines will help you align the shoulders, waist, knees, and ankles symmetrically. -
Block in the head:
In the top section, sketch an oval for the head. Add a vertical centerline down the face to indicate the direction the figure is looking, slightly turned to the left.
Grid Consistency
Make your head-height marks exactly the same size. If your top section is 1 inch, every section below must match perfectly or the figure will look stretched.
Step 2: Constructing the Anatomy
-
Outline the torso box:
Below the head, draw a simplified box shape for the ribcage. It should span roughly from the second to the third horizontal line. Keep the lines geometric to emphasize volume. -
Add the pelvic block:
Sketch a smaller, tapered block shape below the ribcage for the pelvis. Leave a small gap between the ribcage and pelvis for the waist area. -
Position shoulder joints:
Draw small circles at the top corners of your ribcage box to represent the shoulder joints. This helps you visualize the rotation point for the arms. -
Draft the arms:
Sketch cylinders extending from the shoulder joints. The upper arm should end around the waistline, and the forearm should extend down to the hip area. -
Construct the legs:
Draw long cylinders for the thighs, tapering in slightly at the knees. Then, add the lower legs, making sure to define the calf muscle curve. -
Sketch the boots:
At the bottom, block out the shape of heavy boots. Use boxy shapes first to get the perspective right before adding details.
Dynamic Angles
Instead of a static standing pose, tilt the pelvic and shoulder lines in opposite directions (contrapposto) to create a more natural, heroic stance.
Step 3: Refining and Inking
-
Define muscle groups:
Over your geometric blocks, lightly sketch the contours of the muscles. Focus on the pectorals, deltoids, and quadriceps. Use curving lines to show the roundness of the forms. -
Add clothing details:
Sketch the outline of tight-fitting shorts or underwear and the details on the boots. Keep the clothing lines wrapping around the cylinder forms of the limbs to show depth. -
Start the inking process:
Switch to your fine-liner pen. Carefully trace over your refined pencil lines. I prefer to use broken or slightly sketched lines rather than one continuous stroke to give the drawing a textured, organic feel. -
Add cross-hatching shadows:
Use vertical hatching lines to shade the side of the figure away from the light source. Focus on the side of the torso, the inner leg, and the side of the face. -
Detail the grid:
ink your initial ruler lines, but keep them thinner or lighter than the figure itself. This retains that technical ‘blueprint’ aesthetic. -
Erase pencil guides:
Once the ink is completely dry, gently erase all the underlying pencil construction lines, leaving a clean, sharp diagram.
Now you have a structurally sound figure study ready for more detailed costume design or character development
Silhouette-First Pose Design Challenge
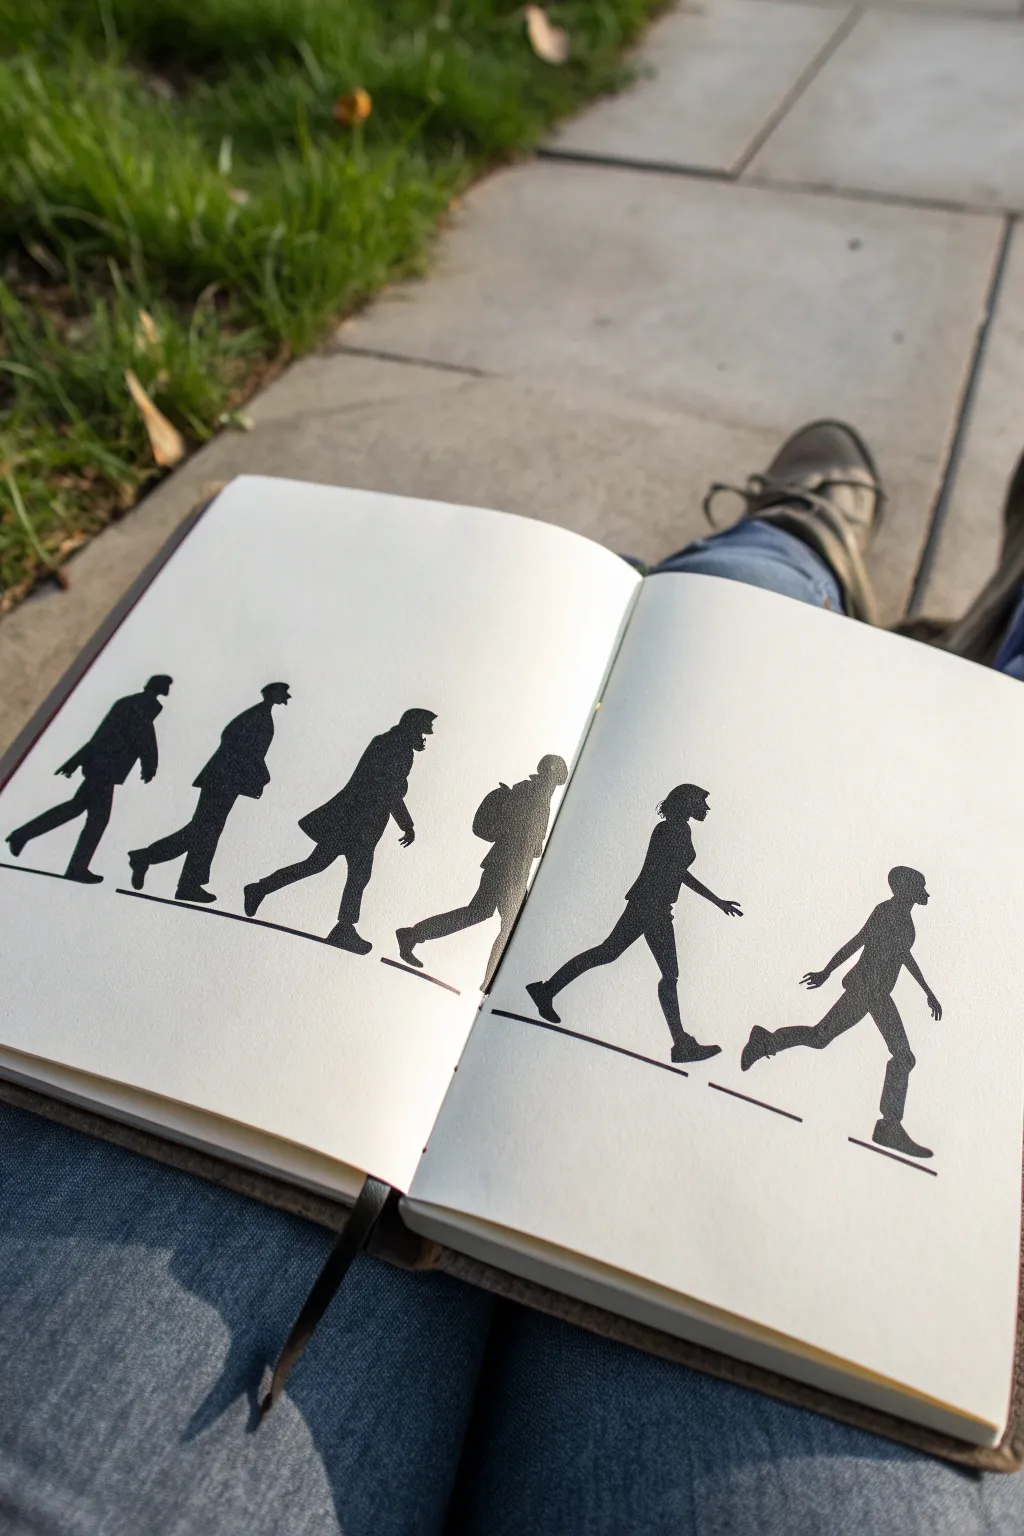
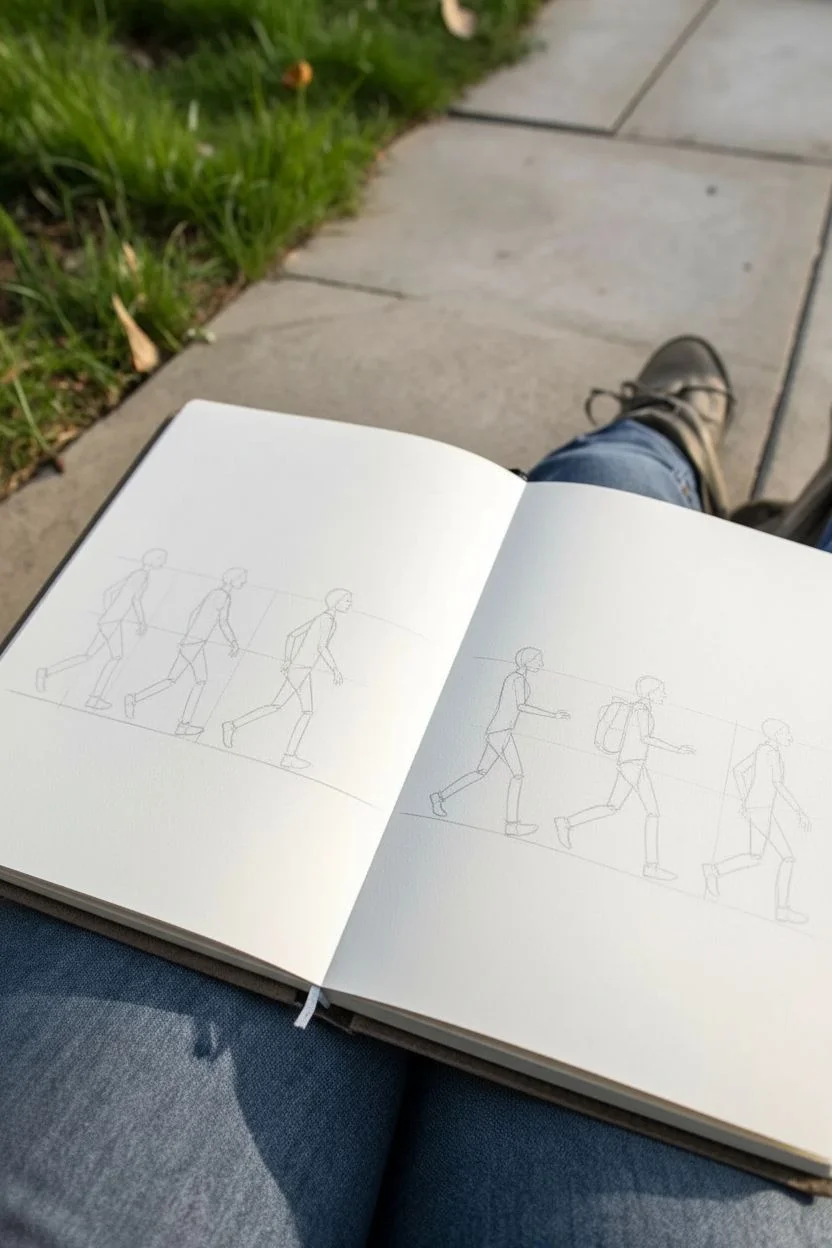
Capture the dynamic flow of human movement using stark, high-contrast silhouettes in this sketchbook study. By removing internal details, you’ll focus entirely on gesture, stride, and body language to tell a story across a two-page spread.
Step-by-Step Tutorial
Materials
- Hardbound sketchbook (heavyweight paper preferred)
- Finer-tip black drawing pen (0.3mm or 0.5mm)
- Broad-tip black marker or brush pen for filling
- Pencil (HB or 2B)
- Eraser
- Ruler or straight edge
Step 1: Planning composition
-
Define the ground plane:
Begin by opening your sketchbook to a fresh spread. Using your ruler and a light pencil touch, draw a horizontal baseline spanning both pages. This line doesn’t need to be perfectly continuous; slight breaks between figures can add visual interest, but keep the level consistent. -
Sketch basic armatures:
Before drawing clothes or flesh, lightly sketch stick-figure ‘skeletons’ to establish poses. Space them out evenly: three figures on the left page and three on the right works well to avoid crowding the gutter (the center fold). -
Vary the energy:
Plan a progression of speed or style. For the leftmost figures, sketch poses that suggest a steady, heavy walk. As you move right, angle the torsos forward and extend the stride length to imply acceleration or running.
Fixing Smudges
If you accidentally smudge black ink outside the line, turn it into a grounded element like a shadow, a rock, or uneven terrain rather than trying to erase it.
Step 2: Outlining forms
-
Flesh out the first figure:
Starting on the far left, draw the contour of the first walker over your stick figure. Give this character a coat or jacket shape to add bulk, emphasizing the backward swing of the rear leg. -
Draft the middle walkers:
Move across the page. For the central figures (near the book’s spine), focus on transitional poses. Perhaps one figure is mid-stride with a backpack, leaning slightly forward. Keep your pencil lines light so corrections are easy. -
Sketch the runners:
On the right page, draft the final two figures in more dynamic action. Lift the back foot higher and bend the knees more deeply. Using a silhouette style means you need clear ‘negatives spaces’ between limbs so the action reads clearly. -
Refine the silhouettes:
Go back over your pencil drafts and firm up the distinct shapes. Ensure that heads, hands, and feet have recognizable profiles. The nose and chin profile become crucial when you can’t see facial features.
Level Up: Evolution
Make the sequence tell a conceptual story by changing more than just speed—try depicting the stages of life from toddler to elder, or the evolution of fashion.
Step 3: Inking and filling
-
Trace the perimeter:
Switch to your fine-tip pen. carefully trace the final outline of your first figure. Be decisive with your lines to avoid a fuzzy edge. -
Fill the black solid:
Using your broader marker or brush pen, color in the entire shape. I generally prefer small circular strokes near the edges and broad strokes in the center to maintain precise control. -
Handle the connection points:
Pay special attention where feet meet the ground line. Thicken the baseline slightly under each planted foot to ‘ground’ the figure, creating a sense of weight. -
Ink the sequence:
Continue this process for each figure moving left to right. Be mindful of the book’s gutter; if a figure is near the center, flatten the page as much as possible to ensure your marker reaches deep into the fold without bleeding onto the wrong spot. -
Solidify the ground lines:
Go over your pencil ground lines with the fine pen. It often looks artistic to leave these as detached segments—just a line under each figure or pair—rather than one long, unbroken border.
Step 4: Final presentation
-
Let the ink cure:
Wait several minutes for the heavy black ink to dry completely. Silhouette art requires dense ink coverage, which can smudge easily if touched too soon. -
Erase guidelines:
Once the ink is bone-dry, gently erase the underlying pencil skeleton and any stray graphite marks. Use a kneading eraser if possible to avoid fading the black ink. -
Check for pinholes:
Inspect your black fills for any tiny white specks of paper showing through. Use your fine liner to dot these in for a truly solid, matte silhouette look.
Now you have a striking study of motion captured in minimalist style, ready to inspire your next character design
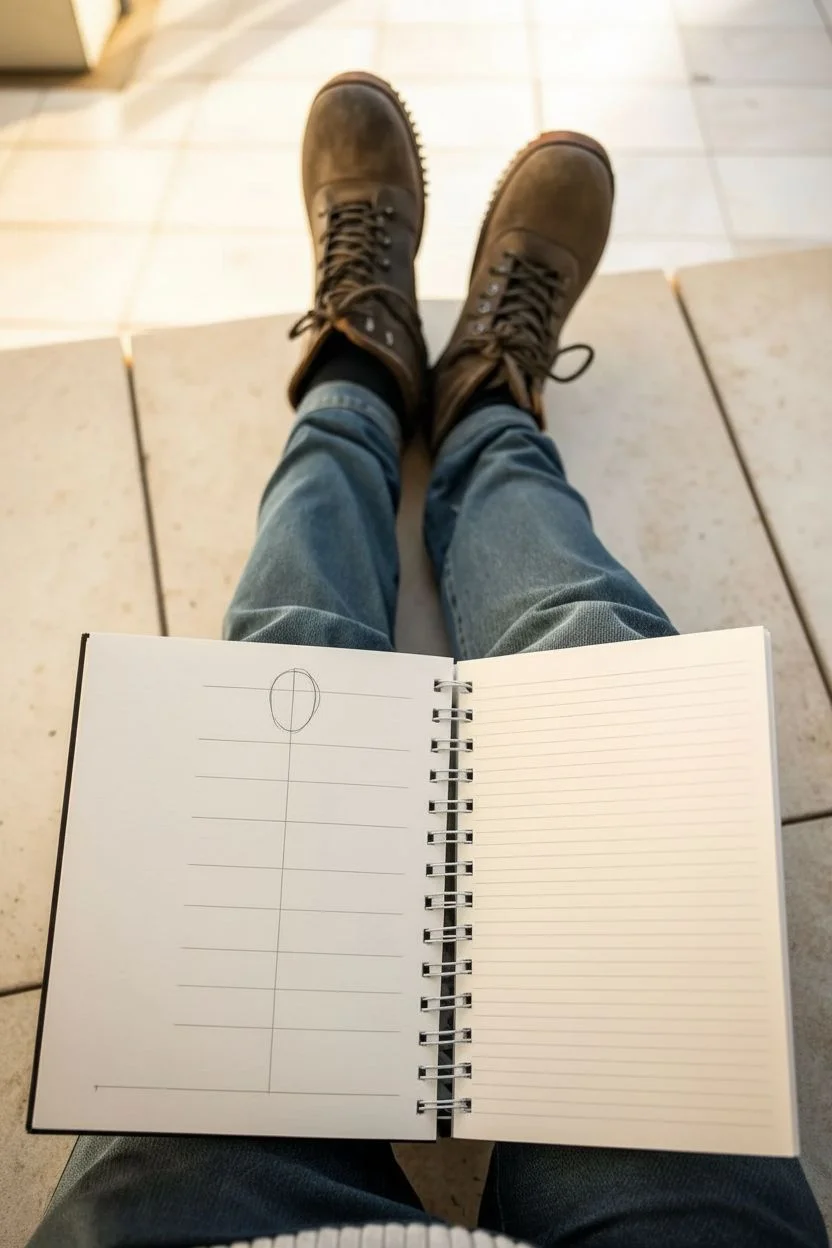
Memory Remix: Draw, Hide, Redraw From Imagination

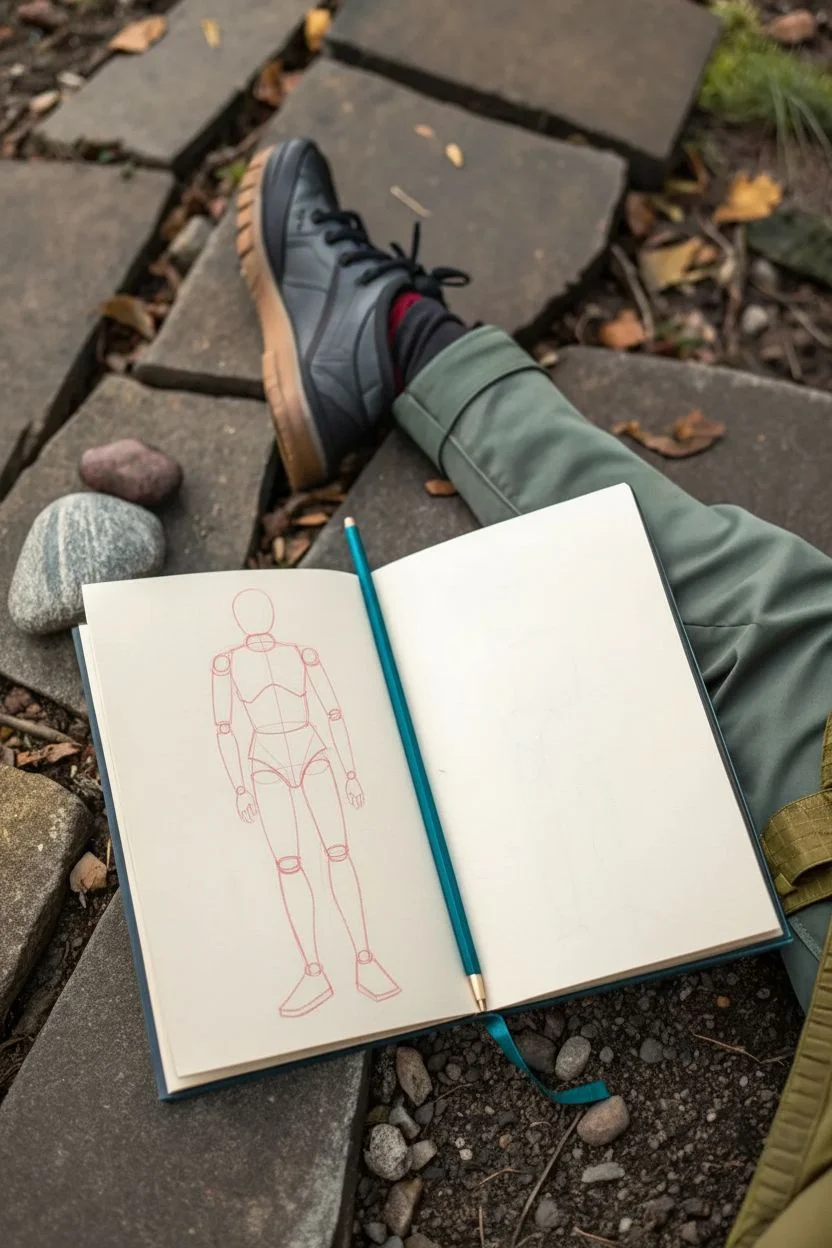
Learn to capture the essence of a pose by breaking the human form down into simple geometric shapes. This exercise uses a dual-color approach to separate your structural lines from your final contours, resulting in a sketch that feels solid and dimensional.
Step-by-Step Guide
Materials
- Hardcover sketchbook (blank pages)
- Red colored pencil (drawing or sketching grade)
- Graphite pencil or black colored pencil
- Teal or blue pencil (optional, for prop placement)
- Eraser (kneaded preferred)
Step 1: Laying the Red Foundation
-
Establish the Line of Action:
Start with your red pencil. Draw a swift, light curve that represents the spine. This simple line will dictate the posture and flow of the entire figure. -
Place the Main Masses:
Sketch a simple oval for the head. Below that, draw a larger, ribcage-shaped oval for the chest, and a boxy shape for the pelvis. Keep these loose and ensure they align with your initial line of action. -
Connect the Torso:
Connect the ribcage and pelvis with curved lines to represent the waist and abdomen. Think of this as a flexible tube connecting two solid masses. -
Shoulder and Hip Joints:
Draw small circles at the corners of the upper ribcage for shoulders and at the bottom corners of the pelvis for the hip joints. These pivot points are crucial for posing the limbs. -
Limb Cylinders:
Represent the upper arms and thighs as simple cylinders extending from the joints. I find it helpful to draw ellipses at the ends to visualize the volume. -
Elbows and Knees:
Add small circles or spheres to indicate the elbow and knee joints. -
Lower Limbs:
Draw tapering cylinders for the forearms and shins. Pay attention to the angle; in a standing pose, the legs usually angle slightly inward to support the body’s weight. -
Hands and Feet Blocks:
At the ends of the limbs, sketch simple wedge shapes for the feet and basic mitten shapes for the hands. Don’t worry about fingers or toes yet; focus on the overall plane of the foot on the ground.
Proportions looking off?
Check your head size. A standard realistic figure is roughly 7.5 to 8 ‘heads’ tall. If the legs look too short, measure the head and stack that vertical distance down the body to check lengths.
Step 2: Defining Structure and Detail
-
Refining Certain Volumes:
Still using the red pencil, go over your cylinders and joints to make them look more mechanical or anatomical. Draw ‘cross-contour’ lines (curved lines wrapping around the form) at the midpoint of the thighs and arms to emphasize roundness. -
Adding Centerlines:
Draw a vertical centerline down the face, chest, and pelvis. This helps orient the direction the figure is facing and adds to the 3D effect. -
Switching to Dark Pencil:
Pick up your graphite or black pencil. We will now selectively outline the figure to give it weight. -
Outline the Silhouette:
Trace the outer edges of your red construction. You don’t need to trace every single line perfectly; instead, look for the ‘rhythm’ of the muscle overlaying the bone. -
Detail the Shoes:
Focus on the feet blocks. Sketch the laces, soles, and ankle support of the sneakers using the dark pencil. The image shows high-top style shoes, which adds character to the simple mannequin. -
Define the Hands:
Refine the mitten shapes into loose indications of fingers. Keep it simple—just enough to show the hand’s orientation. -
Final Accents:
Add a few darker marks at the overlap points—like inside the elbow or behind the knee—to create depth. You can also lightly shade the ground plane beneath the feet to ground the figure.
Level Up: Clothing Drapes
Once your mannequin is solid, use a blue pencil to draw clothes over it. The structural cylinder lines you drew will act as perfect guides for where fabric folds should wrap and bunch.
Now you have a structurally sound figure drawing ready for further refinement or to stand on its own as a study


Have a question or want to share your own experience? I'd love to hear from you in the comments below!