Getting started with digital art can feel overwhelming when you are staring at a blank screen, but the right inspiration makes all the difference. I have put together a collection of manageable drawing prompts and techniques to help you get comfortable with your new creative tools.
Tropical Monstera Leaves
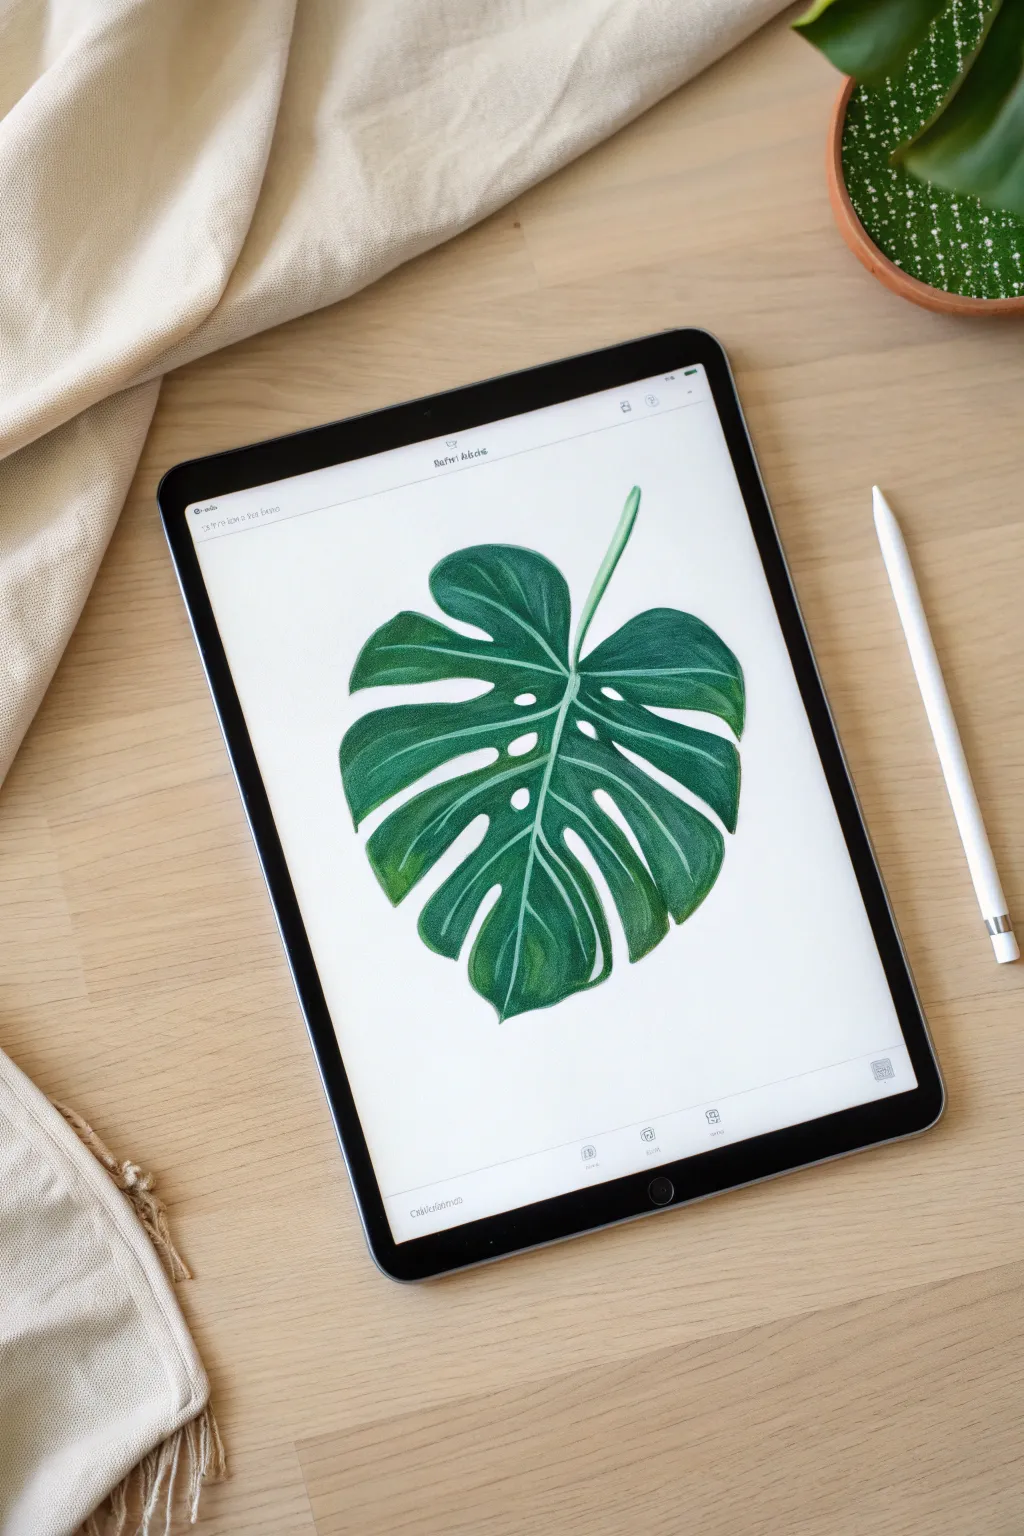
Capture the organic beauty of a Monstera Deliciosa leaf using digital tools that mimic traditional colored pencils. This project focuses on building distinct ridges and shadows to give your flat drawing realistic volume and texture.
Step-by-Step Tutorial
Materials
- iPad with Procreate installed
- Apple Pencil
- Default Procreate Sketching Brushes (6B Pencil)
- Default Procreate Artistic Brushes (Old Beach or similar texture)
Step 1: Drafting the Shape
-
Canvas Setup:
Open a new A4 canvas in Procreate. To mimic the drawing in the image, keep the background white or set it to a very faint cream color. -
Basic Framework:
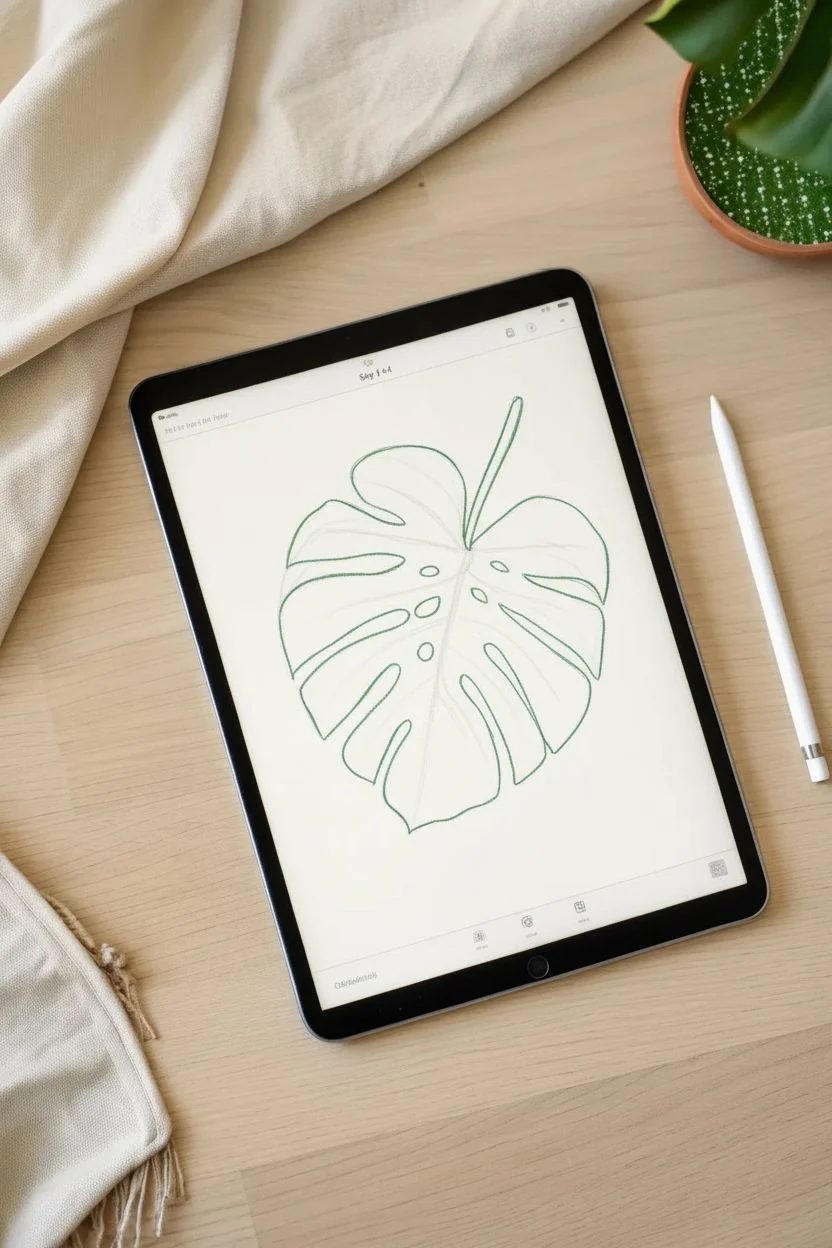
Select the ‘6B Pencil’ from the Sketching panel and choose a light grey color. Roughly sketch a large heart shape, slightly tilted, to serve as the leaf’s body. -
Adding Fenestrations:
Erase deep V-shaped notches from the outer edges of the heart inward toward the center vein. Monstera leaves are known for these splits. -
Internal Holes:
Draw a few oval or circular holes near the center vein where the leaf hasn’t split yet. -
Refining the Outline:
Create a new layer on top. With a darker green pencil, trace your final outline, making the edges organic and slightly wavy rather than perfectly smooth.
Step 2: Coloring and Volume
-
Base Coat:
On a layer beneath your outline, fill the entire leaf shape with a medium forest green. I prefer coloring this in by hand with the pencil brush rather than dropping color, to maintain a textured grain. -
Alpha Lock:
Swipe right with two fingers on your base color layer to turn on Alpha Lock. This ensures you only paint within the leaf shape. -
Deep Shadows:
Select a very dark, cool green. Brush this color firmly along the central midrib and the very edges of the leaf blades. -
Establishing Ridges:
Visualizing the leaf surface like hills and valleys, darken the ‘valleys’ where the veins will sit. -
Blending:
Use the Smudge tool set to a textured brush (like ‘Stucco’ or ‘Pencil’). Softly blend the dark green into the medium base, but don’t over-blend; keep the stroke marks visible for that pencil look. -
Drawing the Stem:
Select a pale, milky mint green. Draw a thick line down the center of the leaf for the midrib, tapering it as it reaches the tip of the leaf.
Flat Leaf Fix
Leaf looking too 2D? Increase the contrast. Darken the green right next to the pale veins significantly to create the illusion of a deep crease.
Step 3: Veins and Texture
-
Lateral Veins:
Using the same pale green, draw curved lines extending from the midrib out toward the leaf edges. Make sure these lines curve upwards slightly to show form. -
Highlighting:
Switch to a lighter, yellowish-green. Lightly shade the raised areas between the veins to simulate light hitting the curved surface. -
Adding Noise:
Create a new layer set to ‘Overlay’ mode. Use a Charcoal brush to lightly dust some texture over the leaf, enhancing the grainy, traditional art feel. -
Refining Edges:
Go back to the eraser tool. Clean up the perimeter of your leaf to ensure the notches are sharp and the holes are clearly defined. -
Final Contrast:
If the drawing looks flat, add a subtle drop shadow on a layer beneath the leaf to lift it off the digital paper.
Make It Glossy
To make the leaf look waxy, add small, hard white highlights on the highest points of the ridges using a thin inking brush.
Now you have a lush, botanical illustration that never needs watering.


Juicy Citrus Slices
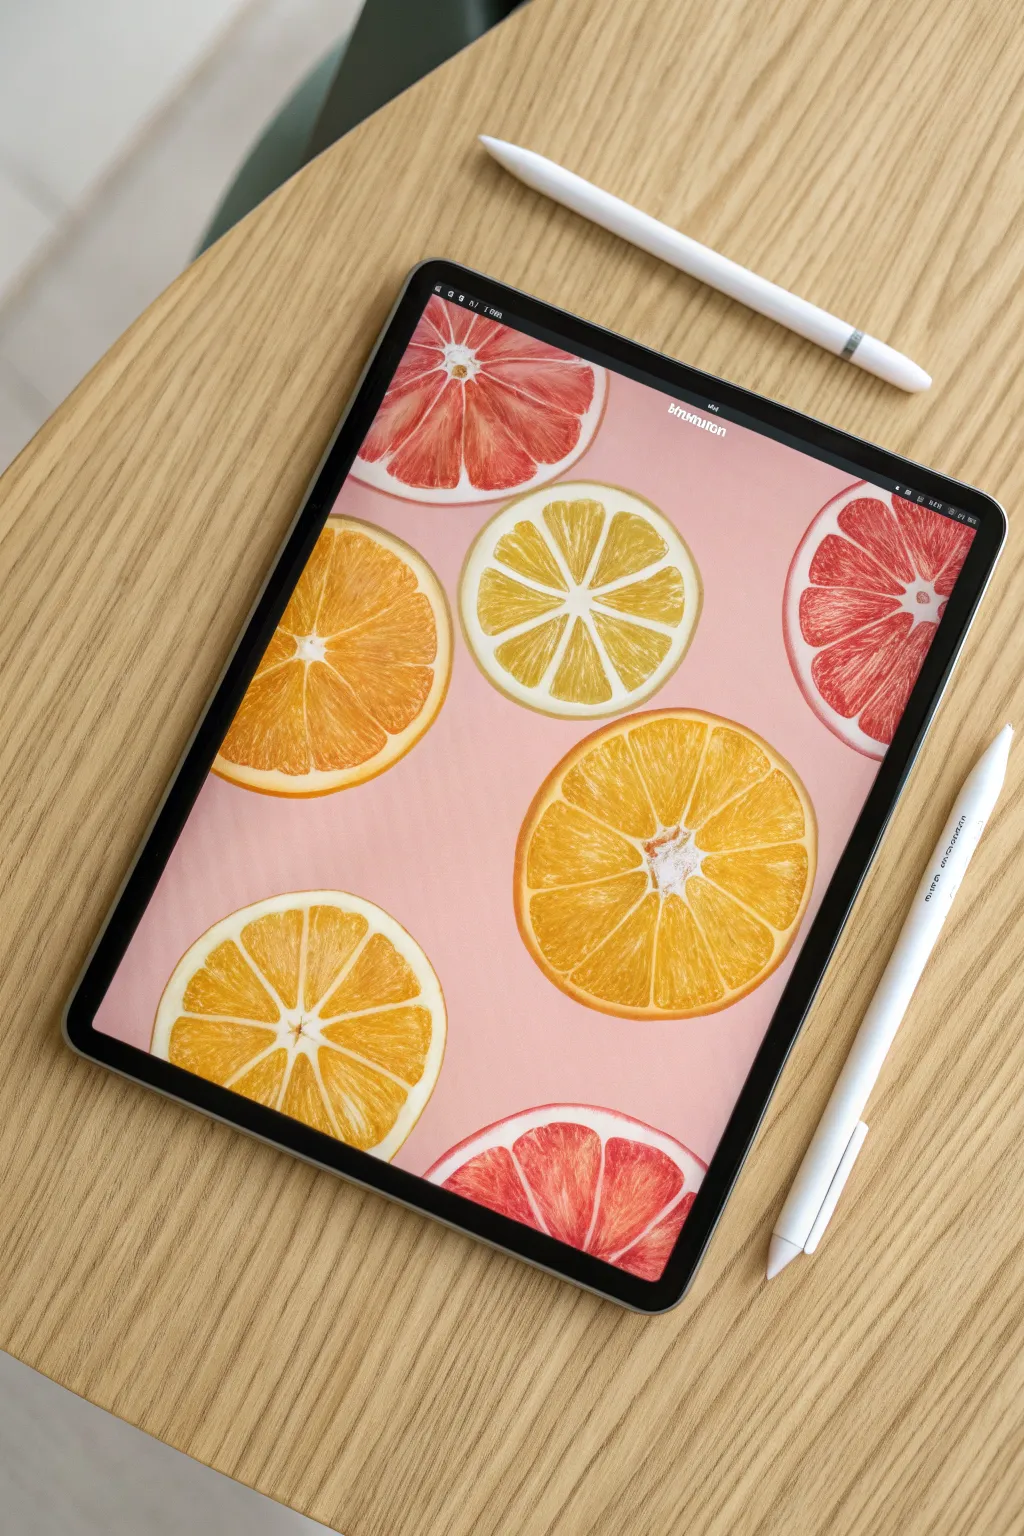
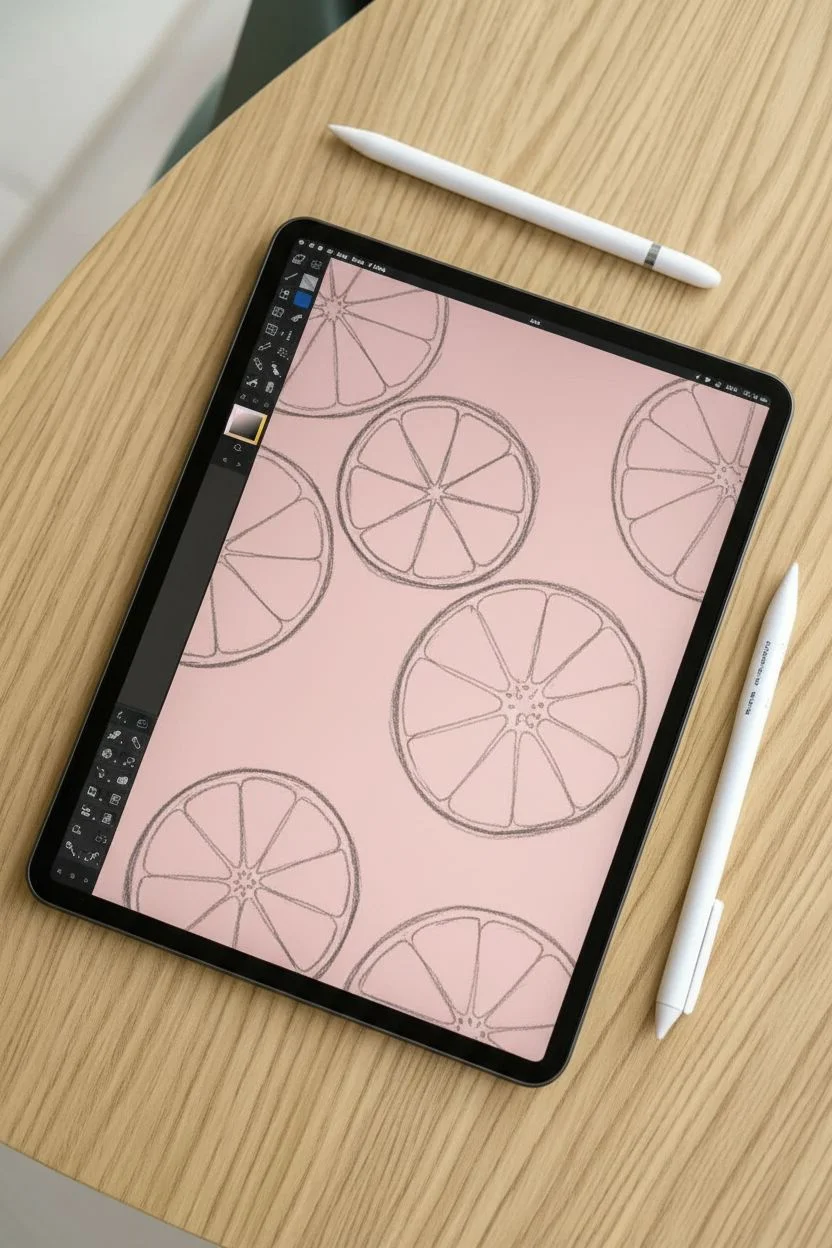
Capture the zest of summer by creating these hyper-realistic yet stylized citrus slices using Procreate. This project focuses on building layers of texture to mimic the juicy pulp and porous rind against a soft pastel background.
Step-by-Step
Materials
- iPad with Procreate installed
- Apple Pencil
- Pressure-sensitive stylus (alternative)
- Reference photos of sliced citrus
Step 1: Setting the Scene
-
Canvas preparation:
Open a new canvas in Procreate. I suggest a screen size canvas or a 3000 x 3000px square for high resolution. -
Background color:
Open the Layers panel, tap the Background Color layer, and select a soft, desaturated pastel pink to match the reference image. -
Rough sketching:
Select a sketching brush like the 6B Pencil. On a new layer, draw several circles of varying sizes scattered across the canvas to represent your fruit placement. -
dividing the segments:
Find the center of each circle and sketch lines radiating outward like bicycle spokes to define the fruit segments. Don’t make them perfectly symmetrical; organic variation looks more natural.
Troubleshooting Shapes
If your circles look wobbly, hold your stylus in place at the end of the stroke. Procreate’s QuickShape tool will snap it into a perfect circle, which you can then edit.
Step 2: Building the Fruit
-
Drawing the rind:
Create a new layer. Select a textured inking brush, such as the Dry Ink brush. Choose a vibrant orange color and trace the outer edge of your sketch to create the rind. -
Adding the pith:
Switch your color to an off-white or cream. Draw a second circle just inside the orange rind, and trace the radiating spoke lines to create the white membrane (pith) separating the segments. -
Rounding the corners:
Where the white spoke lines meet the outer white ring, round off the corners. Citrus segments are teardrop-shaped, not sharp triangles. -
Base color fill:
Create a layer underneath your white pith layer. Select a base color for your fruit (orange, pink for grapefruit, or yellow for lemon) and fill in the segment shapes.
Pro Tip: Organic Feel
Avoid using the Symmetry tool for the fruit segments. Hand-drawing the white membranes with slight irregularities makes the fruit look much more organic and realistic.
Step 3: Texturing the Pulp
-
Locking the layer:
Swipe right on your fruit color layer with two fingers to activate Alpha Lock. This ensures you only paint inside the colored segments. -
Adding gradient depth:
Select a Soft Airbrush and a slightly darker, reddish-orange shade. Gently paint the outer edges of the segments to give them volume and roundness. -
Creating fiber texture:
Choose a brush with grain, like the Noise Brush or Spicule (under Organic). Using a lighter, brighter orange, paint strokes radiating from the center outward to mimic juice sacs. -
Defining the fibers:
Switch to a very fine Technical Pen brush with a white or pale yellow color. Draw thin, fine lines radiating from the center inside each segment to represent the fibrous walls. -
Juicy highlights:
Add small, pure white specks and tiny teardrops near the center of the fruit segments. This makes the fruit look wet and freshly cut.
Step 4: Rind Texture & Final Polish
-
Rind detailing:
Go back to your outer rind layer. Alpha Lock it, then use a textured brush (like Bonobo Chalk) with a lighter orange to dab small pores onto the skin. -
Color variations:
Repeat the coloring process for the other circles. Use ruby and salmon pinks for the grapefruit slices, and bright lemon yellow with white pith for the lemons. -
Adding shadows:
Create a layer set to Multiply blending mode on top of the fruit color but below the pith. Paint subtle shadows where the juicy flesh meets the white membrane to add dimension. -
Final arrangement:
I like to finish by using the Transform tool to slightly rotate or resize individual fruits if the composition feels unbalanced.
Now you have a vibrant, vitamin-packed digital print ready to brighten up your portfolio!


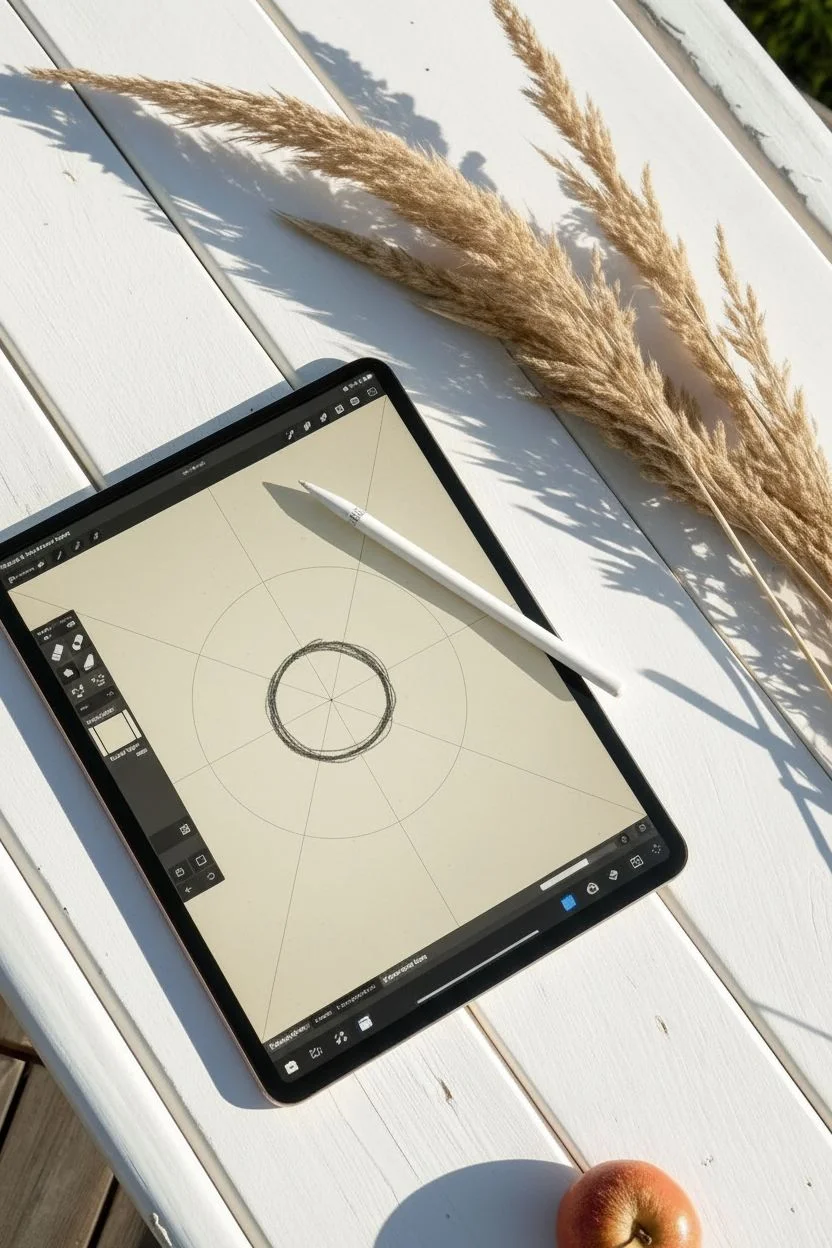
Symmetrical Mandalas
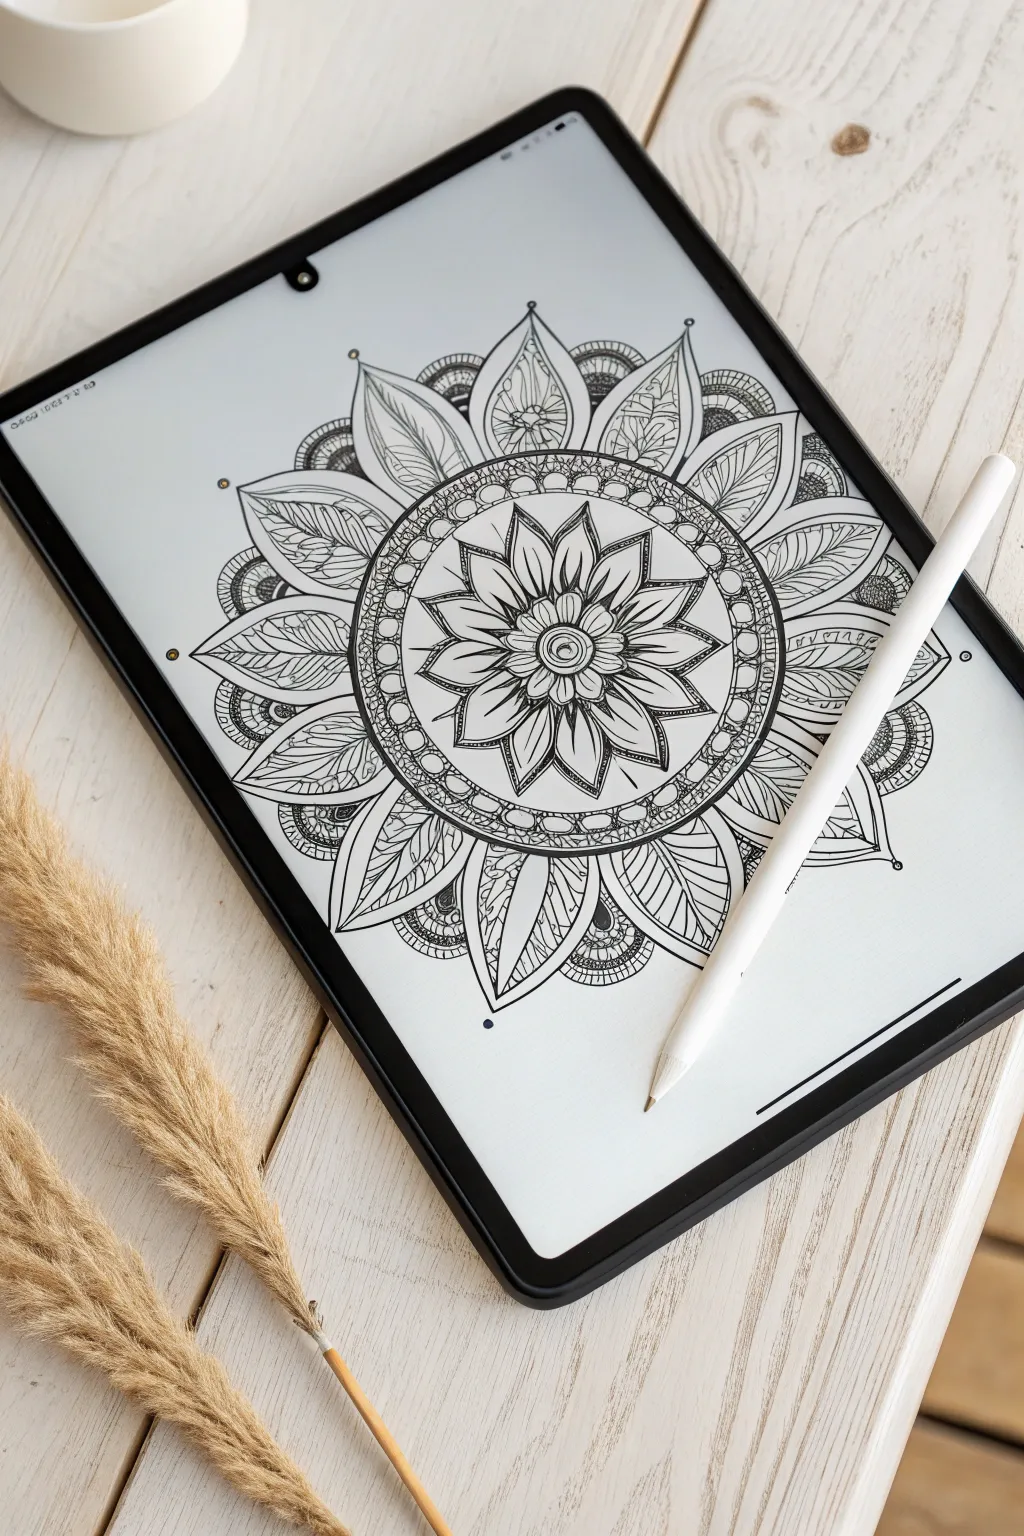
Discover the meditative joy of creating a perfectly symmetrical mandala using digital drawing tools. This project utilizes radial symmetry to turn simple strokes into an intricate, floral-inspired design that looks incredibly complex but is surprisingly easy to build.
How-To Guide
Materials
- iPad with Procreate installed
- Apple Pencil (or compatible stylus)
Step 1: Setting the Symmetry
-
Canvas setup:
Open Procreate and create a new square canvas, ideally 2000×2000 pixels or larger to ensure your lines remain crisp. -
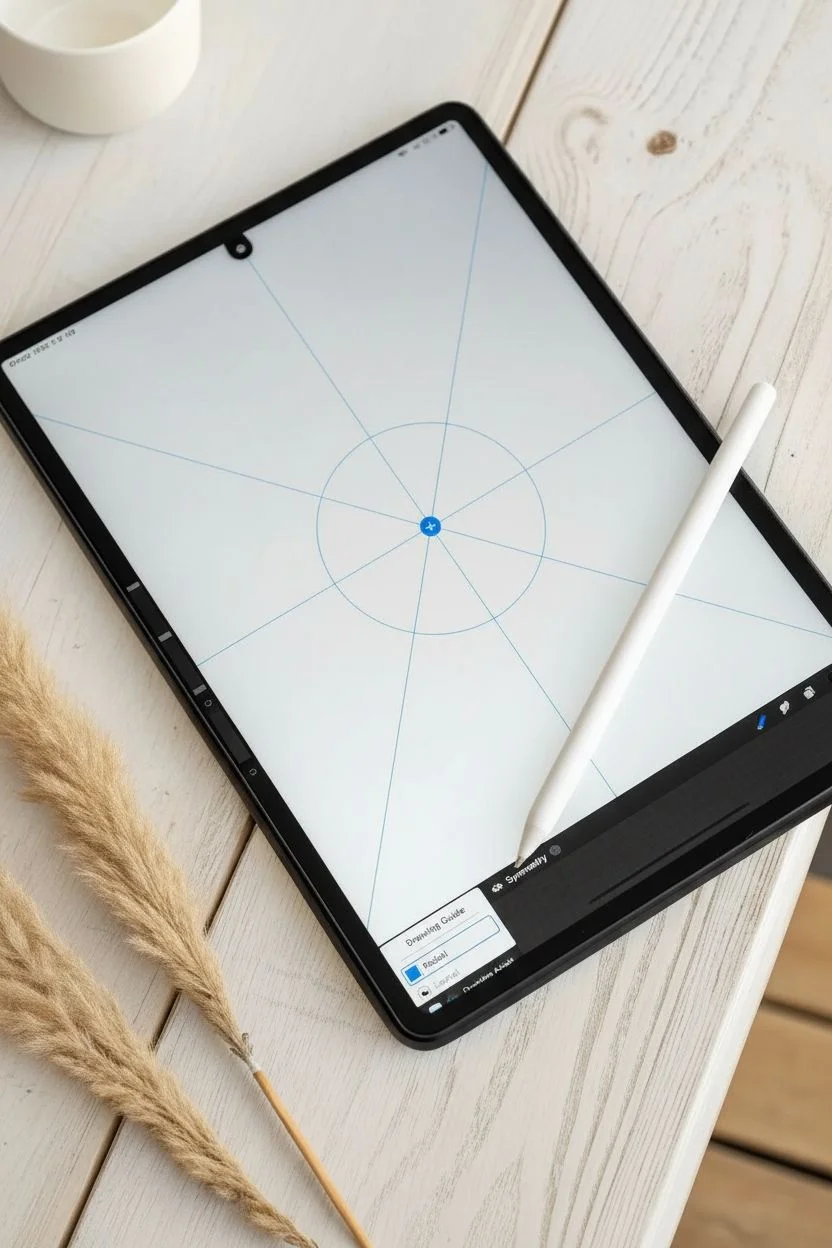
Activate guides:
Tap the wrench icon to open the Actions menu, select the Canvas tab, and toggle the ‘Drawing Guide’ switch to the on position. -
Configure radial symmetry:
Tap ‘Edit Drawing Guide’ immediately below the toggle, choose the ‘Symmetry’ button on the bottom menu, and select ‘Options’ to choose ‘Radial’. -
Check assisted drawing:
Tap ‘Done’ to return to the canvas, then open your Layers panel, tap on Layer 1, and ensure ‘Drawing Assist’ is checked so your strokes replicate automatically.
Step 2: Drawing the Core
-
Select your brush:
Open the Brush Library and choose the ‘Studio Pen’ or ‘Technical Pen’ from the Inking set for smooth, solid lines. -
Center circle:
Start in the exact middle of the canvas and draw a small ring; watch as the radial symmetry creates eight mirrored circles instantly. -
First petal layer:
Draw a pointed petal shape extending outward from the center ring, keeping the lines confident and closed. -
Inner details:
Sketch a smaller, identical petal shape inside the first one to create a double-lined border effect. -
Center details:
Draw three small oval ‘seeds’ or lines vertically within the center of the petals to add density to the core.
Smooth Operator
If your lines feel shaky, tap your brush in the library to edit settings. detailed ‘Stabilization’ or ‘Streamline’ to 50% or higher. This magnetically smooths your hand movements for perfect curves.
Step 3: The Outer Motifs
-
The border ring:
Draw a large circle that encompasses the tips of your first flower layer, holding your pen tip down at the end of the stroke to snap it into a perfect circle. -
Decorative beads:
Add a series of small circles or semi-circles along the inside edge of this new ring to create a beaded jewelry look. -
Large leaf outlines:
From the outer edge of the beaded ring, draw large, sweeping leaf shapes that extend toward the canvas edges, making them wide and prominent. -
Central veins:
Draw a strong, singular line down the center of each large leaf to establish the primary vein. -
Leaf texture:
I like to reduce the brush size slightly here to add delicate diagonal hatching lines inside the leaves, filling only one half of the leaf for visual contrast. -
Scalloped edges:
In the V-shaped gaps between the large leaves, draw stacked semi-circles or scallops to fill the negative space with pattern. -
Outer details:
Add small circles or dots floating just above the tips of the leaves and within the scallop patterns for a finishing touch. -
Cleanup:
Go back to the Actions menu (wrench icon), Canvas tab, and toggle ‘Drawing Guide’ off to view your clean black-and-white artwork without the guidelines.
Color Splash
Create a new layer *under* your line art. Use the ‘ColorDrop’ feature (drag the color circle to a closed shape) to instantly fill sections with vibrant colors or gradients.
Now that you have the framework, you can print this as a custom coloring page or continue designing for a fully finished digital piece


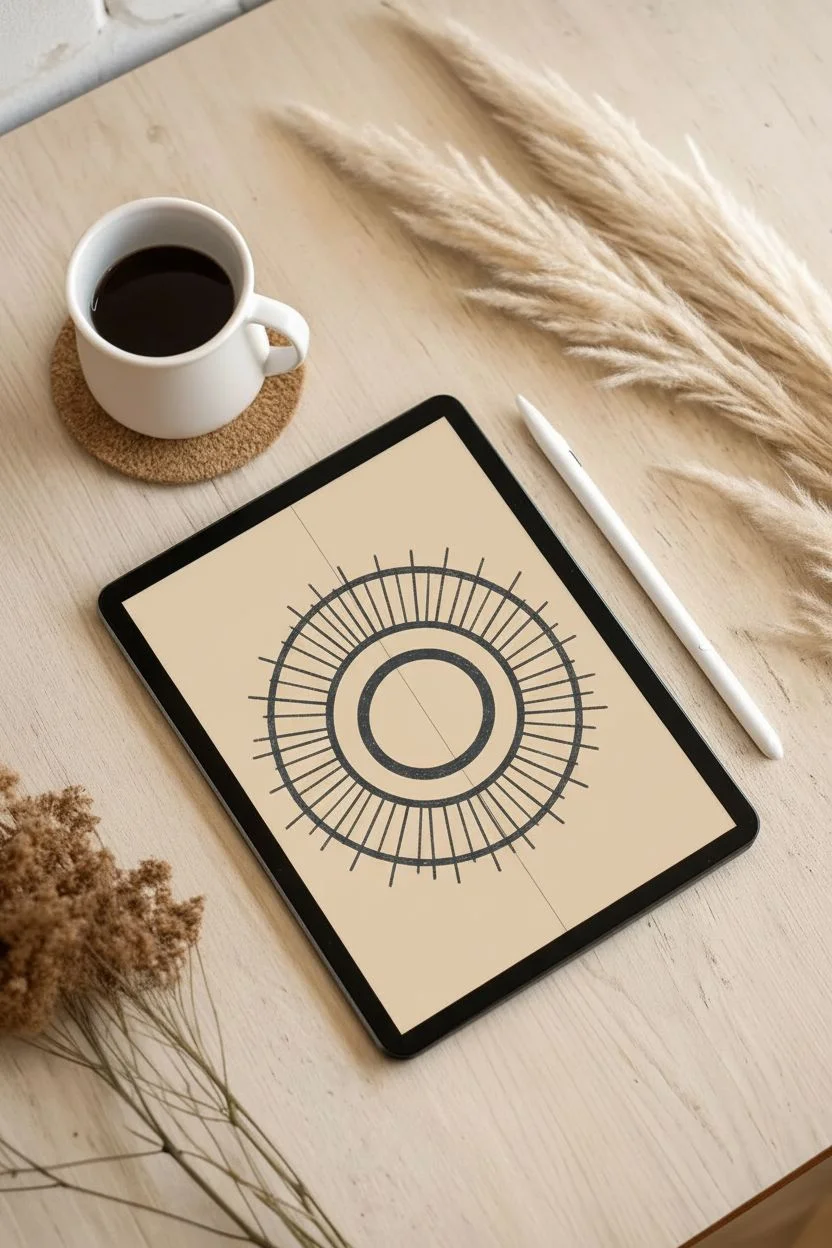
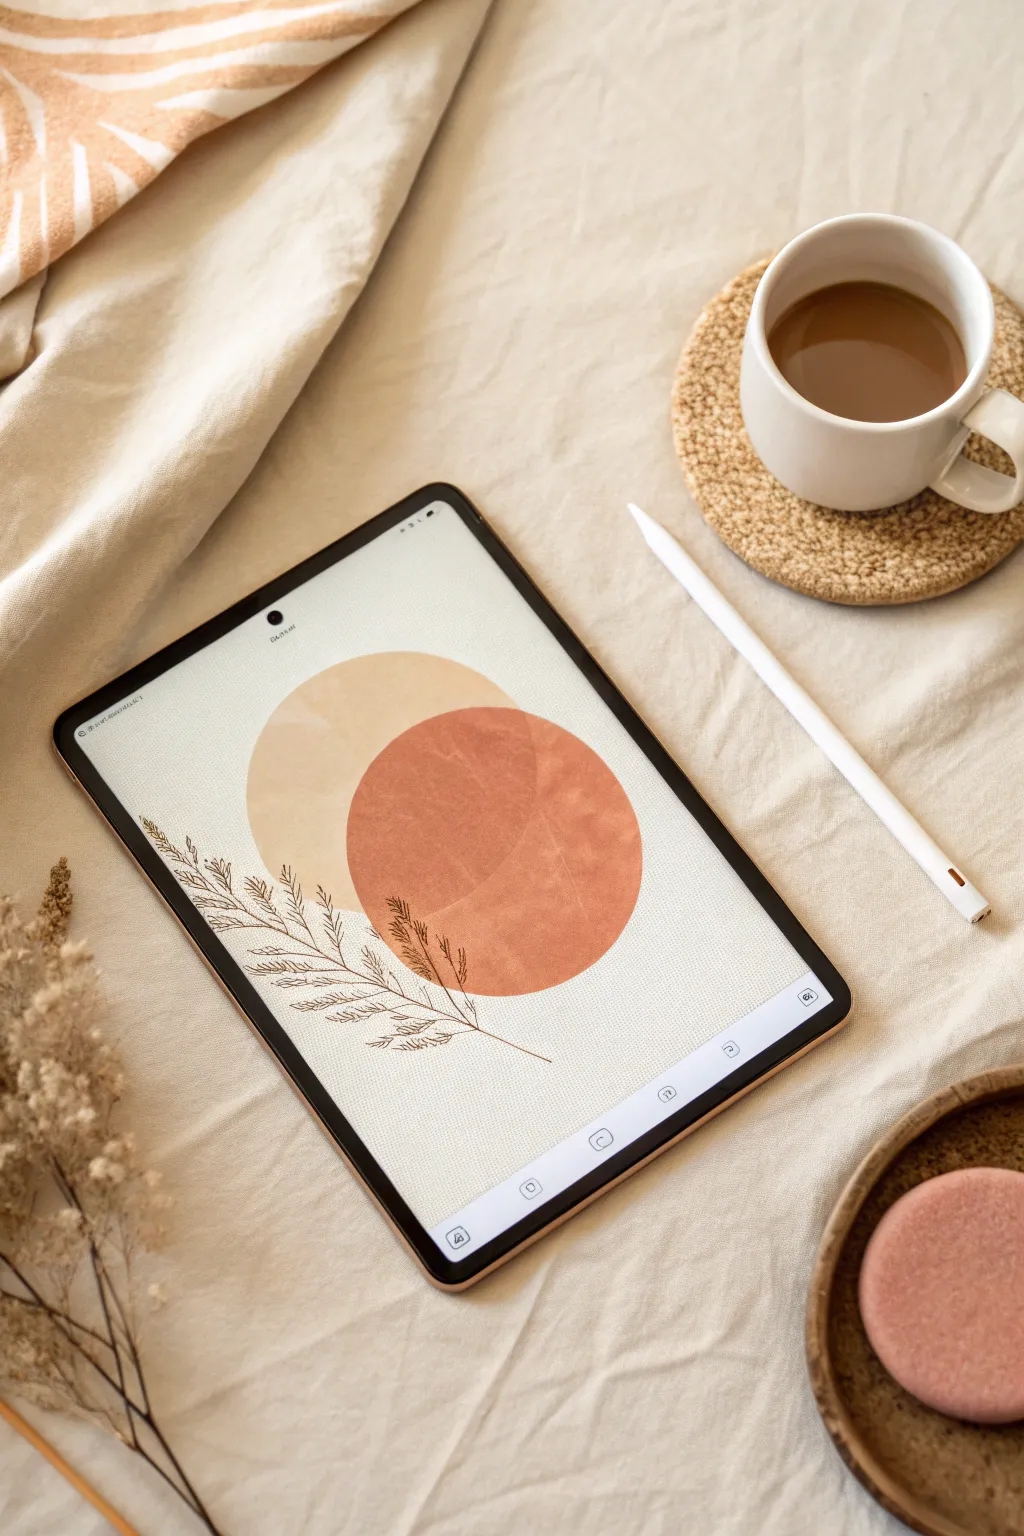
Boho Sun Geometrics
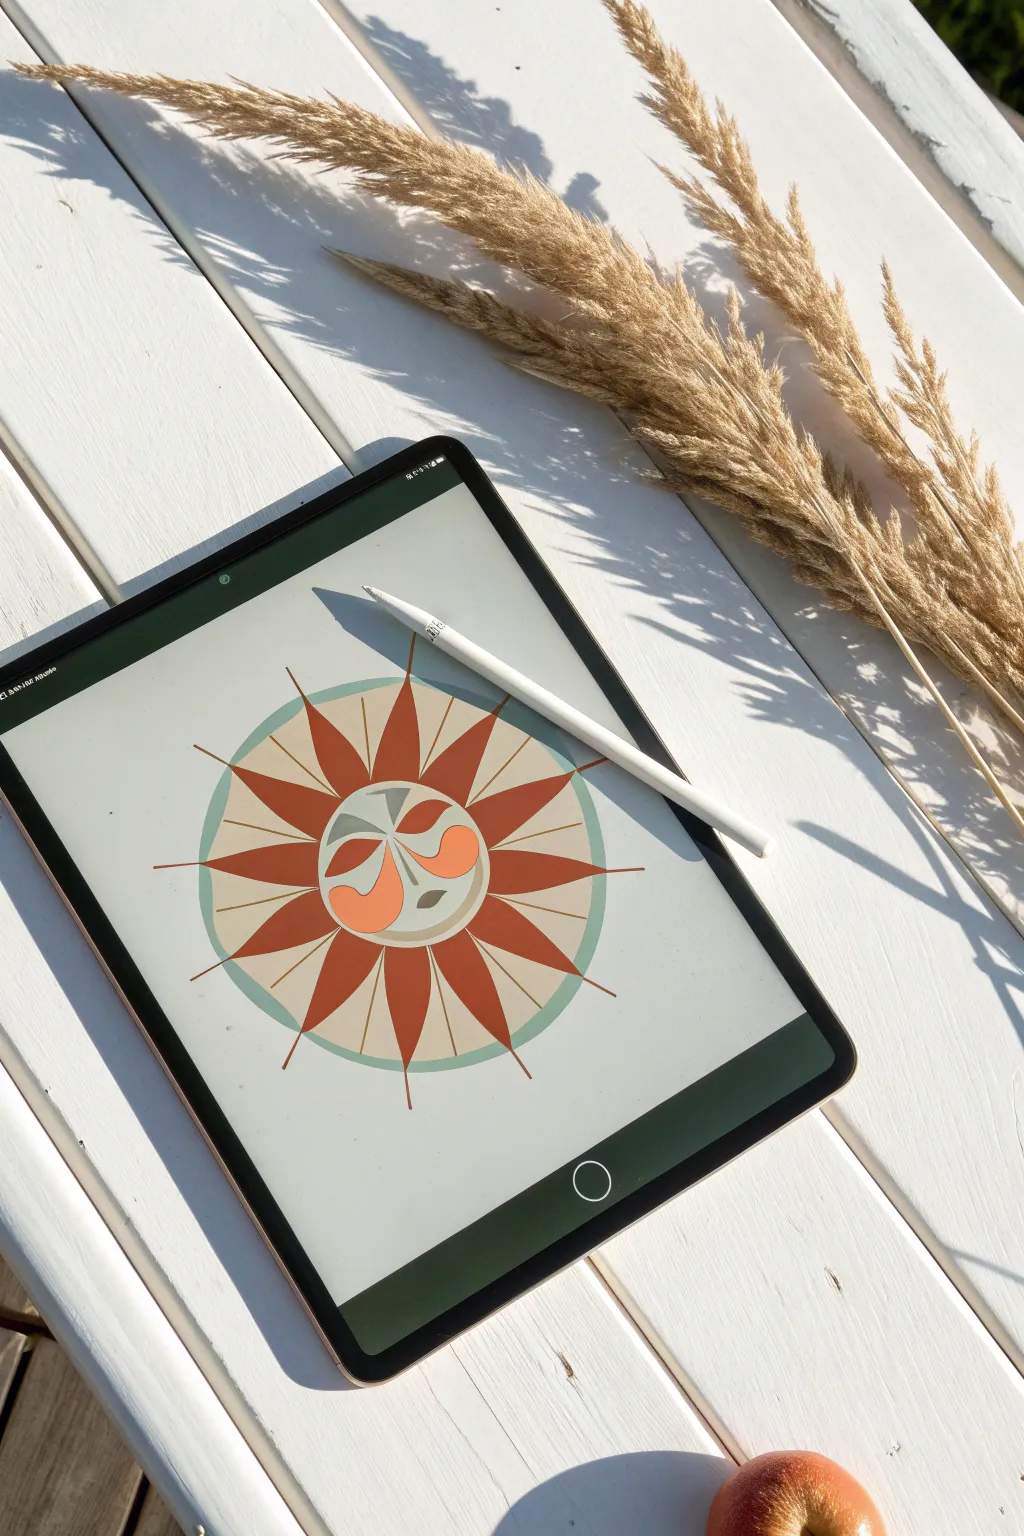
Capture the warmth of mid-century modern design with this stylized geometric sun. Using Procreate’s symmetry tools, you will create precise rays and a whimsical face in a muted, earthy color palette.
Step-by-Step Guide
Materials
- iPad with Procreate
- Apple Pencil
- Monoline Brush (Calligraphy set)
- 6B Pencil Brush (Sketching set)
- Noise Brush or Texture overlay (optional)
Step 1: Setting up the Canvas
-
Background Color:
Open a new square canvas in Procreate. Tap the background layer and select a soft, warm cream or off-white color to establish that vintage paper look. -
Enable Symmetry:
Go to the Actions menu (wrench icon), tap Canvas, and toggle on Drawing Guide. Tap Edit Drawing Guide. -
Symmetry Settings:
Select Symmetry from the bottom menu, then choose Options and select Radial. Turn on Rotational Symmetry. This allows you to draw one ray and populate the whole sun instantly. -
Guide Layer:
On a new layer, use a sketching pencil to draw a rough circle in the center. Hold your pencil down at the end of the stroke to activate QuickShape for a perfect circle.
Perfect Shapes
Use QuickShape! Draw a circle or line and hold your pencil still at the end of the stroke. Procreate automatically snaps it to a perfect geometric shape.
Step 2: Drawing the Geometric Rays
-
Teal Ring Base:
Create a new layer. Select a muted teal or sage green color with the Monoline brush. Draw a large circle that will serve as the background ring for your sun rays. -
Terracotta Rays:
Create a new layer above the ring. Switch your color to a deep terracotta or burnt orange. Ensure Drawing Assist is turned on for this layer by tapping the layer thumbnail. -
Drawing Points:
Draw a sharp, tall triangle shape starting from your center circle guide and pointing outward. The radial symmetry will instantly create matching rays around the circle. -
Filling Color:
Drag and drop the orange color from the top right corner into your triangle shape to fill all the rays simultaneously. -
Inner Circle:
Hide your sketch layer. Create a new layer on top of the rays and draw a solid circle in a light grey-beige color for the sun’s face base.
Step 3: Creating the Face
-
Features Symmetry:
For the face, we need different symmetry. Go back to Edit Drawing Guide, change options to Vertical, and turn off Rotational Symmetry. -
Eye Shapes:
On a new layer roughly in the middle of the face, draw two large, curved organic shapes in terracotta orange that look like oversized eye masks. -
The Eyes:
Switch to your teal color. Inside the orange shapes you just drew, add almond-shaped eyes with half-circle lids. -
Nose and Mouth:
Using a thin Monoline brush stroke, draw a simple vertical line for the nose and a small crescent shape for the mouth. -
Connecting Lines:
I like to add a vertical line extending upward from the nose toward the forehead to enhance the geometric, tribal feel.
Level Up: Paper Feel
Import a photo of watercolor paper as your top layer. Set the blend mode to ‘Linear Burn’ to give the clean digital lines a realistic, organic paper texture.
Step 4: Details & Texture
-
Radiating Lines:
Create a new layer behind the sun face but above the rays. Use a thin terracotta stroke to draw simple straight lines radiating outward between each main sun ray. -
Texture Overlay:
Create a final layer at the very top of your stack. Set the layer blend mode to Multiply. -
Adding Noise:
Fill this layer with a medium grey, then go to Adjustments (wand icon) and choose Noise. Slide slightly to the right to add a grainy texture. -
Opacity Adjustment:
Lower the opacity of the noise layer to about 15-20% so the texture is subtle and applies to the whole artwork.
You now have a chic, modern print ready to be exported for wall art or stickers

PENCIL GUIDE
Understanding Pencil Grades from H to B
From first sketch to finished drawing — learn pencil grades, line control, and shading techniques.
Explore the Full Guide
Seamless Floral Patterns
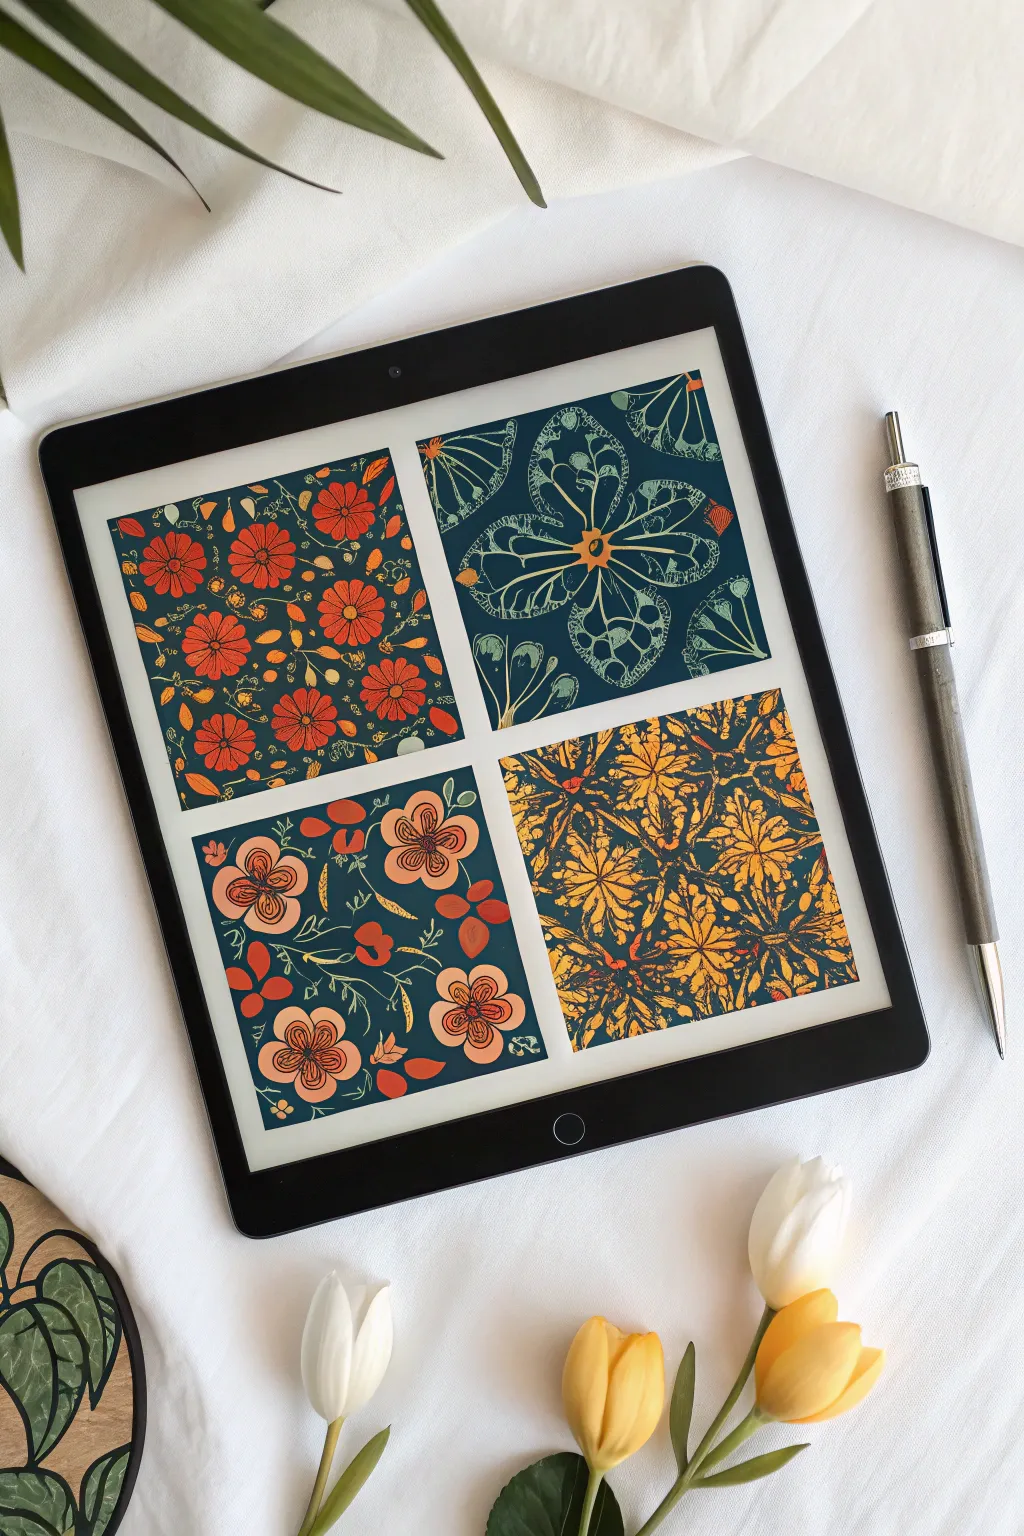

Learn to design a cohesive collection of seamless-style floral swatches inspired by modern folk art. We will utilize Procreate’s symmetry guides and a rich, earthy color palette to create this stunning four-panel grid.
Step-by-Step Tutorial
Materials
- iPad with Procreate installed
- Apple Pencil
- Textured Brush (e.g., ‘Dry Ink’ or ‘6B Pencil’)
Step 1: Canvas Setup & Palette
-
Initialize Canvas:
Open Procreate and create a new square canvas (3000px x 3000px is a good size for high quality). -
Set the Mood:
Fill your background layer with a deep, dark teal color. This serves as the unifying base for all four patterns. -
Create the Grid:
Turn on ‘Drawing Guide’ in the Canvas actions menu. Edit the Drawing Guide to a ‘2D Grid’ and maximize the grid size so you have a simple cross hair dividing the screen into four equal quadrants. -
Select Your Palette:
Create a custom palette featuring earthy tones: Rust Orange, Mustard Yellow, Pale Sage Green, and a Soft Peach/Cream. Stick strictly to these to maintain harmony.
Symmetry Not Working?
If your brush strokes aren’t mirroring, open your Layers panel, tap the active layer, and ensure ‘Drawing Assist’ has a checkmark next to it.
Step 2: Swatch 1: The Floral Toss (Top Left)
-
Draw Main Blooms:
Select the Rust Orange color and a textured brush like ‘Dry Ink’. In the top-left quadrant, draw several scattering daisy-like flowers. Keep them roughly the same size but rotate the angles. -
Add Centers:
Switch to a darker red or brown shade and dab small circles into the center of each daisy. -
Fill the Gaps:
I prefer to zoom in here to add tiny details. Use the Mustard Yellow to draw small sprigs, leaves, or dots in the empty spaces between the flowers to create a dense ‘toss pattern’ look.
Step 3: Swatch 2: The Linear Motif (Top Right)
-
Activate Symmetry:
Create a new layer. Go to Canvas > Drawing Guide > Edit Drawing Guide > Symmetry > Options > Vertical. Tap ‘Done’. Ensure your layer has ‘Drawing Assist’ turned on. -
Sketch the Structure:
In the top-right quadrant, using a pale Sage Green, draw a large butterfly or four-petal flower shape. The symmetry tool will mirror your lines for a perfect folk-art motif. -
Internal Details:
Switch to the Mustard color and draw intricate lines inside the larger shapes, mimicking veins or lace. Keep the lines thin and delicate.
Make it Real
To turn these into true repeat patterns, group your layers, duplicate the group, and move the elements so they hang halfway off the edge, then fill the center gaps.
Step 4: Swatch 3: Organic Roses (Bottom Left)
-
Disable Assist:
Create a new layer and ensure ‘Drawing Assist’ is turned OFF. We want this section to feel hand-drawn and organic. -
Loose Florals:
Using the Soft Peach color, draw three or four large, loose rose shapes. Focus on swirling lines rather than closed petals. -
Flowing Stems:
With the Sage Green, draw long, winding stems that connect the flowers. Allow the leaves to curve naturally to fill the square composition.
Step 5: Swatch 4: The Kaleidoscope (Bottom Right)
-
Radial Symmetry:
Create a new layer. Go back to Edit Drawing Guide > Symmetry > Options > Radial. Move the center blue node to the middle of the bottom-right quadrant. -
Build Density:
Using Mustard Yellow, start drawing from the center of that quadrant outward. Create overlapping geometric leaves or diamonds. -
Contrast Accents:
Switch to Rust Orange and add small filled details within the yellow kaleidoscope pattern to make it pop against the teal background.
You now have a beautiful digital sketchbook page showcasing four distinct folk-art textures!
Glossy Honey Pot
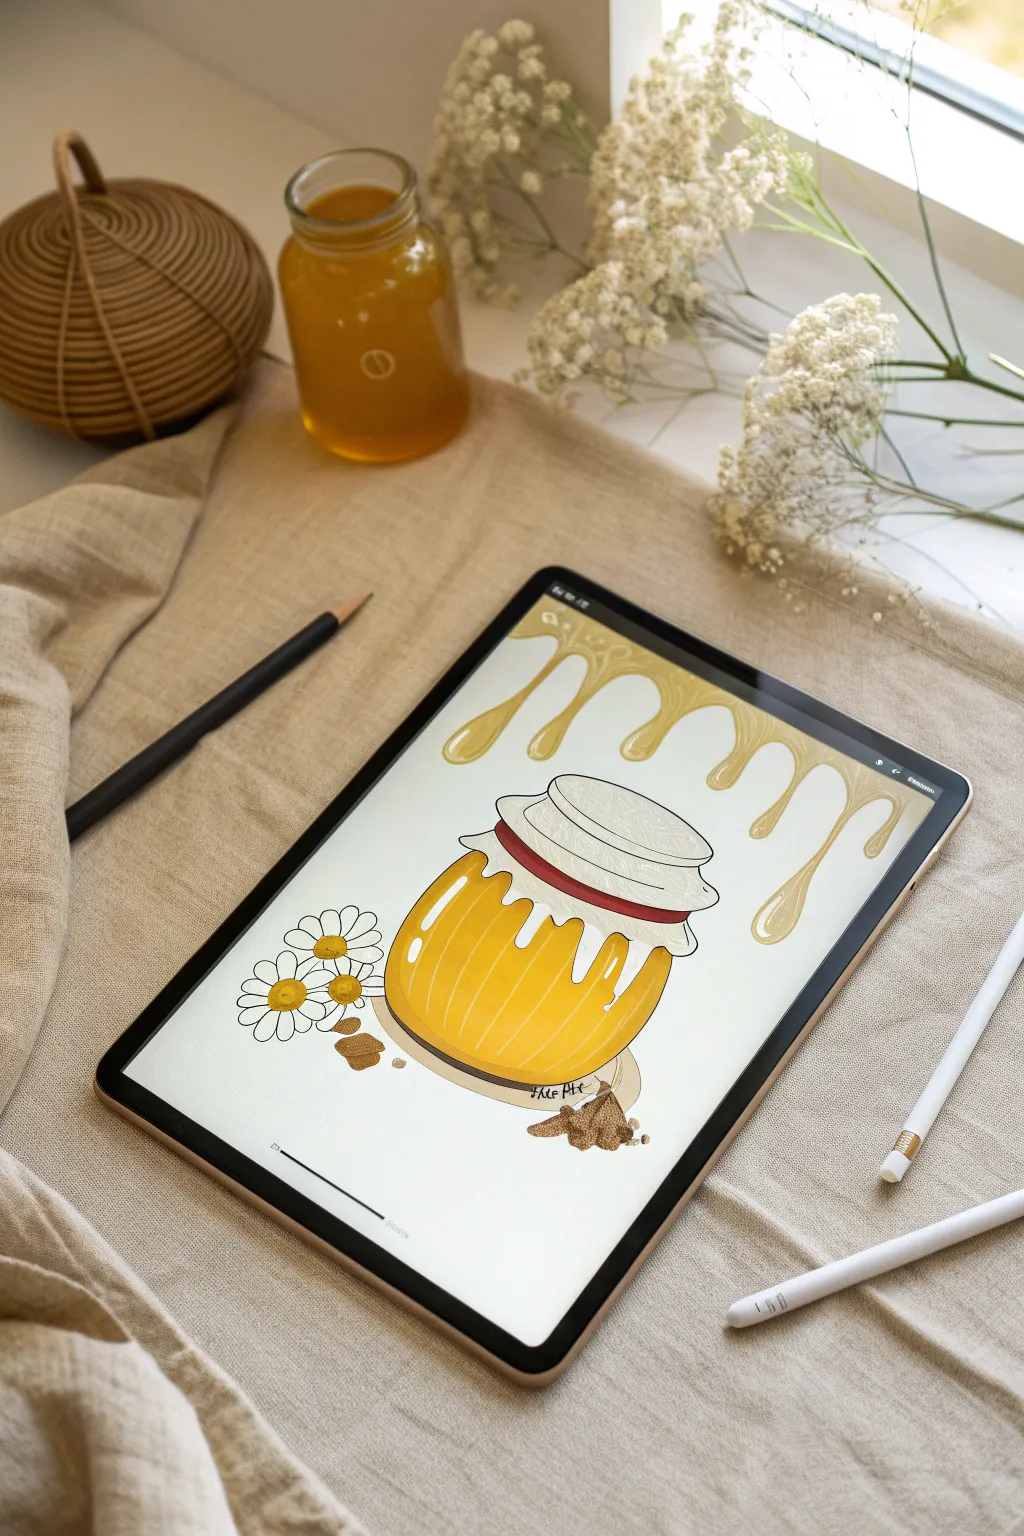
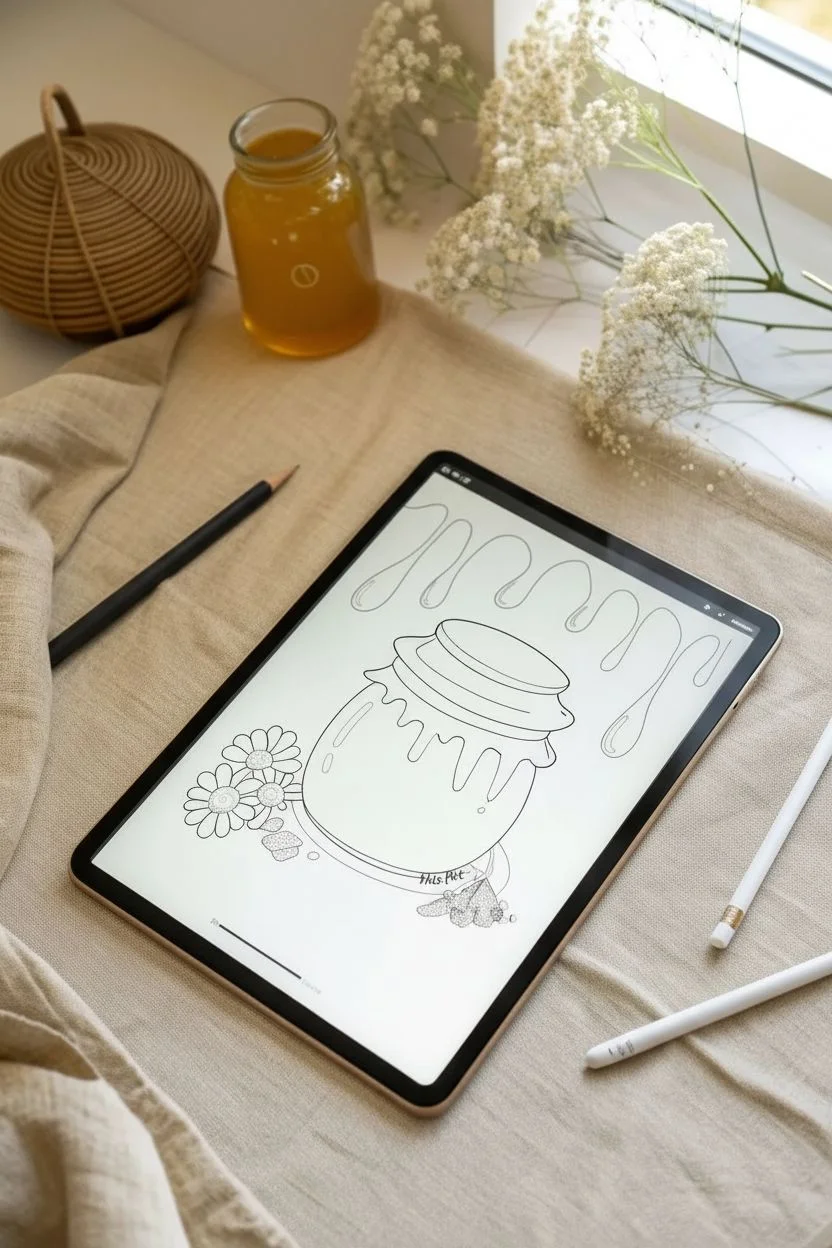
Capture the golden warmth of summertime with this delightful Procreate illustration featuring a stylized honey pot and dripping nectar borders. We will focus on building clean line work and using lighting effects to create that sticky, glossy texture that makes the honey look good enough to eat.
Detailed Instructions
Materials
- iPad with Procreate installed
- Apple Pencil
- Default Brushes: Studio Pen (Inking), Monoline (Calligraphy), Soft Airbrush (Airbrushing)
Step 1: Sketching and Line Work
-
Establish the shapes:
Begin with a rough sketching pencil. Draw a rounded oval for the jar’s body and a slightly flattened oval on top for the lid. Sketch the ruffled fabric edges of the lid hanging down over the glass neck. -
Add the surroundings:
Draw three simple daisy shapes to the left of the jar and a few small, irregular chunks of honeycomb at the base. At the very top of your canvas, sketch a wavy line that mimics honey dripping down from the ceiling of the page. -
Refine the outlines:
Lower the opacity of your sketch layer and create a new layer on top. Select the Studio Pen brush in black for your clean line art. Trace your shapes with confident, smooth strokes, ensuring all shapes are closed for easy filling later. -
Detail the jar:
Add the vertical ridges of the honey jar by drawing curved lines that follow the contour of the glass. Draw the band or string wrapping around the fabric lid to secure it.
Smooth Lines made Easy
If your line art looks shaky, tap your brush settings, go to ‘Stabilization’, and turn ‘Streamline’ up to roughly 40-70%. This acts like a magnetic guide, smoothing out curves as you draw them.
Step 2: Base Colors and Shading
-
Fill the base colors:
Create a new layer beneath your line art. Drag and drop a golden-yellow hue into the jar and the top dripping border. Fill the lid and flowers with an off-white or cream color, and use a reddish-brown for the string. -
Color the details:
Fill the honeycomb chunks at the bottom with a darker, toasted brown and the flower centers with a bright yellow. I like to keep these on separate layers so I can shade them individually. -
Add volume to the honey:
Create a layer above your yellow honey base and set it as a Clipping Mask. Using a Soft Airbrush with a burnt orange color, gently paint along the bottom and side edges of the jar to create a rounded, 3D effect. -
Define the glass ridges:
Switch back to the Studio Pen and select a dark amber color. Draw vertical stripes following the ridge lines you created in the line art phase to emphasize the thick glass texture. -
Shade the fabric lid:
On a layer clipped to the white lid, use a light grey-blue color to paint shadows where the fabric folds and ruffles, particularly under the string tie. -
Depth for drips:
Return to the top dripping border. Use the darker orange airbrush to add a gradient at the very top, fading to lighter yellow at the tips of the drips to simulate liquid accumulation.
Step 3: Gloss and Final Polish
-
Create the shine:
Create a new layer on top of everything and name it ‘Highlights’. Select pure white and the Studio Pen. -
Highlight the jar:
Draw long, curved white shapes on the upper left side of the honey jar, following the curve of the glass. Add smaller hash marks on the right side to balance the reflection. -
Gloss up the drips:
Add teardrop-shaped white highlights to the bottom of the dripping honey border and the drips on the jar’s neck. This high-contrast reflection is the key to making the liquid look wet and sticky. -
Flower details:
Add tiny white dots to the yellow centers of the daisies for texture. Use a textured brush to add a little grain to the brown honeycomb chunks for accuracy. -
Final background check:
Ensure your background layer is set to a clean white or very soft beige to make the golden tones of the honey pop.
Level Up: Glass Effect
To make the honey look like it’s inside glass, verify your fill layer opacity. Lower the opacity of the honey color layer slightly (to 90%) so it feels translucent rather than solid paint.
Now you have a wonderfully sweet illustration that glows right off the screen
BRUSH GUIDE
The Right Brush for Every Stroke
From clean lines to bold texture — master brush choice, stroke control, and essential techniques.
Explore the Full Guide
Stylized Animal Portraits
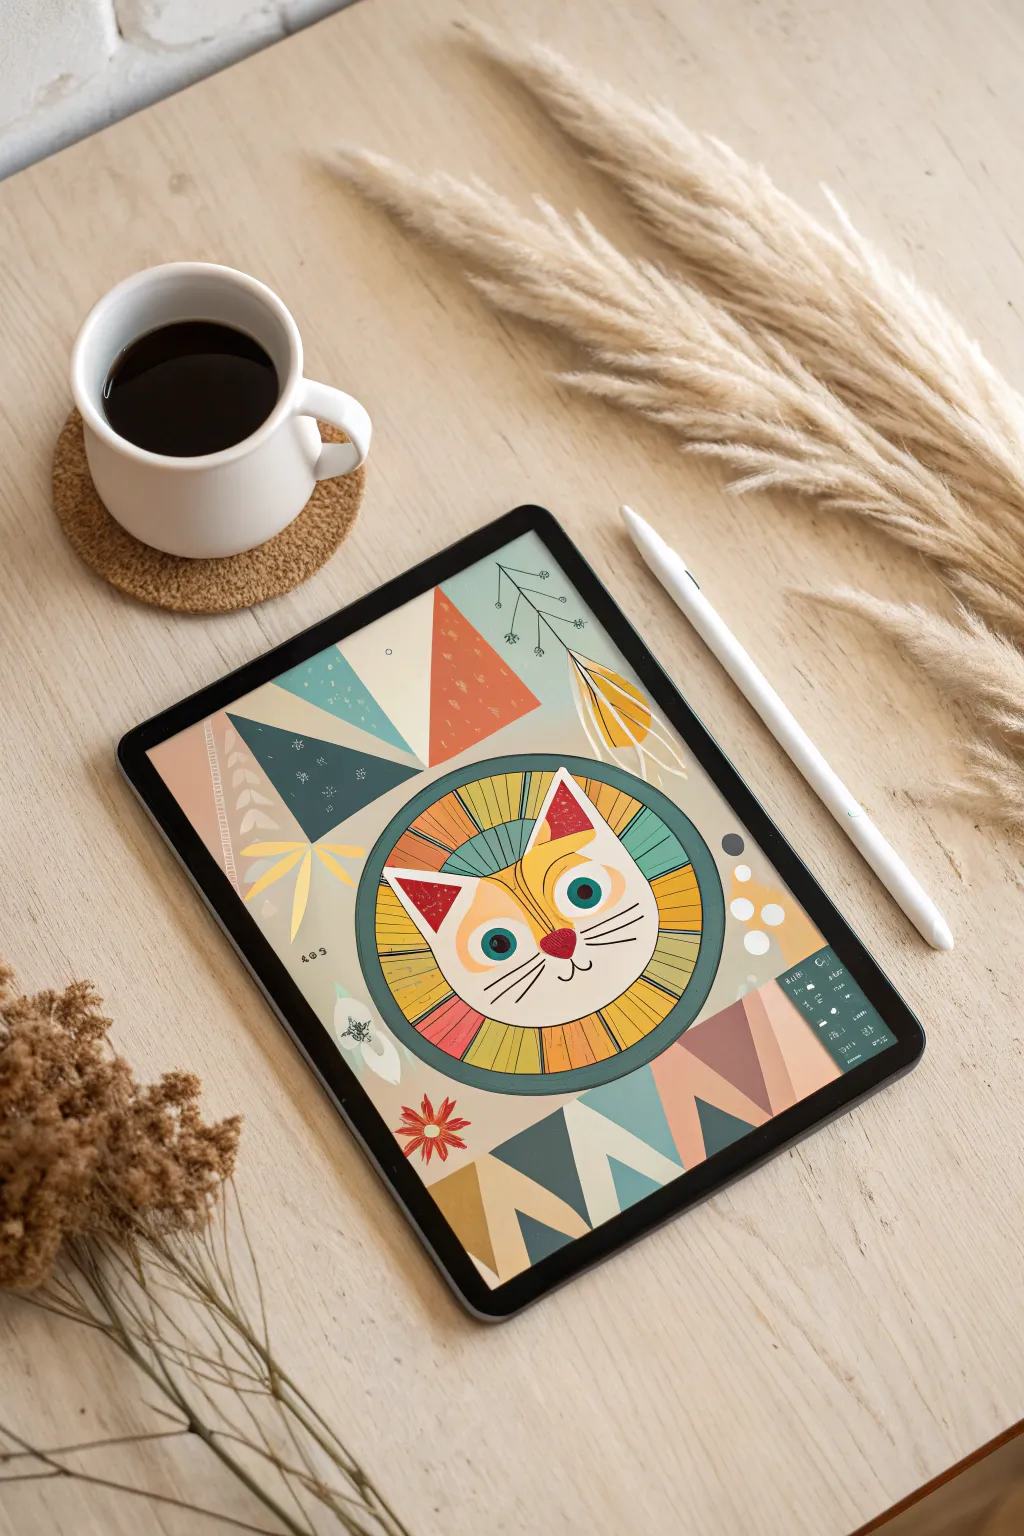
Capture the charm of retro folk art with this stylized digital illustration. By combining simple geometric shapes with a warm, vintage palette and textured brushes, you’ll create a character that looks like a classic block print.
Step-by-Step Guide
Materials
- iPad with Procreate installed
- Apple Pencil
- Default Procreate Brushes: Dry Ink, 6B Pencil, Monoline
Step 1: Setting the Composition
-
Canvas preparation:
Create a new square canvas, roughly 3000 x 3000 pixels. Open your Layers panel, tap the Background color, and select a warm, creamy beige to serve as your paper tone. -
Symmetry guide:
Tap the wrench icon (Actions), go to Canvas, and toggle on Drawing Guide. Tap Edit Drawing Guide and select ‘Symmetry’ (Vertical). This will help us draw the cat’s face perfectly even. -
Central circle:
Select a dark charcoal grey color and the ‘Dry Ink’ brush for a slightly textured edge. Draw a large circle in the center. Hold your pencil down at the end of the stroke to snap it into a perfect QuickShape ellipse. -
Defining the mane:
Inside the main circle, draw a smaller concentric circle for the face area. Connect the inner and outer circles with radiating straight lines to create the segments of the ‘mane’.
Fixing Wobbly Lines
If your hand feels shaky, tap your brush in the library and increase the ‘Streamline’ or ‘Stabilization’ setting to 60-70% for smoother strokes.
Step 2: Drawing the Features
-
Face shape:
On a new layer (still with Symmetry on), sketch a soft, heart-shaped mask or a rounded triangle in the center for the cat’s main facial area. -
Ears and nose:
Draw triangular ears sitting atop the head shape. For the nose, place a small inverted triangle in the center of the face, aligning it with the vertical guide. -
Eyes and whiskers:
Draw large circular eyes with small pupils. I like to leave a tiny white spot in the pupil for a catchlight. Add three straight whiskers on each cheek and a simple ‘w’ shape for the mouth. -
Color blocking the mane:
Create a layer beneath your linework. Pick a mustard yellow and a muted teal. Alternate filling in the segments of the mane. Using a textured brush here instead of the paint bucket tool adds to the hand-made look. -
Coloring the features:
Fill the ears with a muted rust red and the nose with a bright cherry red. Color the eyes teal to match the mane segments.
Step 3: Background Geometry
-
Surrounding triangles:
Turn off the Drawing Guide to work asymmetrically now. Create a new layer behind the central circle. Draw large geometric triangles pointing inward from the corners and sides. -
Bottom zigzag pattern:
At the very bottom of the canvas, draw a row of interlocking triangles (zig-zags) using alternating muted blue, cream, and rust colors. -
Top corner accents:
Add a large teal triangle in the top right corner and a muted red one in the top left to balance the composition. -
Adding texture details:
Select the ‘6B Pencil’ brush. On top of your solid colored triangles, lightly scribble some texture markings or smaller shapes like dots to break up the flat color.
Pro Tip: Quick Recoloring
Use ‘Alpha Lock’ on your shape layers. This lets you paint texture or change colors freely without ever going outside the original lines.
Step 4: Botanical Touches & Finish
-
Leafy sprigs:
Using a thin dark grey brush, draw delicate, spindly olive branches or simple leaf stems in the empty negative spaces on the left and right of the cat. -
Stylized flowers:
Draw a simple geometric flower near the bottom left corner using the rust red color. Keep the shapes basic—just lines radiating from a center point. -
White highlights:
Switch to a pure white color. Add decorative dots alongside the right side of the circle and small strokes inside the ears to make them pop. -
Final texture overlay:
Create a new layer at the very top of the stack. Fill it with a medium grey, set the Blend Mode to ‘Overlay’ or ‘Soft Light’, and add Noise (under Adjustments > Noise) to unify the whole piece with a grainy film look.
Now you have a charming piece of digital folk art ready to be printed or shared!
Glowing Magic Landscapes
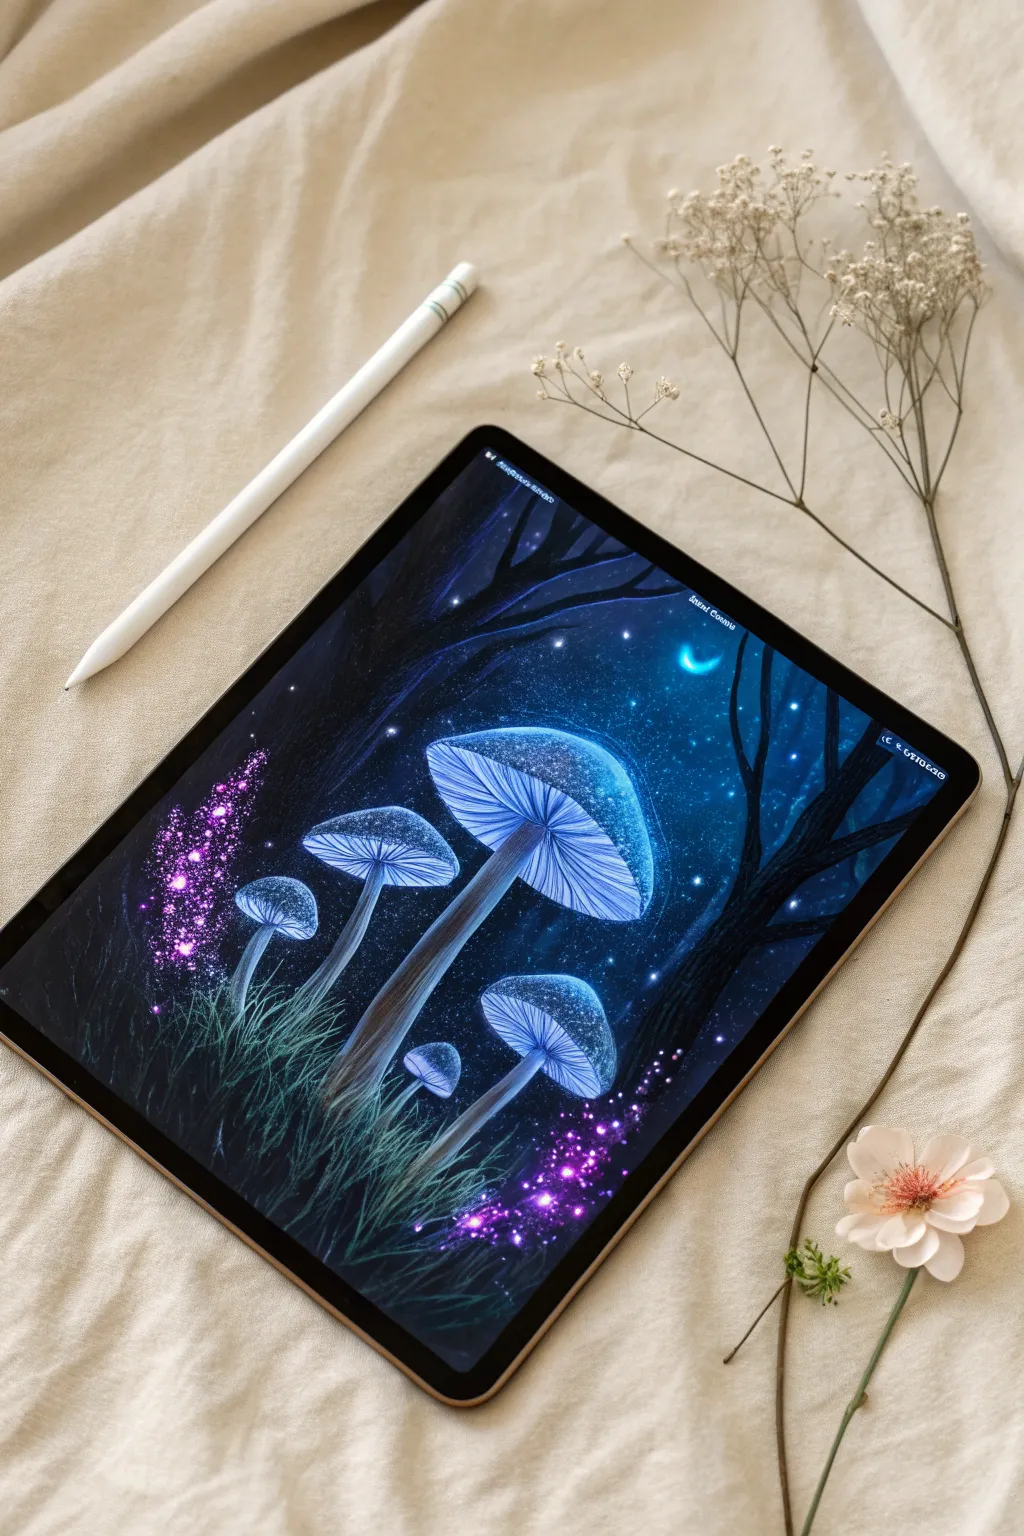
Transport yourself into a mystical forest by painting this glowing digital landscape. You will learn how to create convincing bioluminescence and atmospheric depth using Procreate’s blending modes.
Step-by-Step Tutorial
Materials
- iPad with Procreate installed
- Apple Pencil
- Procreate Brushes: Soft Airbrush, Monoline, Lightpen, and Organic elements (like Swordgrass)
Step 1: Setting the Scene
-
Base Background:
Create a new canvas and fill the background layer with a very dark, midnight blue color—almost black, but with enough blue tone to keep it vibrant. -
Distant Trees:
Create a new layer. Using a textured brush like ‘Charcoal’ or ‘Rainforest’ in a dark navy shade, paint bold, vertical strokes to suggest tree trunks fading into the background. -
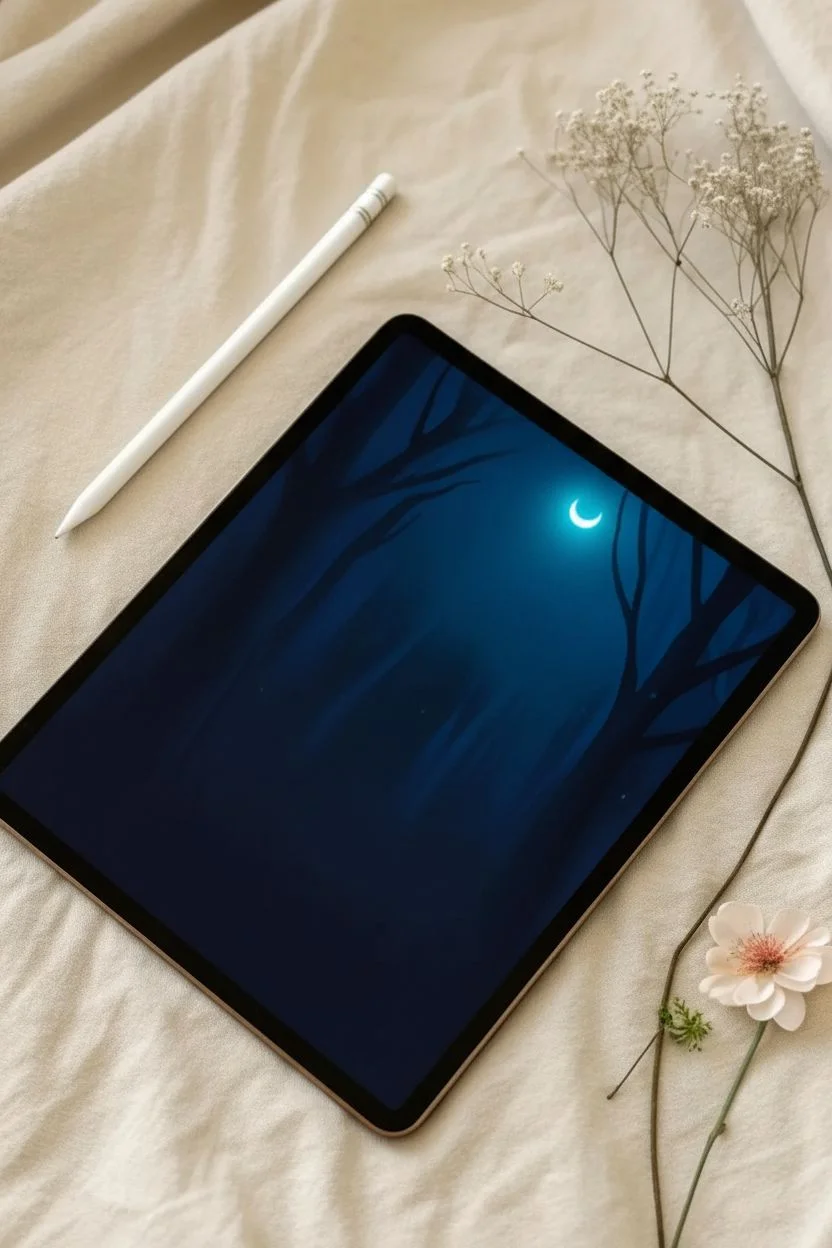
Moonlight:
On a layer behind the trees, use a soft airbrush with a vibrant cyan color to paint a diffuse glow in the upper right quadrant. Add a small, crisp white crescent moon shape within this glow. -
Foreground Silhouette:
Select a solid black color and paint a large, branching tree silhouette in the immediate foreground on the right side to frame your composition.
Step 2: Sculpting the Mushrooms
-
Sketching Forms:
Roughly sketch the placement of your mushrooms. Draw large, umbrella-shaped caps and long, slender slightly curved stems. -
Base Colors:
On a new layer, fill in the mushroom shapes with a medium blue-grey tone. This acts as the foundation for the light to sit on. -
Defining the Gills:
Select a darker blue and use a thin brush like the ‘Technical Pen’. Draw fine lines radiating from the center of the stem outward to the edge of the cap to create the gill texture. -
Shading Stems:
Use a soft airbrush with black to gently shade the bottom of the stems and the areas where the cap casts a shadow, giving the mushrooms volume.
Layer Blend Magic
If the glow isn’t bright enough, duplicate your ‘Add’ layer. It doubles the intensity instantly. Adjust opacity to fine-tune the brightness.
Step 3: Creating the Glow
-
Luminance Layer:
Create a new layer above your mushrooms and set the Blend Mode to ‘Add’. This is the secret to digital glowing effects. -
Inner Glow:
Using a bright electric blue or cyan, gently airbrush the center of the caps and the top of the stems. Use light pressure to build the intensity slowly. -
Highlighting Gills:
Switch to a crisp ‘Lightpen’ brush on the same ‘Add’ layer. Carefully trace the outer edges of the gills and the rim of the caps with pure white to make them pop. -
Atmospheric Bloom:
I like to duplicate the glow layer and apply a Gaussian Blur (around 10-15%) to create a soft halo effect around the mushroom caps.
Wobbly Lines?
If your mushroom gill lines look shaky, turn up the ‘Streamline’ setting in your brush studio. It acts as a stabilizer for smooth, sweeping curves.
Step 4: Magical Details
-
Planting Grass:
Create a new layer at the very bottom. Use the ‘Swordgrass’ brush (under Organic) with a dark teal color to paint dense grass blades grounding the mushrooms. -
Highlighting Grass:
Lock the alpha of your grass layer and brush a little brighter cyan over the tips of the grass blades that are closest to the glowing mushrooms. -
Purple Magic:
Create a new layer set to ‘Overlay’. Select a vibrant magenta or purple color and use a splatter or bokeh brush to paint particles floating around the base of the stems. -
Bright Sparkles:
Switch back to the ‘Add’ blend mode on a top layer. Use a ‘Glimmer’ brush with white paint to add intense, glowing specks among the purple particles for a magical fairy dust look. -
Starry Sky:
Finally, lightly tap a few tiny white dots in the dark sky area to represent distant stars, completing the magical atmosphere.
Step back and admire your glowing forest scene, noticing how the light interacts with the darkness


Clipping Mask Textures
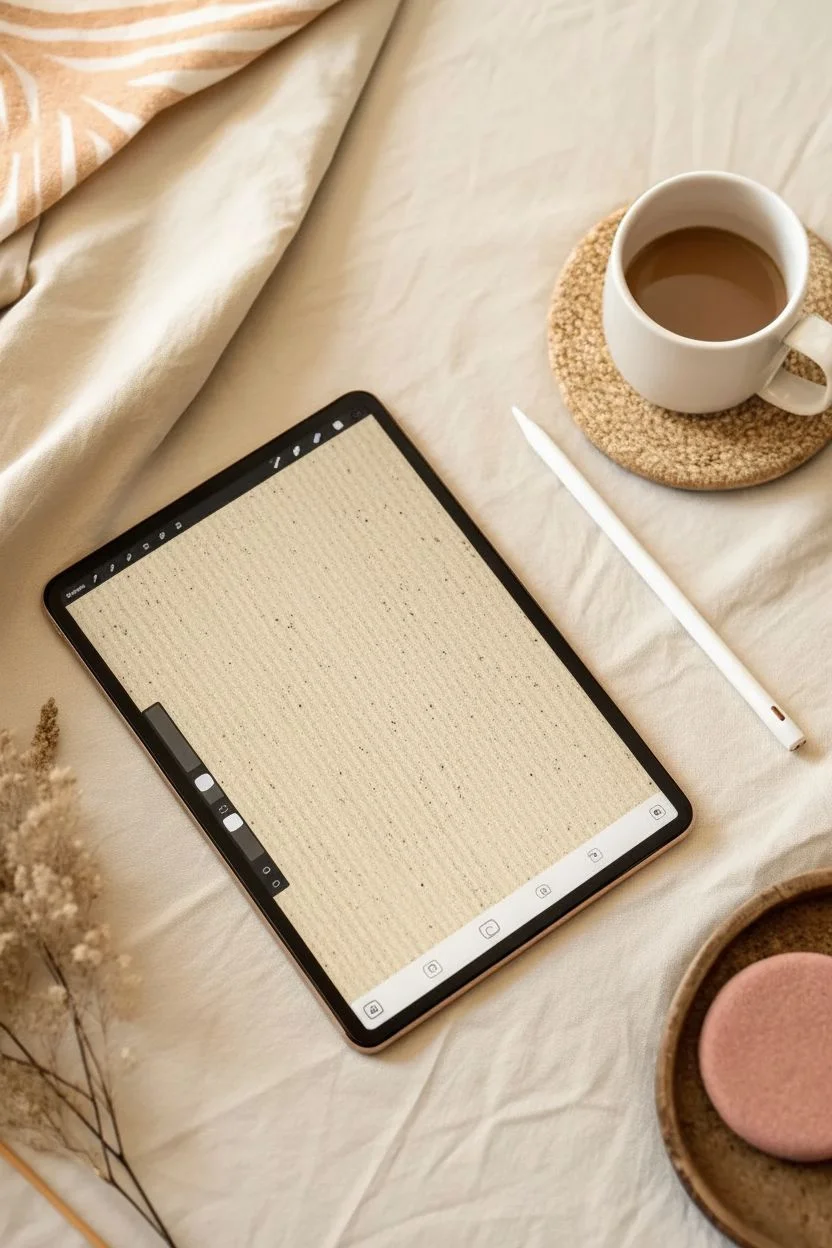
Learn to recreate this stunning boho-style digital artwork that mimics traditional gouache and canvas textures. This project focuses on using clipping masks in Procreate to add rich, realistic depth to simple geometric shapes.
How-To Guide
Materials
- iPad with Procreate app installed
- Apple Pencil
- High-resolution paper texture image
- Watercolor or grunge texture brushes
- Sketching brush (e.g., 6B Pencil)
Step 1: Canvas Setup
-
Initialize canvas:
Open Procreate and create a new screen-size canvas to serve as your digital sketchpad. -
Import texture:
Tap the Wrench icon (Actions), select ‘Add’, and choose ‘Insert a file’ or ‘Insert a photo’ to bring in your paper texture background. -
Fit to screen:
Use the Transform tool (arrow icon) to stretch or resize the paper texture until it covers the entire white canvas. -
Set blend mode:
Open the Layers panel, tap the ‘N’ on your texture layer, and switch the Blend Mode to ‘Multiply’; this ensures the paper grain shows through your painting later.
Invisible Texture?
If your clipping mask texture isn’t showing up, ensure the layer blend mode is set to Multiply or Color Burn so it reacts with the base shape.
Step 2: Geometric Shapes
-
First circle layer:
Create a new layer below your paper texture layer and select a crisp brush, like the Monoline brush from the Calligraphy library. -
Draw beige circle:
Select a muted beige color and draw a rough circle in the upper-left area. Hold your pencil tip down at the end of the stroke to snap it into a perfect shape. -
Fill the shape:
Drag the color circle from the top right corner and drop it inside your outline to fill it solid. -
Second circle layer:
Create another new layer and choose a warm terracotta or rust orange color. -
Overlap the shapes:
Draw a slightly larger circle on the bottom right that partially overlaps your first beige shape, then fill it with color. -
Watercolor effect:
I like to lower the opacity of this terracotta layer to about 80% so the overlapping area creates a darker ‘glazing’ effect, mimicking real paint.
Step 3: Clipping Mask Textures
-
Prepare texture layer:
Create a new layer immediately above your beige circle layer. -
Apple texture:
Select a grunge or watercolor brush in a slightly darker shade, or insert a texture image onto this layer. -
Activate mask:
Tap the layer thumbnail in the menu and select ‘Clipping Mask’. The texture will instantly confine itself strictly inside the beige circle. -
Blend the texture:
Change this clipping mask layer’s Blend Mode to ‘Overlay’ or ‘Multiply’ to integrate the texture naturally into the beige color. -
Repeat process:
Repeat these steps for the terracotta circle: create a new layer above it, apply paint splatters or texture, and set it as a Clipping Mask.
Metallic Accent
Import a gold foil image as a clipping mask over your line art layer to turn the simple sketch into a luxurious metallic botanical illustration.
Step 4: Line Art & Finish
-
Line art layer:
Add a new layer on top of your colored shapes but keep it under the main paper texture layer. -
Select brush:
Switch to a thin sketching brush, such as the 6B Pencil, and choose a dark brown or charcoal color. -
Draw the stem:
Sketch a long, sweeping curve starting from the bottom left corner and extending diagonally up across the circles. -
Add foliage:
Draw quick, wispy strokes branching off the main stem to create delicate leaves or feathery fronds. -
Final adjustment:
Double-check that your top paper texture layer is visible and locked to unify the colors and line art with a consistent grain.
Now you have a beautifully textured digital print ready to be exported and displayed.
Color Palette Swatches
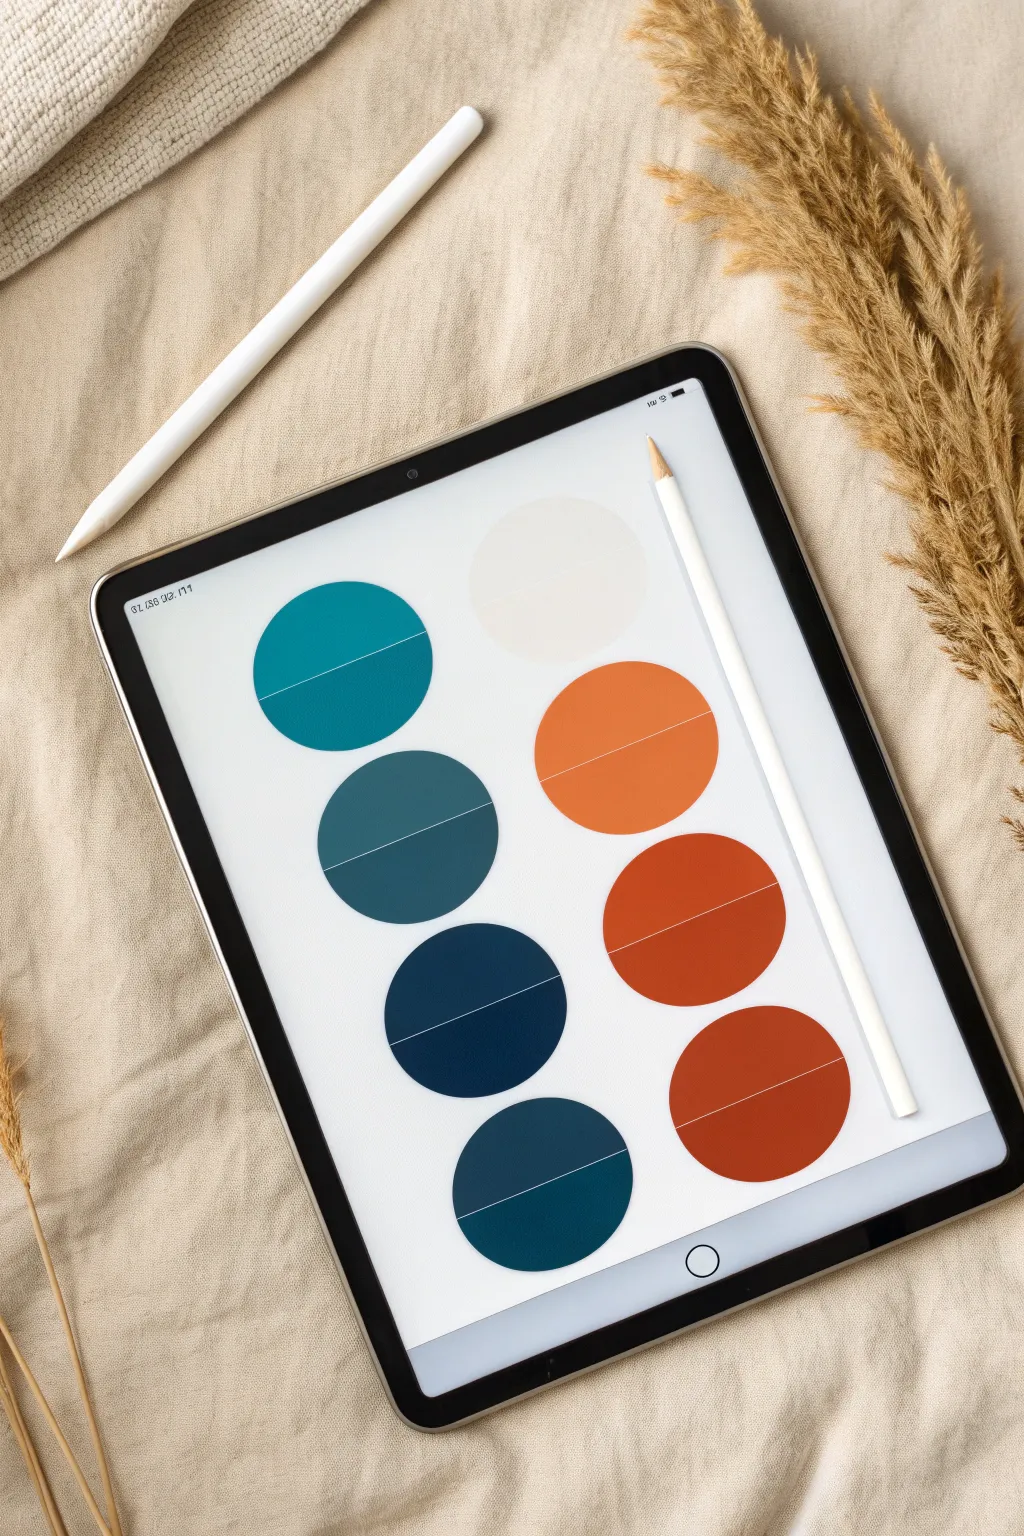
Organize your next artistic project or brand identity with this beautifully minimalist color palette sheet created in Procreate. This digital exercise helps you balance cool teals with warm terracottas in a clean, professional layout.
Step-by-Step Tutorial
Materials
- iPad
- Apple Pencil or compatible stylus
- Procreate App
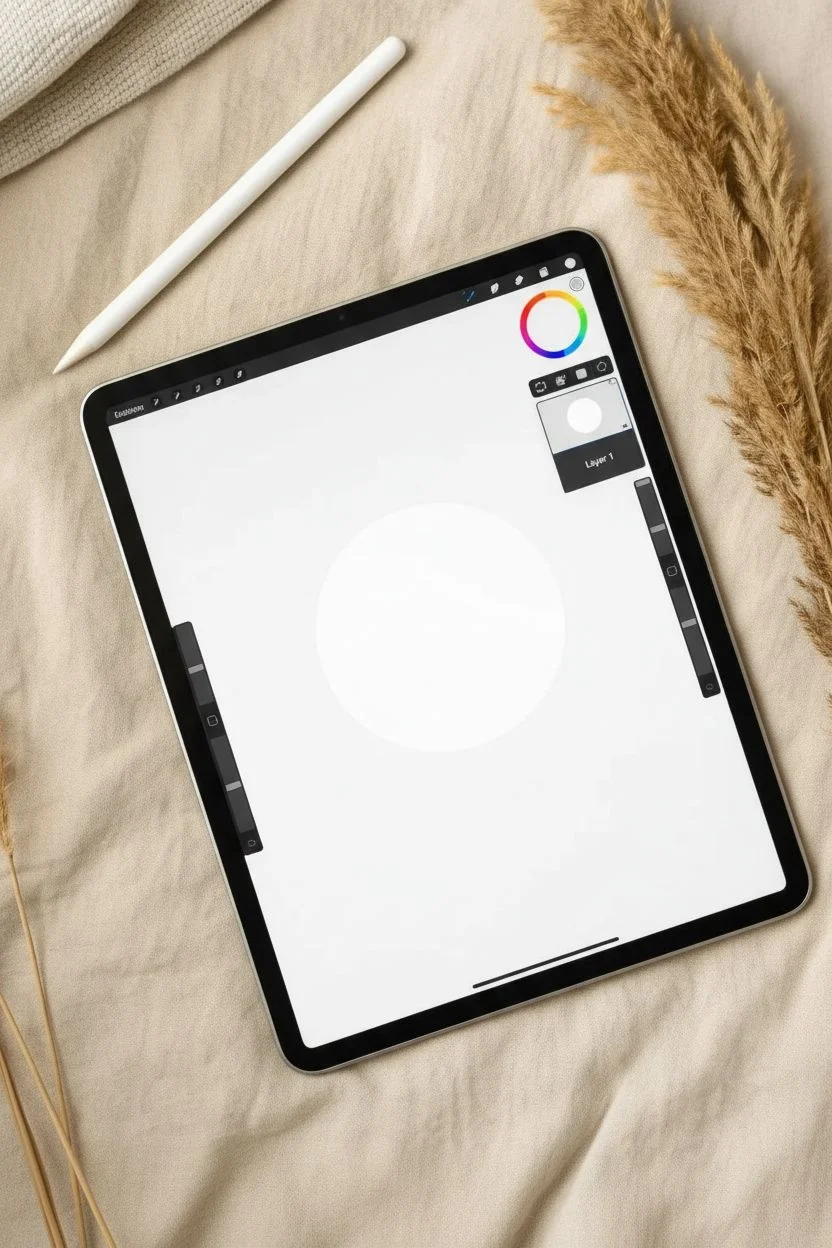
Step 1: Setting the Foundation
-
Canvas Setup:
Open Procreate and create a new canvas. I recommend using the ‘Screen Size’ preset so you have plenty of vertical space to work with. -
Brush Selection:
Tap the Brush Library icon and select the ‘Monoline’ brush under the Calligraphy folder. This ensures your shapes have clean, solid edges without texture. -
Draw the First Shape:
Draw a rough circle near the top left of the canvas. Before lifting your pencil, hold the tip down for a second to engage QuickShape, which smooths the line. -
Perfect the Geometry:
While holding the shape, tap one finger on the screen. This keyboard shortcut forces the shape into a perfectly symmetrical circle. -
Fill the Base:
Drag the color circle from the top right corner and drop it inside your shape. Outline color doesn’t matter yet, just ensure it is filled solid.
Alignment Issues?
If your circles won’t line up, ensure ‘Snapping’ AND ‘Magnetics’ are toggled on in the Transform (arrow icon) menu. Watch for the blue guide lines.
Step 2: Creating the Grid
-
Duplicate the Layer:
Open the Layers panel, swipe left on your circle layer, and tap ‘Duplicate’. You need a total of five circles for the left column. -
Align Vertical Column:
Select the Arrow (Transform) tool. Turn on ‘Snapping’ and ‘Magnetics’ in the bottom settings bar. Drag the duplicates down to form a straight vertical line. -
Merge and Copy:
Once the left column is spaced evenly, pinch the five layers together to merge them. Swipe left on this new merged layer and duplicate it. -
Create Right Column:
With the Transform tool, drag the new duplicate column to the right side. The snapping guides will help you keep it perfectly parallel to the first column. -
Alpha Lock Layers:
Go to your layers panel. Tap each column layer and select ‘Alpha Lock’ from the side menu. This allows you to paint over the circles without going outside the lines.
Step 3: Applying the Palette
-
Curate Cool Tones:
For the left column, we want a gradient of deep teals. Open the Color Disc and choose a vibrant teal. -
Paint First Swatch:
Select a large brush or use ColorDrop to fill the top-left circle. Since Alpha Lock is on, the color will only stick to the circle shape. -
Complete Left Gradient:
Gradually darken your color selection for each subsequent circle going down: move from teal to deep ocean blue, then navy, and finally a near-black petrol blue. -
Curate Warm Tones:
For the right column, select a very pale, milky cream color for the top circle. -
Complete Right Gradient:
Work your way down the right side with earth tones: move from the cream top to a muted orange, then rust, terracotta, and finally a deep brick red.
Add Data
Use the ‘Add Text’ feature to type the actual HEX or RGB code for each color, placing the text neatly on the white dividing line you created.
Step 4: Final Details
-
New Layer for Lines:
Add a brand new layer on top of everything. Change your brush color to pure white. -
Draw Dividers:
Draw a straight horizontal line across the lower third of the top-left circle. Hold the stylus at the end of the stroke to snap it straight. -
Replicate Lines:
I prefer to duplicate this line layer rather than drawing each one, ensuring they are identical lengths. Move the duplicates to the same position on every circle. -
Adjust Opacity:
If the white lines feel too stark against the darker colors, lower the opacity of the line layer slightly to blend them in softly.
Now you have a sleek, reusable template for planning color schemes for all your future designs
Surreal Melting Objects
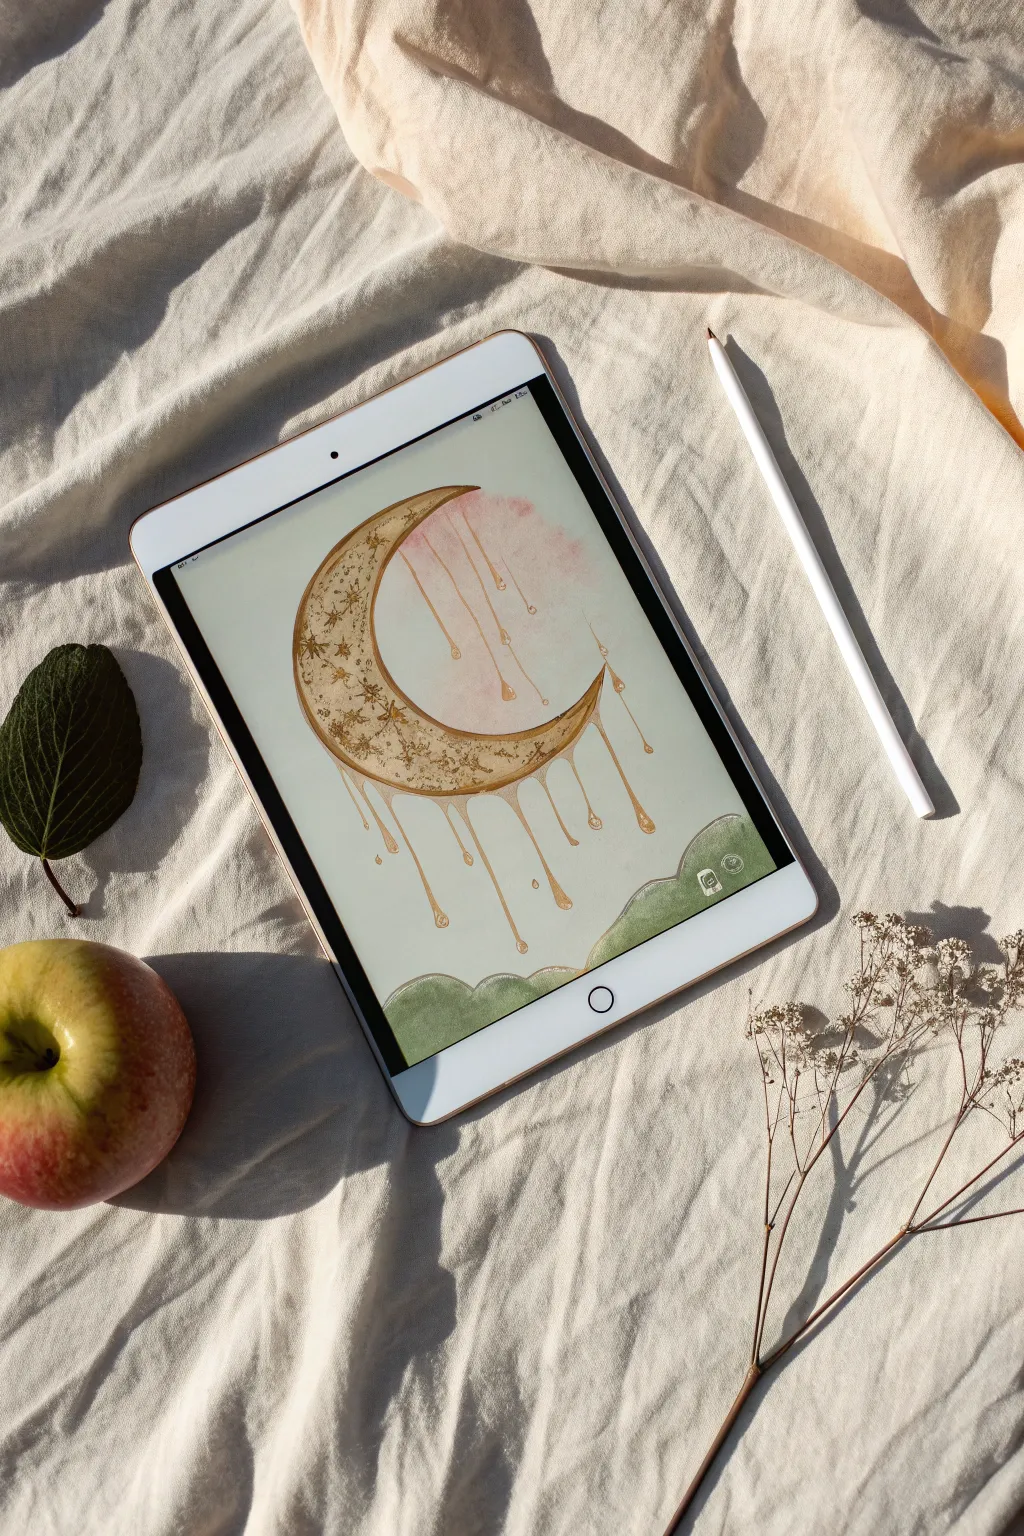
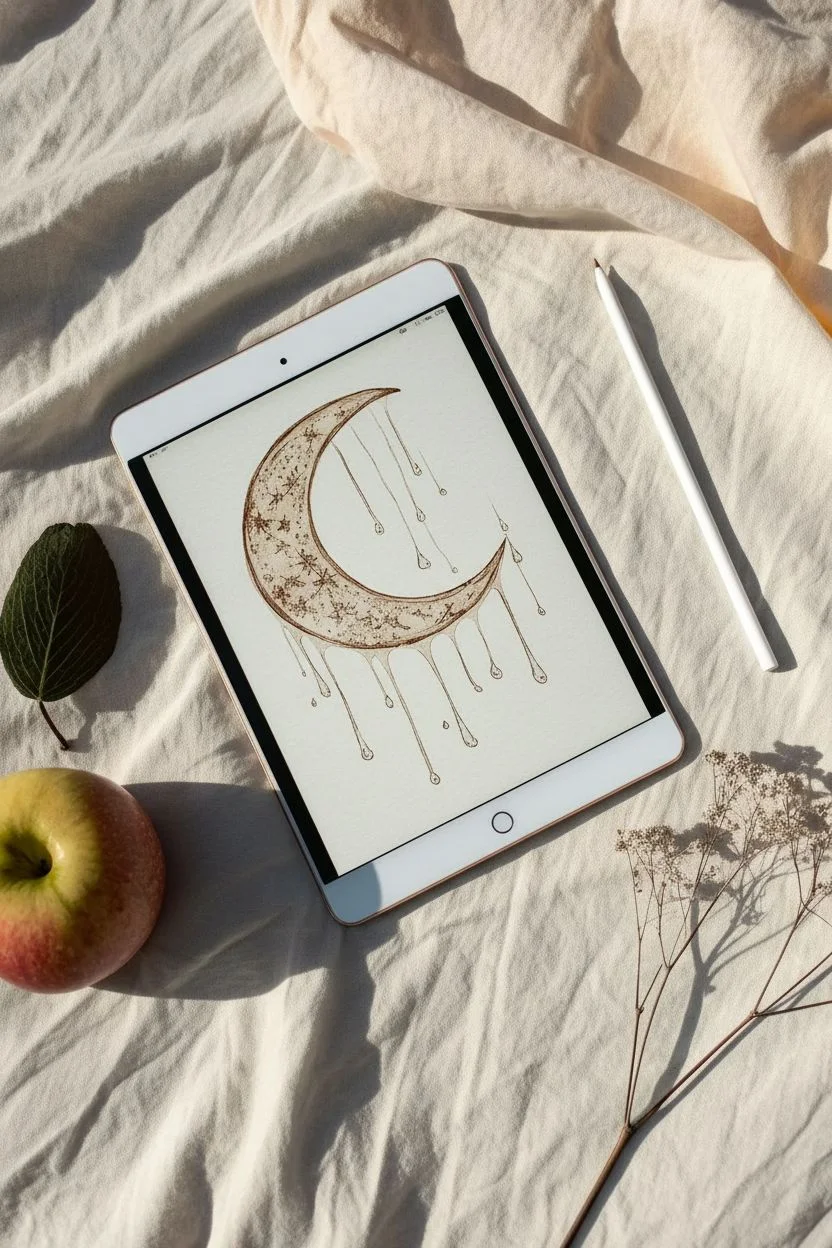
Create a dreamy, surreal illustration featuring a textured crescent moon dripping into liquid gold. This project combines precise line work with soft watercolor backgrounds and grunge textures for a unique digital art piece.
Step-by-Step Tutorial
Materials
- iPad with Procreate installed
- Apple Pencil
- Textured Paper Brush (or overlay image)
- Inking Brushes (e.g., Dry Ink or 6B Pencil)
- Watercolor Brushes
Step 1: Sketching and Linework
-
Canvas Setup:
Open Procreate and create a new screen-size canvas. Import a paper texture image as your bottom layer to give the piece a traditional sketchbook feel. -
Rough Composition:
Select the ‘6B Pencil’ from the Sketching set. On a new layer, loosely sketch a large crescent moon shape in the center of the canvas. -
Adding the Drips:
Draw vertical lines extending downward from the bottom curve of the moon. Add teardrop shapes at the ends of these lines to simulate melting liquid. -
Clean Linework:
Create a new layer for your final lines. Choose a warm, dark brown color instead of harsh black. -
Inking the Outline:
Using a brush like ‘Dry Ink’ or ‘Technical Pen’, trace over your sketch. Vary your pressure to make the lines slightly organic and uneven.
Alpha Lock Magic
Using Alpha Lock on the base layer is crucial. It lets you splash on messy grunge textures freely without ruining your clean edges.
Step 2: Color and Texture
-
Base Color:
Create a layer beneath your linework. Fill the moon shape and the drips with a creamy beige or pale gold color. -
Locking Alpha:
Tap your base color layer and select ‘Alpha Lock’ from the menu. This ensures you only paint inside the moon shape. -
Adding Grunge Texture:
Select a texture brush, such as ‘Rust’ or ‘Noise’ from the Industrial or Textures set. Pick a darker gold-brown color. -
Applying Texture:
Gently paint over the moon base to create a mottled, antique gold effect. I like to concentrate the texture near the edges for depth. -
Star Details:
Switch back to your inking brush. Draw tiny stars, crosses, and sparkles directly onto the moon’s surface using a dark brown tone.
Step 3: Watercolor Atmosphere
-
Pink Wash:
Create a new layer below the moon. Select a soft ‘Watercolor’ brush and choose a dusty pink hue. -
Painting the Blush:
Paint a loose, organic wash behind the upper curve of the moon to make the gold pop. -
Creating Hills:
On a new layer at the very bottom, sketch rolling hill shapes using an olive green shade. -
Filling the Landscape:
Fill the hills using the watercolor brush. Allow for some transparency variation to mimic real paint pooling on paper. -
Color Variance:
Dab a slightly darker green along the bottom edge of the hills to suggest volume and shadow.
Make it Move
Turn on Animation Assist! Duplicate the artwork frames and move the drips slightly downward in each frame to create a looping GIF.
Step 4: Highlights and Finish
-
Highlight Layer:
Create a new layer on top of everything. Set the blend mode to ‘Add’ or simply use pure white. -
Liquid Shine:
Add small white specks and curved lines on the teardrops to make them look wet and three-dimensional. -
Final Adjustments:
If needed, lower the opacity of your background paper texture layer slightly so the colors remain vibrant.
Enjoy your beautifully surreal digital painting that looks just like traditional media.
Split-Screen Style Challenges
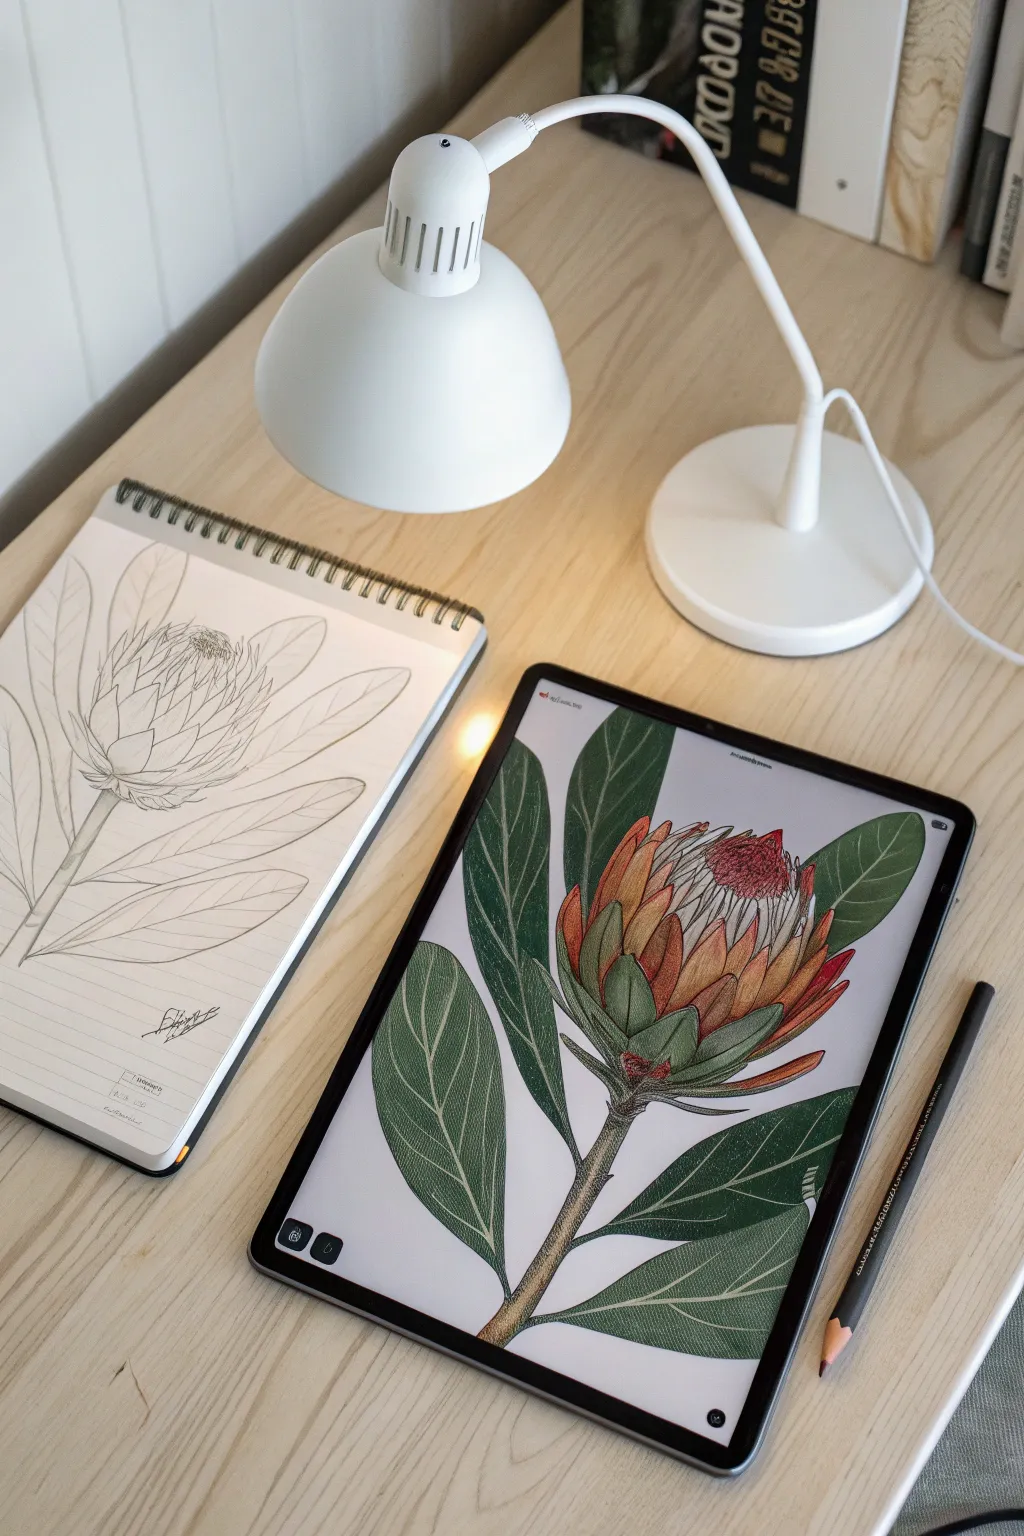
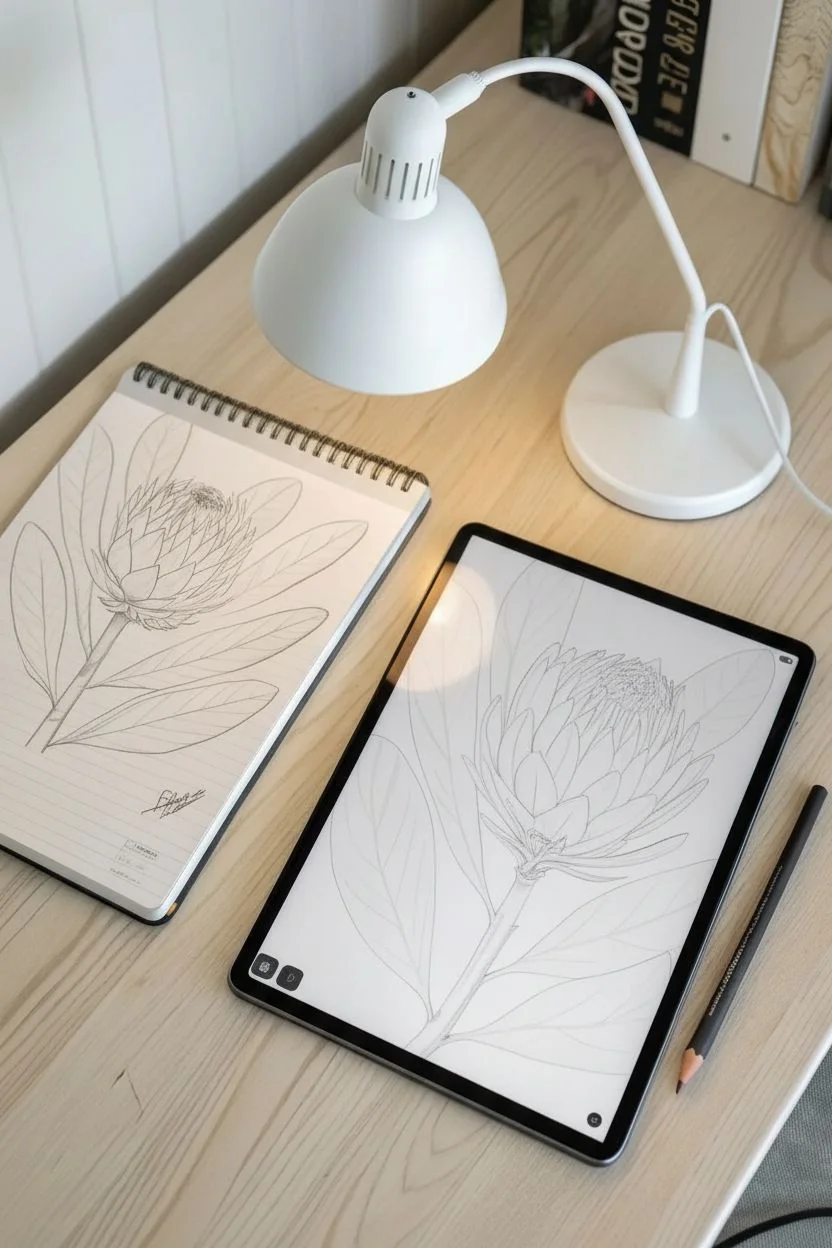
Bridge the gap between traditional sketching and digital illustration with this split-screen style project. You will capture the organic beauty of a King Protea in a sketchbook before bringing it to life with vibrant textures in Procreate.
Step-by-Step
Materials
- iPad with Procreate installed
- Apple Pencil
- Physical sketchbook
- HB Graphite Pencil
- Procreate Brushes (6B Pencil, Dry Ink, Soft Airbrush)
Step 1: Analog Foundation
-
Establish the shape:
Begin in your slightly textured sketchbook by drawing a wide U-shape for the flower’s base. -
Add the bracts:
Sketch layers of pointed, artichoke-like petals (bracts) rising from the base, curving inward toward a central dome. -
Draft the foliage:
Draw a thick stem extending downward and frame it with large, paddle-shaped leaves that overlap the stem slightly. -
Capture for digital:
Snap a well-lit photo of your sketch and import it into Procreate, resizing it to fill the canvas.
Wobbly Lines?
If your hand feels unsteady on the glass screen, increase the ‘Streamline’ setting in your brush properties to smooth out your strokes automatically.
Step 2: Digital Linework
-
Prepare the reference:
Lower the opacity of your imported sketch layer to about 30% so it acts as a faint guide. -
Select your inking tool:
Create a new layer on top and choose a brush with some tooth, like the ‘Dry Ink’ or ‘6B Pencil’ brush, to maintain a hand-drawn feel. -
Trace organic lines:
Outline the petals and leaves, allowing for slight imperfections in line weight to mimic traditional ink. -
Clean up:
Hide the photo layer to inspect your linework, erasing any overlapping lines that distract from the form.
Pro Tip: Alpha Lock
Always use Alpha Lock when shading base layers. It lets you add texture freely without worrying about painting outside lines.
Step 3: Color Blocking
-
Base layer:
Create a layer beneath your linework for color. I like to keep the leaf and flower colors on separate layers for easier editing later. -
Fill the foliage:
Paint the leaves and stem with a solid, desaturated forest green. -
Color the bloom:
Block in the petals with a warm apricot or creamy orange hue, and paint the central dome a pale whitish-pink.
Step 4: Texture and Depth
-
Lock alpha:
Swipe right with two fingers on your color layers to turn on Alpha Lock, ensuring you only paint inside your filled shapes. -
Shadow the leaves:
Using a textured brush, apply a darker green to one half of each leaf and near the stem to create dimension. -
Add gradients:
On the petal layer, use a soft airbrush to blend a deep reddish-coral color starting from the tips and fading downward. -
Define the fibers:
Switch to a thin pencil brush and draw vertical striations on the petals to simulate their fibrous texture. -
Detail the center:
Stipple the central dome with tiny dots of dark red and white, creating a fuzzy, pollen-heavy appearance.
Step 5: Final Polish
-
Vein work:
Select a pale, minty green and draw delicate branching veins over the dark leaf shading for high contrast. -
Highlighting:
Add subtle white rim lighting to the edges of the upper petals to make them pop against the background. -
Paper finish:
Set a paper texture image as your very top layer and change the blend mode to ‘Multiply’ to unify the digital and analog vibes.
Now you have a stunning botanical illustration that perfectly bridges the gap between your sketchbook and screen.


Have a question or want to share your own experience? I'd love to hear from you in the comments below!