Pumpkin painting is my favorite no-carve way to get that fall vibe without the mess or the fast decay. Grab a gourd (real or faux) and let’s turn it into a tiny curved canvas you’ll actually want to display for weeks.
Classic Jack-O’-Lantern Faces
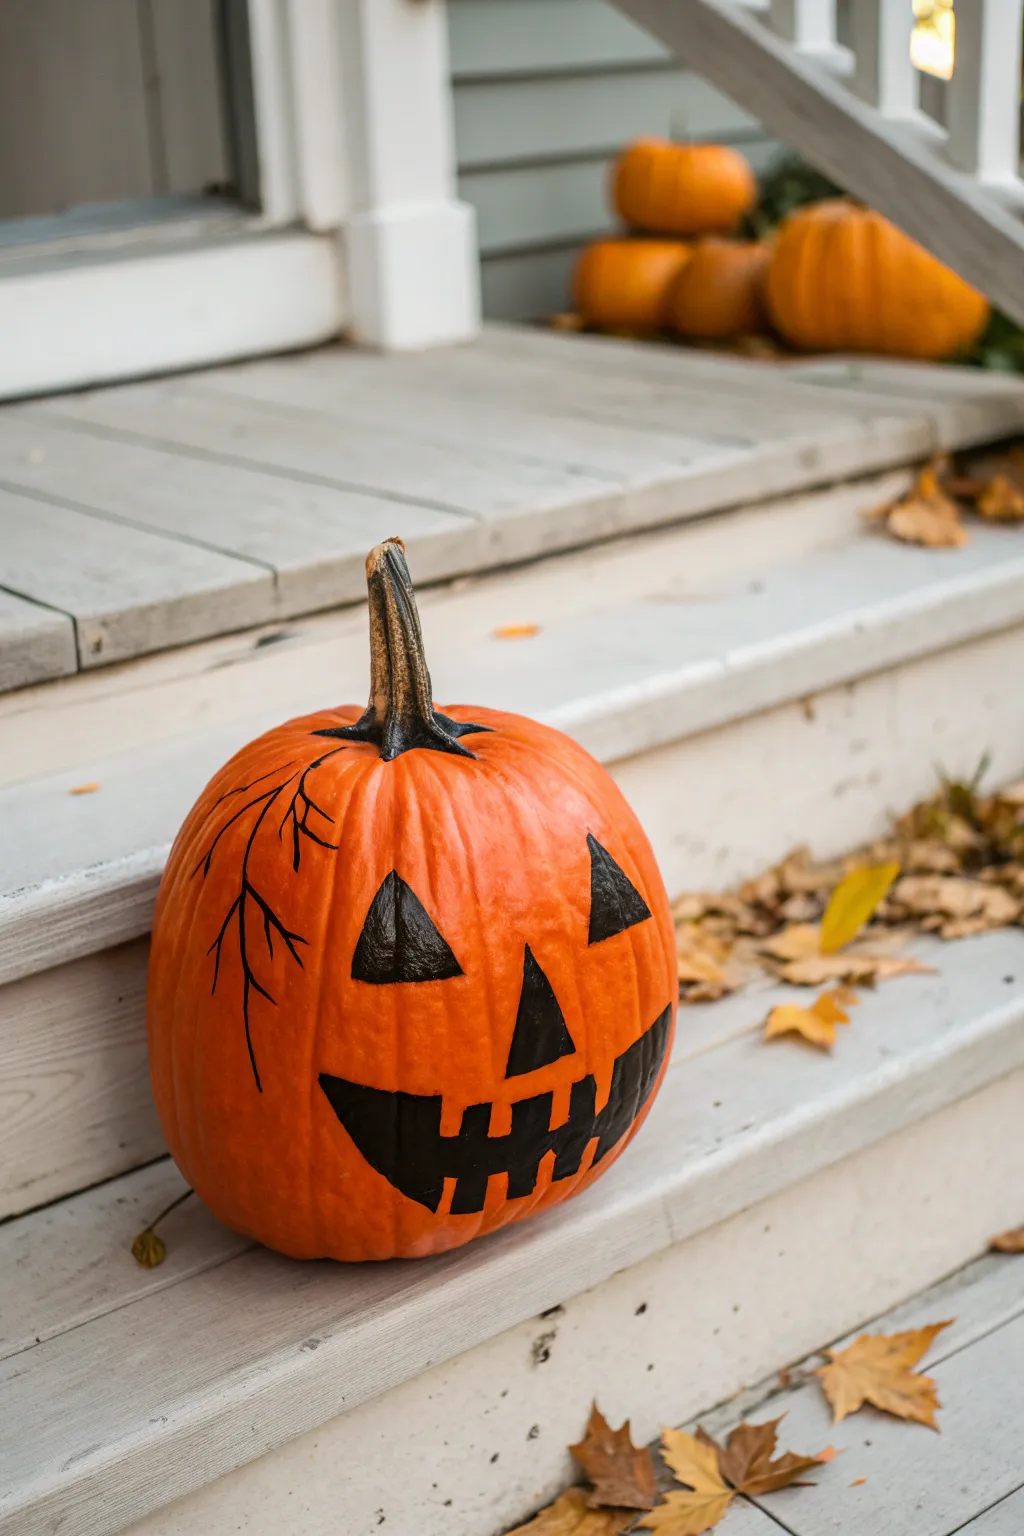
Skip the mess of carving this year while keeping the tradition alive with this sharply painted classic Jack-O’-Lantern face. This design features bold geometric features and a unique ‘cracked’ texture detail that adds a little weathered character to your porch display.
Step-by-Step Guide
Materials
- Medium-sized orange pumpkin
- Black acrylic paint (matte finish recommended)
- Wide flat paintbrush (1 inch)
- Small round detail brush (size 2 or 4)
- Pencil or dry-erase marker
- Damp cloth or paper towels
- Cup of water for rinsing
- Mild soap and water (for cleaning the pumpkin)
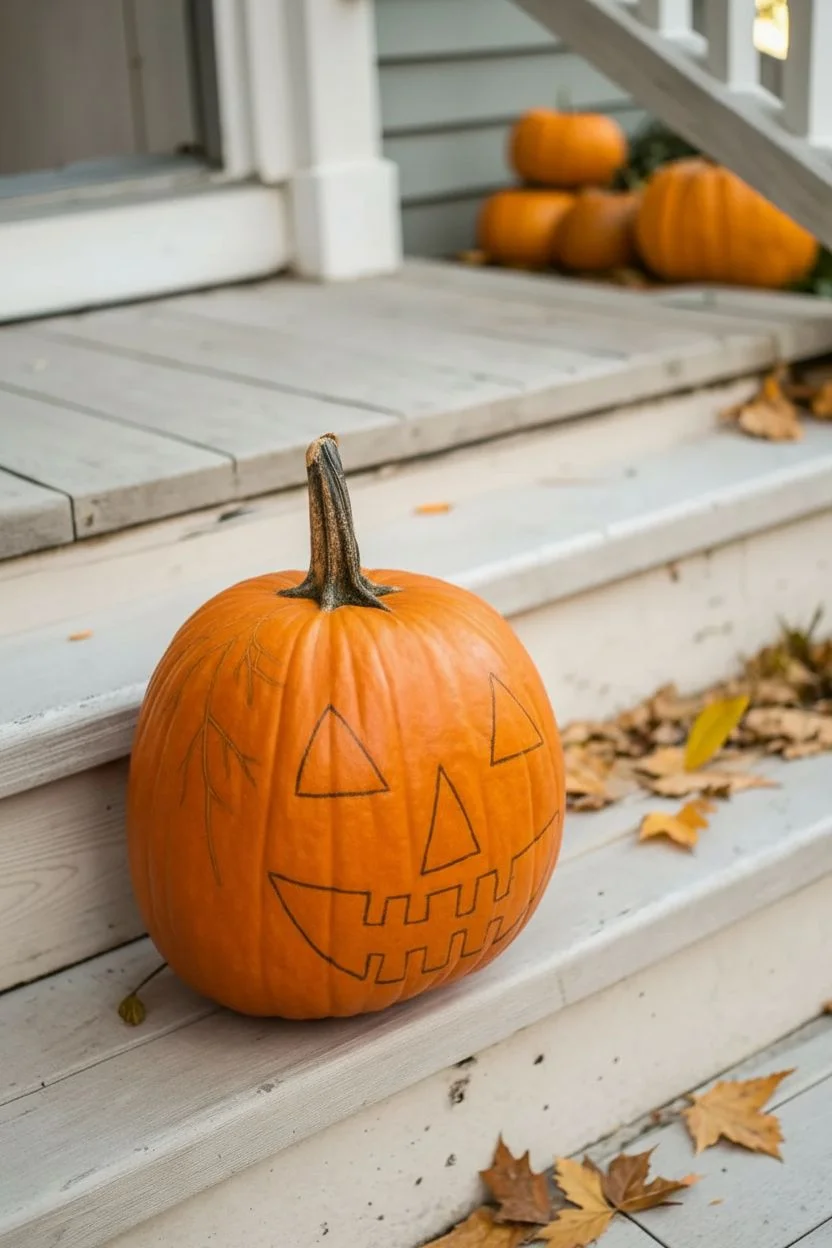
Step 1: Preparation & Sketching
-
Clean and dry:
Begin by washing your pumpkin with mild soap and water to remove any dirt or field grime. This step is crucial because paint adheres much better to a clean, oils-free skin. Dry it thoroughly with a towel. -
Plan the face placement:
Sit the pumpkin on a flat surface to find its ‘best side’—the smoothest face without deep blemishes. Orient the stem so it sits naturally at the top. -
Outline the eyes:
Using a pencil or a dry-erase marker (which wipes off easily if you make a mistake), draw two large equilateral triangles for eyes about a third of the way down from the stem. Angle them slightly inward for that classic expression. -
Outline the nose:
Center a smaller triangle just below the eyes for the nose. I find it looks best if this triangle is slightly taller and narrower than the eye triangles. -
Sketch the mouth anchor points:
Mark the corners of the mouth, ensuring they extend wider than the eyes. Draw a gentle U-curve connecting these points to form the bottom lip. -
Draw the teeth:
Sketch the upper lip with three square notches cut out for teeth. Repeat on the bottom lip with two square notches, staggered so they don’t line up perfectly with the top ones. -
Add the vine detail:
On the left side of the pumpkin face, sketch a long, wavy line starting near the stem and curving down the side. Add branching ‘Y’ shapes coming off this main line to mimic cracks or creeping vines.
Pro Tip: Better Grip
If your acrylic paint is slipping off the pumpkin skin, dab the area with a tiny bit of sandpaper first to roughen the surface slightly for better adhesion.
Step 2: Painting the Design
-
Outline the shapes:
Dip your small round detail brush into the black acrylic paint. Carefully trace over your pencil lines for the eyes, nose, and mouth to create a crisp border. -
Fill the eyes:
Switch to your flat brush if the eyes are large enough, or stick with the round brush for better control. Fill in the triangle eyes completely with solid black paint. -
Fill the nose:
Paint the nose triangle solid black. Be careful not to smudge the wet paint from the eyes above while working your way down. -
Paint the mouth shape:
Fill in the rest of the mouth, carefully working around the square ‘tooth’ gaps. You want those gaps to remain bright orange. -
Refine the edges:
Go back over the sharp corners of your triangles and teeth with the small brush to ensure the points are sharp and defined. -
Paint the vein detail:
Using the very tip of your small round brush, trace the wavy line on the left side. Vary the pressure: press harder for the main stem and lighter for the thin, branching tips. -
Check for opacity:
Acrylic paint can sometimes streak on waxy pumpkin skin. Let the first coat dry for about 10-15 minutes. -
Apply a second coat:
If you see orange peeking through the black, apply a second layer of paint to the facial features for a deep, opaque matte finish. -
Clean up sketch lines:
Once the paint is fully dry to the touch, gently wipe away any visible pencil or marker lines with a damp cloth.
Level Up: Gloss Eyes
After the matte black paint dries, apply a layer of clear gloss varnish or clear nail polish just to the eyes. This makes them shine and look ‘wet’ against the matte skin.
Place your painted masterpiece on your front steps to welcome trick-or-treaters without any mess or candle-lighting required


Simple Ghost Face Pumpkin
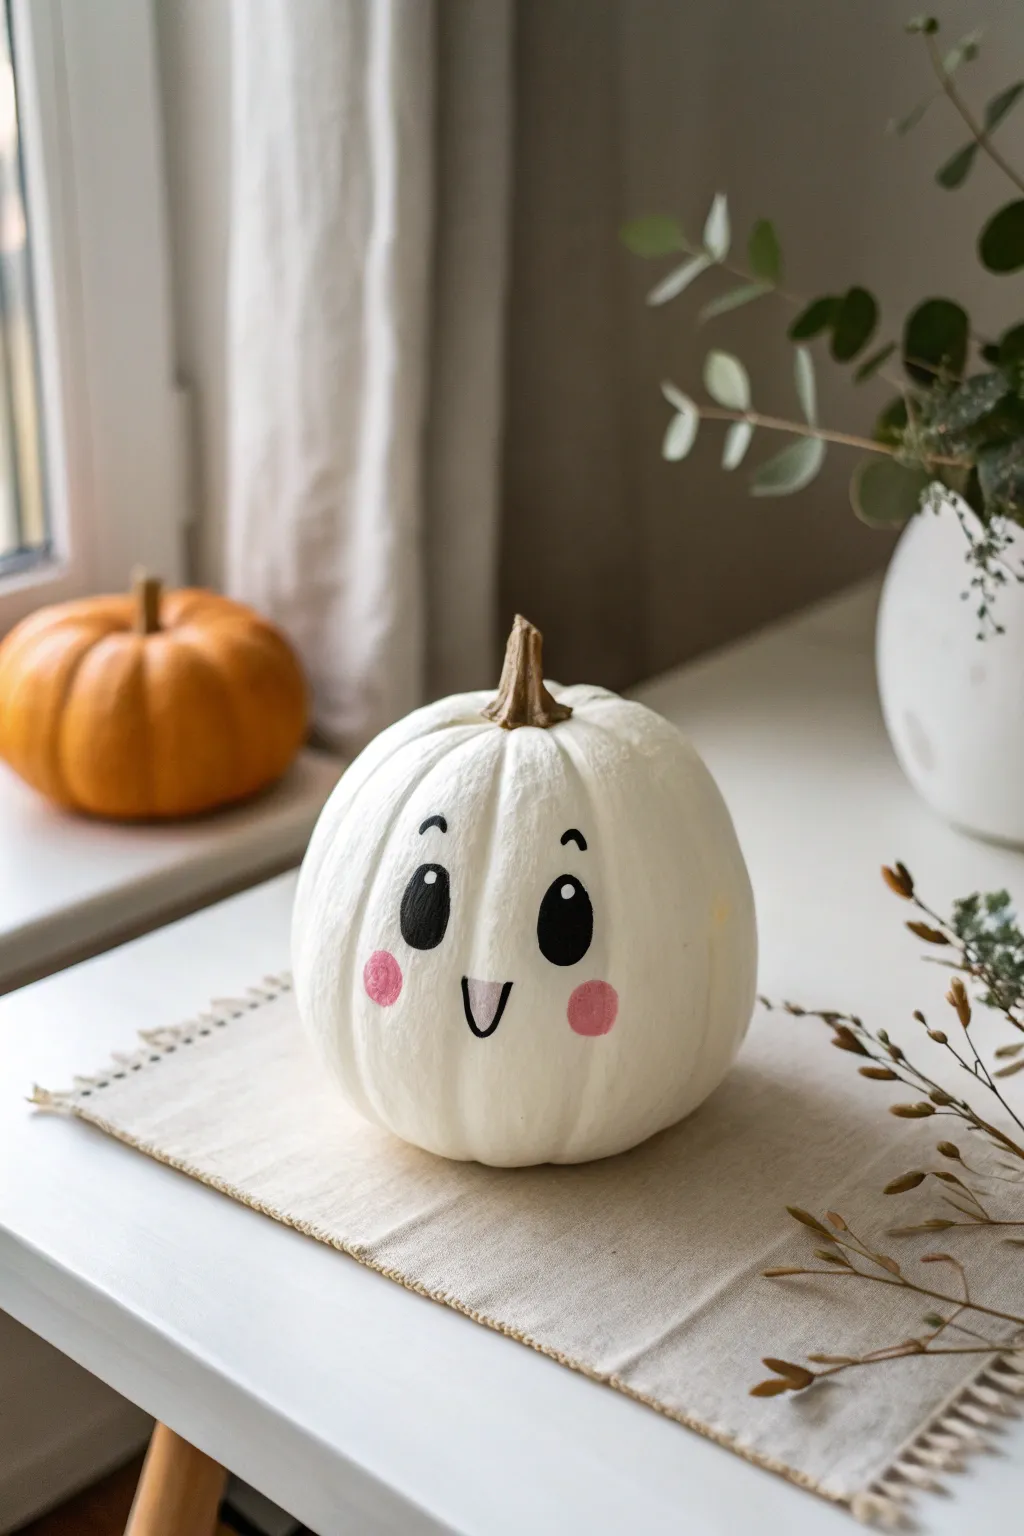
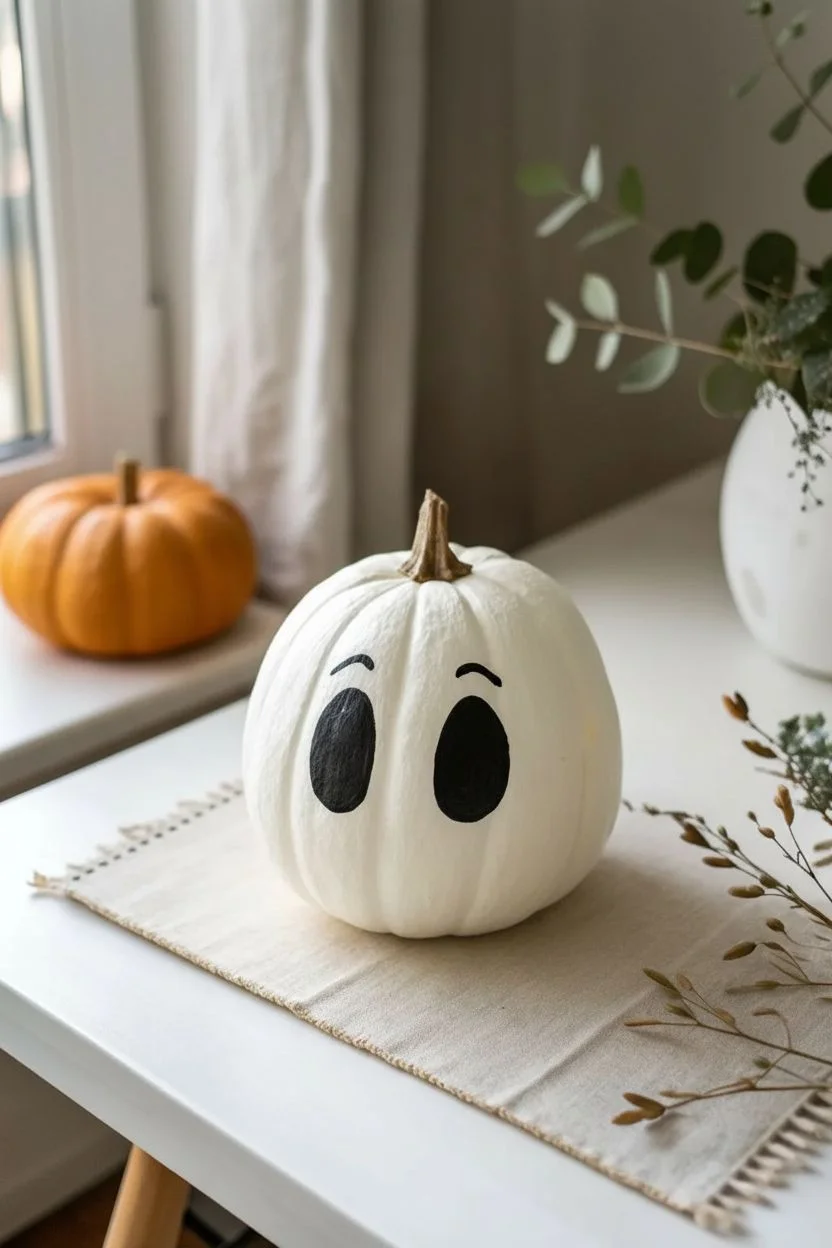
Transform a simple white pumpkin into an adorable friendly ghost with just a few strokes of paint. This minimalist design features large, expressive eyes and rosy cheeks for a look that’s more sweet than scary.
Detailed Instructions
Materials
- Small to medium white pumpkin (real or faux)
- Black acrylic paint
- White acrylic paint
- Pink acrylic paint (soft blush tone)
- Small round paintbrush
- Fine detail paintbrush or black paint pen
- Small sponge dabber or round foam pouncer
- Damp cloth (for cleanup)
- Palette or small dish
- Pencil (optional)
Step 1: Preparation
-
Clean surface:
Begin by wiping down your pumpkin with a damp cloth to remove any dirt or dust. If you are using a real pumpkin, ensure the skin is completely dry before applying any paint. -
Check the stem:
Inspect the stem area; if you are painting a faux pumpkin, you might want to tape off the brown stem with painter’s tape to keep it clean, though steady hands work just as well. -
Plan the face:
Visualize where the face will go. You want it centered on the smoothest, widest side of the pumpkin. I find it helpful to look for a vertical rib to serve as a slightly off-center nose line to anchor the symmetry.
Uneven Cheeks?
If the pumpkin’s ribs are deep, a sponge might miss spots. Use a dry, fluffy brush to dab pink paint into the crevices for a seamless blush effect.
Step 2: Painting the Eyes
-
Outline the eyes:
Using a pencil lightly, sketch two tall, oval shapes for the eyes. They should be positioned roughly halfway down the pumpkin’s height. -
Fill in the base:
Dip your small round brush into the black acrylic paint. Carefully fill in the oval outlines you just drew. -
Refine the shape:
Smooth out the edges of the ovals. The bottoms should be slightly rounder than the tops to give that cute, wide-eyed look. -
Add eyebrows:
Using your fine detail brush or a black paint pen, draw two small, curved arches floating just above the eyes. Keep them short and simple for a cheerful expression. -
Allow to dry:
Let the black paint dry completely. This is crucial because adding the white highlights too soon will turn your crisp black eyes gray.
Glow in the Dark
Swap the white highlight paint for glow-in-the-dark acrylic. During the day it looks normal, but at night the cute eyes will stare back at you.
Step 3: Adding Character
-
Create the mouth:
With the detail brush or paint pen, draw a small ‘V’ or ‘U’ shape between and slightly below the eyes. It should be quite small to maintain the ‘kawaii’ aesthetic. -
Prepare the blush:
Pour a small amount of pink acrylic paint onto your palette. You want a soft, pastel pink rather than a hot pink. -
Apply cheeks:
Dip a round foam pouncer or sponge dabber into the pink paint. Blot it once on a paper towel to remove excess paint, ensuring a soft application. -
Stamp the cheeks:
Press the sponge gently onto the pumpkin surface, below the outer corners of the eyes. Rotate slightly if you need to fill out the circle. -
Touch up cheeks:
If the texture of the pumpkin skin makes the circle uneven, use a small brush to gently fill in any gaps in the pink circles.
Step 4: Final Details
-
Check dryness:
Ensure the black eye paint is fully dry to the touch before proceeding to the final step. -
Add highlights:
Dip the handle end of a paintbrush into white acrylic paint. This creates a perfect dotting tool. -
Place the glint:
Dot a medium-sized white circle in the upper right quadrant of each black eye oval. -
Add secondary shine:
Using a smaller tool or just the very tip of a fine brush, add a tiny second white dot diagonally below the first one for extra sparkle. -
Final inspection:
Step back and look at the face. If any lines look shaky, you can carefully clean them up with a damp Q-tip or touch up with the base white paint (if you used a white painted pumpkin). -
Seal (optional):
If this pumpkin is going outside, applying a coat of clear spray sealer will protect that adorable face from the elements.
Enjoy your charming new pumpkin decoration that brings a friendly spirit to your autumn decor


Candy-Corn Color Blocking
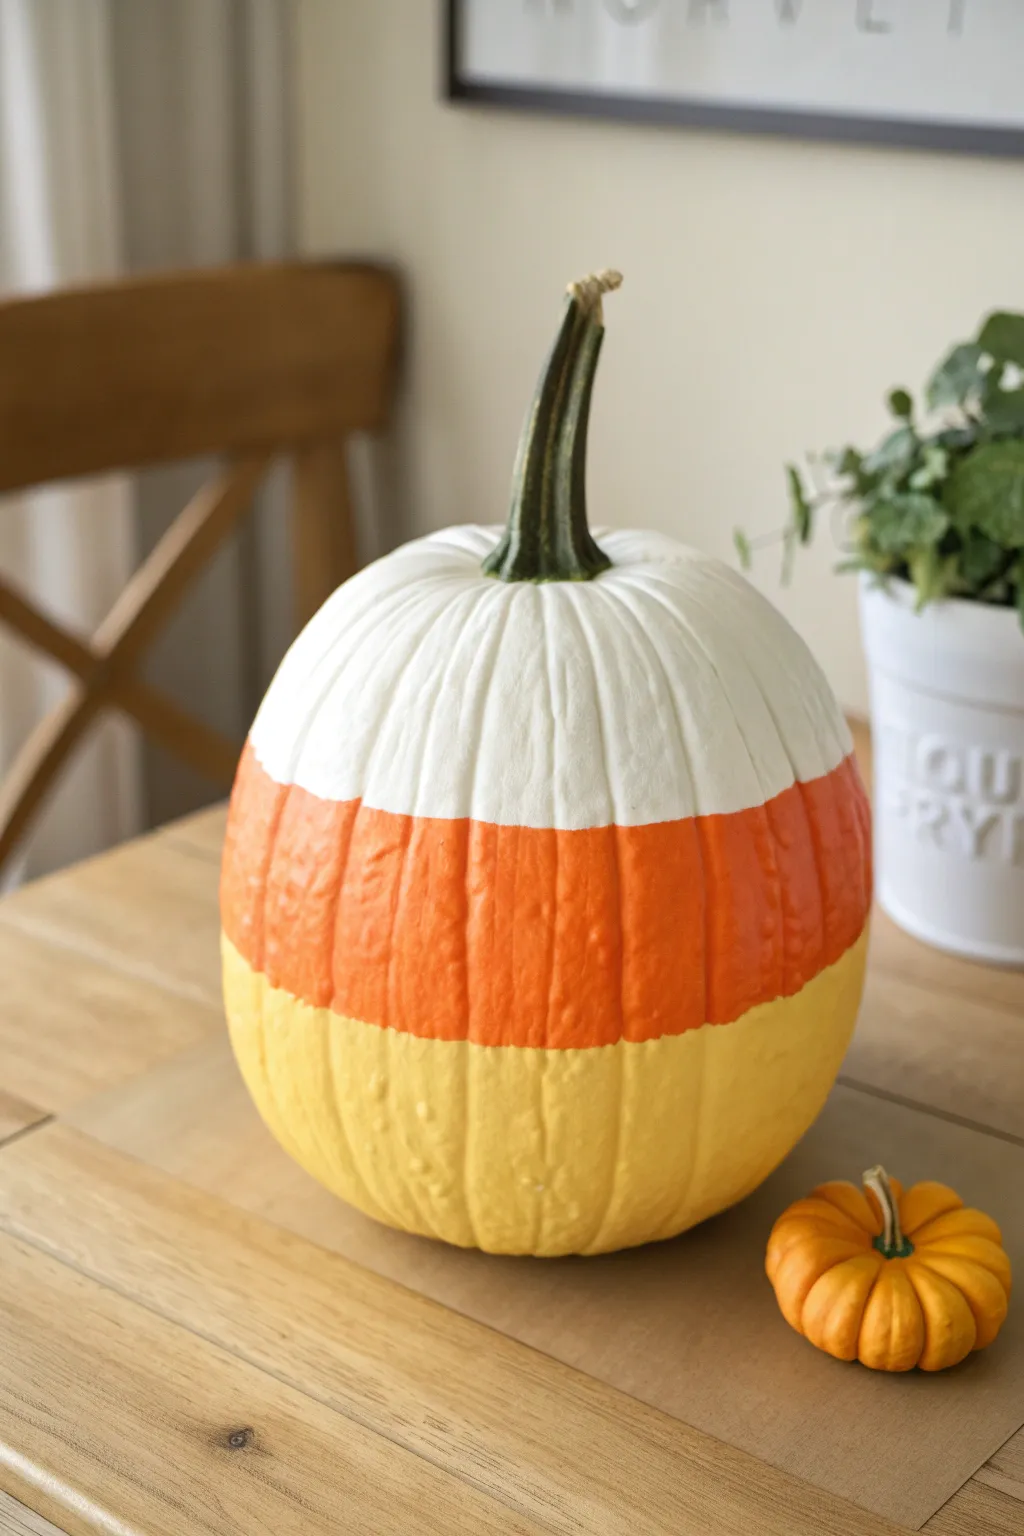
Transform a classic round pumpkin into a giant piece of candy corn with this simple yet striking color-blocking technique. The crisp white, vibrant orange, and sunny yellow stripes create a bold, modern look that pays homage to everyone’s favorite (or most controversial) Halloween treat.
How-To Guide
Materials
- Medium-sized pumpkin (Real or Faux)
- White acrylic craft paint
- Orange acrylic craft paint
- Yellow acrylic craft paint
- 2-inch flat paintbrush
- Small detail brush (optional for touch-ups)
- Painter’s tape (optional)
- Paper plate or palette
- Damp cloth or paper towel
- Drop cloth or newspaper
Step 1: Preparation
-
Clean surface:
Begin by thoroughly cleaning the surface of your pumpkin. If using a real pumpkin, wash off any dirt or debris with mild soapy water and dry it completely. For a faux pumpkin, a quick wipe with a damp cloth is sufficient to remove dust. -
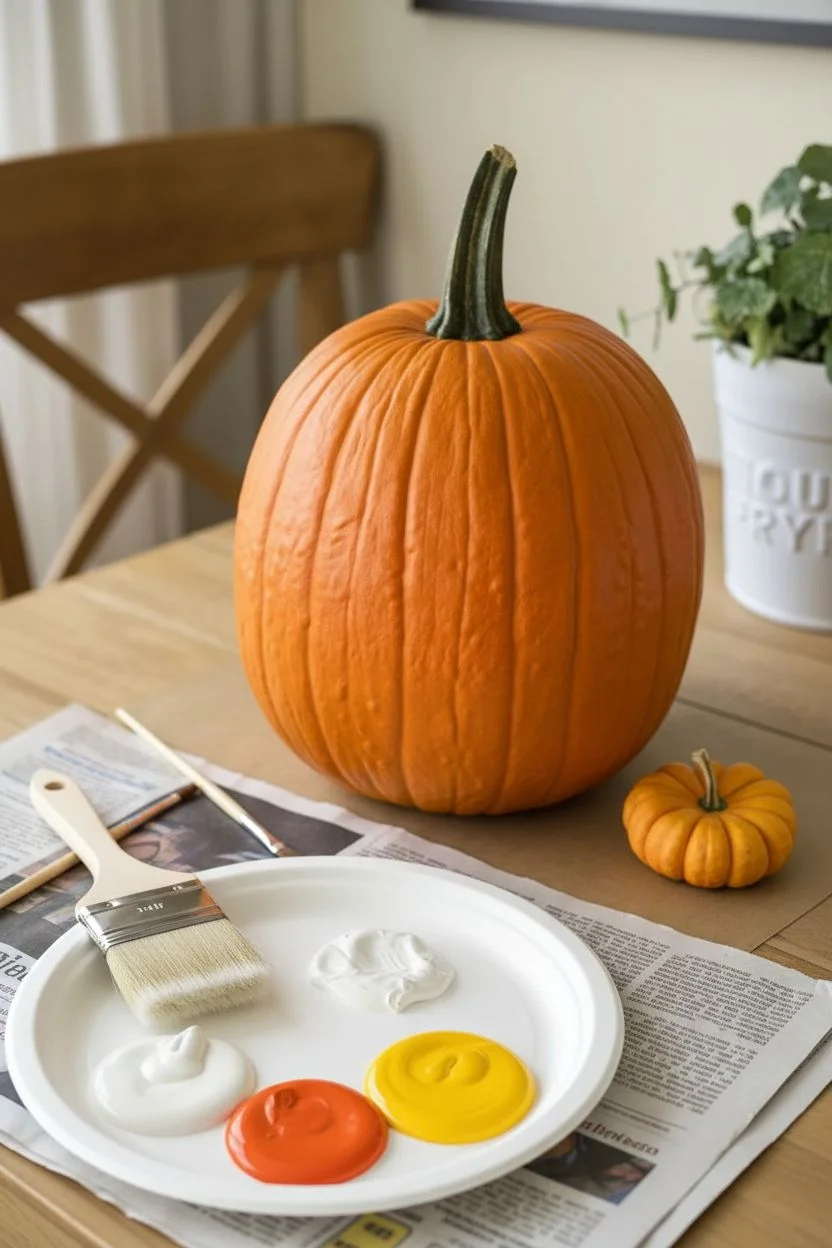
Set up workspace:
Lay down newspaper or a drop cloth to protect your table. Place the pumpkin in the center and squeeze a generous amount of white, orange, and yellow paint onto your palette. -
Plan your zones:
Visually divide your pumpkin horizontally into three roughly equal sections. Remember the classic candy corn order: white on top, orange in the middle, and yellow on the bottom.
Prime Time
Using a real orange pumpkin? Paint the whole gourd with a white primer first. This makes the yellow and white sections pop much more vividly without needing 5+ coats of paint.
Step 2: Painting the Base
-
White layer start:
Start at the top section around the stem. Using your wide flat brush, apply the white paint, brushing downwards from the base of the stem to about one-third of the way down the pumpkin. -
Cover the top:
Continue painting around the entire circumference of the top third. Don’t worry about getting paint on the stem itself; careful brushwork will keep it clean, or you can tape it off if you prefer. -
Smooth the edges:
Feather out the bottom edge of the white paint slightly so it doesn’t leave a thick ridge, which will help when transitioning to the next color visually. -
White layer dry time:
Let this top white layer dry to the touch. White often requires a second coat to be fully opaque, especially over a dark orange pumpkin skin, so I like to let this dry briefly while I prep the next color.
Distressed Design
Once fully dry, lightly sand the painted surface with fine-grit sandpaper. This scuffs the paint for a vintage, rustic farmhouse look that is very on-trend.
Step 3: Adding Color
-
Yellow bottom:
While the top dries, flip your attention to the bottom third. Dip your brush into the yellow paint and cover the bottom section of the pumpkin. -
Base coverage:
Ensure you paint all the way down to where the pumpkin sits on the table. You want the yellow to look solid from all angles. -
Clean brush:
Thoroughly rinse and dry your brush before moving to the orange paint to keep the colors crisp and muddy-free. -
Orange middle:
Apply the orange paint in the center band, bridging the gap between the white top and the yellow bottom. Carefully paint up to meet the white line. -
Meeting the yellow:
Paint downwards to meet the yellow line. Having a steady hand here is key, as you want a relatively clean line without needing tape for that organic, hand-painted look. -
Check opacity:
Assess the coverage. If the pumpkin’s original color is showing through significantly, let the first coat dry completely (about 20-30 minutes acrylic dependent) before applying a second coat to all three sections.
Step 4: Refining Details
-
Touch up lines:
Once the main coats are dry, inspect the borders where the colors meet. Use a smaller detail brush to crisp up any wavy lines or fill in deep ridges in the pumpkin’s skin that the larger brush missed. -
Clean the stem:
If any paint accidentally got onto the stem, use a damp cloth or a wet brush to wipe it away before it cures completely. -
Allow full cure:
Let the pumpkin sit undisturbed for at least an hour to ensure the paint hardens and won’t scratch off when moved.
Place your candy corn creation on a wooden table or mantle for a sweet seasonal display that looks good enough to eat


Matte White Pumpkins With Botanical Vines
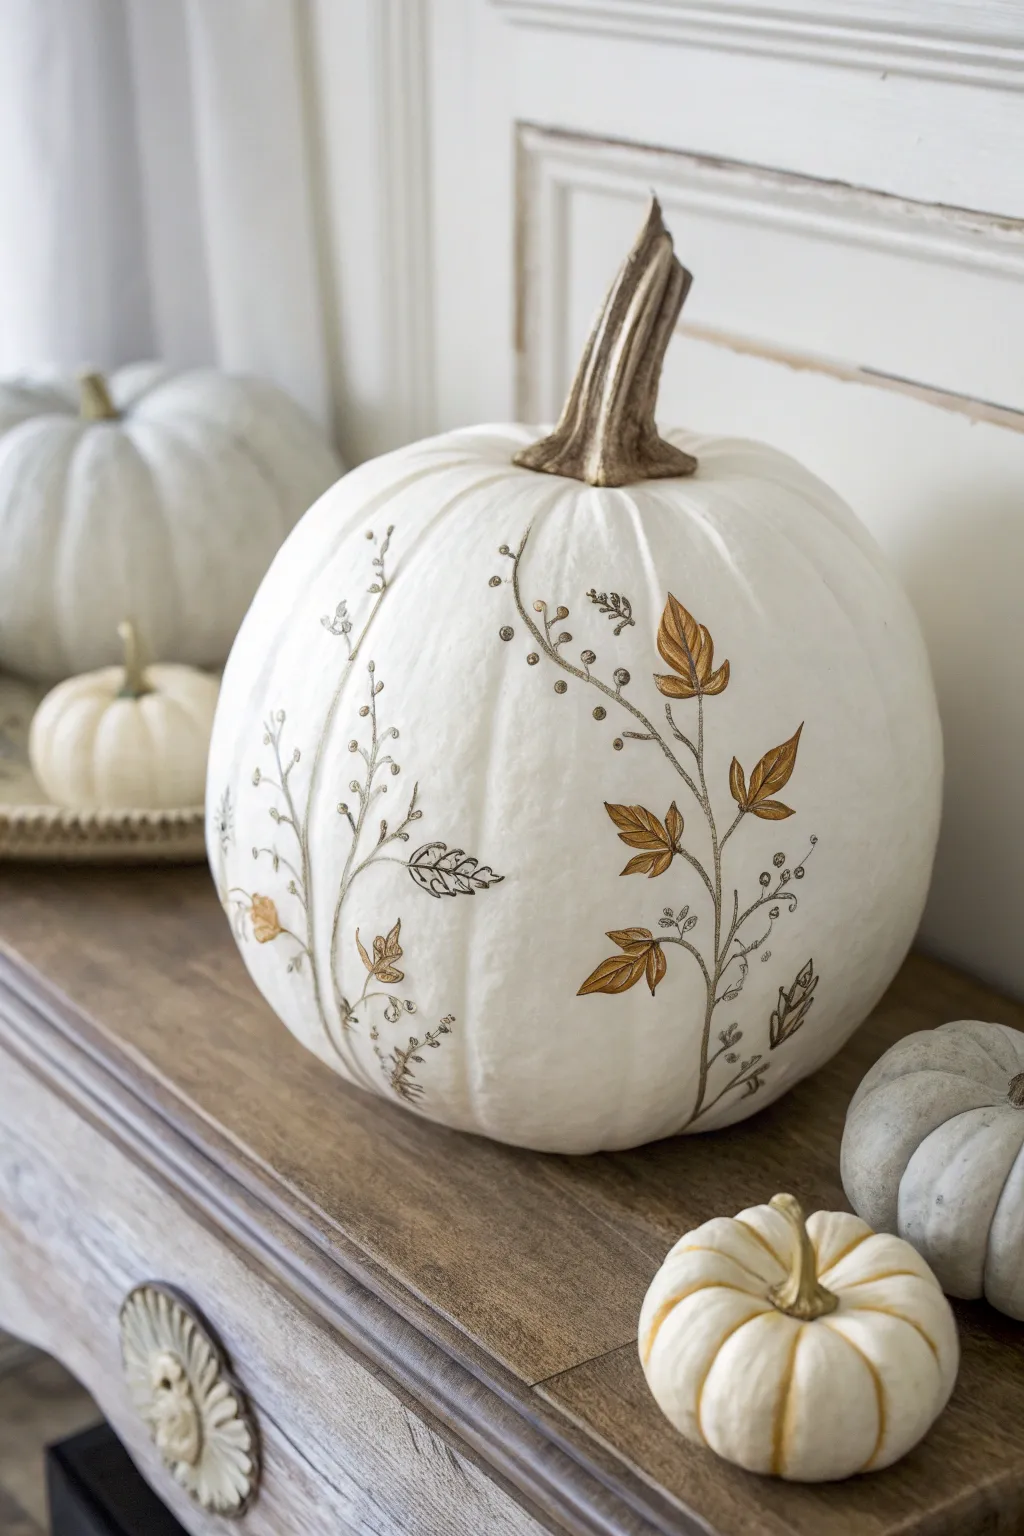
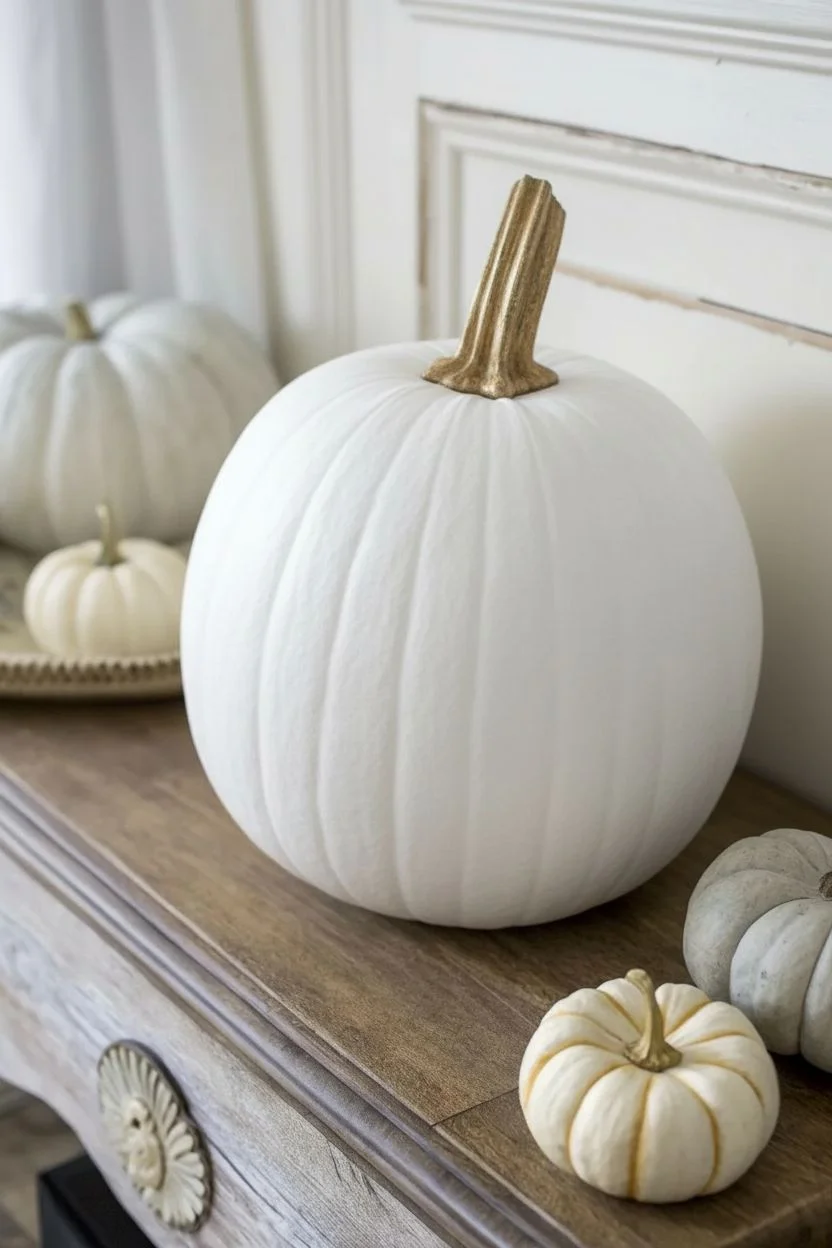
Elevate your autumn decor with this sophisticated take on pumpkin painting, featuring delicate botanical illustrations on a pristine matte white base. The combination of fine line-work and metallic gold leaf accents creates an elegant, heirloom-quality centerpiece.
Detailed Instructions
Materials
- Large, smooth-skinned pumpkin (real or faux)
- Matte white acrylic paint or chalk paint
- Medium flat paintbrush
- Fine-point permanent marker or archival ink pen (brown or dark grey)
- Metallic gold paint pen (extra fine tip)
- Gold leaf adhesive size
- Gold leaf sheets
- Small round detail brush (size 0 or 1)
- Soft, fluffy dry brush (for removing excess gold leaf)
- Graphite transfer paper (optional)
- Pencil (optional)
- Matte spray sealer
Step 1: Base Preparation
-
Clean the surface:
Begin by thoroughly cleaning your pumpkin with a damp cloth to remove any dirt or oils. If using a real pumpkin, ensure it is completely dry before proceeding. -
Apply base coat:
Using the flat paintbrush, apply a layer of matte white paint over the entire pumpkin, including the stem base. Work in vertical strokes following the pumpkin’s natural ribs. -
Layer up:
Allow the first coat to dry completely for about 30 minutes. Apply a second or third coat as needed until you have a solid, opaque white finish. -
Paint the stem:
While you wait for the body to dry, use a mix of brown and gold paint to coat the stem, giving it a rich, realistic texture that contrasts with the white skin.
Step 2: Drafting the Design
-
Plan your vines:
Lightly sketch trailing vine patterns with a pencil directly onto the dry paint. Aim for organic, flowing curves that climb up the pumpkin’s ribs. -
Inking the stems:
Trace over your main vine lines using the fine-point brown or dark grey marker. Keep your hand loose to create natural-looking, slightly jittery lines rather than perfectly straight ones. -
Adding tiny details:
Draw small sprigs, buds, and secondary branches coming off the main stems. Vary the pressure on your pen to create thick and thin line variations.
Fixing Smudged Gold
If gold leaf sticks where you don’t want it, use a stiff brush slightly dampened with water to gently scrub away the wayward flecks without damaging the white paint layer.
Step 3: Leaf and Gold Application
-
Outline larger leaves:
Draw the outlines of the larger maple-shaped leaves attached to the vines. Do not fill them in with ink. -
Apply adhesive size:
Using your small detail brush, carefully paint the gold leaf adhesive inside the leaf outlines you just drew. I prefer to do this in small batches of 3-4 leaves at a time so the glue doesn’t dry out too much. -
Wait for tackiness:
Let the adhesive sit for 5-10 minutes until it becomes clear and tacky to the touch. This step is crucial for smooth gilding. -
Press the gold leaf:
Gently press a sheet of gold leaf over the tacky areas. Use a clean, dry finger or a soft cloth to rub it down firmly, ensuring it adheres to the glue. -
Brush away excess:
Take your fluffy dry brush and vigorously brush over the gilded areas. The excess gold leaf will flake away, leaving perfectly shaped sharp gold leaves. -
Add painted details:
For smaller leaves or berries that are too tiny for leafing, use the metallic gold paint pen to fill them in directly. -
Detail the gold leaves:
Once the gold leaf is secure, go back in with your fine-point marker and draw veins over the gold to add definition and depth. -
Final shading:
Use the brown pen to add tiny dots or stippling near the base of the leaves and vine intersections to create subtle shadows.
Pro Tip: Vintage Finish
For an aged look, mix a tiny drop of brown paint into clear wax and lightly buff it over the dried pumpkin. It settles into the crevices for an antique botanical vibe.
Step 4: Sealing
-
Let it cure:
Allow the entire design to sit for at least an hour to ensure all ink and adhesive is fully set. -
Protective coat:
In a well-ventilated area, spray a light, even coat of matte sealer over the pumpkin. This prevents the gold leaf from tarnishing and protects the white paint from scuffs.
Place your masterpiece on a mantel or sideboard to enjoy the sophisticated sparkle all season long
BRUSH GUIDE
The Right Brush for Every Stroke
From clean lines to bold texture — master brush choice, stroke control, and essential techniques.
Explore the Full Guide
Buffalo Plaid Pumpkin Pattern
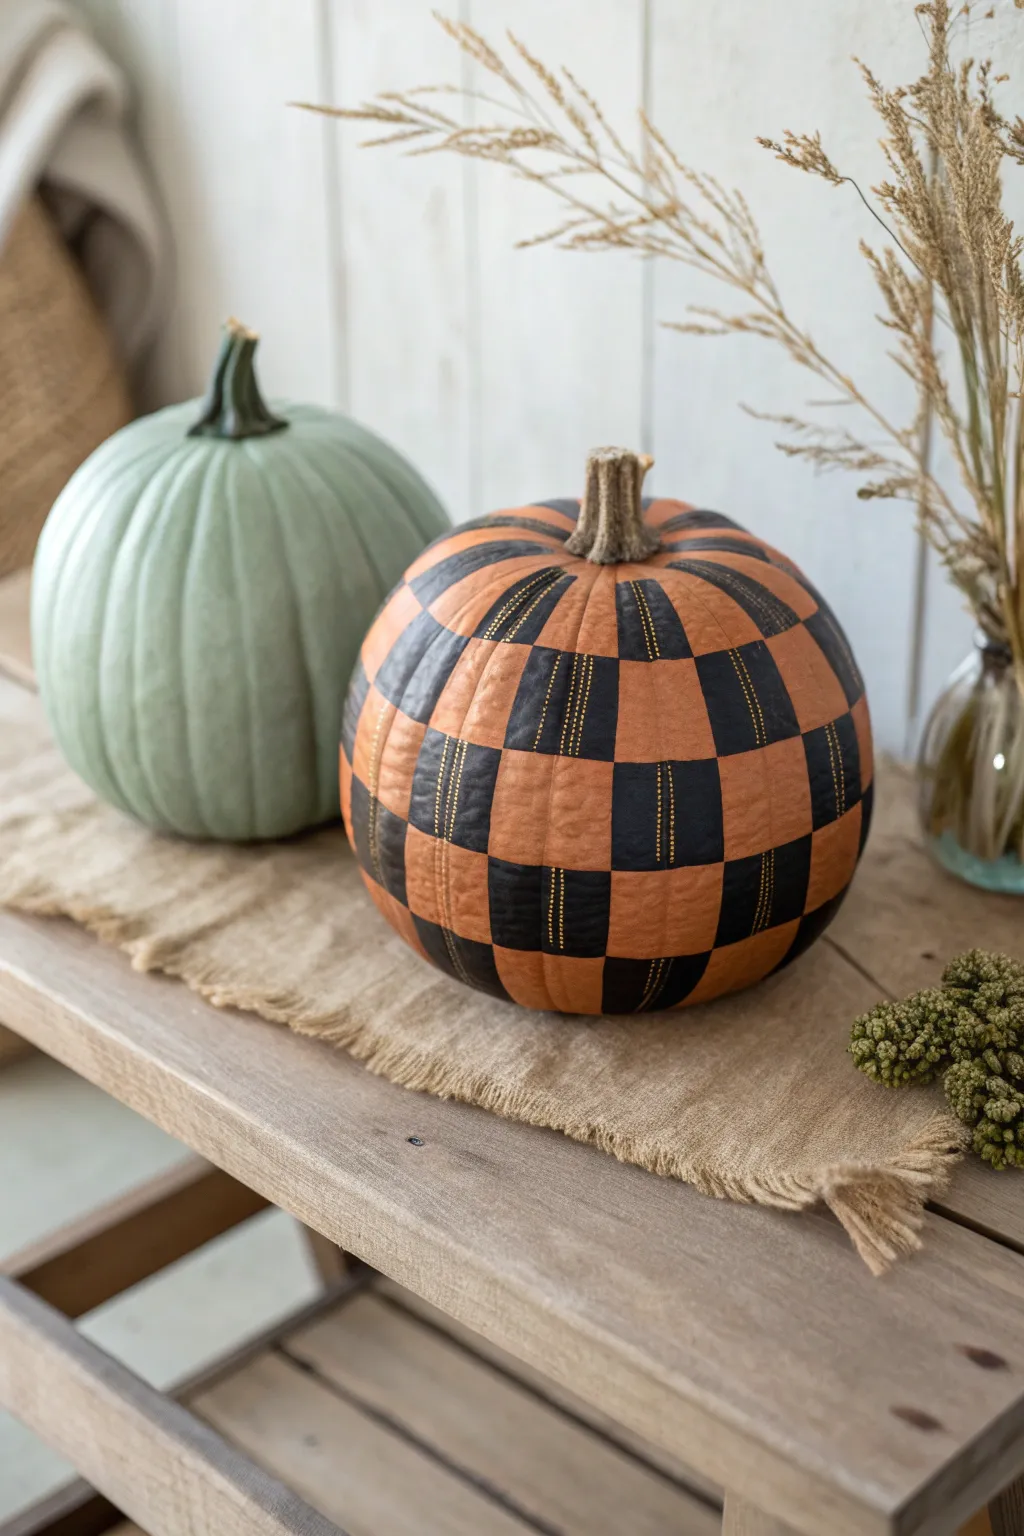
Transform a standard orange pumpkin into a sophisticated piece of autumn decor with this bold, geometric design. By combining distinct black color blocks with delicate faux-stitch detailing, you’ll achieve a cozy buffalo plaid look that brings warmth to any farmhouse-style vignette.
How-To Guide
Materials
- Medium-sized orange pumpkin (real or faux)
- Black acrylic paint (matte finish recommended)
- Gold or tan paint pen (fine tip)
- Painter’s tape or masking tape (1 inch width)
- Flat shader brush (medium size)
- Small round brush (optional, for touch-ups)
- Pencil
- Flexible measuring tape
- Matte clear finishing spray (optional)
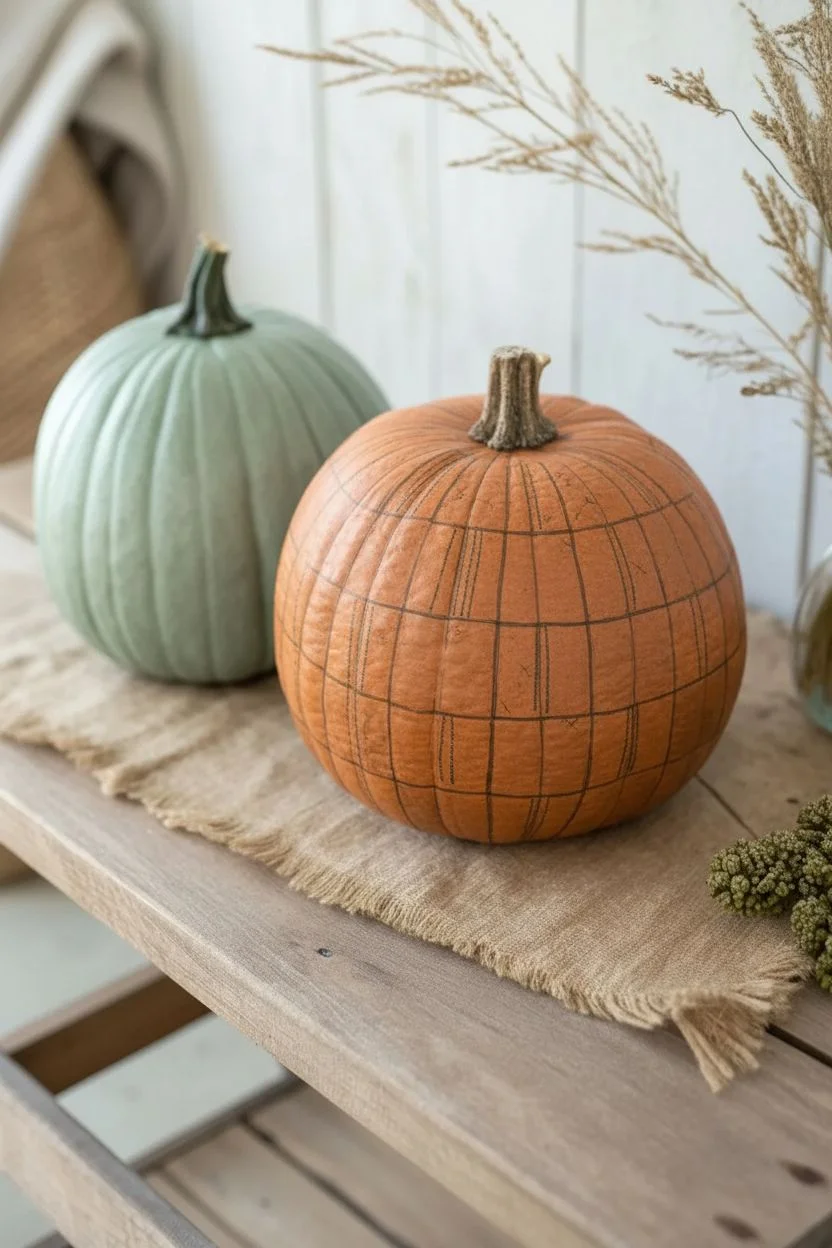
Step 1: Planning and Mapping
-
Clean surface:
Begin by wiping down your pumpkin with a damp cloth to remove any dirt or oils, ensuring the paint adheres properly. If you are using a real pumpkin, make sure it is completely dry before starting. -
Map vertical lines:
Using the pumpkin’s natural ribs as a guide is helpful, but for a true checkered look, you’ll need uniform vertical columns. Use a flexible measuring tape to mark even intervals around the circumference with a pencil. -
Draw horizontal rings:
Lightly sketch horizontal rings around the pumpkin to create a grid. Aim to make them roughly the same height as your vertical columns are wide, creating squares rather than rectangles. -
Correct the grid:
Step back and look at your pencil grid. Because pumpkins are spherical, lines will taper at the top and bottom. Adjust your sketches now to ensure the central band of squares looks as even as possible.
Tape Trick
If you struggle with freehand straight lines, use narrow masking tape or washi tape to block off the grid before painting. Peel it off while the paint is still slightly wet for crispest lines.
Step 2: Painting the Checks
-
Mark the black squares:
To avoid confusion once you start painting, lightly place a small ‘X’ inside every alternating square that needs to be painted black. Double-check that your pattern alternates like a chessboard. -
Outline first square:
Start with a square in the middle of the pumpkin. Using your flat shader brush, carefully paint the outline of the square first to establish crisp edges. -
Fill in the color:
Fill the center of the square with smooth strokes. Matte black paint works best here to absorb light and contrast against the shiny pumpkin skin. -
Continue the pattern:
Work your way around the pumpkin, painting all the marked ‘X’ squares. I find it easier to work in horizontal rows rather than vertical columns to keep the paint consistent. -
Handle the curves:
As you paint squares near the stem and base, follow the curve of the pumpkin. The squares will naturally become slightly triangular or trapezoidal; just keep your edges sharp. -
Let it dry:
Allow the first coat of black to dry completely. If the orange shows through, apply a second coat for a truly opaque, solid black look.
Rustic Texture Upgrade
For a fabric-like texture, lightly sponge a very dark grey over the black squares before adding the gold lines. It softens the look and mimics woven flannel.
Step 3: Adding the Stitch Detail
-
Reference the direction:
Observe the pattern in the photo: the golden stitch lines run vertically through the black squares. They do not run horizontally. -
Prep the paint pen:
Shake your gold or tan paint pen well and depress the tip on a piece of scrap paper until the paint flows smoothly. -
Draw the center line:
Starting in the middle of a black square, draw a vertical dotted line from the top edge to the bottom edge of that black block. -
Add side lines:
Draw two more vertical dotted lines on either side of your center line within the same black square. You should have three distinct dotted lines per black block. -
Repeat the process:
Continue this vertical dotted pattern on every single black square. Try to keep your dots small and evenly spaced to mimic thread. -
Clean up edges:
If any gold paint strayed outside the black squares, use a small brush with a tiny bit of black paint to cover the mistake once it’s dry. -
Seal the work:
Once everything is fully dry (give it at least an hour), you can spray a light mist of matte sealer over the pumpkin to protect the design from scratches or moisture.
Place your stylish plaid pumpkin on a burlap runner or wooden bench to instantly cozy up your entryway for the season
Polka Dots and Speckles
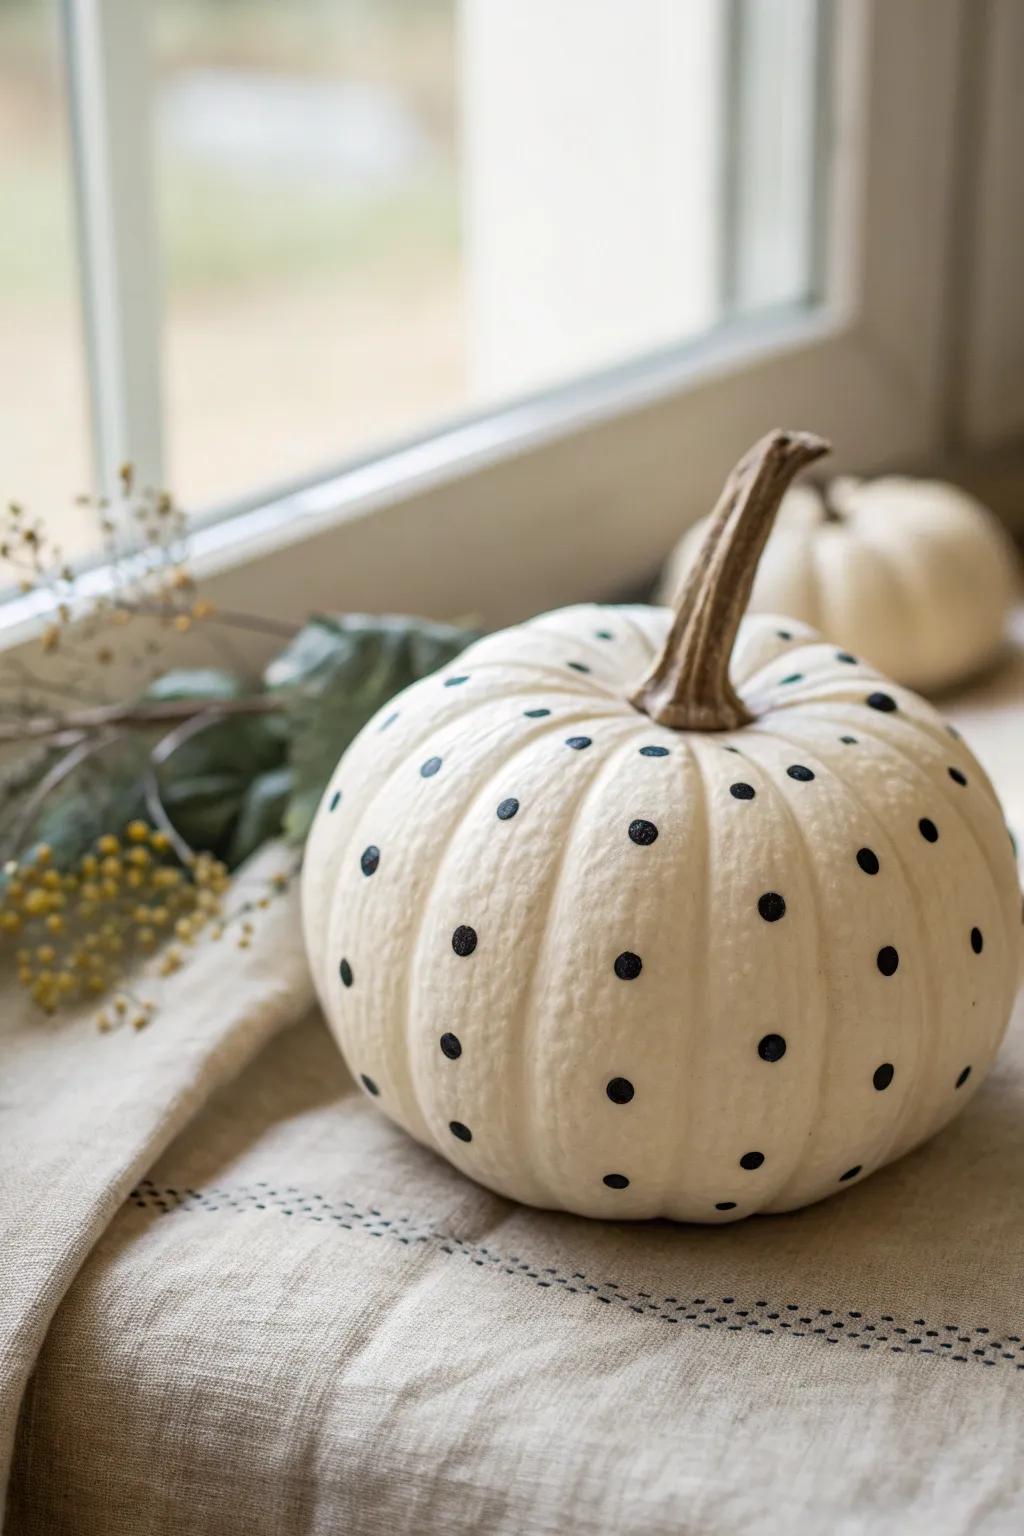
For a sophisticated twist on Halloween decor, look no further than this elegant, cream-colored pumpkin adorned with perfectly placed black polka dots. The contrast creates a chic, modern aesthetic that fits beautifully with neutral farmhouse or minimalist interiors.
Step-by-Step Guide
Materials
- Small to medium white artificial or real pumpkin (smooth surface works best)
- Black acrylic paint (matte or satin finish)
- Small round foam pouncer or dauber (approx. 1/4 inch)
- Small detail paintbrush
- Paper plate or painting palette
- Damp cloth or paper towel (for mistakes)
- Matte spray sealant (optional)
- Alcohol wipes (for prepping the surface)
Step 1: Preparation
-
Select your pumpkin:
Choose a white pumpkin, either real or faux. If using a real one, look for something with defined vertical ribs, as this adds dimension to the final look. -
Clean the surface:
Wipe down the entire surface of the pumpkin with an alcohol wipe or mild soapy water. This removes any oils or dirt that might prevent the paint from adhering properly. -
Dry completely:
Allow the pumpkin to air dry fully. A bone-dry surface ensures crisp paint edges and prevents smudging during application. -
Prepare your paint:
Squeeze a dime-sized amount of black acrylic paint onto your palette or paper plate. Dab your round foam pouncer into the paint to load it. -
Test on paper:
Before touching the pumpkin, press your pouncer onto a scrap piece of paper to ensure the paint isn’t too gloopy. You want an even, flat circle, not a thick blob.
Step 2: Pattern Application
-
Start near the stem:
Begin your pattern at the top near the stem. Choose a vertical rib section and gently press the pouncer down to create your first dot. -
Establish vertical spacing:
Moving down that same vertical rib, space out your next dot roughly 1.5 to 2 inches below the first one. -
Continue the column:
Add 2-3 more dots down toward the base of the pumpkin, following the natural curve of the rib. I like to let the dots follow the pumpkin’s shape rather than a straight ruler line. -
Begin the next section:
Move to the adjacent rib section to the right. To create the staggered ‘brick’ pattern shown in the photo, place your first dot halfway between the height of the first two dots in your previous column. -
Alternate spacing:
Continue adding dots down this second column, keeping them offset from the column next to it. This creates a balanced, organic polka dot look. -
Rotate and repeat:
Slowly rotate the pumpkin and continue this alternating column method around the entire circumference. -
Check for gaps:
Step back and look at the pumpkin from a distance. If any areas look too sparse, you can add a small partial dot or adjust spacing on the remaining sides.
Use a pencil guide
Worried about spacing? Lightly mark the dot placement with a pencil before painting. You can easily erase the marks later if the paint doesn’t cover them perfectly.
Step 3: Finishing Touches
-
Refine the edges:
If any of your foam pouncer circles look fuzzy or uneven, use a very small detail paintbrush dipped in black paint to carefully round out the edges. -
Clean the stem:
Check the stem for any stray black marks. If you accidentally got paint on the brown stem, wipe it off quickly with a damp cloth. -
Allow to dry:
Let the paint dry completely, which usually takes about 30 minutes for acrylics. Don’t touch the dots until they are matte and set. -
Seal the design (optional):
If you plan to display this outdoors or keep it for years, apply a light coat of matte spray sealant to protect the paint from chipping.
Try gold leaf accents
For a glamorous upgrade, apply a tiny dab of gold leaf adhesive to the center of random black dots, then press on gold foil for a sophisticated metallic shimmer.
Now you have a timeless decorative piece that adds charm to your autumn display without overwhelming the space

PENCIL GUIDE
Understanding Pencil Grades from H to B
From first sketch to finished drawing — learn pencil grades, line control, and shading techniques.
Explore the Full Guide
Geometric Color-Block Pumpkins
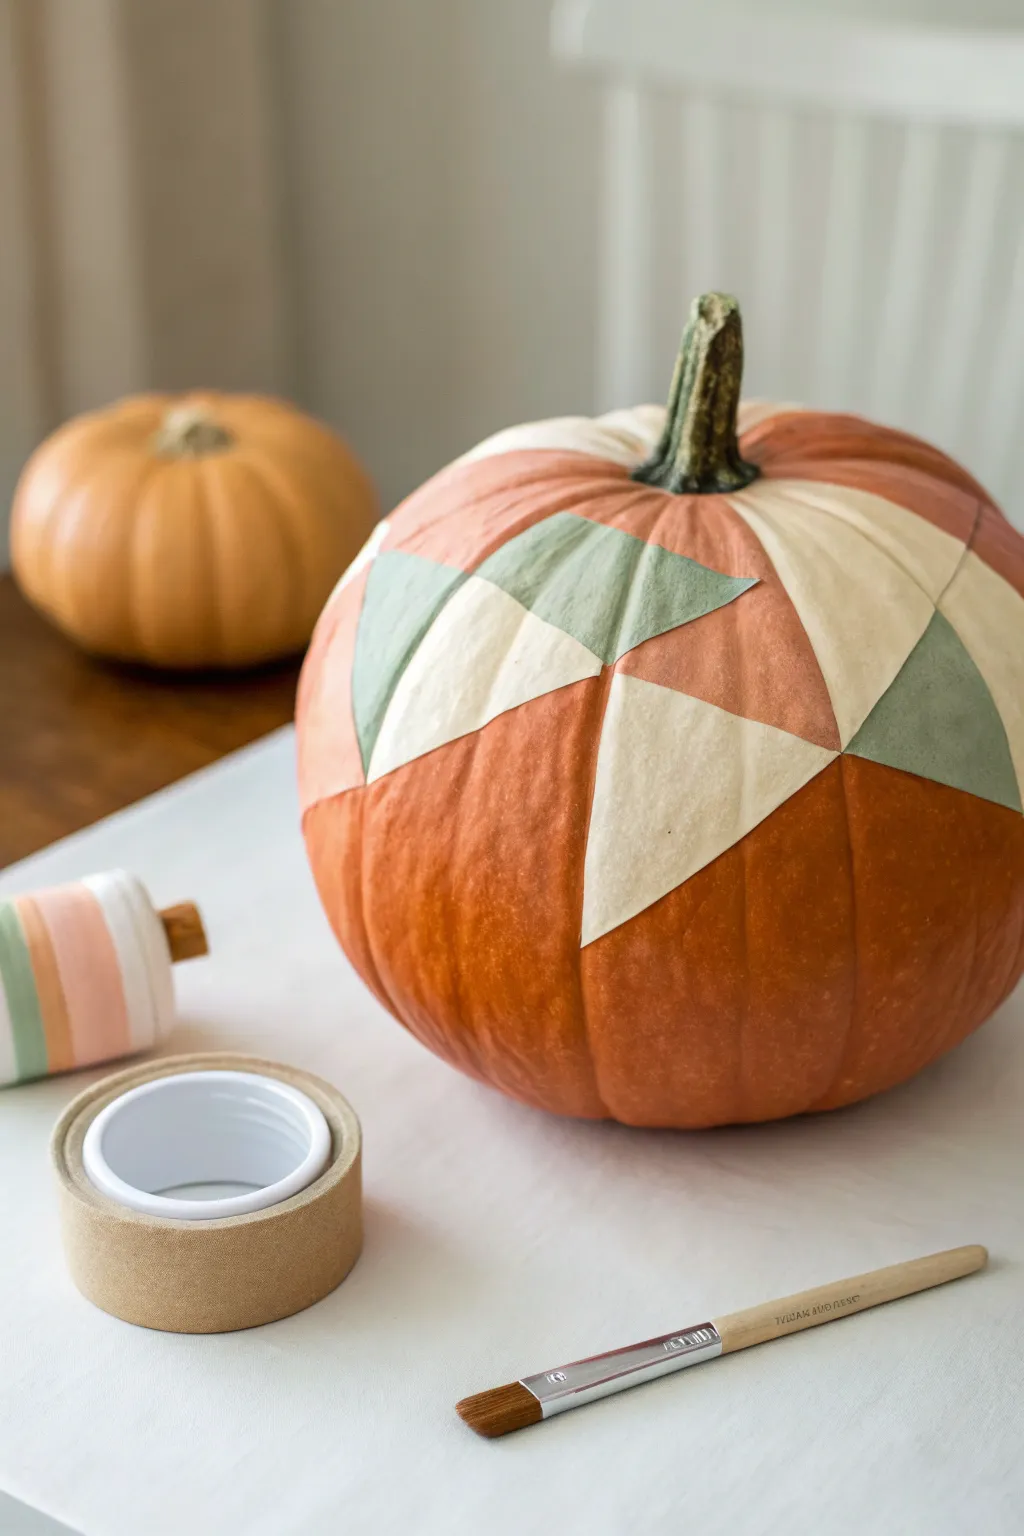
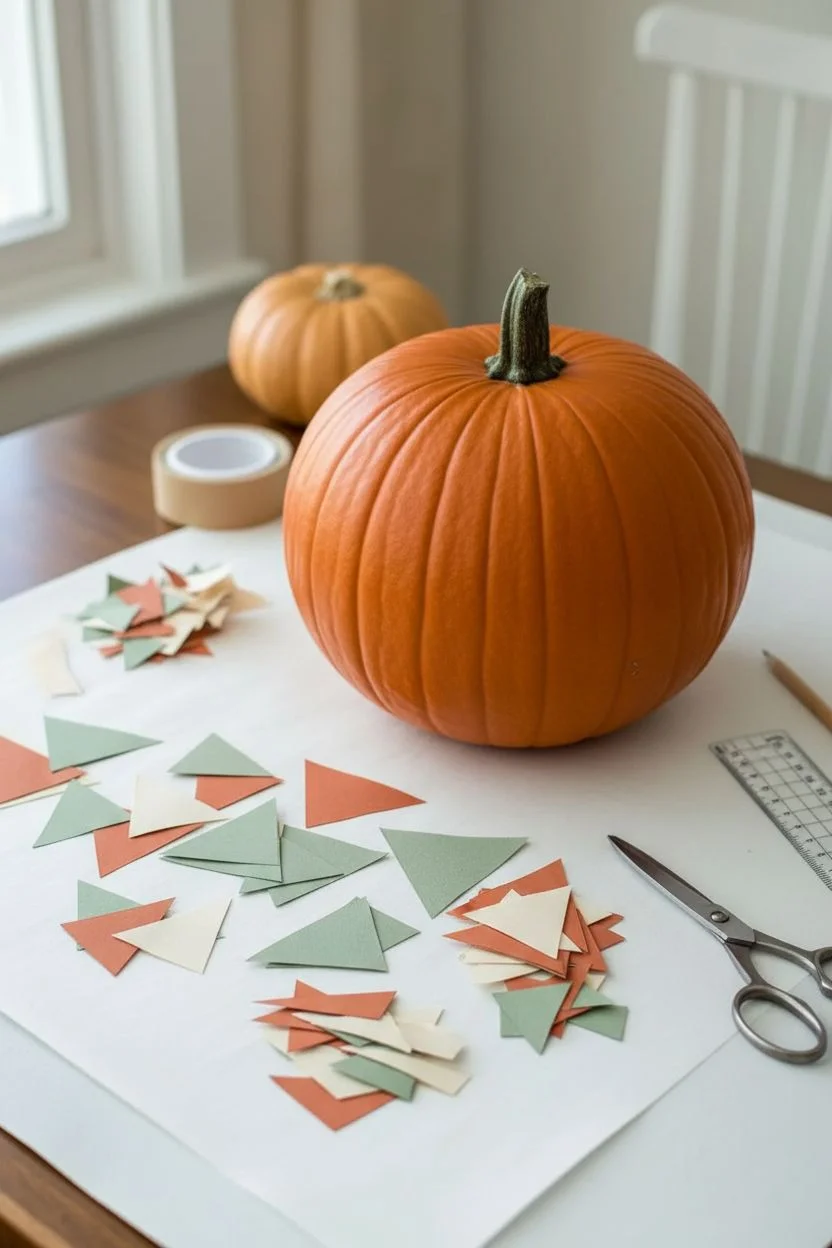
Give your autumn decor a modern, minimalist twist with this geometric color-block pumpkin. By layering paper triangles in muted sage, cream, and terracotta tones, you can achieve a sophisticated, quilt-like pattern that elevates the humble gourd into a piece of art.
How-To Guide
Materials
- Medium-sized orange pumpkin (real or faux)
- Tissue paper or lightweight craft paper (sage green, cream, terracotta)
- Decoupage glue (like Mod Podge)
- Flat paintbrush (1-inch width)
- Scissors
- Pencil
- Ruler
- Damp cloth (for cleanup)
Step 1: Preparation
-
Clean surface:
Begin by wiping down your pumpkin with a damp cloth to remove any dirt or oils. If you are using a real pumpkin, ensure it is completely dry before proceeding. -
Assess the shape:
Look at the natural ribs and curvature of your pumpkin. The geometric pattern works best when it follows these natural lines, so visualize where your focal point effectively sits. -
Cut paper triangles:
Using your scissors, cut several triangles from your chosen tissue or craft paper colors. A mix of equilateral and right-angle triangles creates visual interest. -
Size variation:
Cut the triangles in various sizes, ranging from 2 to 4 inches wide. Having a variety allows you to fit them neatly into the tapered spaces near the top stems.
Step 2: Applying the Design
-
Initial placement:
Before gluing, lay a few triangles onto the dry pumpkin surface to test your pattern. Aim for an alternating color scheme where no two identical colors touch directly. -
Apply base glue:
Using your flat brush, apply a thin, even layer of decoupage glue to a small section of the pumpkin focused on the upper half. -
Place first triangle:
Gently press your first triangle (perhaps a cream one) onto the wet glue. Start near the stem and smooth it downward. -
Smooth wrinkles:
Use your finger or the dry handle of your brush to carefully smooth out any air bubbles or major wrinkles, though slight texture adds charm. -
Layering glue:
Immediately brush a thin coat of decoupage glue over the top of the placed triangle to seal it against the pumpkin skin. -
Connect shapes:
Select a contrasting color, like sage green, and place it adjacent to the first shape. Let the points or edges touch or slightly overlap to create a cohesive geometric grid. -
Working around curves:
As you work, you’ll notice the paper needs to curve. I find it helpful to make tiny relief cuts in the paper if the triangle is puckering too much over a bump. -
Continue the pattern:
Work your way around the pumpkin, creating a band of geometric shapes. You don’t need to cover the entire bottom; focusing on the top hemisphere creates a nice ‘cap’ effect. -
Fill gaps:
If you find awkward gaps between your main triangles, cut smaller, custom-sized slivers of paper to fill the void and maintain the mosaic feel.
Wrinkle Rescue
If your tissue paper is wrinkling excessively, your glue layer is too thick. Use a lighter hand and smooth from the center of the triangle outward.
Step 3: Finishing Touches
-
Final seal:
Once your design is complete, brush a final tailored coat of decoupage glue over the entire papered area. -
Check edges:
Inspect all the corners of your triangles. If any are lifting, dab a tiny bit of extra glue underneath and press firm. -
Drying time:
Allow the pumpkin to sit undisturbed for at least 2-3 hours until the glue surface is completely clear and dry to the touch. -
Clean up stem:
If you accidentally got glue on the stem, gently wipe it away with a damp cloth before it fully hardens to keep the stem looking natural. -
Matte finish:
For an ultra-modern look, ensure your decoupage glue dries matte. If you used a glossy glue, you can do a light topcoat of matte varnish to dull the shine.
Golden Touch
Add a touch of luxury by using gold leaf for a few of the smaller triangles, or paint thin gold lines between the shapes after they dry.
Now you have a stunning, modern centerpiece that perfectly captures the colors of the season
Metallic Stem and Accents
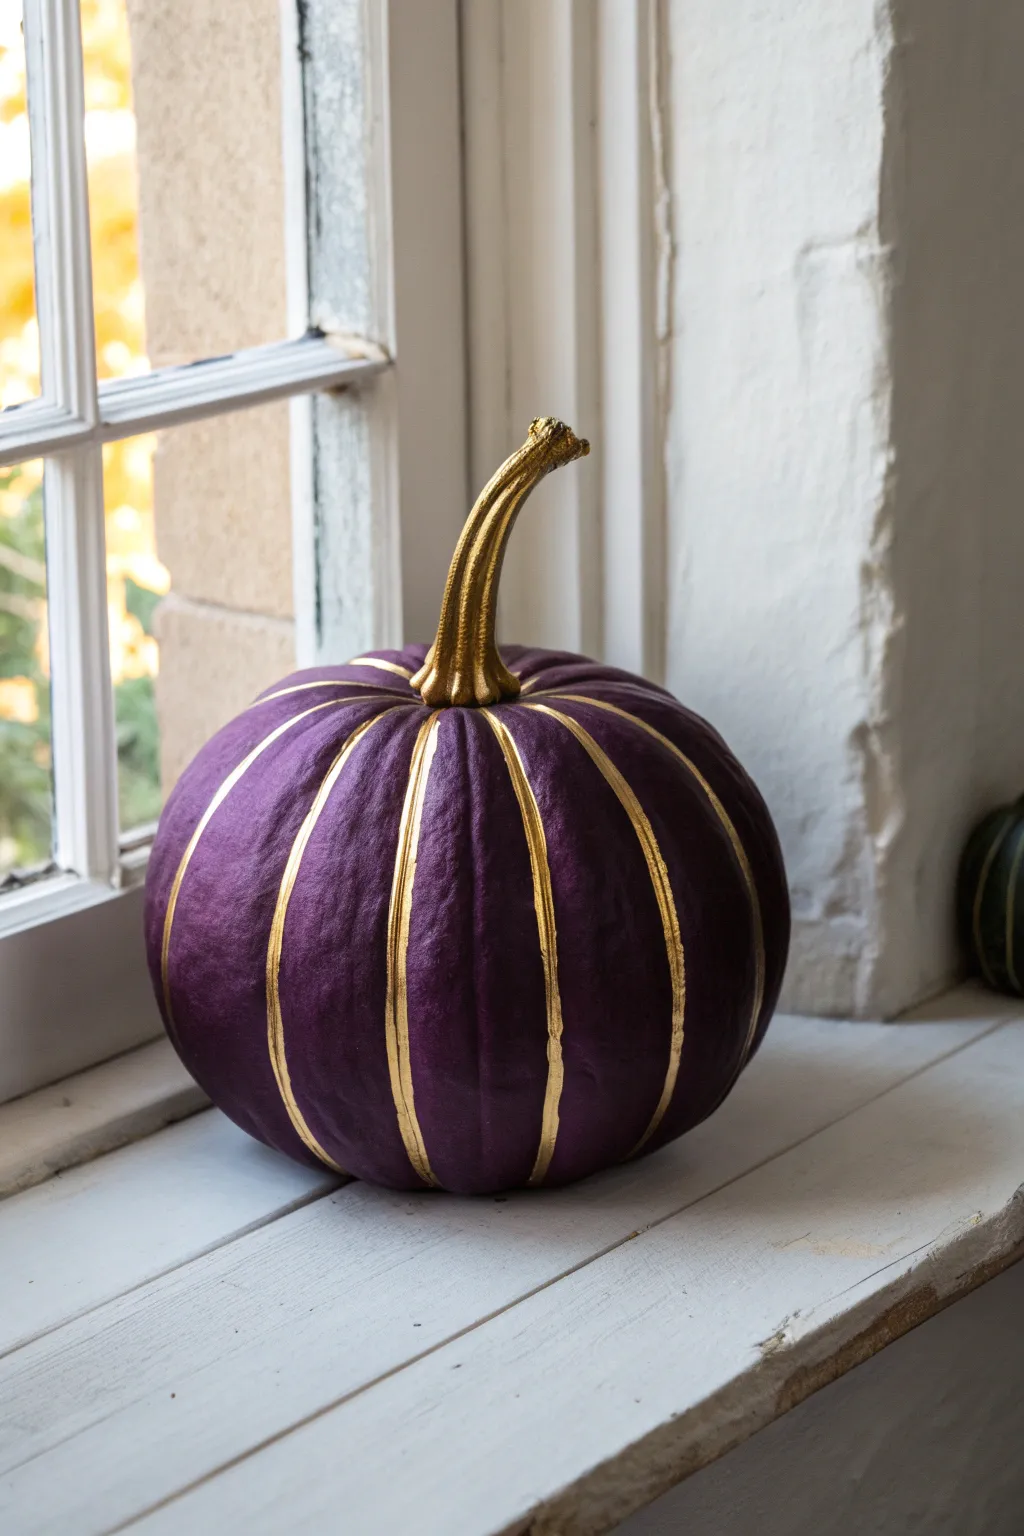
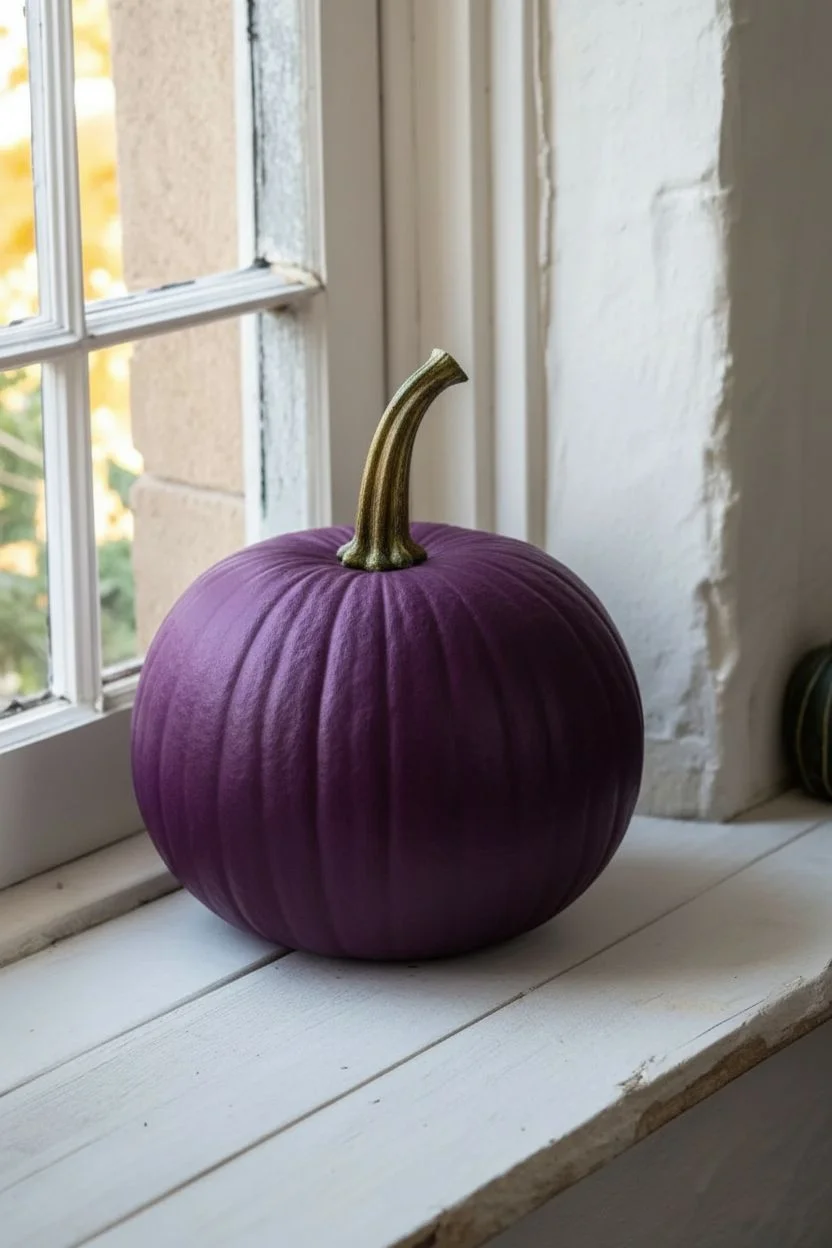
Transform a standard pumpkin into a regal centerpiece by combining deep plum hues with striking metallic highlights. This design uses the pumpkin’s natural shape to guide your brush, making it surprisingly easy to achieve a sophisticated, high-end look.
Step-by-Step Guide
Materials
- Medium-sized faux or real pumpkin (smooth skin is best)
- Deep purple acrylic craft paint (satin or matte finish)
- Metallic gold acrylic paint (high pigment)
- Medium flat paintbrush (approx. 1 inch)
- Small round detail brush
- Medium round brush
- Paper towels or cloth
- Palette or paper plate
- Painter’s tape (optional)
- Clear spray sealer (optional)
Step 1: Base Coat Preparation
-
Clean surface:
Begin by wiping down your pumpkin with a damp cloth to remove any dirt, dust, or oils. If you are using a real pumpkin, ensure it is completely dry before proceeding. -
Protect stem:
If you are worried about getting purple paint on the stem, wrap a small strip of painter’s tape around the very base of the stem where it meets the pumpkin skin. -
Apply first purple layer:
Load your medium flat brush with the deep purple paint. Apply a thin, even coat over the entire body of the pumpkin, working in vertical strokes from top to bottom. -
Let it dry:
Allow the first coat to dry completely. This usually takes about 20-30 minutes depending on the thickness of your paint. -
Apply second coat:
Add a second coat of purple paint to ensure full opacity. The goal is a rich, solid color without any orange showing through. Let this layer dry overnight or for at least a few hours.
Steady Hands
For smoother stripes, rest your pinky finger on the pumpkin’s surface as a stabilizer while you drag the brush down the grooves.
Step 2: Gilded Stem
-
Select gold paint:
Shake your metallic gold paint well to ensure the metallic pigments are evenly distributed. -
Paint the stem:
Using a medium round brush, carefully paint the entire stem gold. I like to work from the top down, getting into all the little twists and crevices of the stem. -
Clean edges:
Carefully paint the base of the stem where it meets the purple skin. If you used tape earlier, remove it now and use a small detail brush to neaten the edge. -
Second gold layer:
Metallic paints can sometimes be translucent, so apply a second coat to the stem once the first is dry to achieve a solid, molten gold look.
Glitter Upgrade
While the gold stripe paint is still wet, lightly sprinkle fine gold glitter over the lines for added texture and sparkle.
Step 3: Accenting the Ribs
-
Study the shape:
Identify the natural grooves or ‘ribs’ that run vertically down your pumpkin. These indentations will serve as your painting guide. -
Load detail brush:
Switch to your small round detail brush and load it with a generous amount of gold paint. -
Start at the top:
Place your brush tip right at the base of the gold stem, aligning it with one of the vertical ribs. -
Paint the stripe:
Slowly drag the brush down the length of the groove. Don’t worry about making the line perfectly straight; following the natural wobble of the pumpkin adds character. -
Manage pressure:
Apply consistent pressure to keep the line width relatively uniform, aiming for a stripe about 1/4 inch wide. -
Complete the circle:
Rotate the pumpkin and continue painting a gold stripe down every major rib until you have circled the entire vegetable. -
Touch up:
Check your stripes for any thin spots. Dab a little extra gold paint onto areas that look patchy. -
Dry and seal:
Allow the gold accents to dry fully. If this will be displayed outdoors, apply a clear spray sealer to protect your work from the elements.
Place your royal creation on a windowsill or mantel to add a touch of glamour to your harvest decor


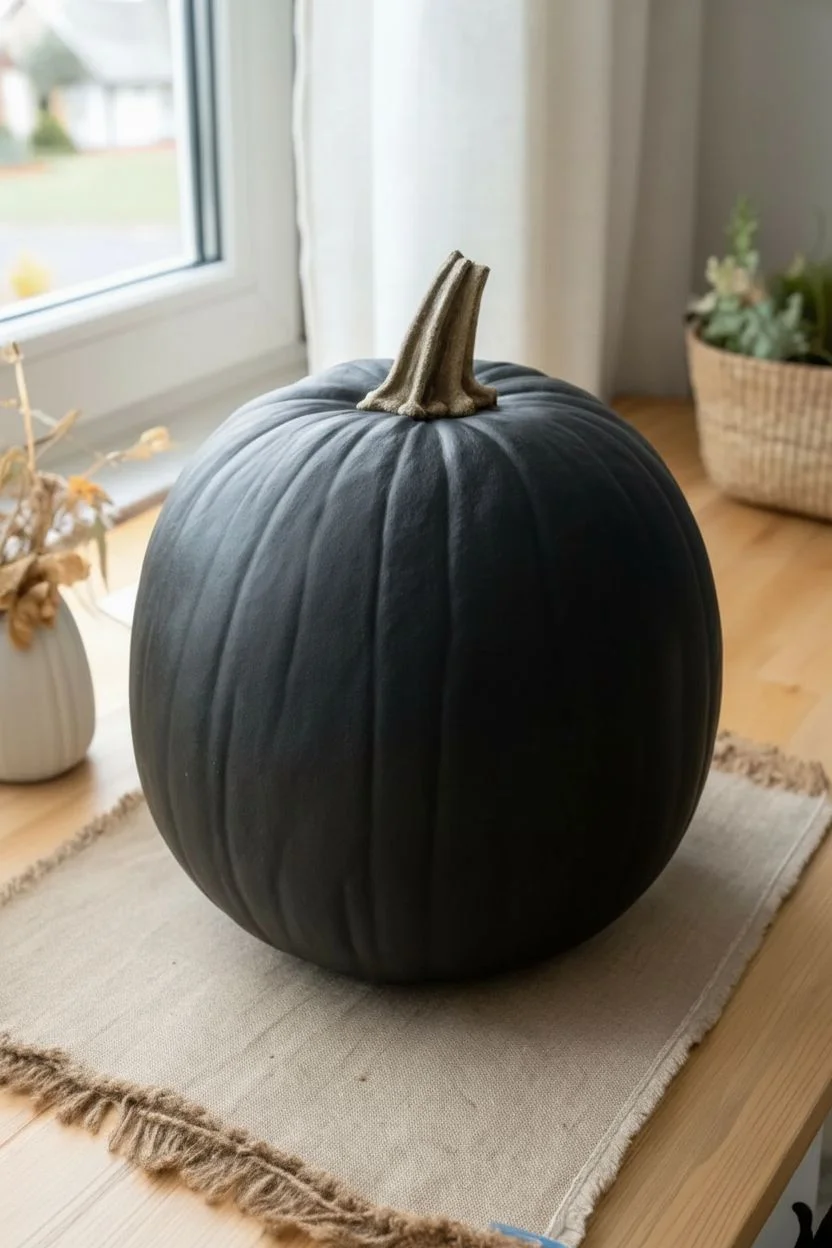
Ombre Fade Pumpkin
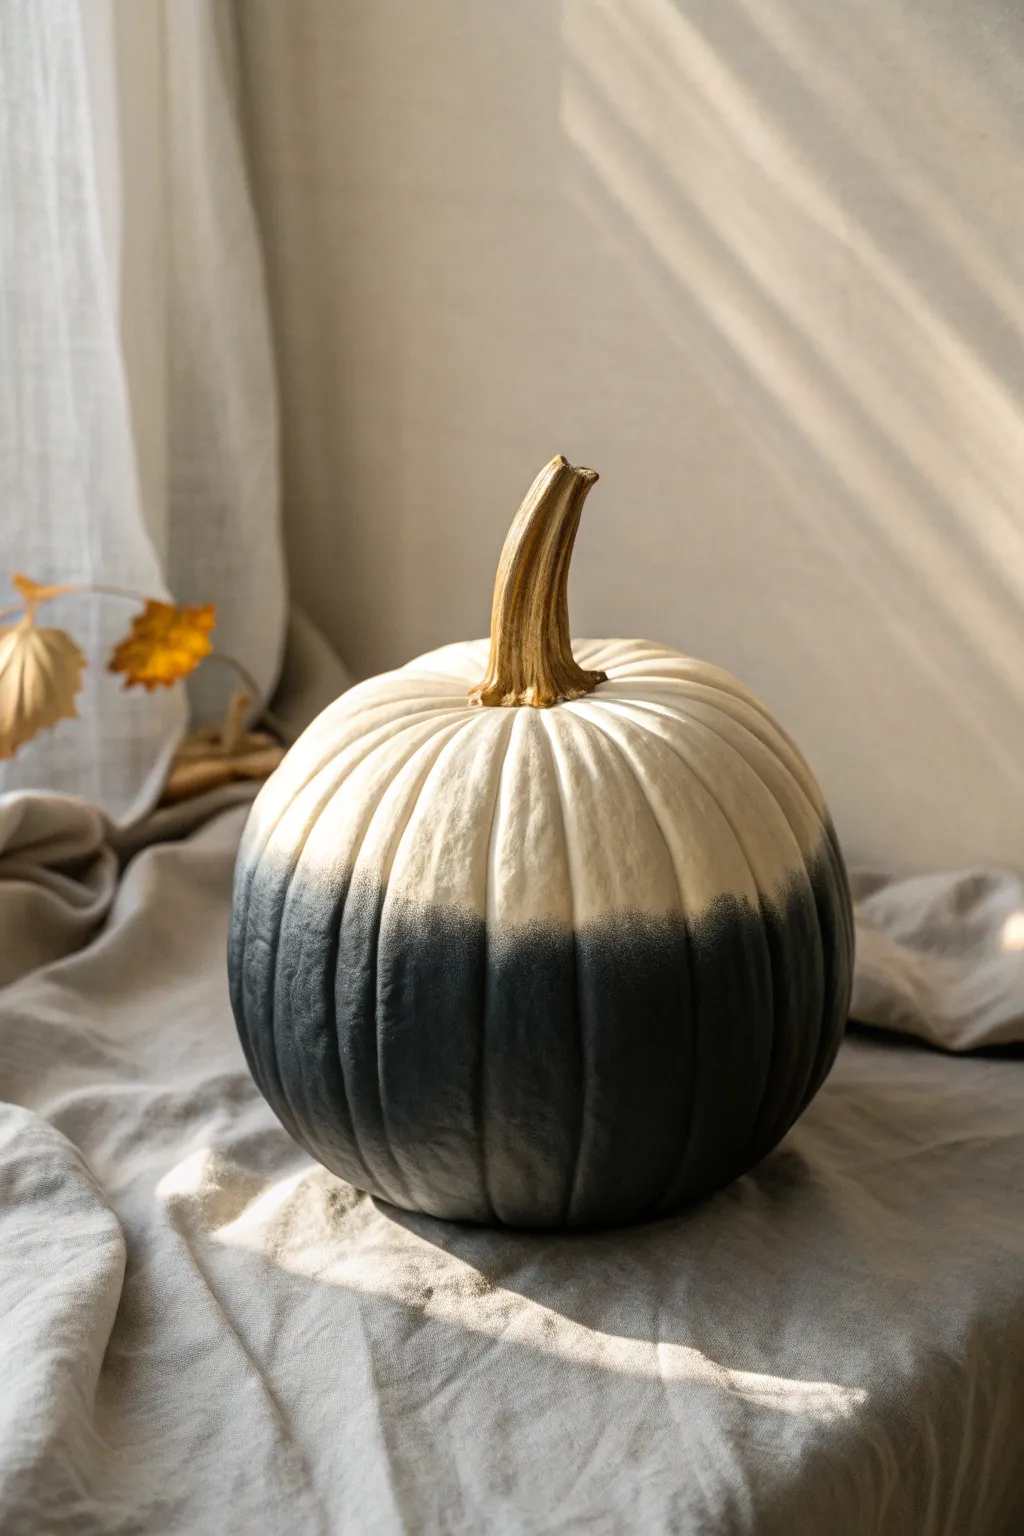
Achieve a sophisticated, modern autumn look with this stunning ombre pumpkin design. The seamless transition from creamy white to deep charcoal creates a dramatic contrast that elevates any seasonal display.
Step-by-Step Tutorial
Materials
- Faux or real pumpkin (medium to large)
- Matte cream or off-white spray paint
- Matte black or charcoal spray paint
- Liquid gold gilding or gold acrylic paint
- Small flat paintbrush
- Painter’s tape
- Cardboard or drop cloth (for workspace)
- Respirator mask (recommended)
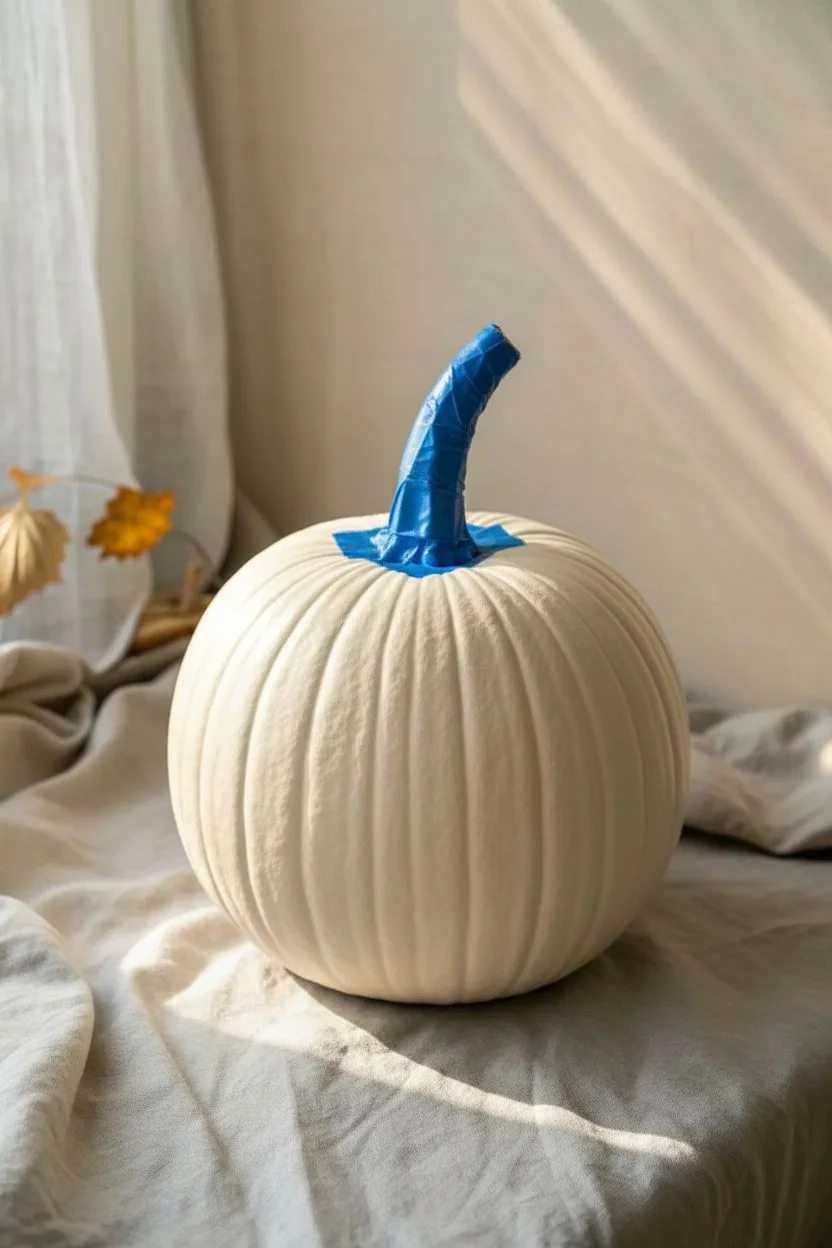
Step 1: Preparation & Base Coat
-
Clean surface:
Begin by thoroughly wiping down your pumpkin with a damp cloth to remove any dust or dirt, then dry completely. -
Protect stem:
Carefully wrap the entire stem in painter’s tape, ensuring the edges near the pumpkin’s body are sealed tight to prevent spray paint leakage. -
Set specific workspace:
Set up a well-ventilated area outdoors or in a garage, laying down cardboard or a drop cloth to catch overspray. -
Apply base color:
Spray the entire pumpkin with the matte cream paint. Hold the can about 8-10 inches away. -
Ensure coverage:
Apply two to three thin coats rather than one heavy one to avoid drips, letting it dry for 15 minutes between coats. -
Dry completely:
Allow this base layer to cure for at least an hour until it is fully dry to the touch.
Step 2: Creating the Ombre Fade
-
Position the pumpkin:
Place the pumpkin on a raised surface, like an overturned bucket covered in plastic, so you can easily access the bottom half. -
Start the dark coat:
Shake the matte black spray paint can vigorously for at least one minute. -
Paint the bottom:
Begin spraying the very bottom of the pumpkin with a solid, opaque layer of black, covering the lower third completely. -
Begin the transition:
Move the can slightly further away (about 12 inches) as you work upward. -
Mist the middle:
Spray in short, light bursts towards the middle section, aiming slightly downward to let the mist fall gently onto the cream surface. -
Check density:
I find that stepping back every few seconds helps me gauge the gradient density; you want speckles of black to fade out, not a hard line. -
Refine the fade:
If the transition looks too harsh, hold the can even further back and very lightly mist the blend line to soften it. -
Rotate and inspect:
Carefully rotate the pumpkin (touching only the dry top or waiting for the black to tack up) to ensure the gradient height is consistent all around.
Softening the Mist
If you accidentally create a harsh line, lightly mist over the transition area with your cream base color to blend the black speckles back out.
Step 3: Gilded Details
-
Remove tape:
Once the spray paint is completely dry, gently peel off the painter’s tape from the stem. -
Prepare gold:
Shake your liquid gold gilding or pour a small amount of gold acrylic paint onto a palette. -
Paint the stem:
Using a small flat brush, apply the gold paint to the stem, working from the top down. -
Clean edges:
Be very precise where the stem meets the pumpkin body to create a crisp, clean metallic edge against the cream paint. -
Final cure:
Let the pumpkin sit undisturbed for 24 hours to allow all paint layers to fully harden and cure.
Reverse Gradient
Try flipping the color scheme by painting the base black and misting white from the top down for a ‘snow-capped’ mountain effect.
Place your sleek ombre creation on a mantel or runner for an instantly elegant centerpiece
Leopard Print Pumpkins
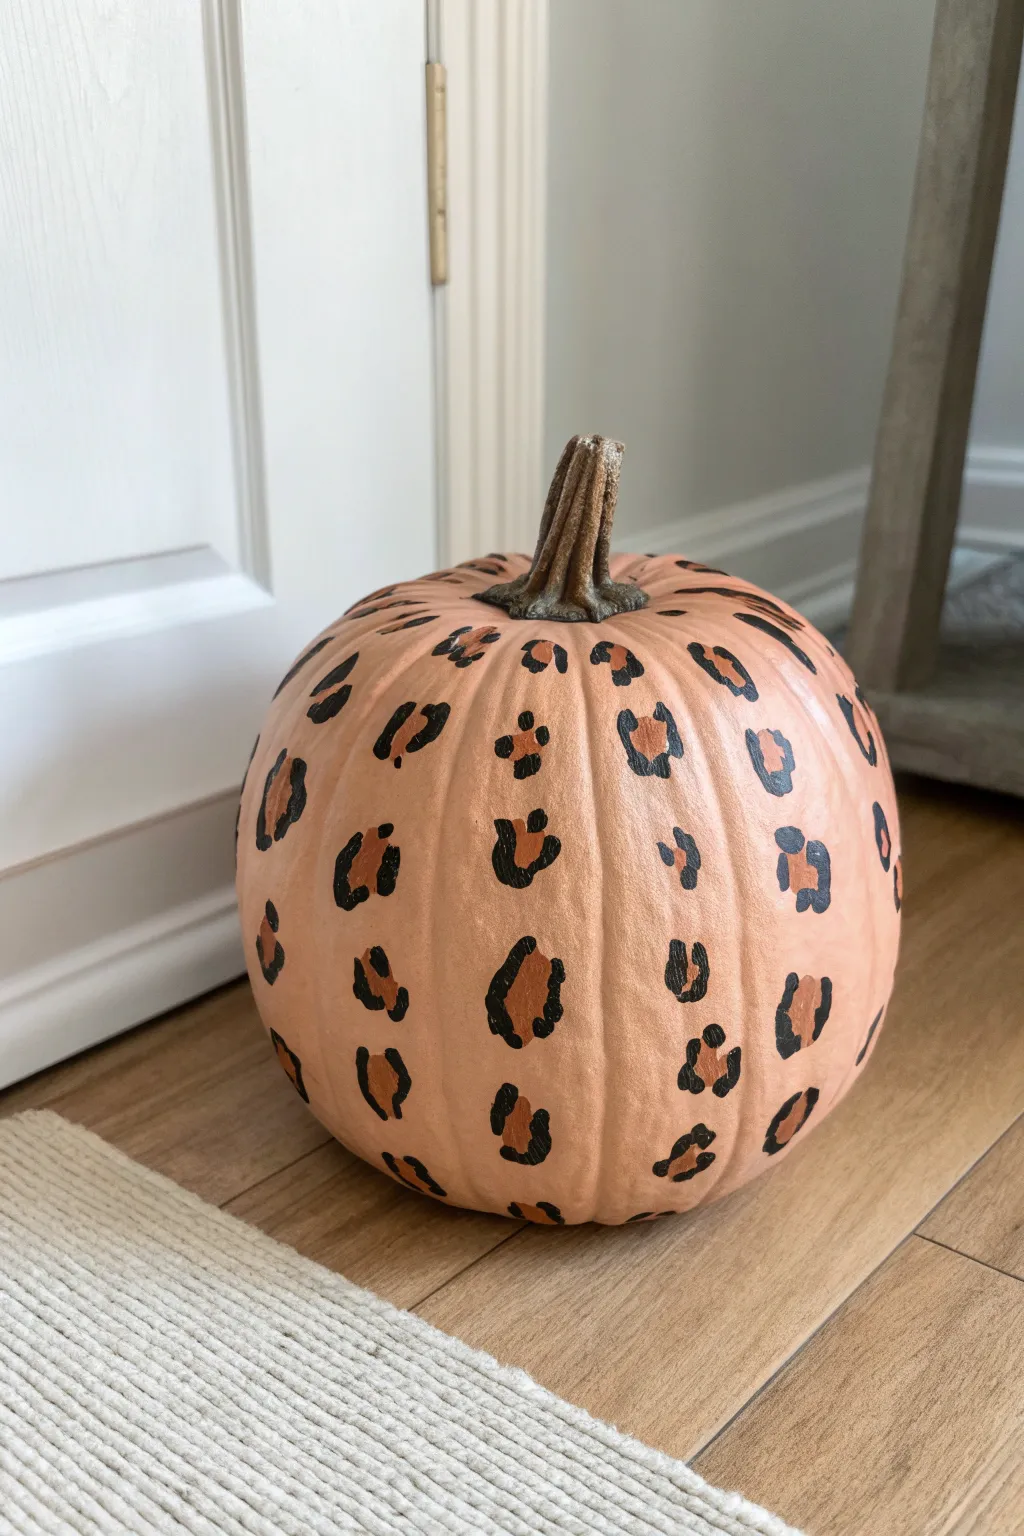
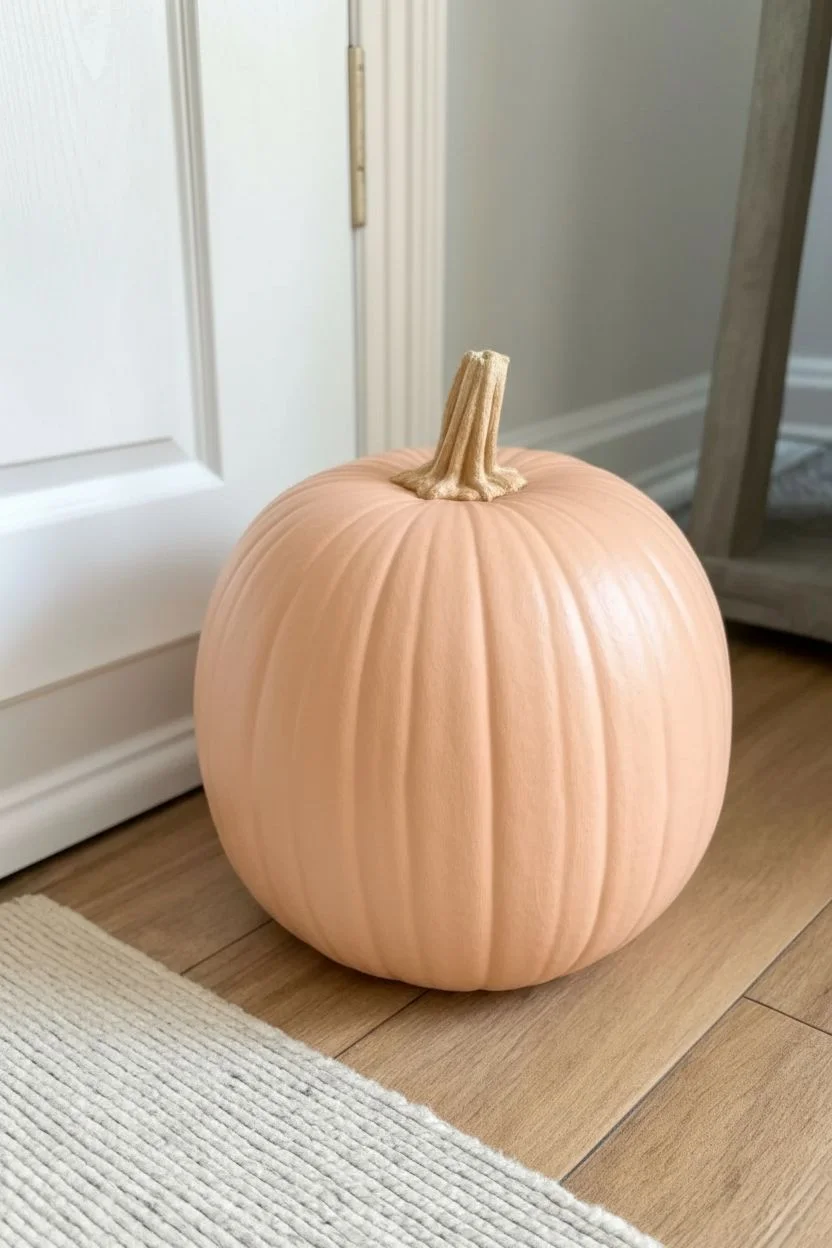
Transform a basic pumpkin into a stylish piece of decor with this trendy leopard print design. The soft peach base paired with bold spots creates a sophisticated look that works beautifully through Thanksgiving and beyond.
How-To Guide
Materials
- Faux or real pumpkin (medium size)
- Matte acrylic paint in soft peach/beige (base color)
- Acrylic paint in dark tan or cognac brown (spot centers)
- Black acrylic paint (outlines)
- Medium flat paintbrush
- Small round detail brush (size 1 or 2)
- Paper plate or palette
- Clear matte sealer spray (optional)
Step 1: Base Coat Application
-
Clean the surface:
Before you start painting, make sure your pumpkin is free of dust or dirt. If using a real pumpkin, wash and dry it thoroughly. For a faux pumpkin, a quick wipe with a damp cloth is sufficient. -
Apply the first coat:
Squeeze your soft peach or beige acrylic paint onto the palette. Using the medium flat brush, apply an even layer of paint over the entire surface of the pumpkin, avoiding the stem. -
Let it dry completely:
Allow the first coat to dry for at least 30 minutes. The paint should be dry to the touch before you proceed to prevent lifting previous layers. -
Apply a second coat:
For a solid, opaque finish, brush on a second layer of the peach paint. I find that two coats usually hide the original pumpkin color perfectly. Let this dry fully before starting the pattern.
Natural Pattern Trick
Avoid making your spots too equidistant. Cluster a few spots closer together and leave slightly larger gaps elsewhere to mimic the organic growth of animal fur.
Step 2: Creating the Leopard Spots
-
Test your colors:
Before painting on the pumpkin, dab your tan and peach paints next to each other on paper to ensure there is enough contrast between the base and the spots. -
Paint the inner spots:
Using your smaller round brush and the dark tan/cognac paint, create organic, irregular blob shapes scattered around the pumpkin. -
Vary the sizes:
Make some spots larger and some smaller to create a natural-looking pattern. Don’t worry about making perfect circles; rough edges look more like real fur markings. -
Check the spacing:
Leave varying amounts of the peach background visible between the tan spots. You want the pattern to feel random but balanced across the ribs of the pumpkin. -
Allow spots to set:
Give the tan spots about 15-20 minutes to dry. They don’t need to be cured, but surface-dry is best so the black paint doesn’t muddy into them.
Try Metallic Accents
For a glamorous twist, swap the dark tan center spots for metallic gold acrylic paint. The shimmer against the matte black outlines looks incredible.
Step 3: Adding the Details
-
Start the outlines:
Dip your fine detail brush into the black acrylic paint. You will be painting around the edges of your tan spots, but not enclosing them completely. -
Create brackets:
Paint messy ‘C’ shapes or brackets around the tan spots. For some spots, paint two separate curves on opposite sides; for others, paint a three-part broken outline. -
Vary the line thickness:
Leopard print isn’t uniform. Press harder in some areas of your stroke and lighter in others to create lines that vary in thickness. -
Fill the empty spaces:
Look for large gaps in your pattern where there are no tan spots. In these areas, paint small, solitary black marks or tiny ‘v’ shapes to act as filler spots. -
Refine the look:
Step back and rotate the pumpkin to view it from all angles. Add more outlines or small black dots wherever the design feels sparse. -
Dry and seal:
Allow the painted pattern to dry completely, preferably overnight. If you plan to display this outdoors, finish with a light mist of clear matte sealer.
Place your stylish new pumpkin on a console table or entryway for an instant pop of modern fall flair
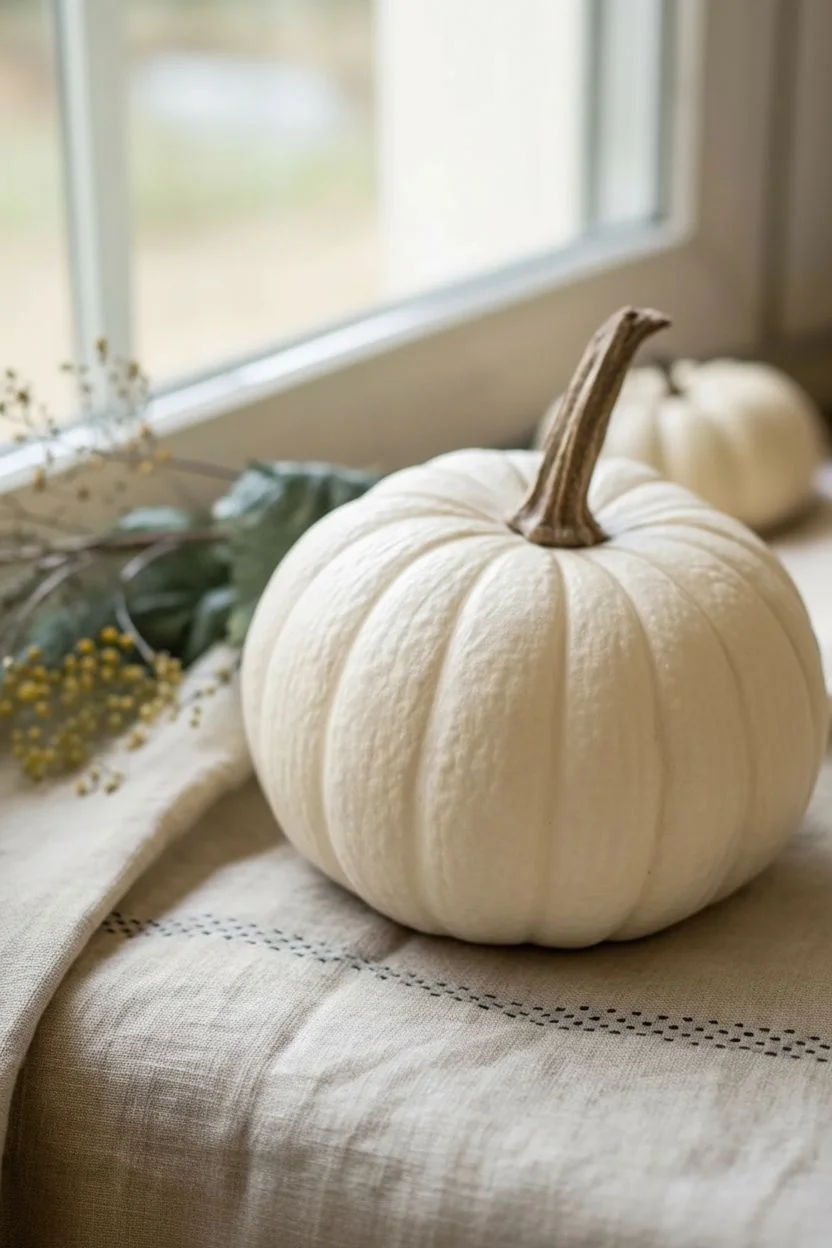
Hand-Lettered Words and Names
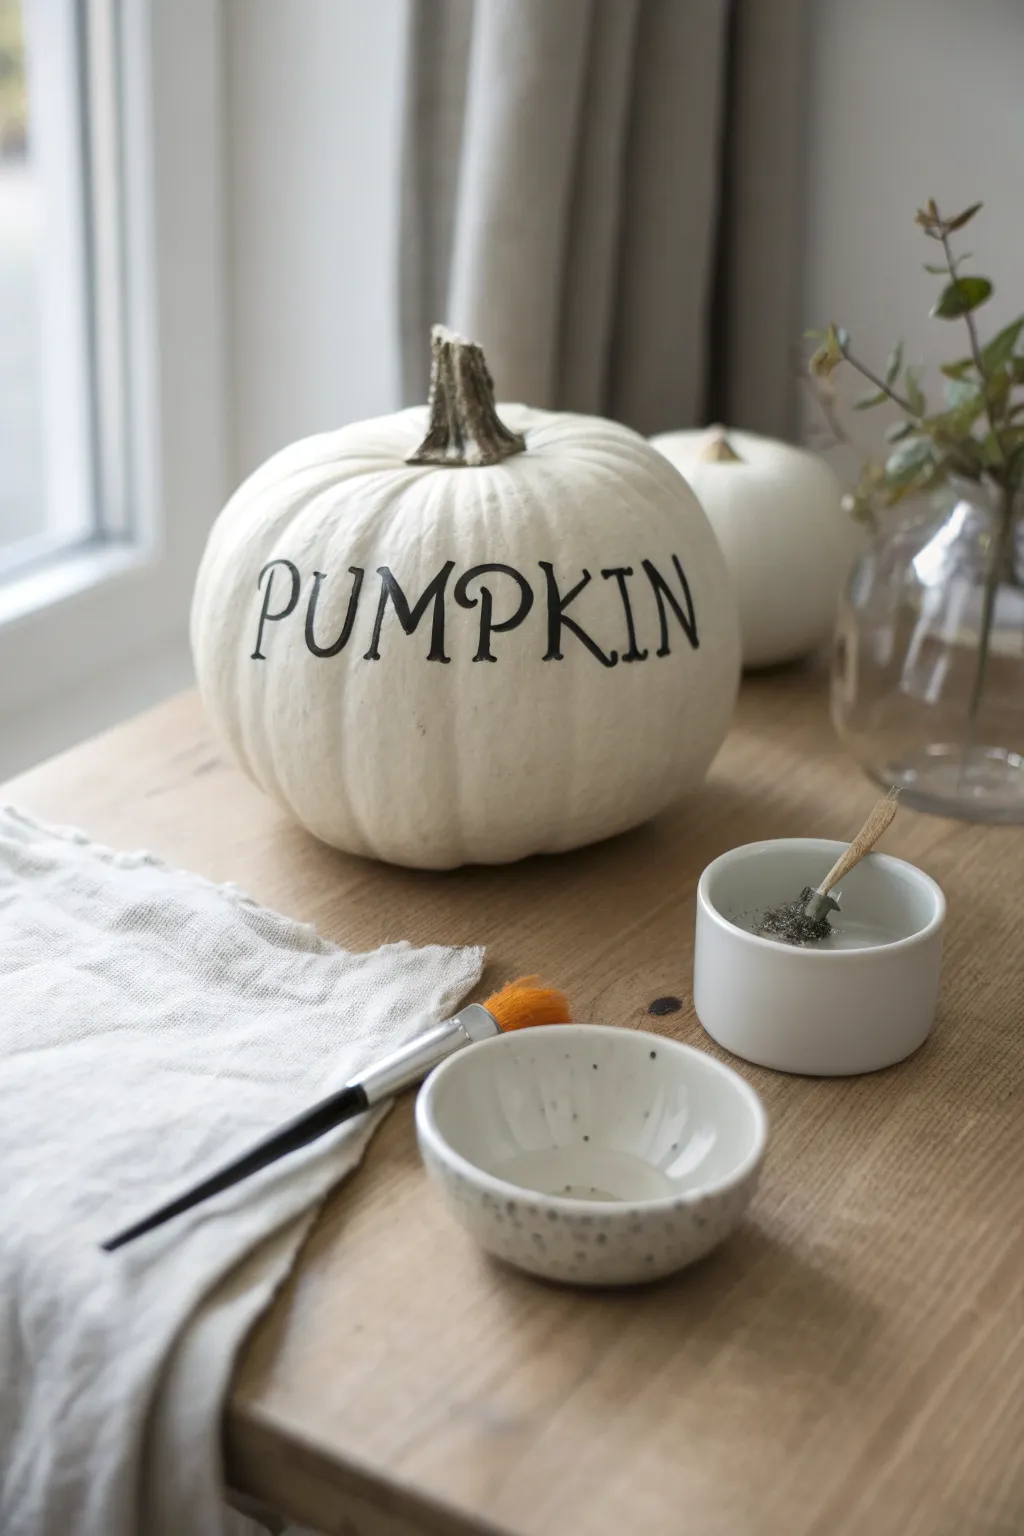

Embrace the understated beauty of autumn with this minimalist white pumpkin project featuring classic serif lettering. This clean, high-contrast design transforms a standard gourd into a sophisticated piece of modern farmhouse decor that looks far more expensive than it is.
Detailed Instructions
Materials
- Medium-sized white craft pumpkin (faux) or real white pumpkin
- Black acrylic craft paint
- Fine-point round paintbrush (size 0 or 1)
- Pencil
- Soft eraser
- Paper towel or cloth
- Small mixing bowl or palette
- Matte clear sealant spray (optional)
- Ruler or measuring tape (flexible)
Step 1: Preparation & Sketching
-
Clean surface:
Begin by wiping down your pumpkin with a damp cloth to remove any dust, dirt, or oils. If using a real pumpkin, ensure it is completely dry before starting; for faux pumpkins, a quick wipe ensures paint adhesion. -
Identify the face:
Rotate the pumpkin to find its best “face”—the smoothest side with the most pleasing roundness and fewest deep ridges, as these can distort your letters. -
Find the center:
Using your flexible ruler or measuring tape, find the horizontal center of the pumpkin. Lightly mark this midpoint with your pencil to help center your word. -
Draft the guidelines:
Very lightly sketch a top and bottom guideline for your letters. Curved lines that follow the pumpkin’s natural shape often look more organic than perfectly straight horizontal lines. -
Sketch the letters:
Using a pencil, lightly draft the word “PUMPKIN” (or your chosen name). Start with the middle letter ‘P’ at your center mark, then work outward to the left and right to keep the spacing even. -
Refine the font style:
Go back over your skeleton letters and add weight to create a serif style. Add small horizontal strokes (serifs) to the ends of the lines and thicken the downstrokes slightly.
Steady Hand Trick
For steadier lines, rest your painting elbow on the table and your pinky finger on the pumpkin. This anchors your hand so only your fingers move the brush.
Step 2: Painting the Lettering
-
Prepare the paint:
Squeeze a small amount of black acrylic paint into your mixing bowl. If the paint feels too thick or paste-like, I like to add a single distinct drop of water to improve the flow for fine lines. -
Load the brush:
Dip your fine-point brush into the paint, rolling it slightly on the edge of the bowl to maintain a sharp tip. You want the bristles coated but not dripping. -
Outline the verticals:
Starting with the first letter, carefully paint over the vertical pencil lines. Use your pinky finger resting on the pumpkin’s surface to steady your hand as you pull the brush downward. -
Add the curves:
Fill in the curved sections of the letters (like the top of the ‘P’ and ‘R’). Go slowly over the ridges of the pumpkin, dabbing paint into the crevices if the brush skips over them. -
Paint the serifs:
Using just the very tip of the brush, add the horizontal serif details at the top and bottom of your strokes. Keep these lines thin and crisp. -
Thicken the downstrokes:
To achieve that classic typography look, go back and slightly widen the vertical downstrokes of each letter, while keeping the horizontal cross-strokes thin. -
Check for consistency:
Step back and look at the word as a whole. Touch up any edges that look shaky or areas where the black paint looks thin or streaks through to white.
Ridges Distorting Text?
Don’t fight the pumpkin’s shape. If a letter falls directly in a deep groove, break the letter slightly or widen the spacing so the stroke lands on a ‘hill’ instead.
Step 3: Finishing Touches
-
Let it dry:
Allow the paint to dry completely. Acrylics usually dry to the touch within 20 minutes, but wait an hour to be safe before touching the lettering. -
Erase guidelines:
Once the paint is rock-hard dry, gently use a soft eraser to remove any visible pencil marks around the painted letters. Be careful not to rub vigorously over the paint itself. -
Clean up details:
If you accidentally smudged any black paint, use a damp Q-tip or a small brush with white paint to clean up the edges and sharpen the letters. -
Seal the work (Optional):
If this pumpkin will be placed outdoors or stored for next year, apply a light coat of matte clear sealant spray to protect the lettering from chipping or fading.
Enjoy the sophisticated charm this custom piece adds to your seasonal display
Chalkboard-Style Message Pumpkin
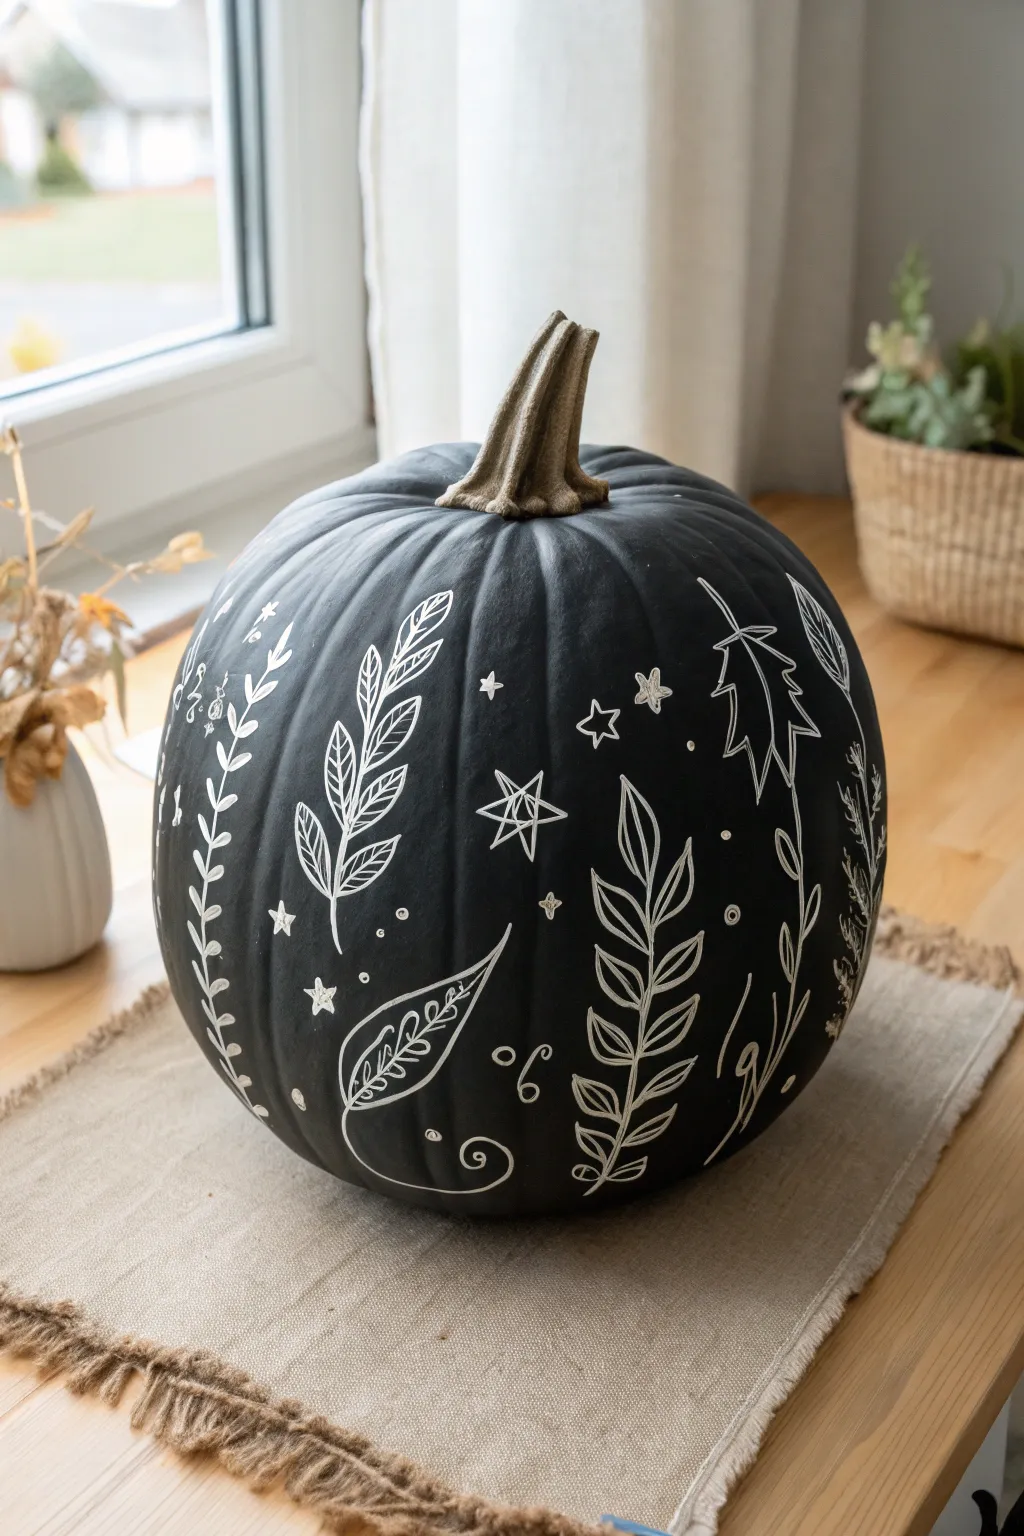
Transform an ordinary pumpkin into an elegant piece of autumn decor with a matte black finish and delicate white foliage. This striking contrast mimics the classic chalkboard look but elevates it with fine-line botanical and celestial doodles.
Step-by-Step Tutorial
Materials
- Medium to large pumpkin (real or faux)
- Matte black spray paint or acrylic craft paint
- Wide foam brush (if using liquid paint)
- White fine-tip paint pens (oil-based or acrylic)
- White medium-tip paint pens
- Pencil (optional)
- Damp cloth
- Painter’s tape or tin foil ( to protect the stem)
- Clear matte sealer spray (optional)
Step 1: Preparation and Base Coat
-
Clean surface:
Start by wiping down your pumpkin thoroughly with a damp cloth to remove any dirt or oils. Let it dry completely so your paint adheres properly. -
Protect the stem:
Wrap the stem tightly with painter’s tape or mold a piece of tin foil around it. This keeps the stem its natural color, which adds a nice rustic contrast to the black body. -
First coat application:
Apply your matte black paint. If using spray paint, work in a well-ventilated area using short, sweeping bursts. If using acrylic paint, use a foam brush to apply a smooth, even layer. -
Dry and repeat:
Let the first coat dry fully (about 15-20 minutes for spray paint, longer for acrylic). Apply a second or third coat until you have opaque coverage with no orange showing through. -
Final drying:
Allow the pumpkin to cure completely before drawing. I usually wait a few hours or even overnight to ensure the tacky surface doesn’t ruin the paint pen nibs.
Step 2: Drawing the Designs
-
Plan your spacing:
Visualize the pumpkin in vertical sections defined by its natural ribs. You will place different plant motifs in alternating sections to create balance. -
Start with large leaves:
Using a medium-tip white paint pen, draw a central vein curving upwards along one of the pumpkin’s ribs. -
Add leaf details:
Add paired leaves stemming from that central vein. Create variety by making some leaves simple ovals and others with jagged edges like holly or oak leaves. -
Create distinct vines:
Move to a different section and draw a long, wandering vine that features small, intricate leaves. Keep the lines crisp and deliberate. -
Incorporate varied flora:
Draw a large, stylized leaf shape (like a teardrop) near the bottom, and fill the interior with small veins or patterns rather than solid color. -
Add celestial elements:
Switch to your fine-tip pen. In the negative spaces between the large plants, draw small five-pointed stars, simple crosses, or tiny dots. -
Draw whimsical swirls:
Add curlicues or spirals at the base of your stems to fill empty space near the bottom of the pumpkin. -
Detail work:
Review your larger leaves. Add internal lines, small dots, or cross-hatching to give them texture and make them pop against the black background. -
Balance the composition:
Rotate the pumpkin and check for large empty black spaces. Fill these with clusters of three dots or tiny star shapes. -
Check opacity:
If the white ink looks translucent as it dries, carefully re-trace the main lines for a brighter, bolder white.
Fixing Mistakes
Make an error? Since the base is black, just paint over the mistake with a small brush and a bit of your original black acrylic paint. Let it dry, then draw again.
Step 3: Finishing Touches
-
Remove stem protection:
Gently peel away the tape or remove the foil from the stem. -
Seal the art (optional):
If you plan to display this outdoors, give the entire pumpkin a light coat of clear matte sealer to prevent the ink from running in the rain.
Glow Up
For a magical touch, use glow-in-the-dark paint pen for the stars and celestial elements so they shine when the lights go down.
This sophisticated pumpkin brings a modern, artistic flair to your seasonal display without the mess of carving
Fruit-Inspired Painted Pumpkins
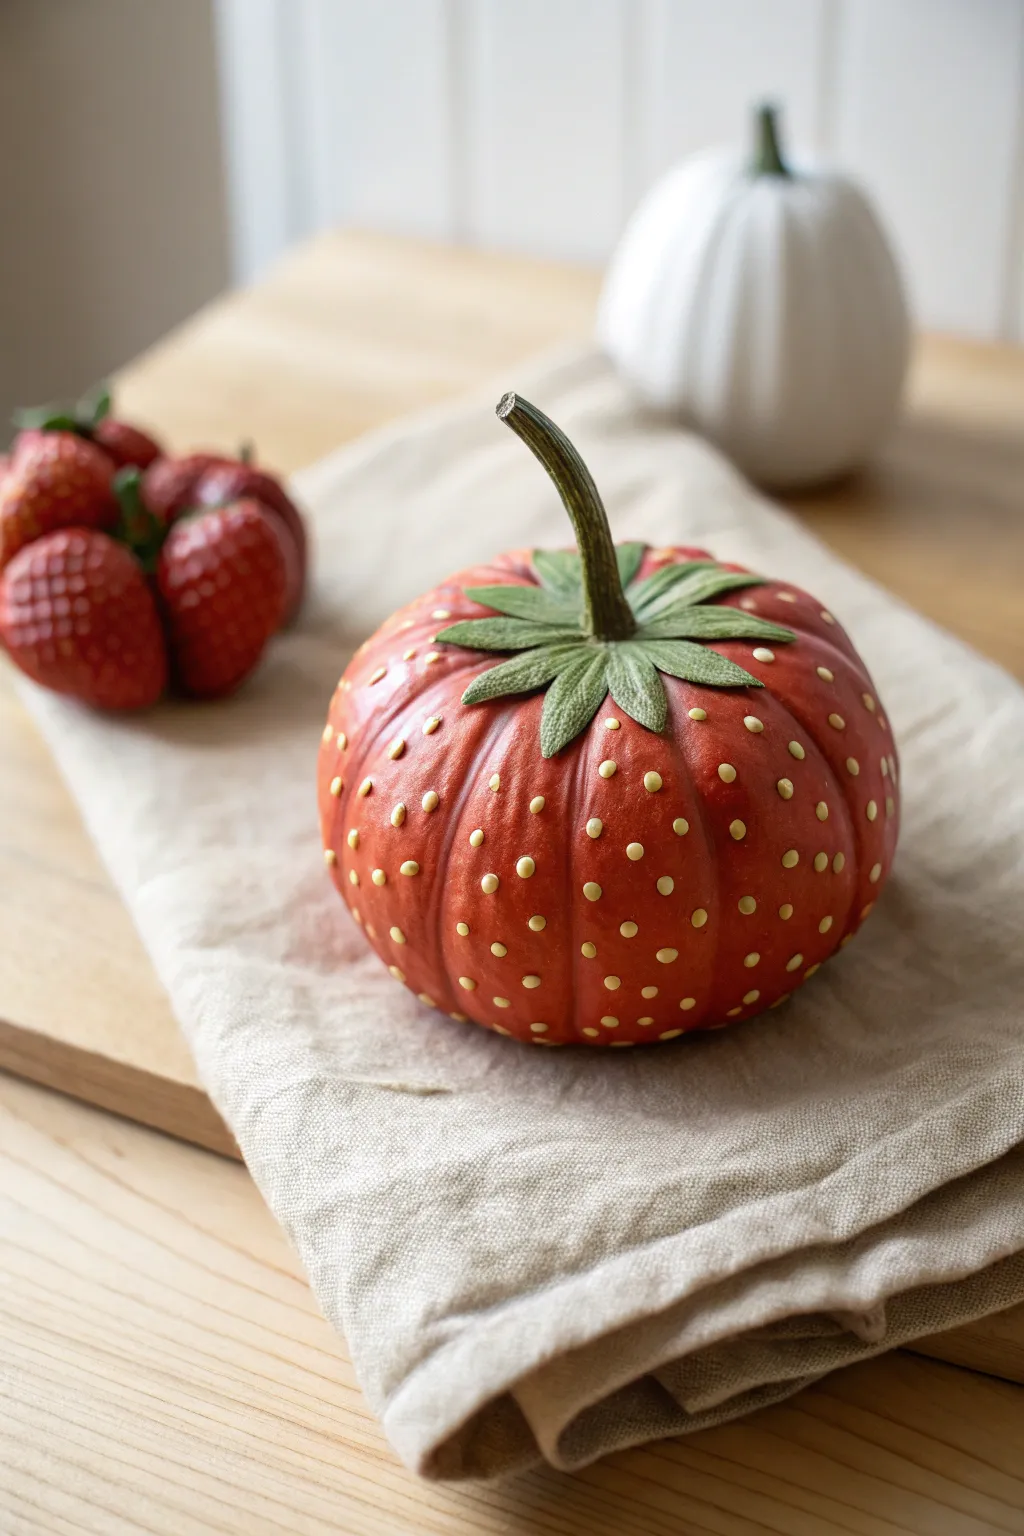
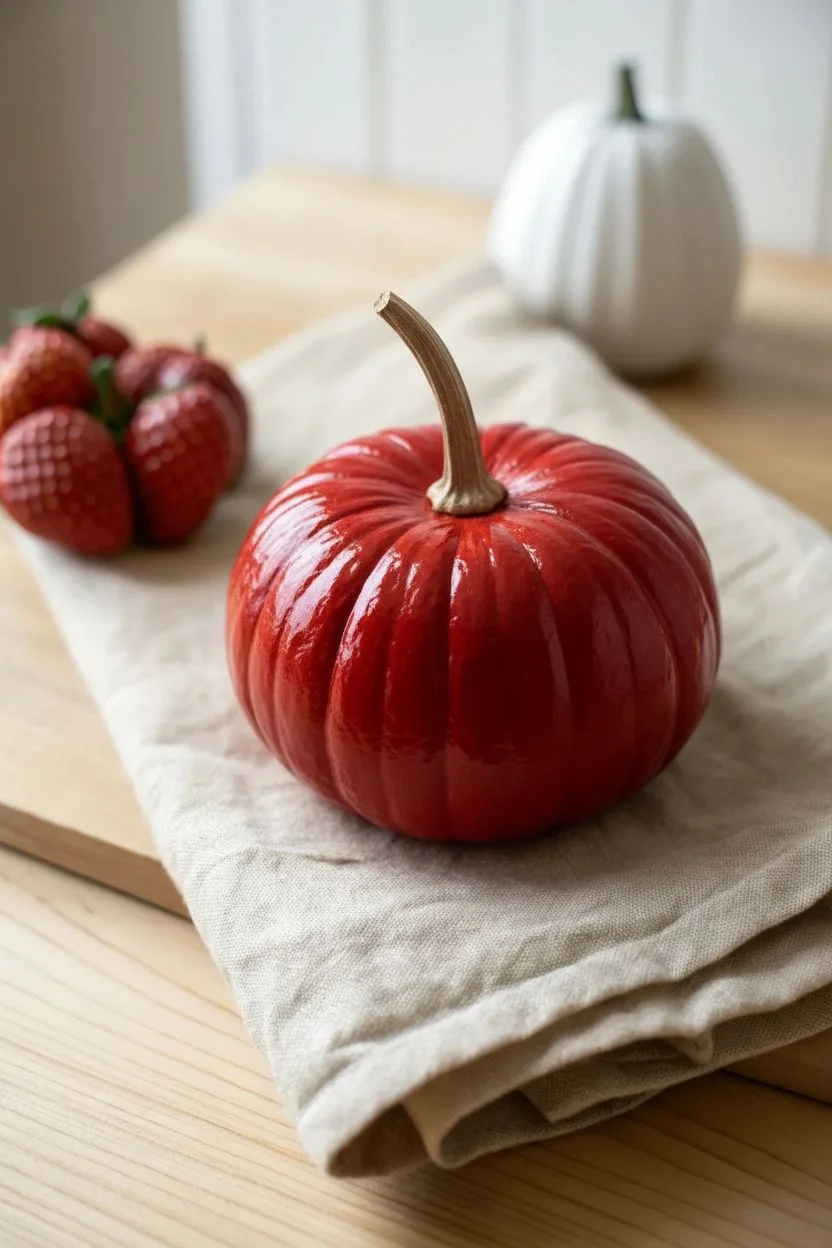
Transform a classic autumn gourd into a vibrant, summer-inspired centerpiece with this playful faux-fruit design. By mimicking the deep red hues and unique texture of a strawberry, you’ll create a whimsical piece of decor that looks almost good enough to eat.
Step-by-Step
Materials
- Small to medium round pumpkin (real or craft foam)
- Red acrylic paint (glossy finish preferred)
- Yellow puffy paint or small yellow beads
- Dark green felt or green craft foam
- Green acrylic paint (olive and forest shades)
- Brown acrylic paint
- Mod Podge or high-gloss varnish
- Hot glue gun and glue sticks
- Scissors
- Medium flat paintbrush
- Small detail paintbrush
- Pencil
Step 1: Base Coat and Color
-
Clean surface:
Begin by wiping down your pumpkin with a damp cloth to remove any dirt or oils, ensuring a clean surface for the paint to adhere to. If you are using a real pumpkin, make sure it is completely dry. -
Remove stem color:
If your pumpkin has a very dark or irregularly colored stem, give it a quick base coat of a neutral beige or soft brown to prepare it for detailing later. -
Apply red base:
Using a medium flat brush, paint the entire body of the pumpkin with bright red acrylic paint. Work the paint into the vertical grooves of the pumpkin to ensure full coverage. -
Add second coat:
Let the first layer dry completely. Apply a second coat of the red paint to get a rich, opaque color that hides the original pumpkin skin beneath. -
Create shading:
While the second coat is still slightly wet, mix a tiny drop of brown into your red paint. Gently brush this darker shade into the deepest crevices of the pumpkin’s ribs to add dimension. -
Seal surface:
Once the red paint is fully dry, apply a layer of Mod Podge or a high-gloss varnish. This authentic gloss finish mimics the shiny skin of a real strawberry.
Uneven Seeds?
If your painted seeds look messy or smeared, let them dry fully, then gently scrape them off with a craft knife or fingernail and try again. Don’t wipe while wet!
Step 2: Seeds and Stem
-
Plan seed placement:
Visualize a grid pattern around the pumpkin. Strawberry seeds typically sit in a somewhat regular diamond pattern, not perfectly random. -
Apply seeds:
Using yellow puffy paint, squeeze tiny, uniform dots across the surface of the pumpkin. If you prefer texture, you can hot glue small yellow seed beads individually instead. -
Refine seed shape:
If using puffy paint, use a toothpick to gently pull the top of the dot slightly downward, giving them a slight teardrop shape similar to real achenes. -
Paint the stem:
Paint the main stem with a mix of olive green and brown. I tend to use vertical strokes here to mimic the fibrous texture of a plant stem. -
Highlight the stem:
Add thin streaks of lighter green paint along the ridges of the stem to make it look fresh and organic.
Berry Basket
Make a trio of these in different sizes—one large pumpkin and two mini gourds. Display them in a vintage green fruit basket lined with gingham for a cute vignette.
Step 3: Leafy Calyx
-
Draft leaf shape:
On a piece of paper, draw a star-like shape with serrated, pointed edges to represent the strawberry’s leafy cap (calyx). Cut this out to use as a template. -
Cut material:
Trace your template onto dark green felt or thin craft foam. Cut out the shape, making sure to cut a small hole in the center for the stem. -
Texture the leaves:
Use a detail brush with lighter green paint to add thin vein lines onto your felt or foam leaves for added realism. -
Attach leaves:
Slide the leaf shape over the stem. Apply hot glue to the underside of the leaves, pressing them firmly onto the top curve of the pumpkin. -
Shape the foliage:
If using felt, pinch the tips of the leaves slightly or glue just the center down, letting the tips curl up naturally for a 3D effect. -
Final touch:
Inspect the junction where the stem meets the leaves. If there is a gap, dab a little green paint there to blend everything seamlessly.
Now step back and admire your fresh-picked creation that brings a sweet twist to traditional fall decor
Donut Pumpkin With Drippy Icing
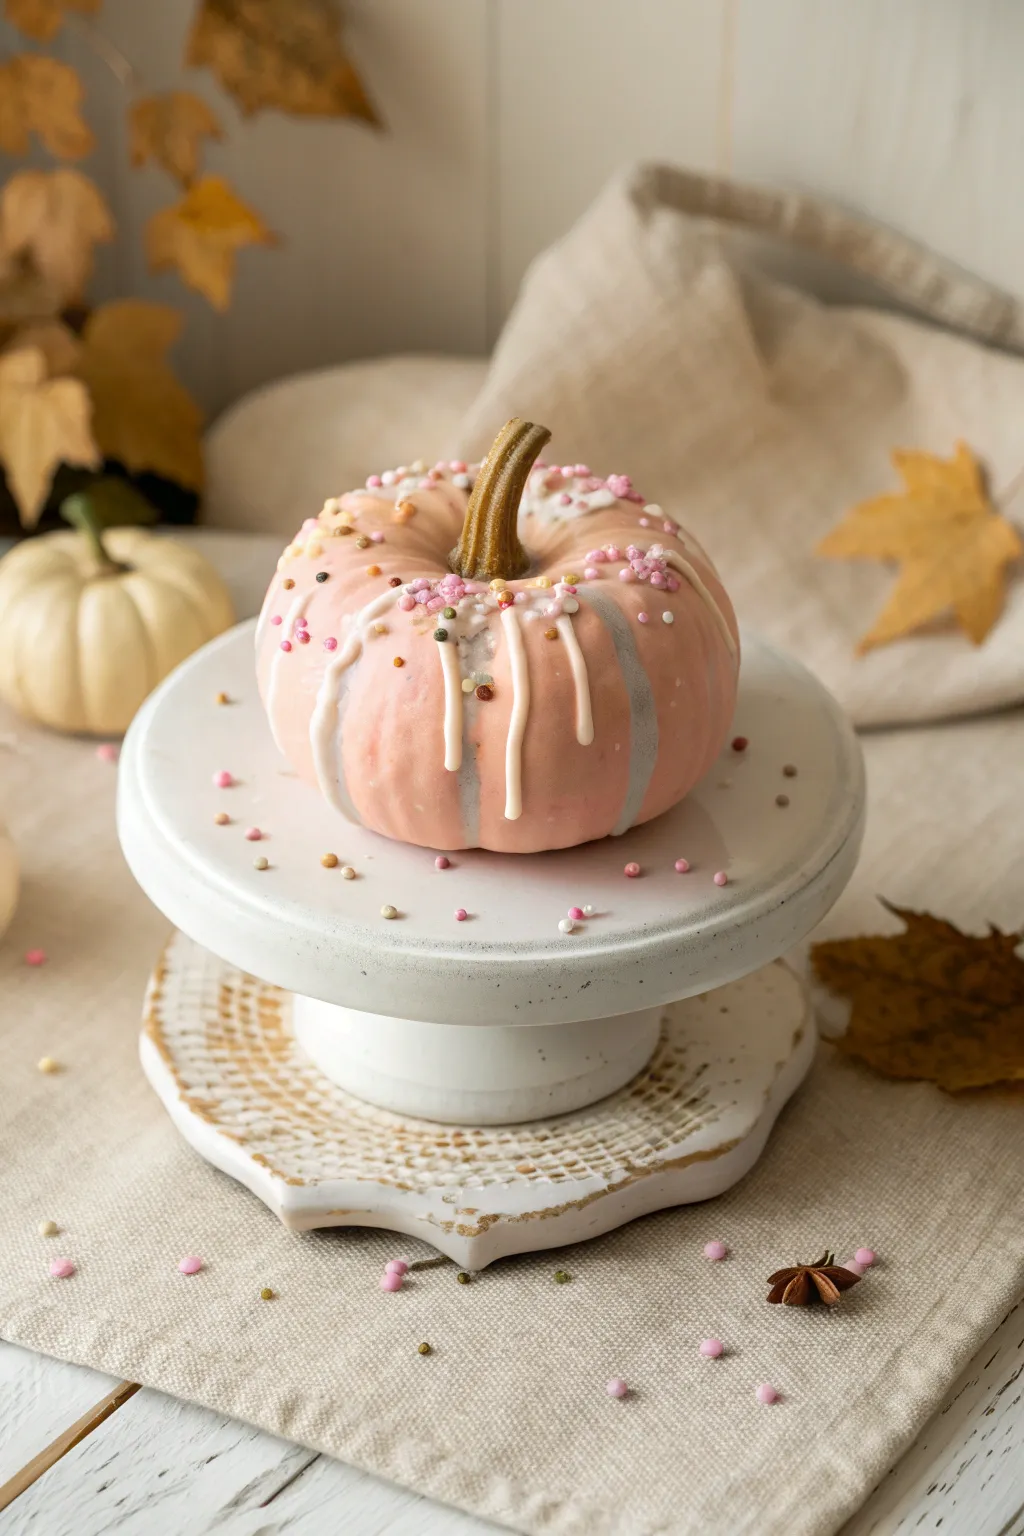

Transform a simple pumpkin into a delectable dessert with this playful no-carve decorating idea. Using soft pink paint, drippy icing effects, and colorful sprinkles, this project looks good enough to eat but will last all season long.
Detailed Instructions
Materials
- Small to medium round pumpkin (real or faux)
- Light pink acrylic craft paint (matte or satin finish)
- White 3D puffy paint or dimensional fabric paint
- Assorted small sprinkles (nonpareils preferably pink and white)
- Gold or metallic brown acrylic paint (for the stem)
- Flat paintbrush (1 inch)
- Fine detail paintbrush
- Paper plate or palette
- Newspaper or drop cloth
- Clear sealant spray (optional)
Step 1: Base Prep & Color
-
Clean surface:
Begin by thoroughly wiping down your pumpkin with a damp cloth to remove any dirt or oils, then dry it completely with a paper towel. -
Stem protection:
You can tape off the stem with painter’s tape if you’re worried about accidental smudges, though we will be painting it later anyway. -
First coat:
Squeeze your light pink acrylic paint onto a palette and apply a smooth, even base coat over the entire body of the pumpkin using the flat brush. -
Drying time:
Let the first layer dry for about 15-20 minutes until it is no longer tacky to the touch. -
Second coat:
Apply a second coat of pink paint to ensure full opacity, making sure you get into the deep grooves of the pumpkin ribs. -
Touch-ups:
Inspect the pumpkin for any streaks or light spots and dab extra paint where needed; let this base layer dry completely for at least an hour.
Drip Disaster?
If a drip runs too far or gets too thin, don’t wipe it! Let it dry completely, then carefully paint over the mistake with your base pink color before retrying.
Step 2: Creating the Icing
-
Test flow:
Before applying directly to the pumpkin, squeeze a small amount of white puffy paint onto a scrap paper to ensure the bottle isn’t clogged and to get a feel for the flow rate. -
Top circle:
Draw a thick, somewhat irregular circle of white paint around the base of the stem to act as the pool of icing. -
Start the drips:
Gently squeeze the bottle while moving downward from the top circle into the grooves of the pumpkin to create the drips. -
Gravity technique:
I find it helpful to squeeze a little extra paint at the very end of the drip and stop moving; gravity will pull it down slightly, creating that perfect heavy droplet look. -
Vary lengths:
Make sure your drips are different lengths—some stopping high up and others reaching halfway down the pumpkin—for a natural, organic appearance. -
Fill the gaps:
Go back and fill in the space between the drips and the stem base so the entire top section looks like a solid cap of glaze.
Sprinkle Station
Place your pumpkin on a baking sheet or tray before adding sprinkles. This catches the bouncing excess so you can reuse them and keeps your workspace clean.
Step 3: The Sweet Details
-
Add sprinkles:
While the white ‘icing’ paint is still very wet, immediately drop your sprinkles onto the white areas. -
Press gently:
If any sprinkles look precarious, very gently tap them with a clean finger or tweezer to seat them into the paint. -
Scatter effect:
Allow a few rogue sprinkles to land on the pink ‘dough’ part of the pumpkin near the icing drips for a messy, realistic bakery look. -
Paint the stem:
Carefully paint the stem with gold or metallic brown paint using your fine detail brush to give it a baked or magical finish. -
Stem shading:
If you want extra depth, dry brush a tiny bit of darker brown into the crevices of the stem. -
Final cure:
Let the pumpkin sit undisturbed for several hours, or preferably overnight, as puffy paint takes much longer to cure than standard acrylics. -
Seal (optional):
Once fully dry, you can lightly mist the pumpkin with a clear sealant if you plan to display it outdoors.
Enjoy displaying your adorable dessert pumpkin on a cake stand to really sell the illusion
Cute Monster Face Pumpkins
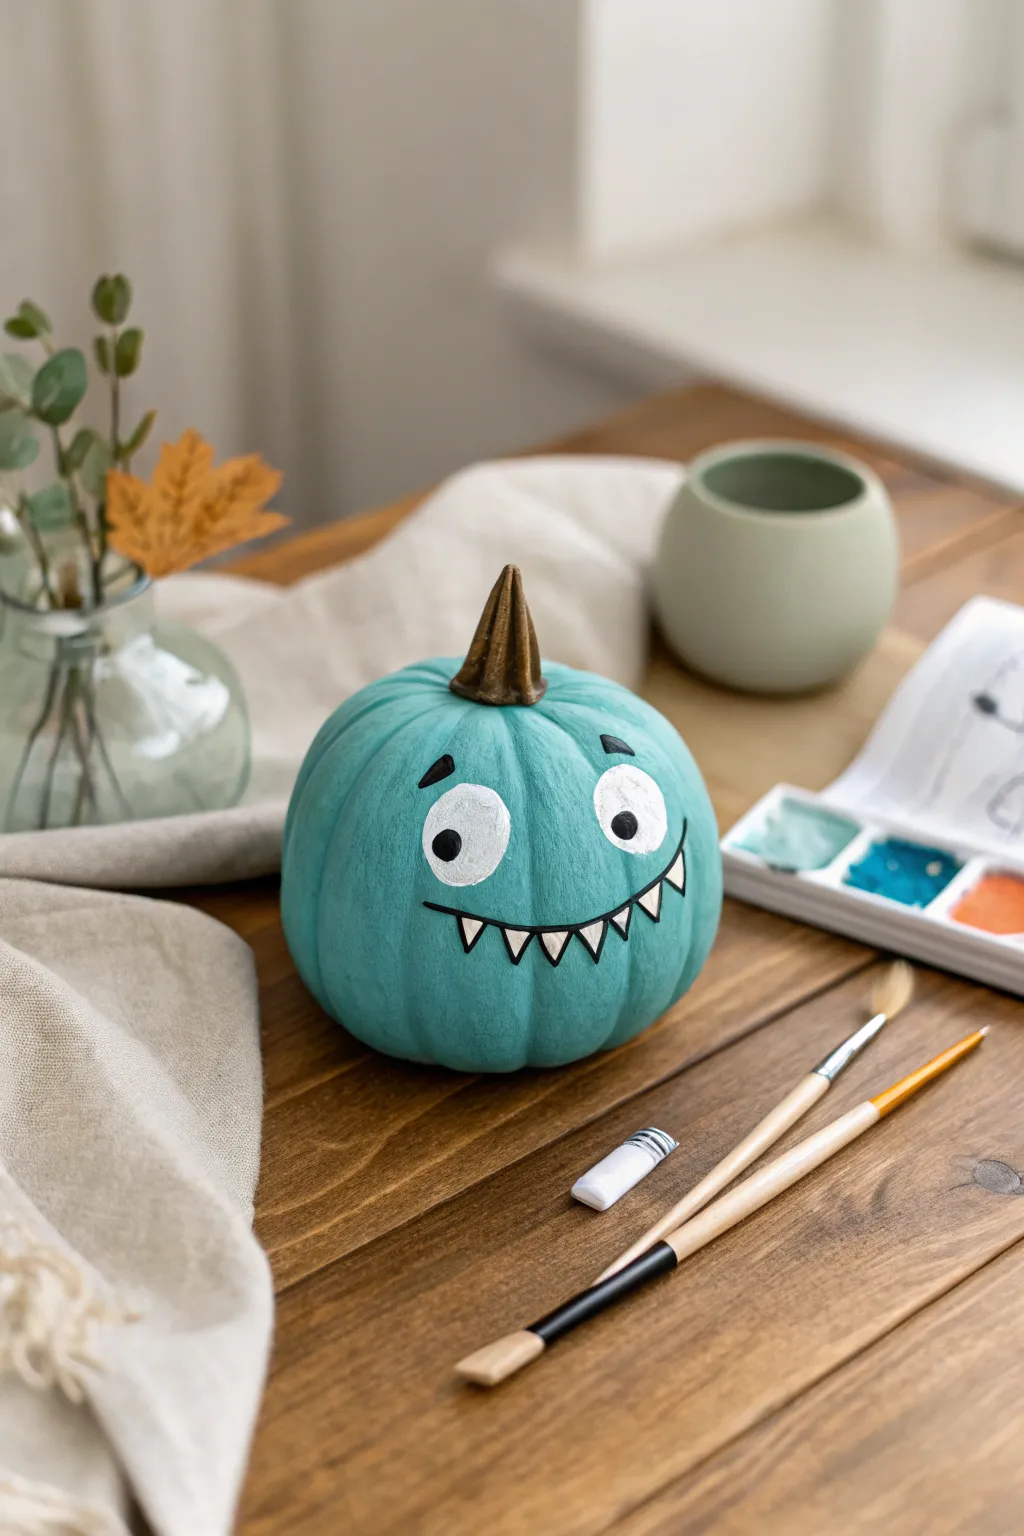
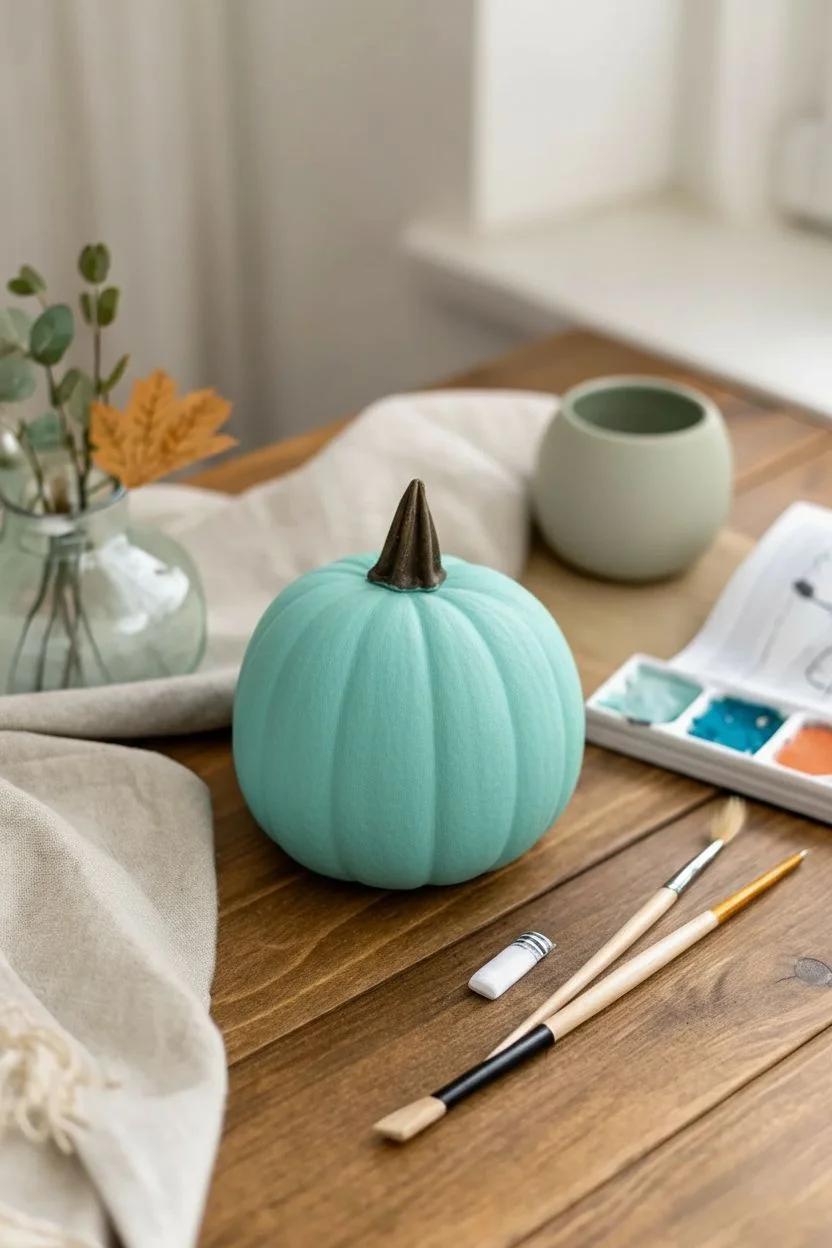
Transform a simple pumpkin into a not-so-scary monster with a coat of soothing teal paint and a goofy grin. This adorable character features expressive painted eyes and a jagged smile that adds personality without the fright.
Step-by-Step
Materials
- Small to medium round pumpkin (real or faux)
- Acrylic paint (teal/turquoise, white, black, dark brown)
- Medium flat paintbrush
- Small round detail brush
- Fine liner brush
- Water cup and paper towels
- Pencil for sketching
- Clear sealant sketch (optional)
Step 1: Base Coat & Prep
-
Clean surface:
Before you begin, wipe down your pumpkin with a damp cloth to remove any dirt or oils. This ensures the paint adheres smoothly to the skin. -
Mix the teal:
If you don’t have a pre-mixed teal, blend blue, green, and a generous amount of white acrylic paint until you reach a soft, pastel turquoise shade like the one in the photo. -
Apply first coat:
Using your medium flat brush, paint the entire body of the pumpkin with your teal mixture. Brush vertically, following the natural ribs of the pumpkin for a clean look. -
Dry and repeat:
Let the first layer dry completely to the touch. Apply a second coat to ensure full opacity so no orange skin peeks through. -
Paint the stem:
While the teal dries, carefully paint the stem with dark brown acrylic paint. You can add a tiny touch of gold or bronze if you want a subtle metallic sheen like in the reference.
Fixing transparency
If your white eye paint looks streaky over the teal, don’t keep layering wet paint. Let it dry fully, then dab a sponge brush for a solid, opaque coat.
Step 2: Creating the Face
-
Draft the features:
Once the base is bone dry, lightly sketch the eyes and mouth with a pencil. Make one eye circle slightly larger than the other for that goofy, lovable expression. -
Base the eyes:
With a clean small round brush, fill in your pencil circles with pure white paint. You might need two layers here to get a solid, bright white against the teal background. -
Outline the mouth:
Switch to your fine liner brush and black paint. Carefully trace the long, curved smile line you sketched earlier. -
Paint the teeth:
Using white paint and your small detail brush, paint small triangles hanging down from the upper lip line to create jagged teeth. Space them out slightly unevenly for character. -
Outline the teeth:
Go back in with your fine liner brush and black paint to outline each individual tooth triangle. This crisp line work makes the smile pop.
Step 3: Details & Definition
-
Add pupils:
Dip the handle end of a paintbrush into black paint and dot it onto the white eye circles. Place them slightly off-center or looking in different directions to enhance the silly vibe. -
Draw eyebrows:
Using the fine liner brush, paint two small, floating eyebrows above the eyes. Slant them slightly upwards to give the monster an inquisitive look. -
Add highlight dots:
Once the black pupils are dry, add a tiny speck of white paint to each pupil. This ‘catchlight’ brings the character to life. -
Clean up edges:
Check your outlines around the eyes and teeth. If any lines look shaky, you can tidy them up with a little bit of the original teal paint on a detail brush. -
Vein details (optional):
If you want extra texture without adding more color, you can dry-brush a very tiny amount of lighter teal specifically on the raised ribs of the pumpkin.
Make it 3D
Glue actual googly eyes over the painted white circles for movement, or use glow-in-the-dark paint for the teeth so the smile shines at night.
Now you have a charming teal monster to brighten up your seasonal table display
Pet Portrait Mini Pumpkins
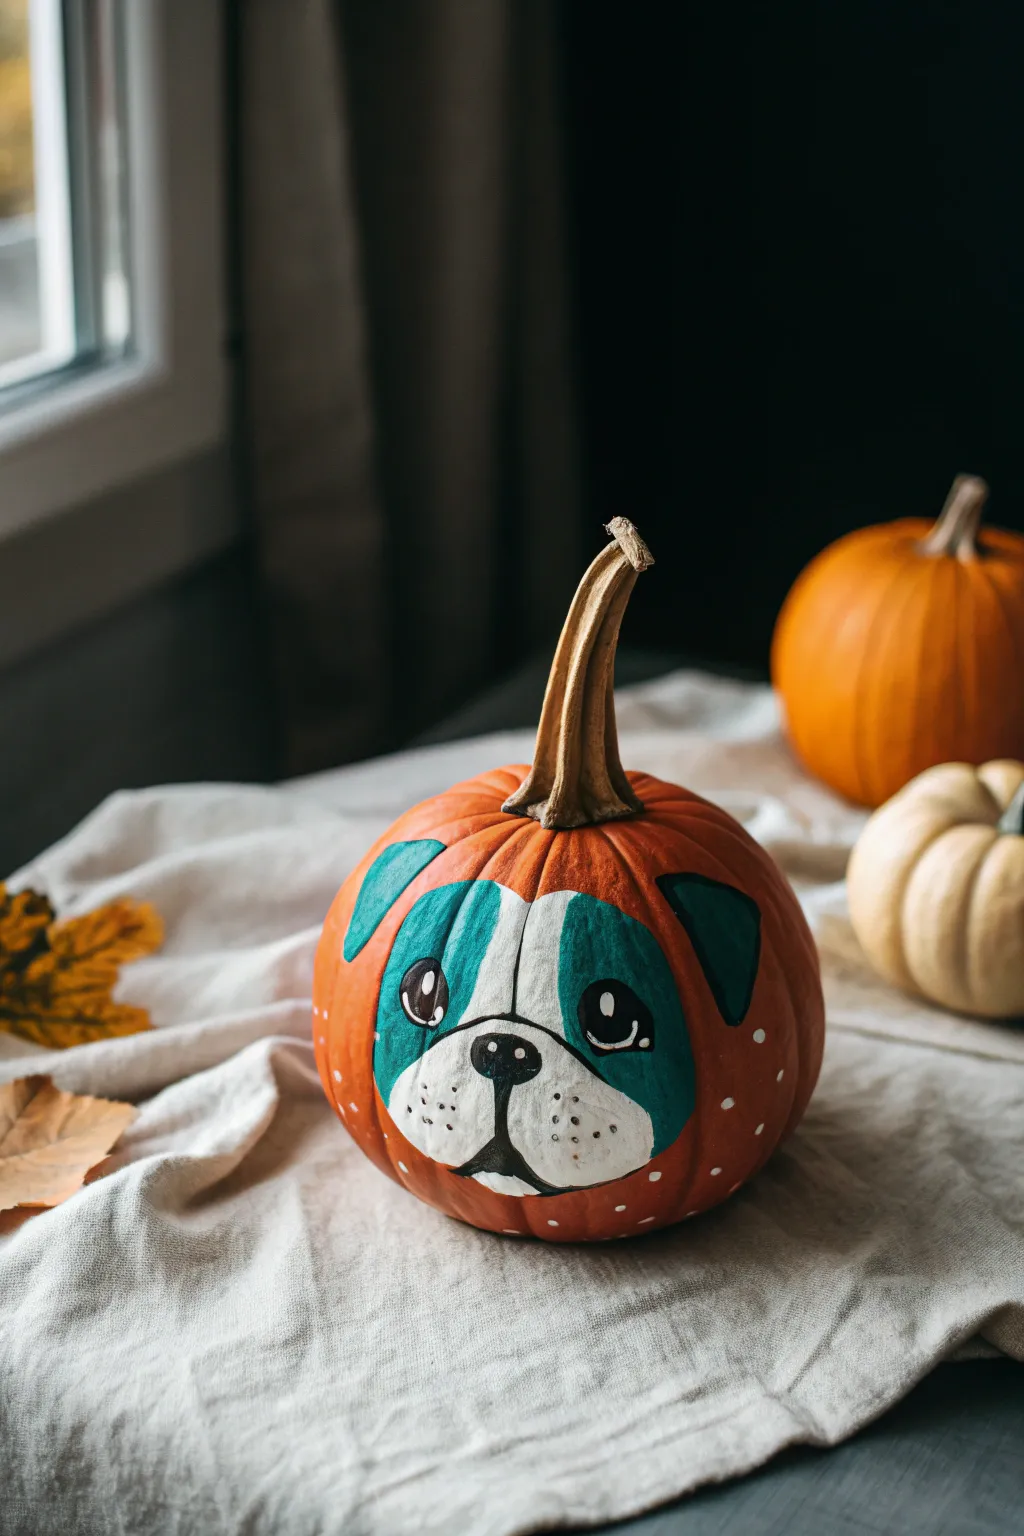
Transform a humble mini pumpkin into an adorable canine companion with this graphic-style painting project. The bright teal markings contrast beautifully with the natural orange rind, creating a whimsical pet portrait that is more sweet than spooky.
Step-by-Step Guide
Materials
- Small round orange pumpkin (clean and dry)
- White acrylic paint
- Teal or turquoise acrylic paint
- Black acrylic paint
- Medium flat paintbrush
- Small round detail brush
- Very fine liner brush (optional, for whiskers)
- Pencil or chalk marker
- Water cup and paper towels
Step 1: Planning and Base Layers
-
Prep the surface:
Begin by wiping down your pumpkin with a slightly damp cloth to remove any dirt or oils, then dry it completely. A clean surface ensures the acrylic paint adheres smoothly without peeling later. -
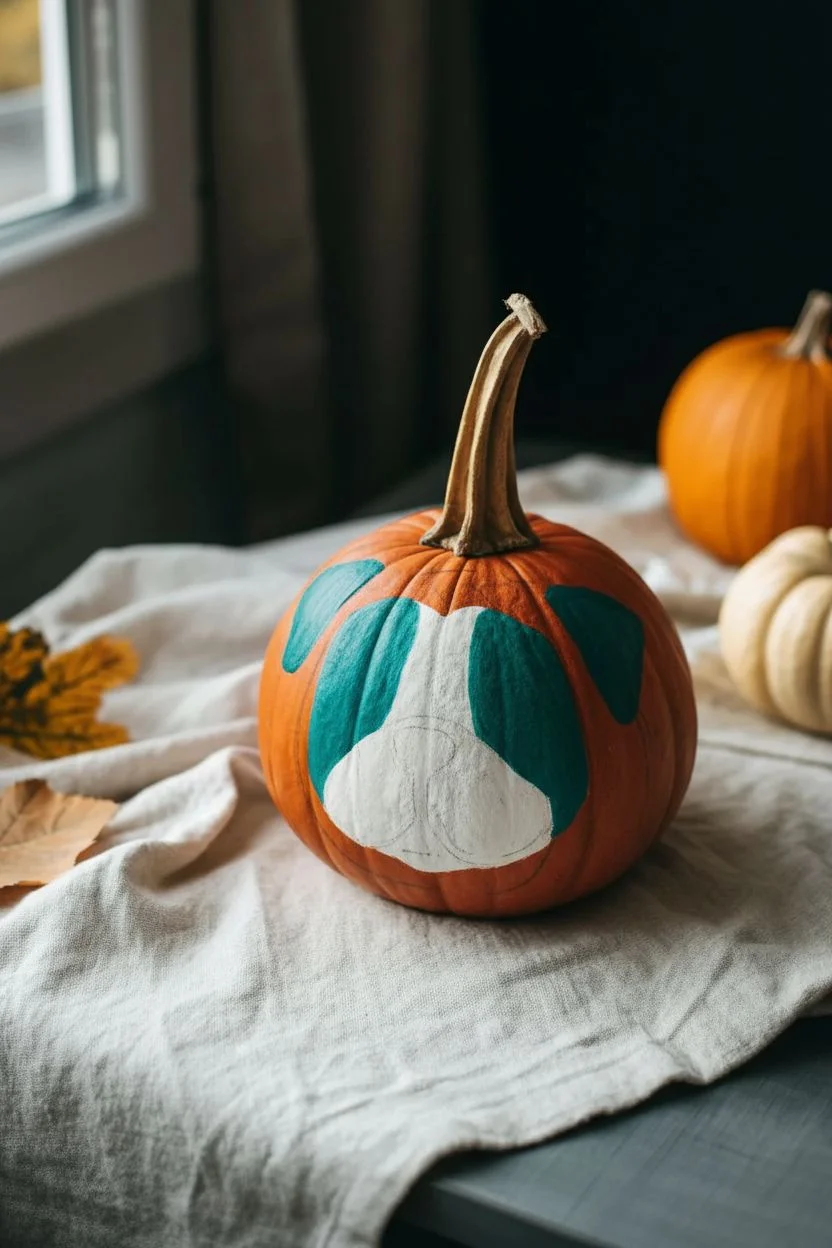
Sketch the outline:
Using a pencil or a light chalk marker, gently sketch the outline of the dog’s face. Draw a large, rounded ‘muffin top’ shape for the forehead and ears, and a lower muzzle area that dips down toward the bottom of the pumpkin. -
Block in the white muzzle:
Load your medium flat brush with white acrylic paint. Fill in the lower center section of the face—the muzzle and nose area—creating a rounded, bulbous shape. -
Add the forehead stripe:
Continuing with white paint, draw a thick vertical stripe connecting the muzzle to the top of the pumpkin, separating the two eye patches. -
Paint the eye patches:
Switch to your medium brush and teal paint. Fill in the large, curved sections on either side of the white stripe. These shapes should look like teardrops or kidney beans that wrap slightly around the curve of the pumpkin. -
Define the ears:
Using the same teal color, paint triangles with softened corners near the top outer edges of the face design to represent the floppy ears. -
Let it dry:
Allow these base layers to dry completely. Acrylics on pumpkin skin can take a little longer than on paper, so give it about 15-20 minutes. I usually work on a second pumpkin while waiting.
Smoother Coverage
Pumpkins are waxy, so the first layer might streak. Mix a tiny drop of dish soap into your acrylic paint to help break the surface tension for a smoother base coat.
Step 2: Facial Features
-
Paint the nose:
Once the white base is dry, use black paint and a small round brush to paint a soft triangular nose right in the center of the white muzzle area. -
Add the mouth:
Draw a thin vertical line down from the nose, splitting into an inverted ‘V’ shape to create the mouth chops. -
Create the eyes:
Inside the teal patches, paint two large black ovals for the eyes. Position them fairly low in the teal patches to give the dog a cute, puppy-like expression. -
Add the eye sparkle:
Dip the handle end of a paintbrush into white paint and dot it into the upper right corner of each black eye. Then, add a tiny curved white line below each pupil for extra liveliness. -
Outline the features:
Use a very fine liner brush with slightly watered-down black paint to outline the white muzzle and the white strip between the eyes. This cartoon outline makes the design pop. -
Detail the snout:
Add tiny black dots on the white muzzle area on either side of the nose to suggest whisker follicles.
Step 3: Finishing Touches
-
Add decorative polka dots:
Dip the handle of a medium paintbrush into white paint. Stamp small white dots randomly around the remaining orange skin of the pumpkin, surrounding the dog face. -
Clean up edges:
If any orange shows through your teal or white blocks where it shouldn’t, go back with a small brush and touch up the solid colors for opacity. -
Seal the stem:
For a polished look, you can dry brush a tiny bit of white paint onto the ridges of the stem to highlight its texture. -
Final dry:
Let the entire project sit undisturbed for at least an hour to ensure the thickest parts of the paint, like the dots, are fully hardened.
Texture Twist
Make the project 3D by gluing small felt triangles for ears or attaching a tiny black pom-pom for the nose instead of painting it.
Place your painted pup on a windowsill or porch step to greet visitors with its sweet cartoon face
Enchanted Fairy House Pumpkin
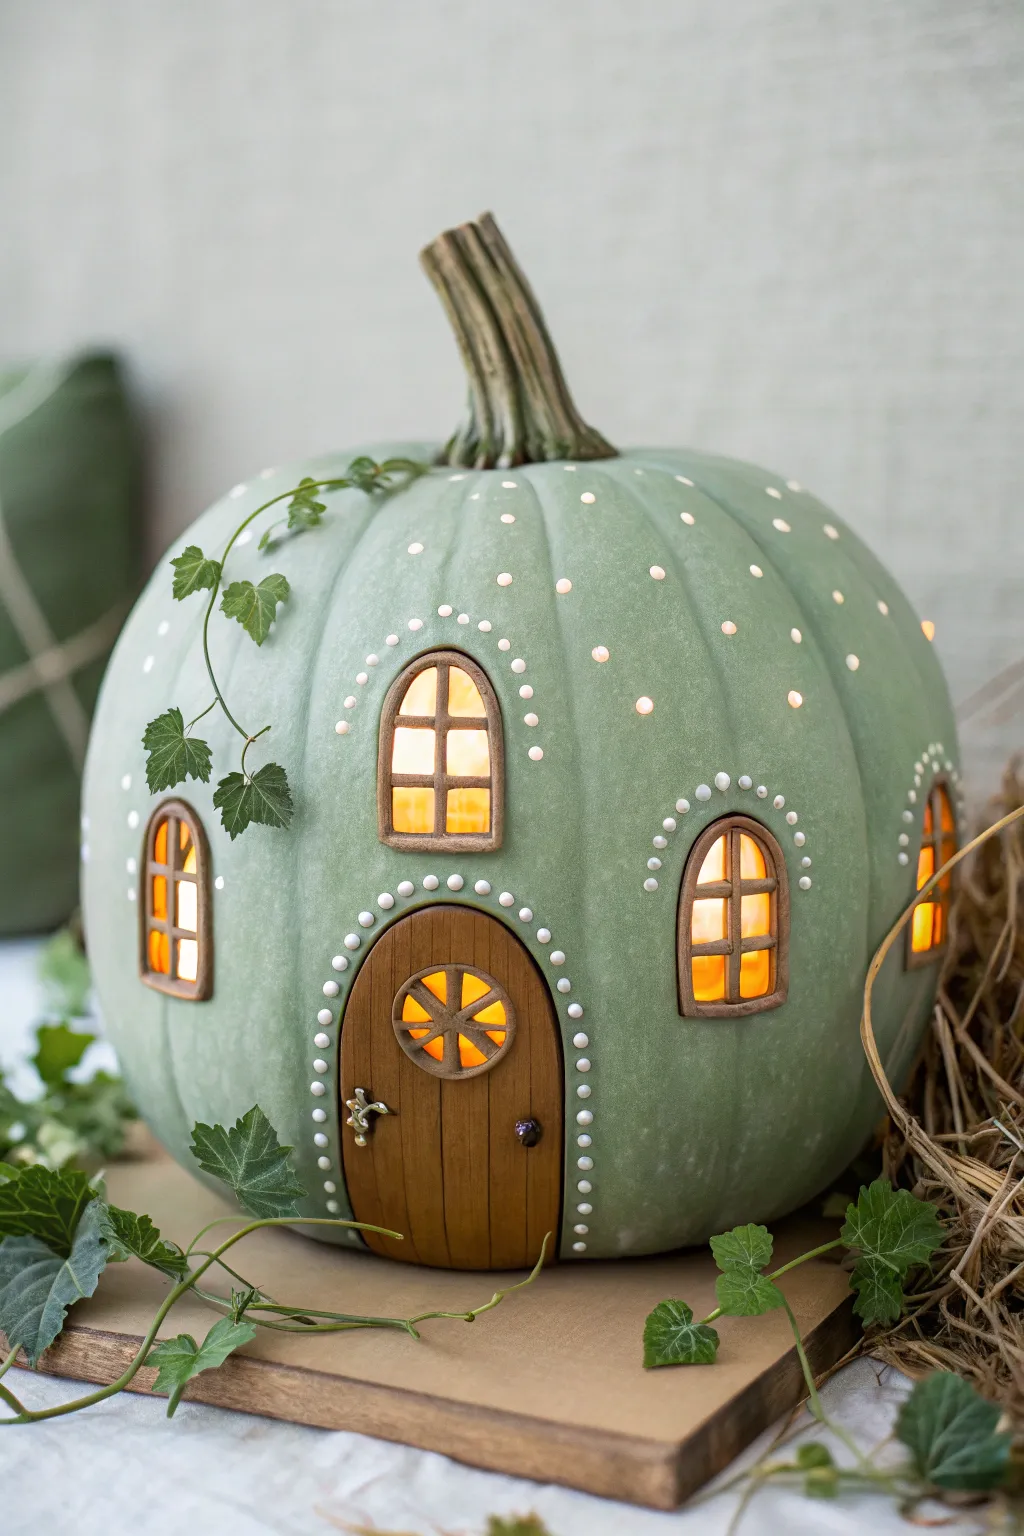
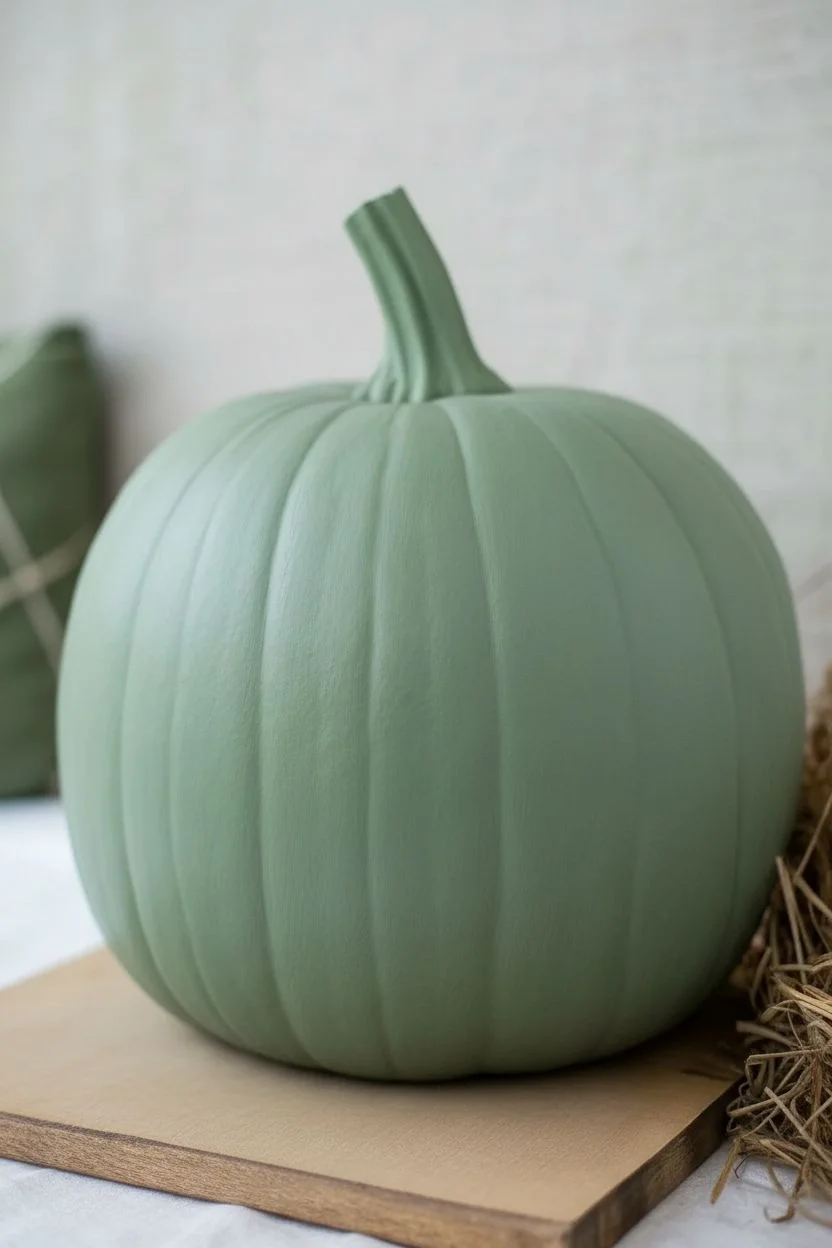
Transform a standard pumpkin into a whimsical woodland abode with gentle sage green hues and illuminated windows. This enchanted fairy house project combines masterful painting with sculpted clay details to create a cozy, glowing centerpiece perfect for autumn display.
Step-by-Step
Materials
- Large faux pumpkin (smooth surface works best)
- Sage green acrylic paint (matte finish)
- Brown polymer clay or air-dry modeling clay
- Translucent yellow vellum paper or yellow tissue paper
- White puff paint (dimensional fabric paint)
- Battery-operated LED string lights or tea lights
- Paintbrushes (large flat brush, fine detail brush)
- Craft knife or pumpkin carving tool
- Strong craft glue or hot glue gun
- Faux ivy vines or dried moss for decoration
- Fine-grit sandpaper
- Matte spray sealer
Step 1: Preparing the Canvas
-
Base Coat:
Begin by cleaning your faux pumpkin surface to remove any dust or oils. Apply a base coat of the sage green acrylic paint using a large flat brush. Use long, vertical strokes that follow the natural ribs of the pumpkin for a smooth finish. -
Second Layer:
Allow the first coat to dry completely, which usually takes about 20 minutes. Apply a second coat of sage green to ensure opaque, even coverage. I like to let this layer cure fully overnight if possible to prevent tackiness.
Step 2: Carving the Features
-
Planning the Layout:
Lightly sketch the locations for one large central door and three or four surrounding windows using a pencil. Place windows slightly higher than the door for a balanced look. -
Cutting:
Carefully cut out the window and door shapes using a craft knife. Save the cutout piece from the door if you want to use it as a template, though we will cover the opening later. -
Sanding Edges:
Gently sand the cut raw edges with fine-grit sandpaper to smooth them out so the subsequent clay frames will sit flush against the pumpkin skin.
Clay Shaping Hack
To get perfectly curved window frames that fit the pumpkin’s round surface, shape the clay directly on the pumpkin before baking or drying, using a layer of foil closely underneath.
Step 3: Sculpting Architectural Details
-
Creating the Door:
Roll out a slab of brown clay to about 1/4 inch thickness. Cut a shape slightly larger than your door opening. Use a sculpting tool or toothpick to etch vertical wood grain lines into the clay surface. -
Adding Door Hardware:
Sculpt a tiny round doorknob and a decorative hinge from small balls of clay. Press these gently onto your clay door. Create a small circular window cutout near the top of the door. -
Window Frames:
Roll thin snakes of brown clay to create window frames. Form arched shapes that match your window cutouts, adding crossbars (mullions) to divide the panes. Ensure these are sized to border the holes you cut earlier. -
Baking or Drying:
If using polymer clay, bake your door and window frames according to the package instructions (usually on a baking sheet in the oven). If using air-dry clay, allow them to harden fully for 24 hours.
Fixing Gaps
If your clay frames don’t sit flush against the pumpkin surface, fill any small gaps with extra white puff paint or a tiny bead of brown caulk before sealing.
Step 4: Assembly and Decoration
-
Installing the Light Choice:
Cut pieces of yellow vellum paper slightly larger than your window and door openings. Glue these on the *inside* of the pumpkin to cover the holes, creating a warm, glowing ‘glass’ effect. -
Attaching Features:
Using strong craft glue, adhere the hardened clay door over the main opening. Glue the clay window frames around the exterior of the window cutouts. -
Painting Details:
If your clay dried a bit chalky, refresh it with a coat of brown acrylic paint. Add tiny highlights with a lighter brown or gold to make the wood grain pop. -
Dot Work:
Using the white puff paint, carefully apply small, uniform dots around the perimeter of the door arch and above each window frame. This creates a charming stone or pearl inlay effect. -
Drilling Light Holes:
For extra sparkle, drill tiny holes randomly around the upper half of the pumpkin using a small drill bit or a sharp awl. These will look like fireflies or stars when lit.
Step 5: Final Touches
-
Sealing:
Once all paint and glue are dry, spray the entire pumpkin with a matte sealer to protect the finish and unify the sheen of the paint and clay. -
Adding Greenery:
Drape a strand of faux ivy or glue dried moss around the stem and down one side of the pumpkin. Secure it with hot glue in discreet spots to simulate vines growing over the cottage. -
Lighting Up:
Place your battery-operated lights inside the pumpkin. Dim the room lights to see the warm yellow glow spill through the vellum windows and tiny drilled holes.
Now you have a magical woodland retreat that brings a touch of fantasy to your seasonal decor
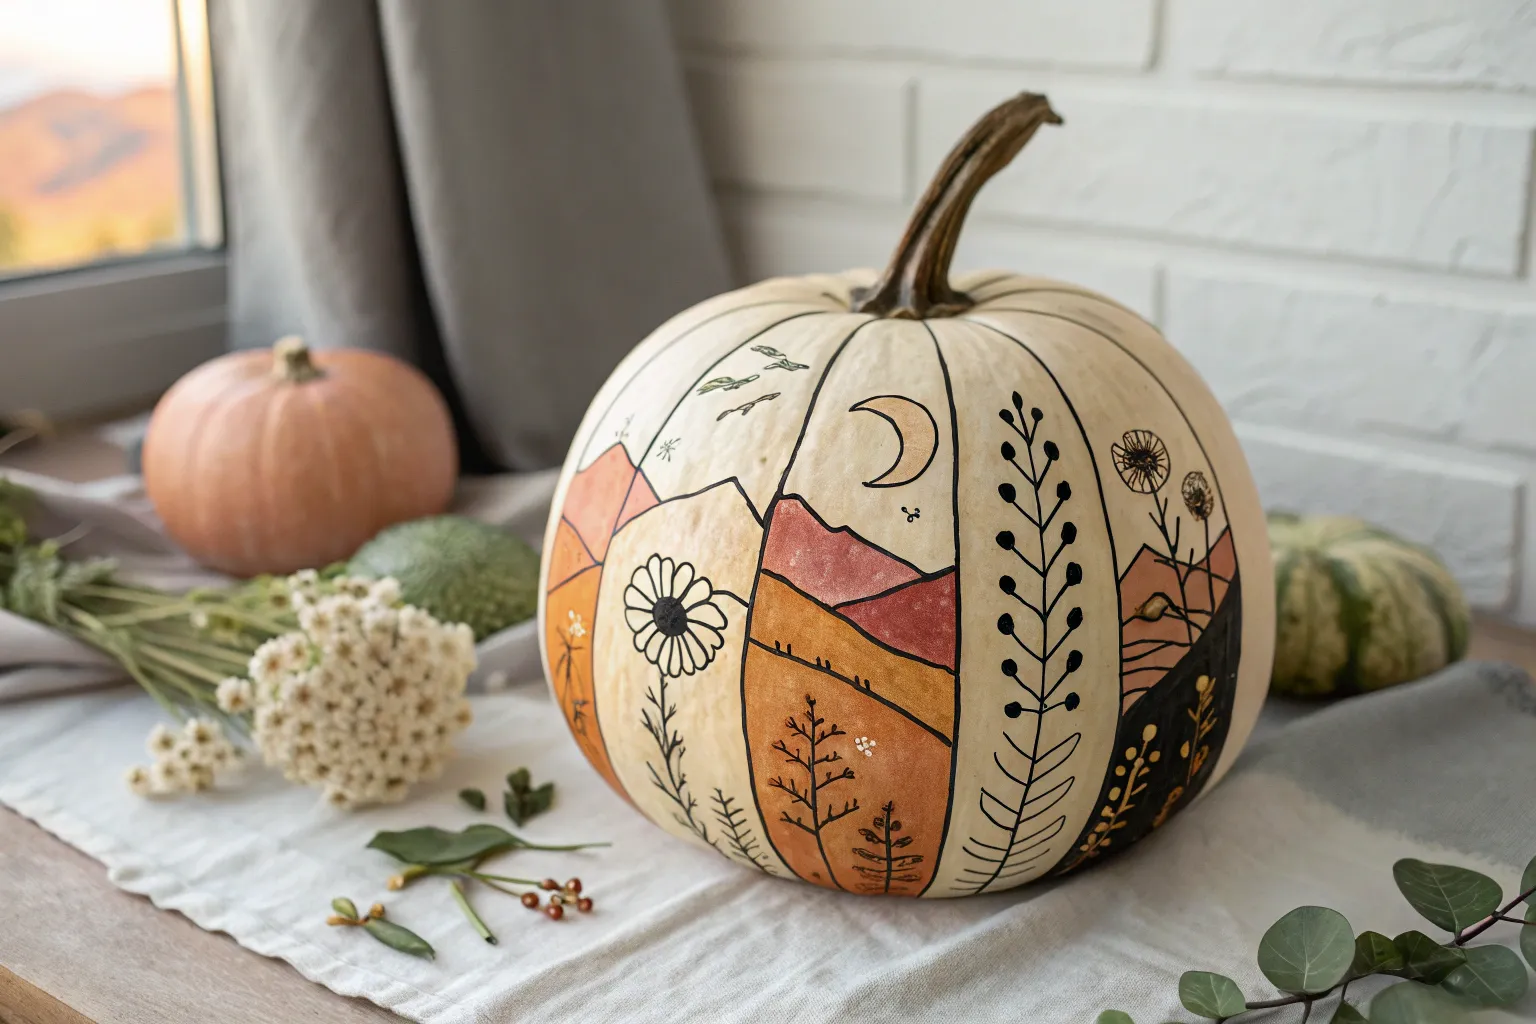
Mini Landscape Painting on a Pumpkin
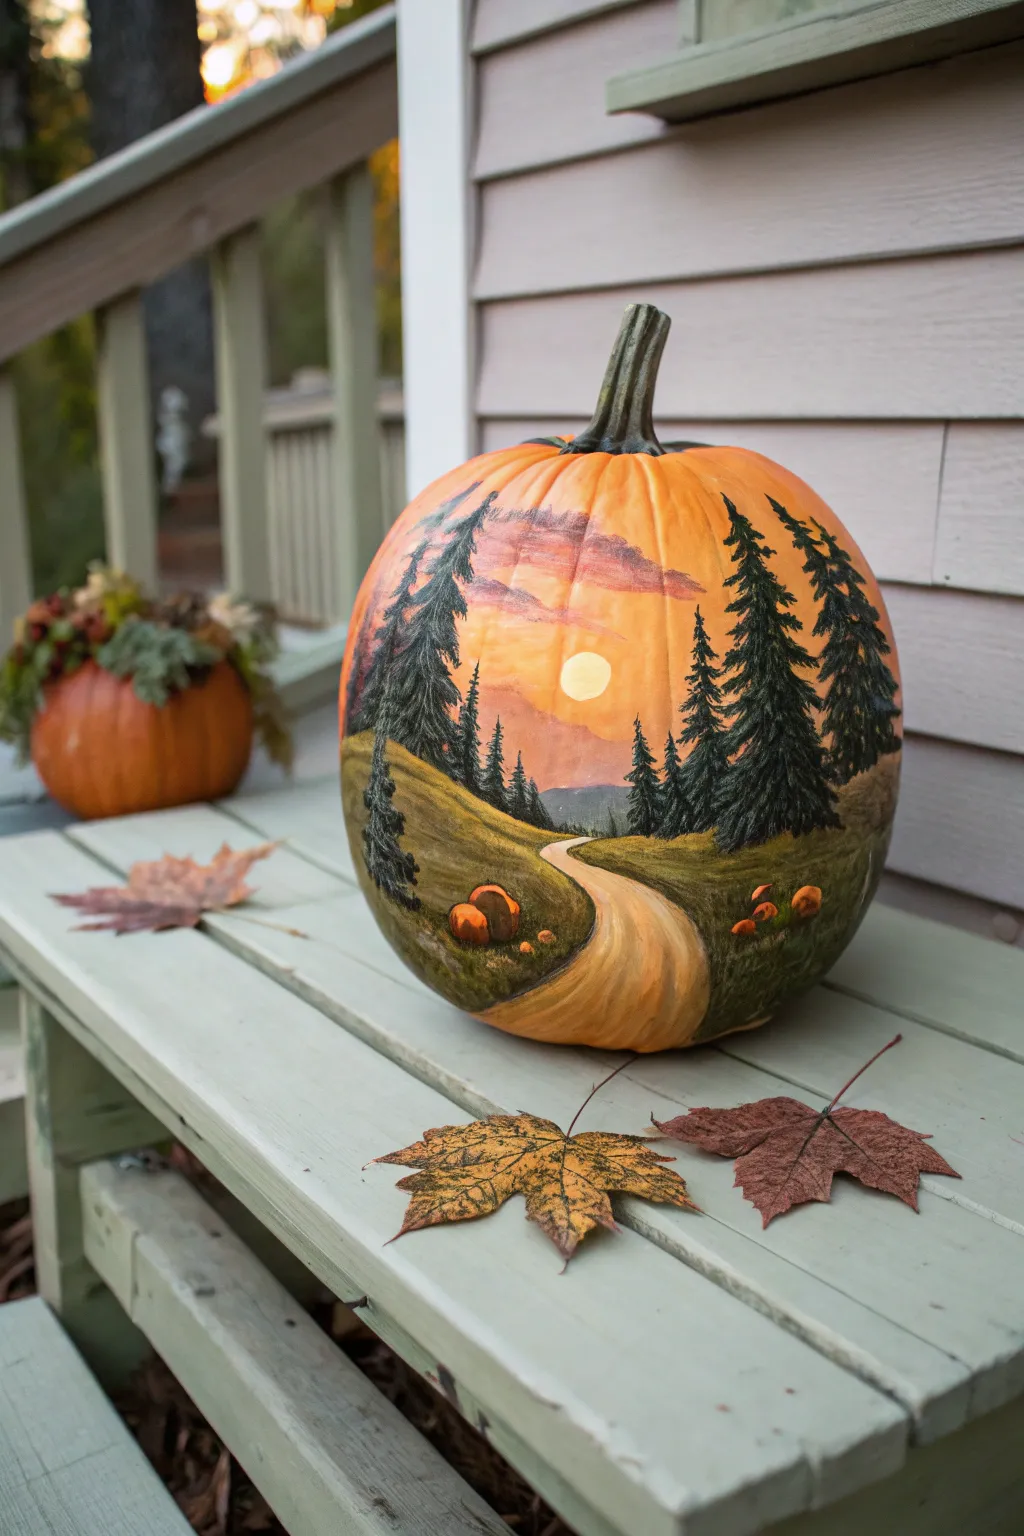
Transform a simple orange gourd into a breathtaking canvas with this serene landscape painting. Featuring towering pine trees silhouetted against a warm, gradient sunset and a winding country road, this project brings the quiet beauty of a forest evening to your front porch.
Detailed Instructions
Materials
- Large, smooth-skinned pumpkin (real or faux)
- Acrylic paints (Titanium White, Mars Black, Burnt Sienna, Yellow Ochre, Cadmium Orange, Hookers Green, Dark Green)
- Gesso or matte medium (optional primer)
- Paintbrushes: 1-inch flat brush, medium filbert brush, small round brush, fine liner brush
- Palette or paper plate
- Cup of water and paper towels
- Clear acrylic spray sealer (matte or satin)
Step 1: Preparation and Sky Gradient
-
Clean surface:
Begin by wiping down your pumpkin with a damp cloth to remove any dirt or oils. If you are using a real pumpkin, dry it thoroughly before painting. -
Prime the surface:
For better paint adhesion, apply a thin coat of clear matte medium or gesso over the face of the pumpkin where you plan to paint. Let this dry completely. -
Mix the sky colors:
On your palette, prepare a gradient of colors for the sunset. You’ll need a pale yellow (white + tiny bit of yellow ochre), a warm orange, and a soft violet-grey for the clouds. -
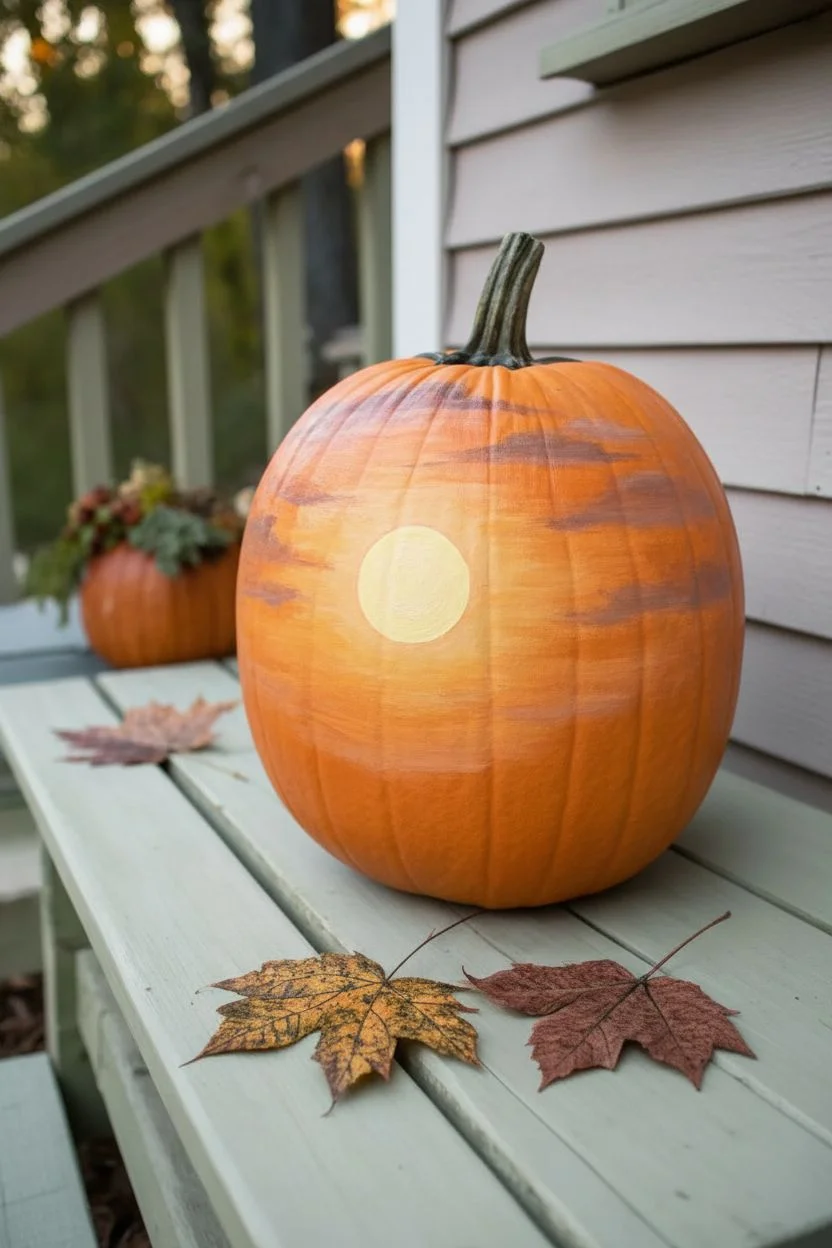
Paint the sun:
Near the center of the pumpkin, use the pale yellow mixture to paint a small circle for the setting sun. -
Create the sunset glow:
While the sun is wet, use a clean brush to blend outward with pure orange, creating a warm halo effect. Keep the strokes horizontal and soft. -
Add distant clouds:
Using your violet-grey mix, lightly streak in some horizontal clouds across the upper sky. I like to keep these translucent so the orange glow shows through.
Shape Mastery
Work with the pumpkin’s natural ribs. Place the tall trees on the protruding ridges to emphasize their height and 3D effect.
Step 2: Landscape and Road
-
Establish the horizon:
Mix a muted dark green using Hookers Green and a touch of black. Paint a rolling hill line below the sky area, dipping down in the center for the valley. -
Draft the winding road:
With a filbert brush and Yellow Ochre mixed with white, paint a winding path starting narrow at the horizon and widening significantly as it curves toward the bottom. -
Texture the hills:
Fill in the grassy areas on either side of the road using varied greens. Mix lighter olive tones for the foreground to create depth. -
Add road details:
To make the road look like dirt or gravel, streak in some Burnt Sienna and white highlights along the curve, following the direction of the path.
Step 3: Adding Trees and Details
-
Paint distant trees:
Using a smaller brush and a lighter grey-green, dab in small tree shapes near the horizon line. These should be less detailed to suggest distance. -
Block in foreground pines:
Switch to dark green mixed with black. Use the edge of a flat brush or a fan brush to tap in the tall, vertical lines for the large pine trees on the right and left sides. -
Create pine branches:
Using a small round brush, tap downward-sloping strokes branching off the main trunks. Make the branches wider and denser near the bottom of the trees. -
Highlight the trees:
Mix a slightly lighter green and tap highlights onto the tips of the branches that would be catching the sunset light (the side facing the sun). -
Add foreground pumpkins:
Paint small orange ovals in the grass near the bottom left and right. Add shading on the bottom and a simple highlight on top to make them look round. -
Final details:
Use your fine liner brush to add tiny grass blades silhouetted against the road and stems on the miniature pumpkins. -
Seal the work:
Once the painting is fully dry (at least 24 hours), spray a light coat of clear acrylic sealer to protect your masterpiece from moisture.
Glow Up
Mix glow-in-the-dark medium into the pale yellow paint for the sun and the moon clouds so the landscape lights up at night.
Now you have a stunning piece of harvest art that captures the peaceful spirit of the season


Have a question or want to share your own experience? I'd love to hear from you in the comments below!