If you love Halloween decor but you’re not in the mood to carve, ghost pumpkin painting is the sweet spot—fast, cute, and wildly customizable. I’m sharing my favorite pumpkin painting ideas with ghosts, starting with the classics and drifting into some artsy, unexpected twists.
Classic White Ghost Face on an Orange Pumpkin
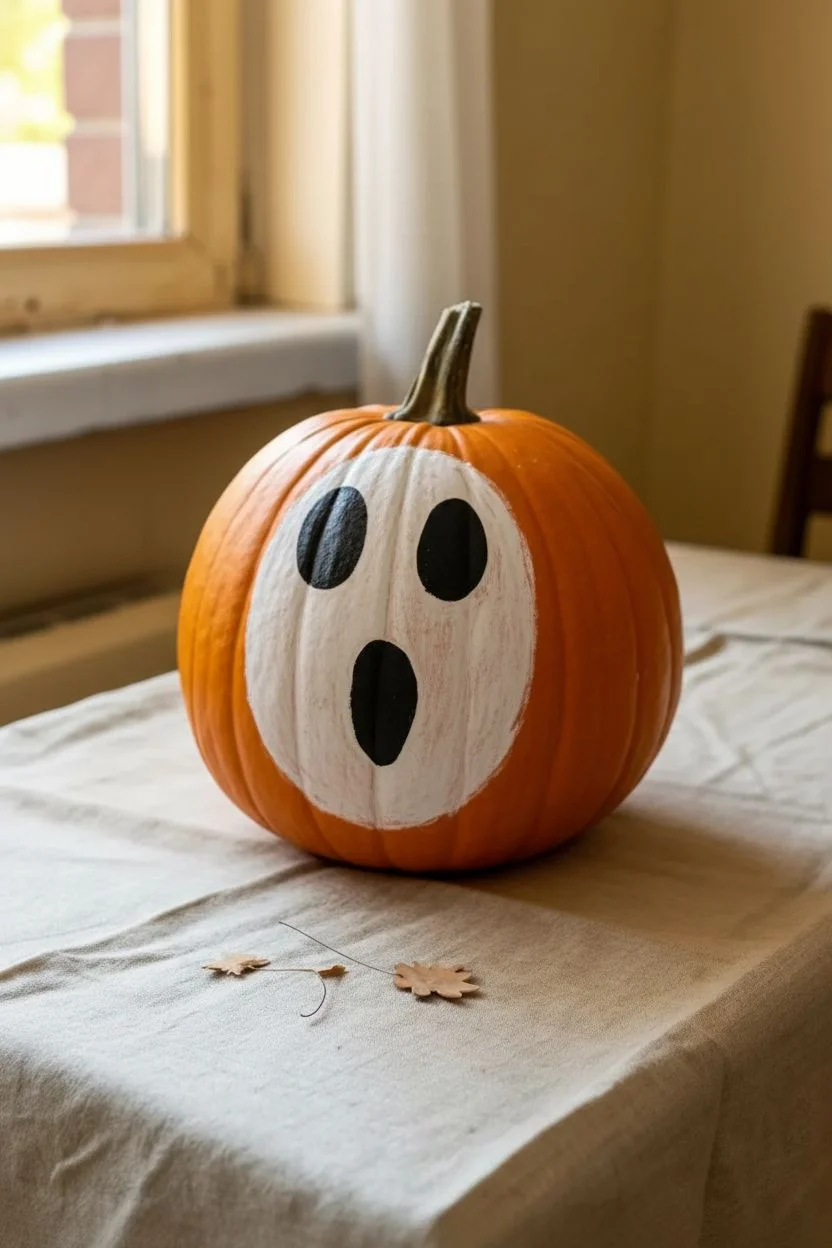
This classic Halloween project transforms a standard orange pumpkin into a startled spirit with a minimalist two-tone design. By painting a large white oval directly onto the pumpkin’s surface, you create a striking contrast that makes the ghostly expression pop without needing complex carving tools.
Detailed Instructions
Materials
- Medium-sized orange pumpkin (cleaned and dried)
- White acrylic paint (matte finish works best)
- Black acrylic paint
- Large flat paintbrush (1-2 inch width)
- Medium round paintbrush
- Small detail paintbrush
- Pencil or chalk (for sketching)
- Paper towel
- Cup of water
- Palette or paper plate
Step 1: Preparing the Base Design
-
Clean surface:
Begin by wiping down your pumpkin with a damp cloth to remove any dirt or oils that might prevent paint adhesion. Dry it completely before starting. -
Outline the ghost shape:
Using a pencil or a piece of white chalk, lightly sketch a large, rounded oval shape on the smoothest side of the pumpkin. -
Check the scale:
Aim for the shape to cover about two-thirds of the pumpkin’s height, leaving plenty of orange visible around the edges to frame the ghost. -
Sketch the features:
Inside your large oval, lightly draw two smaller vertical ovals for eyes near the top third. -
Draw the mouth:
Below the eyes, sketch a taller, slightly larger oval for the open mouth to create that classic ‘surprised’ expression.
Uneven Coverage?
If the white paint is cracking or refusing to stick to the waxy skin, lightly buff the pumpkin surface with fine-grit sandpaper before painting to create better grip.
Step 2: Painting the Ghost Backdrop
-
First coat of white:
Load your large flat brush with white acrylic paint. Start filling in the large oval shape you outlined, carefully painting around the eye and mouth outlines you sketched. -
Feather the edges:
When painting the outer edge of the white oval, don’t worry about a razor-sharp line; a slightly organic, hand-painted edge adds charm. -
Observe coverage:
Orange is a strong color to cover. The first coat will likely look streaky or semi-transparent, but this is normal. -
Let it dry:
Allow the first layer to dry completely. This usually takes about 15-20 minutes depending on the thickness of the paint. -
Second coat:
Apply a second layer of white paint over the same area. I usually brush in a cross-hatch direction (perpendicular to the first layer) to get smoother coverage. -
Final white touch-up:
If you can still see distinct orange showing through, dab a little extra paint on thin spots and let the white base dry completely before moving on.
Step 3: Adding the Facial Features
-
Fill the eyes:
Switch to your medium round brush and dip it into the black acrylic paint. Carefully fill in the two eye ovals you preserved earlier. -
Define the shape:
Use the curvature of the brush to round out the tops and bottoms of the eyes smoothly. -
Paint the mouth:
Fill in the large mouth oval with black paint. Keep your hand steady to ensure the edges are clean against the white background. -
Refine edges:
If the black paint looks a bit jagged, switch to your smallest detail brush to smooth out the perimeter of the eyes and mouth. -
Final drying:
Let the black paint dry fully. Since it is applied directly next to the white, ensure you don’t smudge it while wet. -
Clean up sketch lines:
Once everything is bone dry, if any pencil or chalk marks are still visible around the edges, gently wipe them away with a barely damp cloth.
Glow in the Dark
Mix glow-in-the-dark medium into your white acrylic paint for the final topcoat. The ghost face will charge in the light and emit a spooky green glow at night.
Now you have a charming ghost pumpkin ready to greet visitors right at your door


Full White Pumpkin Turned Into a Round Ghost
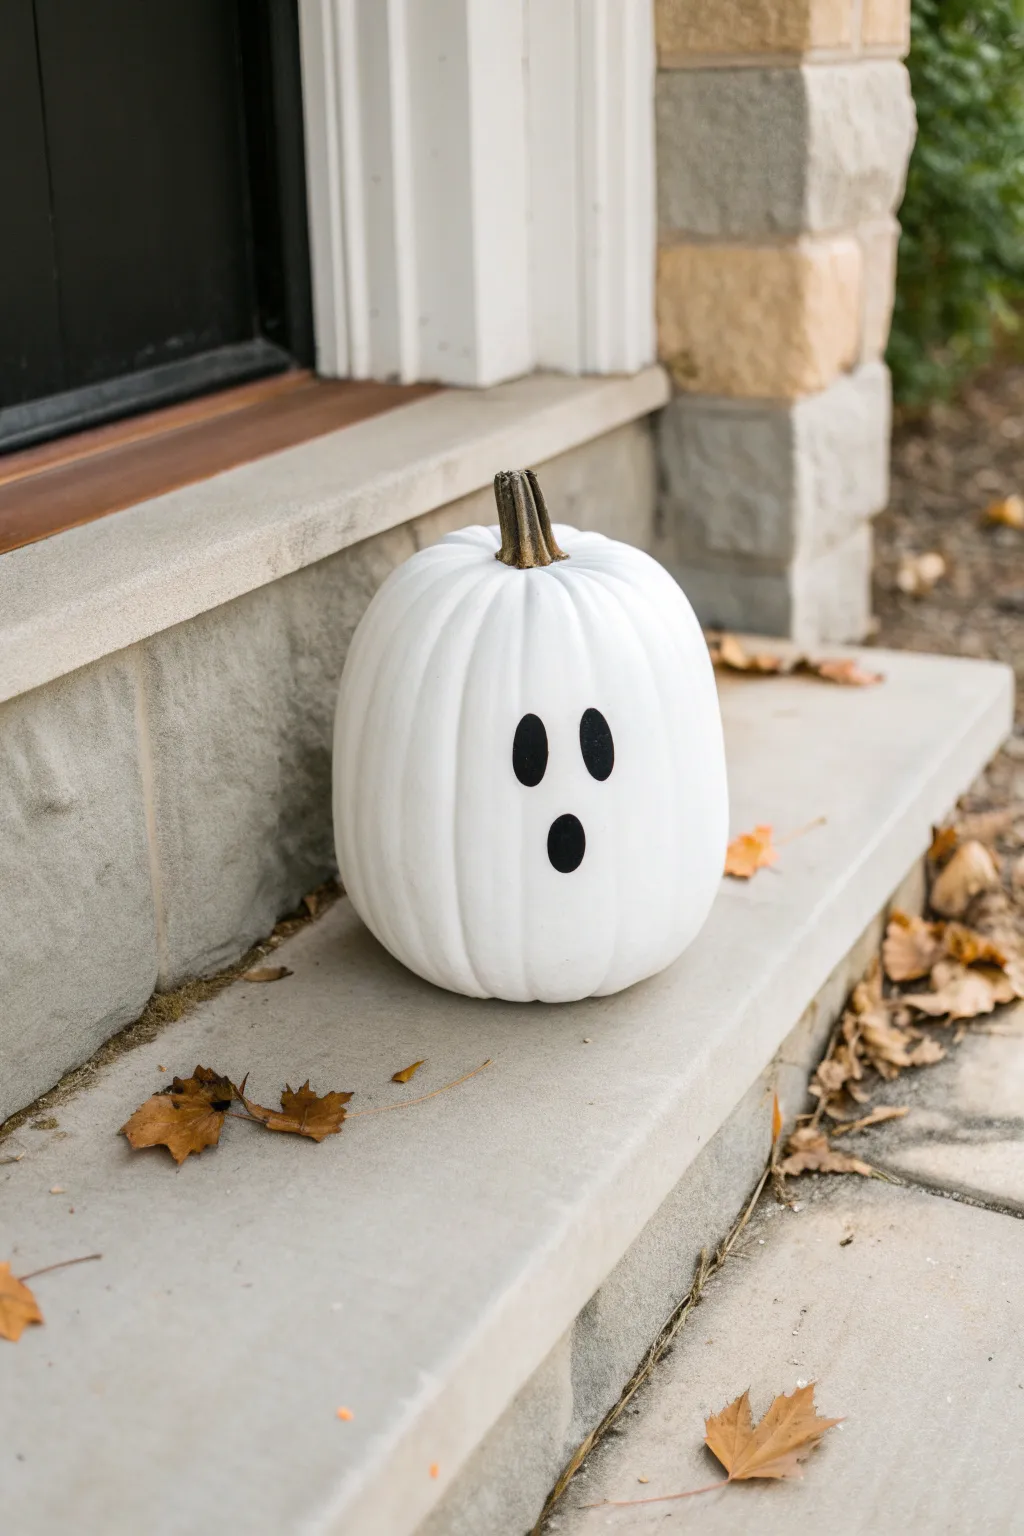
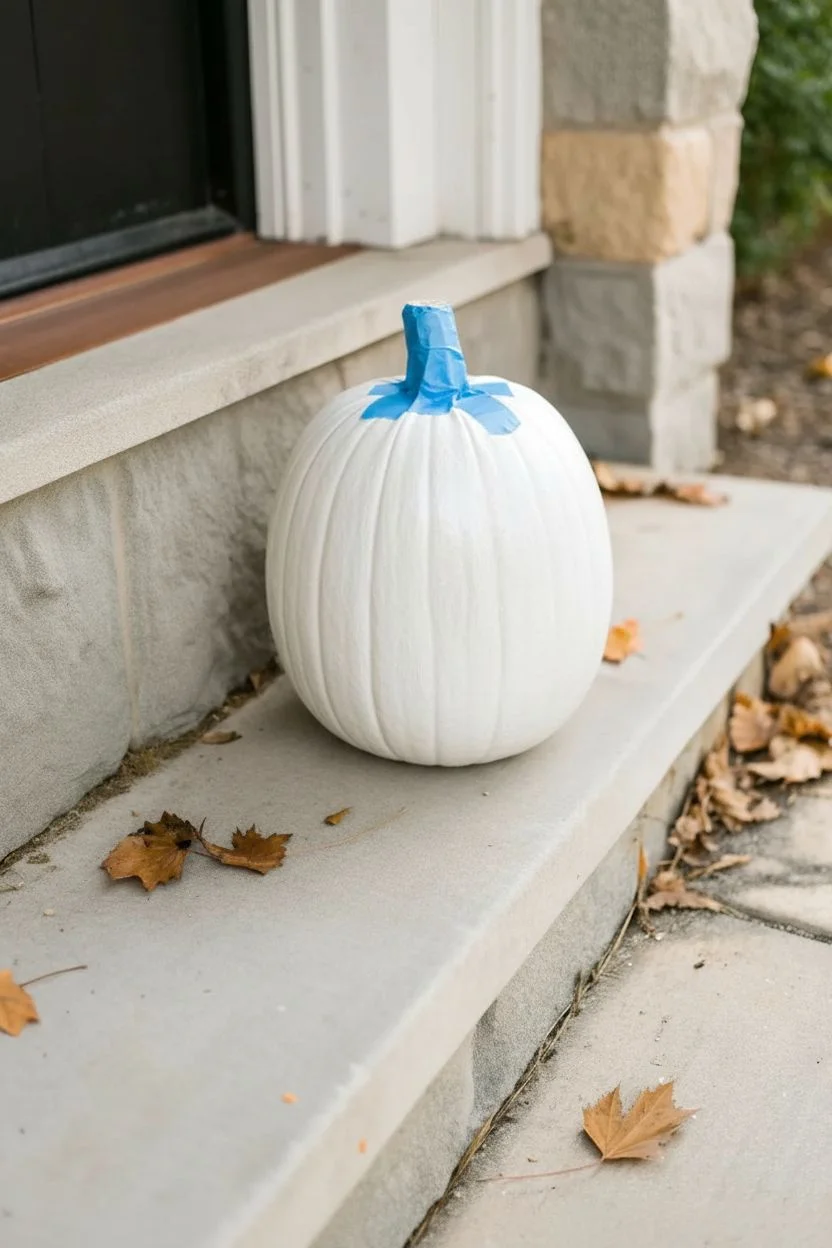
Transform a classic orange gourd into a charmingly spooky porch greeter with nothing but a few coats of paint. This minimalist approach uses a solid white base and simple black features to create an adorable ghost character that feels both modern and festive.
Step-by-Step Guide
Materials
- Medium-sized round pumpkin (real or faux)
- White acrylic craft paint (matte or satin finish)
- Black acrylic craft paint
- Adhesive painter’s tape (optional)
- Medium flat paintbrush (1-inch width)
- Small round detail brush
- Pencil
- Paper towels
- Primer spray (optional but recommended for real pumpkins)
- Sealant spray (clear matte)
Step 1: Preparation and Base Coat
-
Clean and dry:
Begin by thoroughly washing your pumpkin to remove any dirt or field debris. Use a mild soap and water, then dry it completely with a towel. If using a real pumpkin, ensure the stem is intact and dry. -
Protect the stem:
Carefully wrap the stem in painter’s tape. We want to keep that natural brown or green stem color to contrast with the stark white body, so take your time getting the tape snug against the base. -
Prime the surface:
If you are using a real pumpkin, applying a quick coat of spray primer helps the acrylic paint stick better and prevents the orange from bleeding through. Let this sit for about 15 minutes. -
Apply the first white coat:
Squeeze a generous amount of white acrylic paint onto a palette or paper plate. Using your medium flat brush, apply the first layer of white paint. Use vertical strokes that follow the natural ribs of the pumpkin. -
Let it dry completely:
Allow the first coat to dry fully. This usually takes about 30 to 45 minutes. It will look streaky at this stage, but don’t worry—that is perfectly normal. -
Apply the second coat:
Apply a second layer of white paint. Flip your brush direction if needed to fill in crevices, but generally keep the strokes vertical for a clean look. -
Touch up stubborn spots:
Inspect the pumpkin for any areas where the orange skin is still peeking through. I find that a third thin coat is often necessary for that perfect, opaque ghostly look. -
Remove the tape:
Once the final white coat is dry to the touch, gently peel off the painter’s tape from the stem. If any white paint got on the stem, wipe it off quickly with a damp paper towel.
Step 2: Creating the Ghost Face
-
Sketch the features:
Lightly sketch the face using a pencil directly on the dried white paint. You want two tall ovals for eyes and a slightly lower, rounder oval for the mouth. -
Check the placement:
Step back and look at your sketch. The eyes should be fairly close together on the upper half of the pumpkin to give it that surprised, friendly expression shown in the photo. -
Outline the first eye:
Switch to your small round detail brush and dip it into the black acrylic paint. Carefully trace the outline of your first penciled eye oval. -
Fill the eye:
Fill in the oval with black paint. Work slowly near the edges to keep the lines crisp and smooth. -
Paint the second eye:
Repeat the process for the second eye. Try to keep them relatively symmetrical, though a little variation adds character to the ghost. -
Paint the mouth:
Outline and fill in the mouth oval. This shape sits centrally below the eyes, creating the classic ‘O’ expression. -
Clean up edges:
If your hand slipped, wait for the black paint to dry completely, then use a tiny bit of white paint to cover the mistake and reshape the oval. -
Seal the artwork:
Once all paint is completely bone dry (give it at least an hour), take the pumpkin outside and apply a coat of clear matte sealant spray. This protects your ghost from moisture and prevents the paint from chipping.
Paint Persistence
Real pumpkin skins are waxy and resist paint. If your first coat beads up, mix a tiny drop of dish soap into your white acrylic paint to break the surface tension.
Glow Up
Before sealing, paint a layer of glow-in-the-dark medium over the white sections. Your ghost will look normal during the day but illuminate green at night.
Set your new spectral friend on the doorstep to welcome visitors with a silent boo


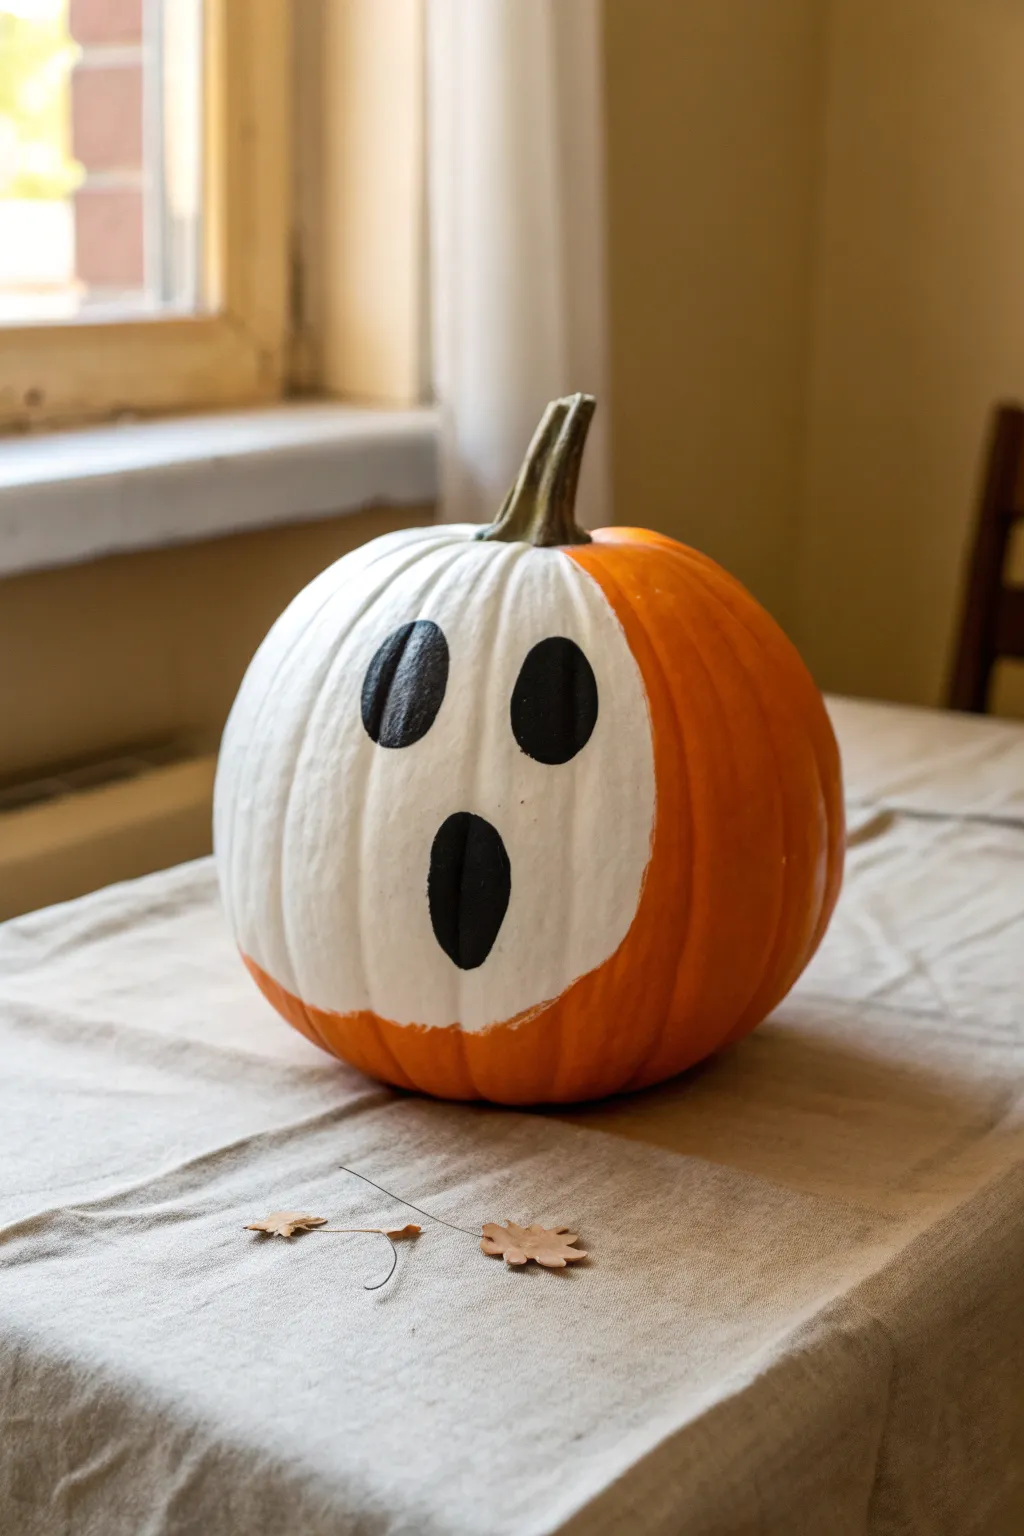
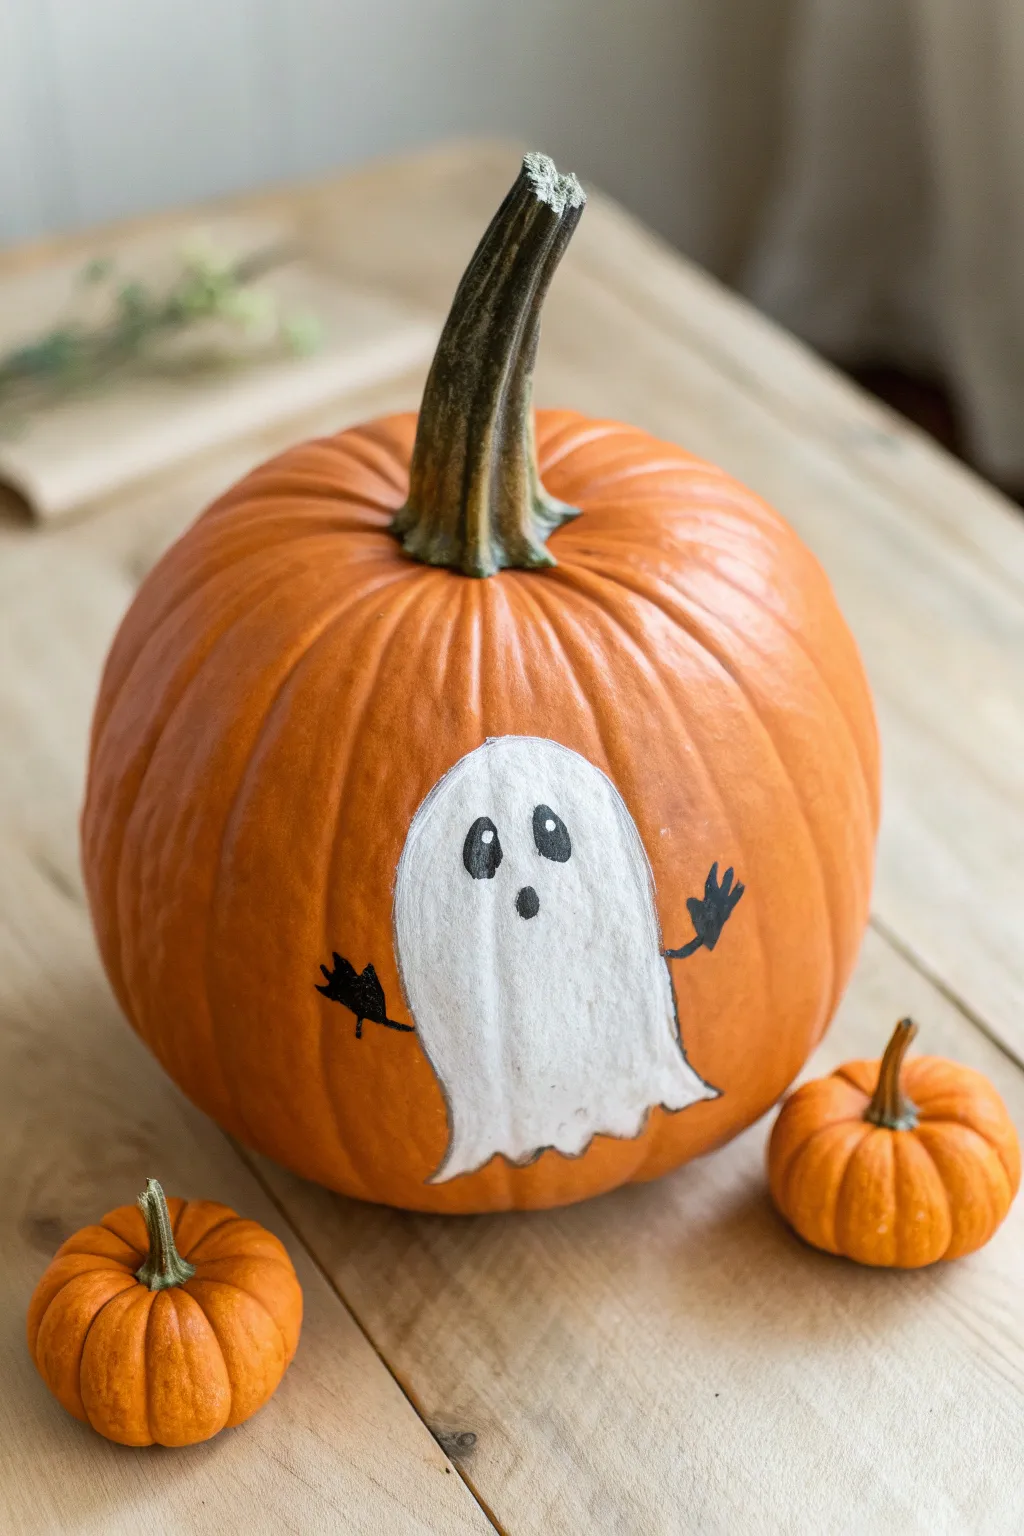
Sheet Ghost Silhouette Drifting Across the Pumpkin
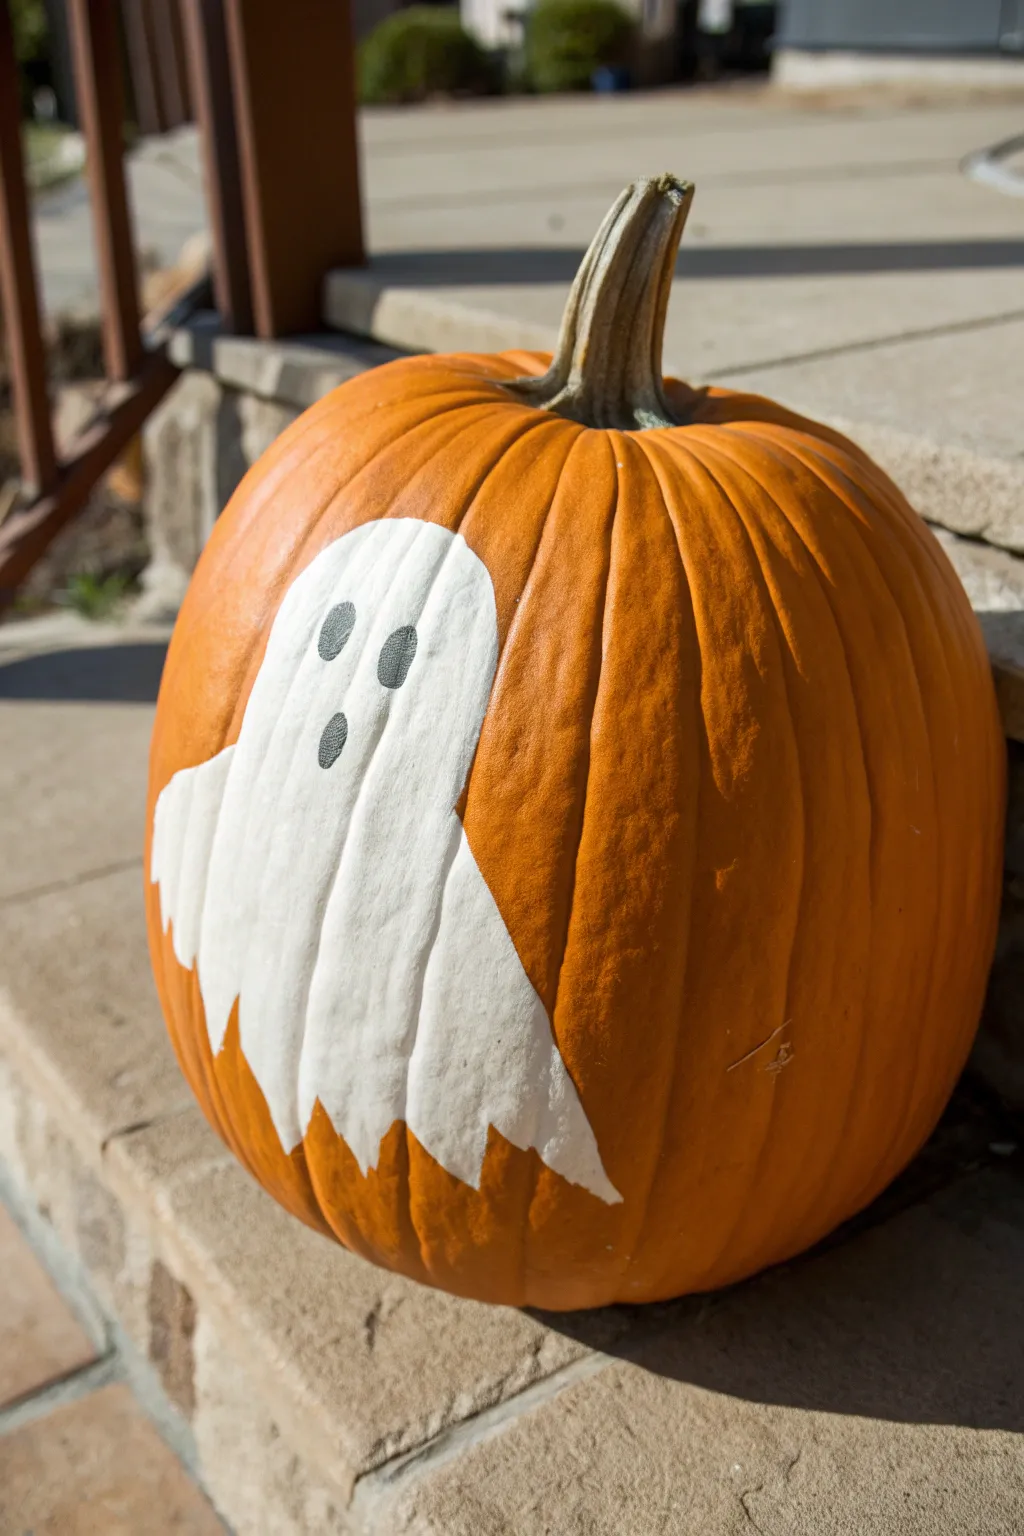
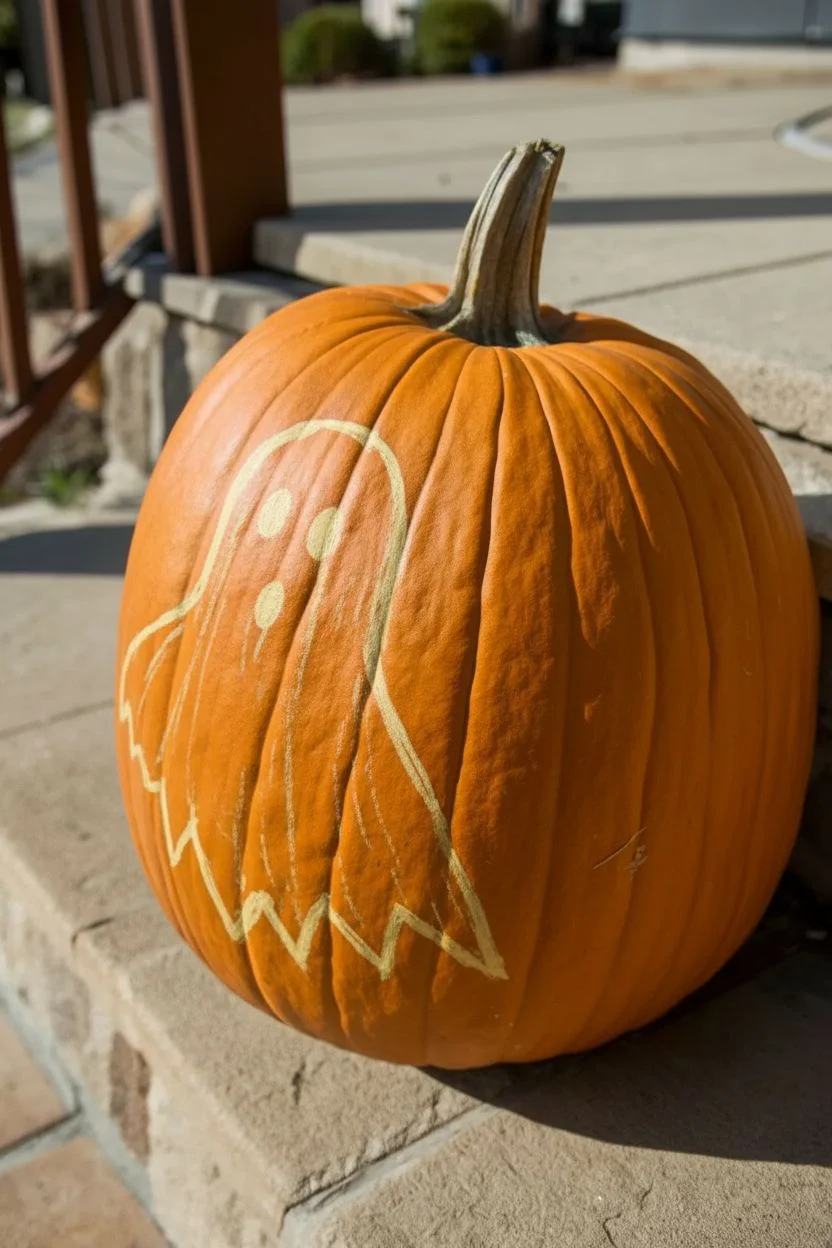
This charming project features a classic white sheet ghost painted directly onto a bright orange pumpkin for a high-contrast, timeless Halloween look. The design creates the illusion of a spirit floating across the curved surface, using key features like a jagged hem and simple oval face to bring the character to life.
Step-by-Step Tutorial
Materials
- Medium-sized orange pumpkin (clean and dry)
- White acrylic craft paint
- Black acrylic craft paint
- Medium flat paintbrush (about 1/2 inch)
- Small round detail brush
- Pencil or chalk (for sketching)
- Paper towel
- Cup of water
- Palette or paper plate
Step 1: Preparation & Sketching
-
Clean surface:
Begin by wiping down your pumpkin with a damp cloth to remove any dirt or oils. Let it dry completely so the paint adheres properly. -
Plan placement:
Choose the smoothest side of your pumpkin to be the ‘front.’ Visualize where the ghost will float; setting it slightly off-center or angled can make it look like it’s drifting. -
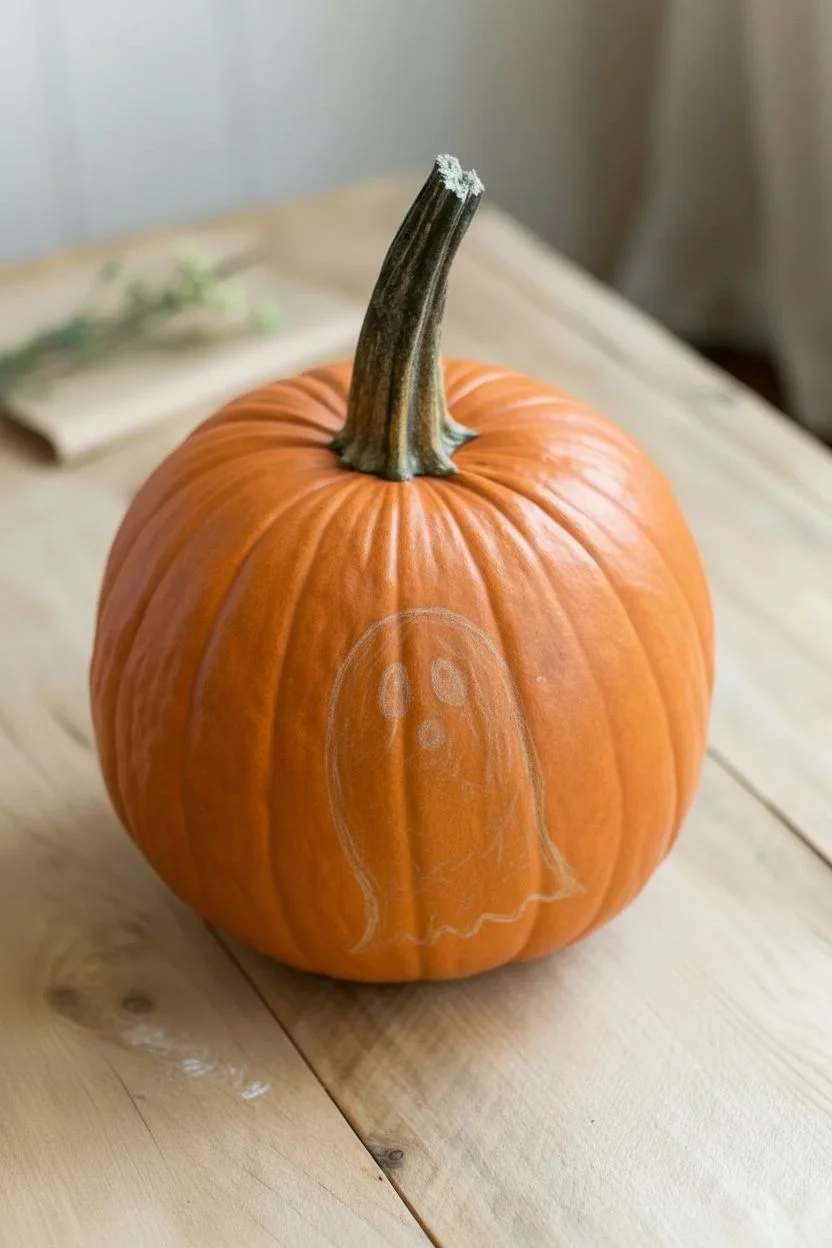
Sketch the outline:
Using a pencil or a piece of chalk, lightly sketch the ghost’s shape directly onto the pumpkin skin. -
Create the head shape:
Draw an inverted U-shape for the head. Make it nice and round at the top. -
Extend the body:
Bring the lines down the sides of the pumpkin. Instead of going straight down, curve them slightly outward or inward to mimic the drape of fabric. -
Draw the hem:
Connect the bottom of your ghost shape with a jagged, zigzag line. Vary the points—some sharp, some curved—to make the ‘sheet’ look tattered and flowy. -
Check proportions:
Step back and look at your sketch. The ghost should take up a good portion of the pumpkin’s face but leave plenty of orange border.
Step 2: Painting the Ghost
-
Load the brush:
Dip your medium flat brush into the white acrylic paint. Don’t overload it, as thick blobs can drip on the curved surface. -
Outline first:
Carefully paint over your pencil or chalk outline first to define the crisp edges of the ghost. -
Fill the center:
Once the outline is established, fill in the rest of the body with white paint. Use long, vertical strokes that follow the curve of the pumpkin. -
Apply second coat:
Acrylic white can be translucent against orange. Let the first layer dry to the touch (about 10-15 minutes), then add a second layer for solid, opaque coverage. -
Refine the edges:
While applying the second coat, tidy up the zigzags at the bottom hem to make them sharp and distinct.
Use Sponge Brushes
For the smoothest white coverage without visible bristles strokes, try dabbing the paint on with a foam sponge brush instead of dragging a standard brush.
Step 3: Adding Facial Features
-
Dry completely:
Ensure the white paint is completely dry before proceeding. If it’s wet, the black paint will mix and turn gray. -
Sketch the face:
Lightly mark lightly where the eyes and mouth will go. I usually place them somewhat high on the head shape. -
Paint the eyes:
Using your small round detail brush and black paint, fill in two vertical ovals for eyes. They should tilt slightly toward each other for a spooky expression. -
Paint the mouth:
Paint a third, slightly smaller oval below the eyes for the mouth. This creates that classic ‘ooo’ expression. -
Clean up:
If your pencil or chalk lines are still visible around the edges, gently wipe them away with a barely damp cloth once all paint is fully cured.
Glow in the Dark
Swap standard white paint for glow-in-the-dark acrylic paint, or add a top coat of it over the white ghost for a spooky surprise when the lights go out.
Place your finished pumpkin on the porch for a delightfully spooky welcome to trick-or-treaters


Spooky Ghost With Dripping Black Mouth
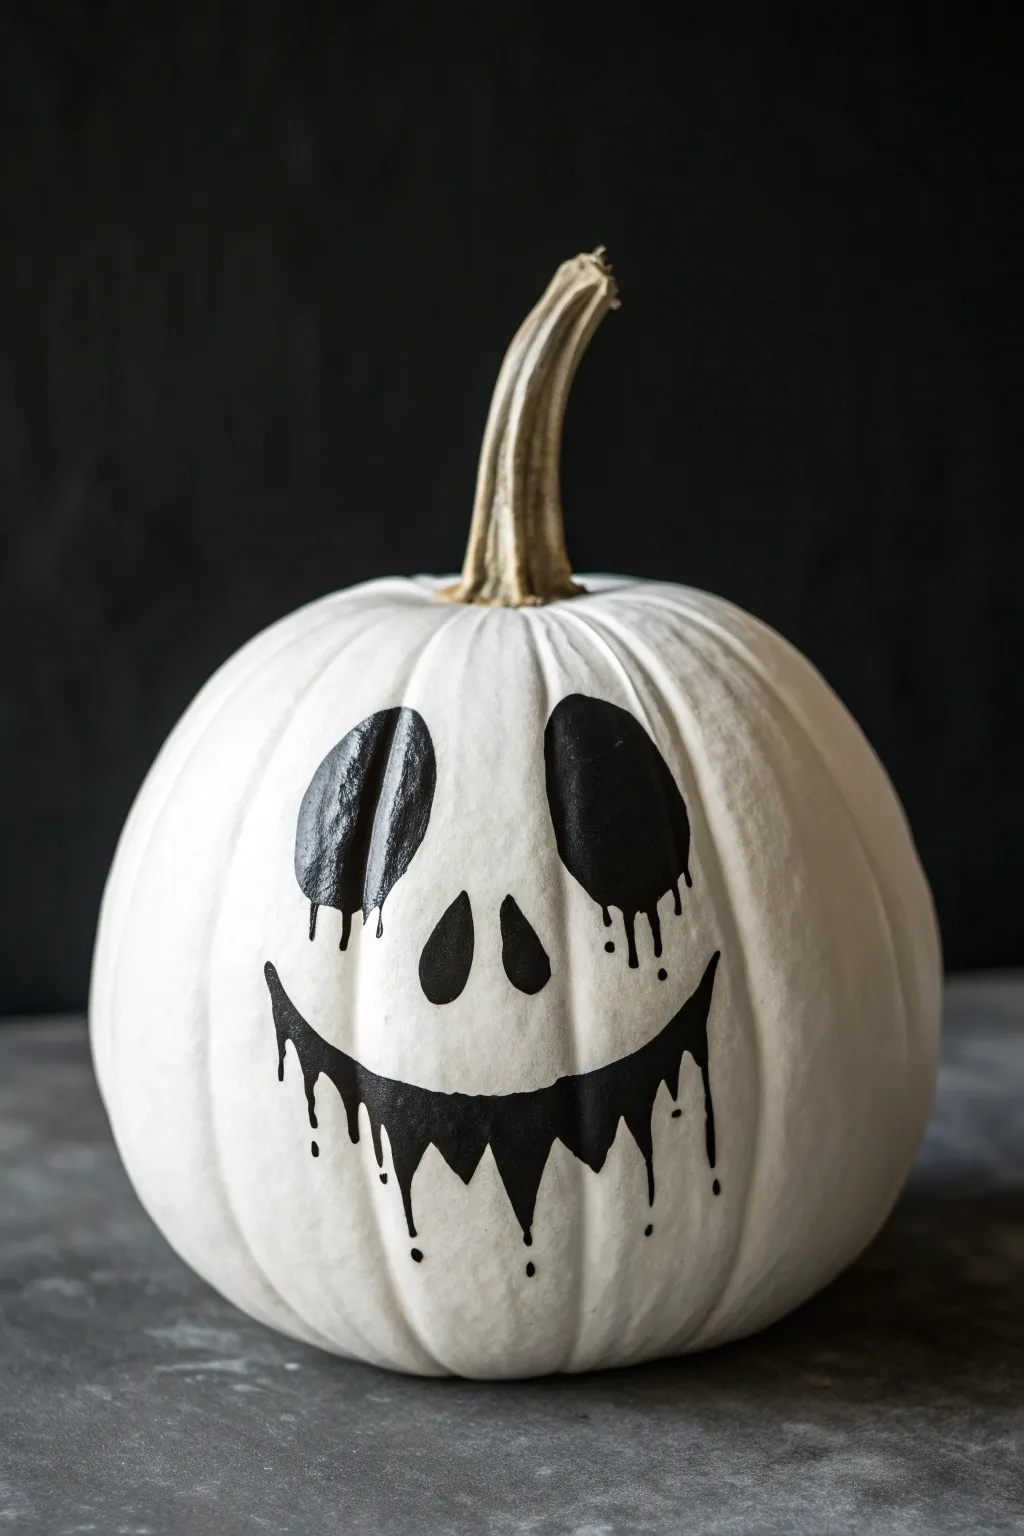
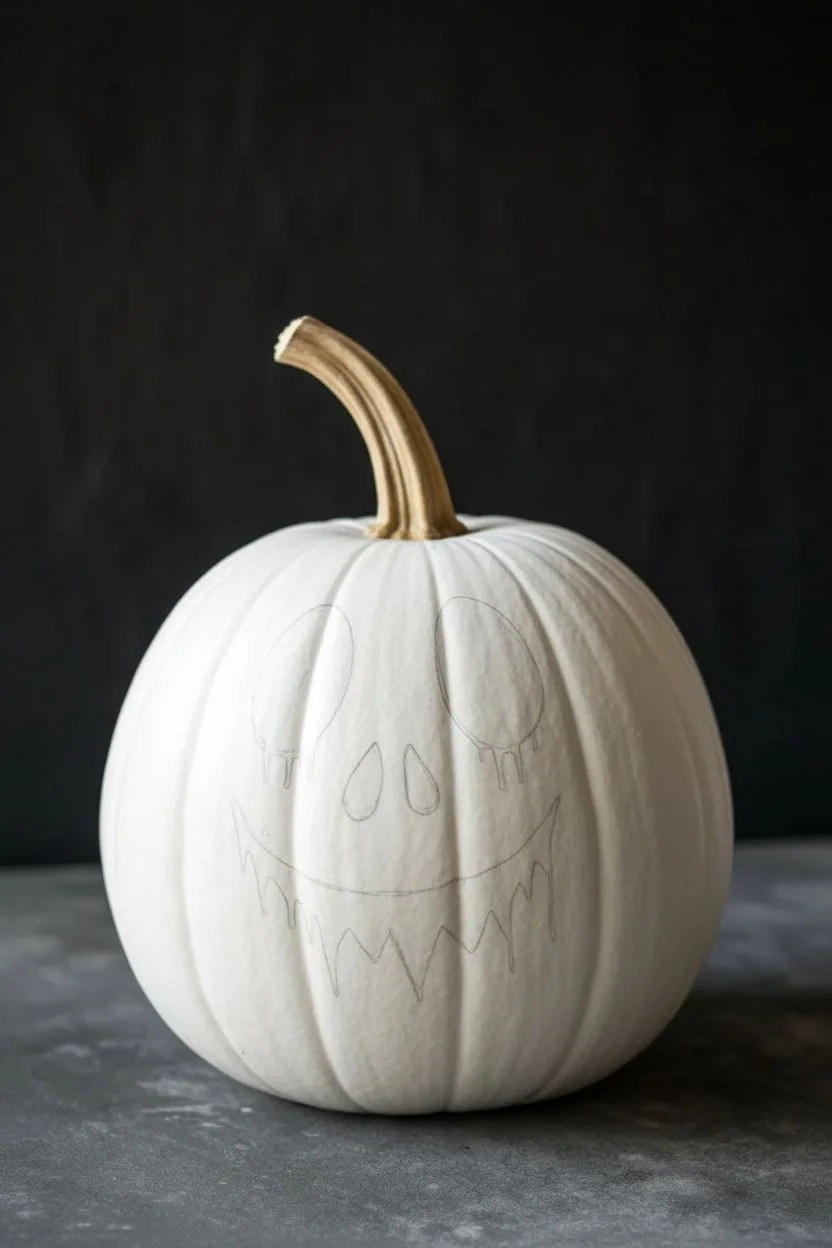
Transform a classic white pumpkin into a haunting character with this high-contrast design. The dripping black paint effect adds an eerie, melted look to the traditional Jack-o’-lantern face without the mess of carving.
Detailed Instructions
Materials
- Medium-sized white pumpkin (real or faux)
- Black acrylic paint
- Pencil or light grey watercolor pencil
- Round synthetic paint brush (size 4 or 6)
- Fine liner paint brush (size 0 or 1)
- Paper towel
- Cup of water
- Matte clear sealant spray (optional)
Step 1: Preparation and Sketching
-
Clean the surface:
Begin by wiping down your pumpkin with a damp paper towel to remove any dirt or dust. A clean surface ensures the paint adheres properly and prevents peeling later on. -
Dry completely:
Allow the pumpkin to air dry fully. If you are using a real pumpkin, make sure the stem is sturdy and the skin is free of deep blemishes in the area where you plan to paint the face. -
Draft the eyes:
Using a pencil or a light grey watercolor pencil, lightly sketch two large, slanted oval shapes for the eyes. Position them high on the pumpkin’s curve, tilting them slightly inward toward the center to create a moody expression. -
Mark the nostrils:
Below the eyes, draw two small, teardrop-shaped nostrils. These should be fairly close together, resembling thin, vertical slits rather than round holes. -
Outline the smile:
Sketch a wide, U-shaped grin that stretches nearly from cheek to cheek. Keep the line somewhat uneven rather than perfectly smooth to enhance the spooky character.
Natural Drip Technique
Instead of painting the heavy drips manually, load a wet brush with watered-down paint and press it against the wet eye bottoms to let gravity create real drips.
Step 2: Painting the Base Features
-
Fill the eyes:
Dip your round brush into the black acrylic paint. Carefully outline the sketched eye shapes first, then fill them in completely. Apply the paint generously to get a solid, opaque black coverage. -
Paint the nostrils:
Switch to a slightly smaller brush if necessary to fill in the teardrop nostrils. Ensure the edges are crisp and sharp. -
Create the mouth base:
Using the round brush, paint the main thick band of the smile. It should be thickest in the center and taper slightly as it reaches the corners of the mouth. -
Let the first layer set:
Allow the black paint to dry for about 10–15 minutes. If the white of the pumpkin is showing through, apply a second coat to ensure a deep, pitch-black finish.
Paint Not Sticking?
If the pumpkin skin is too waxy and repels paint, lightly buff the surface with fine-grit sandpaper or a scouring pad to give the acrylic better grip.
Step 3: Adding the Dripping Details
-
Start the eye drips:
Switch to your fine liner brush. At the bottom edge of the right eye, paint small, vertical lines extending downward to mimic leaking or melting paint. -
Refine the eye drops:
Add tiny rounded teardrop shapes at the end of these vertical lines. Vary the lengths—some short, some slightly longer—to make the drips look organic and natural. -
Add texture to the mouth:
Along the bottom edge of the smile, paint jagged, triangular points facing downward. This creates the illusion of a rough, stitched, or melting mouth. -
Elongate the mouth drips:
Choose several of the jagged points on the mouth and extend them further down using long, thin lines. Finish these lines with small dots or bulbous shapes to simulate heavy drops of liquid. -
Create floating droplets:
I like to add a few standalone black dots just below the longest drips. This small detail makes the paint look like it is actively splashing or falling off the face.
Step 4: Finishing Touches
-
Clean up edges:
Examine your outlines. If any edges look ragged where they shouldn’t, carefully smooth them out with the fine liner brush and a tiny bit of fresh black paint. -
Touch up density:
Check for any streaks in the black areas once the drip details are dry. A quick touch-up coat on the main blocks of color usually solidifies the look. -
Erase guidelines:
If any of your original pencil sketch is still visible around the edges of the paint, gently erase it with a soft eraser or wipe it away with a slightly damp Q-tip. -
Seal the artwork:
For longevity, especially if the pumpkin will sit on a porch, lightly mist the painted face with a matte clear sealant spray. Use short bursts to avoid causing the black paint to run.
Place your spooky creation in a dimly lit corner or on a front step to welcome visitors with a ghostly grin
BRUSH GUIDE
The Right Brush for Every Stroke
From clean lines to bold texture — master brush choice, stroke control, and essential techniques.
Explore the Full Guide
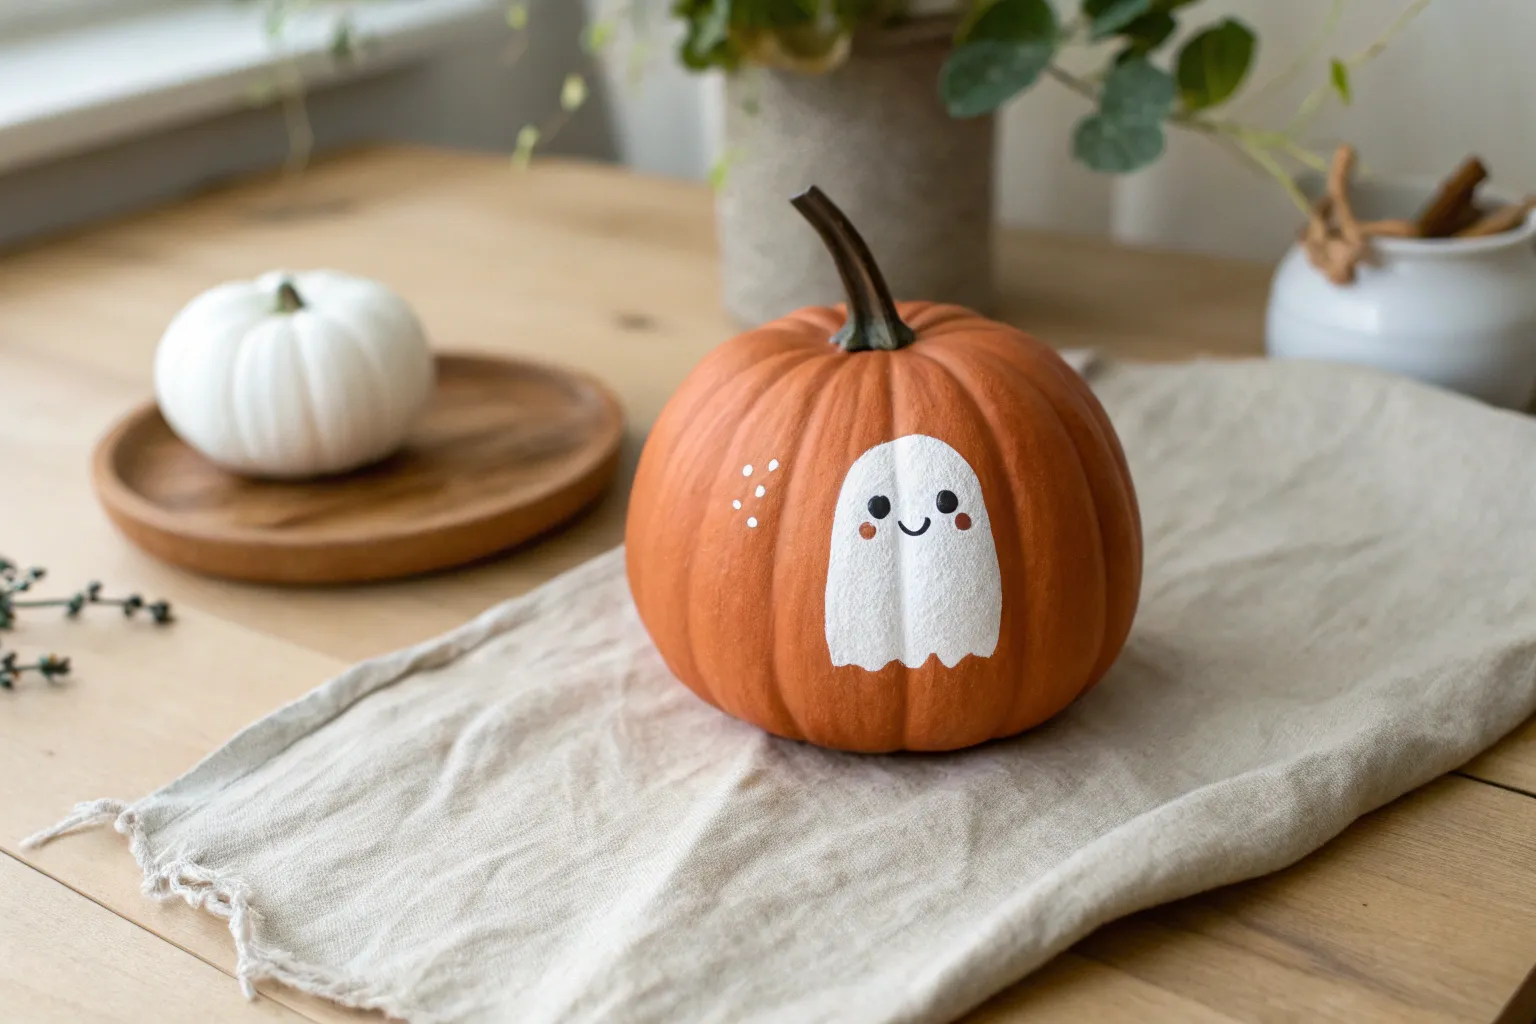
Boo Script Lettering With a Floating Ghost Accent
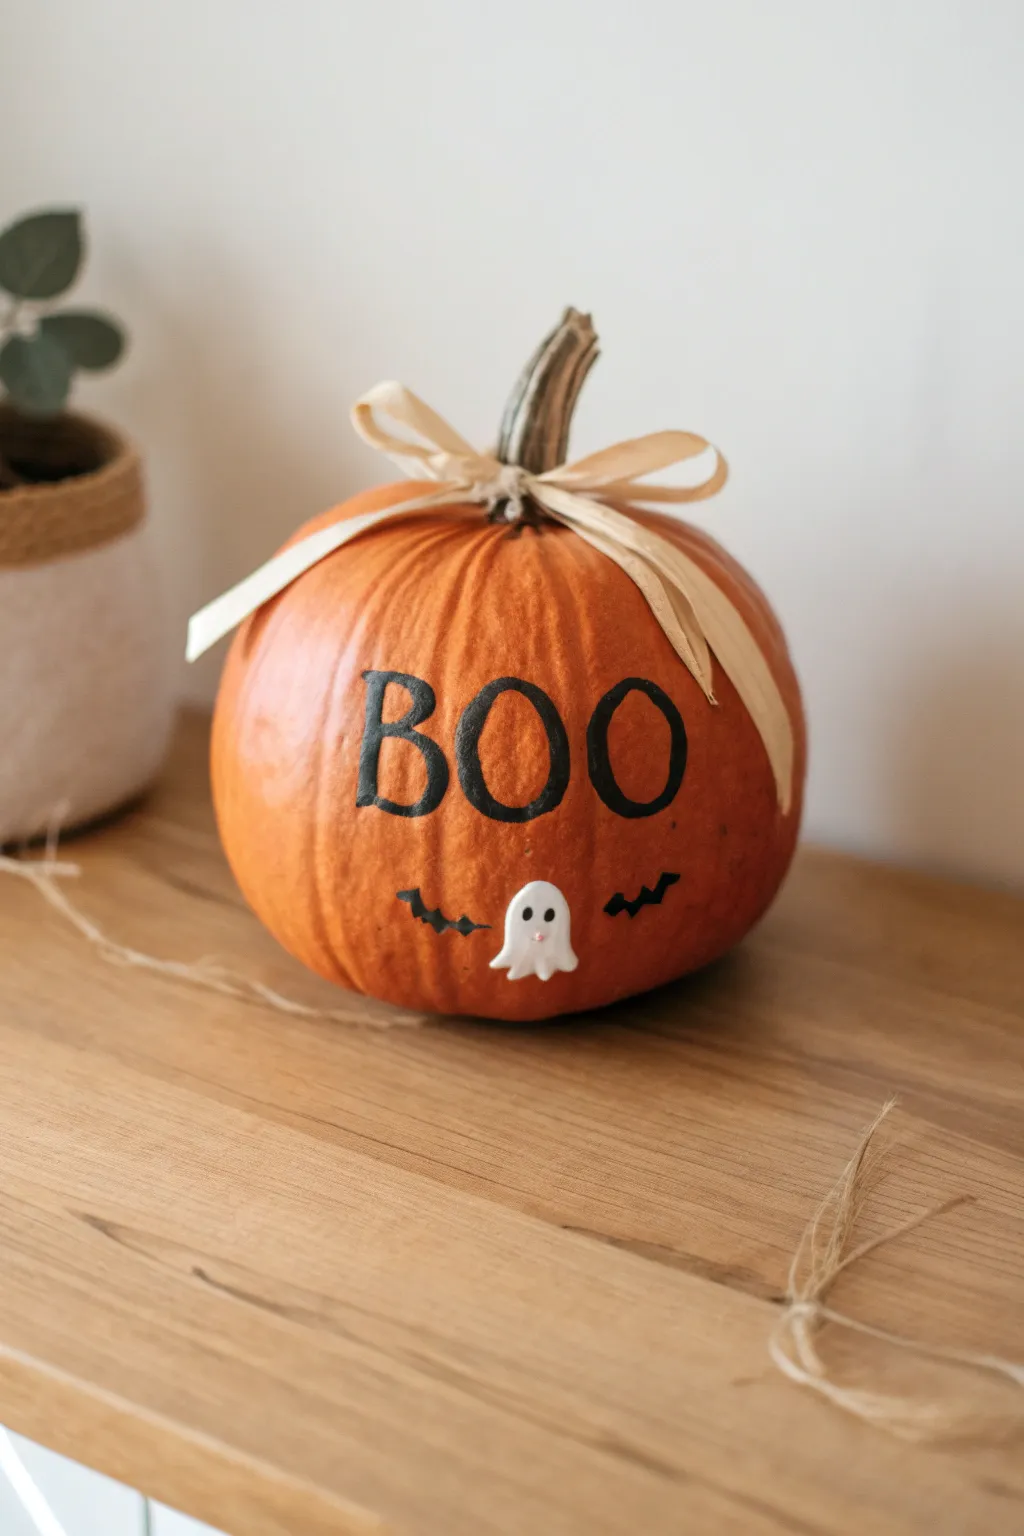
Create a charming Halloween display with this simple yet striking pumpkin project featuring bold lettering and an adorable 3D accent. The combination of classic painted typography and a tiny raised ghost adds lovely texture and personality to your fall decor.
Step-by-Step Guide
Materials
- Small to medium orange pumpkin (real or faux)
- Black acrylic paint
- Small flat paint brush (size 4 or 6)
- Fine liner brush (size 0 or 1)
- White air-dry clay or polymer clay
- Pink acrylic paint (very small amount)
- Fine-tip black permanent marker
- Beige raffia ribbon or corn husk strips
- Pencil
- Super glue or craft glue
- Matte twisted paper twine (optional for stem wrap)
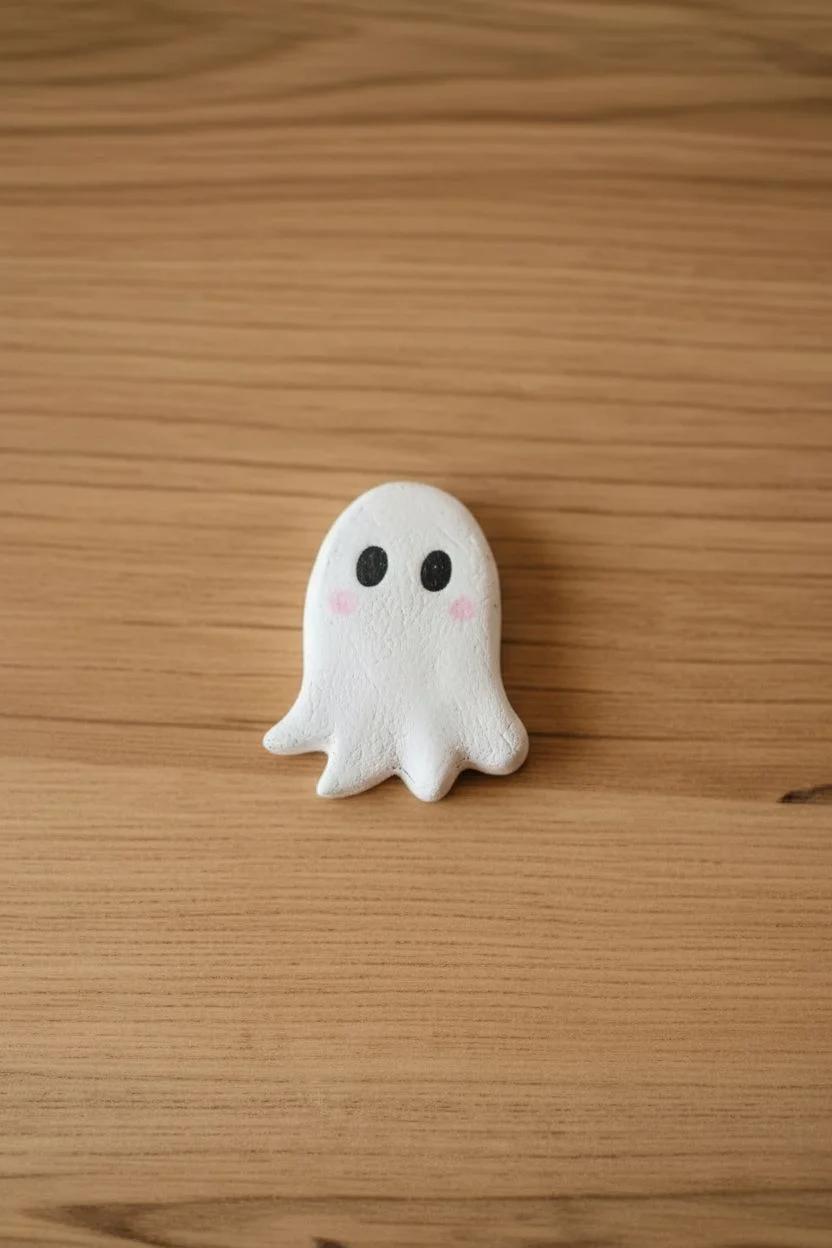
Step 1: Creating the Ghost Accent
-
Shape the Clay:
Pinch off a small amount of white clay, roughly the size of a dime. Roll it into a ball first, then flatten it slightly into a teardrop shape. -
Form the Arms:
Gently pull the bottom edges of the clay outward and upward to create the classic wavy ghost hem. Use a sculpting tool or toothpick to smooth any fingerprints. -
Add Dimension:
Press lightly into the center of the ghost shape so it curves slightly; this will help it sit flush against the rounded surface of the pumpkin later. -
Paint the Face:
Once the clay is fully dry (according to package instructions), use the fine-tip black marker or a tiny dot of black paint to create two small eyes. -
Add Cheeks:
Dip the very tip of a toothpick into pink paint and dab it gently below the eyes to give the ghost rosy cheeks. -
Set Aside:
Place your finished ghost somewhere safe to cure completely while you work on the pumpkin itself.
Sticky Situation
If the clay ghost won’t stick to the waxy pumpkin skin, lightly sand the spot on the pumpkin with fine-grit sandpaper to give the glue more grip.
Step 2: Lettering the Pumpkin
-
Clean the Surface:
Wipe down your pumpkin with a damp cloth to remove any dirt or oils that might prevent the paint from adhering properly, then dry it thoroughly. -
Sketch the Text:
Using a pencil, lightly sketch the letters ‘B’, ‘O’, and ‘O’ across the center of the pumpkin face. Aim for a classic serif font style. -
Outline in Paint:
Take your fine liner brush loaded with black acrylic paint and carefully trace over your pencil outlines. Use a steady hand to define the serifs on the letters. -
Fill the Letters:
Switch to your small flat brush to fill in the body of the letters. Apply a second coat if the orange rind shows through after the first layer dries. -
Sketch the Bats:
Below the text, lightly mark two spots on either side where the ghost will sit. Draw small, simple bat silhouettes—essentially a ‘V’ shape with scalloped wings. -
Paint the Bats:
Use the fine liner brush again to fill in the small bat shapes with black paint. Keep the points sharp for a crisp silhouette.
Glow Up
Paint the little clay ghost with glow-in-the-dark acrylic paint or a top coat so the centerpiece of your design shines even after the lights go out.
Step 3: Assembly and Finish
-
Attach the Ghost:
Apply a small dab of super glue or strong craft glue to the back of your clay ghost. Press it firmly onto the pumpkin, centered directly below the middle ‘O’ and between the two painted bats. -
Prepare the Bow:
Take several strands of raffia ribbon and bundle them together to create a fuller loook. -
Tie the Stem:
Wrap the raffia bundle around the stem base and tie a simple bow. Pull the loops tight but leave them somewhat loose and floppy for a rustic feel. -
Trim Ends:
I usually like to trim the raffia tails at an angle so they drape nicely down the sides of the pumpkin without obscuring the lettering. -
Final Check:
Look over your work for any pencil marks that are still visible and gently erase them, ensuring the paint is completely bone dry first.
Place your new masterpiece on a shelf or entryway table to welcome guests with a friendly spook
Ghost Family Set With Different Expressions
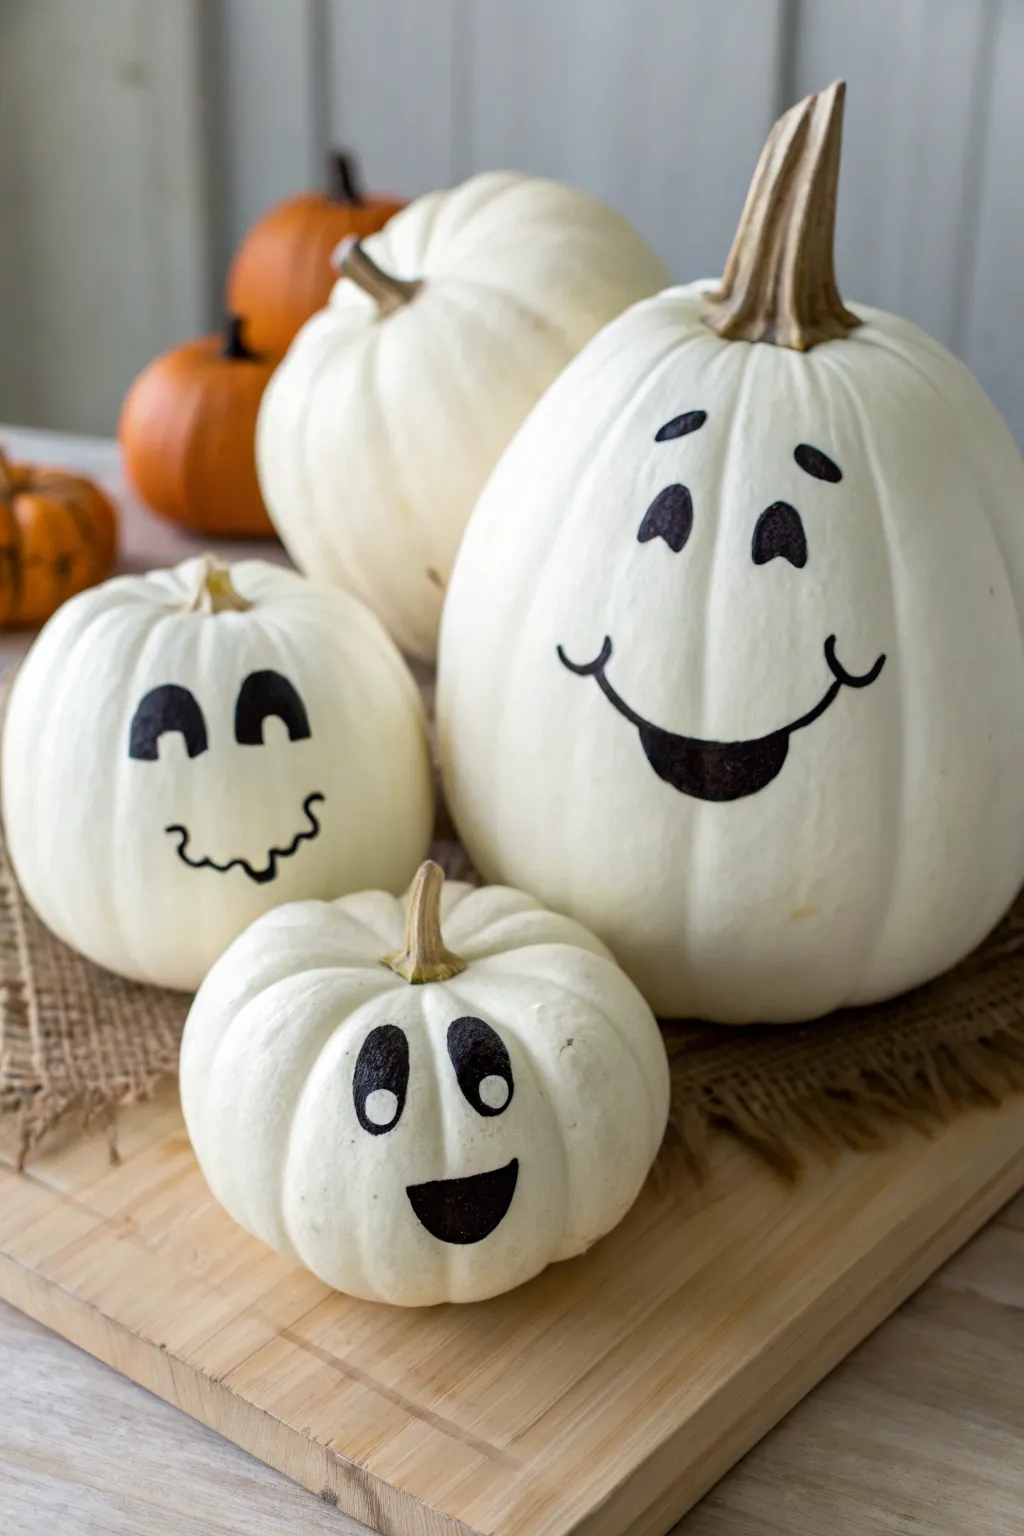

Gather a charming little family of gourds and transform them into friendly specters with these expressive painted faces. By using pumpkins of different shapes and sizes, you create a distinct personality for each character in this not-so-spooky set.
Detailed Instructions
Materials
- 3-4 white pumpkins (various sizes: large, medium, small)
- Black acrylic craft paint
- Small round paintbrush (size 2 or 4)
- Medium round paintbrush (size 6 or 8)
- Pencil
- Damp cloth or paper towel
- Sealer spray (optional, like Mod Podge or clear acrylic)
- Old newspaper or drop cloth
Step 1: Planning and Preparation
-
Clean the surfaces:
Before you begin, wipe down all your white pumpkins with a damp cloth to remove any dirt or garden residue from the pumpkin patch. A clean, drying surface ensures the paint adhered properly. -
Dry thoroughly:
Allow the pumpkin skin to dry completely. If the surface is even slightly damp, the acrylic paint might bead up or streak. -
Test the arrangement:
Group your pumpkins together to decide which face goes on which gourd. Generally, the tallest pumpkin works well for the ‘parent’ figure, while squat, round ones make adorable ‘children’.
Paint Beading Up?
If the paint separates on the shiny pumpkin skin, lightly buff the area with fine-grit sandpaper or a scouring pad first. This creates ‘tooth’ for the paint to grip.
Step 2: Drafting the Expressions
-
Sketch lightly:
Using a pencil, very lightly sketch the facial features onto the pumpkin skins. Don’t press too hard, or you might dent the rind. If you make a mistake, simply wipe it off with a damp finger and try again. -
The Tall Ghost:
For the largest pumpkin, sketch two almond-shaped eyes that tilt inward slightly. Add small, curved eyebrows above them. Draw a wide, deep U-shape for the smile, adding shorter curved lines at the corners for dimples. -
The Wobbly Ghost:
On a medium round pumpkin, sketch two arch-shaped eyes (flat on the bottom, curved on top). For the mouth, draw a squiggly line that looks a bit like a wave or a shaky smile. -
The Baby Ghost:
On the smallest pumpkin, draw two tall oval eyes. Beneath them, sketch a simple D-shape mouth that is flat on top and curved on the bottom for an eager, open expression. -
Review the sketches:
Step back and look at your pencil drafts. Make sure the features are centered and proportionate to the size of each pumpkin.
Step 3: Painting the Features
-
Outline the Tall Ghost’s eyes:
Using your smaller round brush loaded with black acrylic paint, carefully trace the outline of the almond eyes on the large pumpkin. -
Fill the eyes:
Switch to a slightly larger brush if needed, or continue with the small one to fill in the eye shapes completely solid black. Leave a tiny white spec unpainted if you want a highlight, though the example uses solid black shapes. -
Paint the eyebrows:
With the small brush, paint the two small, curved eyebrows using a single confident stroke for each. -
Paint the big smile:
Trace the wide U-shape mouth. Thicken the line at the very bottom of the curve to give the mouth some weight, then taper it out toward the cheek dimples. -
Wobbly Ghost eyes:
Moving to the medium pumpkin, paint the arch-shaped eyes. Keep the bottom edge straight and the top curve smooth. -
Detailing the pupils:
I like to add the pupils carefully here: paint a black semi-circle at the bottom of the eye arch, leaving the top portion (the ‘white’ of the eye) unpainted. It creates a silly, looking-up expression. -
The squiggly mouth:
Use your finest brush tip for the wavy mouth line. Keep the pressure light to maintain a thin, consistent line width across the wiggle. -
Baby Ghost eyes:
On the small pumpkin, outline the tall oval eyes. Fill them in, but similar to the Wobbly Ghost, paint a large black circle inside the oval, leaving a small white crescent at the top or side to suggest they are looking forward. -
Wait for drying:
Let the paint dry for about 10–15 minutes. Acrylic on pumpkin skin can remain tacky for a moment, and you don’t want to smudge your work. -
Second coat check:
Inspect the black areas. If the pumpkin skin shows through, apply a second coat of black paint to make the features bold and opaque.
Make Them Last
To keep your ghost family looking fresh on the porch, spray the painted faces with a clear matte acrylic sealer. This prevents the moisture from peeling the paint.
Once dry, arrange your adorable pumpkin family on a hay bale or table runner for a spirited display

PENCIL GUIDE
Understanding Pencil Grades from H to B
From first sketch to finished drawing — learn pencil grades, line control, and shading techniques.
Explore the Full Guide
Ghost Holding a Tiny Painted Pumpkin Treat
Transform a classic orange pumpkin into a spooky-sweet centerpiece with this simple painting project. The bright white ghost pops beautifully against the pumpkin skin, creating a charming Halloween decoration that requires zero carving.
Step-by-Step
Materials
- Medium-sized orange pumpkin (clean and dry)
- White acrylic craft paint or white chalk paint
- Black acrylic paint or black paint pen (medium tip)
- Medium flat paintbrush
- Small round detail brush
- Pencil or chalk for sketching
- Paper towel
- Cup of water
- Clear matte sealer (optional)
Step 1: Preparation & Sketching
-
Clean the surface:
Wipe down your pumpkin with a damp cloth to remove any dirt or oils. Let it dry completely before starting to ensure the paint adheres properly. -
Choose the best side:
Rotate your pumpkin to find the flattest, smoothest side. This will be your canvas, making it easier to paint straight lines and fill in shapes. -
Outline the ghost:
Using a pencil or a piece of white chalk, lightly sketch the outline of your ghost. Draw a tall, rounded arch for the head and a wavy, uneven line at the bottom for the ghostly tail.
Step 2: Painting the Body
-
First coat of white:
Dip your medium flat brush into the white paint. Fill in the outlined ghost shape, starting from the center and working outward toward the edges. -
Review coverage:
The first layer will likely look streaky or transparent, especially against the dark orange skin. Don’t worry about opacity yet; just focus on defining the shape. -
Dry thoroughly:
Allow this first coat to dry completely. If you paint over wet acrylics, you’ll just drag the paint around rather than building coverage. -
Second coat:
Apply a second layer of white paint. Use dabbing motions if you need to deposit more pigment in stubborn areas. I like to feather the edges slightly to keep the outline soft. -
Final touch-ups:
If the orange is still showing through, add a third coat. The goal is a solid, bright white silhouette. -
Add texture (optional):
For a rustic look like the example, use a slightly dry brush for the final layer to create vertical streaks that mimic fabric texture.
Paint Slipping?
If acrylic paint beads up on the pumpkin skin, the surface might be too waxy. Gently buff the area with fine-grit sandpaper or wipe with rubbing alcohol to help paint stick.
Step 3: Adding Details
-
Outline the body:
Once the white paint is bone dry, take your small round brush with black paint (or a black paint pen). Carefully trace the entire outer edge of the ghost with a thin, shaky line for a hand-drawn feel. -
Draw the arms:
Position two small black stick arms extending from the sides of the ghost. Add three little fingers to each hand, making them look like twiggy claws. -
Paint the eyes:
Near the top-center of the white shape, paint two oval eyes using black. Make them slightly tilted inward to give the ghost a cute, curious expression. -
Add the mouth:
Paint a small, round ‘O’ shape centered below the eyes for the mouth. -
Eye highlights:
Dip the non-brush end (the handle) of a small paintbrush into white paint. Dot a tiny speck of white into the upper corner of each black eye to bring the character to life. -
Seal the work:
If you plan to display this outdoors, apply a coat of clear matte sealer over the painted area once everything is dry to prevent rain damage.
Smoother White
Use white gesso as a primer layer instead of regular white acrylic. It’s thicker, covers the orange pigment faster, and provides a grippy tooth for subsequent layers.
Set your finished pumpkin on the porch or a shelf for a friendly fright
Pastel Ghost Pumpkin in Soft Pink or Blue Tones
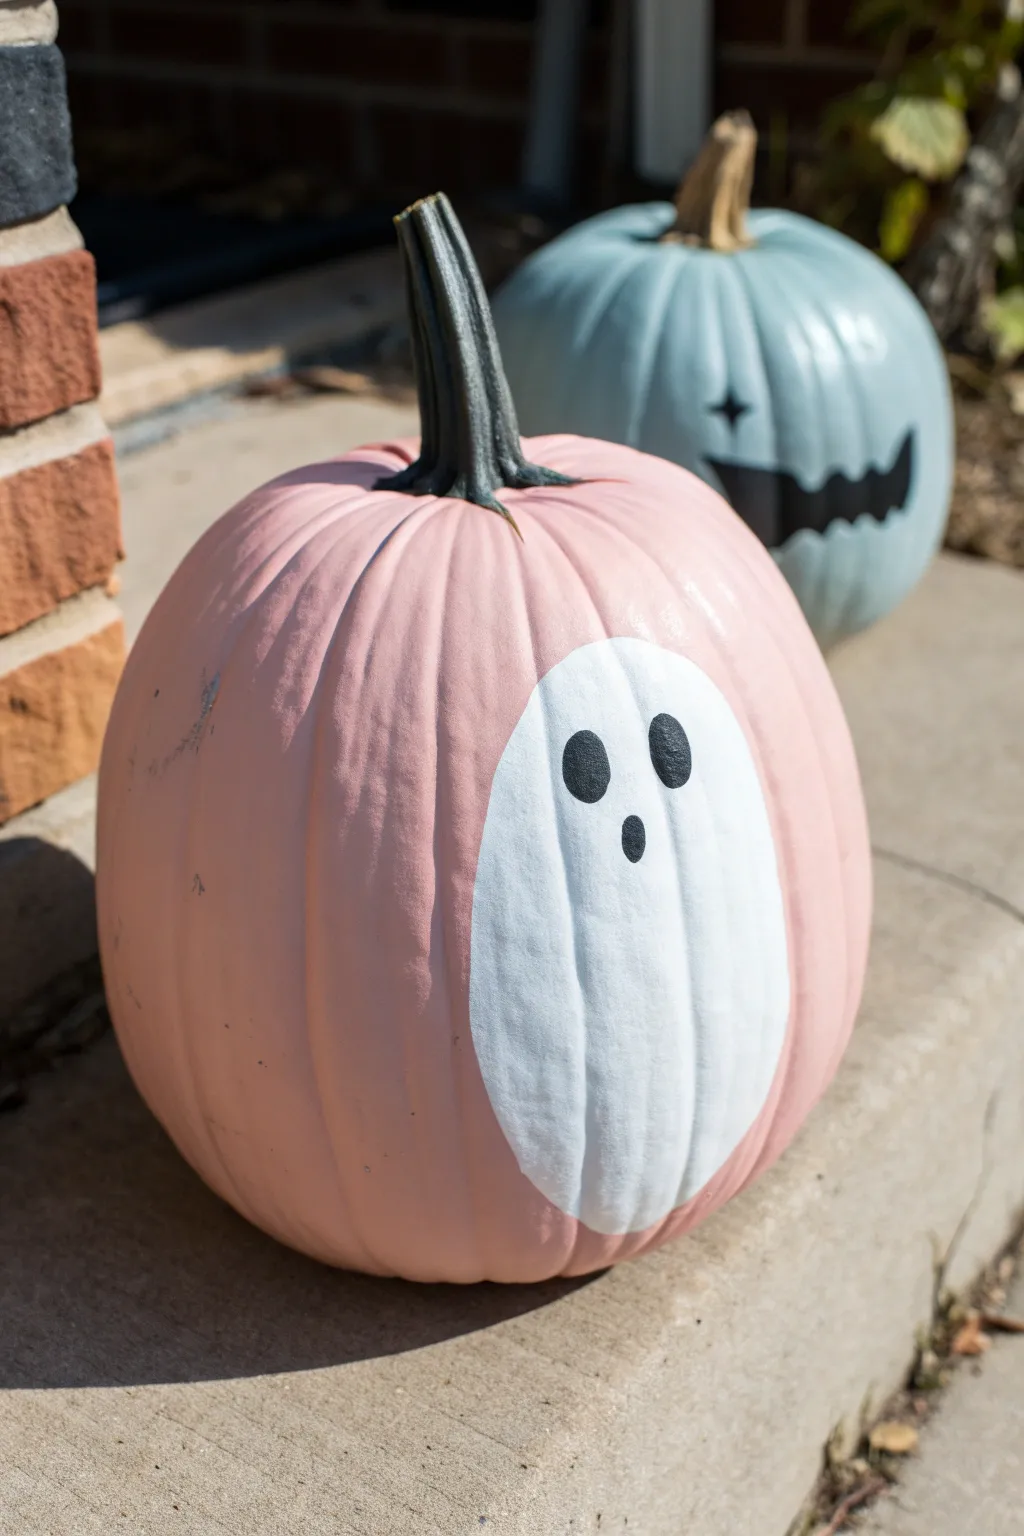
This charming project completely transforms a standard orange pumpkin into a soft, pastel decoration perfect for a not-so-spooky Halloween. With its matte pink finish and minimalist ghost silhouette, it offers a sweet and modern twist on traditional jack-o’-lanterns.
Step-by-Step Guide
Materials
- Medium-sized pumpkin (real or faux)
- Pastel pink acrylic craft paint (matte finish)
- White acrylic craft paint
- Black acrylic craft paint
- Large flat paintbrush (1-2 inch)
- Medium round paintbrush
- Small round detail brush
- Pencil
- Paper towels or cloth
- Palette or paper plate
- Sealer spray (optional, essential if displaying outdoors)
Step 1: Base Coat Application
-
Clean the surface:
Begin by thoroughly wiping down your pumpkin with a damp cloth to remove any dirt or oils. If using a real pumpkin, ensure it is completely dry before you start painting. -
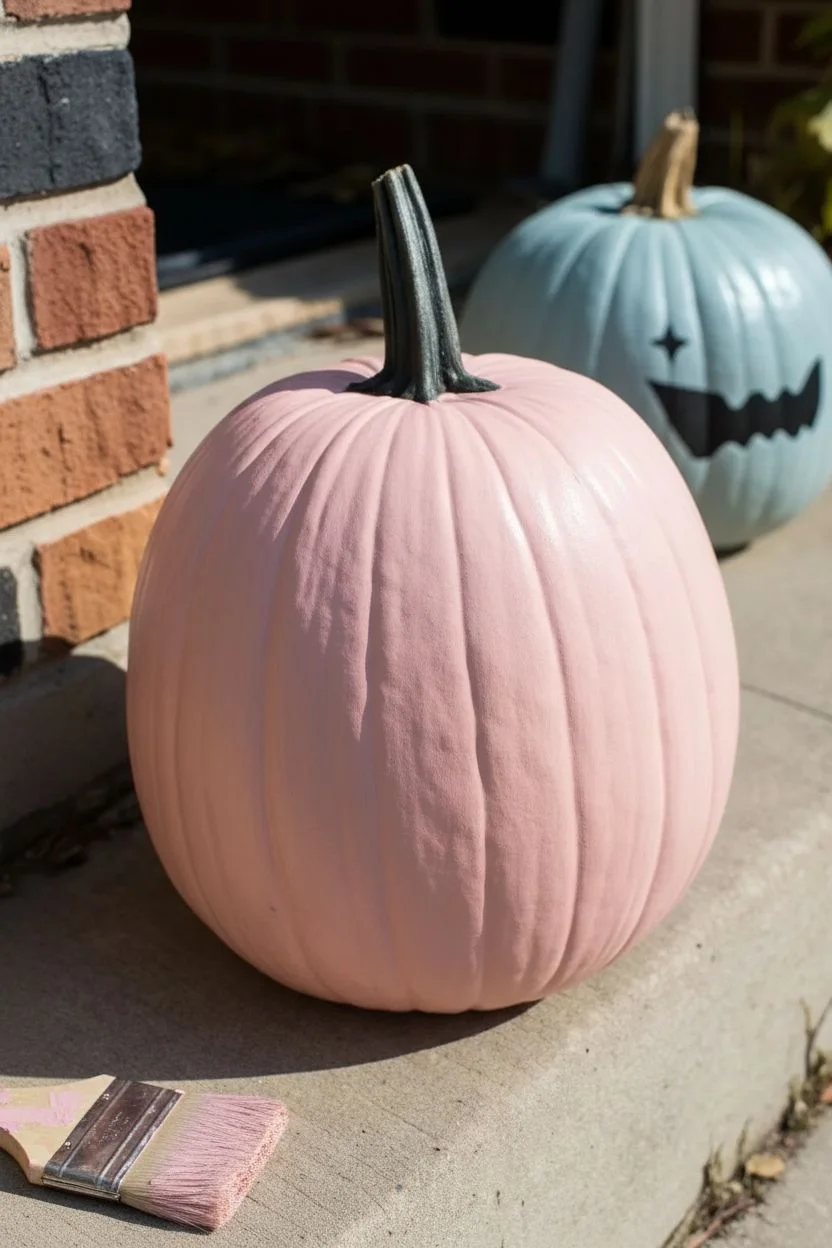
Protect the stem:
If you want to keep the stem natural or dark green like the example, carefully wrap painter’s tape around the base of the stem where it meets the pumpkin skin. -
First pink layer:
Squeeze a generous amount of pastel pink acrylic paint onto your palette. Using the large flat brush, apply the first coat over the entire pumpkin surface. Don’t worry if the orange shows through; thin layers are better than thick globs. -
Let it dry:
Allow the first coat to dry completely. This usually takes about 15-20 minutes for acrylics, but it can vary based on humidity. -
Apply second coat:
Apply a second layer of pink paint using long, vertical strokes that follow the natural grooves of the pumpkin. This helps achieving that smooth, matte finish seen in the photo. -
Final touch-ups:
Check for any streaks or translucent spots. If necessary, apply a third coat just to those areas. I like to let this base layer cure for an hour so the next steps don’t lift the paint.
Step 2: Painting the Ghost
-
Outline the shape:
Using a pencil, very lightly sketch a large oval shape on the flattest side of the pumpkin. The shape should be slightly wider at the bottom than the top, resembling an egg or a classic sheet ghost. -
Fill in the white:
Load your medium round brush with white acrylic paint. Carefully paint inside your pencil lines to create the body of the ghost. -
Build opacity:
White paint over pink can sometimes look streaky. Allow the first white layer to dry to the touch, then apply a second coat to ensure the ghost is solid, bright white. -
Smooth the edges:
Use the edge of your brush to tidy up the perimeter of the ghost shape, ensuring smooth, rounded curves rather than jagged brushstrokes.
Chalky Finish Trick
To get that ultra-matte, almost chalky look seen in the photo, mix a teaspoon of baking soda into your pink acrylic paint before applying the base coat.
Step 3: Adding the Face
-
Plan the features:
Visualize where the face should go. The eyes should be placed in the upper third of the white oval, spaced moderately apart. -
Paint the left eye:
Dip your small round detail brush into black paint. Paint a small, vertical oval shape for the left eye. -
Paint the right eye:
Paint a matching black oval for the right eye. Try to keep them symmetrical in size and orientation. -
Add the mouth:
Below the eyes, centered in the middle, paint a smaller, circular or slightly oval dot for the surprised ‘O’ mouth. It should be smaller than the eyes for that cute, spooky look.
Glow Up
Mix glow-in-the-dark medium into your white paint for the ghost body so the silhouette illuminates softly when the lights go down.
Step 4: Finishing Details
-
Stem detail:
Remove the painter’s tape from the stem. If needed, touch up the stem with a dark green or brown paint to make it pop against the pastel pink. -
Clean up:
Look closely at the edges where the white ghost meets the pink background. If any white strayed outside the lines, use a small brush with pink paint to correct it. -
Seal (optional):
If this pumpkin will live on your porch, spray it lightly with a clear, matte sealer to protect the paint from moisture.
Place your adorable pastel creation on your doorstep or mantel for a festive touch that is sweet rather than scary


Ghost With Starry Night Background and Speckles
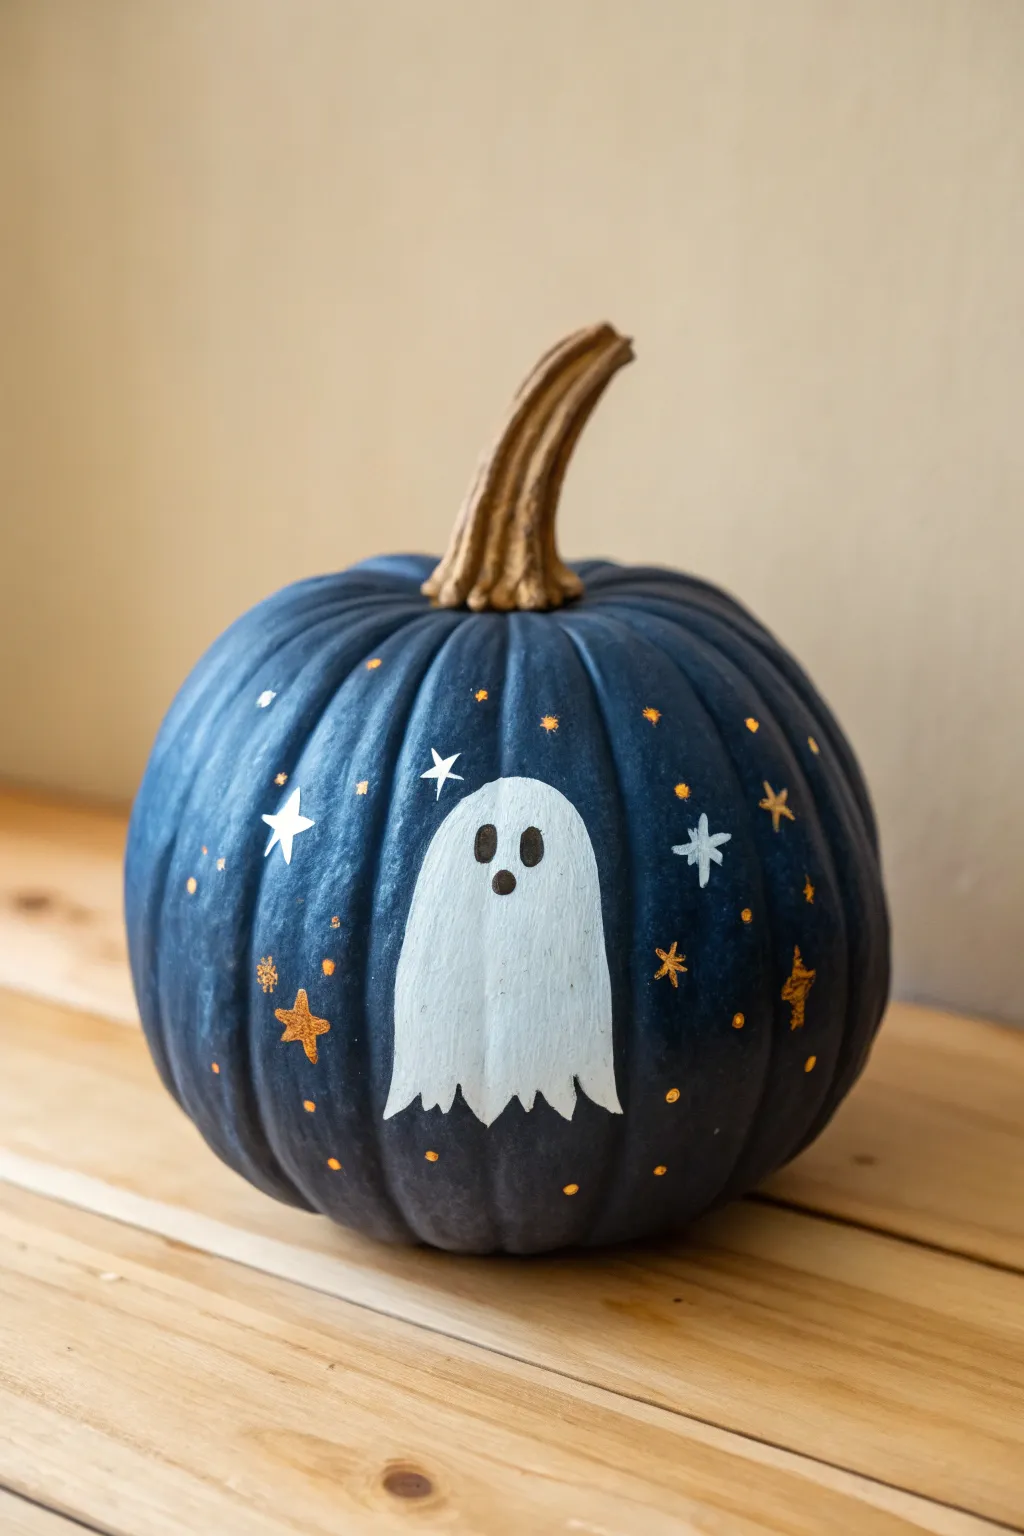
Transform a simple pumpkin into a midnight sky masterpiece featuring an adorable, floaty ghost surrounded by shimmering stars. The deep blue background makes the white ghost pop, creating a modern and magical twist on traditional spooky decor.
Detailed Instructions
Materials
- Faux or real pumpkin (medium size)
- Acrylic paint: Deep Navy Blue (matte or satin)
- Acrylic paint: Titanium White
- Acrylic paint: Metallic Gold
- Acrylic paint: Metallic Silver
- Acrylic paint: Black
- Painters tape (optional, for stem)
- Large flat brush or foam brush
- Small/detail round brush (size 0 or 1)
- Medium round brush (size 4 or 6)
- Palette or paper plate
- Cup of water and paper towels
Step 1: Setting the Night Sky Scene
-
Prepare your pumpkin:
Wipe down your pumpkin with a damp cloth to remove any dust or dirt. If you are using a real pumpkin, ensure it is completely dry before starting. -
Protect the stem:
If you want to keep the natural stem color, carefully wrap painters tape around the base of the stem. Alternatively, you can just paint carefully around it. -
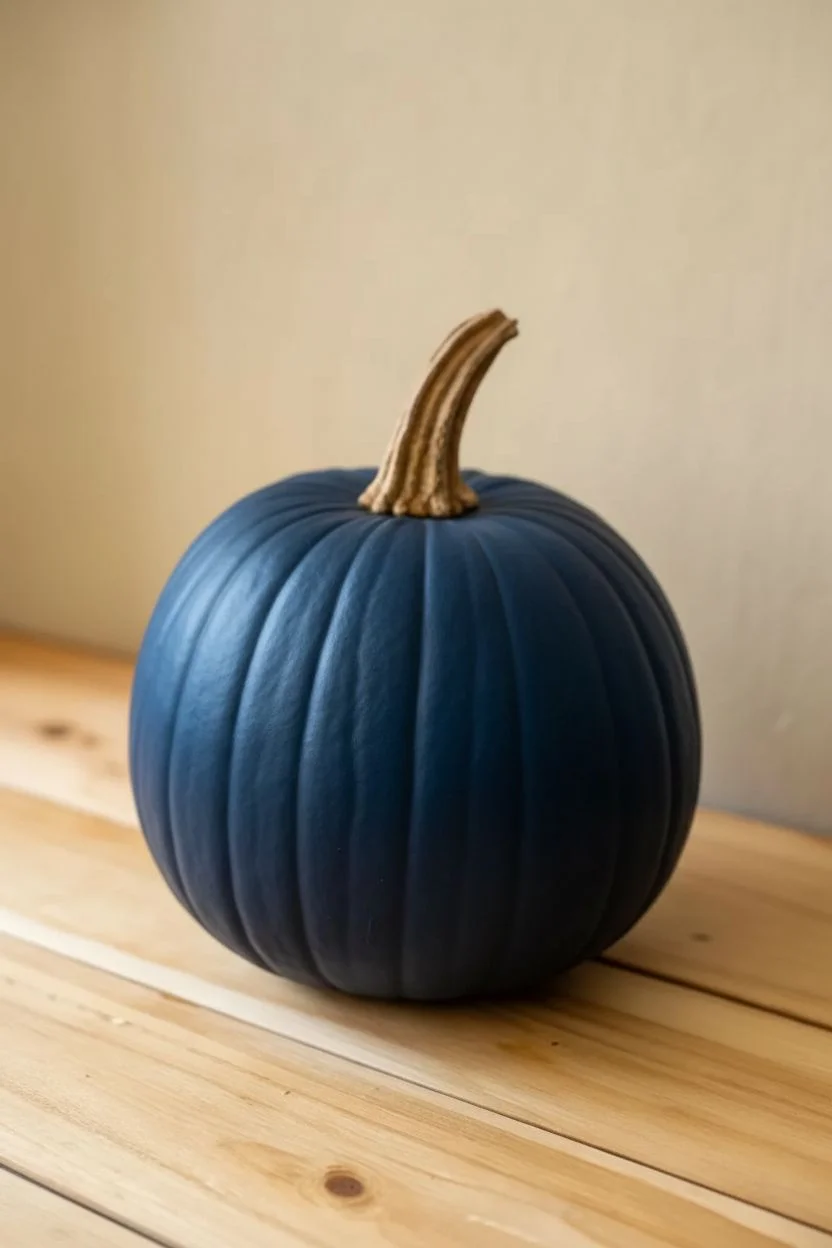
Base coat application:
Using your large flat brush or foam brush, apply a layer of Deep Navy Blue paint over the entire surface of the pumpkin. Don’t worry if it looks streaky at first. -
Add a second coat:
Allow the first coat to dry for about 15-20 minutes. Apply a second coat of the navy blue to ensure full, opaque coverage so no orange shows through. I usually find two coats is perfect for that deep midnight look. -
Full dry time:
Let the blue base coat dry completely. This is crucial before starting the details so the white paint doesn’t mix with wet blue paint and turn light blue.
Clean Lines Hack
If you’re shaky painting the star shapes, use a gold or silver permanent marker or paint pen instead of a brush. It gives you way more control over sharp points.
Step 2: Summoning the Ghost
-
Outline the ghost shape:
Using a medium round brush and Titanium White paint, lightly sketch the outline of a simple ghost shape in the center of the pumpkin. Think of an elongated dome or an upside-down ‘U’. -
Create the ghostly skirt:
At the bottom of your shape, paint a jagged, wavy line to create the tattered bottom of the ghost’s sheet. -
Fill in the body:
Fill in the entire ghost outline with white paint. You will likely need 2-3 layers here, as white over dark blue requires patience to get bright and opaque. -
Dry between ghost layers:
Wait for each white layer to happen before adding the next. This prevents the paint from pulling up and creating a textured mess. -
Paint the face features:
Once the white is fully dry, take your smallest detail brush and dip it in black paint. Paint two vertical ovals for eyes and a slightly smaller oval below them for the mouth. This creates that classic ‘surprised’ expression.
Glow Up
Mix glow-in-the-dark medium into your white paint for the ghost. By day it looks normal, but at night your ghost will actually glow green!
Step 3: Adding Celestial Details
-
Paint prominent gold stars:
Switch to your metallic gold paint. Using the clean detail brush, paint a few five-point stars scattered randomly around the ghost. Keep them small but distinct. -
Add silver accents:
Using metallic silver paint, add a couple of four-point stars (like a cross or a plus sign with pointy ends) to add variety to the night sky. -
Create distant stardust:
Dip the very tip of your detail brush or even a toothpick into the gold paint. Dot tiny speckles all over the empty blue spaces to look like distant stars. -
Vary dot sizes:
Make some dots slightly larger and some microscopic. I like to cluster a few dots together near the ghost to frame it. -
Final touches:
Check your ghost’s eyes; if the black looks glossy or uneven, a second thin coat of black can make them matte and deep. -
Remove tape and dry:
If you taped the stem, peel it off now. Let the entire pumpkin cure for a few hours before moving it to your display spot.
Now you have a charming celestial pumpkin that brings a touch of magic to your Halloween porch
Stacked Ghost Totem With Multiple Pumpkins
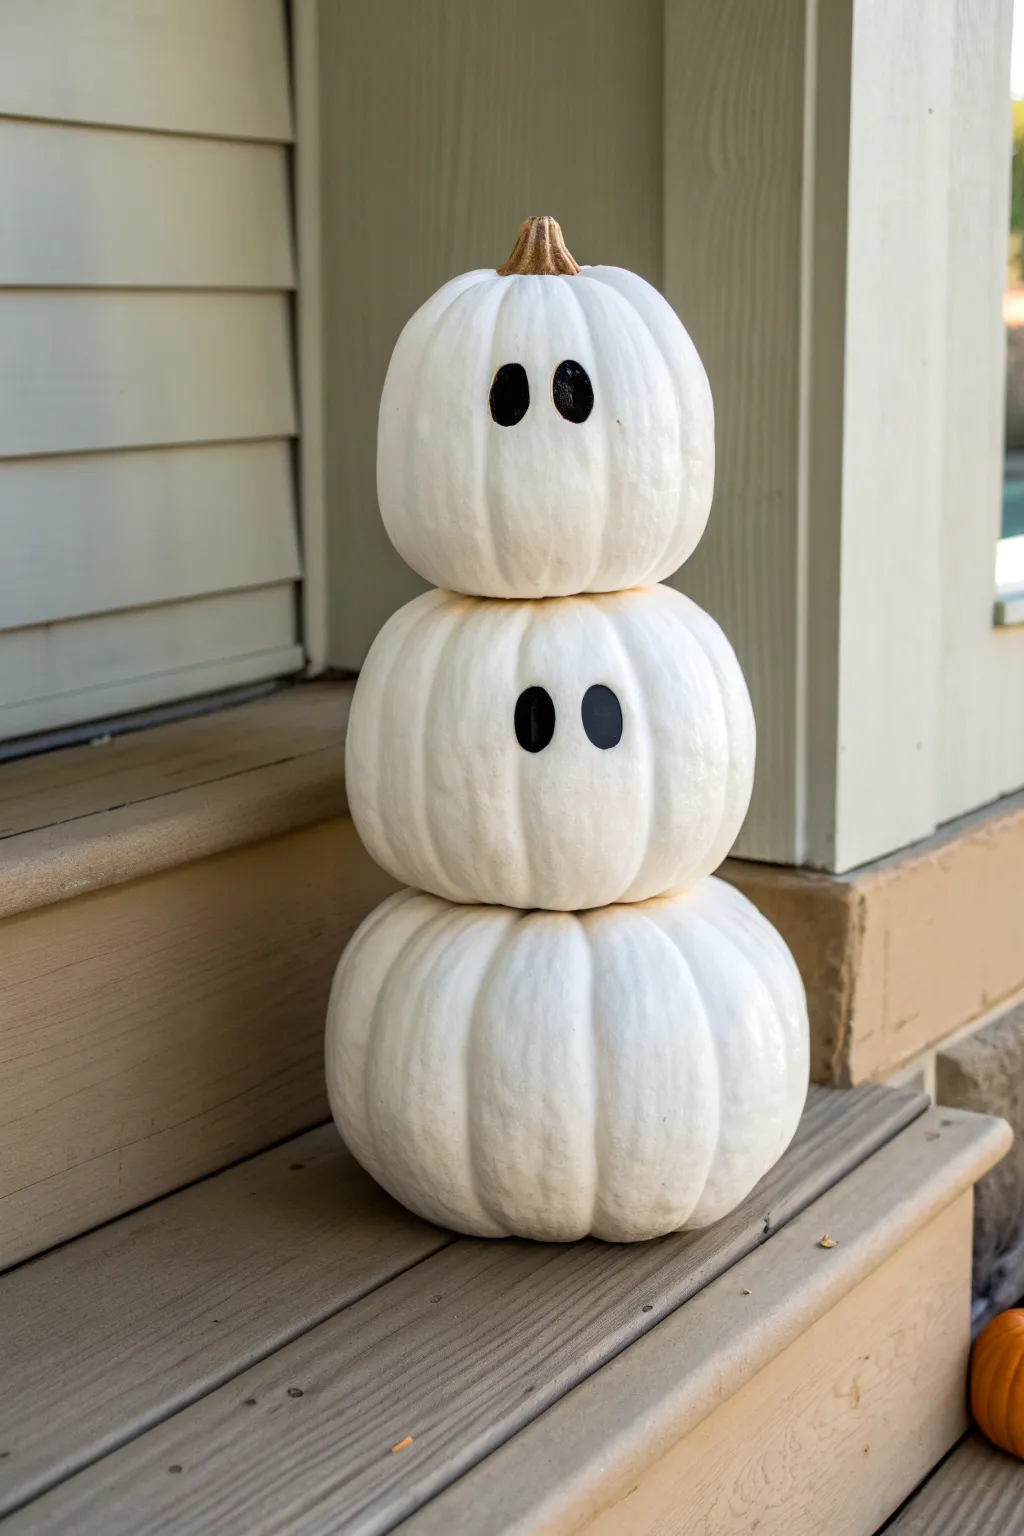
Transform a trio of pumpkins into a charming Halloween display with this delightfully simple ghost totem. The stacked design creates height and whimsy, turning ordinary white pumpkins into friendly spirits greeting guests on your porch.
Step-by-Step
Materials
- 3 pumpkins (graduated sizes: small, medium, large)
- White spray paint or acrylic craft paint (if pumpkins aren’t naturally white)
- Black acrylic craft paint
- Small round paintbrush
- Pencil
- Strong craft glue (like E6000) or hot glue gun (optional for stability)
- Wooden skewer or dowel (optional for stability)
- Clear sealant spray (matte finish)
Step 1: Preparation & Stacking
-
Select your pumpkins:
Choose three pumpkins that stack well together. Look for flatter bottoms and tops to ensure stability. You’ll want a clear size progression: a supportive base, a slightly smaller middle, and a cute little topper. -
Clean surface:
Wipe down all pumpkins with a damp cloth to remove any dirt or debris from the pumpkin patch. Let them dry completely before applying any paint. -
Remove excess stems:
For the bottom and middle pumpkins, snap or cut off the stems as flush to the pumpkin as possible. This is crucial for a stable stack. Leave the stem on the smallest pumpkin intact—it adds character to the top ghost. -
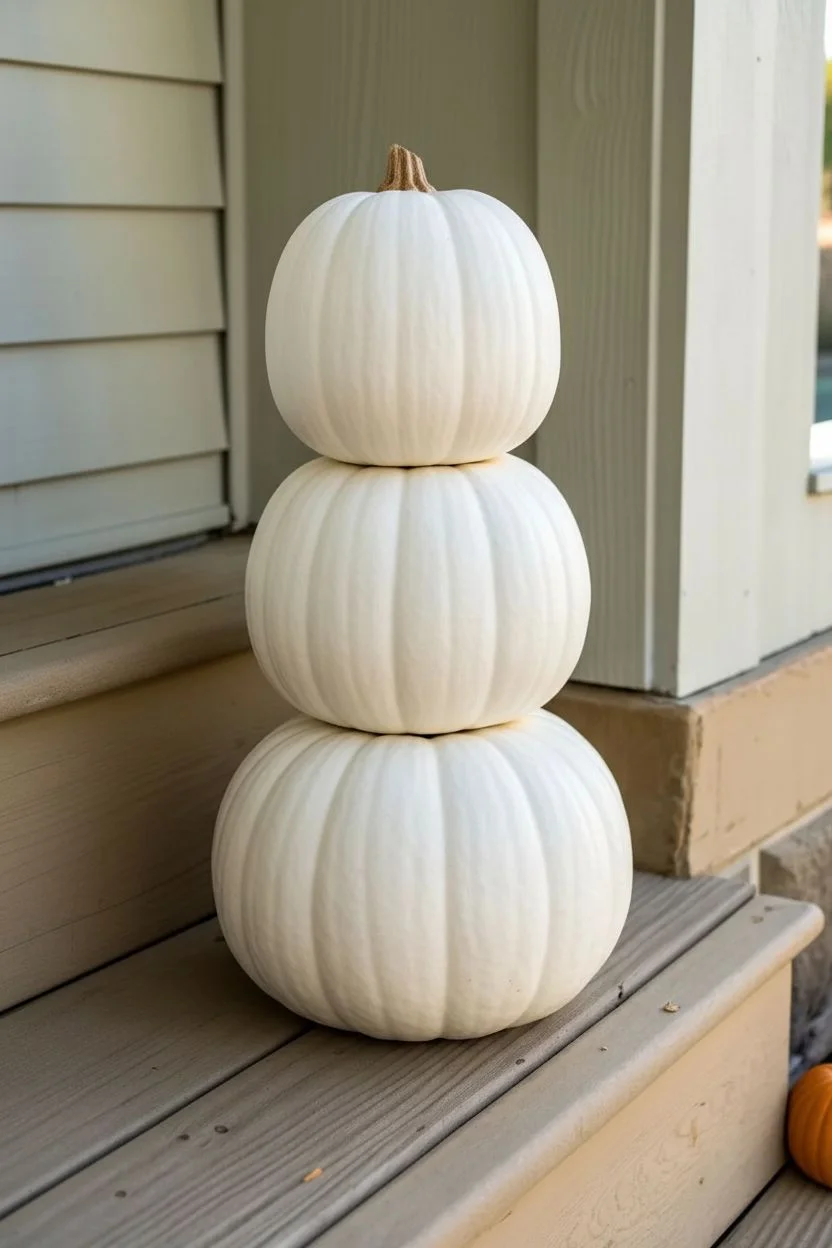
Paint them white (optional):
If you couldn’t find naturally white pumpkins (like Lumina or Casper varieties), take your orange pumpkins to a well-ventilated area. Apply 2-3 coats of white spray paint, letting them dry fully between layers. -
Seal natural pumpkins:
If using real white pumpkins, I find it helpful to wipe them with a mild bleach solution (1 part bleach to 10 parts water) first to help preserve them longer. -
Test the stack:
Arrange your trio to find the best balance point. Rotate the pumpkins until they sit securely on top of one another without wobbling excessively.
Step 2: Painting the Faces
-
Plan the eyes:
With the pumpkins stacked, use a pencil to lightly sketch where the eyes will go on the top and middle pumpkins. The bottom pumpkin usually stays blank as the ‘body’ base. -
Positioning tips:
Place the eyes slightly higher up on the face area. Keep the oval shapes simple and vertical to achieve that classic ghostly expression. -
First coat of black:
Using your small round brush and black acrylic paint, fill in the pencil outlines. Don’t worry about perfect opacity yet; just get the shape defined. -
Refine the edges:
Go back around the edges of your ovals to smooth out any brushstrokes. Crisp edges make the faces pop. -
Second coat:
Once the first layer is dry to the touch, apply a second coat of black paint. Two coats usually give that deep, solid black look that stands out against the white skin. -
Let paint cure:
Allow the painted faces to dry completely for at least an hour before handling them again.
Pro Tip: Stability Secret
If the pumpkins are too round to stack, carve a shallow, small indentation into the bottom of the upper pumpkins so they nestle securely onto the one below.
Step 3: Assembly & Finish
-
Secure the base:
Place your largest pumpkin on your display surface (like a porch step). Apply a ring of hot glue or strong craft adhesive around the center where the next pumpkin will sit. -
Add the middle tier:
Firmly press the middle pumpkin onto the base. Hold it in place for a moment until the glue sets. -
Top it off:
Apply adhesive to the top of the middle pumpkin and set the smallest pumpkin—the one with the stem—on top. Ensure the faces are aligned or slightly offset, depending on the look you want. -
Structural reinforcement (optional):
For extra security in windy areas, you can drive a wooden dowel or strong skewer down through the center of the top two pumpkins into the base pumpkin. -
Protective coat:
Lightly mist the painted areas with a matte clear sealant spray. This protects the acrylic paint from moisture and prevents the black eyes from running if it rains.
Troubleshooting: Paint Peeling?
On real pumpkins, waxy skin can repel paint. If this happens, lightly sand the area where the eyes go with fine-grit sandpaper to give the paint some grip.
Place your ghostly trio near the front door to offer a spooky yet sweet welcome to trick-or-treaters
Negative Space Ghost Using the Pumpkin’s Natural Color

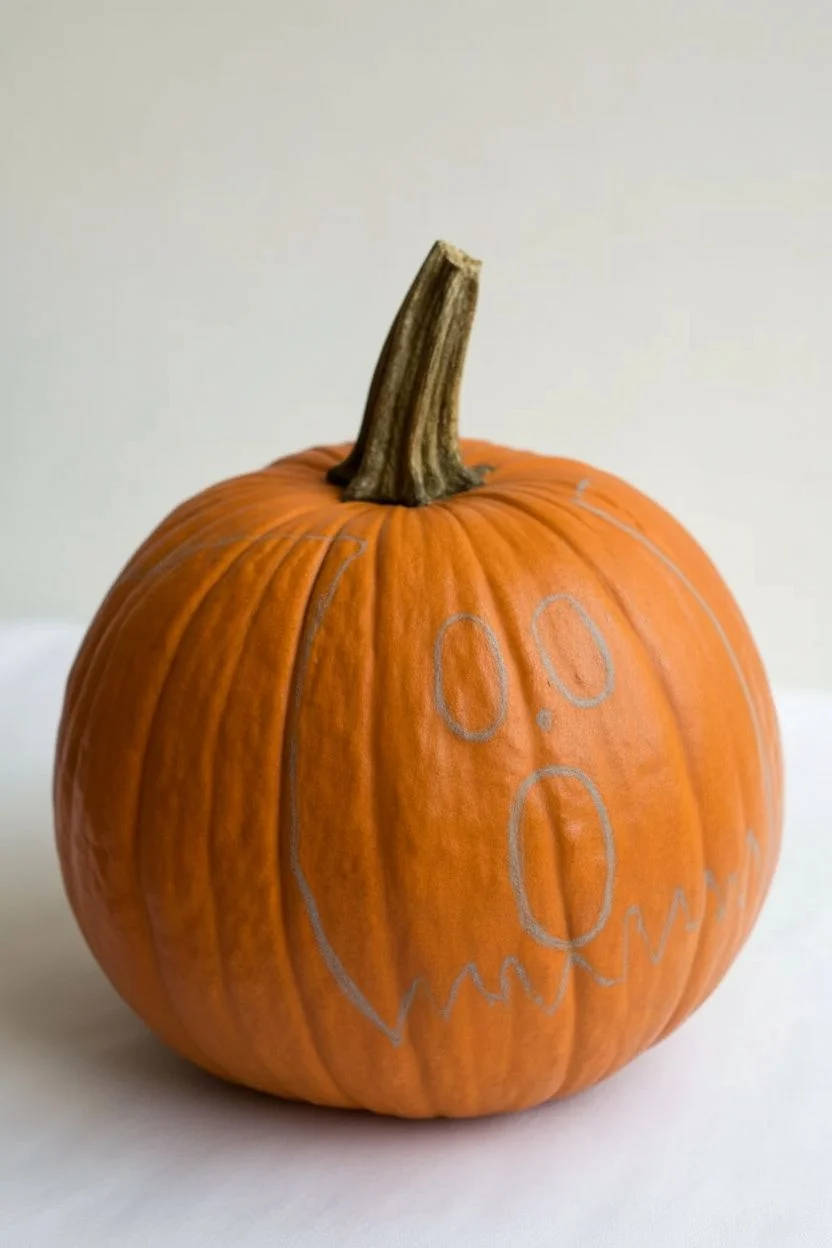
Transform a classic orange pumpkin into a startled specter with this clever painting technique. By layering white paint over the natural pumpkin skin, you create a ghostly silhouette that seems to be emerging right from the rind.
Detailed Instructions
Materials
- Medium-sized orange pumpkin
- White acrylic craft paint (matte finish)
- Black acrylic craft paint
- Medium flat paintbrush (approx 1 inch)
- Small round paintbrush (for details)
- pencil or chalk (optional)
- Paper towels
- Water cup
Step 1: Preparation and Outline
-
Clean the surface:
Wipe your pumpkin down with a damp paper towel to remove any dirt or dust from the pumpkin patch. A clean, dry surface ensures the acrylic paint adheres properly without flaking later. -
Plan the placement:
Decide which side of the pumpkin is the smoothest or has the best shape for a face. Look for a vertical orientation that mimics a tall, ghostly figure. -
Rough sketch:
Lightly sketch the outline of your ghost shape using a pencil or a piece of chalk. You want a large, rounded top that narrows slightly before flaring out into a wavy, tattered bottom hem.
Smudge Control
If you accidentally get black paint on the white area, wait for it to dry fully. Then, dab white paint over the mistake like liquid correction fluid.
Step 2: Painting the Ghost
-
Start at the stem:
Using your medium flat brush, apply white paint starting right around the base of the stem. It’s okay if it touches the stem, but try to keep the stem itself unpainted for contrast. -
Fill the center:
Work your way down the center of the pumpkin, painting thick, vertical strokes. You want a solid opacity here so the orange doesn’t peek through the ghost’s face area. -
Define the sides:
Widen your shape as you go down, following the natural curve of the pumpkin. Keep the edges relatively smooth for the upper body, but don’t worry about perfection; ghosts are fluid creatures. -
Create the tattered bottom:
As you reach the bottom third of the pumpkin, stop painting a clean edge. Instead, use the tip of your brush to pull the paint downward in uneven, jagged drips or waves. -
Refine the hem:
Go back over the bottom edge and add a few sharper peaks to mimic a torn sheet fluttering in the wind. This ragged edge is crucial for the spooky effect. -
Check opacity:
Let the first coat dry for about 10-15 minutes. If it looks streaky, apply a second coat of white paint to ensure a bright, stark contrast against the orange rind.
Step 3: Adding the Facial Features
-
Map out the face:
Once the white paint is completely dry to the touch, lightly mark where you want the eyes and mouth. Place them high enough to leave room for the long, wailing mouth. -
Paint the left eye:
Using the small round brush and black paint, create an oval shape for the left eye. It should be slightly tilted inward to give a mournful or surprised expression. -
Paint the right eye:
Paint the right eye to match. I like to make them slightly asymmetrical to add a bit of personality and character to the ghost’s expression. -
Add a nose (optional):
If you wish, place a tiny black dot between and slightly below the eyes for a spectral nose. -
Create the mouth:
Paint a large, elongated oval for the mouth. This should be much bigger than the eyes to create that classic ‘wailing ghost’ look. -
Fill in the features:
Go back over your black shapes to ensure they are solid and dark. Use the tip of your round brush to clean up the edges of the ovals so they look crisp against the white. -
Final drying time:
Allow the black paint to dry completely. Be careful not to smudge it while handling the pumpkin to move it to its display spot.
Glow Up
Mix a small amount of glow-in-the-dark medium into your white acrylic paint for the final topcoat to make your ghost illuminate at night.
Now your handcrafted pumpkin is ready to greet trick-or-treaters with its silent wail


Have a question or want to share your own experience? I'd love to hear from you in the comments below!