Whenever I need a quick creativity boost, I reach for rainbow colors—because they practically paint joy for you. Here are my favorite rainbow art ideas you can try right away, from sweet classics to playful, unexpected twists.
Classic Watercolor Rainbow Wash
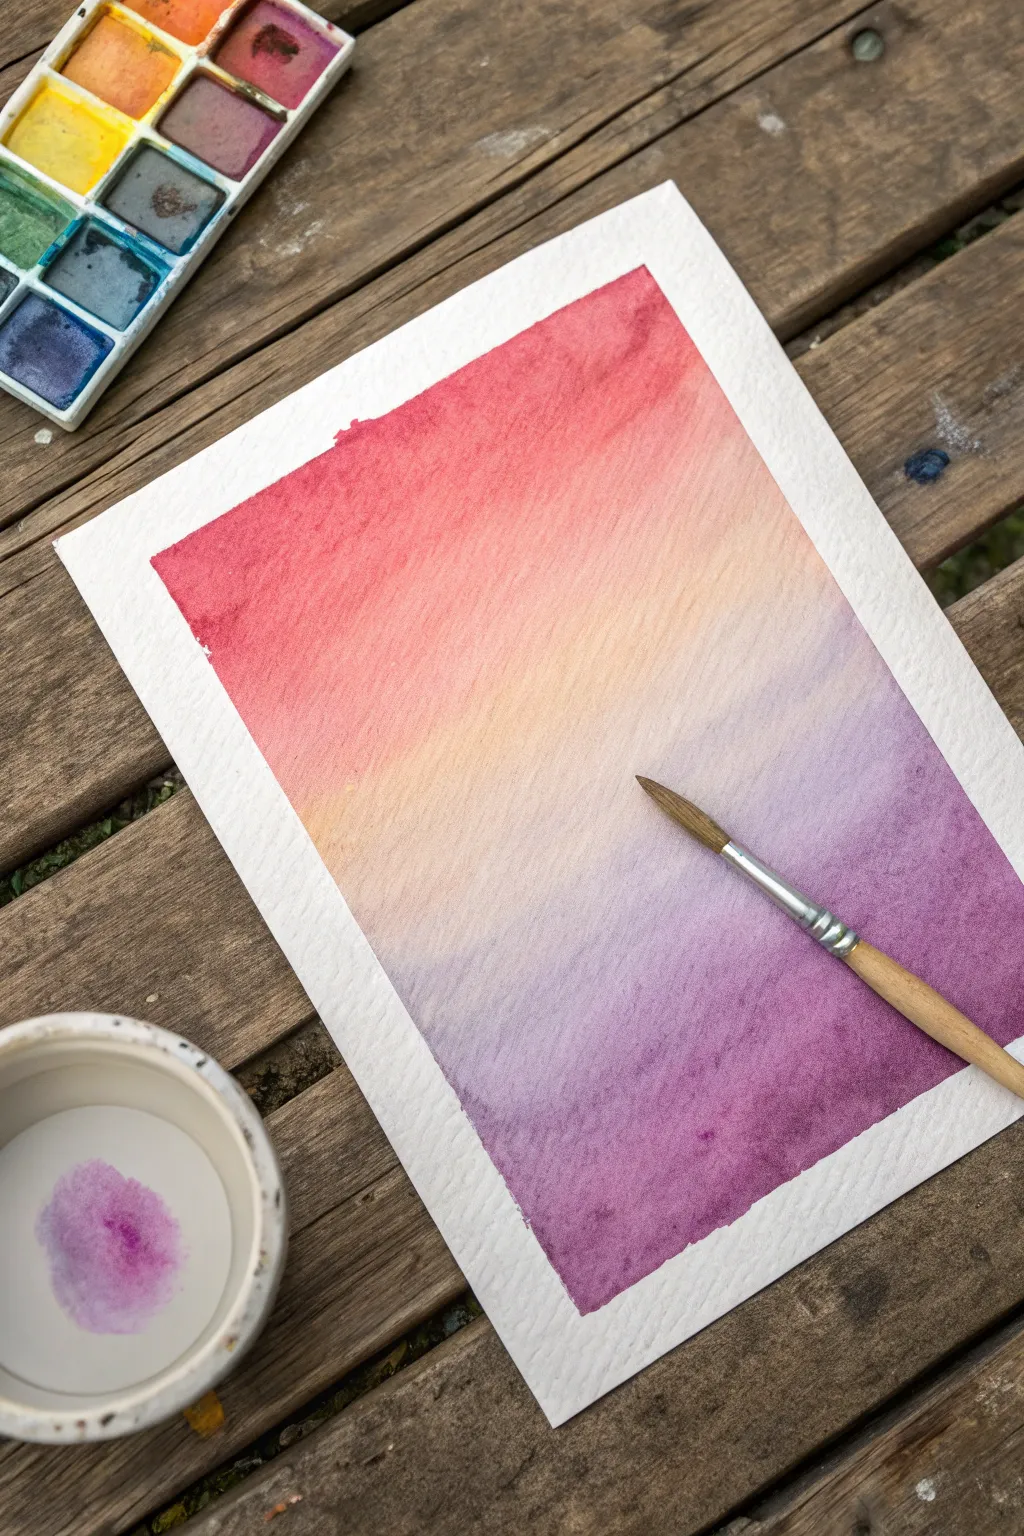
Master the art of the perfect sunset blend with this classic variegated watercolor wash. This project creates a seamless, soothing transition from vibrant berry tones to soft peach and deep violet, capturing the serene palette of twilight.
Detailed Instructions
Materials
- Cold press watercolor paper (approx. 140lb/300gsm)
- Watercolor paints (pan set: red/pink, orange/yellow, purple)
- Round watercolor brush (size 8 or 10)
- Masking tape or painter’s tape
- Wooden board or hard surface to tape paper onto
- Jar of clean water
- Paper towels or cloth
- Small mixing palette or dish
Step 1: Preparation
-
Secure the Paper:
Begin by taping down all four edges of your watercolor paper onto your working board. Ensure the tape overlaps the paper by about a quarter-inch to create a clean white border later. -
Mix Your Palette:
Prepare three puddles of paint in your palette or mixing dish. You’ll need a reddish-pink, a warm yellow-orange, and a violet-purple. Make sure they are watery enough to flow but pigmented enough to show vibrancy. -
Pre-wet the Paper:
Dip your clean brush into the water and paint a layer of clear water over the entire rectangular area inside the tape. The paper should look glistening but not hold standing pools of water.
Step 2: The First Transition
-
Apply the Top Color:
Load your brush with the reddish-pink mixture. Start at the very top edge of the paper and paint a horizontal stroke across. -
Drag the Color Down:
With a slightly damp brush (dip it quickly in water if needed), drag that pink pigment down about one-third of the page. Let the color fade slightly as it moves lower. -
Tilt the Board:
I like to slightly tilt the board toward me during this stage. Gravity helps pull the bead of paint downward, keeping the wash even and preventing strange drying lines.
Pro Tip: Wet-on-Wet
Work quickly! The magic of a smooth gradient relies on the paper staying uniformly wet. If an area starts to dry, stop; adding water now will create hard edges.
Step 3: Blending the Middle
-
Introduce the Orange:
Rinse your brush thoroughly. Pick up the yellow-orange mixture and apply it just below where the pink is strongest, allowing them to touch. -
Feather the Blend:
Gently stroke back and forth where the pink and orange meet. Because the paper is wet, they should naturally bleed into each other, creating a coral hue in the transition zone. -
Continue Downward:
Carry that pale orange color down through the middle section of the paper. This section acts as the glowing light of your sunset.
Level Up: Salt Texture
While the wash is still wet, sprinkle a pinch of coarse sea salt onto the purple section. As it dries, the salt pushes pigment away, creating starry sky textures.
Step 4: Adding Depth
-
Prepare the Base:
Clean your brush again. Load it generously with the violet-purple paint. -
Apply the Purple:
Start applying the purple near the bottom edge of the paper, working your way upward toward the orange section. -
Merge With Orange:
As the purple meets the orange, use a very light touch to let them blend. Be careful not to overwork this area, or the colors might turn muddy brown. -
Strengthen the Bottom:
Dip into more concentrated purple pigment and drop it into the very bottom edge while it’s still wet to deepen the gradient anchor.
Step 5: Finishing Touches
-
Check for Pools:
Look at the edges of your tape. If water is pooling there, wick it up with the corner of a dry paper towel to prevent ‘blooms’ from flowing back into your painting. -
Let it Dry Completely:
Resist the urge to touch it. Leave the paper taped down until it is bone-dry and flat to the touch. This prevents the paper from buckling. -
The Reveal:
Once dry, carefully peel the tape away at a 45-degree angle, pulling away from the center of the painting to ensure a crisp, sharp edge.
Now you have a serene gradient background ready to be framed or used as a base for lettering

Paper Plate Rainbow With Cotton Clouds
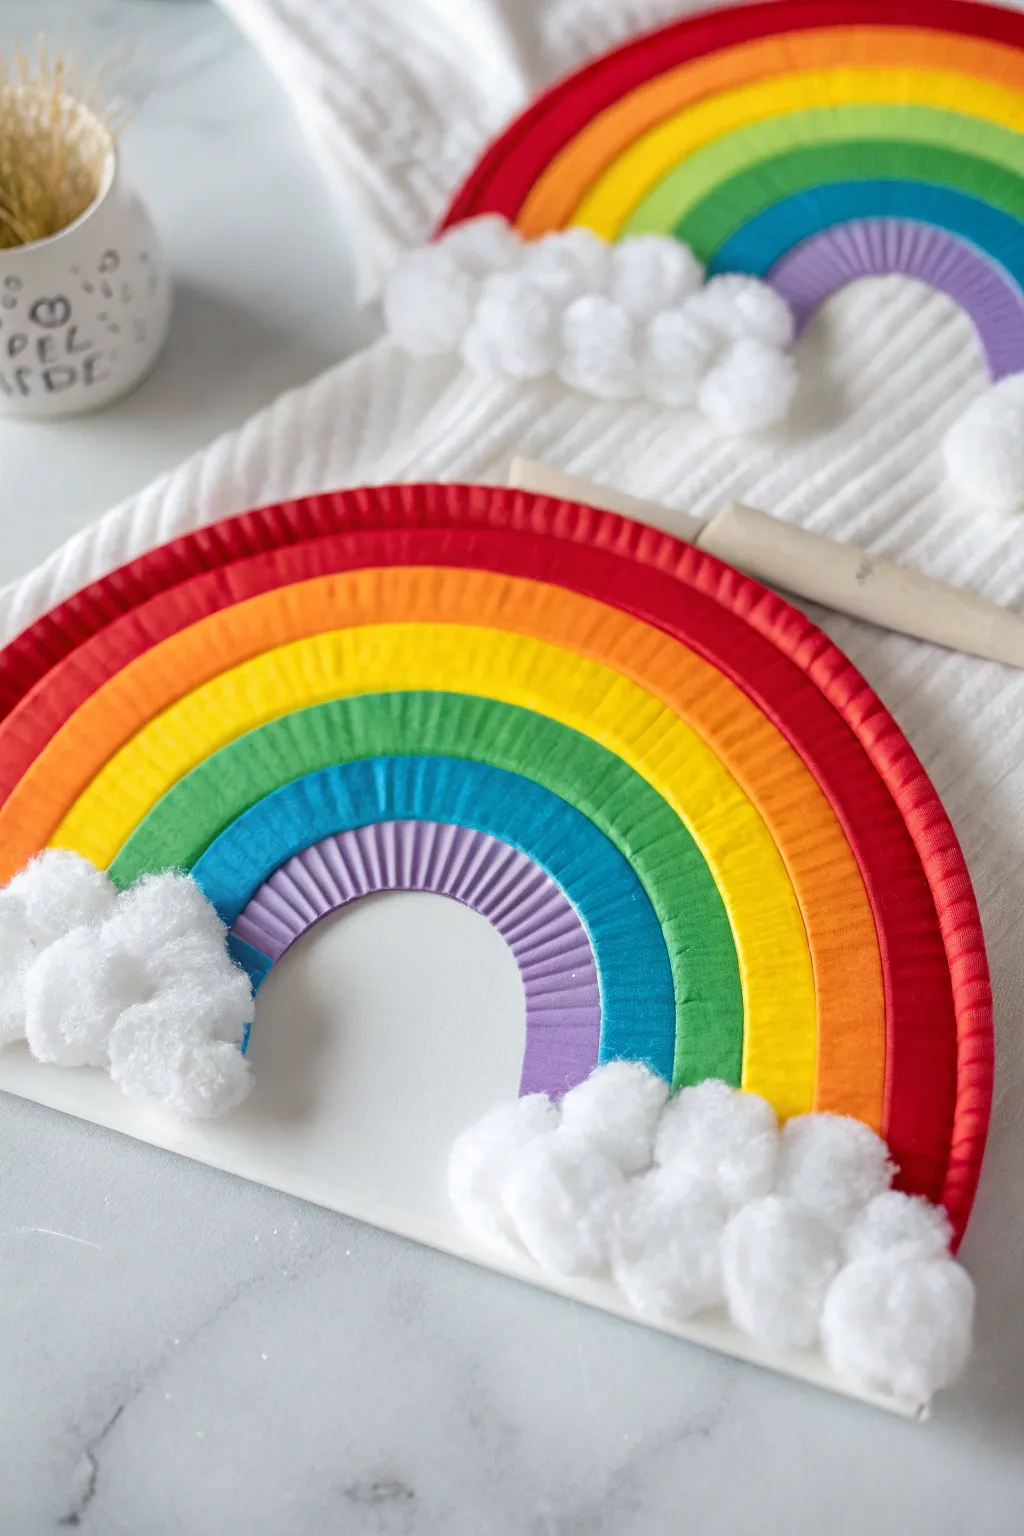
Brighten up any rainy day with this vibrant, textured rainbow craft that pops right off the table. Using the ridged edges of paper plates gives the colored bands a wonderful, sturdy structure, while the fluffy cotton ball clouds add the perfect soft finish.
Step-by-Step Tutorial
Materials
- Large white paper plates (uncoated standard style works best)
- Acrylic or tempera paints (Red, Orange, Yellow, Green, Blue, Purple)
- Paintbrushes
- Scissors
- Pencil
- Cotton balls
- White craft glue or hot glue gun
- White cardstock or a large rectangular cardboard piece (for backing)
Step 1: Preparing the Arches
-
Cut the plate inside:
Take a paper plate and use your scissors to poke a hole in the very center. Cut out the flat central circle, leaving only the textured, ridged rim intact. -
Create the half-circles:
Cut the resulting paper plate ring exactly in half. This will give you two large arches, which will serve as the outermost band of your rainbow. -
Prepare smaller arches:
Repeat the previous steps with more paper plates. For the inner colors, you will need to trim the length of the arch slightly so they Nestle inside each other, or simply overlap them later. I find it easiest to just cut multiple standard rims first. -
Dry fit the layout:
Arrange your cut paper plate rims on your workspace to simulate the rainbow shape. Ensure they stack neatly to form a graduated arch.
Uneven Arches?
If the paper plate rims aren’t nesting perfectly, try cutting a small slit in the inner rim of the larger arch. This allows it to flex and open wider to fit over the smaller one beneath it.
Step 2: Painting the Colors
-
Paint the red band:
Select your largest paper plate arch. Paint the entire ridged surface a bold, bright red. Use long strokes to get paint into the tiny grooves of the plate rim. -
Paint the orange band:
Take the next arch and paint it orange. Allow the paint to be thick enough to cover the white texture underneath. -
Continue the spectrum:
Paint the remaining arches in order: yellow, green, blue, and finally a smaller arch for purple. -
Let them dry:
Set all your painted arches aside on a piece of newspaper or a drop cloth. Let them dry completely before handling, which usually takes about 20-30 minutes depending on paint thickness.
Sparkle Finish
Mix a small amount of silver glitter into your white paint or glue before adding the cotton balls. This gives the clouds a magical, shimmer effect when the light hits them.
Step 3: Assembly and Clouds
-
Prepare the backing:
Cut a large semi-circle or rectangle from white cardstock or cardboard. This will act as the hidden base to glue your rainbow onto. -
Attach the purple arch:
Start from the bottom. Glue the purple arch onto your backing material first, ensuring the bottom edges align with the bottom of your backing. -
Layer the colors:
Glue the blue arch so it slightly overlaps the top edge of the purple one. Continue layering upward with green, yellow, orange, and finally the red arch on top. -
Trim excess backing:
Once the glue is dry, use scissors to trim away any visible white cardstock from the outer edge of the red band or the inner edge of the purple band. -
Fluff the clouds:
Take a handful of cotton balls and gently pull them apart just a little bit to make them look wispier and less like perfect spheres. -
Glue the cloud base:
Apply a generous amount of glue to the bottom left and right ends of your rainbow where all the bands meet. -
Build the clouds:
Press the cotton balls firmly into the glue. Pile them up slightly to create a 3D effect, covering the raw cut edges of the paper plates completely.
Now you have a cheerful piece of art ready to hang on a wall or brighten up a window


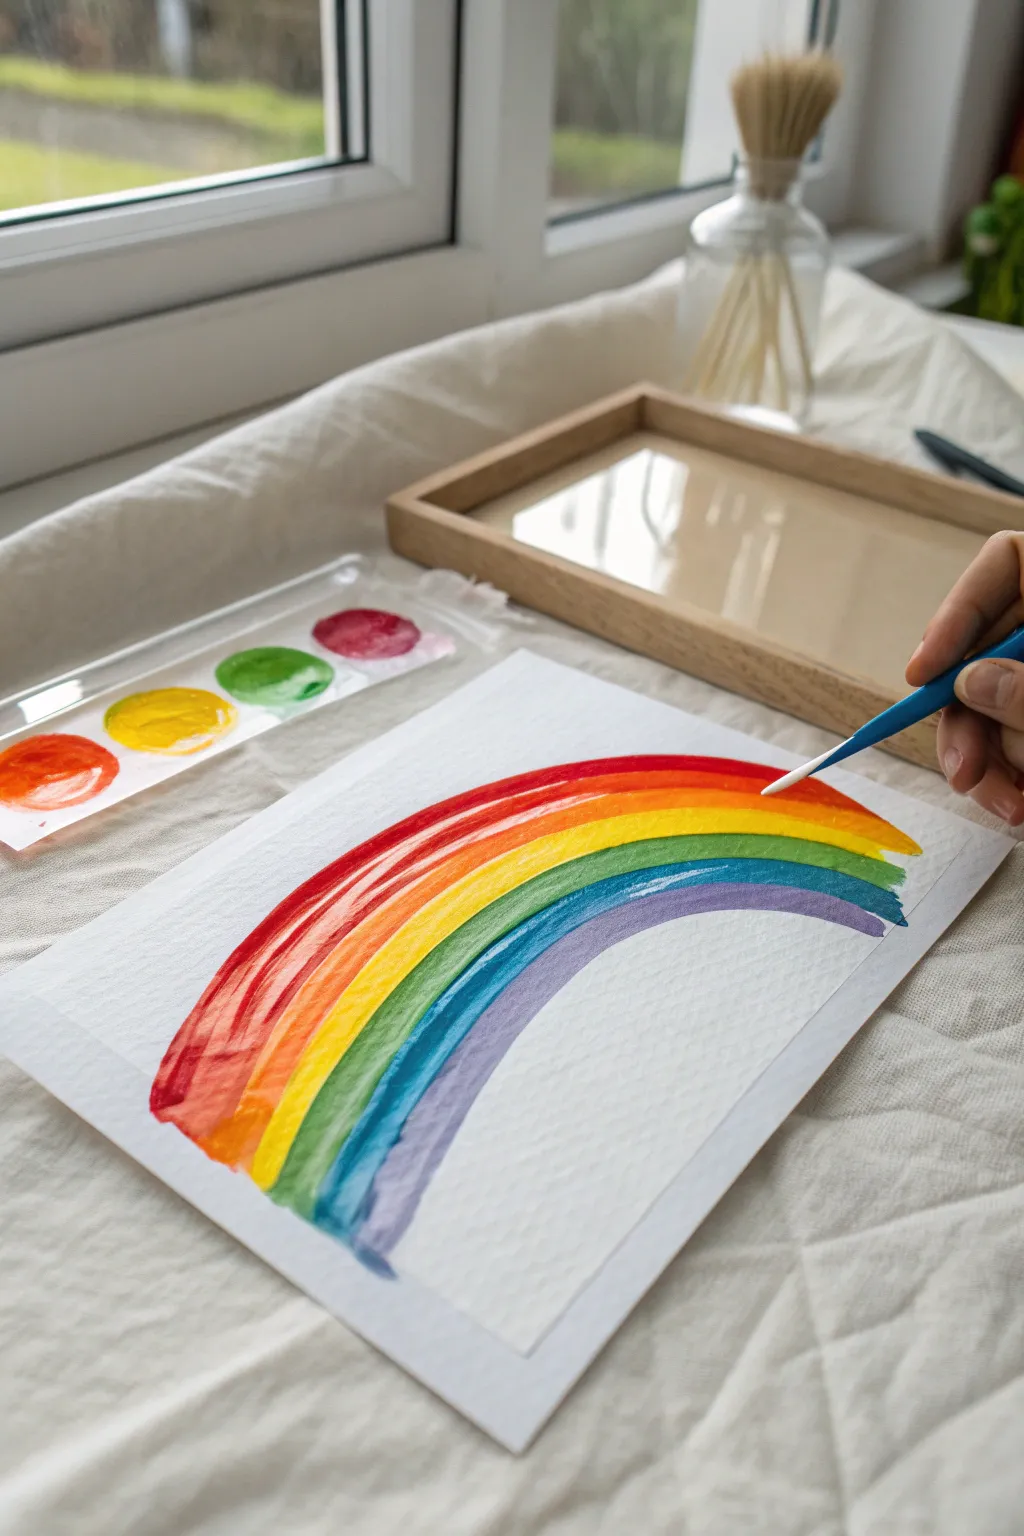
Easy Finger-Painted Rainbow Arc

Capture the magic of a rainbow with this tactile and textured art project that is perfect for little hands. Using a unique scraping or stamping technique, you’ll create a vibrant arc with beautiful, organic streaks of color on crisp white paper.
How-To Guide
Materials
- Large sheet of thick white paper (watercolor or cardstock)
- Acrylic or tempera paints (Red, Orange, Yellow, Green, Blue, Purple)
- Rectangular sponge or a piece of thick cardboard (for dragging paint)
- Paint palette or disposable plate
- Wipes or paper towels for clean-up
Step 1: Preparation and Setup
-
Prepare the workspace:
Clear a large flat surface like a wooden table. Since this project involves dragging paint, you might want to lay down a protective mat or newspaper, although the paper itself is quite large. -
Organize your paints:
Squeeze out generous dollops of each rainbow color (red, orange, yellow, green, blue, purple) onto your palette or plate. Keep them separate for now to ensure clean color application later. -
Position the paper:
Place your oversized white sheet horizontally on the table. You want plenty of room for the arm movement required to create the full arc.
Step 2: Applying the Colors
-
Start with red:
Dip the edge of your sponge or cardboard scraping tool into the red paint. You want a solid line of paint along the bottom edge of your tool. -
Create the first arc:
Starting near the bottom left corner of the paper, press the painted edge down and drag it in a large, seamless curve towards the bottom right corner. This forms the top, outer band of your rainbow. -
Clean or switch tools:
If using a sponge, rinse it thoroughly and squeeze it dry. If using cardboard, grab a fresh piece or wipe the edge clean to prevent muddy colors. -
Apply the orange band:
Load your tool with orange paint. Position this stroke just underneath the red arch, slightly overlapping if you like a seamless look, and follow the same curved path from left to right. -
Add the yellow layer:
Repeat the process with yellow paint. As you move inward, the arc naturally becomes slightly smaller. Try to keep the pressure consistent so the texture remains visible throughout the stroke.
Fixing Broken Lines
If the paint streaks break or run out mid-arc, simply reload the tool with a small amount of paint and gently drag over the gap to fill it.
Step 3: Completing the Spectrum
-
Paint the green stripe:
Load up the green paint next. By now, you might notice the paint texture creates a lovely distressed or ‘chalky’ look on the paper, which adds character to the piece. -
Follow the curve:
Carefully drag the green paint below the yellow. Since the inner curves are tighter, I usually slow my hand movement down a bit here to maintain control. -
Add the blue band:
Apply the blue stripe underneath the green. Ensure the starting and ending points line up roughly with the previous colors so the rainbow looks grounded. -
Finish with purple:
Complete the rainbow with the final purple or violet band on the innermost curve. This is the smallest arc, so use a steady hand to keep it smooth. -
Smooth it down:
While the paint is still tacky, you can gently press your hands over the dried sections or use dry fingers to smooth out any large globs, just like the child in the photo is doing. -
Let it dry completely:
Leave the artwork flat on the table to dry. Because the paint might be thick in areas where the tool was lifted, give it at least an hour before hanging it up.
Texture Tip
For that distinct striated texture seen in the photo, use a piece of stiff cardboard instead of a brush. The uneven edge creates natural streaks.
Once dry, you can hang this cheerful masterpiece on a wall or window to brighten up the room


Tissue Paper Rainbow Suncatcher
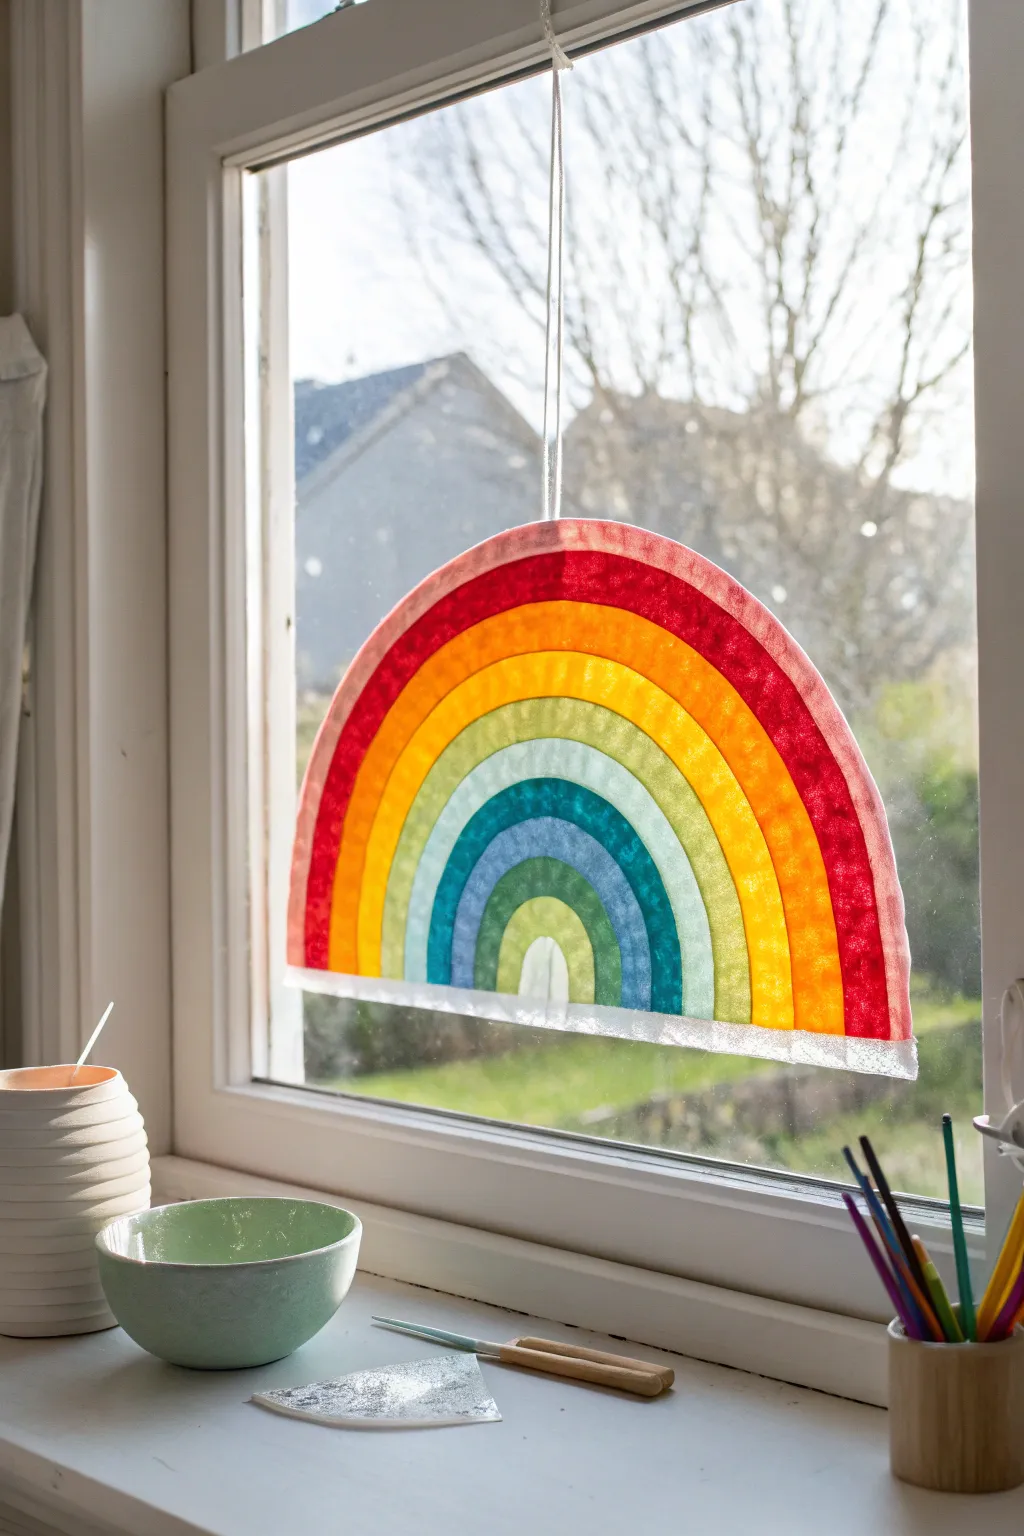
Brighten up any windowsill with this luminous and colorful rainbow suncatcher that glows beautifully when the light hits it. Crafted from layered tissue paper, this project creates a stained-glass effect that brings a cheerful spectrum of color into your home.
How-To Guide
Materials
- Construction paper or cardstock (white)
- Tissue paper in rainbow colors (red, orange, yellow, green, blue, indigo, violet)
- Clear contact paper or self-adhesive laminating sheets
- Scissors
- Pencil
- String or thin ribbon for hanging
- Tape (optional, for securing work surface)
- Craft knife (optional)
Step 1: Preparing the Frame
-
Sketch the rainbow shape:
Begin by drawing a semi-circle rainbow shape on your white cardstock or construction paper. You can use a large bowl or plate to get the top curve perfectly smooth. -
Define the frame width:
Draw a straight line across the bottom to connect the ends of the arch. This will be the foundational shape of your suncatcher. -
Cut out the main shape:
Using your scissors, cut out the entire semi-circle shape from the cardstock. -
Create the window opening:
Carefully cut out the interior of the semi-circle, leaving about a 1/2-inch border all around the edge. This creates the white frame that will hold your colorful masterpiece.
Sticky Situation?
If the contact paper creates large air bubbles, use a pin to prick a tiny hole in the bubble and smooth the air out with your fingertip.
Step 2: Creating the Tissue Layers
-
Cut tissue arches:
Prepare your tissue paper by cutting out curved strips or arches for each color of the rainbow. They don’t need to be perfect, but they should be wide enough to overlap slightly. -
Prepare the adhesive backing:
Cut a piece of clear contact paper slightly larger than your cardstock frame. Peel off the backing paper, exposing the sticky side. -
Secure the sticky sheet:
Lay the contact paper sticky-side up on your table. You might want to tape down the corners so it doesn’t shift while you work. -
Attach the frame:
Press your white cardstock frame onto the sticky contact paper. Make sure it adheres smoothly without any bubbles.
Add Sparkle
Mix in small flakes of silver glitter between the tissue paper layers before sealing the contact paper for a magical, shimmering effect in the sun.
Step 3: Assembling the Rainbow
-
Start with the center color:
Place your smallest, innermost color (violet or blue) into the center bottom of the arch, pressing it firmly onto the sticky surface. -
Layer the next color:
Place the next color strip (indigo or blue) right above the first one. I like to overlap the edges slightly so there are no clear gaps where light shines through without color. -
Continue upward:
Work your way up through green, yellow, and orange, smoothing each piece down as you go. The semi-transparency creates lovely new shades where the colors overlap. -
Finish with red:
Place the final red arc at the very top, ensuring it tucks neatly under or against the top edge of the white frame. -
Seal the back:
Take a second piece of contact paper and carefully place it sticky-side down over your artwork, sandwiching the tissue paper between the two plastic sheets. -
Smooth it out:
Use a ruler or the edge of a credit card to press out any air bubbles, working from the center outward.
Step 4: Finishing Touches
-
Trim the excess:
Cut around the outside edge of the white frame to remove the extra contact paper, giving you a clean, finished edge. -
Pierce a hanging hole:
Use a needle, tack, or small hole punch to create a tiny hole at the very top center of the rainbow frame. -
Thread the string:
Feed a length of thin string or white ribbon through the hole and tie a knot to create a loop. -
Hang and enjoy:
Find a sunny window and hang your creation to see the colors light up the room.
Now you have a dazzling piece of window art that captures the joy of a sunny day
BRUSH GUIDE
The Right Brush for Every Stroke
From clean lines to bold texture — master brush choice, stroke control, and essential techniques.
Explore the Full Guide
Rainbow Scraper Painting
Create a seamless and vibrant arc of color with this satisfying scraper painting technique. By dragging multiple wet hues simultaneously, you achieve a beautiful, blended gradient that looks professionally smooth yet handmade.
Step-by-Step
Materials
- Thick watercolor paper (cold press recommended)
- Liquid watercolor paints or gouache (Red, Orange, Yellow, Green, Blue, Indigo/Violet)
- A flat piece of stiff cardboard or a plastic scraper tool
- Small paintbrushes for applying the initial blobs
- Painter’s tape or masking tape
- Paper towels
- A clean, flat workspace
Step 1: Preparation and Setup
-
Prepare your paper:
Cut your watercolor paper to your desired size. If you plan to frame it later, measure your frame first to ensure a perfect fit. -
Secure the workspace:
Tape down the corners or edges of your paper to a flat work surface. This prevents the paper from shifting while you scrape and helps keep it flat as it gets wet. -
Check your consistency:
Ensure your paints are fluid but rich in pigment. If using tube watercolors or gouache, mix them with a tiny drop of water so they flow easily but aren’t runny.
Step 2: Applying the Paint
-
Position the starting point:
Identify where you want the left side of your rainbow arch to begin on the paper. -
Apply the first color:
Using a brush, place a generous blob or short line of red paint at the top of your starting position. -
Add the warm tones:
Directly underneath the red, place a blob of orange paint so it is touching the red. Repeat this immediately with yellow below the orange. -
Complete the spectrum:
Continue the vertical line of paint blobs by adding green, blue, and finally violet. Ensure all colors are fresh and wet—speed is helpful here. -
Align the blobs:
You should now have a vertical stack of color dots. Make sure they are close enough to touch so there are no white gaps when dragged.
Use a Smooth Edge
For the cleanest swipe, use an old credit card or a designated paint scraper. Cardboard works but can soften quickly if the paint is very watery.
Step 3: The Scrape Technique
-
Position the scraper:
Take your piece of cardboard or plastic scraper. Place the edge firmly down simply to the left of your stack of paint blobs. -
Angle the tool:
Tilt the scraper slightly in the direction you plan to drag; a 45-degree angle usually works best to pull the paint along. -
Begin the arc:
With steady, even pressure, pull the paint effectively to the right, starting to curve upwards immediately to form the top of the arch. -
Commit to the stroke:
Keep the motion continuous. Do not stop or lift the scraper. Move across the peak of the rainbow and guide the tool downwards to complete the other side. -
Lift off clean:
Once you reach the end of the rainbow on the right side, lift the scraper straight up quickly to create a clean finish. -
Clean the tool:
Wipe your scraper completely clean with a paper towel immediately, before any paint dries on the edge.
Make it Metallic
Swap the yellow or orange stripe for gold metallic paint. When the light hits the finished arch, that specific band will shimmer beautifully.
Step 4: Finishing Touches
-
Touch ups:
If the ends look a bit ragged, you can use a slightly damp brush to gently smooth the very edges, though the rustic scraped look is part of the charm. -
Let it dry completely:
Allow the painting to sit undisturbed. Because the paint layers might be thick in spots, give it at least an hour to dry fully. -
Flattening:
If the paper buckles slightly from the moisture, place it under a heavy book once it is 100% dry to flatten it out. -
Frame your work:
Once flat and dry, place your artwork into a simple wooden frame to highlight the vibrant colors.
Enjoy the colorful brightness this simple piece brings to your space
Sponge-Stamped Rainbow Stripes

This project creates a beautiful, minimalist piece of art featuring soft, textured stripes of watercolor in a classic rainbow gradient. Using simple kitchen sponges as stamps gives the lines a wonderfully organic, porous texture that feels both modern and playful.
Step-by-Step
Materials
- High-quality watercolor paper (cold press recommended)
- Clean cellulose kitchen sponges
- Liquid watercolor paints or gouache (Red, Orange, Yellow, Green, Blue, Purple)
- Scissors
- Palette or small shallow dishes for paint
- Paper towels
- Water for cleaning
Step 1: Preparation & Tools
-
Prepare your paper:
Start by selecting a smooth or slightly textured watercolor paper. Heavyweight paper (140lb/300gsm) is ideal here because it won’t buckle as easily under the moisture of the sponge. -
Create your stamps:
Take a clean, dry cellulose kitchen sponge. Using sharp scissors, cut the sponge into several rectangular blocks. Aim for a width of about 2-3 inches and a height of roughly 1 inch to match the stripes shown. -
Check sizing:
Before adding any paint, arrange your dry sponge blocks on the paper to ensure you can fit seven distinct stripes with a little white space in between each one. -
Set up your palette:
Pour a small amount of liquid watercolor or diluted gouache into separate wells on your palette or small dishes. You need a distinct puddle for each color of the rainbow.
Sponge Texture Tip
For more prominent “holes” in your texture, use a sponge with larger pores or barely damp surfaces. A soaking wet sponge creates a solid block of color.
Step 2: Stamping the Warm Tones
-
Load the first sponge:
Dip the long edge of one of your sponge blocks into the red paint. You want the sponge saturated but not dripping wet. I like to blot it once quickly on a paper towel to remove excess moisture. -
Stamp the red stripe:
Place the sponge firmly near the top of your paper. Press down evenly along the entire length of the sponge to transfer the porous texture, then lift it straight up without dragging. -
Prepare the next color:
Using a fresh sponge block (or the other clean end of the first one), load it with a red-orange or coral hue. -
Stamp the second stripe:
Position this stripe just below the red one, leaving a thin gap of white paper between them. Press and lift just as before. -
Add the orange stripe:
Load a new sponge section with bright orange paint. Stamp it below the previous line, maintaining consistent spacing. -
Complete the warm section:
Finally within the warm tones, load a sponge with yellow paint and stamp your fourth stripe. Ensure your alignment remains centered as you move down the page.
Step 3: Stamping the Cool Tones
-
Switch to cool colors:
Pick up a fresh sponge piece for the green paint. Using fresh sponges prevents muddy colors. Dip, blot lightly, and align it below the yellow stripe. -
Stamp the green stripe:
Press the green sponge onto the paper. Pay attention to the pressure; if you press harder, the texture becomes solid, while lighter pressure keeps it airy and sponge-like. -
Apply the blue stripe:
Load a sponge with a rich blue shade. Stamp this stripe below the green one, keeping that consistent white gap that frames each color. -
Finish with purple:
For the final stripe, use a deep purple or violet. Stamp it at the bottom of your stack. This anchors the visible spectrum nicely. -
Let it dry:
Allow the paper to sit undisturbed for at least 30 minutes. The thicker application of paint from the sponges might take longer to dry than a continuous brushstroke. -
Flatten if necessary:
If your paper has curled slightly from the water, place it under a heavy book once it is completely dry to flatten it out again.
Go Metallic
Mix a little gold metallic watercolor into your yellow or orange paint before stamping for a subtle, shimmering effect that catches the light.
Now you have a vibrant, textured rainbow print ready to frame or turn into a greeting card

PENCIL GUIDE
Understanding Pencil Grades from H to B
From first sketch to finished drawing — learn pencil grades, line control, and shading techniques.
Explore the Full Guide
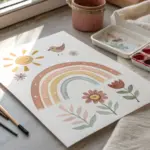
Rainbow Dot Sticker Mosaic
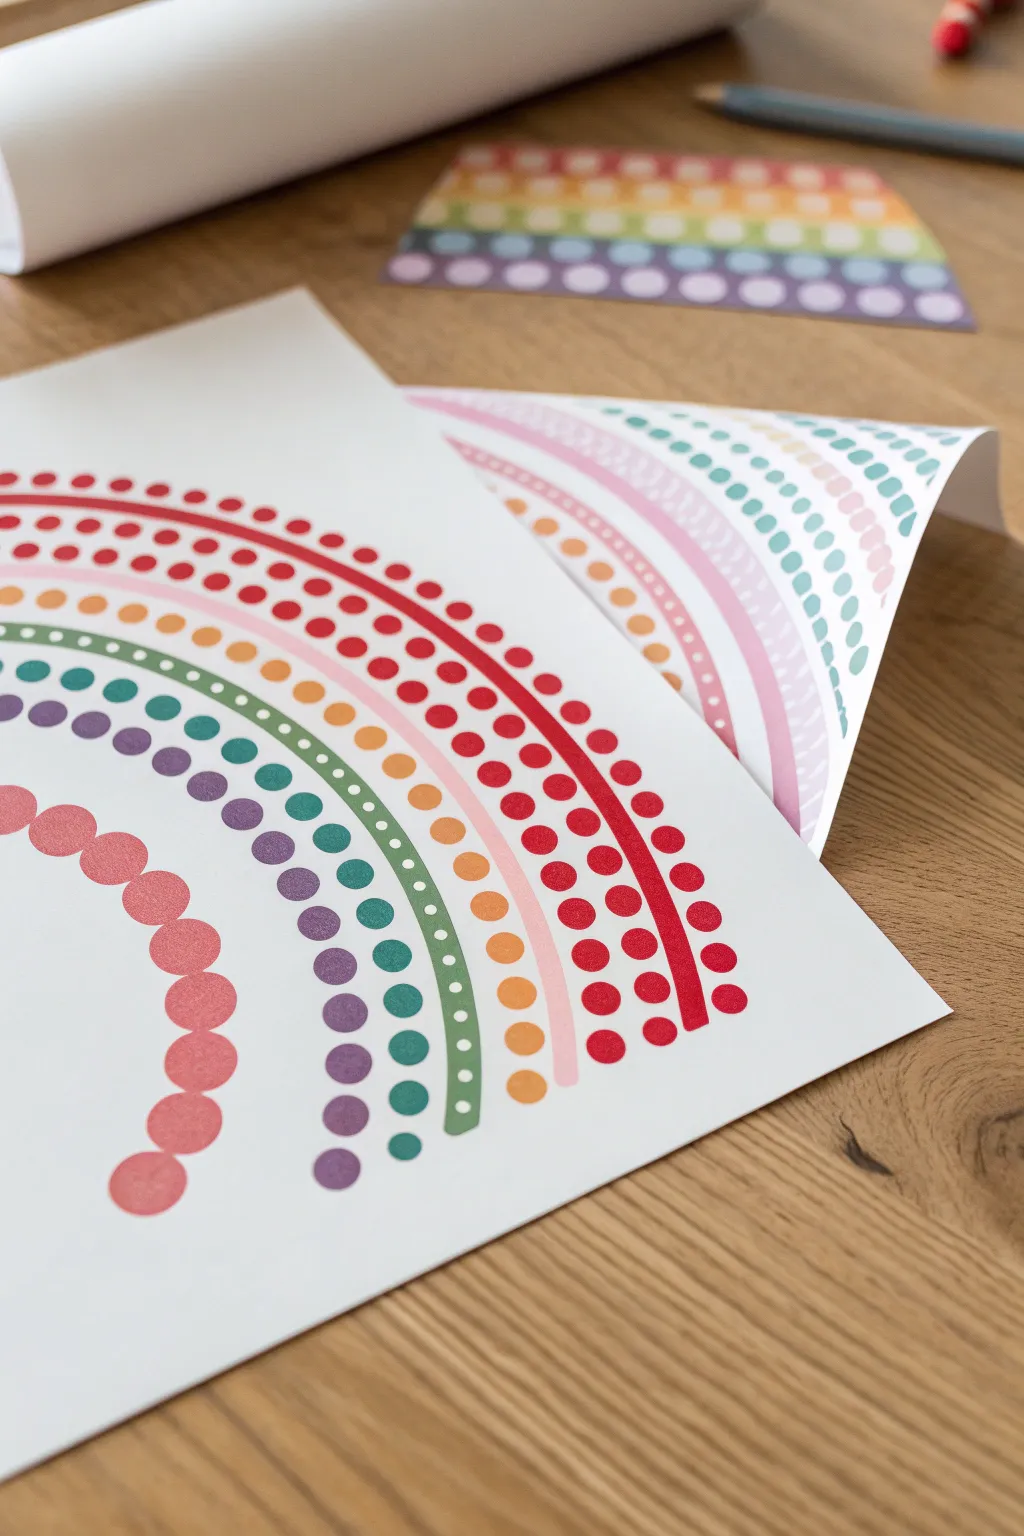
This minimalist rainbow project combines the satisfying symmetry of geometric arcs with the playful nature of dots. It’s a wonderful exercise in precision and color coordination, resulting in a clean, modern piece of wall art that looks professionally printed.
Detailed Instructions
Materials
- Heavyweight white cardstock or art paper (A4 or A3 size)
- Circular dot stickers in rainbow colors (red, pink, orange, green, purple)
- Fine-point colored markers or gel pens (matching the stickers)
- Compass or a set of circular bowls (for tracing)
- Pencil
- Eraser
- Ruler
Step 1: Planning the Arcs
-
Find your center:
Place your paper in a portrait orientation. Decide where the bottom center of your rainbow will be. It usually looks best starting slightly up from the bottom edge to leave a white border. -
Sketch the guidelines:
Using a compass anchored at your bottom center point, lightly draw a series of concentric semi-circles. You will need a distinct lane for each color of your rainbow. -
Create spacing:
For this specific design, ensure you leave a small gap between each color band. I like to make the bands themselves about an inch wide, with a quarter-inch gap between them. -
Define the layers:
Within each color band, lightly mark three distinct sub-sections: an outer line, a middle row for small dots, and an inner line. This structure creates that detailed, technical look.
Step 2: Building the Red Band
-
Start the outer rim:
Select your red marker. Carefully trace the outermost curve of your largest arc. Keep your hand steady to maintain a consistent line weight. -
Add the inner rim:
Draw the corresponding inner curve for the red band. You now have a ‘track’ where your dots will go. -
Apply the dots:
Take your red dot stickers (or use a bingo dabber/marker for drawn dots). Place them evenly spaced right down the center of your two red lines. The spacing is key—try to keep the white space between dots equal.
Sticker Spacing Trick
Cut a small strip of cardstock the width of your desired gap. Use this as a physical spacer between every sticker to ensure perfect, uniform distance without measuring.
Step 3: Adding the Mid-Tone Layers
-
Draw the pink lines:
Move inward to your next guideline. Draw the outer and inner curves using a pink marker. -
Vary the pattern:
Instead of separate distinct dots, you can create a solid band or a dashed line here for variety, though the image keeps a consistent dot pattern. Apply your pink dots between the lines. -
Create the orange layer:
Repeat the process for the orange band. As the arcs get smaller, you might need fewer dots to fill the curve. -
Align the dots:
Try to align your dots radially. Imagine a line engaging from the center point; the red, pink, and orange dots should roughly line up along these invisible rays.
Level Up: Mixed Media
Instead of just stickers, try mixing textures. Use puffy paint for one color band and metallic washi tape for another to add 3D tactile elements to your rainbow.
Step 4: Cool Tones & Finishing Touches
-
Draw green curves:
Switch to your green marker for the next band inward. Draw your bounding lines carefully. -
Place green dots:
Apply the green stickers. If your stickers are too large for this smaller inner arc, you might overlap the lines slightly—that’s okay, it adds artistic charm. -
Add the purple center:
Create the final, smallest arc with purple markers and dots. This anchors the whole rainbow. -
Incorporate large dots:
For an asymmetrical touch like the foreground artwork, create a separate, larger swoosh of big pink dots that cuts across or sits near the main rainbow. -
Erase guidelines:
Once the ink is fully dry, gently erase any visible pencil marks. -
Flatten the artwork:
If the stickers have curled the paper slightly, place the finished piece under a heavy book overnight to smooth it out.
You now have a crisp, geometric rainbow that brings a splash of organized color to any room
Crayon-Resist Rainbow Reveal
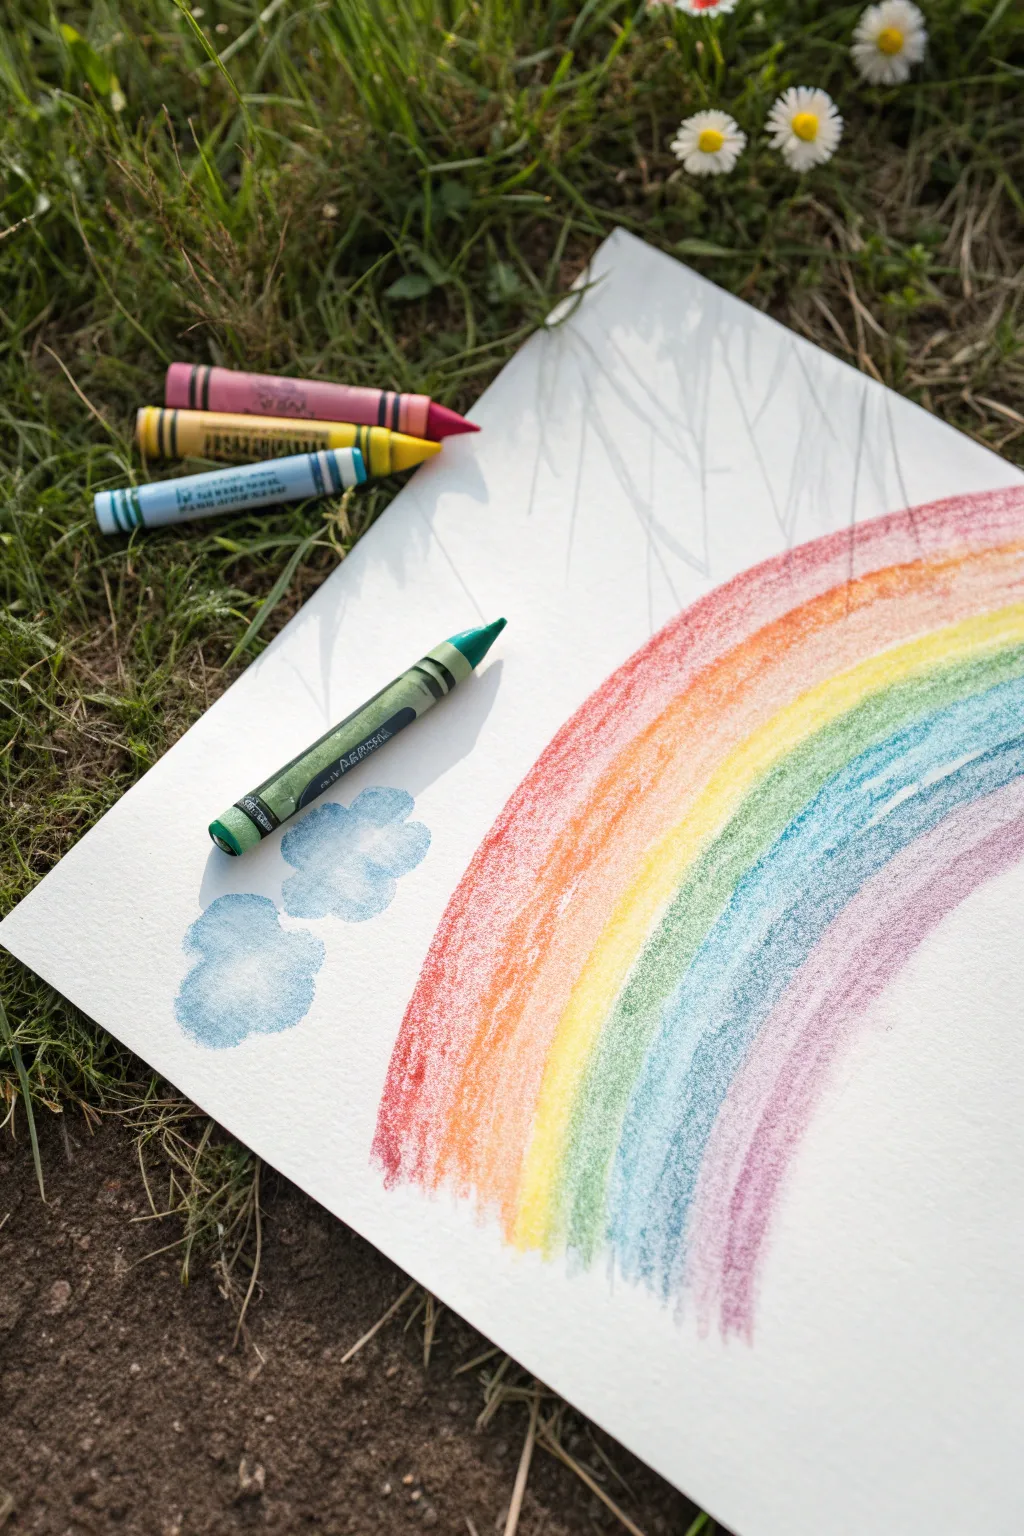
Capture the magic of a rainy day by combining the vibrant flow of watercolors with the subtle texture of wax resist. This simple yet beautiful technique reveals fluffy white clouds emerging from softly painted blue skies alongside a colorful, sweeping rainbow.
How-To Guide
Materials
- Heavyweight white drawing paper or watercolor paper
- Wax crayons (specifically a white crayon for the resist)
- Watercolor paint set or watercolor pencils
- Soft paintbrush
- Cup of water
- Paper towel
Step 1: Creating the Invisible
-
Prepare your workspace:
Lay your paper on a flat surface. Since this project involves a bit of wax and water, working outside on a nice day or laying down a protective mat is a good idea. -
Sketch the cloud outlines:
Take a white wax crayon. Pressing firmly, draw the outlines of two fluffy clouds on the left side of your paper. It might be hard to see, but that’s part of the magic. -
Fill the clouds:
Color inside your cloud outlines with the same white crayon. Ensure you get a nice, thick layer of wax down, as this will push the water away later. -
Add clear details:
You can also add faint lines for rain or wind in the background using the white crayon if you like, though focusing just on the clouds creates a clean look.
Secret Message Magic
Before painting, write a secret message inside the clouds using the white crayon. The words will magically appear when you brush the blue watercolor over them.
Step 2: Painting the Sky
-
Mix your blue wash:
Load your brush with water and pick up some blue pigment. You want a watery consistency—not too thick, almost like blue tea. -
Reveal the clouds:
Gently brush the blue watercolor wash directly over the area where you drew the white clouds. Watch as the paint beads up on the wax, leaving the white paper visible underneath. -
Soften the edges:
Fade the blue paint out around the clouds so they look like they are floating in a soft patch of sky, rather than having a hard, square border. -
Let the sky dry:
Allow the blue areas to dry completely before moving on to the rainbow. This prevents the colors from bleeding into your nice white clouds.
Salt Texture Hack
While the watercolor rainbow is still wet, sprinkle a pinch of table salt over the paint. As it dries, the salt absorbs pigment, creating a starry, speckled texture.
Step 3: The Rainbow Arch
-
Start with red:
Starting near the top right of your paper, paint a wide, curving red stripe that arches down towards the bottom right corner. -
Add orange:
Clean your brush, pick up orange paint, and lay a stripe directly next to the red one. Try to follow the same curve. -
Paint the yellow band:
Continue with a yellow stripe. If the paint is still wet, the edges might blend slightly with the orange, creating a lovely soft transition. -
Layer in the green:
Add your green stripe next. Green usually sits nicely in the middle of the rainbow, providing a cool contrast to the warm top colors. -
Follow with blue:
Paint a blue stripe alongside the green. Be careful not to let this blue mingle too much with the cloud section you painted earlier; keep them distinct. -
Finish with purple:
Complete your rainbow with a final stripe of violet or purple on the inner edge of the arch. -
Add texture (optional):
While the rainbow is drying, you can take a colored crayon (like the green one shown) and lightly scumble over the dry sections to add a mixed-media texture. -
One last check:
Let the entire painting dry flat. Once dry, you can gently wipe over the wax clouds with a clean tissue to remove any tiny beads of blue paint sitting on top of the wax.
Now you have a cheerful piece of art that perfectly captures the calm after a summer shower


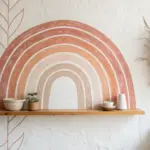
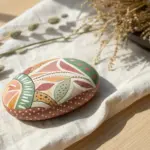
Found-Materials Rainbow Collage
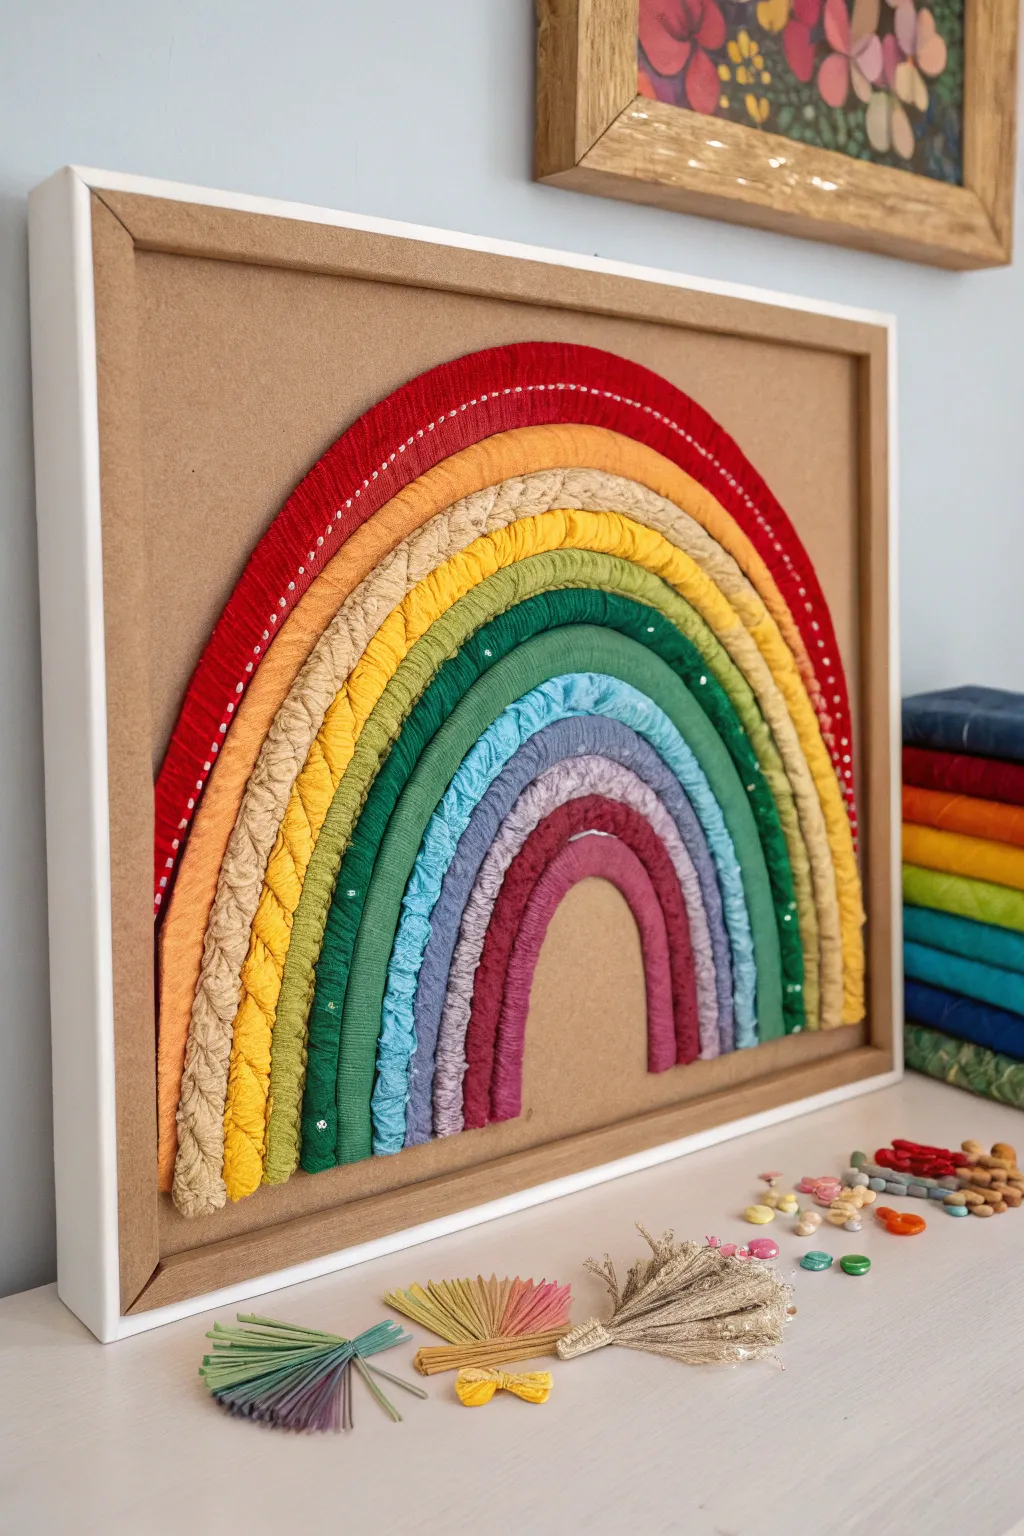
This tactile, dimensional wall art brings a burst of soft texture to any room by reimagining scraps of fabric as vibrant building blocks. Using a simple wrapping technique, you’ll transform ordinary rope into stunning, colorful arches that nestle perfectly into a rustic shadow box.
How-To Guide
Materials
- Thick cotton macrame cord or sash cord (approx. 1/2 inch to 3/4 inch thickness)
- Assorted fabric scraps (cotton, linen, or velvet) in rainbow colors
- A rectangular shadow box frame with a backing board
- Kraft paper or tan cardstock (to cover the backing)
- Fabric scissors or rotary cutter
- Hot glue gun and plenty of glue sticks
- Masking tape
- Pencil
- Measuring tape or ruler
- Optional: Beads, sequins, or embroidery floss for embellishment
Step 1: Preparation & Base setup
-
Prepare the backing:
Disassemble your shadow box frame. Remove the glass (you won’t need it for the final 3D piece) and take out the backing board. Cut a piece of Kraft paper or tan cardstock to the exact dimensions of the backing board. -
Secure the background:
Using a thin layer of glue or double-sided tape, adhere the Kraft paper to the backing board. Smooth out any bubbles to ensure a flat, neutral surface for your rainbow. -
Measure the arcs:
Lay your backing board flat on your workspace. Take your thick cord and lay out the first, smallest arch near the bottom center. Cut the cord to length, making sure the ends sit flush against the ‘ground’ of your frame. -
Cut subsequent cords:
Continue this process for each color band, laying the next piece of cord over the previous one to measure the length accurately. You want them to nest tightly. I usually label the ends with a small piece of masking tape (1, 2, 3…) so I don’t lose the order. -
Prepare fabric strips:
Cut your fabric scraps into long, thin strips, approximately 1 inch wide. Creating imperfect, frayed edges adds to the charm, so tearing the fabric is often better than cutting perfectly straight lines.
Gaps happen!
If you see gaps between arches after gluing, don’t panic. Push the flexible ropes together while the glue is warm, or tuck a tiny folded scrap of matching fabric into the crack with a toothpick.
Step 2: Wrapping the Arches
-
Start the wrap:
Take your smallest cord and the corresponding color strip (purple or pink). Apply a dab of hot glue to the very end of the cord and secure the start of your fabric strip. -
Textured winding:
Begin wrapping the fabric around the cord at an angle. For the scrunched look seen in the blue and yellow bands, push the fabric down the rope every few inches to create gathers and ruffles before gluing. -
Smooth winding:
For the smoother bands (like the red or green), pull the fabric strip taut as you wrap, overlapping slightly to ensure no white cord shows through. -
Add variance:
Mix up your textures. Try braiding three thin strips of fabric together and gluing that braid onto a cord, or twisting the fabric before wrapping it to create a rope-like ridge pattern. -
Secure the ends:
When you reach the end of a cord, trim the excess fabric and use hot glue to secure the tail seamlessly on the back or bottom edge of the rope. -
Embellish (Optional):
Before assembly, you can add extra details. The red arch in the example features white stitching; you can achieve this by hand-sewing a simple running stitch or gluing a thin contrasting string over the fabric.
Step 3: Assembly
-
Dry fit:
Place all your wrapped arches back onto the backing board without glue. Center the entire rainbow structure and ensure the spacing looks correct and the bottom edges align. -
Glue the center:
Lift the smallest, central arch. Apply a generous line of hot glue to the back of the rope and press it firmly into position on the backing board based on your dry fit. -
Stack and secure:
Working outward, glue the next arch. Apply glue not just to the back of the rope, but also a thin line where it will touch the previous arch to keep the rainbow sturdy and gap-free. -
Final adjustments:
Continue gluing each concentric arch until the full rainbow is assembled. Check for any loose fabric edges or visible glue strands and clean them up. -
Reframe:
Place the backing board (with the attached rainbow) back into the frame. Since the art is dimensional, leave the glass out. Secure the back of the frame, and it’s ready to hang.
Pro Texture Tip
For the “ruched” look on the blue arch, use a fabric strip that is 2x wider than normal. Fold it in half lengthwise before wrapping; the double thickness creates deeper, richer folds.
Now you have a stunning, textural statement piece that perfectly captures the joy of color.
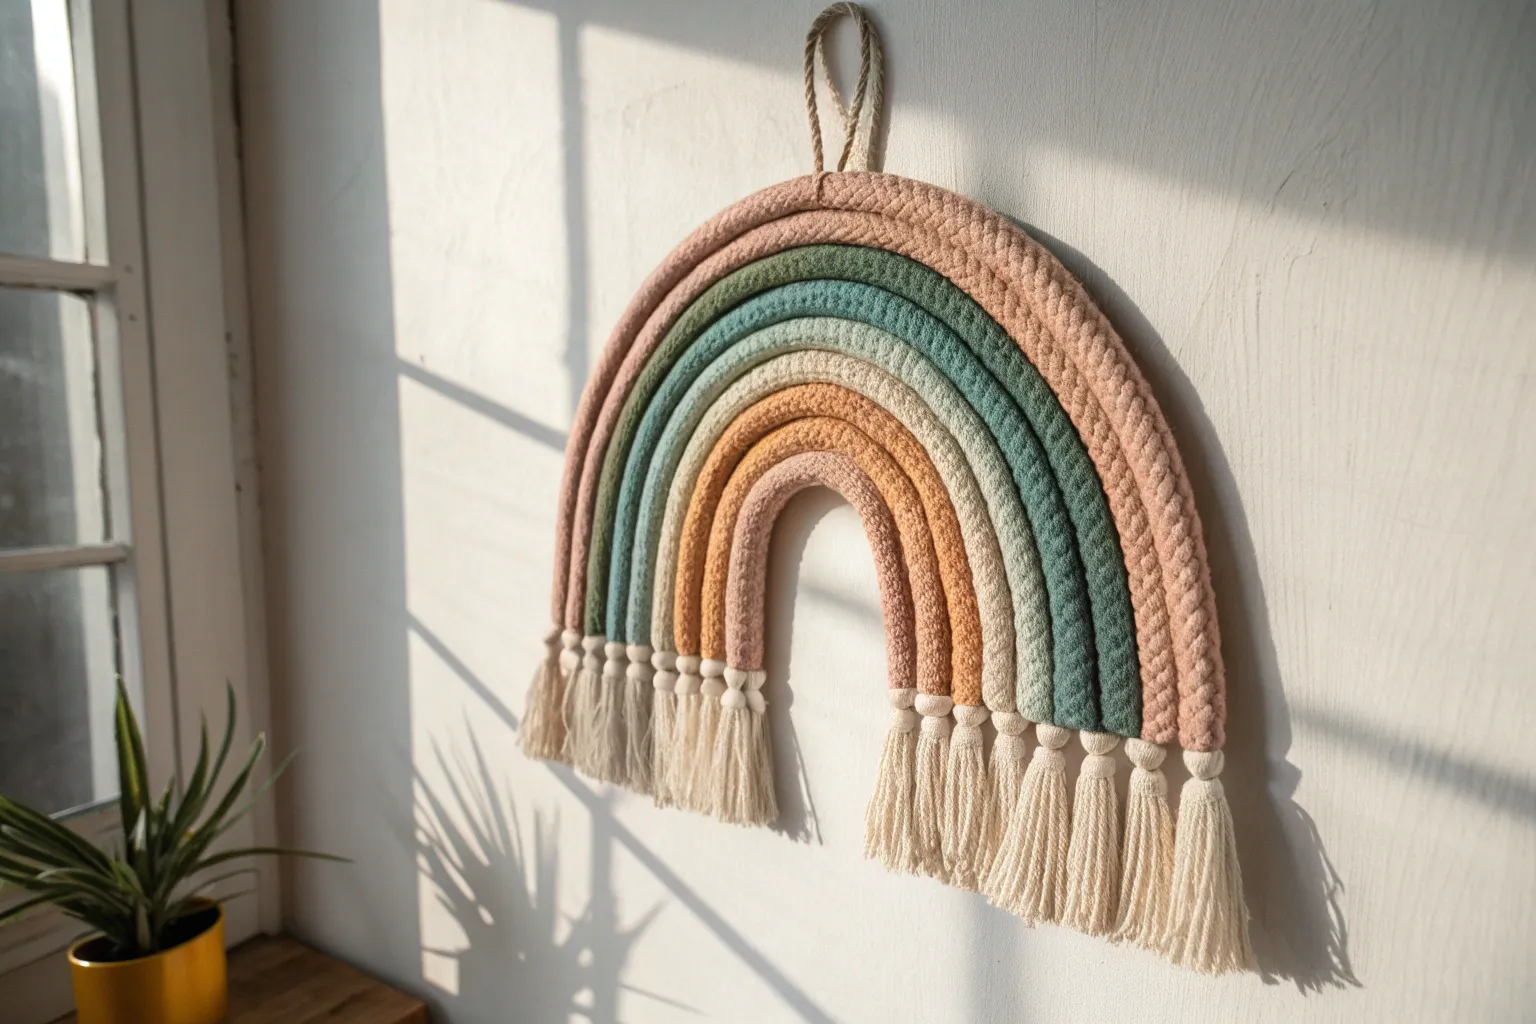
Rainbow Yarn-Wrapped Arch
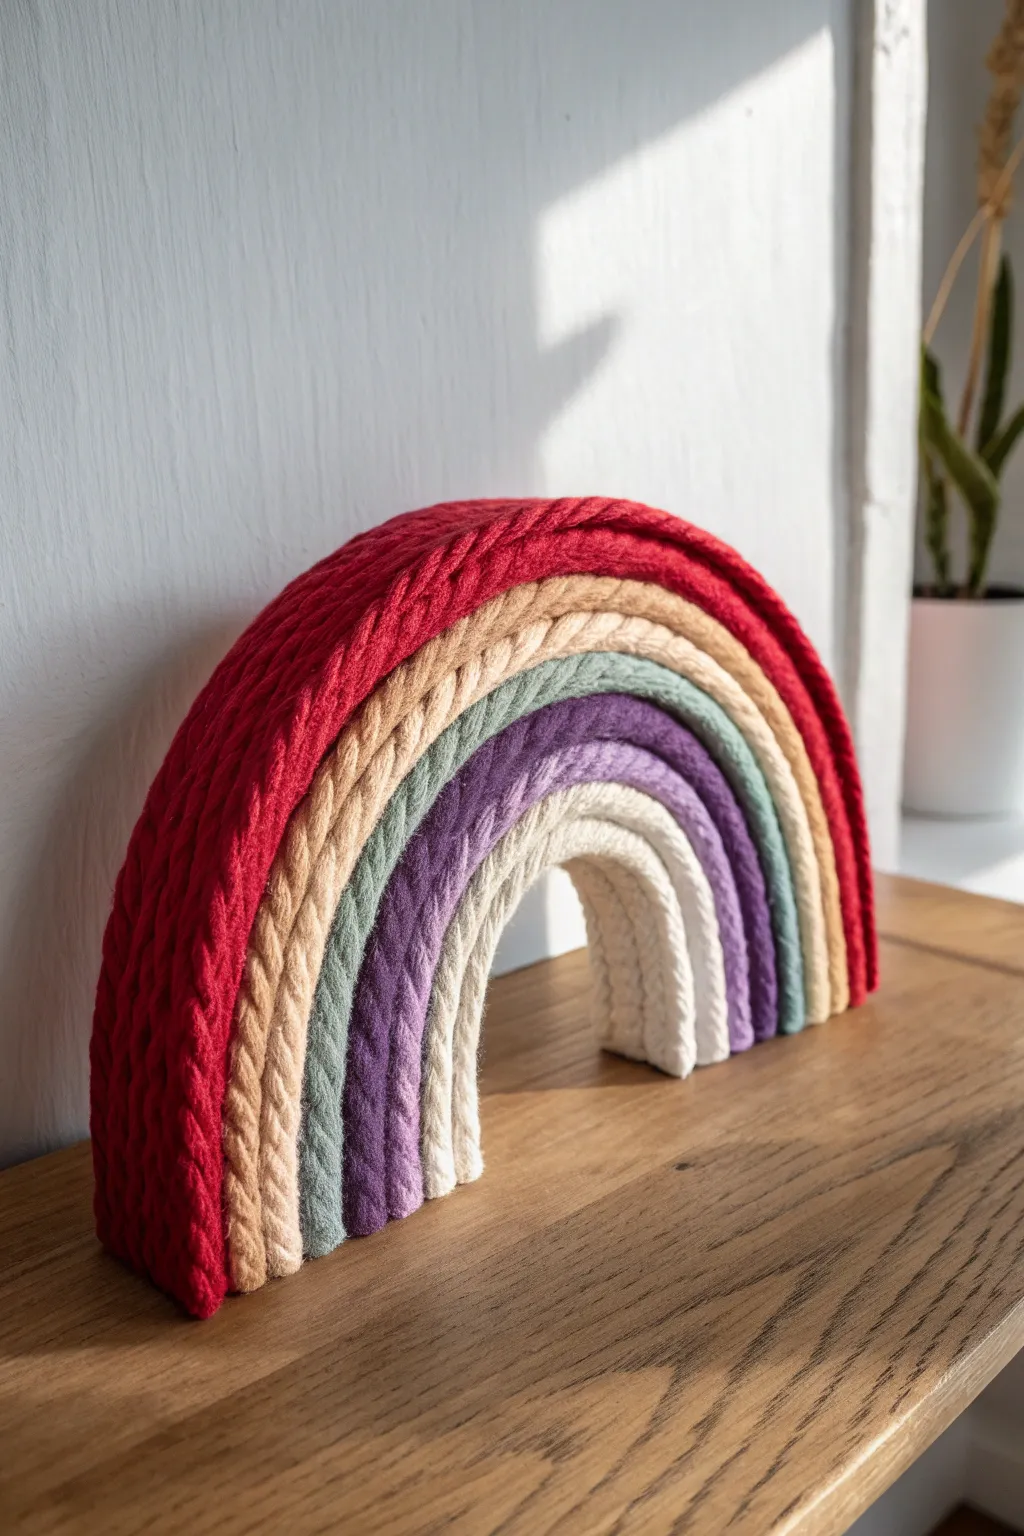
Add a cozy, modern touch to any shelf with this textural yarn-wrapped rainbow. Using thick rope as a sturdy base creates a freestanding arch with a lovely, substantial feel and muted, earthy tones.
Step-by-Step Guide
Materials
- Thick cotton rope (approx. 20mm or 3/4 inch diameter) – at least 3-4 feet
- Chunky yarn or macrame cord in 5 colors: Red, Peach/Beige, Sage Green, Purple, Cream
- Heavy-duty crafting wire or floral wire (12-16 gauge)
- Hot glue gun and clear glue sticks
- Sharp fabric scissors
- Masking tape or painter’s tape
- Measuring tape
- Pencil
Step 1: Preparing the Arches
-
Determine the size:
Decide how large you want your rainbow to be. The smallest inner arch determines the overall scale, so start by curving your rope into a small ‘U’ shape to see how wide you want the center gap to be. -
Cut the first rope:
Cut the piece of thick rope for your smallest inner arch (the cream layer). A length of about 6-7 inches usually works well for a tabletop sized rainbow. -
Secure the ends:
Wrap a small piece of masking tape tightly around the cut ends of the rope to prevent it from fraying while you work. -
Measure subsequent layers:
Lay the first rope piece down in its arch shape. Lay the rope spool above it to measure the next layer (purple). It needs to be longer to wrap around the first one comfortably. -
Cut remaining ropes:
Continue this stacking and measuring process for the green, peach, and red layers, cutting each piece slightly longer than the last. Ensure they nest together perfectly before moving on. -
Add wire for structure:
To make the rainbow hold its shape perfectly, tape a length of heavy-duty wire along the top spine of each rope piece. This internal skeleton allows you to bend the arches precisely later.
Step 2: wrapping the Layers
-
Begin the inner arch:
Start with your smallest rope piece and the cream yarn. Apply a dab of hot glue about 1 inch from the end of the rope. -
Secure the yarn start:
Press the yarn end into the glue and begin wrapping tightly around the rope, covering the wire and the tape. I like to wrap over the starting tail of the yarn for extra security. -
Wrap consistently:
Continue winding the yarn around the rope. Keep the tension high and push the loops together frequently so no white rope shows through underneath. -
Finish the first arch:
Stop wrapping about 1 inch from the other end. Secure the yarn with a small dot of hot glue on the underside/back of the arch and trim the excess. -
Repeat for all colors:
Repeat the wrapping process for the purple, green, peach, and red ropes. Take your time to ensure the yarn lies flat and not twisted.
Gaps showing?
If you see gaps between rows of glue, try gluing from the back side only. Press the arches face-down on a table while the glue cools to ensure the front creates a unified, flat surface.
Step 3: Assembly and Finishing
-
Shape the arches:
Bend each wrapped rope into its final ‘U’ shape. The internal wire will help them hold a smooth curve without flopping open. -
Glue the first two layers:
Run a thin bead of hot glue along the outer curve of the smallest (white) arch. Align it with the inner curve of the purple arch and press them together firmly for 30 seconds. -
Stack the remaining layers:
Continue gluing each subsequent layer: green onto purple, peach onto green, and finally the red outer arch. Keep the bottom legs of the rainbow flush as you glue. -
Trim the ends:
Once the glue is fully set, remove the tape from the rope ends if it’s still visible. Fray the exposed rope ends with a comb if you want a fringed look, or simply trim them flush for a clean, modern finish like the example image. -
Final adjustment:
Stand the rainbow up. If it wobbles, gently bend the wire structure until it sits perfectly flat on your surface.
Level Up: Texture Mix
Don’t stick to just one yarn type. Mix velvet yarn, braided cord, and fuzzy wool in different rows to add incredible tactile depth and visual interest to your rainbow.
Place your warm, colorful creation on a bookshelf or windowsill where it can catch the light
Rainbow Paper Weaving
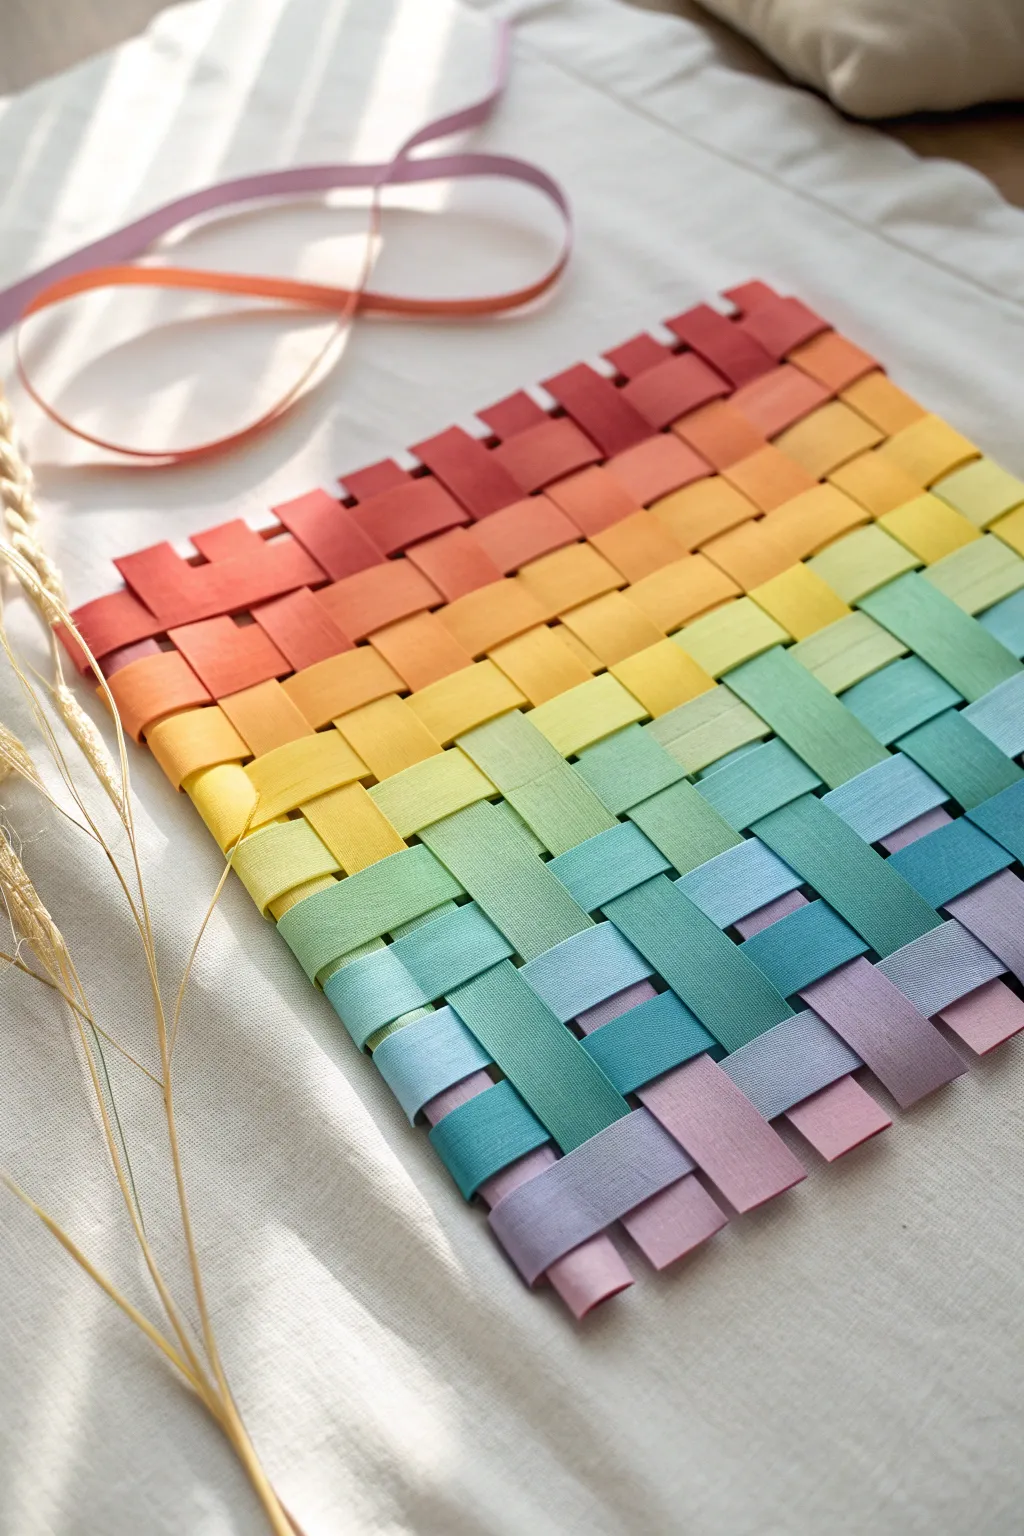
This simple yet striking paper weaving project creates a beautiful gradient square that captures the full spectrum of a rainbow. The soft transition of colors from warm reds to cool purples makes for a calming and satisfying crafting experience.
Step-by-Step Tutorial
Materials
- Construction paper or cardstock (shades of red, orange, yellow, green, light blue, dark blue, purple)
- Ruler
- Pencil
- Scissors or paper trimmer
- Glue stick or double-sided tape
- Optional: Washi tape or masking tape (for stabilizing)
Step 1: Preparing the Strips
-
Select your palette:
Gather your paper sheets. To achieve the gradient look shown in the photo, you will need about 12-14 distinct shades ranging from deep red to soft lavender. -
Measure the strips:
On each sheet of paper, mark 1-inch width intervals using your pencil and ruler. Precision is key here for a neat final grid. -
Cut the paper:
Using a paper trimmer or scissors, cut enough strips of each color. You will need roughly 14 vertical strips (let’s call these the warp) and 14 horizontal strips (the weft). -
Sort into detailed gradients:
Arrange your cut strips on your workspace in the order you plan to weave them. For the warp (verticals), create a gradient from yellow to green to blue. For the weft (horizontals), create a gradient from red to orange to yellow.
Loose Weave Fix
If gaps appear between rows, gently nudge them together with a ruler edge. Use tiny clear tape pieces on the back to hold stubborn strips in place.
Step 2: Setting the Base
-
Align the warp strips:
Lay your vertical strips side-by-side on your work surface. Line them up perfectly so they are touching but not overlapping. -
Secure the top edge:
Place a long piece of masking tape or washi tape across the very top edge of these aligned strips to hold them temporarily in place. This acts as your ‘loom’ anchor. -
Double-check the order:
Before you start weaving, verify your color progression looks right. The image shows the vertical strips transitioning from yellows on the left into greens and teals on the right.
Frame It Up
Mount your finished weaving on a white cardstock background or place it in a shadow box frame to turn your gradient practice into modern wall art.
Step 3: Weaving the Pattern
-
Start the first row:
Take your first horizontal strip (likely a deep red). Weave it through the vertical strips using an ‘over-under’ pattern. Go over the first strip, under the second, over the third, and so on. -
Position the strip:
Slide this first woven strip all the way to the top, snug against your tape anchor. -
Begin the second row:
Take the next horizontal strip (lighter red or dark orange). Weave this one opposite to the first: go under the first vertical strip, over the second, under the third. -
Tighten the weave:
Push this second strip gently upwards until it sits flush against the first row. I find using the edge of a ruler helps keep the rows straight without crinkling the paper. -
Continue the pattern:
Repeat this process with the remaining horizontal strips, alternating the starting ‘over’ or ‘under’ weave for each new row. -
Maintain alignment:
Check frequently that your square isn’t skewing. The strips should remain perpendicular to each other.
Step 4: Finishing Up
-
Secure the final row:
Once all horizontal strips are woven, ensure everything is tight and square. The final weave should feel dense. -
Glue the edges:
Carefully lift the ends of the strips on the back of the artwork. Apply a dab of glue stick under the end of each strip where it overlaps the edge, securing the warp and weft together. -
Trim the excess:
If your strips are uneven at the ends, trim them with scissors to create a clean, uniform square edge around the perimeter. -
Remove the anchor tape:
Gently peel away the masking tape from the top edge. Glue down any loose flaps on that top row just as you did for the others.
Now you have a stunning, colorful piece of geometric art ready to brighten up any space
DIY Rainbow Scratch Art
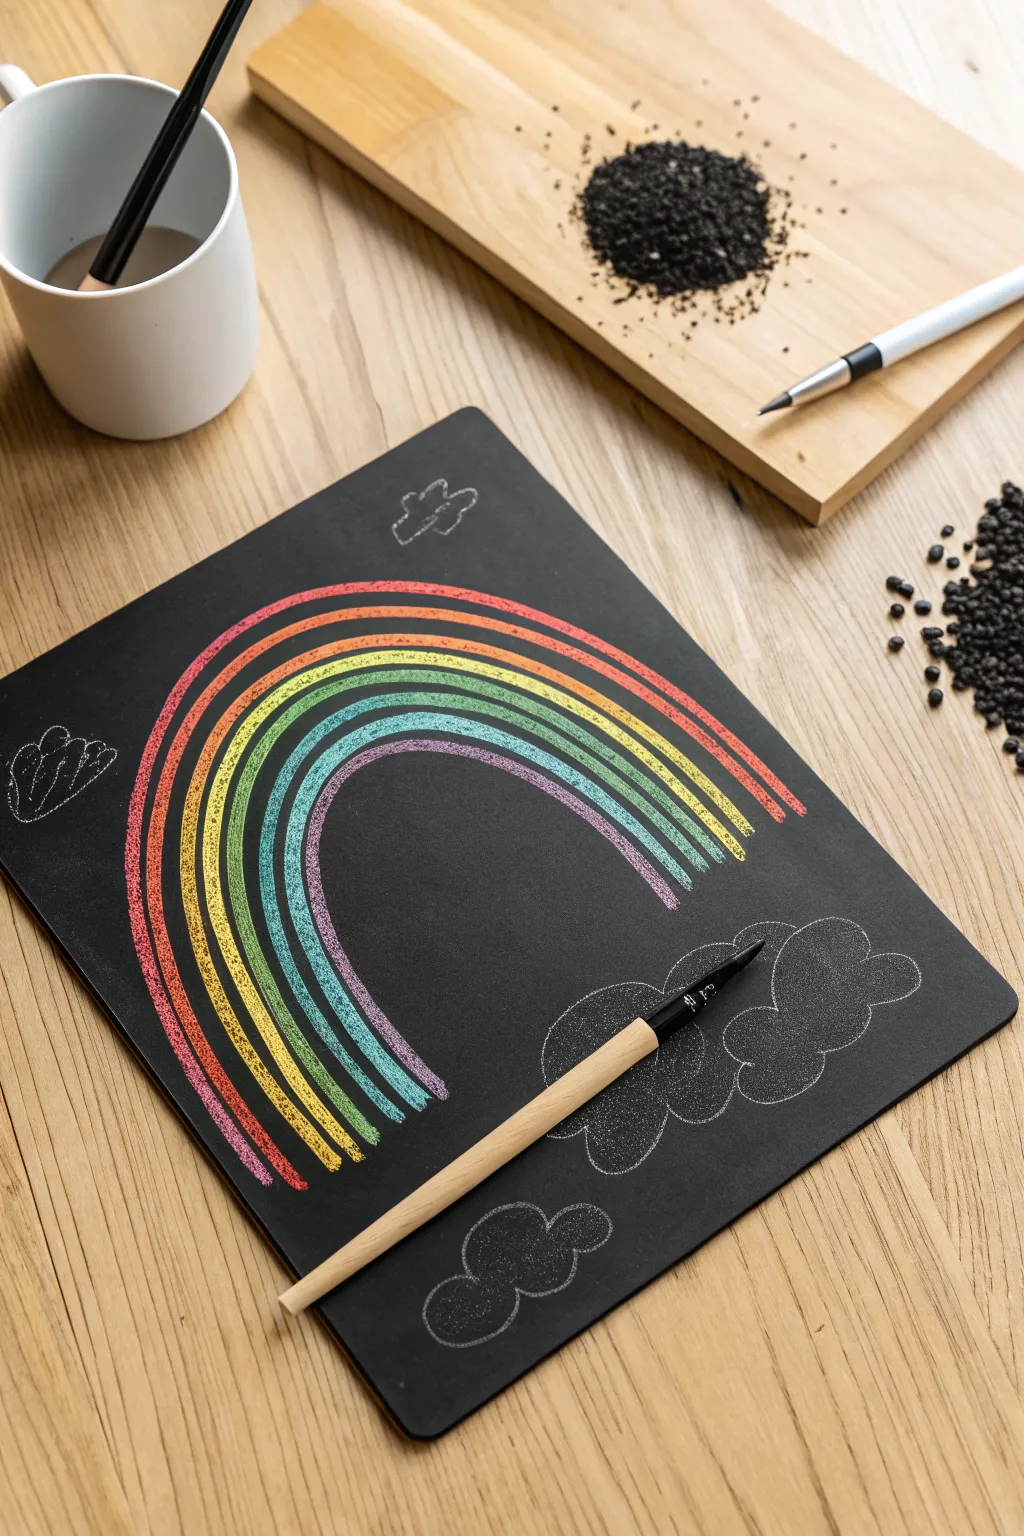
Transform a plain piece of paper into a hidden world of color with this classic, high-contrast art technique. The result is a striking black canvas that reveals a vibrant spectrum wherever you make your mark, perfect for creating glowing rainbows.
How-To Guide
Materials
- Heavy white cardstock or watercolor paper
- Oil pastels (essential for the base layer)
- Black acrylic paint
- Dish soap (liquid)
- Foam brush or wide paintbrush
- Pointed wooden stick or scratch tool (a bamboo skewer works well)
- White or grey colored pencil (optional for cloud details)
- Container for mixing paint
Step 1: Creating the Magic Base
-
Prepare your canvas:
Start with a sturdy piece of cardstock. Standard printer paper is too thin and will tear during the scratching process. -
Apply the color spectrum:
Using your oil pastels, color the entire sheet of cardstock. Cover every inch of white space. -
Create a rainbow gradient:
For the best rainbow reveal later, lay down your pastel colors in stripes or patches that mimic the rainbow order: red, orange, yellow, green, blue, and violet. -
Saturate the color:
Press hard with the pastels. You want a thick, waxy layer of pigment. I like to go over it twice to ensure no paper texture shows through. -
Mix the masking layer:
In a small container, squeeze out a generous amount of black acrylic paint. -
Add the secret ingredient:
Add a few drops of liquid dish soap to the black paint and mix thoroughly. This helps the paint glide over the oily pastel wax without beading up. -
Apply the black coat:
Using a foam brush, paint an even layer of the black mixture over your colored cardstock. -
Check for coverage:
If the colors are showing through, let the first coat dry completely and apply a second coat. The goal is a solid, matte black surface. -
Let it dry completely:
Allow the paint to fully cure. This usually takes about an hour, but it must be bone-dry before you start scratching.
Clean Sweep
Keep a dry paintbrush nearby to sweep away the black paint ‘crumbs’ as you work. Wiping with your hand can smear oils onto the matte surface.
Step 2: Revealing the Rainbow
-
Plan your placement:
Before scratching, visualize where your arch will go. It should span from the bottom left to the bottom right. -
Outline the outer arch:
Take your wooden scratch tool or skewer. Gently scratch the outermost curve of the rainbow first to establish the size. -
Reveal the first band:
Work back and forth with the tool to widen that first line, scratching away the black paint to reveal the colors beneath. -
Create parallel arches:
Move inward and scratch the subsequent bands of the rainbow. Try to keep the spacing consistent between each stripe. -
Vary the texture:
Instead of clearing the paint entirely, try using cross-hatching or zigzag motions for some bands to create visual interest. -
Draw the clouds:
At the base of the rainbow legs, use a white colored pencil or gently scratch very thin outlines to create bubbly cloud shapes. -
Add floating elements:
Sketch a few small clouds floating in the sky area above the rainbow using delicate, thin scratches or the white pencil. -
Clean up debris:
You will have black paint crumbs accumulating. Simply shake the card over a trash bin or blow them away gently.
Pattern Play
Instead of solid stripes, try scratching patterns into each rainbow band—polka dots, chevrons, or swirls—to reveal the colors in a unique way.
Now you have a stunning, high-contrast piece of art that literally glows with color
Bubble Wrap Rainbow Printing
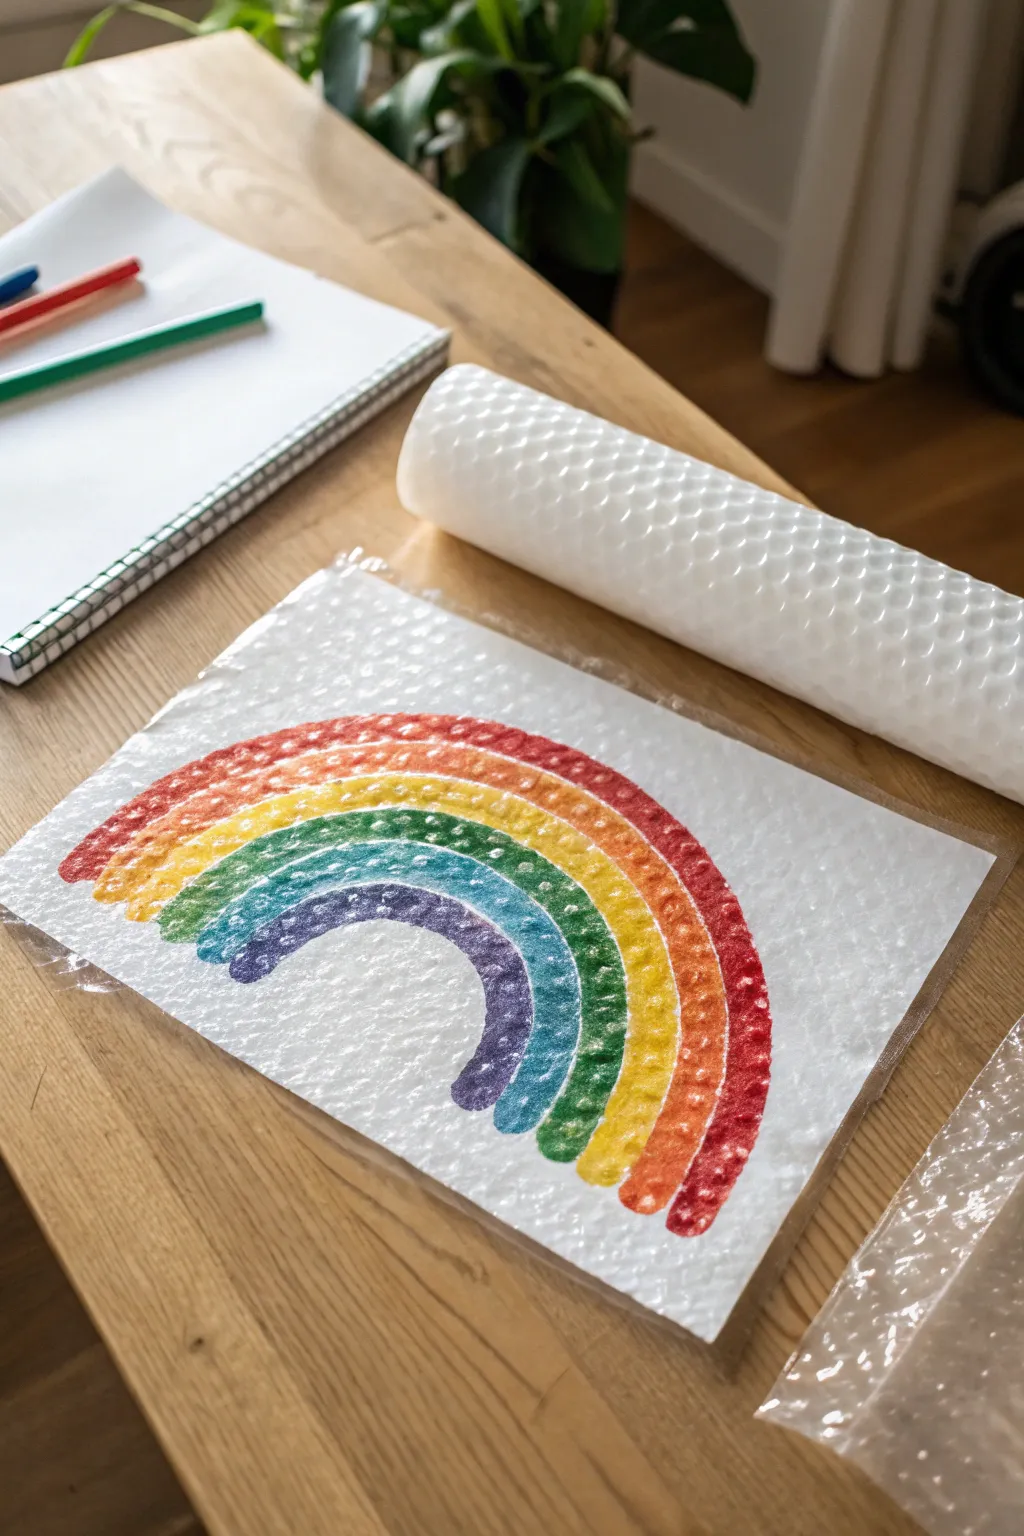
Transform everyday packaging material into a textured masterpiece with this simple printing technique. The raised bubbles create a unique, dotted honeycomb pattern that gives your rainbow a playful and surprisingly sophisticated look.
Step-by-Step Guide
Materials
- Bubble wrap sheet (large enough for your design)
- Heavy white paper, cardstock, or watercolor paper
- Acrylic or tempera paints (Red, Orange, Yellow, Green, Blue, Purple)
- Paintbrushes (flat or medium round)
- Scissors
Step 1: Preparing Your Printing Plate
-
Cut the bubble wrap:
Cut a rectangular piece of bubble wrap that is slightly smaller than your paper size. Ensure the bubble side is facing up. -
Clean the surface:
Check that the bubble wrap is clean and free of dust or lint, which could affect how the paint adheres. -
Plan your spacing:
Visualize where your rainbow arcs will go. You need room for six distinct bands of color, so mentally map out the curve.
Double the Fun
Work quickly! Acrylics dry fast. If the first colors dry before you finish painting the rest, mist the bubble wrap lightly with water before printing.
Step 2: Painting the Rainbow
-
Start with purple:
Begin with the innermost arc. Dip your brush into purple paint and paint a curved line directly onto the raised bubbles. -
Generous application:
Apply the paint fairly thickly. You want enough wet paint to transfer clearly, but not so much that it drips into the valleys between bubbles. -
Add the blue arc:
Paint a blue stripe following the curve of the purple one. Try to keep the stripes close together so they touch, creating a seamless rainbow effect. -
Continue with green:
Add your green arc next. Use broad, sweeping strokes to ensure even coverage across the bubble tops. -
Paint yellow and orange:
Follow with the yellow and orange bands. If your paint starts drying on the earlier colors, you might need to touch them up quickly before printing. -
Finish with red:
Complete the rainbow with the largest, outermost red arc. Make sure the ends of all arcs align roughly for a neat bottom edge. -
Check for gaps:
Quickly scan your painted bubbles. If any spots look dry or thin, dab a little fresh paint on them now.
Muddy colors?
If colors bleed together, your paint was likely too watery or you pressed too hard. Use undiluted tube acrylics and gentle hand pressure next time.
Step 3: The Printing Process
-
Position the paper:
This is the reverse of traditional painting. Instead of pressing the wrap onto paper, you will place your paper on top of the painted wrap. -
Lay it down:
Carefully lower your white paper onto the wet bubble wrap. Once it touches, do not shift or slide the paper. -
Apply gentle pressure:
Rub the back of the paper gently with your hands. Focus on pressing down over the painted areas to ensure the bubbles make contact. -
Don’t press too hard:
Avoid smashing the bubbles flat, as this can cause the paint to smudge rather than leaving distinct circle prints. -
Peel and reveal:
Lift one corner of the paper slowly and peel it back to reveal your print. I love this moment of surprise seeing the texture appear. -
Let it dry:
Place the artwork on a flat surface to dry completely. The thick acrylic dots may take a little longer than a standard wash to set.
Once dry, frame your textured artwork to brighten up any corner of the room
Rainbow Sky Over Simple Silhouettes
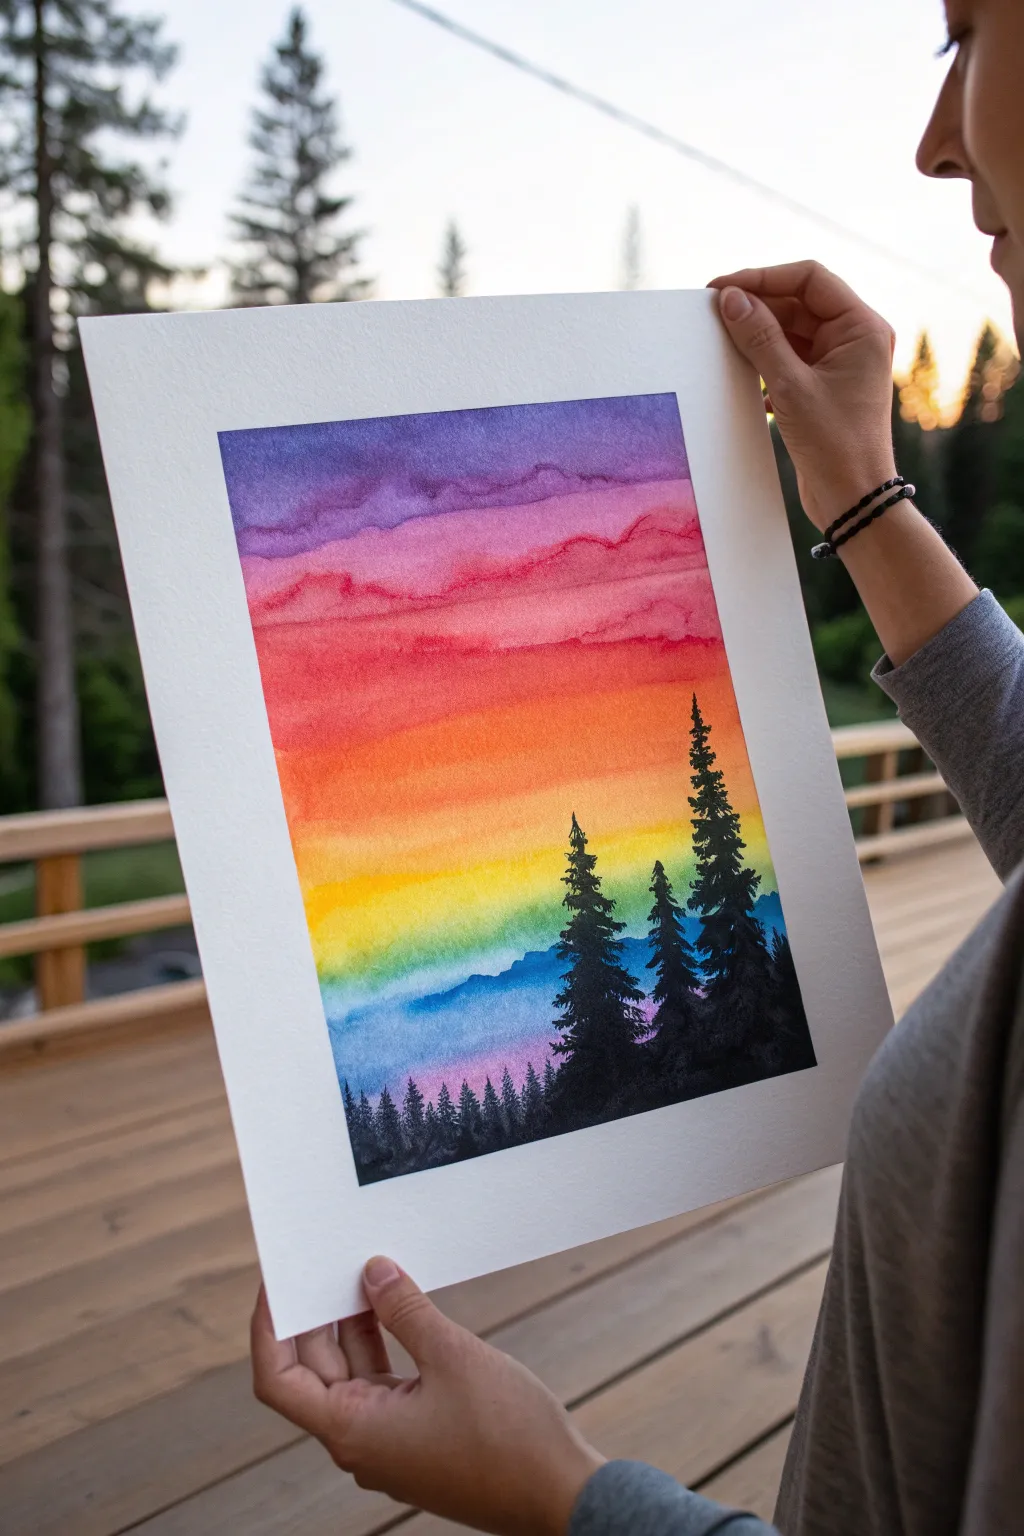
Capture the magic of twilight with this striking watercolor project featuring a glowing rainbow sky. By blending bold horizontal washes and layering crisp black silhouettes, you’ll create a scene that feels both peaceful and electrifying.
Step-by-Step Tutorial
Materials
- Cold press watercolor paper (140lb/300gsm)
- Watercolor paints (Purple, Pink, Red, Orange, Yellow, Blue)
- Black ink or highly concentrated black watercolor/gouache
- Flat wash brush (3/4 inch or 1 inch)
- Round brush (size 4 or 6 for trees)
- Fine liner brush (size 0 or 1 for details)
- Masking tape or painter’s tape
- Drawing board or hard surface
- Two jars of water
- Paper towels
Step 1: Preparation & Sky Wash
-
Secure the paper:
Start by taping your watercolor paper down to a board on all four sides. Press the tape edges firmly to ensure clean, crisp white borders later. -
Select your palette:
Prepare your rainbow colors on your palette: violet, magenta, bright red, orange, lemon yellow, and a cool blue. Ensure they are juicy and ready to flow. -
Wet the sky area:
Using your large flat brush and clean water, dampen the entire paper area inside the tape. It should be glistening with an even sheen, but not puddling. -
Apply the purple band:
Load your flat brush with violet paint. Swipe a broad horizontal band across the very top of the paper, letting the color bleed naturally downward slightly. -
Transition to pink:
While the purple is still wet, rinse your brush quickly and load it with magenta. Apply a band just below the purple, allowing the edges to touch and blend softly. -
Add red and orange:
Continue working down the paper. Add a stripe of bright red, followed immediately by orange. Work fairly quickly so the paper stays damp enough for the colors to fuse without hard lines. -
Paint the yellow glow:
Below the orange, paint a vibrant yellow band. This will be the brightest part of your sky, acting as the light source behind the trees. -
Finish the sky gradient:
This is a tricky transition—clean your brush well before picking up blue. Paint a band of blue below the yellow. If they mix too much, you’ll get green, so try to keep the transition zone narrow or let the yellow dry slightly first if you are worried about mud. -
Add texture:
While the paint is still damp, you can tilt the board slightly or dab extra pigment into the wet bands to create cloud-like textures and uneven organic lines. -
Let it dry completely:
This is crucial. The paper must be bone dry before you start the silhouettes, or the black ink will bleed into the sky. Use a hairdryer on a low setting if you’re impatient.
Bleeding Colors?
If your sky colors are creating ‘blooms’ or cauliflower marks, you may be adding too much water to drying paint. Wait for the layer to be fully dry before fixing, or lift excess water with a thirsty brush.
Step 2: Silhouettes & Details
-
Establish the horizon:
With black ink or concentrated black gouache, paint the distant mountain ridge at the very bottom of the blue section. Keep this layer uneven to look like distant treetops. -
Outline the main trees:
Switch to your medium round brush. Start painting the vertical trunk lines for the three prominent pine trees on the right side. Make them varying heights for a natural look. -
Foliage technique:
To create pine needles, use a stippling or dabbing motion. Start at the top of the tree with small touches and widen your strokes as you move down the trunk. -
Build the branches:
I like to leave tiny gaps of the sky showing through the branches to keep the trees from looking like solid triangles. Let the branches droop slightly downward. -
Add the forest floor:
Paint a solid black mass at the bottom connecting the trees, creating a dense foreground. Vary the top edge of this mass to suggest smaller shrubs and uneven ground. -
Paint the distant tree line:
On the left side of the painting, use a smaller brush to paint tiny, faint spikes along the horizon line. These represent a forest far in the distance. -
Refine the edges:
Use your fine liner brush to add the very tips to the tall pines and any delicate stray branches sticking out from the main silhouettes. -
Final dry:
Let the black ink dry completely. It needs to be matte and set before you touch the paper. -
The reveal:
Slowly peel away the masking tape at a 45-degree angle, pulling away from the painting to prevent tearing the paper.
Starry Night
Once the sky is dry but before painting the trees, flick white gouache or opaque white ink over the purple and blue sections to create a stunning starry sky effect.
Frame your masterpiece in a simple white mat to let those vibrant colors truly shine
Masked Tape Rainbow Geometrics
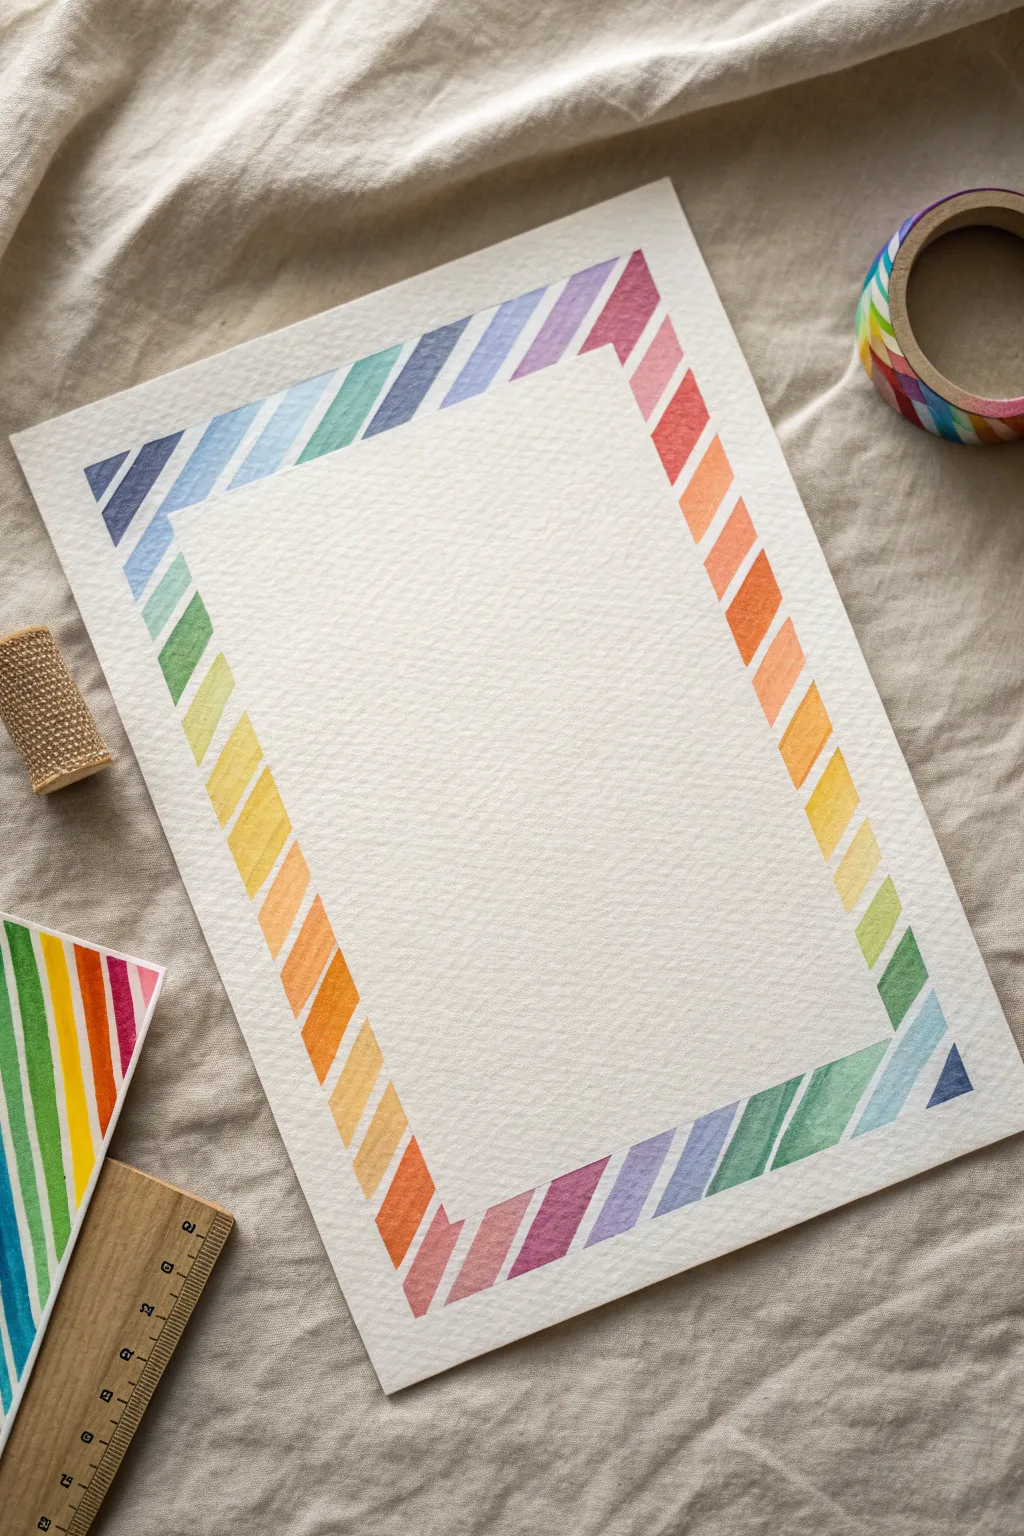
Create a cheerful, sophisticated frame for your notes or invitations using a simple masking technique. This project relies on geometric repetition and color blending to transform ordinary watercolor paper into a piece of custom stationery.
How-To Guide
Materials
- Cold press watercolor paper (A4 or letter size)
- Painter’s tape or artist’s masking tape (low tack)
- Ruler
- Pencil
- Watercolor paints (pan or tube)
- Flat shader brush (size 6 or 8)
- Jar of clean water
- Paper towels
- Cutting mat (optional, but helpful for measuring)
Step 1: Preparation and Masking
-
Create the inner boundary:
Begin by deciding how wide you want your white writing space to be. Use your ruler and pencil to lightly mark a rectangle in the center of your paper, leaving a generous margin (about 1.5 to 2 inches) around the edges for the border design. -
Mask the center:
Place a large piece of masking tape—or overlapping strips—over the central rectangle you just marked. Press down firmly on the edges to ensure a crisp line where the paint meets the paper. -
Mark spacing guides:
On the exposed outer border area, use a ruler to make small tick marks every 1/2 inch (or roughly 1.5 cm) along the inner masked edge and the outer edge of the paper. -
Establish the diagonal angle:
To create the slanted look, you won’t connect the ticks straight across. Instead, visualize connecting the first tick on the inner edge to the second tick on the outer edge. -
Tape the negative space:
Using thin strips of masking tape (or standard tape cut lengthwise), mask off every *other* diagonal stripe. You are essentially covering the white spaces that will separate the colored bars. -
Seal the tape:
Run a bone folder or the back of your fingernail along all the tape edges. This step is crucial to prevent paint from bleeding underneath and ruining your crisp white lines.
Step 2: Painting the Spectrum
-
Prepare your palette:
Mix puddles of your primary colors (red, yellow, blue) and secondary colors (orange, green, purple). Keep the consistency somewhat watery but pigmented enough to show vibrancy. -
Start the gradient:
Choose a corner to begin. Load your flat brush with a deep pink or red. Paint the first exposed diagonal segment. Try to use a single stroke per stripe if possible for a smooth look. -
Transition colors:
For the next stripe, mix a tiny bit of orange into your red. Paint the stripe. Continue this process, slowly shifting the hue for each subsequent segment. -
Work around the border:
Follow the rainbow order: Red -> Orange -> Yellow -> Green -> Blue -> Indigo -> Violet -> Red. Make sure you adjust your mixing so the transition feels gradual across the entire perimeter. -
Handle corners carefully:
When you reach a corner, the stripe might bend or break. I find it easiest to just treat the corner as a continuous turn, painting the L-shape if a stripe wraps around. -
Dry completely:
Let the paint dry fully. Give it at least 20-30 minutes. If the paper feels cool to the touch, it is still wet.
Clean Lines Pro-Tip
For ultra-crisp lines, paint a thin layer of clear clean water or white gouache over the tape edges first. This seals the gap, so any bleeding is invisible clear water, not color.
Step 3: The Reveal
-
Peel the diagonal tapes:
Once the paint is bone dry, carefully peel off the thin diagonal tape strips. Pull them slowly at a 45-degree angle away from the painted area to avoid tearing the paper. -
Remove the center mask:
Now, gently remove the large central block of tape. This is the most satisfying part, revealing the stark contrast between the colorful border and the clean white center. -
Assess and touch up:
Check for any small bleeds. If you spot one, you can often gently scrape it away with a precision craft knife or cover it with a tiny dab of opaque white gouache. -
Erase pencil marks:
Use a soft kneaded eraser to lift up any visible pencil guide marks remaining in the white spaces between the colored bars.
Level Up: Metallic Pop
Swap every fifth colored stripe for a metallic gold or silver watercolor paint. This adds a subtle shimmer that catches the light and makes the stationery look professionally printed.
Now you have a stunning, hand-painted frame ready for your favorite quote or a thoughtful letter
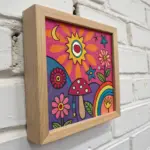
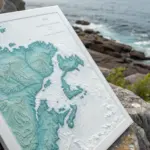
Layered 3D Paper Rainbow Shadow Box
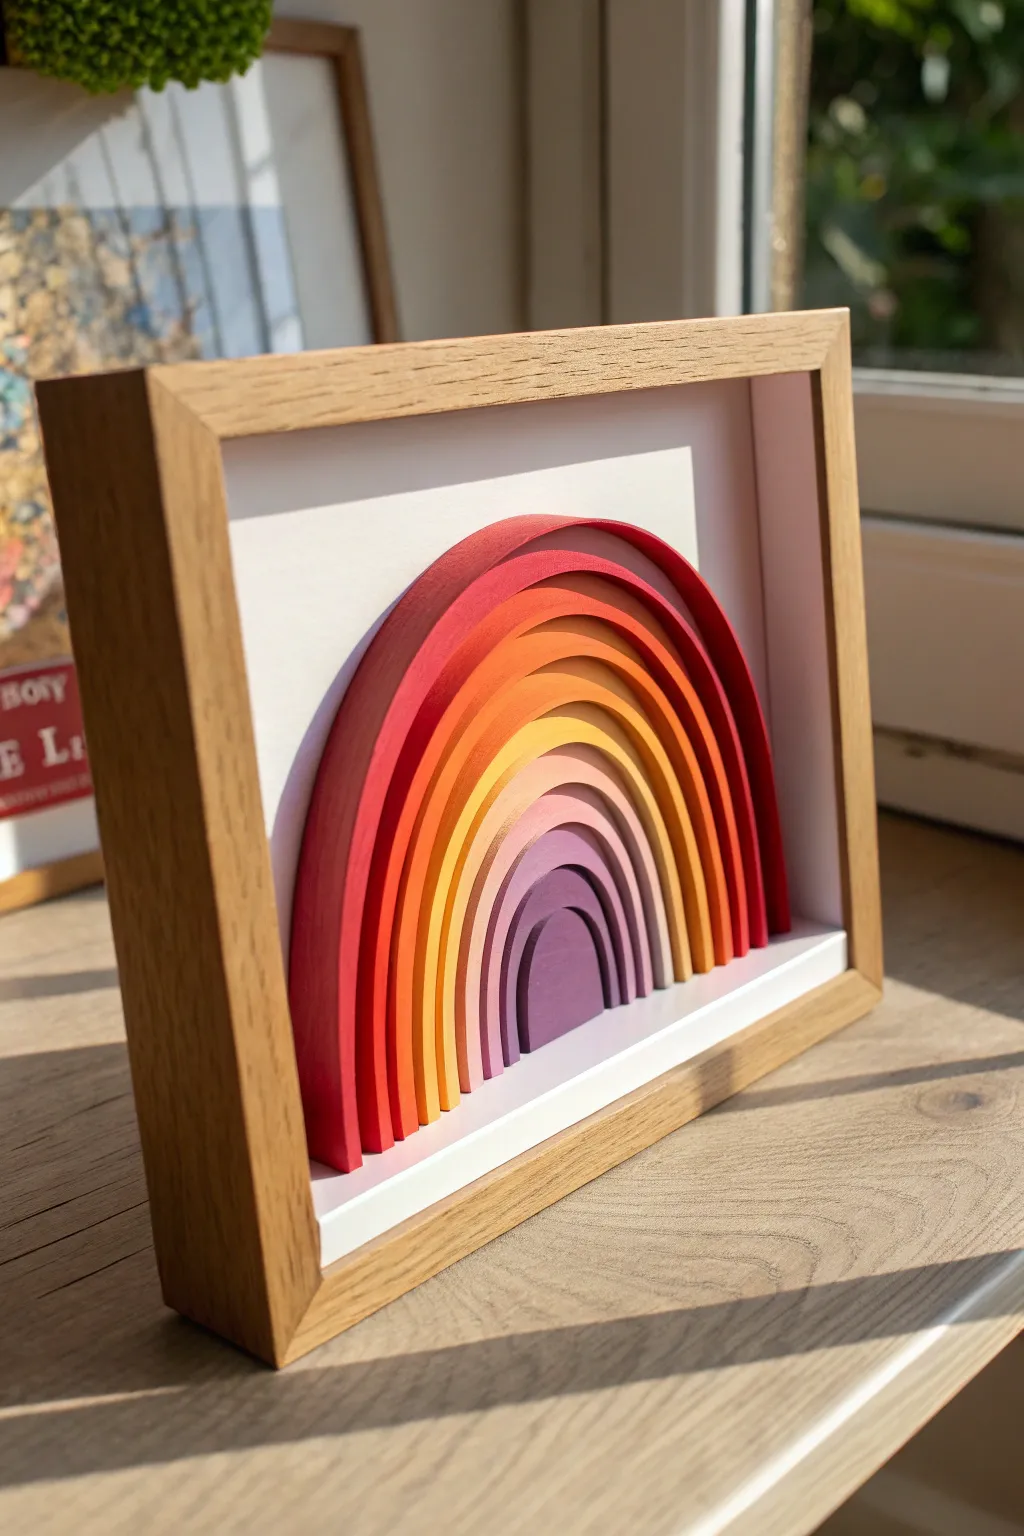
This stunning shadow box takes a simple rainbow motif and elevates it with depth and dimension. By stacking arched strips of paper on their edges, you create a striking architectural effect where light and shadow play between the vibrant layers.
Detailed Instructions
Materials
- Deep shadow box frame (wooden finish looks great)
- Heavyweight colored cardstock (various shades of red, orange, yellow, pink, and purple)
- White backing cardstock or foam board
- Compass or circle cutting tool
- Self-healing cutting mat
- Precision craft knife (X-Acto)
- Metal ruler
- Tacky craft glue or strong PVA glue
- Fine-point tweezers
- Pencil
Step 1: Planning the Arches
-
Measure your frame:
Begin by removing the backing from your shadow box frame. Measure the exact interior dimensions to ensure your white background fits snugly. -
Cut the background:
Cut a piece of white cardstock or foam board to these dimensions. This will be the base on which you build your rainbow. -
Design the template:
On a scrap piece of paper, use a compass to draw the concentric half-circles that will determine the size of your rainbow. I find it helpful to start with the smallest inner arch and work outward to ensure it fits nicely within the frame. -
Determine spacing:
Decide on the gap between each color layer. A gap of about 3-5mm usually creates nice shadows without making the rainbow look disjointed.
Step 2: Creating the Strips
-
Select your palette:
Choose your cardstock colors. For the look in the image, aim for a warm gradient: deep red, bright red, orange, golden yellow, pale yellow, dusty pink, lavender, and deep purple. -
Measure the depth:
Measure the internal depth of your shadow box (from back to glass). You want your paper strips to be slightly shorter than this depth so they don’t touch the glass. -
Cut the strips:
Using your metal ruler and craft knife, cut long, straight strips of each colored cardstock. Make them uniform in width based on your depth measurement (e.g., 0.75 inches). -
Check sturdiness:
If your cardstock is flimsy, you may need to glue two identical strips together for extra stiffness. The strips need to stand upright on their own.
Glue Control
If glue oozes out from under the strips, let it dry until tacky, then gently scrape it away with a toothpick. Wet glue smears and ruins the white background.
Step 3: Assembling the Rainbow
-
Prepare the center:
Start with the smallest, innermost color (the deep purple). Cut a strip to the approximate length needed for the smallest arch. -
Form the arch:
Gently curve the paper strip with your fingers to break the fibers and help it curl without creasing. -
Glue the first layer:
Apply a thin bead of tacky glue to the bottom edge of the purple strip. Using your template as a guide, press it onto the white background in the correct arch shape. -
Hold in place:
Hold the strip down for a minute until the glue grabs. You can place small objects on either side to prop it up while it dries completely. -
Add the next layer:
Move to the next color (lavender). Curve a strip and test fit it over the purple arch, ensuring you maintain that consistent spacing gap. -
Secure the second arch:
Apply glue to the bottom edge and adhere it to the backing. Use tweezers to make minor adjustments to the curve before the glue sets. -
Continue the gradient:
Repeat this process, working outward color by color. As the arches get larger, you might need to splice two strips together if your paper isn’t long enough. -
Clean up edges:
Ensure all the bottom ends of the rainbow strips are flush with the bottom edge of your white backing board. Trim any excess if necessary.
Solar Power
For a magical touch, place a small, hidden LED strip at the bottom of the frame behind the rainbow legs to illuminate the arches from below.
Step 4: Final Framing
-
Final drying time:
Let the entire assembly sit for at least an hour to ensure all strips are rigidly adhered. -
Clean the glass:
Wipe the inside of the shadow box glass to remove any fingerprints or dust specks. -
Mount artwork:
Carefully place your 3D rainbow art into the frame. Securing it can be tricky; I usually use a few dots of hot glue on the back of the foam board to attach it to the frame backing. -
Seal the frame:
Close up the back of the frame, ensuring the paper edges aren’t getting crushed against the glass.
Place your shadow box near a window to watch the changing daylight shift the shadows within the arches
Prism-Inspired Translucent Rainbow Abstract
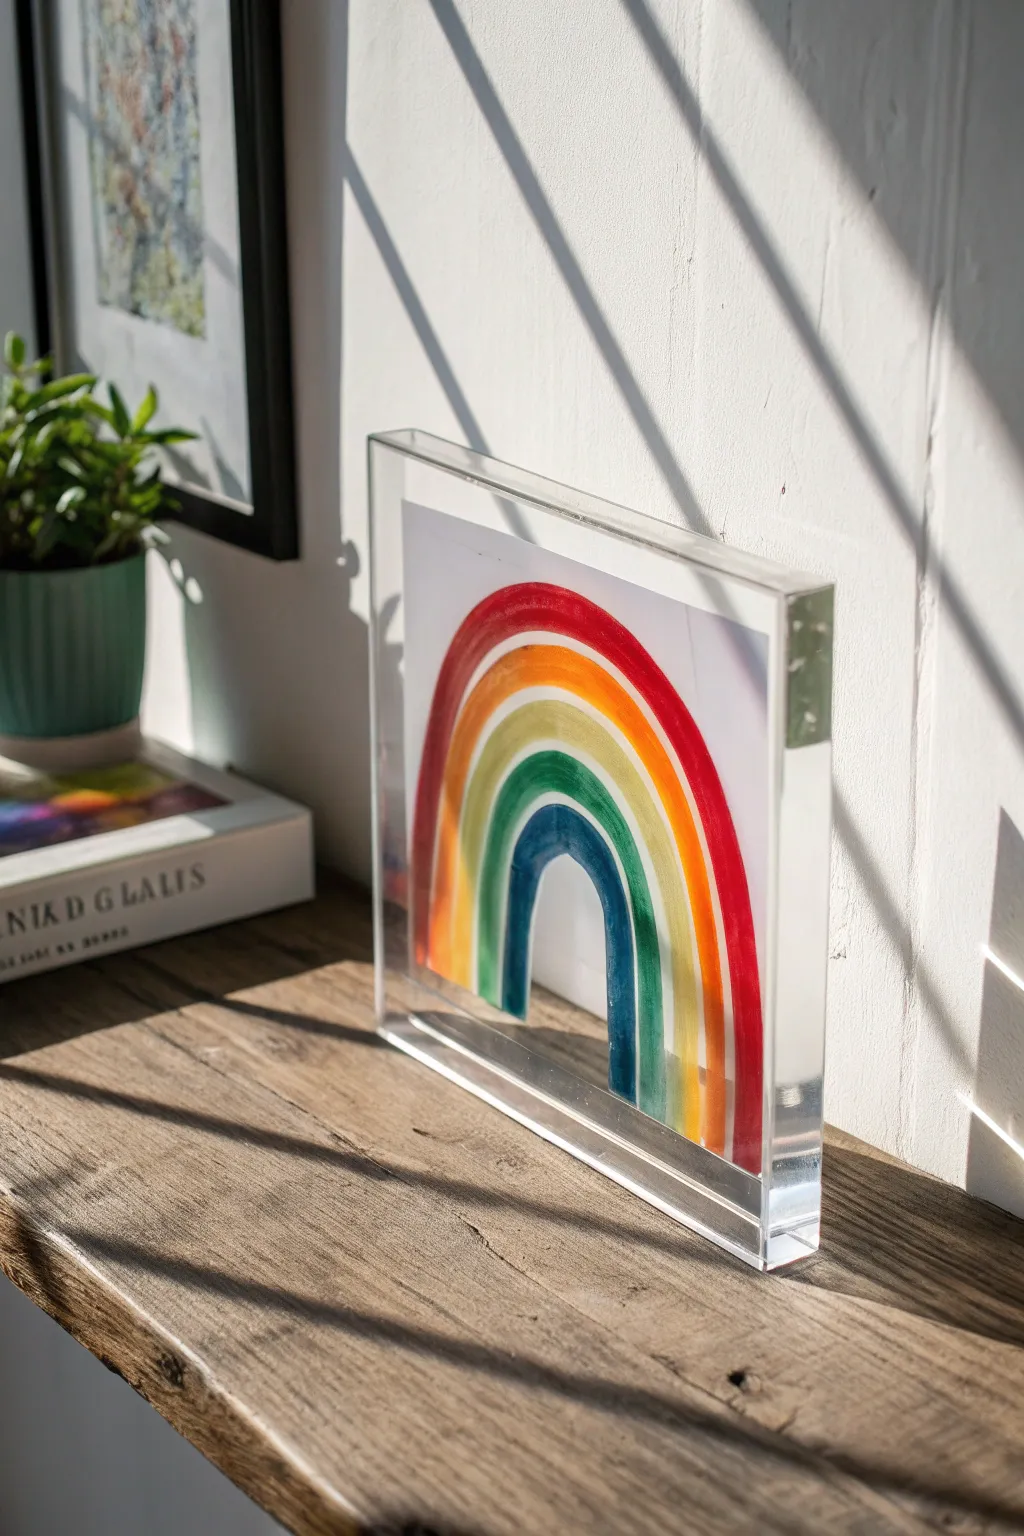
Capture the ethereal beauty of a prism with this modern, free-standing rainbow display. By sandwiching a vibrant painted transparency inside a thick acrylic block, you create a luminous piece of art that glows beautifully when caught in the sunlight.
Step-by-Step Tutorial
Materials
- Thick acrylic magnetic block frame (4×4 or 5×7 inch)
- Clear acetate sheet or heavy transparency film
- Alcohol inks or permanent markers (red, orange, yellow, green, blue)
- Scissors
- Rubbing alcohol and cotton swabs (for cleanup)
Step 1: Preparing Your Canvas
-
Disassemble the frame:
Take your acrylic block frame and separate the two magnetic halves. Set aside the back piece for now. -
Trace the size:
Place the front block on top of your acetate sheet. Use a pencil to very lightly trace the outline so you know your working boundaries. -
Cut the transparency:
Cut the acetate sheet just slightly smaller than your traced line. You want it to fit inside the frame without overhanging the edges. -
Clean the surface:
Wipe the acetate down with a little rubbing alcohol to remove any oils or fingerprints, which helps the ink adhere smoothly.
Step 2: Painting the Rainbow
-
Plan your arc:
Visualize where your rainbow will sit. A centered, high arc works best for this square format. -
Start with red:
Using your red alcohol ink or marker, draw the outermost arch. Keep the line bold and confident. -
Apply the orange:
Draw the orange band directly underneath the red. It’s okay if they slightly touch; a little bleeding creates a lovely watercolor effect. -
Add the yellow:
Continue inward with your yellow stripe. If you’re using alcohol inks, I like to move quickly here so the colors blend while wet. -
Draw the green:
Add the green band next. Try to keep the width of this stripe consistent with the others for a uniform look. -
Finish with blue:
Complete the rainbow with the innermost blue arch. Leave the space beneath the blue empty. -
Refine the edges:
If the ends of your rainbow look uneven, you can carefully trim them on the acetate with scissors later, or wipe away excess ink with a cotton swab dipped in alcohol.
Sun catcher effect
Use alcohol inks instead of markers for a more translucent, glass-like finish that projects colored shadows.
Step 3: Assembly
-
Let it dry completely:
Allow the ink to dry fully. Alcohol inks dry fast, but give it at least 15 minutes to avoid smudging during assembly. -
Clean the acrylic:
While waiting, ensure the inside faces of both acrylic blocks are perfectly clean and dust-free. -
Position the art:
Place your painted acetate sheet onto the bottom acrylic block. Center it carefully. -
Seal the block:
Gently lower the top acrylic block onto the bottom one until the magnets snap together, sandwiching your artwork inside. -
Final polish:
Wipe away any fingerprints from the outside of the block with a microfiber cloth.
Add some sparkle
Mix a tiny amount of glitter into clear drying glue and paint a thin layer over the dry rainbow for extra shimmer.
Place your new translucent sculpture on a sunny windowsill to enjoy the colorful play of light throughout the day


Have a question or want to share your own experience? I'd love to hear from you in the comments below!