If you want realistic painting to feel doable (instead of overwhelming), the trick is picking small, simple subjects that still teach you big skills like values and edges. Here are my favorite beginner-friendly ideas that look impressively real without requiring a complicated scene.
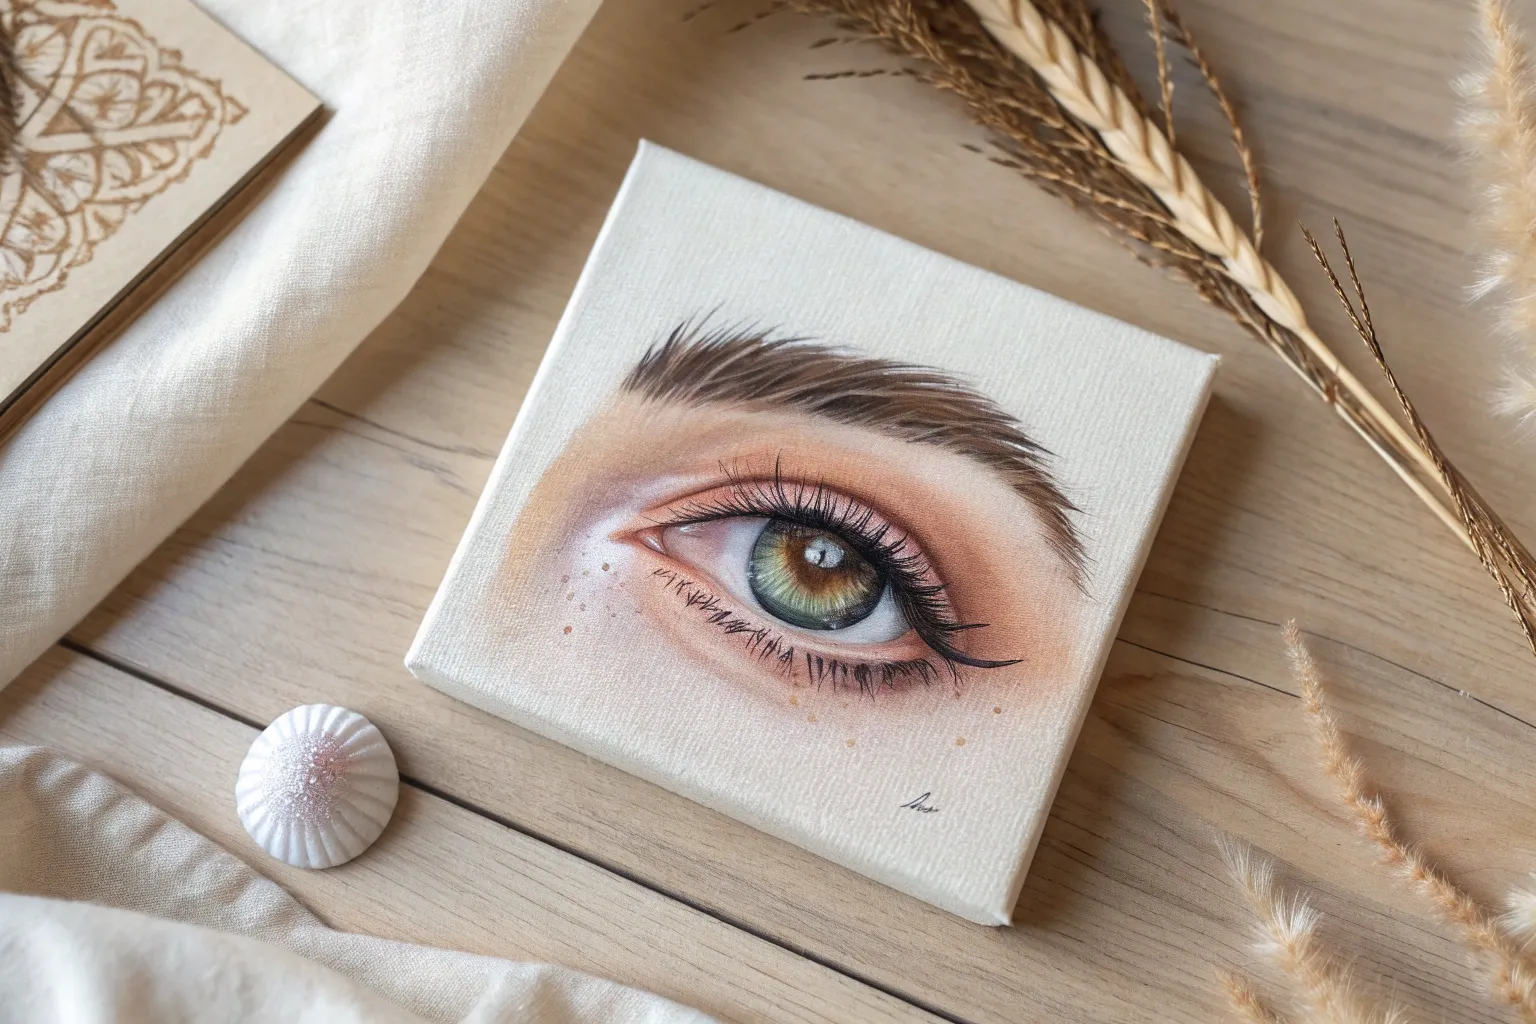
Realistic Eye Close-Up Study
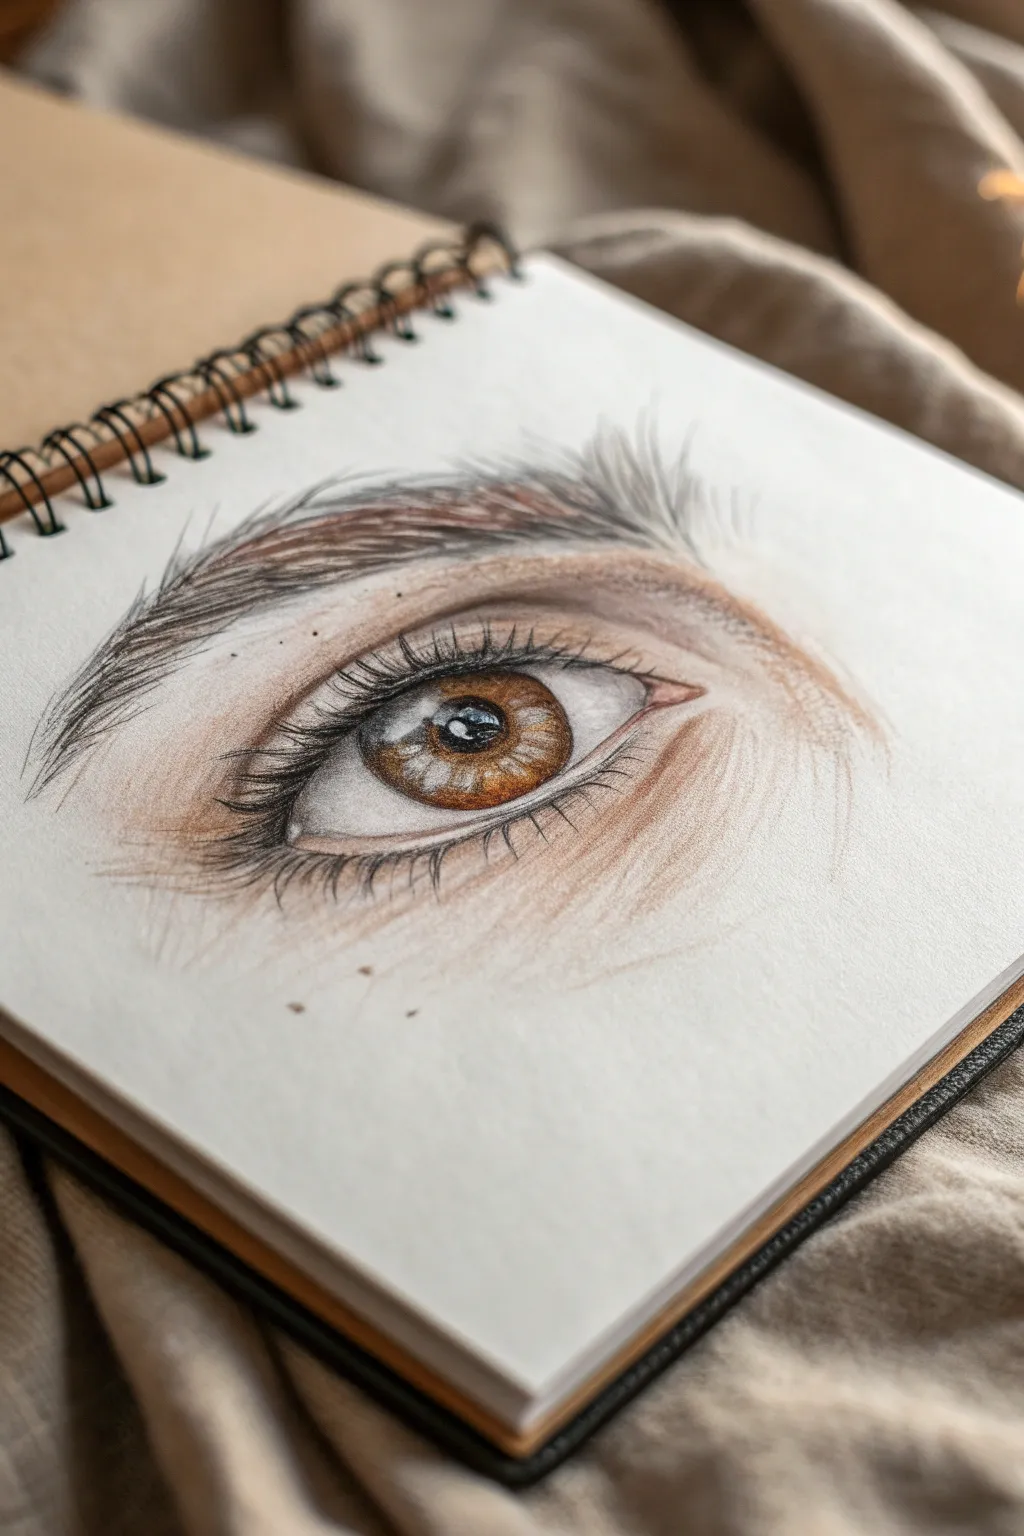
This tutorial guides you through creating a compellingly realistic eye drawing using colored pencils. By focusing on layering translucent skin tones and building deep contrast in the iris, you’ll achieve a lifelike gaze that leaps off the sketchbook page.
How-To Guide
Materials
- Heavyweight drawing paper or sketchbook (smooth or vellum finish)
- Set of colored pencils (artist grade preferred, e.g., Prismacolor or Polychromos)
- Graphite pencil (HB or 2H for outlining)
- Kneaded eraser
- White gel pen or gouache (for highlights)
- Pencil sharpener
Step 1: Sketching the Structure
-
Outline the basic shape:
Begin with a sharpened HB pencil to lightly draw the almond shape of the eye. Don’t press too hard; you want these lines to be barely visible later. Mark the position of the tear duct on the inner corner. -
Define the iris and pupil:
Draw a perfect circle for the iris, ensuring the top is slightly covered by the upper eyelid. Draw a smaller circle in the absolute center for the pupil. -
Map the highlights and creases:
Lightly sketch the reflection shapes (catchlights) inside the pupil and iris now so you don’t accidentally color over them later. Add the lines for the upper eyelid crease and the lower lash line ridge.
Step 2: Coloring the Iris
-
Fill the pupil:
Use a black colored pencil to fill in the pupil completely, carefully avoiding the mapped-out highlight areas. The contrast starts here. -
Base layer for the iris:
Apply a light wash of yellow-ochre or light hazel evenly across the iris. Keep your strokes radiating outward from the pupil like bicycle spokes. -
Build depth with browns:
Take a medium brown or burnt sienna and start darkening the outer ring of the iris. Draw gentle flicks inward toward the pupil to mimic the muscle fibers of the eye. -
Add detail and contrast:
Using a dark espresso brown or black, darken the very outer rim of the iris and the area immediately surrounding the pupil. This creates a dimensional, domed effect. -
Enhance the highlights:
Ensure the reserved white highlights remain crisp. You can add a tiny touch of cool grey or blue to the white of the eye (sclera) to make it look spherical, shading slightly under the upper lid.
Fixing Muddy Colors
If skin tones look waxy or muddy, you’re layering too heavily. Use a kneading eraser to gently lift excess pigment, then re-apply very light, sheer layers.
Step 3: Skin Tones and Shading
-
Lay down the base skin tone:
Choose a light peach or beige pencil. lightly shade the skin around the eye, including the eyelid and the under-eye area. Use circular motions to avoid directional streaks. -
Deepen the creases:
Switch to a terra cotta or darker flesh tone to shadow the eyelid crease. This is where the skin folds, so the pigment should be richer here. -
Add warmth and realism:
Lightly layer a soft pink or salmon color around the tear duct and the waterline (the wet rim between the eye and lashes). This subtle red undertone brings life to the drawing. -
Refine the shadows:
Use a light grey or taupe pencil to deepen the corners of the eye and the shadow cast by the brow bone. Smooth transitions are key here.
Level Up: Texture
To add realistic skin texture, gently stipple small dots using a sharp point of your darkest skin tone pencil near the tear duct and under-eye area.
Step 4: Brows and Lashes
-
Draft the eyebrow shape:
Using a sharp brown pencil, draw individual hairs for the eyebrow. Start with upward strokes at the inner brow, gradually angling them sideways as you move outward. -
Thicken the brow:
Layer darker brown strokes over the base layer of the brow to create volume. Follow the natural growth direction and let some hairs stray for realism. -
Draw the upper lashes:
With a very sharp black pencil, draw the upper eyelashes. Start the stroke on the eyelid line and flick upward in a curve. Vary the length and angle; lashes often clump together slightly. -
Add lower lashes:
Draw the lower lashes similarly but make them shorter, thinner, and more sparse than the top ones. Ensure they grow from the outer edge of the waterline, not inside the eye. -
Final highlights:
Use a white gel pen or a dab of white gouache to place the brightest catchlights in the eye. I also like to add tiny ‘wet’ dots on the tear duct and waterline to mimic moisture.
Step back and admire the soulful depth you’ve created on the page


Simple Sphere Shading Exercise

Mastering the illusion of three-dimensional form is a rite of passage for every artist, and this simple blue sphere is the perfect starting point. Using just one color, you will learn to control water and pigment to create a convincing sense of volume and light.
Step-by-Step Tutorial
Materials
- Cold Press Watercolor Paper (approx 300 gsm)
- Round Watercolor Brush (size 8 or 10)
- Watercolor Paint (Cobalt Blue or Ultramarine)
- Graphite Pencil (HB)
- Jar of Clean Water
- Paper Towel
- Compass or Circular Object (for tracing)
Step 1: Preparation and Outline
-
Trace the shape:
Begin by lightly drawing a perfect circle in the center of your paper. Use a compass or gently trace around a small circular object like a jar lid. Keep the pencil lines very faint so they disappear under the paint later. -
Plan the highlight:
Identify where your light source is coming from. In this example, the light hits the top-left area. Lightly mark a small oval or circle here to remind yourself to leave this area pure white. -
Sketch the shadow:
Sketch a long, elliptical cast shadow extending from the bottom right of the sphere. The shadow should be slightly wider than the sphere itself and stretch diagonally.
Step 2: First Wash: The Sphere
-
Wet-on-wet technique:
Dip your brush in clean water and wet the entire inside of the circle, avoiding the tiny highlight area you marked earlier. The paper should glisten but not have puddles. -
Prepare your wash:
Mix a watery puddle of your blue pigment on your palette. It should be transparent and light for this first layer. -
Drop in color:
Touch your brush to the wet paper on the shadowed side (bottom right) of the sphere. Let the pigment bleed naturally into the wet area, moving toward the center but stopping before it hits the highlight. -
Soften the edges:
Clean and dampen your brush, then gently feather the edges of the paint so it fades smoothly into the white highlight. The transition needs to be seamless to look round.
Fixing “Cauliflowers”
If you see jagged blooms in your paint, you introduced water into a drying area. Don’t touch it! Let it dry completely, then gently scrub the edge with a damp stiff brush to smooth it out.
Step 3: Building Depth
-
Wait for dampness:
Wait until the first layer is no longer shiny but feels cool to the touch. It shouldn’t be bone dry, but not soaking wet either. -
Darken the core shadow:
Mix a slightly thicker, more pigmented blue. Apply this in a crescent moon shape along the bottom right curve of the sphere, known as the core shadow. -
Reflected light:
Crucially, lift your brush before you reach the very bottom edge of the circle. Leave a tiny rim of lighter blue at the bottom edge to represent reflected light bouncing off the table. -
Blend again:
Using a clean, damp brush, soften the inner edge of this darker blue crescent so it blends softly back toward the middle of the sphere.
Level Up: Color Temperature
Make the shadow more realistic by adding a tiny touch of complementary color (orange) to the blue shadow mix. This desaturates the blue, making it look deeper and more shadow-like.
Step 4: The Cast Shadow
-
Base shadow layer:
While the sphere dries completely, mix a medium-strength blue wash. Paint the entire cast shadow shape you sketched earlier, ensuring a hard edge against the white paper but a soft connection where it touches the object. -
Ocean of color:
Ensure the shadow wash is uniform and flat for now. Try to fill the shape quickly so the edges don’t dry before you are finished. -
Deepening the occlusion:
While the cast shadow is still wet, drop highly concentrated (thick) blue pigment right underneath the sphere where it touches the ground. This is the occlusion shadow, the darkest point of the painting. -
Softening the tail:
Clean your brush and gently run it along the furthest edge of the cast shadow. This softens the shadow as it gets further away from the object, enhancing realism.
Step 5: Final Adjustments
-
Assess the contrast:
Once everything is fully dry, evaluate your sphere. Does it look round? If the transition is too abrupt, you can add a very faint glaze of clear water to blend edges. -
Enhance the reflected light:
If your reflected light rim got too dark, take a stiff, damp brush (a ‘thirsty brush’) and gently scrub the bottom edge of the sphere to lift some pigment away. -
Final dry:
Allow the paper strictly to air dry flat to prevent warping. Erase any visible pencil marks around the highlight only after the paper is bone dry.
Start with this simple shape, and soon you’ll be applying these same shading principles to apples, faces, and landscapes
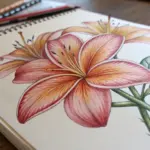

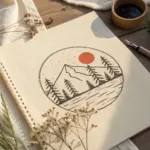
Sunset Gradient With Silhouette Trees
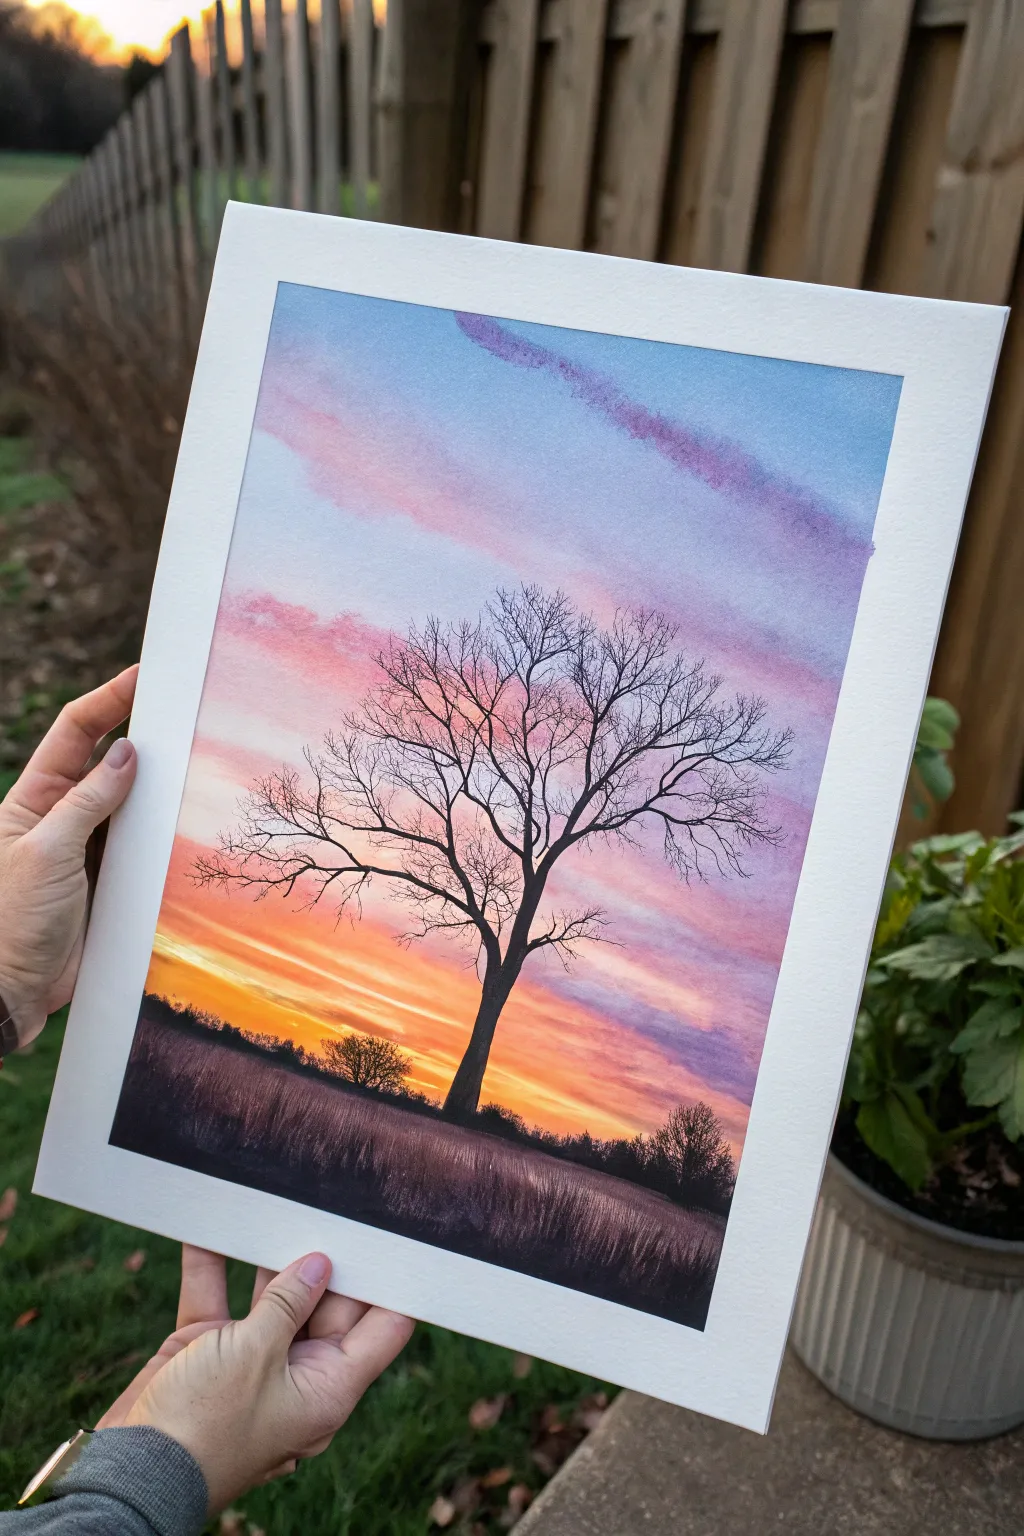
Capture the stark beauty of a winter evening with this vibrant watercolor landscape featuring a leafless tree against a dramatic sunset. The interplay of soft, blended sky gradients and crisp black silhouettes creates a striking contrast that looks more complicated than it actually is.
Step-by-Step Tutorial
Materials
- Cold press watercolor paper (140lb/300gsm)
- Painter’s tape or masking tape
- Watercolor paints (Indigo, Purple/Violet, Alizarin Crimson, Orange, Cadmium Yellow, Lamp Black)
- Large flat wash brush (1 inch)
- Round brushes (sizes 6 and 2 for details)
- Rigger or liner brush (optional, for branches)
- Two jars of water (clean and dirty)
- Paper towels
- Pencil and eraser
- Hairdryer (optional)
Step 1: Preparation and Sketching
-
Secure the paper:
Tape your watercolor paper down firmly to a board or table on all four sides. This creates that clean, professional white border shown in the final piece and prevents the paper from buckling when wet. -
Establish the horizon:
Using a pencil, lightly draw a horizon line about one-quarter of the way up from the bottom. It doesn’t need to be perfectly straight; a slight unevenness adds realism to the field. -
Outline the tree:
Very faintly sketch the main trunk of the tree. Don’t worry about the tiny branches yet, just place the main vertical shape and the primary limbs to ensure your composition is centered.
Fixing “Cauliflowers”
If jagged watermarks appear in your sky, you added water to damp paint. Fix it by gently scrubbing the edge with a damp stiff brush, or camouflage it deeper into the clouds.
Step 2: Painting the Sky Gradient
-
Wet the sky area:
Using your large flat brush and clean water, wet the entire paper surface *above* the horizon line. You want an even sheen, not puddles. -
Apply the blue top:
Load your brush with a watery mix of Indigo or a cool blue. Paint a strip across the very top of the paper, letting the color bleed downward naturally into the wet paper. -
Introduce the clouds:
While the paper is still wet, mix a soft violet. Using horizontal strokes, streak this purple across the upper middle section, allowing it to touch the blue but keeping distinct cloud-like bands. -
Transition to warm tones:
Wash your brush thoroughly. Pick up Alizarin Crimson (pink) and paint horizontal bands below the purple. Notice how the colors start to blend softly where they meet; encourage this soft transition. -
Add the sunset glow:
Moving downward, switch to Orange and then finally Cadmium Yellow right above the horizon line. The yellow should be your brightest point. -
Intensify stripes:
While the wash is still damp, you can carefully drop in slightly more concentrated purple or pink into the cloud bands to create depth, but be careful not to overwork it. -
Let it dry completely:
This is crucial. The paper must be bone dry before moving on. Use a hairdryer continuously moving across the surface if you’re impatient.
Level Up: Starry Night
Wait for the sky to dry completely, then load a toothbrush with white gouache. Flick the bristles to spray tiny stars over the purple and blue sections for a twilight effect.
Step 3: Creating the Foreground
-
Base layer for the field:
Mix a dark purple-brown color. Paint the area below the horizon line. It doesn’t need to be solid black yet; a dark, moody wash sets the foundation for the shadows. -
Add grass texture:
While the ground layer is damp, drop in concentrated black or dark indigo along the bottom edge and flick your damp brush upward slightly to suggest tall grasses catching the failing light.
Step 4: Painting the Silhouette
-
Paint the trunk:
Switch to a size 6 round brush and load it with opaque Lamp Black paint. Paint the main trunk of the tree, ensuring the base is slightly wider where it meets the ground. -
Add main branches:
Extend the trunk into thick primary branches. Remember that tree branches generally taper—they get thinner the further they grow from the center. -
Create the branch network:
Switch to your size 2 brush or a liner brush. Paint secondary branches growing from the main ones, reaching upward and outward. Use a light touch. -
Detail twigs:
Fill in the gaps with very fine, wispy twigs. I find that holding the brush loosely near the end of the handle helps create those natural, jittery organic lines for the smallest ends. -
Add distant shrubbery:
Using the side of your brush or a scruffy old brush, dab small, irregular black shapes along the horizon line to represent distant bushes or a treeline.
Step 5: Final Touches
-
Refine the foreground:
Once the main tree is dry, use a dry-brush technique with black paint to add texture to the grassy field, specifically under the huge tree to anchor it. -
Reveal the border:
Once you are certain the entire painting feels dry to the back of your hand, slowly peel away the masking tape at a 45-degree angle to reveal your crisp white edges.
Step back and admire how the simple black silhouette transforms a colorful background into a believable evening scene


Full Moon With Crater Texture
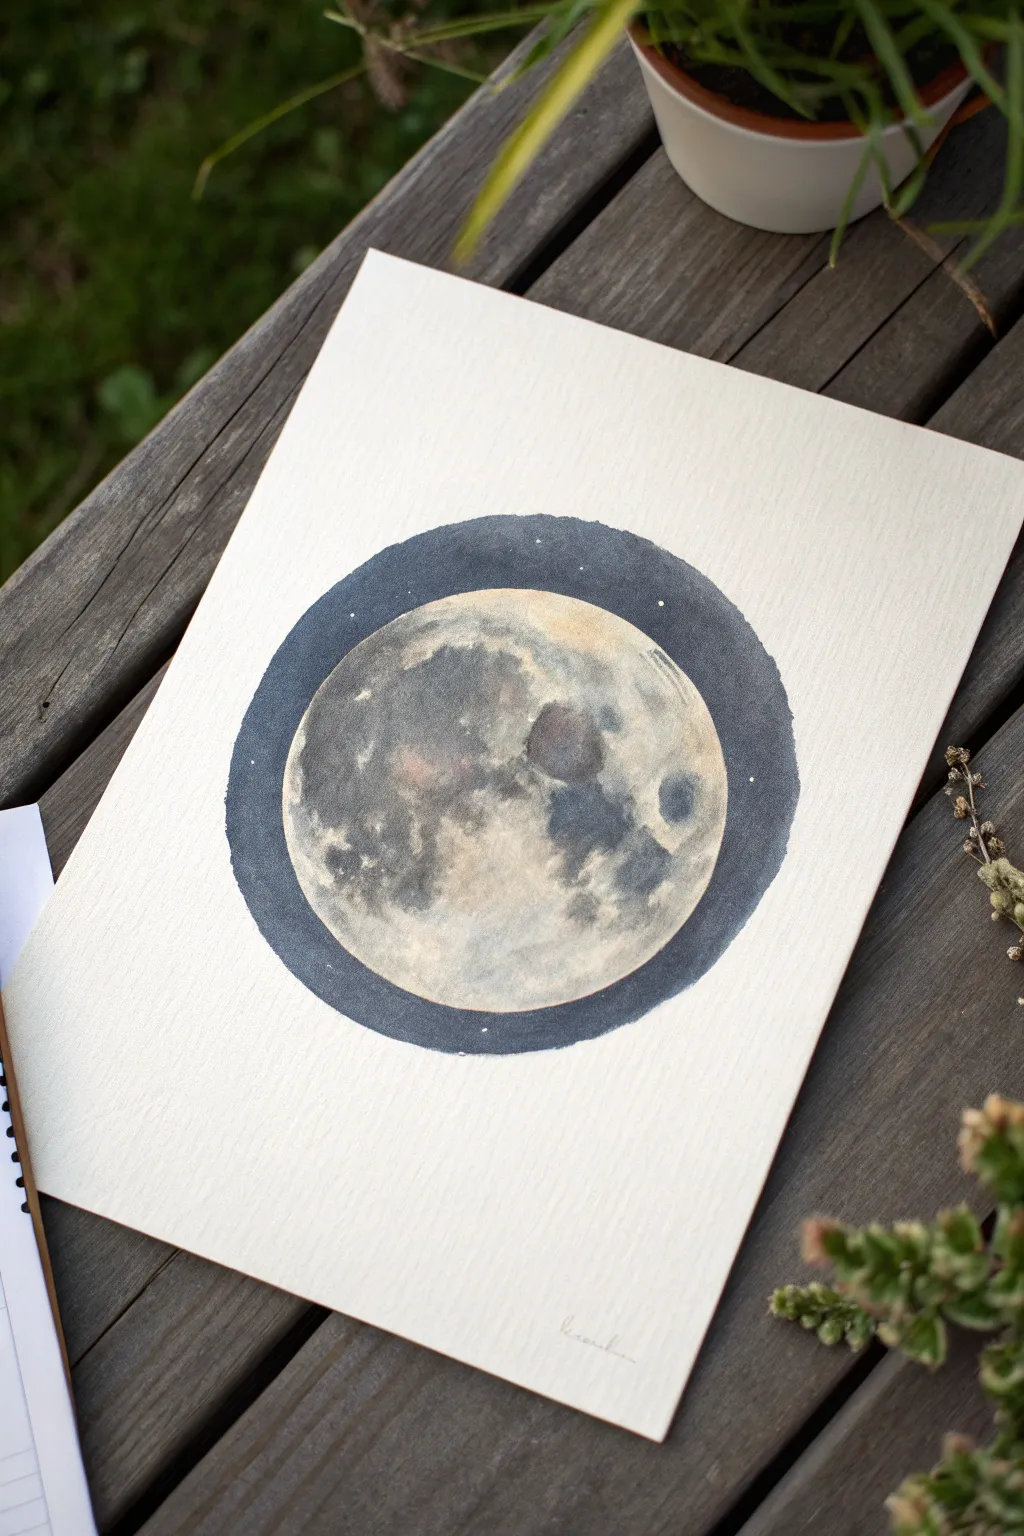
Capture the mysterious beauty of the night sky with this textured watercolor study of a full moon. By layering washes and using wet-on-wet techniques, you will create craggy craters and soft lunar plains framed by a deep starry halo.
Step-by-Step
Materials
- Cold press watercolor paper (300 gsm)
- Watercolor paints (Payne’s Grey, Yellow Ochre, Burnt Umber, Ultramarine Blue)
- White gouache or white gel pen
- Round brushes (sizes 4 and 8)
- Compass or two round objects (one slightly larger than the other)
- Pencil and kneaded eraser
- Paper towels
- Clean water jar
Step 1: Drafting the Layout
-
Establish the boundaries:
Begin by lightly tracing a large circle in the center of your paper using a compass or a bowl. This outer line will define the edge of the dark halo. -
Define the moon:
Inside the first circle, trace a slightly smaller concentric circle. The space between these two lines creates the border for your starry background, while the inner circle becomes the moon itself. -
Lighten the guides:
Roll your kneaded eraser gently over the pencil lines until they are just barely visible. Watercolor is transparent, so heavy graphite lines will show through the final painting.
Pro Tip: Salt Texture
While the grey paint on the moon is still wet, sprinkle a few grains of table salt onto the dark areas. Brush it off when dry for an incredible natural pitted texture.
Step 2: Painting the Lunar Surface
-
Wet the surface:
Using your larger brush and clean water, dampen the entire inner circle (the moon). Be careful not to let the water puddle; you want a satin sheen, not a swimming pool. -
Apply the base glow:
While the paper is wet, drop in a very dilute wash of Yellow Ochre in random patches. This creates the subtle, warm glow often seen on the moon’s surface. -
Start the craters:
Mix a watery grey using Payne’s Grey and a touch of Ultramarine Blue and dab it into the wet surface. Let the paint bloom naturally to form soft, indistinct shapes. -
Deepen the shadows:
While the first layer is still damp, mix a darker, thicker concentration of Payne’s Grey and Burnt Umber. Use the tip of your smaller brush to drop this into areas where you want distinct craters or ‘maria’ (the dark plains). -
Lift for texture:
If an area looks too dark or uniform, use a thirst (clean, slightly damp) brush or the corner of a paper towel to lift pigment away. This negative painting technique brilliantly mimics crater rims. -
Create distinct impact zones:
Wait for the paper to reach a semi-dry state (cool to the touch but no longer shiny). Paint a few small, defined circles with your dark grey mix, then soften just one edge of the circle with a clean wet brush to create dimension. -
Dry completely:
Let the moon dry entirely before moving on. I like to confirm it’s dry by holding the paper up to the light to check for any glistening wet spots.
Troubleshooting: Cauliflowers
If jagged ‘blooms’ appear (back-runs), you added too much water to semi-dry paint. Don’t panic; embrace them as extra ridges on the lunar surface.
Step 3: The Starry Halo
-
Mix the night sky:
Prepare a rich, saturated mixture of Payne’s Grey with a little Ultramarine Blue. Test it on a scrap paper; it should be dark and opaque, almost like ink. -
Paint the border:
Carefully paint the ring between your two pencil circles. Use the tip of your brush to get a crisp edge against the moon, but allow the outer edge of the ring to be slightly rough for an organic feel. -
Smooth the wash:
Work quickly around the circle to ensure the paint doesn’t dry in streaks. If you have enough water in your brush, the color should settle into a flat, matte finish. -
Add the stars:
Once the dark border is bone dry, use a white gel pen or a fine brush with white gouache to dot tiny stars into the dark halo. -
Final highlights:
Add a few tiny specks of white to the brightest sides of your crater rims inside the moon to enhance the 3D effect.
Step back and admire your personal piece of the cosmos, beautifully textured and glowing within its frame


Have a question or want to share your own experience? I'd love to hear from you in the comments below!