A smooth river rock is basically a tiny, palm-sized canvas—and I love how quickly you can turn it into something adorable or stunning. Grab a handful of stones and let me share my favorite river rock painting ideas that go from super simple to total showstoppers.
Classic Ladybug River Rocks
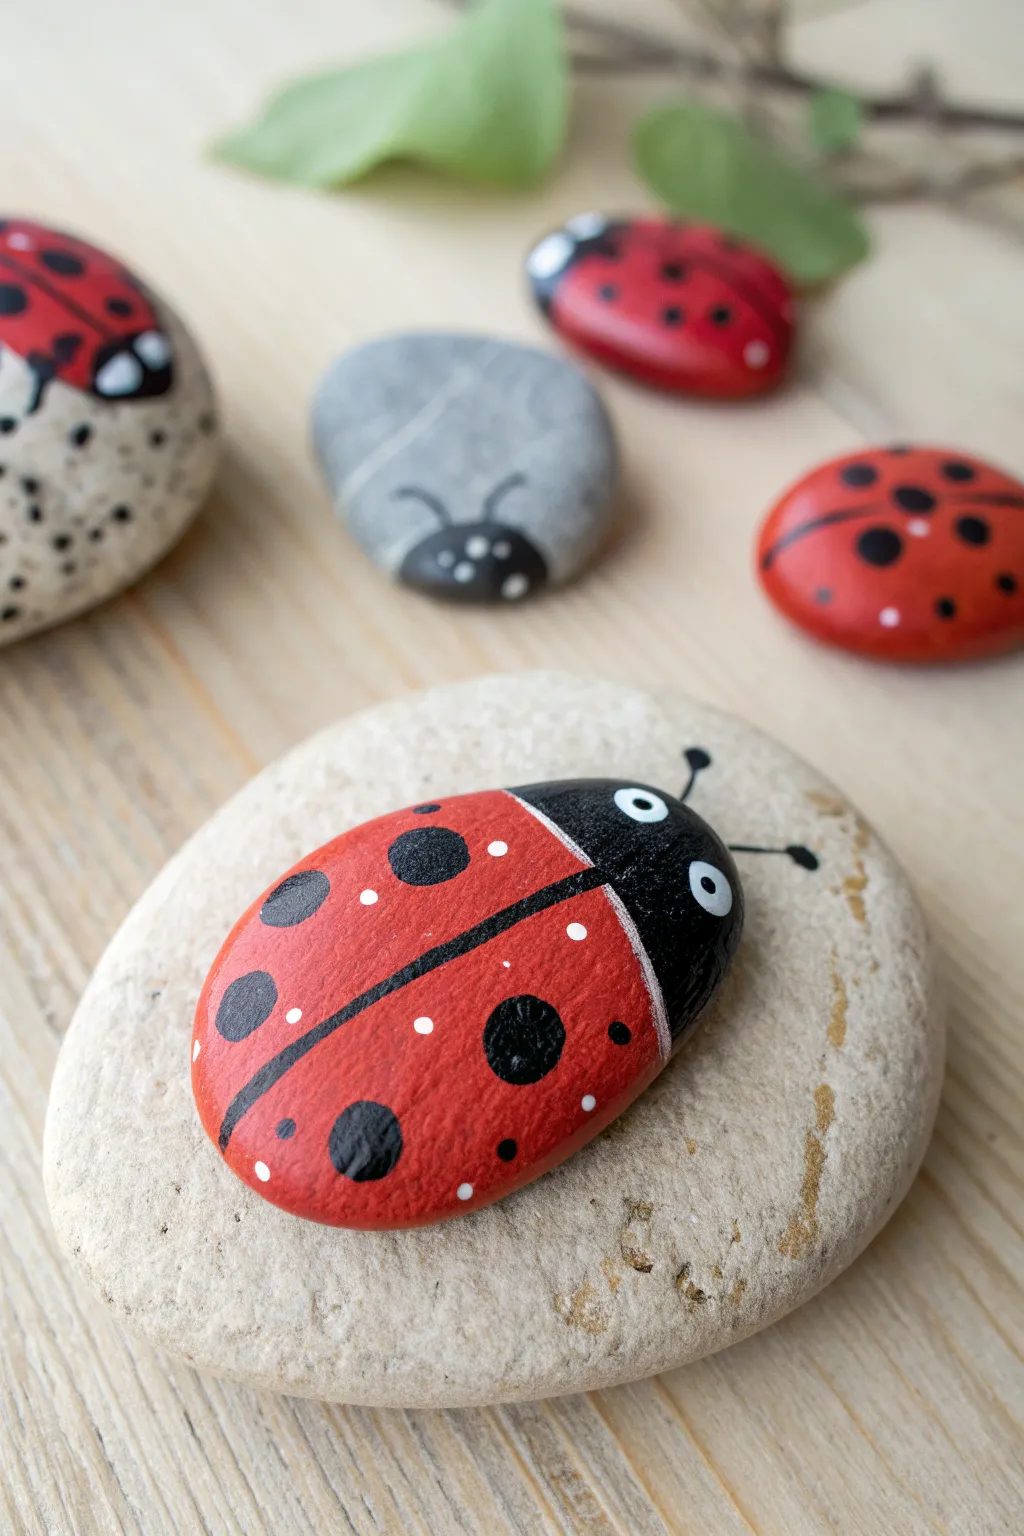
Transform smooth river stones into charming garden insects with this classic ladybug design. The bright red wings and bold black spots create a striking contrast that looks adorable nestled among potted plants or sitting on a windowsill.
How-To Guide
Materials
- Smooth, oval river rocks (various sizes)
- Red acrylic paint (bright scarlet or crimson)
- Black acrylic paint
- White acrylic paint
- Flat paintbrush (medium size)
- Small fine-liner detail brush
- Dotting tool or toothpick
- Pencil
- Clear acrylic sealant (matte or glossy)
- Water cup and paper towels
Step 1: Base Coat & Preparation
-
Clean the rocks:
Before you begin, scrub your river rocks with warm soapy water and let them dry completely to ensure the paint adheres properly. -
Sketch the outline:
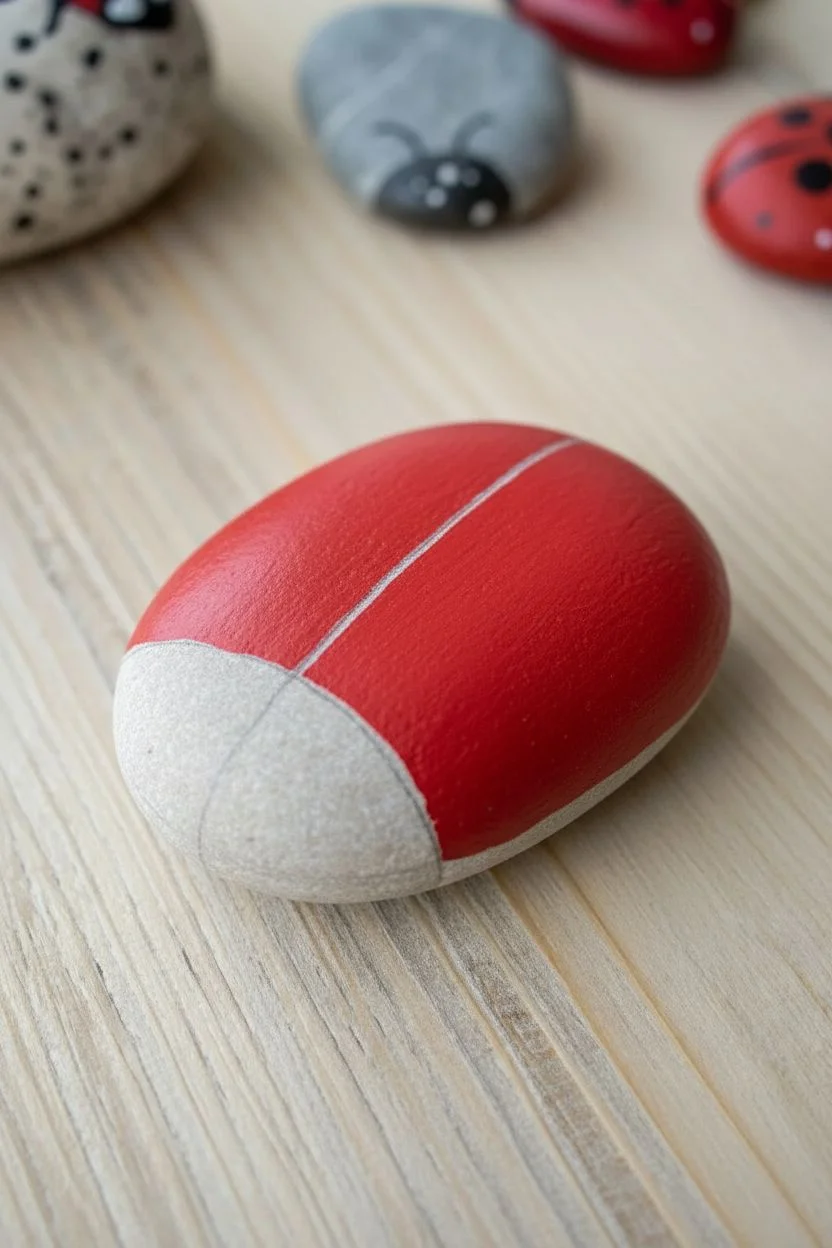
Using a pencil, lightly draw a curved line across the front third of the rock to separate the head from the body. -
Draw the wings divider:
Draw a straight line down the center of the body section to mark where the wings will separate. -
Paint the wings base:
Fill in the larger body section with your bright red acrylic paint, using a flat brush for smooth coverage. -
Let it dry:
Allow the red layer to dry completely. If the rock’s natural color shows through, apply a second coat for opacity.
Uneven Spots?
If your painted dots look lumpy or have peaks in the center, tap the bottom of the rock gently on the table while the paint is wet to help it settle flat.
Step 2: Adding Details
-
Paint the head:
Fill in the smaller front section with black acrylic paint, carefully following your curved pencil line. -
Create the dividing line:
Using a fine-liner brush and black paint, trace over the center line down the red body to separate the wings. -
Add the pronotum:
Thicken the black line slightly where the head meets the red body to create a distinct separation. -
Paint large spots:
Dip a medium-sized dotting tool or the back of a paintbrush into black paint to stamp a few large, round spots onto the red wings. -
Add medium spots:
Use a smaller tool to add medium-sized black dots around the larger ones, keeping the distribution random but balanced. -
Paint the eyes:
Once the black head is dry, use a clean dotting tool to place two white circles on the sides of the head for eyes. -
Refine the eyes:
Add tiny black pupils inside the white eye circles using the very tip of your fine brush or a toothpick.
Stone Selection
Choose rocks that are naturally oval and slightly domed on top. Flat, thin skipping stones won’t give you the nice 3D beetle shape shown in the photo.
Step 3: Finishing Touches
-
Add white highlights:
Dip a toothpick into white paint and add tiny specks scattered between the black spots on the red wings for texture. -
Detail the head:
If desired, paint two thin black antennae curved slightly backward originating from the front of the head. -
Clean up edges:
Check the perimeter of your ladybug; if any red or black paint smeared onto the unpainted bottom of the rock, wipe it or paint over it. -
Dry thoroughly:
Let the entire rock sit for several hours to ensure all layers of thick paint are fully cured. -
Seal the artwork:
Apply a coat of clear acrylic sealant over the painted surface. I like to use a glossy finish here to make the ladybug look like a shiny beetle shell.
Place your finished ladybugs in a group to create a cute family scene in your garden


Bumblebee River Rock Stripes
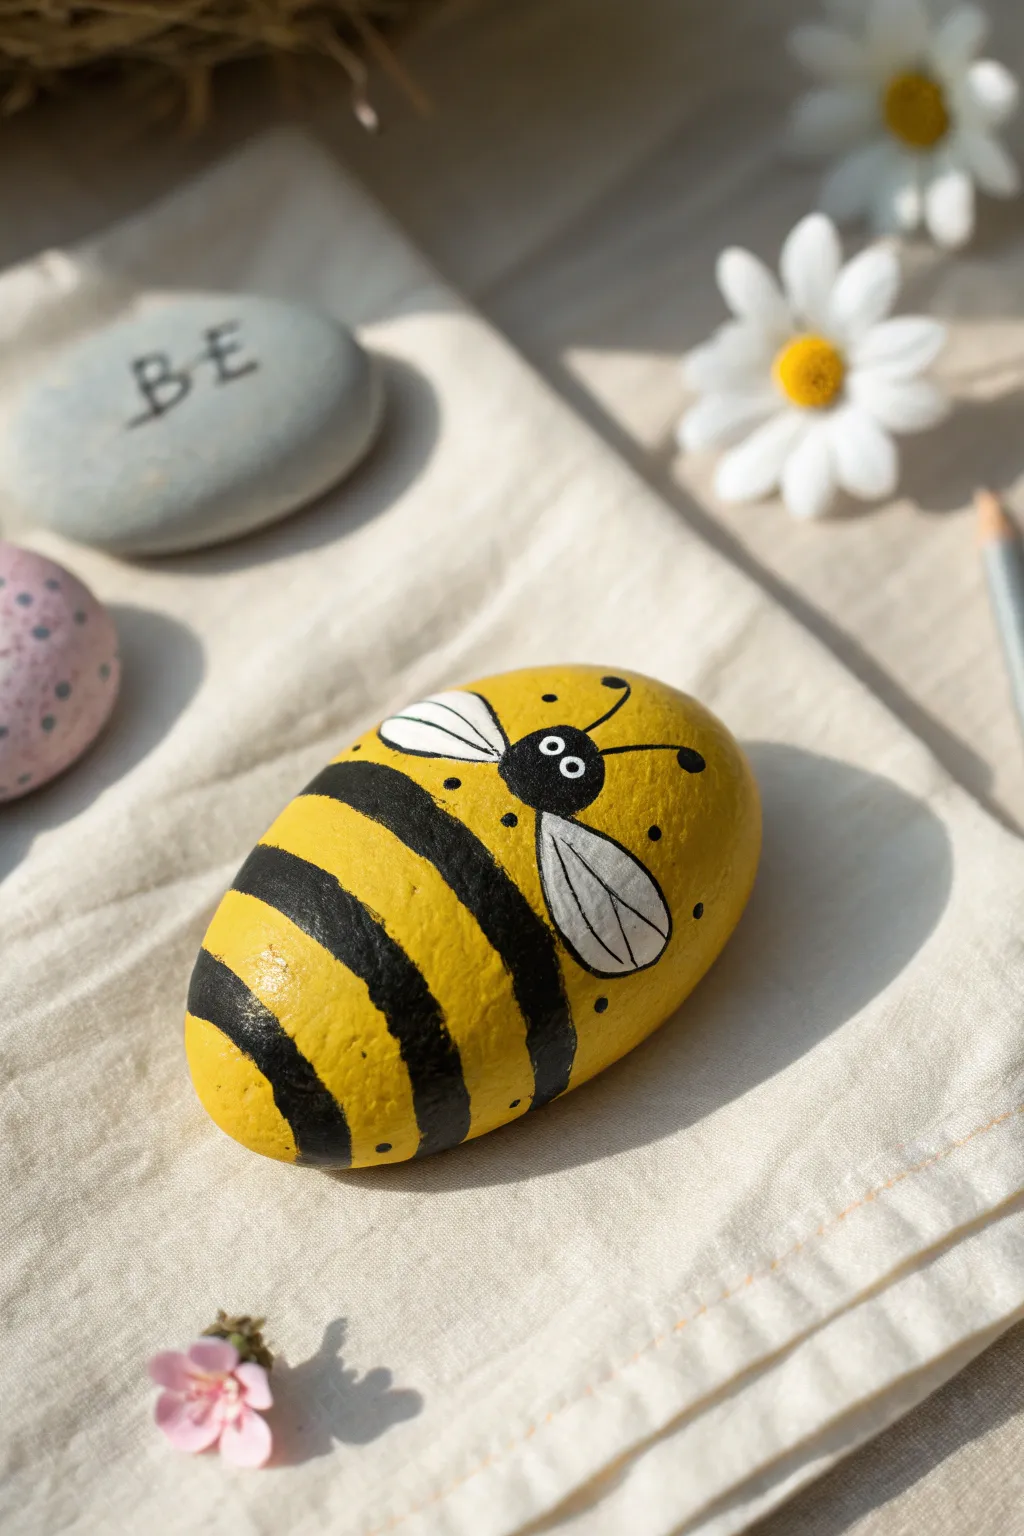
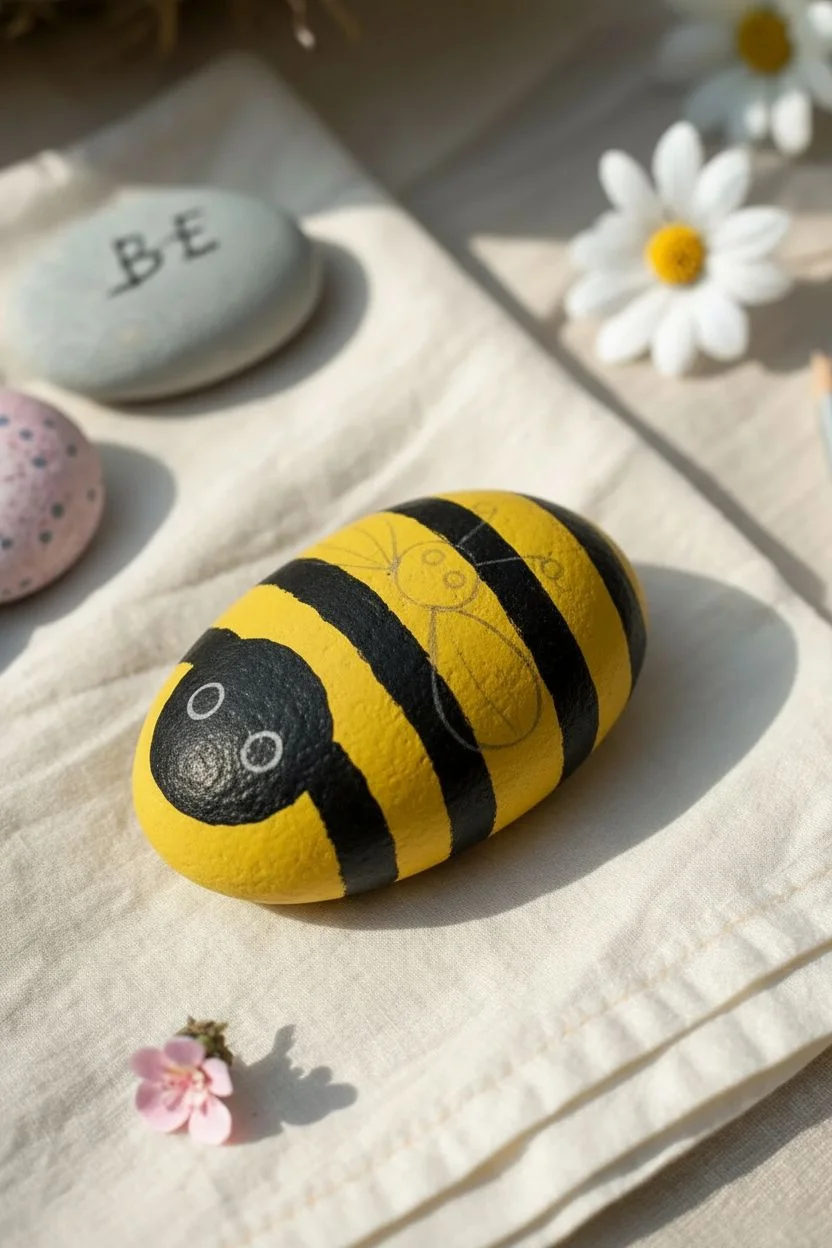
Transform a smooth, oval river stone into a cheerful bumblebee with just a few colors of paint. This adorable garden companion features bold black stripes and delicate white wings, perfect for brightening up a flower bed or a desk.
Step-by-Step Tutorial
Materials
- Smooth oval river rock (about palm-sized)
- Yellow acrylic paint (bright, sunny shade)
- Black acrylic paint
- White acrylic paint
- Paintbrushes: flat (medium) and round (fine detail)
- Pencil
- Dotting tool or toothpick
- Acrylic sealer or varnish (optional but recommended)
Step 1: Base and Body
-
Clean the canvas:
Begin by washing your river rock with warm soapy water to remove any dirt or oils. Let it dry completely in the sun or with a towel. -
Yellow foundation:
Paint the entire top surface of the rock with bright yellow acrylic paint. You may need two or three coats to get a solid, opaque coverage. -
Allow to dry:
Wait between each yellow coat until the paint is visibly dry to prevent lifting the previous layer. -
Sketch the stripes:
Once the yellow base is fully hardened, lightly use a pencil to mark where your black stripes will go. Draw two curved lines for the body stripes and one curved line at the tail end. -
Outline the head:
Lightly sketch a circle near the front of the rock (the ‘head’) where the eyes will eventually go. This area will also be painted black. -
Paint the stripes:
Using a medium round brush and black paint, fill in the striped areas you marked. Try to follow the curve of the rock to make the bee look round and plump. -
Fill the head:
Paint the circular head area black. Don’t worry about the eyes yet; we need this black circle to be the background. -
Refine the edges:
Go back over your black lines with a thinner brush if the edges look uneven. Crisp lines make the design pop.
Paint Pens Work Wonders
If you struggle with brush control for fine lines, use acrylic paint pens for the antennae and wing veins. They offer marker-like precision.
Step 2: Wings and Face Details
-
Sketch the wings:
Lightly pencil in two teardrop shapes for wings. Position one wing overlapping the first body stripe and the other slightly behind it on the opposite side. -
Paint wings white:
Fill in your wing shapes with white acrylic paint. Since you are painting over yellow and black, you will almost certainly need 2-3 coats for pure whiteness. -
Wing outlines:
Once the white wings are bone dry, use your finest brush (or a super-fine paint marker) and black paint to outline the teardrop shapes. -
Wing veins:
Add a straight line down the center of each wing, then paint tiny diagonal V-shapes branching off it to create the vein texture. -
Create the eyes:
Using a dotting tool or the handle end of a paintbrush dipped in white paint, place two small dots inside the black head circle to form the eyes. -
Add pupils:
When the white dots are dry, use a toothpick with a tiny amount of black paint to add the pupils in the center of the white circles. -
Antennae:
Paint two thin, curved lines extending from the top of the head area for antennae, finishing them with small dots at the tips. -
Cute details:
Using your finest tool, add tiny black dots around the body on the yellow sections for extra texture and charm.
Glittery Wings
Mix a tiny pinch of iridescent glitter into your white paint for the final coat on the wings to make them sparkle in the sunlight.
Now your buzzing little friend is ready to be sealed and placed in the garden to keep your flowers company


Simple Heart Pattern River Rocks
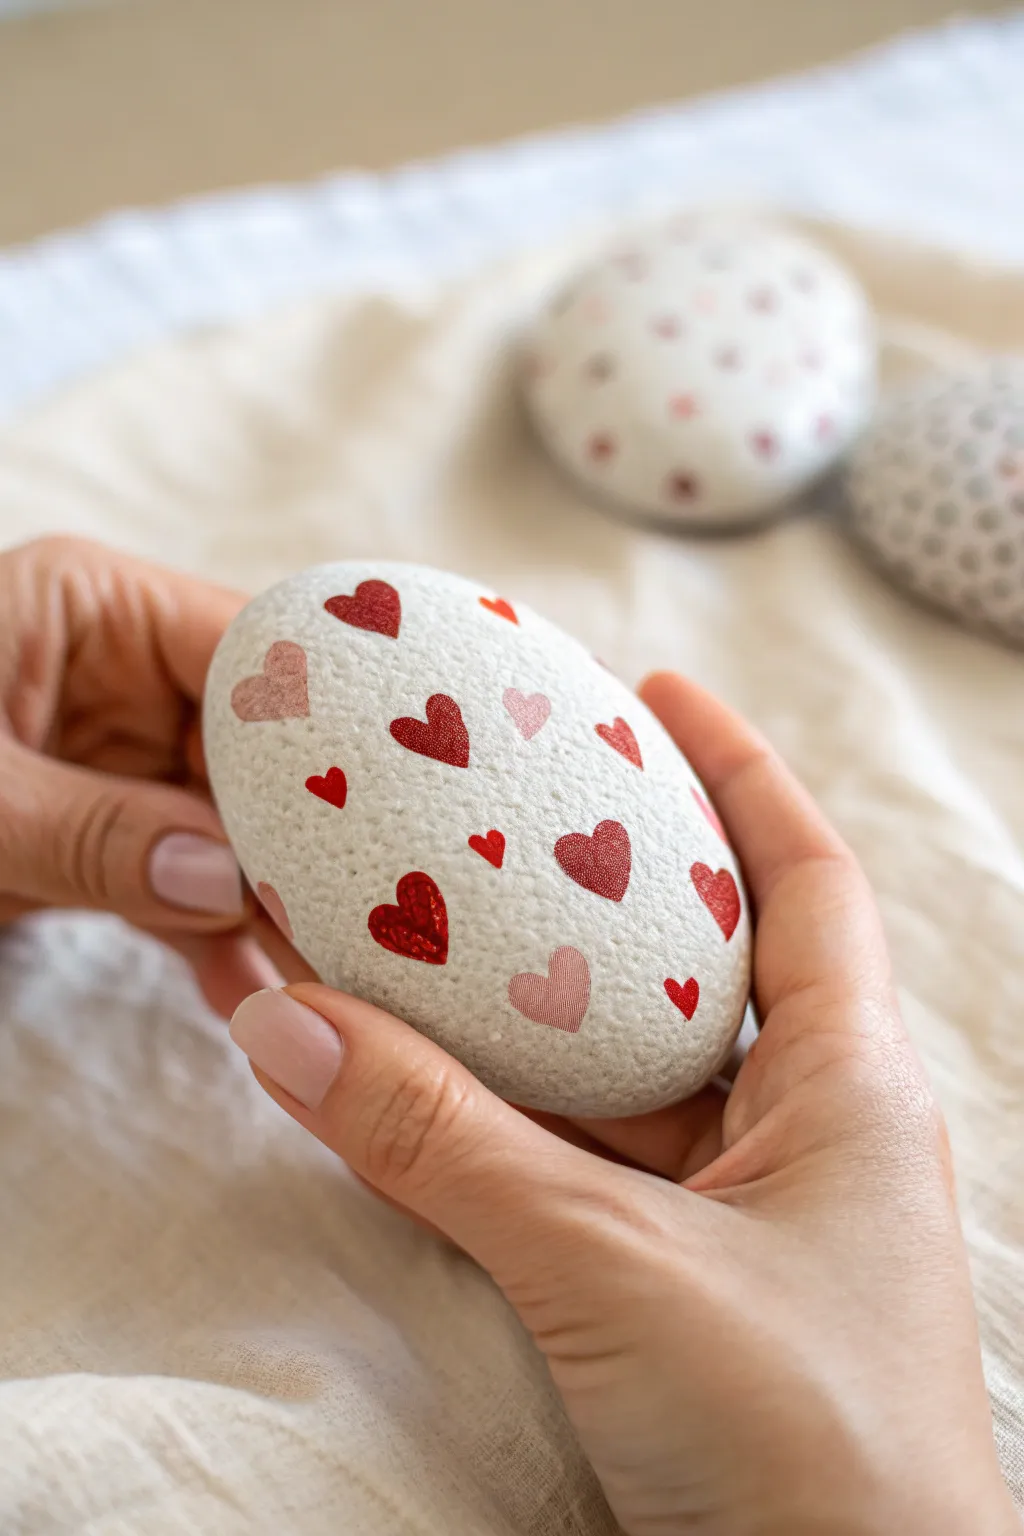
Transform a smooth, plain river rock into a delightful token of affection with this minimalist heart pattern. The contrast of the bright red and soft pink hearts against the white stone creates a clean, modern look perfect for Valentine’s Day or simply to brighten a desk.
How-To Guide
Materials
- Smooth river rock (preferably white or very light grey)
- White acrylic paint (matte finish)
- Wide flat paintbrush
- Heart stickers (various sizes, red and pink) OR Temporary tattoo paper/decals
- Mod Podge (matte or gloss)
- Foam brush
- Tweezers (optional, for precise placement)
- Clear acrylic sealer spray (optional)
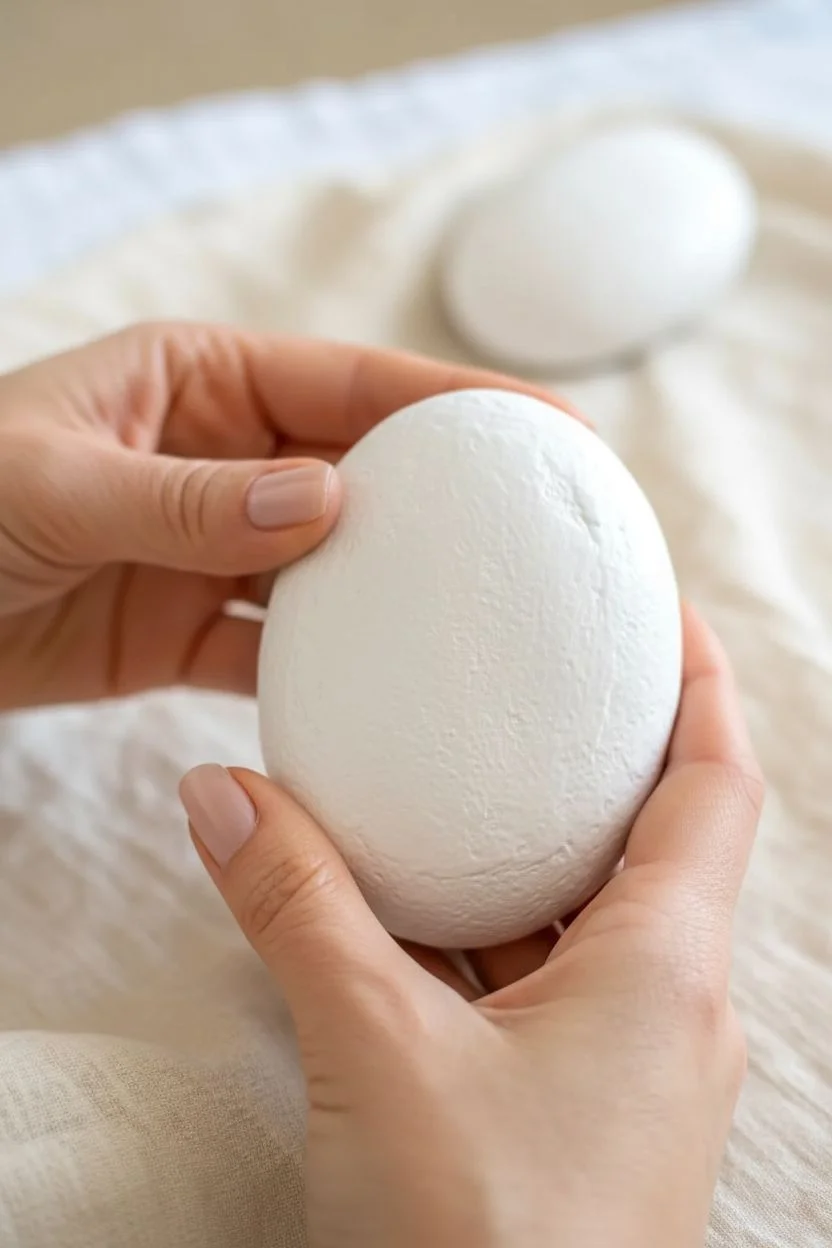
Step 1: Preparing the Canvas
-
Clean the stone:
Begin by thoroughly washing your river rock with warm soapy water. Scrub away any dirt or grit with an old toothbrush and let it dry completely before starting. -
Apply the base coat:
Using a wide flat brush, apply a layer of white matte acrylic paint to the entire surface of the rock. Even if the rock is already light, this creates a uniform canvas. -
Dry and repeat:
Allow the first coat to dry for about 15-20 minutes. Apply a second coat to ensure solid opacity, covering any natural dark spots in the stone. -
Check for smoothness:
Once fully dry, run your finger over the surface. If there are brush strokes, you can lightly sand them down with fine-grit sandpaper for a perfectly smooth finish.
Stickers Won’t Stick?
If stickers peel off the painted surface, the paint might be too chalky. Apply a very thin layer of Mod Podge first, stick the hearts on while it’s tacky, then seal over top.
Step 2: Designing the Pattern
-
Plan your spacing:
Visualize where your hearts will go. A random scatter pattern often looks more organic and pleasing than rigid rows. -
Select your hearts:
Choose a mix of sizes and shades. You want a balance between the bright red focal points and the softer pink accents. -
Place the first anchor heart:
Peel off a medium-sized red heart sticker. Place it slightly off-center on the front of the rock to serve as your starting point. -
Add secondary hearts:
Position two or three pink hearts around the red one, keeping generous space between them. I find tweezers helpful here to avoid getting oils from my fingers on the adhesive. -
Fill the gaps:
Continue adding smaller hearts in the empty spaces. Rotate the orientation of a few hearts slightly so they aren’t all perfectly vertical, adding a sense of movement. -
Wrap around edges:
Place a few hearts near the sides where the rock curves away. This makes the design look continuous rather than just stamped on the front face.
Glitter Glam
Before sealing, dab a tiny bit of glue on one or two red hearts and sprinkle with fine red glitter to add texture and sparkle to your design.
Step 3: Sealing and Finishing
-
Smooth the edges:
Press down firmly on all stickers, paying special attention to the edges. You want to ensure there are no air bubbles or lifted corners. -
Prepare the sealant:
Pour a small amount of Mod Podge onto a palette or paper plate. A matte finish looks natural, while gloss gives it a ceramic look. -
Apply the first seal:
Using a clean foam brush, apply a thin, even layer of Mod Podge over the entire top surface. Do this gently to avoid catching the edges of the stickers. -
Let it cure:
Allow this layer to dry clear, which usually takes about 20-30 minutes. Don’t rush this step or the finish might remain tacky. -
Second coat:
Apply a second layer of Mod Podge for durability. This ensures the stickers won’t peel up over time. -
Final dry:
Let the rock cure overnight in a dust-free area.
Enjoy displaying your lovely hand-decorated stone on a shelf or gifting it to someone special


Daisy Meadow River Rocks

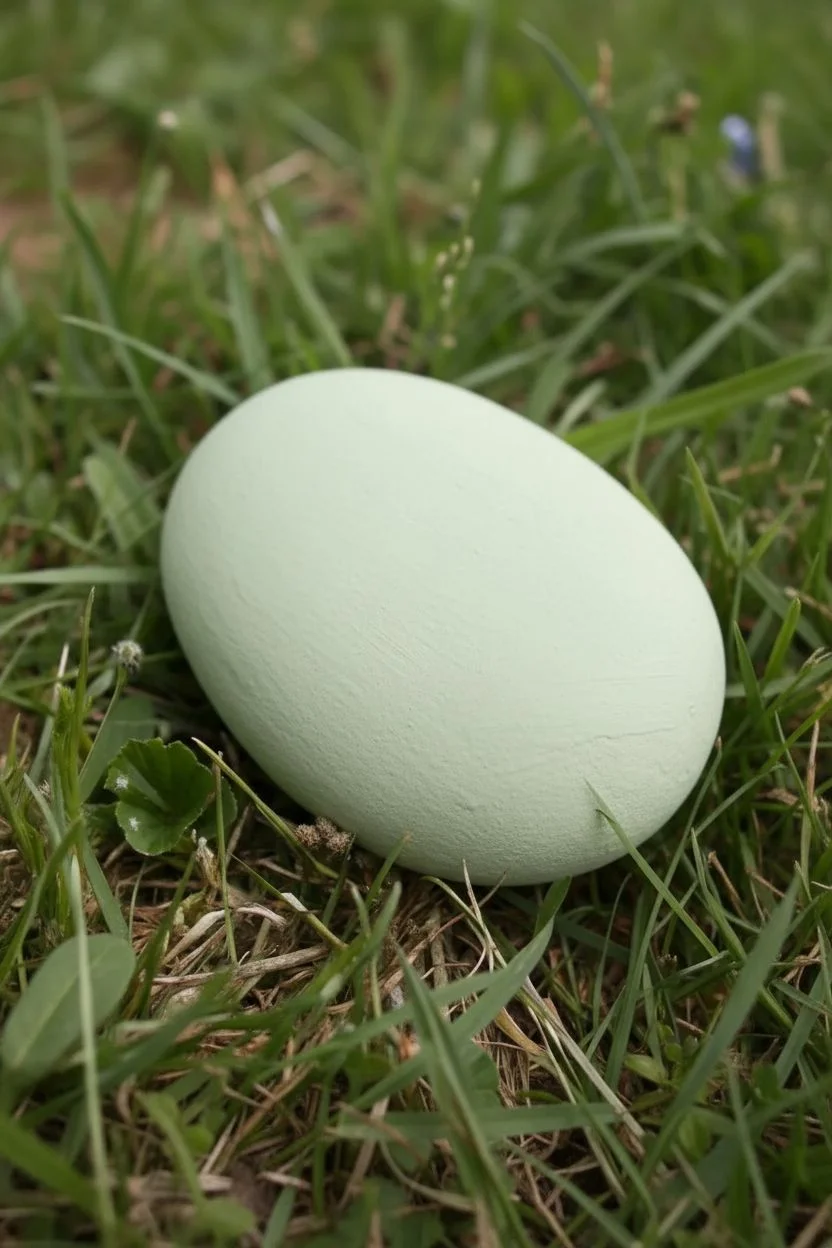
Capture the fresh, hopeful feeling of spring with this soft pastel rock design. Featuring delicate white daisies on a muted green background, this project transforms a simple river stone into a permanent piece of garden art.
Step-by-Step Tutorial
Materials
- Smooth, oval river rock (palm-sized)
- Acrylic craft paints (Pale Sage Green, Titanium White, Bright Yellow, Leaf Green, Olive Green)
- Wide flat paintbrush (approx. 1 inch)
- Small round paintbrush (size 2 or 3)
- Fine liner brush (size 0 or 00)
- Matte or satin sealant spray
- Water cup and paper towels
- Palette or paper plate
Step 1: Preparing the Canvas
-
Clean the surface:
Begin by thoroughly washing your river rock with warm soapy water to remove any dirt or grease. Dry it completely before moving on to painting. -
Base coat application:
Squeeze out a generous amount of Pale Sage Green paint. Using your wide flat brush, cover the entire top and sides of the rock. Don’t worry about the bottom just yet. -
Smooth the texture:
While the first coat is still wet, smooth out any heavy brushstrokes. You want a creamy, even background that feels soft like grass. -
Apply a second layer:
Once the first layer is dry to the touch (usually about 15-20 minutes), apply a second coat of the Pale Sage Green to ensure full opacity so the dark rock doesn’t show through.
Step 2: Painting the Daisies
-
Plan your placement:
Visualize where your five main flowers will go. Place the largest blooms near the center and lower section, with slightly smaller ones near the top to create depth. -
Start the petals:
Switch to your small round brush and load it with Titanium White. For the central lower daisy, paint long, teardrop-shaped petals radiating outward from an imaginary center point. -
Vary the petal shapes:
As you paint the other daisies, vary the direction of the petals. Some flowers should look like they are facing fully forward (round shape), while others might look slightly tilted (oval shape). -
Double coat the white:
White paint is notoriously translucent. I find it usually needs a second pass over each petal once the first layer dries to make them pop against the green background. -
Add the yellow centers:
Dip the tip of your round brush into Bright Yellow paint. Dab a textured circle into the center of each flower. -
Create texture in the center:
While the yellow is wet, you can tap it lightly with the clean end of a brush handle or a toothpick to give it a pollen-like texture.
Uneven Petals?
Don’t stress about perfect symmetry! Real daisies have uneven, overlapping petals. Wobbly lines actually make the flowers look more organic and natural.
Step 3: Adding Greenery and Details
-
Draft the stems:
Using the fine liner brush and Leaf Green paint, draw thin, curving lines extending from the bottom of the flowers down towards the base of the rock. -
Paint the leaves:
Add simple, pointed oval leaves attached to the stems. Keep the leaves loose and organic rather than perfectly symmetrical. -
Add shadow accents:
Mix a tiny dot of Olive Green on your palette. Use this darker shade to paint a thin line along the bottom edge of a few leaves to add dimension. -
Incorporate warm foliage:
To break up the green, mix a little yellow into your green paint to create a lime-chartreuse color. Paint a few wispy blades of grass peaking out behind the flowers. -
Refine the centers:
Mix a tiny amount of brown or orange into your yellow paint. Add tiny dots to the bottom edge of the yellow flower centers to create a shadow side. -
Outline details:
If you want clearer definition, use your finest brush with watery grey paint to faintly outline strictly the separation between overlapping petals, though this is optional for a softer look.
Color Pop Tip
If your yellow centers look dull against the green, paint a small white circle first, let it dry, and then paint the yellow on top for maximum brightness.
Step 4: Finishing Up
-
Final drying time:
Allow the entire rock to dry for at least an hour. Thick blobs of paint in the flower centers may take longer than the rest. -
Seal the artwork:
Take the rock outdoors or to a well-ventilated area. Spray it with two light coats of matte or satin sealant to protect your meadow scene from the elements.
Place your lovely meadow rock in a garden bed or on a windowsill to enjoy these blooms year-round.
BRUSH GUIDE
The Right Brush for Every Stroke
From clean lines to bold texture — master brush choice, stroke control, and essential techniques.
Explore the Full Guide
Sunflower River Rock Centers
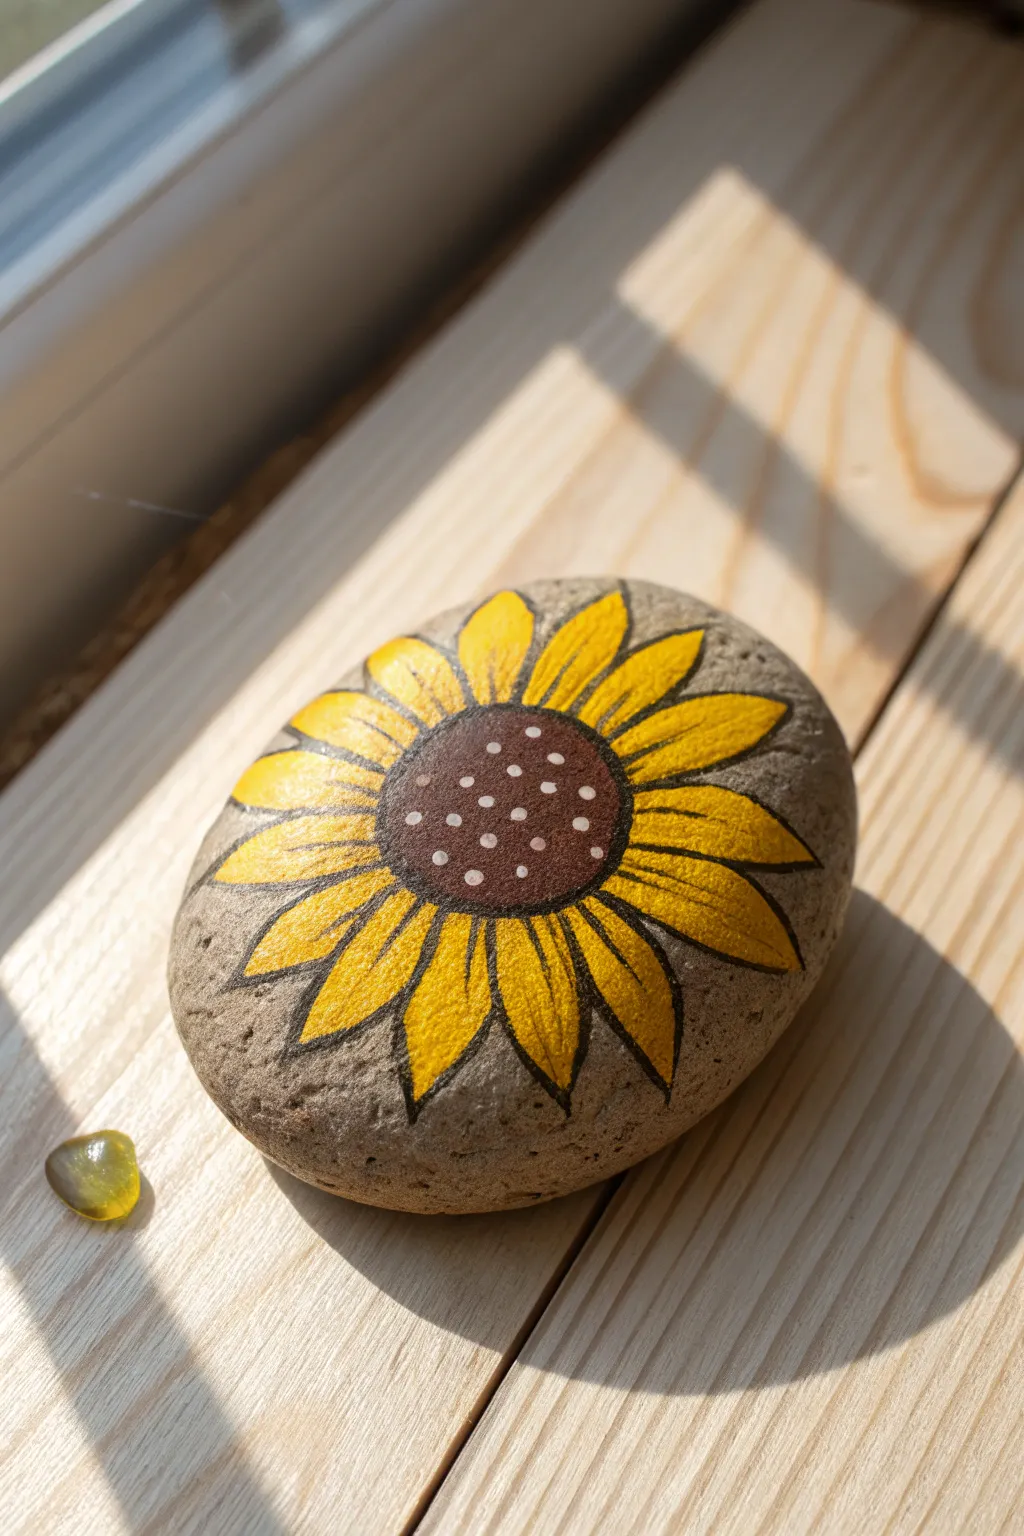
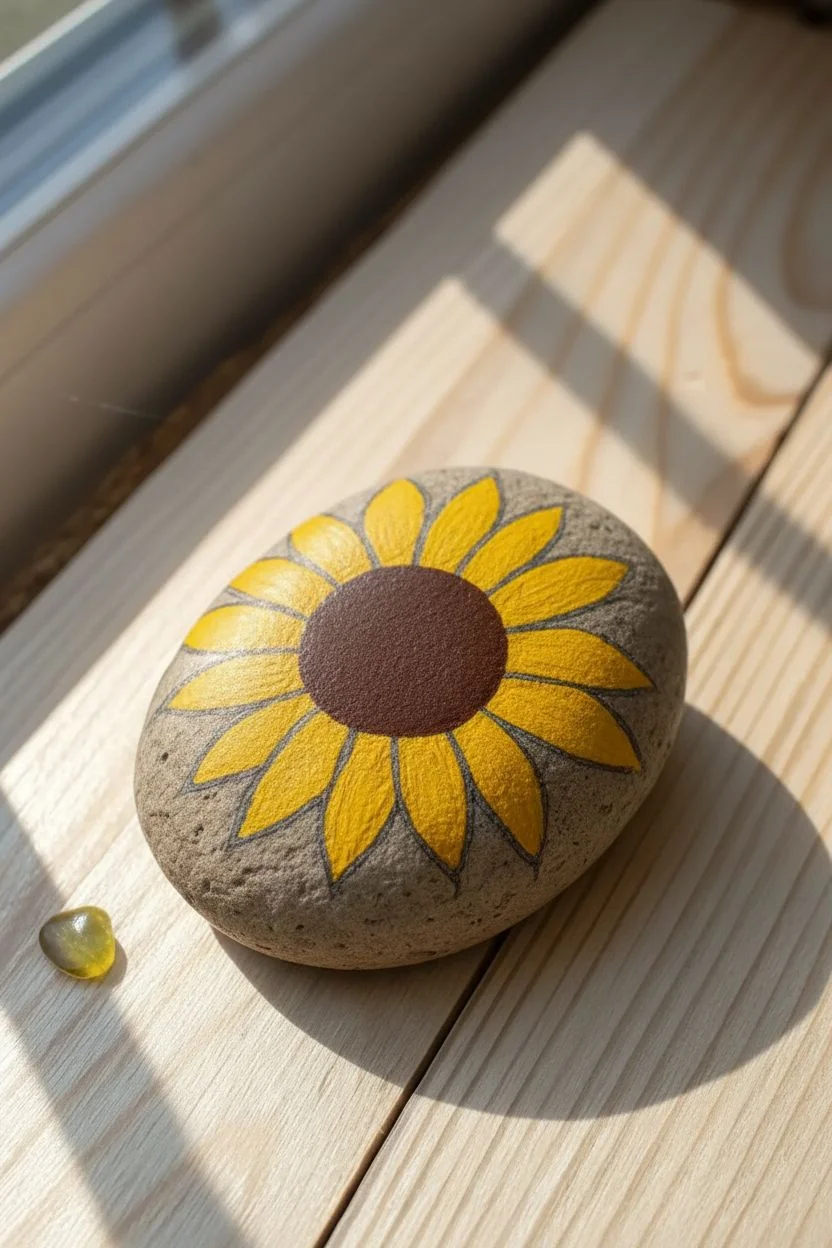
Capture the warmth of late summer with this charming hand-painted sunflower design. Using just a few acrylic colors and a steady hand, you can transform a plain river stone into a permanent bloom that brightens any windowsill.
Detailed Instructions
Materials
- Smooth, oval-shaped river rock (cleaned and dried)
- Acrylic paints (bright yellow, golden yellow, dark brown, white)
- Fine liner brush (size 0 or 00)
- Small round brush (size 2 or 3)
- Black ultra-fine paint marker or permanent ink pen
- Pencil (optional)
- Matte or satin sealant spray
Step 1: Base Layers
-
Clean the surface:
Ensure your rock is completely free of dirt and dust. Wash it with warm soapy water and let it dry fully in the sun before starting. -
Sketch the center:
Using a pencil very lightly, draw an oval or circle in the middle of the rock. This doesn’t need to be perfectly centered; an off-center placement often looks more organic. -
Paint the center shape:
Fill in your sketched circle with dark brown acrylic paint using the small round brush. Depending on the opacity of your paint, you may need two coats for solid coverage. -
Outline the petals:
With the pencil, sketch the outline of the sunflower petals radiating outward from the brown center. Make sure the petals are slightly pointed at the tips and vary slightly in width for a natural look. -
Fill the petals:
Use your bright yellow paint to fill in each petal shape. Leave a tiny gap between the yellow paint and the brown center to prevent muddying the colors while wet. -
Dry completely:
Allow the base coat of the petals to dry fully. If the rock’s natural color shows through, apply a second coat of yellow.
Pro Tip: Marker Safety
Ensure the acrylic paint is 100% dry before using a marker over it. If the paint is even slightly tacky, it will clog the nib of your pen instantly.
Step 2: Adding Detail & Depth
-
Add petal depth:
Mix a tiny amount of golden yellow or orange with your bright yellow. Paint this slightly darker shade at the base of the petals near the brown center to create a subtle shadow effect. -
Outline the center:
Once the brown paint is bone dry, use your black ultra-fine paint marker to draw a clean line around the circumference of the flower’s center. -
Outline the petals:
Continue using the black marker to outline each yellow petal. Keep the lines crisp, but don’t worry if they aren’t machine-perfect; shaky lines add character. -
Add petal texture:
Draw thin, sweeping lines inside the petals starting from the center and flicking outward. Some lines can start from the tip and flick inward. This mimics the veins of the flower. -
Layering the lines:
I prefer to vary the length of these texture lines—some short, some long—so the petals don’t look too uniform. -
Create the seeds:
Dip the back end of a paintbrush or a dotting tool into white paint. Gently stamp small dots onto the brown center. -
Refine the seeds:
Arrange the dots somewhat randomly, but keep them concentrated more towards the center, or follow a slight spiral pattern if you feel confident. -
Final touches:
Check for any yellow paint that might need a touch-up near the black outlines. Use the fine liner brush for these tiny corrections. -
Seal the artwork:
Once all paint and ink are completely cured (give it a few hours), spray the rock with a clear matte or satin sealant to protect it from chipping and fading.
Level Up: Bee Friendly
Paint a tiny bumblebee resting on one of the petals. Use a small dot of black for the body, yellow stripes, and two translucent white teardrops for wings.
Place your finished stone in a sunny spot to enjoy those summer vibes all year round
Fishy River Rock School
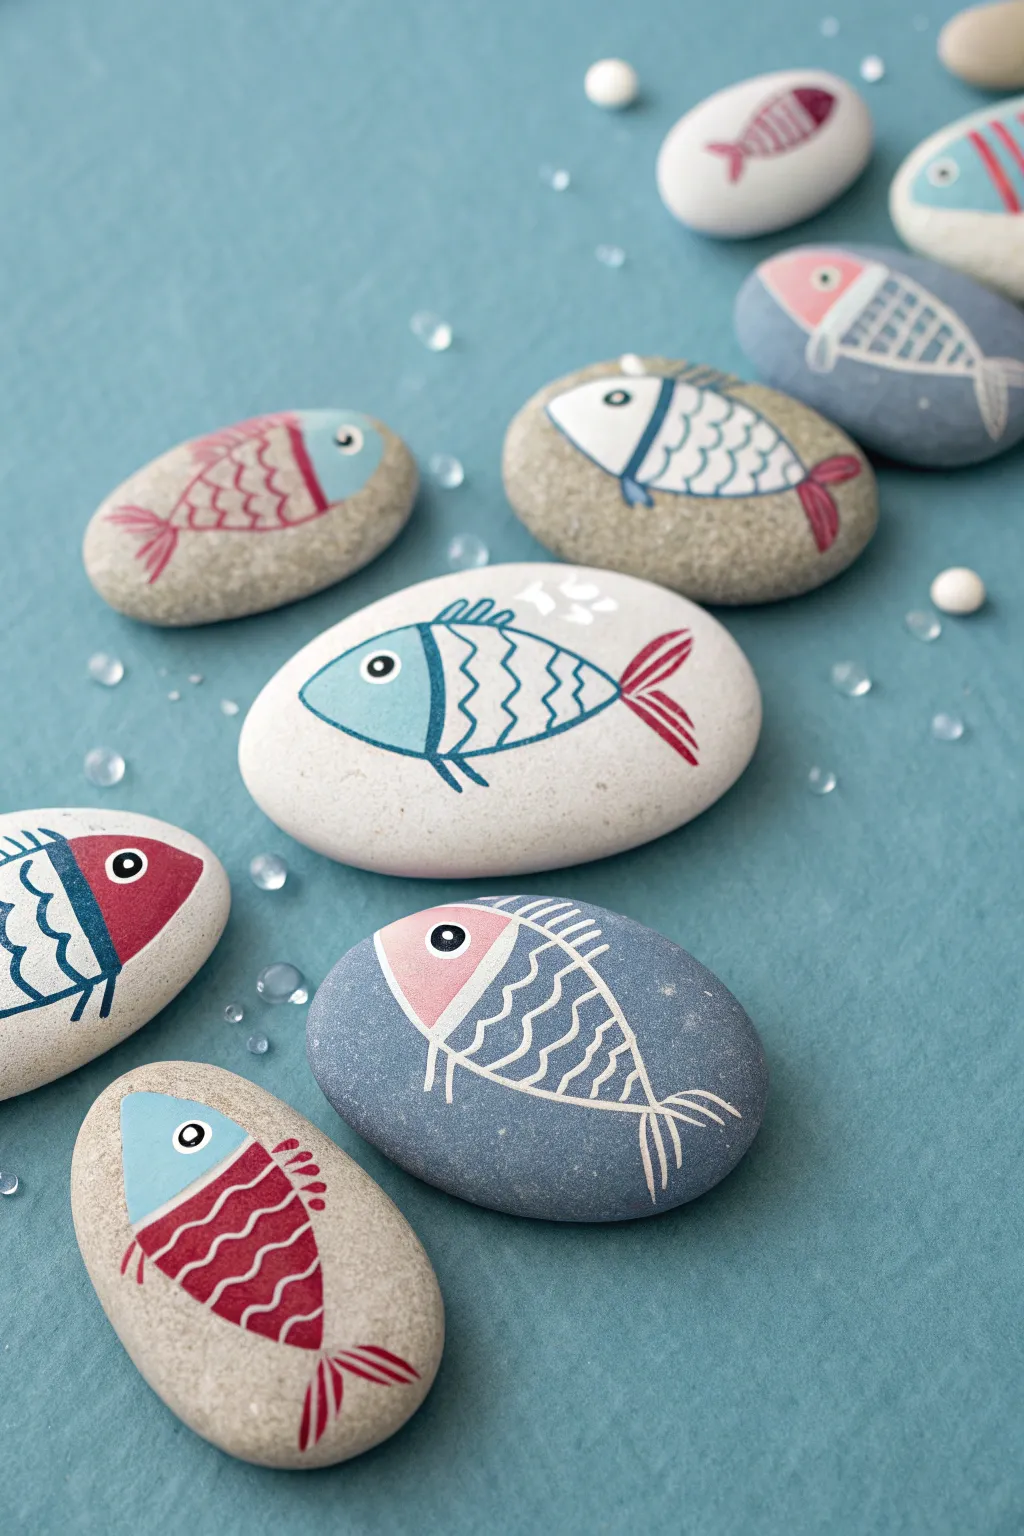
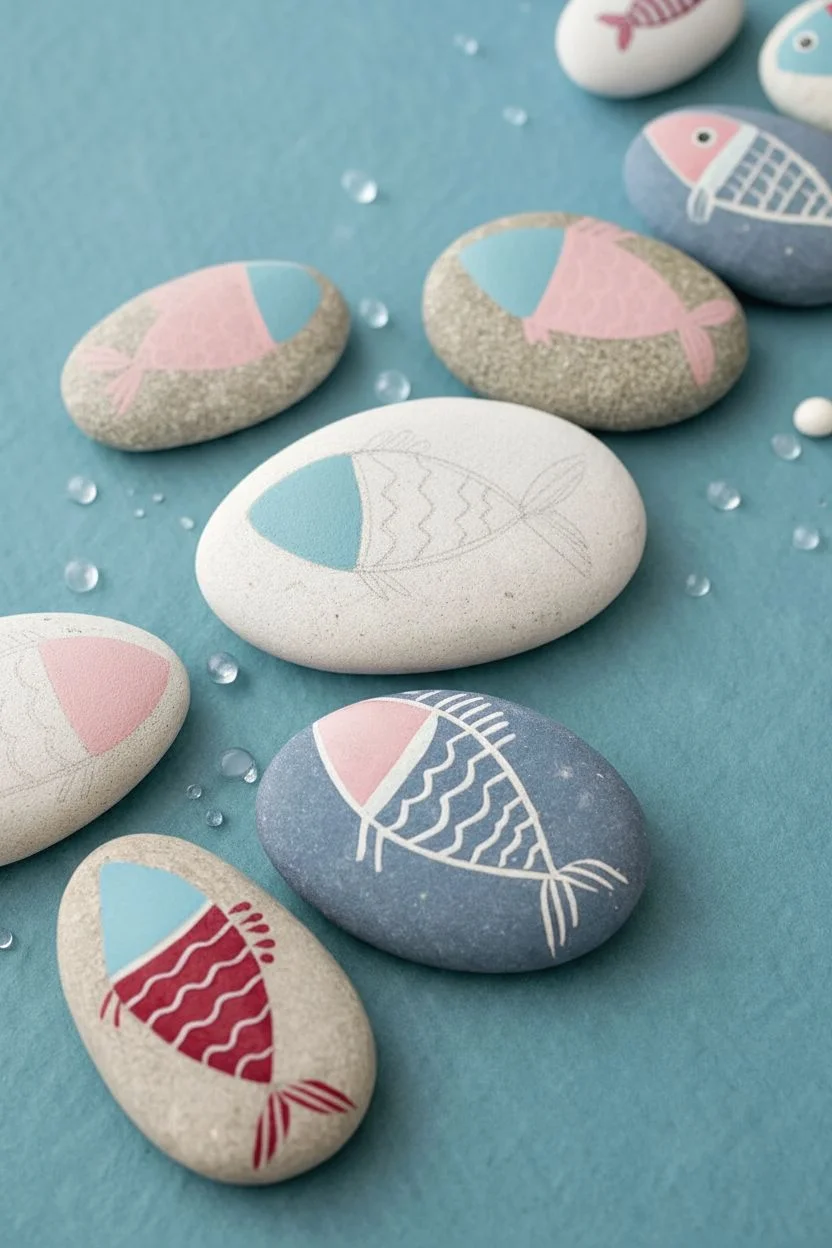
Transform smooth river stones into a swimmingly delightful school of fish with just a few strokes of paint. These stylized designs use simple geometric shapes and a calm nautical palette to create modern, playful decor.
Detailed Instructions
Materials
- Smooth, oval river rocks (various sizes: white, grey, and beige)
- Acrylic paint (opaque white, pale blue, dark blue, crimson red, and black)
- Small flat paintbrush (size 2 or 4)
- Fine liner brush (size 0 or 00)
- Small dotting tool or toothpick
- Pencil for sketching
- Palette or paper plate
- Matte spray varnish (optional)
Step 1: Prepping the Canvas
-
Clean Your Stones:
Before you begin, scrub your river rocks with warm soapy water to remove any dirt or silt. Rinse them thoroughly and let them dry completely, as any moisture trapped inside can ruin the paint adhesion later. -
Assess the Shape:
Examine each rock to find its natural orientation. Most of these fish work best on oval stones positioned horizontally, but slightly rounded ones work well for puffier fish shapes.
Clear Water Contrast
To fix ‘invisible’ designs, always check contrast before drying. If painting on dark grey stones, mix a tiny bit of white into your colors to ensure they stand out opaque and bright.
Step 2: Fish Base Design
-
Sketch the Outline:
Using a pencil, lightly sketch a classic almond or oval shape in the center of the rock for the fish body. Add a triangle at the back for a tail. -
Define the Head:
Draw a curved vertical line roughly one-third of the way from the front of the oval. This separates the head from the body section. -
Block in Color (Head):
Using your flat brush, paint the head section. On the light grey rocks, try a soft pink or pale blue. On darker grey rocks, the opaque light pink really pops. Apply two coats if needed for solid coverage. -
Block in Color (Body or Tail):
Some fish in the school have colorful bodies; others just have colorful tails. For a ‘solid’ fish, paint the body section a contrasting color like deep crimson. For a ‘skeleton’ style fish, leave the stone’s natural color as the body background. -
Dry Time:
Allow these base color layers to dry completely to the touch. I usually give them about 15 minutes so my next lines are crisp.
Step 3: Fins and Outlines
-
Outline the Body:
Load your fine liner brush with the contrasting outline color. For light rocks, use dark navy blue; for the dark grey rock, use white. Carefully trace the outer shape of the fish. -
Add the Tail Fins:
Paint the tail fin. You can either fill it in solid (like the red tails) or keep it as an outline. If filling it in, add slight brush strokes outward to mimic fin texture. -
Top and Bottom Fins:
Using the tip of your liner brush, add small triangular or swept-back fins on the top and bottom of the body. Keep these simple and geometric. -
Detail the Tail:
If you painted a solid tail, use your outline color to draw two or three simple lines inside the tail shape to suggest movement.
Reef Magnet Upgrade
After sealing, glue a strong round magnet to the back of each fish using E6000 glue. They make adorable refrigerator magnets that look like they’re swimming across the door.
Step 4: Patterns and Details
-
Draw Scales:
For the body section, paint a pattern of repeating curved lines (scallops) or zig-zags. On the dark rock, the white zig-zags create a striking skeletal look. Be sure to use a very light hand here. -
Accent Stripes:
Alternatively, you can paint vertical curved stripes across the body for a different fish species look, varying the thickness of your lines. -
The Eye Base:
Dip a dotting tool or the back of a paintbrush into white paint (or black, if the head is light) and place a confident dot in the center of the head section. -
The Pupil:
Once the eye base is dry, add a smaller black dot in the center to complete the eye. This instantly brings the character to life. -
Clean Up:
If any lines look shaky, you can gently scrape away excess paint with a damp toothpick while it’s still semi-wet, or touch up with the background stone color if possible. -
Seal the School:
Once fully cured (wait at least an hour), spray the rocks with a matte varnish. This protects the paint from chipping without adding an unnatural glossy shine.
Arrange your finished stones together on a table or shelf to enjoy your peaceful, low-maintenance aquarium

PENCIL GUIDE
Understanding Pencil Grades from H to B
From first sketch to finished drawing — learn pencil grades, line control, and shading techniques.
Explore the Full Guide
Turtle Shell River Rock Designs
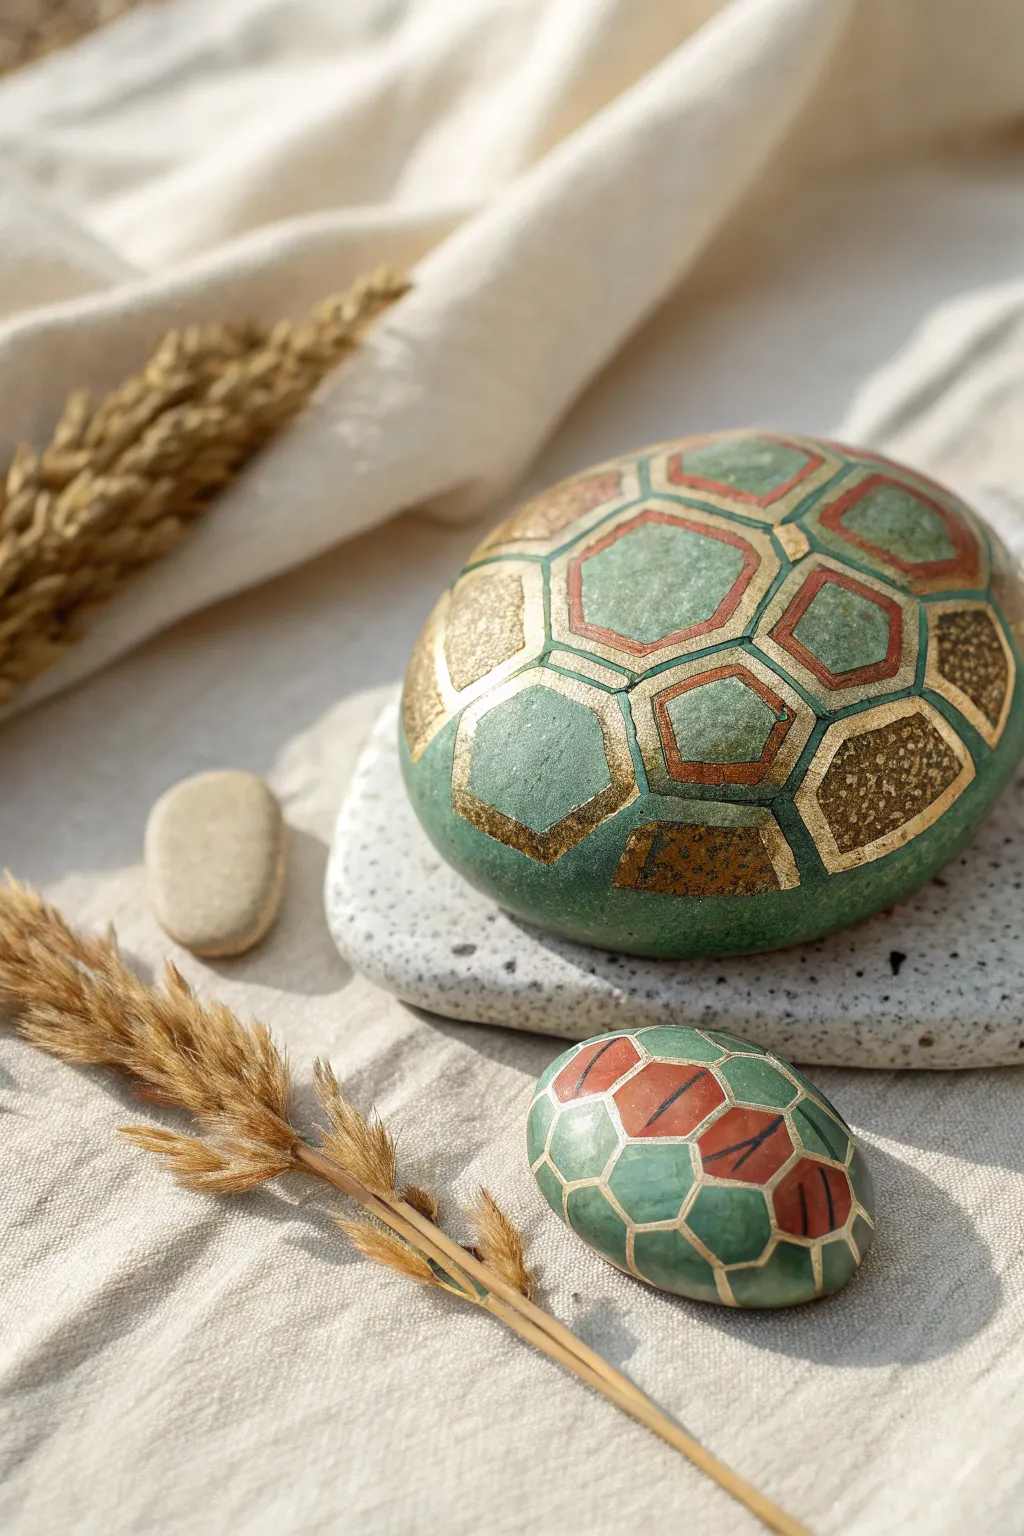
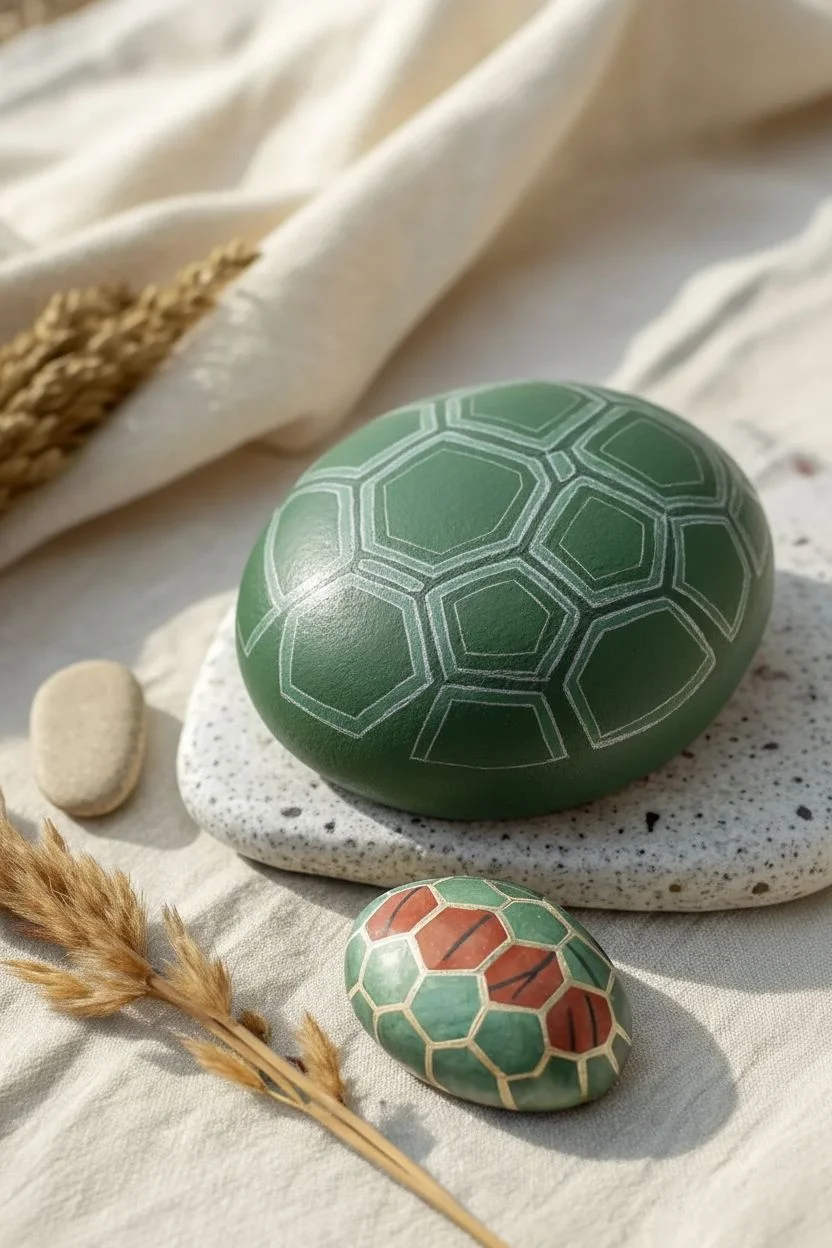
Transform smooth river rocks into elegant turtle shells featuring deep greens, terracotta hues, and luxurious gold accents. This project combines geometric precision with organic textures for stunning garden or desk decor.
Step-by-Step Tutorial
Materials
- Smooth, rounded river rocks (one large, one small)
- Acrylic paints (Forest Green, Sage Green, Terracotta/Burnt Orange, Black)
- Liquid gold leaf or metallic gold acrylic paint
- Fine gold glitter paint or loose glitter with glue
- Fine detail paintbrushes (sizes 00 and 1)
- Flat shader paintbrush
- Pencil or white chalk pencil
- Matte or satin varying finish sealer spray
- Palette for mixing
Step 1: Base Preparation
-
Clean and Dry:
Begin by scrubbing your selected river rocks with soapy water to remove any dirt or oils. Let them dry completely, preferably in the sun, to ensure the paint adheres properly. -
Base Color Application:
Mix a custom shade of green using Forest Green and a touch of Sage to create a natural shell base. Paint the entire top surface of the rock. You might need two coats for full opacity; let the first coat dry fully before adding the second. -
Sketching the Pattern:
Once the base green is bone dry, use a pencil or white chalk pencil to lightly sketch the shell pattern. Start with a central hexagon or pentagon at the very top of the dome, then draw connecting shapes radiating outward to create the scutes (shell plates).
Step 2: Blocking Colors
-
Painting the Centers:
Leave the sketched lines visible (these will be your gold borders later). Fill in the centers of select scutes with a lighter Sage Green to create dimension. I like to focus on the central shapes for this lighter tone. -
Adding Warmth:
Select a few specific scutes, particularly toward the outer ring, to paint with Terracotta or Burnt Orange. This creates the classic box turtle look and adds beautiful contrast to the greens. -
Creating Texture:
For the larger stone, choose a few alternating segments to be textured. Apply a mix of gold glitter paint or a dab of glue sprinkled with fine gold glitter to these specific sections for a sparkle effect. -
Drying Time:
Allow all the blocked colors to dry completely. If the terracotta looks streaky, add a second thin layer to smooth it out.
Clean Lines
If your hand shakes while painting the gold grid, rest your pinky finger on a dry part of the stone for stability, or use a gold paint pen.
Step 3: Detailing and Outlining
-
Thick Gold Borders:
Using your finest brush (size 00) and liquid gold leaf or metallic paint, carefully trace over your initial pencil sketch lines. Make these lines relatively thick and bold to separate the colorful plates. -
Adding Inner Rings:
On the larger stone, paint a secondary, thinner gold line inside some of the terracotta and green shapes. This double-border effect adds sophistication and depth to the design. -
The Smaller Stone Technique:
For the smaller companion stone, simplify the design. Use thinner dividing lines between the green and orange sections. Instead of full gold outlines, you can use a very pale refreshing green or cream color for the grid lines if you want variation. -
Black Lowlights:
To make the shell look 3D, mix a tiny amount of black with green. Paint very thin shadows along the bottom inner edge of each scute plate. This trompe-l’œil technique makes the plates look raised.
Ancient Artifact Look
Lightly sponge brown or dark green paint over the finished, dried gold lines and wipe it off immediately to weather the rock for an antique look.
Step 4: Finishing Touches
-
Clean Up:
Check your gold lines. If any paint wobbled, use a clean damp brush to gently push it back or touch up the adjacent color with your green paint. -
Sealing the Work:
Once the artwork is cured (wait at least 24 hours), spray the stones with a satin or matte sealer. Avoid high gloss, as it can make the rock look like plastic rather than a natural shell.
Place your finished turtle shells among potted plants or on a sunny windowsill to enjoy their tranquil beauty
Penguin Face River Rocks
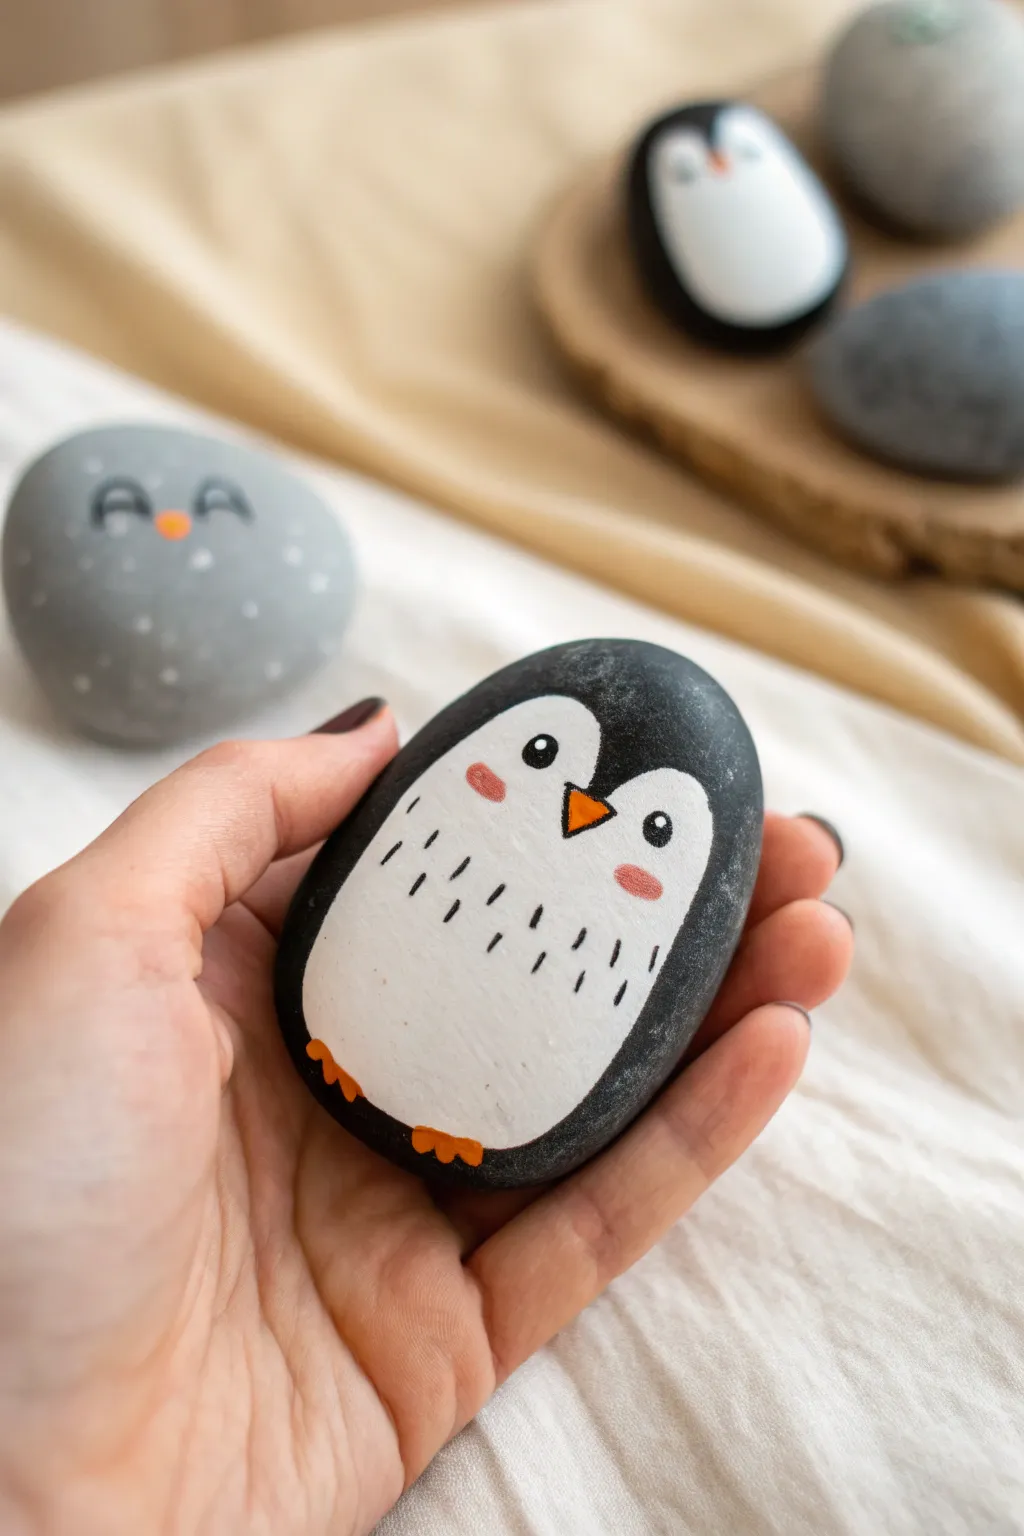
Transform a smooth, oval river stone into an adorable penguin companion with just a few colors of paint. This charming little character features a classic black and white design with sweet rosy cheeks and tiny orange feet, perfect for winter decor or hiding in the garden.
Step-by-Step Guide
Materials
- Smooth, oval river rock (palm-sized)
- Black acrylic paint
- White acrylic paint
- Orange acrylic paint
- Pink acrylic paint
- Flat paintbrush (medium)
- Small round paintbrush (fine tip)
- Pencil
- Clear spray sealant or varnish (matte or satin)
Step 1: Base Coat & Outline
-
Clean the canvas:
Start by washing your rock thoroughly with soap and water to remove any dirt or oils. Let it dry completely before you begin painting; a warm, dry stone holds paint best. -
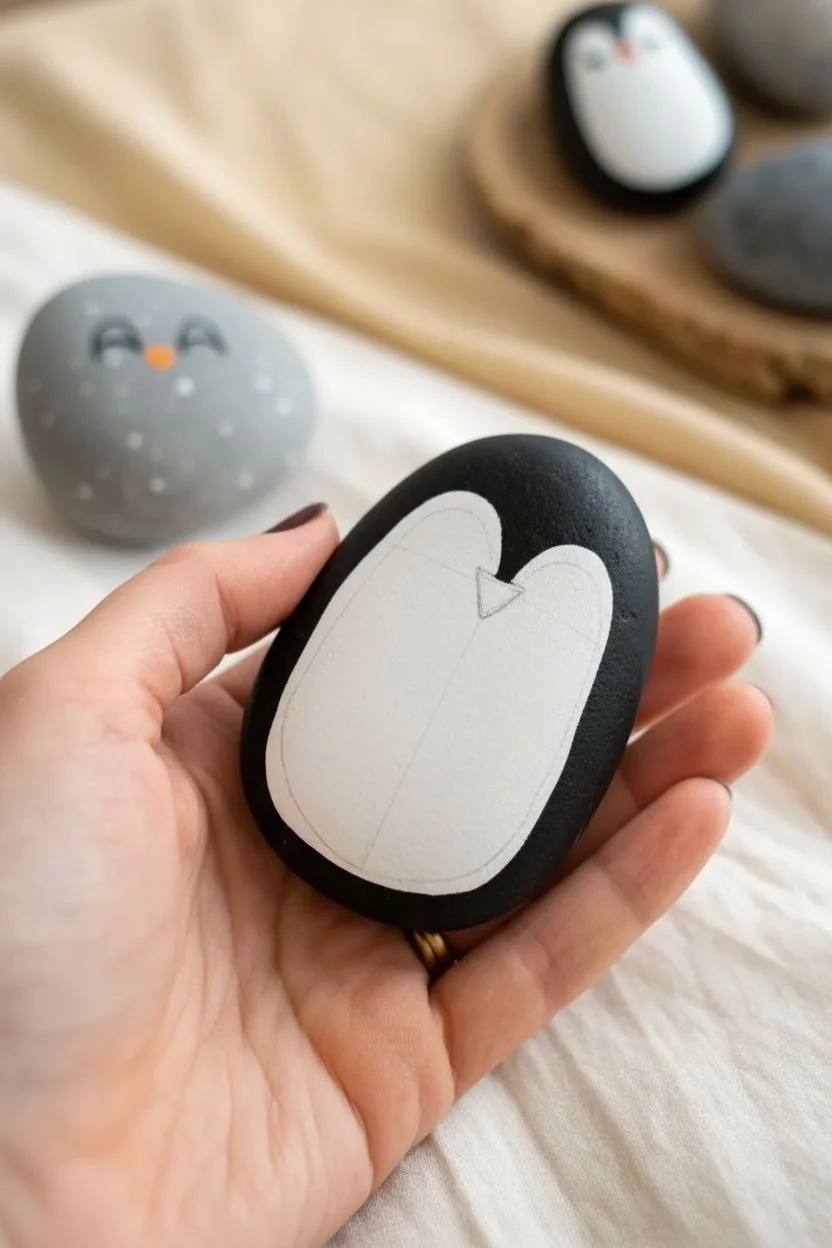
Sketch the belly:
Using a pencil, lightly sketch a large oval shape on the flattest side of the rock. This will be the penguin’s white belly. Make the top slightly wider for the face area. -
Deifne the face:
At the top center of your oval, dip slightly downwards to create a subtle ‘V’ shape or heart-top shape. This defines the forehead area where the black feathers meet the white face. -
Paint the body:
Using your flat brush and black acrylic paint, fill in the entire rock surface *outside* of your penciled oval. Paint carefully around the outline to keep a clean edge. Extend the black paint around the sides and back of the rock. -
First white layer:
Fill in the center oval shape with white acrylic paint. Don’t worry if it looks streaky at first; white often needs multiple coats over a dark rock. -
Let it dry:
Allow the first layers to dry completely. If the white area isn’t opaque enough, apply a second or third coat until you have a solid, bright white belly.
Uneven Coverage?
If your white paint looks gray or streaky, apply thin layers and let each dry fully. Thick globs will just crack. Patience creates the smoothest finish.
Step 2: Face & Details
-
Add the eyes:
Once the white paint is fully dry, take your fine round brush and dip it in black paint. Paint two small, solid black circles near the top of the white area for the eyes. -
Sparkle the eyes:
While you have the black paint handy, check if the eyes are dry (or use the very tip of a clean brush handle). Add a tiny dot of white paint inside each black eye circle at the top right. This reflection makes the penguin look alive. -
Paint the beak:
Mix a little orange paint. With the fine brush, paint a small, inverted triangle centered just below the eyes for the beak. -
Rosy cheeks:
Dip a finger or a small dry brush into a tiny amount of pink paint. Dab it gently on either side of the face, just below the eyes, to create soft, flushed cheeks. -
Feather texture:
Using your finest brush (or a black paint pen if you have one), paint short, vertical dash marks scattered across the white belly area. I find grouping them slightly rather than spacing them perfectly makes the fur look more natural. -
Little feet:
At the very bottom edge of the white belly, paint two small three-toed feet using the orange paint. They should slightly overlap the black border to look like he’s standing.
Make it a Family
Paint rocks of different sizes to create a whole penguin family. You can give them different colored scarves or hats for extra personality.
Step 3: Finishing Touches
-
Check for gaps:
Look over your design. If the black paint got smudged or the edges look messy, touch them up now with the appropriate color. -
Seal the deal:
Once absolutely everything is dry (give it a few hours just to be safe), take the rock outside and spray it with a clear acrylic sealer. This protects the paint from chipping and weather if you choose to leave your penguin outdoors.
Now you have a sturdy little friend ready to waddle onto your desk or garden path


Garden Marker River Rocks
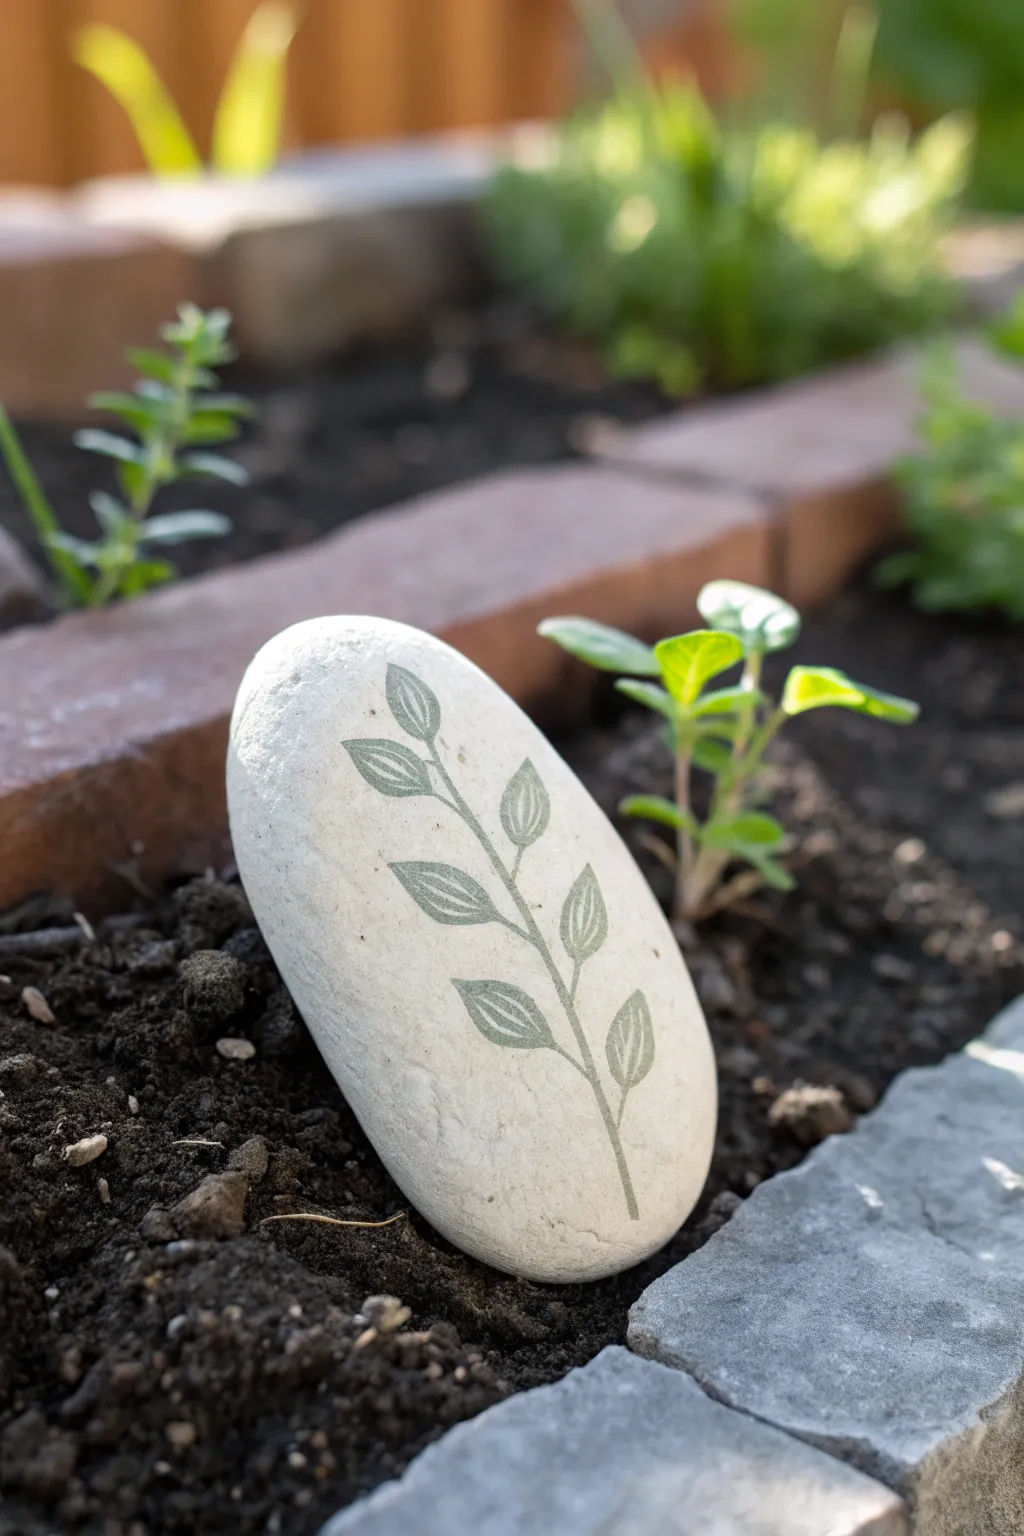
Add a touch of elegance to your vegetable patch or flower bed with this understated river rock marker. The simple green leaf silhouette stands out beautifully against the smooth white stone, creating a natural label that won’t fade in the sun like plastic tags.
Detailed Instructions
Materials
- Smooth, flat river rock (white or light grey)
- Mild soap and water
- Scrub brush
- Pencil
- Sage or olive green acrylic paint (outdoor/multi-surface preferred)
- Fine liner brush (size 0 or 00)
- Small flat brush (optional)
- Clear outdoor sealer (matte or satin finish)
- Paper plate or palette
- Paper towels
Step 1: Preparation
-
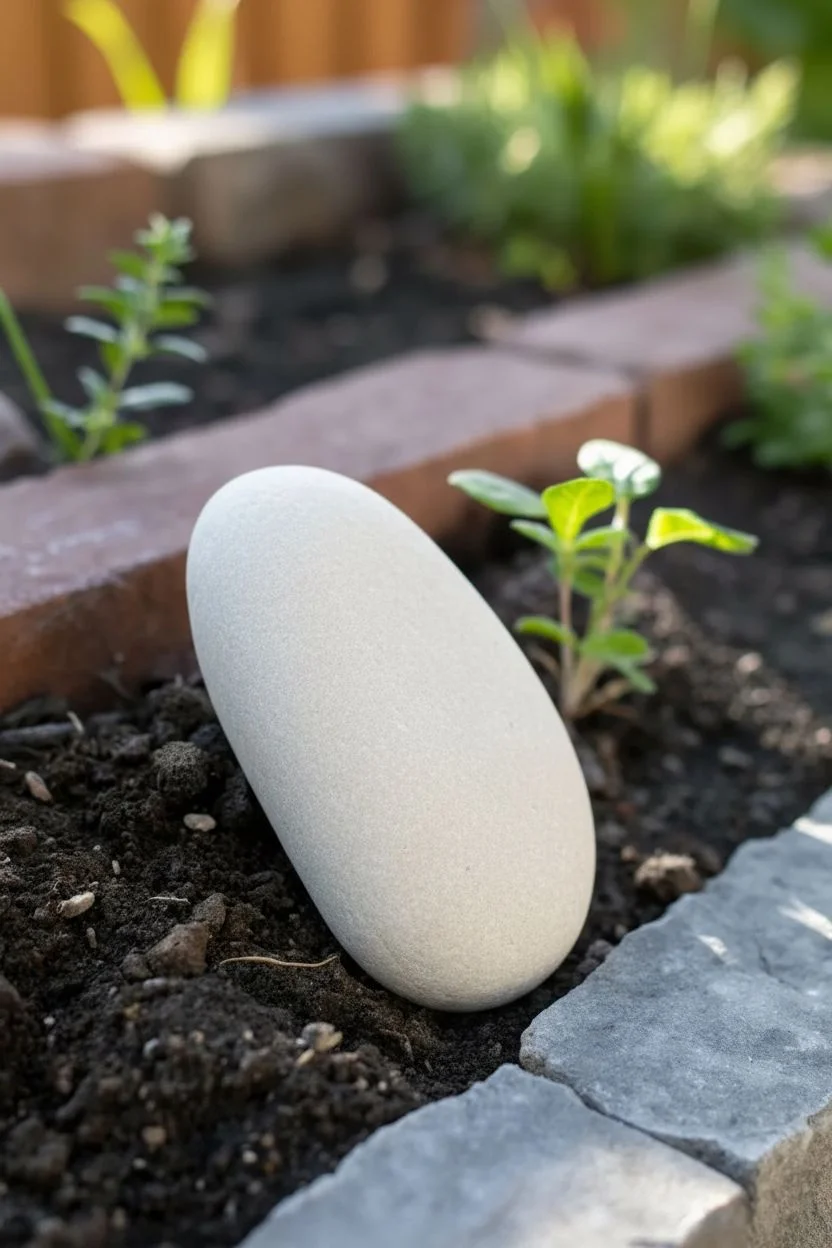
Select your canvas:
Choose a river rock that is relatively flat on one side and stands upright easily. A smooth, light-colored stone works best to make the green design pop. -
Clean the surface:
Thoroughly scrub your rock with mild soap and warm water to remove any dirt or moss. This is crucial for paint adhesion. -
Dry completely:
Let the rock dry in the sun or use a hairdryer to speed things up. It must be bone dry before you apply any paint, or moisture will trap underneath.
Step 2: Designing the Stem
-
Sketch the main line:
Using a pencil, lightly draw a single, slightly curved vertical line up the center of the rock. This will serve as your main stem. -
Add branch lines:
Sketch smaller lines branching off the main stem. Alternate them left and right, angling them upward at about 45 degrees. -
Outline the leaves:
Draw simple, pointed oval shapes at the end of each branch line. Keep them uniform in size for a cohesive look. -
Review the composition:
Step back and check your pencil sketch. Does it look balanced? If not, erase gently and adjust the spacing now before painting.
Stamp Polish
For super crisp edges like the photo, create a DIY stamp by cutting the leaf shape out of a craft foam sheet and gluing it to a wood block.
Step 3: Painting
-
Prepare your paint:
Squeeze a small amount of sage green acrylic paint onto your palette. If the paint feels too thick, add a tiny drop of water to improve flow. -
Paint the stem:
Load your fine liner brush with paint. Carefully trace over your pencil line for the main stem, starting from the bottom and pulling upward with consistent pressure. -
Paint the branches:
Using the same liner brush, paint the thin lines connecting the stem to where the leaves will be. -
Outline the leaf shapes:
Carefully outline the exterior of each leaf shape you sketched earlier. Keep your hand steady and rest your wrist on the table for stability. -
Fill the leaves:
Fill in the leaf outlines. You can continue using the liner brush for precision, or switch to a very small flat brush if the leaves are larger. -
Add detail lines:
Once the green base is tacky but not fully dry, I sometimes like to use a clean, slightly damp brush to lift a tiny line of paint from the center of each leaf to suggest a vein, or paint a vein in a slightly darker green once dry. -
Let it cure:
Allow the paint to dry completely. Since this will be outside, give it at least an hour, or refer to your bottle’s instructions.
Level Up
Paint the English or Latin name of the plant in a tiny sans-serif font underneath the main stem for a true botanical garden feel.
Step 4: Finishing
-
Check for gaps:
Look closely at your design. If the stone’s texture shows through too much, apply a second coat of green to make the leaves opaque. -
Apply sealer:
Once the paint is fully cured, apply a coat of clear outdoor sealer over the entire face of the rock. -
Seal the back:
Don’t forget to flip the rock and seal the back and bottom edges to prevent moisture from seeping in from the soil. -
Final dry:
Let the sealer cure for 24 hours before placing your beautiful new marker into the garden bed.
Place your finished stone near a seedling and enjoy the organized beauty it brings to your garden
Fairy House River Rock Doors
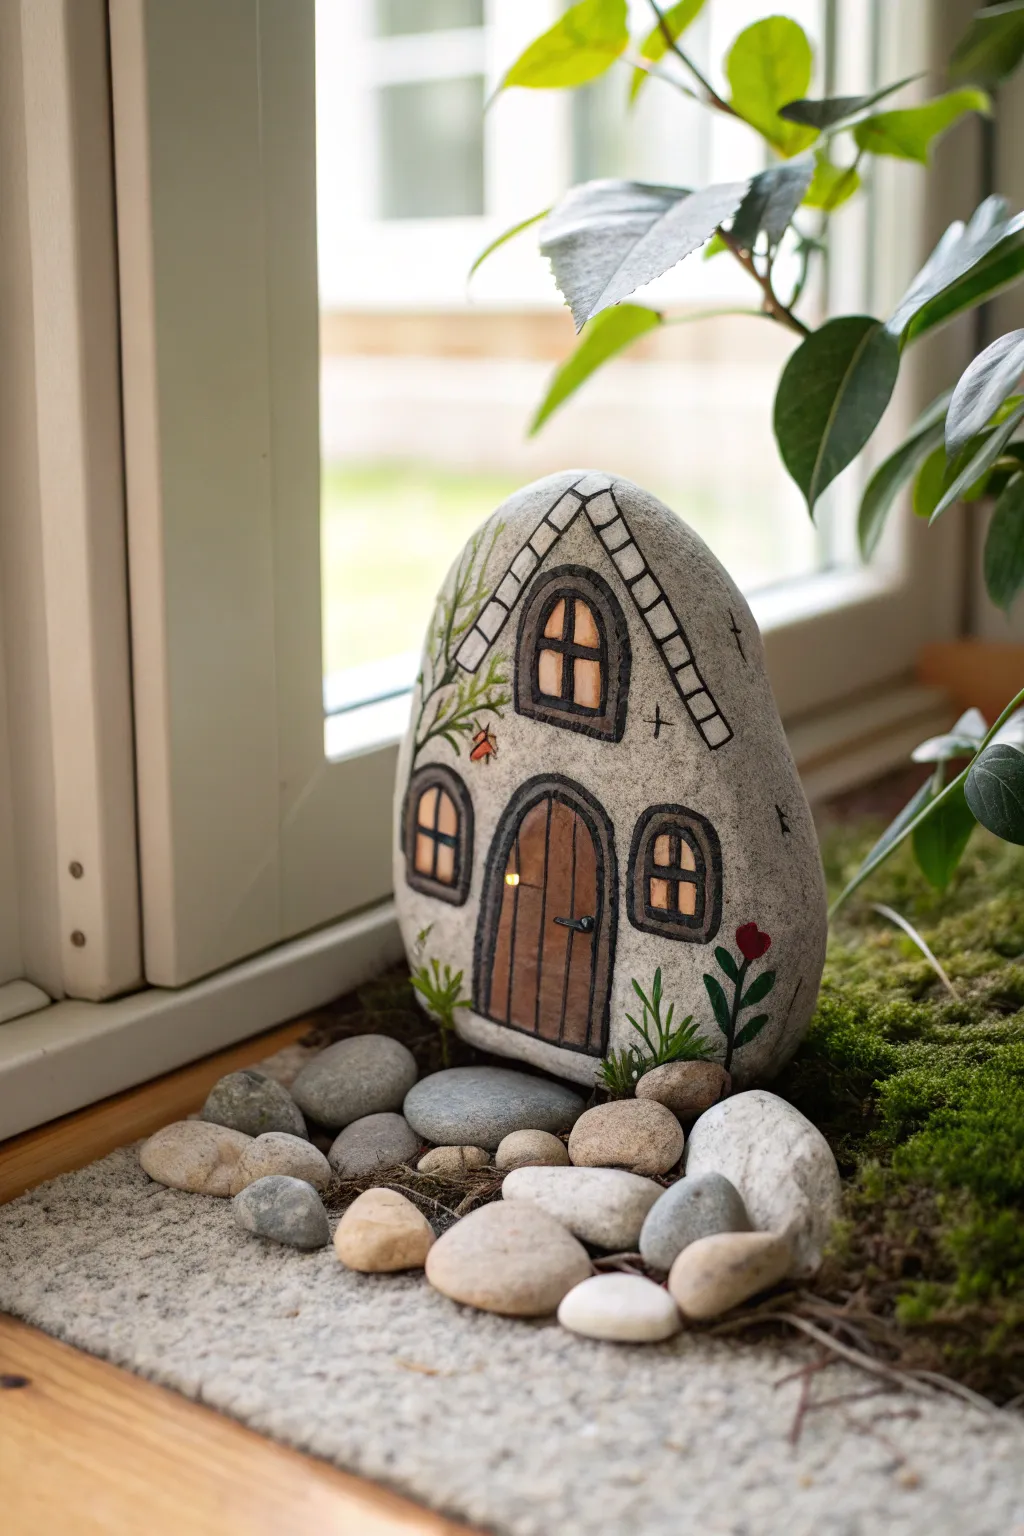
Transform a simple garden stone into an enchanting dwelling for garden folk with this detailed painting project. The warm, glowing windows and carefully painted vines give this piece a cozy, lived-in feel perfect for a windowsill or planter.
Step-by-Step
Materials
- Large, smooth river rock (upright, oval shape)
- Pencil for sketching
- Acrylic paints (black, white, warm yellow, burnt orange, dark brown, medium grey, leafy green, red)
- Fine detail brushes (size 00 or 0)
- Flat shader brush (size 2 or 4)
- Acrylic paint markers (black, white) – optional but helpful
- Matte or satin clear sealant spray
Step 1: Planning and Sketching
-
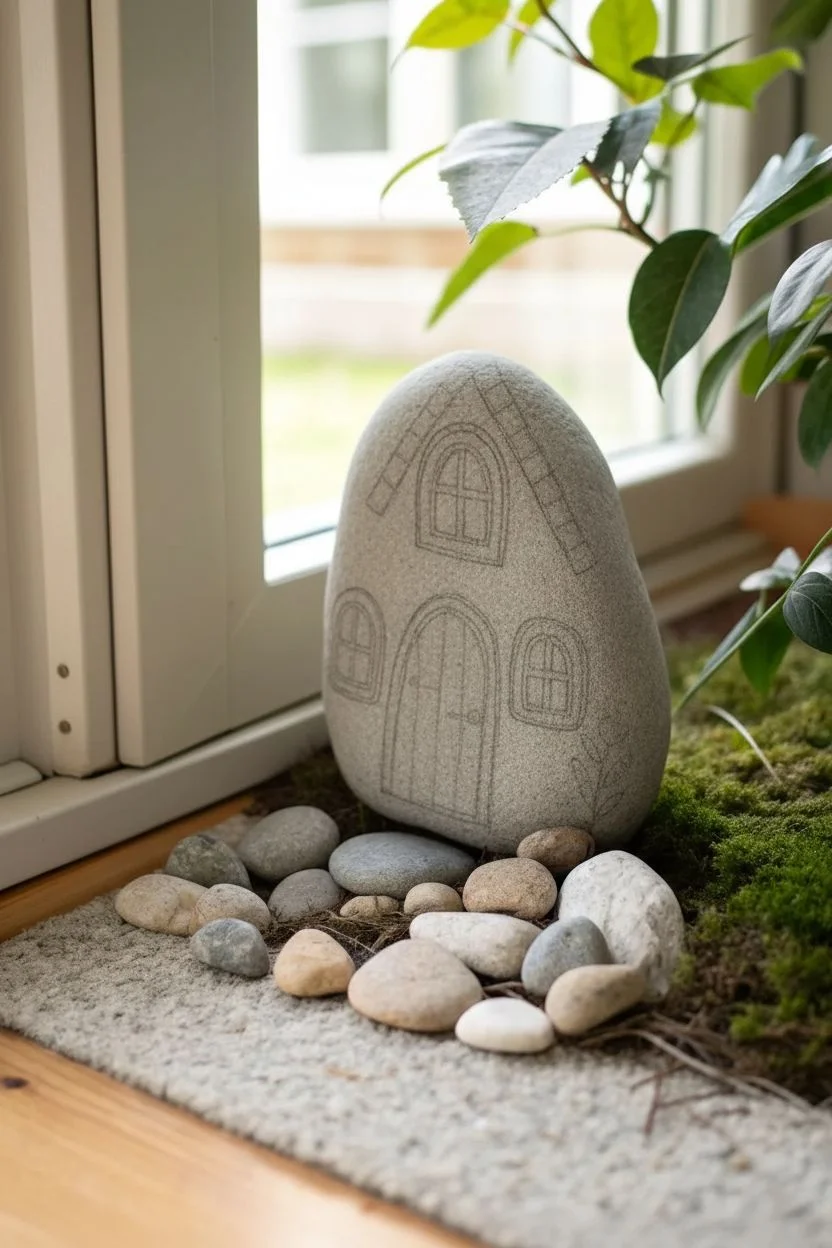
Stone Selection:
Choose a rock that stands upright on its own, preferably with a slightly pointed top that mimics a roofline. Wash it thoroughly with soap and water to remove any dirt or oils, then let it dry completely. -
Rough Layout:
Using a pencil, lightly sketch the main outline of the house. Draw a large central arch for the door at the bottom center. Add two smaller arched windows on either side of the door. -
Roof and Upper Window:
Sketch an inverted ‘V’ shape near the top to define the roofline. Inside this triangular space, draw a fourth window, slightly larger than the side ones but smaller than the door.
Making Lights Pop
Paint a layer of white under the yellow window areas first. This acts as a primer and makes the ‘light’ color appear much brighter and more glowing.
Step 2: Base Colors
-
Painting the Wood:
Mix a warm brown shade and fill in the entire door area. Apply thin layers to keep it smooth, letting each coat dry before adding the next. -
Creating the Glow:
For the window panes, mix warm yellow with a tiny touch of white to create a glowing effect. Paint the inside of all three windows with this luminous color. -
Adding Warmth:
While the yellow paint is still slightly wet, I like to blend a tiny dot of burnt orange into the center of the windows to simulate candlelight depth. -
Roof Details:
Paint the space between your roofline sketch and the edge of the stone with a light grey or natural stone color if your rock is dark. This creates the base for the roof tiles.
Step 3: Fine Details and Outline
-
Defining the Frames:
Using your finest brush and black paint (or a black paint pen), carefully outline all the windows and the door. Make the lines thick enough to represent stone or heavy wood frames. -
Window Grids:
Paint a cross styling ‘plus’ sign in the center of the upper and side windows to create the classic pane look. Keep your hand steady and brace your pinky on the table for support. -
Door Textures:
Mix a darker brown paint with a little water to make a glaze. Paint vertical stripes on the door to look like wood planks. Add a small black horizontal line for the handle and hinge details. -
Roof Shingles:
Outline the inverted ‘V’ roof shape with a thick black line. Then, paint small rectangular blocks along this line to simulate stone coping or thick shingles.
Fixing Shakey Lines
If your black outlines get wobble, wait for them to dry. Then, use the original stone color or background paint to tidy up the edges from the outside in.
Step 4: Nature Elements
-
Vining Foliage:
Mix a natural green shade. Starting from the left side of the house, paint thin, winding vines that creep up the side of the stone and curl over the roofline. -
Adding Leaves:
Along your vine lines, press your brush down gently to create small, teardrop-shaped leaves. Add a few sprigs of grass at the base of the house on both sides. -
Tiny Blooms:
Using red paint, add a small tulip-shaped flower on the right side growing out of the grass. You can also add a tiny orange butterfly or moth near the vines on the left for extra whimsy. -
Highlights:
Add tiny white dots or streaks to the window glass, the door handle, and the edges of leaves to make them pop and look three-dimensional. -
Sealing:
Once the paint is fully cured (usually 24 hours), spray the entire stone with a matte or satin sealant to protect your work from moisture and chipping.
Place your finished fairy cottage near a potted plant or on a sunny windowsill to invite a little magic into your home
Sunset Silhouette River Rocks
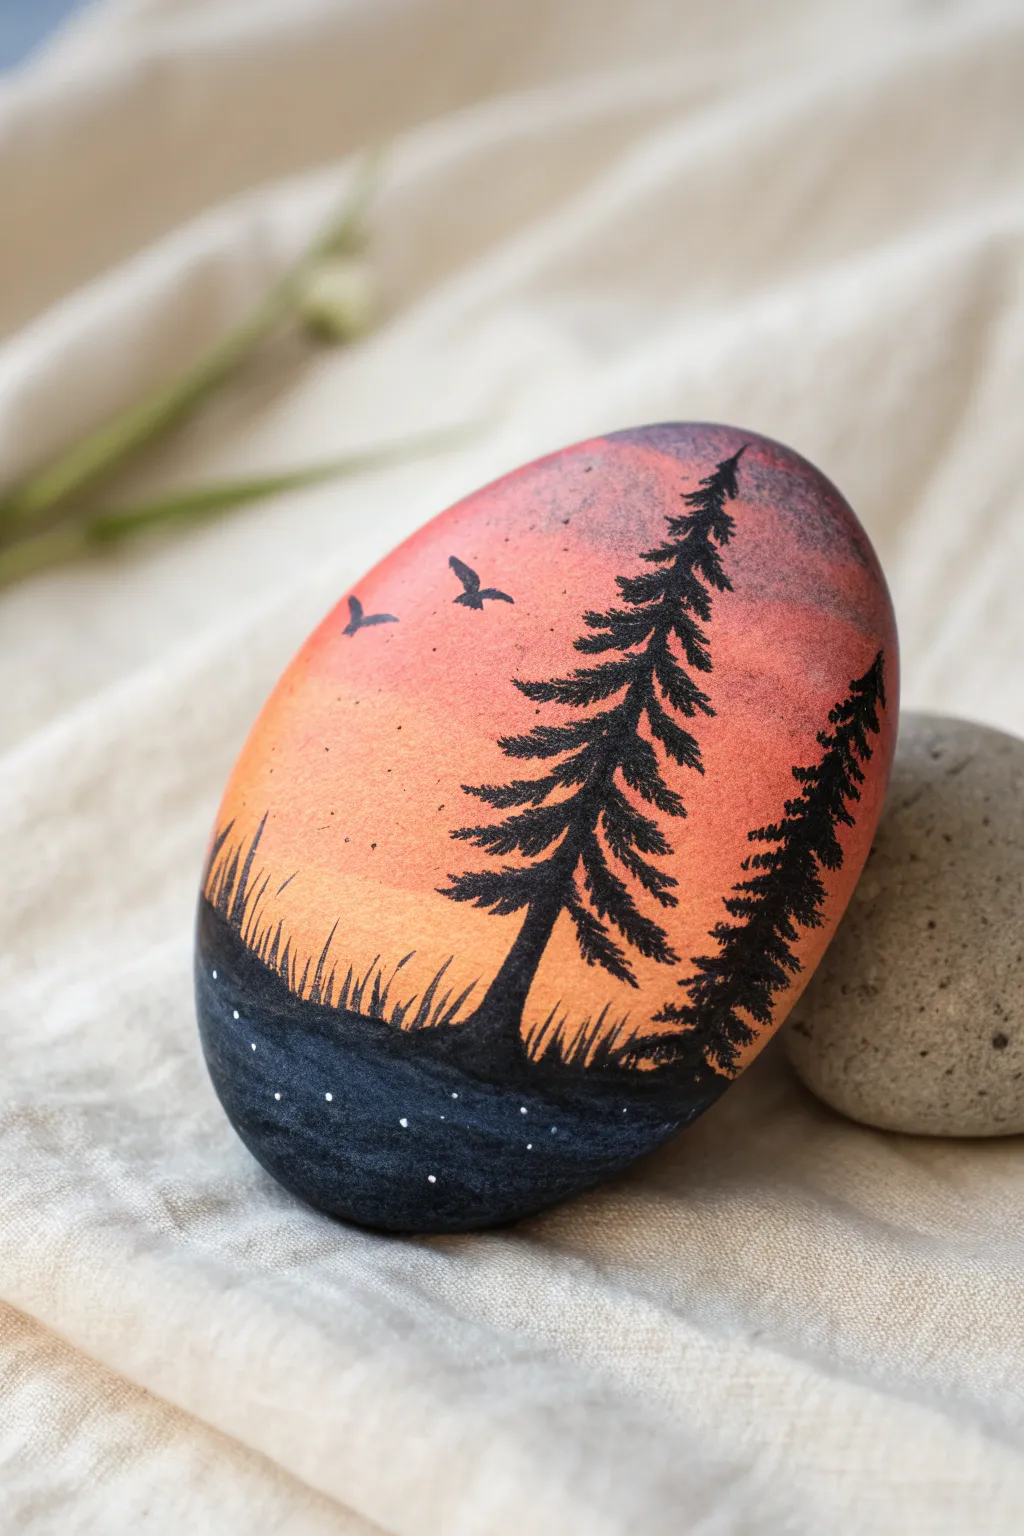
Transform a simple river rock into a tranquil evening landscape featuring towering pines against a glowing sky. This project uses smooth blending techniques to capture the warmth of a sunset before layering on crisp, dark silhouettes for contrast.
Step-by-Step Guide
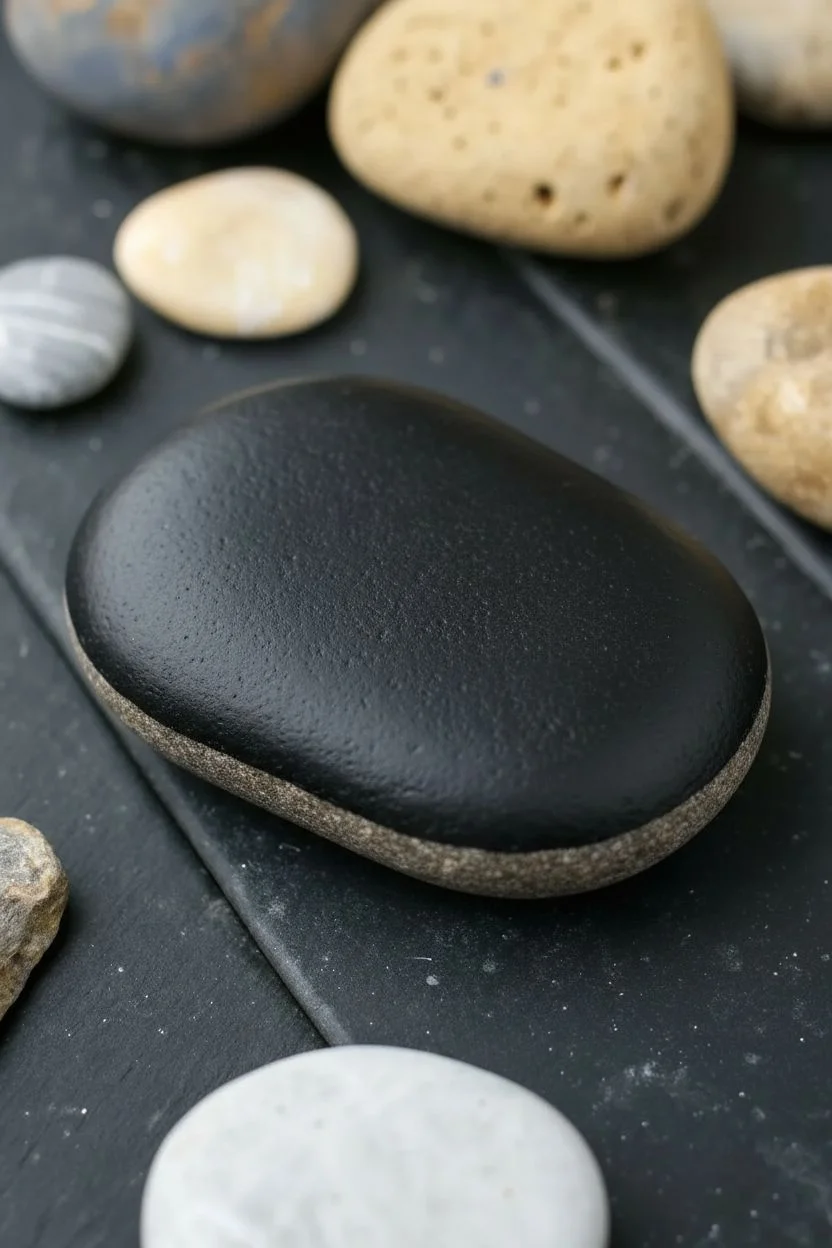
Materials
- Smooth, oval river rock (clean and dry)
- Acrylic paints: Black, Titan White, Cadmium Orange, Primary Red, Violet/Purple
- Paintbrushes: Medium flat brush (for blending), fine liner brush (for details)
- Palette or paper plate
- Cup of water and paper towels
- Clear spray sealer (gloss or matte)
Step 1: Setting the Sky
-
Prime the surface:
Begin by painting the entire front surface of your rock with a coat of Titan White acrylic paint. This base layer ensures your sunset colors will pop and look vibrant rather than soaking into the stone’s natural gray tone. Let this dry completely. -
Prepare your palette:
Squeeze out your sunset colors—Violet, Primary Red, and Cadmium Orange—onto your palette. You want them ready to go because acrylics dry fast, and you’ll need to work wet-on-wet for the best blend. -
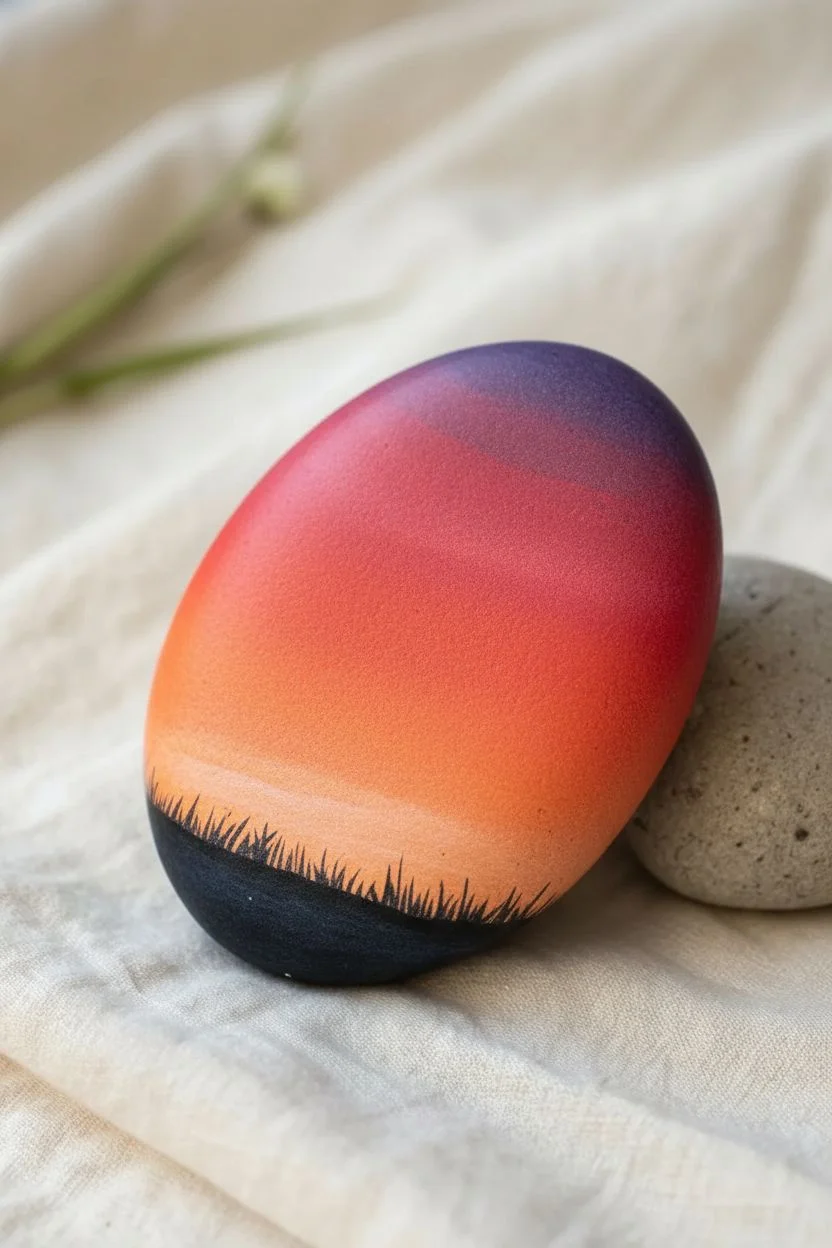
Paint the top band:
Using your medium flat brush, apply a band of Violet paint to the very top curve of the rock. Don’t clean your brush yet. -
Add the middle tones:
Dip barely the tip of your purple-loaded brush into the Primary Red. Paint the next section down, overlapping slightly with the purple to create a seamless transition. The color should naturally shift from cool purple to a deep magenta. -
Blend in the orange:
Clean your brush thoroughly. Pick up the Cadmium Orange and paint the lower middle section of the rock, blending upward into the red area while the paint is still wet. Smooth out the brushstrokes so the gradient looks soft like a real sky. -
Lighten the horizon:
For the lowest part of the sky (right before where the ground will be), mix a tiny dot of White into your Orange. Paint this pale, glowing band at the bottom of your gradient. This creates the effect of the sun having just dipped below the horizon. -
Let it cure:
Allow the sunset gradient to dry completely before moving on to the black paint. If the background is wet, your sharp black lines will bleed and become muddy.
Muddy Sunset?
If your sky colors turn brown, you likely over-blended. Stop, let it dry completely, and re-apply the gradient layers, washing your brush thoroughly between color shifts.
Step 2: Painting the Silhouette
-
Ground level:
Switch to Black acrylic paint. Use the flat brush to paint a solid, curvaceous mound at the very bottom of the rock. This isn’t just a straight line; give it a slight hill shape to add dimension. -
Central pine structure:
Using your fine liner brush and black paint, draw a single vertical line slightly off-center for the trunk of the main tree. It should reach about three-quarters of the way up the rock. -
Adding pine branches:
Starting from the top of your trunk line, tap the tip of your liner brush in a downward zig-zag motion. Keep the strokes very short at the top and gradually widen them as you move down the tree to create that classic conical pine shape. -
Second tree trunk:
Paint a second, shorter vertical line to the right of the main tree. This tree should be partially cut off by the edge of the stone, implying the forest continues beyond the rock. -
Detailing the second tree:
Repeat the stippling/zig-zag technique for the second tree’s branches. I find it helps to hold the brush very loosely here to keep the branches looking organic and uneven. -
Painting the grass:
Along the curved horizon line where the black ground meets the sunset, use the very tip of your liner brush to flick tiny, quick strokes upward. Keep them varied in height and direction to mimic wild grass blades. -
Adding birds:
In the open orange space to the left of the main tree, paint two small ‘V’ shapes for birds. Make one slightly smaller than the other to create a sense of distance.
Pro Tip: Sharp Pines
Dilute your black paint slightly with a drop of water for the tree branches. Ink-consistency paint flows smoother off a liner brush, creating sharper, pointier pine needles.
Step 3: Final Touches
-
Texture the ground:
Mix a tiny amount of water into your black paint to make it fluid. Paint very faint, horizontal streaks across the bottom black area to give the ground some subtle texture so it doesn’t look flat. -
Starry details:
Using the smallest dotting tool you have, or the tip of a toothpick, dip into white paint. Add a few tiny, sporadic dots in the black ground area. These can represent fireflies or reflections. -
Seal the artwork:
Once the paint is bone dry (give it at least an hour), take the rock outside and apply a coat of clear spray sealer. This protects the paint from chipping and gives the colors a permanent, wet look.
Place your finished stone on a shelf or in the garden to enjoy a permanent sunset view
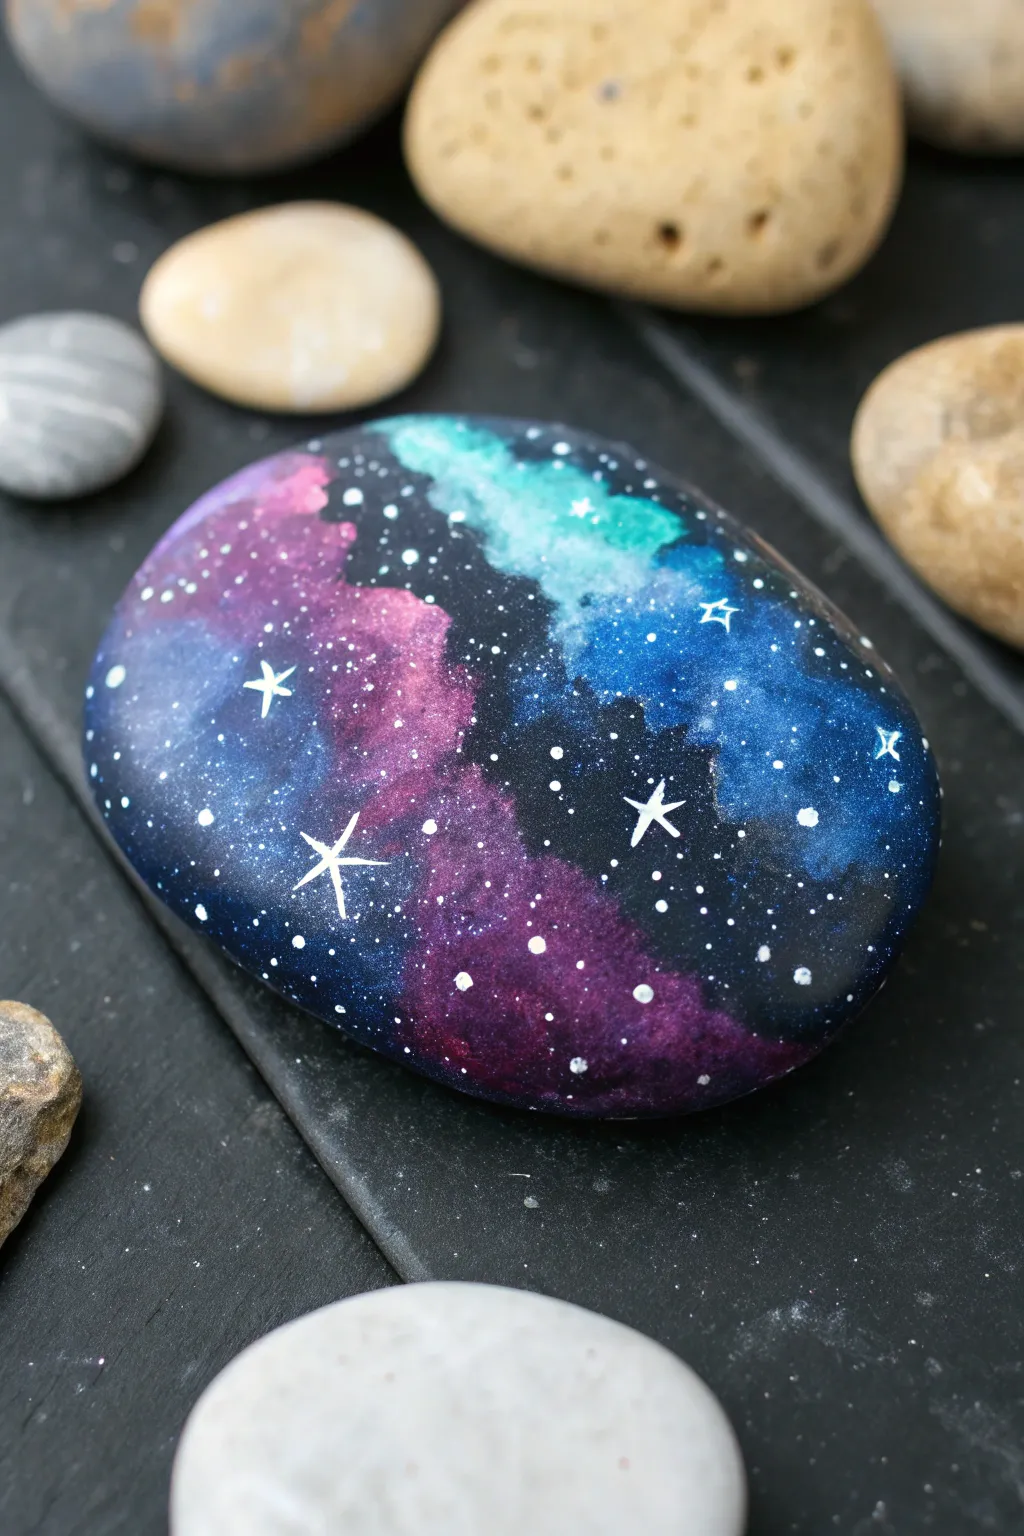
Galaxy Night-Sky River Rocks

Transform a simple river rock into a window to deep space with this mesmerizing galaxy painting project. By layering translucent washes of purple, teal, and blue over a dark base, you can achieve a stunning nebula effect that fits in the palm of your hand.
Step-by-Step
Materials
- Smooth, flat river rock (washed and dried)
- Black acrylic paint (or gesso)
- Violet/Purple acrylic paint
- Teal/Turquoise acrylic paint
- Dark Blue acrylic paint
- White acrylic paint or white paint pen
- Makeup sponges or small sponge daubers
- Small round paint brush (size 0 or 1)
- Fine liner brush (size 00 or 000)
- Old toothbrush (optional)
- Clear acrylic sealant (spray or brush-on)
Step 1: Preparing the Void
-
Clean the surface:
Begin by thoroughly washing your rock with warm soapy water to remove any dirt or oils. Let it dry completely in the sun or with a hair dryer. -
Apply base coat:
Paint the entire top surface of the rock with a solid layer of black acrylic paint. If your rock is very porous, a second coat might be necessary to get a deep, opaque matte finish. -
Let it cure:
Allow the black base to dry fully. It needs to be completely touch-dry before we start layering colors, or the subsequent layers will turn muddy.
Step 2: Creating the Nebula
-
Prepare your sponges:
I prefer to cut a makeup sponge into small wedges for this part. You’ll want a separate clean edge for each color to keep them vibrant. -
Dab the purple:
Dip a sponge edge into the violet paint and blot most of it off onto a paper towel until almost dry. Lightly dab a diagonal cloud-like shape across the left side of the rock. -
Add the teal:
Using a fresh sponge section, pick up the teal paint. Blot it off, then sponge a second cloud shape on the upper right side, leaving some negative black space between the colors. -
Introduce dark blue:
Sponge dark blue paint around the edges of the teal section to blend it softly into the black background. This creates depth and makes the glowing teal pop. -
Intensify centers:
Go back over the center of your purple and teal clouds with a slightly heavier application of paint. This highlights the ‘core’ of the nebula while keeping the edges wispy. -
Blend the transition:
If the colors feel too separated, lightly dab a mix of the purple and blue where the two clouds almost meet to create a soft transition zone.
Sponge Technique Secret
Always offload paint onto a paper towel before touching the rock. Less is more—you want a dry, dusty texture, not wet blobs.
Step 3: Illuminating the Stars
-
Mix watery white:
Dilute a small drop of white acrylic paint with water until it has an inky consistency. -
Splatter tiny stars:
Dip an old toothbrush or a stiff brush into the thinned white paint. Run your thumb across the bristles to flick tiny specks of paint across the entire rock. Use a light touch to avoid large blobs. -
Paint prominent stars:
Dip the handle end of your small paintbrush or a dotting tool into undiluted white paint. Add specific, larger dots randomly throughout the nebula clouds and the black space. -
Draft the major stars:
Locate 3 or 4 spots where you want a shining ‘hero’ star. Place a slightly larger white dot there as your guide. -
Add vertical beams:
Using your finest liner brush, paint a thin vertical line through one of your large guide dots, tapering the ends to sharp points. -
Add horizontal beams:
Paint a horizontal line crossing through the vertical one, creating a four-pointed cross. Make this line slightly shorter than the vertical one for a natural twinkle effect. -
Refine the centers:
Add a tiny extra dot of white right in the center of the cross to make the star look like it’s glowing intensely.
Fixing Muddy Colors
If your nebula colors look dull or gray, let the layer dry completely, then sponge a thin layer of white over the area before re-applying the color.
Step 4: Final Touches
-
Dry completely:
Let the rock sit undisturbed until all paint—especially the thick white dots—is completely hard and dry. -
Seal the galaxy:
Apply a coat of clear acrylic sealer or varnish. A glossy finish works beautifully here, as it simulates the wet, glass-like look of a telescope lens.
Place your finished galaxy rock in a garden or on a desk to add a touch of starlight to your day


Have a question or want to share your own experience? I'd love to hear from you in the comments below!