When I want to paint something truly sad, I lean into simple images that hold a lot of feeling—quiet spaces, heavy weather, and one small figure trying to breathe through it. If you’re craving sad painting ideas that actually look emotional (not just “dark”), these prompts will give you a strong, visual starting point.
Lonely Figure in the Rain
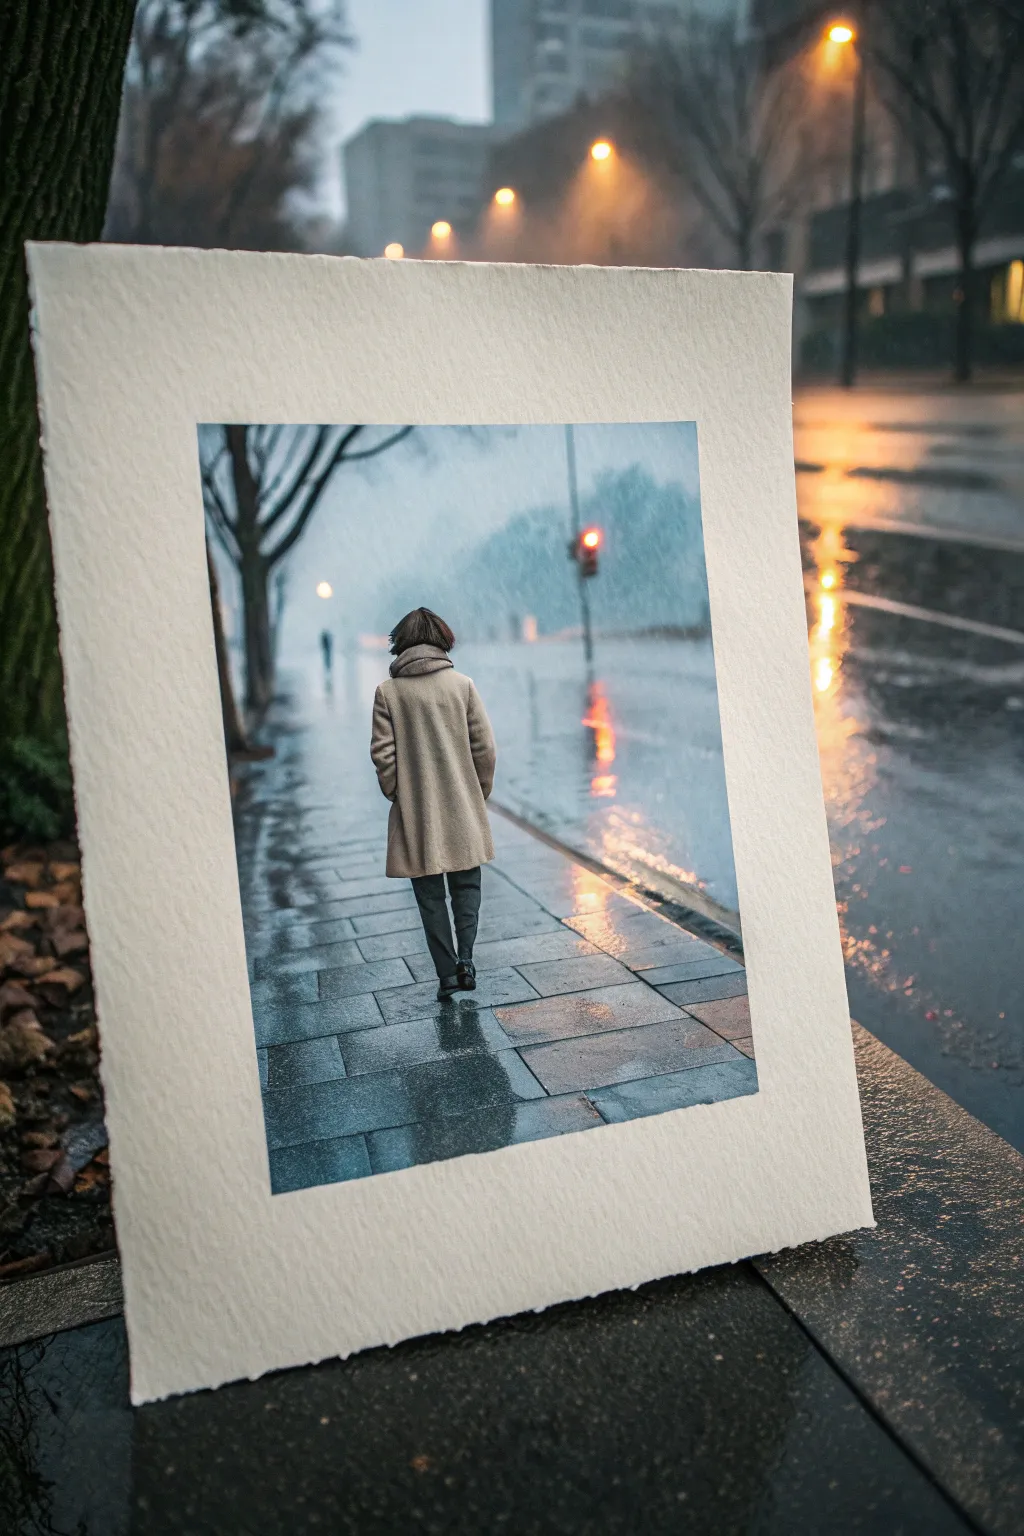
Capture the moody, contemplative atmosphere of a rainy city street with this watercolor project. By focusing on wet-on-wet techniques and reflective surfaces, you’ll create a scene that feels brisk, wet, and deeply emotional.
Step-by-Step Guide
Materials
- Cold press watercolor paper (300 gsm)
- Watercolor paints (Payne’s Gray, Prussian Blue, Burnt Umber, Yellow Ochre, Alizarin Crimson)
- Masking tape
- Round brushes (size 4, 8, and a fine liner)
- White opacity gouache or white gel pen
- Pencil (HB) and kneadable eraser
- Paper towels
- Water jars
Step 1: Sketch and Background Wash
-
Prepare the paper:
Tape your watercolor paper down to a board on all four sides to prevent buckling. Ensure the edges are sealed tight. -
Light sketch:
Using an HB pencil, lightly sketch the horizon line, the vanishing point for the sidewalk perspective, and the basic silhouette of the figure. Keep the lines faint so they don’t show through the transparent paint later. -
Wet the sky:
Brush clean water over the upper half of the paper, covering the sky area down to the horizon line. -
Atmospheric sky:
Drop in a wash of Prussian Blue mixed with a touch of Payne’s Gray. Let the colors bleed softly to create a misty, overcast effect. Keep the value lighter near the horizon. -
Distant trees:
While the paper is still slightly damp, mix a darker cool gray and dab in the shapes of the distant trees on the left. The damp paper will give them soft, fuzzy edges, mimicking distance and rain.
Stay Loose
Don’t overwork the wet pavement. Let the colors bleed naturally. If a puddle blooms unexpectedly, leave it—it adds to the realistic look of water on concrete.
Step 2: The Lonely Figure
-
Coat base layer:
Mix Yellow Ochre with a tiny bit of Burnt Umber to create a beige tone. Paint the main shape of the coat, leaving it slightly lighter on the right shoulder where the light hits. -
Coat shadows:
While the beige is drying, mix a darker version of the same color and add folds and shadows to the back and left side of the coat to give it volume. -
Trousers and shoes:
Paint the trousers using a dark charcoal mix (Payne’s Gray and Burnt Umber). Use distinct, vertical strokes for the legs and darken the shoes to anchor the figure to the ground. -
Hair details:
Using a smaller round brush (size 4), paint the hair with a dark brown mix. Add texture by using only the very tip of the brush.
Step 3: Reflections and Pavement
-
Wet the ground:
carefully wet the pavement area with clean water, avoiding the painted figure’s legs. -
Pavement wash:
Apply a wash of cool blue-gray to the sidewalk. Vary the intensity, making it darker closer to the foreground and lighter as it recedes. -
Reflective lights:
While the pavement wash is wet, drop in small amounts of watered-down Alizarin Crimson or faint orange near the figure’s feet and to the right side to suggest reflected streetlights. -
Adding texture:
Once the wash is dry, use a dry-brush technique with a darker gray to suggest the grid lines of the paving stones. Keep the lines broken and uneven to look natural. -
Figure reflection:
Paint a blurred, vertical shadow directly beneath the figure using a diluted dark gray. Soften the edges with a clean, damp brush so it looks like a wet reflection rather than a hard shadow.
Enhance the Mood
Try tinting your grays with a hint of purple instead of black. This creates a colder, more melancholic rainy atmosphere that feels richer than flat gray.
Step 4: Atmospheric Details
-
Traffic light pop:
Mix a strong, opaque red (or use gouache) and paint the small traffic light in the distance. Add a soft red glaze around it to show the glow in the mist. -
Streetlight glow:
Add a tiny dot of yellow-white for the distant streetlight on the left horizon. -
Tree definition:
Using the size 8 brush, paint the darker, sharper trunk of the tree on the left foreground. I like to keep the branches loose and organic. -
Rain texture:
Load a toothbrush or stiff brush with white gouache and flick tiny droplets over the painting to create the effect of falling rain. -
Final highlights:
Use a white gel pen or opaque white paint to add subtle highlights to the coat’s collar and the edges of the wet paving stones.
Remove the tape carefully to reveal the crisp border around your rainy scene


Silhouette Against a Storm Sky
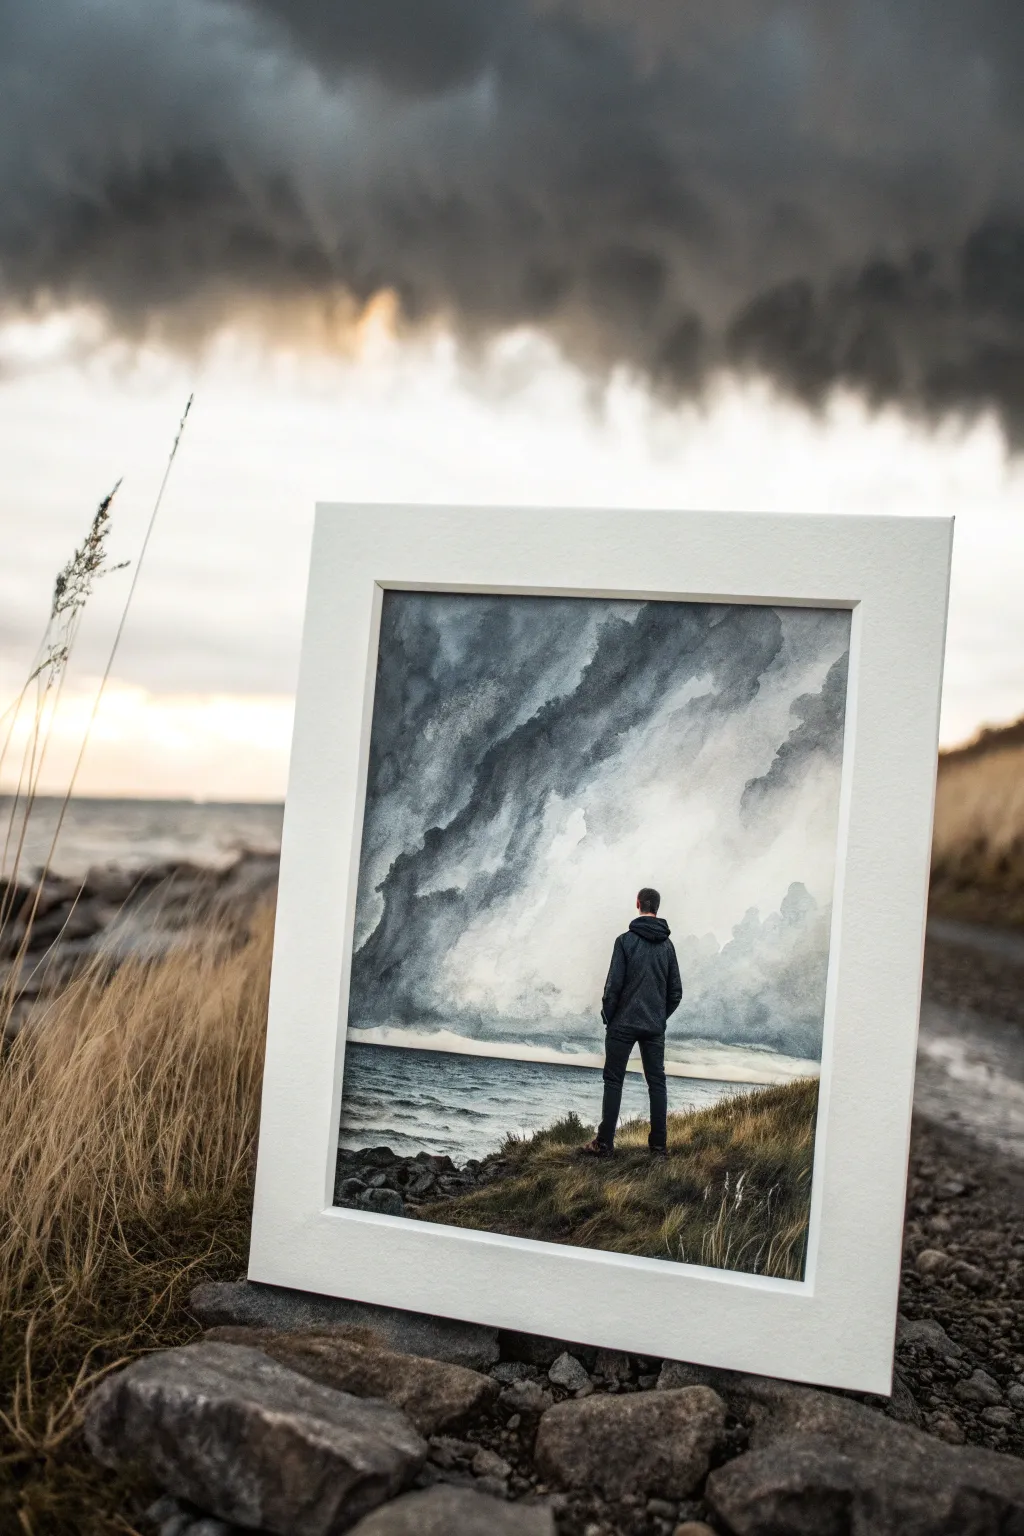
Capture the raw emotion of a brewing storm with this atmospheric watercolor painting. You’ll learn how to build dramatic cloud layers and contrast them with a lonely, contemplative figure on the coast.
Step-by-Step Tutorial
Materials
- Cold press watercolor paper (300gsm)
- Watercolor paints (Indigo, Payne’s Gray, Ultramarine Blue, Burnt Umber, Sepia, Black)
- White Gouache (for highlights and mixing)
- Large round brush (Size 10 or 12)
- Medium round brush (Size 6)
- Fine detail brush (Size 0 or 1)
- Masking fluid (optional)
- Pencil and kneaded eraser
- Clean water and paper towels
- Board and painter’s tape
Step 1: Preparation and Sketching
-
Secure the paper:
Tape your watercolor paper down firmly onto a board. This prevents buckling when we apply heavy water washes later. -
Lightly sketch the horizon:
Draw a faint horizon line roughly in the lower third of the paper. It shouldn’t be perfectly straight; add a slight slope for the grassy bank. -
Draft the figure:
Position your figure slightly off-center to the right. Sketch the outline of a person standing with their back to us, wearing a hooded jacket and jeans. Keep the pencil lines very light so they don’t show through the paint. -
Protect the figure:
If you are not confident painting around the figure, apply a thin layer of masking fluid over your drawing of the person. Let it dry completely before moving on.
Muddy Clouds?
If your clouds turn into one flat gray blob, you’re overworking the paper. Lay the paint down and let the water move it. Stop touching it while it’s wet to preserve the texture.
Step 2: Painting the Stormy Sky
-
Pre-wet the sky area:
With your large brush, brush clean water over the entire sky area, stopping at the horizon line. You want the paper glistening but not swimming in puddles. -
Lay down the base gray:
Mix a watery wash of Payne’s Gray and a touch of Ultramarine. Drop this into the wet paper, leaving some white paper visible near the horizon for light. -
Build storm clouds:
While the paper is still wet, mix a thicker, darker concentration of Indigo and Payne’s Gray. Load your brush and dab it into the upper corners, letting the paint bloom downwards to create heavy cloud masses. -
Create diagonal movement:
Tilt your board slightly or use your brush to guide the dark paint in diagonal strokes towards the horizon. This mimics rain or wind direction. -
Add dramatic contrast:
Mix your darkest gray (almost black) and drop it into the wettest parts of the clouds to deepen the shadows. I find that adding a tiny bit of Sepia here warms up the storm just enough to make it feel ominous. -
Soften the horizon:
As you get closer to the horizon line, dilute your paint significantly. Keep the area directly behind the figure relatively light to create a strong silhouette effect later. -
Dry partially:
Let the sky dry until it loses its glossy sheen but is still cool to the touch.
Step 3: The Sea and Foreground
-
Paint the distant sea:
Using a flat horizontal stroke with the medium brush, paint the water with a mix of Indigo and a little Emerald Green or Teal. Keep the strokes harsh and choppy to suggest waves. -
Add whitecaps:
Lift out tiny horizontal slivers of paint with a clean, damp brush or use white gouache later to suggest cresting waves near the shore. -
Base layer for the grass:
Mix Burnt Umber and Olive Green. Paint the grassy dune area in the foreground using upward flicking motions to suggest tall, windblown grass. -
Deepen the foreground shadows:
While the grass layer is damp, drop in concentrated Sepia and Black at the very bottom edge and around the rocks to ground the scene.
Add Rain Texture
While the sky is damp (not soaking), take a stiff brush with clean water and flick tiny droplets onto the cloud area. This creates ‘blooms’ that look like distant rain texture.
Step 4: The Figure and Details
-
Remove masking fluid:
Once the paper is bone dry, gently rub off the masking fluid if you used it. -
Paint the jacket:
Using the detail brush and a thick mix of Payne’s Gray and Black, paint the jacket. Leave tiny slivers of white paper along the shoulders and hood to act as highlights. -
Detail the jeans:
Paint the legs with a slightly bluer tone (Indigo mixed with Black). Ensure the feet look firmly planted in the grass by painting grass blades overlapping the shoes. -
Refine the grass:
Use the fine liner brush and a mix of Gouache and yellow ochre to paint crisp, individual blades of dried grass in the immediate foreground. -
Final highlights:
Use tiny dots of white gouache to add highlights to the figure’s shoulders and perhaps a few sparkles on the water to tie the lighting together.
Let the painting dry completely before framing it to admire your moody masterpiece.


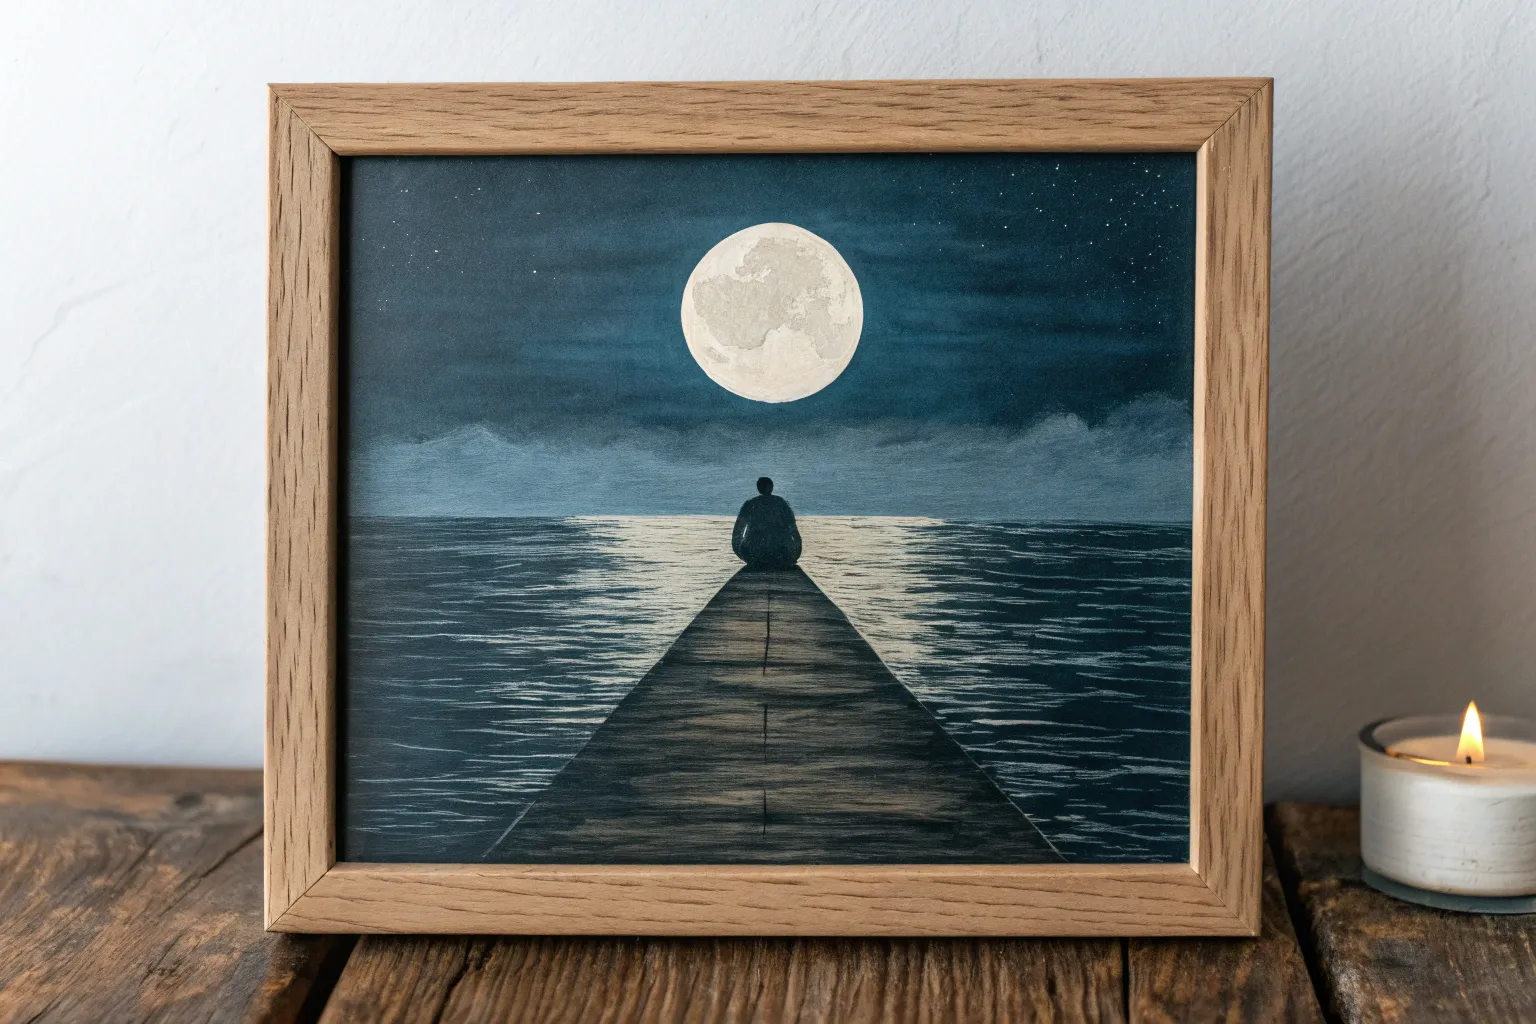
Person Staring at an Oversized Moon
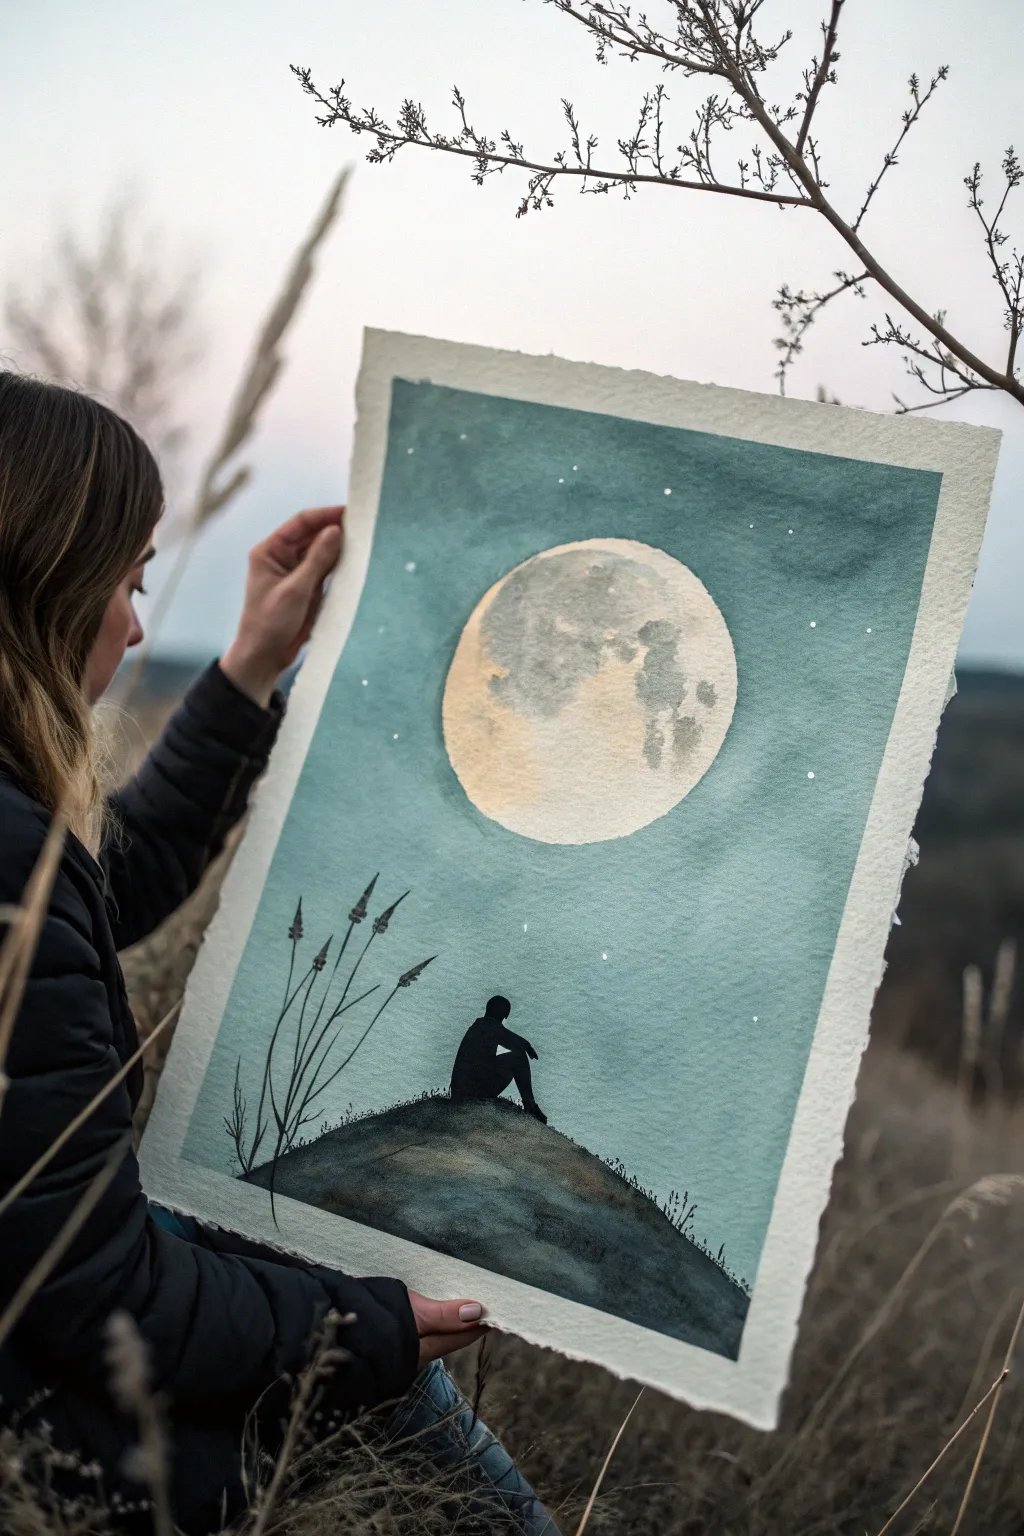
This evocative piece captures a sense of quiet contemplation with a striking silhouette against an oversized moon. The textured teal sky and detailed lunar surface create a moody, atmospheric backdrop that is surprisingly achievable with wet-on-wet techniques.
Step-by-Step
Materials
- Cold press watercolor paper (140lb/300gsm, preferably with deckled edges)
- Masking fluid
- Pencil and eraser
- Watercolor paints: Indigo, Prussian Blue, Burnt Umber, Yellow Ochre, Lamp Black
- White gouache or white gel pen
- Round brushes (sizes 4, 8, and 12)
- Small liner brush (size 0 or 00)
- Paper towels
- Painter’s tape or drawing board
- Salt (optional for texture)
Step 1: Preparation and Sketching
-
Tape down the paper:
Secure your watercolor paper to a board. For this specific look, you might want to leave the deckled edges exposed rather than taping over them, or tape carefully just on the back if the paper is thick enough. -
Outline the composition:
Lightly sketch a large circle in the upper center for the moon. You can trace a bowl or roll of tape to get a perfect shape. -
Add the hill:
Draw a curved hill at the bottom of the paper. It should be an uneven, organic mound shape that takes up the bottom quarter of the page. -
Protect the moon:
Apply masking fluid carefully over the entire moon circle. This step is crucial to keep the moon bright white while you paint the dark sky. Let the fluid dry completely.
Bleeding Edges?
If paint bleeds under your masking fluid, wait for it to fully dry. Then, use a damp stiff brush to gently ‘scrub’ and lift the unwanted color back to white.
Step 2: Painting the Atmospheric Sky
-
Prepare the sky wash:
Mix a large amount of teal-blue wash. Combine Prussian Blue with a touch of Emerald Green or use a pre-mixed Teal color, keeping it quite watery. -
Apply the base layer:
Using your largest round brush, wet the sky area (everything except the hill and the masked moon) with clean water first. -
Drop in color:
While the paper is wet, painting from the top down, apply your teal wash. I like to make the top slightly darker and let it fade just a tiny bit as it nears the horizon line, though the sky here is quite uniform. -
Create texture:
If you want that slightly mottled look seen in the reference, you can drop clean water droplets onto the drying paint or sprinkle a tiny pinch of salt in the corners. -
Let it dry:
Allow the sky to dry completely. This takes patience, but if you rush, the next steps will bleed.
Step 3: The Moon and Stars
-
Reveal the moon:
Once the sky is bone dry, gently rub off the masking fluid to reveal the crisp white circle. -
Paint the lunar surface:
Mix a very diluted grey using Lamp Black and water, and a separate warm wash using Yellow Ochre. Wet the moon circle slightly. -
Add craters and shadows:
Dab the grey wash into the wet moon to create cloud-like ‘seas’ on the lunar surface. Add touches of Yellow Ochre for that warm, glowing feeling on the left side. -
Refine moon details:
Use a smaller brush to add slightly darker grey spots for craters, keeping edges soft. Leave plenty of white paper showing for brightness. -
Add stars:
Using white gouache or a white gel pen, dot random stars in the sky. Make some slightly larger than others for variety, focusing them around the moon.
Pro Tip: Lunar Glow
To make the moon really pop, re-wet the sky area just around the moon’s edge and lift a tiny bit of blue pigment with a clean brush for a glowing halo effect.
Step 4: The Silhouette and Foreground
-
Paint the hill base:
Mix a dark grey-green. Use Indigo mixed with Burnt Umber. Paint the hill shape wet-on-dry so you get a hard edge against the sky. -
Darken the hill:
While the hill is still damp, drop in pure black near the bottom to give it weight and dimension. -
Draft the figure:
Once the hill is dry, lightly pencil in the silhouette of the person sitting. Ensure their posture looks slumped or contemplative, with knees up. -
Fill the silhouette:
Using thick Lamp Black and a size 4 brush, carefully fill in the figure. It must be opaque black to stand out against the moonlit background. -
Paint the tall grass:
With your smallest liner brush (size 0), paint thin, wispy lines rising from the left side of the hill. -
Add grass details:
Paint small seed heads on the tips of the tallest grasses using a tiny dabbing motion. This adds a nice delicate touch to the foreground. -
Final touches:
Add tiny grass blades along the very top edge of the hill silhouette to make it look grounded and natural.
Now you have a serene, sentimental piece of art that perfectly captures a quiet moment of reflection
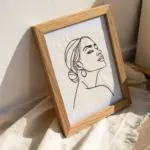
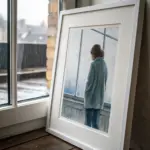
Self-Portrait in Muted Grays
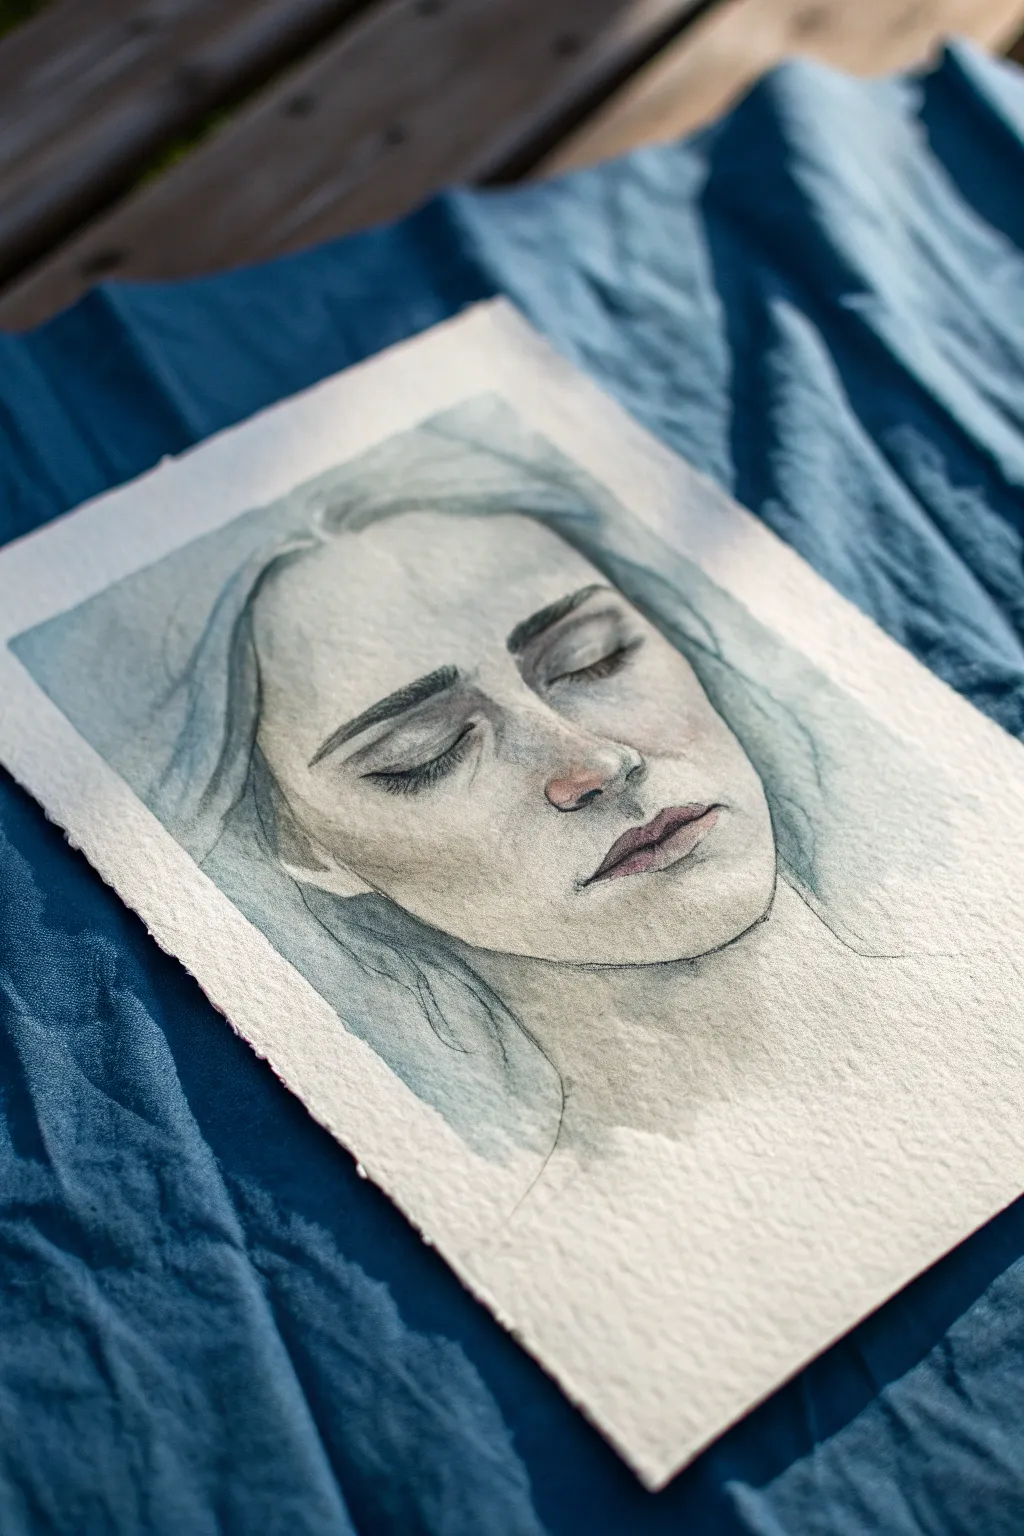
Capture the quiet fragility of a moment with this gentle, ethereal portrait focusing on muted tones and subtle emotions. Using a blend of pencil sketching and soft watercolor washes, you’ll create a piece that feels both personal and peacefully melancholic.
How-To Guide
Materials
- Heavyweight cold-press watercolor paper (300gsm+)
- Graphite pencils (HB and 2B)
- Watercolor paints (Payne’s Gray, Ultramarine Blue, Alizarin Crimson, Burnt Umber)
- Round watercolor brushes (sizes 4, 8, and a fine liner)
- Clean water jar
- Paper towels
- Kneaded eraser
Step 1: Sketching the Foundation
-
Paper Preparation:
Start by tearing the edges of your watercolor paper instead of cutting them. This creates a deckled, raw edge that adds to the emotive, classic feel of the final piece. -
Basic Contours:
Using an HB pencil, lightly map out the face shape. Because the subject is lying down or looking down with eyes closed, focus on the foreshortening of the forehead and the curve of the jawline. -
Feature Placement:
Mark the position of the eyes, nose, and mouth. The eyes should be closed gentle curves with no tension. Keep your lines incredibly faint; you don’t want heavy graphite showing through the pale skin tones later. -
Refining the Details:
Switch to a 2B pencil to gently define the eyebrows and the parting of the lips. Sketch the hair flowing loosely around the face, suggesting movement without drawing every single strand.
Muddy Complexion?
If your skin tones look gray or dirty, you likely overmixed the complementary colors on the palette. Let layers dry fully before glazing a new color on top to keep them clean.
Step 2: Layering the Wash
-
Mixing the Skin Tone:
Create a very watery, pale wash using a touch of Burnt Umber and a tiny drop of Alizarin Crimson. You want a ‘dirty’ pink rather than a bright flesh tone. -
Initial Face Wash:
Apply this pale wash over the entire face area, avoiding only the highest highlights on the nose tip and brow bone. Let this layer dry completely. -
Building Shadows:
Mix a diluted Payne’s Gray into your skin tone mix. Apply this to the eye sockets, under the nose, and beneath the lip to start carving out dimension. -
Adding Warmth:
While the paper is slightly damp but not soaking, drop a slightly more saturated pink (Alizarin Crimson) onto the nose and lips. This ‘wet-on-damp’ technique creates soft, diffused edges. -
Muted Grays:
For the shadowed side of the face and neck, use a cool gray wash (Ultramarine Blue + Burnt Umber). Glaze this gently over dry paint to deepen the mood without muddying the colors.
Keep It Loose
Don’t overwork the hair. Leave white gaps in the watercolor wash to represent shine. The pencil lines you added later will do the heavy lifting for definition.
Step 3: Defining Features
-
The Eyes and Brows:
Using a size 4 brush and a darker gray mix, carefully paint the eyebrows. Use short, flicking strokes to mimic hair growth. Darken the crease of the closed eyelid just slightly. -
Lip Detail:
Deepen the color of the lips with a concentrated mix of Alizarin Crimson and a touch of brown. Focus the darkest pigment in the center line where the lips meet. -
Hair Base:
Mix a large puddle of watery blue-gray. Apply this loosely to the hair area, letting the water carry the pigment into the paper’s texture. Don’t worry about staying perfectly inside the lines. -
Hair Texture:
Once the hair base is dry, use a 2B pencil to draw deliberate, flowing contour lines through the painted hair. This mixed-media touch adds graphical definition. -
Final Pencil Touches:
I like to go back in with a sharp pencil to re-emphasize the eyelashes and the nostril curve. This crisp graphite line contrasts beautifully with the soft watercolor wash. -
Soft Background:
Add a very faint wash of blue-gray around the head to help the portrait pop forward, fading it out into the white of the paper edges.
Step back and admire the quiet emotion conveyed in your delicate portrait
BRUSH GUIDE
The Right Brush for Every Stroke
From clean lines to bold texture — master brush choice, stroke control, and essential techniques.
Explore the Full Guide
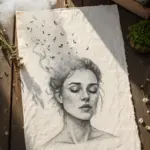
Face Fading Into Smoke
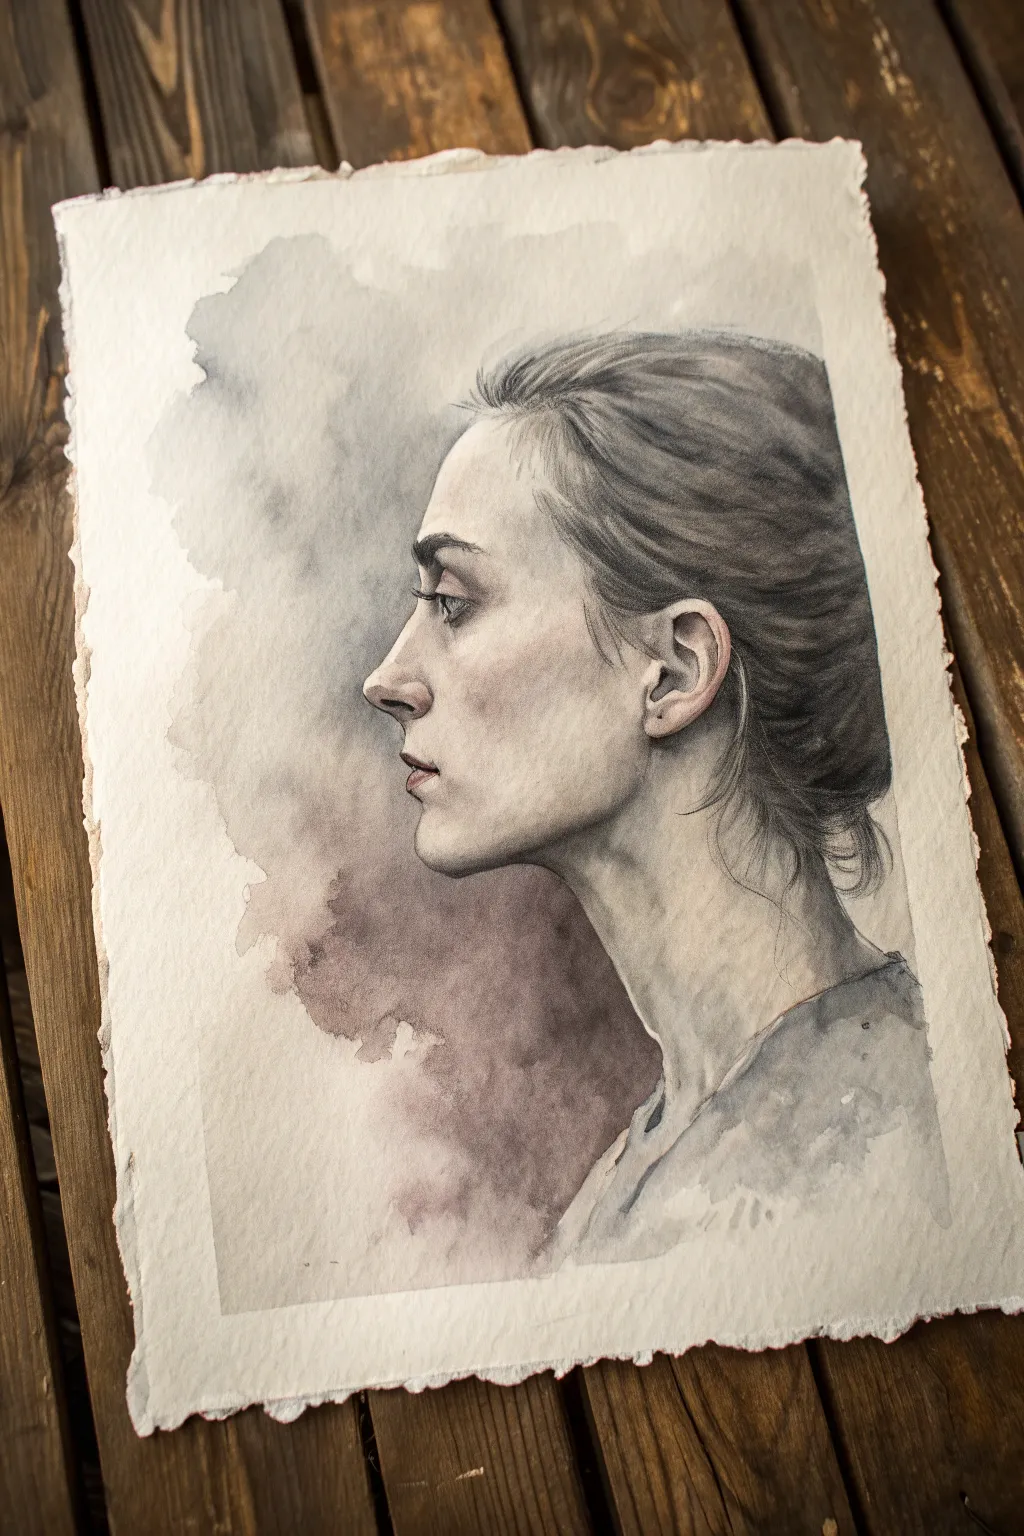
Capture the delicate balance between form and mist with this emotive watercolor portrait. This project focuses on realistic facial structure dissolving into an ethereal, smoky background using a limited, muted palette.
Detailed Instructions
Materials
- Cold Press watercolor paper (300 gsm) with deckled edges
- Watercolor paints: Payne’s Grey, Burnt Umber, Alizarin Crimson, Yellow Ochre
- Graphite pencil (HB or 2B)
- Kneaded eraser
- Round watercolor brushes (Size 2, 6, and 10)
- Flat wash brush (1/2 inch)
- Mixing palette
- Two jars of water
- Paper towels
- Masking tape (optional)
Step 1: Structuring the Profile
-
Initial sketch:
Begin with a light graphite sketch of the profile. Focus on the sharp angle of the nose, the curve of the lips, and the jawline. Don’t press too hard, as watercolor is transparent. -
Refining features:
Add details to the eye, ensuring the eyelid has a visible crease and the lashes are indicated but soft. Sketch the ear structure carefully, as it’s a prominent anchor point. -
Hair flow:
Lightly map out the direction of the hair strands, sweeping them back from the forehead. Keep the lines loose at the back of the head where it will meet the smoke. -
Clean up:
Use a kneaded eraser to lift any excess graphite dust. The drawing should be barely visible, just enough to guide your brush.
Muddy colors?
If your smoke looks brown instead of misty grey, you’re observing ‘mud.’ Wait for layers to fully dry before glazing, or clean your water jar more often.
Step 2: Painting the Skin Tones
-
Base flesh wash:
Mix a very watery wash of Yellow Ochre and a tiny touch of Alizarin Crimson. Apply this pale wash over the face and neck, leaving the highlight on the nose and forehead white. -
Developing shadows:
While the paper is slightly damp but not soaking, mix a diluted grey-purple using Payne’s Grey and Alizarin Crimson. Paint the shadows under the jawline, the eye socket, and the side of the nose. -
Deepening contrast:
Once the first layer is dry, use a size 6 brush with a stronger mix of the shadow color to define the nostril, the corner of the mouth, inside the ear, and the pupil. -
Blush tones:
Add a very sheer glaze of Alizarin Crimson to the cheek, the tip of the nose, and the earlobe to bring warmth and life to the skin. -
Adding texture:
With a damp, clean brush, soften any hard edges on the face, blending the shadow into the light areas for a smooth skin texture.
Step 3: The Hair and Smoke Effect
-
Base hair layer:
Using Payne’s Grey and Burnt Umber, paint the main mass of the hair. Use long, sweeping strokes that follow your sketch lines. -
Detailed strands:
Switch to a size 2 brush and a darker, less diluted mix. Paint individual hairs near the hairline, ear, and the ‘flyaways’ at the nape of the neck for realism. -
Starting the smoke:
Wet the paper area behind the profile (the negative space) with clean water. Do not touch the face yet, but come right up to the back of the hair. -
Dropping in color:
Load a large round brush with a watery Payne’s Grey and a touch of purple. Touch the wet paper and watch the color bloom outward. -
Merging hair and background:
While the background is wet and the back of the hair is still damp, gently drag some of the dark hair pigment into the wet background wash to blur the boundary. -
Creating clouds:
Add more pigment to the wet background in random patches to create a cloudy, uneven accumulation of ‘smoke.’ I find tilting the paper helps the paint drift naturally. -
The fade out:
Use a clean, damp brush to feather the edges of the smoke wash so it disappears into the white of the paper without a hard line.
Emotional atmosphere
Try tinting your water with a drop of blue ink before painting the smoke wash. This subtly cools the entire background, making the warm skin tones pop.
Step 4: Final Touches
-
Clothing suggestion:
Paint the suggestion of the shirt collar loosely with a mid-tone grey wash. Let it be undefined and blurry compared to the face. -
Sharpening focal points:
Once everything is bone dry, add the darkest accents: the eyelashes, the darkest crevice of the ear, and the pupil. -
Highlights:
If you lost the white sparkle in the eye, use a tiny dot of white gouache or a gel pen to bring it back.
Step back and appreciate the quiet, contemplative mood you’ve captured on the rough paper
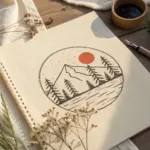
Floating Island With No Way Down
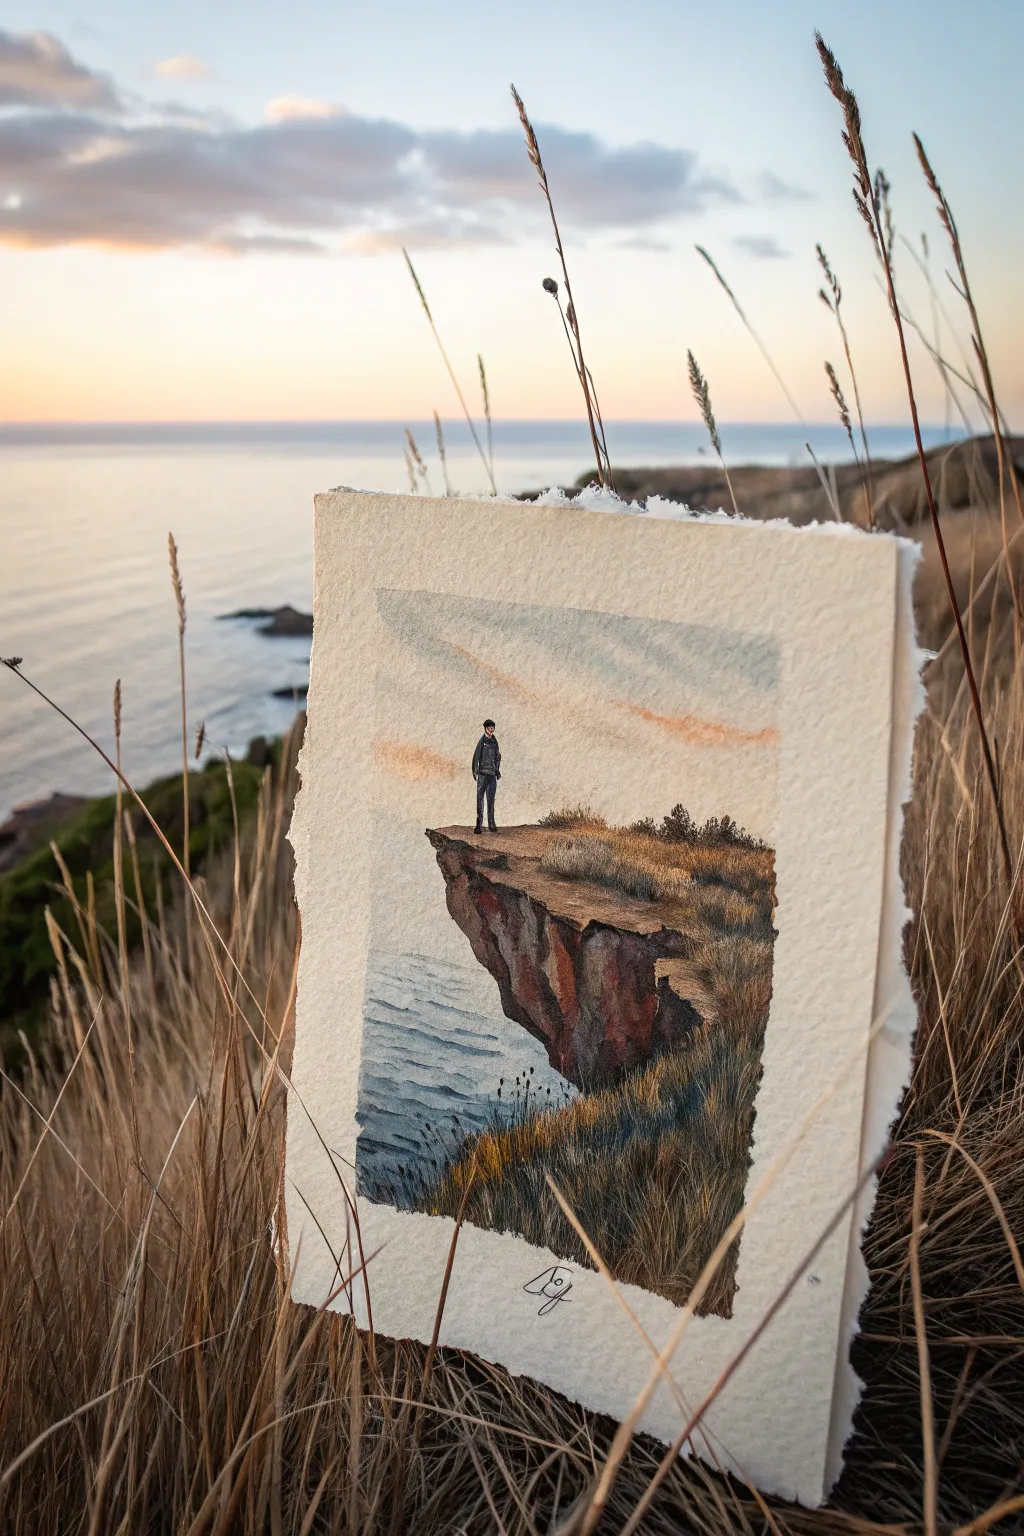
Capture the poignant isolation of a lone figure standing atop a rugged cliff in this emotive watercolor study. Using textured cold-press paper and a muted, natural palette, you’ll create a scene that feels both vast and intimate.
Step-by-Step Tutorial
Materials
- Heavyweight cold-press watercolor paper (300gsm/140lb or higher) with deckled edges
- Watercolor paints (Payne’s Grey, Burnt Sienna, Yellow Ochre, Ultramarine Blue, Alizarin Crimson)
- Small round brushes (Size 0, 2, and 4)
- Flat shader brush (Size 6)
- Pencil (HB or H) for light sketching
- Kneaded eraser
- Masking fluid (optional)
- White gouache or gel pen
- Two jars of water
- Paper towels
Step 1: Preparation and Sketching
-
Prepare the Paper:
If your paper doesn’t have a natural deckled edge, you can gently tear the edges against a ruler to create that rough, organic look seen in the photo. Tape the paper down to a board, leaving a border of about an inch on all sides. -
Sketch the Horizon:
Lightly draw the horizon line about two-thirds of the way down the page. Keep it perfectly straight to suggest a calm ocean. -
Outline the Cliff:
Sketch the jagged profile of the cliff jutting out from the right side. Focus on the sharp undercut and the uneven top surface where the grass grows. -
Place the Figure:
Draw a tiny silhouette of a person standing near the cliff’s edge. Keep the figure small to emphasize the scale of the landscape; simple shapes work best here, like a rectangle for the legs and a slight oval for the torso.
Dry Brush Technique
For realistic rock texture, load your brush with pigment but blot most moisture on a towel. Drag the brush sideways over the paper so paint catches only the tooth of the paper.
Step 2: Painting the Sky and Sea
-
Wet-on-Wet Sky:
Wet the sky area with clean water. Drop in very diluted washes of Yellow Ochre near the horizon for a sunset glow, blending into a soft Ultramarine Blue mixed with a touch of grey as you move upward. -
Add Cloud Textures:
While the sky is still damp, lift out some pigment with a clean, dry brush to create faint, streaky clouds. Let this layer dry completely. -
First Ocean Wash:
Mix a cool, light blue using Ultramarine and a dot of Payne’s Grey. Apply a flat wash for the ocean, keeping it lighter near the horizon line to suggest atmospheric perspective. -
Ocean Details:
Once the first sea layer is dry, use a size 2 brush to paint horizontal ripples. Darken the blue slightly for the waves closer to the cliff bottom to show depth.
Atmospheric Depth
Make the horizon line slightly blurry by running a clean damp brush along it before the paint dries. This pushes the horizon back, making the sad isolation feel more immense.
Step 3: The Cliff and Figure
-
Base Cliff Tone:
Mix Burnt Sienna with a little Payne’s Grey to get a rocky brown. Paint the vertical face of the cliff, allowing the color to be uneven to mimic stone texture. -
Adding Shadows:
While the rock face is damp, drop in stronger concentrations of Payne’s Grey or dark brown into the crevices and under the overhangs to create deep shadows and volume. -
Top Grass Layer:
Use Yellow Ochre mixed with a touch of green for the grassy top. Use upward flickering strokes with a size 0 brush to simulate dry grass blades catching the light. -
Deepening the Grass:
Once the first grass layer is dry, add darker, burnt orange and brown strokes near the bottom of the grassy area to create density. -
Painting the Figure:
Using your smallest brush and a very concentrated mix of Payne’s Grey (almost black), carefully fill in the figure. Add a tiny shadow stretching away from their feet to ground them on the rock.
Step 4: Final Details
-
Foreground Foliage:
In the immediate foreground at the bottom right, paint longer, sharper strokes of dark grass. These should be looser and darker to frame the scene. -
Highlights:
Use a tiny amount of white gouache or a gel pen to add sea foam where the water meets the cliff base, and perhaps a highlight on the figure’s shoulder. -
Sign and Remove Tape:
Add your signature comfortably below the painted area. Carefully peel away the masking tape to reveal the clean border contrasting with the deckled edge.
Now you have a tranquil, contemplative piece that beautifully captures a moment of quiet reflection.

PENCIL GUIDE
Understanding Pencil Grades from H to B
From first sketch to finished drawing — learn pencil grades, line control, and shading techniques.
Explore the Full Guide
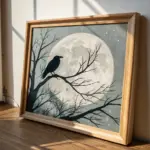
Moon Conversation in a Starless Night
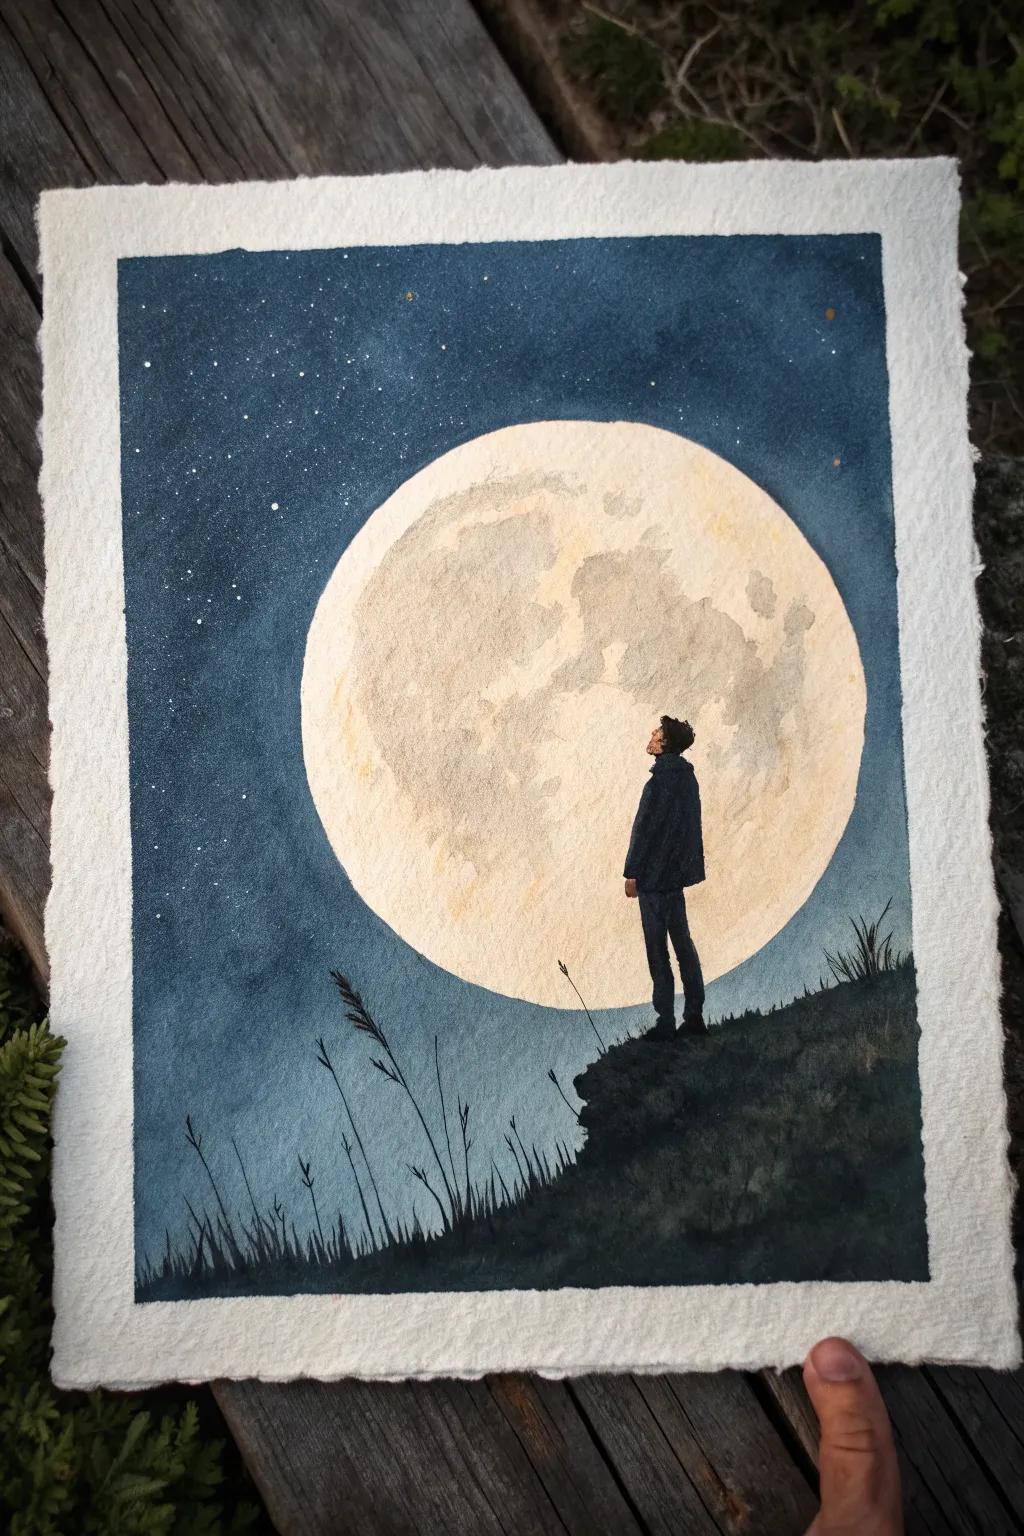
Capture the quiet introspection of a solitary figure gazing at a massive, luminous moon in this evocative watercolor piece. The contrast between the brilliant lunar surface and the deep indigo sky creates a powerful mood of peaceful isolation.
How-To Guide
Materials
- Cold press watercolor paper (300 gsm)
- Masking fluid or drawing gum
- Watercolor paints: Indigo, Prussian Blue, Paynes Gray, Yellow Ochre, Burnt Sienna
- Flat wash brush (large)
- Round brushes (sizes 4 and 0)
- Pencil and geometric compass (or a round object to trace)
- Paper towels
- Palette for mixing
Step 1: Planning and Masking
-
Outline the composition:
Begin by lightly sketching the scene. Use a compass or trace a large bowl to create a perfect circle for the moon in the center-right of the paper. -
Sketch the figure and ground:
Below the moon, draw a steep, uneven slope representing the hilltop. Add a small, simple silhouette of a person standing near the edge, looking upward. -
Protect the moon:
Apply masking fluid carefully over the entire moon circle. This is crucial for keeping that area pristine white while you paint the dark sky later. Let it dry completely until it’s hard to the touch.
Clean Edges
If your masking fluid tears the paper upon removal, you likely pulled too fast or the paper was too soft. Next time, warm the fluid slightly with your hand before rubbing.
Step 2: Painting the Night Sky
-
Prepare the wash:
Create a large pool of dark blue paint on your palette. Mix Indigo with a touch of Prussian Blue to get a deep, rich midnight hue. -
Wet-on-wet technique:
Wet the entire sky area (everything outside the moon and the hill) with clean water. The paper should be glisten, but not hold puddles. -
Apply the gradient:
Start applying your dark blue mix at the top corners, where the sky is darkest. Work your way down towards the horizon. -
Create atmospheric depth:
As you get closer to the hill and the moon, dilute your paint slightly with water to make the blue lighter, suggesting atmospheric glow. -
Add stars:
While the sky is still slightly damp but losing its sheen, splatter a tiny amount of clean water or white gouache for stars. Alternatively, wait until it’s bone dry and use a white gel pen.
Step 3: The Lunar Surface
-
Remove the mask:
Once the sky is 100% dry, gently rub away the masking fluid with your finger or a rubber cement pickup to reveal the crisp white circle. -
Initial moon wash:
Mix a very watery, pale wash of Yellow Ochre. Paint the entire moon surface lightly to remove the stark white of the paper. -
Adding texture:
While the moon is damp, drop in slightly stronger touches of diluted Burnt Sienna and a light gray mix to create craters and maria (the dark plains). -
Softening edges:
Keep the textures soft and blurry. The moon shouldn’t look like a diagram, but rather a glowing orb. Use a clean, damp brush to lift color if areas get too dark.
Starry Depth
Vary your star sizes. Use a toothbrush to flick fine mist for distant stars, and place individual dots with a white gel pen for brighter, closer stars.
Step 4: Foreground and Figure
-
Paint the hill:
Mix a dense black using Indigo and Paynes Gray. Paint the solid silhouette of the hill, ensuring the top edge is rough and organic to look like grass and earth. -
Detail the grass:
Using your smallest round brush (size 0), flick quick, upward strokes along the hill’s edge to create tall blades of grass and wild reeds. -
Paint the figure:
Fill in the sketched figure with the same dark mix. Define the clothing folds slightly with a lighter grey-blue to give the coat dimension, rather than making it a flat black shape.
Step 5: Final Touches
-
Add highlights:
If the figure looks too flat against the dark hill, add a tiny rim of light on the shoulder and hair facing the moon using opaque white gouache or a gel pen. -
Review contrast:
Step back and check the values. The sky needs to be dark enough to make the moon pop. If needed, glaze another layer of Indigo over the sky (avoiding the moon carefully).
Peeling away the tape to reveal the clean border makes the vastness of the scene feel contained and meaningful


Have a question or want to share your own experience? I'd love to hear from you in the comments below!