
When I want a painting to feel instantly spooky, I lean on bold contrast, simple shapes, and a little story hiding in the shadows. These scary Halloween painting ideas start with classic icons you already love, then get more unusual as you scroll—so you can find your perfect level of creepy.
Haunted House Silhouette Under a Full Moon
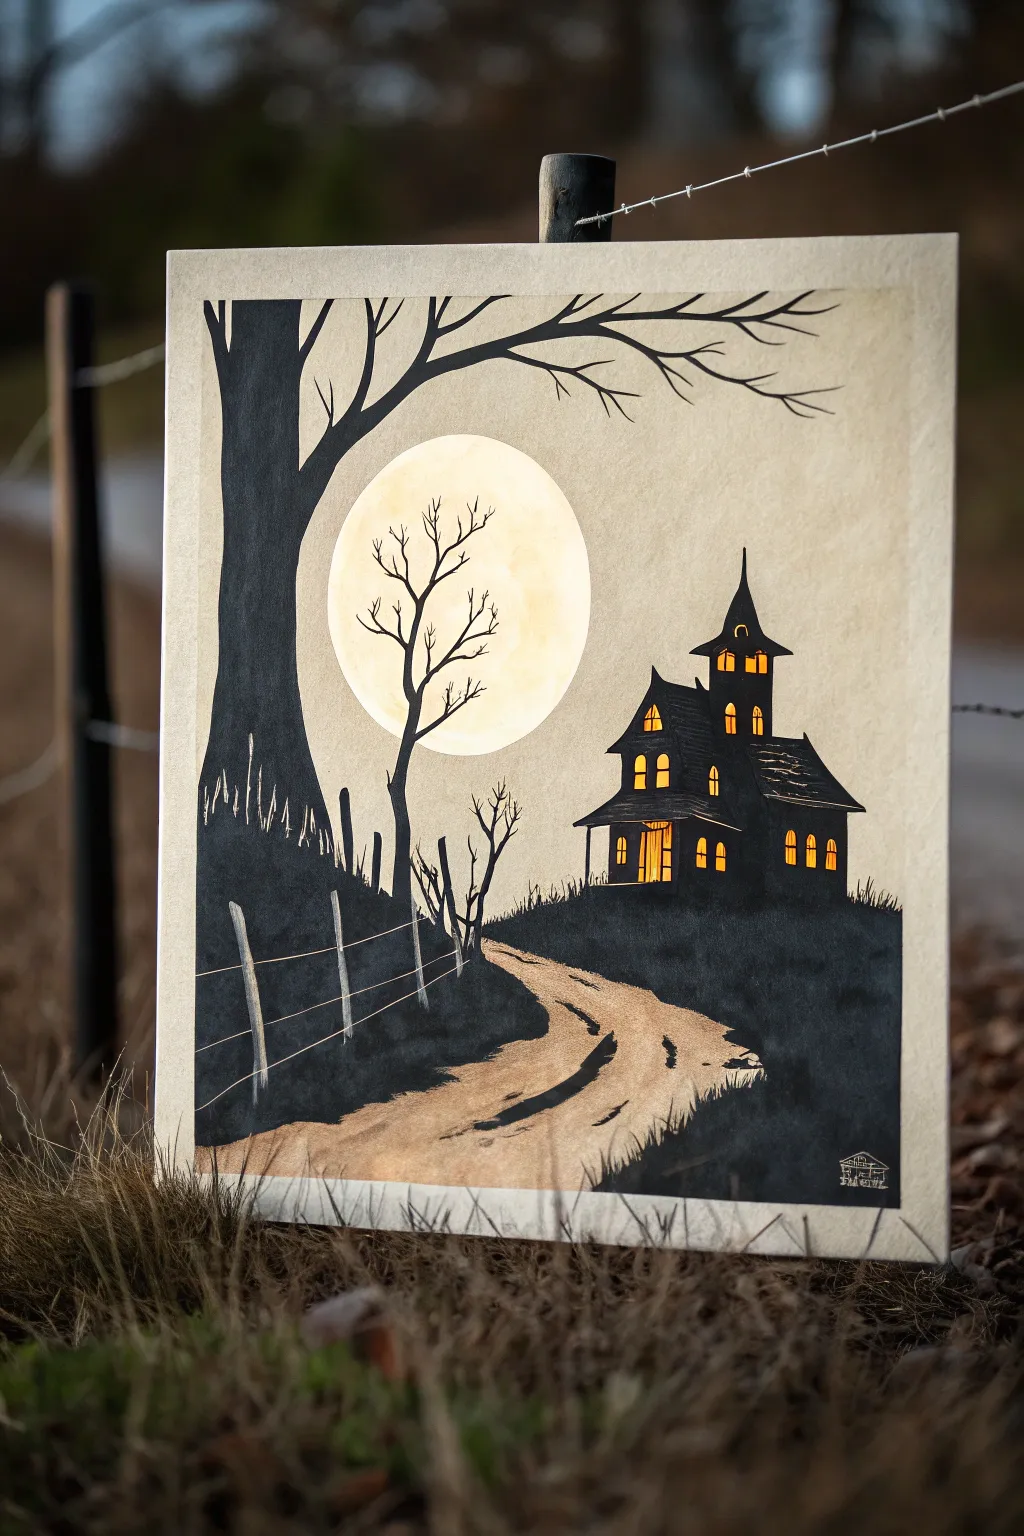
Capture the eerie glow of Halloween night with this striking silhouette painting that plays with light and shadow. The piece features a looming haunted house and gnarled trees set against a creamy moonlit sky, created using a limited palette for maximum graphic impact.
Step-by-Step Guide
Materials
- Thick watercolor paper or mixed media board (approx. 9×12 inches)
- Black acrylic paint or India ink
- Warm white or cream acrylic paint
- Yellow ochre and burnt sienna acrylic paint (for the path)
- Wide flat brush (1 inch)
- Medium round brush (size 6 or 8)
- Fine liner brush (size 0 or 1)
- Pencil and eraser
- Circle template or compass (optional)
- Masking tape
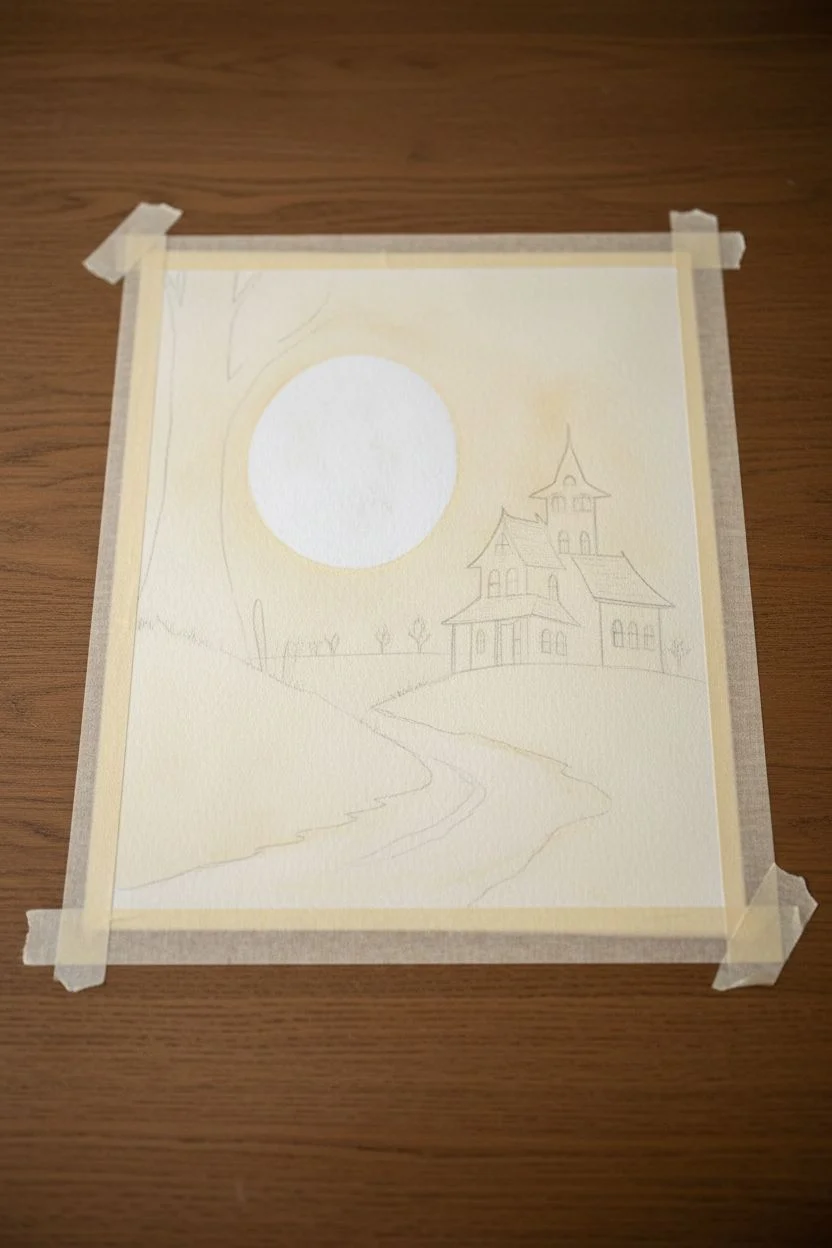
Step 1: Setting the Moonlit Stage
-
Prepare the surface:
Begin by taping down the edges of your watercolor paper to a board with masking tape. This creates a clean white border around your final piece and prevents the paper from buckling. -
Establish the background tone:
Mix a wash of warm white with just a tiny drop of yellow ochre to create that vintage parchment color. Cover the entire paper area inside the tape and let it dry completely. -
Sketch the composition:
Lightly sketch the horizon line about one-third of the way up the page. Draw a large circle for the moon slightly off-center to the left, and outline the winding path leading from the foreground toward the house’s location. -
Draft the silhouettes:
Outline the shape of the haunted house on the right side, focusing on varied roof peaks and a pointy turret. Add the large tree on the left foreground and smaller trees in the distance. -
Paint the moon:
Using creamy white paint, fill in your moon circle. While the paint is still wet, dab in very subtle touches of diluted yellow ochre or grey to suggest craters and texture, keeping the center brightest.
Don’t Be Shaky
For steady lines on thin branches, rest your pinky finger on a dry part of the paper to anchor your hand. Adding a tiny drop of water to your black paint improves flow for long strokes.
Step 2: Building the Shadows
-
Block in the ground:
Load your medium brush with black paint. Fill in the grassy hills on either side of the path, creating an uneven, grassy texture along the top edge of the horizon line. -
Paint the path base:
Mix white, yellow ochre, and a touch of burnt sienna to get a light sandy color. Paint the winding road, letting it be wider at the bottom and narrowing as it recedes. -
Define the path edges:
While the path dries, refine the black edges of the grass meeting the road. Use flicking motions with a smaller brush to make it look like grass blades overlapping the dirt. -
Add path shadows:
Take watered-down black paint or a dark grey mix and paint cast shadows across the path, mimicking the direction of the tree branches and fence posts.
Step 3: The Haunted House
-
Fill the house silhouette:
Using solid black paint and a steady hand, fill in the entire shape of the house. Use the fine liner brush to get sharp points on the roof peaks and eaves. -
Create the windows:
Once the black house is dry to the touch, mix a bright, glowing orange-yellow. Carefully paint small window shapes—arches and rectangles—right on top of the black. -
Add window details:
You might need a second coat of yellow to make them pop. Use your finest brush with black paint to add tiny cross-panes back into the yellow windows for realism.
Make It Glossy
Once fully dry, apply a spot of clear gloss varnish or clear nail polish over just the yellow window panes. This mimics the shine of real glass against the matte house.
Step 4: Atmospheric Details
-
Paint the main tree:
Using the large brush for the trunk and the liner brush for branches, paint the massive tree on the left. Let the branches reach out dramatically over the moon, tapering to fine points. -
Add the spindly tree:
Paint a smaller, thinner dead tree directly inside the moon silhouette. This creates amazing contrast and depth. -
Construct the fence:
Draw thin, vertical posts along the left side of the path. Connect them with two or three droopy horizontal lines to represent wire or old rails. -
Final highlights:
Add very subtle highlights to the fence posts and the edge of the tree trunk facing the moon using a diluted white or grey paint. -
Reveal the border:
Wait until the painting is 100% dry, then slowly peel away the masking tape at a 45-degree angle to reveal your crisp, professional border.
Hang this moody masterpiece in a dim hallway to give your guests a proper Halloween shiver


Misty Graveyard With Ghost Shapes in the Fog

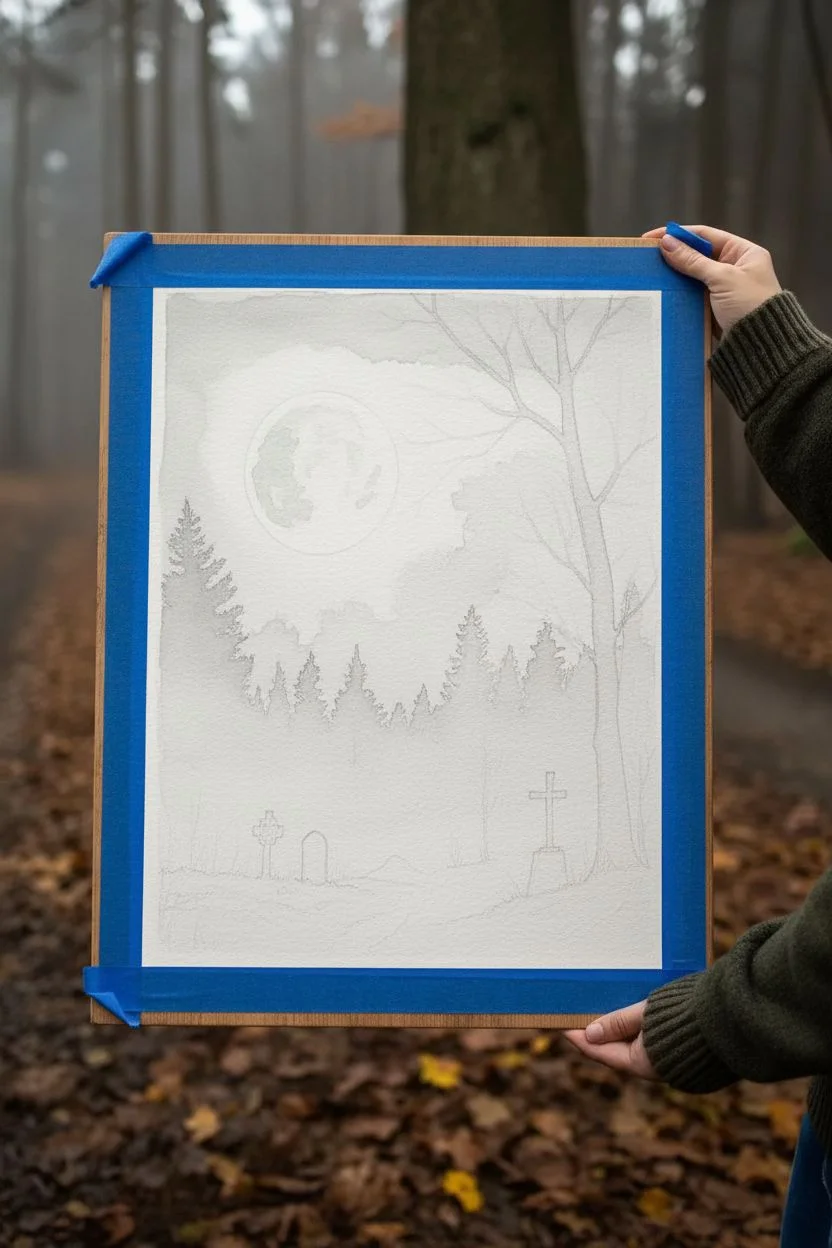
Capture the eerie essence of a foggy Halloween night with this watercolor painting that relies on layers and value control to create depth. You’ll build up a ghostly atmosphere using only black paint and water, resulting in a haunting scene perfect for the spooky season.
Detailed Instructions
Materials
- Cold Press Watercolor Paper (140lb/300gsm)
- Black Watercolor Paint (e.g., Lamp Black or Ivory Black)
- Round Brushes (Sizes 2, 6, and 10)
- White Gouache or White Gel Pen
- Masking Fluid (optional but helpful)
- Two Jars of Water
- Paper Towels
- Painter’s Tape
- Pencil and Eraser
Step 1: Preparation and The Moon
-
Tape your paper:
Secure your watercolor paper to a board using painter’s tape on all four sides. This prevents buckling and creates that crisp white border you see in the final piece. -
Sketch lightly:
Using a pencil, very faintly sketch the position of the moon, the horizon line, the main winding path, and the large tree on the right. Keep lines light so they don’t show through the transparency of the paint. -
Mask the moon (optional):
If you have masking fluid, apply a thin layer over the entire moon circle. If not, you will just need to paint carefully around it in the next steps. -
Wet-on-wet sky:
Wet the entire sky area with clean water, avoiding the moon circle. While the paper is glistening but not puddling, drop in a very watery, pale grey wash. Let it drift naturally to create cloud-like textures. -
Paint the moon:
Once the sky is dry (or after removing masking fluid), paint the moon with a very pale grey. While wet, dab in slightly darker grey spots to create craters, keeping the edges soft.
Mastering the Mist
The key to the fog is the ‘softening’ technique. Immediately after painting a shape, run a damp (not dripping) clean brush along the bottom edge to blur it into the paper’s white.
Step 2: Creating Atmospheric Depth
-
First tree layer (distant):
Mix a light-medium grey. Paint a jagged, uneven treeline about halfway up the paper. While the bottom of this treeline is still wet, use a clean, damp brush to soften the bottom edge so it fades into white mist toward the ground. -
Dry completely:
It is crucial to let this first layer of trees dry 100% before moving on. I like to use a hairdryer on a low setting to speed this up. -
Second tree layer (mid-ground):
Mix a slightly darker grey. Paint another row of pine trees slightly lower than the first, overlapping them. Again, soften the bottom edges with water to maintain that foggy effect near the ground. -
Fog manipulation:
While the paper is damp in the misty area, lift out some pigment with a thirst brush or paper towel to create ‘ghost’ shapes or lighter patches of rolling fog.
Make It Spookier
Add tiny, glowing eyes in the dark forest line using two small dots of yellow or red gouache, or paint a silhouette of a cat sitting on one of the gravestones.
Step 3: Foreground and Details
-
The main tree structure:
Using thick, saturated black paint and a size 6 brush, paint the large leafless tree on the right. Start from the thick trunk and taper out into thinner branches as you move upward. -
Adding fine branches:
Switch to a size 2 brush or a rigger brush for the delicate twigs. Make your movements shaky and organic; nature rarely produces perfect straight lines. -
Painting the path:
Use a medium grey wash to define the ground. create horizontal, sweeping strokes to suggest uneven terrain, leaving lighter areas for the path itself. -
Adding dark foreground grass:
With your darkest black mix, paint the immediate foreground at the bottom. Use upward flicking motions to create the texture of tall, unkempt grass. -
The headstones:
Paint the silhouettes of the gravestones and crosses in the foreground using solid black. Ensure they sit firmly in the grass by adding a bit of shadow at their bases. -
Refining the tree texture:
Once the main tree trunk is dry, you can use a dry-brush technique with slightly lighter grey or white gouache to add bark texture and moss details. -
Final touches:
Remove the tape carefully. If you want a brighter moon or sharper stars, use a white gel pen or small dots of white gouache now.
Peel off your tape to reveal the crisp edges and enjoy your hauntingly beautiful creation


Classic Sheet Ghost Floating Through the Woods
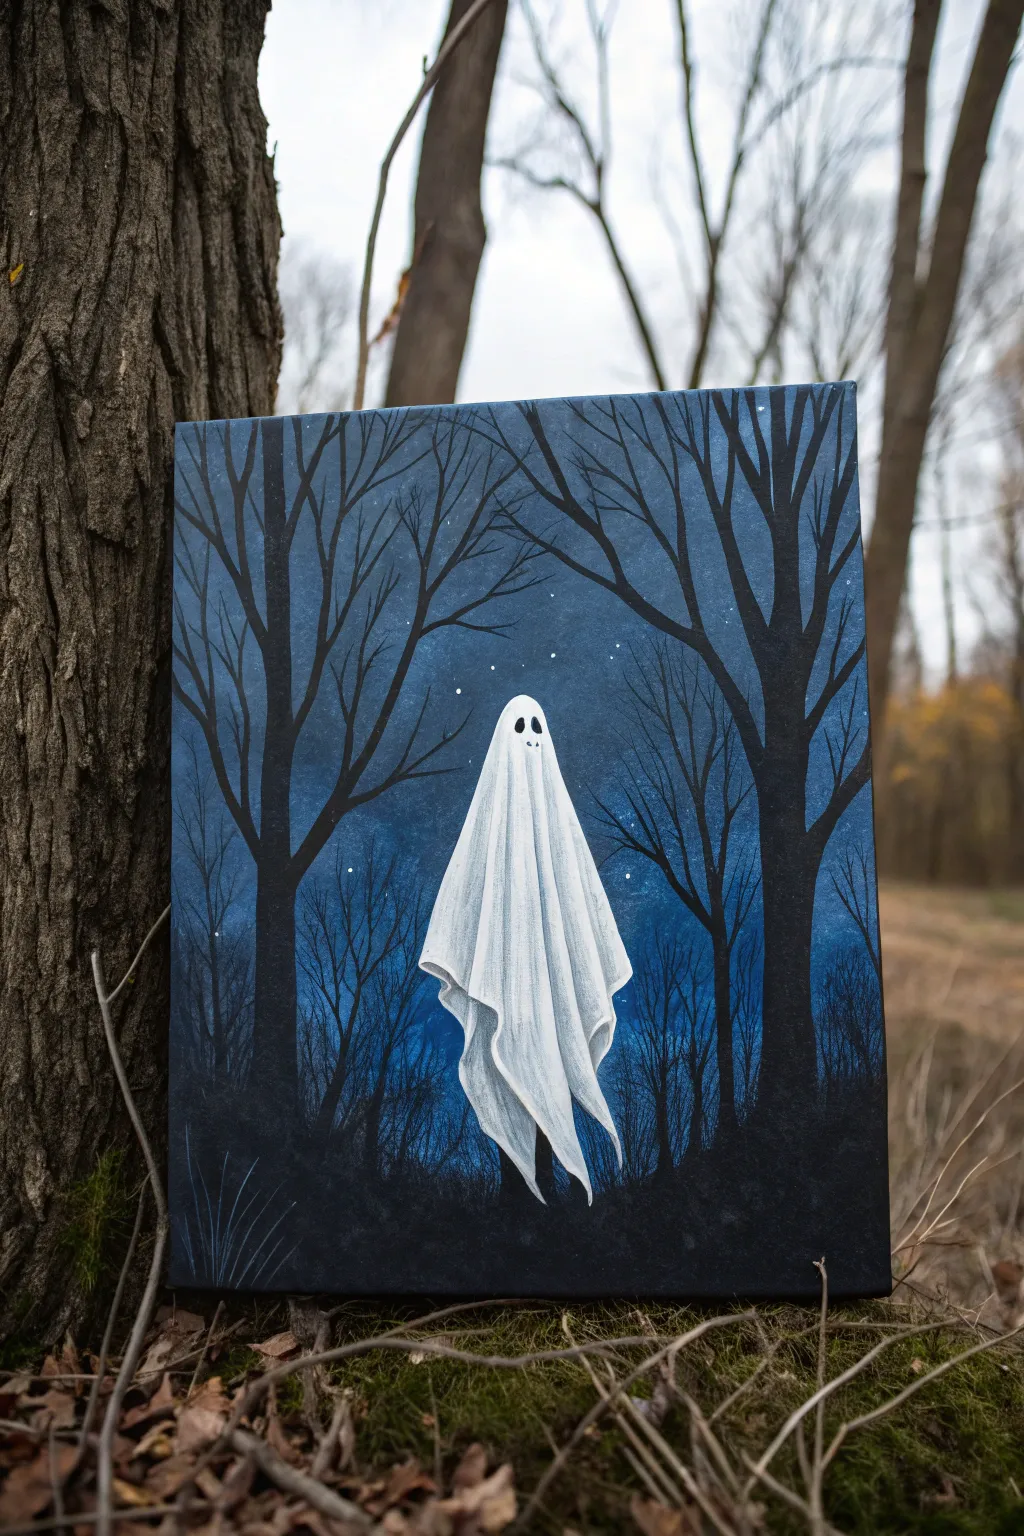

Capture the eerie stillness of a midnight forest with this atmospheric acrylic painting, featuring a classic, draped ghost hovering among barren trees. By layering deep blues and blacks, you will build a moody, mist-filled backdrop that makes your white subject pop brilliantly.
Step-by-Step Tutorial
Materials
- Stretched canvas (e.g., 11×14 or 16×20 inches)
- Acrylic paints: Midnight Blue, Phthalo Blue, Mars Black, Titanium White, Burnt Umber (optional)
- Large flat wash brush (1-inch)
- Medium flat brush
- Small round detail brush (size 1 or 0)
- Fan brush (optional for mist)
- Cup of water and paper towels
- Palette or paper plate
- Chalk or pastel pencil for sketching
Step 1: Setting the Midnight Scene
-
Prime the background:
Begin by covering the entire canvas with a dark base coat. Mix Midnight Blue with a touch of Mars Black to create a deep, rich navy. Use your large flat wash brush to apply this smoothly, ensuring no white canvas shows through. Let this layer dry completely. -
Create the atmospheric glow:
Imagine a light source coming from behind where the ghost will be. Mix a lighter shade of blue using Phthalo Blue and white. Using a clean, dry medium brush, dry-brush this lighter blue into the center of the canvas, fading it outward into the darker edges to create a vignetted, glowing effect. -
Add subtle mist:
While the glow layer is still slightly tacky, blend the edges of the light blue further into the dark background. A soft, circular motion works best here to mimic the look of fog or mist settling near the forest floor. -
Sketch the silhouette:
Once the background is dry to the touch, lightly sketch the placement of your trees and the ghost using a piece of chalk. Focus on two large trees framing the sides and smaller ones receding into the background.
Fixing Translucent White
If your white paint looks streaky or translucent against the dark background, don’t keep brushing wet paint. Let the first layer dry fully, then apply a second coat for solid opacity.
Step 2: Painting the Dark Woods
-
Block in the main trees:
Load your medium flat brush with pure Mars Black. Paint the thick trunks of the two foreground trees on the left and right edges. Keep the lines natural and sightly uneven to represent organic bark texture. -
Branch out:
Switch to your small round brush to pull branches outward from the main trunks. Remember that tree branches generally grow upward and get thinner as they extend away from the trunk. Let these branches curve and twist for a spooky feel. -
Create depth with background trees:
To make the forest look deep, paint smaller, thinner trees between the large ones. I like to mix a tiny bit of blue into my black for these distant trees, pushing them visually further back into the night. -
Add the forest floor:
Stipple or dab black paint along the bottom edge of the canvas to create uneven terrain, bushes, and undergrowth. This grounds your trees and provides a dark base for the ghost to float above. -
Refine the twigs:
Use the very tip of your smallest brush (or a liner brush if you have one) to add tiny, delicate twigs to the ends of the branches. The more intricate these lines, the more realistic the silhouette will appear against the blue sky.
Make It Glow
Mix a tiny amount of neon blue or glow-in-the-dark medium into your white paint for the ghost’s highlights. It will add a supernatural luminescence when the lights go down.
Step 3: Summoning the Ghost
-
Base coat the shape:
Using Titanium White mixed with a very small drop of water for flow, paint the overall outline of the ghost sheet based on your sketch. Fill it in completely solid white. It may look flat now, but that is expected. -
Define the folds:
Mix a light grey using white and a tiny dot of black. Identify where the fabric would naturally fold and drape. Paint vertical, wavy lines using this grey to indicate shadows within the folds of the sheet. -
Deepen the shadows:
Create a slightly darker grey. Paint inside the deepest crevices of the folds, particularly near the bottom hem where the fabric gathers. This high contrast is what makes the fabric look three-dimensional. -
Highlight the peaks:
Clean your brush thoroughly and pick up pure Titanium White. Paint over the ‘high points’ of the folds—the parts of the sheet that would catch the most moonlight. This creates the illusion of volume. -
Add the eyes:
Take your small detail brush and dip it in black paint. Carefully paint two oval, vertical shapes near the top of the head for the eyes. Keeping them slightly asymmetrical adds to the charming, handmade ghost look. -
Soften the edges:
If the outline of your ghost looks too crisp, you can lightly dry-brush a tiny bit of white around the very edges to give it a glowing, supernatural aura.
Step 4: Final Atmospheric Touches
-
Create the stars:
Dilute a small amount of white paint with water until it is the consistency of ink. Dip a stiff brush (or an old toothbrush) into it and flick the bristles to splatter tiny stars across the sky. -
Control the splatter:
Be careful not to splatter too much over the ghost or black trees. If you do, quickly dab it off with a damp paper towel or paint over the mistake with black. -
Paint specific stars:
Use your smallest detail brush to manually place a few larger, brighter stars in the open spaces between branches, making them stand out against the blue glow. -
Add subtle grass:
Using a very light touch and slightly grey-blue paint, flick thin lines upward from the dark bottom section to suggest tall, dead grass blades catching the moonlight.
Step back and admire the spooky yet serene scene you’ve created.


Bat Swarm Silhouettes Cutting Across a Twilight Sky
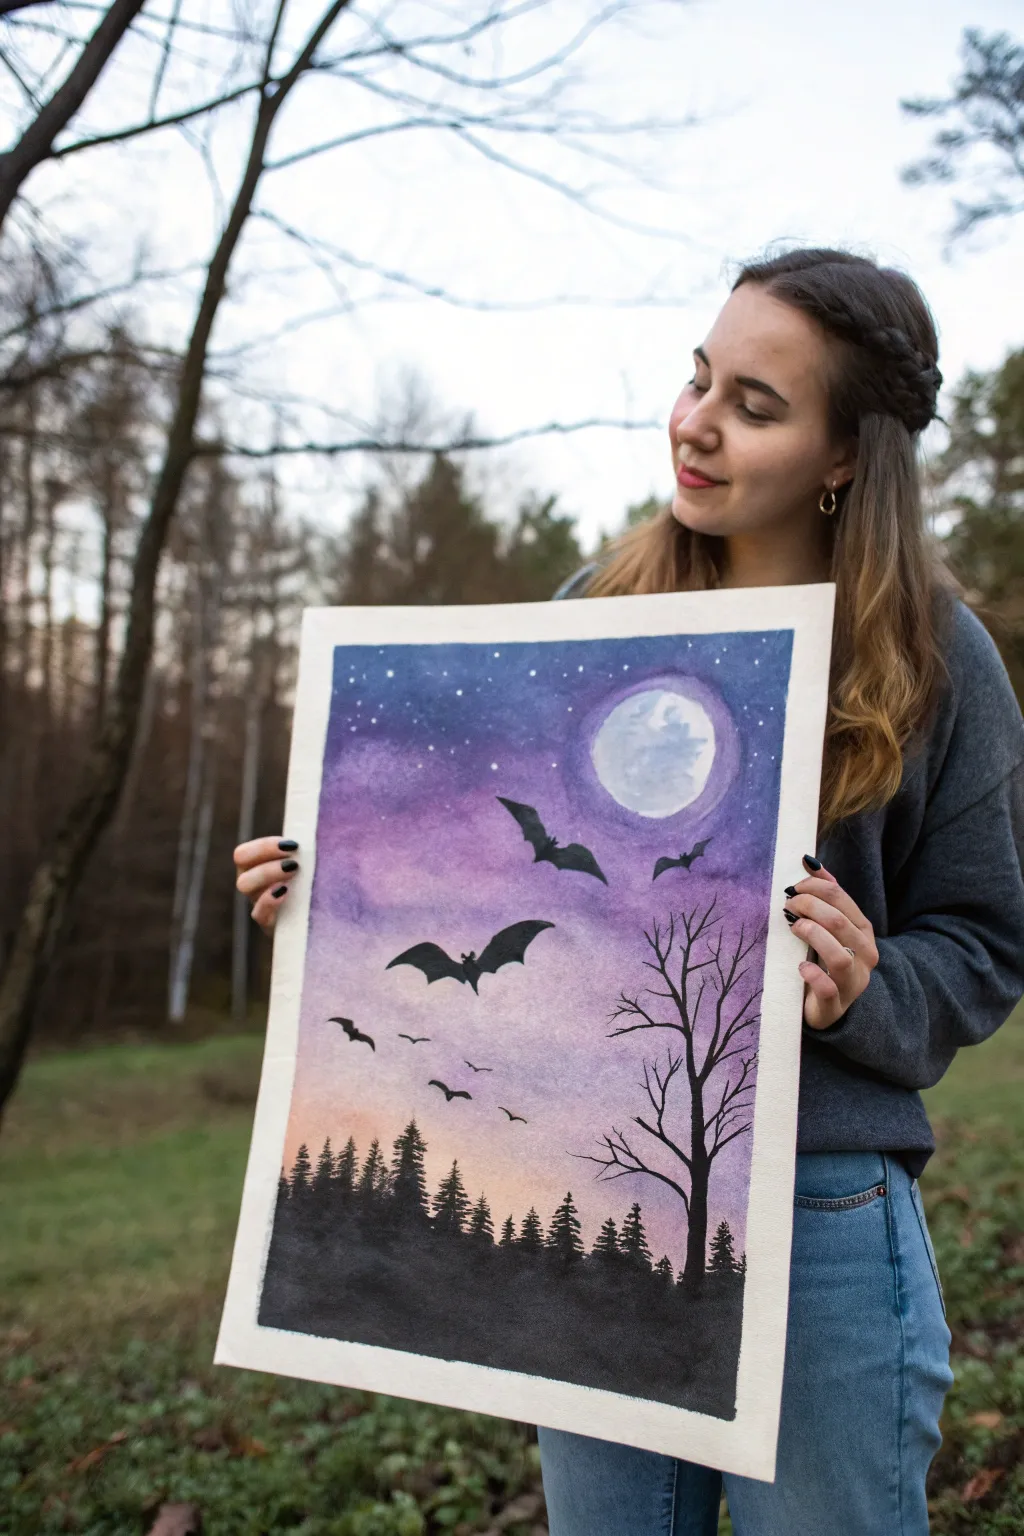
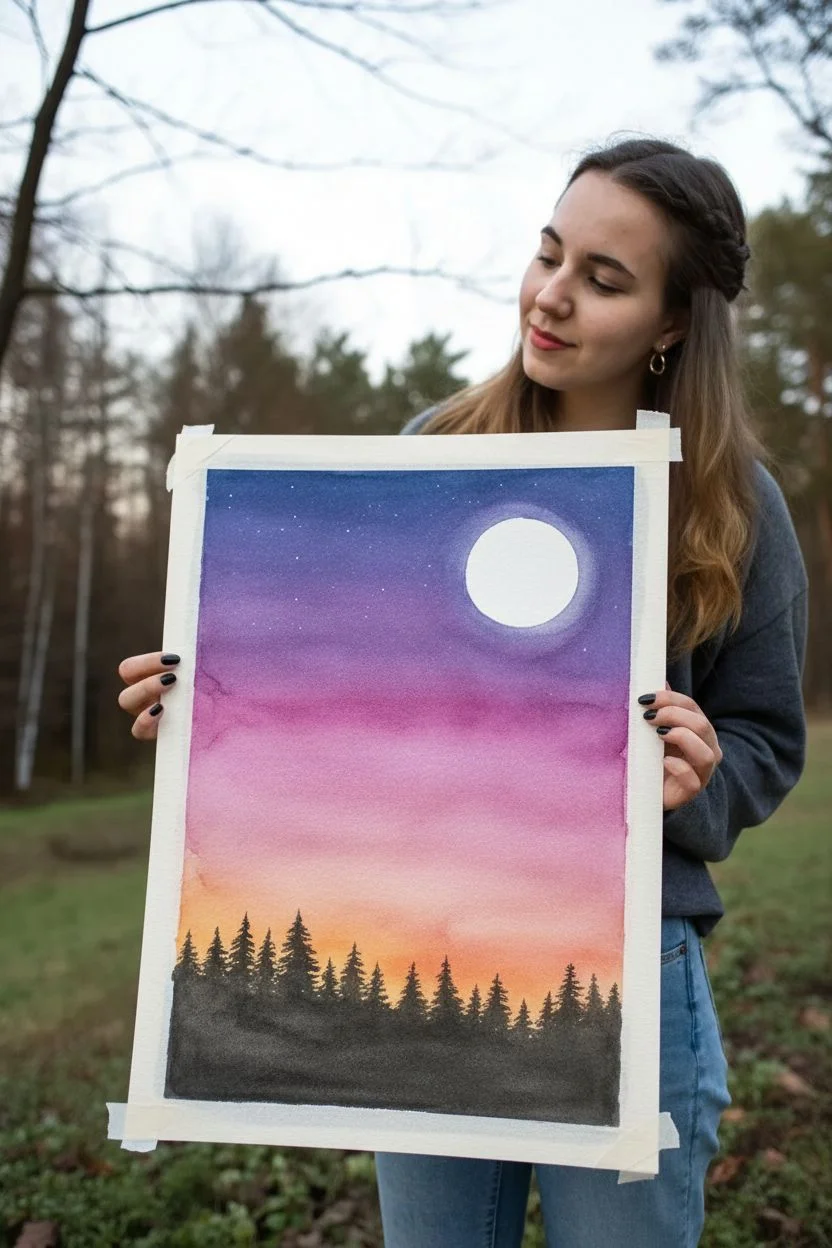
Capture the eerie beauty of Halloween night with this striking silhouette painting that contrasts dark shadows against a vibrant dusk sky. The soft gradient background creates a magical atmosphere perfect for spooky flying creatures.
Step-by-Step Guide
Materials
- Watercolor paper (140lb/300gsm, cold press recommended)
- Painter’s tape or masking tape
- Watercolor paints (Indigo, Purple, Magenta, Orange, Yellow)
- White gouache or white acrylic paint
- Black acrylic paint or India ink
- Large flat wash brush
- Medium round brush
- Small fine liner brush
- Pencil and eraser
- Palette for mixing
- Canteen of water
- Paper towels
Step 1: Preparation & Sky Gradient
-
Secure the Paper:
Begin by taping down all four edges of your watercolor paper to a hard board or table. This creates that clean, crisp white border you see in the final piece and prevents the paper from buckling when wet. -
Sketch the Moon:
Lightly trace a circle for the moon in the upper right quadrant using a pencil. You can trace a roll of tape or a small cup to get a perfect shape. -
Apply Water Glaze:
Using your large flat brush, wet the entire paper surface with clean water, skipping just the inside of the moon circle. The paper should be glistening but not forming puddles. -
Paint the Night Sky:
Starting at the very top, apply a bold wash of Indigo or deep blue. Let it flow downwards about a quarter of the way. -
Transition to Purple:
Clean your brush slightly and pick up purple paint. Blend this into the bottom edge of the blue while the paper is still wet, pulling the color down to the midway point. -
Add Twilight Hues:
Switch to magenta or pink. Blend this below the purple layer. Keep your brush strokes horizontal to ensure a smooth, atmospheric transition. -
Create the Horizon Glow:
Near the bottom, blend in orange and finally a touch of yellow where the tree line will be. This mimics the lingering light of sunset. Let the entire background dry completely before moving on.
Step 2: Moon & Details
-
Fill the Moon:
Once the sky is dry, wet the inside of the moon circle. dropping in very pale, watered-down grey or blue shadows to give it texture. Keep it mostly white. -
Create the Moon Glow:
Mix a translucent white (gouache or watered-down white acrylic) and gently paint a ring around the outside of the moon, softening the hard pencil edge into the sky. -
Splatter Stars:
I like to cover the bottom horizon area with a scrap paper to protect it. Then, load a stiff brush with opaque white paint and tap it against another brush handle to spray tiny stars across the purple and blue sections.
Uneven Gradients?
If your sky colors aren’t blending smoothly, re-wet the entire paper with a clean, damp brush and gently work over the transition lines while everything is wet to soften the edges.
Step 3: Silhouette Foreground
-
Mix the Black:
Prepare a rich, opaque black acrylic paint. Watercolor black can often dry too light, so acrylic is best for these sharp silhouettes. -
Paint the Tree Line:
Using a medium round brush, dab in the textured tops of pine trees along the bottom edge. Vary their heights—some tall, some short—to create a natural forest line. -
Fill the Bottom:
Fill in the area beneath the pine tops completely with solid black to ground the painting. -
Add the Bare Tree:
On the right side, paint a thicker vertical trunk rising from the forest. As you move up, switch to a liner brush to pull out thin, jagged branches reaching toward the moon.
Make it Sparkle
Mix a tiny amount of glitter or iridescent medium into the white paint you use for the stars. It catches the light beautifully when the painting is displayed.
Step 4: The Bat Swarm
-
Draft the Bat Shapes:
If you are nervous about freehanding, lightly sketch the bat positions with a pencil first. Place large ones near the center and smaller ones in the distance. -
Paint the Main Bats:
Using your smallest brush and black paint, carefully fill in the two largest bats in the center. Focus on the sharp points of their wings to show movement. -
Add Distant Flyers:
Paint smaller, simpler ‘m’ shapes lower in the sky and near the horizon line to represent bats that are further away, creating a sense of depth. -
Final Reveal:
Wait until the black paint is 100% dry. Then, slowly peel off the masking tape at a 45-degree angle to reveal the clean white frame.
Frame your spooky masterpiece and enjoy the eerie atmosphere it brings to your Halloween decor
BRUSH GUIDE
The Right Brush for Every Stroke
From clean lines to bold texture — master brush choice, stroke control, and essential techniques.
Explore the Full Guide
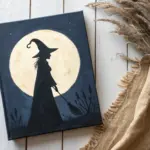
Witch on a Broom Crossing the Moon
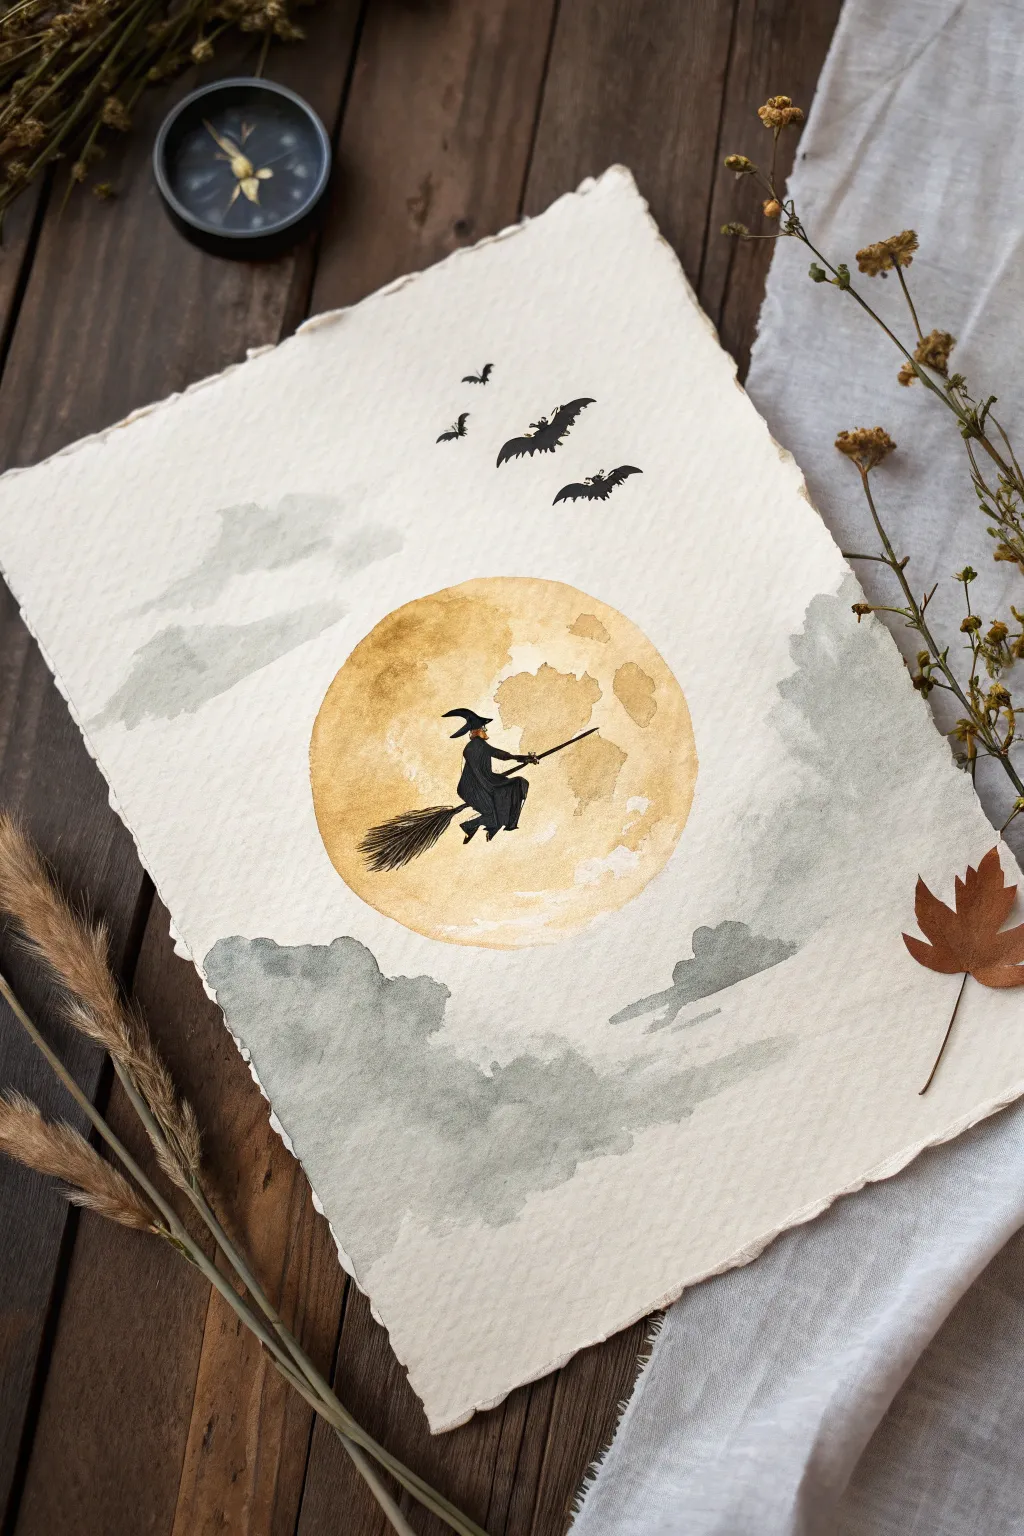
Capture the eerie romance of Halloween with this classic silhouette painting. Using simple watercolor techniques, you’ll create a glowing moon and a mysterious witch soaring through a cloudy night sky.
How-To Guide
Materials
- Cold-pressed watercolor paper (deckled edge preferred for aesthetic)
- Watercolor paints (Yellow Ochre, Burnt Sienna, Payne’s Grey, Lamp Black)
- Round watercolor brushes (sizes 2, 4, and 8)
- Small detail brush (size 0 or 00)
- Clean water jar
- Pencil and eraser
- Paper towels
- Circular stencil or compass
- Micron pen (optional, size 05 black)
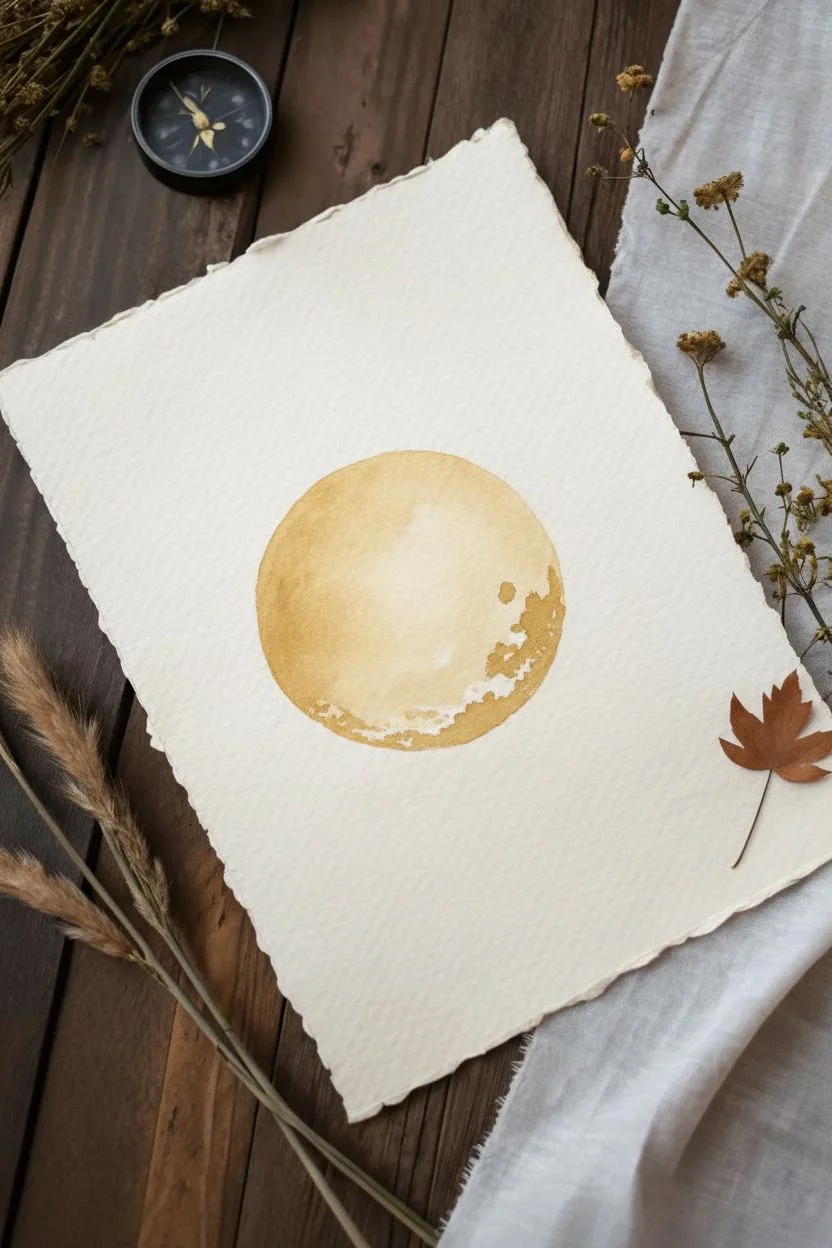
Step 1: Setting the Celestial Scene
-
Outline the moon:
Start by lightly tracing a perfect circle in the center of your paper using a circular object or compass. Keep the pencil line very faint so it won’t show through the yellow paint later. -
Wet the moon area:
Using your size 8 round brush and clean water, gently wet the inside of the circle you just drew. This ‘wet-on-wet’ technique will help the pigment spread naturally. -
Add base glow:
Load your brush with a watered-down Yellow Ochre. Drop the color into the wet circle, allowing it to bloom independently. Leave a few tiny spots lighter or white to create texture. -
Create craters:
Before the base layer dries completely, mix a slightly thicker consistency of Yellow Ochre with a touch of Burnt Sienna. Dab this irregularly around the right side and bottom edges to simulate craters and lunar shadows. -
Define the edge:
If the edges of your moon are too sharp, soften them slightly with a damp, clean brush while the paint is still tacky, but maintain the circular shape. -
Dry partially:
Let the moon painting dry until it is no longer shimmering with water, but feels cool to the touch.
Moon Texture Trick
Sprinkle a tiny pinch of salt onto the wet moon paint. Let it dry completely, then brush it off. This creates amazing crater-like textures.
Step 2: The Witchy Silhouette
-
Sketch the silhouette:
Once the moon area is completely dry, use a pencil to lightly sketch the witch’s form. Place her centrally over the moon for maximum contrast. Focus on the sharp angles of the hat and the flowing cape. -
Paint the broomstick:
Switch to your size 2 brush and Lamp Black paint (or a very concentrated mix). Paint the straight handle of the broom first, keeping the line crisp. -
Fill the figure:
Carefully fill in the witch’s body, hat, and dress with solid black. Be mindful of the pointy nose and chin profile; I like to use the very tip of the brush here for precision. -
Detail the bristles:
For the broom bristles, use quick, flicking motions outward to create a scratchy, realistic texture rather than a solid block. -
Add the bats:
Using your smallest brush or a Micron pen, paint three or four bats silhouetted above the moon. vary their sizes to suggest depth and distance.
Step 3: Atmospheric Clouds
-
Mix the grey:
Prepare a watery wash of Payne’s Grey. You want a transparent, ghost-like consistency, not a solid dark color. -
Paint lower clouds:
Starting at the bottom left corner, paint the rolling shapes of clouds. Use a wet brush to soften the top edges of the clouds so they fade into the white of the paper. -
Add upper atmosphere:
Paint lighter, thinner wisps of clouds near the top left and right sections. Ensure these washes don’t touch the moon directly; leave a buffer of white space around the moon to make it ‘glow’. -
Layering shadows:
While the cloud layer is still damp, drop in slightly more concentrated Payne’s Grey at the very bottom of the cloud formations to add volume and weight.
Paint Bleeding?
If the black witch silhouette starts bleeding into the yellow moon, the moon wasn’t dry enough. Let it dry fully, or use a hair dryer on low first.
Once the paint is fully set, your bewitching night scene is ready to frame or gift.
Raven Sentinel on a Dead Branch
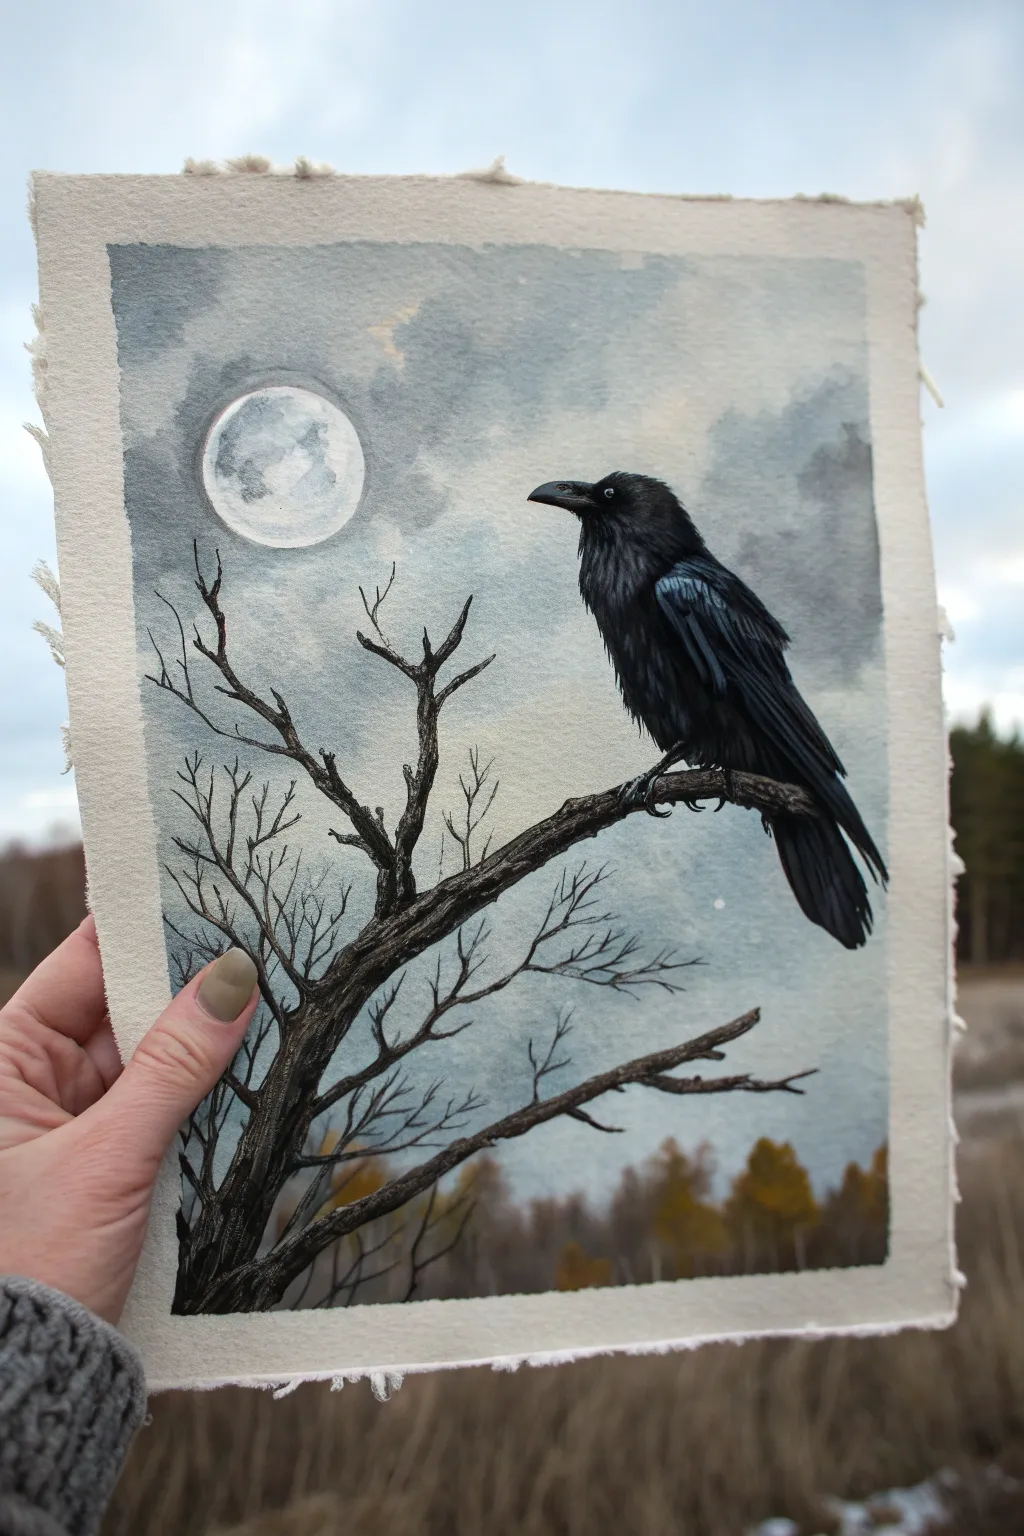
Capture the eerie silence of a moonlit night with this atmospheric watercolor painting. Featuring a stoic raven perched atop a skeletal tree, this piece contrasts soft, cloudy skies with crisp, dark details.
Step-by-Step Tutorial
Materials
- Cold press watercolor paper (deckled edge optional)
- Watercolor paints (Payne’s Grey, Indigo, Burnt Umber, Yellow Ochre)
- Black gouache or waterproof ink
- White gouache
- Round brushes (Sizes 2, 6, and 10)
- Detail liner brush
- Pencil and kneadable eraser
- Masking fluid (optional)
- Palette for mixing
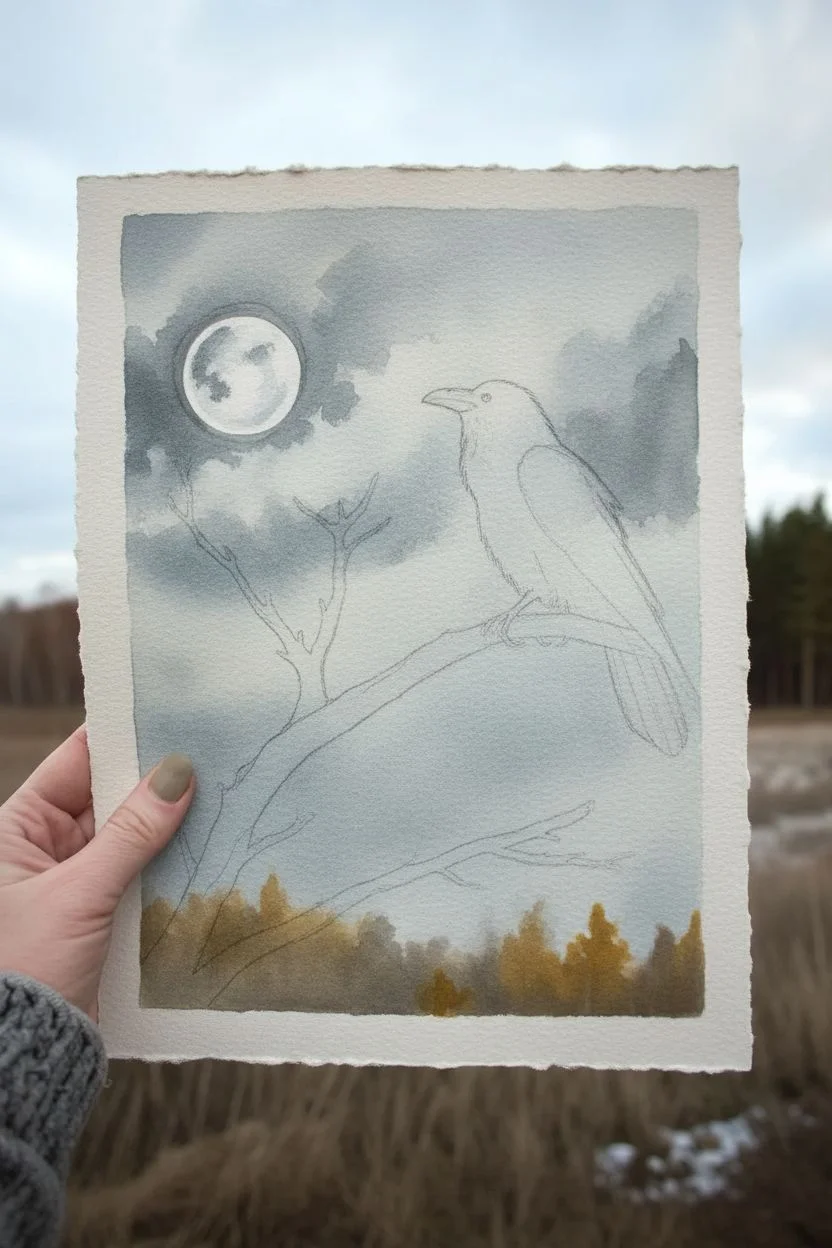
Step 1: Planning and Sky
-
Sketch the composition:
Begin with a very faint pencil sketch. Place a circle for the moon in the upper left quadrant. Draw the main diagonal branch stretching from bottom-left to mid-right, and outline the shape of the raven sitting perched on the end. -
Mask the moon:
Carefully apply masking fluid to the moon circle to protect the white paper. If you don’t have masking fluid, you will need to paint very carefully around this circle in the next steps. -
Create the sky wash:
On your palette, mix a watery wash of Payne’s Grey with a touch of Indigo. Wet the entire sky area of the paper with clean water, avoiding the raven and the branch. -
Add cloud texture:
While the paper is still wet, drop in simpler, darker clouded areas using a more concentrated mix of the grey-blue. Let the paint bloom naturally to create soft, cloudy edges. -
Hint at the forest floor:
Near the bottom edge, mix a very diluted Yellow Ochre and Burnt Umber. While the sky is damp, blend this in loosely to suggest distant, out-of-focus autumn trees. -
Paint the moon:
Once the sky is completely dry, remove the masking fluid. Mix a very faint grey wash and dab it unevenly onto the moon to create craters and shadows, leaving some areas pure white.
Feathery Texture
Don’t paint every single feather. Use ‘lost and found’ edges where some parts of the bird are solid black, and only the lit areas show texture.
Step 2: The Raven
-
Base coat:
Switch to black gouache or a very dense mix of watercolor. Fill in the entire silhouette of the raven. It should be opaque and solid. -
Define the feathers:
Mix a dark blue-grey using Indigo and a touch of white gouache. Using your smallest brush, paint thin, rapid strokes on the wing to suggest individual feathers catching the moonlight. -
Highlight the form:
Add lighter blue-grey highlights to the top of the head, the curve of the beak, and the chest. This separates the bird from the dark background and gives it volume. -
The eye:
Using a tiny dot of pure white gouache, place the catchlight in the raven’s eye. This single dot brings the bird to life immediately.
Spooky Atmosphere
Make the painting scarier by using a toothbrush to flick tiny droplets of white gouache over the sky, simulating a distant, cold mist or stars.
Step 3: The Skeletal Branch
-
Main branch structure:
Use a liner brush and a mix of Black and Burnt Umber to paint the main thick branch. Keep the edges ragged and uneven to mimic rough bark. -
Branch texture:
While the branch is damp, drop in pure black on the underside to create shadow and dimension. -
Extend the twigs:
Using your thinnest liner brush with a fluid, inky consistency of black paint, pull finer twigs upward and outward. Let your hand shake slightly to create gnarly, organic shapes. -
Bark details:
Once the wood is dry, dry-brush a little white gouache mixed with grey along the top edges of the branch to show where the moonlight hits the rough texture. -
Talons:
Carefully paint the raven’s feet gripping the textured wood. Use a dark grey rather than pure black so they don’t disappear into the branch. -
Final assessment:
Step back and look at your contrast. If the sky dried too light, you can add a second glaze of grey to darken the corners, framing the scene.
Peel off your tape or frame your deckled edge to reveal a hauntingly beautiful piece of art

PENCIL GUIDE
Understanding Pencil Grades from H to B
From first sketch to finished drawing — learn pencil grades, line control, and shading techniques.
Explore the Full Guide
Zombie Hands Breaking Through the Soil
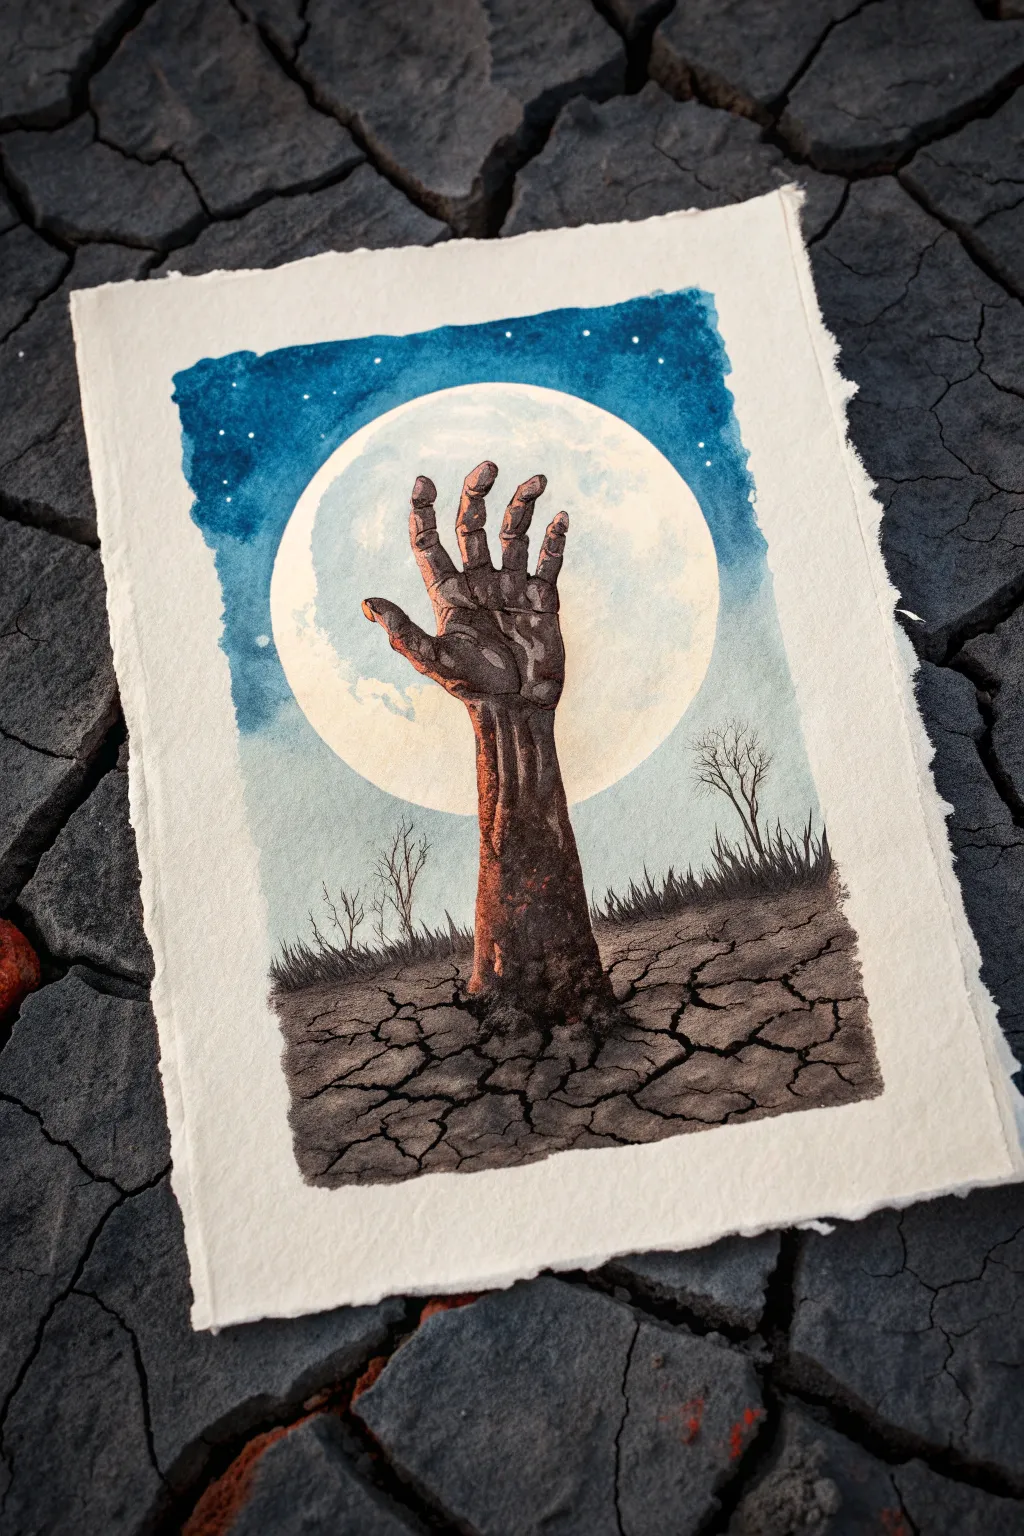
Capture the eerie moment of resurrection with this atmospheric watercolor piece featuring a zombie hand breaking through parched earth. Drawing on stark contrasts between the glowing moon and the dark, cracked soil, this project is perfect for setting a spooky Halloween mood.
How-To Guide
Materials
- Cold press watercolor paper (deckled edge optional)
- Watercolor paints (Indigo, Payne’s Grey, Burnt Umber, Yellow Ochre, Burnt Sienna, Black)
- White opacity: White gouache or white ink
- Pencil (HB or lighter) and eraser
- Masking tape
- Round brushes (sizes 2, 6, and 10)
- Fine liner brush or 00 round
- Clean water and mixing palette
- Paper towels
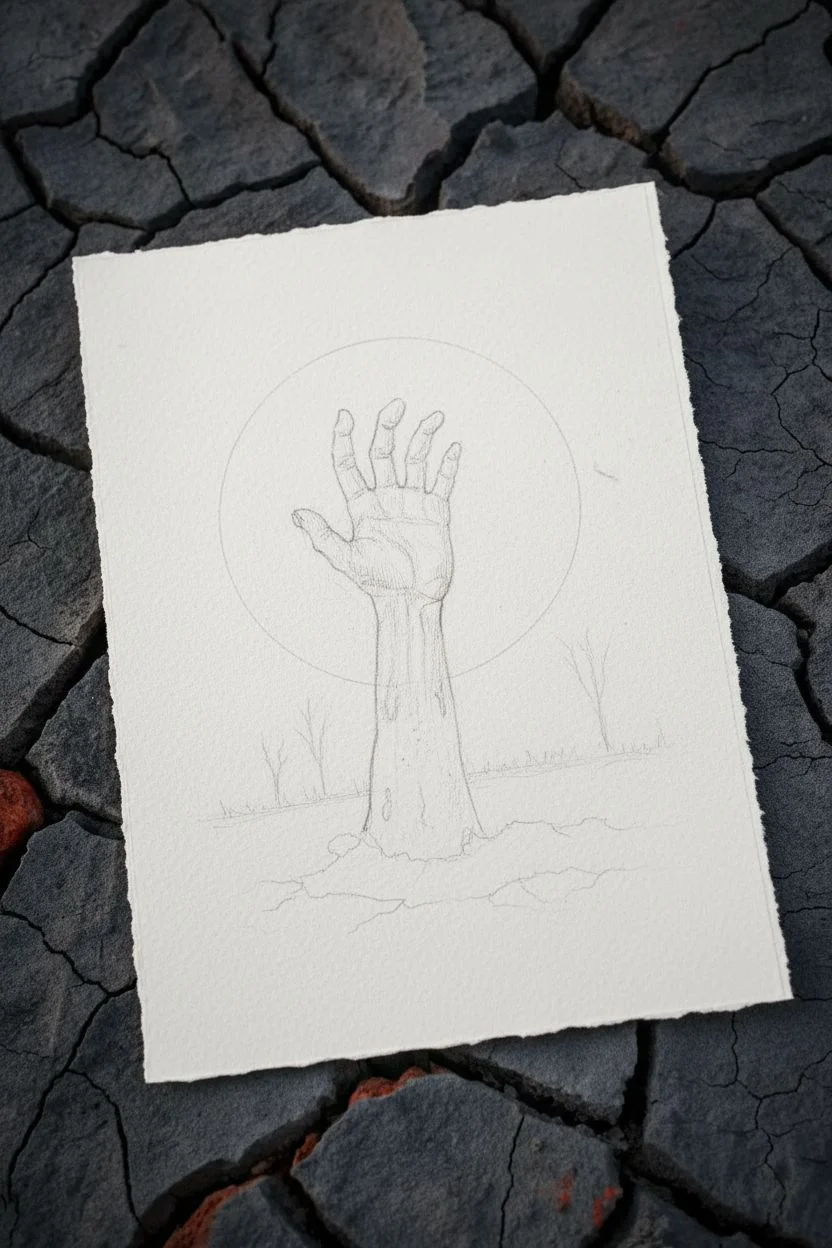
Step 1: Sketching and Preparation
-
Map the horizon:
Start by lightly sketching a low horizon line about one-quarter up from the bottom of your paper. This will be the dusty ground level. -
Position the moon:
Use a compass or trace a circular object (like a mug) to draw a large, dominant moon in the center-top of the page. It should take up a significant portion of the sky. -
Draft the hand:
Sketch the silhouette of a hand reaching straight up from the center of the ground. Focus on the gesture first—fingers slightly curled and grasping—before adding details like knuckles and decayed skin texture. -
Add environmental details:
Lightly indicate where the cracked earth patterns will go in the foreground and pencil in a few spindly, dead trees on the horizon line flanking the arm.
Muddy Colors?
If your ground looks like a blob, let the first light wash dry 100% before painting the dark cracks. Wet paint bleeds and ruins the sharp lines needed for cracked earth.
Step 2: Painting the Sky and Moon
-
Create the moon glow:
With a clean, wet brush, dampen the inside of your moon circle. Drop in a very dilute wash of Yellow Ochre mixed with a touch of Payne’s Grey to give it a textured, cratered look, keeping it mostly pale. -
Paint the night sky:
While the moon dries, wet the sky area around it. Apply a rich wash of Indigo and Payne’s Grey. Let the blue be darkest at the top edges and fade slightly as it nears the horizon. -
Define the moon’s edge:
Carefully paint around the moon’s penciled edge with your dark blue mix to create a crisp, glowing boundary. -
Add the stars:
Once the sky is completely dry, mix white gouache or ink to a creamy consistency and flick it onto the blue area with a toothbrush or stiff brush to create stars. Add a few specific larger stars with a detail brush.
Level Up: 3D Rot
Mix a pinch of salt into the wet watercolor wash on the zombie hand. As it dries, the salt pushes the pigment away, creating a mottled, diseased skin texture instantly.
Step 3: Rendering the Earth and Hand
-
Base layer for the arm:
Mix Burnt Sienna with a little Burnt Umber. paint the entire arm and hand with this base tone, keeping it somewhat translucent. -
Shadowing the flesh:
While the base is still slightly damp, drop in concentrated Burnt Umber and Black on the right side of the arm and under the fingers to establish a strong light source coming from the moon on the left. -
Painting the parched ground:
Wash the foreground area with a mix of Burnt Umber and Grey. Use horizontal strokes near the horizon and more erratic patches in the foreground. -
Detailing the cracks:
Switch to your smallest liner brush. Using a thick mixture of Black and Sepia, paint jagged, interconnecting lines to form the cracked earth pattern. Vary the line thickness to make the cracks look deep. -
Silhouetting the trees:
Use the tip of your smallest brush and black paint to draw the fine, skeletal branches of the dead trees in the background. -
Adding grass texture:
Flick the brush upward along the horizon line with black paint to create sharp, dead grass blades.
Step 4: Final Details
-
Highlighting the hand:
Mix a tiny amount of white gouache with your Burnt Sienna. Paint thin highlights on the left side of the arm, knuckles, and fingertips where the moonlight would hit. -
Deepening shadows:
Glaze a transparent layer of black on the right side of the arm to intensify the cylindrical form. I like to make sure this is the darkest part of the painting. -
Distressing the paper:
This style looks great on rough paper. If you don’t have deckled paper, you can carefully tear the edges of your finished painting against a ruler for that ragged, ancient look.
Display your grim masterpiece on a dark background or rustic frame to really make that moon pop
Phantom Portrait With Faded Features and Hollow Eyes

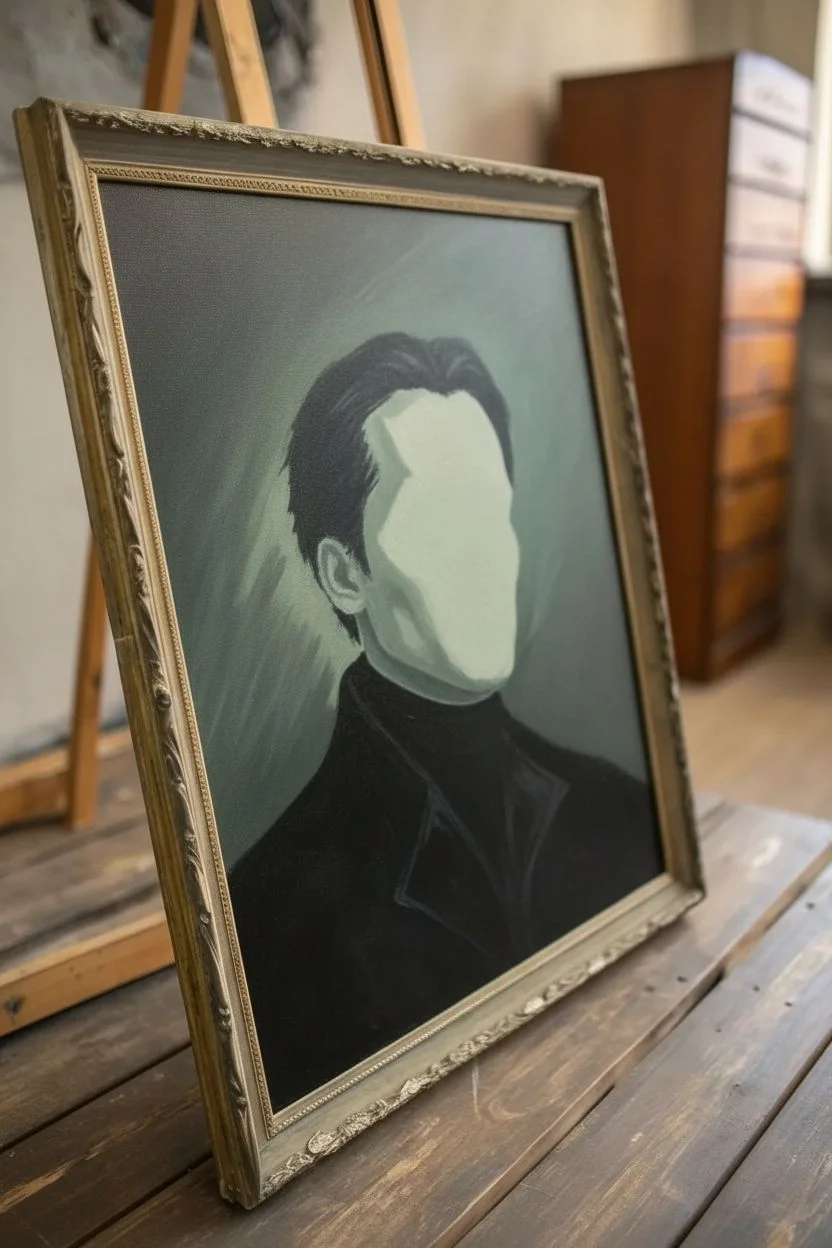
Transform a classic portrait style into something delightfully macabre with this guide to painting a hollow-eyed phantom. The finished piece features a ghastly pale figure with sunken features, perfectly framed for a haunted gallery wall.
Step-by-Step Tutorial
Materials
- 16×20 inch stretched canvas
- Acrylic paints (Titanium White, Mars Black, Burnt Umber, Raw Sienna, Phthalo Green, Alizarin Crimson)
- Set of acrylic brushes (large flat, medium filbert, lush round, fine liner)
- Palette and palette knife
- Water cup and paper towels
- Ornate vintage-style picture frame (gold or brass finish)
- Easel (optional but helpful)
- Charcoal stick or dark graphite pencil
Step 1: Planning and Underpainting
-
Sketch the composition:
Begin by using a charcoal stick or pencil to lightly sketch the head and shoulders. Position the figure slightly off-center, looking toward the right to create an engaging gaze. Don’t worry about perfect realism; focus on the elongated face shape and high collar. -
Establish the background:
Mix Mars Black, Phthalo Green, and a touch of Burnt Umber to create a murky, dark grey-green. Using a large flat brush, cover the entire background around your sketch, using crisscross strokes to create a cloudy, atmospheric texture. -
Create the tonal variation:
While the background is still slightly wet, blend in a little Titanium White into the area behind the head to create a subtle halo effect. This contrast will make the dark hair pop later. -
Block in the coat:
Use pure Mars Black mixed with a tiny drop of Phthalo Green for the coat and turtleneck. Paint the entire clothing area in a solid, dark mass, ignoring the folds for now. -
The base flesh tone:
Mix a large amount of Titanium White with a very small dot of Phthalo Green and a touch of Raw Sienna. You want a sickly, desaturated pale green-grey. Paint the entire face and neck area with this base color.
Pro Tip: The Dead Gaze
To make the eyes look truly hollow, add a tiny touch of crimson red to the lower lash line. It makes the figure look tired and slightly undead.
Step 2: Defining the Features
-
Shadow mapping:
Mix a darker version of your skin tone using more Phthalo Green and a bit of Black. Using a medium filbert brush, gently glaze shadows into the eye sockets, under the cheekbones, and along the sides of the nose. -
Deepen the hollows:
Switch to a smaller round brush and darken the eye sockets significantly. They should look like bruises initially. I find blending the edges out with a clean, dry brush helps interpret that ‘sunken’ look effectively. -
Sculpt the nose and mouth:
Use a mix of Burnt Umber and Black to define the nostrils and the line of the mouth. Keep the lips thin and slightly downturned to enhance the somber expression. -
Paint the eyes:
Inside the dark sockets, paint the whites of the eyes using a dirty off-white (never pure white). Paint the irises a piercing amber color using Raw Sienna mixed with a speck of Alizarin Crimson. -
Add the pupils:
With your fine liner brush, add small black pupils. Place them slightly upward to give the subject a detached, otherworldly stare. -
Detail the lips:
Use Alizarin Crimson toned down with Burnt Umber for the lips. Keep the color concentrated in the center and fade it out toward the corners so he doesn’t look like he’s wearing fresh lipstick.
Step 3: Hair and Refinements
-
Lay in the hair base:
Using a flat brush, paint the hair shape with a mix of Black and Burnt Umber. Sweep the hair back from the forehead, keeping the strokes loose. -
Add hair texture:
Mix a dark grey and use a liner brush to add individual strands sweeping back. Focus on the hairline and the tips where the hair meets the collar to create a slightly unkempt, gothic style. -
Highlight the face:
Wait for the face paint to dry completely. Dry brush pure Titanium White onto the highest points: the brow bone, the bridge of the nose, and the top of the cheekbones. This creates that stark, sculptural lighting. -
Detail the clothing:
Mix a dark grey (Black plus White) and identify the lapels and fabric folds. Use subtle, broad strokes to suggest the heavy wool texture of the coat without over-detailing.
Level Up: Aged Canvas
Before painting, apply crackle medium to the background area. Once painted over, the surface will look like an ancient, weather-beaten oil painting.
Step 4: Final Touches and Framing
-
Add the catchlights:
The most important step: place a tiny dot of pure white in each eye (in the same relative position, usually top right) to bring the phantom to life. -
Glaze and unification:
If the colors look too separated, create a very watery wash of Phthalo Green and glaze it over the shadowed side of the face to tie the skin tones to the background. -
Varnish (optional):
Once fully dry (give it 24 hours), apply a satin varnish to protect the paint and deepen the blacks. -
Frame the work:
Secure the canvas into your vintage gold frame. The contrast between the eerie subject and the elegant frame is what sells the ‘haunted antique’ aesthetic.
Hang this striking piece in a dimly lit hallway and watch your guests do a double-take at your handcrafted ghost.


Have a question or want to share your own experience? I'd love to hear from you in the comments below!