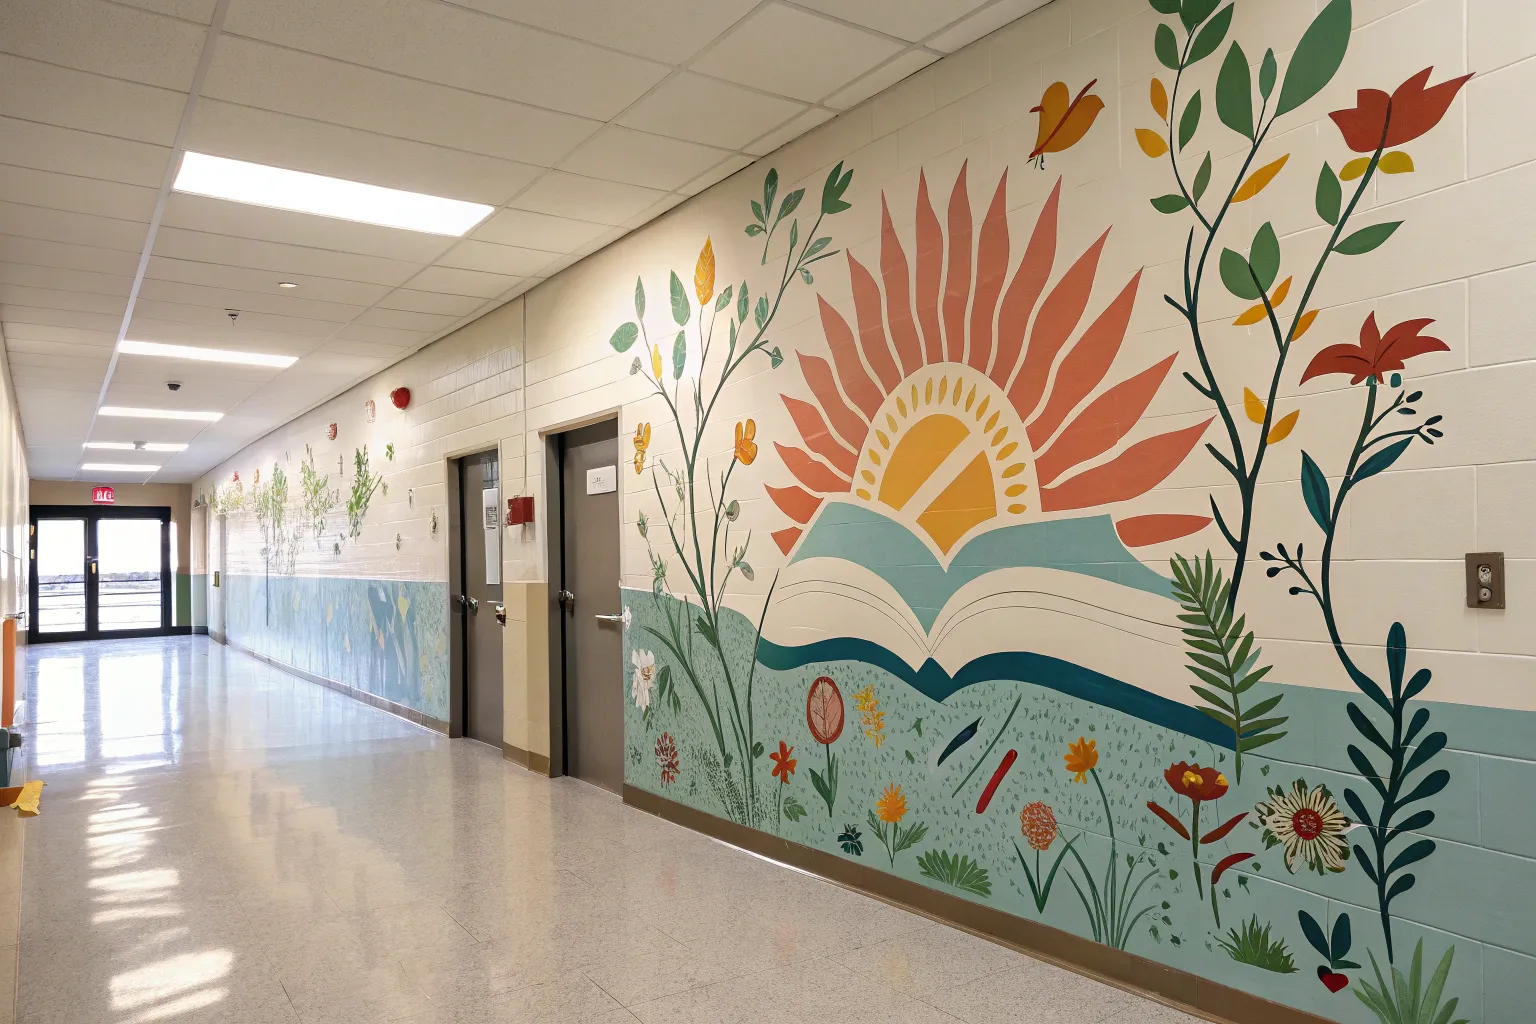
A great school mural can turn an everyday hallway into a place students actually want to linger—like the building itself is cheering them on. Here are my favorite school murals ideas (from classic crowd-pleasers to more unexpected showstoppers) you can adapt to your own walls.
Reading Journey by the Library
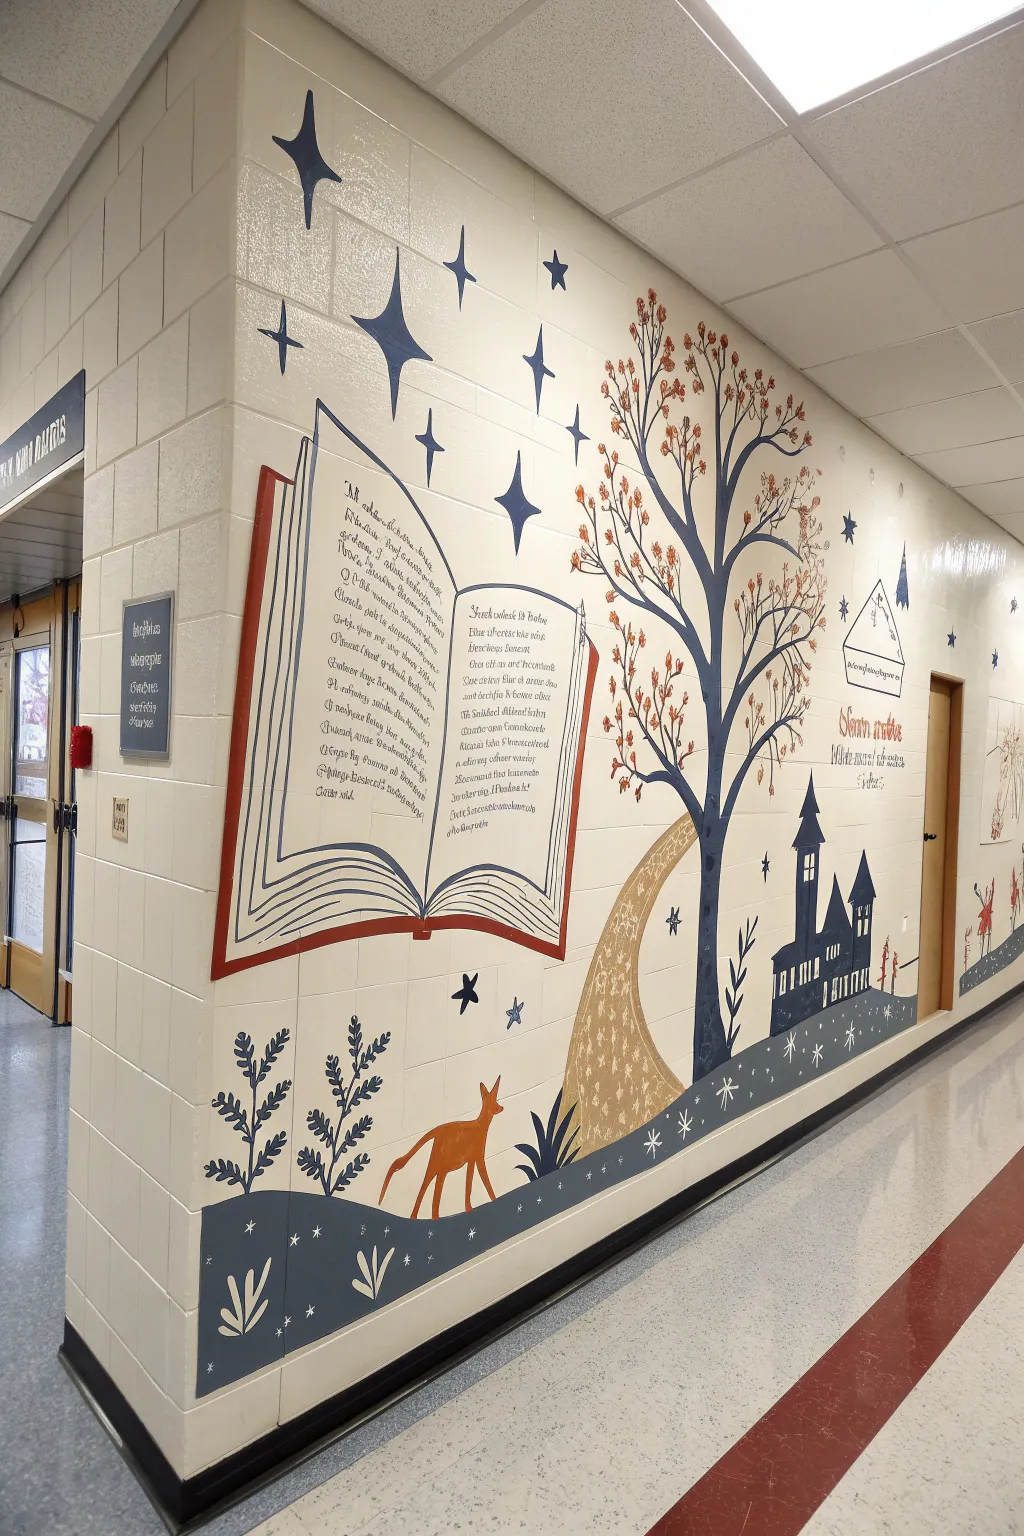
Transform a plain hallway corner into a magical literary escape with this narrative-style mural featuring an oversized book and enchanting forest elements. Using a limited palette of deep blues and autumn oranges creates a cohesive, sophisticated look that feels classic yet playful.
How-To Guide
Materials
- Interior semi-gloss or satin wall paint (Navy Blue, Cream/White, Rust Orange, Light Grey)
- Pencil and eraser
- Painter’s tape (various widths)
- Chalk snap line (optional)
- Assorted paintbrushes (2-inch sash brush, 1-inch flat brush, fine liner brushes)
- Small paint rollers and tray
- Overhead projector (optional but recommended)
- Ladder or stepstool
- Drop cloths
- Transparency film (if using projector)
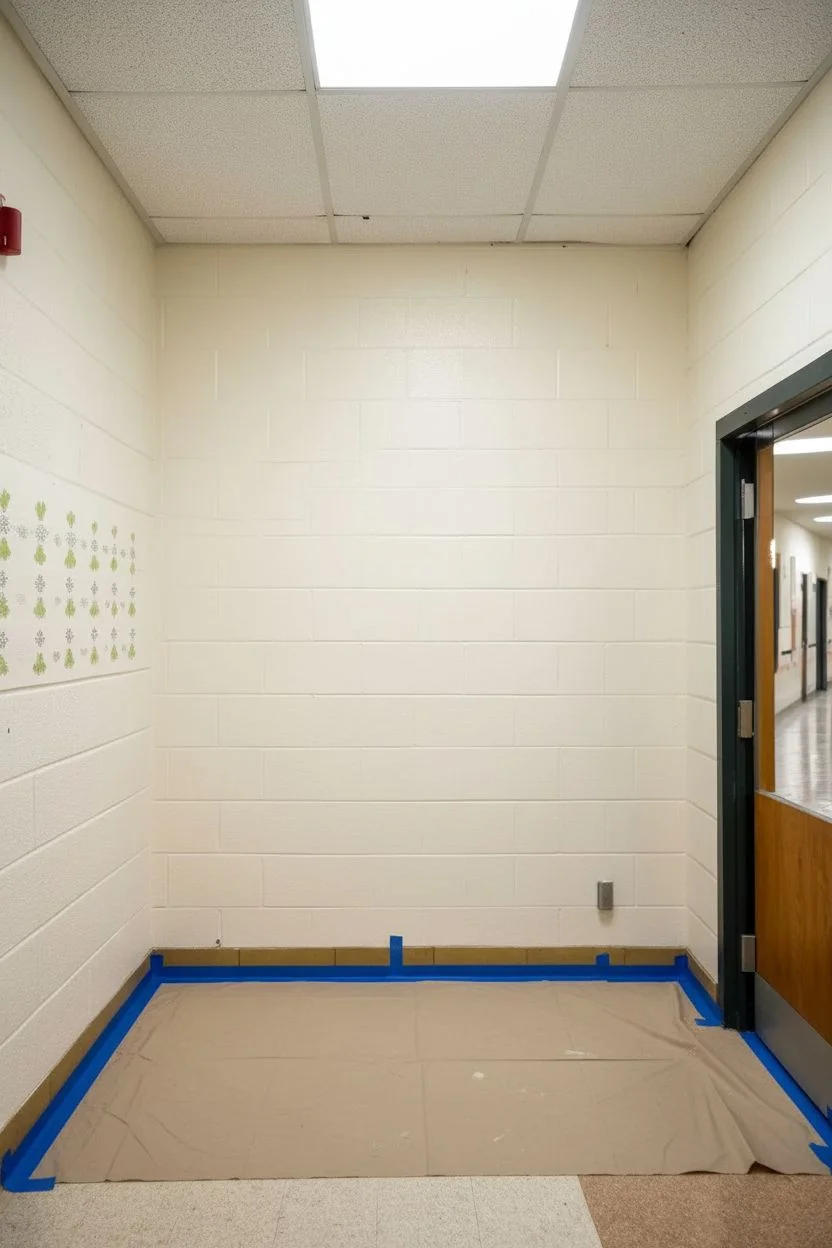
Step 1: Preparation & Sketching
-
Prep the surface:
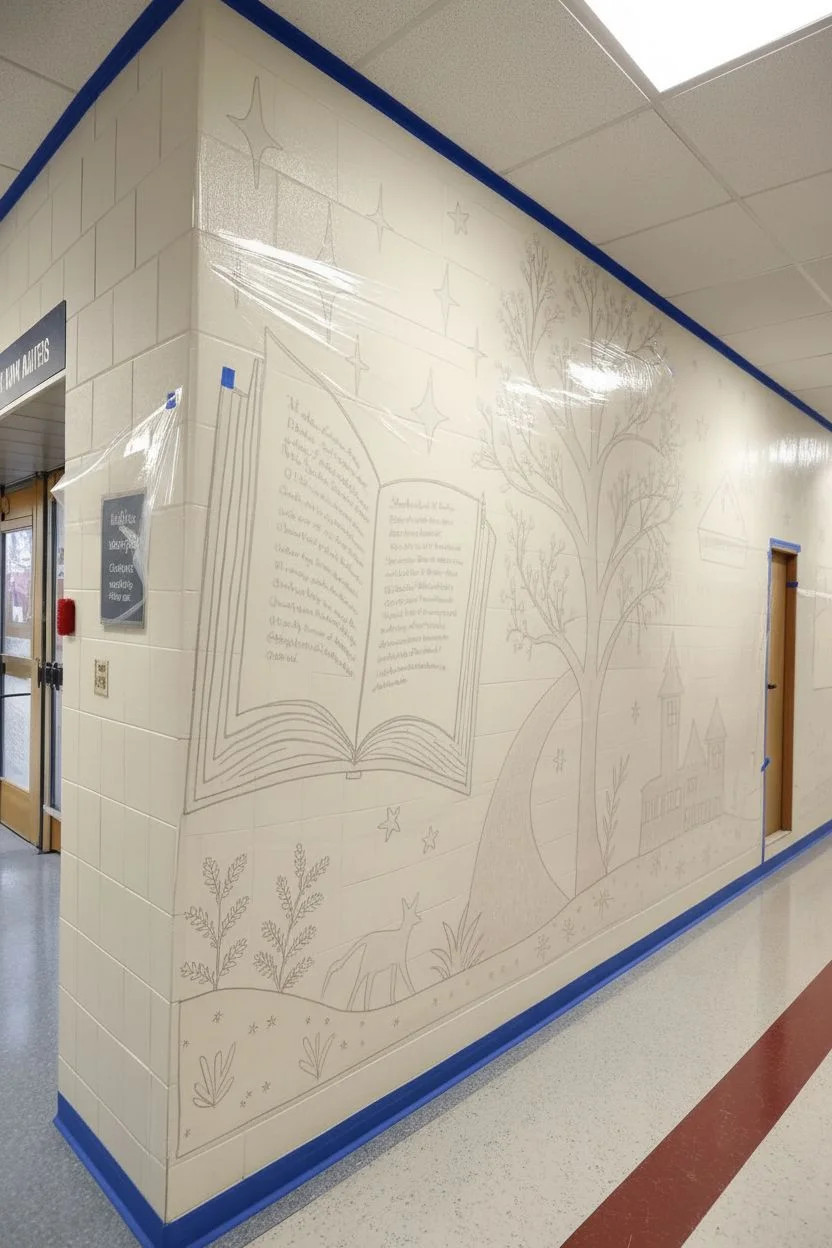
Begin by cleaning the wall surface thoroughly to remove any dust or oils. Tape off the baseboards, ceiling line, and any door frames or fixtures like fire alarms to ensure crisp edges. -
Establish the background:
If your wall isn’t already a warm cream or off-white, apply a fresh base coat using a roller. This provides a neutral ‘page’ for the story to unfold on and helps the dark blues pop. -
Outline the main elements:
Using a pencil, lightly sketch the large open book on the corner wall. The binding should align with the corner edge for a cool 3D effect. If you aren’t confident freehanding, project the image onto the wall and trace the outlines of the book, tree, and house. -
Map out the landscape:
Sketch the rolling hill lines at the bottom. Create a distinct path winding from the bottom right towards the tree, getting narrower as it recedes to build perspective.
Text Texture Trick
When painting the fake text, slightly dilute your paint with water. This helps the brush glide smoothly for those calligraphy-style squiggles without stopping.
Step 2: Painting the Foreground
-
Block in the book cover:
Paint the thick outer cover of the book using your Rust Orange paint and a 1-inch flat brush. Be steady around the corners to maintain a sharp, graphic look. -
Define the pages:
Using Navy Blue and a fine liner brush, paint the outlines of the pages. Add curved lines at the bottom of the open pages to suggest the volume and stack of paper. -
Paint the text simulation:
For the text on the pages, don’t worry about writing real words. Use a small round brush with Navy Blue to flick short, horizontal, squiggle-like strokes that mimic the look of old typography from a distance. Vary the length of the lines to look like paragraphs. -
Fill the silhouette landscape:
Paint the bottom section of rolling hills in distinct blocks. Use Navy Blue for the foreground waves. I like to add a second, lighter grey or muted blue layer behind the dark blue to create depth. -
Create the path:
Fill in the winding path with a light tan or gold color. Once dry, create a texture reminiscent of cobblestones or gravel using a sponge or small brush dabs in a slightly lighter shade.
Step 3: Adding Flora & Fauna
-
Construct the tree:
Paint the tall tree trunk and branches in the same Navy Blue used for the text. Keep the branches spindly and reaching upward. The trunk should anchor the right side of the composition. -
Add autumn leaves:
Using the Rust Orange paint, dab small, leaf-shaped strokes onto the tree branches. Scatter some ‘falling’ leaves near the bottom of the tree to suggest movement. -
Paint the whimsical house:
To the right of the path, paint the silhouette of the house or castle in Navy Blue. Leave small squares unpainted (or paint them white/yellow later) to represent lit windows. -
Detail the fox:
Sketch and paint the small fox figure in the foreground using Rust Orange. Keep the shape simple and stylized—focus on the pointed ears and bushy tail. -
Add stylized plants:
In the dark blue foreground hills, paint fern-like plant silhouettes using a lighter blue or grey. Keep the strokes fluid and symmetrical for a folk-art feel.
Interactive Story
Paint the open book pages with chalkboard paint instead of standard wall paint. This lets the librarian change the ‘story’ or feature a quote of the week.
Step 4: Finishing Touches
-
Sprinkle the stars:
Throughout the sky area above the book and tree, paint various sizes of four-pointed stars using Navy Blue. Group a few together for visual interest. -
Add ground details:
Use a white paint pen or fine brush to add tiny asterisks and dots along the dark blue hills and path borders. This adds a magical, sparkling quality to the ground. -
Clean up edges:
Step back and inspect your lines. Use a small angled brush with the wall’s base color to touch up any smudges or jagged edges, especially around the text and book cover. -
Review and seal:
Once fully dry (give it at least 24 hours), erase any remaining visible pencil marks. If this is a high-traffic hallway, consider applying a clear matte sealer over the lower half to protect against scuffs.
Step back and admire how this charming scene invites students into a world of imagination before they even pick up a book


Kindness Rules Word Wall
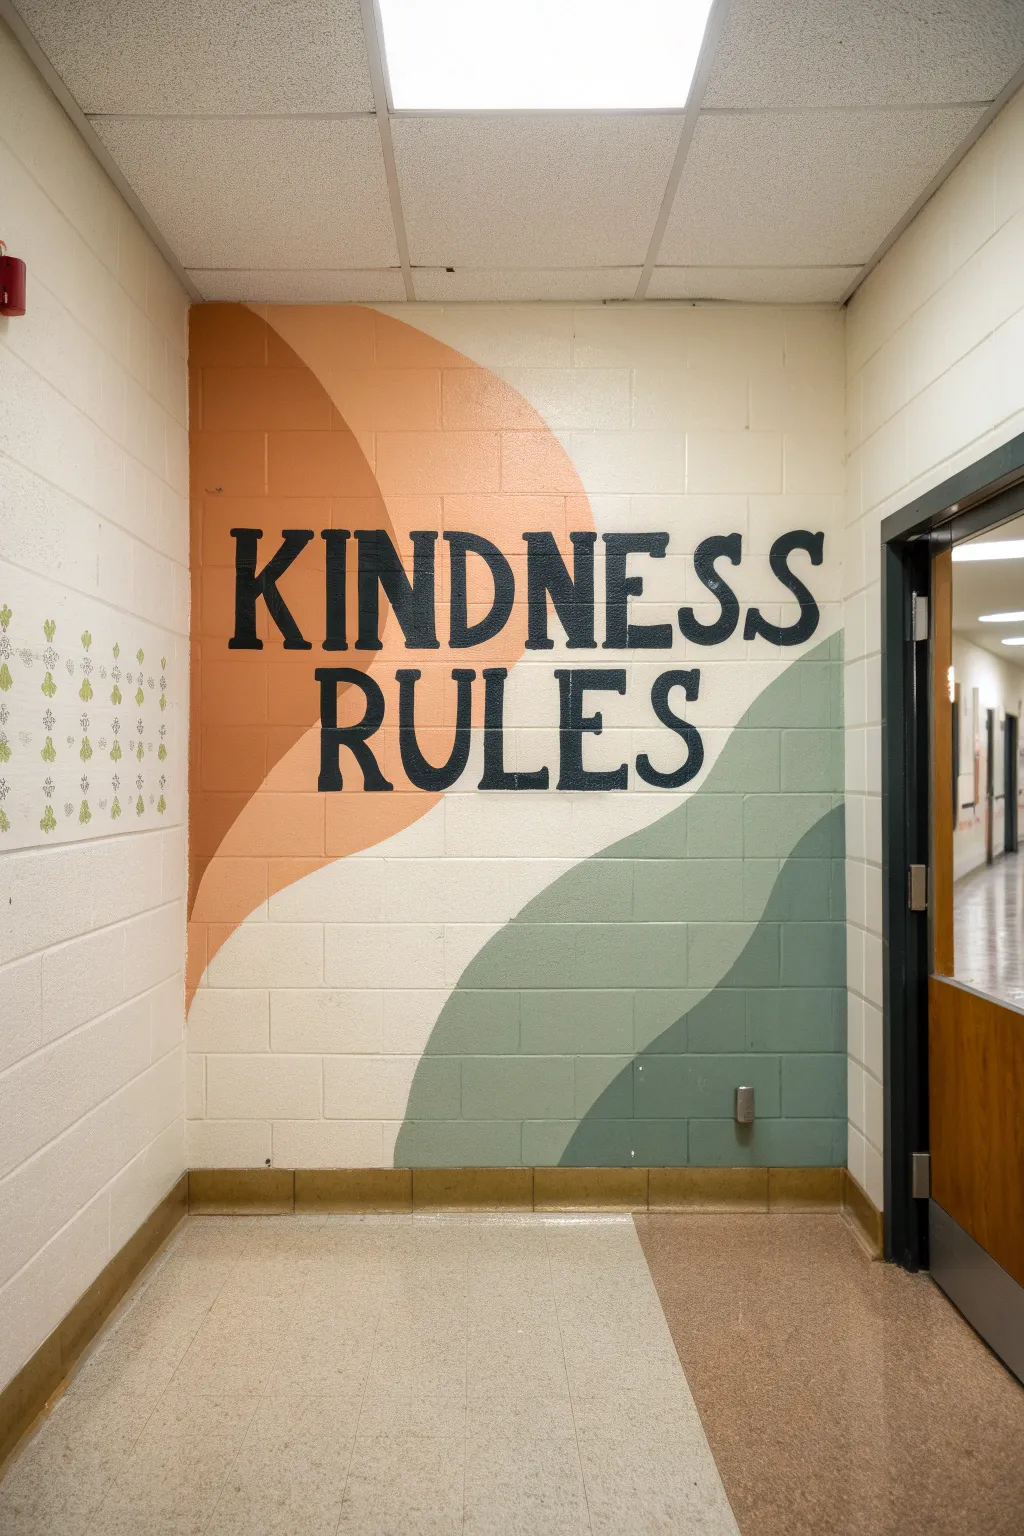
Transform a plain hallway wall into a modern, uplifting statement piece with this abstract mural featuring calming, earthy tones. The design uses soft, wavy color blocks to frame bold serif lettering, creating a space that feels both welcoming and inspiring.
Step-by-Step Guide
Materials
- Interior semi-gloss or satin paint (Cream/Off-White for base)
- Interior semi-gloss or satin paint (Terracotta/Burnt Orange)
- Interior semi-gloss or satin paint (Sage Green)
- Interior semi-gloss or satin paint (Dark Green)
- Interior semi-gloss or satin paint (Black or Dark Navy for text)
- 2-inch angled sash brush (for cutting in)
- Small foam roller and tray
- Pencil and large eraser
- Digital projector (optional but recommended)
- Mural design file or transparency
- Long level or chalk line
- Artist brushes (flat and round sizes 4, 8, and 12)
- Painter’s tape
- Drop cloth
- Ladder or step stool
Step 1: Preparation and Base Coat
-
Clean the surface:
Since school hallways see a lot of traffic, start by thoroughly washing the cinder block wall with warm soapy water or a degreaser to remove handprints and dust. Let it dry completely. -
Clear the area:
Lay down a drop cloth to protect the floor tiles and tape off the baseboards and any door frames or skirting with painter’s tape. -
Apply the background:
Using a roller, apply two coats of your cream or off-white base color. Ensure you get into the grout lines of the cinder blocks, as these can be tricky coverage areas. -
Check for consistency:
Allow the base coat to dry for at least 4 hours. Inspect the wall from different angles to make sure the coverage is even and no old wall color is showing through the texture.
Text Placement Trick
Use the horizontal mortar lines of the cinder blocks as natural guides. Align the bottom or top of your letters with a specific grout line to keep the text perfectly straight without measuring.
Step 2: Drafting the Design
-
Create the wave outlines:
Lightly sketch the large, organic wave shapes onto the wall using a pencil. Start the orange wave high on the left, curving down towards the middle. Start the green waves rising from the bottom right. -
Refine the curves:
Step back frequently to ensure your curves feel fluid and balanced. The goal is an asymmetrical look where the negative space in the middle holds the text. -
Project the text:
Set up a digital projector to cast the words ‘KINDNESS RULES’ onto the center of the wall. Adjust the size so the text spans the width comfortably without touching the color waves. -
Trace the letters:
Using a pencil, carefully trace the outline of the serif font. Pay special attention to the straight lines and the small ‘feet’ (serifs) of each letter to keep them crisp. -
Level check:
Even if using a projector, I find it helpful to verify the text alignment with a long level or measurable reference points on the block wall to ensure the words aren’t tilting.
Smooth Edges Pro Tip
When painting letters on textured block, use a ‘stippling’ or dabbing motion with your brush rather than long strokes. This pushes paint into the pits for crisp, solid lines.
Step 3: Painting the Color Blocks
-
Cut in the edges:
Use a 2-inch angled brush to paint the sharp edges of your wave shapes first. This creates a barrier so you can roll the rest without worrying about going over the line. -
Fill the orange section:
Paint the upper-left wave with the terracotta/burnt orange paint. Use a small roller for the large areas and a brush to push paint deep into the cinder block crevices. -
Fill the green sections:
Paint the lower wave shapes. Use the lighter sage green for the larger bottom section and the darker forest green for the overlapping accent wave. -
Review coverage on blocks:
Cinder blocks are porous; you will likely need a second coat on these colored sections to get a solid, opaque look once the first layer is dry to the touch.
Step 4: Detailing the Text
-
Outline the letters:
Switch to a small flat artist brush (size 4 or 8) and your black paint. Carefully outline the edges of each letter, keeping your hand steady. -
Fill in the letters:
Once outlined, use a slightly larger brush (size 12) to fill in the body of the letters. Work slowly to avoid drips. -
Touch up edges:
Inspect the typography for any wobbly lines. You can use a tiny bit of the background cream paint to ‘erase’ and sharpen any mistakes on the letter edges. -
Clean up:
Remove the painter’s tape while the paint is still slightly tacky to prevent peeling, and erase any visible pencil lines from your initial sketch.
Step back and admire how this simple yet powerful message brightens up the school corridor.


School Pride Mascot Spotlight
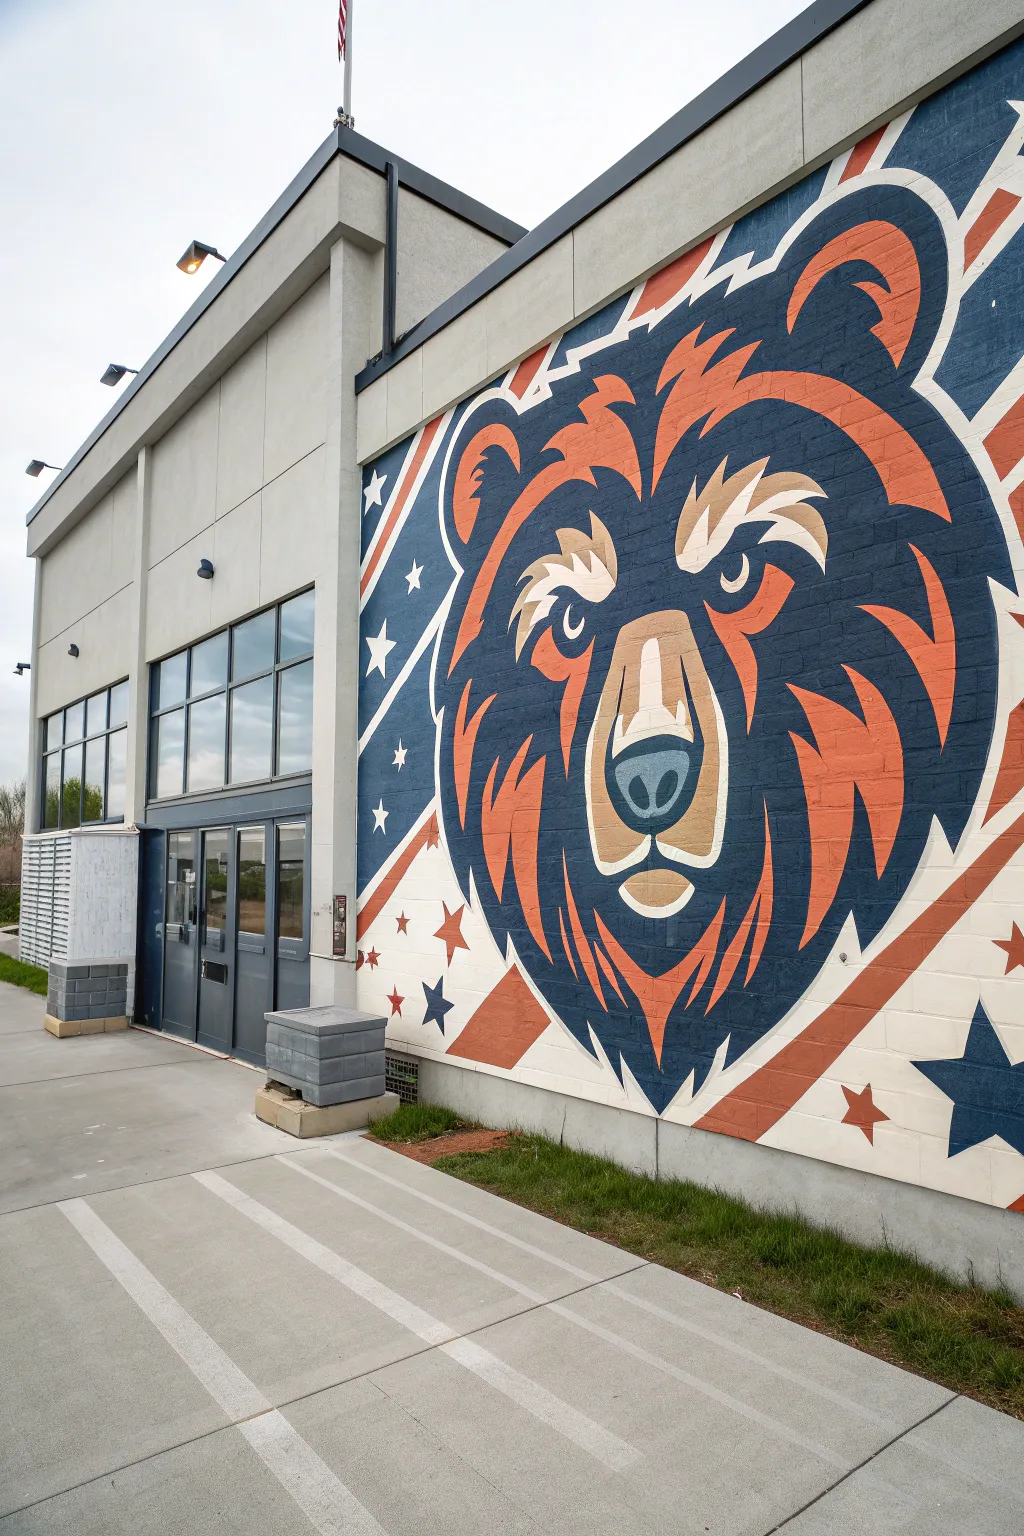

Transform a plain exterior school wall into a soaring symbol of spirit with this dynamic bear mascot mural. Featuring a striking navy, rust-orange, and cream palette set against stylized stars and stripes, this large-scale project combines sharp geometric lines with organic fur textures for a professional finish.
How-To Guide
Materials
- Exterior masonry primer (white)
- Exterior acrylic latex paint (Navy Blue, Rust Orange, Cream/Tan, White)
- Wide painter’s tape (1.5 inch and 2 inch)
- Chalk snap line
- Digital projector (high lumen for outdoor use)
- Scaffolding or sturdy ladder
- assorted paint rollers (9-inch rough surface nap)
- Angled sash brushes (2.5 inch and 1.5 inch)
- Grid paper and pencil
- Extension poles
- Cleaning supplies (TSP substitute, scrub brush, hose)
Step 1: Preparation & Priming
-
Clean the surface:
Begin by thoroughly scrubbing the brick or cinder block wall with a TSP substitute and a stiff brush to remove dirt, grime, or mildew. Rinse well with a hose and allow the surface to dry completely for at least 24 hours. -
Prime the canvas:
Roll on a thick coat of high-quality exterior masonry primer. Since cinder blocks can be porous, I like to back-roll (roll in multiple directions) to ensure the primer gets into all the crevices, creating a solid white base. -
Establish the boundaries:
Measure the total height and width of your intended mural space. Use a chalk snap line to create a clearly defined rectangular border for your artwork, ensuring the top and bottom lines are level with the building’s architectural lines.
Uneven Texture Trouble?
If paint bleeds under tape on rough cinder blocks, seal the tape edge first with a thin line of the *base* color (white primer). This fills the gaps so your top color creates a perfect line.
Step 2: Drafting the Design
-
Set up the projection:
Wait for dusk or evening to ensure visibility. Position your digital projector so the bear mascot image fills your primed space. Adjust the keystone settings to prevent distortion if you are projecting from an angle. -
Trace the main outlines:
Using a pencil or soft charcoal, trace the major shapes of the bear’s head. Focus on the separation between the navy fur and the orange highlights, as well as the distinct shape of the muzzle and eyes. -
Mark the background elements:
Trace the diagonal stripes radiating from the bear and the placement of the stars. Accuracy here is crucial for that clean, graphic look, so take your time with the straight edges. -
Color code the zones:
Before turning off the projector, lightly mark each section with a letter indicating its color (N for Navy, O for Orange, C for Cream, W for White). This paint-by-number approach saves huge headaches later.
Step 3: Painting the Mascot
-
Block in the Navy base:
Start with the darkest color. Use a medium roller or large brush to fill in the deep blue sections of the bear, which form the shadows and the main silhouette. Keep the edges sharp against the future orange zones. -
Apply the Rust Orange:
Fill in the mid-tone fur sections with your rust orange paint. Use an angled sash brush to carefully cut in the jagged ‘fur’ edges where it meets the navy blue, creating that stylized, aggressive look. -
Detail the muzzle and eyes:
Switch to a smaller brush for the cream/tan color. Paint the snout bridge, the lighter fur around the eyes, and the inner ear details. These lighter values bring the face forward and add dimension. -
Add the highlights:
Using the white paint, add the small ‘catch lights’ in the eyes and any sharp teeth details. This tiny step brings the character to life instantly. -
Refine the edges:
Once the main colors are dry to the touch, go back with a small artist brush to sharpen any blurry lines between the fur colors. The contrast between blue and orange needs to be crisp.
Pro Tip: Perspective Check
Step back 20-30 feet frequently during the outlining phase. Up close, big shapes look distorted; stepping back ensures the mascot’s expression reads correctly from a distance.
Step 4: Background & Final Touches
-
Tape the stripes:
For the background diagonal stripes, apply painter’s tape along your traced lines to ensure perfectly straight edges. Press the tape edges down firmly to prevent bleed-under on the textured blocks. -
Paint the background colors:
Fill in the orange and blue stripes. Paint away from the tape edge to minimize seepage. Remove the tape while the paint is still slightly tacky for the cleanest line. -
Stencil the stars:
Make a cardboard stencil for the stars to ensure they are uniform size and shape. Position the stencil over your pencil marks and dab the white paint on gently with a sponge or stippling brush. -
Touch up the grout lines:
Deep grout lines often miss paint. Do a final walk-through and dab paint into any deep recesses that the rollers missed to ensure the image looks solid from all angles. -
Seal the work (Optional):
If your wall faces harsh sunlight or weather, apply a clear, non-yellowing UV-resistant topcoat to protect the vibrancy of the colors for years.
Stand back and admire how this powerful mural completely changes the energy of the school entrance


World Map of Curiosity
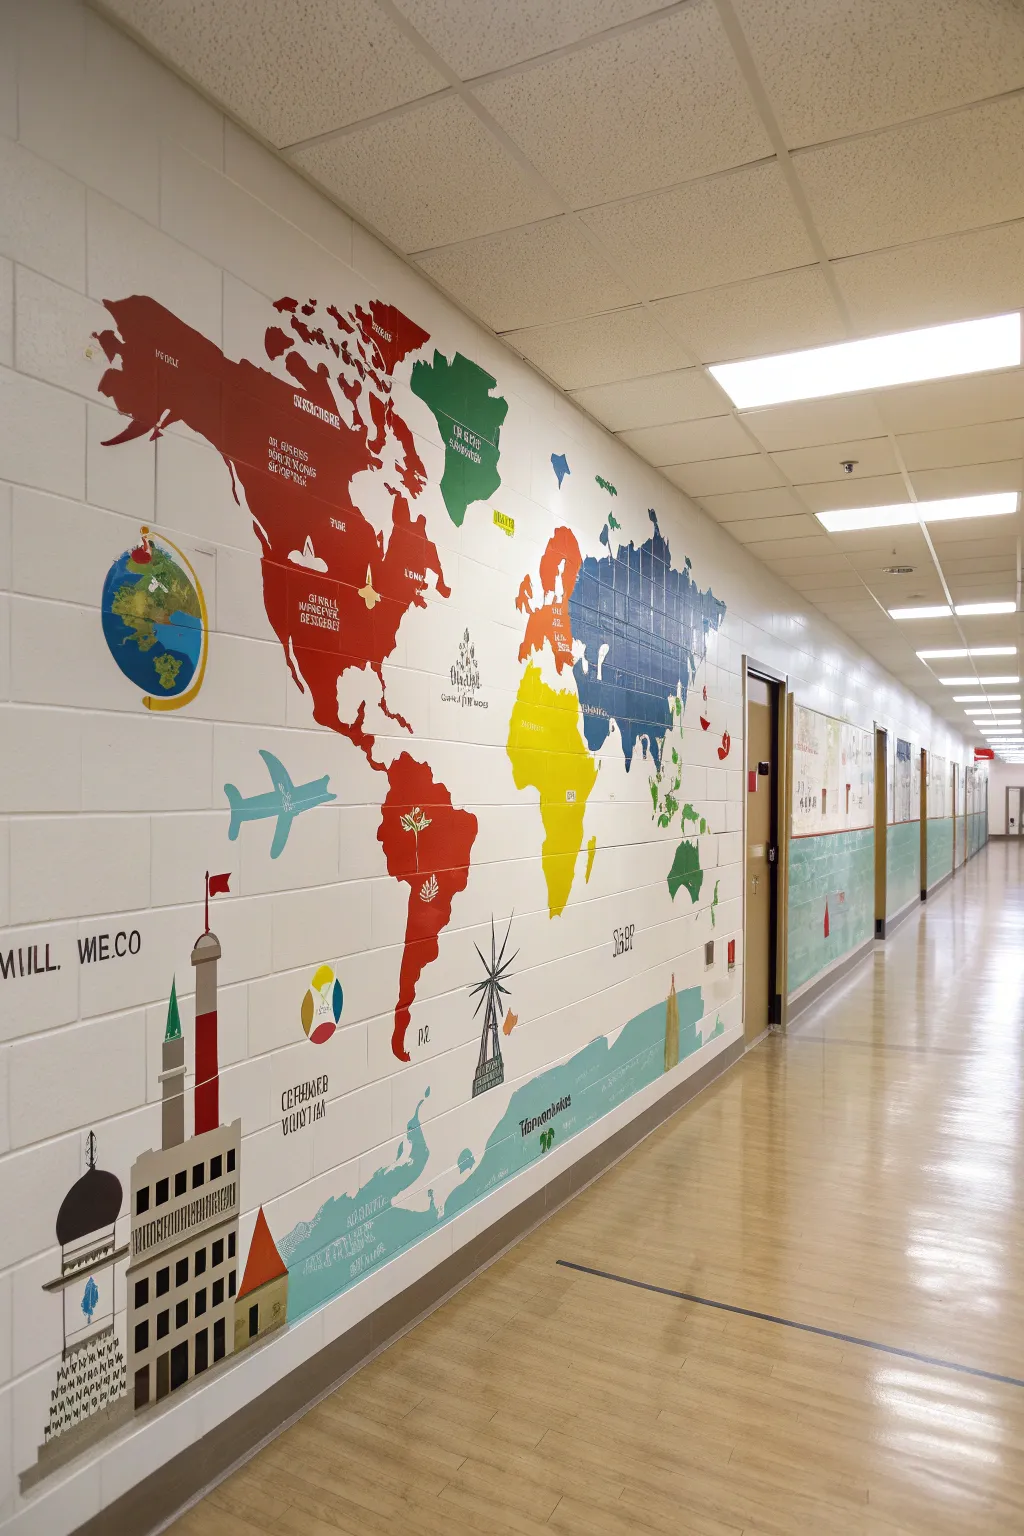
Transform a plain hallway into an educational adventure with this vibrant, stylized world map mural. Featuring bold geographical shapes and whimsical architectural doodles, this project uses a limited color palette to create clarity while inspiring curiosity about global cultures.
Detailed Instructions
Materials
- Interior semi-gloss or eggshell wall paint (white base)
- Acrylic mural paints or interior latex paint (Red, Yellow, Blue, Green, Black)
- White paint (for mixing and touch-ups)
- Projector (essential for accurate geography)
- Computer or tablet with map graphic
- Pencils and large erasers
- High-quality blue painter’s tape
- Assorted brushes: 2-inch angled sash brushes, 1-inch flat brushes
- Fine round brushes (sizes 2-4) for doodles
- Paint rollers and trays
- Drop cloths
- Ladder or step stool
Step 1: Preparation and Mapping
-
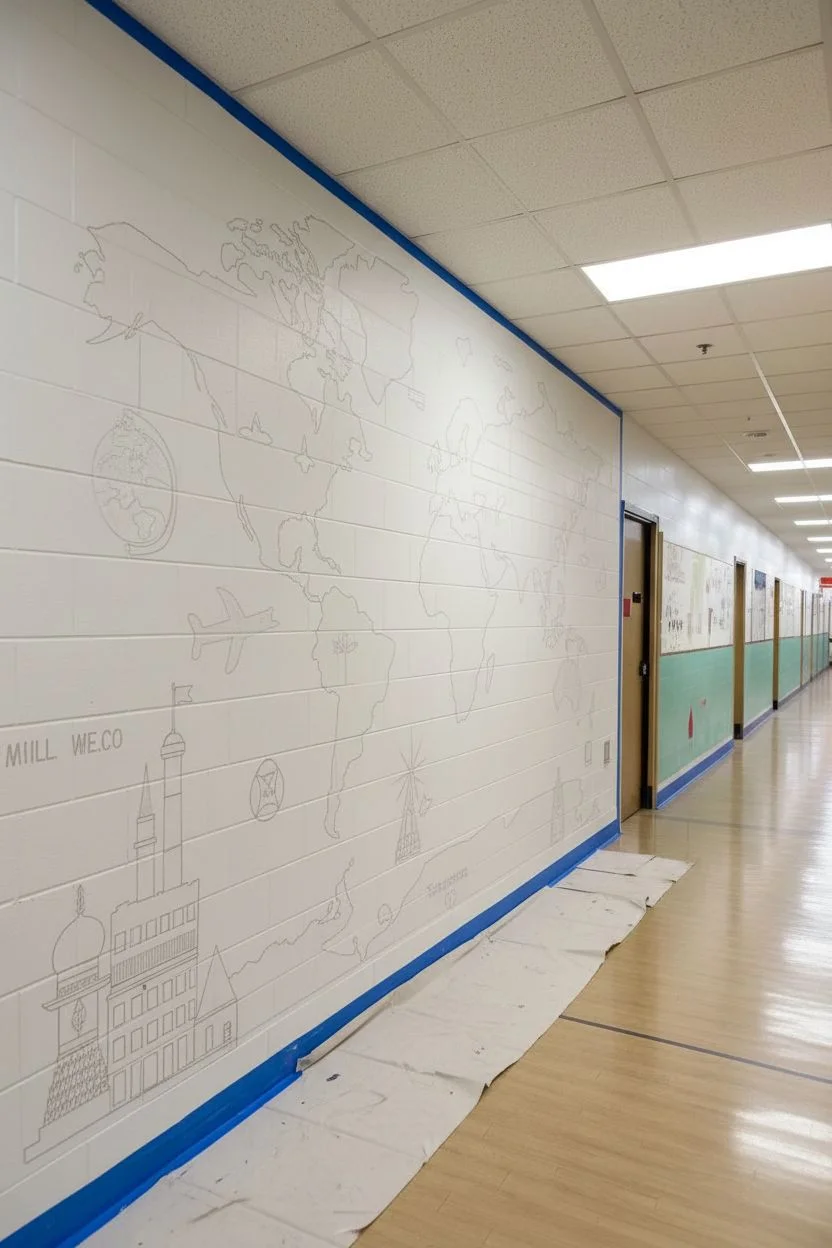
Surface Preparation:
Begin by cleaning the hallway wall thoroughly with a mild detergent and water solution to remove fingerprints and dust. Once dry, lay down drop cloths and tape off baseboards, door frames, and ceiling lines. -
Base Coat:
Apply a fresh coat of white background paint—specifically looking for a bright, clean white to make the map colors pop. If the wall is textured block like in the photo, use a thick nap roller to ensure full coverage in the grooves and let it dry overnight. -
Projecting the Image:
Set up your projector to cast the world map graphic onto the wall. Depending on hallway width, you might need to project and trace one continent or section at a time to get the scale large enough. -
Tracing the Outlines:
Using a light pencil, carefully trace the outlines of the continents. Don’t worry about perfect geographical coastal accuracy; the style here is slightly blocky and stylized. Trace the large icons at the bottom (like the mosque and tower) and the floating elements (plane, globe) at this stage too.
Step 2: Painting the Continents
-
Painting North America (Red):
Mix a deep, rich red acrylic or latex paint. Using a 1-inch flat brush, carefully cut in the edges of the North American continent. Fill the center with a small roller or larger brush, working the paint into the grout lines of the cinder blocks. -
Painting South America & Africa (Red and Yellow):
Continuing with the red, paint South America, ensuring a consistent hue. Switch to a bold, sunny yellow for the African continent. I find that yellow often needs two or three coats to look truly opaque, so be patient here. -
Painting Asia & Europe (Blue and Orange):
Use a deep blue for the large Asian landmass and a burnt orange for Europe. Keep the borders between continents distinct; a tiny gap of white space between landmasses helps visual separation. -
Painting Green Zones:
Apply a forest green shade to Greenland and Oceania/Australia. This color distribution balances the warm and cool tones across the wall. -
Adding the Icons:
Paint the smaller floating icons like the turquoise airplane and the multi-colored globe. Use the same blue from Asia for the water on the globe icon.
Block Wall Pro-Tip
Painting on cinder blocks is tricky! Use an angled brush to ‘stipple’ or dab paint into deep pores and grout lines before smoothing it out to avoid white pinholes.
Step 3: Detailing and Typography
-
Architectural Elements:
Move to the bottom architectural drawings. Paint the large tower building in light grey with red accents, and the domed building in black and white. Use a ruler to keep the window lines straight and uniform. -
Adding Text Details:
Using a fine round brush (size 2) and black paint, carefully add the whimsical text and labels over the dried continent paint. If freehand lettering feels risky, use stencils or re-project the specific text to trace it first. -
White Doodles:
Switch to a small round brush with white paint. Add the small, sketchy illustrations inside the red and blue continents—like the little sailboat, trees, or local culturally significant symbols. -
The Footer Wave:
Create the teal/light blue wave design running along the bottom near the floor. This grounds the mural and adds a nice pop of color behind the architectural drawings. -
Final Cleanup:
Once all paint is thoroughly dry, inspect the edges for any bleeds or drips. Use your white background paint to clean up any lines on the cinder block grout. -
Sealing (Optional):
In high-traffic school hallways, applying a clear, water-based matte varnish over the painted areas can protect the artwork from scuffs and cleaning crews.
Level Up: Interactive Elements
Paint specific geographic points with magnetic primer before the color coat. This allows teachers to attach magnets or flags to mark current events or lessons.
Step back and admire how this colorful cartography turns a daily walk to class into a trip around the world
BRUSH GUIDE
The Right Brush for Every Stroke
From clean lines to bold texture — master brush choice, stroke control, and essential techniques.
Explore the Full Guide
ABC Wall for Early Learners
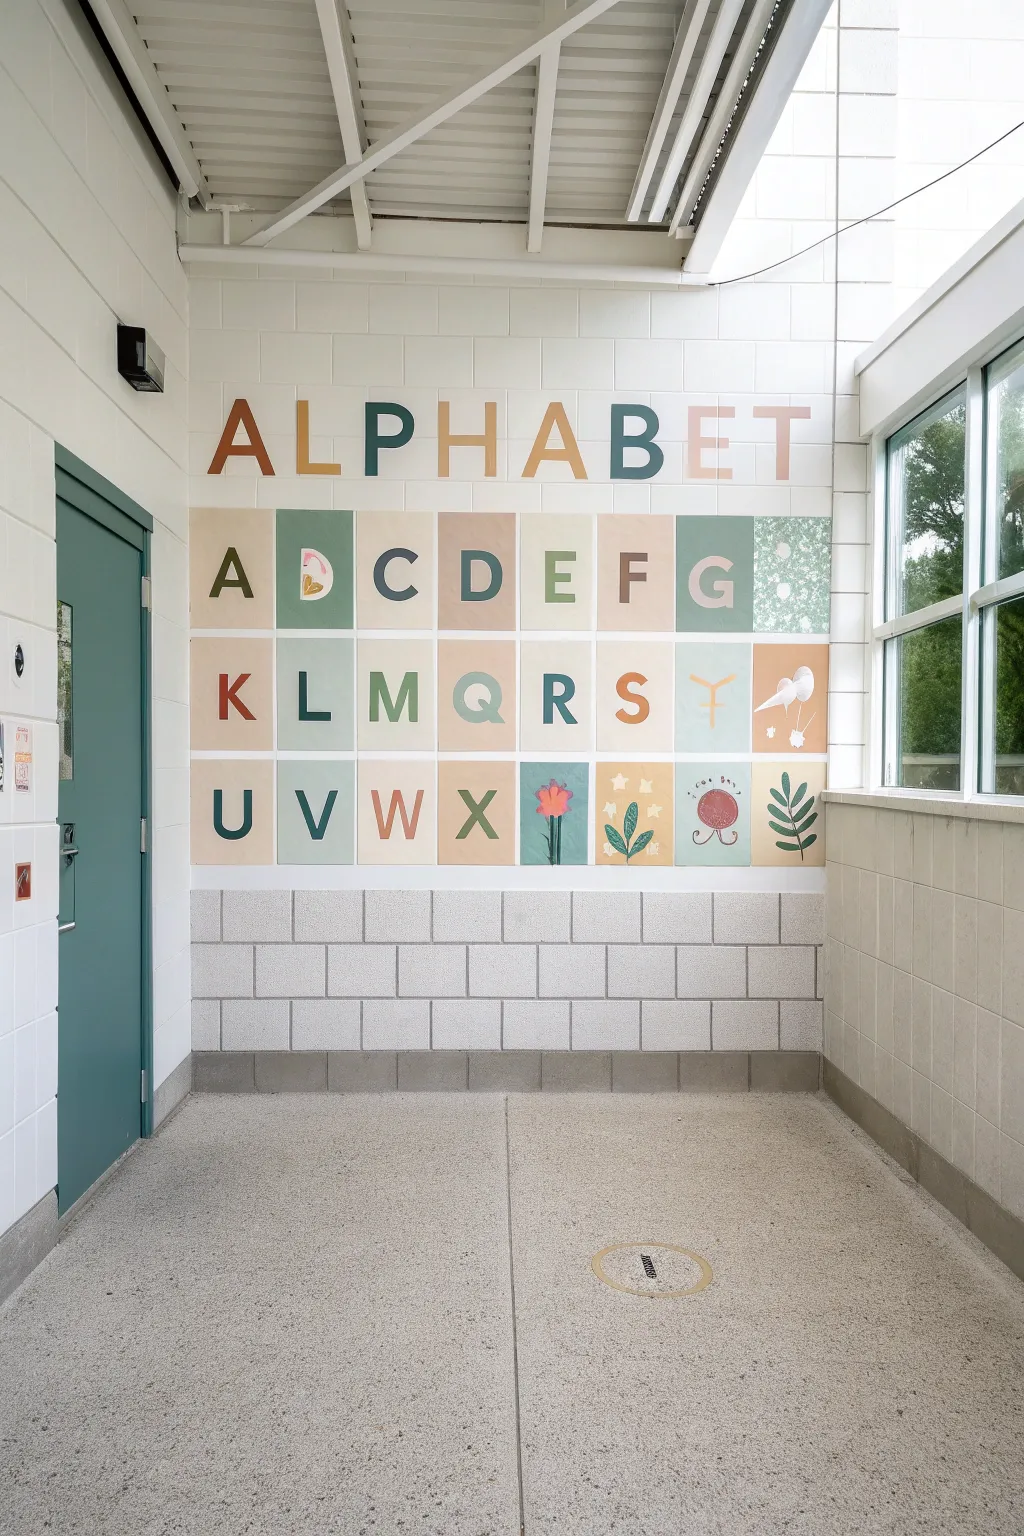
Transform a plain cinder block wall into a gentle learning zone with this muted, modern alphabet grid. The design uses a sophisticated palette of sage, terracotta, and cream to create a calm visual anchor that is both educational and stylish.
Step-by-Step
Materials
- Interior latex paint (Eggshell finish: Cream, Sage Green, Terracotta, Muted Blue, Grey-Beige)
- Painter’s tape (1.5 inch and 0.5 inch widths)
- Laser level or long spirit level
- Chalk line or pencil
- Small foam rollers (4-inch) and handle
- Artist brushes (angled flat shader and round detail brush)
- Stencils for letters (approx. 8-10 inches tall) or a projector
- Measuring tape
- Drop cloth
- Cleaning supplies (TSP or degreaser)
Step 1: Preparation and Grid Layout
-
Clean surface:
Begin by thoroughly wiping down the cinder block wall with TSP or a mild degreaser to remove dust and handprints. Let it dry completely. -
Base coat:
Roll a fresh coat of creamy white paint over the entire designated wall area to ensure a uniform background. This makes your colors pop and covers any existing scuffs. -
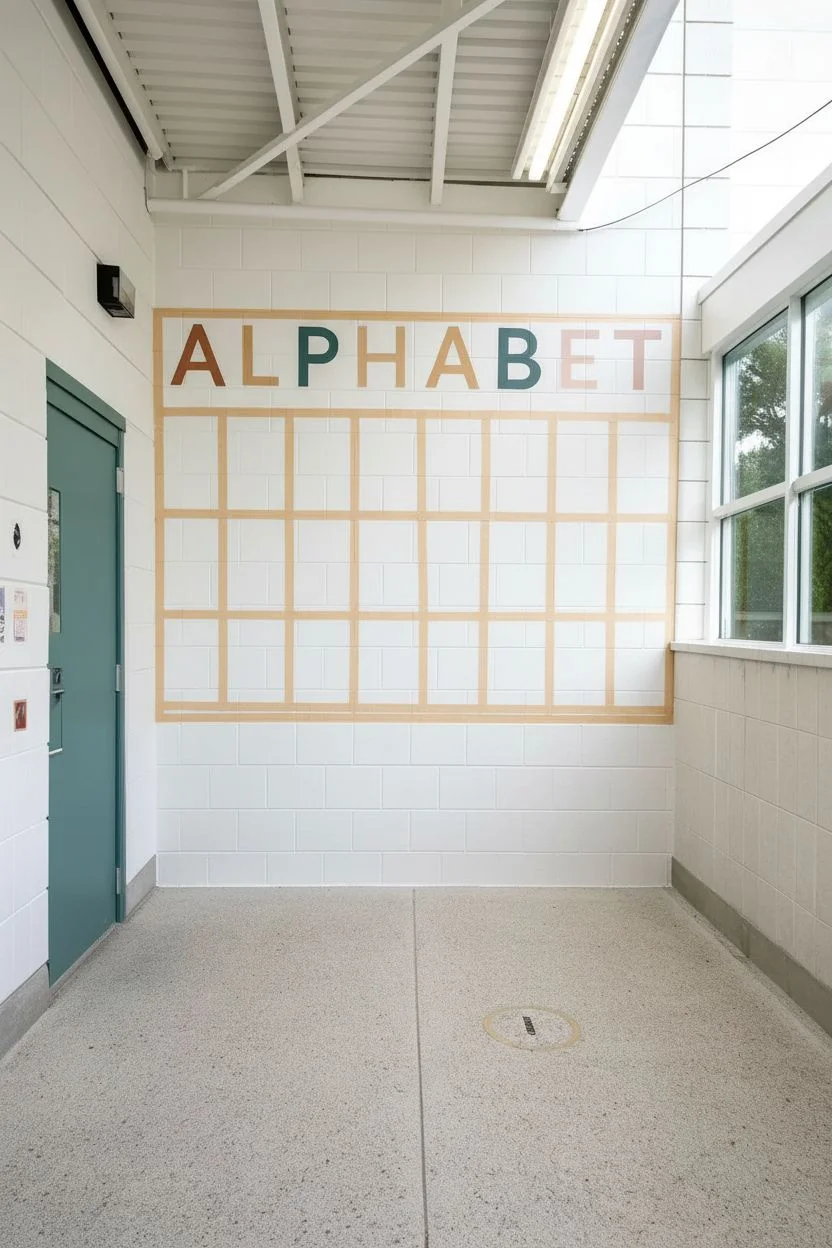
Measure the grid:
Calculate your grid dimensions based on the wall size. The design features four horizontal rows. The top row needs space for the 8 letters of ‘ALPHABET’, while the bottom three rows need 8 squares each. -
Mark lines:
Using a laser level for precision, lightly mark your horizontal and vertical grid lines with a pencil. The spaces between the squares appear to be simply the unpainted white base coat, about 1-2 inches wide. -
Tape the borders:
Apply painter’s tape along the *outside* of your penciled grid lines. You want to mask off the ‘grout lines’ (the white spaces) so you can paint the colored squares freely.
Step 2: Color Blocking
-
Plan the palette:
Map out your color pattern on paper first. Notice how the colors alternate randomly—a sage square next to a terracotta one, followed by beige, then blue. Avoid placing identical colors side-by-side. -
Paint the squares:
Using the small foam rollers, fill in each taped-off square with its assigned color. Cinder blocks are porous, so I find a second coat is almost always necessary for solid coverage. -
Sharp edges:
Remove the painter’s tape while the paint is still slightly tacky to pull a crisp, clean line. If any paint bled under the tape, touch it up with the white base color and a small artist brush. -
Top row header:
For the ‘ALPHABET’ header, you don’t need background squares. These letters float directly on the white wall, aligned centered above your grid.
Bleed-Through Fix
Before painting the colored square, seal the tape edge with a thin layer of the white base paint. This fills gaps and prevents color bleed.
Step 3: Lettering and Illustrations
-
Letter placement:
If you are confident, hand-paint the letters. Otherwise, use a projector to cast the alphabet onto the wall, or tape up large stencils centered in each colored block. -
Painting letters:
Use an angled flat brush to paint the letters. Contrast is key here—paint dark letters (like deep blue or green) on light backgrounds, and lighter letters (cream or white) on the darker squares. -
Handling the texture:
When painting on cinder blocks, use a dabbing motion with your brush to get paint into the little crevices and pits, rather than just dragging it across the surface. -
Adding illustrations:
The last four spots in the grid (after the letter X) are reserved for nature motifs. Sketch a flower, a sprig of leaves, a sun, and a mushroom shape using a pencil. -
Painting details:
Use your round detail brush for these illustrations. Keep it simple and graphic; flat shapes work best with this modern style. -
Final touch-ups:
Stand back and check for any uneven edges or patchy spots. Use a tiny brush to sharpen the corners of your letters or the edges of the color blocks.
Clear Coat Finish
In a high-traffic hallway, roll a water-based matte polyurethane clear coat over the finished mural to protect it from backpacks and scuffs.
Step back and admire how this structured yet playful display brightens the hallway
Math Patterns That Pop
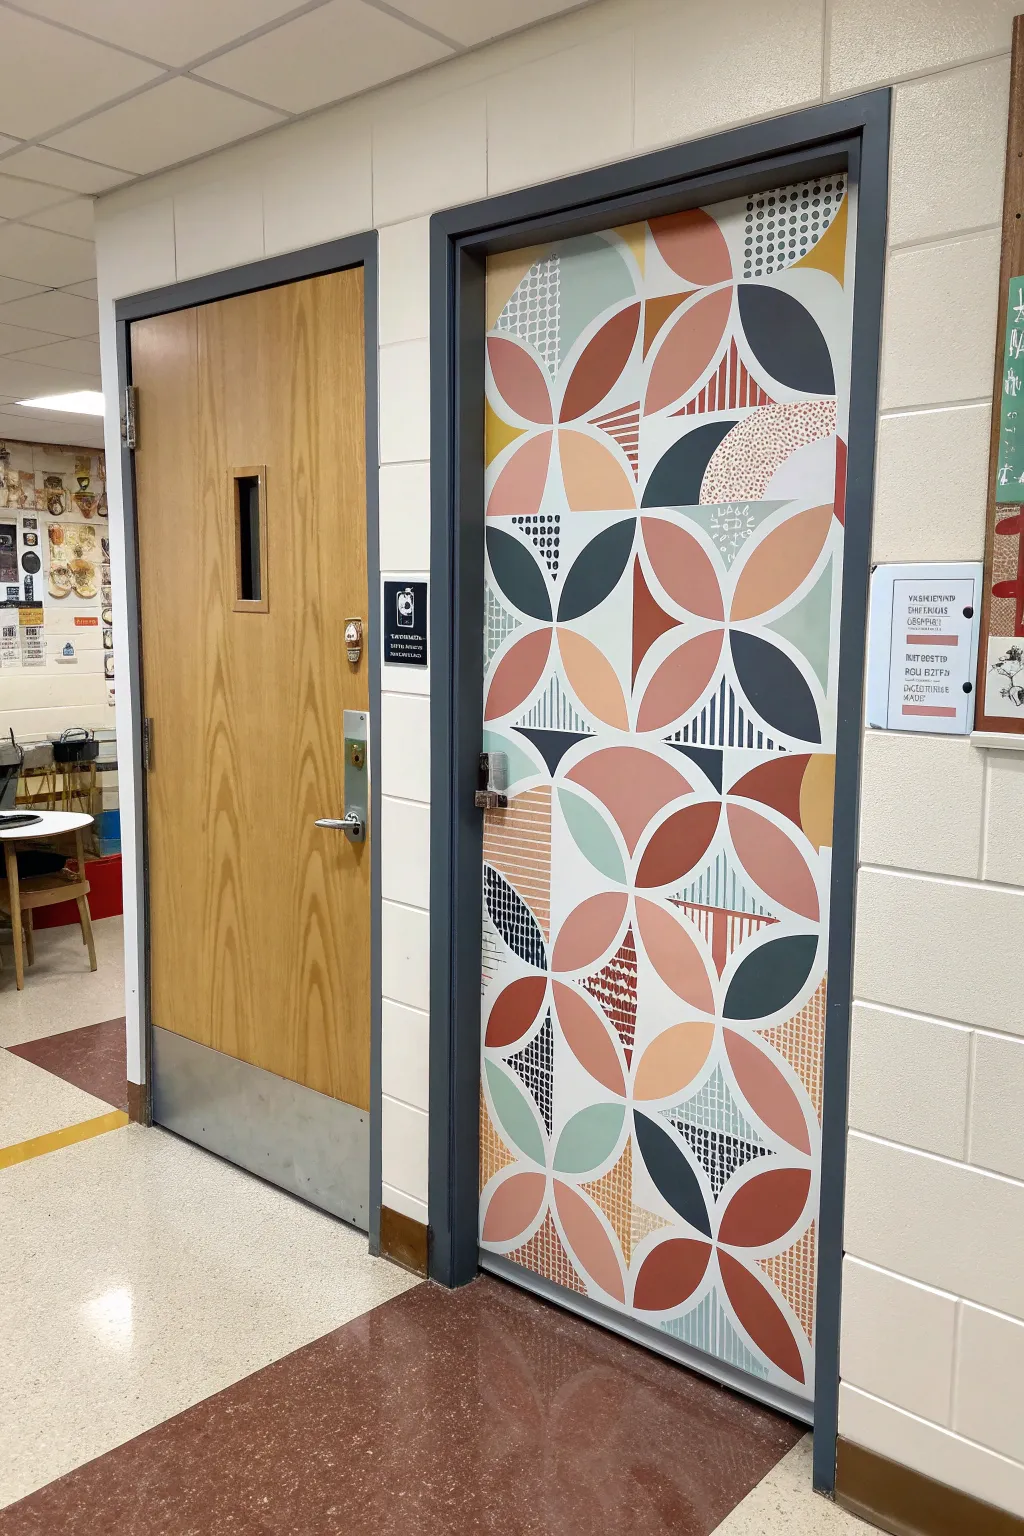
Transform a standard classroom door into a stunning piece of geometric art using overlapping circles and distinct patterns. This mural combines intersecting arcs to create a mesmerizing ‘Flower of Life’ style grid, filled with earthy tones and dotted textures for a modern, approachable look.
How-To Guide
Materials
- White primer/base paint (satin or semi-gloss latex)
- Acrylic paints (terracotta, slate blue, sage green, mustard yellow, peach)
- Small foam roller and tray
- Painter’s tape (various widths)
- Large compass (chalkboard size) or string and pencil
- Pencil and eraser
- Ruler or straight edge
- Assorted brushes (flat 1-inch, detail round brushes)
- White or metallic paint markers (for patterns)
- Clear protective topcoat (polycrylic)
Step 1: Preparation and Base Layer
-
Clean surface:
Begin by thoroughly cleaning the door surface to remove oils and dirt. If the door has a heavy gloss, give it a light sanding to help the paint adhere. -
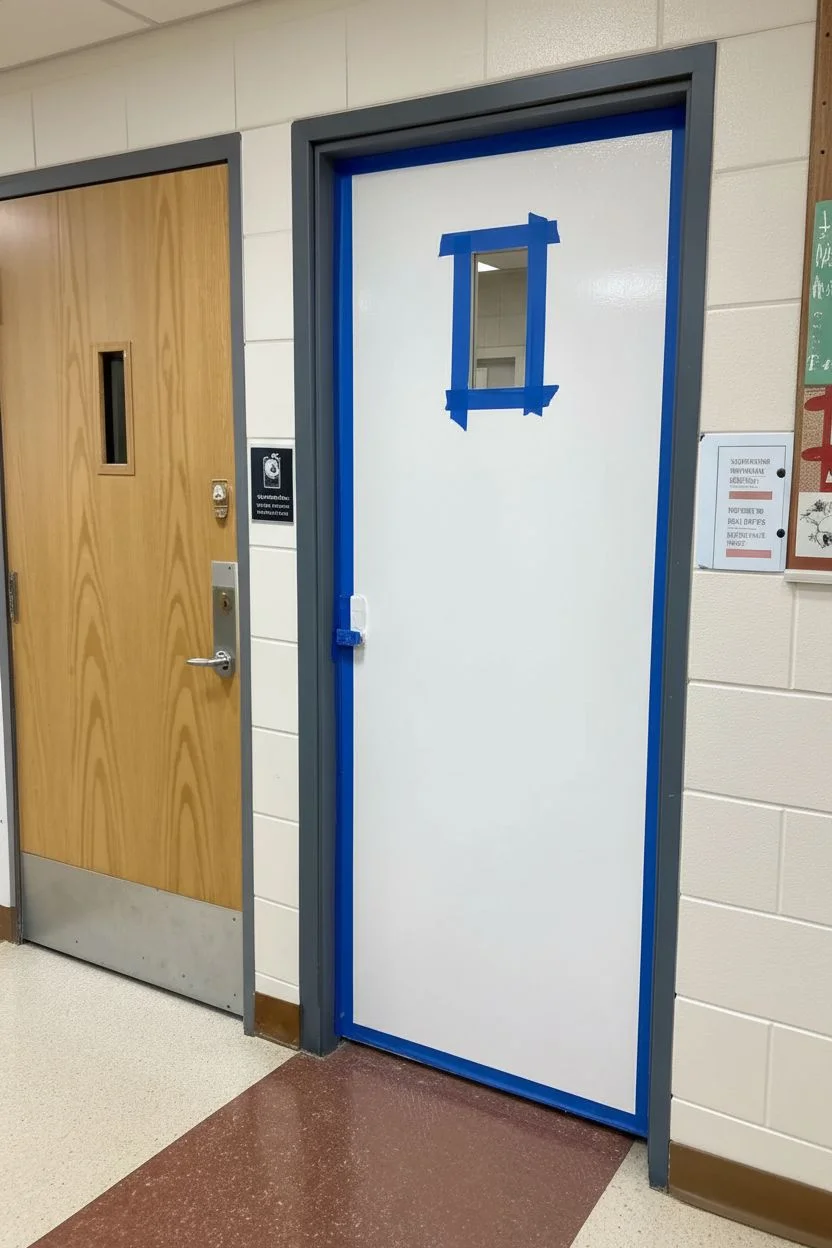
Tape hardware:
Mask off the door handle, lock mechanism, window edges, and hinges with painter’s tape to keep them pristine. -
Apply base coat:
Use a foam roller to apply a solid white base coat over the entire door. You will likely need two coats to ensure the wood tone doesn’t peek through; let the first coat dry completely before adding the second.
Clean Curves Pro-Tip
If you struggle painting curved lines freehand, cut a reuseable stencil from cardstock that matches the exact curve of your compass radius to use as a painting guide.
Step 2: Grid Construction
-
Measure center:
Find the vertical center line of the door with your ruler and mark a faint line from top to bottom. -
Determine radius:
Decide on the size of your overlapping circles. A radius of about 5-6 inches works well for a standard door width to fit the pattern seen in the reference. -
Draw first circle:
Place the point of your compass on the center line near the top and draw your first circle lightly in pencil. -
Intersect circles:
Create the overlapping effect by placing the compass point on the bottom edge of your first circle (where it hits the center line) and drawing the next circle. Continue this down the center. -
Expand the grid:
Move your compass point to the intersection points of the vertical circles to draw the side circles. This creates the classic ‘petal’ shapes where arcs overlap. -
Clean up lines:
Once the grid is full, erase any lines outside the door frame or partial shapes you don’t want to include. The design works best if it looks like a section of an infinite pattern.
Level Up: Texture
Use a vinyl cutting machine to create the intricate white dot and grid patterns out of adhesive vinyl instead of painting them by hand for a super crisp finish.
Step 3: Color Blocking
-
Plan palette:
Before painting, mark each section lightly with a letter code (e.g., ‘G’ for green, ‘T’ for terracotta) to ensure you have a balanced distribution of color. -
Paint solid shapes:
Using a 1-inch flat brush, fill in the petal shapes with your acrylic colors. I find it easiest to paint all the slate blue sections first, then move to the next color. -
Define edges:
Use a smaller brush to carefully cut in the edges where two colors meet to keep the lines crisp. Two coats may be necessary for the darker blues and terracottas. -
Leave white space:
Remember to leave some of the petal sections white, as shown in the original design. This negative space keeps the mural from feeling too heavy.
Step 4: Detailed Patterning
-
Add stripe details:
Once the base colors are fully dry, use painter’s tape to mask off small striped patterns within specific contrasting petals. Paint these stripes in white or a contrasting dark blue. -
Freehand dots:
Using a detail round brush or a paint marker, add stippled textures. Create clusters of small dots in the sage green or peach sections to add visual interest. -
Create triangle grids:
For the ‘mesh’ look seen in some sections, use a white paint marker to draw small, repetitive triangles or cross-hatching over a painted background. -
Layer shapes:
Paint semi-circles or quarter-circles on top of dry solid colors to create the layered, collage-like effect seen in the reference.
Step 5: Finishing Touches
-
Touch ups:
Step back and inspect your lines. Use a small brush with white paint to clean up any smudges or uneven intersections between the petals. -
Remove tape:
Carefully peel away the tape from the hardware and window while the paint is dry to the touch but hasn’t fully cured for days. -
Seal the door:
Since doors are high-traffic areas, apply two coats of clear water-based polycrylic sealant to protect your work from fingerprints and scratches.
Now you have a welcoming, math-inspired entrance that brightens the hallway

PENCIL GUIDE
Understanding Pencil Grades from H to B
From first sketch to finished drawing — learn pencil grades, line control, and shading techniques.
Explore the Full Guide
Space Voyage Corridor
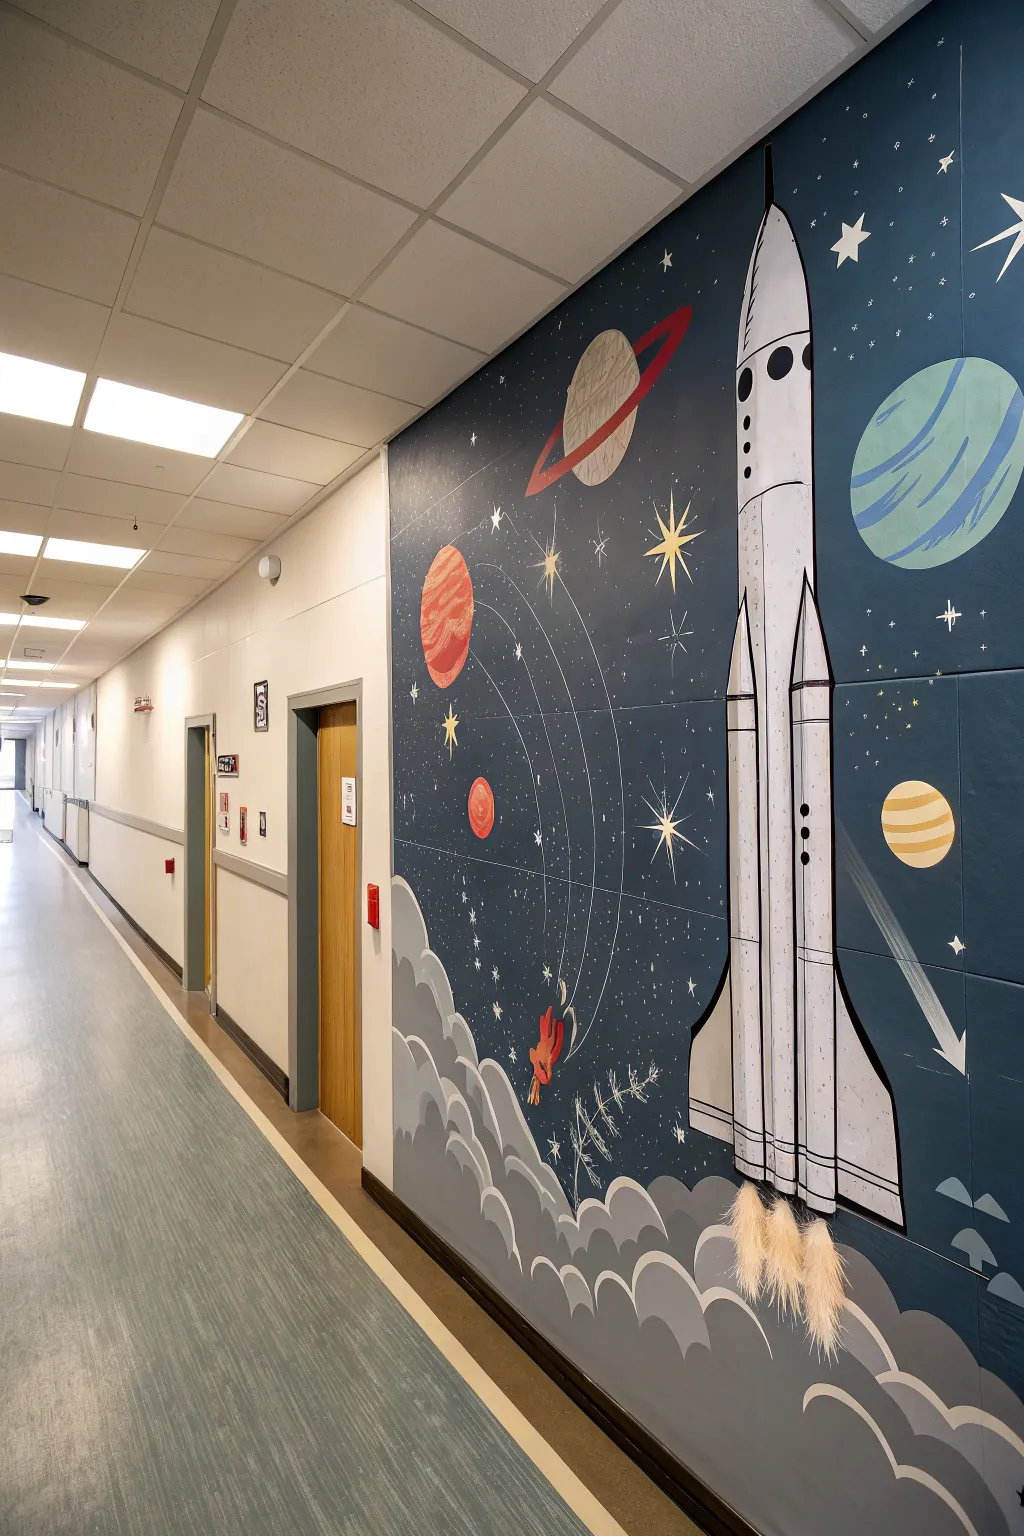
Transform a plain hallway into an interstellar adventure with this large-scale space mural. Featuring a towering rocket ship, vibrant planets, and a soft, tactile surprise at the base, this project invites students to blast off into their imagination every time they walk to class.
Step-by-Step Tutorial
Materials
- Interior semi-gloss latex paint (dark navy blue for background)
- Acrylic mural paints (white, grey, red, orange, yellow, light blue, lime green)
- Wide painter’s tape (2-inch)
- Chalk or watercolor pencils (white)
- Large foam rollers and tray
- Assorted synthetic brushes (2-inch flat, 1-inch angle, fine liner)
- Ruler and yardstick
- Faux fur fabric or unravelled rope (cream/yellow)
- Strong construction adhesive or heavy-duty mounting tape
- Drop cloths
- Scissors
Step 1: Setting the Stage
-
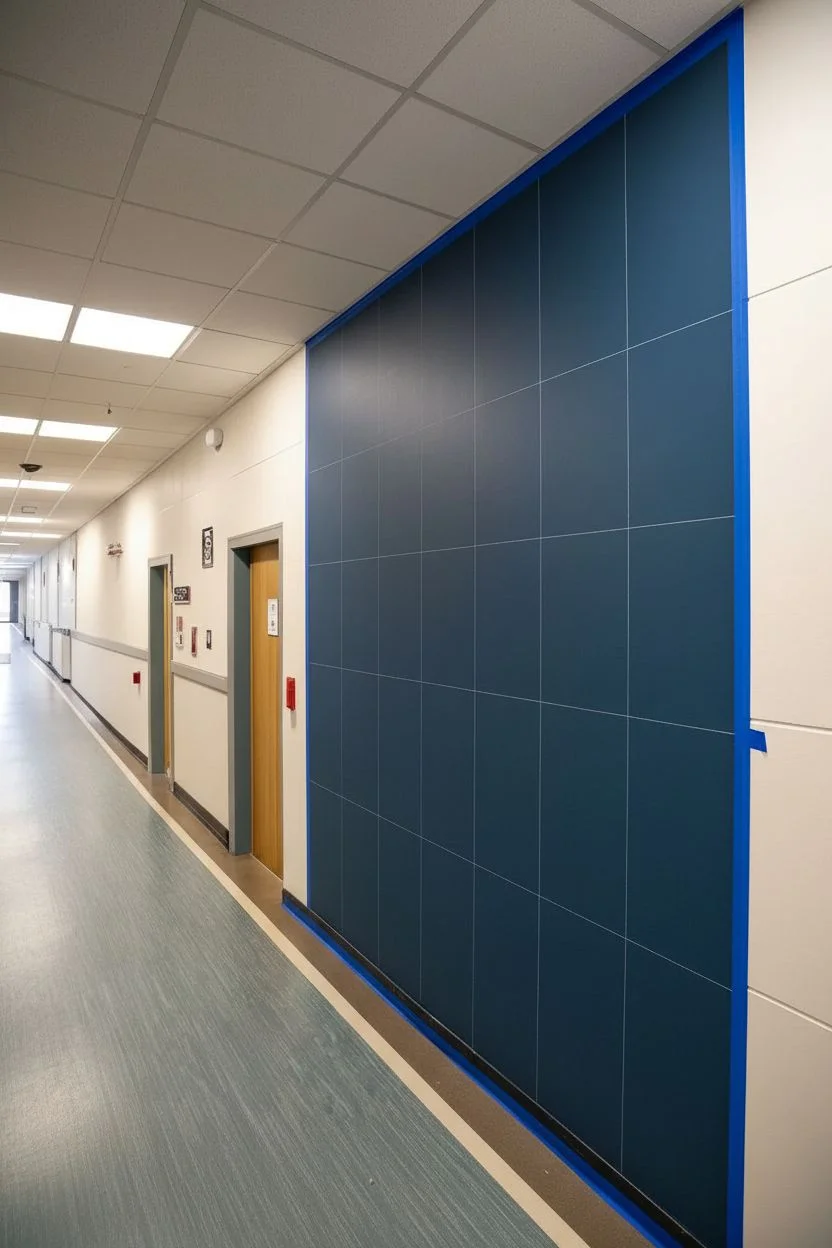
Prep the surface:
Begin by cleaning the hallway wall thoroughly to remove any scuffs or dust. If the wall is slick, give it a light sanding to help the paint adhere. Tape off the ceiling line, floor molding, and any adjacent walls or door frames with blue painter’s tape to ensure crisp edges. -
Roll the background:
Using a large foam roller, apply the dark navy blue latex paint across the entire mural area. This creates your ‘deep space’ canvas. It will likely need two generous coats to get a solid, opaque finish that hides the original wall color. Let this dry completely, preferably overnight. -
Map out the grid:
Since the wall in the photo has tiles or panel lines, use them as a built-in grid for scaling. If your wall is smooth, use a yardstick and white chalk to lightly sketch a large grid. This helps you figure out exactly where the tall rocket should stand versus the floating planets.
Uneven Coverage?
If the dark navy background is showing brush strokes, don’t press harder. Instead, apply a third thin coat using a roller with a smaller nap (like 1/4 inch) for an ultra-smooth finish.
Step 2: Constructing the Rocket
-
Sketch the outline:
Using white chalk or a watercolor pencil, draw the tall vertical fuselage of the rocket first. Add the pointed nose cone and the triangular fins at the bottom. Keep the lines light so they are easy to wipe away later if you need to adjust the proportions. -
Block in base colors:
Fill the rocket body with a light grey or off-white acrylic paint. Use a wide, flat brush for the main body and an angled brush to cut in sharp lines along the edges. You may need two coats here to ensure the dark blue background doesn’t show through. -
Add dimension:
Once the base grey is dry, use a darker grey to paint a shadow along the right side of the rocket and under the nose cone division. This simple shading step instantly makes the flat shape look cylindrical and 3D. -
Define the details:
Switch to a thin liner brush and black paint to outline the rocket’s panels, windows, and fins. Draw the horizontal rings separating the stages of the rocket and fill in the circular portholes with pitch black to simulate depth.
Step 3: Creating the Galaxy
-
Paint the planets:
Sketch circles of varying sizes around the rocket. Paint the large planet in the upper right with teal and lime green swirls. Create a red planet with orange crater details on the left. Finally, add the Saturn-like ringed planet at the top using neutral beige tones with a bold red ring. -
Add atmospheric clouds:
At the bottom of the wall, paint billowing cloud shapes using various shades of grey. Start with the darkest grey at the bottom and layer lighter greys on top to create volume. These clouds ground the mural and hide the floor transition. -
Draw orbital lines:
Using a very steady hand or a long straightedge, paint thin, white, curved lines that sweep across the mural. These orbital paths connect the planets and add a sense of movement and scientific diagramming to the composition. -
Sprinkle the stars:
Use a small round brush to dot white stars throughout the navy background. To create the glowing ‘burst’ stars, paint a cross shape first, then add a smaller ‘X’ over the center. Vary the sizes to create a sense of distance. -
Paint the comet:
On the right side, add a shooting comet. Paint a small circle for the head and drag your brush quickly downwards to create a fading tail. This balances the composition against the red planet on the left.
Glow Up
Mix glow-in-the-dark medium into your white paint for the stars and orbital lines. When the hallway lights dim or go out, the galaxy will secretly come alive for anyone walking by.
Step 4: Interactive Elements
-
Prepare the thrusters:
Instead of painting the fire, we interpret the blast-off with texture. Cut tapered triangular shapes from faux fur fabric or fray piece of thick cream-colored rope to create tufts that resemble exhaust plumes. -
Attach the exhaust:
Apply heavy-duty construction adhesive to the back of your fabric or rope pieces. Firmly press them onto the wall directly beneath the rocket’s engine nozzles. Hold them in place for a minute to ensure the bond sets. -
Final touches:
Inspect the mural for any chalk lines and wipe them away with a damp cloth. Touch up any blue spots where the galaxy paint might have strayed outside the intended lines.
Step back and admire how this interstellar scene completely changes the energy of the corridor
Tree of Learning and Growth
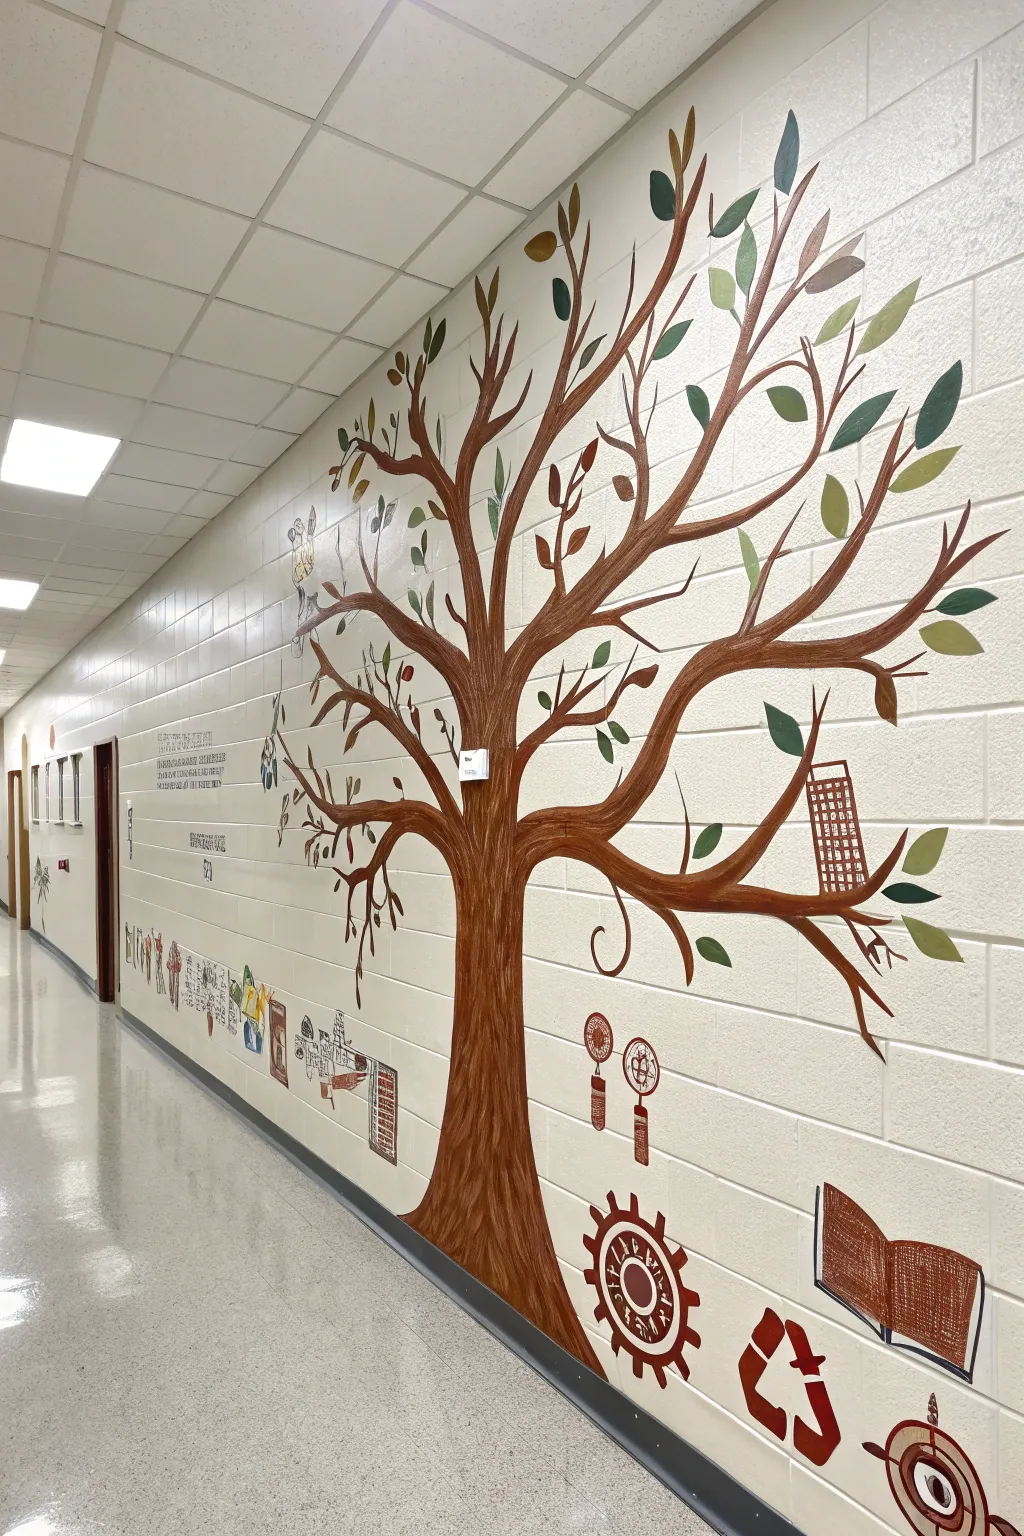
Transform a plain hallway into an inspiring landscape with this expansive tree mural, featuring stylized branches and symbolic icons of education. The design uses the natural grid of cinder block walls to help scale a towering tree that celebrates growth, reading, and recycling.
Step-by-Step
Materials
- Acrylic latex wall paint (dark brown, medium brown, various greens, red, white)
- Wide paintbrushes (2-3 inch) for the trunk
- Smaller angled sash brushes (1 inch) for branches
- Detail brushes for leaves and icons
- Chalk or pastel pencil for sketching
- Painter’s tape and drop cloths
- Step ladder
- Rags and water container
Step 1: Planning and Sketching
-
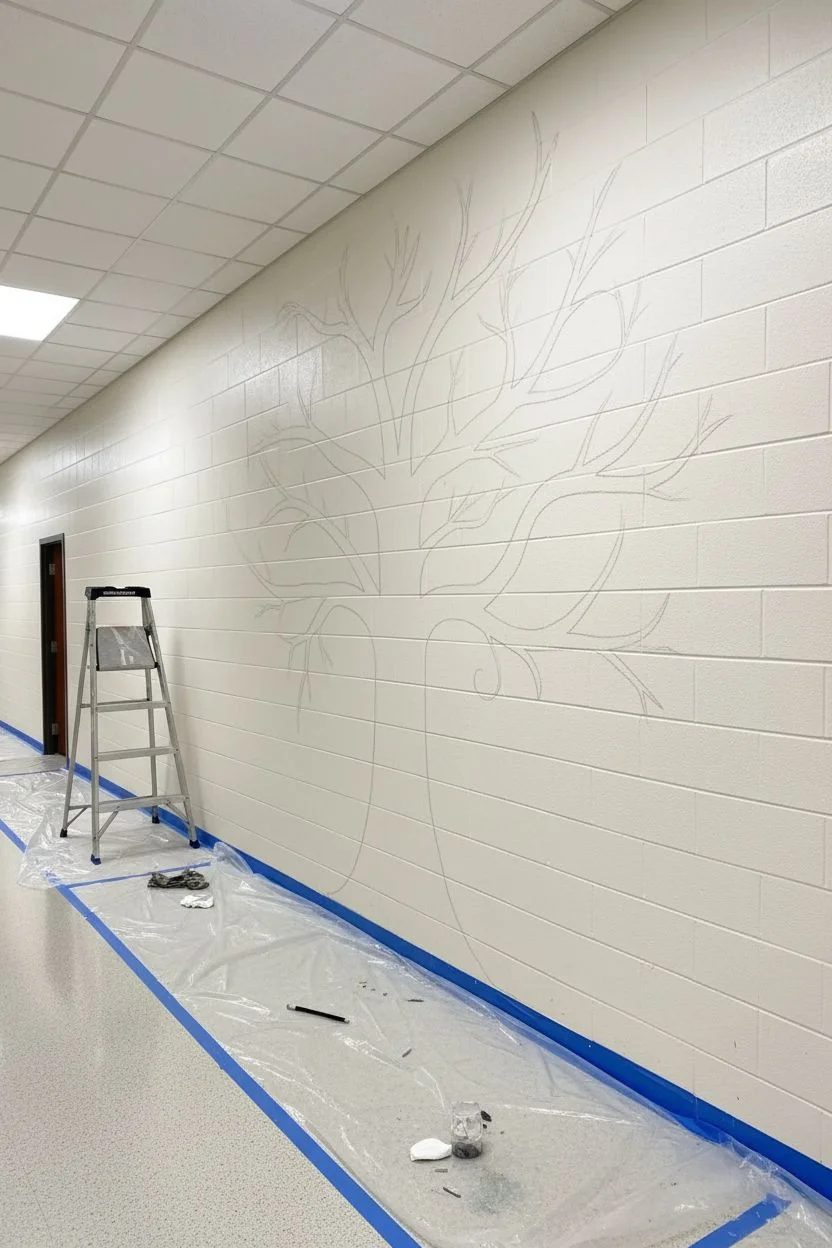
Prepare the surface:
Begin by cleaning the hallway wall thoroughly to remove dust and handprints. If the base color isn’t already a clean off-white or cream, apply a fresh coat of primer or base paint to provide a neutral canvas. -
Tape off boundaries:
Apply painter’s tape along the floor moulding and any door frames or fixtures you need to protect. Lay down drop cloths to catch drips, as painting overhead branches can get messy. -
Sketch the trunk foundation:
Using a piece of chalk or a pastel pencil, lightly sketch the wide base of the trunk. Position it so the roots appear to grow naturally along the floor line, creating a solid foundation. -
Map the main branches:
Extend your sketch upwards, drawing the primary thick branches reaching towards the ceiling. Use the cinder block mortar lines as grid guides to ensure your tree remains balanced and doesn’t lean unintentionally. -
Add secondary branches:
Flesh out the canopy by sketching thinner, wispy branches extending from the main limbs. Let these curve organically, filling the upper negative space without overcrowding it.
Paint on Cinder Blocks
Cinder blocks soak up paint quickly. You will likely need to dab or stipple the paint into the deep pores and mortar lines rather than just brushing across the surface for solid coverage.
Step 2: Painting the Tree Structure
-
Block in the trunk color:
Load a wide brush with your medium brown shade. Fill in the trunk outline, using long vertical strokes to mimic the natural grain of wood bark. Don’t worry about perfect coverage yet; texture is good. -
Paint the main limbs:
Continue the medium brown color up into the thickest branches. As the branches narrow, switch to a 1-inch angled brush to maintain control over the tapering edges. -
Add bark texture and depth:
While the base coat is still slightly tacky, I like to mix a darker brown to shadow the undersides of the branches and the sides of the trunk. Blend this wet-on-wet for a soft, rounded dimensional look. -
Detail the fine tips:
Use a smaller round brush and dark brown paint to create the thinnest twigs at the very ends of the branches. A little water added to the paint helps it flow smoothly for these delicate lines. -
Highlight the form:
Add subtle highlights using a lighter tan or watered-down white on the top edges of the branches and the center of the trunk to suggest a light source.
Step 3: Leaves and Educational Icons
-
Paint base leaves:
Using two different shades of green (olive and forest), paint simple almond-shaped leaves scattered along the branches. Vary the size and direction to keep the tree looking lively rather than stiff. -
Add accent leaves:
Introduce a few leaves in autumnal tones like ochre or muted orange to add warmth and visual interest to the canopy. -
Sketch the lower icons:
Near the base of the tree and along the ‘ground’ level, sketch icons representing school subjects. Include gears for engineering, a recycling symbol, science tools, and an open book. -
Paint the science and recycle icons:
Fill in the sketched icons using a bold rust-red or maroon color. Keep the style flat and graphic, almost like a stamp, to contrast with the organic tree. -
Detail the open book:
Paint the large open book icon at the bottom right. Use cross-hatching or scribbled lines within the book shape to suggest text without writing specific words. -
Create the hanging elements:
Paint a few icons, like the building grid, hanging directly from the branches. Connect them with painted ‘strings’ or attach them directly to a twig so they act like fruit of the tree. -
Final touches:
Step back and check the overall balance. If any area feels too empty, add a small floating leaf or a simple swirl design to fill the gap. Erase any visible chalk lines once the paint is fully cured.
Pro Tip: Branch Flow
When painting thin branches, always pull the brush stroke from the thick part of the branch outward toward the tip. Lifting your brush gradually creates a perfect natural taper.
Now you have a permanent piece of art that inspires students to keep growing every time they walk down the hall


Many Faces, One Community
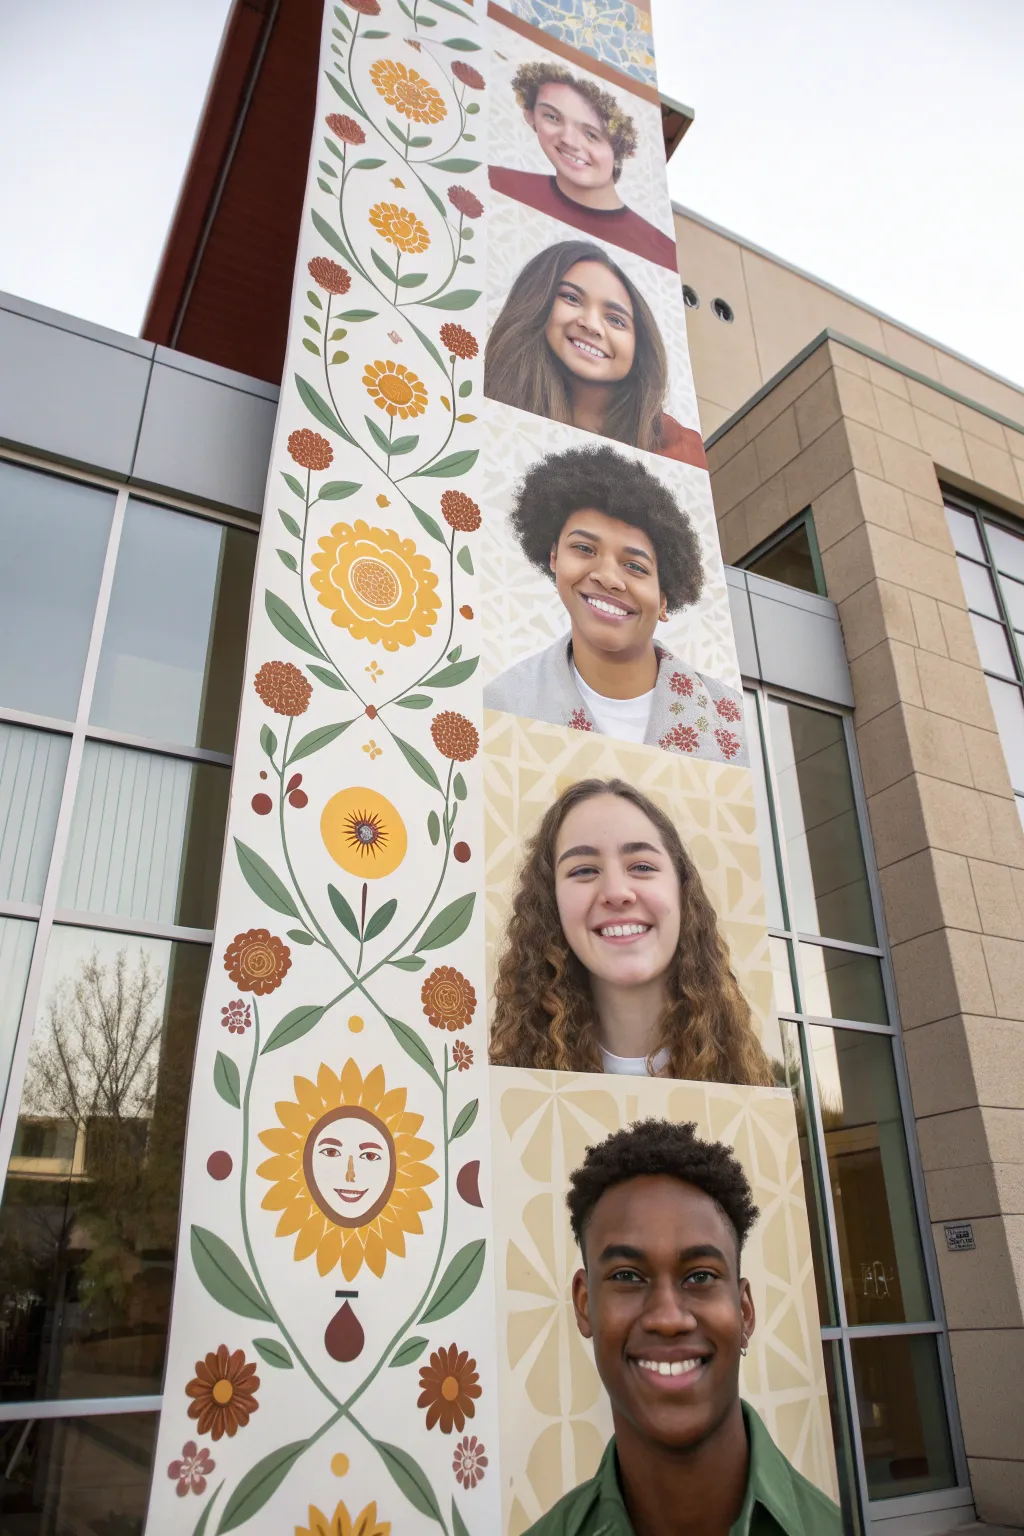

Celebrate the diversity of your student body with this striking vertical banner design that combines high-resolution photography with stylized floral illustrations. This mixed-media approach creates a modern, welcoming visual that harmoniously blends individual faces with the organic growth of a community.
How-To Guide
Materials
- Large format vinyl banner material (e.g., 13oz or 18oz matte vinyl)
- High-resolution digital camera
- Photo editing software (Photoshop or similar)
- Vector illustration software (Illustrator or similar)
- Portrait lighting kit (softbox or natural window light)
- Clean backdrop for photography
- Grommet kit and heavy-duty zip ties (for installation)
- Measuring tape
- Printer service (large format specialist)
Step 1: Conceptualization & Asset Gathering
-
Define the dimensions:
Measure the intended installation space on your school’s exterior facade carefully. This project is designed for a tall, narrow vertical strip, similar to a pillar or architectural recess. -
Map out the grid:
Sketch a layout that divides your vertical space into alternating sections. Plan for a split design: the left third will be dedicated to a continuous floral vine, while the right two-thirds will house the stacked square portraits. -
Recruit student subjects:
Select a diverse group of students to photograph. Ensure you have permission slips signed for public display of their images. -
Set up the photoshoot:
Creating consistent lighting is key here. Set up a studio space with a neutral background and soft, even lighting to avoid harsh shadows on faces. I find that a simple ‘clamshell’ lighting setup works wonders for flattering portraits. -
Capture the portraits:
Photograph the students looking directly at the camera with warm, genuine smiles. Leave plenty of headroom in the frame so you can crop them into perfect squares later without losing hair details.
Consistent Horizons
When photographing, keep the camera lens at eye level for every single student. This consistency makes the final stacked column look cohesive.
Step 2: Digital Design & Illustration
-
Process the photos:
Import your photos into editing software. remove the backgrounds and replace them with subtle, patterned backdrops in warm earth tones like beige, cream, or soft ochre. This unifies the different photos. -
Create the floral runner:
In your vector software, start designing the vertical strip. Draw a meandering green vine that runs from bottom to top. Use a limited color palette of olive greens, deep reds, and golden yellows to match the warm tones of the portraits. -
Add stylized blooms:
Intersperse the vine with stylized graphics of sunflowers, berries, and leaves. Keep the style flat and folk-art inspired rather than hyper-realistic. -
Incorporate a whimsical element:
For a unique touch inspired by the reference, replace the center of one of the large sunflowers with a simplified line-drawing face. It adds a playful ‘Easter egg’ to the design. -
Assemble the layout:
Place the square student portraits in a vertical stack on the right side of your design file. Ensure the edges align perfectly with the floral strip on the left. -
Add background textures:
Behind the portraits, overlay subtle geometric patterns or leaf motifs in a very low opacity. This adds depth so the photos don’t look like stickers placed on a plain wall.
Seasonal Swaps
Design the banner with a velcro-attached bottom section where you can swap in dates or event names for different school milestones.
Step 3: Production & Installation
-
Final file check:
Zoom in to 100% on your digital canvas to check for pixelation. The file needs to be high resolution (usually 100-150 DPI at full scale) for large format printing. -
Export for print:
Save the file as a print-ready PDF with CMYK color profile. Include ‘bleed’ area if your printer requests it. -
Select material:
Order the print on heavy-duty outdoor vinyl. Request hemmed edges for durability and grommets placed every 2 feet along the top and sides. -
Prepare the mounting surface:
Ensure the wall or pillar is clean. If you are mounting to masonry, you may need to install permanent anchor hooks that correspond to your grommet locations. -
Install the banner:
Using heavy-duty UV-resistant zip ties or metal carabiners, secure the top corners first. Allow the banner to hang freely to find its natural center before securing the sides and bottom. -
Tighten and smooth:
Go around the perimeter and tighten the fasteners to remove any wrinkles, ensuring the faces and vines look smooth and taut.
Now you have a vibrant, monumental tribute to your students that brightens the entire campus architecture
Core Values Badge Wall
Transform a plain brick wall into a visual statement of core values with this modern grid mural design. Using a limited color palette of deep navy and terracotta, you’ll create six distinct circular badges featuring clean, symbolic iconography.
Step-by-Step
Materials
- Exterior masonry primer
- Exterior latex paint (white, deep navy blue, terracotta orange)
- Chalk line or laser level
- String and chalk (for drawing circles)
- Painter’s tape (1-inch and 2-inch widths)
- Assorted brushes (2-inch sash brush, small detail brushes)
- Small paint rollers (4-inch) with nap suitable for brick
- Pencil or chalk for sketching
- Ladder (if scaling up)
- Drop cloths
Step 1: Grid & Base Preparation
-
Prep the surface:
Begin by cleaning the brick wall thoroughly to remove dirt and debris. Once dry, apply a coat of masonry primer to the entire area you plan to paint to ensure the colors adhere properly and last longer. -
Establish the background:
Paint the entire rectangular wall section with your base creamy white color. Use a roller for the broad areas and a brush to work the paint into the mortar joints. Allow this to dry completely for at least 24 hours. -
Mark the grid lines:
Using a chalk line or a laser level, divide your wall into six equal rectangular sections—two rows high and three columns wide. Ensure your verticals match the mortar lines if possible for a cleaner look. -
Create the dividers:
Tape off the grid lines created in the previous step. Paint these lines with the terracotta orange paint to create a thin border between each section. Peel the tape while the paint is still slightly tacky to avoid pulling up dry edges.
Tape Trick for Brick
On rough brick, tape won’t seal perfectly. After taping your grid lines, brush a little base coat paint over the tape edge first to seal the gaps before adding the color.
Step 2: Drafting the Circles
-
Find the centers:
In the center of each of your six rectangular sections, mark a small ‘X’ to denote the center point. -
Draw the circles:
Cut a piece of string to the length of your desired radius. Pin or tape one end to the center ‘X’ and tie a piece of chalk to the other. Pull the string taut and trace a perfect circle in each section. -
Define the edges:
Carefully hand-paint the outline of your circles using a small sash brush. The texture of the brick makes taping circles difficult, so a steady hand works best here.
Step 3: Painting the Badges
-
Fill the backgrounds:
Paint the interior of the circles with their designated background colors. Paint the top-left (tree), top-right (mountain), bottom-left (leaf), and bottom-right (magnifying glass) circles in deep navy. Paint the top-center (leaves) and bottom-center (hand) circles in terracotta. -
Apply a second coat:
Brick is porous and absorbs paint. I always apply a second coat to the colored circles to ensure the color is solid and opaque, hiding the white background completely. -
Sketch the icons:
Once the background circles are fully dry, use white chalk to lightly sketch the iconography into each badge: a tree, three leaves, a mountain scene, a maple leaf, a hand with an eye, and a magnifying glass. -
Outline the icons:
Using a thin liner brush and your white exterior paint, carefully trace over your chalk lines. Focus on getting smooth curves for elements like the magnifying glass and the leaves. -
Fill solid white areas:
Switch to a slightly larger flat brush to fill in the thicker solid white areas, such as the mountain snowcap, the palm of the hand, and the thick rim of the magnifying glass. -
Add line details:
Go back in with your finest brush to add the intricate details, like the veins on the leaves, the stars under the mountain, and the eyelashes on the hand symbol. -
Clean up edges:
Inspect the point where the colored circles meet the white wall. If any paint bled or the line is shaky, use your original white wall paint and a small brush to touch up the outer perimeter for a crisp finish. -
Protect the work:
If your wall gets heavy sun or weather exposure, consider rolling on a clear, UV-resistant masonry sealer over the finished mural after it has cured for 72 hours.
Shaky Circle Edges?
Don’t stress about perfect circles on textured brick. Stand back 10 feet to check your work; minor bumps disappear from a distance, and the overall shape will read clearly.
This organized, symbolic display creates a welcoming and inspiring atmosphere for everyone entering the building
Science Icons in Motion
Transform a plain exterior brick wall into a celebration of knowledge with this elegant science-themed mural. Combining iconic symbols like atoms and beakers with flowing organic vines and leaves, this design uses an earthy palette of sage, forest green, and copper to create a sophisticated, academic aesthetic.
Detailed Instructions
Materials
- Exterior masonry primer (white)
- Exterior acrylic latex paint (white for base coat)
- Exterior acrylic paints (copper/rust, sage green, deep forest green)
- Assorted paintbrushes (wide rollers, medium angled sash brushes, fine liner brushes)
- Chalk or charcoal layout sticks
- Painter’s tape
- Drop cloths
- Ladder or scaffolding
- Digital projector (optional, for night tracing)
- Clear exterior UV-resistant sealant
Step 1: Wall Preparation & Base
-
Clean the surface:
Begin by thoroughly cleaning the brick wall. Use a pressure washer to remove dirt, mildew, and loose paint. Let the wall dry completely for at least 24-48 hours before proceeding. -
Prime the brick:
Apply a high-quality masonry primer to the clean brick. Use a thick-nap roller (around 3/4 inch) to ensure the primer gets into the mortar lines and texture of the brick. -
Apply the base coat:
Once the primer is dry, roll on two coats of bright white exterior latex paint. This provides a fresh, clean canvas that will make your muted colors pop. Allow proper drying time between coats.
Step 2: Drafting the Design
-
Project or grid the design:
For accurate proportions on a large scale, I find using a digital projector at night effectively transfers the design. Alternately, use the grid method with chalk lines to map out the composition. -
Sketch the outline:
Trace your projected image or grid sketch using light charcoal or vine chalk. Focus on the main flowing lines of the vines, the large atom shape, and the beaker foundation. -
Refine the details:
Step back frequently to check the balance. The design relies on ‘negative space,’ so ensure your icons aren’t too crowded. Refine the shapes of the leaves and the swirling decorative lines by hand.
Paint on brick won’t flow?
Brick texture eats brushes. Dilute your paint slightly with water or a flow extender to help it glide over the rough surface without losing opacity.
Step 3: Painting the Science Icons
-
Paint the atom structure:
Using a medium round brush and the copper/rust paint, verify the prominent central atom symbol. Use steady, confident strokes to create the oval orbital rings. Keep the lines consistent in width. -
Fill the atom center:
Paint the nucleus of the atom with sage green, adding a small white highlight if desired to give it a spherical look. -
Create the beaker:
Outline the beaker shape in copper paint. Fill the bottom ‘liquid’ portion solid, leaving a negative space line near the top of the liquid to suggest reflection. Add the bubbles rising up. -
Add secondary icons:
Paint the stylized gear (top center) and the geometric pentagon shape (bottom right) using the copper tone. Keep edges crisp against the white brick.
Make it interactive
Add QR codes painted into the design (or on mounted plaques) that link to student science projects, videos, or fun science facts related to the icons.
Step 4: Adding Organic Elements
-
Paint the large leaves:
Switch to your deep forest green. Paint the large, broad leaves at the bottom center. Use the edge of the brush to create the central vein line by leaving the white background visible. -
Create flowing vines:
Using the sage green, paint the long, sweeping vines that connect the composition. Vary the pressure on your brush—press down for thicker sections and lift up for tapering ends. -
Add floral details:
Intersperse small copper flowers and starburst shapes around the vines. These act as filler elements to balance the composition. -
Detail the wheat/grain:
With a fine liner brush and black or dark green paint, add the delicate line-work for the wheat stalks or fine grasses near the bottom left. -
Incorporate lettering:
If your design includes text like ‘Be Curious’ or a school motto, use a flat angled brush for precise lettering in black or dark grey. Use a level line taped on the wall as a guide.
Step 5: Final Touches
-
Clean up edges:
Walk around the mural with a small cup of your base white paint. Touch up any drips, smudges, or lines that became too thick. -
Erase guidelines:
Use a damp rag or sponge to gently wipe away any visible chalk or charcoal lines that weren’t covered by paint. -
Seal the mural:
Protect your hard work by applying a clear, UV-resistant exterior masonry sealer. This prevents fading and makes the wall easier to clean in the future.
Step back and admire how art and science combine to inspire the next generation of learners
Music Staff Through the Hall
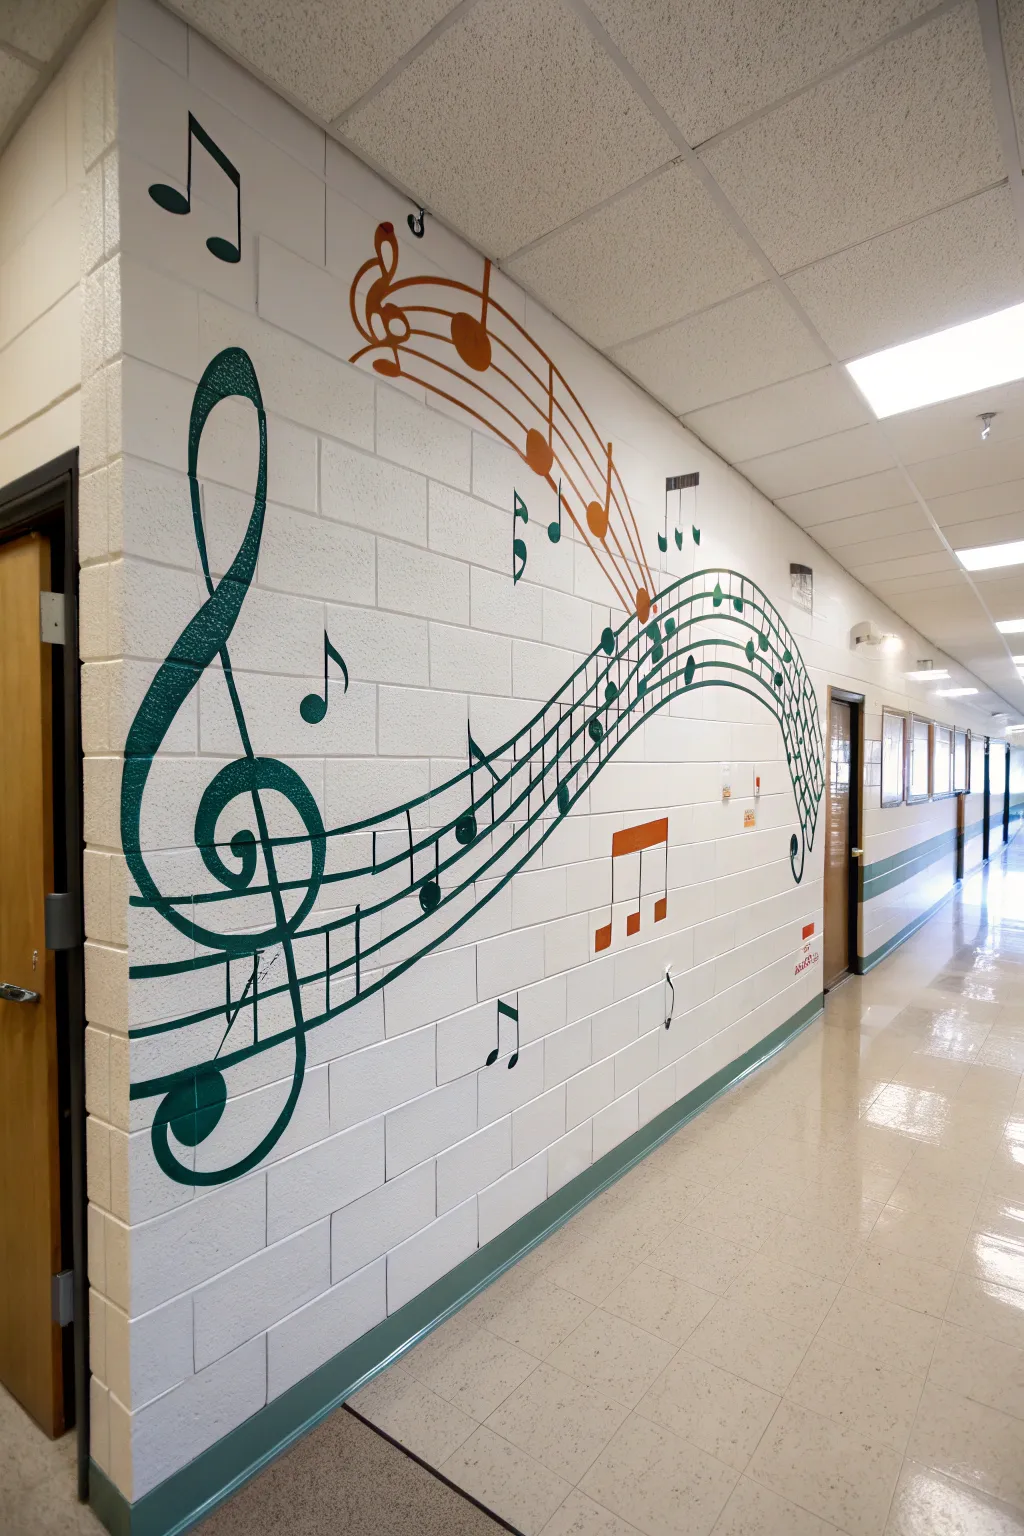
Transform a blank school corridor into a symphony of visual rhythm with this flowing music staff mural. Using bold deep greens and warm orange accents, this design sweeps across the wall, creating movement and energy that perfectly suits a music wing or auditorium entrance.
Step-by-Step Tutorial
Materials
- Interior acrylic latex paint (Deep Green, Orange, Black)
- Painter’s tape (varying widths: 1-inch and 1/4-inch)
- Graphite pencils
- Chalk snap line
- Spirit level (long, ideally 4ft)
- Angled sash brushes (2-inch)
- Small round artist brushes (sizes 4-6)
- Flat artist brushes (size 8-10)
- Drop cloths
- Ladder or step stool
- Eraser
- Projector (optional but recommended)
Step 1: Preparation and Layout
-
Surface Prep:
Begin by thoroughly cleaning the brick wall surface with a mild degreaser and water to ensure proper paint adhesion. Wipe it dry with clean rags. -
Protect the Area:
Lay down drop cloths along the base of the wall and secure them with painter’s tape to protect the floor or carpet from any accidental drips. -
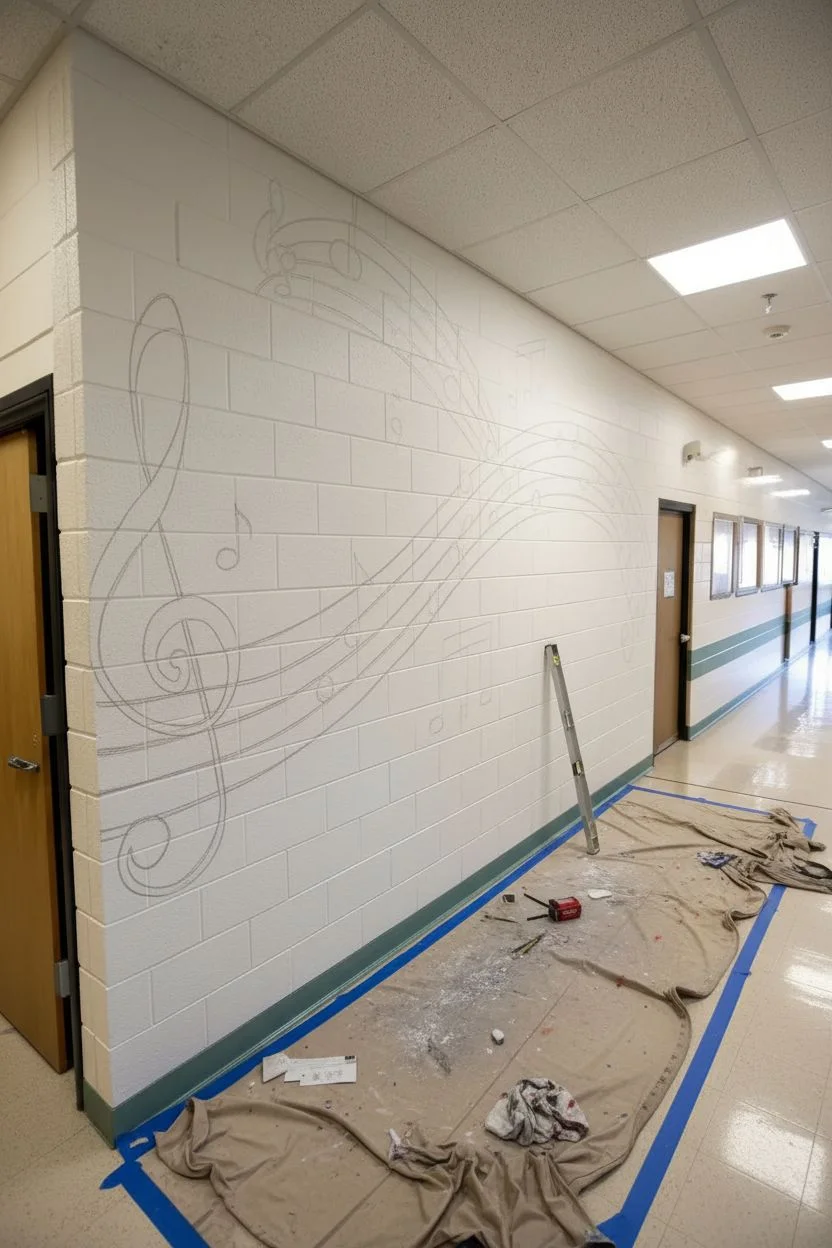
Establish the Flow:
Lightly sketch the general S-curve path of the music staff using a graphite pencil. This guides where the five parallel lines will flow across the wall. -
Marking Parallel Lines:
For the staff lines, you need precision. Mark five equidistant points vertically at the start, middle high point, middle low point, and end of your curve. A distance of 2-3 inches between lines usually works well for this scale. -
Connecting the Lines:
Connect your marked points. If you are confident, hand-draw the curves to keep them organic. For straight sections, use a snap line or a long straight edge. -
Sketching the Clef:
Draw the large Treble Clef on the left side. Start with the vertical line, loop up for the top, spiral down around the second line from the bottom, and finish with the tail. I find it helpful to stand back frequently to check proportions.
Conquer the Grout
On cinder block walls, use a stiff-bristled stencil brush to ‘pounce’ or dab paint into deep grout lines first, then smooth it out with a regular brush for clean lines.
Step 2: Painting the Staff and Symbols
-
Taping (Optional):
For the crispest lines on the straight parts of the staff, apply painter’s tape. However, on textured cinder block, freehand painting with a steady hand often yields better results as tape can bleed in the grooves. -
Painting the Staff Lines:
Load a flat artist brush or a small angled sash brush with Deep Green paint. Carefully paint the five lines of the staff, ensuring you work the paint into the grout lines of the brick for solid coverage. -
Filling the Treble Clef:
Using the same Deep Green, fill in your Treble Clef sketch. Use a smaller round brush to get sharp points on the top loop and the bottom tail. -
Adding Musical Notes:
Sketch and paint various musical notes (quarter notes, eighth notes) along the staff. Place the note heads on lines or spaces as desired, painting them solid green. -
Drawing the Stems:
Add vertical stems to your note heads. Keep these lines consistent in thickness, approximately the same width as your staff lines.
School Spirit Twist
Swap the generic orange accent color for your specific school colors, or paint the notes to represent the actual melody of the school’s alma mater song.
Step 3: Adding Accents and Details
-
Introducing the Orange Staff:
Above the main green staff, sketch a secondary, smaller flowing staff section. Paint these lines using the Orange acrylic latex paint to create contrast. -
Orange Notes:
Add orange musical notes to this upper section, following the same technique as the green notes but keeping them slightly simpler or more abstract. -
Floating Notes:
Paint a few isolated notes floating outside the main staff lines—like the eighth note near the top left or the beamed notes below. This suggests music filling the air. -
High Notes:
Add very small, detached notes near the ceiling line to draw the eye upward and utilize the full vertical space of the wall. -
Touch-ups:
Once the main colors are dry, inspect the edges. Use a small brush with the wall’s base color (usually white or off-white) to clean up any ragged edges or slips. -
Final Erasure:
Gently erase any visible pencil marks that weren’t covered by paint, being careful not to smudge the fresh artwork.
Step back and admire how the painted melody adds rhythm and life to the school hallway
Sports and Teamwork Scene


Transform a plain exterior wall into an energetic slice of school spirit with this stylized basketball scene. Featuring dynamic diagonal stripes, a giant partial ball, and clear player silhouettes against a warm, earthy palette, this mural celebrates both athletics and sharp, modern design.
Detailed Instructions
Materials
- Exterior masonry primer
- Exterior acrylic latex paints (Beige, Light Terra Cotta, Dark Terra Cotta, Charcoal/Black)
- Chalk snap line
- Painter’s tape (2-inch wide)
- Projector or grid method tools
- Long level (4-foot min)
- Extension pole for rollers
- Assorted paint rollers (rough surface nap)
- Assorted angled sash brushes (2-3 inch)
- Tarp or drop cloths
- Graphite or chalk for tracing
Step 1: Preparation & Mapping
-
Clean the surface:
Begin by power washing the exterior wall to remove any dirt, grime, or loose paint chips. Let the masonry dry completely for at least 24 hours to ensure proper adhesion. -
Prime the canvas:
Apply a coat of high-quality exterior masonry primer across the entire area. This neutralizes the surface and helps your geometric shapes pop later on. -
Establish the background:
Roll on two coats of your lightest beige color as the base. Allow full drying time between coats so your tape won’t peel it up later. -
Mark the rays:
Locate a focal point on the bottom right side of the wall. Using a chalk snap line, snap diagonal lines radiating upward toward the top left corner to create the wide, sweeping ‘sunburst’ sections. -
Draft the ball:
On the upper right, draw a large circle segment that gets cut off by the roofline and the right corner. If you don’t have a giant compass, a string pinned to the center point with a pencil attached works perfectly.
Textured Wall Pro-Tip
On rough masonry, standard tape creates fuzzy lines. Seal the tape edge with a thin layer of the *base* color first. This fills the gaps; any bleed matches the background.
Step 2: Geometric Color Blocking
-
Tape the lines:
Apply painter’s tape firmly along your chalk snap lines. Burnish the edges of the tape with a putty knife or rag to prevent paint bleed on the textured wall. -
Paint the dark ray:
Fill the top-left wide diagonal stripe with your dark charcoal or grey paint. Use a brush to cut in the edges first, then roll the center. -
Paint the terra cotta sections:
Fill the alternate radiating stripes and the large basketball shape with the dark terra cotta color. You want a clear contrast against the beige base. -
Add secondary stripes:
Paint the remaining lighter stripes with a softer light terra cotta or peach tone to create depth. Remove the tape carefully while the paint is still slightly tacky to get crisp lines. -
Detail the basketball:
Once the large terra cotta circle is dry, hand-paint the beige swooping lines of the basketball seams. I find a 1-inch flat brush works best to keep these lines consistent in width. -
Create lower arcs:
At the bottom right, freehand or trace the thick, curving terra cotta lines that echo the shape of a ball. These abstract curves verify the sports theme without needing another literal ball.
Level Up: School Spirit
Swap the generic terra cotta and grey palette for your specific school colors. Use the primary color for the ball and stripes, and the secondary color for accents.
Step 3: Adding the Athletes
-
Project the silhouettes:
Wait until the background is fully cured, ideally overnight. Set up a projector at dusk to cast the images of the three players onto the wall. -
Trace the outlines:
Use soft chalk or a pencil to trace the outlines of the players: two defensive figures on the left and the jumping offensive player with the ball on the right. -
Fill the forms:
Using a dark charcoal or grey paint (matching the dark stripe), carefully fill in the silhouettes. Use a small angled brush for fingers, shoes, and ponytails to keep the details sharp. -
Add definition lines:
While the silhouettes are dark, use a very thin liner brush with white or light grey paint to add minimal detail lines—like the waistband of shorts or the collar of a jersey—to give the flat shapes slight dimension. -
Review and touch up:
Step back about 20 feet to view the whole composition. Look for any spotty coverage on the textured wall and dab extra paint into deep crevices where the roller might have missed. -
Seal the work:
Apply a clear, non-yellowing UV-resistant topcoat over the entire mural to protect the vibrancy of the colors from sun and weather damage.
Now you have a dynamic, permanent tribute to teamwork that greets students every day
Hallway History Timeline
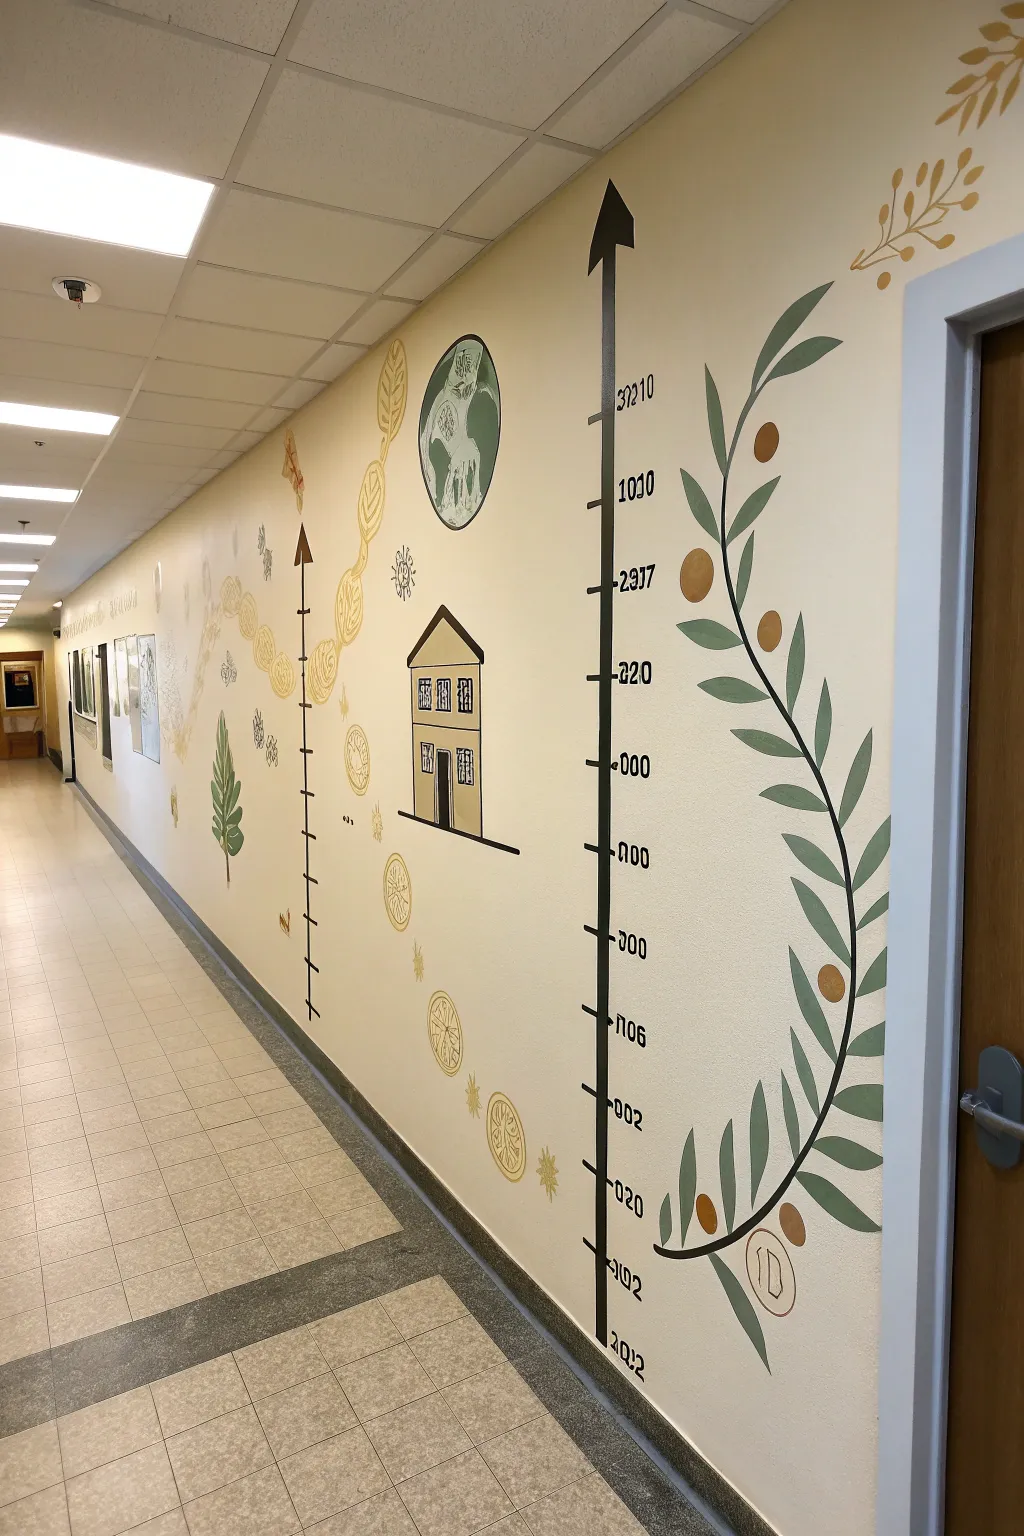
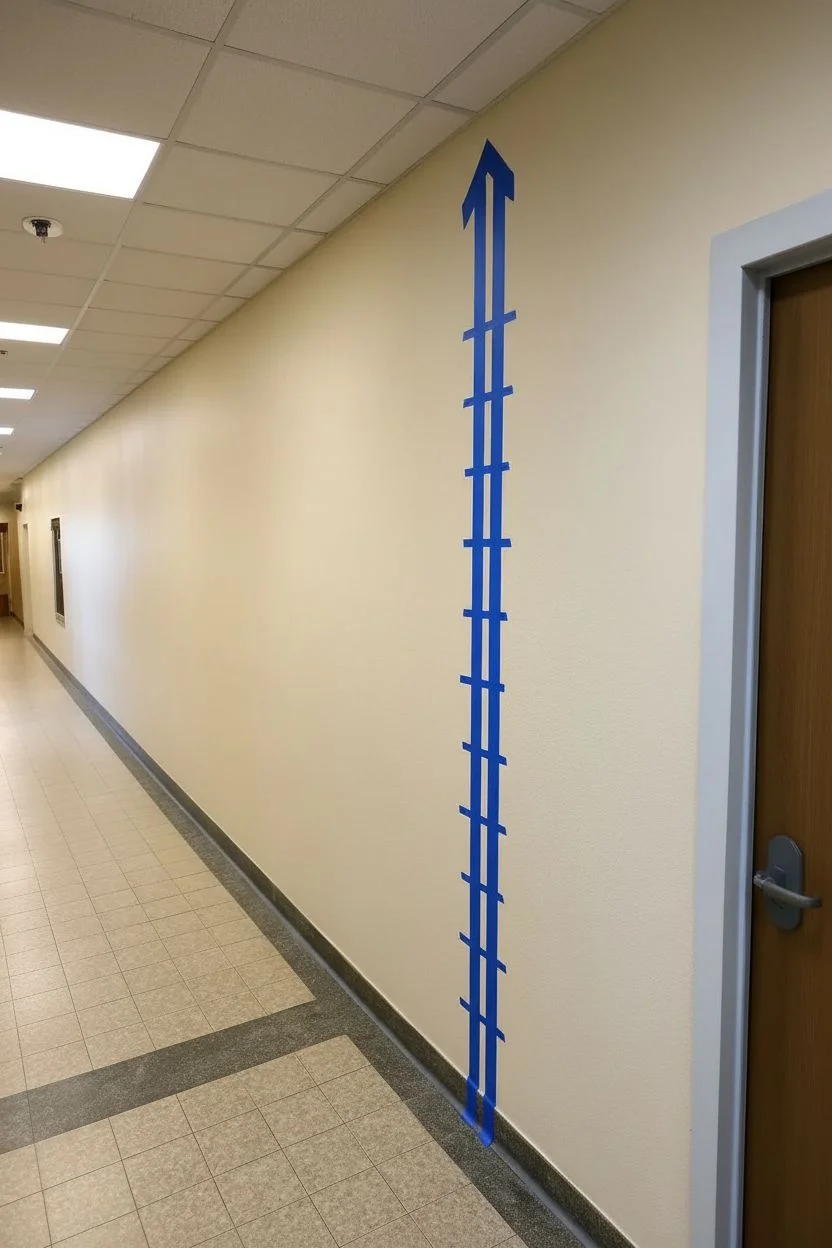
Transform a long, plain hallway into an engaging educational walk with this vertical timeline mural. Using crisp lines, stencils, and a cohesive earth-tone palette, this project creates a professional-looking history tracking system that grows up the wall.
Step-by-Step Guide
Materials
- Interior semi-gloss or satin latex paint (Base wall color, Sage Green, Gold/Mustard, Black, White)
- Painter’s tape (various widths, including fine line tape)
- Laser level or long spirit level
- Measuring tape
- Pencil and eraser
- Assorted stencil brushes and small angled artist brushes
- Cardstock or Mylar sheets for stencil creation
- Craft knife or stencil cutter
- Overhead projector (optional but helpful for larger icons)
- Drop cloths
Step 1: Preparation and Layout
-
Clean the surface:
Begin by thoroughly wiping down the hallway wall to remove dust and fingerprints. If the base wall color needs refreshing, apply a coat of neutral cream or beige latex paint and allow it to dry for at least 24 hours. -
Establish the vertical line:
Decide on the placement of your main timeline bar. Use a laser level to project a perfectly straight vertical line from floor to ceiling. Lightly mark this guide with a pencil. -
Tape the main axis:
Apply two parallel strips of painter’s tape along your pencil guide to create the width of the arrow shaft (about 2-3 inches wide). Press the edges down firmly to prevent bleed-under. -
Mark the increments:
Using a measuring tape, mark regular intervals for your dates (e.g., every 12 inches represents 10 years). Use small pieces of tape or a pencil to indicate where the horizontal tick marks will go.
Crisp Lines Pro-Tip
To prevent paint bleed, paint over the tape edge with your BASE wall color first. This seals the gap. Once dry, paint your black line color on top for razor-sharp edges.
Step 2: Painting the Timeline
-
Paint the black arrow:
Fill in the space between your main tape lines with black paint. I like to use a small roller for this to get a smooth, texture-free finish. -
Create the arrowhead:
At the top of the line, use tape to mask off a triangle shape for the arrowhead. Paint this black and remove the tape while the paint is still slightly tacky to ensure a sharp edge. -
Add tick marks:
Once the main line overlaps are dry, use fine-line tape to mask off the horizontal tick marks at your measured intervals. Paint these black carefully with a flat artist brush. -
Stencil the dates:
Create stencils for your specific years using a computer font printed on cardstock and cut out with a craft knife. Position these next to the tick marks and stipple black paint through them using a dry stencil brush.
Step 3: Adding Illustrations
-
Draft the olive branch:
Freehand sketch or project the large curving olive branch shape to the right of the timeline. Use a pencil to lightly outline the stem and alternating leaves. -
Paint the foliage:
Fill in the leaves with sage green paint using an angled artist brush. For sharp tips on the leaves, pull the brush away from the stem and lift at the end of the stroke. -
Add berries and details:
Paint small circular ‘berries’ or olives using the gold/mustard paint. Ensure these are spaced evenly along the branch for visual balance. -
Create the architectural icon:
To the left of the timeline, outline the house or school building using a ruler. Paint the main structure in beige or light grey, and outline the roof and windows in black for a graphic, illustrative style. -
Paint circular emblems:
Use a compass or trace a round object to create circular borders for other icons (like the coin or badge shown). Fill the background color first, let it dry, and then paint the internal details. -
Add connecting elements:
If you have a secondary timeline path (like the winding dotted line in the background), use a very diluted gold paint or a stencil to create these subtle textures. They should look like faint watermarks behind the main graphics.
Uneven Text?
If stenciling dates on a textured wall causes blurry edges, switch to a paint pen. A wide black acrylic marker allows for steadier control and cleaner numbers than a brush.
Step 4: Finishing Touches
-
Touch up edges:
Inspect all your lines and text. Use a tiny brush with the base wall color to clean up any smudges or spots where paint might have bled under the tape. -
Erase guidelines:
Once the paint has cured completely (give it 48 hours to be safe), gently erase any remaining visible pencil marks with a white vinyl eraser. -
Seal high-traffic areas:
Since this is a hallway, consider applying a clear, water-based matte varnish over the painted elements to protect them from scuffs and backpack rubs.
Your hallway now tells a story that students can walk through every day
Doorway Portals Into Learning
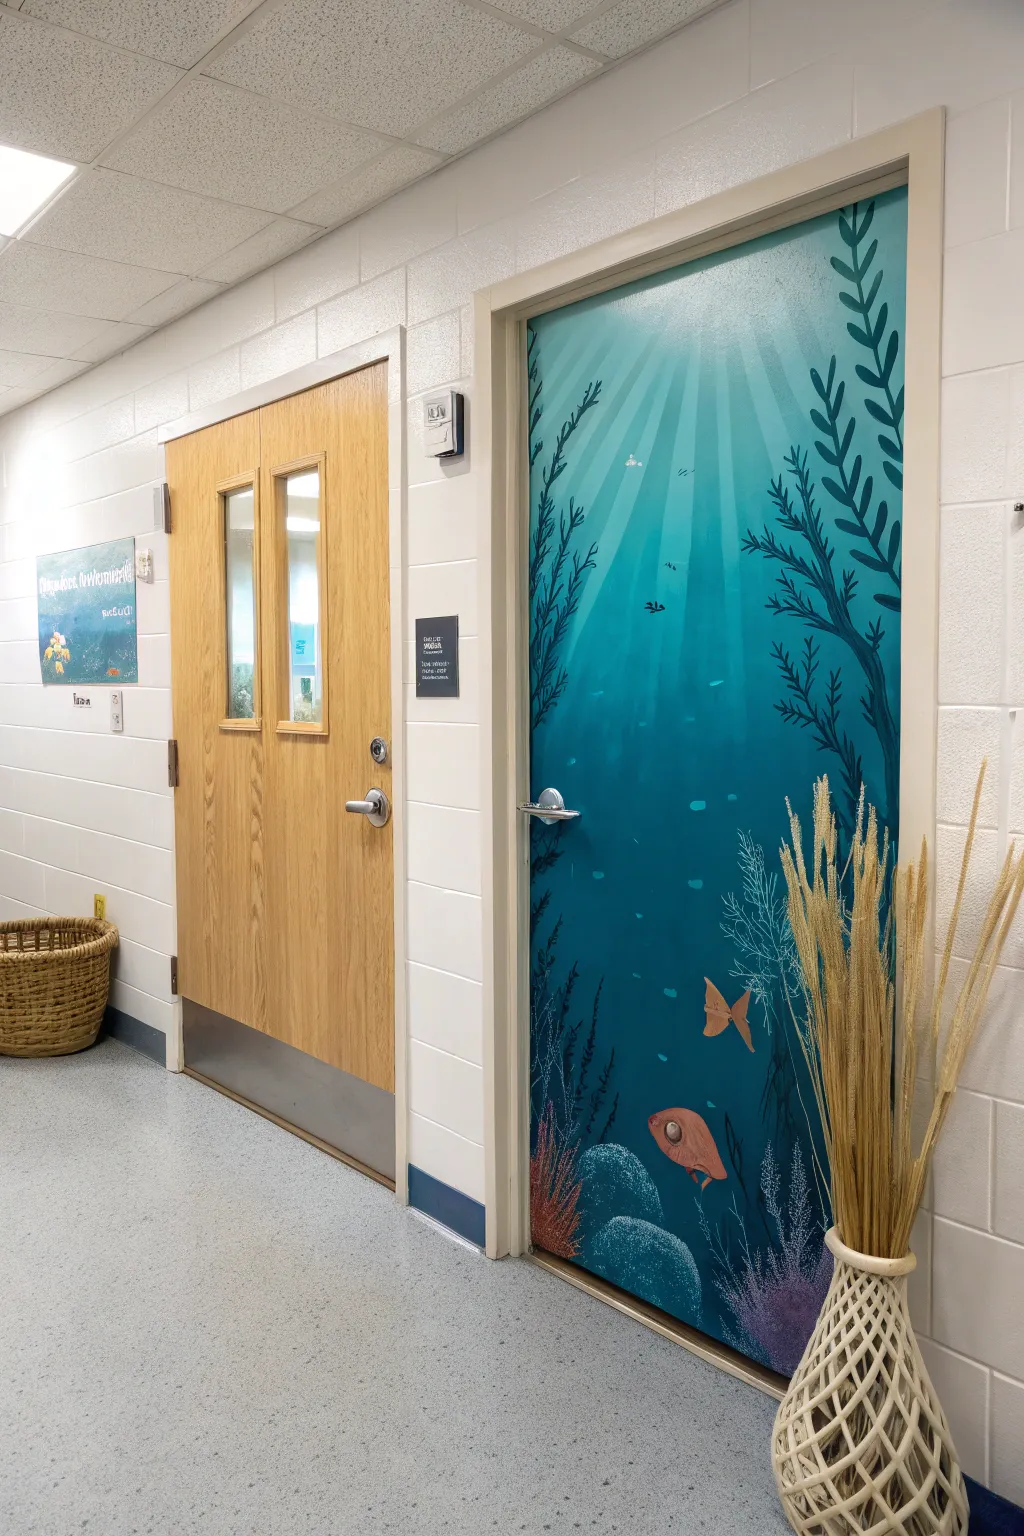
Transform a standard classroom entrance into a magical portal to the ocean floor with this immersive mural project. Using a tranquil palette of teals and aquas, you will learn to blend a gradient sunbeam effect and layer silhouette vegetation for depth.
Detailed Instructions
Materials
- Interior acrylic latex paint (dark teal, medium aqua, light blue, white)
- Pint-sized acrylic craft paints (coral, muted orange, purple)
- Painter’s tape and drop cloth
- Sandpaper (fine grit)
- Primer (bonding primer for doors)
- 2-inch angled sash brush
- 4-inch foam roller
- Assorted detail brushes (rounds and liners)
- Chalk or watercolor pencil
- Sea sponge (optional)
- Clear acrylic sealer (satin finish)
Step 1: Preparation & Base Coat
-
Prep the surface:
Clean the door thoroughly with a degreaser to remove hand oils and dirt. Once dry, lightly scuff the surface with fine-grit sandpaper to give the paint something to grip. Tape off the door handle, hinges, and the door frame. -
Prime the door:
Apply a coat of bonding primer using the foam roller for large areas and the sash brush for corners. Let this cure according to the can’s instructions—usually 1-2 hours. -
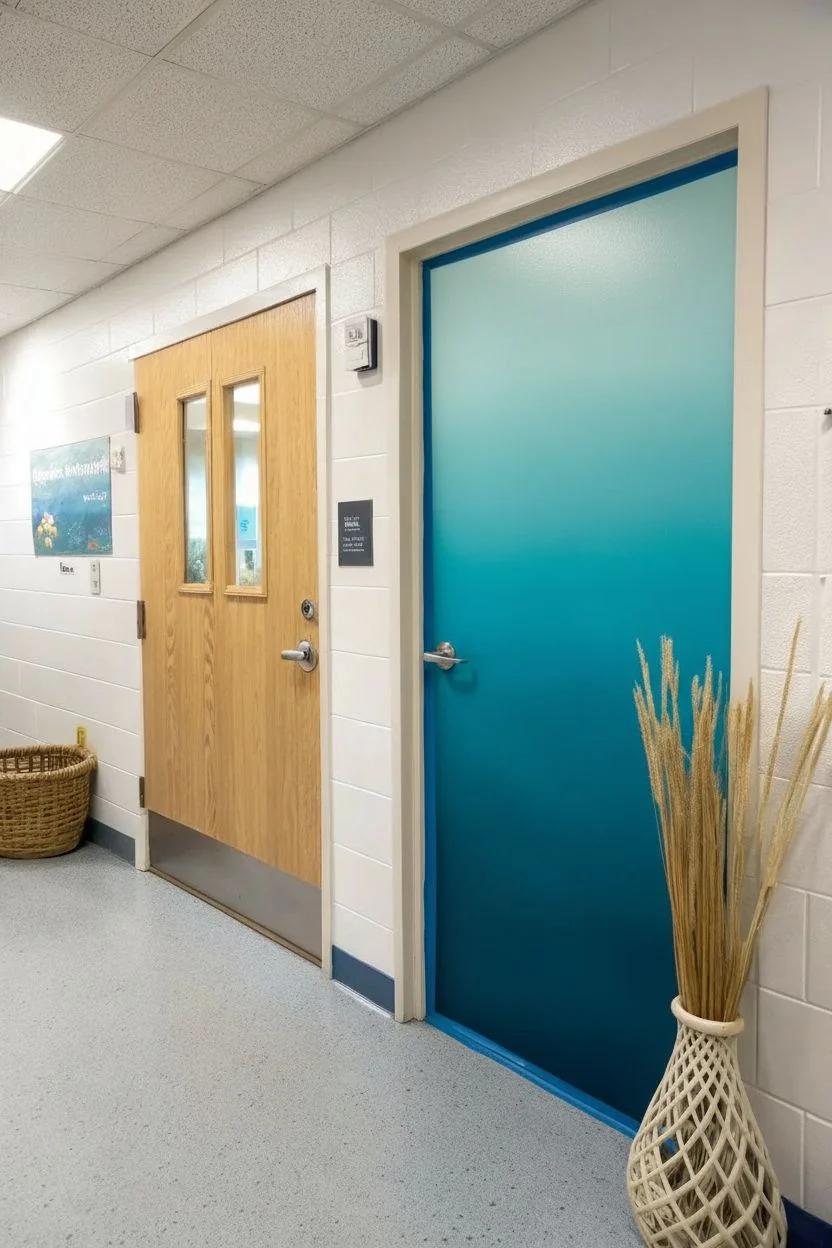
Create the gradient background:
Start by painting the top third of the door with your lightest blue. Paint the bottom third with the dark teal. -
Blend the middle:
While the top and bottom sections are still slightly wet, fill the middle section with the medium aqua. Use a clean, damp brush to feather the transition zones where the colors meet, creating a soft ombré effect from light (surface) to dark (deep water).
Sticky Situation?
If the blending dries too fast, keep a misting spray bottle of water handy. A quick spritz keeps the acrylic wet and workable for smoother gradients.
Step 2: Lighting & Atmosphere
-
Draft the sunbeams:
Once the base is dry, mix a glaze using 1 part white paint to 4 parts water (or clear glazing medium). lightly map out diagonal rays radiating from the top center. -
Paint the rays:
Using a wide brush, drag the translucent white glaze downward from the top center. I like to keep the strokes long and swift to mimic light filtering through water. Let some areas remain transparent. -
Add floating particles:
Dip a toothbrush in diluted white paint and gently flick it at the door to create tiny speckles that look like bubbles or plankton catching the light. -
Add distant fish silhouettes:
Mix a tiny drop of dark teal into your medium blue. Paint very small specific shapes in the background to suggest fish swimming far away; keep them blurry and lacking detail for depth.
Step 3: Foreground Elements
-
Sketch the kelp:
Using a piece of chalk, lightly sketch the tall, wavy seaweed shapes climbing up the sides of the door. Ensure they curve inward slightly to frame the scene. -
Paint the seaweed:
Use your dark teal (or mix a dash of black into it for extra contrast) to fill in the seaweed shapes. Use a liner brush for the thin tips and leafy edges. -
Create the sea floor:
At the very bottom, round out some ‘rocks’ using the dark teal and a sea sponge. Dab lighter aqua on top of the rocks for texture. -
Add coral textures:
Using purple and white paint, use a thin liner brush to create branching coral structures or sea fans at the bottom corners. Short, feathery strokes work best here. -
Paint the foreground fish:
Add your main attractions—a few defined fish near the bottom. Paint their basic shapes in muted orange or coral tones. -
Detail the fish:
Once the orange shapes dry, add a simple large eye with white and black paint, and outline the fins lightly. Keep the details stylized rather than hyper-realistic.
Level Up: 3D Elements
Glue actual clean seashells or small plastic gems onto the ‘sea floor’ section before sealing for a tactile element students can touch.
Step 4: Finishing Touches
-
Review contrast:
Step back and check if your silhouettes pop against the blue background. If the seaweed looks too flat, add a subtle highlight on the inner edge with a slightly lighter teal. -
Remove tape:
Carefully score the edge of the painter’s tape with a craft knife before peeling it off to prevent lifting any dried paint. -
Seal the artwork:
Since doors are high-traffic areas, apply two thin coats of clear satin acrylic sealer using a foam roller to protect against scratches and fingerprints.
Now you have a serene underwater escape that welcomes students every day
Student Handprint Mosaic Wall
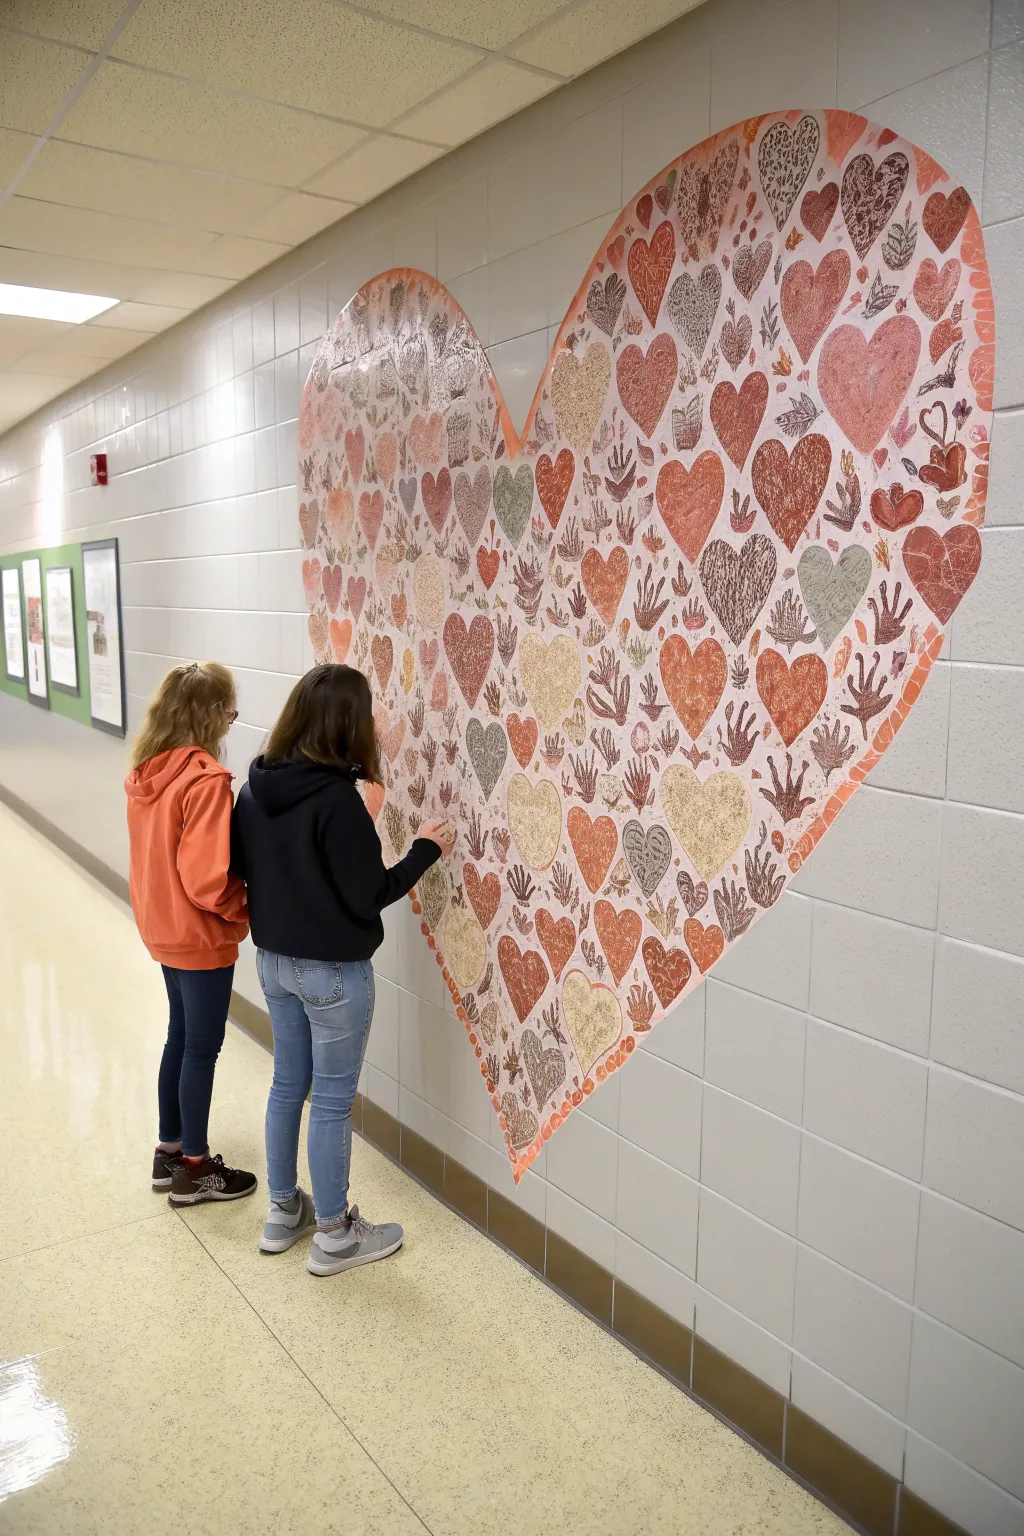
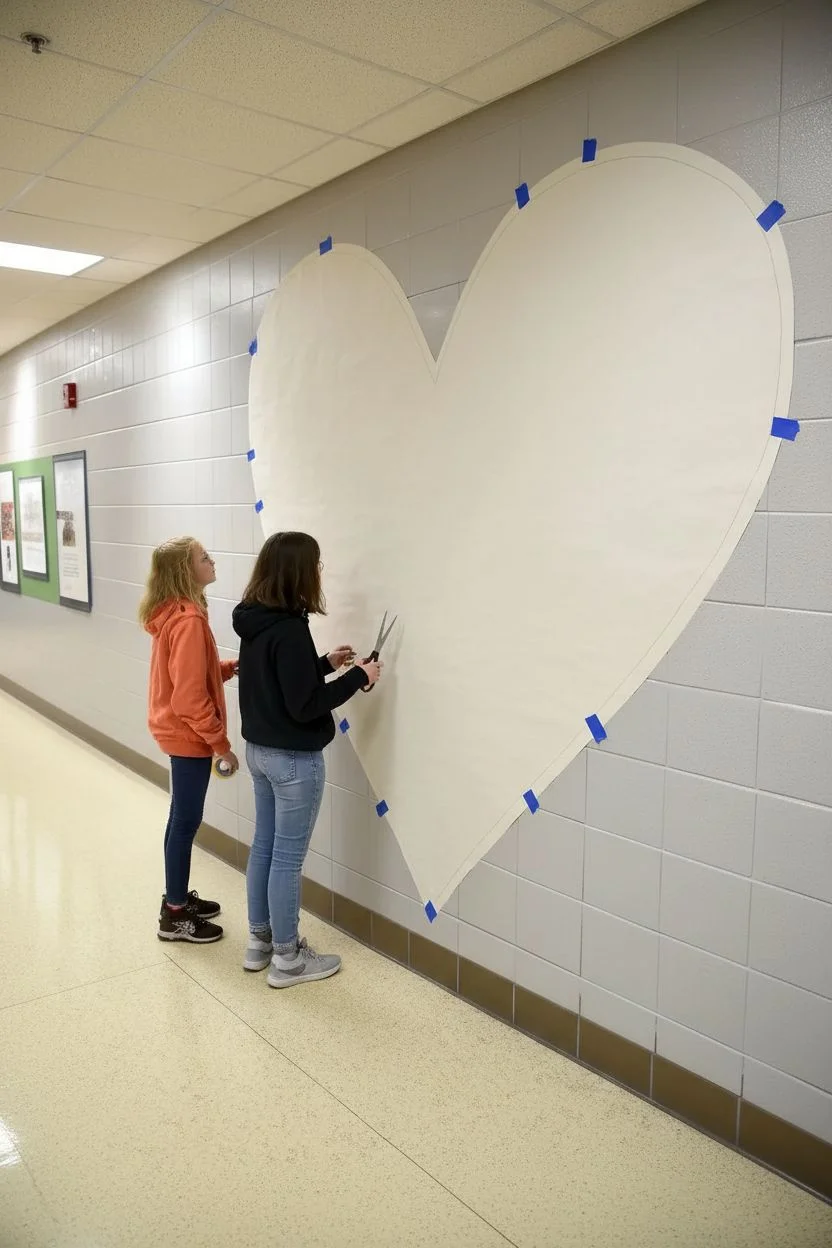
Transform a blank hallway wall into a stunning symbol of community with this large-scale paper heart mural. This collaborative project combines hundreds of uniquely patterned hearts and handprints into a single, cohesive shape that celebrates individuality within a group.
How-To Guide
Materials
- Large roll of white butcher paper or kraft paper (36-48 inches wide)
- Construction paper or cardstock (shades of red, pink, cream, beige, brown)
- Patterned scrapbook paper (optional, in warm tones)
- Washable craft paint or ink pads (reds, browns, dark pinks)
- Scissors
- Glue sticks or spray adhesive
- Wide painter’s tape or masking tape
- Pencil and eraser
- Black markers or crayons (for rubbing textures)
- Textured surfaces (leaves, grids, woven mats) for rubbings
Step 1: Planning the Base
-
Prepare the canvas:
Roll out two large lengths of white butcher paper side-by-side on a clean floor. Secure them together with tape on the back side to create a wide enough surface for a massive heart shape. -
Sketch the outline:
Using a pencil, draw a very large heart shape that fills the paper dimensions. Aim for symmetry, but don’t worry about perfection as the edges will be covered. -
Create the border guide:
Lightly sketch a second line about 2 inches inside the main outline. This internal space will serve as your border zone, which we’ll fill with distinct patterns later. -
Cut the shape:
Carefully cut out the large paper heart along the outer pencil line. Mount this temporarily on a wall or keep it flat on tables if you have enough space.
Sticky Situation
Use a gluestick for the center of the hearts but spray adhesive for the final assembly. This prevents wet glue from warping the paper while ensuring everything stays stuck long-term.
Step 2: Creating the Elements
-
Prepare paper squares:
Cut your construction and patterned paper into hundreds of squares and rectangles varying from 3 to 6 inches. Distribute these to students. -
Texture rubbings:
Have students place their paper over textured surfaces like leaves, brick walls, or the bottom of shoes. Using crayons or wide markers, rub over the paper to pick up unique patterns in warm earth tones. -
Cut individual hearts:
Instruct participants to cut their textured papers into heart shapes of various sizes. They don’t need to be identical; variety adds visual interest. -
Make handprints:
Set up a printing station with washable paint or ink pads. Have students press their hands onto light-colored paper squares. I prefer using a few shades of brown and dark red ink for a cohesive, earthy look. -
Cut out the hands:
Once the handprints are fully dry, cut loosely around them. You can cut them into heart shapes containing the handprint, or just trim the paper into organic shapes. -
Sort the elements:
Organize all the finished cutouts by size and color intensity. Separate the very small hearts which work best for filling gaps.
Color Coordination
Limit your color palette to 4-5 analogous colors (like rust, cream, pink, and brown). This constraint actually makes the final random arrangement look professional and unified.
Step 3: Assembling the Mosaic
-
Define the border:
Start applying paper pieces along the very outer edge of your butcher paper base. Use a consistent color or pattern here to create a defined outline, slightly overlapping the edge of the butcher paper. -
Establish the center:
Place your largest hearts and clearest handprints in the central areas of the heart. Use glue sticks or spray adhesive to secure them flat. -
Fill the field:
Work outwards from the center, placing medium-sized hearts. Rotate the angles slightly so they aren’t all perfectly vertical, giving the mosaic a dynamic, flowing feeling. -
Layer for density:
Begin overlapping the hearts. You want to cover almost all of the white background paper. It’s okay if a little white peeks through, but aim for high density. -
Add detail elements:
Take the smallest hearts and stick them into any awkward empty spaces or use them to bridge gaps between larger pieces. -
Incorporate handprints:
Intersperse the handprint cutouts throughout the design. Try not to cluster them all in one spot; spread them out so they act as ‘discoverable’ details. -
Seal edges:
Go around the perimeter one last time. Ensure every edge piece is securely glued down so they don’t curl up when hung on the vertical wall. -
Mount the mural:
Using strong painter’s tape or mounting putty, adhere the completed butcher paper heart to your hallway wall. Arrange it at a height where students can easily see the details.
Step back and admire how hundreds of small individual contributions have merged into one beautiful, unified statement piece
Interactive Wings Photo Spot
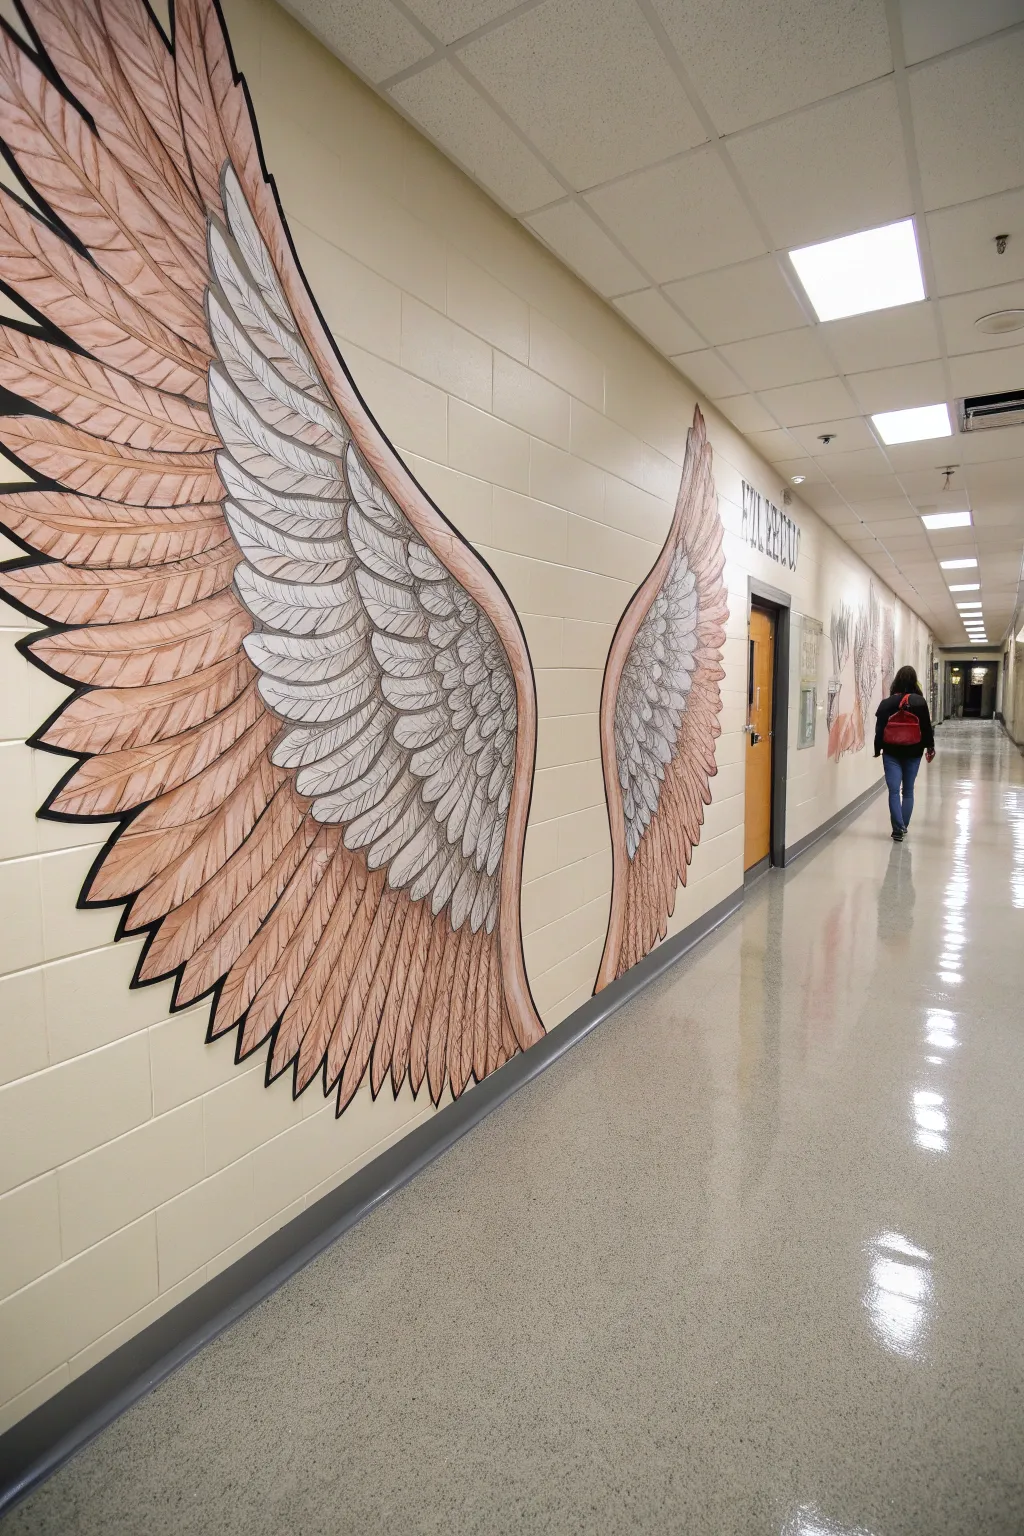
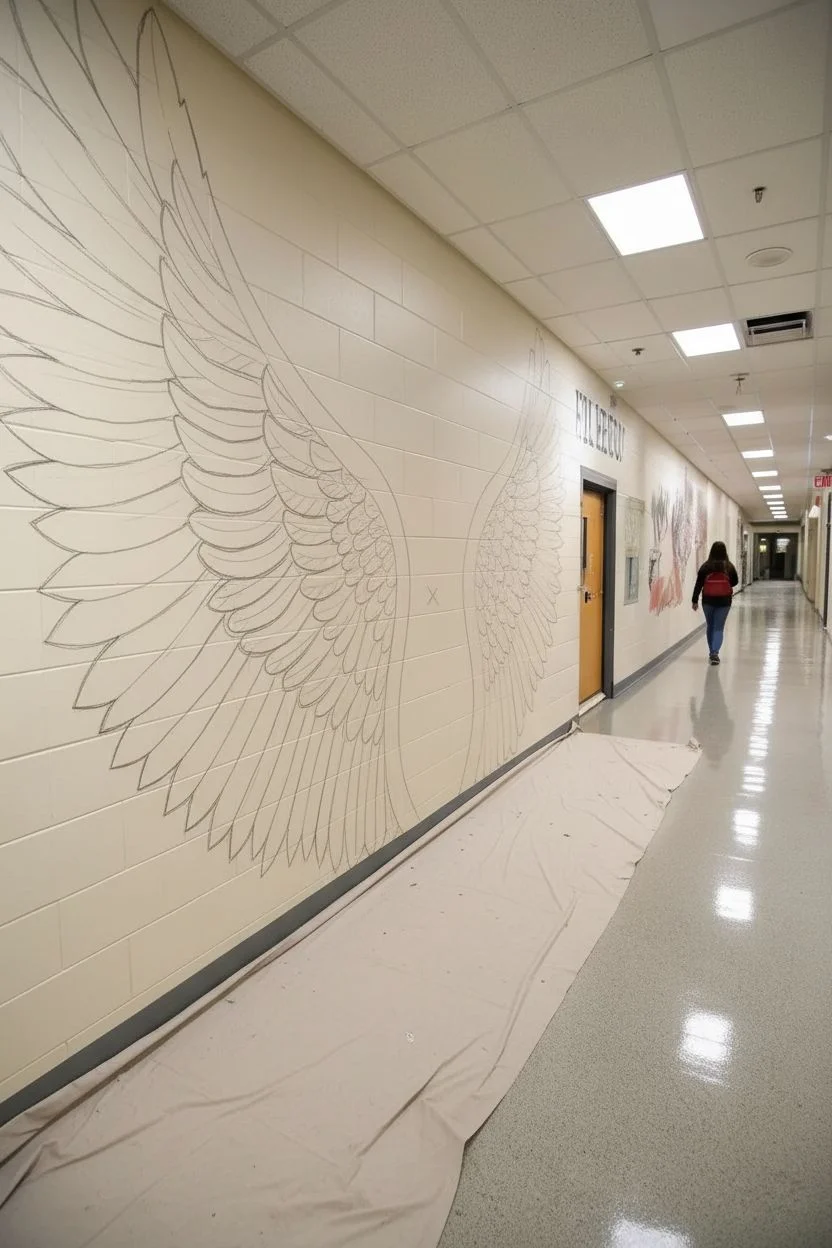
Transform a plain school hallway into an engaging photo destination with this stunning large-scale wing mural. Featuring detailed feather work in soft peach and monochromatic tones, this interactive art piece invites students to step into the frame and become part of the art.
Step-by-Step Tutorial
Materials
- Interior latex wall paint (white, peach/light terracotta, light grey)
- Black acrylic paint or wide-tip black paint markers
- Pencil and eraser
- Projector (optional but recommended)
- Painter’s tape
- Assorted paintbrushes (1-inch flat, medium round, fine liner)
- Step ladder
- Drop cloth
- Reference image of wings
Step 1: Preparation & Sketching
-
Prep the surface:
Clean the wall thoroughly to remove dust and grease. Lay down a drop cloth to protect the floor. If the wall color isn’t already a suitable neutral cream or off-white, apply a base coat and let it fully cure. -
Determine placement:
Measure the average shoulder height of your students. This center point is crucial; mark a small ‘X’ lightly in pencil where the wings should originate so that when someone stands there, the wings align with their back naturally. -
Outline the shape:
Project your reference image onto the wall, centering the gap between the wings over your measured mark. If sketching freehand, draw the large, sweeping curve of the upper wing bone first, ensuring symmetry on both sides. -
Detail the feathers:
Sketch the individual feathers. Start with the smaller, tighter coverts near the top curve, then move to the longer primary and secondary feathers extending downward. Keep the lines light so they don’t show through the paint later.
Pro Tip: Height Hack
Paint two sets of wings! One larger pair at standard adult/teen height, and a smaller, lower pair nearby for younger children or seated students.
Step 2: Base Coloring
-
Paint the inner wing area:
Using a medium round brush, fill in the smaller, upper feathers (the coverts) with white paint. You don’t need opaque perfection here; a little translucency creates texture. I like to keep my strokes directional, following the growth of the feather. -
Apply the peach tones:
Mix your peach or light terracotta paint. Apply this color to the long, flowing primary feathers on the outer and lower edges of the wings. Leave a small gap between feathers to make the outlining step easier. -
Blend the transition:
Where the white upper feathers meet the peach lower feathers, use a slightly damp brush to feather the colors together. You can also mix a very light peach tone to use as a transition shade for the middle rows of feathers. -
Add grey shading:
Mix a diluted light grey. Paint subtle shadows on the white feathers, focusing on the bottom edge where one feather overlaps another. This instantly adds dimension and prevents the white area from looking flat.
Level Up: 3D Elements
Cut a few large feather shapes from stiff cardstock or plastic, paint them to match, and mount them with spacers for a cool 3D relief effect.
Step 3: Outlining & Definition
-
Outline the main shape:
Once the base colors are completely dry, use black acrylic paint and a steady liner brush (or a jumbo paint marker) to trace the entire perimeter of the wings. Vary your line weight—thicker on the outer edges, thinner for interior details. -
Define individual feathers:
Outline each individual feather. The lines don’t need to be mechanically perfect; a slightly organic, sketchy quality adds to the hand-drawn aesthetic seen in the photo. -
Add the rachis:
Paint a thin central line (the rachis or shaft) down the center of the larger primary feathers. Curve this line gently to follow the bend of the feather. -
Create texture lines:
Using a very fine brush or thin marker, draw delicate, diagonal hatching lines extending from the shaft to the edge of each peach feather. These lines mimic the barbs of a feather and add significant realism. -
Deepen the contrast:
Go back into the deepest crevices between feathers with black paint to add depth. Darkening the ‘V’ shape where feathers overlap makes the top layers pop forward visually.
Step 4: Final Touches
-
Clean up edges:
Step back and inspect the mural from a distance. Use the wall’s base color to touch up any smudges or paint drips outside the wing lines. -
Add a protective coat:
Since this is a high-traffic area where people will lean against the wall, apply a clear, matte water-based varnish over the finished painting to protect it from scuffs and oils.
Now you have a permanent, engaging art installation that celebrates school spirit and creativity
Glow-Style Night Sky Surprise
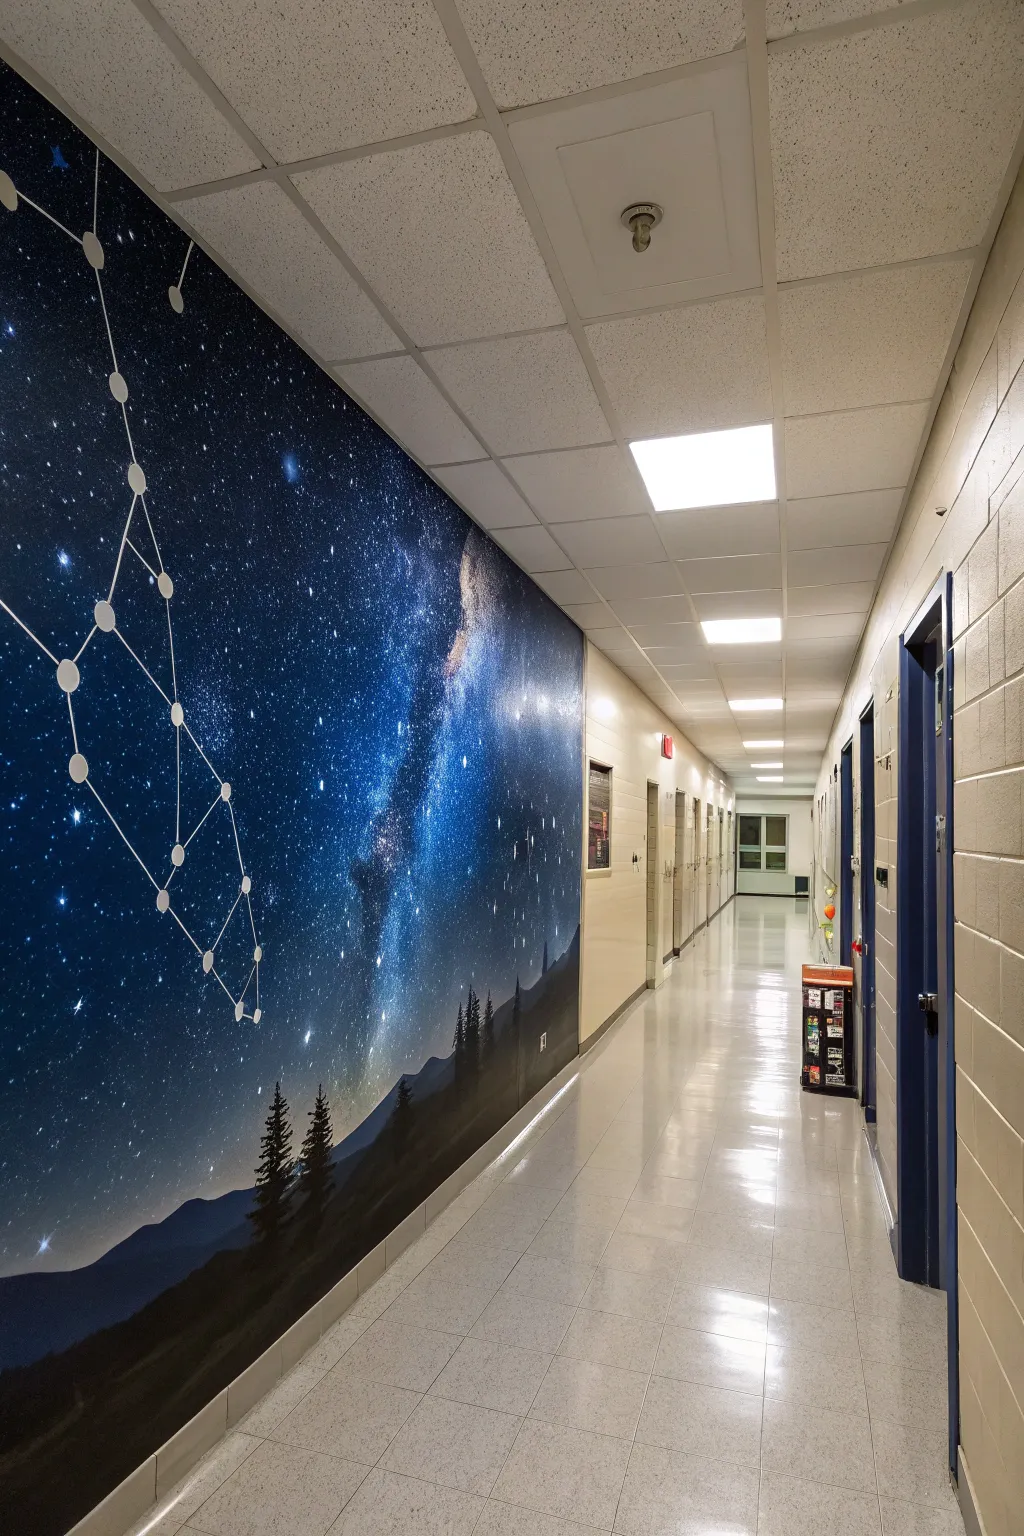
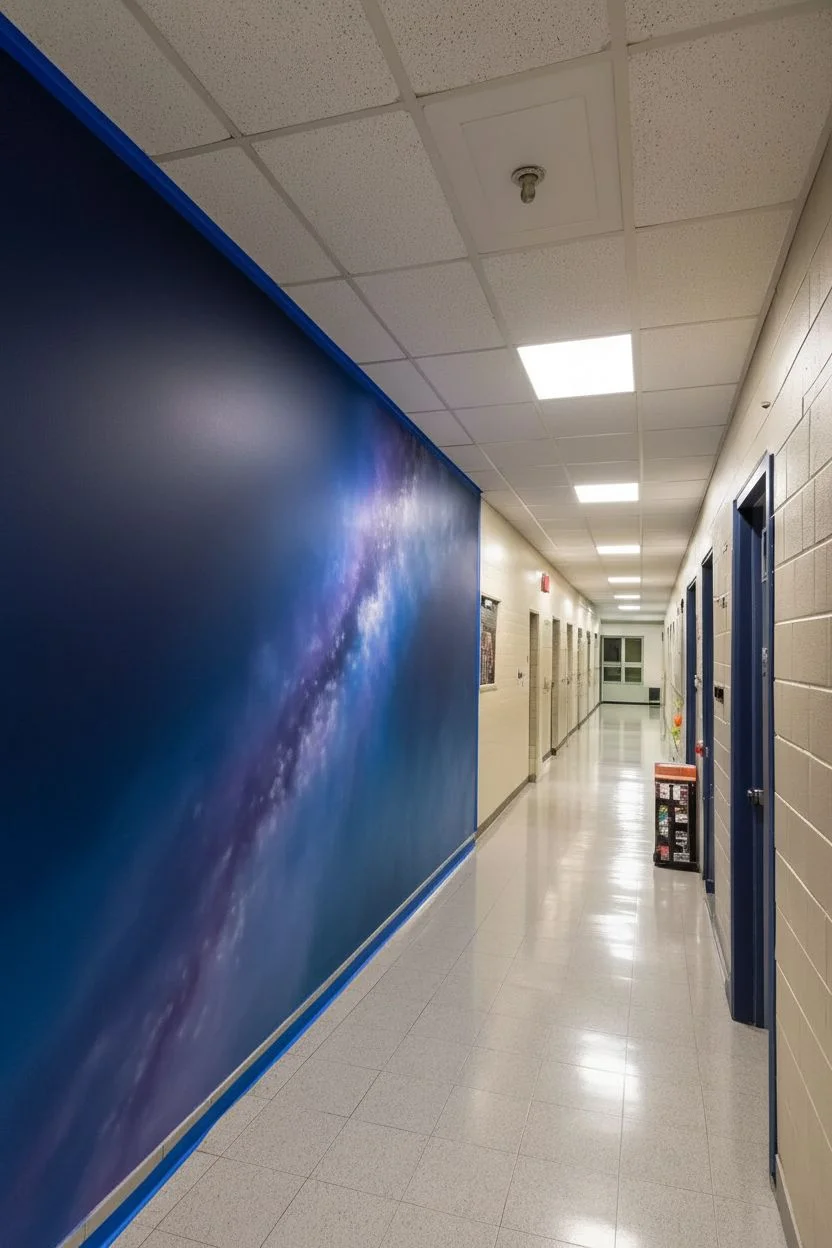
Transform a plain school corridor into a breathtaking portal to the galaxy with this immersive night sky mural. Featuring a deep, star-studded gradient and silhouetted mountain ranges, this large-scale project creates a calming yet awe-inspiring atmosphere for students passing by.
Detailed Instructions
Materials
- High-quality interior latex paint (Black, Deep Navy, Phthalo Blue, Violet, White)
- Wide paint rollers and extension poles
- Large painter’s sponges or sea sponges
- Assorted stencils (stars of various sizes)
- Painter’s tape and drop cloths
- White paint marker or fine liner brush
- Projector (optional but recommended for constellations)
- High-gloss or semi-gloss clear topcoat (optional)
- Toothbrush or stiff bristle brush for spattering
Step 1: Preparation & Base Gradient
-
Clean and mask:
Begin by thoroughly cleaning the wall surface to remove dust and grease. Apply wide painter’s tape to the ceiling line, floor molding, and any adjacent door frames to protect them from darker pigments. -
Establish the horizon:
Decide where your mountain silhouette will begin. Mark a rough line about 2-3 feet from the floor; everything below this will eventually be black, but for now, you can paint over it or leave it blank. -
Apply the darkest blue:
Using a roller, apply your Deep Navy paint starting from the top corners and the upper third of the wall. This creates the depth of deep space. -
Blend the mid-tones:
While the navy is still wet, roll Phthalo Blue and Violet into the middle sections. Use a crisscross motion to blend the edges where the colors meet, avoiding hard lines. -
Add the Milky Way glow:
Mix a small amount of white into your violet or light blue paint. Use a sponge to dab a diagonal, cloudy swoosh across the center of the wall to represent the Milky Way, softening the edges with a dry brush.
Step 2: Stars & Constellations
-
Create background stars:
Dip a toothbrush or stiff brush into thinned white paint. flick the bristles with your thumb to spray a fine mist of ‘distant stars’ across the dark blue and purple areas. -
Paint prominent stars:
Use a small round brush or a stencil to add larger, brighter stars. Focus these clusters near the Milky Way band and randomly throughout the upper sections for variety. -
Map the constellation:
If you are recreating a specific constellation like the one in the photo, project the image onto the wall or lightly sketch the nodes with a chalk pencil. -
Connect the dots:
Using a white paint marker or a liner brush with steady hands, draw straight lines connecting your designated ‘constellation stars.’ I find a straight edge helps keep these lines crisp against the organic background. -
Clean up star shapes:
Go back to the ‘nodes’ of your constellation and paint solid white circles over the intersections to make them pop.
Patchy Background?
Dark paint colors often require 2-3 coats for full opacity. If the wall looks streaky after the first coat, let it dry completely before adding another layer to deepen the navy blue.
Step 3: Landscape Silhouette
-
Draft the mountains:
With a pencil or chalk, sketch the rolling outline of the mountains near the bottom of the wall. Ensure the peaks vary in height to look natural. -
Fill the foreground:
Use your black latex paint to fill in everything below your mountain line. A roller works best for the large bottom section, while a brush is needed for the top ridges. -
Paint distinct trees:
Select a spot for foreground interest—like the left side in the photo—and switch to a small angled brush to paint detailed pine trees rising above the mountain line. -
Detail the tree branches:
Use a fan brush or the edge of your angled brush to tap in the texture of pine needles on your tree silhouettes. Keep these shapes jagged and irregular.
Glow in the Dark
Mix phosphorescent medium into your white star paint. The mural will look normal during passing periods but will magically glow if the lights are dimmed for events.
Step 4: Final Touches
-
Add gentle mist:
Water down a tiny bit of white or light grey paint until it’s a glaze. lightly brush this at the very base of the mountains to create a subtle atmospheric fog effect. -
Seal the work:
Once fully dry (give it at least 24 hours), apply a clear topcoat if this is a high-traffic hallway. This protects the deep dark colors from scuffing. -
Remove tape:
Carefully peel away your painter’s tape while the topcoat is tacky or after it’s dry, scoring the edge with a utility knife if necessary to prevent peeling.
Step back and enjoy the peaceful infinity of space right in your own hallway


Have a question or want to share your own experience? I'd love to hear from you in the comments below!