If your shelves are feeling a little blah, paint is the fastest way to give them a whole new personality. I love how a simple color shift or a playful pattern can turn everyday shelving into an intentional, styled moment.
Classic All-Over Solid Color Shelves
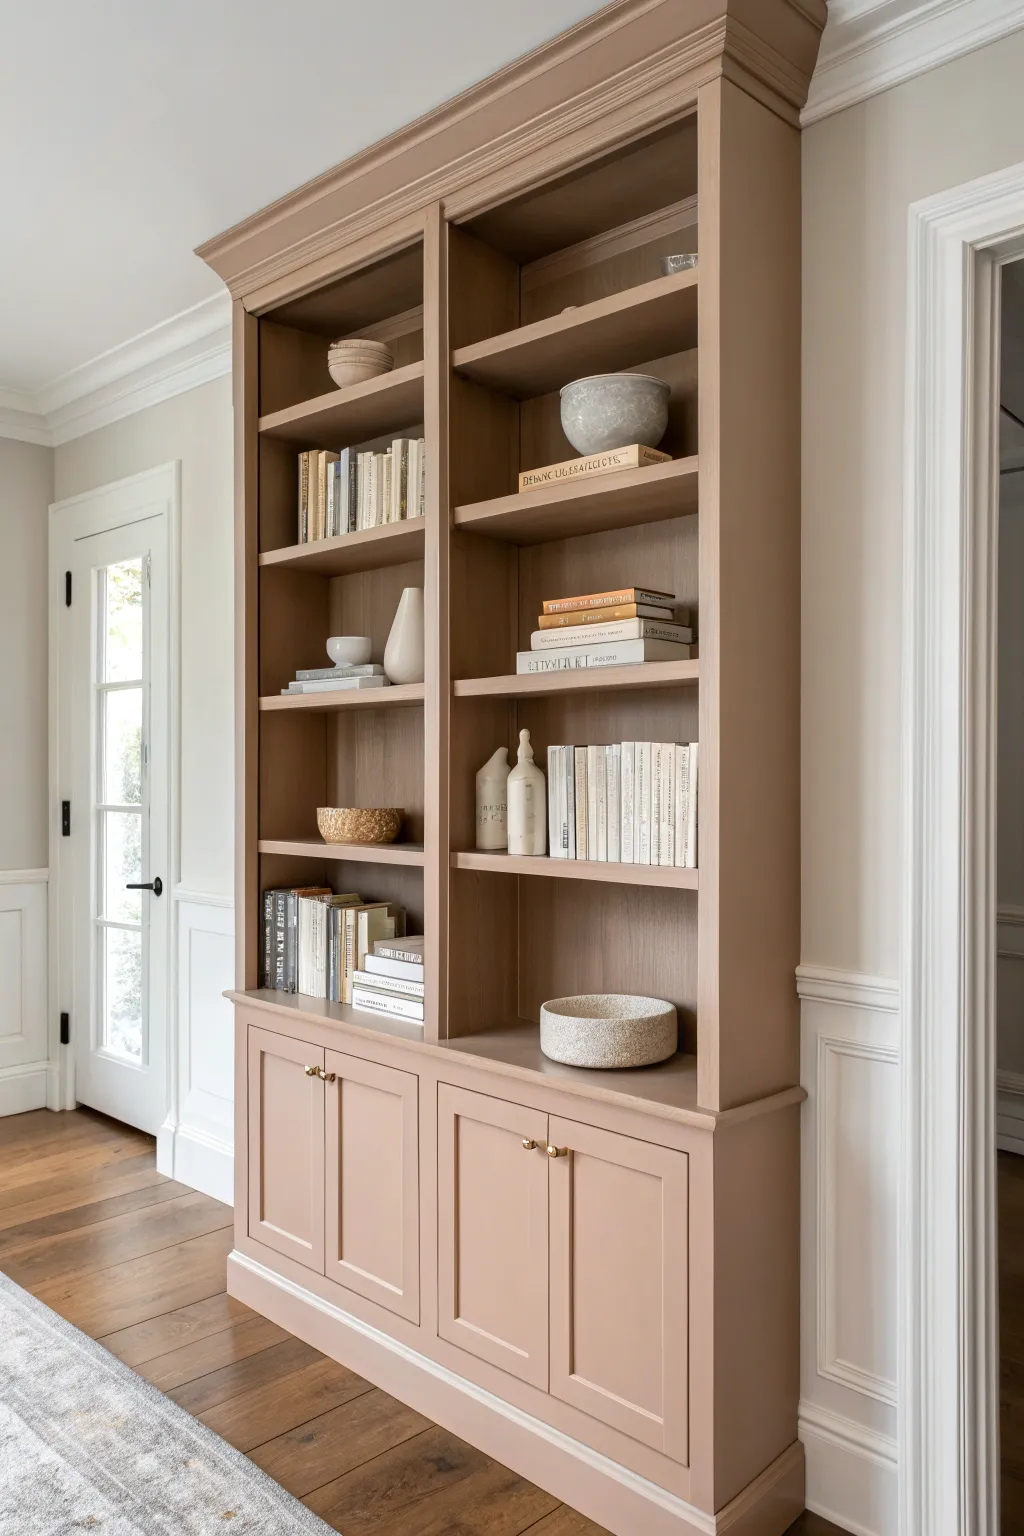
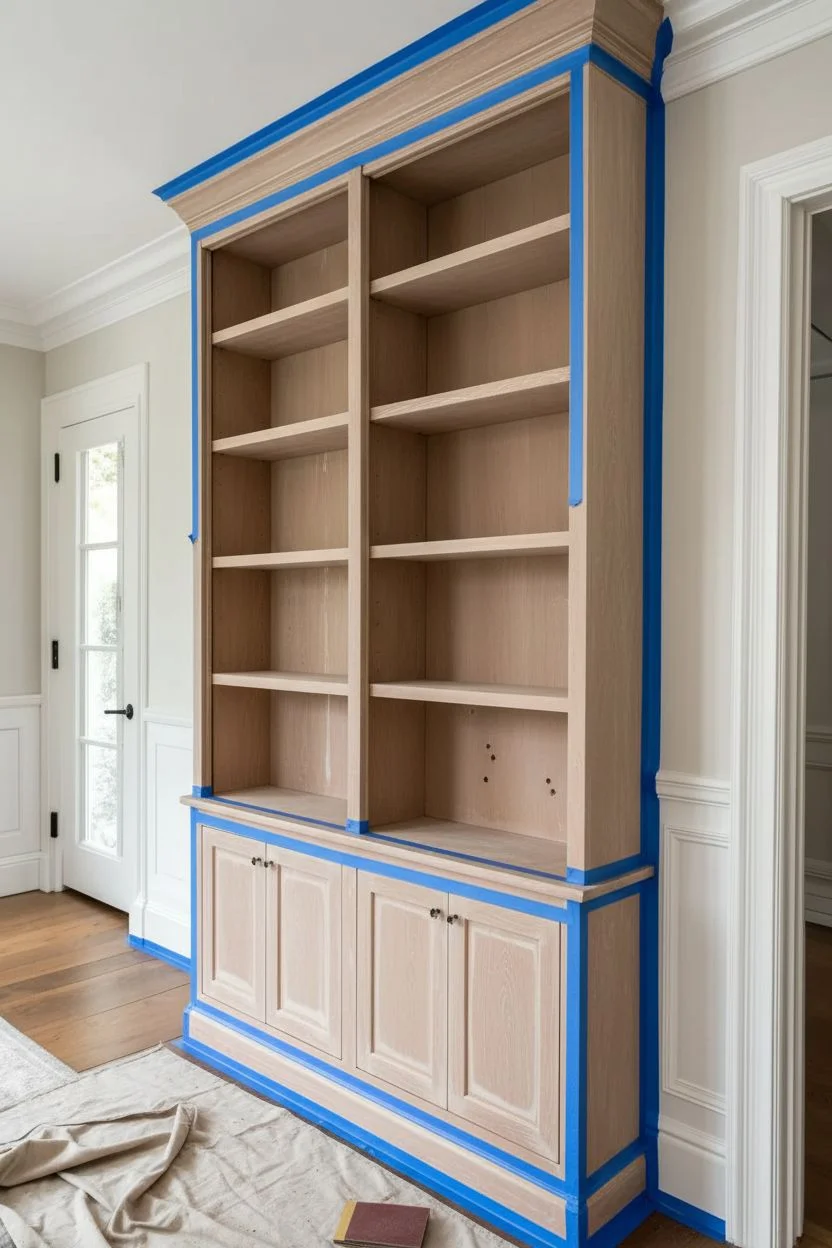
Transform a standard wooden bookcase into a sophisticated built-in feature with this all-over color blocking technique. The unified dusty mauve tone creates a seamless, custom-joinery look that elevates the entire room.
Step-by-Step Guide
Materials
- Wooden bookshelf (unfinished or previously painted)
- High-quality furniture primer
- Satin or eggshell finish interior paint (Dusty Mauve/Terracotta Beige)
- Medium-grit sandpaper (120-150 grit)
- Fine-grit sandpaper (220 grit)
- Tack Cloths
- Painter’s tape
- Small foam roller and tray
- 2-inch angled sash brush
- Wood filler (if repairing holes)
- Drop cloths
- Screwdriver (for hardware removal)
- New cabinet knobs (optional, brass recommended)
Step 1: Preparation & Repairs
-
Clear and clean:
Begin by removing all books, decor, and adjustable shelves from the unit. Wipe down every surface with a damp cloth and mild degreaser to remove dust and oils. -
Remove hardware:
Use your screwdriver to take off any existing cabinet knobs or hinges. Store these screws in a labeled baggie so they don’t get lost. -
Fill imperfections:
Inspect the wood for dings or old screw holes. Apply wood filler with a putty knife, slightly overfilling the hole to account for shrinkage. -
Initial light sanding:
Once the filler is dry, sand the entire unit with medium-grit sandpaper. You aren’t trying to strip it bare, just scuffing the surface to give the primer something to grip. -
Dust removal:
Vacuum up the sanding dust, then wipe everything down thoroughly with a tacky cloth. This step is crucial for a smooth final finish. -
Tape edges:
Apply painter’s tape carefully along the walls, floor, and ceiling where they meet the bookshelf to protect surrounding areas.
Sticky Shelves?
If books stick to the shelves after curing, apply a thin coat of clear polycrylic water-based sealer or place small felt pads under heavy objects.
Step 2: Priming the Surface
-
Cut in corners:
Using your angled sash brush, apply primer into the deep corners, crevices, and detailed molding at the top cornice. -
Roll flat surfaces:
Switch to the foam roller for the larger flat areas like the sides, cabinet doors, and fixed shelves. Roll in long, smooth strokes. -
Dry and scuff:
Let the primer dry completely according to the can’s instructions. Once dry, lightly run fine-grit sandpaper over the surfaces to knock down any bumps. -
Wipe clean again:
One more pass with the tack cloth ensures no dust particles get trapped in your color layers.
Step 3: Applying the Color
-
First coat: Cutting in:
Open your dusty mauve paint and stir well. Just like with the primer, start by using the brush to paint the corners, shelf support holes, and intricate molding profiles. -
First coat: Rolling:
Roll the paint onto the flat surfaces. Be careful not to overload the roller, as drips can form easily on vertical surfaces. -
Check for drips:
While the paint is still wet, inspect the edges and corners. Smooth out any pooling paint with your brush immediately. -
Drying time:
Allow the first coat to dry fully. I usually prefer to wait overnight here to ensure the paint cures enough to not drag when the second coat is applied. -
Second coat application:
Apply the second coat exactly like the first. This layer will provide the true depth of color and hide any streakiness from the first pass. -
Remove tape:
Carefully peel away the painter’s tape while the second coat is still slightly tacky to prevent the dried paint from peeling off with the tape.
Pro Tip: Floating Look
Paint the inside back panel the same color as the shelves. This ‘color drenching’ creates depth and makes your decorative objects pop visually.
Step 4: Finishing Touches
-
Cure time:
Let the bookshelf cure for at least 48 hours before placing heavy objects on the shelves. This prevents books from sticking to the fresh paint. -
Reattach hardware:
Install the cabinet doors and attach your hardware. The brass knobs shown in the inspiration image contrast beautifully with the warm pink tones. -
Style the shelves:
Arrange your books and ceramics. Group items by color or size, leaving some negative space to let that beautiful new paint color show through.
Step back and admire how a single cohesive color can turn a simple storage unit into a stunning architectural focal point


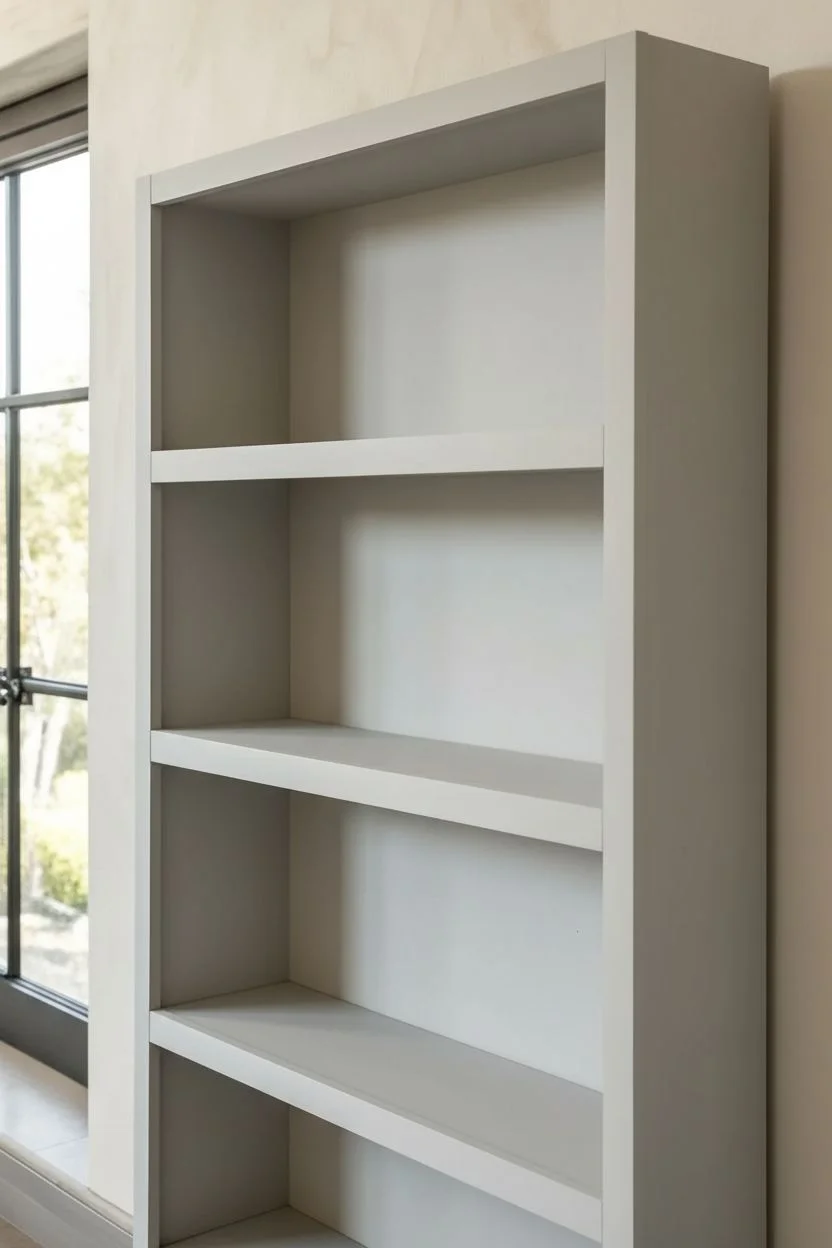
Crisp White Shelves With Fresh, Clean Lines
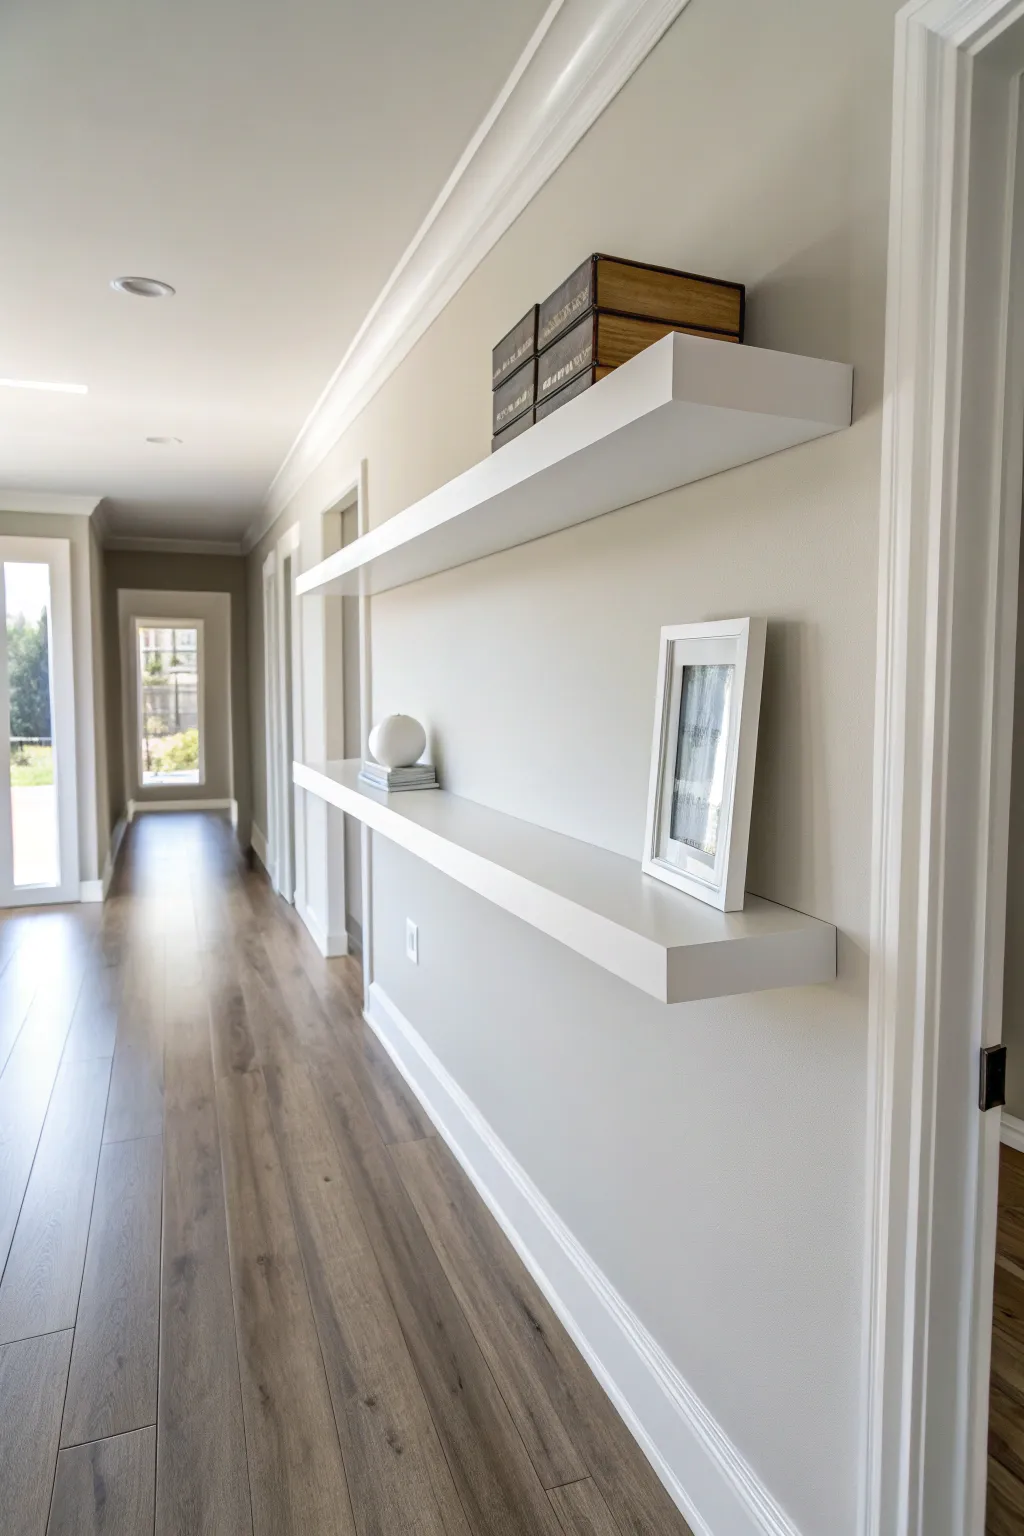
Achieve a high-end, custom look in your hallway with these smooth, thick-profile floating shelves painted in a crisp white. Their hidden bracket system creates a seamless appearance that feels incredibly modern and airy.
Detailed Instructions
Materials
- 2×4 lumber (for internal frame)
- 1/4 inch plywood or MDF sheets (for skins)
- 1×4 pine or poplar boards (for faces)
- 3-inch wood screws
- Stud finder
- Level
- Drill and impact driver
- Circular saw or table saw
- Wood glue
- Brad nailer and 1-inch nails
- Wood filler
- Sandpaper (120 and 220 grit)
- High-quality primer
- Semi-gloss or satin white enamel paint
- Foam roller and angled sash brush
- Paintable caulk
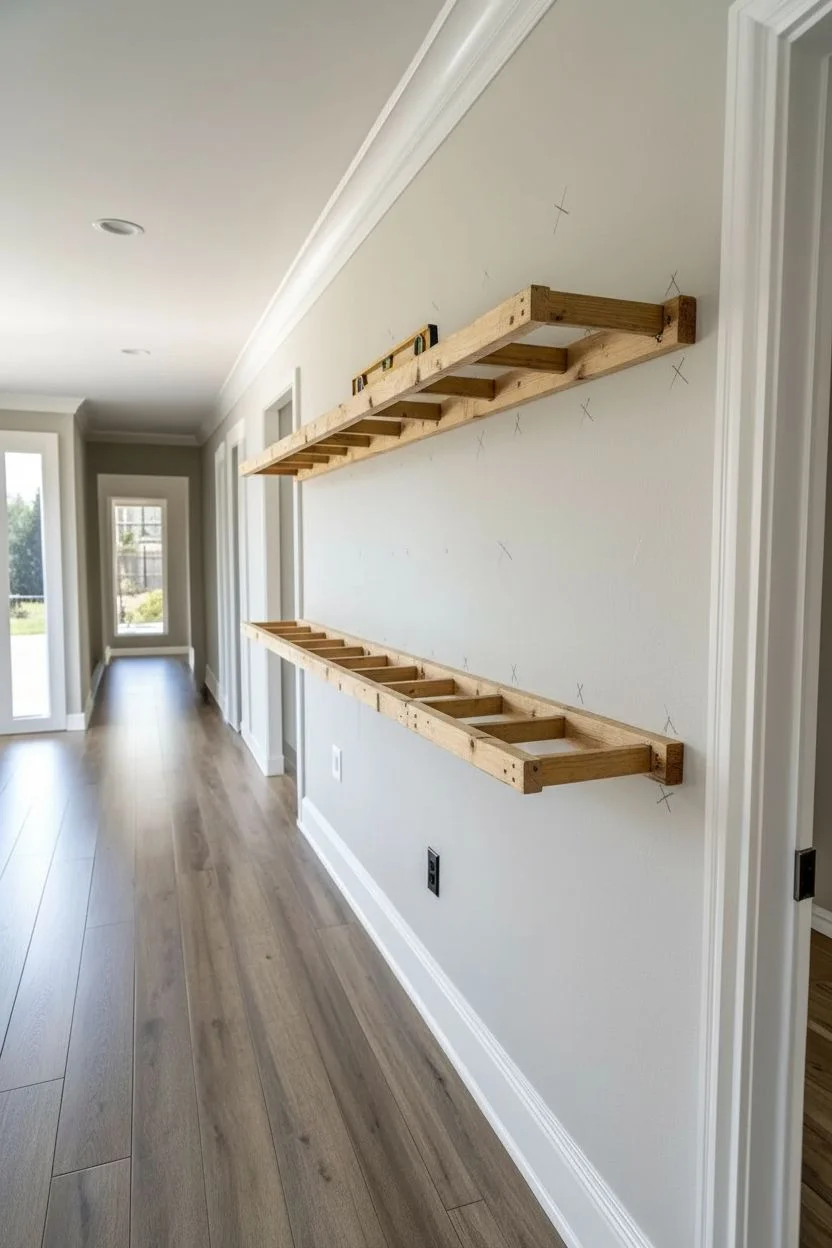
Step 1: Building the Skeleton
-
Measure and mark:
Determine the desired length of your shelves based on your hallway space. Use a stud finder to locate and mark every wall stud in the installation area. -
Cut the frame pieces:
Rip your 2×4 lumber length-wise to create narrower strips if you want a slimmer profile, or use full 2x4s for the chunky look shown. Cut one long back piece to your shelf length and several shorter ‘joist’ pieces (about 6-8 inches long). -
Assemble the bracket:
Screw the short joist pieces perpendicularly into the long back piece using 3-inch screws. Space these joists so they won’t interfere with your wall stud locations. -
Mount the frame:
Hold the assembled frame ladder against the wall. Place a long level on top to ensure it is perfectly horizontal. -
Secure to wall:
Drive 3-inch structural screws through the back piece of your ladder frame directly into the marked wall studs. Ideally, hit at least 3 studs for maximum strength.
Uneven Wall Gaps?
If your walls are wavy, scribe the back of the plywood skin to the wall’s contour before nailing, or use a slightly thicker bead of caulk to hide gaps.
Step 2: Adding the Skin
-
Cut the plywood skins:
Cut your 1/4 inch plywood or MDF into strips that match the depth and length of your mounted frame. You need a top piece and a bottom piece for each shelf. -
Attach the top:
Apply wood glue to the top of the frame joists. Lay the top plywood sheet down and secure it with a brad nailer. -
Attach the bottom:
Repeat the process for the bottom skin, gluing and nailing it into the underside of the frame. -
Prepare the face piece:
Cut a 1×4 pine or poplar board to the exact length of the shelf. This will cover the front opening. -
Install the front face:
Run a bead of glue along the front edge of the assembly. Press the face board in place and secure with finish nails. -
Cap the sides:
Cut small rectangular pieces of 1×4 to cover the exposed left and right ends of the shelf structure. Glue and nail them flush.
Add Under-Lighting
Route a channel into the bottom plywood skin before installation to recess an LED strip for dramatic, modern mood lighting.
Step 3: Finishing for a Seamless Look
-
Fill the holes:
Use wood filler to cover all nail holes and any slight gaps where the wood pieces join. Overfill slightly as it shrinks when drying. -
Sand smooth:
Once the filler is dry, sand the entire shelf with 120-grit paper to level the filler, then switch to 220-grit for an ultra-smooth finish. -
Caulk the wall joint:
Run a thin bead of paintable caulk along the seam where the shelf meets the wall. Smooth it with a wet finger for a seamless transition. -
Prime the wood:
Apply a coat of high-quality stain-blocking primer. This is crucial if using pine to prevent knots from bleeding through later. -
Sand the primer:
Lightly scuff-sand the dry primer with fine-grit sandpaper to knock down any raised grain fibers. -
Paint edges first:
Use an angled sash brush to paint the corners and the caulked edge against the wall. -
Roll the surfaces:
Use a high-density foam roller to apply your semi-gloss white paint to the top, bottom, and face. The foam roller eliminates brush strokes for a factory-finish look. -
Apply final coat:
Allow the first coat to dry according to the can’s instructions, then apply a second coat for full, crisp coverage.
Now step back and admire how these sleek lines completely transform your hallway.


Moody Dark Shelves for a Cozy Library Feel
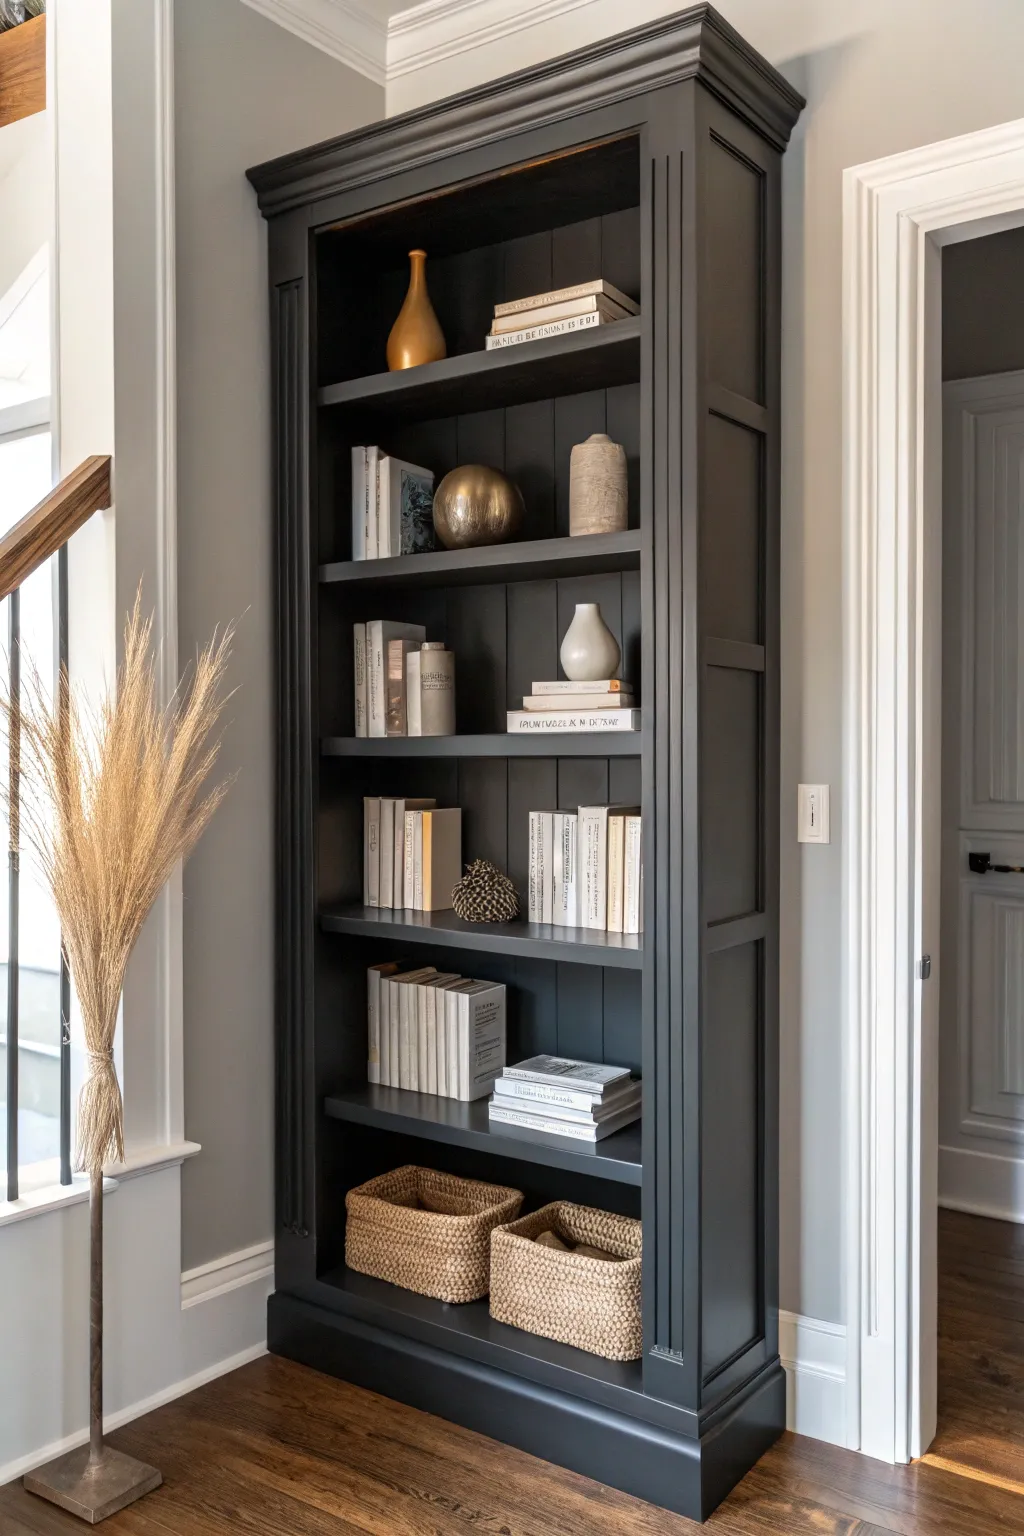
Transform a basic builder-grade bookshelf into a sophisticated library focal point with rich, deep paint and thoughtful styling. This project creates a moody, high-contrast look that feels instantly cozy and expensive, perfect for elevating any quiet corner of your home.
Step-by-Step
Materials
- Tall wooden bookshelf (unfinished or existing finish)
- Sanding block (medium and fine grit)
- Tack cloth
- High-quality primer (tinted grey recommended)
- Interior paint in ‘Charcoal’, ‘Iron Ore’, or ‘Off-Black’ (Satin or Semi-Gloss finish)
- 2-inch angled sash brush
- 4-inch foam roller and tray
- Painter’s tape
- Drop cloth
- Wood filler (optional)
- Screwdriver (for removing hardware)
- Woven storage baskets
- Assorted books and decor items
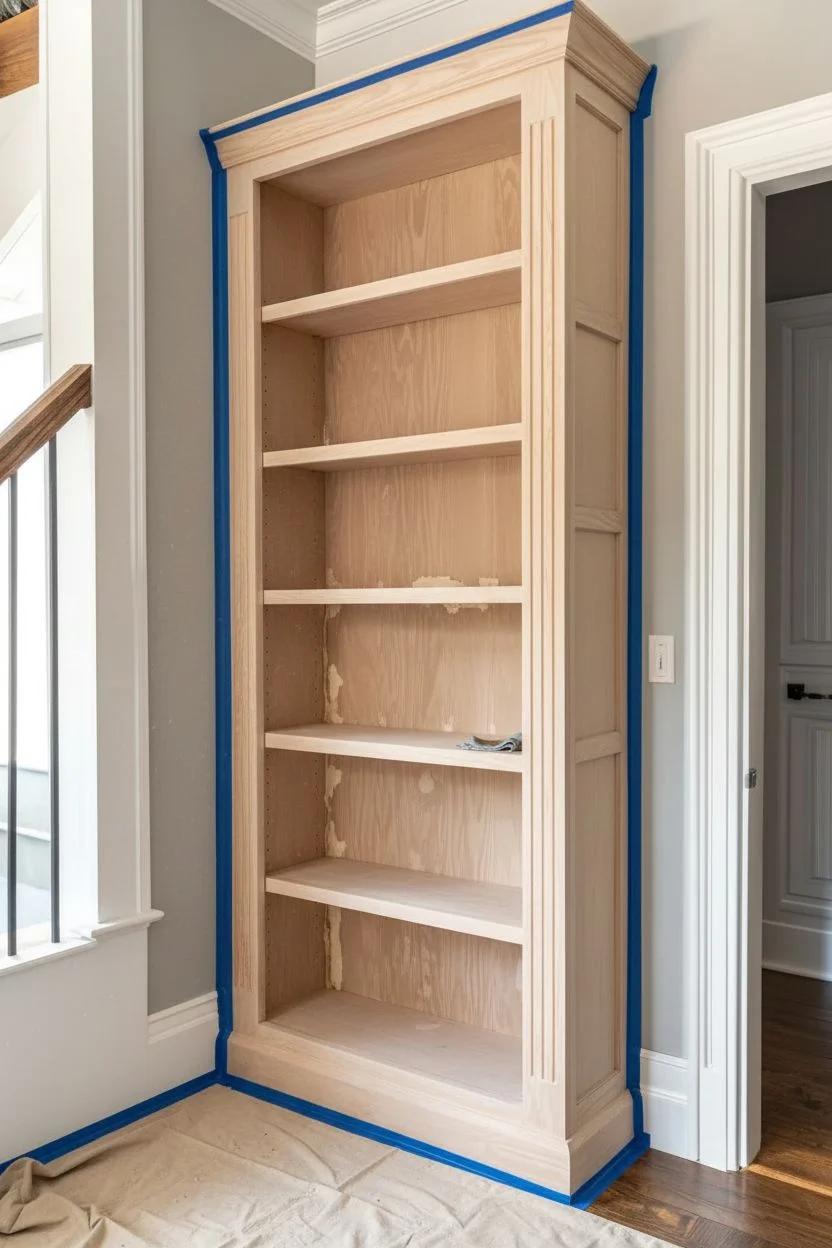
Step 1: Preparation & Repairs
-
Clear and clean:
Begin by removing all shelves (if adjustable) and hardware from the bookcase. Wipe down the entire unit with a damp cloth and mild degreaser to remove dust and oils. -
Fill imperfections:
Inspect the wood for deep scratches, unwanted shelf pin holes, or dents. Apply wood filler with a putty knife, overfilling slightly to allow for shrinkage. -
Sand surfaces down:
Once the filler is dry, sand the entire bookcase. Start with medium grit to scuff up any existing glossy finish, then switch to fine grit to smooth out the filler. This ‘scuff sanding’ is crucial for paint adhesion. -
Remove dust:
Vacuum the sanding dust thoroughly from corners and crevices. Finish by wiping everything down with a tack cloth to ensure a perfectly debris-free surface. -
Mask the area:
Apply painter’s tape to the adjacent walls, floor trim, and ceiling lines if the unit is built-in. Lay down your drop cloth to protect the flooring.
Paint Choice Pro-Tip
For high-traffic shelves, choose water-based alkyd paint (cabinet enamel). It dries harder than standard latex, resisting scratches and scuffs from sliding heavy books.
Step 2: Painting the Foundation
-
Prime the surface:
Apply a coat of primer. Since you are going for a dark finish, I highly suggest asking the paint counter to tint your primer grey; this helps you achieve full coverage with fewer topcoats. -
Cut in corners:
Use your angled sash brush to ‘cut in’ the primer into the deep corners, shelf tracks, and detailed molding areas where a roller can’t reach. -
Roll the flat surfaces:
Use the foam roller on the larger flat panels, sides, and shelf tops. The foam roller helps eliminate brush strokes for a factory-smooth finish. -
Let it cure:
Allow the primer to dry completely according to the can’s instructions. A light sanding with fine-grit paper here can knock down any raised grain.
Step 3: Achieving the Moody Finish
-
First coat of dark paint:
Stir your charcoal paint thoroughly. Begin painting the interior back panel first. Use the brush for edges and the roller for the center to maintain a wet edge. -
Paint the shelves:
Paint the removable shelves separately on a flat surface. Do the undersides first, let them dry, flip, and then paint the tops and front edges. -
Tackle the exterior:
Move to the exterior casing, fluted trim, and crown molding. Use the angled brush carefully on vertical grooves to avoid drips pooling at the bottom. -
Apply second coat:
Once the first coat is dry to the touch (usually 4-6 hours), apply a second coat. Dark colors often require this specifically to prevent light patches from showing through. -
Remove tape:
While the final coat is still slightly tacky (not fully cured), carefully peel away the painter’s tape at a 45-degree angle to ensure crisp lines. -
Extended drying time:
Let the bookshelf cure for at least 48-72 hours before placing objects on it. This patience prevents books ‘sticking’ to the fresh latex paint.
Level Up: Lighting
Install wireless, remote-controlled puck lights under the top molding or individual shelves. The warm downlight creates dramatic shadows against the dark paint.
Step 4: Styling the Look
-
Anchor with baskets:
Place matching woven baskets on the bottom shelf. This adds texture and visually weights the bottom of the display. -
Arrange books creatively:
Stack books both vertically and horizontally. For a cohesive, neutral look like the photo, consider facing the spines inward (showing the pages) or wrapping colorful books in neutral paper. -
Add metallic accents:
Distribute brass or gold decorative objects, like the spherical orb or vases, on different levels to pop against the dark charcoal background. -
Final touches:
Fill gaps with sculptural ceramics in cream or grey tones to break up the dark space without cluttering it.
Step back and admire how this striking dark finish completely redefines the character of your room.


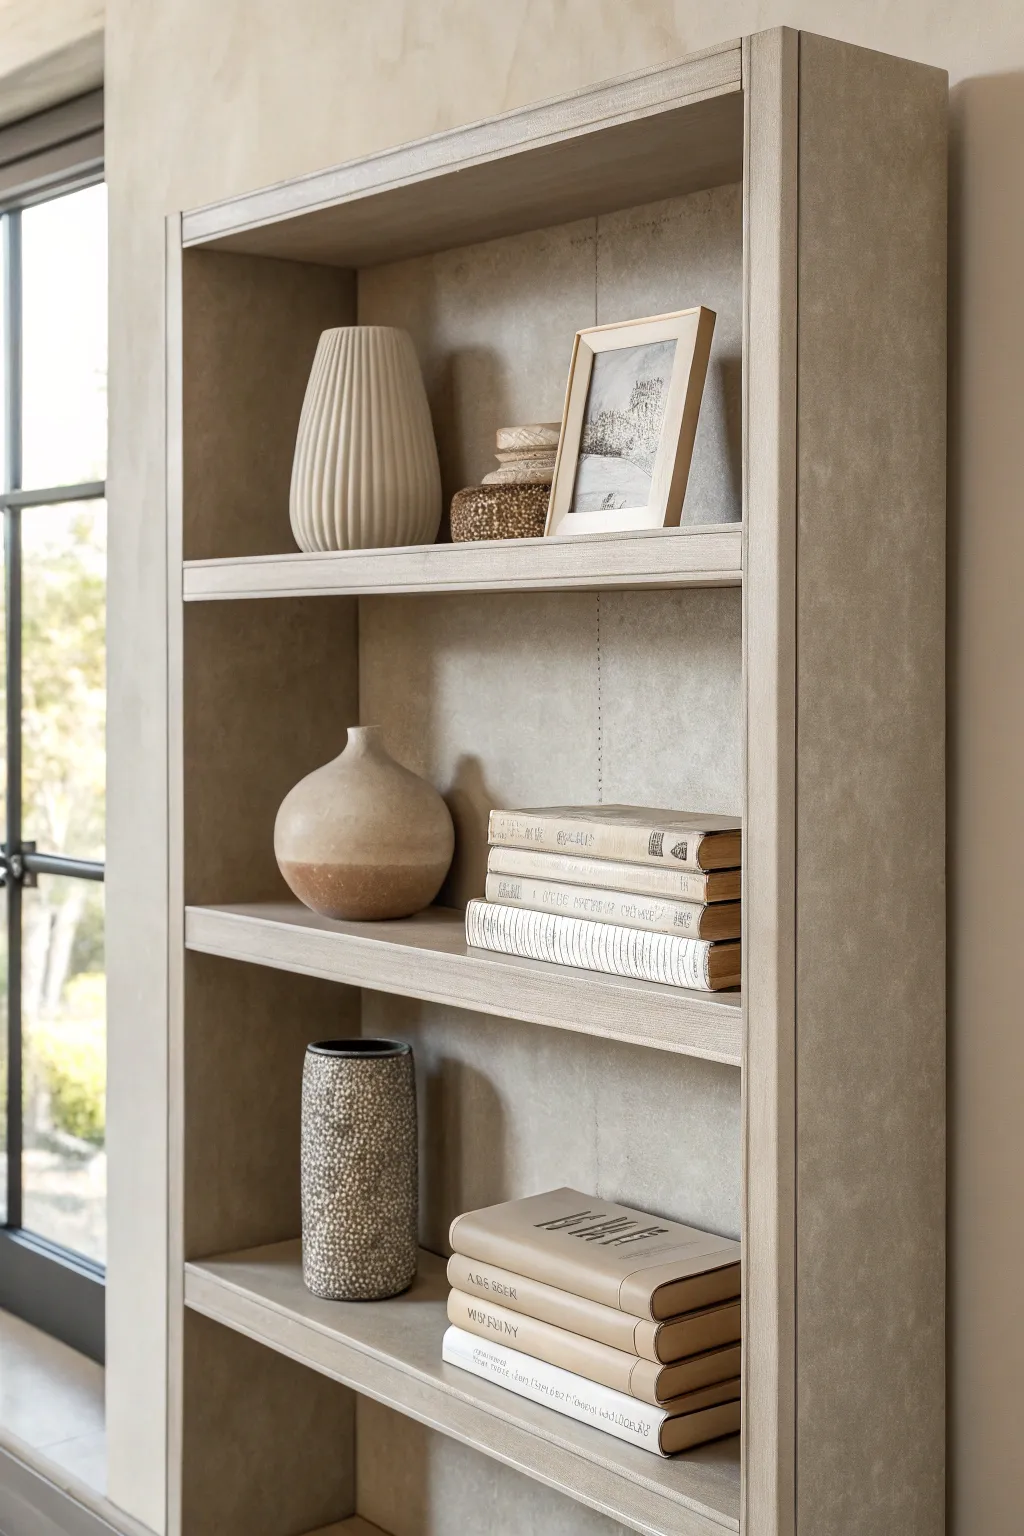
Two-Tone Shelves: Frame One Color, Shelves Another
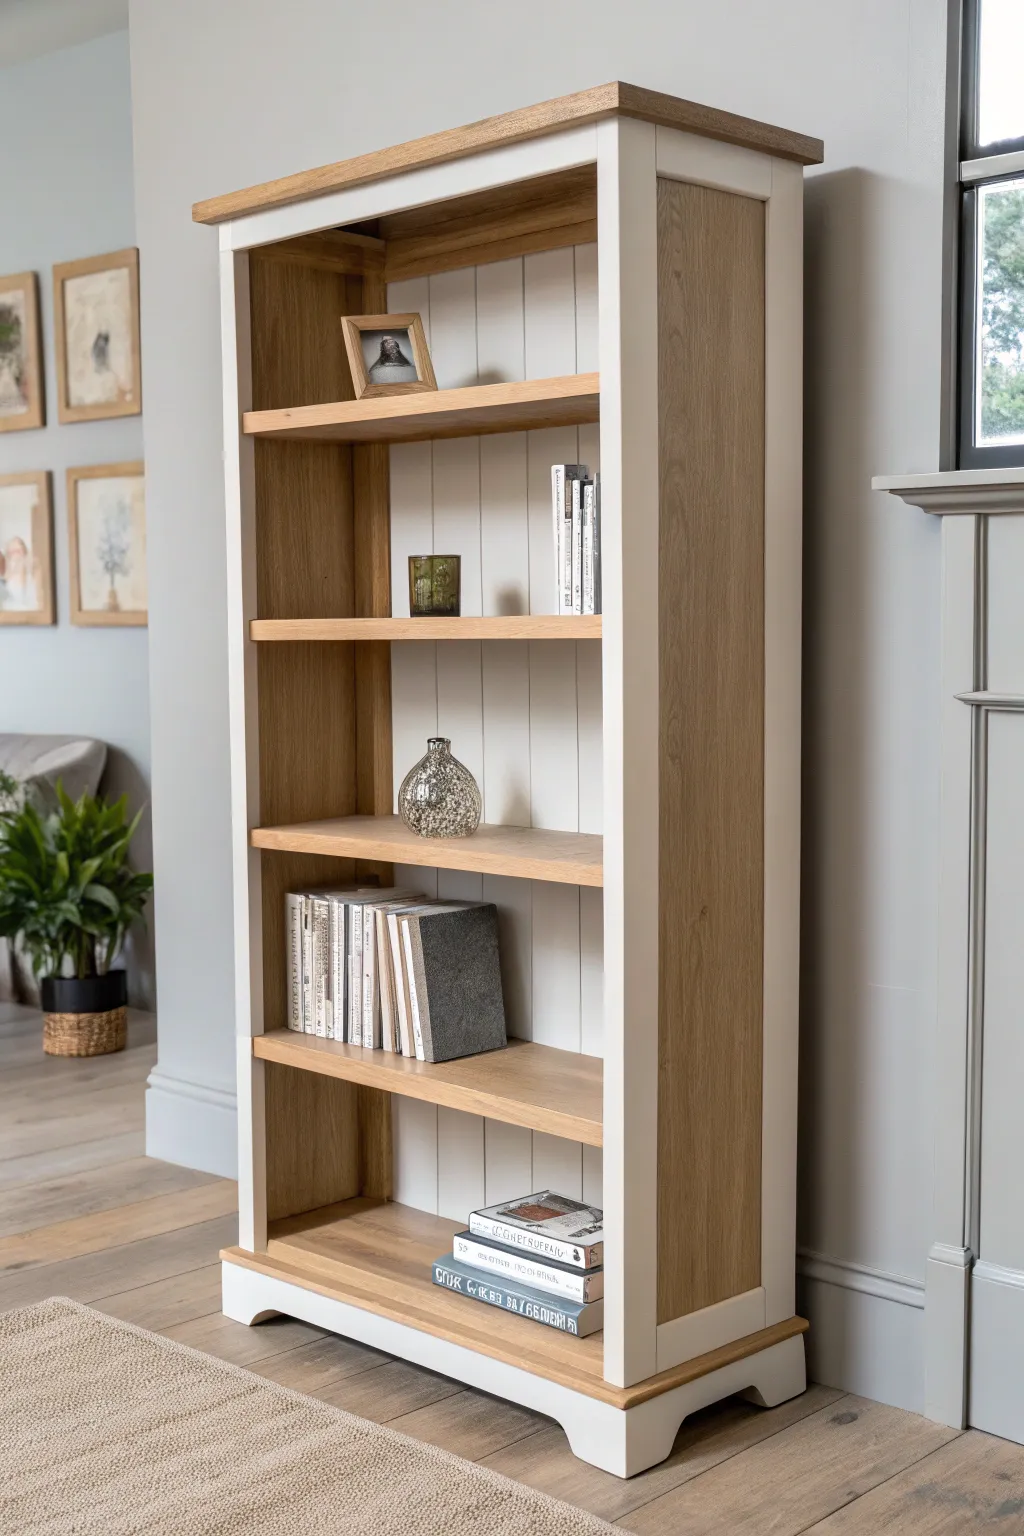
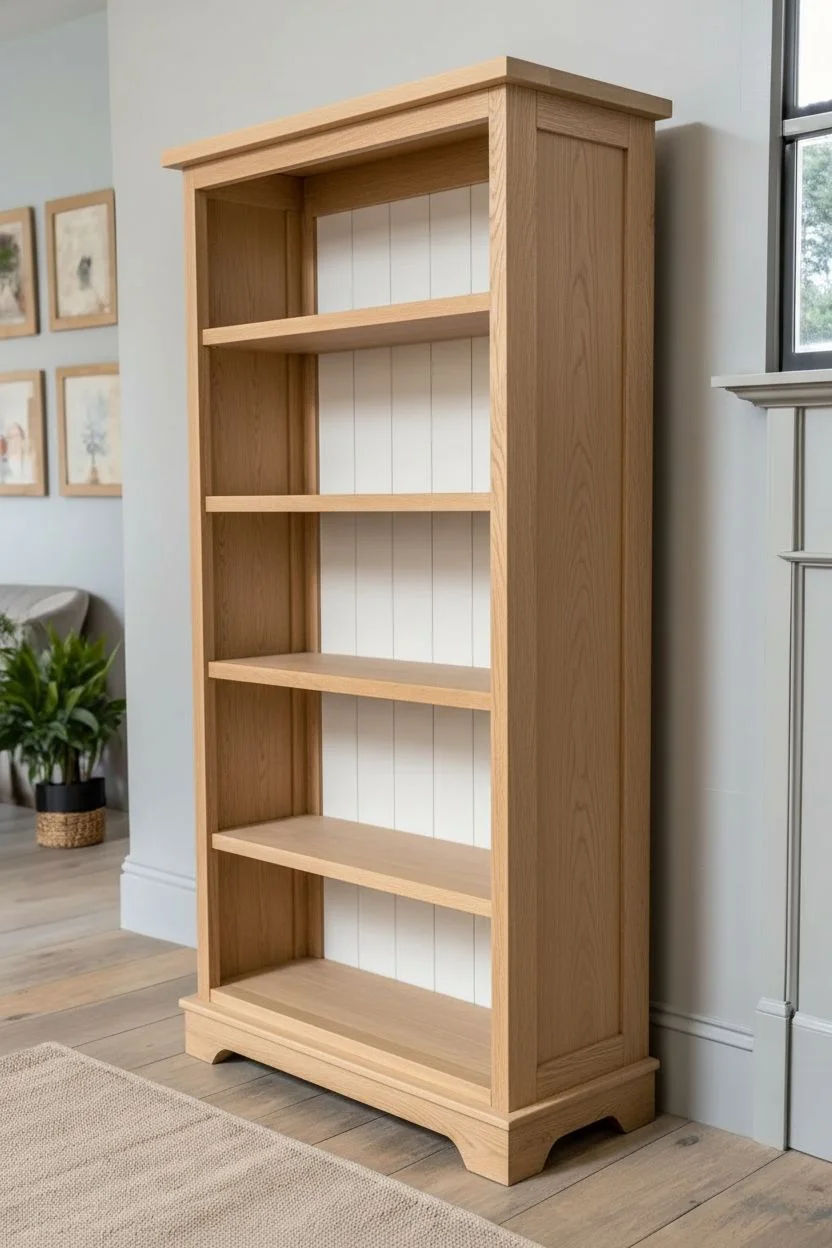
Transform a plain wooden bookshelf into a stylish focal point with this elegant two-tone finish. By contrasting a crisp, creamy white frame against warm, natural wood shelves, you create a sophisticated look that feels custom-made.
Step-by-Step
Materials
- Unfinished wooden bookshelf (or an existing one to strip)
- Sandpaper (120, 180, and 220 grit)
- Painter’s tape (high quality)
- Wood stain (Golden Oak or light walnut shade)
- Creamy white furniture paint (eggshell or satin finish)
- Water-based polyurethane or clear furniture wax
- Paintbrushes (2-inch angled sash brush and 1-inch detail brush)
- Lint-free rags
- Tack cloth
- Drop cloth
Step 1: Preparation & Sanding
-
Assess your furniture:
If you are starting with a pre-finished piece, you will need to strip the old finish completely using a chemical stripper or heavy sanding. For unfinished wood, proceed directly to inspection. -
Initial rough sanding:
Remove any existing varnish or rough spots using 120-grit sandpaper. Sand in the direction of the wood grain to avoid scratches. -
Smooth the surfaces:
Switch to 180-grit sandpaper for a smoother pass over the entire unit. Pay special attention to the areas that will remain unpainted—the top surface, shelf tops, and inner side walls—as these need to be flawless. -
Final polish:
Finish with a 220-grit hand sanding to ensure the wood is buttery smooth. This is crucial for the stained sections. -
Clean up dust:
Vacuum the piece thoroughly and wipe it down with a tack cloth. Any leftover sawdust will ruin your painted finish.
Don’t Tape Too Soon
Wait at least 24-48 hours after applying the protective coat on the stained wood before applying tape. If the clear coat isn’t cured, the tape might pull it right off.
Step 2: Staining the Wood Accents
-
Identify stain zones:
Decide which parts will remain wood. In this look, it’s the very top surface, the facing edge of the shelves, the tops of the shelves, and the interior side panels. -
Apply the stain:
Using a lint-free rag, wipe your chosen wood stain onto the ‘wood’ zones. Work in small sections, wiping off excess stain after a minute or two to prevent blotching. -
Check the tone:
Let the first coat dry according to the can’s instructions. If you want a richer colour, apply a second coat. I find one coat usually keeps it looking natural and airy. -
Seal the stain:
Once fully dry (usually 24 hours), apply a thin coat of water-based polyurethane over the stained areas only. This protects the wood while you paint the rest.
Add Faux Shiplap
To mimic the back panel in the photo, measure and draw vertical lines with a pencil on the back of your bookshelf before painting. It creates a subtle planked effect.
Step 3: Painting the Frame
-
Tape off the wood:
This is the most critical step. Carefully apply painter’s tape over every edge where the stained wood meets the area you plan to paint. Press the tape edges down firmly with a credit card to stop bleed-through. -
Masking large areas:
Cover the main surface of the shelves with paper or plastic, taping it down so no paint splatters land on your fresh stain. -
Prime the frame:
Apply a high-quality primer to the outer sides, the front face frame, the bottom plinth, and the back panel (if it’s not removable). Let it dry completely. -
First coat of paint:
Stir your creamy white paint well. Using a 2-inch angled brush, apply the paint with long, smooth strokes. Watch out for drips around the corners of the shelving. -
Sand between coats:
Once the first coat is dry, lightly scuff it with 220-grit sandpaper. This knocks down brush ridges and helps the next coat adhere. -
Second coat:
Apply your second coat of paint. For the back panel—which often features beadboard grooves like in the image—use a smaller brush to ensure paint gets into the crevices without pooling.
Step 4: Finishing Touches
-
Remove tape:
While the final coat of paint is still slightly tacky (not fully dry), gently peel off the painter’s tape at a 45-degree angle. This prevents the paint from peeling up with the tape. -
Touch-ups:
If any paint bled onto the wood, carefully scrape it away with a razor blade or use a tiny bit of sandpaper. If stain got on the paint, use a small artist’s brush to cover it. -
Final clear coat:
Apply a final protective coat of clear matte polyurethane over the entire piece—both painted and stained sections—to unify the sheen and add durability. -
Cure time:
Let the bookshelf cure for at least 48 hours before placing heavy books or decor items on the shelves to prevent denting the fresh finish.
Now you have a stunning, customised piece of furniture ready to display your favourite reads and decorative treasures
BRUSH GUIDE
The Right Brush for Every Stroke
From clean lines to bold texture — master brush choice, stroke control, and essential techniques.
Explore the Full Guide
Shelf Nook Color-Drenching for Built-In Drama
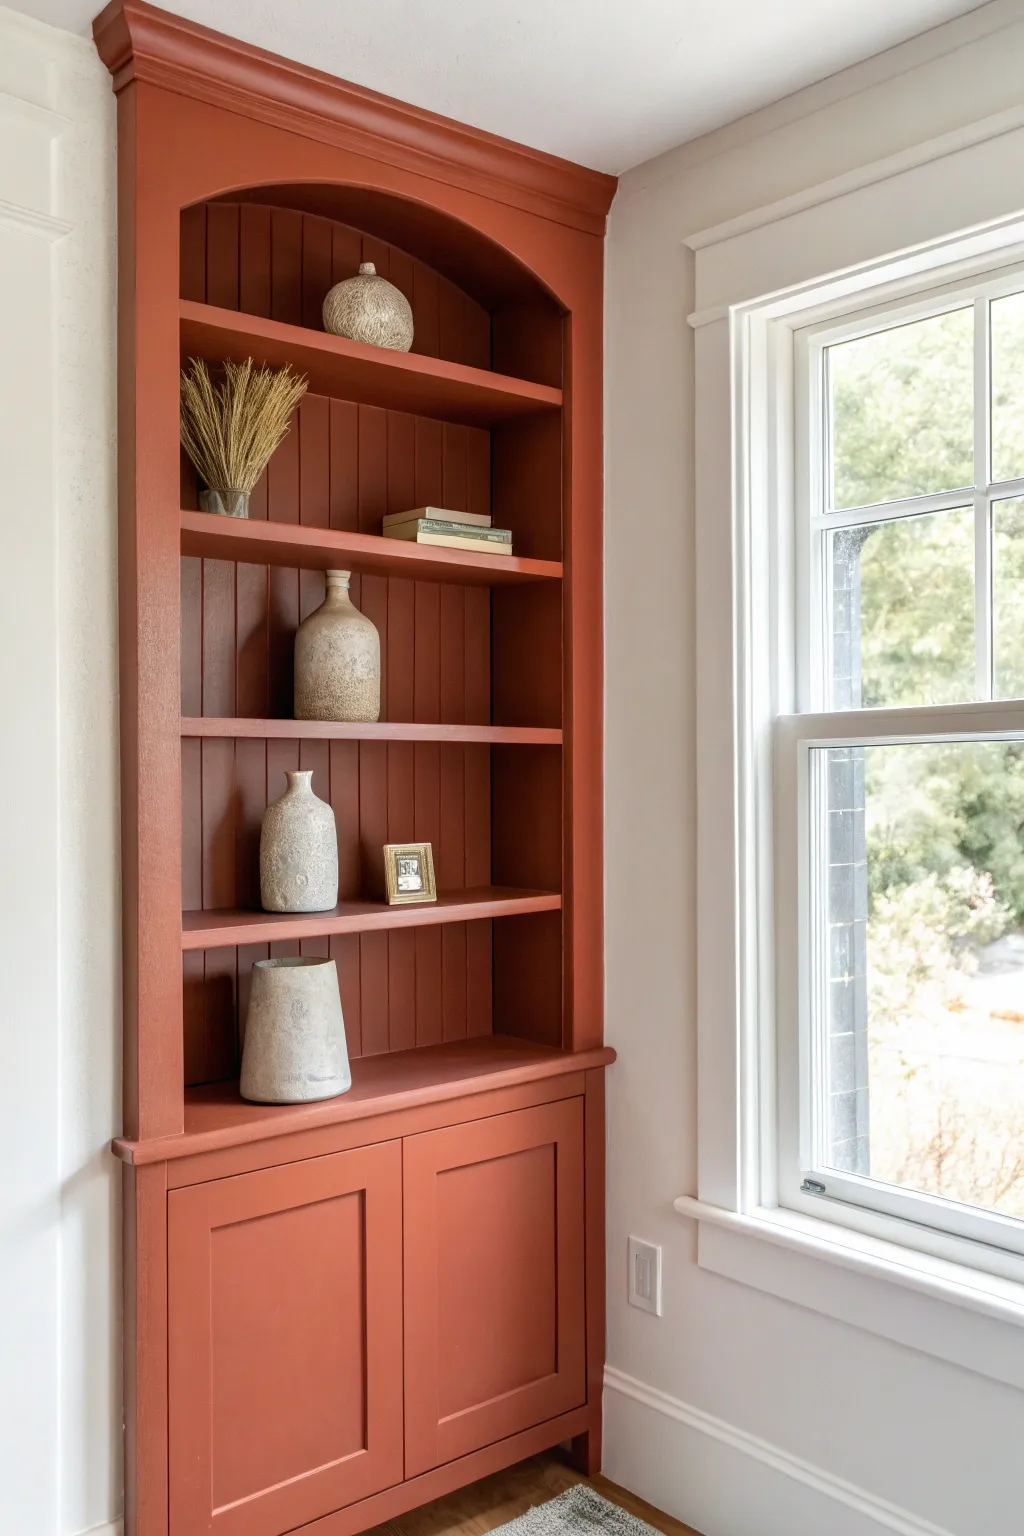
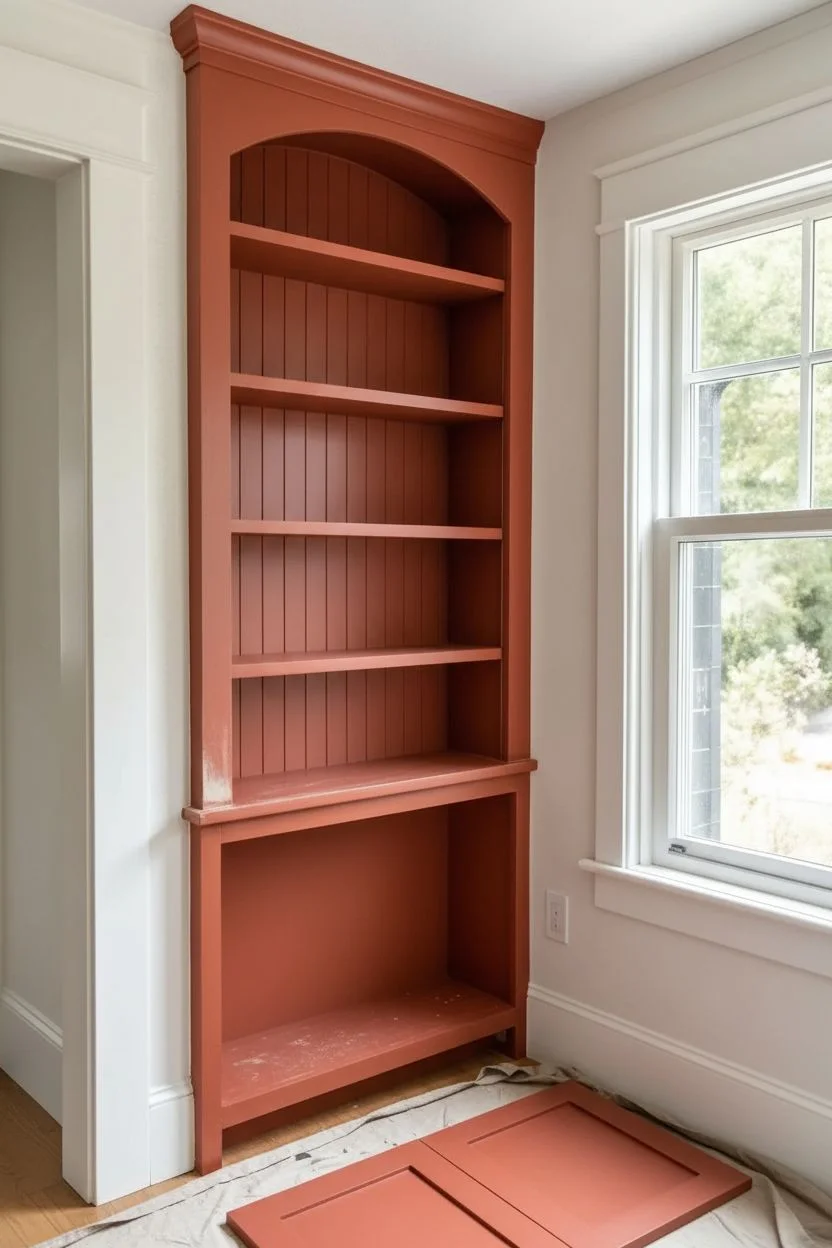
Transform a standard built-in or freestanding shelf nook into a stunning architectural feature with this cohesive, color-drenched approach. By painting the shelves, backing, cabinets, and trim in a single monolithic rusty-orange hue, you elevate simple carpentry into a sophisticated focal point.
Step-by-Step Guide
Materials
- High-quality interior paint (satin or semi-gloss finish, terracotta/rust color)
- Primer (stain-blocking, tinted gray or red recommended)
- Sanding sponges (120 and 220 grit)
- Tack cloth
- Painter’s tape (delicate surface)
- Small foam roller (4-inch) with tray
- High-quality angled sash brush (1.5 to 2 inch)
- Drop cloths
- Screwdriver (for hardware removal)
- Caulk and caulk gun (paintable)
- Wood filler
Step 1: Preparation and Cleaning
-
Clear and clean:
Begin by completely emptying the bookshelf. Remove any adjustable shelving if possible to paint separately. Wipe down every surface with a degreaser or mild TSP solution to remove dust, oils, and old furniture polish. -
Remove hardware:
Using your screwdriver, take off the cabinet doors by unscrewing the hinges. Remove any knobs or pulls and store them safely in a baggie. Lay the doors flat on a drop cloth in your workspace. -
Fill imperfections:
Inspect the wood for nail holes, dents, or gaps in the molding. Apply wood filler to flat surfaces and paintable caulk to seams where the beadboard meets the frame. Smooth the caulk with a wet finger. -
Sand thoroughly:
Once the filler is dry, scuff-sand all surfaces with 120-grit sandpaper. This step is crucial for adhesion, especially if the original surface is glossy. I like to focus heavily on the edges where paint tends to chip. -
Dust control:
Vacuum up the sanding dust, then wipe everything down with a tack cloth to ensure a perfectly smooth base for your primer.
Step 2: Priming and Base Coat
-
Mask the area:
Apply painter’s tape carefully along the wall edges, the floor, and around the window trim adjacent to the built-in. Press the tape edges down firmly to prevent bleed-through. -
Apply primer:
Roll on a coat of stain-blocking primer. If you are making a drastic color change to this deep terracotta, consider asking the paint store to tint your primer gray or slightly red to help with coverage. Let this dry completely. -
Light sanding:
After the primer cures, give it a very quick, light pass with 220-grit sandpaper to knock down any bumps, then wipe clean again.
Sticky Situation?
Cabinet doors often stick if closed too soon. Place small felt bumpers on the inside corners of the doors to keep the fresh paint surfaces from touching the frame directly while curing.
Step 3: Painting the Built-In
-
Cut in the details:
Open your terracotta paint. Start by using the angled sash brush to paint the difficult areas: the grooves of the beadboard backing, inside corners, and around the arched top molding. -
Roll the flats:
Switch to your foam roller for the larger flat surfaces, such as the shelf tops, cabinet sides, and front framing. Work in small sections to maintain a wet edge. -
Paint the cabinet doors:
While the main unit dries, paint the detached cabinet doors. Start with the back side, let dry, flip, and paint the front, using the brush for the recessed panels and the roller for the flat frames. -
Apply second coat:
Allow the first coat to dry according to the manufacturer’s instructions (usually 4-6 hours). Apply a second coat using the same method—brushing crevices first, then rolling flat areas—to achieve that rich, opaque color depth. -
Check for drips:
Inspect the beadboard grooves and corners for paint drips while the paint is still tacky and brush them out immediately.
Add Dimension
For a subtle custom look, mix a tiny bit of glazing liquid into your final topcoat for the beadboard only. This adds depth to the grooves and highlights the backing texture.
Step 4: Finishing Touches
-
Remove tape:
Score the edge of the painter’s tape with a craft knife before the final coat is 100% hard. This prevents the tape from pulling off your fresh paint. Peel the tape away slowly at a 45-degree angle. -
Reassemble:
Once the paint has cured for at least 24 hours (longer is better to avoid sticking), reattach the cabinet doors with their hinges. -
Style cleanly:
Recreate the minimal look by placing neutral, textured ceramics and wheat stalks on the shelves. Keep the styling sparse to let the bold paint color remain the hero of the nook.
Step back and admire how a bold color choice completely refined the character of your space
Soft Neutral Shelves for a Calm, Airy Backdrop
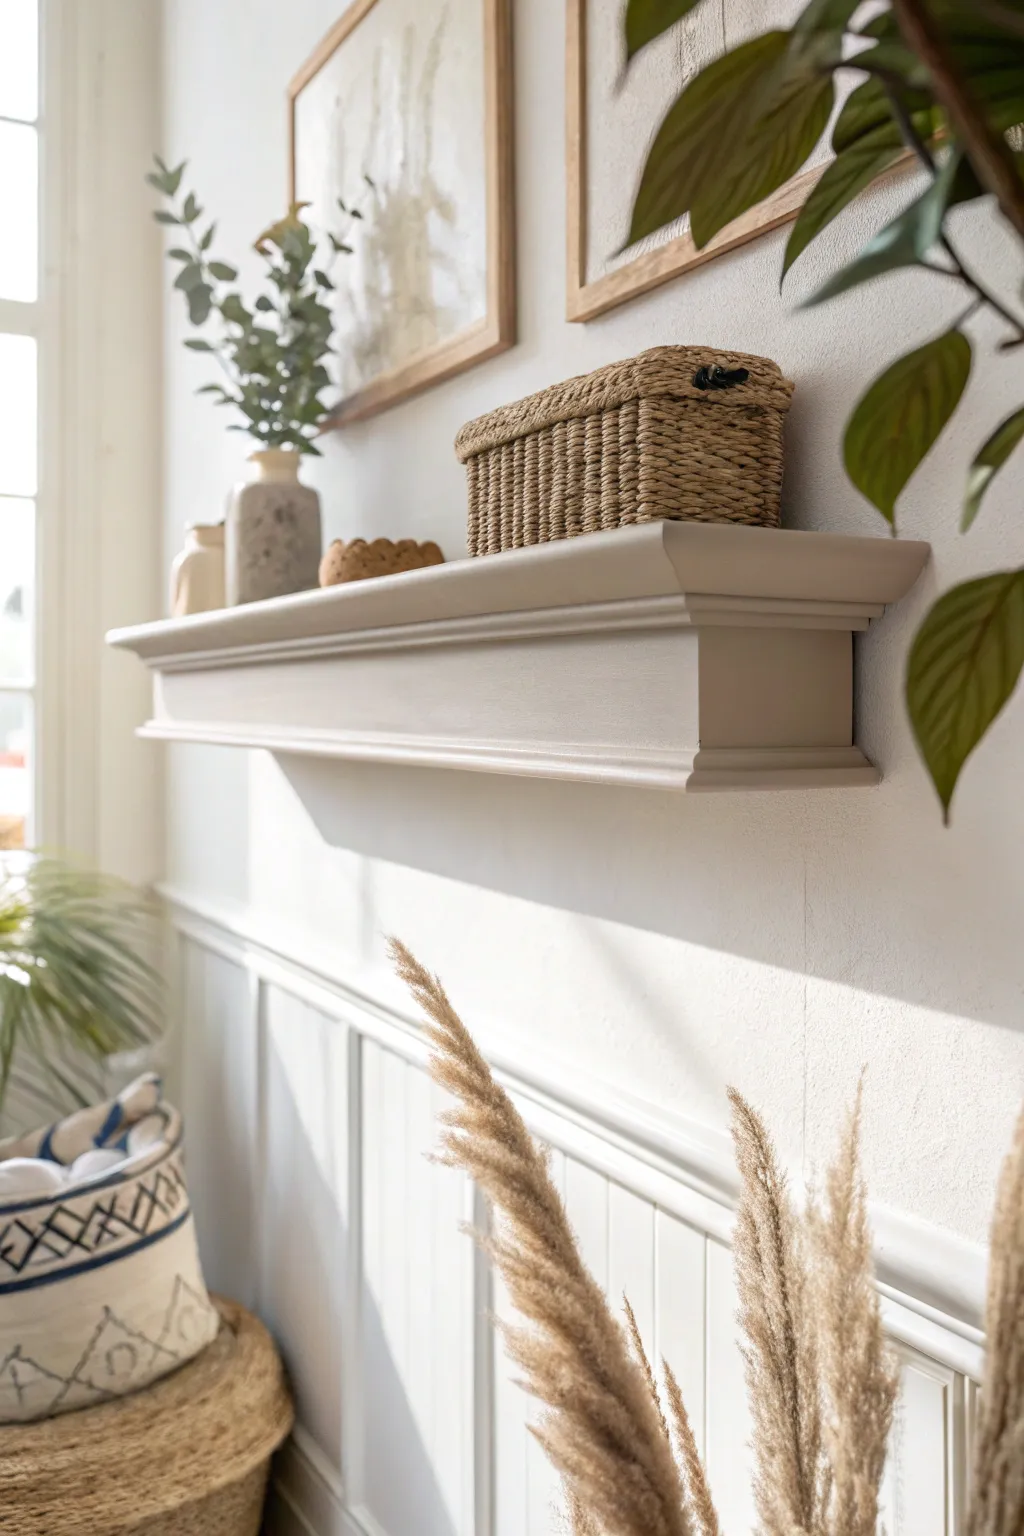
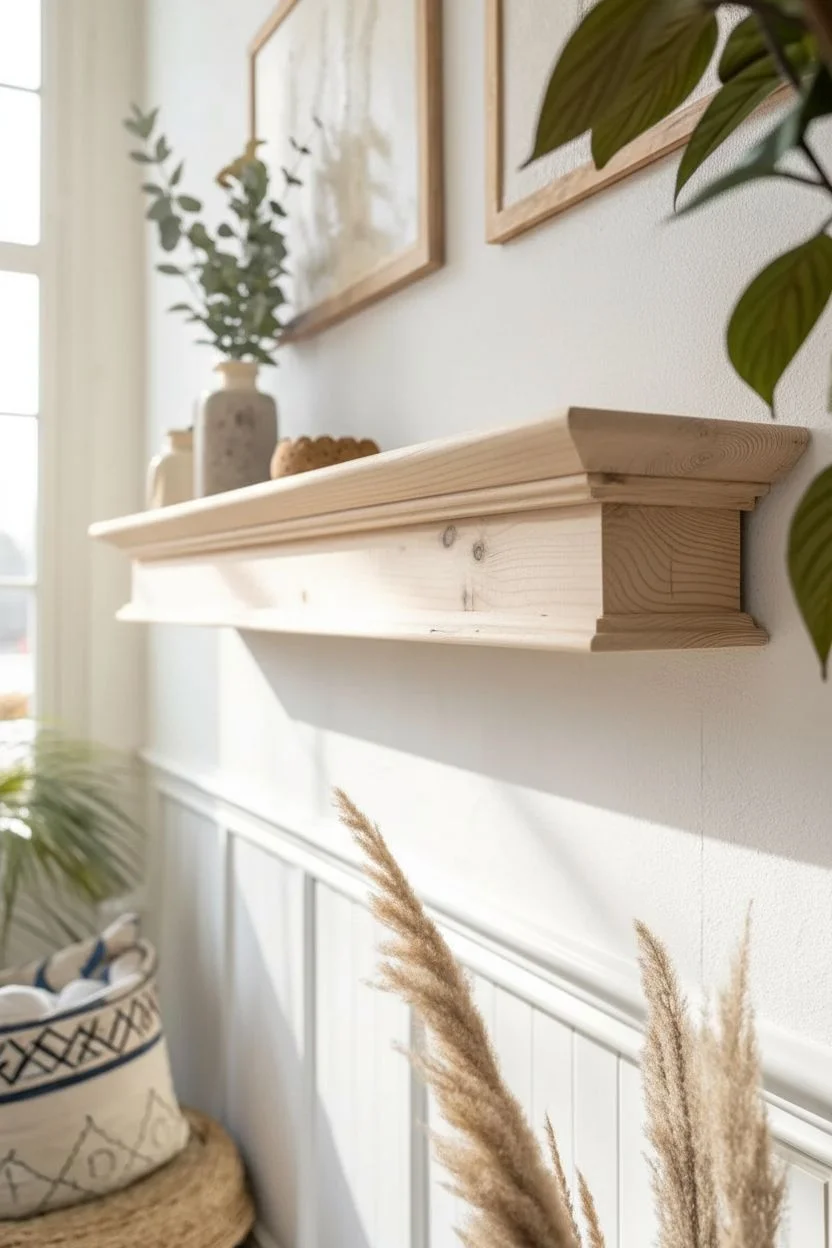
Bring a touch of timeless elegance to your walls with this substantial floating shelf featuring classic molding details. The soft, neutral taupe finish creates a seamless, airy look that blends perfectly with warm minimalist or traditional interiors.
Step-by-Step Tutorial
Materials
- 1×8 pine board (for the top shelf)
- Small wood cleats (for mounting)
- Crown molding (proportionate to your shelf depth)
- Baseboard or flat trim molding (for the bottom apron)
- Detail trim (small cove or quarter round)
- Wood glue
- Brad nailer and 1.25-inch nails
- Wood filler
- Fine-grit sandpaper (220-grit)
- Primer (high-quality bonding primer)
- Warm taupe or ‘greige’ satin or eggshell paint
- 2-inch angled sash brush
- Small foam roller
- Painter’s tape
- Level and stud finder
Step 1: Building the Skeleton
-
Measure and Cut the Top:
Start by determining your desired shelf length. Cut your 1×8 pine board to this exact length. This board will serve as the actual shelf surface and the anchor for all the molding. -
Create the Mounting Cleat:
Cut a strip of wood slightly shorter than your shelf length to act as a mounting cleat. This will be screwed into the wall studs later, and the shelf box will slide over or sit on it. -
Attach the Apron:
Cut pieces of flat trim or baseboard to frame the bottom edge of your 1×8 board. You’ll need one long piece for the front and two short returns for the sides. Miter the corners at 45 degrees for a clean join. -
Secure the Box:
Glue and brad nail these apron pieces directly into the edges of the top board. Ensure the top surface is flush. This creates a shallow ‘box’ structure foundation.
Step 2: Adding Architectural Detail
-
Measure for Crown Molding:
The key to this look is the crown molding layer. Measure and mark your crown molding to wrap around the apron box you just built. Accuracy is crucial here, so measure twice. -
Cut the Crown Miters:
Set your miter saw to cut the crown molding angles. You’ll need outside miters for the front corners. Cut the front piece and the two side return pieces. -
Install the Crown Layer:
Apply wood glue to the back of the molding pieces. Position them snugly against the apron box, ensuring the top edge aligns perfectly or sits just under the shelf lip, depending on your preferred profile. -
Nail in Place:
Secure the molding with your brad nailer. Shoot nails into the solid wood of the apron behind it. If the molding feels loose at the bottom, add small blocking pieces of wood inside the hollow space for support. -
Add Bottom Detail:
To finish the bottom edge and hide the hollow underside, attach a small cove molding or thin trim distinctively around the bottom perimeter of the crown molding.
Seamless Finish Secret
For invisible joints, mix a tiny bit of water into your wood filler before applying. It creates a paste that gets deeper into molding crevices than the dry stuff.
Step 3: Refining the Surface
-
Fill Nail Holes:
Take a dime-sized amount of wood filler and press it into every nail hole. Overfill slightly, as the filler will shrink when it dries. -
Caulk the Seams:
Run a thin bead of paintable caulk along every seam where pieces of wood meet—especially the mitered corners and where the molding meets the top board. Smooth it with a damp finger. -
Sand Smooth:
Once the filler is completely dry, sand the entire shelf with 220-grit sandpaper. I like to pay special attention to the sharp edges of the molding, softening them just a tiny bit for a lived-in look. -
Wipe Clean:
Remove all sanding dust with a tack cloth or a slightly damp microfiber rag. Dust left behind will ruin your smooth paint finish.
Level Up: Aged Stone Look
Before the final paint coat dries, dab it gently with a dry sponge. This adds a subtle texture that mimics the look of cast stone or plaster rather than plain wood.
Step 4: The Perfect Soft Finish
-
Prime the Shelf:
Apply a coat of high-quality bonding primer. This seals the wood and ensures the paint color looks true. Let this dry according to the can’s instructions. -
Sand the Primer:
Give the primed surface a very light scuff sand with fine sandpaper. This knocks down any raised wood grain and creates a buttery smooth base. -
First Coat of Color:
Using your 2-inch angled sash brush, paint the detailed molding crevices first. Immediately follow with a small foam roller on the flat top and front surfaces to smooth out brush marks. -
Final Coat:
Allow the first coat to dry fully, then apply a second coat for rich, opaque coverage. The warm taupe color should look consistent and velvety. -
Mounting:
Once cured (give it at least 24 hours), mount your cleat to the wall studs, and slide your finished architectural shelf over it, securing it through the top with trim screws.
Now you have a custom architectural ledge ready to display your favorite ceramics and greenery.

PENCIL GUIDE
Understanding Pencil Grades from H to B
From first sketch to finished drawing — learn pencil grades, line control, and shading techniques.
Explore the Full Guide
Satin or Semi-Gloss Shelves for Easy Wipe-Down Durability
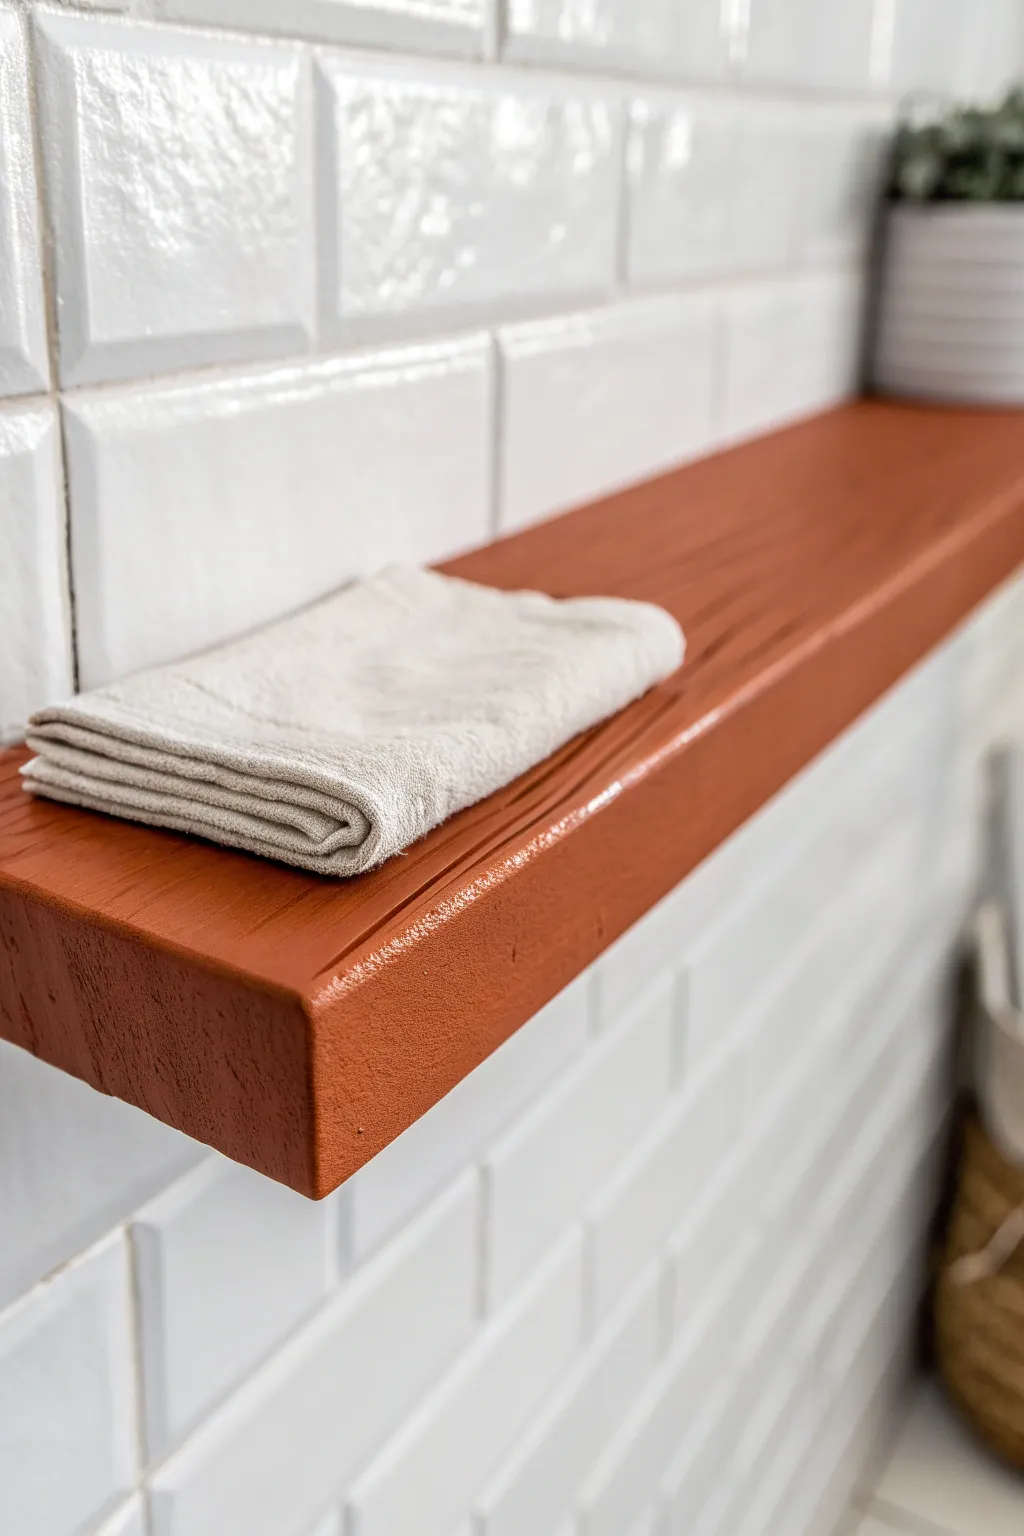
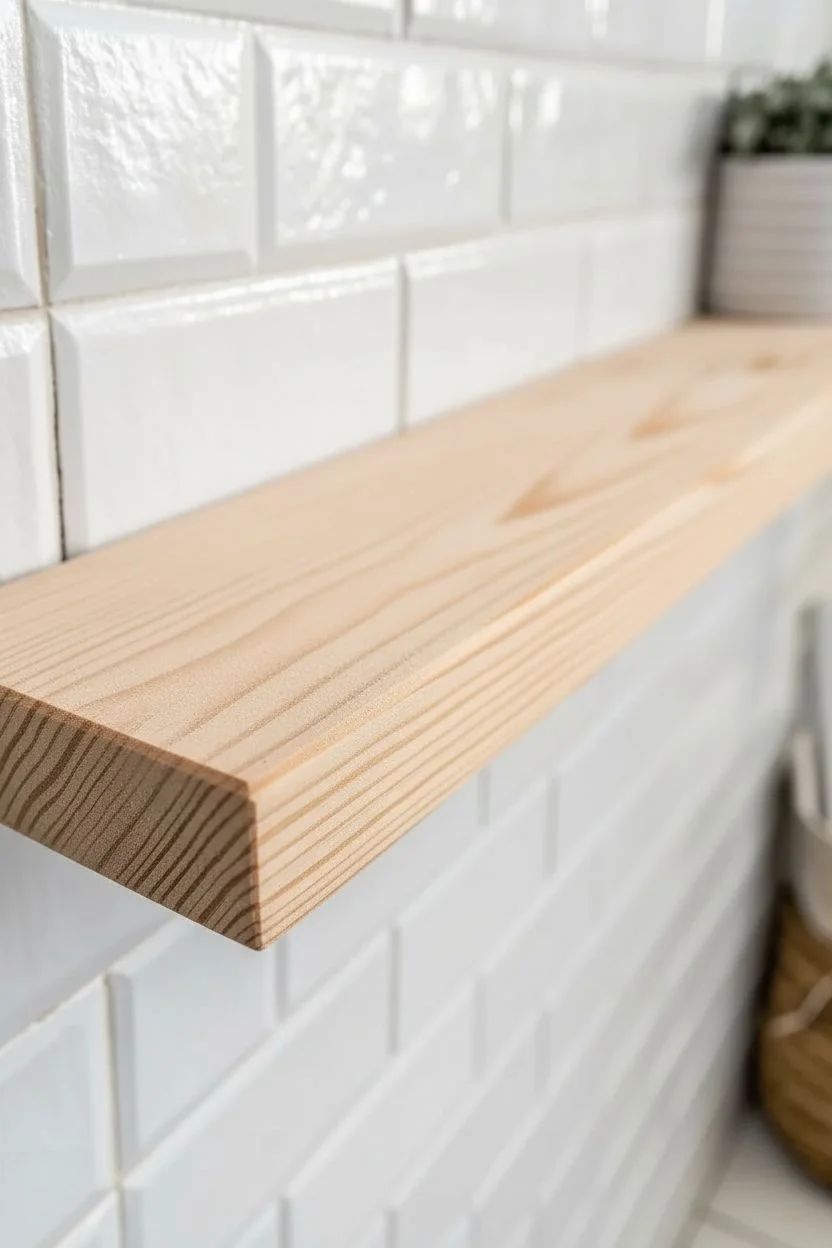
Transform a basic wooden floating shelf into a warm, durable focal point with a rich terracotta finish. This project uses a satin or semi-gloss paint to ensure the surface isn’t just beautiful, but also easy to wipe down and keep clean in moisture-prone areas like bathrooms.
How-To Guide
Materials
- Floating wood shelf (unfinished pine or similar)
- Sandpaper (120-grit and 220-grit)
- Tack cloth or microfiber rag
- High-quality wood primer (stain-blocking)
- Satin or semi-gloss interior paint (terracotta/burnt orange shade)
- 2-inch angled sash brush (synthetic bristles)
- Small foam roller (optional, for smoother finish)
- Painter’s tape
- Drop cloth
- Wood filler (if needed)
Step 1: Preparation
-
Clean the Surface:
Before doing anything, wipe down your wood shelf to remove any dust or manufacturing residues. If it’s an old shelf, ensure it is completely grease-free. -
Fill Imperfections:
inspect the wood for deep knots or small gouges. Use a dab of wood filler on these spots, smoothing it out with a putty knife. Let it dry completely according to the package instructions. -
Initial Sanding:
Sand the entire shelf with 120-grit sandpaper. You want to scuff up the surface to help the primer adhere, and create a level base over any filled areas. -
Refine the Grain:
Switch to 220-grit sandpaper for a second pass. This ensures the wood grain is ultra-smooth, which is crucial for a satin finish where texture shows up easily. -
Remove Dust:
Vacuum up the sanding dust, then wipe the entire piece firmly with a tack cloth. Any leftover dust will create tiny bumps in your paint job.
Sticky Situation?
If objects stick to your shelf after painting, the paint hasn’t fully cured. This process can take up to 30 days for full hardness. Use felt pads under decor during this time.
Step 2: Priming
-
Tape Off Edges:
If your shelf is already mounted (though painting it unmounted is easier), apply painter’s tape to the wall tiles precisely where they meet the wood. -
Apply Primer:
Brush on a coat of high-quality wood primer. Move in the direction of the wood grain. Don’t worry if it looks streaky; the goal is coverage, not perfection. -
Check for Drips:
While the primer is wet, inspect the bottom edges and corners for drips and smooth them out immediately with your brush. -
Light Sanding:
Once the primer is fully dry, giving it a very light scuff with 220-grit sandpaper creates the professional glass-like base we need for semi-gloss paint.
Add a Texture Pop
Before painting, use a wire brush to aggressively scrub the wood grain. This opens the pores, creating a rustic texture that looks amazing under a semi-gloss sheen.
Step 3: Painting
-
First Coat Application:
Dip your angled brush into the terracotta paint. Start painting the edges and corners first, as these are the trickiest parts. -
Rolling the Flat Surfaces:
For the top and face of the shelf, I prefer to use a small foam roller to apply the paint evenly without brush strokes, rolling with the grain. -
Dry Time:
Allow this first coat to dry for at least 4-6 hours. Satin and semi-gloss paints can feel tacky even when they look dry, so patience is key. -
Evaluate Coverage:
Check your coverage. Terracotta pigments can sometimes be translucent, so you might see the primer peeking through. This is normal. -
Second Coat:
Apply the second coat just like the first. Use long, confident strokes or rolls to level out the paint. -
Removing Tape:
If you used painter’s tape, carefully peel it away while the second coat is still slightly damp to get a crisp, clean line against the tile.
Step 4: Curing
-
Final Cure:
Let the shelf cure undisturbed for at least 24 hours before placing any objects on it. This prevents the items from sticking to the fresh paint.
Enjoy the warmth and practical durability your new professionally finished shelf brings to the room
Matte Painted Shelves for a Velvety, Modern Look
Transform a basic IKEA-style laminate or wood bookshelf into a high-end, gallery-worthy piece that mimics the soft look of honed limestone or beige suede. This project uses layers of textured paint and careful dry-brushing to achieve a tactile, matte finish that feels sophisticated and organic.
Detailed Instructions
Materials
- Tall wooden or laminate bookshelf
- Medium-grit sandpaper (120-150 grit)
- High-adhesion primer (specifically for laminate if applicable)
- Chalk-style paint or mineral paint in ‘Greige’ (grey-beige base)
- Chalk-style paint in a lighter cream tone
- Chalk-style paint in a slightly darker taupe tone
- Sea sponge or specialized texture roller
- wide, flat synthetic paintbrush
- Round wax brush or stippling brush
- Matte clear topcoat or furniture wax
- Painter’s tape
- Drop cloth
- Clean rags
Step 1: Prep and Prime
-
Clean surfaces thoroughly:
Before doing anything, wipe down the entire bookshelf with a degreaser or a vinegar-water mix to remove oils and dust that could repel the paint. -
Scuff sand for adhesion:
Lightly sand all surfaces using 120-grit sandpaper. You aren’t trying to strip the finish, just creating tiny scratches so the primer sticks. -
Wipe away dust:
Use a tack cloth or a damp rag to remove every speck of sanding dust, as debris will ruin the velvety texture we are aiming for. -
Apply bonding primer:
Paint a coat of high-adhesion primer over the entire piece. Focus on corners and edges. Let this dry completely according to the can’s instructions, usually overnight.
Uneven Texture?
If your sponge marks look like distinct polka dots, your sponge was too wet. Let it dry, paint over with the base color, and retry with a drier sponge.
Step 2: Creating the Base Texture
-
Apply the first base coat:
Using your wide flat brush, apply the main ‘Greige’ color. Don’t worry about perfect smooth strokes; a little thick texture is actually good here. -
Stipple the wet paint:
While the first coat is still tacky, take a clean, dry brush or a sponge and lightly dab (stipple) the surface to break up brush strokes and create a dimpled texture. -
Let it cure:
Allow this base layer to dry fully. It should look solid but perhaps a bit flat at this stage. -
Apply a second texture coat:
Apply a second coat of the Greige base. Again, use irregular, cross-hatch brush strokes rather than long, straight lines to build organic movement.
Add Faux Seams
Use a straightedge and a pencil to lightly score vertical lines down the back panel before painting to mimic individual stone slabs or wallpaper seams.
Step 3: Adding the Stone Effect
-
Mix a glaze wash:
Mix your darker taupe paint with water (about 50/50) to create a transparent wash. -
Apply the wash:
Brush this watery mix over a small section of the shelf (like one side panel) and immediately wipe most of it back with a rag. This leaves pigment in the textured crevices. -
Create cloudy depth:
For a suede-like look, dip a nearly dry sea sponge into the lighter cream paint. Offload most of the paint onto a paper towel until almost nothing comes off. -
Sponge on the highlights:
Gently press the sponge onto the center of the shelves and outer panels. This creates the soft, lighter ‘clouds’ seen in natural stone. -
Soften with a dry brush:
Take a clean, dry paintbrush and lightly feather over the sponged areas to blur the edges, blending the cream into the greige base. -
detail the corners:
I like to use a tiny bit of the darker taupe paint on a small brush to lightly shadow the inside corners where the shelves meet the sides, adding artificial depth.
Step 4: Sealing the Finish
-
Check for rough spots:
Once all paint layers are bone dry, run your hand over the surface. If any peaks of paint are too sharp, knock them down gently with high-grit sandpaper. -
Apply matte sealer:
Finish with a dead-flat matte polyacrylic or a clear furniture wax. Avoid glossy finishes, as the shine will ruin the stone illusion. -
Buff for sheen (optional):
If using wax, let it dry for an hour and then buff gently with a soft cloth to achieve that subtle, velvety luster.
Style your new shelves with ceramic vases and books in neutral tones to complete the monochromatic, serene vibe


Distressed Painted Shelves for a Soft, Worn-In Patina
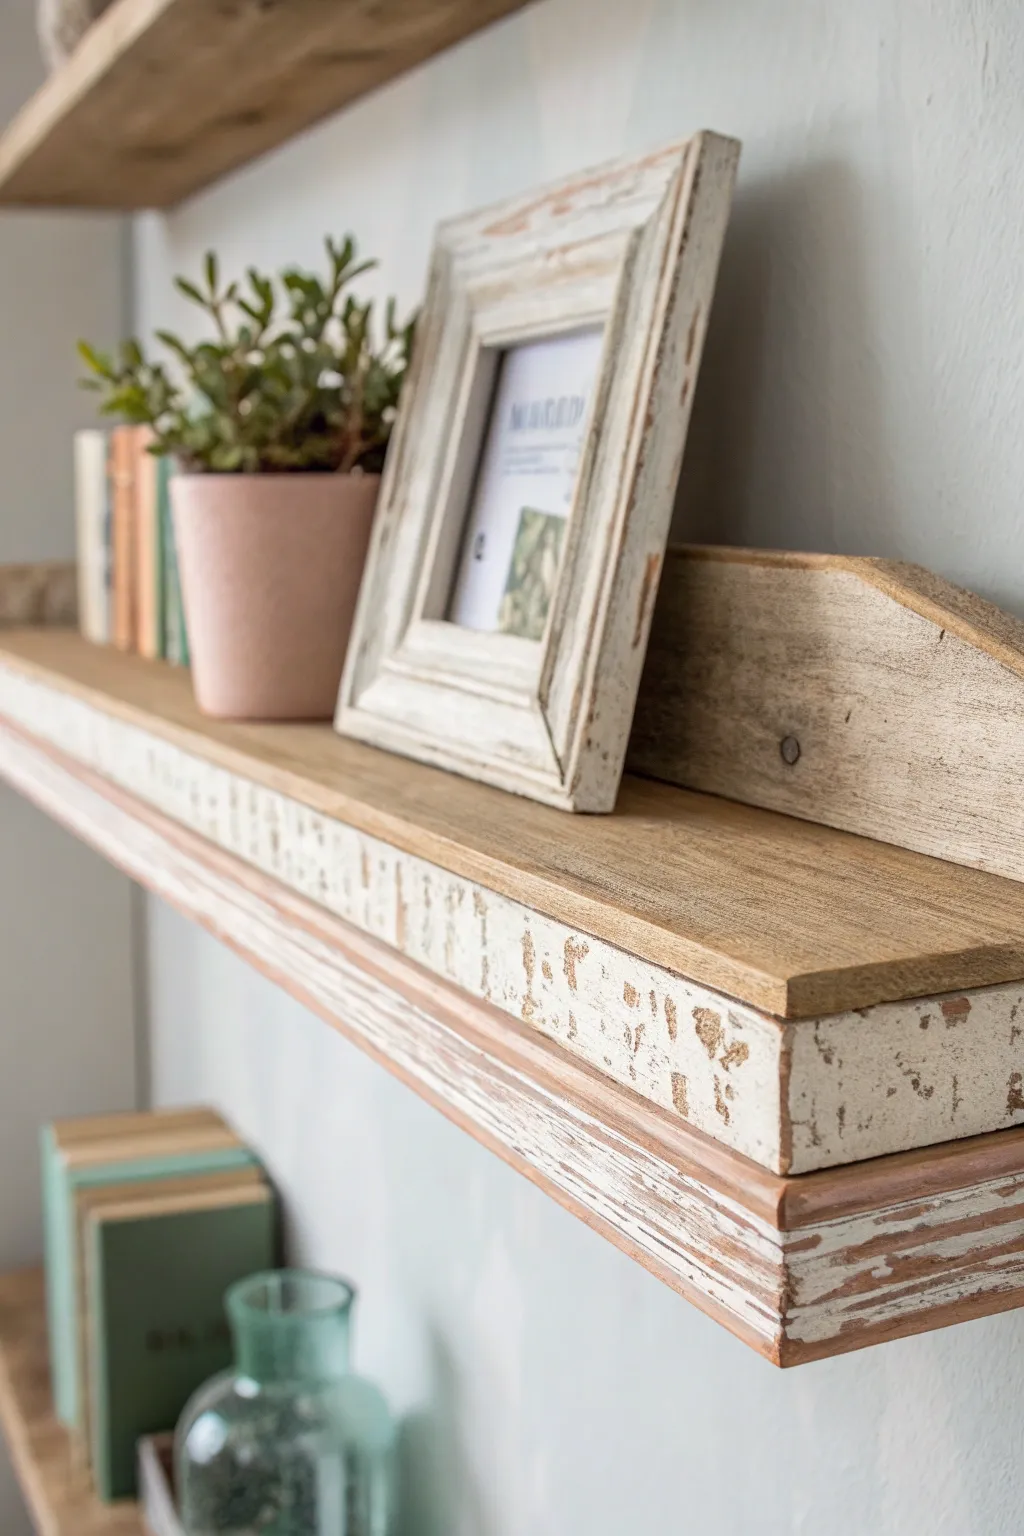
Achieve a beautifully aged, timeworn look on new wood with this simple layered painting and sanding technique. The combination of natural wood tones and chippy white paint creates a soft patina that perfectly complements farmhouse or cottage-style decor.
Step-by-Step Tutorial
Materials
- Unfinished wood floating shelf (or reclaimed wood plank)
- Medium-grit sandpaper (100-120 grit)
- Fine-grit sandpaper (220 grit)
- Wood stain (light oak or walnut)
- White or cream chalk paint
- Candle wax or beeswax puck
- Clean lint-free rags
- Paintbrush (synthetic bristle)
- Putty knife or scraper
- Clear matte wax or polycrylic sealer
Step 1: Preparation and Base Layer
-
Sand the surface:
Begin by sanding your raw wood shelf with medium-grit sandpaper to remove any rough splinters or factory coatings. Wipe away all dust with a tack cloth or damp rag. -
Apply the stain:
Dip a clean rag into your chosen wood stain and rub it generously into the wood grain. I like to work in long, even strokes to ensure full coverage. -
Wipe back access:
Wait about 5-10 minutes for the stain to penetrate, then use a fresh cloth to wipe away any excess liquid. This reveals the beautiful grain underneath. -
Let it dry beautifully:
Allow the stained wood to dry completely according to the manufacturer’s instructions, typically overnight, to prevent the paint layer from bleeding.
Paint Won’t Chip?
If the paint isn’t flaking off easily, your wax layer was likely too thin. Use coarser sandpaper (80 grit) to force the distressing manually.
Step 2: Creating the Resist Layer
-
Identify wear points:
Visualize where natural wear would occur over decades—usually edges, corners, and raised grain areas. -
Apply the wax resist:
Take your candle or beeswax puck and rub it vigorously over those identified areas. The wax will prevent the paint from sticking, creating that authentic chippy look. -
Don’t be shy with wax:
Apply heavy wax pressure on the front face edge of the shelf, as this is the focal point for the distressed effect.
Add Texture
Mix a teaspoon of plaster of Paris into your paint before applying. This thickens it, adding physical texture that looks great when sanded back.
Step 3: Painting and Distressing
-
Apply the chalk paint:
Using a synthetic brush, paint a coat of white/cream chalk paint over the entire shelf, painting right over the waxed areas. Don’t worry if the coverage isn’t perfectly opaque. -
Check for coverage:
If the first coat looks too thin, apply a second coat once the first is dry to the touch, but keep the application somewhat loose. -
Dry thoroughly:
Let the paint dry completely. Chalk paint dries fast, so this usually takes about an hour depending on humidity. -
Scrape the edges:
Use a metal putty knife or scraper to gently attack the waxed areas. The paint should flake off easily where you applied the wax resist. -
Sand for softness:
Take your medium-grit sandpaper and sand over the scraped areas to soften the transition between paint and wood. Sand the flat surfaces lightly to reveal hints of the stain below. -
Detail the corners:
Pay extra attention to corners and sharp edges, sanding them down until the raw wood peeps through distinctly. -
Clean up dust:
Vacuum or wipe away all the sanding dust and paint chips so the surface is clean for sealing.
Step 4: Sealing and Finishing
-
Apply clear wax:
Use a wax brush or clean rag to apply a thin layer of clear furniture wax over the entire piece to seal the paint and enrich the wood tone. -
Buff to a sheen:
Once the wax hazes over (usually 15-20 minutes), buff it vigorously with a soft cloth to create a gentle, satin sheen. -
Optional antique wax:
For an even older look, lightly dab a tiny amount of dark antique wax into deep crevices or corners, then wipe back immediately. -
Assess the front edge:
Double-check the front facing edge; if it needs more contrast, a quick final pass with sandpaper can bring out more of the dark stain.
Mount your beautifully weathered shelf and enjoy the warmth it brings to your walls
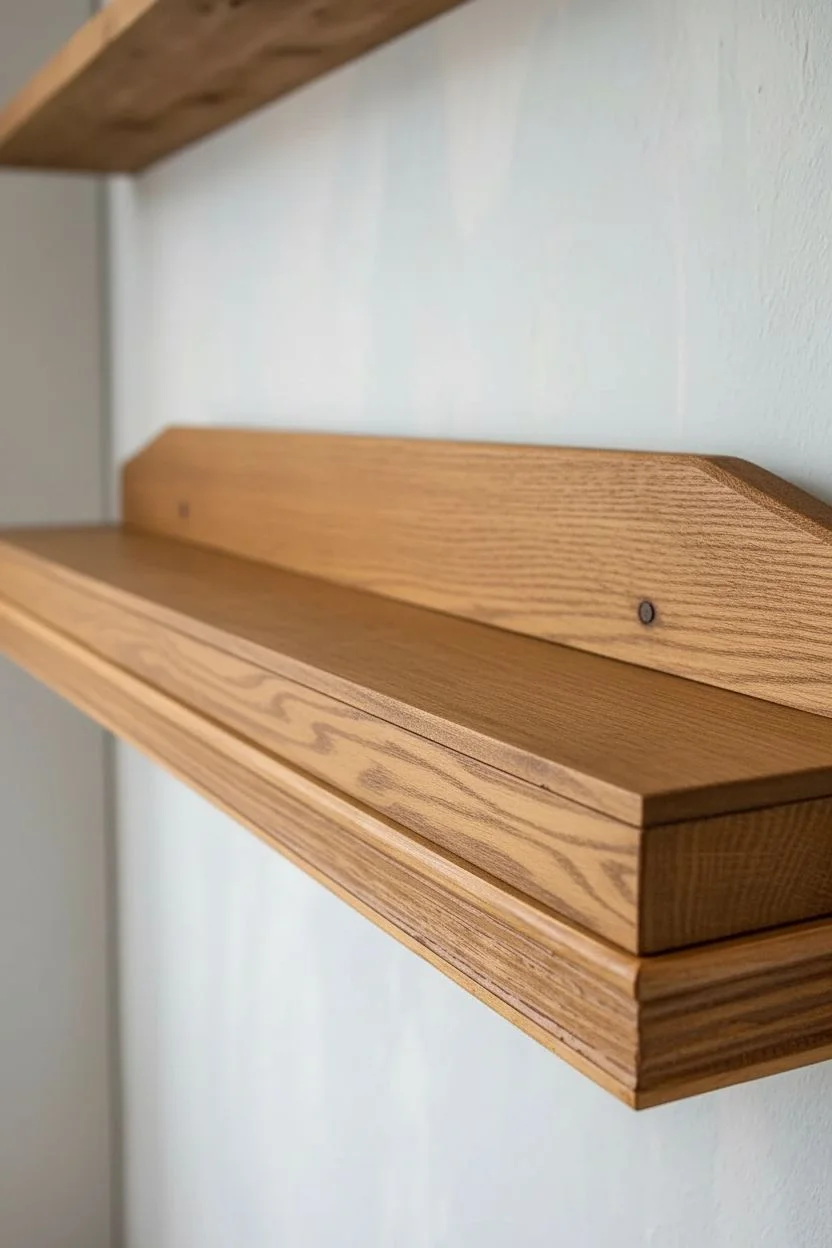
Whitewashed Wood Shelves to Keep the Grain Visible
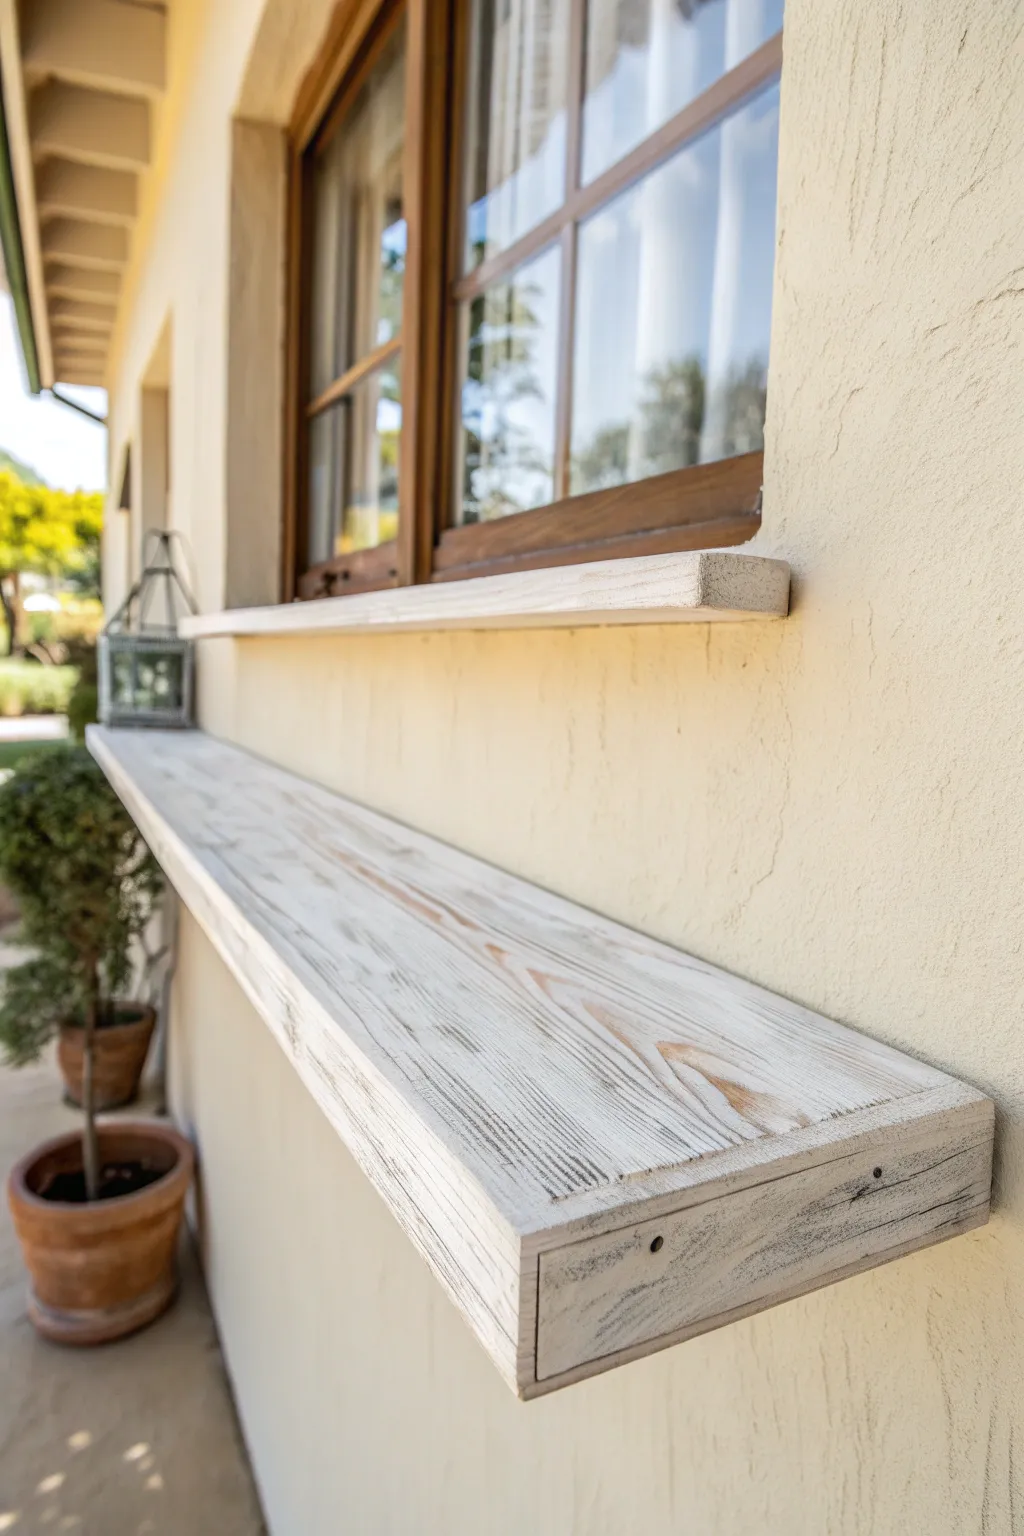
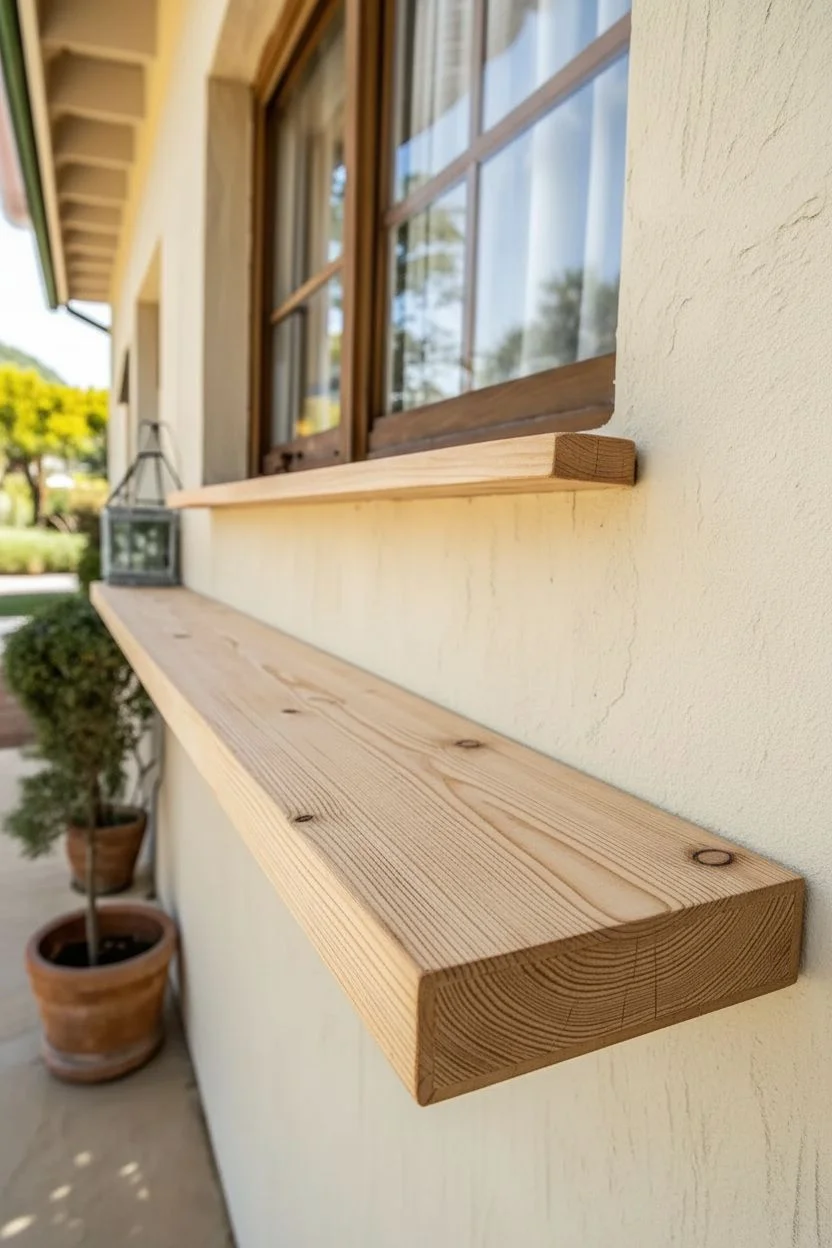
Achieve a breezy, weathered look that highlights the natural beauty of wood grain with this whitewashing technique. This project transforms standard lumber into substantial, charming ledges perfect for an exterior serving hatch or a rustic interior feature.
Step-by-Step Guide
Materials
- Thick timber boards (pine or fir work well)
- Plywood backing sheet (for hollow shelf construction)
- White latex or chalk paint
- Water for diluting paint
- Medium-grit sandpaper (120-grit)
- Coarse-grit sandpaper (80-grit)
- Wide paintbrush (synthetic bristle)
- Clean, lint-free rags
- Wood screws (black or dark finish)
- Drill with countersink bit
- Matte polyurethane sealer (exterior grade if outdoors)
- Bucket for mixing
Step 1: Build and Prep
-
Select your timber:
Choose wood with plenty of character. Boards with prominent grain patterns, knots, and slight imperfections are ideal for this project because the whitewash will settle into these textures, creating depth. -
Construct the box form:
For the chunky look seen here without the weight of a solid beam, build a hollow box shelf. Mitre the front corners where the face board meets the side pieces for a seamless edge, or use simple butt joints for a more rustic appeal. -
Sand the surfaces:
Give the entire assembly a thorough sanding with 120-grit paper. You want to smooth out splinters but keep enough texture for the paint to grip. Clean off all sawdust with a vacuum or tack cloth before proceeding. -
Distress the edges:
Using the 80-grit sandpaper, intentionally round over the sharp corners and edges. I like to focus on areas that would naturally weather over time, making the shelf look established rather than brand new.
Knotty by Nature
Don’t fill knots or cracks with wood putty before painting. These imperfections absorb more whitewash, creating beautiful dark-light contrast that defines this style.
Step 2: Whitewash Application
-
Mix the whitewash:
Create a wash by mixing your white paint with water in a bucket. A 1:1 ratio is a good starting point, but if you want more opacity, try 2 parts paint to 1 part water. Stir effectively until the consistency is like heavy cream. -
Test the opacity:
Before committing to the shelf, test your mixture on a scrap piece of the same wood. If the grain is hidden, add more water; if it’s too faint, add a dab more paint. -
Apply the first pass:
Dip your wide brush into the mixture and apply it generously to the wood, working in the direction of the grain. Don’t worry about perfect coverage; slop it on to ensure it gets into the crevices. -
Wipe back immediately:
Working in sections so the paint doesn’t dry fully, take a clean rag and wipe off the excess paint. Wipe firmly in the direction of the grain. This removes the surface paint while leaving white pigment trapped in the wood’s pores and texture. -
Assess and layer:
Let the first coat dry for about 20 minutes. If you desire a whiter look, apply a second coat using the same paint-and-wipe method. The goal is to see the tan and brown wood tones peeking through the white veil. -
Create distinct highlights:
For a ‘dry brushed’ effect on the rougher areas, dip just the tips of your dry brush into undiluted white paint. Lightly drag it over the raised grain and corners to make them pop against the darker recesses.
Too White?
If your paint mix was too thick and obscured the grain, wait for it to dry completely, then use an orbital sander with 100-grit paper to aggressively cut back to the wood.
Step 3: Finishing Touches
-
Sand for contrast:
Once fully dry, take a sheet of 120-grit sandpaper and lightly sand specific spots, particularly over knots and edges. This reveals the raw wood underneath and enhances the weathered aesthetic. -
Drill pilot holes:
If attaching a front face board (as seen in the shelf construction), pre-drill holes for your screws. This prevents the wood from splitting near the edges. -
Install rustic hardware:
Drive rugged black or dark screws into the pre-drilled holes. Leave the screw heads visible or slightly countersunk; their dark colour adds a nice industrial contrast to the pale wood. -
Clean the surface:
Wipe the shelves down one last time with a damp cloth to remove sanding dust, ensuring the surface is clean for sealing. -
Seal the wood:
Apply a clear, matte polyurethane sealer. If this shelf is going outside like the one in the photo, ensure you use an exterior-grade spar varnish to protect against UV and moisture. -
Final drying time:
Allow the sealer to cure according to the manufacturer’s instructions—usually 24 hours—before placing any lanterns or pots on your new shelf to prevent sticking.
Now you have a stunning architectural feature that blends rustic warmth with fresh, bright tones, ready to display your decor
Painted Shelf Edges for a Subtle Pop of Color

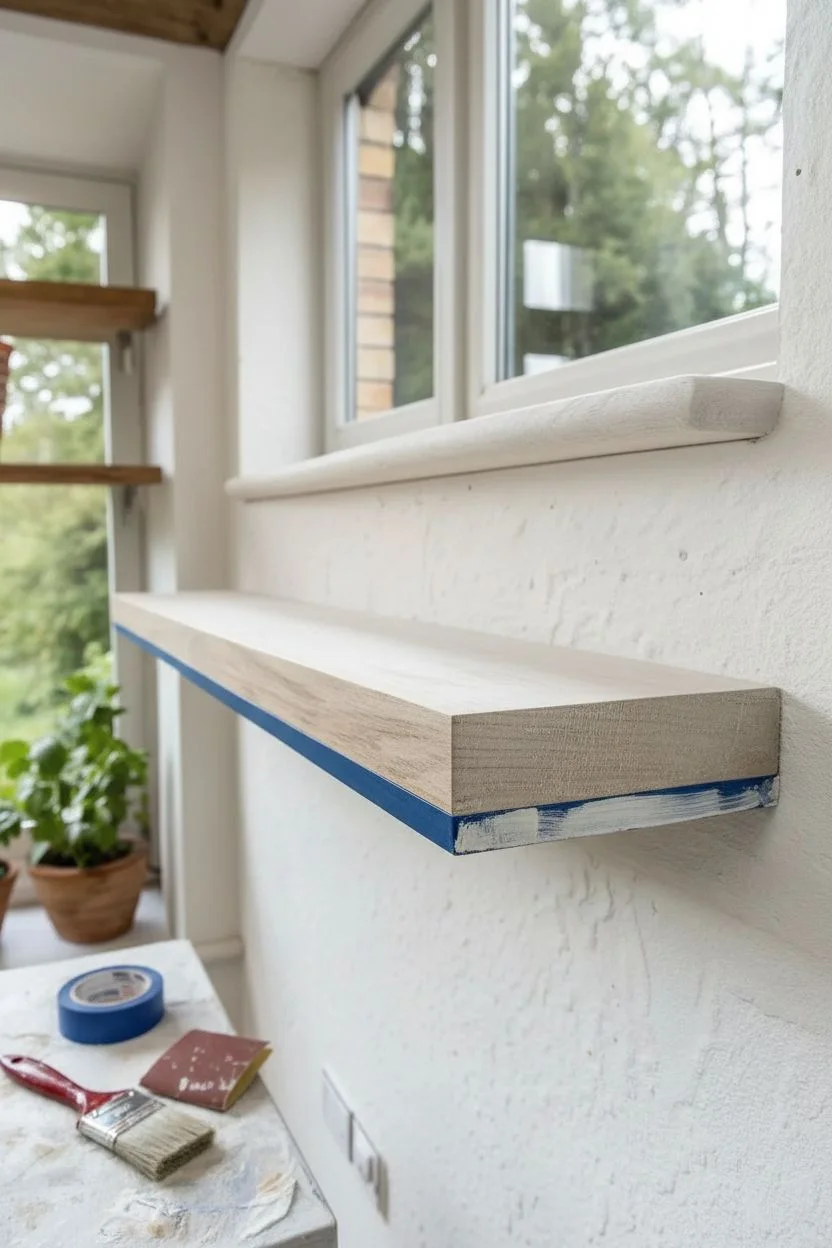
Elevate a standard floating shelf by adding a sophisticated, understated flash of color that draws the eye without overwhelming the room. This project creates a custom look by pairing the warmth of natural wood grain with a sleek, painted blue chamfered edge.
How-To Guide
Materials
- Thick oak floating shelf (untreated or sanded down)
- Painter’s tape (high-quality, gentle release)
- Sandpaper (120 and 220 grit)
- Wood primer (white or grey)
- Satin finish paint (deep navy or slate blue)
- Small angled sash brush
- Clear matte wood varnish or oil
- Lint-free cloth
- Tack cloth
- Drop cloth
Step 1: Preparation
-
Measure and mask:
If your shelf is already installed, lay down a drop cloth underneath. If not, place it on a stable work surface. This design features a two-tone look: the majority is natural wood, while the bottom edge is painted. -
Sand the surfaces:
Before doing anything else, give the entire shelf a light sanding with 220-grit sandpaper to open the pores of the wood and ensure smooth transitions. Wipe away dust with a tack cloth. -
Establish the paint line:
Apply painter’s tape along the vertical face of the shelf, exactly where the wood meets the bottom edge or trim. Press the tape down firmly with a credit card or fingernail to prevent bleed-through. -
Protect the wall:
If the shelf is already mounted, apply tape along the wall directly beneath the shelf to protect the plaster from stray brush placement.
Bleeding Lines?
If paint bled under the tape, wait until fully dry. Wrap a small sanding block with 220-grit paper and carefully sand the bleed away from the raw wood before oiling.
Step 2: Painting the Edge
-
Prime the accent strip:
Apply a thin layer of wood primer only to the bottom edge or trim piece you intend to paint. This step is crucial for getting that solid, opaque blue block color. -
Sand the primer:
Once the primer is fully dry, lightly scuff it with fine sandpaper to knock down any raised grain or brush strokes. -
First coat of color:
Using your small angled brush, apply the first coat of deep blue paint. Focus on smooth, long strokes. Don’t worry about full coverage yet; thin coats are better than thick ones. -
Dry and recoat:
Allow the first coat to dry according to the can’s instructions. Apply a second coat for a rich, fully opaque finish. A third coat might be necessary depending on the pigment depth. -
Remove tape (the scary part):
I prefer to remove the painter’s tape while the final coat is still slightly tacky, not bone dry. Pull it away at a 45-degree angle slowly to get that crisp, professional line.
Make it Metallic
Swap the matte blue paint for a metallic gold or copper leaf paint on that bottom edge. The shimmer against natural oak creates a stunning, high-end luxe aesthetic.
Step 3: Finishing the Wood
-
Clean the wood surface:
Ensure the unpainted top and front face of the shelf are completely free of dust. -
Apply clear coat:
Dip a lint-free cloth or a clean brush into your clear matte varnish or wood oil. Works in the direction of the grain. -
Watch the edge:
Be incredibly careful near your newly painted blue line. You want the varnish to cover the wood right up to the paint, but dragging clear coat over the blue can change its sheen. -
Wipe slight excess:
If using oil, let it sit for a few minutes to soak in, then gently wipe away excess with a clean rag found. -
Dry time:
Leave the shelf undisturbed for at least 24 hours to cure. -
Final inspection:
Check your paint line. If there was minor bleeding, use a small razor blade or craft knife to gently scrape the stray paint off the wood grain.
Step back and admire how a simple strip of blue transforms a basic shelf into a custom architectural feature
Color-Blocked Shelves With Clean, Modern Shapes
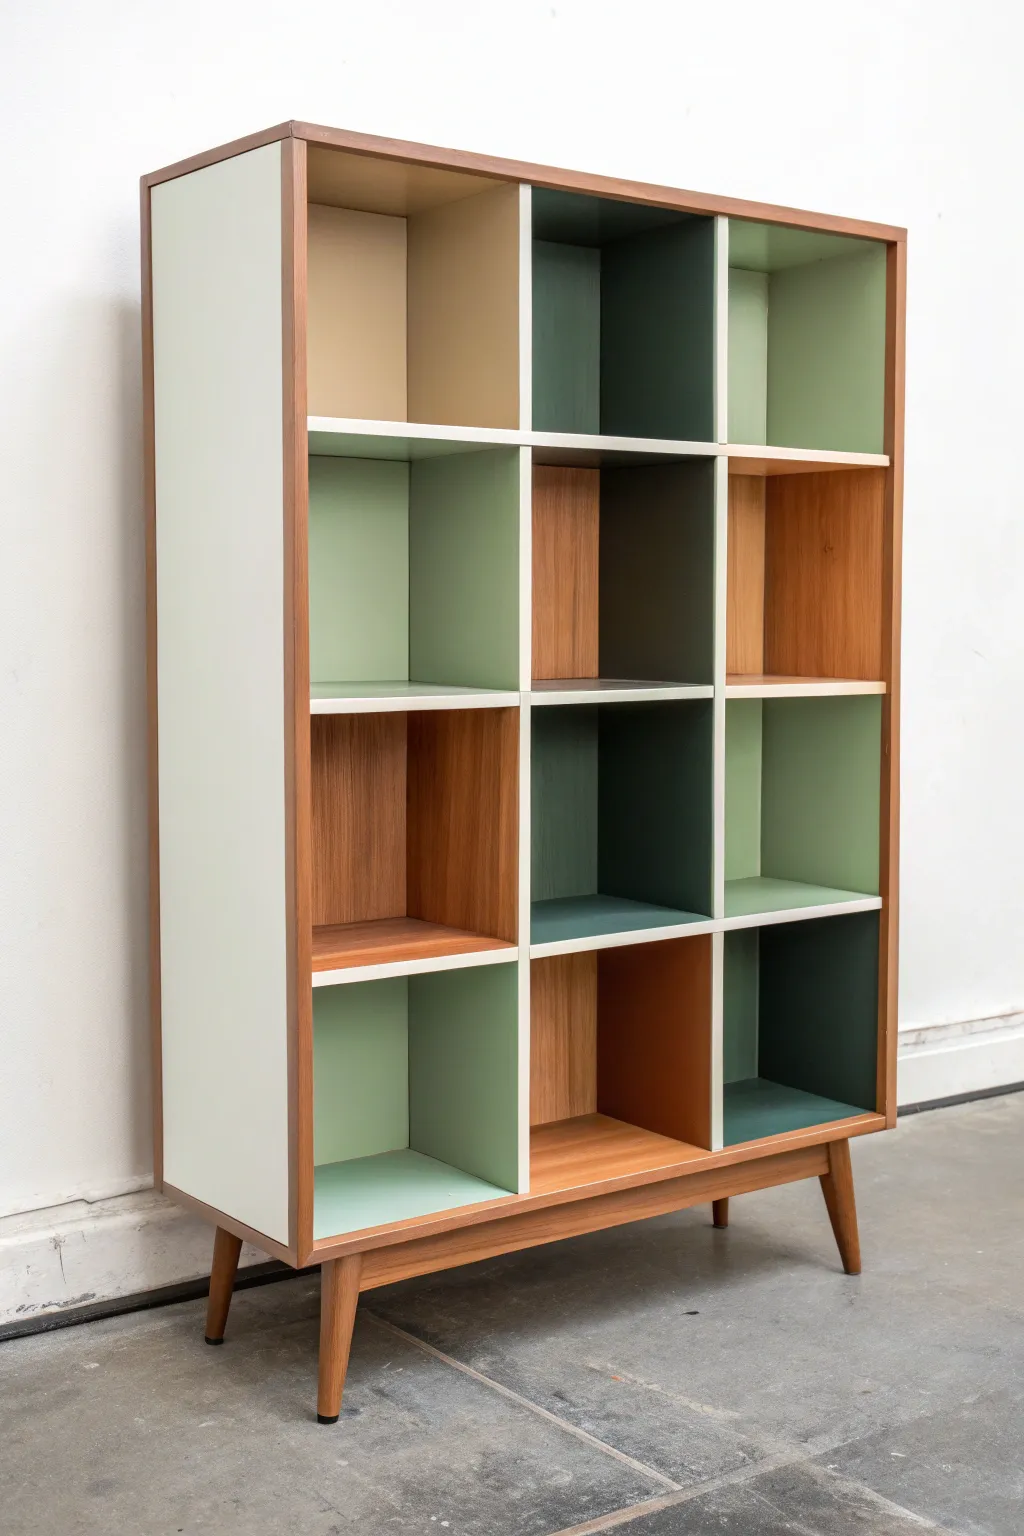

Transform a simple wooden cubby shelf into a geometric statement piece by playing with depth and color. This project combines natural wood grain with a carefully curated palette of sage, forest green, and beige for a sophisticated, mid-century modern aesthetic.
Step-by-Step
Materials
- Wooden cubby bookcase (preferably with backing)
- Sandpaper (120 and 220 grit)
- Painter’s tape (multi-surface)
- Wood primer (high adhesion)
- Satin finish interior paint (Sage Green, Forest Green, Beige)
- White satin enamel paint (for edges)
- Drop cloth
- Small foam rollers (4-inch)
- Angled sash brush (1.5 inch)
- Polycrylic topcoat (optional)
- Mild degreaser or TSP alternative
- Tack cloth
Step 1: Prep Work
-
Clean the surface:
Before doing anything, wipe down the entire shelf with a mild degreaser or TSP substitute to remove decades of furniture polish or grime. This ensures your paint creates a lasting bond. -
Sand for adhesion:
Scuff sand the entire piece with 120-grit sandpaper. You don’t need to strip it to bare wood, but you do need to remove the glossy sheen so the primer sticks. -
Dust removal:
Vacuum up the sanding dust, then wipe everything down with a tack cloth to get every last particle. -
Tape the exterior:
Since we are keeping the outer frame and legs natural wood, carefully apply painter’s tape along the inside edges of the exterior frame to protect it from stray brush strokes.
Master the Corners
Paint tends to pool in the back corners of cubbies. After brushing into a corner, use a dry brush to pull excess paint outward to prevent drips and cracking.
Step 2: Planning and Priming
-
Map your colors:
Sketch a quick grid of your shelf on paper and assign your colors (Sage, Forest, Beige, and Natural). Aim for balance—try not to put two identical colors right next to each other. -
Tape the natural sections:
For the cubbies that will remain natural wood, tape off their interior edges completely to protect them during the painting process. -
Prime the paintable sections:
Apply a coat of high-adhesion wood primer to the interiors of the cubbies you plan to paint. Use an angled brush for corners and a small foam roller for the flat back and side panels. -
Sand the primer:
Once the primer is fully dry, give it a very light hand-sand with 220-grit sandpaper to smooth out any brush textures or raised grain. -
Clean again:
Wipe away the fine dust from priming with your tack cloth.
Step 3: Applying Color
-
Start with the lightest color:
Begin painting your beige/tan sections. I prefer starting light because it’s easier to cover up mistakes with darker colors later if needed. Apply two thin coats rather than one thick one. -
Paint the mid-tones:
Move on to your sage green sections. Use the angled brush to cut in the back corners first, then smooth out the sides and back panel with the foam roller for a seamless finish. -
Apply the dark accents:
Paint the designated forest green cubbies. Dark colors can sometimes be transparent, so be patient and apply a third coat if necessary to get full, deep opacity. -
Let it cure:
Allow the interior paint to dry for at least 24 hours. This hardness is crucial so the tape doesn’t peel it off in the next step.
Metallic Accent Upgrade
Instead of white edges, try using liquid gold leaf or metallic copper paint on the front trimming for a luxe, Hollywood Regency twist on the design.
Step 4: The Crisp Edge Detail
-
Tape for the edges:
This step defines the look. Carefully tape off the newly painted interior walls and the natural exterior wood, leaving only the thin front-facing edges of the shelves exposed. -
Seal the tape:
Run a credit card or flat edge firmly over your tape lines to prevent bleed-through. -
Paint the edges white:
Apply a crisp white satin enamel to these front edges. Use a small artist’s brush or a very small foam roller. This white grid creates the ‘pop’ that separates the colors. -
Remove tape:
Pull the tape off while the white paint is still slightly tacky (not wet, but not fully cured) at a 45-degree angle to ensure a razor-sharp line. -
Seal the surface:
If you plan to use this for heavy books or objects, protect your work with a clear polycrylic topcoat applied over the painted surfaces.
Allow the shelf to cure for a few days before filling it with your favorite books and decor to ensure the finish remains perfect
Ombre Shelves That Fade From Light to Dark
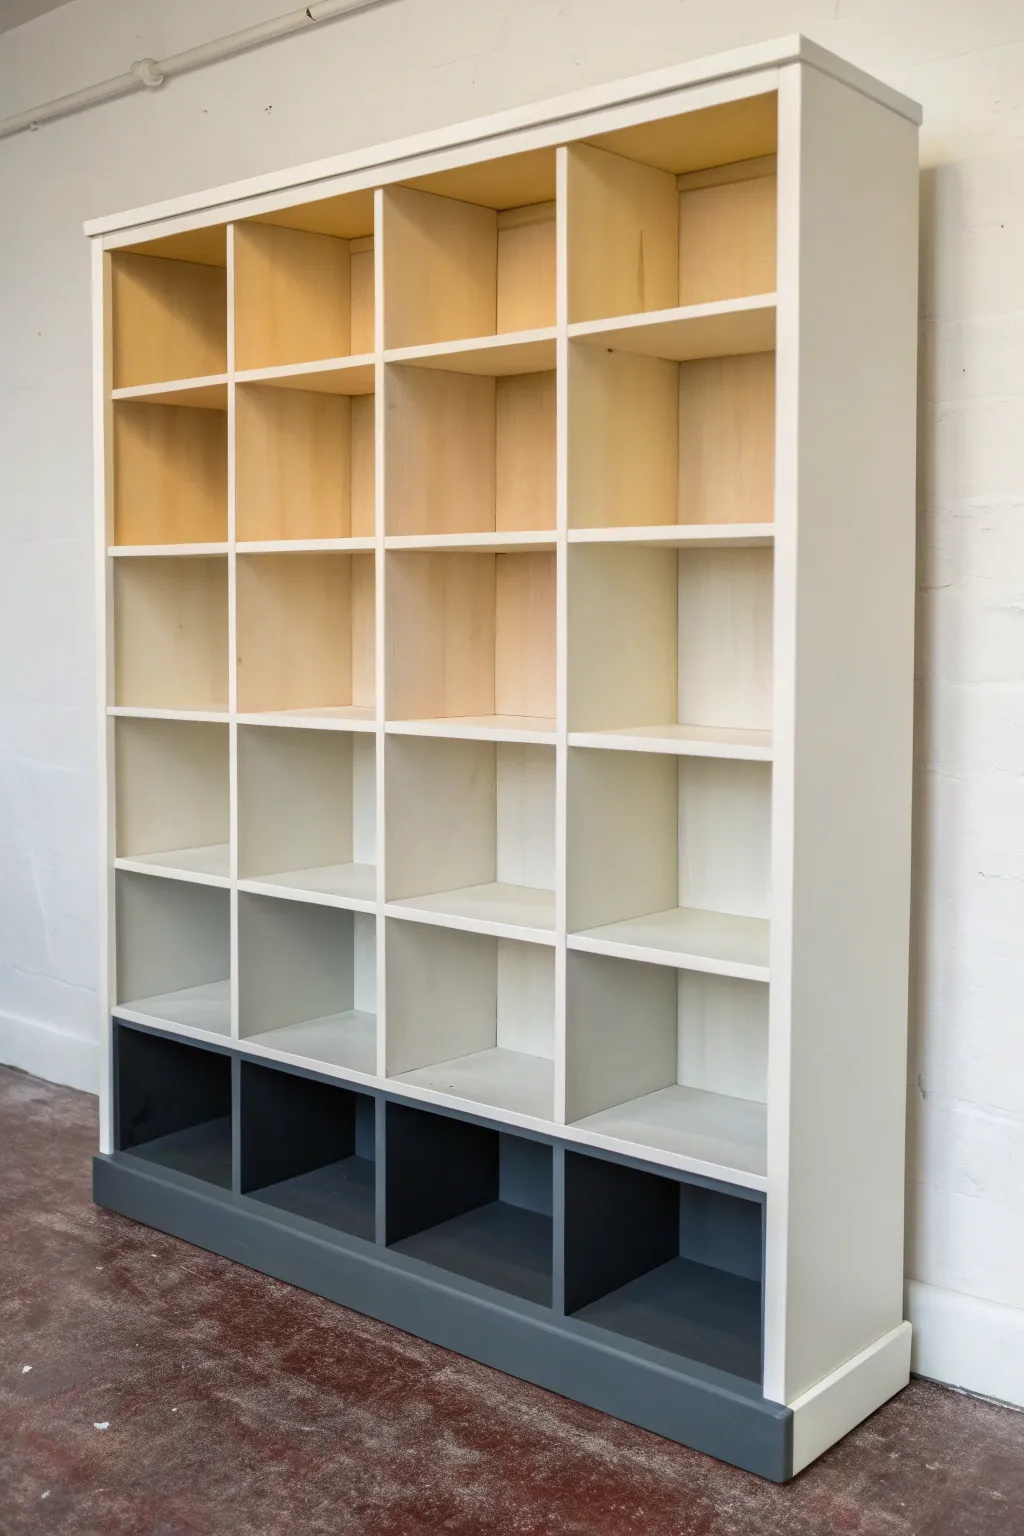

Transform a basic cube organizer into a stunning piece of statement furniture with this subtle gradient technique. By blending paint colors from a warm natural tone down to a deep charcoal, you create a sophisticated waterfall effect that draws the eye downward.
Step-by-Step Tutorial
Materials
- Unfinished wooden cube shelving unit
- Sandpaper (120 and 220 grit)
- Tack cloth
- Primer (high-quality wood primer)
- White semi-gloss paint (for the exterior frame)
- Base paint color 1: Warm beige or cream (top rows)
- Base paint color 2: Light grey (middle transition)
- Base paint color 3: Deep charcoal or slate blue (bottom row)
- Small roller with foam sleeves
- 2-inch angled sash brush
- Painter’s tape
- Mixing cups and stir sticks
- Drop cloth
Step 1: Preparation and Planning
-
Sand the surfaces:
Begin by giving the entire shelving unit a thorough sanding with 120-grit sandpaper to remove any rough spots or splinters. Follow up with 220-grit for a smooth finish, wiping away all dust with a tack cloth. -
Map your gradient:
Look at your shelf rows. For this look, the top two rows require a warm, natural tone that transitions into a cooler grey, finally ending in a dark slate at the bottom base. Plan your color breaks at the shelf lines. -
Prime the exterior:
Apply a coat of primer to the outer casing (sides, top, and front facing framing) of the unit. Do not prime the inside of the cubbies yet if you want the wood grain texture to remain visible under the lighter paint colors.
Bleeding Tape Lines?
Before painting your accent color, brush a tiny amount of the *base* color (white) along the tape edge first to seal it tightly.
Step 2: Painting the Exterior
-
Apply the white frame color:
Using your foam roller for flat areas and the angled brush for corners, paint the entire exterior frame in white semi-gloss. I find two thin coats give a much cleaner finish than one thick one. -
Let it cure:
Allow the white frame paint to dry completely according to the can’s instructions—usually about 4-6 hours—before applying tape. -
Mask the frame:
Carefully apply painter’s tape along the inner edges of the white frame where it meets the cubby interiors. This ensures crisp lines between the white structure and the colored interiors.
Step 3: Creating the Ombre Effect
-
Mix the top color:
For the top two rows, you want a translucent wash rather than solid paint. Mix your warm beige paint with water (about a 1:1 ratio) to create a color wash that lets some wood grain peek through. -
Paint the top section:
Brush this warm wash into the interiors of the top two rows of cubbies. Wipe away excess with a rag if it looks too opaque. -
Mix the transition color:
For the third row down, switch to your light grey paint. You can use it full strength for better coverage, or dilute it slightly if you want to maintain the wash consistency of the upper levels. -
Paint the middle section:
Apply the light grey to the interior of the third row of cubbies including the back panel, sides, and the top and bottom of that specific shelf section. -
Mix the darkest shade:
Prepare your deep charcoal or slate blue paint. This bottom section anchors the piece, so opacity is key here—use the paint undiluted. -
Paint the bottom row:
Paint the interior of the bottom row of cubbies with the dark charcoal. Ensure you get deep into the corners with your angled brush. -
Paint the kickplate:
Don’t forget the exterior base or kickplate of the unit. As visually shown in the image, painting this lowest exterior strip in the same dark charcoal color grounds the piece effectively.
Smoother Gradient
To make the transition more subtle, mix 50% of the top color with 50% of the middle color for the shelf row right between them.
Step 4: Finishing Touches
-
Remove tape:
While the paint is dry to the touch but not fully cured (usually about an hour after the last coat), carefully peel away the painter’s tape at a 45-degree angle to reveal your clean lines. -
Touch up lines:
Inspect the edges where the colored interiors meet the white frame. Use a small artist’s brush to correct any bleeds with the appropriate color. -
Seal the shelves:
Since shelves see a lot of dragging and movement, apply a clear water-based polycrylic topcoat over the painted interiors for added durability. -
Apply second coat of sealer:
Once the first coat of sealer is dry, lightly sand with 220-grit paper and apply a second coat to ensure a rock-hard finish. -
Final cure:
Let the shelving unit sit for at least 24-48 hours before placing books or heavy objects on it to prevent the paint from sticking or peeling.
Now you have a custom piece of storage that perfectly bridges the gap between airy and grounded design
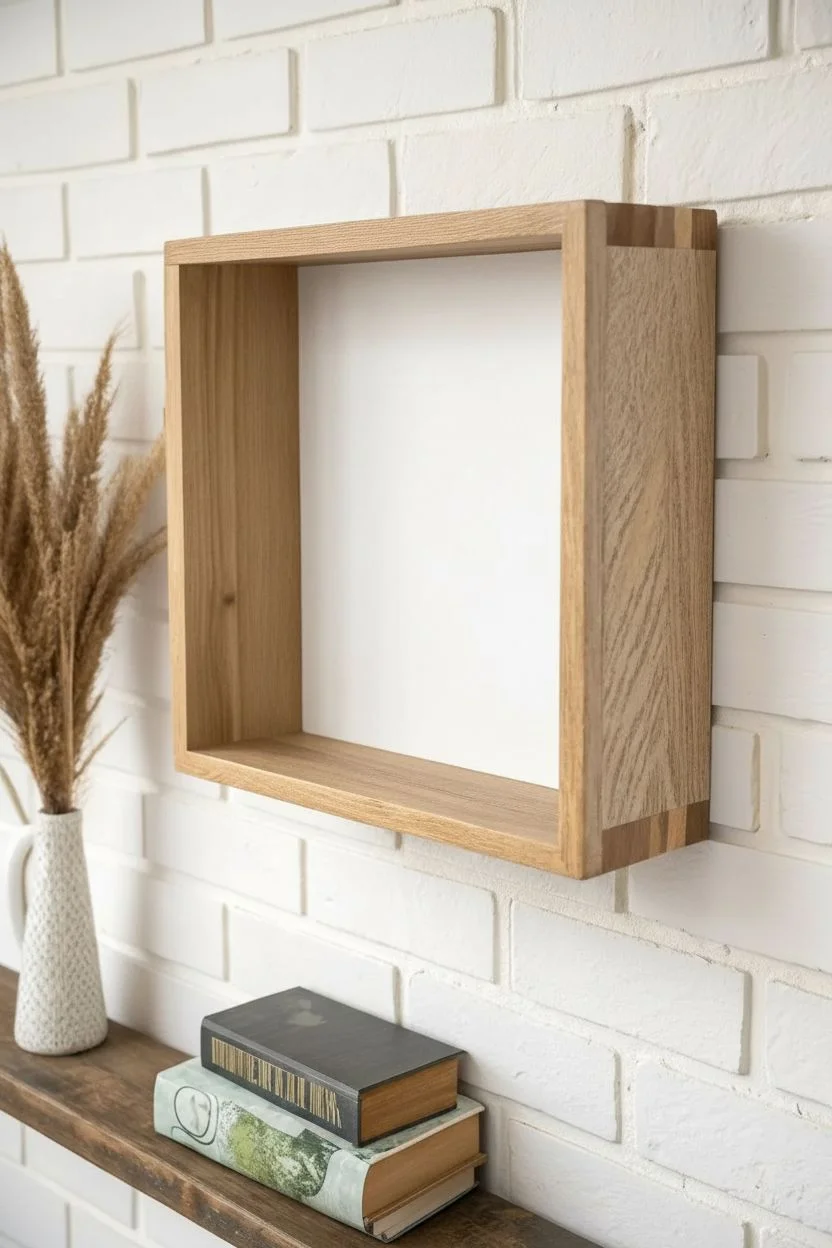
Striped Shelves Using Painter’s Tape for Super Crisp Lines
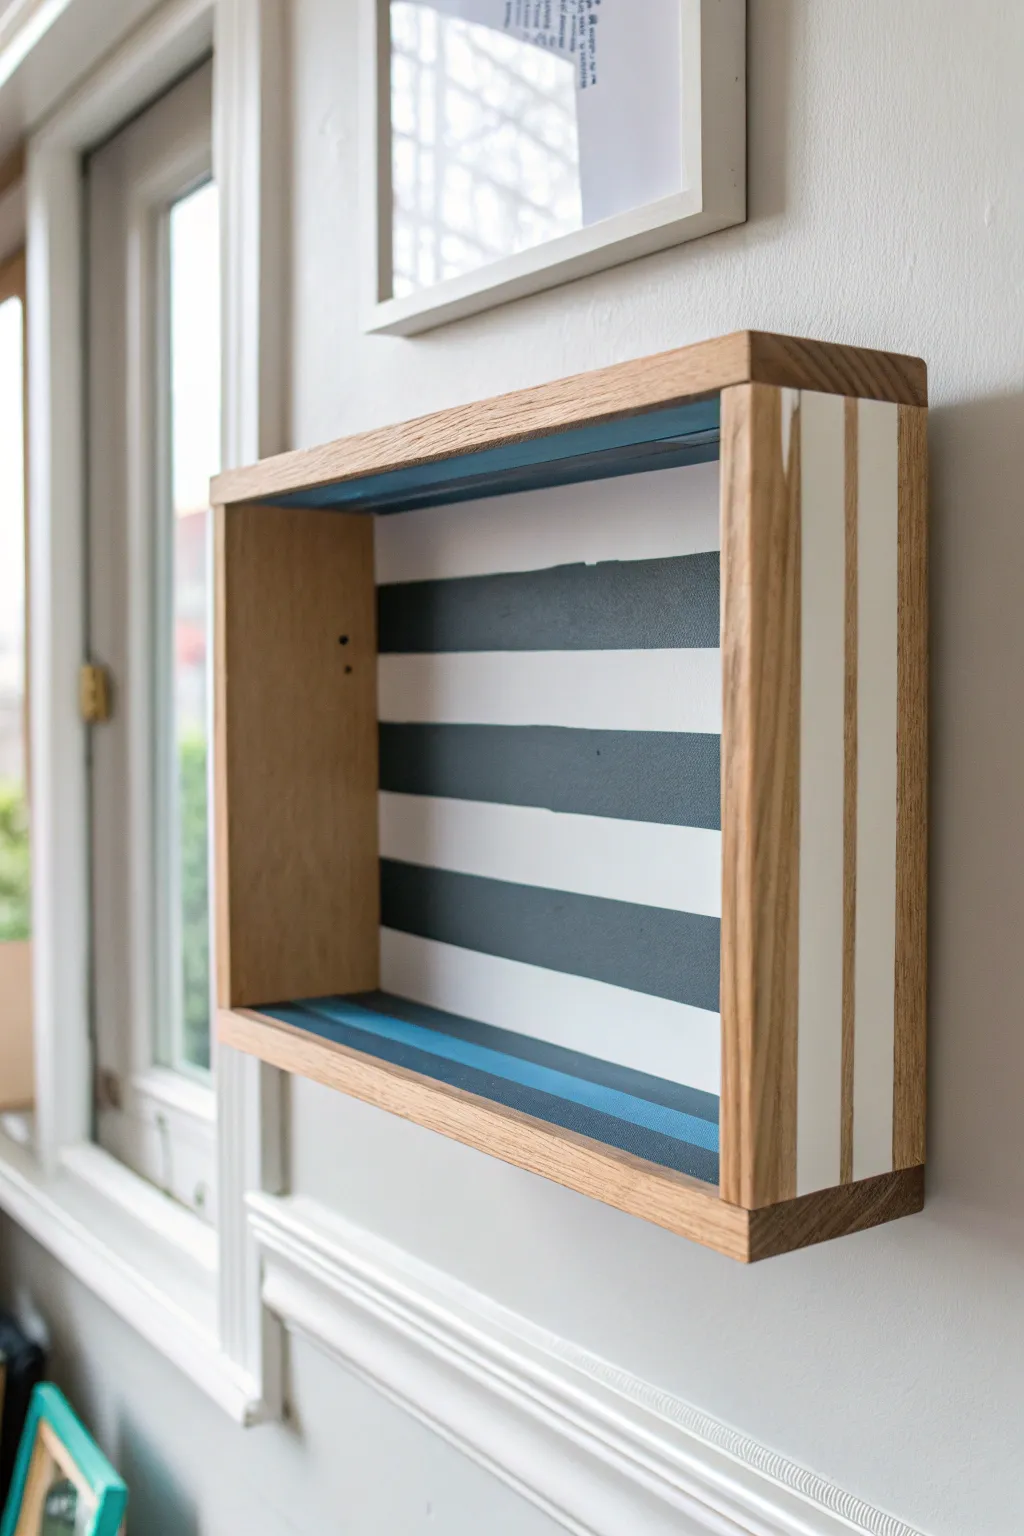
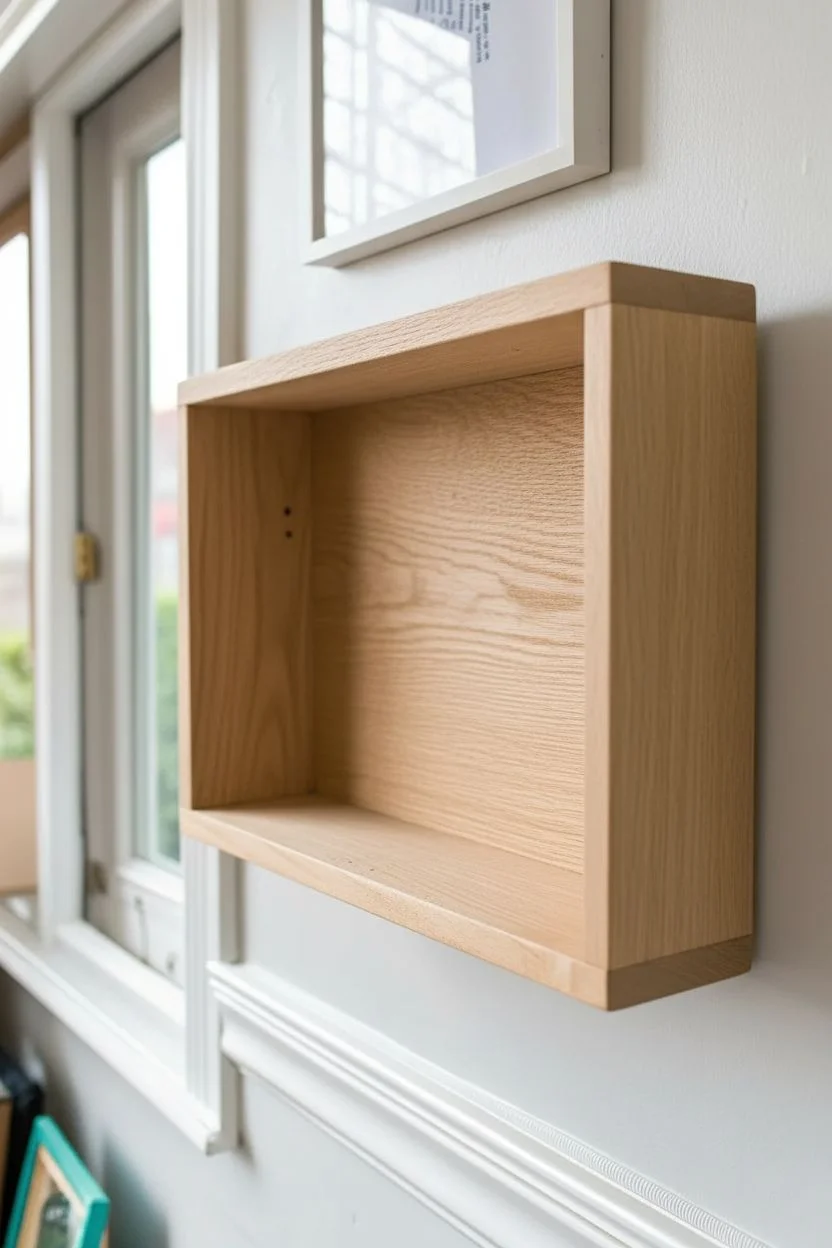
Transform a plain wooden shadow box into a modern statement piece with a clever mix of painted patterns and exposed grain. This project combines bold interior stripes with subtle exterior detailing for a high-contrast look that pops against any wall.
Step-by-Step Guide
Materials
- Unfinished wooden shadow box or deep shelf
- High-quality painter’s tape (various widths)
- White acrylic or latex paint
- Dark blue-grey acrylic or latex paint (matte finish)
- Medium blue acrylic or latex paint (for inner top/bottom)
- Small foam roller
- Small angled paintbrush (1-inch)
- Fine-grit sandpaper (220-grit)
- Ruler or measuring tape
- Pencil
- Clear matte polyurethane (optional)
Step 1: Prep & Planning
-
Sand the surface:
Begin by lightly sanding the entire wooden box with 220-grit sandpaper. You want to remove any rough splinters or factory glaze to ensure the paint adheres perfectly and the exposed wood looks polished. -
Wipe it down:
Use a tack cloth or a damp microfiber rag to completely remove all sanding dust. -
Measure the back panel:
Measure the height of the inside back panel. Divide this number by the number of stripes you want (the example uses about 7 stripes) to determine your stripe width. -
Mark your guides:
Using a pencil, make tiny, faint tick marks along the left and right inner edges of the back panel to guide where your tape lines will go.
Bleeding Lines?
If paint bleeds under the tape, wait for it to dry fully. Then, create a ‘fix it’ tape line and verify the straight edge with the original background color.
Step 2: Painting the Interior
-
Base coat the white:
Paint the entire back panel white first. It’s much easier to paint a solid background and stripe over it than to alternate colors from the start. Let this dry completely. -
Apply the tape:
Run strips of painter’s tape horizontally across the back panel, using your pencil marks as guides. Press the edges of the tape down firmly with your fingernail or a credit card to prevent bleed-through. -
Paint the contrasting stripes:
Using the dark blue-grey paint and a small foam roller, paint the exposed areas between the tape strips. A roller helps avoid brush strokes for a cleaner graphic look. -
Remove tape promptly:
Peel off the painter’s tape while the dark paint is still slightly wet. This ensures the cleanest possible edge and prevents the paint from pulling up with the tape. -
Paint top and bottom panels:
Switch to your medium blue paint. Carefully paint the interior top ceiling and interior bottom floor of the box. Use an angled brush to cut in carefully where these panels meet the striped back.
Step 3: Exterior Details
-
Tape the side exterior:
Moving to the outside of the box, apply two vertical strips of painter’s tape to create a ‘racing stripe’ effect. -
Seal the tape edges:
I find that painting a very thin layer of the base color (or clear matte medium) over the tape edge first helps stop the next color from bleeding under. -
Paint vertical stripes:
Fill in the area between your tape strips with white paint. You might need two coats here since raw wood can soak up the pigment. -
Reveal the design:
Once the white paint is tacky but not fully dry, peel back the tape to reveal the crisp white stripes against the natural oak grain. -
Clean up edges:
If any paint bled onto the front face frame, use a tiny bit of sandpaper or a sharp craft knife to gently scrape it away for a perfect finish. -
Optional protection:
If this shelf will see heavy use, apply a coat of clear matte polyurethane over the painted areas once they are fully cured.
Level Up: Mix Materials
Try using gold leaf instead of paint for the exterior vertical stripes. The metallic shine contrasts beautifully with the raw wood grain.
Hang your new shelf near a window to let natural light highlight those perfectly crisp lines
Stenciled Shelf Backings for Pattern Without Chaos
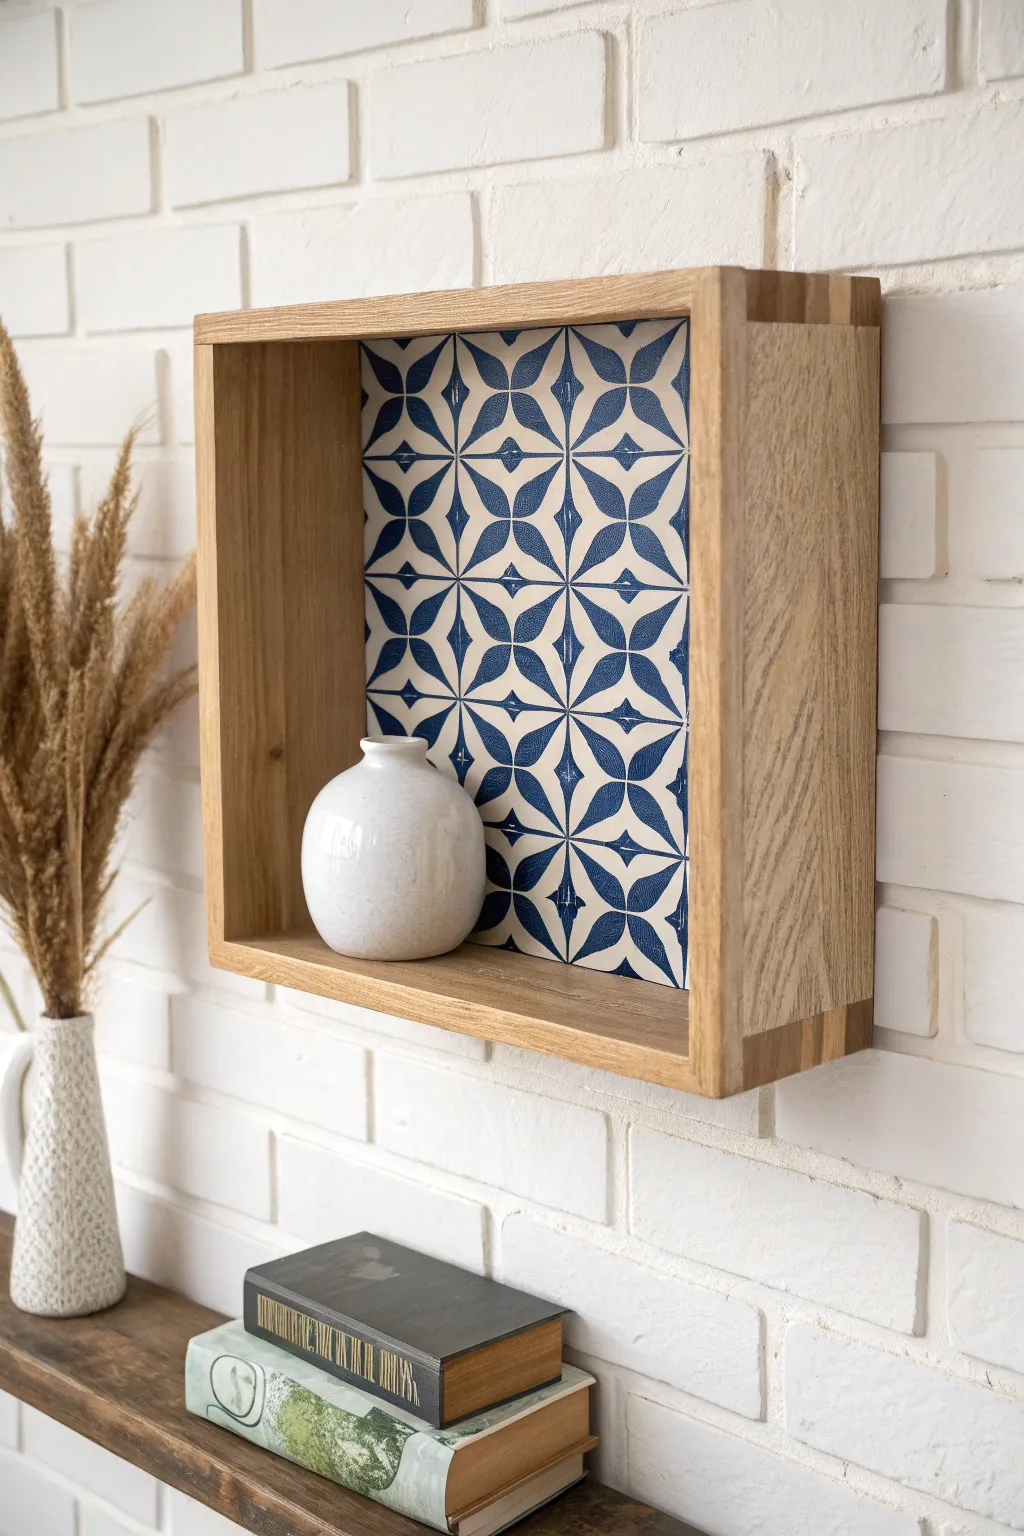
Transform a plain wooden shadow box into a striking wall feature by adding a faux-tile backing. This project creates the look of expensive encaustic tiles using simple stenciling techniques, adding a pop of Mediterranean-inspired pattern without overwhelming your space.
Step-by-Step Tutorial
Materials
- Square wooden shadow box shelf (unfinished or light wood)
- Geometric tile stencil (approx. 4-6 inch repeat pattern)
- White chalk paint or matte acrylic paint (base coat)
- Navy blue acrylic or chalk paint (stenciling color)
- Painter’s tape
- Stencil brush or high-density foam roller
- Small artist’s brush (for touch-ups)
- Sandpaper (220 grit)
- Paper towels
- Clear matte sealer (spray or brush-on)
Step 1: Preparation
-
Clean surface:
Begin by wiping down the back panel of your shadow box to ensure it is free of dust and debris. If the backing is removable, carefully take it out; if not, tape off the interior wooden sides thoroughly to protect them from paint. -
Light sanding:
Give the back panel a quick scuff with 220-grit sandpaper. This helps the paint adhere better, especially if the wood was previously finished. -
Base coat application:
Apply a coat of white chalk paint to the entire back panel. Use smooth, even strokes. Let this layer dry completely, usually about 30-60 minutes. -
Second coat:
Apply a second coat of white paint for opaque, solid coverage. Allow this to cure fully before moving on to stenciling, or your tape might lift the paint later.
Step 2: Stenciling the Pattern
-
Position the stencil:
Place your geometric stencil in the center of the painted back panel. It’s crucial to start in the middle so the pattern cuts off evenly at the edges, creating a professional ’tiled’ look. -
Secure firmly:
Tape the stencil down securely with painter’s tape to prevent it from shifting while you work. Movement is the enemy of crisp lines. -
Load the brush:
Dip your stencil brush or foam roller into the navy blue paint. I like to immediately offload most of the paint onto a paper towel until the brush feels almost dry. This ‘dry brush’ technique prevents paint from bleeding under the stencil. -
Apply paint:
Apply the blue paint over the stencil using a vertical stippling (up-and-down dabbing) motion. Avoid sweeping strokes, which can push paint under the edges. -
Check coverage:
Lift a corner of the stencil gently to peek at your progress. If the blue looks too faint, replace the corner and do another light pass. Build color gradually rather than all at once. -
Move the stencil:
Carefully lift the stencil straight up. Reposition it to continue the pattern outwards towards the edges, aligning it perfectly with the previously painted section using the stencil’s registration marks. -
Complete the edges:
Continue stenciling until the entire back panel is covered. When working near the edges, use painter’s tape to mask off the wooden side walls again if you didn’t remove the back panel.
Bleeding Lines?
If paint seeps under the stencil, your brush was too wet. Wait for it to dry, paint over the error with your base white color, and try again with a much drier brush.
Step 3: Finishing Touches
-
Touch up errors:
Once the blue paint is dry, inspect the pattern for any bleeds or smudges. Use a small artist’s brush and a tiny bit of white paint to clean up any messy lines. -
Distress (Optional):
For a slightly aged, authentic tile look, you can very lightly sand over the dried stencil pattern with high-grit sandpaper to soften the stark contrast. -
Seal the work:
Protect your artwork by applying a clear matte sealer. A spray sealer works best here to avoid smearing the stencil work. Apply in light, even coats. -
Reassemble:
Remove all painter’s tape carefully. If you removed the back panel, re-secure it into the wooden frame. -
Style the shelf:
Your shelf is ready. Place a simple object, like a white ceramic vase, inside to contrast beautifully against the busy geometric pattern.
Level Up: Texture
Mix a little plaster or baking soda into your white base coat before painting. This creates a slightly gritty, stone-like texture that makes the backing look like real grout and ceramic.
Hang your new shelf and enjoy the sophisticated pop of pattern it brings to your wall
Painted Geometric Shapes That Wrap Around Shelf Corners
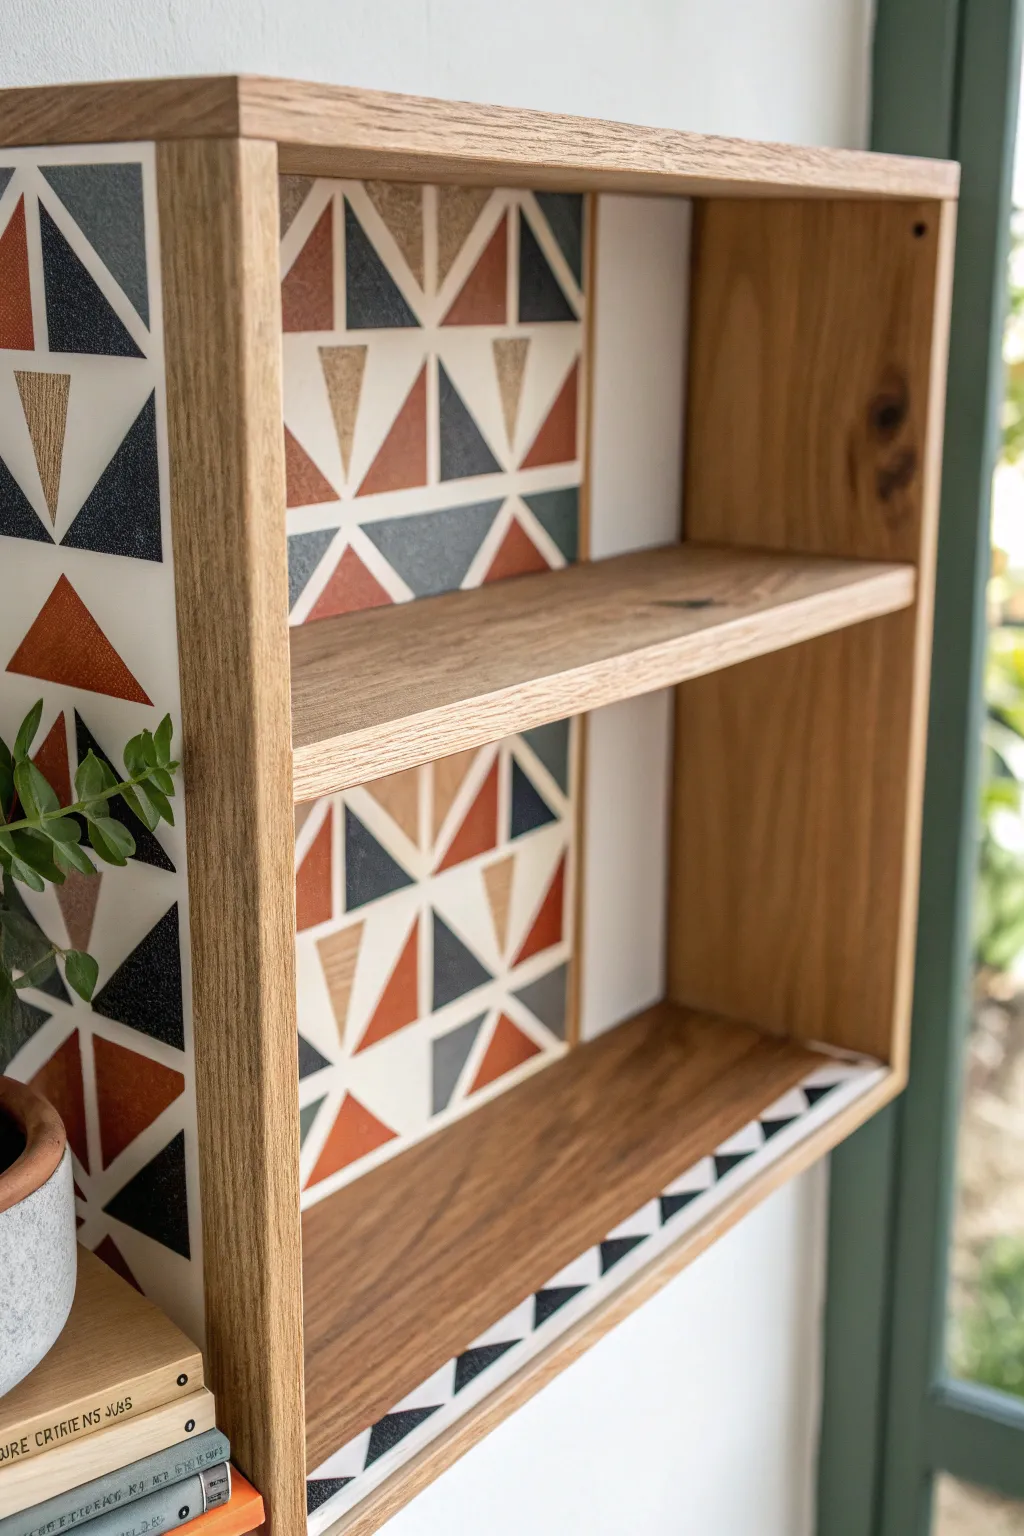
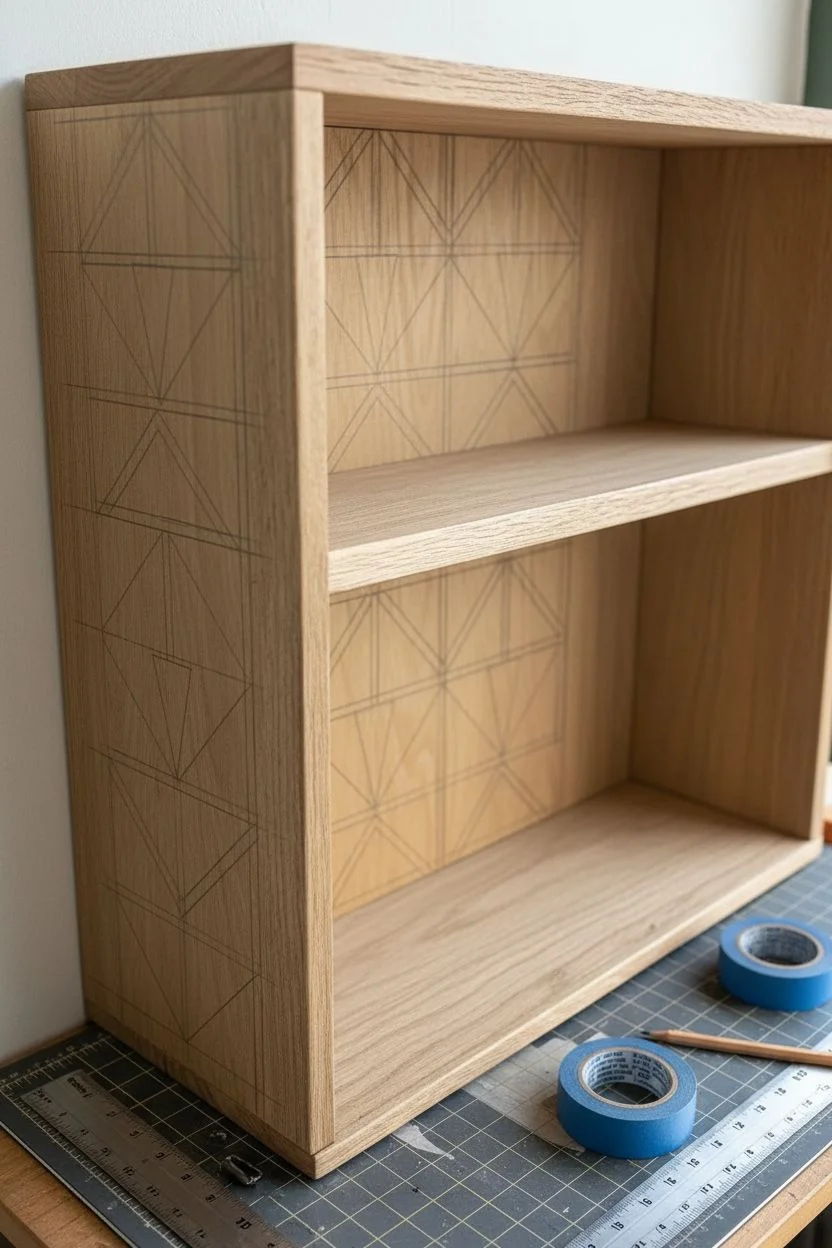
Transform a plain wooden shelving unit into a mid-century modern statement piece by wrapping a bold geometric pattern around its corners. This project uses precise masking and a warm, cohesive color palette to create an optical illusion of depth that brings ordinary storage to life.
Step-by-Step
Materials
- Unfinished wooden shelf (or a shelf with a removable back panel)
- Painter’s tape (high-quality, low-tack for delicate surfaces)
- Acrylic craft paints (burnt orange, navy blue, metallic gold/beige, soft white)
- Small flat artist brushes (sizes 4 and 8)
- Ruler (metal preferred)
- Pencil
- X-Acto knife or craft blade
- Self-healing cutting mat (optional)
- Clear matte polyurethane sealant
- Fine-grit sandpaper (220 grit)
Step 1: Preparation and Mapping
-
Surface prep:
Begin by removing the back panel if possible, as painting flat is easier. If the wood is rough, lightly sand the areas you intend to paint with 220-grit sandpaper. Wipe away all dust with a tack cloth or slightly damp rag to ensure the paint adheres perfectly. -
Establish the grid:
Decide on the size of your triangles. A 3-inch or 4-inch square grid works well for most standard shelves. Using a ruler and a light pencil touch, mark out a grid of squares on the side panel and the back panel where you want the pattern to appear. -
Planning the wrap around:
Pay special attention to where the side panel meets the back. For the ‘wrap around’ effect to look convincing, the grid lines on the side must align perfectly with the grid lines on the back panel. -
Draw the diagonals:
Turn your grid squares into triangles by drawing diagonal lines. Vary the direction of the diagonals (some going top-left to bottom-right, others opposite) to create a dynamic ‘pinwheel’ or varied geometric look rather than a repetitive chevron.
Step 2: Masking the Design
-
Initial taping:
This process requires painting in stages. Mask off the first set of triangles that will receive your first color (e.g., the navy blue). Place the tape distinctly *outside* the pencil lines so the paint covers the line. -
Seal the tape edges:
To prevent paint bleed, which is crucial for sharp geometric shapes, press the tape edges down firmly with a credit card or your thumbnail. -
The white base trick:
I like to painting a very thin layer of your background white (or a clear matte medium) over the tape edge first. This seals any tiny gaps; if anything bleeds under, it’s just clear/white, locking the edge for the colored paint.
Clean Lines Pro Tip
For ultra-crisp corners where the shelf side meets the back, use an X-Acto knife to gently trim the tape exactly in the crease before painting.
Step 3: Painting the Geometry
-
First color application:
Using a flat brush, apply your navy blue triangle paint. Use smooth strokes moving from the tape inward to avoid pushing paint under the tape. Apply two thin coats rather than one thick one for the smoothest finish. -
Remove tape while damp:
Peel off the painter’s tape slowly at a 45-degree angle while the second coat is still slightly tacky. This helps ensure a crisp line without pulling up dried paint chips. -
Second color masking:
Allow the first color to dry completely (at least 2-3 hours). Then, tape off the next set of triangles for your burnt orange color. You can tape directly over the fully dried navy sections to get clean adjacent lines. -
Applying warm tones:
Paint the burnt orange sections. Repeat the process of sealing tape edges and applying two thin coats. -
Adding metallic accents:
Once the orange is dry and tape is removed, mask off the remaining triangles for the metallic gold or beige tone. These lighter/metallic shades might need three coats to achieve full opacity. -
The white negative space:
If your wood isn’t being painted white, fill in the remaining triangles with your soft white paint to create the bright background contrast shown in the image.
Level Up: Texture
Mix a small amount of baking soda into the burnt orange paint to give those specific triangles a terra-cotta texture that contrasts with the smooth wood.
Step 4: Finishing and Assembly
-
Touch-ups:
Inspect your work closely. If there are any small bleeds or uneven lines, use a very fine detail brush and the background color to carefully correct them. -
Adding shelf edge details:
For the checkerboard detail on the bottom shelf edge seen in the photo, masking tape is your best friend again. Tape off small alternating squares along the front edge and paint them black or navy to coordinate with the main pattern. -
Erase pencil marks:
Once the paint is cured (give it 24 hours to be safe), gently erase any visible pencil grid lines that weren’t covered by paint. -
Sealing the work:
Apply a coat of clear matte polyurethane over the painted areas. This protects the design from scratches when you slide books or objects onto the shelf. -
Reassembly:
If you removed the back panel, reattach it now with small nails or wood glue. Step back and admire how the pattern seemingly folds through the corner of the shelf.
Now you have a custom piece of furniture that looks professionally designed and adds a pop of modern art to your room
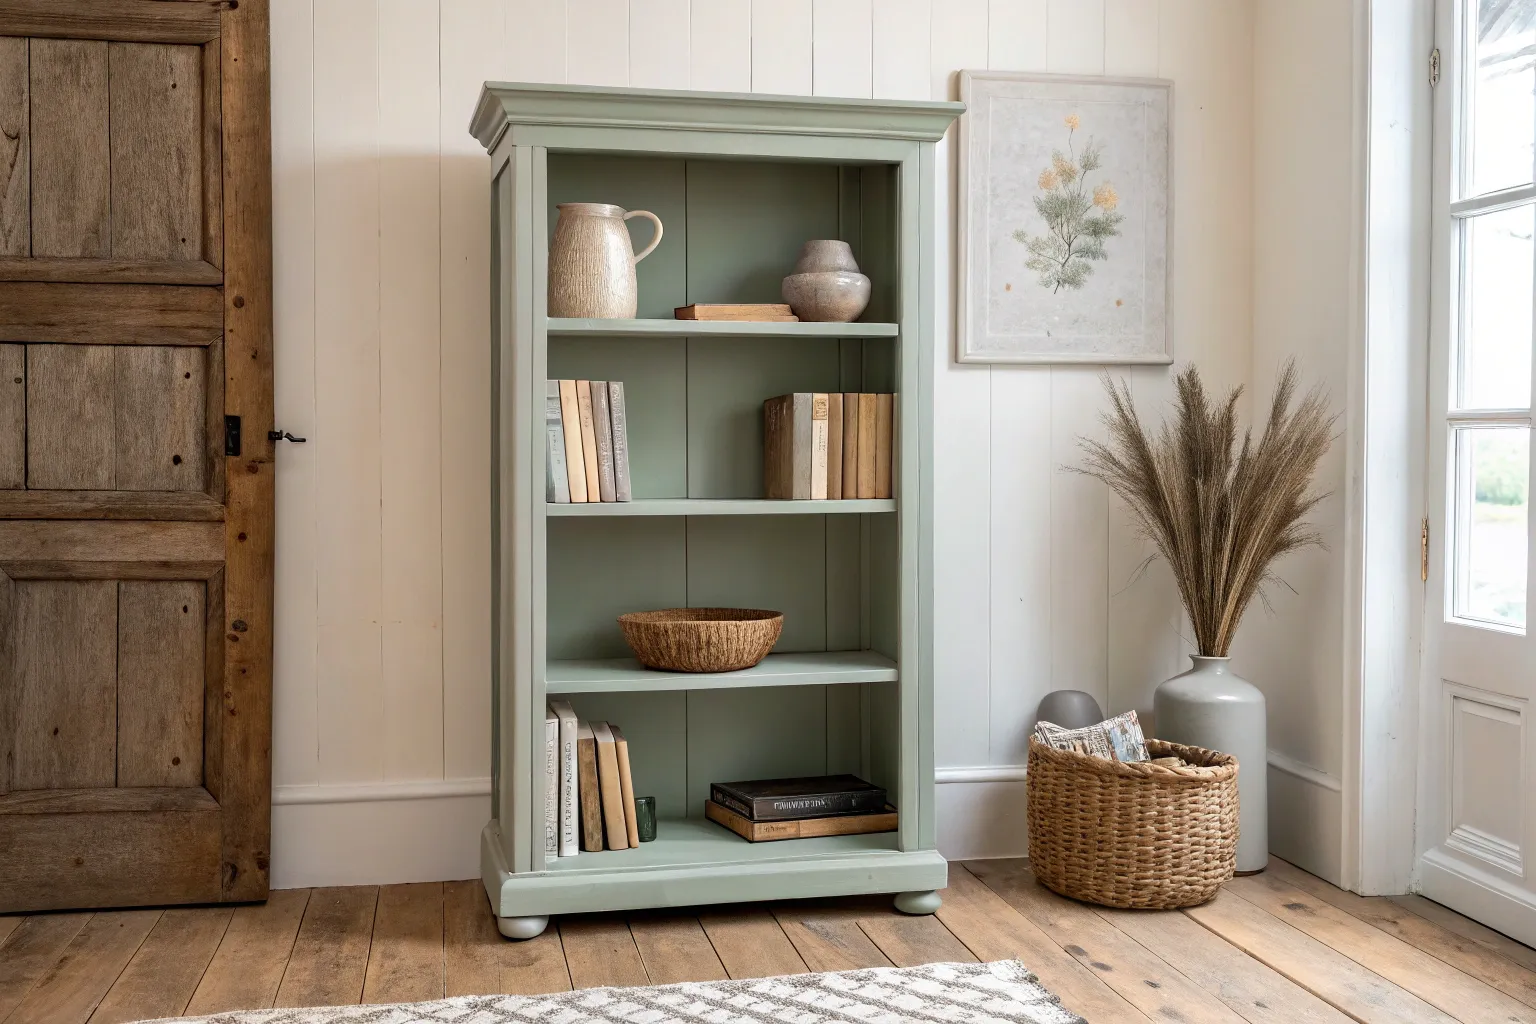
Unexpected Painted “Shadow Box” Interiors for a Peekaboo Surprise

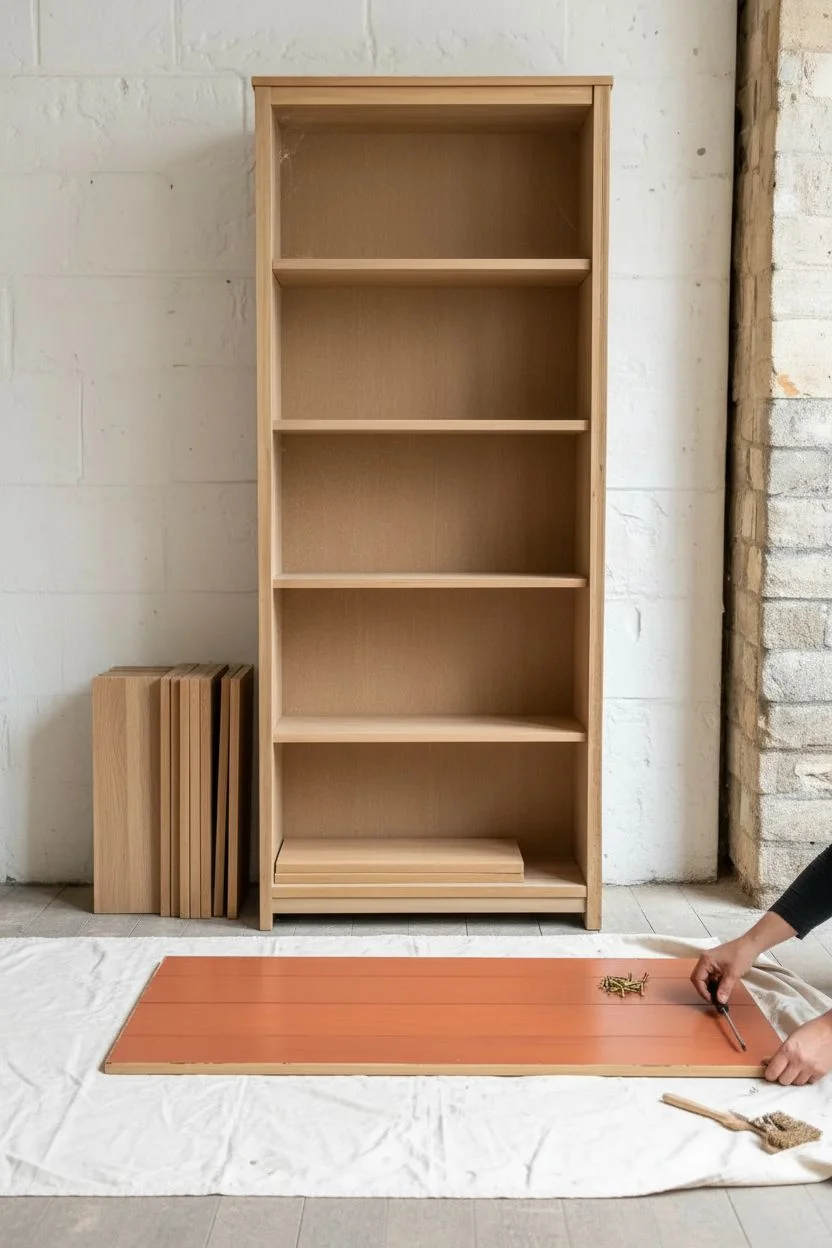
Transform a standard bookcase into a statement piece by adding a warm, rusty pop of color to the interior back panel while keeping the exterior natural. This peekaboo effect adds depth and architectural interest, making your shelf styling truly shine against the rich backdrop.
Step-by-Step Guide
Materials
- Tall wooden bookcase with a removable or accessible back panel
- Sandpaper (120 and 220 grit)
- Painter’s tape (high quality)
- Primer suitable for wood
- Interior paint in a terracotta or burnt orange shade (satin finish)
- Small foam roller
- 2-inch angled paintbrush
- Drop cloth
- Screwdriver (if disassembly is needed)
- Tack cloth or microfiber rag
Step 1: Preparation & Disassembly
-
Clear the shelves:
Remove all books, vases, and decor items from the bookcase to give yourself a completely empty workspace. -
Remove shelves:
Take out any adjustable shelves. If your shelves are fixed, you will need to rely heavily on precise taping later, but removing them is ideal if possible. -
Assess the back panel:
Check if the back panel can be unscrewed or popped out. Working on the back panel while it is lying flat on the floor is much easier than painting inside a deep box. -
Remove the back panel:
Use your screwdriver to carefully remove the fasteners holding the back panel in place. Set the main frame of the bookcase aside. -
Clean surface:
Wipe down the back panel to remove any dust or cobwebs that might have accumulated behind the books.
Paint Peeling?
If paint peels when removing tape or shelves, the surface wasn’t sanded enough. Lightly sand the spot, prime, and touch up with a small artist’s brush.
Step 2: Sanding & Priming
-
Light scuff sand:
Even if pre-finished, give the interior side of the back panel a light sanding with 120-grit paper to help the new paint adhere. If it has a tongue-and-groove texture, ensure you get into the grooves. -
Wipe clean:
Remove all sanding dust with a tack cloth so your paint finish remains smooth. -
Tape edges (optional):
If you plan to leave the very edges of the back panel unpainted (where they touch the frame), tape them off now. Otherwise, you can paint edge-to-edge. -
Apply primer:
Roll on a coat of high-quality wood primer. A small foam roller works great here for a smooth finish without brush marks. -
Dry and lightly sand:
Let the primer dry completely according to the can’s instructions. Once dry, run a 220-grit sandpaper over it very lightly to knock down any raised grain, then wipe clean again.
Add Faux Texture
No grooves? Create a faux shiplap look by drawing horizontal or vertical lines with a dark sharpie or paint pen before the final clear coat.
Step 3: Painting the Color
-
Cut in grooves:
If your panel has vertical grooves like the example, use your angled brush to paint inside these crevices first. A roller might miss the deepest parts. -
Roll the first coat:
Using the foam roller, apply your terracotta paint to the flat surfaces. Work in long, even strokes from top to bottom. -
Let dry:
Allow the first coat to dry fully. This colour is rich, so don’t panic if it looks streaky at first. -
Apply second coat:
Apply a second coat for full opacity and depth of color. I prefer to do a third thin coat if the orange tone isn’t quite vibrant enough yet. -
Cure time:
Let the paint cure for at least 24 hours. You don’t want books or shelves sticking to tacky paint later.
Step 4: Reassembly
-
Reattach panel:
Carefully place the back panel back onto the bookcase frame and screw it into place. -
Insert shelves:
Slide your shelves back in. The contrast between the natural wood shelf edges and the painted back will immediately pop. -
Style carefully:
Arrange your ceramics and books, allowing plenty of negative space so the new background color is visible.
Enjoy the warmth this simple update brings to your room without overwhelming the space


Have a question or want to share your own experience? I'd love to hear from you in the comments below!