Rock painting is my favorite kind of low-pressure art because the stone’s shape does half the work for you. If you’re craving simple rock painting that looks adorable without perfect drawing skills, these easy rock painting ideas will get you started fast.
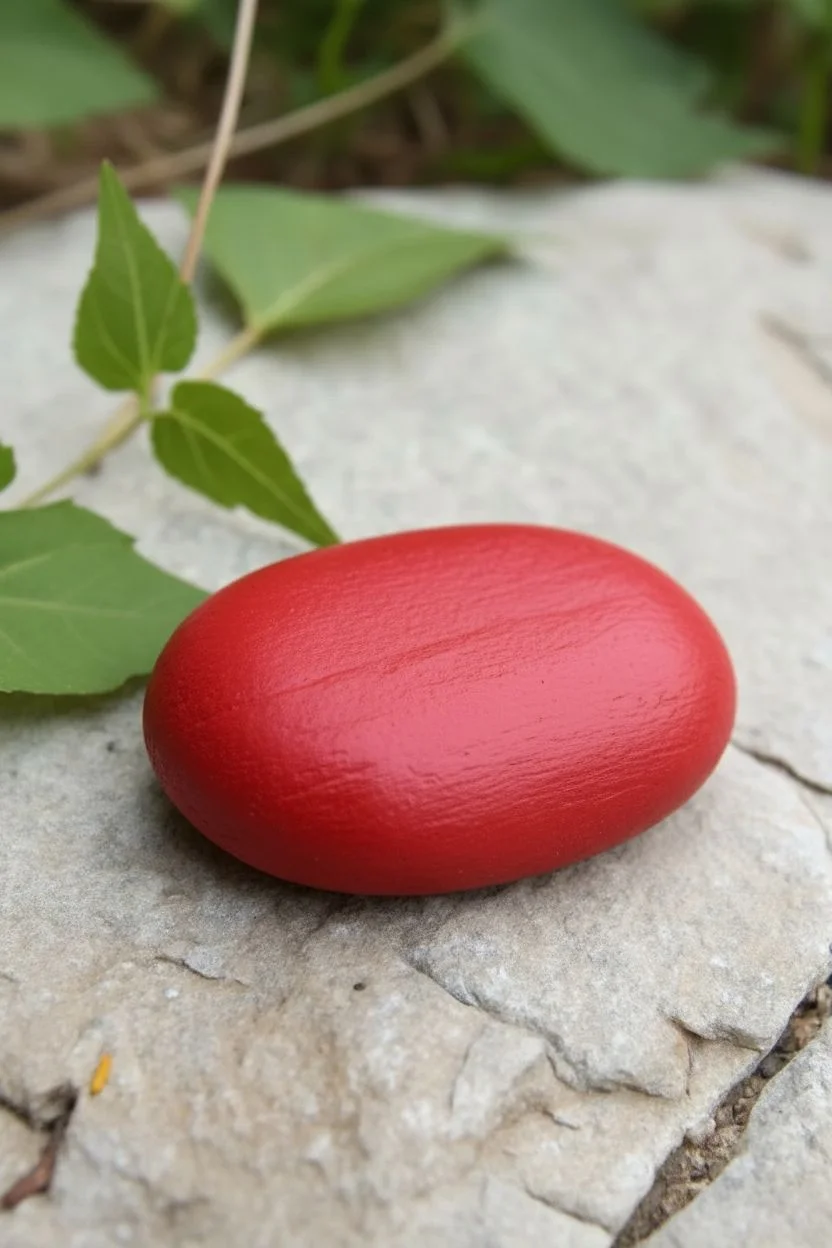
Classic Heart Rocks
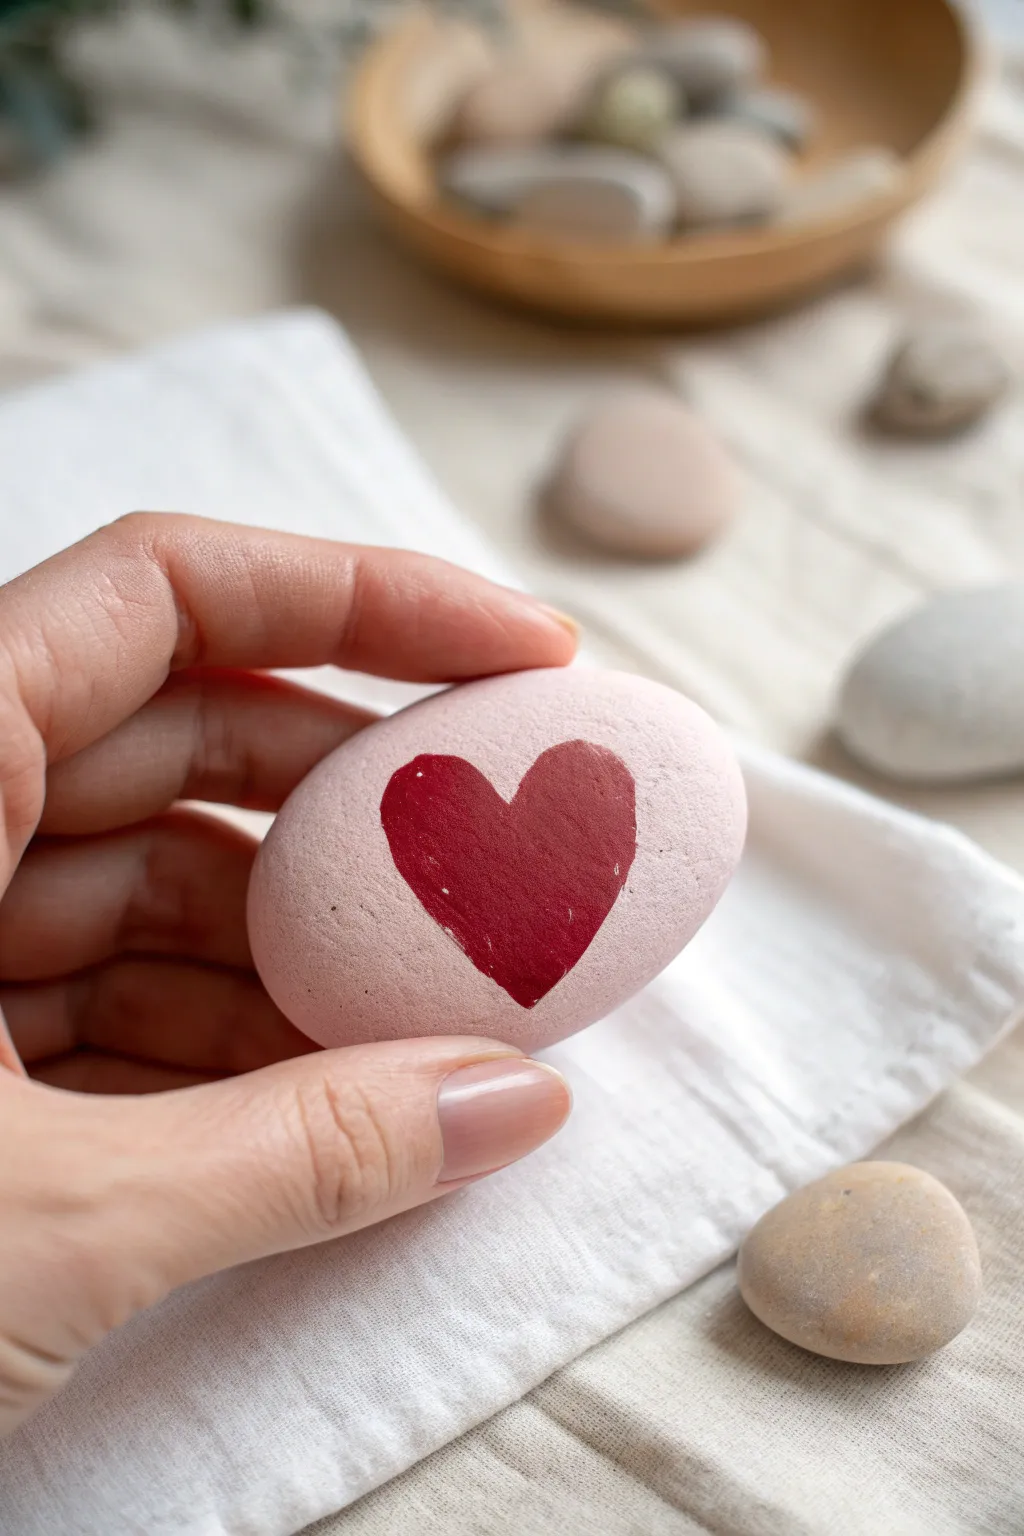
Capture the essence of love with this minimalist painted rock that features a bold crimson heart on a soft blush background. The smooth, matte finish gives it a modern, sophisticated look that makes it perfect for a small gift or pocket charm.
How-To Guide
Materials
- Smooth river rock (oval or round shape)
- Soft pink or blush acrylic paint (matte finish)
- Deep red or crimson acrylic paint
- Flat paintbrush (medium size)
- Fine detail paintbrush (small size)
- Surface sealer or matte varnish (optional)
- Water cup and paper towels
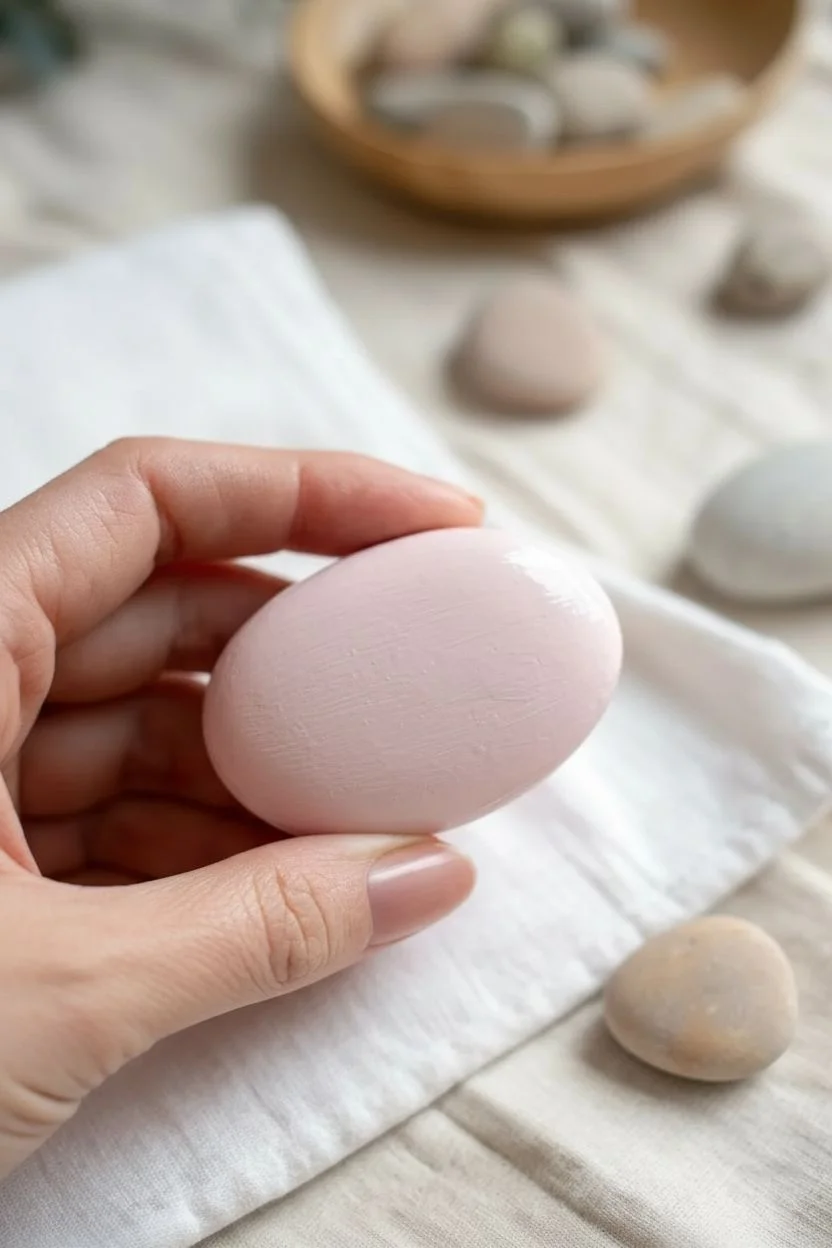
Step 1: Preparing the Base
-
Clean the surface:
Begin by washing your stone with warm soapy water to remove any dirt or grit. Let it dry completely before starting. -
Mix your base color:
If you don’t have the perfect shade of blush pink, mix a tiny dot of red into a large amount of white acrylic paint. You want a very pale, almost neutral pink. -
Apply the first coat:
Using your medium flat brush, paint the entire top surface of the rock with your blush color. Don’t worry if it looks streaky yet. -
Wait for drying:
Allow this first layer to dry for about 10-15 minutes until it is dry to the touch. -
Add a second coat:
Apply a second layer of the blush paint. This ensures a solid, opaque background that hides the natural color of the stone. -
Smooth the edges:
While the paint is wet, gently feather the paint down the sides of the rock so it doesn’t have a harsh ridge where the paint stops. -
Final dry time:
Let the base coat dry completely. I usually give this step at least 20 minutes to ensure my red heart won’t blend into the pink background.
Heart Shape Hack
Make two dots of red paint side-by-side using the back end of your paintbrush handle. Pull them down to meet at a point for a perfect heart shape every time.
Step 2: Painting the Heart
-
Load the fine brush:
Dip your fine detail brush into the deep red acrylic paint. You want enough paint for smooth flow, but not a dripping glob. -
Mark the center:
Visualize the center of your stone. Make a tiny dot where you want the cleft (the top dip) of the heart to be. -
Paint the left curve:
Starting from your center dot, paint a curved line up and to the left, bringing it down toward the bottom center point. -
Paint the right curve:
Mirror that stroke on the right side, starting from the top center dot, curving up and right, and meeting the first line at the bottom point. -
Fill the shape:
Gently fill in the outline with your red paint. Use smooth strokes to avoid creating texture bumps inside the heart. -
Refine the edges:
Look closely at your heart’s edges. If they look shaky, use the very tip of your brush to carefully smooth out the unexpected bumps. -
Check opacity:
Reds can sometimes be translucent. If the pink shows through, wait for the red to dry and add a second thin layer right on top. -
Cleaning up:
If you made a mistake, let the red dry, then use a tiny bit of your blush base color to paint over the error and crisp up the line.
Step 3: Finishing Touches
-
Protect your work:
Once the heart is totally dry (give it an hour), apply a thin layer of matte varnish if you plan to keep the rock outdoors. -
Final inspection:
Check for any missed spots or brush hairs stuck in the paint before displaying your stone.
Date Night Idea
Create a matching set using inverted colors: paint a second rock with a red base and a soft pink heart to keep one and give the other to a partner.
Place your finished heart rock on a desk or shelf as a gentle reminder of affection


Rainbow Stripe Rocks
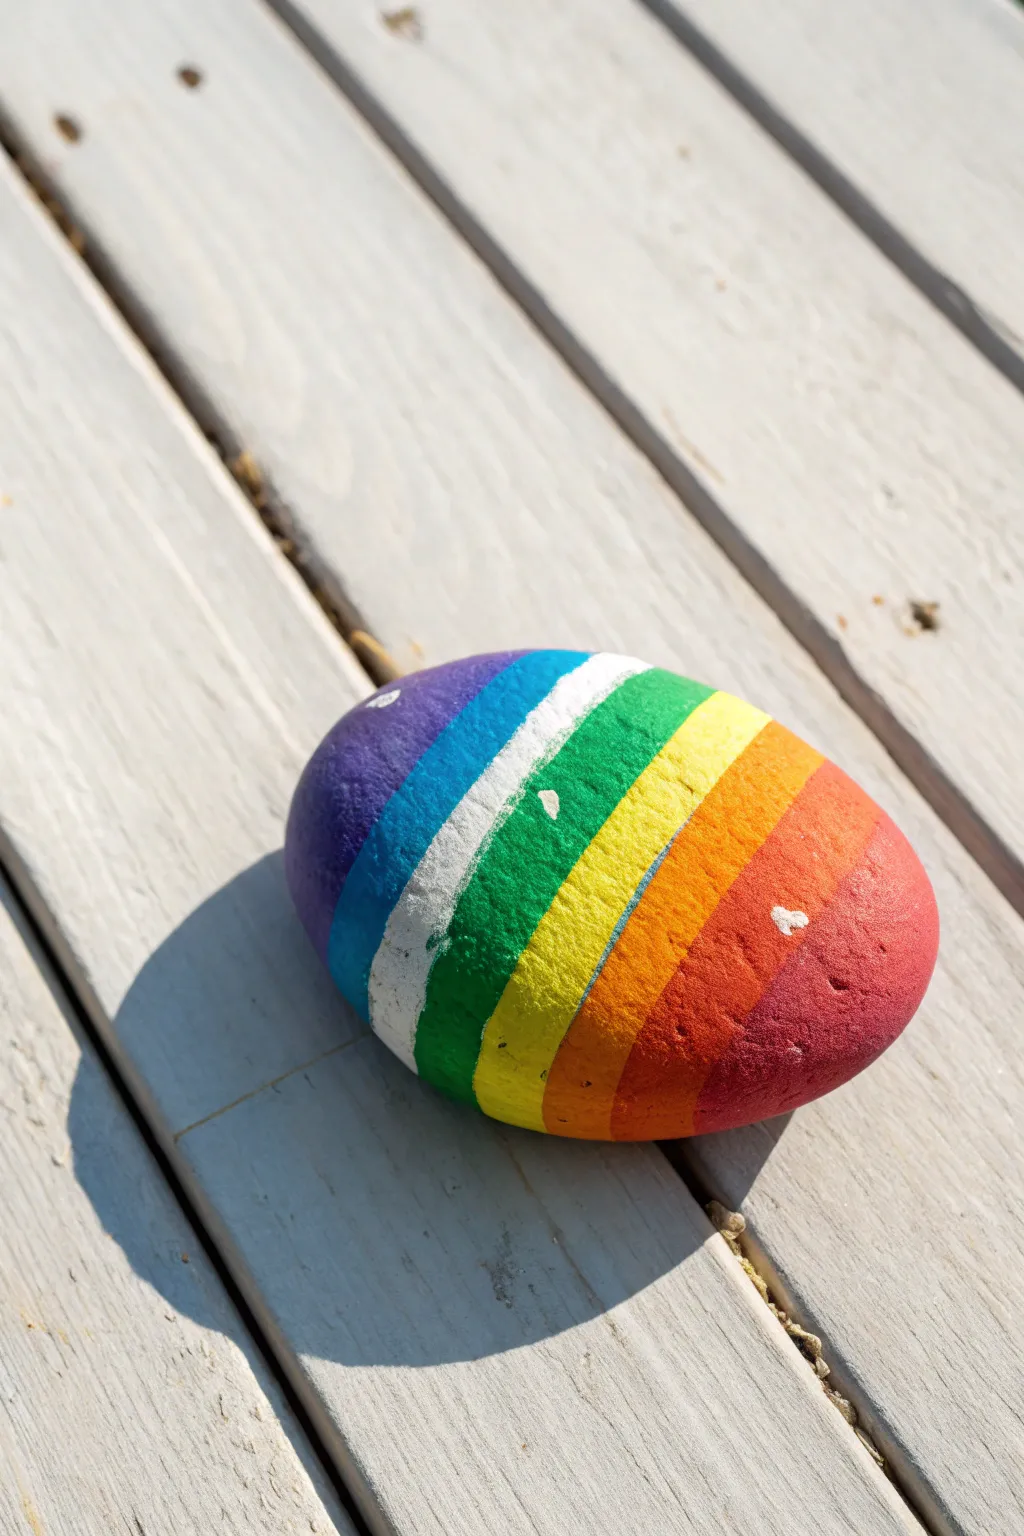
Brighten up your garden or windowsill with this vibrant, smooth stone featuring bold stripes of every color. The addition of a crisp white band breaks up the spectrum, giving the classic rainbow palette a fresh and modern twist.
Step-by-Step
Materials
- Smooth, oval river rock (clean and dry)
- Acrylic paints (purple, dark blue, cyan, white, green, yellow, orange, red)
- Flat paintbrush (medium width)
- Thin liner paintbrush (for touch-ups)
- Pencil (optional)
- Mod Podge or clear acrylic sealer
- Palette or paper plate
- Cup of water
- Paper towels
Step 1: Preparation & Planning
-
Clean and dry:
Start by scrubbing your river rock with warm soapy water to remove any dirt or grease. Rinse it well and let it dry completely in the sun. -
Visualize the stripes:
Look at the rock’s shape. You will be painting curved stripes that follow the natural contour of the stone rather than perfectly straight lines. -
Sketch guidelines (optional):
If you’re nervous about freehanding, lightly sketch the curved bands across the rock with a pencil. Aim for roughly equal widths, though the ends can taper slightly.
Step 2: Painting the Cool Colors
-
Start with purple:
Load your flat brush with purple stunning paint. Apply a curved stripe on the far left end of the rock. Paint smoothly over the edge so the color wraps around. -
Add dark blue:
Rinse your brush well. Apply a stripe of dark blue right next to the purple. Don’t worry if they touch slightly; a tiny overlap ensures no bare rock shows through. -
Paint the cyan stripe:
Next to the dark blue, paint a band of bright cyan or light blue. This lighter shade helps transition into the white stripe that comes next. -
The white breaker:
Now for the high-contrast element. Paint a solid stripe of white. This band makes the surrounding colors pop, but it may need two coats for full opacity. -
Apply the green:
On the other side of the white line, paint a vibrant green stripe. Try to keep your brushstrokes moving in the same curved direction as the rock’s surface.
Paint looking streaky?
Don’t overwork wet acrylics. If the first coat looks thin or streaky, let it dry fully before adding a second layer. Painting over wet paint just lifts it off.
Step 3: Painting the Warm Colors
-
Brighten with yellow:
Paint the yellow stripe next to the green. Since yellow is translucent, I usually lay it on a bit thicker or plan for a second coat right away. -
Add the orange:
Follow the yellow with a cheerful orange stripe. Keep the width consistent with the previous bands to maintain the pattern’s rhythm. -
Finish with red:
Paint the final end of the rock with a rich red. Wrap this color around the curve just like you did with the purple on the opposite side. -
Let it dry completely:
Set the rock aside for at least 30 minutes to ensure all the paint layers are dry to the touch.
Pro Tip: Tape Trick
For ultra-crisp lines, use thin strips of washi tape or masking tape to mask off sections. Paint every other stripe, let dry, remove tape, and then fill the gaps.
Step 4: Refining & Sealing
-
Second coat check:
Inspect your stripes. If the rock’s natural color is showing through the yellow or white, carefully dab on a second layer of paint. -
Tidy the edges:
Use a damp, thin liner brush or even a toothpick to gently scrape away or cover any accidental smudges where colors might have bled into one another. -
Seal for protection:
Once the paint is bone dry, apply a layer of Mod Podge or a clear acrylic spray sealer. This protects the paint from chipping and gives the colors a polished look. -
Dry and display:
Allow the sealer to cure according to the bottle’s instructions before placing your rock outside.
Enjoy finding the perfect sunny spot for your cheerful rainbow creation


Easy Ladybug Rocks
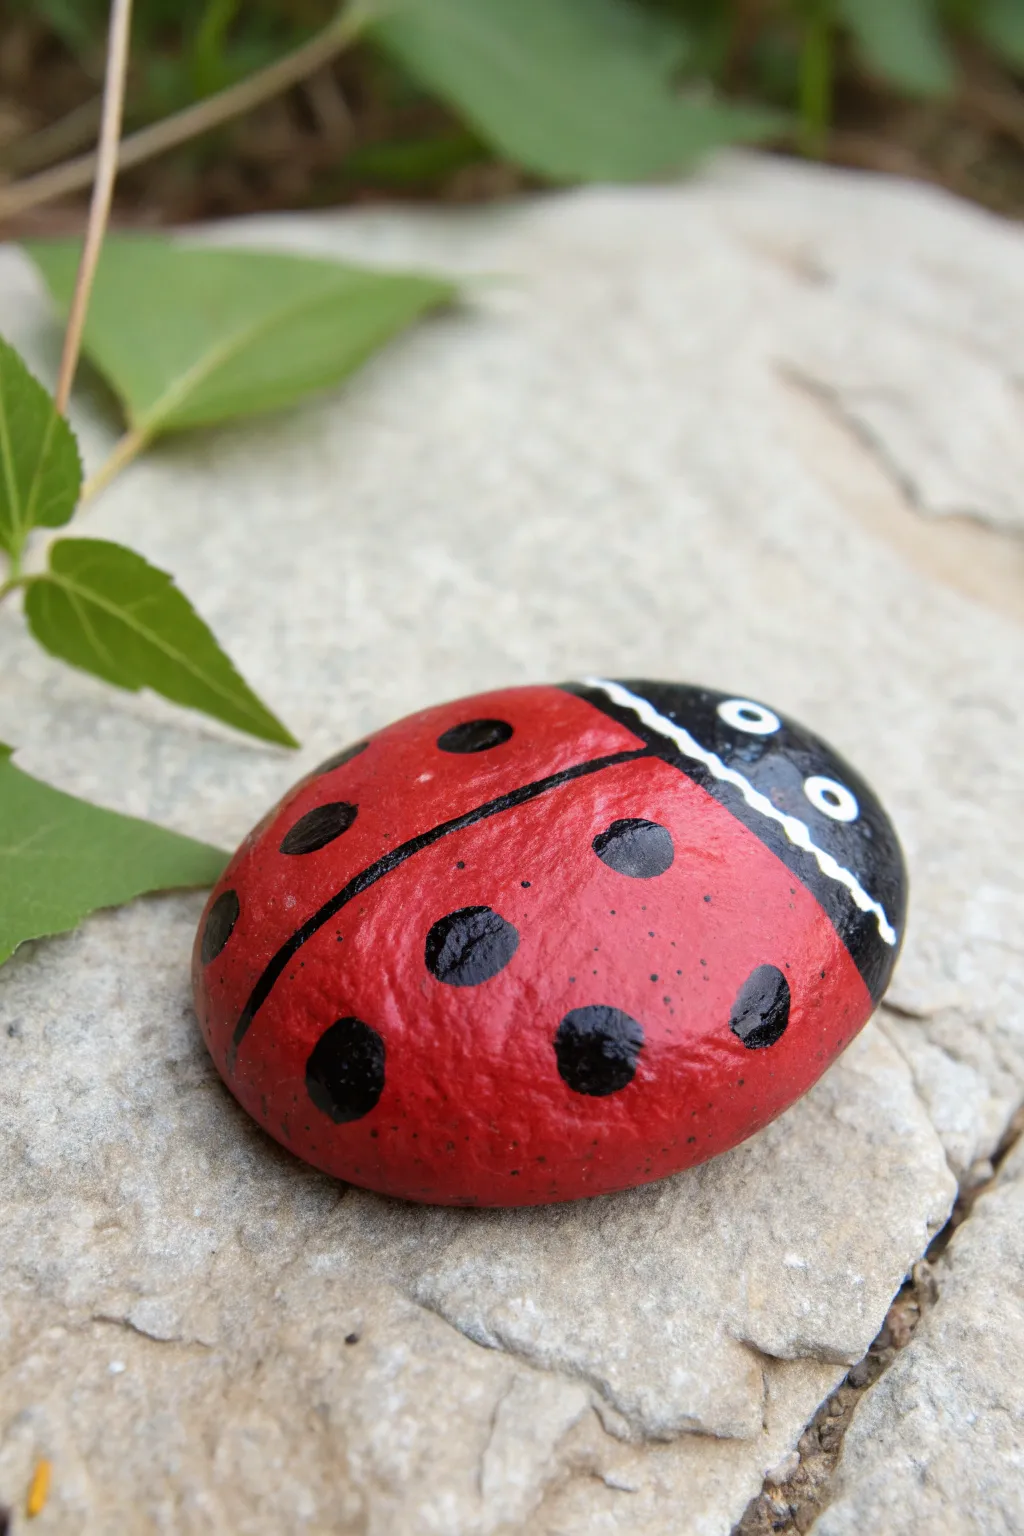
Transform a simple garden stone into a charming little beetle with this classic rock painting project. The bright red body and glossy black features create a delightful pop of color that looks right at home nestled among your potted plants.
Step-by-Step Guide
Materials
- Smooth, rounded river rock (oval shape)
- Acrylic craft paints (Bright Red, Black, White)
- Medium flat brush
- Small round detail brush (size 0 or 1)
- Extra-fine detail brush or liner brush (size 00 or 000)
- Dotting tools (or toothpicks/ends of paintbrushes)
- Mod Podge or clear outdoor sealer
- Water cup and paper towels
- Palette or paper plate
Step 1: Base Coating
-
Select the perfect stone:
Look for a stone that is relatively smooth and has a nice oval shape, mimicking the natural body of a ladybug. Clean it thoroughly with soap and water, then let it dry completely before starting. -
Paint the red base:
Using your medium flat brush and the Bright Red acrylic paint, cover the top and sides of the rock. You don’t need to paint the very bottom if it will be sitting in dirt. -
Apply a second coat:
Acrylic red can sometimes be a bit translucent. Once the first layer is dry to the touch, apply a second coat to ensure a solid, vibrant color foundation. Let this dry completely.
Paint Transparency?
Red paint is often sheer. If your rock’s natural color shows through, paint a layer of white primer first, let it dry, and then add your red on top for maximum brightness.
Step 2: Creating the Layout
-
Block in the head:
Visualize the rock as a beetle. At the narrower end of the oval, use your small round brush and black paint to create a semi-circle shape for the head. This should cover about the front 20-25% of the stone. -
Fill the head area:
Fill in that semi-circle shape entirely with black paint. Keep your edges relatively smooth where the black meets the red. -
Paint the center line:
Switch to your extra-fine liner brush. Starting from the center bottom of the black head area, paint a thin black line straight down the middle of the red section to the tail of the rock. This line separates the wings. -
Widen the dividing line:
Go back over that center line slightly to make it bold and distinct, tapering it just a tiny bit at the very end.
Step 3: Adding Details
-
Add large spots:
Using a larger dotting tool or the back end of a paintbrush handle dipped in black paint, place 4-6 large black dots on the red wings. Try to make them fairly symmetrical on either side of the center line. -
Add smaller spots:
Switch to a smaller dotting tool or a toothpick. Add smaller black dots interspersed between the larger ones to create variety and texture, just like a real ladybug. -
Paint the neck detail:
Where the black head meets the red body, use your finest liner brush and white paint to create a thin, slightly wavy line right on the border. This separates the head from the wings visually. -
Create the eyes:
Dip a medium-sized dotting tool into white paint. Place two white circles on the black head area, spacing them somewhat wide apart. -
Add pupils:
Once the white eye dots are completely dry, use a smaller dotting tool or toothpick with black paint to add pupils inside the white circles. I like to place them slightly off-center to give the ladybug a cute, looking-up expression. -
Add texture flecks (Optional):
To make the rock look more weathered and realistic, you can dip an old toothbrush or stiff brush into black paint, wipe most of it off, and very lightly spatter tiny specs onto the red wings.
Make it a Family
Paint rocks of different sizes to create a whole beetle family. Use slightly different shades of red or even orange and yellow for variety in your garden display.
Step 4: Finishing Touches
-
Check for touch-ups:
Look over your design. If any red shows through the black spots, carefully dab a little more black paint on top to make them opaque. -
Let it cure:
Allow the entire rock to dry for several hours or overnight. The thick dots of paint will take longer to dry than the base coat. -
Seal the rock:
Apply a coat of clear outdoor sealer or Mod Podge. A glossy finish works particularly well here as it mimics the hard shell of a beetle.
Place your new little friend in a garden bed or near a window for a cheerful decorative accent


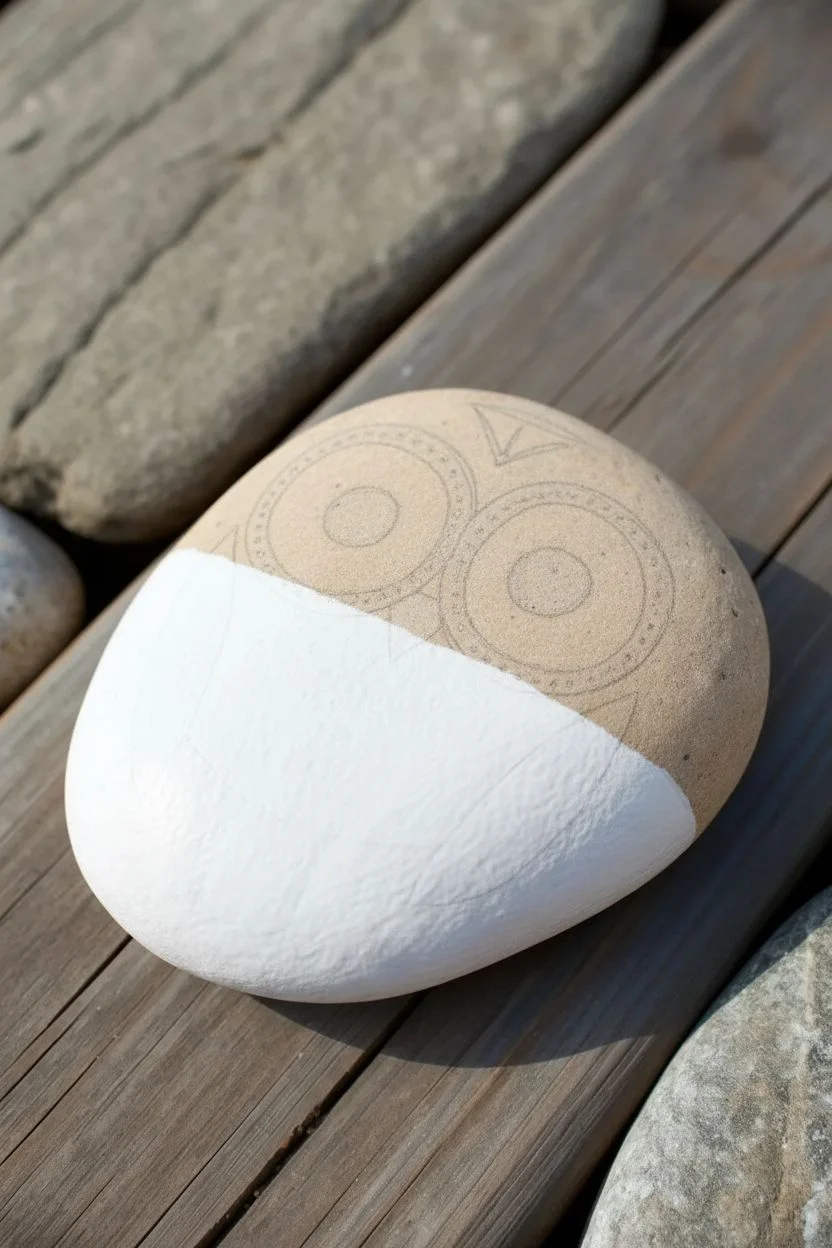
Smiley Face Mood Rocks

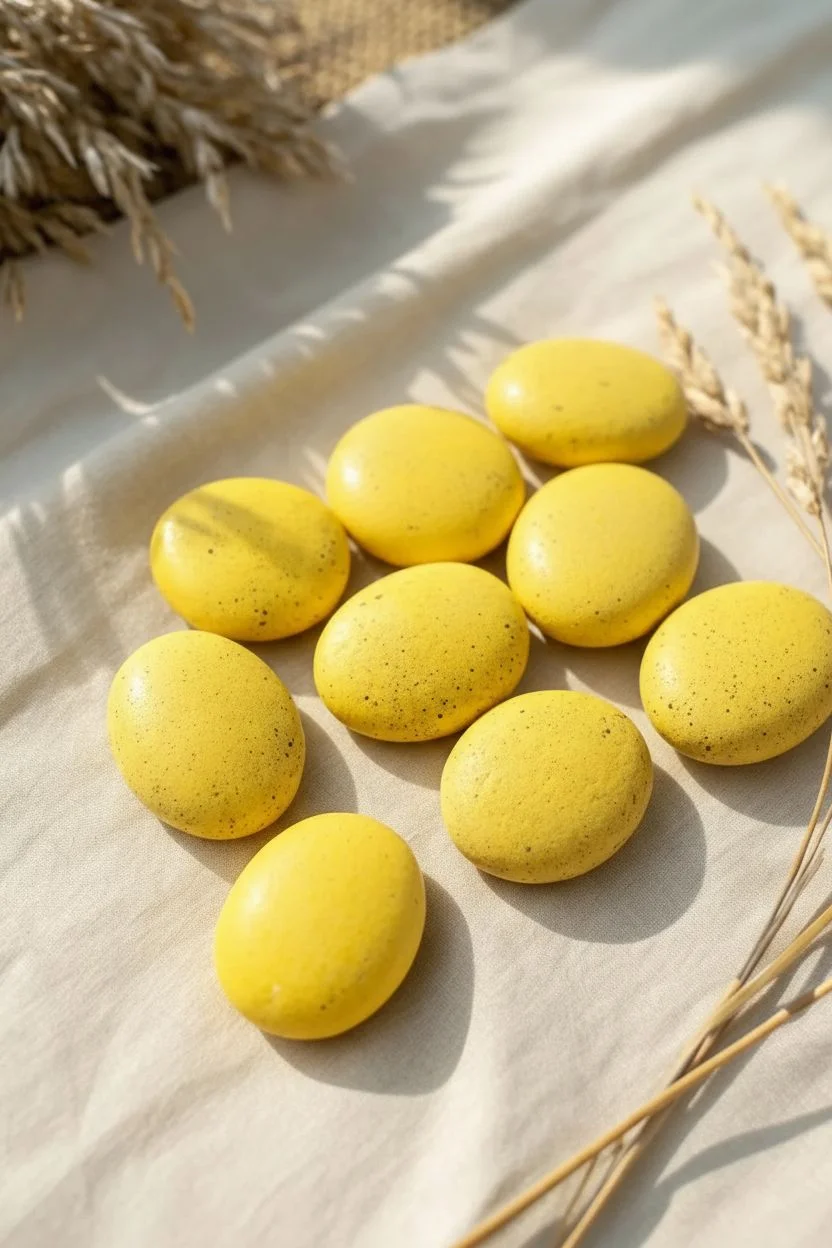
Brighten up your garden or desk with these cheerful, emoji-inspired stones. With their vibrant yellow base and expressive black details, these smooth rocks capture a whole range of happy emotions in a simple, durable format.
Detailed Instructions
Materials
- Smooth, round river stones (palm-sized)
- Acrylic paint (bright yellow, black)
- Wide flat paintbrush
- Fine liner brush or black paint marker (posca pens work great)
- Old toothbrush (optional for speckling)
- Clear acrylic sealer (spray or brush-on)
- Newspaper or drop cloth
Step 1: Base Preparation
-
Clean and Dry:
Begin by washing your stones thoroughly with warm, soapy water to remove any dirt or grit. Let them dry completely, preferably in the sun, to ensure the paint adheres properly. -
The First Coat:
Squeeze out a generous amount of bright yellow acrylic paint. Using a wide flat brush, paint the top surface of each rock. Smooth out any brushstrokes as you go. -
Observe Coverage:
Allow the first layer to dry for about 15-20 minutes. Yellow pigment is often semi-transparent, so don’t worry if the stone’s color still peeks through initially. -
Layer Up:
Apply a second and possibly third coat of yellow, allowing proper drying time between each. You want a solid, opaque lemon-yellow surface that completely hides the rock underneath. -
Add Texture (Optional):
For that realistic ‘egg-like’ texture seen in the photo, dip an old toothbrush in watered-down black or brown paint. Run your thumb over the bristles to lightly mist tiny speckles onto the yellow surface. Let this dry fully.
Step 2: Drawing the Expressions
-
Plan Your Moods:
Before committing to paint, decide which expressions you want. You can sketch them lightly with a pencil directly on the dry yellow paint first. -
The Classic Smile:
For the simple smiling face, use a fine liner brush or a black paint marker to draw two small dots for eyes. Add a wide, curved ‘U’ shape below for the mouth throughout the center. -
Winking Face:
Create a winking expression by drawing one standard eye dot and one curved line arching upward for the closed eye. Add a small smile underneath. -
Tongue Out:
Draw the eyes (winking or open) and a wide smile. Attached to the bottom of the smile line, draw a small ‘U’ shape to represent a tongue sticking out. -
Heart Kiss:
For the kissing face, draw two curved lines for closed happy eyes. Instead of a mouth, draw a small, hollow heart outline slightly off-center. -
Bashful Grin:
Draw upward-curving arches for the eyes to make them look squeezed shut in happiness. Add a crooked or sideways smile for a silly, bashful look. -
Line Weight:
Go back over your black lines to thicken them slightly. I find that varying the thickness—making the middle of the smile slightly thicker than the corners—adds a lot of character.
Uneven Yellow?
Yellow paint is notoriously transparent. If your rock still looks dark after two coats, try painting a base layer of white first. This makes the yellow pop instantly.
Step 3: Finishing Touches
-
Clean Up Edges:
If you made any mistakes with the black paint, wait for it to dry completely, then carefully dab a little yellow paint over the error to cover it up. -
Final Dry:
Let the face details dry for at least an hour to ensure the black paint is set and won’t smear during the sealing process. -
Seal the Deal:
Apply a coat of clear acrylic sealer. A spray sealer typically works best to avoid dragging the black paint, but a brush-on varnish works if you are gentle. -
Glossy Finish:
If you prefer a shiny look like the reference photo, use a high-gloss varnish. Apply a second coat after the first has dried for maximum durability.
Marker Mastery
Instead of a brush for the faces, use acrylic paint pens (like Posca). They offer way more control for fine lines and dry matte, looking just like paint.
Now you have a set of cheerful stones ready to be hidden in the park or displayed on a shelf
BRUSH GUIDE
The Right Brush for Every Stroke
From clean lines to bold texture — master brush choice, stroke control, and essential techniques.
Explore the Full Guide
Short Kindness Word Rocks
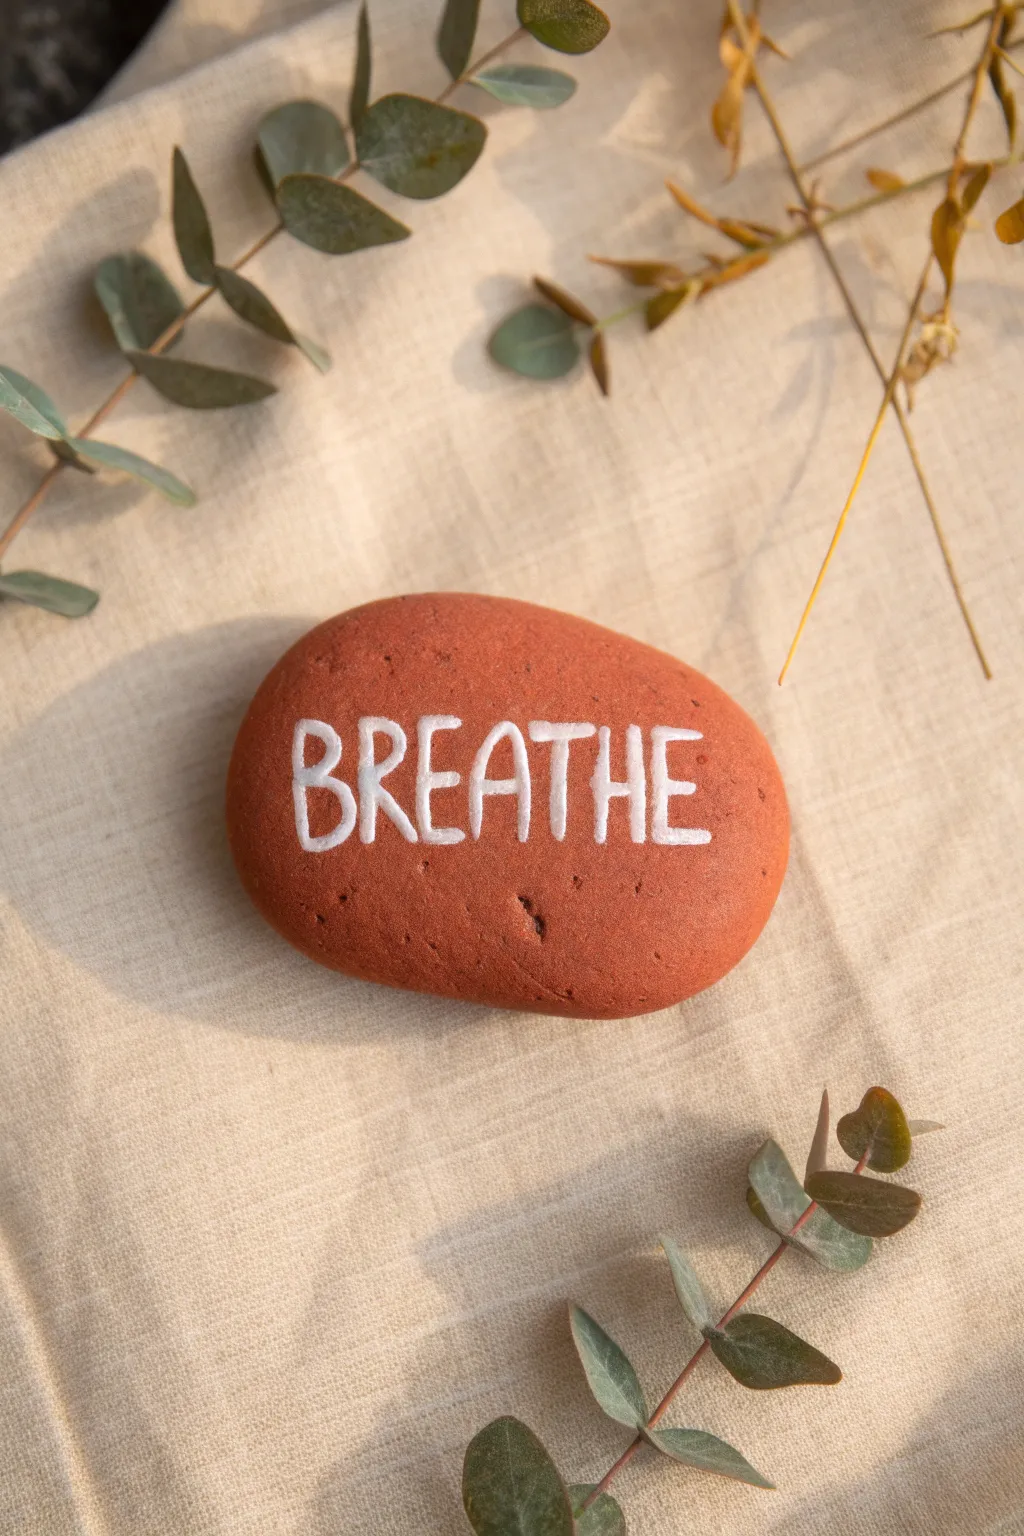
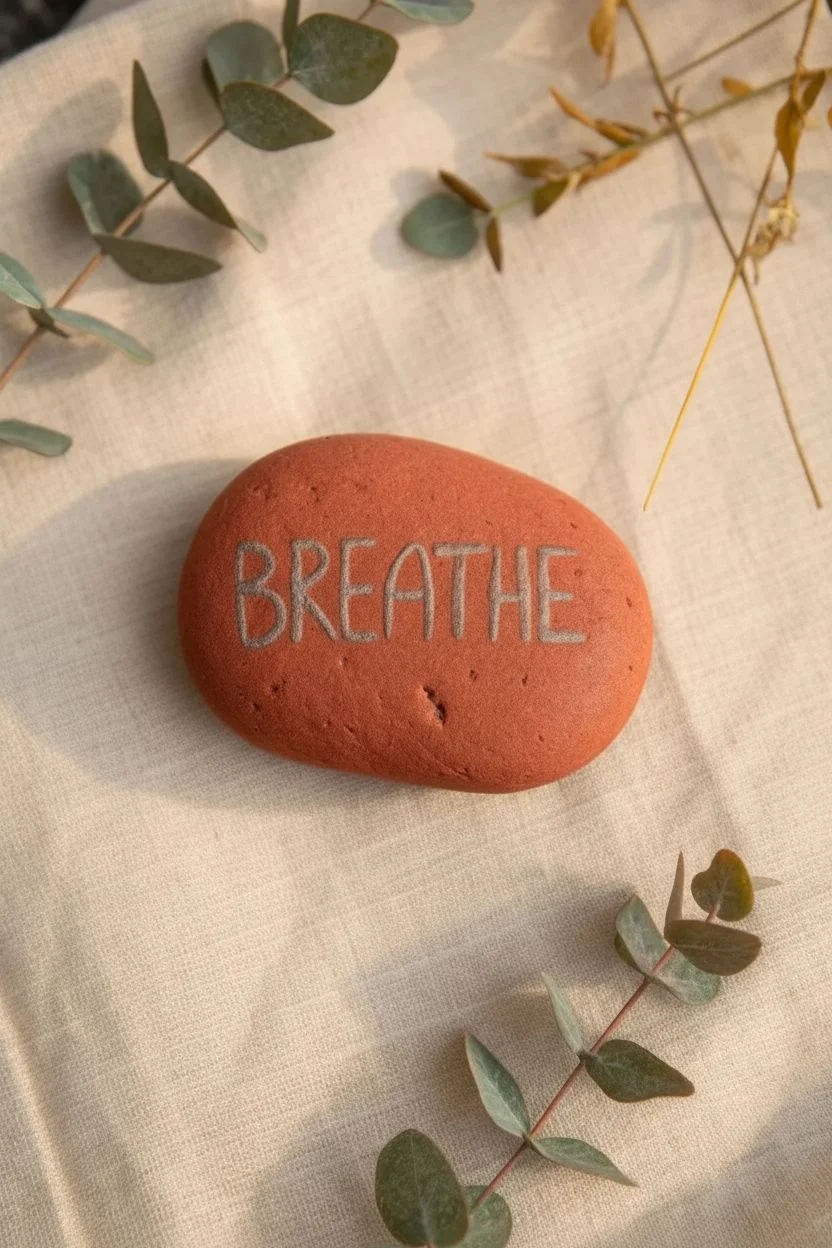
Simple yet powerful, this project transforms a humble reddish-brown stone into a calming touchstone for anxiety or stress relief. The stark white lettering against the terracotta background creates a modern, clean look perfect for a desk or bedside table.
Step-by-Step
Materials
- Smooth, oval river rock (reddish-brown or terracotta color)
- White acrylic paint or specialized white paint pen (fine to medium tip)
- Small flat paintbrush (if using bottled paint)
- Artist’s liner brush (optional, for edges)
- Pencil (HB or lighter)
- Soap and water
- Matte spray sealer or varnish
- Paper towel or cloth
Step 1: Preparation & Planning
-
Clean surface:
Begin by washing your stone thoroughly with soapy water to remove any dirt or oils. This is crucial because even natural oils from your hands can prevent the paint from adhering properly. -
Dry thoroughly:
Let the rock dry completely. I usually leave mine in the sun for an hour to ensure no moisture is trapped in the porous surface. -
Visual spacing:
Look at the face of your rock and mentally divide it horizontally. You want the word ‘BREATHE’ to sit right in the center, leaving equal space above and below. -
Light sketch:
Using a pencil, very lightly sketch out the seven letters: B-R-E-A-T-H-E. The ‘A’ marks the exact center, so it helps to draw that letter first and work outward to the sides. -
Refine letters:
Adjust your sketched letters to be relatively consistent in height and width. A simple, sans-serif block font works best for this design.
Uneven Lines?
If your hand shakes, rest your wrist on a table while painting. If a line goes rogue, let it dry completely, then gently scratch the excess off with a toothpick to straighten the edge.
Step 2: Lettering Application
-
Prime the pen:
If using a paint pen, shake it well and press the tip on a scrap piece of paper until the white paint flows smoothly and evenly. -
First pass:
Carefully trace over your pencil lines to create the skeleton of your letters. Don’t worry about thickness yet; just get the basic shapes down. -
Thicken the strokes:
Go back over each letter and slightly widen the strokes. The goal is to make the letters bold enough so they stand out clearly against the reddish background. -
Straighten edges:
Pay special attention to the ends of the letters (like the tips of the ‘E’ and bottom of the ‘T’). Use the very tip of your tool to square them off for a crisp, typed look. -
Clean up borders:
If you notice any ragged edges where the paint bled slightly, you can sometimes gently scrape it away with a toothpick while the paint is still tacky. -
Assess opacity:
Allow the first layer of white to dry for about 10-15 minutes. White paint on dark rocks often looks translucent at first.
Add Dimension
To make the letters pop even more, add a tiny grey shadow line to the right and bottom of each letter. This faux-3D effect makes the word look carved or raised.
Step 3: Finishing Touches
-
Second coat:
Apply a second layer of white paint directly over your letters. This step is what gives the text that bright, popped-out appearance seen in the photo. -
Check for gaps:
Look closely at the texture of the rock. If the stone has pits or bumps, dab a little extra paint into those crevices so the letters look solid. -
Final drying:
Let the rock sit undisturbed until the paint is completely cured. This usually takes at least an hour, or longer if you applied the paint thickly. -
Seal result:
To protect your work from chipping or fading, apply a light coat of matte clear sealer. A matte finish keeps the stone looking natural rather than glossy. -
Final cure:
Allow the sealer to dry fully according to the manufacturer’s instructions before handling or gifting to a friend.
Place your finished stone somewhere visible as a gentle daily reminder to pause and recenter yourself
Polka-Dot Confetti Rocks
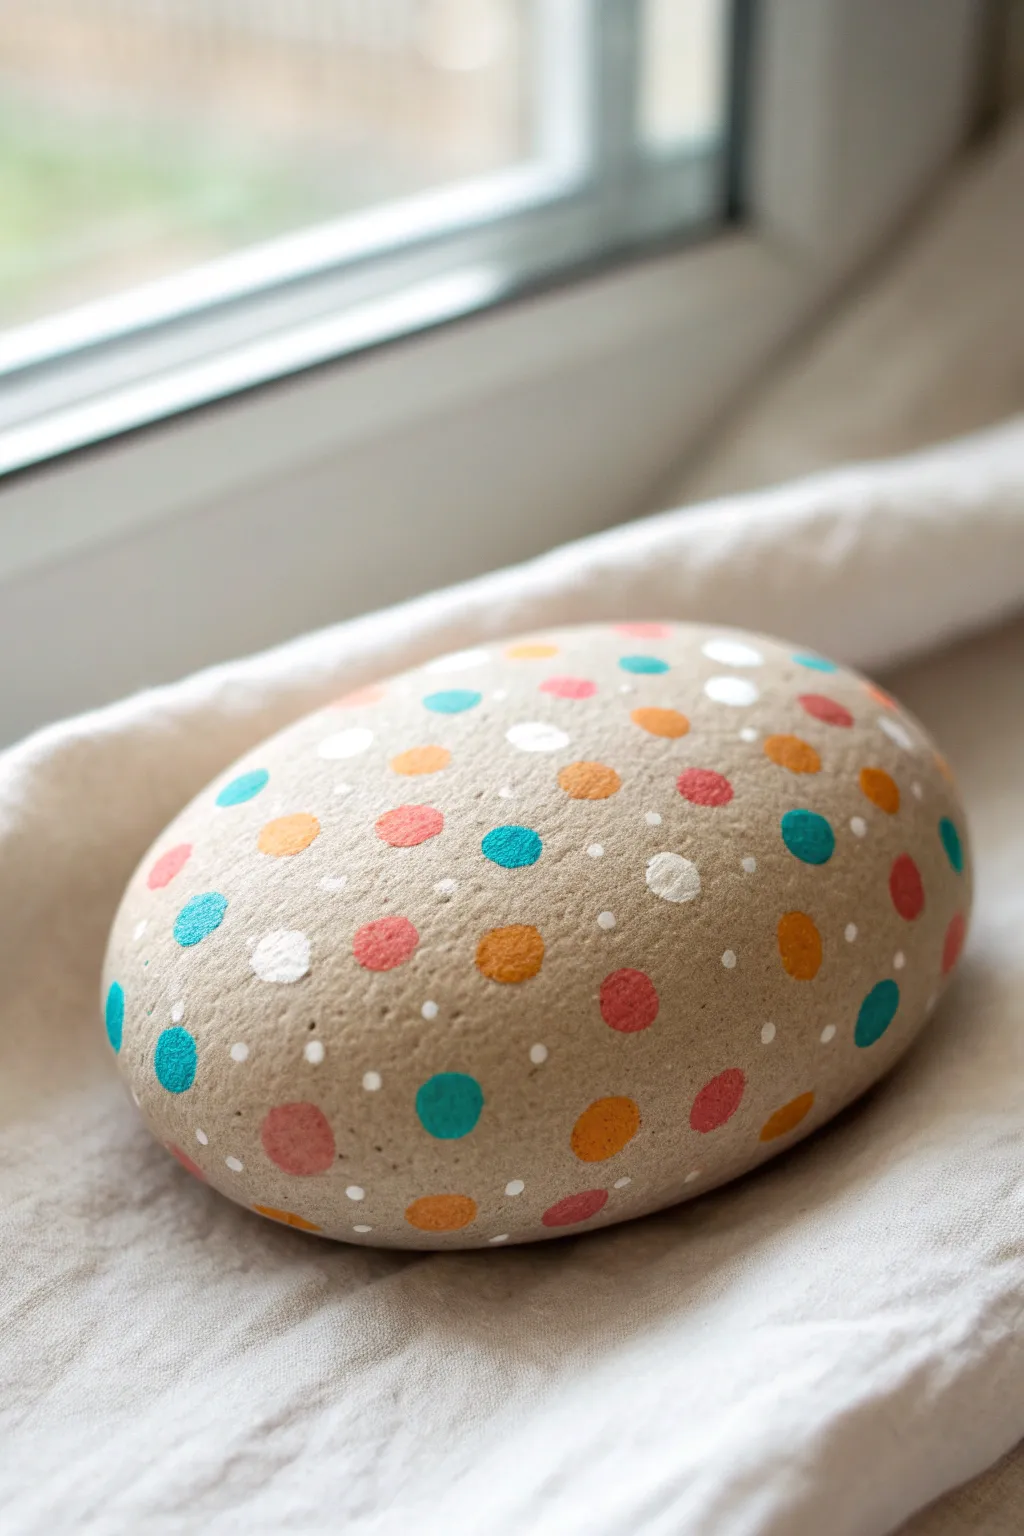
Transform a smooth, natural stone into a celebration of color with this wonderfully simple confetti design. By leaving the background unpainted, the vibrant dots pop against the raw, organic texture of the rock for a modern, minimalist look.
Step-by-Step Tutorial
Materials
- Smooth, oval river rock (cleaned and dried)
- Acrylic paints (Teal, Coral Pink, Orange, White)
- Small round paintbrush (size 2 or 3)
- Fine dotting tool or toothpick
- Paper plate or palette
- Cup of water and paper towels
- Matte or satin spray sealant
Step 1: Preparation
-
Clean Your Canvas:
Begin by scrubbing your rock thoroughly with warm soapy water to remove any dirt or oils. Rinse it well and let it dry completely in the sun or with a towel. -
Palette Setup:
Squeeze small amounts of teal, coral pink, orange, and white acrylic paint onto your palette. Ensure your paints are a creamy consistency; if they are too transparent, you might need to apply multiple coats later.
Step 2: Painting the Large Dots
-
Start with Teal:
Dip your small round brush into the teal paint. Create several medium-sized circles randomly scattered across the rock’s surface. Aim for a mix of placement without clustering too many together. -
Add Coral Pops:
Clean your brush thoroughly. Pick up the coral pink paint and paint circles of similar size in the empty spaces. Let these dots act as warm accents against the cool teal. -
Introduce Orange:
Rinse the brush again and switch to the orange paint. Fill in larger gaps with orange circles. Try to balance the colors so no single hue dominates one side of the ston. -
Create Large White Accents:
Using the white paint and your brush, add just a few larger white circles. These act as bright highlights and help break up the saturated colors. -
Refine the Shapes:
Go back over your larger dots if they look uneven. Gently round out the edges with the tip of your brush to ensure they are crisp circles. Let this layer dry to the touch for about 10 minutes.
Uneven Circles?
If your painted circles look wobbly, let them dry completely. Then, use a toothpick to gently scrape away the excess paint on the edges to refine the round shape.
Step 3: Details & Finishing
-
Switch to the Dotting Tool:
For the confetti effect, switch to a fine dotting tool or the blunt end of a toothpick. Dip it into the white paint. -
Sprinkle Tiny Dots:
Gently press tiny white dots into the open spaces between the larger colorful circles. Imagine you are shaking sprinkles onto a cookie; keep the placement random and airy. -
Vary the Pressure:
I like to vary how hard I press the dotting tool. Lighter pressure creates microscopic pin-prick dots, while heavier pressure makes slightly bolder accents. -
Second Coat Check:
Examine your color dots. If the rock’s color is showing through the teal or orange, carefully paint a second layer over just those circles to make them opaque. -
Dry Completely:
Allow your rock to dry undisturbed for at least an hour. The thicker dots may take a bit longer to set fully. -
Seal the Design:
Take the rock to a well-ventilated area. Apply a light coat of matte or satin spray sealant. -
Final Cure:
Let the sealant cure according to the can’s instructions before handling or displaying your new confetti artwork.
Metallic Magic
Swap the white accent dots for metallic gold or silver paint. The metallic sheen adds a festive, high-end finish that catches the light beautifully.
Enjoy the satisfying simplicity of your sophisticated new polkadot rock decoration

PENCIL GUIDE
Understanding Pencil Grades from H to B
From first sketch to finished drawing — learn pencil grades, line control, and shading techniques.
Explore the Full Guide
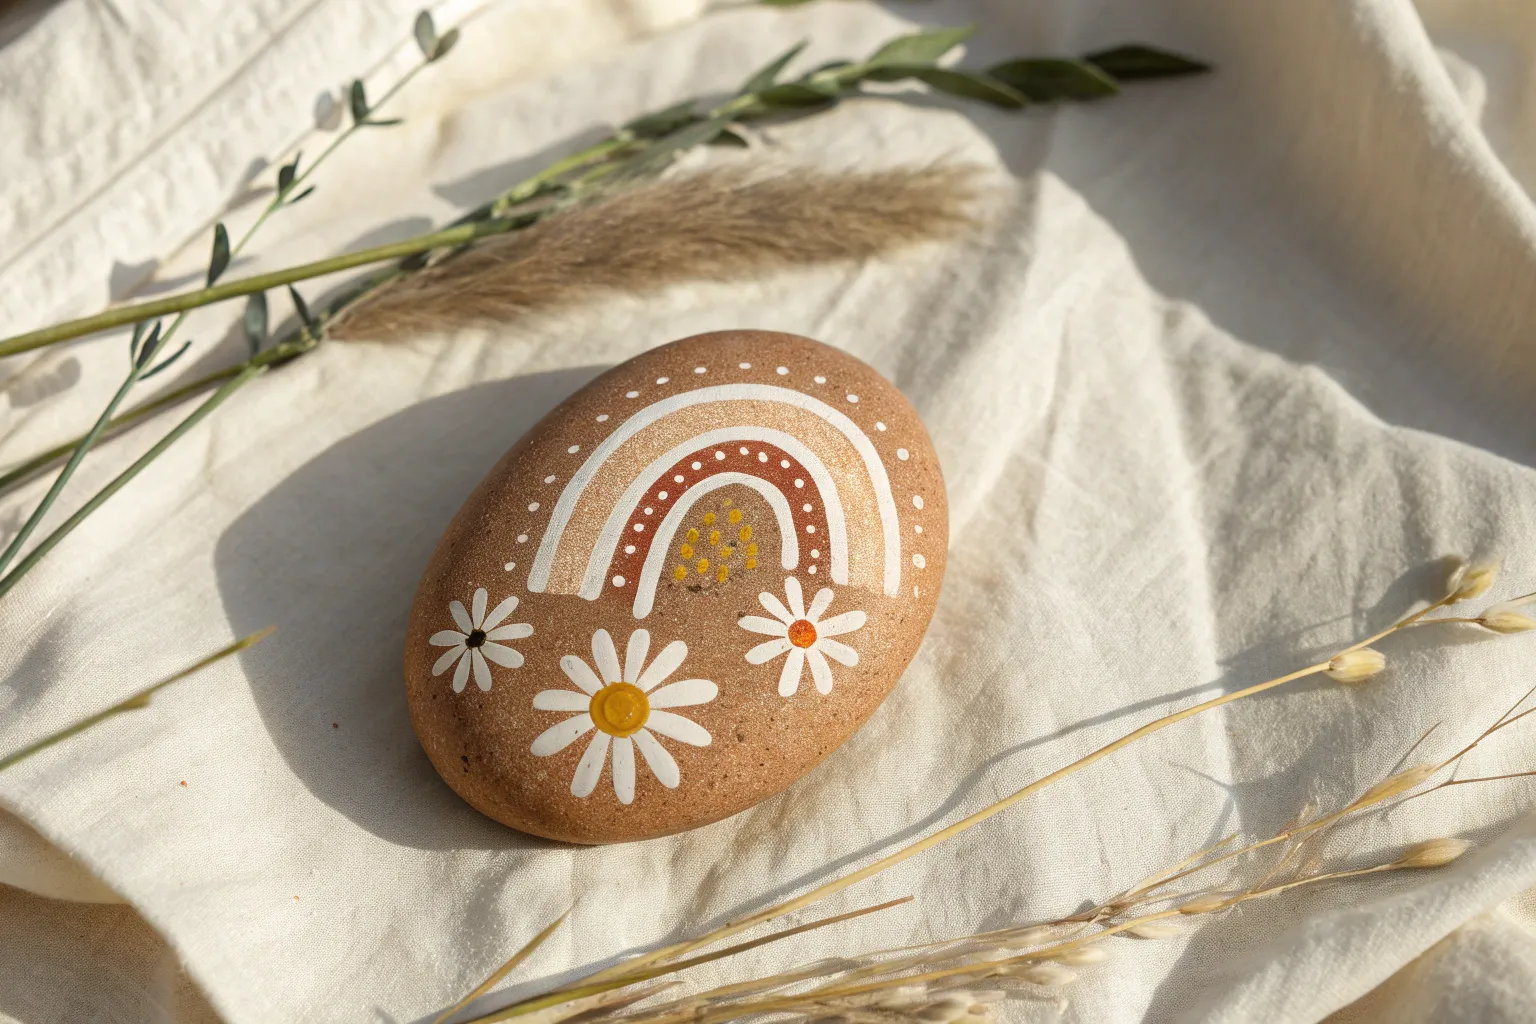
Dot Flowers Made From Simple Circles
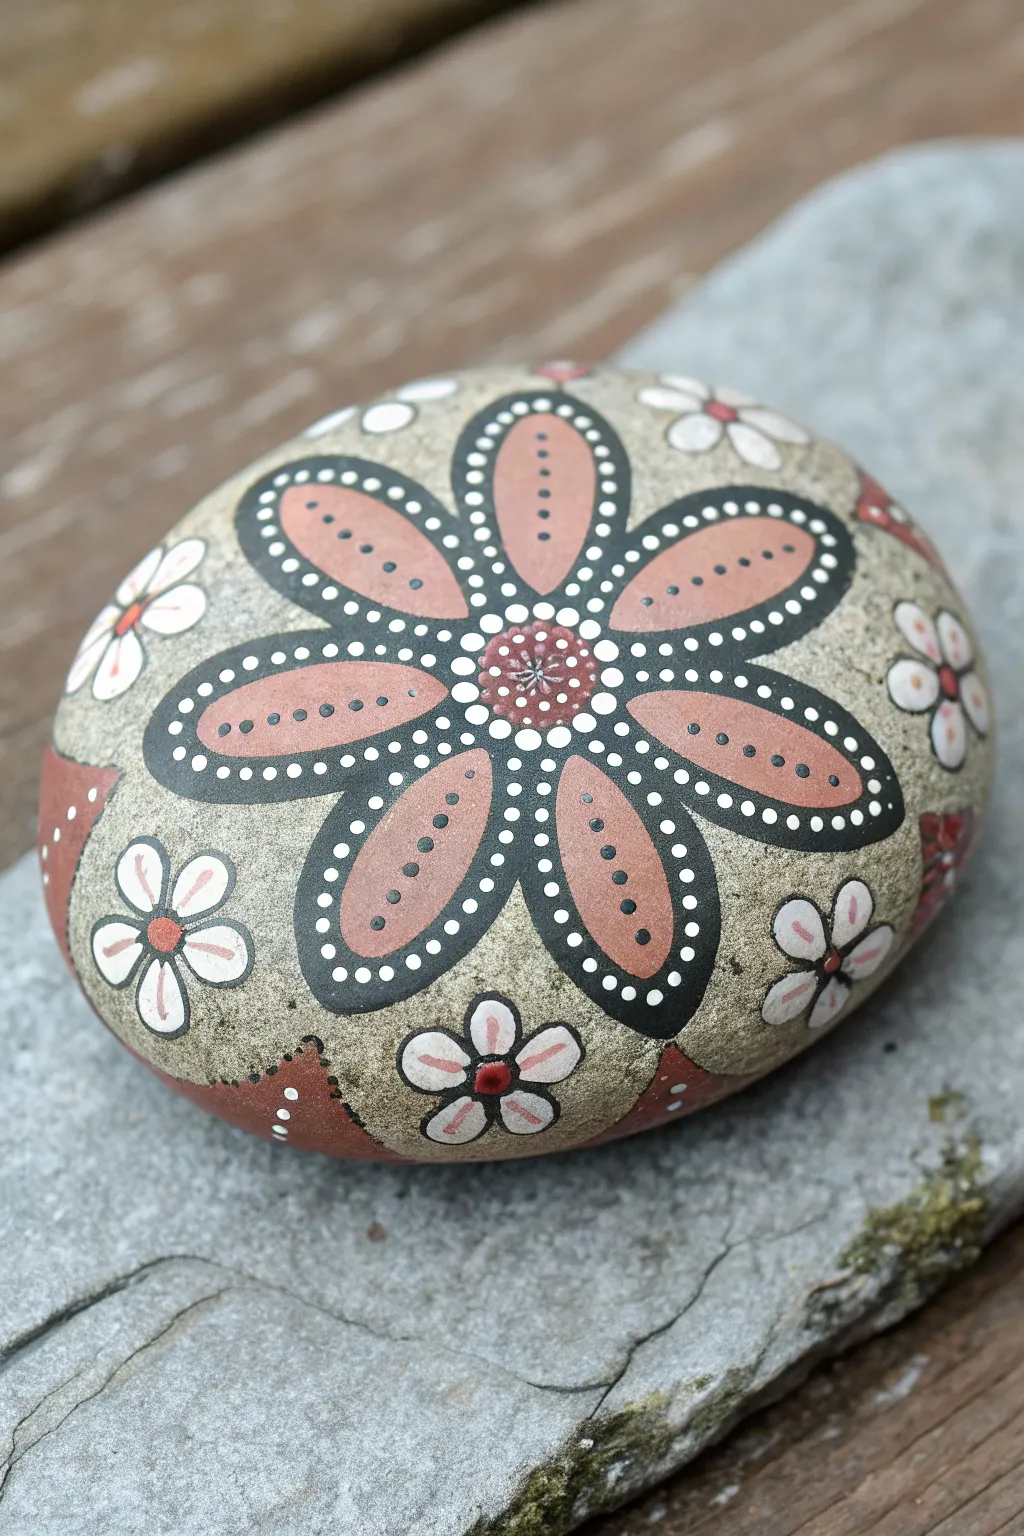
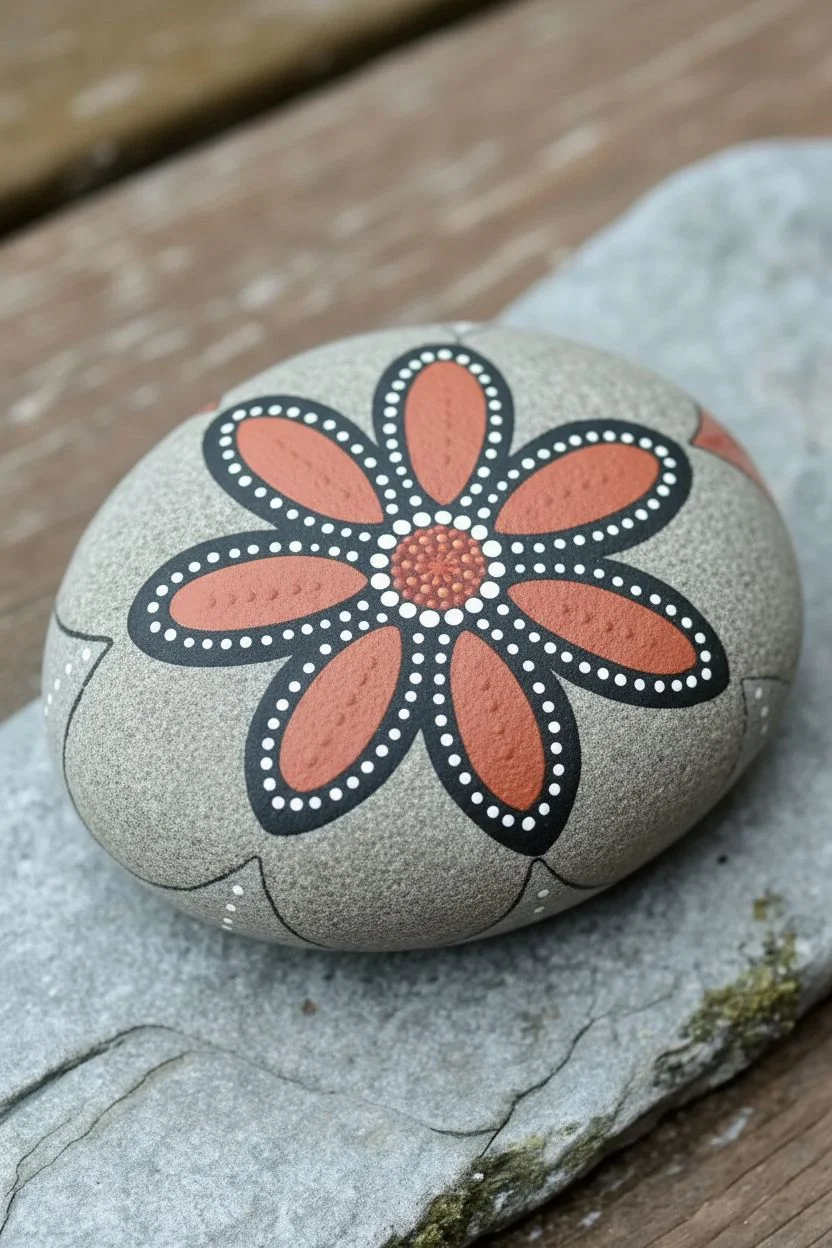
Transform a humble grey stone into a striking piece of folk art with this detailed mandala flower design. By combining simple teardrop shapes with precise dotting techniques, you create a harmonious pattern of burnt orange and stark black and white accents.
Detailed Instructions
Materials
- Smooth, round river rock (approx. 4-5 inches wide)
- Acrylic paints: Burnt Orange (or Terracotta), Black, White, Red (for centers)
- Fine tip paint brushes (size 0 and 00)
- Dotting tools (various sizes, or use ends of brush handles/toothpicks)
- Acrylic sealer (matte or glossy spray)
Step 1: Painting the Central Flower
-
Preparation:
Begin by washing your stone thoroughly with soap and water to remove any dirt or oils. Let it dry completely. The charm of this design relies on the natural grey stone showing through, so we won’t be painting a base coat. -
Marking the Center:
Find the approximate center of your rock. Using a small dotting tool dipped in burnt orange paint, place a single dot right in the middle. This will anchor your entire design. -
Creating the Center Cluster:
Around that initial center point, use a slightly larger dotting tool to create a tight circle of burnt orange dots. You want a clustered look that forms the flower’s heart. -
Outlining the Petals:
Using a very fine brush and black paint, lightly sketch or paint the outline of eight large teardrop shapes radiating from the center cluster. Imagine a compass: paint North, South, East, and West petals first, then fill in the diagonals to keep spacing even. -
Thickening the Borders:
Go back over your black petal outlines. You want a distinct, bold black border. Make the lines thick enough to eventually hold small white dots later. -
Filling the Petals:
Dip a medium brush into your burnt orange paint. Carefully fill inside each teardrop shape. I find it helpful to leave a tiny sliver of unpainted stone between the orange fill and the black border to keep the colors crisp, though touching is fine too.
Paint Consistency Pro Tip
If your dots have peaks like little mountains, your paint is too thick. Thin it slightly with a drop of water or flow medium until it creates smooth, flat domes.
Step 2: Adding Detailed Dotwork
-
Dotting the Petal borders:
Once the black outline is dry, take a small dotting tool or toothpick dipped in white paint. Carefully place a series of small, evenly spaced dots directly on top of the black border of each petal. -
Refining the Center:
Return to the orange center cluster. Using white paint and a fine tool, add tiny white dots between the orange ones. Add a tiny red or dark accent dot in the very middle for depth. -
Inner Petal Details:
Down the center of each orange petal, paint a straight line of black dots. Start with slightly larger dots near the outer tip and make them progressively smaller as you move toward the flower center. -
Outer Edging Dots:
Around the main central cluster (but inside the base of the petals), add a ring of white dots to separate the center from the petals visually.
Step 3: The Background Elements
-
Painting Small White Flowers:
In the open grey spaces between the large orange petals, paint smaller 5-petaled flowers. Use white paint for the petals. These should be simple, rounded shapes. -
Adding Flower Centers:
Once the white petals are dry, place a small dot of burnt orange or red in the center of each small white flower. -
Creating Corner Accents:
If your rock has visible sides or corners like the one shown, paint partial semi-circles of burnt orange along the rim. Outline these shapes in black to match the main flower. -
Detailing the Accents:
Just like the main petals, add a row of white dots along the black outline of these side accents. -
Final Touches:
Inspect your rock for any sparse areas. You can add tiny standalone white dots in open grey areas to balance the composition, but don’t overcrowd it. Let the natural stone breathe. -
Sealing:
Allow the paint to cure for at least 24 hours. Once fully dry, apply a clear acrylic sealer to protect your detailed work from weather and scratches.
Level Up: Color Gradient
Try mixing a lighter shade of orange for the tips of the petals and blending it into the darker burnt orange near the center for a beautiful ombré effect.
Place your finished mandala stone in a garden nook or on a desk where its symmetry can bring a moment of calm
Bumblebee Stripe Rocks
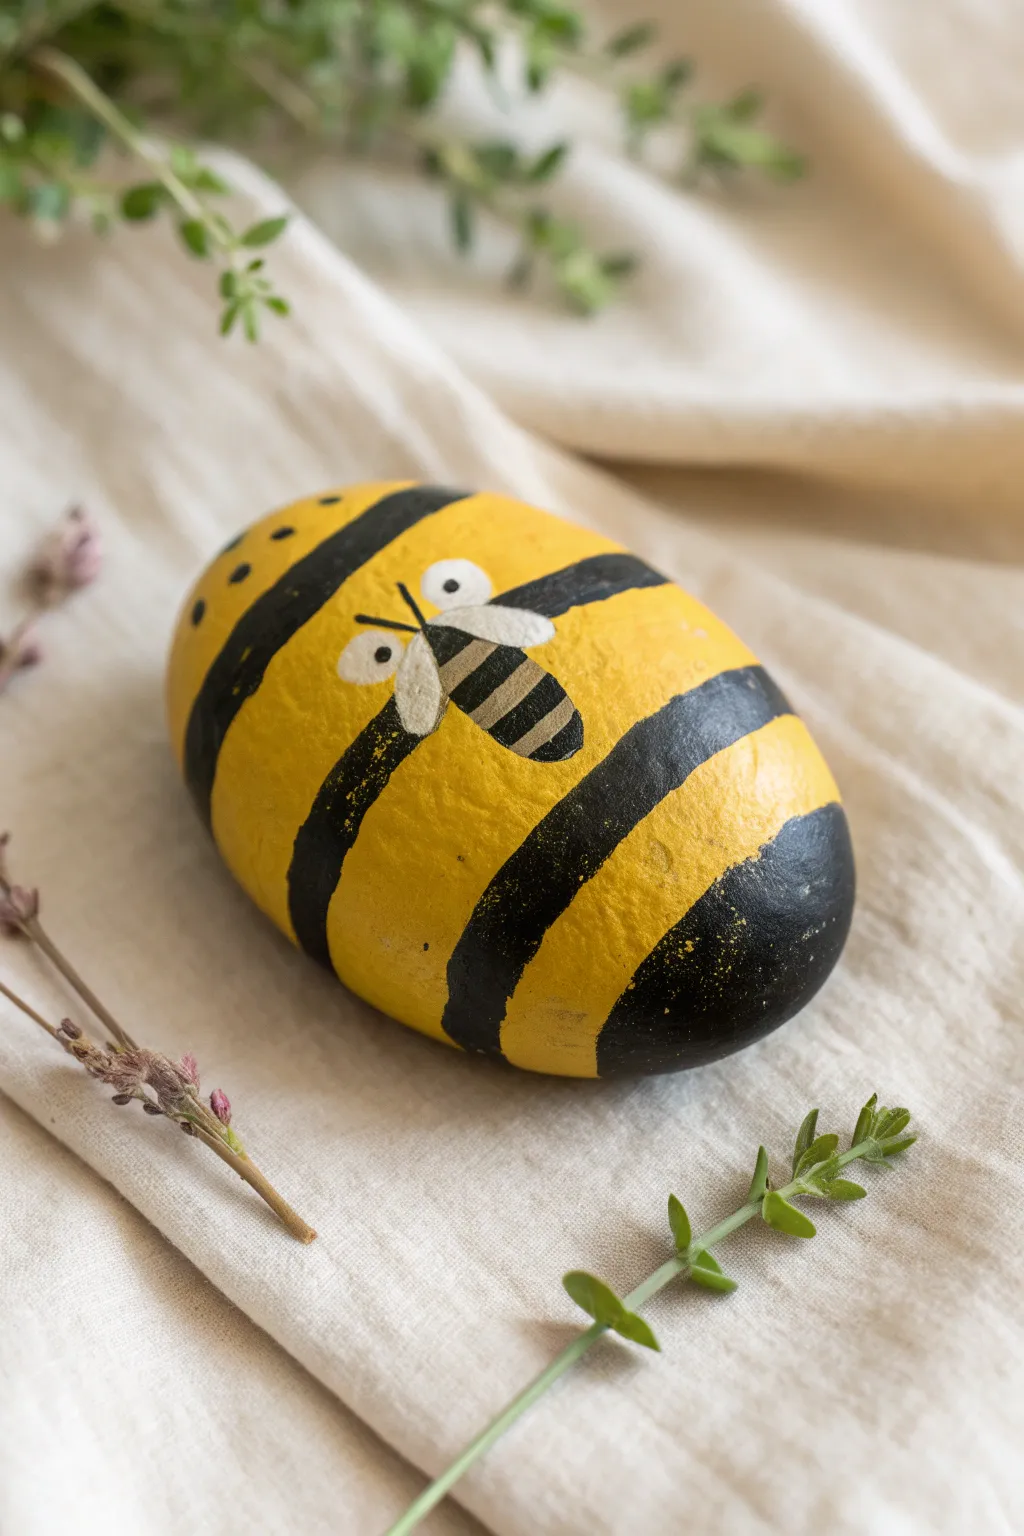
Transform a simple garden stone into a cheerful, buzzing centerpiece with this beginner-friendly project. The bold yellow and black stripes create a striking background for a tiny, whimsical bee character right in the center.
How-To Guide
Materials
- Smooth, oval-shaped river rock
- Yellow acrylic paint (bright, sunny shade)
- Black acrylic paint
- White acrylic paint
- Grey acrylic paint (or mix black and white)
- Flat paintbrush (medium size)
- Fine detail paintbrush (size 0 or 00)
- Dotting tool or toothpick
- Spray sealant or Mod Podge
Step 1: Base Coat
-
Clean the Stone:
Begin by washing your stone with warm soapy water to remove any dirt or oils. Let it dry completely before starting, as this ensures the paint adheres properly. -
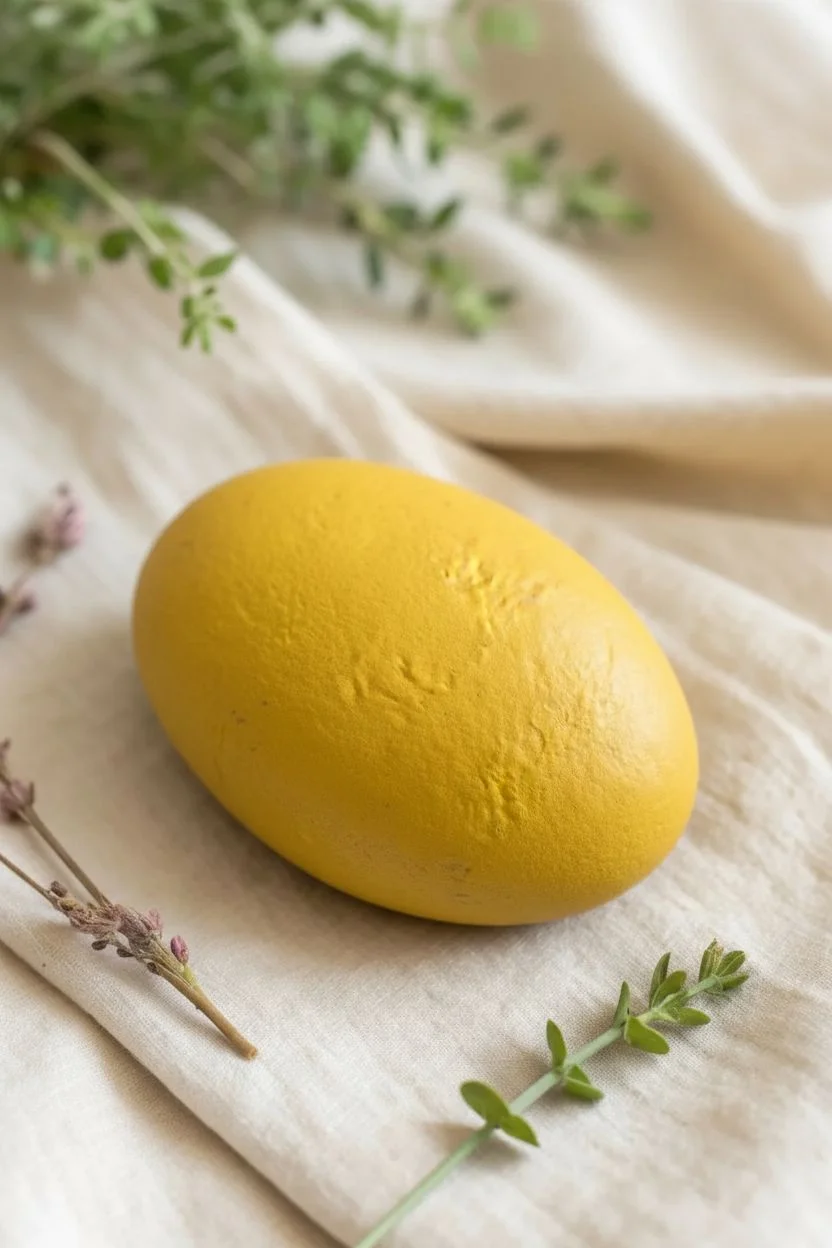
Apply Yellow Base:
Paint the entire top surface of the rock with a bright yellow acrylic paint. You may need two or three thin coats to get full, opaque coverage. Allow each layer to dry fully before adding the next.
Smooth Moves
To get super clean lines on your large stripes, you can use thin strips of masking tape or painters tape, pressing the edges down firmly.
Step 2: Painting the Stripes
-
Plan the Black Stripes:
Visualize where your stripes will go. This design features thick, curved black bands that wrap around the rock. -
Paint the Ends:
Start by painting the very tip of the rock black to create solid end-caps. -
Create the First Stripe:
Using your medium flat brush, paint a bold black stripe near one end. The edges don’t have to be perfectly straight; a slightly organic, hand-painted look adds charm. -
Create the Second Stripe:
Paint a second, matching black stripe near the other end of the rock. Leave a wide yellow gap in the center of the stone—this is where your character will live. -
Touchups:
If the edges look messy, wait for the black paint to dry and carefully neaten them up with a little yellow paint.
Glitter Wings
After painting the white wings on the mini bee, add a layer of iridescent glitter paint or shimmer glaze to make them sparkle in the sun.
Step 3: The Mini Bee Character
-
Outline the Wings:
In the center of the wide yellow band, use white paint and a fine detail brush to paint two small, teardrop-shaped wings pointing outward. They should look like leaves. -
Paint the Bee Body:
Between the wings, paint a small oval shape using grey paint for the bee’s body. -
Add Wing Details:
Once the white wings are dry, dab two small white circles on the outer edges for the eyes. I find a dotting tool works best here for perfect circles. -
Body Stripes:
Switch to your finest detail brush and black paint. Carefully paint horizontal stripes across the small grey body of the mini bee. -
Add the Antennae:
Paint two very thin black lines extending up from the head area in a ‘V’ shape. -
Finishing the Face:
Use a toothpick dipped in black paint to add tiny dots inside the white eye circles for pupils.
Step 4: Final Details
-
Add Decorative Dots:
On the yellow section near the top of the rock (above the stripes), add a small cluster of black dots using the tip of a paintbrush handle to suggest texture or movement. -
Dry and Seal:
Let the entire rock dry overnight. Once cured, apply a coat of clear spray sealant to protect your design from weather and chipping.
Now you have a happy little garden companion ready to hide among your flowers


Sweet and Simple Strawberry Rocks
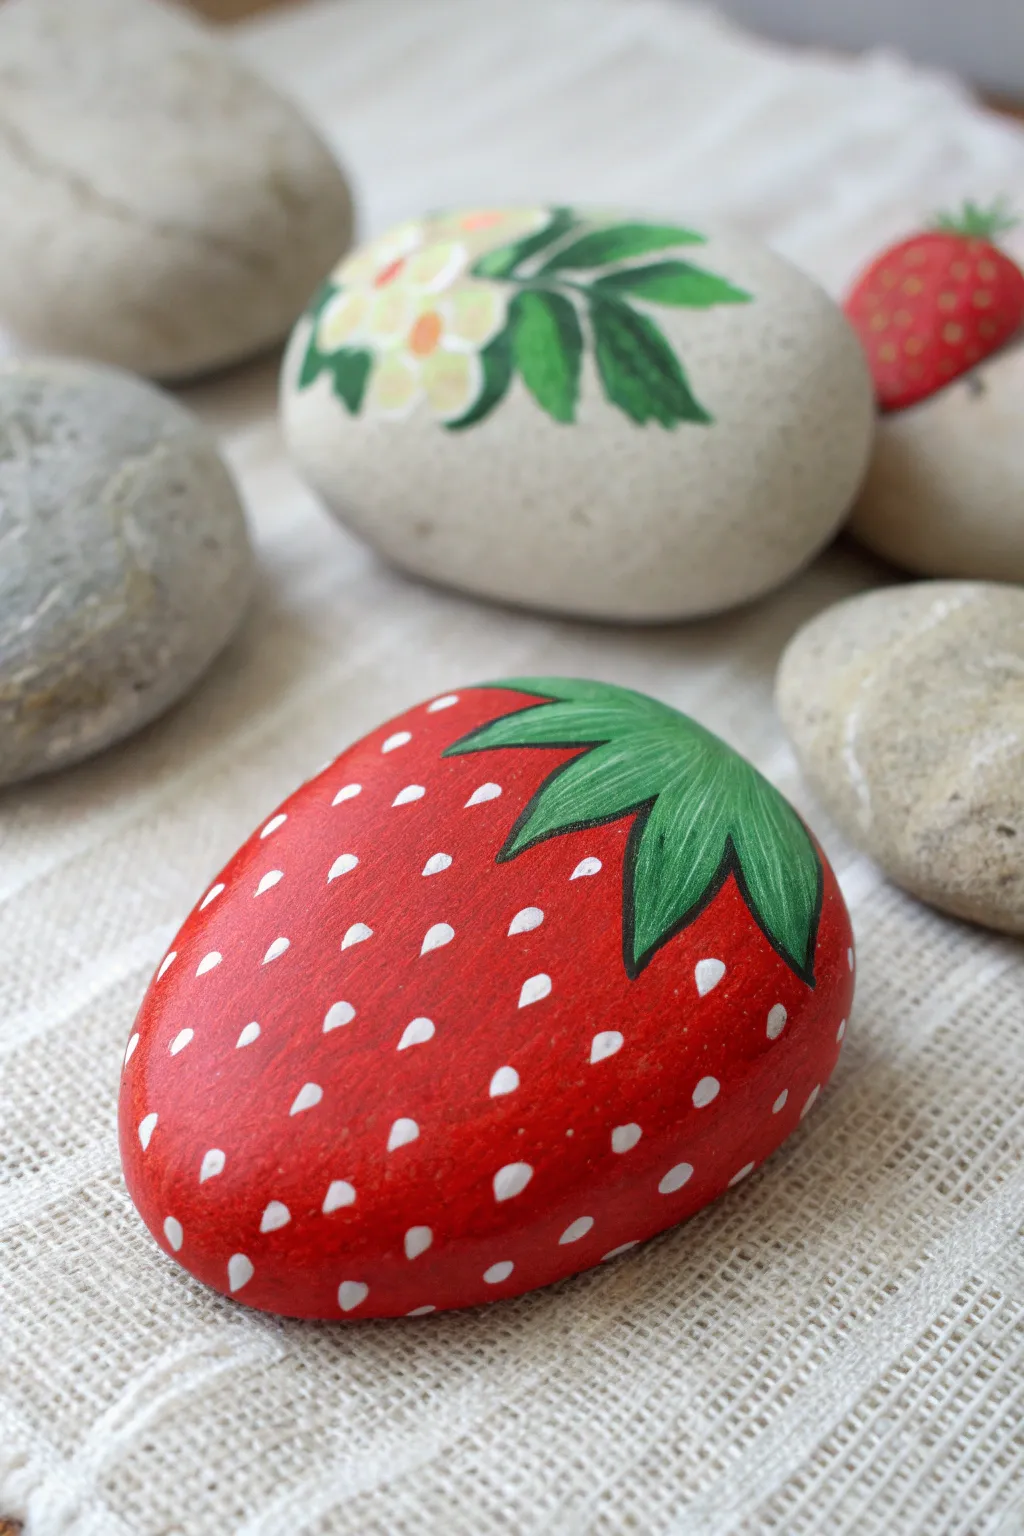
Transform a simple garden stone into a vibrant, sun-ripened strawberry with this fun painting project. The result is a charming piece of decor that looks almost good enough to eat, perfect for brightening up flower pots or garden paths.
Step-by-Step Guide
Materials
- Smooth, oval-shaped river rock
- Acrylic paint (Bright Red, Dark Red, White, Leaf Green, Dark Green)
- Flat paintbrush (medium)
- Small round paintbrush (fine detail)
- Toothpick or dotting tool
- Pencil
- Clear acrylic sealer (spray or brush-on, gloss finish)
- Palette or paper plate
- Water cup and paper towels
Step 1: Preparation & Base Coat
-
Clean the surface:
Begin by washing your rock thoroughly with soap and water to remove any dirt or oils. Let it dry completely before starting. -
Sketch the leaves:
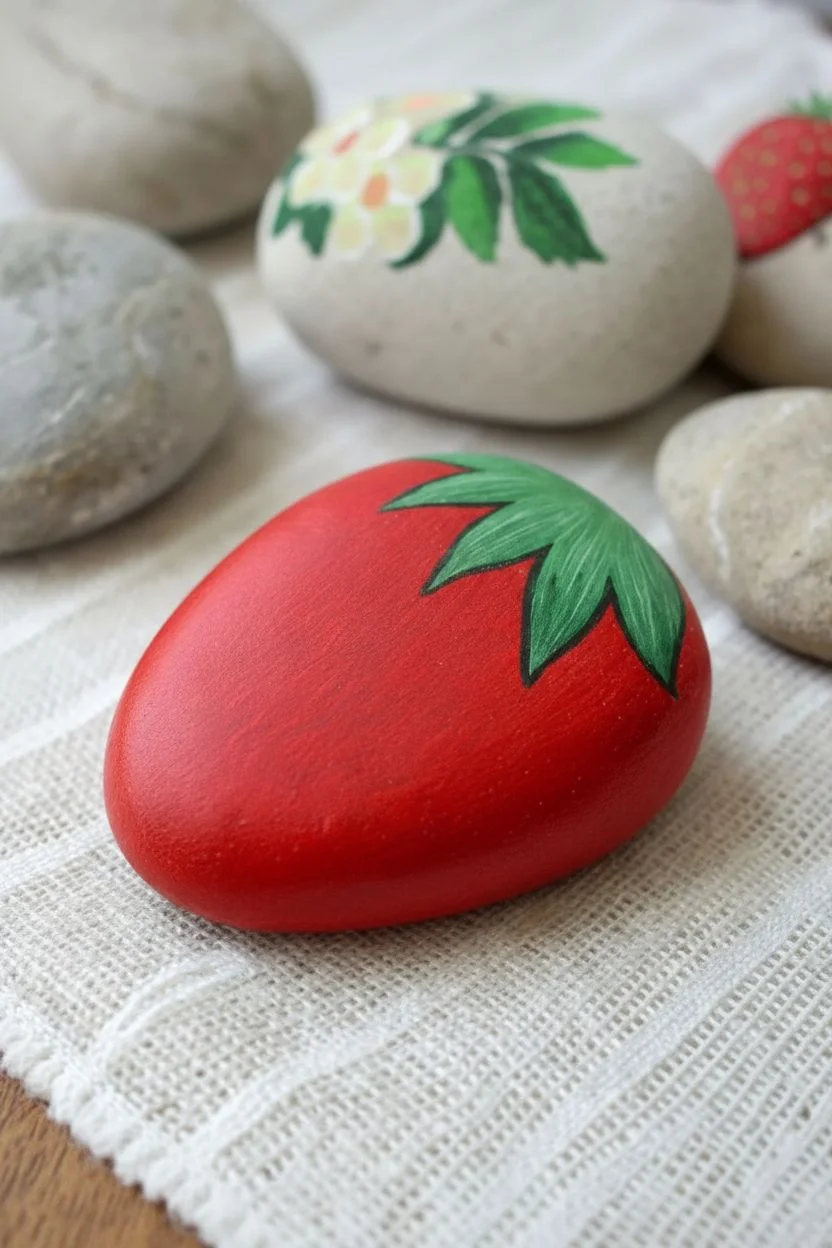
Using a pencil, lightly sketch the outline of the strawberry leaves (the calyx) at the wider end of the rock. Draw about five triangular, jagged points extending outward from a central point. -
Apply the red base:
Load your flat brush with bright red acrylic paint. Paint the entire body of the strawberry up to the pencil line of the leaves. -
Add a second coat:
Acrylics can sometimes look streaky on the first pass. Once the first layer is dry to the touch, apply a second coat of bright red for a solid, opaque coverage.
Step 2: Adding the Greens
-
Paint the leaves:
Switch to your small round brush and load it with leaf green paint. Carefully fill in the leaf shapes you sketched earlier, ensuring you cover the edges where the red paint stops. -
Detail the leaf texture:
To give the leaves dimension, mix a tiny bit of dark green with your leaf green. Paint thin lines gently sweeping from the center of the stem out to the tips of each leaf to create vein-like textures. -
Define the edges:
For a sharp look, outline the leaves very faintly with the darker green shade. This separates the green cap from the bright red fruit body.
Seed Precision Trick
Does your brush feel clumsy? Use a toothpick instead! Dip the sharp end into white paint to stamp perfect, tiny seeds without needing a steady hand.
Step 3: Seeds & Highlights
-
Create the seeds:
This is the most crucial step for realism. Take a small round brush or a fine dotting tool and dip it in white paint. Make small teardrop shapes scattered across the red surface. -
Proper spacing:
Keep the ‘seeds’ evenly spaced but not perfectly regimented. Aim for a diagonal grid pattern, as this mimics how real strawberry seeds grow. -
Refine the seed shape:
If your white dots look too round, use the very tip of your brush to drag the bottom of the dot slightly downward to create that classic teardrop point. -
Add depth to seeds:
Make the seeds pop by painting a tiny accent. Mix a drop of dark red into your white paint (to make pink) or use plain yellow, and dab a minuscule dot inside or just below some of the white seeds. -
Wait for drying:
Give the rock plenty of time to dry completely. If you rush to the sealing step while the thick dots of paint are wet, you risk smearing your hard work.
Make a Strawberry Patch
Paint rocks of different sizes and cluster them together. Add a rock painted with white flowers and green vines to simulate a blooming strawberry plant.
Step 4: Finishing Touches
-
Seal the artwork:
Take your clear acrylic sealer—I prefer a gloss finish for fruit because it mimics that fresh, juicy sheen—and apply a thin, even coat over the entire painted surface. -
Protect the bottom:
Once the top is dry, don’t forget to flip the rock and seal the bottom, even if unpainted, to protect the stone from moisture wicking up from the soil.
Now you have a delightful, everlasting strawberry to add a pop of color to your home or garden
Easy Watermelon Slice Rocks
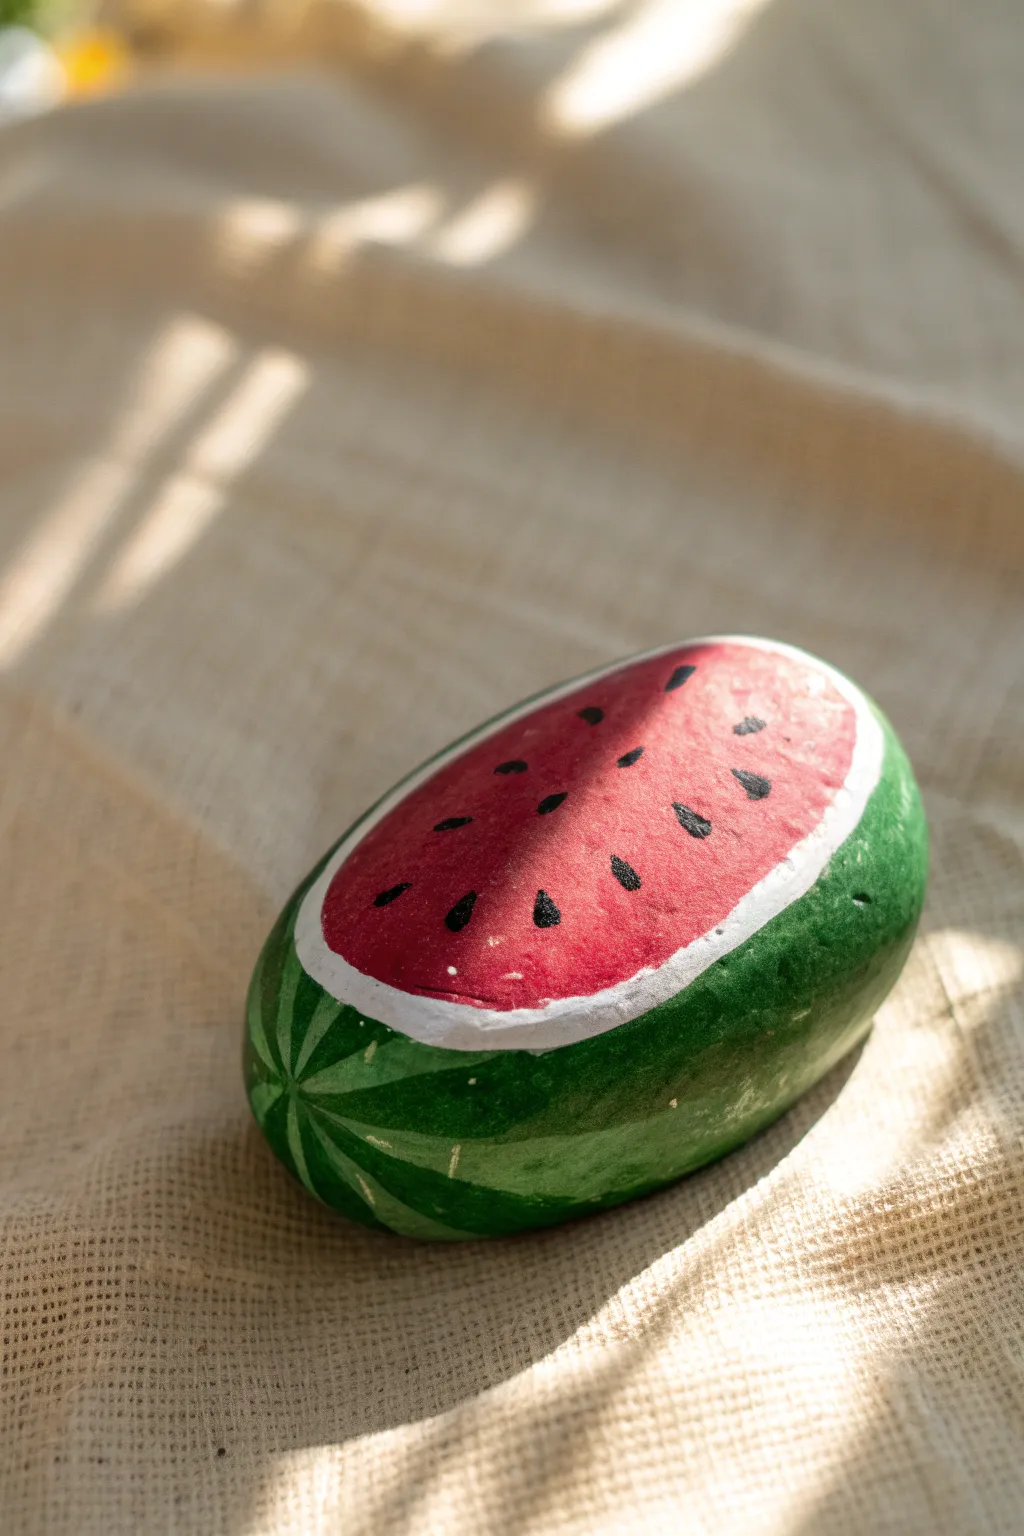

Transform a simple stone into a slice of summer with this vibrant watermelon rock painting project. The result is a delightfully realistic looking fruit wedge that makes for cheerful garden decor or a sweet handmade gift.
Detailed Instructions
Materials
- Smooth, oval-shaped river rock
- Acrylic paints: Bright Red, White, Dark Green, Light Green, Black
- Flat paintbrush (medium size)
- Small fine-liner detail brush
- Pencil for sketching
- Palette or paper plate for mixing
- Cup of water
- Paper towels
- Acrylic spray sealer (gloss or matte)
Step 1: Base and Rind
-
Clean your canvas:
Begin by washing your rock thoroughly with soap and water to remove any dirt or oils. Let it dry completely before you start painting so the layers adhere properly. -
Sketch the separation:
Using a pencil, lightly draw an oval shape on the top face of the rock. This line will separate the red fruity flesh from the green rind later on. -
Paint the fruit flesh:
Fill in the inner oval area using your bright red or pinkish-red acrylic paint. Use your flat brush for smooth coverage. -
Check opacity:
Depending on your paint quality, the red might look a bit translucent. If so, let the first coat dry and apply a second layer for a rich, juicy color. -
Base coat the rind:
While the top dries, paint the remaining sides and bottom of the rock with a dark green acrylic paint. -
Complete coverage:
Ensure the green paint meets the edge of where your red center will be, but leave a small gap of bare rock if possible to make the next step easier. -
Dry completely:
Allow the entire rock to dry. It’s crucial that the red and green paints are dry to the touch to prevent smudging.
Seed Spacing Tip
Visualize a triangle pattern when placing seeds rather than rows. This keeps the distribution looking random but balanced across the red surface.
Step 2: Details and Definition
-
Paint the pith:
Using a smaller brush and white paint, create a rim around the red center. This white band represents the watermelon rind’s pith. -
Refine the border:
Carefully trace the edge where the white pith meets the green skin. You want a distinct, fairly thick white line separating the red from the green. -
Add rind stripes:
Mix a little light green with your dark green, or use straight light green paint. Using a fine brush, paint wavy, jagged stripes starting from the very bottom center of the rock and flaring upwards toward the white rim. -
Blend the stripes:
If the stripes look too stark, I find that slightly watering down the light green paint helps them blend more naturally into the dark green base. -
Create the starburst:
On the bottom or end of the rock (the ‘rind’ end), bring all your light green stripes together to meet at a central point, creating a starburst pattern characteristic of watermelons. -
Paint the seeds:
Dip your fine-liner brush into black paint. Paint small teardrop shapes scattered across the red area. -
Correct seed orientation:
Make sure the pointed ends of the teardrop seeds are facing inward toward the center of the fruit slice. -
Vary the seeds:
Don’t make them too uniform; random placement looks more organic. You can paint some slightly smaller than others. -
Optional highlights:
For extra realism, add a tiny white dot or thin line on one side of each black seed to mimic light reflecting off the wet seed. -
Seal the deal:
Once all paint is completely bone dry (wait at least an hour), take the rock outside and spray it with a clear acrylic sealer to protect your artwork from the elements.
Take a bite!
Paint a jagged ‘bite mark’ into the side using white paint over the red and green sections, creating the illusion that someone took a nibble.
Place your finished slice in a sunny spot in the garden to confuse hungry visitors.
Simple Cactus Rocks With Little Spines
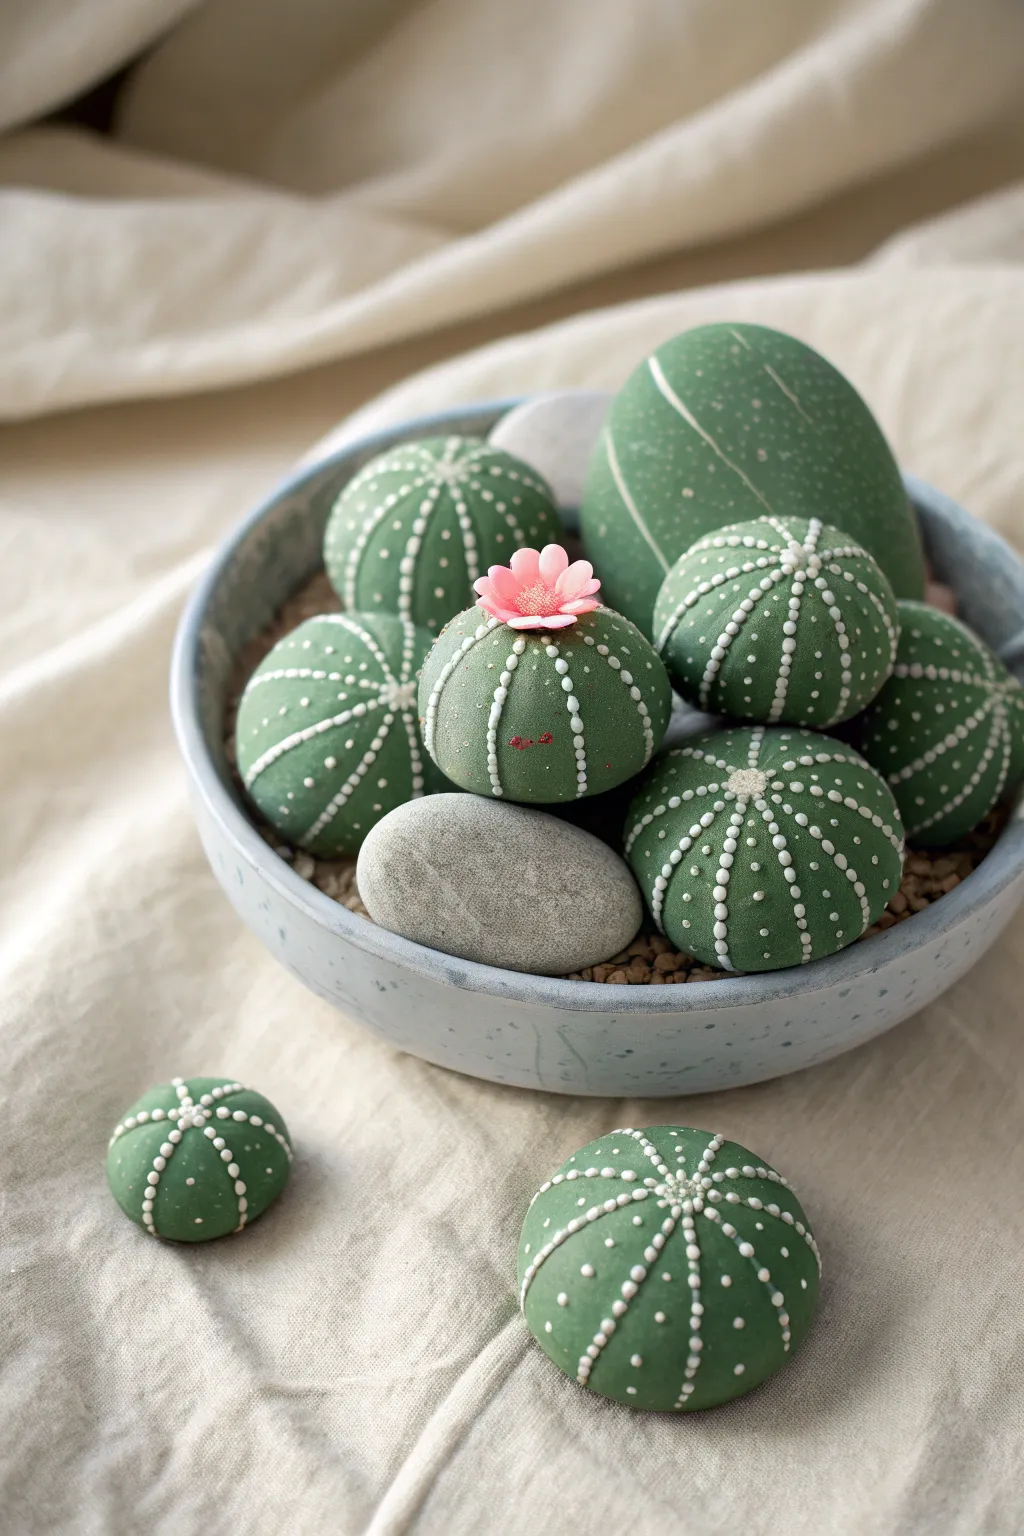
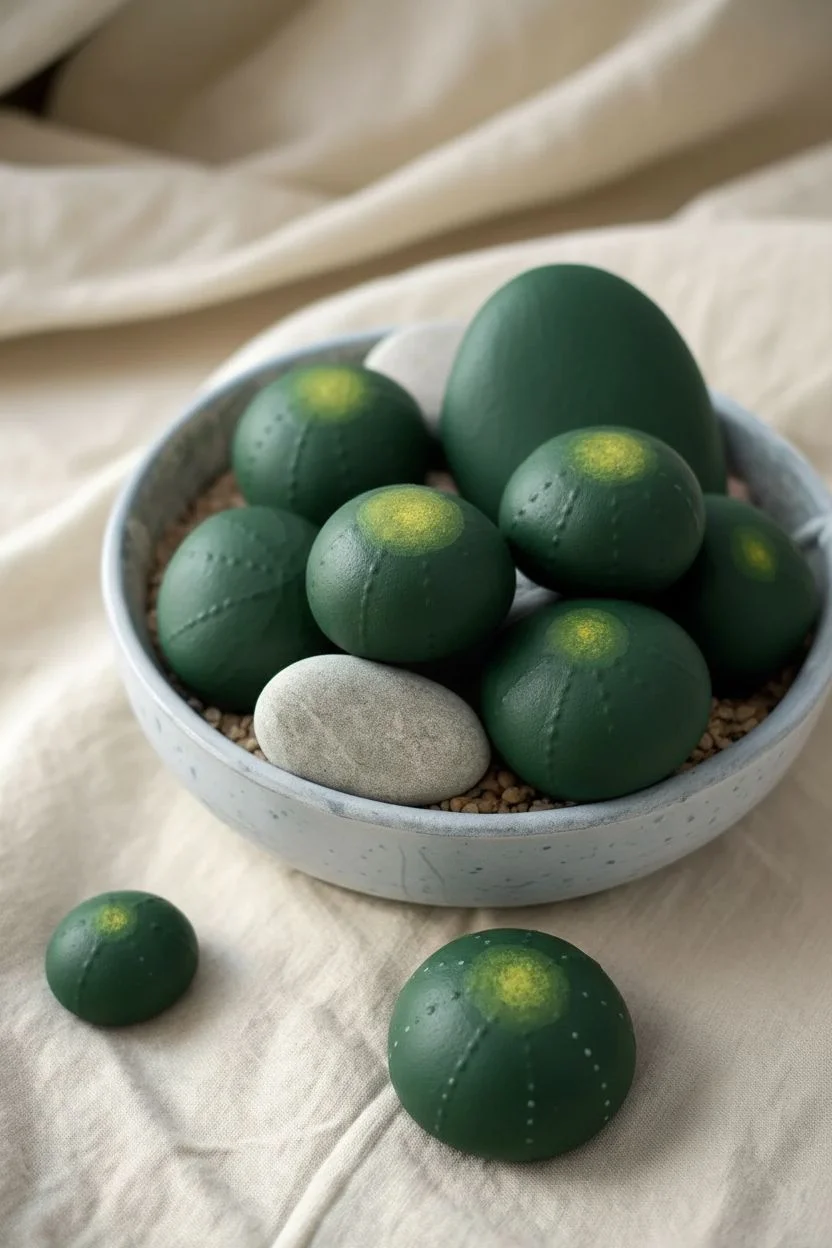
Transform smooth river stones into an adorable, care-free succulent garden that never needs watering. With shades of soothing green and delicate white detailing, these painted rocks mimic the texture of sea urchin cacti perfectly.
Step-by-Step
Materials
- Smooth, round river rocks (various sizes)
- Acrylic paint: Dark green, medium sage green, lighter lime green
- Acrylic paint: White
- Acrylic paint: Soft pink (for flower)
- Flat paintbrush (medium)
- Fine detail brush (size 0 or 00)
- Dotting tool or toothpick
- Shallow ceramic bowl or planter
- Small pebbles or gravel (for filling the bowl)
- Matte spray varnish (optional)
Step 1: Base Coating
-
Clean the surface:
Begin by washing your chosen rocks with soap and warm water to remove any dirt or oils. Let them dry completely before applying any paint. -
Select your greens:
Choose a variety of green acrylics to create depth in your arrangement. Use a darker forest green for some stones and a muted sage or olive tone for others. -
Apply the first coat:
Using a flat brush, paint the entire top and sides of each rock. You don’t need to paint the very bottom that will sit in the gravel, which makes handling them easier. -
Build opacity:
Acrylic paint can sometimes be translucent on dark stones. Allow the first coat to dry for about 15 minutes, then apply a second coat for a solid, opaque finish. -
Create a gradient (optional):
For a more realistic look, I like to mix a tiny bit of yellow into my green for the very center top of the rock, blending it outwards while the paint is still wet to simulate light hitting the cactus tip.
Step 2: Detailing the Cacti
-
Plan the spines:
Visualize the center point on top of your rock. The spine patterns will radiate outward from this single point like a starburst. -
Paint the ribs:
Using your finest detail brush and a slightly lighter shade of green than your base color, paint thin, faint lines radiating from the center down the sides. These guide where your dots will go. -
Prepare the white paint:
Place a small dollop of white acrylic paint on your palette. If it’s very thick, thin it with a single drop of water so it flows smoothly off your tool. -
Start dotting:
Dip a dotting tool or the tip of a toothpick into the white paint. Start at the very center top of the rock and place your first dot. -
Create the spine lines:
Working along the faint guidelines you painted earlier, place small white dots in rows down the sides of the rock. Try to keep the spacing consistent between each dot. -
Vary the patterns:
On some rocks, make the dots distinct and separated. On others, you can paint tiny ‘x’ shapes or small stars instead of simple dots to mimic different cactus varieties. -
Add a flower base:
Select one ‘hero’ rock to have a bloom. Paint a small pink circle at the very top center, covering the point where your white lines meet. -
Detail the flower petals:
Using a small brush, add defined petal shapes in a lighter pink on top of the base circle. Add a tiny yellow or white center to the flower for realism.
Wobbly Lines?
If your spine lines look shaky or uneven, don’t wipe it all off. Let the white dry, paint over the mistake with your base green color, and try again.
Step 3: Assembly
-
Seal the artwork:
Once all paint is perfectly dry (give it an hour), spray the rocks with a matte varnish. This protects the paint from chipping without adding an unnatural glossy shine. -
Prepare the planter:
Fill your shallow bowl or dish with small gravel or pebbles. Fill it almost to the rim to give your cacti a raised platform. -
Arrange the garden:
Nestle your painted rocks into the gravel. Place larger rocks in the back and smaller ones in front. You can leave one or two unpainted grey stones in the mix for natural contrast.
Textured Spines
For a 3D effect, use ‘Puffy Paint’ or dimensional fabric paint for the white dots. They will dry raised, giving your cactus a real tactile texture.
Place your new stone garden on a sunny windowsill where it can look fresh forever
Cute Mushroom Cap Rocks
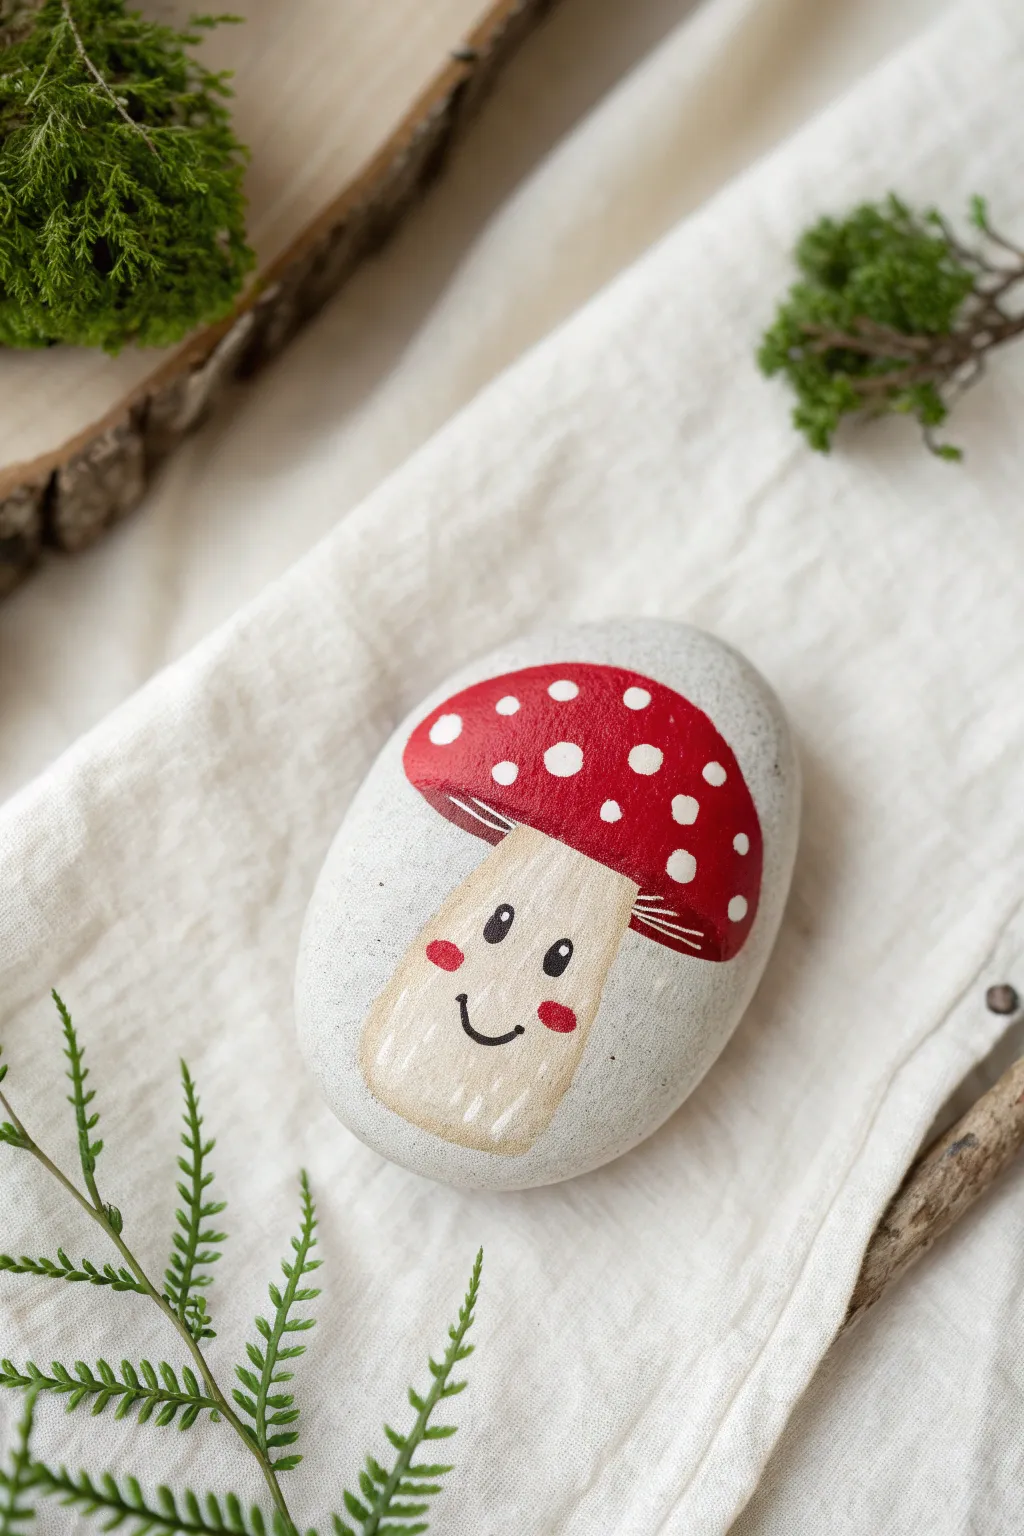
Transform an ordinary grey pebble into a smiling forest friend with this adorable mushroom rock painting project. The design features a classic red-capped mushroom with a kawaii-style face that’s sure to bring a touch of whimsy to your garden or desk.
How-To Guide
Materials
- Smooth, oval-shaped river rock (light grey)
- Acrylic paints (Titanium White, Bright Red, Beige/Tan, Black, Rose Pink)
- Pencil for sketching
- Detail brushes (fine liner and small flat brush)
- Matte or satin sealant spray
- Water cup and palette
- Paper towels
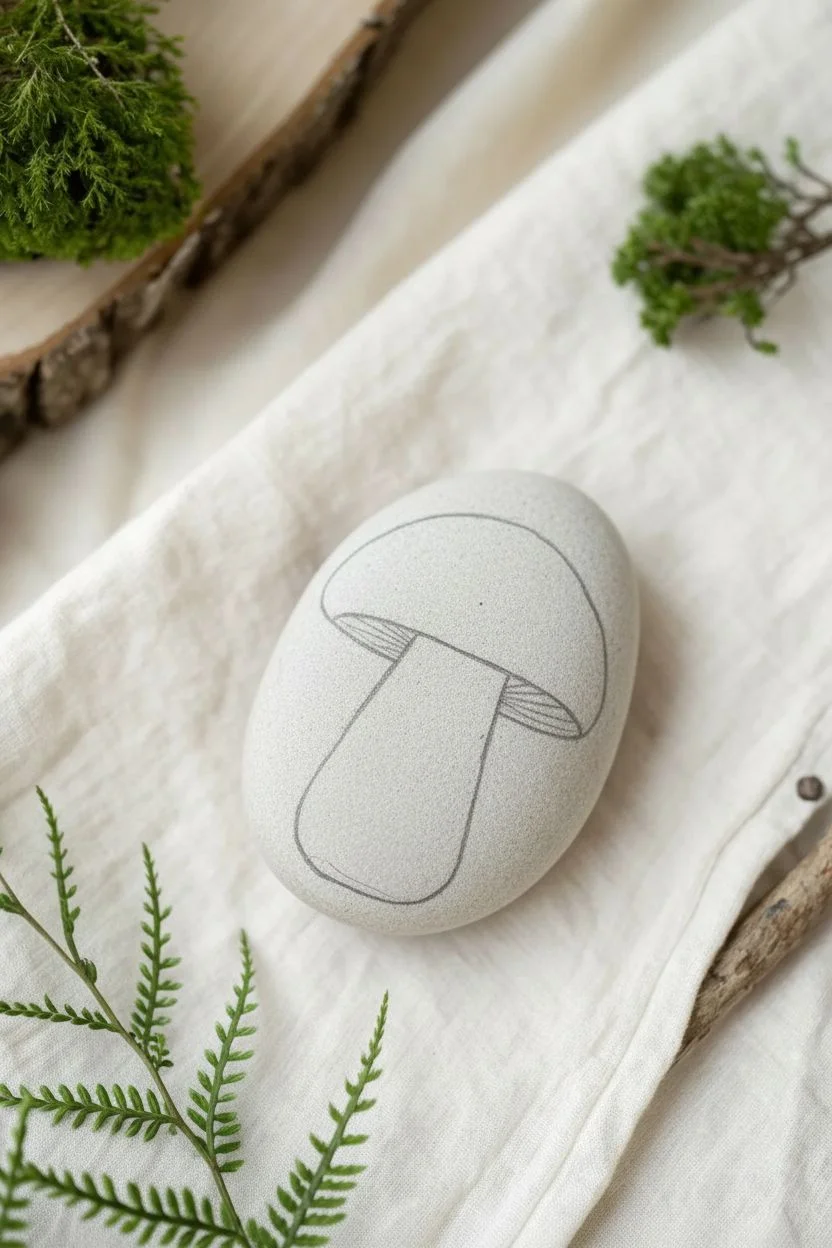
Step 1: Sketching the Shape
-
Clean surface:
Begin by washing your stone with soapy water and drying it completely to ensure the paint adheres properly. -
Outline the stalk:
Using a pencil, lightly sketch a wide, trapezoid-like shape for the mushroom stem in the lower center of the rock. Keep the bottom rounded to match the rock’s curve. -
Add the cap:
Draw a large, rounded semi-circle sitting on top of the stem. It should look like a little helmet or umbrella over the stalk. -
Detail the underside:
Sketch a curved line connecting the bottom corners of the cap, dipping slightly behind the stem to create dimension.
Step 2: Blocking in Color
-
Paint the stem base:
Mix a small amount of white with tan paint to create a creamy beige. Fill in the stem area completely. -
Apply second coat:
Once the first layer is dry, apply a second coat of beige to ensure the grey rock doesn’t show through. -
Base coat the cap:
Using a small flat brush, carefully fill in the top cap area with bright red acrylic paint. -
Cap coverage:
Let the red dry and add another layer. Red can be translucent, so a third ultra-thin layer might be needed for vibrancy. -
The underside:
Paint the narrow sliver of the mushroom’s underside (the area peeking out from under the red cap) with a dark reddish-brown or deep maroon.
Smooth Moves
If your red paint looks streaky, try mixing in a tiny drop of white paint. It increases opacity significantly without turning the red too pink, saving you from painting endless layers.
Step 3: Adding the Face
-
Map the features:
Lightly pencil in the eyes and mouth on the dried beige stem to get the spacing just right before painting. -
Paint the eyes:
Using your finest detail brush or a black paint pen, paint two small, vertical oval shapes for the eyes. -
Add the smile:
Paint a small, simple U-shape between the eyes for a happy little smile. -
Rosy cheeks:
Dip a round paintbrush handle or a dotting tool into pink paint and stamp two oval cheeks just below the eyes. -
Eye sparkles:
Add tiny white dots inside the upper right corner of each black eye to give the character life and shine.
Woodland Scene
Don’t stop at one! Paint a whole family of mushrooms in different sizes, or add a tiny painted ladybug crawling up the side of the stem for extra cuteness.
Step 4: Final Details
-
Texturize the stem:
Mix a slightly lighter shade of beige (more white) and paint thin, vertical streaks near the bottom of the stem for a wood-grain texture. -
Cap spots:
Using the handle end of a brush, dot various sizes of white circles all over the red cap. -
Gills detail:
On the dark maroon underside of the cap, use your finest white brush to paint tiny, thin lines radiating outward to represent the mushroom gills. -
Protection:
Allow the rock to dry overnight, then spray with a matte sealant to protect your artwork from chipping.
Place your finished mushroom rock in a potted plant or on a windowsill to enjoy its cheerful expression every day
Minimal Owl Face Rocks
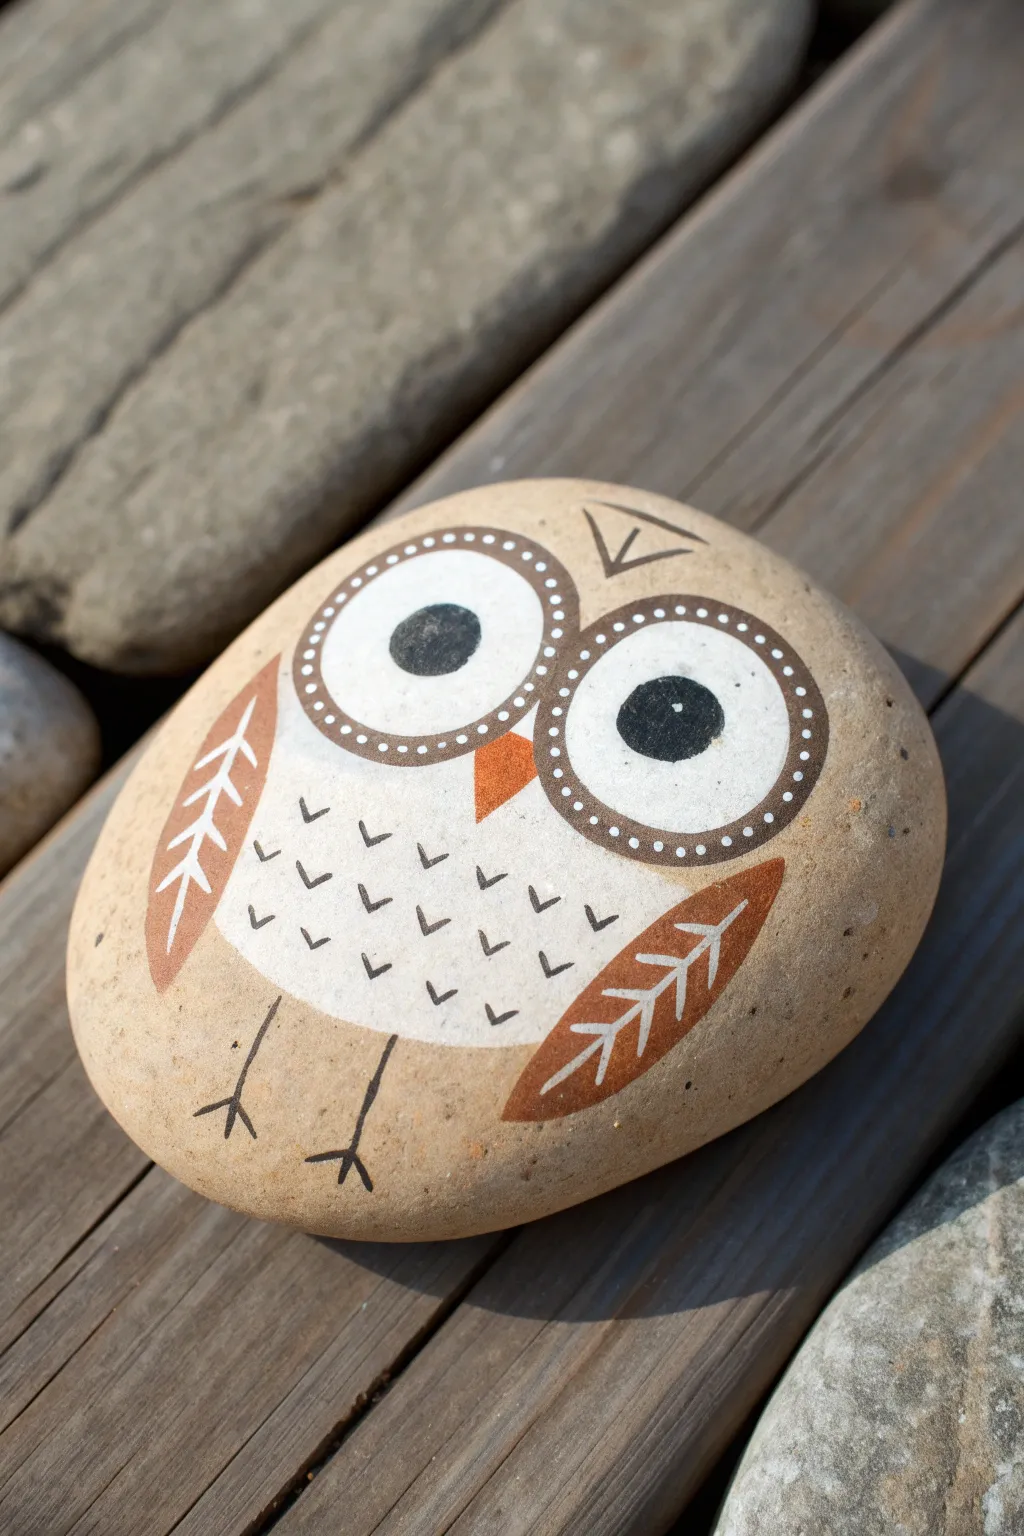
Transform a smooth garden stone into a charming woodland friend with this simple folk-art inspired design. Using clean lines, varying textures, and a limited color palette, you’ll create a stylized owl that looks equally great in a potted plant or as a paperweight.
Step-by-Step Guide
Materials
- Smooth, oval-shaped river rock (cleaned and dried)
- White acrylic paint or paint pen
- Black acrylic paint or fine-point paint pen
- Rust-orange or terracotta acrylic paint
- Medium brown acrylic paint
- Small round paintbrush
- Fine liner brush
- Dotting tool or toothpick
- Matte spray sealant (optional)
Step 1: Planning and Base Work
-
Choose your canvas:
Find a stone that is relatively flat and oval-shaped. A smooth surface is crucial for getting crisp lines, so wash off any dirt and let it dry completely before starting. -
Sketch the outline:
Lightly sketch the owl’s main features with a pencil. Draw two large circles for eyes near the top, a curved ‘U’ shape beneath them for the body’s belly, and mark the position of the wings on the sides. -
Paint the belly:
Fill in the large U-shaped area on the lower half of the rock with white acrylic paint. You may need two coats to get a solid, opaque finish, letting the first layer dry before adding the second.
Uneven Dots?
If your white dots around the eyes vary too much in size, wipe your dotting tool clean after every 3-4 dots. Excess paint build-up on the tool causes blobs.
Step 2: Creating the Eyes
-
Base of the eyes:
Paint two large white circles at the top of the white belly section. These should touch in the middle and dominate the upper part of the rock. -
Outer rim detail:
Using your medium brown paint and a fine brush, carefully outline the white eye circles. Make this line fairly thick, creating a defined brown ring around each eye. -
Adding the pupils:
Once the white paint is fully dry, paint a solid black circle inside each white one. Place them slightly cross-eyed or looking sideways for a quirky expression. -
Dotting the frames:
Take your dotting tool or the tip of a toothpick, dip it in white paint, and create a ring of tiny, evenly spaced dots all around the brown outer rim of the eyes.
Level Up: Night Owl
Swap the white belly for a dark navy blue and use metallic gold or silver for the feather V-shapes and wing details to create a starry, nocturnal version.
Step 3: Wings and Beak
-
Paint the beak:
In the small triangular space between the bottom of the two eyes, paint a sharp, downward-pointing triangle using the rust-orange paint. -
Shape the wings:
Paint a curved, leaf-like shape on the left and right sides of the owl’s body using the medium brown paint. The tips should point downward and slightly inward. -
Feather lines:
Paint small V-shapes or diagonal lines branching off the white spine to create a stylized feather pattern on both wings.
Step 4: Fine Details
-
Draw the forehead markings:
Above the eyes, use black paint to draw a small inverted triangle shape with a line down the middle, suggesting tufts of feathers or ears on the forehead. -
Texture the belly:
On the white belly section, use a fine black pen or brush to paint small, scattered ‘v’ shapes. These simulate fluffy chest feathers. -
Create the feet:
At the very bottom of the rock, paint two stick-figure legs using black. Each foot should have three simple toes spreading out. -
Highlights:
Add a tiny speck of white paint inside the black pupils to bring the owl’s gaze to life. -
Final seal:
Allow the entire project to cure for 24 hours. I usually finish with a spray matte sealant to protect the paint from weather if it’s going in the garden.
Find a cozy spot in your garden or on a bookshelf for your new wise companion to rest
Simple Fish Scale Pattern Rocks

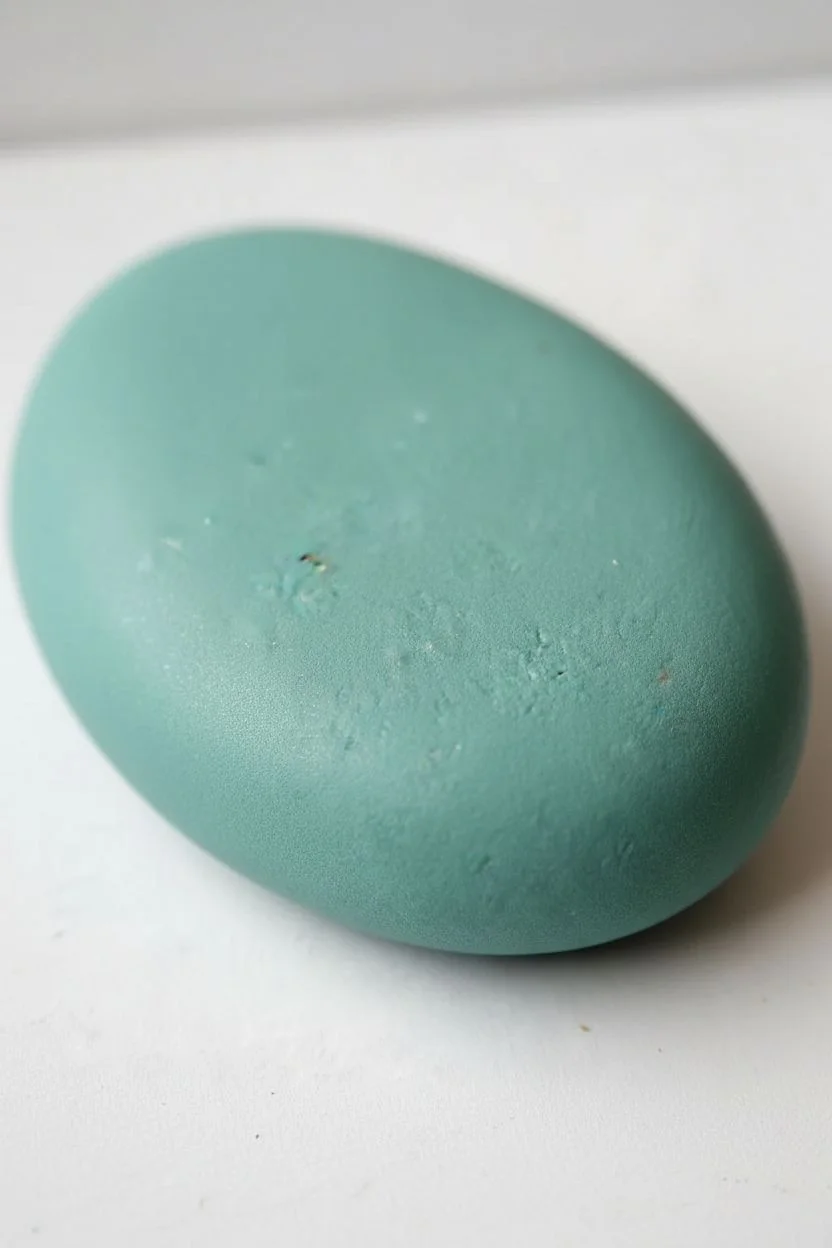
Transform a smooth stone into a shimmering treasure from the sea with this elegant fish scale pattern. The soothing teal background paired with delicate white linework creates a mesmerizing effect that looks much more complicated than it actually is.
Detailed Instructions
Materials
- Smooth, oval river rock (flat is best)
- Teal or seafoam green acrylic paint
- Flat paintbrush
- White extra-fine tip paint pen (0.7mm or smaller)
- Spray sealer or varnish (matte or satin)
- Soap and water for cleaning
- Paper towels
Step 1: Preparation & Base Coat
-
Clean Your Canvas:
Begin by scrubbing your rock with warm water and a little dish soap. Getting rid of any grit or oils is crucial so the paint sticks properly. Let it dry completely. -
Apply the First Layer:
Load your flat brush with teal acrylic paint. Apply a smooth, even coat across the top surface of the rock. -
Dry and Repeat:
Allow the first coat to dry—usually about 10–15 minutes. If the rock’s natural color is showing through, add a second coat for full, opaque coverage. I prefer doing two thin layers rather than one thick gloppy one. -
Check the Surface:
Ensure the paint is fully dry and not tacky to the touch before you bring out the paint pen. Waiting an extra hour here saves heartache later.
Step 2: Drawing the Scales
-
Prime the Pen:
Shake your white paint pen well and depress the nib on a scrap piece of paper until the ink flows smoothly but isn’t dripping. -
Start the Top Row:
Near the top edge of the rock, draw a row of connected ‘U’ shapes or scallops. They don’t need to be perfect circles; slightly flattened curves look organic. -
Begin the Second Row:
Start the next row of scales directly beneath the first. Position the peak of the new scale in the valley between two scales above it, creating an offset brick-like pattern. -
Continue the Pattern:
Work your way down the rock, row by row. Try to keep the size of your ‘U’ shapes relatively consistent, but don’t stress over minor variations. -
Handle the Edges:
As you reach the sides of the rock, let the scallops trail off naturally. You can draw partial ‘U’ shapes to imply the pattern wraps around the curve. -
Fill the Surface:
Continue until you have covered the entire painted surface with the interlocking scale pattern.
Steady Hand Trick
Anchor your pinky finger against the dry part of the rock or the table while drawing. This acts like a kickstand and stabilizes your hand for smoother curves.
Step 3: Adding Details & Finish
-
Add Texture Details:
Go back to the top row. Inside each scale, draw 3 to 5 tiny tick marks coming up from the bottom curve of the ‘U’. This mimics the texture of real fish scales. -
Angle the Ticks:
Draw the center tick straight up, and slightly angle the side ticks inward. This small detail adds dimension to the flat drawing. -
Work Systematically:
Move row by row down the rock, adding these small hash marks to every single scale. Take breaks if your hand gets shaky. -
Let the Ink Set:
Give the white ink ample time to dry completely. Paint pens can smear easily if touched too soon. -
Seal the Deal:
Take your finished rock outside or to a well-ventilated area. Hold the spray sealer about 10 inches away and apply a light mist. -
Final Coat:
Once the first light mist is dry, apply a heavier coat of sealer to protect your artwork from chipping and UV fading.
Pen Acting Up?
If the white ink stops flowing over the acrylic paint, the nib might be clogged with dry paint dust. Wipe the tip gently on a damp paper towel to get the ink moving again.
Place your finished mermaid scale rock in a garden pot or on a sunny windowsill to enjoy its calming pattern
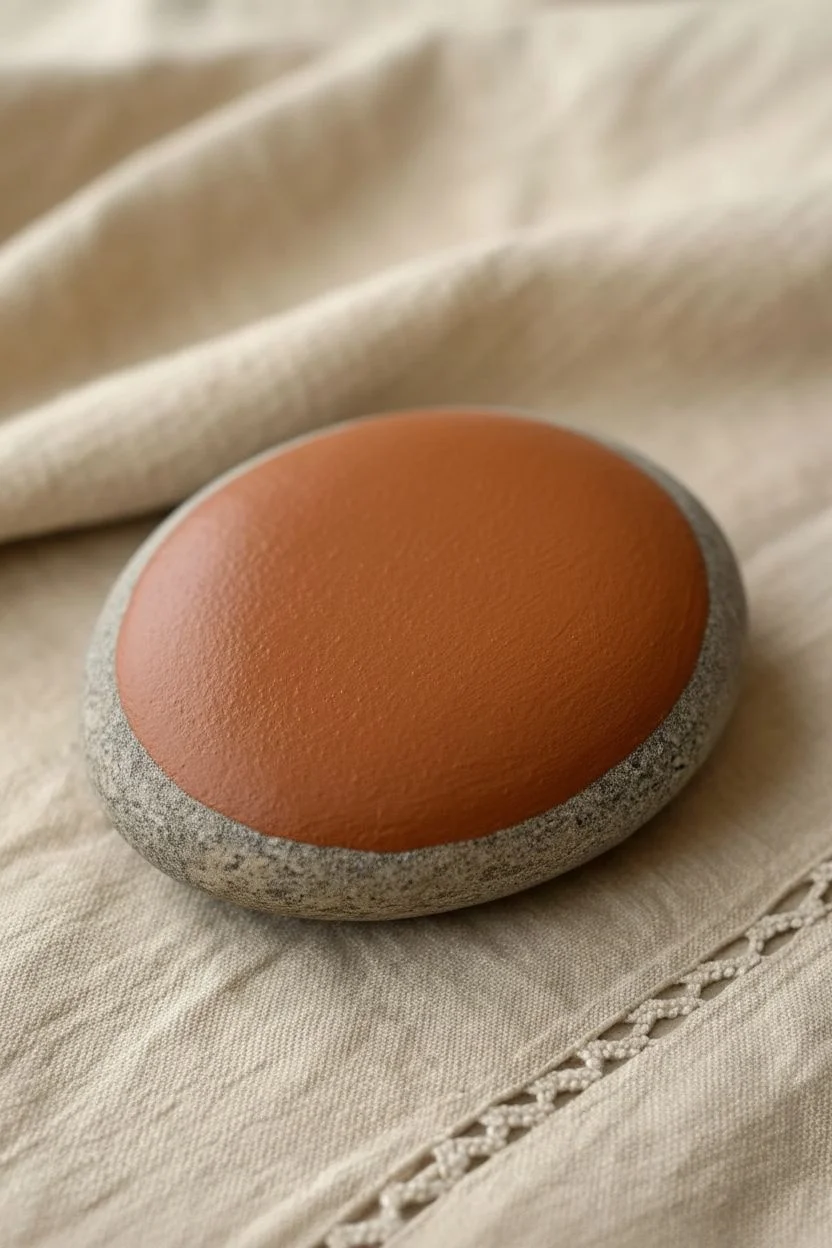
Beginner Dot Mandala Ring Rocks
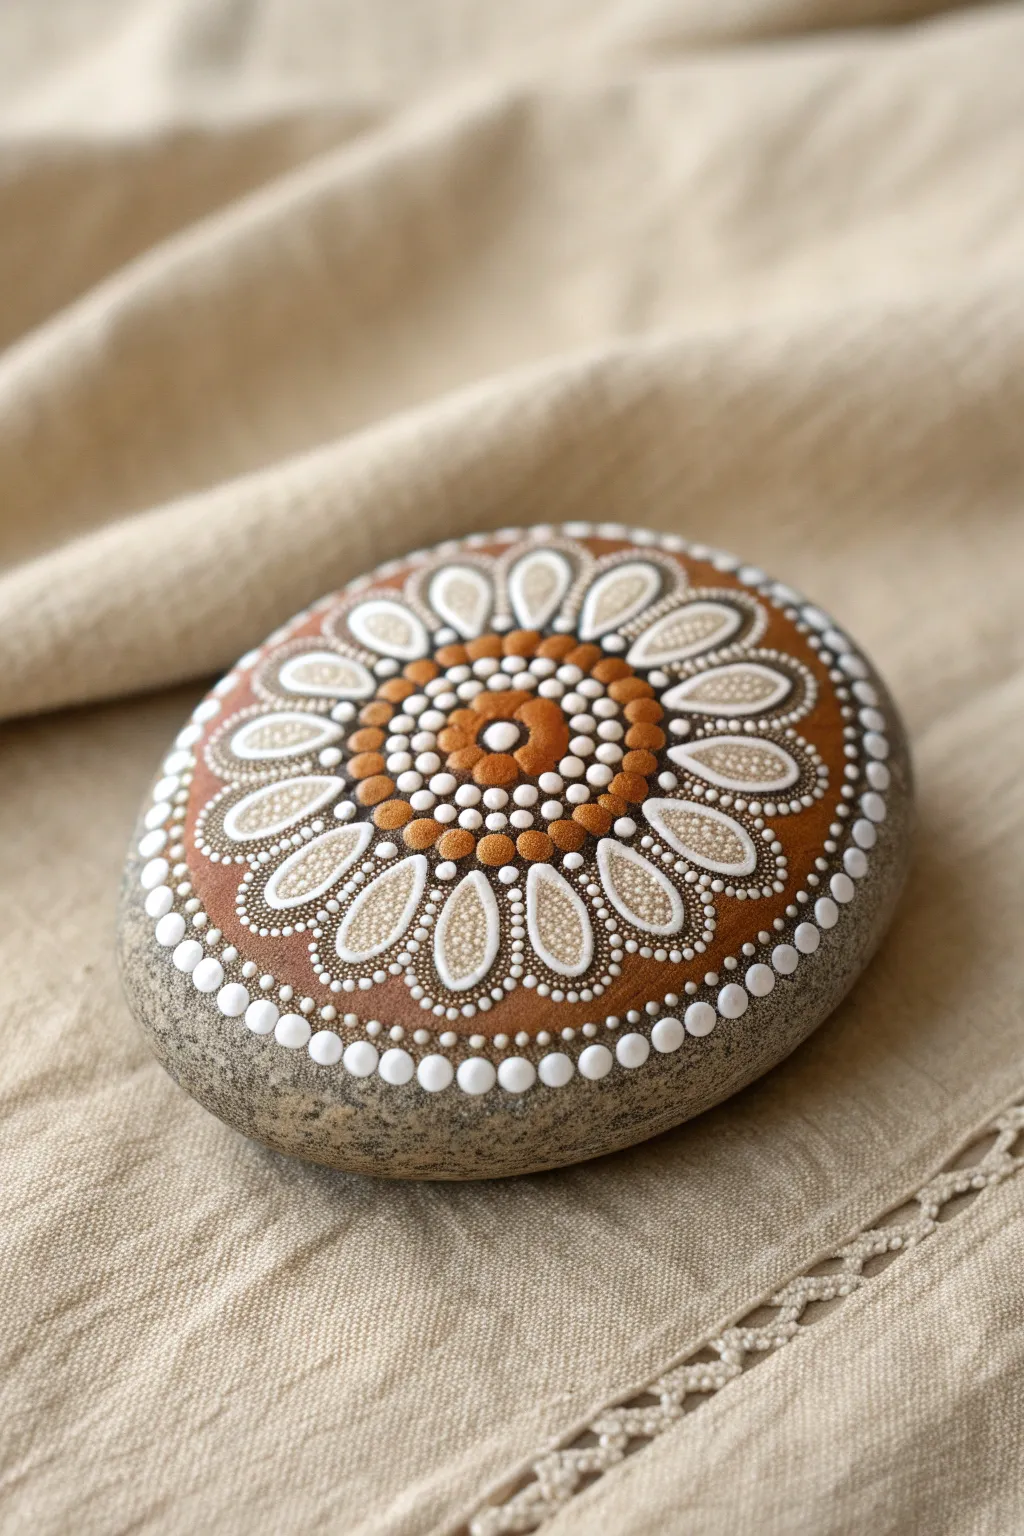
This project features a soothing mandala design painted on a smooth river rock, using warm terracotta tones and crisp white dots to create an intricate floral pattern. The symmetrical petals radiate outward from a central point, proving that complex-looking beauty can be achieved with simple dots.
Step-by-Step
Materials
- Smooth, round river rock (approx. palm-sized)
- Acrylic paint: White, Burnt Sienna (or Terracotta), Cream/Beige, and a mix for Light Brown
- Dotting tools (various sizes from fine needle to 4mm)
- Black acrylic paint (optional, for base)
- Clear acrylic sealer (spray or brush-on)
- Palette or paper plate
- Damp cloth or paper towel
Step 1: Base Preparation
-
Clean the Stone:
Begin by washing your stone with soap and water to remove any dirt or oils. Let it dry completely in the sun or with a hair dryer. -
Paint the Background Circle:
Using your Burnt Sienna or Terracotta paint, create a large, perfect circle on the flattest face of the rock. This acts as the canvas for your mandala. -
Initial Drying:
Allow this background circle to dry fully. If the rock’s natural color shows through too much, apply a second coat for opacity.
Uneven Dots?
If your dots start looking like Hershey’s Kisses with peaks, your paint is too thick. Mix in a tiny drop of water or pouring medium to get a creamy consistency.
Step 2: Creating the Center
-
Establishing the Center:
Load a medium-sized dotting tool with white paint. Place a single, crisp dot in the absolute center of your terracotta circle. -
First Ring:
Using a slightly smaller tool and the Burnt Sienna paint, place a ring of small dots immediately touching the central white dot. -
Second Ring:
Switch to white paint and a small tool. Create a second ring of dots around the previous one. Try to place these dots in the “valleys” between the previous row’s dots. -
Third Ring – Contrast:
Use the Burnt Sienna again with a medium tool to create a third, bolder ring of dots enclosing the center cluster.
Master the “Walk”
When ‘walking the dots’ around a petal, only dip your tool in paint for the very first dot. Let the paint run out naturally as you continue down the line for a taper.
Step 3: Building the Petals
-
Marking Petal Centers:
Using white paint and a large dotting tool, place 8 to 10 large dots evenly spaced around your central design. These will be the anchors for your petals. -
Walking the Dots:
This is a classic technique: Load a small tool with white paint. Place a small dot at the top of one of your large anchor dots, then ‘walk’ smaller and smaller dots down one side towards the center. Repeat on the other side to form a tear-drop shape. -
Filling the Petals:
Inside each white tear-drop outline, fill the space with tiny dots using cream or light beige paint. Keep them dense to create a textured, solid look inside the petal. -
Adding Outer Accents:
In the V-shaped spaces between the tips of the white petals, place a medium Burnt Sienna dot. -
Walking the Outer Dots:
Just like before, walk tiny white dots around these new Burnt Sienna anchors, creating a second layer of tear-drops that nest between the first set.
Step 4: Final Details
-
The Border Ring:
Use a medium tool with white paint to create a final ring of dots that completely encircles the entire mandala design, framing it against the terracotta background. -
Outer Stone Border:
Where the terracotta background meets the bare grey stone, add a decorative ring of large white dots. I find this creates a lovely transition between the painted area and the natural rock. -
Top Dots:
Once the base layers are dry, add tiny ‘top dots’ on your largest circles (the center and the outer border) in a lighter shade or white to add 3D dimension. -
Final Cure:
Let the rock sit undisturbed for at least 24 hours to ensure all layers of paint are cured all the way through. -
Sealing:
Apply a coat of clear acrylic sealer to protect your work from scratches and UV fading.
Place your finished mandala rock on a desk or in the garden for a touch of zen calm
Black-and-White Doodle Rocks
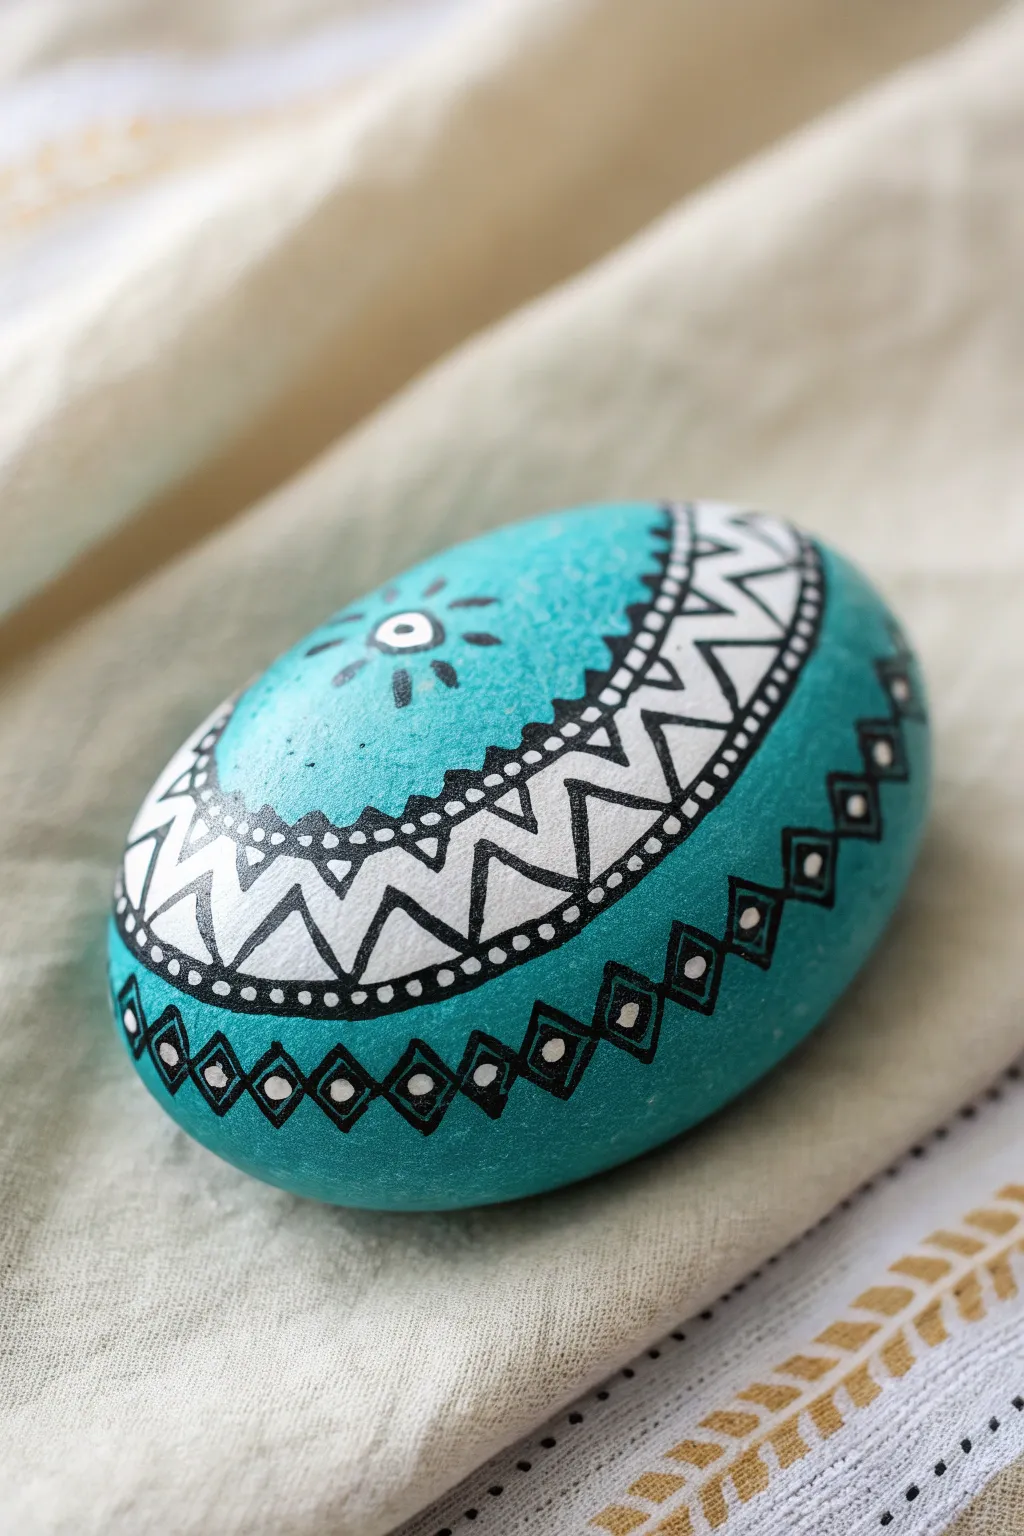
Transform a smooth river rock into a striking piece of decor with this vibrant turquoise design featuring high-contrast black and white details. The geometric patterns, from zig-zags to diamond chains, give it a beautiful bohemian doodle style that looks far more complex than it actually is.
Step-by-Step Guide
Materials
- Smooth, oval river rock (clean and dry)
- Acrylic paint (teal/turquoise)
- Wide flat paintbrush
- White acrylic paint pen (fine tip)
- Black acrylic paint pen (extra fine tip)
- Black acrylic paint pen (medium tip)
- Spray sealer (matte or gloss)
- Paper plate or palette
- Pencil (optional)
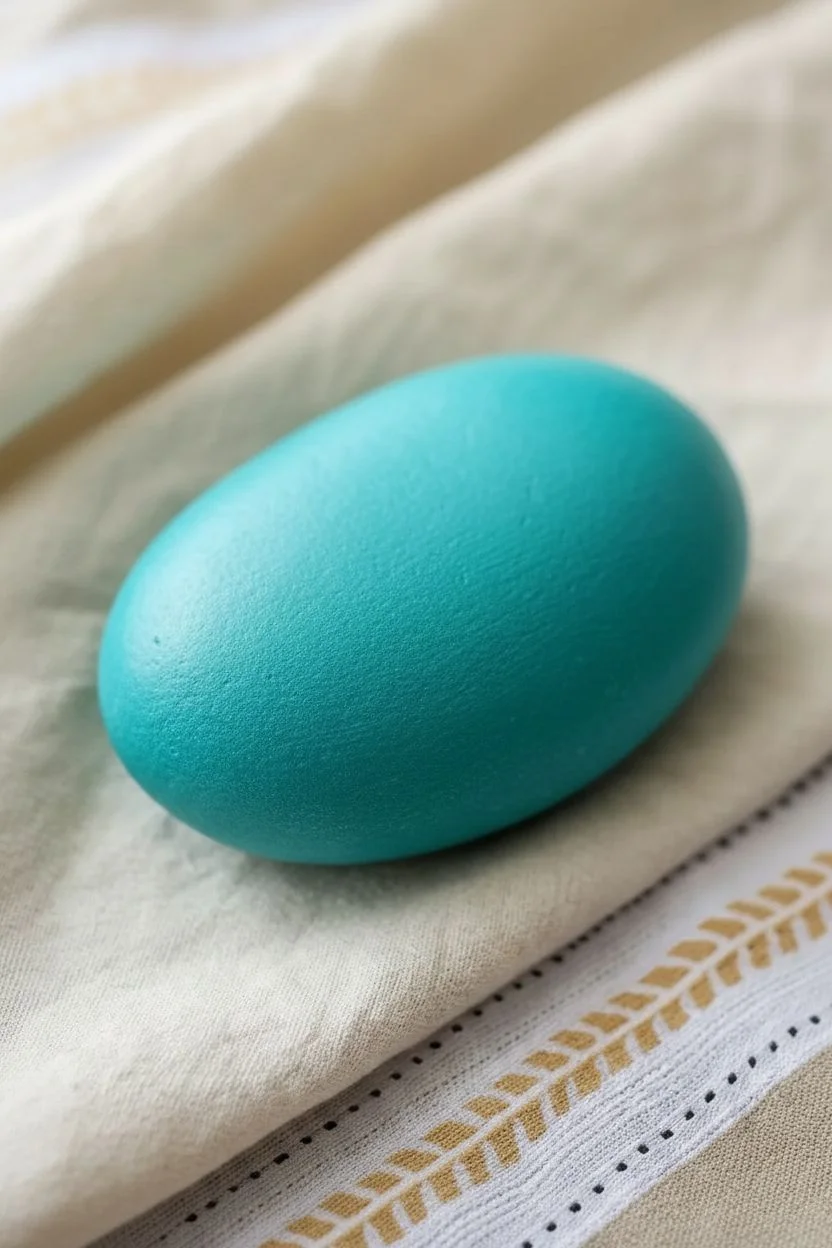
Step 1: Base Coat
-
Clean surface:
Begin by washing your rock thoroughly with soap and water to remove any dirt or oils. Let it dry completely before starting. -
Apply base color:
Load your flat paintbrush with teal acrylic paint. Enhance the coverage by applying long, smooth strokes across the top surface of the rock. -
Dry and repeat:
Allow the first coat to dry for about 15-20 minutes. If the stone’s natural color is showing through, apply a second coat for a rich, opaque finish. -
Fully cure:
Set the rock aside until the paint is bone dry to the touch. Painting pens over tacky acrylic will clog the nibs.
Smudged Lines?
If your black ink bleeds into the white paint, the white layer wasn’t fully dry. Wait longer between layers or use a hairdryer on a cool setting to speed up the process safely.
Step 2: The White Band
-
Outline the band:
Using your white paint pen, draw two parallel curved lines across the center-upper section of the rock to define a wide band. It should follow the natural curve of the stone. -
Fill the band:
Color in the space between your two lines with the white paint pen. You may need two layers of white to ensure the teal doesn’t peek through. -
Create zig-zags:
Once the white band is dry, switch to your black extra-fine tip pen. Draw a continuous zig-zag line running through the center of the white band. -
Add triangles:
Inside each ‘V’ shape created by the zig-zag (both top and bottom), draw a smaller triangle. This creates a nested geometric look. -
Thicken the borders:
Trace over the top and bottom edges of the white band with your black pen to create a crisp, defining border. -
Detail the border:
Add tiny black dots along the inner edge of the black borders you just drew. I like to space them evenly to create a delicate stitched effect.
Step 3: Diamond Accents
-
Draft the diamond chain:
Below the main band, use your black pen to draw a horizontal row of connected diamond shapes. Try to keep them uniform in size. -
Double the lines:
Carefully draw a smaller diamond inside each of the larger diamonds. This creates a frame effect. -
Fill the centers:
Using your white paint pen, add a single solid white dot in the very center of each diamond. -
Add vertical lines:
Connect the top and bottom points of each diamond to the main design or drawing space with tiny vertical lines if needed to anchor the pattern.
Crisp Edges
For the steadiest lines on a curved surface, anchor your pinky finger against the table or the rock itself while drawing. This acts as a pivot point for better control.
Step 4: Finishing Touches
-
Top decoration:
In the open teal space at the very top of the rock, draw a small white circle with a black dot in the center. -
Sunburst rays:
Draw short black lines radiating outward from that circle—alternate between simple lines and lines with small dots at the end for a sunburst look. -
Side details:
If you have space on the far sides, extend the diamond pattern or add simple vertical lines to wrap the design around the curve. -
Check for gaps:
Look over the black lines. If any look faded against the white or teal background, go over them one last time for maximum contrast. -
Seal the rock:
Once all ink is completely dry (give it at least an hour), take the rock outside and spray it with a clear sealer to protect your artwork from chipping.
Now you have a stunning, hand-painted stone perfect for brightening up a desk or garden path
Easy Garden Marker Rocks
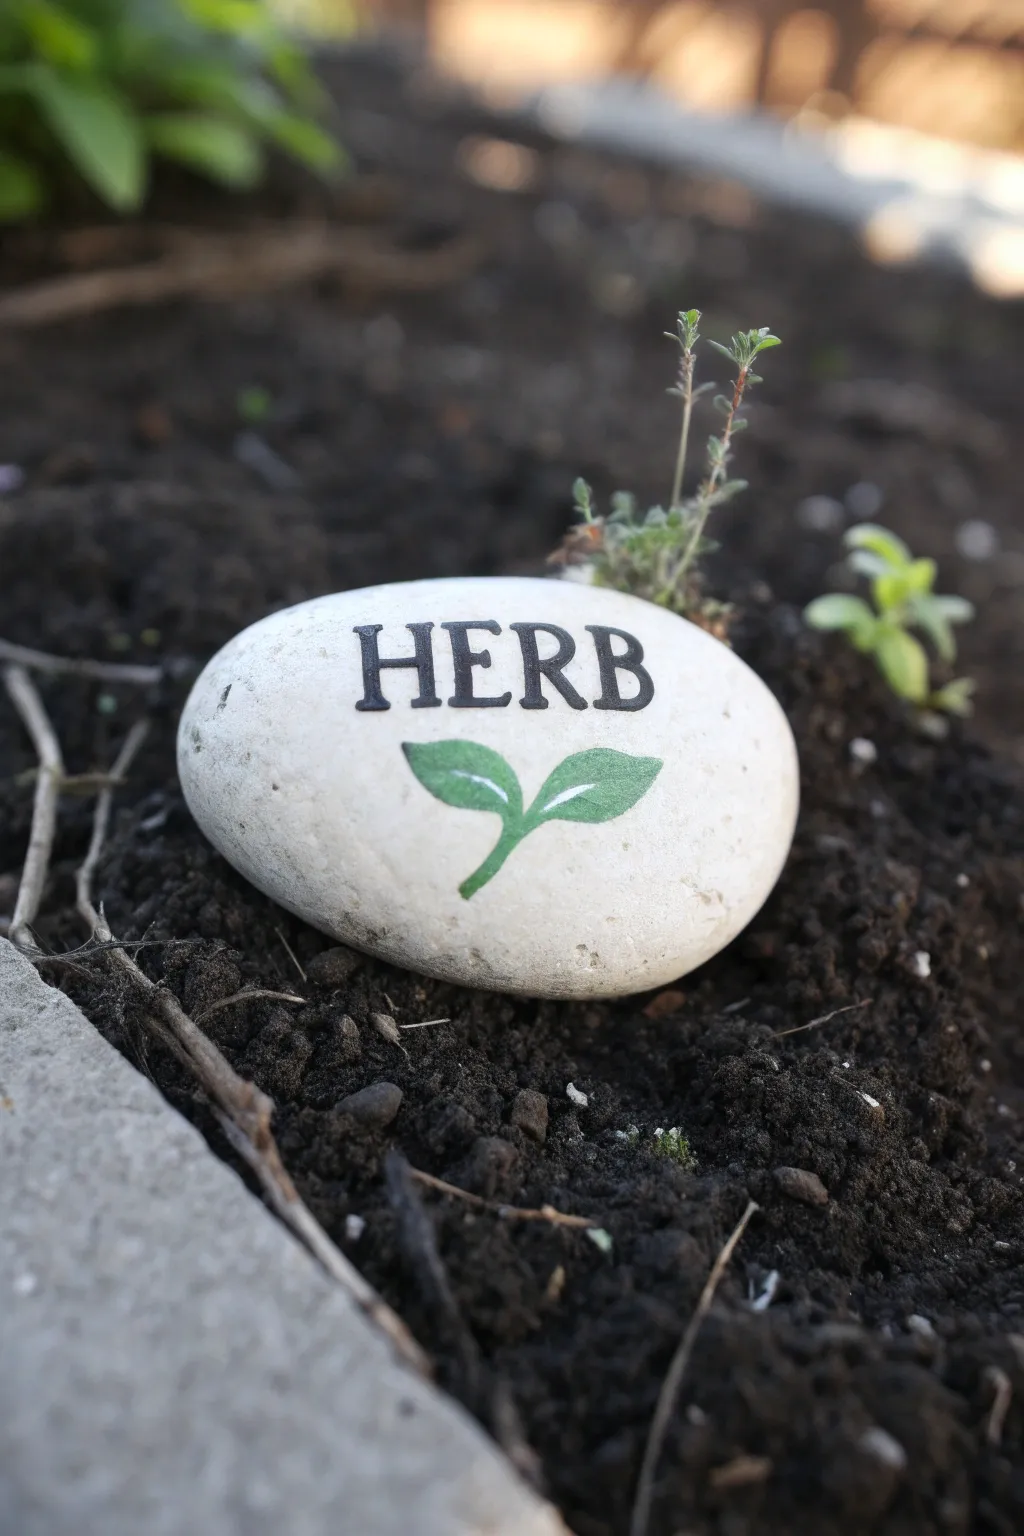
Create a clean and elegant garden marker with just a smooth stone and a steady hand. This project features classic serif lettering and a simple sprig illustration for a timeless look that blends beautifully with your greenery.
Detailed Instructions
Materials
- Smooth river rock (white or light grey)
- Black acrylic paint or paint pen (fine tip)
- Green acrylic paint or paint pen
- Small fine detail paint brushes
- Pencil
- Eraser
- Clear outdoor sealer (spray or brush-on)
- Soap and water
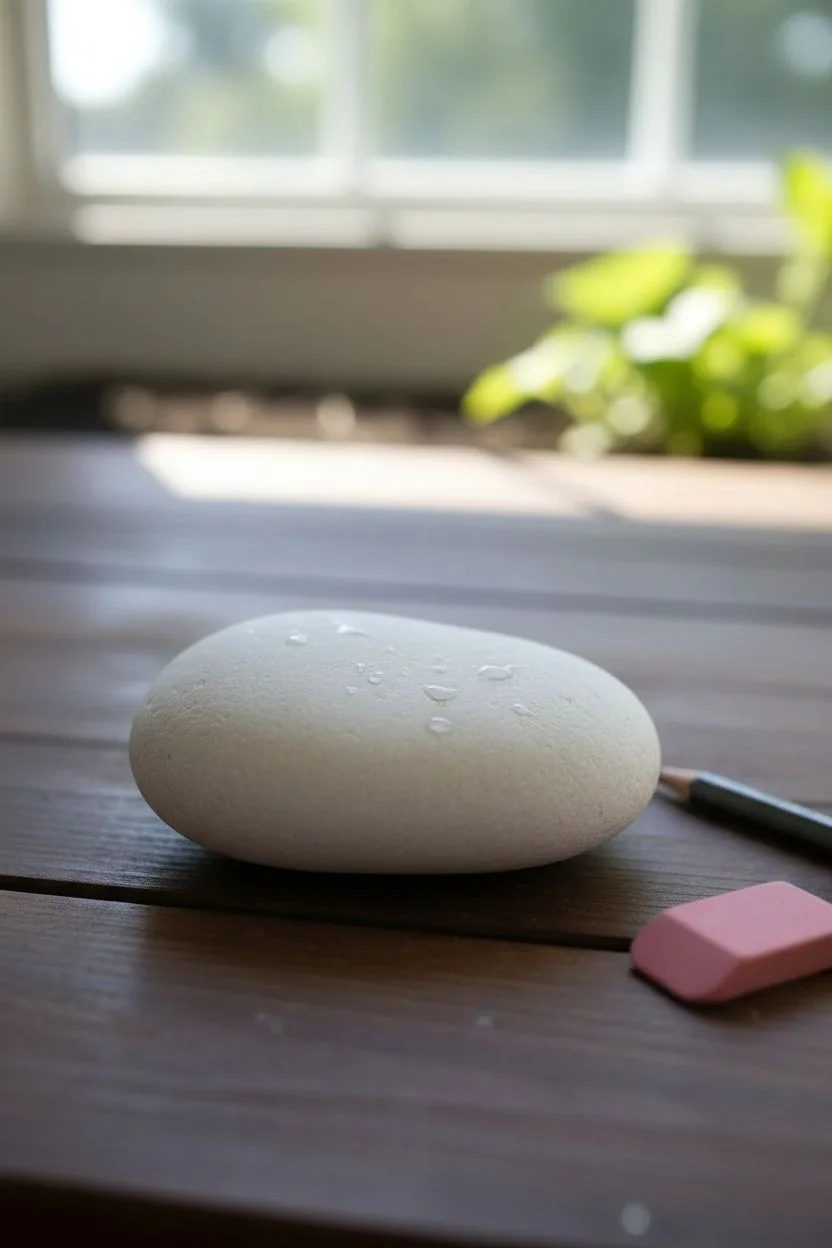
Step 1: Preparation
-
Clean the stone:
Begin by washing your stone thoroughly with soap and water to remove any dirt or oils. -
Dry completely:
Let the rock dry completely, preferably in the sun, to ensure no moisture is trapped inside. -
Plan the layout:
Observe the shape of your rock. Find the smoothest, flattest face to be your canvas.
Step 2: Drafting the Design
-
Sketch the baseline:
Lightly sketch a horizontal line with your pencil across the upper middle section of the stone to guide your text alignment. -
Lettering draft:
Using a pencil, lightly write the word ‘HERB’ in capital letters. Aim or a serif font style (with little feet on the letters) to match the rustic aesthetic. -
Check spacing:
Step back and look at your spacing. Ensure the word is centered horizontally. -
Sketch the sprig:
Below the text, lightly draw a simple stem curving slightly to the left. -
Add leaves:
Draw two almond-shaped leaves branching off the top of the stem, one pointing left and one pointing right.
Wobbly Lines?
If your hand shakes while lettering, rest your pinky finger on a dry part of the rock for stability. Using a paint pen instead of a brush offers much more control.
Step 3: Painting the Text
-
Outline letters:
Using a fine-tip black paint pen or a very small detail brush with black acrylic paint, carefully trace the outline of your ‘HERB’ letters. -
Fill the letters:
Gently fill in the bodies of the letters. Take your time to keep the edges sharp. -
Refine serifs:
Go back and carefully define the serifs—the small horizontal strokes at the ends of the letters—to give it that classic typed look. -
Dry the black paint:
Allow the black text to dry completely before moving on to avoid smudging.
Use Stencils
Not confident in your freehand lettering? Purchase small adhesive letter stencils from a craft store to get crisp, professional-looking text easily.
Step 4: Painting the Greenery
-
Paint the stem:
With your green paint, draw a single fluid line over your pencil stem sketch. I like to start from the bottom and flick slightly upward for a natural taper. -
Fill the leaves:
Paint the two leaves green. You can leave a tiny sliver of unpainted white space in the middle of each leaf to mimic a vein, or paint them solid. -
Add detail (Optional):
If you painted the leaves solid, you can wait for the green to dry and use a white paint pen to draw a very thin vein line. -
Clean up:
Once all paint is 100% dry, gently erase any visible pencil marks that weren’t covered by paint.
Step 5: Finishing Touches
-
Final drying:
Let the rock sit for at least an hour to ensure the paint has cured. -
Seal the rock:
Apply a clear outdoor sealer. This is crucial for garden markers to protect them from rain and sun. -
Second coat:
Apply a second light coat of sealer for extra durability.
Place your finished marker in the soil next to your favorite herbs and enjoy your organized garden
No-Pressure Marble Swirl Rocks
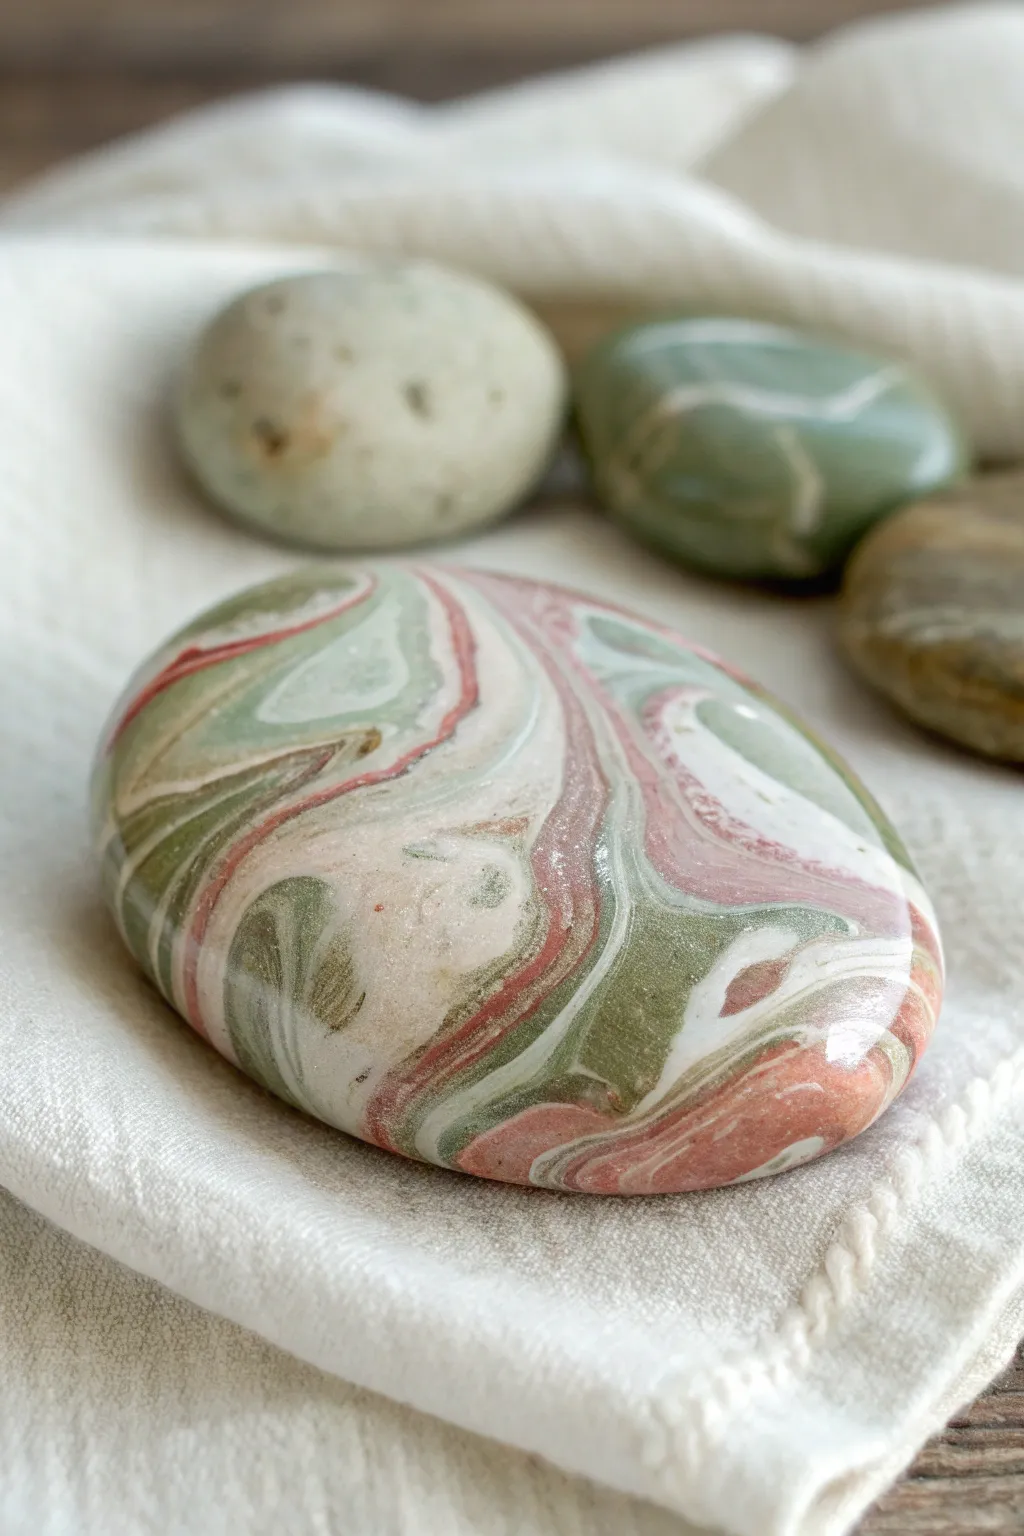
Capture the organic elegance of natural stone with this surprisingly simple water marbling technique. Using a mix of muted earthy tones like sage, terracotta, and cream creates a sophisticated, fluid design that looks like polished river agate.
Step-by-Step
Materials
- Smooth, oval river rock (cleaned and dried)
- White acrylic paint (base coat)
- Large bowl or container (deep enough to submerge rock)
- Water (room temperature)
- Solvent-based paints (marbling paints, enamels, or nail polish work best)
- Colors: Sage green, dusty pink/terracotta, beige, white
- Toothpick or skewer
- Primer spray (optional)
- Water-based high-gloss varnish/sealant
- Gloves
- Wax paper or drying rack
Step 1: Preparing the Canvas
-
Clean the surface:
Start by washing your rock thoroughly with soapy water to remove any dirt or oils. Let it dry completely in the sun or with a cloth. -
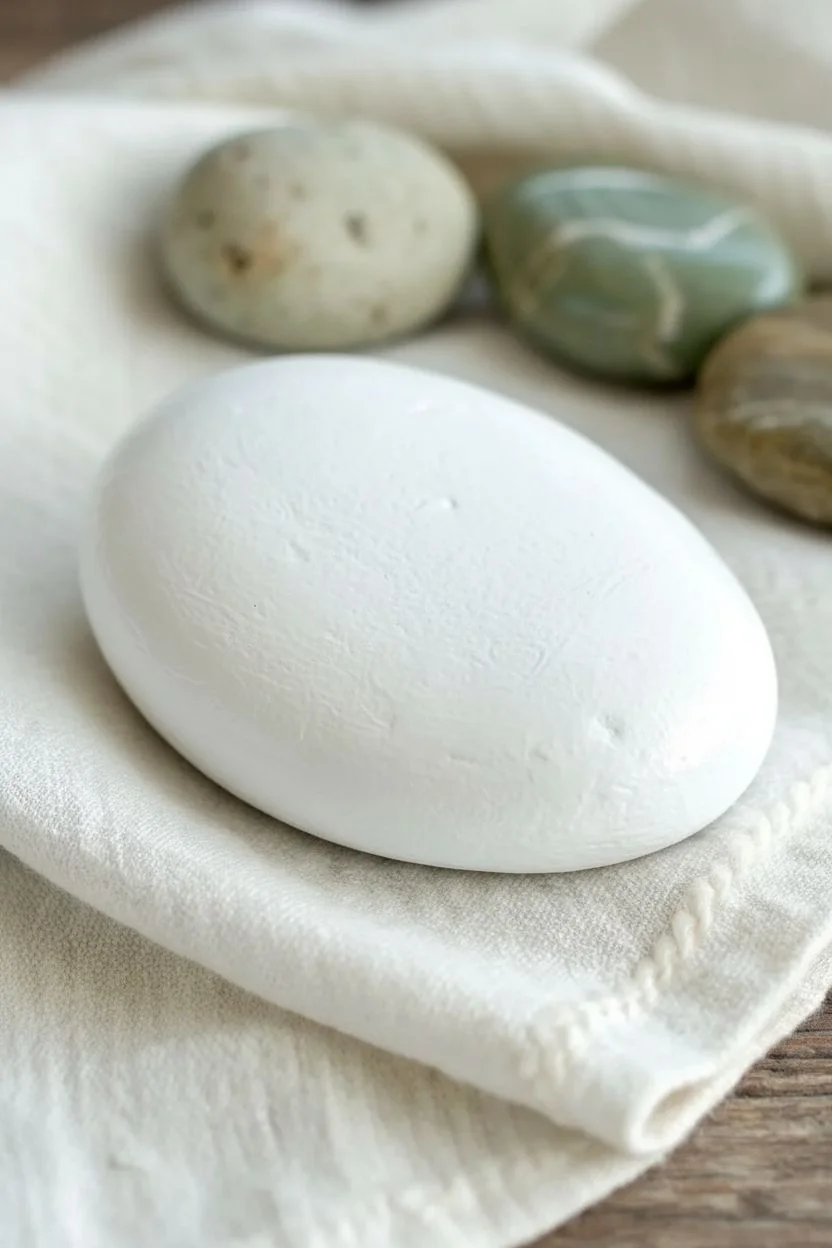
Apply a base coat:
To make the muted colors pop against the dark stone, paint the entire top surface of the rock with a layer of white acrylic paint. This acts as a bright primer. -
Let it dry:
Allow the white base coat to dry fully. If the rock is very dark, a second coat might be needed for full opacity.
Water Temperature Matters
Use room temperature water. Too cold, and the polish clumps instantly; too hot, and it spreads too thin. Room temp keeps it pliable.
Step 2: Creating the Swirls
-
Prepare the water bath:
Fill your container with room temperature water. It needs to be deep enough so the rock can be dunked without hitting the bottom immediately. -
Drop the first color:
Using your first polish or marbling paint—let’s start with the sage green—gently drop a few drips onto the surface of the water. It should spread out into a thin film. -
Layer the colors:
Quickly add drops of dusty pink and beige into the center of the green ring. Aim for a ‘bullseye’ pattern as you layer them. -
Add white highlights:
Intersperse drops of white paint among the colored rings. This creates that milky, agate-like separation between the darker hues. -
Swirl the pattern:
Take a toothpick and very gently drag it through the floating paint. Don’t over-mix; just draw a few lines to distort the circles into organic, marble-like waves.
Step 3: The Dip
-
Protect your hands:
Put on a pair of disposable gloves. This process can get messy, and oil-based paints are hard to scrub off skin. -
Position the rock:
Hold the rock firmly, with the white-painted side facing down towards the water surface. Find the spot in the paint film that looks the most pleasing. -
Dip smoothly:
In one smooth, confident motion, dip the rock face-down into the water, pushing it through the paint film. -
Clear the surface:
While the rock is still submerged, use your other hand (or blow on the water) to disperse the remaining floating paint so it doesn’t double-coat the rock when you pull it out. -
Remove and inspect:
Pull the rock out of the water. Provide a quick shake to remove excess water droplets.
Add Metallic Veins
For a luxe geology look, mix in a few drops of gold or copper polish. It simulates mineral deposits found in real agate.
Step 4: Finishing Touches
-
Dry thoroughly:
Place the rock on wax paper or a drying rack. It is crucial to let it dry completely, which may take longer than standard acrylics—often a few hours. -
Clean up edges (optional):
If paint got onto the unwanted underside of the rock, you can clean it up with a cotton swab dipped in nail polish remover or acetone. -
Add high gloss:
To achieve that wet, polished stone look seen in the photo, apply a coat of high-gloss varnish. I find a spray varnish works best to avoid smearing the design. -
Final cure:
Let the varnish cure according to the bottle instructions, usually overnight, for a durable, glass-like finish.
Enjoy the soothing process of watching the colors dance on the water.


Have a question or want to share your own experience? I'd love to hear from you in the comments below!