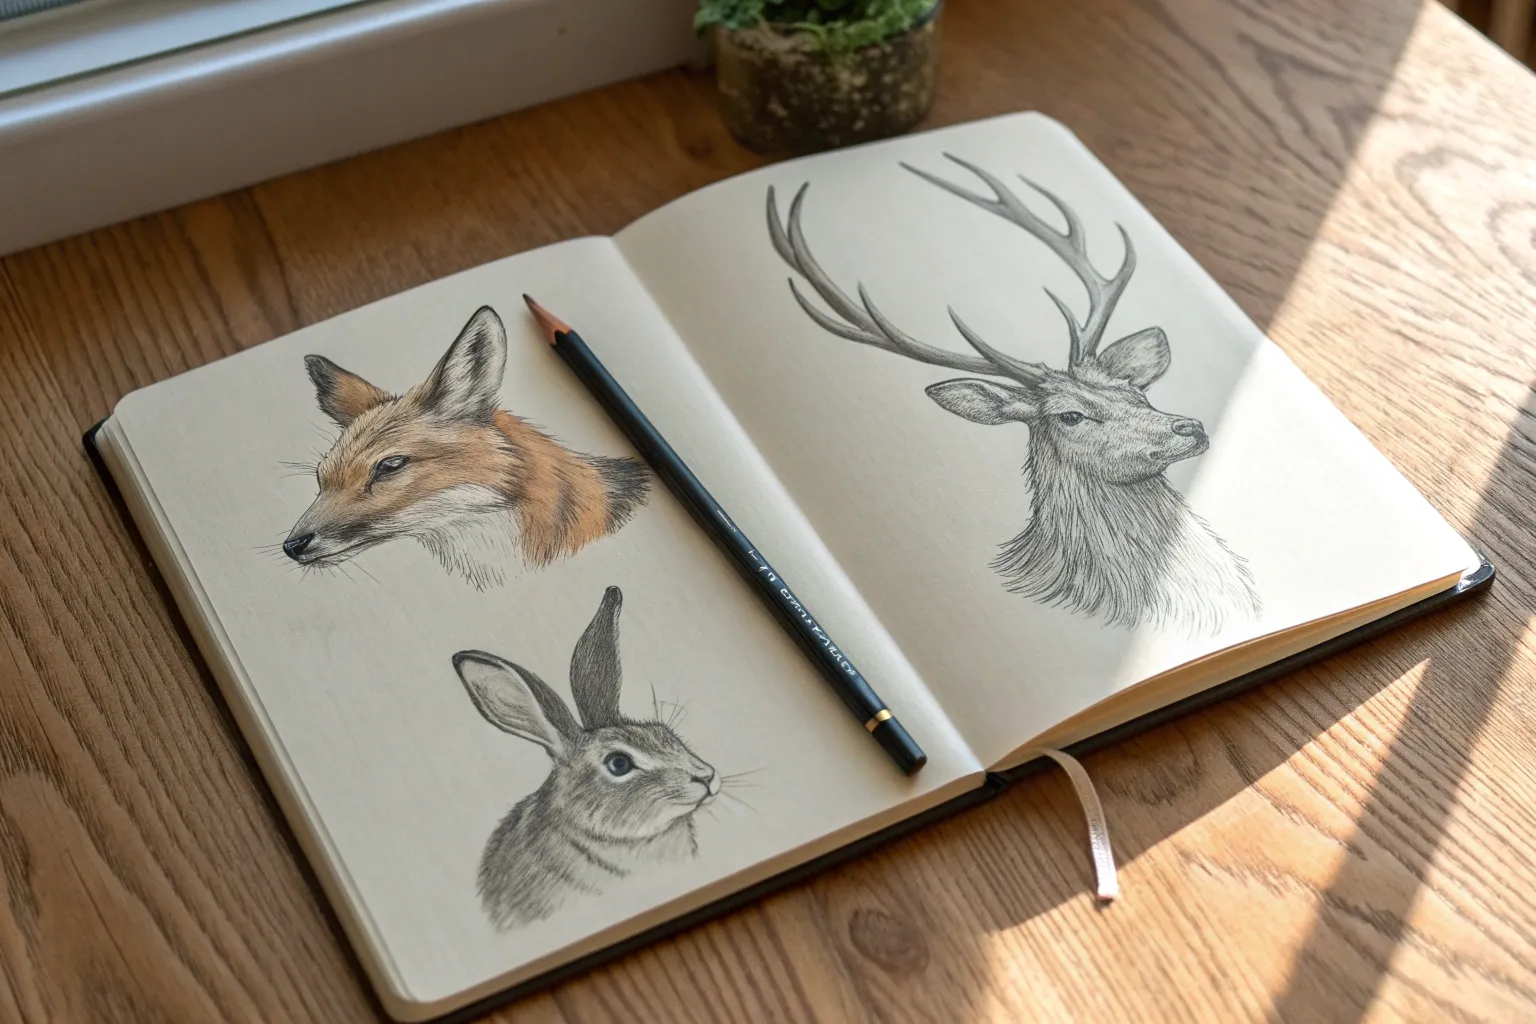
If you’re craving fresh sketch animal drawing ideas, quick studies are such a satisfying way to build confidence without overthinking it. I pulled together a mix of classic go-tos and a few artsy curveballs so you can keep your animal sketching practice fun and consistent.
Cat Headshot With Whisker And Eye Focus
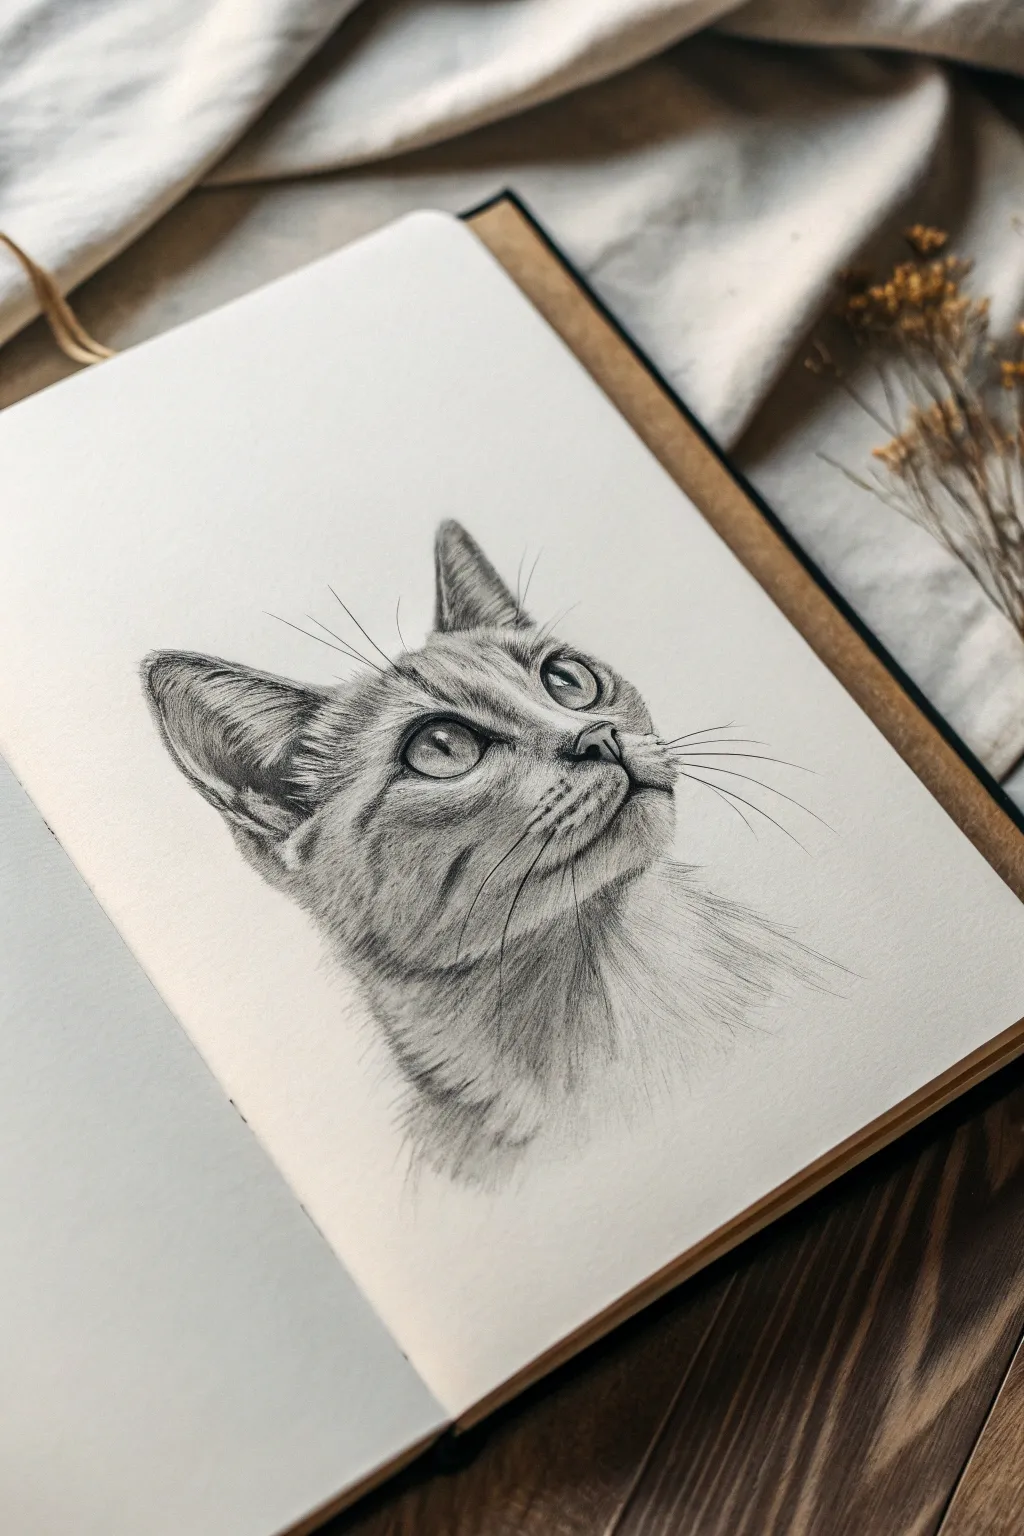
Capture the captivating gaze of a feline with this detailed graphite study, focusing on the intricate textures of fur and bright, reflective eyes. This project guides you through building layer upon layer of pencil strokes to create depth and realism in a stunning headshot portrait.
Step-by-Step
Materials
- Sketchbook with smooth or medium-tooth paper
- Set of graphite pencils (HB, 2B, 4B, and 6B)
- Mechanical pencil (0.5mm 2B) for fine details
- Kneaded eraser
- Precision eraser (pencil style or mono zero)
- Blending stump or tortillon
- Pencil sharpener
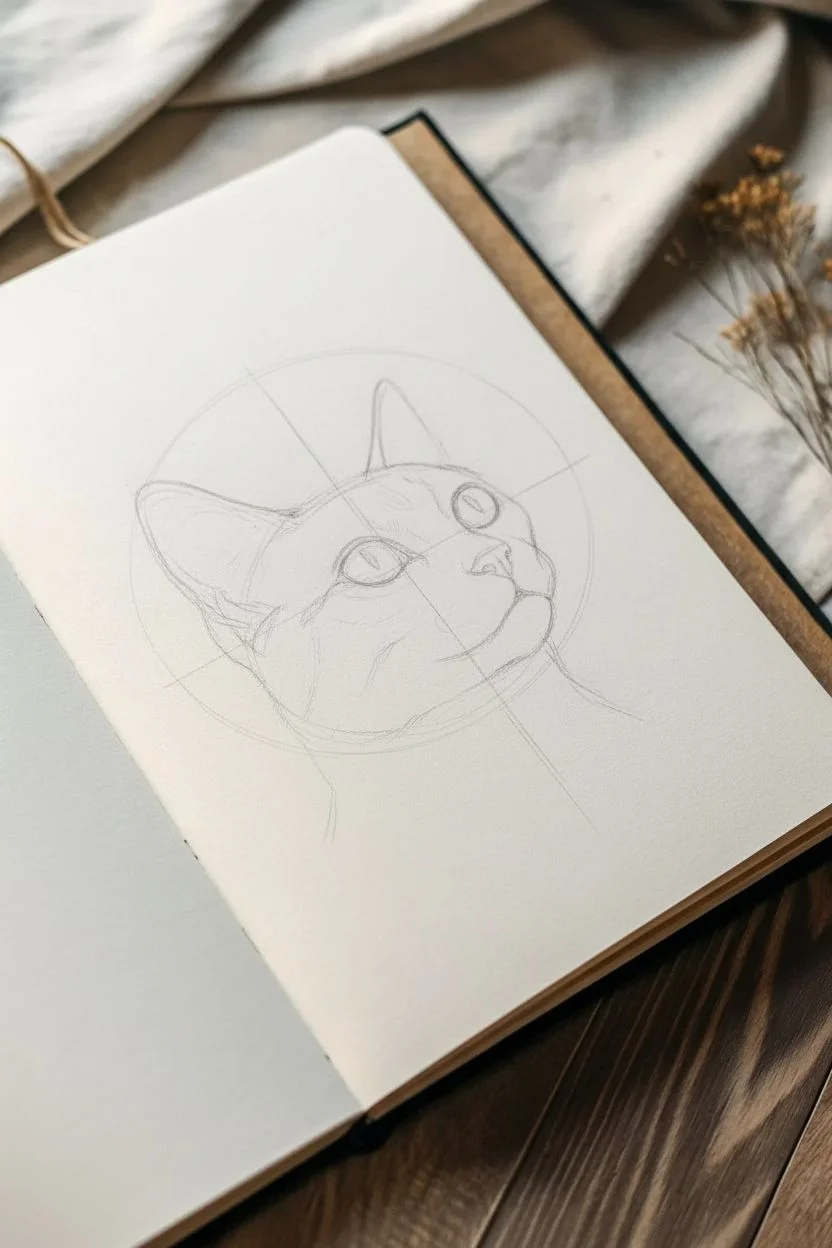
Step 1: Laying the Foundation
-
Map the proportions:
Begin with a light HB pencil to sketch a circle for the head and a smaller oval snout area attached to the lower front. Draw a curved vertical centerline that follows the tilt of the head looking upward and to the right. -
Place features:
sketch horizontal guidelines across the centerline for the eyes, nose, and top of the ears. Position the eyes along the main guideline, keeping the right eye (furthest away) slightly narrower due to perspective. -
Define the outline:
Lightly trace the final shape of the head, connecting your initial shapes. Add the triangular ear forms, ensuring the left ear feels closer and larger, while the right ear tucks slightly behind the curve of the head. -
Detail the features:
Refine the almond shape of the eyes and the small triangular nose pad. Mark the mouth line curving gently upwards to give that subtle inquisitive expression.
Keep it Sharp
Fur texture relies on clear, individual lines. Rotate your pencil every few strokes or sharpen constantly to prevent the tip from dulling into a blurred smudge.
Step 2: Shading the Eyes and Nose
-
Establish the gaze:
Using a 4B pencil, darken the pupils, leaving a distinct white circle in each for the highlight. This reflection is crucial for life-like eyes. -
Shade the iris:
Switch to a 2B pencil to shade the iris, radiating lines outward from the pupil. Keep the top of the iris slightly darker where the eyelid casts a shadow. -
Define the nose:
Shade the nose pad with an HB nail, darkening the nostrils significantly. Add tiny stippling dots on the muzzle area where the whiskers will eventually emerge.
Step 3: Rendering Fur Texture
-
Directional mapping:
Before heavy shading, use your HB pencil to draw faint arrows or lines indicating which way the fur grows. On the nose bridge, it goes up; on the cheeks, it sweeps back. -
Base fur layer:
Start applying short, quick strokes with an HB pencil following your directional map. Cover the main areas of the face, leaving the white areas around the chin and eyes lighter. -
Darkening the patterns:
Using a 2B or 4B pencil, specifically target the tabby markings. Create the ‘M’ shape on the forehead and the darker stripes on the cheeks using densely packed, short strokes. -
Deepening shadows:
Switch to a 6B pencil for the deepest crevices—inside the ears and the shadow beneath the chin. This high contrast makes the drawing pop off the page. -
Ear details:
Draw long, sweeping hairs inside the ears using a sharp mechanical pencil. Keep the edges of the ears soft and fuzzy rather than outlining them with a hard line. -
Blending softness:
I like to use a blending stump gently on the smoother mid-tone areas like the nose bridge to soften the pencil strokes, but avoid over-blending the detailed fur markings.
Muddy Fur Fix
If your fur looks like a solid gray block, you’ve over-blended. Use a mono zero eraser to ‘draw’ white hairs back in, then layer fresh sharp pencil strokes on top.
Step 4: Final Details
-
Neck and chest fur:
Use looser, longer strokes for the neck fur to suggest it is fading out. This vignette effect draws focus back to the sharp details of the face. -
Adding whiskers:
Ensure your pencil is extremely sharp. With a confident, quick motion, draw the long whiskers extending from the muzzle. Press harder at the root and lift off to taper the end. -
Eyebrow whiskers:
Don’t forget the vibrissae (whiskers) above the eyes. These are usually thinner and slightly shorter than the muzzle whiskers. -
Lifting highlights:
Take your precision eraser or the sharp edge of a kneaded eraser and lift out tiny strokes of graphite in the fur to create bright, white hairs, especially on the chin and inside the ears.
Step back and admire the intense gaze of your feline portrait, complete with soft textures and sharp details


Simple Sitting Dog Sketch With Big Shapes
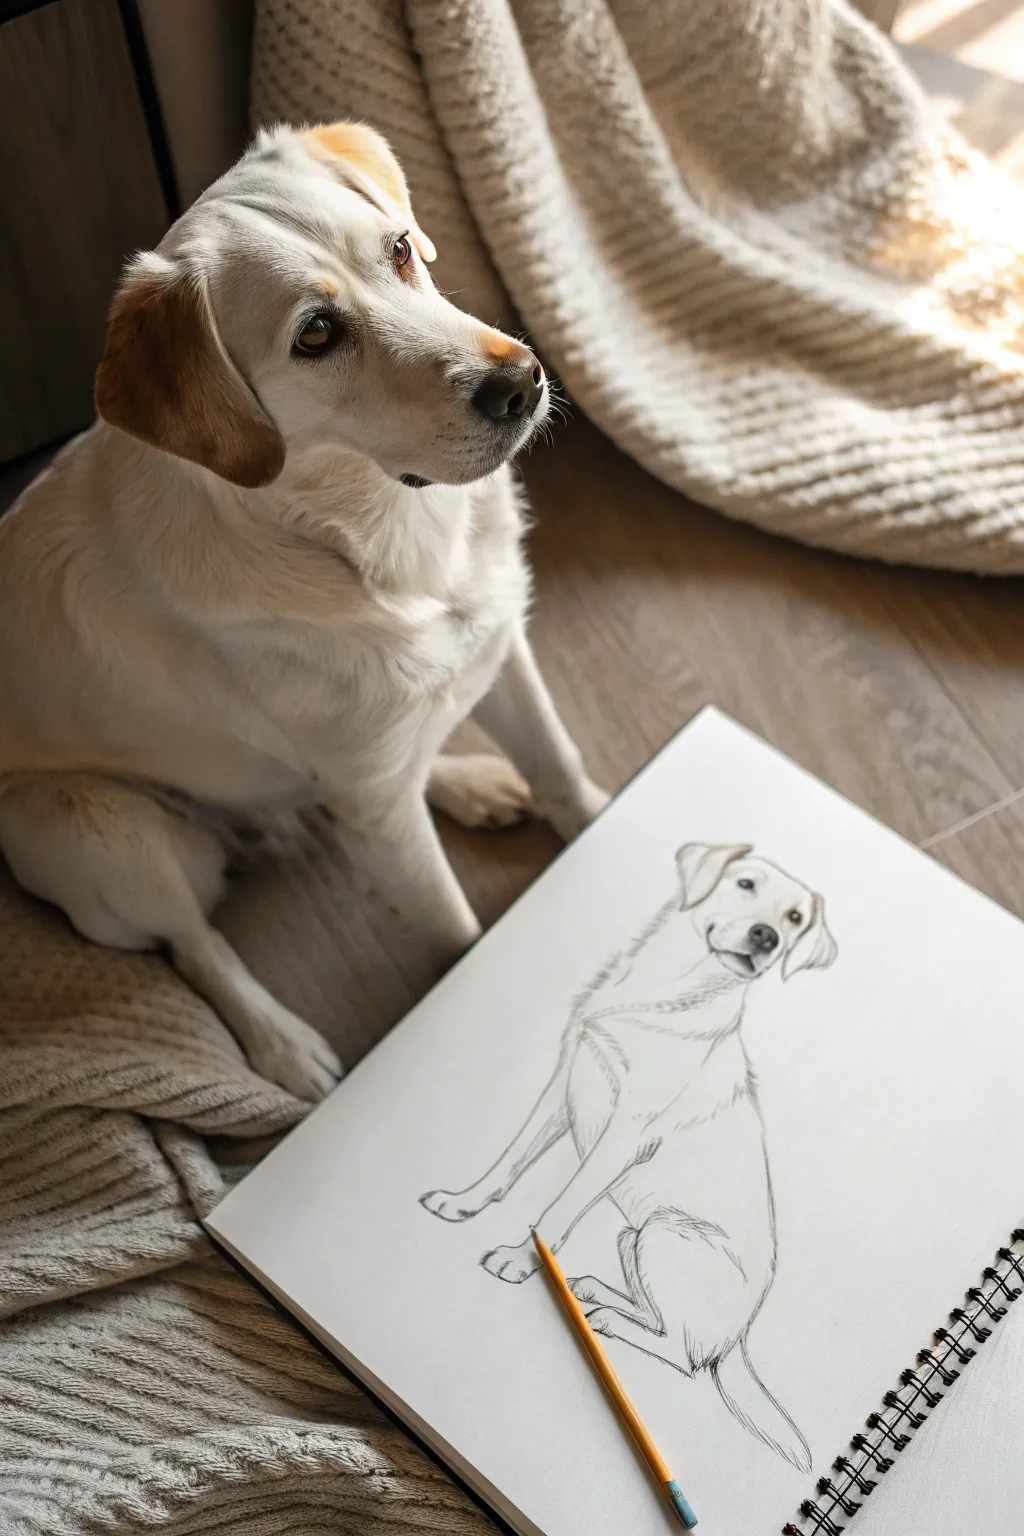
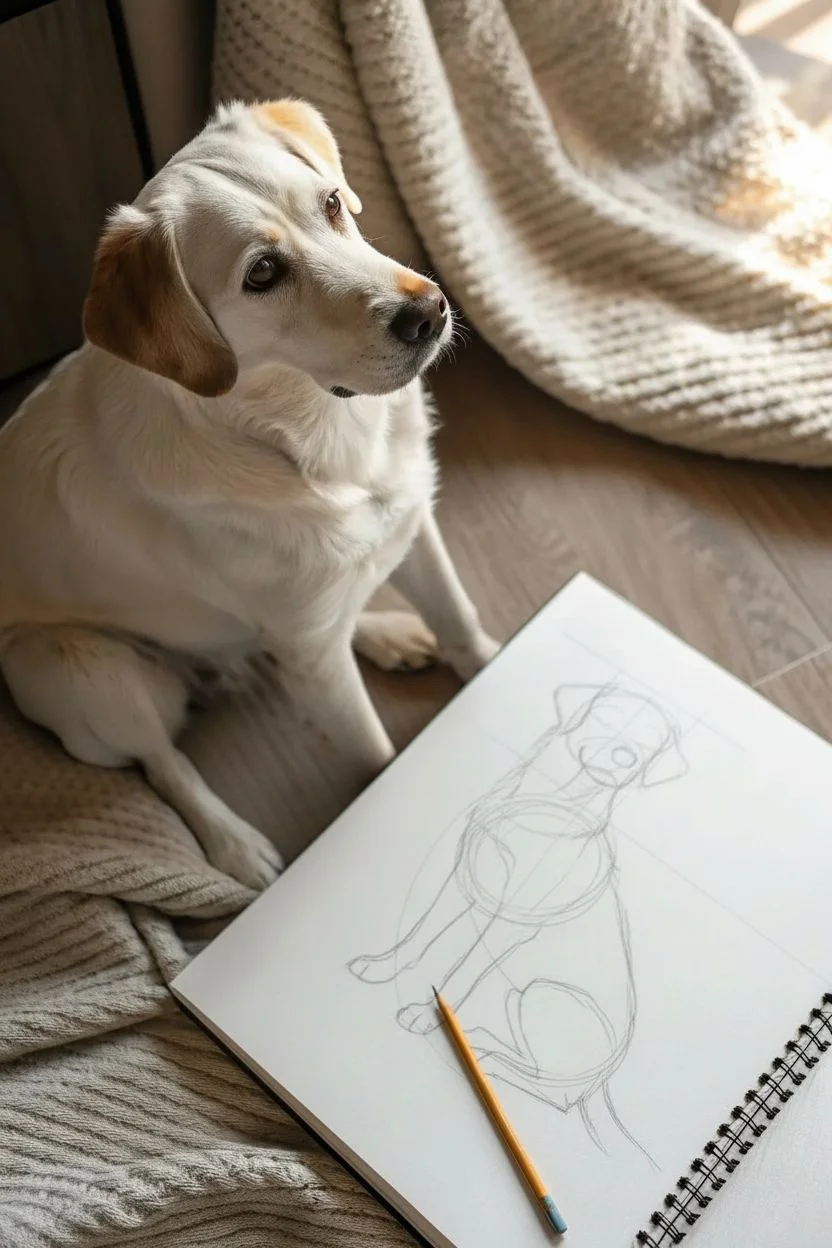
Capture the calm demeanor of a loyal friend with this simple pencil study of a sitting dog. This tutorial focuses on breaking down the canine form into basic shapes before refining the soft fur texture and expressive eyes.
Step-by-Step Guide
Materials
- Sketchbook or drawing paper (medium weight)
- H pencil (for initial outlines)
- HB or 2B pencil (for shading and details)
- Kneaded eraser
- Pencil sharpener
Step 1: Planning and Structure
-
Establish the Head:
Start near the top third of your page by drawing a simple circle for the skull. Attached to the lower right side of this circle, add a smaller, slightly squared-off oval to represent the muzzle. -
Angle the Body:
Draw a long, sweeping line extending down from behind the head to mark the spine’s curve. For the chest, lightly sketch a large oval overlapping the bottom of the neck area. -
Position the Legs:
Map out the front legs as straight vertical lines coming down from the chest oval. For the rear leg, draw a large, curved shape visible on the side, representing the powerful thigh muscle of a sitting dog. -
Mark Key Features:
Lightly indicate a horizontal line across the face circle to place the eyes. Sketch triangular flaps dropping down from the sides of the head to position the ears.
Keep it Loose
Don’t grip your pencil too tightly near the tip. Holding it further back allows for flowier lines, which is perfect for capturing the relaxed feel of soft fur.
Step 2: Defining the Contours
-
Refine the Face Shape:
Using a slightly darker stroke, trace the actual contour of the head. Connect the muzzle smoothly to the skull, giving the nose a slight upward tilt for an alert expression. -
Detail the Eyes and Nose:
Draw the eyes along your guideline, keeping them almond-shaped with small highlights reserved. Add the nose at the tip of the muzzle with characteristic nostril curves. -
Draw the Ears:
Flesh out the ears, letting them hang naturally. Pay attention to the fold where the ear meets the head, adding a small line to show depth. -
Outline the Neck and Chest:
Connect the head to the body with sloping lines. Instead of a solid line, use short, broken strokes here to suggest a bit of fur texture along the ruff of the neck. -
Shape the Front Legs:
Define the front legs, narrowing them slightly at the ‘wrist’ joint and flaring out for the paws. Add small, curved lines to indicate individual toes. -
Form the Back and Hips:
Trace the back line down to the tail. Define the bent rear leg, ensuring the knee joint is visible and the paw tucks naturally beside the front legs.
Level Up: Color Accents
Once the graphite sketch is done, use watercolor pencils to add subtle brown or golden hues to the ears and eye patches, just like the dog in the photo.
Step 3: Shading and Texture
-
Erase Guidelines:
Take your kneaded eraser and gently lift away the initial structural circles and lines, leaving only your refined contour sketch. -
Add Facial Shading:
Switch to your softer HB or 2B pencil. Shade firmly inside the pupils and the nose, leaving tiny white spots for the ‘sparkle’ of life. -
Create Fur Texture:
I like to use loose, flicking pencil strokes to mimic fur. Add these shadow patches under the ears and along the chest to show the coat’s direction. -
Shadow the Undersides:
Lightly shade the belly area and the inside of the back leg. This helps ground the dog and gives the body three-dimensional volume. -
Ground the Subject:
Add a little bit of shading directly underneath the paws and the tail. This cast shadow prevents the drawing from looking like it is floating in space. -
Final Touches:
Review the sketch for contrast. Darken the separation between the toes and deepen the shadow inside the ear flap to complete the look.
Step back and admire the personality you have captured in those simple pencil strokes


Horse Gallop Gesture Sketch For Movement
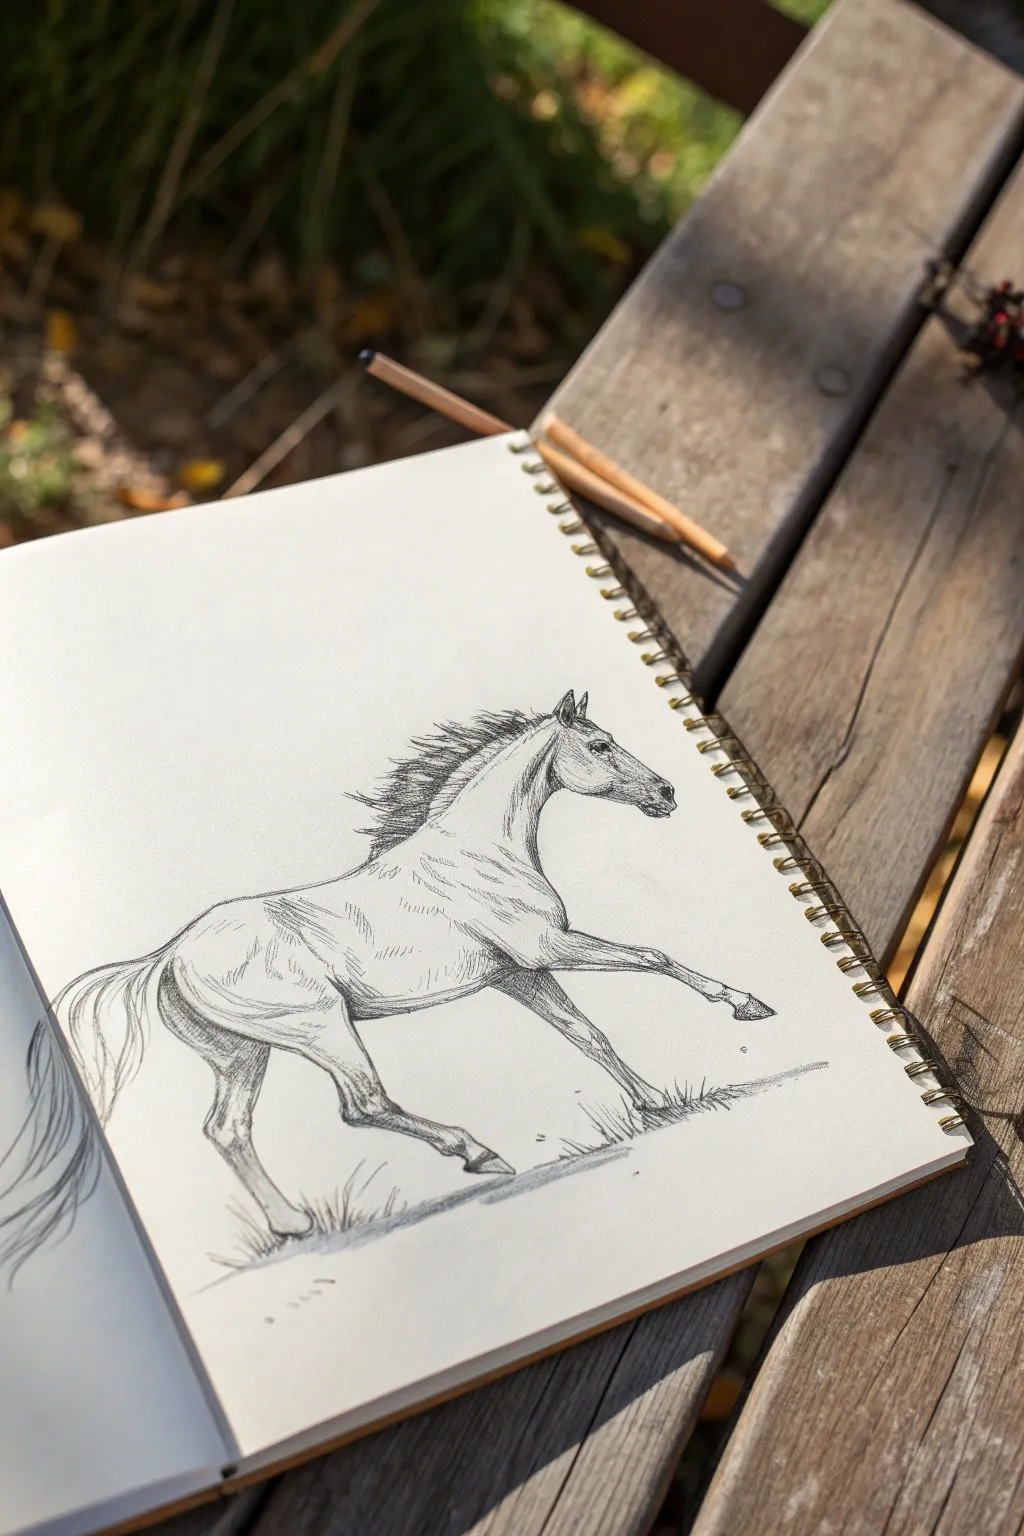
Capture the raw energy and elegance of an equine in motion with this dynamic pencil sketch. Using loose gesture lines that evolve into detailed muscle definition, you’ll create a drawing that feels like it’s galloping right off the page.
Step-by-Step Tutorial
Materials
- Spiral-bound sketchbook (heavyweight drawing paper recommended)
- Graphite pencils (H or HB for sketching, 2B and 4B for shading)
- Kneaded eraser
- Pencil sharpener or craft knife
- Reference photo of a galloping horse
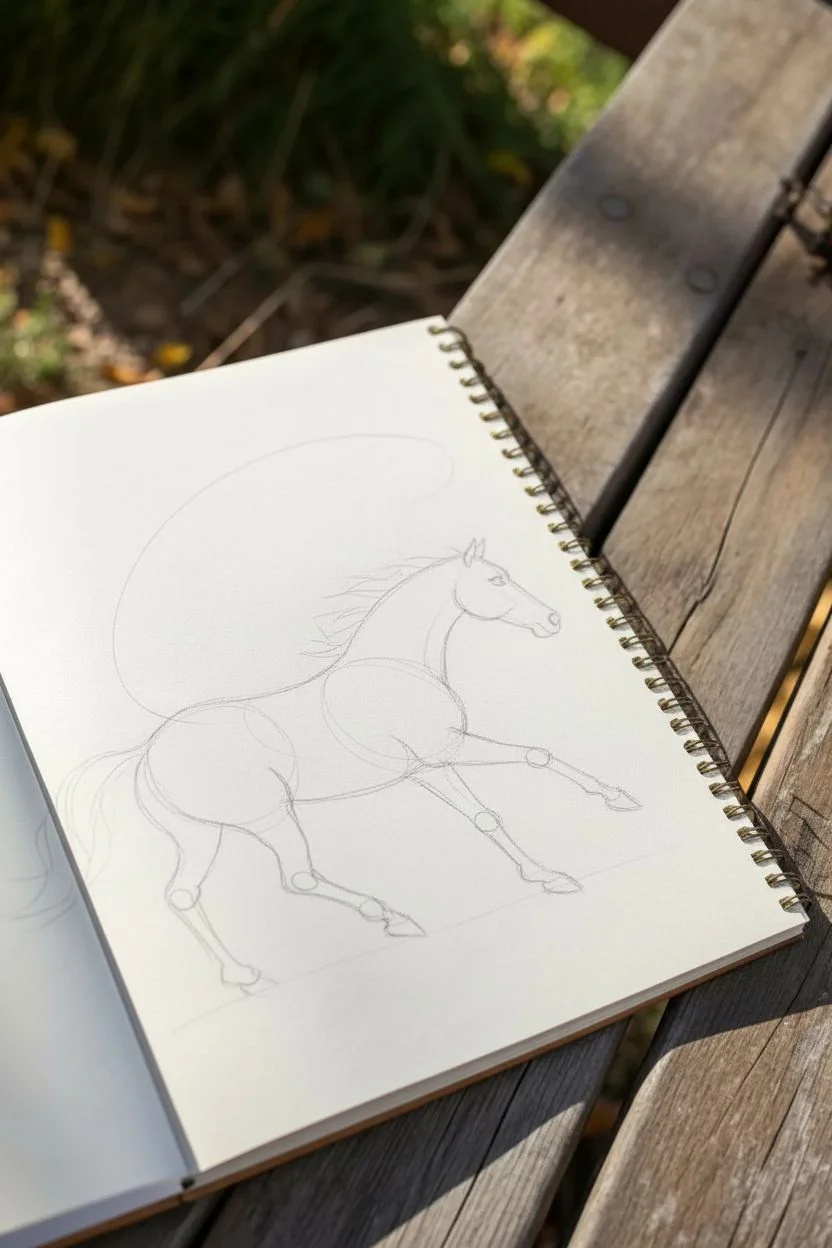
Step 1: Laying the Framework
-
Establish the Action Line:
Start by drawing a faint, sweeping curve that represents the horse’s spine. This ‘line of action’ should flow from the head, down through the back, and extend out where the tail will be. Keep your grip loose and your wrist flexible. -
Block in Major Masses:
Lightly sketch three main shapes along your action line: a smaller circle for the head, a large oval for the ribcage, and a slightly smaller oval for the hindquarters. Ensure the ribcage allows enough space for the neck connection. -
Connect the Forms:
Draw the neck by connecting the head circle to the ribcage oval with sloping lines. Connect the ribcage to the hindquarters with a curved line for the back and a subtle curve for the belly. -
Map the Legs:
Use stick-figure lines to determine the position of the legs. Capture the gallop by having the front leg extended forward and the back legs pushing off. Mark the joints (knees and hocks) with small circles to ensure correct articulation.
Capture the Motion
Don’t connect every single line perfectly. Leaving small gaps in your contour lines, especially on the ‘leading edges’ of shapes, creates a sense of vibration and movement.
Step 2: Refining the Form
-
Flesh Out the Limbs:
Draw cylindrical shapes around your leg guidelines. Notice how horses’ legs taper significantly near the hooves but are muscular and thick near the body. Pay attention to the fetlock joint right above the hoof. -
Define the Head Profile:
Refine the circle of the head into a proper horse profile. Add the slope of the nose, the jawline, and place the eye high on the side of the head. Sketch triangular shapes for the ears, angled slightly back to suggest speed. -
Sketch the Mane and Tail:
Using quick, flicking strokes, draw the mane flowing backward along the neck. Do the same for the tail, ensuring the hair follows the direction of the movement to emphasize the speed of the gallop. -
Eraser Maintenance:
Take your kneaded eraser and gently dab away your initial geometric guidelines and stick figures, leaving only the refined outline of the horse.
Wonky Proportions?
If the legs look stiff, check the joints. Horse legs don’t bend like human legs. The ‘knee’ on the front leg is halfway up, and the back leg has a hock that bends backward.
Step 3: Shading and Texture
-
Define Muscle Groups:
Switch to a slightly sharper pencil. Lightly draw internal lines to suggest major muscle groups, particularly around the shoulder, the flank, and the thigh. These shouldn’t be hard outlines, but soft suggestions of form. -
Begin Hatching:
Start shading the darker areas using diagonal hatching lines. Focus on the underbelly, the underside of the neck, and the distant legs (the ones on the far side of the body). -
Deepen the Shadows:
Layer your hatching strokes. I usually cross-hatch in the deepest shadow areas, like where the legs meet the body and under the jaw, to create more contrast and volume. -
Detail the Face:
Darken the eye, leaving a tiny speck of white paper for the highlight. Add shading around the muzzle and nostrils to give the face dimension. -
Texturize the Hair:
Return to the mane and tail with your darker pencil (2B or 4B). Add decisive, dark strokes within the hair masses to create depth and separation between the strands. -
Ground the Subject:
Sketch some rough, horizontal scribbles under the planted hooves to represent grass or dirt. This ground shadow is crucial for making the horse look like it is making contact with the earth rather than floating. -
Final Touches:
Review the drawing for contrast. Strengthen the outer contour lines in select areas—underside of the belly, the knees/hocks—to give the drawing weight and finality.
Now you have a spirited equine sketch ready to gallop through your sketchbook pages


Rabbit Profile With Soft Fur Hatching
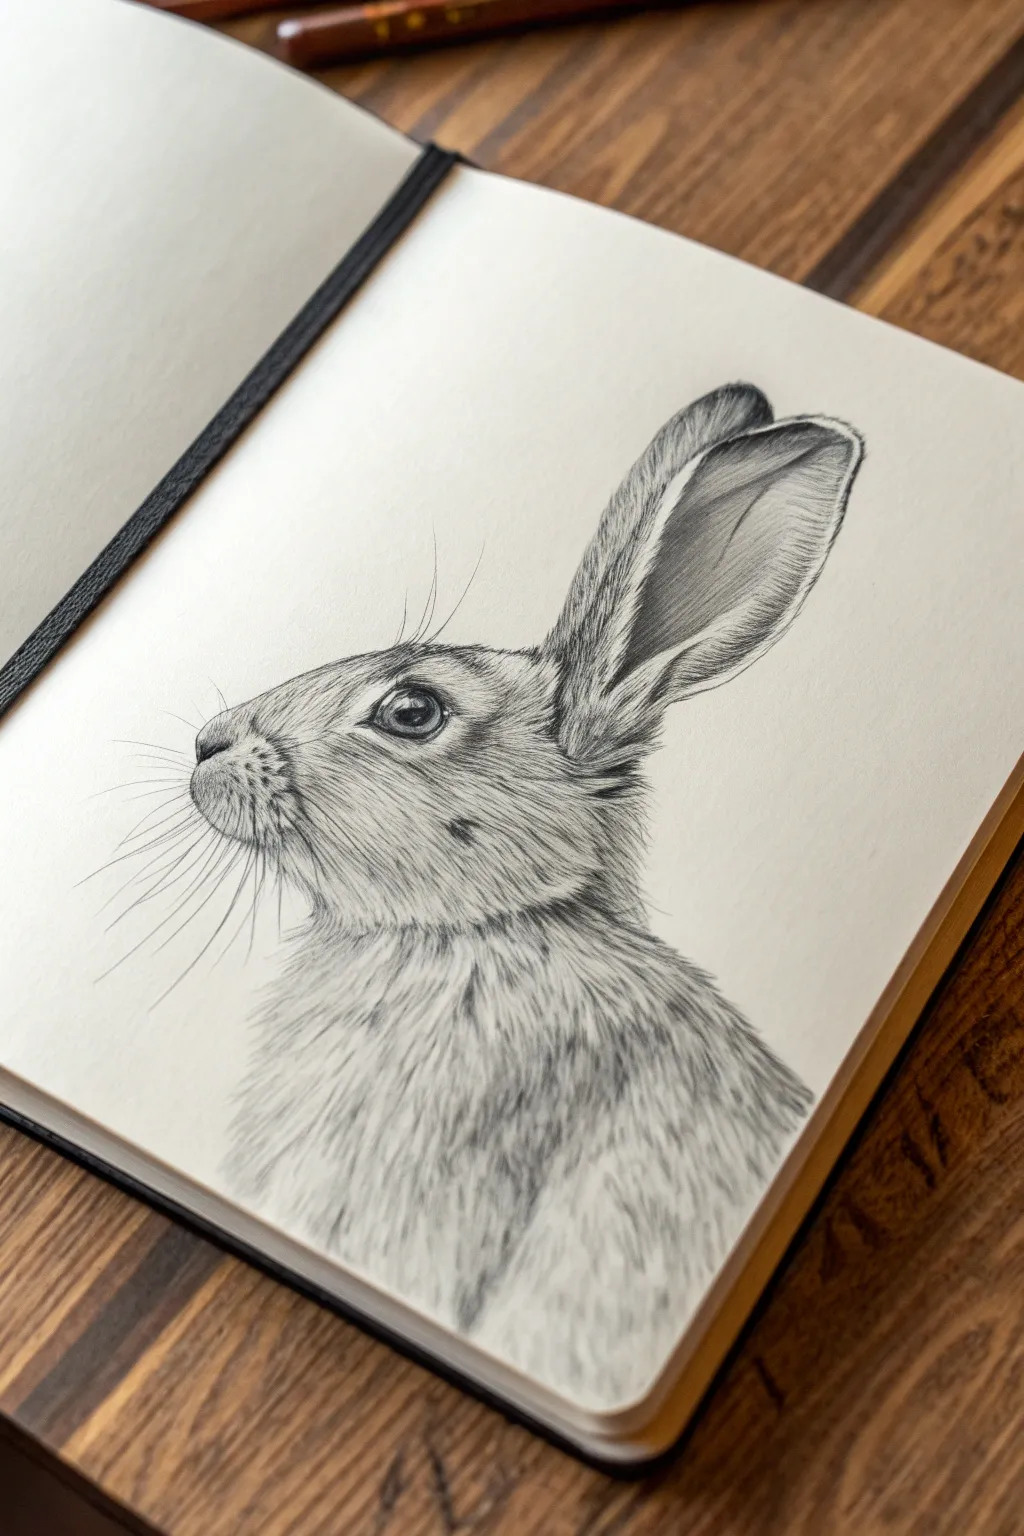
Capture the delicate nature of a wild rabbit with this detailed pencil study, focusing on building realistic fur textures through patient hatching. This project teaches you how to render soft, dense fur and the alert expression characteristic of a hare or rabbit in profile.
Step-by-Step
Materials
- High-quality sketchbook (cream or off-white paper recommended)
- Graphite pencils (HB, 2B, 4B, and 6B)
- Fine mechanical pencil (0.5mm, HB or 2B)
- Kneaded eraser
- Precision vinyl eraser (or eraser pen)
- Blending stump (tortillon)
- Sharpener
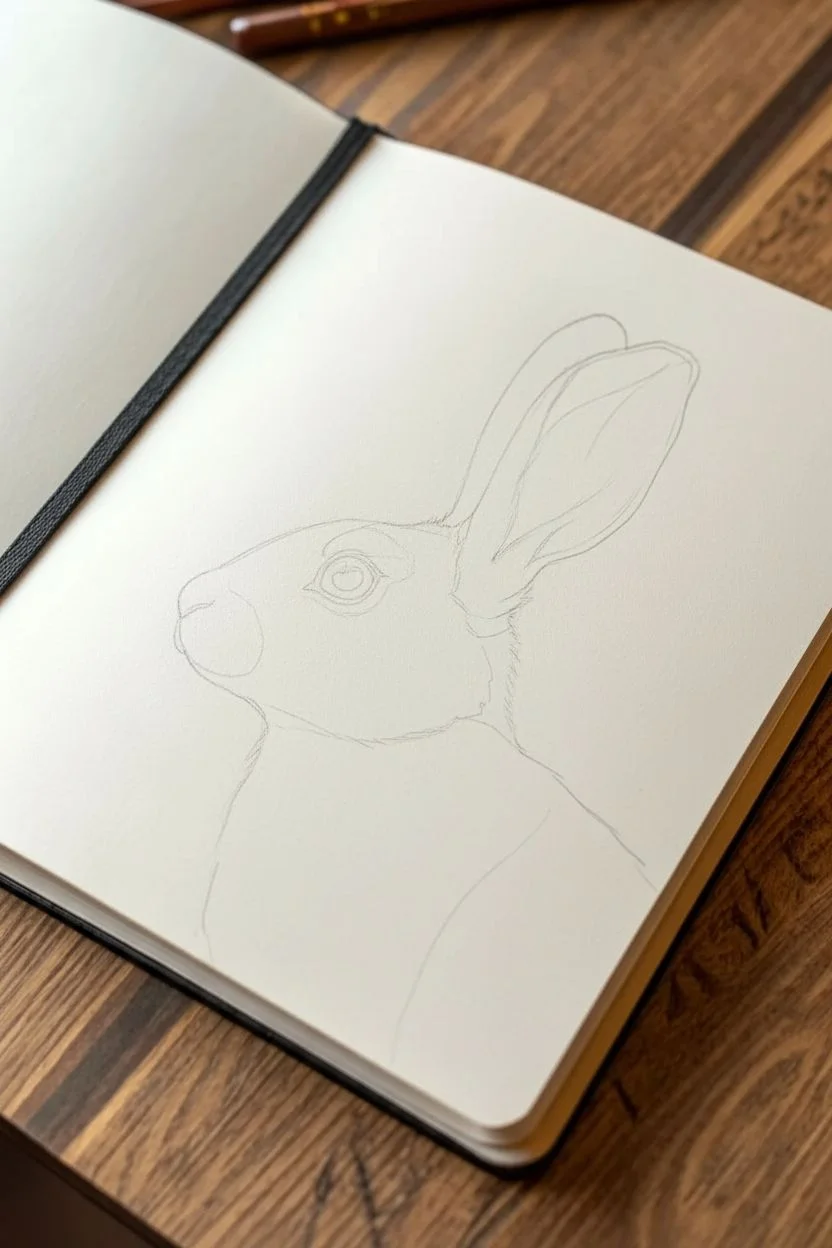
Step 1: Basic Outline & proportions
-
Establish the head shape:
Start with a light HB pencil. Draw a slightly flattened circle for the cheek/jaw area and a smaller, rounded triangle shape attached to the left side for the nose and muzzle. Keep marks incredibly faint so they can be erased later. -
Map the ears:
Sketch two long, leaf-like shapes extending upwards and slightly back from the top of the head. The front ear should be fully visible, while the back ear is partially tucked behind. Notice how they narrow at the base where they attach to the skull. -
Place the eye and features:
Position the eye high on the triangular muzzle section, slightly closer to the ears than the nose. It should be a large, almond shape. Mark the small V-shape for the nostril and the curve of the mouth. -
Define the neck:
Draw a sweeping curve downwards from the back of the head to suggest the neck and shoulders. The rabbit’s chest should puff out slightly below the chin.
Muddy Fur?
If your fur texture looks like a grey smudge, you’re blending too much. Keep your pencil sharp and rely on the stroke direction and distinct lines rather than rubbing the graphite.
Step 2: Facial Details & Refining
-
Darken the eye:
Switch to a 4B pencil. Outline the eye firmly, leaving a crisp white circle for the highlight (crucial for life!). Fill in the pupil with your darkest value, leaving the iris slightly lighter. -
Detail the nose and muzzle:
Refine the nostril shape with a 2B pencil. Begin adding tiny, dotted stippling marks around the muzzle where the whiskers will eventually originate. -
Initial ear structure:
Use your HB pencil to draw the inner folds of the ear. The near ear acts like a scoop; define the rim and the shadow that falls inside the deep cavity.
Step 3: Creating Fur Texture
-
Short fur on the face:
Using a sharp mechanical pencil or a sharpened HB, start making very short, quick strokes around the nose and eye. These strokes should follow the contours of the bone structure beneath. -
Layering the cheeks:
Move to the cheek area. The fur here is slightly longer. Use directional strokes that fan outwards from the eye towards the jaw. Layering is key—overlap your strokes to create density. -
Darkening the shadows:
Switch to a 2B or 4B pencil to deepen the shading under the eye and along the jawline. I find that creating ‘clumps’ of shadow makes the fur look more organic than uniform shading. -
Ear texture:
The inside of the ear needs very short, velvety strokes. On the rim and back of the ear, use longer, sweeping lines. Darken the deep pocket of the ear with a 6B pencil for maximum contrast.
Level Up: Colored Pencil
Try this same technique on tan-toned paper using brown, white, and black colored pencils. Use the white pencil specifically for the whiskers and chest highlights.
Step 4: Body Fur & Finishing Touches
-
Neck transitions:
The fur changes direction at the neck. Start drawing longer, softer strokes that flow downward. This mimics the thicker winter coat often seen on hares. -
Chest fluff:
Use your 2B pencil to create the fluffy chest area. These strokes should be looser and less precise than the face. Leave some areas of the paper lighter to suggest volume and highlights. -
Deepening contrast:
Go back over the darkest areas—usually behind the jaw, under the chin, and inside the ear—with your 6B pencil. This high contrast makes the drawing pop off the page. -
Adding whiskers:
This step requires confidence. Take a sharp HB or mechanical pencil and draw long, sweeping curves originating from the muzzle dots. Vary the pressure so the lines taper off at the ends. -
Final highlights:
Use a precision eraser or the edge of a kneaded eraser to lift out small highlights in the fur, particularly above the eye and on the ridge of the nose. -
Clean up:
Erase any remaining guide lines or smudges around the outside of the drawing to keep the profile crisp against the background.
Now you have a soft, textural rabbit portrait that captures a quiet moment in nature
BRUSH GUIDE
The Right Brush for Every Stroke
From clean lines to bold texture — master brush choice, stroke control, and essential techniques.
Explore the Full Guide
Owl Front View With Bold Symmetry
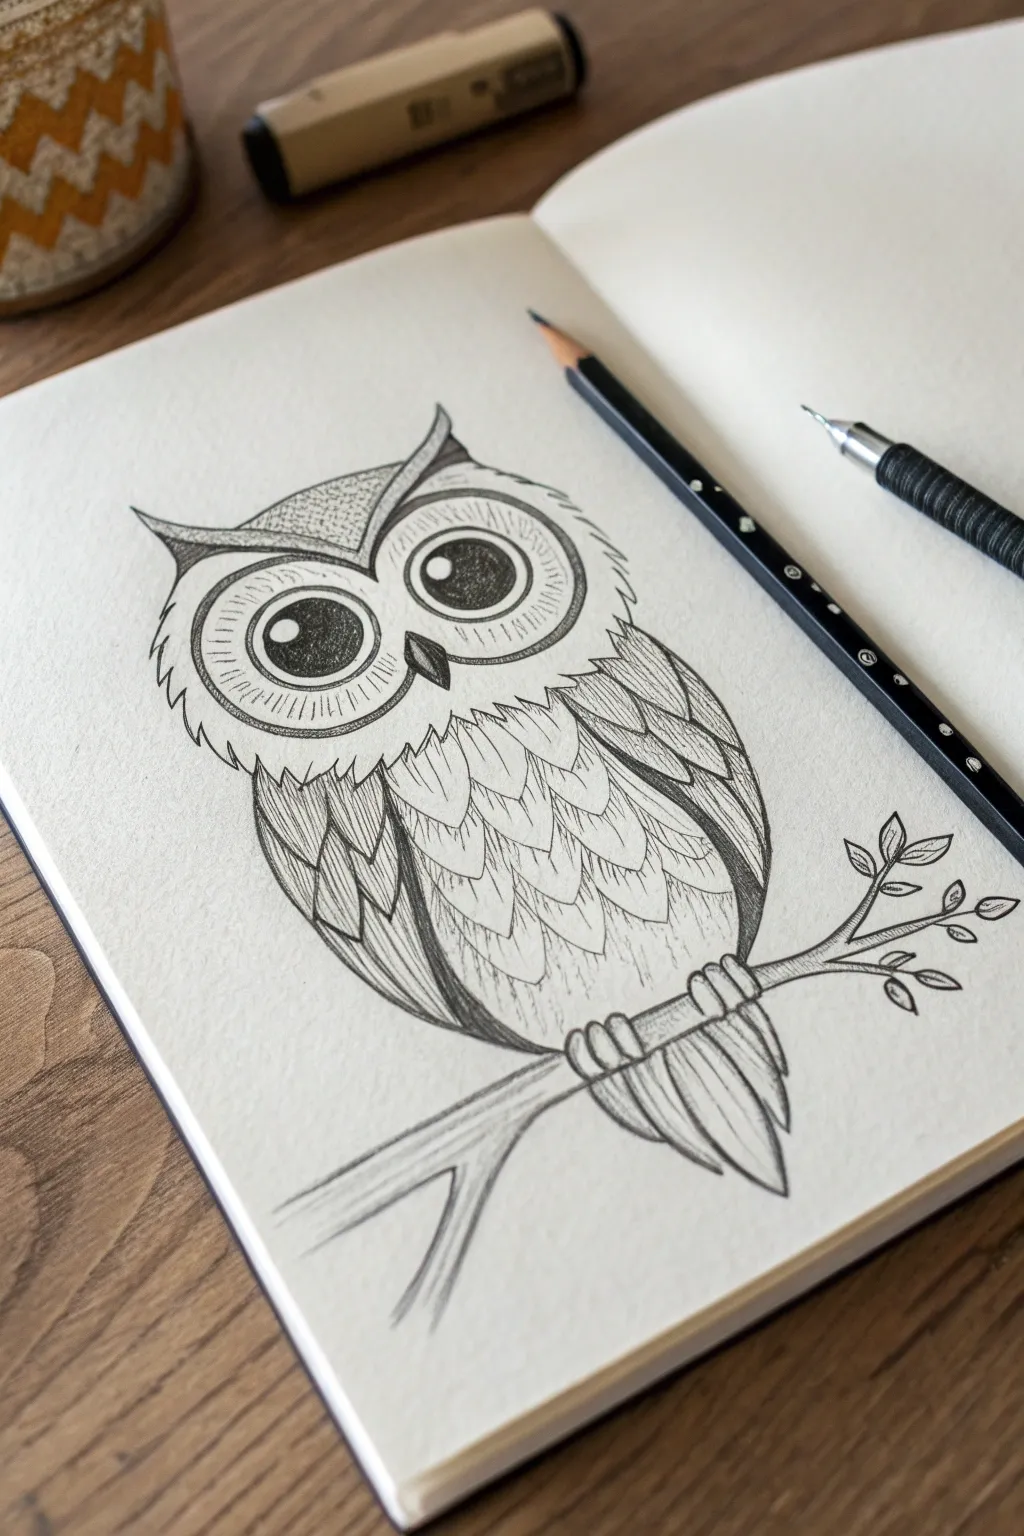
Learn to draw this charming, symmetrical owl illustration using classic graphite pencil techniques. The design combines bold, cartoon-like proportions with realistic feather textures for a delightful sketchbook page that pops.
How-To Guide
Materials
- Sketchbook or drawing paper (medium tooth)
- Graphite pencils (HB for sketching, 2B or 4B for shading)
- Fine-point mechanical pencil (optional, for details)
- Eraser
- Pencil sharpener
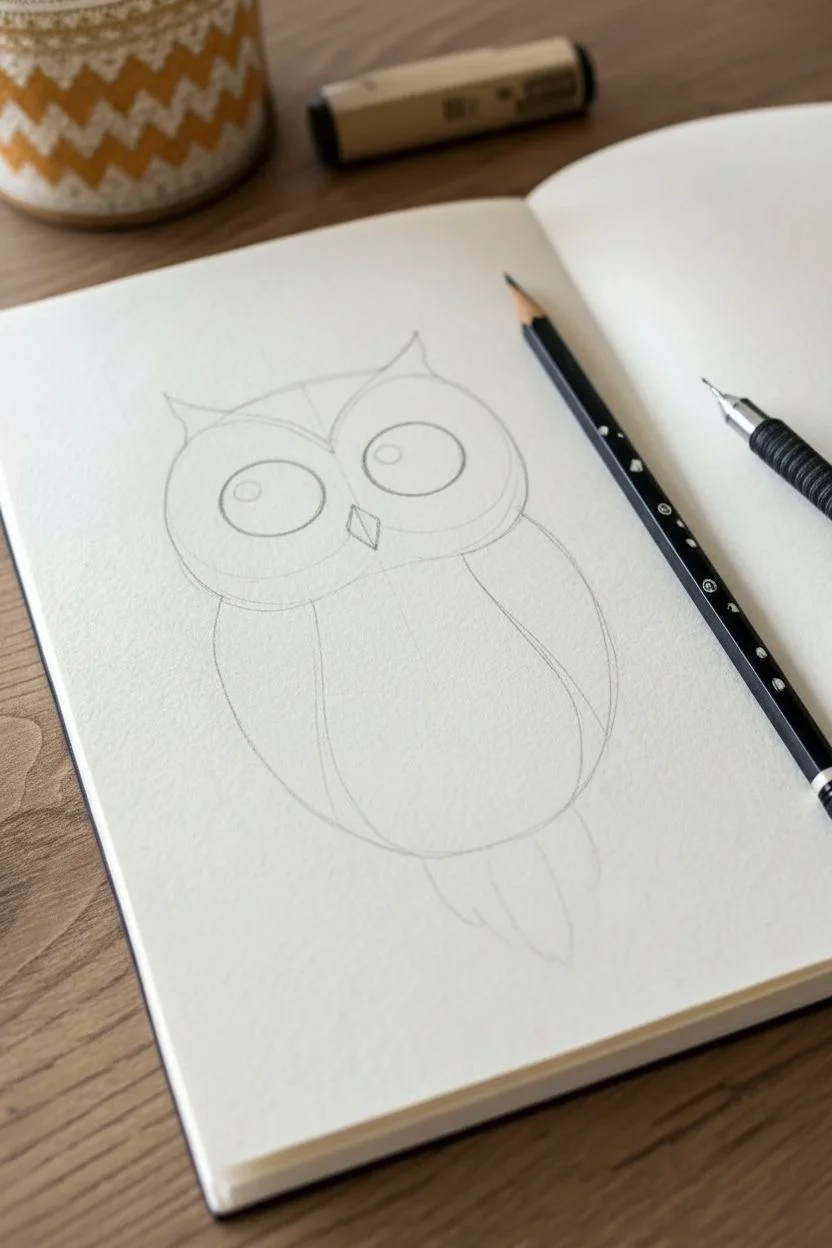
Step 1: Laying the Foundations
-
Draw the head shape:
Start by drawing a wide, slightly flattened oval for the head. At the top of the oval, dip the line slightly in the center to create the brow ridge, and extend the corners upward into small points for the ear tufts. -
Add the body outline:
Below the head, sketch a narrower, U-shaped curve for the body. The body should be slightly smaller in width than the head to give it that cute, stylized look. -
Sketch the eye circles:
Inside the head oval, draw two large, symmetrical circles that take up a significant portion of the face. Leave a small gap between them in the center for the beak. -
Place the pupils:
Within those large circles, draw smaller dark circles for the pupils. Leave a tiny white circle inside each pupil near the top right or left to represent a highlight or ‘catchlight’. -
Form the beak:
Right between the eyes, draw a small, downward-pointing triangle or diamond shape for the beak. It should nestle perfectly in the space between the eye rings.
Stippling for Texture
Don’t rush the dots on the forehead! Vary the density of your stippling—more dots near the edges, fewer in the center—to create a subtle 3D rounded effect.
Step 2: Refining Facial Features
-
Detail the eye rings:
Draw a second circle around each eye socket to create a rim. Inside this rim, sketch short, radiating lines all the way around, like the spokes of a wheel, to mimic the texture of facial feathers. -
Define the forehead texture:
Create a V-shape on the forehead, starting from the beak and widening up toward the ear tufts. Fill this triangular area with stippling (lots of tiny dots) to give it a soft, fuzzy texture. -
Shape the face outline:
Go over your initial head outline with bolder strokes. Near the cheeks, make the line jagged or zigzagged to suggest fluffy feathers sticking out, rather than a smooth line.
Uneven Eyes?
If your eye circles look lopsided, draw a very faint vertical line down the center of the face first. Use this axis to measure equal distances for both eyes before darkening.
Step 3: Creating the Feathered Body
-
Outline the wings:
On either side of the body, draw long, curved teardrop shapes for the folded wings. These should curve inward, hugging the owl’s belly. -
Draw chest feathers:
Down the center of the chest, draw rows of ‘U’ or ‘V’ shapes layered like roof tiles. These are the breast feathers. Keep them loose and sketchy. -
Texture the wings:
Add detail to the wings by drawing longer, narrower loops inside the wing outline. Use darker pencil pressure here to separate the wing feathers from the softer chest feathers. -
Shade the wings:
Use hatched lines—parallel diagonal strokes—to shade the wing feathers. I prefer using a softer 2B pencil here to get deeper darks, which helps the wings stand out against the lighter belly.
Step 4: Perch and Final Details
-
Sketch the branch:
Draw two parallel lines slanting upwards from the bottom left to the right. Make the branch look organic by adding a fork at the end with a few small leaves attached. -
Add the talons:
Where the owl sits on the branch, draw three small ovals wrapping around the wood for the toes. Add a few curved lines for the tail feathers hanging down behind the branch. -
Detail the wood grain:
Draw flowing lines along the length of the branch to simulate wood grain. Keep these lines light and fluid. -
Final shading pass:
Go back over your darkest areas—the pupils and the shadows under the wings—with your darker pencil. Strengthen the outer contour lines to make the drawing pop off the page.
Sign your name near the branch and admire your wise new friend
Fox Side Profile With Clean Contour Lines
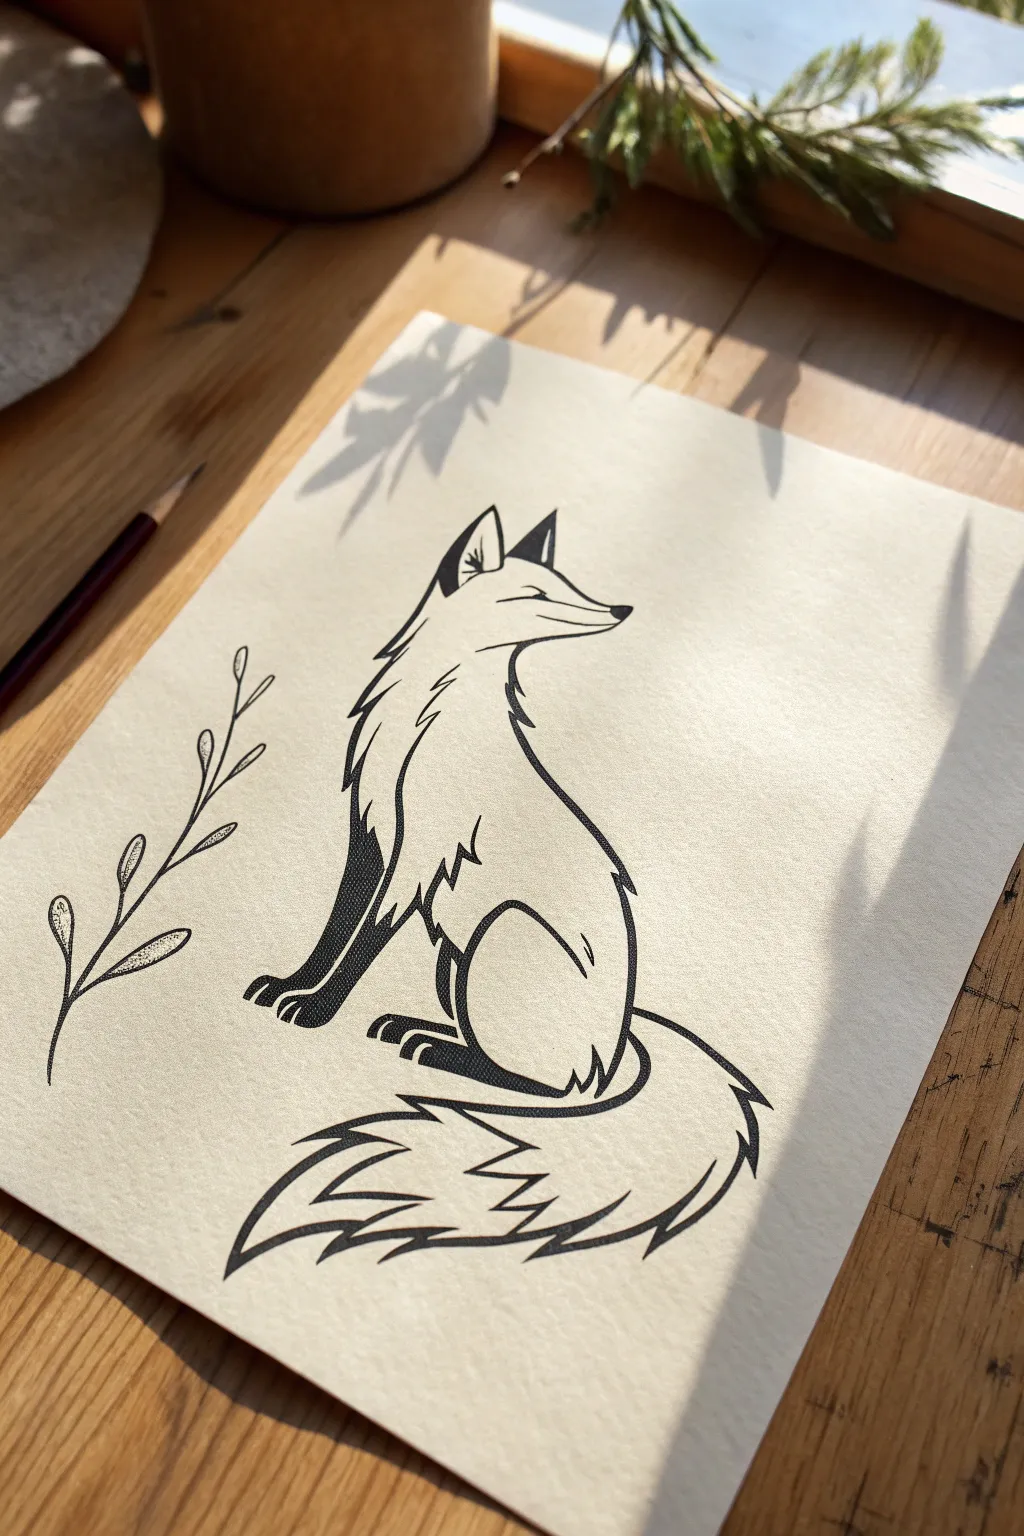
Capture the elegant simplicity of a sitting fox with this stylized line art project. Using clean contour lines and bold black accents, you’ll create a striking minimalist illustration perfect for beginners or seasoned sketchers.
Detailed Instructions
Materials
- High-quality drawing paper (smooth bristol or mixed media paper)
- HB pencil for initial sketching
- Soft eraser (kneaded suggested)
- Fine liner pen (0.3mm or 0.5mm)
- Thicker marker or brush pen for filling bold areas
- Ruler (optional, for checking proportions)
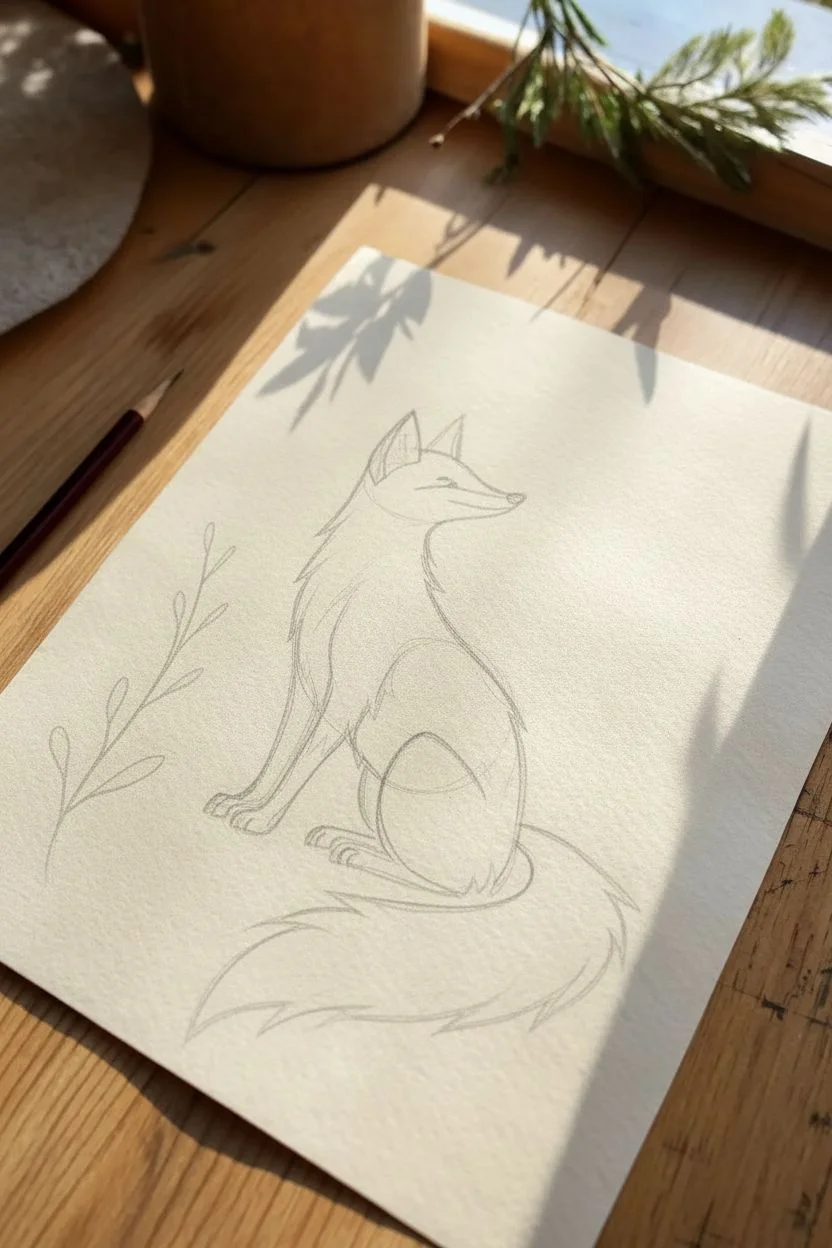
Step 1: Planning the Structure
-
Map the head and body:
Start with your HB pencil using very light pressure. Draw a small circle for the head and a larger, elongated oval below it for the body, leaning slightly backward to represent the seated posture. -
Connect the neck:
Sketch a curving line connecting the back of the head to the body oval to form the arched back. Draw a shorter line for the front of the neck, creating a smooth transition. -
Establish the snout and ears:
Extend a triangular shape from the front of the head circle for the snout. Add two triangular ears on top of the head—one slightly behind the other to show perspective.
Step 2: Refining the Sketch
-
Define the chest fur:
Instead of a smooth line for the chest, lightly sketch jagged, zig-zag lines hanging down from the neck area to suggest thick, fluffy fur. -
Sketch the legs:
Draw the front legs as slender, vertical shapes extending from the chest fur. For the visible hind leg, draw a large curved shape (like a rounded ‘C’) near the base of the body to show the thigh muscle. -
Add the tail:
Sweep a large, bushy tail shape wrapping around the base of the fox. Make the tip pointed and curvature smooth, mimicking the flow of the letter ‘S’ resting on its side. -
Place the foliage:
lightly sketch a simple branch to the left of the fox. Use a central stem line and small almond shapes for the leaves.
Smudge Alert
If your hand drags across wet ink, use a separate scrap of paper under your drawing hand as a protective shield while you work.
Step 3: Inking the Contours
-
Outline the head:
Switch to your 0.3mm or 0.5mm fine liner. Carefully trace the top of the snout, moving up over the forehead and outlining the ears. Keep the points sharp. -
Detail the face:
Draw the nose tip as a small, filled triangle. Add a simple curved line for the closed eye and a subtle line for the mouth/jaw. -
Ink the fur texture:
Ink the jagged fur on the chest and the back of the neck. Use quick, confident flicks of the pen to make the points look like natural hair tufts rather than stiff triangles. -
Draw the back and leg:
Create a smooth, continuous line down the fox’s back. Ink the large curve of the hind leg, leaving a gap where the tail overlaps.
Level Up: Shadow Play
Use a light grey marker or diluted ink wash to add a soft drop shadow under the fox and leaves for a 3D effect.
Step 4: Adding Contrast and Detail
-
Fill the dark accents:
Using your thicker marker or brush pen, fill in the front legs (stops near the ‘elbow’) and the tips of the ears. This bold black creates the classic fox ‘stocking’ look. -
Detail the tail:
Ink the outer shape of the tail using jaggy strokes similar to the chest fur. I find it helpful to vary the size of the zig-zags here to make it look bushier. -
Add the tail tip:
Draw interior zig-zag lines inside the tail to separate the white tip from the main body of the tail. -
Ink the branch:
Go over your foliage sketch with the fine liner. Keep the leaf outlines simple and clean, avoiding excessive shading. -
Clean up:
Wait at least 5-10 minutes for the ink to dry completely. Gently erase all underlying pencil marks to reveal the crisp illustration.
Enjoy the sleek and modern look of your finished fox illustration

PENCIL GUIDE
Understanding Pencil Grades from H to B
From first sketch to finished drawing — learn pencil grades, line control, and shading techniques.
Explore the Full Guide
Deer Portrait With Antler Texture Study
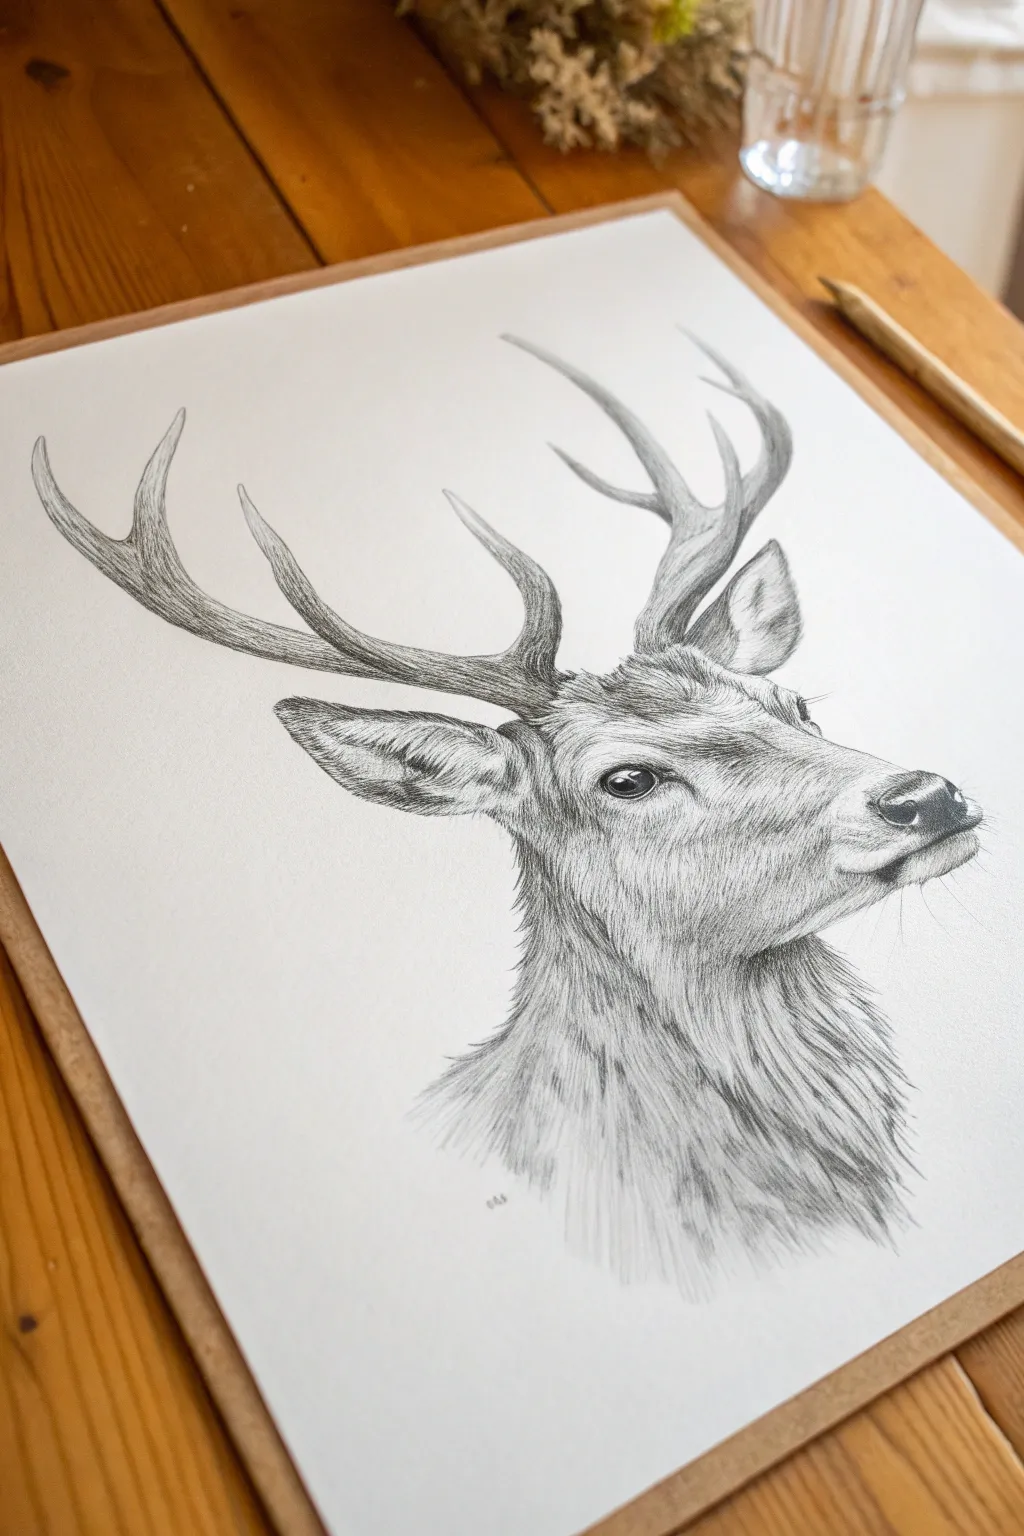
Capture the quiet majesty of a stag with this highly detailed pencil study. This project focuses on building realistic fur textures and capturing the rugged, organic feel of antlers through careful shading.
Step-by-Step
Materials
- High-quality drawing paper (smooth or Bristol board)
- Set of graphite pencils (HB, 2B, 4B, 6B)
- Mechanical pencil (0.5mm, HB or 2B) for fine details
- Kneaded eraser
- Precision stick eraser (optional)
- Blending stump or tortillon
- Pencil sharpener
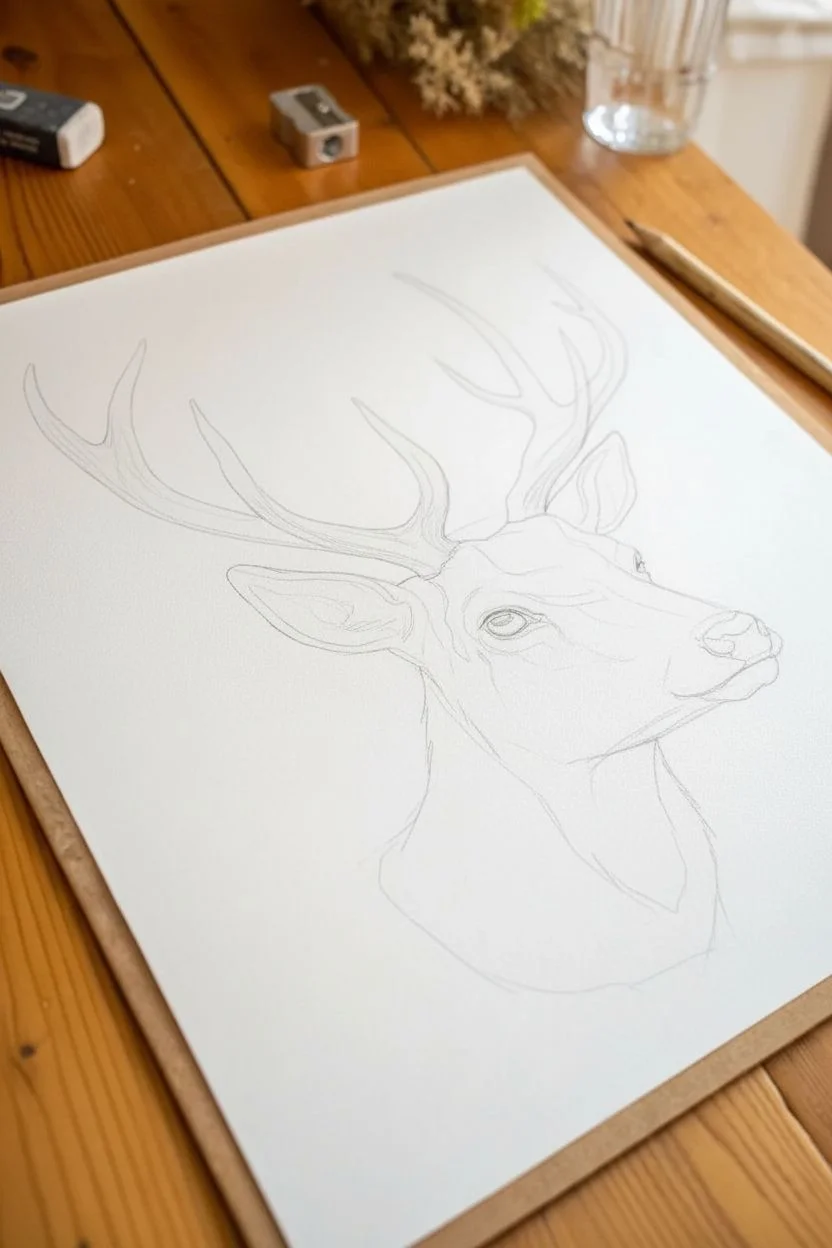
Step 1: Drafting the Structure
-
Establish the Head Shape:
Begin lightly with an HB pencil to outline the basic geometry of the deer’s head. Draw a slightly elongated oval for the muzzle and a broader, deeper shape for the cheek and jaw area. -
Position Key Features:
Mark the placement of the eye about halfway down the head, ensuring it sits deep enough to look natural. Sketch the triangular shape of the nose at the tip of the muzzle and outline the large, alert ears. -
Map the Antlers:
Extend curved lines upward from the forehead to map out the main beams of the antlers. Pay close attention to the branching tines; the left antler sweeps back while the right one curves forward slightly in perspective. -
Refine the Outline:
Go over your structural lines to solidify the final contour. Add subtle bumps along the nose bridge and the curve of the jawline, then erase your initial construction guides with a kneaded eraser until they are barely visible.
Step 2: Detailed Rendering: The Face
-
Draw the Eye:
Switch to a 4B pencil to darken the pupil, leaving a tiny, crisp white circle for the highlight reflection. Shade the iris with a gradient from dark to medium grey to create depth. -
Detail the Nose and Muzzle:
Use a 2B pencil to shade the nose pad, using stippling (tiny dots) to suggest a wet, porous texture. Darken the nostril significantly for depth. -
Start the Facial Fur:
Using a sharp mechanical pencil or a sharpened HB, begin drawing short, flicking strokes around the eye and bridge of the nose. These strokes should follow the natural direction of hair growth, flowing away from the center of the face. -
Build Density on the Cheek:
Layer longer pencil strokes along the cheekbone and jaw. I find it helpful to vary the pressure here—press harder at the root of the hair clump and lift off at the end to create a tapered look. -
Refine the Ear Texture:
Sketch the fluffy interior of the ear with soft, wispy lines. For the outer ear edge, use darker, shorter strokes to define the rim against the background.
Fixing Flat Fur
If the fur looks like flat wires, you need more variation. Overlap your strokes significantly and ensure you have a mix of 3-4 distinct values (light, mid, dark) to create 3D depth.
Step 3: Antlers and Neck
-
Base Tone for Antlers:
Lightly shade the entire antler shape with an HB pencil to get rid of the stark white of the paper. This base tone ensures the texture looks solid later on. -
Create Ridges and Pearls:
Use a 2B pencil to draw irregular, wandering lines lengthwise along the antlers to mimic the ridges. Add small oval shapes near the base (the burr) to represent the bumpy ‘pearling’ texture. -
Deepen Antler Shadows:
With a 4B pencil, darken the underside of the main beams and the crevices between the ridges. This high contrast makes the antlers look round and three-dimensional rather than flat. -
Draft the Neck Fur:
Moving down to the neck, use long, sweeping strokes with a 2B pencil. The fur here acts as a mane and is much longer and coarser than the face fur. -
Layering for Volume:
Add a second layer of strokes over the neck area using a 4B or 6B pencil for the darkest shadows. Focus these darks where fur clumps overlap or tuck under the jawline. -
Softening the Edges:
Let the sketch fade out at the bottom of the neck. Use lighter, sparser strokes at the very bottom edge to create a vignette effect, rather than a hard cutoff line.
Add Winter Breath
To make the scene atmospheric, gently smudge a little graphite powder near the mouth and nose using a piece of tissue to create the soft, foggy illusion of cold breath.
Step 4: Final Touches
-
Enhance Contrast:
Step back and assess your drawing. Use your softest pencil (6B) to punch up the darkest areas: the pupil, the nostril, inside the ear, and the deepest shadows of the neck ruff. -
Lift Highlights:
Take your stick eraser or a pinched edge of kneaded eraser and lift out thin lines in the fur on the highlights of the cheek and brow. This simulates light catching individual hairs. -
Clean Up:
Erase any smudges from the surrounding white paper to ensure a professional presentation.
Sign your intricate study and admire the life you’ve captured on the page
Lion Mane Sketch Using Layered Line Direction
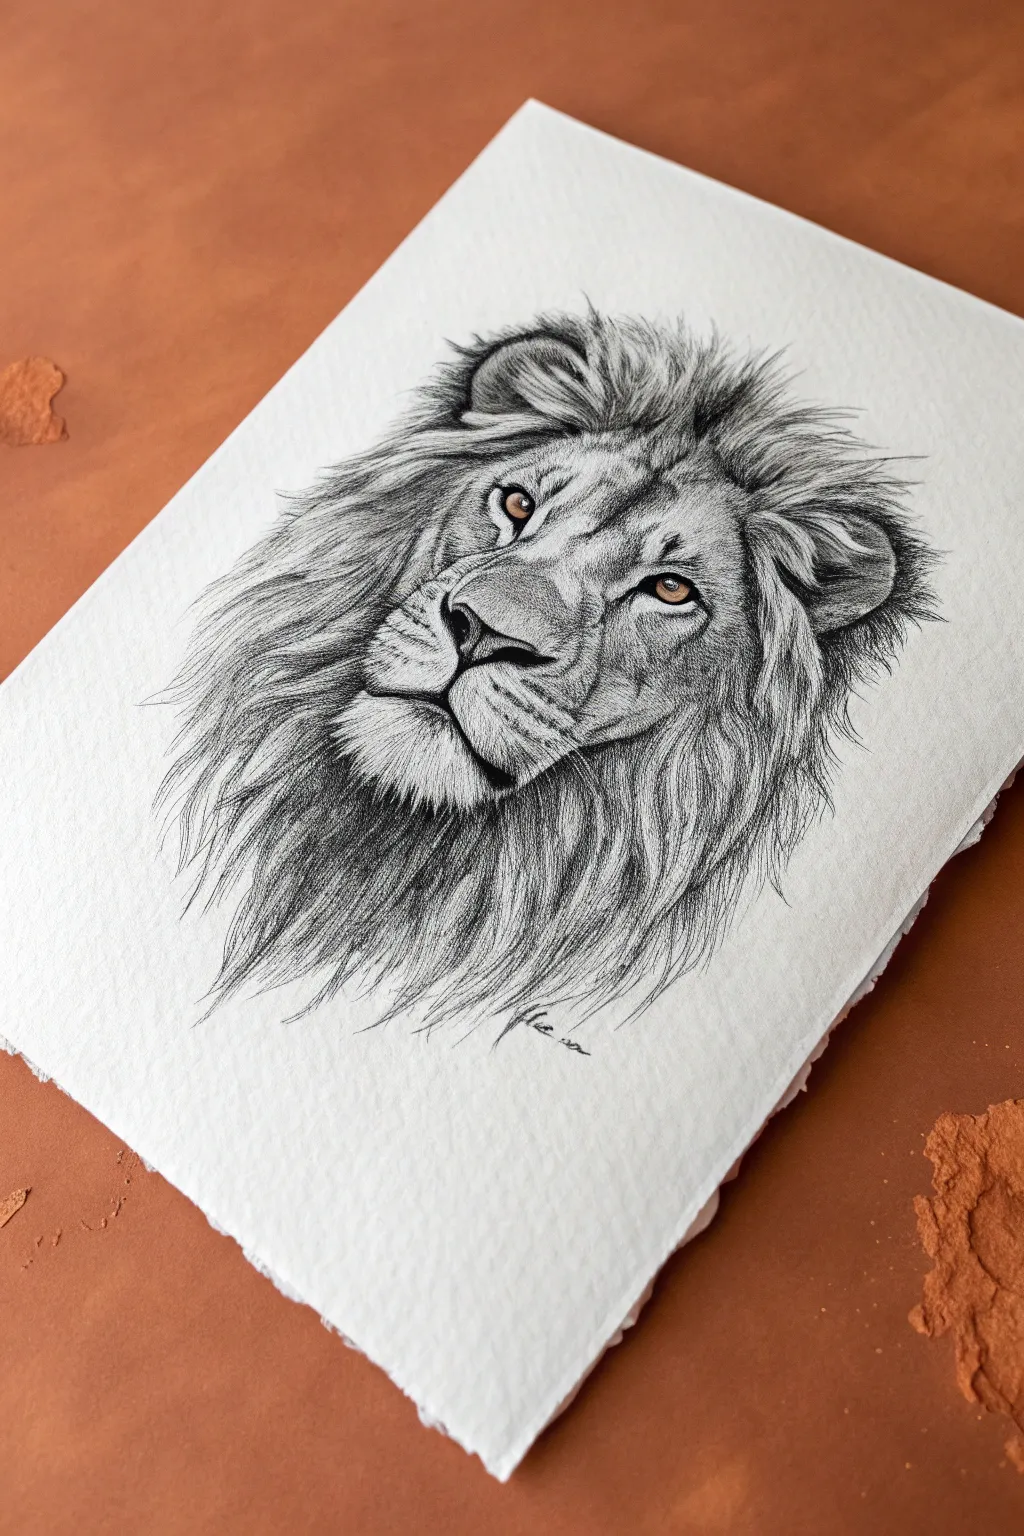
Capture the king of the beasts with this striking monochromatic sketch that focuses on texture and direction. The piece contrasts precise facial details with the flowing, layered complexity of a wild mane, punctuated by piercing golden eyes.
Detailed Instructions
Materials
- High-quality textured watercolor paper or mixed media paper (rough grain)
- Graphite pencils (HB, 2B, 4B, 6B)
- Fine liner pens or black ink (0.1, 0.3, 0.5 sizes)
- Colored pencils (golden yellow, brown, burnt sienna)
- Blending stump (tortillon)
- Kneaded eraser
- Precision eraser pen
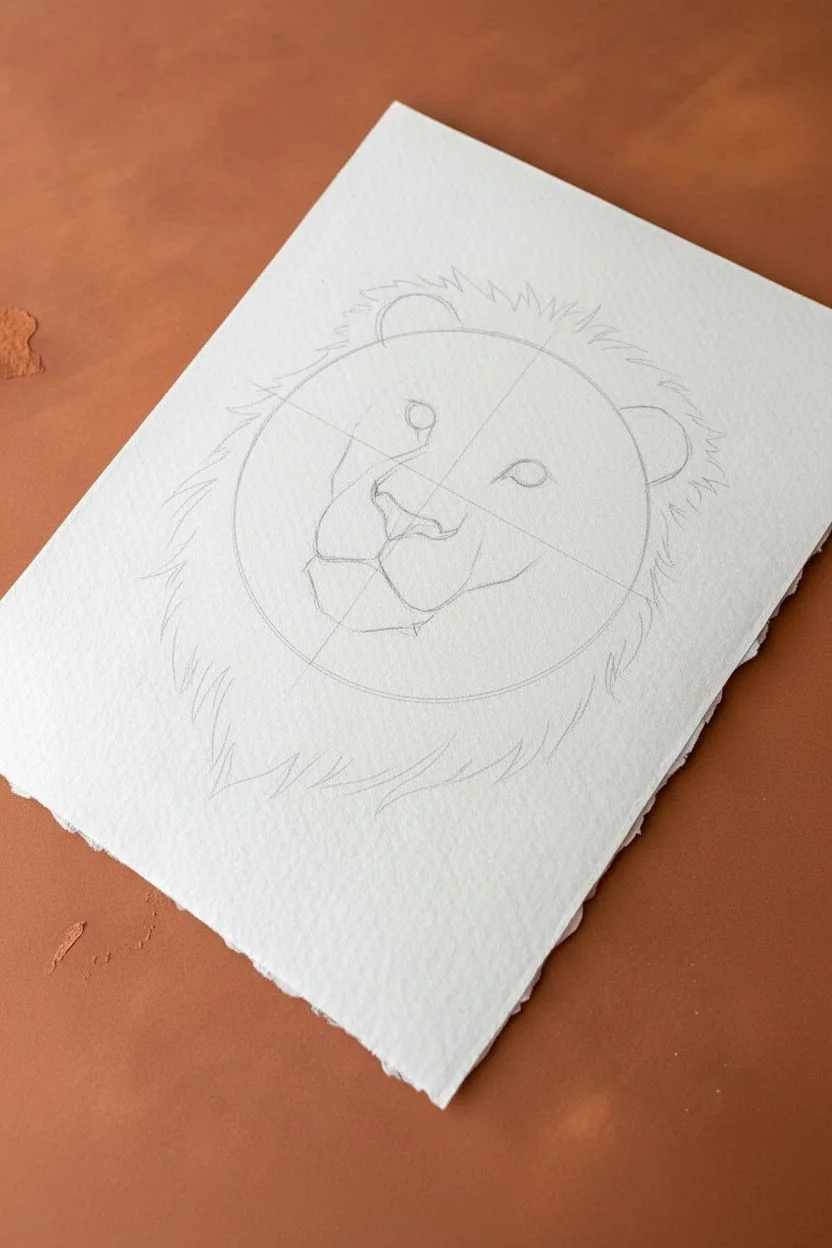
Step 1: Structural Foundation
-
Head proportions:
Begin with a light HB pencil. Sketch a large circle for the main head mass and a smaller, slightly squared oval overlapping the lower third for the snout area. Draw a vertical centerline that curves slightly to the right to indicate the lion is turning his head. -
Feature placement:
Mark the eye line about halfway down the main circle. Place the triangular nose shape at the bottom of the snout circle. Sketch the mouth line below the nose, extending it wider than the nose itself. -
Ear positioning:
Add the ears near the top of the main circle. The ear on the left should be partially hidden by the mane later, while the ear on the right is more prominent and rounded. -
Mane boundaries:
Lightly sketch the outer perimeter of the mane. Don’t make a solid line; use loose, jagged marks to suggest where the hair tips will end. This creates a ghost outline for your later texture work.
Fur Direction Tip
Rotating your paper frequently helps you maintain the natural curve of your wrist for creating smoother, sweeping fur strokes in different directions.
Step 2: Facial Detailing
-
Defining the eyes:
Switch to a sharp 2B pencil or 0.1 fine liner. Detailed the almond shape of the eyes. Darken the rims heavily, resembling eyeliner, and draw the small, round pupils. -
Adding color:
Before adding too much graphite, lightly color the irises with your golden yellow pencil. Add touches of brown near the top of the iris for shadow, and leave a tiny white spot for the catchlight. -
Nose and mouth:
Darken the nostrils and the central split of the upper lip. Use a 4B pencil or ink pen for the darkest crevices. Add the small dots (whisker spots) on the muzzle area using rhythmic rows. -
Facial fur texture:
Using short, controlled hatching strokes with an HB pencil, map the direction of the fur on the face. The fur strokes should radiate outward from the nose and curve around the eyes.
Step 3: Developing the Mane
-
Layering strategy:
The mane is built in clusters, not individual hairs. Start closer to the face. Draw ‘V’ shaped clumps of hair pointing away from the face using a 2B pencil. -
establishing flow:
Pay attention to the specific section shown in the image: the hair sweeps backward and slightly downward. Use long, sweeping strokes that mimic this gravity and movement. -
Darkening the depths:
Switch to your 6B pencil or thicker ink pen (0.5). Darken the areas *between* the clumps of hair. This negative space shading creates depth and makes the lighter hair strands pop forward. -
Shadowing the neck:
Under the chin and jawline, create a dense shadow area. I prefer to use cross-hatching here to build up a deep value that separates the head from the neck mane. -
Section by section:
Work outward from the face to the paper edge. As you move further out, make your strokes longer and looser. The mane should look wilder at the edges compared to the shorter fur on the face. -
Varying line weight:
Combine thin, sharp lines (using the hardest pencil or finest pen) with thick, soft lines. This variation prevents the drawing from looking like a wire brush and gives it an organic feel.
Contrast Boost
For ultra-deep blacks without the shine of heavy graphite, carefully go over your darkest shadows with black charcoal or a matte black polychromos pencil.
Step 4: Refining and Finishing
-
Contrast check:
Step back and look at your drawing. Deepen the darkest shadows—especially inside the ears, under the chin, and the pupils—to ensure a full tonal range. -
Highlight recovery:
Use your precision eraser or the sharp edge of a kneaded eraser to lift out graphite. Create fine white lines in the mane to represent stray hairs catching the light. -
Texture enhancement:
Lightly run a blending stump over the mid-tone areas of the fur to soften the pencil marks slightly, then draw crisp lines over top again. This creates a multi-layered look. -
Whiskers:
Use a very sharp pencil or a white gel pen if you have one. Draw distinct, long whiskers originating from the muzzle spots. Make these lines quick and confident to avoid shaky strokes. -
Final signature:
Add your signature unobtrusively near the bottom, perhaps following the curve of a mane lock, to complete the composition.
Step back and admire the powerful gaze and intricate textures you have brought to life on the page


Elephant Skin Wrinkle And Shadow Practice
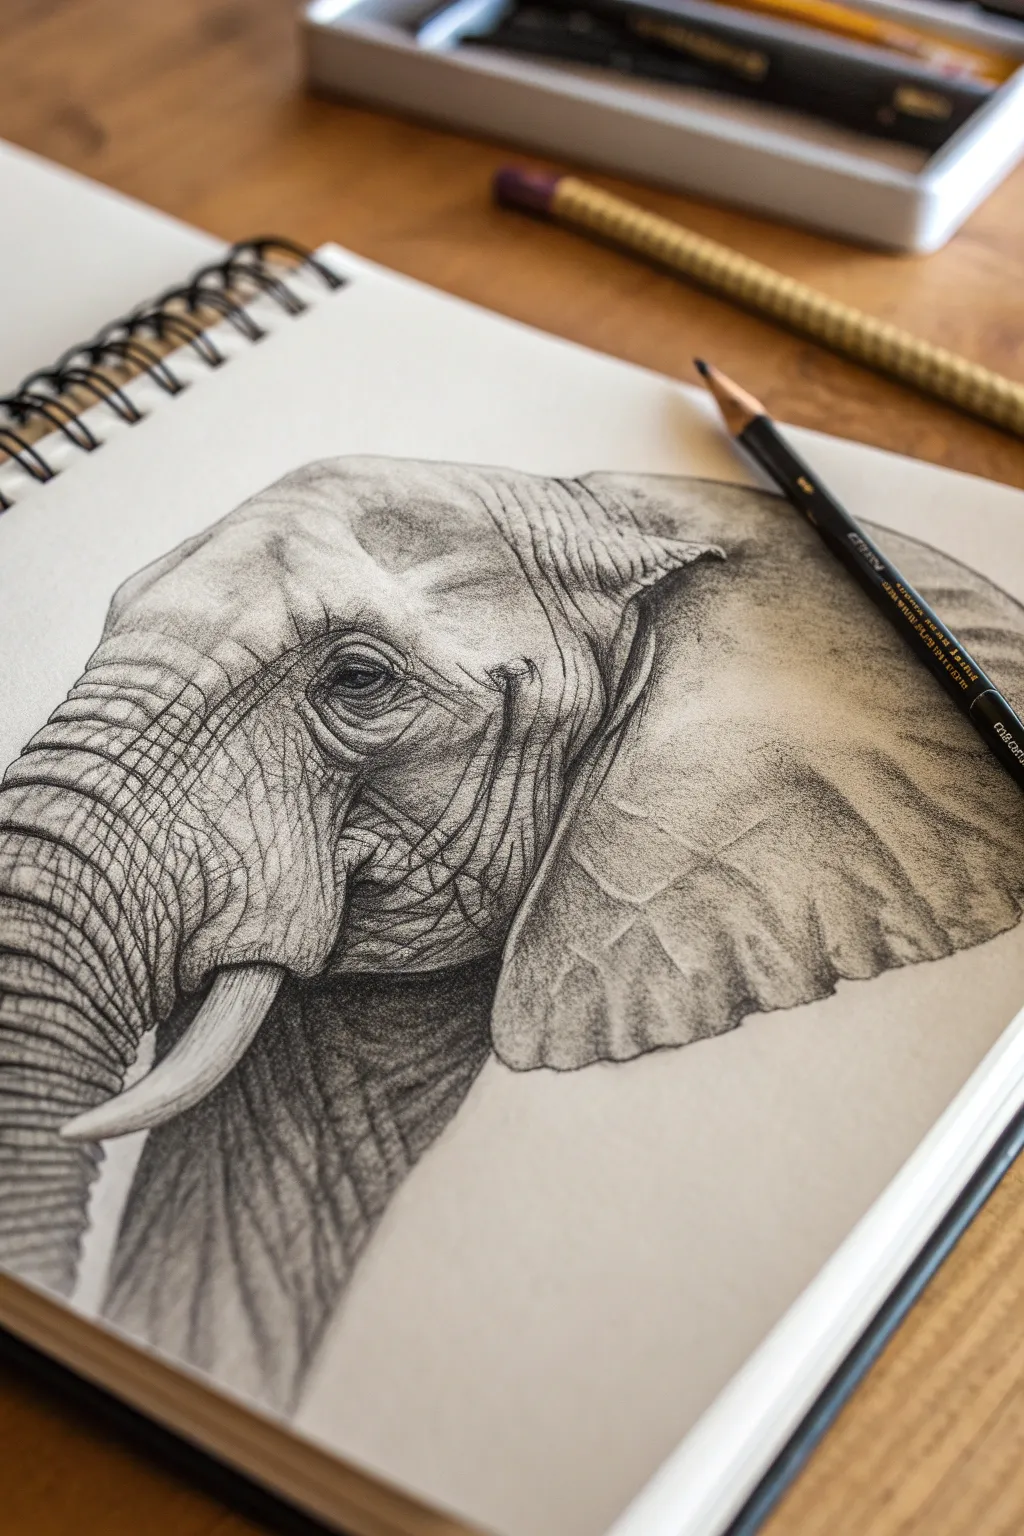
This project focuses on the intricate beauty of elephant skin, capturing the deep folds and contrasting textures of a wise giant. Using a combination of sharp lines and soft shading, you will render a lifelike profile that emphasizes depth and dimension.
Step-by-Step
Materials
- Sketchbook with textured drawing paper (medium tooth)
- Graphite pencils (HB, 2B, 4B, 6B)
- Black charcoal pencil (for deepest shadows)
- Kneaded eraser
- Precision eraser or eraser pencil
- Blending stump or tortillon
- Pencil sharpener
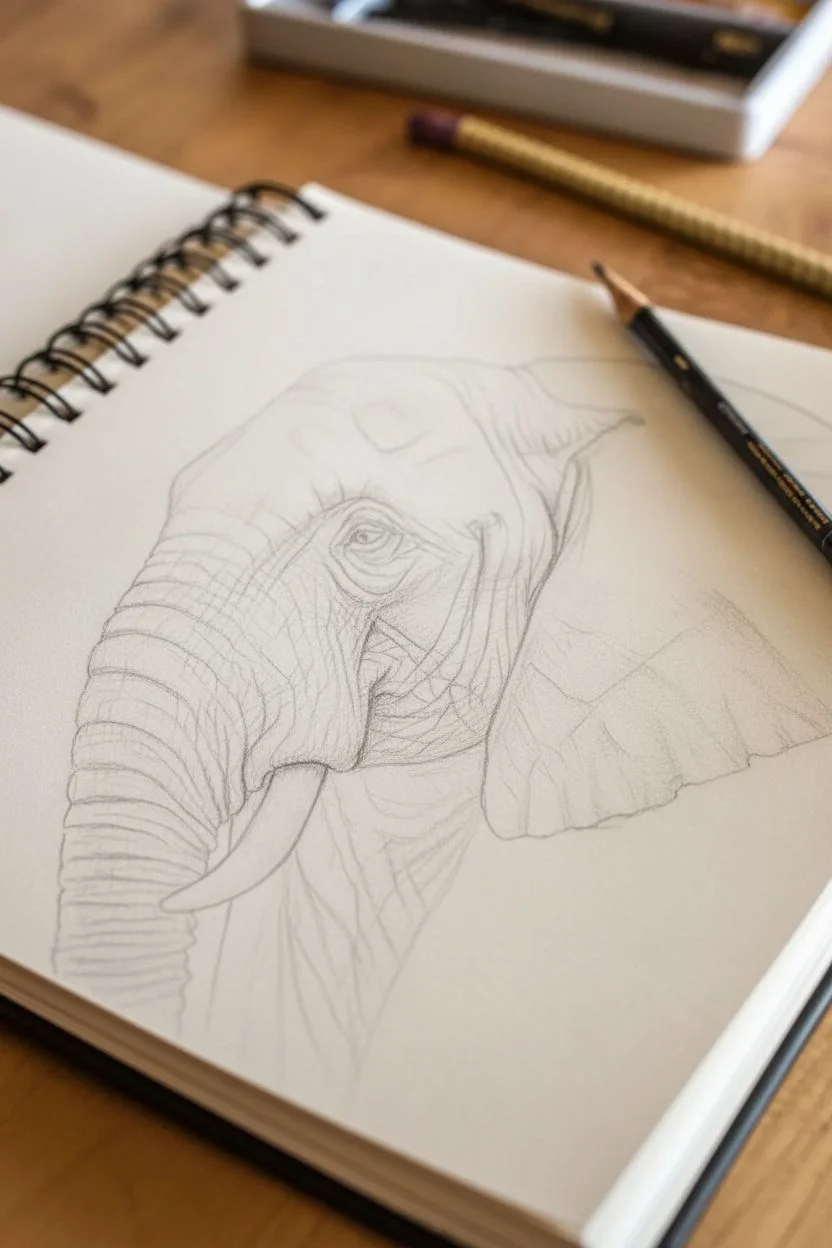
Step 1: Basic Structure & Outline
-
Map the Head Shape:
Begin with an HB pencil using very light pressure. Draw a large, rounded shape for the cranial dome and extend a curved line downward to establish the flow of the trunk. Sketch a large, rough triangle hanging off the side to represent the ear. -
Refine the Profile:
Tighten the outline of the forehead, bringing it down into the brow ridge. Define the curve of the trunk, noting the segmented ridges. Sketch the location of the eye, placing it deep within the skull structure, about a third of the way down the head. -
Place the Tusk and Mouth:
Draw the curved tusk emerging from beneath the trunk base. Add the lower lip line and the sagging skin of the neck below the jaw. Keep these lines faint as they are merely guides.
Muddy Textures?
Graphite sheen can kill depth. If shading looks shiny or grey, spray a workable fixative, let dry, and layer charcoal over the deepest blacks for a matte finish.
Step 2: Defining the Eye & Features
-
Render the Eye:
Using a 4B pencil, darken the pupil and iris, leaving a tiny speck of white paper for a highlight. While shading, create the heavy, folded eyelids surrounding the eye to give it that sleepy, ancient look. -
Establish Main Folds:
Switch to a 2B pencil to map out the primary wrinkle lines. These radiate from the eye and flow down the cheek. Draw the deep horizontal creases on the trunk, making them curve with the form to show roundness. -
Outline Ear Textures:
Sketch the ragged edge of the ear. Draw the large veins and folds on the ear flap, noting that the skin here is flatter and papery compared to the deep cracks on the face.
Step 3: Shading & Texture
-
Base Shading Layer:
With an HB pencil held at a low angle, lay down a light, even layer of graphite over the shadowed areas—under the ear, beneath the trunk, and the neck folds. Avoid the highlight on the forehead. -
Deepening Shadows:
Use a 6B or charcoal pencil to punch up the darkest areas. Focus on the shadow cast by the ear onto the neck and the deep crevices around the eye. This high contrast is crucial for realism. -
creating the Crisscross Pattern:
Elephant skin isn’t just lines; it’s a network of tiny polygons. On the cheek and forehead, draw intersecting lines to create small diamond or square shapes. Shade the top and left sides of these tiny shapes slightly darker to make them pop out. -
Detailing the Trunk:
Work your way down the trunk. Between the deep horizontal rings, add smaller vertical cracks. Use a blending stump to soften the shading between these cracks so the skin looks leathery, not metallic. -
Ear Texturing:
Shade the ear with broad, sweeping strokes. Use the side of your 4B pencil to create a grainy texture that mimics the rough surface. Darken the edges of the rips and tears in the ear for dimension. -
Tusk Smoothness:
The tusk should look smoother than the skin. Shade it lightly with an HB pencil, creating a gradient from the root (darker) to the tip. Use a clean eraser to lift a strip of light along the top edge to simulate a sheen.
Background Atmosphere
Add a soft, out-of-focus background using powdered graphite applied with a tissue. This mimics a depth-of-field effect, making the sharp details of the elephant pop.
Step 4: Refinement & Final Touches
-
Refining Wrinkle Depth:
Go back over your major wrinkles with a sharp 4B pencil. Vary the line weight—thick and dark in the deepest part of the fold, tapering to thin and light at the ends. -
Adding Micro-Texture:
I like to stipple or lightly tap the pencil tip in the shadowed areas of the neck and lower jaw to suggest rough, coarse skin pores. -
Blend and lift:
Use your blending stump to smudge the graphite gently in the mid-tone areas like the forehead. Then, take your kneaded eraser and pinch it to a fine point. dab it onto the ‘peaks’ of the wrinkles to lift pigment and create highlights. -
Final Contrast Check:
Assess the drawing from a distance. If the drawing looks flat, deepen the darkest blacks—especially under the ear and tusk—with the charcoal pencil to ensure the animal feels three-dimensional.
Take a moment to appreciate the texture you’ve built, transforming simple lines into living, breathing skin
Perched Bird Sketch With Feather Crosshatching
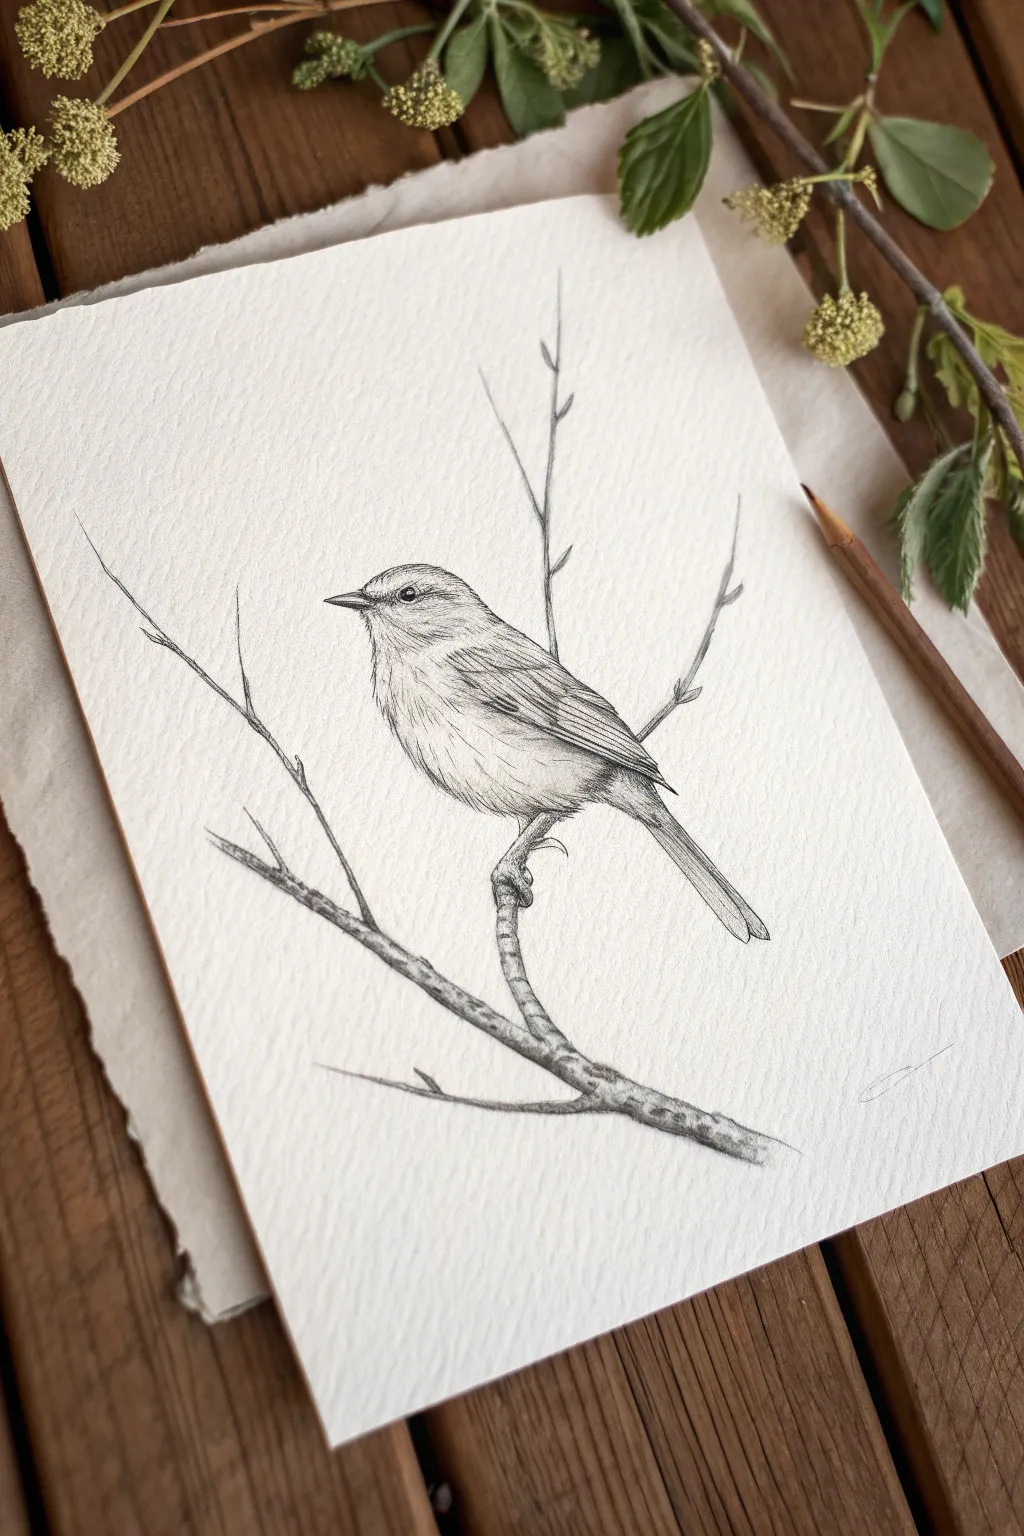
Capture the fragile beauty of a songbird with this detailed graphite sketch. By combining careful observation with precise hatching techniques, you will create a realistic texture that brings the soft feathers and rough bark to life on the page.
Step-by-Step Tutorial
Materials
- Textured fine art paper (cold press watercolor or heavy sketch paper)
- H or HB pencil (for initial layout)
- 2B and 4B graphite pencils (for shading)
- Kneaded eraser
- Pencil sharpener or sandpaper block
- Precision eraser (rendering stick or mono zero)
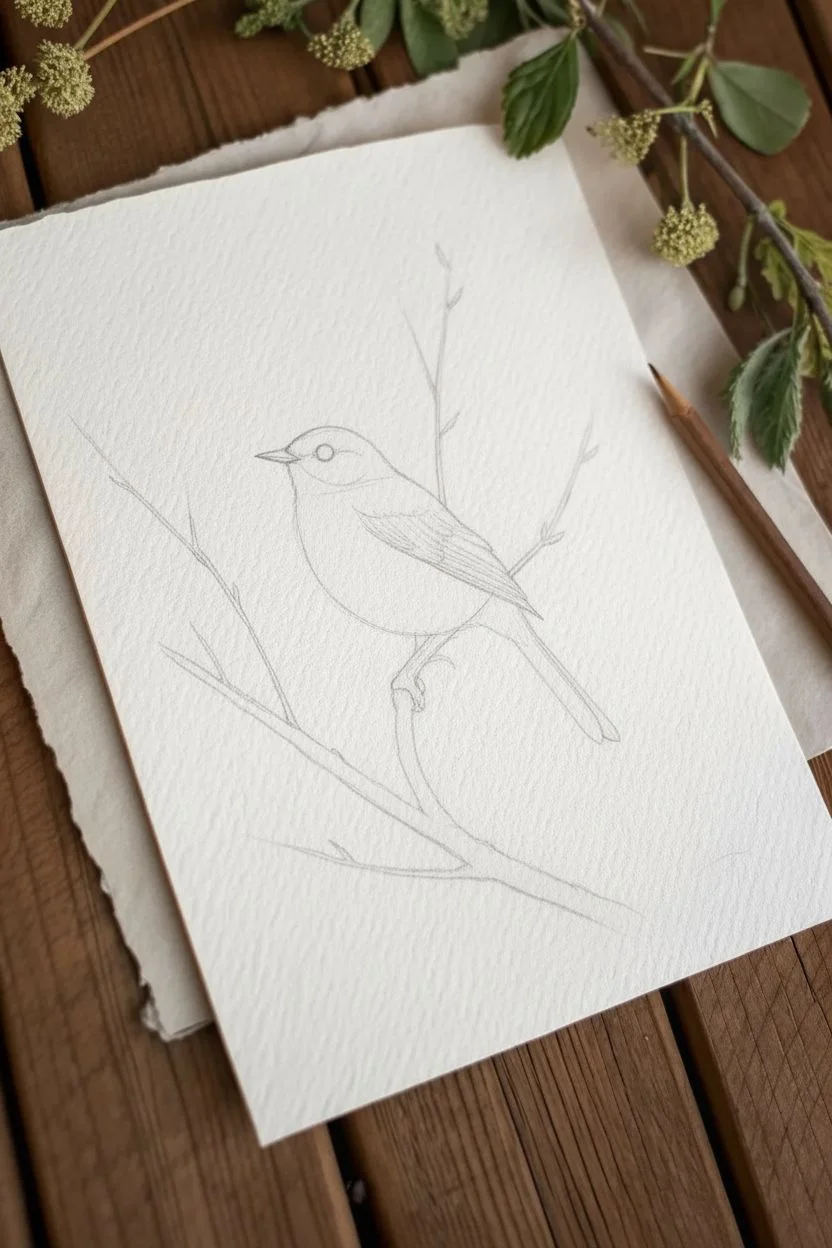
Step 1: Structural Layout
-
Map the Composition:
Begin by lightly marking the top and bottom boundaries of your bird on the paper to ensure it fits well within the frame. Draw a gentle diagonal line to represent the main axis of the branch. -
Block in Basic Shapes:
Use your H or HB pencil to sketch a simple oval for the bird’s body and a smaller circle for the head, slightly overlapping the top left of the oval. Keep these lines incredibly faint. -
Connect and Refine Outline:
Draw the contour lines connecting the head to the body, creating the neck curve. Sketch a small triangle for the beak and a long, thin rectangle extending back for the tail feathers. -
Position the Features:
Place the eye halfway up the head, closer to the beak than the back of the skull. Sketch the legs, ensuring the feet wrap convincingly around the branch line you drew earlier. -
Detail the Branch:
Thicken the branch line, adding small knots and a fork that extends upward behind the bird. Add a few thin, twiggy offshoots to balance the composition.
Use Textured Paper
Using cold-press watercolor paper adds instant organic texture. The pencil skips over the ‘valleys’ of the paper grain, creating natural highlights.
Step 2: Building Texture and Form
-
Define the Eye:
Switch to a sharpened 2B pencil. Carefully darken the pupil, leaving a tiny, crisp white circle for the highlight catchlight. This immediately brings life to the subject. -
Beak and Face Detail:
Refine the beak shape, making the top mandible slightly darker. Add short, directional strokes radiating from the beak base to mimic tiny facial feathers. -
Wing Construction:
Lightly outline the layered feather groups on the wing. I find it helpful to think of them as overlapping scales or shingles rather than individual lines. -
Initial Hatching:
Using the HB pencil, apply soft diagonal hatching across the shadow side of the bird (the belly and under the wing) to establish volume. Keep the pressure light. -
Feather Texture:
With the 2B pencil, start drawing short, curved dashes on the chest and belly. Vary the direction of these strokes to follow the roundness of the bird’s body form.
Level Up: Branch Shadow
Add a very faint cast shadow on the branch directly under the bird’s belly. This small detail visually connects the bird to its perch, adding weight.
Step 3: Deepening Shadows and Finishing
-
Darkening the Wing:
Use the 4B pencil to add deep contrast between the wing feathers. Draw the rigid lines of the flight feathers (primaries) with firm, confident strokes. -
Cross-Hatching Shadows:
Return to the belly and under-tail area. Layer a second set of diagonal lines over your initial shading to deepen the shadows without losing the texture of the paper. -
Refining the Legs:
Draw the scales on the bird’s legs using tiny horizontal bands. Darken the underside of the legs and claws where they cast a shadow on the wood. -
Texturing the Branch:
Use irregular, jagged vertical lines to simulate tree bark. Press harder with the 4B pencil on the underside of the branch to ground the object. -
Twig Accents:
Trace over the thin twigs with a sharp point. Add tiny buds at the tips or junctions to give the environment a seasonal context. -
Final Contrast Check:
Step back and assess your values. Deepen the darkest crevices in the feathers and measuring the contrast against the white of the paper. -
Cleanup:
Use the kneaded eraser to lift any stray graphite dust or construction lines that are still visible outside the bird’s form.
Now you have a timeless nature study that captures the quiet stillness of the outdoors
Goldfish Sketch With Minimal Lines And Bubbles
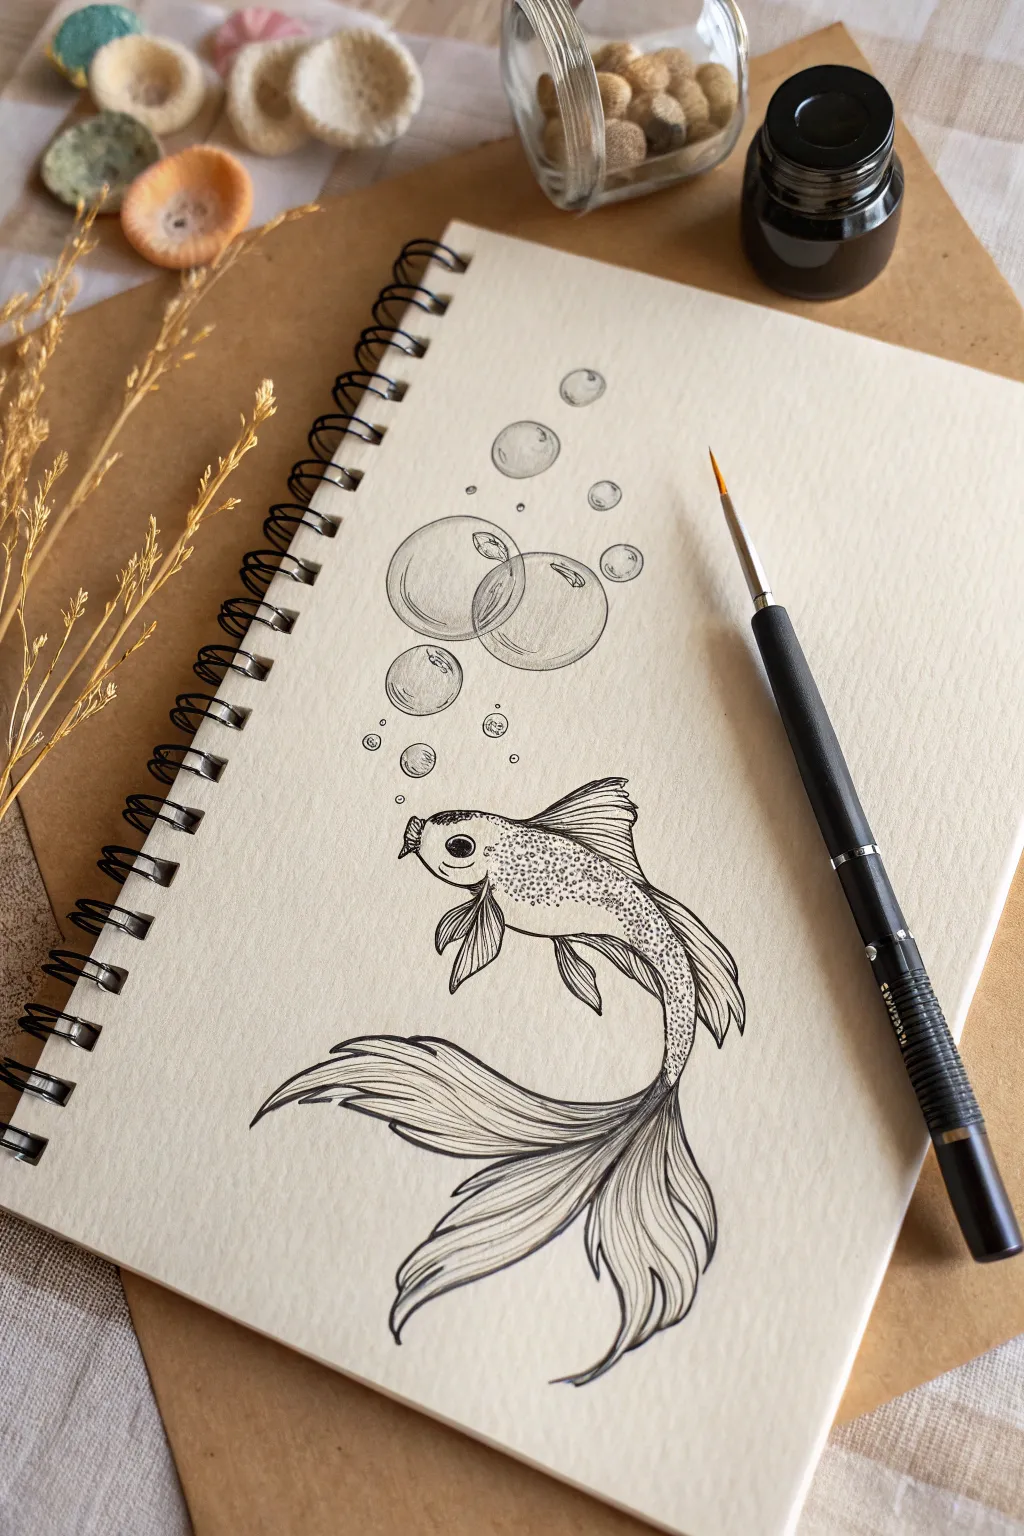
Capture the graceful movement of a fantail goldfish with this delicate black ink sketch. The combination of fine stippling textures and sweeping fin lines creates a sense of weightlessness, perfectly balanced by a whimsical column of rising bubbles.
Step-by-Step
Materials
- Spiral-bound sketchbook (smooth or slightly textured paper)
- Fine-point technical pen (e.g., Micron 005 or mapping nib)
- Black drawing ink (if using a dip pen/brush pen)
- Fine watercolor brush (optional, for shading)
- HB Drawing pencil
- Kneaded eraser
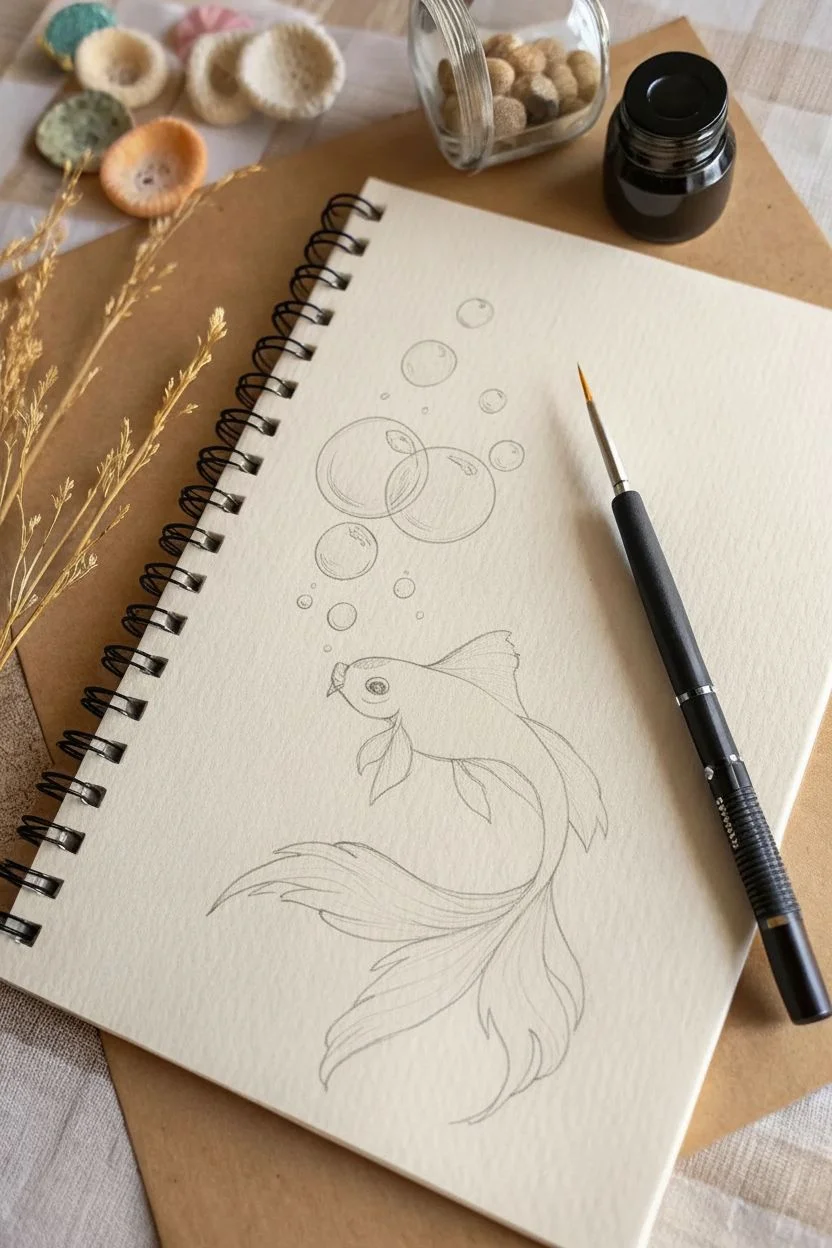
Step 1: Sketching the Base Form
-
Outline the body shape:
Start with your HB pencil, sketching a gentle, semi-oval shape for the main body. The head should be rounded, tapering slightly toward the tail. -
Position the fins:
Lightly mark the placement of the dorsal fin on top and the pectoral fin near the gills. Keep these lines faint so they can be easily erased later. -
Draft the flowing tail:
Sketch long, sweeping S-curves extending from the back of the body. Imagine the tail moving through water; let the lines overlap and curve downward to create volume and movement. -
Add the bubble column:
Draw circles of varying sizes rising from the fish’s mouth area. Keep the smallest bubbles near the mouth and make them progressively larger as they float upward to the left.
Mastering Fluid Lines
For the long tail strokes, try moving your entire arm from the elbow rather than just your wrist. This creates smoother, more confident curves without shaky wobbles.
Step 2: Inking the Outline
-
Trace the head and eye:
Using your fine pen or dipped brush, carefully outline the head. Draw a large, round eye with a dark pupil, leaving a tiny white dot for a highlight to bring the fish to life. -
Define the body scales:
Instead of drawing individual scales, use stippling (tiny dots) along the top of the back and upper sides. Denser dots create shadows, while fewer dots suggest light hitting the scales. -
Ink the dorsal fin:
Outline the top fin with jagged, thin lines. Add interior lines that radiate from the body outward to show the fin’s ribbing structure. -
Refine the flowing tail:
Go over your pencil curves with long, fluid ink strokes. Vary your pressure—press harder at the base of the tail and lift off towards the tips to create tapered, elegant lines.
Step 3: Adding Texture and Detail
-
Shade the body:
Add more concentrated dots near the bottom belly and under the pectoral fin to give the fish a rounded, 3D appearance. -
Detail the pectoral fins:
Draw the small side fin with delicate, quick strokes, ensuring it looks like it’s overlapping the body slightly. -
Texture the tail:
Fill the tail shape with long, parallel lines that follow the curve of the outer shape. Leave some areas empty or with fewer lines to suggest transparency in the delicate fin tissue. -
Outline the bubbles:
Ink the circles you drafted earlier. Don’t make the lines perfectly uniform; slight breaks in the line can make them look more natural. -
Adding bubble reflections:
Draw tiny curved shapes or squares inside the upper right of each bubble to represent shiny reflections on the surface.
Smudged Ink?
If you accidentally smudge wet ink, don’t wipe it! Let it dry fully, then gently scrape the smudge with an X-Acto knife or cover it with a tiny dot of white gouache.
Step 4: Finishing Touches
-
Review contrast:
Look at the darkest areas, like the eye and the base of the tail. If they need more depth, add another layer of ink or stippling. -
Erase guidelines:
Once the ink is completely dry (wait at least 15 minutes to be safe), gently use the kneaded eraser to lift away all visible pencil marks. -
Final assessment:
Check the balance of the composition. If the bubbles feel too light compared to the fish, you can thicken their bottom edges slightly to add visual weight.
Now you have a serene, effortless study of aquatic motion right in your sketchbook
Frog Sketch With Simple Lily Pad Shapes
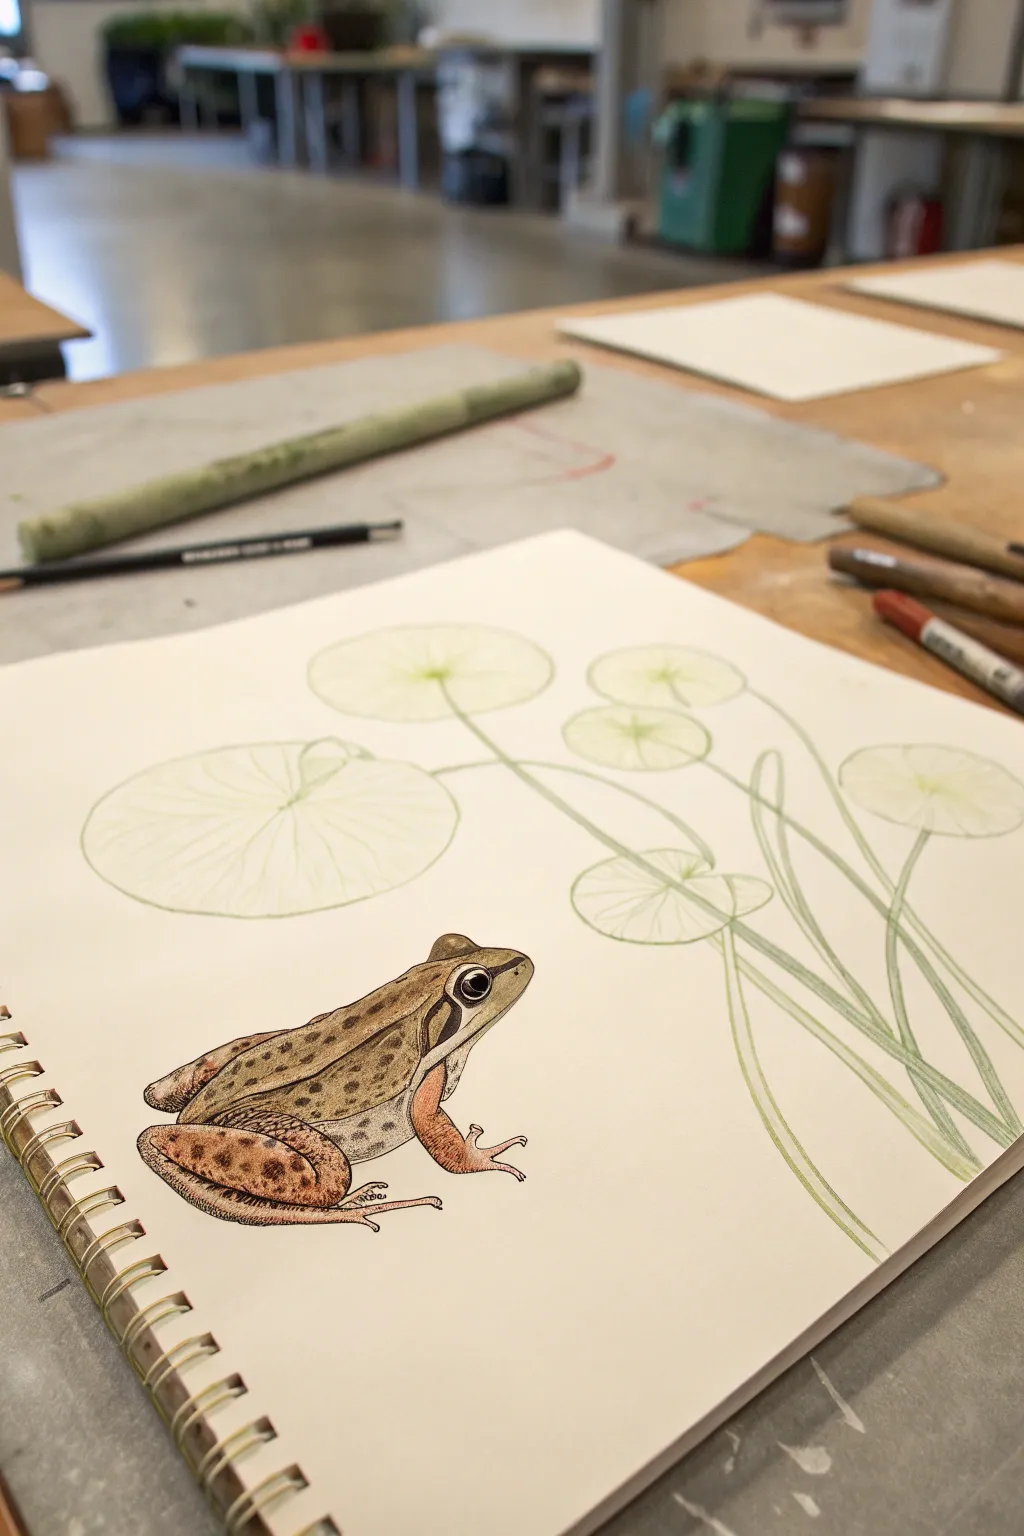
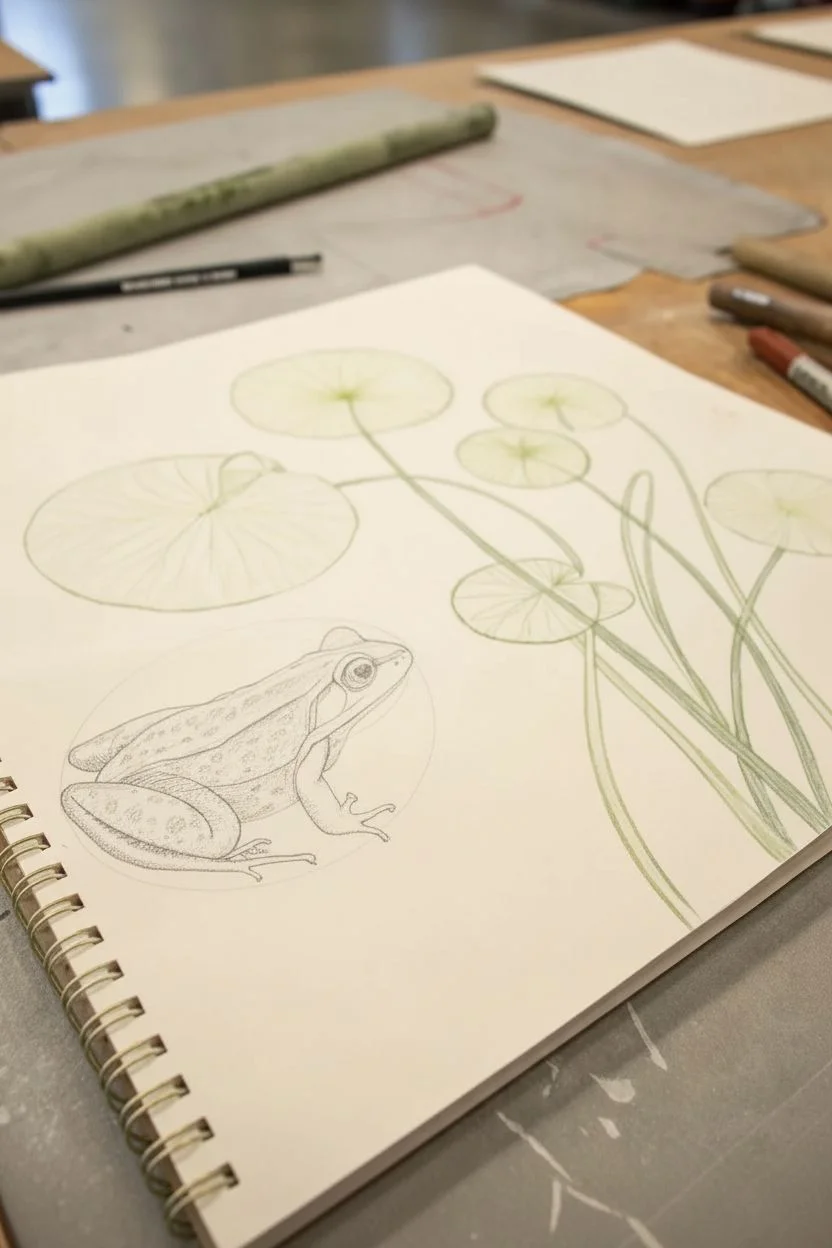
This sketchbook study contrasts a fully rendered, realistic wood frog with airy, simplified botanical elements. The juxtaposition between the detailed amphibian and the delicate, geometric lily pads creates a balanced and modern composition perfect for nature journaling.
Step-by-Step Tutorial
Materials
- Spiral-bound sketchbook (heavyweight mixed media paper suggested)
- Graphite pencil (HB or 2H for sketching)
- Kneaded eraser
- Fine liner or dip pen with brown ink (optional for outlines)
- Colored pencils or watercolor pencils (Ochre, Burnt Sienna, Dark Brown, Olive Green, Black, Rust)
- Light green pastel pencil or soft colored pencil
- Paper blending stump or cotton swab
Step 1: Sketching the Composition
-
Plan the layout:
Visualize your page layout. The frog will sit in the lower-left quadrant, looking towards the right. The lily pads will occupy the upper and right sections, arching over the frog without crowding it. -
Block in the frog shape:
Using an HB pencil, lightly sketch two overlapping ovals to form the frog’s body and head. The body oval should be larger and angled downward. Add angular guidelines for the bent hind legs tucked against the body. -
Refine the frog contour:
Connect your shapes to form a smooth outline. detail the pointed snout, the curve of the back, and the specific shape of the front toes. Pay attention to the large eardrum circle just behind the eye. -
Draft the lily pads:
Draw the lily pads as simple, floating ellipses and circles in the background. Keep your pencil pressure extremely light. Vary their sizes, making the ones higher up slightly smaller to suggest distance. -
Add the stems:
Draw long, sweeping lines curving from the lily pads down toward the bottom right corner. These stems should overlap naturally, creating a graceful flow that leads the eye back to the frog.
Clean Color
Place a scrap piece of paper under your drawing hand. This prevents oils from your skin smudging the graphite or colored pencil as you move across the page.
Step 2: Rendering the Frog
-
Establish the darks:
Use a black or dark brown pencil to define the darkest features: the pupil of the eye, the ‘mask’ marking extending through the eye, and the deep creases where the legs fold against the body. -
Base layer of color:
Lightly shade the entire upper body of the frog with an Ochre or tan pencil. Reserve the bright white of the paper for the belly and the chin stripe. -
Add warmth:
Layer a Rust or Burnt Sienna color onto the legs and slight patches on the back. I often press a bit harder on the front arms to show muscle definition. -
Detail the skin texture:
Sharpen your dark brown pencil to a fine point. Stipple small dots and irregular spots across the back and legs to mimic the frog’s speckled skin pattern. -
Deepen the shadows:
Add shading under the belly and along the bottom of the legs using a cool gray or dark brown to give the frog volume and weight on the page. -
Highlight the eye:
Ensure there is a small, crisp white catchlight in the eye. If you lost it during shading, use a white gel pen or opaque white paint to add a tiny dot.
Depth Trick
Make the lily pads in the background slightly paler green and less detailed than the ones in the foreground. This atmospheric perspective adds instant depth.
Step 3: Stylizing the Botanicals
-
Outline the pads:
Switch to a light green pastel pencil or soft colored pencil. Outline your sketched circles and modify them to have slight indentations, creating the characteristic kidney shape of lily pads. -
Draw the veins:
From the center of each lily pad, draw 6-8 straight lines radiating outward like wheel spokes. Keep these strokes faint and delicate. -
Thicken the stems:
Go over your initial stem lines with the green pencil, doubling the line in some places to give the stems a slight thickness. They should look translucent compared to the solid frog. -
Subtle shading:
Add just a whisper of green shading near the centers of the pads. Leave the edges mostly white to maintain that airy, sketch-like aesthetic. -
Cleanup:
Use your kneaded eraser to lift any remaining graphite guidelines from the background, leaving only the colored pencil work visible.
Now you have a dynamic page that captures the detailed life of the frog alongside the gentle geometry of its habitat
Penguin Waddle Sketch Using Two-Step Poses
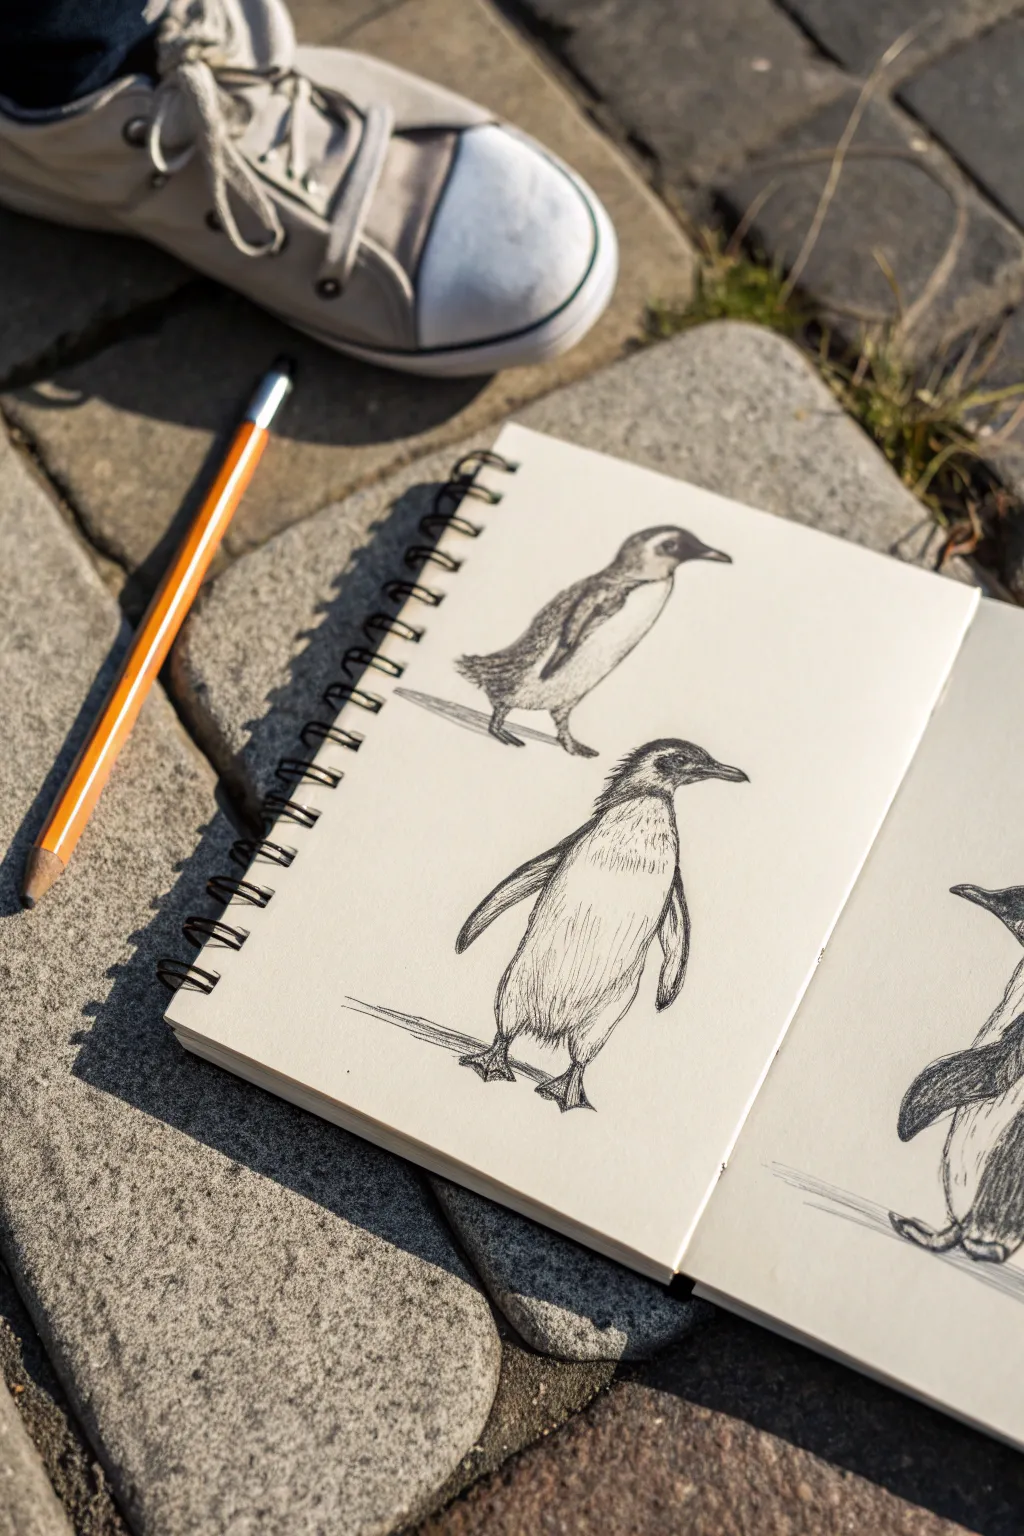
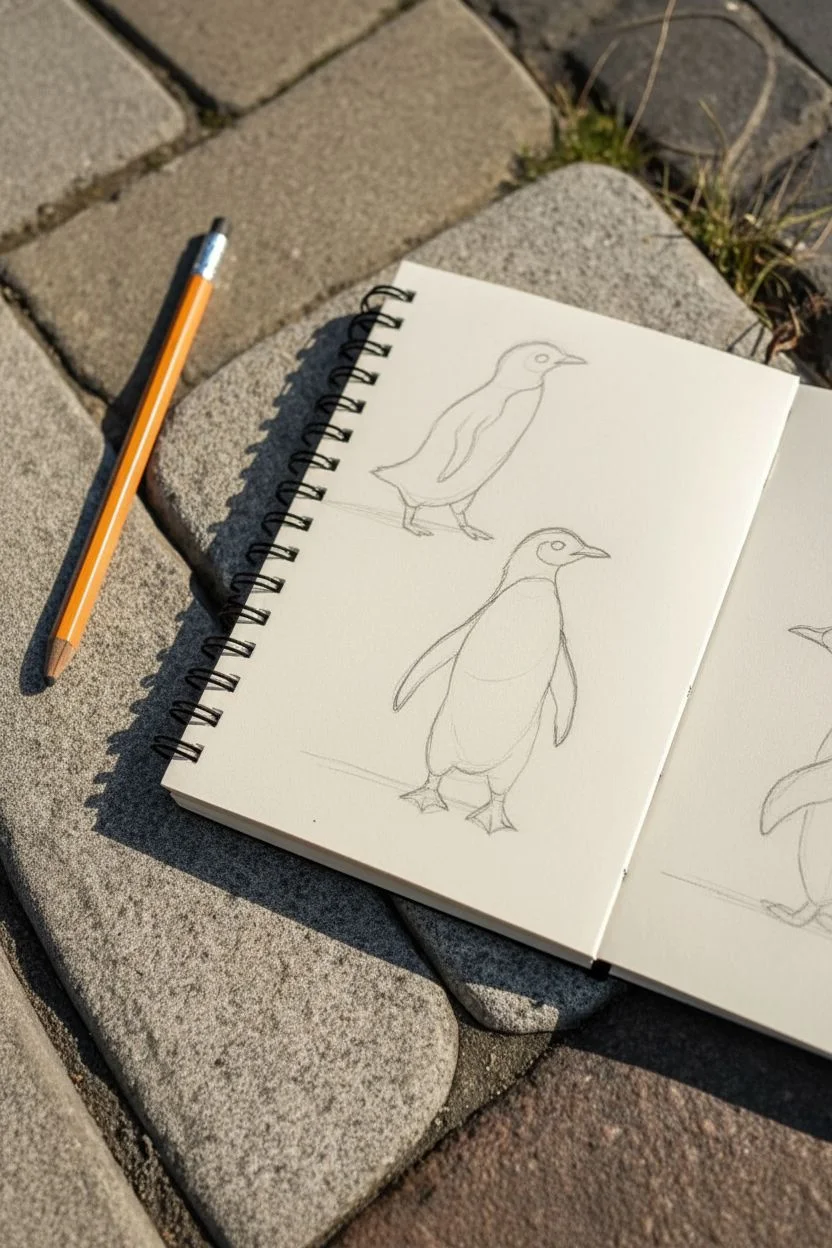
Capture the charming waddle of penguins with this two-pose study in your sketchbook. Using a fine-tipped pen, you’ll create textured, lively drawings that emphasize posture and movement through simple hatching techniques.
Detailed Instructions
Materials
- Sketchbook or drawing paper (heavyweight preferred)
- HB Pencil (for initial layout)
- Fine liner pen (01 or 03 size, black ink)
- Eraser
Step 1: Drafting the Shapes
-
Map the layout:
Visualize the page layout first. You’ll want the top penguin walking towards the right and the bottom penguin standing taller below it. Lightly mark the ground line for each figure using your HB pencil. -
Construct the top penguin’s body:
Start the top figure by sketching an elongated oval tilted forward at a 45-degree angle. This represents the main torso as the penguin leans into its walk. -
Add the head and tail:
Attach a smaller circle to the top right of your oval for the head. Sketch a small, pointed triangle at the back for the tail feathers. -
Refine the outline:
Connect these shapes with a smooth contour line. Define the beak as a sharp, slightly curved point. Sketch the flipper laid back against the body. -
Draft the bottom penguin:
For the lower figure, draw a tall, upright oval. This penguin is standing more vertical, looking towards the right. -
Position the flippers:
On the bottom figure, sketch the flippers extending slightly outward from the body to suggest balance. The left flipper should be visible in perspective. -
Add feet anchors:
Draw simple triangular shapes for the feet on both penguins. For the top walker, place one foot forward and one pushing back.
Smudge Alert
Fine liner ink can smear instantly if touched while wet. Place a scrap sheet of paper under your drawing hand to protect your work as you move across the page.
Step 2: Inking and Texturing
-
Outline the top penguin:
Switch to your fine liner pen. Trace the main outline of the top penguin, using short, broken lines to suggest feathers rather than a solid hard line. -
Define the face markings:
Draw the signature circular eye and the darker banding around the neck. Leave a small white highlight in the eye for life. -
Texture the back and wings:
Use short, diagonal hatching strokes to darken the penguin’s back and flipper. Keep the strokes tighter near the spine and looser towards the belly. -
Detail the belly feathers:
On the white belly area, add very sparse, delicate ticks. These tiny marks show the curvature of the body without darkening the white plumage too much. -
Ink the bottom penguin’s head:
Move to the second bird. Ink the beak and eye first, ensuring the pupil is dark. Create the dark ‘cap’ on the head with dense cross-hatching. -
Form the vertical body:
Outline the body using long, sweeping loose strokes to emphasize its height. Make the lines slightly jagged near the legs to mimic fluff. -
Hatch the shadow side:
Assuming light is coming from the top left, add vertical hatching lines down the right side of the standing penguin’s body and under the wing. -
Ground the figures:
Add horizontal scribbles under the feet of both penguins. This simple shadow anchors them to the page so they aren’t floating. -
Erase guidelines:
Once the ink is completely dry—I usually give it a full minute just to be safe—gently erase all your original pencil marks to reveal the clean sketch.
Feather Fluff
To make the penguins look fluffier, lift your pen quickly at the end of each hatching stroke. This tapered line mimics the soft texture of downy feathers.
Fill the rest of the page with different poses to create a complete colony study
Monkey Hands And Face Expression Studies
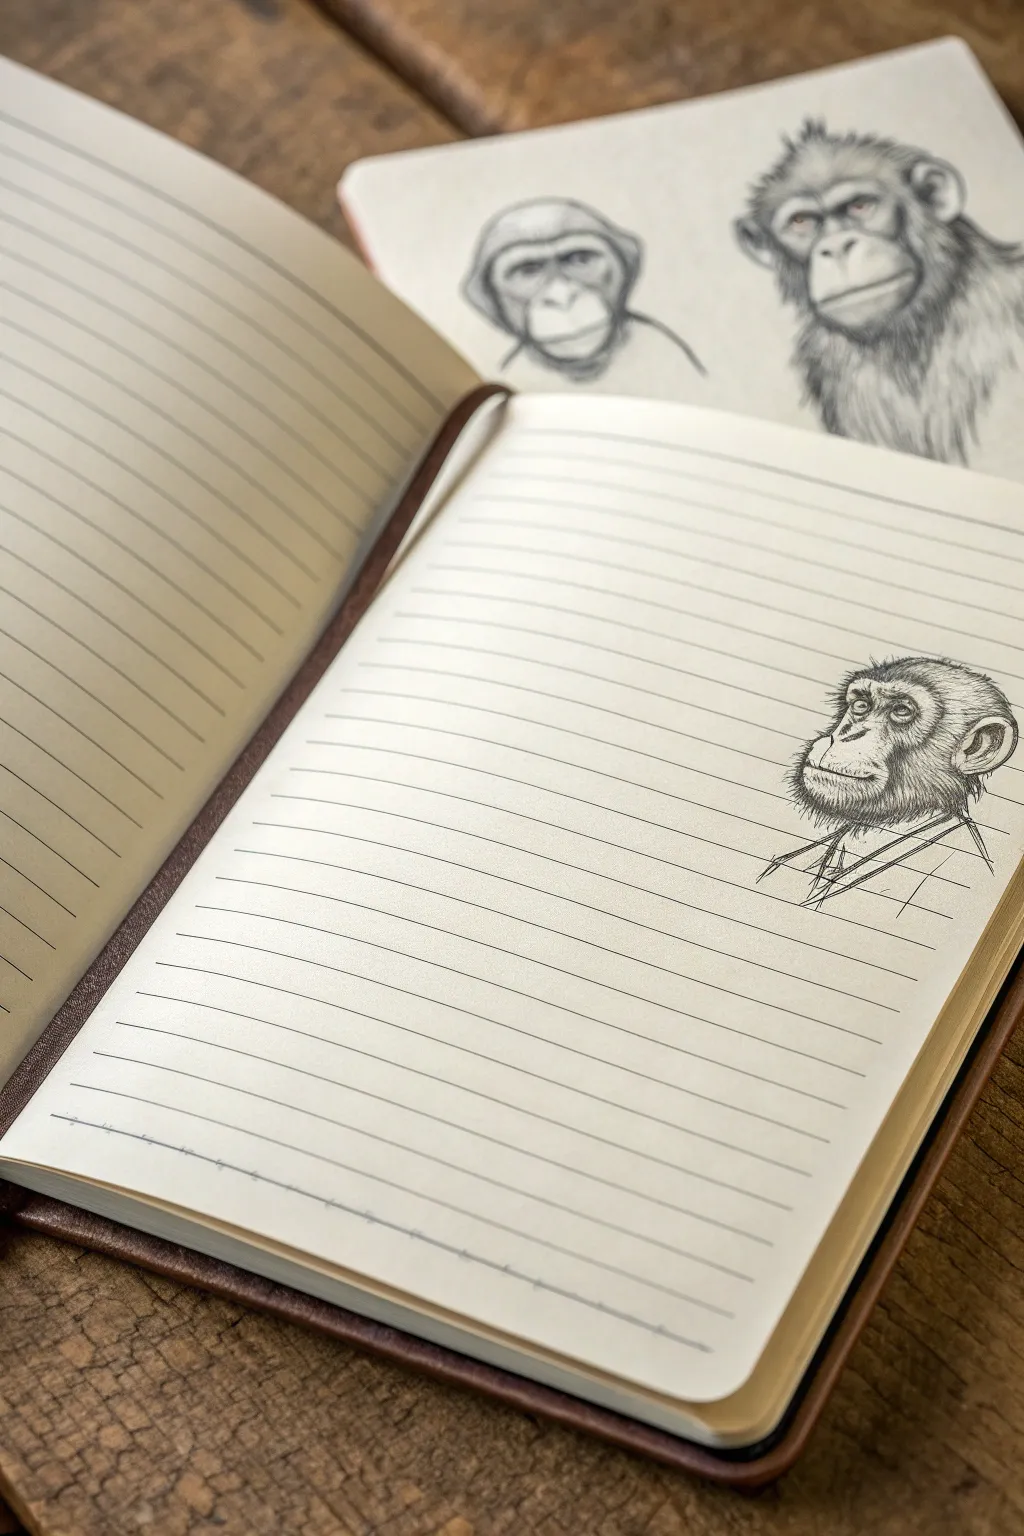
Capture the thoughtful expression and distinctive features of a primate with this detailed sketchbook study. This project focuses on rendering realistic fur textures and facial character using simple graphite pencils on classic lined pages.
Step-by-Step Guide
Materials
- Leather-bound lined journal or notebook
- Separate sheet of off-white sketch paper (optional for practice)
- HB graphite pencil (for initial layout)
- 2B or 4B graphite pencil (for shading and details)
- Fine-point mechanical pencil (0.5mm)
- Kneaded eraser
- Reference photo of a chimpanzee
Step 1: Laying the Foundation
-
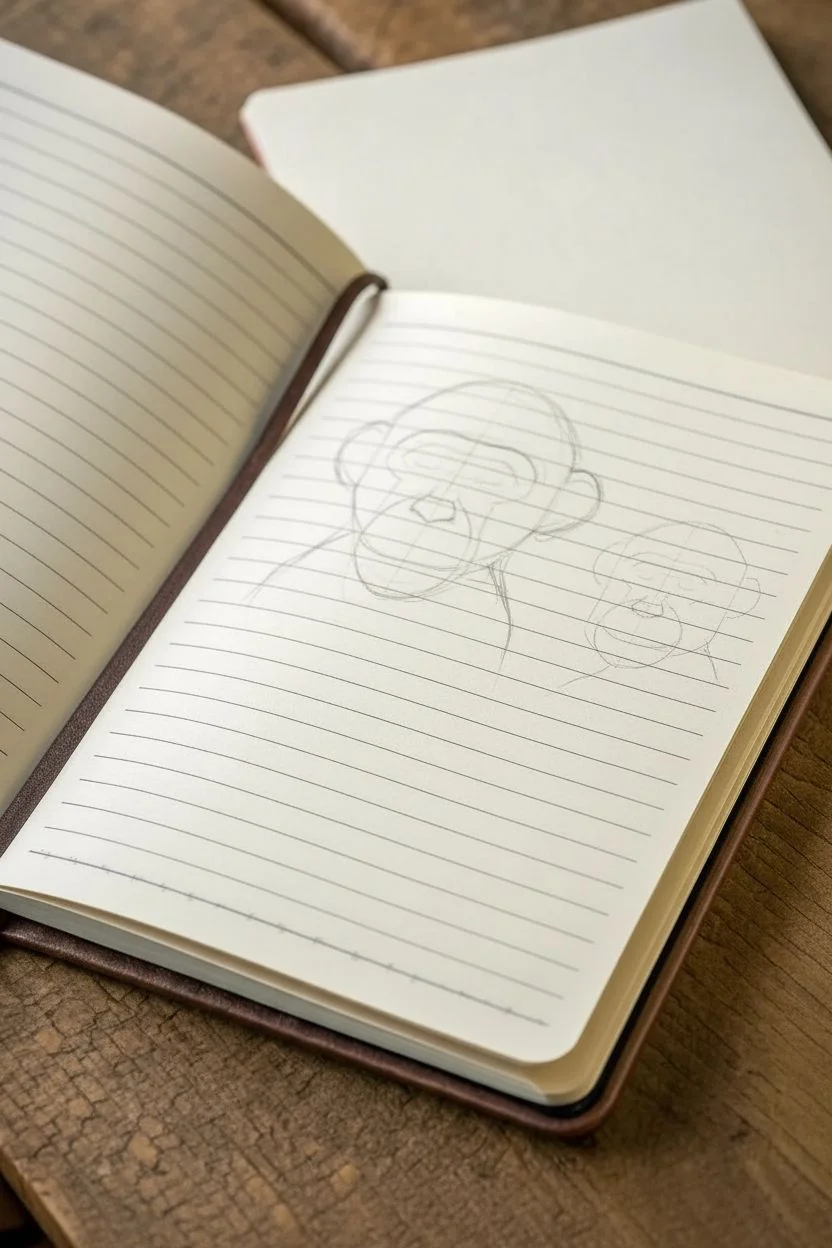
Analyze the shapes:
Begin by observing your reference photo. Identify the basic geometric forms that make up the chimpanzee’s head—typically a large oval for the cranium and a smaller, protruding oval for the muzzle area. -
Lightly sketch the outline:
Using your HB pencil, very faintly draw these basic shapes directly onto the lined notebook page. Place the head on the right-hand side of the page, about midway down, leaving room for the neck and shoulders. -
Mark facial features:
Draw faint guidelines to position the eyes, nose, and mouth. The eyes should sit deep within the skull, and the nose is relatively small and flat compared to the prominent muzzle. -
Refine the contour:
Connect your basic shapes to create a more organic outline of the head. Pay attention to the brow ridge, which is a key feature, making it slightly heavy and overhanging the eyes.
Step 2: Developing the Face
-
Sketch the eyes:
Switch to your mechanical pencil or a sharpened 2B. carefully draw the eyes. They are quite human-like but darker. Leave a tiny speck of white paper for the highlight to bring them to life. -
Detail the wrinkles:
Chimpanzee faces are full of character lines. Lightly sketch the wrinkles around the eyes and across the muzzle. Don’t press too hard; you want these to look like skin folds, not scars. -
Define the nose and mouth:
Darken the nostrils and the line of the mouth. The lips are usually thin and pressed together in this expression. Add some light shading around the mouth to show the curvature of the muzzle. -
Add the ears:
Sketch the large, rounded ear on the visible side of the head. It sits fairly high and far back. Detail the inner swirls of the ear cartilage with varied line weights.
Pro Tip: Line Integration
Don’t fight the notebook lines. Let them show through lighter areas of fur to maintain the transparency and authentic feel of a casual sketchbook study.
Step 3: Rendering Fur and Texture
-
Start the fur direction:
Observe the direction the hair grows on your reference. With your HB pencil, make short, light strokes to map out these directions—flowing back from the brow and down the cheeks. -
Build fur density:
Using a 2B or 4B pencil, start layering short, quick strokes over your directional map. Press harder in shadow areas, like under the chin and behind the ear, to create depth. -
Create the beard:
Sketch the scruffy hair around the chin and jawline. These hairs are often coarser and stick out more. Use quick, flicking motions with your pencil to simulate this texture. -
Detail the head hair:
Add the hair on top of the head. It’s usually thinner than the body fur. I like to keep the pencil somewhat loose here to suggest the softness of the hair against the scalp. -
Shade the skin:
Return to the face area containing bare skin. Use the side of your HB pencil to add soft, even shading. Smooth it slightly if needed, but keep the texture of the paper visible.
Level Up: Background Practice
On a separate sheet, draw 2-3 smaller, quick gesture studies of the same monkey from different angles, then tuck this sheet into the journal for a layered look.
Step 4: Final Touches
-
Deepen the shadows:
Look for the darkest points of your drawing—usually the pupils, nostrils, and deep overlaps of fur. Re-emphasize these with your softest pencil (4B) to increase contrast. -
Sketch the collar:
Lightly draw the suggestion of a shirt collar and shoulders below the neck. Keep this very sketchy and loose compared to the detailed face, giving it an artistic, ‘study’ feel. -
Clean up highlights:
Use your kneaded eraser to lift off any graphite smudges on the face where the light hits—specifically the brow ridge, nose tip, and cheekbones. -
Review vertical rhythm:
Step back and see how the drawing integrates with the notebook lines. If the lines overpower facial details, you can gently reinforce the drawing’s main contours to ensure it stands out.
Now you have a soulful primate portrait peering out from your everyday notebook notes
Extreme Close-Up Animal Eye In Ink Dots
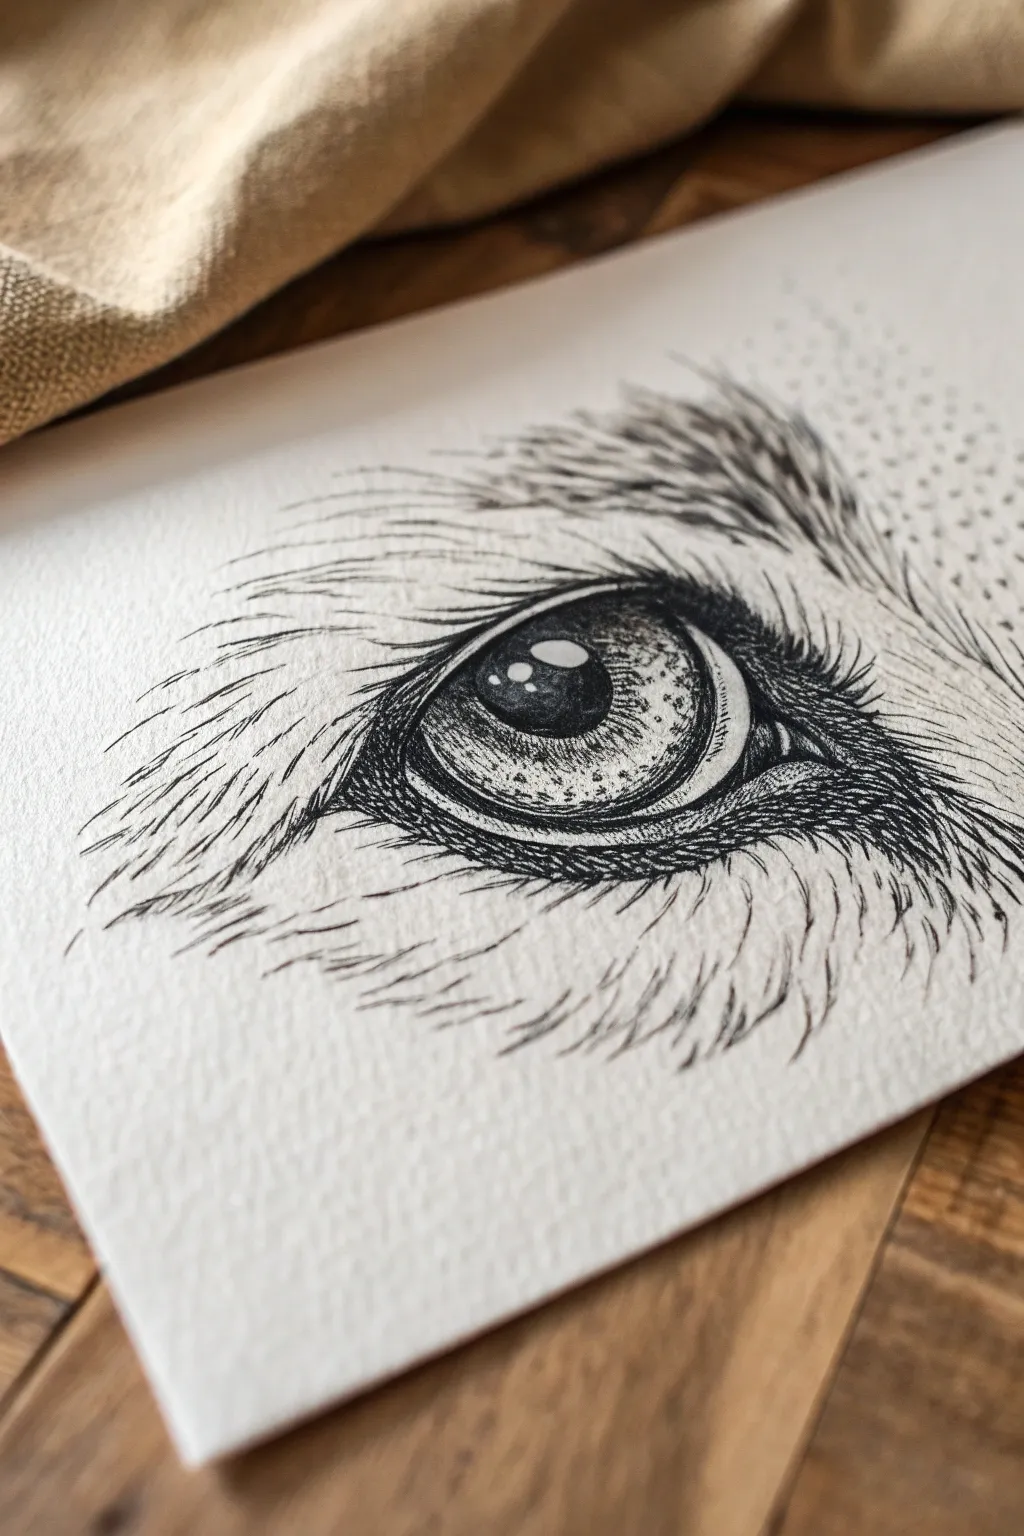
Capture the intense gaze of a wolf using fine liner pens and precise stippling techniques. This tutorial guides you through creating extreme detail on a small scale, focusing on the interplay of texture between the glossy eye and the soft surrounding fur.
Detailed Instructions
Materials
- Fine liner pens (sizes 005, 01, and 03)
- Textured watercolor paper or heavyweight cardstock
- HB graphite pencil for sketching
- Kneaded eraser
- Blending stump (optional)
- Reference photo of a wolf or dog eye
Step 1: The Initial Framework
-
Outline the eye shape:
Begin with a very light pencil sketch of the almond-shaped eye. Focus on the sharp corners and the heavy upper lid that gives the animal its intense expression. -
Mark the highlights:
Inside the iris, draw two distinct circles for the light reflection (catchlights). These must stay perfectly white, so mapping them out now prevents accidental inking later. -
Map the fur direction:
Lightly sketch directional arrows or faint lines radiating outward from the eye to indicate which way the fur grows. This guide is crucial for a realistic flow.
Step 2: Inking the Eye
-
Define the pupil:
Using your 03 pen, fill in the pupil. Work carefully around the highlight circles you mapped out earlier, keeping the edges of the pupil sharp and dark. -
Outline the rim:
Switch to a 01 pen to draw the thick, dark rim of the eyelid. This area is usually wet and dark, so darken it significantly but leave tiny white gaps to suggest moisture. -
Stipple the iris:
This is where the magic happens. Using the 005 pen, create the iris texture entirely with dots (stippling). Place dots densely near the pupil and outer rim, and sparsely in the center. -
Add iris veins:
Still with the 005 pen, draw extremely faint, wiggly lines radiating from the pupil outward. These shouldn’t be solid lines, but rather broken, organic marks that blend into your stippling. -
Deepen the upper shadow:
The brow casts a shadow over the top of the eye. Use denser stippling or tiny hatching lines at the very top of the iris to make it look recessed under the lid.
Ink Smearing?
If your hand smears fresh ink, place a scrap piece of paper under your drawing hand. Work from left to right if you are right-handed to avoid dragging your palm.
Step 3: Creating Fur Texture
-
Start the inner corner:
Using short, rapid flicking motions with the 005 pen, draw the short, stiff hairs near the tear duct. Pay close attention to your directional pencil guides. -
Build the brow:
Move to the area above the eye. Use longer, sweeping strokes with the 01 pen. I prefer to lift the pen at the end of each stroke to create a tapered, hair-like point. -
Layer the darks:
Where the fur bunches up near the eye corners, overlay your strokes. Cross-hatching isn’t ideal here; instead, add more strokes in the same direction to build density without losing the ‘hair’ look. -
Feather the edges:
As you move away from the eye, let the pencil lines guide you but make the ink strokes more sparse. The drawing should fade out into the white paper, not end abruptly. -
Add texture dots:
In the corner of the paper (top right in the example), add a cluster of fine dots. This suggests the pore texture of the snout without needing to draw every single hair.
Add Winter Detail
To make this a snowy scene, leave small, random circular gaps in the fur texture to represent snowflakes resting on the animal’s face.
Step 4: Final Details
-
Reinforce the contrast:
Step back and look at your drawing. Use the 03 pen to darken the very darkest crevices—specifically the crease above the upper lid and the inner corner of the eye. -
Refine the highlights:
If your catchlights look too stark, add two or three microscopic dots inside the white area with your 005 pen to simulate a reflection of the environment. -
Clean up pencil lines:
Wait at least 15 minutes to ensure the ink is bone dry. Then, gently erase all underlying graphite sketches with a kneaded eraser to reveal the crisp ink work.
Take a moment to admire the lifelike depth you have achieved with just a few pens
Animal Silhouette Filled With Pattern Texture
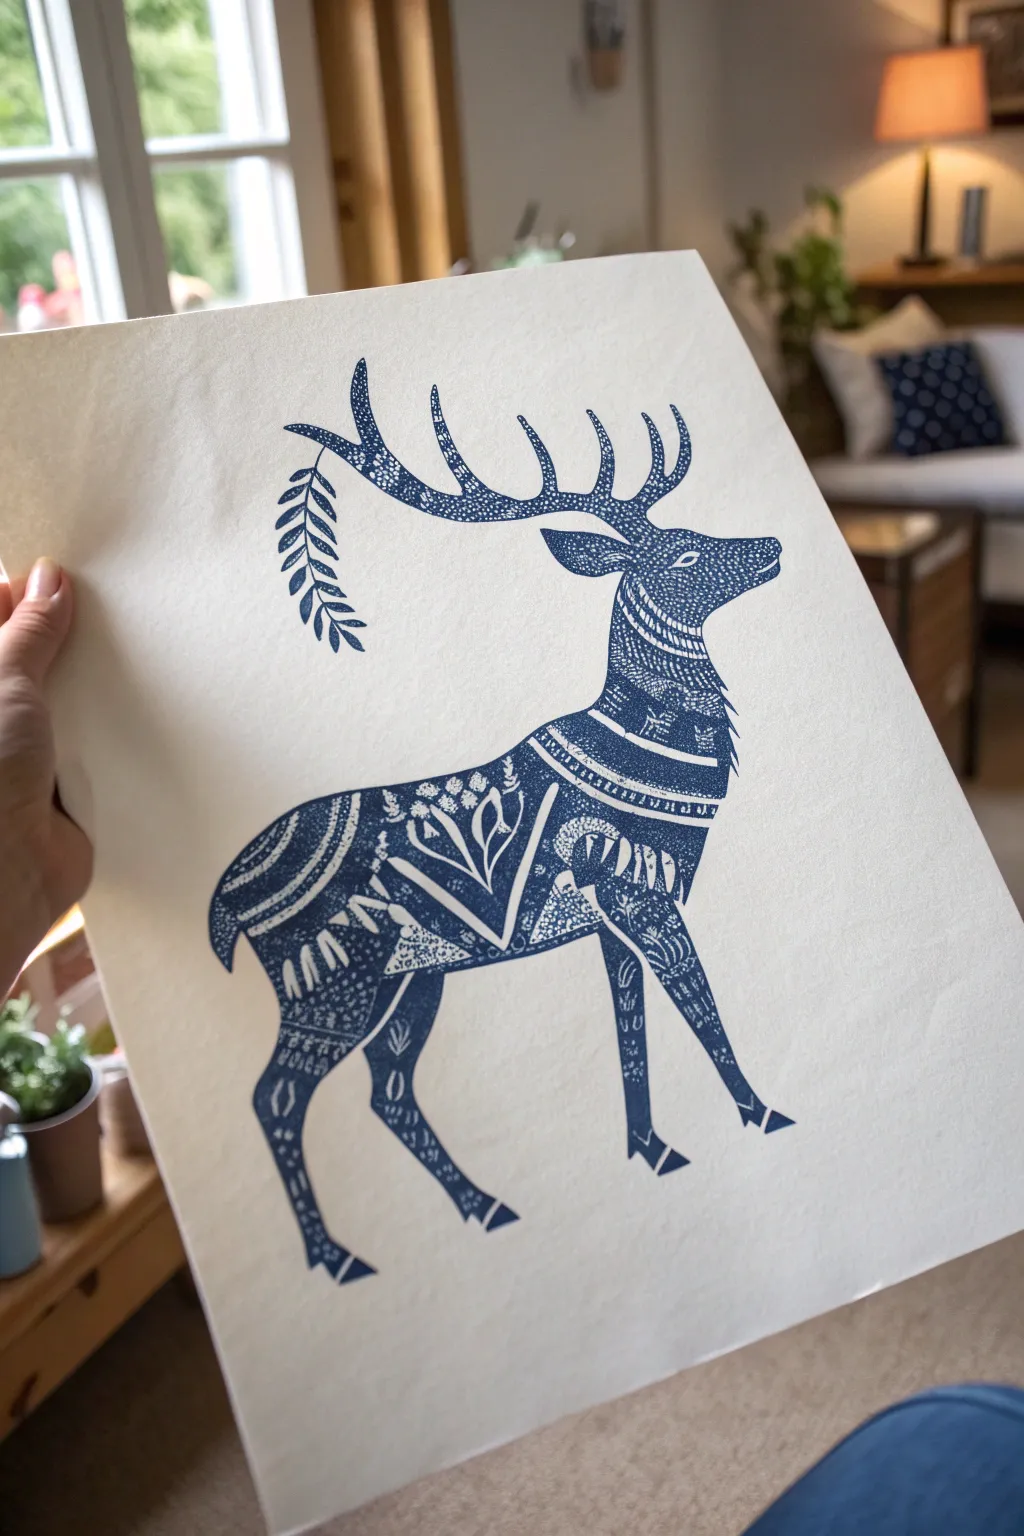
This striking project combines the bold simplicity of a silhouette with the intricate charm of folk art patterns. Using just a single deep blue ink color, you will learn to fill a deer’s form with geometric bands, floral motifs, and delicate textures for a print-style effect.
Step-by-Step Tutorial
Materials
- High-quality mixed media or Bristol paper (off-white or cream)
- Deep blue fine liner pens (sizes 0.1mm, 0.3mm, 0.5mm)
- Deep blue brush pen or broad marker (for filling large areas)
- Pencil (HB or 2H)
- Kneaded eraser
- Reference photo of a deer
- Tracing paper (optional)
Step 1: Drafting the Outline
-
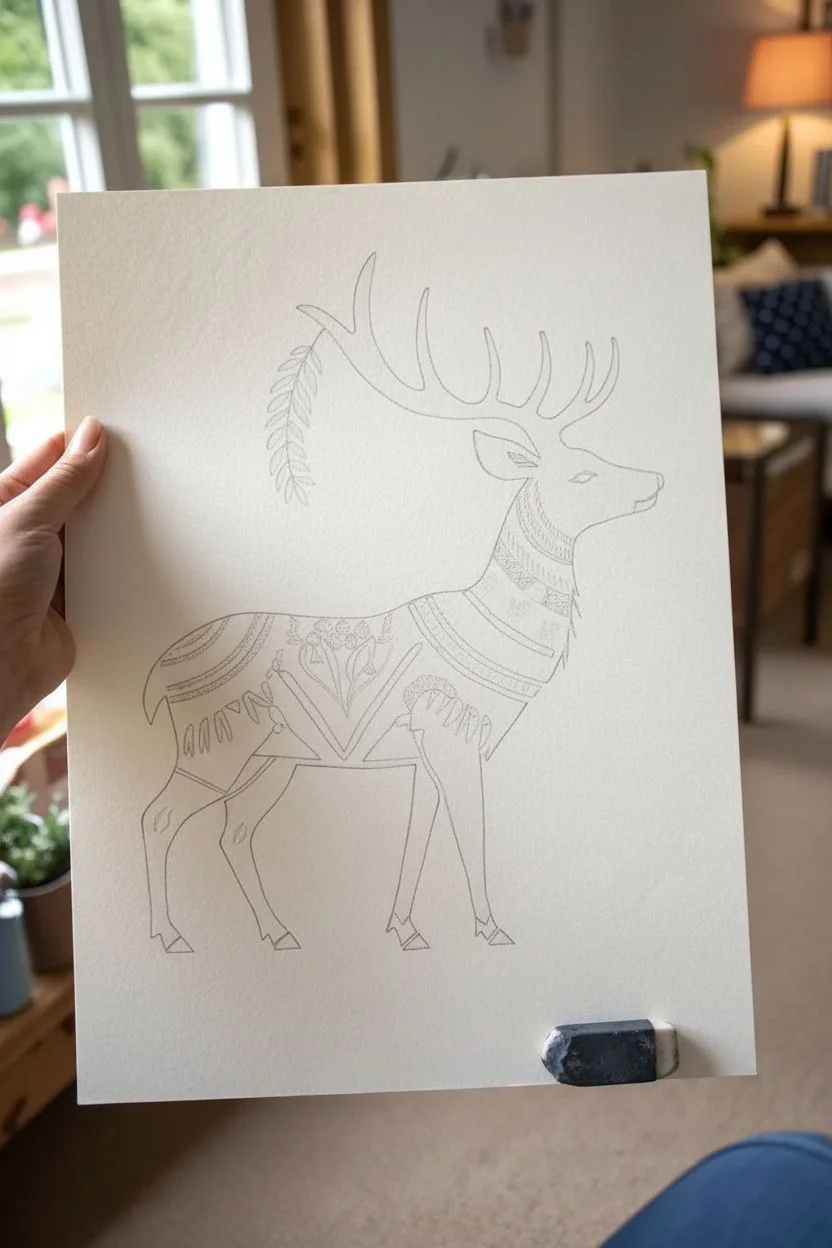
Establish the pose:
Begin by lightly sketching the basic skeletal structure of the deer with your pencil. Focus on the standing posture, noting how the back legs angle backward and the chest stands proud. -
Refine the silhouette:
Flesh out the shapes to create a clean outer contour. Pay special attention to the neck’s curve and the precise shape of the antlers, ensuring they branch out elegantly. -
Add the decorative branch:
Draw the swooping leafy branch hanging from the rear antler tine. Keep your pencil lines very faint, as you only need the suggestion of where the leaves will go. -
Section off the body:
Lightly draw internal dividing lines across the deer’s body. These curves will separate the different pattern zones—mark out the neck bands, the shoulder saddle, the chest, and the flank areas.
Step 2: Inking the Head and Antlers
-
Outline the antlers:
Using a 0.3mm pen, carefully ink the outline of the antlers. Instead of filling them in solid, use a stippling technique (tiny dots) or small circles to create texture inside the tines. -
Detail the face:
Outline the head and snout. Draw the eye as a small, almond-shaped white space (negative space) and fill the surrounding face area with tight stippling using a 0.1mm pen to create a gradient effect. -
Ink the hanging leaves:
Go over the hanging branch. Similar to the antlers, fill the leaves with a mix of solid blue edges and patterned interiors, perhaps using small dashes to mimic leaf veins.
Keep it Steady
To prevent smudging your intricate work, place a scrap piece of paper under your drawing hand. This acts as a shield between your skin oils and the fresh ink.
Step 3: Patterning the Neck and Chest
-
Create the neck bands:
Moving down the neck, use a 0.5mm pen to draw thick dividers. Fill the spaces between these dividers with contrasting patterns: try vertical hatching in one band and small triangles in the next. -
Fill the chest area:
For the broad chest area, switch to a folksy aesthetic. Draw horizontal bands containing zig-zags, dots, or small x-shapes. Leave thin strips of white paper between the heavy blue lines to keep the design legible. -
Add solid contrast:
Select a specific band on the lower neck to fill in completely with the brush pen. This solid dark block will anchor the design and make the delicate white lines within it pop.
Go Digital
Scan your finished drawing at a high resolution (300dpi). You can then digitally invert the colors to create a stunning white glowing deer on a deep blue background.
Step 4: Filling the Body and Legs
-
Design the floral saddle:
On the deer’s shoulder and mid-body, sketch a large floral or leafy motif inside a V-shape. Ink the negative space around the leaves with your brush pen so the leaves appear white against a dark blue background. -
Texture the rear flank:
Move to the rounded rear of the deer. Create curved bands that follow the muscle shape, filling them with repetitive arches or scale patterns using the 0.3mm fine liner. -
Pattern the legs:
The legs are thinner, so keep patterns simple. Use small vertical lines, distinct fern-like dashes, or tiny brackets ‘()’ running down the shins. -
Define the hooves:
Ink the hooves as solid triangular shapes using the brush pen. This solid weight at the bottom helps the figure feel grounded.
Step 5: Refining and Cleaning
-
Check line weights:
Scan your drawing for areas that look too light. I generally like to go back over the main outline of the entire deer with the 0.5mm pen to ensure the silhouette is crisp and distinct from the patterns. -
Enhance the density:
If some patterned areas look too sparse, add tiny dots or hatch marks to darken the ‘value’ of that section without losing the white details. -
Erase pencil guides:
Wait at least 15-20 minutes to ensure the ink is bone dry. Gently roll your kneaded eraser over the entire image to lift any visible graphite lines.
Now you have a beautifully textured piece that captures the spirit of the forest through simple geometry and ink
Surreal Deer Sketch With Birds In The Antlers
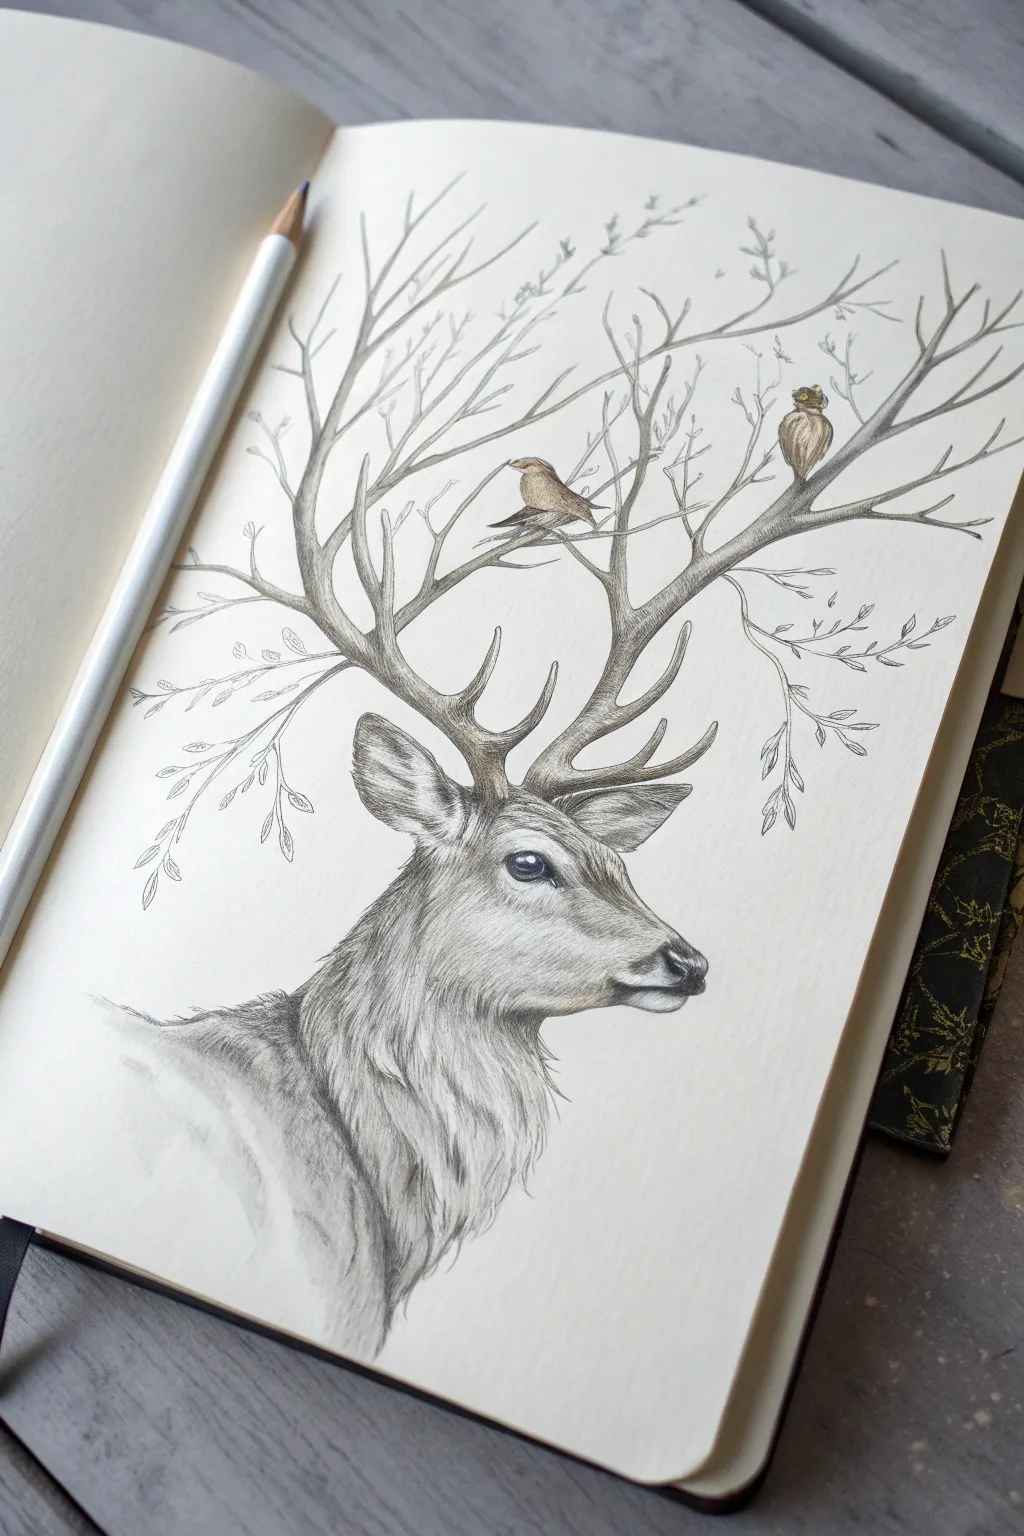
This whimsical pencil drawing blends the natural majesty of a stag with the delicate structure of tree branches. By transforming standard antlers into a sprawling canopy for small birds, you’ll create a surreal nature study that feels both grounded and magical.
How-To Guide
Materials
- High-quality sketchbook paper (smooth or vellum finish)
- Graphite pencils (HB, 2B, 4B)
- Mechanical pencil (0.5mm, HB lead)
- Kneadable eraser
- Blending stump (tortillon)
- Fine-tipped colored pencils or subtle markers (brown, beige)
Step 1: Laying the Foundation
-
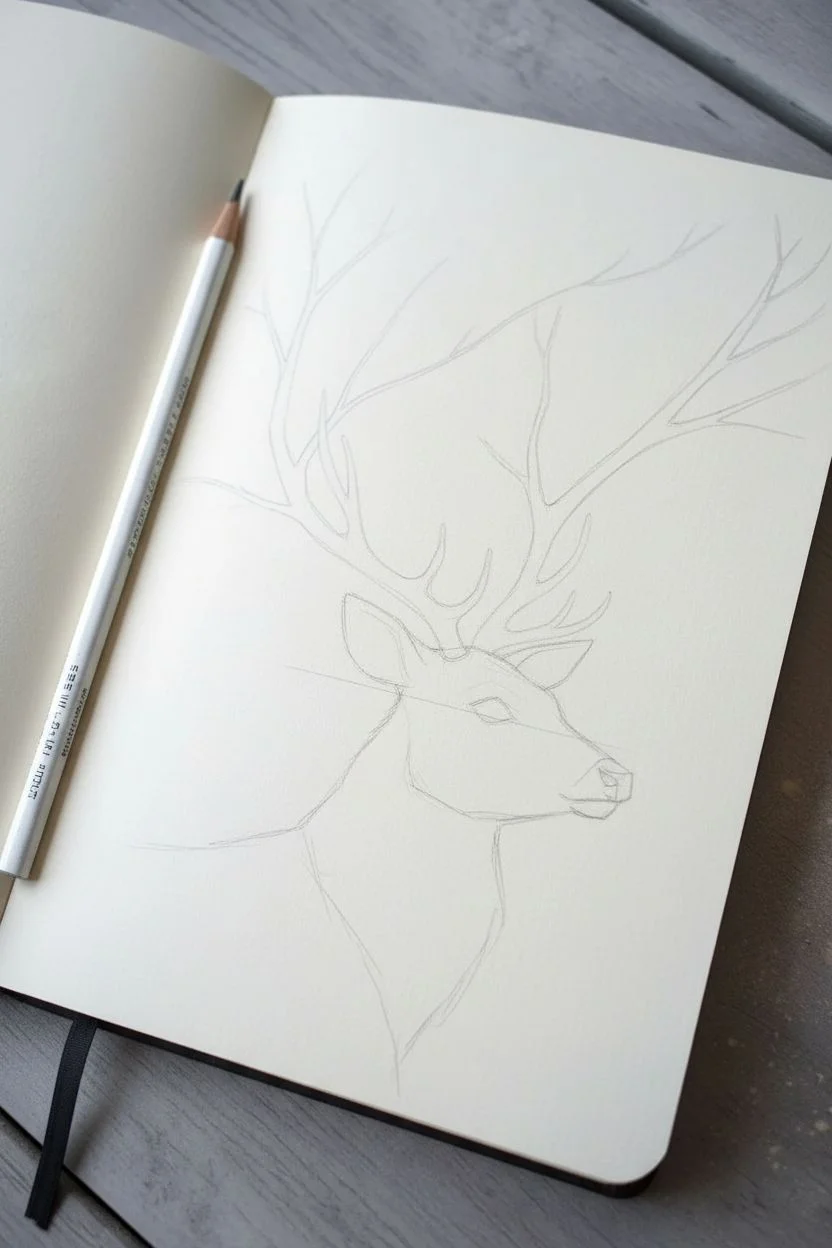
Basic Shapes:
Start with a light HB pencil to block out the deer’s head. Draw a slightly elongated oval for the head and a thicker cylinder for the neck. Mark a horizontal line for eye placement. -
Refining the Profile:
Define the snout and jawline. The nose should be somewhat square at the tip, transitioning into a soft mouth line. Sketch the ear shape, positioning it high on the back of the head. -
Mapping the Antlers:
Instead of standard antlers, sketch long, reaching lines growing from the pedicles (the base of the antlers). Let these main branches curve outward and upward, creating a ‘V’ shape that will become your tree structure.
Troubleshooting: Flat Fur?
If the fur looks flat, you likely kept your pencil strokes too uniform in length. Vary the pressure and length, and ensure your strokes always follow the underlying muscle curves.
Step 2: Detailed Rendering: The Stag
-
The Eye:
Switch to a darker 2B pencil for the eye. Draw the almond shape, leaving a distinct white highlight near the top. Darken the pupil and shade the iris, darkening the corners for depth. -
Fur Texture – Face:
Using a sharp mechanical pencil or pointed HB, start adding short, directional strokes for fur. Around the nose and eyes, the fur is very short and fine. Follow the contours of the bone structure underneath. -
Fur Texture – Neck:
As you move down the neck, lengthen your strokes. The fur here acts like a ruff, so layer the lines to create volume. Use a 2B pencil to add shadows in the deeper fur folds under the jaw and down the throat. -
The Ear:
shade the inner ear with soft, dark strokes to show depth, leaving the outer rim lighter. Add wispy, longer hairs coming from the inside edge. -
Deepening Shadows:
Take a 4B pencil to reinforce the darkest areas: the nostril, the pupil, the corner of the mouth, and the shadow cast by the head onto the neck. This contrast brings the animal to life.
Level Up: Seasonal Shift
Change the season of the drawing by altering the antler-branches. Draw cherry blossoms for spring, full lush leaves for summer, or bare icy twigs for a stark winter scene.
Step 3: The Surreal Antlers
-
Branch Structure:
Return to the antlers. Thicken the base lines you drew earlier, making them look like wood bark rather than bone. Taper them as they extend upward. -
Branching Out:
Add smaller sub-branches splitting off the main limbs. Keep the lines somewhat jagged and organic, avoiding perfect curves. These should reach high up the page, filling the negative space. -
Adding Texture to Wood:
Use a sharp HB pencil to draw linear wood grain texture along the branches. Add small knotholes or bumps where smaller twigs might have broken off. -
Integration:
Ensure the transition from the stag’s skull to the tree-antlers is seamless. I like to blend a bit of the forehead fur up over the base of the branches so it looks like they are growing naturally from the skin.
Step 4: Inhabitants and Details
-
Perched Birds:
Sketch two small birds perched on the branches. Place one lower on a horizontal cross-branch and another higher up. Keep their shapes simple and rounded—think sparrows or finches. -
Feather Details:
Lightly shade the birds’ wings and bellies. Use tiny distinct strokes for wing feathers. -
Subtle Color:
If you wish, use a touch of brown or beige colored pencil on the birds to make them a focal point, distinguishing them from the monochrome deer. -
delicate Leaves:
At the very tips of the thinnest branches, draw tiny, singular leaves. Don’t overdo it—just a few sprigs here and there to suggest the tree is alive. Keep these lines very faint and delicate. -
Final Touches:
Review the whole piece. Use a blending stump to soften the shading on the deer’s neck and smooth out the larger branches. Clean up any stray smudge marks with your kneadable eraser.
Step back and admire how the natural world blends together in your unique creature sketch


Have a question or want to share your own experience? I'd love to hear from you in the comments below!