When I’m stuck on what to paint, I reach for the sky—because sky gradients and glowing light are instant magic. These sky painting ideas keep the sky as the main character, with simple blends, low horizons, and bold silhouette foregrounds that feel doable even on a busy day.
Golden Hour Sky With Soft, Glowing Clouds
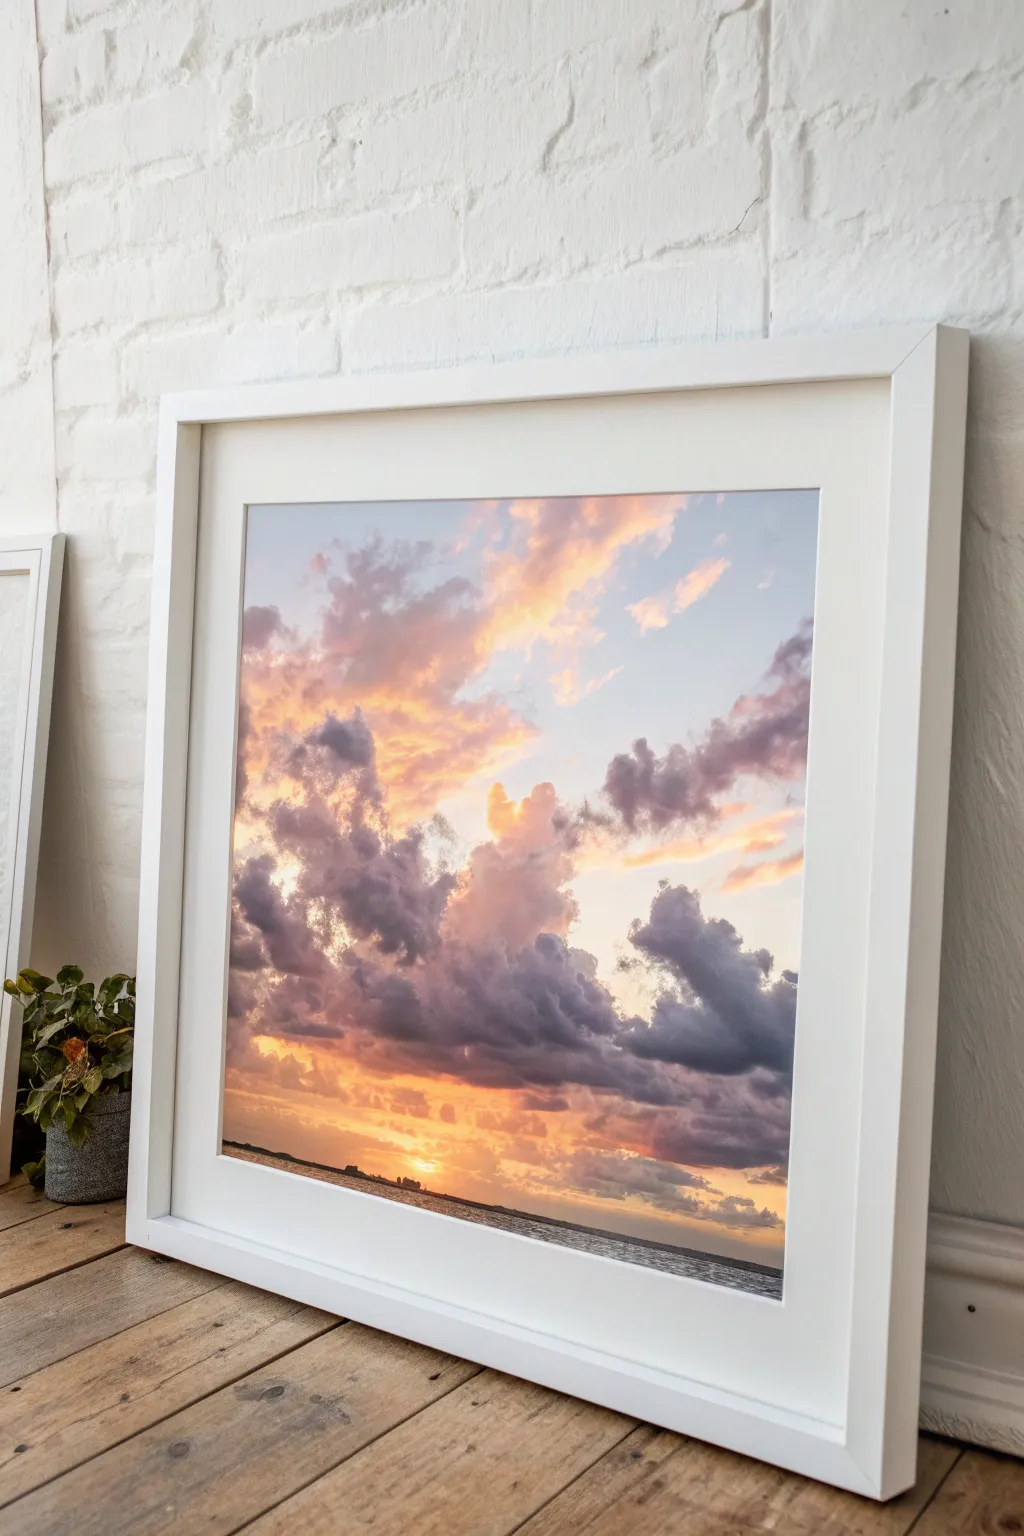
Capture the breathtaking warmth of a sunset sky by layering soft pinks against dramatic purples in this acrylic painting project. The finished piece features billowing, light-touched clouds floating over a distant sea horizon, framed elegantly to bring a calming atmosphere into any room.
Step-by-Step Guide
Materials
- Canvas panel or stretched canvas (square format, e.g., 12×12 inches)
- Acrylic paints: Titanium White, Ultramarine Blue, Dioxazine Purple, Cadmium Yellow Light, Cadmium Orange, Alizarin Crimson
- Soft synthetic brushes: 1-inch flat wash, medium filbert, small round detail brush
- Slow-drying medium or retarder (essential for blending)
- Palette knife for mixing
- Cup of water and paper towels
- White wooden frame (optional, for finishing)
Step 1: Setting the Background Gradient
-
Prepare the sky mixture:
Begin by mixing a very pale, cool blue using plenty of Titanium White and a tiny dot of Ultramarine Blue. Since acrylics dry quickly, add a drop of slow-drying medium to keep the paint workable longer. -
Lay the base color:
Using the 1-inch flat wash brush, cover the top two-thirds of the canvas with your pale blue mixture. Use horizontal strokes to ensure even coverage. -
Establish the horizon glow:
While the top is still wet, clean your brush and mix a soft peach tone using White, a touch of Cadmium Yellow, and a speck of Orange. Apply this to the bottom third of the canvas. -
Blend the transition:
Where the blue meets the peach, gently brush back and forth horizontally to create a soft, seamless transition. If the paint feels draggy, dip your brush tip slightly in water.
Step 2: Building the Cloud Structure
-
Mix shadow colors:
Create a stormy purple-grey for the cloud shadows by mixing Dioxazine Purple, Ultramarine Blue, a touch of Alizarin Crimson, and enough White to make it a mid-tone value. -
Block in main cloud shapes:
Switch to your medium filbert brush. Using the purple-grey mix, loosely block in the large diagonal cloud formations stretching from the bottom left toward the upper right. Don’t worry about details yet; just focus on the overall shapes. -
Design the lower cumulus:
Add a heavier, darker bank of horizontal clouds closer to the horizon line, grounding the composition. Keep the edges ragged and natural. -
Soften the edges:
Wipe most of the paint off your brush. Gently scumble (light circular motions) over the edges of your purple shapes to make them look fluffy rather than cut out of paper.
Muddy colors?
If your oranges and purples are mixing into brown, let the purple layer dry completely before applying the orange highlights on top. Glazing works wonders here.
Step 3: Adding Light and Warmth
-
Mix the highlight color:
Prepare a luminous coral-orange using White, Cadmium Orange, and a hint of Alizarin Crimson. This needs to be brighter than your background sky. -
Apply the first highlights:
Imagine the sun is low on the horizon. Dab this coral color onto the left-facing and bottom edges of your purple clouds, where the light would naturally hit them. -
Create the golden core:
Mix a bright, intense yellow-orange using White and Cadmium Yellow. Apply this near the center bottom of the cloud mass, creating the ‘burning’ effect where the sun is strongest. -
Blend into the shadow:
Use a clean, damp filbert brush to gently blend the transition between the bright orange highlights and the purple shadows. You want a gradient, not a harsh line.
Add texture
For the brightest highlights, mix a little modeling paste into your yellow and orange paint. This impasto technique will physically catch the light in the room.
Step 4: Details and Atmosphere
-
Refine the sky holes:
Take your original pale blue sky color and paint back into the clouds in a few spots to create ‘holes’ or breaks in the cloud cover, adding depth. -
Add distant horizon details:
Using the small round brush and a dark purple-grey mixture, paint a very thin, straight line across the absolute bottom for the distant land or sea horizon. -
Paint the water reflection:
Beneath the horizon line, add tiny horizontal dashes of the peach and yellow sky colors to suggest sunlight reflecting on water. -
Enhance the sun burst:
Mix pure Titanium White with a tiny bit of Yellow. Place a small, soft glow right at the horizon line where the sun is setting to create a focal point. -
Final blending check:
Step back from the canvas. If any edges look too sharp, use a dry, soft brush to lightly sweep over them, creating that signature misty aesthetic. -
Varnish and frame:
Once completely dry (wait 24 hours), apply a satin varnish to unify the sheen. Mount in a simple white frame to mimic the modern, airy look of the inspiration photo.
Hang your finished piece in a spot that gets morning light to enhance those beautiful warm tones even further


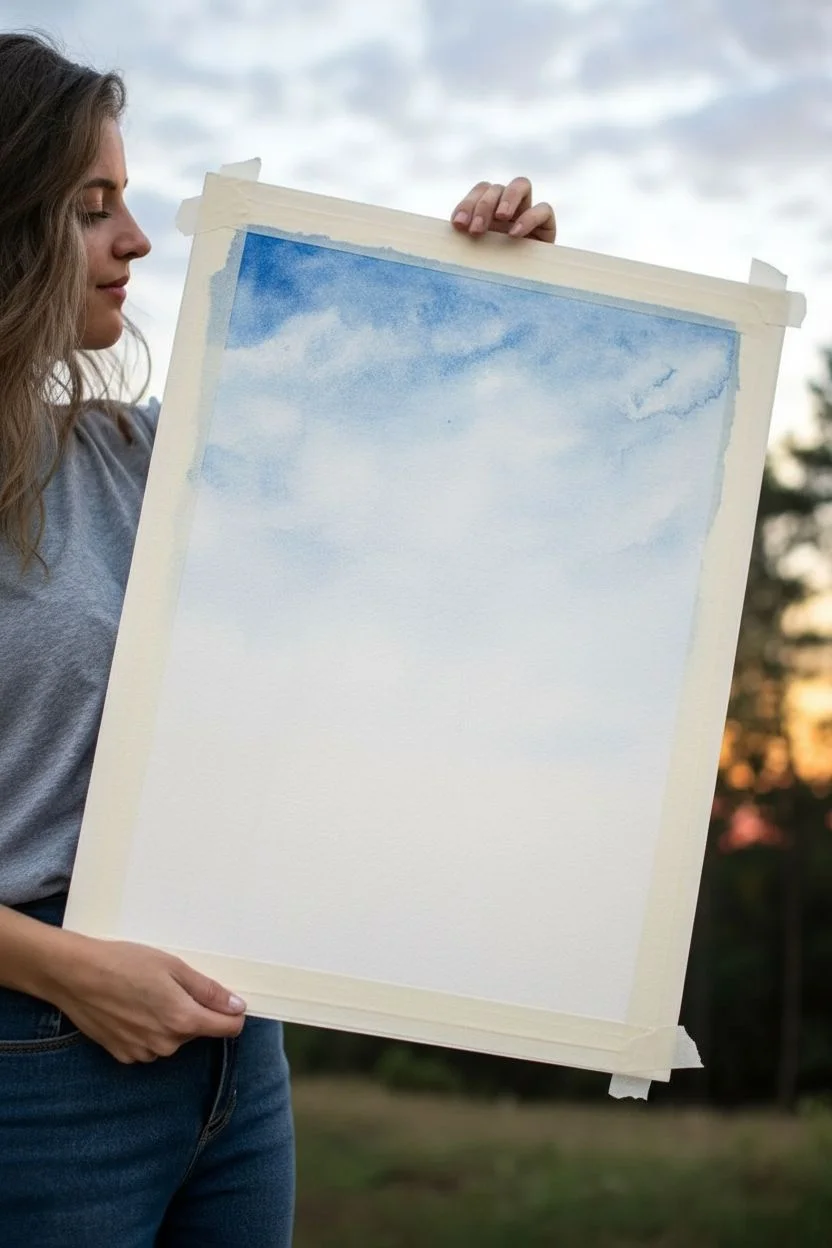
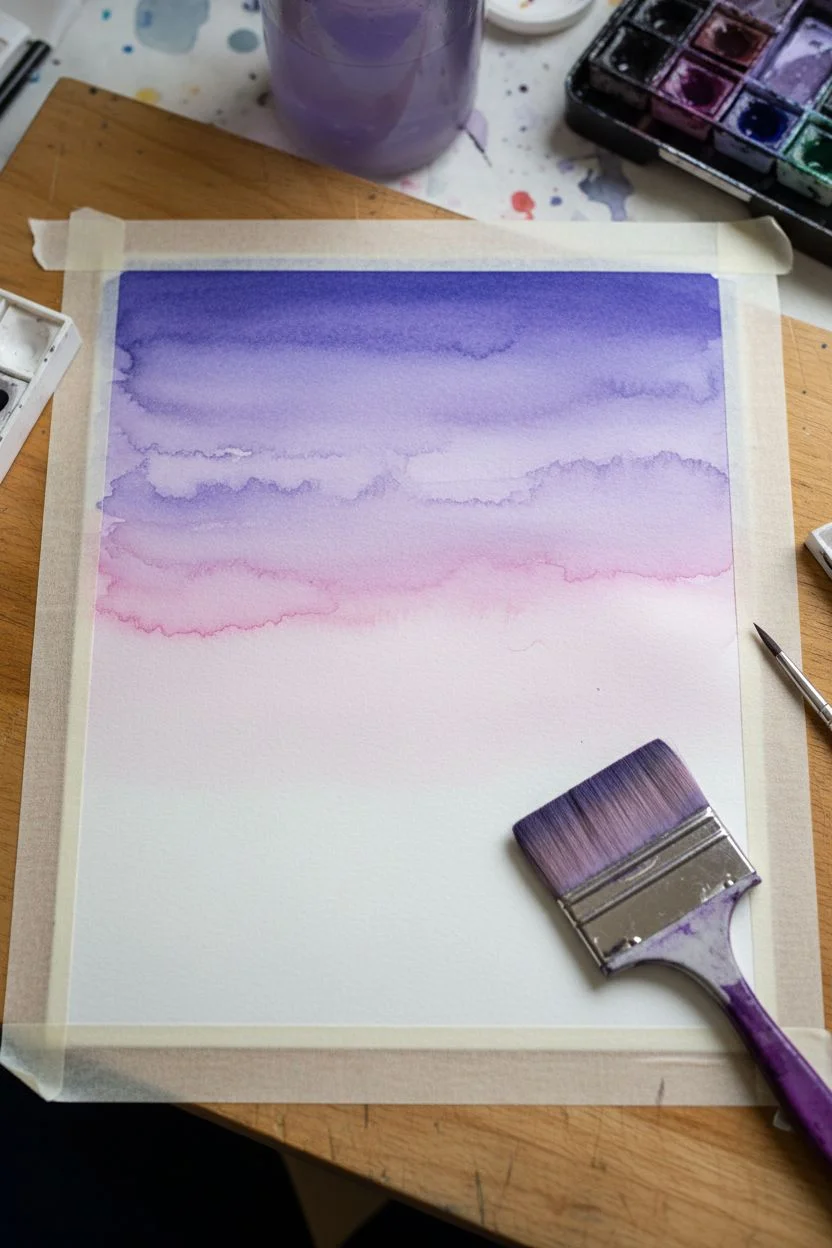
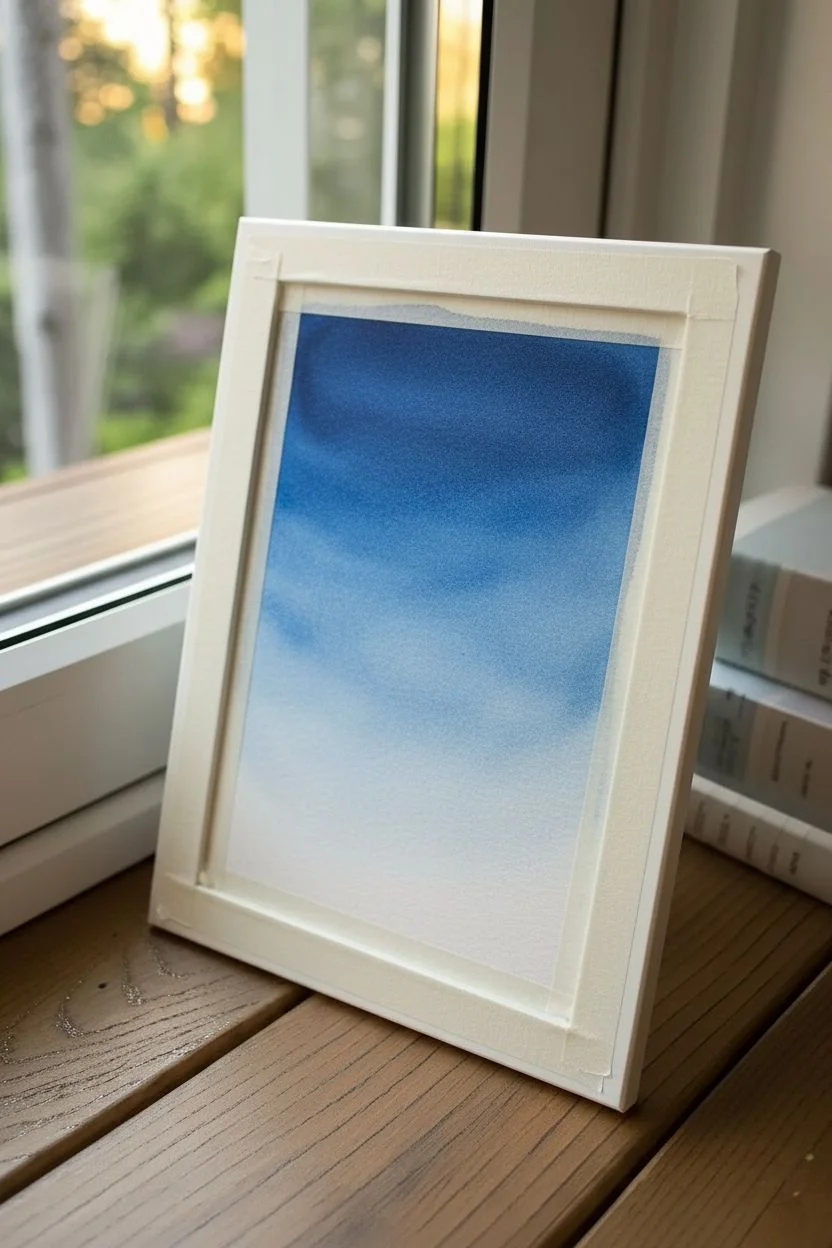
Clear Blue Day Sky With Subtle Value Shift
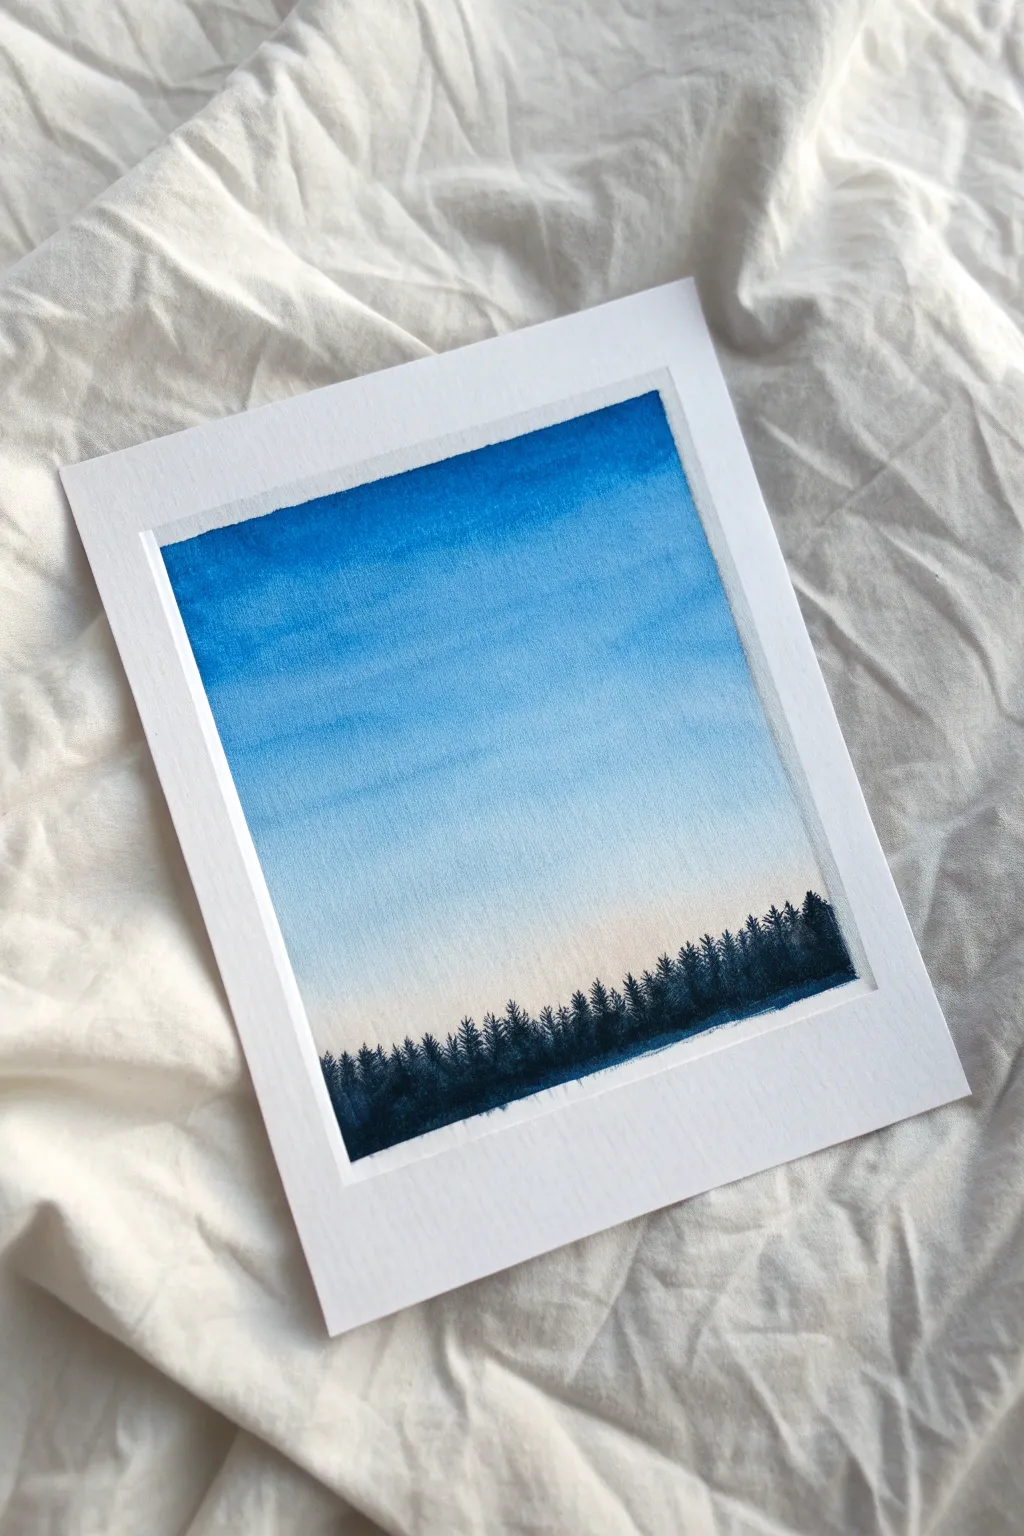
Capture the peaceful transition of a clear day into twilight with this minimalist watercolor landscape. This project focuses on mastering a smooth wet-on-wet gradient wash that fades effortlessly from deep azure to pure white, grounded by a crisp treeline.
Detailed Instructions
Materials
- Cold Press Watercolor Paper (block or loose sheet)
- Painter’s Tape or Masking Tape
- Watercolor Paint: Phthalo Blue or Cerulean Blue
- Watercolor Paint: Indigo or Payne’s Gray (for trees)
- Watercolor Paint: Tiny touch of Rose Madder or Alizarin mixture (optional)
- Large Flat Wash Brush or Hake Brush
- Small Round Brush (Size 0 or 2) for details
- Two containers of water
- Paper towels
- Mixing palette
Step 1: Preparation & Wetting
-
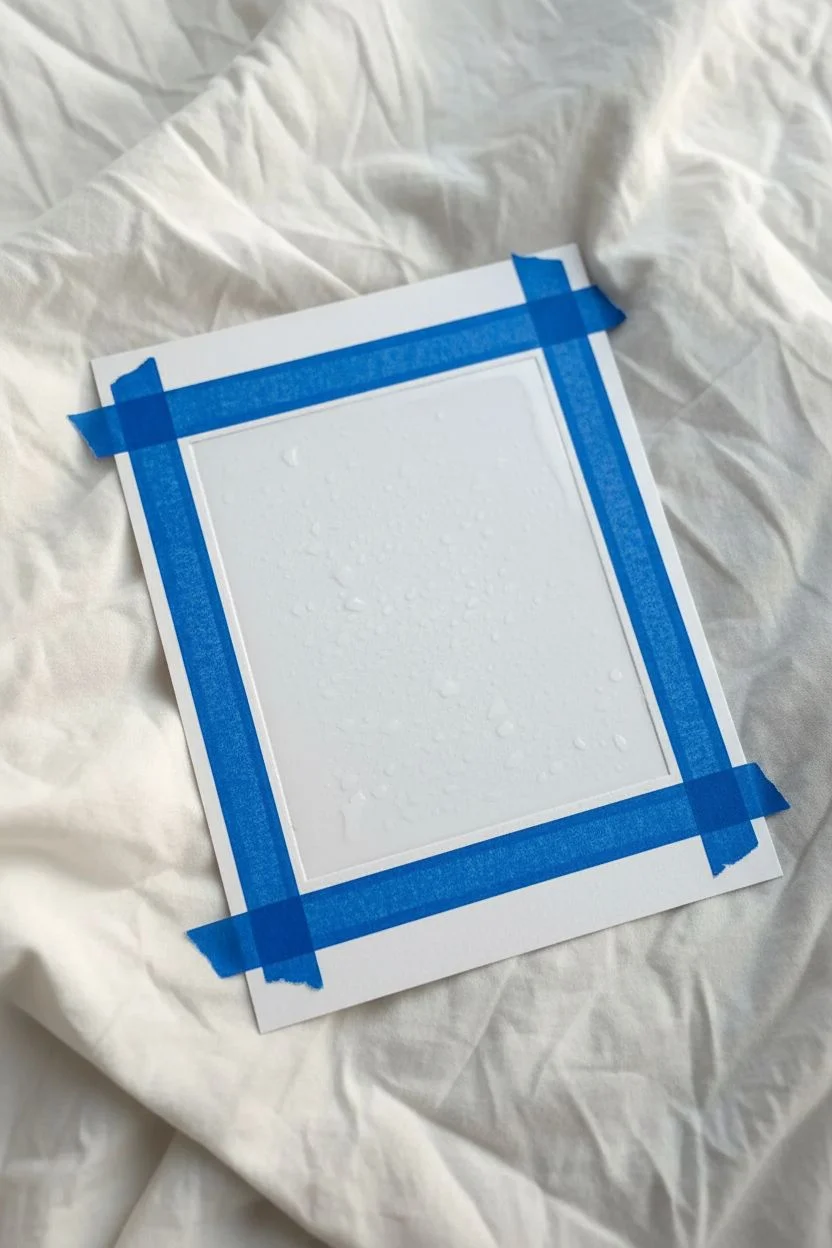
Tape the borders:
Secure your watercolor paper to a board or table using painter’s tape. Create a uniform border on all four sides. Press the edges of the tape down firmly with your fingernail or a bone folder to prevent paint from sneaking underneath. -
Prepare your sky wash:
On your palette, mix a generous puddle of your chosen sky blue (Phthalo Blue works well for intensity). You want a high pigment-to-water ratio initially, but ensure it flows smoothly. -
Wet the paper:
Using your large flat brush and clean water, apply an even coat of water across the entire sky area, stopping just above where you want the treeline to be. The paper should glisten but not have standing puddles.
Fixing “Cauliflower” Blooms
If you see water marks spreading in your sky, it means you added water while the paper was damp-drying. Don’t touch it! Let it dry, then gently lift the mark with a damp stiff brush later.
Step 2: Creating the Gradient Sky
-
Apply the darkest blue:
Load your large flat brush with the sky blue mixture. Start at the very top of the taped area and paint a bold horizontal stroke across the paper. -
Begin the fade:
Dip your brush into the water once to dilute the pigment slightly on the brush. Paint the next stroke immediately below the first, overlapping slightly so the colors blend. -
Continue lightening:
Repeat the process: dip, stroke, overlap. With each downward pass, you are adding more water and less pigment, naturally creating a gradient. -
Transition to clear water:
By the time you reach the bottom third of the sky, your brush should be holding almost clear water. This creates the soft, pale horizon line visible in the reference. -
Tilt for smoothness:
If you notice streaks, tilt your board slightly to help gravity pull the pigment downward evenly. I like to let this sit for a moment to ensure the blend is seamless. -
Optional faint warmth:
If you want a hint of warmth at the horizon, you can touch a very dilute, watery mix of pale pink into the bottom wet area, but exert caution to keep it subtle. -
Let it dry completely:
This is crucial. The paper must be bone dry before you paint the trees, or they will bleed into the sky. You can use a hair dryer on a low setting if you are impatient.
Pro Tip: Atmospheric Noise
For a subtle texture in the sky like the reference image, don’t mix your gradient perfectly smooth. Let the grain of the cold press paper naturally catch the pigment for an airy feel.
Step 3: Painting the Forest Silhouette
-
Mix the tree color:
Create a thick, opaque mixture of Indigo or Payne’s Gray. You want this paint typically drier than your sky wash so it holds sharp details. -
Establish the ground line:
Using your small round brush, paint a slightly uneven horizontal line across the very bottom of the sky area to serve as the forest floor. -
Paint the first tree trunks:
Draw tiny vertical lines upward from your ground line to marking the heights of your trees. Vary the heights to make the forest look natural. -
Stipple the foliage:
Using the very tip of your small brush, use a stippling or dotting motion to add branches. Start narrow at the top of the trunk and widen as you go down. -
Dense vs. sparse:
Paint some trees closer together so they merge into a solid dark mass, while leaving the tops of the trees distinct and separated against the light sky. -
Refine the shapes:
Look for empty spots. Add tiny baby trees between the larger ones to fill gaps and add depth to the silhouette. -
Final dry:
Allow the tree layer to dry completely. The thick pigment may take a little longer than the sky wash.
Step 4: The Reveal
-
Remove the tape:
Once the paper is absolutely dry to the touch, peel the tape away slowly. Pull it away from the painting at a 45-degree angle to ensure a crisp, clean white border.
Now you have a tranquil miniature landscape ready to be framed or sent as a greeting card


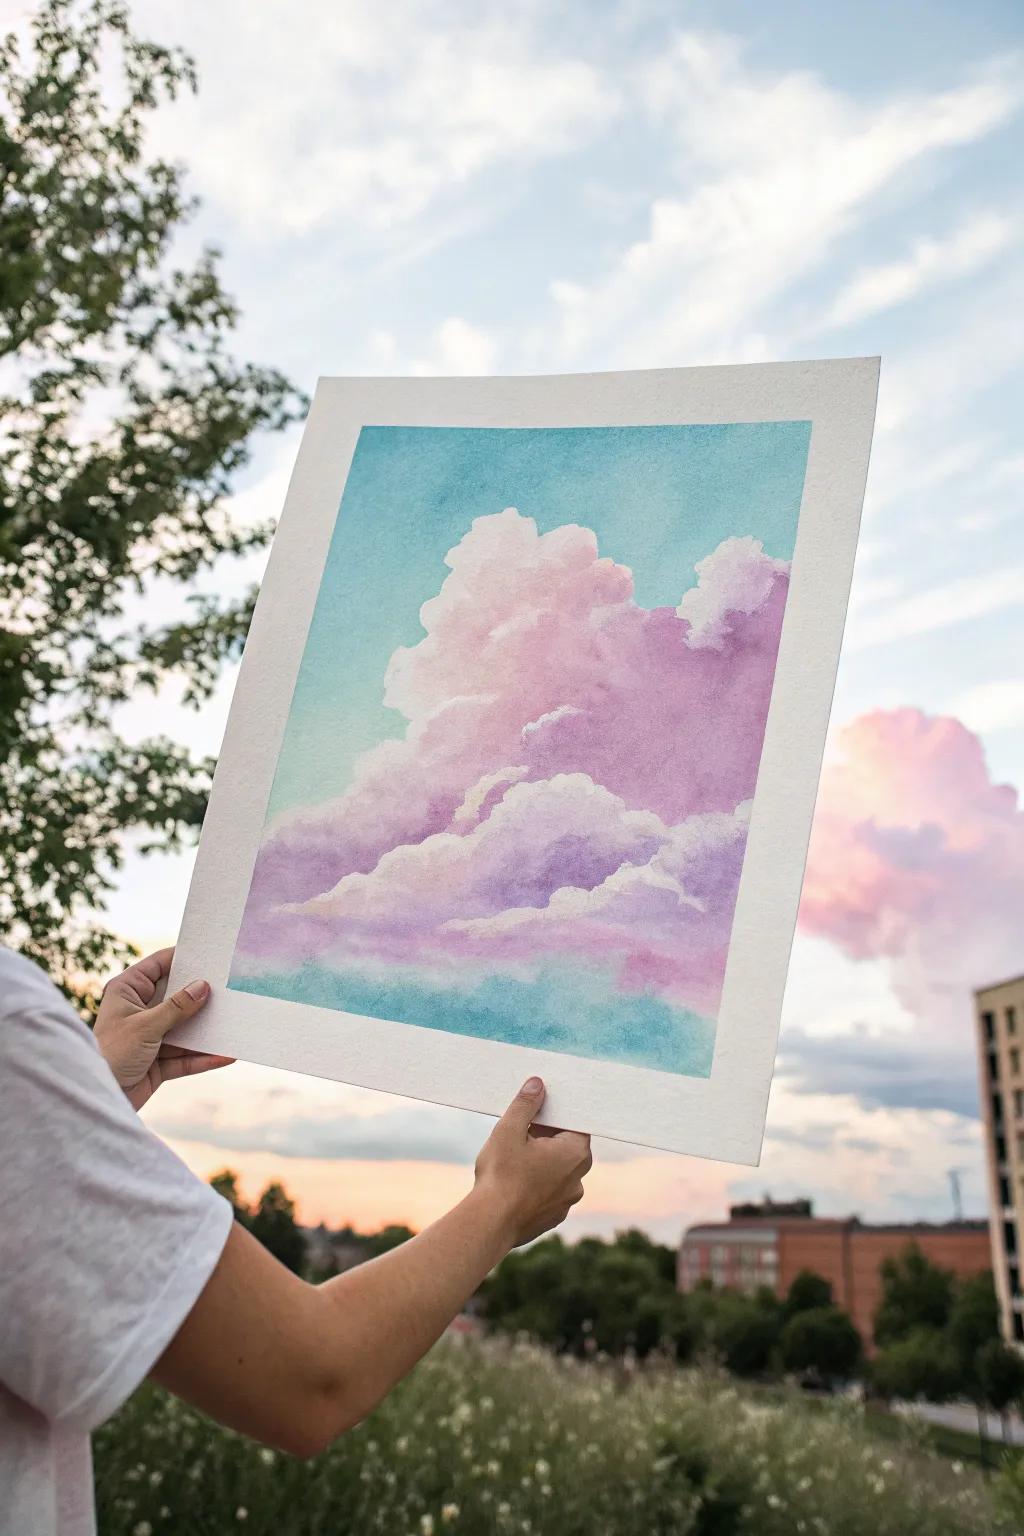
Cotton-Candy Pink Twilight Fade
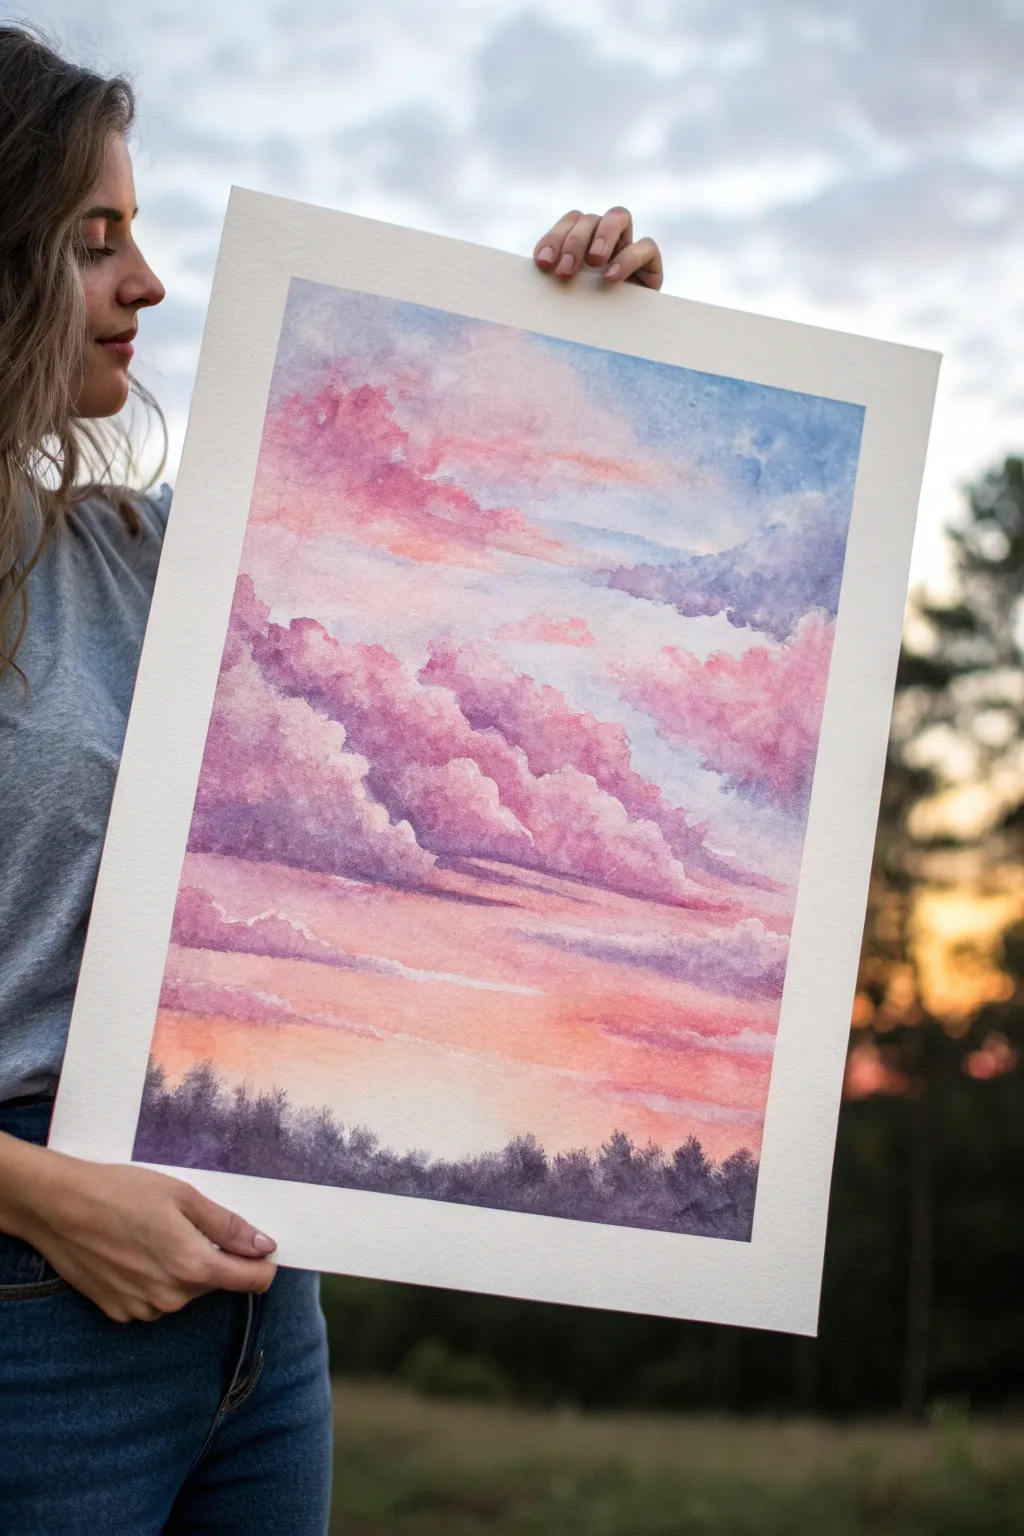
Capture the dreamy softness of a summer evening with this vibrant watercolor sky painting. You’ll layer washes of rose, violet, and peach to create billowy clouds that seem to glow against a deepening blue atmosphere.
Step-by-Step Guide
Materials
- Cold press watercolor paper (140lb/300gsm), taped to a board
- Watercolor paints: Rose Madder, Cobalt Blue, Ultramarine Blue, Yellow Ochre, Burnt Sienna, Dioxazine Purple
- Large flat wash brush
- Medium round brush (size 8 or 10)
- Small round brush (size 4)
- Clean water cups (2)
- Paper towels
- Palette for mixing
- Masking tape
Step 1: Setting the Sky Base
-
Prepare the paper:
Begin by securing your paper to a board with masking tape on all four sides. This helps keep the paper flat when wet and creates that crisp white border seen in the final piece. -
Pre-wet the sky area:
Using your large flat wash brush and clean water, gently wet the upper two-thirds of your paper. You want an even sheen, not puddles, to prepare for a wet-on-wet technique. -
Paint the upper blue sky:
Load your brush with a watery mix of Cobalt Blue. Apply this to the top right and left corners, letting it fade as you move toward the center. Keep the blue light and airy. -
Add a hint of violet:
While the blue is still damp, drop in a very faint wash of Dioxazine Purple mixed with plenty of water near the top edges to deepen the twilight feel.
Step 2: Creating Cotton-Candy Clouds
-
Mix your pink tones:
On your palette, mix a generous amount of Rose Madder with a touch of water. You want a vibrant but transparent pink. I like to keep a second puddle ready with a tiny bit of purple added for shadows. -
Form the main cloud shapes:
Switch to your medium round brush. While the paper is still slightly damp (but losing its shine), paint the upper edges of the large, diagonal cloud bank using the pure pink mix. -
Soften the edges:
Use a clean, damp brush to gently tickle the top edges of your pink clouds so they blur slightly into the blue sky, but keep the bottom edges more defined. -
Add cloud volume:
Drop the slightly purpler pink mix into the lower/middle sections of the clouds while they are wet. This creates immediate volume and shadow within the fluff. -
Define the diagonal flow:
Continue adding diagonal streaks of pink clouds moving from the upper left down towards the center right. Leave some white gaps between them to represent the brightest highlights.
Softness Secret
To get fluffier clouds, blot wet paint with a crumpled paper towel. Lift color gently to regain white highlights if an area gets too dark.
Step 3: The Glowing Horizon
-
Mix a peachy sunset color:
Combine Rose Madder with a little Yellow Ochre to create a warm salmon or peach color. -
Paint the middle horizon:
Below your main pink cloud bank, paint horizontal streaks of this peach color. Let these streaks overlap slightly with the bottom of the pink clouds to blend them. -
Fade to the bottom:
Add more water to your brush and drag the peach color down towards the bottom third of the paper, letting it fade into a very pale, almost white glow near where the treeline will be. -
Intensify shadows:
Once the main cloud layer is semi-dry, use a smaller round brush with a stronger mix of Dioxazine Purple and Rose Madder to paint the darkest undersides of the largest clouds for dramatic contrast. -
Let it dry completely:
Stop and let the entire sky section bone dry. If the paper is cool to the touch, it’s still wet. This pause is crucial to prevent the treeline from bleeding upward.
Muddy Clouds?
If your pinks and blues are turning gray where they touch, your paper was likely too wet. Let layers dry more between applications next time.
Step 4: Contrasting Treeline
-
Mix a dark forest hue:
Create a dark, neutral color by mixing Ultramarine Blue, Burnt Sienna, and a touch of Dioxazine Purple. It should be thick and creamy, not watery. -
Establish the treeline base:
Using the medium round brush, paint an uneven horizontal strip along the very bottom edge of your paper. -
Add tree details:
Switch to your small round brush or the tip of your medium brush. Use a dabbing or stippling motion to create the irregular, pointy tops of pine trees along the upper edge of your dark strip. -
Vary tree heights:
Make sure some trees are taller than others to create a natural-looking silhouette. Keep the edges soft and slightly fuzzy to mimic atmospheric distance. -
Final reveal:
Once the paint is thoroughly dry, carefully peel off the masking tape at a 45-degree angle to reveal your clean edges.
This serene sky study brings a peaceful splash of color to any room and helps you master soft wet-on-wet transitions.


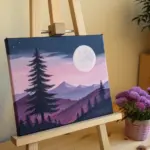

Purple Dusk Sky Over Layered Mountain Silhouettes
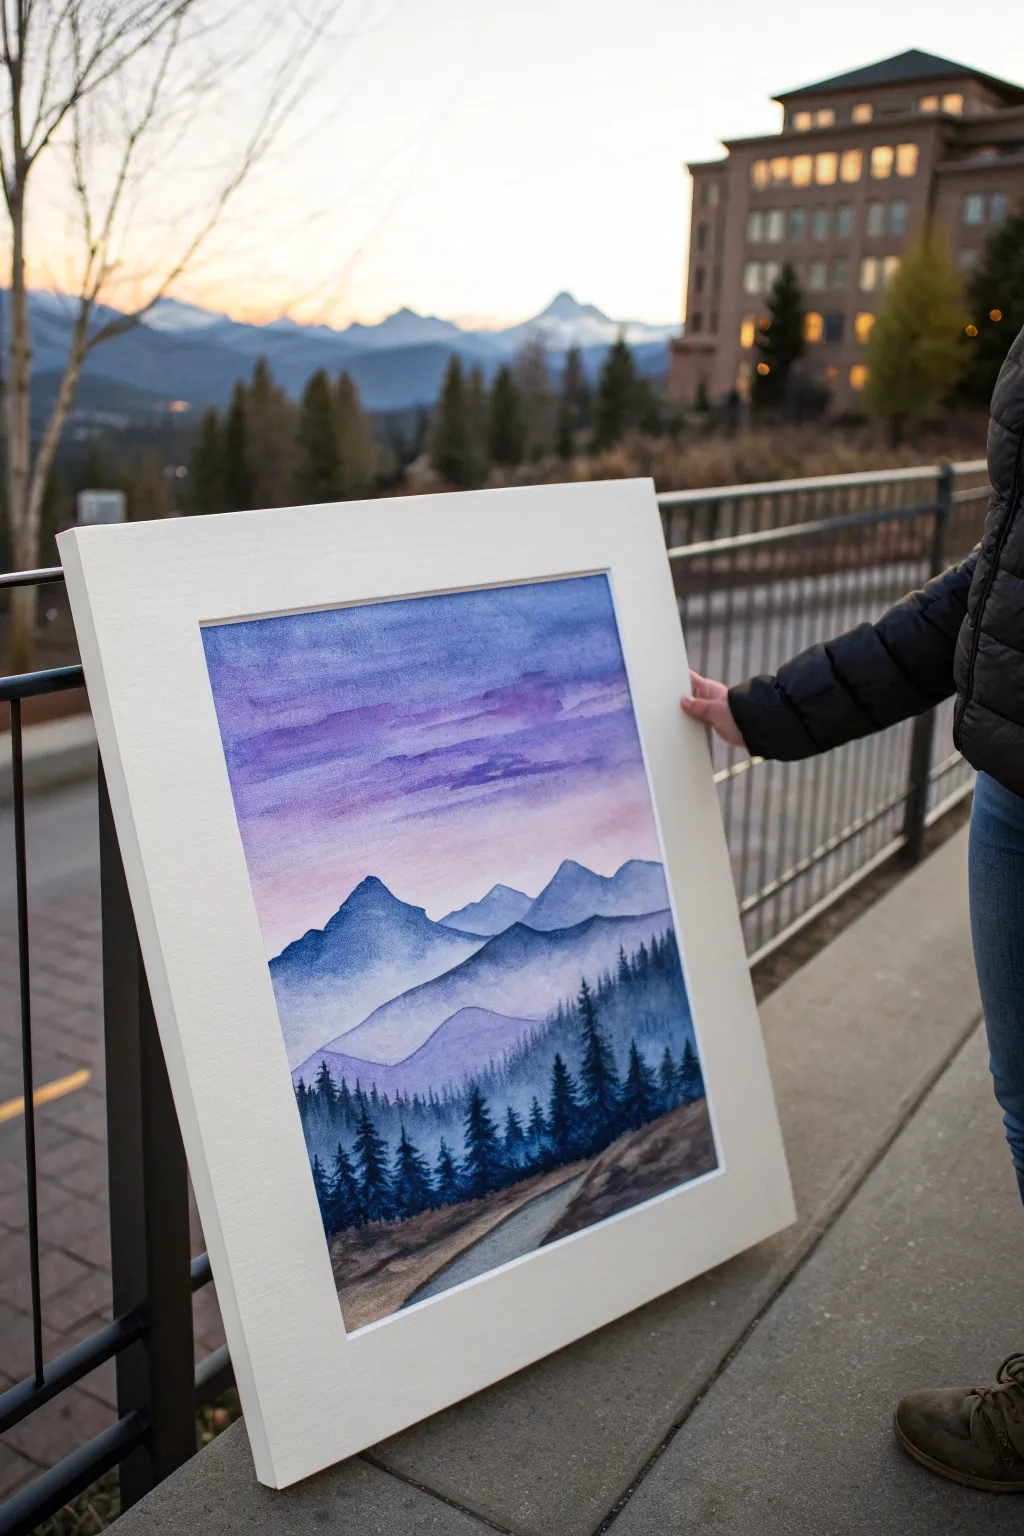
Capture the serene beauty of twilight in this watercolor project, featuring a soft gradient sky that fades from deep indigo to pale rose. You’ll build depth through layers of misty blue mountains and finish with crisp, dark pine silhouettes framing a winding path.
Detailed Instructions
Materials
- Cold press watercolor paper (140lb/300gsm)
- Watercolor paints: Indigo, Ultramarine Blue, Purple/Violet, Alizarin Crimson, Burnt Sienna, Burnt Umber, Payne’s Gray
- Masking tape
- Large flat wash brush
- Medium round brush (size 8 or 10)
- Small detail brush (size 2 or 4)
- Two jars of water
- Paper towels
- Hairdryer (optional, for speed)
Step 1: Painting the Gradient Sky
-
Prepare the paper:
Begin by taping down all four edges of your watercolor paper to a board. This keeps the paper flat and creates that clean, professional white border seen in the final piece. -
Wet the sky area:
Using your large flat brush and clean water, thoroughly wet the upper two-thirds of the paper. You want an even sheen, not puddles. -
Apply the top darks:
While the paper is wet, load your brush with a mix of Indigo and Purple. Apply broad horizontal strokes at the very top, letting the color bleed downwards naturally. -
Blend the mid-tones:
Rinse your brush slightly and pick up a lighter Purple or diluted Violet. painting just below the dark indigo, slightly overlapping to blend the edges softly. -
Add the sunset glow:
Clean your brush completely. Pick up a watery mix of Alizarin Crimson or a soft pink. Paint the lower sky area above where the mountains will be, blending upward into the purple. -
Create cloud streaks:
Before the wash dries completely, lift out pigment horizontally with a damp, clean brush or dab in slightly darker purple lines to suggest striated clouds. -
Dry completely:
Let this layer dry 100%. If the paper is cool to the touch, it’s still damp. Use a hairdryer if needed.
Mist Master
To get that foggy mountain effect, keep a separate ‘clean water’ brush ready. Paint the mountain top with pigment, then immediately switch to the wet brush to drag the bottom edge down.
Step 2: Layering the Mountains
-
Paint the distant peaks:
For the furthest mountain range, mix a very watery Ultramarine Blue with a touch of Purple. Paint the silhouette of sharp peaks about halfway down the paper. -
Fade the bottoms:
Immediately rinse your brush and use clean water to soften the bottom edge of these distant mountains, fading them out into the white of the paper to create a misty effect. -
Paint the middle range:
Once the first range is dry, mix a slightly stronger, darker blue (add a tiny bit of Payne’s Gray to your blue). Paint a second mountain range overlapping the first, slightly lower down. -
Soften the middle layers:
Again, use a clean, damp brush to drag the pigment downwards from the bottom of this second range, creating a smooth gradient that mimics atmospheric fog. -
Add the foreground ridge:
Create a third, lower range using a mix of Ultramarine and more Payne’s Gray. This layer should be distinct but still lighter than the trees to come.
Step 3: Foreground and Details
-
Sketch the path:
Lightly pencil in the curve of the road at the bottom center to guide your painting. -
Paint the ground base:
Use a mix of Burnt Sienna and a touch of blue (to desaturate it) to paint the ground on either side of the path. Keep it loose and textured. -
Add the road:
Paint the road using a dilute gray or dirty wash water. While wet, drop in tiny specks of brown for texture. -
Start the pine trees:
Mix a very dark, concentrated color using Payne’s Gray and Indigo. With your small detail brush, paint vertical lines for tree trunks on the hillsides. -
Flesh out the foliage:
Using the tip of your brush, stipple or dab outward from the trunks to create pine branches. Make the trees in the foreground larger and more detailed than those further back. -
Deepen shadows:
Once the ground is dry, add a second layer of Burnt Umber mixed with Indigo to the bottom corners to anchor the scene and add contrast. -
Reveal the border:
Wait for everything to be bone dry, then carefully peel off the masking tape at a 45-degree angle to reveal your crisp white edges.
Cauliflower Blooms?
If you see unwanted textures or ‘blooms’ in your sky, you likely added water to a section that was already half-dry. Let it dry completely, and you might be able to glaze over it later.
Once framed with a wide mat, this peaceful landscape serves as a perfect window into nature for any room in your home
BRUSH GUIDE
The Right Brush for Every Stroke
From clean lines to bold texture — master brush choice, stroke control, and essential techniques.
Explore the Full Guide
Ocean Horizon Sky With Mirrored Color Bands
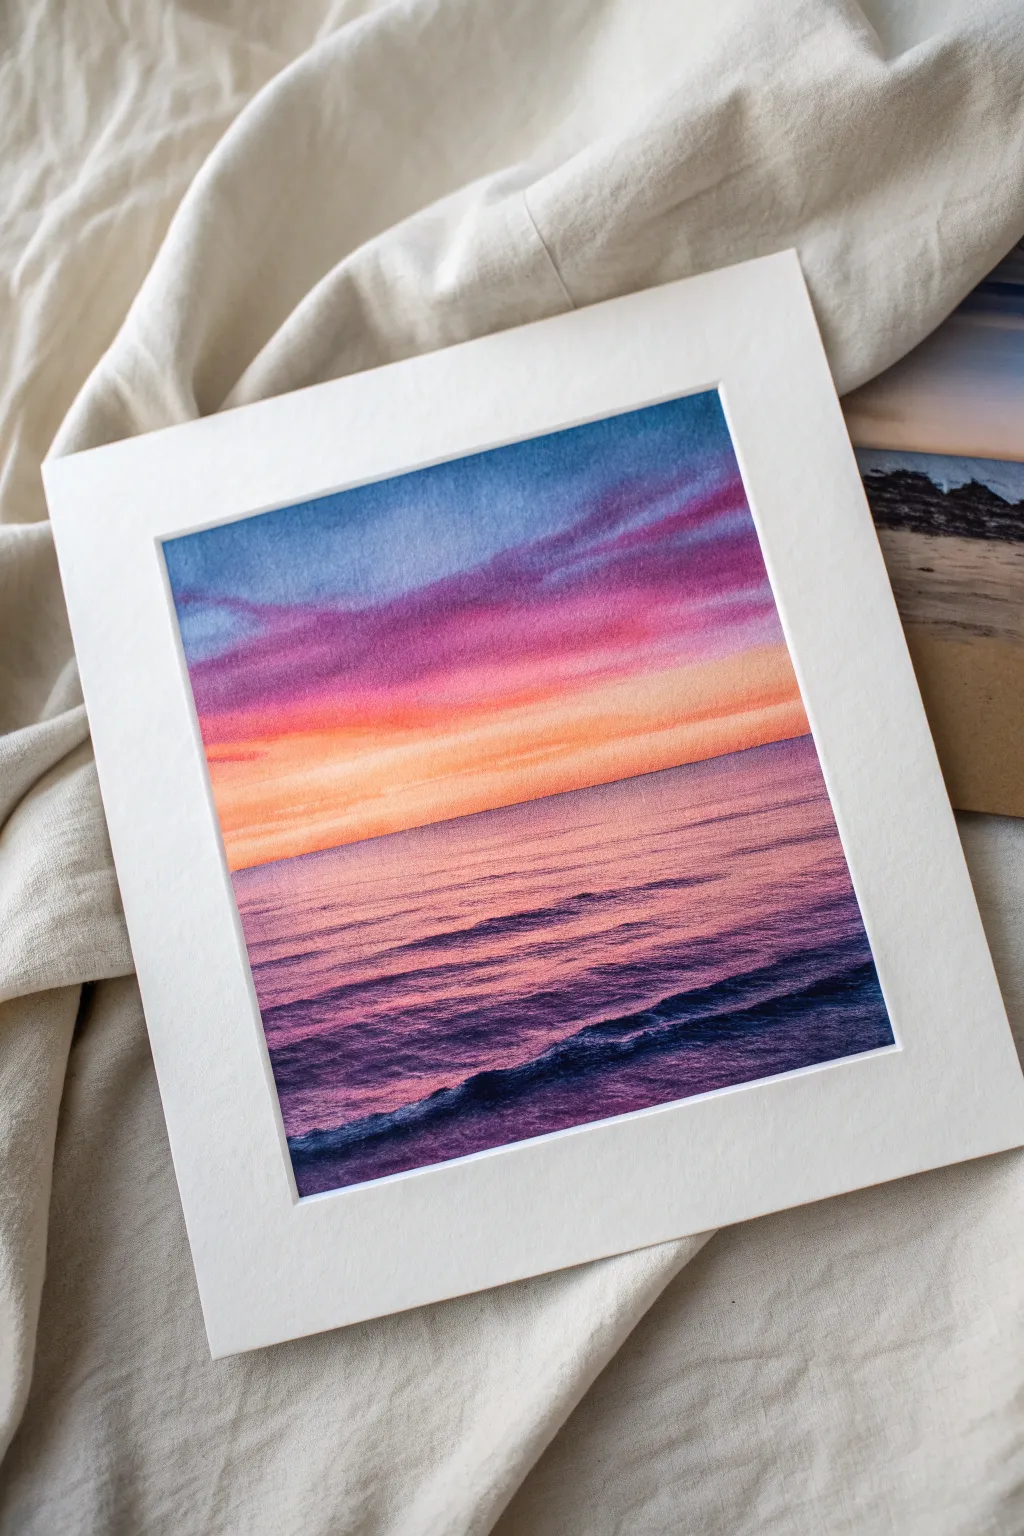
Capture the serene beauty of a twilight ocean where the horizon creates a perfect mirror between sky and sea. This watercolor project focuses on mastering wet-on-wet blending to create seamless gradients of violet, pink, and deep indigo.
Step-by-Step Guide
Materials
- Cold press watercolor paper (140lb/300gsm)
- Watercolor paints (Indigo, Ultramarine Blue, Quinacridone Magenta, Cadmium Orange, Lemon Yellow)
- Flat wash brush (3/4 inch)
- Round brushes (sizes 6 and 2)
- Masking tape
- Drawing board
- Two jars of water
- Paper towels
- White mat board for framing
Step 1: Preparation & Sky Base
-
Secure the paper:
Tape your watercolor paper down firmly to your board on all four sides. This creates that crisp white border seen in the final piece and prevents warping. -
Establish the horizon:
Lightly draw a straight horizontal line across the paper about one-third of the way up from the bottom. This will separate your sky from the ocean. -
Wet the sky area:
Using your flat wash brush and clean water, thoroughly wet the paper above the horizon line. The paper should glisten but not have standing puddles. -
Begin the upper gradient:
Load your brush with a mix of Ultramarine Blue and a touch of Indigo. Apply this to the very top edge of the sky, letting it bleed downwards into the wet paper. -
Introduce purples:
While the blue is still wet, mix Quinacridone Magenta with a little blue to make a soft violet. Paint horizontal strokes just below the blue, allowing them to merge naturally. -
Warm the horizon:
Rinse your brush thoroughly. Mix a vibrant Cadmium Orange with a tiny bit of Magenta. Apply this near the horizon line, blending upward into the purple area to create that glowing transition.
Step 2: Painting the Ocean
-
Mirror the colors:
Once the sky is damp but not soaking, wet the area below the horizon line. We want to reflect the sky’s colors but in reverse order. -
Lay the base wash:
Start right under the horizon line with your orange mix, but dilute it slightly more than the sky. The water often appears slightly lighter at the distance. -
Deepen the foreground:
As you move down the paper towards the bottom edge, switch to your violet mix, and finally your deep indigo mix at the very bottom. Use horizontal strokes to mimic the motion of water. -
Create wave texture:
While the ocean wash is still wet, take a thirstier, slightly drier round brush (size 6) loaded with concentrated violet paint. Drag it horizontally across the wet wash to suggest ripples. -
Refine the horizon:
While everything is drying, use a small, damp brush (size 2) to carefully tidy the horizon line. I find running the brush once across creates a sharp separation between air and sea.
Muddy colors?
If your orange and blue mix into a dull brown, let the blue layer dry completely before glazing the orange near it, or leave a tiny gap of white paper that creates a glowing effect.
Step 3: Details & Finishing
-
Enhance sky clouds:
Wait until the sky is bone dry. Re-wet specific small areas and drop in darker purple shadows to define the clouds streaking across the upper sky. -
Paint the rolling wave:
Mix a dark, saturated Indigo. With your size 6 brush, paint the dark, rolling wave shape in the immediate foreground. Use a jagged, rolling motion to capture the breaking water. -
Add wave shadows:
Dilute your Indigo and paint thinner, broken lines in the middle distance of the water. These suggest smaller waves catching the last light. -
Lift highlights:
If your foreground wave looks too flat, use a clean, damp brush to gently lift a little pigment from the top edge of the wave foam. -
Dry completely:
Let the painting sit until absolutely dry to the touch. The paper should feel warm and flat. -
Reveal the border:
Slowly peel away the masking tape at a 45-degree angle not to tear the paper. This reveals the clean edges essential for mounting. -
Mat the artwork:
Place your white mat board over the painting. Center the composition so the horizon sits beautifully within the window.
Soft Sea Foam
For realistic sea foam on the dark wave, sprinkle a pinch of salt onto the wet indigo paint. As it dries, it creates natural, bubbly textures perfect for ocean water.
Step back and enjoy the peaceful atmosphere of your handmade coastal view
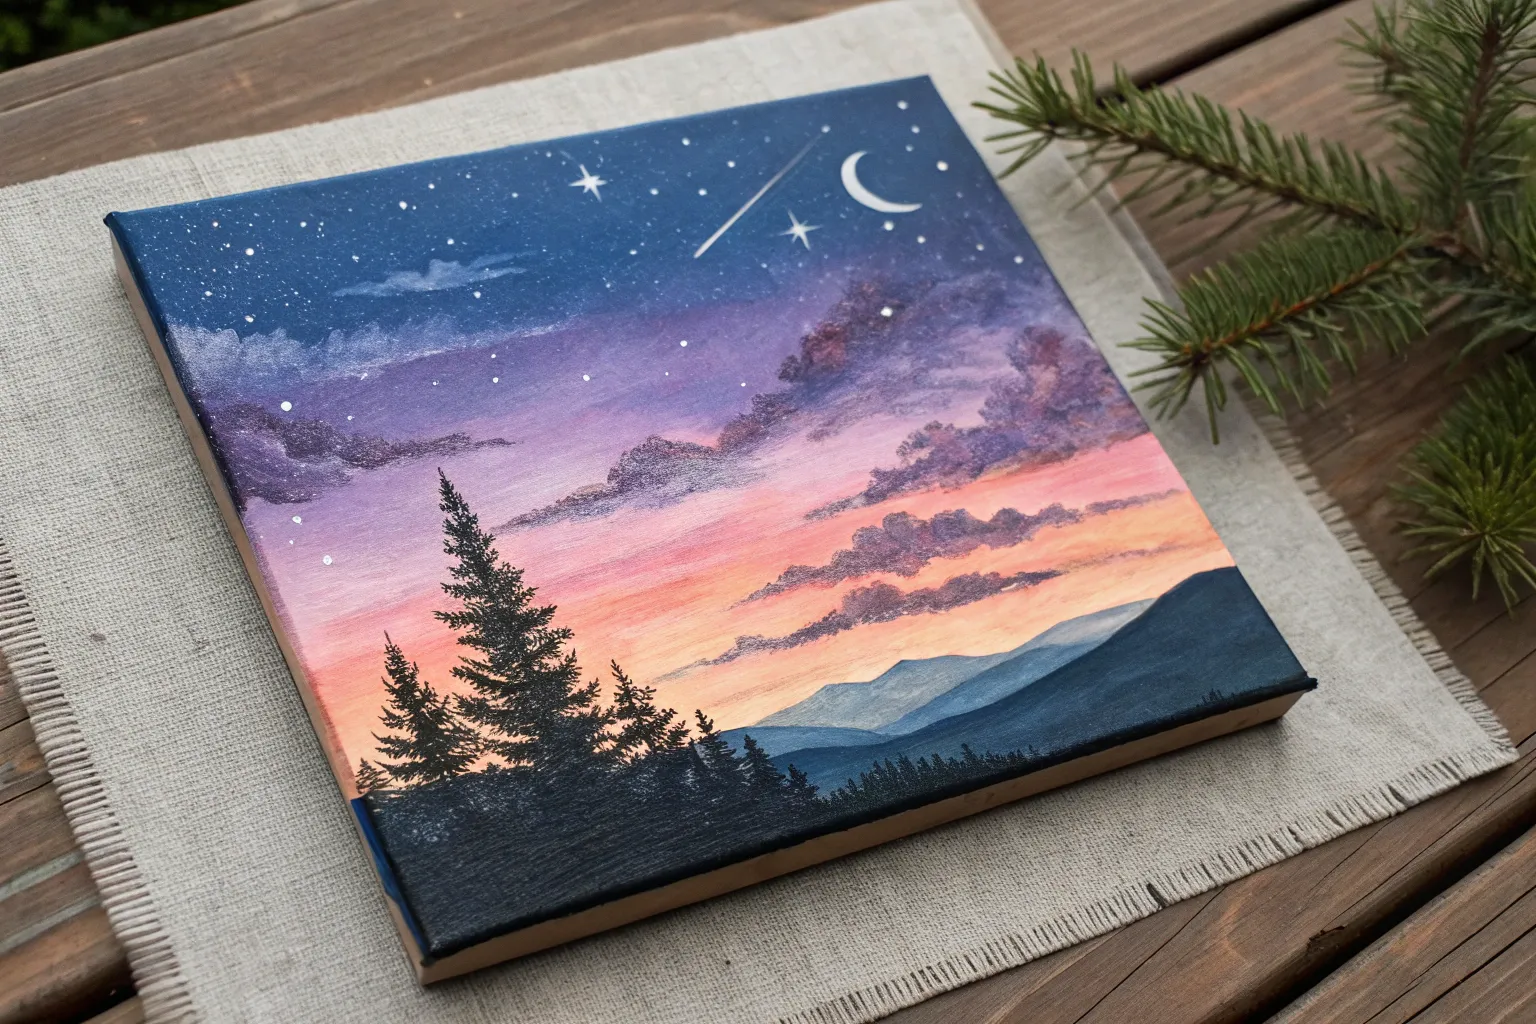
Starry Night Sky With Splatter Stars
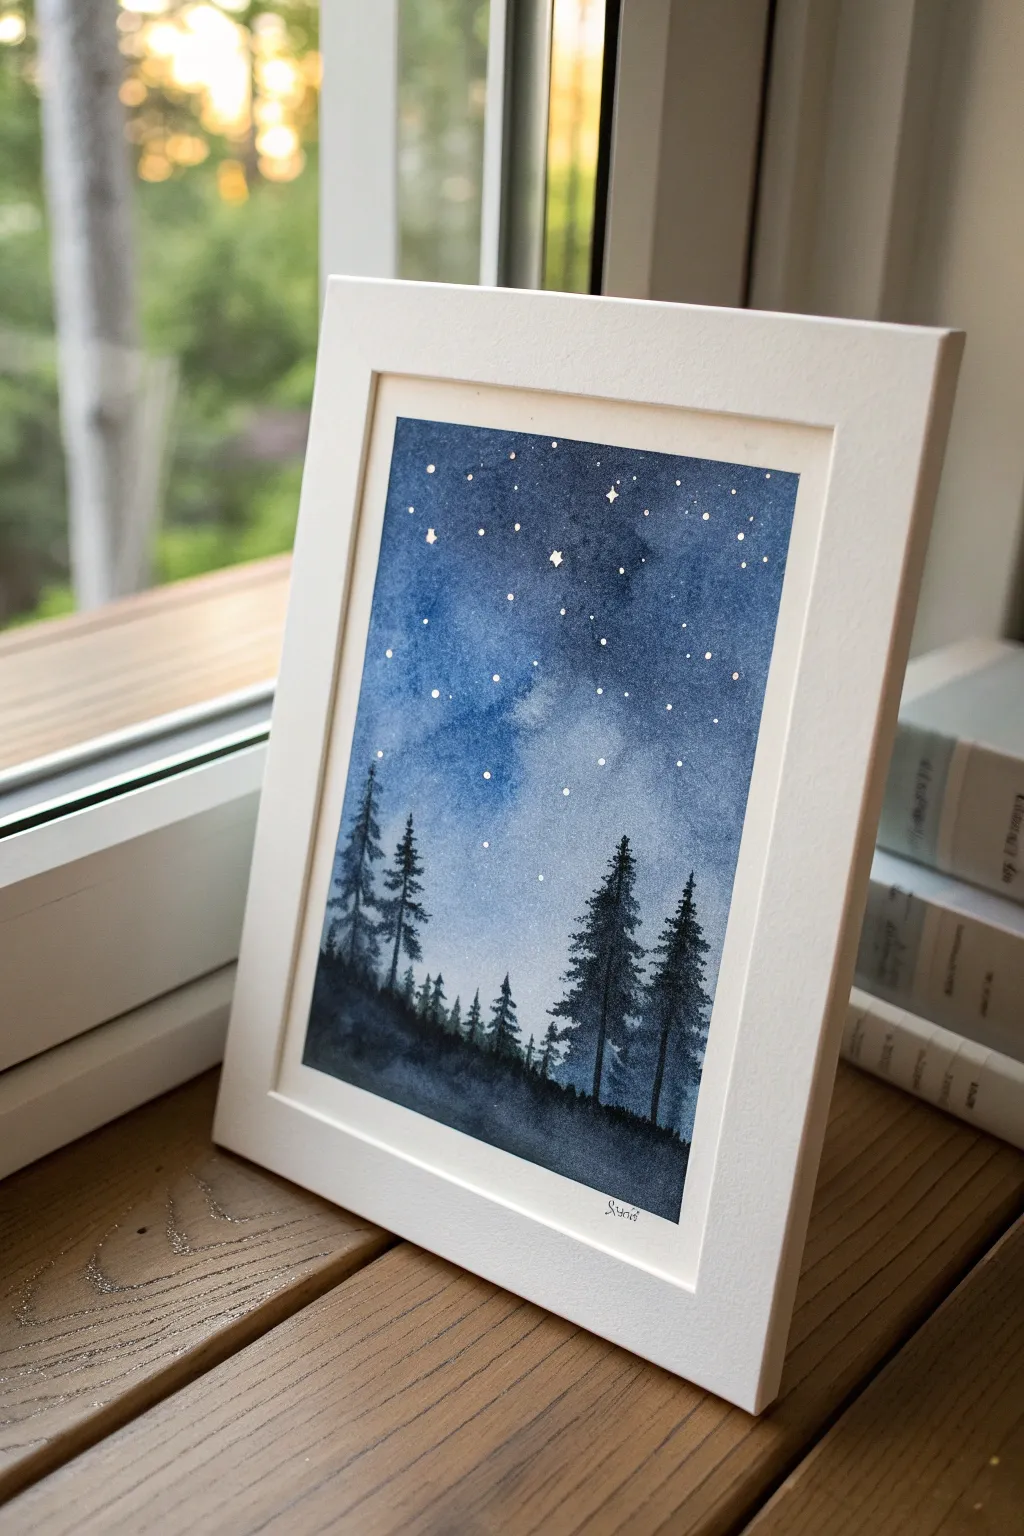
Capture the serene beauty of a crisp night in the woods with this elegant watercolor project. By combining a classic wet-on-wet sky wash with precise silhouette work, you’ll create a moody atmosphere perfect for framing.
How-To Guide
Materials
- Cold-pressed watercolor paper (approx. 5×7 inches)
- Watercolor paints (Indigo, Prussian Blue, Payne’s Grey, Lamp Black)
- Wide flat brush for washes
- Medium round brush (size 6 or 8)
- Small fine liner brush (size 0 or 1)
- Opaque white gouache or white ink
- Masking tape
- Two jars of water
- Paper towels
- Old toothbrush (optional for splatter)
Step 1: Atmospheric Sky Gradation
-
Prepare the workspace:
Begin by taping down all four edges of your watercolor paper to a board. This not only creates the clean white border seen in the example but also prevents the paper from buckling during the wet wash. -
Wet the paper:
Use your wide flat brush to apply a layer of clean water across the upper three-quarters of the paper. You want the surface to be evenly glistening, but not swimming in puddles. -
Apply the deepest blues:
Load your medium round brush with a heavy concentration of Indigo mixed with a touch of Payne’s Grey. Apply this darkest mixture to the very top corners of the sky, letting the wet paper help the pigment spread. -
Create the gradient:
As you work your way down the paper, dip your brush into water to slightly dilute the paint. Transition from the deep Indigo into a Prussian Blue or brighter Ultramarine for the mid-sky section. -
Fade to the horizon:
Continue painting downward, adding more water and less pigment as you approach the bottom third of the paper. The sky should be very pale almost white-blue just above where the treeline will be, creating a glow effect. -
Dry completely:
This is crucial: allow the sky layer to become bone-dry before proceeding. If the paper is damp, your stars and trees will bleed into the background.
Starry Control
Cover the bottom area (where trees will go) with a scrap piece of paper while splattering stars. This keeps your future forest silhouette pure dark without speckles.
Step 2: Creating the Constellations
-
Mix the stars:
Prepare a creamy consistency of white gouache or opaque white ink. It should be fluid enough to flick, but thick enough to stand out against the dark blue. -
Splatter texture:
Dip a brush (or an old toothbrush) into the white mixture. Hold it over the painting and tap the handle firmly to release fine speckles. Focus the density near the top where the sky is darkest. -
Add hero stars:
Using your fine liner brush, manually dot several larger, brighter stars in random locations. For added sparkle, paint tiny four-point crosses on a few of the brightest ones.
Step 3: The Forest Silhouette
-
Mix the shadow color:
Create a rich, dark mixture using Indigo and Lamp Black. You want this to look nearly black on the paper but retain a hint of cool blue tone. -
Draft the background hills:
With a diluted version of your dark mix, paint a soft, undulating hill shape across the bottom. This creates distant terrain and grounds the composition. -
Start the main trees:
Switch to your fine liner brush or the tip of a round brush. Draw a thin vertical line to serve as the trunk for your first large pine tree on the right side. -
Build the branches:
Using a light dabbing or stippling motion, add branches extending from the trunk. Start very narrow at the top and gradually widen the span of the branches as you move down the tree. -
Vary the heights:
Paint a second large pine next to the first, slightly shorter or taller to create interest. I find that natural forests look best when the spacing isn’t perfectly even. -
Add receding trees:
On the left side of the painting, paint smaller, slightly fainter trees. You can achieve this by adding a tiny drop of water to your black mix, making them appear further away. -
Fill the forest floor:
Connect the bases of all your trees with the dark black-blue mixture, filling in the bottom edge of the painting completely to create a solid silhouette. -
Final reveal:
Wait until the painting is 100% dry to the touch. Carefully peel away the masking tape at a 45-degree angle to reveal your crisp white borders.
Handling Blooms
If you see cauliflower-like blooms in your sky, you likely added water to semi-dry paint. You can’t fix it easily, so embrace the texture as ‘milky way’ clouds.
Place your finished piece in a simple white frame to highlight the deep contrast of the night sky

PENCIL GUIDE
Understanding Pencil Grades from H to B
From first sketch to finished drawing — learn pencil grades, line control, and shading techniques.
Explore the Full Guide
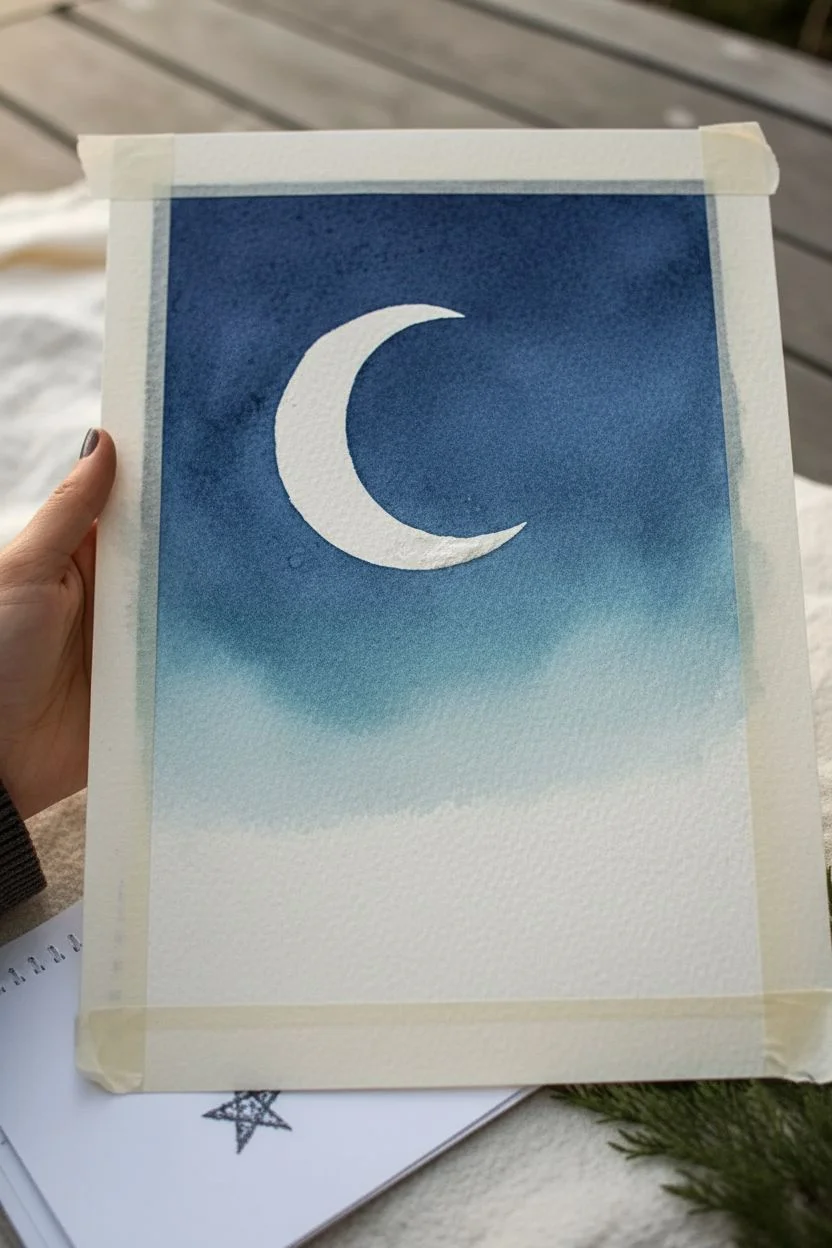
Crescent Moon in a Smooth Indigo Wash
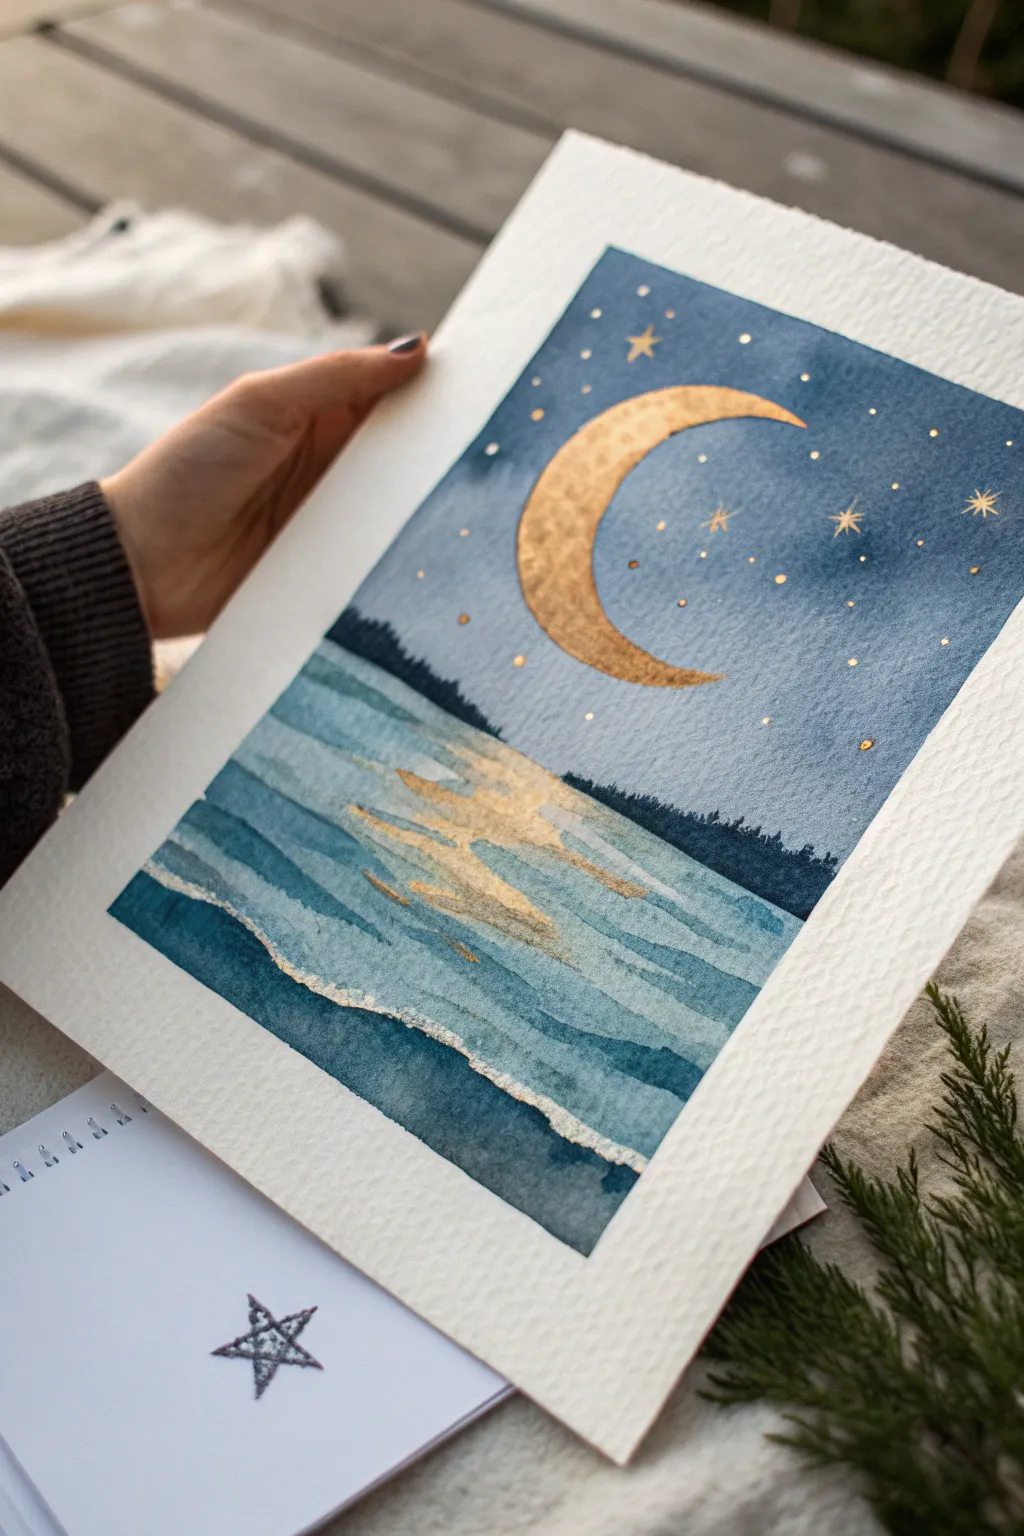
Capture the serene magic of a moonlit night with this watercolor piece that combines rich indigo hues with shimmering gold accents. The contrast between the matte, deep blue sky and the metallic golden crescent creates a striking visual that evokes a peaceful evening at the ocean’s edge.
Detailed Instructions
Materials
- Cold-press watercolor paper (300 gsm)
- Watercolor paints (Indigo, Prussian Blue, Payne’s Grey, Teal/Turquoise)
- Gold metallic watercolor paint or gold gouache
- Masking fluid (optional but recommended)
- Round watercolor brushes (sizes 2, 6, and 10)
- Washi tape or masking tape
- Jar of clean water
- Paper towels
- Pencil and eraser
Step 1: Preparation & Sky
-
Tape and Trace:
Begin by taping down all four edges of your watercolor paper to a board to prevent warping. Lightly sketch a large crescent moon in the upper center and a horizon line about one-third of the way up from the bottom. -
Protect the Moon:
If you are using masking fluid, carefully apply it over your moon sketch to preserve the white paper. Alternatively, you can carefully paint around this shape later, but masking makes the wash much easier. -
Prepare the Sky Wash:
Mix a generous amount of Indigo with a touch of Payne’s Grey. You want a deep, saturated color. Wet the paper above the horizon line with clean water using your largest brush—this is the wet-on-wet technique. -
Paint the Gradient:
Start applying your dark indigo mix at the very top of the paper. As you work your way down towards the horizon, dilute the paint slightly with water or a tiny touch of Teal to create a subtle fade, keeping the darkest values at the top. -
Add Texture:
While the sky is still wet, drop in tiny blooms of clean water or concentrated pigment in random spots to create a soft, atmospheric texture. Avoid overworking it. -
Let it Dry:
Allow the sky section to dry completely. The paper should feel room temperature to the touch, not cool.
Step 2: Water & Horizon
-
Establish the Horizon:
Mix a thick, dark concentration of Indigo and Payne’s Grey. Using the tip of a size 6 brush, paint a jagged, uneven silhouette of distant trees right along the horizon line. -
Paint the Water Base:
For the water, mix Prussian Blue with a bit of Teal. Start painting horizontal strokes below the tree line. Leave thin slivers of white paper between some strokes to represent foam caps and light reflecting on waves. -
Deepen the Waves:
While the first water layer is damp, drop darker Indigo into the wet areas, specifically at the bottom of the page and under the ‘waves’ to create depth and shadow. -
Dry and Reveal:
Let the entire painting dry thoroughly. If you used masking fluid on the moon, gently rub it away with your finger or a rubber cement pickup to reveal the pristine white paper underneath.
Boost the Glow
Work wet-on-wet for the sky but use wet-on-dry for the gold moon. This ensures crisp edges that make the moon pop against the dark background.
Step 3: Golden Details
-
Paint the Moon:
Activate your metallic gold paint with a few drops of water until it reaches a creamy consistency. Fill in the crescent moon shape, applying it thickly for an opaque, shiny finish. -
Add Moon Texture:
While the gold is still wet, you can drop in a slightly darker gold or a tiny bit of brown watercolor to create craters and surface texture on the moon. -
Reflect the Light:
Using the gold paint, add horizontal broken strokes across the water directly beneath the moon. Make the strokes wider near the horizon and narrower as they come closer to the bottom edge. -
Create Stars:
Now for the fun part: load a small brush with gold paint and tap it against another brush handle to splatter tiny stars across the sky. Control the splatter so it doesn’t cover your trees too heavily. -
Define Major Stars:
I like to use a size 0 or 2 brush to hand-paint a few larger, four-pointed ‘sparkle’ stars in the sky to create focal points among the splatters.
Fixing Muddy Water
If your wave layers bleed into a blob, let the paper dry completely. Then, use a white gel pen or opaque white gouache to re-add the highlights and wave crests.
Peel off your tape carefully to reveal those crisp white borders and enjoy your celestial seascape
Milky Way Arc With High-Contrast Glow
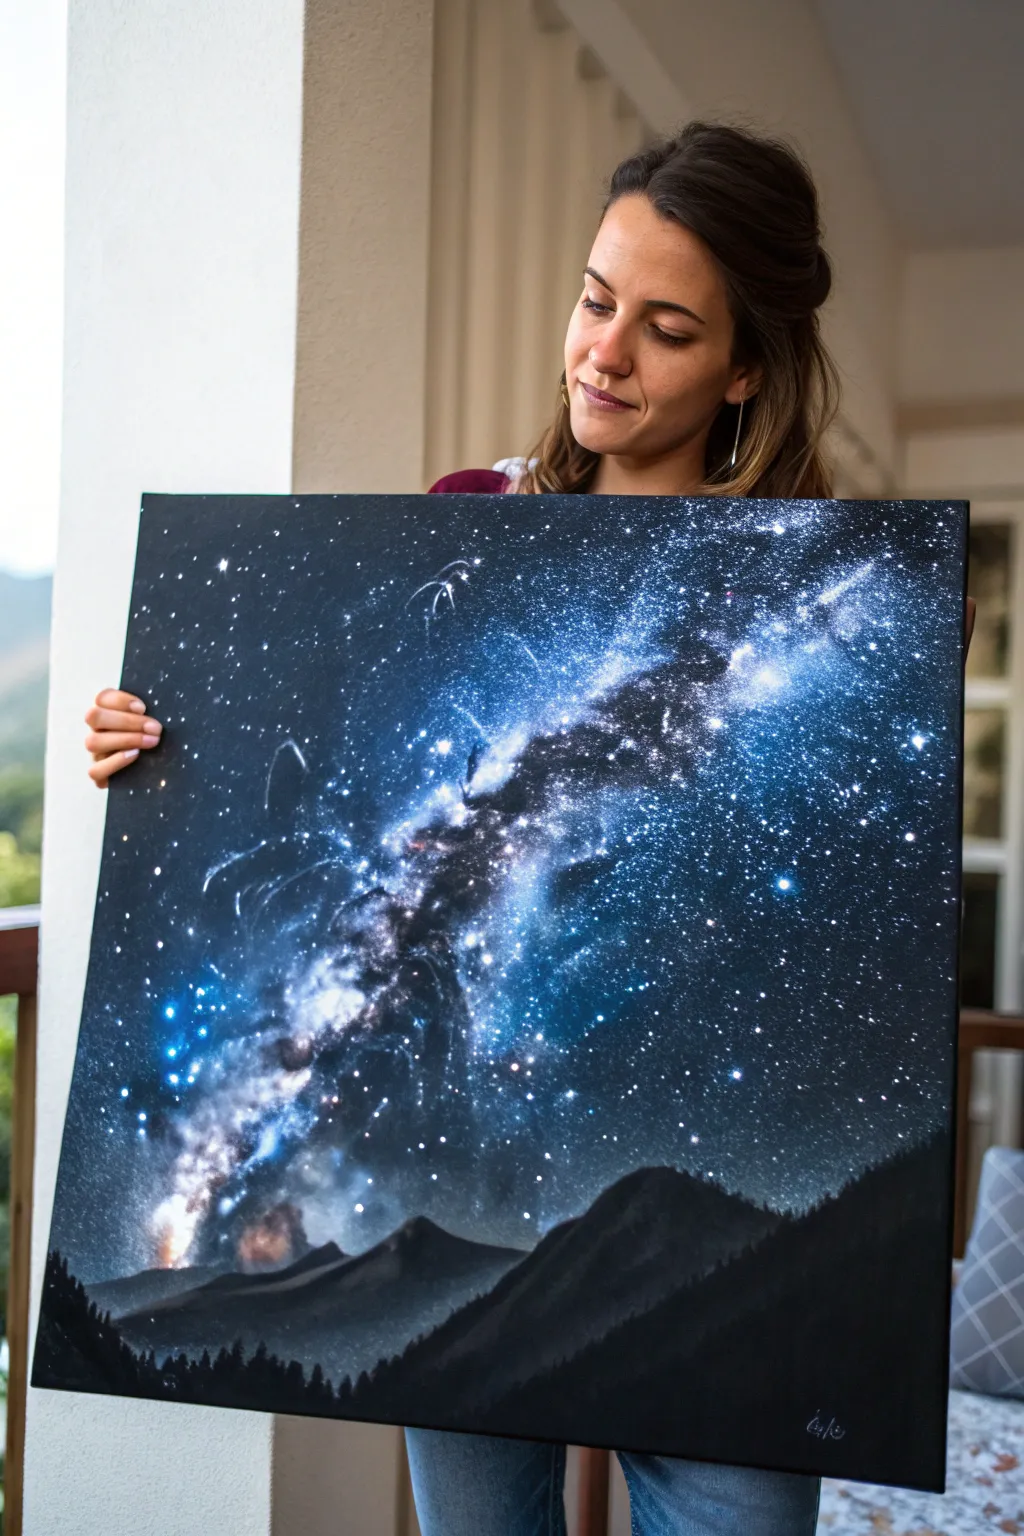
Capture the awe-inspiring beauty of the cosmos with this large-scale acrylic painting featuring a vibrant Milky Way arc. The high contrast between the deep black void and the brilliant blue star-clouds creates a stunning focal point for any room.
Step-by-Step Guide
Materials
- Large square stunning canvas (approx. 24×24 or 30×30 inches)
- Acrylic paints: Mars Black, Titanium White, Phthalo Blue, Ultramarine Blue, Dioxazine Purple
- Large flat brush or foam sponge roller
- Assorted round brushes (sizes 2, 4, and 8)
- Fine liner brush or old toothbrush (for splattering)
- Sea sponge or scrunched-up paper towel
- Mixing palette
- Water cup and rags
Step 1: Setting the Stage
-
Prime the Void:
Begin by covering the entire canvas with a solid coat of Mars Black. Using a large flat brush or a foam roller ensures a smooth, opaque finish without distracting brushstrokes. Let this base layer dry completely before moving on. -
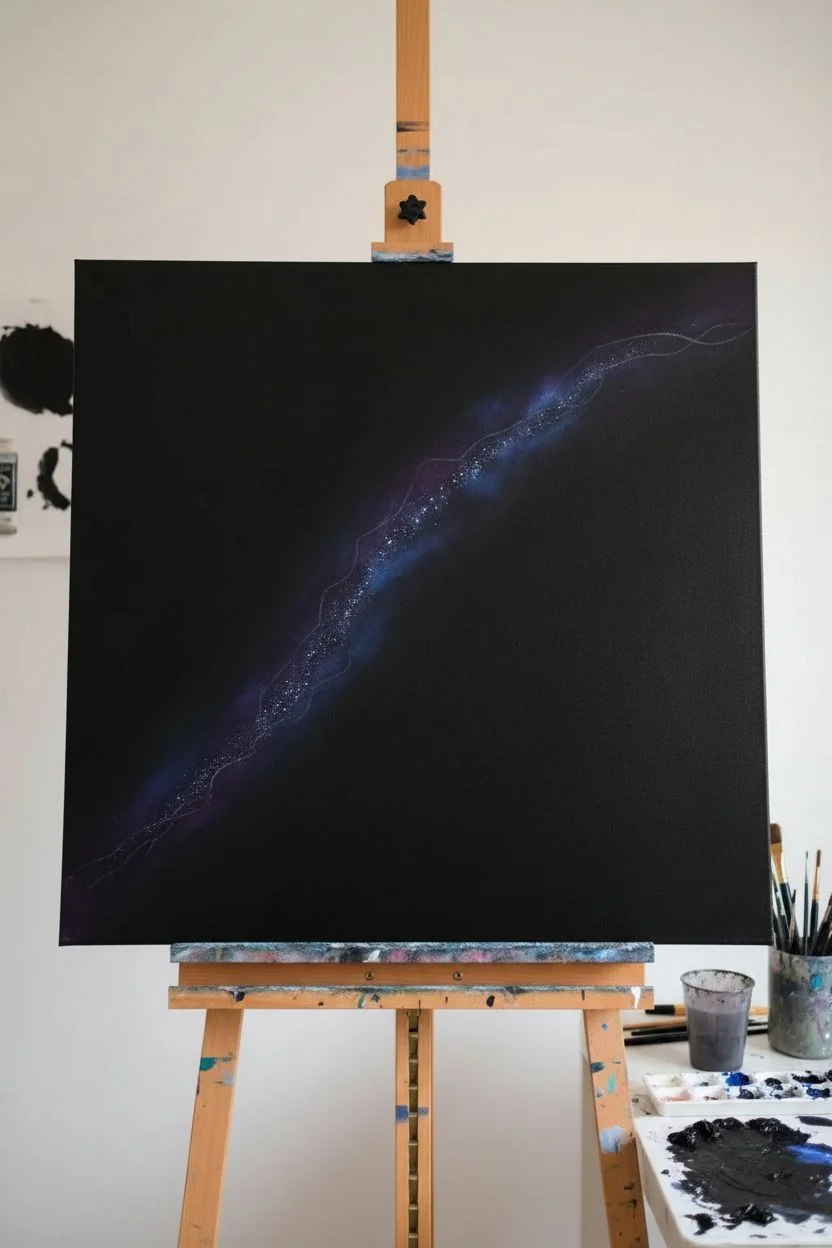
Map the Galaxy:
Lightly sketch the path of your Milky Way using a piece of white chalk or a very watered-down grey paint. Draw a diagonal arc stretching from the bottom left to the top right, creating a wide, uneven channel where the light will live. -
Deep Space Glazing:
Mix a very dark wash of Dioxazine Purple and Phthalo Blue with a little water or glazing medium. Apply this loosely around the edges of your chalk outline, fading it into the black background to create subtle depth behind the stars.
Step 2: Building the Milky Way
-
Sponge the Nebula Base:
Dampen a sea sponge and dip it into a mix of Phthalo Blue and a tiny touch of Titanium White. Gently dab this color along the center spine of your diagonal arc, keeping the texture cloudy and irregular. -
Layering Blues:
While the first layer is tacky, sponge in some Ultramarine Blue along the outer edges of the bright blue path. This transition helps the galaxy recede naturally into the black sky. -
Adding the Glow:
Load a clean section of your sponge with pure Titanium White mixed with the tiniest drop of blue. Concentrating on the ‘core’ of the galaxy (the thickest part of the arc), dab in bright highlights to represent dense clusters of stars. -
Softening Transitions:
Use a dry, soft blending brush to lightly feather the edges of your sponged areas. I prefer to use circular motions here to blur the paint slightly, mimicking the gaseous look of space dust. -
Creating Dust Lanes:
Mix a semi-transparent dark grey (black mixed with water). Carefully paint wispy, irregular lines cutting *across* the bright white and blue sections. These negative spaces represent cosmic dust blocking the light.
Paint Too Transparent?
Cheap acrylics can look muddy on black. If your colors aren’t popping, paint a layer of white first where the nebula will go, let it dry, then glaze your blue over it.
Step 3: Starlight and Silhouettes
-
The Spritz Technique:
Dilute Titanium White paint with water until it reaches an ink-like consistency. Load an old toothbrush or stiff bristle brush, point it at the canvas, and flick the bristles to spray fine mist—these are your distant stars. -
Major Stars:
For the brighter, closer stars, use a fine liner brush or the tip of a toothpick. Dot varying sizes of white directly onto the canvas, placing larger dots within the Milky Way band and smaller ones in the plain black sky. -
Star Flaring:
Select 3-5 of your largest stars and carefully paint tiny cross-shapes over them to create a ‘lens flare’ effect, adding a magical sparkle to the composition. -
Mountain Base:
Using black paint, block in the shape of the mountains at the bottom of the canvas. Keep the horizon low (bottom 20% of the canvas) to maintain the focus on the sky. -
Atmospheric Perspective:
Mix a dark grey-blue color. Lightly dry-brush the peaks of the farthest mountains to make them look hazy and distant compared to the foreground. -
Foreground Peaks:
Paint a second, closer mountain ridge in solid black, overlapping the grey-blue ridge. This creates a sense of scale and distance. -
Detailed Treeline:
Along the very bottom edge and the slopes of the foreground mountains, use a small flat brush turned vertically or a fan brush to tap in the jagged silhouette of pine trees.
Glow in the Dark
Mix phosphorescent medium into your final white star splatters. By day it looks normal, but at night your galaxy will emit a soft, magical luminescence.
Step 4: Final Touches
-
Shooting Stars:
If you wish, add faint, swift lines using a liner brush with watered-down white to suggest comets or shooting stars streaking near the galaxy. -
Contrast Check:
Step back and assess your values. If the galaxy doesn’t pop enough, add one final layer of pure white sponge dabs to the very brightest center points.
Hang your masterpiece in a spot with good lighting to let those deep blues and bright whites truly shine


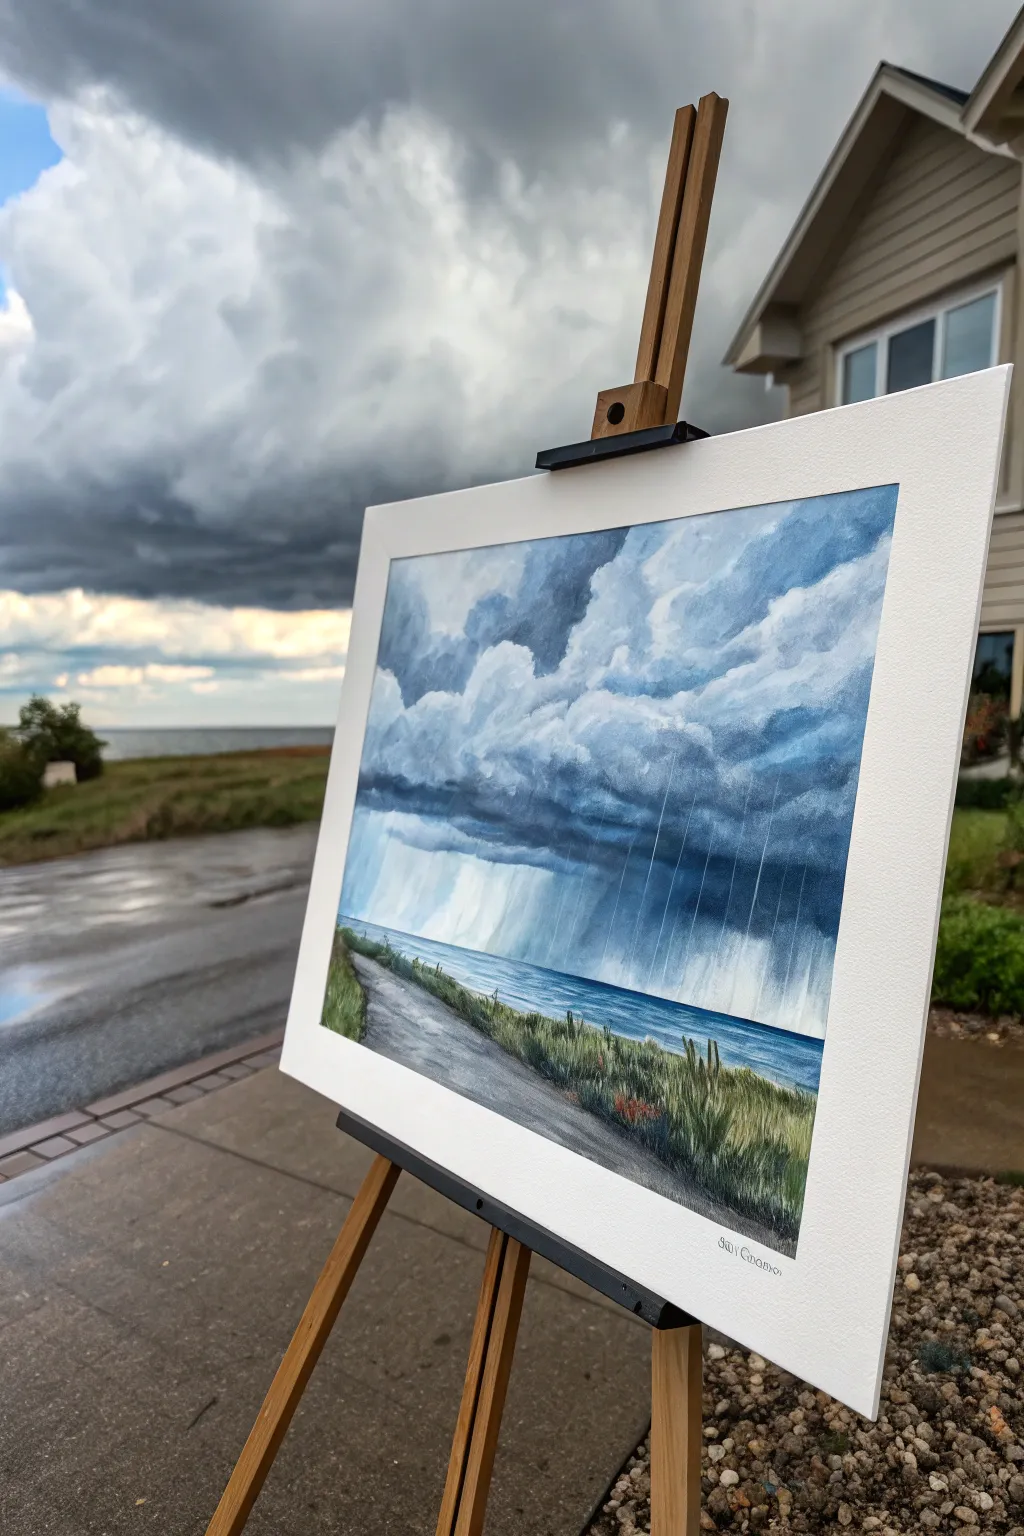
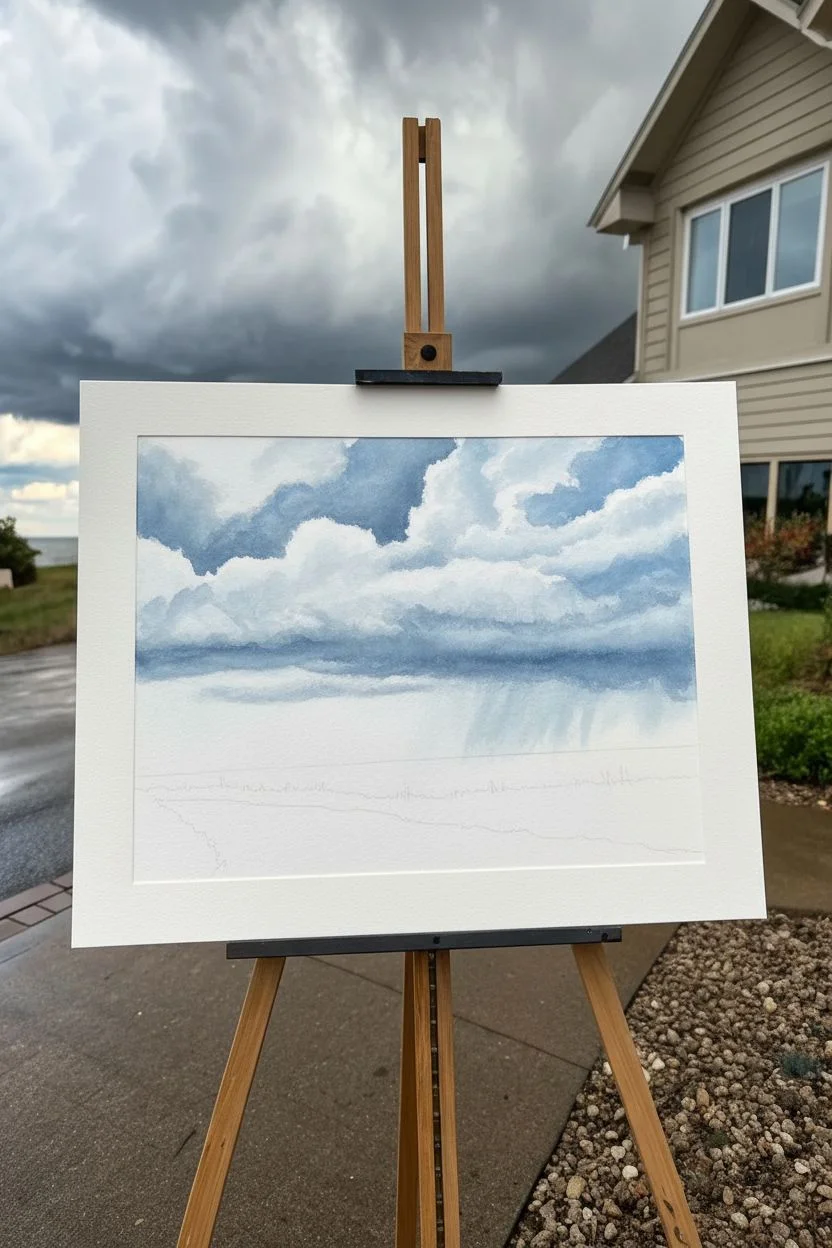
Storm Front Sky With Layered, Heavy Clouds
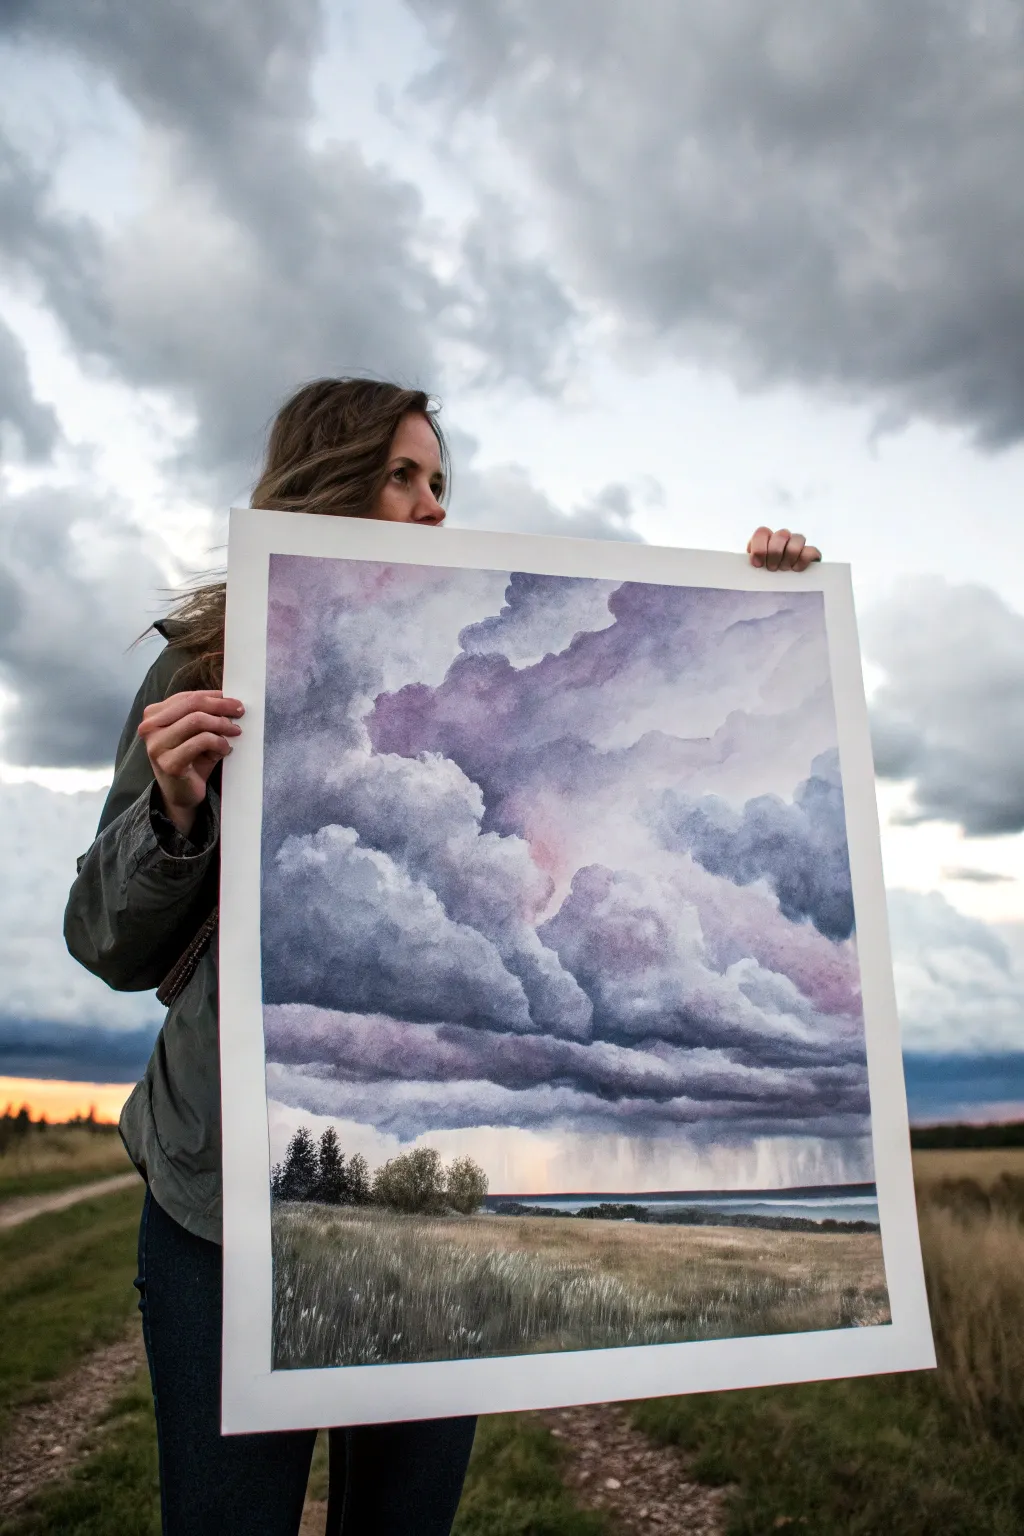
Capture the moody intensity of an approaching storm using wet-on-wet watercolor techniques to create heavy, soft-edged clouds. This large-scale painting focuses on the interplay between deep purples and soft atmospheric pinks against a grounded, textured landscape.
Step-by-Step Tutorial
Materials
- Large sheet of cold press watercolor paper (approx. 18×24 inches or larger)
- Watercolor paints (Indigo, Paynes Gray, Alizarin Crimson, Ultramarine Blue, Burnt Sienna, Yellow Ochre)
- Large round wash brush (size 12 or larger)
- Flat hake brush (1-2 inches) for wetting paper
- Small round brush (size 4) for details
- Rigger brush for grass textures
- Masking tape and drawing board
- Two jars of water (one clean, one dirty)
- Paper towels
- Hairdryer (optional, for speeding up layers)
Step 1: Preparation and Initial Wash
-
Secure the paper:
Tape your large watercolor paper securely to a board on all four sides. This helps prevent buckling when working with heavy water washes, which is crucial for this sky. -
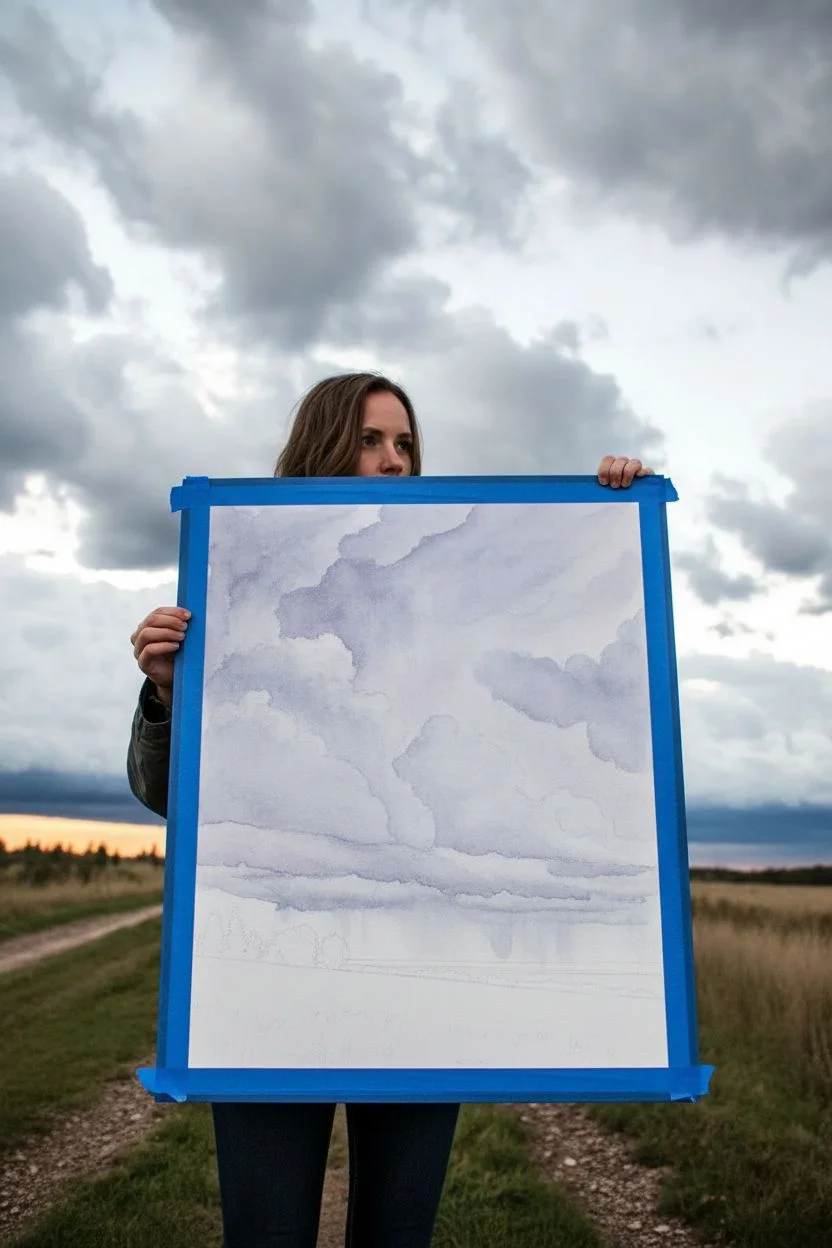
Sketch the horizon:
Lightly sketch a very low horizon line, leaving about 80% of the paper for the sky. Mark general shapes for the distant tree line on the left, but keep pencil marks faint. -
Pre-wet the sky:
Using your large hake brush, wet the entire sky area with clean water. You want an even sheen, not puddles. Let it soak in for a minute until the paper loses its gloss but remains damp.
Step 2: Building the Storm Clouds
-
Base cloud color:
Mix a watery wash of soft pink using highly diluted Alizarin Crimson. Drop this into the center and lower-middle areas of the wet sky where the light will filter through the coming storm. -
First shadow layer:
While the pink is still wet, mix Ultramarine Blue with a touch of Alizarin Crimson to make a soft lavender. Paint the upper edges of the cloud formations, letting the wet paper soften the edges naturally. -
Deepening the drama:
Create a stronger ‘storm gray’ by mixing Indigo and a tiny bit of Burnt Sienna. With your large round brush, start defining the heavy, dark underbellies of the clouds. Work while the paper is still damp to keep edges soft. -
Lifting out highlights:
If your clouds get too dark, rinse your brush, dry it on a towel, and gently lift pigment off the paper to reclaim the white fluffy tops of the thunderheads. -
Layering heavy shapes:
As the paper begins to dry slightly (moist, not wet), add thicker pigment of Payne’s Gray and Indigo to the darkest cloud masses. Focus on the diagonal sweep of clouds coming from the top right. -
Creating the rain curtain:
Near the horizon, pull vertical strokes of diluted gray wash downwards from the dark cloud bottom into the horizon area. Use a damp brush to soften vertical lines, mimicking distant rain sheets falling.
Mud Control
If your purple clouds turn brown or muddy, stop. Let the layer dry completely before adding more paint. Overworking wet darks is the main cause of mud.
Step 3: Landscape and Details
-
Dry the sky:
Allow the sky completely to dry. It must be bone dry before painting the horizon to ensure a crisp edge. Use a hairdryer if you are impatient. -
Distant trees:
Mix a dark green using Indigo and Yellow Ochre. Paint the silhouette of the trees on the left side. Keep the shapes loose; they shouldn’t be detailed individual trees, but rather a mass of foliage. -
Distant water line:
With a diluted blue-gray wash, paint a thin horizontal strip just below the horizon to suggest a body of water or distant misty hills reflecting the sky. -
Field base layer:
Paint the foreground field with a wash of Yellow Ochre and Burnt Sienna. While wet, drop in hints of darker green to suggest shadows in the grass. -
Grass texture:
Once the field base is dry, use a rigger brush or the tip of a small round brush with thicker gouache or opaque watercolor to flick upward grass blades in the immediate foreground. -
Final atmosphere:
If the transition between sky and land looks too sharp near the rain, lightly glaze a very thin wash of clean water over that specific area to unify the atmosphere.
Soft Edges Secret
Keep a spray bottle of water handy. If your paper dries too fast while shaping clouds, a fine mist will re-wet the surface without disturbing the pigment.
Step back and admire the powerful atmosphere you have captured in your storm scene
Driving Rain Sky Using Directional Brush Streaks
Capture the drama of a coastal storm with this atmospheric landscape painting that focuses on heavy cloud formations and visible rain sheets. The key to this piece lies in the contrast between the dark, brooding underbelly of the clouds and the striking vertical streaks that suggest a downpour over the ocean.
Detailed Instructions
Materials
- Watercolor paper (140lb or 300gsm cold press block recommended)
- Paints: Indigo, Payne’s Gray, Ultramarine Blue, Titanium White (gouache or white watercolor), Sap Green, Burnt Sienna
- Large flat wash brush (1 inch)
- Round brushes (size 6 and 10)
- Rigger or liner brush for fine details
- Masking tape
- Mixing palette
- Two containers of water
- Paper towels
Step 1: Setting the Horizon & Sky Base
-
Prepare the canvas:
Tape down all four edges of your watercolor paper to a board to prevent buckling and create a crisp white border. Lightly sketch a horizon line about one-third up from the bottom of the page. Add a simple diagonal line starting from the bottom left corner tapering toward the middle right for the road and grassy bank. -
Wet-on-wet sky wash:
Using your large flat brush, wet the entire sky area with clean water. The paper should be glisten but not have puddles. This prepares the surface for soft cloud transitions. -
Initial blue layer:
Mix a watery wash of Ultramarine Blue and apply it to the upper right section of the sky, leaving patches of white paper untouched to represent the brightest cloud tops.
Step 2: Building the Storm Clouds
-
Deepening the shadows:
While the paper is still damp, mix Indigo with a touch of Payne’s Gray. Load your size 10 round brush and start dropping this dark pigment into the lower and left sections of the cloud mass. Let the color bloom naturally into the lighter blue areas. -
Define cloud bottoms:
Use a thicker mixture of Payne’s Gray to paint the flat, dark undersides of the storm clouds. Keep these strokes horizontal and ragged to suggest the heaviness of the impending rain. -
Lifting highlights:
If the clouds look too heavy, use a clean, thirsty brush to lift out pigment along the top edges of the cloud formations, re-establishing some white fluffiness. -
Dry time:
Allow the sky layer to dry completely. This is crucial before adding the rain effect, otherwise, you’ll create a muddy blur.
Don’t Overwork
If your rain streaks start lifting the ocean color underneath, stop immediately. Let the underlying layer dry longer, or swap to gouache which sits on top of watercolor without reactivating it.
Step 3: The Ocean and Rain curtain
-
Painting the sea:
Mix a rich teal using Ultramarine Blue with a tiny dot of Sap Green. Paint the ocean strip below the horizon line. Make the color darker directly under the storm clouds and lighter as it moves toward the foreground. -
Establishing the rain:
This is the defining technique for this piece. Mix a semi-transparent wash of white gouache or diluted white watercolor. Using a flat brush, make swift, straight vertical strokes from the dark cloud base down to the water. -
Varying intensity:
Apply more pressure on some strokes and less on others to create varying densities of rain. The white paint should veil the horizon line slightly, pushing the sea into the distance. -
Adding rain streaks:
For the distinct sharp rain lines seen in the reference, use a ruler and a rigger brush with very dilute white or light gray paint. Draw fine, straight vertical lines over the softer wash areas.
Add Drama
For a more intense storm, scrape into the wet grass paint with the handle of your brush or a credit card to create light-colored stalks or wind-blown reeds pointing away from the storm.
Step 4: Foreground Details
-
Base layer for the road:
Mix a light gray using dilute Payne’s Gray and water. Wash in the road area in the foreground, keeping the strokes directional to lead the eye into the painting. -
Painting the grassy bank:
Mix Sap Green with a touch of Burnt Sienna for an earthy olive tone. Paint the grassy area between the road and the sea. Use upward flicking motions with your size 6 brush to simulate blades of grass. -
Adding depth to foliage:
While the grass is damp, drop in pure Indigo or dark green at the base of the clumps to create shadow and volume. -
Final texture:
Once dry, use a dry-brush technique with a little dark gray on the road surface to give it the texture of asphalt. -
Finishing touches:
Remove the tape carefully at a 45-degree angle to reveal your clean edges. Sign your work in the bottom corner.
Step back and admire the moody atmosphere you’ve created with those powerful vertical strokes
Sunbeams Breaking Through Cloud Gaps
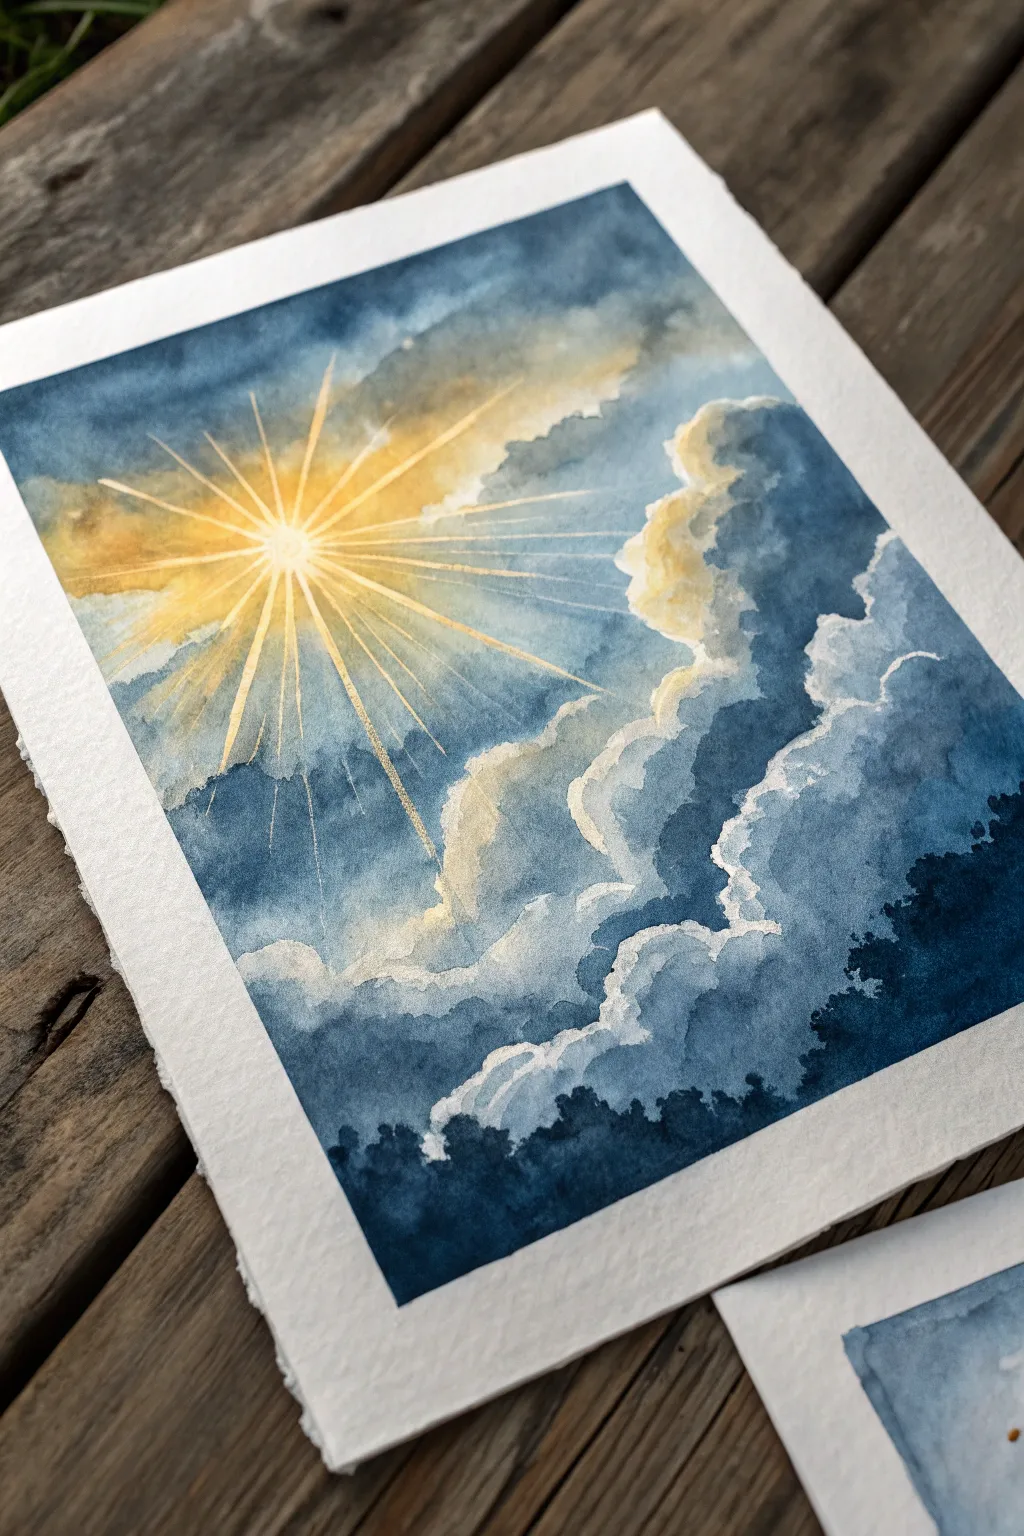
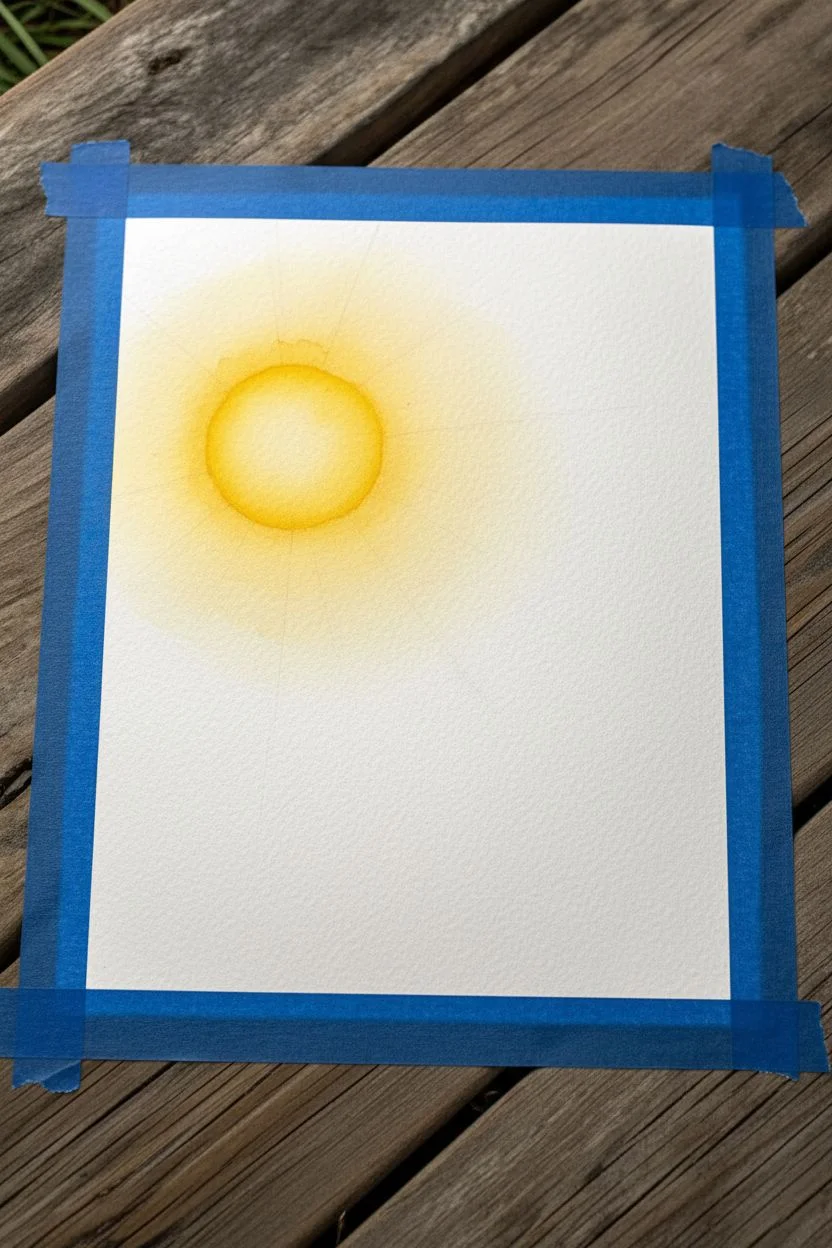
Capture the dramatic beauty of light piercing through a storm with this atmospheric watercolor project. By balancing deep, moody blues against brilliant gold, you’ll learn to create a glowing focal point that feels truly luminous.
Step-by-Step Guide
Materials
- Cold press watercolor paper (300 gsm)
- Blue painter’s tape
- Watercolor paints: Indigo, Payne’s Gray, Yellow Ochre, Cadmium Yellow
- White gouache or white gel pen
- Round brushes: Size 12 (wash), Size 6, and Size 0 (detail)
- Clean water jar
- Paper towel
- Ruler (optional)
Step 1: Preparation and The Golden Light
-
Prepare your surface:
Tape down all four edges of your watercolor paper to a board using blue painter’s tape. This creates that crisp white border seen in the reference and keeps the paper flat. -
Map the light:
Lightly sketch a small circle where your sun will be, located in the upper left quadrant. Draw faint lines extending outward to guide your sunbeams. -
Wet the sun area:
Using your large brush and clean water, wet the area around the sun circle, extending outward about two inches. -
Apply the glow:
Drop in Cadmium Yellow right at the center circle. While the paper is still wet, blend in Yellow Ochre as you move outward, letting it fade into the white of the paper. -
Dry completely:
Let this yellow layer dry fully. This is crucial so your blue sky doesn’t turn the sun green.
Step 2: Building the Stormy Sky
-
Mix your darks:
Create a puddle of deep blue by mixing Indigo with a touch of Payne’s Gray. You want a rich, satisfying darkness for the drama. -
Paint the upper sky background:
Start painting the blue sky areas around the yellow glow. Use a wet brush to soften the edge where the blue meets the yellow halo, creating a seamless transition. -
Form the cloud shapes:
Using the Size 6 brush, paint the silhouette of the cumulus clouds on the right side. Leave the very edges of the paper unpainted white to represent the ‘silver lining’ catch-lights. -
Soften cloud interiors:
While the cloud paint is damp, touch a clean, damp brush to the inner edges of the cloud shapes to soften them, giving them volume rather than a flat look. -
Add lower shadows:
Paint the heavy, dark cloud bank at the bottom of the paper using your darkest Indigo mix. Use jagged, uneven strokes to mimic distant treetops or rough cloud bottoms.
Muddy colors?
If your yellow sun turns green when meeting the blue sky, your yellow layer wasn’t dry enough. Let the yellow dry completely before adding any blue nearby.
Step 3: Defining the Rays and Details
-
Paint the negative space rays:
Look at where your pencil guidelines are. Paint dark blue wedge shapes *between* the rays, leaving the yellow/white underlying paper visible as the beams of light. -
Extend the beams:
Continue these negative shapes outward, making the blue areas wider as they get further from the sun source. -
Enhance the highlights:
Once the sky is dry, mix a little white gouache with yellow. Use your smallest brush or a ruler to paint very thin, sharp lines right down the center of your brightest sunbeams. -
Brighten cloud edges:
Use pure white gouache to carefully line the scalloped edges of the clouds on the right, emphasizing where the light hits them most strongly. -
Final contrast check:
Evaluate your darks. If the blue dried too light, add a second glaze of Indigo over the darkest shadow areas to make the light pop even more.
Level Up: Texture
Sprinkle a tiny pinch of salt onto the wet indigo paint at the very bottom cloud bank. As it dries, it creates a starry, textural effect in the deep shadows.
Peel off the tape carefully to reveal your stunning, crisp-edged skyscape
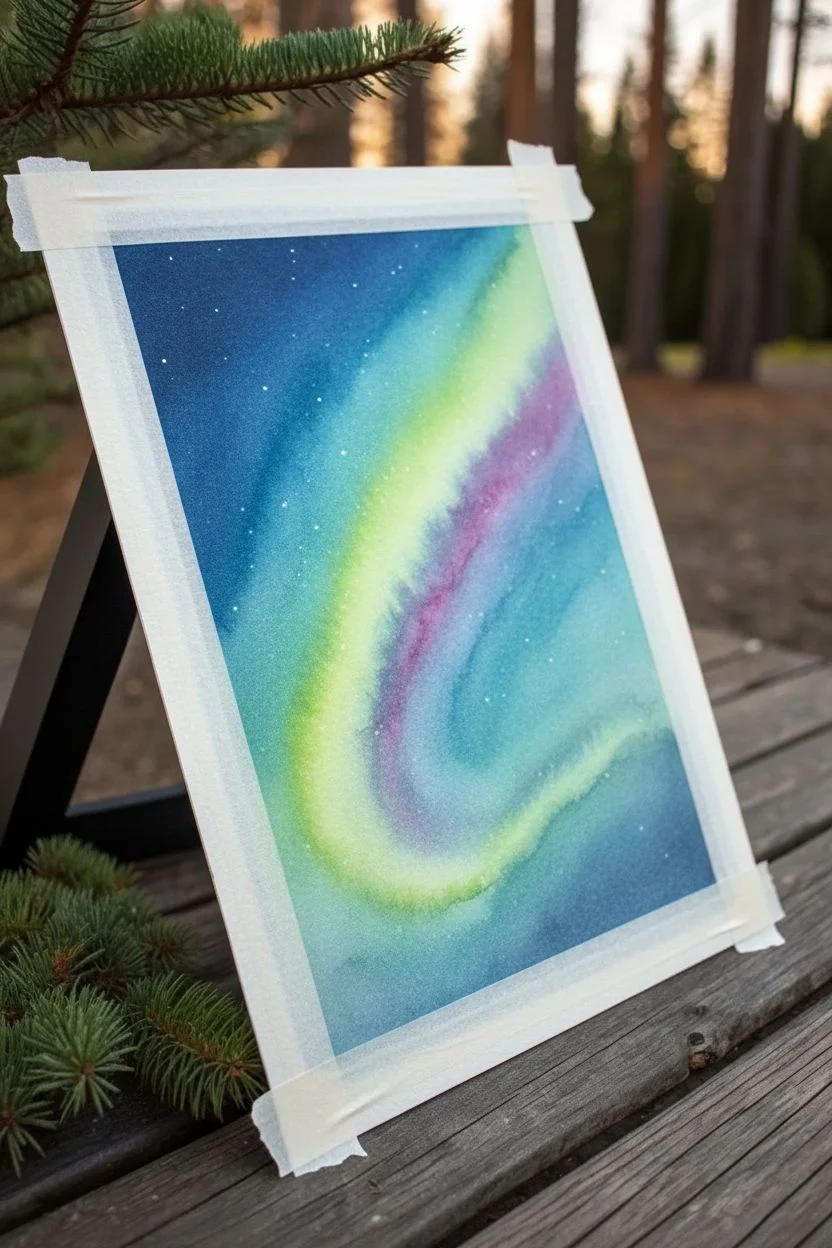
Aurora Sky With Ribbon-Like Light Curtains
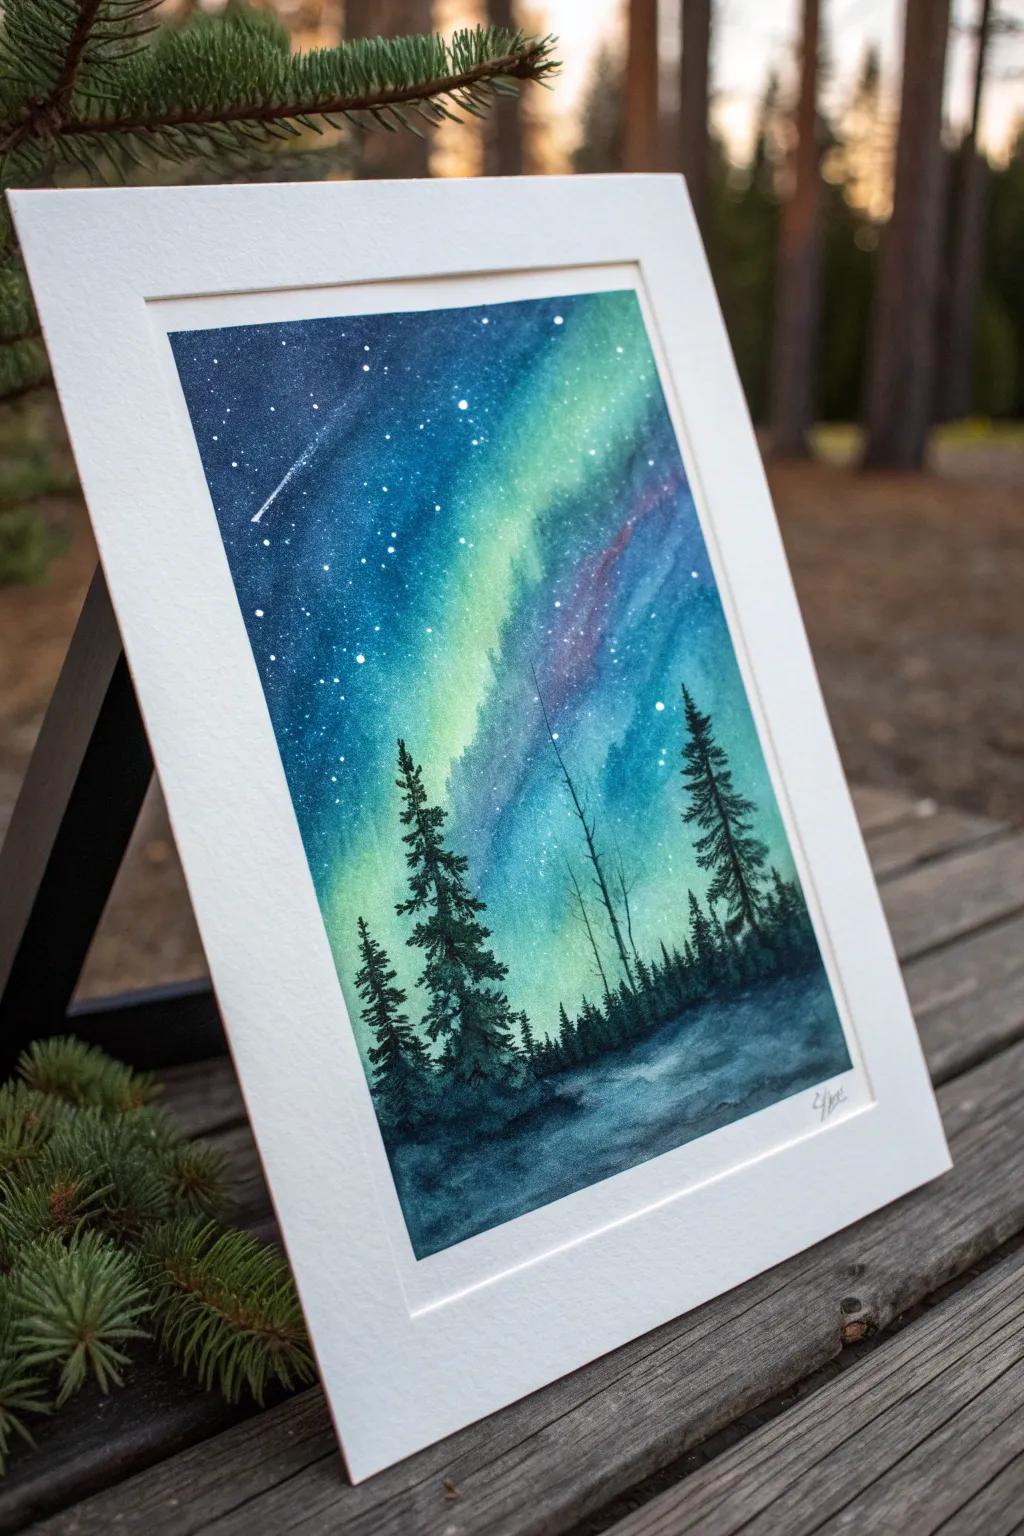
Capture the magic of the polar skies with this vibrant watercolor piece featuring sweeping ribbons of green and violet light. By combining wet-in-wet techniques for the atmosphere with crisp silhouettes for the forest, you’ll create a breathtaking night scene full of depth.
How-To Guide
Materials
- Cold Press watercolor paper (140lb/300gsm, taped down)
- Watercolor paints (Indigo, Prussian Blue, Phthalo Green, Yellow, Magenta/Purple)
- White gouache or white ink
- Large wash brush or mop brush
- Medium round brush (size 6 or 8)
- Small liner or detail brush (size 0 or 1)
- Clean water jars
- Paper towels
- Old toothbrush (optional for stars)
- Masking tape
Step 1: Setting the Sky Foundation
-
Prepare the paper:
Begin by taping down all four edges of your watercolor paper to a board. This prevents buckling and creates that crisp white border seen in the final piece. -
Wet the surface:
Using your large wash brush, apply a generous layer of clean water over the entire upper two-thirds of the paper where the sky will be. You want the paper glistening but not swimming in puddles. -
Lay the aurora path:
Mix a bright, refreshing yellow with a tiny touch of green. While the paper is still wet, paint a sweeping, diagonal curve across the middle of the sky. This will be the glowing heart of your aurora. -
Build the green glow:
Immediately add a stronger Phthalo Green around the edges of your yellow streak. Let the colors bleed slightly into the yellow, but keep the center bright to simulate luminosity. -
Add violet accents:
While the surface remains damp, drop in hints of magenta or purple along one side of the green ribbon. This creates that magical, shifting color transition often seen in active solar storms.
Muddy Skies?
If your green and blue mix into a muddy brown, wait for the yellow/green layer to dry completely before adding the blue sky, then wet ONLY the blue area to blend edges gently.
Step 2: Deepening the Night
-
Introduce the dark sky:
Mix a deep, rich color using Indigo and Prussian Blue. Start painting the corners of the sky, working inward toward your colorful aurora ribbon. -
Blend carefully:
As you approach the green and purple areas, use a damp, clean brush to soften the edges. You want a smooth gradient from the pitch-black corners to the glowing light, not hard lines. -
Intensify the contrast:
While the blue is still wet, drop even darker pigment (Indigo mixed with a tiny bit of black) into the very top corners. This high contrast makes the aurora pop. -
Create texture:
If I want a starry texture, I sometimes sprinkle a tiny pinch of salt into the wet blue areas now, though for a smooth look, simply let the paint settle naturally. -
Let it dry completely:
This is crucial. The paper must be bone-dry before proceeding to the stars or trees. If it’s cold to the touch, it’s still wet.
Make It Sparkle
For a truly magical finish, mix a tiny amount of iridescent or pearlescent medium into your white star paint. The stars will shimmer when the light hits the artwork.
Step 3: Stars and Silhouettes
-
Splatter the stars:
Dilute white gouache or ink with a little water. Load a toothbrush or stiff brush, and flick the bristles to spray fine mist droplets over the dark blue sections of the sky. -
Add main stars:
Use your smallest detail brush to manually dot a few larger, brighter stars in key areas to break up the uniformity of the splatter. -
Paint the shooting star:
With a steady hand and white gouache, drag a thin line across the upper left corner, tapering it off at the end to create a celestial streak. -
Start the treeline:
Mix a very dark, opaque shade using Indigo and Green (or Black). Using the tip of your medium round brush, tap in the jagged tops of the distant, shorter trees along the bottom horizon. -
Paint the tall pines:
Switch to a detailed brush for the prominent foreground trees. Draw a thin vertical line for the trunk first. -
Flesh out the branches:
Starting from the top of the trunk, use a zig-zag motion to paint downward-sloping branches. Keep the top narrow and widen the tree as you go down. -
Add the dead tree:
For visual variety, paint a thin, spindly tree without needles in the middle section. Use very light pressure to keep the lines delicate. -
Ground the forest:
Fill in the bottom area with a dark wash to connect all the tree bases, creating a shadowy forest floor or snowbank. -
Remove tape:
Once everything is perfectly dry, slowly peel away the masking tape at a 45-degree angle to reveal your clean edges.
Step back and admire your personal window into the arctic night sky
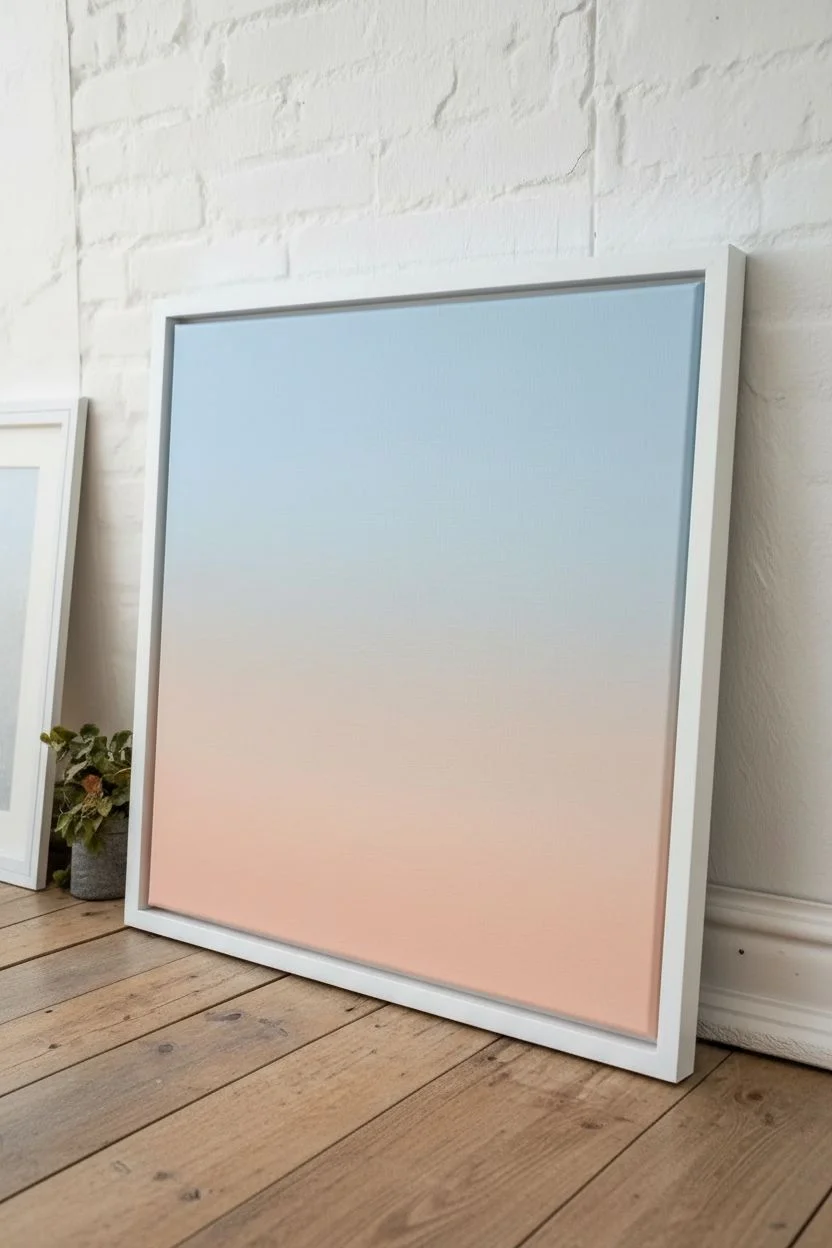
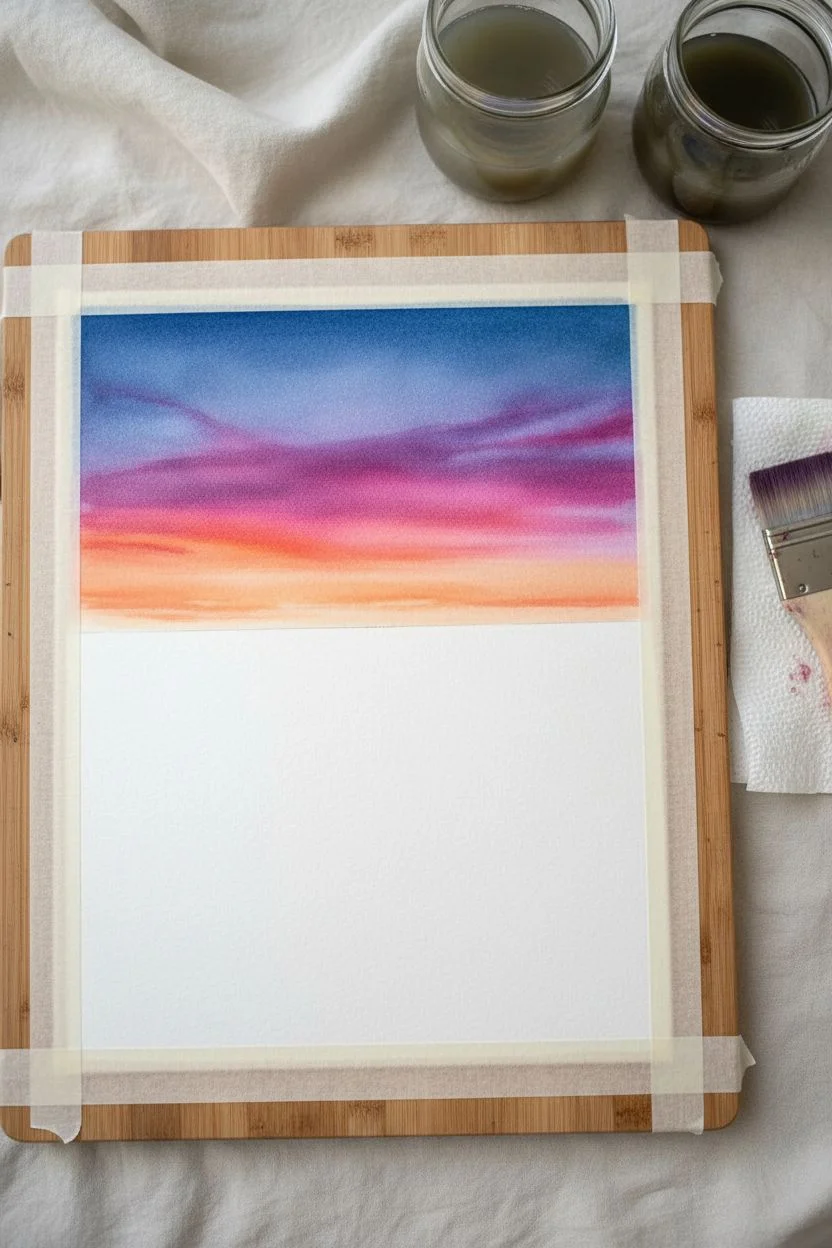
Desert Heat Haze Sky With Soft, Blurred Edges
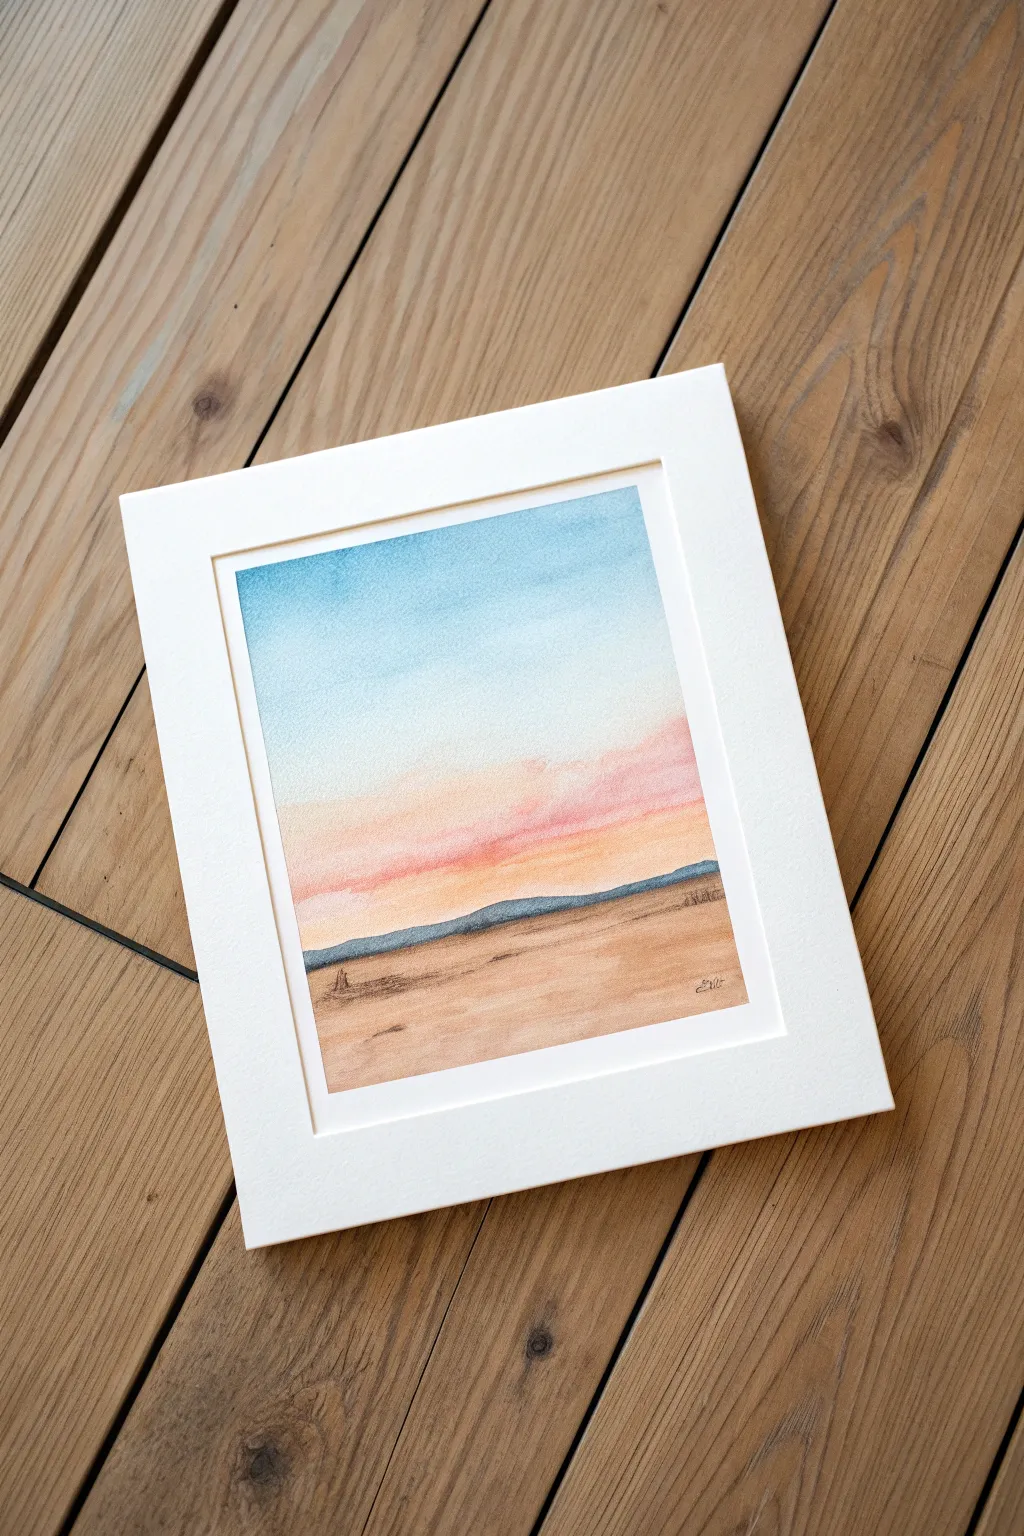
Capture the serene warmth of a desert sunset with this soft, blended watercolor landscape. Using the wet-on-wet technique, you will learn to create seamless transitions from cool blue skies to warm, peachy horizons.
Step-by-Step Tutorial
Materials
- Cold press watercolor paper (140 lb/300 gsm recommended)
- Watercolor paints (Cerulean Blue, Alizarin Crimson, Yellow Ochre, Burnt Sienna, Payne’s Grey)
- Painter’s tape or masking tape
- Flat wash brush (1-inch or similar)
- Round brush (size 6 or 8)
- Clean water jar
- Paper towels
- Drawing board or hard surface
Step 1: Setting the Sky
-
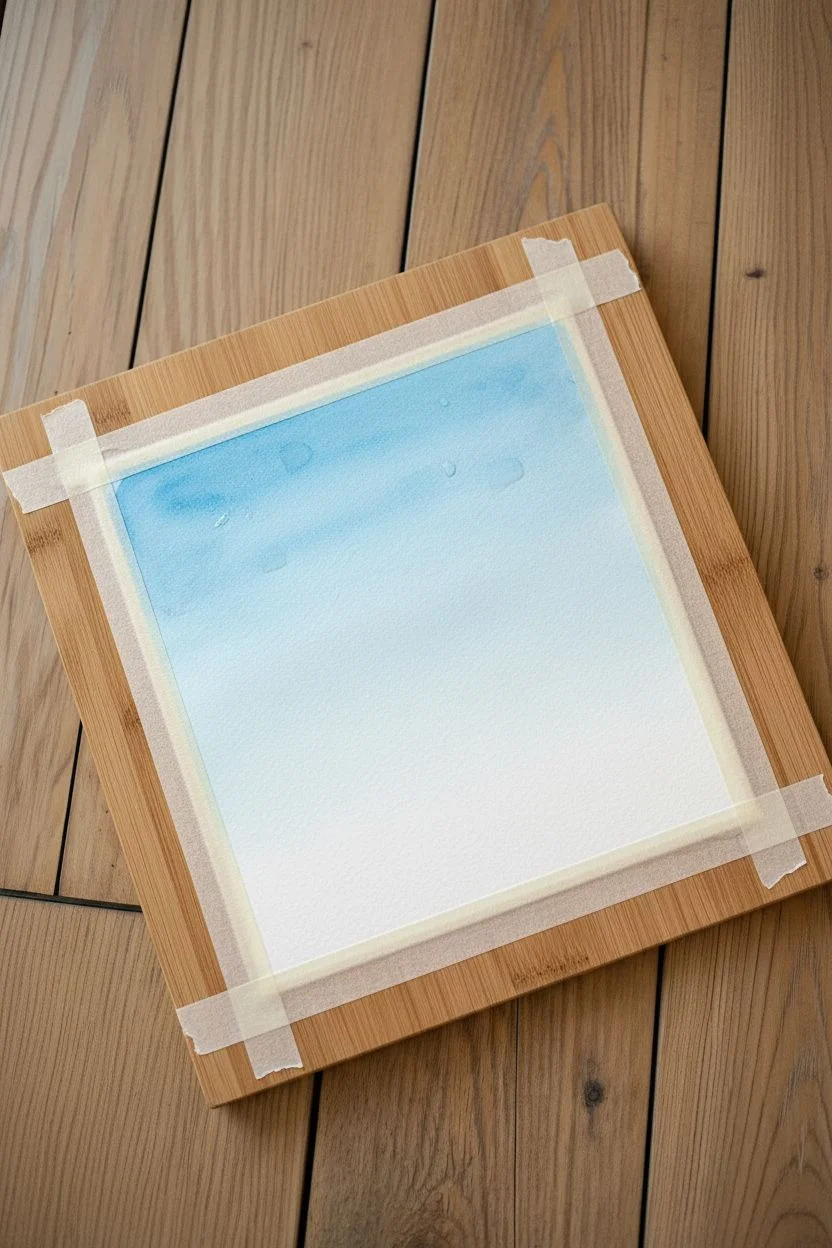
Prepare your paper:
Begin by taping down all four edges of your watercolor paper to a board. This prevents the paper from buckling when wet and creates a clean white border for framing later. -
Wet the sky area:
Dip your flat wash brush into clean water. Apply an even coat of water to the upper two-thirds of your paper, stopping just below where you want the horizon line to be. The paper should glisten but not have puddles. -
Apply the blue:
Load your brush with a diluted wash of Cerulean Blue. Starting at the very top edge, sweep the color across the paper moving downward. As you move down, let the blue naturally fade out or add a little water to your brush to dilute it further. -
Fade to white:
Stop applying blue about halfway down the sky section. Clean your brush and use slightly damp bristles to pull the blue edge downward, softening it until it disappears into the white of the paper.
Keeping Dampness
Work quickly on the sky. If your paper dries mid-wash, you’ll get ‘blooms’ or hard edges. Keep a water spray bottle handy to lightly mist the paper if needed.
Step 2: Creating the Sunset Haze
-
Mix the sunset hue:
While the sky is still damp, mix a soft peach color using Alizarin Crimson and a touch of Yellow Ochre. You want this color to be transparent and delicate. -
Introduce the warmth:
Starting near the horizon line (below the blue), paint horizontal strokes of your peach mixture. Allow the color to drift upward slightly to meet the fading blue. -
Blend the transition:
Where the pale blue and peach meet, let the wet paper do the work. If the line looks too harsh, tilt your board slightly or use a clean, damp brush to gently tickle the edges together, creating a soft violet transition. -
Strengthen the horizon:
Add a slightly more saturated line of pink or light red right at the bottom of the sky area to suggest the intensity of the setting sun. -
Dry completely:
Before moving on to the land, let the sky section dry entirely. If you paint the mountains while the sky is wet, the colors will bleed uncontrollably.
Step 3: Painting the Landscape
-
Mix the distant mountains:
Create a cool, muted grey-blue by mixing Payne’s Grey with a little Cerulean Blue. Keep the mixture fairly watery so the mountains appear distant and atmospheric. -
Paint the mountain ridge:
Using your round brush, paint a low, undulating mountain range right over the bottom edge of your sunset wash. Keep the shapes simple and not too jagged. -
Define the ground:
Mix a sandy beige color using Yellow Ochre and a tiny bit of Burnt Sienna. Paint the foreground area, starting from the bottom of the mountains and filling the rest of the paper. -
Add texture:
While the ground wash is wet, you can drop in slightly darker brown spots (Burnt Sienna) to suggest uneven terrain or shadows.
Fixing Hard Lines
If a hard line forms in your sky gradient, scrubbing it will damage the paper. Instead, re-wet the entire sky area gently and glaze over it to smooth the transition.
Step 4: Final Details
-
Dry the foreground:
Allow the ground layer to dry completely. It should look matte, with no shine on the surface. -
Add dry brush details:
Mix a darker brown with less water. Blot your round brush on a paper towel so it holds very little moisture. Lightly drag the brush horizontally across the foreground to create texture. -
Create faint shadows:
Use a small amount of diluted purple or grey to add minimal shadow lines under the dry brush textures, giving the desert floor some depth. -
Sign and peel:
Once you are happy with the painting and it is bone dry, carefully peel away the tape at a 45-degree angle to reveal your crisp edges.
Place your finished piece in a simple mat to highlight the delicate wash of the desert sky
Dreamy Pastel Sky With Oversized Whimsical Clouds
Capture the magic of a twilight sky with this dreamy watercolor project featuring voluminous, cotton-candy clouds. Using soft transitions of pink, purple, and teal, you’ll create an ethereal atmosphere that feels both calming and vibrant.
Step-by-Step Guide
Materials
- Cold press watercolor paper (140lb/300gsm)
- Watercolor paints (phthalo blue, quinacridone rose, dioxazine purple, cobalt teal)
- Large round brush (size 10 or 12)
- Small round brush (size 4 or 6)
- Painter’s tape or masking tape
- Clean water jar
- Paper towels
- Mixing palette
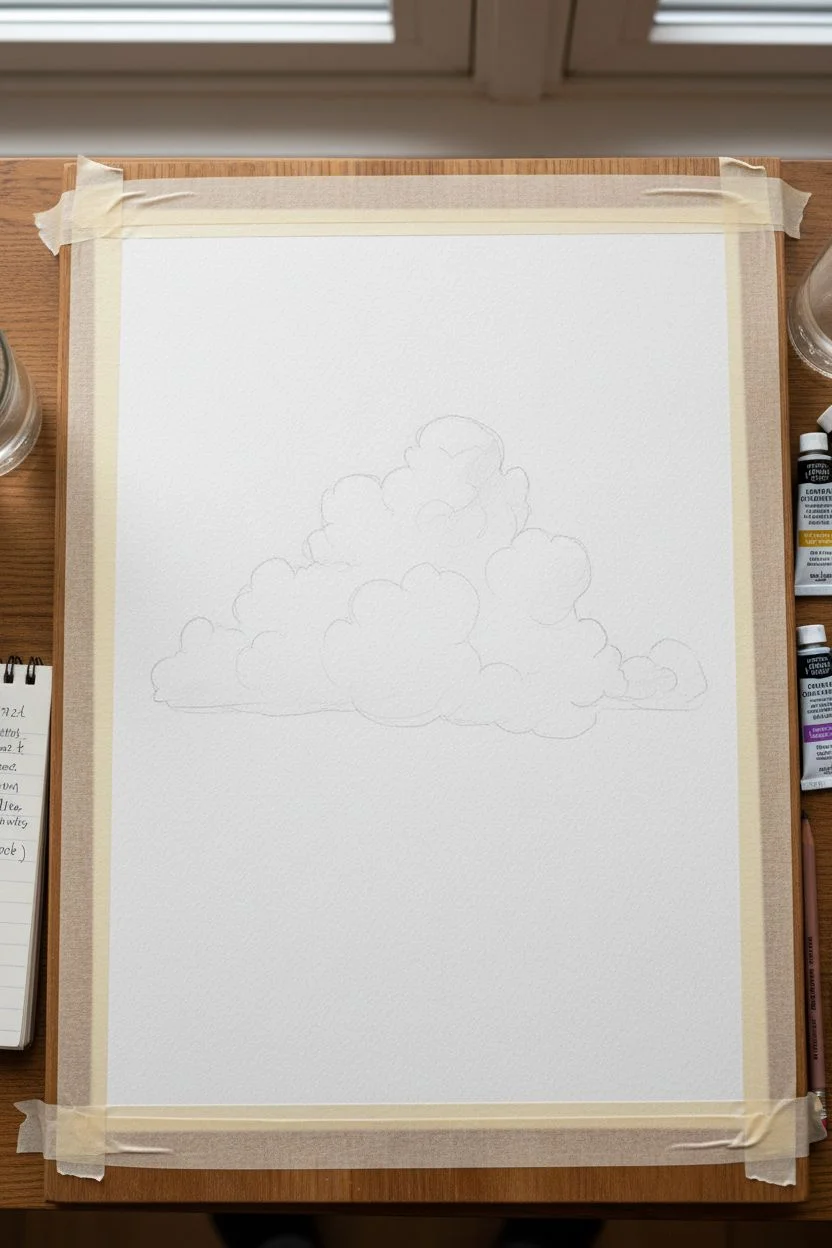
Step 1: Preparation and Sketching
-
Secure the paper:
Tape down all four edges of your watercolor paper to a sturdy board or table. This creates that crisp white border seen in the photo and prevents the paper from buckling when wet. -
Lightly outline clouds:
Using a very hard pencil (like a 2H) effectively barely touching the paper, sketch the large cloud formation. Focus on the organic, bubbly shapes of the cumulus clouds, keeping the top edges billowing and irregular.
Keep Edges Soft
For fluffier clouds, dampen the paper slightly more than usual. The wetter the paper, the softer the transition. If edges look too hard, blur them with a damp brush.
Step 2: Painting the Sky Background
-
Mix the sky color:
Create a watery mix of cobalt teal with a tiny touch of phthalo blue. You want a bright, refreshing cyan color that isn’t too dark. -
Wet the sky area:
With clean water, paint only the ‘sky’ area of your paper, carefully painting around your pencil sketch of the clouds. This negative painting technique keeps the white paper pristine for the cloud highlights. -
Apply the teal wash:
Drop your teal mix into the wet sky area. Start at the top corners for the deepest saturation and let it fade slightly as it nears the cloud line. -
Softening edges:
While the sky is still damp, check the edges touching the clouds. You want them defined but not razor-sharp, so use a clean, slightly damp brush to soften any harsh lines if needed. -
Bottom sky wash:
Don’t forget the strip of teal sky at the very bottom of the paper. Apply this wash now so it matches the top section.
Step 3: Building the Cloud Volume
-
Mix pastel purples and pinks:
Prepare three puddles on your palette: a soft pink (quinacridone rose diluted), a lavender (purple + blue + water), and a slightly deeper violet shadows mix. -
Wet the cloud body:
Wet the inside of the large cloud shape with clean water, but leave a dry ‘rim’ of white paper along the top edges. This preserves the bright white highlights that make the clouds pop. -
Drop in pink tones:
While the paper is wet, touch your brush loaded with the soft pink mix to the upper-middle section of the cloud. Let the pigment bloom naturally. -
Introduce lavender:
While the pink is still wet, drop the lavender mix into the lower sections of the cloud puffs. Allow the pink and purple to merge on the paper for a seamless gradient. -
Deepen the shadows:
Using your deeper violet mix, concentrate the color at the base of the cloud, just above where the bottom teal sky begins. This weight gives the cloud its voluminous, 3D structure. -
Lifting highlights:
I like to use a thirsty (clean, dry) brush to lift out pigment in small circular motions within the purple area. This creates the look of smaller, internal cloud puffs catching the light. -
Refining edges:
Use your smaller brush to gently soften the transition between the white paper rim and the pink paint. You want a soft glow, not a hard stripe of color.
Watermarks Forming?
Cauliflowers or ‘blooms’ happen when you add extra water into drying paint. If the cloud is starting to dry, stop adding paint and let it finish completely before glazing.
Step 4: Final Details
-
Add floating wisps:
Mix a very dilute purple. Paint a few small, disconnected wisps of cloud floating away from the main mass to add movement and realism. -
Enhance contrast:
Once the cloud layer is semi-dry, add slightly more saturated purple to the deepest crevices between the cloud bumps to define the shapes further. -
Evaluate balance:
Step back and check the values. The bottom of the cloud should be the darkest part of the painting, anchoring the airy shapes above. -
Remove tape:
Wait until the painting is completely bone-dry. Slowly peel the tape away at a 45-degree angle to reveal your crisp, professional border.
Hang your painting near a window to see how your colors harmonize with the changing light of the real sky
Surreal Color-Shift Sky With Unexpected Palettes
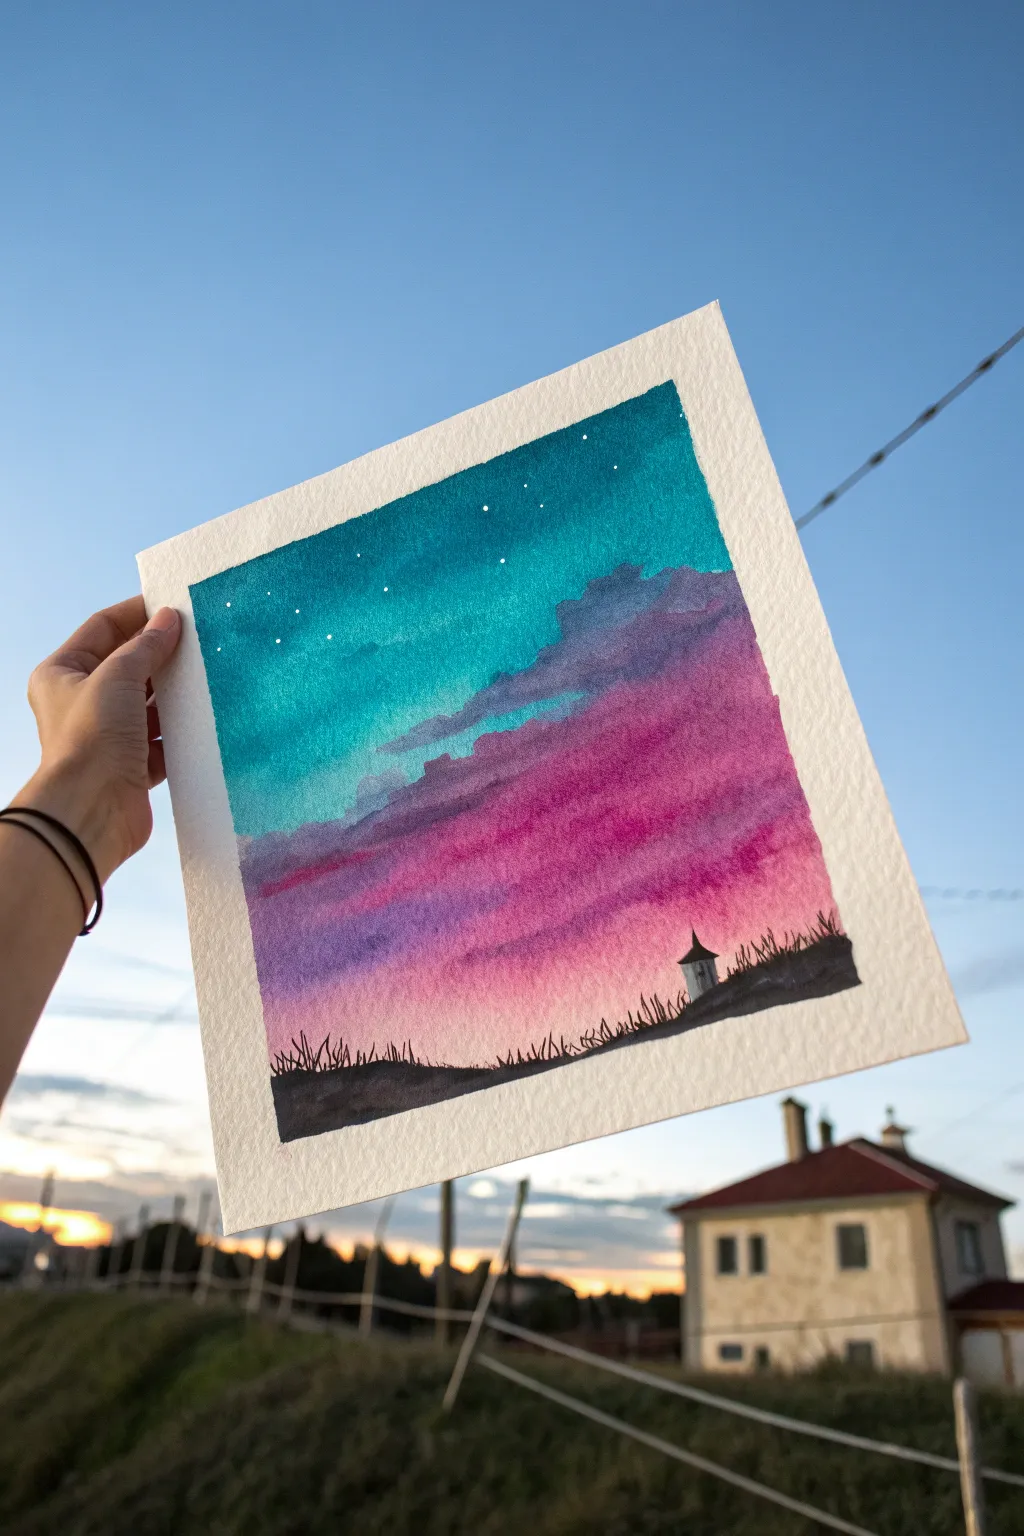
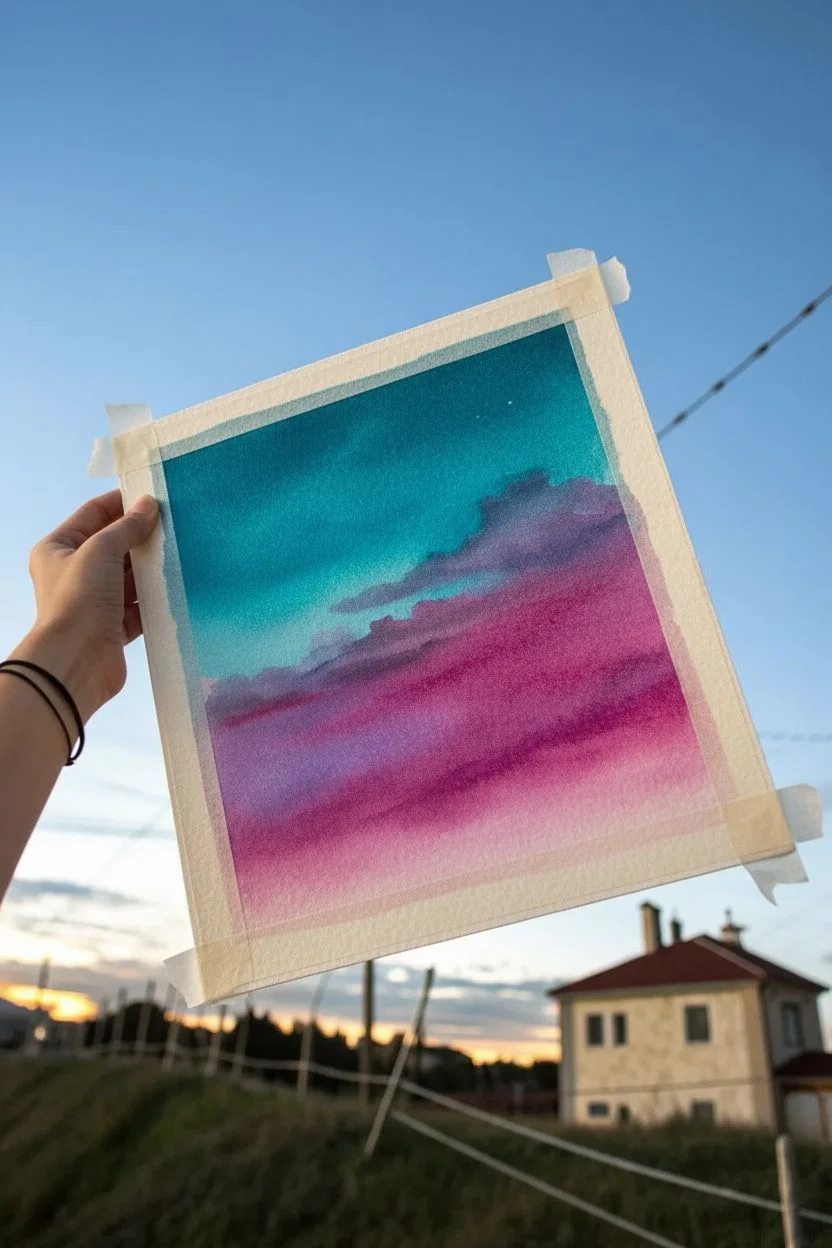
This vibrant watercolor painting captures a surreal twilight scene where a deep teal cosmos bleeds seamlessly into a warm, magenta horizon. The high-contrast palette and delicate silhouette work create a striking, otherworldly atmosphere perfect for beginners looking to experiment with bold color shifts.
Step-by-Step
Materials
- Cold press watercolor paper (300 gsm)
- Masking tape
- Watercolor paints (Turquoise/Teal, Indigo, Magenta/Rose, Black)
- White gel pen or gouache
- Large flat wash brush
- Medium round brush (size 6 or 8)
- Small detail brush (size 0 or 1)
- Jar of clean water
- Paper towels
- Hairdryer (optional)
Step 1: Preparation and Base Layer
-
Secure the paper:
Start by taping down all four edges of your watercolor paper to a sturdy board or table. Press the tape down firmly to ensure crisp, clean borders later. -
Pre-wet the sky area:
Using your large flat brush and clean water, apply an even coat of water across the upper two-thirds of the paper. You want a glisten, not a puddle, to prepare for the wet-on-wet technique. -
Apply the teal top:
Load a medium round brush with a rich teal or turquoise pigment. Start at the very top edge and paint horizontally, letting the color become slightly more transparent as you move down towards the middle of the paper. -
Introduce the magenta:
While the paper is still damp but not soaking, pick up your magenta or rose color. Start applying this from the bottom third of the sky area, brushing upward to meet the teal. -
Blend the transition:
Where the teal and magenta meet, gently gently work the brush back and forth horizontally. Allow the colors to bleed into each other naturally to create a soft, purplish transition zone without making mud. -
Add cloud shadows:
While the magenta layer is still damp, mix a bit of indigo into your magenta to create a muted purple. Dab this color loosely into the middle transition area to suggest soft, billowing cloud forms.
Muddy Colors?
If the teal and pink turn brown where they meet, you’re overworking the blend. Next time, let the water do the mixing on the paper rather than brushing back and forth too aggressively.
Step 2: Refining and Drying
-
Deepen the sky:
If the top teal section looks too pale, add a second layer of concentrated turquoise mixed with a tiny drop of indigo to the very top corners to frame the scene. -
Dry completely:
This is crucial: allow the entire background wash to dry completely. The paper must be bone dry before you add the foreground, or the black ink will bleed everywhere. You can use a hairdryer to speed this up. -
Test the dryness:
Touch the back of your hand to the paper. If it feels cool to the touch, it is likely still damp inside the fibers. Wait another few minutes to be safe.
Brighter Stars
For stars that really pop, use correction fluid (White-Out) or a specialized acrylic paint marker instead of gel pens. These sit on top of the watercolor better and stay bright white.
Step 3: Silhouettes and Stars
-
Paint the horizon line:
Using a saturated black watercolor or nice opaque ink, paint an uneven, rolling ground line across the bottom inch of the paper. -
Add grassy texture:
Switch to your smallest fine liner brush. Using quick, upward flicking motions, pull thin lines of black paint up from the horizon hill to create the look of tall grass and weeds. -
Structure the building:
On the right side of the hill, paint a small, simple silhouette of a structure or tower. Keep the shapes geometric—a vertical rectangle with a triangular roof works perfectly. -
Detail the silhouette:
Add a tiny vertical line at the very tip of the roof for a spire. Ensure the black paint is solid and opaque; if it looks gray as it dries, apply a second coat. -
Add the stars:
Once the sky is completely dry, use a white gel pen or a fine brush dipped in white gouache to dot small stars into the teal section. -
Create a constellation:
Group a few stars together or form a recognizable pattern, like the Big Dipper, in the darkest part of the upper sky for added interest. -
Reveal the border:
Peel the masking tape away slowly. Pull the tape away from the center of the painting at a 45-degree angle to prevent ripping the paper surface.
Frame your mini-masterpiece against a real sunset and enjoy the contrast of your creation


Have a question or want to share your own experience? I'd love to hear from you in the comments below!