
Soft pastels are basically the shortcut to big, glowy color—and they’re incredibly forgiving while you learn. Here are my favorite soft pastel art ideas to help you practice blending, layering, and those satisfying, velvety gradients that make pastels feel like magic.
Sunset Gradient Sky With Silhouettes
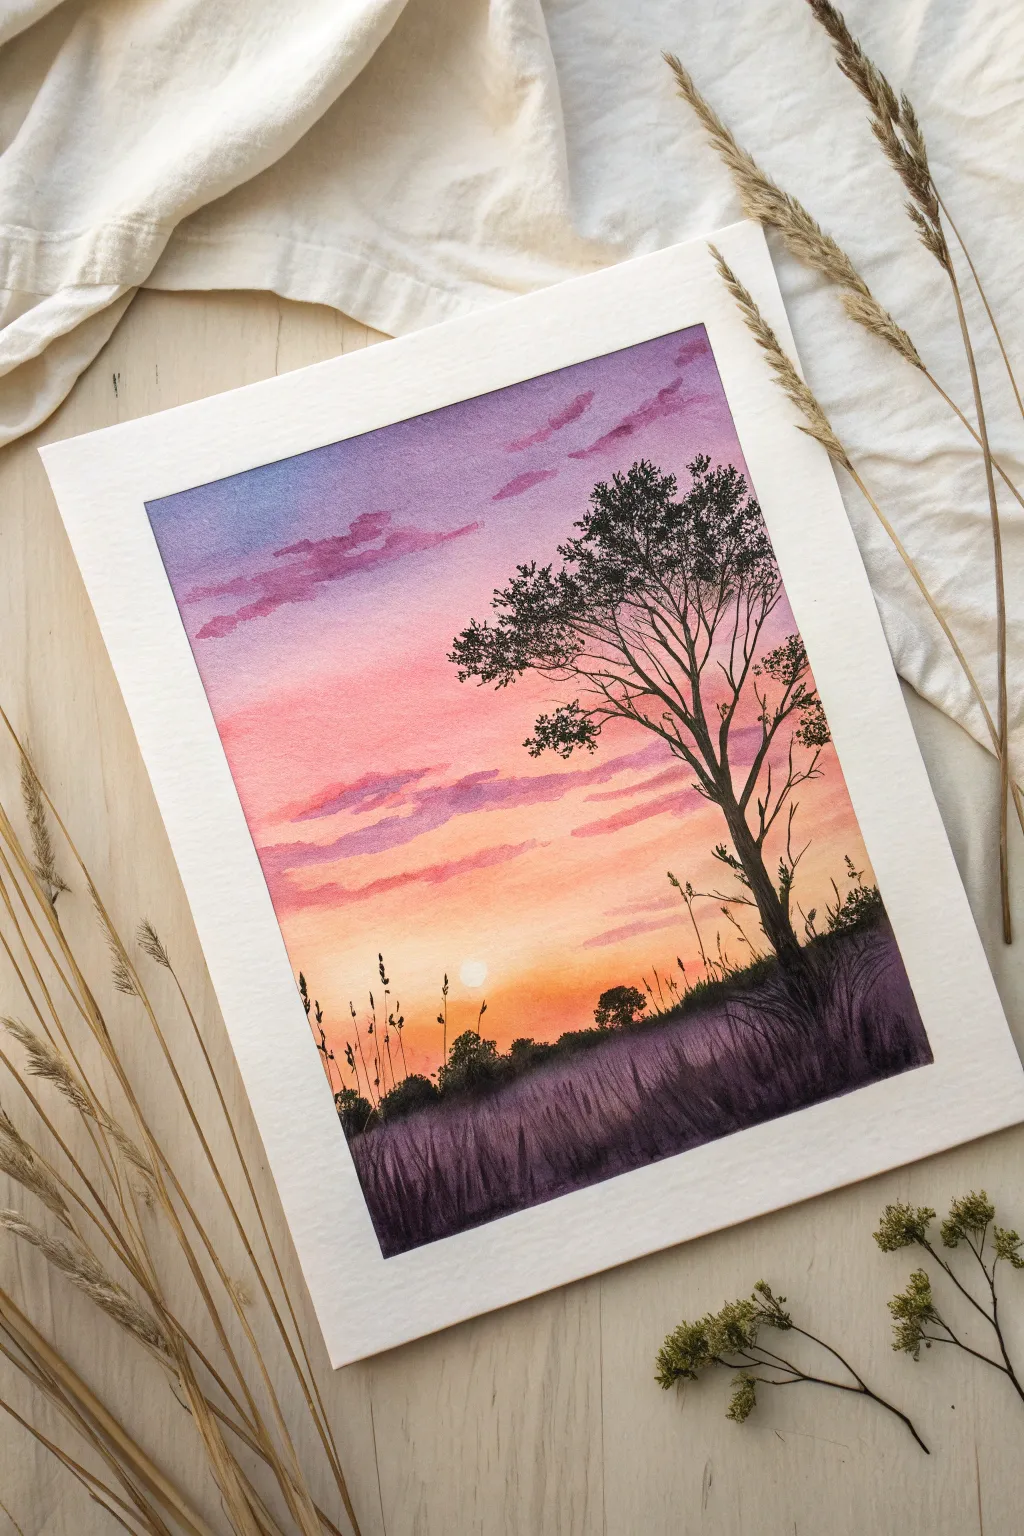
Capture the fleeting beauty of twilight with this vibrant soft pastel landscape, featuring a stunning gradient sky that transitions from deep violet to glowing orange. The stark black silhouettes of a tree and tall grasses create a captivating contrast against the soft, blended background.
Detailed Instructions
Materials
- Soft pastels (stick form): Dark purple, magenta, cool pink, warm peach, orange, bright yellow, white, and black
- Pastel paper or textured mixed media paper (white or cream)
- Black pastel pencil or charcoal pencil (for fine details)
- Blending tools (soft sponge, blending stump, or clean fingers)
- Masking tape
- Fixative spray (workable)
- Paper towels for cleaning hands
Step 1: Setting the Sky’s Foundation
-
Prep the surface:
Begin by taping down all four edges of your paper to a hard board or table. This creates that crisp, professional white border seen in the example image and keeps the paper from shifting while you work. -
Apply the top layer:
Start at the very top of the page with a deep purple pastel stick. Apply horizontal strokes across the paper, covering about the top 20% of the sky area. Don’t press too hard yet; we want to layer. -
Transition to magenta:
Below the purple, introduce a rich magenta or cool pink. Overlap it slightly with the bottom edge of the purple section to make blending easier later. -
Create the warmth:
Move down to a warm peach or salmon tone for the middle section of the sky. This is where the sunset glow begins to take shape. -
Add the horizon glow:
For the area just above the horizon line, use a bright yellow and a touch of deep orange. Leave a small circular spot blank or use pure white pastel later to represent the setting sun. -
Blend the gradient:
Using a soft sponge or your clean fingers, gently rub the colors horizontally. I like to start from the lightest yellow and work my way up to the dark purple to avoid dragging dark pigments into the bright glow. Aim for a seamless transition between hues.
Keep it Clean
Keep a damp cloth nearby to wipe your fingers between colors. Pastels smudge easily, and touching the yellow sun with purple dust on your hands will muddy the focal point immediately.
Step 2: Clouds and Atmosphere
-
Sketch soft clouds:
Take a slightly darker shade of purple-pink and gently sketch loose, horizontal cloud shapes in the upper third of the sky. Keep the edges ragged and natural. -
Soften the clouds:
Lightly smudge the bottom edges of these clouds into the background sky, leaving the top edges slightly more defined to suggest light hitting them. -
Define the sun:
If you didn’t leave a white space, use a strong white pastel stick to press a small, clean circle near the horizon where the yellow is brightest. Softly blend the edges outward just a tiny bit to make it glow.
Step 3: Creating the Foreground
-
Establish the horizon:
Using a black soft pastel, fill in the bottom section of the paper to create the ground. This creates the dark, grassy field. Don’t make the top line perfectly straight; add bumps for distant bushes or terrain. -
Add atmospheric haze to the grass:
Gently layer a small amount of dark purple over the black grass area, especially near the top of the grass line. This reflects the sky’s color into the dark shadows and adds depth. -
Draw the main tree structure:
Switch to a black pastel pencil or a sharp edge of charcoal. Draw the trunk of the main tree on the right side. Start thicker at the base and let the lines get thinner as they reach upward, branching out organically. -
Detail the branches:
Continue adding smaller and smaller branches. Let them reach high into the pink and purple sky. Keep your hand loose; nature isn’t perfectly straight. -
Add foliage texture:
Stipple or dab the black pastel stick on the ends of some branches to simulate clumps of leaves. Don’t overdo it—leaving gaps allows that beautiful sky to peek through. -
Sketch distant vegetation:
On the horizon line, use the pencil to draw tiny silhouettes of distant trees and bushes. These should be much smaller than your main tree to create a sense of scale. -
Draw foreground grasses:
Using quick, upward flicking motions with your black pastel pencil, add tall stalks of grass rising from the bottom dark area. Vary their heights and angles. -
Add final details:
Add tiny details like seed heads on the tall grasses or a few extra twigs on the main tree. Clean up any dust that might have fallen on your white border.
Add Depth
Instead of using pure black for the shadows, layer dark indigo or deep violet first, then add black on top. This creates a richer, more vibrant shadow that feels alive rather than flat.
Peel back the tape carefully to reveal your crisp edges and enjoy the peaceful sunset scene you’ve created


Glowing Moon in a Night Sky

Capture the mystic beauty of a full moon surrounded by a deep, starry expanse and soft, rolling clouds. This project utilizes the blending power of soft pastels to create a smooth, glowing lunar surface and a rich, velvety night sky.
Step-by-Step
Materials
- Dark navy or black pastel paper (heavyweight, textured)
- Soft pastels (titanium white, ivory, light ochre, dark blue, black, slate grey)
- Pastel pencils (white, light grey, dark grey) for details
- Paper stump or blending sponge
- Kneaded eraser
- Masking tape (low tack)
- Workable fixative spray
- A circular object to trace (like a roll of tape or a lid)
Step 1: Setting the Scene and Sky
-
Prepare the workspace:
Begin by taping down all four edges of your dark paper to a drawing board or hard surface. This creates a crisp white border around the finished piece and keeps the paper flat. -
Outline the moon:
Place your circular object in the center of the paper, slightly above the midline. lightly trace around it using a white pastel pencil. Don’t press too hard; you just want a faint guide. -
Fill the dark sky:
Using the side of a deep blue or black soft pastel stick, cover the entire sky area around your circle. Be careful not to color inside the moon’s outline yet. Apply a thick, even layer of pigment. -
Blend the background:
Use your fingers or a soft blending sponge to smooth out the dark sky. Push the pigment into the grain of the paper to eliminate white specks, creating a solid, velvety darkness.
Lunar Glow Trick
To make the moon truly shine, lightly rub a tiny amount of white pastel into the dark sky immediately surrounding the moon’s edge for a hazy halo effect.
Step 2: Creating the Lunar Surface
-
Base layer for the moon:
Fill the circular moon shape with a cream or very light ivory soft pastel. Cover the area completely but use a light hand so the paper isn’t saturated immediately. -
Adding texture shadows:
Using a slate grey or light purple-grey pastel, sketch irregular shapes on the moon’s surface to represent the ‘maria’ (the dark plains). Focus these darker patches on the left side and center. -
Layering colors:
Scumble a little bit of light ochre or rusty pink lightly over some of the grey areas to add warmth and realism to the lunar geography. -
Blending the crater details:
With a small paper stump or your pinky finger, gently smudge the grey and ochre patches. You want them to look soft and cloudy, not like hard rigid shapes. -
Highlighting the bright spots:
Take a pure titanium white pastel and hit the right edge of the moon and the areas between the dark patches. This high contrast is what makes the moon appear to glow. -
Refining the edge:
I like to use a sharp white pastel pencil to clean up the circumference of the moon, ensuring it is a perfect circle against the dark background.
Smudged Edges?
If you accidentally smudge dark blue into your white moon, use a kneaded eraser to lift the dark pigment cleanly before reapplying the white layer.
Step 3: Atmospheric Details
-
Forming the clouds:
At the bottom of the paper, scribble loose, horizontal shapes using a mix of white and light grey pastel. Let the tops of these shapes be fluffy and irregular. -
Shadowing the clouds:
Add touches of the dark blue used in the sky to the bottom sections of the clouds. This grounds them and seamlessly integrates them into the night background. -
Softening the atmosphere:
Blend the clouds using a circular motion with your finger. Pull the white pigment upwards slightly into the dark sky to create a misty, transparent effect near the cloud tops. -
Adding stars:
Take your sharpest white pastel pencil or a white gel pen. Dot random stars throughout the dark sky. Vary the pressure so some stars are bright and others frequent. -
Creating the sparkle:
Choose two or three prominent stars and draw a small cross or four-pointed flare shape to make them twinkle distinctively. -
Final reveal:
Once you are satisfied with your blending, carefully peel away the masking tape to reveal the crisp clean edges of your night sky masterpiece.
Now you have a serene piece of the cosmos captured on paper.


Beach Horizon With Soft Waves
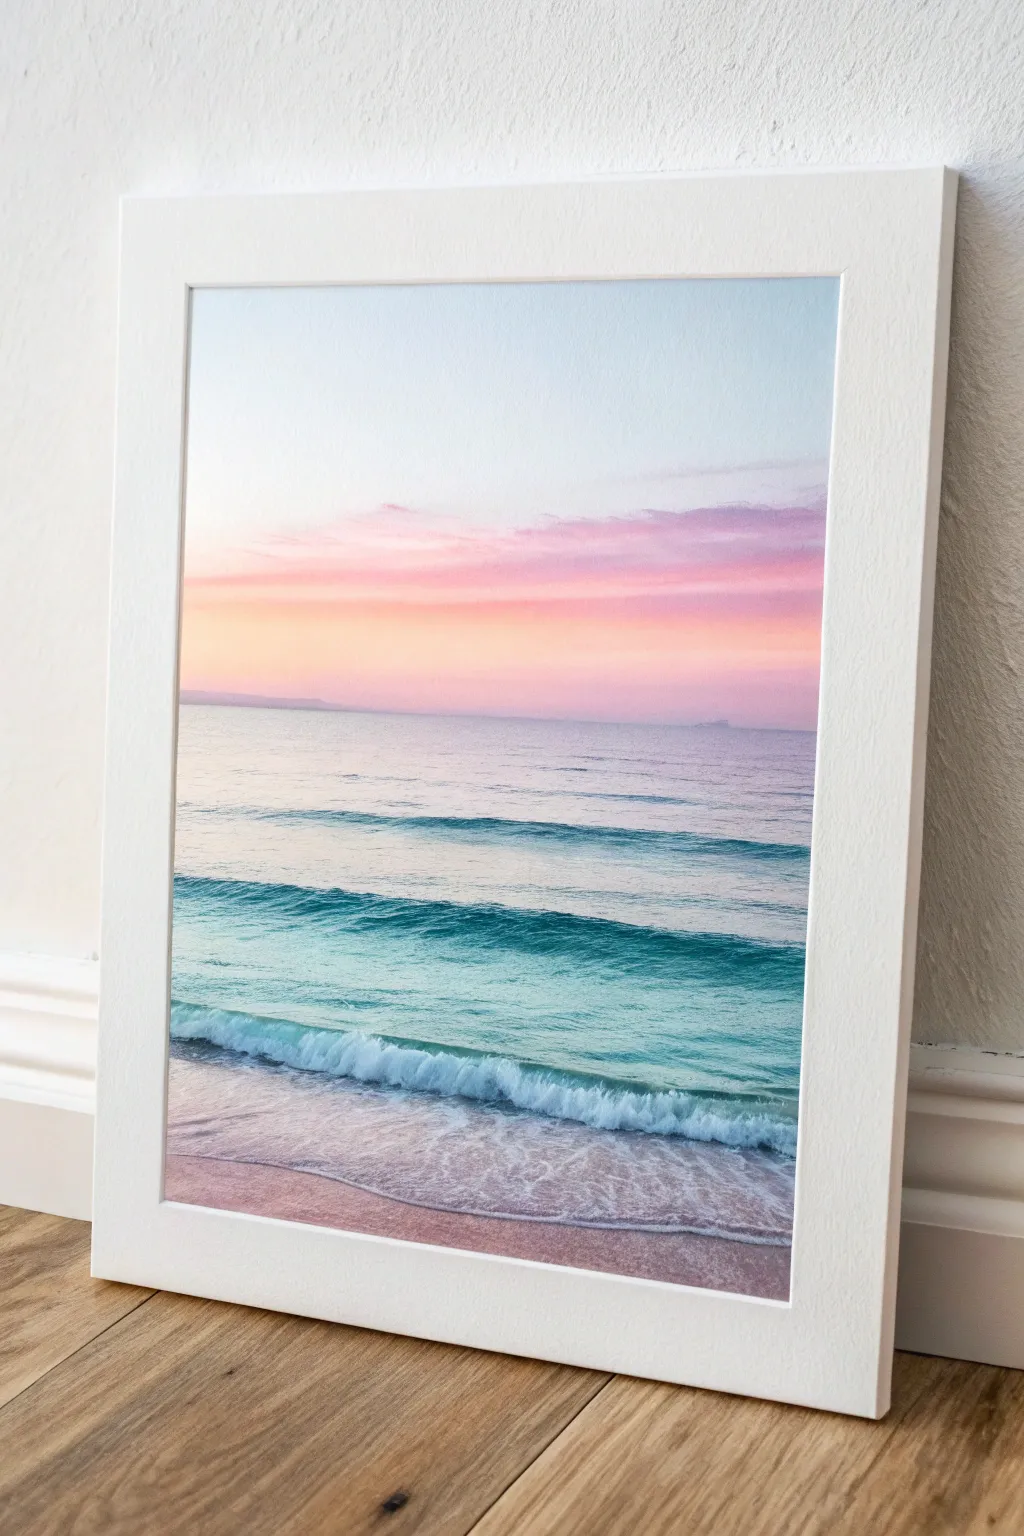
Capture the tranquil beauty of a gentle seascape using soft pastels to create a smooth, blended gradient sky and rolling turquoise waves. This project emphasizes delicate transitions and capturing the transparency of shallow water washing over sand.
How-To Guide
Materials
- Textured pastel paper (white or light grey)
- Soft pastels (various shades of pink, peach, lilac, light blue, teal, turquoise, deep blue, white, and warm beige)
- Hard pastel sticks or pastel pencils (white and dark teal for details)
- Blending stumps or tortillons
- Soft foam sponge or chamois cloth
- Paper towels
- Masking tape
- Fixative spray (workable)
Step 1: Setting the Sky
-
Prepare the workspace:
Begin by taping down all four edges of your pastel paper to a rigid drawing board. This creates a clean white border and keeps the paper flat while you work. -
Establish the horizon:
Lightly sketch a straight horizontal line about one-third of the way up from the bottom of the paper. This separates the sky from the sea. Don’t press hard; you just need a faint guide. -
Base layer for the sky:
Start at the very top of the sky with a pale, cool blue. As you move down, transition into a very light lilac purple. -
Adding warmth:
Below the lilac, introduce soft pinks and varying shades of peach. Apply the pigments horizontally using the side of the pastel stick for broad coverage. -
Intensify the horizon:
Just above the horizon line, lay down a strip of warmer, slightly more vibrant orange-pink to simulate the sun’s fading glow. -
Blend the gradients:
Use a foam sponge or your fingers to smooth the sky colors together. I tend to blend from top to bottom, wiping my hands between color changes to keep the pale blue from turning muddy when it hits the orange. -
Create cloud streaks:
Take a slightly darker mauve or purple pastel and gently streak in thin, horizontal cloud formations across the pink section. Lightly soften the edges so they look wispy rather than solid.
Keep It Clean
Keep a damp towel nearby to wipe fingers between blending sky sections. Orange and blue are complementary colors and make brown if mixed accidentally.
Step 2: Painting the Ocean
-
Distant waters:
For the water directly below the horizon, use a pale, dusty violet-blue. Keep your strokes strictly horizontal to mimic the calm distance of the sea. -
Mid-ocean transition:
As you move closer to the foreground, shift your color palette to light blues and aquas. Leave gaps of paper showing through to suggest light hitting the water surface. -
Forming the waves:
Identify where the two main wave crests will be. Use a rich turquoise or deep teal to mark the underside of the waves where the water is thickest and darkest. -
Blending the water:
Gently blend the ocean colors, maintaining the horizontal direction. Be careful not to over-blend the teal lines; you want to keep that contrast for the wave structure.
Add Some Sparkle
For extra magic, gently drag a distinct, sharp edge of a white pastel stick across the water surface to create reflected glimmers of light on the waves.
Step 3: Foreground and Details
-
Creating the shallows:
In the immediate foreground, create the wet sand using a mix of warm beige and a touch of the pink from the sky, reflecting the sunset. -
Transparent wash:
Glaze a very light layer of pale blue or white over the top edge of the sand to show the thin, transparent sheet of water receding. -
Defining the foam:
Using a sharp white hard pastel or pastel pencil, draw the crashing foam of the waves. make small, scribbly circular motions to create the texture of bubbles. -
Highlighting the crests:
Add bright white highlights along the very top edge of the turquoise waves. This makes them look like they are catching the last calm light of the day. -
Shadows and depth:
Add a tiny amount of deep blue or purple right underneath the white foam of the crashing wave to create a drop shadow on the sand. -
Final adjustments:
Step back and look for balance. If the water looks too flat, add a few more horizontal streaks of dark teal in the mid-ground. -
Clean and seal:
Carefully peel away the masking tape to reveal the crisp border. Spray a light coat of workable fixative outdoors to protect your soft layers.
Now you have a peaceful, permanent sunset to enjoy regardless of the weather outside


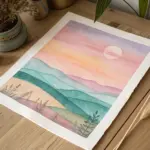
Mountain Landscape With Misty Layers

Capture the serene beauty of distant peaks fading into the horizon with this atmospheric soft pastel landscape. This project focuses on building depth through subtle color transitions, creating a dreamy, layered effect that draws the viewer into the scene.
Step-by-Step
Materials
- Textured pastel paper (white or light cream)
- Soft artist pastels (shades of peach, pink, lavender, violet, indigo, teal, forest green, and dark umber)
- Hard pastel sticks or pastel pencils (dark brown/black for details)
- Blending tools (paper stumps, soft sponge, or fingers)
- Workable fixative spray
- Masking tape
- Drawing board
Step 1: Setting the Sky and Horizon
-
Secure the paper:
Tape your paper securely to a drawing board or table using masking tape on all four edges. This creates a crisp white border for later framing and keeps the paper flat while you work. -
Establish the sky gradient:
Begin at the very top of the paper with a very pale, warm peach or soft pink pastel. Apply it lightly using horizontal strokes. -
Transition downward:
As you move down the top third of the paper, gradually introduce a whisper of pale lavender, blending it gently upwards into the peach to create a seamless, soft-focus sky. -
Create the first mountain silhouette:
Using a light mauve or dusty purple, sketch the faint outline of the most distant mountain range about one-third down the page. Keep this edge soft and undulating. -
Fill and fade:
Fill in this first mountain shape lightly. Using your finger or a soft sponge, blur the bottom edge of this shape downward so it disappears into the white of the paper, mimicking distant mist.
Muddy Colors?
If your layers start looking muddy or grey, you’re likely over-blending. Spray a light layer of fixative to ‘lock’ the under-layer, let it dry completely, and then apply fresh color on top.
Step 2: Building the Purple Ranges
-
Add the second layer:
Select a slightly darker, cooler purple. Draw the next ridge line below the first one, overlapping it slightly. The shapes should be organic and not too jagged. -
Blending for atmosphere:
Fill this shape deeply at the top edge, but again, as you work downwards, lighten your pressure. I find using a clean blending stump helps pull the pigment down into a hazy fade. -
Introduce the third tier:
Choose a violet-blue shade now. Create a third mountain layer, bringing it closer to the viewer. This layer should appear slightly crisper at the top edge than the previous ones. -
Enhance the mist:
Between these purple layers, you can lightly scumble a bit of white or very pale gray pastel to enhance the ‘fog’ trapped in the valleys, blending it smoothly.
Step 3: The Cool Mid-Ground
-
Shift to blue-greens:
Transition your palette to cooler tones. For the large mountain mass on the left, use a muted teal or slate blue. This shape should be larger and bolder than the distant ranges. -
Add texture:
Instead of blending this layer perfectly smooth, use the side of the pastel stick to gently drag color across the paper’s grain. This suggests the texture of distant trees without drawing them individually. -
Define the slopes:
Use a slightly darker shade of that same slate blue to shadow the right side of the mountain slopes, indicating a light source coming from the upper left or center-top. -
Layer the valley:
Create a secondary ridge in the mid-ground using similar blue-green tones but keep it slightly lighter to push it behind the darker foreground elements coming next.
Add Birds
To emphasize the vast scale of the mountains, use a sharpened hard pastel or charcoal pencil to add two or three tiny, simple ‘v’ shapes in the sky to represent distant soaring birds.
Step 4: The Dark Foreground Forest
-
Establish the tree line:
Select your darkest colors: deep forest green, dark indigo, and dark umber. Create the final, closest layer at the bottom of the page. -
Create canopy texture:
Use short, vertical strokes to simulate the tops of pine or fir trees along the ridge of this foreground layer. The top edge should be jagged and distinct. -
Deepen the shadows:
Press firmly with dark umber or black in the lowest sections of the foreground to ground the composition. This high contrast against the misty background creates the illusion of distance. -
Add subtle highlights:
With a burnt sienna or warm brown pastel, lightly touch the tops of the foreground trees to catch the ambient light, adding warmth to the coolness. -
Final blending check:
Look over the whole piece. If the mist effect feels too sharp anywhere, gently tap it with a clean finger to soften the transition. -
Seal and reveal:
Spray a light coat of workable fixative. Once dry, carefully peel away the masking tape to reveal the clean, professional border.
Frame your new landscape behind glass with a mat to keep the pastel dust secure and enjoy the view
BRUSH GUIDE
The Right Brush for Every Stroke
From clean lines to bold texture — master brush choice, stroke control, and essential techniques.
Explore the Full Guide
Fluffy Clouds With Sunlit Edges

Capture the fleeting magic of sunset lighting with this dramatic soft pastel study. You’ll layer rich blues and warm peaches to build a majestic, glowing cloud formation that feels both heavy and weightless.
Step-by-Step Tutorial
Materials
- Textured pastel paper (sanded or cold-press watercolor paper worked well here)
- Soft pastels (ultramarine blue, sky blue, indigo, peach, light pink, warm yellow, white, dark grey/purple)
- Artist tape
- Blending stump or tortillon
- Fixative (optional)
- Paper towels for cleaning fingers
Step 1: Setting the Sky
-
Tape the edges:
Begin by taping down your paper to a rigid board using artist tape. This creates that crisp, clean border visible in the reference image, which really elevates the final look. -
Base blue layer:
Using the side of a sky blue pastel stick, block in the upper right and left corners of the paper. Keep your strokes light and airy, leaving the large central area blank for your cloud shape. -
Deepen the gradient:
Add a touch of ultramarine blue to the very top corners to create depth. Gently blend this into the lighter blue with your fingers so the sky looks smooth and distant. -
Define the cloud silhouette:
With a very light peach or cream pastel, lightly sketch the outline of your massive cumulus cloud. Keep the edges ragged and bumpy rather than smooth circles.
Muddy colors?
If your pinks and blues are turning brown where they meet, stop blending. Spray a light fixative, let it dry, and layer fresh color on top confidently.
Step 2: Building Cloud Volume
-
Shadow blocking:
Start with the dark underbelly of the cloud. Use a mixture of indigo and dark purple/grey to fill the bottom horizontal band of the cloud mass. This heavy base gives the cloud visual weight. -
Mid-tone transition:
Above the dark base, layer in dusty pinks and lavenders. I find that scumbling (using circular scribbles) helps create that fluffy texture right from the start. -
Adding the glow:
On the upper ‘boulders’ of the cloud, apply a generous layer of warm peach and light pink. This is where the setting sun is hitting the moisture. -
Highlight intensity:
Select your brightest warm yellow or creamy white. Apply this strictly to the top-right edges of the cloud puffs where the light source is strongest. -
Finger blending:
Use your pinky finger to gently smudge the peach tones into the pinks, and the pinks into the dark purples. Don’t over-blend; you want to keep some texture visible.
Step 3: Dark Base and Foreground
-
Deepening the storm:
Return to the dark blue/grey band at the bottom of the cloud. Press harder now to get maximum pigment density, suggesting a rain-heavy atmosphere. -
Distance horizon:
Below the dark cloud base, add a thin strip of lighter sunset orange or pink to suggest the distant horizon peeking through. -
Silhouette foundation:
At the very bottom edge of the paper, block in a solid black or deep charcoal strip. This creates the ground line. -
Tree line details:
Using the sharp edge of a broken black pastel or a pastel pencil, dab tiny irregular shapes along the horizon line to suggest distant trees and bushes.
Make it moody
Swap the peach highlights for electric purples and silvers to transform this into an impending storm scene instead of a sunset.
Step 4: Refining and Finishing
-
Grass textures:
On the left side of the foreground, use quick, upward flicks with a sharp dark pastel edge to create tall grasses reaching up towards the cloud. -
Cloud edge control:
Go back to the top of the cloud. If you lost any crispness while blending, re-apply the white highlight to the very rim to make it pop against the blue sky. -
Atmospheric wisps:
Add a few faint, horizontal streaks of dark grey drifting off the main cloud body on the left side to simulate wind sheer. -
Final check:
Step back and look for contrast. If the sunlit parts aren’t glowing enough, add another layer of pure pigment without blending. -
Reveal:
Carefully peel away the artist tape at a 45-degree angle to reveal your crisp, white margins.
Enjoy the dramatic contrast between the soft, sunlit tops and the heavy, shadowed bottoms of your cloud formation
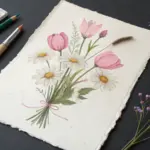
Field of Wildflowers in Soft Focus
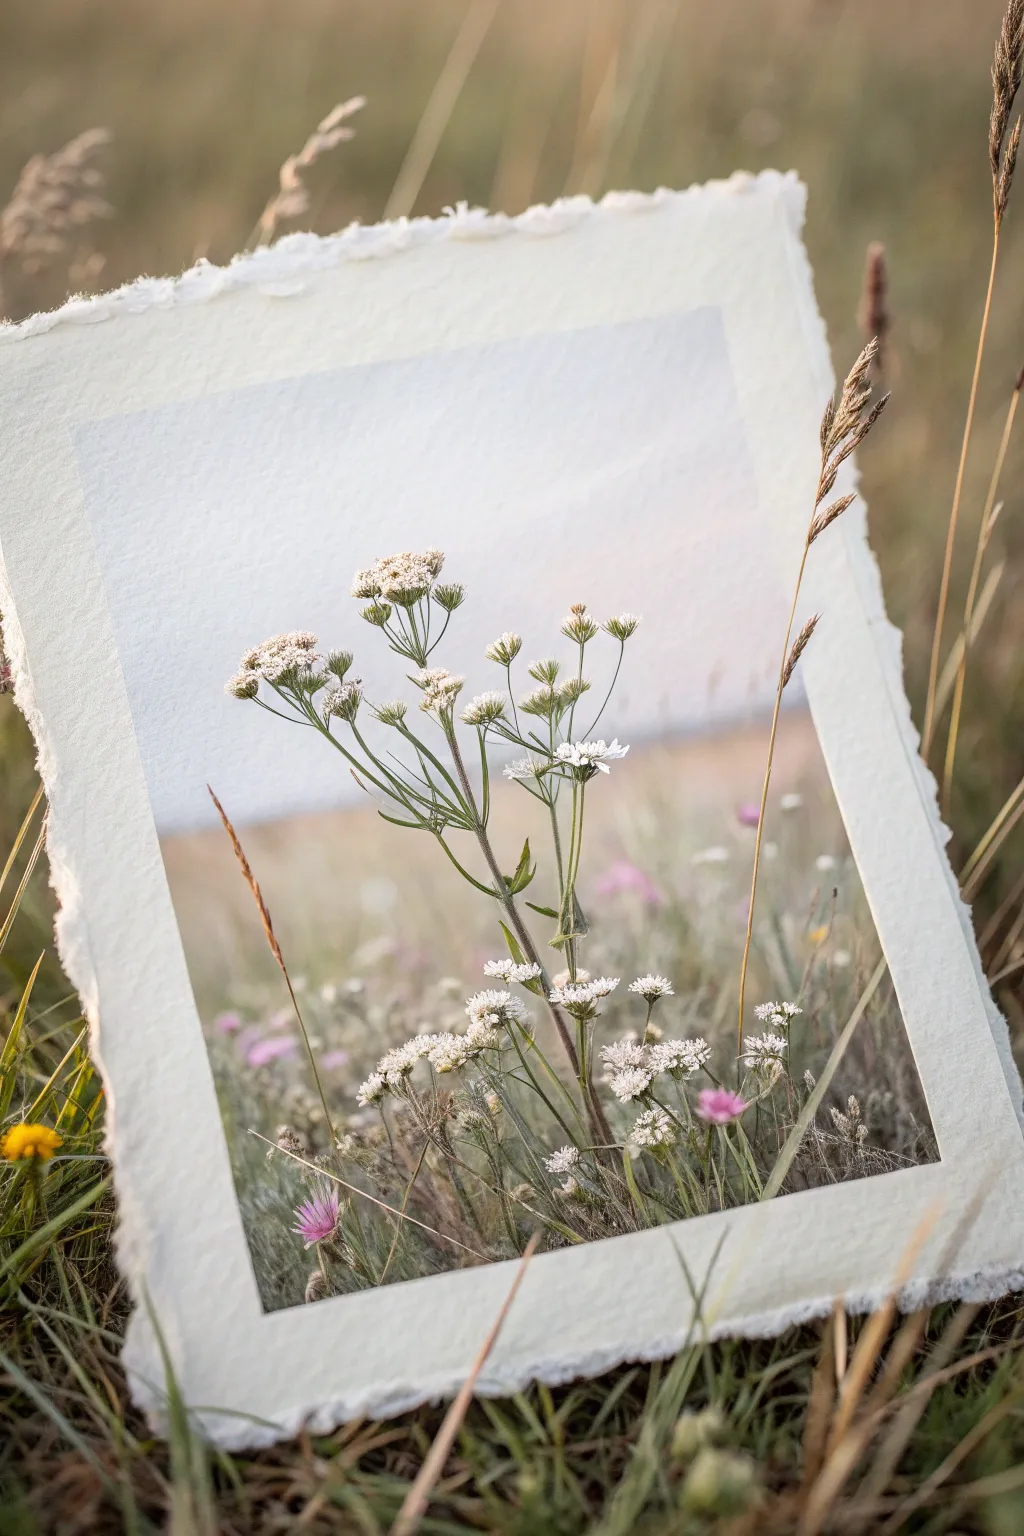
Capture the delicate beauty of a meadow by blending photography and soft pastel techniques on handmade paper. This project creates a stunning trompe-l’œil effect where a field of wildflowers seems to continue seamlessly through a deckled-edge frame.
How-To Guide
Materials
- Heavyweight cold-press watercolor paper or handmade rag paper (approx. 300gsm)
- Soft artist pastels (white, cream, olive green, sap green, pale blue, lavender)
- Hard pastel pencils (dark green, brown, white) for details
- Painter’s tape or low-tack masking tape
- Ruler
- Fixative spray (workable matte)
- Small basin of water and a deckle/tearing ruler (optional)
- Drawing board
Step 1: Preparing the Handmade Edge
-
Creating the deckled edge:
If you aren’t using pre-made rag paper, you can fake the look. Dip a paintbrush in water and draw a line along the four edges of your paper about half an inch in. -
Tease the fibers:
Wait about a minute for the water to soak in, then gently tear away the wet strip. Pull slowly to leave long, fuzzy fibers exposed, mimicking a traditional deckle edge. -
Masking the borders:
Once dry, measure a wide border around your paper—roughly 1.5 to 2 inches wide. Apply painter’s tape firmly along these inner lines to create a crisp rectangular workspace in the center.
Smudged Borders?
If pastel dust drifts onto your clean white border, use a kneadable eraser. Press and lift the dust straight up rather than rubbing, which can grind the pigment into the paper fibers.
Step 2: Building the Background Atmosphere
-
Base layer of sky:
Start at the top of your taped rectangle. Gently scumble a very pale blue pastel horizontally. Keep the pressure light; we want the paper texture to show through slightly. -
Adding warmth:
As you move lower towards the horizon line, blend in a touch of pale lavender or a warm cream tone to suggest a hazy, late-afternoon atmosphere. -
Blurring the field:
For the bottom third of the background, lay down broad strokes of muted olive and sage greens. Use your finger or a foam applicator to smudge these completely, creating a ‘bokeh’ or out-of-focus effect for the distant grass. -
Securing the base:
Lightly mist the background with workable fixative. This prevents the sky colors from muddying the crisp details we will add next.
Go 3D
For a mixed-media twist, glue actual dried pressed flowers or thin grasses over the drawing’s foreground stems before framing for incredible dimension.
Step 3: Drawing the Foreground Flora
-
Sketching the stems:
Using a sharpened hard pastel pencil in dark olive or brown, sketch the main stems of the wildflowers. Keep the lines thin and slightly erratic to mimic natural growth. -
Branching out:
Add smaller offshoots and leaf structures. I find it helpful to vary the pressure—harder at the joints, lighter at the tips. -
Umbels and flower heads:
Switch to a soft white pastel. Dot small clusters at the top of your stems to form the umbrella-shaped flower heads typical of Queen Anne’s Lace or Cow Parsley. -
Refining the petals:
Use a white pastel pencil to add sharper, tiny dots on top of the soft white clusters. This variety in texture makes the flowers pop forward. -
Adding depth to the greenery:
In the lower section, add a few strokes of pink or purple pastel to suggest other wildflowers hiding in the grass, keeping them softer than the main white subjects.
Step 4: Final Elements and Reveal
-
Highlight and shadow:
Add tiny touches of yellow or cream to the centers of the white flower heads for warmth. Gently shade the underside of the green stems with a dark brown pencil. -
The reveal:
Slowly peel away the painter’s tape. Pull it away from the drawing at a 45-degree angle to ensure a crisp, clean line against the raw white border. -
Texturing the border:
To enhance the ‘object’ quality of the paper, you can lightly rub a clean white pastel over the deckled edges if they got smudged during handling. -
Protective coat:
Give the entire piece a final, light spray of fixative. Hold the can at least 12 inches away to avoid droplets.
Now you have a serene window into nature that captures the quiet stillness of a summer meadow

PENCIL GUIDE
Understanding Pencil Grades from H to B
From first sketch to finished drawing — learn pencil grades, line control, and shading techniques.
Explore the Full Guide
High-Contrast City Skyline Silhouette
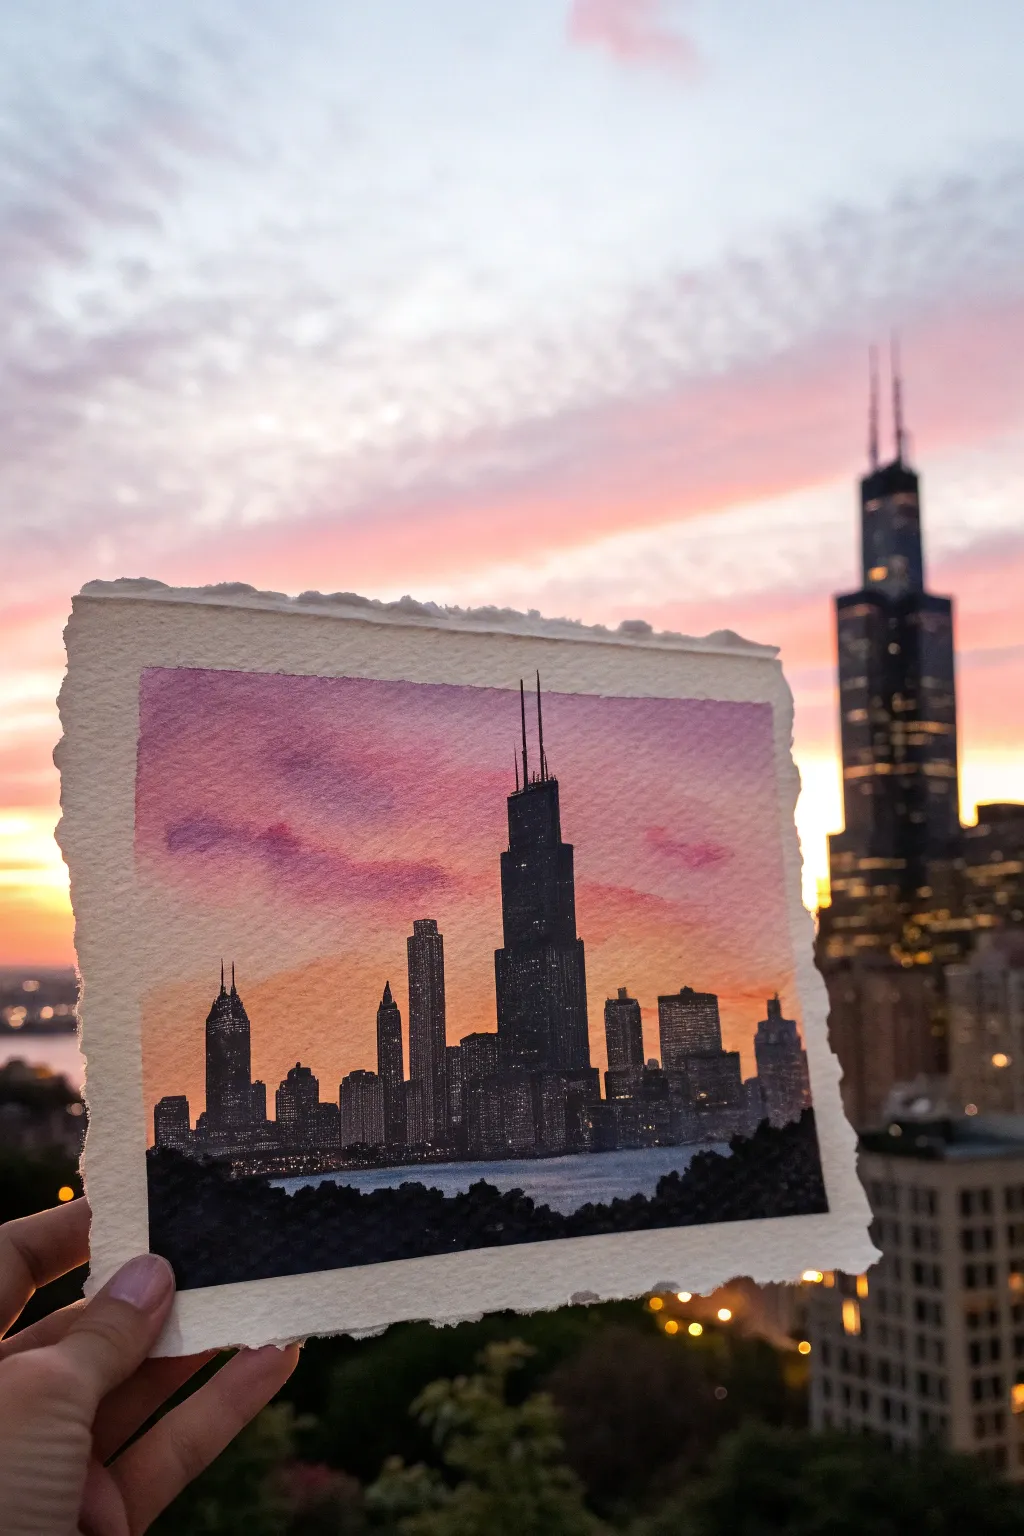
Capture the dramatic beauty of a city silhouette against a vibrant, fading sunset with this high-contrast project. Using the texture of paper to your advantage, you will blend soft gradients of pink and orange before anchoring the scene with a bold, dark skyline.
Step-by-Step Guide
Materials
- High-quality textured paper (watercolor or pastel paper with tooth)
- Soft pastels in pink (magenta/rose), violet, orange, and yellow
- Hard pastel or charcoal stick in deep black
- Black pastel pencil (for fine details)
- Masking tape
- Paper towels or blending stump
- Fixative spray (workable)
Step 1: Setting the Scene
-
Prep your surface:
Begin by taping down the edges of your textured paper to a board. This creates the crisp, clean white border seen in the reference image and keeps the paper flat while you work. -
Sketch the horizon:
Lightly mark a low horizon line about one-quarter of the way up from the bottom using a light grey pastel or pencil. This will separate the water/trees from the buildings. -
Lay down the yellow base:
Starting just above your horizon line, apply a horizontal band of warm yellow pastel. This represents the last light of the sun fading behind the buildings. -
Add the orange glow:
Directly above the yellow, scumble in a vibrant orange. Slightly overlap it with the yellow so they can mix naturally in the next steps. -
Introduce the violet sky:
At the very top of the paper, apply a cool violet or purple tone. Bring this color down towards the middle, leaving a gap for the pink. -
Bridge with pink:
Fill the remaining middle space between the orange and violet with a soft magenta or rose pink. Allow the strokes to differ slightly in pressure to suggest cloud textures.
Clean Edges Trick
If your pastel dust smudges into the white border during removal, a white vinyl eraser cleans it up perfectly without damaging paper tooth.
Step 2: Blending the Gradient
-
Initial blend:
Using your fingers or a soft paper towel, gently rub the yellow section horizontally. Work your way upward into the orange, blending the transition smooth. -
Cloud textures:
As you move into the pink and violet sections, switch to a more circular or dabbing motion. This preserves some texture and creates the mottled look of clouds rather than a perfect smooth gradient. -
Refining the sky:
I like to go back in with a stick of pink pastel and add a few loose, horizontal streaks over the violet area to mimic lower-hanging clouds catching the light, then tap them gently to soften. -
Fix the background:
Once you are happy with the sky gradient, give the paper a light mist of workable fixative. This prevents the sky colors from muddying the black skyline you’re about to add.
Step 3: Constructing the Skyline
-
Block in the main tower:
Using a black hard pastel or charcoal stick, draw the central, tallest skyscraper first. Focus on the vertical blocky shapes and the antennas on top. -
Add supporting buildings:
Draw the varying heights of the surrounding buildings to the left and right. Pay attention to the silhouette shapes—some have slanted roofs, others are rectangular. -
Fill the silhouette:
Fill in the building shapes completely with solid black. Press firmly to get a deep, opaque dark value that contrasts sharply against the sunset. -
Detail with pencil:
Switch to a black pastel pencil to sharpen the edges of the buildings and draw fine details like the needle-thin antennas on the tallest tower. -
Create window lights:
You can suggest illuminated windows by either leaving tiny pinpricks of the paper showing through the black or by carefully lifting specks of pigment with a kneaded eraser.
Paper Choice Matters
Try this on distinctively textured watercolor paper (cold press). The bumps will catch pastel unevenly, creating natural ‘noise’ in the sky.
Step 4: Foreground and Finishing
-
Base foreground:
Below the buildings, add a very dark strip for the distant water or ground. Use a dark grey or black, blending it slightly softer than the buildings to suggest depth. -
Add textured foliage:
At the very bottom edge, use the side of your black pastel stick to create a rough, bumpy texture representing the tree line or bushes in the immediate foreground. -
Reveal the border:
Carefully peel away the masking tape. Pull it slowly and at an angle away from the drawing to ensure a crisp, clean edge.
Frame your miniature masterpiece against a real window for a stunning effect
Desert Dunes With Smooth Shadows
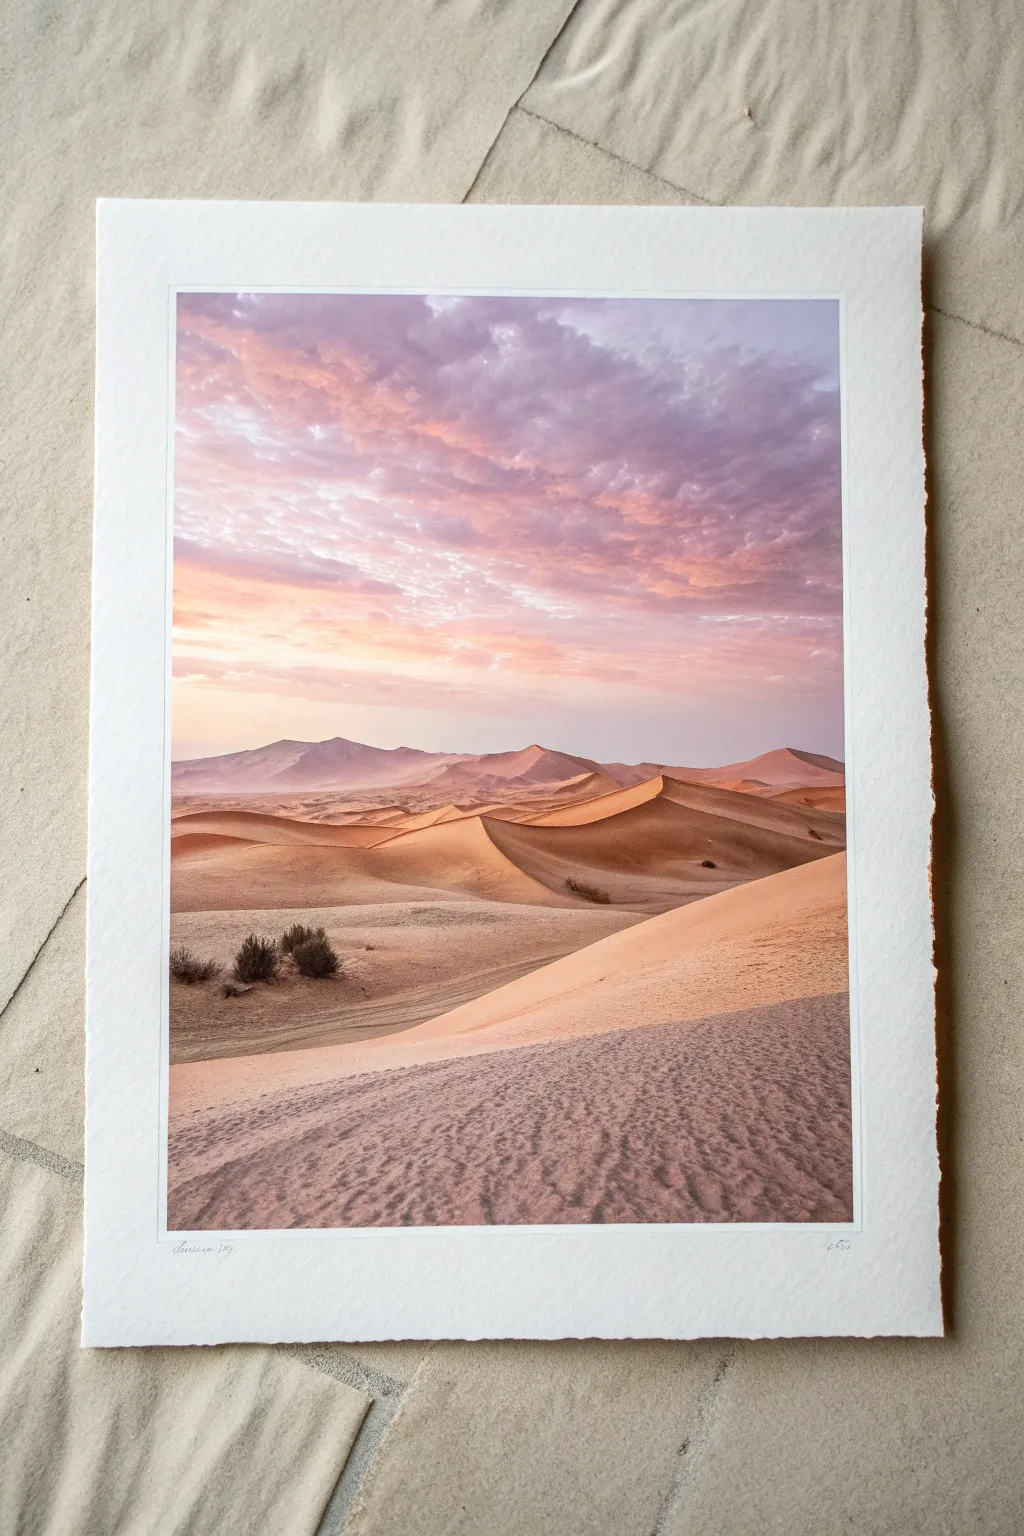
Capture the breathtaking tranquility of a desert sunset with this soft pastel study, focusing on the interplay of warm light and cool shadows across rolling sand dunes. You will learn to layer soft hues to create a sky that glows and sculpt dunes that feel three-dimensional and vast.
Step-by-Step
Materials
- High-quality pastel paper (sanded or textured, white or warm-toned)
- Soft pastels in a range of colors: pinks, lavenders, peach, warm ochres, burnt sienna, umbers, and cool greys/blues
- Pastel pencils for fine details (dark brown/black)
- Blending tools (tortillions, blending stumps, or soft foam applicator)
- Workable fixative spray
- Artist tape
- Drawing board
Step 1: Setting the Scene
-
Prepare your surface:
Tape your pastel paper securely to a drawing board on all four sides. leaving a crisp white border if you desire the framed look shown in the reference. -
Initial sketch:
Using a neutral-colored hard pastel or pastel pencil, lightly map out the horizon line about two-thirds down the page. Sketch the flowing, S-curve shapes of the main dunes, ensuring the foreground dune sweeps in from the right to lead the eye.
Keep it Clean
Place a sheet of glassine paper under your hand while working on the bottom dunes to prevent smudging the sky you’ve already finished.
Step 2: Painting the Sky
-
Base layer for the sky:
Start at the very top with a soft lavender or muted purple. As you move downward, transition into a dusty pink, then a warm peach, and finally a pale, glowing yellow just above the distant mountains. -
Blend the gradient:
Use the side of your finger or a soft foam tool to gently blend these bands of color together horizontally. You want a seamless transition from the cool top to the warm horizon. -
Add cloud texture:
With a slightly darker mauve or grey-purple pastel, scumble light, irregular strokes over the upper sky area to suggest cloud formations. Keep the touch light so the underlying pinks show through. -
Define cloud highlights:
Take a pale pink or white pastel and touch the bottom edges of the larger cloud shapes. Gently smudge these upwards to create volume and fluffiness.
Step 3: Sculpting the Distant Mountains
-
Layering the background range:
For the mountains furthest away, use a pale, cool violet or bluish-grey. Atmospheric perspective makes distant objects lighter and cooler, so keep these tones muted. -
Mid-ground hills:
As you move slightly forward to the next range of hills, introduce a bit more warmth—perhaps a dusty rose mixed with the grey. Define the ridgelines clearly but keep the blending soft.
Color Harmony
Use the same pale lavender from your sky in the deepest shadows of the sand. This hidden color repetition ties the whole painting together beautifully.
Step 4: Creating the Dunes
-
Block in shadow shapes:
Identify where the light is hitting (from the left/sunset) and where the shadows fall. Fill the shadow sides of the dunes with cool browns, deep terracottas, and hints of violet. -
Highlight the crests:
On the sunlit faces of the dunes, apply bright warm ochre, peach, and light sand colors. Use firm strokes to follow the curve of the dune, reinforcing its shape. -
Sharp ridges:
The key to realistic dunes is the sharp contrast at the crest. Ensure the line where the light side meets the shadow side is crisp and distinct. -
Foreground texture:
For the large dune in the immediate foreground, focus on texture. Use the side of a grainy pastel (like a dark sand or grey-brown) and drag it lightly across the paper’s tooth to simulate ripples in the sand. -
Deepen the foreground shadows:
The foreground shadows should be the darkest values in the piece. I like to mix a deep umber with a touch of purple here to make the shadows recede effectively.
Step 5: Details and Final Touches
-
Add vegetation:
Using a dark brown or charcoal pastel pencil, make short, clustered marks in the mid-ground valleys to represent desert shrubbery. Keep these loose and organic. -
Refine the ripples:
Go back to the foreground dune and gently emphasize the ripple patterns with subtle horizontal bands of light and shadow, following the slope of the terrain. -
Check values:
Step back and squint at your artwork. Ensure the sky is the lightest area, and the shadow sides of the dunes provide enough contrast to create depth. -
Clean up:
Carefully remove the painter’s tape to reveal the crisp white border. Blow away any excess dust outdoors. -
Fixative (Optional):
If you wish to protect the surface, apply a very light coat of workable fixative, keeping in mind this might slightly darken the colors.
Frame your piece behind glass with a mat to keep the pastel dust away from the glass surface


Aurora-Inspired Color Ribbons
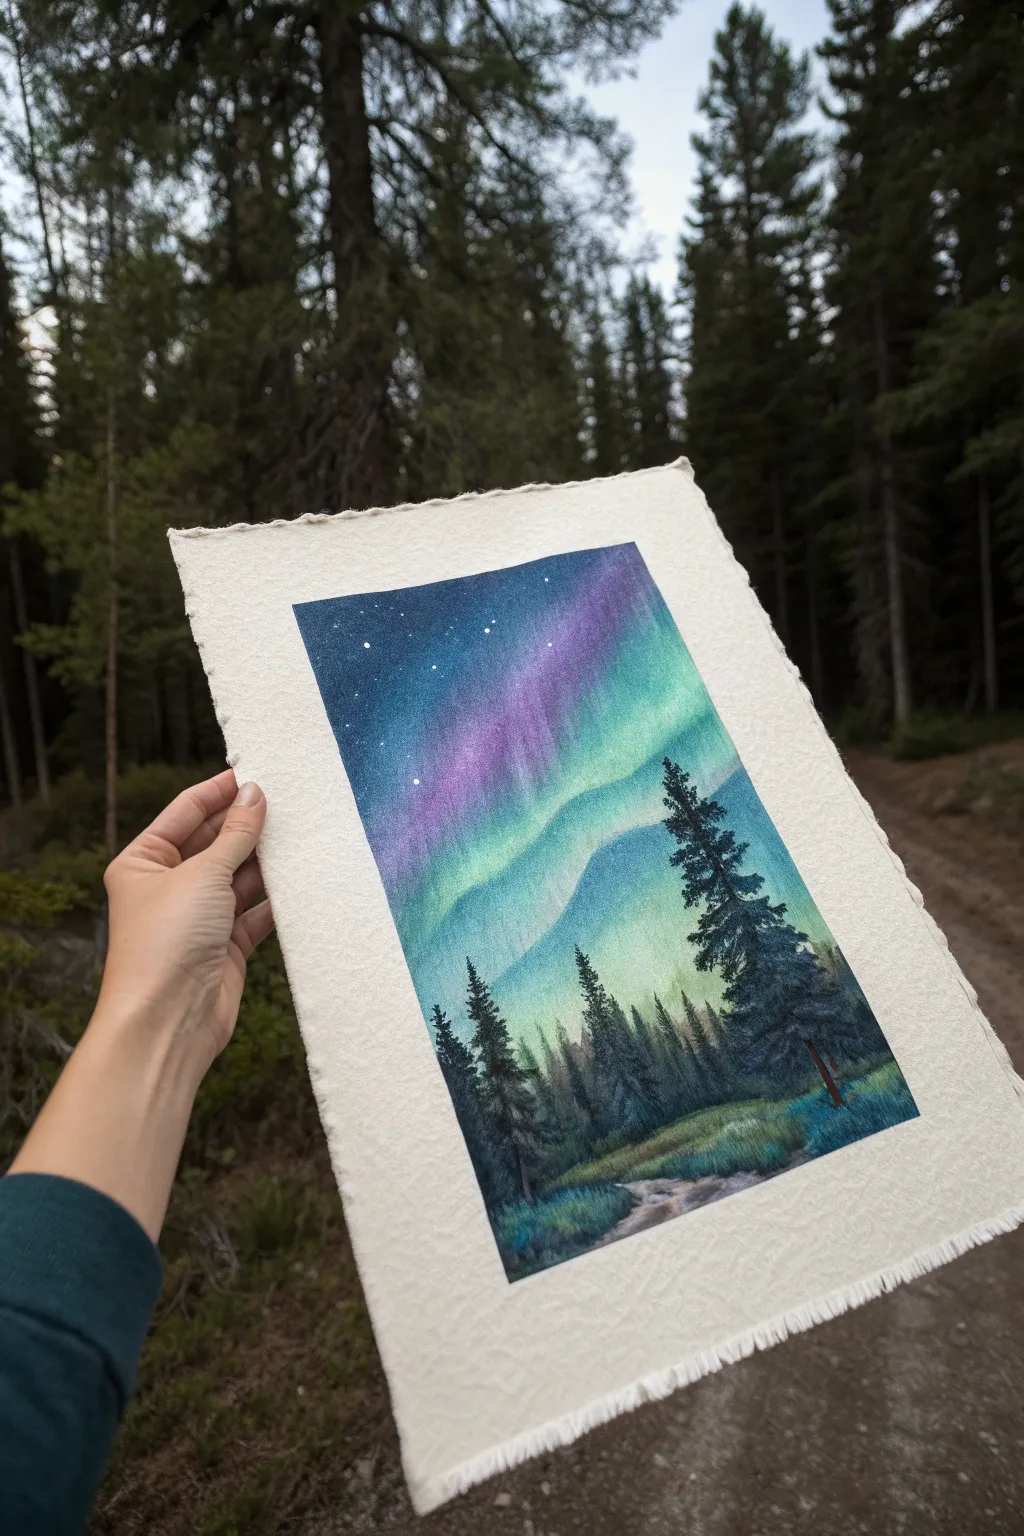
Capture the magic of the northern lights with this stunning soft pastel landscape, featuring vibrant ribbons of color dancing above a serene pine forest. The texture of the handmade paper adds a rustic charm that perfectly complements the ethereal glow of the night sky.
How-To Guide
Materials
- Textured or handmade pastel paper (cream/off-white)
- Soft pastels (Deep indigo, violet, magenta, teal, bright cyan, forest green, black)
- Pastel pencils (black, dark green, white)
- Blending stumps or soft paper towels
- Fixative spray (workable)
- Masking tape (optional, to hold paper flat)
- Kneaded eraser
Step 1: Setting the Night Sky
-
Establish the background:
Start at the very top of your paper with your deepest indigo or midnight blue soft pastel. Apply it heavily in the upper left corner, fading slightly as you move toward the center. -
Create the transition:
Below the indigo, blend in a band of violet or deep purple. Use your fingers to smudge the border between the blue and purple so there are no hard lines. -
Add the first glow:
In the center of the sky, introduce a vibrant magenta or pink hue. Let this color streak downwards diagonally from the upper right toward the middle left. -
Applying the aurora teal:
Below the pink, lay down thick strokes of bright teal and cyan. These strokes should wave and curve like a ribbon across the paper, creating the main body of the aurora. -
Initial blending:
Gently blend the teal upwards into the pink and purple using a clean finger. You want a soft, misty transition where the colors meet, mimicking light dispersing in the atmosphere.
Muddy Colors?
If your sky colors turn grey when blending, stop! Wipe your fingers clean between every color shift. Blue and orange mix to brown, so keep warm and cool blending zones separate.
Step 2: Refining the Lights and Stars
-
Intensify the glow:
Layer a brighter, almost white-cyan pastel right in the center of your teal ribbons to create a glowing ‘core’ for the lights. -
Soften the edges:
Use a light touch to pull some of the teal color downwards into the area that will become the horizon, creating a hazy, atmospheric look near the treeline. -
Add the stars:
Using a sharp white pastel pencil or a corner of a white pastel stick, dot tiny stars into the dark indigo sections at the top left. Vary the pressure to make some stars brighter than others. -
Secure the layer:
Lightly spray the artwork with a workable fixative. This prevents the sky from getting muddy when we add the dark trees on top.
Step 3: Creating the Forest Landscape
-
Block in the ground:
At the bottom of the page, block in the grassy area using shades of olive and forest green. Keep the strokes horizontal and somewhat loose. -
Sketch the path:
Leave a small, winding negative space or add light grey/brown strokes to suggest a narrow path cutting through the grass in the foreground. -
Establish the tree shapes:
Using a dark charcoal or black pastel stick, sketch the vertical lines for the tree trunks. Place the tallest, most prominent tree on the right side for balance. -
Foliage details:
Switch to a black or very dark green pastel pencil for control. scribbling tight, downward-slanting zig-zag motions to create the pine branches on your tree trunks. -
Varying the canopy:
Make the trees on the left side slightly shorter and less detailed to push them into the distance. Ensure the tops of the trees overlap the glowing sky. -
Adding dimension to trees:
Lightly touch the lighter green pastel to the tips of the right-hand tree branches. This suggests the aurora’s light is reflecting off the needles. -
Deepening the shadows:
Reinforce the darkest shadows at the very base of the trees where they meet the grass to ground them firmly. -
Refining the foreground:
Use blending stumps to smudge the grassy area slightly, integrating the base of the trees into the landscape. Add a few vertical flicks of green for grass blades near the path.
Level Up: Star Clusters
Make a constellation pop by using a white gel pen for the brightest stars instead of pastel. The sharp tint contrast against the soft sky adds incredible depth.
Now step back and admire how the vibrant celestial colors contrast against the silent, dark forest
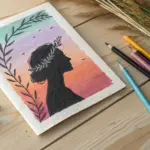
Black Paper Neon Color Pop Study
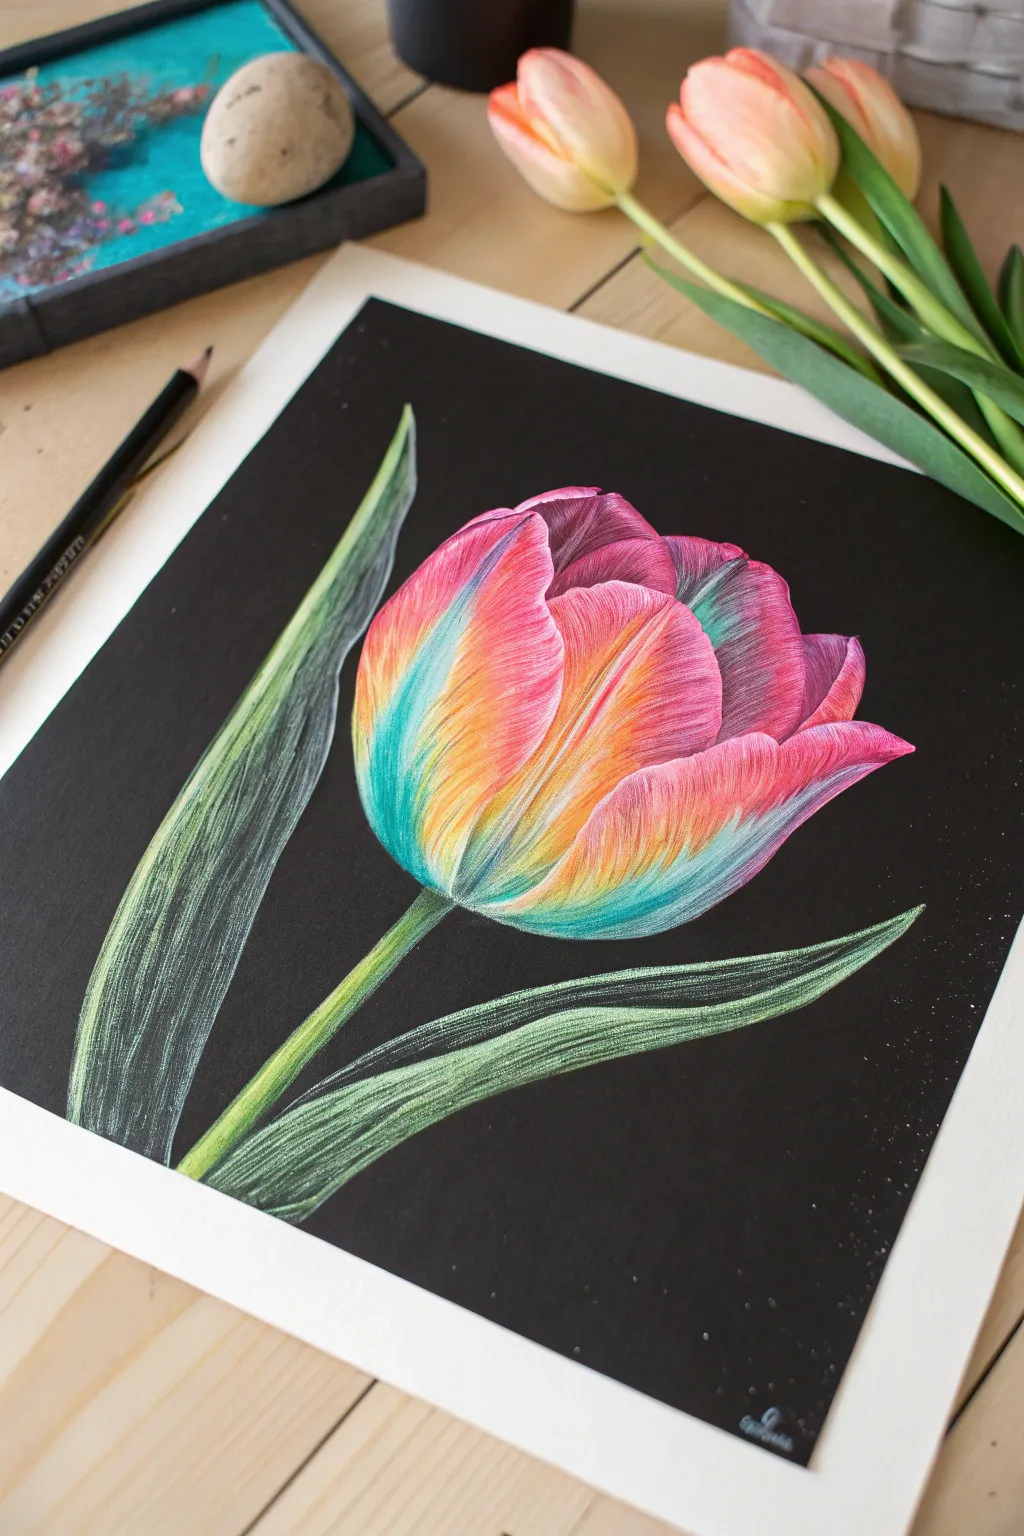
This stunning study explores the power of negative space by placing a vibrant, multicolored tulip against a deep black background. The high contrast allows the neon-like pinks, oranges, and teals to pop dramatically, creating a glowing effect that brings the flower to life.
Step-by-Step
Materials
- Black mixed media or pastel paper (smooth or fine tooth)
- Soft pastel sticks (magenta, teal, orange, yellow, white, deep purple)
- Pastel pencils (white, light green, dark green, black for cleanup)
- Blending stump or torchon
- Kneaded eraser
- Workable fixative (optional)
- Masking tape
Step 1: Sketching the Framework
-
Secure the paper:
Tape down your black paper to a drawing board or hard surface to keep it flat and create a crisp border if desired. -
Outline the shape:
Using a white or very light gray pastel pencil, lightly sketch the basic cup shape of the tulip head. Keep your pressure extremely light so lines can be easily adjusted. -
Add petal definition:
Draw the overlapping curves that define the individual petals. Focus on the central petal and the two side petals wrapping around it. -
Stem and leaves:
Sketch a sturdy stem descending from the flower base and add two long, lance-shaped leaves—one rising high on the left and a lower one extending to the right.
Glow Up Technique
To make the colors truly neon, lay down a thin layer of white pastel first, blend it into the black paper, and then apply your bright pinks and teals on top.
Step 2: Layering the Flower Head
-
Base layer of pink:
Start by applying a vibrant magenta or hot pink soft pastel to the upper edges and main body of the petals. Apply broadly, following the curve of the flower. -
Introduce teal shadows:
For the shadowed areas at the base of the flower and the outer edges of the side petals, scumble in a bright teal or turquoise hue. This unexpected cool tone creates the ‘neon’ look. -
Add warmth with orange:
In the center of the petals where the pink meets the teal base, blend in a bright orange pastel. This creates a glowing transition zone. -
Blend the transition:
Use your finger or a blending stump to gently smudge these colors together. Aim for a soft gradient where pink turns to orange, then to teal. -
Deepen the shadows:
Use a deep purple or dark magenta pastel in the crevices between petals to create separation and depth. -
Highlighting texture:
Switch to pastel pencils for detail. Make fine, flicking strokes with white and light pink over the petals to mimic the vertical veins and texture of tulip skin.
Step 3: Developing the Greenery
-
Base green layer:
Fill the stem and leaf shapes with a medium green soft pastel. Don’t worry about perfect coverage yet. -
Cool shadows on leaves:
Apply the same teal used in the flower to the shadowed side of the leaves (the left side of the tall leaf, for example) to unify the color palette. -
Brighten the edges:
Use a light yellow-green or lime pastel along the illuminated edges of the stem and leaves to make them look cylindrical. -
Create leaf striations:
With a white or very pale green pastel pencil, draw long, continuous lines running the length of the leaves. This simulates the parallel venation found in tulips. -
Blend lightly:
Gently smooth the leaf colors, but leave some of the pencil texture visible to keep the foliage interesting.
Muddy Color Fix
If your orange and teal start turning brown where they meet, stop blending. Spray a light fixative, let it dry, and then layer fresh color on top to keep hues pure.
Step 4: Refining and Cleaning
-
Intensify contrast:
Go back with your brightest white pastel pencil and add sharp highlights to the very tips of the petals and the brightest curve of the stem. -
Correct with black:
Use a black pastel pencil to tidy up the outer edges of your drawing. I find this helps ‘erase’ any stray dust and sharpens the silhouette against the dark paper. -
Final dust removal:
Tap the board vertically to shake off loose powder, or use a kneaded eraser to lift specific spots without smearing.
Step back and admire how the dark background makes your vibrant tulip appear to be glowing from within
Negative Space Silhouette on a Filled Background
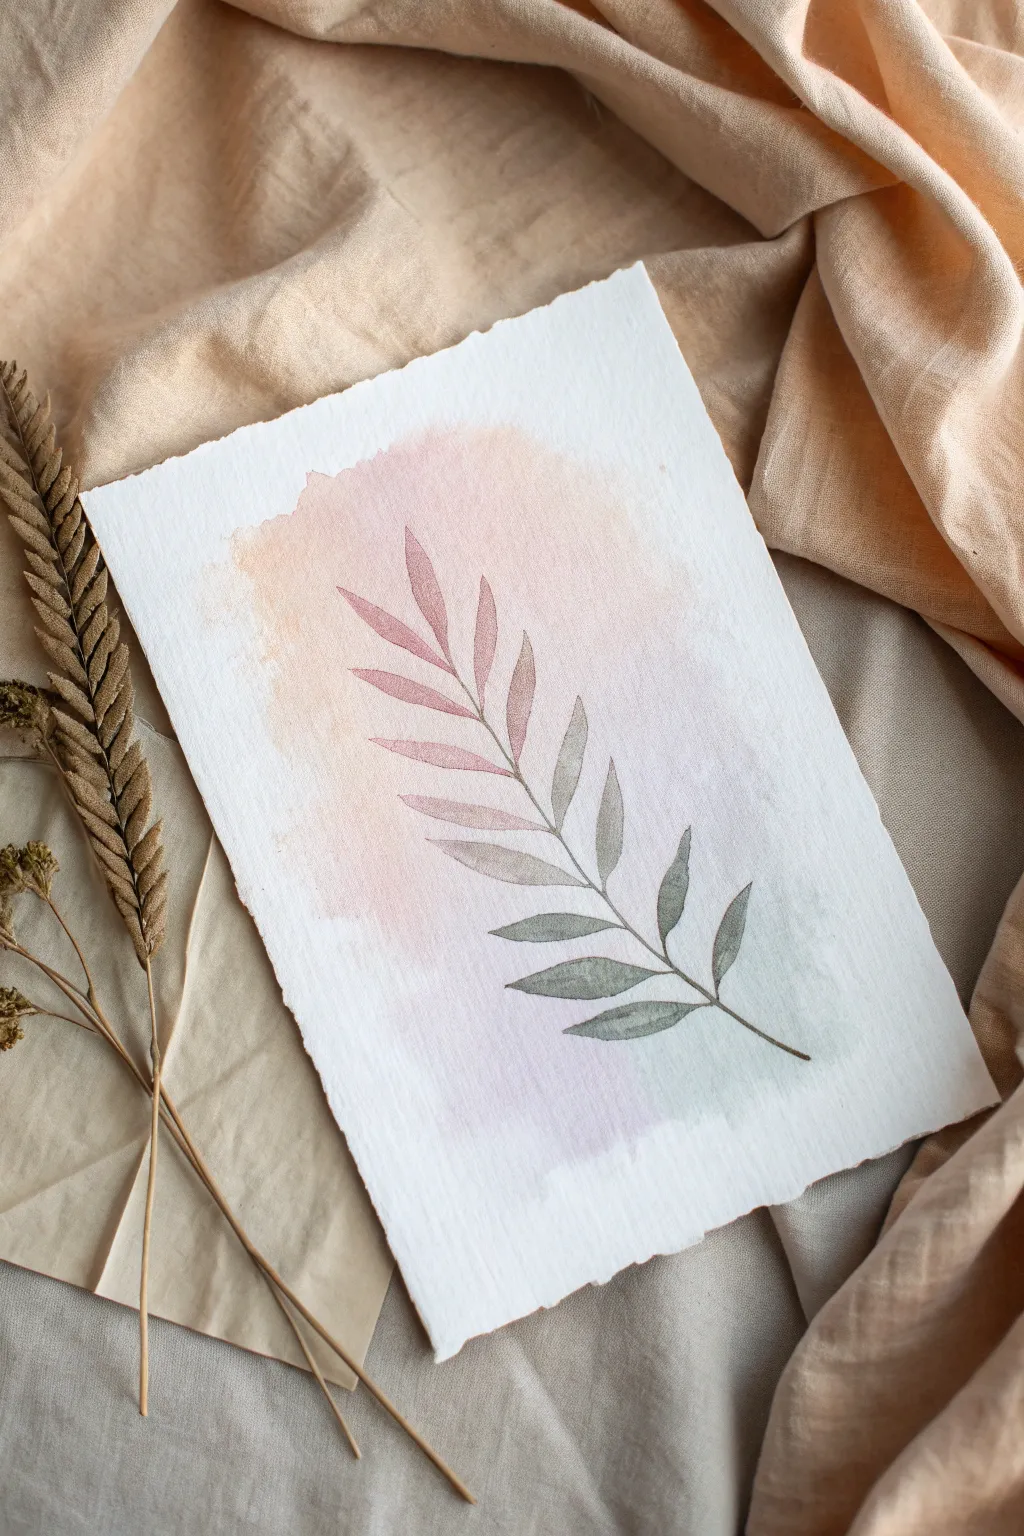
Capture the delicate beauty of nature with this soft focus watercolor leaf study. This project combines a dreamy, pastel wash background with a precisely painted botanical silhouette that transitions from warm pink to cool sage green.
Step-by-Step Tutorial
Materials
- Cold press watercolor paper (deckle edge preferred, approx. 300gsm)
- Watercolor paints (Alizarin Crimson, Sap Green, Paine’s Gray, Yellow Ochre)
- Round watercolor brushes (Size 6 for washes, Size 2 for details)
- Jar of clean water
- Paper towels
- Pencil (HB or H)
- Kneaded eraser
- Mixing palette
Step 1: Preparation & Sketching
-
Preparing the paper:
If you are using a large sheet, tear it to size using a ruler to create the soft, deckled edges shown in the photo, or start with pre-cut handmade cotton rag paper. -
Sketching the stem:
Using a hard pencil like an H or HB, very lightly draw the central curved line of the stem starting from the bottom right and arching up towards the left. -
Adding the leaves:
Sketch the outline of the leaves. Start with smaller leaves at the tip and make them progressively longer as you move down the stem. Keep the pressure extremely light so the graphite doesn’t show through the translucent paint later. -
Softening the lines:
Roll a kneaded eraser gently over your sketch. You want the lines to be barely visible, just enough to guide your brush without trapping graphite under the watercolor.
Step 2: Creating the Background Wash
-
Mixing the warm wash:
On your palette, water down a mix of Yellow Ochre and a tiny touch of Alizarin Crimson to create a very pale, watery peach tone. -
Applying the initial wash:
With your size 6 brush, paint a loose, abstract shape behind where the upper leaves will sit. Use plenty of water so the edges remain organic and soft. -
Transitioning colors:
While the peach area is still damp, rinse your brush and pick up a very watery mix of Alizarin Crimson and Paine’s Gray for a dusty purple tone. Touch this to the bottom edge of the peach wash, letting them bleed together naturally. -
Adding cool tones:
Mix a very pale wash of Sap Green and Paine’s Gray. Apply this to the bottom right area of the background shape, allowing it to merge with the purple section. -
Softening edges:
Dip your brush in clean water and run it along the outer edges of your background shape to fade the color out into the white paper, avoiding hard lines. -
Drying time:
Let this background layer dry completely. It must be bone dry before you paint the leaves on top, or the details will bleed.
Wet-on-Dry Precision
Ensure the background wash is totally dry. If the paper feels cool to the touch, it’s still wet inside. Use a hair dryer on low to speed it up.
Step 3: Painting the Botanical Subject
-
Mixing the leaf gradient:
Prepare two main puddles of paint: a dusty rose (Alizarin Crimson + tiny bit of Green to desaturate) and a sage green (Sap Green + Paine’s Gray). -
Starting the top leaves:
Switch to your size 2 detail brush. Load it with the dusty rose mix and carefully fill in the top 3-4 leaves and the upper stem. -
Beginning the blend:
For the next set of leaves down, dip your brush into the sage green mix without fully rinsing off the pink. This creates a muddy, transitional brownish-purple tone for the middle leaves. -
Painting the middle section:
Paint the middle leaves with this transitional color. I like to drop a tiny dot of pure water into the center of a wet leaf occasionally to create a ‘bloom’ texture. -
Transitioning to green:
Rinse your brush and load it purely with the sage green mix. Paint the lower leaves, ensuring crisp points at the tips. -
Refining the stem:
Connect the leaves with the main stem line. As you move down, thicken the line slightly, transitioning the color from the pink at the top to the dark green at the base. -
Adding depth:
While the lower green leaves are still slightly damp, drop a more concentrated mix of Paine’s Gray into the very base of the leaves (where they meet the stem) to add dimension. -
Final drying:
Allow the painting to dry flat. If the paper buckles slightly, you can press it under heavy books once it is 100% dry.
Metallic Veins
Once the painting is dry, use a fine-tip gold gel pen or metallic watercolor to draw delicate central veins on the leaves for a bit of shimmer.
Display your finished piece in a floating frame to show off those beautiful deckled edges
Pastel Dust Painting With Soft Scatter Texture
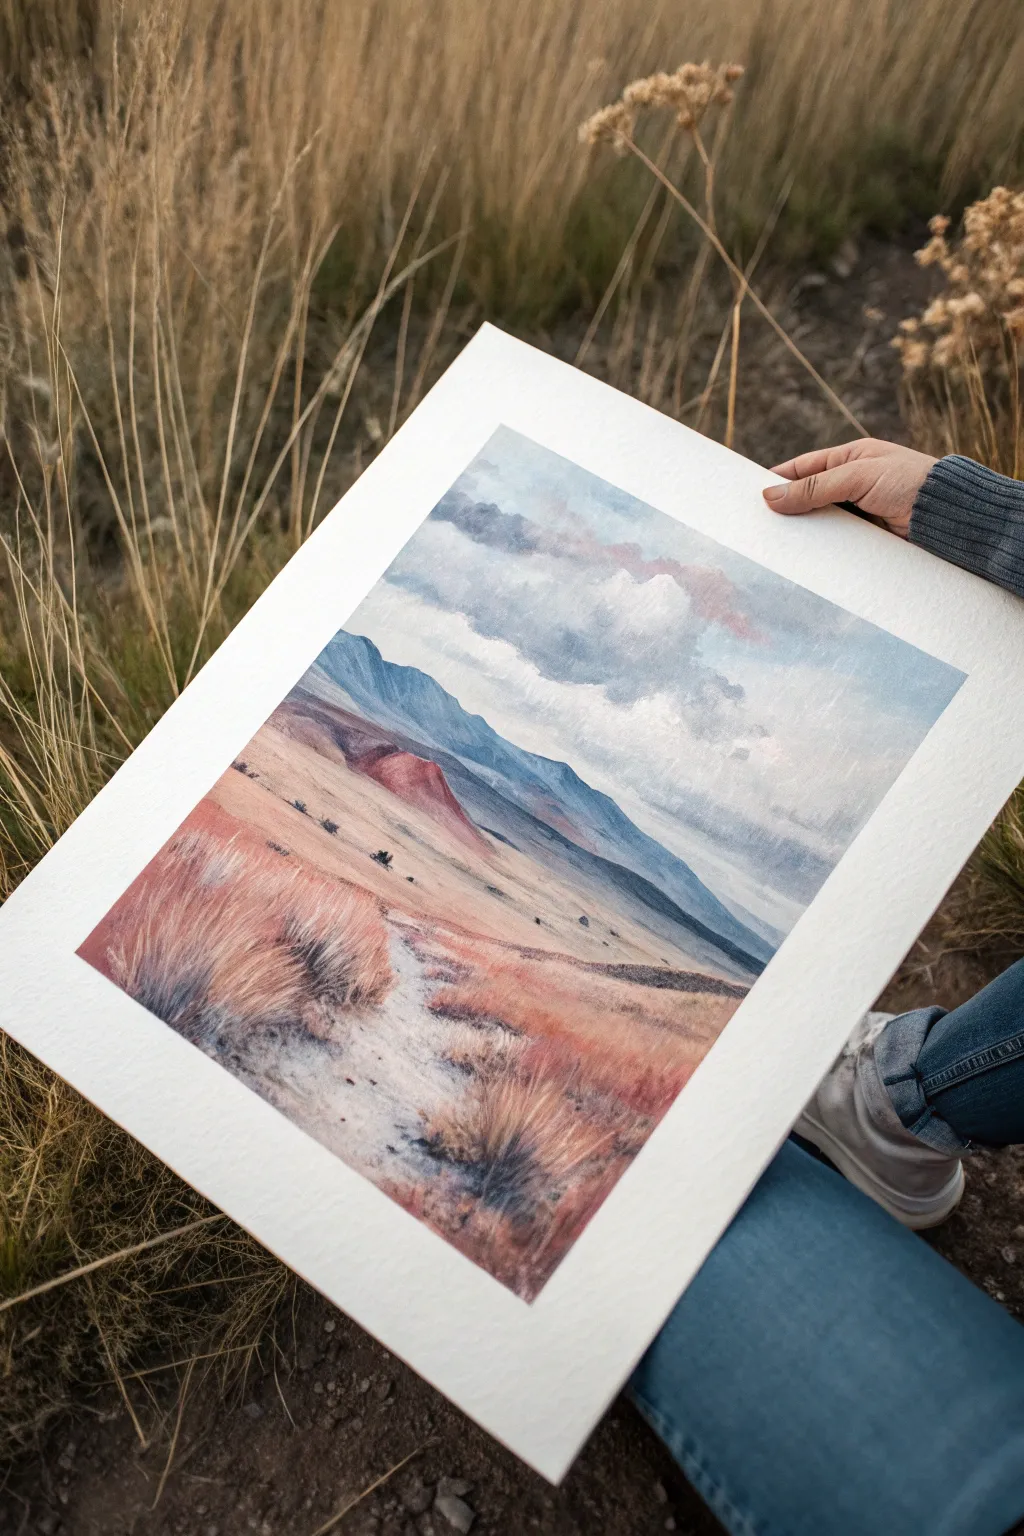
Capture the serene beauty of a wide-open valley with this atmospheric soft pastel landscape. You’ll layer soft pinks, dusty ochres, and hazy blues to create a scene that feels expansive and gently windswept.
Detailed Instructions
Materials
- Textured pastel paper (white or light cream)
- Soft pastels (full landscape set)
- Hard pastels or pastel pencils (for details)
- Blending stumps or tortillons
- Kneadable eraser
- Glassine paper (hand rest)
- Fixative spray (workable)
- Masking tape
Step 1: Setting the Sky and Horizon
-
Tape down boundaries:
Secure your paper to a rigid board using masking tape, leaving a clean white border around the edges. This creates that professional framed look seen in the photo. -
Base layer for the sky:
Using the side of a light blue pastel stick, sweep broad strokes across the upper third of the paper. Leave random patches of white paper showing to represent the brightest cloud highlights. -
Adding cloud shadows:
Introduce a soft, muted grey-purple into the lower sections of the clouds. Use a very light touch, gently scumbling the pigment over the blue to suggest volume without harsh edges. -
Warm up the atmosphere:
Lightly graze a pale salmon pink or peach color near the horizon line and drift a little into the upper clouds. This mimics the warm glow of sunlight filtering through the atmosphere. -
Blend the sky:
Use your fingers to gently smudge the sky colors together. Aim for a soft, out-of-focus look, ensuring the transition from blue to pink is seamless.
Muddy colors?
If your valley floor starts looking muddy, stop blending! Spray a light layer of fixative, let it dry completely, and then apply fresh, clean strokes of color on top to restore vibrancy.
Step 2: Sculpting the Mountains
-
Block in distant peaks:
Select a cool, hazy blue pastel. Sketch the outline of the furthest mountain range. Keep the silhouette irregular but not jagged, suggesting eroded slopes. -
Layering the mid-ground range:
For the closer mountain ridge that cuts diagonally across the middle, use a slightly darker, more saturated blue-grey. Apply the pastel with downward strokes to mimic gravity’s pull on the slopes. -
Adding atmospheric perspective:
Lightly glaze a touch of the sky’s pale violet over the distant mountains to push them further back. The closer ridge should remain darker and more defined.
Add movement
To simulate wind, angle your foreground grass strokes slightly to the right. Use a hard eraser to lift out ‘wind streaks’ in the sky for a breezier atmosphere.
Step 3: Developing the Valley Floor
-
Lay the sandy foundation:
Cover the large mid-ground valley area with a creamy ochre or sand color. Use wide, horizontal strokes to emphasize the flatness of the plains. -
Introduce the red earth:
Identify the unique red hill feature on the left side. Use a dusty terracotta or burnt sienna pastel to block in this shape, blending it slightly into the valley floor. -
Shadows and depth:
Add subtle shadows to the valley using a muted cool brown. Place these shadows behind the red hill and in the crevices of the distant slopes to give the terrain three-dimensionality. -
Scatter small vegetation:
Take a dark grey or deep green hard pastel (or sharp edge of a stick) and dot tiny, irregular marks across the mid-ground. These represent distant sagebrush or scrub.
Step 4: Detailing the Foreground
-
Establishing the path:
In the bottom left, leave a winding area lighter, using a very pale grey or off-white to suggest a dry, dusty trail cutting through the grass. -
Base colors for grass:
Apply a mix of burnt orange, rust, and dull pinks to the bottom section of the paper. These directional strokes should flick upward slightly to suggest tall, dried grasses. -
Creating texture:
Using the side of a textured pastel, drag it lightly over the foreground colors. This ‘scumble’ technique catches the paper’s tooth, creating a gritty, scatter-texture effect perfect for dry earth. -
Defining grass clumps:
Switch to a harder pastel or pastel pencil in dark brown and charcoal grey. Draw decisive, upward-flicking lines in clusters to create specific tufts of grass in the immediate foreground, especially near the bottom right. -
Final highlights:
Use a sharp, cream-colored pastel to add sunlit tips to the foreground grass clumps. A few final bright strokes on the path will help guide the viewer’s eye into the painting.
Peel back your tape to reveal crisp edges that instantly frame your beautiful, airy landscape


Have a question or want to share your own experience? I'd love to hear from you in the comments below!