
If you’ve ever stared up at the night sky and wanted to bottle that feeling on paper, a solar system painting is such a satisfying way to do it. I love how you can go super simple and graphic or get wildly detailed with textures, rings, and glowing atmospheres—either way, it always feels a little magical.
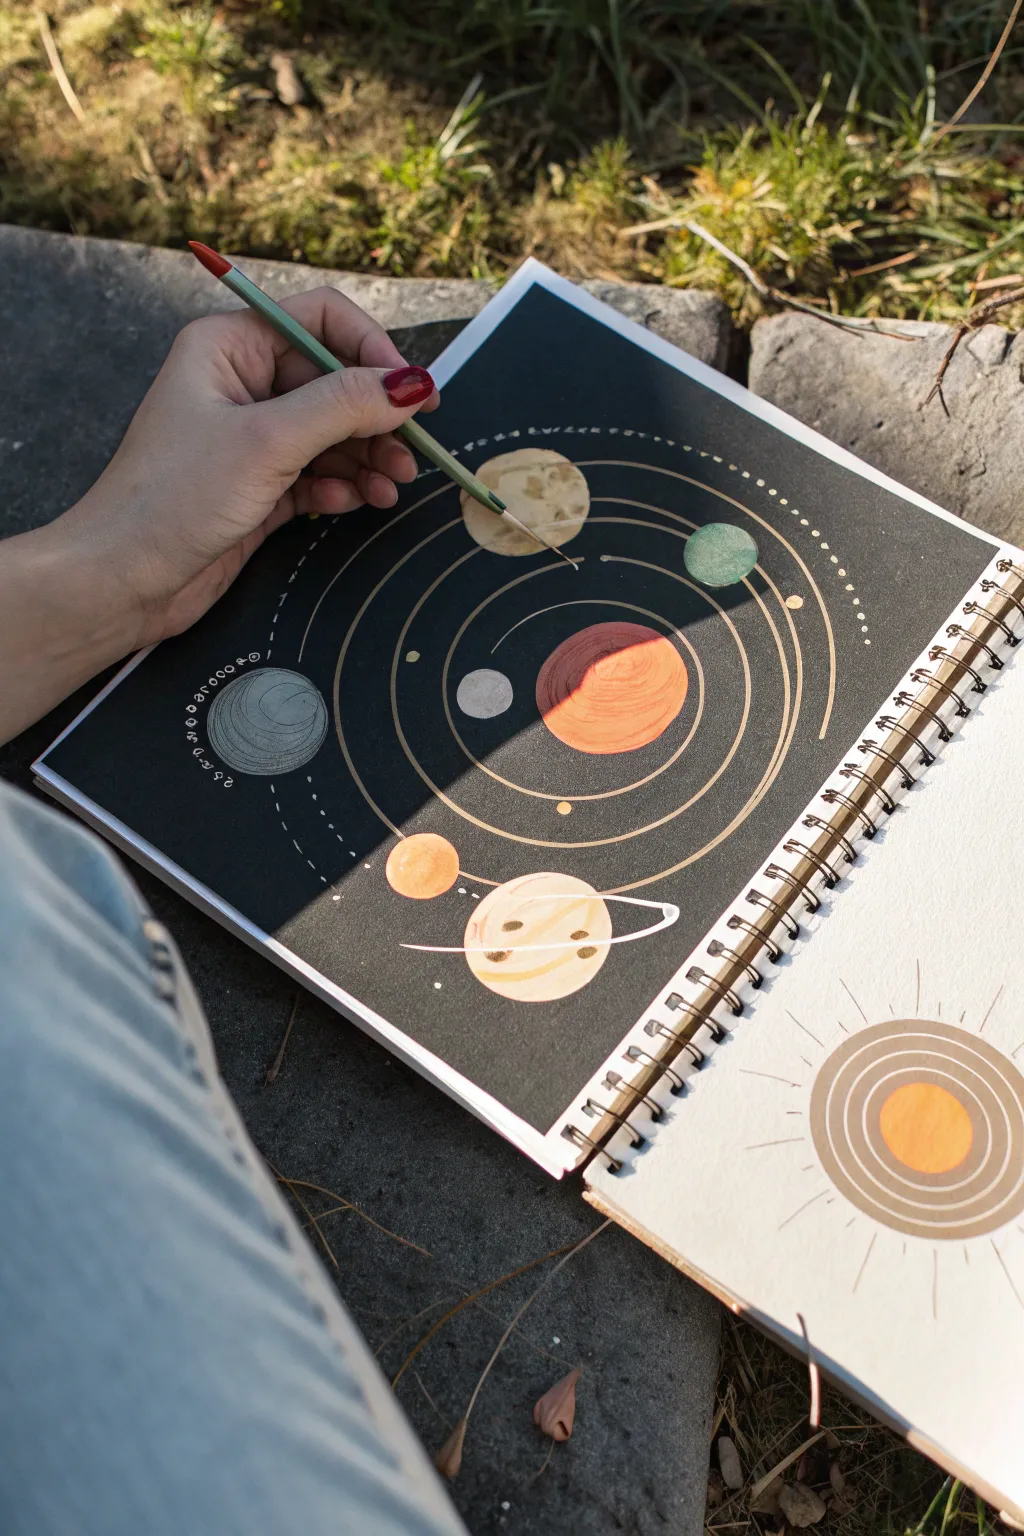
Classic Solar System Orbit Diagram

Capture the cosmic dance of planets with this elegant solar system orbit chart. The deep, starry background contrasts beautifully with the delicate metallic shimmers and concentric white lines, creating a piece that feels both scientific and artistic.
Step-by-Step Guide
Materials
- Square watercolor paper (heavyweight, cold press)
- Deep indigo and black watercolor or gouache
- Metallic watercolor set (gold, copper, silver, bronze)
- Standard watercolor set
- White gel pen or fine white paint marker
- Compass tool (essential for perfect circles)
- Ruler
- Pencil and eraser
- Round paintbrushes (size 2 and 6)
- Salt (table salt)
- White square frame
Step 1: Setting the Stage
-
Draft the orbits:
Begin by finding the exact center of your square paper. Using a compass, lightly draw a series of concentric circles radiating outward. These will be your orbit paths, so space them somewhat evenly, though the inner orbits can be tighter together. -
Sketch the planets:
Lightly sketch circles for the planets heavily based on their real sizes relative to each other—make Jupiter distinctively large and Mercury tiny. Place them randomly along their orbit lines to create a dynamic composition rather than a straight line. -
Mask the celestial bodies:
If you have liquid masking fluid, apply it carefully over your pencil sketches of the sun and planets. If not, you will need to paint very carefully around them in the next phase.
Uneven Circles?
If your hand-traced orbit lines look shaky, don’t worry. Go over them a second time loosely to create a ‘sketchy’ artistic style, or use a compass adapter that holds a gel pen.
Step 2: Painting the Cosmos
-
Mix the background color:
Create a rich, dark space color by mixing indigo, black, and a touch of deep violet. You want a color that is nearly black but has depth. -
Apply the first wash:
Paint the entire background around your planets. Keep the wash relatively wet to allow for some natural texture variation. -
Add starry texture:
While the background paint is still wet, sprinkle a pinch of table salt onto onto the paper. As it dries, the salt will push the pigment away, creating tiny star-like bursts and nebula textures. Let this dry completely before brushing the salt off. -
Deepen the void:
Once dry, assess the darkness. If it looks too pale, add a second layer of dark wash, being careful not to obliterate the cool textures you just made.
Pro Tip: Splatter Technique
For extra depth in your galaxy, load a stiff toothbrush with white gouache and flick the bristles to spray a fine mist of distant stars over the dark background.
Step 3: Bringing Planets to Life
-
Paint the Sun:
Remove the masking fluid if you used it. Paint the central sun using a bright opaque yellow gouache or watercolor. While wet, drop in a deeper orange/gold to give it a spherical, glowing appearance. -
Detail the rocky planets:
For Mercury, Venus, Earth, and Mars, use small brushes. Mix metallic paints with standard colors—try a copper shimmer for Mars and a blue-green shimmer for Earth. The metallic sheen mimics the light reflecting in space. -
Paint the gas giants:
Jupiter and Saturn need banded textures. Paint the base circle, then while wet, drag a slightly darker color across horizontally to create stripes. -
Add Neptune and Uranus:
Use cool blues and aquatic teals for the outer ice giants. A wash of metallic silver over the top gives them an icy, distant look. -
Create the asteroid belt:
Between the orbits of Mars and Jupiter, use a tiny brush or the tip of a white pen to stipple a ring of dots, representing the asteroid belt.
Step 4: Final Alignment
-
Trace the orbits:
Once all paint is bone dry, use a white gel pen or fine paint marker to carefully trace over your pencil orbit lines. Use your compass with the pen attached if you want machine-perfect precision, or freehand it for an organic look. -
Add distinct stars:
Use the white gel pen to add sharp, specific stars in empty areas of the background to complement the softer salt textures. -
Add the text details:
At the very bottom of the piece, use a fine-tip pen to write small symbols or names for each planet corresponding to their vertical alignment, adding a scientific diagram feel. -
Erase guidelines:
Gently erase any visible pencil marks remaining around the edges or text. -
Frame the universe:
Place your finished solar system into a clean white square frame to make the dark background pop.
Hang your new orbital map in a study or bedroom to inspire dreams of space travel

Planets in a Straight Line Layout
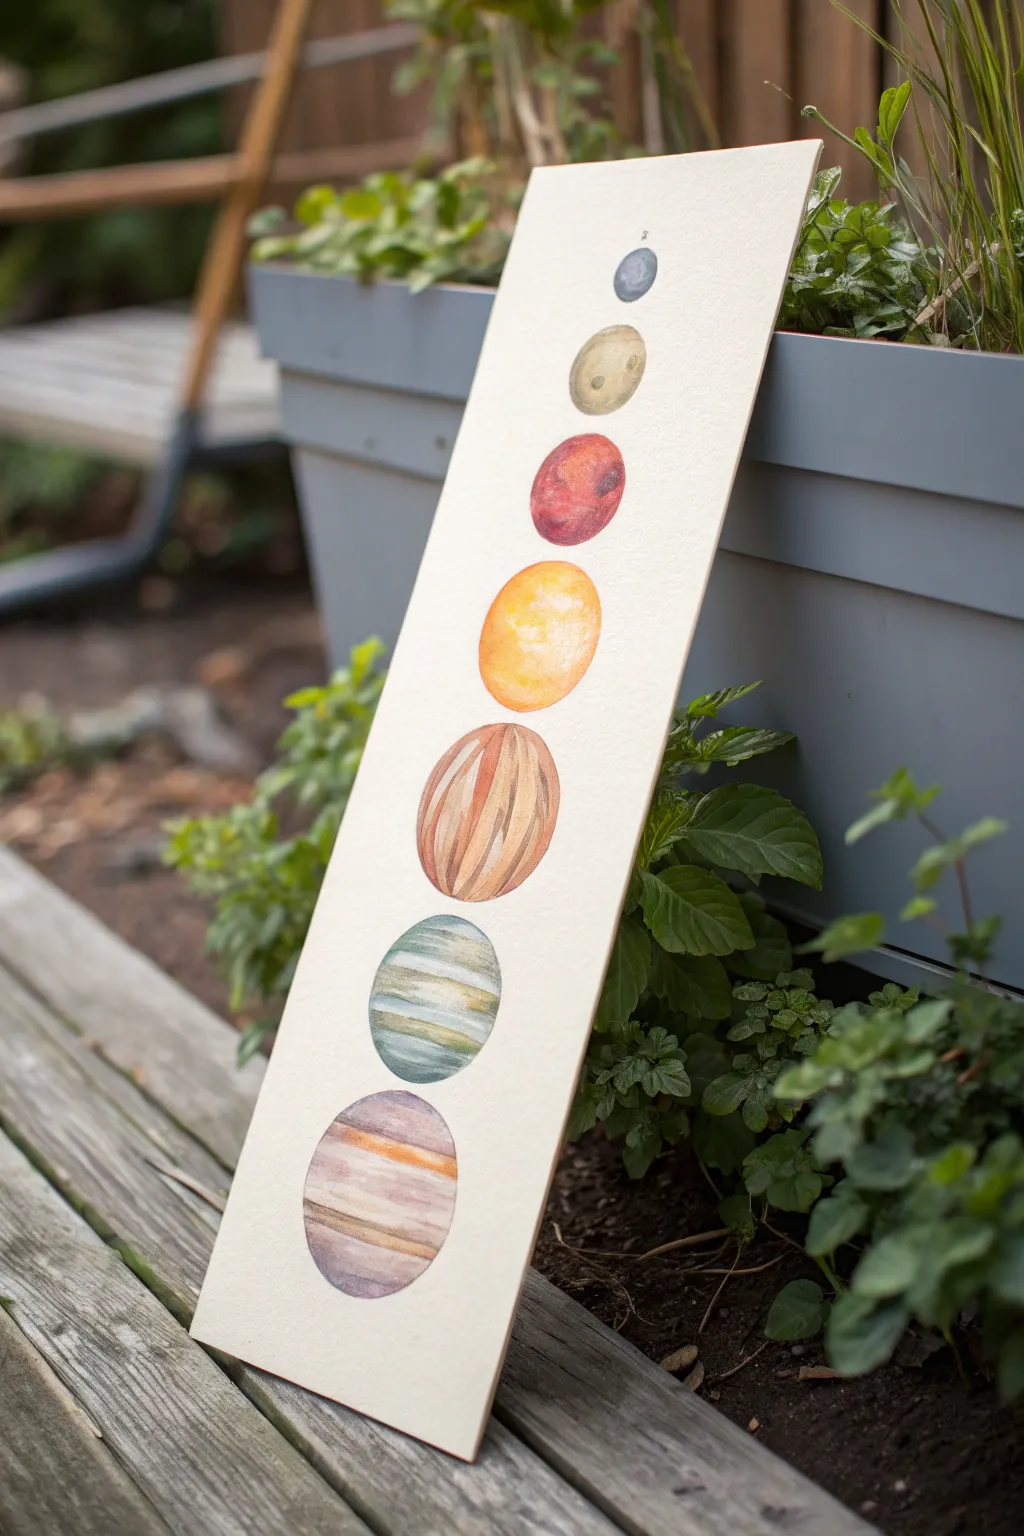
Capture the serene beauty of the cosmos with this elegant watercolor study, featuring seven celestial bodies aligned in a perfect vertical column. The soft, textured washes and warm, earthy palette give this scientific arrangement a distinctly artistic and vintage feel.
Detailed Instructions
Materials
- heavyweight watercolor paper or illustration board (long vertical strip)
- watercolor paints (ochre, burnt sienna, sepia, indigo, olive green, cadmium orange)
- round watercolor brushes (size 4 and 8 for laying washes)
- fine liner brush (size 0 or 1 for details)
- compass or circle stencil
- pencil (HB or 2H)
- kneaded eraser
- jar of clean water
- paper towels
Step 1: Planning the Composition
-
Paper preparation:
Begin by cutting your watercolor paper or board into a long, narrow rectangle. A ratio of roughly 1:3 works well for this elongated layout. -
Finding the center:
Use a ruler to lightly mark a vertical centerline down the entire length of the paper. This invisible guide is crucial for keeping your planets perfectly stacked. -
Drafting the circles:
Using a compass or circle stencil, lightly draw seven circles along your centerline. Start with the largest circle at the bottom (Jupiter) and gradually decrease the size as you move upward, though keeping them relatively close in scale creates a pleasing stylized look. -
Refining the sketch:
Lightly sketch the internal details for the gas giants. For the bottom two planets, draw horizontal curved bands to guide your painting later. For the striped planet in the middle, draw vertical or diagonal striations. -
Clean up:
Gently roll a kneaded eraser over your pencil lines to lift the graphite until it is barely visible. Heavy pencil marks can smudge into wet watercolor and look messy.
Step 2: Painting the Gas Giants (Bottom)
-
Jupiter’s base layer:
Start with the bottom-most planet (Jupiter). Wet the circle with clean water first, then drop in a pale wash of mauve or desaturated purple mixed with a touch of brown. -
Creating bands:
While the paper is still damp but not soaking, stroke in horizontal bands of burnt sienna and ochre. Let the colors bleed slightly into the base wash for soft edges. -
Saturn’s stripes:
Moving to the second planet up (Saturn), apply a base wash of pale olive or grey-green. Once this is semi-dry, use a smaller brush to paint distinct horizontal stripes using a mix of indigo and deep green to create volume. -
Textural lifting:
If the bands look too heavy, use a clean, thirsty brush to lift some pigment off the center of the sphere, creating a highlight that enhances the 3D effect.
Water Control Tip
For smooth, round planets without ‘cauliflower’ blooms, pre-wet the paper circle with clean water first. Drop pigment into the wet area and let it spread naturally to the edges.
Step 3: Painting the Terrestrial Planets (Middle)
-
Vertical texture:
For the third planet up, which features distinctive vertical striping, start with a warm cream base. Paint curvaceous vertical stripes using varied tones of terracotta and brown to mimic woodgrain or geological strata. -
Sun-kissed sphere:
The fourth planet is a glowing orange orb. Wet the circle and drop in cadmium orange, letting it pool more heavily at the bottom right to suggest shadow. -
Adding gradients:
While the orange planet is wet, drop a tiny amount of yellow into the upper left quadrant for a highlight, and a touch of red-orange at the bottom for depth. -
Mars texture:
For the fifth circle (the red planet), use a dry-brush technique with reddish-brown paint. Dab the color onto dry paper to create a craggy, cratered texture rather than a smooth wash.
Bleeding Edges?
If paint is bleeding outside your circle lines, your brush is overloaded. Blot your brush on a paper towel before touching the paper to control the flow better.
Step 4: Finishing Details
-
Upper planets:
Paint the second-to-top planet with a diluted wash of raw sienna or beige. While wet, drop in darker brown spots to create craters or surface variation. -
The final moon:
The smallest, top circle should be painted a cool grey-blue. Keep it simple, perhaps darker on one side to match the light source of the others. -
Defining edges:
Once all planets are completely bone-dry, use your smallest brush with a very diluted dark paint (sepia or indigo) to lightly crisp up any edges that became too fuzzy, but don’t outline the whole circle. -
Final assessment:
Check for consistency in lighting. Use a slight glaze of shadow color on the bottom-right of each sphere if they look too flat.
Now you have a stunning, scientifically-inspired art piece ready to bring a touch of the galaxy to your home decor


Textured Planet Close-Ups on a Starry Field
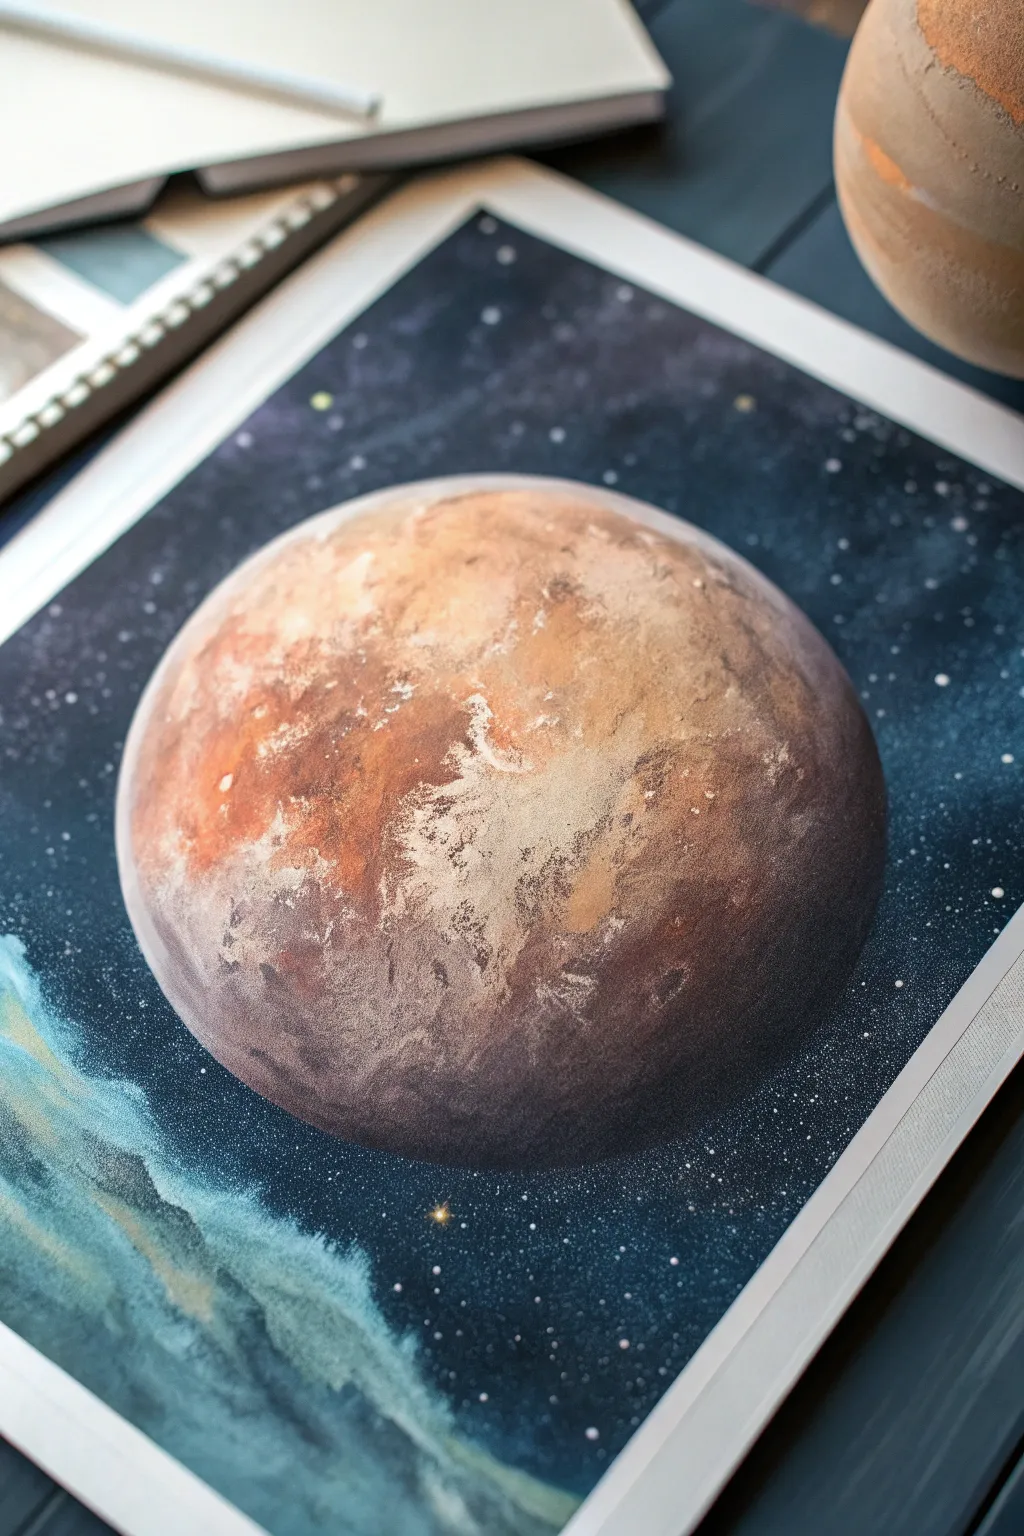
Capture the craggy, mysterious surface of a distant world with this textured planet painting. Using dry-brushing and sponging techniques, you will build up layers of color to create a realistic spherical illusion against a deep space background.
Step-by-Step Guide
Materials
- Heavyweight watercolor paper or mixed media paper (A4 or larger)
- Masking tape
- Acrylic paints: Titanium White, Mars Black, Burnt Sienna, Yellow Ochre, Ultramarine Blue, Phthalo Blue
- Large circular object (plate or bowl) or compass
- Pencil
- Medium flat brush
- Small round detail brush
- Natural sea sponge or scrunched paper towel
- Old toothbrush (for splattering)
- Palette or paper plate
- Water cups and paper towels
Step 1: Preparing the Void
-
Secure the paper:
Tape down all four edges of your paper to a flat work surface. This creates a clean white border and prevents buckling when the paint gets wet. -
Outline the planet:
Place your circular template (like a plate) slightly off-center on the paper. Lightly trace the circle with a pencil. Don’t press too hard; you just need a faint guide. -
Base coat the sky:
Mix Mars Black with a touch of Ultramarine Blue to create a deep, rich dark tone. Using your flat brush, carefully paint the entire area *outside* the circle. Cut in carefully around the pencil line to keep the planet shape crisp. -
Add depth to space:
While the black mix is slightly damp, blend in some pure Phthalo Blue in the corners or random patches. This subtle variation makes space look vast rather than flat. -
Create the nebula mist:
In the bottom left corner, mix a watery wash of teal (Phthalo Blue + White). Dab this loosely to create a cloudy, ethereal nebula effect that fades into the black.
Step 2: Building the Planet Surface
-
Planet base layer:
Paint the entire inside of the circle with a solid coat of Burnt Sienna or a warm brown. This mid-tone acts as the foundation for the planet’s surface. -
Establish the shadow:
Determine your light source (in this image, it’s coming from the top left). Mix a dark brown (Burnt Sienna + small dot of Black) and paint a crescent moon shape along the bottom right edge of the planet. Blend the inner edge softly into the base color. -
Sponge on texture:
Dip a damp natural sea sponge lightly into Yellow Ochre mixed with a little White. Dab off excess paint on a paper towel until the sponge is almost dry. Gently press this texture onto the upper left side of the planet. -
Layering varied tones:
Repeat the sponge technique with pure Burnt Sienna in the transition zone between the light and shadow areas. The goal is to create a patchy, uneven terrain look. -
Deep craters:
Use a small round brush with dark brown paint to add irregular splotches or small rings within the shadowed areas. These suggest craters and deep valleys.
Fixing “Flat” Planets
Planet look like a flat circle? Darken the shadow crescent significantly and increase the brightness of the highlight opposite it. High contrast creates the 3D sphere illusion.
Step 3: Highlights and Atmosphere
-
Dry brush highlighting:
Load a flat brush with Titanium White and wipe almost all of it off. Lightly skim the brush over the top left area where the light hits the hardest. I find this really makes the texture ‘pop’ forward. -
Define the terminator line:
Enhance the transition zone adjacent to the shadow side with a bit of rusty orange. This warmth adds realism to the rocky surface. -
Atmospheric glow:
Take a very watery glaze of white or pale blue. Carefully paint a thin line along the very top edge of the planet curve to suggest an atmosphere catching the light. -
Star splatter:
Cover the painted planet with a paper towel cutout or scrap paper to protect it. Dilute white paint with a few drops of water until it’s inky. Dip an old toothbrush in it and flick the bristles to spray stars across the black background. -
Specific bright stars:
Use your smallest detail brush to add a few larger, deliberate stars by dotting pure white paint. Add tiny cross shapes to one or two to create a twinkling effect. -
Final reveal:
Wait until everything is completely dry to the touch. Carefully peel off the masking tape at a 45-degree angle to reveal your crisp white borders.
Natural Texture
Instead of a sponge, ball up a piece of plastic wrap or aluminum foil. Dip it in paint and stamp it onto the planet for sharp, jagged mountain-like textures.
Now you have a stunning celestial portrait ready to frame or hang on your wall


Simple Kid-Friendly Solar System With Labels
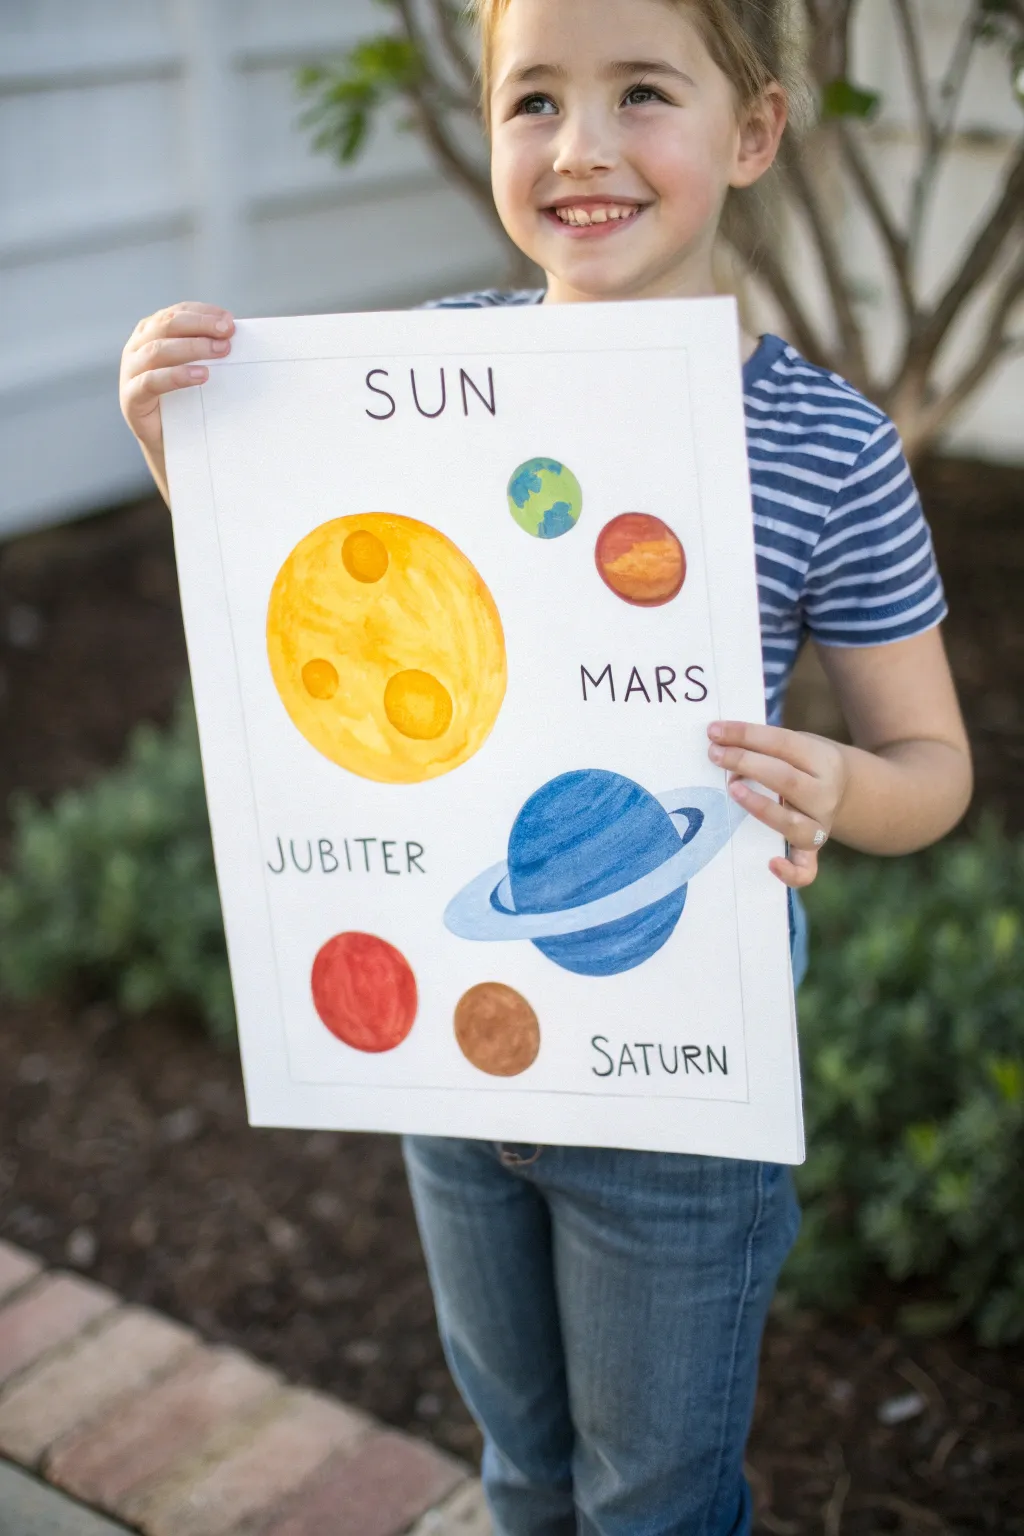
This charming project combines simple geometric shapes with the fluid beauty of watercolors to create a cheerful solar system guide. The bright, sunny yellow and deep space blues pop against a crisp white background, making it perfect for a bedroom wall or a classroom display.
Step-by-Step
Materials
- Heavyweight watercolor paper (A3 or 11×17 size)
- Watercolor paint set (pan or vibrant tubes)
- Round watercolor brushes (size 6 and size 10)
- Fine-point black permanent marker or drawing pen
- Pencil and eraser
- Ruler
- Cups or distinct circular objects for tracing
- Masking tape (optional)
Step 1: Planning and Layout
-
Prepare the paper border:
Start by drawing a faint pencil border about one inch from the edge of your paper. This not only frames the artwork nicely but also gives you a guideline for where to place your text later. -
Trace the Sun:
The Sun is the star of the show here. Find a large circular object, like a small cereal bowl, place it on the left side of the paper, slightly above center, and trace lightly with your pencil. -
Outline the planets:
Sketch the other planets using various smaller circles. Place a medium circle for Jupiter near the bottom right, and scatter smaller circles for Earth, Mars, and Saturn around the remaining space. Don’t worry about perfect astronomical order; arrange them artistically to fill the page. -
Add planet details:
For the large yellow sun, sketch three or four smaller ovals inside the main circle to represent craters or sunspots. For Saturn (the blue planet), draw a wide, tilted oval ring surrounding it. -
Label with pencil:
Using your ruler as a baseline guide, lightly print the names of the celestial bodies next to them. Write ‘SUN’ at the top, and label ‘MARS’, ‘JUBITER’ (feel free to correct the spelling to Jupiter, or keep the cute kid-spelling!), and ‘SATURN’ in clear, block letters.
Step 2: Painting the Solar System
-
Paint the first wash of the Sun:
Load your large brush with water and a bright lemon yellow. Paint the entire main circle of the Sun, but carefully paint *around* the internal crater ovals, leaving them white for now. -
Fill the sun spots:
While the main yellow is still damp, mix a slightly darker, orange-yellow tone. Fill in those crater ovals you left blank. The damp edges might bleed slightly into the lemon yellow, creating a nice soft glow. -
Color Planet Earth:
Move to the small Earth circle. Dab spots of green for continents first, then rinse your brush and fill the remaining space with a watery blue. Let the colors touch so they create hazy coastlines. -
Layer Mars and the red planet:
For the red planets, specific brushwork adds texture. Paint a base of light red or terracotta. Before it dries, add a swipe of darker brown or pure red across the middle to give it a spherical, rounded look. -
Paint the blue giant:
For the Saturn-like planet with rings, use a deep cool blue. Paint horizontal stripes of varying blue intensities across the planet ball to mimic gas giant storms. Keep the ring white for the moment. -
Define the planetary rings:
Mix a very watery, pale blue-grey. Carefully paint the ring surrounding the blue planet. I like to keep this extremely transparent so it looks like ice and dust. -
Add the remaining planets:
Fill in any remaining small circles with reddish-brown or simple brown tones, varying the water ratio so they look textured rather than flat.
Wet-on-Wet Magic
For better texture on the gas giants, drop a pinch of table salt onto the wet paint. When it dries and you brush it off, it creates a starry, speckled texture perfect for planets.
Step 3: Finishing Touches
-
Dry thoroughly:
This step is crucial: let the painting dry completely. If the paper feels cool to the touch, it’s still damp. Wait until it is room temperature to avoid smearing the ink in the next steps. -
Ink the labels:
Take your black fine-point marker and trace over your penciled text. Use a steady hand and try to keep the letters thin and whimsical. -
Ink the border:
Use a ruler and the pen to draw the final box border around the composition. Go slowly to avoid slipping. -
Erase guidelines:
Once the black ink is totally dry, gently run a large eraser over the entire page to remove the original pencil sketches and guidelines.
Make It 3D
Use glitter glue or metallic paint pens to add shimmering details to the rings or the sun’s craters for an artwork that sparkles in the light.
Hang your masterpiece proudly and enjoy your colorful trip through the galaxy
BRUSH GUIDE
The Right Brush for Every Stroke
From clean lines to bold texture — master brush choice, stroke control, and essential techniques.
Explore the Full Guide
Sponge-Dabbed Planet Texture Study
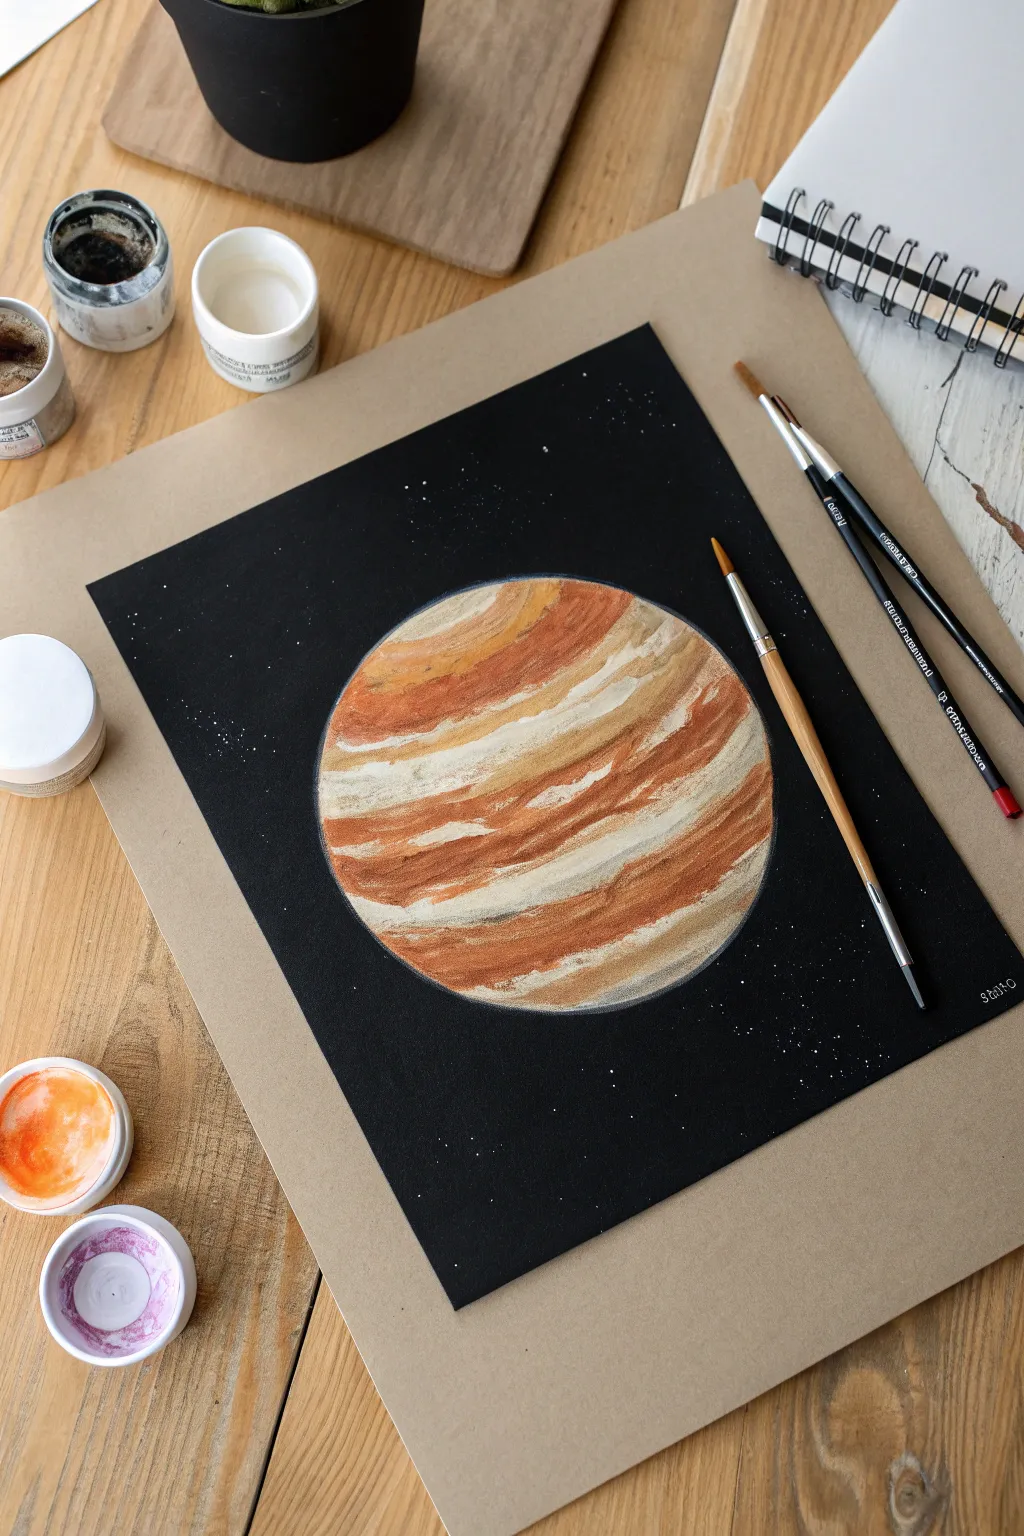
Capture the distinct banded atmosphere of a gas giant with this striking painting project on dark paper. By layering warm earth tones and crisp whites against a stark black background, you’ll create a dimensional planet that seems to float right off the page.
How-To Guide
Materials
- Black heavyweight cardstock or drawing paper
- Tan backing board or mounting board
- Gouache or acrylic paints (Titanium White, Burnt Sienna, Yellow Ochre, Burnt Umber)
- Small painting sponges or sponge daubers for texture
- Round synthetic brushes (Size 4 and Size 0 for details)
- Palette for mixing
- Water cup and paper towels
- Compass or round object to trace
- White or metallic silver gel pen (optional for stars)
- White chalk pencil (for sketching)
Step 1: Setting the Scene
-
Prepare the substrate:
Begin by selecting a high-quality sheet of black paper. To give the piece a finished, studio-study look, mount this black paper onto a larger piece of tan backing board or heavy kraft paper using double-sided tape or glue. Ensure the black paper is centered. -
Outline the planet:
Use a white chalk pencil or a very faint touch with a white colored pencil to draw a perfect circle in the center of your black paper. A compass works best, but tracing a bowl or lid is a great alternative. -
Mix your palette:
Prepare your paints on the palette. You’ll need distinct puddles of Titanium White, Burnt Sienna (reddish-brown), Yellow Ochre (golden yellow), and a touch of Burnt Umber (dark brown). Keep them separate initially, but allow space for mixing intermediate shades.
Uneven Edges?
If your circle looks wobbly, cut a hole in a sticky note or piece of paper to use as a stencil. Place it over the black paper and paint through it for a super crisp edge
Step 2: Building the Atmosphere
-
Establish the base tones:
Using a slightly damp sponge or a stiff brush, pick up some Burnt Sienna. Dab this color gently onto the planet, focusing on curved bands that mimic the gas giant’s storms. Leave horizontal gaps of black paper showing through for now. -
Add golden highlights:
While the first layer is still tacky, introduce Yellow Ochre into the spaces between the reddish-brown bands. Blend the edges slightly where the colors meet to create a soft, gaseous transition. -
Create the white bands:
Load your brush with Titanium White. Paint distinct, sweeping horizontal curves across the planet. These represent the high-altitude cloud belts. Vary the thickness of these lines—some thick, some whisper-thin. -
Deepen the shadows:
Mix a little Burnt Umber with your Sienna. Apply this darker shade to the bottom right edges of the colored bands to suggest roundness and shadow, giving the flat circle a 3D spherical effect.
Step 3: Refining Texture and Details
-
Dry brush technique:
Once the base layers are dry to the touch, use a dry brush with very little white paint to drag across the darker bands. This creates a weathered, streaky look typical of planetary storms. -
Soften the edges:
Clean your brush and leave it barely damp. Gently run it along the outer perimeter of the circle to ensure the paint doesn’t look like a hard cutout. You want a crisp edge, but the paint texture should follow the curve. -
Enhance the contrast:
Go back in with pure Titanium White on the brightest parts of the cloud bands (usually the upper left area if imagining a light source). This high contrast against the black paper makes the planet pop. -
Add turbulent swirls:
Using your smallest detail brush (size 0), add tiny swirls or ‘eyes’ within the red bands to mimic storms like the Great Red Spot. Keep these subtle and integrated into the existing bands.
Go Metallic
Mix a tiny amount of pearl or copper metallic medium into your red and yellow paints. The subtle shimmer will make the atmospheric bands look luminous under light
Step 4: Final Touches
-
Clean up the perimeter:
If any paint strayed outside the circle, use black paint or a black marker to carefully touch up the background edge, restoring the perfect sphere shape. -
Splatter the stars:
Dilute a small amount of white paint with water until it is milky. Load a brush, hold it over the black paper (protecting the planet with a paper circle cutout), and tap the handle to splatter tiny stars in the background. -
Detail stars:
For a few larger, brighter stars, use a fine tip brush or a white gel pen to place specific dots around the planet, concentrating them in corners to frame the subject. -
Sign your work:
Use a white gel pen or thin brush to sign your name or date the piece in the bottom corner of the black paper, completing the scientific illustration aesthetic.
Enjoy displaying your finished celestial study as a beautiful reminder of the vastness of space
Masked Circle Planets With Crisp Edges

Capture the magic of the cosmos in a perfect circle with this mesmerizing watercolor technique. This project combines deep, moody blues with sparkling stars to create a planetary portrait that looks professional and crisp against the clean white paper.
Step-by-Step Tutorial
Materials
- Cold press watercolor paper (300 gsm)
- Watercolor paints (Indigo, Prussian Blue, Payne’s Gray, Black)
- White gouache or white ink
- Round watercolor brushes (sizes 4, 8, and a small detail brush)
- Compass or a circular object to trace (approx. 5-6 inches)
- Drawing gum (masking fluid) or low-tack painter’s tape
- Pencil and eraser
- Palette for mixing
- Two jars of water
- Salt (optional, for texture)
Step 1: Preparation and Outline
-
Paper Setup:
Begin by taping down your watercolor paper to a hard board or your work surface. This prevents buckling when the paper gets wet and creates that lovely clean border you see in the finished piece. -
Draw the Circle:
Use a compass or trace a circular object like a bowl to draw a light pencil circle in the center of your paper. Keep the lines faint so they don’t show through later. -
Protect the Edges:
This is the most critical step for that crisp edge. Carefully apply masking fluid over the pencil line, or use masking tape to block off the *outside* area of the circle if you are comfortable cutting curves. Alternatively, just paint very carefully up to the line, but masking fluid is safer.
Bleed-Proof Borders
To ensure your circle stays perfectly sharp, run a bone folder or credit card firmly over the edge of your masking tape or fluid before painting to seal it tight.
Step 2: Painting the Atmosphere
-
Wet-on-Wet Base:
With a clean brush, apply a layer of clear water inside the circle. You want the paper to be glisten, but not hold puddles. This prepares the surface for soft blends. -
First Color Wash:
Load your brush with a diluted Prussian Blue. Drop it into the wet circle, letting it flow naturally. Keep some areas lighter to suggest clouds or atmospheric depth. -
Deepening the Shadows:
While the first layer is still damp, mix a stronger Indigo and Payne’s Gray. Dab this into the wetter areas, focusing on one side to create a shadow side of the planet. -
Creating Texture:
To mimic the cratered surface of a moon or planet, lift out small bits of pigment using a thirsty, dry brush or a crumpled paper towel. This creates soft cloud-like highlights. -
Adding Contrast:
Introduce concentrated black or deep violet into the darkest regions. Let the colors bleed into the blue, creating that deep space aesthetic. -
Salt Technique (Optional):
If you want organic craters, sprinkle a pinch of table salt onto the wet paint. As it dries, the salt pushes the pigment away, leaving star-like textures. -
Complete Drying:
Let this base layer dry completely. It must be bone dry before the next step, or the stars will blur.
Step 3: Stars and Details
-
Mixing the Stars:
Squeeze out a small amount of white gouache or opaque white ink. dilute it slightly with water until it reaches a milky consistency. -
Splatter Method:
Dip a stiff brush or an old toothbrush into the white mix. use your finger to flick the bristles over the painting to create a spray of tiny distant stars. -
Specific Constellations:
Using your smallest detail brush (size 0 or 00), manually paint larger, brighter stars. I like to place a few prominent ones in the darker areas for high contrast. -
Defining Craters:
If you want distinct impact craters, use the white gouache to paint small semi-circles, softening the inner edge with a damp brush to make them look 3D. -
Final Adjustments:
Assess the overall balance. If the blue looks too flat, you can add a very thin glaze of dark blue over dry sections to unify the look, avoiding the bright white stars.
Cosmic Shimmer
Mix a tiny amount of iridescent medium or metallic silver watercolor into your dark indigo paint for a planet that subtly sparkles when the light hits it.
Step 4: The Reveal
-
Remove Masking:
Once the painting is 100% dry, gently rub away the masking fluid with your finger or a rubber cement pickup tool. If you used tape, peel it away slowly at a 45-degree angle. -
Clean Up:
Erase any visible pencil marks remaining around the edge of the circle to ensure the orb looks like it’s floating. -
Framing Border:
Remove the perimeter tape from the paper edges to reveal the clean rectangular border that frames your cosmic circle.
Now you have a stunning, self-contained universe ready to display or gift to a stargazer

PENCIL GUIDE
Understanding Pencil Grades from H to B
From first sketch to finished drawing — learn pencil grades, line control, and shading techniques.
Explore the Full Guide
Saturn Rings That Actually Look Dimensional
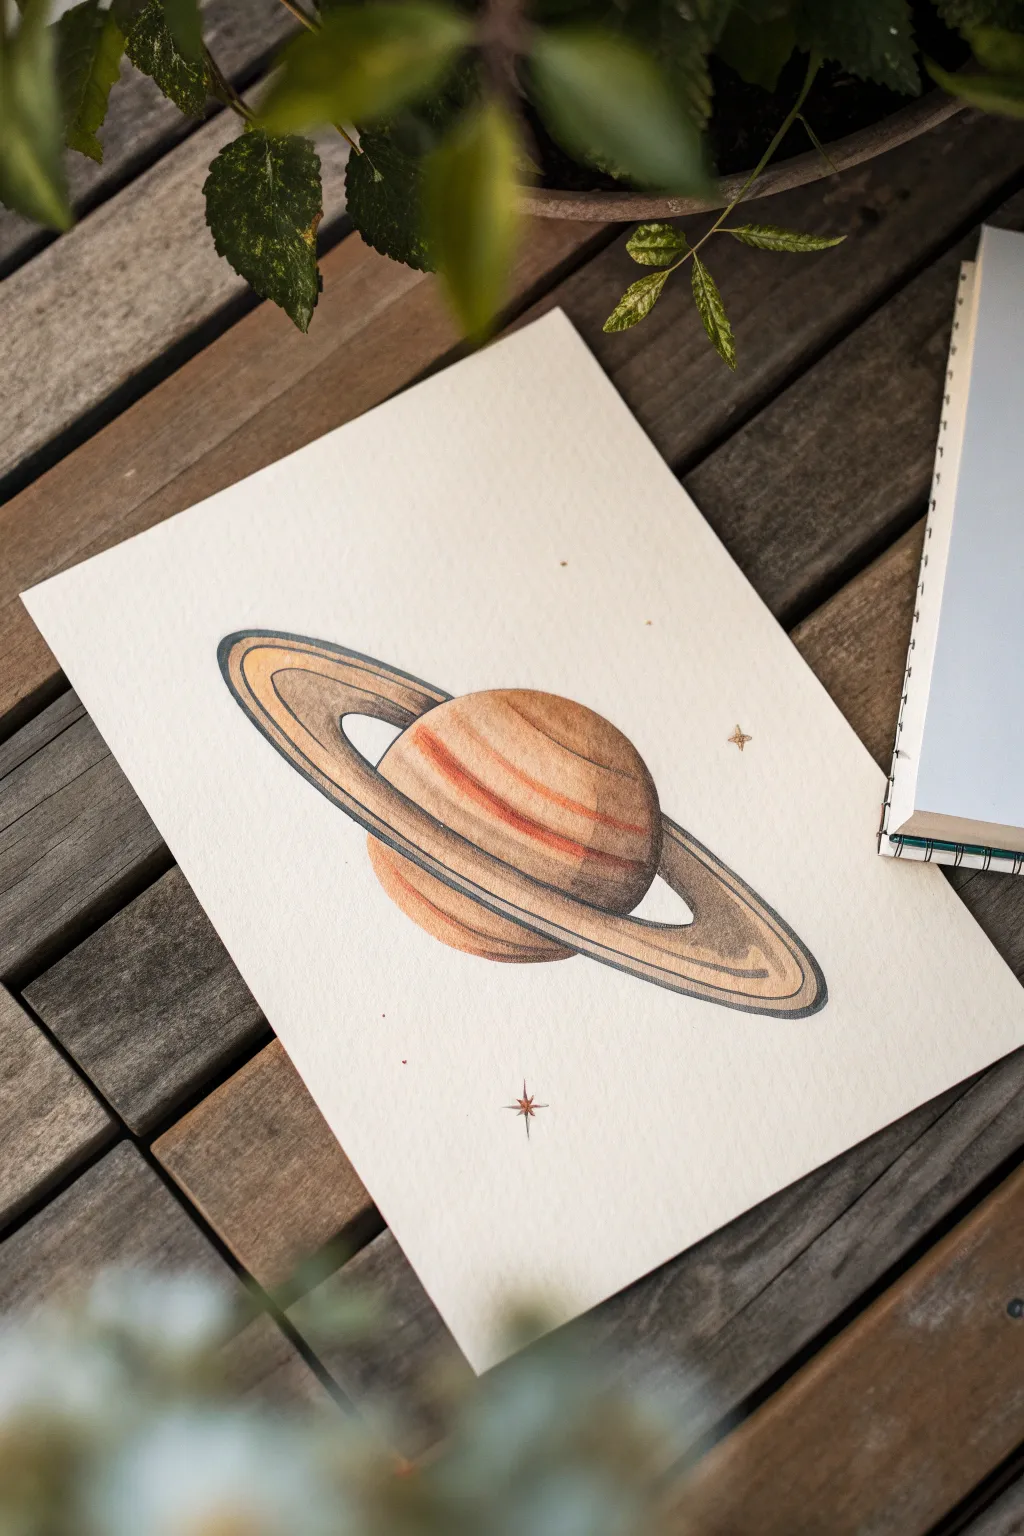
This watercolor project focuses on capturing the majestic sweep of Saturn’s rings with a surprising amount of depth and dimension. Using subtle shading and warm, earthy tones, you’ll create a celestial portrait that feels both vintage and scientifically inspired.
How-To Guide
Materials
- Cold press watercolor paper (cream or white)
- Pencil (HB or H for light lines)
- Fine liner pen (Black, waterproof)
- Watercolor paints (Burnt Sienna, Yellow Ochre, Burnt Umber, Payne’s Grey)
- Small round brushes (Size 2 and 4)
- Mixing palette
- Clean water
- Paper towels
Step 1: Drafting the Planet
-
Sketch the Sphere:
Start by lightly sketching a simple circle for the planet’s body. Don’t press too hard with your pencil, as we want outline visibility to be minimal later on. -
Draft the Ring Ellipse:
Draw a large, flat oval (ellipse) surrounding the sphere. The planet should sit right in the center of this oval. Tilt the axis slightly so the rings look like they are angling downward from left to right. -
Create Ring Width:
Draw a smaller, inner oval inside the first one to define the width of the rings. Ensure the gap between the two ovals remains consistent. -
Erase Hidden Lines:
Carefully erase the part of the back ring that would be hidden behind the planet’s sphere. Also, erase the part of the sphere that is covered by the front section of the rings. -
Ink the Outline:
Using a waterproof fine liner, trace over your final pencil lines. Keep your hand steady for smooth curves. Let the ink dry completely before gently erasing any stray pencil marks.
Step 2: Painting the Atmosphere
-
Base Wash:
Mix a very watery wash of Yellow Ochre. Apply this pale color to the entire surface of the planet sphere, working wet-on-dry. -
Adding Bands:
While the base is still slightly damp, mix a thicker consistency of Burnt Sienna. Paint horizontal stripes across the planet’s face to mimic atmospheric bands. The slight dampness will help soften the edges naturally. -
Deepening Shadows:
Mix a small amount of Burnt Umber. Glaze the right side of the sphere to create a shadow side, immediately giving the circle a spherical form. -
Defining the Equator:
Paint a thin, distinct stripe of reddish-orange (Burnt Sienna mixed with a touch of red) near the center line to act as a focal point for the surface details.
Smooth Curves
When inking the long curves of the rings, lock your wrist and move your entire arm from the elbow. This reduces shakiness and creates much smoother elliptical lines.
Step 3: Rendering the Rings
-
Initial Ring Wash:
Apply a pale wash of dilute Burnt Umber to the rings. Be very precise with your brush tip to stay within the inked lines. -
Separating the Rings:
Once the initial wash is dry, use a darker mix of Burnt Umber and Payne’s Grey to paint thin concentric lines within the ring band. This mimics the Cassini Division and separates the A and B rings. -
Adding Ring Shadow:
This is crucial for dimensionality: Paint a dark shadow on the planet’s surface right underneath where the rings cast their shade. Use a mix of Burnt Umber and Payne’s Grey. -
Highlighting the Tilt:
Darken the far left and far right curves of the rings slightly more than the front section. This gradient effect helps imply the curvature of the orbit. -
Final Touches:
Add tiny decorative stars around the planet using a fine liner or a small dab of paint, drawing simple four-point sparkles to fill the negative space.
Cosmic Sparkle
Mix a tiny amount of iridescent medium or metallic gold watercolor into your Yellow Ochre wash. It gives the planet a subtle, magical shimmer in the light.
Now you have a beautifully rendered, dimensional planet ready to frame
Jupiter’s Great Red Spot Spotlight
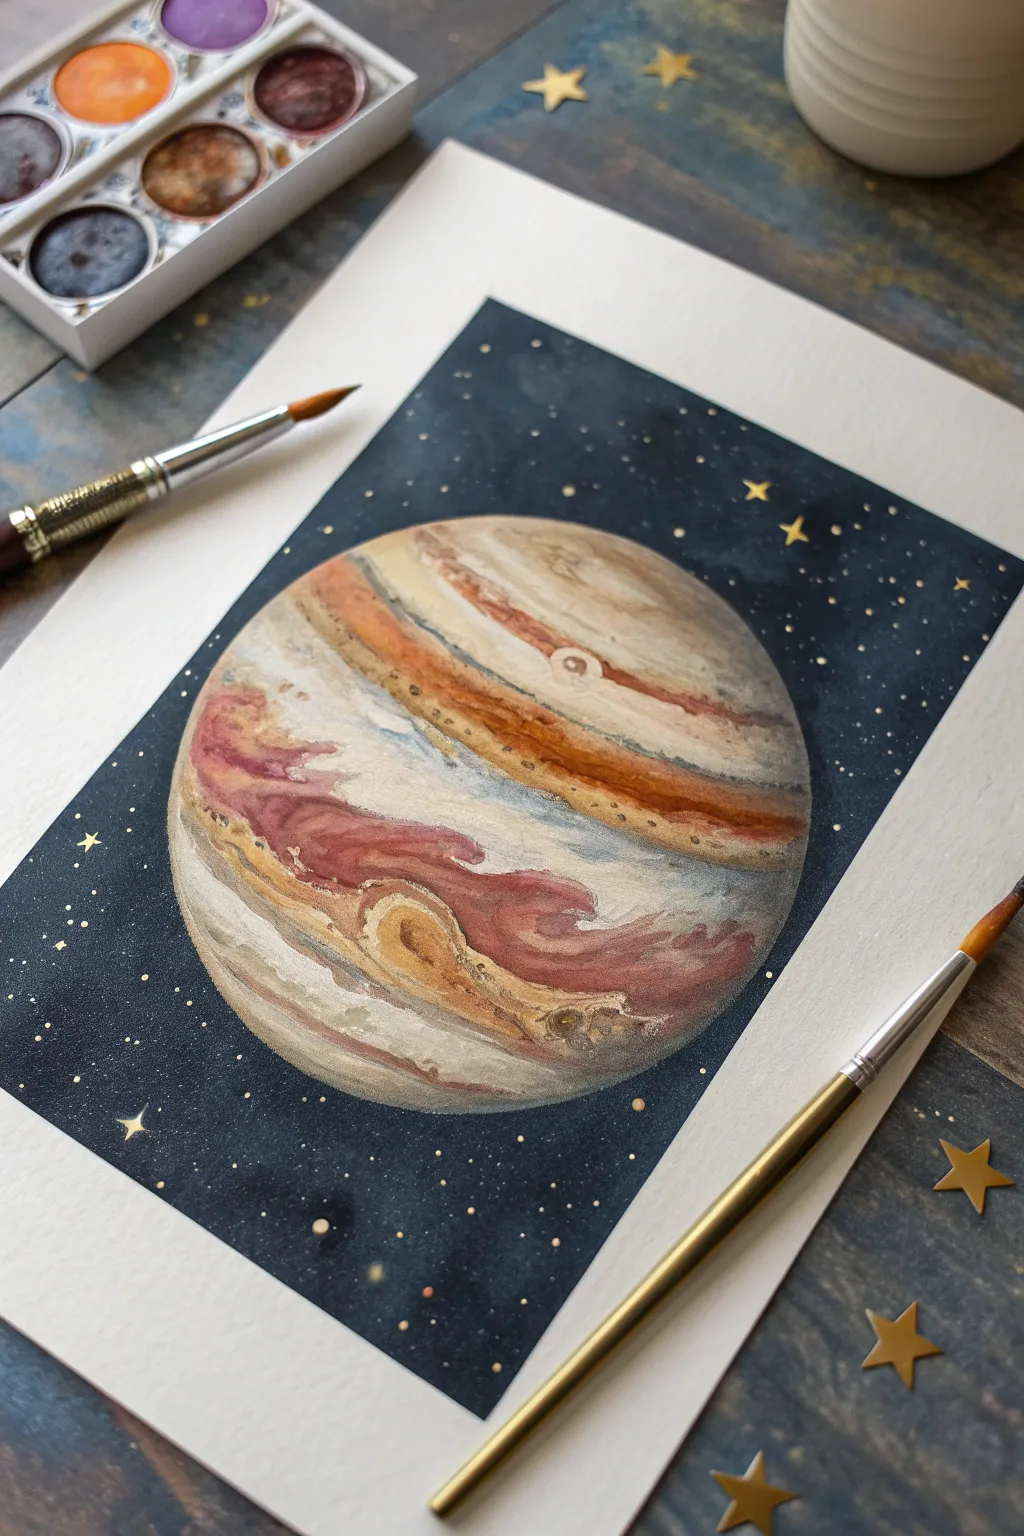
Capture the swirling majesty of our solar system’s gas giant with this watercolor project that balances soft, wet-on-wet blending with crisp, celestial details. The result is a moody, atmospheric portrait of Jupiter set against a deep, star-studded expanse.
Step-by-Step
Materials
- Cold press watercolor paper (300 gsm)
- Watercolor paints (burnt sienna, yellow ochre, Payne’s grey, indigo, burnt umber, alizarin crimson)
- White opacity paint (gouache or acrylic ink)
- Gold metallic watercolor or ink
- Compass or circular object (for tracing)
- Pencil and kneaded eraser
- Round watercolor brushes (size 2, 6, and 10)
- Painter’s tape or washi tape
- Clean water and paper towels
Step 1: Setting the Stage
-
Tape boundaries:
Begin by taping down the edges of your paper to a flat board. This creates a clean white border later and prevents buckling when the paper gets wet. -
Trace the planet:
Use a compass or a bowl to lightly trace a large circle in the center of your page. Keep the graphite lines faint so they disappear under the paint later. -
Sketch the bands:
Lightly sketch curved, horizontal guiding lines across the planet to mark where Jupiter’s distinct cloud bands will go. Don’t make them perfectly straight—a slight downward curve adds spherical dimension. -
Mark the Great Red Spot:
Draw an oval shape in the lower-middle section for the Great Red Spot. It should feel like it’s swirling within the bands, not floating on top.
Wet-on-Wet Control
If your planetary bands are bleeding too much into each other, let the paper dry for 60 seconds before adding the darker stripes. The paper should be moist, not soaked.
Step 2: Painting the Gas Giant
-
Base wash:
Wet the entire circle with clean water until it glistens but isn’t pooling. I find this pre-wetting step crucial for getting those fuzzy, gas-like edges. -
First light layers:
Drop in very diluted yellow ochre and raw sienna into the lighter bands. Let the color bloom naturally on the wet paper. -
Deepening the bands:
While the paper is still damp, mix burnt sienna with a touch of burnt umber. Paint the darker distinct stripes, following the curve of your planet. -
Creating the Red Spot:
Mix alizarin crimson with a tiny bit of burnt sienna. Paint the Great Red Spot, leaving the center slightly lighter to create a sense of depth and storm activity. -
Adding atmospheric texture:
While the bands are drying but still slightly tacky, lift some pigment using a thirsty (clean, damp) brush to create separating white wisps between the chaotic storms. -
Shadow side:
Once the first layers are dry, glaze a very watery Payne’s grey or diluted indigo over the right side of the planet to create a crescent shadow, giving it a 3D spherical form. -
Defining details:
Switch to your size 2 brush. With a stiffer paint consistency, add thin, crisp lines within the dark bands and swirl details around the Red Spot to suggest turbulence.
Step 3: The Cosmic Background
-
Outline carefully:
Once the planet is 100% dry, outline the circle with your dark background color—a mix of indigo and Payne’s grey—making sure not to bleed into your planet work. -
Fill the void:
Fill in the rest of the rectangular background with this dark mix. You can drop in hints of black or purple while it’s wet to create subtle nebula-like variations. -
Let it dry completely:
Wait for the background to dry fully. If it looks patchy, apply a second coat of indigo for a truly deep, velvet space look.
Metallic Orbit
After the piece is dry, dilute your gold paint and paint a faint, single orbital ring or arc passing behind the planet for a stylized sci-fi aesthetic.
Step 4: Starry Finish
-
Flick the stars:
Load a stiff brush or an old toothbrush with white gouache. Flick the bristles to spray a fine mist of distant stars across the dark background. -
Paint larger stars:
Use your smallest brush to manually dot a few larger, brighter stars. Group a few together to create constellations or clusters. -
Add gold accents:
For a magical touch, add tiny dots of metallic gold paint interspersed with the white stars. This catches the light beautifully. -
The Reveal:
Peel off the masking tape slowly at a 45-degree angle to reveal your crisp white borders.
Step back and admire your own miniature window into the cosmos


Earth With Clouds and Glow
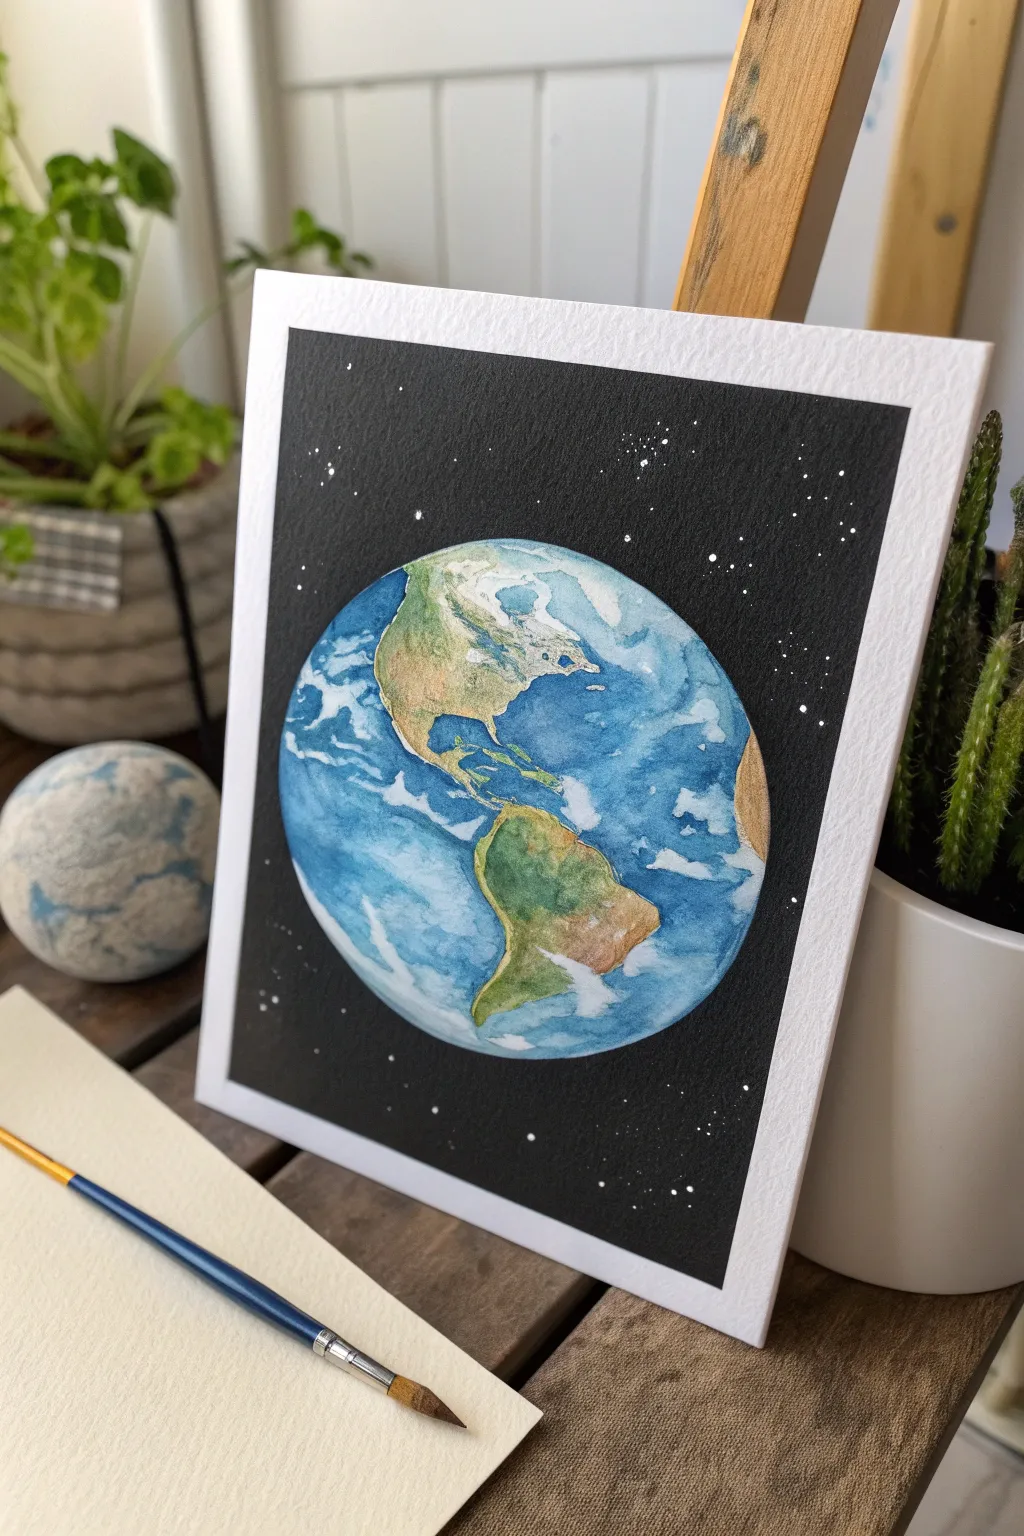
Capture the breathtaking view of our home planet with this vibrant watercolor project. By combining wet-on-wet techniques for the oceans with crisp detailing for the continents, you will create a floating globe set against the deep, star-speckled void of space.
Step-by-Step Tutorial
Materials
- Cold press watercolor paper (300 gsm)
- Painter’s tape or masking tape
- Compass or a circular object to trace (approx. 4-5 inches)
- HB pencil
- Watercolor paints (Cerulean Blue, Prussian Blue, Sap Green, Burnt Sienna, Yellow Ochre, Lamp Black)
- White gouache or white gel pen
- Round brushes (a size 6 or 8 for fills, and a size 0 or 2 for details)
- 2 jars of water (one for clean, one for dirty)
- Paper towels
- Masking fluid (optional but recommended)
Step 1: Preparation & Sketching
-
Secure the paper:
Tape down all four edges of your watercolor paper to a board or hard surface. Ensure the tape is straight, as this creates the crisp white border shown in the final piece. -
Draw the circle:
Using a compass or by tracing a circular bowl, draw a centered circle. Keep your pencil pressure light so the graphite doesn’t show through the paint later. -
Sketch the continents:
Lightly sketch the outlines of North and South America. Don’t worry about perfect geographical accuracy; focus on capturing the general shapes of the landmasses. -
Mask the highlights (optional):
If you are using drawing gum or masking fluid, apply small sporadic patches over the ocean areas where you want the brightest white clouds to be. Let this dry completely before painting.
Step 2: Painting the Ocean
-
Wet the ocean areas:
With a clean, damp brush, wet only the water areas of the globe, carefully working around the continents. The paper should glisten but not have puddles. -
Lay the base blue:
Drop in diluted Cerulean Blue while the paper is still wet. Let the color flow naturally, keeping it lighter near the center and the clouds. -
Add deep space depth:
While the first layer is still damp, introduce Prussian Blue or a darker indigo along the outer edges of the circle to create the illusion of roundness and atmosphere. -
Create soft clouds:
To make soft, misty cloud formations, use a clean, thirsty brush/corner of a paper towel to lift color out of the blue wash before it dries. -
Let it dry completely:
Ensure the ocean layer is bone dry before moving on to the land to prevent bleeding.
Bleeding Edges?
If black paint bleeds into your blue earth, wait for it to dry. Use opaque white gouache to paint over the mistake, then re-paint the blue ocean over that patch.
Step 3: Painting the Continents
-
Base layer for land:
Start with a light wash of Yellow Ochre or diluted Green on the continents. I like to drop different colors in while wet to create organic terrain textures. -
Add green zones:
While the land base is damp, drop Sap Green into the Amazon rainforest area and the eastern parts of North America. -
Add arid zones:
Drop touches of Burnt Sienna or brown into the western United States and mountainous regions to represent deserts and mountains. -
Define the coastlines:
Once the interior land paint is semi-dry, use your smallest brush with slightly more pigmented paint to sharpen the coastlines, giving structure to the shapes.
Pro Tip: Roundness
To make Earth look spherical, keep the center lighter and the edges darker. This simple value change creates instant 3D volume on a flat circle.
Step 4: The Void & Details
-
Paint the background:
Using Lamp Black (or a very concentrated mix of dark blue/black), carefully paint the background around the Earth circle. Take your time near the edge to keep the circle perfectly round. -
Add cloud texture:
Once everything is dry, remove the masking fluid (if used). Use white gouache to paint distinct, fluffy clouds on top of the blue ocean, softening the bottom edges with a damp brush. -
Atmospheric glow:
You can lightly dry-brush a tiny amount of white gouache along the very edge of the earth against the black background to suggest a thin atmosphere. -
Splatter the stars:
Cover the painted Earth with a scrap piece of paper or paper towel. Load a stiff brush or toothbrush with white gouache and flick it to create a field of stars. -
Detail the stars:
Use a white gel pen or the tip of your smallest brush to manually add a few larger, brighter stars in the black void. -
The reveal:
Once the entire painting is completely dry, slowly peel away the masking tape at a 45-degree angle to reveal the clean borders.
Enjoy the perspective of viewing our blue marble from deep space.
Moon Phases Plus the Solar System

Merge the grandeur of our solar system with the delicate cycle of moon phases in this minimalist watercolor piece. Using a vertical composition, this project balances earthy planetary tones against a stylized lunar timeline for a modern, astronomical aesthetic.
Detailed Instructions
Materials
- Heavyweight watercolor paper (300gsm cold press recommended)
- Watercolor paints (shades of rust, ochre, indigo, brown, grey)
- Round watercolor brushes (size 6 and size 2)
- Pencil (HB or H)
- Compass or circle stencils (various sizes)
- Ruler
- Fine-liner pen (0.1mm or 0.3mm in dark grey or black)
- Palette for mixing
- Paper towels and water cup
Step 1: Drafting the Layout
-
Establish the centerline:
Begin by lightly drawing a vertical line down the center of your paper using a ruler; this will act as the anchor for your moon phase timeline. -
Draft the moon circles:
Along this central line, mark five evenly spaced points. Using a small circle stencil or compass, draw five small circles (about 1 inch diameter) centered on these points. -
Draft the planet circles:
To the left of the centerline, sketch five larger circles (about 2-2.5 inches diameter). Position each large circle so its vertical center aligns roughly with the gaps between the moon phases, creating a staggered, balanced composition. -
Add moon crescents:
To the right of the centerline, lightly sketch crescent moon shapes corresponding to each small central circle. These should look like shadows or phases orbiting the timeline.
Step 2: Painting the Planets
-
Top planet: Striated rust:
Mix a rusty red with a touch of brown. Paint the top large circle using a wet-on-dry technique, leaving horizontal bands slightly lighter to mimic Jupiter-like stripes. -
Second planet: Golden glow:
For the second large circle, use a yellow ochre or golden orange. Keep the wash fairly uneven to give it a textured, gaseous appearance. -
Third planet: Earthy bands:
Mix a desaturated brown with a hint of purple. Paint this circle with defined horizontal bands of pigment, allowing some water blooms to create a rocky texture. -
Fourth planet: Pale sand:
Use a very watered-down beige or buff titanium for the fourth circle. While it’s still wet, drop in a slightly darker tan on the bottom edge for immediate volume. -
Fifth planet: Icy blue:
Create an indigo or slate blue wash for the bottom circle. Use a dabbing motion with a thirsty brush to lift out some pigment, creating a cratered, icy surface look.
Wet-on-Wet Magic
To get those swirly planet textures, drop clean water onto a partially dry planet. The water pushes pigment away, creating natural-looking craters and clouds.
Step 3: Painting the Moon Phases
-
Base colors for the timeline:
Paint the five small circles on your centerline using a variety of muted tones—terracotta, slate blue, mustard, and grey—to differentiate them from the planets. -
Painting the crescents:
Move to the crescent shapes on the right. Paint these as thin, delicate slivers using the same color palette but perhaps slightly more diluted. -
Adding texture:
While these smaller shapes are drying, I like to add tiny specks of darker pigment into the wet paint to mimic lunar surface irregularities.
Fixing Hard Edges
If a planet dries with a harsh outline you don’t like, gently scrub the edge with a clean, damp stiff brush to soften it into the background paper.
Step 4: Final Details
-
Inking the axis:
Once the paint is bone dry, use your ruler and fine-liner pen to trace over the initial vertical pencil line, passing directly through the center of the small moon circles. -
Connecting the shapes:
Extend this line slightly beyond the top and bottom circles to ground the composition. -
Refining edges:
If any paint bled outside your pencil lines, you can gently tidy it up with a damp brush or leave it for a more organic feel. Erase any visible pencil marks that weren’t covered by paint.
Hang your finished celestial chart in a simple frame to admire the quiet rhythm of the cosmos
Solar System Silhouette With a Glowing Sun
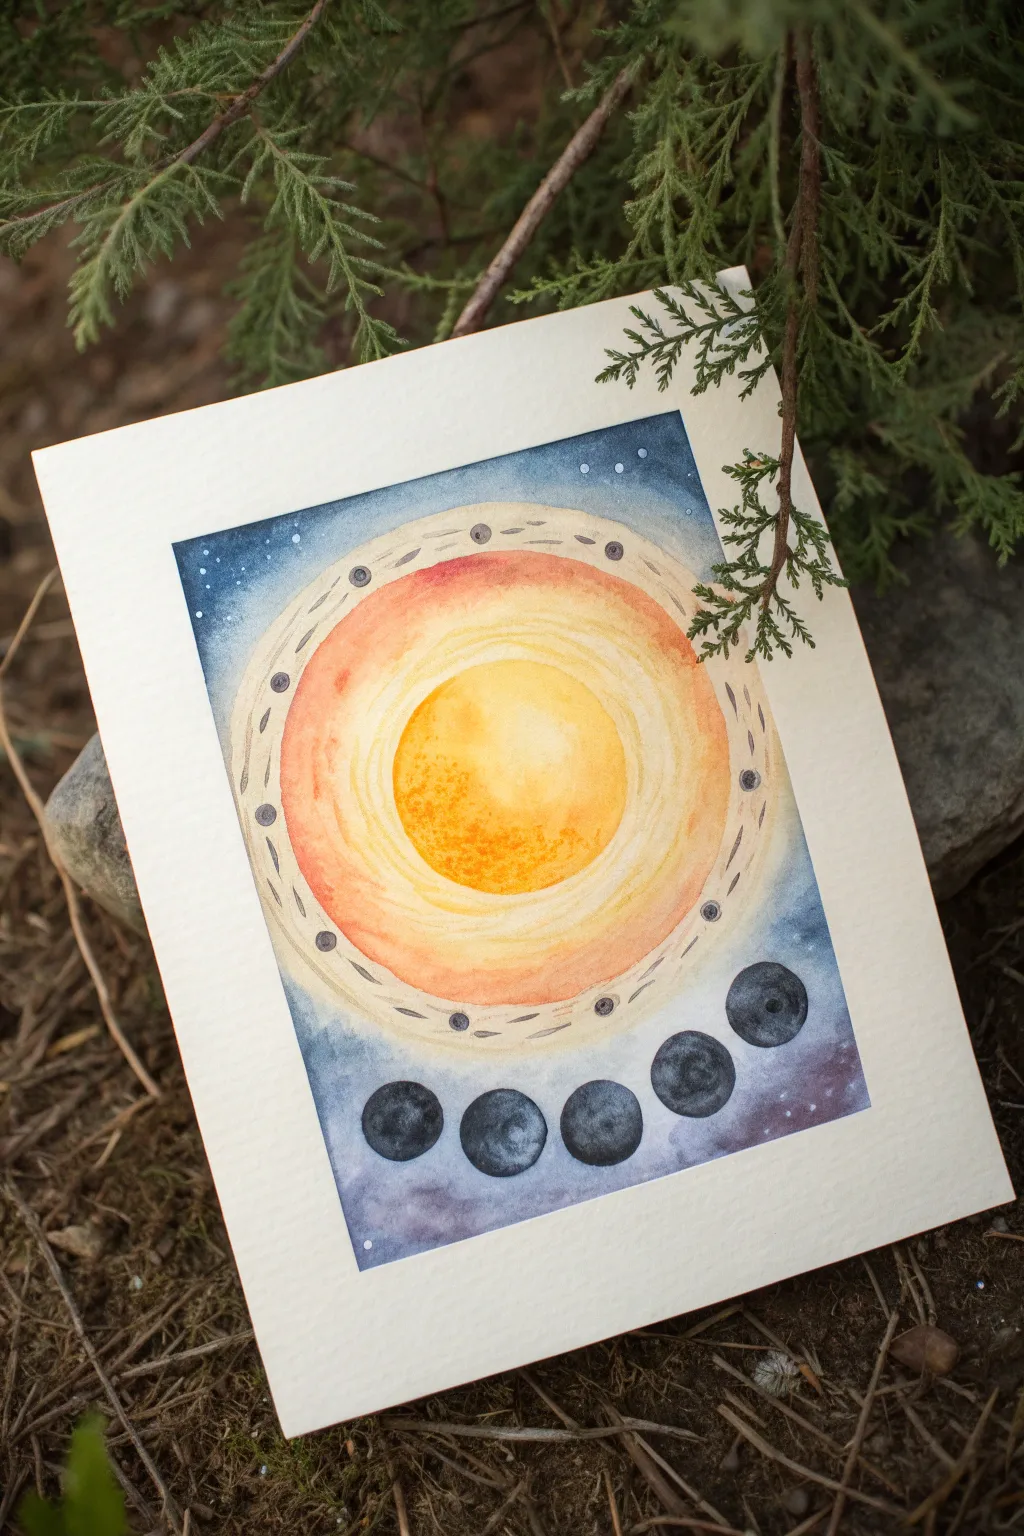
This ethereal watercolor painting captures the serene progression of a planetary cycle with a warm, glowing sun at its heart. Set against a deep starry background, the concentric rings and shadowy orbs create a mystical diagram of celestial movement.
Step-by-Step Tutorial
Materials
- Cold press watercolor paper (140lb/300gsm)
- Watercolor paints (Indigo, Burnt Sienna, Yellow Ochre, Cadmium Yellow, Payne’s Grey)
- White opacity medium (white gouache or bleed-proof white)
- Round brushes (sizes 2, 6, and 10)
- Compass or circular objects for tracing
- Pencil and kneaded eraser
- Masking tape
- Palette for mixing
- Two jars of water
Step 1: Preparation and Sketching
-
Secure the paper:
Tape down all four edges of your watercolor paper onto a board. This ensures a crisp white border and prevents buckling when the paper gets wet. -
Draft the central circles:
Using a compass, lightly draw the central sun circle. Draw two progressively larger concentric circles around it to form the halo and the outer decorative ring. -
Sketch the planetary sequence:
Below the main circular design, lightly sketch a curved row of five small circles. These will become the dark planetary phases at the bottom. -
Clean up lines:
Use a kneaded eraser to gently lift excess graphite. You want the lines faint enough to guide you but light enough to disappear under the paint.
Smooth Gradients
To get that seamless glow in the sun, tilt your board slightly. Gravity pulls the pigment down, helping bands of color blend softly into one another.
Step 2: Painting the Glowing Sun
-
Wet-on-wet center:
Wet the innermost circle with clean water. Drop in a rich Cadmium Yellow, letting it bloom naturally. Add a touch of Orange or Burnt Sienna near the bottom edge for depth. -
Create the first halo:
While the center is still damp (but not soaking), paint the next ring outward using a very dilute Yellow Ochre. Let the colors bleed slightly at the boundary for a glowing effect. -
Paint the outer warmth:
For the third ring, mix a soft wash of Burnt Sienna and dilute Red. Paint this ring, allowing it to fade comfortably into the yellow tone of the previous ring. -
Define the decorative border:
The outermost band needs to stay mostly unpainted or extremely pale cream. I like to leave this paper-white initially to ensure high contrast later. -
Dry thoroughly:
Allow the entire central sun section to dry completely before moving to the background to avoid unwanted bleeding.
Metallic Magic
Swap the yellow ochre ring for a gold metallic watercolor paint. The shimmer adds a magical, astrological feel to the finished piece.
Step 3: The Starry Abyss
-
Prepare the dark mix:
Mix a deep, saturated pool of Indigo and Payne’s Grey. You want a color that feels like midnight. -
Paint the upper background:
Carefully paint the area surrounding the top half of the main circle. Start with a heavy saturation near the corners and dilute it slightly as you approach the sun’s outer ring. -
Paint the lower background:
Continue the dark wash into the bottom section, carefully painting around your five small planetary circles. Let the wash get slightly purple or reddish near the very bottom for variety. -
Add stars:
While the blue background is just barely damp, splatter tiny droplets of water to create ‘blooms’ or soft stars. Let this dry completely.
Step 4: Details and Phases
-
Paint the planetary phases:
Fill in the five bottom circles using a mix of Payne’s Grey and Indigo. Vary the water ratio to create texture, making them look like stone or shadowed moons. -
Decorate the outer ring:
Return to the outer band of the sun design. Using a small size 2 brush and diluted grey paint, create the small orbital markings—little dots and dashed lines following the curve. -
Add darker accents:
Paint small, dark grey circles spaced evenly around that outer decorative ring to echo the planets below. -
Highlight with white:
Using white gouache or a gel pen, add tiny, sharp dots to the dark blue background to represent distant, crisp stars. -
Remove tape:
Once the paper is bone dry to the touch, slowly peel away the masking tape at a 45-degree angle to reveal your clean edges.
Hang this piece where it can catch the light and remind you of the vastness of the cosmos
Mini Planet Tiles for a Gallery Wall
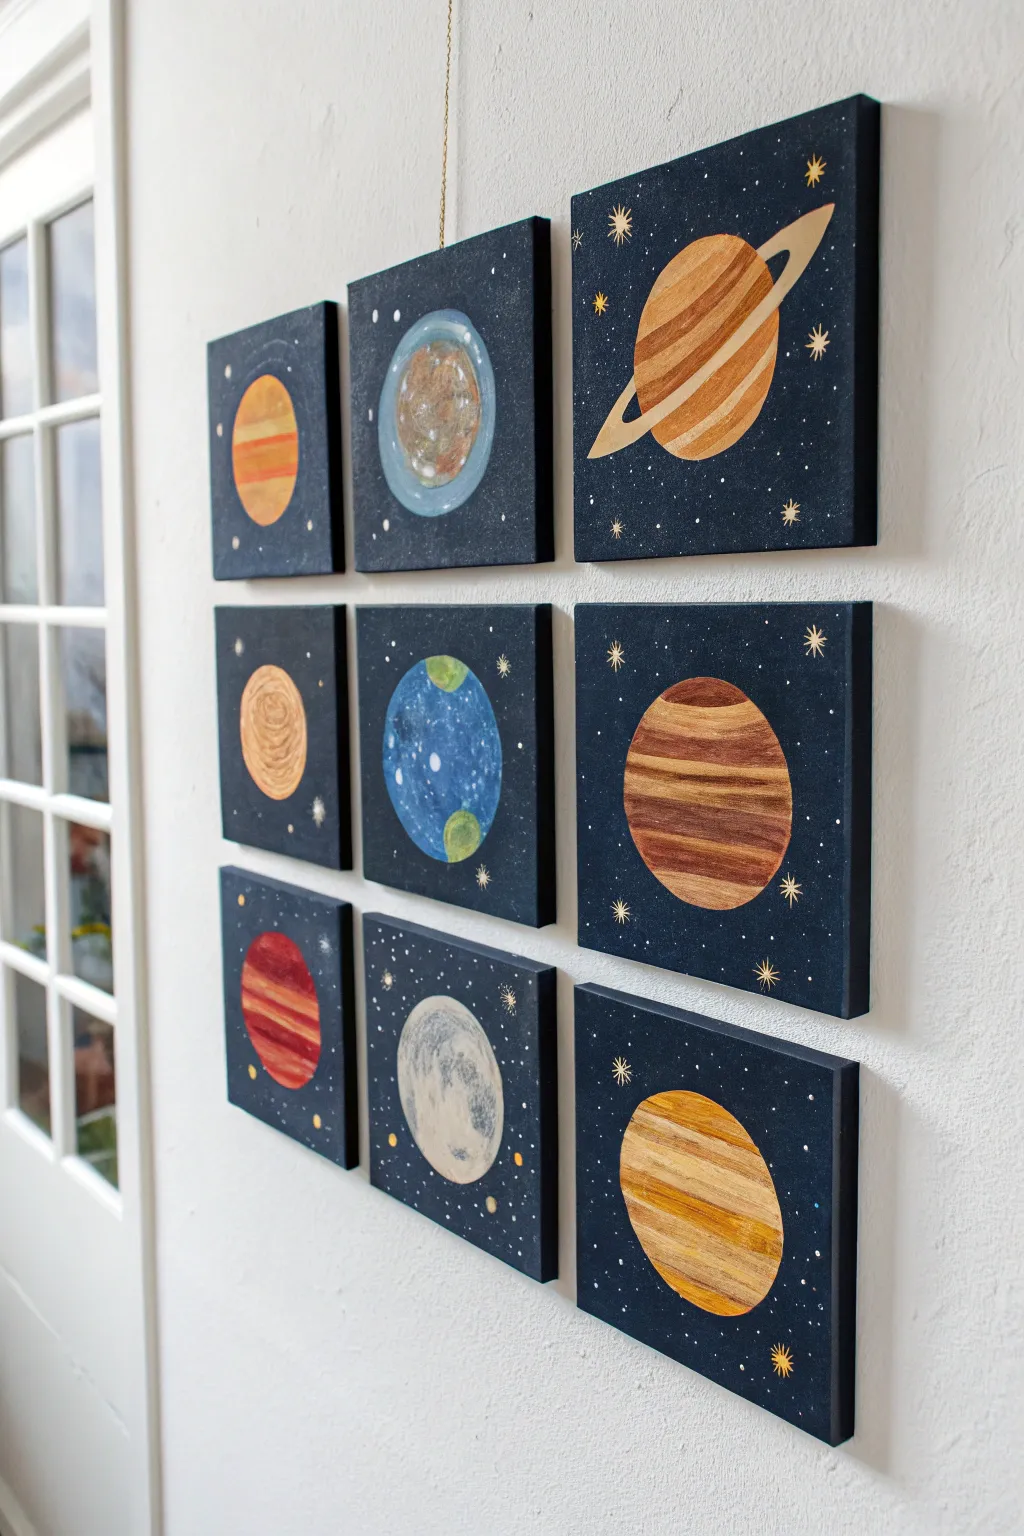
Transform a blank wall into a window onto the cosmos with this set of nine mini canvases. By breaking the solar system down into individual portraits, you create a modern, structured gallery wall that celebrates the unique colors and textures of each planet.
Step-by-Step
Materials
- 9 mini square canvases (approx. 4×4 or 6×6 inches)
- Black acrylic paint
- Dark blue acrylic paint (Phthalo or Prussian Blue)
- Assorted acrylic craft paints (ochre, burnt sienna, orange, light blue, white, green, red)
- Metallic gold paint or paint pen
- Flat shader brushes (medium and small)
- Fine liner brush
- Round sponge applicator or compass (optional)
- White paint pen (fine tip)
- Command strips or mounting tape
Step 1: Prepping the Void of Space
-
Base coat application:
Begin by painting all nine canvases with a solid coat of black acrylic paint. Ensure you paint the edges as well, since these will be visible on the wall. -
Adding depth:
While the black is still slightly tacky or just after drying, dry-brush a very small amount of dark blue paint into the center areas. This adds a subtle atmospheric depth so the background isn’t simply flat black. -
Starry details:
Load a toothbrush or stiff brush with watered-down white paint and flick it over the canvases to create distant stars. For larger, specific stars, use a fine liner brush or a white paint pen to dot them in individually.
Perfect Circles
Don’t freehand the planets. Trace a jar lid, cup, or masking tape roll to get crisp, uniform circles that make the grid look professional.
Step 2: Painting the Gas Giants & Saturn
-
Drafting the shapes:
Use a light pencil or chalk to outline your circles. To keep them uniform, I find it helpful to trace a circular object like a jar lid or use a compass. -
Saturn’s base:
For the Saturn canvas (top right), paint a large ochre circle. While wet, streak in lines of burnt sienna and white to create the atmospheric bands. -
Adding the rings:
Once the planet body is dry, paint a flat, angled ring using a mix of light tan or gold paint. Ensure the ring goes ‘behind’ the planet by stopping the line on either side of the sphere. -
Jupiter’s storms:
For the largest gas giant (middle right), use broad distinct stripes of chocolate brown, tan, and cream. Keep the brushstrokes horizontal and slightly wavy to mimic gas clouds.
Step 3: Ice Giants and Terrestrials
-
Earth’s continents:
Paint a blue circle for Earth (center). Once dry, stipple green shapes for continents and swiirl in diluted white paint for cloud cover. -
Mars and Venus:
Use rusty red and orange tones for Mars (bottom left), adding texture with a dry brush. For Venus (top left/middle left), blend oranges and yellows for a hot, thick atmosphere look. -
The Neptune & Uranus glow:
For the ice giants, use varying shades of cool blue. You might want to create a lighter halo around the edge of the circle (as seen in the top center canvas) to suggest an atmosphere reflecting light. -
Texturing the Moon:
For the grey moon canvas (bottom center), paint a light grey circle. Use a sea sponge or scrunched paper towel dipped in darker grey to stamp on craters and texture.
Streaky Paint?
Planet bands looking messy? Use a flat shader brush and pull paint in one continuous horizontal swoosh rather than short choppy strokes.
Step 4: Finishing Touches
-
Highlighting:
Decide on a light source direction (usually top right). Add a subtle curve of white or metallic gold along that edge of every planet to make them look 3D. -
Gold accents:
Using a gold paint pen or fine brush, draw stylized four-point stars on a few canvases (like the Saturn and Jupiter ones) to add a decorative, magical touch. -
Final drying:
Let all canvases cure for at least 24 hours. Because of the dark background, check for any ‘shiny’ spots where the paint lay too thick and flatten them with a matte varnish if desired. -
Installation:
Arrange your grid on the floor first to balance the colors. Use a level and measuring tape to space them evenly on the wall, leaving about 1-2 inches of gap between each tile.
Step back and admire your personal observatory as it brings a sense of wonder to the room
Planet Rocks Arranged as the Solar System
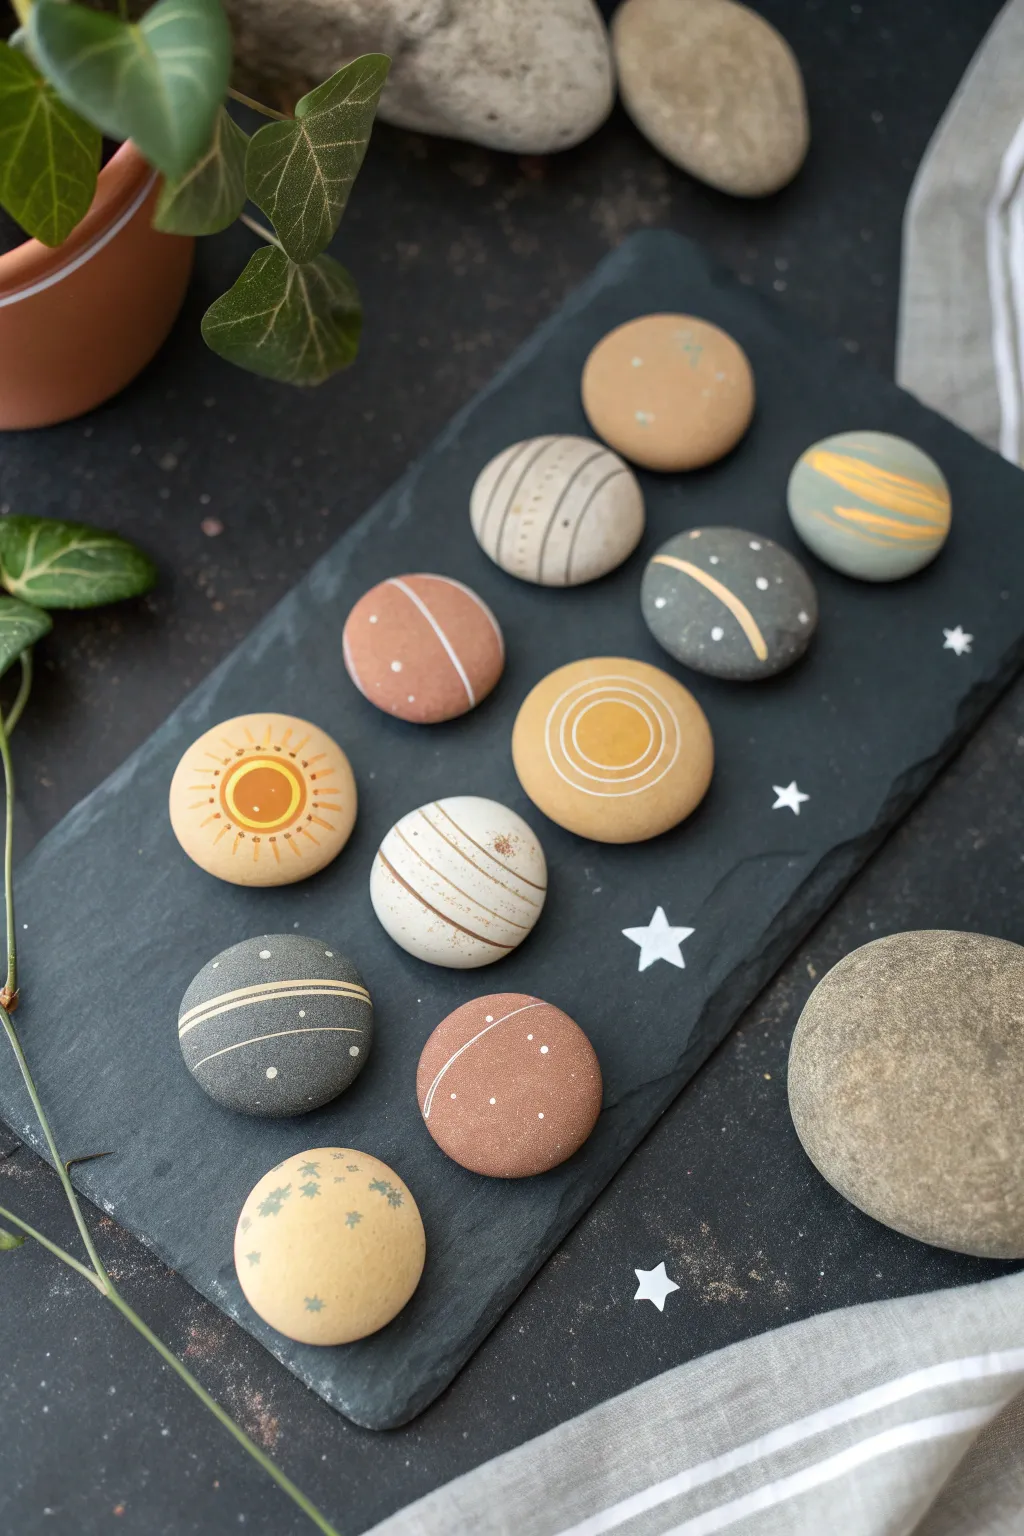
Bring the cosmos down to earth with these beautifully understated painted planet rocks. Using a palette of muted clay tones and simple geometric lines, you can transform smooth river stones into an elegant solar system display.
Detailed Instructions
Materials
- 10-12 smooth, round river rocks (varying sizes)
- Acrylic paints (terracotta, beige, mustard yellow, slate grey, sage green, white)
- Fine detail paintbrushes (size 0 and 00)
- Small flat paintbrush
- Slate serving board or dark cardstock (for display)
- White paint pen (fine tip) or white gel pen
- Paper stars (optional punches)
- Matte spray varnish
Step 1: Preparing the Canvas
-
Clean the stones:
Begin by washing your river rocks with warm soapy water to remove any dirt or grit. Scrub them gently with an old toothbrush if needed to ensure a perfectly smooth surface. -
Dry thoroughly:
Let the stones dry completely in the sun or use a hairdryer to speed things up. Any trapped moisture underneath the paint can cause it to bubble later. -
Plan your planets:
Arrange your stones in size order before painting. Pick a large, round yellow-toned stone for the sun, a large banded one for Jupiter, and smaller ones for terrestrial planets like Mars and Mercury.
Wobbly Lines?
If you struggle painting thin curved lines, try rotating the rock with your hand while holding the paintbrush still, rather than moving the brush itself.
Step 2: Base Coating
-
Mix your palette:
Prepare a muted, earthy color palette. Instead of bright primaries, mix a little brown or grey into your yellows and reds to achieve that sophisticated ‘boho’ look seen in the photo. -
Paint the Sun:
Start with your largest ‘Sun’ stone. Apply a base coat of soft beige or pale yellow. You may need two thin coats for full opacity, letting each layer dry in between. -
Paint the gas giants:
For Jupiter and Saturn, choose light grey or cream base coats. These neutral backgrounds will make the striped details pop later. -
Color the rocky planets:
Paint the remaining smaller stones in solid shades of terracotta (Mars), slate grey (Mercury/Moon), and sage green (Earth/Uranus). Aim for a smooth, matte finish. -
Allow to cure:
Let all base coats dry completely for at least 30 minutes. The surface must be hard to the touch so your fine lines don’t drag through wet paint.
Level Up: Galaxy Dust
Flick an old toothbrush dipped in diluted white paint over your slate background before arranging the rocks to create a realistic spray of distant stars.
Step 3: Detailing the Solar System
-
Detail the Sun:
On your beige sun rock, use a mustard or orange paint to create a solid circle in the center. Carefully paint a thin ring around it, followed by small radiating dashes to represent solar rays. -
Create gas bands:
For the striped planets, load a liner brush with thinned brown or grey paint. Enhance the roundness of the stone by painting slightly curved parallel lines across the surface rather than perfectly straight ones. -
Add dimension to Saturn:
On your Saturn stone (the yellow-ochre one), paint concentric white or cream circles in the center. I find that resting my hand on the table helps steady the brush for these circular motions. -
Render Neptune and Uranus:
Take your sage or blue-grey rocks and add sweeping, organic swirls using a lighter yellow or cream paint. This mimics the gaseous atmosphere without needing complex shading. -
Detail the red planet:
For the terracotta Mars rock, use a white paint pen or fine brush to draw a single, elegant diagonal line and a few tiny dots for craters. -
Add rings and orbits:
On the dark grey stones, use very thin white lines to suggest planetary rings. A single curved line crossing the stone off-center creates a great 3D effect. -
Planetary texture:
For a textured look on Earth or Venus, try dabbing a nearly dry brush (dry brushing) with a lighter color to create subtle cloud formations or landmasses. -
Final constellations:
Add tiny clusters of white dots on your darker stones to represent moons or distinct surface features.
Step 4: Assembly and Display
-
Seal the artwork:
Once all paint is bone dry, spray the rocks with a matte varnish. This protects the paint from chipping and deepens the colors without adding an artificial gloss. -
Prepare the background:
Take your dark slate board. If you want to mimic the photo exactly, you can adhere small white paper stars or draw simple 5-point stars directly onto the slate with a white pencil. -
Arrange the system:
Place the Sun on the left and arrange your planets in order outward. Don’t worry about perfect astronomical distance; focus on a balanced visual composition.
Now you have a stunning, tactile model of the solar system ready to display on a shelf or use as an educational tool
Asteroid Belt Detail Between Mars and Jupiter
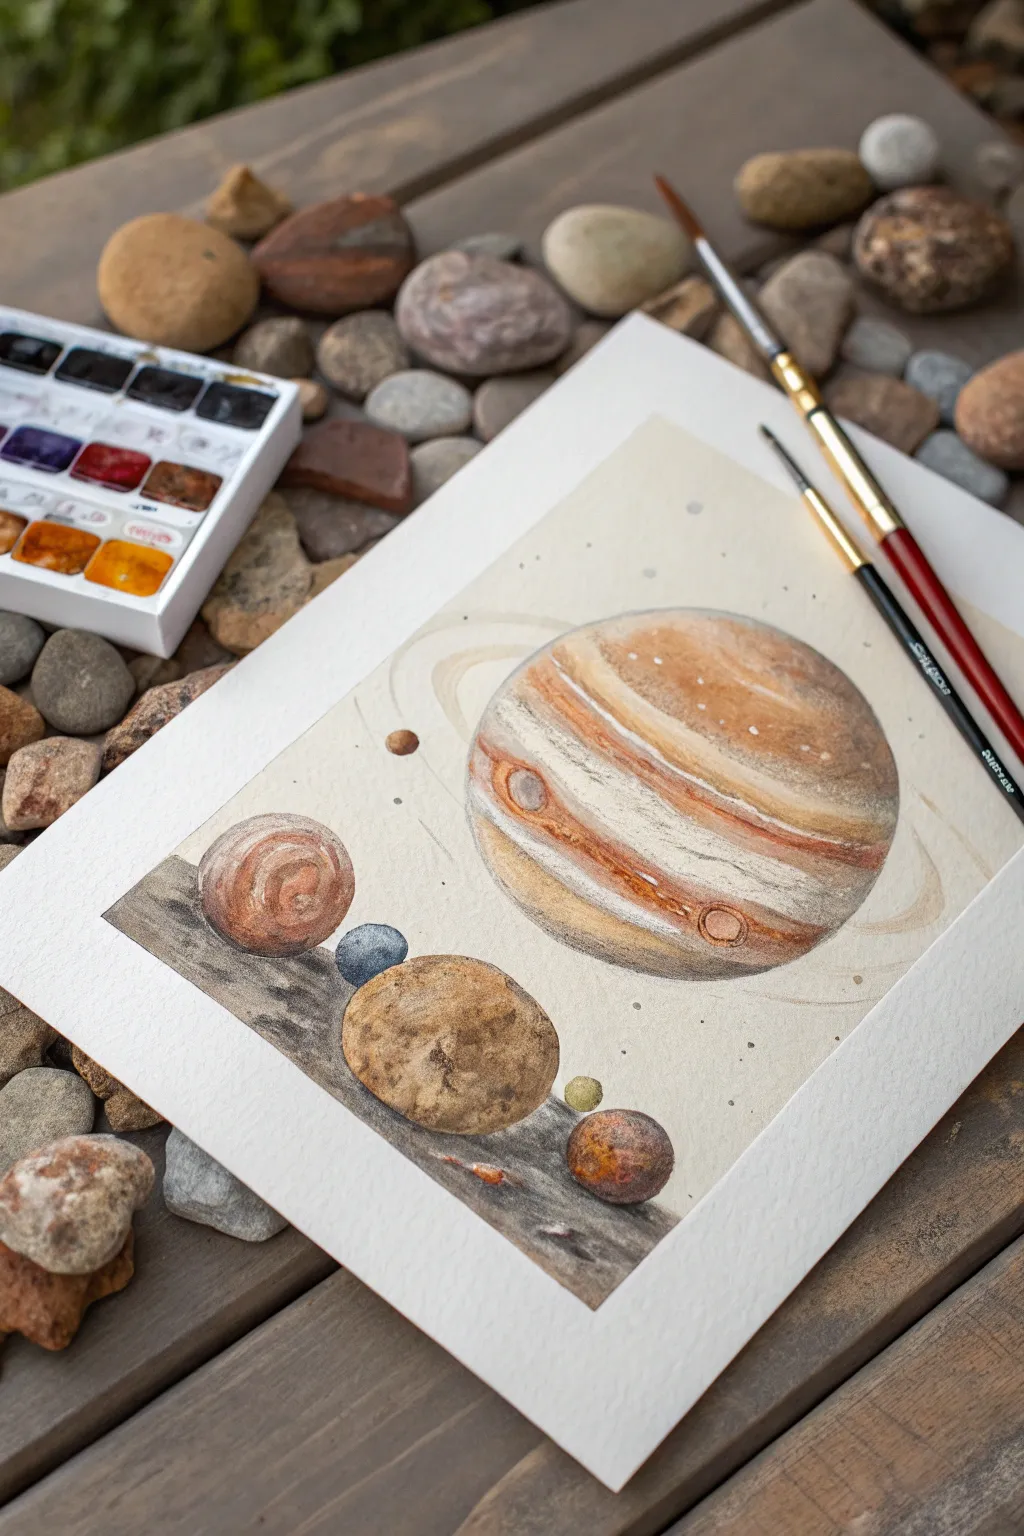
This unique watercolor composition playfully blends celestial majesty with earthly textures, reimagining Jupiter and its surrounding bodies as if they were rugged stones found on a riverbed. The result is a warm, textured study of planetary surfaces featuring earthy tones and delicate ring details.
How-To Guide
Materials
- Cold press watercolor paper (300 gsm)
- Watercolor pan set (focused on earth tones: Burnt Sienna, Yellow Ochre, Burnt Umber, Indigo, Sepia)
- Round watercolor brushes (Size 2 and 6)
- Pencil (HB or H) for sketching
- Kneaded eraser
- White gouache or white gel pen
- Clean water and paper towels
- Painter’s tape or masking tape
Step 1: Planning and Sketching
-
Paper Prep:
Begin by taping down your watercolor paper to a board to prevent buckling. A roughly A5 or 5×7 inch size works perfectly for this intimate study. -
Mapping Jupiter:
Draw a large circle on the right side of the paper for Jupiter. It doesn’t need to be a perfect geometric circle; a slightly organic shape enhances the prominent ‘stone’ aesthetic. -
Adding the Orbiters:
Sketch various smaller circles to the left and bottom of Jupiter to represent asteroids or moons. Vary their sizes significantly, from tiny pebbles to larger rocks, and stack a few near the bottom left corner. -
Ring Guidelines:
Lightly pencil in the elliptical path of Jupiter’s rings, ensuring they wrap behind the planet and sweep widely around the front.
Natural Texture Hack
Sprinkle a pinch of table salt onto Jupiter’s wet paint bands. Let it dry completely before brushing it off to create organic crater-like blooms.
Step 2: Painting the Gas Giant
-
Base Wash:
Wet the Jupiter circle with clean water. Apply a very pale wash of Yellow Ochre mixed with a touch of Burnt Sienna to create a warm undertone. -
Defining Bands:
While the surface is still damp but not soaking, use your size 6 brush to stripe in horizontal bands. Use alternating mixes of Burnt Sienna and a cooler grey-brown to mimic Jupiter’s storms. -
The Great Red Spot:
Drop a concentrated mix of Burnt Sienna and Red Iron Oxide into the lower-left quadrant of the planet to create the famous storm eye, letting the edges bleed slightly soft. -
Building Texture:
Once the first layer is dry, glaze over darker bands with Sepia. I like to lift a little pigment out with a thirsty brush in the lighter zones to create a cloudy texture. -
Shadows:
Add a crescent of shadow on the right side of the planet using a dilute mix of Indigo and Burnt Umber to give the sphere three-dimensional form.
Level Up: Cosmic shimmer
Mix a tiny amount of metallic gold watercolor or iridescent medium into your ring color. It adds a magical glow when the light catches the artwork.
Step 3: Creating the Asteroids
-
Rock Textures:
Treat each smaller circle like a pebble. Paint the largest asteroid on the left with swirls of reddish-brown, mimicking a polished agate stone. -
Granite Effects:
For the bottom-center asteroid, use a stippling motion with Yellow Ochre and grey. While wet, drop in tiny specks of darker brown to create a granite-like surface. -
Cool Tones:
Paint the smallest ‘moon’ tucked between the larger rocks with a cool bluish-grey to add color contrast against all the warm earth tones. -
Grounding Shadow:
Paint a dark, sweeping shadow underneath the bottom cluster of asteroids using dark grey. This creates the illusion that they are resting on a surface, distinct from the floating planet.
Step 4: Final Details
-
Painting the Rings:
Using a steady hand and very dilute beige paint, trace the ring lines. Keep the paint translucent so the background paper texture shows through. -
White Highlights:
Use white gouache or a gel pen to add tiny specular highlights to the ‘eyes’ of the storms on Jupiter and the tops of the asteroids to make them look wet or polished. -
Atmospheric Splatter:
Load a small brush with watery grey paint and tap it against another brush handle to sprinkle tiny speckles around the planet, simulating distant stars or dust.
Step back and admire your mini solar system, where the line between planet and pebble is beautifully blurred
Kuiper Belt Edge With Dwarf Planets
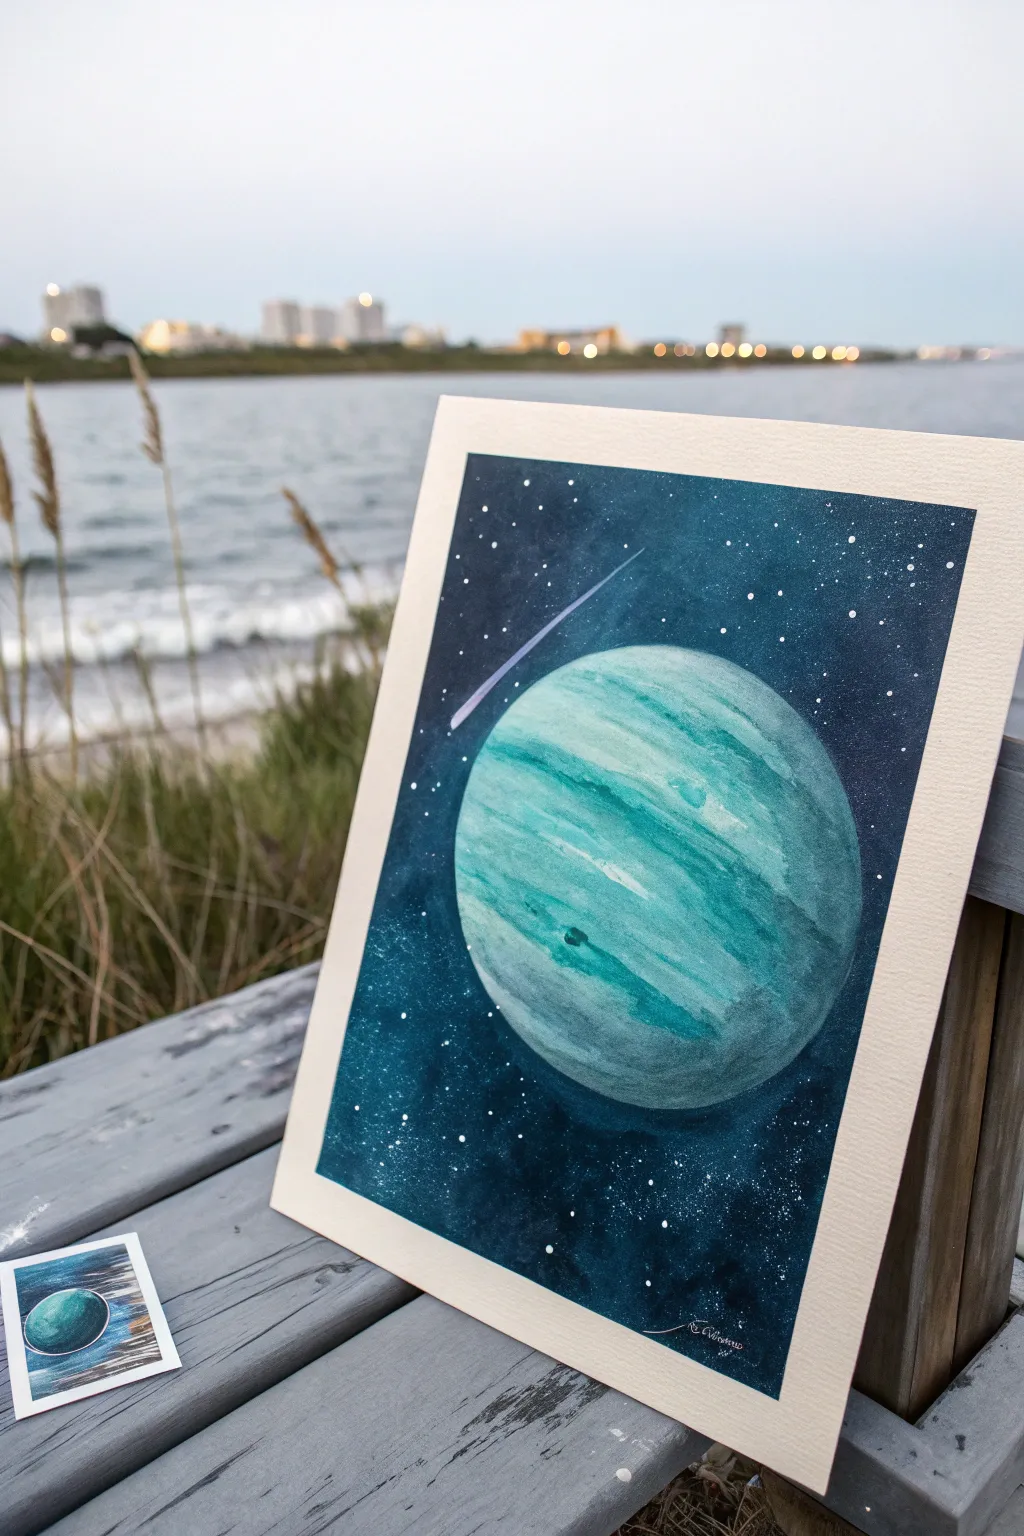
Capture the mysterious beauty of the outer solar system with this ethereal watercolor painting of a blue-green ice giant. This project uses wet-on-wet techniques to create swirling, atmospheric cloud bands and splatter effects for a distant, starry Kuiper Belt backdrop.
Detailed Instructions
Materials
- High-quality watercolor paper (cold press, 140lb/300gsm)
- Watercolor paints (Phthalo Blue, Turquoise, Indigo, Prussian Blue, White Gouache)
- Painter’s tape or masking tape
- Drawing board or hard surface
- Round watercolor brushes (sizes 4, 8, and a small liner)
- Compass or circle template
- Pencil and eraser
- Two jars of water
- Paper towels
- Old toothbrush (optional for stars)
Step 1: Preparation and Sketching
-
Secure the paper:
Start by taping down all four edges of your watercolor paper to a board. This creates the crisp white border seen in the original artwork and prevents the paper from buckling under heavy washes. -
Outline the planet:
Using a compass or a circular object like a bowl, lightly trace a large circle slightly off-center to the right. Keep the pencil lines very faint so they won’t show through the translucent watercolor layers later. -
Mask the planet (optional):
If you are worried about painting inside the lines, you can apply liquid masking fluid to the planet’s interior. However, careful brushwork works just as well for this loose style.
Step 2: Painting the Ice Giant
-
Wet the surface:
With a clean, large brush, apply a thin sheen of clean water inside the circle of your planet. You want the paper damp and glistening, but not forming puddles. -
Lay the base tone:
Load your brush with a watery mix of Turquoise and a touch of Phthalo Blue. Sweep horizontal strokes across the wet circle, allowing the pigment to bloom comfortably on the damp paper. -
Create cloud bands:
While the first layer is still wet, pick up more concentrated pigment—Indigo or Prussian Blue. Paint curved stripes following the curvature of the sphere. The wet paper will soften these edges naturally, creating a gaseous look. -
Lift highlights:
Rinse your brush and pat it dry on a paper towel. Use this ‘thirsty’ brush to lift pigment away from the upper left side of the planet and between the darker bands, revealing the lighter paper underneath for a highlighted 3D effect. -
Deepen the shadows:
Add your darkest blue mix to the bottom right curve of the planet to establish the shadow side. Let the planet dry completely before moving on.
Uneven Wash?
If your dark background dries with ‘cauliflower’ watermarks, simply glaze over it with another layer of dark blue once fully dry. This deepens the color and hides imperfections.
Step 3: The Deep Space Background
-
Prepare the background wash:
Mix a large puddle of very dark paint using Indigo, Prussian Blue, and perhaps a tiny touch of black. You need enough to cover the whole background without stopping to mix more. -
Cut in the edge:
Carefully paint around the edge of your dry planet with a medium brush. Outline it precisely first, so you don’t accidentally paint over your work. -
Fill the void:
Working quickly, fill in the rest of the rectangular background. I find it helpful to keep the leading edge of the paint wet to avoid streaks. The background doesn’t have to be perfectly flat; subtle variations add depth to space. -
Create the meteor trail:
While the background is damp (or after drying if you prefer more control), use a liner brush with diluted white gouache or light blue to paint a sharp, thin line streaking diagonally across the sky. -
Add the meteor head:
Thicken the leading end of the line slightly with brighter white gouache to represent the meteor itself burning up.
Add Moons
Create depth by painting tiny, solid circles near the planet using light grey or white gouache. Add a tiny shadow on one side of each moon to match the primary light source.
Step 4: Finishing Details
-
Splatter the stars:
Load an old toothbrush or a stiff bristle brush with white gouache diluted to a creamy consistency. Use your thumb to flick the bristles, spraying fine white dots across the dark background. -
Protect the planet:
Be sure to cover your painted planet with a scrap piece of paper while splattering so the stars appear behind it, not on top of it. -
Accentuate specific stars:
Use your smallest liner brush or a white gel pen to add a few larger, brighter stars manually. Place them randomly to avoid a grid-like pattern. -
Reveal the border:
Wait until the painting is bone dry—touch it with the back of your hand to check for coldness. Slowly peel away the painter’s tape at a 45-degree angle to reveal the clean, sharp frame.
Now you have a stunning, atmospheric window into the far reaches of the solar system ready to frame and display
Neon-on-Black Solar System for High Contrast
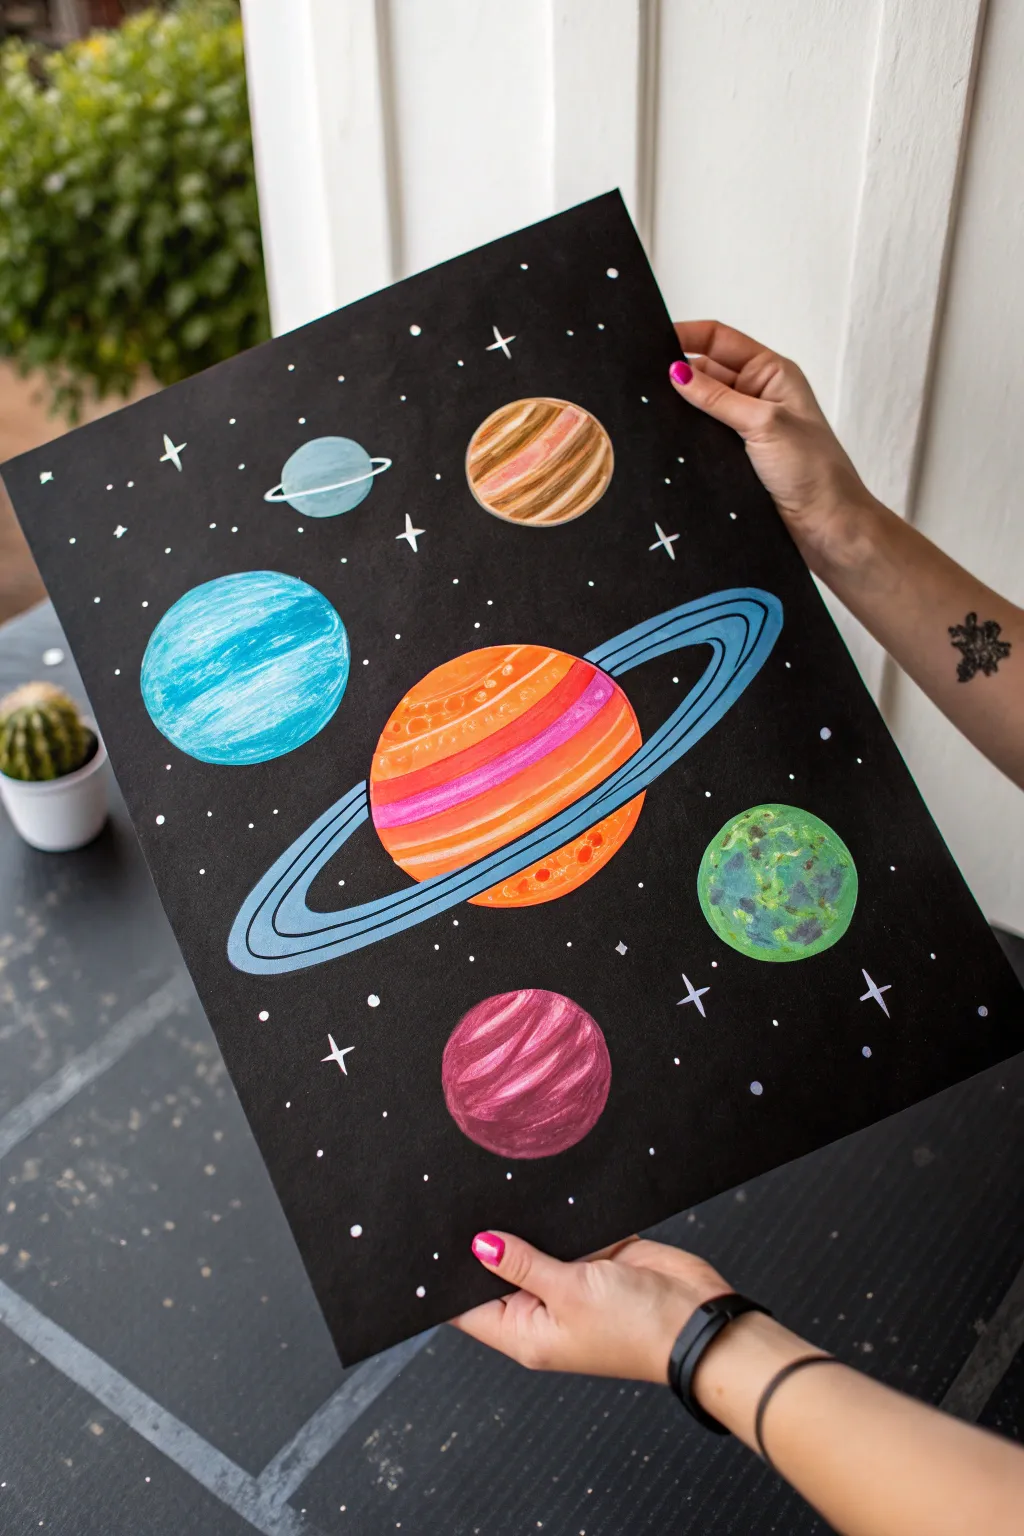
Capture the magic of space with this striking painting that uses bold neon colors against a deep black background for incredible contrast. This project features stylized versions of planets and Saturn’s rings, making it a perfect blend of scientific wonder and artistic fun.
Step-by-Step Tutorial
Materials
- Heavyweight black cardstock or poster board (approx. A3 or larger)
- Acrylic paints (bright neon colors: orange, pink, blue, green, yellow, white)
- Paintbrushes: medium flat brush, small round detail brush
- Pencil for sketching
- White or metallic silver gel pen (optional)
- Circle templates (cups, bowls, or lids of various sizes)
- Palette for mixing
Step 1: Planning and Sketching
-
Prepare the background:
Start with a clean sheet of heavyweight black cardstock. Ensure the surface is flat and free of dust so your paint adheres smoothly. -
Map out planet placement:
Visualize where your planets will go. In the reference, there is a large central planet (Saturn) surrounded by smaller ones. Lightly sketch the circular shapes using a pencil. -
Use circle templates:
To get crisp, perfect circles, trace around household objects like cups or lids. For the central planet, use a medium-sized bowl or lid. Use smaller caps for the surrounding planets. -
Sketch the rings:
Draw the large, sweeping rings around the central orange planet. Sketch an elongated oval shape that cuts through the center of the planet, angling it diagonally for a dynamic look. -
Add background details:
pencil in tiny circles or 4-pointed star shapes in the empty black space to guide where your stars will go later.
Step 2: Painting the Planets
-
Base coat the central planet:
Mix a bright neon orange with a touch of white to make it opaque. Paint the entire sphere of the central planet, avoiding the ring area if you sketched it clearly. -
Add striped details:
While the orange is still slightly tacky or dry, layer on horizontal stripes using hot pink and lighter peach tones. Let the brushstrokes curve slightly with the planet’s shape to give it 3D volume. -
Paint the blue ring:
Using a vibrant light blue, carefully fill in the rings. Use a flat brush to get smooth, long strokes along the curve of the ring. You may need two coats to cover the black paper completely. -
Detail the rings:
Once the blue base is dry, use a thin brush with a darker blue or black to draw concentric lines inside the ring, separating it into multiple bands. -
Create the blue planet:
Paint the large planet on the left with a bright cyan or turquoise. Add dimension by painting lighter white-blue on the top half and darker blue strokes on the bottom. -
Paint the textured green planet:
For the planet on the right, use a lime green base. While wet, dab in darker greens and blues using a scumbling or tapping motion to create a cratered, earthy texture. -
Add the smaller planets:
Paint the top center planet with swirling browns and creamy whites for a Jupiter-like effect. Paint the bottom planet deep magenta with lighter pink swirls. -
Execute the tiny ringed planet:
For the smallest blue planet near the top left, paint a simple circle and add a thin white line for a ring.
Paint opacity issues?
If neon paint looks transparent on black paper, paint everything white first. Let it dry completely, then layer the neon colors on top for maximum brightness.
Step 3: Finishing Touches
-
Define the outlines:
If your edges look a little messy, you can tidy them up. I sometimes use a very fine brush with black paint to clean up the outside edges of the circles. -
Add highlights:
Mix a tiny amount of water with white paint. Add small curved reflection lines on the top right side of each planet to suggest a light source. -
Paint the stars:
Using pure white paint and your smallest brush (or the tip of a handle), dot various sizes of stars throughout the background. -
Draw cross-stars:
For the larger twinkling stars, paint a small cross or plus sign + and taper the ends to points. -
Final inspection:
Step back and look at the contrast. If any neon colors look dull against the black, add a second coat of paint to make them pop.
Make it shimmer
Mix a pinch of fine loose glitter into your star paint or use metallic markers for the rings to give the galaxy a subtle, magical sparkle.
Once dry, hang your vibrant galaxy on the wall and enjoy the colorful view of space
Minimal Flat-Graphic Solar System Shapes
Capture the stark beauty of space with this flat-lay graphic interpretation of our solar system. Using opaque paints on deep black paper creates a striking contrast that allows the planets and their orbits to pop with modern simplicity.
How-To Guide
Materials
- Black sketchbook paper or heavy black cardstock
- Gouache or opaque acrylic paints (terracotta red, ochre yellow, muted teal, cream, grey)
- Fine liner brushes (sizes 0 and 00)
- White gel pen or fine white paint marker
- Compass or circle stencils
- Pencil for sketching
- Palette for mixing
Step 1: Planning and Sketching
-
Map the center:
Begin by finding the approximate center of your black page. This doesn’t need to be mathematically perfect, but it will serve as the anchor for your central planet. -
Establish the orbits:
Using a compass gently, lightly sketch concentric circles radiating outward from your center point. Space them irregularly to create visual interest rather than a perfect target shape. -
Place the planets:
Lightly sketch circles of varying sizes along different orbit lines. Place a large one near the center, a medium one with rings further out, and scatter smaller circles for moons and distant planets.
Paint opacity issues?
If your colors look transparent on black paper, mix a tiny drop of white gouache or acrylic into every color. The white pigment adds the necessary opacity to pop against the dark.
Step 2: Painting the Planets
-
Mix your palette:
Prepare your paints. You want a muted, earthy palette: mix a soft terracotta, a pale grey-blue, a creamy beige, and a warm ochre. Gouache works beautifully here for its matte opacity. -
Base coat the central planet:
Paint the large central planet with a flat circle of terracotta red. Ensure the paint is thick enough to cover the black paper without being gloppy. -
Add dimension:
While the terracotta is still slightly workable, add a swipe of lighter orange or cream to one side to suggest a subtle spherical highlight. -
Paint the gas giant:
For the Saturn-like planet, paint a cream-colored circle. I like to add horizontal stripes of slightly darker ochre while wet to mimic gas bands. -
Fill in the rocky planets:
Paint the remaining smaller circles. Use the grey-blue for a Neptune-esque planet and ochre for smaller bodies. Vary the sizes to keep the composition dynamic. -
Detail the rings:
Once the cream planet is dry, carefully paint a thin white or pale grey ring around it. Make the ring wider at the sides and very thin across the front of the planet. -
Add surface textures:
Go back to your grey and ochre planets. Add tiny dots or swirls in a slightly darker shade to give them a cratered or stormy texture.
Step 3: Drawing the Orbits
-
Trace inner orbits:
Using a very fine brush with diluted cream paint, or a gel pen, trace over your pencil lines for the orbits closest to the center. -
Vary the line weight:
For outer orbits, switch to a dashed line or a dotted line pattern. This variation adds a technical, diagrammatic feel to the artwork. -
Connect the systems:
Where a planet has a moon, draw a tiny secondary orbit circle around that planet to show its local gravitational pull. -
Create the asteroid belt:
Instead of a solid line, create one orbit entirely out of tiny, irregular dots and dashes to represent an asteroid belt.
Metallic Orbit
Swap the white gel pen for a metallic gold or silver paint pen when drawing the orbit lines. It catches the light beautifully and gives an antique map vibe.
Step 4: Final Touches
-
Highlight the path:
Add tiny gold or yellow dots along some of the orbit lines to act as waypoints or distant stars. -
Add cosmic dust:
If you have a customized corner like the spiral text in the reference, use a white gel pen to write tiny script or draw small constellations in the negative space. -
Clean up edges:
Check the edges of your planets. If the black paper shows through unevenly, carefully touch up the perimeter with opaque paint. -
Sun companion:
If working in a sketchbook, you can mirror this design on the opposite page with a large, stylized sun motif to complete the spread.
Close your sketchbook knowing you’ve captured a tiny universe on paper
Solar System Inside a Circular Galaxy Window
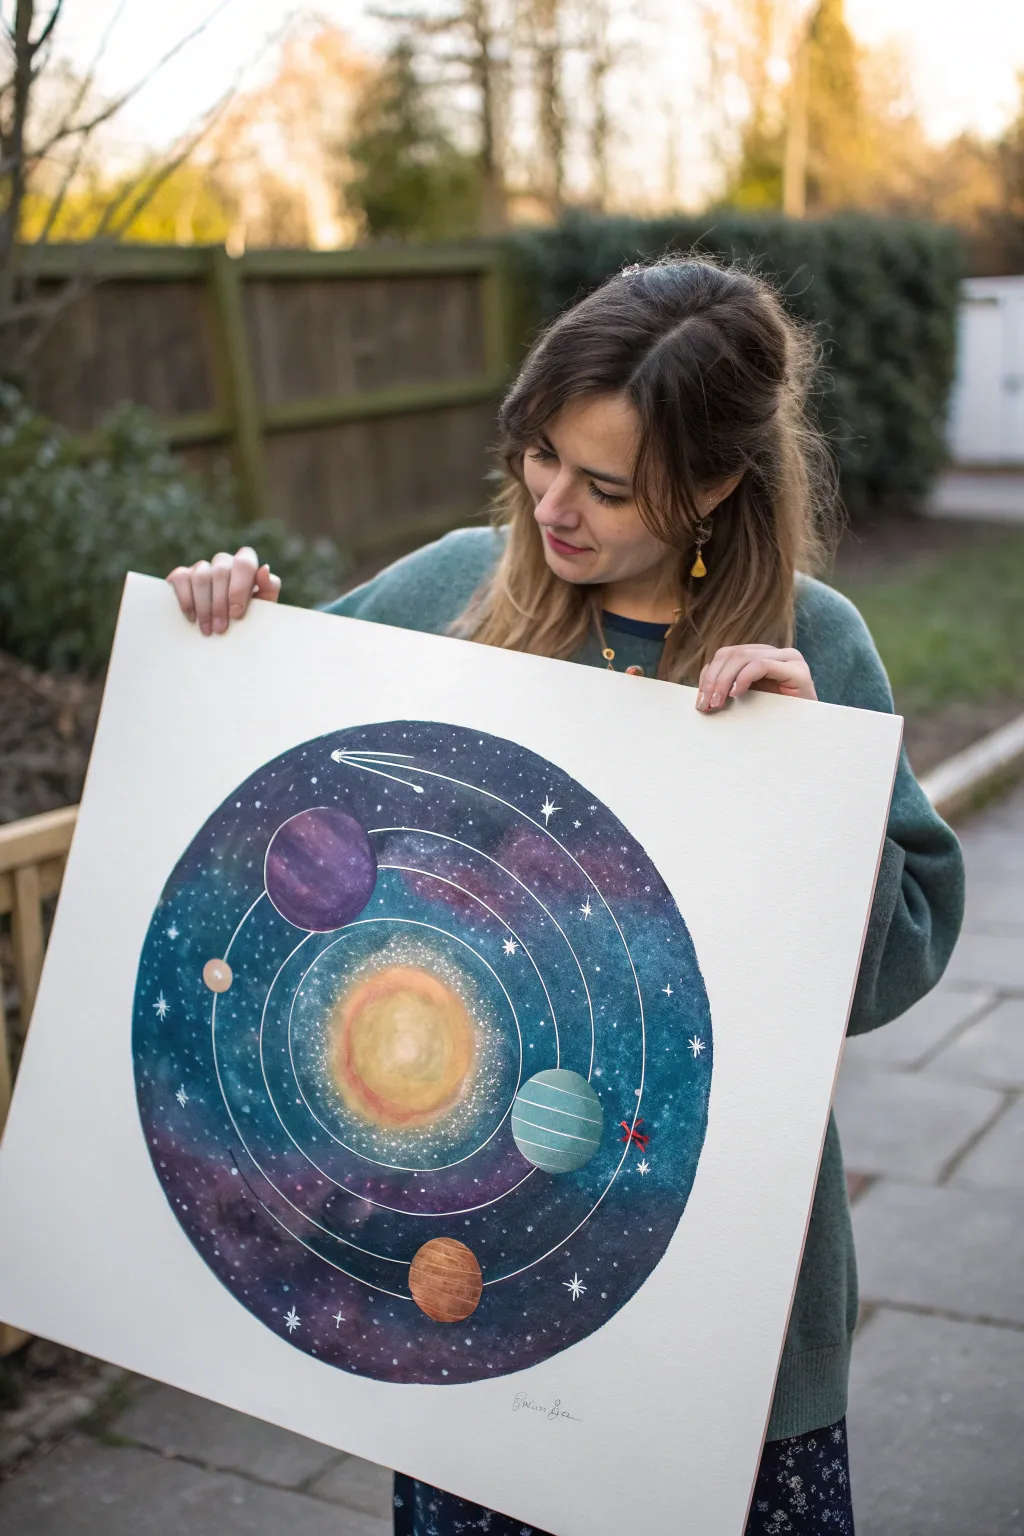
Step into a universe of your own making with this stylized solar system painting, where celestial bodies orbit within a perfect circular window. The blend of deep watercolor textures creating a nebula effect against the crisp white orbital lines offers a striking balance of chaos and order.
Detailed Instructions
Materials
- Large square watercolor paper (cold press creates nice texture)
- Watercolor paints (indigo, violet, teal, ochre, orange)
- Gouache paints (white, plus matching planetary colors)
- Large compass or a round object to trace (like a dinner plate)
- Masking fluid
- Pencil and eraser
- Brushes (large wash brush, medium round, fine detail liner)
- White gel pen or Posca marker
- Paper towels and water cup
Step 1: Drafting the Design
-
Trace the boundary:
Begin by establishing the main circular boundary in the center of your square paper. Use a large compass or trace around a circular household object like a serving platter to get a perfect ring. -
Map the orbits:
Lightly sketch the concentric circles for the orbital paths inside your main circle. Don’t worry about them being mathematically perfect distances; visual spacing works best. -
Position the planets:
Sketch small circles for planets along the various orbital paths. Vary their sizes to represent gas giants and terrestrial planets, placing them scattered around the sun rather than in a straight line for visual interest. -
Masking time:
Apply masking fluid carefully over your sketched planets and the central sun area. This protects the white paper, allowing you to paint the dark background freely without worrying about the edges.
Step 2: Painting the Galaxy
-
Base wash:
Wet the entire area inside the main circle (excluding the masked spots) with clean water. Drop in diluted teal and deep blue, letting the colors bleed naturally into the wet paper. -
Deepening the space:
While the paper is still damp, introduce darker pigments like indigo and violet. Focus the darkest colors towards the edges of the circle and in patches between orbits to create depth. -
Creating texture:
Sprinkle a pinch of salt onto the wet paint in a few areas or dab lightly with a crumpled tissue. This creates the blooming, starry texture characteristic of watercolor galaxies. -
Let it dry completely:
Patience is key here; wait until the background is bone dry. If the paper feels cool to the touch, it still needs more time. -
Starry details:
Load a toothbrush or stiff brush with white gouache and flick it over the dry painting to create distant stars. Use a small brush to manually paint a few larger, twinkling stars.
Uneven Circles?
If you struggle to paint perfect circles freehand, trace a coin or button lightly with a pencil first, or use circle stencils for the smaller planetary bodies.
Step 3: Planetary Details
-
Reveal the white:
Gently rub away the masking fluid to reveal the pristine white circles for your sun and planets. -
Ignite the sun:
Paint the central circle with a wash of yellow ochre, blending out to a soft orange at the edges. I like to keep the very center slightly lighter to make it look like it’s glowing. -
Paint the planets:
Fill in the planetary circles with different colors—purples, rusty reds, and teals. Add stripes or swirls while the paint is wet to mimic atmospheric bands. -
Defining the orbits:
Using a white gel pen or a very fine brush with white gouache, carefully trace over your original pencil lines for the orbital rings. A steady hand is crucial here. -
Final touches:
Add a shooting star with a long tail using the white pen. Finally, ensure the outer edge of your main galaxy circle is crisp; if paint bled over, touch it up with white gouache or clean it with a damp brush.
Pro Tip: Glowing Orbits
For a subtle glow, trace your white orbital lines with a very diluted, watery wash of the background color before going over them with opaque white ink.
Hang your cosmic creation on the wall and enjoy the view of your personal solar system
Abstract Planet Energy Swirls and Orbit Trails
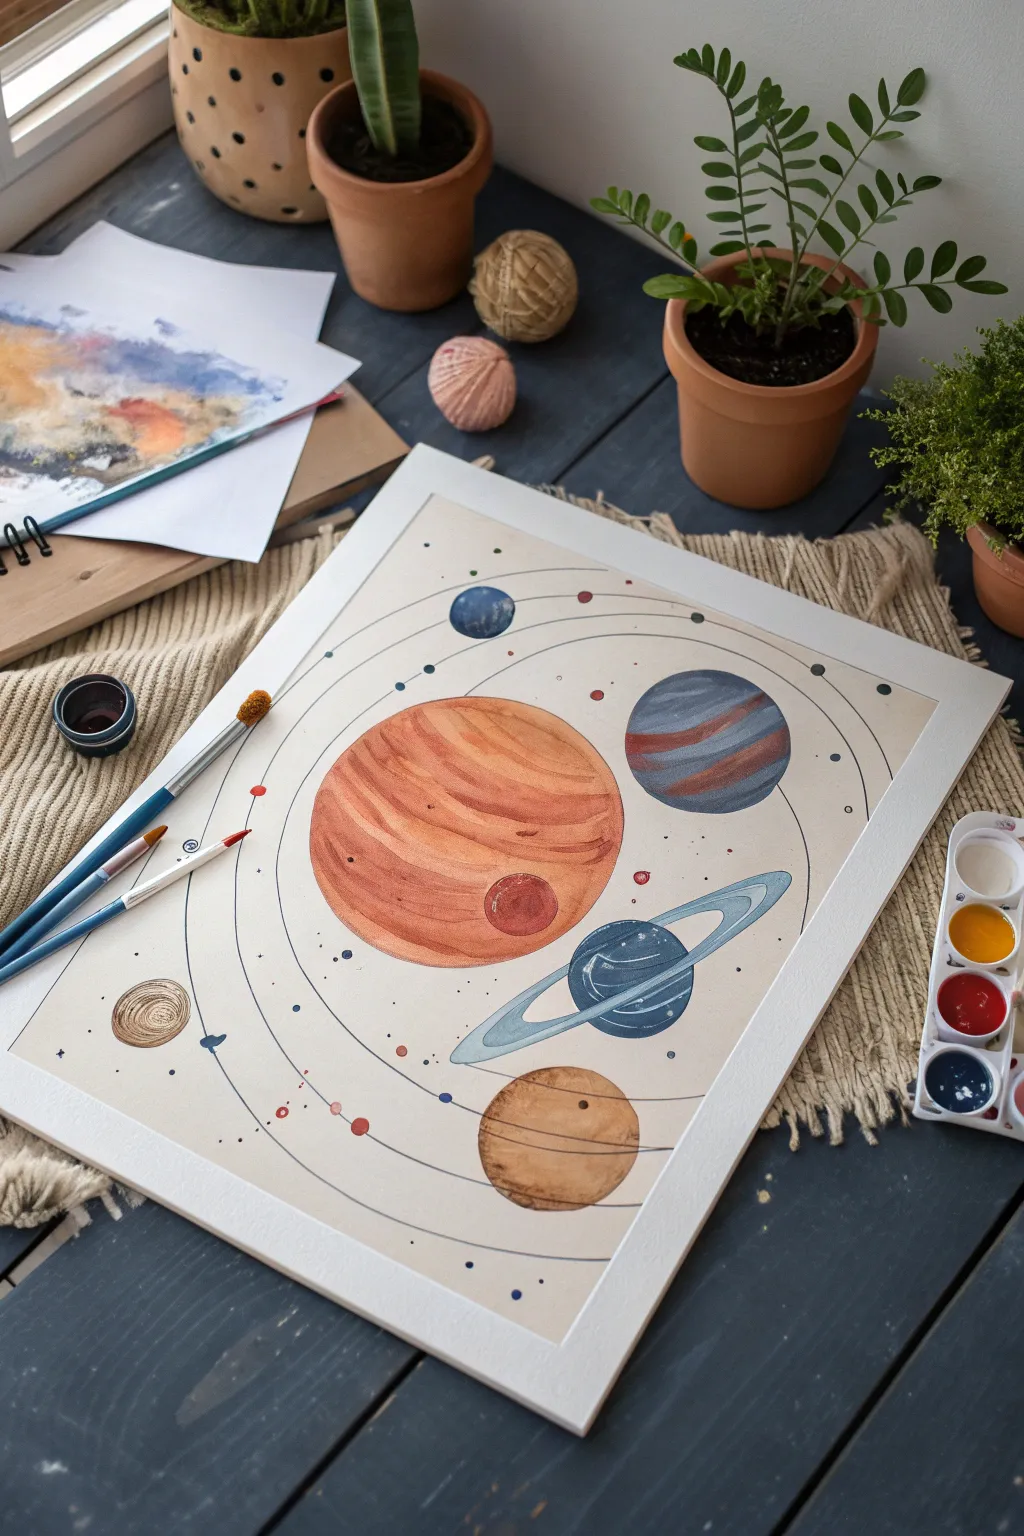
Capture the magic of the cosmos with this elegant watercolor painting featuring stylized planets and delicate orbital rings. The soft, layered washes of paint create depth on the planets, while precise ink lines ground the composition in a delightful illustrative style.
Step-by-Step Tutorial
Materials
- Cold-press watercolor paper (9×12 inches or larger)
- Watercolor paint set (must include burnt sienna, ochre, indigo, and prussian blue)
- Round watercolor brushes (size 4 and 8)
- Fine liner brush or navy drawing pen
- Pencil and eraser
- Compass or various circular objects for tracing
- Palette for mixing
- Cup of water and paper towels
Step 1: Planning the Cosmos
-
Draft the layout:
Start by lightly sketching the positions of your planets using a pencil. Place the largest planet (Jupiter-esque) slightly off-center to the left. Position a ringed planet (Saturn) below and to the right of it. -
Trace perfect circles:
Use a compass or trace household objects like jar lids or large coins to create crisp outlines for your planets. Vary the sizes significantly to create visual interest. -
Add secondary planets:
Sketch a medium-sized planet in the bottom center and another in the upper right. Distribute smaller circles randomly throughout the composition to act as distant moons or dwarf planets. -
Sketch the orbits:
Lightly draw sweeping, curved lines that loop around the central area. These don’t need to be biologically accurate orbits; think of them as aesthetic flow lines that connect the celestial bodies.
Bleeding Lines?
If your orbit lines are feathering into the paper, your background or previous paint layers aren’t dry enough. Wait longer or use a hair dryer on low heat.
Step 2: Painting the Planetary Surfaces
-
Paint the giant planet:
Mix a watery wash of burnt sienna and orange. Fill the large planet circle, painting quickly with your size 8 brush. While wet, drop in stripes of darker reddish-brown to create a storm-cloud effect. -
Add the Red Spot:
Before the main planet dries completely, paint a distinct, darker red circle on its lower right quadrant. The slight bleeding at the edges will make it look integrated into the atmosphere. -
Create the ringed planet:
For the Saturn-like planet, use a deep indigo blue. Paint the sphere, leaving lighter bands or lifting pigment with a dry brush to suggest stripes. Paint the rings with a very transparent wash of light blue-grey. -
Detail the rings:
Once the base wash of the rings is dry, use a smaller brush to add thin, concentric lines of darker blue within the ring band to define the separation. -
Paint the smaller planets:
For the upper right planet, create stripes using alternating bands of muted grey-blue and brown. For the bottom planet, use yellow ochre with horizontal texture strokes of brown. -
Fill the moons:
Use solid indigo or prussian blue to fill in the smallest circles scattered around the page. These provide high-contrast anchor points for the eye.
Step 3: Defining Orbits and Details
-
Dry consistently:
Allow the entire painting to dry completely. If the paper is cool to the touch, it’s still damp. I usually wait an extra ten minutes just to be safe before adding ink. -
Outline the orbits:
Using a very fine liner brush loaded with liquid watercolor or a navy drawing pen, carefully trace over your pencil orbit lines. Keep your hand loose to achieve smooth curves. -
Connect the dots:
Ensure the orbit lines occasionally intersect or pass behind the planets. You can break the line where it hits a planet to make the sphere appear to be in front. -
Add orbital markers:
Along the orbit lines, paint tiny dots of red, blue, and brown. These represent asteroids or space debris and add a whimsical confetti look to the trails. -
Finalize planet outlines:
If your painted edges are a bit rough, use your fine liner to add a very thin, broken outline around the planets. This sharpens the illustration without making it look like a cartoon. -
Erase guidelines:
Once your ink lines are 100% dry, gently erase any visible pencil marks from your initial sketch to leave a clean, professional finish.
Stardust Splatter
Dip a toothbrush in white gouache or acrylic. Running your thumb over the bristles to flick tiny white specks onto the paper adds a magical starry texture.
Frame your cosmic creation in a simple wood frame to let the warm tones of the planets shine


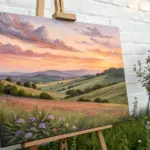
Have a question or want to share your own experience? I'd love to hear from you in the comments below!