When I’m craving calm, I reach for spiritual drawing because it turns a blank page into a quiet little sanctuary. These ideas are meant to help you visualize inner peace, cosmic connection, and all the gentle mystery you feel but can’t always put into words.
Classic Mandala for a Meditative Warm-Up
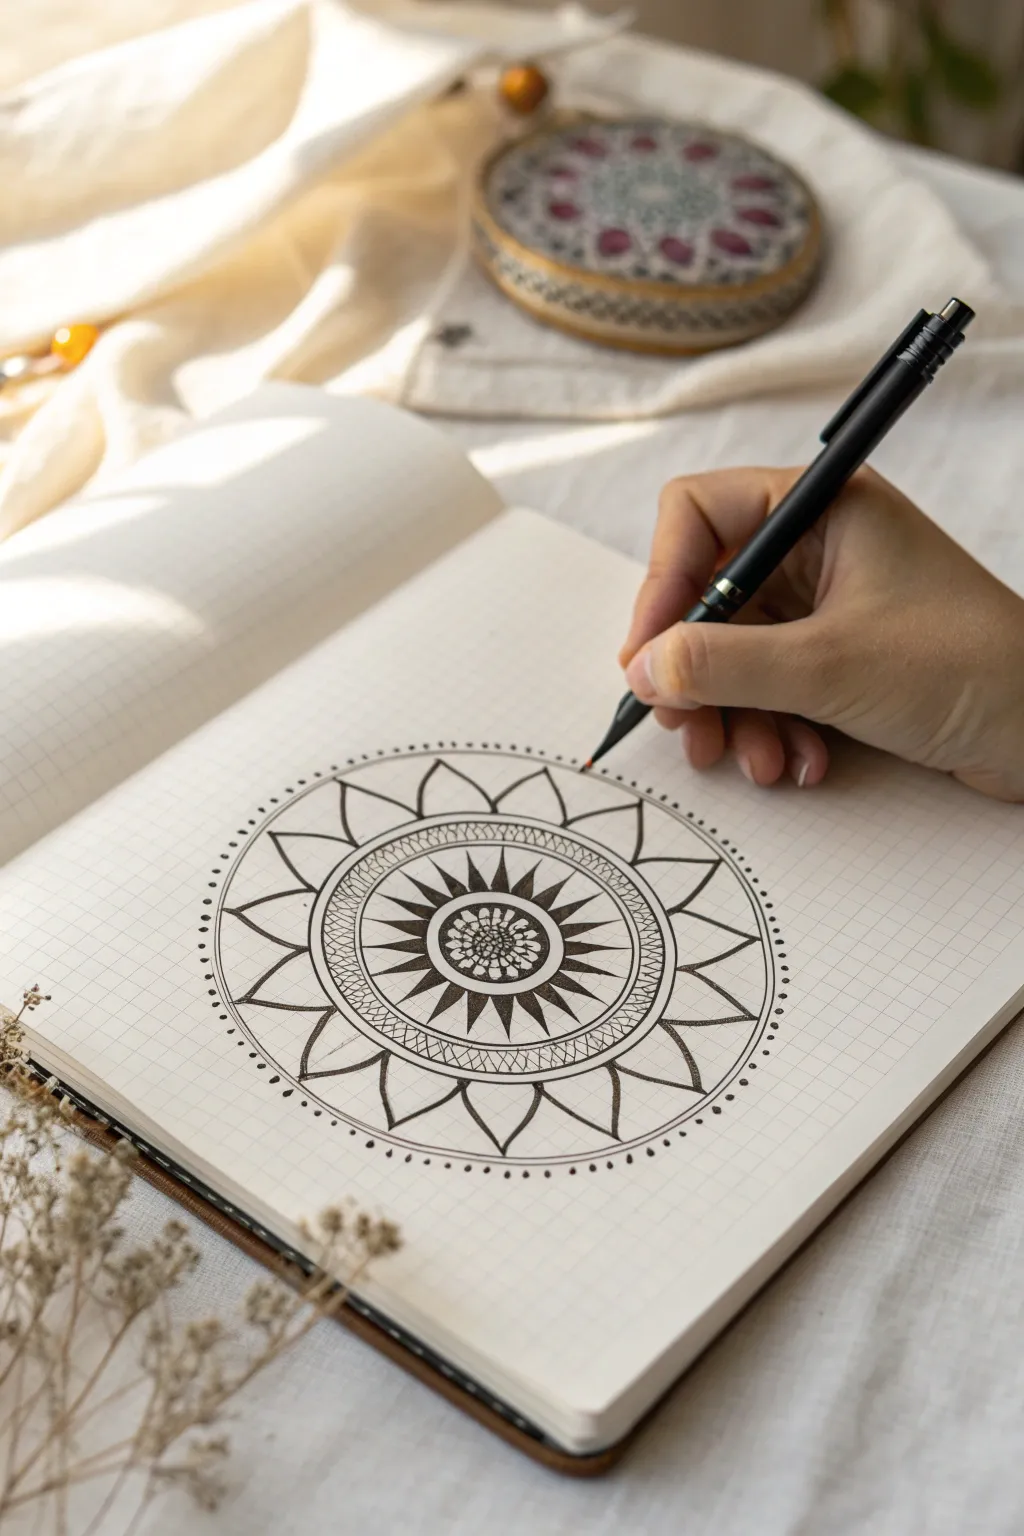
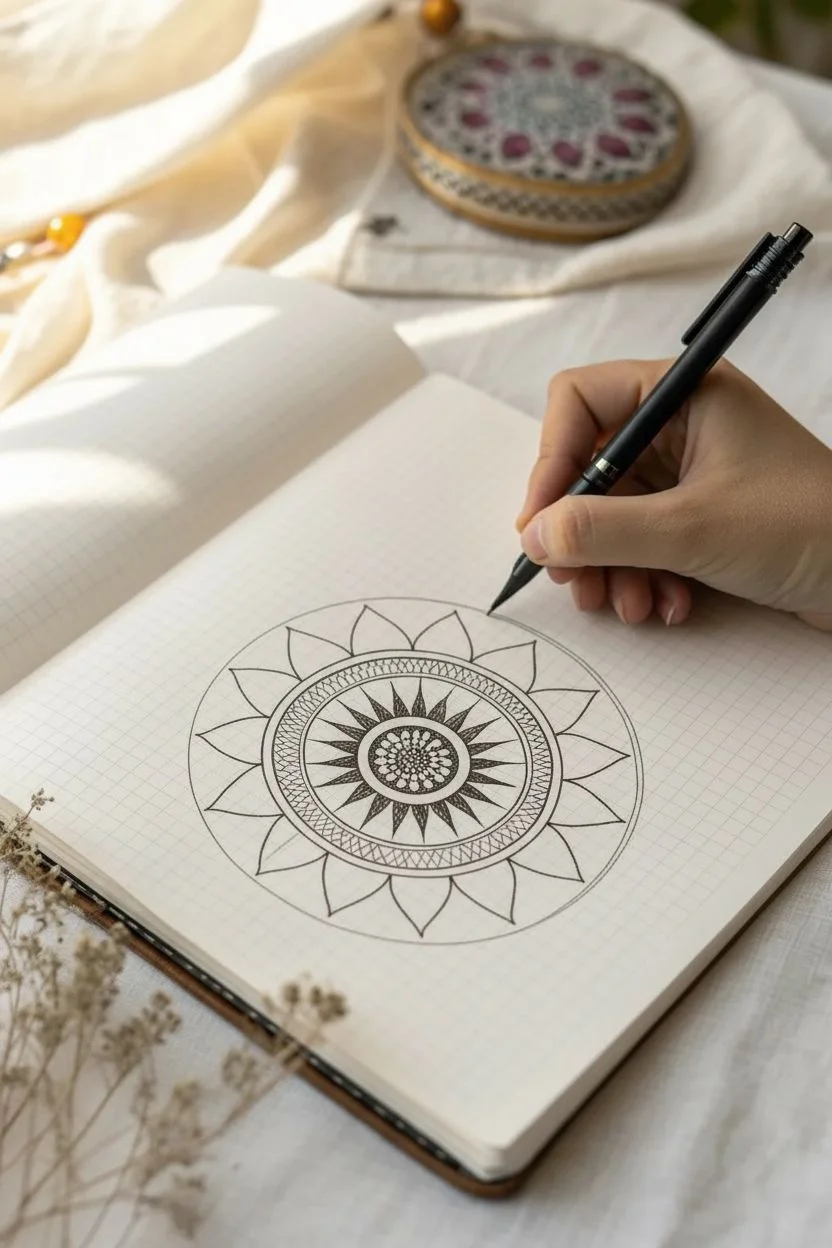
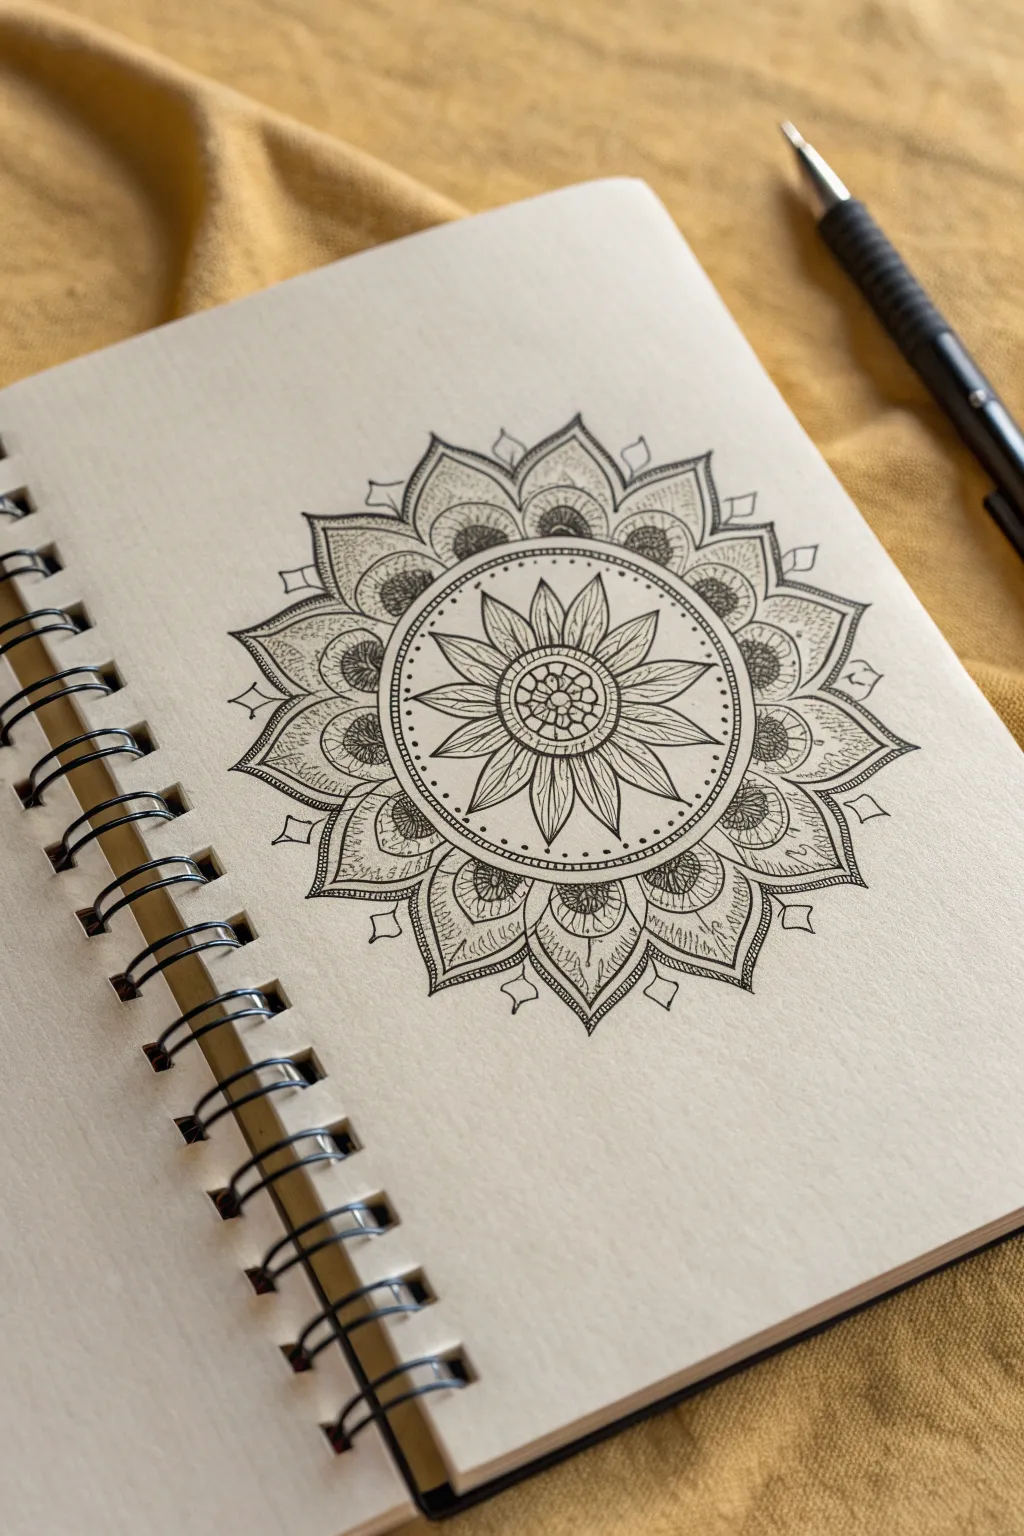
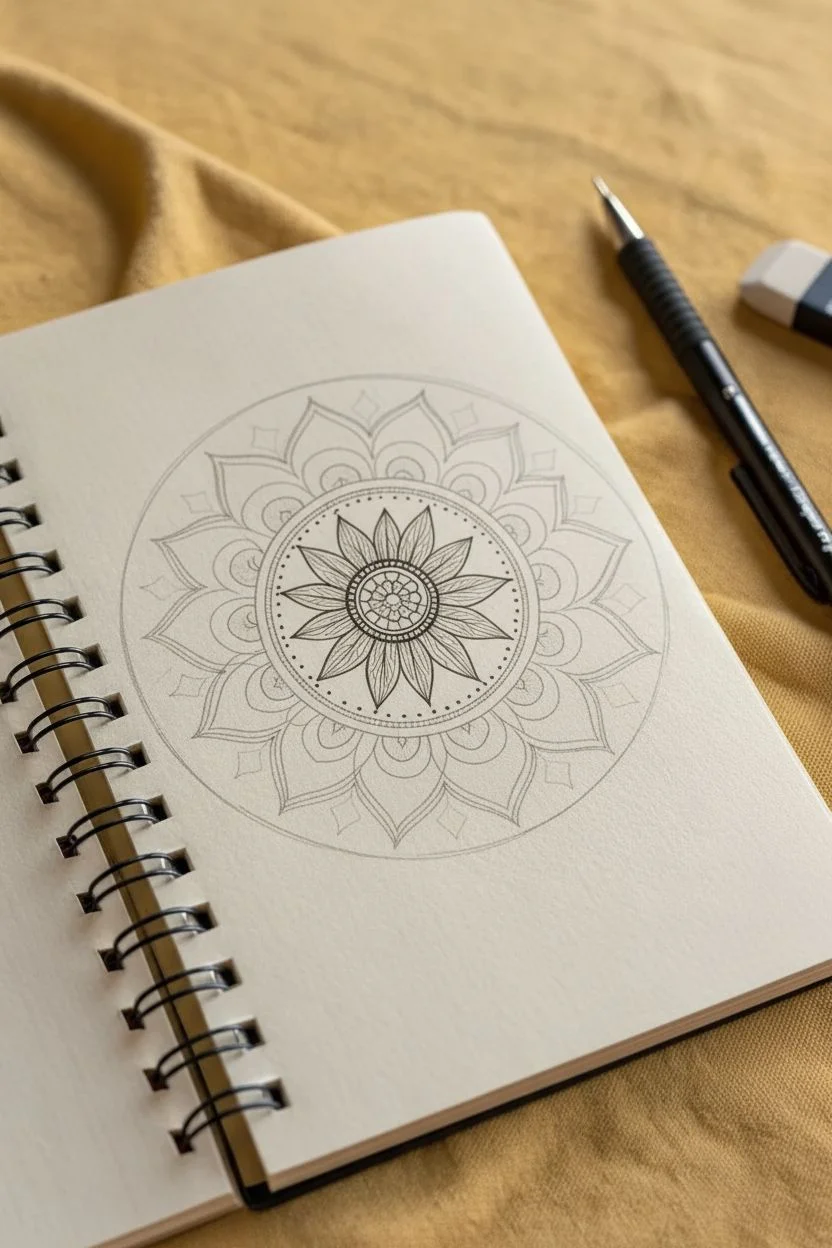
This classic mandala design combines precise geometry with organic floral shapes for a deeply calming drawing session. Using grid paper as your guide, you’ll build outward from a central seed to create a balanced, radiant circular pattern.
Detailed Instructions
Materials
- Grid paper notebook or sketchbook
- Fine liner pen (black, size 03 or 05)
- Thicker marker pen (black, brush tip or size 08) for filling
- Compass (optional suitable for grid counting)
- Pencil and eraser (for initial guidelines)
Step 1: Establishing the Core
-
Mark the center:
Begin by finding the center of your page. Mark a small dot at the intersection of two grid lines to serve as your anchor point. -
Draw the central seed:
Sketch a small circle around your center point, roughly two grid squares in diameter. Inside this circle, draw a tiny, solid black dot in the very middle. -
Add texture to the center:
Fill the space between the center dot and the circle outline with small, tight stippling or tiny circles to create a textured, pollen-like effect. -
Create the first petal ring:
Draw small, simple petals radiating directly from the central circle. Aim for about 12-16 petals that touch each other at the base, keeping them uniform. -
Enclose the core:
Draw a unified circle bordering the tips of these small petals to contain the central motif.
Step 2: Building the Starburst Layer
-
Draft the guide circles:
Using your compass or careful freehand counting, draw two concentric circles outside the core. Space them about 2-3 grid squares apart. -
Draw the spikes:
In the gap between these two new circles, draw sharp, triangular spikes. The base of each triangle should sit on the inner circle, and the tip should touch the outer circle. -
Fill for contrast:
I find that adding high contrast early on helps anchor the design, so use your thicker marker to color in the negative space between the spikes, leaving the triangles white. -
Outer containment ring:
Draw a double line around the outer edge of your starburst layer. This creates a thin track or band that separates the heavy black center from the lighter outer petals. -
Detail the band:
Fill this thin track with fine diagonal hatching or a simple zigzag pattern to add visual interest without overwhelming the design.
Wobbly Lines?
Don’t stress over imperfection. If a circle looks uneven, simply thicken the line weight slightly to mask the wobble and smooth out the curve.
Step 3: Expansive Outer Petals
-
Set the outer boundary:
Determine the final size of your mandala. Sketch a faint pencil circle about 3-4 grid squares away from your hatch-marked band. -
Sketch large petals:
Draw large, curved petal shapes. Start the base of each petal on the hatched band, curving outward to touch your pencil guideline, and returning to the band. -
Refine the shapes:
Go over these large petals with your fine liner, ensuring the curves are smooth. The tips should be slightly pointed, resembling a lotus flower opening up. -
Add internal detail:
Inside each large petal, draw a single curved line running from the base almost to the tip, mimicking a central vein. -
Thicken the outlines:
Carefully re-trace the outer edges of the large petals to give them a slightly bolder line weight than the internal vein details.
Grid Paper Secret
Use the grid squares to count spacing (e.g., ‘every 2 squares is a petal tip’) rather than measuring. It keeps symmetry effortless.
Step 4: Finishing Touches
-
The dotted halo:
Create a ring of dots around the entire perimeter. Place a dot just above the tip of every petal, and then space smaller dots evenly between the petal tips. -
Connect the dots:
Draw a very fine, broken or solid line connecting these outer dots if you want a contained look, or leave them floating for an airy effect as shown in the image. -
Erase guidelines:
Wait at least 5-10 minutes for the ink to fully set, then gently erase any visible pencil circles or stray grid marks.
Take a deep breath and admire the balanced energy your new mandala brings to the page.


Meditating Figure With Aligned Chakra Points
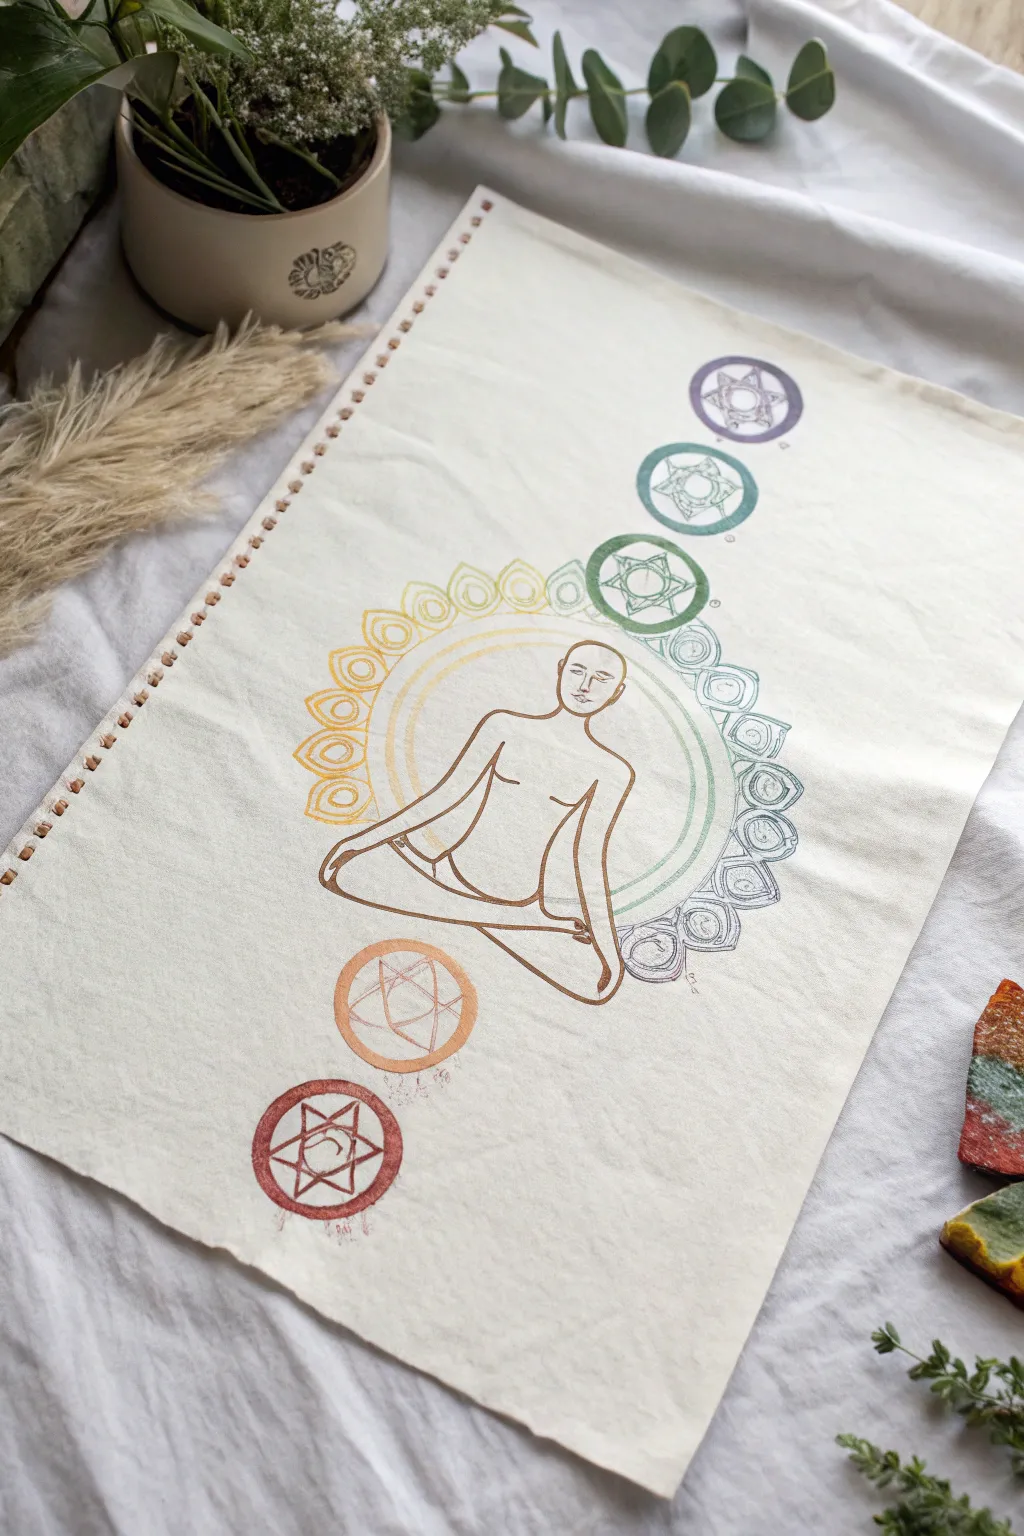

This serene artwork maps the seven chakras along a stylized meditating figure, creating a visual guide to spiritual alignment. The piece combines precise geometric symbols with fluid line art on textured paper for an organic, grounded feel.
Step-by-Step Tutorial
Materials
- Heavyweight textured paper or handmade cotton rag paper (ideally with a perforated or deckled edge)
- Pencil (HB or 2H)
- Eraser
- Fine liner pens in chakra colors (Red, Orange, Yellow, Green, Light Blue, Indigo, Violet)
- Brown or sepia fine liner pen (0.3mm to 0.5mm)
- Ruler
- Circle template or compass
- Reference images for standardized chakra symbols/yantras
Step 1: Setting the Structure
-
Prepare your paper:
Select a sheet of heavy, textured paper. If you want the look of the reference image, choose a page from a sketchbook with perforated edges or tear the edge of a cotton sheet against a ruler for a raw finish. -
Establish the centerline:
Using your ruler and a pencil, lightly draw a vertical line straight down the center of the page. This is crucial for keeping the seven chakra points perfectly aligned. -
Mark chakra positions:
Measure seven equidistant points along your vertical line. Leave enough space between the top two and the bottom two to accommodate the figure in the middle. The central three points will overlap with the figure’s body.
Drawing Perfect Circles
If you don’t have a compass, trace small household items like bottle caps, coins, or spools of thread to get uniform circles for your chakra points.
Step 2: Drafting the Figure
-
Sketch the head and torso:
Lightly sketch the outline of the meditating figure in the center. Start with an oval for the head, placed just below the throat chakra point. Extend lines down for the neck, sloping into shoulders. -
Draw the arms and legs:
Sketch the arms resting on the knees in a classic lotus pose. The legs should form a wide, stable base. Keep the lines simple and stylized—you don’t need intense anatomical detail, just the essence of the form. -
Outline the central halo:
Use your compass (or a large bowl) to draw a large, faint circle behind the figure’s upper torso. This represents the solar plexus and heart energy radiating outward.
Smudged Ink?
If you accidentally smudge wet ink, turn it into ‘energy’ by stippling small dots of the same color around the smudge to make it look intentional.
Step 3: Drawing the Symbols
-
Sketch the Root and Sacral symbols:
At the bottom two points, sketch circles for the Root (Muladhara) and Sacral (Svadhisthana) chakras. Inside the bottom circle, sketch a four-petaled flower shape with an inverted triangle. Above it, sketch a six-petaled shape. -
Add the upper symbols:
Move to the top three points (Throat, Third Eye, Crown). Draw circles for each. Add their respective geometric details: the sixteen-petaled flower for the throat, the two-petaled shape for the brow, and the thousand-petaled lotus (simplified) for the top. -
Draft the radiating petals:
Around the large central halo behind the figure, sketch a ring of stylized petals. The left side should transition from yellow to orange, while the right side transitions into greens and blues, bridging the gap between the lower warm colors and upper cool colors.
Step 4: Inking and Coloring
-
Ink the figure:
Take your brown or sepia fine liner and carefully trace over the pencil sketch of the person. Use a confident, continuous line where possible to keep it looking smooth. I prefer sepia over black here because it feels earthier and softer. -
Ink the Root Chakra:
Switch to your red fine liner. Outline the bottom-most symbol. Use light hatching or stippling inside the petals to add texture without coloring it in completely solid. -
Ink the Sacral Chakra:
Using an orange pen, ink the second symbol up from the bottom. Repeat the texturing technique. -
Ink the Solar Plexus arc:
With a yellow pen, ink the petals on the left side of the central halo. Allow the yellow to transition into the orange sections near the bottom of the arc. -
Ink the Heart Chakra arc:
Using a green pen, ink the petals on the right side of the central halo. You can also lightly outline the large circle behind the figure in a very pale green or yellow to connect them. -
Ink the Throat Chakra:
Use a light blue or turquoise pen for the circle just above the figure’s heart/throat area. Ink the geometric details precisely. -
Ink the Third Eye and Crown:
Use indigo (dark blue) for the brow point and violet for the top-most circle. Ensure the small triangles and symbols inside are crisp. -
Clean up:
Wait at least 15 minutes to ensure all ink is completely dry. Gently erase all remaining pencil marks, being careful not to snag the paper’s texture.
Hang this piece in your quiet corner to serve as a daily reminder of balance and centering


Sun and Moon Pair to Explore Duality
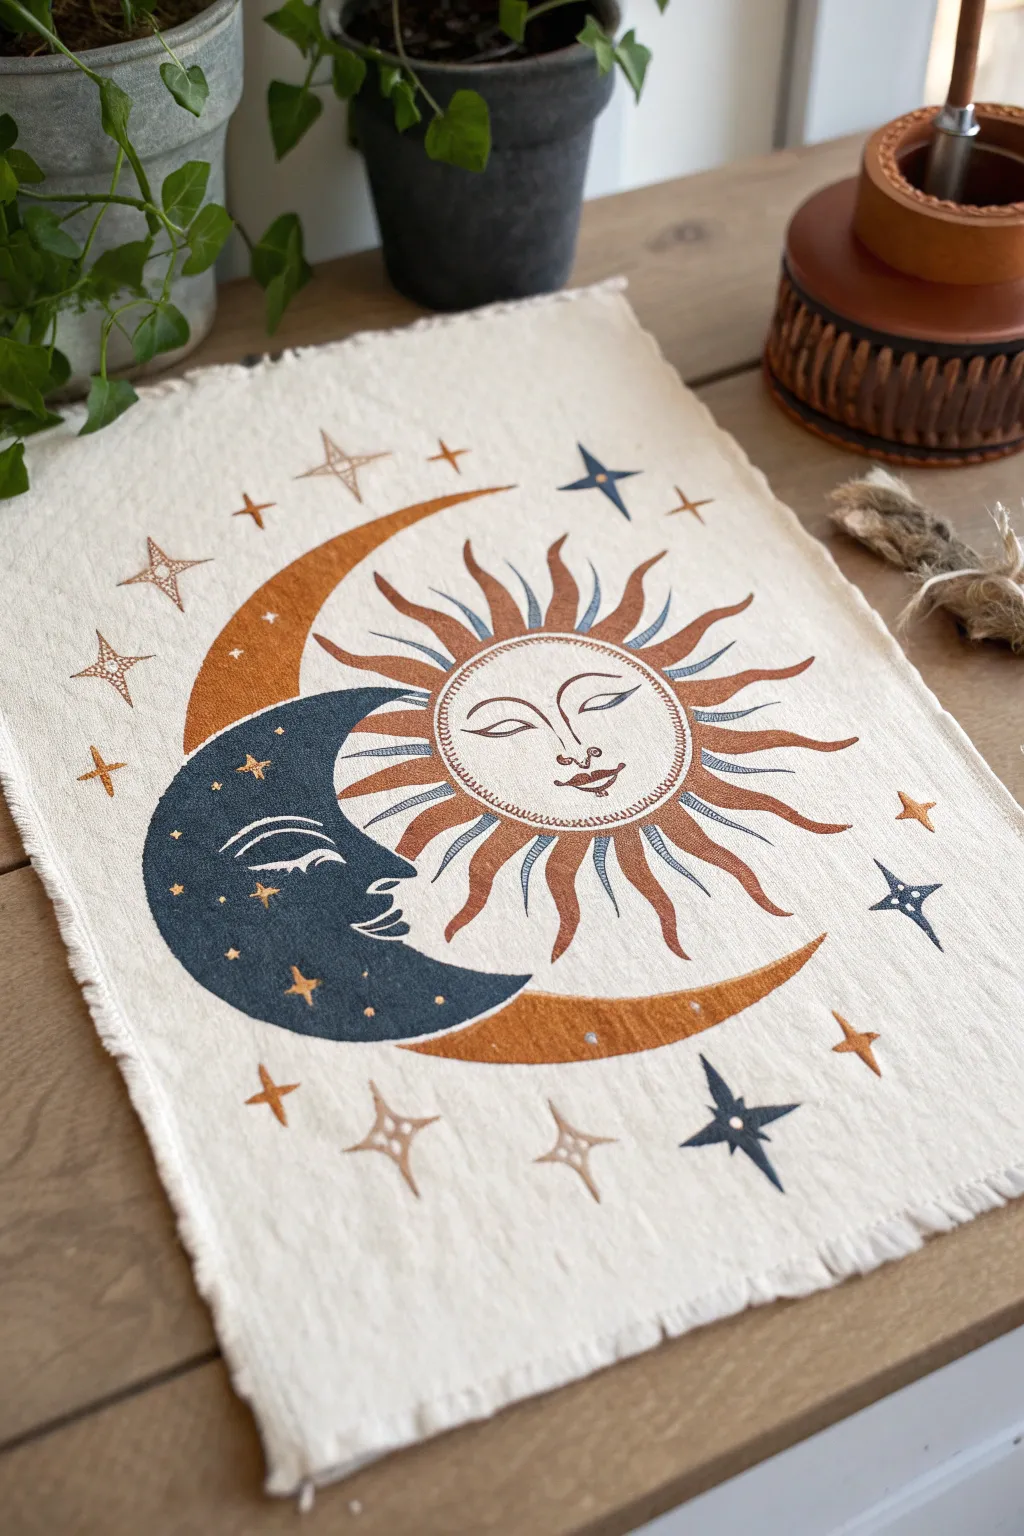
Capture the mystical balance of light and dark with this block-printed style artwork on raw linen canvas. The rustic, frayed edges and earthy terracotta and indigo tones give the piece a timeless, bohemian charm perfect for an altar or wall hanging.
Detailed Instructions
Materials
- Raw, unbleached cotton or linen fabric (approx. 11×17 inches)
- Fabric paints (Terracotta/Rust, Deep Indigo/Navy, Metallic Gold)
- Medium and fine round paintbrushes
- Pencil and eraser
- Cardboard or cutting mat (to protect surface)
- Ruler
- Fabric scissors
- Iron (for setting the paint)
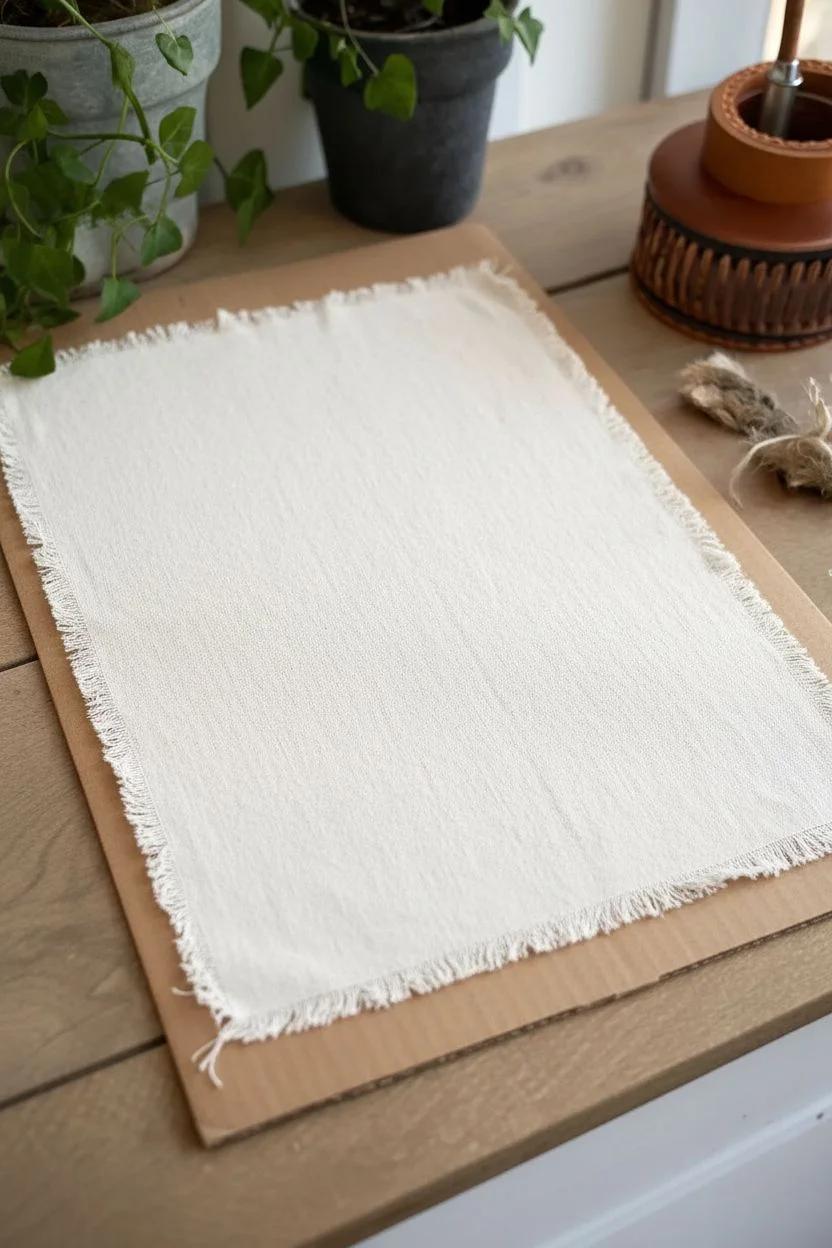
Step 1: Preparing the Canvas
-
Cut the fabric:
Measure and cut your piece of raw linen or cotton to your desired size. Leave about an inch of extra room on all sides for the frayed edge effect. -
Create the fringe:
Gently pull the horizontal and vertical threads along the cut edges of the fabric. I usually pull until I have a soft fringe about 1/4 to 1/2 inch deep on all four sides. -
Secure the workspace:
Place a piece of cardboard or a protected mat underneath your fabric to prevent paint from bleeding through onto your table.
Step 2: Sketching the Design
-
Outline the central circle:
Use a compass or trace a medium-sized bowl to lightly draw a perfect circle in the center of the fabric. This will be the sun’s face. -
Draw the crescent moon:
Sketch a large crescent shape on the left side. It should curve around the central sun, with the top point reaching high and the bottom point sweeping underneath. -
Add the sun rays:
Lightly sketch wavy, flame-like rays radiating outward from the central sun circle. Alternate between longer and shorter rays for a dynamic look. -
Detail the faces:
Draw the sleeping face profile inside the crescent moon. Then, sketch the serene, full face of the sun in the center circle. Keep the lines simple and stylized. -
Place the stars:
Scatter various star shapes around the border. Use a mix of four-pointed stars, simple crosses, and diamond shapes to fill the negative space.
Fixing Bleeds
If paint bleeds into the fabric grain, don’t scrub. Wait for it to dry, then redefine the edge with a slightly thicker outline or turn the mistake into a small star.
Step 3: Painting the Motifs
-
Paint the Crescent Moon:
Load a medium round brush with deep indigo paint. Carefully fill in the main body of the crescent moon, working around the facial profile details you sketched. -
Fill the Sun frame:
Switch to the terracotta or rust-colored paint. Paint the outer band of the crescent shape on top and the sweeping tail at the bottom that cradles the blue moon. -
Color the rays:
Paint the sun’s rays using the terracotta color. For added depth, you can mix a tiny bit of blue into the rust for the shadow side of the rays, though solid rust works beautifully too. -
Outline the Sun face:
Using a very fine brush and the rust paint, carefully trace the outline of the sun’s central circle. Add a decorative dashed or dotted line just inside the circle’s edge. -
Paint the facial features:
With the finest brush available, paint the eyes, nose, and lips of the sun in rust. Switch to indigo to define the closed eye and lip line of the moon profile.
Aged Effect
Soak the fabric in strong black tea or coffee and let it dry completely before creating your painting. This gives an antique, parchment-like background.
Step 4: Adding Details & Finishing
-
Paint the stars:
Using the terracotta paint, fill in the outlines of the larger stars. Use indigo for a few select stars to balance the color distribution. -
Add gold accents:
Once the base layers are dry, take your metallic gold paint. Add tiny dots or small stars inside the dark blue section of the moon. -
Highlight the eyes:
Add tiny touches of gold or white to the eyelids of the sun face to make the expression pop. -
Let it cure:
Allow the paint to dry completely. This usually takes at least 24 hours, depending on the thickness of your paint application. -
Heat set the design:
Place a thin scrap cloth over your dry artwork and iron on a high, dry heat setting for 3-5 minutes. This makes the design permanent and washable.
Now you have a stunning piece of celestial art ready to bring balance to your space


Hamsa Hand With an Eye for Protection
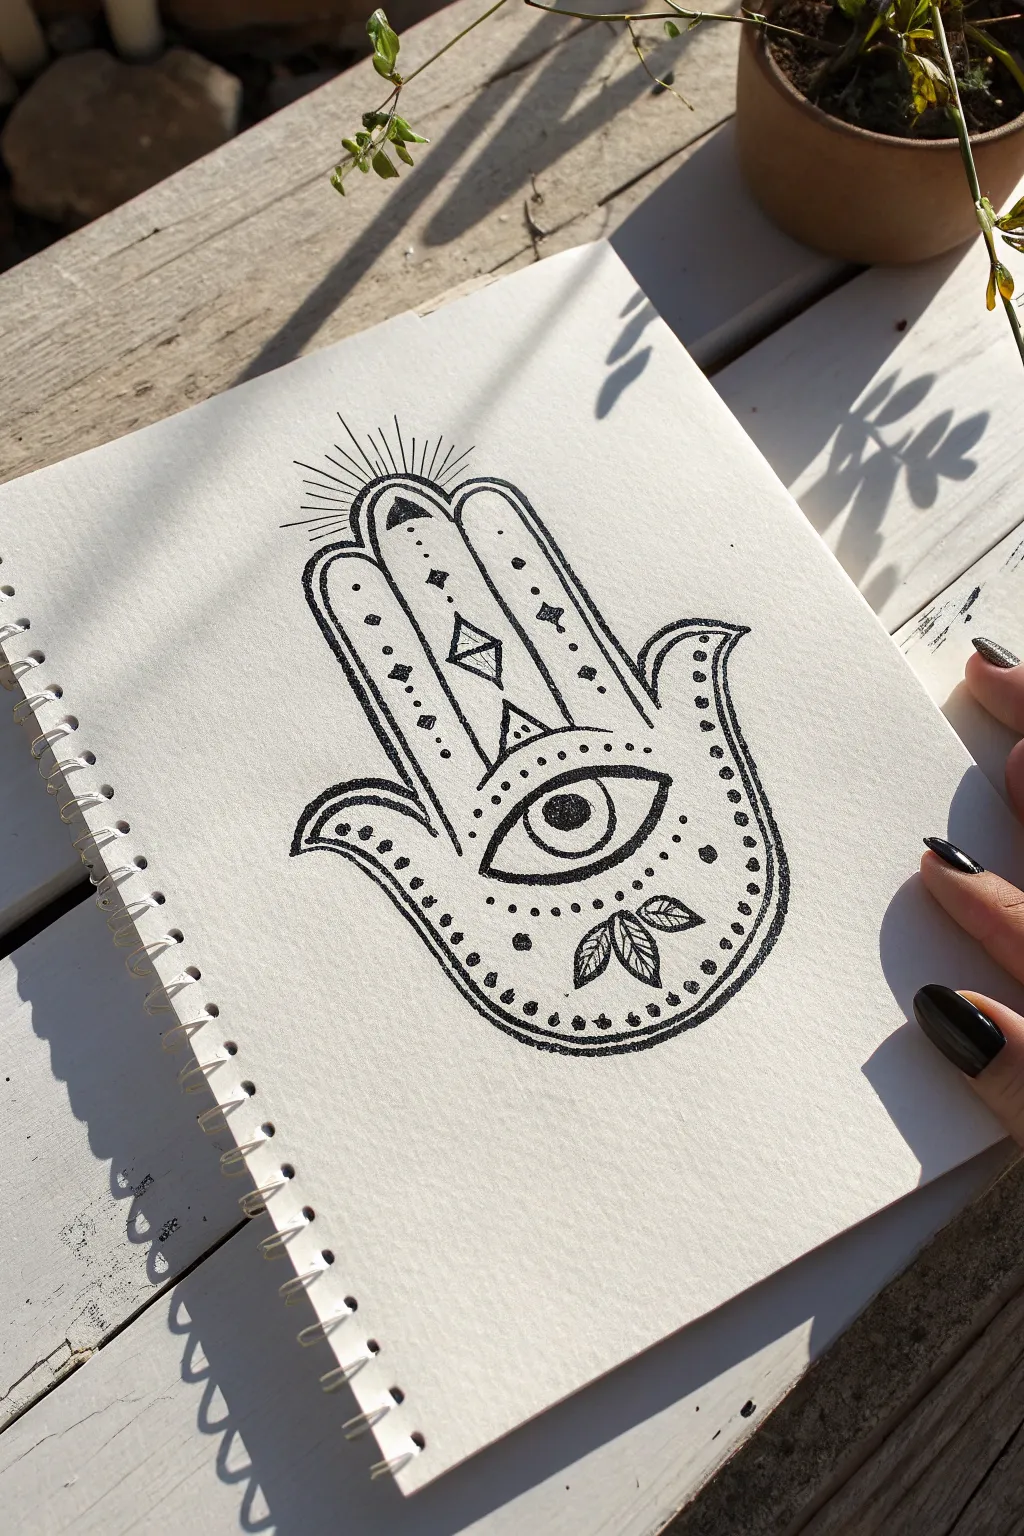
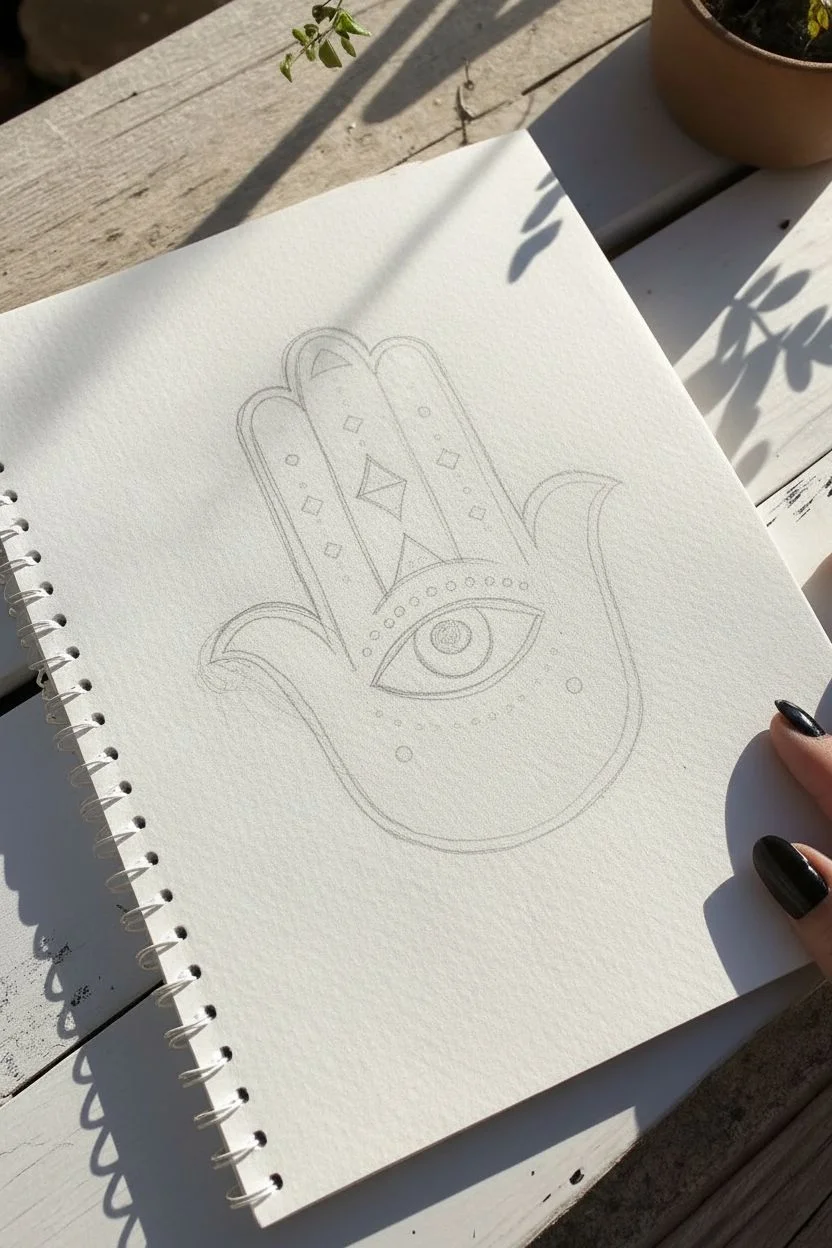
This striking black-and-white Hamsa hand combines crisp linework with delicate stippling to create a textured, protective talisman. The design features a central eye for warding off negativity, balanced by geometric accents and organic leaf details.
Step-by-Step
Materials
- Spiral-bound sketchbook (medium tooth paper)
- Black fine liner pen (0.5mm or 0.8mm for outlines)
- Black fine liner pen (0.1mm or 005mm for details)
- HB pencil
- Soft block eraser
- Ruler (optional)
Step 1: Sketching the Framework
-
Draft the central palm:
Begin by lightly sketching the main shape of the palm with your HB pencil. Aim for a symmetrical U-shape that is slightly wider at the top than the bottom. -
Add the fingers:
Draw the three central fingers extending from the palm. The middle finger should be the tallest, with the index and ring fingers slightly shorter and equal in height. Keep the tops rounded. -
I include the thumbs:
Sketch the two curved thumbs (or outer fingers) extending outwards from the sides of the palm. They should curl slightly away from the center, mirroring each other perfectly to maintain balance. -
Place the central eye:
In the middle of the palm, draw a large almond shape for the eye. Add the iris as a perfect circle in the center.
Steady Hands
For cleaner stippling, hold the pen vertically rather than at an angle. This ensures circular dots instead of small dashes and keeps the texture uniform.
Step 2: Inking the Outlines
-
Trace the perimeter:
Switch to your thicker fine liner (0.5mm or 0.8mm). Carefully trace the entire outer edge of the hand shape. I find it helpful to rotate the sketchbook as I draw curves to keep my hand steady. -
Add the inner border:
Draw a second line paralleling the inside of the entire hand shape, creating a thin, consistent border about 3mm thick. -
Define the eye:
Ink the outline of the eye and the iris. Fill in the pupil with solid black, leaving a tiny white crisp highlight if you wish to give it life. -
Create finger segments:
Using the thinner pen, draw a curved line or chevron shape at the base of the middle finger to separate it from the palm.
Step 3: Adding Details & Texture
-
Draw geometric accents:
On the middle finger, draw a diamond shape. Add small dots and diamond accents to the other fingers to fill the negative space without overcrowding it. -
Stipple the iris:
Using your finest pen (0.1mm), add tiny dots around the pupil inside the iris. Concentrate the dots near the pupil and let them fade out towards the edge for a gradient effect. -
Border stippling:
Add a row of evenly spaced dots inside the double border of the main hand shape. This creates a decorative ‘beaded’ look. -
Base decoration:
At the very bottom of the palm, near the wrist area, draw three small leaves fanning out. Use fine lines to add veins to these leaves. -
Radiating energy:
At the very top of the middle finger, draw thin, straight illuminated lines radiating outward like a crown or aura. -
Shade the thick border:
Return to the thick outer border line. Use your pen to stipple (tap dots) densely along this line to give it a rough, textured appearance rather than a smooth solid ink line.
Gold Accents
Once the black ink is fully dry, re-trace the inner sun rays or the center diamond with a metallic gold gel pen for a touch of spiritual luminosity.
Step 4: Final Touches
-
Erase pencil marks:
Wait at least five minutes to ensure the ink is completely dry, then gently erase all visible pencil sketches. -
Reinforce blacks:
Check the pupil and any other solid black areas. If the paper tooth shows through, add another layer of ink to make the black profound and solid.
Your finished Hamsa is now ready to serve as a mindful artistic meditation in your sketchbook

PENCIL GUIDE
Understanding Pencil Grades from H to B
From first sketch to finished drawing — learn pencil grades, line control, and shading techniques.
Explore the Full Guide
Evil Eye Charm With Ornamental Borders
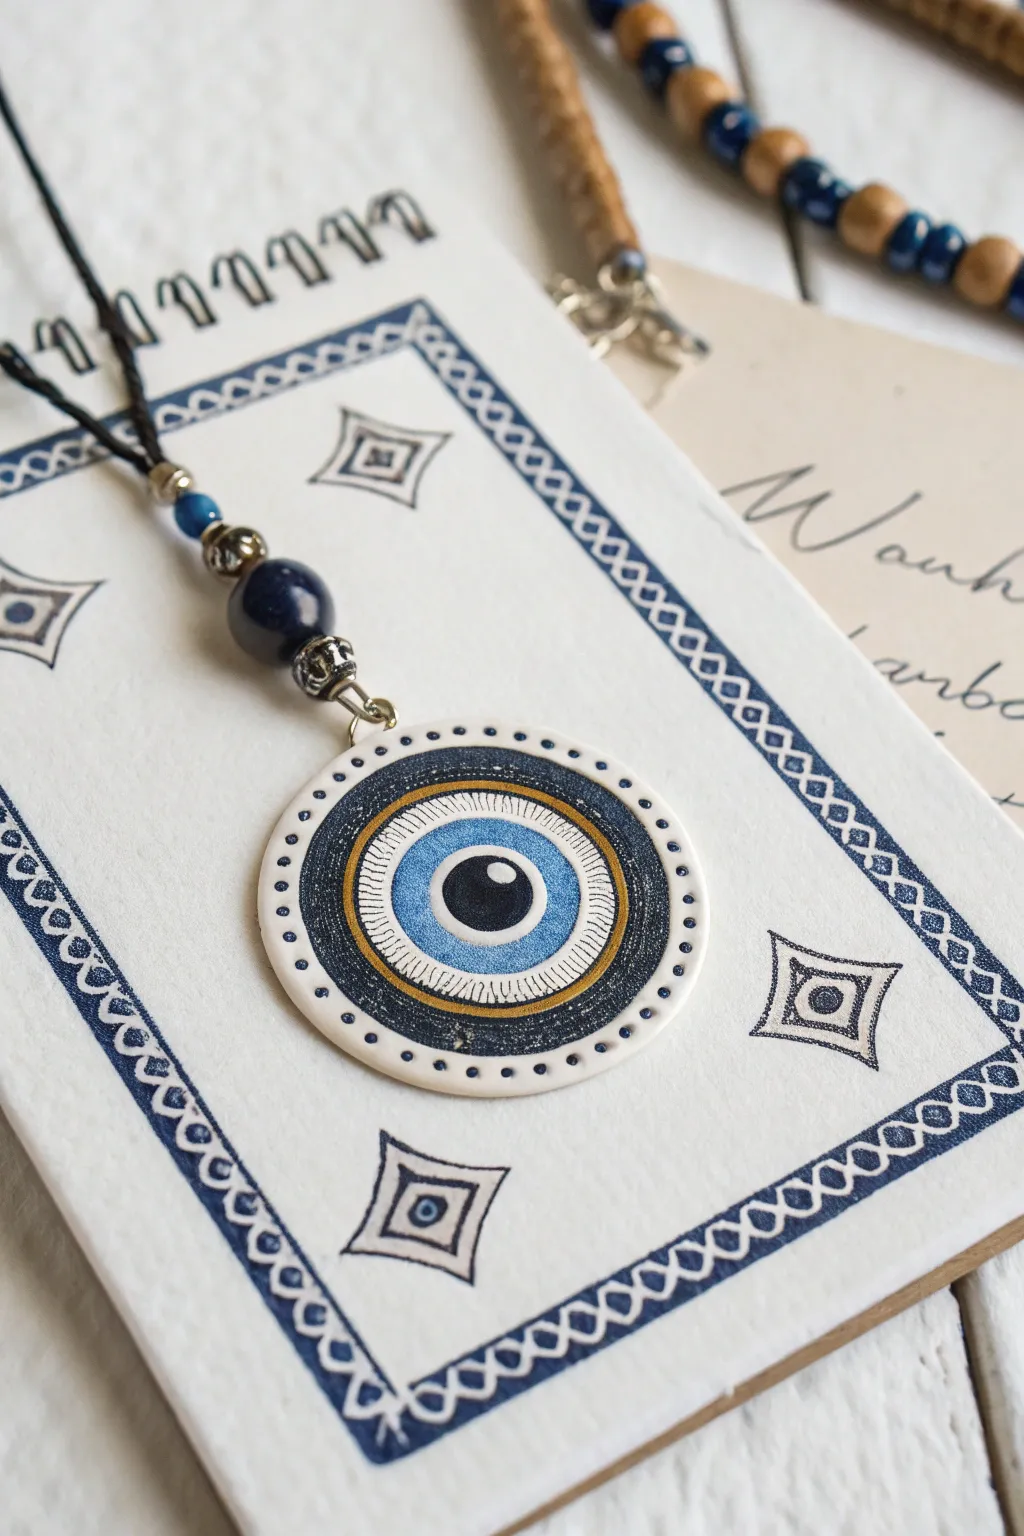
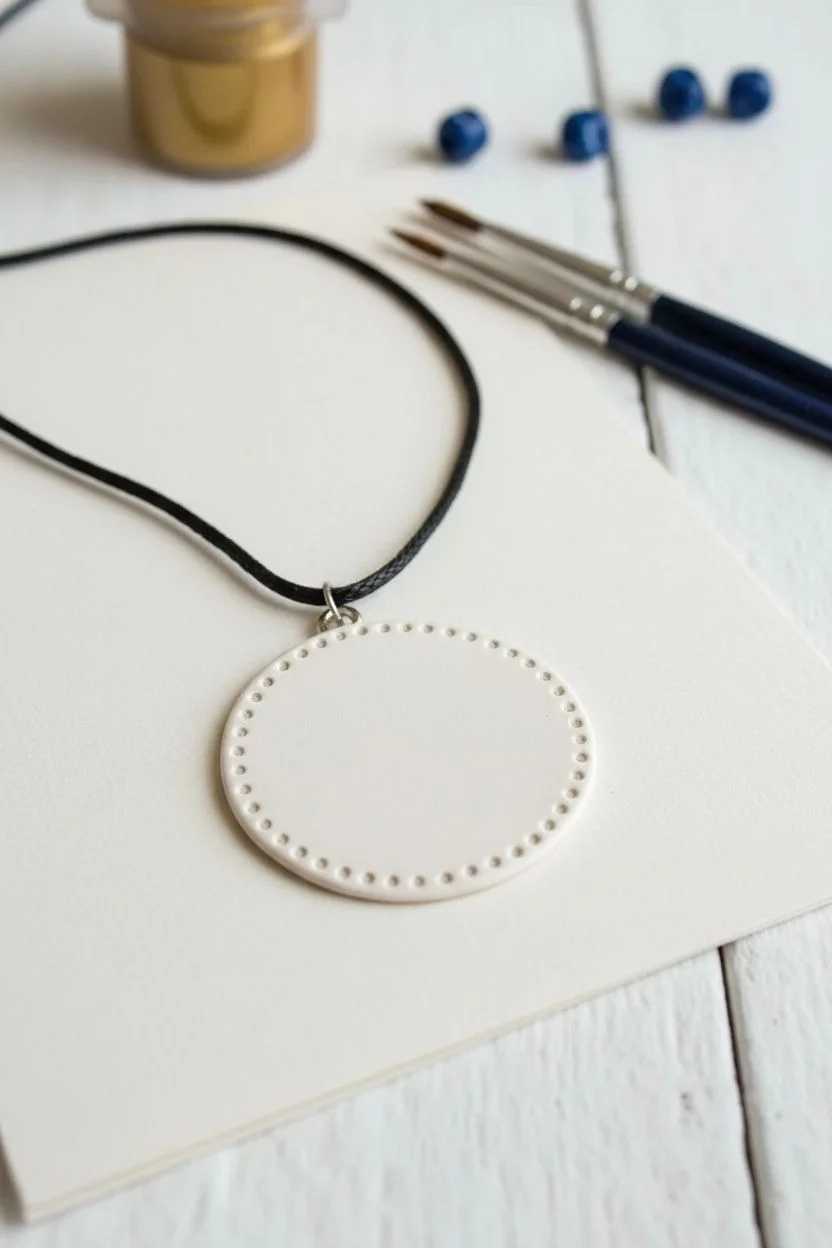
Craft a protective talisman and its matching display card with this detailed tutorial. You will create a polymer clay pendant featuring the traditional Nazar design and mount it on a hand-drawn ornamental backing.
Detailed Instructions
Materials
- White polymer clay
- Acrylic paints (dark blue, light blue, black, metallic gold)
- Gloss glaze or resin
- Fine detail paintbrushes (00 or smaller)
- Circle cutters (small)
- Eye pin
- Jewelry cord (black)
- Assorted blue beads
- Heavyweight cream cardstock
- Blue fine-liner pen or marker
- Needle tool or toothpick
Step 1: Sculpting the Base
-
Condition the clay:
Start by kneading a small amount of white polymer clay until it is soft and pliable. This prevents cracks during baking. -
Form the shape:
Roll the clay into a smooth ball, then flatten it into a perfect disc about 1.5 inches in diameter. You can use a rolling pin and a circle cutter for a cleaner edge, or shape it by hand for an organic feel. -
Add texture:
Using a needle tool, gently press small indentations around the very outer rim of the clay disc to create a decorative dotted border. -
Insert hardware:
Carefully push an eye pin into the top edge of the disc. Secure the clay around the pin so it doesn’t pull out after baking. -
Bake the piece:
Bake the clay disc according to the manufacturer’s instructions (usually around 275°F for 15-20 minutes). Let it cool completely before painting.
Steady Hand Trick
To paint perfect concentric circles, place the clay disc on a banding wheel or lazy susan. Spin the wheel while holding your brush steady in one spot.
Step 2: Painting the Eye
-
Base outline:
Using your darkest blue acrylic paint, paint a large circle in the center, leaving a rim of white clay visible around the outside near your textured dots. -
Adding gold:
Once the dark blue is dry, paint a distinct ring of metallic gold inside the dark blue circle. I find a steady hand is key here, so rest your wrist on the table. -
Light blue iris:
Paint a smaller circle of light blue inside the gold ring. This creates the characteristic ‘iris’ of the evil eye. -
The pupil:
Paint a solid black circle in the very center. Add a tiny dot of white near the top of the black pupil to simulate a light reflection. -
Fine details:
Use a very fine liner brush to add thin, radial lines in the dark blue section, mimicking the texture of an iris or decorative etching. -
Seal the charm:
Coat the entire front of the painted pendant with a gloss glaze or a layer of UV resin to give it a ceramic-like shine and protect the paint.
Fixing Paint Smudges
If you smudge the acrylic paint while it’s wet, quickly wipe it away with a damp Q-tip. If dry, paint over the mistake with the base color.
Step 3: Assembly & Card Design
-
Create the necklace:
String your black cord through the eye pin. Add a large dark blue bead, a metallic spacer, and a smaller blue bead directly above the pendant. -
Prepare the card:
Cut a piece of cream cardstock into a rectangle. Use a pencil to lightly sketch a rectangular border and corner diamond shapes. -
Draw the border:
Trace over your pencil lines with a blue fine-liner. Draw a ‘chain’ pattern for the border using small intersecting ovals or diamonds. -
Add corner accents:
Fill in the corner diamond shapes with concentric lines and a central dot to echo the eye motif. -
Mounting:
Punch two small holes at the top of the card or cut small slits to slide the necklace cord through, allowing the pendant to rest in the center of your drawing.
Wear your new creation for good luck or gift it on its custom card for a thoughtful presentation
Unalome Path Symbol With a Tiny Lotus Finish
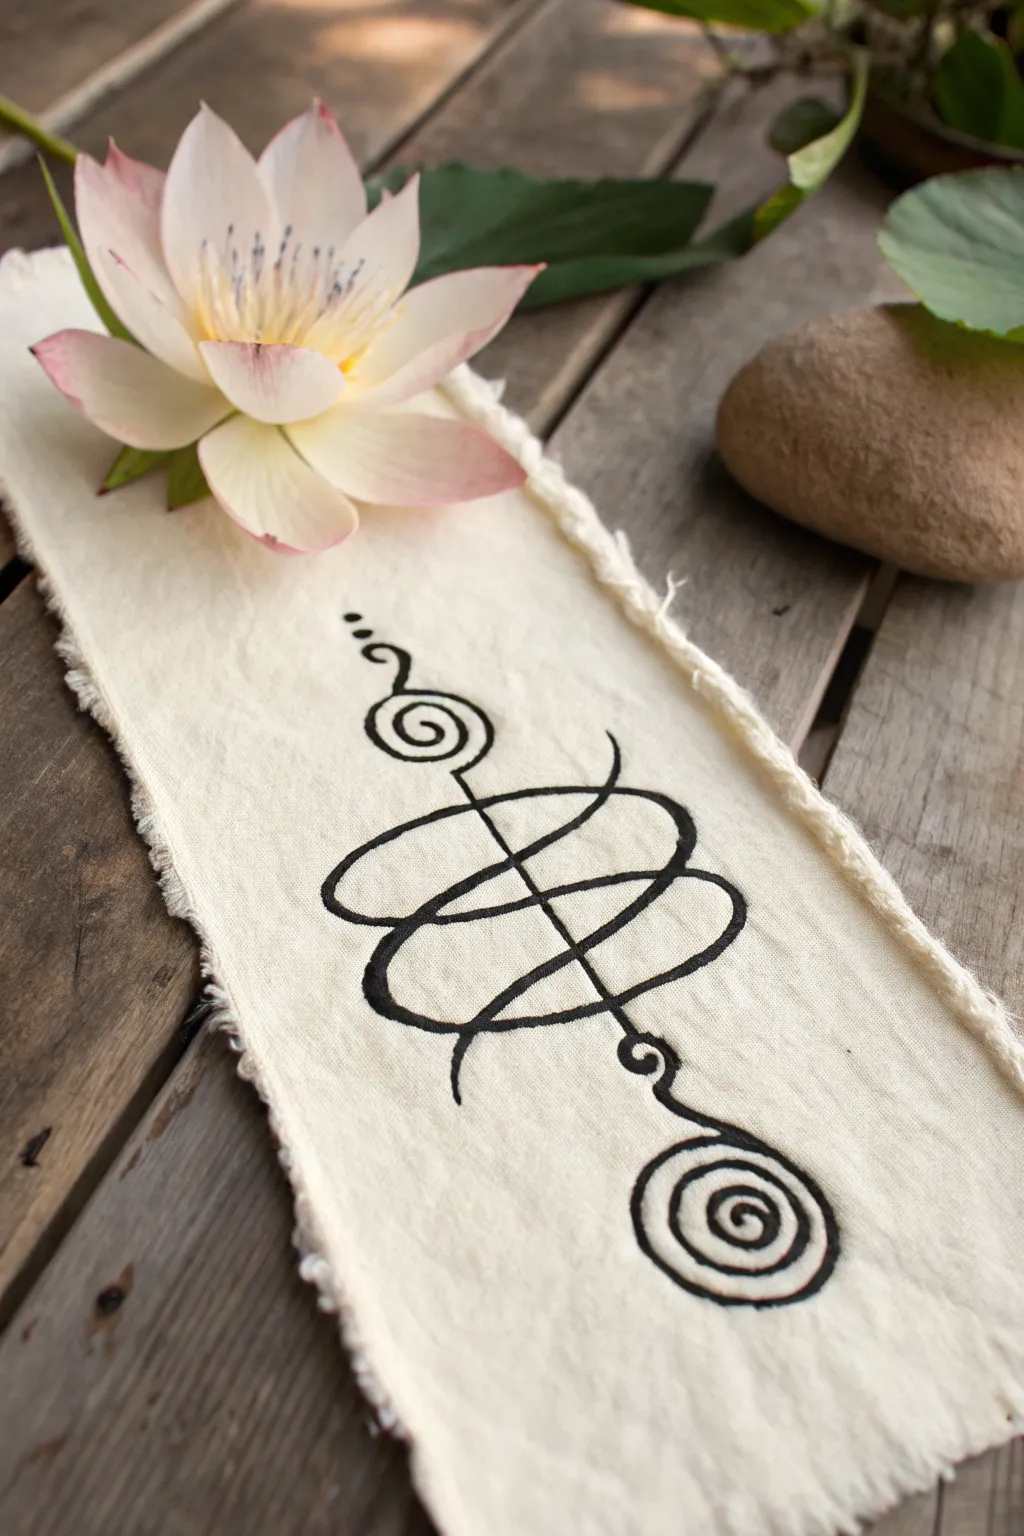
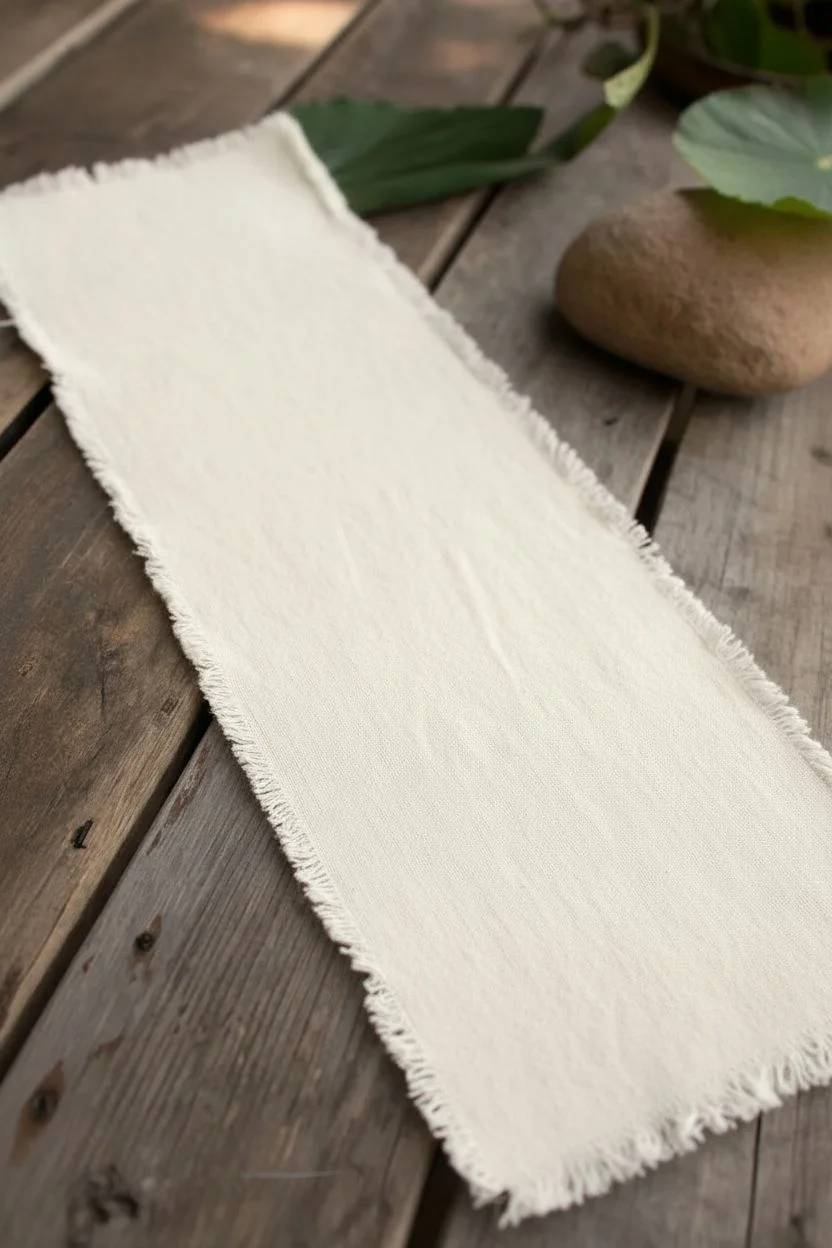
This serene project combines the rustic texture of raw-edged fabric with the clean, spiritual elegance of an Unalome symbol. It’s a mindful drawing exercise that results in a beautiful altar piece or wall hanging.
Step-by-Step
Materials
- Strip of natural cotton or linen fabric (cream/off-white)
- Black fabric marker or permanent ink fine-liner
- Fabric scissors
- Pencil (HB or lighter)
- Eraser
- Ruler
- Iron (optional)
Step 1: Preparing the Canvas
-
Cut the fabric strip:
Cut a rectangular strip of your linen or cotton fabric, approximately 4 inches wide and 12 inches long. Don’t worry about perfect lines; the rustic look is part of the charm. -
Create the raw edges:
Gently pull at the loose threads along all four sides of your fabric strip. Continue fraying until you have a nice, soft fringe of about 1/4 inch around the entire perimeter. -
Smooth the surface:
If your fabric is wrinkled, give it a quick press with an iron. A flat surface ensures your ink lines won’t skip or bleed unpredictably.
Bleeding Lines?
If ink bleeds into the fabric grain, don’t panic. Thicken the line art intentionally to mask the bleed, or embrace the ‘fuzzy’ edge as a wabi-sabi aesthetic choice.
Step 2: Drafting the Design
-
Mark the center line:
Using a ruler and a very light pencil touch, draw a faint vertical line down the center of the fabric to help keep your symbol symmetrical. -
Sketch the bottom spiral:
Start about 2 inches from the bottom edge. Lightly sketch a tight spiral that unwinds clockwise, moving upward. -
Draw the central loops:
Extend the line from the bottom spiral upwards, curving it into a loose figure-eight or infinity-style loop that crosses the center line twice. -
Add the crossing line:
Sketch a straight diagonal line that intersects through the center of your loops, connecting the lower section to the upper path. This adds geometric balance to the curves. -
Sketch the top motif:
Continue the line upward into a smaller, tighter spiral at the top, mirroring the style of the bottom one but slightly smaller. -
Place the final dots:
Add three small dots in a vertical row just above the top spiral, gradually decreasing the distance between them.
Add Golden Accents
For a magical touch, re-trace just the center dots or the very tip of the top spiral with a metallic gold fabric marker to catch the light.
Step 3: Inking the Symbol
-
Test your pen:
On a scrap piece of specific fabric, test your black marker to check for bleeding. If it spreads too much, move the pen faster or switch to a finer tip. -
Trace the bottom spiral:
Begin inking at the center of the bottom spiral. Use steady, confident pressure as you trace over your pencil lines, moving slowly to saturate the fabric weave. -
Ink the main loops:
Follow the path upward into the loops. Try to keep your hand lifted slightly off the fabric to avoid smudging wet ink as you turn corners. -
Thicken specific curves:
I like to go back over the outer curves of the loops just slightly to add line weight variation, making the symbol feel more organic and hand-painted. -
Ink the straight line:
Draw the diagonal crossing line. Using a ruler here is optional; a freehand line often looks more authentic to the style. -
Complete the top:
Ink the top final spiral and the three dots carefully. Press the pen down firmly for the dots to ensure they are solid black circles. -
Let it set:
Allow the ink to dry completely for at least 30 minutes. Fabric ink can take longer to settle than paper ink. -
Erase guidelines:
Once clearly dry, gently erase any visible pencil marks. Hold the fabric taut with your other hand to prevent it from bunching up while erasing.
Now you have a centered, peaceful piece of art ready to be placed on an altar or framed as a reminder of your journey
BRUSH GUIDE
The Right Brush for Every Stroke
From clean lines to bold texture — master brush choice, stroke control, and essential techniques.
Explore the Full Guide
Sacred Geometry Overlay in Clean Line Art
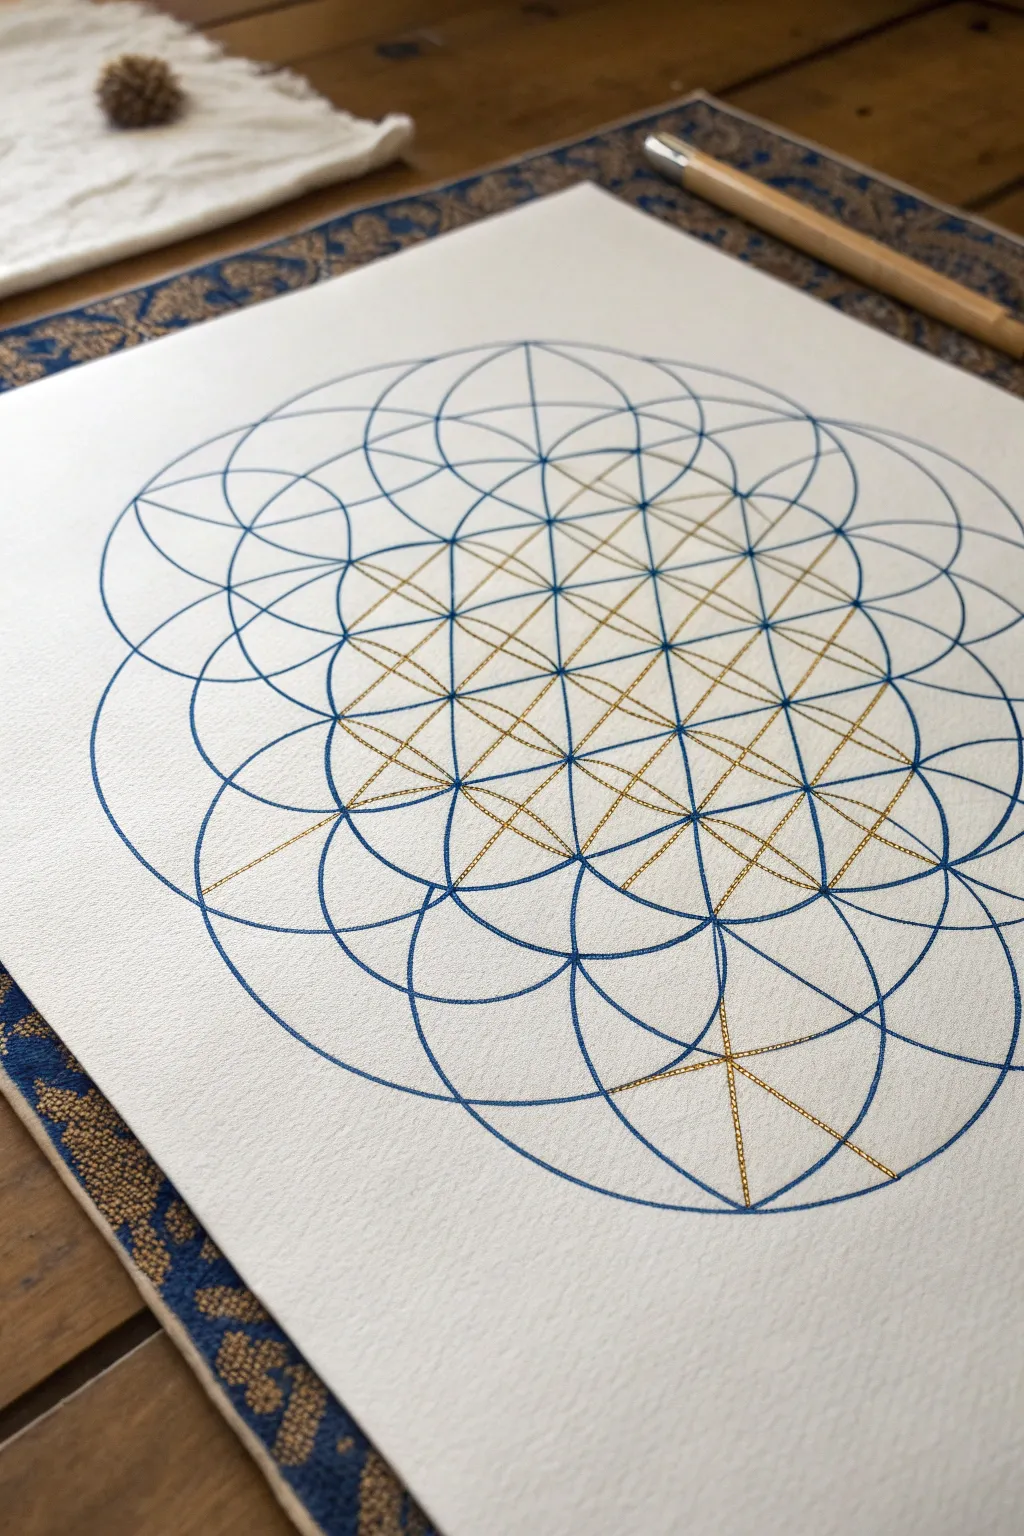
This meditative artwork combines the foundational Flower of Life pattern in serene blue with a striking, golden geometric overlay. The result is a harmonious interplay of curved organic forms and rigid linear structures that feels both ancient and modern.
Step-by-Step Guide
Materials
- High-quality watercolor paper (cold press with texture)
- Fine liner pen (Navy Blue, 0.3mm or 0.5mm)
- Gel pen or metallic marker (Gold, fine tip)
- Quality drawing compass with extension leg (optional but helpful)
- Straight edge or clear ruler (12 inch)
- Graphite pencil (hard, e.g., 2H or 4H)
- White eraser
- Compass adapter (to hold pens)
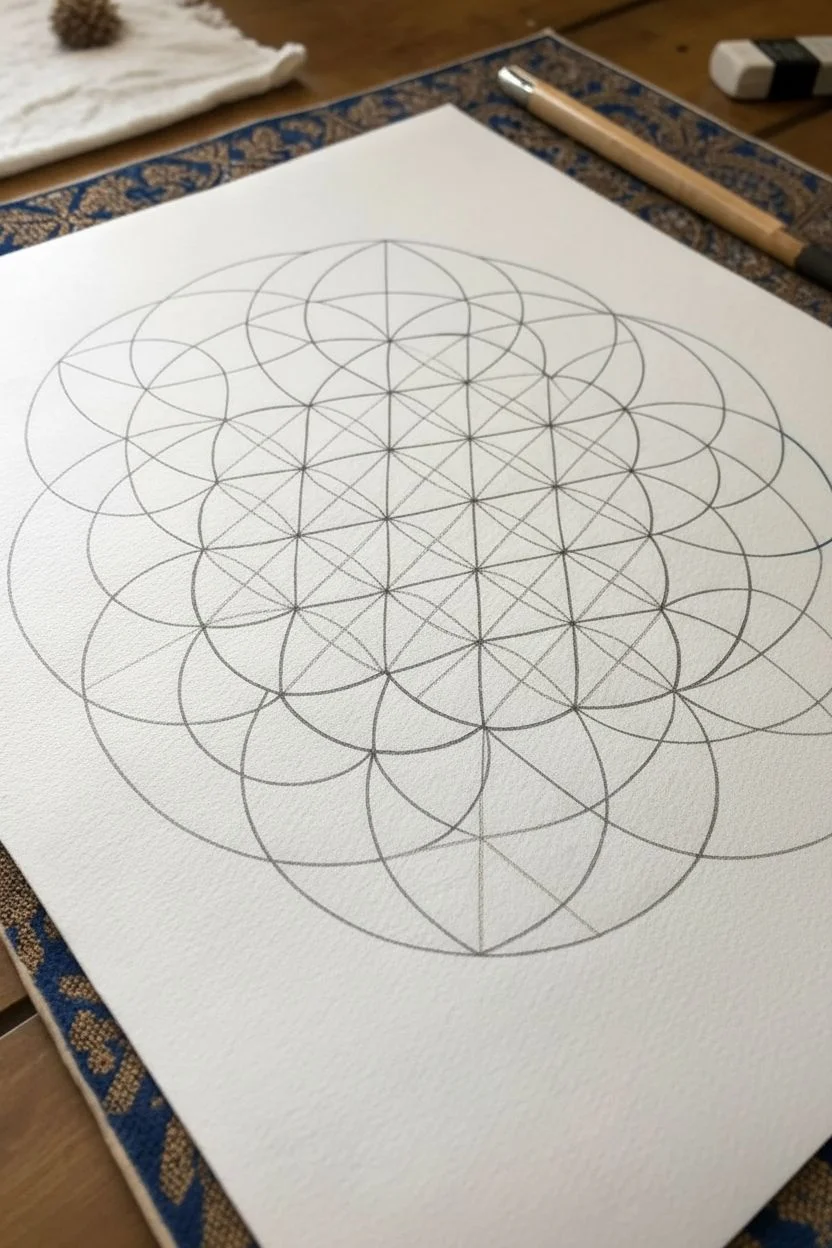
Step 1: Drafting the Flower of Life
-
Find the Center:
Begin by lightly marking the exact center of your watercolor paper with your graphite pencil. This will be the anchor point for your entire mandala. -
Set the Radius:
Adjust your compass to your desired circle radius (about 1.5 to 2 inches works well for a standard page). Lock this width; precision is key, so don’t let it slip. -
The Central Circle:
Place the compass needle on your center mark and draw the first circle lightly in pencil. This is the seed of the pattern. -
First Layer of Petrographs:
Place your compass needle on the edge of the central circle (anywhere is fine for the first one) and draw a second circle. This creates a ‘vesica piscis’ shape. -
Complete the Seed of Life:
Move the needle to where the two circles intersect and draw another circle. Repeat this around the center until you have six circles surrounding the central one, forming a six-petaled flower. -
Establish the Full Flower:
Continue expanding outward. Place your needle at the intersections of the outer arcs and draw the next round of circles. For the design shown, you will need to complete three full concentric layers of circles. -
Refine the Perimeter:
Once your grid is full, you can choose to draw a large outer circle that encompasses the entire design to create a contained border, though leaving the edges open like the reference image is also beautiful.
Keep it clean
Place a scrap sheet of paper under your hand while drawing. This protects the paper oils from interfering with the ink and prevents smudging your wet lines.
Step 2: Inking the Blue Base
-
Switch to Ink:
Attach your blue fine liner to the compass using an adapter. Double-check your radius is still perfectly matched to your pencil marks on a scrap piece of paper. -
Trace the Arcs:
Carefully trace over every pencil circle with the blue ink. Maintain steady pressure to ensure the lines are crisp and uniform. -
Dry and Erase:
Allow the blue ink to dry completely—give it at least 15 minutes to avoid smearing. Then, gently erase the underlying graphite marks.
Step 3: The Golden Overlay
-
Identify Intersections:
Look at the six-petaled flowers within your grid. You will be connecting the centers of specific circles to creating triangles and hexagons. -
Draw the Inner Hexagon:
Using your ruler and the gold pen, connect the intersection points surrounding the central flower to create a perfect hexagon. -
Form the Star Tetrahedrons:
Connect every other point of that hexagon to form two overlapping equilateral triangles (a Star of David shape). This represents the masculine/feminine balance. -
Expand the Grid:
Move outward to the next layer of intersections. Draw straight lines connecting these outer points back to the inner geometric shapes. -
Connect the Diagonals:
Locate opposing points across the center of the mandala. Draw long straight golden lines cutting through the center, connecting the distinct ‘nodes’ where the blue circles cross. -
Add Secondary Geometries:
Continue identifying triangular relationships between the intersection points. I like to focus on creating smaller triangles within the larger ones to add density to the center. -
Final Visual Check:
Review the symmetry. The goal is to highlight the straight-line energy hidden within the curves, often resembling Metatron’s Cube. Add final gold lines to balance any empty-feeling spaces.
Uneven circles?
If your circles aren’t meeting perfectly at the intersections, your compass radius likely slipped. Tighten the hinge screw on your compass to secure the width.
Step back and admire the vibrational balance your precise geometry has created
Moon Phases Across a Calm Horizon Line
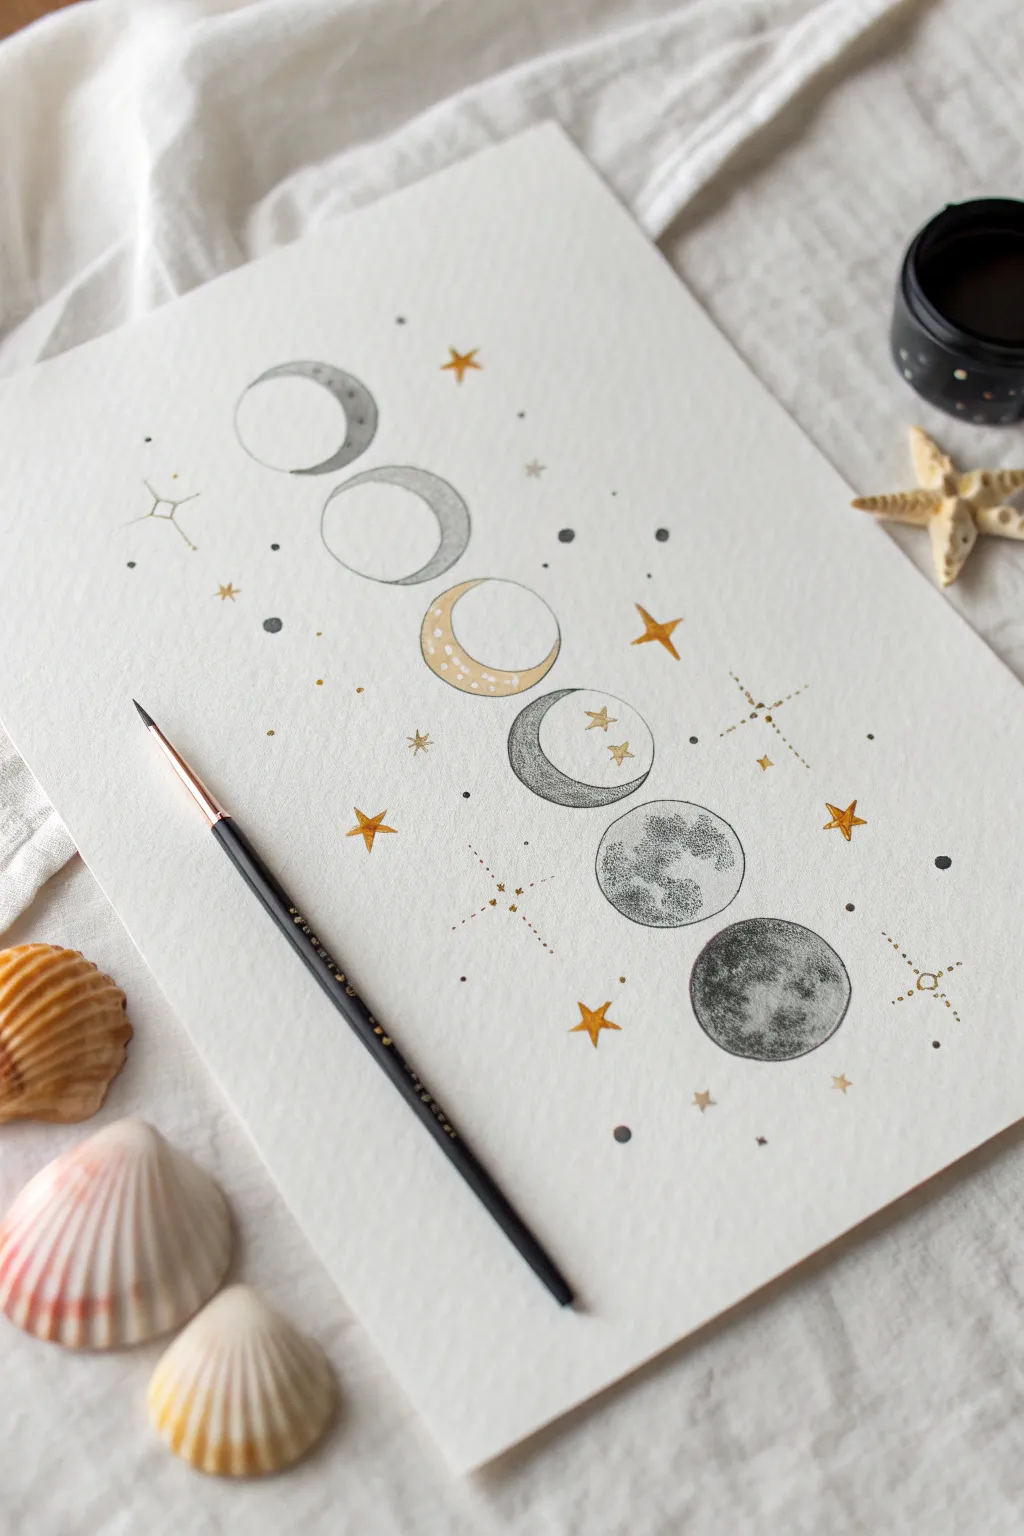
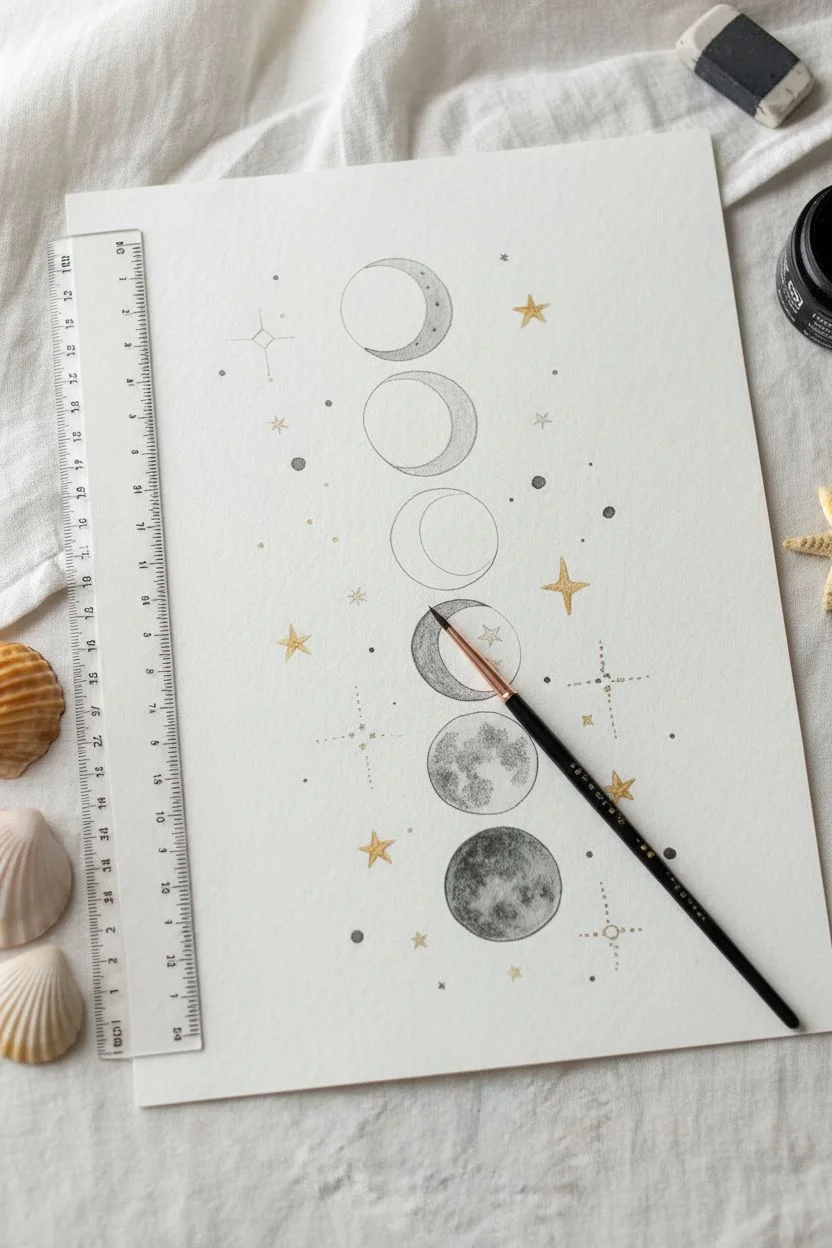
Capture the mystic progression of the lunar cycle with this delicate watercolor and ink illustration. Featuring six distinct moon phases adorned with celestial stardust and geometric constellations, this vertical composition brings a serene, magical energy to your sketchbook.
Step-by-Step Tutorial
Materials
- Cold press watercolor paper (A4 or A5 size)
- Pencil (HB) and eraser
- Compass or circular object (approx. 1.5 inch diameter)
- Black waterproof fine liner pen (01 or 03 size)
- Black ink or dark grey watercolor paint
- Metallic gold watercolor pan or acrylic ink
- Fine detail paintbrush (size 0 or 2)
- Small round paintbrush (size 4)
- ruler
Step 1: Drafting the Layout
-
Establish the centerline:
Use a ruler to find the vertical center of your paper. Make small, faint marks at the top and bottom to guide alignment without drawing a solid line through your artwork. -
Space the moons:
Mark the center points for six circles vertically. Ensure equal spacing between them—about half an inch to an inch usually works best to keep the flow consistent. -
Draw the circles:
Using a compass or a small circular stencil, lightly draw your six circles in pencil. Keep the lines barely visible so they won’t show through the paint later. -
Sketch the phases:
Lightly sketch the crescent shapes inside your circles. From top to bottom: a thin waxing crescent, a thicker crescent, a half moon, a gibbous moon, a full moon, and another gibbous moon. Use the photo as a reference for the exact curves.
Step 2: Painting the Moons
-
Base wash for the top moon:
Dilute your black ink or dark grey watercolor heavily with water. For the top crescent, apply a sheer, watery wash to the ‘dark’ side of the moon, leaving the crescent shape pure white paper. -
Second moon gradient:
For the second moon down, paint the dark side with a slightly more pigmented grey wash. While wet, drop in a tiny bit of darker pigment near the edge to create volume. -
Adding the gold accent:
Skip to the third moon (the half-moon shape). Instead of grey, fill the left-hand crescent shape with opaque metallic gold paint. Leave the right side empty for now or fill it with tiny white stippled dots if your paper allows. -
Texturing the lower moons:
For the bottom three moons, you want more texture. Mix a darker, more saturated grey/black wash. Paint the moon shapes, but use a ‘thirsty’ brush to lift out tiny clouds of pigment while it’s still damp to create craters. -
Stippling detail:
On the fifth moon down (the full one), use a very fine brush or stippling pen to add tiny dots in darkest areas. This mimics the rough, cratered surface of the moon.
Clean Edges Pro Tip
For perfectly crisp moon edges, lay down a tiny strip of masking fluid along the curve of the crescent before painting. Rub it off only after the paint is 100% dry.
Step 3: Celestial Embellishments
-
Gold stars:
Load your smallest brush with gold paint. Scatter five-pointed stars around the composition. Vary their sizes—some large focal stars and some tiny distant twinkles. -
Constellation lines:
Using your gold paint or a gold gel pen, draw delicate dotted lines connecting imaginary points. Create simple geometric shapes like crosses or diamonds near the moon phases. -
Adding stardust:
Dip your fine brush into black ink or dark grey paint. Carefully place tiny dots in clusters around the moons, intermingling them with the gold stars to create a sense of drift. -
Enhancing the Gold Moon:
Return to the third moon (the gold one). Use white gouache or a white gel pen to add tiny dots or patterns over the dried gold paint for added visual interest. -
Internal moon details:
On the fourth moon, paint two small gold stars directly inside the white crescent area. This breaks the realism and adds a magical touch. -
Final ink splatter:
I like to protect the main moons with a scrap of paper and gently tap a pigment-loaded brush over the edges of the page for very faint, random splatter texture.
Level Up: Cosmic Depth
Mix a tiny drop of blue or purple into your grey watercolor wash. It creates a ‘cold’ space atmosphere that contrasts beautifully with the warm metallic gold.
Now step back and admire how perfectly the gold glimmers against the matte grey textures.


Zodiac Wheel With Your Birth Sign Highlighted
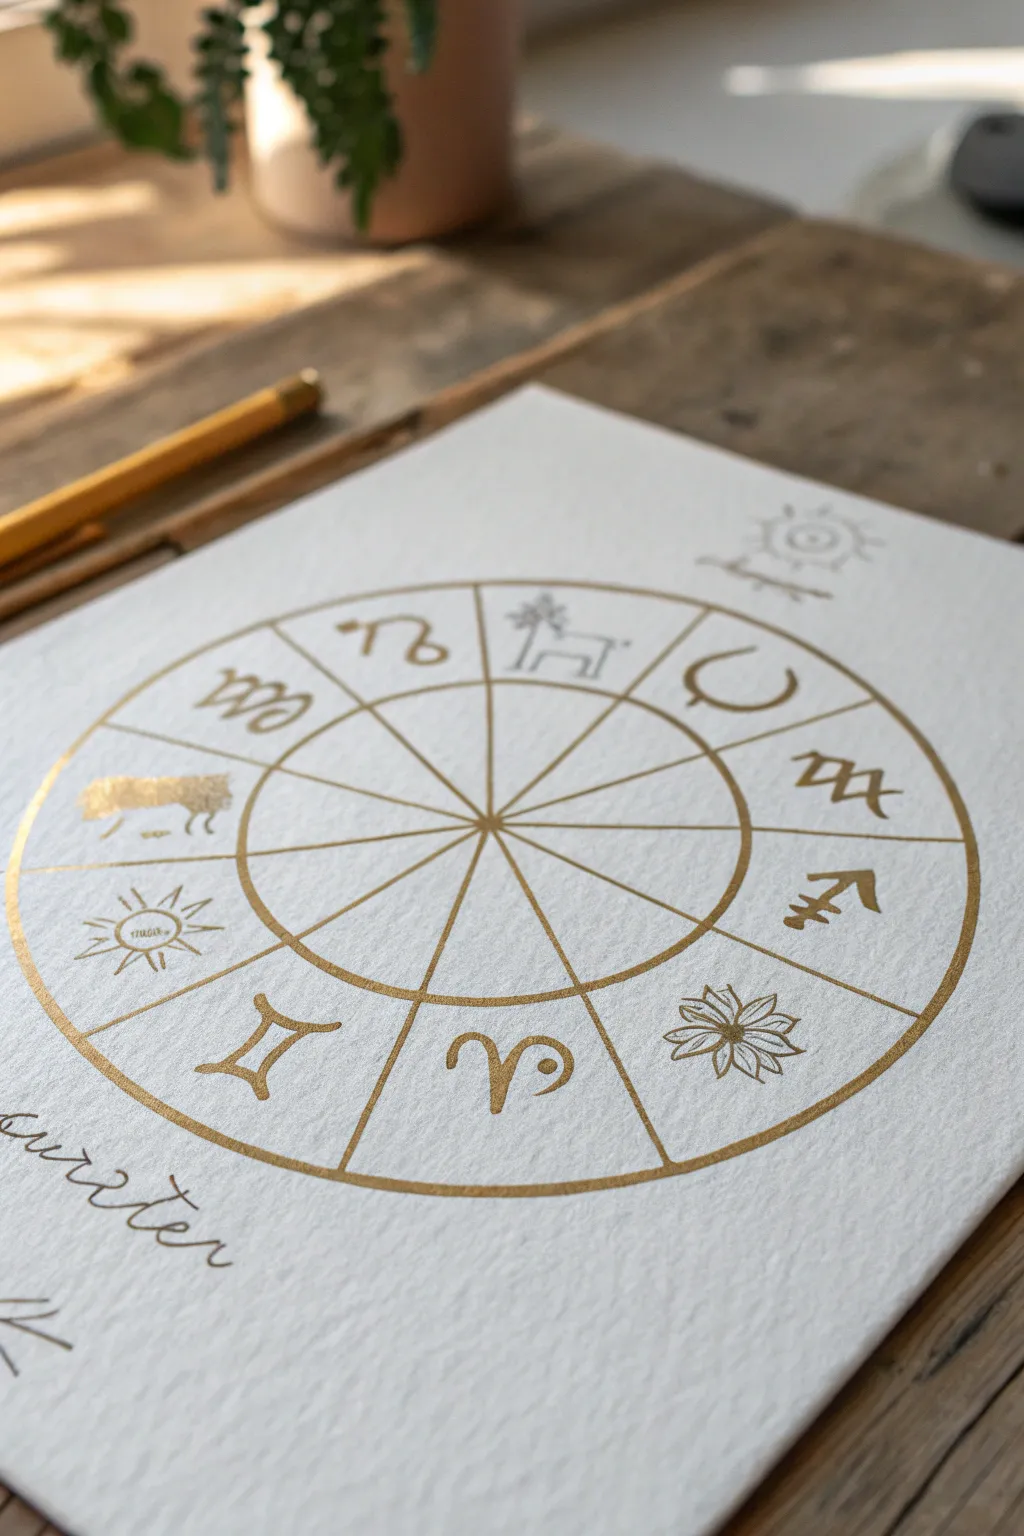
Capture the celestial beauty of the stars with this minimalist zodiac wheel, rendered in shimmering metallic gold against textured white paper. It’s an elegant way to display the astrological signs while practicing your precision drawing skills.
Step-by-Step
Materials
- High-quality watercolor paper (cold press or rough for texture)
- Gold metallic paint marker (fine tip)
- Metallic gold ink (optional, for dipping pen)
- Drawing compass
- Protractor
- HB pencil
- Kneaded eraser
- Ruler
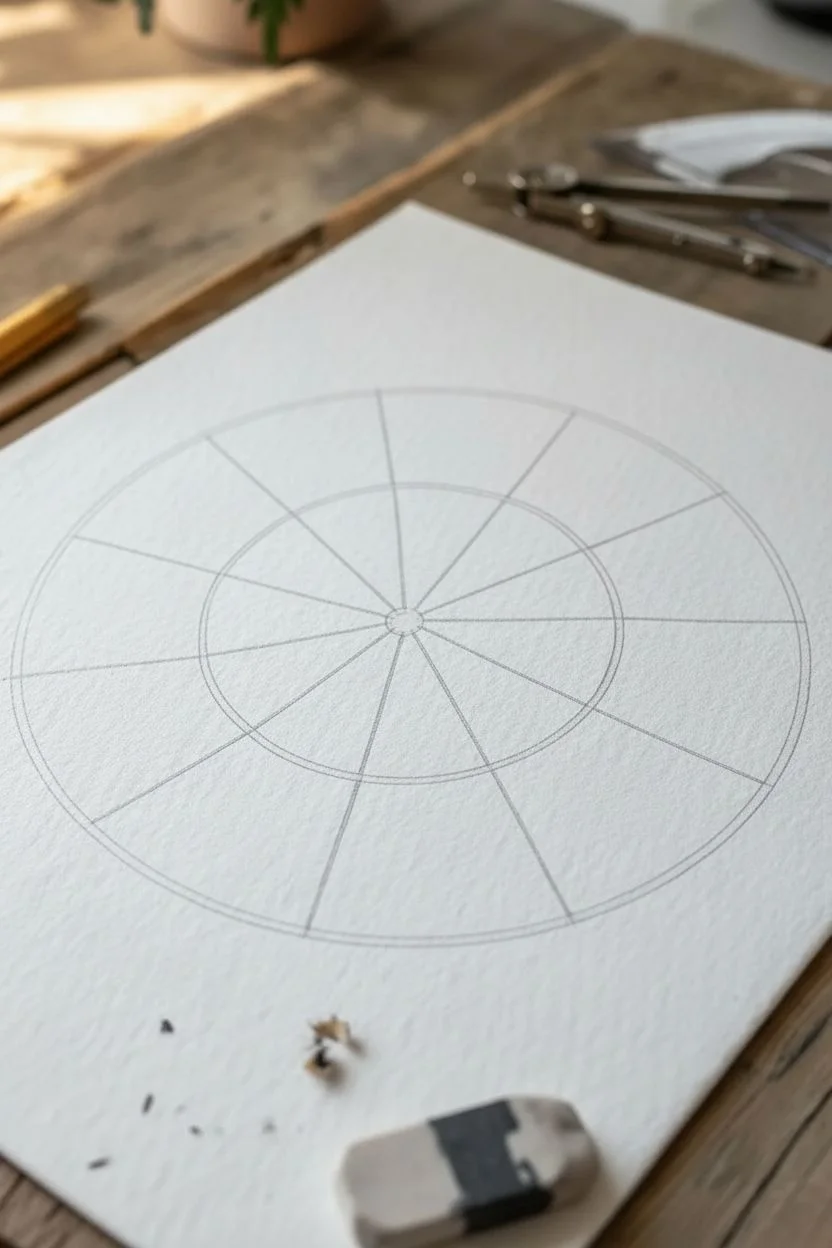
Step 1: Drafting the Structure
-
Set your center point:
Begin by finding the exact center of your watercolor paper. Mark this spot lightly with your pencil; this will be the anchor for your entire astrological chart. -
Draw the inner circle:
Set your compass to a small radius (about 1.5 to 2 inches) and draw the central circle. Keep your touch light so the graphite doesn’t indent the paper deeply. -
Create the outer boundary:
Expand your compass significantly—aiming for a radius that fills the page comfortably while leaving a generous border—and draw the large outer circle. -
Mark the segments:
Place your protractor on the center point. You need to divide the circle into 12 equal sections for the zodiac signs. Mark a small tick every 30 degrees around the outer edge. -
Connect the spokes:
Using your ruler, draw straight lines connecting opposing tick marks through the center point. These lines should extend from the inner circle to the outer circle, creating the ‘slices’ for each sign.
Ink Skipping?
Textured paper can make markers skip. If lines look broken, go back over them slowly or switch to a dip pen with liquid gold ink for better flow.
Step 2: Sketching the Symbols
-
Reference your signs:
Before drawing directly on the final paper, sketch the 12 zodiac symbols on a scrap sheet to get comfortable with their simplified forms. The artwork shown uses stylized, slightly rustic versions of the classic glyphs. -
Pencil in the glyphs:
Starting at the 9 o’clock position with Aries (or your preferred starting point), lightly sketch each symbol into its designated slice. Center them visually within their wedge. -
Add decorative elements:
Sketch the small sun icon in the top right corner and any additional text, like the cursive writing seen in the bottom left. Keep the text loose and flowing. -
Refine the lines:
Go over your pencil sketch one last time, correcting any spacing issues. Since the ink is permanent, you want your guide to be perfect.
Step 3: Inking in Gold
-
The main circle lines:
Shake your gold metallic marker well to ensure the pigment is mixed. Carefully trace over the inner and outer circles first. I find rotating the paper as I draw the curve helps keep my hand steady. -
Tracing the spokes:
Use the ruler again to ink the straight lines dividing the sectors. Lift the ruler straight up after drawing to avoid smearing the wet metallic ink. -
Inking the symbols:
Switch to a freehand approach for the zodiac glyphs. Apply consistent pressure to keep the line width uniform. For the filled-in areas (like the animal silhouette shown), gently color them in with the marker. -
Highlighting details:
Ink the small sun symbol and the cursive text. Allow the ink to pool slightly in the curves of the letters for a richer, embossed look. -
Let it cure:
Metallic markers can take longer to dry than standard pens. Let the artwork sit untouched for at least 15-20 minutes to prevent smudging. -
Erase the guides:
Once the ink is completely bone-dry, gently roll a kneaded eraser over the entire piece to lift the graphite lines without damaging the paper’s texture.
Make It Glossy
Once fully dry, add tiny dots of clear dimensional glaze or glossy accents over the star points to make them physically shine and pop.
Hang your finished wheel in a well-lit spot where the gold can catch the sunlight throughout the day
Third Eye Portrait With Starry Forehead Space
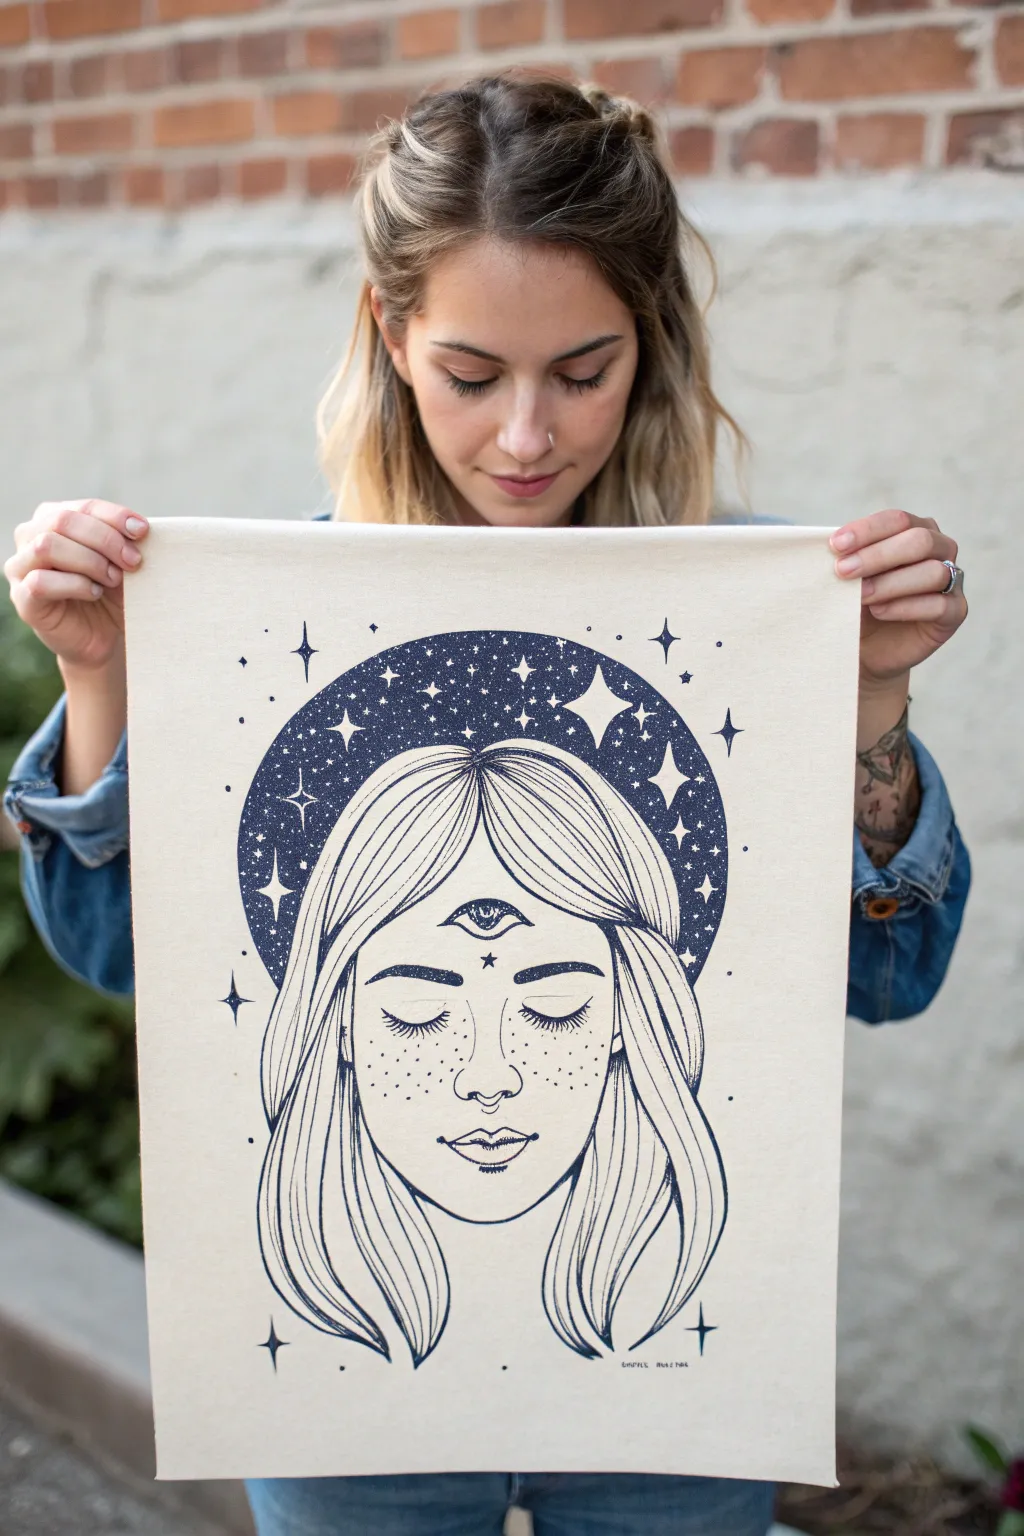
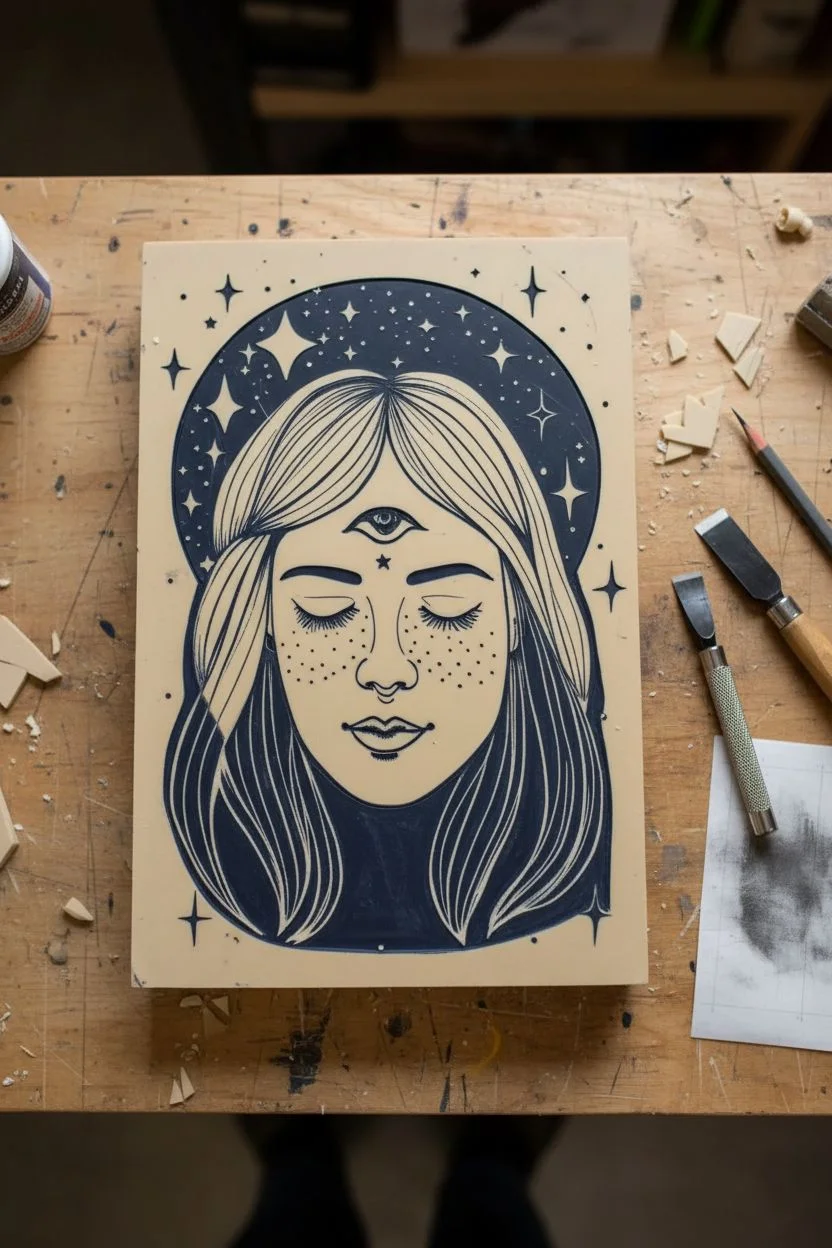
Channel mystic energy with this serene fabric print featuring a starry-eyed deity surrounded by a cosmic halo. The striking contrast of deep navy ink on unbleached cotton creates a modern spiritual aesthetic perfect for hanging in your meditation corner or sacred space.
Step-by-Step Tutorial
Materials
- Unbleached cotton fabric or pre-hemmed canvas banner
- Deep navy blue block printing ink (fabric safe)
- Soft rubber brayer (4-inch)
- Linoleum block (Speedball speedy-carve or similar soft cut)
- Linoleum carving tools (V-gouge and U-gouge)
- Pencil and tracing paper
- Bone folder
- Glass palette or acrylic sheet for rolling ink
- Iron and ironing board
Step 1: Designing and Carving
-
Draft your vision:
Begin by sketching the portrait on paper. Focus on symmetry for the face, drawing closed eyes with long lashes, a centered third eye on the forehead, and simple, flowing hair strands that frame the face. -
Add the celestial halo:
Draw a large circle behind the head to act as the night sky halo. Within this circle, sketch various sizes of four-pointed stars and small dots for stardust, ensuring they don’t overlap with the hair. -
Transfer the image:
Trace your final design onto tracing paper with a soft lead pencil. Flip the tracing paper face-down onto your linoleum block and rub the back firmly with a bone folder to transfer the graphite image. -
Carve the fine details:
Using your smallest V-gouge tool, carefully carve the outlines of the face, the eyelashes, and the strands of hair. Remember, whatever you carve away will remain the color of the fabric. -
Clearing the halo:
For the halo, carve out the star shapes and tiny dots. You want the background of the circle to remain raised (uncarved) so it prints as a solid dark block, while the stars will be the negative space. -
Remove excess material:
Switch to a wider U-gouge to clear away all the linoleum outside of your design completely. I like to trim the block close to the design edge to minimize the risk of ink smudges on the border.
Patchy Ink?
If the solid halo looks distressed or patchy, your fabric might have too much texture. Mist the fabric very lightly with water before printing to help it absorb the ink more deeply.
Step 2: Inking and Printing
-
Prepare the fabric:
Iron your cotton fabric or canvas thoroughly to ensure a completely flat surface. wrinkles will prevent the ink from transferring evenly. -
Charge the ink:
Squeeze a line of navy blue fabric block printing ink onto your glass palette. Roll the brayer back and forth and lift it occasionally to create a velvety, consistent texture on the roller. -
Apply ink to block:
Roll the inked brayer over your carved block. Apply a thin, even layer first, then go over it again to ensure the large solid areas of the halo are fully saturated without filling in the fine lines of the face. -
Position the print:
Carefully align your block over the fabric. Once you touch the block to the fabric, do not shift or slide it, as this will blur the fine details. -
Apply pressure:
Press down firmly on the back of the block. You can use the clean back of a spoon or a clean brayer to rub the back of the generic block in circular motions to ensure good contact, especially around the edges. -
The reveal:
Slowly peel one corner of the block up to check the transfer. If it looks good, carefully pull the entire block away from the fabric.
Add Gold Accents
Once the blue ink is fully dry, use a fine-tip gold fabric marker or gold leaf adhesive to fill in the stars within the halo for a shimmering, three-dimensional effect.
Step 3: Finishing Touches
-
Clean up edges:
If you missed a few tiny spots in the solid dark halo, use a very small paintbrush dipped in the block printing ink to carefully touch up the solid blue areas. -
Add extra sparkle:
Use the paintbrush to add tiny freestanding stars or dots outside the main halo design if you want the magic to extend further into the negative space. -
Dry completely:
Let the print dry undisturbed for at least 24-48 hours. Oil-based block printing inks can take longer to cure than acrylics, so patience is key. -
Heat set the ink:
Once dry, heat set the design according to your ink manufacturer’s instructions. Usually, this involves ironing the reverse side of the fabric for several minutes.
Hang your celestial portrait on the wall to bring a sense of calm intuition to your room
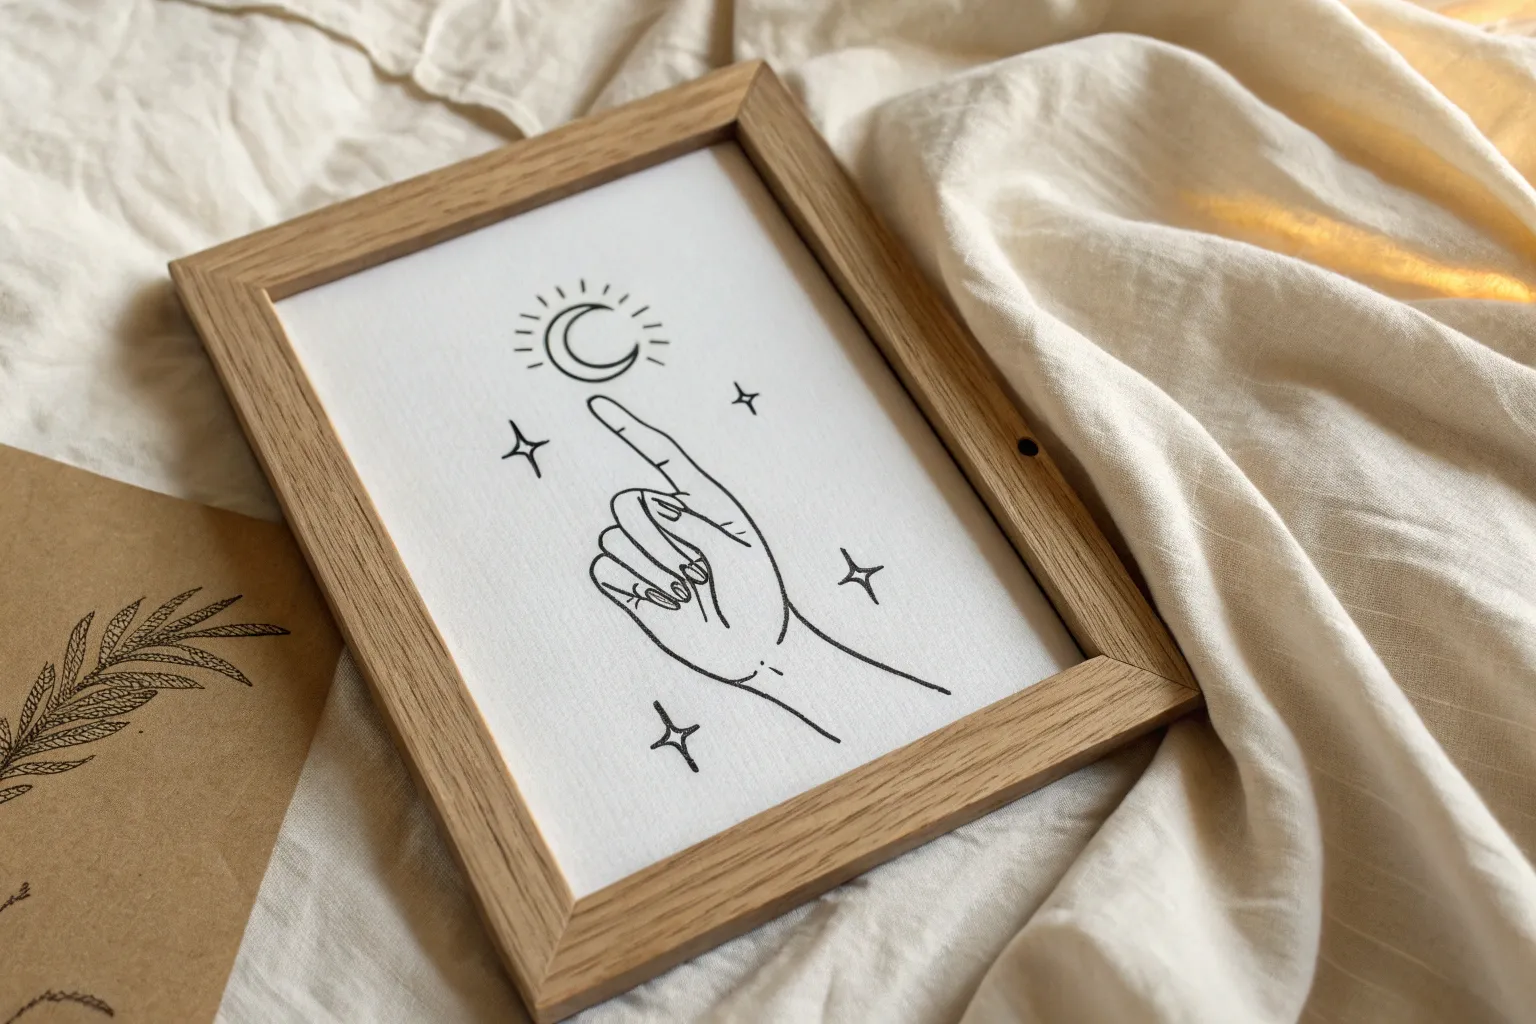
Hands Releasing Light as Tiny Orbs of Energy

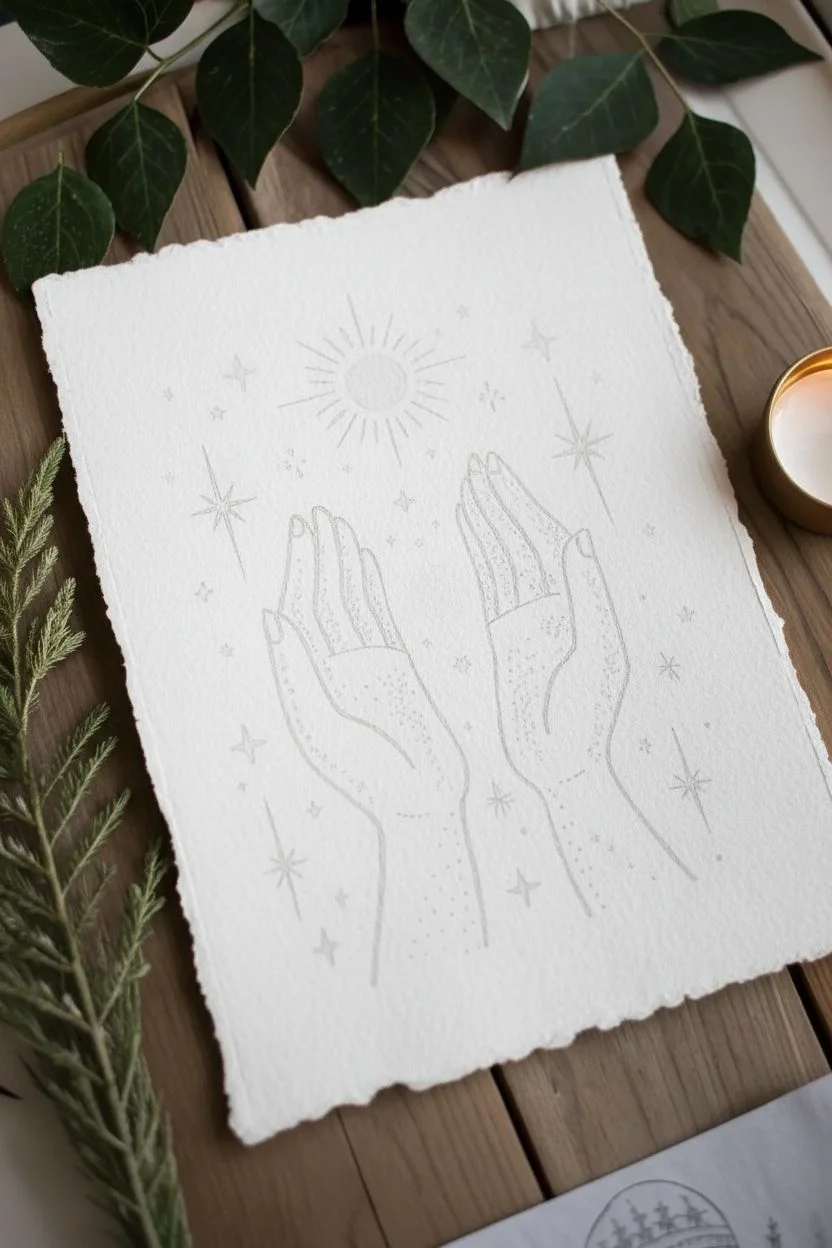
This celestial illustration captures the gentle release of energy through two reaching hands, rendered in shimmering metallic gold against textured paper. The combination of fine line work and mystical stippling creates a truly ethereal piece perfect for a meditation space.
Detailed Instructions
Materials
- Heavyweight cold-press watercolor paper with deckle edge
- Fine liner or dip pen with gold metallic ink
- Gold watercolor paint or gouache
- Small round brush (size 0 or 00)
- Pencil (H or HB)
- Kneaded eraser
- Ruler
Step 1: Planning the Composition
-
Center layout:
Begin by finding the vertical center of your textured paper. Lightly mark a vertical line to guide the symmetry of the hands and the placement of the sun. -
Sketch the hands:
Using your H pencil, sketch the outline of two hands reaching upward. Position the wrists near the bottom third, angling the palms slightly open as if they are cupping water or light. Keep the lines very faint. -
Add celestial elements:
Above the hands, lightly sketch a circle for the sun centered at the top. Around the hands and sun, mark placements for larger stars—some four-pointed, some five-pointed—and the small moon or orb resting between the palms. -
Refine the sketch:
Go over your pencil lines to ensure the fingers look proportional. I like to keep the style slightly stylized and elongated rather than perfectly anatomical to fit the spiritual theme. Once happy, gently lift excess graphite with a kneaded eraser until the sketch is barely visible.
Step 2: Inking the Foundation
-
Outline the hands:
Dip your pen in metallic gold ink or use a gold fine liner. Carefully trace the outline of the hands. Use a steady, confident stroke, breaking the line occasionally if you want an older, mystical map aesthetic. -
Draw the sun:
Ink the sun’s circle at the top. Draw radiating rays extending outward—alternate between longer straight lines and shorter lines to create a dynamic burst effect. -
Create the major stars:
Ink the larger stars you planned earlier. For the four-pointed stars (the ‘north star’ style), draw a long vertical line crossed by a shorter horizontal one, then curve the inner corners inward to create sharp points. -
Fill the sun:
Using gold watercolor or gouache and your small brush, fill in the center circle of the sun. This solid gold element anchors the top of the composition.
Choosing Paper
Use cold-press paper for this project. The rough texture catches the metallic pigments beautifully, making the gold shimmer more than it would on smooth paper.
Step 3: Adding Magical Details
-
Stippling shadow:
This is the crucial texture step. Using the very tip of your gold pen, add tiny dots (stippling) inside the hands. Concentrate the dots heavily near the outer edges of the palms and fingers to create a sense of volume and shadow. -
Fade the stippling:
As you move toward the center of the palms, space the dots further apart. This gradient from dense to sparse makes the hands look like they are glowing from within. -
Create the center orb:
Between the palms, instead of drawing an outline, create a circle shape purely using stippling. Use a slightly lighter gold or dilute your ink slightly if possible to make this ‘energy orb’ look soft and diffuse. -
Connect with flow lines:
Draw very fine, loose curves along the wrists and forearms to suggest movement or the flow of energy. These shouldn’t be solid outlines, but rather suggestion lines.
Ink Not Flowing?
Metallic pens often clog on textured paper. Scribble on a scrap sheet or shake the pen vigorously (capped!) to re-mix the mica particles if the line starts skipping.
Step 4: Celestial Atmospherics
-
Scatter small stars:
Fill the empty negative space around the hands with tiny stars. Vary these—some can be simple crosses, some diamond shapes, and others just simple dots. -
Add sparkle clusters:
Group three or four tiny dots together in random spots like constellations. This adds depth to the ‘sky’ background without cluttering it. -
Dry and erase:
Allow the metallic ink to dry completely. Metallic inks can smudge easily, so give it an extra 10 minutes. Once safe, gently erase any remaining visible pencil marks. -
Final highlights:
If you have a white gel pen, you can add incredibly tiny dots to the centers of the largest stars or the sun for extra contrast, though the gold alone is beautiful.
Place your finished artwork near a candle or natural window light to see the gold ink truly come to life
Aura Silhouette Filled With Gradient Dotwork
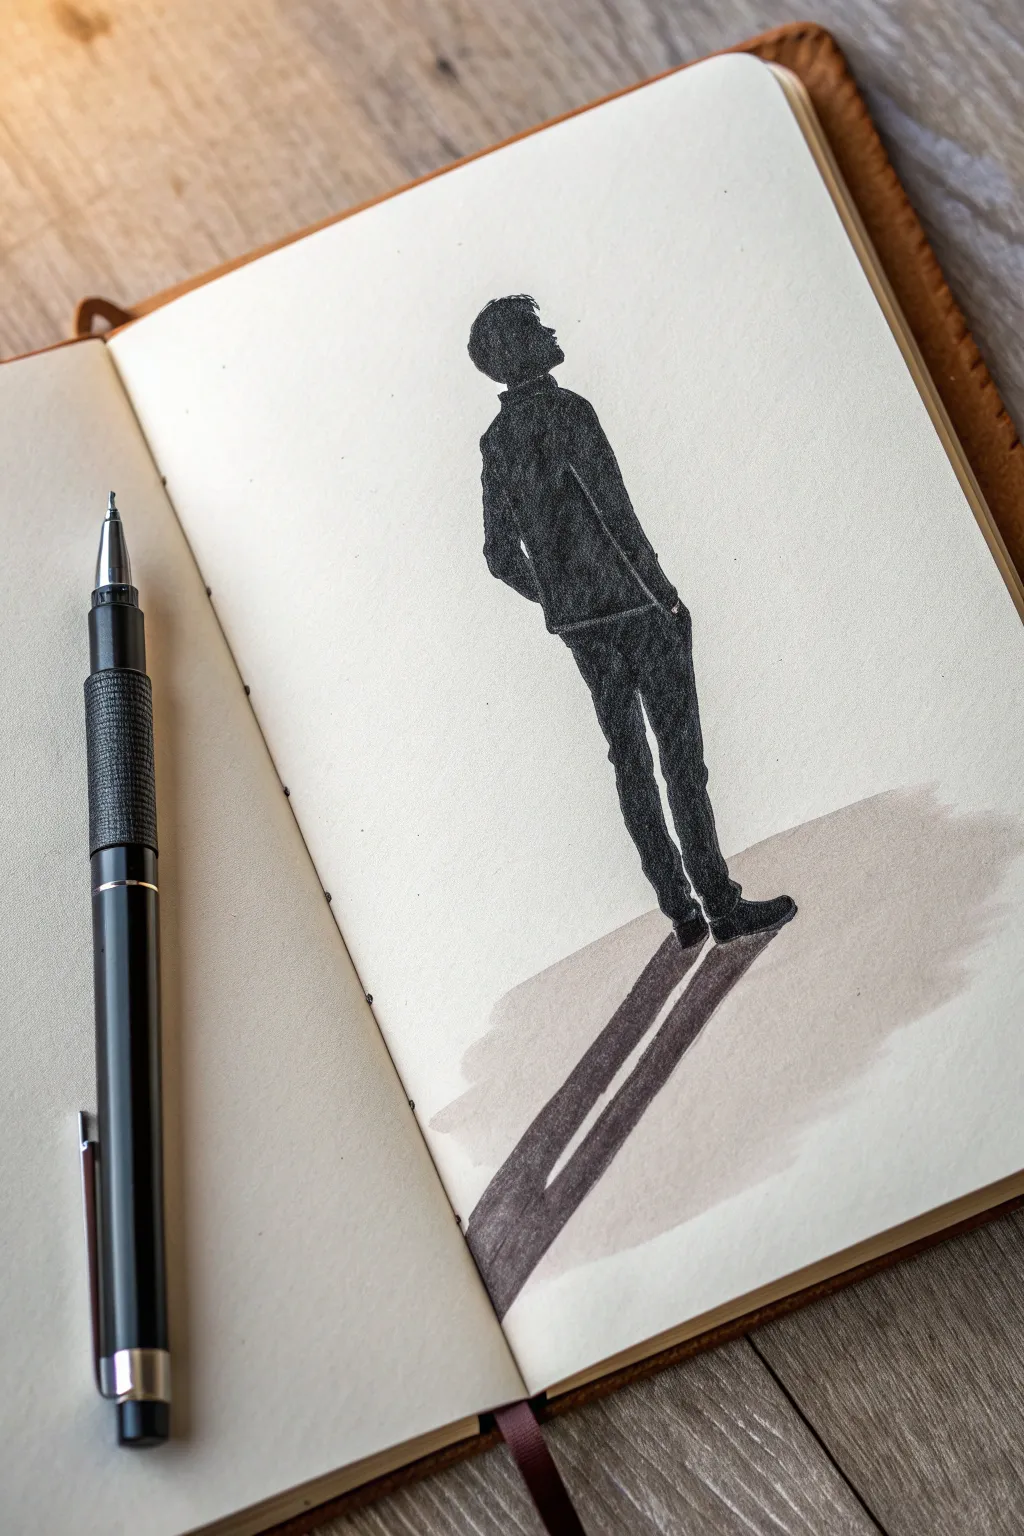
Capture a moment of quiet contemplation with this striking silhouette study. By combining solid black shading with a subtle watercolor wash, you’ll create a figure that feels both grounded and deeply atmospheric.
How-To Guide
Materials
- Sketchbook with mixed-media or heavy sketch paper
- HB or 2B graphite pencil
- Black drawing pens (fine liners in 0.1, 0.5, and a brush pen)
- Black alcohol-based marker or India ink
- Diluted brown or gray watercolor (or a very light Copic marker)
- Soft paintbrush
- Eraser
Step 1: Drafting the Figure
-
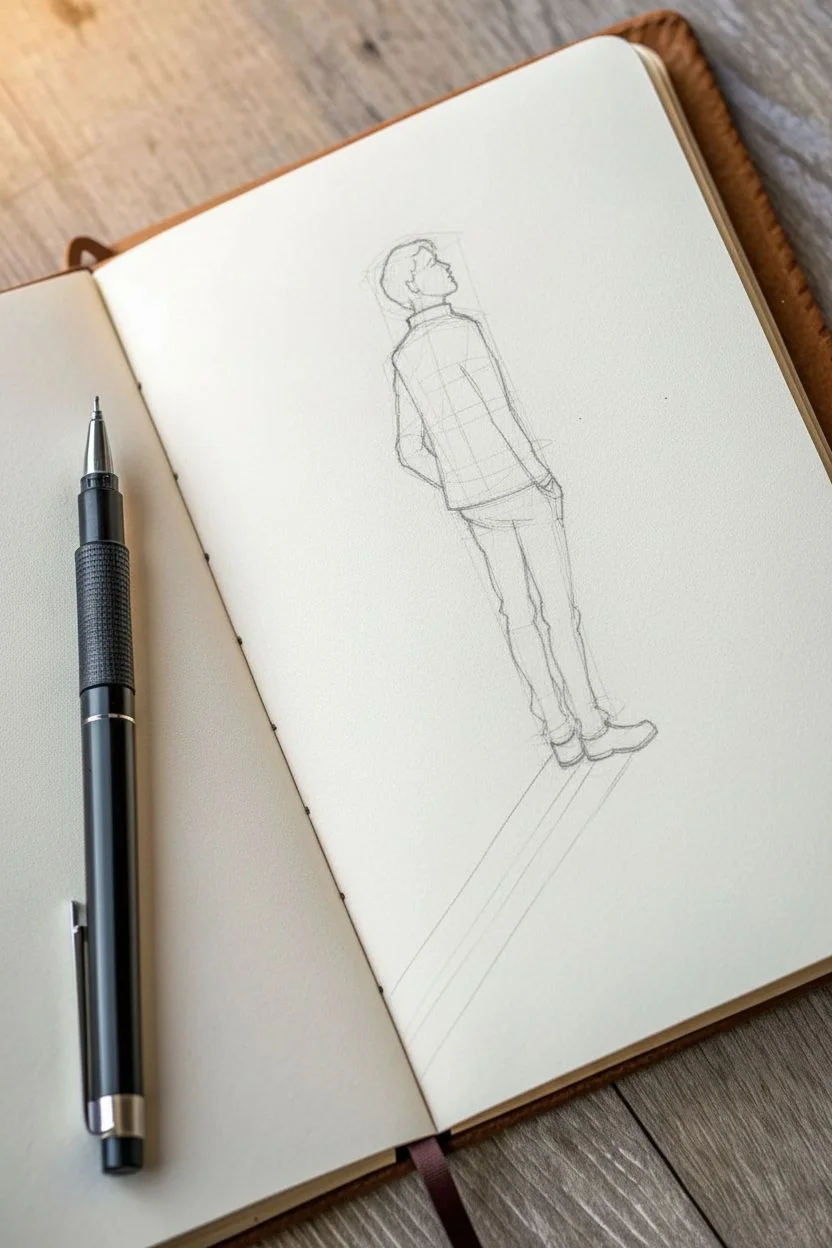
Establish the pose:
Start by lightly sketching a vertical line to establish the figure’s center of gravity. Keep your pencil strokes faint. -
Block in major shapes:
Draw an oval for the head, tilting it slightly upward. Sketch a rectangular shape for the torso and simple tubes for the legs to get the proportions right before adding details. -
Refine the outline:
Connect your shapes to create the final contour. Add the collar of the jacket, the slightly hunched pockets where the hands are hidden, and the shape of the shoes. The silhouette relies entirely on this outer edge, so take your time getting the profile right. -
Map the shadow:
Draw two long, parallel lines extending from the feet diagonally toward the bottom left of the page. This will be the cast shadow that grounds your figure.
Ink Bleeding?
If your black ink bleeds into the ground wash, ensure the watercolor is 100% dry before inking near it. Use a hairdryer to speed the process up.
Step 2: Inking the Silhouette
-
Outline the figure:
Use a 0.5 fine liner to trace your final pencil lines. Be confident with your strokes to ensure a crisp edge. -
Erase guidelines:
Once the ink is completely dry, gently erase all graphite marks to keep your paper clean for the filling stage. -
Fill solid black areas:
Using a black marker or a brush pen, fill in the deepest black areas of the figure. I like to start with the pants and jacket center, leaving the edges for more detailed work. -
Define hair texture:
Switch to a 0.1 fine liner for the head. Instead of a solid block, use tiny, dense scribbles or stippling along the top edge to simulate messy hair texture against the light. -
Add fabric texture:
While most of the figure is solid black, leave faint, tiny slivers of white paper or use a slightly dried-out marker to create texture where the light hits the shoulder and jacket folds.
Add a Halo effect
Use a white gel pen to outline just the sun-facing side of the figure. This creates a brilliant ‘rim light’ effect, making the silhouette pop.
Step 3: Creating Atmosphere
-
Prepare the ground wash:
Mix a very watery, pale brown or warm gray watercolor wash. Alternatively, grab a very light beige alcohol marker. -
Apply the ground shadow:
Paint or color a loose, organic puddle shape underneath the feet. Let the edges be rough and uneven to look like natural ground. -
Darken the cast shadow:
Return to the long diagonal shadow lines you drew earlier. Fill these in with a medium-gray marker or a second layer of watercolor. It should be darker than the ground wash but lighter than the figure. -
Layering shadow depth:
Add a third, darker pass to the shadow right where it touches the shoes. Shadows are darkest where the object meets the ground. -
Texturizing the clothes:
For a ‘dotwork’ effect, take your finest pen and add high-density stippling (dots) over the black marker in the jacket area. It adds a subtle grittiness that breaks up the flat black ink. -
Final inspection:
Check your silhouette’s edges. If any lines look shaky, thicken the silhouette slightly to smooth them out.
Enjoy the quiet drama of your finished silhouette composition
Constellation Map Shaped Like a Heart or Head
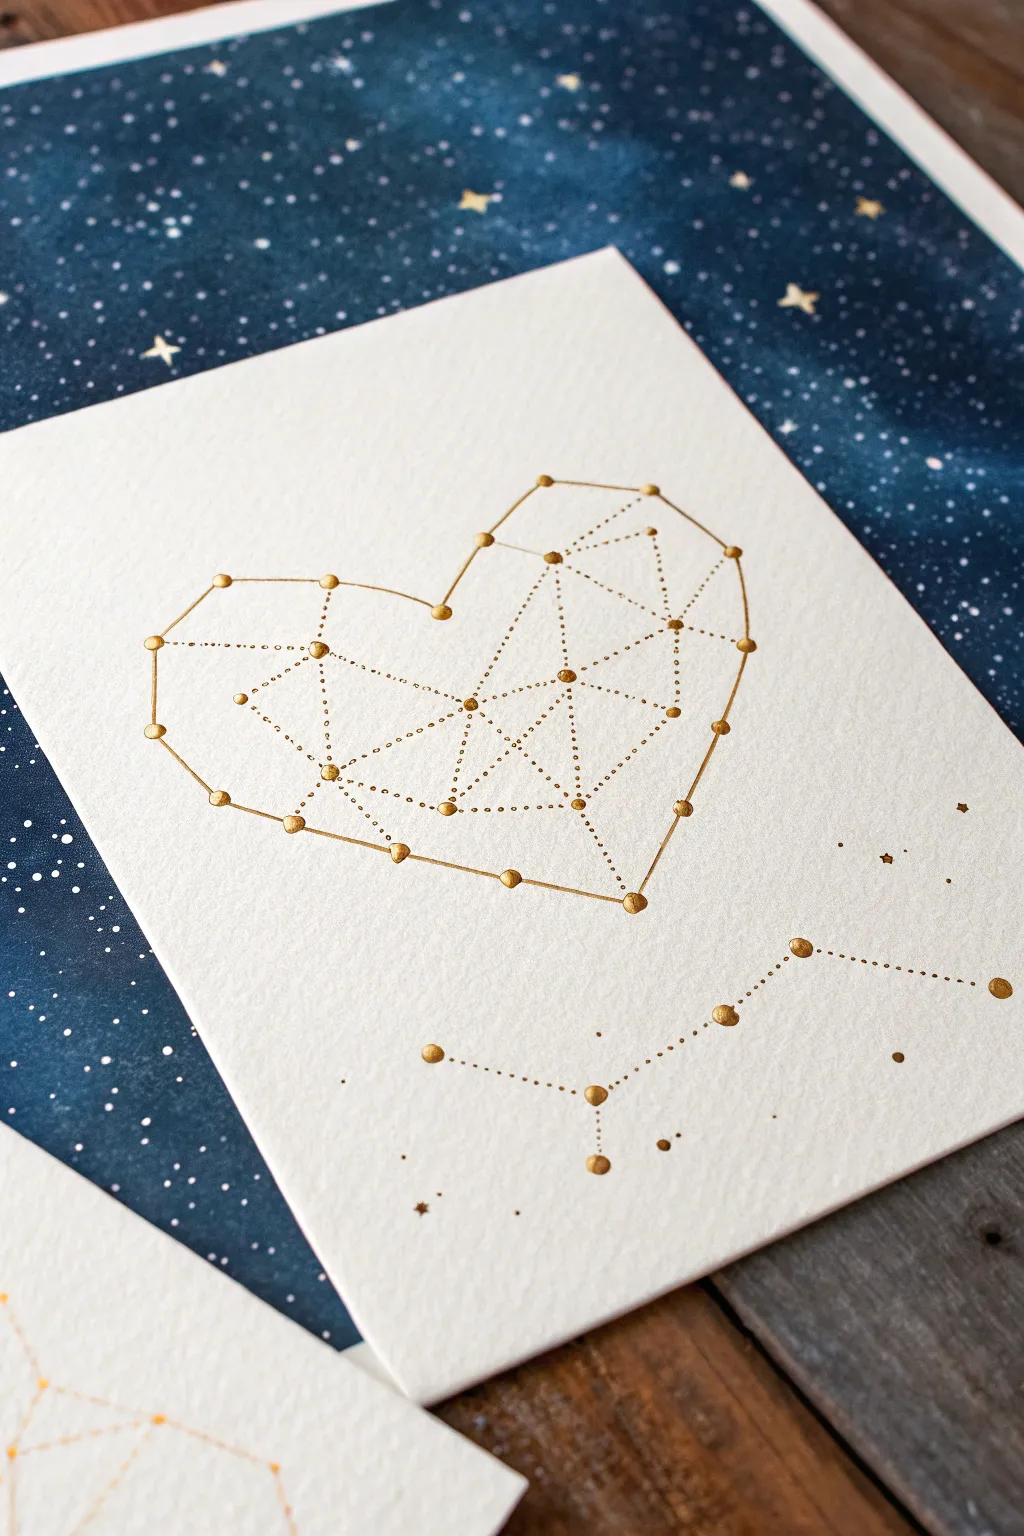
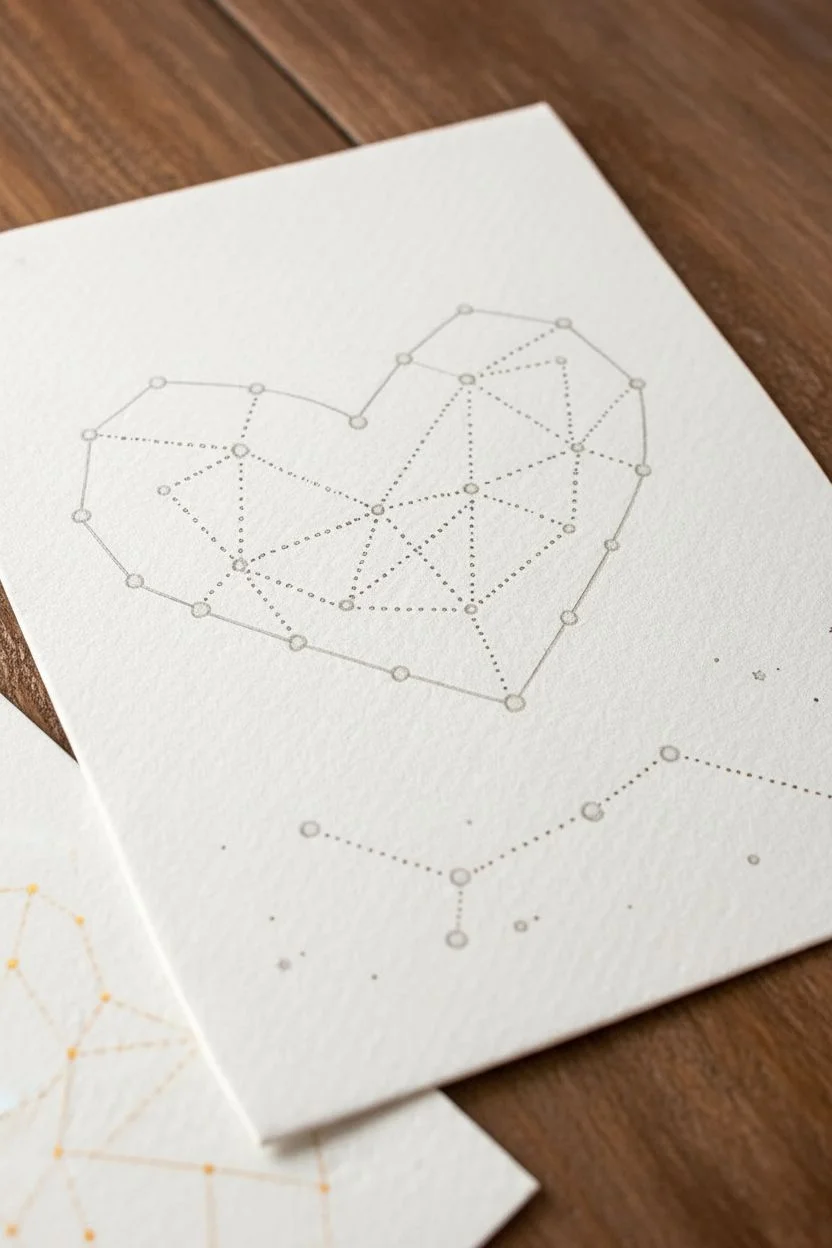
This elegant project combines the romance of starry nights with geometric minimalism, creating a heart-shaped ‘constellation’ in shimmering gold. The result is a high-contrast, mystical piece perfect for framing or gifting to a loved one.
Detailed Instructions
Materials
- High-quality watercolor paper or heavy cardstock (white or cream)
- Gold metallic paint marker (fine point)
- Gold metallic paint marker (medium point) or gold gouache
- Fine-liner pen (gold or light brown)
- Pencil (HB or H)
- Ruler
- Eraser
- Compass or circular object (optional for sketching guides)
Step 1: Preparation & Sketching
-
Lay the Foundation:
Start with a clean sheet of heavy watercolor paper. Since this design relies on negative space, ensure your surface is free of any smudges or creases. -
Map the Heart Shape:
Using a pencil very lightly, sketch the outline of a heart in the center of your paper. Focus on creating a balanced symmetry, perhaps using a ruler to mark the vertical center line first. -
Mark the Major Stars:
Along the perimeter of your pencil heart, mark small dots where your main ‘stars’ will go. Space them out irregularly to make it look organic, like a real constellation, rather than a perfect connect-the-dots puzzle. -
Add Internal Structure:
Place a few strategic dots inside the heart shape. These will serve as anchor points for your interior geometric lines. Imagine dividing the heart into large triangles.
Step 2: Creating the Constellation
-
Connect the Exterior:
Using your ruler and a very light pencil touch, draw straight lines connecting the perimeter dots. Don’t close the entire loop perfectly; leave a few gaps to maintain that ethereal, floating constellation look. -
Triangulate the Interior:
Connect your internal dots to the edging dots, forming a shattered glass or low-poly effect. Creating triangles of various sizes adds visual interest and depth to the simple shape. -
Plan the Dotted Lines:
Decide which connections will be solid lines and which will be dotted. A mix of both creates a sophisticated texture. I usually mark the dotted paths lightly with a dashed pencil line so I don’t forget. -
Add a Lower Constellation:
To balance the composition, sketch a smaller, free-form constellation line underneath the heart, perhaps resembling a dipper or a random celestial wandering.
Clean Lines Pro-Tip
Wipe the edge of your ruler with a tissue after every few lines. Metallic markers tend to pool on the edge and can smear across your clean white paper when you move the ruler.
Step 3: Inking in Gold
-
Paint the Primary Stars:
Take your medium-point gold marker or a small brush with gold gouache. diverse the size of your stars slightly—some should be bold circles, while others can be tiny specks. Apply these over your pencil guide dots. -
Allow Initial Drying:
Let these gold focal points dry completely before moving your hand over the paper to avoid smearing the metallic pigment. -
Draw Solid Connections:
Switch to your fine-point gold pen. Use a ruler to trace over your solid pencil lines, connecting the gold stars with crisp, confident strokes. -
Create Dotted Trails:
For the dotted sections, carefully tap the fine-point pen along the ruler’s edge. Keep the spacing consistent for a polished look. -
Enhance Star Brightness:
Once the lines connect to the stars, go back and slightly enlarge any star ‘nodes’ that look too small compared to the lines connected to them. -
Scattered Stardust:
Add tiny, random specks of gold ink around the heart and the lower constellation to represent distant stars and add atmosphere.
Level Up: Zodiac Sign
Instead of a random line at the bottom, customize the artwork by drawing the actual zodiac constellation of the person you are making this for.
Step 4: Finishing Touches
-
Erase Guidelines:
Wait until the gold ink is absolutely bone dry. Then, gently erase any visible pencil marks, being careful not to rub strictly over the metallic paint which can sometimes dull. -
Optional Background:
If you want the full galaxy effect seen in the display, you can mount this white card onto a piece of dark navy or black paper painted with white watercolor splatters.
Now you have a shimmering piece of celestial art that captures the magic of the night sky in a simple, heartfelt shape
Mirror-Symmetry Spirit Totem Down the Page
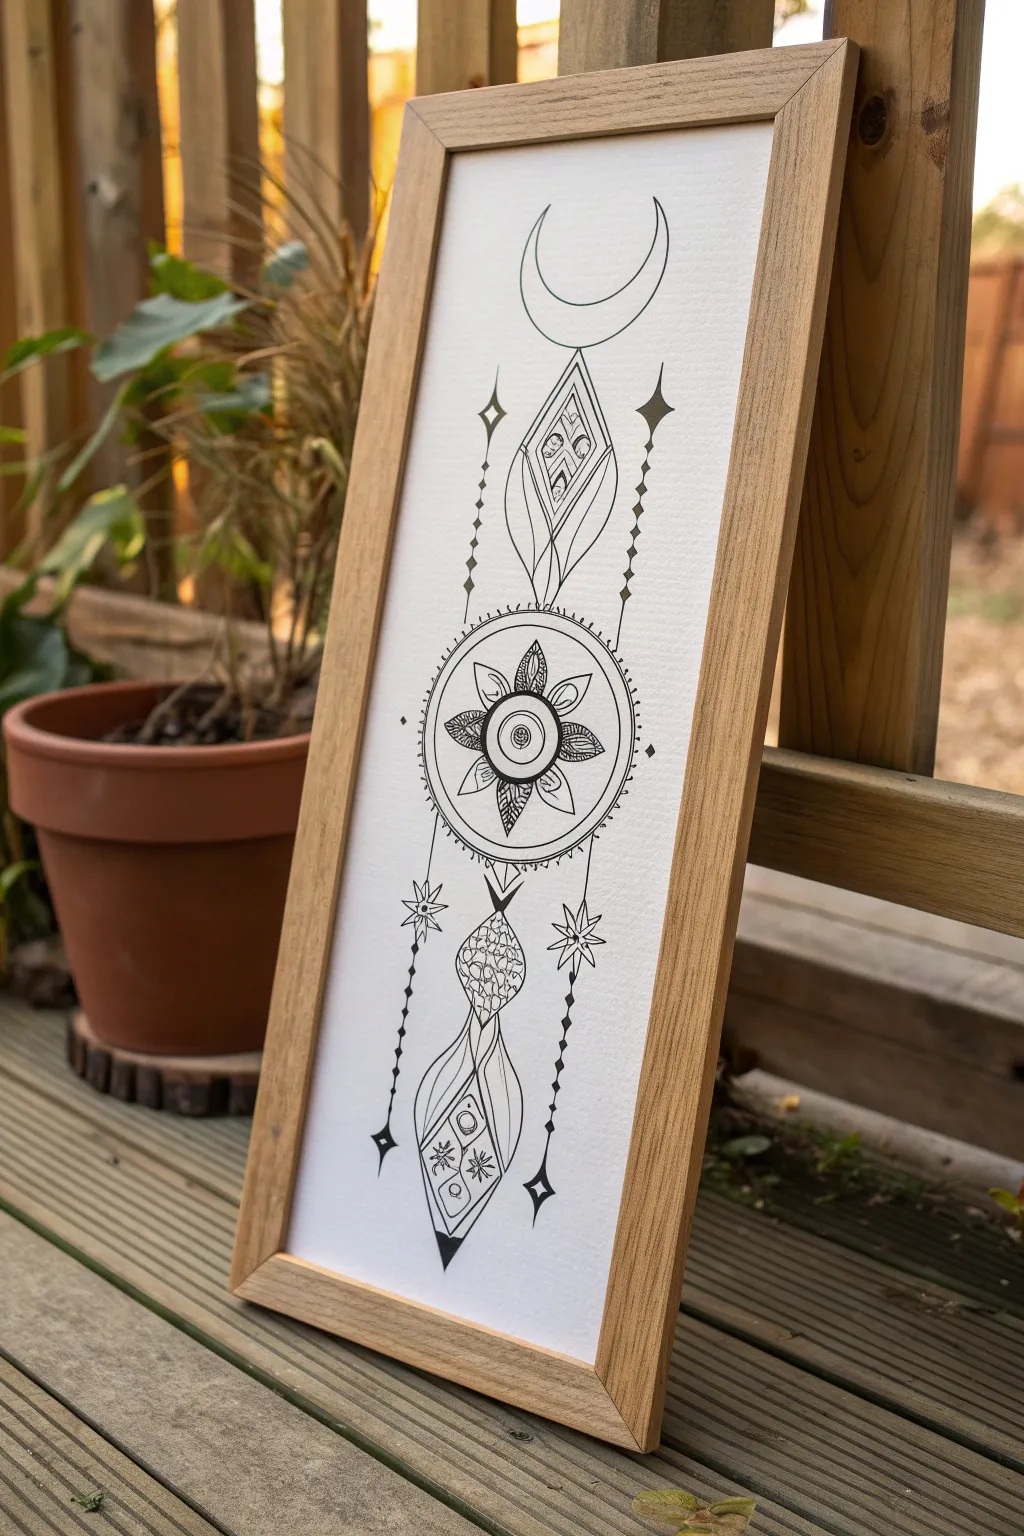
This elegant black-and-white illustration combines celestial motifs with geometric symmetry to create a striking vertical totem. The clean lines and hanging ornamental details give it a serene, mystical quality that looks beautiful in a simple wood frame.
Step-by-Step Guide
Materials
- High-quality white drawing paper (heavyweight, e.g., Bristol or mixed media)
- Pencil (HB or H for sketching)
- Eraser (kneaded eraser is best)
- Ruler
- Compass or circle template
- Fine liner pens (sizes 005, 01, 03, and 05)
- Black brush pen or marker (for filling large areas)
- Wooden frame (portrait orientation)
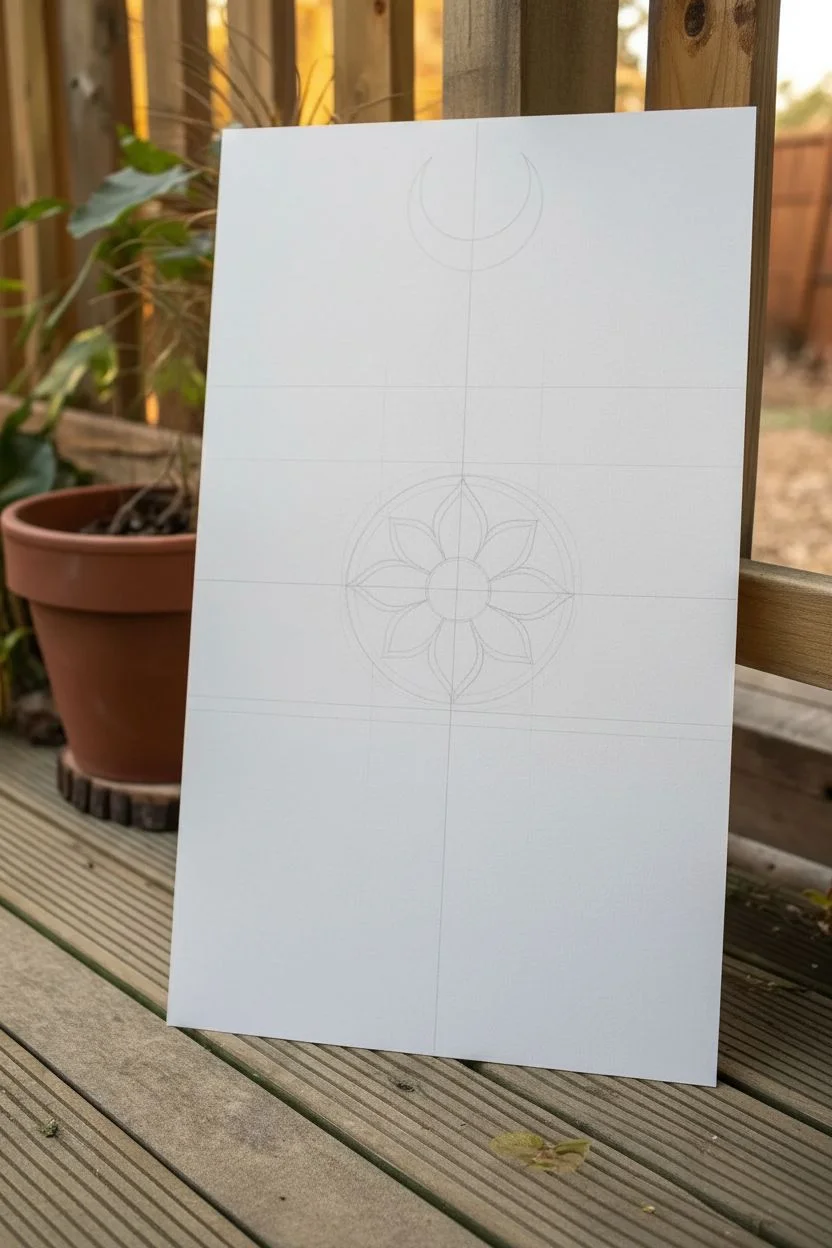
Step 1: Setting the Structure
-
Establish the centerline:
Begin by lightly drawing a vertical line down the exact center of your paper using a ruler. This is crucial for maintaining symmetry throughout the totem drawing. -
Map out the zones:
Mark horizontal guides for where your main elements will sit: one near the top for the moon, one below that for the upper geometric shape, a central zone for the mandala, and a lower section for the hanging pendant. -
Draft the moon:
At the very top, use your compass or freehand sketch an upward-facing crescent moon. Ensure the horns of the moon are equidistant from your centerline. -
Sketch the geometric diamond:
Just underneath the moon, draw a diamond shape that elongates into a teardrop point at the top. Sketch internal curves that mimic flower petals or leaves within this diamond outline.
Symmetry Hack
Draw one side of the design in pencil, then fold the paper along the centerline and rub firmly to transfer a faint graphite mirror image to the other side.
Step 2: Drawing the Central Mandala
-
Create the circle guide:
Place the point of your compass on the centerline in your central zone. Draw a circle that will be the outer boundary of your main focal point. -
Add inner rings:
Draw two smaller concentric circles inside the main one to create a border. In the very center, draw a small ‘bullseye’ circle. -
Draft the flower petals:
Sketch an eight-pointed flower design radiating from the center. Create the petals so they alternate between simple pointed shapes and shapes with internal detailing. -
Add rim details:
On the outermost ring of your circle, sketch tiny semicircles or ticks all the way around to create a textured border effect.
Add Gold Accents
Use a metallic gold gel pen or gold leaf paint for the moon and the stars to give the celestial theme a shimmering, magical finish.
Step 3: Designing the Lower Pendant
-
Draft the hanging connector:
Below the mandala, draw a V-shape that connects to a complex, layered teardrop shape. This section mimics a jewelry pendant or chandelier crystal. -
Fill the pendant:
Divide this lower pendant into sections. The top part should be a textured, scalelike pattern, while the bottom section should taper into a sharp point with geometric symbols inside. -
Add hanging chains:
Using your ruler, lightly sketch vertical lines dropping from the mandala and the upper diamond. Mark spots for beads (diamonds) and stars along these lines.
Step 4: Inking and Refining
-
Outline main shapes:
Switch to your 03 or 05 fine liner. Carefully trace over your main structural lines—the moon, the diamond, the circle, and the pendant outlines. -
Ink the detailed center:
Use a finer 01 pen for the mandala details. Ink the petals, shading half of each petal leaf black for contrast, and filling in the tiny center pupil. -
Create the chain details:
For the hanging ‘chains’ on the sides, draw small black diamond shapes along the lines. Add stylistic four-pointed stars at the ends of the side chains. -
Texturing the pendant:
I like to use my thinnest 005 pen here. Draw the delicate ‘scale’ pattern in the middle of the lower pendant and the tiny geometric symbols in the bottom tip. -
Add solid blacks:
Use your brush pen or thicker marker to fill in the solid black triangle at the very bottom tip and any heavy black sections within the central flower. -
Final clean up:
Once the ink is completely dry (give it at least 15 minutes to be safe), gently erase all your pencil guides and centerline marks. -
Frame the artwork:
Place your finished drawing into a simple light-wood frame to complement the organic, earthy feel of the design.
Hang your new totem artwork in a quiet corner to add a touch of peace and balance to your space
Automatic Intuitive Doodles Turned Into a Mandala Center
This peaceful drawing exercise starts with a simple central flower and radiates outward into a structured yet organic mandala. The result is a striking black-and-white illustration with delicate line work and stippled shading.
How-To Guide
Materials
- Spiral-bound sketchbook (smooth, heavyweight paper preferred)
- Fine liner pen (01 or 03 size, black)
- Pencil (HB or 2B)
- Eraser
- Compass (optional, for guidelines)
- Ruler
Step 1: Setting the Structure
-
Mark the center:
Begin by finding the approximate center of your page. You can eyeball this for a more intuitive feel or use a ruler to measure lightly with a pencil. -
Draw pencil guidelines:
Using a compass or by carefully sketching circles, create three concentric guideline circles. make the smallest about 1 inch wide, the middle one about 2.5 inches, and the largest roughly 4-5 inches wide. -
Ink the central core:
Switch to your fine liner. In the very center, draw a tiny circle. Surround this with two layers of small, rounded petals to form a tight bud. -
Define the first border:
Draw an ink circle around your central flower bud. Add a second ring just outside it to create a thin track or border. -
Add radial petals:
Draw long, pointed petals radiating from that central border out to your middle pencil guideline. They should look like sunflower petals—slightly wider at the base and tapering to a sharp point.
Uneven Petals?
Don’t panic if your symmetry is off. Mandalas are forgiving. Just thicken the outline of the smaller petals to visual balance them with the larger ones.
Step 2: Building the Layers
-
Detail the petals:
Inside each of those long petals, draw two or three curved lines following the shape of the petal to suggest veins and texture. -
Create the decorative ring:
Draw a circle that touches the tips of your pointed petals. Draw another circle about a quarter-inch outside of that one to create a wide band. -
Fill the band:
Inside this new wide band, place evenly spaced dots all the way around. This stippling effect adds a lovely texture that contrasts with the clean lines. -
Draw the main outer petals:
Using your largest pencil guideline as a limit, draw large, wide arches or scallops. center each arch so its peak aligns with the gap between the inner pointed petals. -
Double the outline:
Add a second line just inside each of these large arches to give them a distinct, bold border.
Step 3: Shading and Embellishment
-
Hatch the petals:
At the base of each large outer petal, use quick, short hatching lines flicking upward. This creates a gradient shadow that gives the mandala depth. -
Add inner details:
Draw a smaller, rounded semi-circle inside the base of each large petal, right over the hatching. Fill the space above this semi-circle with tiny stippled dots. -
Sketch the final peaks:
In the ‘V’ shape between each large outer petal, draw a small, sharp triangular peak. This bridges the gaps and makes the design feel cohesive. -
Float the diamonds:
Directly above the tip of each large petal, draw a small, floating diamond shape. I find this extra element makes the energy of the mandala feel expansive. -
Add final texture:
Review your drawing for empty spaces. Add tiny dots or extra vein lines in the central flower if it feels too open. -
Erase guidelines:
Wait at least 5-10 minutes to ensure the ink is bone dry. Gently erase all your pencil circles and marks to reveal the crisp black lines.
Level Up: Gold Accents
After the black ink dries, use a metallic gold gel pen to fill in the floating diamonds or the central flower seed for a touch of sacred geometry flair.
Now you have a centered, meditative piece of art that reflects your focus and patience
Energy Thread Drawing Using One Continuous Line
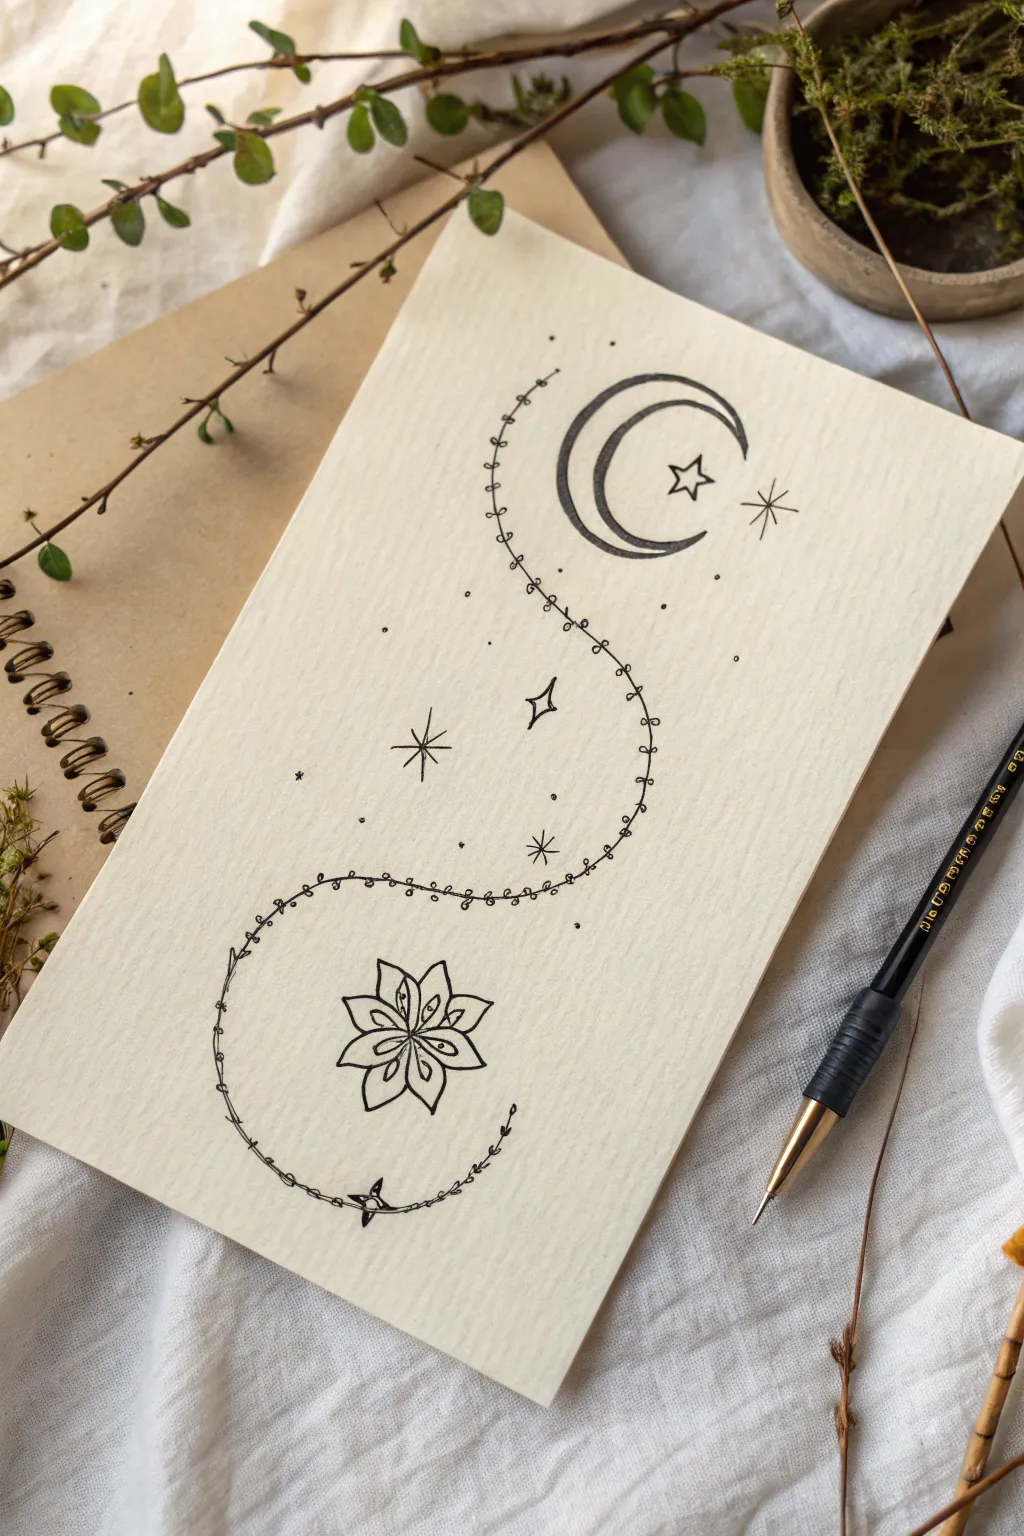
Capture the delicate balance between the heavens and the earth with this elegant line drawing. Featuring a winding, leafy path connecting a crescent moon to a blooming flower, this piece uses simple ink work to create a serene and mystical composition.
Step-by-Step Guide
Materials
- Cream-colored textured paper (watercolor or mixed media, approx. 5×8 inches)
- Fine liner pen (black, size 03 or 05)
- Pencil (HB or mechanical)
- Eraser
- Ruler (optional, for spacing)
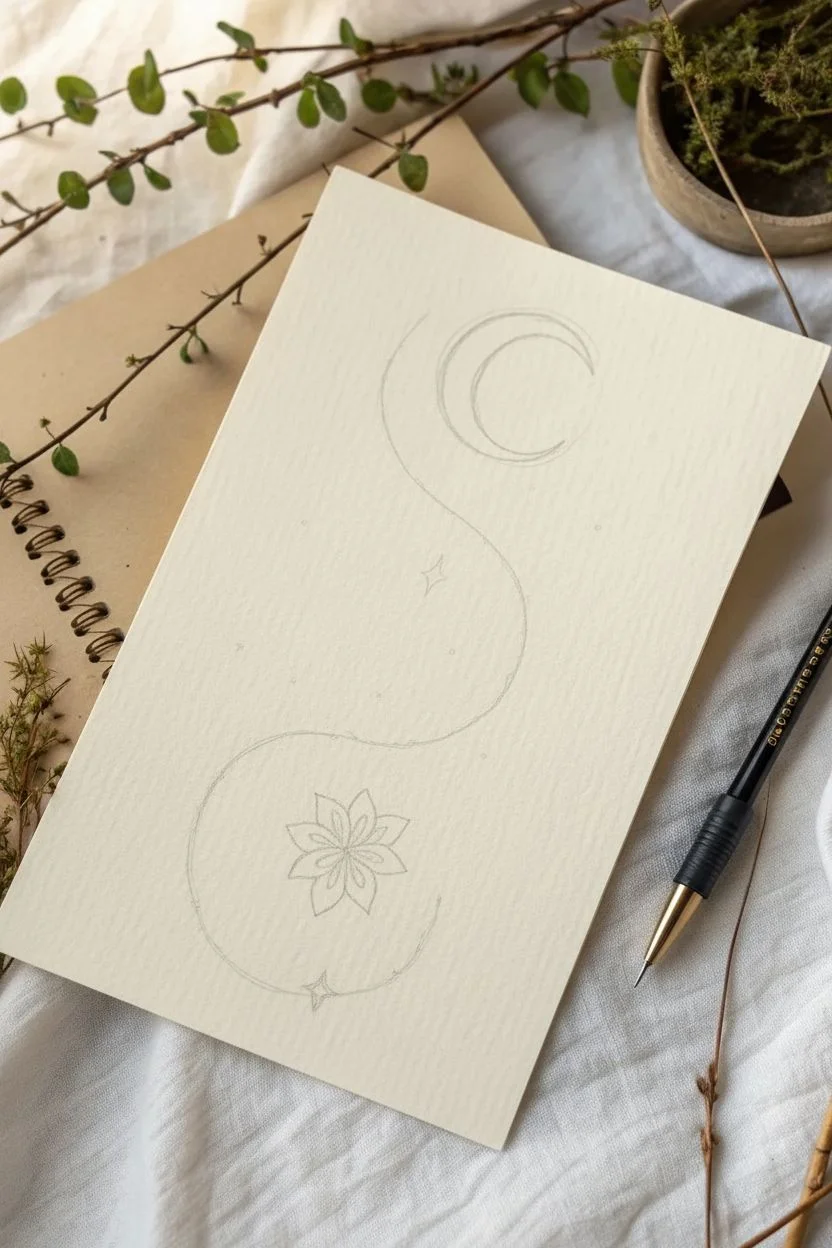
Step 1: Planning the Layout
-
Establish the curve:
Begin with a pencil to lightly sketch the central ‘energy thread.’ Drawing softly, create a large, gentle S-curve that starts near the top right and sweeps down to the bottom left. This spine will guide the entire composition. -
Mark anchor points:
At the top of your S-curve, sketch a rough circle where the moon will go. At the bottom loop of the curve, sketch a circle for the flower’s placement to ensure everything fits comfortably on the page.
Step 2: Inking the Moon
-
Draw the crescent:
Switch to your fine liner pen. In the top right area, draw a crescent moon shape. Keep the outer curve smooth and consistent giving it a nice, thick C-shape. -
Add the inner outline:
Carefully draw a second, slightly smaller crescent line inside the first one. This double-line technique adds weight without needing to color it in fully. -
Detail the moon:
Draw a small, five-pointed star nestled inside the curve of the crescent.
Wobbly Lines?
If your long vine line looks shaky, don’t worry. Simply thicken the line slightly in the wobbly areas or add an extra leaf over the mistake to hide it.
Step 3: Creating the Flower
-
Center point:
Move to the bottom spiral of your pencil S-curve. Draw a small gemstone-like shape or diamond in the very center of your flower area. -
First layer of petals:
Draw four pointed petals radiating outward from the center—up, down, left, and right. Inside each petal, draw a small teardrop shape for detail. -
Second layer of petals:
Draw four more pointed petals in the gaps between the first four. These should look like they are tucking behind the first layer.
Add Some Magic
Use a gold or silver gel pen for the stardust dots and the inner details of the flower to make the drawing shimmer when it catches the light.
Step 4: Weaving the Energy Thread
-
Trace the main vine:
Using your initial pencil guide, draw the main connector line in ink. Start high near the moon and wind it down, encircling the flower at the bottom but not touching it. Let the line trail off naturally at the very bottom. -
Add the foliage:
Along this main winding line, draw tiny loops or leaves. These are small, seed-like ovals attached directly to the line. Space them out evenly, placing them on alternating sides of the vine as you go. -
Vary the direction:
As the vine curves, rotate the direction of your little leaves so they follow the flow of the line naturally.
Step 5: Celestial Embellishments
-
Draw primary stars:
In the open space between the moon and the flower, draw two distinct stars. Use a simple four-point cross design (long vertical line crossed with a horizontal one) and add diagonal lines for a sparkle effect. -
Add a diamond star:
Near the middle curve of the vine, draw a four-pointed diamond star shape (like the ‘sparkle’ emoji) to add variety to your celestial shapes. -
Scattered stardust:
Fill the empty negative spaces with tiny dots. I like to cluster a few dots near the main stars and leave other areas more sparse to create a shimmering effect. -
Simple star accents:
Add 2-3 very simple asterisks (*) or cross shapes near the moon and near the bottom trail of the vine to balance the visual weight.
Step 6: Finishing Touches
-
Wait for drying:
Let the ink sit for at least 5-10 minutes to ensure it is completely dry to the touch. -
Erase guidelines:
Gently erase your initial pencil S-curve and placement circles. Be careful not to scrub too hard over the inked areas. -
Final check:
Look for any gaps in your vine or areas that feel too empty. Add a tiny dot or two if needed to balance the composition.
Now you have a serene piece of art that symbolizes connection and growth to display on your altar or wall
Dream Portal Doorway Framed by Sacred Geometry
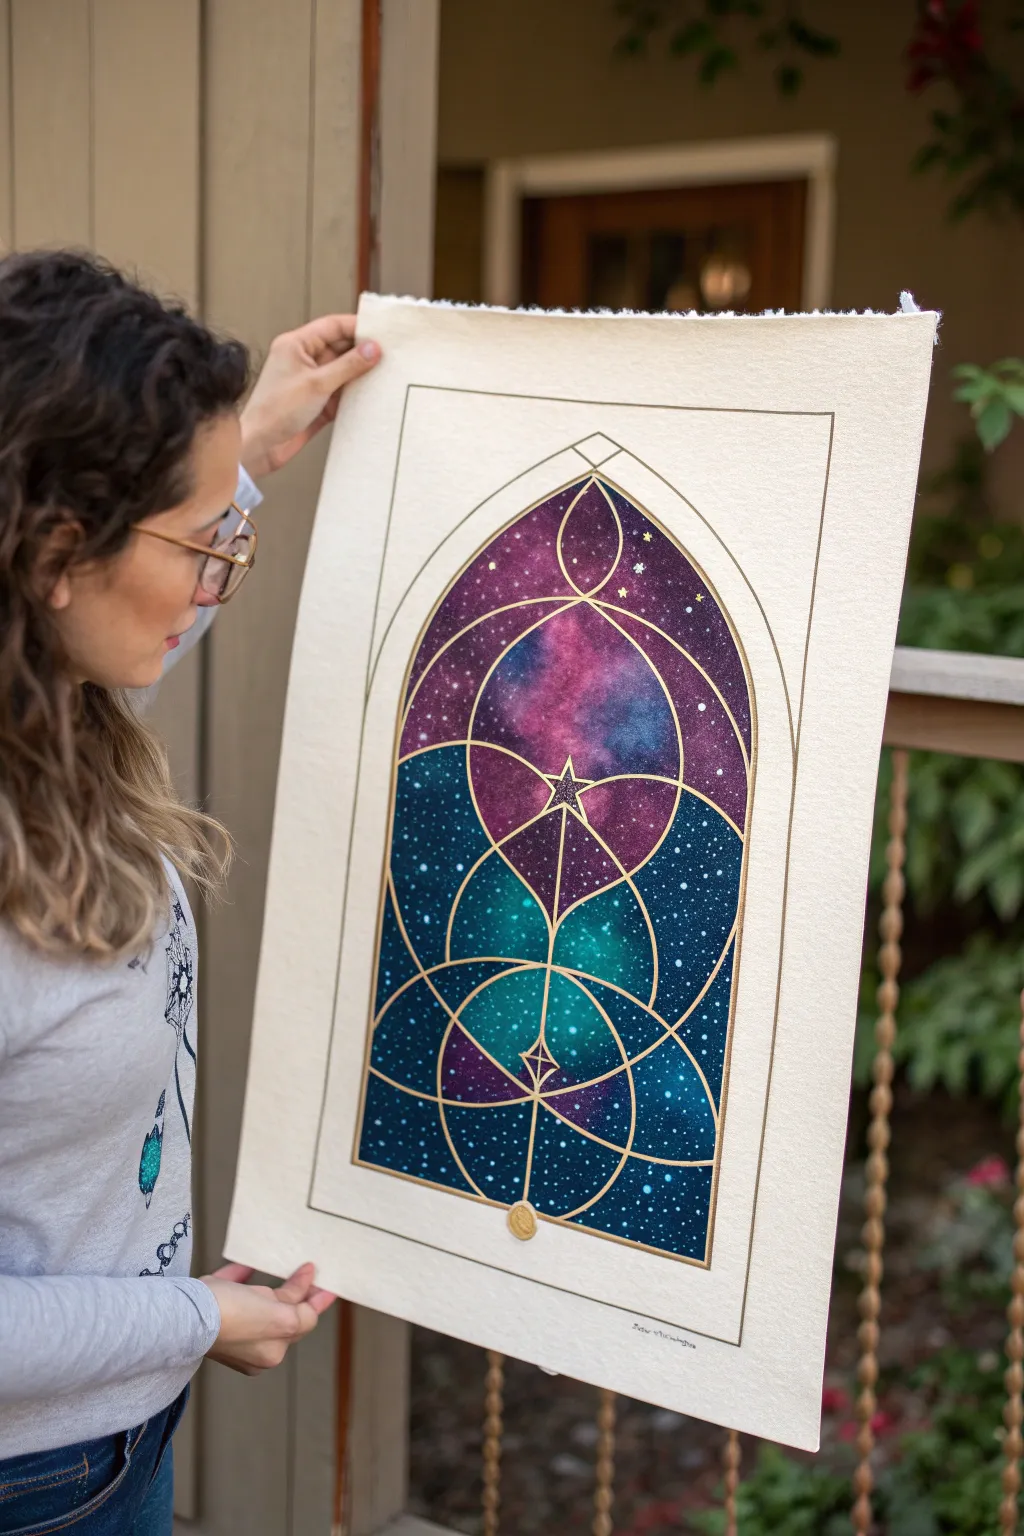
This stunning piece combines the loose, ethereal beauty of watercolor galaxies with the precision of sacred geometry. The result is a portal-like window that looks like stained glass made of stardust, framed elegantly on high-quality deckled paper.
Step-by-Step Tutorial
Materials
- Large sheet of heavyweight cold-press watercolor paper (300lb is ideal for flatness)
- Watercolor paints (Indigo, Magenta, Turquoise, Phthalo Blue, Purple)
- Gold leaf pen or fine-tip gold paint marker
- Liquid masking fluid
- Compass with an extension arm (for large circles)
- Large ruler or T-square
- Pencil and eraser
- White gouache or white gel pen
- Artist tape
- Old toothbrush (for splattering)
Step 1: Planning and Masking
-
Prepare your paper:
Start by tearing the edges of your watercolor paper against a ruler if it doesn’t already have a deckled edge. Tape the paper down firmly to a board to prevent buckling during the heavy washes. -
Draft the frame:
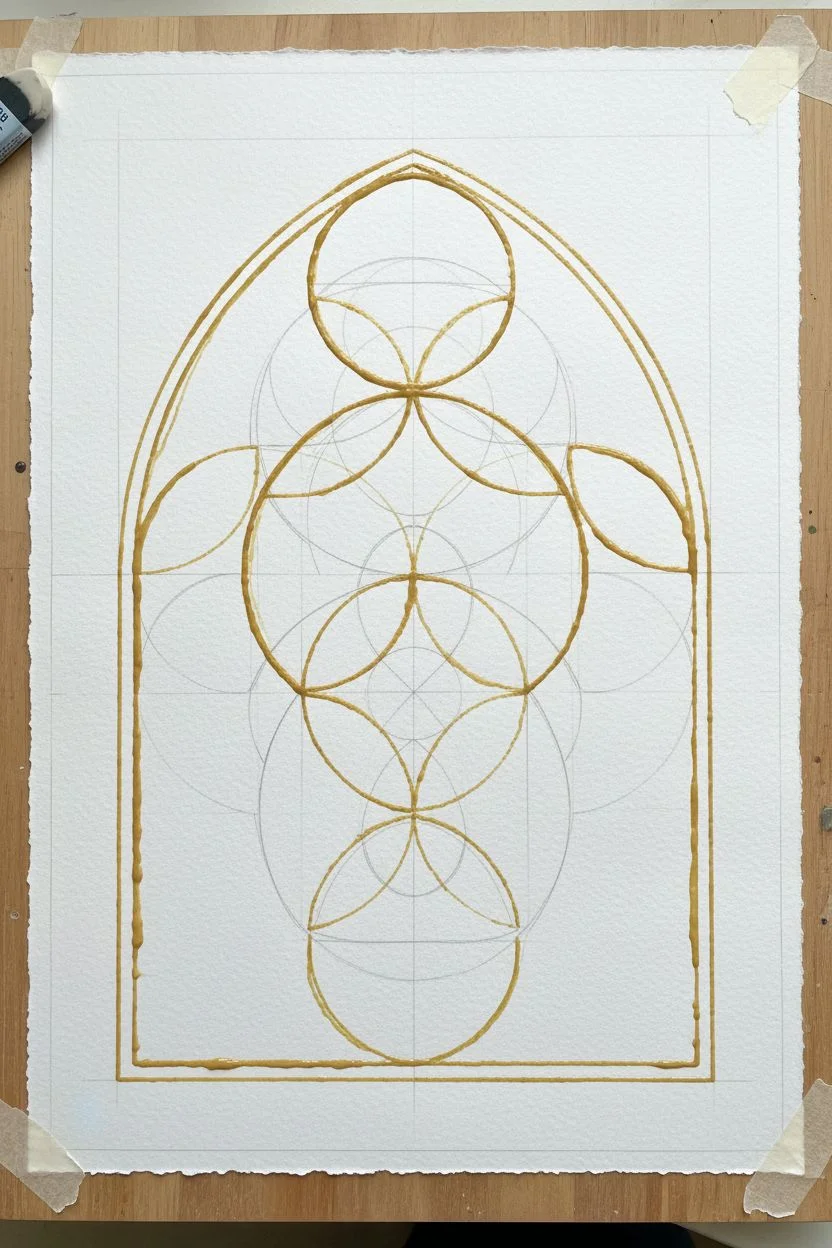
Lightly sketch a large rectangular border using a ruler. Inside this, draw the gothic arch shape—vertical sides that curve gently to a point at the top. Ensure it’s centered and symmetrical. -
Draft the geometry:
Using your compass, lightly draw the overlapping circles and arcs within the arch. The design features a central vertical axis with intersecting circles creating almond shapes (vesica piscis) and curved triangular segments. Take your time to get the intersections precise. -
Apply masking fluid:
Carefully apply masking fluid over all your pencil lines that define the geometric pattern and the outer border. This will preserve the white paper so we can add gold later. Let this dry completely before touching it with any paint.
Fixing Wobbly Lines
If your gold marker slips, don’t panic. Wait for it to dry, then use a small brush with opaque watercolor matching the background galaxy to carefully paint over the mistake and reshape the line.
Step 2: Painting the Galaxy
-
Wet-on-wet base:
Working in sections inside the arch, wet the paper with clean water until it glistens. You want it damp but not forming puddles. -
Drop in color:
While the paper is wet, load your brush with concentrated watercolor. Start with lighter colors like magenta and turquoise in the center areas. Allow them to bleed naturally. -
Deepen the cosmos:
Add darker hues like indigo, purple, and phthalo blue around the edges and in the negative spaces between the geometric shapes. Creating contrast between the dark edges and bright centers makes the ‘stars’ glow. -
Blend and layer:
Tilt your board slightly to help colors merge. If colors look too pale, wait for the first layer to dry slightly and add a second, more saturated layer of paint for depth. -
Create the stars:
Once the background is damp-dry (not soaking), dip an old toothbrush into white gouache or diluted white acrylic. Run your thumb over the bristles to splatter fine mist across the galaxy sections. -
Add bright stars:
Use a fine detail brush or a white gel pen to manually add a few larger, brighter stars or cross-shaped glints in the darker areas for variety. -
Dry thoroughly:
This is crucial: Let the painting dry completely, preferably overnight. If the paper is cool to the touch, it is still wet.
Step 3: Gilding the Geometry
-
Remove masking:
Gently rub away the masking fluid using a rubber cement pickup tool or your finger. Reveal the crisp white lines underneath. -
Clean up edges:
If any paint bled under the mask, use a slightly damp stiff brush to scrub it away, or cover it with a touch of white gouache. -
Apply the gold:
Go over the revealed white lines with a gold leaf pen or paint marker. I find a steady hand and a ruler help mostly for the straight vertical lines, while free-handing the curves often feels more organic. -
Add detail accents:
Add small diamond shapes or stars at the key intersection points of the geometry using the gold marker to emphasize the structure. -
Line the outer border:
Draw a thin gold line around the rectangular border you sketched in the beginning to frame the arch. -
Final touches:
Check the contrast. If the gold looks lost against some lighter galaxy areas, you can carefully darken the paint right next to the gold line to make it pop.
Level Up: Real Gold Leaf
Instead of a marker, use gold size (glue) on the white lines. Once tacky, press real 24k or imitation gold leaf sheets onto the lines, then brush away the excess for an incredibly brilliant, textured shine.
Hang this piece where it can catch the morning light and illuminate your cosmic creation


Have a question or want to share your own experience? I'd love to hear from you in the comments below!