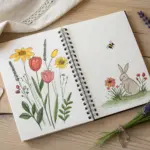
Spring is finally peeking through the gray of winter, bringing with it a fresh palette of colors that begs to be captured in our sketchbooks. Whether you are craving the softness of watercolors or the crisp lines of ink, these prompts will help you celebrate the season of renewal and get your creative juices flowing.
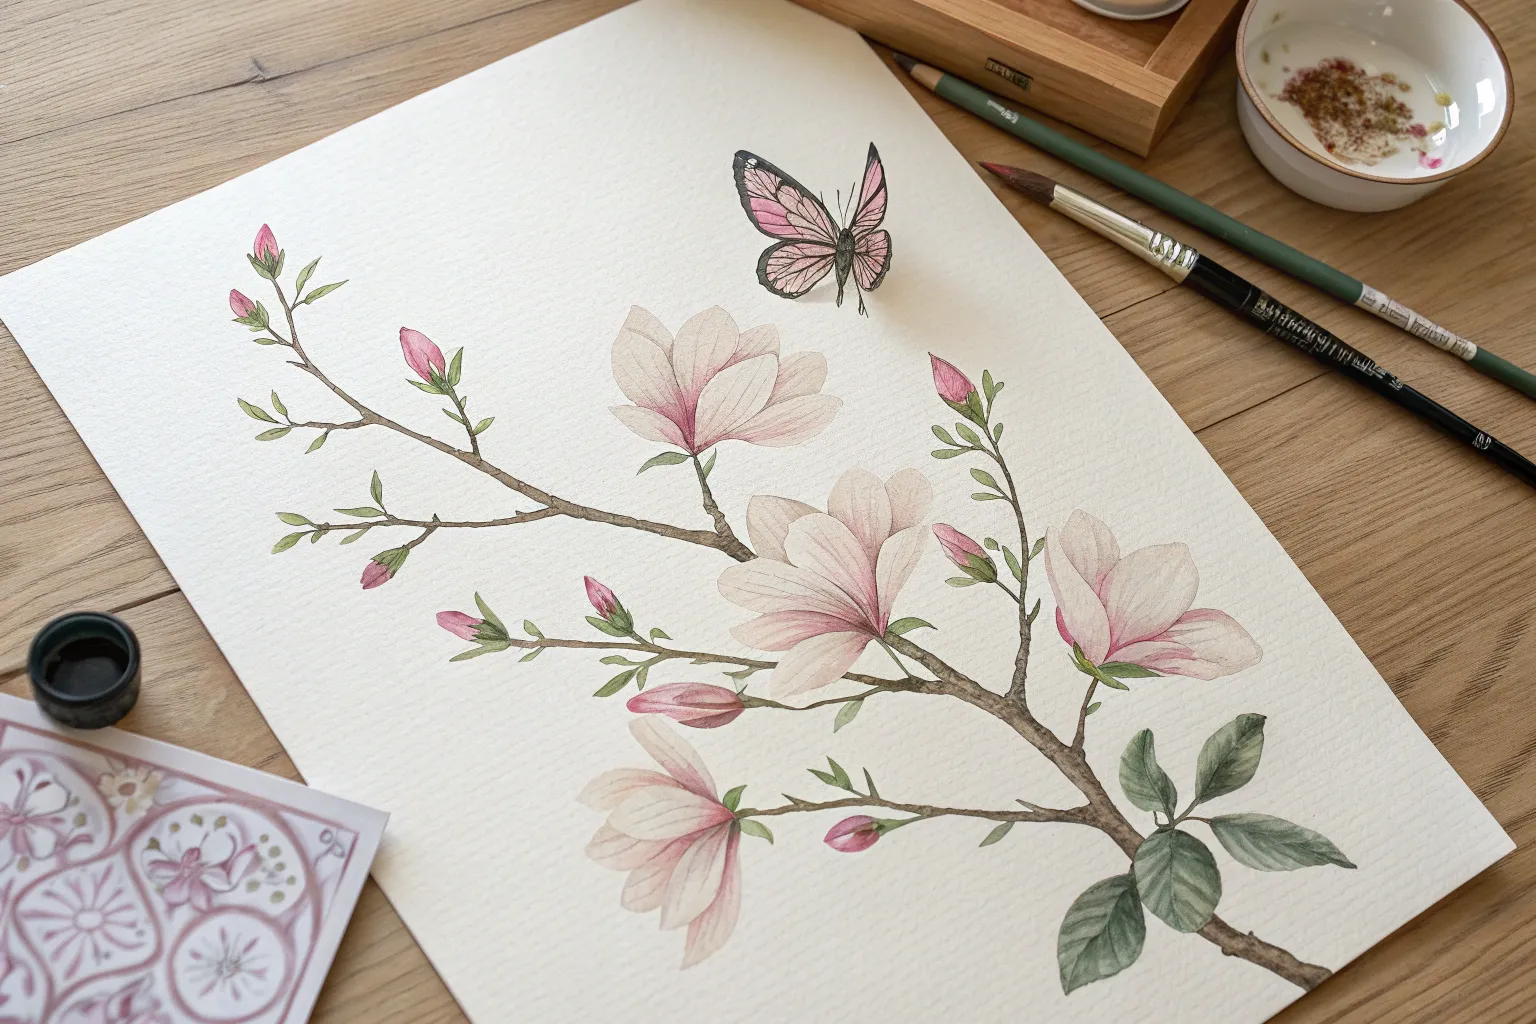
Delicate Cherry Blossom Branches
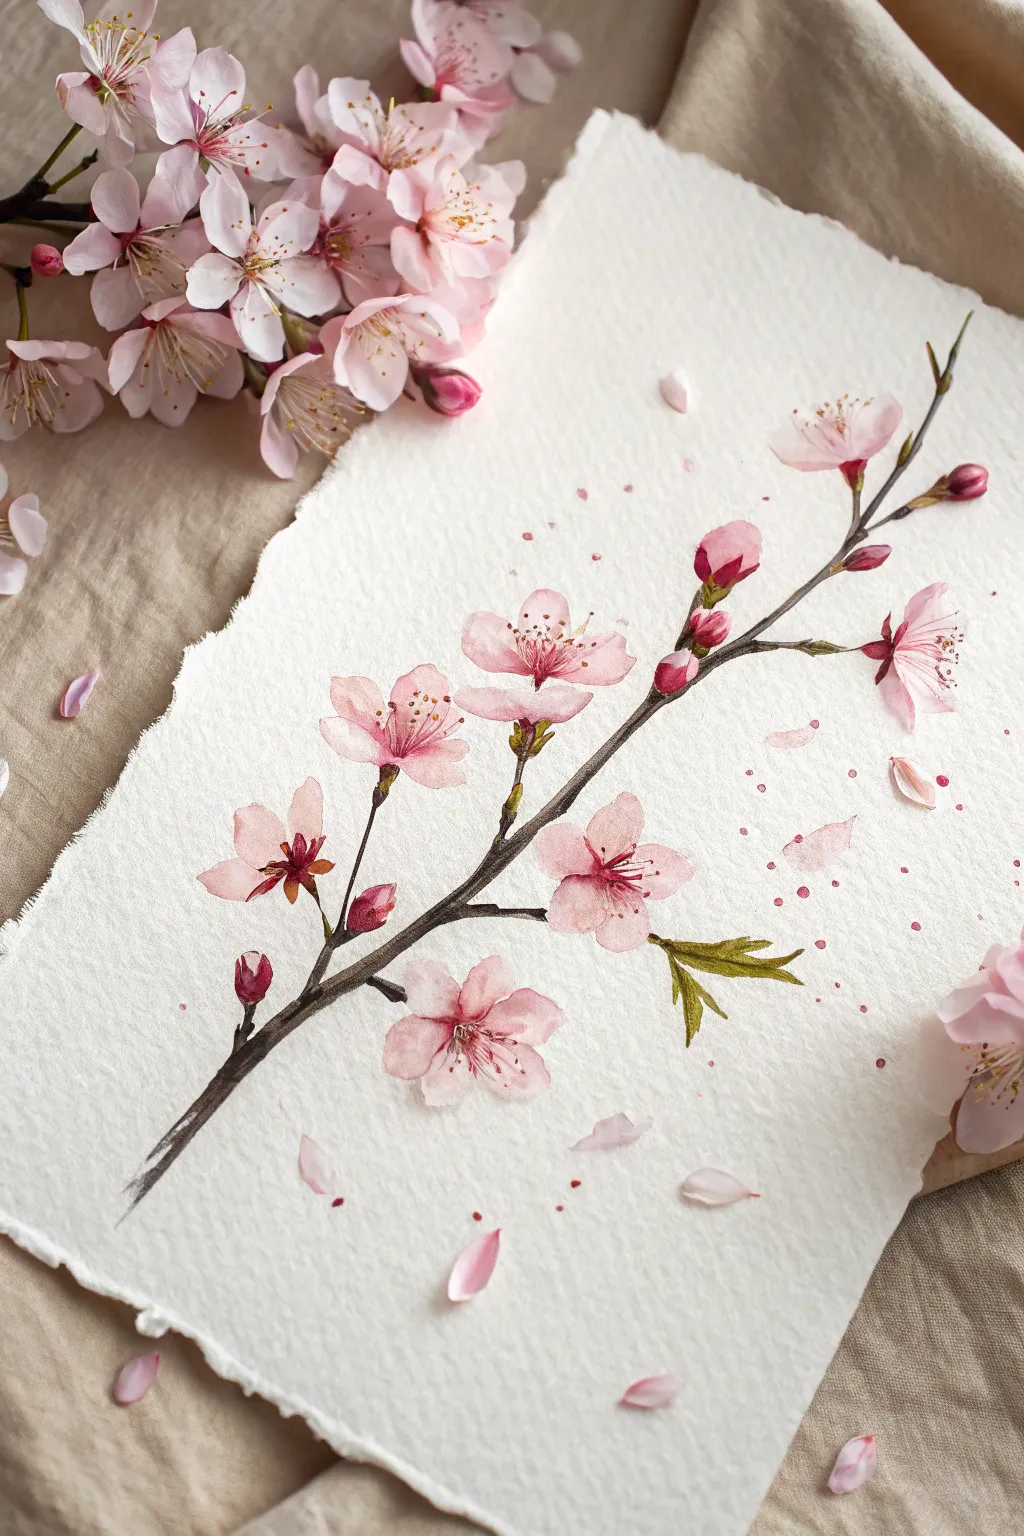
Capture the ephemeral beauty of spring with this soft watercolor study on textured paper. You will learn to balance wet-on-wet softness for the petals with crisp, dry brushstrokes for the wood to create a realistic yet romantic botanical illustration.
Detailed Instructions
Materials
- Cold press watercolor paper (300gsm)
- Watercolor paints (Alizarin Crimson, Quinacridone Rose, Burnt Umber, Sap Green, Paynes Gray)
- Round watercolor brushes (size 6 for washes, size 0 or 1 for details)
- HB Pencil and kneaded eraser
- Palette
- Two jars of water
- Paper towels
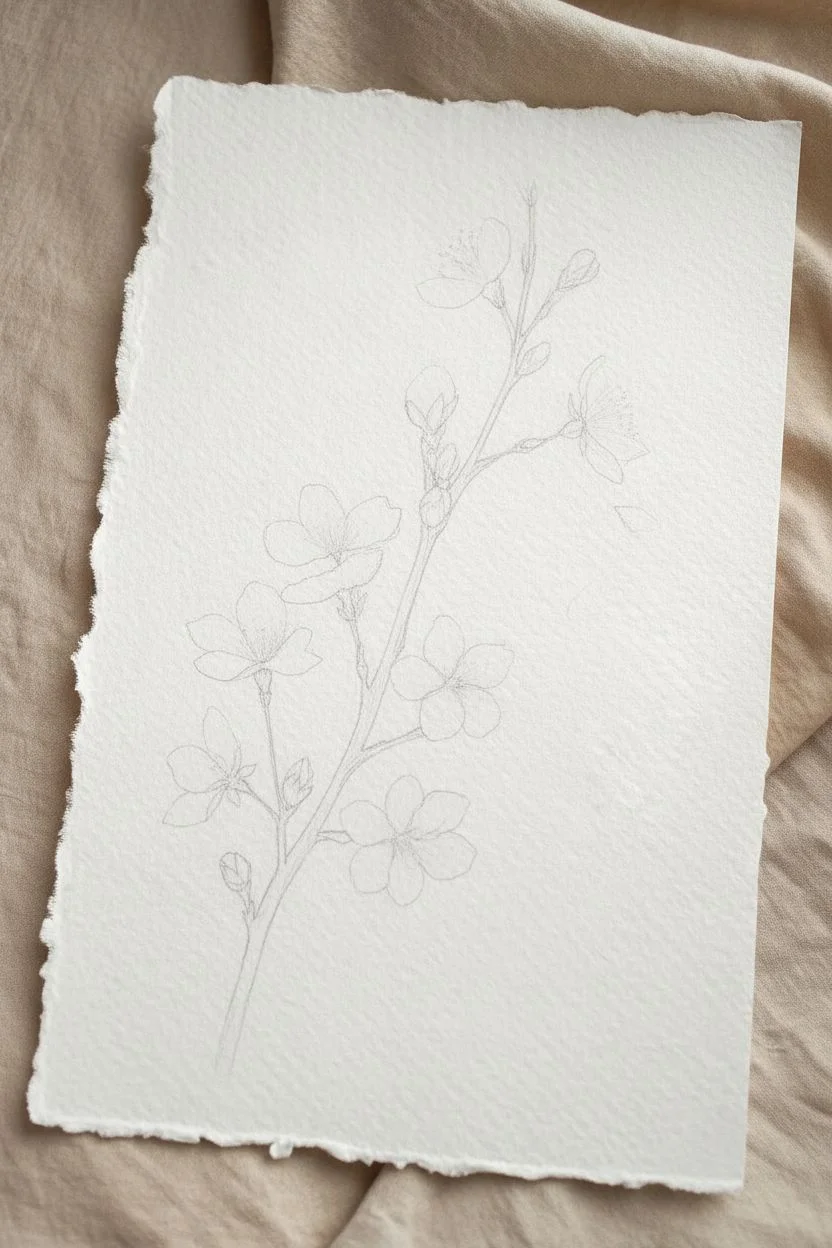
Step 1: Sketching and Preparation
-
Create the edges:
To mimic the rustic look in the example, gently tear the edges of your watercolor paper instead of cutting them, creating a soft ‘deckle’ effect. -
Map the branch:
Using an HB pencil, very lightly sketch a diagonal line from the bottom left to the top right to serve as your main branch. -
Position the blooms:
Draw light circles along the branch where you want your main flower clusters to sit, varying the spacing so it doesn’t look too uniform. -
Define the shapes:
Refine the circles into five-petal flower shapes and add small teardrop shapes for the buds, keeping your pencil pressure extremely light so graphite won’t show through the paint.
Pro Tip: Controlled Bleed
To keep the flower centers soft without turning into a blob, wait 10-15 seconds after painting the base petal layer before dropping in the darker color. The paper should be damp, not swimming in water.
Step 2: Painting the Blooms
-
Mix the base pink:
Dilute your Alizarin Crimson with plenty of water to create a very pale, transparent baby pink. -
Paint the first petals:
Fill in the petal shapes with this pale wash, leaving tiny slivers of white paper untouched between individual petals to define them. -
Add soft gradients:
While the petal wash is still wet, drop a tiny amount of slightly more concentrated Quinacridone Rose into the center of the flower; let it bleed naturally toward the edges. -
Paint the buds:
Color the buds with a darker, more saturated pink mixture, as closed flowers hold more concentrated pigment. -
Create falling petals:
Paint a few loose, single petals falling below the main branch to add movement to the composition. -
Let it dry:
Allow the flower layer to dry completely. I like to check the paper temperature with the back of my hand to ensure it’s bone dry.
Troubleshooting: Hard Edges
If your soft petals dry with harsh, unwanted lines inside them, you likely have too much water on your brush (creating ‘blooms’). Dab your brush on a paper towel before painting to control moisture.
Step 3: The Branch and Leaves
-
Mix the wood color:
Combine Burnt Umber with a touch of Paynes Gray to get a dark, neutral brown. -
Paint the main stem:
Using your size 6 brush, paint the branch with a confident stroke, lifting pressure occasionally to thin the line and pressing down to thicken it. -
Navigate the flowers:
Carefully paint around your dried pink petals, ensuring the brown touches the base of the flower without overlapping the pink. -
Connect the buds:
Switch to your size 0 detail brush to paint the thin, delicate stems that connect the buds to the main branch. -
Add leaves:
Mix Sap Green with a little brown to desaturate it, then paint small, pointed leaves emerging near the buds and branch tips.
Step 4: Details and Finishing
-
Paint the stamens:
Once the center of the flowers is dry, use your smallest brush and a concentrated dark rose/red mix to flick fine lines radiating from the center. -
Add pollen dots:
Dot the ends of these fine lines with a tiny speck of dark brown or deep yellow ocher to represent the anthers. -
Texturize the branch:
Use a dry-brush technique with dark brown to add slight roughness and knots to the wood for realism. -
Atmospheric splatters:
Load a brush with watery pink paint and gently tap the handle against a finger to speckle tiny droplets around the composition. -
Final erase:
Once the painting is 100% dry, gently erase any visible pencil sketch lines that weren’t covered by paint.
Frame your delicate branch in a simple wood float frame to show off those beautiful torn edges.


Splashy Rain Boots and Puddles

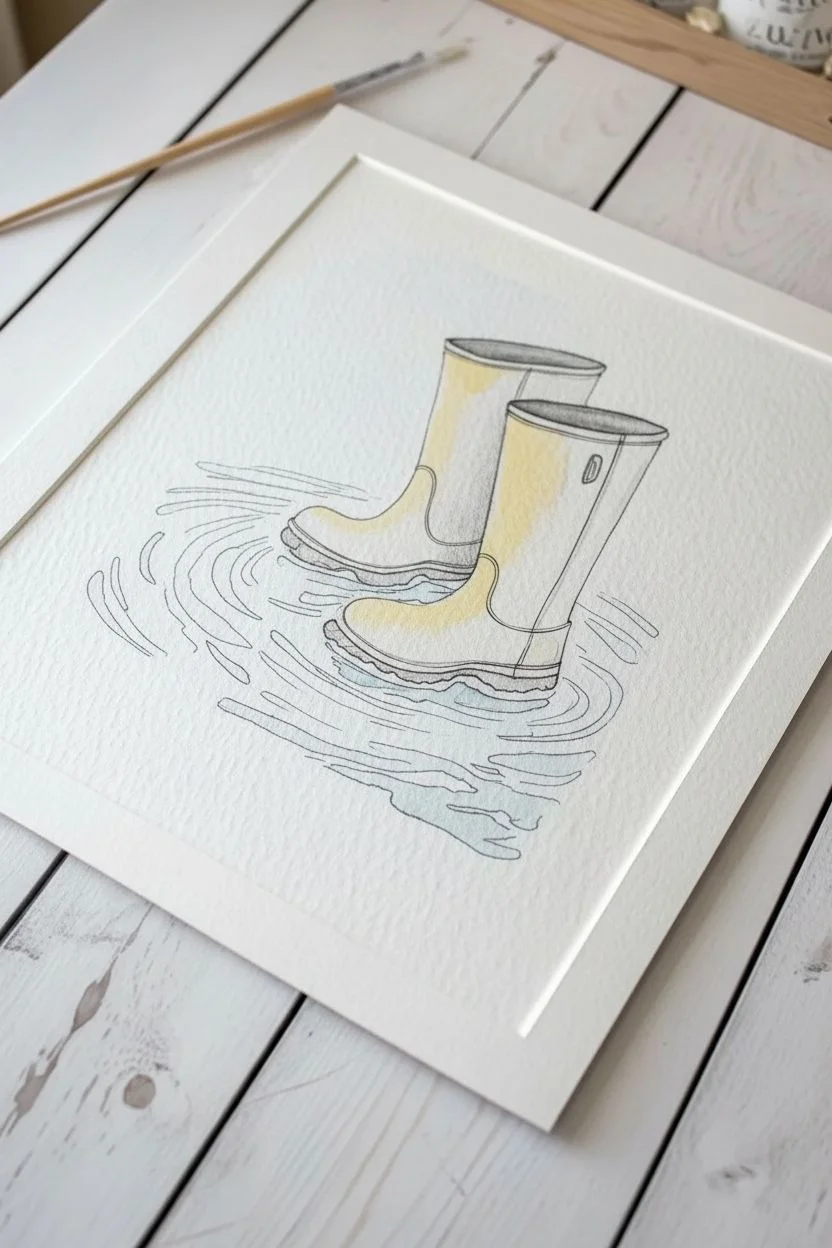
Capture the joy of puddle jumping without getting your feet wet in this vibrant watercolor illustration. The contrast between the cheerful yellow boots and the cool blue water makes for a striking yet simple composition that celebrates the season.
Detailed Instructions
Materials
- Cold press watercolor paper (300 gsm)
- Watercolor paints (Cadmium Yellow, Ultramarine Blue, Payne’s Grey, Burnt Sienna)
- Waterproof black fine liner pen (0.3mm or 0.5mm)
- Round watercolor brushes (sizes 4 and 8)
- HB Pencil and eraser
- Two jars of water
- Paper towel
Step 1: Sketching and Inking
-
Outline the boots:
Start with a light pencil sketch. Draw two cylinder shapes for the shafts of the boots, slightly angled away from each other. Add the curved foot shapes at the bottom, making one boot look like it is stepping slightly in front of the other. -
Add boot details:
Refine the shape by adding a thick sole to the bottom of each boot. Draw a rim around the top opening and add a small, rectangular pull-tab on the side of the front boot. -
Sketch the puddle:
Draw loose, concentric oval shapes radiating outward from the boots to define the puddle. These don’t need to be perfect circles; irregular wobbly lines look more like natural rippling water. -
Ink the drawing:
Trace over your pencil lines with a waterproof black fine liner. Use a confident, continuous stroke for the boots. For the water ripples, break the lines occasionally to keep the movement fluid. -
Clean up:
Wait at least five minutes to ensure the ink is completely dry, then gently erase all visible pencil marks so the paper is clean for painting.
Smear Prevention
If your black outline bleeds when painting, your pen might not be waterproof. Test your pen on a scrap piece of paper first. If it smears, do the painting first, let it dry, and add the ink lines last.
Step 2: Painting the Boots
-
Base yellow wash:
Soak your size 8 brush with clean water and pick up plenty of Cadmium Yellow. Paint the body of the boots, but here is the trick: leave a vertical strip of white paper unpainted on the shin area of each boot to act as a glossy highlight. -
Add shading:
While the yellow is still damp, mix a tiny touch of Burnt Sienna into your yellow to create a golden-orange shadow color. Apply this to the back of the calves and the lower ankle area to create roundness. -
Paint the interior:
Switch to your smaller size 4 brush. Mix a light wash of Payne’s Grey and carefully paint the inside visible rim of the boots to show depth. -
Detail the soles:
Using a more concentrated, darker mix of Payne’s Grey or black, carefully fill in the thick rubber soles of both boots. Try to keep the edges crisp against the yellow.
Step 3: Creating the Splash
-
First water layer:
Dilute Ultramarine Blue with plenty of water. Paint following the oval shapes of your ripple sketches. Leave random gaps of white paper between the blue strokes to represent light reflecting on the water surface. -
Deepen the puddle:
While the first layer is still slightly wet, drop in some slightly darker blue pigment right underneath the soles of the boots. This grounds the drawing and shows the depth of the water. -
Add movement lines:
Use the tip of your small brush to paint thin, curved blue lines following the outer ripples. Vary the pressure so the lines taper at the ends. -
Create splashes:
Load your brush with watery blue paint and gently tap the handle against your finger over the paper to create small droplets around the boots. -
Add motion accents:
Use the fine liner again to add a few very small, dashed ink marks near the water droplets to emphasize the splashing motion.
Level Up: Reflections
To make the puddle look realistic, while the blue paint under the boots is wet, drop in a tiny amount of yellow. This creates a soft, blurry reflection of the boots in the standing water.
Let your artwork dry completely and enjoy this cheerful splash of spring color.


Vintage Watering Can Pouring Life
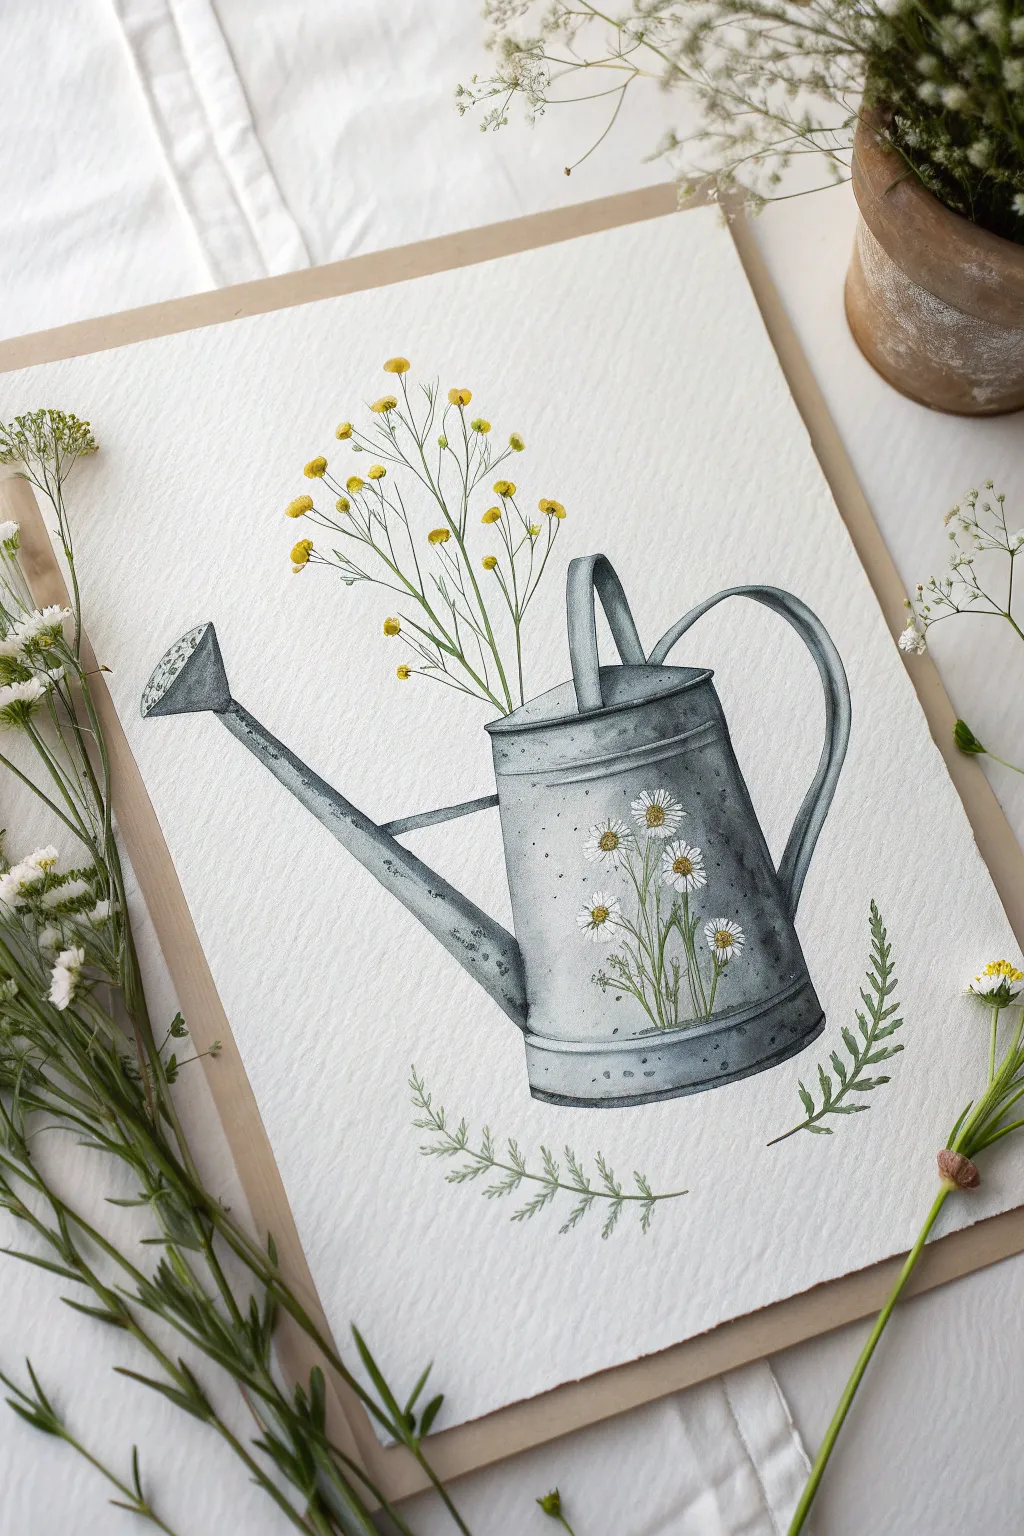
Capture the charm of antique gardening tools with this botanical illustration featuring a galvanized watering can filled with wildflowers. We will focus on creating a realistic metal texture using watercolor washes and fine ink details.
How-To Guide
Materials
- Cold press watercolor paper (300gsm)
- HB pencil and kneaded eraser
- Watercolors (Payne’s Grey, Indigo, Yellow Ochre, Sap Green, Burnt Sienna)
- Round brushes (sizes 6 and 2)
- Waterproof fine liner pen (0.1mm or 0.3mm, black or dark grey)
- White gouache or white gel pen
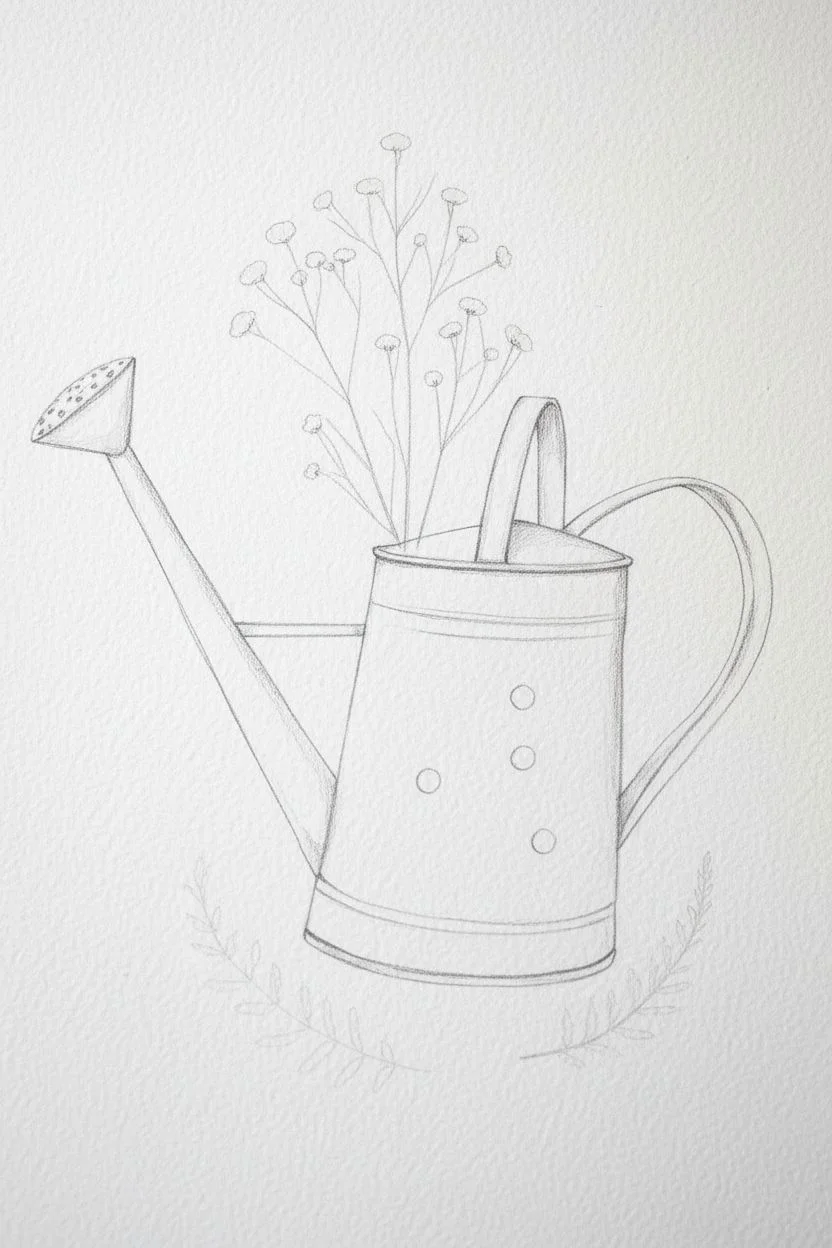
Step 1: Sketching the Structure
-
Outline the body:
Start by drawing a slightly tapered cylinder for the main body of the can. Sketch an oval at the top rim and a curved line for the base to establish perspective. -
Add the spout:
Position the long spout extending from the lower left side, angling upward. Top it with the flat, triangular shape of the sprinkler head (the rose). -
Draw the handles:
Sketch a sturdy handle arcing over the top and a second reinforcement handle attached to the back side. -
Place the florals:
Lightly pencil in tall, thin stems rising from the can’s opening and outline the small fern fronds curving at the base. -
Sketch the motif:
Draw three small circles on the side of the can to indicate where the painted daisy decoration will go later.
Step 2: Creating the Galvanized Look
-
Base wash:
Mix a watery, pale wash of Payne’s Grey. Paint the entire metal surface of the can, but avoid the circles we drew for the daisy motif. -
Build dimension:
While the paper is still slightly damp, drop darker grey pigment along the left and right edges of the cylinder to make it look round. -
Handling the hardware:
Paint the spout and handles with the same grey mix, adding a touch of Indigo on the undersides for shadow. -
Adding texture:
Galvanized metal isn’t perfectly smooth. Flick a tiny bit of darker grey paint from a stiff brush onto the drying can to create subtle speckles. -
Defining the rim:
Use your size 2 brush to paint a crisp, dark line under the rolled rim at the top and the reinforcing bands near the bottom.
Bleeding Colors?
If your grey wash bleeds into the white daisy area or the yellow flowers, wait for the paint to dry completely, then fix the edges with white gouache or a gel pen.
Step 3: Bringing the Flora to Life
-
Yellow blooms:
Use a vibrant Yellow Ochre to paint the small, button-like flower heads on the tall stems emerging from the can. -
Greenery:
Mix Sap Green with a touch of grey for a natural tone. Carefully paint the thin stems connecting to the yellow flowers. -
Base ferns:
Paint the fern leaves at the bottom using short, rhythmic strokes for each leaflet, getting smaller toward the tip. -
Daisy motif:
Since we left the daisy spots unpainted (or if you painted over them, use opaque white gouache), fill in the petals with pure white. Add tiny yellow centers once the white is dry.
Pro Tip: Highlight Placement
Leave a thin sliver of unpainted white paper along the top edge of the spout and the highest curve of the handle. This negative space mimics light hitting the metal.
Step 4: Ink and Refinement
-
Vintage rusting:
I like to dilute a little Burnt Sienna and dab it specifically where the spout meets the body and along the bottom rim to simulate old rust. -
Outline work:
Once everything is bone dry, use your fine liner to trace the main contours. Keep the line ‘broken’ in places to maintain a sketched, organic feel. -
Sprinkler details:
Use the pen to add small stippled dots on the face of the sprinkler head to represent the holes. -
Final contrast:
Add a few pen hatching lines on the shadowed side of the can and under the handle to deepen the contrast.
Step back and admire the nostalgic spring mood you have captured on paper


Curated Spring Floral Wreath

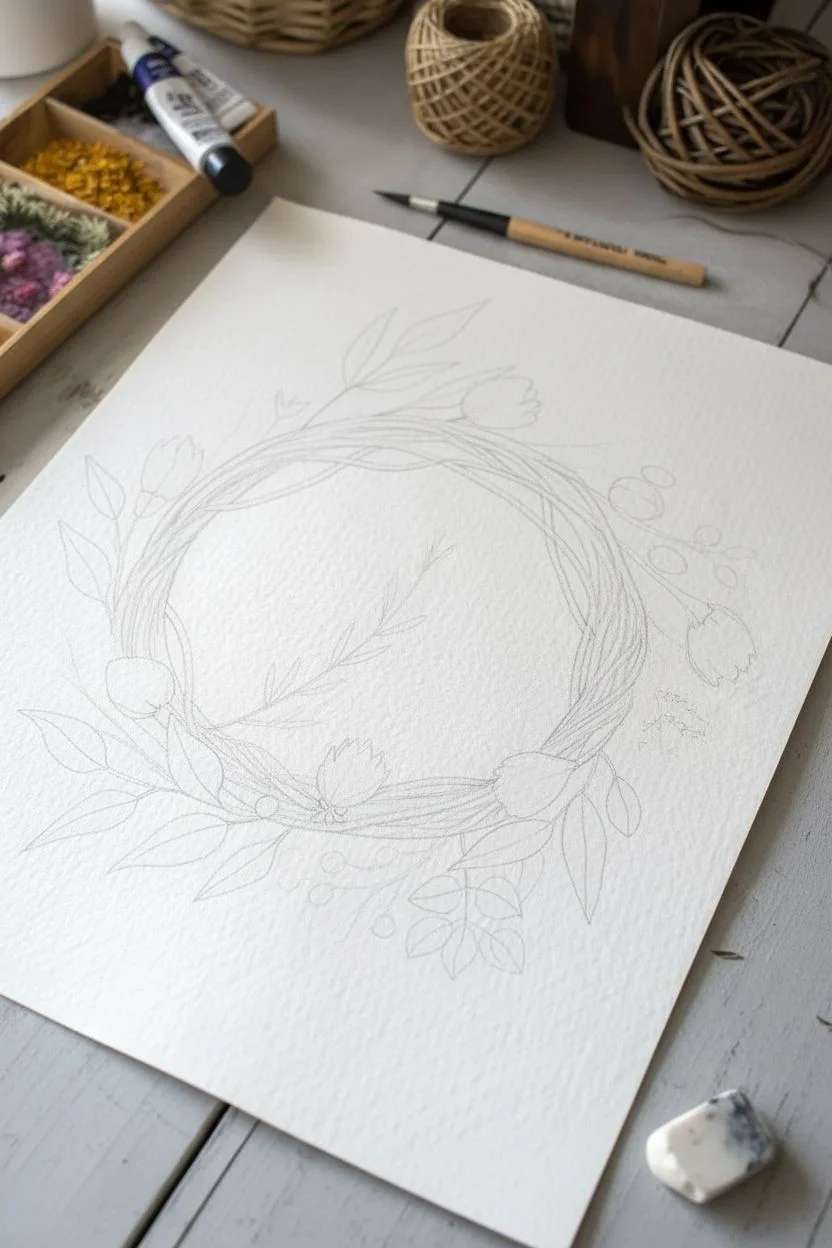
Capture the rustic elegance of spring with this botanical watercolor wreath tutorial. You will build up layers of twisted vines and tuck in deep red blooms to create a piece that feels both organic and refined on textured paper.
Step-by-Step Tutorial
Materials
- Cold press watercolor paper (300gsm)
- Watercolor paints (Sepia, Alizarin Crimson, Sap Green, Yellow Ochre)
- Round brushes (size 2 and 6)
- HB Pencil and kneadable eraser
- Palette and water jar
Step 1: Sketching the Structure
-
Draw the guide:
Begin by lightly tracing a circle in the center of your paper using a bowl or compass to act as your main guide. -
Outline the vines:
Sketch multiple overlapping lines wrapping around your circle guide to represent the twisted grapevine texture. -
Place the flora:
Lightly mark the positions of the tulip-shaped flowers and the main leaves to ensure a balanced composition. -
Add the center element:
Sketch the solitary sprig of leaves floating in the center of the wreath, keeping the lines delicate and slightly curved.
Muddy colors?
Ensure each section is dry before painting adjacent areas. If colors touch while wet, they will bleed and turn muddy.
Step 2: Painting the Wreath Base
-
Mix the wood tone:
Create a warm wood color by mixing Sepia or Burnt Umber with a fair amount of water for a medium transparency. -
Paint the strands:
Using a size 2 brush, paint the individual vine strands, leaving tiny slivers of white paper between lines to define the separate twigs. -
Deepen the shadows:
While the base layer is still slightly damp, drop in a more concentrated dark brown into the intricate knots where the vines overlap. -
Let it set:
Allow the wreath structure to dry completely so your flower colors don’t bleed into the brown wood.
Level Up
Add highlights to the yellow berries or vine knots using a gold metallic watercolor paint for a shimmering effect.
Step 3: Adding Blooms and Foliage
-
Paint the flowers:
Mix a rich Alizarin Crimson and paint the flower buds, keeping the color saturated at the base and adding water to fade it slightly at the tips. -
Mix leaf greens:
Prepare a muted sage green by mixing Sap Green with a tiny touch of brown to harmonize it with the wreath. -
Create large leaves:
With a size 6 brush, paint the broad lance-shaped leaves using a press-and-lift motion to create a tapered point. -
Add texture:
I like to vary the green mixture slightly for different leaves, adding more water to some for transparency. -
Detail the ferns:
Switch back to your fine brush to paint the delicate fern-like fronds using short, quick strokes for texture. -
Connect the stems:
Paint thin green stems connecting your flowers and leaves, making them look as if they are tucked into the grapevine structure.
Step 4: Details & Finishing Touches
-
Paint berries:
Mix Yellow Ochre and dot in small clusters of berries and buds on fine stems extending outward. -
Paint the center sprig:
Use a reddish-brown mix (crimson plus brown) to paint the floating central branch, keeping the leaves slender. -
Refine the vines:
Go back over the wreath base with a very fine brush and dark brown paint to crisp up edges or define lost details. -
Add leaf veins:
Once the large leaves are fully dry, paint a faint, thin central vein using a watery green mix. -
Clean up:
Gently erase any visible pencil lines once the entire painting is bone dry to leave a clean, professional look.
Frame your beautiful botanical wreath to add a touch of handmade spring warmth to your home
BRUSH GUIDE
The Right Brush for Every Stroke
From clean lines to bold texture — master brush choice, stroke control, and essential techniques.
Explore the Full Guide
Magical Fairy House in a Tree Stump
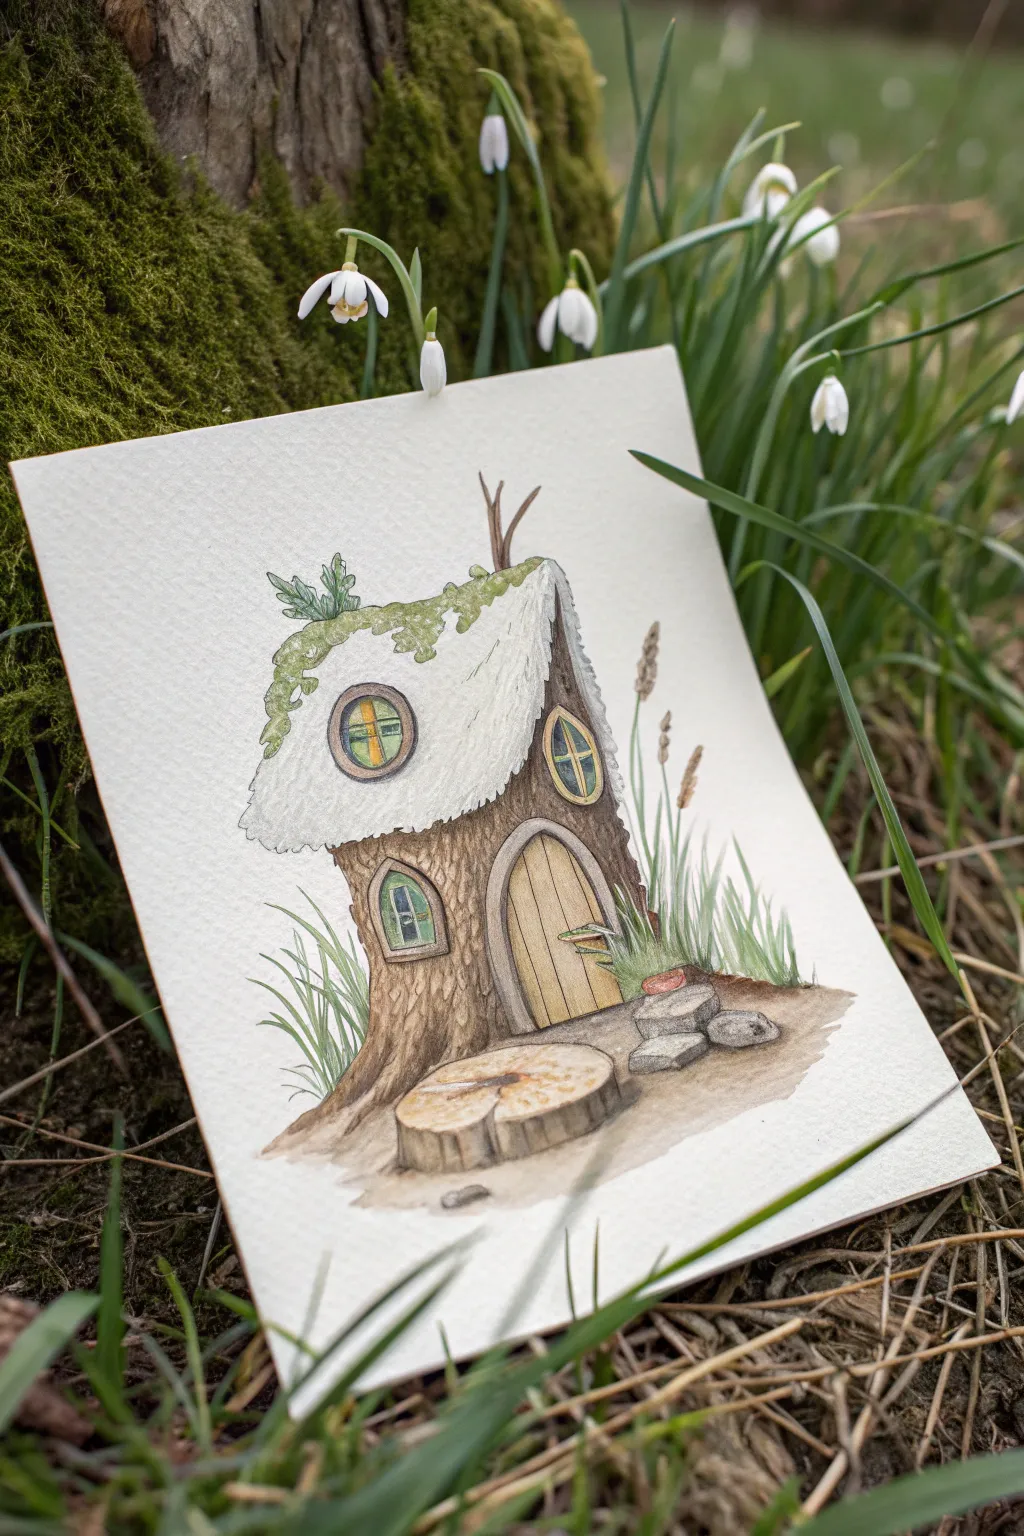
Capture the magic of early spring with this enchanting illustration of a fairy home built into an old tree stump. This project combines loose watercolor washes with precise ink detailing to create a cozy, textured woodland scene.
Step-by-Step
Materials
- Cold-press watercolor paper (300gsm)
- HB pencil and kneaded eraser
- Waterproof black fineliners (0.1 and 0.3 sizes)
- Watercolor set (browns, greens, yellow, ochre)
- Round brushes (flats for washes, small rounds for details)
- White gel pen or white gouache
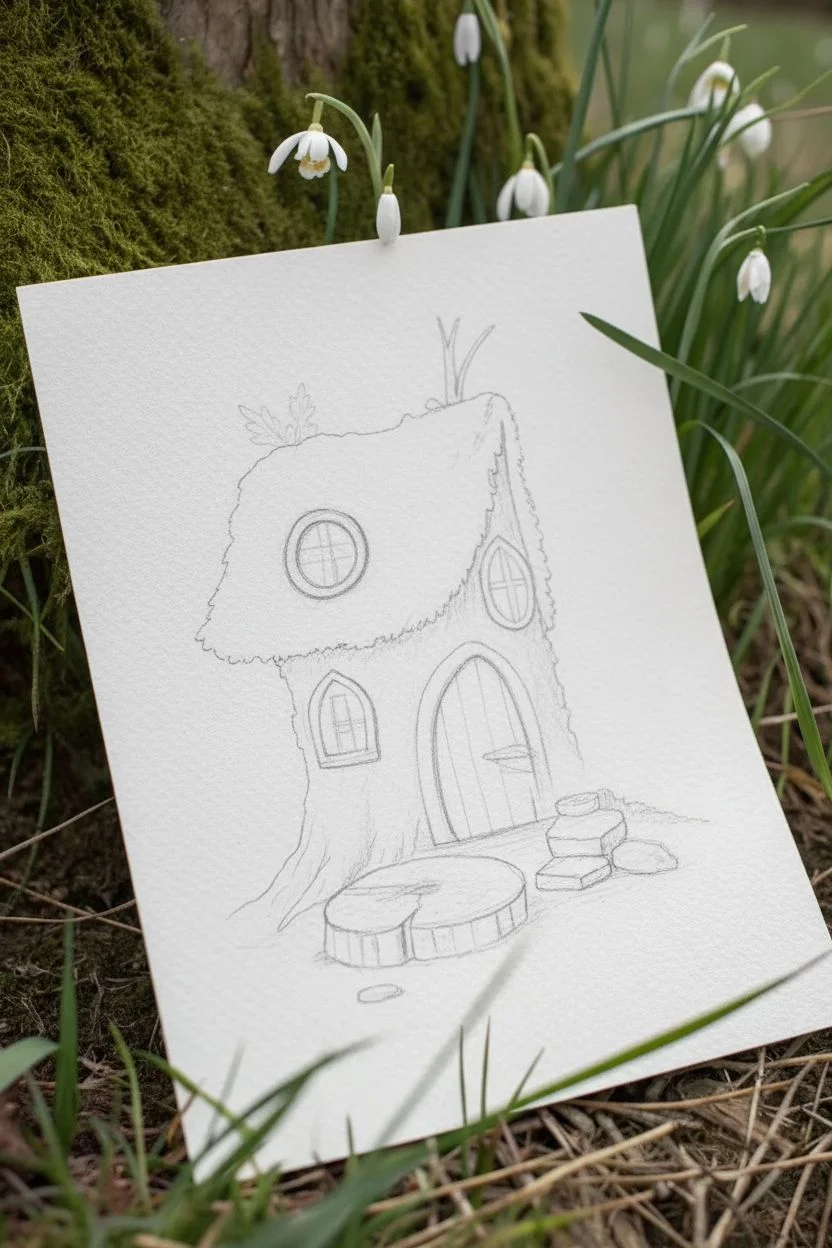
Step 1: Sketching the Foundations
-
Outline the Main Shape:
Begin with a light pencil sketch of the stump’s body. Draw a slightly slanted cylinder that widens at the base to suggest roots gripping the earth. -
Draft the Roof:
Top the cylinder with a thick, uneven shape for the roof. Let it drape over the edges like a heavy blanket or melting snow, adding a small twig chimney sticking out the top. -
Place Architectural Details:
Sketch a large arched doorway near the base. Add a small round window on the door itself, and two circular windows on the upper part of the stump, tucked under the roofline. -
Add Foreground Elements:
Draw loose, spiky lines for grass blades around the base. Add a few oval shapes for stone steps leading to the door and a small log slice sitting in the front yard.
Muddy Colors?
Work light to dark. If your bark texture looks muddy, ensure the first yellow-ochre wash is completely bone-dry before applying the darker brown vertical stripes.
Step 2: Applying Watercolor Washes
-
Base Wood Tones:
Mix a watery wash of yellow ochre and light brown. Paint the bark area and the door, keeping the application loose and avoiding the windows. -
Roof Texture:
Leave the majority of the roof white (the paper color). Dab small spots of sap green mixed with a little brown onto the top edges of the roof to simulate moss growth. -
Window Glow:
Paint the window panes with a bright warm yellow to create a cozy, inviting light from within. I like to drop a tiny hint of orange in the center while it’s still wet for extra warmth. -
Grass and Ground:
Use diluted sap green for the grass blades. Paint the ground and stone steps with a wash of grey-brown, letting the colors bleed slightly into the bottom of the stump for a natural look. -
Deepen the Bark:
Once the first layer is dry, use a darker burnt umber to paint vertical streaks on the stump, mimicking the ridges of tree bark.
Seasonal Shift
To turn this into a full spring bloom scene, paint small pink or purple flowers amongst the grass blades and add tiny green buds to the twig chimney.
Step 3: Inking and Definition
-
Outline the Structure:
Using a 0.3 waterproof pen, carefully trace the main outlines of the house, roof, and door frame. Keep the lines slightly shaky to maintain an organic, wooden feel. -
Texture the Wood:
Switch to a finer 0.1 pen. Draw vertical, wavy lines down the length of the stump. Add knots and irregularities to show the wood’s age. -
Define the Roof:
Use stippling (tiny dots) or short, dashed lines on the roof to give it a fuzzy, mossy texture without filling it in completely. -
Detail the Windows:
Draw the cross-mullions on the windows carefully. Outline the circular frames with heavier ink lines to make them pop against the bark. -
Enhance the Greenery:
Ink the grass blades with quick, upward flicking motions. Add some small leaf shapes sprouting from the roof moss. -
Final Shadows:
Add cross-hatching under the eaves of the roof and beneath the window frames to create depth and dimension. -
Highlights:
Use a white gel pen to add tiny reflections on the window panes and highlights on the mossy roof patches.
Sign your whimsical creation and find the perfect spot to display your little woodland dwelling.


Have a question or want to share your own experience? I'd love to hear from you in the comments below!