When spring hits, I always reach for my rock stash because these little stones are perfect for quick, cheerful bursts of color. Here are my favorite spring rock painting ideas—from classic seasonal icons to a few unexpected designs that still feel totally springy.
Easy Easter Egg Patterns
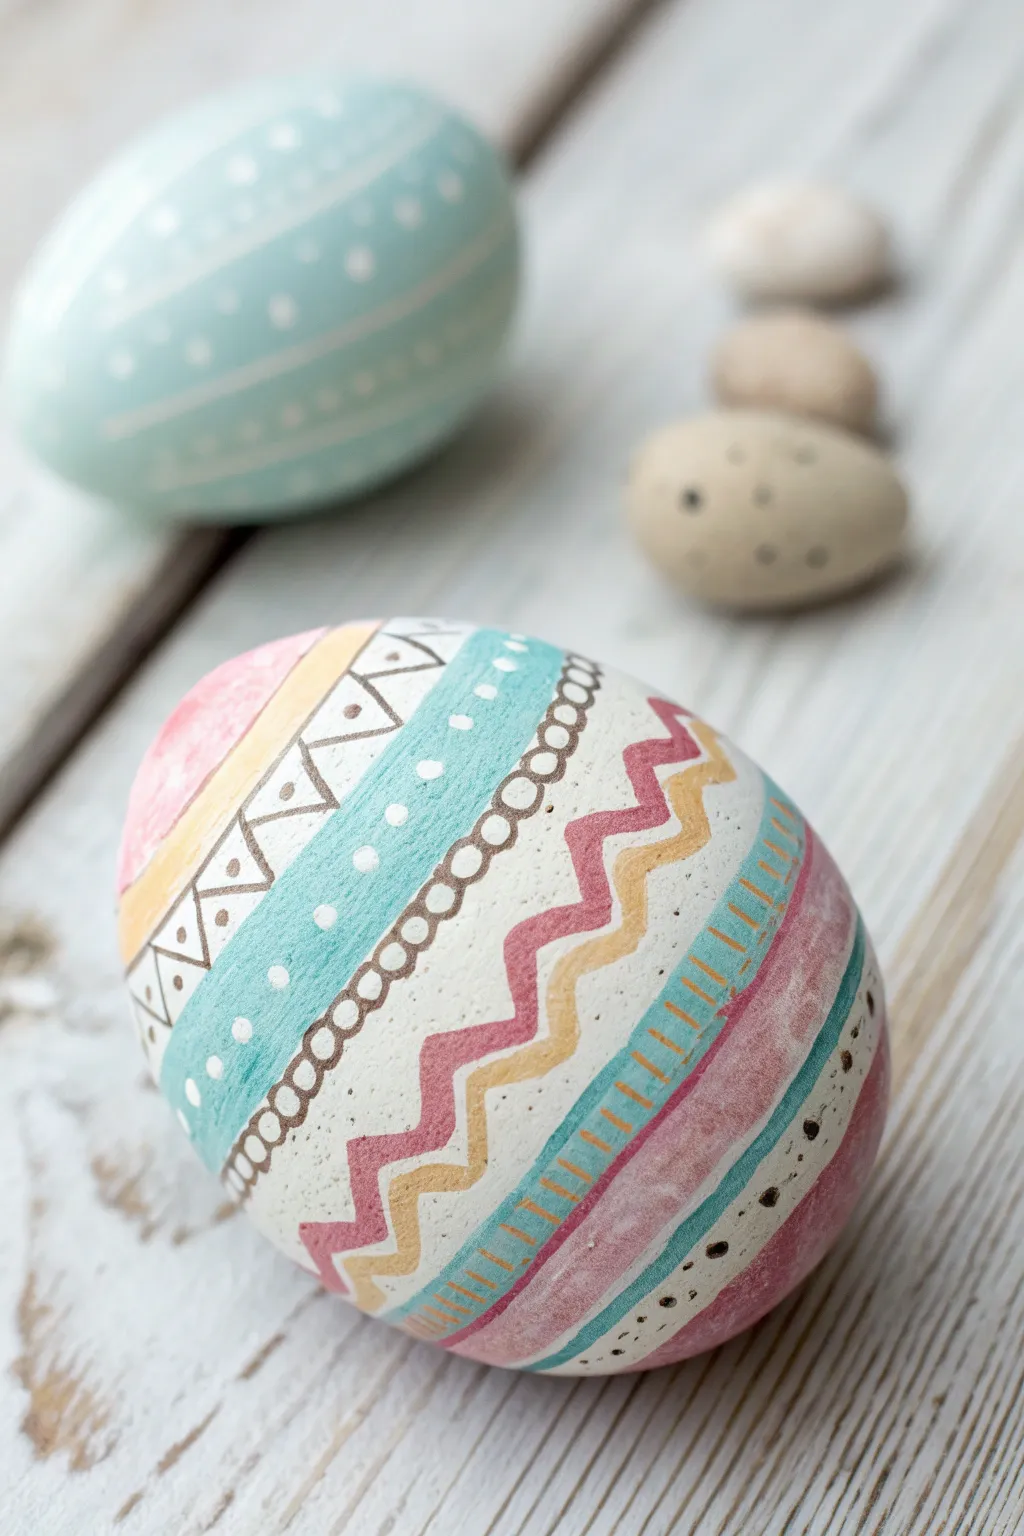
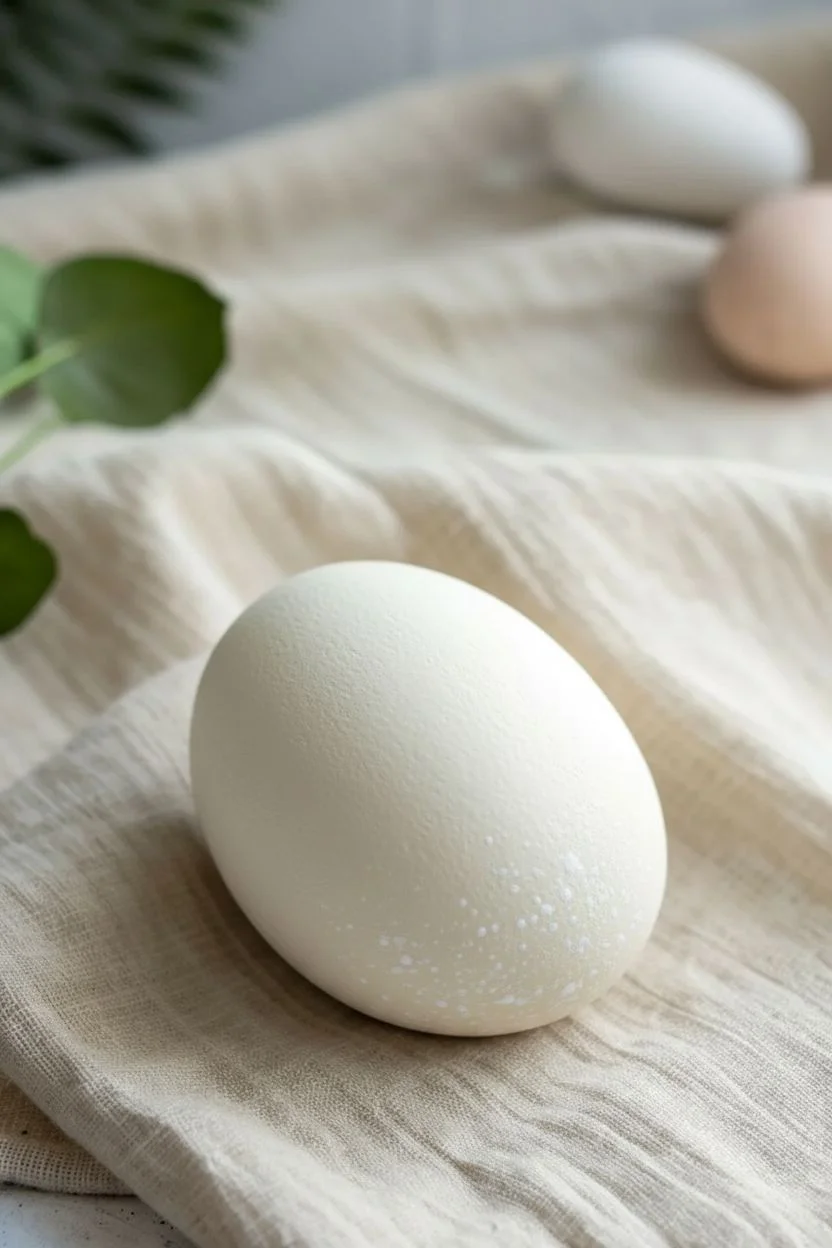
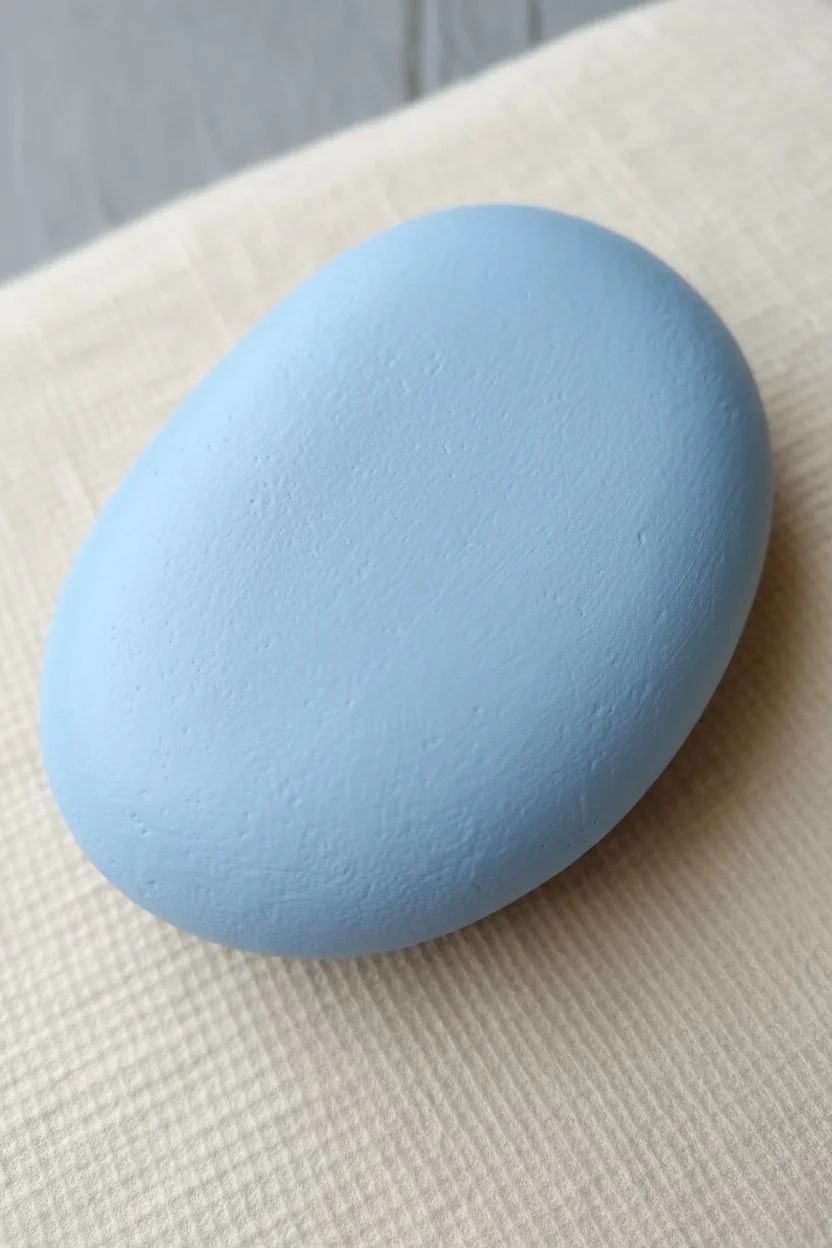
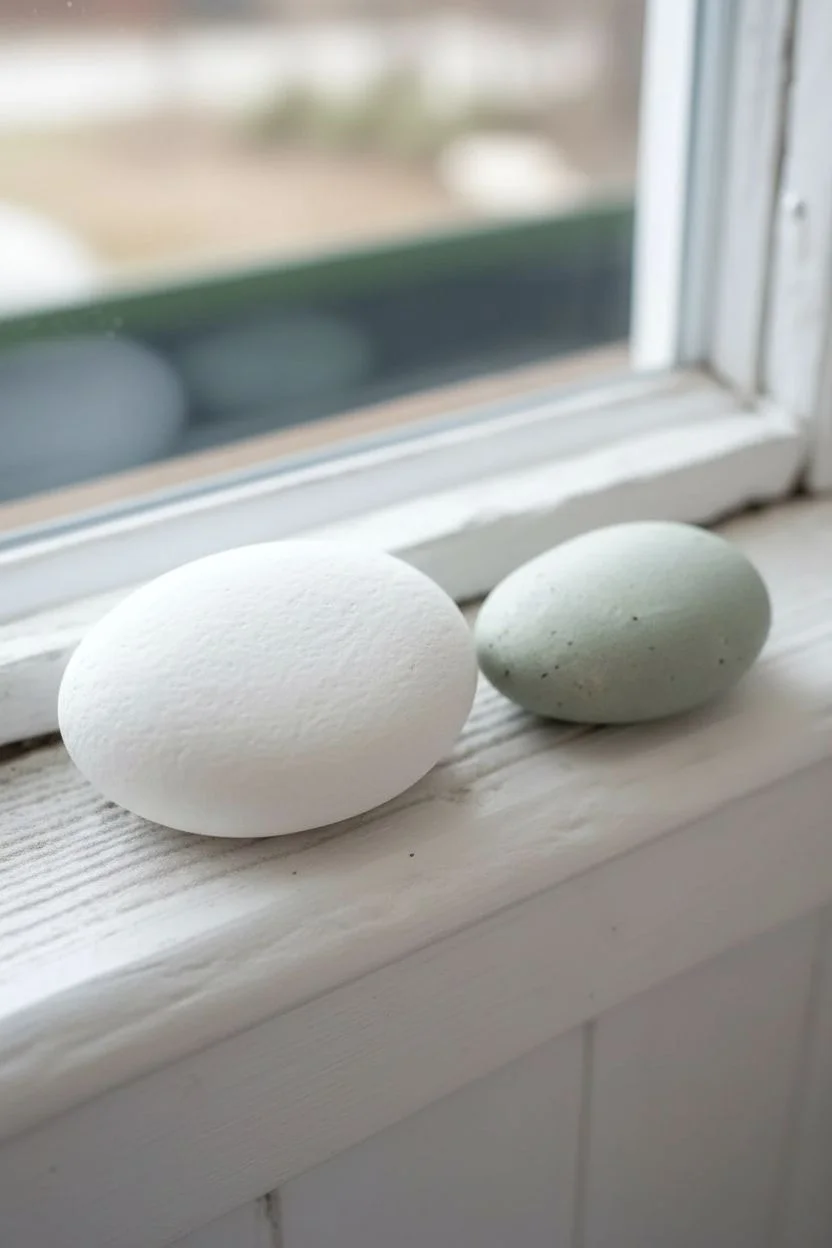
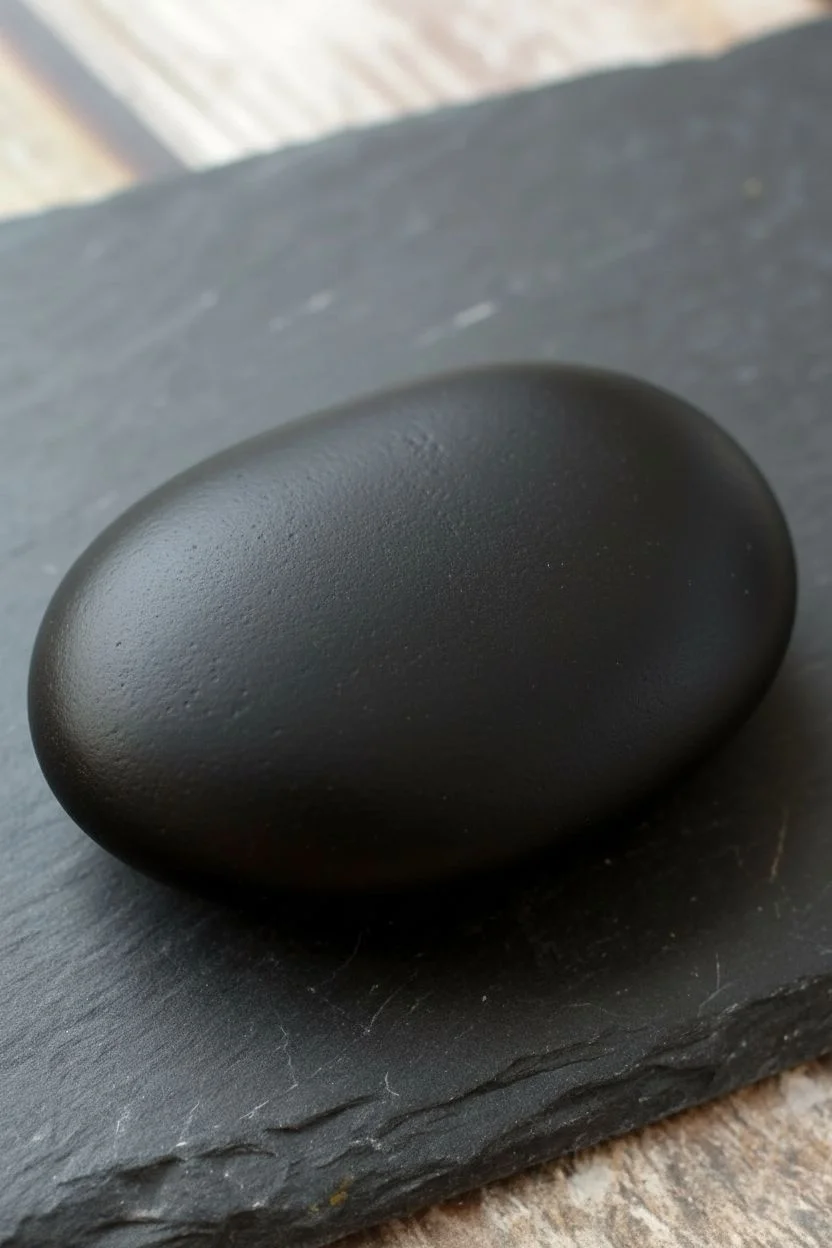
Transform a simple smooth stone into a charming Easter decoration with this layered, bohemian-inspired design. The soft pastels and geometric bands create a delicate look that mimics traditional pysanky or folk-art eggs without the fragility.
Step-by-Step Tutorial
Materials
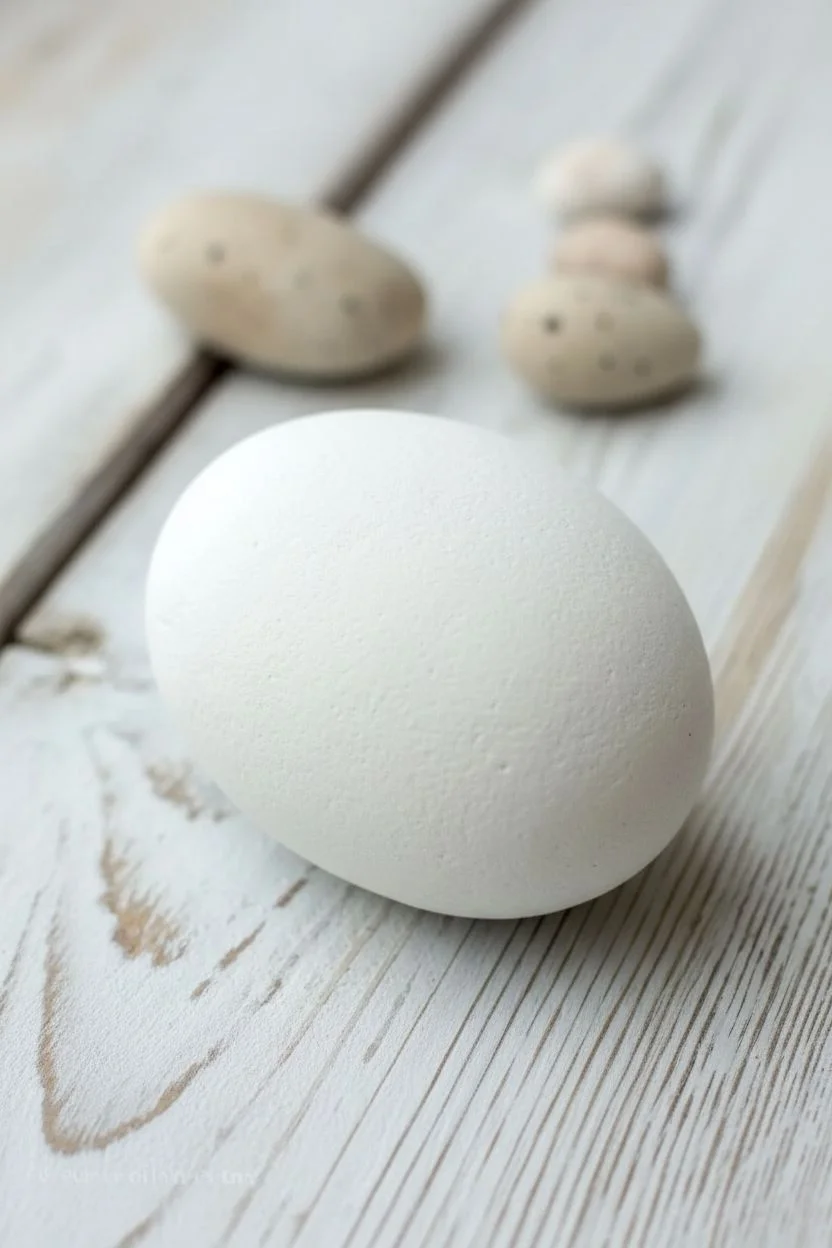
- Smooth, egg-shaped river rock (cleaned and dried)
- White acrylic paint or gesso (for priming)
- Acrylic paints: pastel pink, buttery yellow, teal/mint, brown, white
- Fine liner paintbrush (size 00 or 000)
- Small flat paintbrush (size 2-4)
- Pencil (optional)
- Matte finish sealant spray
Step 1: Base Preparation
-
Surface Prep:
Start by scrubbing your egg-shaped rock with soap and water to remove any dirt or oils. Let it dry completely in the sun or with a hairdryer before starting. -
Priming:
Apply a solid coat of white acrylic paint or gesso over the entire surface of the rock. This ensures your pastel colors will pop and look true to tone rather than muddy against the gray stone background. -
Second Coat:
Once dry, add a second coat of white if the stone is still showing through. A consistent base is key for this design.
Fixing Shaky Lines
If your fine lines look wobbly, simply wait for them to dry, then use a small flat brush with the background color to ‘cut in’ and tidy up the edges.
Step 2: Color Blocking
-
Top Pink Section:
Using your flat brush, paint the very top ‘cap’ of the stone with a soft pastel pink. Don’t worry about a perfectly straight edge yet as we will refine it later. -
Yellow Band:
Directly below the pink, paint a medium-width band of buttery yellow. -
Teal Band:
Paint a wider band of teal or mint green below the yellow. This will be the widest colored section on the top half. -
Central White Section:
Leave a wide band of the white base coat exposed in the center of the egg. This negative space is crucial for the central zigzag design. -
Lower Bands:
Below the white center, add a thin teal stripe, followed by a wider pink section at the bottom. Leave the very bottom tip natural or paint it white.
Step 3: Detailed Patterning
-
Top Divider Line:
Switch to your fine liner brush and brown paint. Carefully paint a thin line separating the yellow and teal sections. -
Triangle Pattern:
In the yellow band, use the brown liner to draw a zigzag line that creates a row of triangles. Add a small vertical dash inside each triangle for texture. -
Teal Polka Dots:
Dip the non-brush end of your paintbrush into white paint. Gently dot a row of white spots along the center of the wide teal band. -
Chain Link Border:
painted along the bottom edge of the teal band (where it meets the white center), use the brown liner to paint small, connected loops or circles, creating a chain-link effect. -
Central Zigzags:
In the large central white band, paint two parallel zigzag lines. Make the top one pink and the bottom one yellow. They should nestle together. -
Lower Striping:
Move to the lower half. Use teal paint to add vertical dashes or ‘stitches’ inside the thin teal band you painted earlier. -
Pink Section Texture:
On the bottom pink section, use very watered-down white paint or a ‘dry brush’ technique to create soft, horizontal streaks for a worn, vintage look. -
Bottom Speckles:
At the very base of the rock, dip a stiff brush or toothbrush in brown paint and flick it lightly to add tiny speckles, giving it that natural eggshell appearance.
Paint Consistency Tip
Thicken your paint slightly for the dots, but thin it down with a drop of water for the long liner geometric strokes to help the paint flow smoothly.
Step 4: Finishing
-
Drying Time:
Allow the rock to sit undisturbed for at least an hour to ensure the thickest parts of the paint are fully cured. -
Sealing:
Spray the rock with a matte finish sealant. I find a matte finish looks more realistic for an egg than a glossy one.
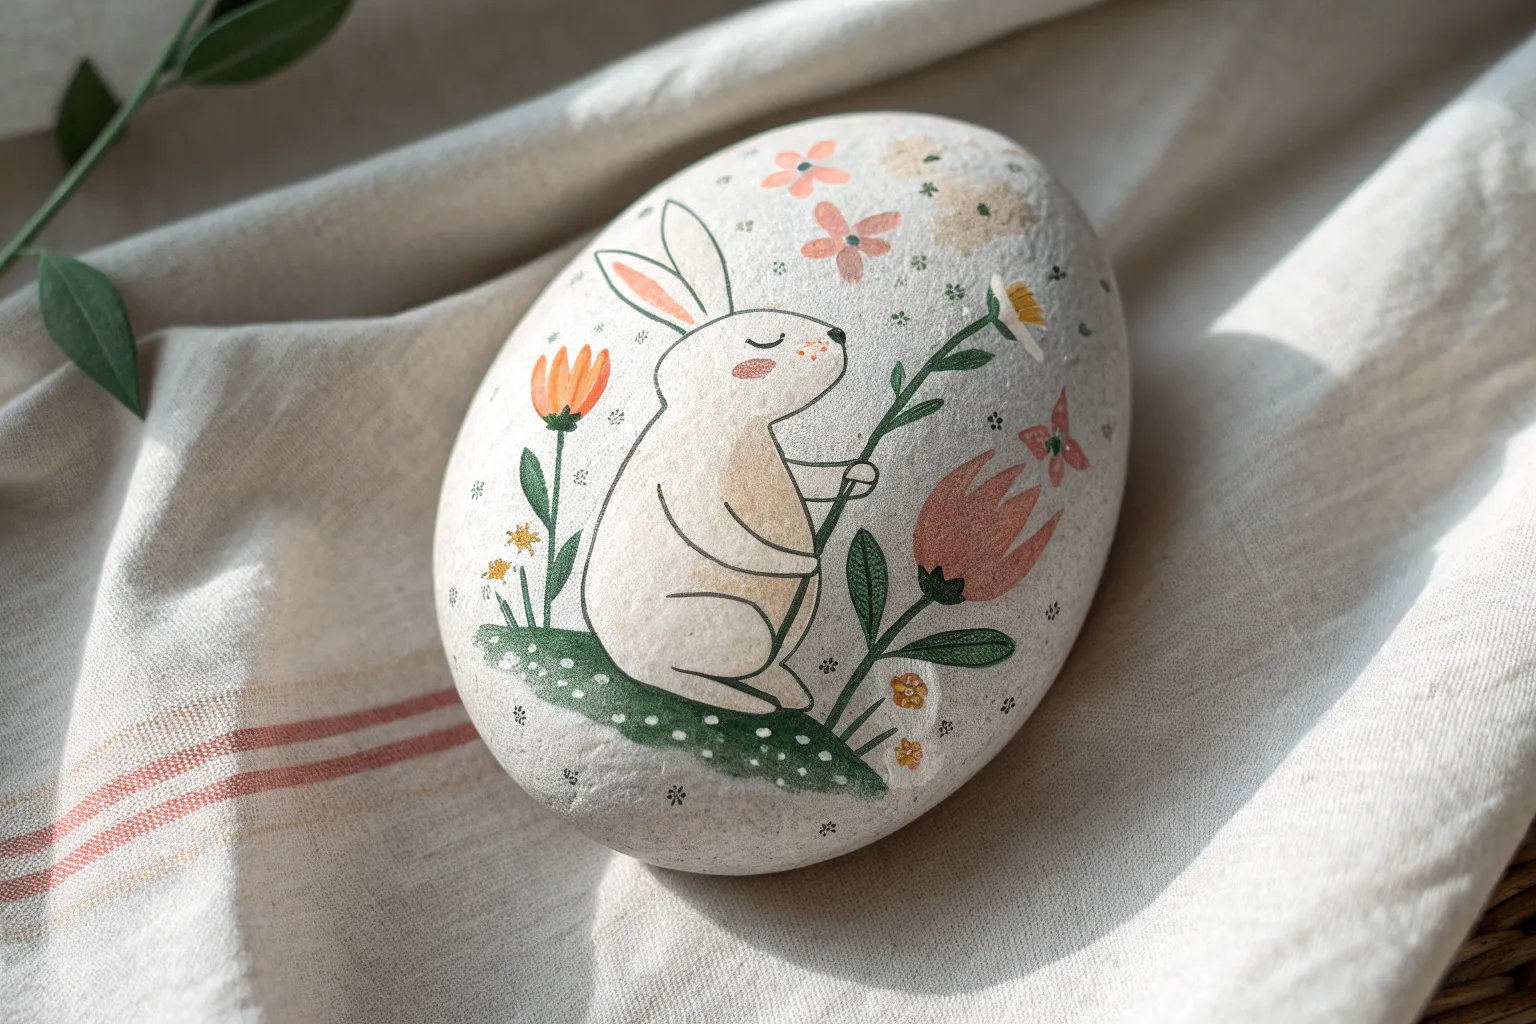
Display your stone eggs in a basket or scatter them on a table runner for a beautiful, everlasting spring display


Bunny Face Rocks With Whiskers
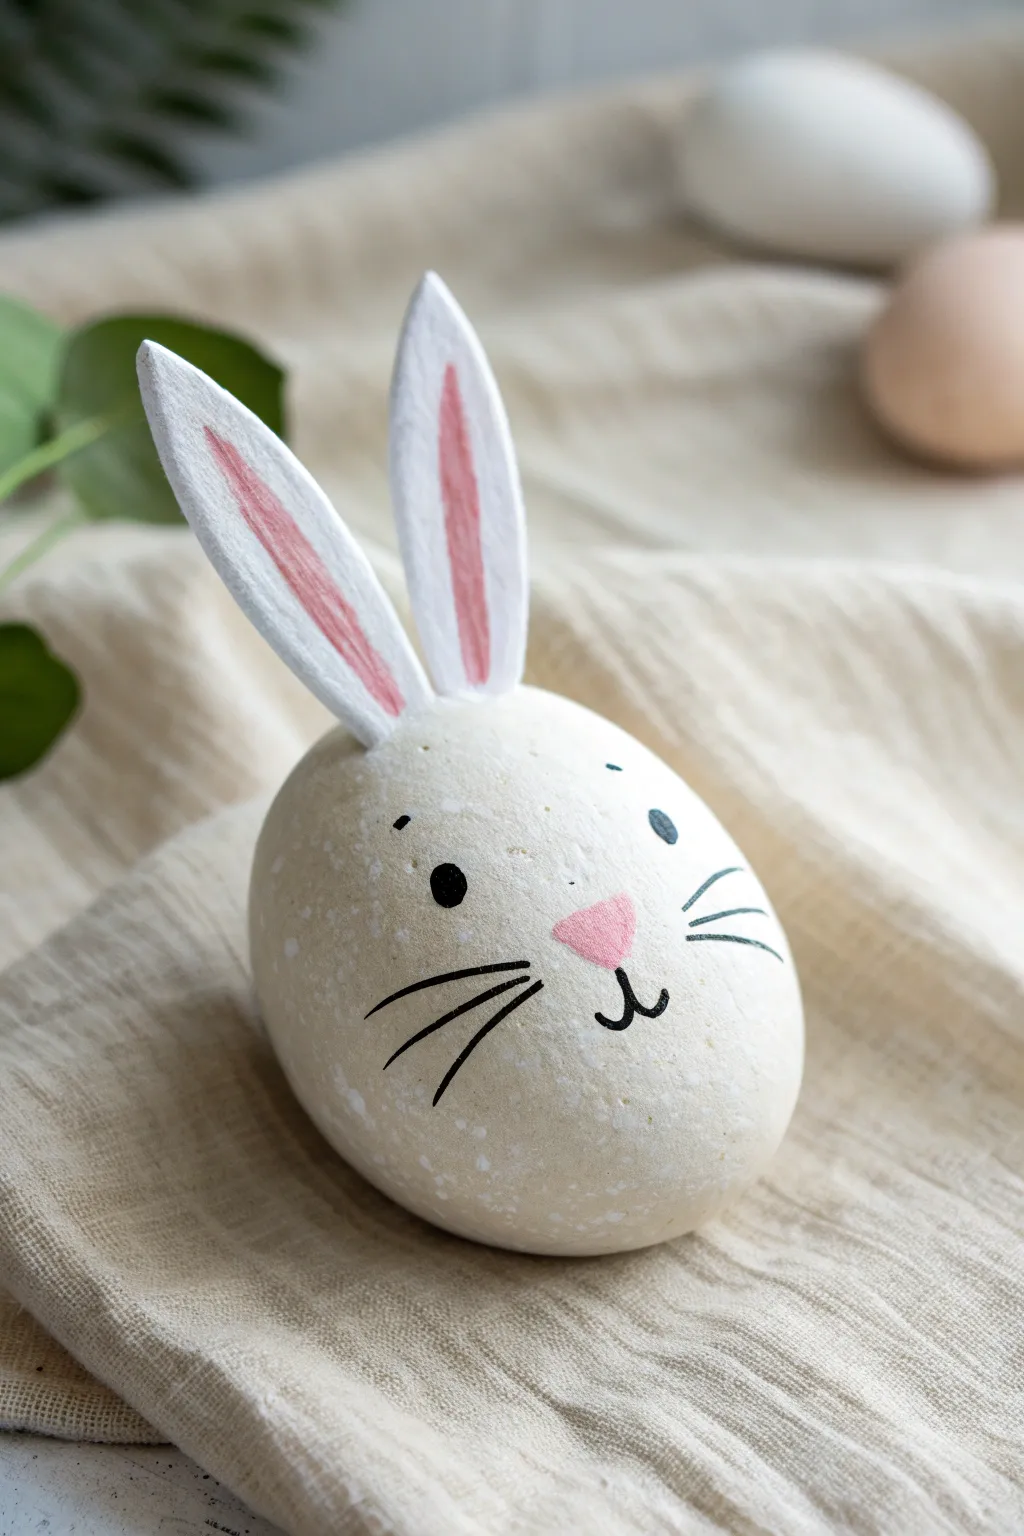
Transform a smooth, egg-shaped river rock into an adorable, wide-eyed bunny perfect for a spring display. This project combines simple stone painting with attached 3D ears for a charming mixed-media effect that sits sweetly on any shelf.
Step-by-Step
Materials
- Smooth, egg-shaped rock (approx. 3-4 inches tall)
- Cream or off-white acrylic paint
- Light pink acrylic paint
- Black acrylic paint or black paint pen (fine tip)
- White acrylic paint
- Stiff white felt, craft foam, or heavy cardstock
- Scissors
- Strong craft glue or hot glue gun
- Flat paintbrush
- Fine detail paintbrush
- Toothbrush or splatter brush (optional)
- Matte sealant
Step 1: Base and Texture
-
Clean Your Canvas:
Begin by scrubbing your rock thoroughly with soap and water to remove any dirt or oils. Let it dry completely in the sun or with a hair dryer. -
Apply the Base Coat:
Using a flat brush, paint the entire surface of the rock with cream or off-white acrylic paint. This creates a soft, natural rabbit fur color. -
Build Opacity:
Allow the first layer to dry to the touch, then apply a second or third coat until the natural rock color is completely hidden and the finish is smooth. -
Add Speckled Texture:
To mimic the speckled texture seen in the photo, dilute a tiny amount of white paint with water. Dip a toothbrush or stiff brush into it and gently flick minimal splatters across the bottom half of the rock. -
Dry Thoroughly:
Set the rock aside to dry completely before attempting to add facial features. If the base is wet, your black lines might bleed.
Uneven Whiskers?
If your hand shakes while painting whiskers, lightly sketch them with a pencil first. Use a paint pen rather than a brush for more control over thin lines.
Step 2: Creating the Face
-
Paint the Nose:
Mix a soft, rosy pink paint. Using a small detail brush, paint an inverted triangle with rounded corners in the center of the rock, slightly below the midway point. -
Outline the Mouth:
Once the nose is dry, use a fine tip black paint pen or a liner brush with black paint to draw a small vertical line down from the bottom of the nose. -
Curve the Smile:
From the bottom of that vertical line, draw two small ‘J’ curves outward—one to the left and one to the right—to create the bunny’s mouth. -
Add the Eyes:
Dip the handle end of a paintbrush or a dotting tool into black paint. Stamp two solid black circles above the nose area, spacing them widely apart for a cute expression. -
Draw Eyebrows:
Using your finest brush or pen, add two tiny, floating dashes high above the eyes to give the bunny a surprised or attentive look. -
Whiskers:
Draw three long, sweeping lines on each cheek area using quick confident strokes. Start the lines near the nose but don’t let them touch it. -
Highlight the Eyes:
I like to wait until the black eye circles are totally dry, then add a tiny white dot to the upper right of each pupil to bring the character to life.
Step 3: The Ears
-
Cut the Shape:
Cut two long, narrow oval shapes with pointed tips from your stiff white felt or craft foam. These should be roughly half the height of your rock. -
Paint the Inner Ear:
Use the same pink paint from the nose to paint a long, thin stripe down the center of each ear. Leave a generous white border around the edges. -
Feather the Edges:
For a more painterly look, you can dry-brush the edges of the pink stripe slightly so it isn’t a harsh line. -
Attach the Ears:
Apply a dab of strong glue to the bottom edge of each ear. Press them firmly onto the top curve of the rock, angling them slightly outward. -
Seal the Rock:
Once the glue is set, brush a coat of matte sealant over the stone surface (avoiding the fabric ears) to protect your paint from chipping.
Make Them Stand
If your ears won’t stand up straight, glue a toothpick or short piece of wire to the back of each ear for invisible support before attaching to the rock.
Place your finished bunny among some decorative straw or fresh flowers for a lovely seasonal touch


Chick Hatching From an Egg
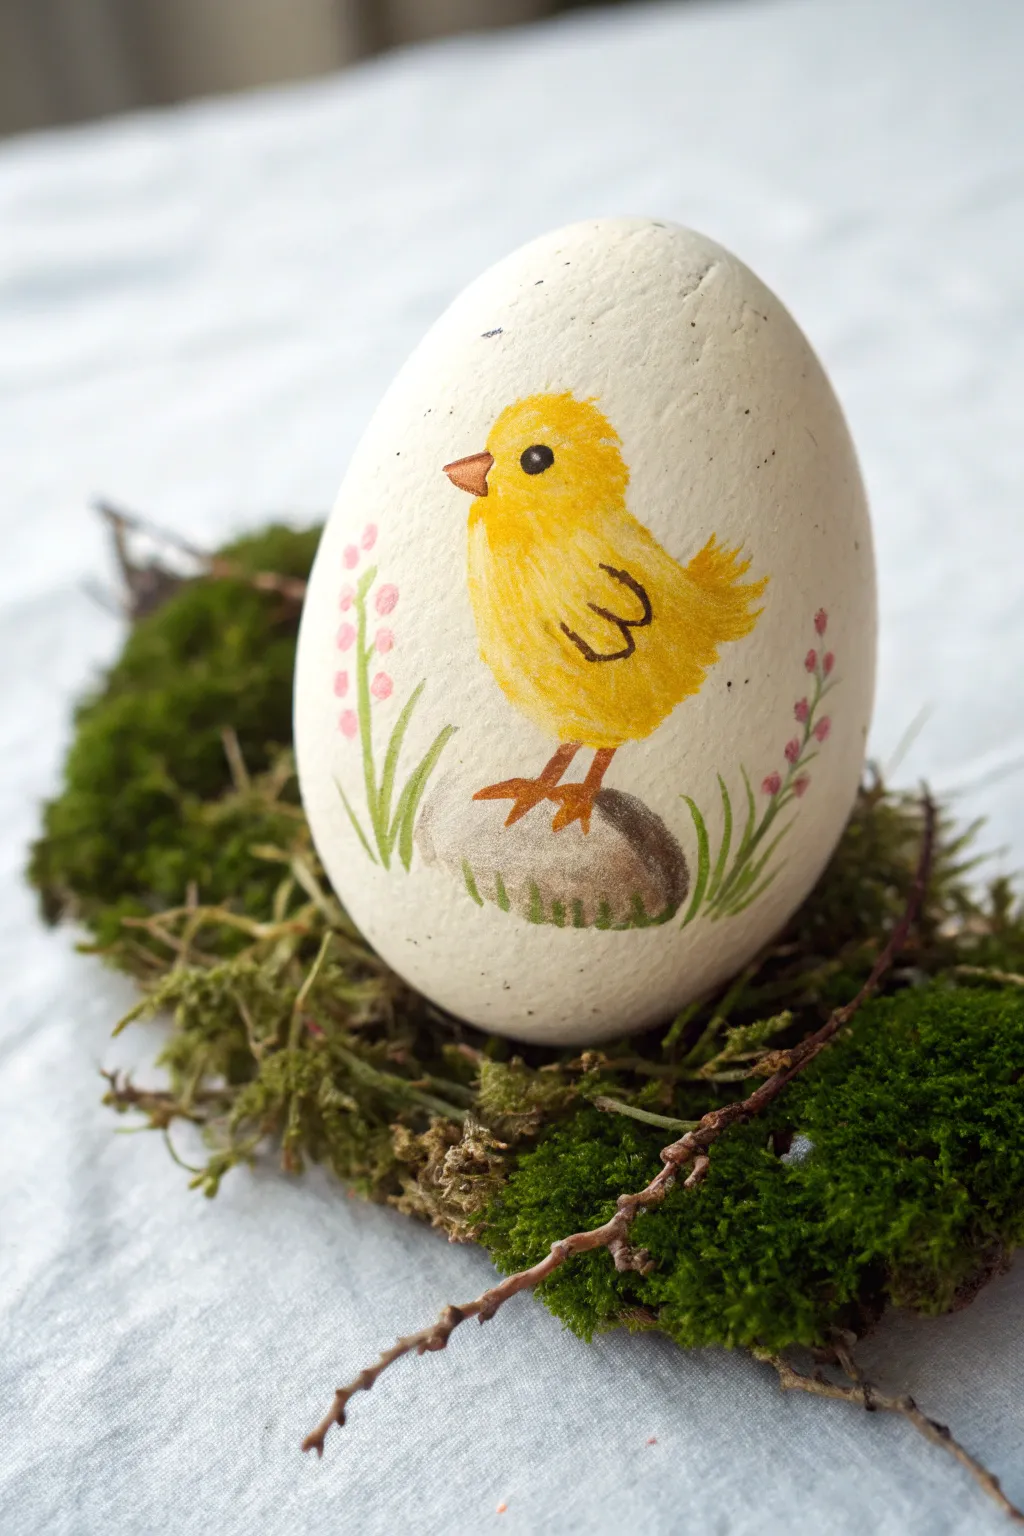
Transform a smooth, egg-shaped rock into a charming spring decoration featuring a fluffy yellow chick standing amongst wildflowers. This delicate painting style uses soft colors to create a heartwarming scene perfect for Easter displays.
Step-by-Step Tutorial
Materials
- Smooth, egg-shaped rock (white or beige base preferred)
- Acrylic paints: Titanium White, Butter Yellow, Golden Yellow, Orange, Burnt Umber (brown), Sap Green, Pink
- Pencil for sketching
- Fine detail paintbrush (size 0 or 00)
- Small flat brush (size 2 or 4)
- Matte sealer or varnish spray
- Palette or small plate for mixing
Step 1: Preparation & Base
-
Clean the surface:
Begin by thoroughly washing your rock with soap and water to remove any dirt or oils that might prevent the paint from sticking. Let it dry completely. -
Prime the background:
Even if your rock is naturally pale, apply a coat or two of Titanium White acrylic paint over the entire surface. This ensures your yellow chick will look bright and vibrant rather than dull. -
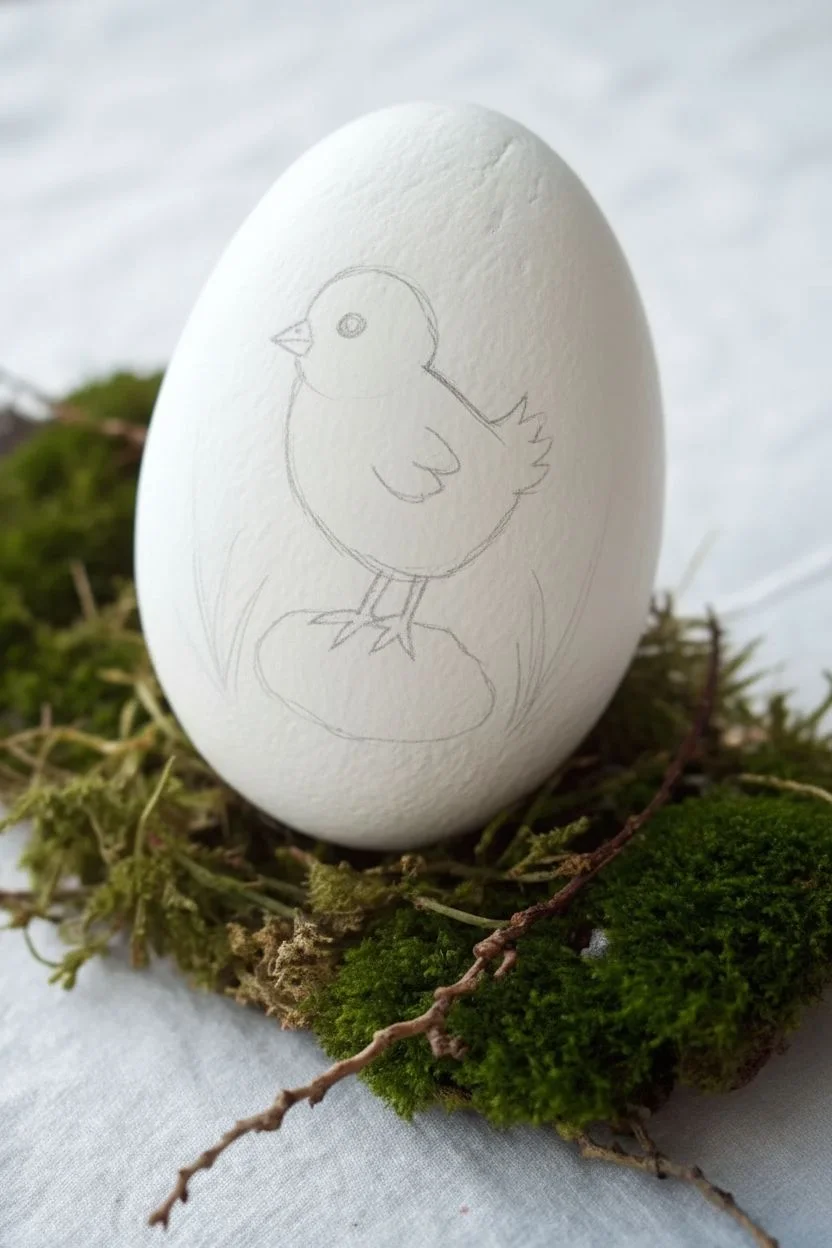
Sketch the outline:
Once the white base is fully dry, lightly sketch the oval body shape of the chick using a pencil. Add a smaller circle for the head on top, blending them together slightly. -
Add details:
Sketch a small triangle for the beak, two stick legs ending in feet, and the rough outline of a rock beneath the chick. Mark where your grass springs will go.
Natural Texture
Don’t over-blend the yellow paint on the chick. Leaving brushstrokes visible actually helps mimic the look of fluffy down feathers.
Step 2: Painting the Chick
-
Block in the yellow:
Load your small flat brush with Butter Yellow paint. Fill in the entire body and head of the chick. You may need two coats here to get solid coverage. -
Add depth and fluff:
While the yellow is still slightly tacky, mix a tiny bit of Golden Yellow or Orange. Use a detail brush to feather in short, flicking strokes near the wing area and tail to simulate texture. -
Paint the wing:
Using a slightly darker yellow-orange mix, paint a small curved wing shape on the side of the body. Outline it loosely with small ‘c’ shapes to look like feathers. -
Create the beak:
Use plain Orange paint for the small triangular beak. Add a tiny dot of white on the top edge later for a highlight. -
Paint the eye:
Dip the very tip of your finest brush (or a toothpick) into black or dark brown paint. Place a small dot for the eye, then add a micro-dot of white inside it for a sparkle. -
Detailed legs and feet:
Switch to an Orange-Brown mix. Carefully paint the two thin legs extending down from the body, ending in three-toed feet resting on the sketch line for the rock.
Nest Display
Glue real moss and small twigs to the bottom of the finished rock to make it stand upright and look like a hatched egg.
Step 3: Environmental Details
-
Paint the rock base:
Mix white with a touch of Burnt Umber to create a light stone grey-beige. Fill in the rock shape underneath the chick’s feet. Let dry. -
Shadowing the rock:
Take watered-down brown paint and glaze the bottom right edge of the painted stone to give it volume and shadow. -
Adding grass blades:
Load your fine brush with Sap Green. Paint long, sweeping blades of grass rising up from the sides of the stone. I like to vary the height so it looks natural. -
Blooming flowers:
Using a soft pink shade, dot small circles along the tops of the tallest grass stems. These don’t need to be perfect; irregular dots look more like wild buds. -
Final dry grass texture:
Add tiny, short vertical strokes of darker green or brown at the very bottom of the painted stone to ground it in the ‘moss’. -
Seal the artwork:
Allow the entire painting to cure for 24 hours. Finish by spraying a light coat of matte sealer to protect the paint without making it too shiny.
Place your finished chick in a small basket or on a windowsill to welcome the season.


Simple Tulip Cluster
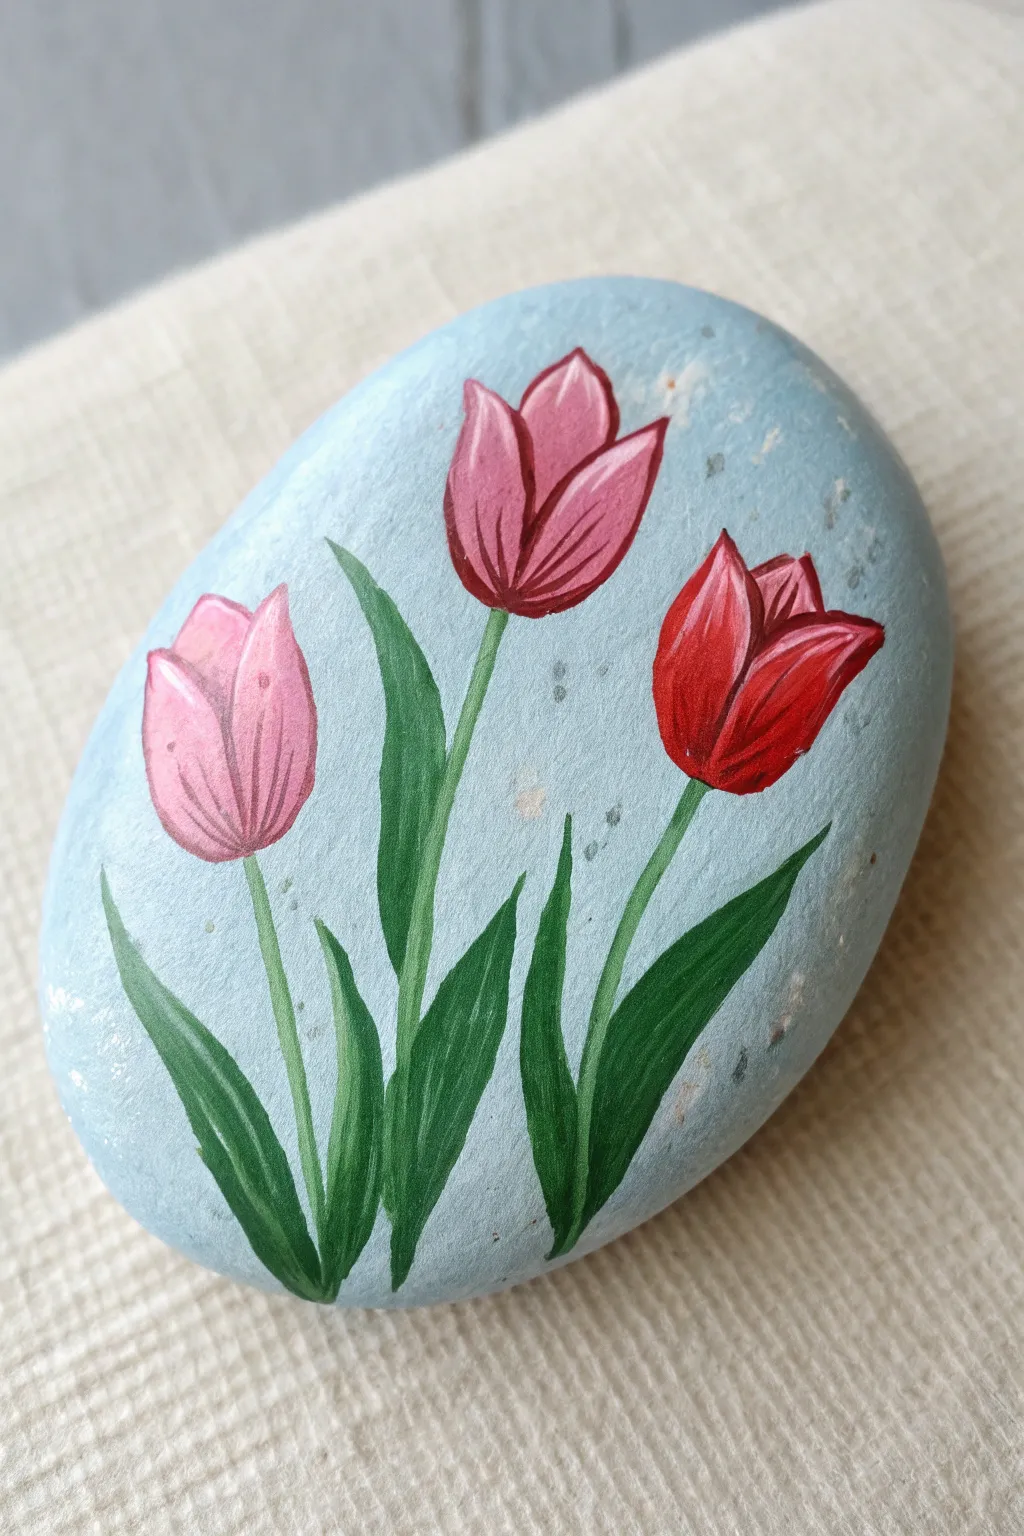
Brighten up your garden or windowsill with this vibrant trio of tulips painted on a smooth river stone. The soft blue background makes the pink and red petals pop, creating a charming piece of spring decor that lasts forever.
How-To Guide
Materials
- Smooth, flat river rock (oval shape preferred)
- Acrylic paints: Light Blue, White, Leaf Green, Dark Green, Light Pink, Dark Pink, Red, Burgundy
- Paintbrushes: Flat brush (for background), fine liner brush, and small round brush
- Pencil for sketching
- Clear acrylic sealant (spray or brush-on)
- Palette or paper plate for mixing
- Cup of water and paper towels
Step 1: Preparing the Canvas
-
Clean and Dry:
Begin by thoroughly washing your rock with soap and water to remove any dirt or oils. Let it dry completely before starting. -
Base Coat Application:
Using a flat brush, mix light blue paint with a tiny drop of white to create a soft sky tone. Paint the entire top surface of the rock. -
Second Layer:
Once the first coat is dry to the touch, apply a second layer of the light blue to ensure solid, opaque coverage where the stone’s texture doesn’t show through. -
Add Texture (Optional):
While the blue is still slightly wet, I like to lightly dab a few spots with a dry brush or sponge to create subtle texture, but keeping it smooth works just as well.
Brush Control
For the crispest lines on the veins, slightly thin your paint with a drop of water so it flows like ink off your liner brush.
Step 2: Sketching and Stems
-
Light Sketch:
Use a pencil to lightly sketch three oval shapes for the flower heads—one on the left, a higher one in the center, and one on the right. Add long, curved lines for stems connecting them to the bottom. -
Base Stems:
Load a liner brush with leaf green paint. Carefully trace over your stem lines, making them slightly thicker at the bottom and tapering as they reach the flower heads. -
Painting Leaves:
Paint long, slender leaves emerging from the base of the stems. Use a sweeping motion, pressing down for the wider part of the leaf and lifting up for the pointed tip. -
Leaf details:
Mix a little dark green with your leaf green. Add subtle shadow lines along one side of each leaf to give them dimension and roundness.
Add Sparkle
Mix a tiny amount of iridescent medium or glitter glaze into the final coat of petal paint for a subtle shimmer in the sunlight.
Step 3: Painting the Blooms
-
Left Tulip Base:
Paint the leftmost tulip shape with a solid coat of light pink. Don’t worry about shading yet; just get the silhouette right. -
Center Tulip Base:
Map out the center, tallest flower using a medium pink or rose shade. -
Right Tulip Base:
Fill in the rightmost flower shape with a bright, primary red. -
Defining Petals:
Once dry, use a small round brush to paint distinct petal shapes over the base coats. Imagine a central oval petal with two side petals embracing it.
Step 4: Detailed Shading
-
Pink Shading:
On the light pink tulip, use a darker pink to paint thin lines radiating from the bottom of the flower upward. This mimics the natural veins of a petal. -
Center Tulip Depth:
For the middle rose-colored tulip, use a burgundy or deep magenta to outline the petals and add depth near the base of the bloom. -
Red Tulip Highlights:
On the red tulip, mix a little white into your red (or use the light pink) to add highlights on the tips of the petals where the sun would hit. -
Crisp Outlines:
Where petals overlap, use your darkest shade (like deep burgundy) with the liner brush to clearly separate the front petals from the back ones. -
Final White Accents:
Add tiny, whisper-thin strokes of white to the very edges of the petals on all three flowers to make them look delicate and sharp.
Step 5: Finishing Touches
-
Speckle Effect:
Dilute a tiny bit of grey or darker blue paint with water. Dip an old toothbrush or stiff brush in it and flick it with your thumb to create a very faint splatter effect on the background for an artistic look. -
Connect Stems:
Double-check that the green stems meet the flower heads cleanly. If there’s a gap, fill it in with a tiny dot of green. -
Seal It:
Allow the rock to dry for at least 24 hours. Apply two coats of clear acrylic sealer to protect your artwork from the elements.
Place your lovely tulip rock in a potted plant or on your desk to enjoy a touch of spring year-round
BRUSH GUIDE
The Right Brush for Every Stroke
From clean lines to bold texture — master brush choice, stroke control, and essential techniques.
Explore the Full Guide
Smiley Daisy Faces
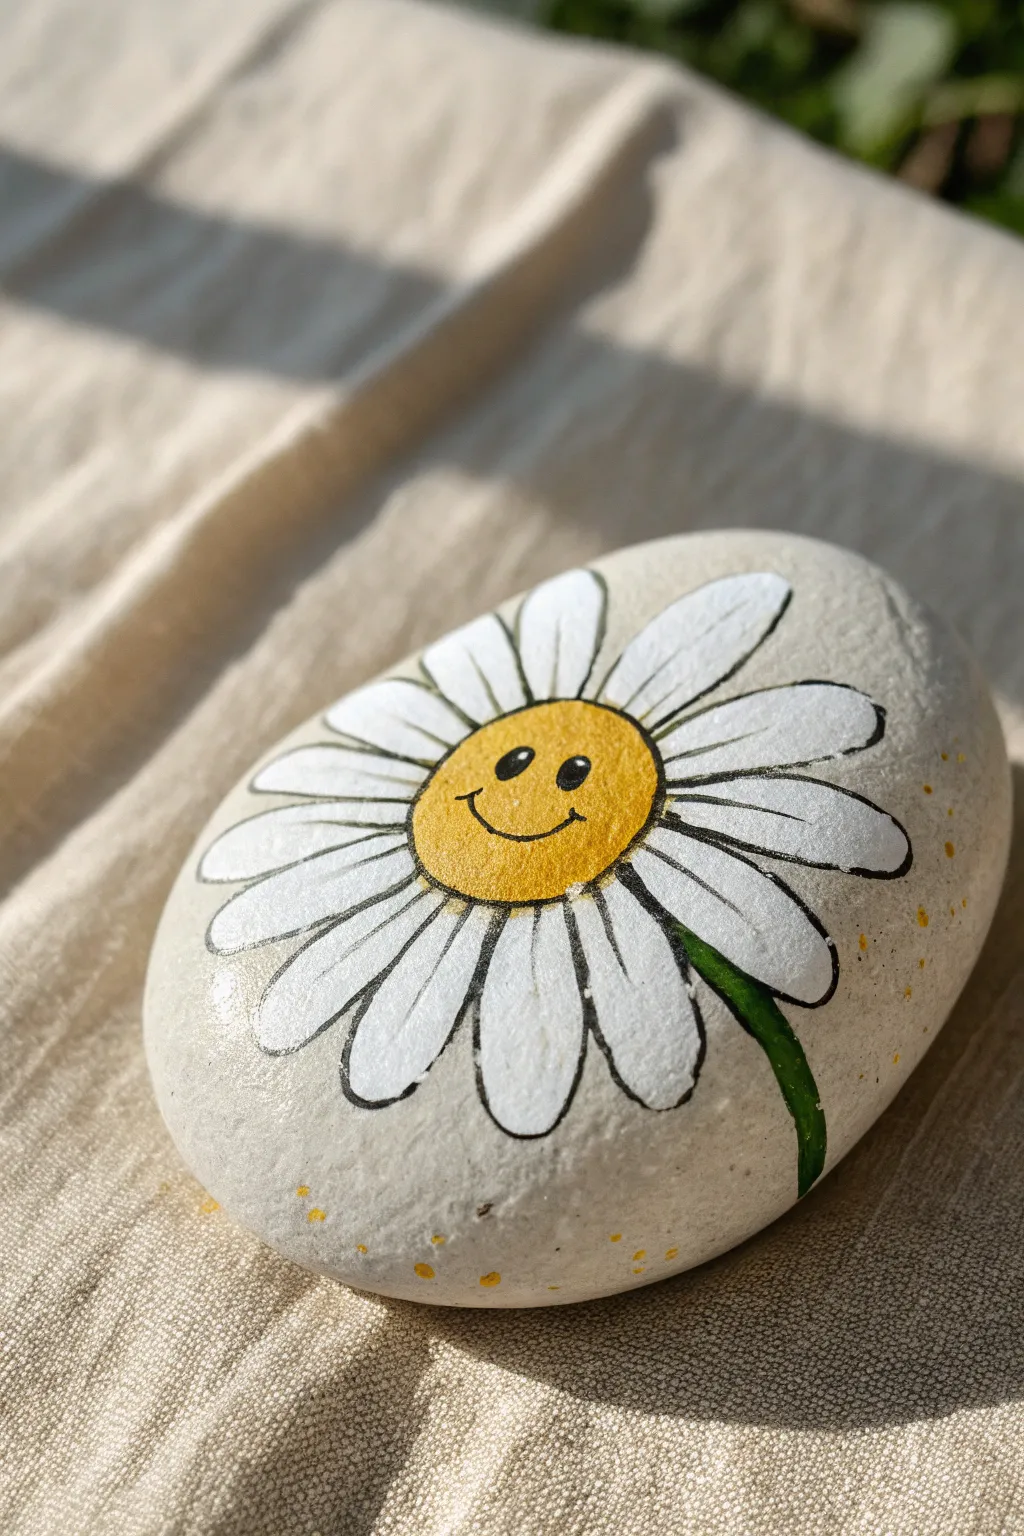
Brighten up your garden or windowsill with this cheerful painted rock featuring a classic white daisy with a happy twist. This friendly little flower brings instant spring vibes with its sunny yellow center and sweet smiling face.
Step-by-Step Tutorial
Materials
- Smooth, rounded river stone (approx. palm-sized)
- White acrylic paint (high opacity)
- Yellow acrylic paint (golden yellow)
- Green acrylic paint (leaf green)
- Black fine-point paint pen or liner brush
- Pencil for sketching
- Flat paintbrush (medium size)
- Small round paintbrush (size 1 or 2)
- Matte or glossy sealant spray
- Water cup and paper towels
Step 1: Preparation & Base Sketch
-
Clean the stone:
Start by washing your rock with warm, soapy water to remove any dirt or oils that might repel the paint. Let it dry completely in the sun or use a hairdryer to speed things up. -
Position the center:
Using a pencil, lightly sketch a medium-sized circle slightly off-center on the flattest part of the rock. This will be the flower’s happy face. -
Draw the petals:
Sketch long, oval-shaped petals radiating outward from your center circle. Aim for about 12-14 petals that stretch almost to the edge of the stone. -
Add a stem:
Draw a slightly curved line coming down from between two bottom petals to represent the stem. -
Refine the shapes:
Look over your sketch. The petals don’t need to be perfectly symmetrical—natural variations make the flower look more organic.
Smooth Operator
A super-smooth, non-porous rock works best for this design. The marker glides easier over smooth surfaces than pitted ones.
Step 2: Painting the Flower
-
Paint the center yellow:
Using your small round brush, fill in the center circle with golden yellow acrylic paint. You might need two coats for a solid, bright color. -
Start the white petals:
Load your medium flat brush with white acrylic paint. Start painting the petals, working from the center outward toward the tips. -
Layer the white:
White paint can often be translucent on dark rocks. Let the first coat dry fully, then apply a second (and maybe third) coat until the petals are crisp and opaque. -
Paint the stem:
Switch back to your small round brush and paint the stem green. Make the top slightly thicker where it meets the petals and taper it as it goes down. -
Let everything dry:
Ensure all paint layers are completely dry to the touch before moving on to the outlining phase to prevent smudging.
Step 3: Details & Outline
-
Outline the center:
With your black fine-point paint pen, carefully trace the outer edge of the yellow circle. A slightly disjointed, sketchy line adds charm here. -
Draw the eyes:
Place two small black oval dots in the upper half of the yellow circle for the eyes. These sit slightly wide apart for a cute look. -
Add the smile:
Draw a simple U-shape centered below the eyes. Add tiny tick marks at the ends of the smile to create sweet little cheeks. -
Outline the petals:
Trace around each white petal with the black pen. Don’t worry about perfect continuous lines; lifting your pen occasionally creates a lovely illustrated texture. -
Add petal definition:
Draw a few short lines or creases inside the petals, starting from the yellow center, to give the flower some dimension. -
Add splatter spots:
Dilute a tiny bit of yellow paint with water. Dip a toothbrush or stiff brush in it and flick it gently near the bottom of the rock to add subtle speckles. -
Final drying time:
Allow the black ink and splatter to dry for at least 15 minutes. -
Seal the artwork:
Spray the entire rock with a clear sealant. This protects your daisy from weather and scratches if you plan to leave it outdoors.
Paint Pen Clogs?
If your black outline pen stops flowing over the paint, wipe the tip on a damp paper towel to remove dried acrylic buildup.
Now you have a permanent bloomer that will keep smiling regardless of the weather
Bright Butterfly Wings
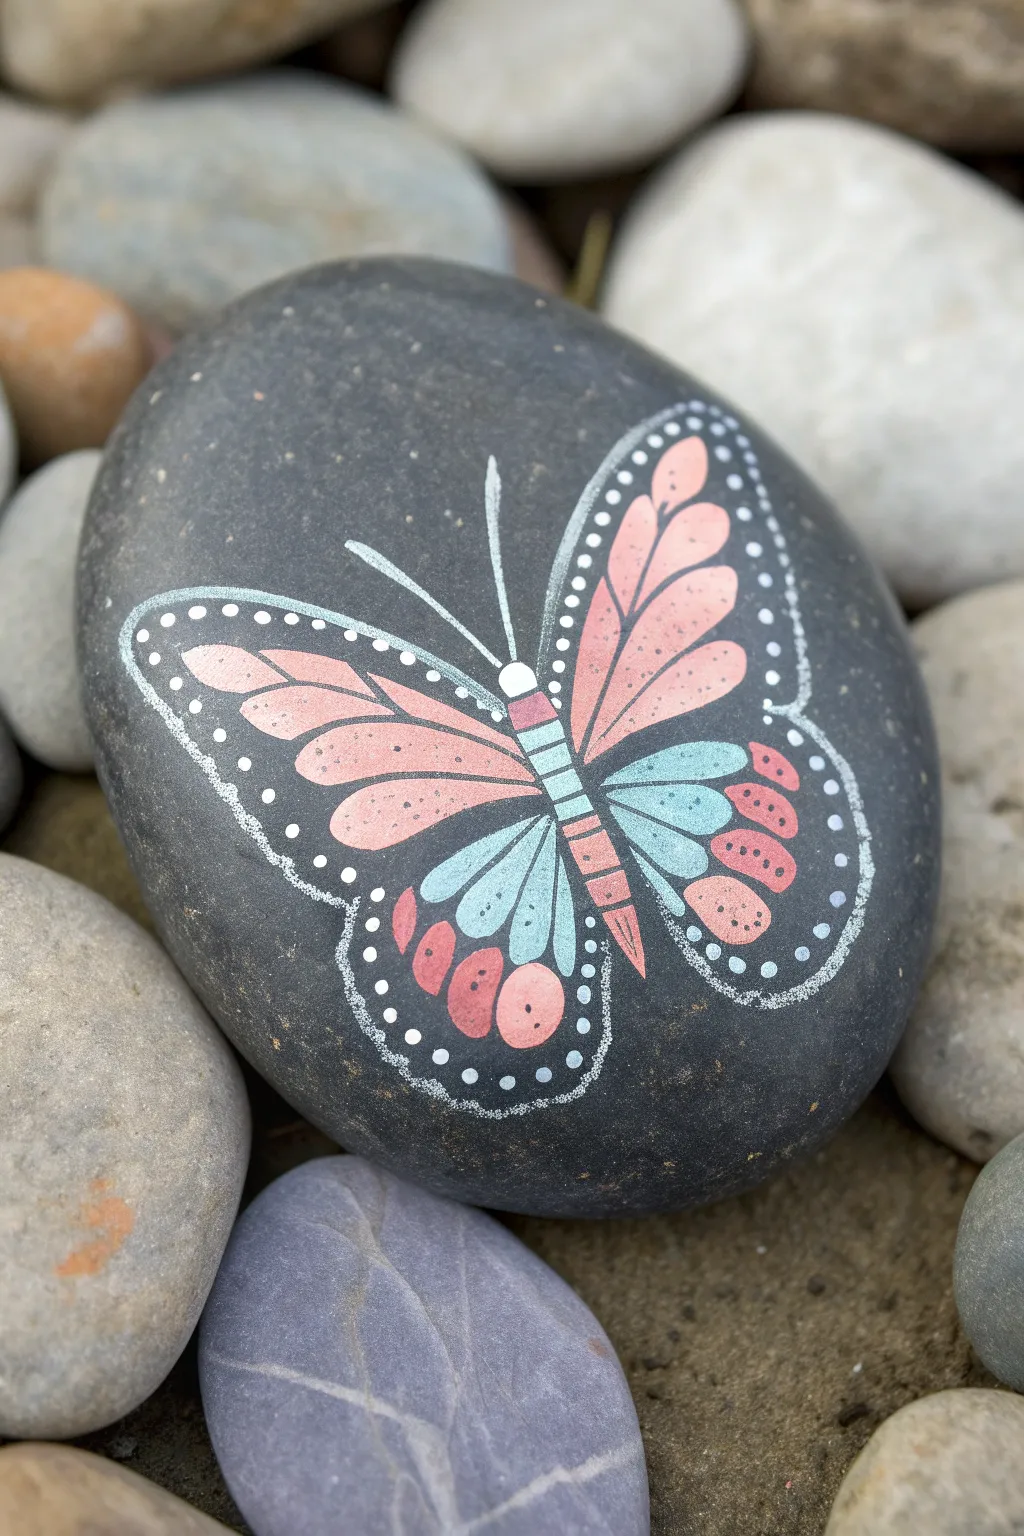
Capture the delicate flutter of spring with this elegant butterfly painted on a smooth slate rock. The design features soft coral and teal hues framed by crisp white linework, creating a beautiful contrast against the natural dark stone.
How-To Guide
Materials
- Smooth, dark river rock (flat oval shape)
- White paint marker (extra fine tip)
- Acrylic paints (coral pink, teal/light turquoise, white)
- Small round detail brush (size 0 or 00)
- Pencil for sketching
- Matte finish sealer spray
Step 1: Planning the Shape
-
Clean Your Canvas:
Begin by washing your rock with soap and water to remove any dirt or oils. Let it dry completely before starting, as moisture can ruin your paint adhesion. -
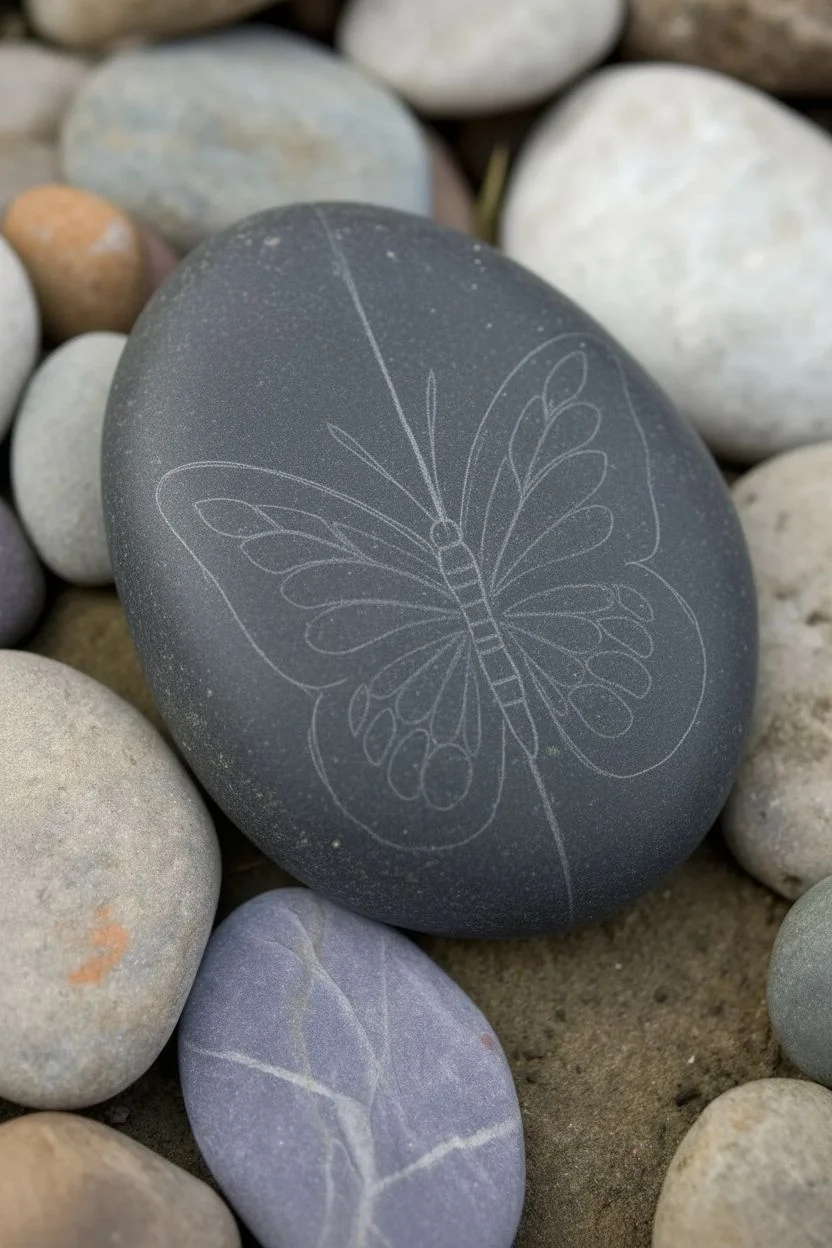
Sketch the Symmetry:
With a pencil, lightly sketch a central vertical line to act as the butterfly’s body. Draw the long, slender body shape centered on the rock. -
Outline the Wings:
Sketch the upper wings first, making them elongated and teardrop-shaped. Then, add the lower wings, which should be slightly rounder and wider at the bottom.
Dot Precision Tip
If your paint pen flows too fast, puddle some white paint on a palette and use the non-brush end of a paintbrush to stamp perfect, uniform dots.
Step 2: Painting the Body and Base
-
Base Body Layer:
Using your fine white paint pen or a brush, paint the head as a small circle. Color the thorax and abdomen with alternating segments of teal and coral pink. -
Antennae Details:
Draw two long, thin antennae extending from the head with your white paint pen. They should curve gently outward for a graceful look. -
Wing Outlines:
Use the white paint pen to trace over your pencil sketch of the wings. Add a double line along the outer edge of the upper wings to create a border for later details.
Step 3: Adding Color Blocking
-
Upper Wing Color:
Mix a soft coral pink acrylic paint. Using your small detail brush, fill in the main sections of the upper wings. Leave a small gap between the color and your white outline to keep the design airy. -
Lower Wing Variation:
For the lower wings, switch to your teal paint. Fill the upper section of the lower wing with teal teardrop shapes, radiating outward from the body. -
Lower Wing Accents:
Beneath the teal sections on the lower wings, paint rounded shapes in coral pink. This creates a lovely two-tone effect that mimics real butterfly patterns. -
Vein Details:
Once the pink paint on the upper wings is dry, use a very fine brush or pen to draw thin lines through the pink sections, simulating wing veins.
Make It Shimmer
Mix a tiny amount of pearl or metallic medium into your coral and teal paints. The wings will catch the sunlight beautifully outdoors.
Step 4: Refined Details
-
White Dot Borders:
This is the signature step. Using your white paint pen, carefully place small dots all along the inside of your outer white wing outline. Space them evenly for a clean, beaded look. -
Highlighting the Body:
Add tiny white highlights to the colored segments of the body to give it dimension and make it pop against the dark stone. -
Decorative Elements:
Add extra dots or small dashes within the colored wing sections if you want more texture. I sometimes add tiny teal dots inside the pink areas for contrast. -
Clean Up:
Check your white outlines. If any colored paint overlapped messy lines, go back over the white outline with your pen to sharpen everything up. -
Final Drying:
Allow the rock to dry overnight to ensure the thickest parts of the paint are fully cured before sealing. -
Sealing:
Spray the rock with a clear matte sealer. This protects your handiwork from the elements if you plan to place it in the garden.
Place your stone in a sunny spot in the garden or use it as a cheerful paperweight

PENCIL GUIDE
Understanding Pencil Grades from H to B
From first sketch to finished drawing — learn pencil grades, line control, and shading techniques.
Explore the Full Guide
Cute Ladybug On a Leaf
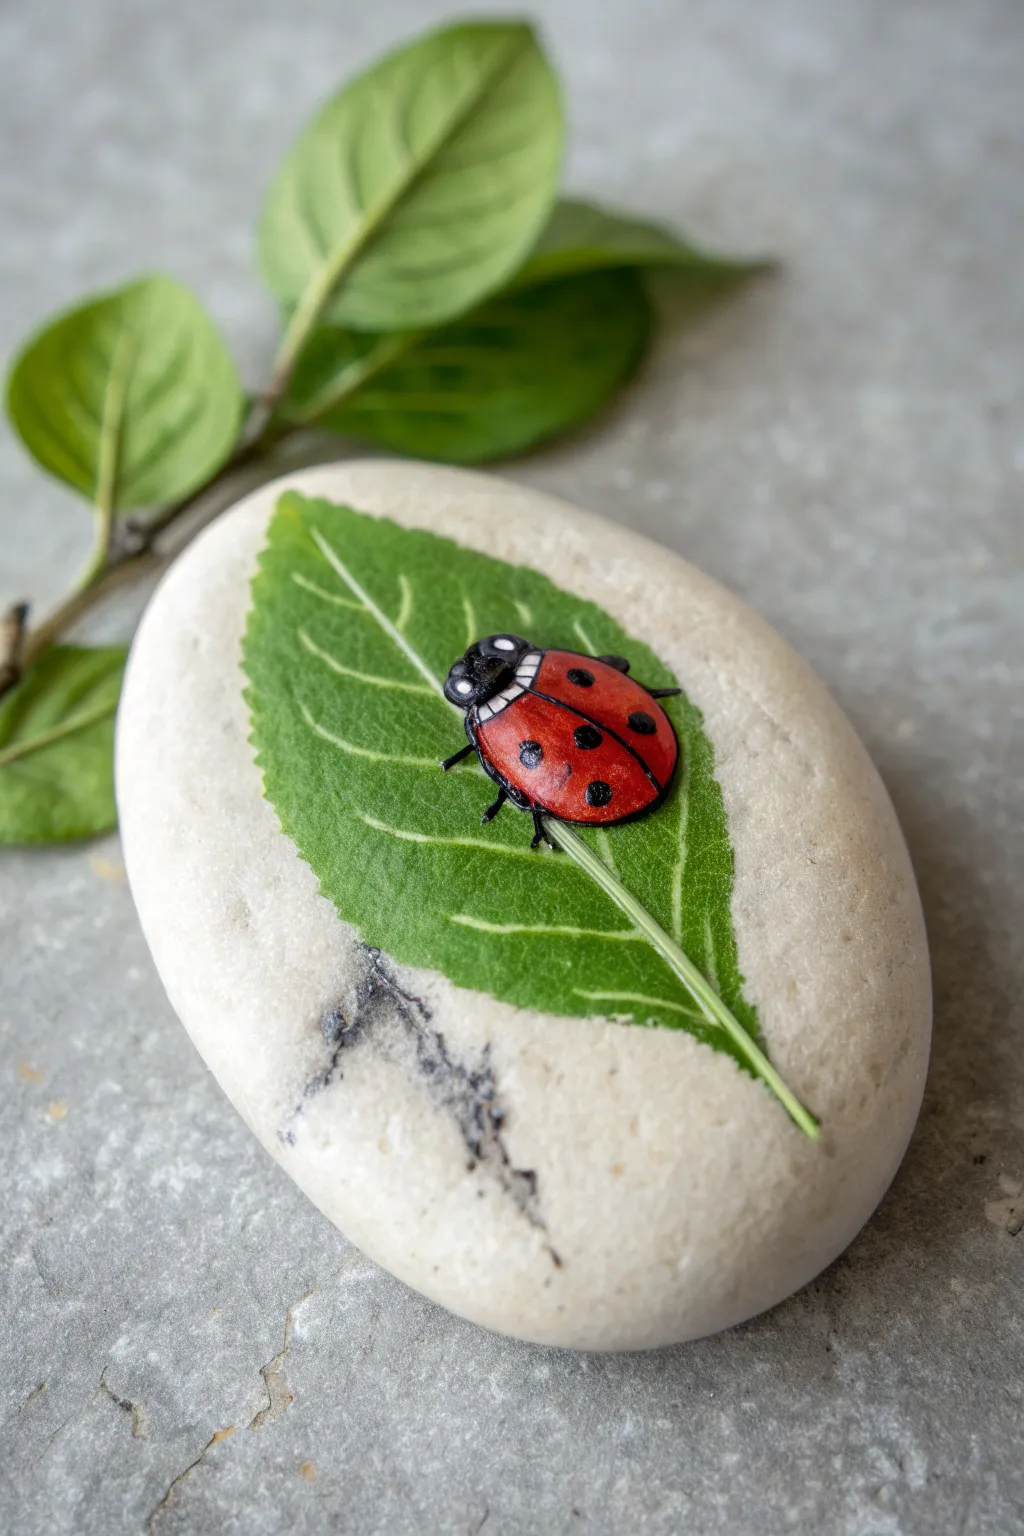
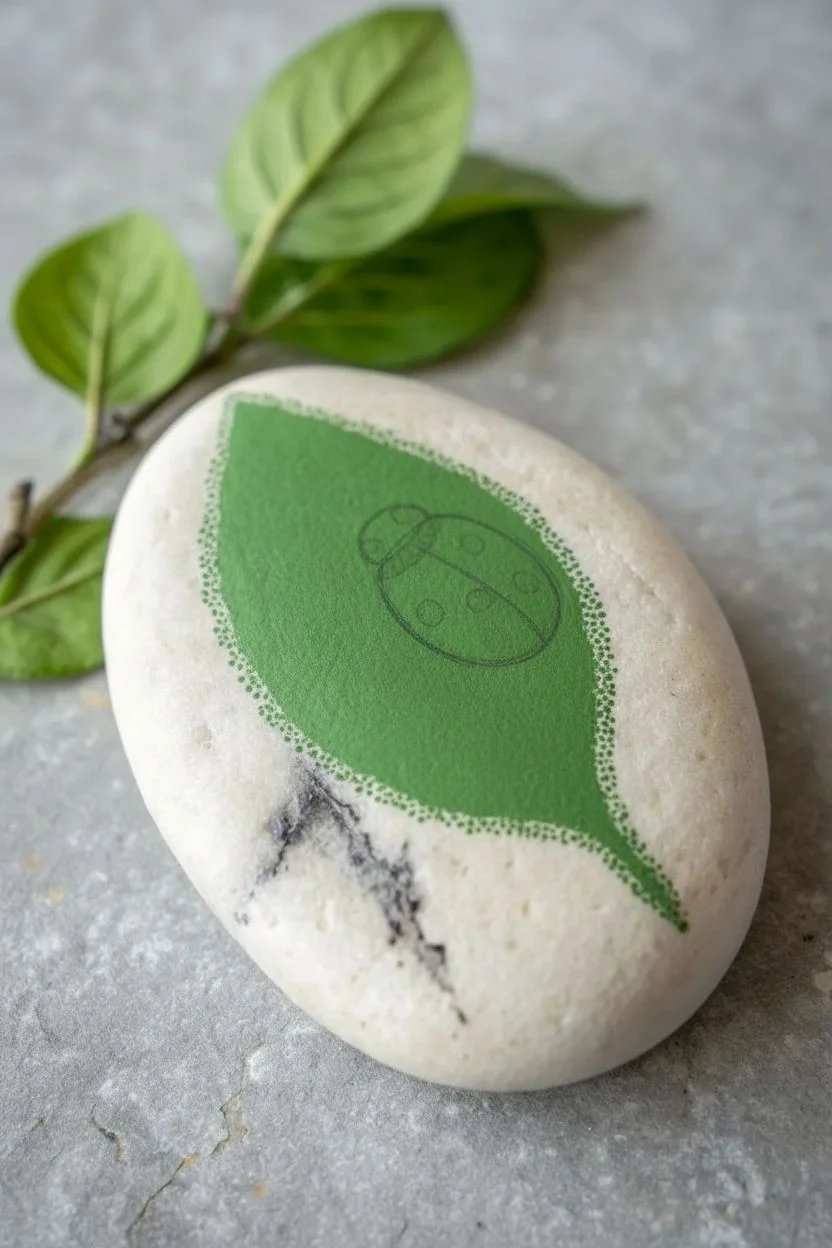
Bring a touch of nature indoors with this wonderfully detailed rock painting project. By layering shades of green for the leaf and adding glossy highlights to the ladybug, you can transform a simple smooth stone into a vivid garden scene.
Step-by-Step Guide
Materials
- Smooth, oval-shaped river rock (clean and dry)
- Acrylic paints: White, Black, Red, Dark Green, Light Green (or Yellow and Blue to mix)
- Fine detail brushes (liners and small rounds)
- Flat brush for base coating
- Pencil for sketching
- Palette or small plate
- Water cup and paper towels
- Clear acrylic sealer (spray or brush-on gloss)
Step 1: Preparation and Leaf Base
-
Prepare the canvas:
Start with a clean, dry rock. If your stone has a rough texture or a dark color, you might want to prime the painting area with a thin layer of white acrylic paint first to help the colors pop, though leaving the natural stone background looks lovely too. -
Sketch the outline:
Lightly use a pencil to draw the silhouette of a single leaf running diagonally across the stone. Draw a simple oval shape on top of the leaf for the ladybug’s body. -
Base coat the leaf:
Fill in the leaf shape with a medium green acrylic paint. Don’t worry about the veins yet; just get a solid, opaque coverage. You may need two coats for full opacity. -
Add leaf texture:
While the green is dry, mix a slightly darker green. Use a small brush to stipple or sponge texture onto the leaf edges to make it look organic rather than perfectly flat.
Step 2: Detailed Leaf Painting
-
Paint the veins:
Mix a very light green or yellow-green shade. Using your finest liner brush, paint the central vein running down the leaf, extending it past the bottom to form a stem. -
Add secondary veins:
Branching off the main vein, paint delicate, thin lines angling outward towards the leaf edges. Make these faint and feathery. -
Refine the edges:
Using your medium green, touch up the outer edges of the leaf to give it slightly serrated or uneven look, mimicking a real leaf shape.
Smooth Operator
If your paint feels thick or drags, mix in a tiny drop of water or flow medium. This helps create razor-sharp lines for the tiny legs.
Step 3: Painting the Ladybug
-
Base coat the ladybug:
Fill the oval sketch of the ladybug with a bright red acrylic paint. This is the main body (the elytra). Let this dry completely before adding a second coat if needed. -
Paint the head:
At the top of the red oval, paint a small semi-circle in black for the pronotum and head. -
Define the wings:
Draw a thin black line down the center of the red oval to separate the wings. -
Add the spots:
Using a dotting tool or the back of a paintbrush handle, dip into black paint and place several spots symmetrically on the red wings. -
Legs and antennae:
With an ultra-fine brush and black paint, draw tiny legs sticking out from beneath the body and two small antennae on the head. -
White details on head:
Add two small white distinct patches on the sides of the black head area (the pronotum) to make it look realistic.
Dew Drop Drama
Add 3D realism by painting clear ‘dew drops’ on the leaf using a white highlight, a dark shadow, and a dot of UV resin for actual texture.
Step 4: Highlights and Shadows
-
Create a drop shadow:
Mix a transparent grey or watered-down black. Carefully paint a thin shadow underneath the ladybug’s body on the green leaf to ground it. -
Shadow the leaf:
Add a faint shadow on the stone itself, just under the leaf edges giving the illusion that the leaf is resting on the rock. -
Highlight the shell:
To make the shell look shiny and rounded, add a small, curved stroke of white paint on the red part of the shell, near the top. -
Final leaf highlights:
Add tiny touches of white or pale yellow to the highest points of the leaf veins to suggest light hitting the ridges. -
Seal the rock:
Once absolutely everything is dry, apply a clear gloss sealer. I prefer a glossy finish here because it accentuates the ‘wet’ look of the beetle’s shell.
Place your finished stone in a plant pot or on your desk for a permanent sign of spring
Buzzy Bee Stripes and Wings
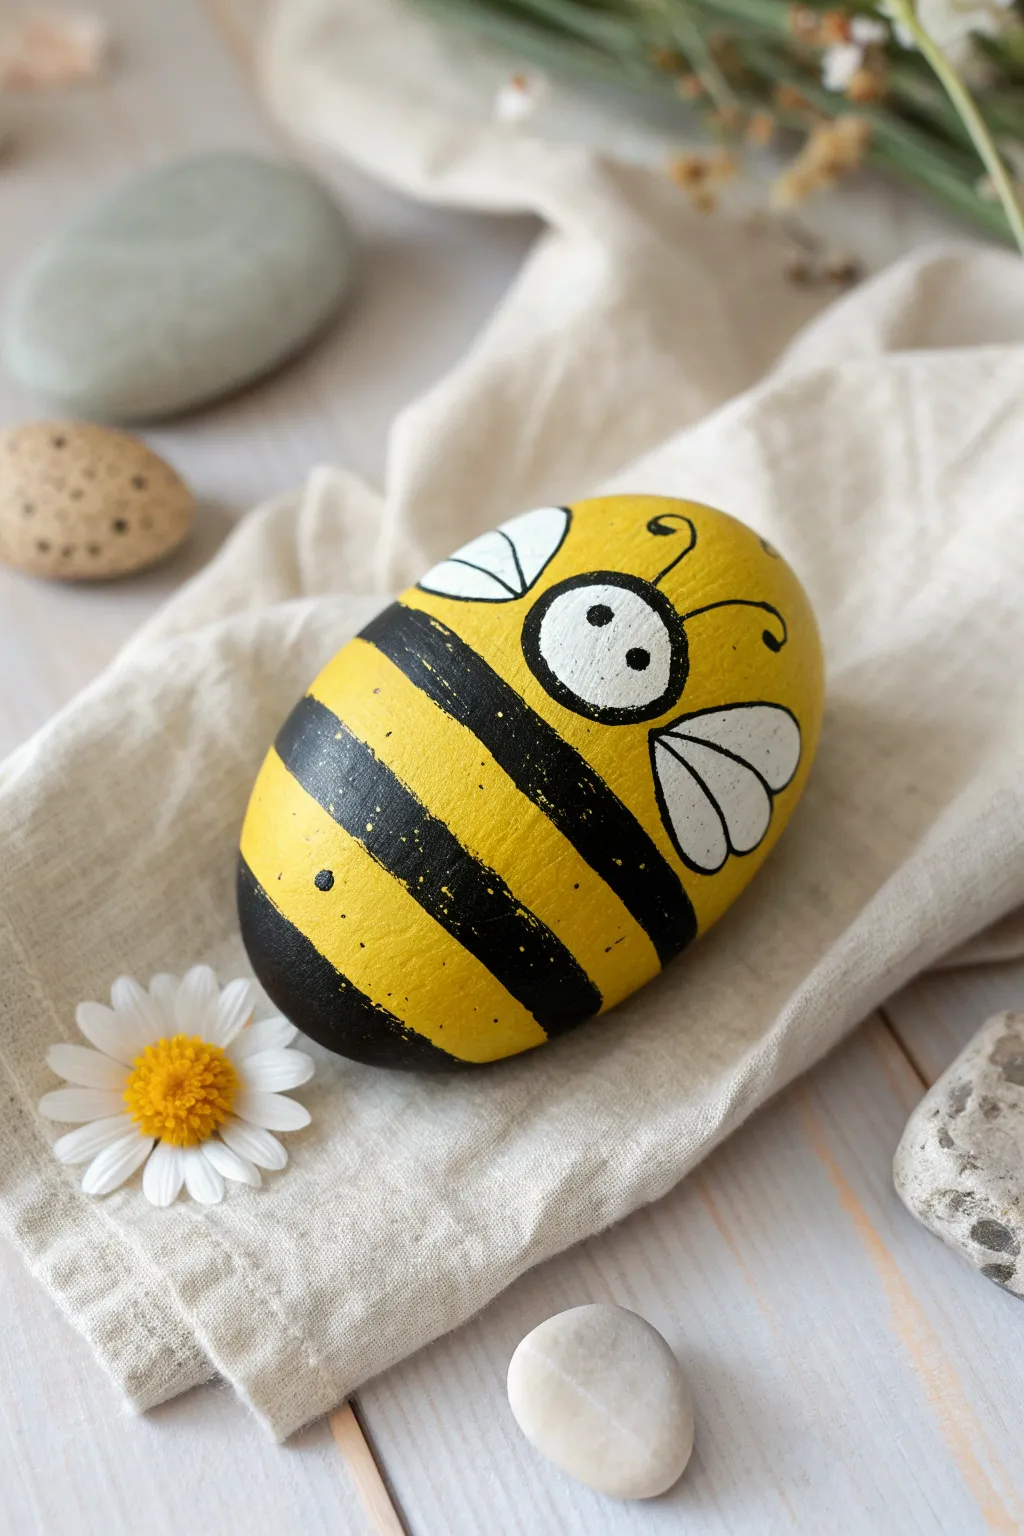
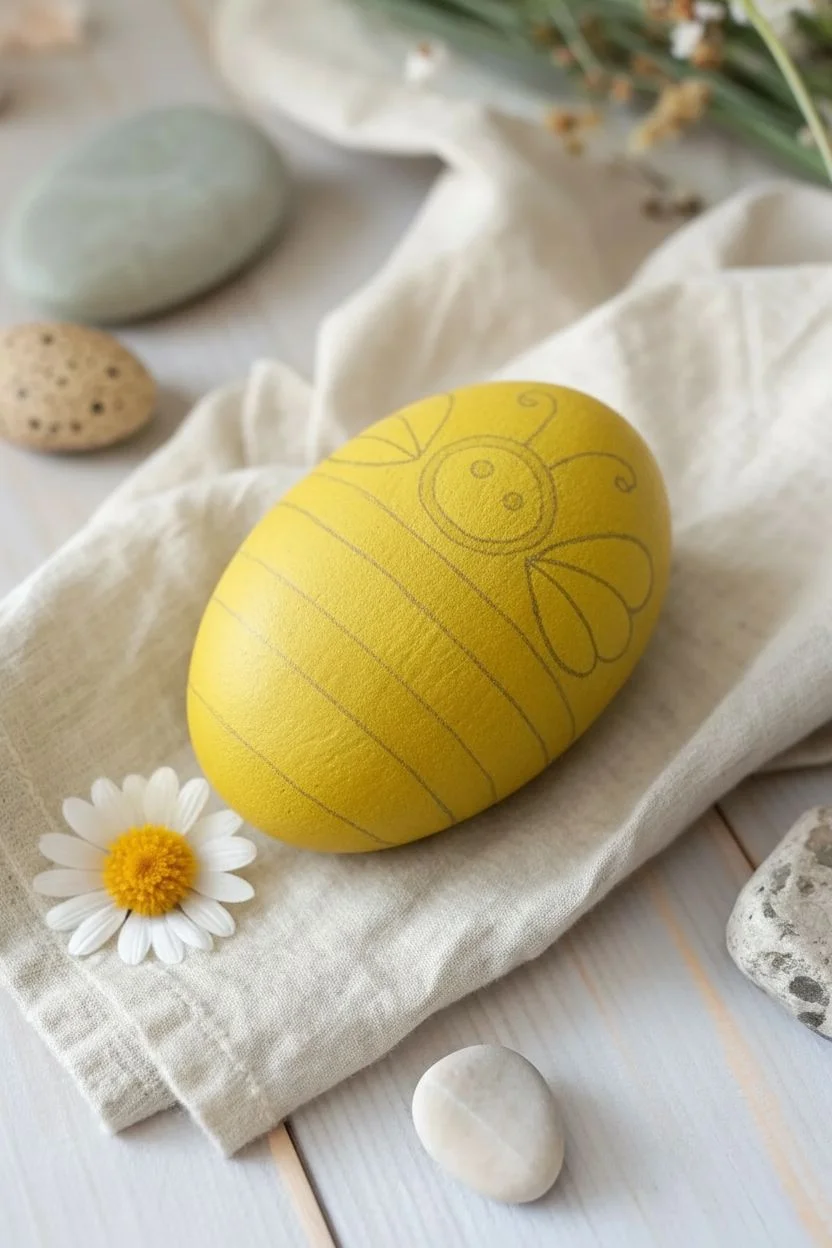
Transform a simple oval stone into this cheerful, buzzing friend with bright yellow paint and bold black stripes. The cartoony face and simple wings make this a perfect project for beginners looking to add a touch of whimsy to their garden or desk.
Step-by-Step Tutorial
Materials
- Smooth oval river rock (approx. palm-sized)
- Acrylic paint: Bright Yellow, Black, White
- Flat paintbrush (medium)
- Round detail paintbrush (small)
- Pencil
- Clear acrylic sealer (spray or brush-on)
- Water cup and paper towels
Step 1: Base Coat & Sketching
-
Clean the surface:
Begin by washing your rock thoroughly with soap and water to remove any dirt or oils. Dry it completely before painting, or the acrylics won’t adhere properly. -
Apply the yellow base:
Using your medium flat brush, paint the entire top surface of the rock with bright yellow acrylic paint. I usually find that two or three thin coats work better than one thick coat for solid, streak-free coverage. -
Let it dry completely:
Wait for the yellow paint to dry fully between coats. This is crucial so your pencil lines won’t gouge the paint later. -
Sketch the design:
Lightly sketch the outline of the bee’s features with a pencil. Draw two vertical curved lines for the stripes, a large circle near the front for the face/antenna area, and oval shapes for the wings on the sides.
Step 2: Painting the Body Pattern
-
Outline the stripes:
Switch to a smaller brush and carefully paint the outlines of the black stripes you sketched. This helps contain the paint when you fill them in. -
Fill the black stripes:
Fill in the thick black bands across the bee’s body. Don’t worry if the edges look a bit rough; a little texture adds character to the bee. -
Paint the tail:
Paint the very back end of the rock black to create the bee’s bottom segment. -
Create the wings:
Use white paint to fill in the teardrop-shaped wings on the upper sides of the yellow body. You might need two coats of white to make it opaque against the yellow background. -
Add face details:
Paint a large white circle on the front yellow section for the eye area. Let this dry completely before adding pupils.
Paint Looking Streaky?
Yellow can be notoriously transparent. If it looks sheer, apply a coat of white first as a primer, let it dry, then apply the yellow on top for vibrancy.
Step 3: Fine Details & Finishing
-
Outline the eye:
Using your finest detail brush and black paint, carefully outline the large white eye circle. Keep your hand steady and rest your pinky on the table for balance. -
Add the pupils:
Dip the back end of your paintbrush handle into black paint and dot two small eyes inside the white circle. This creates perfectly round pupils. -
Draw the antennae:
With the detail brush, paint two thin, curved lines extending from the top of the eye circle, curling slightly at the ends. -
Outline the wings:
Once the white wings are dry, outline them with a thin black line. Add a small line down the center of each wing for detail. -
Clean up edges:
Check for any yellow spots that need touch-ups or black lines that need smoothing. I like to use a clean damp brush to quickly wipe away mistakes before they dry. -
Seal the rock:
Once all paint is completely bone dry (wait at least an hour), apply a coat of clear acrylic sealer to protect your bee from the elements and give it a nice sheen.
Pro Tip: Dotting Tool Hack
Don’t have a detail brush? Use a toothpick for the fine black outlines on the wings and antennae. It gives you incredible control for thin lines.
Now you have a charming little garden guardian ready to nestle among your flowers


Cherry Blossom Branch With Dot Blooms

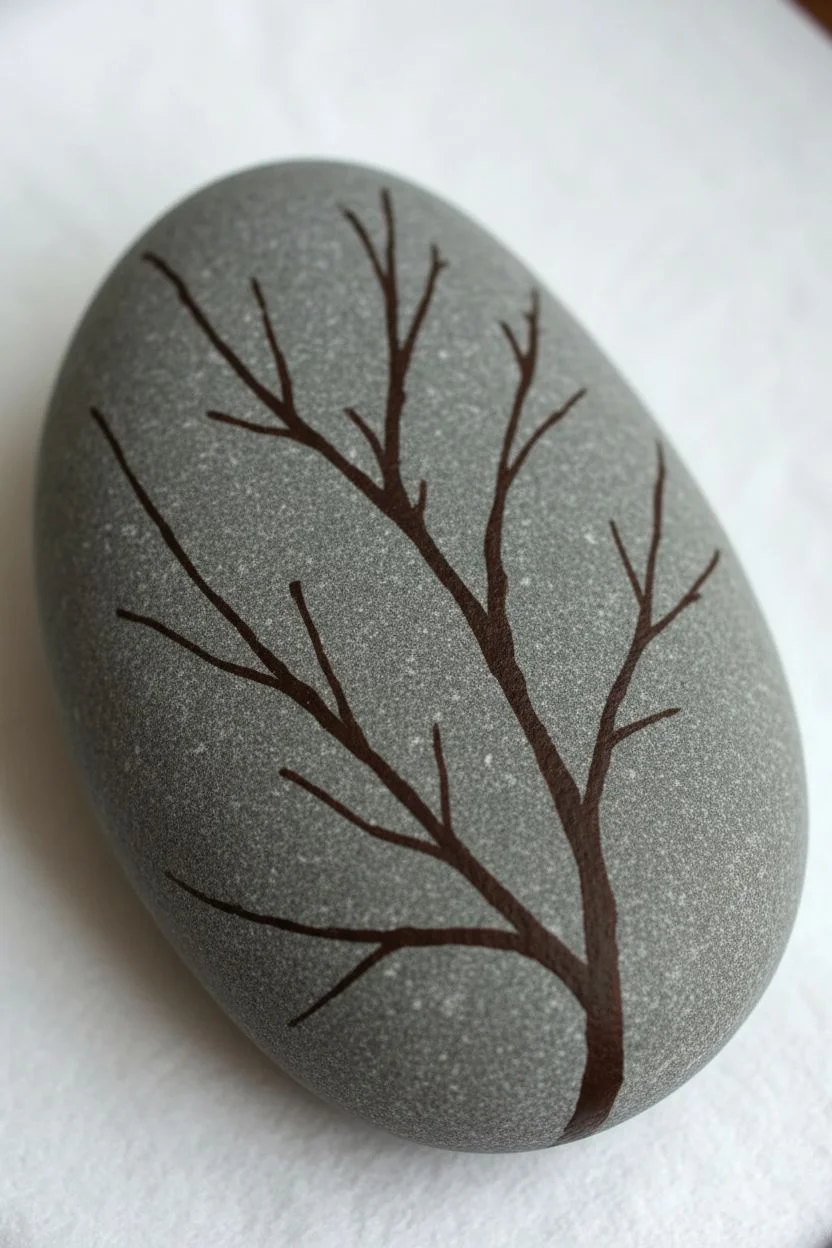
Bring the softness of spring indoors with this gentle cherry blossom design on a smooth grey stone. Featuring pale pink petals and intricate stamens, this piece captures the ephemeral beauty of sakura season in permanent acrylic.
How-To Guide
Materials
- Smooth, oval river rock (medium grey)
- Acrylic paints: Dark brown, white, pale pink (blush), deep pink/magenta, yellow-ochre
- Fine detail brushes (liners and spotters, size 0 and 00)
- Small dotting tool or toothpick
- Palette or small plate
- Water cup and paper towels
- Matte spray varnish or sealer
Step 1: Painting the Branches
-
Clean the canvas:
Begin by washing your stone with warm soapy water and scrubbing away any dirt or grit. Let it dry completely so the paint adheres properly. -
Visualize the layout:
Before painting, look at the natural shape of your stone. Imagine a main branch growing from the bottom right corner, reaching diagonally upwards towards the top left. -
Mix the branch color:
Mix a small amount of dark brown paint with a tiny drop of water to make it flow smoothly, like ink. -
Paint the main stem:
Using your fine detail brush, paint the thickest part of the branch starting near the bottom edge. Use light pressure, allowing the line to taper as it goes up. -
Add side branches:
Paint a few smaller twigs branching off the main stem. Keep these lines jagged and organic looking rather than perfectly straight, mimicking real wood growth. -
Extend the tips:
At the very ends of your branches, use the very tip of your brush to flick out thin, delicate twig endings where the buds will eventually sit.
Natural Petals Tip
Don’t make petals perfect circles. Wiggle your brush slightly as you paint the outer edge to give them a natural, fluttering appearance.
Step 2: Creating the Flower Petals
-
Mix the petal color:
Create a very pale, milky pink by mixing a large amount of white with just a speck of pink or red. It should be almost white. -
Place the main blooms:
Identify three main spots for your open flowers. Paint five simple teardrop shapes in a circle for each flower, making sure the petals don’t quite touch in the center initially. -
Refine the shape:
Double-check that the outer edges of the petals are slightly rounded. You may need a second coat of this pale pink once the first layer is dry to ensure opacity against the grey stone. -
Add blush shading:
While the petal paint is still slightly damp (or by glazing over dry paint), add a tiny touch of slightly darker pink near the center of each flower to create depth.
Step 3: Adding Details & Buds
-
Paint the flower centers:
Once the petals are dry, use a strong deep pink or magenta to paint a small, solid circle right in the middle of each flower. -
Draw the stamens:
Using your smallest liner brush and the deep pink paint, draw fine lines radiating outward from the center circle onto the petals. -
Dot the pollen:
Dip a toothpick or very fine dotting tool into yellow-ochre or gold paint. Place tiny dots at the end of each pink stamen line. -
Create the buds:
Along the thinner branch tips, paint small oval shapes using a medium pink shade. Make some slightly larger than others. -
Highlight the buds:
Add a tiny stroke of white or pale pink to the top of each bud to make them look round and dimensional. -
Connect the buds:
Use your brown paint to carefully connect the base of each pink bud to the branch, adding small sepals (the little leafy cups) at the bottom. -
Final touches:
I like to add a few stray grey or black speckles around the background if the rock looks too clean, though this is optional. -
Seal the stone:
Allow the stone to dry for at least 24 hours. Finish with a matte spray varnish to protect the artwork without adding an unnatural high gloss.
Add Metallic Flair
Replace the yellow pollen dots with metallic gold paint. It catches the light beautifully and adds a subtle shimmer to the stamens.
Now you have a serene piece of nature art that captures the fleeting beauty of spring for years to come.
Fresh Rainbow After Rain
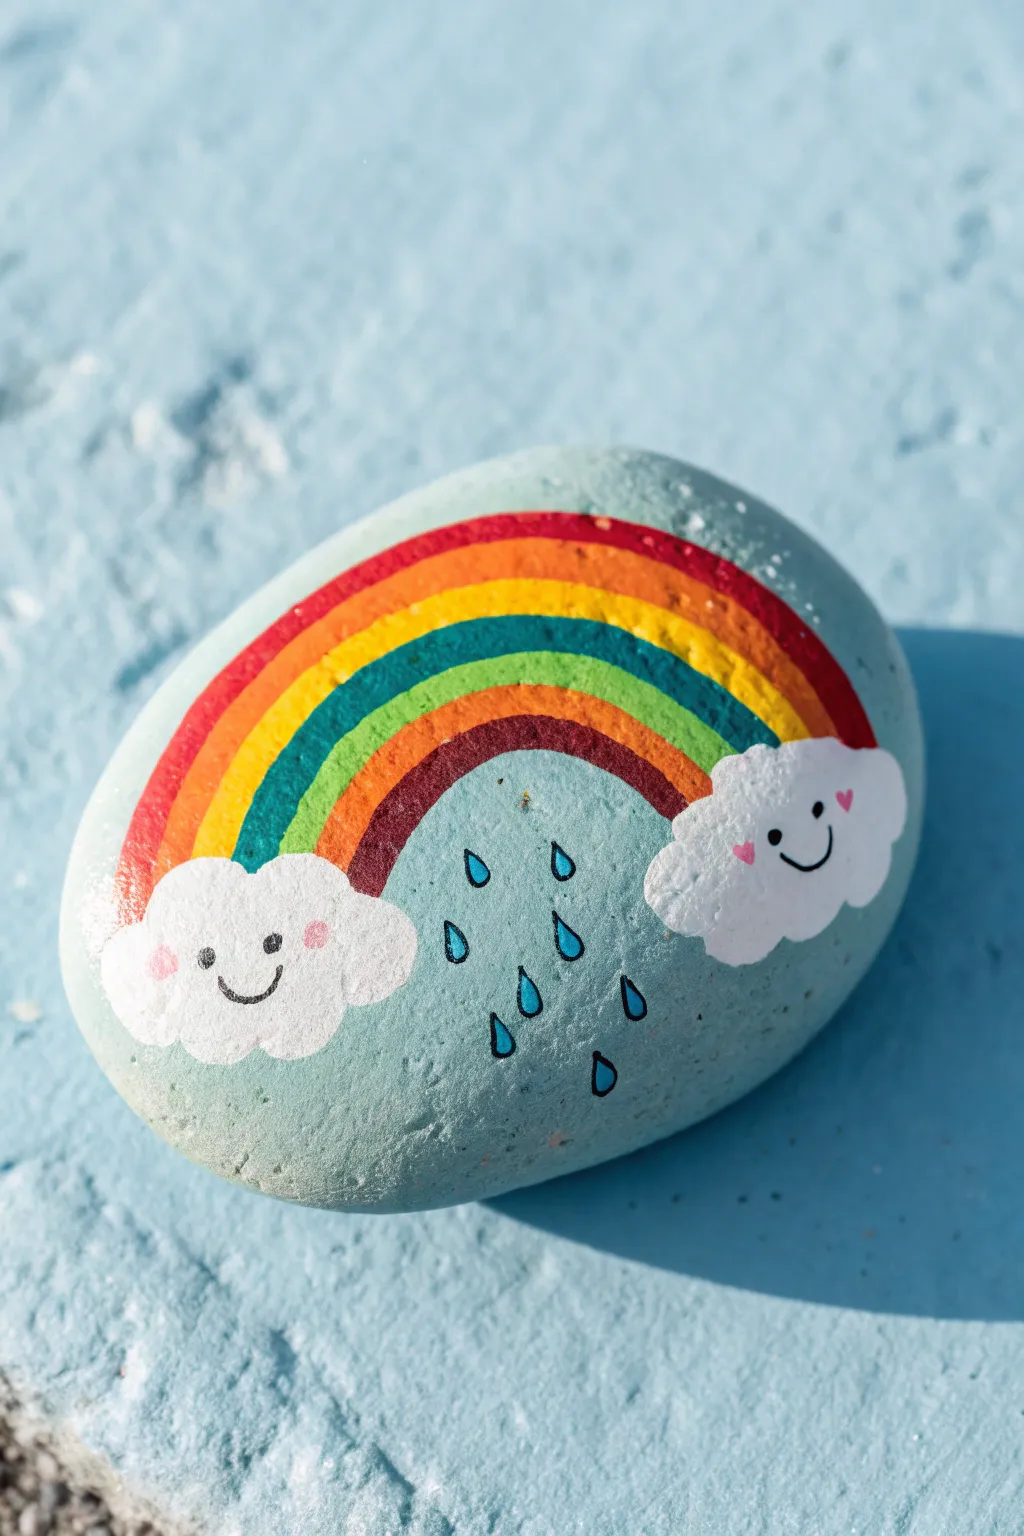
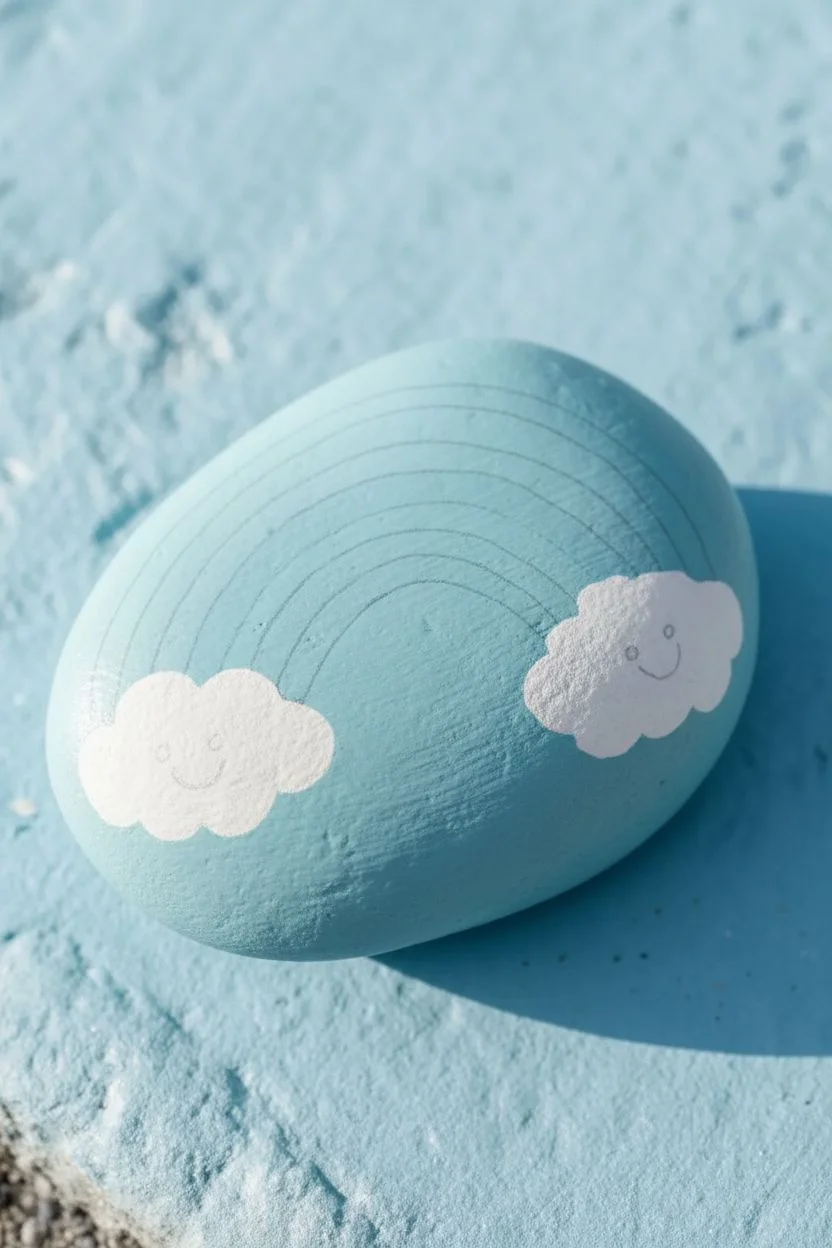
Capture the magic of a fresh spring shower with this adorable painted rock. Featuring a vibrant rainbow arching between two smiling clouds, this design uses soft pastels and simple lines to create a cheerful decoration for your garden or windowsill.
Detailed Instructions
Materials
- Smooth oval river rock (approx. 3-4 inches wide)
- Acrylic paints: Light teal/aqua, white, red, orange, yellow, green, blue, purple, black, pink
- Flat paintbrush (medium size for base coating)
- Fine liner brush (for details)
- Small round brush
- Pencil for sketching
- Paint pens (optional, for outlining)
- Acrylic sealer (spray or brush-on, matte or glossy)
Step 1: Preparing the Canvas
-
Clean and Dry:
Begin by washing your rock with warm, soapy water to remove any dirt or oils. Let it dry completely in the sun or use a hairdryer to speed things up. -
Base Coat Application:
Mix a small amount of white paint into your teal or aqua acrylic to create a soft, pastel sky blue. Apply this color over the entire top surface of the rock using your flat brush. -
Second Layer:
Allow the first coat to dry fully. If the rock’s natural color is still showing through, apply a second coat of the pastel blue for a smooth, opaque finish. -
Sketching the Design:
Once the base is bone-dry, use a pencil to very lightly sketch the placement of your clouds on either side. Draw a large arch connecting them for the rainbow.
Steady Hands
For smooth rainbow curves, anchor your pinky finger on the table or the side of the rock while painting. This stabilizes your hand for cleaner lines.
Step 2: Painting the Rainbow
-
Primary Red Arch:
Start with the outermost band of the rainbow using red paint and a small round brush. Paint a smooth curve following your pencil sketch. -
Orange and Yellow:
Clean your brush thoroughly. Paint the orange stripe directly underneath the red, and then follow with the yellow stripe. Try to keep the lines touching but not blending. -
Cool Colors:
Continue working inward with a stripe of green, then blue. I find it helpful to rotate the rock as I paint to keep my hand steady for these curves. -
Final Purple Arch:
Finish the rainbow with a stripe of deep purple or violet on the innermost curve. Let the entire rainbow dry completely before moving to the next step to avoid smudging.
Fixing Smudges
If rainbow colors bleed into each other, wait for them to dry completely. Then, simply repaint the line with the correct color to cover the mistake.
Step 3: Adding Clouds and Rain
-
Fluffy Clouds:
Using white paint and a round brush, paint the cloud shapes at the base of each rainbow end. Use a dabbing motion to give the edges a fluffy, scalloped look. -
Layering White:
White paint often needs two or three coats to look solid against a colored background. Apply additional layers to the clouds until they are bright and opaque. -
Drawing Raindrops:
Use a fine liner brush or a blue paint pen to draw teardrop shapes falling from the center of the rainbow arch. Outline them in blue first. -
Filling Raindrops:
Fill the bottom half of some raindrops with blue paint, leaving others open or just outlined for visual variety.
Step 4: Fine Details
-
Cloud Faces:
With an ultra-fine brush and black paint (or a fine-tip black paint pen), draw a simple ‘U’ shape for the smile and two small dots for eyes on each cloud. -
Cheeky Details:
Dip the non-brush end of a paintbrush into pink paint to stamp small, perfectly round cheeks onto the clouds. You can also paint tiny pink hearts near the cheeks for extra sweetness. -
Raindrop Outlines:
Go back over your raindrops with a very fine black outline to make them pop against the blue background. -
Sealing:
Allow the rock to dry for at least 24 hours. Once cured, apply a clear acrylic sealer to protect your artwork from the elements and give it a nice sheen.
Now your cheerful rainbow rock is ready to brighten up even the gloomiest rainy days
April Showers Umbrella Rock
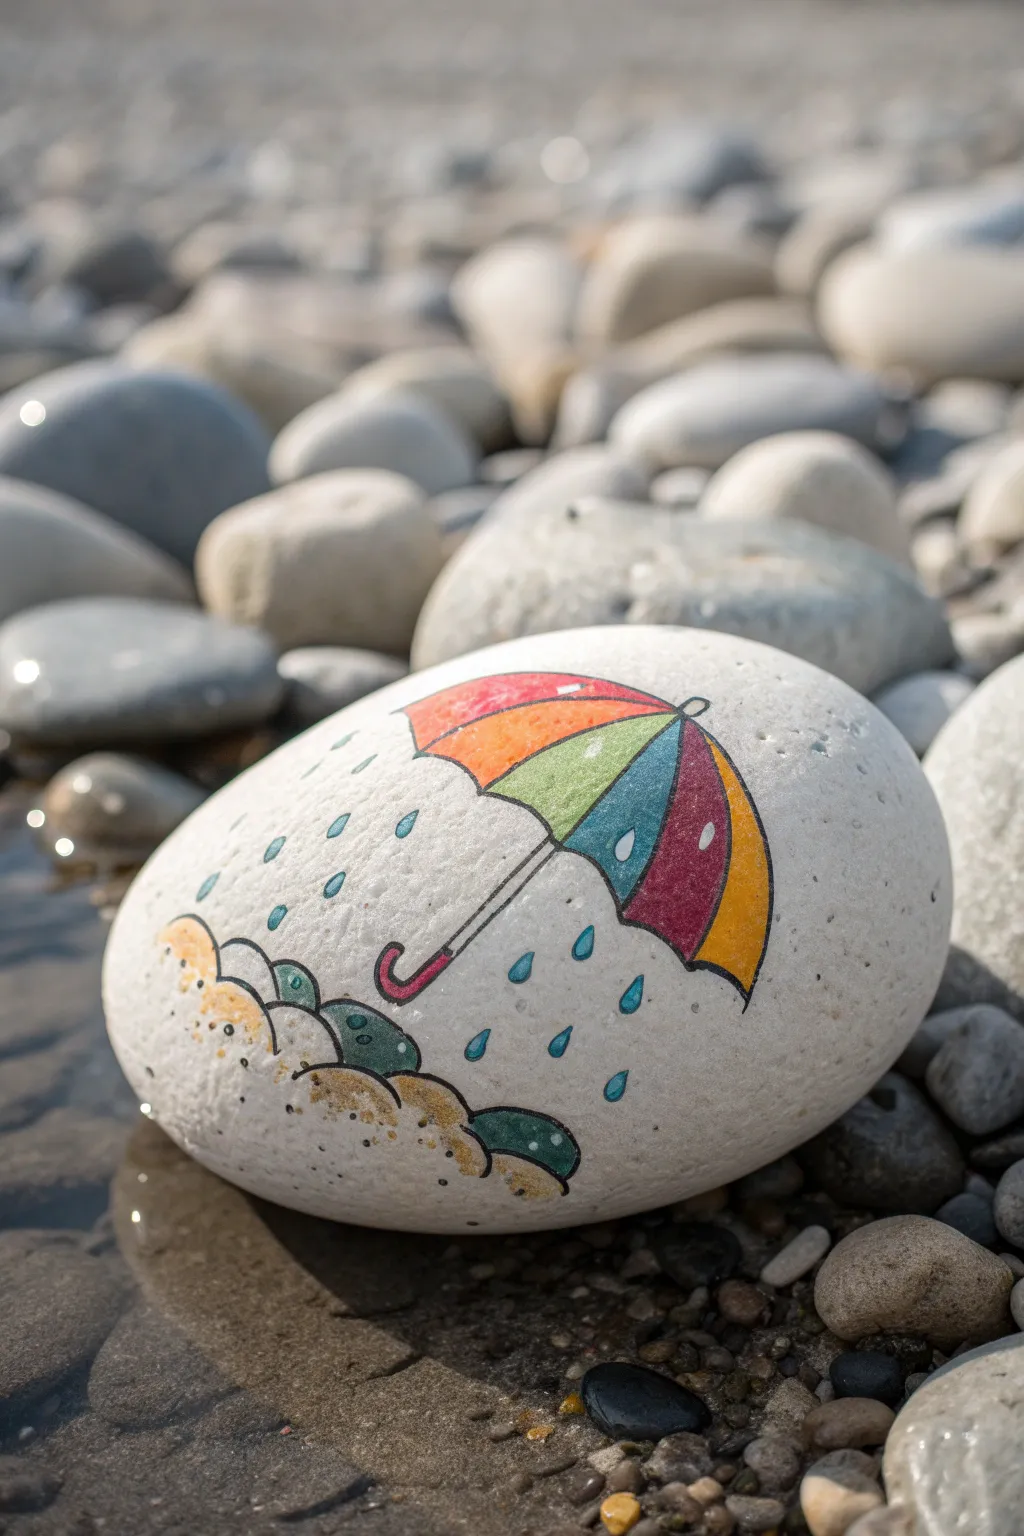
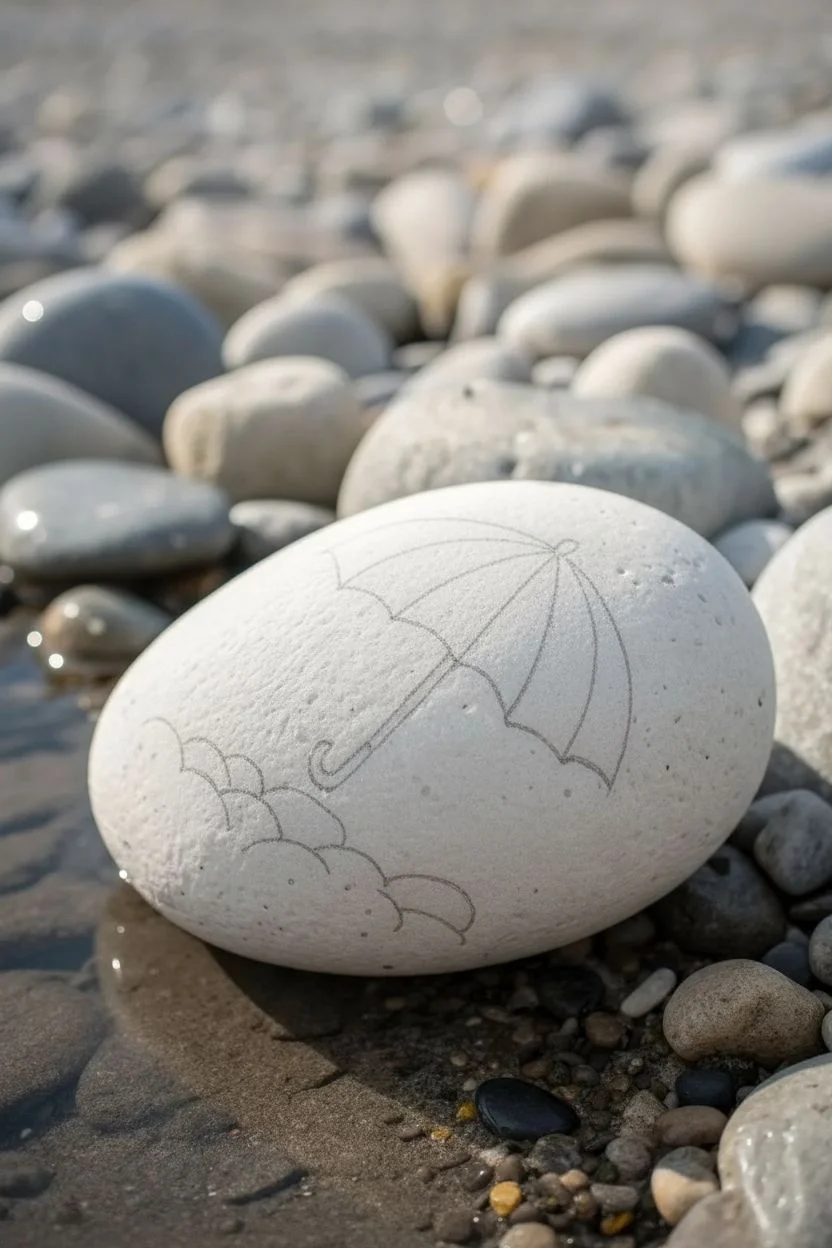
Embrace the April showers with this cheerful painted stone, featuring a colorful umbrella protecting the ground from a gentle downpour. The rounded shape of the rock perfectly frames the umbrella’s curve, making it a charming addition to any indoor or outdoor garden.
Step-by-Step Tutorial
Materials
- Smooth, oval-shaped river rock (white or light grey)
- Black fine-point paint pen (like Posca or microns) or detail brush
- Acrylic paints: Orange, Lime Green, Teal/Blue, Deep Red, Yellow, Light Pink
- Small round brush (size 0 or 1)
- Small flat brush (size 2)
- Blue paint pen or paint for raindrops
- Clear matte varnish or sealant
- Pencil and eraser
Step 1: Planning and Outlining
-
Select your stone:
Choose a rock that is nice and smooth with a rounded, oval face. A white or very light grey stone works best so the colors pop without needing a white base coat. -
Clean surface:
Scrub the rock with soap and water to remove any dirt or oil, then let it dry completely before starting. -
Sketch the umbrella curve:
With a pencil, lightly draw a large arch near the top center of the rock. This will be the top edge of your umbrella. -
Draw the bottom scallops:
Connect the ends of your arch with a series of small, scalloped curves. There should be four or five scallops to create the fabric sections of the umbrella. -
Add ribs and handle:
Draw curved lines extending from the ‘peak’ of the umbrella down to the points between the scallops. Then, sketch the handle shaft coming straight down from the center, finishing with a J-hook curve. -
Sketch the ground:
At the bottom left, draw a few bubbly, cloud-like shapes to represent the ground or splash puddles.
Step 2: Adding Color
-
Paint the red section:
Using your small flat brush, fill in one of the umbrella segments with deep red acrylic paint. -
Paint the orange section:
Paint the adjacent segment on the left with a bright orange. Be careful to stay inside your pencil lines. -
Add green and blue:
Continue painting the segments. Use a lime green for the center-left and a teal or blue for the center-right section. -
Finish the yellow segment:
Fill the final right-side segment with a sunny yellow. I find that applying two thin coats here ensures the yellow is opaque enough. -
Color the handle:
Paint the handle and hook with a pink or magenta color. Keep your hand steady, or switch to a very fine brush for this thin line. -
Paint the ground shapes:
Fill in your ground bubbles with alternating colors like yellow and teal green to match the umbrella palette. -
Add white highlights:
Once the umbrella panels are dry, add a tiny white tear-drop highlight to the center of each colored section to make them look shiny and wet.
Paint Pen Precision
If you struggle with brush control on bumpy rocks, use acrylic paint pens for filling the color sections too, not just the outlines.
Step 3: Detailing and Sealing
-
Outline the umbrella:
Using a black fine-point paint pen, carefully trace over your original pencil lines on the umbrella body and handle. Make the line relatively thin and crisp. -
Outline the ground:
Trace the ground shapes with the black pen. Add a little texture by stippling some small dots inside the yellow ‘sand’ areas. -
Draw raindrops:
With a blue paint pen or fine brush, draw small tear-drop shapes falling around the umbrella. Vary their angles slightly to look like natural rain. -
Add water droplets:
Draw a few tiny blue drops actually touching the umbrella or bouncing off the ground shapes to show the splashing effect. -
Erase pencil marks:
Ensure all paint and ink is 100% dry, then gently erase any visible pencil sketch lines. -
Apply sealant:
Finish by applying a coat of clear matte varnish. This protects your artwork from the elements if you choose to hide it outside.
Make It 3D
After sealing, use a tiny drop of dimensional glaze or clear UV resin on each raindrop to make them physically raised and glossy like real water.
Now you have a captured moment of springtime weather to brighten up your desk or garden path
Happy Frog in Spring Greens
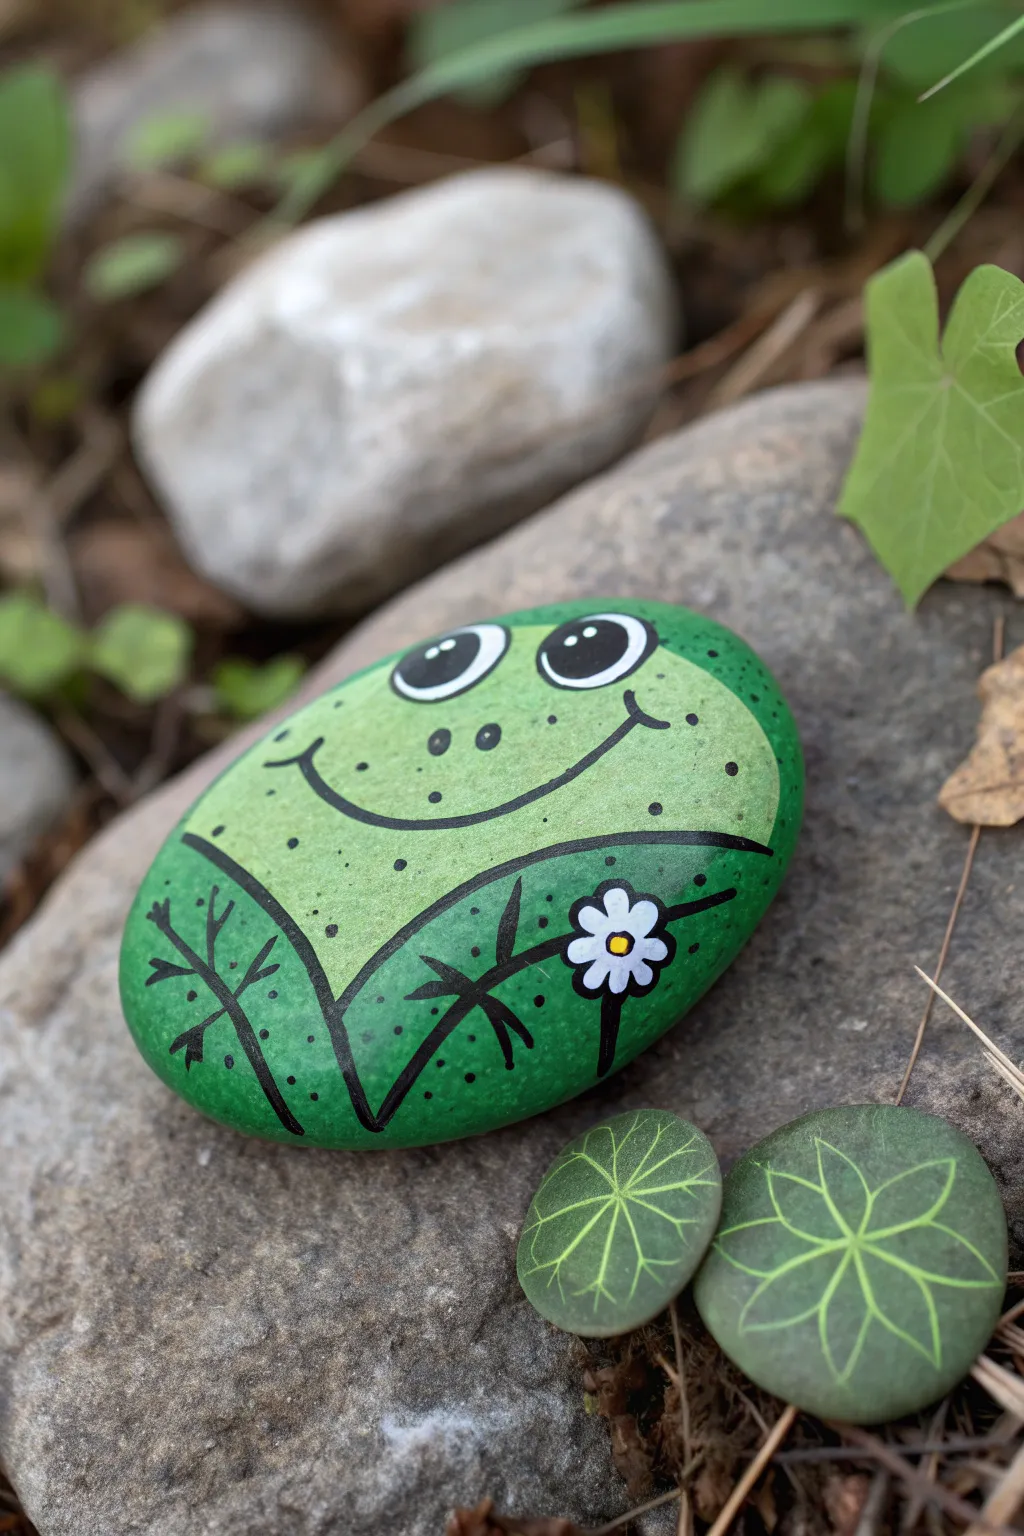
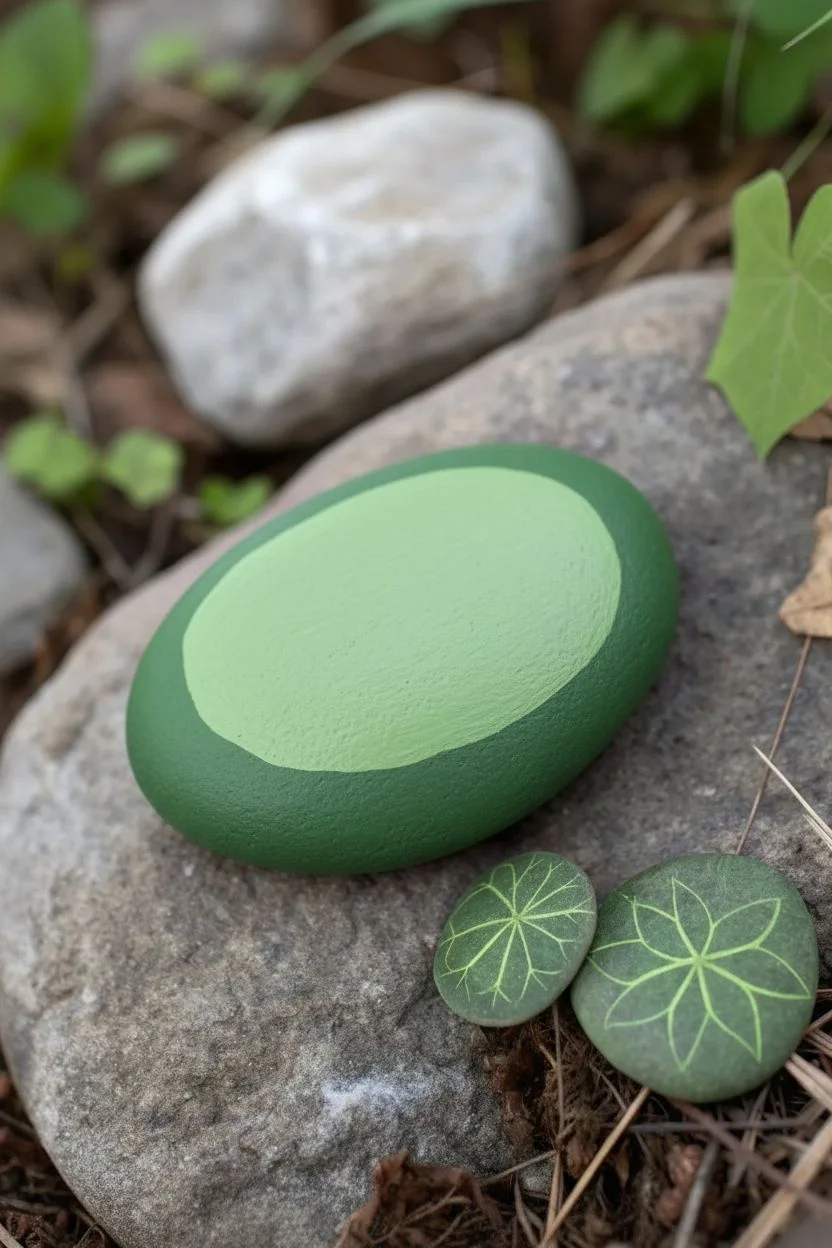
Transform a smooth, round stone into a cheerful amphibian basking in the spring sun. This project uses two shades of green and simple linework to create a smiling frog friend holding a tiny daisy.
Detailed Instructions
Materials
- Smooth, round river rock (palm-sized is ideal)
- Acrylic craft paint (Light Green, Dark Leaf Green, White, Yellow, Black)
- Small flat brush (size 4 or 6)
- Fine liner brush (size 0 or 00)
- Black paint marker or ultra-fine brush for outlining
- Pencil for sketching
- Spray sealer or varnish (matte or glossy)
Step 1: Base Coat and Blocking
-
Prime the canvas:
Begin by washing and drying your rock thoroughly to remove any dirt or oils. Apply a coat of white acrylic paint to the top surface if your rock is very dark, as this helps the green colors pop. -
Apply the main green:
Paint the entire top surface of the rock with your darker ‘Leaf Green’. This will serve as the background color for the body and legs. You might need two layers for full opacity. -
Lighten the center:
While the base is dry, mix your lighter green (or add a touch of yellow/white to your leaf green). Paint a large, rounded semi-circle shape in the upper center of the rock. This lighter area defines the frog’s face and chest. -
Create the legs:
Visualize two angled shapes on the bottom left and right sides of the lighter area. Leave these dark green to represent the frog’s folded hind legs.
Uneven Paint?
If your green paint looks streaky, use a sponge dabber instead of a brush for the second coat. This creates a uniform, slightly textured finish perfect for frog skin.
Step 2: Facial Features
-
Sketch the face:
Once the green paint is completely dry, lightly sketch the eyes and mouth with a pencil. Draw two large ovals at the top of the head area, slightly tilting inward. -
Paint the eyes:
Fill in the two oval eye shapes with opaque white paint. Use your small brush carefully to keep the edges crisp. -
Add the smile:
Using a very fine liner brush and black paint (or a paint pen), draw a wide, curved smile that stretches almost from cheek to cheek. Add small upward ticks at the corners for extra cheer. -
Draw the nose:
Place two small black dots or short dashes in the center of the face, just above the smile line, for nostrils. -
Detail the eyes:
Paint large black circles inside the white ovals for pupils. I like to have them looking up and to the right for a whimsical expression. -
Add sparkle:
Once the black pupils are dry, add a tiny white dot in the upper right corner of each pupil to give the eyes a lifelike shine.
Paint Pen Precision
For the crispest black outlines, use a POSCA paint marker (extra fine tip) instead of a brush. It gives you much more control over the smile and leg details.
Step 3: Body Details and Flower
-
Outline the body:
Use your liner brush or black marker to outline the separation between the light green chest and the dark green legs. Draw a bold curved line defining the edge of the light green area. -
Define the legs:
Draw the legs’ shape by outlining the dark green sections on the left and right. Add lines for folded limbs, making them look like knees tucked in. -
Add texture:
Using the fine tip of your paint pen or brush, add small speckles and dots across the light green face area to mimic frog skin texture. -
Paint the flower:
On the right side of the frog’s chest (your right), paint a small white daisy shape with five or six rounded petals. -
Add the stem:
Painting carefully over the dark green leg area, draw a thin black line extending down from the flower to look like a stem being held. -
Finish the flower:
Place a dot of yellow paint in the center of the white petals. -
Include extra foliage:
To fill empty space on the legs, draw simplified black branch patterns or leaf veins. This adds visual interest without needing more colors. -
Seal the rock:
Allow the rock to dry for at least 24 hours. Finish with a clear spray sealer to protect your frog from the elements if he’s going to live in the garden.
Place your happy frog in a flower pot or next to a garden path to greet visitors
Mini Mushroom Patch
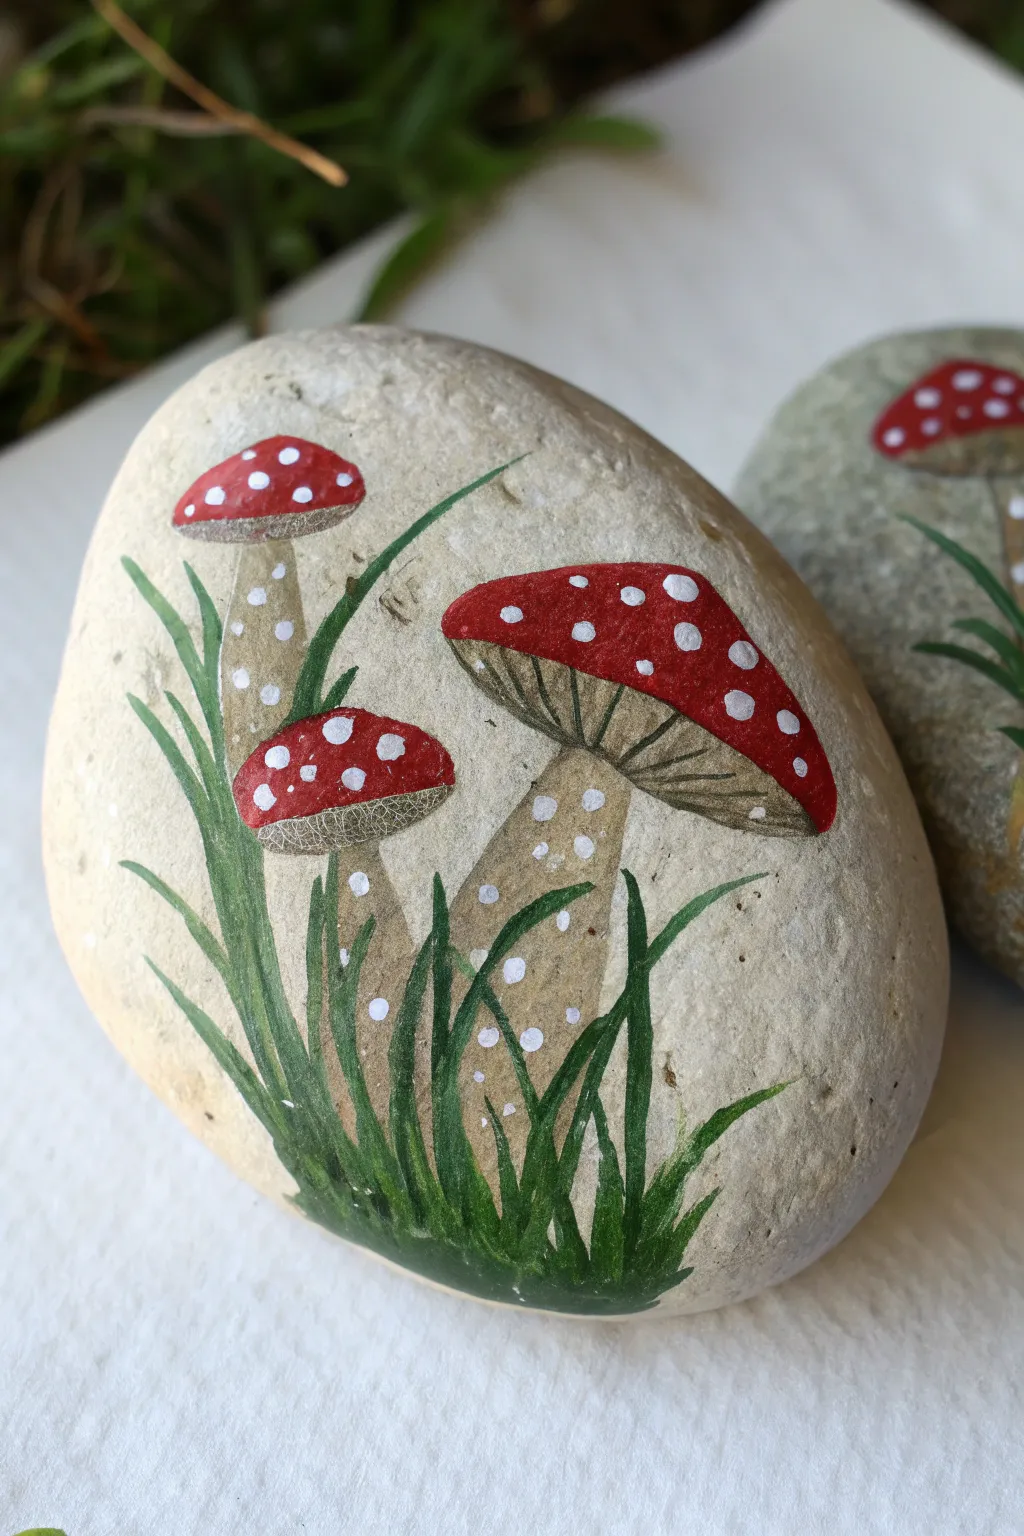
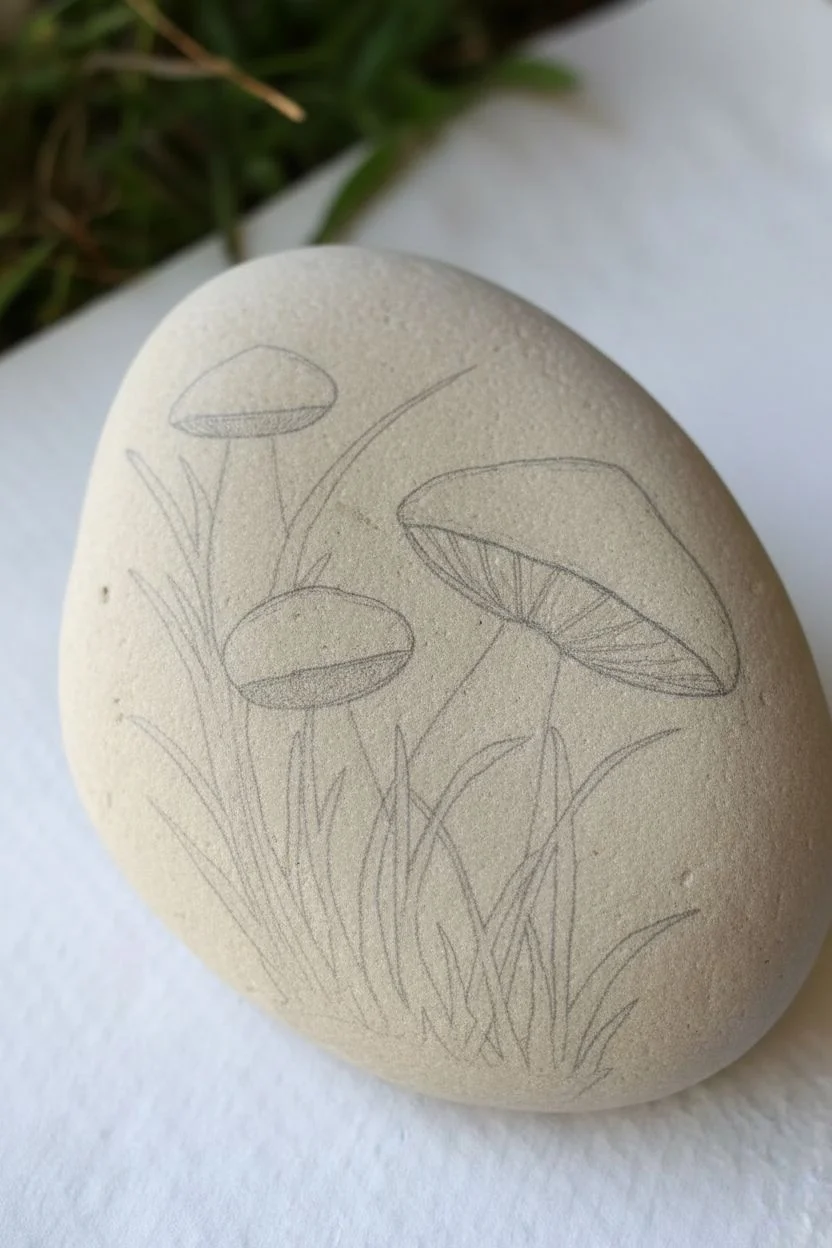
Capture the magic of a forest floor with these charming red-capped mushrooms painted on smooth river stones. The beige stone background perfectly mimics a natural earthy canvas, making the bright reds and greens pop beautifully.
Detailed Instructions
Materials
- Smooth, beige or light gray river rock (medium size)
- Acrylic paints: Bright Red, Titanium White, Deep Green, Lime Green, Burnt Umber (Brown), Beige/Tan
- Detail brushes: Fine liner (size 0 or 00), small round brush (size 1 or 2)
- Pencil for sketching
- Water cup and paper towels
- Matte or glossy sealant spray
Step 1: Sketching the Scene
-
Clean and Prep:
Begin by washing your stone with soapy water to remove any dirt or oils. Let it dry completely so the paint adheres properly. -
Outline the Stems:
Using a light pencil, sketch three mushroom stems of varying heights. I like to curve them slightly so they look organic rather than stiff. -
Add the Caps:
Top each stem with a distinct cap shape. Draw a large, wide cap on the rightmost mushroom and two smaller, rounder caps on the left side. -
Mark the Grass:
Lightly sketch the direction of grass blades at the base, ensuring they overlap the bottom of the mushroom stems naturally.
Paint Consistency
Add a tiny drop of water to your paint for the grass blades. Thinner paint flows better from the brush, creating sharper, more tapered points.
Step 2: Painting the Mushrooms
-
Base Coat the Stems:
Mix a small amount of Burnt Umber with White or Beige to create a light tan color. Paint the stems, keeping the paint fairly thin so the rock texture shows through slightly. -
Paint the Red Caps:
Using your bright red paint and a small round brush, fill in the top portion of the mushroom caps. You might need two coats for a vibrant, solid red. -
Create the Gills:
Underneath the red caps, where the mushroom gills would be, paint a crescent shape using a darker beige or diluted brown. -
Detailing the Gills:
Once the under-cap area is dry, take your finest liner brush with dark brown paint. Draw tiny, curved lines radiating from the stem outward to the edge of the cap to resemble gills. -
Stem Texture:
Add subtle texture to the stems by dabbing tiny white dots randomly along them. This mimics the natural spotting found on fly agaric mushrooms. -
Cap Highlights:
Dip the handle end of a paintbrush into Titanium White paint. Dot the red caps with spots of varying sizes—some tiny, some slightly larger.
Step 3: Adding the Grass
-
Base Grass Layer:
Load a liner brush with Deep Green paint. Start at the very bottom of the rock and flick the brush upward in quick, sweeping motions to create long grass blades. -
Varying Angles:
Paint some grass blades crossing over each other and curving in different directions to avoid a ‘picket fence’ look. -
Adding Dimension:
Mix a little Lime Green with the Deep Green. Paint smaller, lighter blades of grass in front of the darker ones to create depth and volume. -
Grounding the Scene:
Darken the very bottom edge of the rock with the Deep Green to simulate a shadowy patch of earth where the grass grows. -
Final White Accents:
Add a few tiny white dots floating among the grass blades near the bottom, suggesting pollen or tiny wildflowers. -
Sealing:
Allow the paint to cure for at least 24 hours. Spray with a clear sealant to protect your miniature landscape from the elements.
Uneven Dots?
If your white dots look messy, use a toothpick or dotting tool instead of a brush tip. This guarantees perfectly round circles every time.
Now you have a little piece of the forest floor to decorate your garden or desk
Garden Sprouts and Seedling Labels
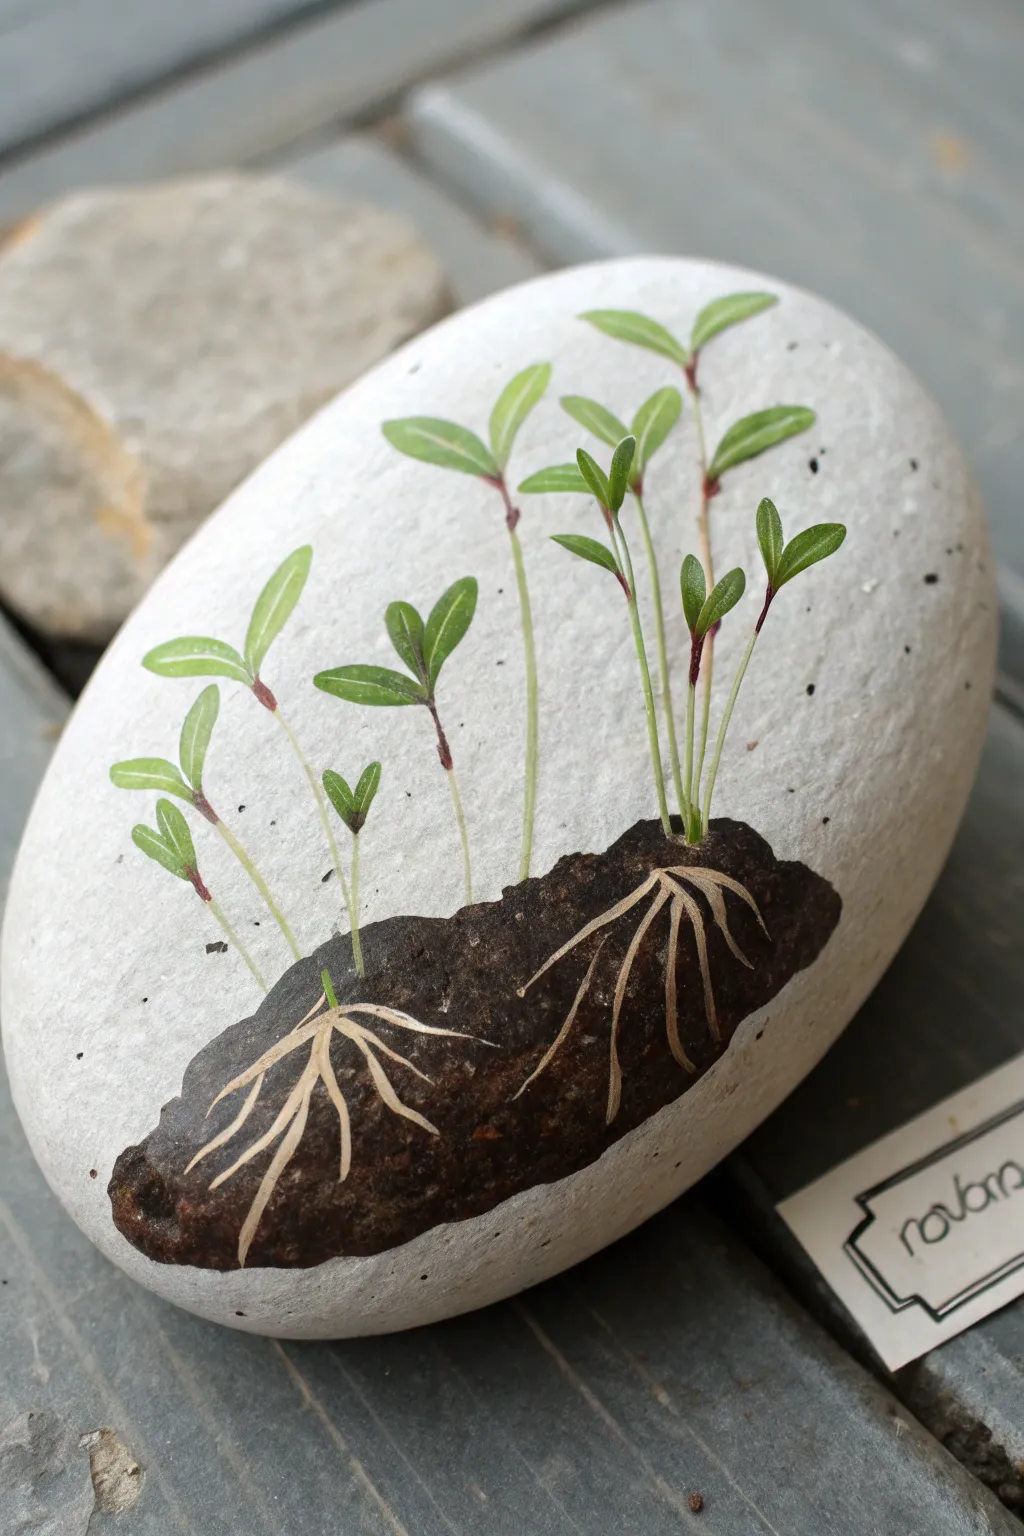
Celebrate the quiet beginnings of life with this elegant rock painting featuring delicate green seedlings emerging from rich, dark soil. The white background makes the botanical details pop, creating a natural looking piece perfect for marking garden rows or sitting on a windowsill.
Detailed Instructions
Materials
- Smooth, oval river rock (medium to large size)
- White matte acrylic paint or gesso
- Acrylic paints: Dark brown, black, burnt umber, sap green, lime green, deep red/maroon, beige/cream
- Fine detail brushes (sizes 0, 00, and 000)
- Medium flat brush
- Pencil (optional)
- Matte spray varnish or sealant
Step 1: Stone Preparation
-
Clean the surface:
Begin by scrubbing your rock with warm soapy water to remove any dirt or grit, then let it dry drastically. -
Base coat application:
Using your medium flat brush, apply a coat of white acrylic paint over the entire top surface of the rock. You don’t need to paint the underside unless you want to. -
Opacity check:
Allow the first layer to dry completely. If the stone’s natural color is showing through, apply a second or third coat until you have a solid, opaque white canvas.
Pro Tip: Steady Hands
For the ultra-fine roots and stems, brace your painting hand against the table or rest your pinky finger on a dry part of the rock to stabilize your brush strokes.
Step 2: Painting the Soil Bed
-
Outline the earth:
Near the bottom third of the rock, visualize an uneven, organic oval shape that tilts slightly upward to the right. This will be your soil mound. -
Mix the soil color:
On your palette, mix dark brown with a touch of black to create a deep, rich loam color. -
Fill the shape:
Paint in the soil shape with the dark mixture. Don’t make the edges perfectly smooth; a little bumpiness adds to the texture of dirt. -
Add texture:
While the brown paint is still slightly tacky, I like to stipple (tap repeatedly) a tiny bit of burnt umber or lighter brown in a few spots to give the earth dimension so it isn’t just a flat silhouette.
Step 3: Creating the Root System
-
Mix root color:
Combine beige or cream paint with a tiny dot of brown to get a pale, earthy tan color. -
Draft the main roots:
Using your finest liner brush (size 00 or 000), carefully paint thin lines extending downward into the dark soil patch. Start from the top edge of the soil where the plants will be. -
Branching out:
From those main root lines, paint smaller, finer root hairs branching off. Keep your hand light to ensure the lines remain delicate. -
Add depth:
Once dry, you can go back with a very watery transparent white to highlight just the thickest parts of the roots for extra volume.
Level Up: Plant Labelling
Turn this art into functional garden markers by painting the specific leaf shape of the veggie you planted (like carrots or radishes) and lettering the name on the back.
Step 4: Sprouting Upwards
-
Stem placement:
Switch to a pale, watery green mix. Paint very thin, slightly curved lines rising up from the soil mound. Vary the heights—some short, some tall. -
Color transition:
Near the base of the stems (where they meet the soil) and at the tiny joints where leaves will emerge, gently blend in a small amount of deep red or maroon paint. This reddish tint mimics real seedling stems. -
Leaf shapes:
At the top of each stem, paint small oval or tear-drop shaped leaves. Use a mid-tone sap green for the base color of the leaves.
Step 5: Details & Highlights
-
Defining the leaves:
Mix a lighter lime green. Carefully add a small stroke on the upper edge or center of each leaf to suggest light hitting the fresh growth. -
Veins and stems:
Use your thinnest brush with the deep red/maroon paint to trace the central vein of the larger leaves and reinforce the shadowed side of the stems. -
Clean up:
If any green went outside the lines, use a clean brush with a dab of white paint to touch up the background and crisp up the edges. -
Speckling (Optional):
To mimic an organic finish or soil dust, you can flick a tiny amount of watered-down black paint onto the white background using an old toothbrush, creating minute speckles.
Step 6: Finishing Touches
-
Allow to cure:
Let the rock sit undisturbed for at least an hour to ensure all layers, especially the thick dark soil, are fully dry. -
Seal the work:
Take the rock outside or to a well-ventilated area and apply a matte spray sealant. A glossy finish might distract from the natural look, so matte is best here.
Now you have a permanent piece of springtime growth that you can keep year-round
Spring Quote Rocks With Hand Lettering
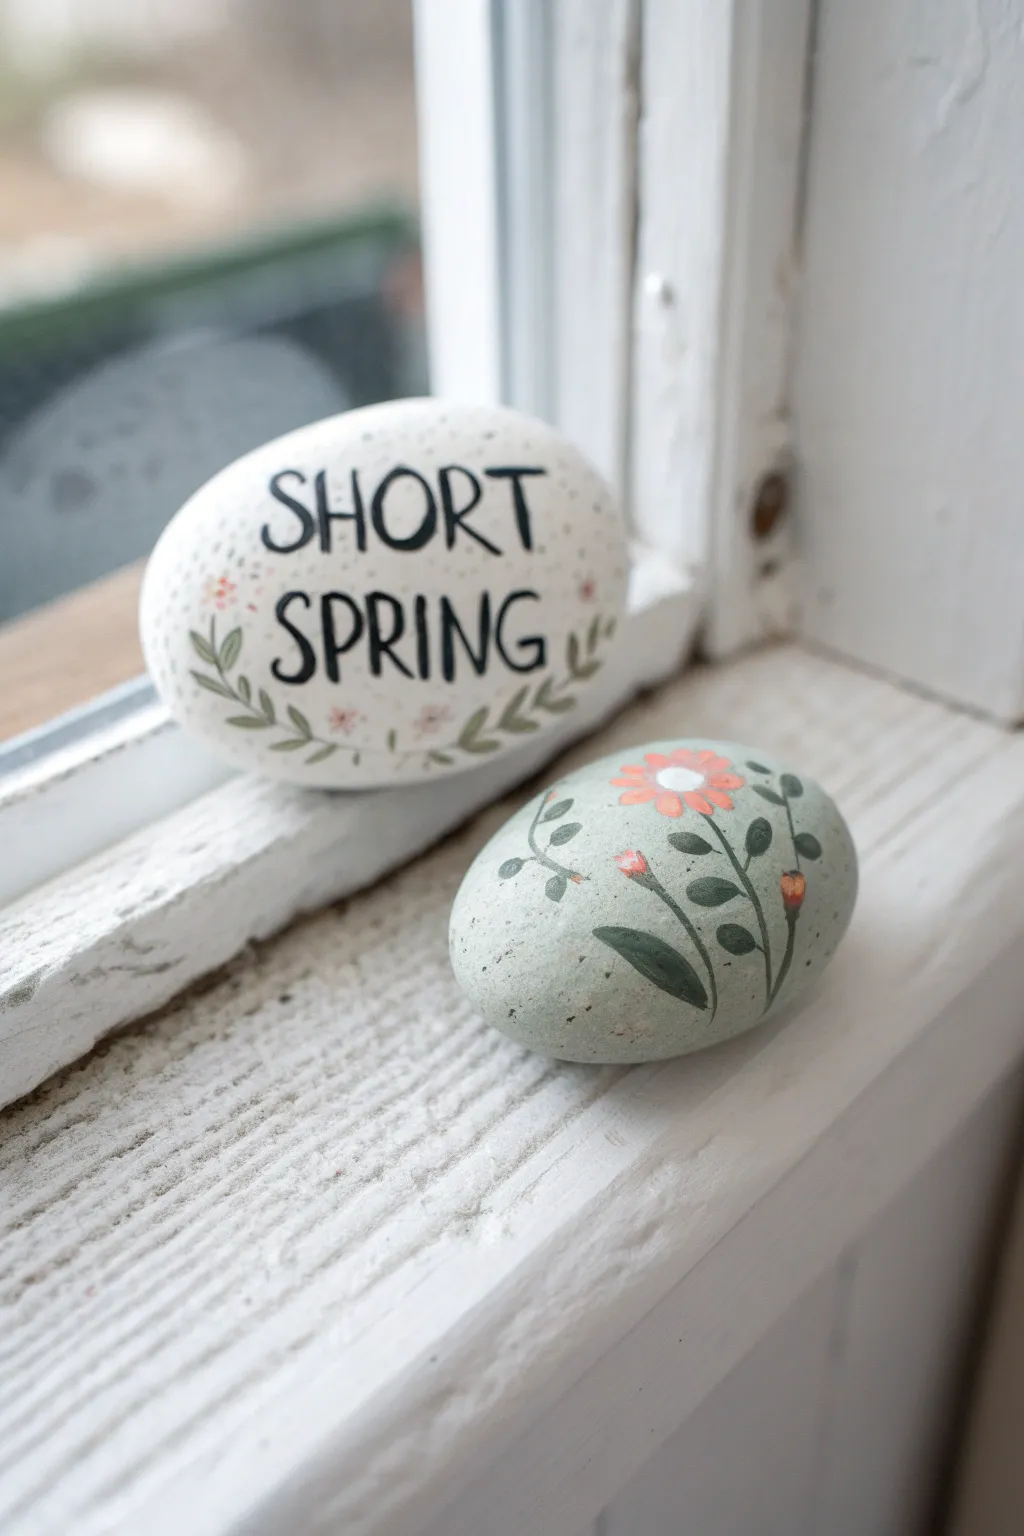
Capture the fleeting beauty of the season with these minimalist painted stones featuring delicate typography and soft floral motifs. The clean white and sage green backgrounds offer the perfect canvas for simple messages and botanical illustrations.
How-To Guide
Materials
- Smooth, oval river rocks (approx. 2-3 inches)
- White acrylic paint (matte finish)
- Sage green acrylic paint (matte finish)
- Black fine-point paint pen (0.7mm or similar)
- Small round paintbrushes (sizes 0 and 2)
- Pink acrylic paint (or paint pen)
- Orange/Red acrylic paint (or paint pen)
- Dark green acrylic paint
- Pencil and eraser
- Spray sealant (matte or satin)
- Water cup and palette
Step 1: Preparation & Base Coat
-
Clean the surface:
Begin by washing your rocks with warm, soapy water to remove any dirt or oils. Use an old toothbrush to scrub into any crevices, then rinse thoroughly and let them dry completely. -
Apply the white base:
Select your smoothest oval rock for the quote. Paint the entire top surface with white acrylic paint. You will likely need 2-3 coats to achieve full opacity, letting each layer dry before applying the next. -
Apply the sage base:
For the floral companion rock, paint the surface with a soft sage green acrylic. Like the white rock, apply multiple thin coats for a smooth, even finish without brushstrokes.
Step 2: Lettering the Quote Rock
-
Draft the text:
Once the white base is bone dry, lightly sketch the words ‘SHORT’ and ‘SPRING’ using a pencil. Center the text, placing ‘SHORT’ near the top via a slight arch and ‘SPRING’ directly below it. -
Ink the letters:
Carefully trace over your pencil lines with a black fine-point paint pen. Use steady, downward strokes. I find it helps to anchor my pinky finger on the table to keep my hand stable. -
Thicken the downstrokes:
To give the lettering a hand-lettered look, go back and slightly thicken the vertical lines of each letter, leaving the horizontal lines thin. -
Sketch the vines:
With a pencil, draw two curved lines coming up from the bottom center, framing the word ‘SPRING’ like a laurel wreath. -
Paint the leaves:
Using a size 0 brush and sage green paint (or a green paint pen), add small, simple leaves along the vine stems. -
Add floral details:
Dot tiny pink flowers among the green leaves using the tip of a toothpick or a very fine brush. -
Add texture:
Create a speckled egg effect by flicking a toothbrush with diluted black paint lightly over the rock, or manually adding tiny black dots with your finest pen.
Paint Pen Flow
If your paint pen skips over the rough rock texture, press the tip onto a piece of scrap paper a few times to get the ink flowing again before returning to the rock.
Step 3: Painting the Sage Floral Rock
-
Map out the stems:
On the dry sage green rock, use a pencil to lightly draw three main stems curving outward from a central bottom point. -
Paint main leaves:
Mix a dark green acrylic. Using a size 2 round brush, paint broad, teardrop-shaped leaves attached to the stems. Vary the angles to make it look organic. -
Add the main bloom:
At the top of the central stem, paint a simple flower shape using a coral or soft orange paint. Start with five or six petals radiating from a center point. -
Paint buds:
On the tips of the side stems, add small tear-drop shaped buds in a darker orange or red tone. -
Detail the flower center:
Once the main flower is dry, add a white circle in the center to make the bloom pop against the green background. -
Connect the elements:
Use your black fine-point pen or a very fine liner brush with dark green paint to connect the flowers and buds to the main stems with thin, delicate lines. -
Refine the background:
Just like the first rock, add tiny black specks across the surface to unify the design and add that natural, stony texture.
Fixing Smudges
Did you smudge the lettering? Don’t wipe it! Let the mistake dry completely, paint over it with your base color (white or sage), and try again once dry.
Step 4: Finishing Touches
-
Clean up sketches:
Wait at least an hour to ensure all paint and ink is fully cured. Gently erase any visible pencil marks that weren’t covered by paint. -
Seal the artwork:
Take the rocks to a well-ventilated area. Apply a light coat of matte or satin spray sealant. This protects the paint from chipping and keeps the colors vibrant.
Place your finished stones on a sunny windowsill or scatter them in the garden to welcome the new season with handmade charm
Floral Mandala in Pastel Dots
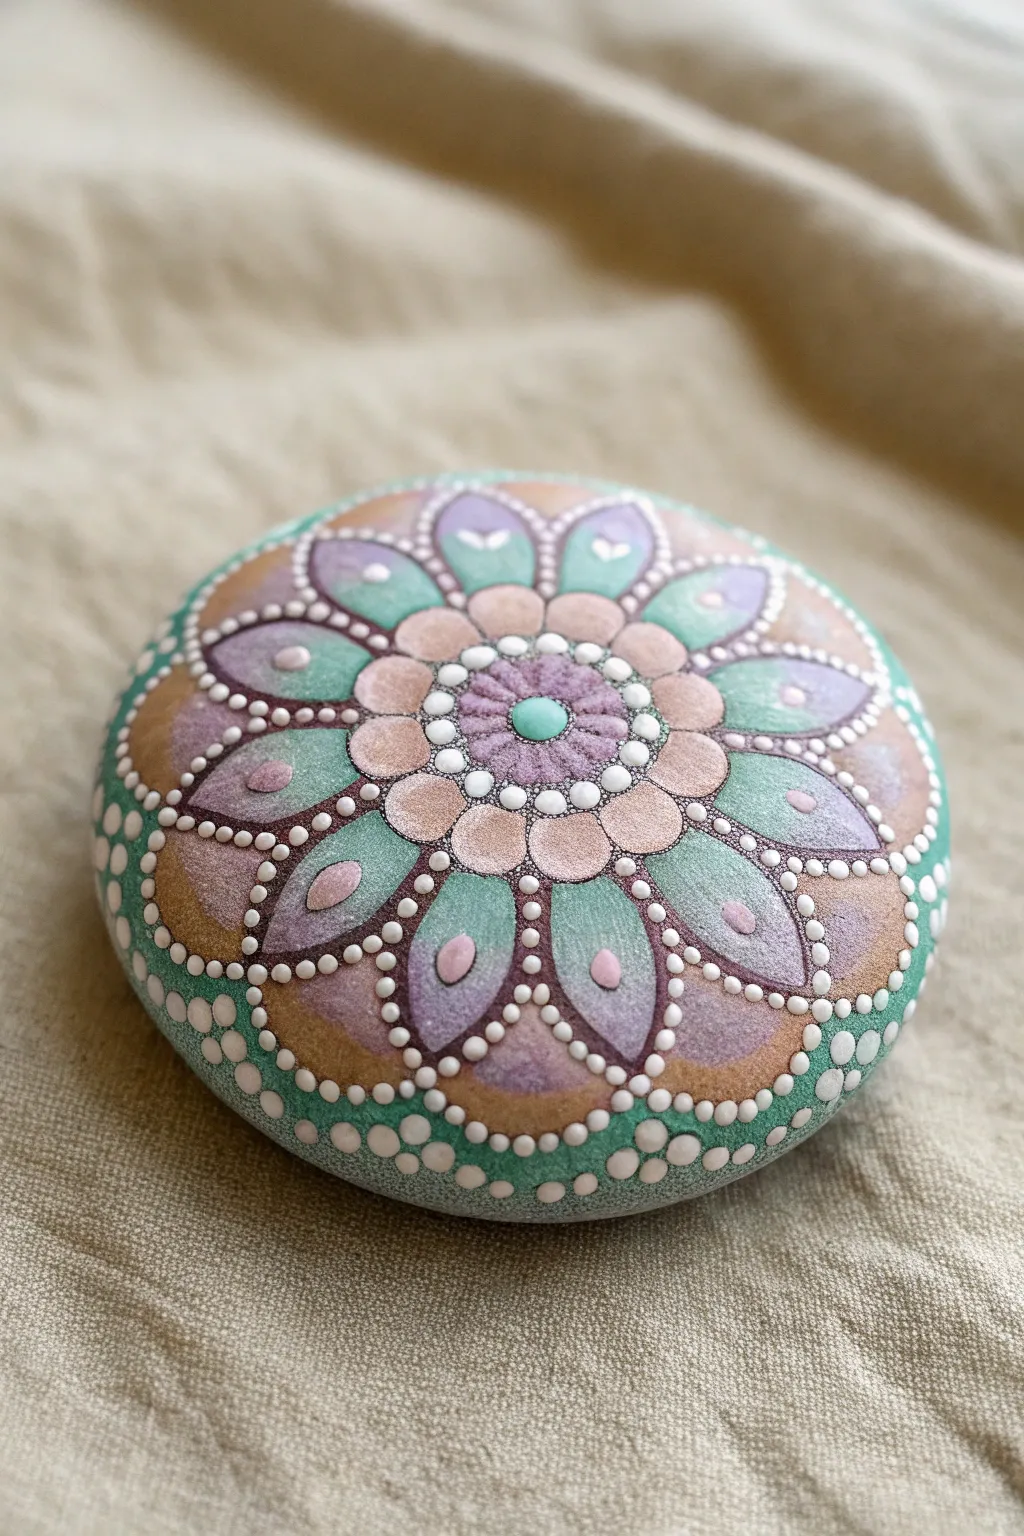
Capture the soft essence of spring with this soothing pastel mandala stone. Using a palette of mint, lavender, warm peach, and crisp white, you’ll build up layers of delicate dots to create a mesmerizing floral pattern that radiates from the center.
Step-by-Step Tutorial
Materials
- Smooth, round river rock (approx. 3-4 inches diameter)
- Acrylic paints: Mint green, lavender/lilac light purple, peach/tan, white, and a darker purple for outlines
- gesso or white primer (optional but recommended)
- Dotting tools (various sizes from pinhead to 5mm)
- Small fine liner brush (00 or 000)
- Compass and white chalk pencil or slate pencil
- Matte or satin varnish spray
Step 1: Preparation & Base Geometry
-
Prepare the Surface:
Begin by cleaning your rock with soapy water and letting it dry completely. If the stone is dark, you might want to sponge on a very light layer of the mint green paint all over to act as a translucent base, though natural stone works beautifully too. -
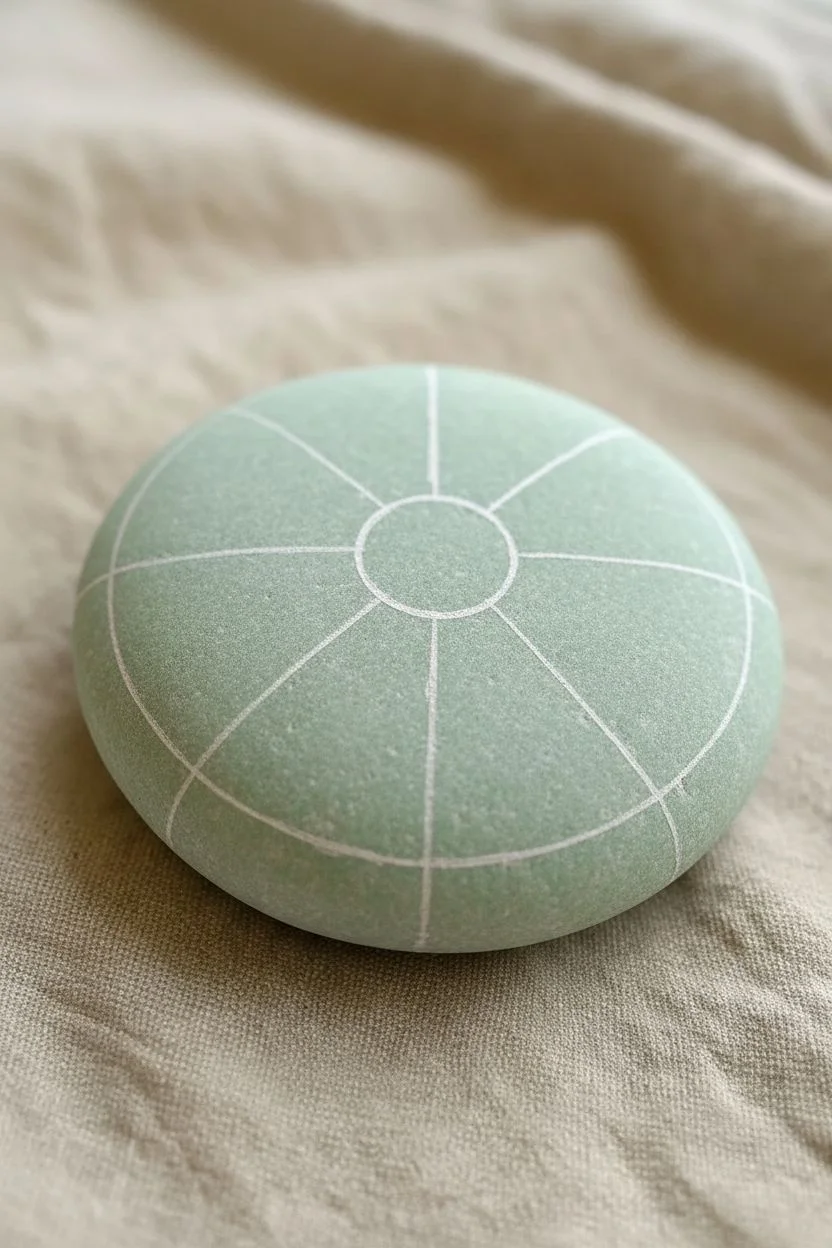
Find Center and Mark Guidelines:
Using a ruler, find the approximate center of your stone. Use your compass with a chalk pencil to draw a small central circle (about an inch diameter) and a larger outer circle where the petals will end. Lightly mark 8 or 12 evenly spaced radial lines extending from the center like wheel spokes to guide your petal placement.
Step 2: The Central Rosette
-
Paint the Core:
Start with a medium-sized dot of mint green right in the absolute center. Surround this with a solid painted circle of lavender purple, keeping the edges neat. -
Inner Petal Layer:
Around the central purple circle, paint small, rounded petal shapes using the peach/tan paint. These should look like a small flower blooming from the center. Let this layer dry. -
First Dot Accents:
Using a small dotting tool and white paint, create a ring of tiny dots outlining the border between the purple center and the peach petals. Add a larger white dot at the base of each peach petal.
Smoother Dots
Consistency is key! If your paint forms peaks like meringue, mix in a drop of flowing medium or water. You want the paint to settle into a smooth, self-leveling dome.
Step 3: Expanding the Mandala
-
Large Petal Outlines:
Paint the main floral shape. Create large, pointed petal outlines radiating outward. Alternate the colors: paint one petal solid mint green, the next lavender, and repeat around the stone. The tips should reach your outer guide circle. -
Outer Ring Base:
In the V-shaped gaps between the tips of these main petals, paint curved triangle sections using the peach/tan color to fill the negative space. -
Refining Shapes:
Use a fine liner brush and dark purple paint (mixed with a tiny bit of water for flow) to carefully outline each main petal. This separation makes the pastel colors pop. -
Texture with Sponging:
I like to create that soft, velvety texture seen in the reference by lightly dabbing a slightly lighter shade of the base color into the center of the petals while the paint is still tacky, or stippling it on after drying.
Wobbly Lines?
If your petal outlines look shaky, don’t worry. The overlay of white ‘walking dots’ is incredibly forgiving and will hide most uneven edges underneath.
Step 4: Detailed Dot Work
-
White Contour Dots:
Load a small dotting tool with white paint. Walk the dots along the dark purple outline of every petal. Start with a larger dot at the base and let them get progressively smaller as you travel up the petal side. -
Inner Petal Decorations:
Inside the mint green petals, add a medium teardrop shape or dot of lavender. Inside the lavender petals, add a medium teardrop of mint green. -
Highlighting Centers:
Place a single, distinct white dot (or a tiny heart shape if you’re feeling steady) near the top tip inside each main petal. -
Outer Periphery:
Moving to the peach outer sections, add a line of medium white dots following the curved outer edge of the stone. This frames the entire design.
Step 5: Finishing Touches
-
Filling the Voids:
If there are gaps near the bottom of the rock where the design fades, add clusters of graduated white dots (large to small) to blend the design into the bare stone. -
Top Dots:
To create dimension, add ‘top dots.’ Once your base layer of dots is 100% dry, place a smaller, lighter colored dot on top of the larger ones. For example, a tiny light pink dot on top of the interior mint oval. -
Final Drying:
Let the rock sit undisturbed for at least 24 hours. The thick dots take much longer to dry than flat paint. -
Seal the Artwork:
Finish with a spray varnish. A matte finish looks very natural, but satin will make the colors gleam slightly without looking like plastic.
Place this calming stone on your desk or in a planter to enjoy a permanent bloom all year round
High-Contrast Neon Spring on Dark Stones
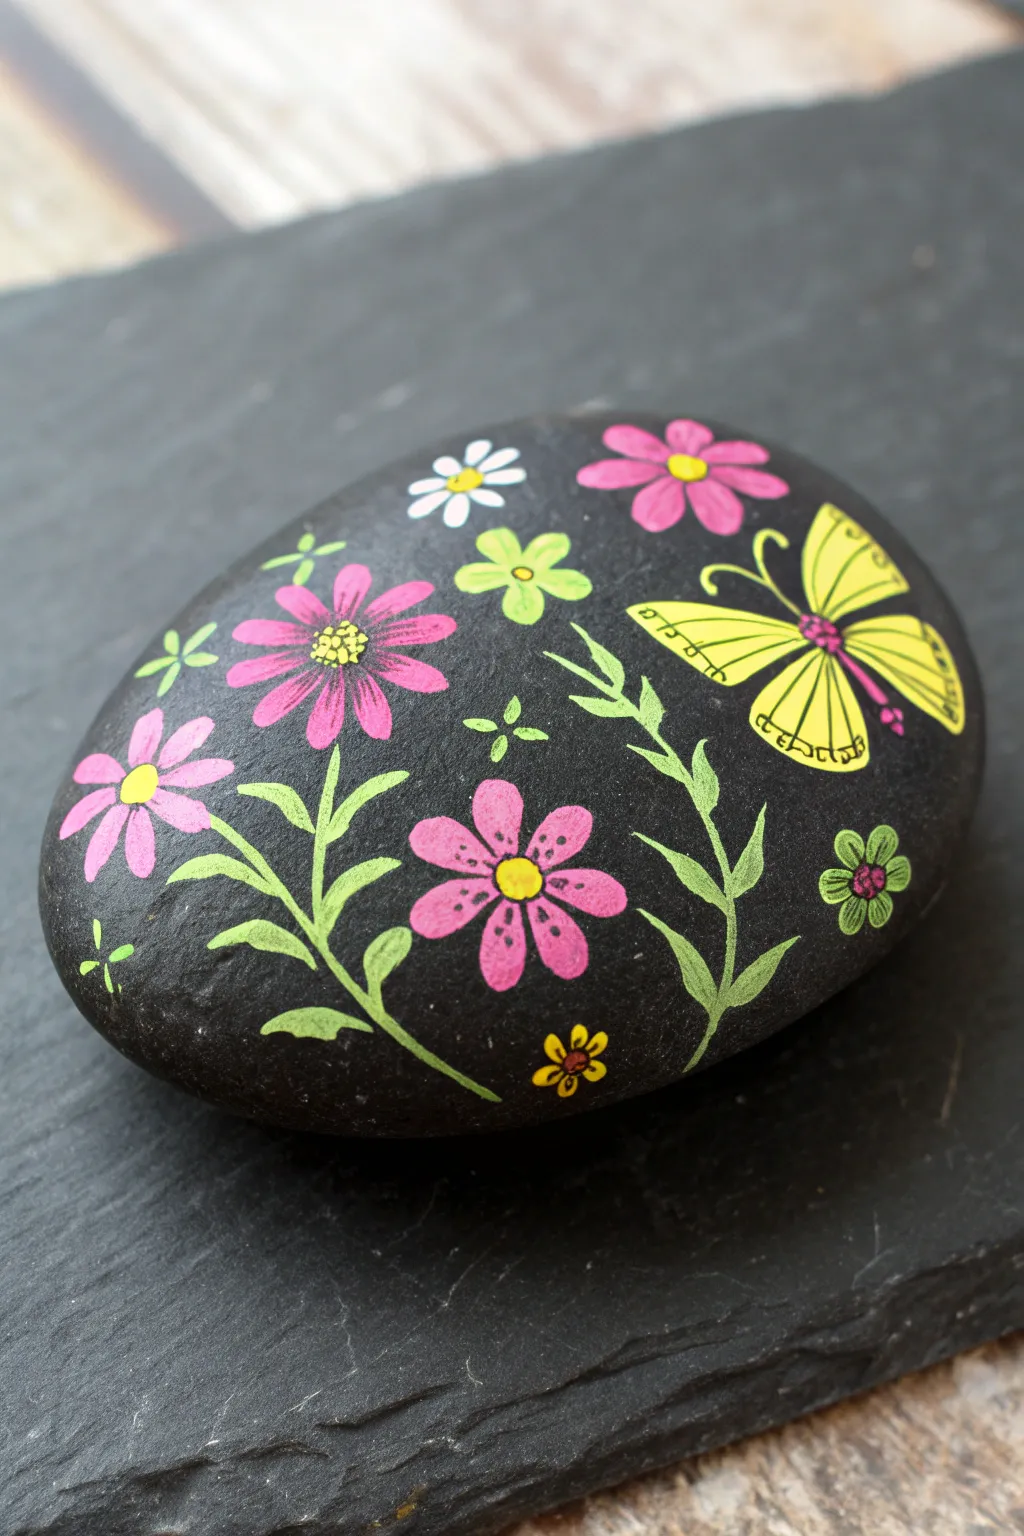
This high-contrast rock painting project makes vibrant spring colors pop dramatically against a dark background. Using simple flower shapes and neon hues, you’ll create a cheerful garden scene complete with a bright yellow butterfly.
Detailed Instructions
Materials
- Smooth, oval river rock (dark gray or black)
- Black acrylic paint (matte finish)
- Acrylic paint pens (Neon pink, yellow, lime green, white, bright green)
- Fine liner brush or extra-fine tip black pen
- Pencil (optional)
- Clear spray sealant (matte or gloss)
Step 1: Base Preparation
-
Clean the surface:
Begin by washing your stone with warm soapy water to remove any dirt or oils. Let it dry completely before starting. -
Apply the dark background:
Even if your rock is naturally dark, paint the entire top surface with matte black acrylic paint. I find this creates a uniform canvas that makes the neon colors truly stand out. -
Dry creating:
Allow the black base coat to dry fully. If the coverage looks streaky, apply a second thin coat and let it dry.
Step 2: Painting the Main Elements
-
Map out the design:
Lightly sketch the placement of your three large pink flowers and the butterfly using a pencil, or just visualize their positions: one flower bottom-left, one center-middle, one top-right. -
Paint pink petals:
Using a neon pink paint pen, draw the petals for the three main flowers. Keep them simple and slightly elongated ovals radiating from a center point. -
Butterfly wings:
On the right side of the rock, draw the butterfly wings with a bright yellow paint pen. Create two large upper wings and two smaller lower wings. -
Add white details:
While the main colors dry, use a white paint pen to add a small daisy-like flower near the top center. The white acts as a primer for color or stands alone as a bright accent. -
Secondary flowers:
Add a small five-petal flower in lime green near the center, and a tiny green flower on the far right edge.
Colors not popping?
If your neon paints look dull on the black rock, paint the shape in white first. Let it dry, then layer the neon color on top for maximum brightness.
Step 3: Adding Details & Foliage
-
Draw stems and leaves:
Switch to a light lime green paint pen. Draw sweeping, curved lines for stems connecting to your pink flowers. Add pointed, leafy shoots branching off the main stems. -
Create fern-like fronds:
On the right side, underneath the butterfly, paint a long, fern-style branch with small leaves coming off a central spine using the same lime green. -
Add flower centers:
Once the pink petals are dry, add bright yellow circles to the centers of the main pink flowers. -
Tiny accents:
Using your smallest nibs, add extra details: a tiny yellow flower at the bottom, small green cross-shapes (stars) in empty black spaces, and yellow dots on the white flower.
Add some sparkle
After the paint is dry but before sealing, add tiny dots of shimmery glitter glue to the center of the flowers or the butterfly wings.
Step 4: Fine Lining & Finishing
-
Outline the butterfly:
Using an extra-fine black pen or brush, carefully outline the butterfly wings. Draw a thin black body in the center. -
Butterfly details:
Add the internal details to the wings: horizontal lines across the yellow sections and small scalloped edges along the wing tips. -
Define the flowers:
Use the fine black pen to add stippling (tiny dots) inside the yellow centers of the pink flowers. This adds texture and depth. -
Petal separation:
Draw very thin lines between the pink petals near the center to separate them visually. -
Final touches:
Add tiny pink dots inside the butterfly body or near the wing base for extra color coordination. -
Seal the artwork:
Allow the paint to cure for at least 24 hours. Once fully set, spray with a clear acrylic sealer to protect your work from the elements.
Place your glowing floral rock in a sunny spot in the garden to surprise visitors.


Have a question or want to share your own experience? I'd love to hear from you in the comments below!