Whenever I need a big, satisfying painting session without overthinking, I grab a squeegee and let the paint do the talking. These squeegee painting ideas focus on easy setups, bold color, and that one magical pull that turns messy paint into something surprisingly gorgeous.
Classic Dot-and-Drag Abstract
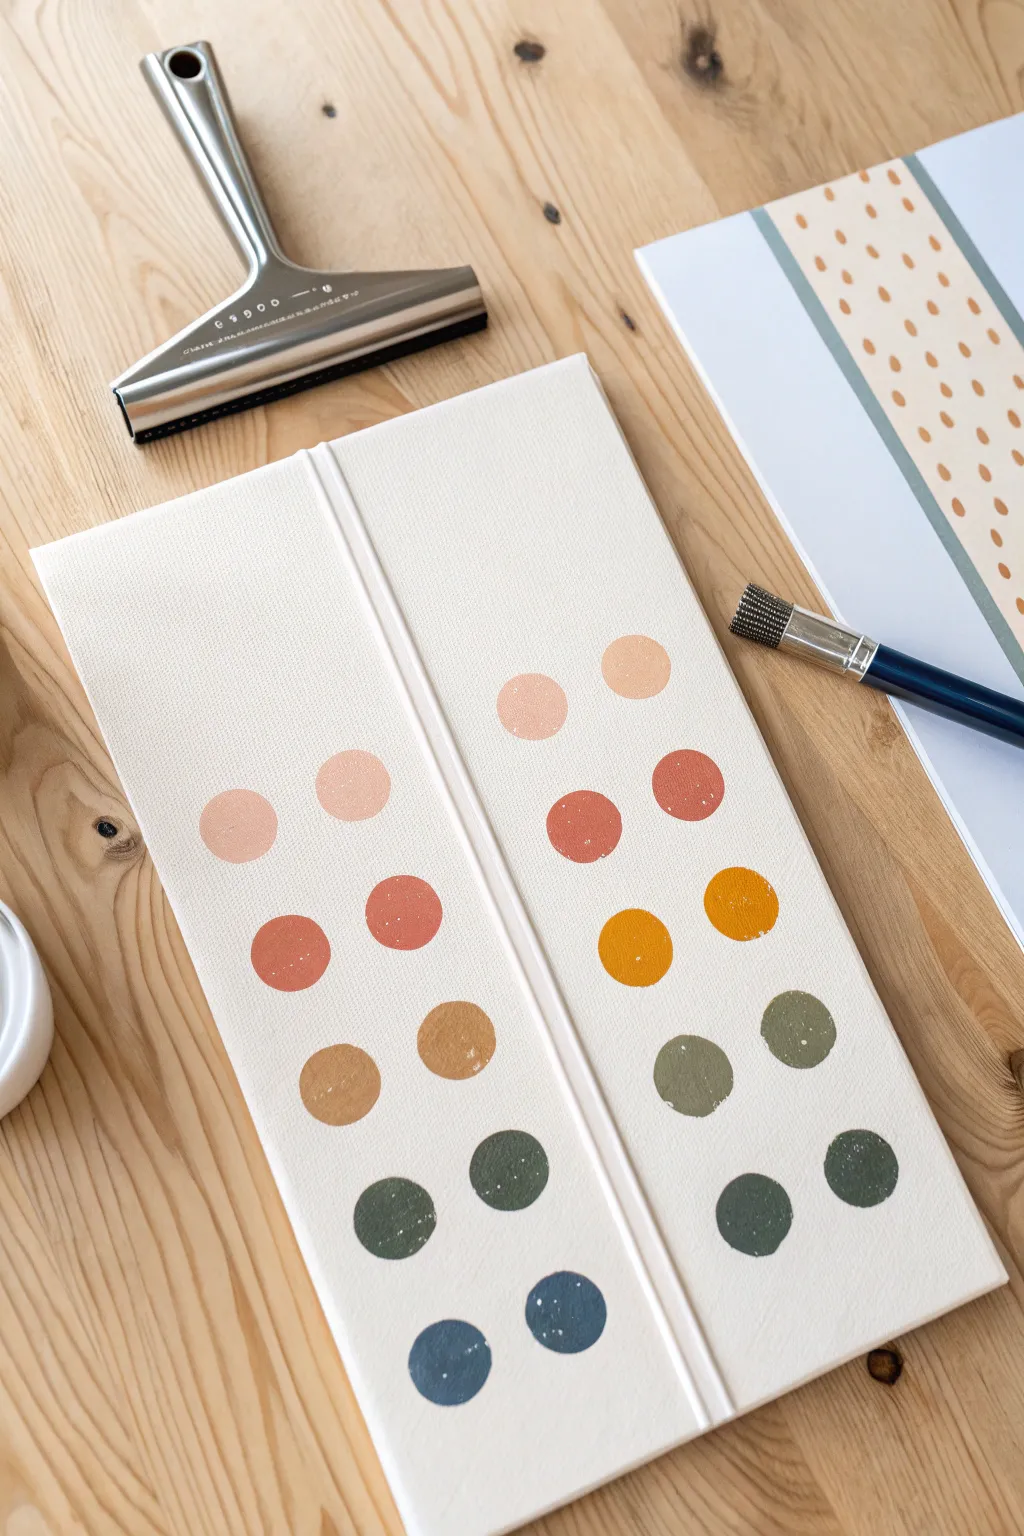
This minimalist project plays with earthy tones and satisfying geometry to create a modern abstract piece. By dragging perfectly placed dots of paint, you’ll achieve a clean, textured look that feels both structured and organic.
How-To Guide
Materials
- Rectangular stretched canvas or canvas board
- Acrylic paints (Soft Pink, Terracotta, Ochre/Mustard, Sage Green, Forest Green, Slate Blue)
- Painter’s tape or thin masking tape (1/4 inch width)
- Flat squeegee or old gift card
- Ruler
- Pencil
- Palette or paper plate for mixing
- Paper towels
Step 1: Preparation and Layout
-
Prepare the workspace:
Lay down protective paper or a drop cloth on a flat, sturdy table. Ensure your canvas is free of dust or lint. -
Create the central divide:
Place a strip of thin masking tape or painter’s tape vertically down the exact center of your canvas. Press the edges down firmly to prevent paint bleed. -
Plan paint placement:
Using a ruler and a pencil, lightly mark small dots or ticks along both sides of the tape where you want your paint to go. -
Space the marks:
Aim for symmetric spacing, leaving about 1.5 to 2 inches between each mark vertically so the dragged colors don’t muddy into each other.
Clean Edges Secret
Before painting, seal your tape edges with a thin layer of white acrylic or matte medium. This prevents colored paint from bleeding under.
Step 2: Applying the Paint
-
Select your palette:
Arrange your acrylic tubes. For this specific look, organize them from lightest to darkest: pale blush, terracotta, mustard yellow, muted olive, deep forest green, and finally slate blue. -
Apply the first column dots:
Starting on the left side of the tape, squeeze a pea-sized dot of paint directly onto each pencil mark. -
Keep dots consistent:
Try to make each dot roughly the same volume to ensure the drag marks are uniform in length. -
Apply the second column dots:
Repeat the process on the right side of the tape, mirroring the colors exactly so the left and right sides match horizontally. -
Check consistency:
Before squeegeeing, look over your dots. If any look significantly smaller, add a tiny bit more paint now.
Step 3: The Squeegee Pull
-
Position the tool:
Take your squeegee or plastic card and place it just above the top left dot (the pale blush color). -
Drag the first dot:
Apply firm, even pressure and drag the squeegee straight down over the dot, smearing the paint for about 2-3 inches. -
Clean the tool:
Wipe the squeegee completely clean with a paper towel. I find this crucial because any leftover residue will dirty the next color. -
Continue down the left side:
Move to the second dot (terracotta) and repeat the drag motion. Continue this process all the way down the left column using a clean edge each time. -
Execute the right side:
Repeat the drag-and-clean process for the right column, trying to match the length of the drags to the left side.
Go Metallic
Swap one of the earth tones for a metallic gold or copper paint. The shimmer adds a stunning contrast against the matte finish.
Step 4: Finishing Touches
-
Let the paint set:
Allow the paint to dry until it is tacky but not wet to the touch. This usually takes about 15-20 minutes depending on thickness. -
Remove the tape:
Carefully peel the tape strip off the center, pulling it slowly at a 45-degree angle to reveal the crisp white line. -
Final dry:
Let the canvas dry completely overnight before displaying or framing.
Hang your new geometric artwork in a spot with good natural light to highlight the texture of the dragged paint


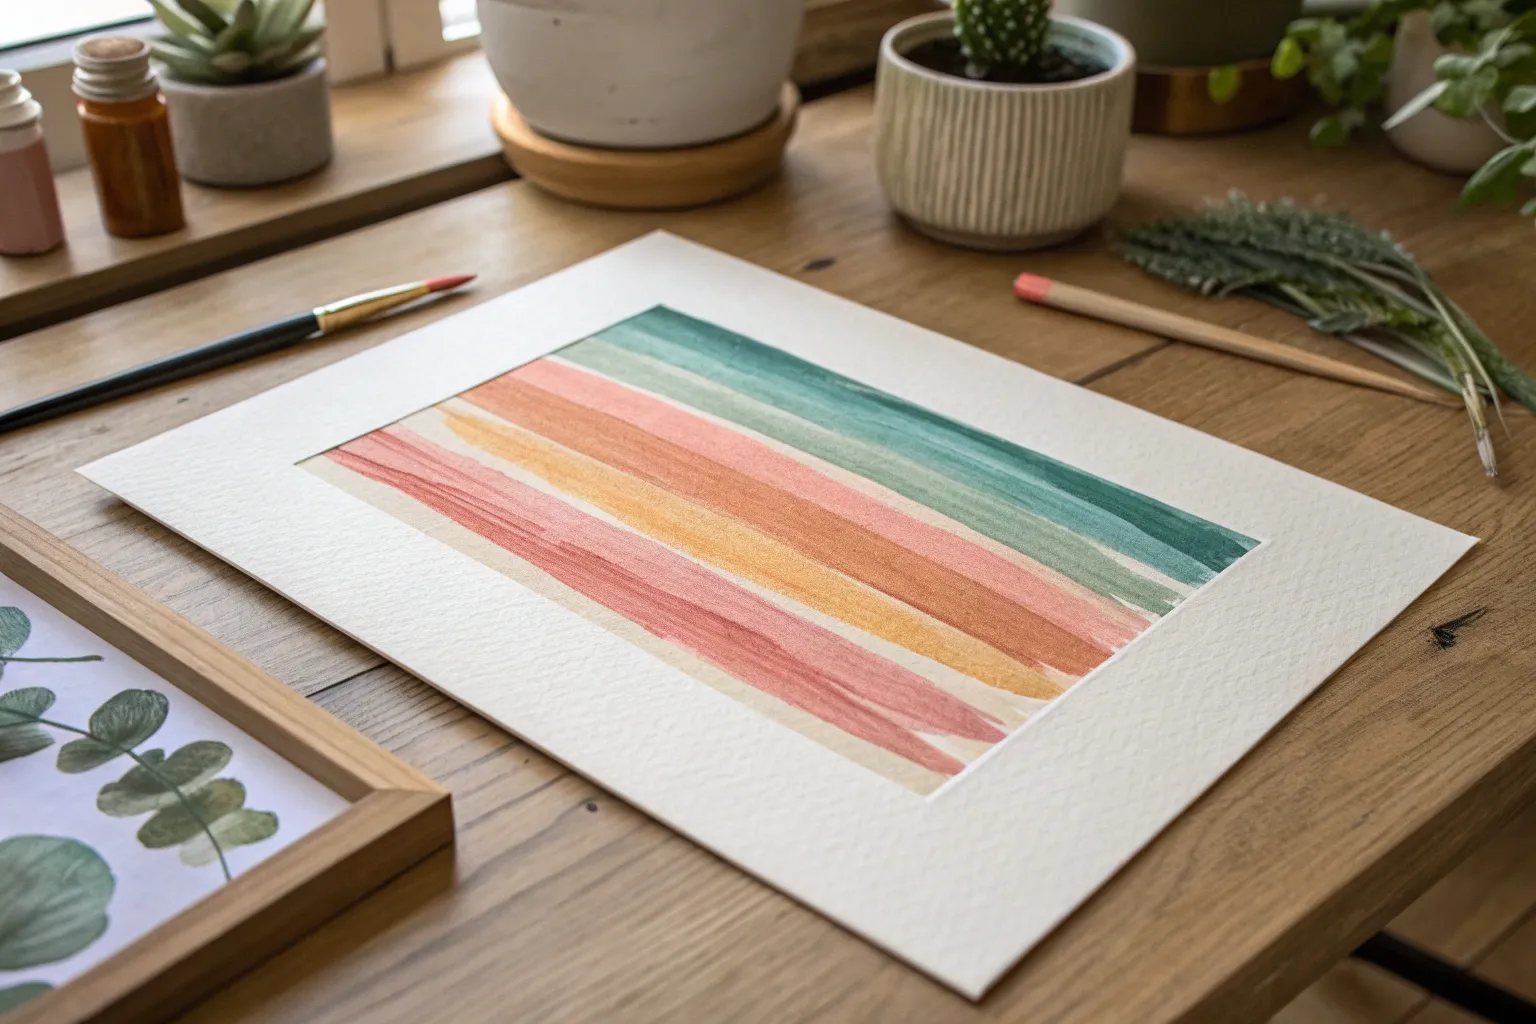
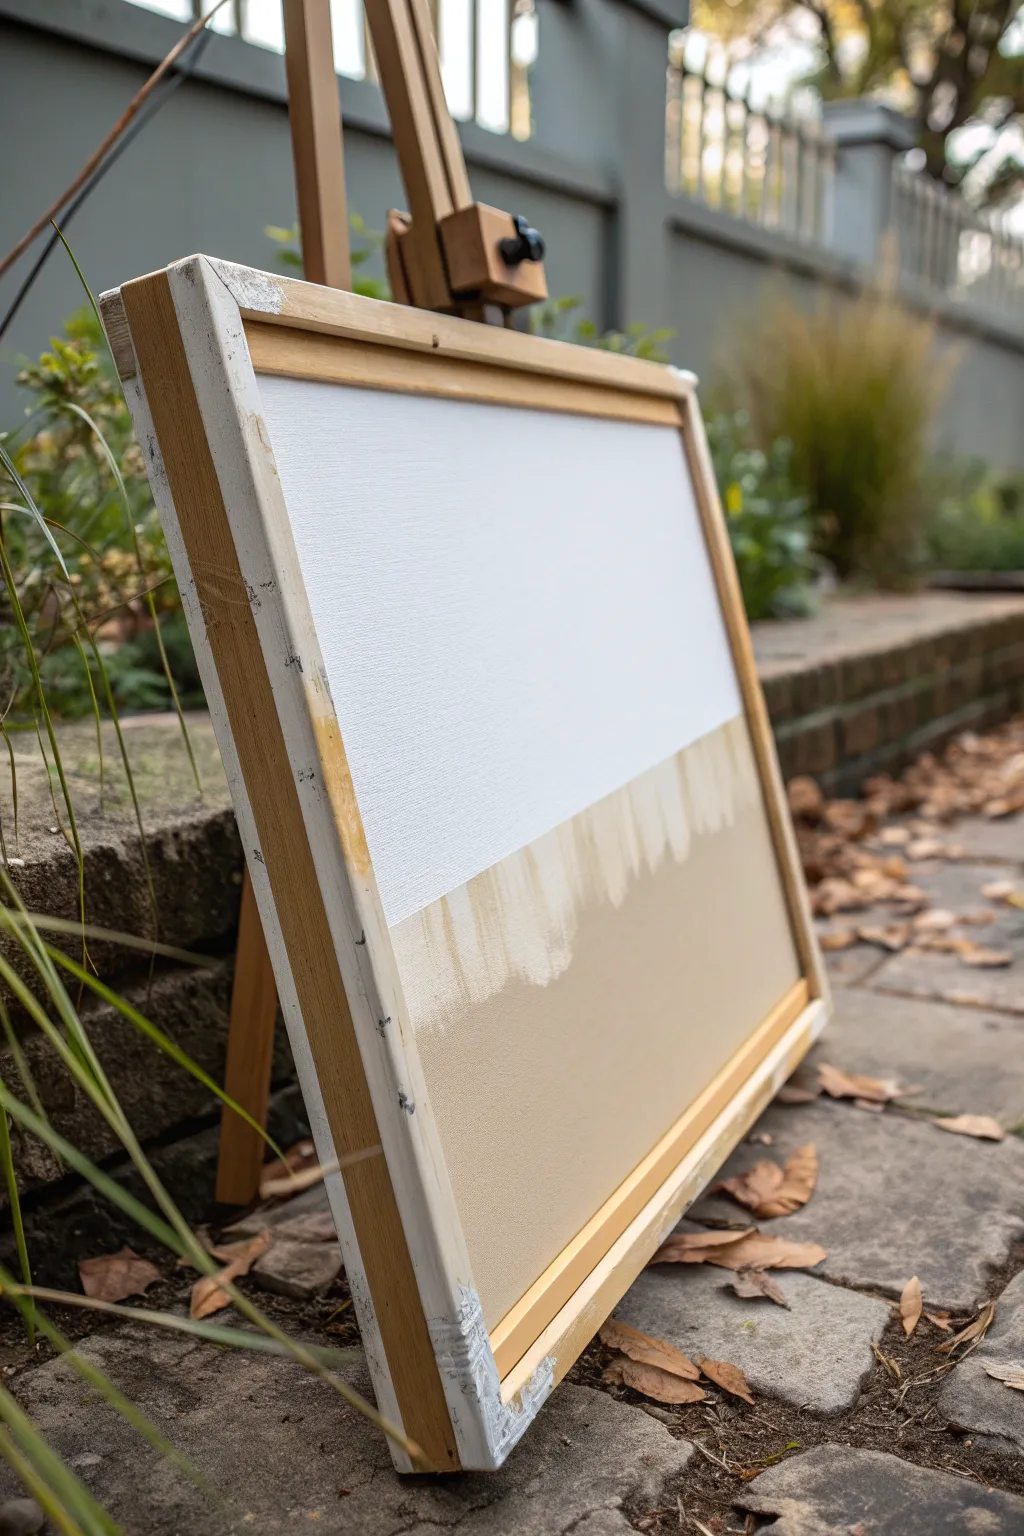
Clean Vertical Pull Stripes
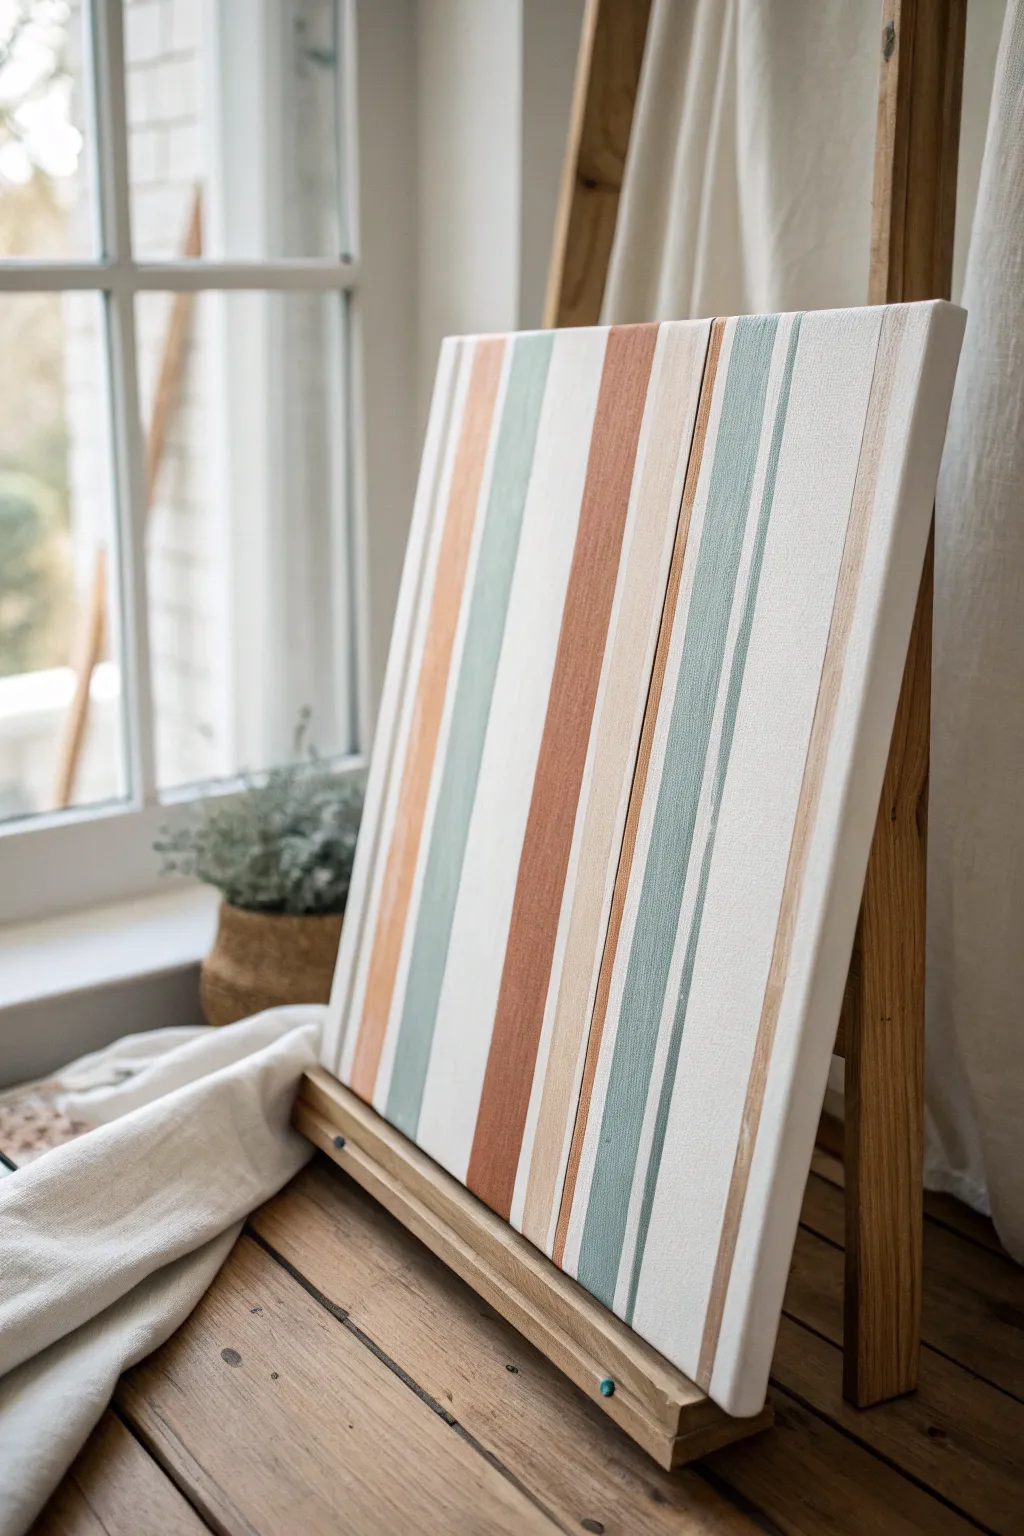
Create a calming, minimalist piece of art with this vertical stripe technique that feels effortless yet sophisticated. Using muted, earthy tones and a clean pull method, you’ll achieve perfectly imperfect lines that add warmth to any room.
Step-by-Step Guide
Materials
- Stretched canvas (rectangular, portrait orientation)
- Acrylic paints (Titanium White, Terracotta/Burnt Sienna, Sage Green, Beige/Warm Sand, Soft Peach)
- Squeegee or large flat scraping tool (plastic or silicone)
- Masking tape or painter’s tape
- Palette or paper plate
- Palette knife (for mixing)
- Clean rag or paper towels
Step 1: Preparation & Base
-
Set the Stage:
Begin by setting up your workspace with a drop cloth to catch any drips. Place your canvas securely on an easel or flat on a table if you prefer more control over the pressure. -
Prime the Surface:
If your canvas isn’t pre-primed, apply a coat of gesso. For this look, a smooth surface is ideal, so lightly sand the primed canvas once dry to remove rough texture. -
Mix Your Palette:
Prepare your colors. Mix a ‘warm sand’ shade using beige and a touch of white. Create a ‘sage green’ by mixing green with grey and white. Ensure the terracotta and peach tones are distinct but harmonious. -
Apply the Base:
Paint the entire canvas with a coat of Titanium White or very pale off-white. This ensures the background peeking through the stripes is clean and bright. Let this layer dry completely.
Step 2: Creating the Striped Pattern
-
Plan Your Layout:
Visualize where you want your colored stripes. Unlike random abstract art, this piece relies on alternating thick and thin vertical bands of color with white space in between. -
Tape for Precision (Optional):
For razor-sharp edges like in the photo, apply strips of painter’s tape vertically down the canvas. Press the edges down firmly to prevent bleed-through. Varing the width between tape strips creates interest. -
Load the First Color:
Depending on your tool, apply a line of ‘warm sand’ paint at the very top edge of the canvas, just within the area you want to stripe. -
The Squeegee Pull:
Place your squeegee or scraping tool directly above the bead of paint. Applying firm, even pressure, pull the tool straight down to the bottom edge in one continuous motion. -
Check Consistency:
If the paint breaks or skips, you can do a second pass while the paint is wet, but try to keep it to one or two swipes to maintain that raw, dragged texture. -
Clean Your Tool:
Wipe your squeegee completely clean with a rag. Any residue will muddy the next color application. -
Add The Terracotta:
Select a wider area for the bold terracotta stripe. Apply a generous bead of paint at the top and pull down firmly. Allow the fade-out at the bottom if it happens naturally. -
Incorporate the Sage:
Move to the next section and repeat the process with your sage green mix. I find that placing cool tones next to warm ones really makes the palette pop. -
Layering Thin Stripes:
For the very thin accent lines, use the narrow edge of a palette knife instead of the large squeegee. Apply a small dot of peach or darker brown at the top and drag it down carefully. -
Remove Tape:
If you used masking tape, gently peel it away while the paint is still slightly tacky but not wet. Pull at a 45-degree angle away from the painted area.
Uneven Drag Lines?
If your pull skips, you likely need more paint at the start or softer pressure. Don’t overwork it; part of the charm is the texture.
Step 3: Finishing Touches
-
Touch Up:
Inspect the white negative spaces. If any paint bled or smudged into areas meant to be white, touch them up with a small brush and titanium white paint. -
Paint the Sides:
Don’t forget the edges of the canvas. You can wrap the stripes around the sides or paint the edges a solid white for a framed look. -
Let it Cure:
Allow the painting to dry flat for at least 24 hours. Thicker ridges of paint created by the squeegee may take longer to cure than thin layers. -
Varnish:
Once fully dry, apply a coat of matte varnish. A glossy finish would distract from the earthy, natural vibe, so stick to matte or satin.
Add Metallic Flair
Mix a tiny amount of gold leaf or metallic bronze paint into one of the thinner stripes for a subtle shimmer that catches the light.
Hang your finished canvas near a window to let natural light enhance those soothing earth tones

Ombre Fade From Dark to Light
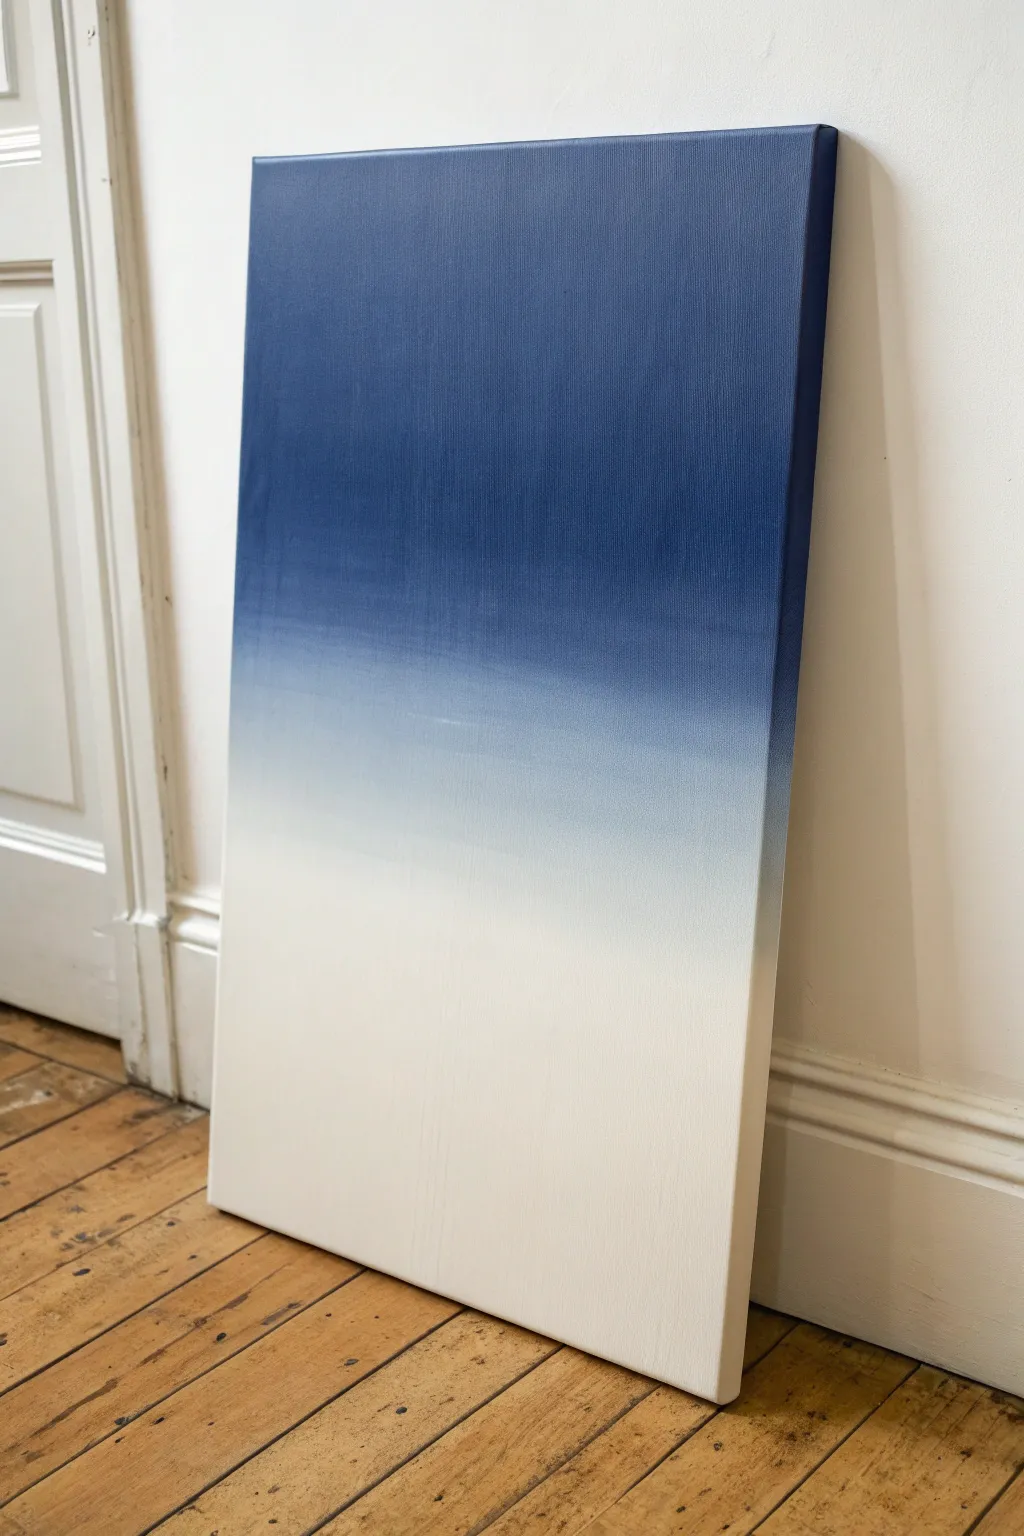
Achieve a stunningly smooth transition from deep ocean blue to crisp white with this soothing gradient technique. The squeegee method makes blending effortless, creating a serene, modern piece of art perfect for a coastal-inspired space.
Step-by-Step
Materials
- Large stretched canvas (e.g., 20×30 inches)
- Acrylic paints (Phthalo Blue or Navy Blue, Titanium White)
- Large rubber squeegee (wider than the canvas width is ideal, but a handheld one works too)
- Plastic drop cloth
- Paper towels
- Mixing palette or small cups
- Palette knife
Step 1: Color Preparation
-
Prepare your workspace:
Lay down a plastic drop cloth to protect your floor or table, as squeegee art can push excess paint off the edges. -
Mix your base navy:
Squeeze a generous amount of your darkest blue onto your palette. If the paint feels too thick, add a tiny drop of water or acrylic flow medium, but keep it substantial. -
Create a mid-tone mix:
In a separate spot, mix roughly 60% blue with 40% white to create a transitional medium blue tone. -
Prepare the white:
Have a large pile of Titanium White ready. You will need more white than blue to ensure the bottom section stays bright and clean.
Patchy spots?
If you see bald spots on the canvas, add more white paint directly to the squeegee blade and do a gentle pass over just the lower white section to fill it in.
Step 2: Paint Application
-
Apply the dark blue dots:
Along the very top edge of the canvas, place distinct dots or a thick line of the pure dark blue paint directly from the tube or using a spoon. -
Layer the transition colors:
About three inches down from the top, apply a horizontal line of your mixed mid-tone blue across the canvas width. -
Add the first white layer:
Just below the mid-tone line, apply a generous line of pure white paint. It’s okay if the lines aren’t perfectly straight; the squeegee will handle that. -
Fill the bottom:
For the bottom half of the canvas, add scattered dots of white paint to ensure full coverage when dragged down.
Step 3: The Squeegee Pull
-
Position the tool:
Place your squeegee at the very top edge of the canvas, ensuring the rubber blade is making full contact with the surface. -
First partial drag:
Pull the squeegee down slowly and steadily about one-third of the way. Stop and wipe the blade clean with a paper towel. -
Resume from the top:
Restart at the top again. This time, drag the squeegee further down, past the blue section and into the white zone. Press fairly hard to flatten the paint. -
Check the blend:
Observe the transition. If the line between blue and white is too harsh, I like to lightly tap the boundary with the squeegee edge before smoothing again. -
The full pull:
Start at the top one last time and drag continuously all the way to the bottom edge in one smooth motion without stopping. -
Clean the edges:
Use your palette knife or a gloved finger to wipe away drips from the sides of the canvas while the paint is still wet. -
Dry and assess:
Let the painting sit flat to dry for 24 hours. If you see canvas texture showing through too much, you can repeat the process once the first layer is dry.
Add some sparkle
Mix a small amount of iridescent medium or fine silver glitter into your white paint for a subtle shimmer that catches the light like ocean foam.
Prop your new masterpiece against a wall for a relaxed, modern vibe


Two-Color Blend With a White Swipe
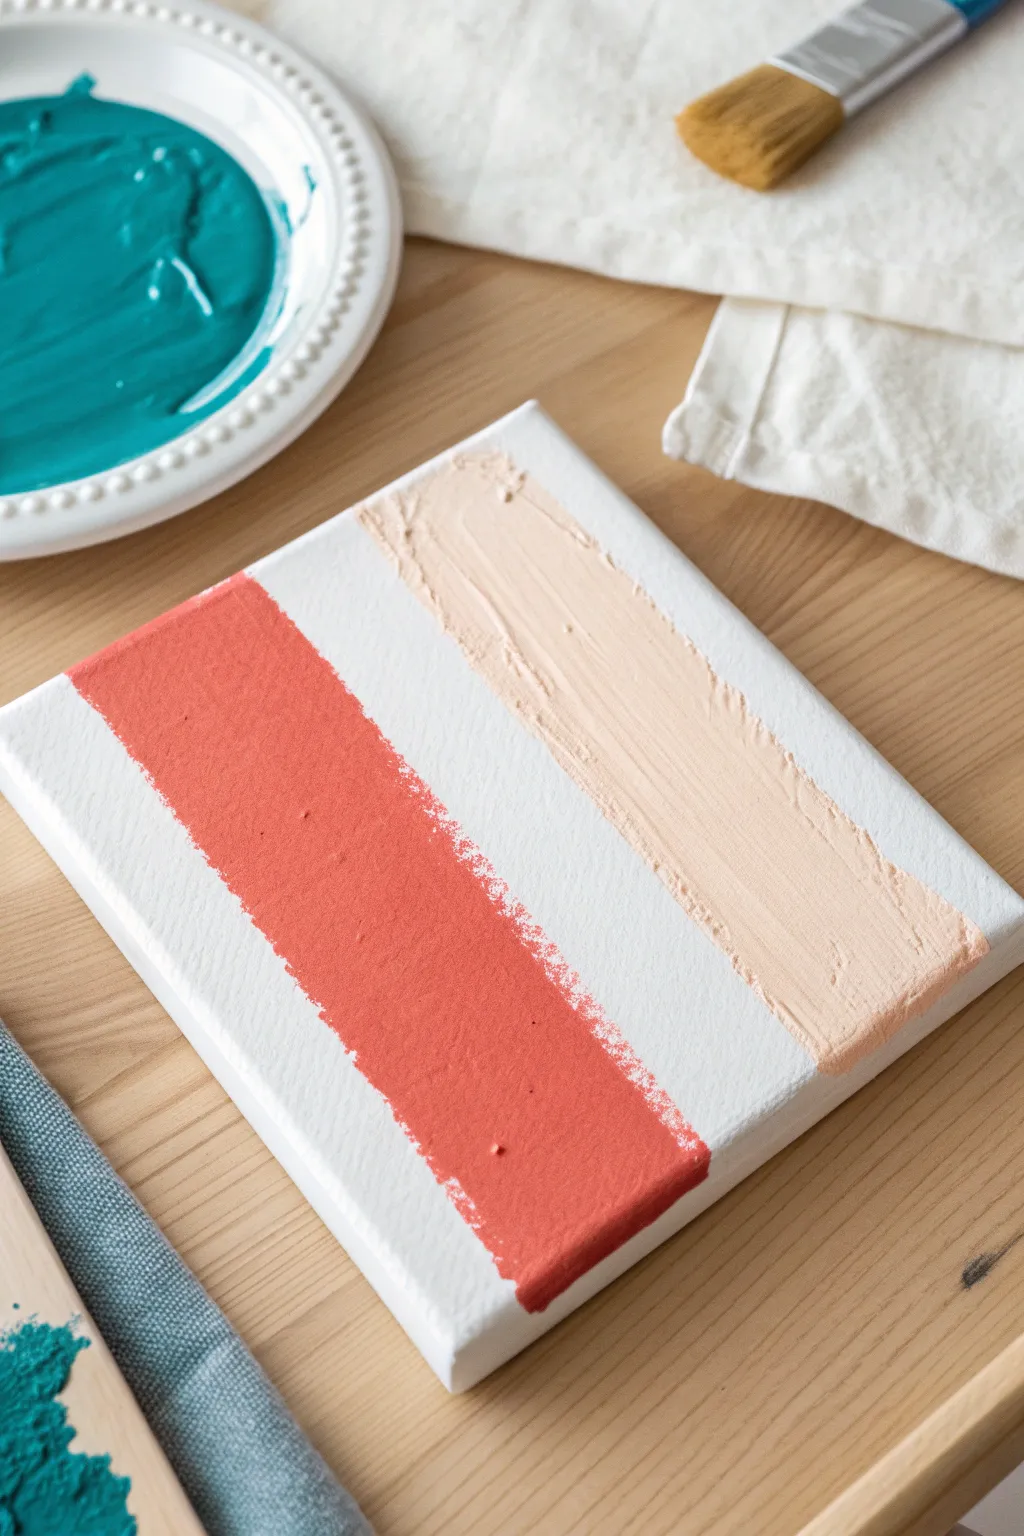
Create a modern, minimalist art piece featuring bold, textured stripes of terracotta red and soft beige against a bright white background. This technique uses drag-painting methods to achieve uneven, organic edges that give the artwork a unique, handcrafted feel.
Detailed Instructions
Materials
- Small square canvas (e.g., 6×6 or 8×8 inch)
- Acrylic paint: Terracotta red or coral
- Acrylic paint: Light beige or sand
- Acrylic paint: White (titanium white recommended)
- Flat squeegee tool, palette knife, or old credit card
- Palette or paper plate
- Protective workspace covering
Step 1: Preparation
-
Set up your workspace:
Begin by laying down a protective covering on your table to catch any paint drips. Ensure your canvas is clean and free of dust. -
Prepare your palette:
Squeeze out generous amounts of your terracotta red, beige, and white acrylic paints onto a reusable palette or a disposable paper plate. You’ll need enough paint to create thick, opaque layers.
Smooth Drag Technique
Keep your wrist locked and move your entire arm when dragging the squeegee. This prevents wobbly lines and ensures a confident, straight stripe down the canvas.
Step 2: Painting the Stripes
-
Load the first color:
Take your squeegee tool or palette knife and pick up a bead of the terracotta red paint along the straight edge. Aim for an even distribution of paint across the tool’s width. -
Apply the left stripe:
Position the tool near the top left third of the canvas. Press down gently and drag the tool downward in a straight, steady motion all the way to the bottom edge. -
Assess the texture:
Check your first stripe. If the coverage is too thin, you can carefully drag a second layer over it while wet, but the slightly rough, broken edges are part of the charm. -
Clean your tool:
Before switching colors, wipe your squeegee or palette knife completely clean with a paper towel to avoid muddying the next shade. -
Load the second color:
Pick up a fresh bead of the beige paint on your clean tool, just as you did for the first color. -
Apply the right stripe:
Move to the right third of the canvas, leaving a wide gap of white space in the center. Place your tool at the top edge and drag the beige paint downward in a parallel line to the first stripe. -
Finish the drag:
Ensure you pull the tool all the way off the bottom edge of the canvas to create a clean exit for the stripe.
Broken Lines?
If your stripes are breaking up too much, add a tiny drop of water or flow medium to your paint. It helps the paint glide smoother without losing opacity.
Step 3: Refining the Center
-
Clean the tool again:
Thoroughly wipe off any beige residue from your dragging tool. -
Load the white paint:
Pick up a generous amount of white paint. You want this layer to be opaque enough to crisp up the center section. -
Place the center swipe:
Position your tool at the very top of the central white gap. Align it so it slightly overlaps the inner edges of both the red and beige stripes if you want a blended look, or keep it strictly in the middle for separation. -
Drag the white stripe:
Pull the white paint downward through the center channel. I find that applying slightly more pressure here helps flatten the texture of the adjacent colors if they overlap. -
Check the edges:
Observe where the white paint meets the colored stripes. The goal is to have a clean, bright white path that contrasts with the textured colored lines.
Step 4: Finishing Touches
-
Review the composition:
Step back and look at the balance of the three stripes. If any area looks too patchy, you can touch it up with a small brush, dabbing paint to mimic the dragged texture. -
Clean the tool edges:
If paint has pooled over the sides of the canvas, use a clean finger or a damp cloth to wipe the edges smooth for a professional finish. -
Let it dry flat:
Leave the canvas lying flat to dry completely. Because the paint is applied thickly, this may take several hours or overnight.
Hang your new textured art piece in a well-lit spot to highlight the subtle ridges and organic edges of the paint
BRUSH GUIDE
The Right Brush for Every Stroke
From clean lines to bold texture — master brush choice, stroke control, and essential techniques.
Explore the Full Guide
Rainbow Swipe Panel
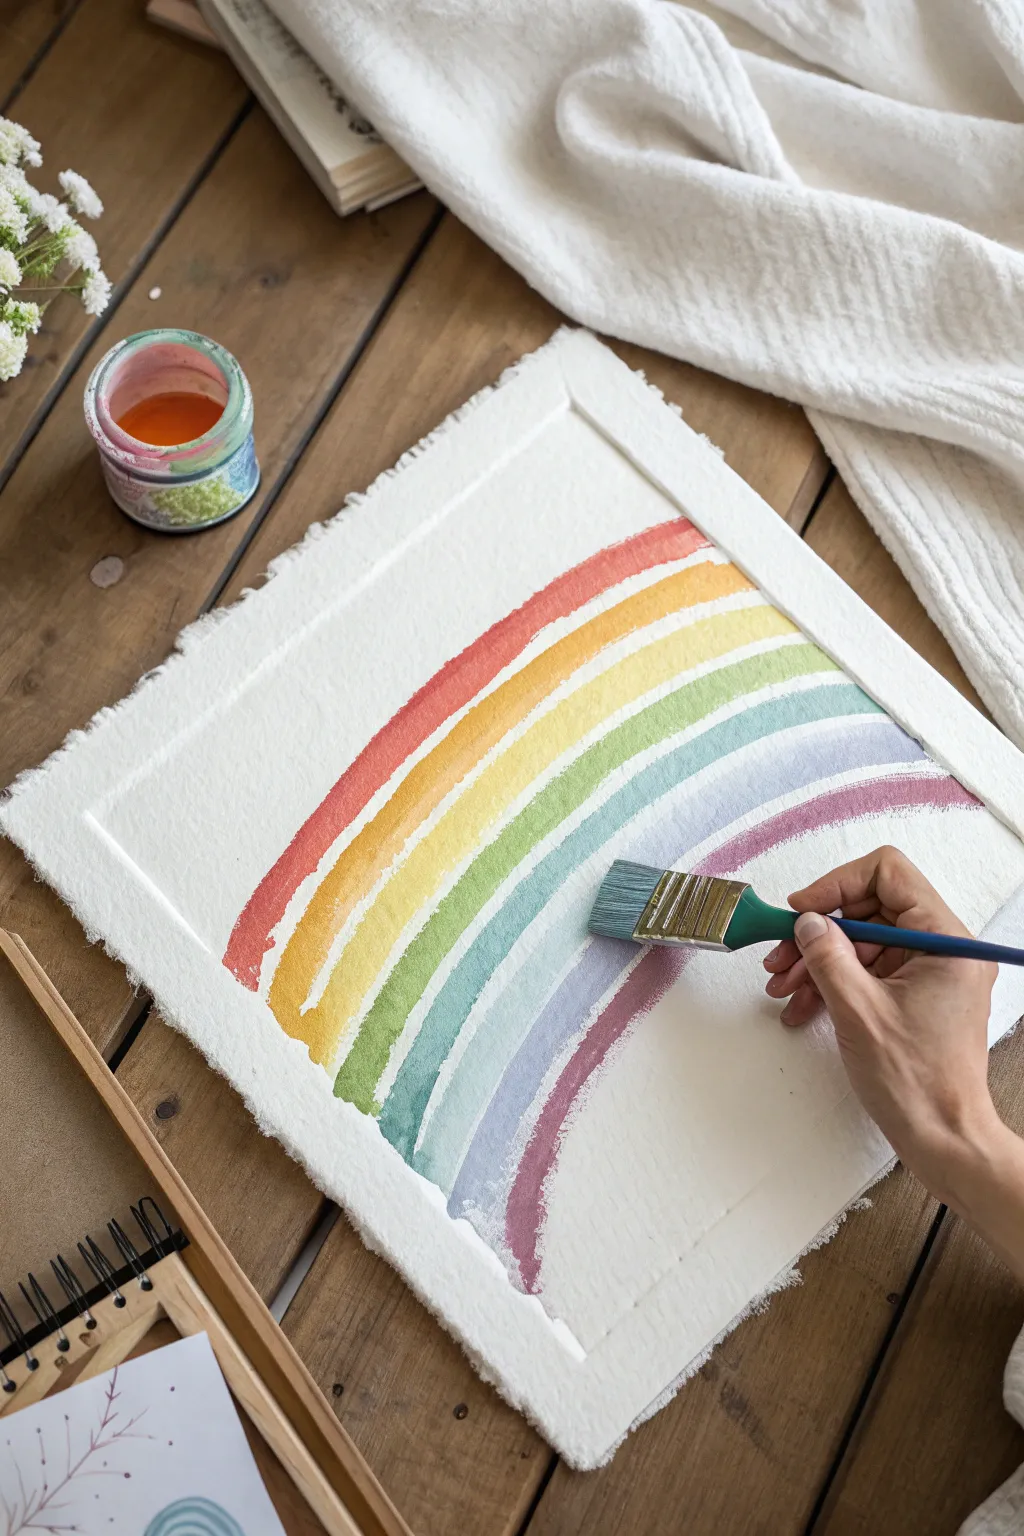
Capture the magic of a soft, gradient rainbow using a broad brush technique that mimics a squeegee’s clean sweep. This project focuses on vibrant, translucent curves on textured paper, resulting in a charming and minimalist piece of art perfect for a nursery or studio wall.
Step-by-Step Guide
Materials
- High-quality watercolor paper (rough or cold press, 300gsm+)
- Watercolor paints (Red, Orange, Yellow, Green, Blue, Indigo, Violet)
- Wide flat brush (1-inch or 1.5-inch)
- Masking tape (low-tack)
- Palette for mixing
- Two jars of water
- Paper towels
- Pencil (optional)
Step 1: Preparation
-
Prepare the paper:
Select a sheet of thick, textured watercolor paper. If you want that beautiful deckle edge shown in the photo, you can carefully tear the edges against a ruler or buy paper pre-made this way. -
Mask the borders:
Using low-tack masking tape, create a border around your painting area. For this specific look, tape off a rectangle in the center, leaving a wide margin of white paper around the edges to frame your rainbow. -
Secure the paper:
Tape the corners or edges of your paper down to your work surface or a wooden board. This prevents the paper from buckling when it gets wet. -
Mix your palette:
Pre-mix all seven colors of your rainbow in your palette. You want a high pigment-to-water ratio so the colors appear vibrant but still fluid. Ensure you have enough of each color mixed regarding the size of your brush.
Uneven Arcs?
If you struggle with freehand curves, lightly draw the arcs with a pencil purely as a guide. Erase gently once the paint is fully dry.
Step 2: Painting the Arcs
-
Load the brush (Red):
Dip your wide flat brush into the red paint. Ensure the bristles are fully saturated but not dripping excessively. -
Paint the first arc:
Starting from the bottom left of your taped area, sweep the brush up and over to the bottom right in a single, confident arching motion to create the top red band. -
Clean and reload:
Rinse your brush thoroughly in your first water jar, then refine it in the second clean jar. Squeeze excess water out on a paper towel before loading the next color. -
Paint the orange arc:
Load up your orange paint. Place the brush just below the red arc, leaving a tiny sliver of white space between them to prevent bleeding. Follow the same curve, sweeping from left to right. -
Continue with warm tones:
Repeat the process for yellow. Keep your wrist loose to maintain a smooth curve. If the brush creates a ‘dry brush’ texture at the end of the stroke, that’s okay—it adds character. -
Transition to cool tones:
Move on to green. By now, the rhythm of the stroke should feel natural. Focus on keeping the width of the stripe consistent with the previous ones. -
Add the blue band:
Paint the blue arc next. I find that steadying my elbow on the table helps keep the curve parallel to the others. -
Apply indigo and violet:
Finish the rainbow with the indigo and finally the violet stripe at the bottom. The inner arc will be the smallest and tightest curve.
Pro Tip: Wetness Control
For smooth, solid stripes, add a drop of ox gall medium to your water usage. This improves flow without diluting the vibrant color.
Step 3: Finishing Touches
-
Let it dry completely:
Do not touch the tape yet. Allow the paint to dry naturally until the paper feels room temperature to the touch (cold paper means it is still damp). -
Remove the tape:
Ideally, peel the tape away slowly at a 45-degree angle. This reveals the crisp, straight edges where the rainbow starts and ends, creating that ‘window’ effect. -
Flatten if needed:
If your paper has curled slightly from the water, place it under a clean heavy book overnight once it is 100% dry.
Step back and admire the simple, joyful elegance of your new watercolor creation
Soft “Cloudy” Pastel Smears
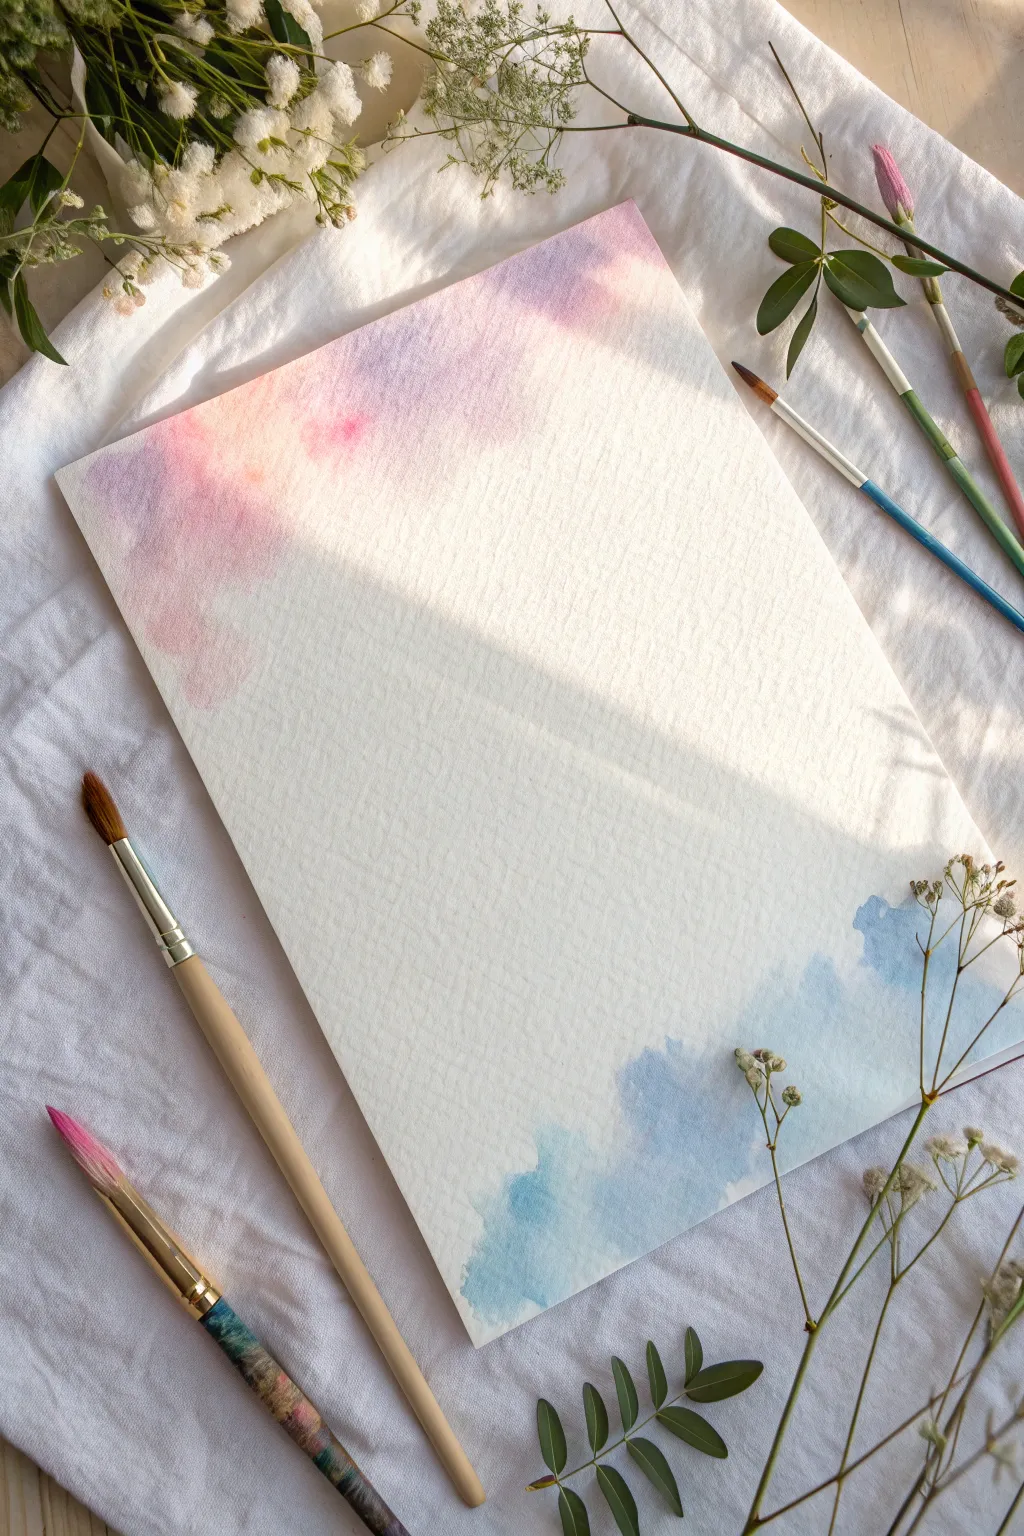
Capture the ethereal beauty of a sunrise and a clear blue sky using a surprisingly simple squeegee technique. This project creates a soft, textured background perfect for calligraphy or leaving blank as tranquil wall art.
Detailed Instructions
Materials
- Cold press watercolor paper (A4 or A5)
- Watercolor paints (tube or pan)
- Small plastic squeegee, old credit card, or scraping tool
- Soft synthetic round brush (size 6 or 8)
- Jar of clean water
- Paper towels
- Palette or mixing dish
- Masking tape (optional)
Step 1: Preparation
-
Secure the Paper:
Begin by placing your watercolor paper on a flat, sturdy surface. If you want a crisp white border, tape the edges down with masking tape, but for this specific look, leaving the edges raw and untaped works perfectly. -
Mix Your Palette:
Prepare two distinct color puddles on your palette. For the top ‘sunrise’ section, mix a watery blend of pale pink with a tiny touch of violet. For the bottom section, mix a diluted sky blue. -
Check Consistency:
Ensure your paint is fluid but not completely transparent. It needs enough pigment to be moved by the squeegee but enough water to flow across the textured paper.
Step 2: Creating the Pink Haze
-
Apply the Pink Paint:
Using your brush, dab several dots or a loose line of the pink-violet mixture extensively across the very top left corner of the paper. -
Initial Drag:
Place the edge of your squeegee or card just above the wet paint. Apply gentle pressure and drag the tool diagonally downward and to the right. -
Softening the Edge:
Lift the squeegee abruptly as you reach the middle-top area. This lifting motion creates the feathery, disappearing edge characteristic of soft clouds. -
Layering Dimensions:
While the first layer is still damp, dot a slightly more concentrated amount of pink into the wettest areas. -
Second Swipe:
Clean your squeegee, then drag this new pigment slightly differently—perhaps curving slightly—to create depth within the cloud formation. -
Let it Be:
Resist the urge to overwork it. The beauty of this technique lies in the spontaneous textures the paper grain creates as the squeegee passes over it.
Pressure Control
For a ‘cloud’ look, use light pressure so the squeegee skips over the paper tooth. Heavy pressure creates solid blocks of color.
Step 3: Creating the Blue Horizon
-
Position the Blue:
Move to the bottom right corner of your paper. Load your brush with the sky blue mixture. -
Dab and Drop:
Apply generous drops of blue paint along the bottom right edge. I find that varied droplet sizes help create a more organic shape later. -
Upward Sweep:
Take your clean squeegee and place it at the very bottom edge. Drag the paint upward and slightly to the left, moving toward the center of the page. -
Creating the Fade:
As you drag upward, gradually reduce the pressure on the squeegee until you are barely touching the paper, allowing the paint to run out naturally. -
Adding Texture:
If the blue looks too flat, add a tiny drop of water to the squeegee edge and drag it through the blue section again to disturb the pigment.
Golden Hour Glow
Mix a tiny amount of metallic gold watercolor into your pink section before dragging for a shimmering sunset effect.
Step 4: Finishing Touches
-
Review the Balance:
Step back and look at the negative space. The white diagonal band in the center creates breathing room between your two color zones. -
Dry Completely:
Allow the artwork to air dry flat. Using a heat gun can push the pigment around too much, so patience is key for this soft look. -
Flattening:
Once bone dry, if the paper has buckled slightly from the water, place it under a heavy book overnight to smooth it out.
You now have a serene, pastel artwork ready to frame or gift

PENCIL GUIDE
Understanding Pencil Grades from H to B
From first sketch to finished drawing — learn pencil grades, line control, and shading techniques.
Explore the Full Guide
Bold Black-and-White With One Accent
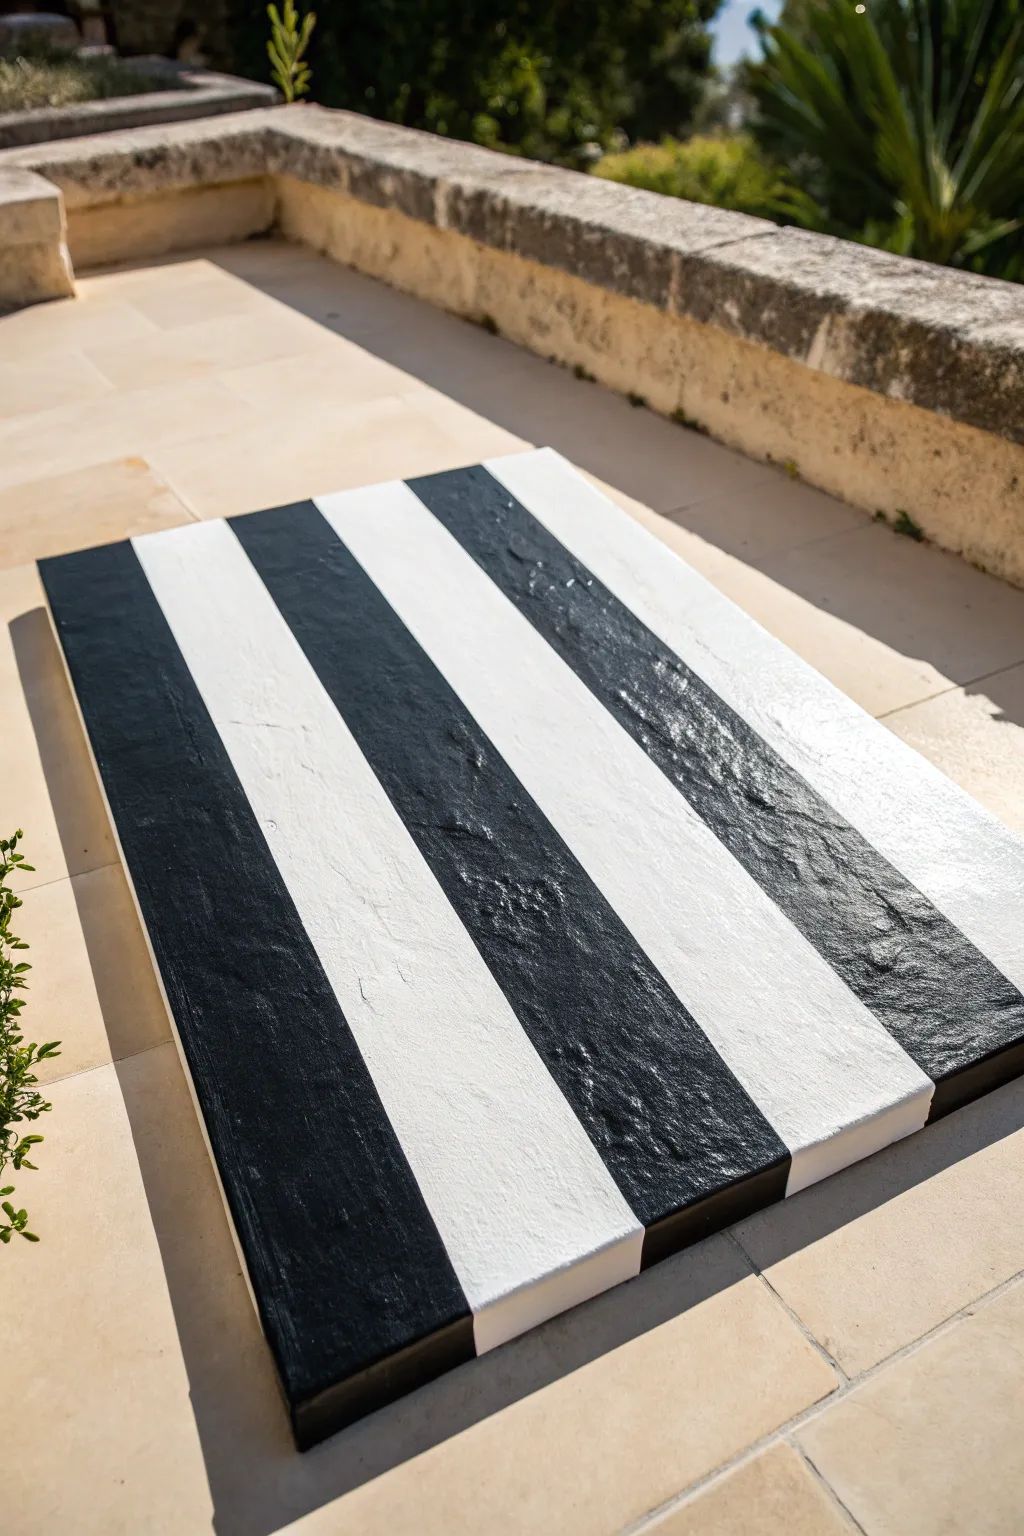
Embrace the power of high contrast with this striking black and white striped canvas. Using a squeegee technique creates a satisfyingly thick texture and perfectly imperfect lines that feel modern and architectural.
Step-by-Step
Materials
- Large rectangular stretched canvas (e.g., 24×36 inches)
- Heavy body acrylic paint (Mars Black)
- Heavy body acrylic paint (Titanium White)
- Wide squeegee or large spreading tool (width of stripes matches squeegee size)
- Painter’s tape or masking tape (optional for guides)
- Drop cloth or plastic sheeting
- Paper towels for wiping the tool
Step 1: Preparation & Planning
-
Prepare the Workspace:
Lay down a drop cloth or plastic sheet on a flat surface. This technique uses a lot of paint, so ensure your surface is protected from drips. -
Select the Canvas Orientation:
Place your canvas on the prepared surface. For this project, a vertical orientation (portrait) works best to emphasize the height of the stripes. -
Map the Stripes:
Decide on the width of your stripes based on the width of your squeegee. You can lightly mark the top edge of the canvas with a pencil to indicate where each stripe will start and end to keep them relatively straight. -
Prime the Surface (Optional):
If you want a smoother base, apply a thin layer of white gesso and let it dry. However, since the paint application will be thick, working directly on the primed canvas is usually sufficient.
Step 2: Applying the Paint
-
Load the First Stripe:
Start at the very top edge of the canvas for your first black stripe. Squeeze a generous bead of black heavy body acrylic paint directly onto the canvas, right along the top line where the stripe begins. -
The First Pull:
Place your squeegee directly above the line of paint. Pressing down firmly but evenly, pull the squeegee straight down toward the bottom of the canvas in one continuous motion. -
Check Coverage:
If the paint breaks or runs out before reaching the bottom, simply add more paint to the canvas where the break occurred and continue the pull downward. The texture variation adds character. -
Clean the Tool:
Wipe your squeegee completely clean with a paper towel. It is crucial there is no black residue left before switching to white. -
Apply the White Stripe:
Move to the next section. Squeeze a generous bead of titanium white paint along the top edge, right next to the black stripe you just finished. -
Pull the White Stripe:
Using the clean squeegee, pull the white paint down the length of the canvas. Try to keep the edge close to the black stripe without muddying the colors too much, though a little overlap creates a nice organic seam. -
Clean and Repeat:
Thoroughly clean the squeegee again. This resetting process is vital to maintaining the high contrast look.
Clean Edges Instantly
Keep a pack of baby wipes nearby. If black paint accidentally smears into a white zone, a quick wipe while wet is much easier than painting over it later.
Step 3: Finishing Touches
-
Continue the Pattern:
Repeat the process across the rest of the canvas, alternating between black and white beads of paint and pulling them down vertically. I find that working quickly helps keep the flow consistent. -
Fixing Gaps:
Inspect the canvas for any large bare spots. You can carefully dab a little extra paint into these areas with a palette knife, smoothing it to match the squeegee texture. -
Detail the Sides:
Don’t forget the edges of the canvas. Use a brush or your finger to extend the stripe color over the side for a gallery-wrapped finish, so it looks good from all angles. -
Allow extensive drying time:
Because this technique uses thick layers of heavy body acrylic, standard drying times won’t apply. Let the painting sit undisturbed in a dust-free area for at least 24 to 48 hours. -
Optional Varnish:
Once fully cured (wait a few days to be safe), you can apply a gloss varnish to enhance the sheen and protect the texture.
Go Geometric
Add a diagonal stripe masking tape line across the canvas before painting. Peel it off reveal a striking negative space line cutting through your texture.
Hang your bold creation in a well-lit area to let the shadows play off the rich texture you captured
Shimmery Streak Accents
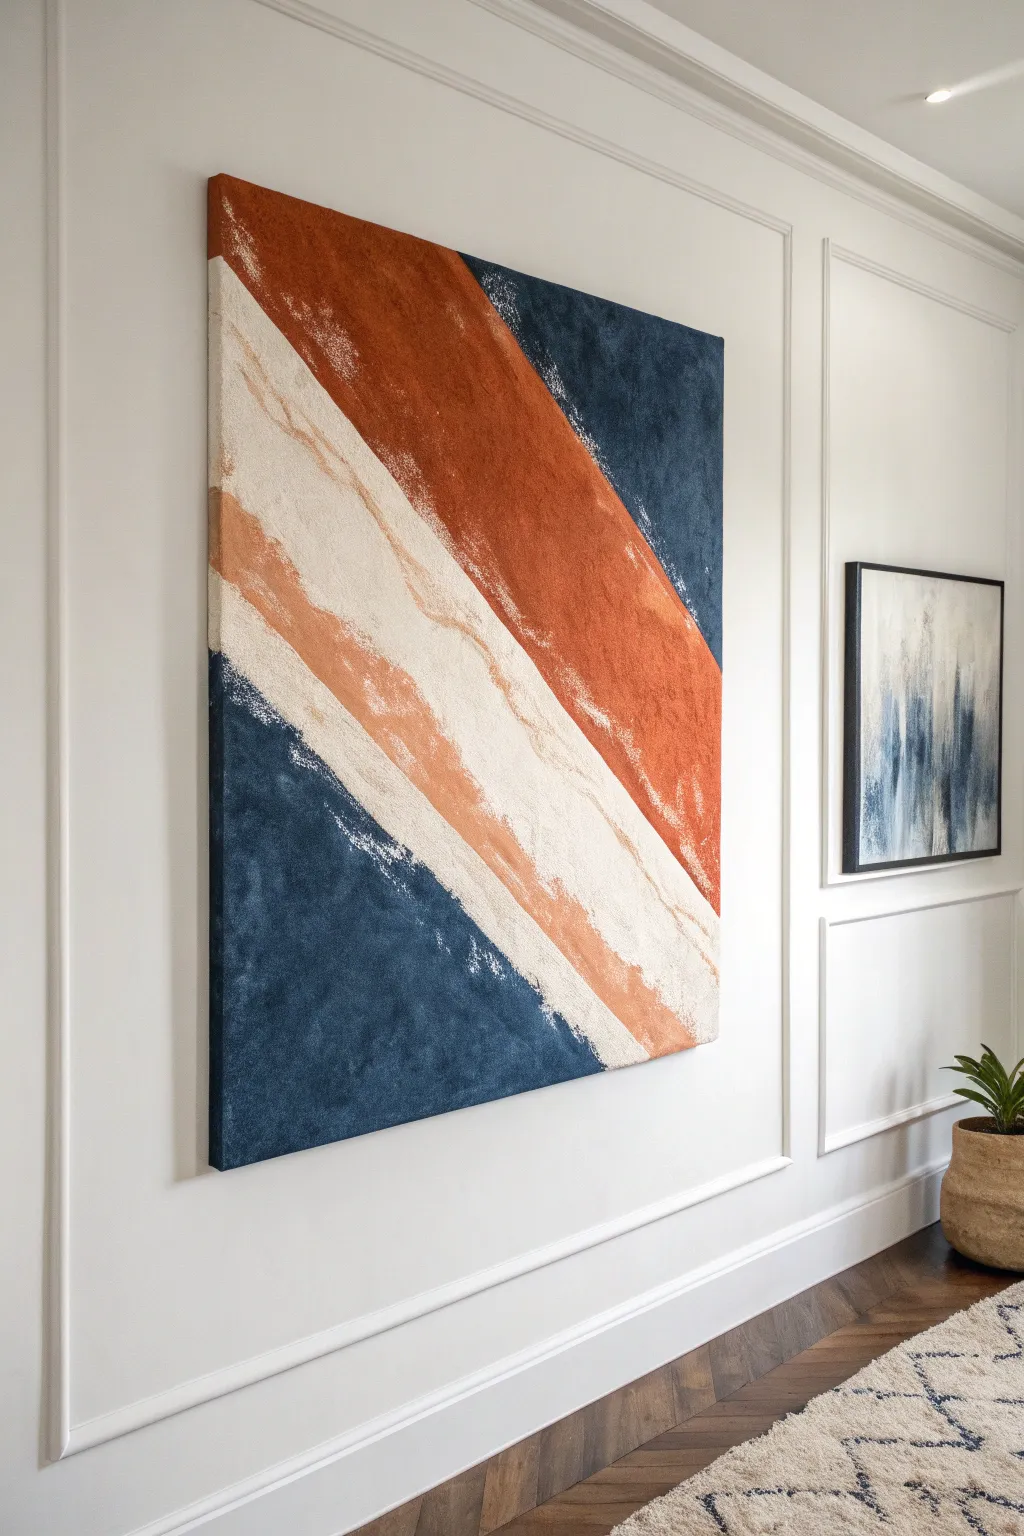
Evoke the raw texture of seaside cliffs and sandy shores with this bold, diagonal abstract piece. By dragging thick, textured paint across the canvas, you’ll create organic streaks and shimmering edges that catch the light beautifully.
Detailed Instructions
Materials
- Large rectangular stretched canvas (e.g., 24×36 or larger)
- Heavy body acrylic paints (Navy Blue, Burnt Orange, Warm Beige/Cream, White)
- Texture paste, modeling paste, or fine sand medium
- Large squeegee tool or wide putty knife
- Painter’s tape or masking tape
- Palette knives
- Large mixing palette or disposable plates
- Drop cloth
Step 1: Preparation & Planning
-
Analyze the composition:
Visualize the diagonal flow of the piece. Notice how the bands of color move from the top left reddish-orange down to the bottom right blue, intersected by a creamy white stripe. -
Protect your workspace:
Lay down a drop cloth. This project involves dragging heavy amounts of paint, which can get messy at the edges. -
Mix the texture medium:
In separate piles on your palette, mix your acrylic colors with a generous amount of texture paste or sand medium. Aim for a consistency like frosting or gritty peanut butter to hold the ridges. -
Prep the canvas background:
Apply a thin base coat of white acrylic paint over the entire canvas to ensure no raw canvas shows through the textured layers. Let this dry completely.
Clean Breaks
To get those cool white interruptions in the color, let your base coat dry fully. When you drag the squeegee over it rapidly, it will ‘skip’ over the canvas weave naturally.
Step 2: Applying the Color Blocks
-
Mark the diagonal guides:
Lightly use painter’s tape to mark off the broad diagonal zones if you lack confidence in freehanding, but remember we want organic, rough edges, so don’t press the tape down firmly. -
Apply the Navy Blue:
Load a palette knife with your textured Navy Blue mix. Apply it thickly to the bottom-left corner and the top-right corner areas, as seen in the reference. -
Spread the Burnt Orange:
Apply the textured Burnt Orange mix in a broad diagonal band adjacent to the top-right blue section. Don’t worry about smoothing it out yet; just get the bulk of the paint on the canvas. -
Add the sandy tones:
Place the Cream/Beige mixture in the central channel between the blue and orange sections. Add streaks of pure White within this beige zone to create dimension. -
Layer the transition colors:
Add a thinner, secondary strip of Burnt Orange or a lighter peach tone alongside the main cream stripe to create that layered, sedimentary look.
Step 3: The Squeegee Technique
-
Position the squeegee:
Start at the top edge of your main orange band. Hold your large squeegee or wide putty knife at a 45-degree angle to the canvas surface. -
Drag the first section:
Apply firm, consistent pressure and drag the tool diagonally down the length of the orange section. I like to do this in one continuous motion if possible to avoid stop-marks. -
Clean the tool:
Wipe your squeegee completely clean with a rag. Clean tools are essential to keep the colors from turning into mud. -
Drag the cream center:
Repeat the dragging motion for the central cream and beige stripe. Allow the squeegee to pick up slight edges of the neighboring orange paint to blend the boundaries naturally. -
Work the blue sections:
Finally, drag the texture across your Navy Blue corners. Depending on the size of your canvas, you might need two passes to cover wide areas. -
Create the ‘skips’:
If the paint looks too perfect, lightly drag a clean palette knife over dry spots or add a tiny bit more paint and re-drag to create those rough, white ‘skips’ where the texture breaks.
Golden Hour Glow
Mix a small amount of metallic gold or bronze paint into the Burnt Orange section just before the final drag. This adds a subtle shimmer that catches the sunlight.
Step 4: Finishing Touches
-
Refine the edges:
Use a small palette knife to feather the edges where colors meet. You want them to look like eroding rock layers rather than straight painted lines. -
Check the sides:
Look at the deep edges of your canvas. Continue the color and texture around the sides for a gallery-quality finish that doesn’t require a frame. -
Final drying time:
Because the paint and texture medium are thick, allow the painting to dry flat for at least 24 to 48 hours before hanging it vertically.
Once fully cured, this textured masterpiece will bring a modern, earthy element to your wall


Tape-Resist Chevron Zigs
Embrace the textured charm of squeegee art with this geometric chevron canvas. By combining crisp tape lines with the organic, scraped look of paint dragged across fabric, you’ll create a modern piece that feels both structured and delightfully imperfect.
Detailed Instructions
Materials
- Square stretched canvas (approx. 12×12 or 16×16 inches)
- Painter’s tape or masking tape (1-inch width)
- Acrylic paint (Muted terracotta or peach)
- Acrylic paint (White or cream)
- Squeegee or old credit card
- Ruler
- Pencil
- Paper plate or palette
- Drop cloth or newspapers
Step 1: Preparation & Taping
-
Canvas Prep:
Start by laying your canvas on a protected flat surface. If your canvas is raw, you might want to give it a base coat of white gesso or paint. If it’s pre-primed, you can leave the background white for high contrast. -
Mark the Grid:
To ensure your chevrons are even, use a ruler and pencil to lightly mark vertical guide lines every 3 to 4 inches across the width of the canvas. -
Establish the Peaks:
Along each vertical line, make small tick marks every 3 inches down the length. These will be the points of your zig-zags. -
Apply First Tape Strips:
Begin taping your pattern. Connect your first set of tick marks diagonally to create the upward ‘zig’ of the chevron. Press the tape down firmly, especially at the edges. -
Complete the ‘Zag’:
Connect the next set of marks to create the downward ‘zag’, forming a V-shape. Continue this process until the entire canvas is covered in a continuous zigzag pattern. -
Repeat for Thickness:
Place a second row of tape parallel to the first row to determine the thickness of your painted stripes. The space between the tape strips will be where the paint goes. -
Seal the Edges:
I always run a fingernail or the edge of a credit card firmly along every tape edge. This is crucial for preventing paint bleed and getting those crisp lines later.
Bleed Blocker
Paint a thin layer of your background color (white) over the tape edges first. This seals the tape, meaning any bleed is invisible!
Step 2: Squeegee Painting
-
Mix Your Color:
Squeeze a generous amount of your terracotta paint onto a palette. If you want a softer look like the photo, mix in a little white to create a varied, chalky consistency. -
Apply Paint Dots:
Place small dollops of paint directly onto the canvas inside the masked-off chevron areas. Space them out slightly so you have room to drag. -
The Squeegee Drag:
Take your squeegee or old credit card and place it at the top of a masked section. Pull the paint downward and diagonally, following the direction of the tape. -
Create Texture:
Don’t aim for perfect opacity. Vary your pressure as you drag—press harder to reveal the canvas weave and lighter to leave more paint. This creates that desirable distressed look. -
Scrape and Move:
Continue dragging paint through all the masked sections. If you have excess paint on the squeegee, wipe it onto the next section or back onto your palette. -
Dry Briefly:
Let the paint set for about 10 to 15 minutes. You want it to be tacky but not completely wet, as super wet paint can pool when tape is removed.
Tape Tearing Paint?
If peeling tape lifts the paint underneath, use a hairdryer on low heat to soften the paint adhesive slightly before pulling.
Step 3: The Reveal
-
Remove Tape Carefully:
Start peeling the tape off slowly at a 45-degree angle. Pulling away from the painted area helps keep the edge sharp. -
Wrap the Edges:
If your design extends to the sides of the canvas (gallery wrap style), make sure to paint and finish those edges now with a small brush or your squeegee tool. -
Final Touch-Ups:
Inspect your lines. If any paint bled under the tape, use a small stiff brush dipped in water (or your background color) to tidy up the edges while the paint is still relatively fresh. -
Full Cure:
Allow the entire canvas to dry completely, usually overnight, before hanging it up or displaying it outdoors.
Hang your new geometric masterpiece and admire the clean lines against that cool textured finish
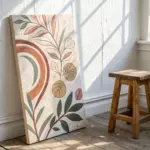
Masked Circle “Portal” Reveal
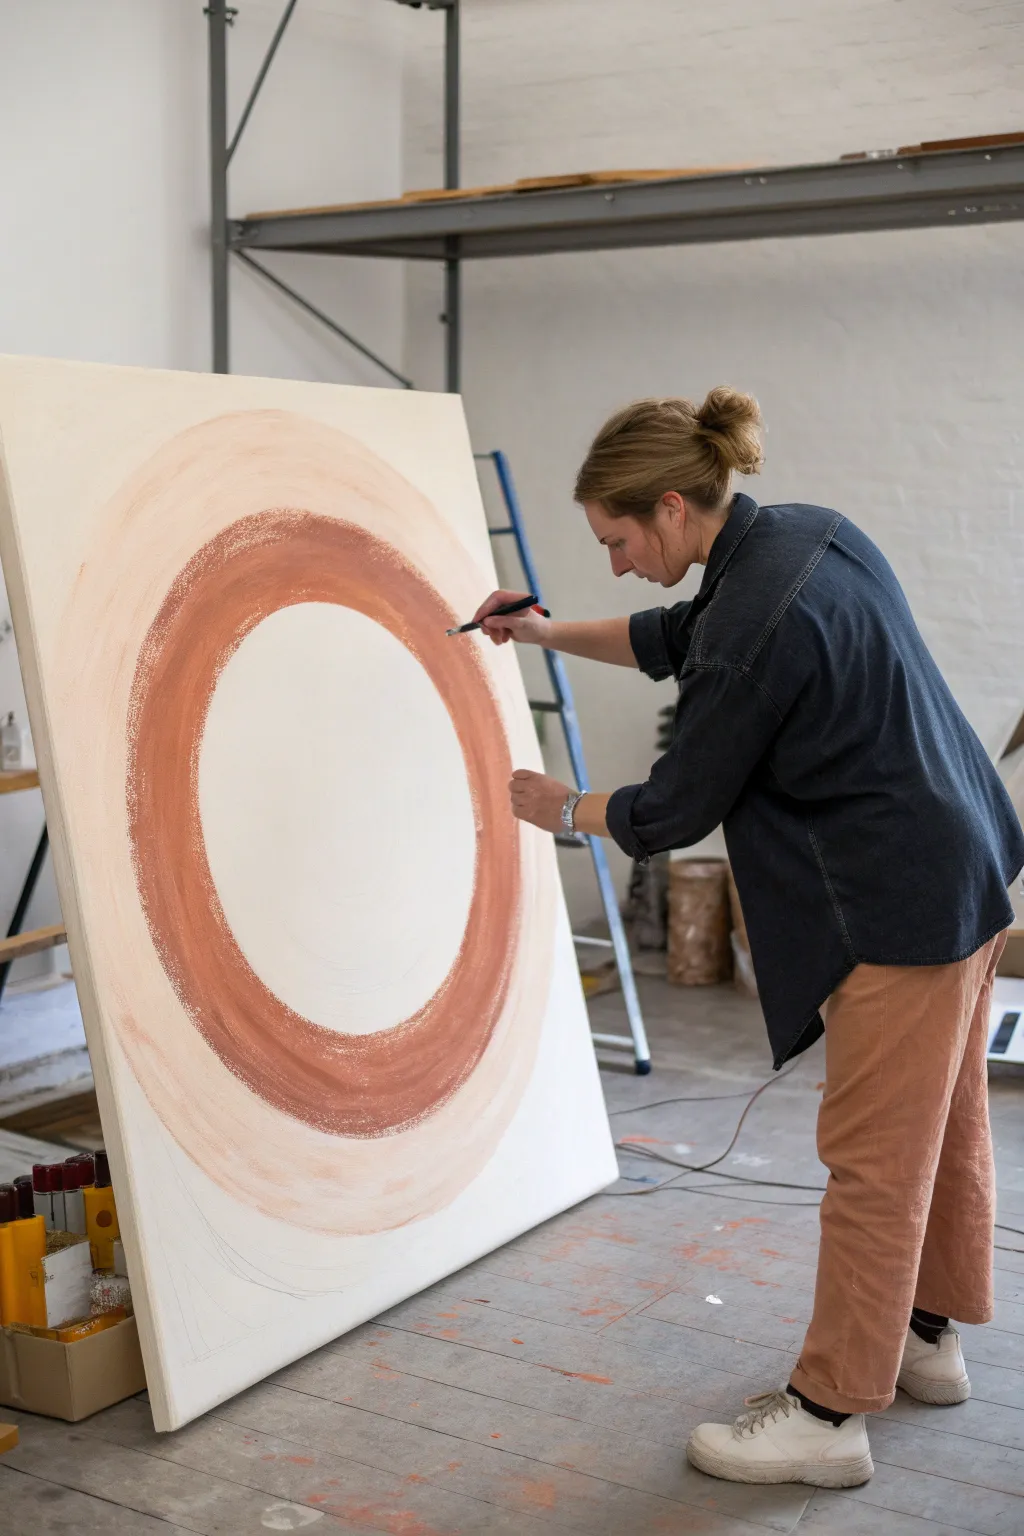
Create a stunning, minimalistic focal point for any room with this large-scale circular abstract piece. The design features soothing concentric rings in terracotta and blush tones that evoke a sense of calm and groundedness.
Step-by-Step Guide
Materials
- Large stretched canvas (at least 36×48 inches)
- Acrylic paints (Titanium White, Burnt Sienna, Unbleached Titanium, Red Iron Oxide)
- Wide flat paintbrush (2-3 inches)
- Detail brush for edges
- Pencil
- String and pushpin (for drawing circles)
- Mixing palette or plates
- Easel or wall mount for painting upright
Step 1: Preparation & Sketching
-
Set up your canvas:
Place your large canvas on a sturdy easel or lean it securely against a wall. Ensure you have ample space to move your arm in wide arcs. -
Create a compass:
To draw perfect circles on such a large scale, tie a piece of non-stretch string to a pushpin. Tie a pencil to the other end of the string. -
Find the center:
Measure and mark the exact center of your canvas lightly with a pencil. Insert the pushpin into this center mark. -
Draft the inner circle:
Extend the string to define the radius of the central white void. Keep the string taut and lightly swing the pencil around to draw your first circle. -
Draft the outer rings:
Lengthen the string to define the width of your first colored ring (the dark terracotta band) and draw a second circle. Repeat this process for the outer blush ring.
Uneven Circles?
If your circle looks wobbly, don’t worry. The dry-brush aesthetic is forgiving. Simply broaden the ring slightly in the thinner areas to correct the visual weight.
Step 2: Painting the Texture
-
Mix the terracotta tone:
Combine Burnt Sienna with a touch of Red Iron Oxide. You want a rusty, warm earth tone. Don’t over-mix; a little variation adds depth. -
Apply the first ring:
Using a wide flat brush, paint the space between your first and second pencil lines. Use a dry-brush technique here—load only a little paint and drag it to create a textured, scratchy look rather than a solid block of color. -
Soften the edges:
While painting the terracotta ring, I like to keep the brush strokes following the curve of the circle to maintain momentum and flow. -
Mix the blush tone:
For the outer ring, mix Unbleached Titanium with a very small amount of your terracotta mix and plenty of Titanium White. Aim for a soft, sandy peach color. -
Paint the outer ring:
Apply this lighter color to the outer band. Allow it to slightly overlap the darker ring in places to create an organic transition, but maintain that dry, textured application. -
Refine the inner edge:
Take a smaller brush with a bit of the terracotta paint to carefully tidy up the inner edge of the dark ring, ensuring the central white circle remains crisp. -
Feather the outer edge:
Let the outermost edge of the blush ring fade naturally into the canvas background. You can use a clean, dry brush to feather the wet paint outward for a soft, hazy finish. -
Check for consistency:
Step back from the canvas frequently to ensure your rings look balanced and the texture is roughly consistent around the entire circumference. -
Optional pencil details:
Looking closely at the inspiration, you can see faint sketching lines. Feel free to leave visible pencil marks or add loose gestural lines around the bottom for an artistic, unfinished aesthetic. -
Final drying:
Allow the painting to dry upright for at least 24 hours before moving or framing it.
Texture Master
Work with a very dry brush. Wipe excess paint onto a paper towel before touching the canvas to get that scratchy, organic ‘noise’ in the colored bands.
Step back and admire the calm, centering energy this piece brings to your space
Layered Pulls for Extra Depth
Embrace simplicity with this calm, dual-tone squeegee painting that suggests a hazy horizon line. By layering a soft beige over a crisp white background, you create a subtle textural transition that adds surprising depth to a minimalist composition.
Step-by-Step
Materials
- Stretched canvas (square or rectangular)
- Titanium White acrylic paint
- Buff Titanium or Beige acrylic paint
- Wide flat paintbrush (2-3 inch)
- Squeegee or large palette knife
- Paper towels or rag
- Easel or flat work surface
- Drop cloth
Step 1: Setting the Foundation
-
Prepare your workspace:
Since this technique involves dragging paint, things can get a little messy at the edges. Lay down a drop cloth if you are working indoors, or set up your easel in a safe outdoor spot like I’ve done here. -
Prime the canvas:
Even if your canvas is pre-primed, apply a fresh coat of Titanium White acrylic paint over the entire surface. This ensures a uniform texture and brightness. -
Establish the background:
While the primer is still slightly tacky or just dry, apply a generous, even layer of white paint to the top two-thirds of the canvas. Use a wide flat brush for broad, smooth strokes. -
Let it dry completely:
This base layer needs to be fully dry before you add the next color. If it’s wet, the colors will muddy together instead of layering cleanly. Give it at least 30-45 minutes.
Clean Pull Secret
Wipe your squeegee blade completely clean after every single pass. Even a tiny bit of dried paint on the edge will create unwanted streaks in your smooth color blocks.
Step 2: Creating the Horizon
-
Mix your second tone:
Prepare your beige or Buff Titanium paint. You want a heavy body consistency; if your paint is too fluid, let it sit on the palette for a few minutes to thicken slightly. -
Apply the paint line:
Squeeze or spoon a thick bead of the beige paint directly onto the canvas, horizontally across the middle. Position this line slightly below the vertical center to create a grounded composition. -
Position the squeegee:
Place your squeegee or large spreading tool directly above the bead of beige paint. Hold the tool at a 45-degree angle to the canvas surface. -
The downward pull:
Apply firm, consistent pressure and pull the squeegee straight down toward the bottom edge of the canvas. Move in one steady motion without stopping. -
Check the coverage:
Examine the bottom section. If the paint coverage is too thin or patchy, you can add more paint to the bottom edge and pull upwards slightly to fill gaps, but be careful not to overwork it. -
Clean the edges:
Wipe away any excess paint that has spilled over the sides of the canvas with a damp paper towel to keep the profile neat.
Metallic Horizon
Mix a small amount of gold or silver paint into your beige tone before pulling. It adds a subtle shimmer to the ‘earth’ section that catches the light beautifully.
Step 3: Feathering the Transition
-
Inspect the meeting point:
Look at where the white and beige meet. The initial pull probably left a hard or uneven ridge of paint. -
Prepare a clean brush:
Take a clean, dry flat brush. Ensure it has absolutely no water on it. -
Feather upward:
Gently place the brush at the top edge of the wet beige paint. With a very light flicking motion, brush upward into the white section. This creates the ‘layered pull’ look. -
Vary the stroke height:
Don’t make every upward stroke the same length. I prefer to vary them—some short, some slightly longer—to mimic the organic look of a landscape or grasses. -
Use the squeegee again (optional):
If the brush strokes look too distinct, lightly drag a clean squeegee horizontally across the transition zone to flatten and blur the texture slightly. -
Let the texture set:
Allow the thick areas of paint, especially near the transition line, to dry undisturbed. This might take longer than usual due to the paint thickness.
Step 4: Finishing Touches
-
Paint the sides:
Once the face is dry, paint the sides of the canvas canvas to match the adjacent front colors—white on top, beige on the bottom—for a gallery-wrapped finish. -
Seal the work:
Apply a matte varnish once the painting is cured (usually 24-72 hours for acrylics) to protect the surface without adding distracting glare.
Hang your finished piece in a well-lit area to let the subtle textures catch the light.
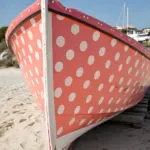
Dry Scrape for Broken Texture
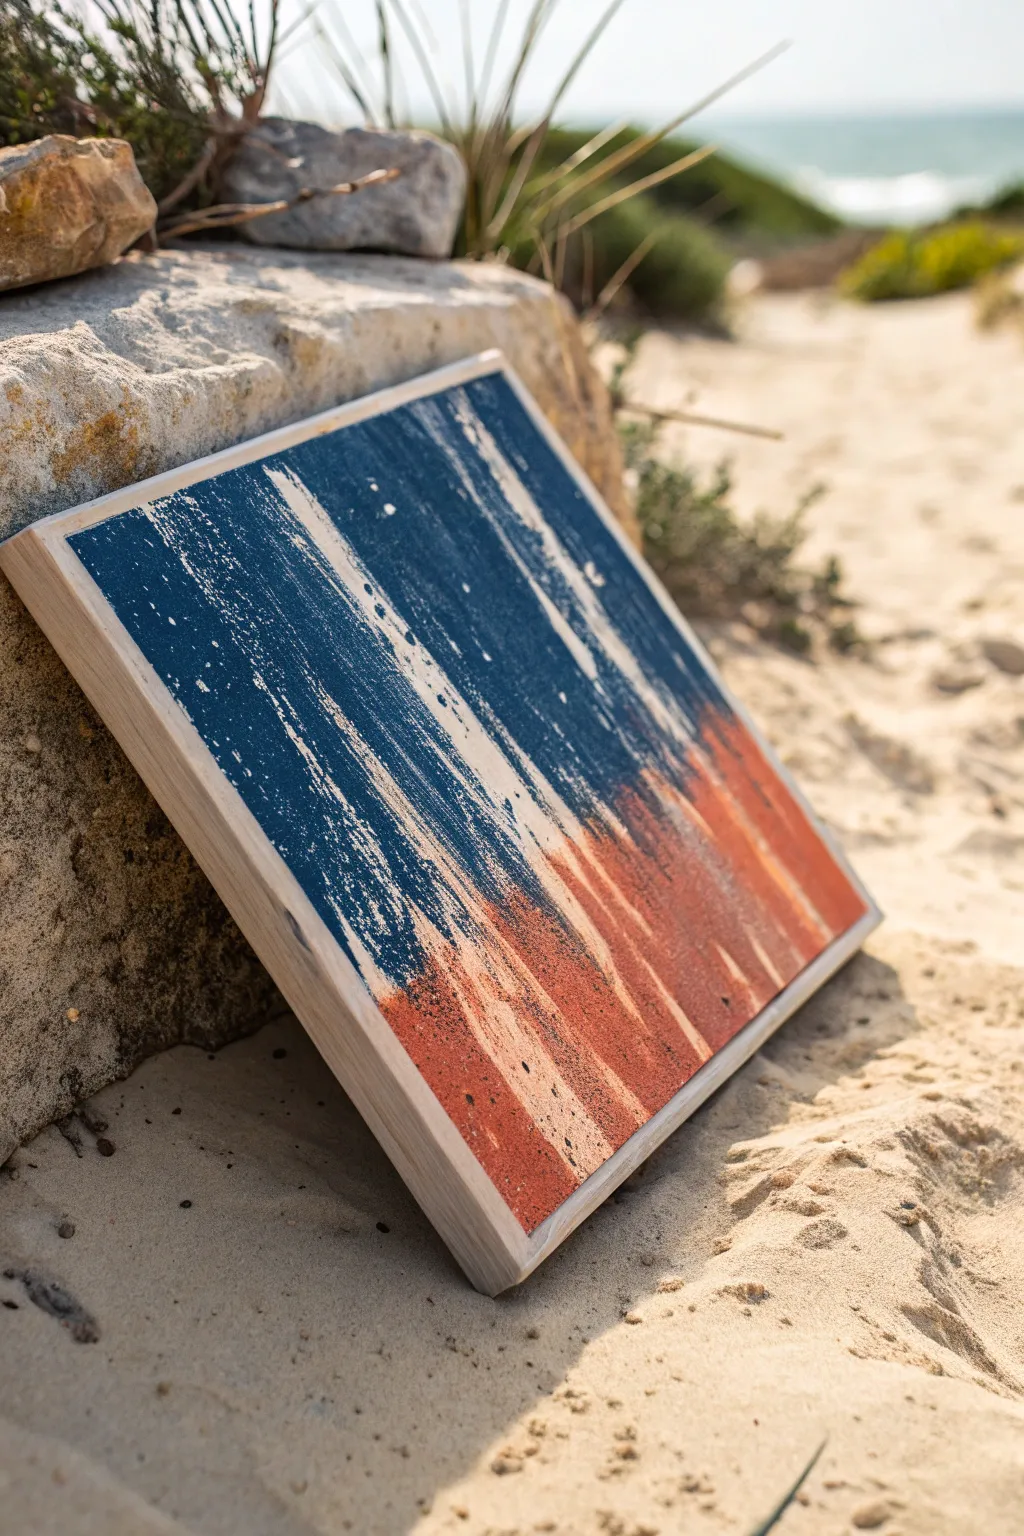
Capture the raw, beautiful texture of weathered wood and peeling paint with this simple squeegee technique. Bold navy blue meets rusty terra cotta in a vertical, distressed composition that perfectly mimics the look of a worn boat hull.
Detailed Instructions
Materials
- Square wood panel or canvas (approx. 12×12 inches)
- Acrylic paint: Navy Blue
- Acrylic paint: Terra Cotta / Burnt Orange
- Acrylic paint: White or Cream (for base layer)
- Wide flat squeegee or old plastic gift card
- Palette knife (optional)
- Sandpaper (fine grit)
- Painter’s tape
- Matte spray sealant
Step 1: Preparation & Base Layer
-
Prepare the surface:
If you are using a raw wood panel, give it a quick sanding to ensure it is smooth. Wipe away any dust with a damp cloth or tack cloth. -
Protect the edges:
Since this frame has a visible natural wood edge, apply painter’s tape carefully around the outer sides to keep them clean while you paint. -
Prime the surface:
Apply a base coat of white or cream acrylic paint. This doesn’t need to be perfect, but it provides a bright underlayer that will peek through the distressed texture later. -
Let it dry completely:
Ensure the base coat is bone dry before moving on. Waiting about 30 minutes to an hour usually does the trick.
Step 2: The Squeegee Technique
-
Apply the bottom color:
Squeeze a generous line of terra cotta or rusty orange paint directly onto the panel, roughly one-third of the way up from the bottom edge. -
Apply the top color:
Squeeze a line of navy blue paint across the panel, roughly one-third of the way down from the top edge. -
Begin the drag:
Take your squeegee and place it above the blue paint line. With firm, even pressure, drag the tool straight down towards the bottom edge of the panel. -
Create the break:
As you drag down, lift the squeegee slightly or change the angle to create ‘skips’ or breaks in the paint coverage. This is key for that weathered look. -
Repeat vertically:
Go back to the top and repeat the vertical drag in parallel sections until the width of the board is covered. Don’t overwork it; one or two passes per section is usually best. -
Blend the transition:
At the point where the blue meets the orange, allow the colors to mix slightly on the board as you drag, but try to keep distinct zones of color. -
Adding distressed details:
While the paint is tacky, use the edge of a dry squeegee or a palette knife to scrape off small patches of wet paint, revealing the white base underneath. -
Emphasize the texture:
If the texture looks too smooth, lightly tap the flat side of the squeegee against wet areas and pull away quickly to create organic peaks and pits.
Dry vs. Wet Squeegees
For this scratchy look, keep your squeegee clean and dry between swipes. A wet tool creates smooth blends, while a dry tool encourages those jagged skips.
Step 3: Finishing Touches
-
Dry thoroughly:
Let the artwork dry completely. Because the paint might be thick in areas, leave it overnight to be safe. -
Sand for extra wear:
Once dry, take a fine-grit sandpaper and lightly buff areas where you want more distress, particularly along the vertical streaks. -
Remove dust:
Wipe the surface with a clean, dry cloth to remove any sanding residue. -
Remove tape:
Carefully peel off the painter’s tape from the wood edges to reveal the clean border. -
Seal the artwork:
To protect your new piece, spray a light coat of matte sealant over the entire surface. This preserves the colors without adding unwanted shine.
Paint Too Gloopy?
If you have too much paint buildup, don’t keep scraping. Let it dry partially, then scrape off the excess with a palette knife for cool texture.
Now you have a striking piece of modern art that brings a touch of rugged shoreline character to your home
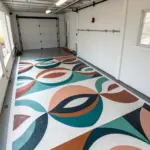
Squeegee Mini Series on Small Surfaces
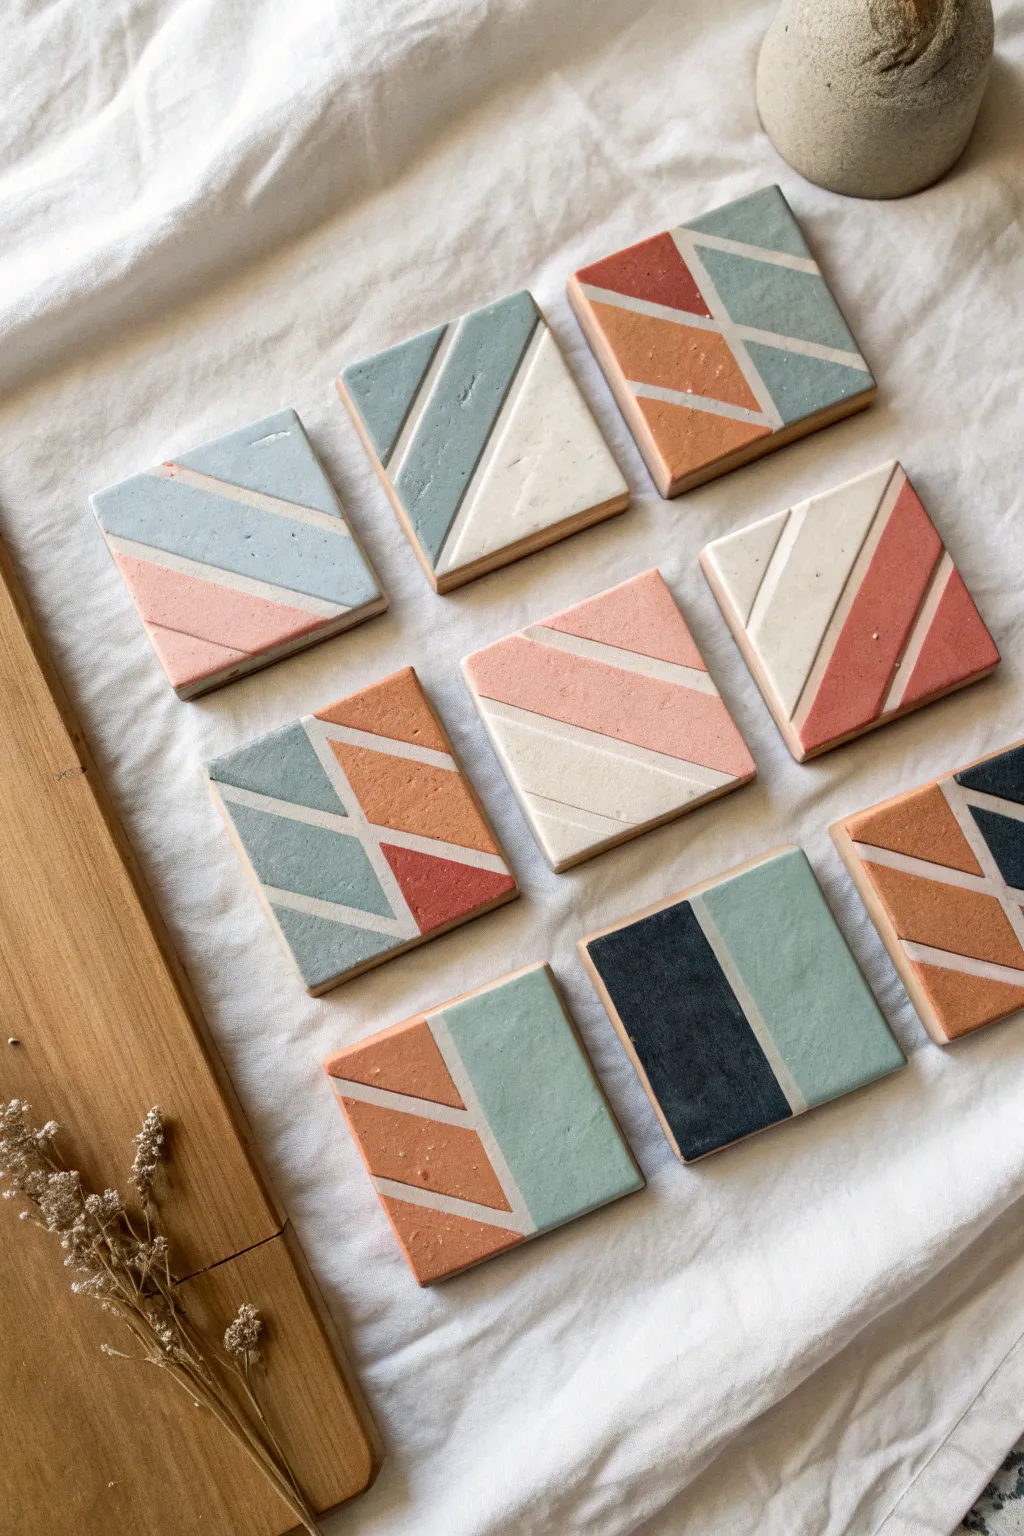
These miniature geometric tiles bring a modern, minimalist vibe to any surface with their precise lines and soft, earthy palette. By using a clever masking and scraping technique, you can create the illusion of complex inlaid designs on simple small canvases.
Step-by-Step Tutorial
Materials
- Small square tiles (ceramic bisque, wood, or heavy cardstock squares)
- Acrylic paints (terracotta, sage green, slate blue, charcoal, blush pink, off-white)
- Small squeegee or old credit card
- Thin painter’s tape or graphic art tape (1/8 inch or 1/4 inch width)
- Palette or wax paper
- Scissors
- Matte sealant spray or matte medium
Step 1: Preparation & Masking
-
Clean your surface:
Begin by wiping down your square tiles to ensure they are free of dust or oils. If you are using wooden squares, give them a light sanding for a smooth base. -
Plan your geometry:
Visualize the designs before taping. Notice how the designs in the photo rely on diagonals and intersecting lines. Sketch a few ideas on paper first if you want to be precise. -
Apply the first tape line:
Cut a strip of thin art tape longer than the tile. Press it firmly across the surface, creating your main diagonal or dividing line. -
Add intersecting lines:
Continuing with the tape, create secondary geometric shapes. You can cross the first line or create parallel stripes. Look at the reference: some tiles have just two sections, while others have three or four. -
Seal the edges:
Run your fingernail or the edge of your squeegee firmly over the tape edges. This crucial step prevents paint from bleeding under the tape and ensures those crisp white lines later.
Bleeding Lines?
Paint leaking under tape? Before applying color, brush a thin layer of matte medium or white paint over the tape edges to seal them perfectly.
Step 2: Paint Application
-
Mix your palette:
Prepare your acrylic colors. Aim for that muted, earthy look by mixing a tiny dot of brown or gray into your primary colors to desaturate them. -
Apply the first color:
Squeeze a small bead of paint directly onto one section of the tile, or dab it on generously with a brush. You need enough paint to move around, not just a thin layer. -
Squeegee the section:
Take your mini squeegee or credit card and drag the paint across that specific section. Pull the paint away from the tape edge or parallel to it for the smoothest finish. -
Clean the tool:
Wipe your squeegee perfectly clean with a paper towel before switching colors. I prefer to keep a damp cloth nearby for this to keep the workflow moving. -
Fill remaining sections:
Repeat the process for the other geometric shapes on the tile, using contrasting colors like slate blue next to terracotta or blush pink next to cream. -
Check coverage:
Ensure the paint covers the surface solidly but isn’t pooling thickly against the tape edges, which can cause lifting issues later.
Pro Tip: Thickness
Don’t press too hard with the squeegee. A lighter touch leaves a slightly raised, textured surface that looks more premium and handmade.
Step 3: The Reveal
-
Let it set deeply:
Allow the paint to dry until it is tacky but not fully hardened. Usually, 10 to 15 minutes is the sweet spot for acrylics on this scale. -
Remove the tape:
Carefully peel back the tape at a sharp 45-degree angle. Pull slowly to reveal the clean substrate underneath, which acts as your ‘grout’ line. -
Fix imperfections:
If a little paint bled through, use a toothpick or a clean, damp brush to gently scrape it away while the paint is still relatively fresh. -
Full dry time:
Let the tiles cure completely for at least an hour or two. The thick squeegeed paint might take longer than a standard brush coat. -
Apply sealant:
Finish by spraying a light coat of matte sealant over the tiles. This unifies the sheen and protects the paint from scratching.
Arrange your finished tiles in a grid or use them individually as modern coasters


Have a question or want to share your own experience? I'd love to hear from you in the comments below!