
When I’m craving something moody but still magical, I lean into starry night colors—deep blues, warm golds, and that instantly recognizable swirling sky energy. These ideas are all about capturing those glowing stars and wind-like spirals, whether you’re copying the classic vibe or pushing it into your own twist.
Classic Starry Night Scene Study
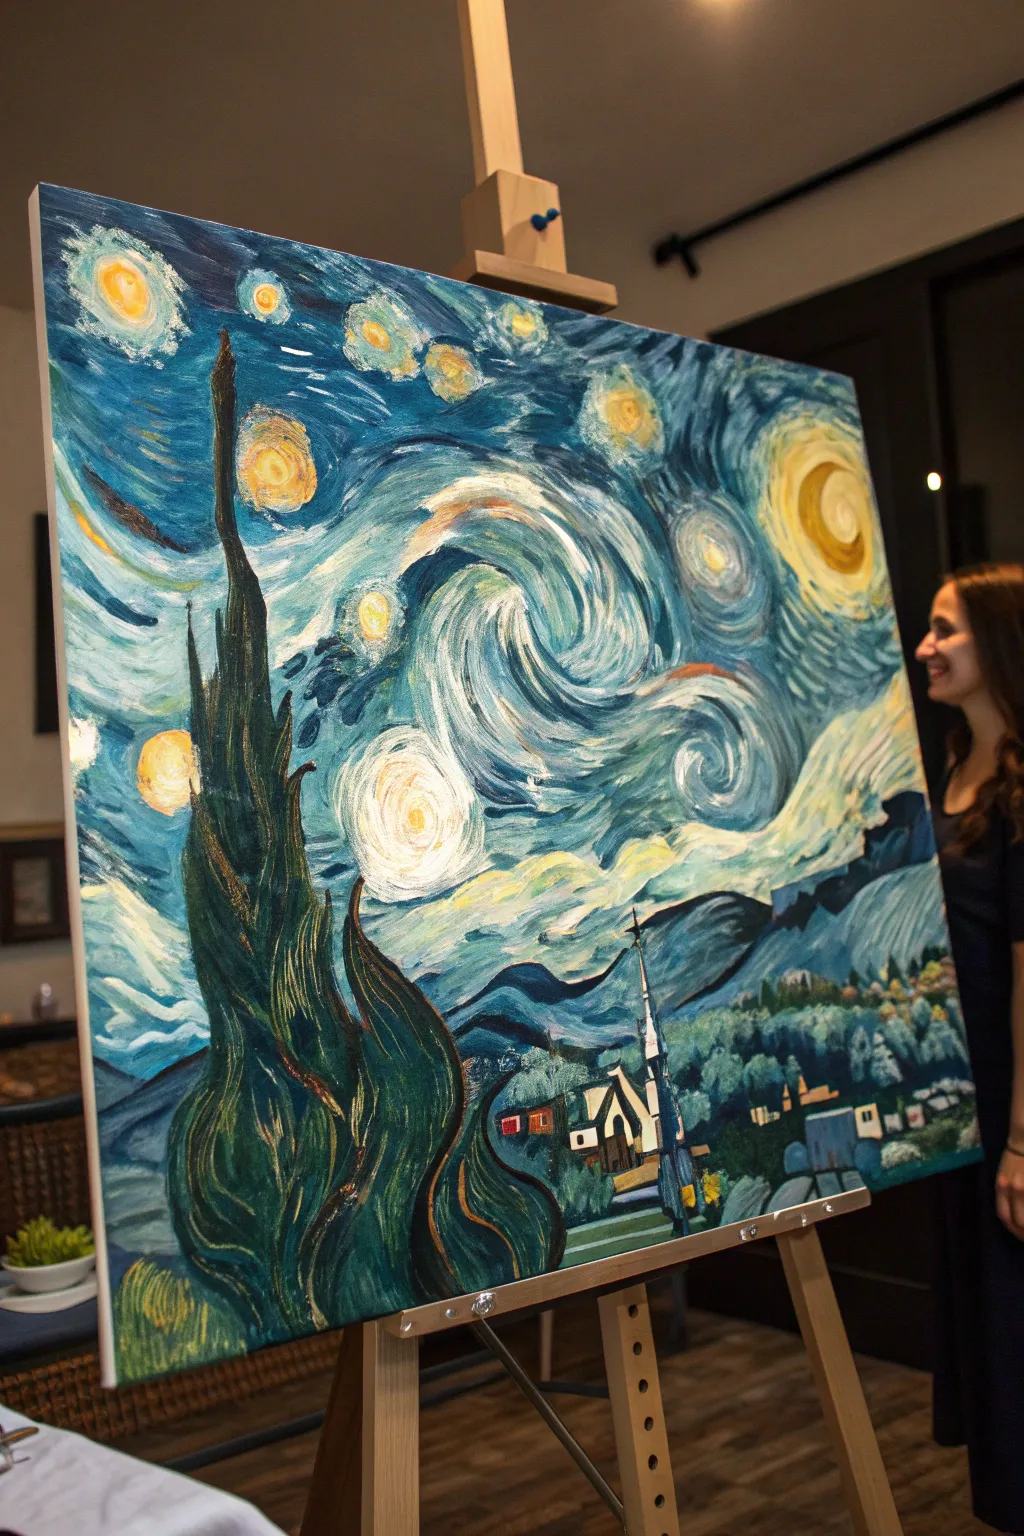

Capture the swirling movement and vibrant emotion of Vincent van Gogh’s most famous work with this detailed acrylic study. By breaking down the complex composition into manageable layers, you’ll build the iconic cypress tree, rolling hills, and luminous night sky step by step.
Step-by-Step
Materials
- Stretched canvas (16×20 or 18×24 inches)
- Acrylic paints (dark blue, ultramarine, phthalo blue, white, bright yellow, ochre, orange, black, burnt umber, green)
- Large flat brush (1 inch)
- Medium filbert brush
- Small round detail brush
- Palette knife (optional for texture)
- Water cup and paper towels
- Easel
Step 1: Setting the Scene
-
Sketch the major shapes:
Using a small round brush with watered-down light blue or yellow paint, lightly map out the composition. Draw the towering, flame-like cypress tree on the left, the rolling horizon line of the mountains, and circles for the moon and stars. -
Block in the sky background:
Mix a light blue shade using white and a touch of ultramarine. Use your large flat brush to fill the upper portion of the canvas, brushing horizontally but curving around the moon and star placements. -
Establish the mountains:
Mix a medium blue using cobalt or phthalo blue. Paint the rolling hills in the distance below the sky, using long, sweeping strokes to mimic the flow of the landscape. -
Paint the village base:
For the village area at the bottom right, use darker blues and greens. Don’t worry about details yet; just block in the dark shapes where the houses and church will eventually sit.
Step 2: The Swirling Sky
-
Create the central swirl:
Load your medium filbert brush with white and a little blue. Start in the center of the sky and paint the iconic ‘S’ shape swirl using short, dashed strokes rather than one continuous line. -
Layer blues for movement:
Repeat the dashed stroke technique around your white swirl using progressively darker blues. Let the colors sit side-by-side rather than blending them completely to keep that Impressionist texture. -
Add the stars and moon:
Paint the circles you reserved earlier with bright yellow. I like to add a touch of orange to the crescent moon for warmth. Surround these orbs with dashed rings of white and pale yellow to create a glowing halo effect. -
Refine the wind currents:
Go back into the sky with your smallest brush and pure white paint. Add defined, rhythmic dashes that follow the flow of the wind, weaving through the darker blue areas.
Stroke Direction
Van Gogh’s style relies on visible brushstrokes. Don’t smooth the paint out; let each dash of color stand distinct to create vibration.
Step 3: Foreground and Details
-
Build the cypress tree:
Mix black with burnt umber and a touch of deep green. Paint the large cypress shape on the left, using upward, flickering strokes that resemble flames to give the tree its vertical energy. -
Add highlights to the tree:
While the dark paint is tacky, mix a little ochre or brown into your green. Add subtle highlights to the edges of the cypress branches, following the upward curves to give the tree volume. -
Outline the village structures:
Switch to a small round brush and black paint. Carefully outline the small houses and the prominent church steeple in the lower right quadrant. -
Illuminate the windows:
Dab tiny squares of bright yellow into the houses to create lit windows, creating a cozy contrast against the cold, dark night. -
Detail the rolling hills:
Add thick outlines of black and dark blue to the mountain ridges. Use sweeping strokes to define the valleys and peaks, ensuring they look heavy and grounded compared to the airy sky. -
Final impasto touches:
If you want extra texture, re-load a brush with thick yellow or white paint and dab it onto the centers of the stars and the moon for a slight 3D effect.
Add Modeling Paste
Mix acrylic modeling paste into your paint before applying specifically to the stars and the cypress tree for authentic, thick texture.
Step back and admire the rhythmic movement you’ve captured in your own personal tribute to post-impressionism


Signature Swirl Brushstroke Practice
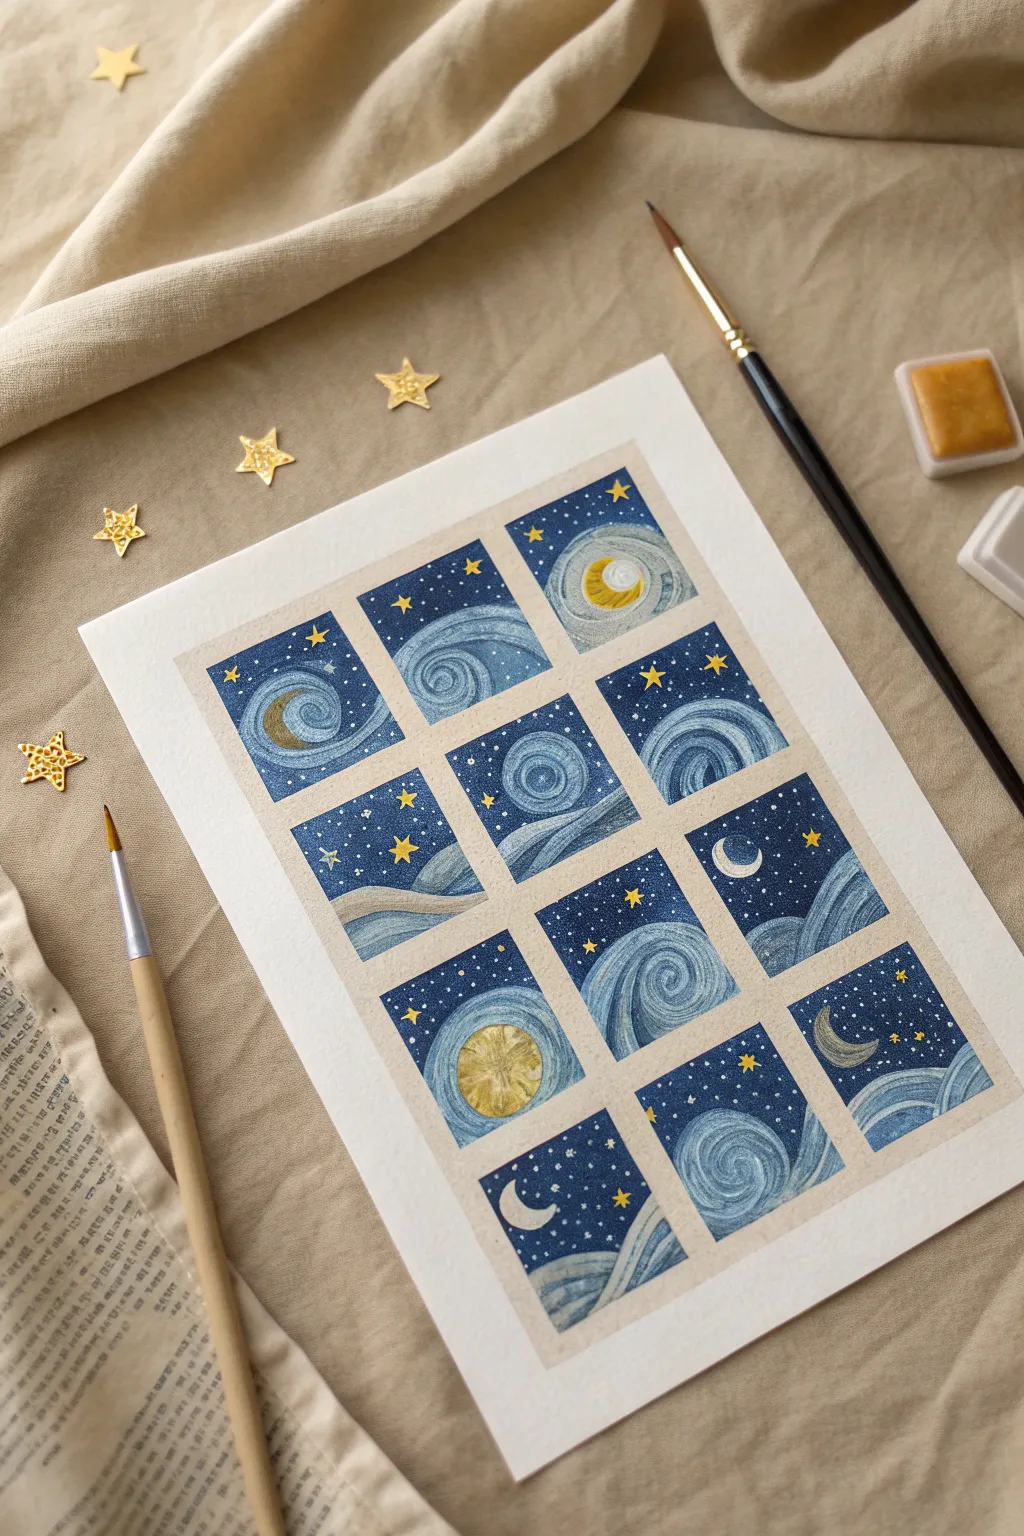
Capture the essence of distinct celestial movements with this structured yet whimsical watercolor study. This project breaks down the iconic “Starry Night” swirls into twelve manageable vignettes, allowing you to practice signature brushstrokes across a cohesive grid.
Step-by-Step Tutorial
Materials
- Cold press watercolor paper (A4 or 9×12 inch)
- Artist grade watercolor paints (Indigo, Prussian Blue, Ultramarine, Paynes Gray)
- Metallic gold watercolor paint or gold gouache
- Gouache paint (White and Yellow)
- Round watercolor brushes (Size 2 and 4)
- Fine liner brush (Size 0 or 00)
- Washi tape or masking tape (approx. 5mm width)
- Pencil and ruler
- Water jar and paper towels
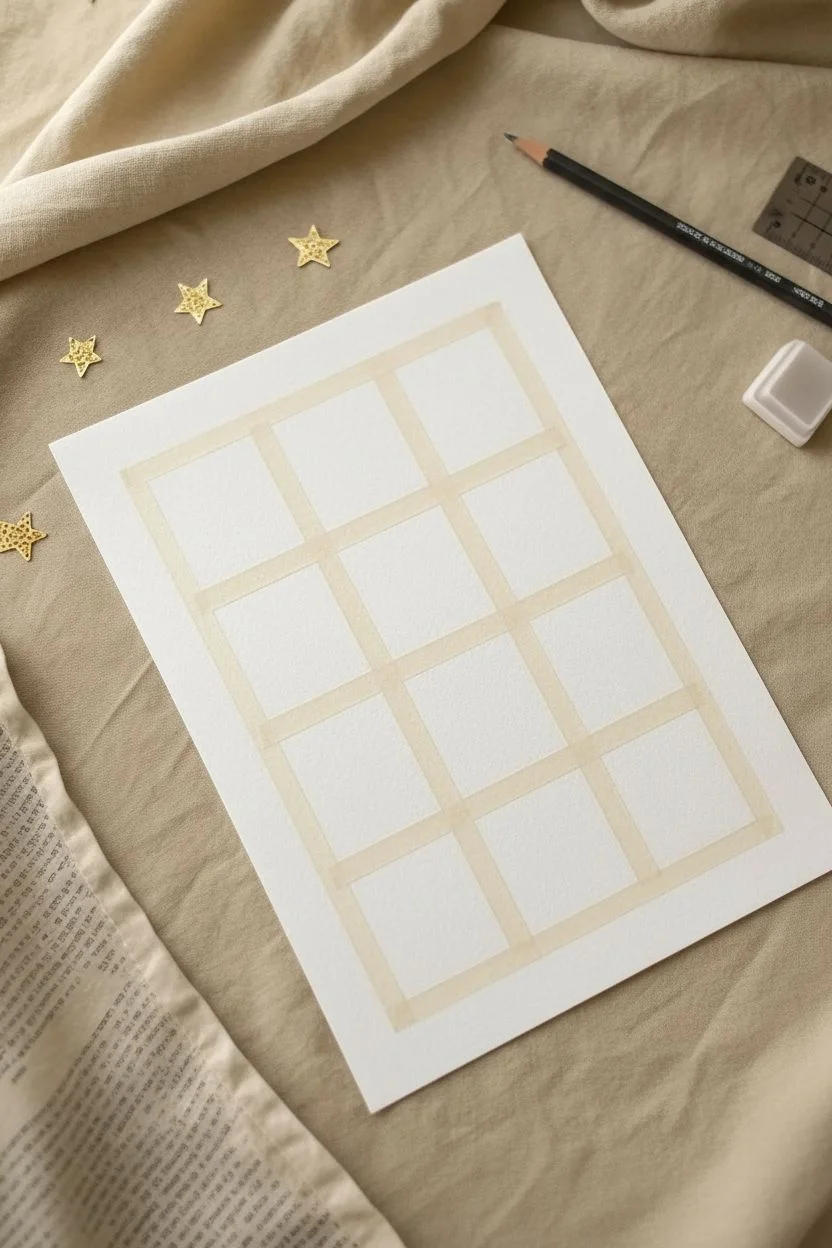
Step 1: Grid Preparation
-
Measure the margins:
Start by measuring equal margins around your paper, leaving a central rectangle where your grid will live. Use a ruler and a light pencil touch to mark the boundaries. -
Draft the grid:
Divide your central rectangle into three equal vertical columns and four equal horizontal rows. This will create twelve small boxes. Lightly sketch the grid lines. -
Apply the tape:
Carefully place narrow washi tape or masking tape over your pencil lines. Ensure the tape intersects cleanly at the corners to create crisp, white borders between each miniature painting once removed.
Tape Removal Tip
If your paper tears when removing tape, heat the tape surface gently with a hair dryer on a low setting for a few seconds. This softens the adhesive for a clean release.
Step 2: Sketching the Elements
-
Plan the moons:
In random squares, sketch different moon phases using your pencil. Draw crescents in corners, a full moon in the center of a swirl, or half-moons resting on hills. Leave some squares moonless to focus solely on the wind swirls. -
Outline the hills:
In the bottom row and a few middle squares, draw rolling hill shapes at the bottom. Vary the heights and slopes to keep each vignette unique. -
Map the wind flow:
Lightly draw the main spiral line for each square. Deciding the direction of the swirl now helps prevent confusion when you start painting with wet pigment.
Step 3: Painting the Swirls
-
Lay the base color:
Mix a deep Indigo or Prussian Blue with a fair amount of water. Paint the background related to the sky, avoiding your moons and main swirl lines, to establish a dark atmospheric base. -
Start the dark strokes:
Using a size 2 brush and concentrated Indigo (less water), paint short, curved dash-like strokes following your spiral pencil lines. This mimics the ‘impasto’ look of Van Gogh using watercolor. -
Add mid-tone blues:
Switch to Ultramarine Blue. Fill in the gaps between your dark strokes with new curved lines. The variation in blue hues creates the sense of movement and depth. -
Highlight with white:
Mix a little white gouache with light blue watercolor. Add thin, directional strokes within the spirals to act as the ‘wind’ catching the light. I find this step really brings the motion to life.
Level Up: Metallic Pop
Use gold leaf adhesive on the stars instead of paint, then apply real gold leaf. The texture contrast against the matte watercolor creates a stunning, luxurious dimension.
Step 4: Celestial Details
-
Paint the moons:
Fill in your moon sketches with yellow gouache or opaque yellow watercolor. For the full moons, you can add slight texture with a darker ochre to mimic craters. -
Add gold accents:
Using metallic gold paint, carefully add a rim to the crescent moons or add flecks of gold into the yellow centers for a magical shimmer. -
Create the stars:
With a fine liner brush and yellow or gold paint, dot small stars into the dark blue areas of the sky. Draw small 5-point stars for larger celestial bodies as seen in the reference. -
Texture the hills:
Wash the hill shapes with a diluted blue-grey or Payne’s Gray. Once dry, add curved sweeping lines over the hills, similar to the sky, but perhaps in a lighter, muted tone to differentiate the ground.
Step 5: Finishing Touches
-
Splatter stars:
Load a toothbrush or stiff brush with white gouache. Cover the ‘hill’ areas with a paper towel and flick tiny white speckles onto the dark blue sky areas for distant galaxies. -
The reveal:
Wait until the painting is 100% bone dry. Slowly peel off the tape at a 45-degree angle away from the paint to reveal your crisp, clean grid.
Enjoy the rhythmic process of filling each square with starlit motion


Acrylic Impasto Without Oils
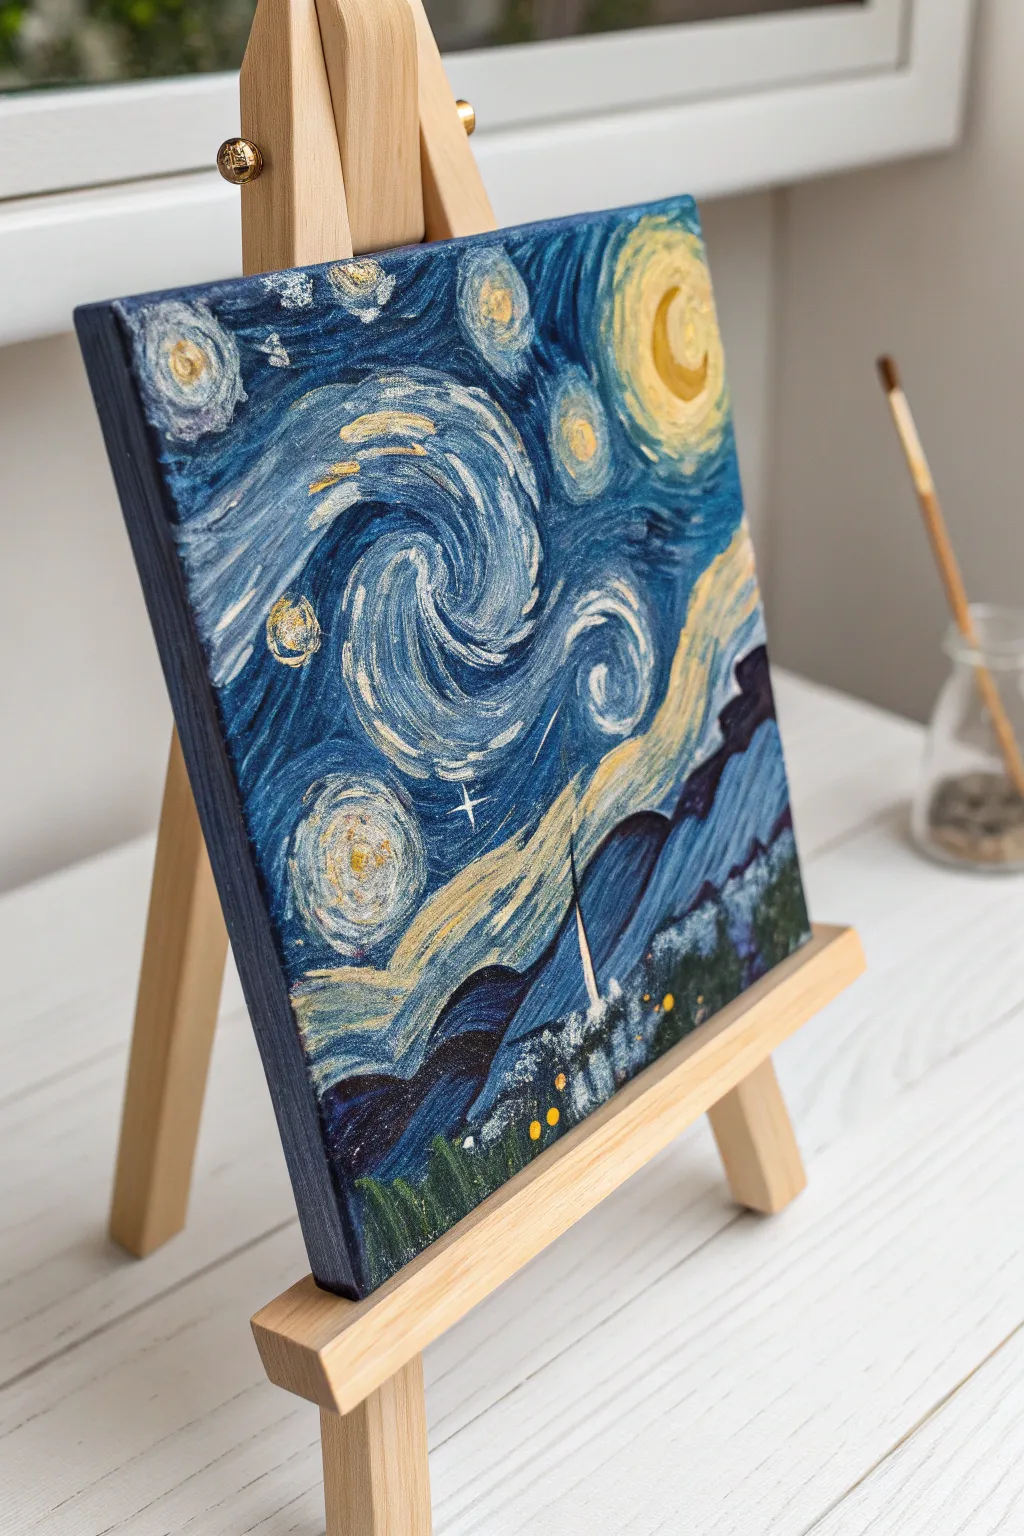
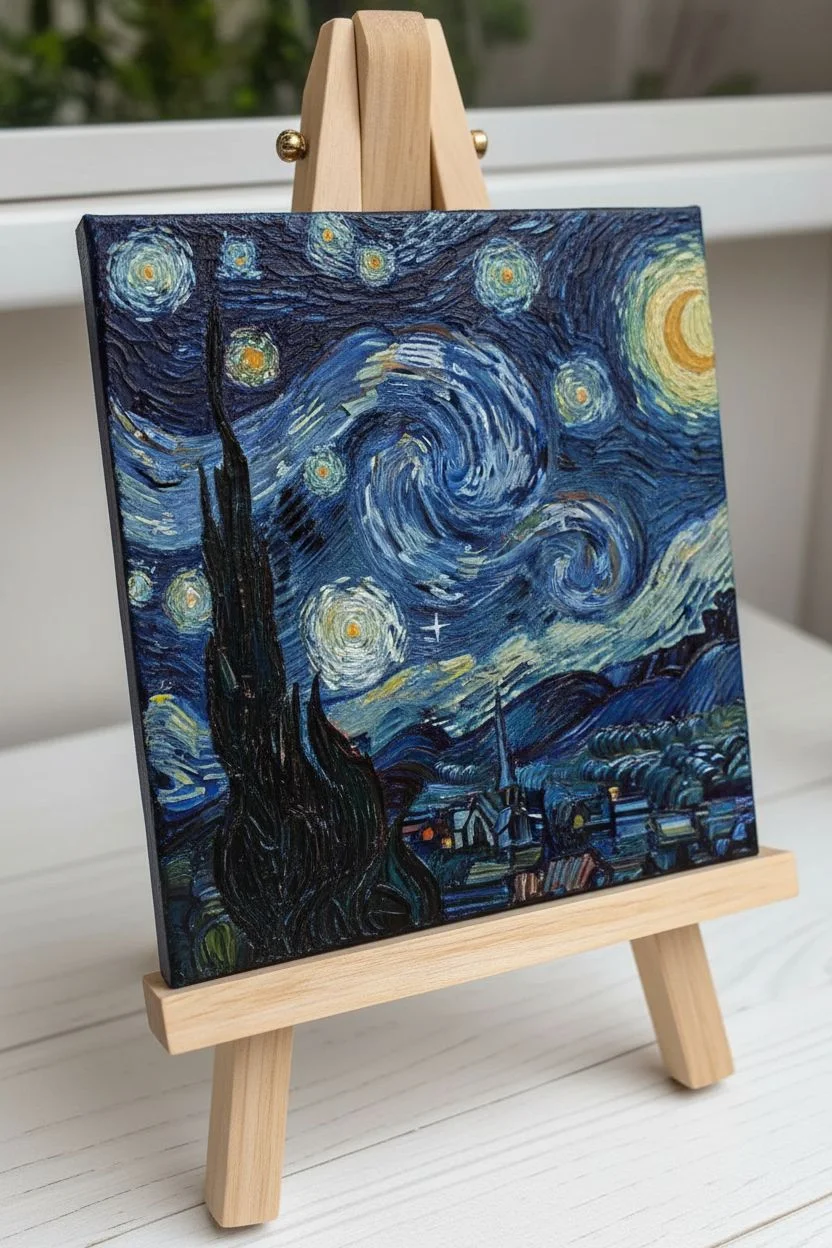
Capture the swirling magic of Van Gogh’s masterpiece on a charming miniature scale without the long drying time of oils. This project uses heavy body acrylics and texture paste to recreate that iconic impasto movement and depth.
Detailed Instructions
Materials
- Small square canvas (e.g., 6×6 or 8×8 inches)
- Miniature wooden display easel
- Heavy body acrylic paints (Phthalo Blue, Ultramarine Blue, Titanium White, Cadmium Yellow, Yellow Ochre, Black)
- Acrylic modeling paste or gel medium
- Palette knife (small)
- Small round brushes (sizes 0, 2, and 4)
- Palette for mixing
- Cup of water and paper towels
Step 1: Setting the Sky
-
Prime the Surface:
Mix a small amount of modeling paste with Phthalo Blue and a touch of black. Apply a thin, uneven base coat over the entire canvas to establish a textured, dark night foundation. -
Map the Composition:
Using a size 2 brush and diluted white paint, lightly sketch the main elements: the large swirl in the center, the crescent moon in the top right, the eleven stars, and the dark cypress tree silhouette on the left. -
Build the Base Blues:
Mix your modeling paste with Ultramarine Blue. Using a small palette knife or a stiff brush, apply thick, short strokes around the swirl area, following the direction of the wind.
Step 2: Creating the Swirls
-
Layering Light Blues:
Create a lighter blue by mixing Phthalo Blue with Titanium White and plenty of paste. Apply this color inside your darker blue strokes, maintaining that curved, dashed pattern. -
The Main Spiral:
For the central S-curve, use a brush loaded with thick white and pale blue paint. Push the paint onto the canvas rather than dragging it smoothly to keep the ridges visible. -
Adding Motion:
Switch to a smaller brush. Add distinct, separate dashes of unmixed white and very pale yellow throughout the sky stream to mimic the wind’s movement. -
Painting the Moon:
Mix Cadmium Yellow with a little white and paste. Build up the texture for the crescent moon on the right, making it physically raised from the canvas surface.
Build the Paste
Mix paint with the modeling paste on your palette first, not on the canvas. Aim for a frosting-like consistency that holds peaks.
Step 3: Stars and Details
-
Adding the Stars:
Place thick dabs of yellow ochre where you marked the stars. Surround these centers with concentric dashed rings of pale yellow and white to create the glowing halo effect. -
Lower Landscape:
Mix black with a tiny bit of blue. Paint the rolling hills at the bottom, using smoother, longer strokes compared to the sky to differentiate the texture. -
The Village Hints:
Using your smallest brush (size 0), dab tiny squares of greyish-blue and black to suggest the village houses. Add distinct yellow dots for windows. -
The Cypress Tree:
Load a palette knife or larger brush with black and deep green. Paint the large flame-like cypress tree in the foreground on the left, ensuring it overlaps the sky to create depth. -
Village Spire:
Carefully paint the small church spire rising from the village using a thin line of white or light blue leading up from the dark silhouette.
Glow in the Dark
Mix phosphorescent medium into your white and yellow paints for the stars and moon to make your night sky actually glow when the lights go out.
Step 4: Final Touches
-
Highlighting the Swirls:
Once the base layers are slightly tacky, dragging a dry brush with pure white over the highest ridges of your blue impasto can really make the texture pop. -
Edge Work:
Don’t forget the sides of your canvas to give it a finished look. Paint the edges a solid dark blue or extend the image around the corners. -
Final Contrast:
Add a few final dashes of your darkest blue near the yellow stars to maximize the contrast and make the lights appear brighter. -
Drying:
Because the paint application is thick, allow the painting to dry flat for at least 24 hours before displaying it on the easel.
Place your finished miniature masterpiece on its easel to bring a touch of starry wonder to your desk or shelf


Fork-Dragged Texture Swirls
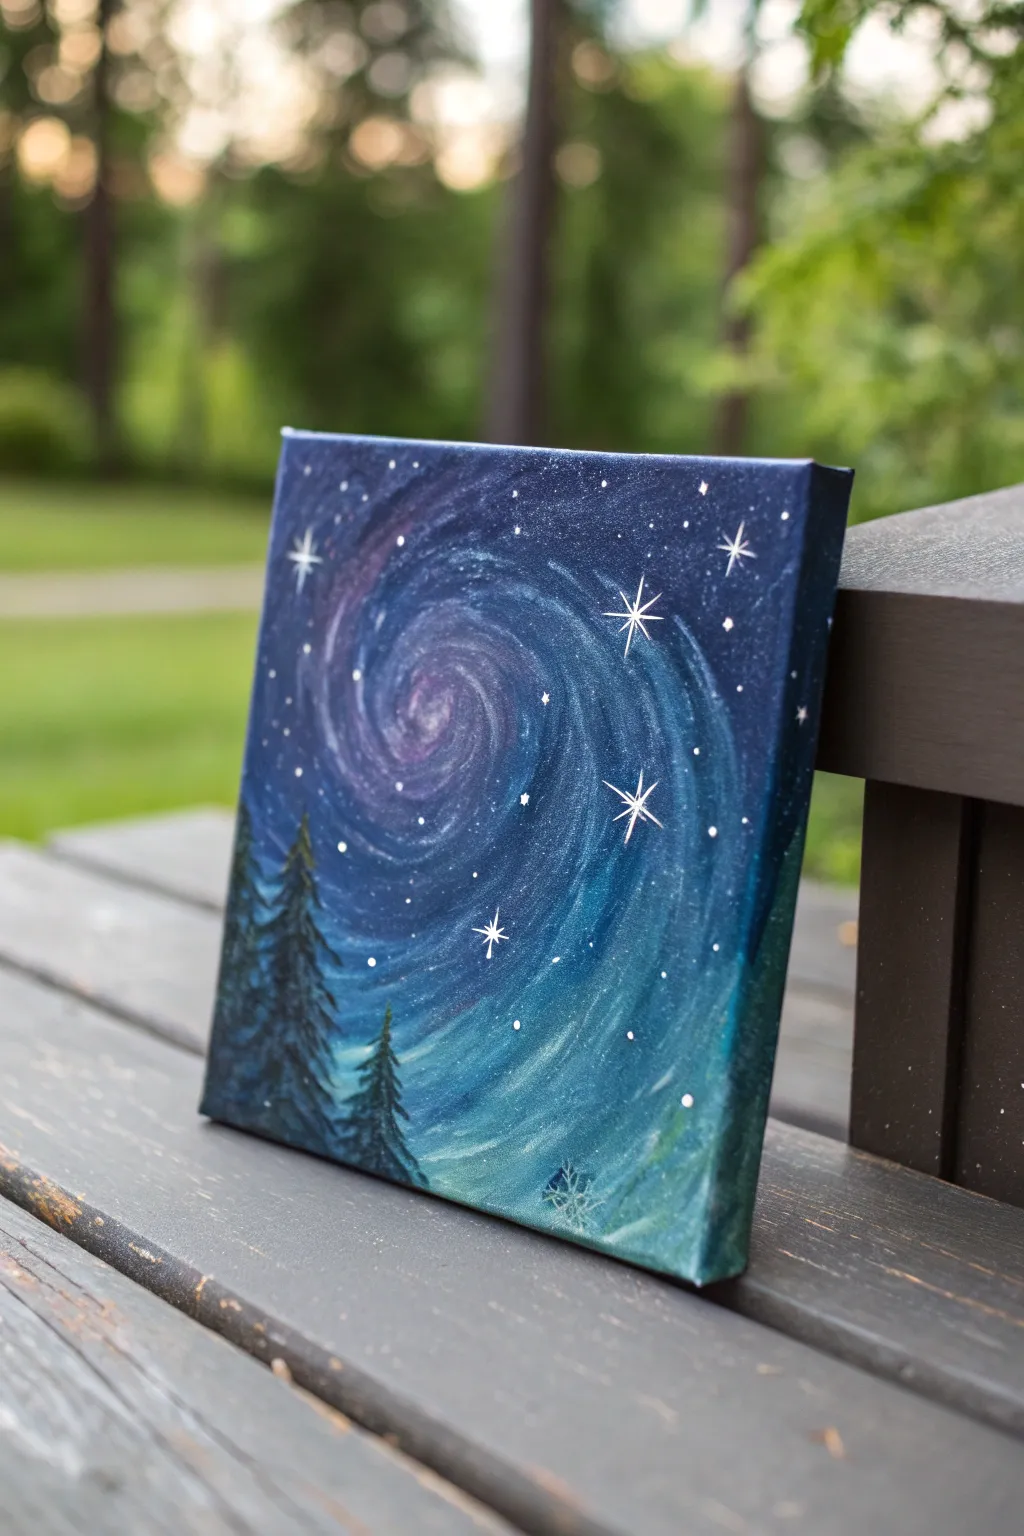
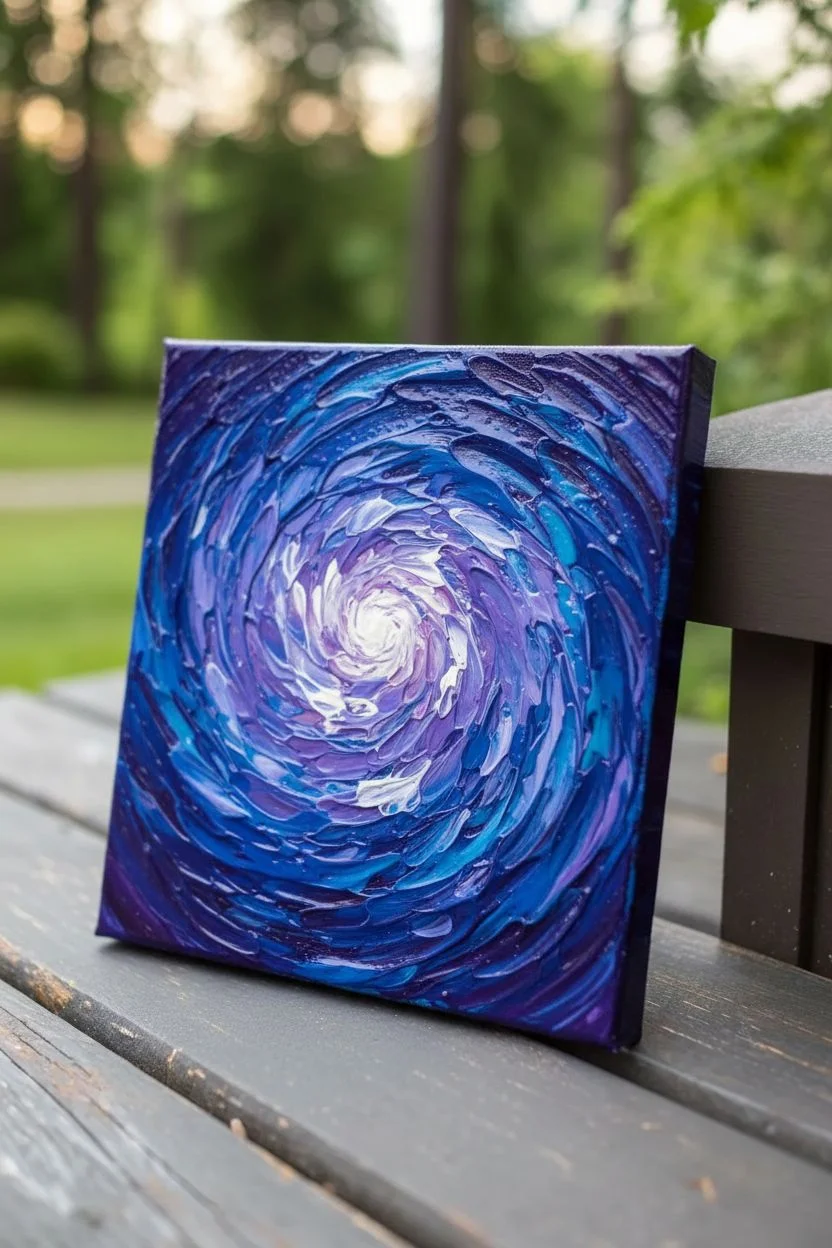
Capture the magic of a swirling night sky using a simple kitchen fork to create dynamic texture and flow. This small canvas project layers deep blues and purples with crisp white stars and grounding pine trees for a dreamy celestial scene.
Step-by-Step
Materials
- Small square canvas (e.g., 6×6 or 8×8)
- Acrylic paints: Phthalo Blue, Ultramarine Blue, Purple (Dioxazine), Titanium White, Black, Teal
- Plastic fork (for texture)
- Small flat brush (1/2 inch)
- Fine liner brush (0 or 00 size)
- Palette or paper plate
- Cup of water and paper towels
Step 1: Creating the Swirling Background
-
Base layer:
Begin by squeezing generous dollops of Phthalo Blue, Ultramarine Blue, Purple, and a touch of Teal directly onto the canvas. Do not mix them yet. -
Initial spread:
Using your flat brush, roughly spread the paint to cover the entire white surface of the canvas, including the edges. It’s okay if the colors remain somewhat separated; you want a thick, wet layer for the next step. -
Add the center light:
Drop a small amount of white and light purple mix right in the center of where your galaxy spiral will be. This highlight will act as the glowing core. -
The fork swirl technique:
Take your plastic fork and place the tines gently into the wet paint at the center glowing spot. Drag the fork outwards in a spiral motion, expanding the circle as you move toward the edges. -
Refining the flow:
Continue using the fork to drag colors into one another, following the spiral path. If the fork lines are too harsh, I like to lightly sweep over them with a clean, dry brush to soften the ridges while keeping the directional flow. -
Deepening the corners:
While everything is still wet, add a touch more dark blue or purple to the outer corners to create a vignette effect, blending it inward toward the spiral flow. -
Drying time:
Let this background layer dry completely. Because the paint might be thick from the texture work, this could take an hour or more. Use a hairdryer on a low cool setting if you need to speed it up.
Step 2: Painting the Foreground Trees
-
Tree placement:
Once the sky is dry, load your small flat brush or a medium round brush with plain black paint. Decide where your trees will go—focusing on the bottom left corner works well for framing. -
Trunks first:
Paint vertical lines for the tree trunks. Vary the heights, making the one closest to the edge taller and the ones further right slightly shorter to create depth. -
Pine branches:
Switch to a smaller brush. Start at the top of a trunk and use a dabbing motion to create branches that flare out wider as you move down the tree. -
Adding density:
Overlap your dabbed strokes so the trees look full and dense. Ensure the bottom area connects solidly to form a vague horizon line.
Clean Lines
Wipe your fork on a paper towel after every few swipes. This prevents the colors from becoming a muddy grey and keeps the purple and blue streaks vibrant and distinct.
Step 3: Stars and Details
-
Splatter stars:
Dilute a small amount of Titanium White paint with water until it is the consistency of ink. Dip an old toothbrush or stiff brush into it. -
Flicking technique:
Hold the brush over the canvas and flick the bristles with your finger to create a spray of tiny, distant stars. Focus more splatter along the lighter spiral path. -
Painting large stars:
For the prominent hero stars, use your finest liner brush and undiluted Titanium White paint. Choose 3-5 spots on the canvas for these accents. -
Creating the flares:
Paint a small ‘plus’ sign for each large star. Then, carefully extend the vertical line longer than the horizontal one to create a twinkling cross shape. -
Center glow:
Add a tiny dot of extra white right in the intersection of the cross lines to make the star look like it’s shining brightly. -
Final touches:
Inspect the canvas edges. Paint them dark blue or black to match the outer sky for a polished, frameless look. -
Varnish optional:
Allow the painting to cure for 24 hours before adding a gloss varnish to make the galaxy colors pop and protect the surface.
Glow Up
Mix a tiny amount of glow-in-the-dark medium into your white paint for the stars. The painting will look normal by day but reveal a hidden galaxy when the lights go out.
Hang your mini masterpiece on the wall or prop it on a shelf to enjoy your own slice of the cosmos
BRUSH GUIDE
The Right Brush for Every Stroke
From clean lines to bold texture — master brush choice, stroke control, and essential techniques.
Explore the Full Guide
Ink Linework for Wind Swirls
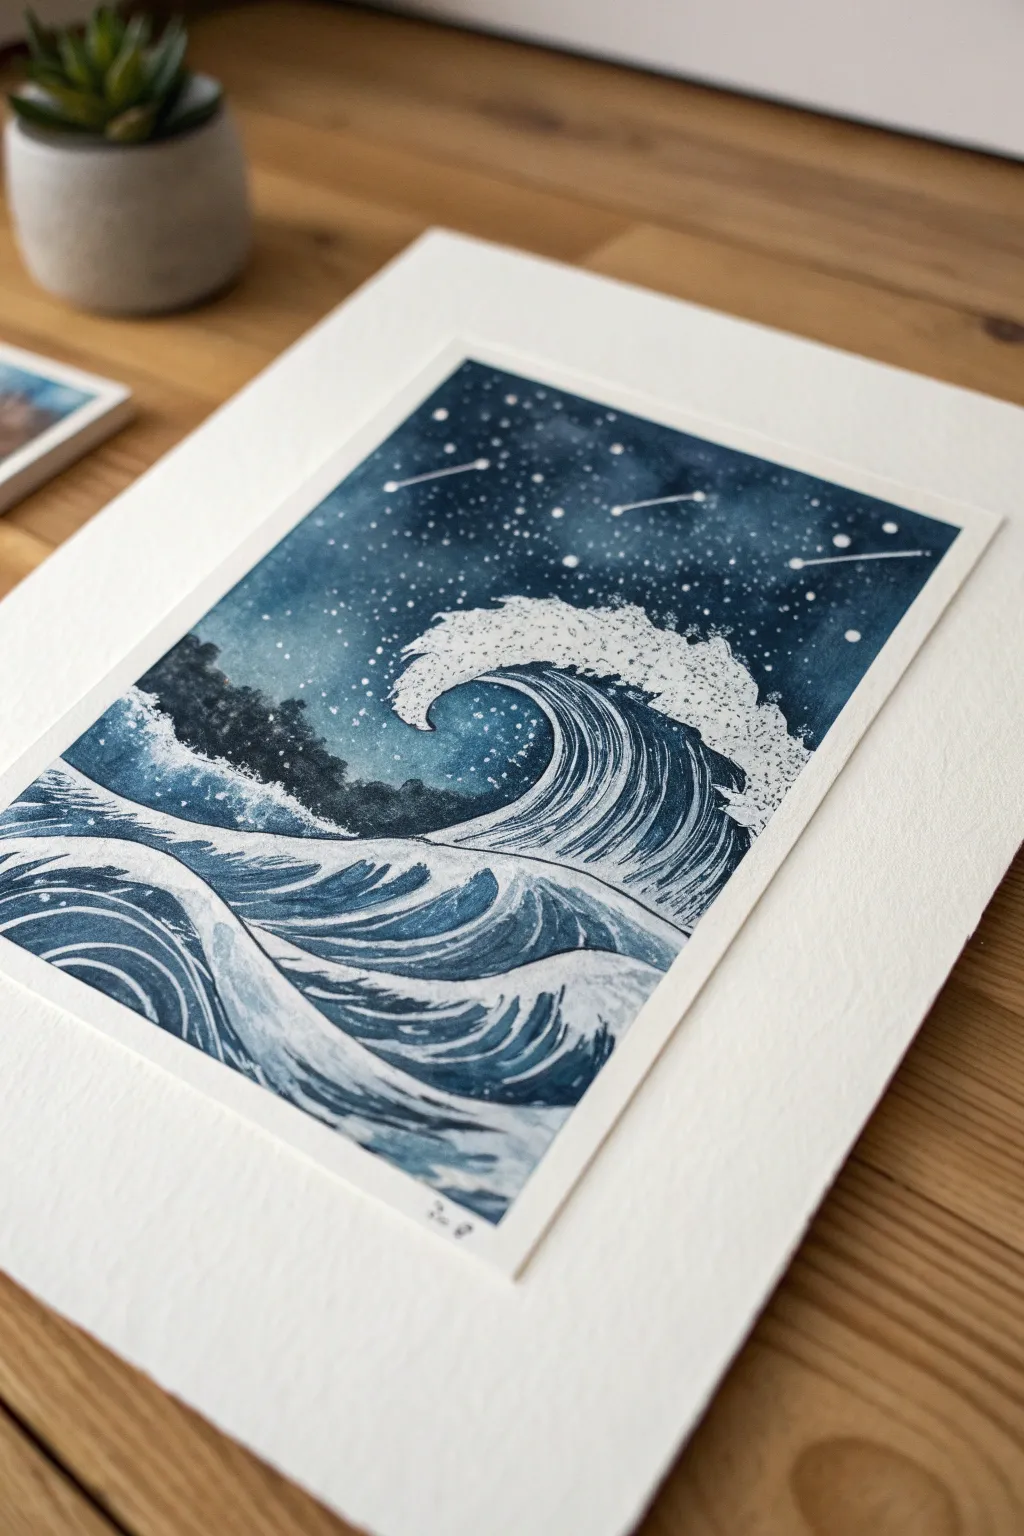
This tutorial guides you through creating a stunning mixed-media piece that merges the dynamic power of a crashing wave with the tranquility of a starlit sky. Using deep indigo watercolors and crisp white ink, you’ll achieve a striking contrast that feels both ancient and cosmic.
Detailed Instructions
Materials
- Cold press watercolor paper (300 gsm)
- Watercolor paints (Indigo, Prussian Blue, Payne’s Gray)
- White gouache or opaque white ink
- Fine liner brushes (size 0 and 00)
- Medium round brush (size 6 or 8)
- Masking tape
- Pencil and eraser
- Palette
- Two jars of water
- White gel pen (optional for stars)
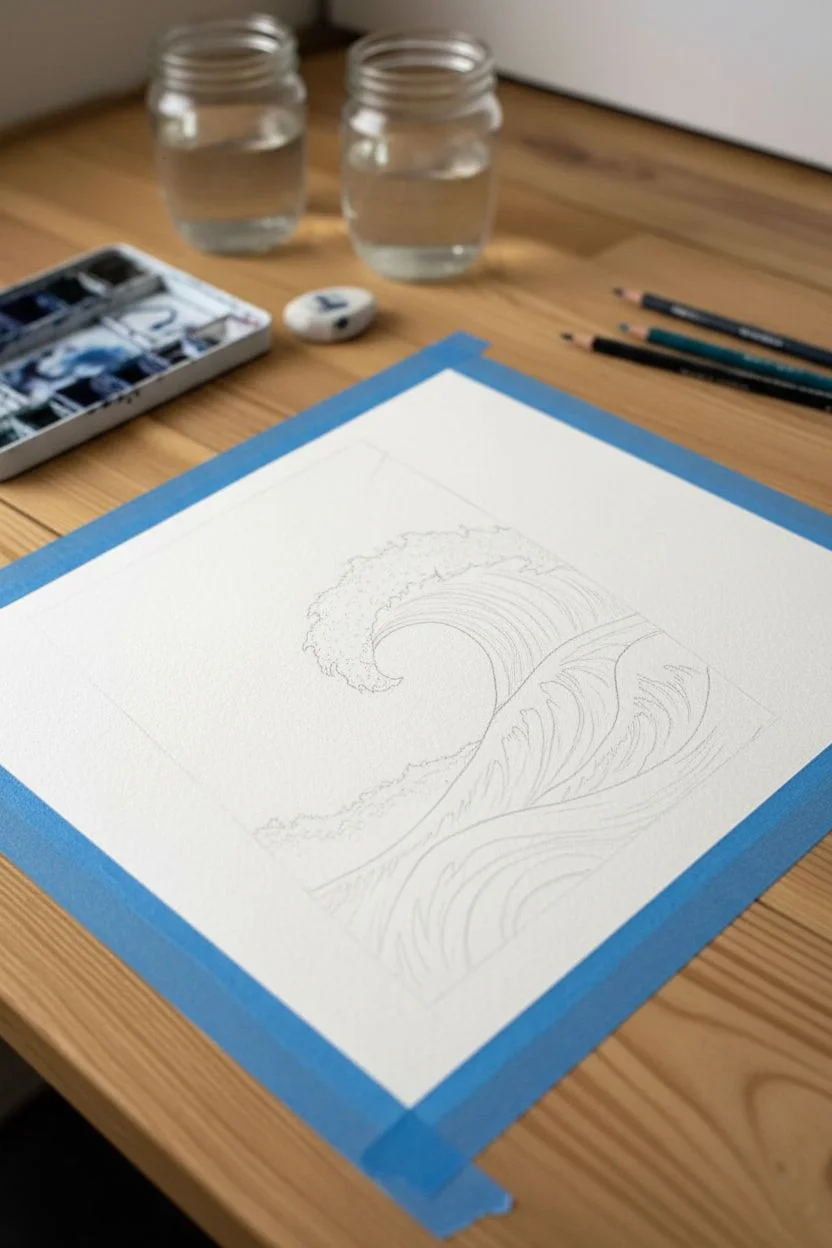
Step 1: Preparation and Sketching
-
Secure the paper:
Tape down all four edges of your watercolor paper to a drawing board or table. This creates that crisp, clean white collection border seen in the final piece and prevents the paper from buckling when wet. -
Draft the wave composition:
Lightly sketch the main curve of the large wave. Focus on the spiraling crest and the varying heights of the smaller swells in the foreground. Keep your pencil lines faint so they don’t show through the lighter areas later. -
Outline the foam areas:
Define the areas where the white foam will be. Mark out the jagged top edge of the wave crest and the sweeping bands of foam on the water’s surface.
Uneven Coverage?
If your large dark areas look patchy, apply a second layer of paint once the first is dry. Gouache is opaque and forgives patchiness well.
Step 2: Painting the Ocean
-
Base wash for the sky:
Start with the sky area above the wave. Wet the paper slightly, then drop in a deep, saturated Indigo. Let the color fade slightly as it nears the horizon line to create atmosphere. -
Adding atmospheric texture:
While the sky is still damp, dab in touches of Payne’s Gray or a darker blue near the top corners to create a vignette effect. Let this section dry completely. -
Blocking in the water darks:
Mix a strong Prussian Blue with a touch of Indigo. Paint the dark undersides of the waves, carefully painting around your sketched foam areas. I like to keep these strokes directional, following the curve of the water. -
Creating the mid-tones:
Dilute your blue mixture slightly with water. Fill in the remaining water areas, blending them into the darker sections to create volume and movement within the wave body. -
Developing the wave curl:
Inside the main barrel of the wave, use your darkest blue mix to create deep shadows right under the curling lip. This contrast is essential for making the wave look hollow.
Metallic Magic
Swap white gouache for silver metallic ink for the constellations and wave highlights. It catches the light beautifully when framed.
Step 3: Detailing and Linework
-
Adding white linework:
Once the blue paint is bone dry, switch to your fine liner brush and white gouache (or white ink). Paint thin, sweeping lines along the body of the wave to represent rushing water. -
Refining the foam crest:
Fill in the large foam crest at the top. Use a stippling motion (rapid dots) with the brush to create a bubbly, aerated texture rather than a solid white block. -
Foreground foam details:
Paint the thick, ropy bands of foam in the foreground water. Use confident, curvy strokes that mimic the flow of the ocean surface. -
Enhancing contrast:
If your white lines look transparent as they dry, go over key areas properly a second time. The brightness of the white against the dark indigo is what makes this style pop.
Step 4: The Starry Sky
-
Create the constellations:
Using your finest brush or a white gel pen, map out simple constellations in the sky area. Draw small dots for stars and connect them with delicate, thin lines. -
Splatter the stars:
Load a brush with watery white gouache. Tap the handle against another brush over the sky area to create a spray of fine mist and random stars. Cover the wave area with a scrap paper if you want to keep the water clean. -
Add larger stars:
Manually paint a few larger, brighter stars scattered among the mist to create depth in your galaxy. -
Final reveal:
Wait until everything is absolutely dry before peeling off the masking tape. Peel slowly and at an angle away from the painting to ensure a perfect edge.
Frame this piece behind glass to protect the delicate gouache surface and enjoy your personal slice of cosmic ocean
Glowing Halo Stars and Moon
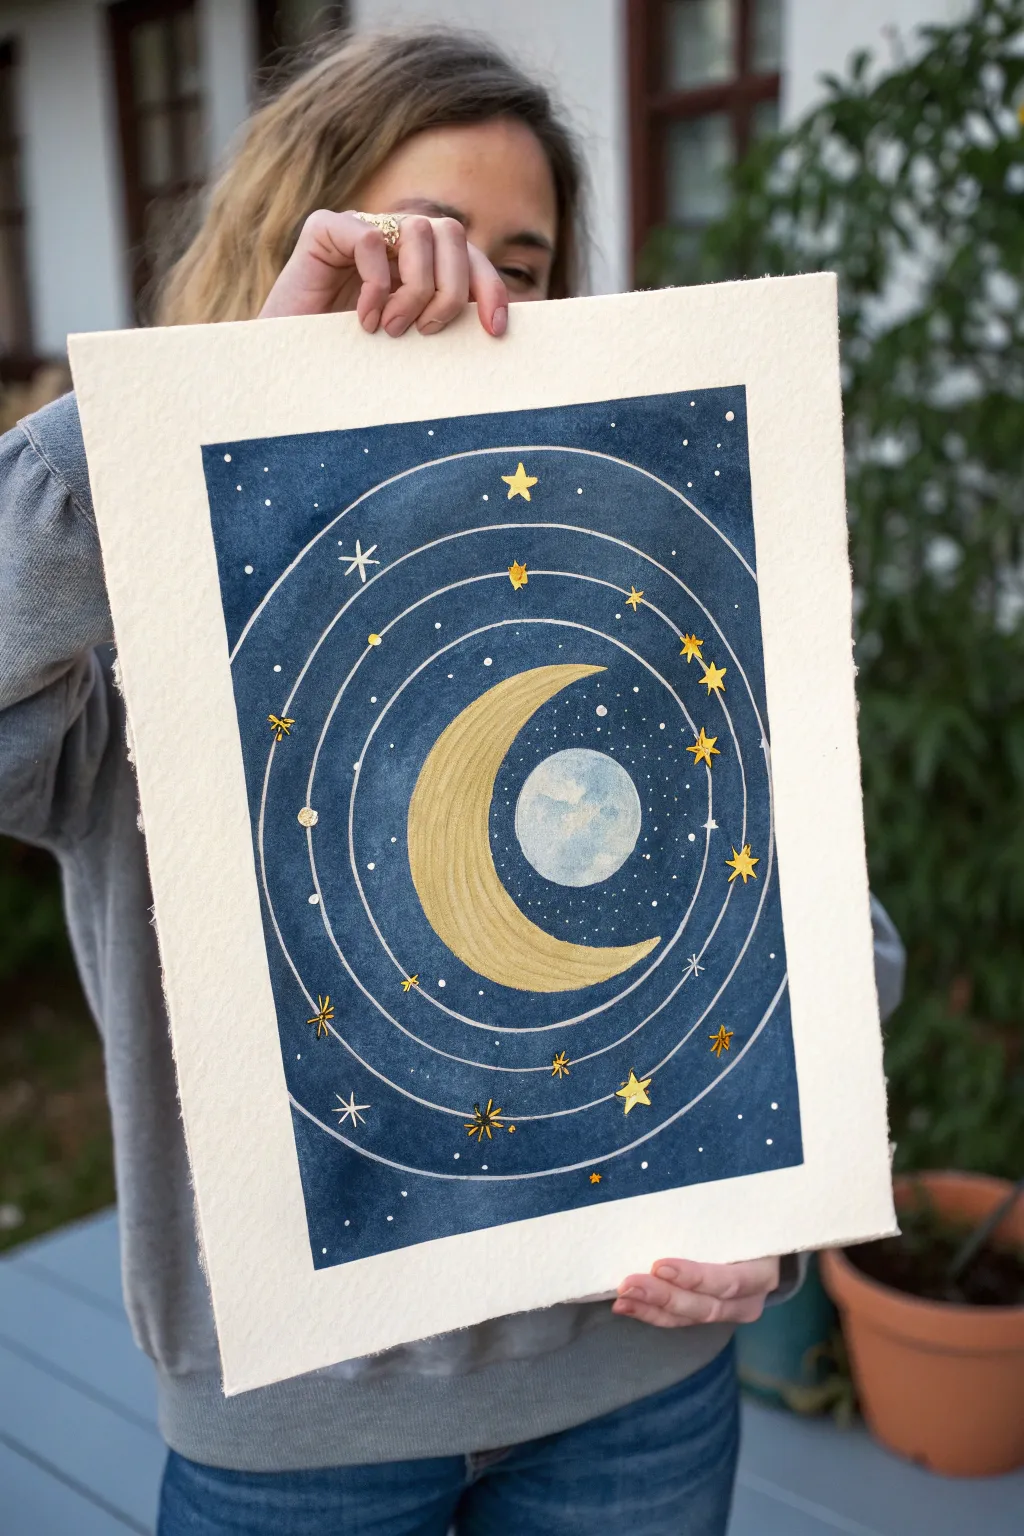
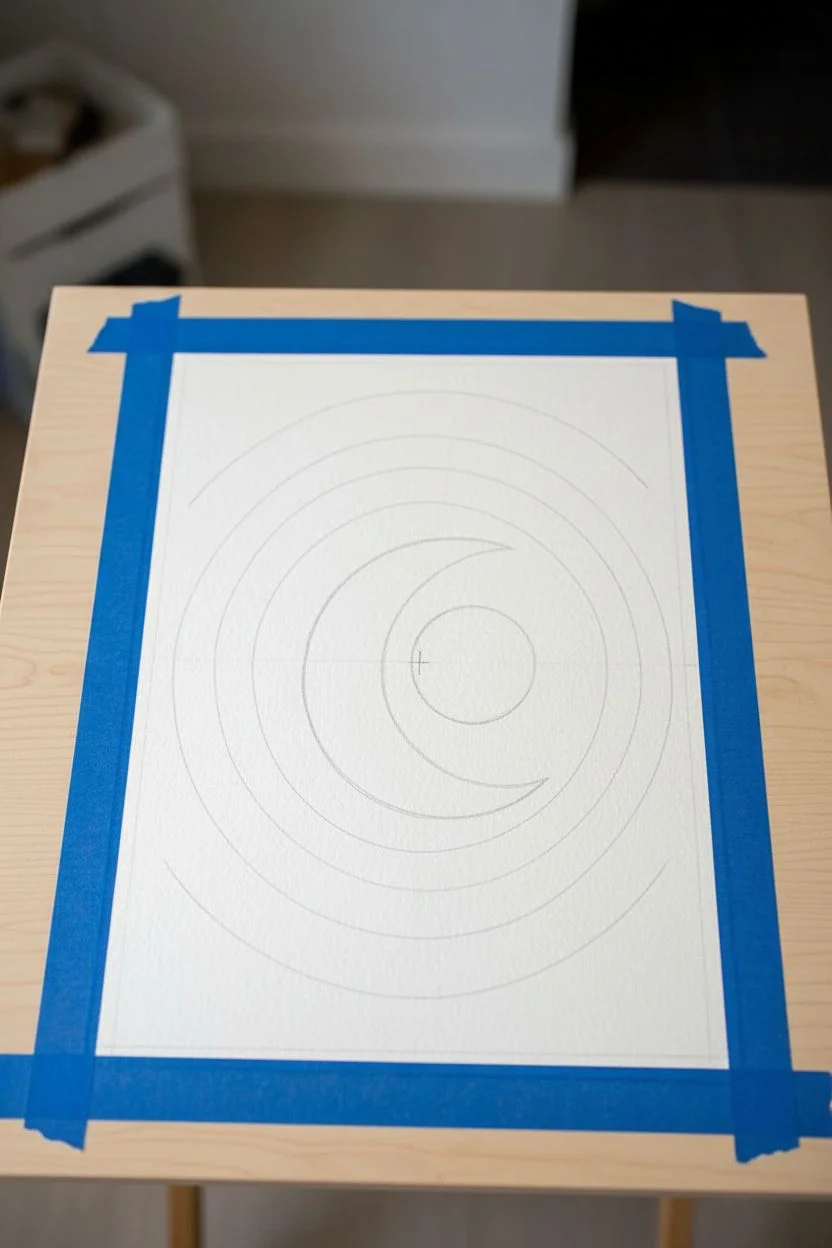
Capture the magic of a starry night with this elegant watercolor and gouache painting, featuring a striking golden crescent set against deep indigo orbits. The combination of metallic sheen and matte blues creates a sophisticated celestial piece perfect for framing.
How-To Guide
Materials
- Cold press watercolor paper (300 gsm or heavier)
- Masking tape
- Watercolor paints (Indigo, Prussian Blue, Payne’s Grey)
- Gold metallic watercolor or gouache
- White opacity gouache or a white gel pen
- Compass for drawing circles
- Pencil and eraser
- Round watercolor brushes (sizes 2, 6, and 10)
- Palette for mixing
- Two jars of water
Step 1: Preparation and Sketching
-
Secure the paper:
Tape down all four edges of your watercolor paper to a board or table. This creates a clean white border and prevents the paper from buckling when wet. -
Mark the center:
Find the approximate center of your paper and make a tiny, light mark. This will be the anchor point for your concentric circles. -
Draw the orbits:
Using a compass, draw a series of concentric circles radiating from the center. Space them unevenly for visual interest—some closer together, some further apart. -
Outline the moon:
Lightly sketch a large crescent moon shape in the center. Inside the curve of the crescent, draw a full circle to represent the ‘shadow’ side of the moon.
Uneven Blue Layer?
If your background looks streaky, wait for the first layer to dry completely, then apply a second thin wash of the dark blue for a solid, opaque finish.
Step 2: Painting the Background
-
Mix the night sky color:
Create a deep, rich navy color. I like to mix Indigo with a touch of Payne’s Grey to get that really dark, velvety night sky tone. -
Paint the first section:
Carefully paint the background space, working around your pencil lines for the moon and the orbital rings. You essentially want to leave narrow white gaps where the ring lines are. -
Refine the edges:
Use a smaller size 2 brush to get crisp edges around the moon shape and along the concentric ring lines. -
Let it dry completely:
Allow the blue background to dry fully. If the paper feels cold to the touch, it is still damp.
Add Dimension
Glue tiny flat-back crystals or actual gold leaf flakes onto the center of the largest stars for real sparkle that catches the light.
Step 3: The Moon and Details
-
Paint the crescent:
Load your brush with gold metallic paint. Fill in the crescent moon shape, applying a second coat if needed for maximum shimmer. -
Create the moon shadow:
Mix a very watery, pale blue-grey wash. Paint the full circle adjacent to the crescent. While wet, drop in tiny hints of darker blue to create a crater texture. -
Define the orbits:
Using white gouache or a white gel pen, carefully trace over the unpainted ring lines you left earlier to make them pop against the dark blue. -
Add main stars:
Paint several five-pointed stars along the orbital rings using the gold paint. Vary their sizes and orientation. -
Add secondary stars:
Switch to white gouache to paint smaller four-pointed stars and tiny dots scattered throughout the dark blue expanse. -
Paint starburst details:
Add fine gold rays emanating from the larger gold stars to give them a twinkling effect. -
Splatter stars:
Load a toothbrush or stiff brush with white gouache, tap off the excess, and gently flick fine mist over the painting for distant stars.
Step 4: Finishing Touches
-
Review and touch up:
Look for any uneven edges where the blue meets the white lines or the moon. Use a small brush to tidy these up. -
Remove tape:
Once the artwork is 100% dry, peel the masking tape away slowly at a 45-degree angle to reveal your crisp white border.
Frame your cosmic creation and enjoy the peaceful atmosphere it brings to your space

PENCIL GUIDE
Understanding Pencil Grades from H to B
From first sketch to finished drawing — learn pencil grades, line control, and shading techniques.
Explore the Full Guide
Cozy Village Lights Below the Sky
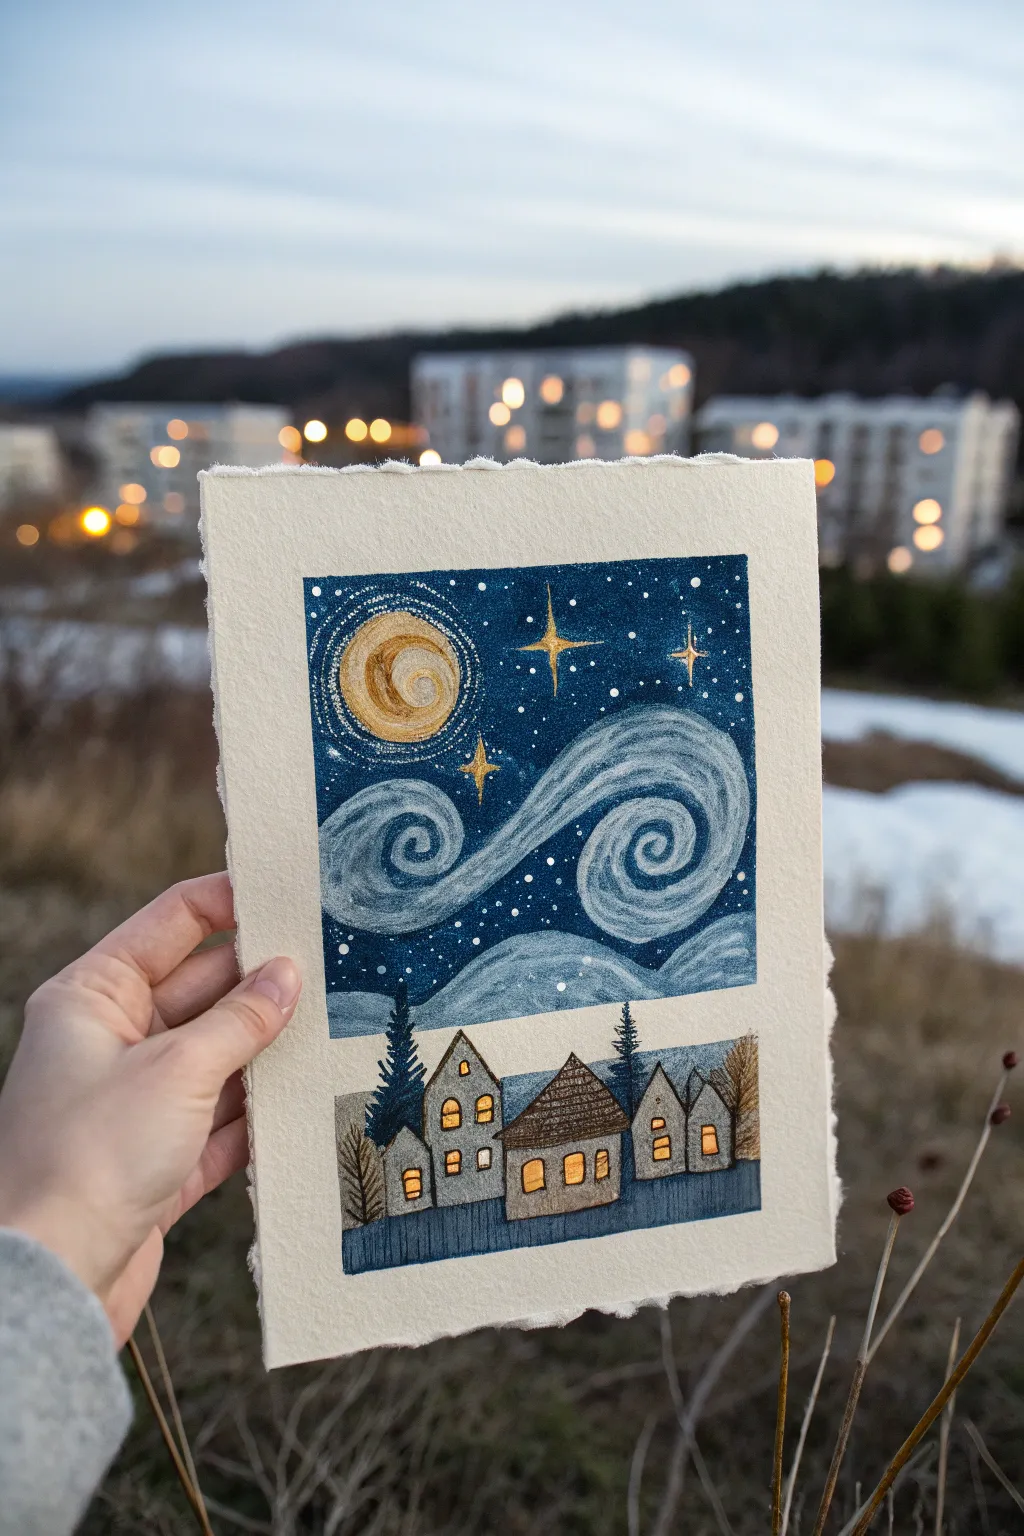
This project captures the magic of a Van Gogh-inspired sky swirling above a cozy, lit-up hamlet. Using opaque paints and metallic accents on textured paper, you’ll create a charming scene that feels both folkloric and modern.
Step-by-Step Guide
Materials
- Heavyweight cold-press watercolor paper with deckled edges
- Gouache paint (Prussian Blue, White, Black, Burnt Umber)
- Metallic watercolor or ink (Copper/Gold)
- Small round brushes (size 0 and 2)
- Fine liner brush for details
- Pencil and eraser
- Painter’s tape or washi tape
- Palette for mixing
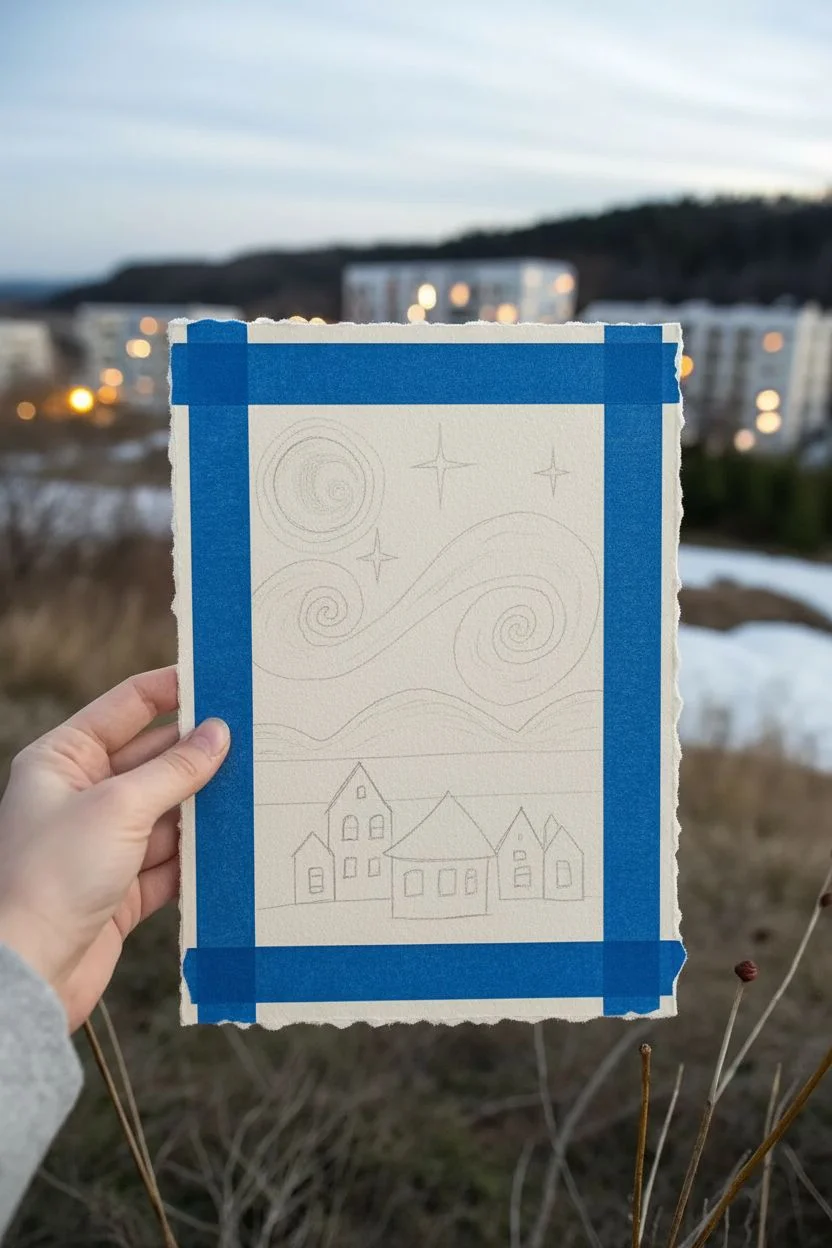
Step 1: Planning and Sketching
-
Define the borders:
Begin by lightly marking a rectangular boundary for your painting in the center of your paper, leaving a generous margin. This artwork looks best with clean, straight edges, so you may want to use painter’s tape to mask off the rectangle. -
Sketch the horizon:
Divide your rectangle roughly into two sections: the top two-thirds for the sky and the bottom third for the village. Draw a slightly uneven horizontal line to separate them. -
Outline the village:
Sketch three simple house shapes in the foreground. Make the center house slightly wider with a simpler roof, whilst the flanking houses can be taller and narrower. Add small rectangles for windows. -
Sketch the sky elements:
Lightly draw a large circle in the upper left for the moon. Then, sketch two large swirling shapes sweeping across the middle sky, reminiscent of ‘The Starry Night’. Finally, mark small crosses where your brightest stars will go.
Glow Up
Make the stars really pop by adding a tiny dot of pure white paint in the very center of your metallic stars after they are fully dry.
Step 2: Painting the Sky
-
Base layer for the sky:
Mix a deep Prussian Blue gouache. Paint the entire sky area, carefully painting around your moon circle and the swirling wind shapes. You want a solid, opaque dark blue background. -
Create the swirls:
Using a lighter mix of blue and white, paint the swirling wind shapes. Don’t worry about perfect blending; visible brushstrokes add to the stylized look. -
Detail the wind:
Once the swoops are dry, take a fine brush with white paint and add thin contour lines inside the swirls to give them movement and definition. -
Paint the moon:
Fill in the moon circle with your metallic copper or gold paint. Let the paint pool slightly to create texture. Add concentric rings around the moon with a fine white line to suggest glowing light. -
Add the stars:
Using your metallic paint, draw four-pointed stars where you marked your crosses. Then, dip a toothbrush or stiff brush in white paint and gently flick it to create a spray of tiny distant stars across the dark blue areas.
Make it a Card
Adjust the scale to fit a folded 5×7 card. Use metallic gold pen for the written greeting inside to match the moon and windows on the front.
Step 3: Building the Village
-
Paint the houses:
Mix a light grey-beige for the house walls. Fill in the house shapes carefully, leaving the window rectangles unpainted for now. -
Structure the roofs:
Paint the roofs with a dark grey or brown tone. Once dry, use a fine liner brush with black or dark brown paint to add hatching lines or small shingles for texture. -
Illuminate the windows:
Paint the small window rectangles with your metallic gold or copper paint. This connects the earth to the sky and makes the homes look warm and inviting. -
Add outlines:
Use a very fine brush or a fine-tip pen to outline the houses, roofs, and windows. This illustrated style relies on crisp outlines to separate the elements. -
Ground the scene:
Paint the ground area below and between the houses with a dark blue-grey mix, similar to the sky but slightly muted. Add vertical brush strokes to suggest a fence or tall grass in the foreground. -
Plant the trees:
Using a dark green or black mix, paint small pine trees between and behind the houses. Use short, jagged strokes to mimic pine needles. -
Final foliage:
Add a few bare, decided-looking trees on the far left and right edges using delicate brown lines. I like to make these slightly translucent to show distance.
Peel off your tape carefully to reveal the crisp edges of your tranquil winter night scene
Mountain Landscape Starry Night Remix
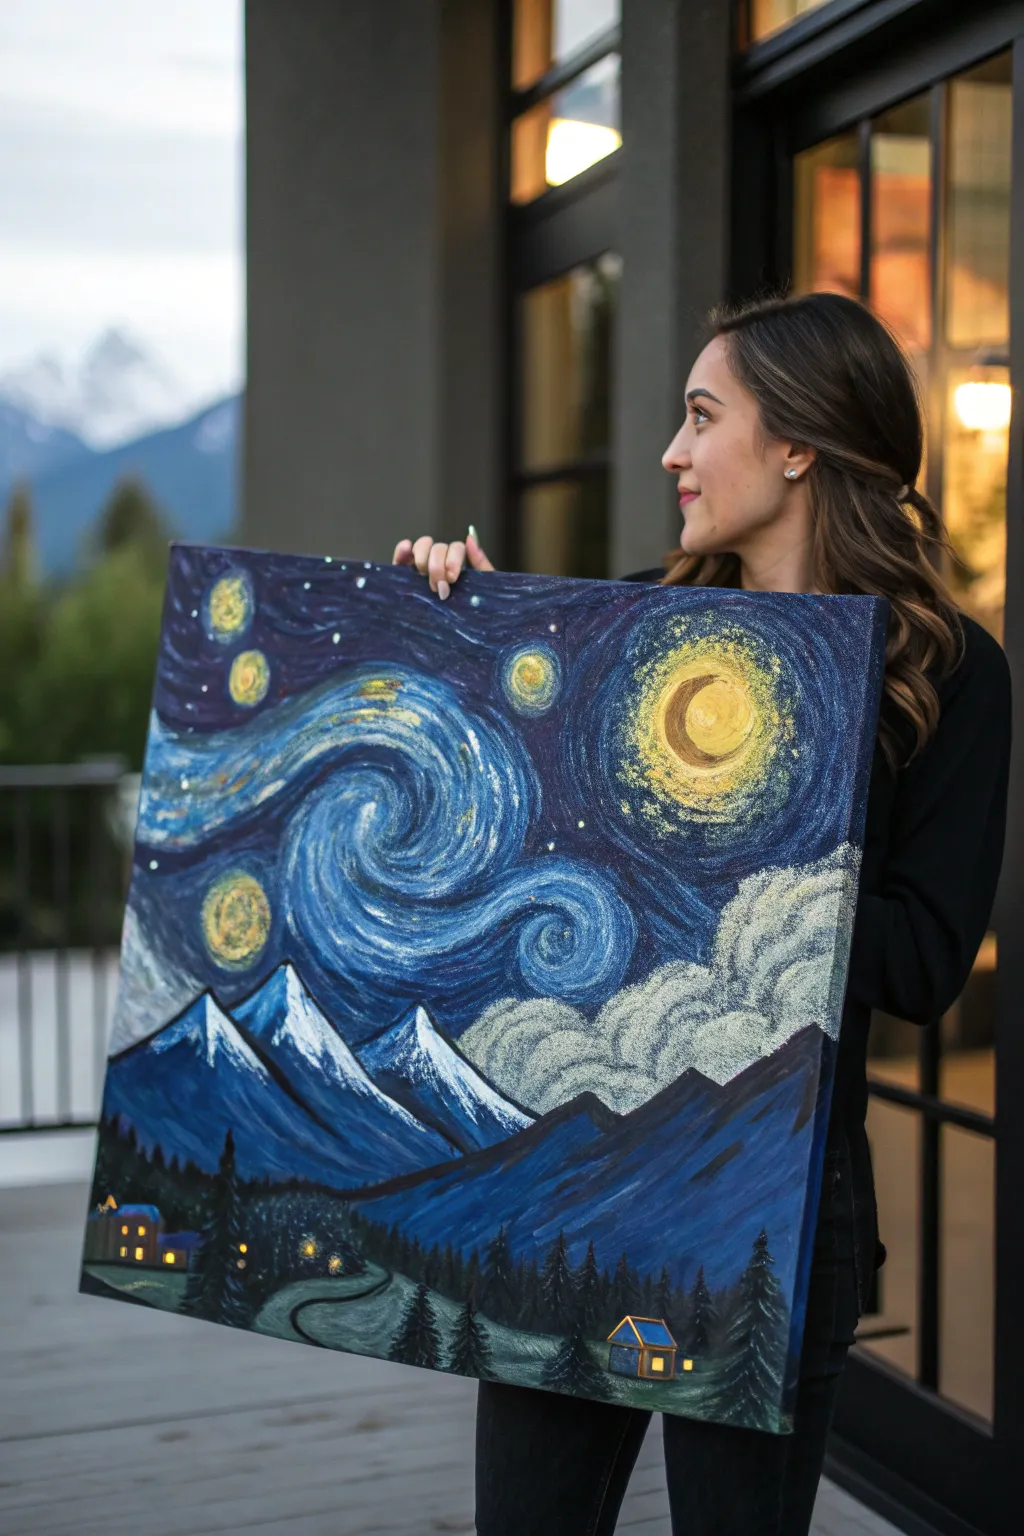
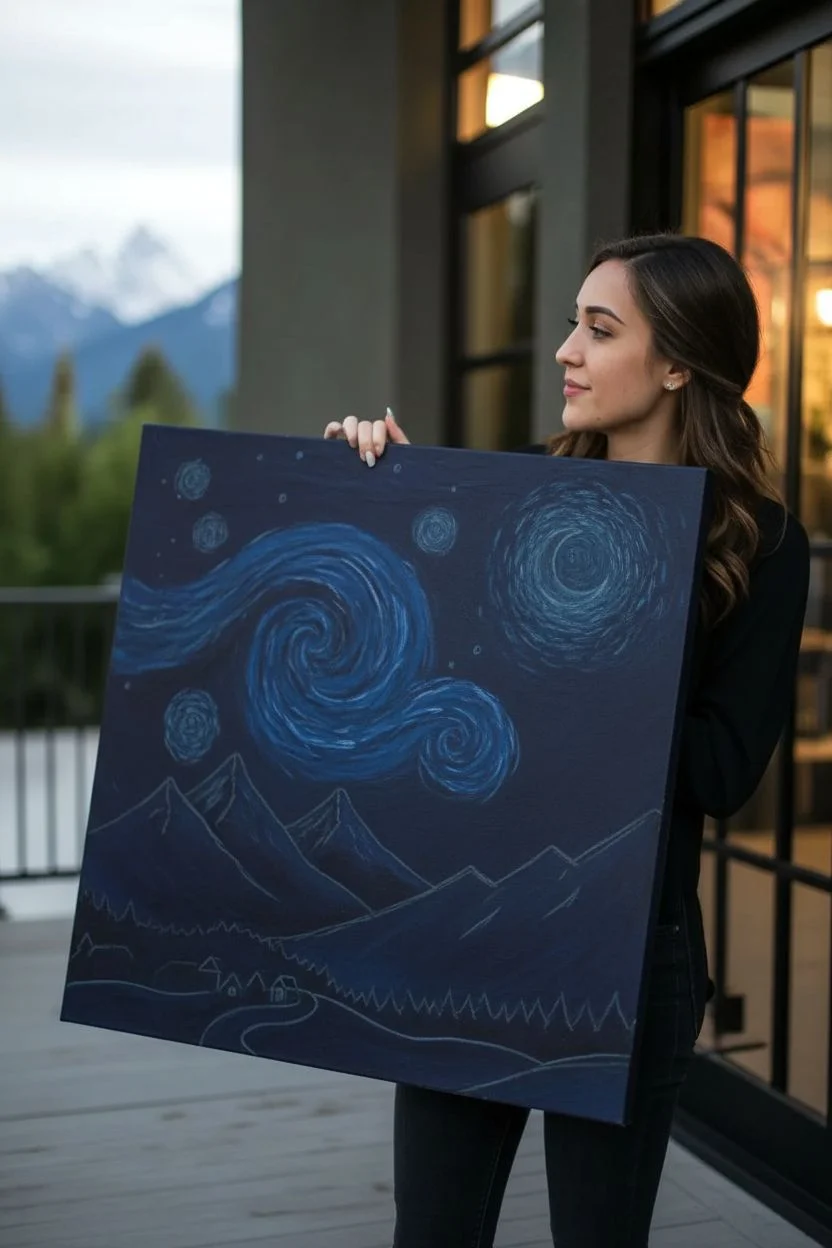
Imagine Vincent van Gogh hiking through the Alps; this stunning canvas is likely what he would have created. This tutorial blends the famous swirling sky of ‘Starry Night’ with a majestic, snowy mountain landscape for a truly unique masterpiece.
Step-by-Step
Materials
- Large stretched canvas (approx. 24×30 inches)
- Acrylic paints (Phthalo Blue, Ultramarine Blue, Titanium White, Cadmium Yellow, Yellow Ochre, Burnt Umber, Black)
- Set of acrylic brushes (large flat brush, medium filbert, fine liner)
- Palette knife (optional for texture)
- Water cup and paper towels
- Easel or flat work surface
- Chalk or pencil for sketching
Step 1: Setting the Scene
-
Map out the composition:
Lightly sketch the horizon line about one-third of the way up the canvas. Draw three large, jagged triangles for your mountain peaks on the left and center. Add a rolling hill line in the foreground for the cabins and road. -
Outline the sky elements:
Using your chalk, sketch a large crescent moon in the top right corner. Draw a large, wave-like swirl starting from the left edge and curling into the center of the sky. Mark spots for smaller stars. -
Base coat the sky:
Mix Ultramarine Blue with a touch of Black to create a deep midnight blue. Using a large flat brush, paint the entire sky area, avoiding the moon and stars you sketched. This dark background will make the lighter swirls pop.
Muddy colors?
If your blue swirls are turning green when they touch the yellow stars, let the yellow paint dry completely before adding the blue strokes around them.
Step 2: Painting the Starry Sky
-
Create the glowing orbs:
Mix Cadmium Yellow with Titanium White. Paint the crescent moon and the centers of your stars. While the paint is still wet, add touches of Yellow Ochre to give them depth and warmth. -
Start the halo effect:
Using a dry brush technique with pale yellow, paint short, dashed strokes radiating outward from the moon and stars. This creates the shimmering halo effect characteristic of Van Gogh’s style. -
Develop the great wind swirl:
Load a medium filbert brush with lighter blue (mix Phthalo Blue and White). Follow the curve of your sketched swirl with long, flowing strokes. Add parallel lines of pure Phthalo Blue and white adjacent to these to build volume. -
Fill the sky with motion:
Fill the remaining dark space in the sky with short, dashed strokes in various shades of blue. Keep the strokes directional, flowing around the stars and the main swirl like a river current. -
Add cloud texture:
On the right side, just above the mountains, use a sponge or a scruffy brush to dab on a cloud bank using Titanium White and pale grey. I like to keep this texture fluffy to contrast with the sharp brushstrokes of the sky.
Step 3: The Mountain Landscape
-
Block in the mountains:
Paint the mountain silhouettes in a dark navy blue. This color should be darker than the sky but lighter than the foreground trees. -
Add snowy highlights:
Using a palette knife or a flat brush loaded with thick white paint, drag the paint down the right side of the mountain peaks. This implies a light source coming from the moon on the right. -
Create shadow on the peaks:
Mix a light blue-grey and apply it to the left side of the peaks. Blend slightly where it meets the white to soften the transition. -
Paint the foothills:
Fill the area below the mountains with a mid-tone blue-grey, representing distant hills before the foreground.
Pro Tip: Impasto Style
Don’t be stingy with the paint! For the sky swirls, load your brush heavily so the paint physically stands off the canvas, mimicking Van Gogh’s famous texture.
Step 4: Foreground Details
-
Paint the dark forest:
Mix Black with Phthalo Green or Blue to get a very dark, near-black color. Use a fan brush or small flat brush to tap in vertical pine tree shapes along the bottom and sides of the canvas. -
Create the winding path:
Paint a curving road winding from the bottom center toward the mountains using a muted grey-green. Highlight the edges with a lighter grey to show its form. -
Construct the cabins:
Use a small square brush to paint simple block shapes for the cabins. Use touches of brown and blue for the walls and roofs. -
Turn on the lights:
Using pure Cadmium Yellow on a fine liner brush, paint small squares for the windows. Add a tiny dot of white in the center of the yellow to make the light look intense and glowing. -
Final adjustments:
Step back and look at your painting. Add a few more white dashes to the sky or extra trees in the foreground to balance the composition if needed.
Hang your new masterpiece in a spot where it can catch the evening light


Torn-Paper Starry Night Collage
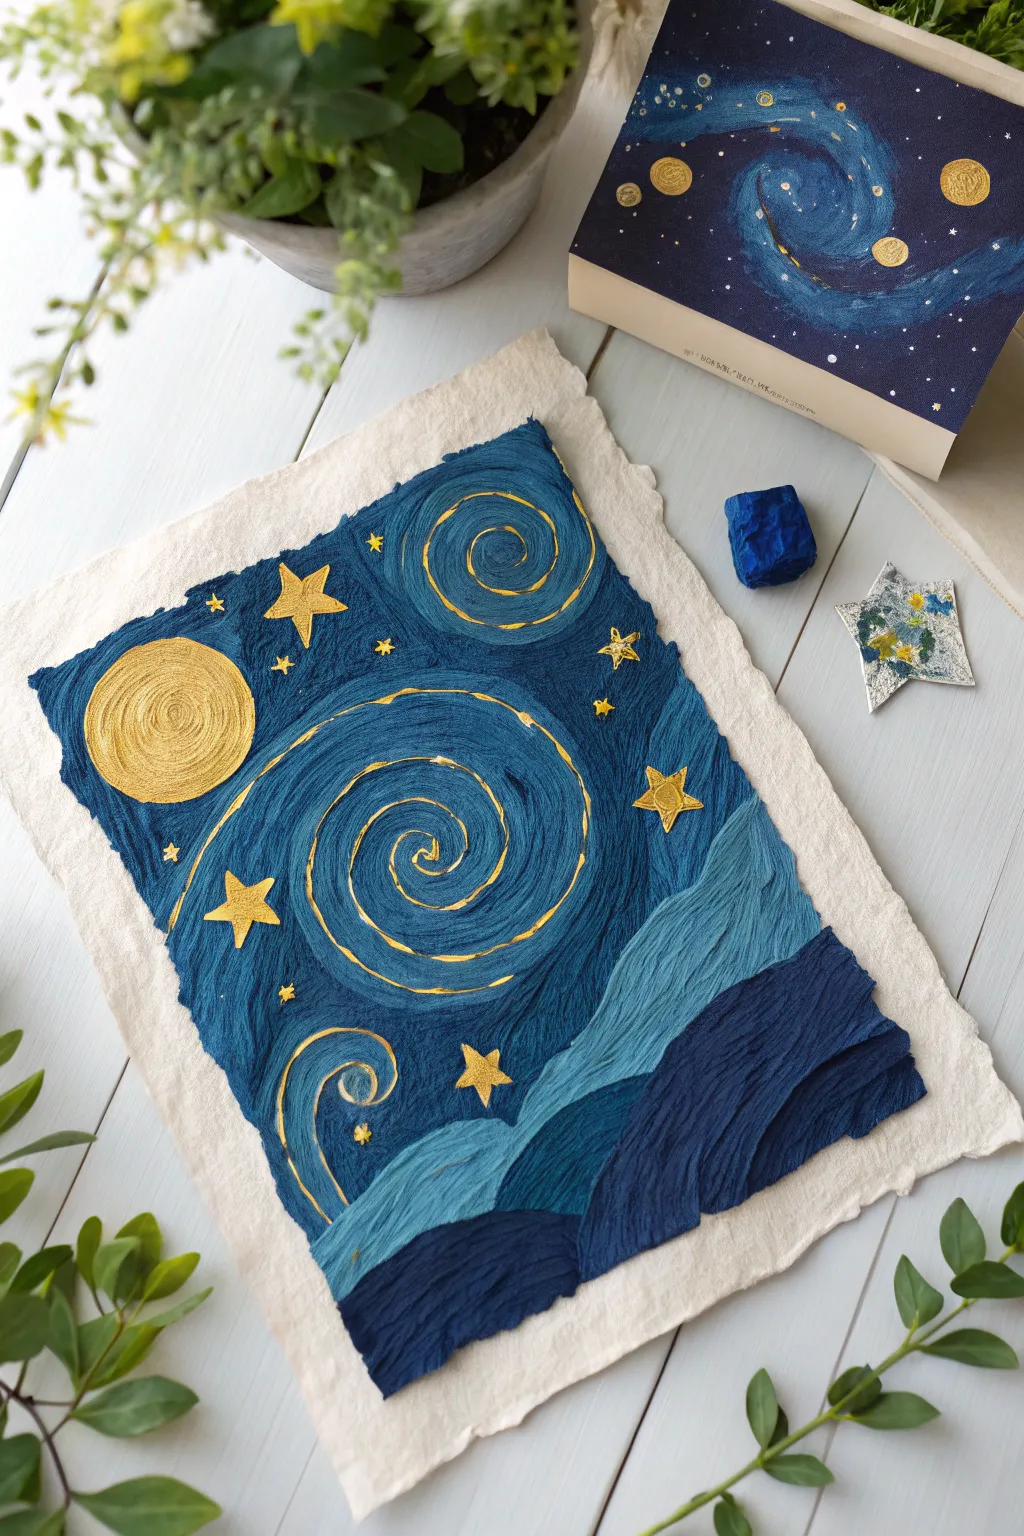
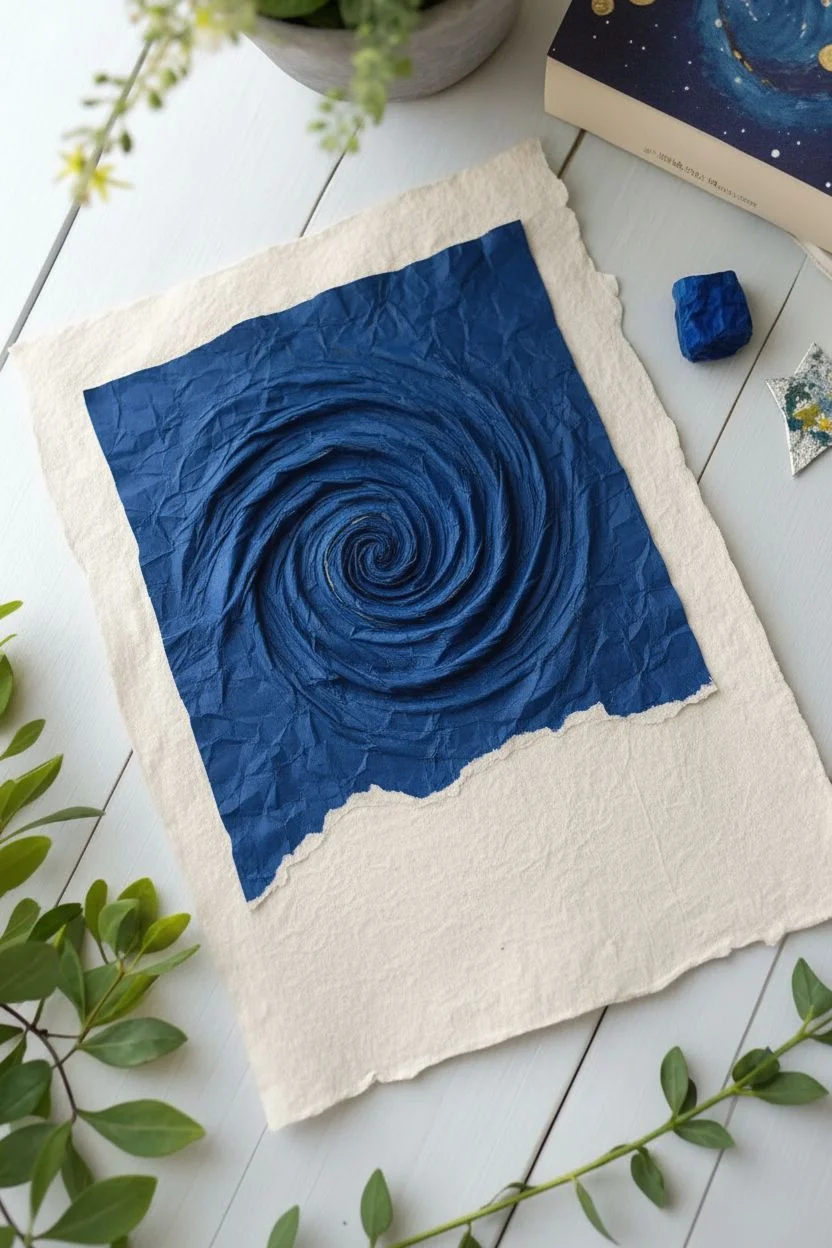
Using layers of textured crepe paper and touches of shimmering gold, this tactile collage reimagines Van Gogh’s masterpiece with incredible depth. The technique relies on crinkling and layering monochrome papers to build swirling skies and rolling hills that literally pop off the page.
How-To Guide
Materials
- Heavyweight watercolor paper or handmade rough paper (white/cream)
- Deep sapphire blue crepe paper
- Cerulean or medium blue crepe paper
- Navy or midnight blue textured paper
- Gold acrylic paint or metallic gouache
- Fine detail paintbrush (size 0 or 1)
- White PVA glue or matte medium
- Small bowl of water
- Gold foil or gold paper (optional for stars)
- Scissors
Step 1: Preparing the Base and Sky
-
Prepare your canvas:
Start with a sheet of heavy, rough-edged handmade paper or watercolor paper as your base. The deckled edges add a nice rustic touch that complements the torn paper aesthetic. -
Create the sky texture:
Take your deep sapphire blue crepe paper and cut a piece slightly larger than the upper two-thirds of your background. Gently crumple it into a ball to create wrinkles, then flatten it back out. -
Adhere the sky:
Apply a thin layer of PVA glue to the top section of your base paper. Lay down the sapphire crepe paper, intentionally bunching it slightly as you press it down to maintain those ripples and texture. -
Form the swirls:
While the glue is still tacky, use your fingers to pinch and twist the paper in specific spots to create the centers of the iconic wind swirls. You want raised ridges here.
Sticky Situation?
If the crepe paper tears too easily while wet with glue, switch to a dry glue stick for the initial placement, then seal with liquid glue only after it’s in position.
Step 2: Building the Landscape
-
Layer the lighter hills:
Tear a strip of cerulean blue paper for the middle ground hills. The torn edge should face upward to mimic a rugged horizon line. -
Attach the middle ground:
Glue this lighter blue strip below the sky, overlapping the bottom edge of the sapphire paper. Push the paper together horizontally slightly to create vertical ridges and grain. -
Create the foreground shadows:
Tear a piece of your darkest midnight blue paper for the bottom-most hills. Tearing creates a natural, organic edge that looks softer than a scissor cut. -
Secure the foreground:
Paste the dark blue layer at the very bottom, overlapping the cerulean layer. Ensure the texture runs somewhat parallel to the horizon to suggest rolling land. -
Trim the edges:
Once the glue is dry, use scissors to carefully trim the excess blue paper around the edges of your white base sheet, leaving a clean border of the white handmade paper visible.
Step 3: Adding Celestial Details
-
Sketch the wind:
Load your fine brush with gold acrylic paint. Following the raised ridges you created in the sky earlier, paint thin, broken curved lines to define the swirling wind currents. -
Paint the moon:
In the upper left corner, paint a solid circle of gold. Add concentric circles of metallic paint around it to simulate a glowing halo. -
Detail the swirls:
Intensify the main spiral in the center of the sky by adding thicker gold strokes that follow the paper’s crumpled grain. -
Add larger stars:
Cut small five-pointed star shapes from gold foil or paint them directly. Place larger stars scattered through the sky, focusing on the upper corners and right side. -
Sprinkle small stars:
Paint tiny four-point glints or simple dots of gold in the empty blue spaces to represent distant stars. -
Highlight the hills:
Run a very dry brush with a whisper of gold paint along the top torn edges of the hills to separate the layers visually. -
Paint the bottom swirl:
Near the bottom left, just above the hills, add a final stylized wave or swirl in gold to balance the composition.
Wrinkle Master
Don’t smooth the paper perfectly! The magic is in the unpredictable wrinkles. Let the paper buckle to catch the gold paint on the ridges later.
Allow the gold paint to dry completely before framing your textured masterpiece in a shadow box


Have a question or want to share your own experience? I'd love to hear from you in the comments below!