If you can draw a simple boot shape, you can draw a stocking—and make it look festive with just a few smart details. Here are my favorite stocking drawing ideas to help you build the shape, add texture, and decorate it in ways that feel totally you.
Classic L-Shape Stocking Outline
Capture the simple charm of a traditional holiday stocking with this clean, fine-line ink drawing. Its minimalist pattern and crisp outline make it a perfect addition to your winter sketchbook or a homemade holiday card.
Detailed Instructions
Materials
- Sketchbook or drawing paper (heavyweight preferred)
- HB or 2B pencil for sketching
- Fine liner pen (0.3mm or 0.5mm, black ink)
- Ruler (optional, but helpful for the cuff)
- Kneaded eraser
Step 1: Drafting the Basic Shape
-
Establish the width:
Begin by lightly sketching a horizontal oval near the top of your page. This will become the opening of the stocking cuff. -
Draw the cuff sides:
Drop two short, vertical lines down from the edges of your oval. Connect their bottom endpoints with a curved line that runs parallel to the bottom curve of your initial oval. -
Form the leg:
From the bottom of the cuff, draw two long, vertical lines downward. Angle the left line slightly inward as it goes down to create a natural fabric drape. -
Create the turn:
Now, sketch the curve for the heel on the left side, bringing the line smoothly outward and then curving it horizontally to start the foot. -
Shape the toe:
Extend the foot line to your desired length, then create a rounded ‘U’ shape for the toe section. -
Close the loop:
Draw the top of the foot line back towards the leg, curving it gently upward to meet the right side of the leg line you started earlier. Your basic ‘L’ shape brings the silhouette together.
Wobbly Lines?
If your long lines feel shaky, try moving your entire arm from the shoulder rather than just moving your wrist. This creates smoother, more confident strokes for the stocking’s body.
Step 2: Adding Details & Refinement
-
Define the cuff details:
Add a second, slightly smaller curved line just inside the bottom edge of the cuff to show the sewn hem. -
Mark the heel and toe:
Lightly sketch curved lines across the heel and toe areas to separate these sections from the main body of the stocking. -
Grid the pattern:
Very faintly pencil in a diagonal grid across the main body of the stocking. This isn’t part of the final art, but it serves as a guide for placing your star pattern evenly.
Pattern Play
Swap the simple crosses for small polka dots, holly leaves, or even tiny reindeer silhouettes to change the aesthetic completely while keeping the same base shape.
Step 3: Inking the Final Lines
-
Ink the outline:
Switch to your fine liner pen. Trace over your pencil outline with a confident, steady hand. I find it helpful to pull the pen toward me rather than pushing it away for smoother curves. -
Rib the cram:
Draw vertical lines inside the cuff area to create a ribbed texture. Keep the spacing consistent, but allow the lines to curve slightly with the fabric. -
Stitch the hem:
Add tiny vertical tick marks along that inner hemline on the cuff you sketched earlier to simulate stitching. -
Ink the heel and toe:
Go over the heel and toe separation lines. Keep these lines fairly thin compared to the outer silhouette. -
Create the star pattern:
Using your pencil grid as a guide, draw simple four-point crosses or stars at the intersections. Keep the lines thin and delicate. -
Add floating accents:
Place a few partial stars near the edges of the stocking outline to show that the pattern wraps around the form. -
Erase guidelines:
Wait at least five minutes for the ink to fully dry. Then, gently use your kneaded eraser to lift away all the underlying pencil sketches and grid lines.
Now you have a charming, hand-drawn stocking ready to be colored or left as an elegant line drawing


Fluffy Fur Cuff Stocking Texture
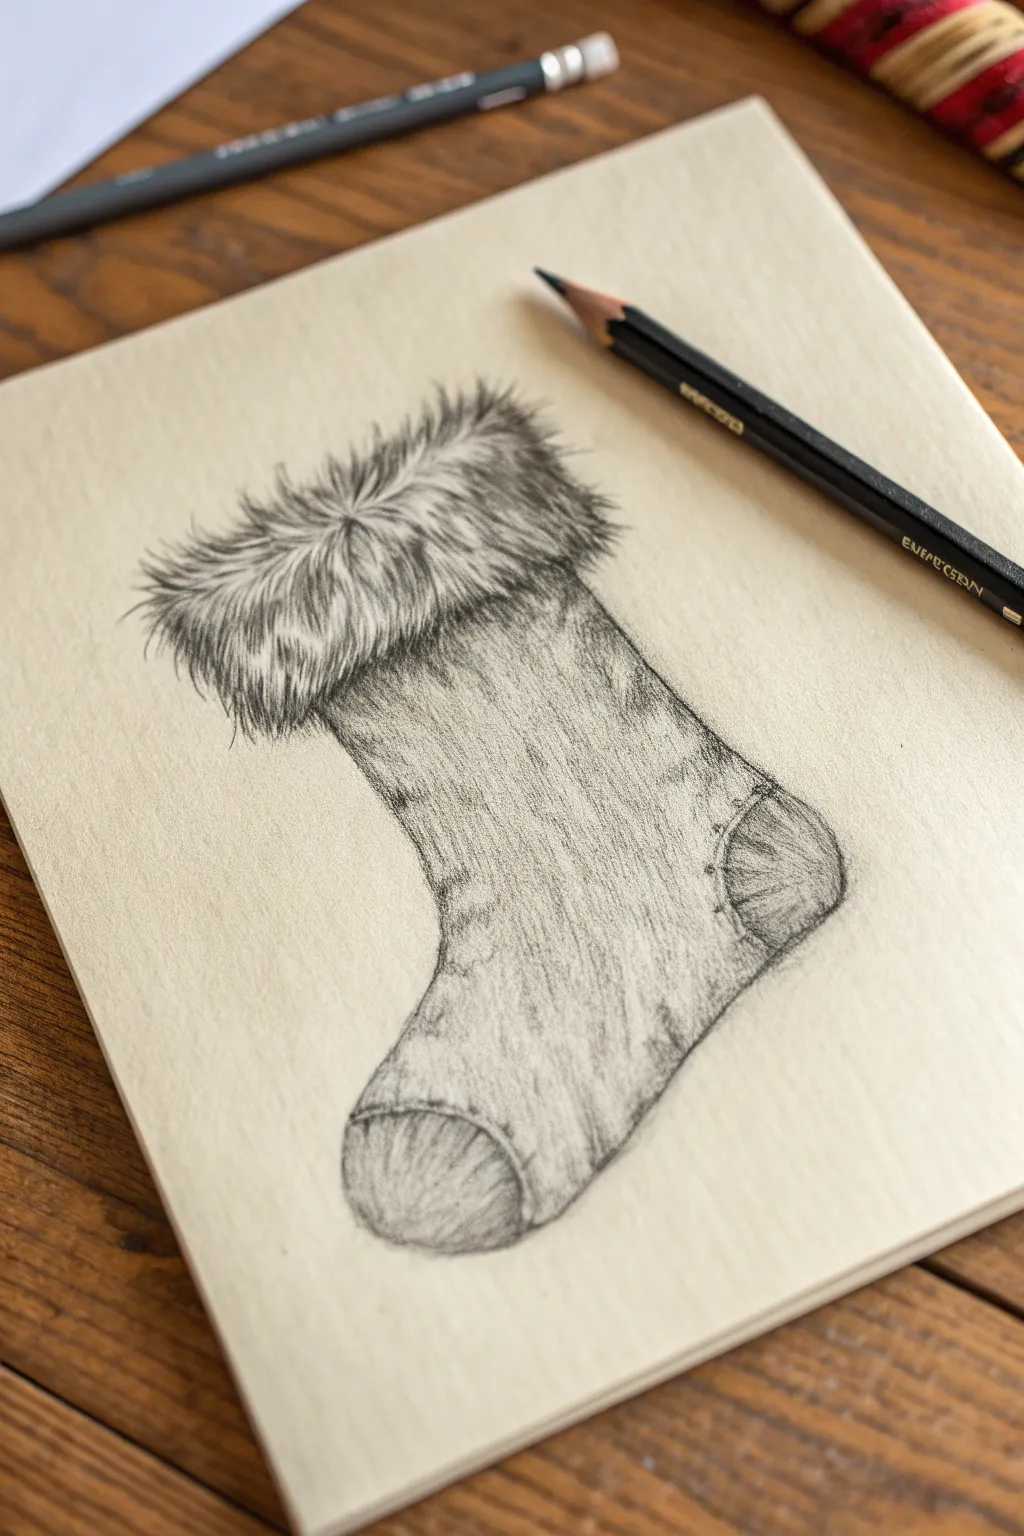
Capture the cozy warmth of the holidays with this pencil drawing that focuses on realistic texture contrasts. You will learn to render deep, fluffy fur against a smoother, knit-like stocking body for a festive illustration that pops off the page.
Step-by-Step
Materials
- Smooth bristol or heavyweight sketchbook paper (cream or off-white recommended)
- H or HB pencil (for initial sketching)
- 2B and 4B graphite pencils (for shading)
- Fine-point mechanical pencil (0.5mm, HB or 2B)
- Kneaded eraser
- Blending stump or tortillon
- Pencil sharpener
Step 1: Outlining the Shape
-
Establish the Basic Form:
Start with a light H pencil to draw a slanted rectangle for the leg of the stocking. At the bottom, curve the lines outward to form the foot shape, keeping the toe rounded and soft. -
Define the Cuff Area:
Draw an oval shape at the very top of the rectangle to represent the opening. Just below this, sketch a wide, rugged band that overlaps the main stocking body; this will become the fluffy fur cuff. -
Mark Heel and Toe:
Lightly outline semi-circular patches at the heel and the toe area. These structural seams add realism to the sock and break up the texture. -
Refine the Silhouette:
Go over your outline with slightly more confidence, giving the fabric a bit of a wavy, organic edge rather than perfect straight lines, suggesting soft material.
Don’t Over-Blend
Avoid using your finger to smudge graphite. Oils from your skin can damage the paper. Use a blending stump for the body, but keep the fur strokes sharp.
Step 2: rendering the Fur Texture
-
Map Directional Flow:
Using your mechanical pencil, make very faint directional marks on the cuff. The fur should radiate outward from the center, bunching slightly at the top rim and drooping downward at the bottom edge. -
Create Individual Strands:
Switch to a sharp 2B pencil. Begin drawing quick, tapered flicking motions. Start from the root of the fur clump and lift your pencil at the end of the stroke to create a whisper-thin tip. -
Layering the Hair:
Build up layers of these strokes. Variate the lengths—some short, some long. Ensure the strokes at the bottom edge of the cuff extend past your initial outline to look messy and realistic. -
Add Depth and Shadow:
With a 4B pencil, darken the areas where the fur hairs clump together or overlap. These small V-shaped shadows create volume and make the white highlights pop. -
Refine the Top Edge:
Pay special attention to the top opening. The fur here should look like it’s wrapping over the edge, so curve your strokes inward toward the center of the stocking opening.
Step 3: Texturing the Stocking Body
-
Base Shading:
Use the side of your HB pencil to lay down a soft, even layer of graphite over the main body of the stocking, avoiding the heel and toe patches for now. -
Simulate Knit Texture:
Draw tiny, subtle vertical dashes or repeating ‘v’ shapes down the length of the stocking. Keep these loose and slightly irregular to mimic hand-knit wool. -
Create Cylinder Volume:
Taking your 2B pencil, darken the right side of the stocking leg and the underside of the foot. This simple gradient makes the stocking look round rather than flat. -
Cast Shadow Under Cuff:
Add a darker shadow band directly underneath the fur cuff. This is crucial for showing that the cuff is thick and casts a shadow onto the fabric below. -
Stitching Details:
Draw small, dark dots or dashes along the inner seams of the heel and toe patches to look like thread stitching.
Add a Pattern
Once shaded, use your eraser to ‘draw’ white snowflakes or stripes into the main body of the stocking for a decorative Nordic sweater effect.
Step 4: Final Touches
-
Shade Heel and Toe:
Fill in the heel and toe patches. I like to shade these in a slightly different direction (curved lines following the shape) to distinguish the fabric type from the main body. -
Blend for Softness:
Use a blending stump to very gently smudge the main body of the stocking. Do not blend the fur cuff; you want those lines to remain crisp and distinct. -
Highlight Removal:
Take your kneaded eraser and pinch it into a fine wedge. Tap it along the center of the stocking leg and the top of the foot to lift off graphite, creating a fuzzy, highlighted look. -
Deepen Contrast:
Do a final pass with your 4B pencil, reinforcing the darkest crevices in the fur and the shadow side of the stocking to maximize contrast.
Now you have a wonderfully textured stocking ready to be filled with imaginary gifts


Striped and Polka Dot Stocking Bands
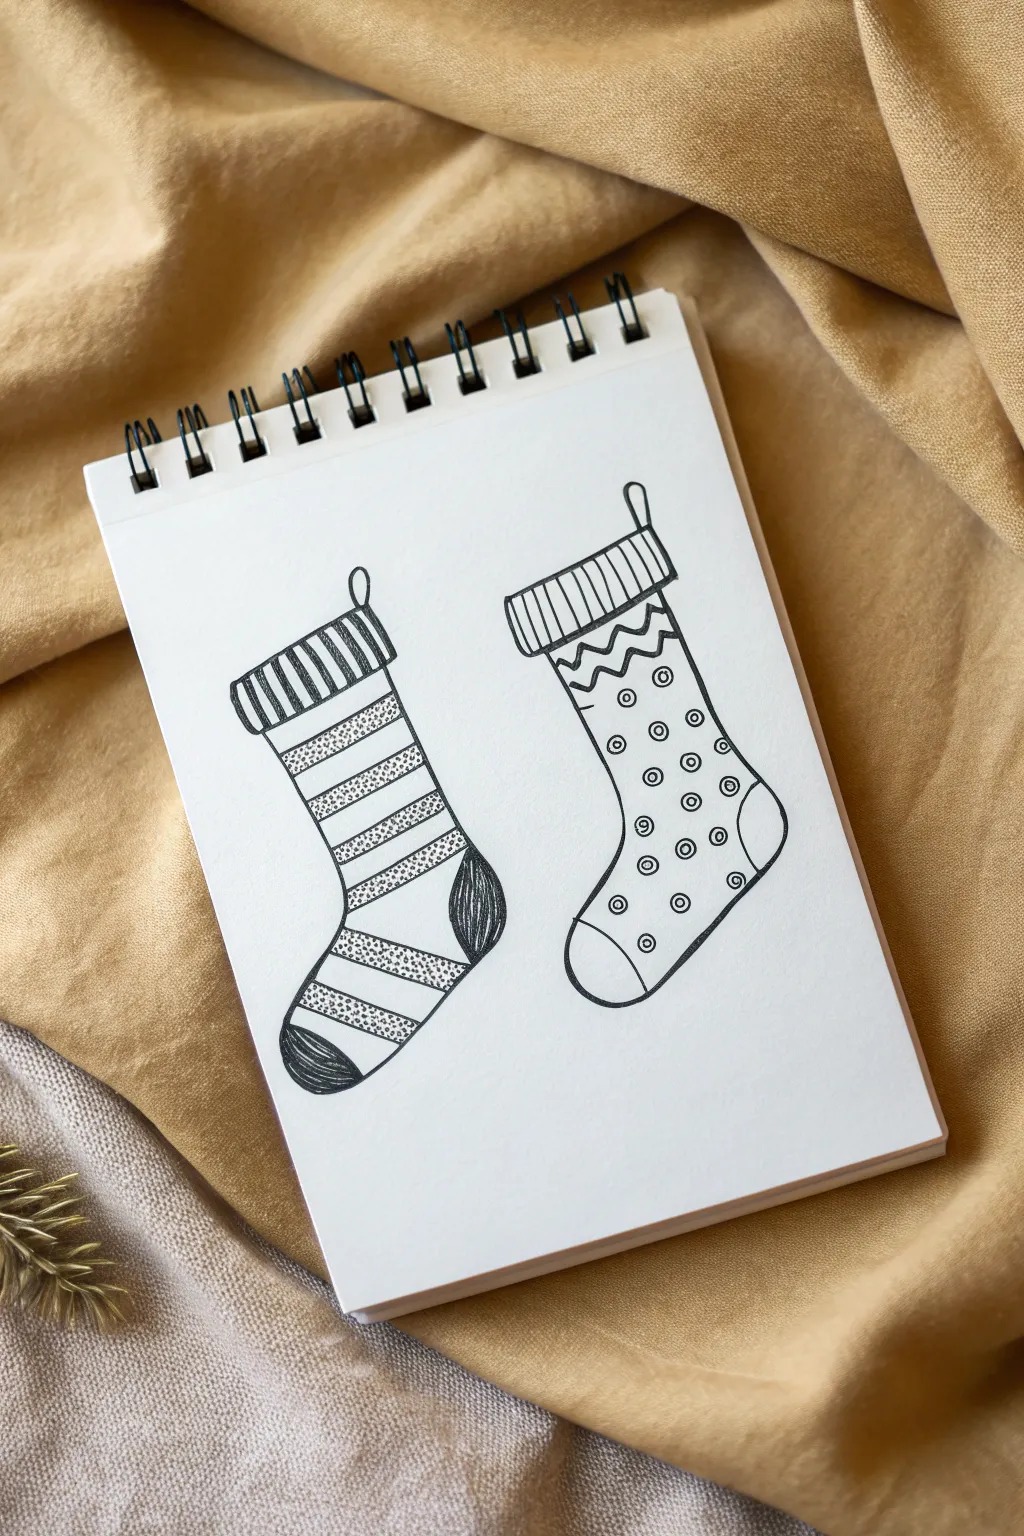
Learn to sketch this charming pair of Christmas stockings featuring classic stripes and playful polka dots. This ink drawing combines simple geometric patterns with bold outlines for a cozy, festive illustration.
Step-by-Step
Materials
- Spiral-bound sketchbook or drawing paper
- Fine liner pen (Black, typically 0.5mm)
- Pencil (HB or 2B)
- Eraser
Step 1: Basic Outline Construction
-
Define the basic shapes:
Begin with a pencil to lightly sketch the general L-shaped form for two stockings sitting side-by-side. Make sure they are roughly the same size and angled slightly towards each other. -
Draw the cuffs:
At the top of each stocking shape, draw a rectangular band that is slightly wider than the leg of the stocking. These will become the folded-over cuffs. -
Add hanging loops:
Sketch a small, curved loop attached to the top left corner of the left stocking’s cuff, and the top right corner of the right stocking’s cuff. -
Outline the toe and heel:
For the left stocking, sketch curved lines to demarcate a heel patch and a toe patch. Do the same for the right stocking, creating a defined toe cap area.
Uneven Circles?
Don’t stress if your polka dots aren’t perfect circles. The hand-drawn irregularity adds charm. If you rush, try slowing your pen stroke down.
Step 2: Inking the First Stocking (Stripes)
-
Ink the main outline:
Using your fine liner, go over the pencil perimeter of the left stocking. Keep your lines confident and smooth. -
Details on the cuff:
Draw vertical lines across the cuff area, spaced relatively close together to create a ribbing effect. -
Create the striped pattern:
Draw pairs of horizontal lines down the leg and foot of the stocking. Leave a wider gap between each pair to create alternating thick and thin bands. -
Fill the heel and toe:
Fill in the heel and toe sections with closely spaced vertical lines. I like to curve these slightly with the form of the stocking to add a bit of volume. -
Texture the stripes:
Inside the narrower horizontal stripes you drew earlier, use a stippling technique (lots of tiny dots) to fill them in. This contrasting texture makes the pattern pop.
Step 3: Inking the Second Stocking (Polka Dots)
-
Ink the outline:
Trace the perimeter of the second stocking with your pen, ensuring the toe cap line is clearly defined. -
Draw the ribbed cuff:
Fill the top cuff rectangle with vertical lines, similar to the first stocking, but perhaps spaced slightly wider apart. -
Add the chevron detail:
Just below the cuff, ink two parallel zigzag lines that run horizontally across the top of the stocking leg. -
Create the polka dot field:
Fill the main body of the stocking with small circles. Arrange them in roughly diagonal rows for a neat, repeated pattern look. -
Add inner dots:
Place a single, tiny dot in the center of every other circle. This alternating detail adds a nice level of complexity without cluttering the drawing. -
Detail the toe:
Leave the toe cap plain and white for contrast against the busy pattern of the leg.
Add Dimension
Use a light gray marker or very diluted ink wash to add a shadow just along one side of the stockings to make them look rounded and 3D.
Step 4: Final Touches
-
Erase pencil guides:
Once the ink is completely dry—give it a minute or two to prevent smudging—carefully erase all underlying pencil sketch lines. -
Strengthen outer lines:
If needed, go over the main outer perimeter of both stockings one more time to thicken the line weight, which helps separate the objects from the background.
Now you have a cozy pair of holiday illustrations ready to be used on greeting cards or gift tags


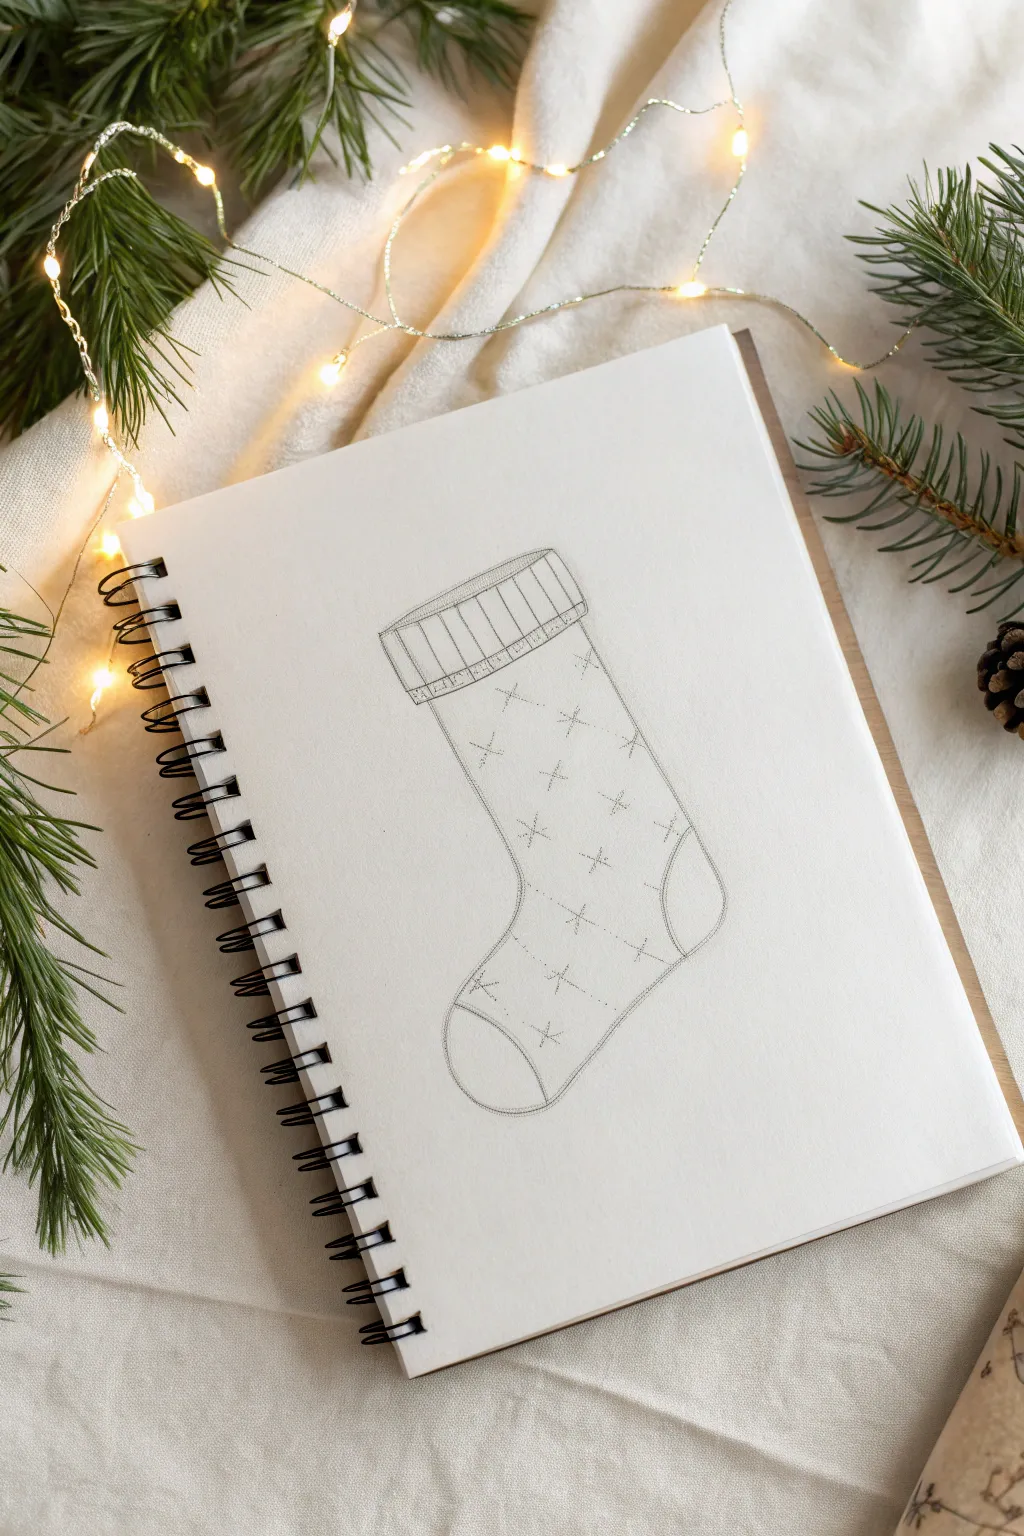
Snowflake Motif Stocking Panel
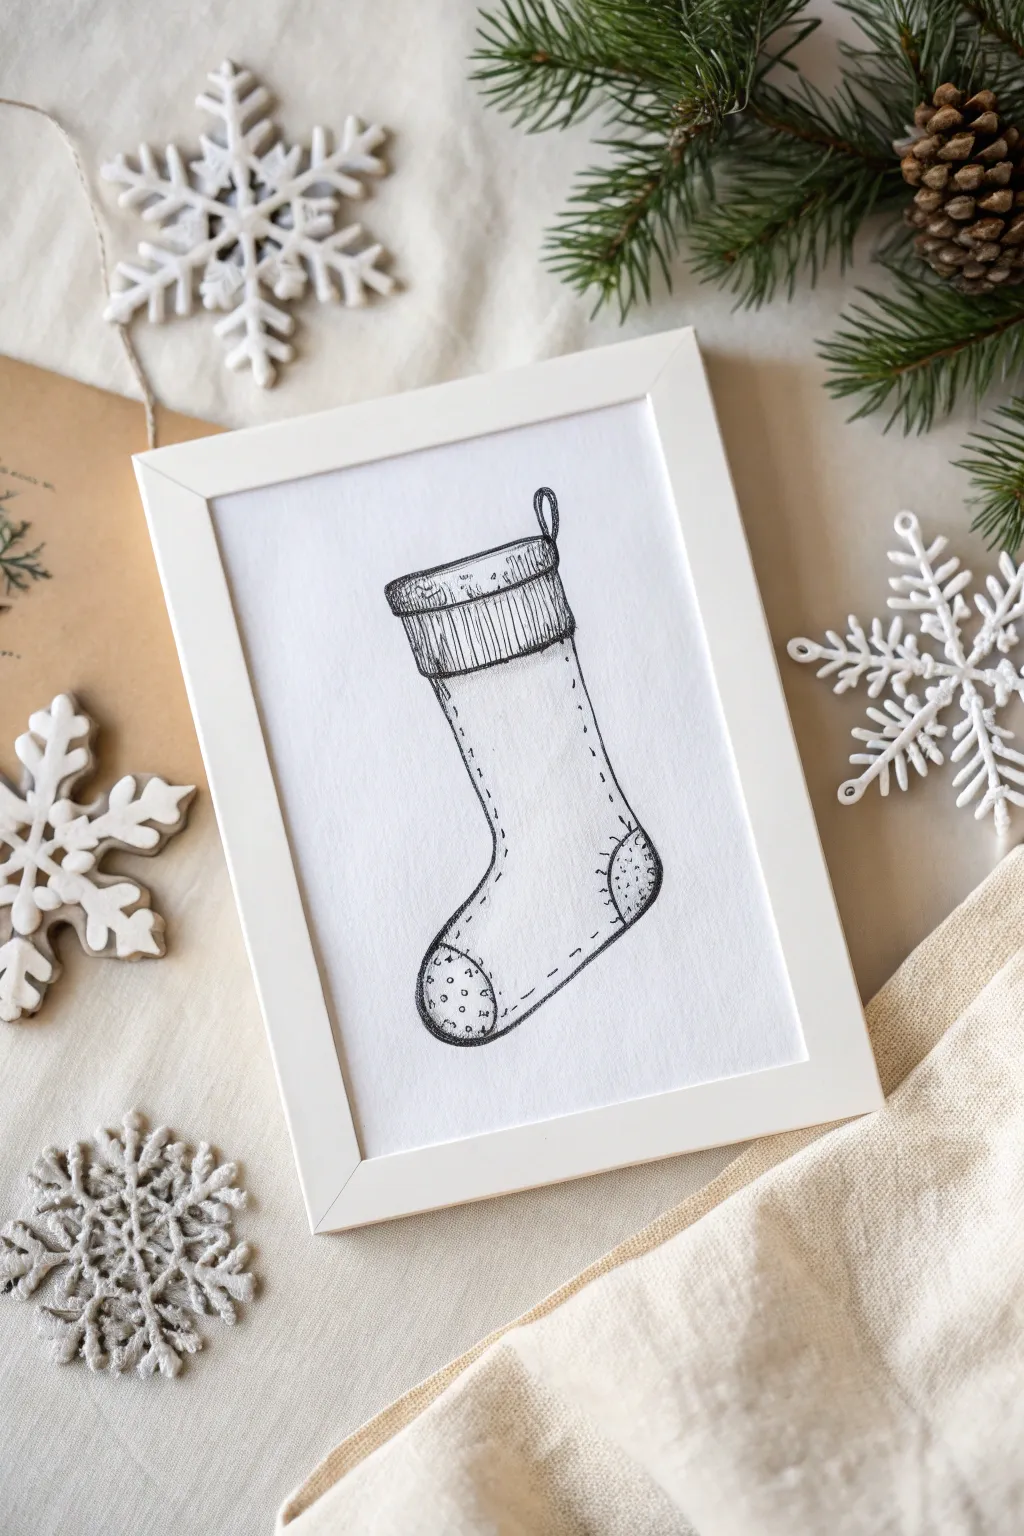
Capture the simple charm of the season with this minimalist ink drawing of a classic Christmas stocking. The clean lines and subtle details create a piece that feels both nostalgic and modern, perfect for understated holiday decor.
Step-by-Step Guide
Materials
- High-quality white drawing paper or cardstock (A5 or 5×7 size)
- Fine liner pens (sizes 0.1, 0.3, and 0.5)
- Pencil (HB or 2B)
- Soft eraser
- Ruler
- White picture frame (to fit paper size)
Step 1: Sketching the Outline
-
Map the basic shape:
Begin by lightly sketching the overall shape of the stocking with your pencil. Draw a vertical rectangle for the leg and a curved oval shape at the bottom for the foot, ensuring they connect smoothly at the heel. -
Add the cuff:
At the top of the leg, sketch a rectangular cuff that is slightly wider than the stocking itself. Give the top and bottom edges a slight curve to suggest roundness and volume. -
Refine the curves:
Go over your guide shapes to create a continuous outline. Soften the heel and toe curves so the stocking looks natural and fabric-like, rather than rigid geometric shapes. -
Sketch the loop:
Draw a small loop attached to the top right corner of the cuff. This is the hanger, so make sure it looks like a folded piece of fabric or ribbon. -
Mark the patches and details:
Lightly draw curved lines at the toe and heel to demarcate the reinforced areas, often seen on traditional knit stockings.
Ink Flow Tip
Keep a scrap piece of paper nearby to test your pens before touching the artwork. This ensures ink is flowing smoothly and prevents sudden blobs.
Step 2: Inking the Details
-
Outline the main form:
Switch to your 0.5 fine liner pen. Carefully trace the outer silhouette of the stocking, including the cuff and hanging loop. Keep your hand steady for crisp, clean lines. -
Detail the cuff ribbing:
Using a 0.3 pen, draw vertical lines inside the cuff area. Freehand these lines rather than using a ruler; slight imperfections make the texture look more like knitted fabric. -
Add texture to the cuff:
For the top edge of the cuff, use small, scribbly marks or tiny dots with a 0.1 pen to suggest a fuzzy or woolen texture, contrasting with the vertical ribbing below. -
Stitching lines:
With the 0.3 pen, add a dashed line running down the center-front of the stocking leg and along the bottom curve. This decorative stitching adds a handmade charm to the depicted object. -
Inking the patches:
Outline the heel and toe patches with the 0.3 pen. Inside these patches, add small dots or tiny ‘v’ shapes using the 0.1 pen to differentiate the texture from the main body of the sock. -
Create shadows:
I like to add depth here by adding very fine hatching lines. Use the 0.1 pen to add small diagonal hatch marks just under the cuff and along the back curve of the heel to suggest rounding.
Step 3: Final Touches
-
Erase pencil marks:
Wait for the ink to dry completely—give it at least 5 to 10 minutes to avoid smudges. Then, gently erase all underlying pencil sketches with a soft eraser. -
Review contrast:
Step back and look at your drawing. If the outline feels too faint against the white paper, carefully go over the main perimeter line once more with the 0.5 pen to thicken it slightly. -
Prepare for framing:
Check your paper size against your frame. If necessary, trim the edges of the paper using a ruler and craft knife for a straight fit. -
Frame the artwork:
Clean the glass of your white frame to remove any dust or fingerprints. Place your drawing inside, secure the back, and it’s ready to display.
Add a Splash of Color
Use watercolor to add a soft wash of red to the stocking or green to the cuff after the ink dries. Ensure your ink is waterproof first!
Now you have a charming piece of handmade art to hang on your wall or gift to a loved one

PENCIL GUIDE
Understanding Pencil Grades from H to B
From first sketch to finished drawing — learn pencil grades, line control, and shading techniques.
Explore the Full Guide
Candy Cane Overflow Stocking Drawing
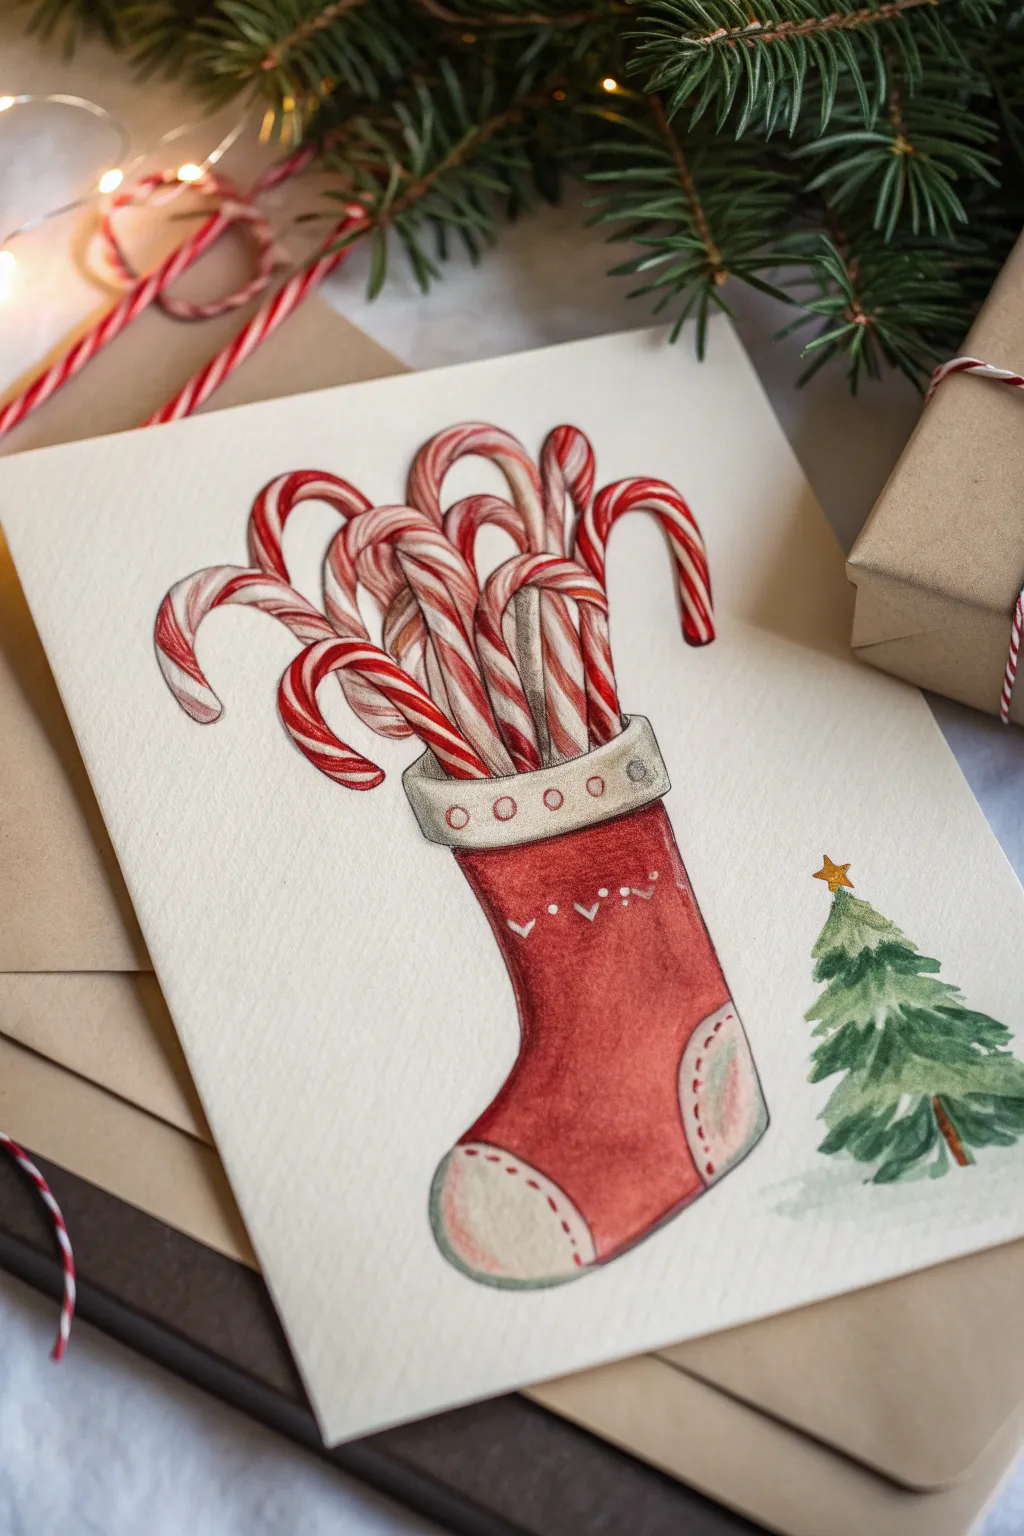
Capture the sweetness of the season with this charming watercolor and colored pencil illustration featuring a stocking bursting with striped treats. The artwork combines vibrant reds and crisp whites for a classic holiday look that feels both traditional and whimsical.
How-To Guide
Materials
- Hot press watercolor paper (smooth texture)
- HB pencil for sketching
- Kneaded eraser
- Watercolor paints (Alizarin Crimson, Sap Green, Burnt Umber, Yellow Ochre)
- Round watercolor brushes (sizes 2 and 4)
- Colored pencils (Red, Dark Red, White, Gray, Warm Brown)
- Fine liner pen (optional)
- Palette and water cup
Step 1: Sketching the Composition
-
Outline the stocking shape:
Begin with a light pencil sketch of the main stocking shape. Draw a curved boot form with a clearly defined cuff at the top, a heel patch, and a toe patch to give it a classic sock structure. -
Arrange the candy canes:
Sketch a cluster of candy canes emerging from the top of the stocking. Vary their heights and angles—have some hooking toward the left, others to the right so they look tumbled in rather than stiffly arranged. -
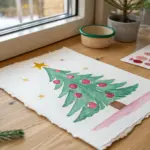
Add background details:
To the right of the stocking, lightly sketch a small, simple Christmas tree shape. Top it with a small star. -
Refine the lines:
Go back over your candy canes and define the twisted stripe patterns on each one. Keep your pencil pressure light so these lines don’t show through the paint later.
Keep It Round
When painting stripes on the candy canes, always curve your brush strokes slightly. Straight lines will make the canes look flat, while curved lines create a cylindrical 3D illusion.
Step 2: Watercolor Base Layers
-
First wash on the stocking:
Mix a diluted Alizarin Crimson and apply a wash to the main body of the stocking. Leave the cuff, heel, and toe patches unpainted for now. -
Painting the patches:
For the heel and toe patches, use a very watery mix of Yellow Ochre and a touch of gray to create a cream-colored, vintage fabric look. Paint the cuff area with this same pale wash. -
Painting the tree:
While the stocking dries, paint the small tree using Sap Green. Use short, downward strokes to mimic pine branches, leaving tiny gaps of white paper for a textured, snowy look. -
Adding the star:
Carefully dab a dot of Yellow Ochre or gold paint for the star atop the tree. -
Shadows on the stocking:
Once the red layer is dry, mix a slightly darker red (add a touch of brown or purple to your crimson) and paint along the right edge and bottom curve to create volume.
Step 3: Detailed Candy Cane Stripes
-
Initial red stripes:
Using your smallest brush (size 2), carefully paint the alternating red stripes on the candy canes. Follow the curve of the cane to make them look round, not flat. -
Deepening the red:
Identify where the candy canes overlap. Use a more saturated red paint in the shadowed areas where one cane sits behind another to separate them visually. -
Adding warm shadows:
Mix a very faint gray-brown wash. Apply this to the white stripes of the candy canes, specifically on the sides that would be in shadow, to give them 3D form.
Add Some sparkle
Once the art is dry, use a metallic gold gel pen to outline the star on the tree or add tiny dots to the stocking cuff for a festive, glittering touch.
Step 4: Colored Pencil Refinement
-
Enhancing the texture:
Once all paint is perfectly bone dry, take your red colored pencil and trace the edges of the red stripes to make them crisp. I like to press harder on the shadowed side for extra definition. -
Shading the white areas:
Use a gray colored pencil to gently shade the white parts of the candy canes and the cream stocking cuff. This adds a level of realism that watercolor alone sometimes misses. -
Stitching details:
Use a dark red or brown pencil to draw small dashed lines (stitching) along the heel, toe, and cuff seams. -
Decorative motifs:
With a white colored pencil or a white gel pen, draw tiny hearts or zigzag patterns on the main red body of the stocking for a knitted effect. -
Final shadows:
Add a touch of dark gray or brown pencil right where the candy canes enter the stocking cuff to show depth and separation. -
Grounding shadow:
Lightly brush a very watery gray wash underneath the tree and stocking to ground the objects so they aren’t floating in space.
This delightful illustration is now ready to be turned into a custom greeting card or framed as holiday decor
Gift Box Peek-Out Stocking Scene
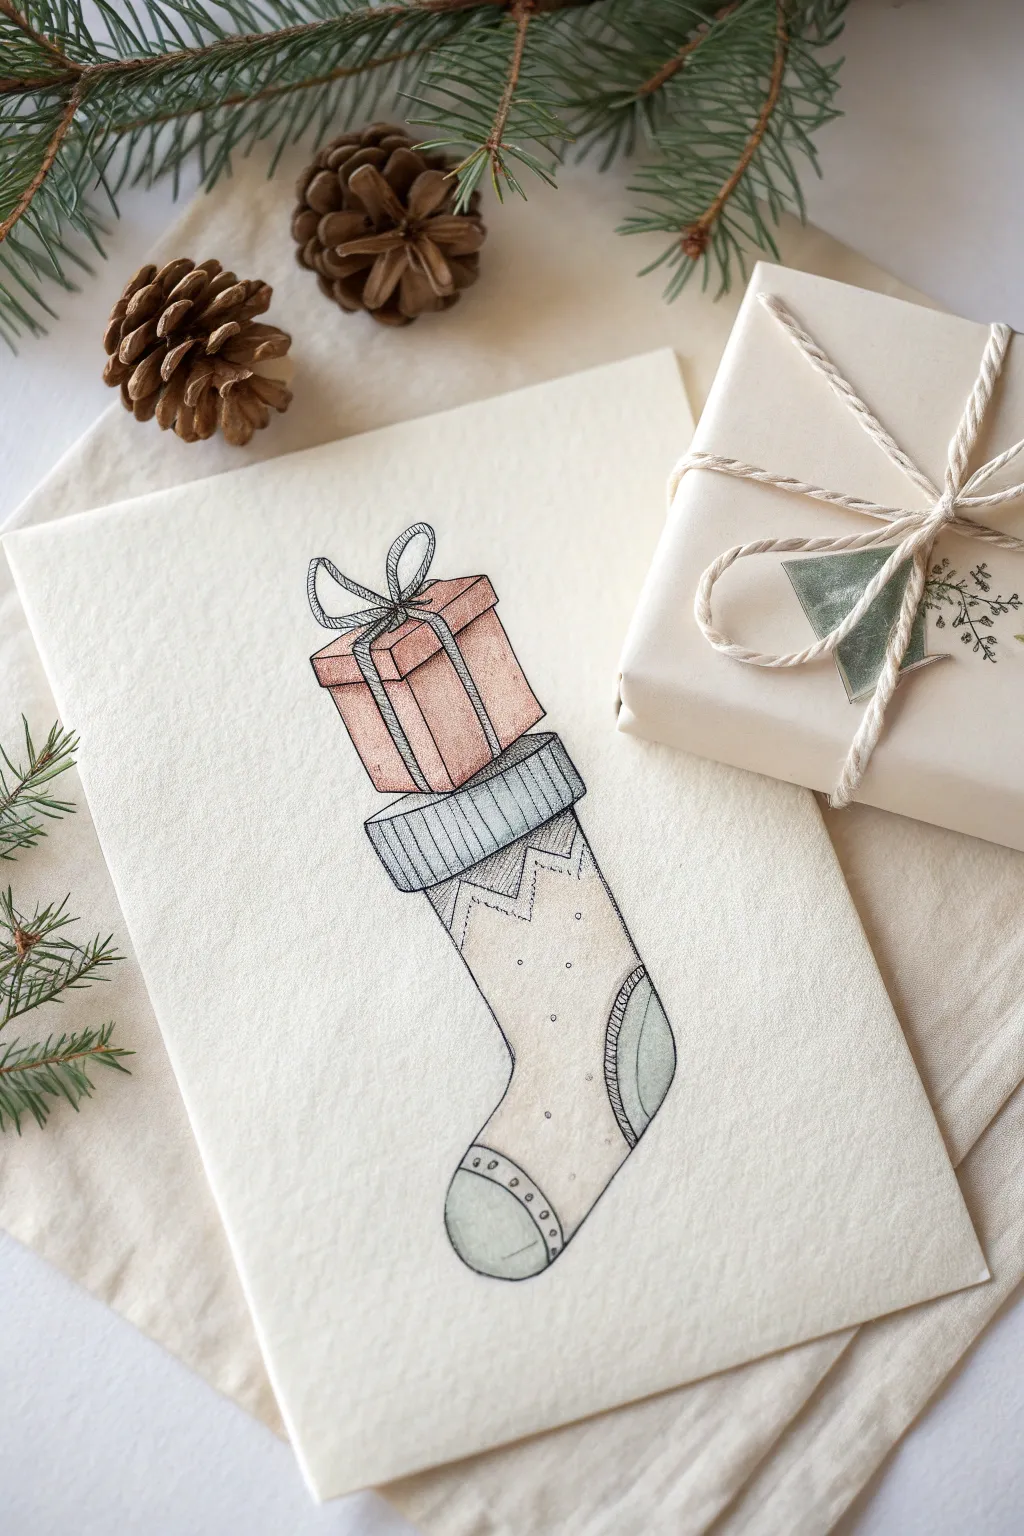
This charming illustration features a cozy, patterned stocking overflowing with a neatly wrapped gift box. The soft watercolor washes combined with crisp ink outlines give it a classic, hand-drawn look perfect for custom holiday cards.
Step-by-Step
Materials
- Cold press watercolor paper (A5 size)
- Pencil (HB or H)
- Kneaded eraser
- Fine liner pen (black, waterproof, 0.1mm and 0.3mm)
- Watercolor paints (Peach/Salmon, Cream/Buff, Teal/Grey-Blue)
- Small round watercolor brush (size 2 or 4)
- Paper towel
- Water cup
Step 1: Sketching the Foundations
-
Outline the gift box:
Start by drawing a cube shape near the upper middle of your paper. Tilt it slightly to the left for a dynamic angle. Draw the top square first, then the visible side panels, ensuring the vertical lines are parallel. -
Draft the stocking cuff:
Directly beneath the box, draw a wide, curved rectangle for the stocking’s cuff. It should look like it’s wrapping around the bottom of the box, slightly wider than the gift itself. -
Draw the stocking body:
From the bottom of the cuff, sketch a long, vertical curve curving gently to the right to form the ankle. At the bottom, round it out to create the heel, then sweep left to form the toe, creating a classic sock shape. -
Add details:
Lightly sketch a ribbon bow on top of the box. Add the heel and toe patches on the stocking with curved lines. Draw a zig-zag pattern just below the cuff and scattered small circles for a polka-dot texture on the main body.
Step 2: Inking the Design
-
Trace the gift box:
Using your 0.1mm fine liner, carefully trace the pencil lines of the gift box. Use a light hand for the ribbon to keep it looking delicate. -
Ink the stocking outline:
Go over the main outline of the stocking. When inking the cuff, use vertical hatch marks (lines close together) to simulate a ribbed knit texture. -
Add pattern details:
Ink the zig-zag pattern and the small polka dots. Outline the heel and toe patches. Add small circles along the seam of the toe patch for extra detail. -
Refine the ribbon:
Add simple, linear shading to the ribbon loops to show depth. I find that deepening the shadows where the ribbon knots makes the bow pop. -
Erase pencil marks:
Wait until the ink is completely dry (give it a few minutes to be safe), then gently gently erase all underlying pencil sketch lines with a kneaded eraser.
Ribbed Knit Texture
For the cuff, don’t draw straight lines. Make your hatch marks slight ‘S’ curves to mimic the fabric wrapping around a rounded form.
Step 3: Adding Color
-
Paint the gift box:
Mix a watery salmon or peach color. Paint the box faces, leaving the ribbon unpainted (or paint it white/grey later). Let one side appear slightly darker to suggest a light source. -
Color the stocking cuff:
Use a muted teal or grey-blue wash for the ribbed cuff. Keep the paint fairly translucent so the ink hatching shows through clearly. -
Wash the stocking body:
Apply a very pale cream or buff wash to the main part of the stocking. This warms up the paper white without being overpowering. -
Paint heel and toe:
Use the same teal or grey-blue mixture from the cuff to paint the heel and toe patches. This creates a cohesive color palette. -
Shadowing the ribbon:
Add a tiny touch of grey to the ribbon loops and tails to distinguish them from the white paper background. -
Final shading touches:
Once the first layers are dry, add a tiny strip of darker cream paint along the right side of the stocking to give the form some rounded volume.
Make It Sparkle
After the watercolor dries, use a metallic gold or silver gel pen to trace the polka dots or the ribbon edges for a festive, shimmering effect.
Now you have a delicate holiday illustration ready to be framed or sent as a greeting
BRUSH GUIDE
The Right Brush for Every Stroke
From clean lines to bold texture — master brush choice, stroke control, and essential techniques.
Explore the Full Guide
Bow-Tied Ribbon Stocking Cuff

Blend the softness of watercolor illustration with physical texture in this charming Christmas card design. Featuring a classic stocking motif adorned with holly and geometric patterns, the artwork comes to life with the addition of a real miniature satin bow.
How-To Guide
Materials
- Heavyweight watercolor paper or cardstock (cold press)
- Pencil and eraser
- Watercolors (Red, Green, Grey/Payne’s Grey, Beige/Cream)
- Fine liner or colored pencils for detailing
- Small round brushes (size 2 and 4)
- Red satin ribbon (1/4 inch width)
- Gold thread or wire
- Craft glue or needle and thread
Step 1: Drawing the Base
-
Outline the Shape:
Begin by lightly sketching the outline of a Christmas stocking in the center of your paper. Draw a wide cuff at the top, a straight leg, and a curved foot with a distinct toe and heel patch. -
Add Pattern Guides:
Lightly sketch the internal patterns. Draw a zigzag line just below the cuff and another near the toe patch. These will serve as guides for your geometric knit pattern later. -
Sketch the Holly:
In the center of the stocking leg, draw a small cluster of holly leaves radiating from a central point. Add a simple flower or berry shape in the middle of the leaves. -
Refine Lines:
Go over your pencil lines to ensure they are clean, but keep them faint enough that they won’t show heavily through the paint. Erase any unnecessary stray marks.
Bleeding Colors?
If your red paint bleeds into the cream wool area, let it dry completely, then gently lift the unwanted color with a damp, clean brush or a discrete dab of white gouache.
Step 2: Watercolor Layers
-
Paint the Cuff:
Mix a watery grey or diluted Payne’s Grey. Paint the cuff area with vertical strokes to mimic a ribbed texture. Let the color pool slightly at the bottom edge of the cuff for shadow. -
Base Color:
Wash the main body of the stocking with a very pale, diluted beige or cream color to give it a warm, wooly look. Avoid painting over the holly leaves and the heel/toe patches. -
Adding Red Accents:
Using a slightly more concentrated red watercolor, fill in the heel and toe patches. I like to keep the edges slightly soft to maintain that cozy textile feel. -
Painting the Holly:
Use a deep green to fill in the holly leaves. While the paint is still damp, you can drop in a tiny bit of darker green at the base of the leaves for depth. -
Detailing the Center:
Paint the center flower of the holly cluster with a soft red, allowing it to bleed slightly into the surrounding area if you want a looser look, or keep it crisp for a cleaner illustration. -
Drying Time:
Let the entire piece dry completely. If you proceed while the paper is damp, your fine lines in the next step will bleed.
Step 3: Adding Texture & Details
-
Ribbed Cuff Details:
Once dry, use a fine brush or a grey colored pencil to draw vertical lines on the cuff, emphasizing the ribbed texture painted earlier. -
Geometric Patterns:
Using a red colored pencil or a very fine brush, trace over your zigzag guides. Add small cross-hatch or diamond patterns within the zigzags to simulate embroidery stitches. -
Holly Veins:
Add fine veins to the holly leaves using a dark green pencil or pen. You can also add small dots around the background of the stocking to mimic texture or snow. -
Refining Edges:
Lightly outline the stocking shape with a sepia or grey pencil to define the edges without making them too harsh.
Make It Sparkle
Mix a tiny amount of metallic gold watercolor paint and splatter very fine droplets over the dry illustration for a magical, festive shimmer effect.
Step 4: The 3D Element
-
Tie the Bow:
Take your red satin ribbon and tie a small, neat bow. Adjust the loops so they are even and trim the tails at an angle for a professional finish. -
Secure the Center:
Wrap a tiny piece of gold thread or wire around the center knot of the bow to add a touch of sparkle and keep the shape tight. -
Attach to Paper:
Place a small dot of strong craft glue to the left of the stocking cuff. Press the bow firmly onto the paper. Alternatively, you can make a tiny hole and stitch the bow on for a more secure hold. -
Final Shape:
Gently fluff the loops of the ribbon with your finger or a pencil tip to give the bow dimension so it doesn’t lay completely flat against the paper.
This multimedia approach creates a lovely keepsake that feels special enough to frame or gift
Zentangle Swirl Pattern Stocking
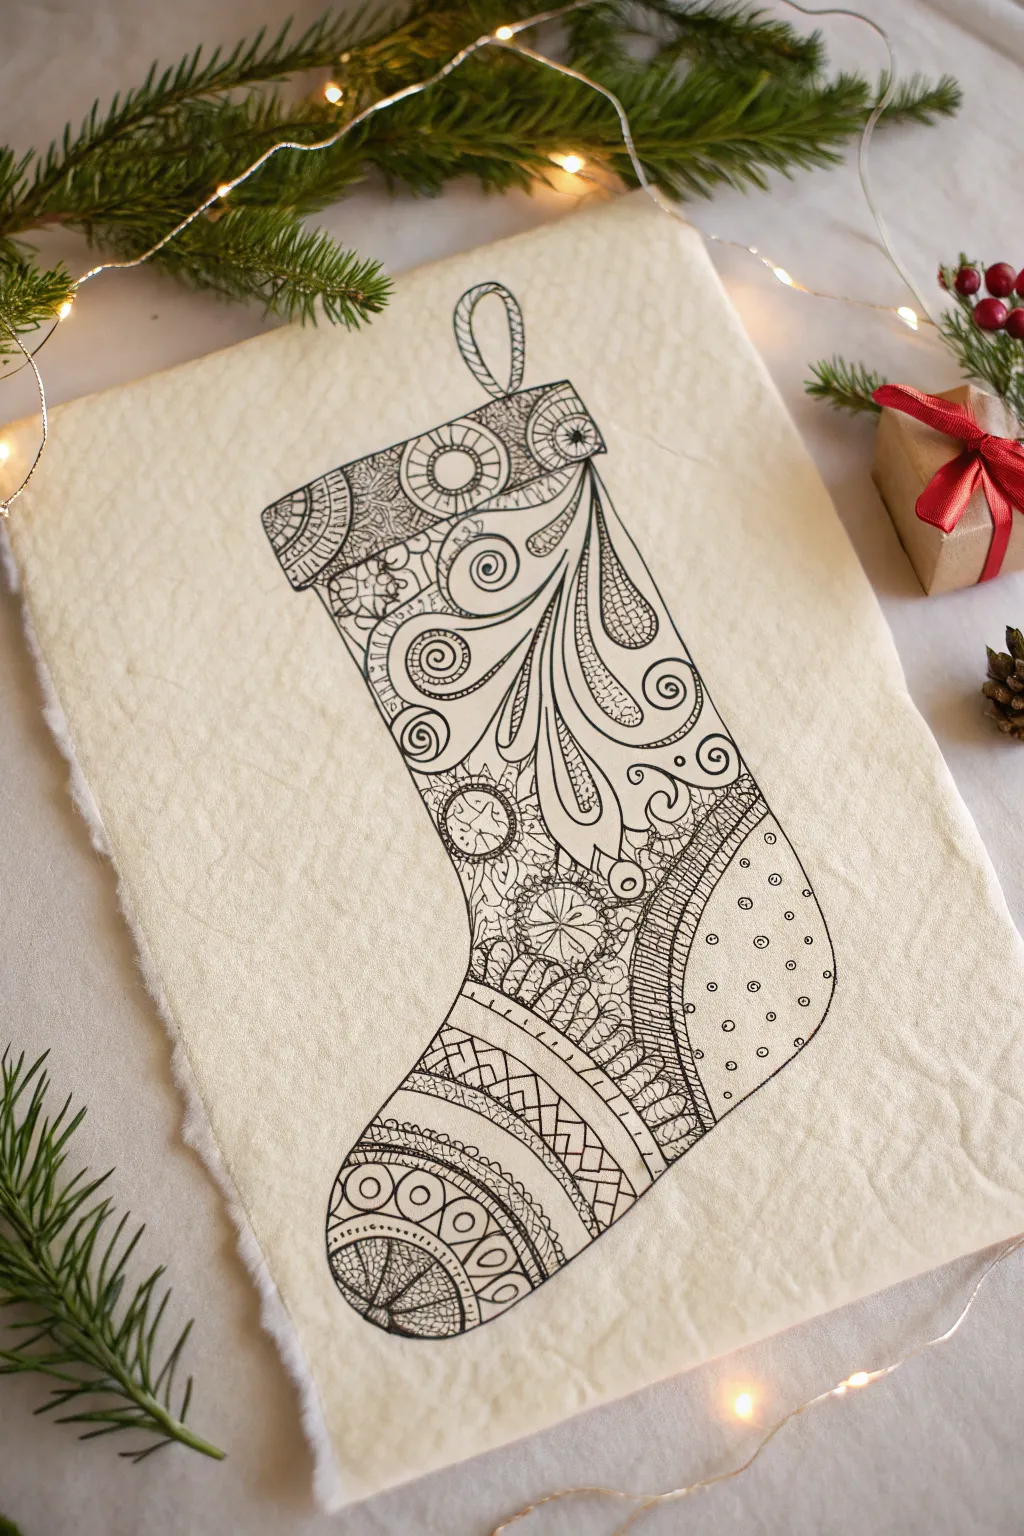
Capture the holiday spirit with this intricate, meditative line drawing of a Christmas stocking. Featuring graceful swirls, geometric bands, and delicate details, this project looks beautifully rustic on handmade paper.
Step-by-Step Guide
Materials
- Handmade or textured watercolor paper (pale cream or off-white with deckled edges)
- Fine liner pens (black, sizes 01, 03, and 05)
- Pencil (HB or 2H for light sketching)
- Eraser (kneaded eraser preferred)
- Ruler (optional, but helpful for bands)
Step 1: Drawing the Base Outline
-
Sketch the silhouette:
Begin by lightly sketching the overall shape of the stocking with your pencil. Start with the cuff rectangle at the top, then curve down for the ankle, and round out the heel and toe. Keep the lines very faint so they are easy to ink over later. -
Add the loop:
Draw a small loop attached to the top left corner of the cuff, looking like a folded ribbon or string for hanging. -
Divide the space:
Using your pencil, section off the heel and toe areas with curved lines. Draw two curved bands across the lower ankle area to create distinct zones for patterning later.
Ink Smearing?
If you are left-handed or working quickly, place a piece of scrap paper under your drawing hand. This acts as a shield to prevent oils and friction from smudging fresh ink.
Step 2: Inking the Structures
-
Define the perimeter:
Switch to your 05 fine liner to ink the main outline of the stocking. Go over your pencil lines confidently, but don’t worry if the line has a slight wobble; it adds to the hand-drawn charm. -
Ink the structural divisions:
Trace over the internal dividing lines you sketched for the heel, toe, cuff, and ankle bands. This creates the ‘frames’ for your Zentangle patterns.
Use Varied Line Weights
Don’t use just one pen size! Using a thick 05 for outlines and a delicate 005 or 01 for the inner shading creates essential visual hierarchy and prevents the drawing from looking flat.
Step 3: Filling the Patterns
-
Start with the main swirls:
In the large central area of the stocking, use an 03 pen to draw large, paisley-like swirls. Start from the center and let them flow upward and outward. Add double lines to some swirls to give them visual weight. -
Detail the swirls:
Inside the teardrop shapes of your main swirls, add small repeating patterns like scales, dots, or parallel lines using the 01 pen for finer detail. -
Fill the gaps:
Between the large swirls, fill the negative space with small circles, orbs, or tiny floral mandalas. This density creates that classic Zentangle look. -
Pattern the cuff:
Moving to the top cuff, draw a series of semi-circles or arches. Fill these with concentric lines and small perpendicular dashes to mimic woven fabric. -
Decorate the heel:
For the heel section, draw simple polka dots or small circles. I like to vary their sizes slightly to keep it looking organic rather than perfectly uniform. -
Create the geometric bands:
In the bands across the foot, draw a zigzag or diamond lattice pattern. Use the 03 pen for the main zigzags and the 01 pen to add hatching or cross-hatching inside the shapes. -
Texture the toe:
On the toe cap, draw curved vertical lines that follow the shape of the toe. Segment these with horizontal curves to create a grid, then fill alternating sections with fine lines or stippling.
Step 4: Refining and Finishing
-
Thicken key lines:
Go back over the major structural lines (the outline of the stocking and the main section dividers) with your 05 pen to make them pop against the intricate filler patterns. -
Add high-contrast black:
Look for small gaps between your circles and swirls. Use your pen to color these tiny triangular voids completely black. This ’rounding’ technique adds incredible depth and contrast. -
Erase pencil marks:
Wait at least 10-15 minutes to ensure the ink is completely dry. Gently use your kneaded eraser to lift away any visible pencil guidelines.
Display your finished drawing alongside some evergreen sprigs or frame it as unique holiday decor


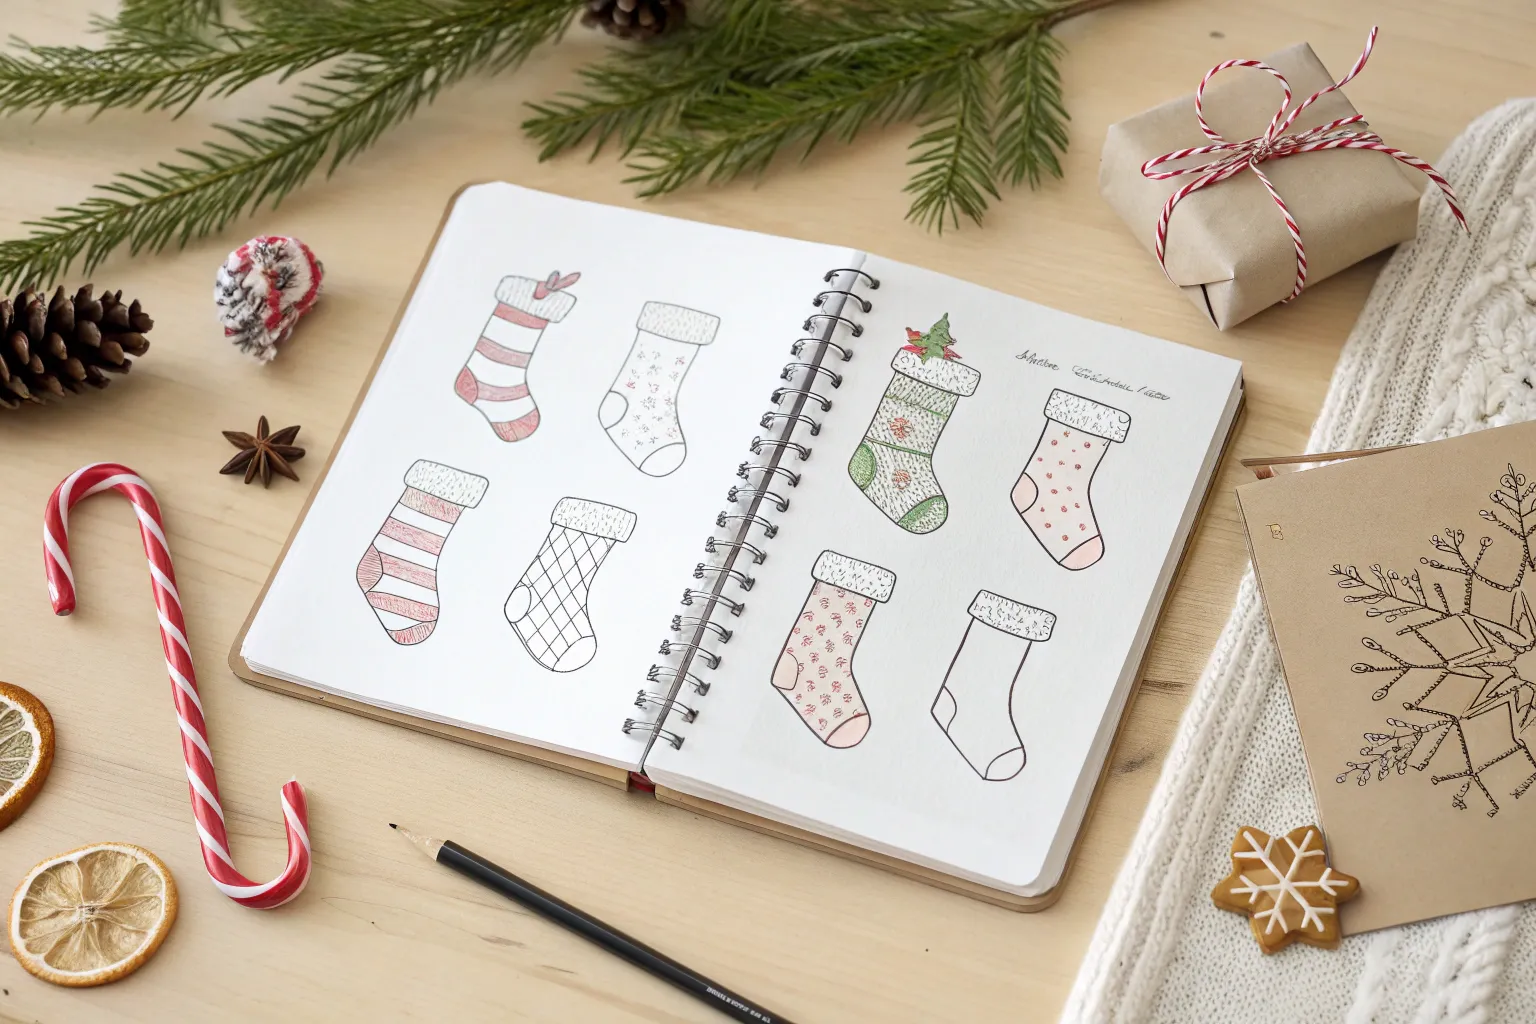
Mini Stocking Doodles for Gift Tags
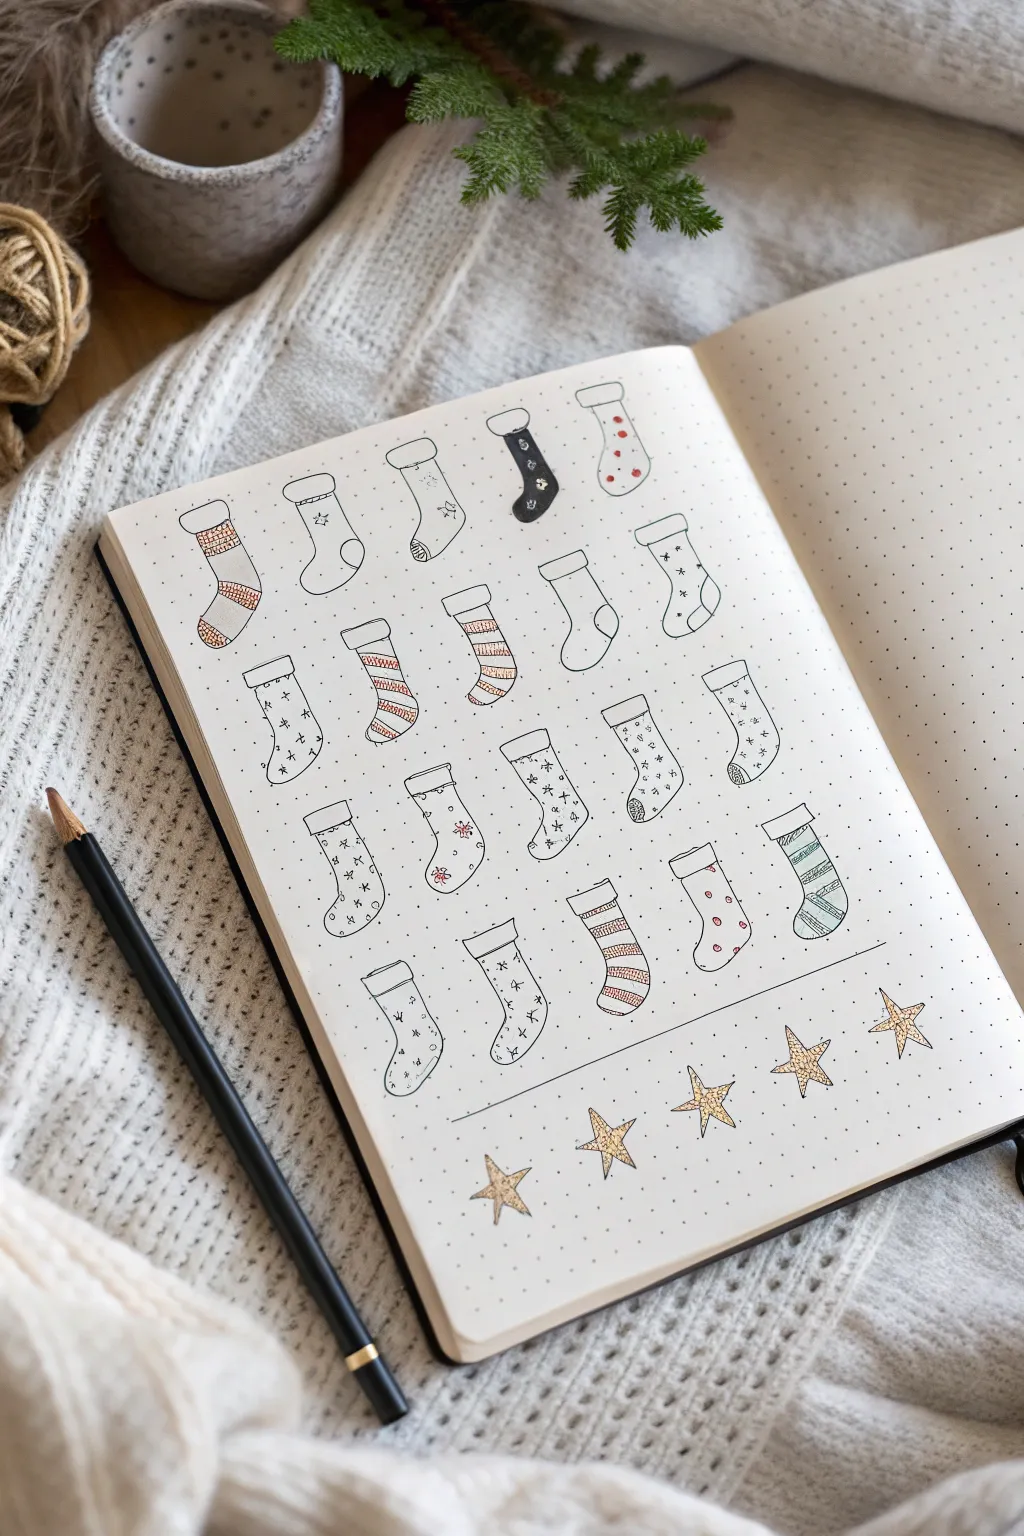
Create a charming holiday tracker or festive doodle page with this neat grid of mini Christmas stockings. The simple repetitive shapes make this perfect for beginners, while the tiny patterns offer endless opportunities for creativity.
Step-by-Step
Materials
- A5 dotted notebook or bullet journal
- Pencil (HB or mechanical)
- Black fineliner pen (0.3mm or 0.5mm)
- Eraser
- Colored pencils or brush pens (red, green, gold)
- Ruler (optional)
Step 1: Setting the Grid
-
Map out spacing:
Begin by counting the dots in your journal to center your design. You’ll need space for five rows of stockings, plus a row of stars at the bottom. Aim for about 3-4 dot spaces between each stocking horizontally to keep things airy. -
Sketch the basic shapes:
Using a pencil, lightly sketch the outline of 23 stocking shapes. Arrange them in rows of five, though feel free to leave a few spots blank or offset them slightly for visual interest. The basic shape looks like a chunky letter ‘L’ with a rounded toe and heel. -
Add cuffs:
Draw a small rectangle or oval shape at the top of each stocking to form the fluffy cuff. Make sure this section is slightly wider than the leg of the stocking to give it dimension. -
Draft the bottom stars:
Beneath your grid of stockings, sketch a horizontal line. Below that line, pencil in five five-pointed stars evenly spaced across the page.
Pattern Variety
Don’t overthink the patterns! Simple zig-zags, waffle grids, and tiny hearts work just as well as complex designs.
Step 2: Inking the Outlines
-
Trace outer lines:
Switch to your black fineliner. Carefully trace over your pencil sketches for the stockings. Keep your hand steady, but don’t worry if lines aren’t perfectly straight—the wobble adds handmade charm. -
Detail the drawing:
Ink the cuffs and the divider line near the bottom of the page. Once the ink is completely dry, gently erase all your pencil guides to leave a clean slate. -
Fill the black stocking:
Pick one stocking in the top row (third from left in the example) and color the main body entirely black with your pen, leaving small white shapes like a tree or dots as negative space.
Step 3: Adding Patterns
-
Stripe designs:
Select 4-5 scattered stockings to be striped. Draw diagonal or horizontal simple lines across the body of these stockings. Vary the thickness of the stripes for visual interest. -
Polka dots:
On a few other stockings, add tiny circle outlines or small solid dots. This mimics a classic fabric print. -
Starry textures:
For a magical look, fill several stockings with tiny asterisks or four-pointed star shapes. These look great when kept simple and minimalistic. -
Simple cuffs and heels:
On some simpler designs, draw a curved line to delineate the heel and toe cap. You can leave these plain or add tiny stitch marks. -
Snowflake motifs:
Draw delicate snowflake shapes on one or two stockings. Use fine lines to prevent the small drawings from becoming blobby.
Interactive Advent
Turn this into an advent calendar by coloring in one white stocking each day leading up to Christmas.
Step 4: Coloring and Finishing
-
Apply red tones:
Using a red colored pencil or fine marker, color in specific stripes, polka dots, or heel patches. Diagonally cross-hatch the red areas for a textured, fabric-like appearance rather than coloring them solid. -
Add green accents:
Repeat the process with a muted green color. I like to focus on striping for the green stockings to contrast with the red details. -
Gold stars:
Color the five stars at the bottom with a gold or yellow pencil. Add a subtle texture by using small stippling dots or cross-hatching to fill them in. -
Final shading:
To make the stockings pop, add a tiny grey shadow line just outside the right and bottom edge of each stocking. This subtle step grounds the drawings on the page.
Now you have a festive page ready to track your holiday countdown or simply admire for its cozy vibes


Have a question or want to share your own experience? I'd love to hear from you in the comments below!