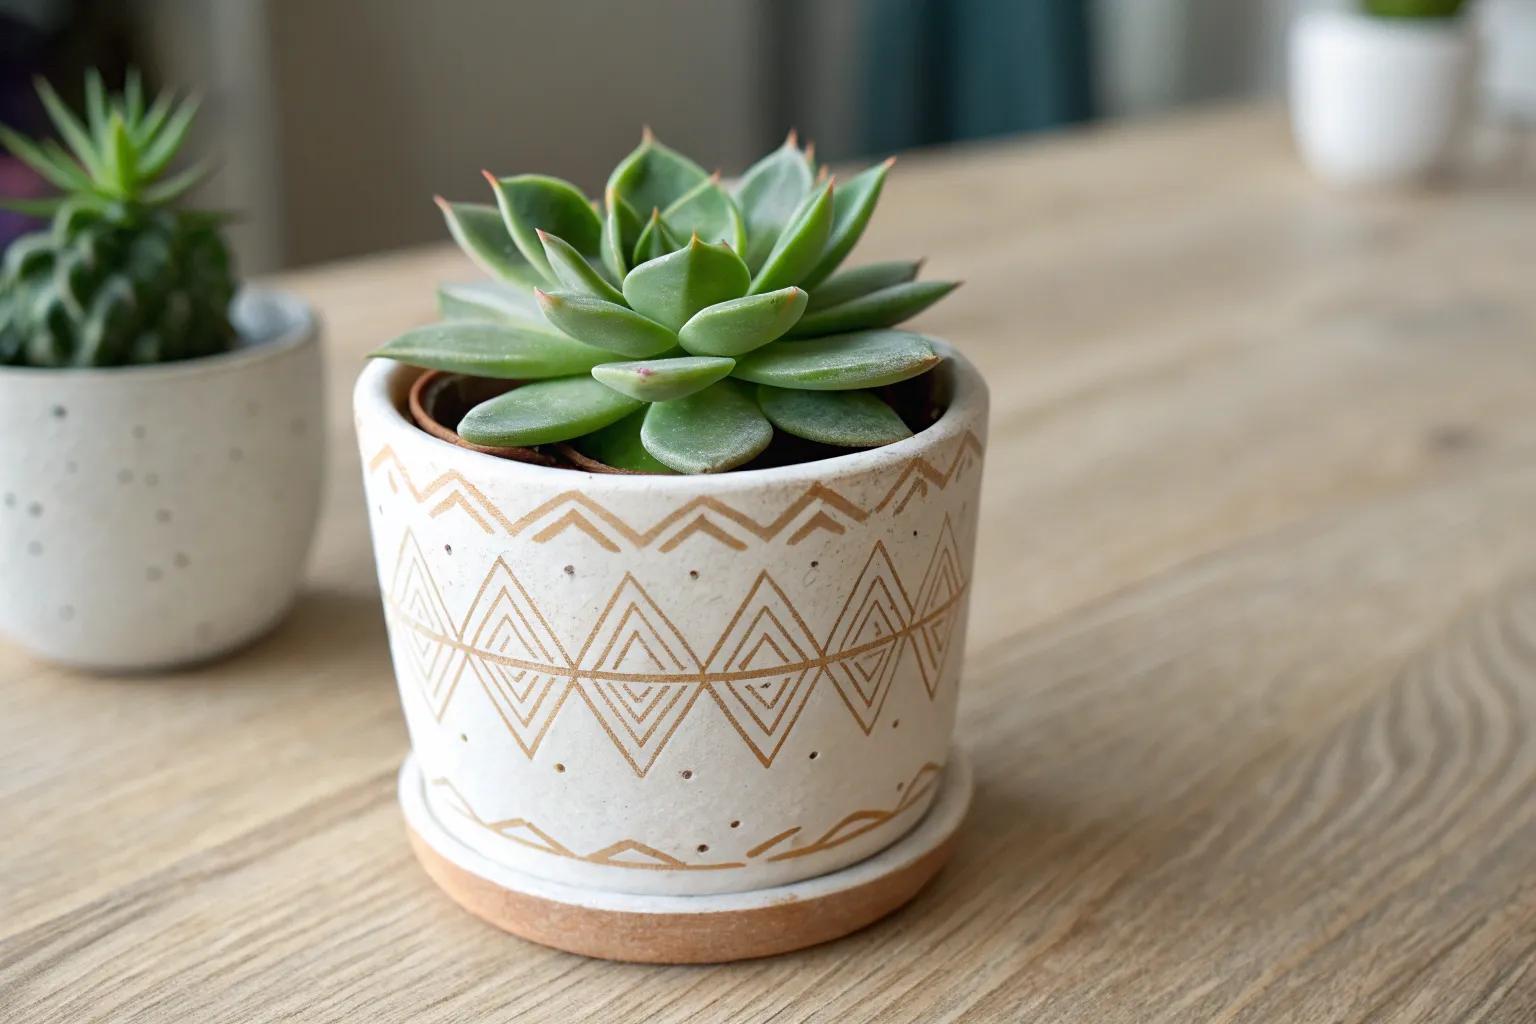
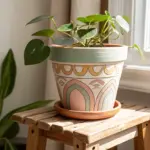
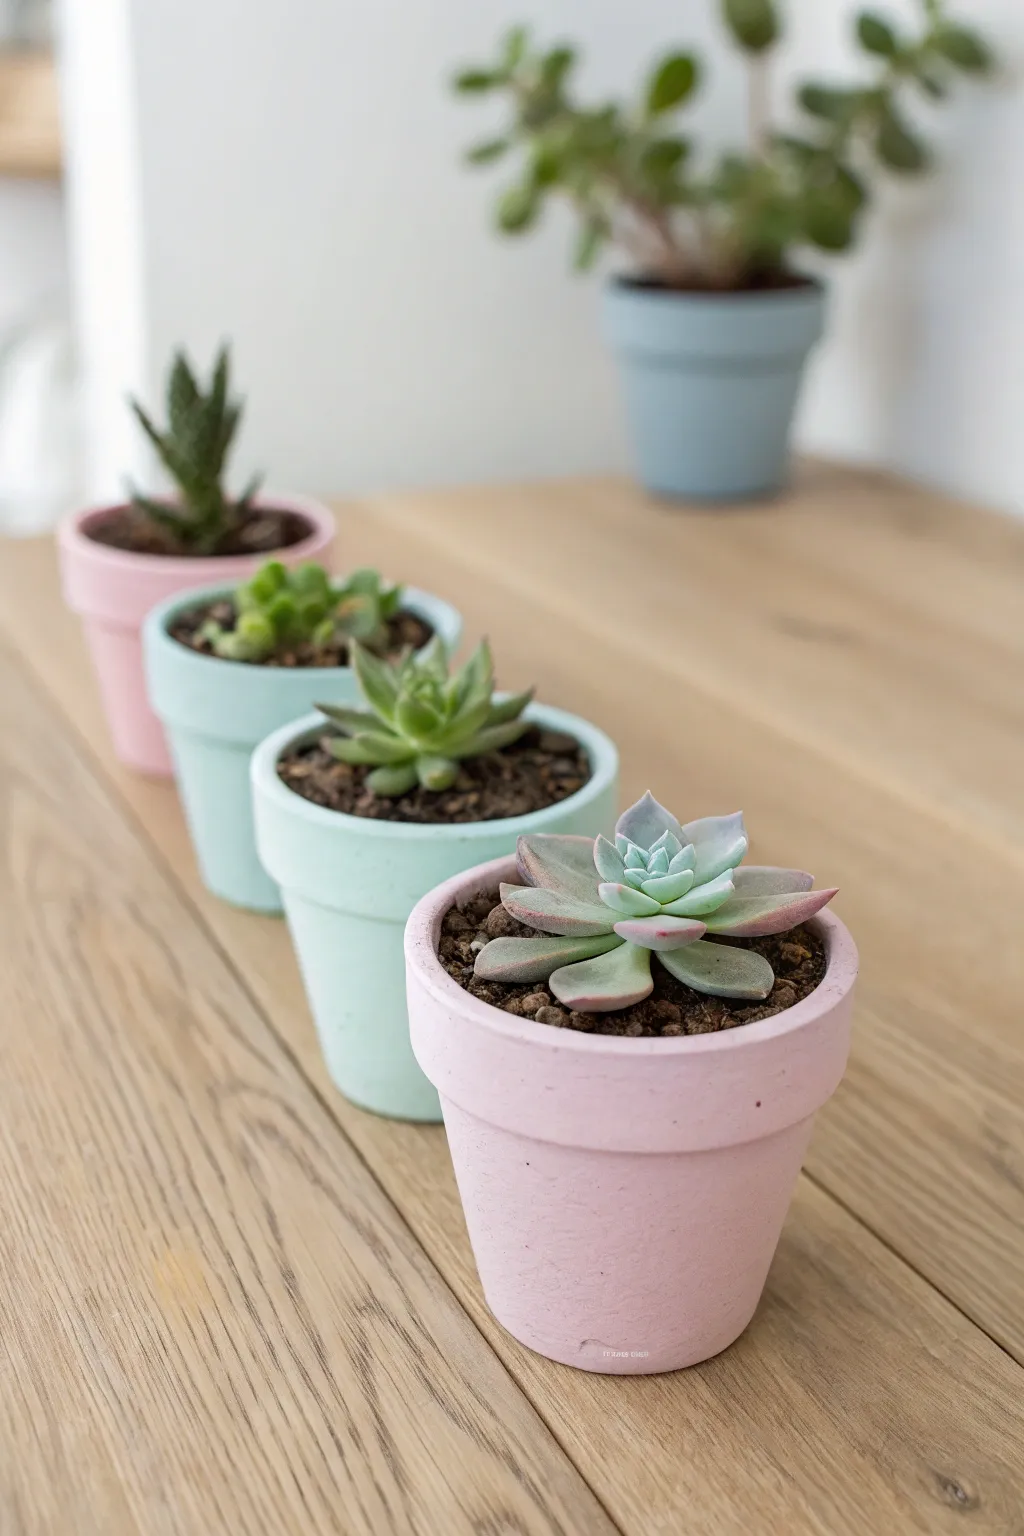
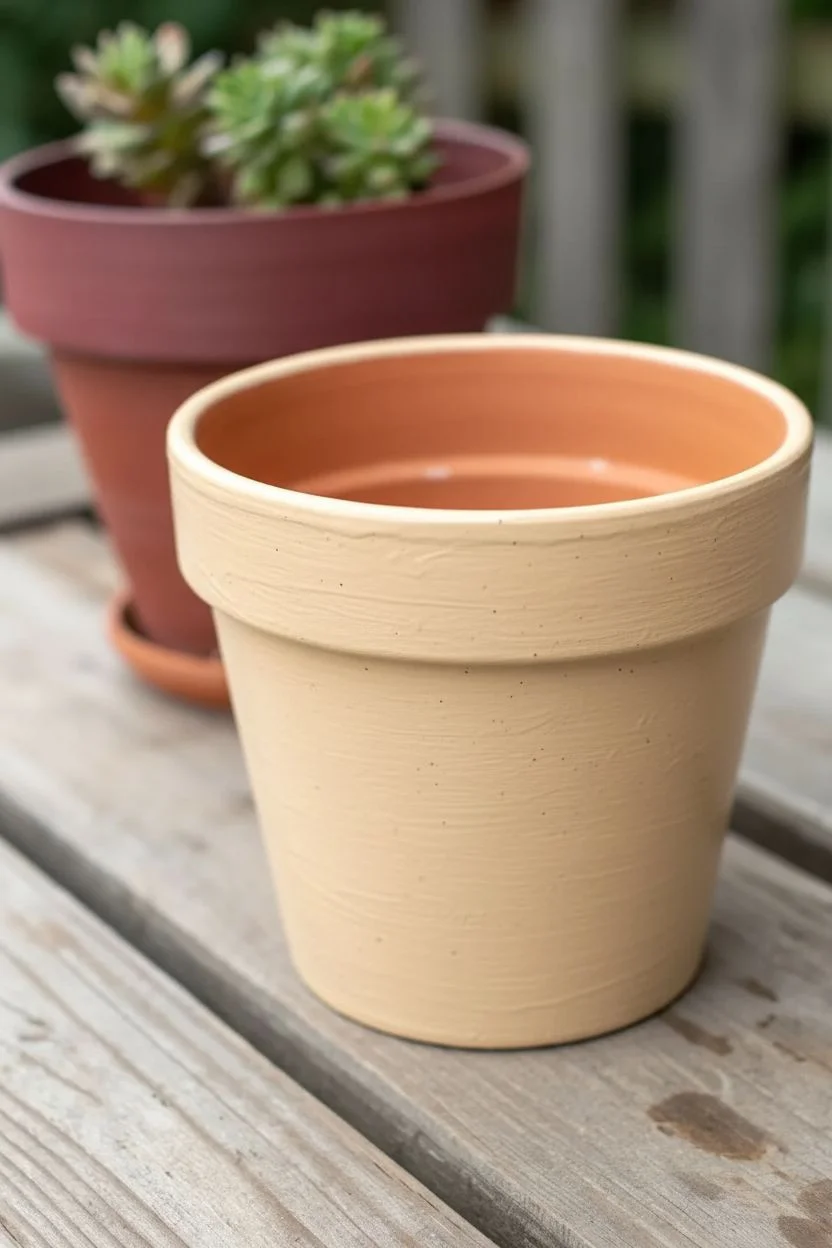
I love how a simple terracotta pot turns into a tiny art piece the moment you add paint, especially when it’s holding a bold little succulent. Here are my favorite succulent pot painting ideas—starting with classic, easy wins and building up to the artsy, “how did you do that?” designs.
Classic Solid Color Makeover
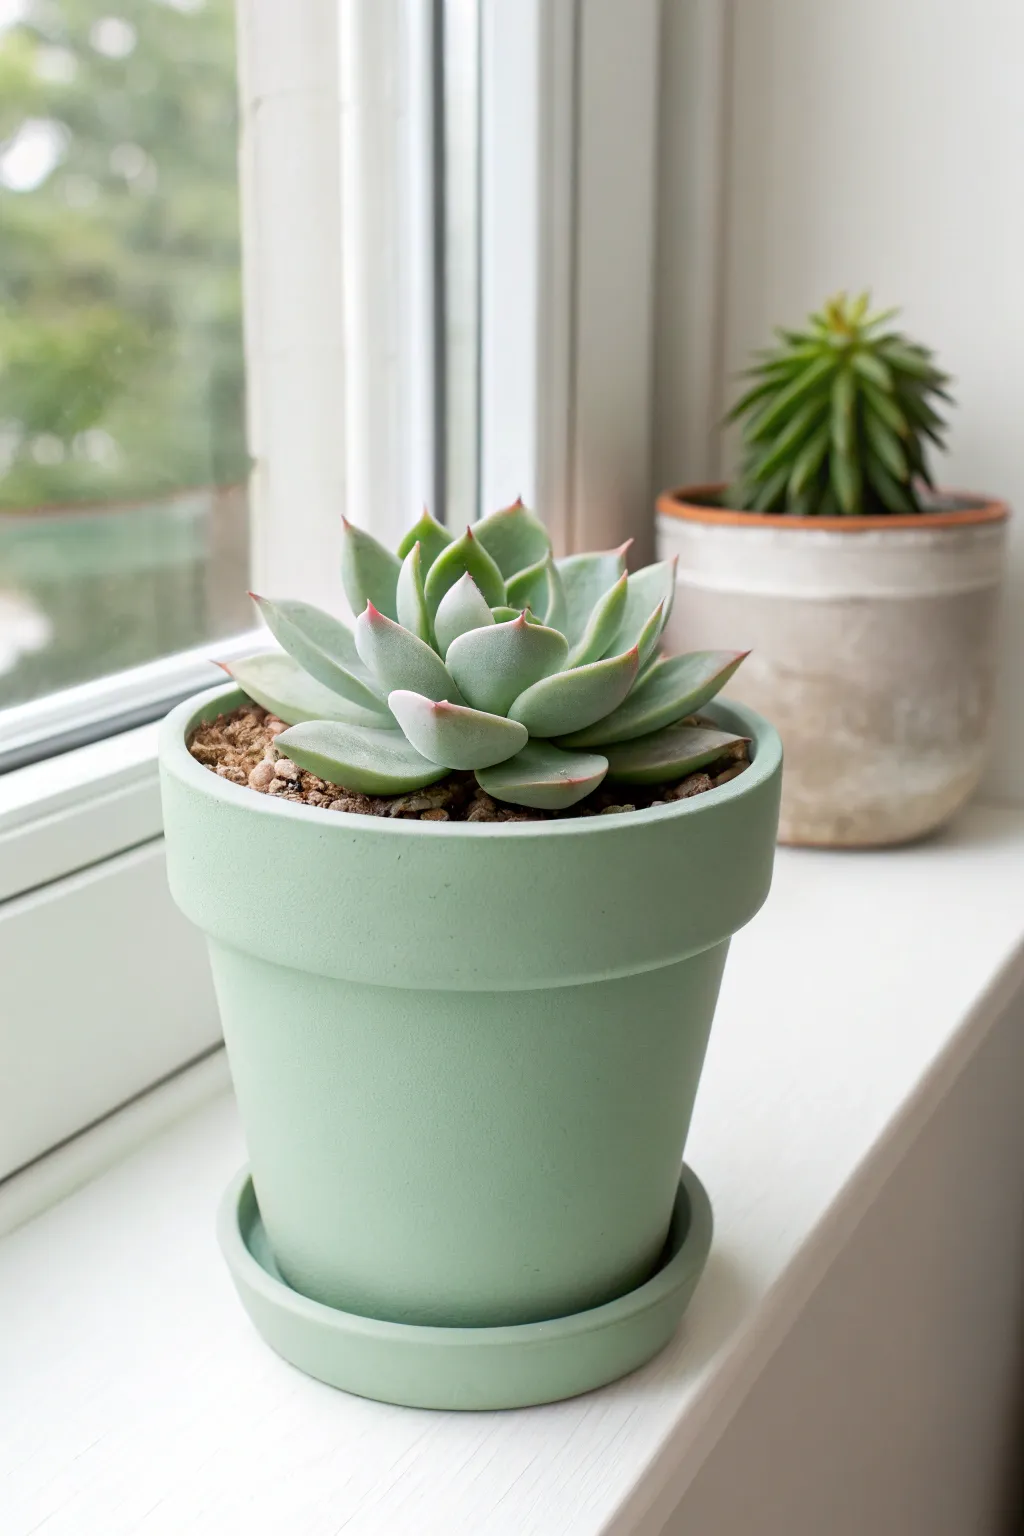
Transform an ordinary terracotta planter into a modern minimalist statement piece with this ultra-smooth, matte sage green finish. This project proves that sometimes a single, well-chosen color is all you need to elevate your indoor garden.
Step-by-Step
Materials
- Terracotta pot and matching saucer (clean and dry)
- Acrylic craft paint (sage green or mint green)
- White acrylic paint (optional, for mixing)
- Matte sealant spray or matte varnish
- Medium flat synthetic brush
- Small round brush (for detailed edges)
- Fine-grit sandpaper (220 grit)
- Damp cloth or sponge
- Cardboard or drop cloth
- Palette or paper plate
Step 1: Preparation & Base
-
Clean the surface:
Begin with a completely clean slate. Terracotta is porous and holds dust well, so wipe down both the pot and saucer thoroughly with a damp cloth to remove any debris or oils. -
Dry completely:
Allow the clay to dry fully before applying any paint. If moisture is trapped underneath, your paint might bubble later. -
Sand for smoothness:
For that professional, factory-finished look seen in the photo, lightly sand the exterior of the pot with 220-grit sandpaper to knock down any bumps in the clay. -
Wipe away dust:
Use a tack cloth or a slightly damp paper towel to remove all the sanding dust. A clean surface is crucial for a smooth paint job. -
Mix your shade:
Squeeze out your sage green paint. If the color feels too dark or saturated compared to the soft pastel in the image, mix in a small amount of white acrylic paint until you achieve that perfect muted mint tone.
Step 2: Painting Process
-
First coat application:
Using your medium flat brush, apply the first coat of paint. Brush in long, horizontal strokes around the circumference of the pot to minimize visible brush marks. -
Don’t forget the rim:
Paint the top rim and go about one to two inches down the inside of the pot. Since soil will cover the rest of the interior, you don’t need to paint all the way down inside. -
Paint the saucer:
While the pot dries, paint the outer edge and the top surface of the saucer. I usually skip the very bottom of the saucer to prevent it from sticking to the surface if it gets wet. -
Let it dry:
Allow the first coat to dry completely. This usually takes about 20-30 minutes depending on your humidity, but don’t rush it. -
Check for opacity:
Evaluate the coverage. Terracotta absorbs paint quickly, so the first coat often looks streaky. This is normal. -
Apply second coat:
Apply a second layer of paint, moving your brush in the same direction as before. This builds up that solid, opaque block of color. -
Detailing the bottom:
Flip the pot upside down once the sides are dry to neatly paint the very bottom edge where it meets the saucer. -
Third coat (if needed):
For lighter pastel colors like this mint green, a third thin coat is often necessary to completely hide the orange clay tones underneath.
Uneven Texture?
If brush strokes are still visible after drying, lightly sand the painted surface with high-grit sandpaper (400+) between coats to level it out.
Step 3: Sealing & Finishing
-
Final drying period:
Let the final coat of paint cure for at least an hour. The paint should feel completely dry and chalky to the touch. -
Apply matte sealant:
To preserve that powdery, soft look, use a matte spray sealant. Hold the can 10-12 inches away and apply a light, even mist over the pot and saucer. -
Second seal layer:
Apply a second light coat of sealant for durability, especially if the pot will be near a sunny window or handled often. -
Re-plant your succulent:
Once the sealer has fully cured (check manufacturer instructions, usually 24 hours), pot your succulent directly into your new stylish container.
Create a Set
Paint two more pots in varying shades of green—one slightly darker and one lighter—to create an ombré gradient display on your windowsill.
Enjoy the calming presence this simple yet elegant project adds to your window ledge


Simple Two-Tone Color Block
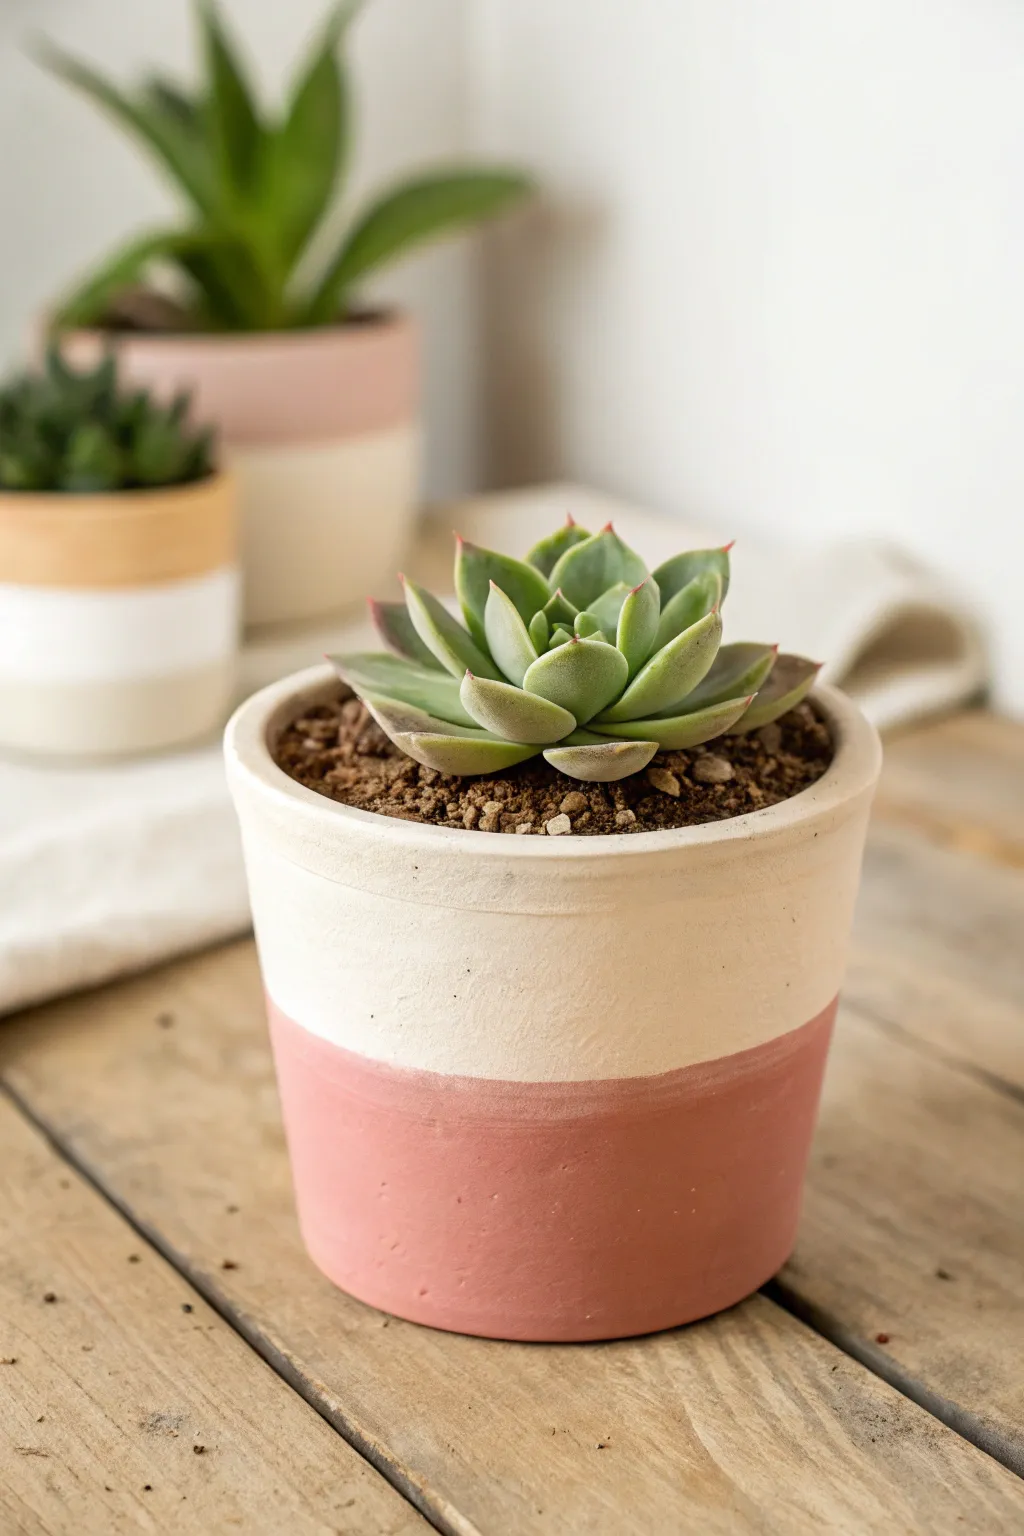
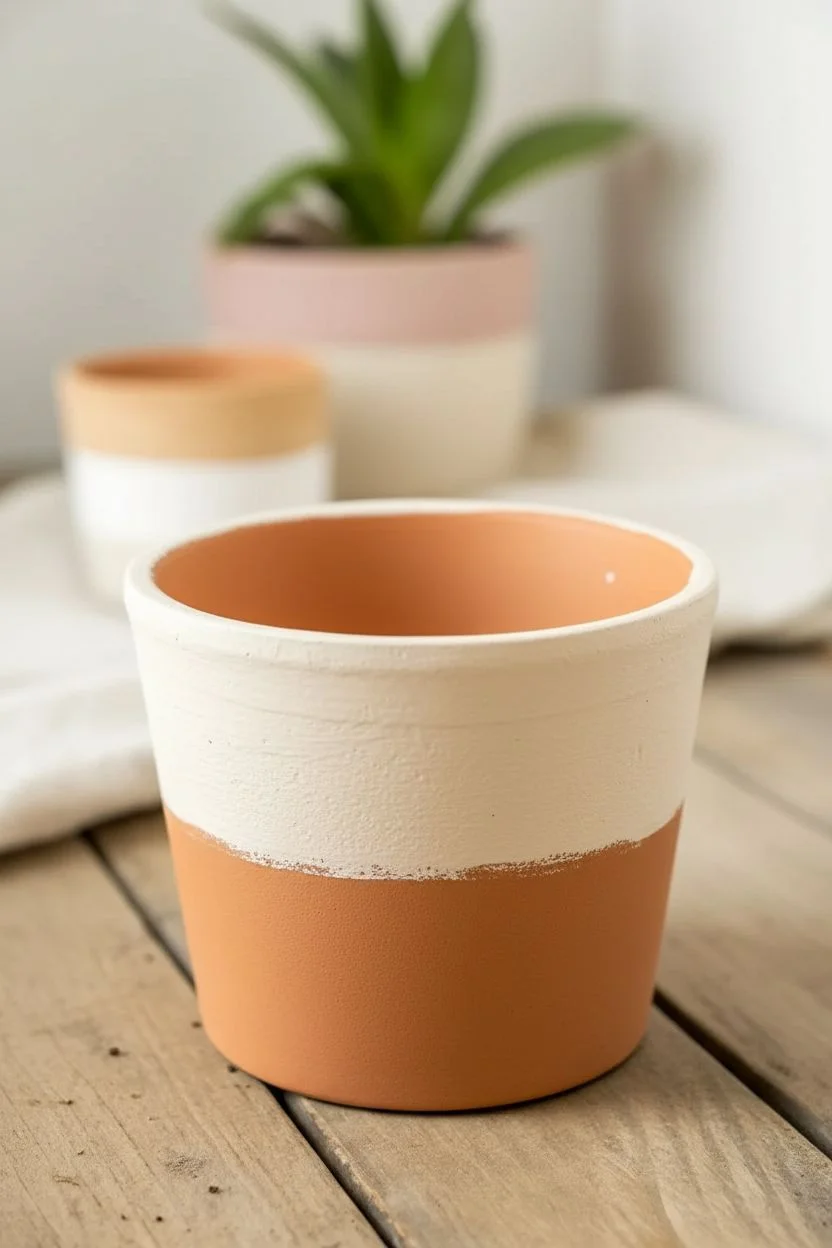
Embrace minimalism with this soft, two-tone color block design that pairs natural terracotta with creamy neutrals and dusty pinks. Ideally suited for succulents, this clean aesthetic adds a modern yet warm touch to any windowsill garden.
Step-by-Step Guide
Materials
- Small terracotta pot (clean and dry)
- White or cream acrylic paint (outdoor/multi-surface preferred)
- Dusty rose or muted pink acrylic paint
- Painter’s tape (washi tape works too)
- Flat paintbrush (approx. 1 inch width)
- Small foam brush (optional)
- Paper plate or palette
- Matte finish sealant spray or Mod Podge
Step 1: Preparation
-
Clean surface:
Begin by ensuring your terracotta pot is completely clean and free of dust or price sticker residue. Wipe it down with a damp cloth and let it dry thoroughly. -
Base coat planning:
Decide on your base color. For the crisp look in the photo, the creamy white section sits at the top, but the clay itself is porous, so a base coat helps later layers pop.
Step 2: Painting the Top Section
-
First layer of cream:
Using your flat brush, apply a layer of cream or off-white acrylic paint to the top half of the pot. Don’t worry about a perfect bottom edge yet, just make sure you cover slightly more than the top half. -
Paint the rim:
Extend the cream paint over the lip of the pot and about an inch into the inside rim. This ensures that when filled with soil, the terracotta won’t peek through at the top. -
Dry and repeat:
Allow the first coat to dry for about 15-20 minutes. Terracotta absorbs moisture quickly, so the first coat might look streaky. Apply a second coat for solid, opaque coverage. -
Full drying time:
Let this top section dry completely for at least an hour. This is crucial because you will be applying tape over it next.
Bleeding Lines?
If paint bleeds under the tape, wait for it to dry completely. Re-tape slightly lower or higher, or use a stiff, flat brush with the top color to straighten the edge manually.
Step 3: Creating the Color Block
-
Masking off:
Once the cream paint is fully cured to the touch, apply a strip of painter’s tape horizontally around the pot. Position it where you want the color change to happen—usually just below the thickened rim. -
Seal the edge:
Run your fingernail or a credit card firmly along the bottom edge of the tape. I find this simple step prevents the pink paint from bleeding underneath and ruining the crisp line. -
Painting the bottom:
Dip your brush into the dusty rose paint. Apply your first coat to the bottom exposed section of the pot, brushing downward away from the tape to minimize seepage. -
Watch the bottom:
Paint all the way down to the base. You don’t necessarily need to paint the very bottom underside, but ensure the curve is fully covered. -
Second rose coat:
Let the first pink layer dry to the touch, then apply a second coat to ensure the color is rich and even. -
Remove tape:
While the second coat of pink is still slightly damp (not soaking wet, but tacky), carefully peel off the painter’s tape at a 45-degree angle. This usually results in the cleanest line.
Make it texture
Mix a teaspoon of baking soda into your acrylic paint before applying. This creates a trendy, ceramic-like texture that mimics unglazed pottery.
Step 4: Finishing Touches
-
Touch-ups:
Inspect your distinct line. If there was any minor bleeding, use a tiny detail brush with a bit of the cream paint to carefully correct it once the pink is fully dry. -
Sealing:
To protect the paint from water damage when you water your plants, apply a coat of matte sealant spray or brush-on matte varnish over the exterior. -
Final cure:
Let the pot sit for 24 hours to ensure all layers and sealants are fully cured before introducing soil and your succulent.
Now you have a chic vessel ready to house your favorite little green companion


Tape-Trim Geometric Patterns
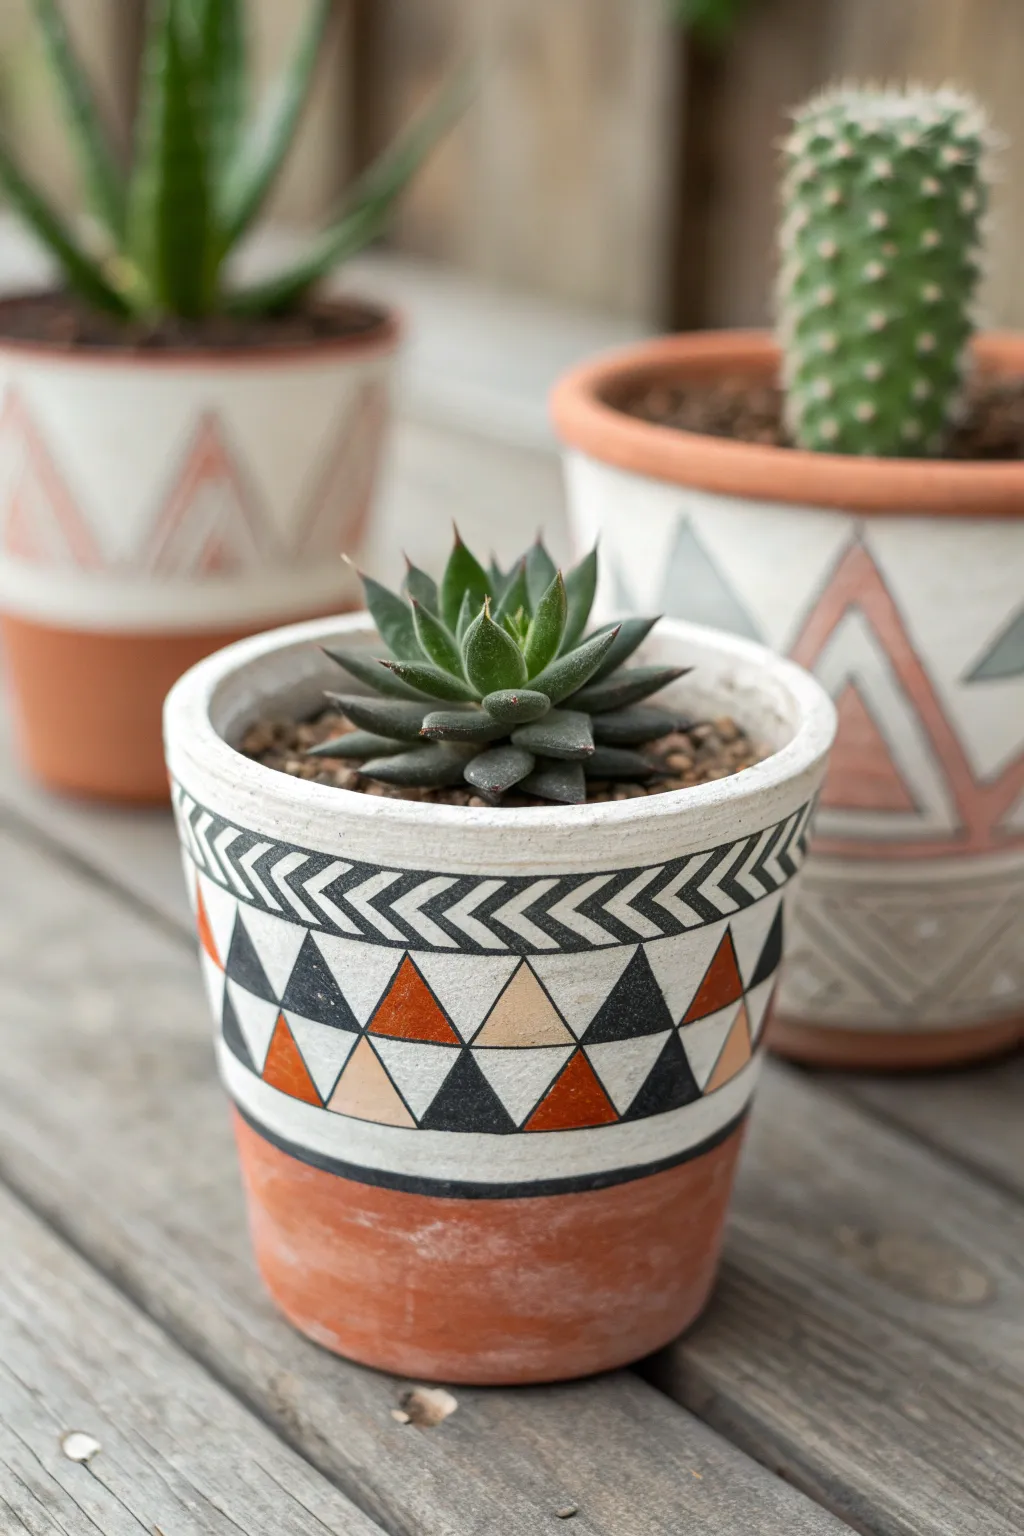
Transform a plain terracotta pot into a modern bohemian statement piece with this intricate geometric design. Featuring a striking combination of Aztec-inspired arrows and a colorful mosaic of triangles, this pattern uses masking tape magic to create crisp, professional lines.
Step-by-Step Tutorial
Materials
- Clean terracotta pot (standard 4-6 inch size)
- White acrylic craft paint (chalk finish works well)
- Black acrylic craft paint
- Burnt orange or terracotta-colored acrylic paint
- Nude or peach acrylic paint
- Painter’s tape or masking tape (various widths)
- Fine detail paintbrush (round size 0 or 1)
- Flat shader paintbrush (size 4 or 6)
- Pencil
- Ruler or measuring tape
- Matte spray sealer (optional)
Step 1: Base Preparation
-
Clean the Surface:
Begin by wiping down your terracotta pot with a damp cloth to remove any dust or debris. Let it dry completely so the paint adheres properly. -
Tape the Base Line:
Apply a strip of painter’s tape horizontally around the lower third of the pot. This exposes the top two-thirds for painting while keeping the bottom section as raw terracotta for a nice contrast. -
Paint the Background:
Using your flat brush, paint the exposed upper section of the pot with white acrylic paint. You will likely need 2-3 coats to achieve full opacity over the orange clay, letting each coat dry for about 15 minutes in between.
Step 2: Drafting the Pattern
-
Mark the Arrow Band:
Once the white base is bone dry, use a pencil and ruler to lightly mark a horizontal band about an inch wide near the rim. This will eventually become the chevron/arrow pattern section. -
Outline the Triangle Grid:
Below the arrow band, lightly sketch a grid of triangles. Draw a horizontal line first, then use diagonal lines to create a row of interconnected triangles encompassing the middle section of the pot. -
Define the Arrows:
Inside the top band you marked earlier, sketch a series of repeating ‘V’ shapes or chevrons pointing to the right to create the arrow pattern seen in the rim design.
Wobbly Lines?
If hand-painting lines is difficult, use a fine-tip permanent black marker or paint pen for the outlining steps instead of a brush.
Step 3: Painting the Triangles
-
Paint Black Triangles:
Select a few triangles randomly around the pot to be black. Use your fine detail brush to carefully fill them in, keeping your edges as straight as possible. -
Add Burnt Orange Accents:
Clean your brush and switch to the burnt orange paint. Fill in a few more triangles, trying to space them out so no two orange shapes are touching. -
Fill with Nude Tones:
Use the nude or peach paint to fill in the remaining triangles that aren’t white. I personally like leaving about a third of the triangles as the white background color to keep the design looking fresh. -
Outline the Shapes:
Using the very tip of your detail brush and black paint, slowly trace the outline of every triangle to separate the colors and sharpen the geometric look. A steady hand is key here.
Add Texture
Mix a small amount of baking soda into your base white paint to give the pot a textured, ceramic-like feel before adding the geometric patterns.
Step 4: Detailing the Rim
-
Border the Arrow Band:
Paint two thick black horizontal lines to define the top and bottom borders of your arrow band near the rim. -
Paint the Chevrons:
Dip your fine brush in black paint and fill in the ‘V’ shapes you sketched earlier. Ensure the points of the chevrons are sharp. -
Create the Bottom Border:
Paint a solid black line right along the edge where your initial tape was placed. This separates the painted design from the raw terracotta bottom.
Step 5: Finishing Touches
-
Remove the Tape:
Carefully peel off the painter’s tape from the bottom of the pot. Do this slowly at a 45-degree angle to avoid peeling up any paint edges. -
Touch Up Edges:
If any paint bled under the tape or lines look shaky, use a tiny bit of white paint or a damp Q-tip to clean up the errors. -
Seal the Design:
Allow the pot to cure for 24 hours. If you plan to keep this outdoors or water it frequently, spray a clear matte sealer over the painted section to protect your hard work.
Pop in your favorite succulent and enjoy your custom modern planter


Soft Ombre Fade

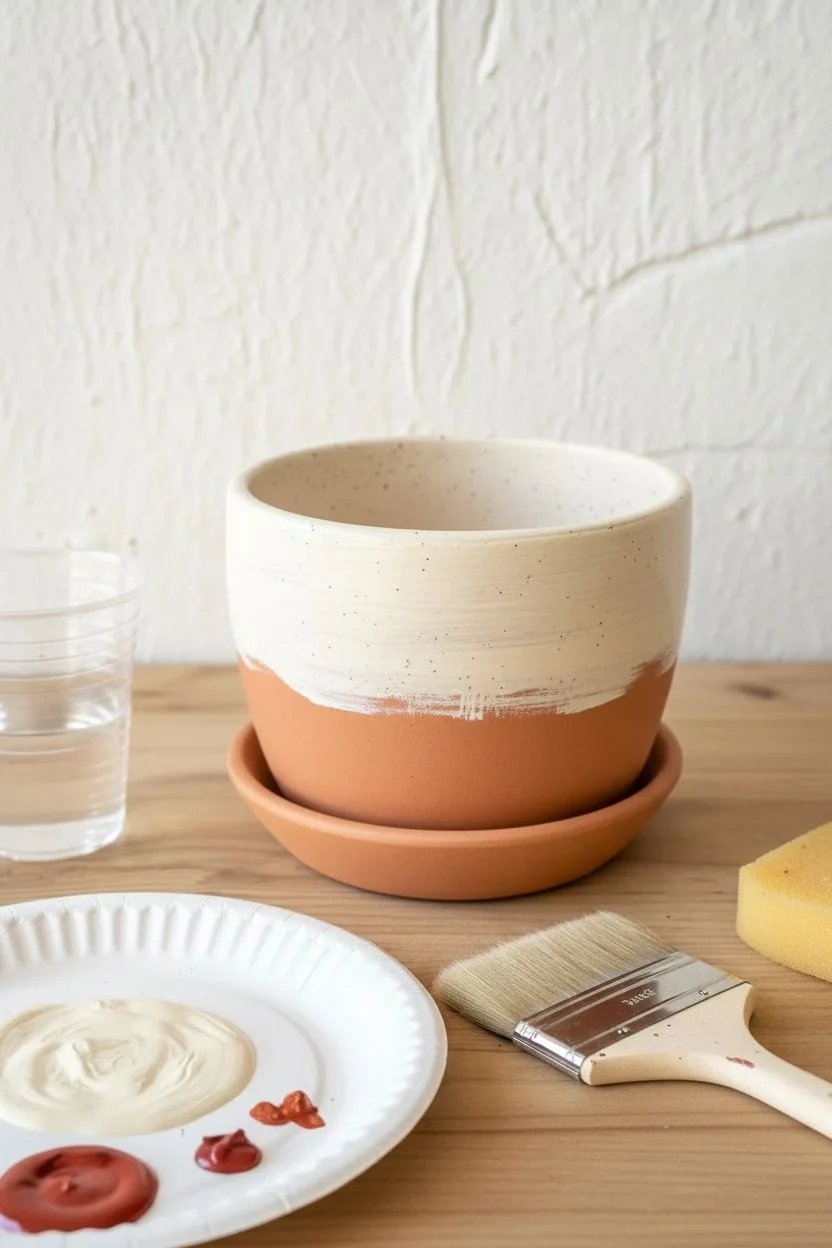
Capture the warmth of desert earth tones with this subtle, sophisticated ombre design. This project transforms a basic ceramic pot into a sunset-hued home for your succulents using a soft, blended gradient technique.
Step-by-Step Guide
Materials
- Small ceramic planter pot (unglazed or primed)
- Matching terracotta saucer
- Acrylic paint: Cream or Beige
- Acrylic paint: Burnt Sienna or Terracotta
- Acrylic paint: Red Oxide or Deep Red-Brown
- Wide flat paintbrush
- Soft blending sponge or foam brush
- Palette or paper plate
- Matte spray sealer (optional)
- Water cup and paper towels
Step 1: Base Preparation
-
Clean surface:
Begin by wiping down your ceramic pot and saucer with a damp cloth to remove any dust or oils. Let it dry completely. -
Prime the pot:
If your pot is dark or glazed, apply a coat of white primer. If it’s raw bisque or terracotta, you can skip this, but a primer helps the colors pop. -
Mix the top color:
Squeeze out a generous amount of your Cream or Beige acrylic paint onto your palette. You want enough to cover the top third of the pot. -
Apply the top band:
Using the wide flat brush, paint the top rim and the upper third of the pot with the cream color. Don’t worry about a perfect straight line at the bottom edge.
Wet-on-Wet is Key
For the smoothest ombre, you must work while the paint is wet. If it dries too fast, add a tiny drop of acrylic retarder or water to your mix.
Step 2: Creating the Ombre Gradient
-
Prepare the middle tone:
On your palette, mix a transition color by combining your Cream paint with a small amount of Burnt Sienna. -
Apply the middle band:
Paint the middle section of the pot with this mixed tone, slightly overlapping the bottom edge of the cream section while the paint is still wet. -
Blend the upper transition:
While both bands are wet, use a slightly damp sponge or a clean dry brush to lightly feather the line where the cream meets the middle tone. I like to use quick horizontal strokes here to blur the boundary. -
Mix the darkest tone:
Prepare your darkest color by using pure Red Oxide or by mixing Burnt Sienna with a touch of the Deep Red-Brown. -
Paint the bottom section:
Apply this dark, rich color to the bottom third of the pot, extending it all the way to the base curve. -
Blend the lower transition:
Just as before, overlap the wet dark paint with the wet middle tone. Use your blending tool to soften this line, creating a seamless fade from the middle tan to the deep reddish bottom. -
Detail the rim:
Check the very top rim of the pot. Ensure the cream color wraps neatly over the lip for a finished look. -
Work in layers:
Acrylics can be translucent. Once the first ombre layer is dry to the touch, repeat the process with a second coat to deepen the opacity and smoothness of the gradient.
Step 3: Finishing Touches
-
Paint the saucer:
Paint the exterior of the saucer with your middle transition tone (the Burnt Sienna/Cream mix). This ties the top and bottom colors together nicely. -
Dry thoroughly:
Allow the pot and saucer to dry completely, ideally for at least 2-3 hours depending on humidity. -
Inspect the blend:
Look at your gradient from a distance. If any lines look too harsh, you can lightly dry-brush a small amount of the intermediate color over the area to soften it further. -
Seal the work:
To protect your paint from water damage when watering your plant, apply a light coat of matte spray sealer over the exterior. -
Plant:
Once the sealer is dry, fill your pot with succulent soil and gently nestle your plant inside.
Speckled Texture
Flick a toothbrush dipped in diluted brown paint over the finished dry pot to create a natural, stone-like speckled effect.
Now you have a beautifully blended pot that rivals any boutique ceramic piece
BRUSH GUIDE
The Right Brush for Every Stroke
From clean lines to bold texture — master brush choice, stroke control, and essential techniques.
Explore the Full Guide
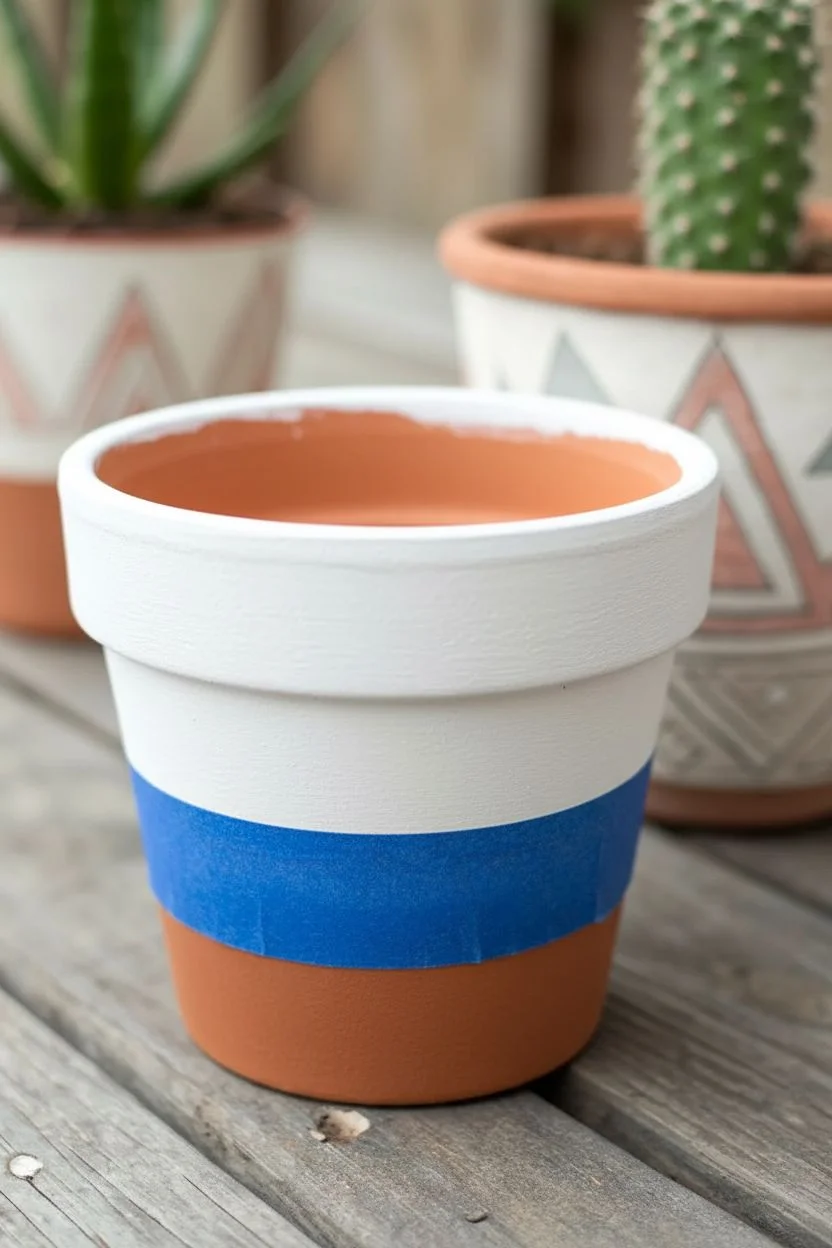
Metallic-Dipped Bottom Edge
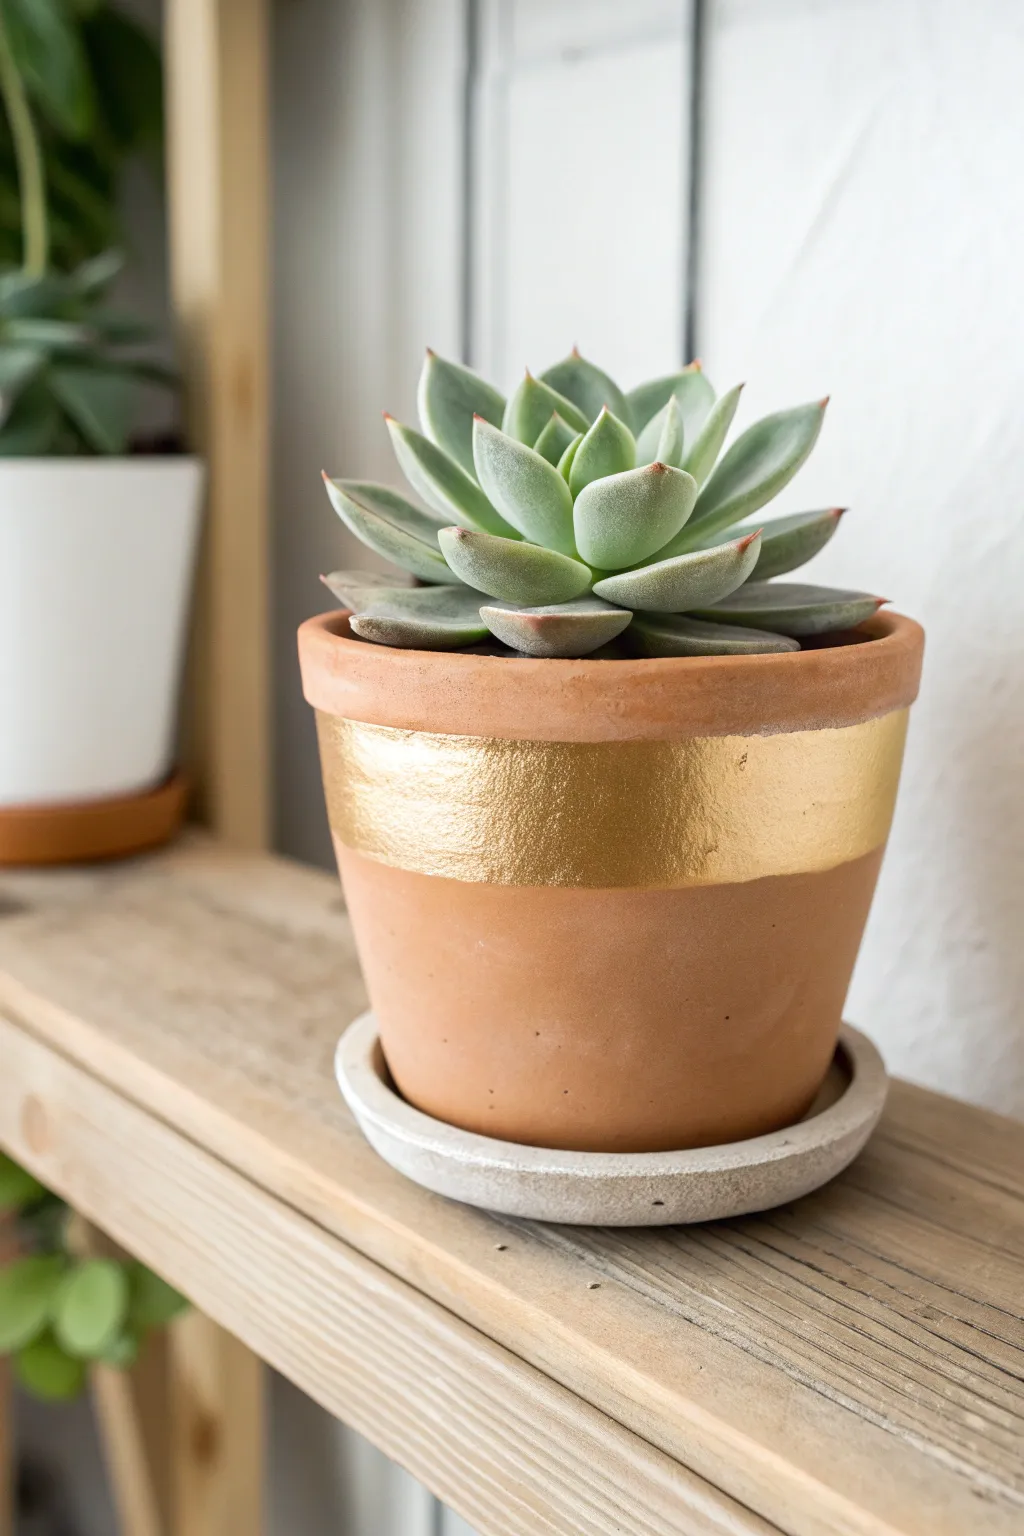
Add a touch of modern luxury to a classic terracotta pot with a striking band of metallic gold. The contrast between the matte, earthy clay and the shimmering gold leaf creates an elegant home for your favorite Echeveria.
Step-by-Step
Materials
- 4-inch terracotta pot
- Gold leaf adhesive (sizing)
- Gold leaf sheets
- Painter’s tape or masking tape
- Small flat paintbrush
- Soft, fluffy craft brush
- Clear acrylic sealer (spray or brush-on)
- Concrete or stone saucer (optional for display)
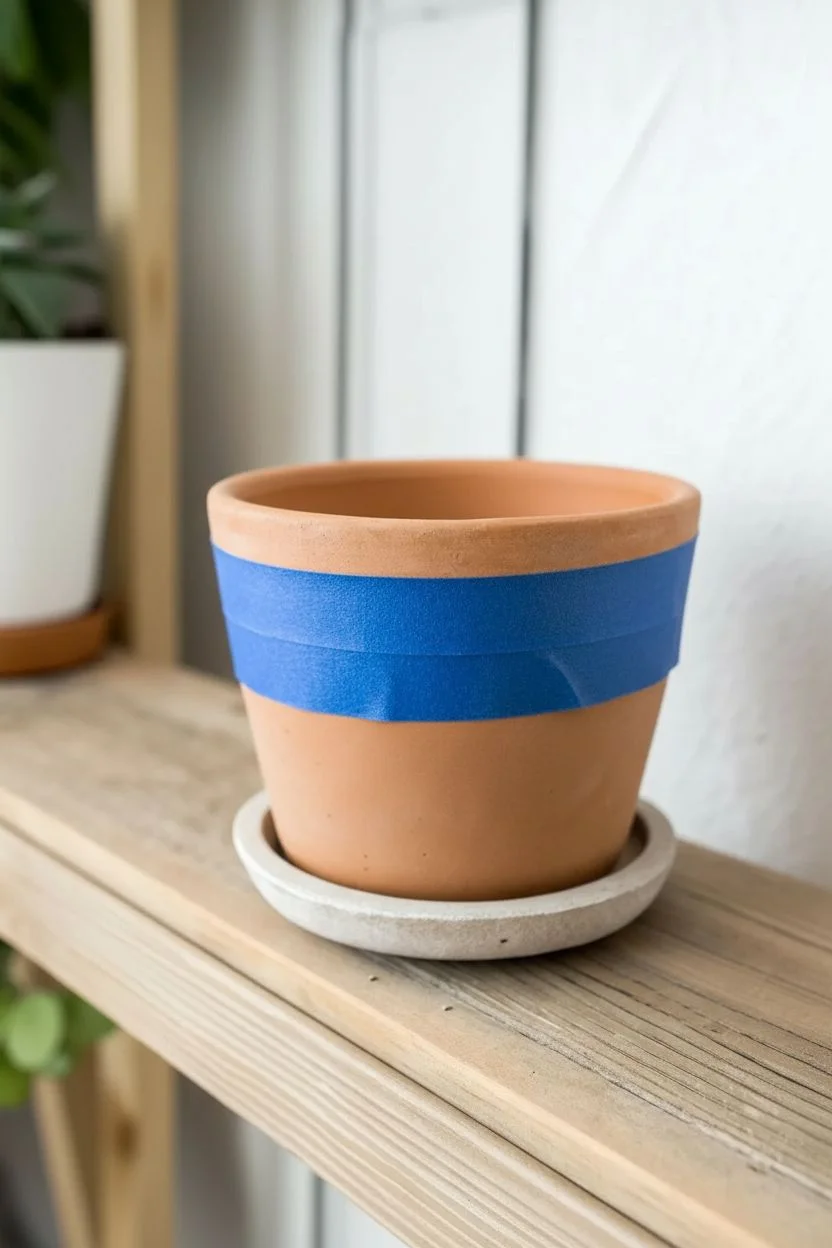
Step 1: Preparation & Taping
-
Clean the pot:
Begin by ensuring your terracotta pot is completely clean and dry. Wipe it down with a damp cloth to remove any dust or manufacturing residues, then let it air dry for at least 30 minutes. -
Measure the band:
Decide how wide you want your gold band to be. For the look in the photo, aim for a band that covers the top rim and extends about an inch down the body of the pot. -
Apply the tape:
Wrap painter’s tape horizontally around the body of the pot to create a crisp line. Press the edge of the tape down firmly with your fingernail to prevent adhesive from bleeding underneath.
Uneven Gold Edges?
If the gold line looks ragged after removing tape, use a tiny brush with a bit of gold paint (not leaf) to carefully touch up solely the very edge for a sharp finish.
Step 2: Applying the Gold Leaf
-
Apply adhesive:
Using your small flat paintbrush, apply a thin, even layer of gold leaf adhesive (sizing) to the area above the tape line. Don’t forget to coat the very top rim of the pot as well. -
Wait for tackiness:
Allow the adhesive to dry until it feels tacky but not wet. This is crucial; if it’s too wet, the leaf will slide. It usually turns clear when it’s ready, which takes about 15-20 minutes depending on the brand. -
Place the leaf:
Gently lift a sheet of gold leaf and lay it over the adhesive. Press it down lightly using the backing paper or your fingers, being careful as the material is extremely delicate. -
Cover gaps:
Continue applying sheets until the entire glued area is covered. Don’t worry about overlapping; these layers add nice texture. Use small scraps to fill in any tiny holes. -
Buff the surface:
Take your soft, fluffy craft brush and gently brush over the gold leaf in circular motions. This removes the excess loose bits and burnishes the gold onto the pot for a smooth finish. -
Remove dust:
Give the pot a final gentle sweep with the fluffy brush to ensure all loose gold flakes are removed from the surface.
Pro Tip: Liquid Gold
For a simpler alternative to leafing, use a high-quality liquid gold gilding paint. It offers less texture but achieves a similar shine with fewer steps.
Step 3: Finishing Touches
-
Remove the tape:
Carefully peel away the painter’s tape while pulling it away from the gold edge at a 45-degree angle. This helps maintain a sharp, clean line. -
Seal the gold:
Apply a coat of clear acrylic sealer over the gold section to prevent tarnishing and protect the delicate leaf from scratches. -
Let it cure:
Allow the sealer to cure fully according to the manufacturer’s instructions before handling the pot extensively. -
Prepare for planting:
If you plan to plant directly inside, ensure the drainage hole is clear. A small piece of mesh screen over the hole keeps soil in while letting water out. -
Pot the succulent:
Fill the pot with succulent-specific soil mix and settle your plant into its new home. Add a matching saucer underneath to complete the modern rustic look.
Your shimmering new pot is now ready to catch the light on your favorite shelf
Tiny Polka Dots and Dashes
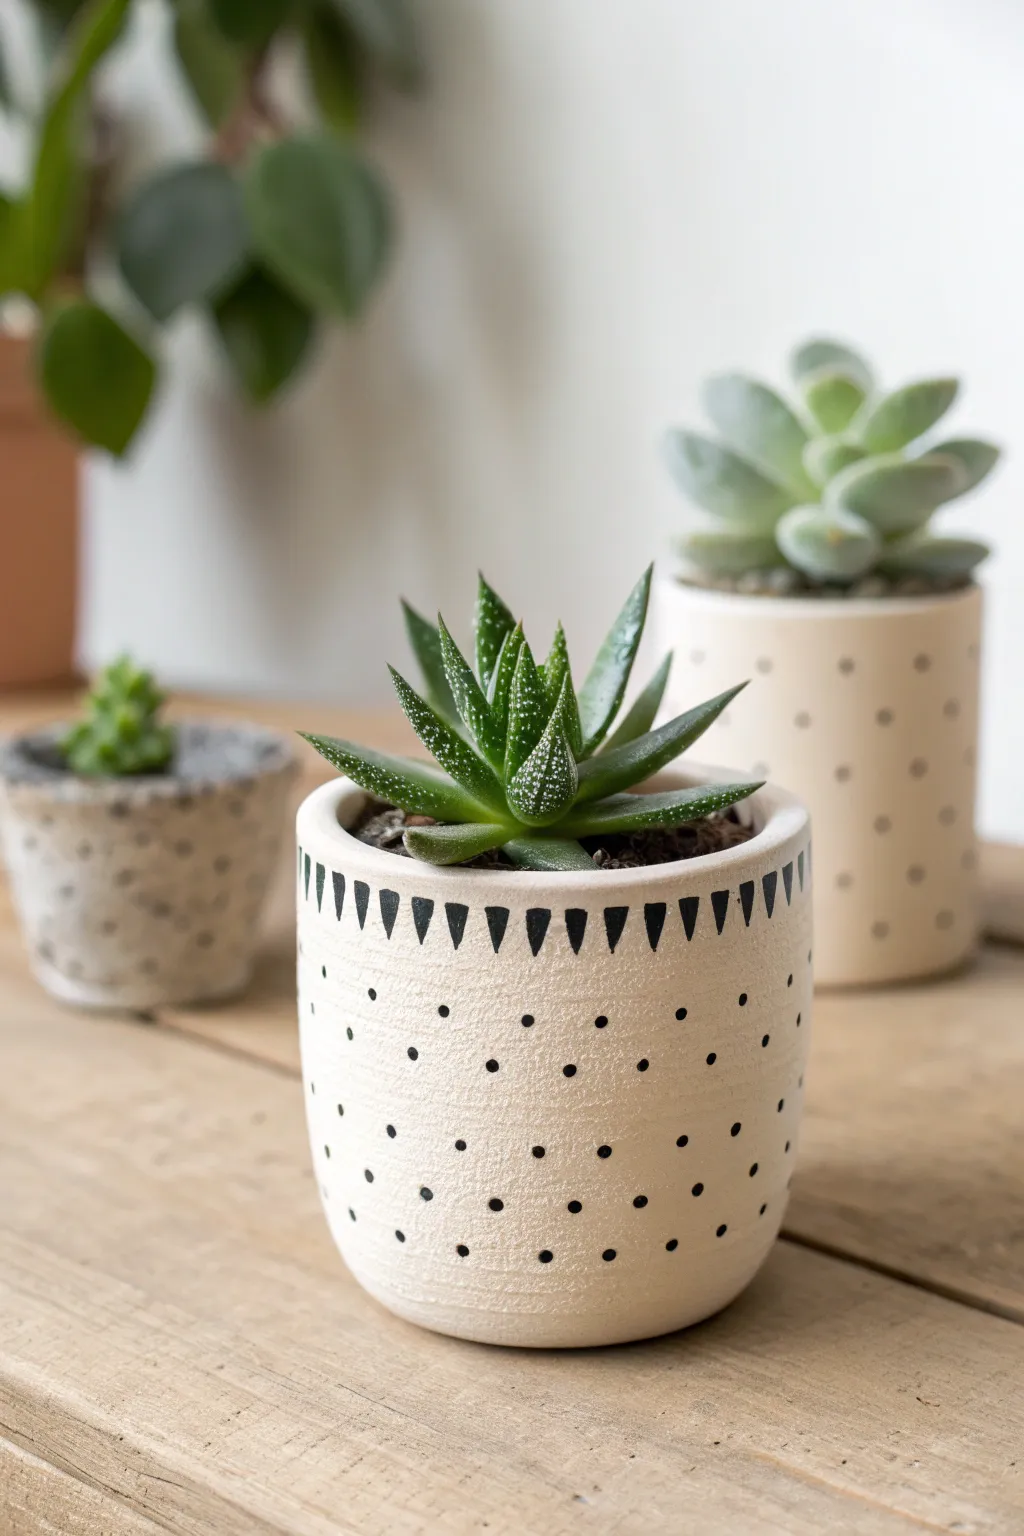
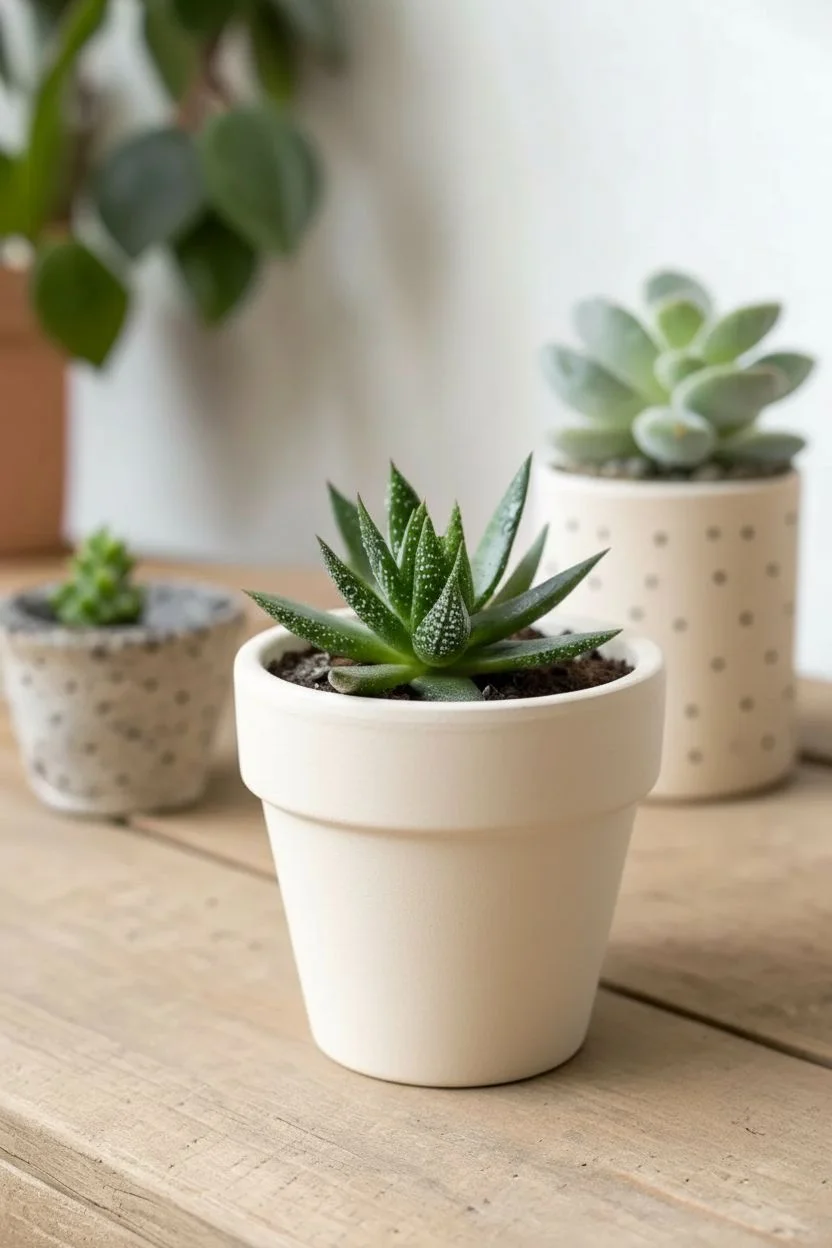
Embrace a minimalist bohemian aesthetic with this charming succulent pot design featuring tiny, randomized polka dots and a striking geometric rim. The finished look pairs the organic texture of unglazed pottery with crisp, modern black linework for a planter that feels both handmade and contemporary.
Detailed Instructions
Materials
- Small terracotta or ceramic pot (cleaned and dried)
- Cream or off-white acrylic paint (matte finish)
- Black acrylic paint or a black paint pen (fine tip)
- Flat paintbrush (medium size)
- Very fine detail paintbrush (size 0 or 00)
- Dotting tool, toothpick, or the wrong end of a brush
- Matte sealant spray or Mod Podge (optional)
- Paper plate or palette
- Cup of water and paper towels
Step 1: Base Preparation
-
Clean the surface:
Begin by wiping down your terracotta or ceramic pot with a damp cloth to remove any dust or oils. Let it dry completely so the paint adheres properly. -
Mix your base color:
Squeeze a generous amount of cream or off-white acrylic paint onto your palette. If the paint feels too thick, thin it slightly with a drop of water for smoother application. -
Apply the first coat:
Using your flat paintbrush, apply an even layer of the cream paint over the entire exterior of the pot. Don’t forget to paint just inside the upper rim where the soil line will be. -
Let it dry:
Allow this first coat to dry to the touch, usually about 15-20 minutes. I usually take a quick tea break here to ensure I don’t rush the process. -
Apply a second coat:
Paint a second layer of the cream color to ensure full opacity, covering any streaks or terracotta showing through. Let this layer dry completely for at least an hour.
Uneven Triangles?
If your rim triangles look messy, wait for the black paint to dry fully. Then, use a small brush with your cream base color to ‘erase’ and reshape the edges.
Step 2: Detailed Design Work
-
Prepare the black paint:
Put a small dab of black acrylic paint on your palette. If you are using a paint pen instead, shake it well and test the flow on a scrap piece of paper first. -
Start the rim pattern:
Using your fine detail brush or paint pen, start at the very top edge of the pot’s rim. You will be painting small triangles pointing downward. -
Paint the first triangle:
Paint an inverted triangle shape, about a quarter-inch long. The flat base of the triangle should align with the lip of the pot. -
Create the spacing:
Leave a small gap—roughly the width of your triangle—before painting the next one. Consistency is key, but minor variations add to the handmade charm. -
Complete the circumference:
Continue painting these downward-pointing triangles all the way around the rim. If you find the spacing gets tricky near the end, slightly adjust the width of the last few triangles to make them fit seamlessly. -
Refine the triangles:
Go back over your triangles to sharpen any fuzzy edges or fill in spots where the black paint looks thin. -
Prepare for dots:
Switch to your dotting tool. If you don’t have one, the rounded end of a small paintbrush handle or a toothpick works perfectly for these tiny speckles. -
Dip and test:
Dip your tool into the black paint. Test a dot on a paper towel to gauge the size; you want small, delicate specks rather than large globs. -
Start dotting:
Begin applying dots randomly across the body of the pot, below the triangle border. Keep the spacing fairly open and airy. -
Vary the placement:
Avoid creating distinct rows or patterns. Try to stagger the dots so they look naturally scattered like confetti. -
Check density:
Assess the pot from a distance. Fill in any large empty spaces with a single dot, but be careful not to overcrowd the design.
Paint Pen Precision
For the crispest lines on the rim triangles, a fine-tip opaque black paint pen is much easier to control than a brush, especially for beginners.
Step 3: Finishing Touches
-
Allow to cure:
Let all the black detail work dry completely. Since the dots might be thicker than a brushstroke, give this at least 30-45 minutes. -
Seal the pot:
If you plan to use real plants that require watering, spray the pot with a clear matte sealant. This protects your artwork from water damage and soil staining. -
Final dry:
Let the sealant cure according to the manufacturer’s instructions before potting your succulent.
Once dry and planted, this stylish little pot will add a lovely handcrafted touch to your windowsill collection

PENCIL GUIDE
Understanding Pencil Grades from H to B
From first sketch to finished drawing — learn pencil grades, line control, and shading techniques.
Explore the Full Guide
Pastel Rainbow Pot Set
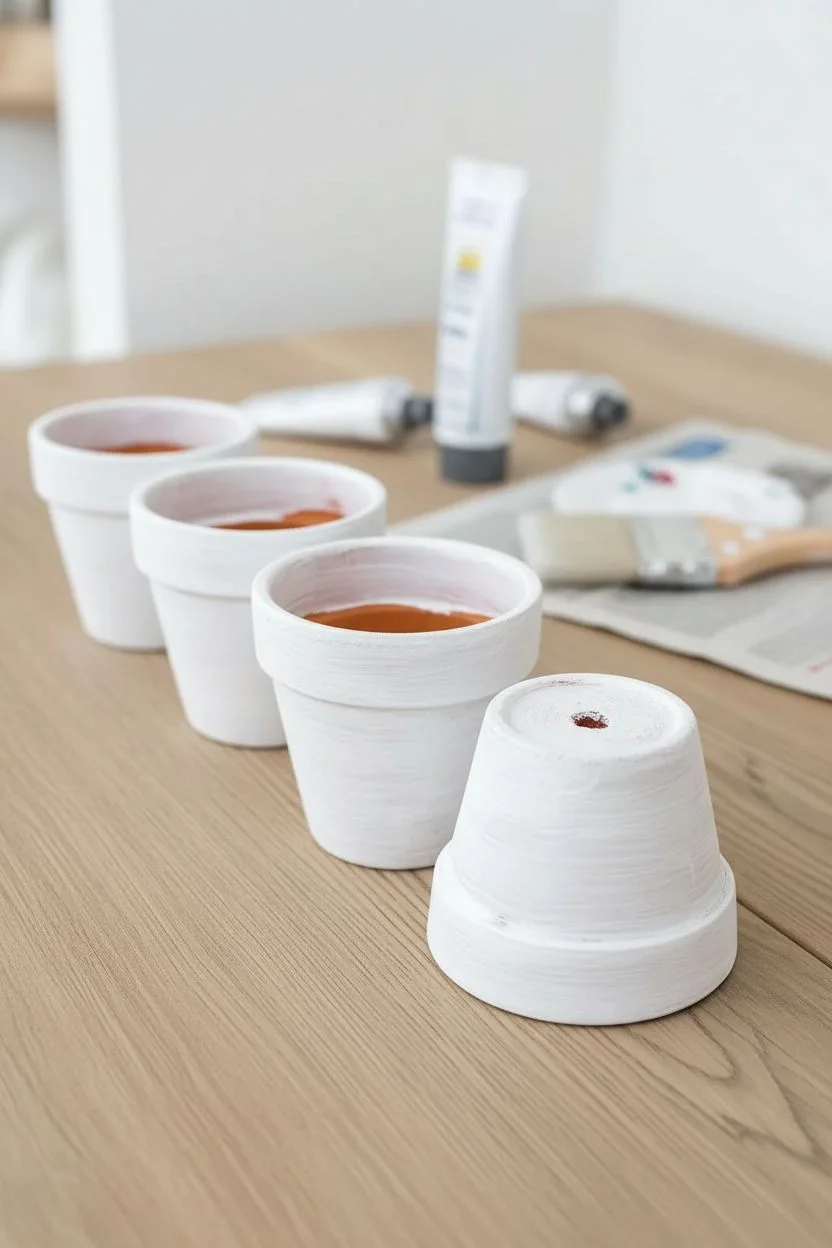
Bring a soft, calming vibe to your window sill with this set of alternating pastel pots. The matte finish and gentle contrast between blush pink and mint green creates a cohesive look perfect for tiny succulents.
How-To Guide
Materials
- 4 small terra cotta pots (2-3 inch diameter)
- White acrylic gesso or primer
- Matte acrylic paint in blush pink
- Matte acrylic paint in mint green
- Medium flat brush (3/4 inch)
- Small round brush for touch-ups
- Matte spray sealer or varnish
- Newspaper or drop cloth
- 4 small succulents
- Succulent potting mix
Step 1: Preparation & Priming
-
Clean the surface:
Begin by thoroughly wiping down your terra cotta pots with a damp cloth to remove any warehouse dust or oils. Let them dry completely, as moisture will prevent the paint from sticking. -
Apply the base coat:
Squeeze out a dollop of white gesso or primer. Using your flat brush, coat the exterior of all four pots evenly. This step is crucial because terra cotta is porous and will soak up your colored paint if unprimed. -
Paint the inner rim:
Don’t forget to paint the top rim and just about one inch down the inside of the pot. We do this so the raw clay doesn’t show above the soil line later. -
Dry the primer:
Allow the primer to dry fully, which usually takes about 20-30 minutes. If the coverage looks streaky or thin, applying a quick second coat creates a much smoother canvas for your pastels.
Step 2: Applying Color
-
Prepare your palette:
Pour out your blush pink and mint green paints onto a palette or paper plate. If your colors feel too vibrant, mix in a tiny drop of white to soften them into true pastels. -
Paint the pink pots:
Select two of your pots for the pink hue. Use your rinsed flat brush to apply the blush color in smooth, horizontal strokes around the pot, moving from the bottom up to the rim. -
Paint the green pots:
Take the remaining two pots and repeat the process with the mint green paint. Focus on keeping your brushstrokes long and even to minimize texture. -
Paint the rims:
Carefully paint the top rim and the inner upper section of each pot to match its exterior color. I find it helps to hold the pot by the drainage hole at the bottom to keep my fingers out of the wet paint. -
Let the first coat dry:
Set the pots aside on your newspaper. Acrylics dry fast, but give them at least 15 minutes to become touch-dry before assessing the coverage. -
Apply a second coat:
For that solid, matte look seen in the photo, a second coat is almost always necessary. Apply another layer to all four pots, ensuring no white primer is peeking through. -
Check the bottoms:
Once the sides are dry, flip the pots over carefully. Paint the bottom edge if you missed it earlier, as this completes the professional look. -
Seal the paint:
Take the pots outside or to a well-ventilated area. Spray them lightly with a matte sealer. This protects the paint from water damage when you water your plants later.
Uneven Coverage?
If the paint looks streaky even after two coats, lightly sand the dry surface with fine-grit sandpaper (like 320 grit) and apply a third, slightly thinned coat for a flawless finish.
Step 3: Planting & Styling
-
Add soil base:
Once fully cured, fill the bottom third of each pot with specialized succulent potting mix, which drains better than standard soil. -
Position the plants:
Gently remove your succulents from their nursery containers. Loosen the root ball slightly and place one plant into each painted pot. -
Fill gently:
Spoon extra soil around the sides of the roots, pressing down lightly with your thumbs or a small tool to secure the plant. Leave a small gap between the soil surface and the rim. -
Clean up:
Use a small, dry brush to dust off any soil particles that might have stuck to the texture of your matte paint or the leaves of the succulent. -
Arrange the pattern:
Line them up on your table or shelf, alternating the colors—pink, green, pink, green—or group them together to enjoy your new pastel collection.
Level It Up
Dip the tips of an old toothbrush in white paint and flick it over the dry pots to create a subtle speckled eggshell effect on top of the pastel colors.
Now you have a charming row of soft colors to brighten up your desk or windowsill
Minimalist Line Art Botanicals
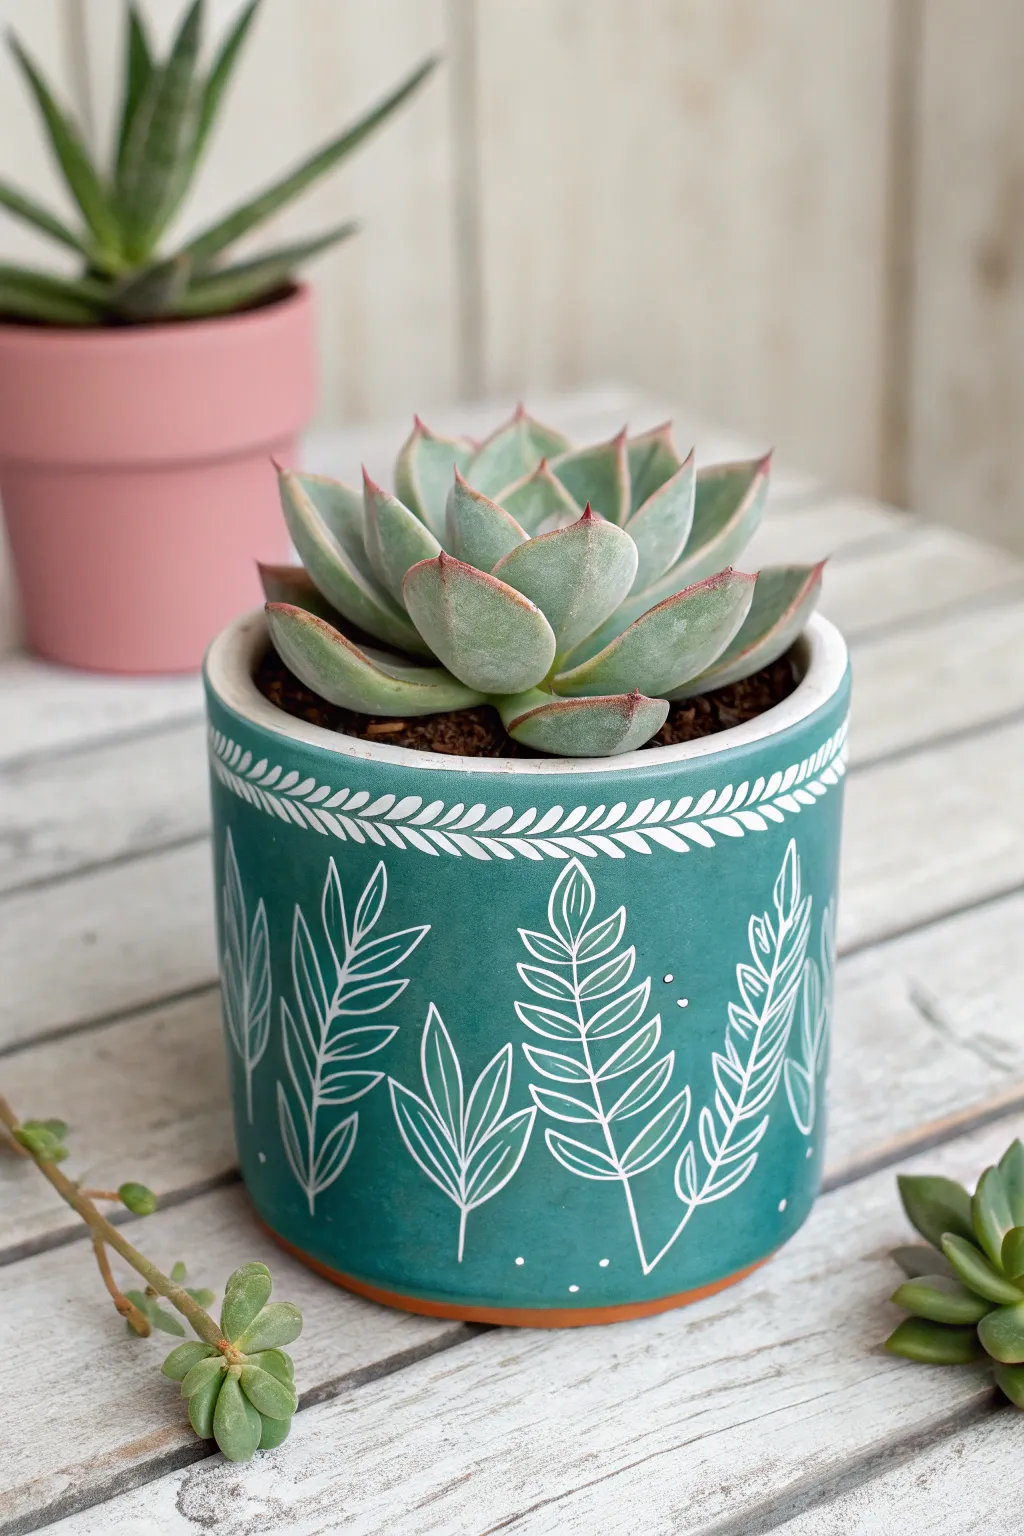
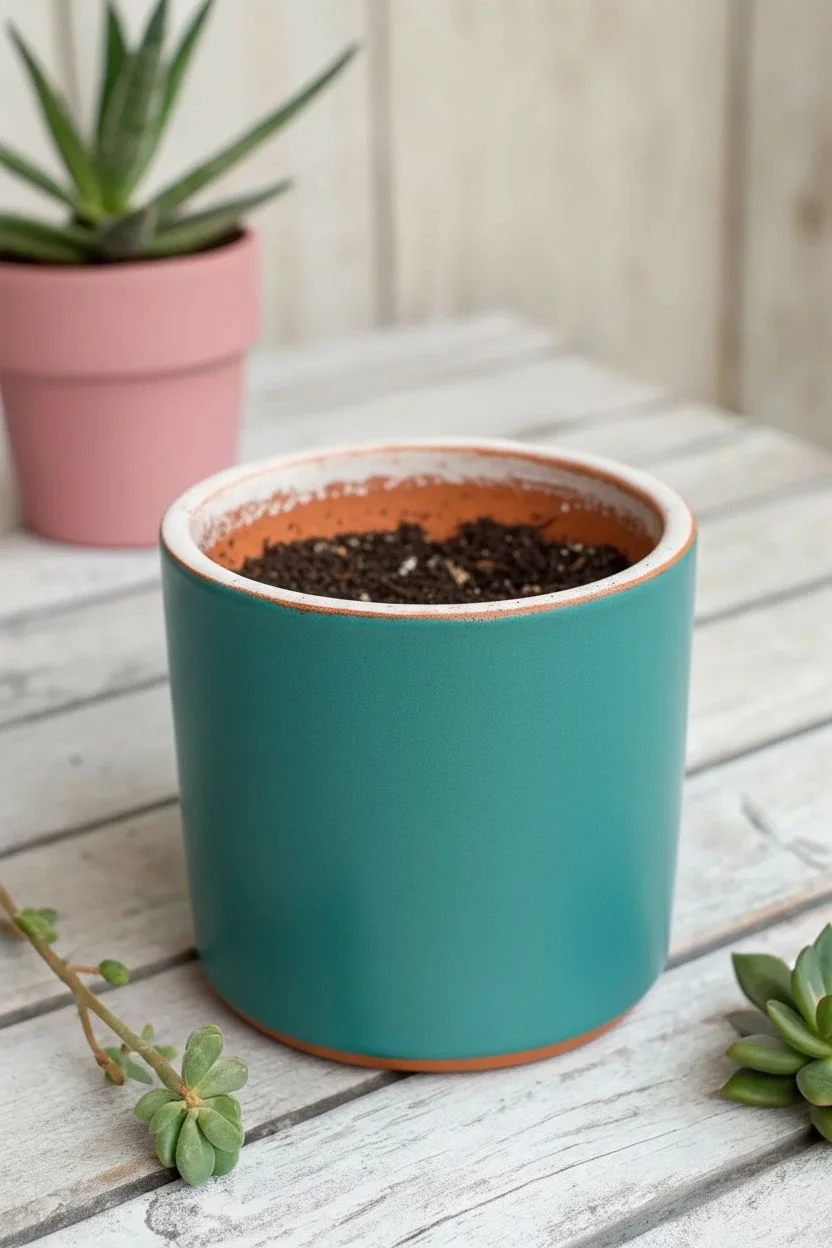
Capture the serene beauty of nature with this elegant succulent pot design, featuring crisp white botanical illustrations against a rich teal backdrop. The minimalist line work, combined with a decorative rim pattern, creates a sophisticated, modern look perfect for showcasing your favorite Echeveria.
Step-by-Step Tutorial
Materials
- Terracotta pot (4 to 6-inch diameter)
- Teal or deep turquoise acrylic craft paint
- White paint pen (fine tip/0.7mm)
- White paint pen (extra-fine tip/0.5mm, optional for details)
- Medium flat paintbrush
- Water cup and paper towels
- Pencil
- Spray sealant (matte finish)
Step 1: Base Coat Preparation
-
Clean surface:
Begin by ensuring your terracotta pot is completely clean and dry. Wipe it down with a damp cloth to remove any dust or sticker residue, as this ensures the paint adheres smoothly. -
Apply base color:
Using your medium flat brush, apply a generous coat of teal acrylic paint to the entire exterior of the pot. Work in horizontal strokes for a uniform finish. -
Paint the rim:
Don’t forget to paint the top rim of the pot. You should also bring the color down about an inch on the inside of the pot so the terracotta doesn’t show above the soil line. -
Let dry and repeat:
Allow the first coat to dry completely (about 20-30 minutes). I usually apply a second coat to ensure the color is opaque and solid, hiding the orange terracotta tone completely.
Fixing Wobbly Lines
If a paint pen line goes rogue, don’t panic. Let the white dry completely, then use a small brush with your base teal color to ‘erase’ the mistake by painting over it.
Step 2: Designing the Rim
-
Sketch the vine:
Once the teal base is fully dry, lightly use a pencil to mark a horizontal line around the thickest part of the rim. This will serve as the spine for your vine pattern. -
Draw the spine:
Using the fine-tip white paint pen, trace over your pencil line to create a solid white stripe circling the pot’s rim. -
Add first leaves:
Starting from the white line, draw small, simple leaf shapes angling upwards. Place them closely together, like the teeth of a comb or fern fronds. -
Complete the pattern:
Repeat the leaf shapes on the bottom side of the white line, angling them downwards to mirror the top set. This creates a continuous leafy vine effect.
Level Up: Metallic Accent
Swap the white paint pen for a gold or silver metallic marker. The shimmer against the matte teal creates a luxurious, high-end feel.
Step 3: Main Botanical Illustrations
-
Plan placement:
Visualize three to four main vertical stems around the body of the pot. You want them spaced somewhat evenly but at varying heights for a natural look. -
Draw stems:
With the white paint pen, draw the central vertical lines for your stems. Make some slightly curved and others straighter to add variety. -
Add stem leaves:
Draw the leaves extending from the stems. These should be larger than the rim pattern leaves. Create an outline of a tapered oval shape for each leaf. -
Detail the leaves:
Draw interior lines within larger leaves to mimic veins. A simple central line down the middle of each leaf outline works perfectly. -
Fill the gaps:
Between the tall stems, draw smaller, simpler sprigs near the bottom. These only need 3-5 leaves and help ‘ground’ the design so it doesn’t look like floating plants. -
Add decorative dots:
To fill empty negative space, add tiny white dots sporadically around the leaves. Group them in clusters of two or three for a whimsical touch.
Step 4: Finishing Touches
-
Clean up sketch lines:
Check for any visible pencil marks. If the paint is fully cured, you can gently erase them, or simply carefully touch up with a dab of teal paint. -
Seal the pot:
Take the pot to a well-ventilated area. Spray it with a clear matte sealant. This is crucial to protect your delicate line work from water damage when you water your plant. -
Pot your plant:
Once the sealant is dry to the touch, fill the pot with succulent soil and nestle your Echeveria inside for the finished look.
Place your newly decorated pot on a bright windowsill and enjoy the custom botanical art you created


Mini Mountain Sunset Wrap
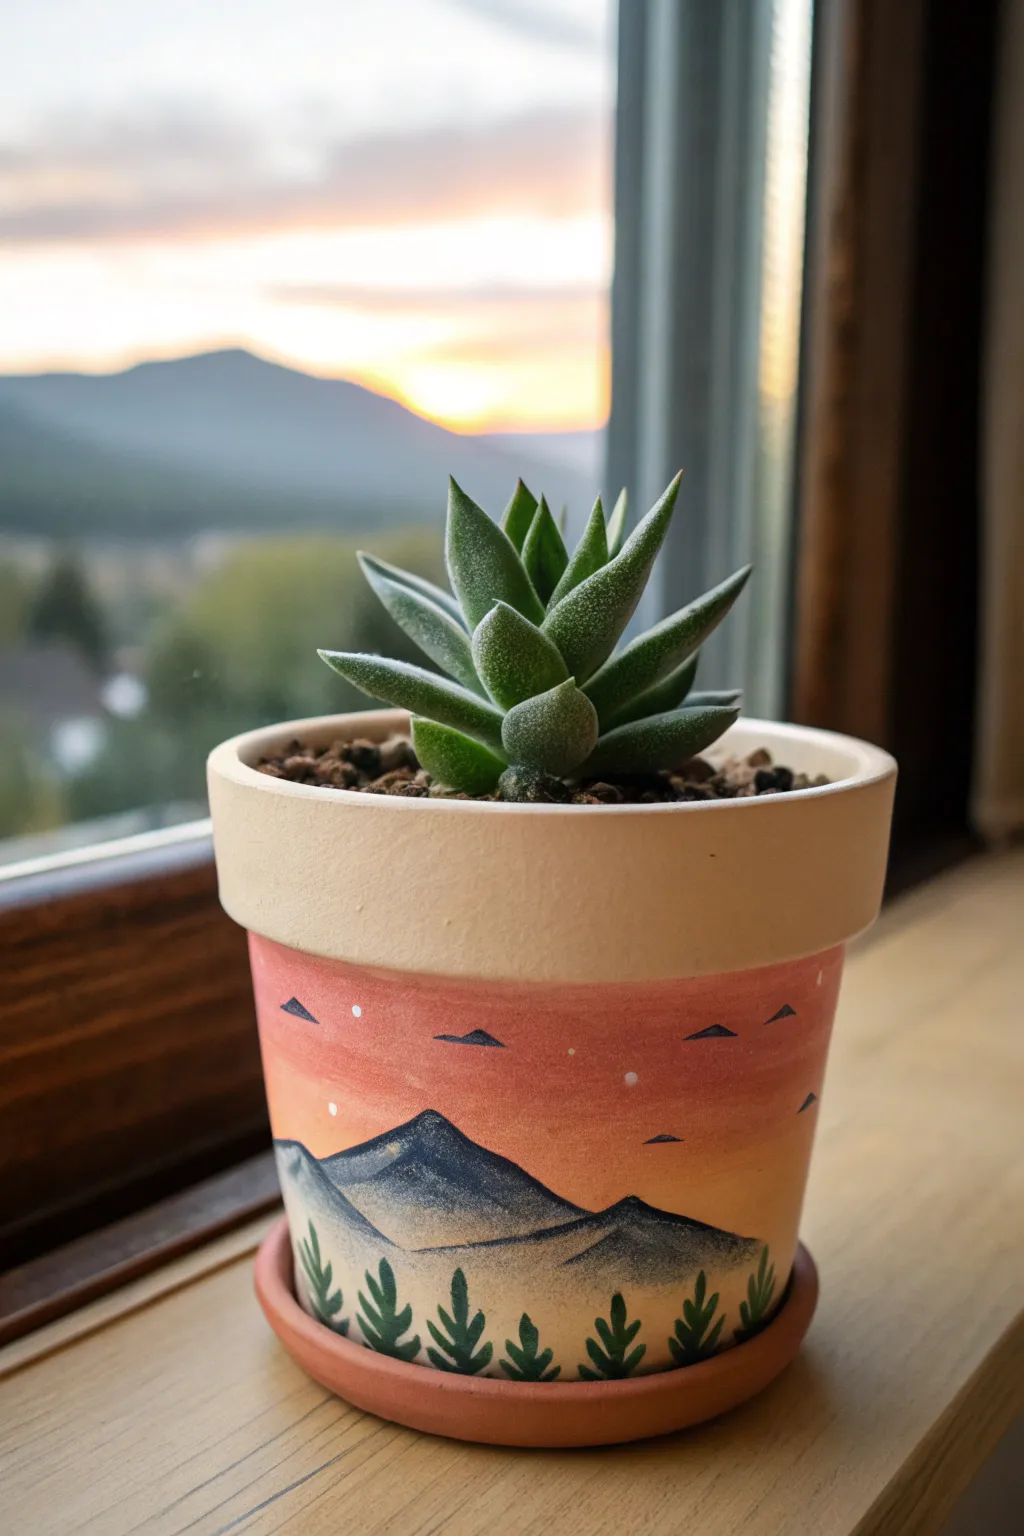
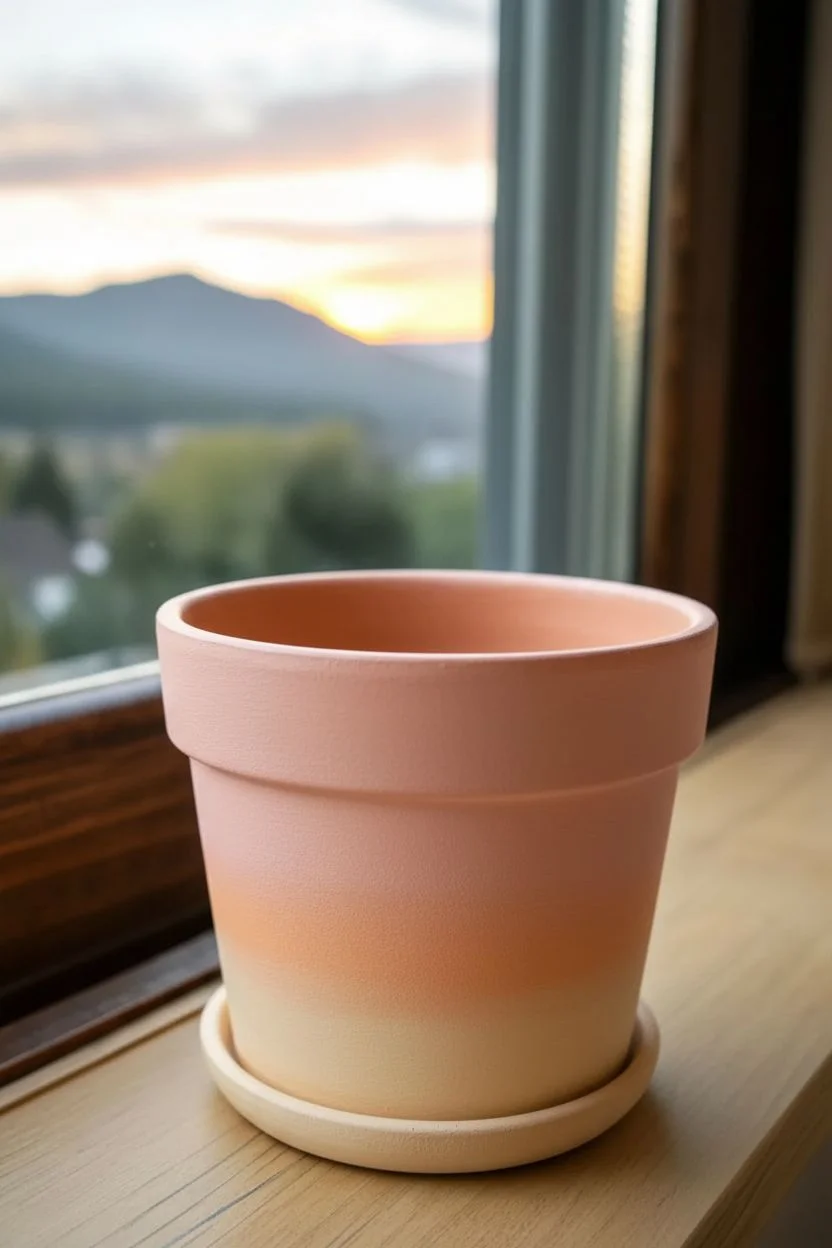
Capture the serenity of twilight on your windowsill with this gradient sunset pot. The design wraps seamlessly around the terracotta surface, featuring silhouetted peaks and pines against a soft, blending sky.
How-To Guide
Materials
- Terracotta pot (cleaned and dried)
- Acrylic paints: White, Peach, Pink, Dark Blue/Navy, Black, Dark Green
- Gesso or white primer (optional but recommended)
- Wide flat brush
- Medium round brush
- Fine liner brush
- Palette for mixing
- Water cup and paper towels
- Matte spray sealer
Step 1: Prepping and Gradient Sky
-
Prime the Surface:
Begin by ensuring your pot is free of dust. While you can paint directly on terracotta, apply a thin coat of white gesso or acrylic paint to the main body of the pot (below the rim) to make your sunset colors pop. -
Mix Your Sunset Colors:
Prepare a palette with a soft peach, a pale pink, and a little white. If your peach is too vibrant, tone it down with a dot of white to achieve that muted, dusk look. -
Paint the Upper Sky:
Using a wide flat brush, paint a band of pale pink mixed with a little white just below the rim of the pot. Keep the stroke horizontal and smooth. -
Add the Horizon Glow:
Immediately underneath the pink strip, while the paint is still wet, apply your peach color around the middle section of the pot. -
Create the Gradient:
Clean your brush slightly, leaving it damp. Gently brush back and forth where the pink and peach meet to blend them creates a seamless ombre transition. I find that working quickly before the acrylic dries is key here. -
Paint the Base:
For the bottom third of the pot (where the ground will be), paint a pale yellowish-cream or very light peach to serve as the backdrop for the mountains and trees. Let the entire background dry completely.
Step 2: Painting the Landscape
-
Outline the Mountains:
Mix a dark navy blue with a tiny bit of black. Using a medium round brush, paint a wavy, jagged line across the lower third of the pot to represent the tops of the mountains. -
Fill the Peaks:
Fill in the mountain shapes with your dark blue mix. Don’t worry about being perfectly solid; a little texture mimics rocky terrain. -
Add Atmospheric Haze:
While the blue is drying, you can dry-brush a very small amount of white or light grey near the peaks to give them a sense of distance and dimension. -
Paint the Foreground Hills:
Below the blue mountains, paint a second, lower layer of hills using a lighter, warm sandy color or pale yellow ochre. This creates depth between the distant peaks and the foreground. -
Draft the Trees:
Switch to your fine liner brush and load it with dark green paint. Along the very bottom edge of the pot, paint small vertical lines to spacing out where your pine trees will go. -
Detail the Pine Trees:
Flesh out the trees by painting small, downward-angled dashes coming off the central lines. Make them wider at the bottom and pointy at the top. -
Add the Birds:
Using the very tip of your fine liner brush and black paint, add tiny ‘V’ shapes or simple triangles in the peach section of the sky to represent distant birds. -
Paint the Stars:
Dip the back end of a brush handle into white paint and dot a few ‘stars’ into the darker pink areas of the sky. -
Seal the Work:
Once absolutely everything is dry, take the pot outside and apply a coat of matte spray sealer to protect your landscape from water damage.
Uneven Blending?
If acrylics dry too fast while blending the sky, mix in a drop of ‘slow drying medium’ or keep your brush slightly damp to extend working time.
Golden Hour Glow
Mix a tiny amount of metallic gold paint into your peach horizon color for a sunset that subtly shimmers when the light hits it.
Place your favorite succulent inside and enjoy the view of a mountain escape right from your desk
Night Sky and Star Speckles
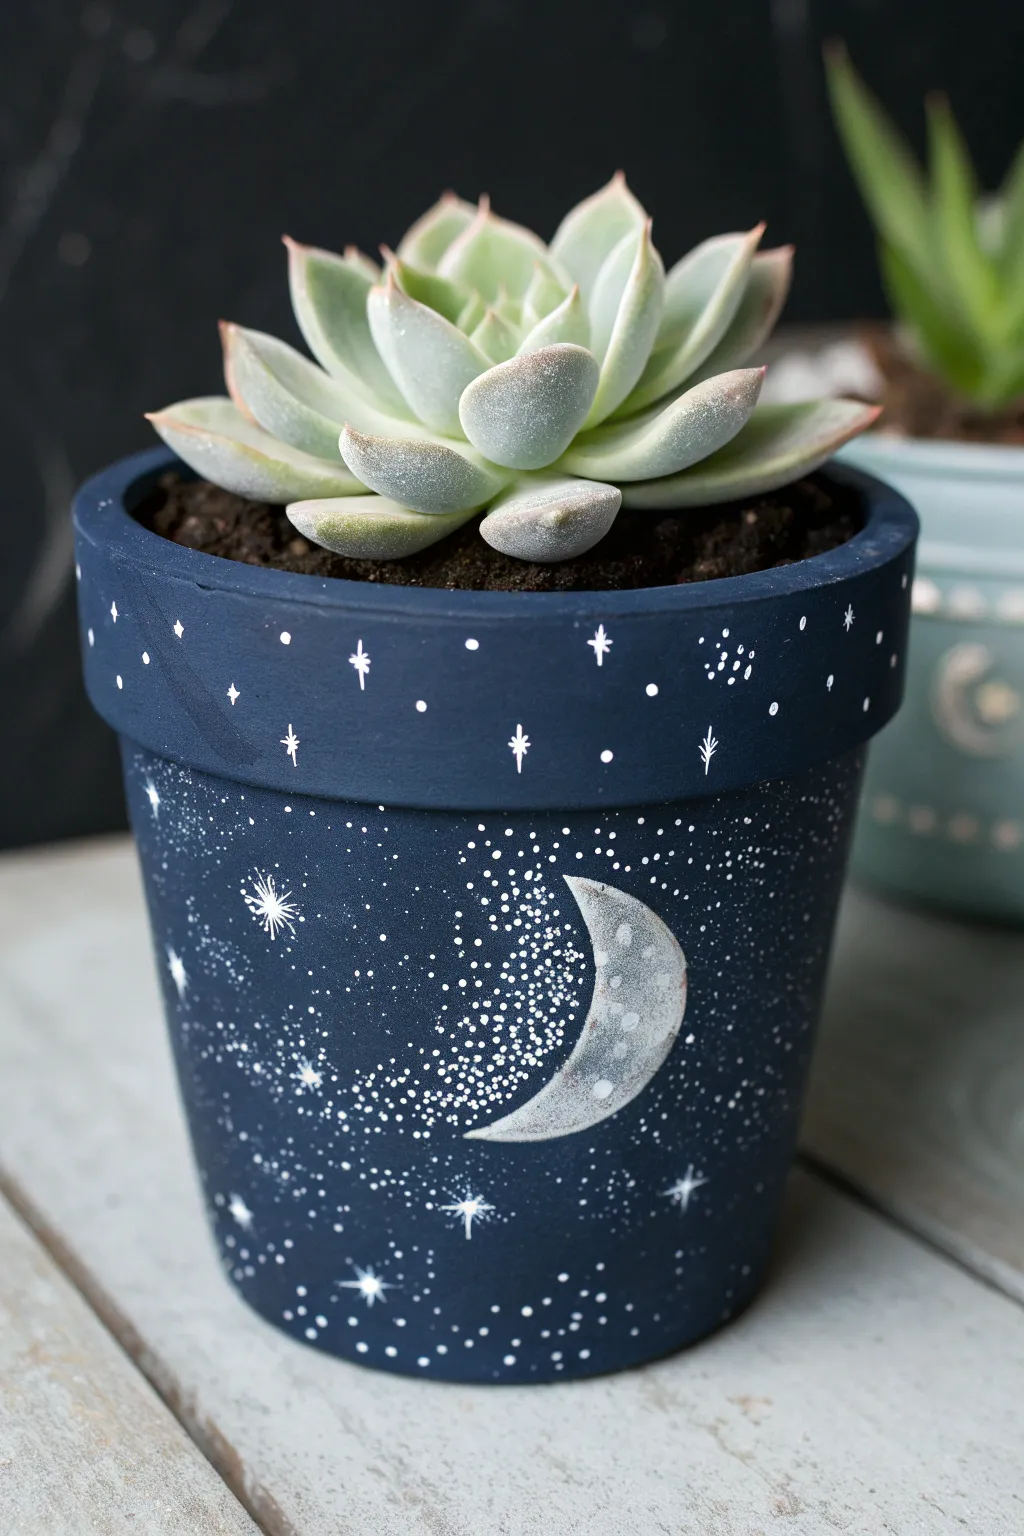
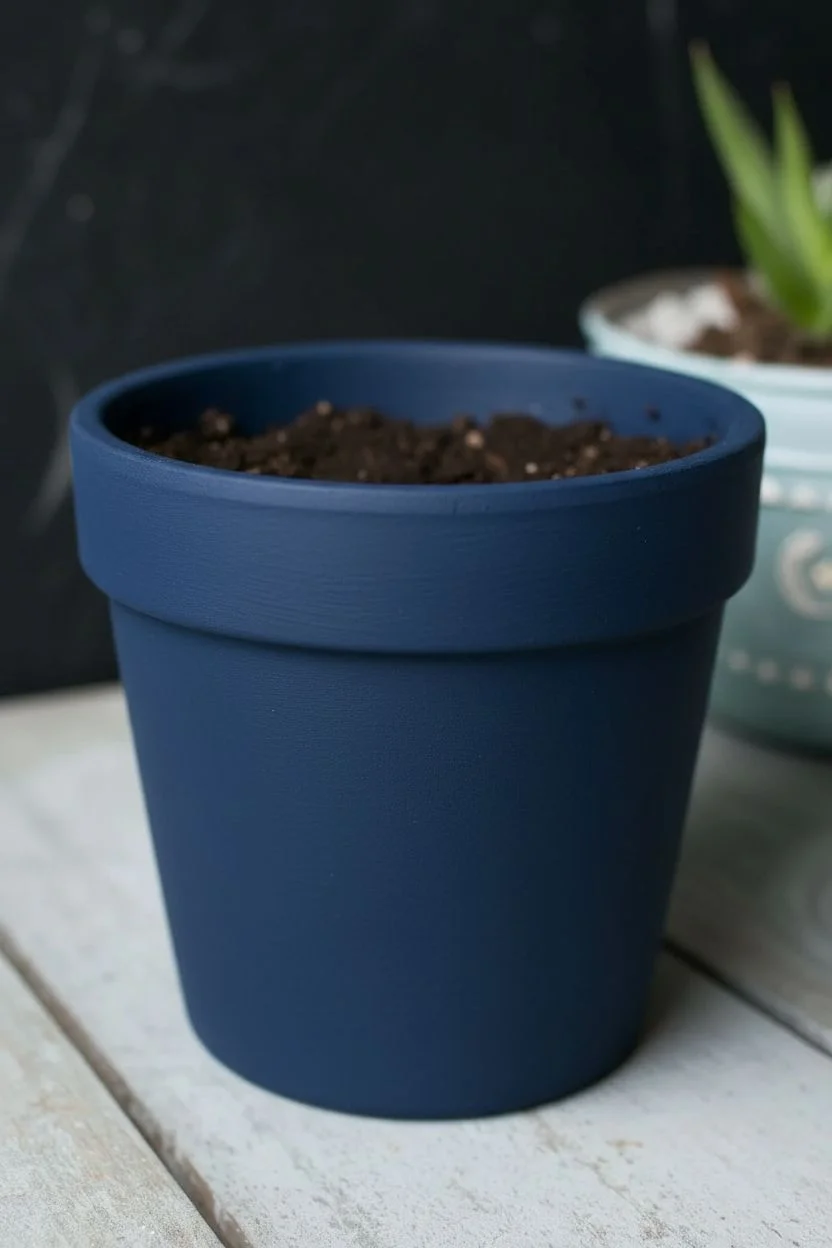
Transform a plain terracotta pot into a dreamy piece of decor with this deep navy and starry night design. The combination of simple splattering techniques and hand-painted celestial details creates a stunning home for your favorite succulent.
Detailed Instructions
Materials
- Small terracotta pot (cleaned and dried)
- Deep navy blue acrylic paint
- Titanium white acrylic paint
- Silver metallic acrylic paint
- Wide flat brush
- Fine detail liner brush (size 00 or 000)
- Medium round brush
- Old toothbrush
- Cup of water
- Paper towels
- Matte spray sealer
Step 1: Base Coat Application
-
Clean surface:
Begin by ensuring your terracotta pot is completely free of dust and dirt. Wipe it down with a damp cloth and let it dry fully so the paint adheres properly. -
First layer:
Using your wide flat brush, apply a generous coat of deep navy blue acrylic paint. Cover the entire exterior, including the rim and just inside the top edge where the soil line will be. -
Rim details:
Pay special attention to the underside of the rim lip, as this area is often easy to miss but visible from lower angles. -
Second layer:
Allow the first coat to dry for about 20 minutes. Apply a second coat of navy blue to ensure an opaque, rich color with no terracotta showing through. -
Re-check opacity:
Terracotta is porous and thirsty; if the color still looks streaky after drying, add a quick third coat for a solid, matte finish.
Star Maker Tip
For perfectly round stars without a brush, try dipping the tip of a toothpick or a sewing pin head into the paint. It offers much better control than bristles for the tiniest dots.
Step 2: Painting the Moon
-
Outline the crescent:
Mix a tiny drop of white into your silver metallic paint to brighten it. With your medium round brush, lightly sketch a crescent moon shape on the main body of the pot. -
Fill the shape:
Fill in the crescent moon with the silver mixture. Don’t worry about it being perfectly smooth; a little texture adds to the crater-like effect. -
Add texture:
While the silver is still slightly wet, dab a very dry brush with a tiny bit of plain white paint onto the moon to create highlights and uneven surface texture. -
Clean edges:
If your edges got messy, use a small brush with the navy base color to tidy up the outline of the moon once the metallic paint is dry.
Step 3: Creating the Stars
-
Mix star paint:
Water down a small amount of white acrylic paint until it has the consistency of heavy cream or ink. It needs to flow easily from your brush. -
Paint larger stars:
Using your finest detail liner brush, paint a few scattered four-point ‘cross’ stars on the rim and the body of the pot. Keep the lines thin and delicate. -
Add starbursts:
Create one or two larger starbursts near the moon by drawing a cross, then adding smaller diagonal rays between the main points. -
Dot the rim:
Dip the handle end of a paintbrush into your white paint and dot random stars along the rim of the pot for uniform circles. -
Create the Milky Way:
Dip an old toothbrush into your watered-down white paint. Test the splatter on a paper towel first by running your thumb across the bristles. -
Splatter zone:
Angle the toothbrush near the moon and flick the bristles to create a dense cluster of tiny specks, simulating a galaxy cloud or the Milky Way trailing off the moon. -
Controlled speckling:
Step back and splatter lightly over the rest of the pot to fill in empty dark spaces, keeping the density lower than the area around the moon. -
Manual touch-ups:
If the splatter missed any spots, use the tip of your liner brush to manually add tiny dots to balance the composition. -
Final dry:
Let all the detail work dry completely, ideally for at least an hour, to prevent smearing during the sealing process. -
Protection:
Ideally, take the pot outside and spray it with a clear matte sealer. This protects your artwork from water damage when you water your plant.
Glow Up
Mix glow-in-the-dark medium into your white paint for the stars. During the day it looks white, but at night your succulents will have a ghostly, magical glowing backdrop.
Once the sealer cures, pot your favorite pale green succulent to contrast beautifully against the dark midnight blue background
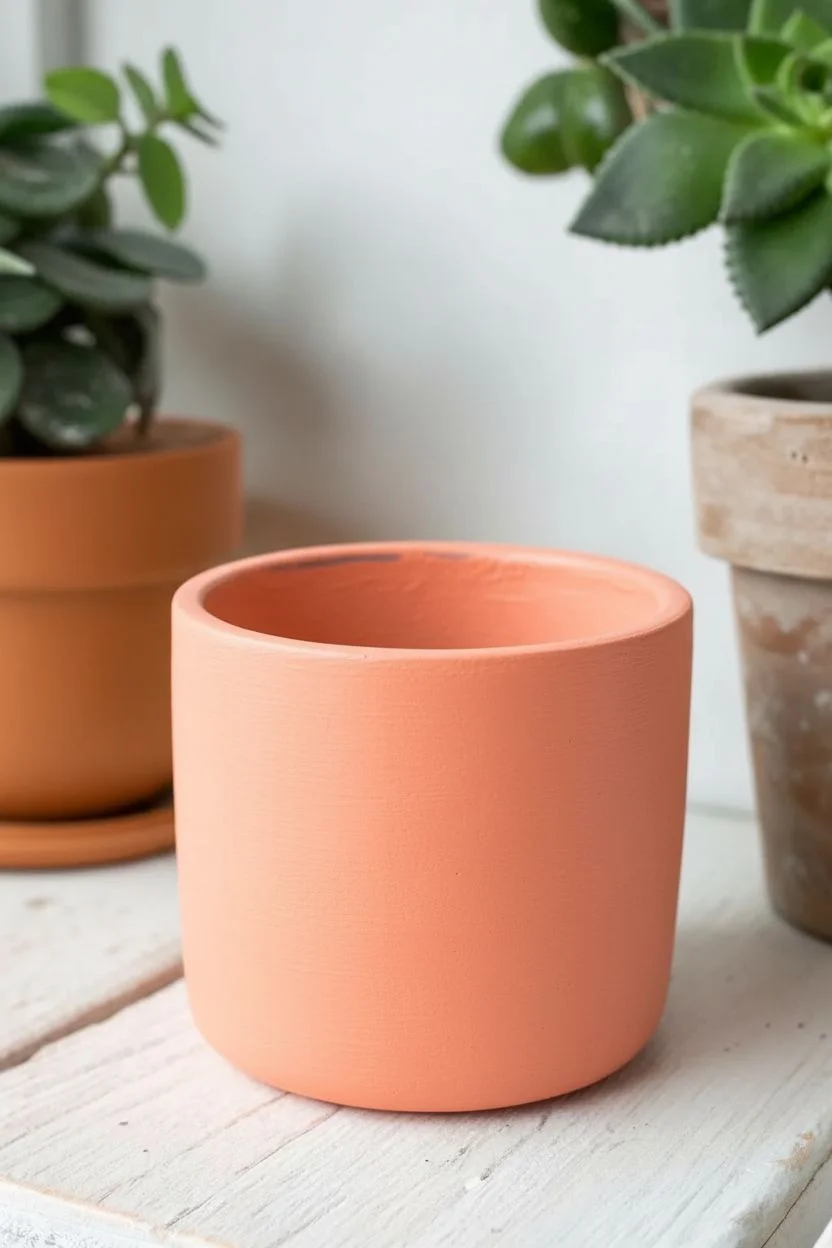
Whimsical Sleepy Face Planter
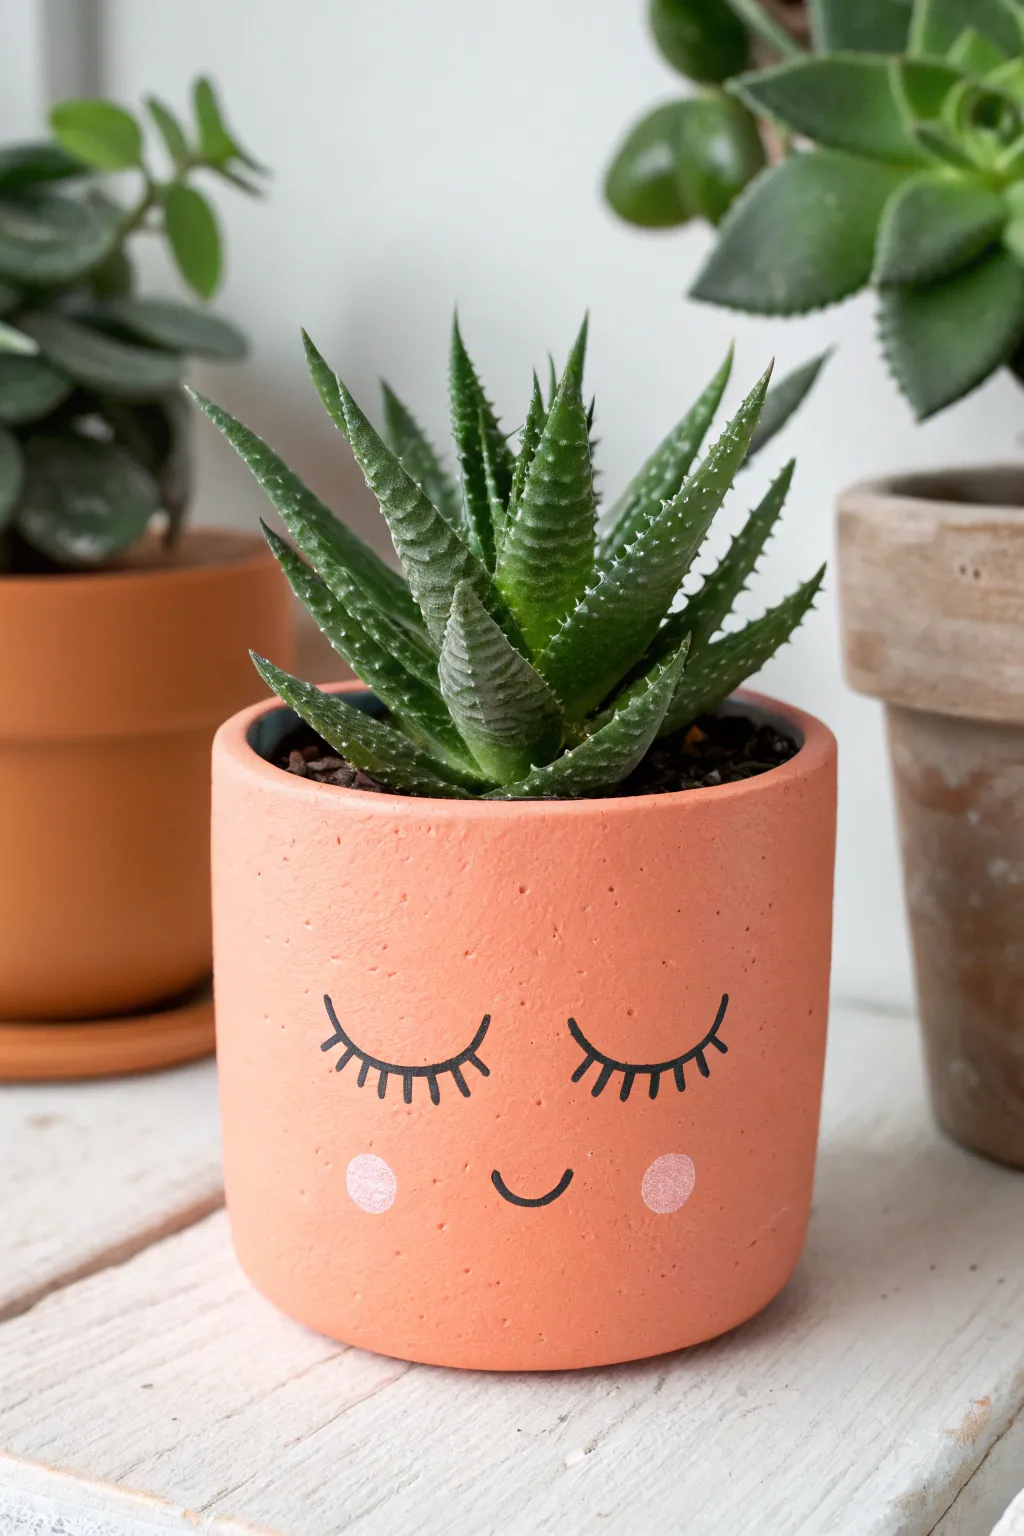
Give your succulents a serene new home with this incredibly simple yet charming face design. The soft peach base combined with blushing cheeks and peaceful closed eyes creates a soothing vibe perfect for any sunny windowsill.
Step-by-Step Guide
Materials
- Small cylindrical terracotta or ceramic pot (approximately 3-4 inches)
- Acrylic paint: Coral or peach shade
- Acrylic paint: Black
- Acrylic paint: Light pink
- Medium flat paintbrush
- Fine detail liner brush (size 0 or 00)
- Small round sponge dabber or Q-tip
- Matte sealant spray or Mod Podge
- Pencil
- Succulent and potting soil
Step 1: Preparing the Base
-
Clean the surface:
Start by wiping your pot down with a damp cloth to remove any dust or oils. If you are using a standard terracotta pot, ensure it is completely dry before you begin painting. -
Base coat application:
Using your medium flat brush, apply a smooth coat of the coral or peach acrylic paint. Paint in horizontal strokes around the circumference of the pot for the cleanest finish. -
Check for coverage:
Allow the first coat to dry for about 15-20 minutes. If the terracotta color is still peeking through, apply a second coat to ensure a solid, opaque peach background. -
Paint the rim:
Don’t forget to paint the top rim of the pot and at least an inch down the inside. This ensures the finished look is polished even after you add soil.
Step 2: Planning the Face
-
Sketch lightly:
Once the base paint is thoroughly dry to the touch, use a pencil to very lightly sketch where you want the face features. Start by marking the center point for the smile. -
Position the eyes:
Draw two gentle downward curves for the sleeping eyes. Try to keep them symmetrical and spaced widely enough to leave room for the cheeks. -
Draw the lashes:
Add small tick marks spreading upward from the eye curves to represent the eyelashes. I find that spacing them slightly unevenly actually looks more organic and cute.
Use your pinky
Improve your stability by resting your pinky finger on the dry surface of the pot while you paint the fine black lines. It acts as an anchor for shaky hands.
Step 3: Painting the Details
-
Load the liner brush:
Dip your fine detail liner brush into the black acrylic paint. You want the paint to be fluid but not watery, so mix in a tiny drop of water if it feels too thick. -
Paint the eye curves:
Following your pencil sketch, carefully trace the main downward curve of the first eye with a steady hand. -
Adding eyelashes:
Paint the eyelashes using quick, light flicks of the brush moving outward. Aim for 5-7 lashes per eye for that whimsical look. -
Repeat for the second eye:
Move to the second eye, trying to mirror the curve and lash style of the first one as closely as possible. -
Create the smile:
Paint the small U-shaped smile centered between the eyes but slightly lower down. Keep this line thin and delicate. -
Prepare the cheeks:
Pour a small amount of light pink paint onto your palette. If you don’t have pink, mix a tiny bit of red with white. -
Stamp the cheeks:
Dip a small round sponge dabber or the end of a Q-tip into the pink paint. Blot it once on paper to remove excess paint, then press it gently onto the pot just below the outer corner of each eye. -
Clean up:
If you made any small smudges with the black paint, wait for it to dry completely, then carefully touch it up with a dot of your base peach color.
Uneven cheeks?
If your stamped cheeks look uneven or textured, wait for them to dry, lightly sand the spot, paint over with the peach base, and try stamping again.
Step 4: Finishing Up
-
Seal the artwork:
Allow all paint to cure for at least an hour. Apply a coat of matte sealant spray or brush on Mod Podge to protect your work from water damage when watering your plant. -
Pot your plant:
Once the sealer is dry, fill the pot with succulent soil and nestle your Haworthia or other succulent into its new sleepy home.
Now you have an adorable, peaceful planter that looks great on its own or as part of a cheerful collection
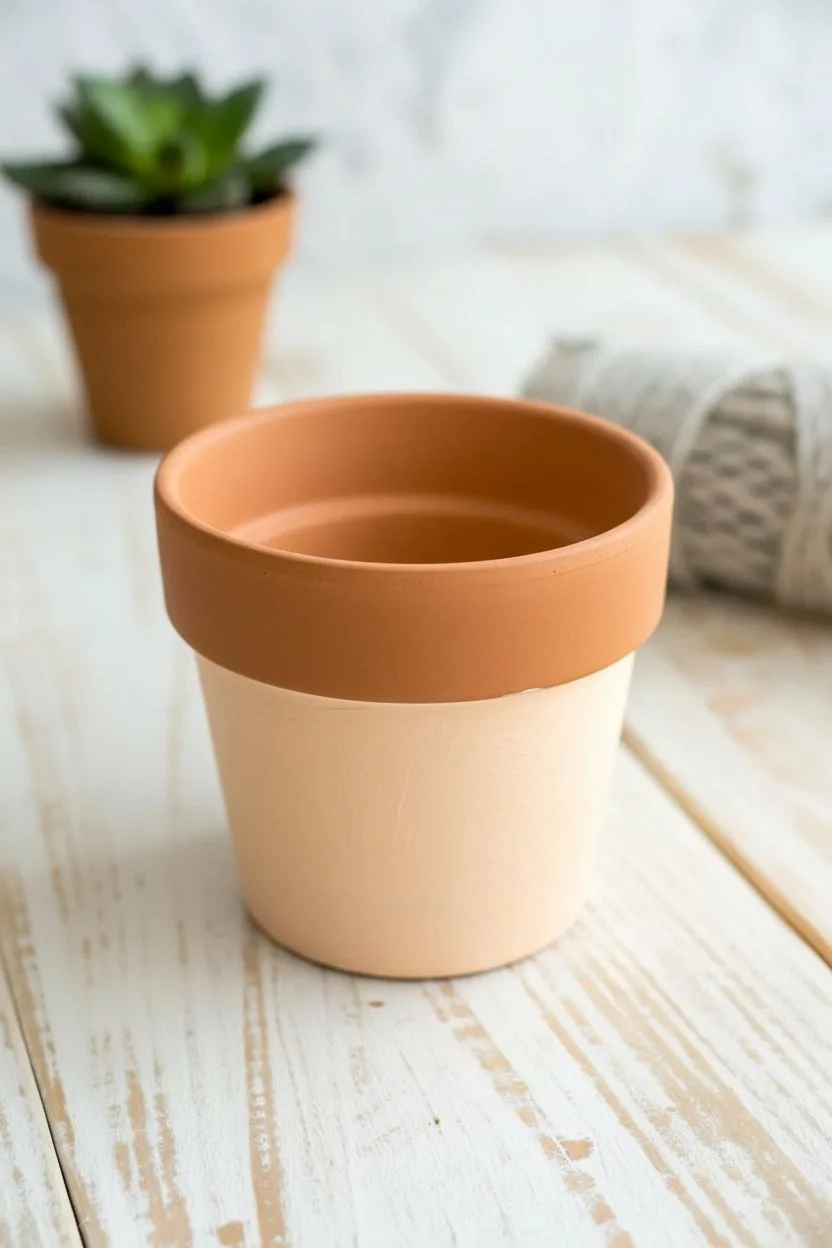
Animal Face With Succulent Hair
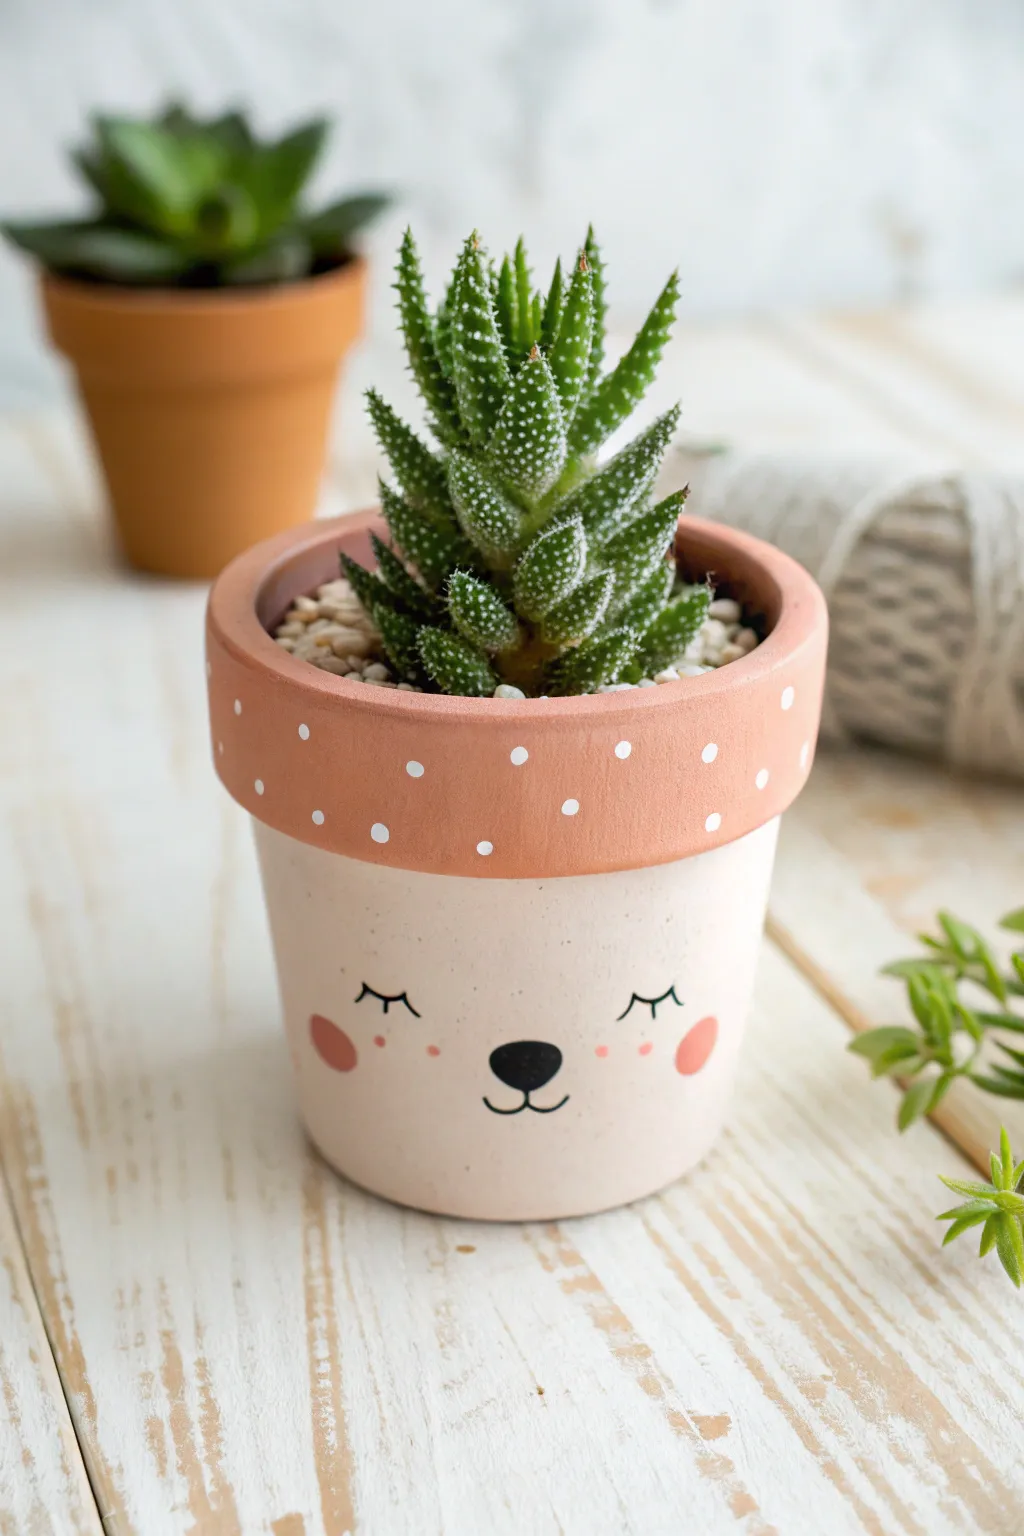
Turn a standard terracotta pot into an adorable character with this simple painting project. The sleepy face design pairs perfectly with a spiky succulent, giving the impression of a fun, punk-rock hairstyle.
Step-by-Step
Materials
- Small terracotta pot (clean and dry)
- Acrylic craft paint (light peach/beige, white, black, rosy pink)
- Small flat paintbrush
- Fine liner detail brush or black paint marker
- Small round paintbrush or foam pouncer
- Small dotting tool or toothpick
- Potting soil and gravel/pebbles
- Spiky succulent (like Haworthia or Aloe)
- Water cup and paper towels
Step 1: Base Coat Painting
-
Clean the pot:
Ensure your terracotta pot is completely free of dust and stickers. Wipe it down with a damp cloth and let it dry fully before starting so the paint adheres properly. -
Mix the skin tone:
Mix a light peach or beige color using white and a tiny drop of orange or brown acrylic paint. You want a soft, natural hue that contrasts nicely with the terracotta rim. -
Paint the body:
Using a flat brush, paint the entire body of the pot below the rim with your mixed skin tone. Apply thin, even horizontal strokes. -
Add a second coat:
Let the first layer dry for about 15 minutes. Apply a second coat to ensure the terracotta color doesn’t show through, creating a solid, opaque finish. -
Paint the rim:
For the rim, you can leave it natural terracotta or paint it a slightly darker unglazed clay shade if your pot is stained. In this project, the rim has a warm, earthy tone that complements the pale base.
Use a Paint Marker
If you are nervous about painting fine lines like the eyelashes or mouth with a brush, use a fine-tip black acrylic paint pen instead for better control.
Step 2: Adding the Polka Dots
-
Prepare white paint:
Pour a small amount of white acrylic paint onto your palette. It shouldn’t be too watery, as you want the dots to hold their shape. -
Create the dots:
Dip the handle end of a paintbrush, a dotting tool, or a toothpick into the white paint. Gently press it onto the rim of the pot to create small, evenly spaced polka dots. -
Refine the pattern:
Continue dotting around the entire circumference of the rim. Try to stagger the dots slightly for a playful, random look rather than a perfect grid. -
Dry completely:
Allow the polka dots to dry completely before handling the pot again to avoid smudging the white accents.
Seal the Deal
Before planting, spray the entire painted exterior with a matte clear acrylic sealer. This protects your artwork from water damage when you water the succulent.
Step 3: Drawing the Face
-
Plan the face:
Visualize where the center of the face will be. You want the features low enough on the pot so they aren’t hidden by the rim’s shadow. -
Paint the nose:
Using black paint and a small round brush, paint a soft, rounded triangle or oval shape in the center for the nose. -
Add the mouth:
With a fine liner brush or a black paint pen, draw two small curved lines coming down from the bottom of the nose to create a simple ‘w’ mouth shape. -
Draw the sleeping eyes:
Above the nose, paint two wide, downward-curving arcs for the closed eyelids. Keep them symmetrical and spaced evenly apart. -
Add eyelashes:
Paint three tiny little flicks off the outer corner of each eyelid arc to create sweet eyelashes. -
Apply rosy cheeks:
Dip a round paintbrush or a small foam pouncer into rosy pink paint. Dab off the excess, then gently stamp a circle on either side of the face, just below the eyes. -
Add freckles:
Using the very tip of your fine brush or a toothpick, add two or three tiny pink freckle dots between the cheek and the nose for extra character.
Step 4: Planting the ‘Hair’
-
Add soil:
Once the paint is fully cured (give it at least an hour), fill the pot about 3/4 of the way full with cactus or succulent soil. -
Position the plant:
Remove your spiky succulent from its nursery pot and nestle it into the soil. I like to center it perfectly so the spikes look like a funky mohawk. -
Top with gravel:
Cover the exposed soil with small white or light-colored gravel. This finishes the look and keeps moisture away from the plant’s leaves.
Now you have a charming little desk companion that adds a touch of personality to your succulent collection
Basket-Weave Rim Detail
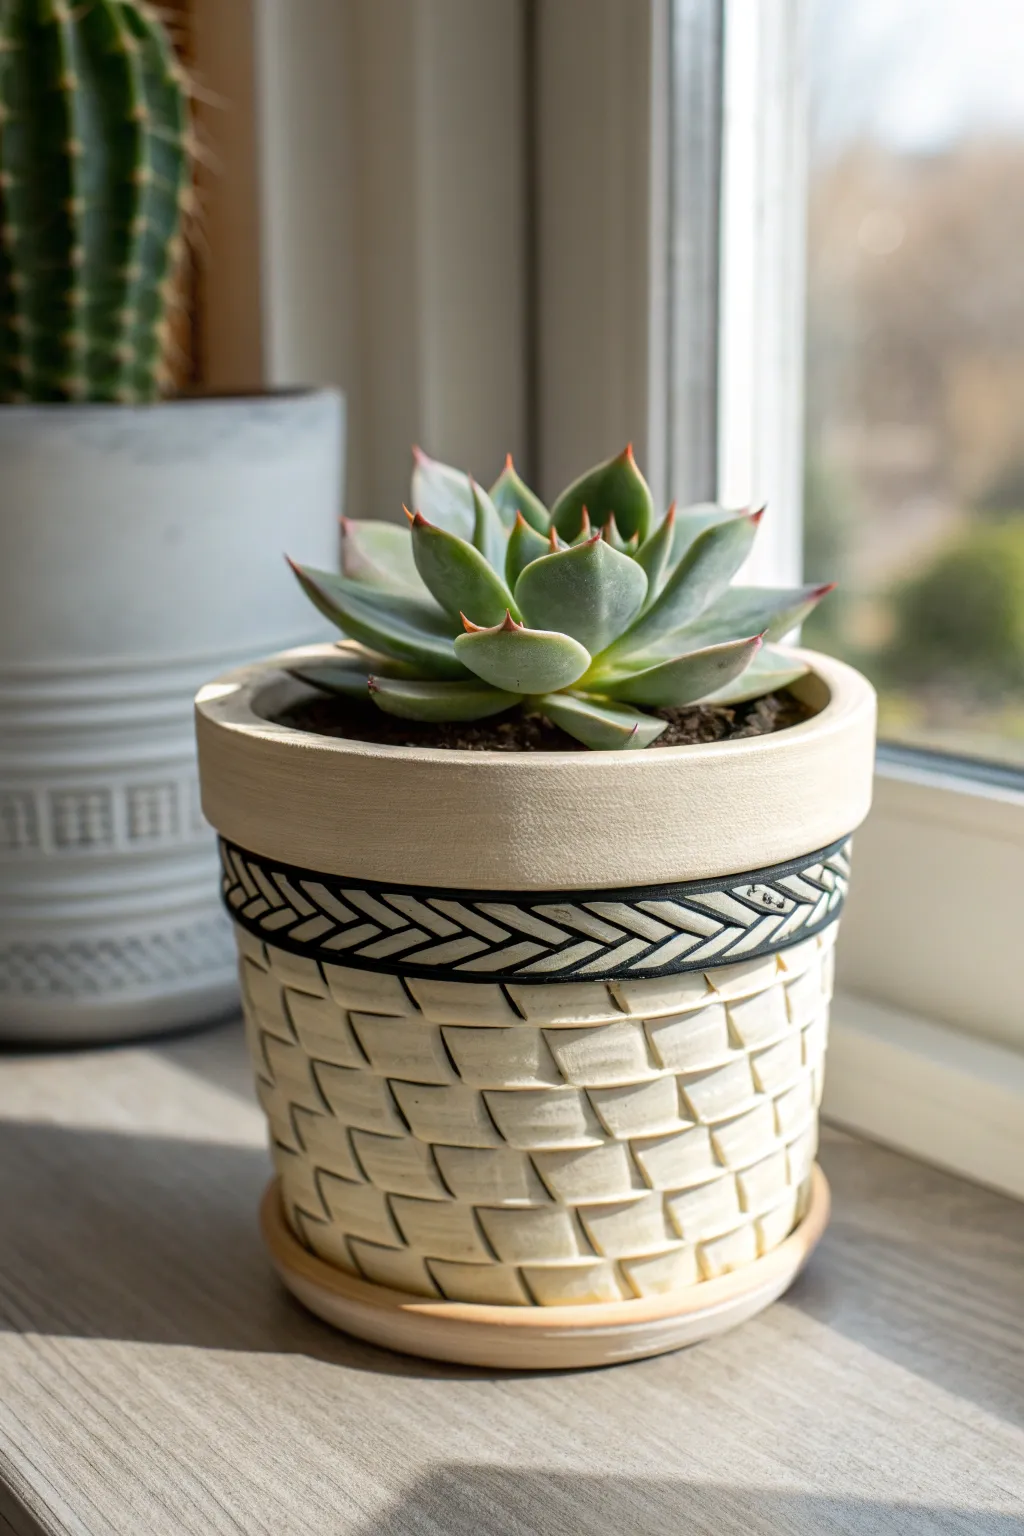
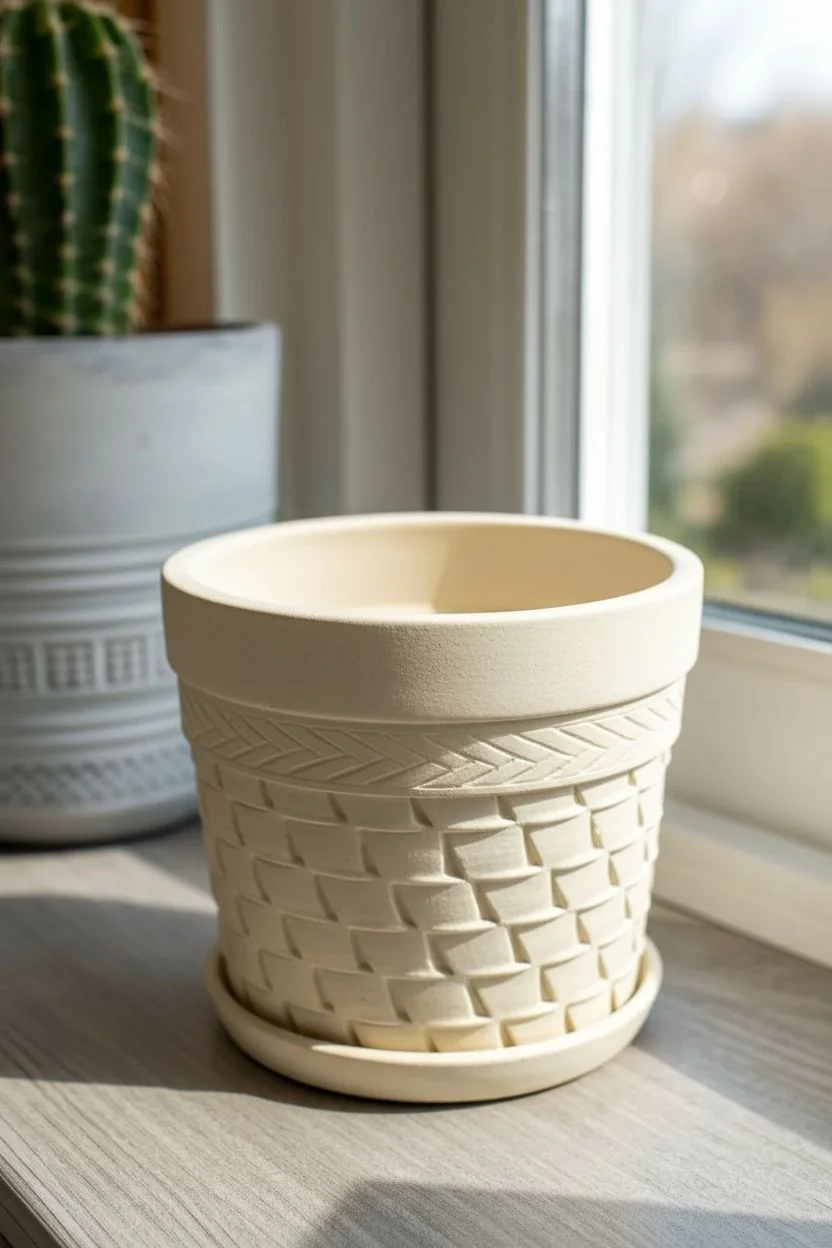
Transform a plain textured planter into a detailed statement piece by highlighting its natural weave. This project focuses on accentuating the rim with a striking high-contrast braided pattern that perfectly complements the subtle basket texture below.
Detailed Instructions
Materials
- Textured ceramic or resin pot (basket weave pattern)
- Matte black acrylic paint
- Off-white or cream acrylic paint (to match pot base)
- Fine liner brush (size 00 or 000)
- Small flat shader brush (size 2 or 4)
- Matte clear sealant spray
- Palette or small dish
- Damp cloth for corrections
Step 1: Preparation & Base work
-
Clean the surface:
Before dipping your brush, ensure the pot is completely free of dust and oils. Wipe it down with a damp cloth and let it dry fully, as any debris will interrupt your fine lines. -
Study the relief:
Examine the rim of your pot carefully. Most textured pots like this have a raised or indented pattern already molded into the rim. This project relies on following those existing ‘braid’ guides rather than free-handing the design. -
Touch up the base:
If your pot isn’t already the perfect creamy off-white shown here, apply a base coat of cream acrylic paint to the entire exterior. Use a flat shader brush to get into the crevices of the basket weave texture.
Step 2: Defining the Rim Detail
-
Load your liner brush:
Squeeze a small amount of matte black acrylic onto your palette. Thin it slightly with a drop of water until it has an ink-like consistency; this helps the paint flow smoothly into the crevices without clumping. -
Outline the top border:
Starting at the very top edge of the patterned band, carefully paint a thin black line that defines the upper boundary of the weave. Rest your pinky on the pot for stability. -
Outline the bottom border:
Repeat the previous step for the bottom edge of the rim band. You are essentially creating a ‘track’ for your braided pattern to live inside. -
Paint the diagonal separators:
Using your fine liner brush, paint the diagonal lines that separate the individual ‘strands’ of the braid. Follow the molded grooves of the pot. If your pot is smooth, paint diagonal slashes leaning right, spaced about 1/4 inch apart. -
Create the opposing diagonals:
Now paint the diagonals leaning to the left to complete the chevron or V-shape of the braid. This creates the skeleton of the weave pattern. -
Fill the voids:
Identify the triangular gaps between the ‘weaves.’ Carefully fill these small triangular negative spaces with solid black paint. This negative painting technique makes the cream-colored strands pop forward visibly.
Clean Lines Troubleshooting
If your hand shakes, rest your painting wrist on a steady object (like a stack of books) at the same height as the pot. Correct mistakes instantly with a wet toothpick.
Step 3: Adding Depth & Finish
-
Add texture lines:
To make the cream strands look like actual woven fiber, paint two very thin, parallel black lines horizontally across each cream segment. Keep these lines whisper-thin. -
Dry and inspect:
Let the black paint dry completely for about 15 minutes. Rotate the pot and look for any spots where the black outline looks shaky or thin, and touch them up. -
Highlight the weave Body:
Move down to the main body of the pot. Mix a very dilute wash of brown or dark beige paint (90% water, 10% paint). I find this adds necessary age to the piece. -
Apply the wash:
Brush the wash quickly over the basket-weave body texture and immediately wipe it off with a paper towel. The darker color will stay in the deep recesses, emphasizing the 3D texture. -
Clean up the rim:
If any wash got onto your crisp black-and-white rim, carefully dab it away with a damp Q-tip or touch it up with fresh cream paint. -
Seal the work:
Once all paint is bone dry (give it an hour to be safe), take the pot to a ventilated area. Apply two light coats of matte clear sealant spray to protect your detailed line work from water damage during watering. -
Pot your plant:
Fill the pot with succulent soil and add your chosen plant, ensuring the leaves don’t obscure your beautiful new rim detail.
Level Up: Metallic Touch
For a luxe look, trace inside the black outline with a very fine gold leaf pen. The subtle metallic shimmer usually looks stunning against matte black.
Place your newly decorated pot in a sunny windowsill where the light can catch the textures you’ve worked so hard to highlight
Faux Terrazzo Confetti Speckles

Achieve the high-end look of stone terrazzo without the heavy price tag using just a bit of paint and patience. This project transforms a plain pot into a trendy, speckled masterpiece featuring earthy tones of rust, ochre, and slate that pop against a creamy base.
How-To Guide
Materials
- Small concrete or terracotta pot (cylindrical shape works best)
- White or cream acrylic paint (for the base)
- Acrylic paints in accent colors (rust/terracotta, mustard/ochre, slate blue/grey, black)
- Small flat angled detail brush
- Medium flat brush (for base coat)
- Paper plate or palette
- Matte spray sealer or Mod Podge
Step 1: Prepping and Priming
-
Clean surface:
Begin by wiping down your pot with a damp cloth to remove any dust or oils that might prevent the paint from adhering properly. -
Apply base coat:
Using your medium flat brush, apply a smooth layer of cream or off-white acrylic paint over the entire exterior of the pot. -
Dry and repeat:
Let the first coat dry completely for about 20 minutes. Apply a second or third coat until the original color of the pot is completely hidden and the finish is opaque. -
Prepare palette:
Squeeze small, dime-sized amounts of your accent colors—rust, mustard, slate, and black—onto your paper plate while the base coat cures.
Fixing Smudges
If you smudge a shape, wait for it to dry completely. Don’t wipe it wet! Once dry, paint over the mistake with your cream base color, let that dry, and create a new shape on top.
Step 2: Painting the Terrazzo Chips
-
Start with primary shapes:
Dip your small angled brush into the rust-colored paint. Create random geometric shapes on the pot surface, like jagged triangles, uneven trapezoids, or small squares. -
Shape variation:
Avoid making perfect circles or squares; real terrazzo chips are shattered fragments, so jagged, sharp edges look more authentic. -
Second color addition:
Clean your brush thoroughly and switch to the mustard/ochre color. Paint similar jagged shapes in the empty spaces between your rust spots. -
Spacing methodology:
Leave varying amounts of white space between the shapes. Clump a few close together and leave other areas more sparse to mimic natural stone dispersion. -
Add slate accents:
Introduce the slate blue or dark grey paint. I like to make these shapes slightly smaller than the first two colors to create depth and visual hierarchy. -
Darkest details:
Use the black paint sparingly. Add tiny flecks or very small shards near larger colored shapes to act as high-contrast accents. -
Wrap the rim:
Don’t forget to paint a few shapes folding over the top rim of the pot. This small detail makes the faux finish look solid, rather than just painted on the front. -
Rotate and assess:
Turn the pot slowly and look for large empty gaps. Fill these areas with medium-sized shapes in whichever color feels underrepresented.
Step 3: Creating Texture and Sealing
-
Speckling effect:
For a true stone look, dip an old toothbrush or stiff bristle brush into watered-down grey paint and lightly flick tiny mists of splatter over the pot. This ties the larger shapes together. -
Final drying time:
Allow the detailed paint work to dry completely, preferably overnight, to ensure the distinct shapes don’t smear during sealing. -
Apply protection:
Brush on a coat of matte Mod Podge or spray with a clear matte sealer. A glossy finish tends to look more like plastic, while matte preserves the stone aesthetic.
Metallic Pop
For a glam twist, mix in gold leaf foil flakes among the painted chips. Apply the foil using size adhesive where you want a shiny accent before doing your final clear coat sealing.
Once sealed and dry, your trendy terrazzo pot is ready to be the stylish new home for your favorite succulent
Dripping Glaze Illusion
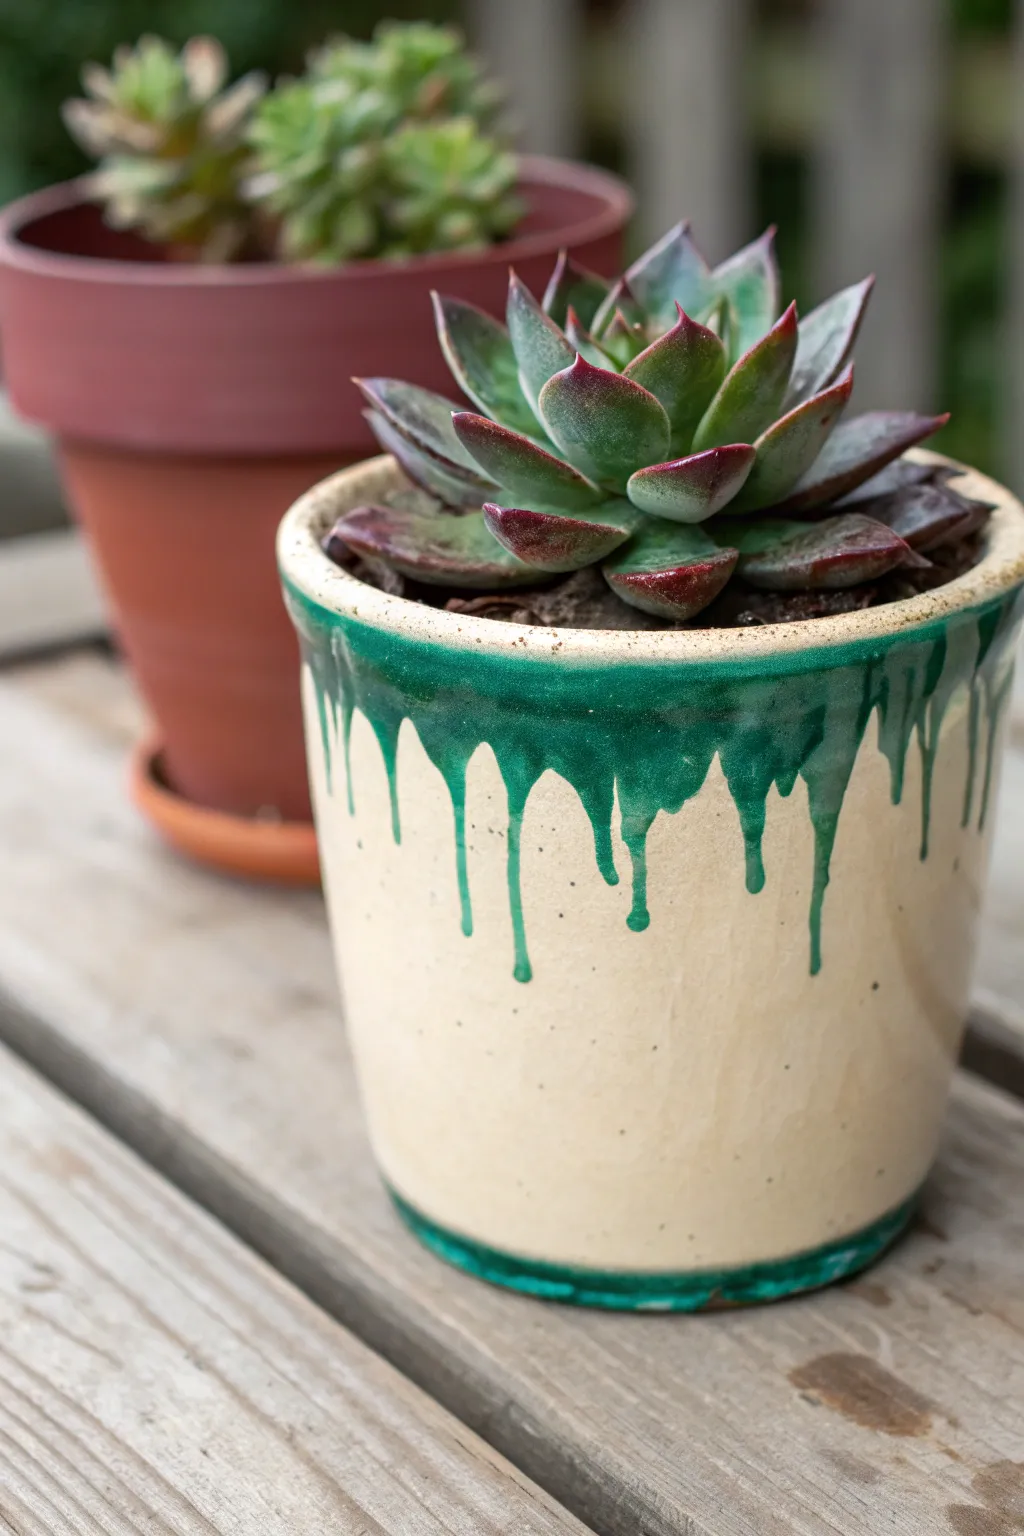
Capture the high-end look of fired pottery without a kiln using this clever painting technique. By layering glossy acrylics to mimic the gravity-defying flow of melted glaze, you can transform a plain pot into an emerald-rimmed masterpiece.
Step-by-Step Tutorial
Materials
- Clean terracotta or ceramic pot
- Glossy acrylic paint (Cream or Warm Beige)
- Glossy acrylic paint (Emerald Green or Teal)
- Glazing medium or pouring medium
- High-gloss polyurethane varnish (brush-on or spray)
- Wide flat paintbrush
- Small round paintbrush
- Eyedropper or plastic squeeze bottle (optional)
- Fine-grit sandpaper
- Water cup and paper towels
Step 1: Preparation and Base Coat
-
Prep the Surface:
Before you begin painting, give your pot a quick sanding with fine-grit sandpaper to remove any rough texture or manufacturing bumps. Wipe it down thoroughly with a damp cloth to remove all dust. -
Mix the Base Color:
If your cream paint is too stark, mix a tiny drop of brown or yellow ochre into it to achieve that warm, pottery-dough beige seen in the reference. You want an opaque, creamy consistency. -
Apply First Base Layer:
Using a wide flat brush, coat the entire exterior of the pot with your cream color. Don’t worry about the inside rim yet. Let this layer dry completely. -
Apply Second Base Layer:
Apply a second coat of the cream paint to ensure solid coverage with no streaks. I prefer to paint horizontally around the pot for a hand-thrown look. Allow this to dry for at least an hour. -
Simulate Speckles (Optional):
Real clay often has iron flecks. To mimic this, dip an old toothbrush in watered-down brown paint and lightly flick a very sparse mist of speckles onto the beige base. Let dry.
Step 2: Creating the Drip Effect
-
Prepare the Glaze Mixture:
Mix your Emerald Green paint with a glazing medium or pouring medium. You want a ratio of about 2:1 paint to medium. The consistency should be fluid enough to run slowly, like honey, but not watery. -
Paint the Top Rim:
Using a generous amount of the green mixture on your brush, paint a thick band around the very top edge of the pot, extending about half an inch down the outside. -
Start the Drips:
Load a small round brush (or use an eyedropper) with a heavy bead of the green mixture. Place the tip right at the bottom edge of your painted green band. -
Guide the Flow:
Gently press the paint bead so gravity takes over and it begins to slide down the side of the pot. Do not brush it down; let it flow naturally to create organic, rounded ends. -
Vary the lengths:
Repeat this process around the rim, spacing the drips irregularly. Make some long and slender, and others short and stubby, to imitate the unpredictable nature of kiln-fired glaze. -
Connect the Gaps:
Go back and smooth out the transition between the solid green rim and the start of your drips so it looks like one continuous pour. -
Bottom Rim Detail:
While the top is drying, paint a thin, uneven line of the pure green paint around the very bottom edge of the pot to anchor the design visually. -
Let it Set:
Creating thick drips means a longer drying time. Lay the pot flat or leave it upright in a dust-free area and let it cure for at least 24 hours. Don’t rush this, or the thick paint will wrinkle.
Don’t fight gravity
Work on the drips while the pot is upright. If the paint is running too fast, tilt the pot upside down for a few seconds to slow the flow until it thickens slightly.
Step 3: Finishing Touches
-
Inspect the Texture:
Once the paint is rock hard, check for any unwanted bubbles in the dried drips. If you find any sharp peaks, very gently sand them down, though usually, the medium self-levels well. -
Apply Gloss Varnish:
To truly sell the ceramic illusion, apply a coat of high-gloss polyurethane varnish over the entire painted surface. This unifies the sheen levels of the different paints. -
Second Varnish Coat:
For extra durability and a glass-like shine, apply a second coat of varnish once the first is dry. -
Clean the Inside:
If you got any messy drips on the inside of the pot during the process, wipe them away or paint the inner rim a solid color for a professional finish. -
Final Cure:
Let the varnish cure according to the manufacturer’s instructions before potting your succulent.
Dual-tone magic
Before the green drips dry, add a tiny drop of teal or darker blue into the center of a few drips. The colors will swirl slightly as they settle, creating depth.
Once your faux-glazed pot is completely dry, you can pot your favorite Echeveria to complete the organic look
Aged Patina and Crackle Finish
Transform a plain terracotta pot into a piece of weathered pottery that looks like it has been aging in a garden for decades. This project uses layering techniques to achieve a beautiful verdigris-inspired teal finish with a realistic distressed texture.
How-To Guide
Materials
- Standard terracotta pot (with ridges preferred)
- Medium-grit sandpaper
- Dark brown acrylic paint (Burnt Umber or similar)
- Teal or Turquoise chalk paint
- Off-white or cream chalk paint
- Small sea sponge
- Chip brush or old bristle brush
- Paper towels
- Matte clear sealant spray
- Plastic plate or palette
- Cup of water
Step 1: Base Preparation
-
Clean and prep:
Begin with a clean, dry terracotta pot. If your pot is new, wipe it down quickly to remove dust. If it’s glazed, you’ll need to sand the surface thoroughly to help the paint adhere. -
Dark base coat:
Squeeze some dark brown acrylic paint onto your palette. Add a few drops of water to thin it slightly, creating a wash consistency rather than a thick paste. -
Apply the wash:
Using your chip brush, cover the entire exterior of the pot with the dark brown wash. Don’t worry about perfect coverage; you want it to soak into the clay to simulate the underlying aged earth tones. -
Wipe back:
Before the paint dries completely, take a paper towel and wipe away the excess. You want the dark color to remain deep in the grooves and textures of the pot while leaving the high points slightly lighter.
Pro Tip: Gritty Texture
Mix a teaspoon of baking soda into your teal paint before applying. This creates a gritty, calcified texture that looks incredibly authentic when dry brushed.
Step 2: Creating the Patina
-
Mix the main color:
Prepare your teal or turquoise chalk paint. Chalk paint is ideal here because it dries matte and sands beautifully. I usually pour a small amount onto the plate and don’t water it down. -
Dry brush application:
Dip just the tips of your dry chip brush into the teal paint. Offload most of the paint onto a paper towel until the brush is almost dry. -
Layering color:
Lightly drag the brush horizontally around the pot. Focus on the raised ridges. You want the dark brown base to peek through significantly, so use a very light hand. -
Build the top rim:
Apply a slightly heavier coat of teal near the upper portion of the pot, but avoid painting the very top lip; leave that rust-brown to mimic wear and tear. -
Drying time:
Let this first teal layer dry completely. Chalk paint dries fast, so 15-20 minutes should be sufficient.
Step 3: The Distressed Band
-
Identify the band:
Locate a central section of the pot where you want the distinct lighter, weathered band to sit. On the reference pot, this is just below the halfway mark. -
Apply cream accent:
Using the sea sponge, dab a small amount of off-white or cream paint onto this central band. Use a stippling motion to create uneven texture rather than a solid line. -
Blend the band:
While the cream paint is still tacky, use your brush to feather the edges slightly into the surrounding teal, so it looks like a natural salt deposit or calcification rather than a painted stripe. -
Add texture:
Once the cream band is dry, go back over it very sparsely with a dry brush and a tiny bit of dark grey or brown paint to create the look of scratches and dirt.
Level Up: Mossy Details
Dab tiny spots of bright moss-green paint into the deepest crevices or near the bottom rim to simulate algae growth on the ‘aged’ pottery.
Step 4: Finishing Touches
-
Sanding for age:
Rub the medium-grit sandpaper over the entire pot, focusing heavily on the ridges and the rim. This removes paint to reveal the terracotta and brown base underneath. -
Enhance the defects:
Sand aggressively in random spots to create ‘bald’ patches where the paint looks chipped away. This unevenness is key to the aged effect. -
Dust off:
Wipe away all the sanding dust with a slightly damp cloth to reveal the true colors. -
Final seal:
Take the pot to a well-ventilated area and spray it with a matte clear coat. This protects your paint job from water damage when you water your succulent. -
Potting:
Once dry, fill with cactus soil and plant your rosette succulent to complete the look.
Enjoy the timeless charm this weathered pot brings to your succulent collection


Have a question or want to share your own experience? I'd love to hear from you in the comments below!